Haley Strategic’s Low-Visibility Thorax Incog

It could be argued that warfare is a telegraph of the societies engaged in it. Despite the continued conventional conflict in places like Eastern Europe and Southwest Asia, much of the rest of the world is looking at asymmetric threats that require a more refined response. Whether it’s protecting the Olympic Games or the president’s life, being adaptable to threats that don’t require MultiCam and machine guns has become critical to any defense plan — including those of prepared citizens.

Two years ago, Haley Strategic Partners launched their Thorax Plate Carrier. It’s a product still on par with market trends: a compound of Velcro and MOLLE that minimizes bulk while accepting a diverse array of clip-on placards with the traditional pair of pinch-buckles mounted to the front of the carrier. Multiple placard options, plus multiple cummerbund and side-entry options made the Thorax a heavy-duty, low-bulk option for everyone from prepared citizens to professional end users.

The Haley Strategic Thorax Incog

This year, HSP announced a new iteration of the concept they’re calling the Thorax Incog that’s aimed squarely at low-profile use cases. Every design feature of the Thorax Incog is purpose driven and meant to provide users with the lowest-possible signature while still being scalable to carry a fighting load. The Thorax Incog starts with plate bags made from 500D Cordura and stretch Tweave.

While the original Thorax included heavier, padded, thermo-formed backing and technical laminates to sustain a heavy load over time, the simpler construction of the Incog variant is meant to hug both your plates and your body with a glove-like fit. It should actually form to your body over time if you wear it enough. But this glove can quickly turn into a gauntlet with just a few quick additions to the carrier. More on that in a minute …
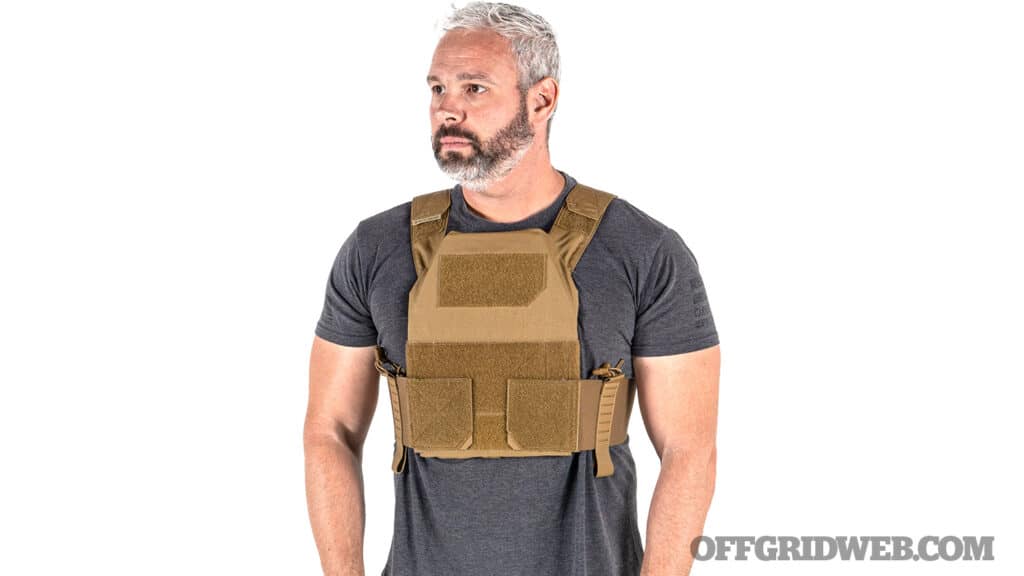
Man with Haley Strategic Thorax incog plate carrier with on added gear

Above: Right: In slick configuration, the Thorax Incog with DFNDR plates still allows unimpeded access to your AIWB draw.

Slicked Down

The front bag has two fields of loop material, a large one for attaching a triple-rifle-mag TRMP Incog panel, and a smaller chip-shaped one up top for patches — whether you’re running a police placard, American flag, or just your favorite morale patches. The rear bag also has a small loop field up high for patches or placards.

The cummerbund is attached by inserting it into a pass-through sleeve sewn into the back of the carrier. Once it’s in place, press down on the hook-and-loop and you’re good to go. The Incog-specific cummerbunds that come with the Incog are elastic, and each side features a single cell that can hold a rifle mag, radio, small med kit, or other accessory. The sleeve has a single row of laser-cut PALS slots on the outside if you want to attach a small pouch. If you need more or different side support, the Thorax Incog is compatible with all existing Thorax cummerbunds, including their Chicken Strap, Side Entry System, and side-plate-bearing PALS cummerbunds.

The aforementioned TRMP Incog is a variation of the existing Haley Strategic Triple Rifle Magazine Placard. The difference lies in the attachment system. When designing the Thorax Incog, HSP received feedback from SOF personnel that while they did want modularity, they wanted the slicked-down configuration to be as slick as possible. That meant no buckles or G-hooks on the front bag that would protrude when wearing the carrier concealed under plainclothes.

The result is what the HSP team calls TabLoc. The front of the plate carrier has two narrow channels sewn into it — one at each outside edge. The TRMP panel itself has a corresponding pair of long, thin, reinforced nylon tabs that slide into the channels before the hook-and-loop is pressed to lock everything together.
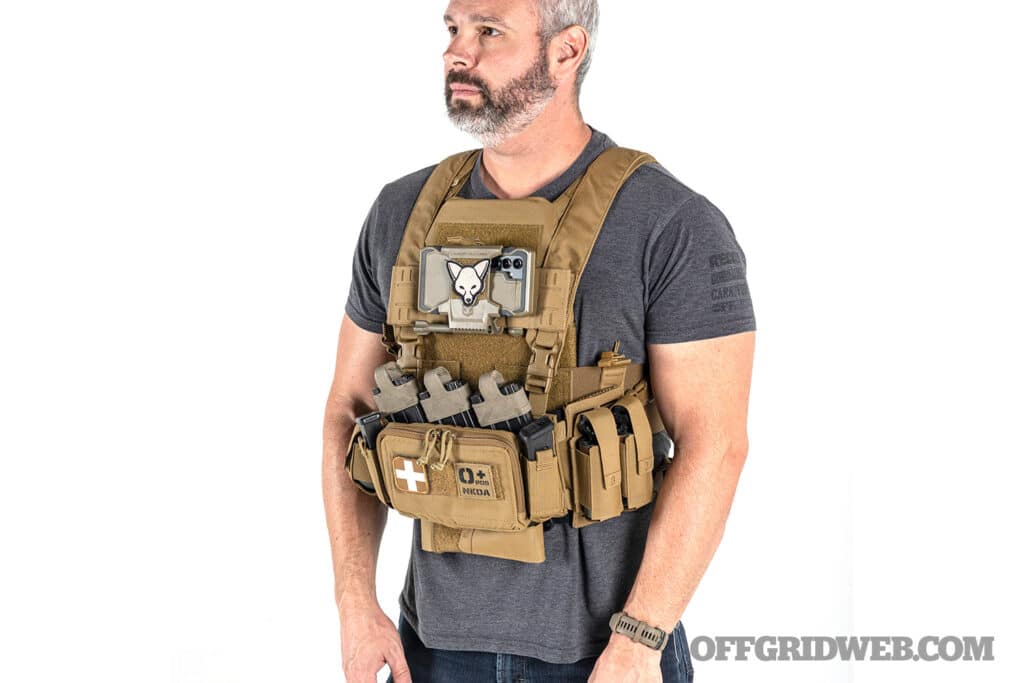
A fully loaded Thorax Incog plate carrier

Above: The bulked up fully loaded Thorax Incog.

Bulked Up

Bulking up the Thorax Incog is quick work, if your use case requires it. Conventional wisdom might scoff at the idea of taking a plate carrier designed to be low-visibility and then building it out to run as a high-profile rig with full combat load. But there are advantages to this. First and foremost, because of the intention for it to be low-pro, the Thorax Incog has a much snugger, glove-like fit to the body. The plate bags hug the plates tighter and the carrier hugs you tighter.

So even when you pile on placards and pouches, the Incog variant still sits closer to the body. For prepared citizens — who are not running 12-hour missions laden down with grenades and multiple radios and enough ammunition for a protracted gunfight — the extra padding can be foregone for a more bespoke fit that will be just as comfortable in most situations. This also has the benefit of a carrier that can strip down slim enough to fit under a hoodie or flannel.

The second is increased adaptability if you do choose to bulk up. Within the Haley Strategic ecosystem alone, there are multiple ways to scale up the Thorax Incog. If you have added the TRMP Incog panel to the front of your carrier, and that’s not enough extra capacity, you can add on the Auxiliary MOLLE Panel. The AMP is simply a hook-and-loop wrap that completely engulfs the TRMP. Now you can carry three rifle mags, plus whatever you can fit onto the six rows of laser cut MOLLE slots.

If that isn’t enough, you can add a hanger to the bottom of the carrier, by sandwiching in the hook-and-loop between the back of the TRMP and the front of the plate carrier. HSP offers multiple hangers including MOLLE panel variants, the Multi-Mission Hanger, which is a general cargo pouch that can be adapted to carry different types of items, or the 5-Banger Hanger, which is a purpose built hanger that holds five 40mm rounds in elastic loops.

Haley Strategic also has “wing pouches” that hang off the edge of the carrier, tucked behind the cummerbund, that will hold military grade radios if you need communications. We’ve seen wing pouches from other manufacturers that hold everything from knives to tourniquets to (even) more magazines. Adding pouches onto the cummerbund is also an option.

The only potential issue with scaling your carrier up with all these attachments is, if you want to go back down to a slick configuration, it’s going to take a few minutes to manually remove each component. Switching on the fly or in the middle of a protracted crisis is less than ideal, especially if you’re somewhere other than your garage (where we presume you have a plastic tub to store all your nylon “parts and pieces” just like we do).
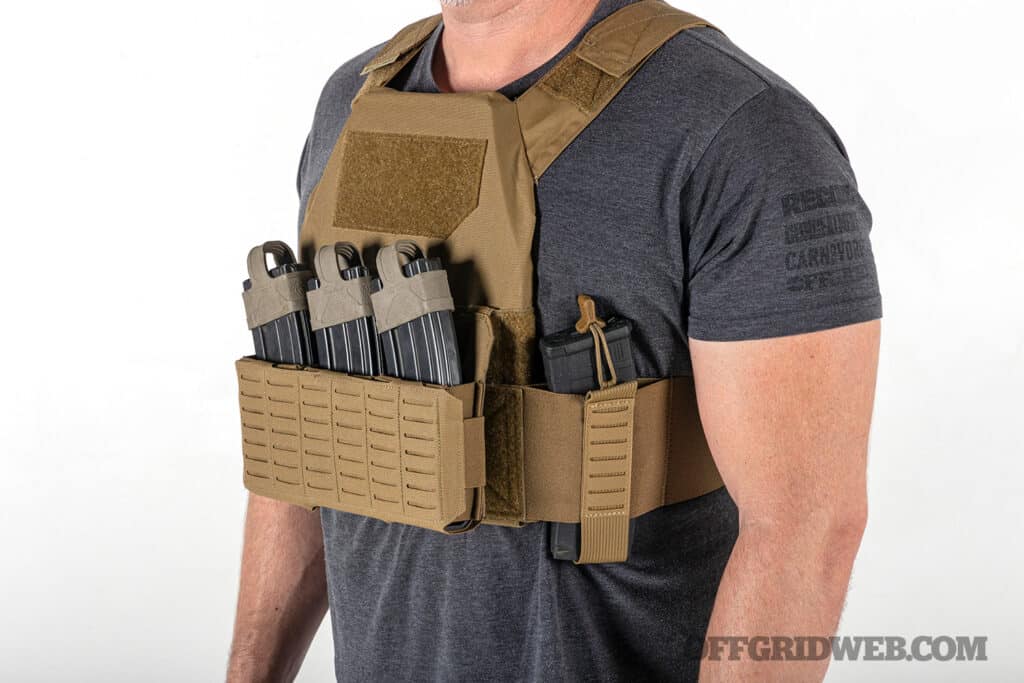
man with a thorax incog with attached mag holder

Above: The fastest way of scaling up this slick plate carrier is to put on a kitted-out chest rig over it. This is known as patrol configuration.

The Middle Ground: Patrol Ready

The alternative is a setup sometimes referred to as “patrol configuration,” where you simply keep your plate carrier completely slick all the time and don a separate, pre-loaded chest rig over it when more gear is needed. That term comes from situations when special operations units have to infiltrate their target area on foot — through jungle or over mountains — and then engage a specific objective through direct assault.

Because plate carriers trap body heat and can be highly uncomfortable with a heavy rucksack on top of them, these teams would keep a slick plate carrier in their pack while hiking through harsh terrain. But they still wear standalone chest rigs to have ammunition, first aid, and comms within arms’ reach if they get attacked on the move. When the team reaches its specific target, they pull those plate carriers out of their rucks, put the chest rigs on over top of them, and now have body armor to protect them during the deliberate assault.

This approach holds good value for prepared citizens. For those living in urban or suburban areas, wearing a plate carrier with nothing attached to it, easily concealed with street clothes, allows you personal protection when moving through high-risk neighborhoods, or when civil unrest begins to escalate. You may need to move through dangerous areas without making yourself a target by appearing as if you showed up to participate.

But if you wind up in a situation where having at least a basic self-defense loadout accessible and in the open is advantageous, you can slip your chest rig on over the armor and street clothes. The reverse is also true. Folks living in rural areas who may be concerned with protecting a ranch or other larger property might not need plates very often but may want a chest rig and rifle handy when checking their property lines in a vehicle, on an ATV, or even on horseback.

A small chest rig like HSP’s D3 Micro, shown in photos on the previous page, can stow almost anywhere — under a car seat, in a saddlebag, even inside a backpack or messenger bag where it’s quickly accessible but completely hidden until needed.

The Thorax Incog is the Total Package

Due to its simplified design, the Thorax Incog Plate Bags ($125) and cummerbund ($60) are nearly $100 less than the original Thorax plate bags by themselves ($270). If you need the additional load-bearing properties of the latter, it’s money well spent. But if your job or preparedness plan are built around concealability and scalability, the Incog variant will save you some money which can be conveniently spent on accessories. In fact, at $95, the TRMP Incog placard is almost exactly the price difference between the two Thorax models.
We’ve seen a lot of really great plate carriers. Some are bombproof workhorses meant to haul a platoon’s worth of gear.

Others are ultra-minimalist with zero load carriage whatsoever. Others attempt to be a jack-of-all-trades but don’t perform in either category with true excellence. The Haley Strategic Thorax Incog may be the first one we’ve come across that scales up and down with real seamlessness.

In base configuration, it’s truly slick but can be built up to a level that allows it to punch way above its weight class against more complex, much more expensive plate carriers. If you don’t yet have a hard armor setup in your gear locker, or you think it’s time to refresh your kit to keep up with current advancements, we almost guarantee the Haley Strategic Thorax Incog can be made into your goldilocks fit, regardless of use case or occupation.
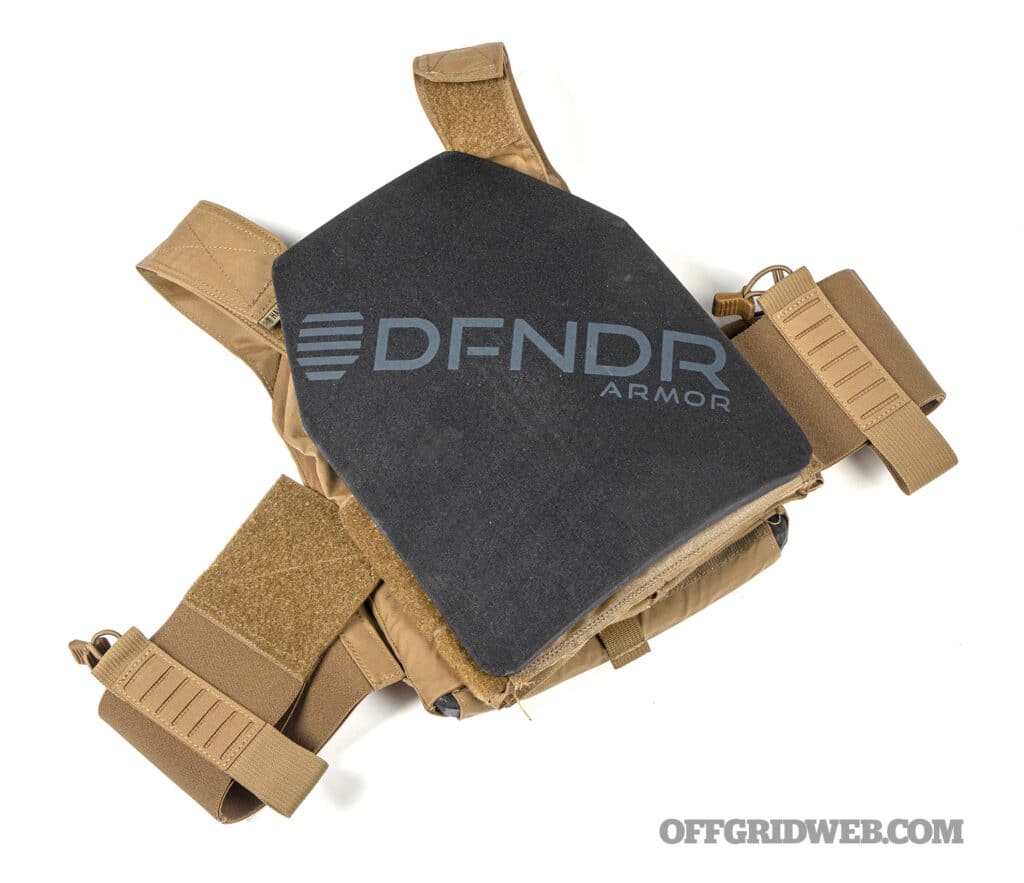
image of defender plates

Above: The DFNDR is an ideal Thin and Lightweight Plate for the Thorax Incog

The State of The Plate

Much like night vision or AR-pattern carbines, your kit must be looked at as a system. The armor plates are one component of that system and not all plates will work with all carriers. We initially had some trouble finding plates that fit the Thorax Incog. We have Level III+ plates from multiple manufacturers that would not fit this carrier, on account of being too thick (1.1 to 1.2 inches).

Because the Incog is meant to be a low-profile carrier, the bag sizing is biased to thinner plates. Since we did not have any plates on hand that fit properly, the team at Haley Strategic directed us to DFNDR Armor, the brand they carry and use.

The folks at DFNDR were very responsive and incredibly helpful, sending over a set of their new RF1 Elite plates. Plate thickness and weight are usually a balancing act against cost and protection level.

Rifle-rated plates can be had for 5-ish pounds per plate, but they’re typically over an inch thick. You can get them thinner, but then you’re relying on more ceramic in the construction, which can make them closer to 8 pounds per plate. But thinner, heavier plates can be cheaper. Protection levels being (relatively) equal, you typically wind up at a decision point that looks like this:

  • Lightweight
  • Thin
  • Inexpensive

Pick two.

In the case of DFNDR’s RF1 Elite, you’re getting the first two in exchange for the third. These stand-alone plates require no soft armor backer and are tested to the NIJ’s new armor rating protocol, which classifies rifle-rated armor into three categories. The lowest level, RF1, is required to stop the following threats:

5.56x45mm NATO M193 ball (55-grain FMJ)
7.62x51mm NATO M80 ball (147-grain FMJ Steel Jacket)
7.62x39mm Russian 57N231S (122-grain Mild Steel Core)

The DFNDR RF1 Elite plates are rated to stop all of these threats while measuring only 0.75-inch thick and weighing in at an astonishing 2.09 pounds per plate for a medium SAPI cut. Prices range from (brace yourself) $1,390 to $1,730 per plate, depending on size — no small financial feat, for sure.

But what you’re paying for is the ability to have rifle-level armor protection that is thin enough to wear under almost any shirt and light enough to wear all day. The adage buy once, cry once might hurt your wallet for a couple of months but will ensure that you have a piece of cutting-edge protective equipment that will serve you well, and do so comfortably, for years to come.

Sources

Read More

Don’t miss essential survival insights—sign up for Recoil Offgrid's free newsletter today!

Check out our other publications on the web: Recoil | Gun Digest | Blade | RecoilTV | RECOILtv (YouTube)

Editor's Note: This article has been modified from its original version for the web.


TOPS Knives El Pionero

If you are looking for a versatile and reliable tool that can handle various tasks, from kitchen prep to outdoor adventures, look no further than a paring knife. This simple yet efficient knife design has been a staple in kitchens worldwide for decades, and for good reason. Its compact size and sharp blade make it an excellent choice for precision cuts, peeling, and coring fruits and vegetables. However, the usefulness of a paring knife continues beyond the kitchen.

Its lightweight design and thin edge make it an ideal tool for outdoor enthusiasts, hunters, and butchers. Let's dive into the benefits of using a paring knife for various utility to camp craft tasks and cover The TOPS Knives El Pionero, a unique collaboration between a renowned security consultant and a top-tier knife manufacturer, resulting in a versatile and innovative fixed-blade knife design.

Señor Calderon

Ed Calderon is a security consultant and trainer specializing in Mexican criminal culture and its impact on personal security. He is the founder of Ed's Manifesto, a platform where he shares his insights and experiences from his former career as a police officer in Tijuana, Mexico. Ed is also a frequent guest on podcasts and media outlets, where he discusses topics such as cartel violence, kidnapping, human trafficking, and survival skills. He is known for his expertise and authenticity in the personal security field that has come out of Mexico.

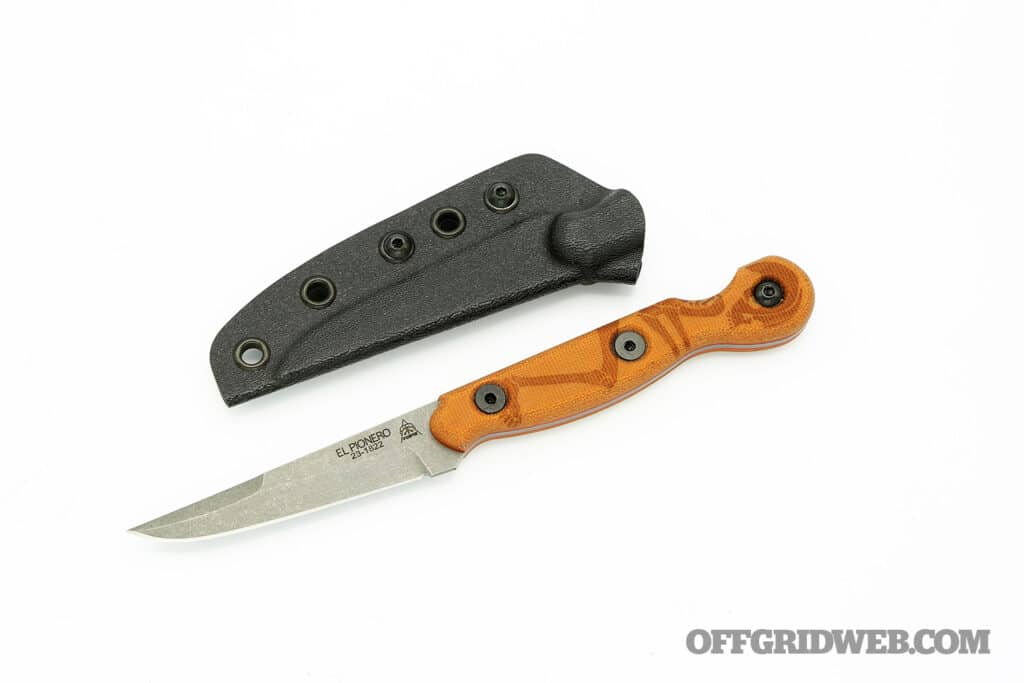
Image of the TOPS Knives El Pionero with kydex sheath

Above: The TOPS El Pionero is made of high carbon 1095 steel with a Tumble Finish for durability.

TOPS Collaboration

In the past few years, Ed Calderon had the chance to conduct one of his most acclaimed training courses at the TOPS Knives facility. During his stay, he was invited to be a guest on TOPS Daily Grind (podcast), where he conversed about edged tools and weapons with Leo, the president of TOPS. One of the discussion topics was a potential collaboration between the two to create a unique knife design that would be both functional and innovative.

After much brainstorming, Ed and Leo agreed that a paring knife would be the perfect design base. The knife's simplicity and versatility make it one of the most common knife types worldwide, and it would also be a great starting point for customization. Thus, the idea for El Pionero was born. It's a knife that blends functionality with elegance, and it's designed to be a reliable tool for everyday use.

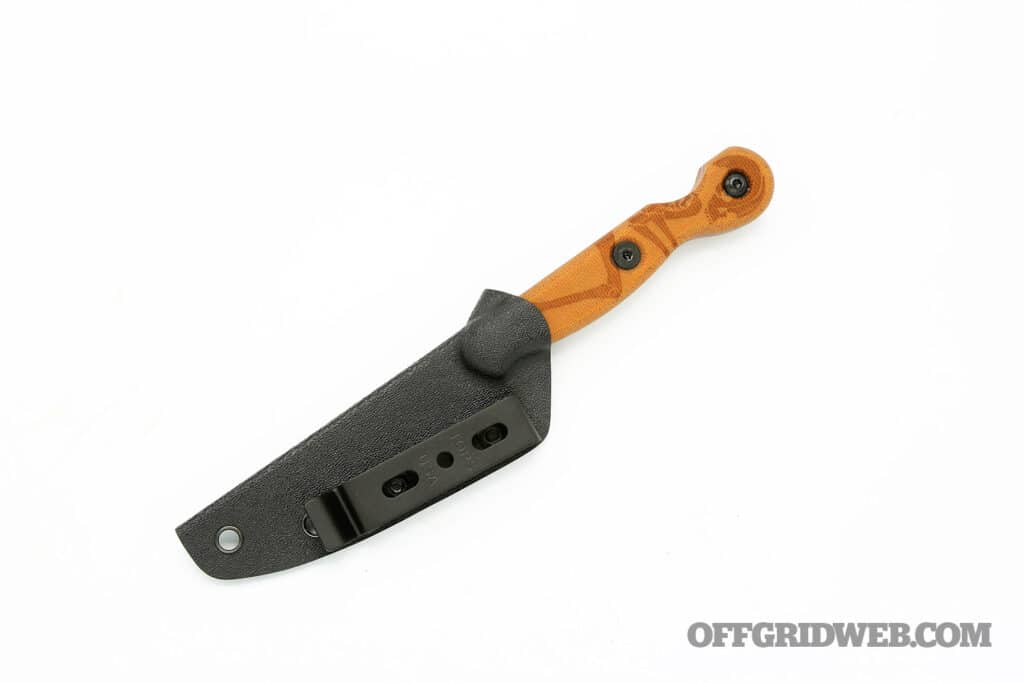
Image showing the knife in kydex sheath and metal clip

Above: The TOPS El Pionero has a black Kydex sheath and a Multi-Position Spring Steel clip for versatile carry.

Undercover Paring Knife

The El Pionero Knife is a versatile, reliable fixed blade designed for outdoor enthusiasts, butchers, and individuals seeking a reliable self-defense tool. With an overall length of 7.63 inches, this knife packs a punch with its 3.38-inch blade length and a cutting edge of 3.13 inches. The blade thickness of 0.090 inches ensures that the knife can easily handle challenging tasks.

The El Pionero features TOPS’ staple steel, high carbon 1095 with an RC 56-58, and a Tumble Finish, making it a durable and long-lasting tool that can withstand harsh conditions. The Tan Canvas Micarta handle scales provide a comfortable grip and exceptional durability, ensuring the knife stays firmly in your hand during use.

The graphic on the El Pionero is a skeleton pattern engraved on the micarta scales. The handle pattern is designed to enhance the aesthetics and grip of the knife and reflect its tactical and practical nature. The skeleton pattern is also a signature of Ed Calderon.

Image of the El Pionero handle showing divot

Above: Tan canvas Micarta scales offer a secure grip. The finger divot is his signature technique learned from his mother. 

Weighing in at only 2.9 ounces, the El Pionero is one of the lightest knives that TOPS makes. With the included black Kydex sheath and Multi-Position Spring Steel clip, the knife weighs in at 4.1 ounces, making it easy to carry with you on any adventure.

The knife has many other features that Ed has found to be useful on knives throughout his experience. The finger divot is a signature of his that he originally learned from his mother and is designed to make it easy to know where the edge is oriented based on where that divot is felt. It also helps when extracting a knife that has been stabbed into something and may be somewhat stuck. The false edge aids in penetrating as well. The Kydex sheath is low profile and easily customizable by the end user to be worn in multiple configurations.

Image of the El Pionero with assorted outdoor gear

Above: The TOPS Knives El Pionero Knife features a 3.38-inch, 0.090-inch thick blade, it is an excellent choice for outdoor enthusiasts and individuals seeking self-defense options.

Tactical Meets Practical

I got the knife just in time to photograph and take to the woods for some preliminary tasks before the big trip coming down the pipe. I was rigging up tarps for camp and doing some camp crafts requiring cutting 550 paracord and making a fire.

These seemingly mundane tasks can reveal a lot about a piece of gear, especially a knife. I was curious to see how the knife would perform and how well it would carry on my person during several hikes and on my upcoming international trip.

The first test I conducted was to see how well it could shave hair off my arm. People should know two things about TOPS Knives: they always have hair-popping, wicked sharp edges, and they've mastered 1095 carbon steel!

In the Northeast Woods, I split firewood with a heavier cutting tool and used finger-to-thumb diameter pieces to make tinder by way of feather sticks. I prefer a 3-inch to 3.5-inch blade for camp crafts. The El Pionero sliced wood like a lightsaber, easily making thin, curly feathers. I’m a fan of making my own tinder, so making feathers that will take a spark is essential, especially for my next trip into the Amazon Rainforest!

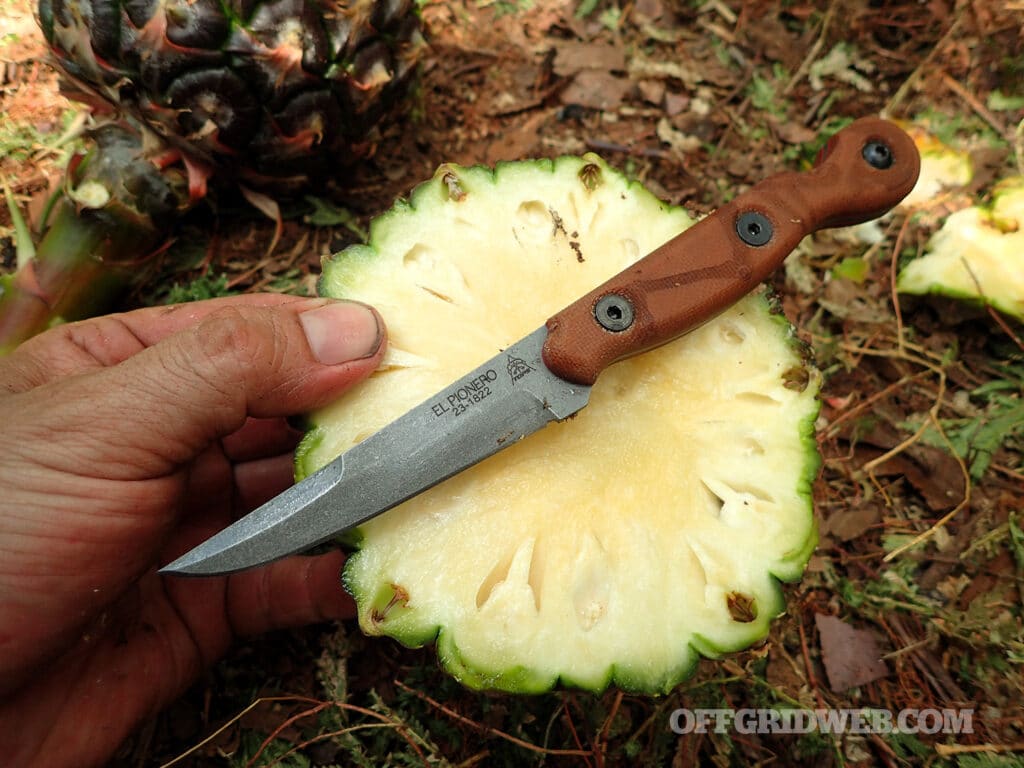
The El Pionero with a pinapple it was used to slice

Above: Pineapples were sliced in the jungle with the El Pionero over several days. The blade remained sharp despite the harsh jungle floor as the cutting board.

Jungle Companion

The first real-world test for the El Pionero was slicing pineapple along the trail in the jungle. Naturally, the thin, sharp blade was perfectly up to the task. I didn’t bother cleaning the excess juice off the knife. Eventually, the accumulation of all things gunky and the humidity would take their toll.

Fire preparation in the jungle is a communal task. I like being in charge of the small elements like thin twigs and feather sticks, which are often overlooked. Since this was a trip with students, I wanted to set a good example of how much of the small prep is needed. Those little things—there’s nothing bigger. I wanted to show off my El Pionero and how valuable a small paring-style knife can be in a long-blade culture. As expected, it made nice curls, the likes of which would make Mors Kochanski proud.

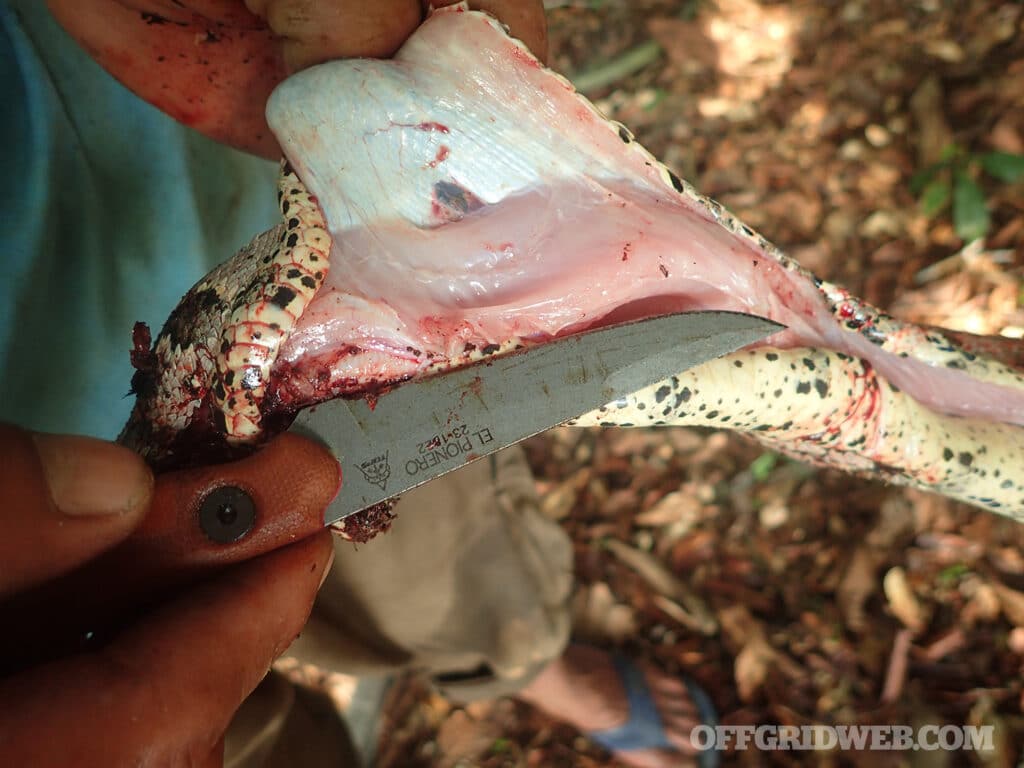
Image of the El Pionero being used to process a snake

Above: Cleaning animals for food is routine in the jungle, as is using cutting tools. The El Pionero skinned this boa constrictor, which fed 12 people. 

While preparing the ground and the surrounding area for my camp, one of our reliable local guides called my name repeatedly. They spotted a red-tailed boa in the creek and handed it to me. The whole camp knew that we would enjoy a feast the following day.

We had procured two live chickens along with the boa, which would also be grilled for the feast. For skinning and cutting the boa, we used the El Pionero, which was also used for various other purposes like preparing fire, cutting cords, and carving spoons out of palm. Despite its multiple uses, the knife remained razor-sharp and did a great job skinning the tough serpent into manageable pieces.

After one chicken was dispatched, I wasted no time defeathering it while it was still warm. Then, I cleaned the jungle bird using the knife in an inverted position, choking up on the spine toward the knife's point. After the bird was cleaned, it got a quick dunk in the river before the butchering. The El Pionero was perfect for quartering the jungle bird for the swamp grill.

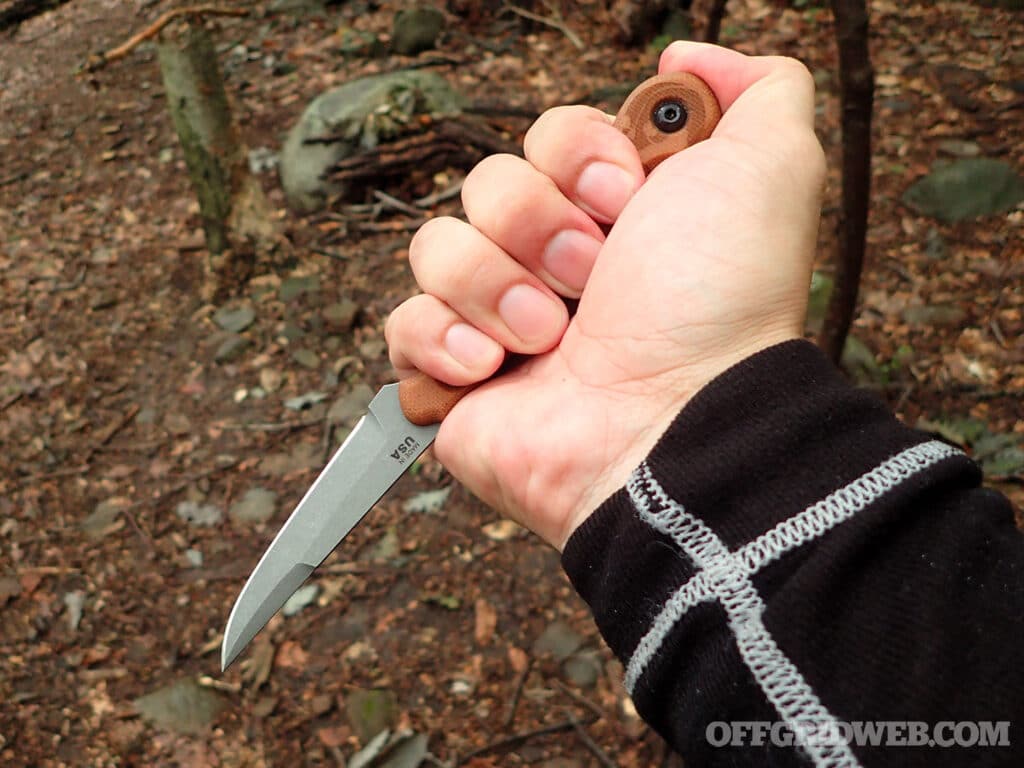
image of the El Pionero being held in reverse grip

Above: The El Pionero is comfortable in a reverse thumb-supported grip and a reverse edge in grip style.

Aftermath

The El Pionero knife is perfect for outdoor activities, butchering, and self-defense. Its lightweight design and durability make it ideal for any outdoor enthusiast or professional.

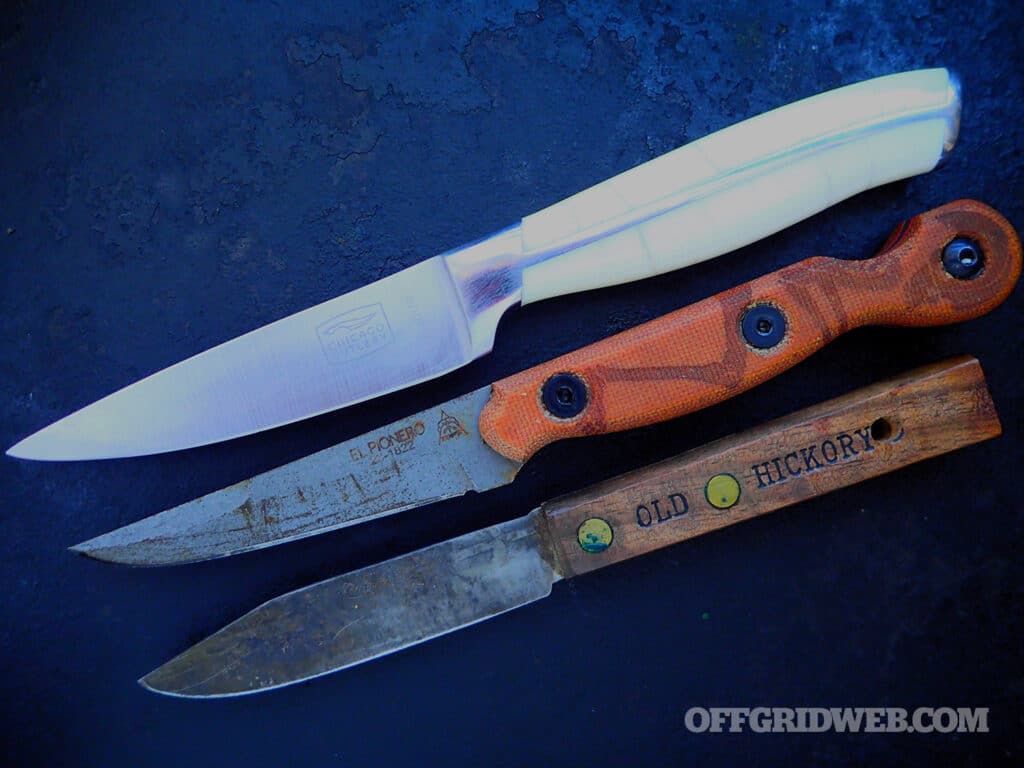
I carried the El Pionero confidently clipped on my pocket and inverted on my belt. The clip held up well. As expected, the handle offered a secure grip even when wet from animal fat and blood. The 1095 carbon blade remained sharp with a fair amount of surface rust and the start of a promising patina. The environment alone is harsh on gear and people alike—easy doesn’t live in the jungle!

Multiple types of paring knives

Above: TOPS El Pionero looking well used after a trip to the Jungle

Conclusion

The success of this project showcases the power of teamwork and creativity. The knife underwent several design iterations before achieving the perfect balance of form and function. The outcome is a durable, practical, and aesthetically pleasing knife that embodies innovation and practicality. It's a testament to the skills and dedication of Ed Calderon and the team at TOPS Knives.

El Pionero Specs

  • Overall Length: 7.63 inches
  • Blade Length: 3.38 inches
  • Cutting Edge: 3.13 inches
  • Blade Thickness: 0.090 inches
  • Blade Steel: 1095 RC 56-58
  • Blade Finish: Tumble Finish
  • Handle Material: Tan Canvas Micarta
  • Knife Weight: 2.9 ounces
  • Weight w/ Sheath: 4.1 ounces
  • Sheath: Black Kydex
  • Sheath Clip: Multi-Position Spring Steel
  • Designer: Ed Calderon
  • Made in the USA
  • MSRP: $220.00

Source

www.topsknives.com

About the Author

Adventurer, writer, photographer, and survival instructor for Randall’s Adventure & Training, Reuben has spent most of his life hiking and backpacking through the wildernesses of the world. He has traveled abroad in extreme environments and seeks out primitive survival techniques, construction, and uses of knives and edged tools. Reuben has published many articles on survival, knife and tool use, and woodcraft. He remains a lifetime student of survival!

Read More

Don’t miss essential survival insights—sign up for Recoil Offgrid's free newsletter today!

Check out our other publications on the web: Recoil | Gun Digest | Blade | RecoilTV | RECOILtv (YouTube)

Editor's Note: This article has been modified from its original version for the web.


Yeti 1500X Power Station by Goal Zero

Every day, we take for granted the ability to access a virtually-unlimited supply of electricity. It keeps our food cold, our homes warm, and our lights on, not to mention a myriad of computers, TVs, cell phones, washing machines, air fryers, and hair dryers. But life hasn’t always been this way — when we look at the grand scale of human history, reliable access to electricity is an infinitesimal blip on the radar. For thousands upon thousands of years, our ancestors lived without it, a fact that sounds almost unimaginable today.

As you consider this, it’s easy to jump to an extreme conclusion. “I don’t really need electricity in an emergency situation,” you might think. “It’s nothing but a modern luxury! My great grandparents did fine without it.” No so fast. Humanity also survived for thousands of years without access to clean running water, sewer infrastructure, and antibiotics, but that doesn’t mean we should willingly go back to the Dark Ages. One could argue that just like these things, electricity has become a virtual necessity in the 21st century. Sure, you can survive without it, but life becomes significantly harder.

Electricity: A Resource Worth Stockpiling

With all this in mind, it’s wise to prepare a source of electricity for emergencies, just as you’ve likely prepared emergency sources of other consumables (water, food, medicine, and so on). For short-term situations, this might mean a pocket-sized USB power bank that can top off your cell phone enough to call a family member. But for long-term catastrophes or events involving multiple people, that little power bank isn’t going to cut it.

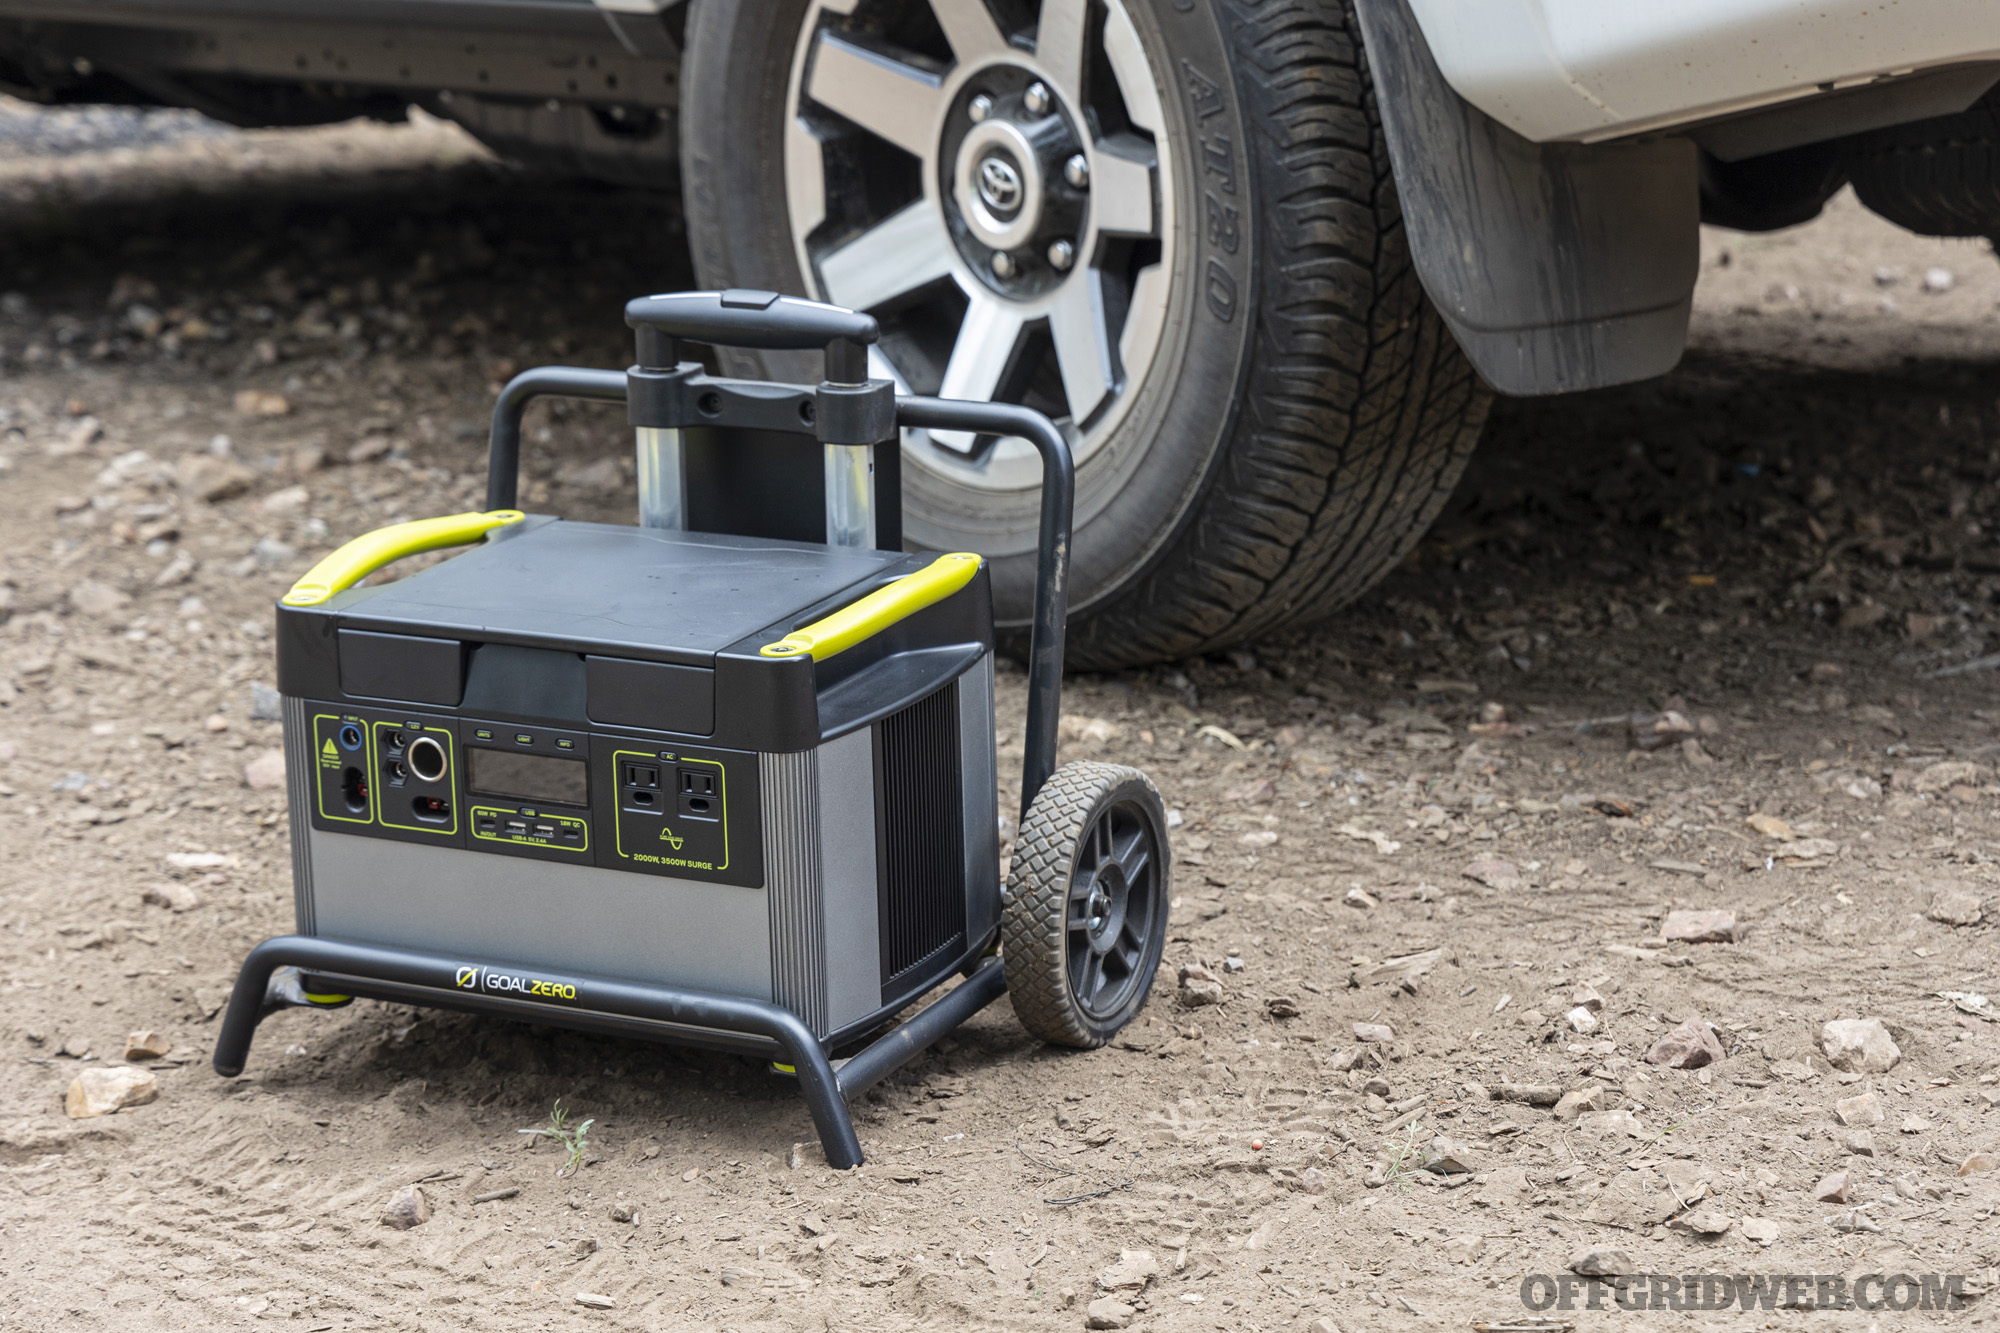
yeti 1500x by a vehicle wheel

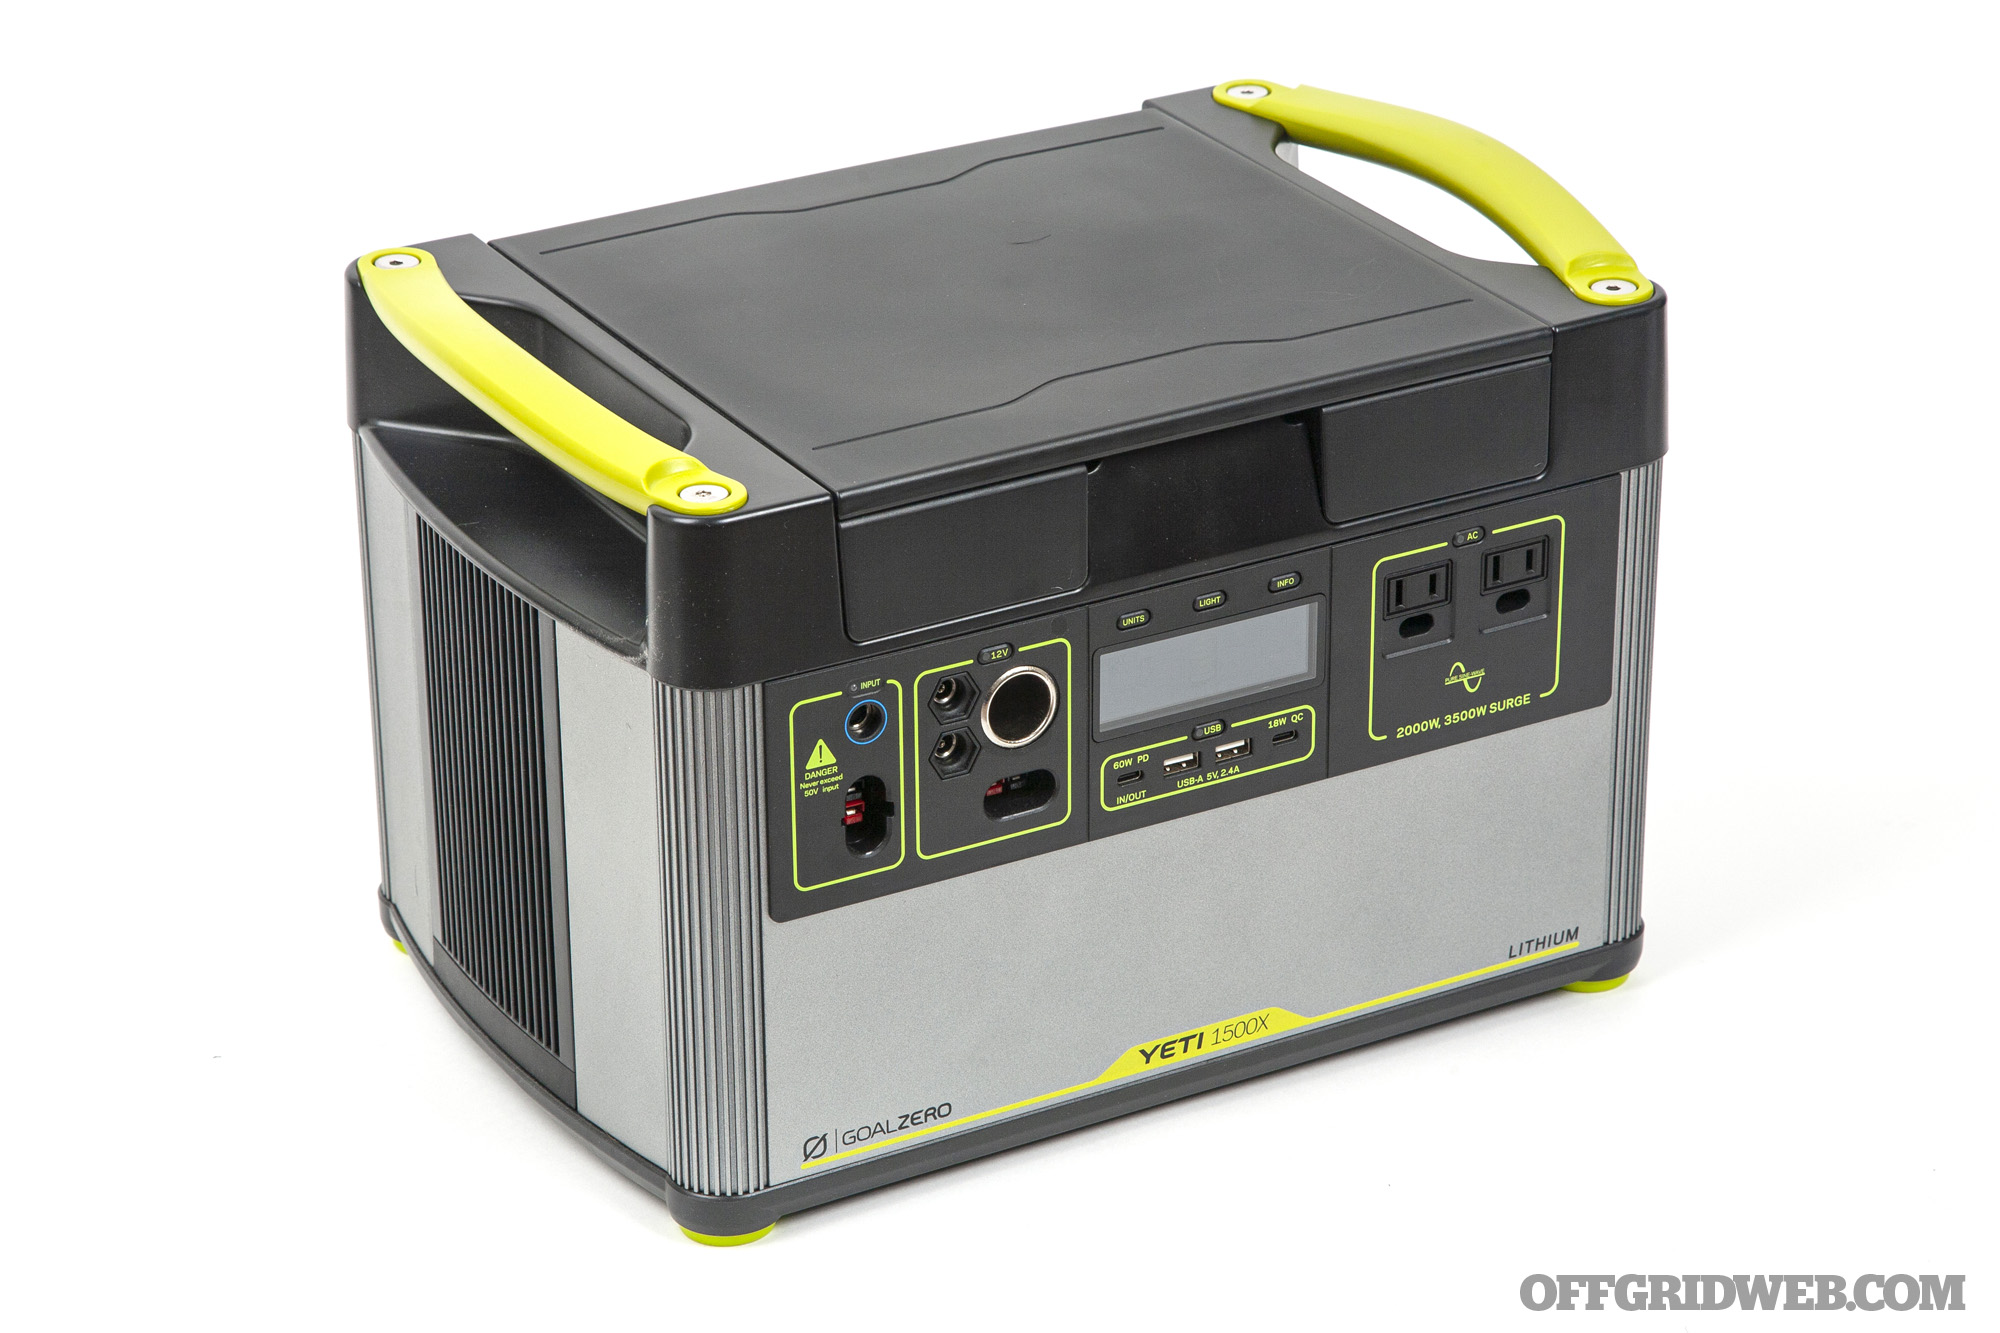
Above: The Yeti 1500X from Goal Zero offers a whopping 1,516 watt-hours of energy, enough to run a full-size refrigerator for 21 hours.

Let’s say you’re at home when a major storm wipes out power lines, leaving your entire neighborhood in a multi-day blackout. Can you keep your food refrigerated, or is it all going to spoil? Will you have reliable lighting, or will you be stumbling around by candlelight? What about running important medical devices, such as a CPAP machine for sleep apnea? Similar questions can be asked for scenarios where you’re away from home or entirely off-grid — can you keep enough headlamps, lanterns, radios, and/or satellite phones powered-up for the whole family? Under more mundane circumstances, can you keep your laptop and cellular hotspot charged while working from remote locations?

Generators vs. Power Stations

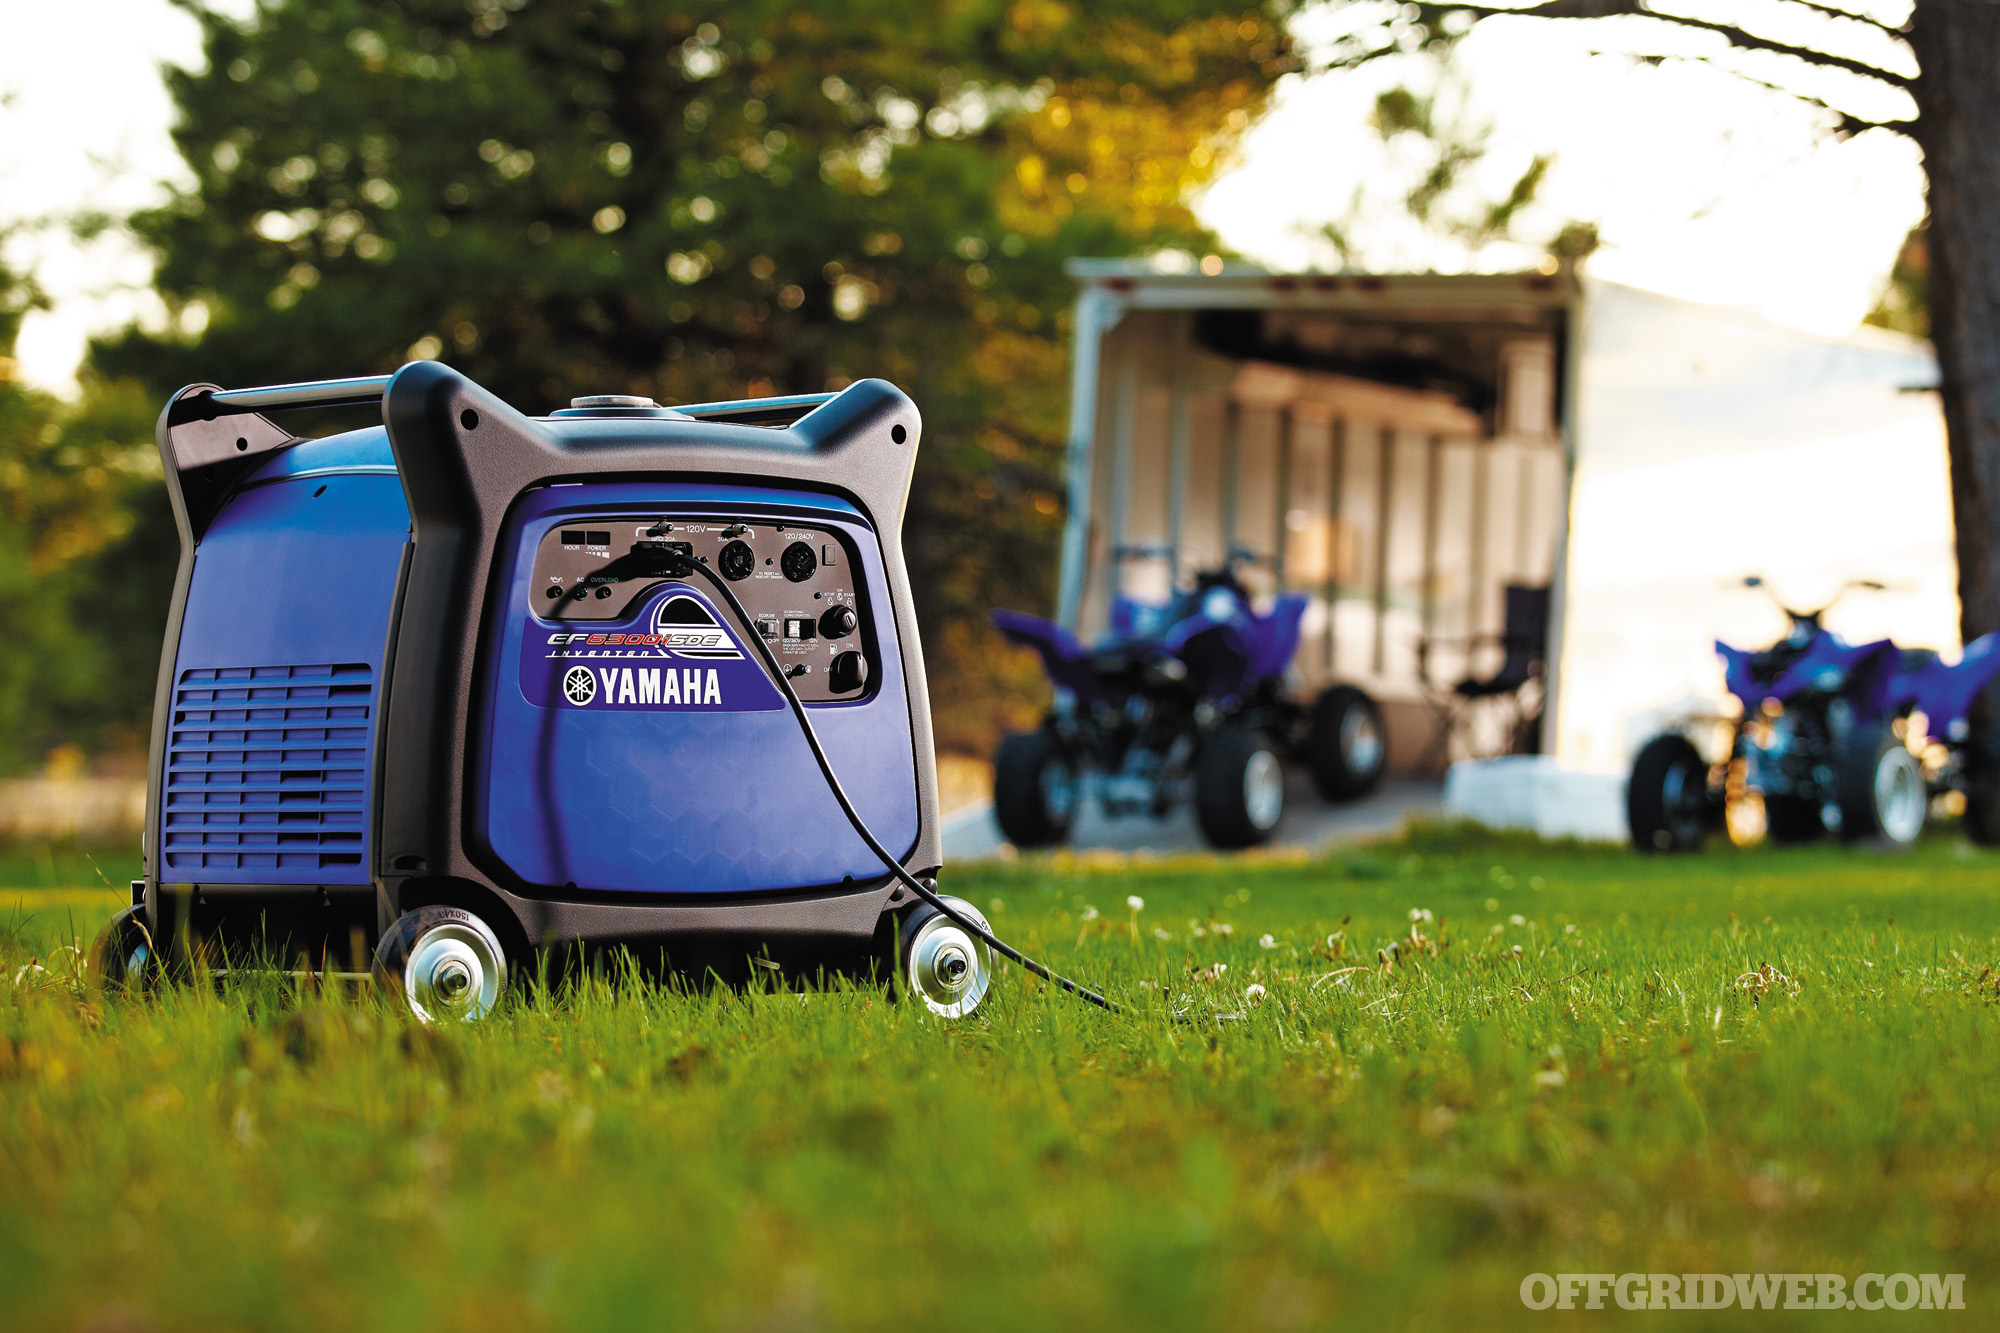
image of a yamaha generator

Above: A traditional generator is a useful tool for emergency preparedness, but produces substantial amounts of exhaust, heat, and noise. It also requires access to consumable fuel.

A traditional solution to many of these concerns is a gas- or diesel-powered generator, but these devices are not without some drawbacks:

  • They contain moving parts that require periodic maintenance.
  • They’re loud, which can be either a mild annoyance or a major safety concern depending on the circumstances.
  • They produce heat and exhaust gases, so they must be used outdoors or in well-ventilated areas.
  • Most importantly, they convert one limited resource (fossil fuel) into another (electricity).

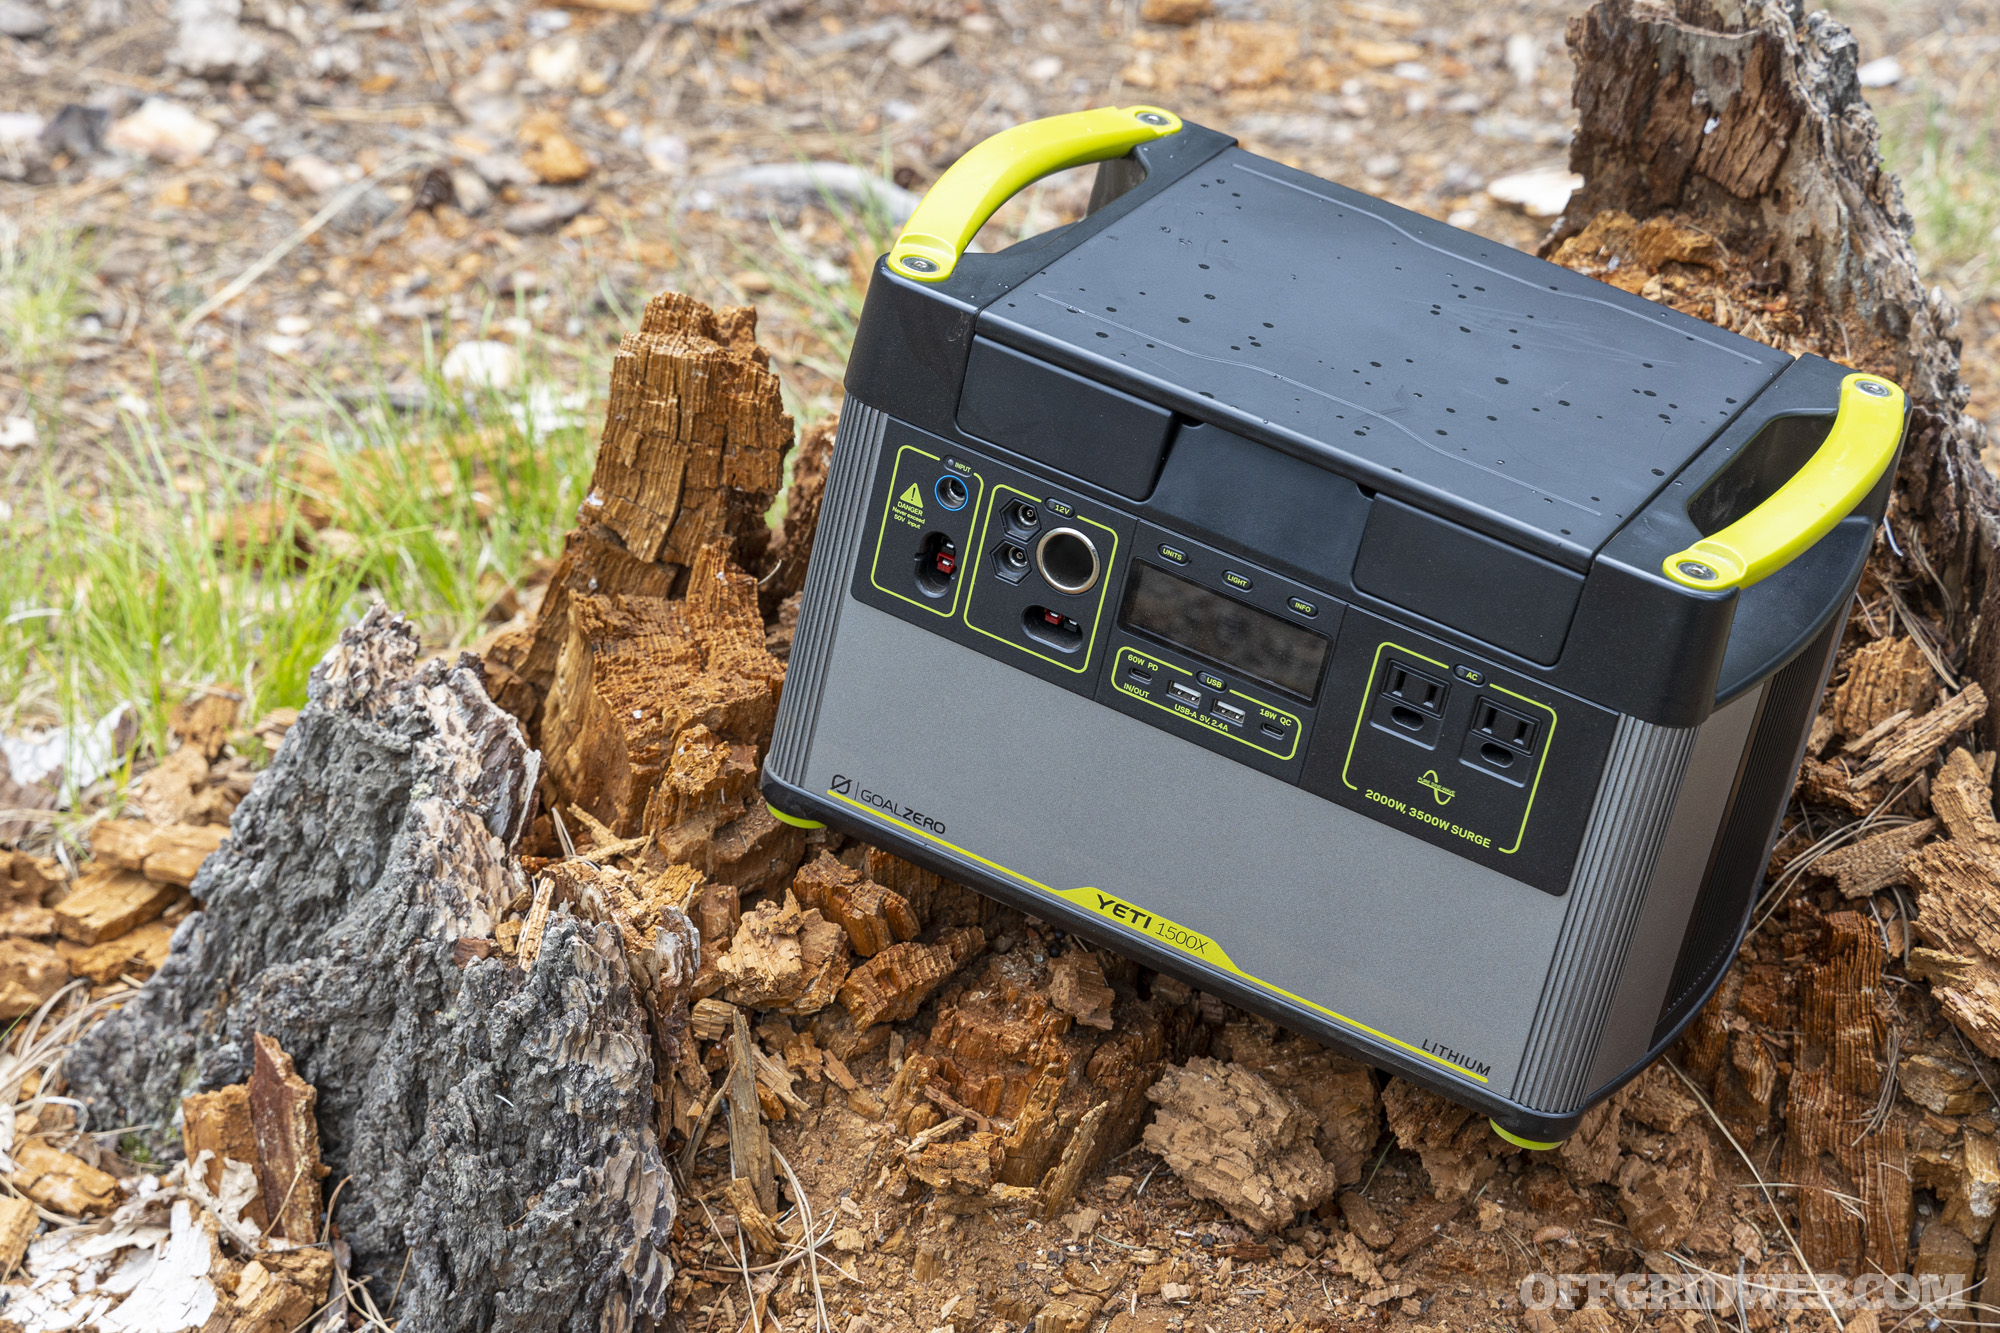
image of a goal zero yeti on a stump

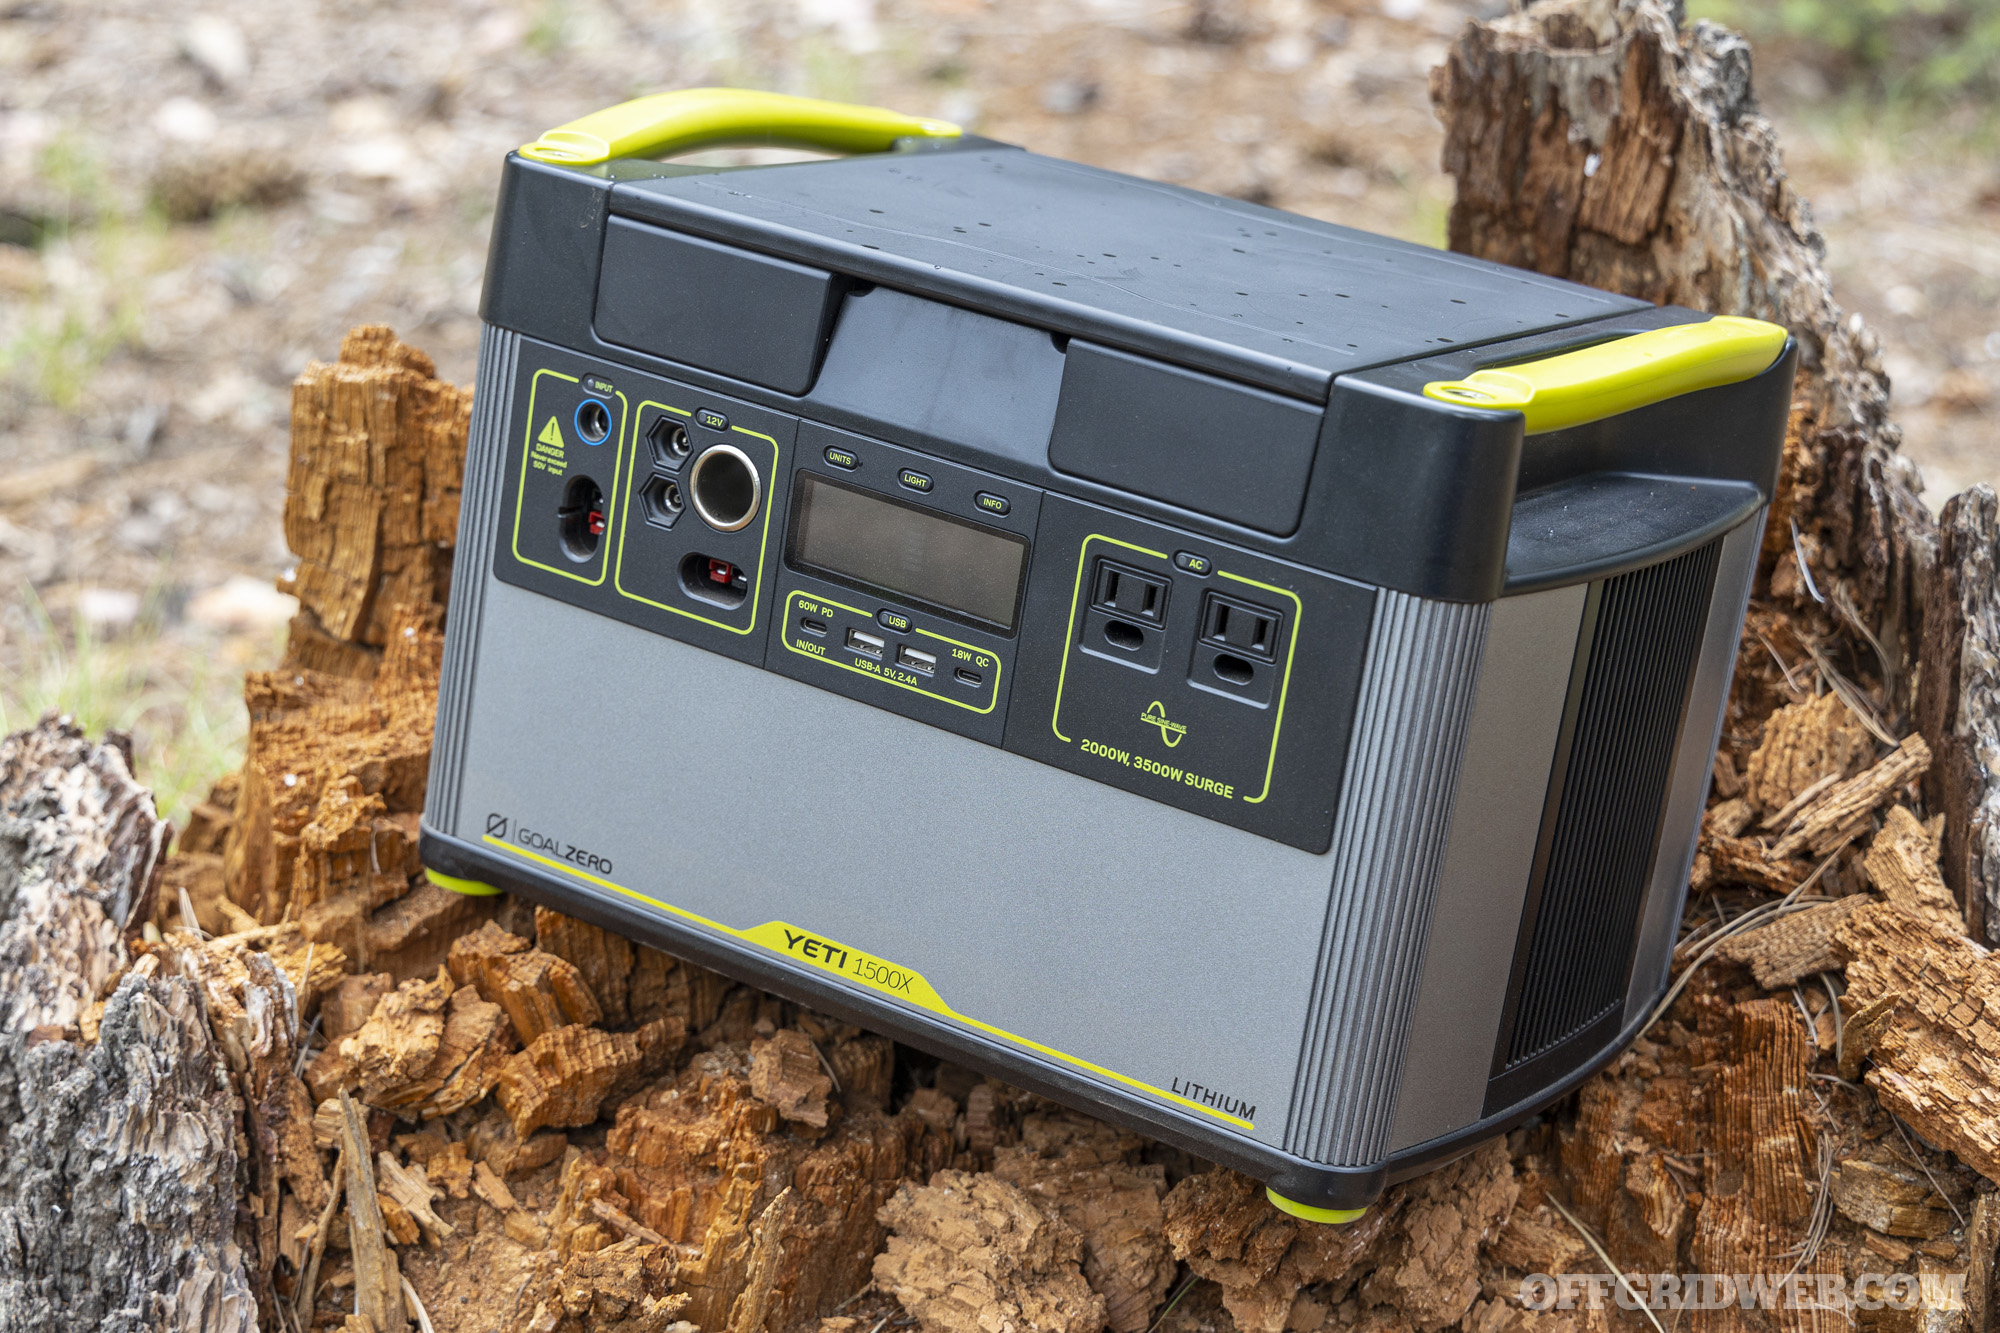
Above: The Goal Zero Yeti 1500X contains lithium-ion batteries that provide silent, reliable power for a variety of large and small electronic devices.

Portable power stations, sometimes called solar generators or battery backups, address each of these concerns. Since they’re based on high-capacity batteries, they contain no mechanical moving parts aside from a few small fans, and they’re virtually silent. They produce no exhaust fumes and comparatively minimal heat. Best of all, they don’t require consumable fuel, and can be topped off at any wall outlet, charged inside a vehicle, or passively recharged off-the-grid using solar panels.

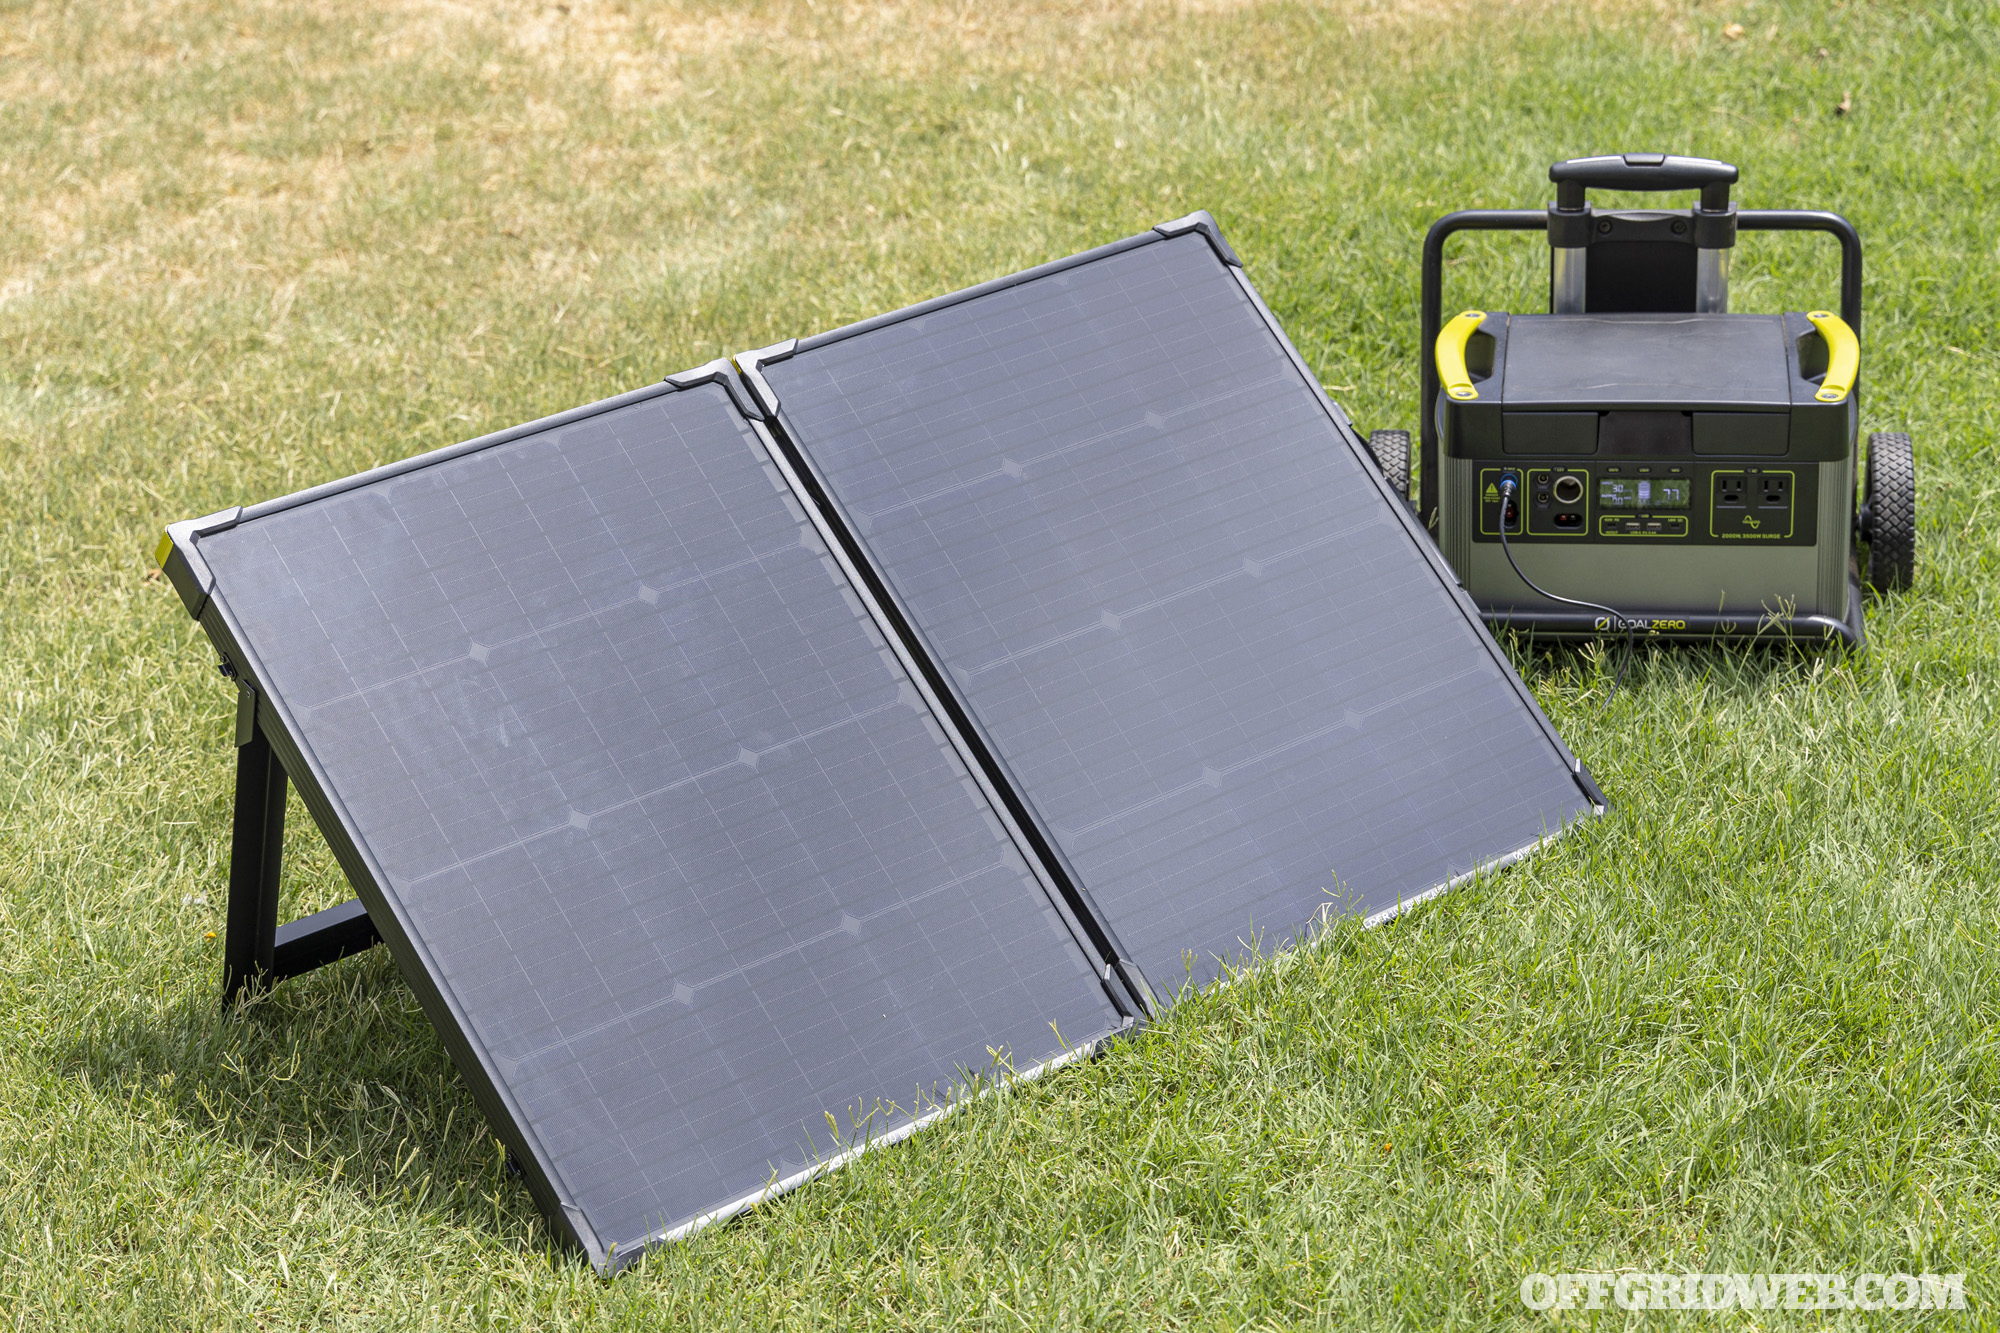
Image of a yeti 1500x with solar panels

Above: Paired with a solar panel setup, such as this Boulder 100 Briefcase from Goal Zero, the Yeti becomes a standalone source of renewable electricity. It can also be charged from a wall outlet, vehicle, or even a traditional gas generator.

It’s not technically correct to call these generators, since they’re simply portable storage vessels for electricity from any other source. Rather than thinking of a power station as a replacement for a traditional gas generator, think of it as a versatile addition — after all, you can still charge the former from the latter.

The Goal Zero Yeti 1500X

image of a yeti 1500x

Goal Zero is one of the most prominent names in the portable power industry, and has been producing power stations and matching solar panels for nearly 15 years. The company was initially founded in an effort to supply off-grid power to families in impoverished nations such as the Democratic Republic of the Congo. Since then, it has supported numerous humanitarian and disaster recovery projects in Southeast Asia, Africa, South America, the Caribbean, and the United States.

The earliest large power stations created by Goal Zero featured lead-acid batteries, not unlike what you might find under the hood of your car. These batteries were eventually replaced by modern lithium-ion cells, which are smaller, lighter, more shelf-stable, produce more consistent voltage, and can maintain efficiency in a much larger temperature range.

image of a 1500x with top open revealing stored cables

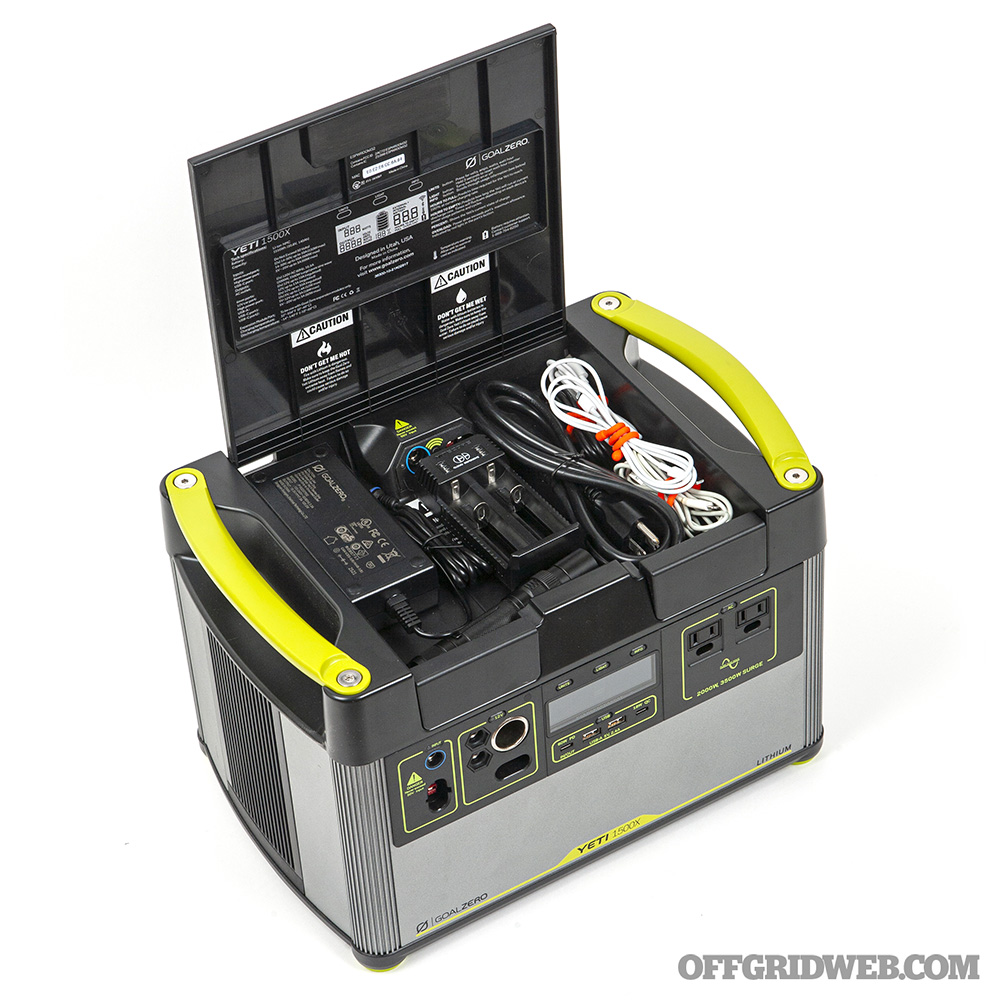
Above: The Yeti's top tray offers storage for cables and accessories, as well as the included wall charger. Just don’t leave the charger here while it’s plugged in, especially with the lid closed, since it can overheat.

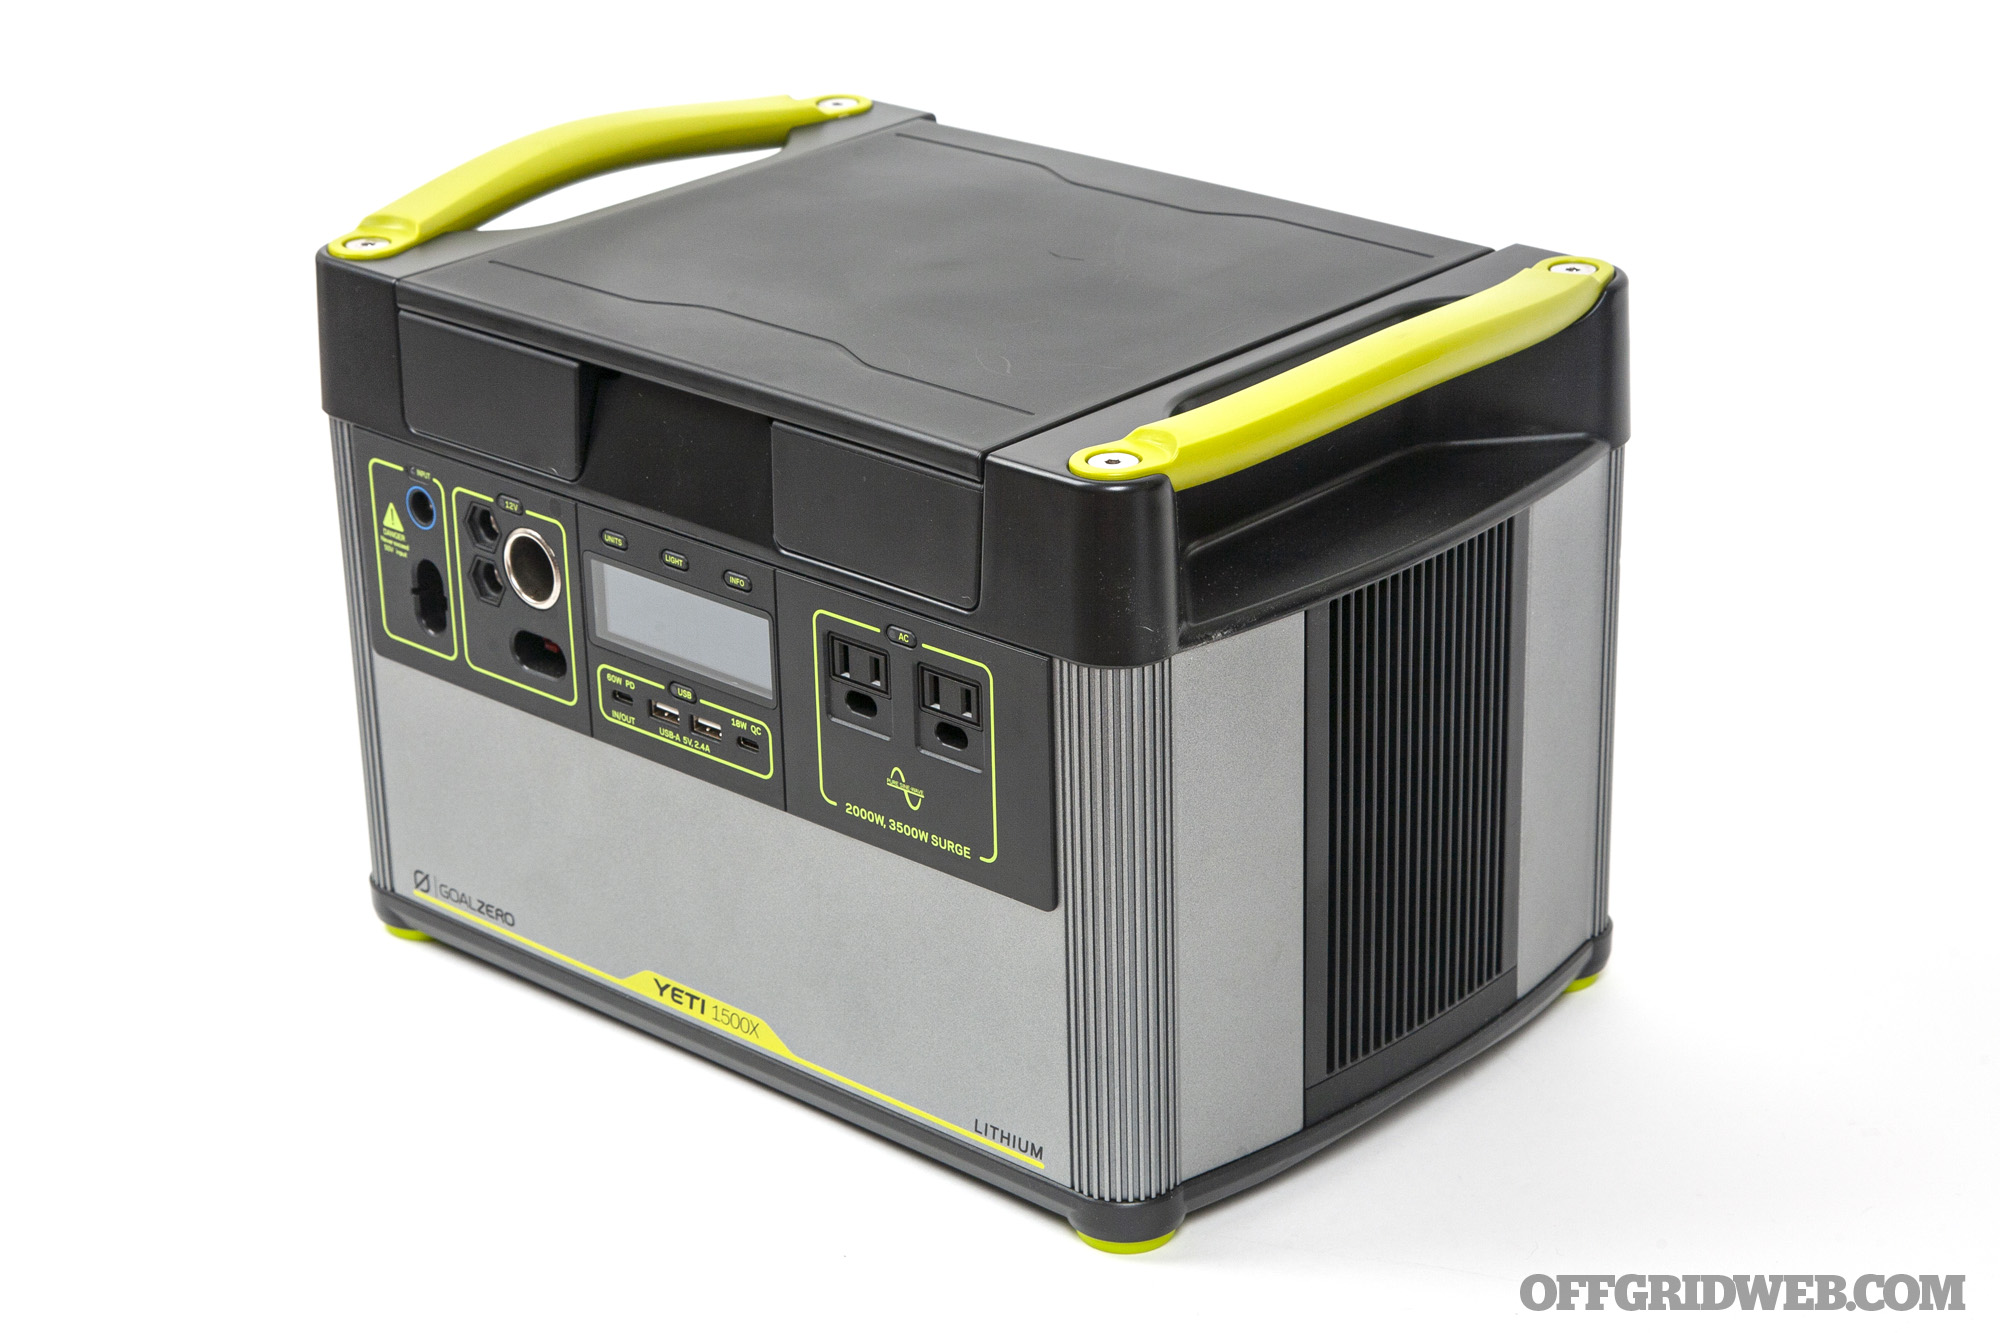
The Goal Zero Yeti 1500X is the company’s best-selling large portable power station, positioned mid-range between the compact Yeti 200X and the 106-pound Yeti 6000X (which, ironically, is about the size of a Yeti cooler — no relation between the two brands). We could write several pages about the technical specs of the Yeti 1500X alone, but in the interest of not boring all our non-electrician readers, we’ll keep it brief. It provides 1,516 watt hours of capacity (140.4 amp hours at 10.8 volts). You’re probably more familiar with milliamp hours, the measurement typically used for small power banks and flashlight batteries; the Yeti 1500X capacity equates to more than 140,000 milliamp hours. Here’s a quick rundown of performance with a few common devices:

  • Smartphone (12Wh) – 127 recharges
  • Laptop (50Wh) – 31 recharges
  • Headlamp (5Wh) – 303 recharges
  • 42” LED TV (100W) – 15 hours
  • Mini Fridge (35W) – 44 hours
  • Full-Size Refrigerator (65W) – 21 hours

side view of the 1500x

In practical terms, it won’t replace a whole-house generator, but this 46-pound unit can easily keep a whole family’s small electronics powered for a week or more. It’ll also keep your fridge or other large appliances running long enough to make it through most short neighborhood blackouts.

Yeti 1500X Specifications

Battery Capacity
1,516 watt-hours (10.8 volts, 140.4 amp-hours)

Battery Type
Lithium-ion nickel manganese cobalt (NMC)

Operating Temperature
32-104 degrees F

Dimensions
15.3 x 10.2 x 10.4 inches

Weight
46 pounds

close up image of the power input

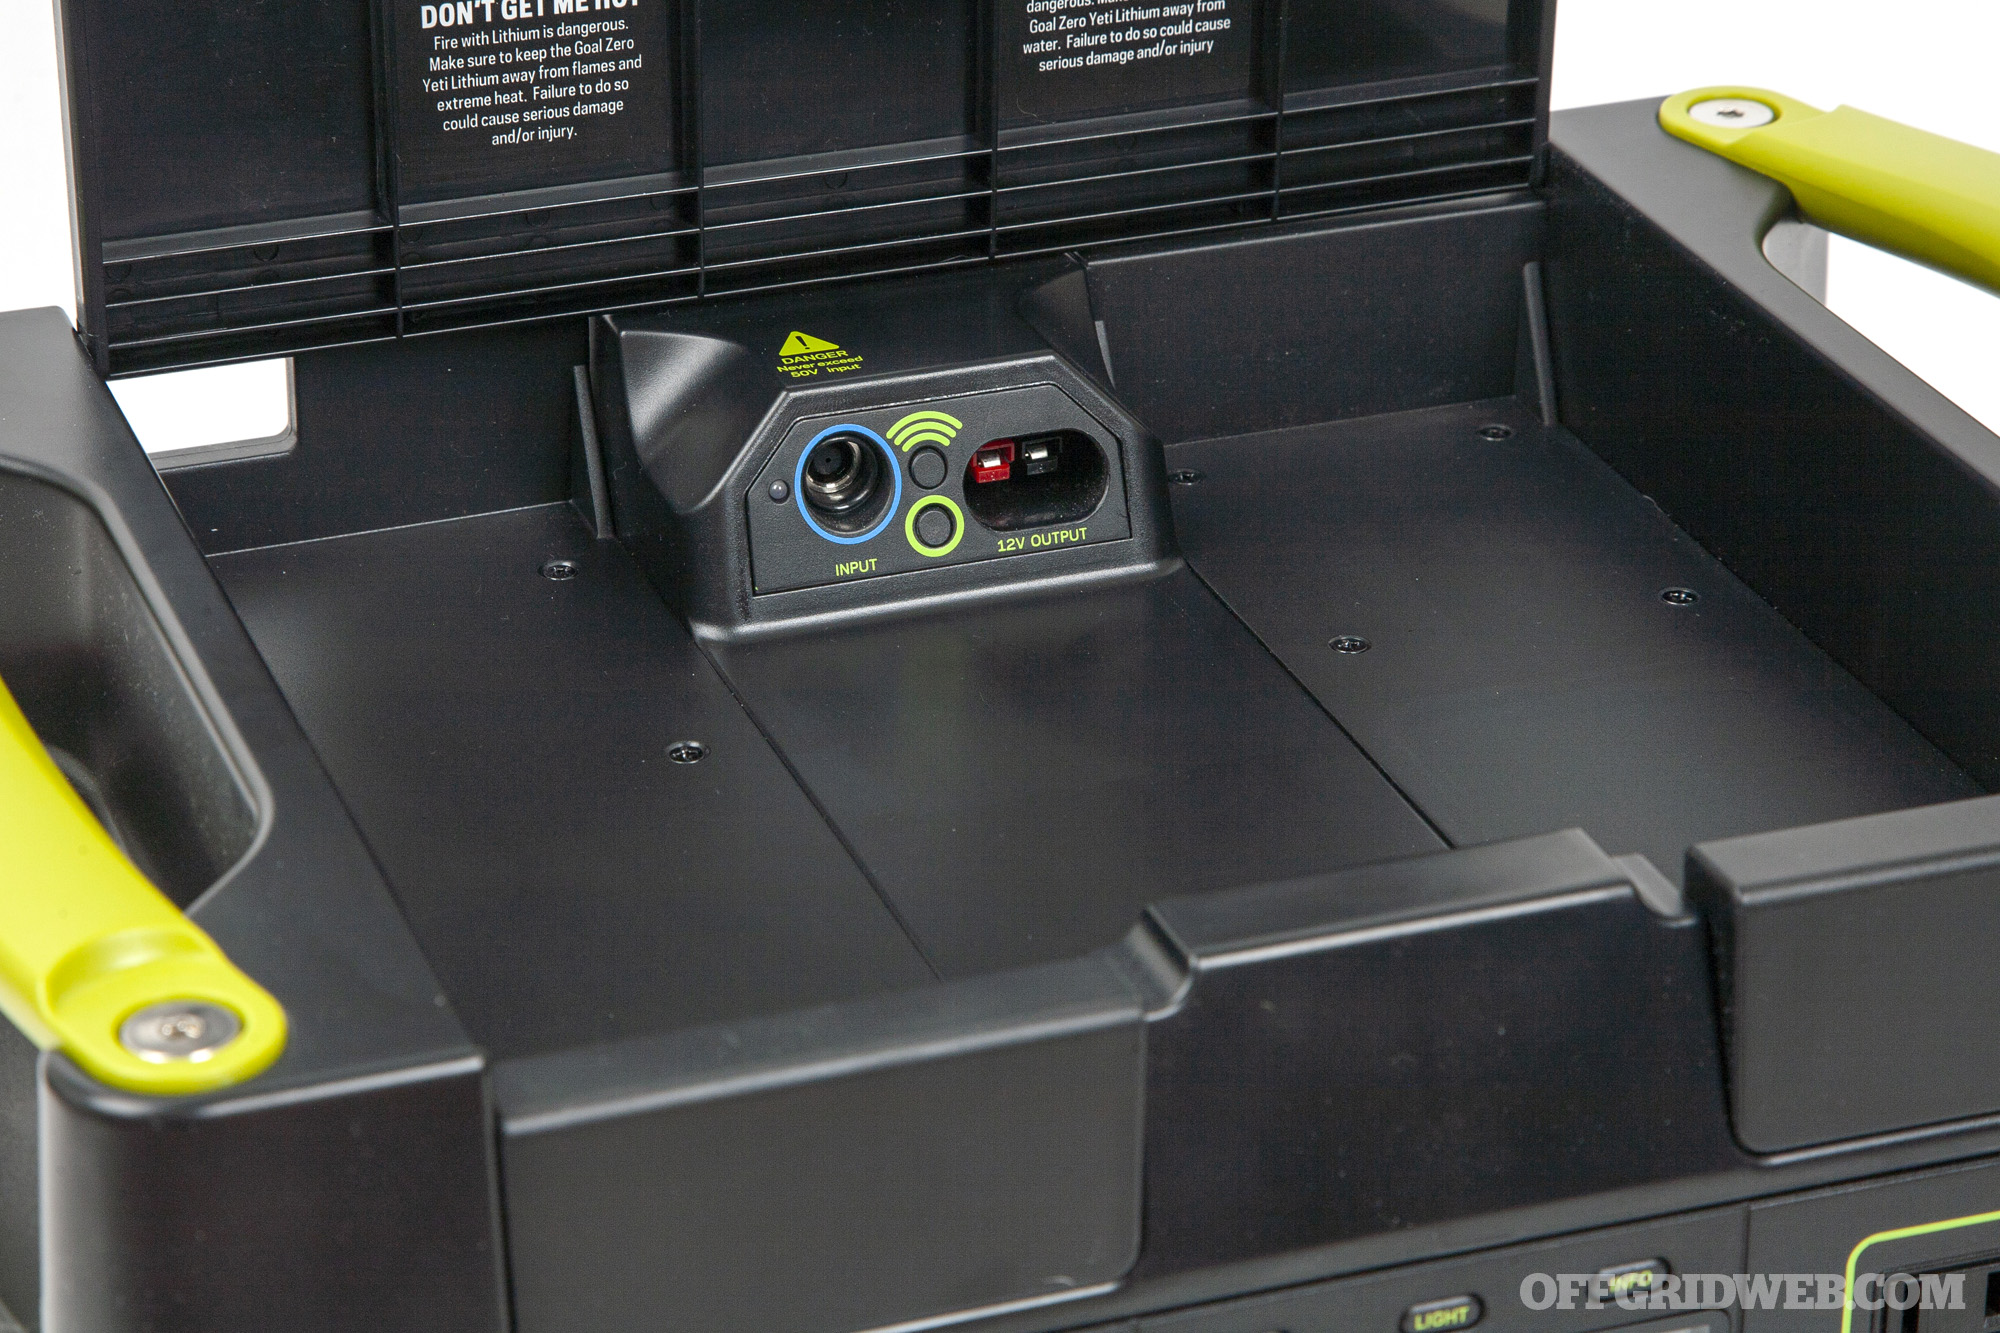
Above: The top tray contains an 8mm input port for solar or AC power, a 12V high-power output, and the pairing button for Goal Zero’s smartphone app. Additional components such as the Yeti Link expansion module can be installed here as well.

Inputs (AC or Solar)
1x 600W high-power charging port, 2x 150W 8mm charging ports

Outputs
2x AC outlets, 1x USB-C PD port (input or output), 1x USB-C QC port, 2x USB-A ports, 2x 6mm accessory ports, 1x 12V car port, 2x high-power ports, 1x Goal Zero expansion module port

close up of yeti 1500x on a stump

MSRP
$1295

URL
www.goalzero.com

Unboxing and Initial Issues

When we first received a Yeti 1500X test unit for this article, we decided to fully charge it for the first time. Unfortunately, this did not go smoothly. We placed the included charging “brick” in the accessory tray on top of the Yeti, plugged it in to the wall, and walked away for about 90 minutes. The flip-up cover was left open and the unit was charged in a 78-degree, well-ventilated room. Despite this, we returned to find the brick had become too hot to touch, and the unit was no longer charging. In fact, the brick got so hot that a hole was melted through the plastic tray beneath it. Shortly after this incident, the Yeti began to exhibit strange behaviors, such as beeping loudly every few minutes. We called Goal Zero and spoke to a very helpful and apologetic customer support representative, who walked us through a few tests over the phone. It was eventually determined that our Yeti would need to be exchanged for a new unit under warranty.

image of goal zero charging cords

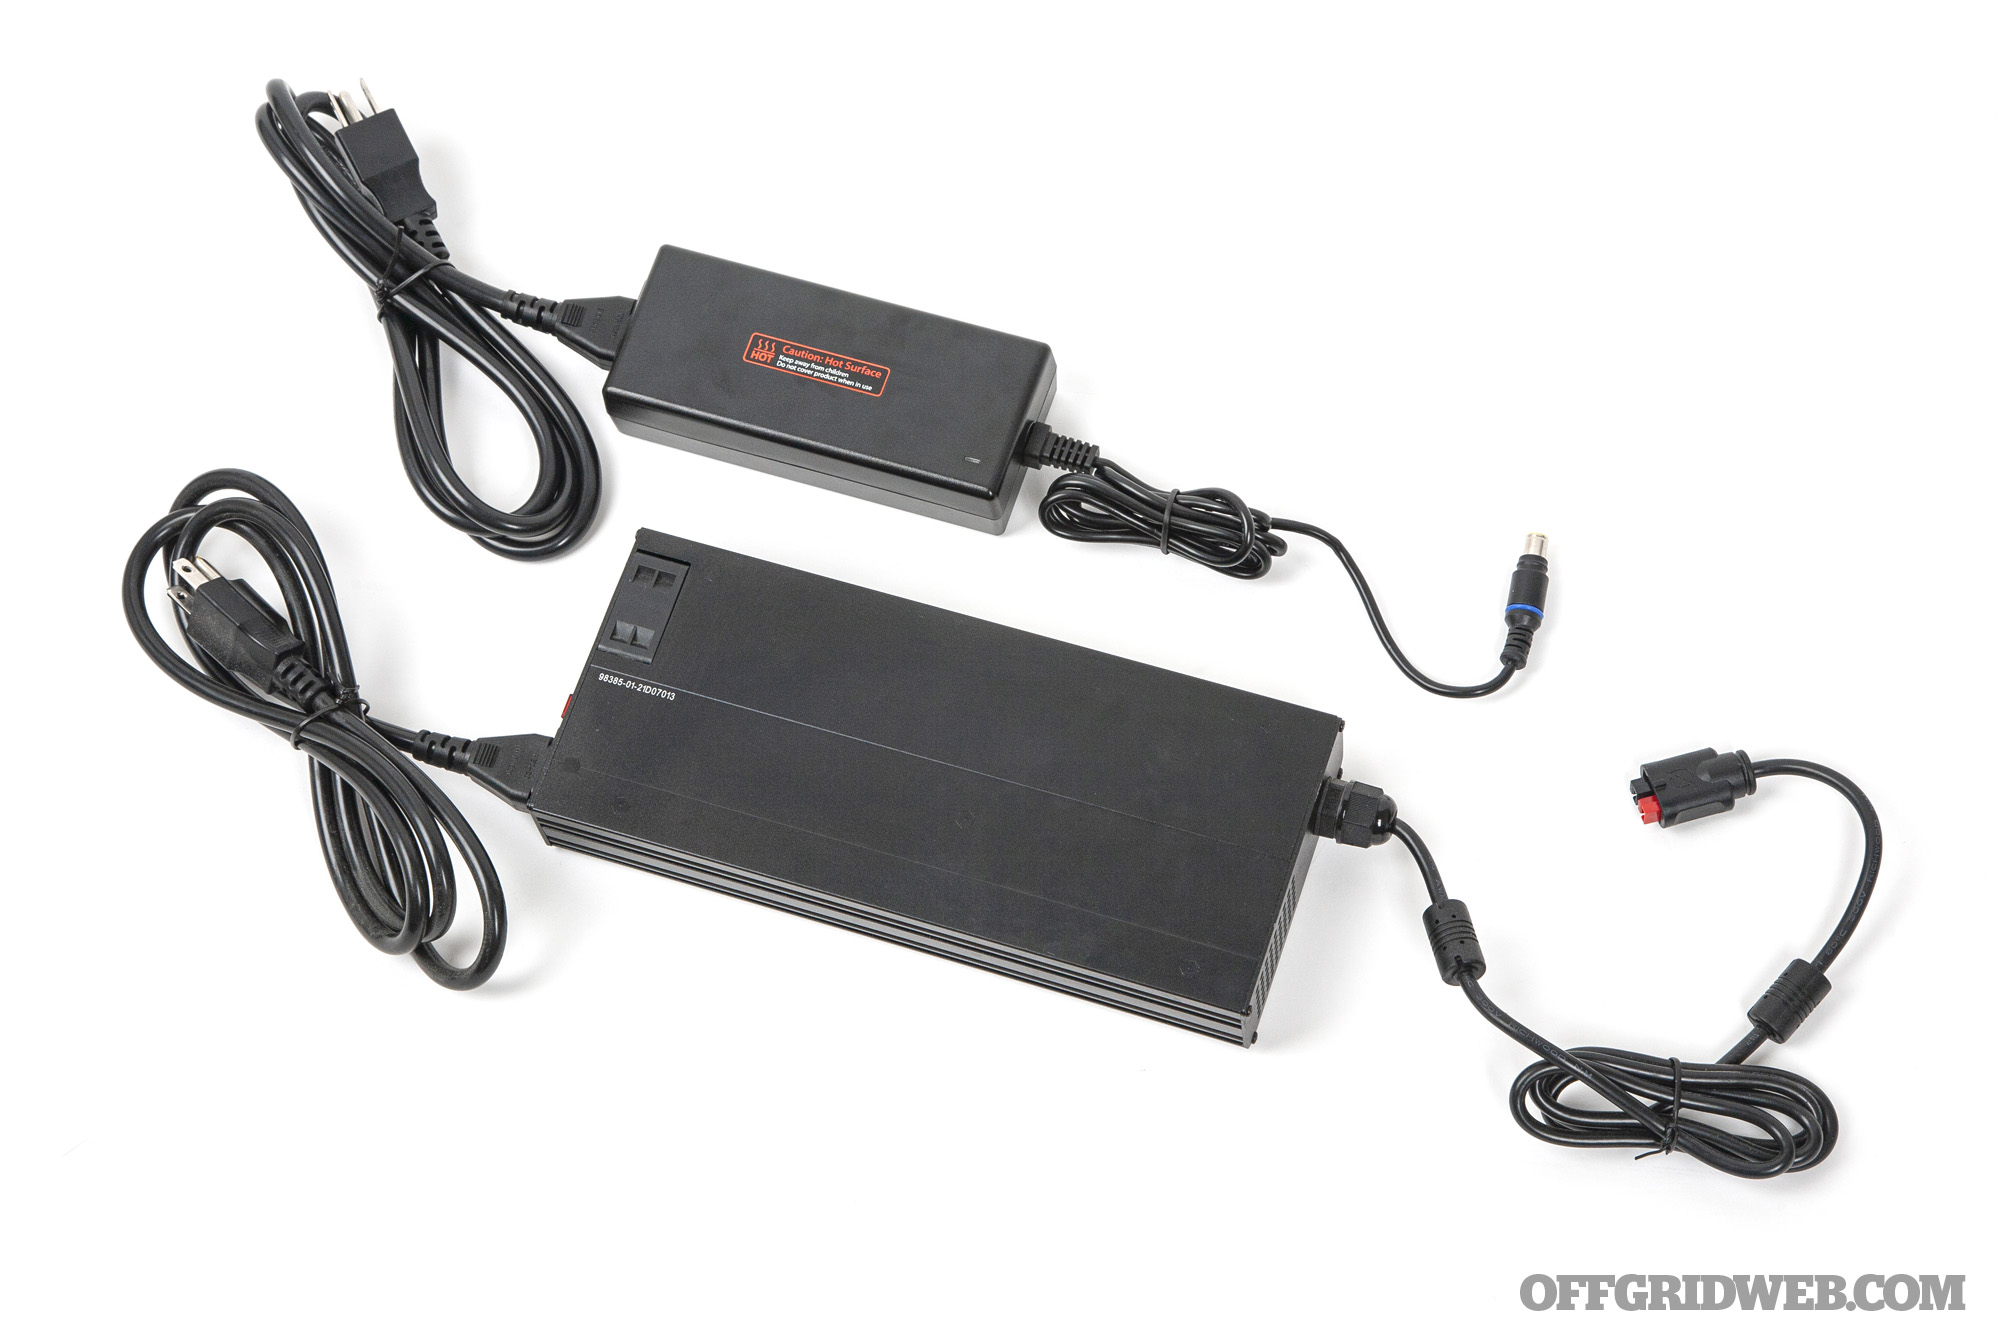
Above: A standard 120W wall charger (top) is included with the Yeti, but the charger that arrived with our first Yeti 1500X was evidently defective. Goal Zero replaced it under warranty. The optional 600W charger (bottom) will recharge the unit nearly five times faster.

On the upside, Goal Zero quickly shipped us a replacement Yeti and new charger, and everything functioned normally this time. A company representative stated that the excessive heat may have been caused by a faulty power brick, and said that this is the first one they’ve seen fail in such a manner. Regardless, we had no more problems from that point forward.

Testing the Yeti

yeti 1500x on wheeled base

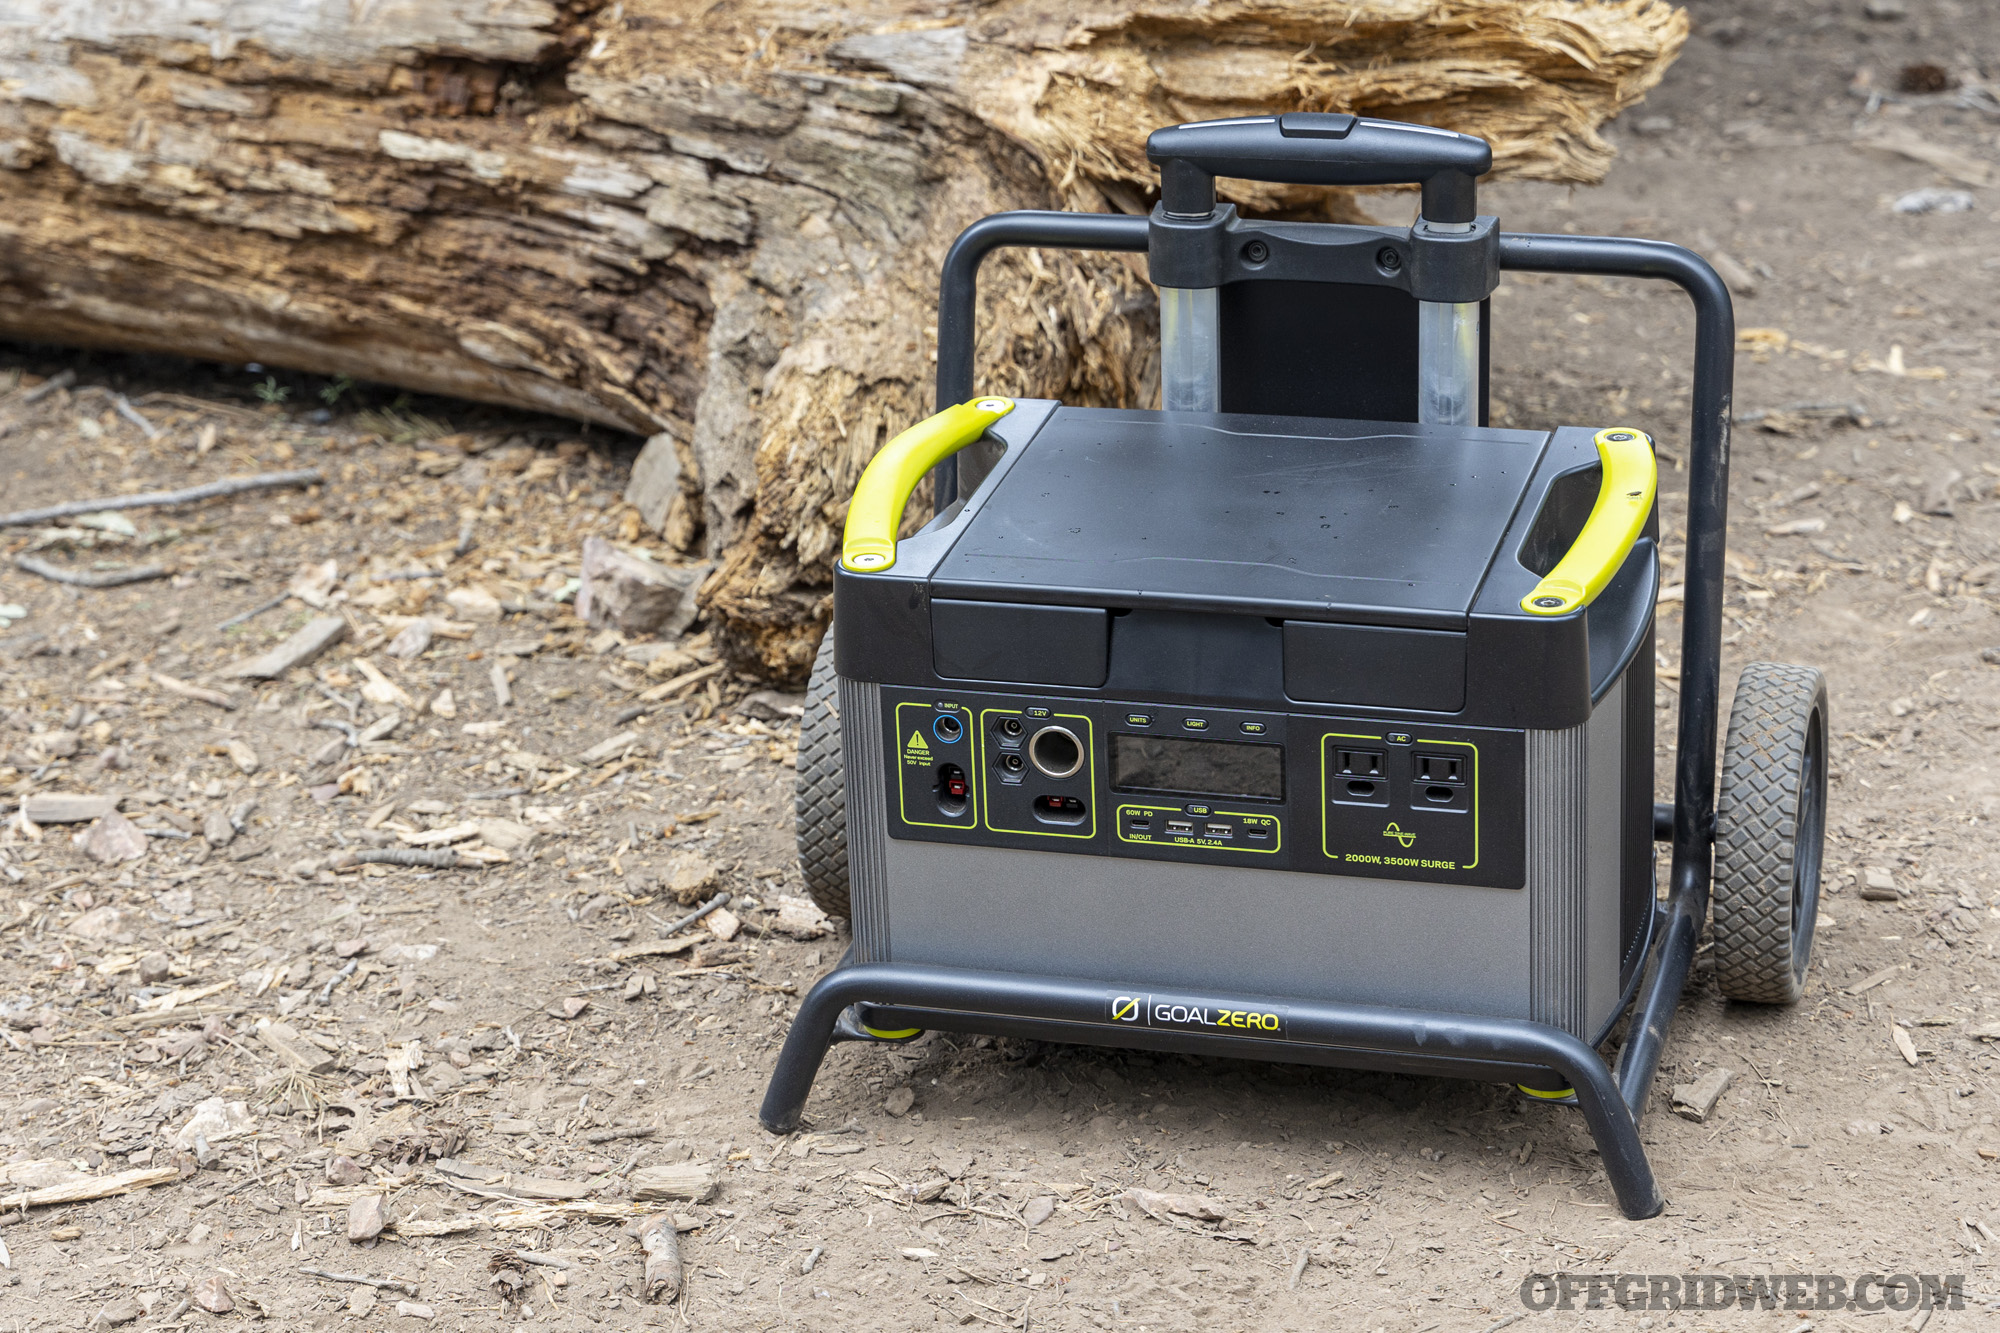
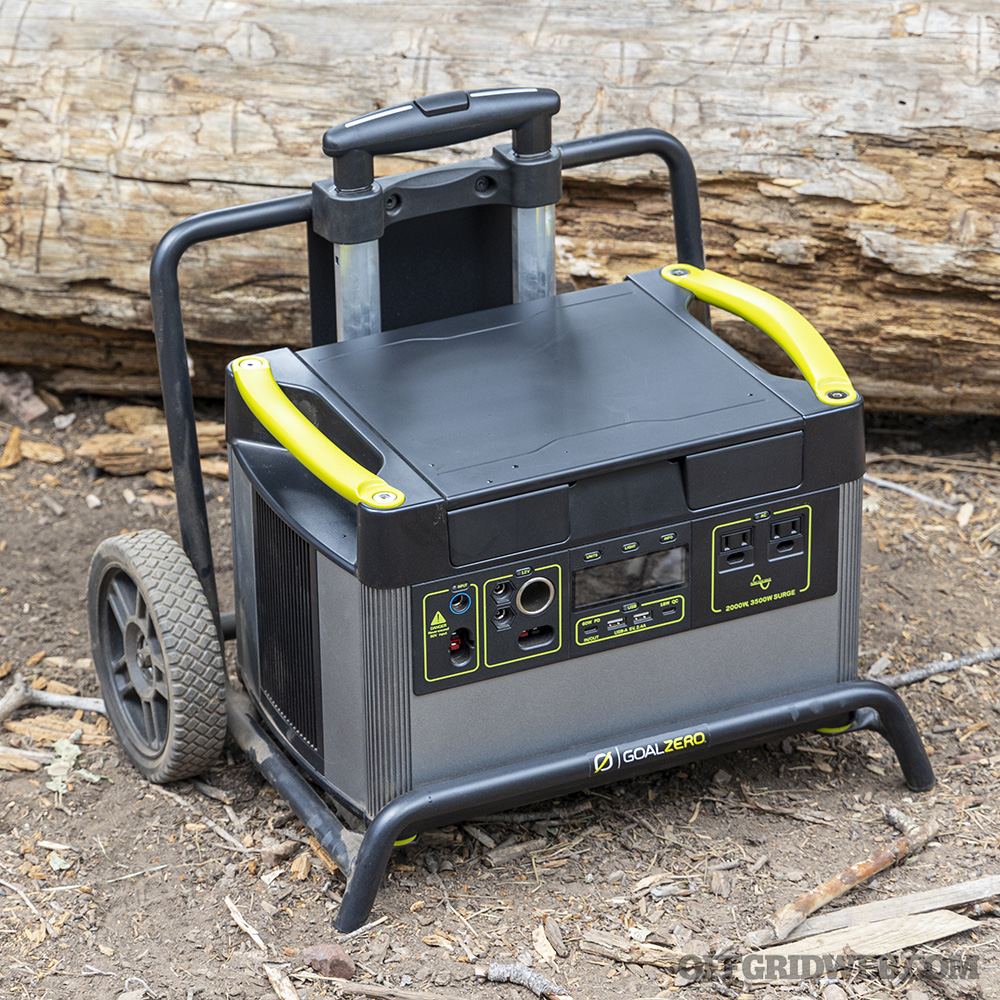
Above: Although the Yeti 1500X has sturdy carry handles built in, it weighs 46 pounds, so the optional Roll Cart is a valuable accessory.

We spent several months using the Yeti 1500X, both around the house and in off-grid locations. It effortlessly powered a variety of USB devices, including phones, radios, flashlights, and camera battery chargers. Two 5V 2.4A USB-A ports, an 18W USB-C Quick Charge (QC) port, and a 60W USB-C Power Delivery (PD) port will handle most small-to-medium electronics with ease. In the garage, the Yeti powered a Dremel, drill, and a large shop vac without breaking a sweat. Inside the house, we tested it on multiple fans, a TV, a blender, a coffee maker, a laptop charger, and a mini fridge without any hiccups.

Strangely, the only reasonable device we found that gave the Yeti trouble was a car-camping air mattress inflator that ran on the 12V DC car accessory port. This pump was marked at 8A, less than the port’s peak draw of 13A, but it would still trip the Yeti’s circuit protection feature, resulting in a red light on the relevant output button. We suspect that turning on the pump caused a momentary spike above its own advertised 8A rating. Thankfully, tripping a circuit doesn’t require throwing a breaker or replacing a blown fuse — just press the button and watch the light reset from red to white. It’s also worth noting that the Yeti had no issue running a similar air pump off its AC inverter wall outlets, so choose a mattress inflator accordingly if you’re planning to use the Yeti for car camping.

If you install the Goal Zero app on your smartphone, you can pair it with the Yeti to monitor charging status, control preferences, activate or deactivate ports, and update the unit’s firmware. This can be done from nearby via Bluetooth, or from anywhere via WiFi Direct Connect.

image of goal zero lanterns

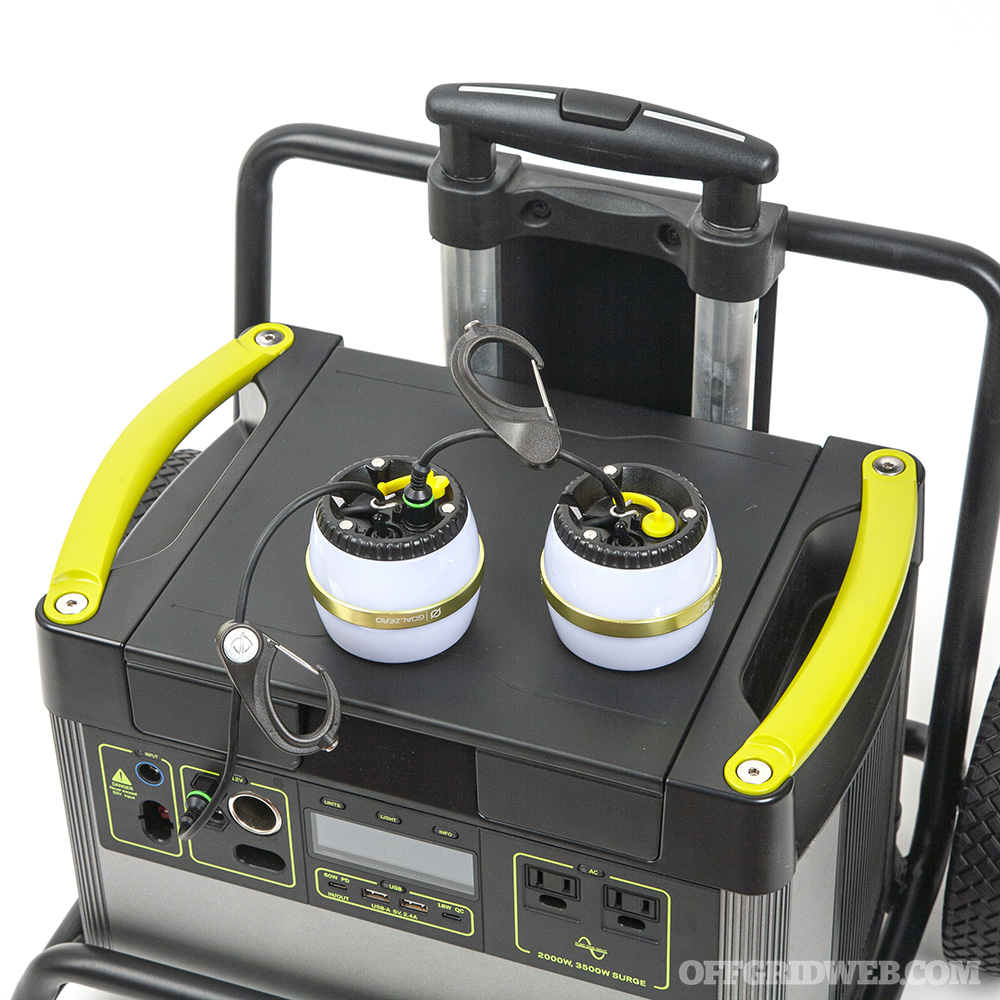
Above: These Light-A-Life lanterns can be connected to the Yeti’s 6mm ports or daisy-chained to each other. Each features an integrated eight-foot cord and magnetic carabiner.

To add to the versatility of the Yeti, we picked up a few optional accessories. First, the Yeti Roll Cart ($100) is highly recommended if you’re going to use the power station in anything but a static position. It makes moving the 46-pound device much easier. Next, we got two Goal Zero Light-A-Life 350 LED lanterns ($40 each), which feature integrated, daisy-chainable 6mm power cords and carabiners. These lanterns are ideal for hanging inside a tent or awning next to the Yeti, and can produce 350 lumens of warm white light for hundreds of hours. A 600W wall charger ($200) makes it possible to recharge the Yeti in only 3 hours, as opposed to 14 hours with the standard wall charger.

image of goal zero solar briefcase

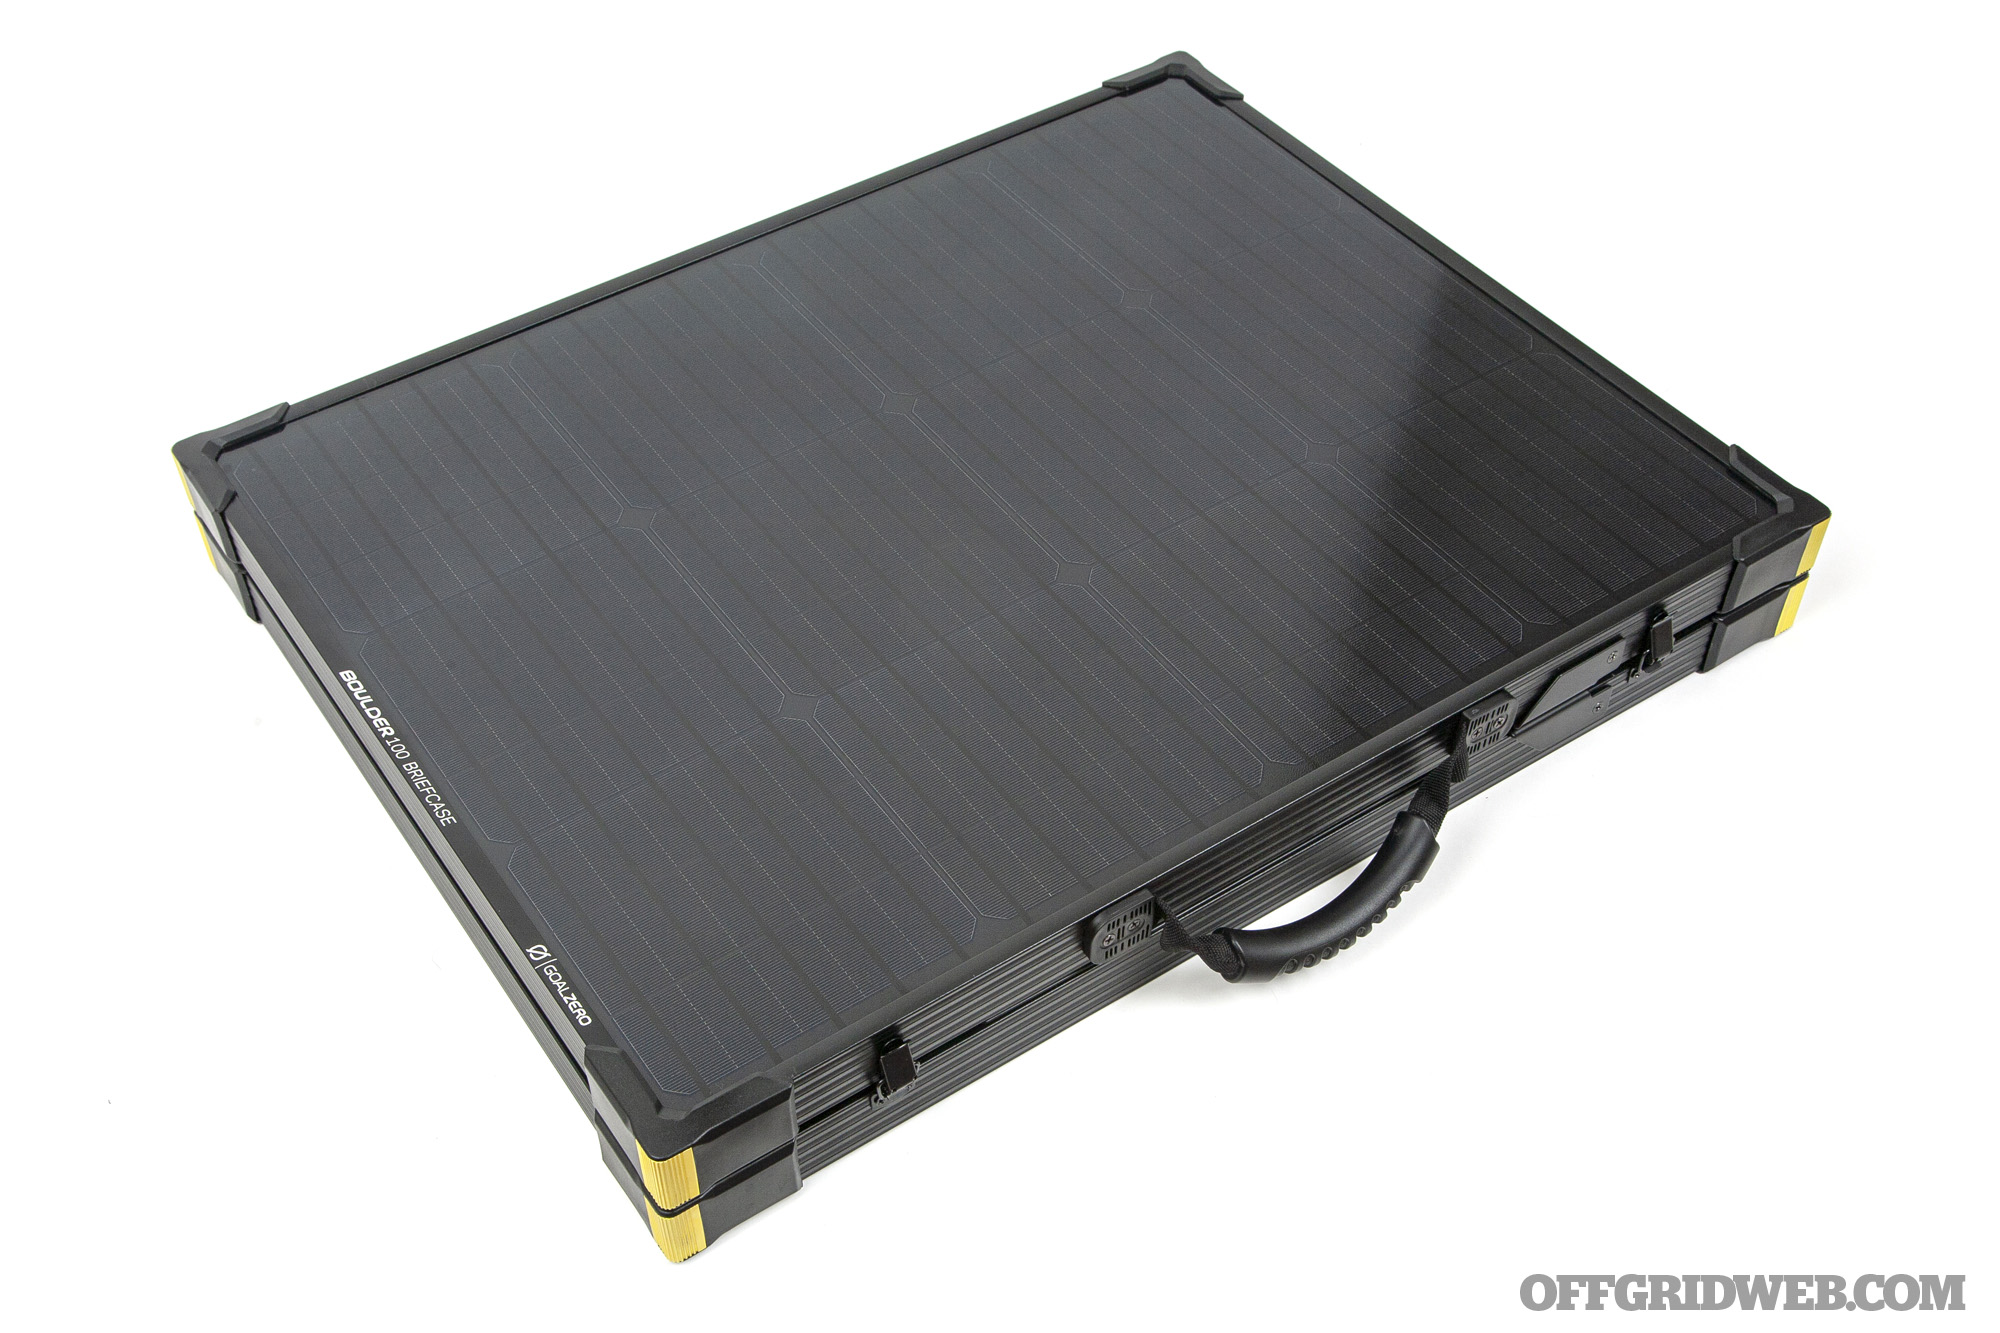
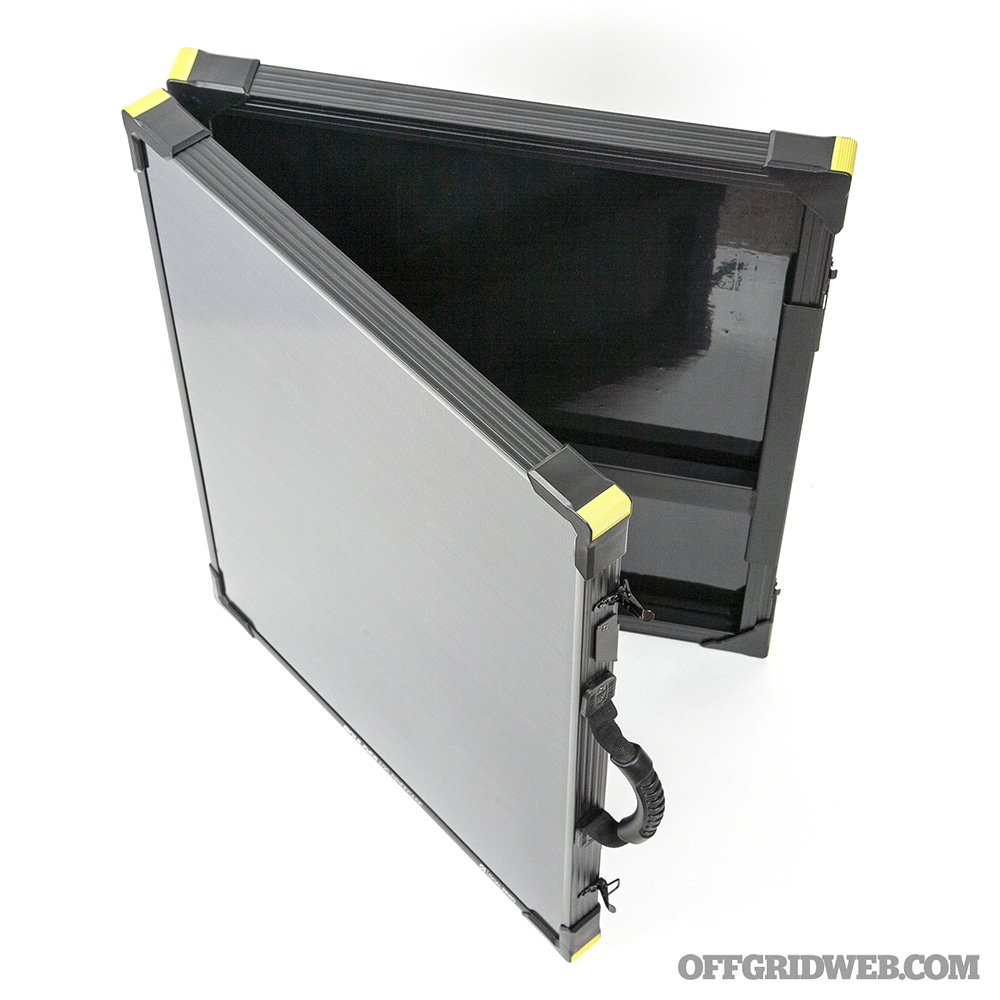
Above: The Boulder 100 Briefcase solar panel folds in half for easier transport and storage. Each panel is enclosed in an aluminum frame and protected by tempered glass.

Finally, for a fully off-grid-capable setup, we paired our Yeti 1500X with a Goal Zero Boulder 100 Solar Briefcase ($300, or $200 if purchased with a Yeti 1500X). This consists of two 50W solar panels chained together inside a sturdy aluminum frame. For easy transport, the Boulder 100 Briefcase can be folded in half and stowed in an included canvas bag.

image of goal zero solar briefcase open

When our Yeti needs to be topped off, we just unfold the “briefcase,” prop up the stand, face the panel into the sun, and plug in the integrated 8mm cable. The Yeti’s LCD display immediately shows how much power the panel is producing, as well as an estimated time until fully charged. Under ideal circumstances, Goal Zero says the Boulder 100 will fully recharge the Yeti 1500X in 18-36 hours. If you have multiple panels, they can be linked to charge the Yeti much faster.

Conclusion

close up of yeti 1500x on wheel base

Once we got past the warranty exchange hiccup we had with our first Yeti, we were impressed by the capabilities and ease of use this power station offers. Although it’s certainly possible to wire up some car batteries to create a DIY emergency power source for less money, you’ll need to invest a lot of time and research into that project, and it certainly won’t be as portable.

The Yeti 1500X is easy to pick up and place in the trunk of a car, and we found that incredibly helpful for road trips and camping weekends. Its display makes it clear exactly how much power is remaining and how long a specific device (or devices) can run; in the unlikely event a circuit is overloaded, the Yeti’s built-in protection features make it easy to find the issue and reset the port with a single button press. And Goal Zero’s huge ecosystem of parts and accessories makes it simple to expand this power station’s capabilities with integration systems for solar panels, your vehicle, or your home.

Much like clean running water from the tap, a reliable source of electricity isn’t just a superfluous luxury. It’s a modern-day resource you truly appreciate once you’ve been forced to go without it.

Read More

Don’t miss essential survival insights—sign up for Recoil Offgrid's free newsletter today!

Check out our other publications on the web: Recoil | Gun Digest | Blade | RecoilTV | RECOILtv (YouTube)


Tropical Cyclone Aftermath: Post-Storm Survivor Strategy

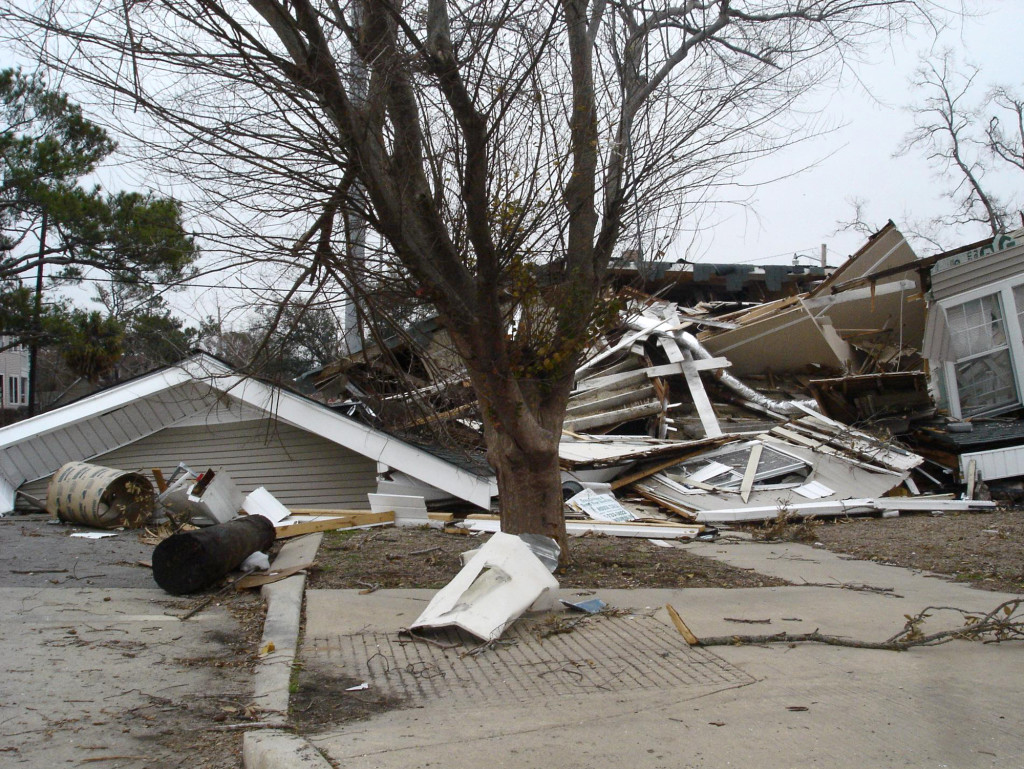
A killer hurricane makes landfall in your area, causing widespread devastation. The once familiar neighborhood outside your doors now resembles an apocalyptic wasteland. Thanks to solid planning, preparations, and maybe a little luck, you survived. But what now? Although these storms can be tremendously destructive; the tropical cyclone aftermath can often be just as challenging.

destroyed building after a hurricane

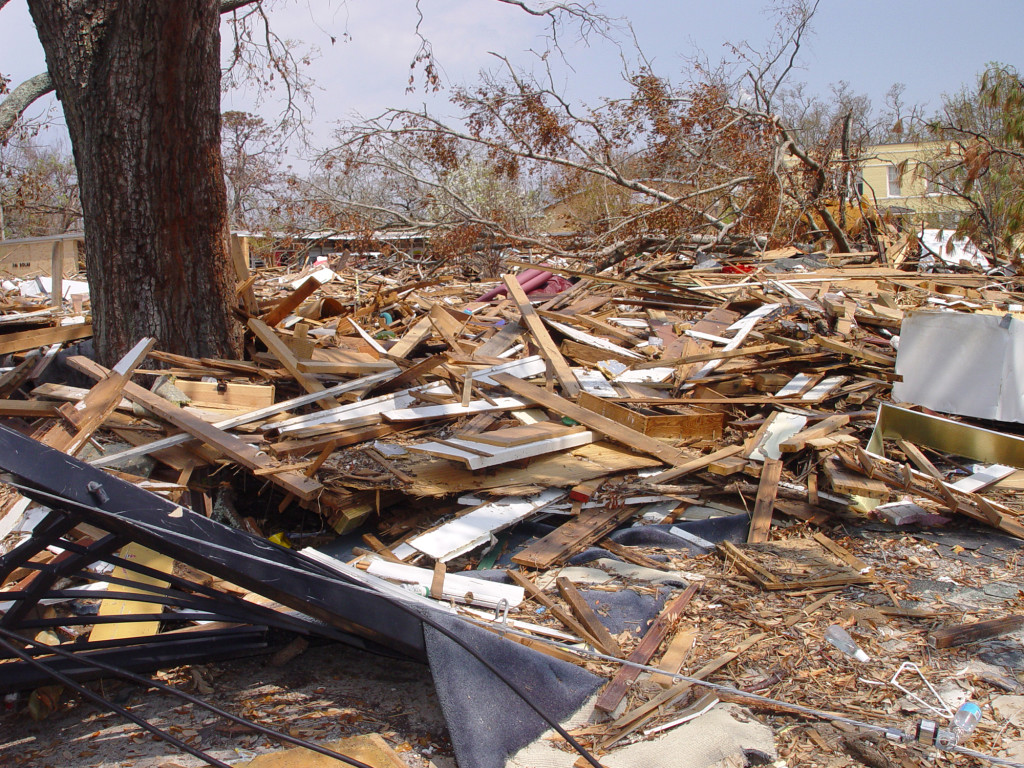
After any major storm, roads, streets, and highways will be covered with incredible amounts of disaster debris, making even short-distance travel dangerous, or downright impossible. Under these conditions it’s best to stay put. But when circumstances require you to leave the relative safety of your home, having the right gear, supplies, and the proper mindset can mean the difference between a safe journey and getting stranded in the middle of a very ugly situation.

This isn’t about bugging out and fighting your way out of Dodge, it’s about essential mobility in the aftermath of a crisis. Whether it’s getting to a hospital or reaching a friend/relative who’s in trouble, getting from point A to point B will be far easier if you know what to expect, what to do, and what gear to have in your kit.

What to Expect After the Storm

Severe Flooding

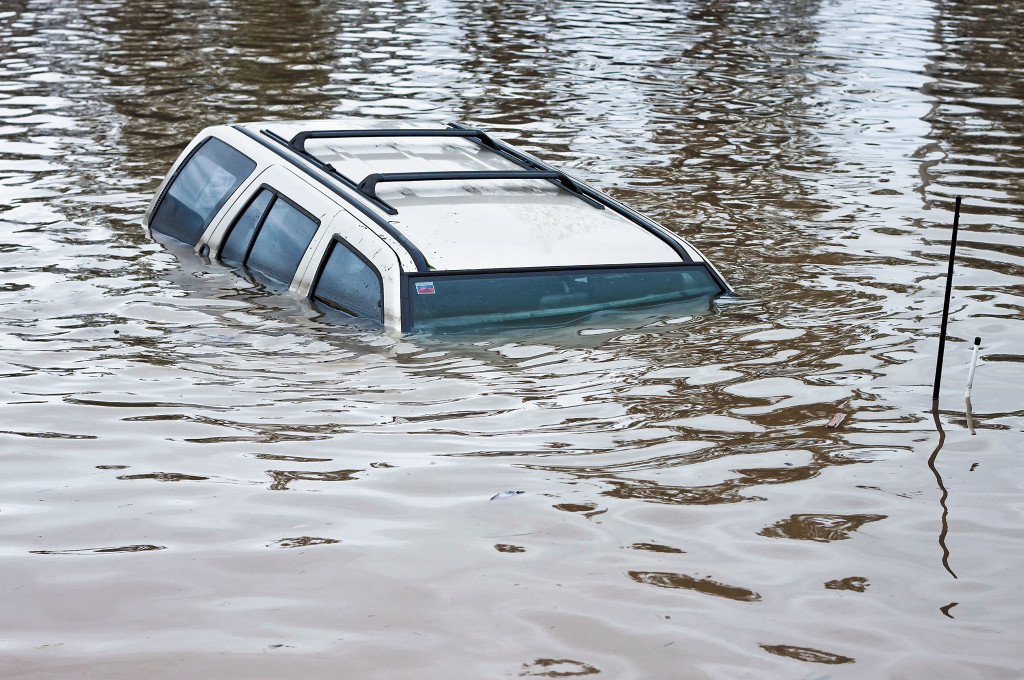
Tropical cyclones can bring lots of rainfall in a short amount of time, resulting in widespread flooding. Standing water can conceal deep potholes, tree branches, downed power lines, and other dangerous vehicle-damaging debris. Driving through standing water is never a good idea, but after a storm it could be fatal.

Hazardous Road Conditions

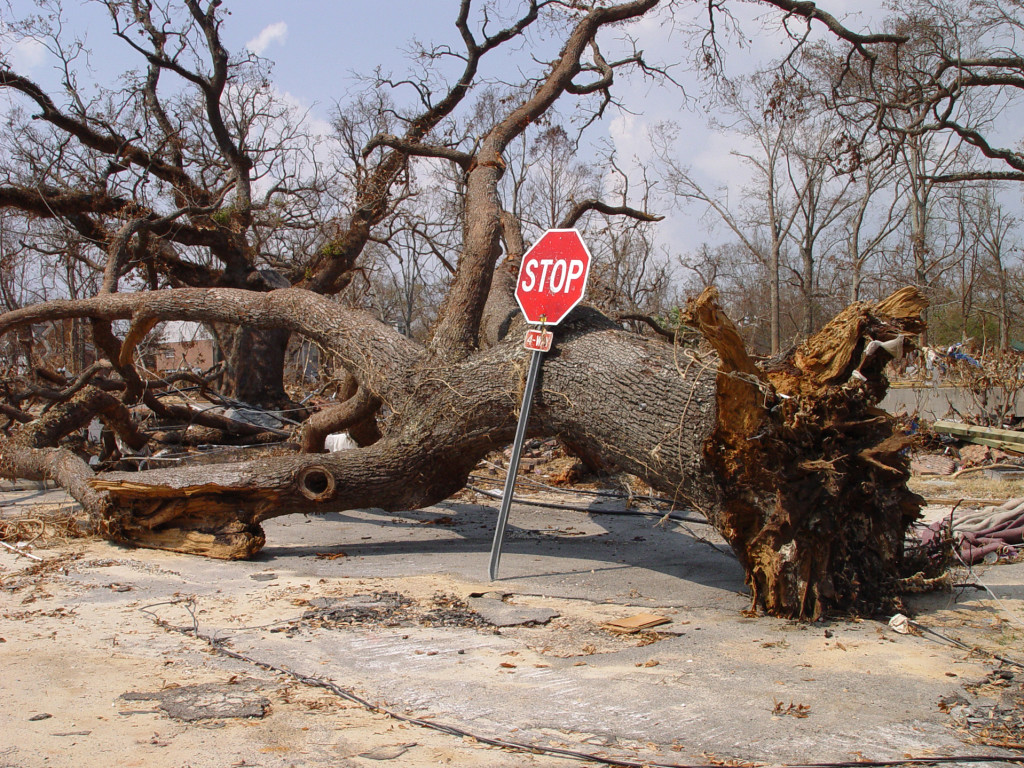
After a tropical cyclone, the roads may be covered with all sorts of plant debris, but what’s underneath that blanket of vegetation may be much more dangerous. Expect sharp, twisted metal, and other jagged objects that can easily puncture or slash tires. Post-hurricane, many roads will be choked with construction debris, roofing nails, fallen trees, dangerous rubble, and downed power lines — all have the potential to abruptly shut your trip down.

car-sinking-in-flood-water

Out-of-Control Motorists

Hurricane-force winds can destroy, or severely damage, traffic lights and signs. Expect chaotic driving conditions, as the rules-of-the-road are replaced by the every-man-for-himself mentality. Add to this distracted, stressed-out, panicked drivers trying to navigate through some very difficult circumstances.

Grid-Down Conditions

It’s not unusual for the power to be out for days, maybe even weeks, after a tropical cyclone. This means closed gasoline stations, blacked-out traffic and streetlights, and possibly a larger number of pedestrians trying to make their way around all the debris. Overnight, this reality will change the way you live and require drastic changes in what you do and how you do it.

downed tree and destroyed road after a hurricane

Slow Cleanup

Over the past 20 years, urban centers have been expanding, and weather-related disasters have been increasing in intensity and frequency. Powerful debris-generating tropical cyclones can easily overwhelm solid waste management facilities, and delay recovery efforts. Expect to see entire communities drowning in storm debris and piles of rotting garbage overflowing onto the streets. If previous storms are any indication of what to expect, don’t anticipate a quick cleanup.

Altered Traffic Patterns

Roads may be closed, and traffic redirected to bypass damaged infrastructure. If you need to travel, plan on using alternate routes away from overcrowded main traffic arteries. But be prepared for adverse road conditions since these lesser-used roads will typically be the last to be cleared of storm debris, and major obstacles. The first priority for cleanup crews will be to clear a path for emergency vehicles and utility repair workers.

Post Tropical Cyclone Vehicle Preparation

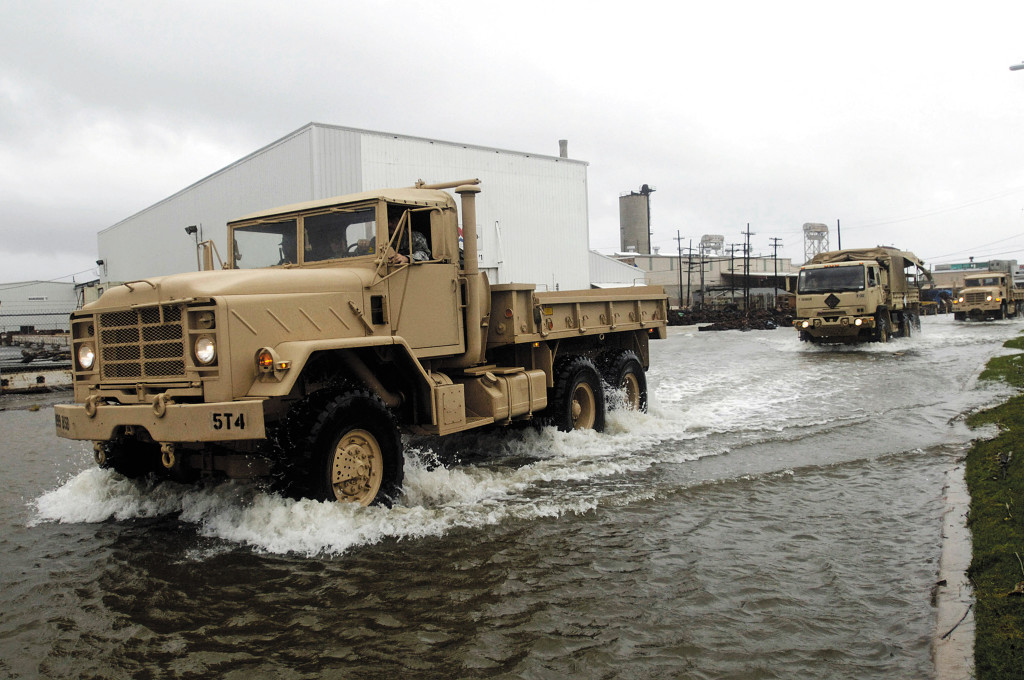
military-trucks-driving-through-water

Most vehicles on the road today were designed to be driven on relatively smooth, flat pavement. After a tropical cyclone, many a “daily driver” will not be up to the challenge. Anticipate a high number of abandoned vehicles, as motorists leave their damaged rides on the side of the road and continue on foot. To help reduce the chances of you becoming an unwilling pedestrian, here are some areas to focus on.

The most vulnerable part of your vehicle are probably the tires. Normally, a flat or damaged tire is an annoyance; in the aftermath of a storm, however, it can stop you dead in your tracks. Just having a spare tire is not enough, especially if it’s one of those anemic small spares. You’ll need a full-size spare (preferably more than one), and the ability to repair and re-inflate damaged tires.

image of post storm vehicle items

Here are some tips and suggestions:

Multiple Spare Tires

Under normal circumstances, the thought of lugging around more than one spare tire may seem absurd. After a hurricane, however, you’d be crazy to go anywhere without at least two full-size spare tires. The idea is simple — having multiple tires pre-mounted on simple, inexpensive rims will ensure a quick tire change, and avoid time-consuming, dangerous roadside repairs.

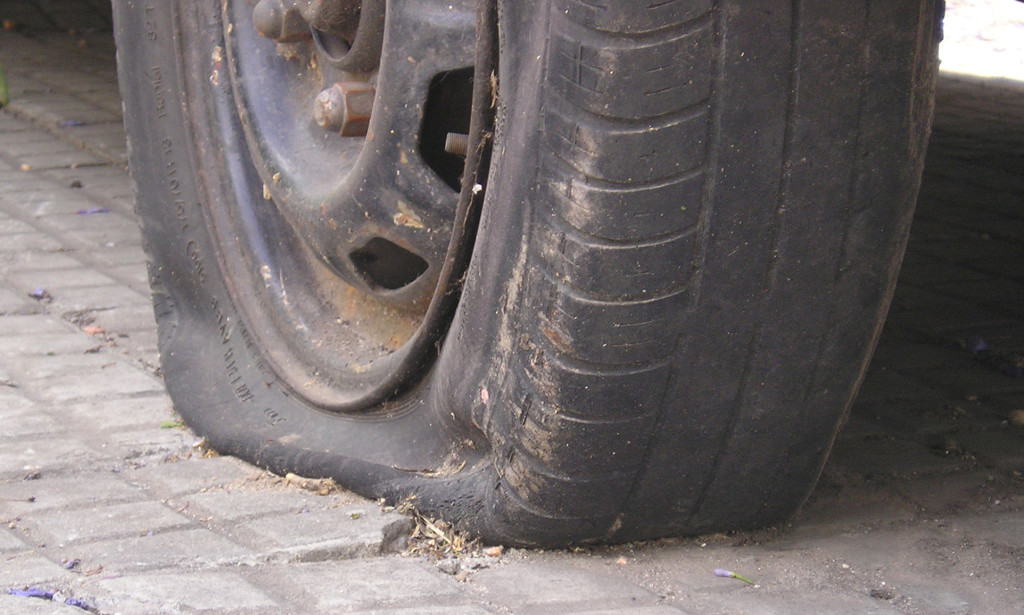
Image of a damaged tire after a storm

If you plan on driving in a post-hurricane environment, severe tire damage is an absolute certainty; the idea is to resolve the problem quickly, even under the most difficult circumstances. Having multiple spares, is a practical solution that can’t be beat.

Put a Plug In It

Normally, a flat requires nothing more than a trip to the tire shop for a quick repair, or replacement. During an emergency, you’ll need gear to handle it yourself. A temporary tire repair can usually be made by removing the foreign object from the puncture site, reaming the hole, and inserting a sticky, self-vulcanizing plug.

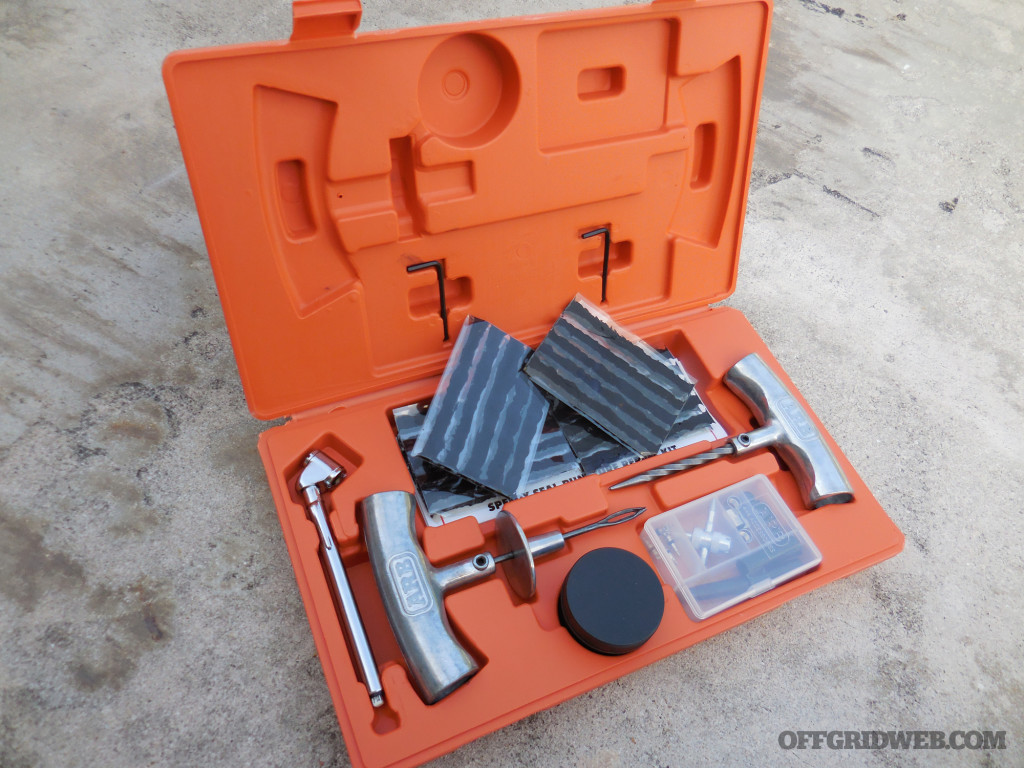
image of a tire repair kit

The Speedy Seal tire repair kit from ARB includes all the necessary components to repair tubeless tires. Hard plastic...

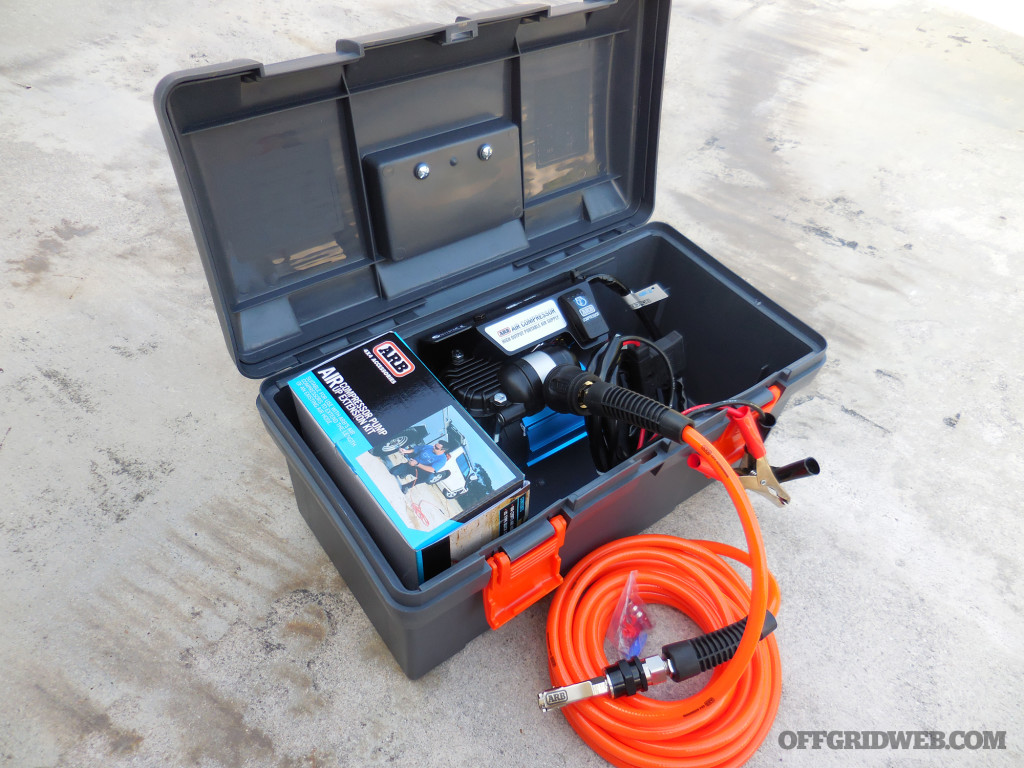
The ARB Speedy Seal Tire Repair Kit contains all the necessary components for making emergency repairs on tubeless radial or cross-ply tires, without having to remove the tire from the rim — this is a huge plus. But plugging the hole is only one part of the repair; you’ll also need to re-inflate the tire(s). The ARB High Performance 12V Air Compressor is a portable, self-contained unit that operates using your vehicle’s 12-volt battery to quickly re-inflate tires.

image of an air compressor

The ARB Portable 12V Air Compressor, (CKMP12) comes in a durable carrying case, includes a 19-foot air hose, and all...

Run-flat Tires

Run-flat, or self-supporting tires have sidewalls that are heavily reinforced to support the vehicle, and to withstand deflation over limited distances, usually 100 to 300 miles, depending on road and driving conditions. While this is an advantage, blowouts are still possible, and sidewall damage can take the tire completely out of service. When you do get a puncture, it’s not always easily repaired, sometimes requiring an expensive tire replacement. While these tires do offer some valuable advantages, they do have limitations and you’ll still need a backup plan.

Self-Sealing Tires

These bad boys have a layer of sealant inside the tire that helps maintain air pressure when punctured. Not bad, but, this feature only works if the puncture is no larger than 5mm, and is near the tread center. Larger punctures, slashes, and tears can still flatten the tire. As with run-flats, self-sealing tires are more expensive than conventional tires, and you’ll still need a plan to replace or repair damaged tires.

Also make sure to have a quality jack to lift your vehicle safely and securely. After a storm, security will be a big concern, and you’ll want to spend as little time as possible exposed on the roadside. Plan and prepare to resolve potential problems quickly and efficiently.

Emergency Tools

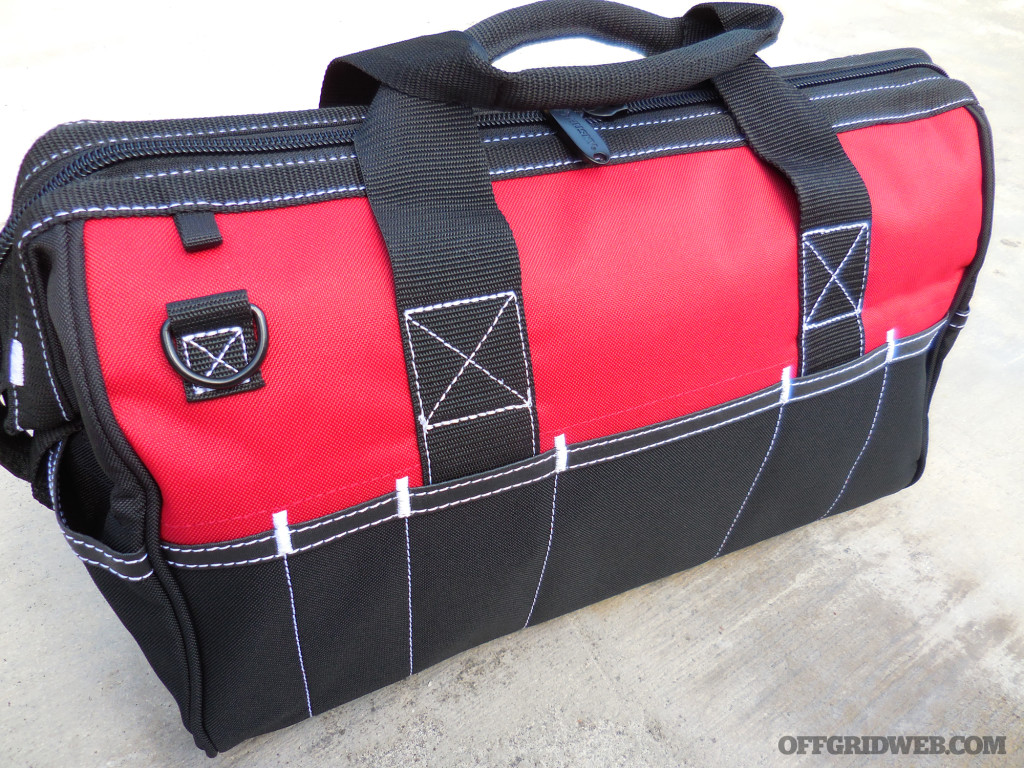
image of a tool bag

A good bag is the foundation for building your toolkit. Look for sturdy handles, well-reinforced corners, and...

Emergency roadside repairs can often be made with simple hand tools. Sounds easy enough, unless those tools are sitting in your garage. In the aftermath of a crisis, you’ll need to pack the right gear, even for short trips. While a generic tool kit is better than nothing at all, consider putting together your own toolkit. Include multipurpose tools, in the sizes you’re most likely to need for your make and model vehicle. (See the checklist below for basic toolkit suggestions.)

Note: Avoid the all-in-one, roadside emergency tool kits commonly built around useless filler items. Always buy solid tools that won’t fall apart the first time you use them. Test your tools under real-world conditions well in advance of any crisis.

Self-Rescue Gear

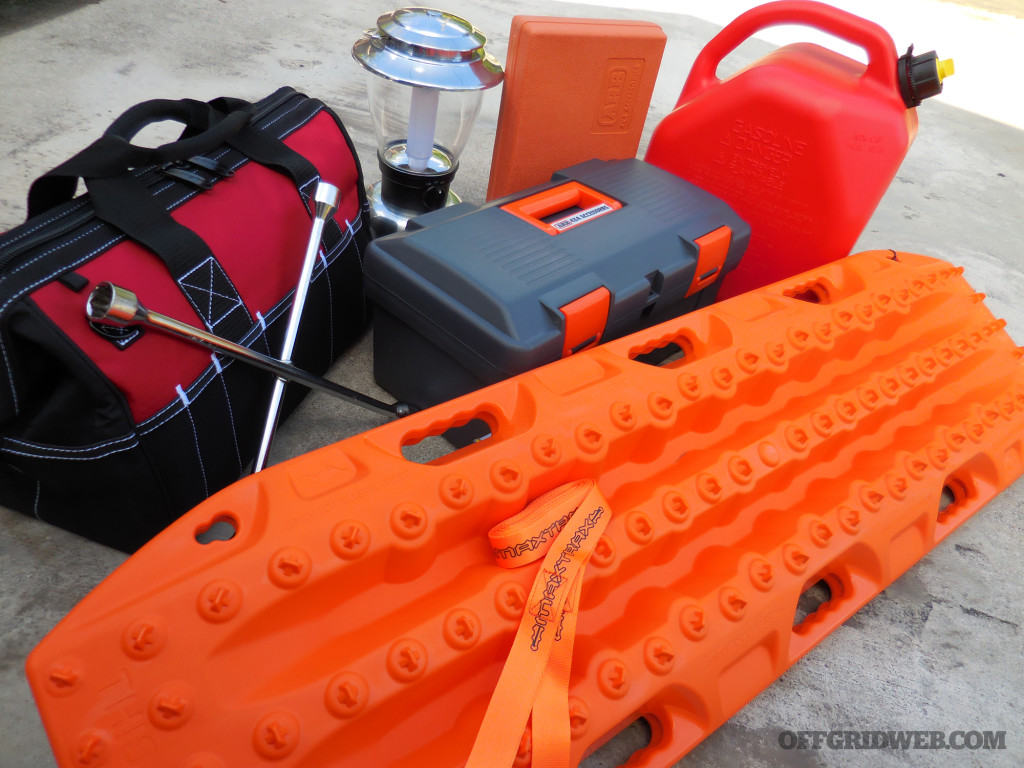
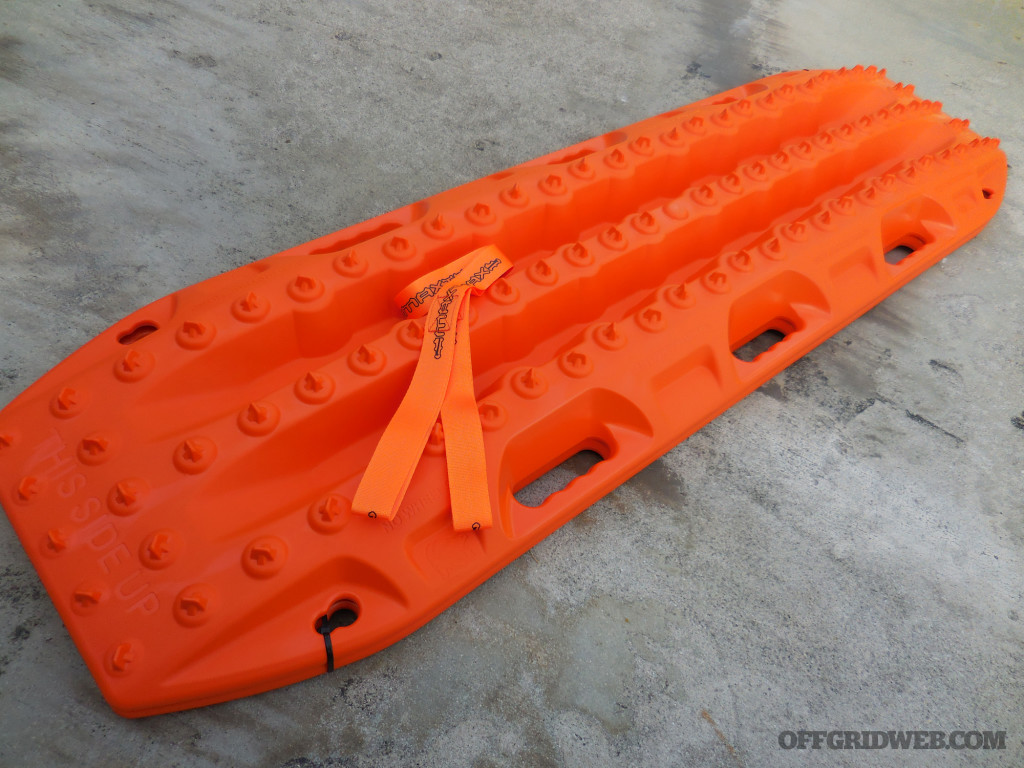
After a tropical cyclone fallen trees, utility poles, fences, signs, even dislodged roadway guardrails can block roads and create serious hazards, causing you to make your way around the obstacles. But leaving the paved surface brings the risk of getting stuck in mud, sand, or loose dirt. MAXTRAX is a lightweight vehicle recovery device designed to be safely deployed and used by one person. It provides serious traction in wet or dry conditions, and can even be inverted and used as an improvised shovel to clear debris from around the tires.

image of Maxtrax

MAXTRAX is a lightweight vehicle extraction tool for safe, quick, and easy recovery in mud, sand, or standing water. Can also be used as an improvised shovel to clear debris from around the tires, and under your vehicle. Bright orange color makes them easy to see in any environment.

Note: It’s also a good idea to pack a small shovel, axe, bolt cutters, handsaw, and machete to help in clearing away small debris, branches, or other obstructions. Flashlights, lanterns, and headlamps with extra batteries should always be in your vehicle, along with an emergency vehicle kit containing flares, jumper cables, gloves, etc., all the stuff you’d need for routine road hazards.

Navigating Checkpoints

Checkpoints are not something we see a lot of here in the USA, but after a tropical cyclone, it’s something we may need to anticipate and prepare for. After a storm, access to certain areas may be managed by law enforcement checkpoints. If you encounter these checkpoints, be prepared to identify yourself and to explain the purpose of your trip. You may be asked for a valid driver’s license or some other government-issued photo identification.

Also be ready to explain the visible contents of your vehicle. (A word to the wise: pack your gear discreetly and don’t dress like Rambo.) The less attention you call to yourself, and your vehicle, the better. Even though checkpoints are usually set up long after the affected neighborhoods have been stripped clean by looters, ironically, innocent people can get jammed-up for lack of proper ID, or for having the “wrong” look.


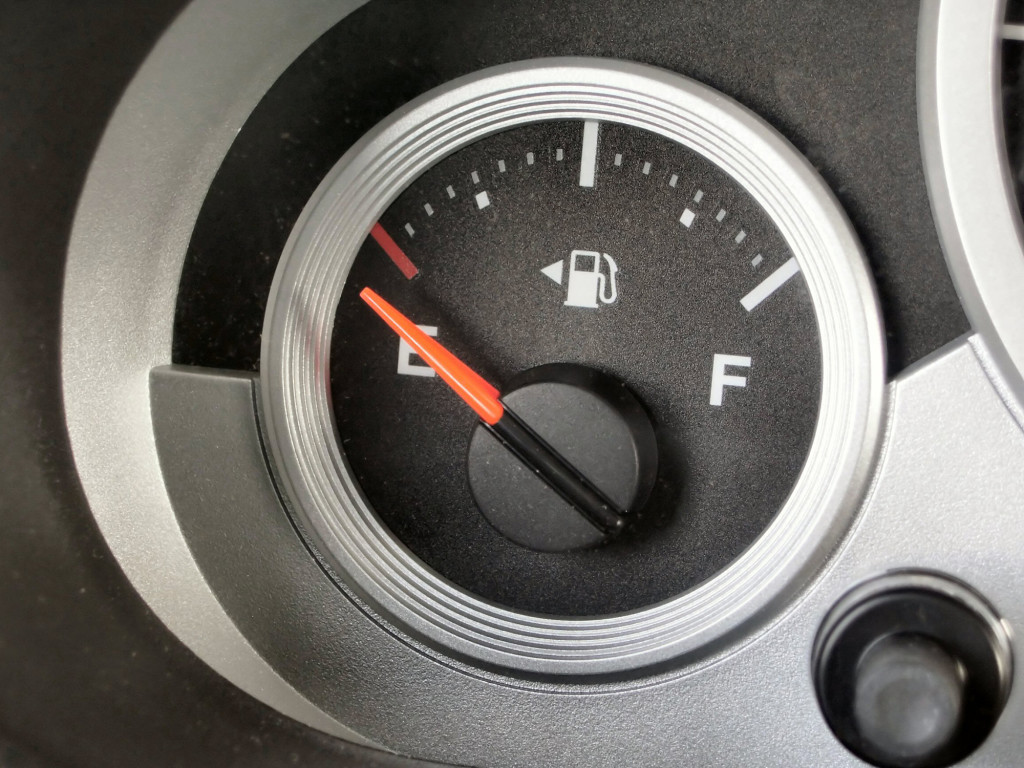
image of an empty fuel gauge

Fuel

You should expect gasoline stations to be closed, completely dry from the pre-storm run, or at best unable to process any form of credit or debit cards. If you’re caught short on gas, or simply want to top-off the tank and you’re lucky enough to find a functioning station, expect long lines and to pay in cash. If you’re looking to fill gasoline containers, make sure to bring your own. After a storm, gasoline containers are almost impossible to find, at any price.

Mindset

During any crisis, some people will be at their best, while others will unfortunately be at their worst, especially if rescue efforts don’t arrive as quickly as expected. Getting through this chaos, and adjusting to the new (although temporary) normal is never easy, but having the right mindset will help you get through the madness.

It’s really important that you understand and accept that, at least for a while, you’ll be on your own. Don’t expect any outside help. Accepting this reality and planning for it, is possibly one of the most important things you can do for yourself, and your family. Take the time to acquire the necessary knowledge and skills, to take care of your own problems. Real-world practice will help you develop confidence and expose weaknesses.

Rookie Mistakes to Avoid After a Hurricane

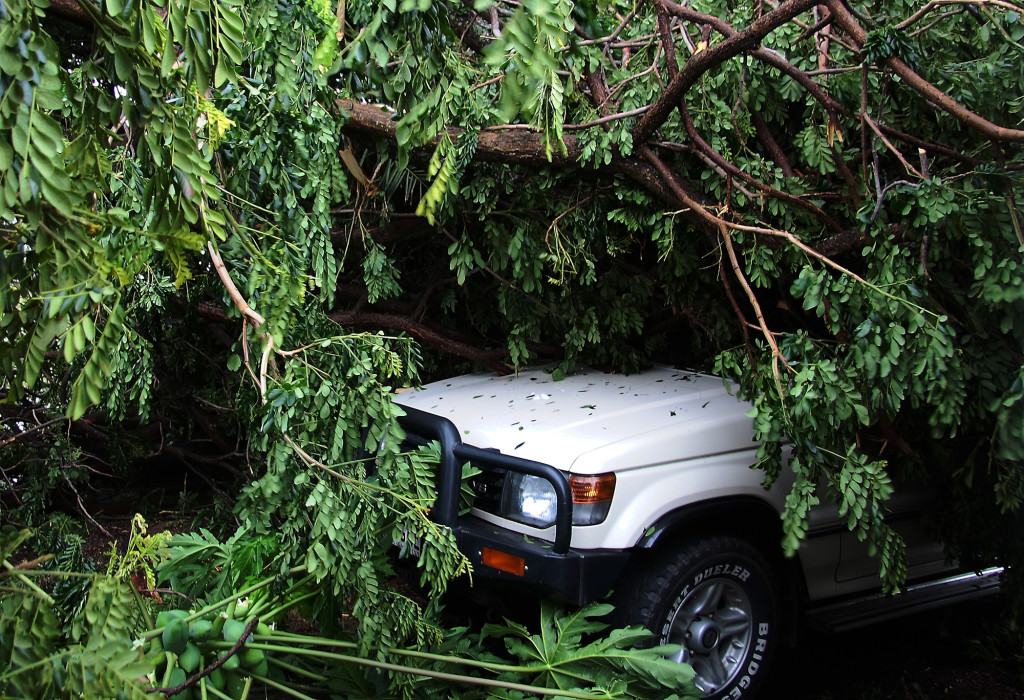
image of a car crushed by a fallen tree after a tropical cyclone

Driving a Storm-Damaged Vehicle

Perform a throughout inspection of your vehicle, including the undercarriage, the engine compartment, and any portions of the vehicle exposed to the effects of the storm, before taking the vehicle on the road. Look for water, wind, and flying debris damage. If in doubt, don’t take the risk of driving an unsafe vehicle.

No Survival Supplies

Setting out, on even a short trip, without essential survival supplies, is asking for trouble. Pack water, calorie-dense energy food, a first-aid kit and daily medications, communications, spare clothes, and extra shoes.

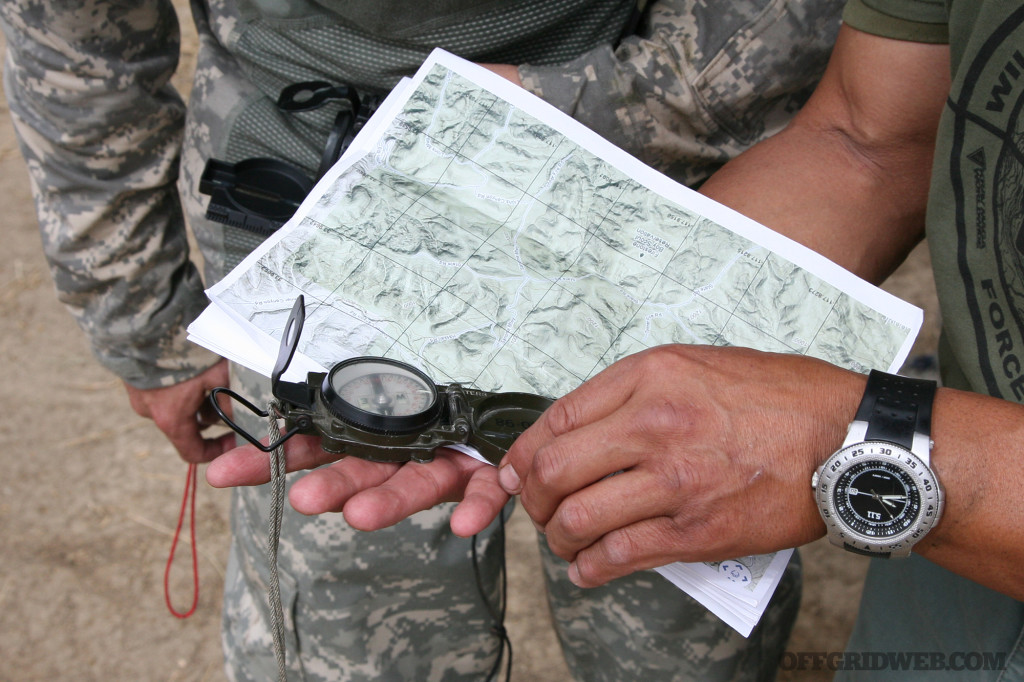
image of men using a map and compass

Failing to Leave a Trail

If things go badly during your trip, will others know where to start looking for you? Draw out a map showing your anticipated route and itinerary. If you don’t arrive at your destination, at least others will know where to start their search.

Underestimating the Dangers

Just because the storm has passed doesn’t mean it’s safe to venture out. We all know that storms kill people, but many of us are surprised to learn that there are often more fatalities and serious injuries in post-storm related incidents. The period immediately after a storm is usually the most dangerous, and an excellent time to shelter in place and avoid the chaos. If you must go out, do so with extreme caution, and never by yourself.


Tools for Survival - Ratchet

Basic Toolkit Checklist

Pack quality tools that you’re most likely to need for your vehicle during an emergency. At minimum, your kit should contain the following items:

  • Set of socket wrenches
  • Screwdrivers — full set
  • Open and adjustable wrenches
  • Adjustable, Lineman’s and Diagonal pliers
  • Multitool
  • Bolt cutters, crowbar, and hammer
  • LED lantern, flashlight and extra batteries
  • Duck and electrical tape, tie wraps

image of a flooded road after a storm

Don Becker / U.S. Geological Survey

Speaking From Experience: Hurricane Andrew

In the early morning hours of August 24, 1992, Hurricane Andrew tore a destructive path through South Florida, causing more than $26.5 billion in property damage (in 1992 dollars), and leveling more than 100,000 houses in Miami-Dade County. Overnight, this Category 5 storm transformed a thriving community into terrifying piles of rubble.

At first light of day, the true extent of the devastation became painfully obvious our family home was completely destroyed, and we were forced to evacuate. Using the rear bumper of my Jeep as a battering ram, I pushed the jammed garage door off its tracks, and began a long and difficult journey. It would take many hours of painfully slow travel, over roads blanketed by storm debris, fallen trees, toppled utility poles, and tangled power lines, to get to safety.

As I look back today, I realize just how lucky we were. Despite the loss of our home, and most of our personal property, it could have been much worse. Since Andrew, I have weathered many more tropical cyclones, but one constant remains — there is no substitute for skills, planning, gear, and the proper mindset. It also doesn’t hurt to be lucky.

Wrap-Up

Hurricane aftermath 3

Hitting the streets after a hurricane, even for a short trip, requires skills, gear, supplies and the right mindset. Understanding the challenges, and knowing how to manage the situation will dramatically increase the odds in your favor, and help you safely overcome the obstacles. When the time comes you will either be prepared, or you may find yourself among the many victims, waiting for help to arrive. Now is the time to give yourself every possible advantage. Stay safe, and be prepared.

Sources

Read More

Don’t miss essential survival insights—sign up for Recoil Offgrid's free newsletter today!

Check out our other publications on the web: Recoil | Gun Digest | Blade | RecoilTV | RECOILtv (YouTube)


What’s Bugging You: Bug Bites and Stings

WARNING

This article is intended to be a brief overview and not a comprehensive guide for treating bug bites and stings. If you think you might be having an allergic reaction or the bite/sting appears to be getting infected, seek medical attention.

The Great Outdoors is, well, great, but there’s always a chance you may run afoul of the creatures that live in it. Rarely, you may have an encounter with a bear, mountain lion, or rattlesnake. Much more often, however, you’ll encounter a hostile bug or a whole swarm of them. Off the grid, few people can say they’ve never had a bite or a sting from one of the wilderness’ smaller residents.

The scientific name for what we consider bugs is “arthropods.” Arthropods include insects (ants, bees, wasps, etc.) and arachnids (ticks, spiders, lice, scorpions, etc.). If a bug wakes you up at night by crawling across your face, the difference between them may not matter to you, but you should still know which is which.

The main differences between insects and arachnids are in how they’re built. Insects have three body segments (head, thorax, abdomen), while arachnids have just two (cephalothorax, abdomen). Insects have six legs, while arachnids have eight. Another difference is that insects have two antennae, and some have wings. Arachnids have neither.

Let’s discuss some of the most common offenders with regards to bites and stings.

image of a mosquito biting a human

Above: The mosquito is the world’s deadliest creature, believe it or not.

Mosquito Bites

What’s the most dangerous creature in the world? The great white shark? The Bengal Tiger? The grizzly bear? Nope. It’s the mosquito. Mosquitoes transmit various microorganisms that cause disease (pathogens) by acting as a carrier “vector.” That is, they don’t get sick themselves but pass infections to others through their bite. Mosquito-borne diseases include malaria, dengue fever, West Nile, yellow fever, Zika, and chikungunya. Malaria alone killed 627,000 people in 2020.

Only females bite humans. They have a long mouthpart called a “proboscis,” which pierces the skin, sucks out blood, and injects saliva into the bloodstream. This saliva can contain pathogens as well as allergy-causing substances (allergens). Although severe allergic reactions to mosquito

bites are extremely rare, individuals who are truly allergic may experience hives, swollen throat, and wheezing. The bite itself usually appears as a small, puffy lump that appears soon after you’re bitten. It will often turn red and cause itchiness for a time. Scratching is discouraged, as it can cause a skin infection. No treatment is necessary, although calamine lotion, hydrocortisone cream, or antihistamines can be used if needed. Signs of infection passed by mosquitoes may include fever, headache, and body aches. If these symptoms occur, further investigation is warranted.

Prevention involves removing possible mosquito breeding grounds from the area. Any area of standing water — even just an empty soda can or old tire should be removed. Mosquitoes are most active during warm weather, so repellents should be applied if spending time outside.

The most effective chemical repellents in the United States include one of these active ingredients:

  •  DEET
  •  Picaridin
  •  IR3535
  •  Para-menthane-diol (PMD)
  •  2-Undecanone
  •  Oil of lemon eucalyptus

Whichever product you choose, read the label before you apply it. DEET may offer the longest-lasting protection. Other than lemon eucalyptus, plants and oils that discourage mosquitoes include rosemary, lavender, mint, lemongrass, and marigold. If you’re using a spray repellent, apply it outdoors and away from food. You may need to reapply it 6 to 8 hours later if you’re still in an area where mosquitoes are active.

There are situations where you might require both sunscreen and insect repellent. In these cases, the Centers for Disease Control and Prevention (CDC) recommend sunscreen first, wait until it dries, then apply repellent. It should be noted that sunscreen should be reapplied every two hours or so.

Other ways to prevent mosquito bites:

  • When outdoors, wear long-sleeved shirts and pants. Tuck cuffs into your socks.
  • Clothing (but not skin) can be sprayed with the insecticide Permethrin 0.5 percent.
  • In primitive settings where air conditioning isn’t an option, use mosquito netting and door/window screens.

image of a honey bee

Above: Honeybees leave their stinger and part of their abdomen when they sting.

Bee Stings

Bees, members of the order Hymenoptera, are important pollinators that are essential for a healthy ecosystem but are territorial and defend their hives by stinging intruders. Africanized “killer” honeybees are even more so, defending a wider area and even following an offender for hundreds of yards.

When a honeybee stings, it leaves a barbed stinger in the wound. This proves fatal to the bee, as it leaves some of its organs with the stinger as well when it pulls away. Most of the time, symptoms include an instant, sharp burning pain at the site which turns into a red welt. Some swelling in the area is also noted. In most people, the swelling and pain go away within a few hours but the redness may last up to a week.

Rapid action will speed recovery. If the stinger is still in the wound, remove it immediately with a fingernail or even by scraping with a credit card. The faster it is removed, the faster symptoms will resolve.

Then, follow this procedure:

  • Clean the bite with soap and water or an antiseptic.
  • Use ice packs to reduce pain and swelling.
  • Use topical hydrocortisone cream or an antihistamine to reduce swelling.
  • Use calamine lotion or an antihistamine to relieve itching.
  • Oral antihistamines like diphenhydramine are also an option for symptom relief.

Severe allergic reactions from bee stings occur more often than with mosquito bites but are still uncommon. Also known as “anaphylaxis,” you’ll see:

  • Prominent skin reactions, including pronounced swelling, hives, and itching
  • Flushed or pale skin
  • Rashes that develop away from the site of the sting
  • Shortness of breath
  • Swelling of the throat or tongue
  • A weak, rapid pulse
  • Nausea and vomiting
  • Dizziness or fainting
  • Loss of consciousness

Treatment for anaphylaxis in adults involves the use of epinephrine 0.3 mg (adrenaline) injections (the pediatric dose is 0.15 mg). Auto-injectors such as the EpiPen are pre-dosed and simple to use. More than one injection may be required in some cases. Oral antihistamines, as used for minor sting symptoms, are generally too slow to effectively stop an anaphylactic reaction.

To avoid bee stings in areas where they are plentiful, consider these tips:

  • Clear garbage and fallen fruit from the area.
  •  Avoid leaving open cans or cups of sweet beverages outside.
  • Tightly cover food containers and trash cans.
  •  Avoid brightly colored clothing.
  •  Wear long pants and shirts.
  •  Avoid using scented soaps or anything with a strong scent.
  •  Use gloves when trimming vegetation near a hive.

If bees are swarming near you, stay calm, cover your mouth and nose, and quickly exit the area. Swatting bees may provoke them to sting.

image of a yellow jacket wasp

Above: Unlike bees, wasps are predators.

Wasp and Hornet Stings

Wasps and hornets, also Hymenoptera members, are similar to bees in many ways, but there are differences. One is that, unlike bees, these insects have smooth stingers that aren’t left at the site of the sting. A wasp or hornet can sting multiple times without sacrificing its life. Another is diet wasps and hornets take nectar from flowers, but also prey on spiders, flies, aphids, caterpillars, ants, bees, and insect larvae.

How are wasps and hornets different? Hornets are a type of wasp but tend to be larger and have wider heads. Wasps like yellowjackets have very slender waists as opposed to hornets, which are built thicker and rounder in the mid-section. In addition, most wasps have only one set of wings, while hornets have two. From a behavior standpoint, hornets are more aggressive and inflict more painful stings. In rare cases, the toxin in hornet venom can be deadly, especially if there have been multiple stings.

A wasp or hornet sting appears as a red, raised welt with a puncture hole in the middle. You can expect instant sharp, burning pain at the site of the sting. Hives or welts may develop peak signs at about 48 hours and last for up to a week. As time passes, the area may swell and look darker red or bruised. In severe cases, anaphylaxis as seen in bee stings may occur. The treatment for both minor and major reactions is the same.

Prevention strategies are also the same as for bees, with the added suggestion of clearing animal feces or roadkill from the area. They attract flies, which are on the menu for wasps and hornets.

image of a swarm of fire ants

Above: Fire ants will swarm and attack if their nest mound is disturbed.

Fire Ants Bites and Stings

Invasive species of insects are widespread in many areas of North America. One of the most concerning in terms of injuries to humans and pets is the fire ant. Originally from South America, the fire ant — another stinging member of the order Hymenoptera — is now widespread throughout the Southern U.S. and has even been identified in California. The Food and Drug Administration (FDA) estimates that costs related to fire ant control, damage caused to crops, and medical treatment approaches several billion dollars annually.

Fire ants are more aggressive than native ants, pushing out local native species. They produce visible mounds in open areas. When the mound is stepped upon, hundreds swarm in response to the threat and bite exposed feet, ankles, and legs of both humans and animals.
The fire ant is unusual in that it both bites and stings.

Once on your skin, it bites in order to hold its body in place. This bite is minimally uncomfortable, but then the ant uses a stinger on its abdomen to inject venom called “solenopsin” into the intruder. The pain from the sting feels like a burn (hence, “fire ant”) and can be excruciating. Unless removed, the ant will sting multiple times. Dozens of ants may be involved, causing a significant amount of venom to be injected.

The site of the sting swells into a red bump within hours. It may develop a pustule similar to a whitehead pimple in the first 24 to 36 hours, which, if scratched, can become infected and cause scarring. If left alone, the bumps disappear after three days or so. If infected, antibiotics are often necessary. Some people become allergic to the venom and, in rare cases, may develop anaphylaxis that requires the use of epinephrine to treat.

Treatment involves topical medicines like hydrocortisone cream or calamine lotion. Oral antihistamines like diphenhydramine (Benadryl) are also helpful. Home remedies include a paste made from baking soda and water, aloe vera, or a 50-percent bleach solution.

image of a tick in human skin

Above: An adult tick feeding.

Tick Bites

Ticks, members of the order Ixodida, are well-known carriers (also known as “vectors”) of disease-causing organisms that affect humans, pets, and wildlife. In the United States, they’re responsible for even more vector-borne diseases than the mosquito. In extreme cases, they can be a severe threat to long-term health.

You might think of ticks as insects, but they are actually tiny eight-legged arachnids related to scorpions and spiders. The range for ticks seems to be increasing, ranging all the way from the East coast to the South to the Upper Midwest. The Western blacklegged tick covers the entire Pacific coast. Others are more regional, such as the Lone Star Tick, mostly found in (you guessed it) Texas.

Ticks survive by biting the skin of a host and extracting a meal of blood. Unfortunately, they also transmit various disease-causing microbes to humans and animals through their infected saliva.

The CDC recognizes more than 15, including:

  • Lyme disease
  •  Anaplasmosis
  • Tularemia
  • Babesiosis
  • Rocky Mountain Spotted Fever
  • Ehrlichiosis
  • Relapsing Fever

Ticks don’t jump like fleas do. Usually, ticks spend their time in grasses and bushes, holding on with their back pairs of legs and latching onto passersby with their front pair(s). The larvae, which also bite, like to live in leaf litter. In inhabited areas, they can be found in shaded woodpiles, leaf piles, or tall grass.

To pass along a disease to animals or humans, ticks must first find their hosts by detecting smells, sensing body heat, or feeling vibrations from movement. When the tick latches onto its victim, its mouth parts pierce the skin and start extracting blood. Blood meals are required for a larva to continue its progress to adulthood.

Bites may be difficult to identify, but as the tick remains attached to the skin for a relatively long time, redness and swelling may exist. Some note a burning sensation. If the tick is passing the organism that causes Lyme disease (Borrelia), more than half will develop a tell-tale “bull’s-eye” rash known as “erythema migrans” that spreads as time goes by. Treated early, antibiotics like doxycycline and amoxicillin can eliminate the infection. If ignored, long-term consequences can occur.

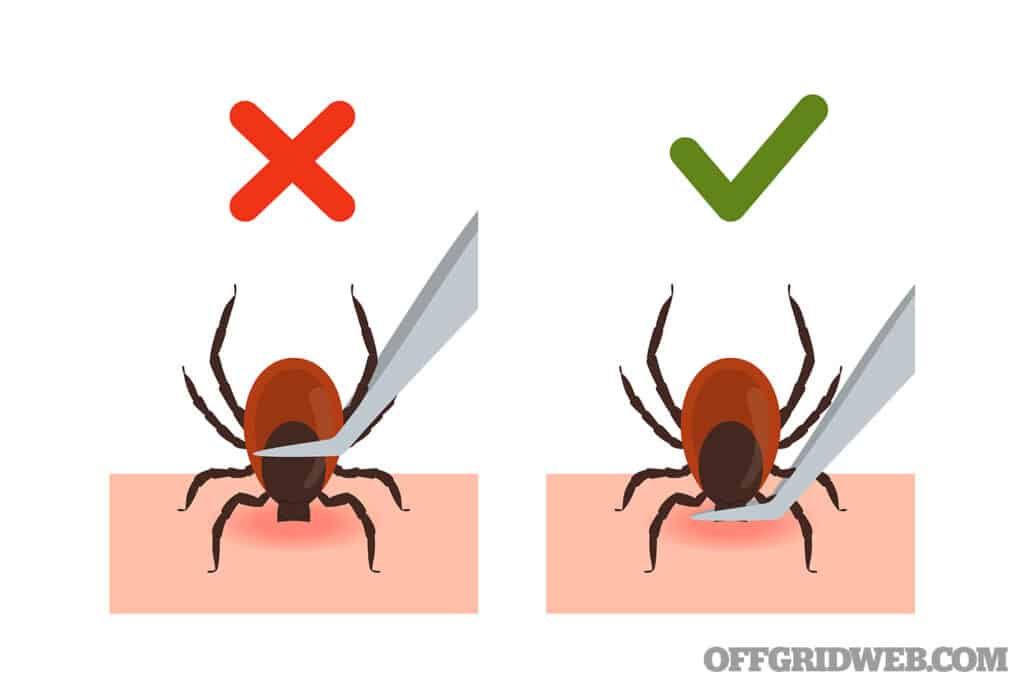
Once found, it’s important to remove the tick as soon as possible. It may be possible to just brush or wash it off if it hasn’t bitten you yet. If it’s deep in the skin, the simplest method is to use fine-tipped tweezers to grasp the bug as close to the skin’s surface as possible and pull straight up in an even manner. Twisting as you pull or pulling at an angle may cause the mouth parts to remain in the skin.

After removal, thoroughly clean the wound area with soap and water or isopropyl (rubbing) alcohol and apply antibiotic ointment. Wash your hands afterward. As an added precaution, launder clothing in hot water and dry in high heat. If all this is done within the first day after the bite occurs, infection is highly unlikely.

image of tick removal

Above: Pets and children should be inspected for ticks after a day outdoors. Grasp the tick as close to the skin as possible during removal.

For prevention, thorough exams after a day outdoors, paying special attention to children and dogs (especially their ears) In addition, consider:

  • Long pants and sleeves in tick-rich environments
  • Thick socks and high-top boots (tuck your pants into them)
  •  Walking in the center of trails to avoid brushing up against vegetation
  • Using insect repellants like DEET (20 percent or greater) on skin (oil of lemon eucalyptus is one natural alternatives), as with mosquitoes
  • Applying Permethrin 0.5-percent insecticide to clothing, hats, shoes, and camping gear 24 to 48 hours before using (proper application will even withstand laundering). Avoid use on skin, however.

Spider Bites

In temperate North America, two spiders are to be especially feared: The black widow and the brown recluse.

The black widow spider (genus Lactrodectus) is about ½-inch long and is active mostly at night. Southern black widows have a red hourglass pattern on the underside of their abdomens, but other sub-species may not. They rarely invade your home but can be found in outbuildings like barns and garages. Although its bite has very potent venom damaging to the nervous system, the effects on each individual are variable.

image of a black widow spider

Above: Female black widow spider

A black widow bite will appear red and raised and you may see two small puncture marks at the site of the wound. Severe pain at the site is usually the first symptom soon after the bite.

Depending on the individual bitten and the amount of venom, you might see:

  • Muscle cramps
  • Abdominal pain
  •  Weakness
  •  Shakiness
  •  Nausea and vomiting
  •  Fainting
  •  Chest pain
  •  Difficulty breathing
  •  Rapid heart rate
  •  Disorientation

Each person will present with a variable combination and degree of the above symptoms. The very young and the elderly are more seriously affected than most. Symptoms usually last for 3 to 7 days but may persist for several weeks.

image of a brown recluse spider

Above: Brown recluse spider

The brown recluse spider (genus Loxosceles) has a tiny body and legs about an inch long. Unlike most spiders, it only has six eyes instead of eight, but they’re so small it is difficult to identify them from this characteristic.

Victims of brown recluse bites report them to be painless at first, but may experience these symptoms:

  • Itching
  • Pain, sometimes severe, after several hours
  • Fever
  • Nausea and vomiting
  • Blisters
  • Skin breakdown

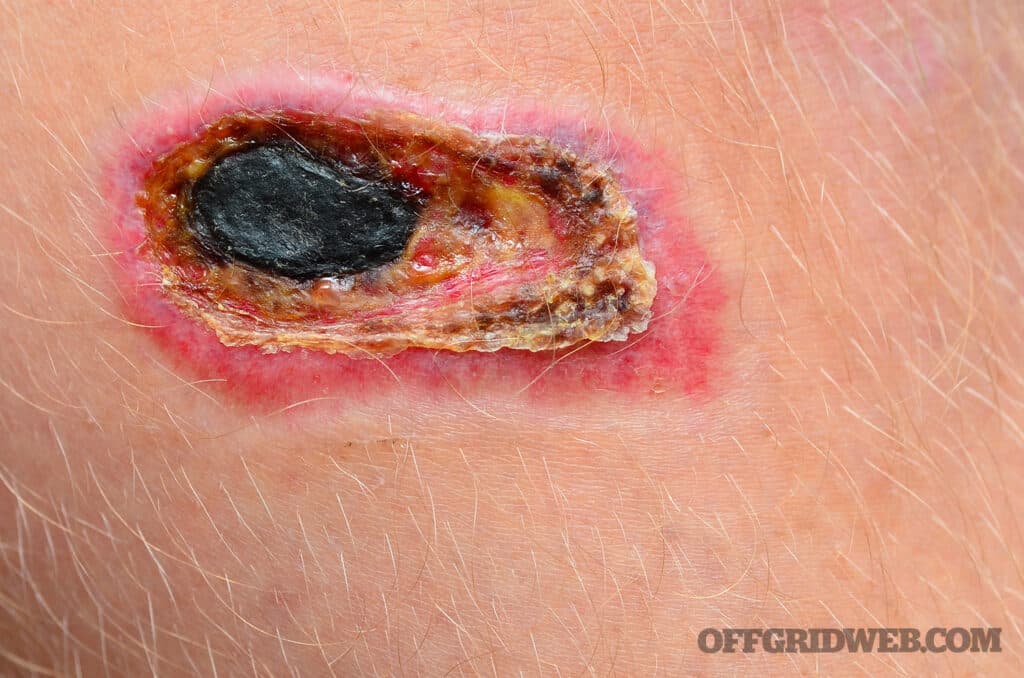
The venom of the brown recluse is thought to be more potent than that of a rattlesnake, although much less is injected in its bite. Substances in the venom disrupt soft tissue, which leads to local damage to blood vessels, skin, and fat. This process, seen in severe cases, leads to death of tissue (called “necrosis”) immediately surrounding the bite. Areas affected may be extensive and take months to heal.

image of a brown recluse spider bite

Above: Appearance of a brown recluse bite

Once bitten, the human body activates its immune response as a result, and can go haywire, destroying red blood cells and kidney tissue, and hampering the ability of blood to clot appropriately. These effects can lead to coma and eventually death. Almost all deaths from brown recluse bites have been recorded in children.

The general treatment for spider bites includes:

  • Washing the area of the bite thoroughly with soap and water.
  • Applying cool compresses to painful and swollen areas.
  • Apply antibiotic ointment three times a day to prevent infection.
  • Pain medications such as acetaminophen/Tylenol.
  • Antihistamines for itching and swelling.
  •  Monitor on bed rest for severe symptoms.
  • Raise an affected extremity.
  • Warm baths for those with muscle cramps (black widow bites only; stay away from applying heat to the area with brown recluse bites).
  • Antibiotics are sometimes prescribed to prevent secondary bacterial infections. Spider antivenom is sometimes given for black widow bites, much as snake antivenom is given for venomous snake bites. No antivenom is currently approved for brown recluse bites.

image of a scorpion

Above: The bark scorpion is common throughout the southwestern United States

Scorpion Stings

Most stinging bugs are insects, but an arachnid that can sting is the scorpion. Most scorpions are harmless; in the United States, only the bark scorpion of the Southwest desert (Centruroides sculpturatus) has toxins that can cause severe symptoms. Children are most at risk for major complications.

Although the bark scorpion is only 2 to 3 inches long, some scorpions may be much larger. They’re usually yellow to brown, have eight legs, eight eyes, and pincers, and inject venom through their “tail.” They’re most commonly active at night. Interestingly, scorpion exoskeletons are fluorescent under ultraviolet light, so you can find them most easily at night by using a “black light.”

Physical effects from scorpion stings often develop rapidly and affect the nervous system. Symptoms you may see include:

  • Immediate pain in the area of the sting
  • Swelling at the site
  • Numbness or tingling
  • Sweating
  • Weakness
  • Increased saliva output
  • Vomiting
  • Restlessness, twitching, or other unusual movements
  • Irritability
  • Difficulty swallowing
  • Rapid breathing and heart rate

It’s important to act rapidly to treat a scorpion sting:

  • Wash the area with soap and water.
  • Remove jewelry from affected limb (swelling may occur).
  • Apply cool compresses to decrease pain. A thin cloth between the skin and cold pack will decrease the chance of cold-related damage.
  • Give an antihistamine, such as diphenhydramine (Benadryl).
  • Keep your patient calm and at rest; faster pulse rates speed the spread of venom.
  • Limit food intake if the throat is swollen.
  • Give pain relievers such as ibuprofen or acetaminophen but avoid narcotics — they may suppress breathing.
  • Don’t cut into the wound or use suction to attempt to remove. It doesn’t help!

Symptoms tend to peak in the first few hours and resolve within a day. An antivenin is available that effectively treats children, the group most severely affected.

Final Thought

Off the grid, it’s important to watch out for the large predators, but it’s the smallest ones that can sometimes cause the most trouble. Know how to recognize them and treat their bites and stings.

About The Author

Joe Alton, MD, FACOG, FACS, is an actively licensed physician, medical preparedness advocate, and The New York Times bestselling author of several award-winning books, including The Survival Medicine Handbook: The Essential Guide For When Help Is NOT On The Way, now in its fourth edition. His website at www.doomand
bloom.net has over 1,500 articles, videos, and podcasts on medical and disaster preparedness, as well as an entire line of quality medical kits packed in the United States.

Read More

Don’t miss essential survival insights—sign up for Recoil Offgrid's free newsletter today!

Check out our other publications on the web: Recoil | Gun Digest | Blade | RecoilTV | RECOILtv (YouTube)

Editor's Note: This article has been modified from its original version for the web.


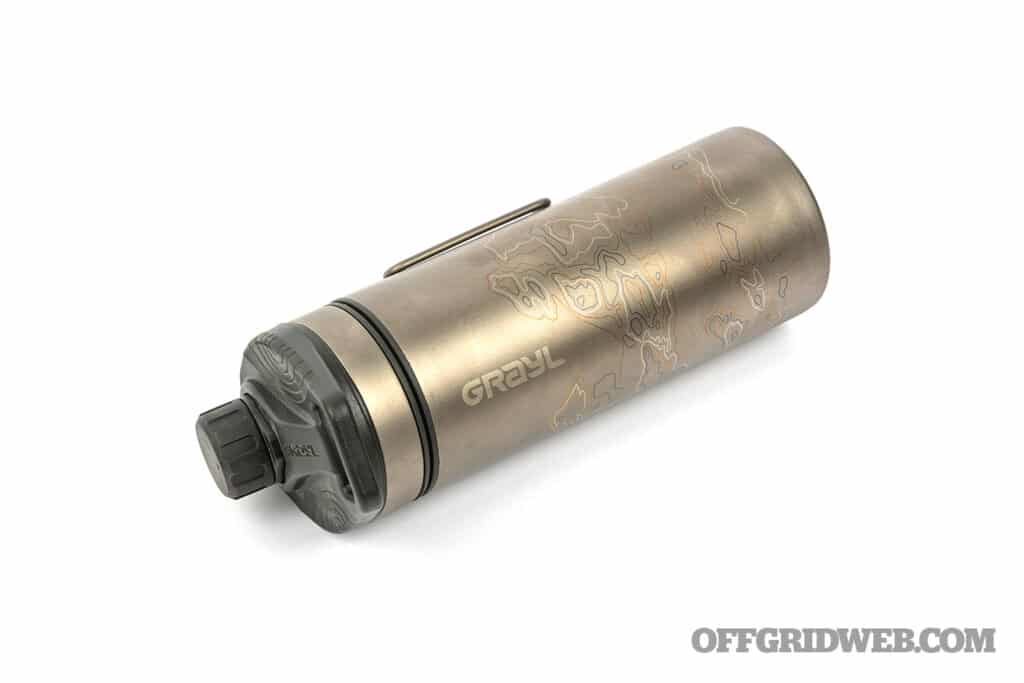
Hands On: Clean Water To Go with the Grayl Geopress

Dehydration kills. In 2004, a study of the National Hospital Discharge Survey discovered that, in the U.S. over 500,000 hospitalizations were a direct result of dehydration. Sadly, about 10,000 of those resulted in death. In third world countries, this statistic is far greater, with millions of people dying each year. Dig into these numbers a little bit, and you’ll find that often times, these injuries and deaths are not due to water being completely inaccessible. They’re correlated with waterborne diseases and other contaminants from lack of access to clean water.

Even if you don’t live in sub-Saharan Africa, clean drinking water may not always be readily available, especially if you find yourself in the backwoods far away from regulated municipal water sources. The water in that nearby creek might look and smell perfectly fine, but it could contain microscopic pathogens that will make your life absolutely miserable — and severely dehydrate you — if you drink it.

This is where Grayl, and their recently released GeoPress Ti comes in. This 24-ounce water bottle contains a powerful, easy-to-use water purifier, and has a few other tricks up its sleeve.

image of a titanium grayl geopress

Above: Multicolored topo map patterns have been laser-etched onto the titanium, adding a little visual flair to the exterior.

Grayl Geopress Ti: Design and Build Quality

When it comes to portable water purifiers, durability is paramount. As the name suggests, the GeoPress Ti is crafted from CP4 Grade 1 titanium, known for its exceptional strength-to-weight ratio.

This material is not only incredibly durable but also lightweight, making the GeoPress Ti easy to carry, whether you’re hiking through rugged terrain or packing light for international travel. The laser-engraved finish adds a nice touch of aesthetic appeal, and the toughness of the material ensures it’ll hold up to serious use.

image of a grayl with outer cup removed showing the filter

Above: The two main components of the Grayl GeoPress, the outer cup and inner purifier bottle.

The GeoPress consists of two components: an outer cup and an inner Purifier Press bottle that nests inside it. The bottle portion is equipped with a replaceable, American-made filter cartridge at its base, and a SimpleVent cap with a pour spout and carry handle. Wide, butterfly-style handles on the outer titanium cup fold away when not in use.

This cup can be used in a stand-alone manner for collecting and boiling water or cooking food. However, if you run across a suspect water source, you can purify it in less than 10 seconds with the following steps:

  • Fill cup with dirty water.
  • Position purifier bottle on top of cup on a flat surface and twist the SimpleVent cap ½ turn to allow air to pass through.
  • Using your body weight, press down steadily with both hands until the bottle reaches the bottom of the cup.

Image of gryal georpress among outdoor gear with stove

Above: Since the GeoPress Ti cup is metal, it can be placed onto a stove to boil water or cook food. 

Grayl GeoPress Ti: Performance in the Field

No review would be complete without real-world testing, and I put the GeoPress Ti to the ultimate challenge. For 10 days, I relied solely on water from a cattle watering hole in Texas, a source so contaminated with feces and other pollutants that it was undrinkable by any conventional means.

The GeoPress Ti not only purified the water, but it did so with remarkable efficiency. I was able to use the purified water for everything from drinking and cooking to hygiene and cleaning. Since then, it’s been a critical piece of gear that accompanies me on every wilderness outing.

Grayl’s OnePress global filtration and purification system is the heart of the GeoPress Ti, allowing you to transform the world’s most dubious freshwater sources into clean, drinkable water in just 8 seconds. Independent lab testing shows that the system removes 99.99 percent of viruses, 99.9999 percent of bacteria, and 99.9 percent of protozoan cysts, including the likes of Rotavirus, Hepatitis A, and Norovirus.

It also filters out particulates, such as silt and microplastics, while activated carbon adsorbs chemicals, pesticides, heavy metals, and odors. In my case, the purifier effectively neutralized the filthiest water I’ve ever encountered, providing me with safe hydration despite the austere conditions.

One of the most impressive aspects of the GeoPress Ti is its flow rate. The ability to purify 24 ounces of water in just 8 seconds is a game-changer, especially when you’re in a situation where time is of the essence.

image of grayl geopress with optional stove

Grayl’s micro stove is incredibly small and lightweight, but provides a fast way to boil water in the cup. Fuel is sold separately but easily found at Walmart or any camping store.

Multi-Functional Capabilities

While the GeoPress Ti excels at water purification, capabilities extend far beyond that. The titanium construction allows the outer cup to be used as a cooking vessel for heating water over hot coals or cooking a simple meal. Butterfly handles provide a stable grip, ensuring that you can safely pick up the cup even when it’s hot.

Built into the purifier cartridge is a one-way silicone valve, another clever feature that adds to the versatility of this device. It allows you to add electrolytes or a sports drink mix to your water without compromising the integrity of the filter cartridge. This is particularly useful for those long days in the field when you need more than just water to keep going. The valve also enables the use of any other potable beverage.

During my 10-day test, I also appreciated the SimpleVent cap, which protects the spout from cross-contamination and provides a fast flow of water. Whether you’re chugging water on the go or filling a hydration reservoir, the wide contoured spout pours with ease.

Durability and Longevity

One of the key selling points of the GeoPress Ti is its durability. This purifier is built to withstand the harshest conditions, including a 10-foot drop at full capacity onto concrete. I’m not always gentle with my gear, so I appreciate this sturdy design.

The purifier cartridge is rated for 350 cycles, or about 65 gallons (250 liters) of water, before it needs to be replaced. Even after prolonged use, I found that the cartridge maintained its effectiveness, with press times only gradually increasing as the cartridge reached the end of its lifespan. With a shelf life of up to a decade for an unopened cartridge, it’ll remain ready for years to come.

image of the grayl geopress ready to use

Above: The Gryal GeoPress is easy to use, just fill the outer cup and press the internal filter cup down for fresh clean water. 

Ease of Use

In a survival situation, simplicity is key. The GeoPress Ti’s design ensures that it’s easy to use, even under stressful conditions. The Fill-Press-Drink system is intuitive, allowing you to quickly purify water without the need for complicated setup, cleaning, or maintenance. Whether you’re filtering water from a stream, a stagnant pond, or a contaminated source like the cattle watering hole I encountered, the GeoPress Ti makes the process straightforward and efficient.

The ergonomic SoftPress Pads provide a comfortable, non-slip surface for pressing, while the SimpleVent Drink Cap allows for easy venting during the filtration process. The result is a purification system that’s not only effective but also user-friendly.

Our only concern relates to stand-alone use of the outer cup. If it’s filled with dirty water for the purifier, it should be considered contaminated, but it would be easy to pack it away and use it later for a meal. If the cup isn’t thoroughly sanitized between these uses, it might introduce the exact pathogens you’re trying to avoid drinking into your food.

Grayl offers suggestions for how to avoid cross-contamination, such as washing the cup with soap and water or using it to bring water to a rolling boil. Regardless of the method you use, don’t forget to clean the cup before drinking or eating from it directly, otherwise you might regret it.

Practical Applications

The GeoPress Ti is designed for a wide range of users, from outdoor enthusiasts and survivalists to international travelers and overlanders. If you’re someone who frequently finds yourself in environments where clean water is not guaranteed, the GeoPress Ti is an invaluable tool.

Its ability to purify water from virtually any freshwater source makes it ideal for backcountry adventures, international travel in regions with questionable water quality, and emergency preparedness. Some people will even find it handy on vacations to towns in the U.S. where the local drinking water may be less than ideal.

For outdoor recreationalists, the GeoPress Ti offers the added benefit of being able to cook and boil water in the field, reducing the need to carry multiple pieces of gear. Grayl also offers a GeoPress Ti cook lid ($25) which fits the outer cup, and a Titanium Dining Set ($53) with a plate, bowl, and spork that match the GeoPress.

Lastly, there’s a Titanium Camp Stove ($23), which attaches to isobutane fuel canisters from any camping store and can be used for cooking or boiling water. This micro-stove folds up into a tiny bag and weighs only 28 grams (not including fuel).

Image of a Geopress in carry bag with Offgrid patch

Above: Grayl also offers this BottleLock Hip Pack ($160) which is made in the USA in your choice of MultiCam pattern (Black, Arid, Tropic, or Alpine). Its 4.5-liter capacity is perfect for small tools, snacks, maps, and other items.

Final Thoughts

My experience using the GeoPress Ti while living off stagnant cattle bath water for 10 days has left me thoroughly impressed with its capabilities. From its titanium construction and rapid purification system to its versatility as a cooking vessel and its user-friendly design, the GeoPress is a great piece of kit and an efficient water purification solution. With the ability to purify the world’s most challenging freshwater sources, this purifier is ready to take on any adventure.

Grayl GeoPress Ti: Specs and Availability

Volume: 24oz
Weight: 20.1 ounces
Cartridge Lifespan: 350 cycles (65 gallons / 250 liters)
MSRP: $220
URL: grayl.com

Read More

Don’t miss essential survival insights—sign up for Recoil Offgrid's free newsletter today!

Check out our other publications on the web: Recoil | Gun Digest | Blade | RecoilTV | RECOILtv (YouTube)

Editor's Note: This article has been modified from its original version for the web.
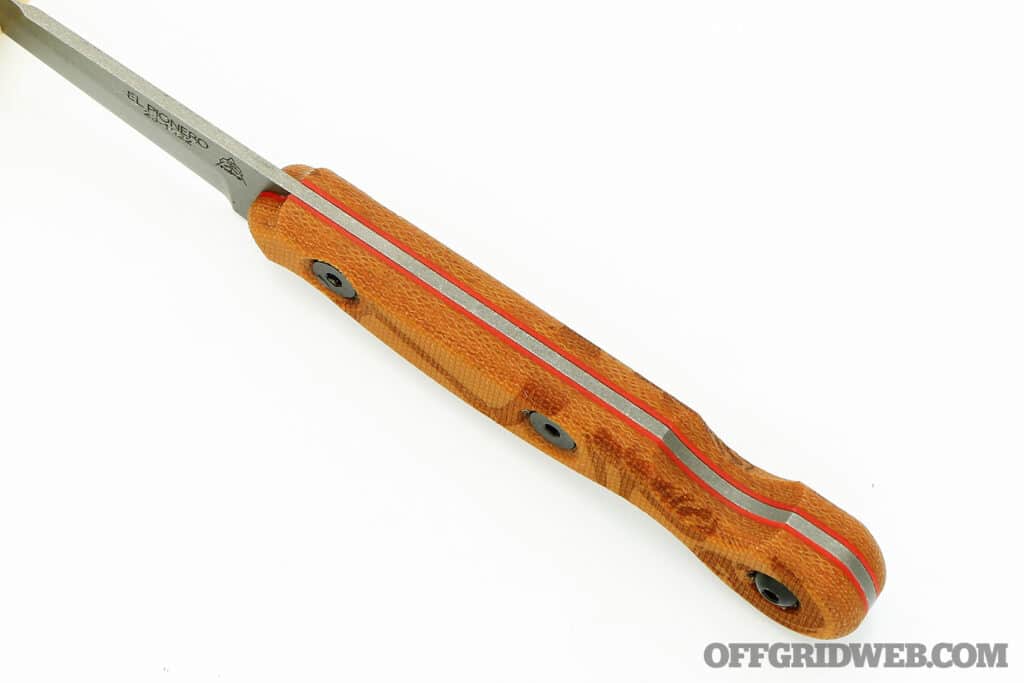

The Waffle House Index: Measuring Storm Intensity with Waffles?

On the internet, it's wise to take everything you read with a healthy dose of skepticism. There are plenty of half-truths and outright lies online, so when you hear something outlandish, there's a good chance it's a falsehood spread through social media posts and unscrupulous blogs. However, there are a handful of cases where these outlandish claims are legitimate, the Waffle House Index is one such example.

Image of a Waffle House Waffle

Above: Waffle House as a disaster measurement tool? Sounds crazy, but it actually works.

Waffles Predicting Weather Severity?

It may be hard to believe, but the Waffle House Index is a real metric used by the Federal Emergency Management Agency (FEMA) to measure the scale and severity of a storm. It's based on the casual restaurant chain with more than 2,000 locations throughout the southern United States. Every Waffle House location is open 24 hours a day, 365 days a year, and the chain has become famous for staying open during severe weather.

Image of a Waffle House Restaurant sign

Above: The Iconic Waffle House Sign. Photo by: Flickr / Steve Snodgrass

It's not unheard of for a restaurant to stay open rain or shine, but you may be thinking that a city-wide power outage would surely cause Waffle House to close its doors. Not so — the company actually has an impressive disaster response plan in place. Popular Science reports, “Waffle House is a leader in disaster preparedness. It maintains its own fleet of portable generators, operates a mobile command center to assist in disaster recovery, and trains employees in crisis management to ensure that it can resume operations as quickly as possible, often within hours. And since 2012, it reports all this information directly to FEMA via email.”

The “Special” Menu

There's a special limited menu for when generators are in use or food supplies are running low, but Waffle House won't close unless it's absolutely necessary. Locations in Joplin, Missouri stayed open even as a multiple-vortex EF5 tornado struck the city.

Image of a Waffle House Restaurant torn apart by Hurricane Katrina on the Biloxi, Mississippi coast.

Above: This Waffle House on the Biloxi, Mississippi coast was torn to shreds by Hurricane Katrina. Photo: Carol M. Highsmith / Library of Congress

The Waffle House Index

When Waffle House closes due to a storm, there's serious cause for concern. FEMA Administrator Craig Fugate coined the term, and told the Wall Street Journal, “If you get there and the Waffle House is closed? That's really bad. That's when you go to work.” This led to the development of the Waffle House Index as an informal metric for measuring the effects of storms, hurricanes, and even tornadoes. The index has three levels:

  • Green – The situation is relatively normal, and the restaurant is still serving its full menu. Power outages and structural damage are unlikely.
  • Yellow – The restaurant is serving a limited menu, and may be operating with a generator and/or limited food reserves.
  • Red – The restaurant is closed. This typically happens only if structural damage is severe or food reserves have run out.

While the Waffle House Index isn't a formal measurement of disasters, it's still a real metric tracked by FEMA — believe it or not. So, if you're ever in a Waffle House and employees start closing up shop during a storm, you'd better get out of Dodge ASAP.

Sources

Read More

Don’t miss essential survival insights—sign up for Recoil Offgrid's free newsletter today!

Check out our other publications on the web: Recoil | Gun Digest | Blade | RecoilTV | RECOILtv (YouTube)


The Full Spectrum Warrior

Shoot, move, communicate — these three skills are critical to your success in any gunfight. Unfortunately, many modern firearms training programs only address shooting, encouraging students to build technical proficiency by standing on a flat range and punching holes in paper targets, month after month and year after year. Retired U.S. Navy SEAL Rich Graham set out to build a more well-rounded and realistic curriculum through his training company Full Spectrum Warrior.

Rather than only three skills, the FSW program is based on 12 pillars, which include health (diet, physical, and mental), movement and strength, communication and teamwork, situational awareness, work ethic and attitude, integrity, and, of course, being dangerous enough to “be a victor, not a victim.” Recently, Safariland invited me to attend an intense two-day training event at the FSW ranch in central Florida. Read on for some lessons learned from this experience.

After flying into Orlando and driving about an hour north, I arrived at Deep Woods Ranch, a piece of private land owned and operated by Full Spectrum Warrior. The name is certainly fitting, since it’s surrounded by the Ocala National Forest and features a mixture of sandy terrain, dense forest, and open swampland.

Graham has put in years of work to transform it into his ideal training playground, complete with dozens of steel targets, an obstacle course, various decommissioned military and police vehicles, a driving course, multiple climbing walls, conex boxes, elevated shooting platforms, and a CQB shoot house. Naturally, when Safariland wanted to gather some media personnel to try its latest holsters and gear, this was the perfect place to do it.

Image of a Walther PDP handgun

Above: During the course, attendees used Walther PDPs outfitted with C&H Direct Mount optics, Modlite PL350C lights, Safariland holsters, and ammo from Remington and Federal.


Full Spectrum Warrior: Equipment

Each attendee loaded up with a loaner Walther PDP handgun, which was equipped with a direct-mount red dot from C&H Precision and a prototype of the new PL350C weaponlight from Modlite. For close-range drills, we used frangible 9mm from Federal; the rest of the time we shot Remington Range ammo.

We were also outfitted with Safariland Liberator HP 2.0 ear protection, a Bianchi nylon web belt, a Bianchi double mag pouch, and a light-bearing Safariland 6000-series holster with Level I retention. Speaking of which …

imaage of a man with a safariland holster

Above: Safariland Kydex Holster used with the Walther PDP during the course.

A Note About Retention Levels

Safariland says that one of the most common questions they receive from new holster buyers is: What’s the difference between retention Levels I, II, and III? Let’s take a moment to clear that up.

A standard molded Kydex holster, such as those often used for competition and concealed carry, is not considered an active retention holster friction is the only thing holding the gun in place. To enhance security, levels of active retention are added so that the weapon requires more deliberate actions before it detaches from the holster. Per Safariland’s definition, each level of active retention requires an additional hand movement before the user can remove the weapon.

  • Level I is the Safariland ALS system, a thumb lever that must be pressed forward as the gun is drawn. The 6354RDSO holsters we used at this event were set up with ALS only (Level I).
  • Level II adds a secondary guard that must be disabled with two movements. For Safariland, this will be either the SLS strap alone or an ALS system with the optional ALS Guard add-on.
  • Level III requires three manual hand movements to release the weapon. Safariland’s popular ALS/SLS duty holsters are a good example of this level.

Obviously, each of these levels is a compromise between speed and security. A Level I holster makes it easier for the user to draw the weapon quickly, but also creates less barriers for a bad guy who might want to fight you for that weapon. Whether you’re a prepared citizen, competition shooter, cop, or member of the military, you should keep this delicate balance in mind as you choose a holster.
Hand-to-Hand Skills

image of men practicing hand to hand combat at the fill spectrum warrior course

Above: During a hands-on fight, disrupting an attacker’s vision by turning his head can create an opening to break free or counterattack.

Full Spectrum Warrior: Hand-to-Hand Skills

Our first training exercise involved learning to defend against something anyone who open-carries a firearm should prepare for: a “bad guy” attempting to take your gun. Thankfully, working with an active retention holster makes this task much less daunting. I was paired up face-to-face with a partner who was tasked with deactivating the Safariland ALS Level I retention on my holster.

This is not an easy task, especially with the included ALS Hood Guard blocking access to the ALS release lever. Once I realized that my opponent wasn’t going to be able to snatch my gun quickly, I developed enough confidence to focus on defending and counterattacking rather than protecting the gun.

While old-school law enforcement training taught officers to pin the gun into the holster in the event of a hands-on fight, Graham encouraged us not to do this with our Safariland ALS holsters. Instead, I learned to use one forearm to deflect the hand that’s reaching for the gun, and the other forearm to redirect the bad guy’s head. As soon as my opponent couldn’t see me, it opened the door to move away or strike other weak points.

It’s also wise to use footwork to make the holster harder for an opponent to access. Rather than turning my dominant side toward my opponent, I rotated that side of my body away from the attacker to put the gun further out of reach as I defended myself. Above all, I made sure not to let my partner get behind me, as this would make it relatively easy for him to take my gun out of the holster, given that he knows how to operate its retention system. This may sound obvious, but it’s something you might not do in the heat of the moment unless you’ve practiced it.

Next, I learned what to do if my gun is already out of the holster when a physical fight takes place. A circular “hack” strike with the muzzle of the gun, similar to the motion of repeated overhand stabs with an ice pick, can be used to disorient an assailant long enough to take a few steps back and shoot. I practiced this on a padded stick swung slowly toward me by my partner, using my peripheral vision as a cue to react.

The absolute worst-case scenario is when an opponent manages to get his hands on your gun while it’s drawn. With good situational awareness and spatial management, this shouldn’t happen, but Murphy’s Law still applies. In one simultaneous movement, strike the opponent’s forearms with your support hand forearm and violently pull the pistol back toward your body this should be enough to break his grip. As a bonus, the front sight and slide serrations will cut into his hand if he attempts to hold on tight. I practiced each of these movements with a Umarex blue gun PDP replica and learned how hard it can be to wrestle for control of a weapon.

Image of two men doing a Full Spectrum Warrior Training Drill using Paintball guns and holstered hand guns in safariland holsters

Above: We used Umarex paintball guns to practice muzzle discipline in a crowded, chaotic environment. As other students walked near the line of fire, the muzzle was deflected to a safe direction.

Full Spectrum Warrior: Movement & Muzzle Discipline

“Always keep the muzzle pointed in a safe direction.” This is a safety rule we’ve all heard, but what constitutes “a safe direction” in a real-world setting like a crowded mall or multistory office building with people above, below, and all around you? That’s a lot more complicated. You may need to keep the gun pointed up, down, in a very specific direction, or switch seamlessly between these positions. It’s not like a flat range, where you know you can always keep the gun aimed into the berm.

To practice these skills, I was given a Umarex paintball training pistol and instructed to shoot targets while walking through a crowd of other students milling around at random. Some walked slowly, while others ran or even bumped into me. Whenever someone approached my line of fire, I immediately diverted the gun to a safe direction.

During this exercise, Graham occasionally shouted “Behind you!” to prompt a quick 180-degree turn and engagement of another target, all while maintaining continuous muzzle discipline. This visually and mentally challenging exercise is one of the best ways I’ve seen an instructor teach muzzle awareness in a realistic setting.

Full Spectrum Warrior: CQB Techniques

The FSW facility has a plywood shoot house with a variety of rooms, corridors, and intersections, and we made good use of it to learn two-man close quarters battle (CQB) skills. Anyone who’s worked on CQB knows this is a skill set that can’t be mastered in a few short hours, so we worked on the most fundamental aspects.

Students practiced leaning or hinging around corners to methodically “take bites” of the room while minimizing their own exposure and learned the basic steps of entering closed rooms.
In general, for an inward-opening doorway …

  • The #1 man (aka point man) approaches the door from the hinge side, staying close to the wall.
  • The #2 man approaches from the opposite side and waits for a “ready” nod from the #1 man to open the door.
  • The #1 man keeps his muzzle up at the ready while the #2 man quickly pushes open the door.
  • As the door swings out of the way, the #1 man moves in, staying close to the inside wall and rapidly scanning the perimeter of the room.
  • The #2 man enters immediately behind him, moving the opposite direction along the inside wall and scanning the other half of the room’s perimeter.

Once inside a room, students looked for — in order of priority — armed subjects, unarmed subjects, dead space (e.g., a couch or counter that creates a visual obstruction), open doors, and closed doors. To confirm successful clearance of a room, we communicated “clear left,” “clear right,” and eventually “all clear.” Each pair of students had the opportunity to work through the shoot house with Unit Solutions paintball carbines as well as the Walther-PDP-style Umarex pistols in our Safariland holsters.

Full Spectrum Warrior: Low-Light Shooting

At the end of the first day of training, students stayed after sunset to practice shooting with white light. I worked around VTAC barricades to shoot over, under, and through their various openings. The Modlite PL350C on my PDP cut through the darkness and gave me a clear view of the steel plates downrange.

image of a man with a hand gun safariland holster behind a pickup truck during the full spectrum warrior course

Above: Valuable lessons from the course, vehicles don’t provide much hard cover.

Full Spectrum Warrior: Vehicle Combatives

Here’s another skill set many of us haven’t had an opportunity to practice. The FSW facility allowed me to get in some reps shooting out of and around vehicles, and also to practice evasive maneuvers while driving between shooting positions. Students worked in driver/passenger pairs, learning how to shoot through a side window or windshield. The latter tends to deflect outgoing rounds upward due to its steep angle and laminated layers, but Graham also noted that this isn’t a guarantee — he says “bullets do crazy sh*t” sometimes after passing through objects.

However, Graham explained that shooting out of your vehicle should be a last resort, because …

  • If you can drive away from danger, drive.
  • If you can’t drive away, get out and move to cover.
  • If you can’t get out, only engage the threat for as long as it takes to buy enough time to do one of the above.

To escape a vehicle, I practiced unbuckling the seatbelt with my support hand and holding the door open by planting my outside foot near the hinge. Once a gun is drawn, the dominant hand’s job is good muzzle discipline; don’t use it for leverage against the steering wheel as you climb out of the seat. As I bailed out, I stayed as low as possible and kept my gun pointed in a safe direction (in this case, up).

Once you’re outside a vehicle, Graham recommends backing away from it at least one to two steps, since this provides more field of view and more room for incoming rounds to deflect as they pass through the sheet metal or glass. Remember that vehicles don’t provide much hard cover, the engine block is the only part that’s likely to completely stop incoming rounds reliably so you should take cover elsewhere if there’s a better alternative nearby.

For our final vehicle-based exercise, we paired up in squad cars and drove rapidly through an obstacle course that involved slaloms, reversing, shooting targets out the side windows, and eventually bailing out to cover each other as we retreated to safety. This ties in with the “tactical triad” mentioned in the introduction: shoot, move, communicate.

Each partner had to shoot targets, be aware of the other’s movements, and communicate to maintain safety and provide continuous covering fire. For example, after I got into position outside the vehicle, my partner yelled “moving” and waited to hear my approving “move” command (or a disapproving “hold” command) before moving. Once he reached his next position, he shouted “set” to let me know he’d be able to cover me if I needed to move or reload.

image of a man doing an obstacle course while equipped with a handgun and safariland holster during the Full Spectrum Warrior course

Above: The Full Spectrum Warrior obstacle course tests students’ strength, agility, flexibility, and balance with a variety of challenging obstacles.

Full Spectrum Warrior: Obstacle Course

Speaking of movement, Graham places a clear emphasis on physical strength and agility with his FSW curriculum, and it’s not hard to see why. The ability to move quickly without exhaustion or injury is essential in a combat environment, as well as in the contexts of law enforcement and civilian self-defense. During the course, students tested themselves by leaping over walls, crawling under barriers, sliding through pipes, and climbing up and down various platforms.

Shooting stations were present between each obstacle, and it became increasingly tough to get good hits as my heart rate elevated from the exertion. Elements such as monkey bars and gymnast-style parallel bars tested my upper body and grip strength, and I had to climb on top of a conex box to reach one of the shooting stations.

If your idea of strenuous physical activity is jogging between two positions at the range, you may be in for a rude awakening in a real-world gunfight. Pushing myself through the FSW obstacle course was difficult and humbling, but it left me excited to work harder on these important aspects of dynamic shooting in the future.

photo of Rich Graham during a training course

Above: During his time as a sniper with SEAL Team 10, Rich Graham learned that being a true warrior is about much more than shooting or simple combatives. This led to the development of Full Spectrum Warrior and its multi-disciplinary training program.

A Full Spectrum of Skills

After two days of intense training with Graham and his FSW instructor cadre, the holsters and gear provided by Safariland held up to all the training with ease — not once did a student’s pistol go flying out of a holster, even while grappling, climbing over walls, clambering out of a vehicle, or somersaulting out of the drainage pipe on the obstacle course. The Walther PDP ran flawlessly with both the Federal frangible ammo and Remington ball ammo, and its C&H red dot kept shining brightly through the Florida sun.

Most importantly, I walked away tired and bruised but satisfied in a way that few training experiences can provide. I could’ve happily spent several days drilling down into any one of the topics Graham covered, so I can’t wait to return to Deep Woods Ranch for another course in the future.

Resources

Safariland: safariland.com
Full Spectrum Warrior: fullspectrumwarriors.com
C&H Precision: chpws.com
Walther: waltherarms.com
Modlite: modlite.com
Federal: federalpremium.com
Remington Ammunition: remington.com

Read More

Don’t miss essential survival insights—sign up for Recoil Offgrid's free newsletter today!

Check out our other publications on the web: Recoil | Gun Digest | Blade | RecoilTV | RECOILtv (YouTube)

Editor's Note: This article has been modified from its original version for the web.
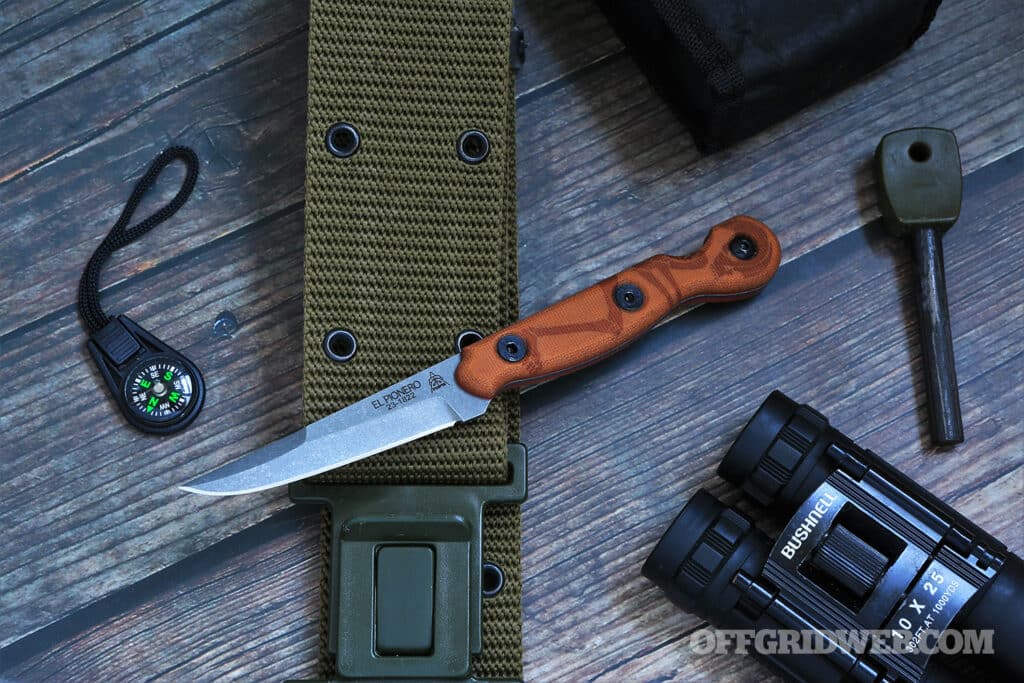

Preparedness Essentials: Mini Survival Kit

If we tried to account for every possible piece of equipment we would want to have in our survival kit during an emergency situation, the ideal gear loadout would probably require a 100 plus liter mountaineering pack to carry it all. For most of us, it is unrealistic to haul that much gear daily, and it would be a serious encumberment issue during an actual emergency that required movement. Beyond the obvious awkward pack size and the physical strain of carrying that much weight, the social aspect of running around with all that would definitely make you stand out from the crowd.

Survival Kits: The Eternal Struggle

In the early days of my preparedness journey, like so many others, I faced this issue. After multiple sessions of unpacking, negotiating with myself about priorities, and repacking just the “most important Items” I still found myself with a pack or sling bag that was too big or heavy to realistically be carried regularly. Which typically resulted in leaving the bag at home or in my trunk, separating me from the survival kit I would need in an emergency. As time went on, my skillset and knowledge improved. Combining that with some more real-world experience, I came to a profound realization that the best gear in an emergency is the gear you have on you!

I needed away to ensure that I always had potentially life saving equipment on my person and knew that there was a very real chance that I would be separated from my larger survival kit bag either due to an emergency or by virtue of not wanting to carry a large bag with me at all times. This is where the mini survival kit, or MSK for short, comes into play!

What is a Mini Survival Kit?

The basic principle of the mini survival kit is simple, it is a bare bones kit that you can easily keep on your person. When I began putting my MSK together, I realized it was not going to be designed to give me everything I needed to survive off the grid for days or weeks at a time. It is designed to provide some basic tools and supplies that would give me a leg up in an emergency until I could reach better equipment and tools.

Urban vs. Wilderness Survival Kit

A question I often see regarding the building of any survival kit is: should it be built for urban or wilderness environments? While dedicated full sized kits are best served for one task or the other, the mini survival kit can be well suited for both. The principles of survival are surprisingly similar in both locations. Core skills like starting a fire to keep warm and cook as well as purifying water for drinking and washing are universal needs regardless of your environment. Many of the tools I will detail when breaking down my personal mini survival kit are as well suited in the woods as they are in the city!

How To Carry a Mini Survival Kit

When it comes to how you carry your mini survival kit, personal preference is going to play a big role. Some people advocate stashing the various items on different parts of your body, but I found during high stress scenarios fumbling around your pockets to find what I needed was not advantageous. I found my personal mini survival kit to be better suited for single container carry. I tried multiple containers, including hard plastic cases, Altoids tins, and high-end billet aluminum containers. The Altoids tin was a touch on the small side, and the other plastic and aluminum boxes felt unwieldly in my pocket. Ultimately, I came to my current configuration and haven’t looked back!

Image of a mini survival kit with a compact knife and survival supplies inside

Above: The Tuff Possum Pocket Possibles Pouch with Modl Outdoors Glow in the Dark Infinity Tool and a Knives By Nuge PSK EDN

Mini Survival Kit Container

Tuff Possum Pocket Possibles Pouch: This small pouch is compact at just  3.5 x 5 inches. It is made from Durastretch nylon that is both lightweight and tough. It features a quality YKK zipper and has rubberized tabs at each end. Despite the small size, the Pocket Possibles Pouch can hold a fair amount of kit thanks to the center zipper and stretchy material.

Modl Infinity Tool: A small tool with so many purposes. This glow in the dark version acts as my grab handle for the pouch but can also be used to as a way to attach or hang the pouch if needed or act as a signal device while it glows in the dark if you need to conserve battery power on your other light sources.

Image of a pouch and small tools outside of a mini survival kit

Above: Some of the Tools in my Mini Survival Kit. Vargo Titanium Whistle, Olight I3E EOS, Fisher Bullet Space Pen, and a Knives By Nuge PSK EDN

Mini Survival Kit Tools

Knives by Nuge PSK EDN: This simple high carbon steel knife and basic kydex sheath combo ensure that I have a cutting tool when I need it. This knife sports a 2-inch scandi grind blade and an overall length of just 4.25 inches. While it is not big enough to be a comfortable all-day user, it a very functional or durable backup blade. The Scandi grind is ideal for processing wood to carve makeshift tools or make tinder for a fire, and it can be easily sharpened on any flat stone you find if needed. The spine is ground to a 90-degree angle, allowing for scraping tasks and striking a ferrocerium rod to make fire.

Vargo Outdoors Titanium Whistle: This whistle is small and super lightweight, but it makes a big sound! It weighs a mere tenth of an ounce and produces 100+ decibels, making it an ideal signaling device to alert search and rescue personnel of your location while expending very little energy.

Fisher Bullet Space Pen: This compact pen is capable of writing in just about any environment, including underwater, or as the name indicates in space. This is particularly helpful in wet or cold environments where most pens would not be functional. While the pen is an often-overlooked piece of survival equipment the ability to take notes or leave messages can be invaluable if you want to leave a warning about a threat in the area to others or need to move from a location and you want to let people know where you were moving and why.

Olight I3E EOS: This tiny flashlight runs on a single AAA battery and produces an impressive 90 lumens. It will run from 45 to 90 minutes depending on the quality of the battery used, making it an ideal backup light or emergency use light. Flashlights not only enable us to better navigate in the dark, they can also serve as a valuable signaling device if stuck outdoors at night.

ITS Tactical First Strike Bypass Bundle: This kit contains a variety of tools that are designed to help bypass several different types of locks. While bypass tools are not as effective at defeating locks as a traditional pick set, they can defeat many padlock and combination locks quickly and requires less technical skill to use, which may be particularly valuable in low light environments.

Mini Ferrocerium Rod: Ferro rods are a great option to help get fires started, especially in cold, wet, or windy environments. The sparks coming off a ferro rod can be over 5000 degrees Fahrenheit, which will quickly ignite many flammable materials. In this kit, I would use the spine of the PSK EDN to strike the ferro rod. While ferro rods are effective, they do require some practice, so be sure to train with your tools before you rely on them!

assorted fires starting and emergency supplies from the inside of a mini survival kit

Above: A few more tools including the ITS Tactical First Strike Bypass Bundle and mini ferro rod along with some of the supplies that make the kit work.

Mini Survival Kit Supplies

Basic First Aid: I keep first aid pretty bare bones with a few bandages, some Steristrips for larger cuts, antibiotic gel, sting relief, and burn cream. While none of this covers any catastrophic injuries, it covers a majority of the minor injuries that can occur while moving quickly.

Water: I have a 1 liter whirl pack bag and a chemical purification agent that will allow me to treat river water or even some urban water supplies to ensure I stay hydrated in the short term. Dehydration has a terrible impact on our bodies, making us physically weak and mentally dull. Having easy access to drinkable water during an emergency allows us to keep moving until we can reach a better solution.

Fire: Storm Matches and Black Beard Fire Plugs are a great way to get a fire going even in adverse conditions. I have a lot of fire redundancy in this kit, but fire is a universal resource in both wilderness and urban survival situations. While many people don’t initially think that fire is valuable in a urban environment, you’ll quickly change your mind when you are forced to dumpster dive for food and want to cook your find to ensure you are killing off any harmful microbes on that food!

Duct Tape: Let’s be real, no survival kit is complete without some duct tape! From repairing gear to binding a wound a duct tape is an invaluable resource that should not be overlooked.

Kevlar Cord and Snare Wire: Kevlar Cord can be used to bind things if needed, replace busted shoelace, or even cut through materials such as the plastic often used in restraints such as zip ties and thick duct tape. Snare wire is primarily used for trapping small animals should you need a meal but can also be used for a variety of other purposes such as setting up perimeter warning systems so you can get out fast before a potential threat reaches you.

Button Compass: While the compact button compass is not the most reliable means of navigation, it may be enough to help you get your bearings and get you moving in the right direction.

Image of a mini survival kit along with everyday carry items

Above: Some of my regular EDC items including a Failsafe Goods Field Wallet that holds a pen, notebook, and Wazoo Gear FireCard and a Knives by Nuge Sheepsfoot Chickpea along side my Mini Survival Kit

Final Thoughts

When I put this kit together, I built it to complement the gear that I would normally carry on a regular basis, but I wanted to ensure it could stand alone if needed. I keep my normal everyday carry pretty simple with a fixed blade knife, a flashlight, a Wazoo Spark Necklace as well as a wallet with a pen, notebook, and Wazoo FireCard. In an emergency, I already have my primary cutting tool, the ability to make fire, something to light the way, and can take notes or leave messages if needed. I purposely built redundancy into the mini survival kit should I become separated from my primary tools or experience equipment failure. While this kit will not sustain me over the long-term, each of these items presents a significant advantage during a variety of wilderness or urban emergencies allowing me to focus on fast movement to reach a secure and better equipped location instead of spending valuable time trying to find resources to accomplish essential life sustaining tasks.

Sources

Read More

Don’t miss essential survival insights—sign up for Recoil Offgrid's free newsletter today!

Check out our other publications on the web: Recoil | Gun Digest | Blade | RecoilTV | RECOILtv (YouTube)


The Way of the Wheelgun

Wheelguns are obsolete — or at least that’s what internet commenters and the self-proclaimed experts behind the counter at your local gun store will probably tell you. Granted, modern semi-automatic pistols offer some substantial advantages over wheelguns, including higher capacity, faster reloads, light and precise triggers, and the ability to easily install accessories such as weapon lights.

I’ll admit I prefer shooting my Glocks and other semi-autos, and I consider them much better primary defensive weapons for everyday carry. However, that certainly doesn’t mean there’s no place for the revolver in today’s market. After taking a two-day practical revolver class with instructors Ed Calderon of Ed’s Manifesto and Raul Martinez of Rogue Methods, I’m fully convinced that the revolver is still a valuable and deadly tool under the right circumstances.

This course is called La Chata, the Spanish term for flat, stubby, or — most relevant in this case — snub-nosed. Calderon and Martinez, both of whom have appeared in the pages of previous issues of this magazine to discuss their extensive real-world experiences in hostile environments, teamed up to teach this two-day class at the Pro Gun Vegas shooting range in Boulder City, Nevada.

Calderon spent more than a decade chasing drug runners and violent cartel members as a member of Mexican law enforcement, while Martinez grew up on the mean streets of Chicago, deployed to Iraq with the U.S. Army, and returned home to work on a Chicago Police Department undercover narcotics team. The duo has considerable firsthand experience with street violence, all of which was integrated into the La Chata course curriculum.

instructors Logan Prather of Send Me Training & Consulting, Raul Martinez of Rogue Methods, and Ed Calderon of Ed’s Manifesto and the Manifesto Radio Podcast.

Above: Instructors from left to right – Logan Prather of Send Me Training & Consulting, Raul Martinez of Rogue Methods, and Ed Calderon of Ed’s Manifesto and the Manifesto Radio Podcast.

The Wheelgun: A Tool with a Specific Purpose

The class began with a simple question: Why choose a revolver? In simplest terms, it’s a tool for solving problems quickly in extremely close quarters. If you’re trying to hit a small target at extended range or might end up in a drawn-out firefight, it’s not the ideal choice. Even for a skilled shooter, reloads are slow and the long, heavy double-action trigger pull can be challenging. But if you’re in a situation that involves using surprise to your advantage, firing two or three shots at close to contact distance, and then making a quick escape, a revolver excels.

Much of what we know about fighting with revolvers comes from the criminal underworld, or as Calderon puts it, “murdery sh*t.” Revolvers are the preferred tool of many sicarios throughout the third world due to their widespread availability, reliability, ease of concealment, and the fact that they don’t leave behind evidence (spent casings). In America, these so-called Saturday night specials are also cheap enough to be disposed of or destroyed after a crime, eliminating the evidence trail.

Among these users, deep concealment is a way of life and holsters are a foreign concept — they’ll just tuck the gun into their waistband, pocket, or even a bag of food where it can be accessed and fired in a split second. Some will even cut off the trigger guard and shave down the hammer spur to make it easier to fire from inside concealment layers (this is commonly known as a Fitz Special). Unlike semi-automatics, revolvers don’t rely on a reciprocating slide that can get hung up on clothing or pushed out of battery by an opponent in a hands-on fight.

For those of us who carry fine-tuned semi-auto handguns with upgraded triggers, red-dot sights, compensators, and Kydex holsters, the idea of carrying a tiny snub-nose in a pocket might seem as jarring as trading in a Lamborghini for a Toyota Tercel. But unless you’re extremely dedicated to dressing and planning your day around that semi-auto, you’ll probably encounter situations where an ultralight revolver makes a lot of sense.

These might include going for a run in gym shorts, doing yard work, or simply carrying inside your own house. The wheelgun is miles better than going unarmed, and it can buy you time to get to another weapon if the situation deteriorates. Revolvers also make outstanding backup guns for those who carry in the line of duty.

Image of two wheelguns with kydex holsters

Above: In addition to my primary revolver, the red-dot-equipped Taurus 856 T.O.R.O. I also tested a more compact 856 model with 2-inch barrel and bobbed hammer. The latter is preferable for deep concealment.

Wheelgun Caliber Considerations

So, what caliber should you go with? According to Calderon, that question isn’t as significant as you might think. During his time working in Mexican law enforcement, he frequently found cheap .22 LR revolvers at crime scenes. While some of you may scoff at the idea of using a rimfire weapon for self-defense, those small bullets are extremely effective when applied to the right place in the right quantity.

At one point in Calderon’s career, a killer referred to his small-caliber wheelgun as a “stapler” due to his preferred method of use — press the muzzle into the victim, mash the trigger a few times, and walk away. In this context, the size and power of the round is almost meaningless; shot placement and violence of action will end the fight before it begins.

Calderon’s preferred calibers for revolvers are .22LR and 9mm (i.e., the Ruger LCR), followed closely by .38 Special. This is a byproduct of their availability more than ballistic effectiveness; any one of them will be lethal if it’s fired into vital areas at contact distance.
Reliability and Safety

Revolvers may be reliable, but they’re absolutely not failure-proof. One common issue, especially among shooters who are used to semi-autos, is short stroking the trigger. While attempting to fire several rounds quickly, the shooter may not release the trigger far enough to reset the hammer, causing the second trigger press to go “click” when it’s supposed to go “bang.” If the gun gets hot and/or dirty, spent brass may stick in the cylinder, making reloads difficult.

Even worse, the case rim can slide in front of the ejector, causing the ejector to become ineffective and preventing the cylinder from closing until the case has been removed. Speaking of reloads, they should be treated much like a malfunction — Calderon explained that reloading a revolver during a fight will usually be impossible, so learn to work with the contents of the cylinder and don’t empty the gun without another weapon or an escape plan.

Regarding safety, a modern double-action revolver’s heavy trigger makes it reasonably safe to carry in a pocket but be sure to avoid carrying anything else in that pocket that might press or snag the trigger. Protecting the trigger with something like a Kydex trigger sheath tethered to the lining of the pocket is a wise safety measure.

If your clothing allows, inside-the-waistband Kydex holsters are also a good way to secure the gun — in a situation where a fight seems imminent, the gun can be discreetly removed from the holster and staged in a pocket for faster access. Lastly, at contact distances, especially while grappling, it’s all too easy to sweep yourself with the muzzle of a snub-nose revolver. Be extremely cautious about where you put your non-dominant hand while firing one-handed, or how you position your support hand while firing two-handed.

image of man with a wheelgun cup close to a target

Above: A student practices ducking an incoming strike and moving around for double underhooks. In this position, it’s much easier to control an attacker.

Put Your Wheelgun to Work

As mentioned earlier, the snub-nose revolver is an up close and personal tool, and that means that many of the ways it can be used will seem gruesome. But if you’re in a fight for your life, you’ll do whatever it takes to survive. Calderon began the discussion about vital targets with a PowerPoint slide about shooting opponents in the face. The “T-box” formed by the nose and ocular cavity can easily be penetrated even by low-velocity rimfire rounds, so he recommended visualizing a bright red clown nose.

on your target and aiming for that (if you have a phobia of clowns or have watched It too many times, that should be easy enough). In confined spaces, sweeping your dominant hand up the target’s chest and pressing the muzzle into the chin is another option. Outside of headshots, shots to center mass (the heart or lungs) and the pelvic girdle (hip bone structure and femoral arteries) are likely to stop a threat quickly. Since the typical engagement distance with a revolver shouldn’t be much beyond arm’s reach, hitting these targets shouldn’t be difficult.

As with many Ed’s Manifesto classes I’ve taken over the years, the classroom portion incorporated analysis of real videos of street killings. Students watched several examples of sicarios in Mexico and South America casually walking up to targeted individuals in public places, looking around for witnesses, and then firing one round into the back of the victim’s head at contact distance. Typically, the assassin bends over to deliver one or two more finishing shots, then simply walks away.

These attacks are over in the blink of an eye and rarely involve more than three shots. In another example, a killer approaches a victim with both hands in his jacket pockets, turns his head to ask a question about something nearby, and uses the momentary distraction to fire a revolver through his jacket pocket into the victim’s groin. The victim crumples to the ground as if a string holding him upright had suddenly been cut.

Obviously, the purpose of studying these vicious criminal acts is not to encourage students to commit similar crimes. It’s to show that the revolver is an extremely potent weapon in deep-concealed, close-range settings, and that the “bad guys” are well aware of this fact — understanding this can help you turn the tables and avoid being victimized.

Instructor and student having a discussion

Above: Each student started with an empty gun and practiced drawing and dry-firing to get used to the feel and trigger weight of a revolver. For hands-on drills, inert green plastic guns were used.

Wheelgun Drills on the Range

Once we left the classroom, the range portion of the class was led by Martinez and a third instructor, Logan Prather of Send Me Training & Consulting in Oklahoma. We began by working on the fundamentals of our draw with empty guns. From a holster, Prather said your draw should be no different from any other semi-auto, but recommended practicing various starting points for the draw process — hands up, arms crossed over the chest, hands together at the waistline, and so on. If you’re not using a belt-mounted holster, Martinez says it's a good idea to sweep the support hand across the outside of the cover garment, indexing the gun and ensuring it hasn’t moved unexpectedly before the draw.

  • To grip a revolver, hook the support hand thumb down over the dominant hand thumb. If you use a thumbs-forward grip like a semi-auto and you have large hands, you may burn your thumb due to gas escaping between the front of the cylinder and the barrel (i.e., cylinder gap). Martinez called this a “self-correcting mistake” since you’ll only do it once.
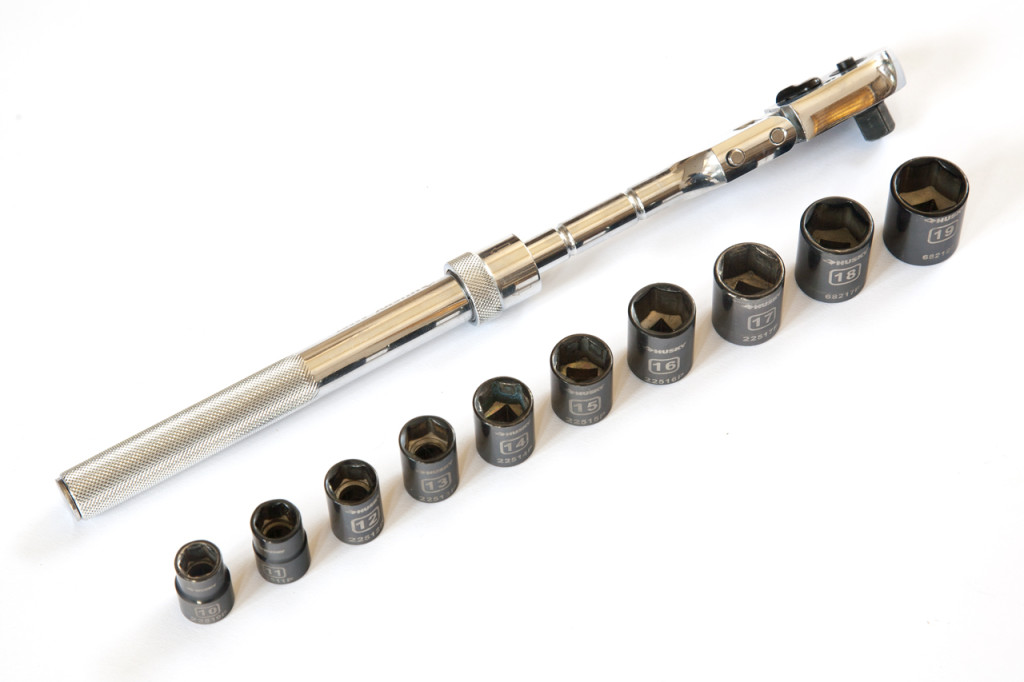
  • For reloads, all of the instructors made one thing clear — there’s no fast way to reload, only slightly less slow ways. Rather than going down the rabbit hole of moon clips and speed loaders that might shave a small amount of time off a long process, we simply learned to work as quickly as possible with loose rounds from a pocket.
  •  To start a reload, hold the frame of the gun in the palm of the support hand, open the cylinder, and use the support hand’s middle and ring fingers to grip the cylinder, preventing it from flipping closed.
  • Tilt the gun back and press the ejector rod, either with your support hand thumb or the palm of your dominant hand.
    Hold the gun flat in your palm again and feed rounds into the cylinder with your dominant hand. (This hand generally has more dexterity for handling loose rounds.)
  • Close the cylinder and transfer the gun back into your dominant hand.

At the beginning of the second day, we started with a cold drill involving five shots, a reload, and five more shots as fast as possible. The instructors’ best time was 12.38 seconds — quite impressive but also a reminder of how much slower these reloads are than a semi-auto magazine change. My best time was just over 20 seconds, which is said to be fairly typical for students who are new to the revolver platform.

three images of wheelgun close combat training

Above: A student practices ducking an incoming strike and moving around for double underhooks. In this position, it’s much easier to control an attacker.

Hands-On Gunfighting

Since we’ve established that snub-nose wheelguns are close-range tools, it’s critical to be prepared for the other aspect of that reality: you’re close enough that the opponent can grab you and/or your gun. Martinez has considerable experience in this field, so he passed on some lessons and let us fight each other over control of inert training guns.

If an opponent lunges at you, take a wide and aggressive stance and square your hips to him. One quick redirect strategy is to grab the opponent’s wrist with one hand and grab his shirt collar with the other, pushing up and out to redirect his head away from the fight. In the event that you’re unable to redirect or create distance, move in rapidly and go for control. Martinez recommends the clinch technique known as double underhooks — this means hooking your lower arm under the opponent’s arm, ducking under his armpit, and circling the other arm around the torso.

If the underhook is blocked from one side, go for the other side. Once you’re behind your opponent with double underhooks, you’ve established physical control and can maneuver into a rear choke or pin the opponent to the ground with relative ease.
If you’re going in for a hands-on fight, having a gun in hand already may be a significant disadvantage, since a stronger and faster opponent may be able to take control of it before you can use it.

Only draw the gun when you’re confident you can prevent this. To build that confidence, each student paired up with another and practiced controlling the gun while grappling, then switched and tried to take it away from their partner. Since we had an odd number of students, I was paired up with Martinez himself, and he made quick work of folding me into a pretzel.

Ideally, a fight in the real world shouldn’t come to this — you can palm the gun ahead of time or maneuver your body to draw from an angle your adversary won’t be able to see. One of the fundamentals of fighting with a concealed revolver is that the bad guy never gets to see the gun, they only get to feel it once it’s used against them. Speaking of which …

image of a man drawing wheel from concealed position close to a target

Above: Unlike a semi-auto, a revolver can be fired reliably from within a cover garment. This method of defense can surprise an attacker who thinks he has the upper hand.

Shooting Wheelguns From Concealment

With most concealed-carry weapons, you’ll clear your cover garment, draw the weapon, and then use it. With wheelguns, you can skip straight to the last step. The final exercises in the La Chata course involved firing our guns from inside cover garments. Each student brought an old sweatshirt or jacket, gripped the gun inside the pocket, and fired into a target to see the effectiveness.

Those with bobbed hammers (i.e., no external hammer spur) fared better, since the hammer couldn’t snag on fabric inside the pocket, but even revolvers with traditional hammers functioned smoothly for the most part. It’s surprisingly easy to walk up to a target and send six rounds of .38 into the waistline without showing any signs of carrying a firearm until it goes bang.

Expanding upon this lesson, we worked on multi-step drills that started with firing from concealment, then drawing and firing again from a retention position near the waist, and finally backing up to fire from full extension. During these drills, red balloons were placed on targets to represent vital areas and provide immediate feedback for hits.


man firing a wheelgun through a bag of chips

Lessons From The Real World: The Spiciest Snack

Here’s a deep concealment lesson based on real-life experience. While working for Chicago P.D., Martinez rolled up on a group of gang members hanging out on a street corner. As they scattered and ran, one threw a bag of chips he had been eating out of … and the bag made a clank when it hit the pavement. Upon closer inspection, there was a revolver hidden among the chips, ready to be pointed and fired through the bag at any moment.

One of the students in our class tested the technique, and aside from leaving behind a cloud of chili-and-lime-flavored dust in the air, the revolver functioned perfectly. Keep this in mind the next time you see someone sketchy carrying a bag of snacks in public.


image of a Taurus 856 T.O.R.O. Wheelgun

Featured Wheelgun: Optics Ready: Taurus 856 T.O.R.O.

Feature-rich semi-auto pistols and simple, compact revolvers may seem like two distinct categories, but what if there was a midpoint between the two? That’s exactly what Taurus set out to create with the introduction of the Taurus Optics Ready Option (T.O.R.O.) series of revolvers. Serving as the industry’s first factory red-dot-ready small-frame wheelgun series, these revolvers include a removable optic plate that’s compatible with Holosun K series optics such as the 407K, 507K, EPS, and EPS Carry.

During this class, I primarily used a Taurus Defender 856 T.O.R.O. equipped with a Holosun EPS Carry red dot. The 856 features a 3-inch barrel, smooth double-action trigger, compact rubberized grip, and it can be loaded with six rounds of .38 Special +P ammo. (A five-shot .357 Magnum version of the same gun, the 605 T.O.R.O., is also offered by Taurus.)

This revolver is available in matte black finish, but I preferred the classic bead-blasted stainless finish seen here. The 856 ran flawlessly during the entire course, with roughly 400 rounds fired in two days and no cleaning in between. The optic held zero nicely, and led to substantial interest from instructors and other students who hadn’t previously tried a small-frame revolver with a red dot. At an MSRP of $455, I’d consider this a very good value, especially for semi-auto shooters who might want to try dabbling in the revolver world for the first time.

When we weren’t doing deep concealment work, I carried the gun in a Monocle Kydex holster from Harry’s Holsters, which is specifically designed for the T.O.R.O. revolver series. This holster offered solid retention and stayed exactly where I put it on my belt thanks to the steel DCC clip. Aesthetically, the rich brown color also suits the wheelgun nicely.

image of many wheelguns on a table at the firing range

Above: Students brought out a wide array of wheelguns, from polished classics to ultralight rimfire models.

Closing Thoughts

By the end of this two-day course, I felt far more comfortable shooting a revolver and working within its limitations. Much like a defensive fixed blade, I hope I’ll never have to use this tool in a defensive scenario, because doing so will likely involve fighting at “bad breath distance.” I certainly hope that I never have to reload it during a fight for my life. But the venerable revolver shouldn’t be relegated to history books — it can be carried discreetly and fired before an attacker even notices you’re armed, shifting the balance of power in your favor. And as we learned during the hands-on grappling portion of the class, a compact, mechanically simple weapon is exactly what you’ll want if someone is trying to wrench it from your hands.

Sources

Read More

Don’t miss essential survival insights—sign up for Recoil Offgrid's free newsletter today!

Check out our other publications on the web: Recoil | Gun Digest | Blade | RecoilTV | RECOILtv (YouTube)

Editor's Note: This article has been modified from its original version for the web.