Safe Haven: How to Buy Your Ideal Bug-Out Property

This article originally appeared in Issue 5 of our magazine.

Hank Williams Jr. wrote and sang a song called “A Country Boy Can Survive.” The song spotlights the skills and abilities of people who can survive on their own, with a little backwoods knowhow common in rural America. You can improve your survivability by having backcountry property that’s able to sustain life when given the opportunity and a little preparation.

The problem for many of us, though, is that we’re city dwellers living in a concrete jungle of skyscrapers, surrounded by a sea of suburban sprawl. And even if you don’t live in a large metropolis like New York or Los Angeles, all it would take is one solid catastrophe to have your town go to pot. Owning land in the middle of nowhere — or at least isolated enough — will ensure you have a relatively safer destination to evacuate to in an emergency. A bug-out property can serve as a rally point for your family to reunite, a resupply depot (if you’ve dug a hidden cache) before moving to a safer region, or a place to set up your underground bunker (see below for more).

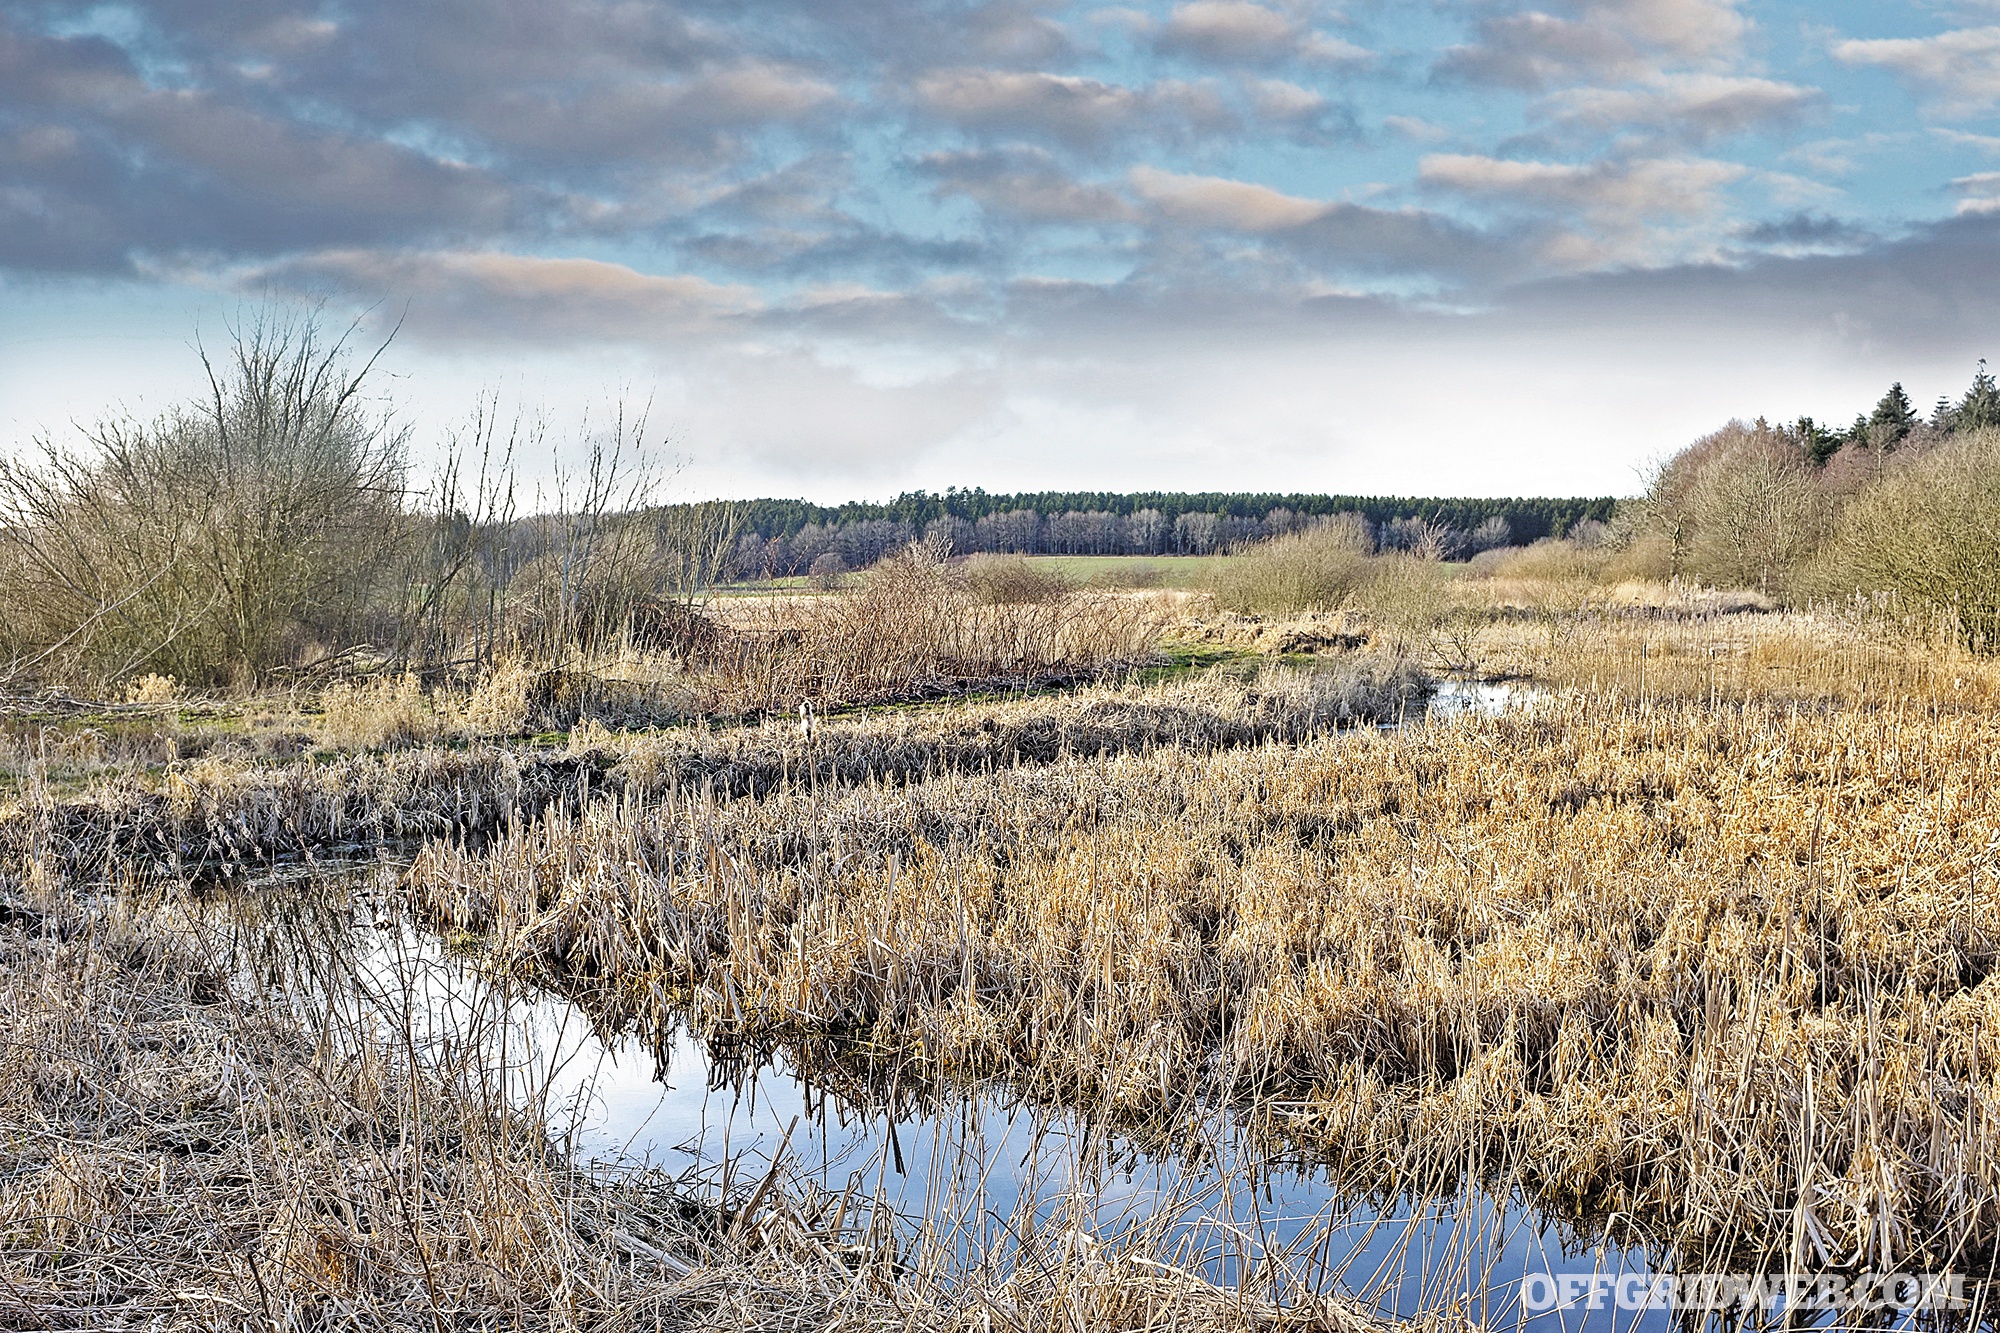
Selection of a great rural bug-out location begins by determining the distance you think you can travel when SHTF. Draw an arc on a map with that distance, and your search for a bug-out location can begin.

Determining Land Ownership

All real estate is owned by someone. It may be privately held or owned by some governmental agency, but rest assured it has an owner. Property in private ownership will tend to be urbanized in some form, even if it is a fishing cabin 10 miles from a paved road. Property owned by a government entity will most likely be rural. That governmental agency may be a utility district or a city, county, or state government. In fact, the federal government owns approximately 27 million rural acres. But just because property is owned by a governmental agency doesn’t mean it cannot be purchased or leased. For instance, you can obtain a leasehold interest in state and federal property, even in a national or state forest. (Visit www.fs.fed.us/land/staff/disposal.shtml to learn more.)

Most truly rural properties are located in unincorporated areas, meaning they are outside of a city’s jurisdiction and therefore only subject to development rules of the county or the state. County building and rural development rules tend to be much less restrictive than those of an urbanized city and far less scrutinized by governmental officials. Once an ideal bug-out location is found, ownership of the land, no matter how rural, can be determined relatively easily. Using a common smartphone app or a geodetic map, determine the exact longitude and latitude of the property in question. If the property actually has an address, present either the longitude/latitude or address to your local title insurance company.

Title insurance companies have access to the historical ownership data of every piece of property in the United States, according to Rick Fortunato, senior vice president for Chicago Title Company. You can even check on properties in other states from your local title insurance company; they all have nationwide data search capabilities. Historical property data may date back hundreds of years and may include photographs. For a very small fee, the title insurance company can give you the name and contact information for any property owner as well as provide important data such as existing taxes, recorded easements, guaranteed access rights, and, most importantly, water rights. You will want to make sure you have the right to access the property and build on it if you so desire. It’s also important to know if anyone else has any rights on your property before you acquire it. Those rights of others might include underground pipe easements and rights to access other adjacent properties.

Easements/Building Regulations

The ability to build on a property is controlled by the zoning of the governmental jurisdiction. Rural properties will most likely be governed by a county or parish, depending on the location. Once a property location is known, zoning and development standards for the property can be found online, in most cases, by contacting the governmental jurisdiction. The development standards may include a required minimum parcel size, maximum building height, selection of building materials, grading maximums, and other important regulations. Those other regulations might include permits needed for tree removal, stream alteration, habitat modification, and endangered species locations that may impact your ability to build. It’s important to know all of the regulations — even if you later choose to ignore them.

Most properties don’t have mineral or hydrocarbon rights. Those rights may have been acquired from previous property owners by large oil or mining companies many decades ago. It’s uncommon to have mining or oil-drilling rights, so don’t be surprised if your bug-out site doesn’t have them. Having easements on your property, for items such as underground piping, means that the easement holder usually has the right to come onto your property and repair the buried facilities at their discretion, not yours. The same would be true for mineral or hydrocarbon extraction. Theoretically, oil drilling and mining could occur at any time on your property although numerous governmental permits are required that often take years to obtain so it shouldn’t be a surprise. Large oil and mining companies, for public relations purposes, typically negotiate with nearby landowners to eliminate confrontation prior to initiating construction activities. Additionally, mining companies may not even need to set foot on your property, accessing those precious underground goodies from afar.

Water is a primary need for a long-term stay at any location. If permanent running water or a lake is not available, then a well can supply your water needs, assuming a well doesn’t already exist. Many properties don’t have the right to drill a new well, so a careful review of title insurance company data can determine water rights of any property. The cost of drilling a well varies greatly due to soils and geographical conditions. A call to a local drilling company near the intended property can give you a reasonable estimate of the cost of a new well. Electricity may be required to run a pump.

Homesteading

Under Abraham Lincoln in 1862, the federal government passed legislation to promote westward expansion and agricultural development, basically known as the Homesteading Act. This act provided 160 acres of free federal government land to persons wishing to start farming. Virgil Earp, Wyatt’s older brother, was a noted homesteader and, although decades ago homesteading was once a popular style of acquiring free ownership of rural property, it’s not a viable alternative in today’s world due to changes in the laws. During the peak of free land homesteading the federal government gave out over 270 million free acres of land. In 1986, congress amended the old federal law and eliminated that free land alternative. Only Alaska still offers a form of homesteading to promote recreational cabin development.

Financial Incentives

The federal government and all states have dozens of agricultural and farming assistance programs that offer both tax breaks and financial incentives for new farmers. You must substantially farm the land to achieve any meaningful tax break or development grant. A quick check of your state’s farmer assistance program will demonstrate ways of obtaining farmland. See the sidebar for additional resources that provide info on various other financial benefits you can qualify for.

Location, Location, Location

A quick search of the Internet using search terms like “bug-out properties” and “off-grid land” will produce hundreds of available, but certainly publicly known, properties. While searching, you might find excess state or federal property for sale, lease, or even trade. The federal government often auctions off excess land that even includes former military missile silos and hardened bunkers. Acquiring excess federal government land is as easy as checking their website at www.govsales.gov and looking in your geographical area of interest. Excess-land sales occur all the time.
A proper bug-out property can often be acquired with a minimum amount of money utilizing a variety of financing mechanisms and depending on how much you want to spend. Some government land leases are free. A lease of private or government land is the cheapest, quickest, and easiest way of obtaining use of a safe haven property, but it is subject to their rules. Such land — acquired under the radar, away from the Internet, and not financed — is the logical choice if you wish to maintain maximum security.

A title insurance company, along with a licensed real estate broker/agent, can provide you with important property data with a minimal cost. The title company agents can assist you in interpreting all of the necessary information on any property no matter its location.

A country boy can certainly survive on a cheap lease.

Bomb Shelter Tax Breaks

In the early 1960s, a number of states, not the federal government, passed legislation that gave homeowners a tax break for money spent building a bomb shelter. In a few states and some cities, those tax break rules from the ’60s have been overlooked and forgotten, but are still on the books. Your tax expert should check the regulations before taking the exemption on your returns for a preexisting bomb shelter on your property or building one that qualifies for exemption.
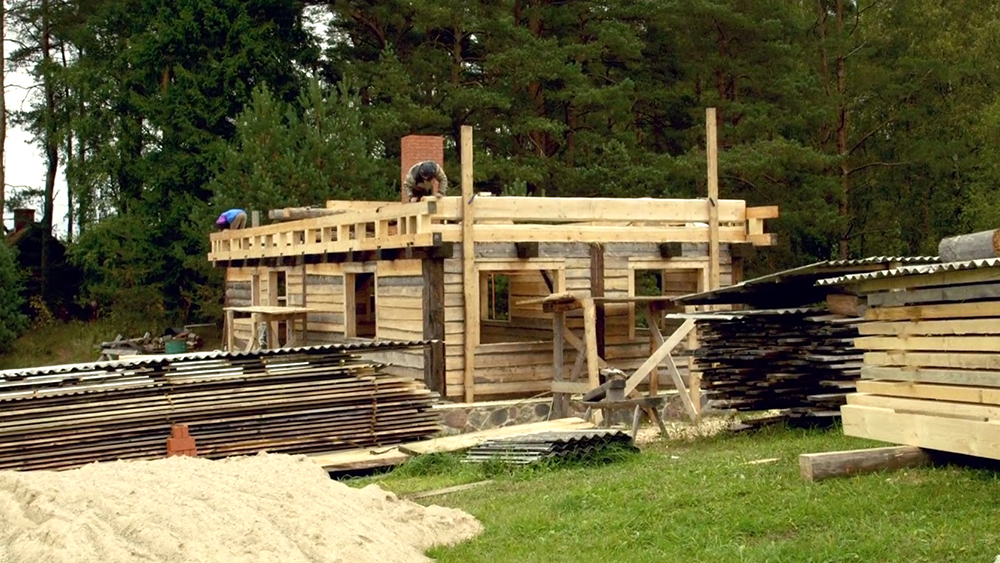
Drop-In Bunker

Now that you have acquired your bug-out land, you may choose to build your shelter yourself or hire someone else to do it for you. Another alternative is to buy a prefabricated bunker. Many of these premade bunkers can be customized to your specifications. They are constructed in a factory then brought your to your location, assembled, and professionally installed. There are many choices available; here are a few to check out.

Atlas Survival Shelters: This company makes underground cabins with patented “undetectable escape hatches” and plenty of amenities.
www.atlassurvivalshelters.com

Ultimate Bunker: This family-owned business builds underground bunkers, gun vaults, and storm shelters for various disasters.
www.ultimatebunker.com

Additional Resources

There are a variety of grants, subsidies, tax breaks, and other financial incentives your bug-out location may qualify for. Here is a brief list of the many resources available that can provide more information — but, as always, be sure to do your research first before soliciting any service for help.

Benefits.gov: A federal online guide to loans and grants for very low-income homeowners to repair and improve rural dwellings.
www.benefits.gov/benefits/benefit-details/402

Federal Grants Wire: This is a directory for various federal grants and loans available from several hundred governmental departments and agencies.
www.federalgrantswire.com

Land Trust Alliance: This organization assists in establishing land trusts for maintaining open land and conserving resources.
www.landtrustalliance.org/policy/public-funding/state-funding

Public Lands Title: A private company that will assist anyone over 18, for a small fee, in acquiring rural land in 18 states.
www.governmentland.com

The Center for Rural Affairs: This nonprofit corporation focuses on rural community development and family farm and ranch policy, among other issues.
www.cfra.org/renewrural/freeland

The Houston Chronicle: Provides data on ways of utilizing loans and grants from the U.S. Small Business Administration to buy farms, start businesses, and even start beekeeping.
http://smallbusiness.chron.com/grants-buying-farm-land-13924.html

USA.gov: The U.S. government’s official web portal contains a directory for federal and state government surplus and seized properties, as well as surplus land sales.
www.usa.gov/shopping/shopping.shtml

USDA Rural Development: A program from the U.S. Department of Agriculture to establish eligibility for obtaining rural housing.
http://eligibility.sc.egov.usda.gov/eligibility/welcomeAction.do

About the Author

Phil Schwartze is president of The PRS Group, a Southern California land-planning and entitlement-to-use company that specializes in obtaining governmental approvals for unique projects. He has a master’s degree from Cal State Los Angeles and is the former mayor of San Juan Capistrano, California. www.prsgrp.biz


New: Grey Ghost Gear RRS Transport Bag

For many years, we've made a point to stash an emergency go-bag in each of our vehicles. These bags are less comprehensive than a full-fledged bug-out bag — the sort of pack we'd choose to meet all foreseeable needs in a long-term survival scenario — and are instead focused on short-term necessities. This means clothing and basic toiletries for an unexpected overnighter, food and water in case we end up stuck in the vehicle, a trauma kit for medical emergencies, batteries and chargers for our important electronics, basic tools, and a weapon in case things really go downhill. This way, we're never unprepared, even if we're running a quick errand on a moment's notice.

The team at Grey Ghost Gear have released their own take on the go-bag theme, known as the RRS Transport Bag. They say this duffel-style bag was “developed at the behest of several LEOs and First Responders from a cross-section of agencies in a large metropolitan area.” Now that the design has been tested in the field by these agencies, it's being made available to the general public as a go-bag or range bag.

The RRS Transport Bag has a large main compartment that will fit a folded SBR or PDW. This compartment also has a pair of zippered mesh pockets, six elastic loops for pistol mags or other tools, and a hook-and-loop surface to attach pouches or a holster. Each end of the bag has large pouches with buckle closures for stowing medical gear or other items you need to access quickly. The side of the bag offers five rifle mag pouches as well.

This bag is constructed from 500D Cordura, and includes dual carry handles plus a removable shoulder strap. MSRP is $86, and it's available in black, coyote brown, or ranger green. For more information on the RRS Transport, go to GreyGhostGear.com.


Food for Thought: How Long Can You Survive on Multi-Vitamins?

This article originally appeared in Issue 4 of our magazine.

Here’s a cold hard fact: Overwhelmingly, urban dwellers are unprepared to face crises, their hope placed on FEMA or other disaster relief agencies to meet their post-crisis needs. Not having groceries is just one of those concerns.

Few would contest the notion that a well-nourished individual would thrive better than one merely trying to survive in the aftermath of a catastrophe. But, do you always need a sandwich to survive?

You may have incurred injuries. In addition to all your other gear, can you carry a 10-day supply of calories for yourself or your family? If not, who’s going to carry the 10-day water supply for each of them? Plus, you all may be on foot … and you may have to carry a child as well.

This intentionally provocative article examines the extreme situation of involuntary, near-total starvation, post-crisis in urban North America. Humans are actually more adaptable to starvation than generally appreciated. Healthy adults can benefit from an alternative strategy by understanding the adaptation process and how it might be optimized by simple oral supplements — versus having to carry a conventional calorie sub-load in your kit.

Are there precedents for urban starvation that we can study to develop a crisis calorie management plan? The truth is that there haven’t been any modern U.S. urban disasters where starvation-related mortality was a major concern, mostly because otherwise healthy adults can easily withstand fasting for three to five days, by which time disaster relief resources have usually managed to provide food and supplies to those directly affected by the crisis.

So for our purposes in this article, we’re looking beyond simply being hungry for three to five days, instead focusing on two distinct conditions of involuntary starvation beyond five days.
Individuals may be subjected to total or near-total starvation. With the former, no hydration and no caloric intake occurs — in this case, you will perish due to dehydration stress alone, generally surviving several days to a week or two depending on the individual. In the latter case of near-total starvation, you’re presumed to have access to at least nominal hydration levels, but otherwise no other essential micro-nutrients (vitamins) and caloric intake.

Get Informed

We can actually find relevant information on near-total starvation, both voluntary and involuntary. There are many examples that we can examine: professional entertainers in the late 1800s, who deliberately starved themselves in public at great length for fame and notoriety; starvation during polar desert expeditions; emaciated POWs in concentration camps; severe mental health disorders such as anorexia; prisoner hunger strikes; and even some specific medical studies, including the Minnesota Starvation Experiment (1944-’45) and the Iowa prison studies (1969).

The determinants of how long you can endure starvation include:

  • Availability of hydration
  • Initial body fat and protein stores
  • Calorie demand based on environment (e.g. cold, strenuous, etc.)
  • Initial health status (e.g. significant trauma accelerates the pace of starvation demise)
  • Gender (women have a slight survival advantage)
  • Age extremes (very young and old have limited fat and protein reserves)

In the past 50 years, the only well-documented involuntary near-total starvation in a North American survival situation is the story of Carla Corbus and her mother. After a small plane crash in California’s Trinity Mountain range during the winter of 1967, they survived starvation for at least 54 days before dying. Carla’s daily diary entries were published in the Saturday Evening Post in 1968. Incidentally, their tragic story was the impetus for legislation mandating transponder beacons for aircraft.

A normally proportioned 160-pound person requires approximately 1,200 calories per day to avoid adapting to fasting and starvation metabolism. Our metabolic sensors monitor our bodies and ensure that our brain tissues continuously receive a steady supply of their preferred energy source, glucose (carbohydrates). Upon sensing a caloric restriction, body stores of glucose, particularly muscle and liver glycogen, are consumed within 72 hours to nourish the brain and other critical tissues. And after only 12 hours of fasting, the next day’s carbohydrate calorie needs are already being sourced by metabolically cannibalizing body stores of fat and protein.

In fact, practically all of your body fat is expendable without serious adverse effects. The human body has a mechanism for us to sustain long periods of starvation — by allowing brain tissue to readily utilize the byproducts of fat and protein metabolism, transformed into glucose and ketones. The brain can derive two-thirds of its energy from ketones, synthesized mostly from fat, allowing humans to survive near-total starvation for 60 to 90 days.

Proteins, however, play a more critical role in maintaining normal body function. Their uncontrolled depletion during starvation results in loss of tissue architecture, blood elements, enzymes, and muscle mass, as well as impairment of our immune system. Unlike fat, precious body water is required to eliminate toxic byproducts of protein metabolism. So, if our bodies were only able to utilize our protein stores to maintain brain tissue, we would only survive for 20 to 30 days. In short, if you lose more than one-third to half of your total body protein, that’s all she wrote.

Starvation also depletes non-calorie essential micro-nutrients, particularly vitamin C (ascorbic acid) and vitamin B-1 (thiamine). Unlike most other animals, humans cannot synthesize vitamin C, nor store thiamine in large quantities. Vitamin C deficiency causes scurvy; thiamine deficiency causes beriberi. Without these vitamins, calorie energy utilization and critical tissue repair mechanisms fail within weeks. Despite having non-citrus food and water, more than 2 million sailors died of scurvy from the years 1500 to 1800, more than were ever claimed by naval warfare itself.

Above: If there’s an emergency evacuation and you have to flee the city on foot, at least be sure to grab a 10- to 21-day supply of glucose and multi-vitamin tablets. That’s a lot easier than toting three week’s worth of groceries.

Have a Plan

Providing even nominal amounts of glucose calories favors the metabolizing of body fat stores, rather than precious protein. As little as ¼ ounce of carbohydrates during starvation reduces protein waste by about 50 percent. This tiny bit of intervention generates roughly 8.5 ounces of metabolic water, sufficient to sustain daily requirements under limited conditions. It also conserves body water otherwise required to excrete protein waste products. In great part, this is how black bears survive their months of winter hibernation — humans just cannot do it to the same extent as bears.

What does this mean practically? Simply take two 4-gram glucose tablets per day, and you will conserve precious protein calories and body water. Take a daily multi-vitamin containing C and thiamine, and you will support your critical metabolism mechanisms.

So realistically, the prospect of long-term near-total starvation in North America is a most unlikely scenario.

And by understanding human adaptation to starvation, we can devise unconventional strategies to limit wasted protein and sustain micro-nutrients when faced with limited access to nourishment.

While attempting to escape the city on foot, a 10- to 21-day supply of glucose and multi-vitamin tablets is a lot easier to tote and maintain than the same amount of groceries. Plan on hearing your stomach complain, but answer it with the higher priority of hydration, and take your pills. Relying on stockpiled food is obviously ideal, but it's not the only way to make it through a short-term crisis without starving.

So there’s your food for thought — you don’t always need a sandwich to survive.

Tip: Storing Vitamins and Supplements

To keep vitamins and other dietary supplements at their peak potency for longer, it’s best to store them in a cool, dry place. Avoid places like the refrigerator and bathroom medicine cabinet where humidity and temperature differences can reduce their effective shelf life. Certain vitamins and supplements could require specific storage methods such as being kept out of light, so do keep them in their original packaging. Vitamins lose their strength with time, so be mindful of their expiration dates and swap them out when needed.


Review: Big Frig Denali Pro Cooler

Rotomolded coolers are all the rage with soccer moms, frat boys, outdoor enthusiasts, and preppers alike. This is due to the fact that they are practically indestructible, keep ice cold for a long time, and can hold enough beverages to get the entire 1996 Dallas Cowboys team drunk. Hunters and fishermen love these coolers, too, since they're a great place to store meat in remote locations. From an emergency preparedness standpoint, it's wise to have a large cooler on hand to preserve food during a power outage, or transport it to your bug-out location without worrying about spoilage.

The Big Frig Denali Pro

These days, it seems like every Tom, Dick, and Harry has come out with their own version of the trendy rotomolded cooler. Names like YETI, RTIC, Engel, Orca, and Pelican have all been emblazoned on white, tan, and coral-colored coolers across the country. These range from less than $100 to more than $1,000 and come in a variety of sizes, but at the end of the day, most of them are relatively minor variations on the same product.

However, even with so many coolers to choose from, if you do your research you can find some that stand out in the crowd. We have used coolers from all of those companies we named, and while they're all respectable choices, we're always on the lookout for new and improved gear. That's when we came across a brand we hadn't heard of previously: Big Frig.

Started in 2016, Big Frig came about by selling tumblers and coolers in bulk to schools, businesses, churches, and other organizations. Once the owner realized he could sell the coolers in quantity at a lower cost than most of the companies on the market, it was gangbusters from there. Now you can find Big Frig coolers in outdoor stores across the country, as well as online and direct from Big Frig. In order to test the company's offerings from an emergency preparedness standpoint, we picked up a 70-qt Denali Pro cooler. This line of coolers comes standard with wheels, a dry goods basket, and a divider that doubles as a cutting board.

Here's a quick overview of the 70-qt Denali Pro specs:

Capacity: 70 quarts / 60 lbs of ice

External Dimensions: 33.5 by 17.5 by 18 inches

Internal Dimensions: 27 by 12 by 13.5 inches

Weight: 37 lbs

Colors: White, Sand, Desert Camo

MSRP: $375

Solving Common Cooler Problems

One of the biggest complaints of some of the larger coolers on the market is a lack of mobility. Having to carry a 100+ pound cooler filled with ice, food, and drinks to and from your campsite, boat, bonfire, or bug-out truck can be a literal pain in the back. This has been such a problem that companies have created optional wheel kits to add to coolers that lack wheels.

Having these included standard on the Big Frig cooler is a fantastic feature. But Big Frig didn't just slap some cheap plastic wheels on their cooler, it used 7.25-inch-diameter rubber tires. This gives nice shock absorption and the ability to cruise across the top of the sand at the beach, as opposed to sinking in. Non-slip rubber feet also help the cooler stay put when it's not rolling.

Another chief complaint about many coolers is how hard they can be to open. On a hot summer day the last thing you want is something standing between you and that icy cold beverage. The reason for this problem is the temperature differential between inside and outside, which causes a pressure differential. While this is more of a nuisance than anything, Big Frig went the extra mile and added a pressure release valve on the front of their coolers. Press this and the pressure inside equalizes with the outside — voila, no more fighting to get at your refreshment of choice.

Big Frig also threw in a few clever added features, such as stainless steel bottle openers integrated into the corners of the cooler, and a ruler on top for measuring fish you catch.

Insulation Test

Many of the new-style rotomolded coolers that have popped up in the past few years claim to retain ice for a week or longer. Big Frig says that the 70-quart Pro series cooler will hold 60 pounds of ice and keep it “cold for up to 10 days”. We wanted to test the insulation of this cooler in the real world, so we filled it with ice and checked it daily.

Now, a couple notes about our test. If you want to keep ice for many days, it is important to cool the foam, or core, of the cooler before you fill it with ice. This can be accomplished by leaving it outside if it is cool enough, putting it in a freezer overnight, or putting some sacrificial ice in it to cool it down. Otherwise, any residual warmth retained by the cooler itself will accelerate melting and throw off the results.

For our test, we used the sacrificial ice method and left it overnight. The next day, we filled the cooler with ice and drinks to simulate real-life usage. We opened the cooler once a day to check the ice level. The temperatures were in the low- to mid-70s in the day and 40s at night. After 3 days, the ice was obviously beginning to melt, and its level was receding.

Another key for extended ice retention is keeping the drain plug in place, assuming the cooler's contents are fully waterproof. Even though the cooler was more water than ice by day 6, the water was just above freezing and obviously much cooler than the outside air that would fill the cooler if we were to drain it.

By day 8, the ice in the cooler was fully floating in the water. This lasted for several days as the ice slowly melted in the chilly water. It took 14 days for all the ice in the cooler to melt. And even still, the water could be considered cool with a temperature around 37 degrees.

In the heat of the summer, if you were actually using the cooler and opening it many times a day, you probably wouldn't see 10+ days of ice. However, our real-world test showed that the Big Frig should easily be able to keep its contents ice cold during most camping or hunting trips and short-term emergencies.

Conclusion

Overall, the Big Frig cooler impressed us with its thoughtful features and clever design. While there’s a lot to like about it, we would love to see a better-designed handle on the side opposite the wheels, or even a secondary rigid handle. This would make transport via the wheels easier.

A way to strap the cooler down without interfering with access to its contents would be useful as well. Nobody wants their fully-loaded cooler bouncing around in the bed of their truck — or worse, tumbling out.

Even with those items we would like added, the Big Frig Denali cooler is one of our favorites in its class, and we look forward to seeing how it holds up to use in the years to come. For more information on Big Frig coolers, tumblers, and other products, visit BigFrig.com.

Pros:

  • More affordable than most similar-sized coolers
  • The inclusion of wheels is a big plus
  • Lots of standard features, such as the integrated pressure valve and bottle openers

Cons:

  • We would trade the fish measuring scale on the lid for a cup holder (or two)
  • Needs a rigid handle opposite the wheels
  • Additional tie-down points on the exterior would be nice, especially if they still allowed access to opening the lid

Hot and Bothered: Surviving Heat & Humidity

This article originally appeared in Issue 4 of our magazine.

The summer months bring with them the warmth and humidity we’ve come to expect. Most of us look forward to being outside and enjoying the nice weather. Whether it’s that half-marathon you’d like to cross off your bucket list or maybe just a short hike, it’s no surprise people are more active in the summer months.

Hot and humid weather combined with increased activity has no doubt contributed to incidents of heat-related illnesses. Hyperthermia occurs when your body’s core temperature reaches levels greatly above normal (98.6 degrees F), which would begin at about 100 degrees F. Depending on the severity of hyperthermia, it can bring about several other critical issues, including dehydration, heat exhaustion, and heatstroke. These can occur with and without exercise — however, we’ll focus here on exercise-related heat illnesses. We’ll look at what you can do to better prepare yourself, and what to do if it’s too late. Understanding practical steps you can take is imperative to your safety.

Exertional Heatstroke

Exertional (yes, that’s a word!) heatstroke is a life-threatening illness that occurs when the body is unable to dissipate the heat it is storing and reaches critical temperatures, according to the Health Care of Homeless Persons manual. This leads to a breakdown of the body’s heat-control mechanisms.

Signs:

  • Disorientation
  • Nausea
  • Vomiting
  • Diarrhea
  • Severe dizziness
  • Weakness
  • Extreme thirst
  • Disorientation
  • Convulsions
  • Coma

Predisposing Factors:

  • Obesity
  • Dehydration
  • Low physical fitness level
  • Lack of heat acclimatization

Exertional Heat Exhaustion

Exertional heat exhaustion is significant weakness that occurs when too much fluid and electrolytes are lost through sweating. This generally leads to an inability to continue exercise.

Signs:

  • Fatigue
  • Thirst
  • Malaise
  • Shortness of breath
  • Dizziness
  • Headache
  • Nausea
  • Vomiting
  • Diarrhea
  • Profuse sweating

Predisposing Factors:

  • Dehydration
  • High body mass
  • Lack of heat acclimatization

Above: According to the Journal of Athletic Training, on average, your body temperature increases 0.4 degrees F for every percent of body mass lost through sweating in hot and humid environments.

Before Activity

Environment

To stay safe in hot and humid conditions, you really have to know your environment. Dry heat conditions, such as in a desert, typically have high ambient temperatures, but low humidity. Conditions like this allow for heat to dissipate effectively through evaporation. By contrast, humid weather can be especially dangerous because moisture in the air doesn’t allow sweat to evaporate well, keeping the sweat rate high without the attendant cooling effect.

Another factor to consider is time of day. Solar radiation peaks around noon, which is when sunburn occurs the quickest. The highest temperatures, however, usually occur around 3 to 4 p.m., depending on cloud cover. Wear sunscreen when appropriate, and do your best to avoid these hotter times.

Clothing Options

The clothes you wear can make a significant difference in how you tolerate the heat. Clothing creates a microenvironment between your skin and the fabric, which will affect your body’s ability to dissipate heat through sweating. Clothing that absorbs sweat will not allow that heat to be transferred away from your body, making matters worse, according to Advanced Environmental Exercise Physiology. As more heat is generated through activity, it creates a situation where heat builds up without being released.

First, limit the amount of clothing you’re wearing. More skin exposure results in better heat dissipation. Next, look for light-colored, moisture-wicking fabric. Light-colored clothes reflect more of the heat radiating from the sun, and moisture-wicking fabric allows sweat to be transferred to the material, where it will evaporate. Cotton or wool retains heat by trapping sweat in the fabric. If you only have cotton garments, look for something loose-fitting. This allows more airflow to your skin and increases evaporative heat loss.

Pre-cooling

Pre-cooling your body is another effective way to safely lengthen the amount of time it takes for your body to reach critical temperatures, according to the Journal of Strength and Conditioning Research. Some options include spending some time in an air-conditioned building or vehicle, placing a cold wet towel on the back of your neck or drinking cool water. Regardless of the method, this can lengthen the time you can safely spend time in this type of environment.

Hydration

Hydration in hot and humid environments cannot be stressed enough. Since sweating is your body’s primary method of cooling, dehydration can occur during hyperthermic conditions if you aren’t regularly drinking.

An accurate way to see if you’re dehydrated is by observing your urine color. Urine that is clear may indicate you are overhydrated, while pale yellow, somewhat resembling lemonade, would represent adequate hydration. When urine color is darker, similar to apple juice, it’s a pretty good indicator that you are dehydrated, and fluid intake is highly recommended at that point. Look to drink about 16 to 20 ounces of water one-and-a-half to two hours before activity.

To prevent dehydration during activity, drink roughly 7 to 10 ounces every 20 to 30 minutes.

During Activity

Activity should also be altered in these environments to reduce the likelihood of developing heat illnesses. It’s far too common for people to wait until there are warning signs before they reduce intensity — you should try your best to avoid this situation. Reduce the intensity at which you’ll be working, especially if you aren’t accustomed to this type of weather. When possible, take short breaks to avoid reaching high temperatures.

To prevent dehydration during activity, drink roughly 7 to 10 ounces every 20 to 30 minutes. Many of the popular sports drinks contain electrolytes, which are lost in sweat. If you’re planning on being active for 75 minutes or longer, a sports drink may be beneficial. Otherwise, water will do just fine.

After Activity

It’s very important to rehydrate after being out in the heat. To figure out how much to drink, you would ideally measure your bodyweight before and after being active or in the environment. Following this guideline, drink between 20 and 24 ounces for every pound of bodyweight that you lost. Whether it’s water or a sports drink, opt for something cold to help bring down your core temperature faster.

Treatment

So, what if it’s too late? First and foremost, try to reduce as many environmental variables as possible by moving indoors or to a shaded area. The most effective cooling method is immersion in cool water, but not cold water. Water that is too cold can cause shock. The problem is that it’s not practical for most people. A more realistic option would be placing cold wet towels on the back of your neck, splashing cold water on your body, or the use of fans to circulate air toward you. If symptoms are severe, such as in the case of exertional heatstroke, medical assistance is highly recommended to quickly replace the lost fluids and reduce temperatures.

Heat can create a very dangerous situation if you’re not ready. Know the environment, plan accordingly, and be aware of the warning signs. Adequate preparation makes all the difference — sometimes between life and death.

About the Author

Ryne Gioviano, M.S.Ed., NSCA-CPT is the owner of Achieve Personal Training & Lifestyle Design. He holds a master’s degree in exercise physiology and is a certified personal trainer through the National Strength and Conditioning Association. For more information, visit www.achieve-personaltraining.com. You can find Ryne on Twitter and Instagram at @RGioviano.


Video: Building an Effective Signal Fire

As survivalists, it's easy to fall victim to our own pride. We all like to think we'll be able to survive any disaster on our own, using the experience, knowledge, and gear we possess. But there may come a day when it's necessary to call for help, and if that day comes, you'll need to know how to do so effectively. In previous articles, we've discussed a variety of emergency signals, including DIY noisemakers, NATO panel signals, and international ground-to-air signal code — each of these can clearly indicate your position when you need help.

One of the most widely-known improvised emergency beacons is a large pillar of smoke from a signal fire. You're probably aware that throwing leafy green branches onto a fire is a quick way to produce white smoke, but it's not necessarily that simple. If you put too many of these branches on at once or toss them on haphazardly, you'll extinguish the fire along with your hopes of rescue. It's essential to plan your signal fire ahead of time, and prepare it to produce smoke at a moment's notice.

The video below from YouTuber Mr. Baron shows how to convert an extremely simple tipi-style fire into a signal fire by perching pine branches on top of the structure. This design allows plenty of airflow on the sides of the fire, ensuring it can burn efficiently.

Survival Russia shows another method that incorporates an elevated platform into the middle of the tipi. The green branches are then hung along the sides like shingles on an improvised shelter, while gaps in the base platform provide airflow to feed the fire. This configuration has some advantages, such as protecting the underlying tinder from wind, rain, and moisture on the ground.

Regardless of the method you use, it's critical to remember that if you want to make the most of your signal fire, you shouldn't just throw a few fronds onto your existing campfire. You may only have one shot at signaling to a nearby boat or aircraft, and as always, preparation will improve your chances of success.


Antibiotic Alternatives: Plants, Poultices, & Pet Meds

WARNING: This article is meant to be a general overview and not a detailed guide on medical alternatives to be used in dire situations. Seek medical attention from a licensed physician before attempting any of these methods.

A couple decades ago, I was backpacking in Central America and met a grad student who was studying the medicinal plants of the Mayan people. As a direct descendant of the ancient civilization, he wanted to know more about plants that were used back then and that are still available today. We had a great discussion, and he was kind enough to show me some medicinal plants. I asked him what he does when he gets sick and needs medicine; he replied that he goes to the doctor and gets a prescription. Why? Because, that’s the best medicine available today and is most efficient at treating illness. He added that the Mayans used plants because that was the best medicine they had available at the time.

That statement made quite the impression on me as a physician. I don’t shun those using medicinal plants, but I always share this story when they direct the conversation that way. But what if you find yourself in a situation where access to modern medicine is limited, or non-existent?

Prior to 1850, infections were the most common cause of death. In the latter part of the 19th century, people like Lister, Koch, and Pasteur made advances that significantly lowered mortality due to infections. So, assuming you’re up to date on your vaccinations and that smallpox doesn’t make a comeback, the three biggest threats to surviving without modern antibiotics are pneumonia, infectious diarrhea, and skin infections. Fortunately, there are plants, poultices, and pet meds that serve as alternatives to treating infection.

Plants

Wild garlic and other plants can serve to fight infection as well as inflammation.

It’s important to know what plants are available in your area or bug-out location. What’s present in the Midwestern United States may not be present in the Southwest. It’s also important to identify plants correctly, as there are plants that mimic others and may not be helpful or could even be harmful (see Eat This, Not That in Issue 25 of RECOIL OFFGRID). Many of the plants used for medicinal purposes have both antimicrobial properties as well as anti-inflammatory properties. To be clear, don’t use plants to stave off infection if antibiotics are available.

It’s critically important to know what’s available around you and what these plants look like in all seasons. There are plenty of books on medicinal plants and herbs, but a local plant identification class where you’re shown exactly what to look for, what properties the plants have, and in what sort of habitat they typically thrive is the most helpful. By local, keep in mind that you may have to drive a few hours, but it’s always worth your effort if it could save your life. There are numerous plants that can be helpful, but it’s a good idea to keep a list of what you see in your area. If you wait until a scenario requires you to cram the material, it’ll be way too late. Preplanning and education is the key.

Wild onions and garlic are easy to spot in the wild if you’re looking for them. They can be helpful in fighting infection as well as inflammation. Whether you’re eating them or using them topically in a poultice, they can be a valuable asset to have handy. Apple cider vinegar is also good to keep handy because it has many uses in a survival situation and is difficult to make/source in a hurry. It can help kill bacteria due to its acidity, and can help treat skin infections, bladder infections, and diarrhea. I’d recommend drinking 1 to 2 teaspoons in a cup of water twice a day to bolster the immune system. The water can be room temperature or warmed.

Tea tree oil is also something to keep handy due to its many potential benefits, including as an antibacterial agent to help with skin. For skin ailments, apply the tea tree oil directly to a closed wound, such as a boil, then cover with a bandage. This will help as an antiseptic to prevent further infection from getting into the wound. One drop of tea tree oil in a teaspoon of coconut oil rubbed on the wound twice a day should assist with healing and reduce localized inflammation. Keep in mind that tea tree oil can be toxic if ingested, and some people may experience irritated skin after applying it. Make sure to try a small test spot to see how your skin reacts.

Eucalyptus oil and camphor oil can be helpful in upper respiratory infections to help open the airways and break up some mucus. They can be used as a steam and inhaled or applied topically. The camphor can also be good for inflammation by rubbing it onto the skin in the affected area. There are many commercially available camphor combination creams (often mixed with menthol) available at your local superstore. Acorns can be easy to find and are a good source to use as an antiseptic for wounds on the skin. A handful of acorns in a pint of water is adequate to be beneficial. You can increase the efficacy of the liquid by crushing, then boiling the acorns. Don’t drink the water as it can upset the stomach and cause abdominal pain. Instead, soak a cloth in the water and use it as a poultice or even a compress and place it on the affected area.

Poultices

The use of a poultice goes way back in time and can be a useful addition to your survival skills. A poultice is a paste made of plant material, used to relieve inflammation or as a drawing salve for infection. It’s often placed on the injured area and covered with a cloth. Onions, charcoal, table salt or Epsom salt, or numerous herbs/plants (dandelion leaves, calendula flowers, and cayenne pepper) can be viable agents to cover a wound or area of inflammation.

As a general rule, use water as warm as you can tolerate without burning your skin to draw an infection and cold water to help with inflammation. Grind, crush, or pulverize the herb/plant/powder and add a little water to create a paste. You can then add it directly to the skin or onto a cloth if it irritates the skin. The best cloth would be cheesecloth. You want the paste to work on the skin, but not get too absorbed into the cloth. It’s important that the poultice stay on for several hours to maximize effectiveness. You may need to repeat two to three times a day, depending on its efficacy and the severity of the wound. If you have an open wound or abrasion, application of honey is useful. This serves as a barrier to help protect the wound from debris and bacteria, but also acts as a topical antibacterial agent. We often will use medical-grade honey in wound clinics at the hospital as an adjunct to other modalities to treat wounds.

Pet Meds

When considering pet meds, you’re really faced with a bit of a dilemma. First is acquiring the drugs. Fish antibiotics are available without a prescription from many online retailers. Unfortunately, you won’t be able to buy them at your local retail pet store, as many of these medications are limited to distributors. With some foresight, however, an online retailer can have them to you in a few days. Many of the fish antibiotics are the same generic name and dose as for humans. This makes it easy for consumers in the self-reliance environment. Second, some folks question the safety and purity of fish antibiotics purchased online. Many are manufactured in the same facility as human antibiotics, but end up targeting a different market. The FDA doesn’t regulate fish antibiotics like they do other meds, so it’s often questioned whether they’re safe to take. Impurities, concentration of drug, and absorption inconsistency are a few issues often cited as a concern. You should first try your local doctor for standard human antibiotics. Some physicians are open to writing a prescription to have on hand for emergency use.

The important part of taking any antibiotic is to know what you’re treating with the antibiotic on hand. One antibiotic does not treat every infection. Taking an incorrect antibiotic may not treat the infection, and can allow the infection to progress as well as increase antibiotic resistance. This is why doctors don’t like to treat illnesses with antibiotics if they’re not needed, as antibiotic resistance has made it challenging to treat certain infections. The Sanford Guide to Antimicrobial Therapy is published every year and is an excellent choice to guide which antibiotic to use in a particular infection. Although this guide is directed towards humans, it would be valuable in guiding your choices in the lateral fish antibiotic market. I’ve kept one at my fingertips for the past 25 years.

When choosing which antibiotic to purchase (for your fish, of course), choose one that has a dose comparable to humans. The less “extra” ingredients, the better; however, this still may not ensure it’s free of impurities due to the lack of regulation. Next, get a variety of antibiotics, as one antibiotic doesn’t work for every infection. For example, a drug for a bladder infection may not be the best choice for a skin infection. Last, please put some thought into the decision to use the antibiotic. This should not be taken lightly, and in a survival situation should be reserved for life or death circumstances.

Antibiotics and Their Uses

Typical Adult DoseInfectious Uses
Cipro500 mg
2x a day
Urinary tract
Travelers diarrhea
Diverticulitis
Anthrax
Typhoid fever
Amoxicillin/
clavulanate
875/125 mg
2x a day
Sinus infection
Skin infection
Infected diabetic foot
Cat/dog bite
Trimethoprim/
Sulfamethoxazole
800/160 mg
2x a day
Urinary tract
Skin infection
Travelers diarrhea
Doxycycline100 mg
2x a day
Tick-borne disease
Pneumonia
Metronidazole500 mg
3x a day
Some GYN infections
Giardia
Diverticulitis with Cipro (moderate cases)

In Summary

A recently published book by Dr. Joe Alton and his wife Amy of Doom and Bloom Medical called Alton’s Antibiotics and Infectious Disease is easy to read and understand, and explores using antibiotics in an austere environment. It’s well worth picking up if you want to learn more about infectious disease and options for treatment. Check online retailers for books on medicinal plants as well. Find one specific for your area/region or make your own reference based on what you see around you.

Plants, poultices, and pet meds are excellent alternatives if nothing else is available to you. Otherwise, see your physician if you’re dealing with an infection. Pharmaceutical-grade antibiotics, if you need them, are the best choice for treating infections. For minor inflammation, you could certainly try plants and poultices, but I would caution you to stop these treatments if they’re not working and seek medical help. Lastly, pet meds like fish antibiotics are an option if no other antibiotics are available. I would only use them in a dire situation and wouldn’t take them in lieu of seeking medical treatment.

Important Things to Remember

  1. Know your local plants, their uses, and locations.
  2. Understand which plants act as antiseptics and anti-inflammatories.
  3. Don’t rely on lesser treatments when better options are available (and warranted).

About the Author

David L. Miller, DO, FACOI is an internist in private practice for 20 years. His experiences away from the office have included time as a fight doctor in regional MMA events and as a team physician for 10 years at a mid-major university in the Midwest. Currently, he serves as the lead medical instructor for the Civilian Crisis Response team based out of Indianapolis.

More From Issue 31

Don’t miss essential survival insights—sign up for Recoil Offgrid's free newsletter today!

Read articles from the next issue of Recoil Offgrid: Issue 32

Read articles from the previous issue of Recoil Offgrid: Issue 30

Check out our other publications on the web: Recoil | Gun Digest | Blade | RecoilTV | RECOILtv (YouTube)

Editor's Note: This article has been modified from its original version for the web.


Book Review: “Bushcraft” by Mors Kochanski

The Premise: Mors Kochanski is one of the forefathers of modern bushcraft, a skillset and mindset steeped in the traditional skills of our ancestors. Bushcraft emphasizes self-sufficiency through knowledge and improvisation as opposed to reliance on advanced gear and technology. Kochanski summed up his philosophy with an appropriately concise quote: “The more you know, the less you carry.”

Born in Canada in 1940 to Polish immigrant parents, Kochanski grew up on a remote farm in Saskatchewan. When he wasn’t busy assisting his father, a carpenter and WWI veteran, Kochanski spent his time hunting, trapping, and exploring the woods with his five siblings. Attending school required him to walk 7 miles each day on a rugged forest road. This independent lifestyle helped him develop a deep appreciation for nature, and eventually led him to a career as an outdoor instructor at the University of Alberta. In 1988, Kochanski published his first and most famous book, Northern Bushcraft. Its title was later shortened to Bushcraft.

The 411: In the book’s introduction, Kochanski states, “There is nothing in the bush that does not have a use at some time or other.” This statement forms the foundation for a dense tome of what he calls “basic existence skills.” The introduction also makes it clear that this book is intended to be approachable for anyone who wishes to become more comfortable in the outdoors. However, don’t take this as a sign that the content will be oversimplified — it most assuredly is not.

The first six chapters of Bushcraft focus on core skills. Firecraft explains the essential nature of a fire in the wilderness. It goes into detail on ignition sources, tinder materials, fuel requirements, and the benefits of various layouts, pot suspension systems, and cooking techniques.

Axecraft, Knifecraft, and Sawcraft — prioritized in this order — emphasize the value of these cutting tools for all other bushcraft skills. Cutting techniques are shown for everything from felling trees to delicate carving and shaving. There’s also a clear emphasis on blade maintenance, safety, and first aid.

Bindcraft is a shorter chapter on how to improvise cordage from more than a dozen natural materials.

Sheltercraft discusses how to build a “micro-environment” to escape the elements. Kochanski provides guidance on shelters ranging from simple open-fronted windbreaks to permanent, fully enclosed dwellings for the entire family.

The following six chapters change focus from skills to specific natural resources: Birches, Conifers, Willows, Shrubs, Moose, and Hare. In keeping with this book’s foundation, Kochanski writes about how to find, harvest, and repurpose every substance within each of these resources.

Nearly every page of Bushcraft features highly detailed illustrations. The New Edition also features 14 pages of color photos in a supplement at the end of the book.

The Verdict: Whether you’re a sheltered suburbanite or a seasoned outdoorsman, this book is packed with lessons that can improve your wilderness survival skills. Its near-encyclopedic information density makes it a volume that must be patiently studied rather than skimmed, but Kochanski’s diligent explanations of each technique make it easier to digest. The multitude of diagrams are hugely helpful as well.

Although Bushcraft has value for all survivalists, it’s not precisely tailored to every survivalist. It’s decidedly old-fashioned, and despite being written in the 1980s, it often feels equally relevant to the 1880s or 1780s. Even common tools like a lighter are never mentioned. On one hand, this means the skills within are timeless and reliable; on the other hand, they sometimes feel needlessly antiquated.

A larger and more prominent issue throughout the book is its regional focus. Kochanski wrote it based on his experience in Canada, and its original title was a better reflection of this theme. Most of the content is relevant to any locale, but some — especially the final six chapters — will be less useful outside of the Great White North. Also, all units are metric, so Americans should keep a converter handy.

While Bushcraft isn’t the only wilderness skills book you should own, it’s deserving of a place in almost any survivalist’s library. Even if you have access to modern gear, proficiency in traditional bushcraft skills will build your creativity and help you learn to stay alive with nothing more than your wits and a sharp blade.

Book & Author
Bushcraft: Outdoor Skills and Wilderness Survival (New Edition)
Mors Kochanski

Publisher
Partners Publishing

MSRP
$19

URL
www.partnerspublishing.ca

Pages
304 pages

Rating
>Thrive
Survive
Die

OFFGRID Library of Recommended Books

More From Issue 31

Don’t miss essential survival insights—sign up for Recoil Offgrid's free newsletter today!

Read articles from the next issue of Recoil Offgrid: Issue 32

Read articles from the previous issue of Recoil Offgrid: Issue 30

Check out our other publications on the web: Recoil | Gun Digest | Blade | RecoilTV | RECOILtv (YouTube)

Editor's Note: This article has been modified from its original version for the web.


Hankerin’ for Survival: An Overview of Handkerchiefs, Bandanas, & Shemaghs

Once upon a time, almost every boy in America was equipped with two things when they left the house each morning – a pocket knife and a bandana. As they got older and turned from boys to men, many of them carried two handkerchiefs, one for their own use and one that they could hand to a female friend in need.

Today, the daily carry of a handkerchief or bandana isn’t nearly as common. But, this is a valuable, multi-purpose tool that should be in your pocket or pack when you hit the trail. Before we get into that, though, perhaps we should define a few terms so we’re all on the same page.

Understanding the Terminology

Traditional handkerchiefs are typically small enough to fit in a shirt pocket. (Photo: Łeba / Wikimedia Commons)

A handkerchief is a piece of fabric that is usually about 12 inches square. While they can be found in virtually any color you can imagine, they are most often plain white. Materials may include cotton, silk, or linen, and traditional handkerchiefs often featured decorative elements such as a monogram or lace.

A bandana can be tied around the head to soak up sweat. (Photo: Pixabay.com)

A bandana is larger, usually 22 inches on a side with oversized versions going up to 27 inches. This fabric is often found in a paisley print in a wide range of colors. Most modern bandanas are 100-percent cotton or a cotton-synthetic blend.

A U.S. Marine in Afghanistan wearing a shemagh. (Photo: U.S. Department of Defense)

A shemagh is even bigger, typically 42 inches square, with some variations reaching 47 inches on a side. This is a traditional Middle Eastern head garment that has found popularity with military forces and outdoor adventurers around the world due to its versatility.

The traditional handkerchief, while better than nothing, is limited in uses due to its smaller size. When it comes to carrying one of these tools in your kit, we recommend either a bandana or a shemagh. So, why is a bandana or shemagh a good addition to your pocket or pack?

Uses of a Handkerchief

Protection From the Elements

In cold weather, wrap or fold it around your neck to help stave off a chill. If it is hot out, dampen the fabric and lay it against the sides of your neck. Evaporation is a cooling process. Tie it around the lower part of your face — think of a stereotypical biker or bandito — to protect against wind, especially dust, dirt, or sand that might be blowing in that breeze. It also works great to keep the sun off your head and neck, shielding your skin from the harmful effects of sunburn. Lay it flat on your head with an edge trailing down your neck, then put on a ball cap or other hat over it. Shemaghs are large enough to be loosely wrapped around the entire head and face, creating a barrier against wind, dust, and glare.

Water Pre-Filter

Cloth can serve as a pre-filter to remove sediment, bugs, and other floating debris from water. Simply pour the water through the fabric to trap what you can before using your chosen filtration or purification method — for example, iodine, chlorine, or a micro-filter. It is important to note, though, that the fabric absolutely will not remove any microscopic organisms like bacteria, protozoa, or viruses. Pouring water through the bandana does not render it safe to consume, but it can improve taste and clarity.

Hunting or Self-Defense

Bundling cloth around a heavy object allows it to be used as an impact weapon.

There are a few ways you can use a bandana or shemagh as a weapon. First, with some practice, you can channel your David-versus-Goliath fighting spirit and launch rocks or other smallish projectiles by using the fabric as a sling. With substantially less practice, you can use it as a slungshot impact weapon. Drop a rock into the middle of the fabric, then pull up all four corners into your hand. Swing the weighted end at your attacker. As with all improvised weapons, these methods will require some amount of training and repetition to pull off effectively.

Bindle

Remember the hobo many of us masqueraded as at Halloween when we were kids? Constructed in a manner similar to the slungshot mentioned earlier, you can use the cloth to carry gear in a hobo bindle, should the need arise. Simply lay out the fabric and place your supplies in the middle. Draw up the corners and tie them together.

Run a stick under the knot if you want to be traditional and carry the bindle over your shoulder. This is a good way to stash small loose items such as tinder shavings or wild edibles.

Pot Holder

Wrap a bandana or shemagh around a pot handle to safely lift it off the fire. However, a word of caution — as many of you already know, cotton loses its insulation properties when it gets wet. That’s why we try to avoid it for clothing when we venture into the field. If we get wet from the weather or sweat, it won’t keep us warm, unlike wool or many synthetics. The same holds true if we grasp a hot pan with a wet cotton cloth. The heat will transfer to our hand much faster through damp fabric.

First Aid

While it isn’t going to be sterile, the bandana can be used to mop blood from a wound as well as create a makeshift compression bandage. Place gauze pads on the wound and secure by tying the bandana around it. You could also tie down an ice pack or medicinal plants in the form of a poultice.

While a shemagh or large bandana could be used as an expedient tourniquet if no other options are available, that’s not recommended as the fabric needs to be kept fairly wide around the limb to prevent further injury. This will be difficult with the bandana or shemagh, and achieving sufficient tightness around a limb to occlude blood flow will be practically impossible. It could, however, serve well as a sling for an injured arm or be used in conjunction with a branch to immobilize a broken limb.

The bandana or shemagh is a powerful tool with a wide range of uses — not bad for something as simple as a square piece of cloth. It also weighs nearly nothing, so toss a few of them in your pack. You’ll be glad you did.

Survival Handkerchief Buyer’s Guide

If you're looking for a bandana or shemagh to add to your survival kit, here are a few survival-oriented options to consider.

Cabin Fever Game Bandana

Photos courtesy Colter Co. USA.

The Cabin Fever Game Bandana adds entertainment to the list of uses. It has a printed game board as well as instructions for Tic Tac Toe, Checkers, Dots and Boxes, and Marbles. The game pieces are up to you and Mother Nature to provide.

Dimensions: 22 inches x 22 inches

MSRP: $14

URL: ColterCoUSA.com

Wazoo Foraging Bandana

Photos courtesy Wazoo Survival Gear.

The guys at Wazoo teamed up with a few respected foraging instructors to put together a great reference for wild edibles that can go everywhere with you. It features detailed drawings of a dozen common plants, plus their uses and a ton of other information to help in the flora identification process.

Dimensions: 22 inches x 22 inches

MSRP: $11

URL: WazooSurvivalGear.com

Know Your Knots Bandana

Photos courtesy Colter Co. USA.

Knot tying is an essential survival skill. Learn how to tie 16 different highly-useful knots with the detailed diagrams on this bandana. In addition, they’ve included a short paragraph detailing the uses for each of the knots featured. Very handy information to have in the field.

Dimensions: 22 inches x 22 inches

MSRP: $14

URL: ColterCoUSA.com

Wazoo Tracking Field Kit

Photos courtesy Wazoo Survival Gear.

While you aren’t going to become a master tracker with just a Wazoo Tracking Field Kit, it will certainly get you moving in the right direction. The bandana is printed with true-to-scale prints from 21 common critters, from frog to mountain lion. The kit also includes a snap bracelet that is printed with a ruler, helping the user determine the size of the tracks.

Dimensions: 22 inches x 22 inches

MSRP: $14

URL: WazooSurvivalGear.com

Stayin’ Alive Reflective Survival Bandana

Photos courtesy Colter Co. USA.

The Stayin’ Alive Bandana packs a ton of information into a small space. It covers four survival essentials – Shelter, Food, Water, and Fire. The bandana itself isn’t just bright orange for visibility, the ink is reflective and when a flashlight hits it at night, it really shines!

Dimensions: 22 inches x 22 inches

MSRP: $14

URL: ColterCoUSA.com

Shemagh Tactical Desert Scarf

Photo courtesy Rothco.

Rothco has a line of shemaghs that come in a huge range of colors, from subdued to brilliant. All are large enough to serve in a variety of roles, from the traditional head wrap to a bindle and more. Each has a traditional fringe, too, adding visual appeal to this multi-purpose addition to your kit.

Dimensions: 42 inches x 42 inches

MSRP: $15

URL: Rothco.com


Parental Preps Issue 31

Got a tip you’d like to share? Send it to offgrid@recoilweb.com along with a well-lit, high-resolution photo of yourself. Also include your name, and your website or social media handles if applicable. Please keep your tip submissions between 250 and 350 words. By sending in submissions, you grant CMG West LLC the unrestricted, transferable and sub-licensable, irrevocable, royalty-free, world-wide, and perpetual license to reproduce, distribute, publicly display, make derivative works of, and otherwise use the Submissions in any media whatsoever now known or later invented throughout the world for any purpose whatsoever, commercial or not.

Give them the tools to help them prevent bullying. A bully’s main target is a child who they perceive as vulnerable. Keep your child safe from being a target by helping them to achieve and maintain a high self-esteem and solid relationships at home and with their peers. In the event that your child is a victim of a bully, role-play with them how they can protect themselves, be assertive, and, if necessary, alert the school officials. A child needs to understand that there’s no shame in walking away from a hostile situation or asking an adult for help.

Help them to adopt safe behaviors online. Engaging in open conversation with your child is a great way to teach them the importance of online safety. Not only is it important to verbalize this with them, but you must also give them real-world scenarios they can mentally file. This involves role-playing scenarios that they could encounter online. Afterward, discuss how the situation should be approached and why. Talk about how they should manage a situation where a stranger attempts to engage them in conversation online. Also guide them in how much information they should be revealing about themselves online in general and the dangers of revealing too much.

Teach your child about using public transportation, safely. For their first experience using public transportation, you should travel with them and stay near your child, but allow them to travel alone — for example, your child would pay for their bus ticket and sit alone, but mom or dad would sit nearby. This way you can keep a close eye on your child and intervene should assistance be needed. The next experience could involve them traveling with a friend. Be sure to engage in many role-plays for this situation as well. Discuss what they could do in certain “emergency” situations if they’re using public transportation. For instance, what should they do if they become separated from a friend with whom they’re traveling? What if they lose their cell phone? What if someone tries to rob them? The role-plays will help them be prepared for the worst circumstances.

Justin Lavelle
Chief Communications Officer, BeenVerified.com
BeenVerified.com is a source of online background checks and contact information. It allows individuals to quickly find more information about people, phone numbers, email addresses, property records, and criminal records. The company helps people discover, understand, and use public data in their everyday lives in order to make better decisions for themselves and their families.


Passwords: Having a password is a great idea for your kids. If someone comes up to them and says something to the effect of “Your mom told me to pick you up and take you to her,” your child will respond with “what’s the password?” If the unknown person does not know the password, you should instruct your child to run away, tell a trusted adult, and/or make a scene to attract attention.

Attempted abduction: Often, when kids are put in a situation where they’re not sure what to do, they posture or freeze. This is a critical aspect of attempted abductions. One way to help kids mitigate attempted abductions is to instruct them to yell, scream, bite, and scratch the abductor. This will cause a scene and hopefully elicit an intervention. Another way to mitigate abductions is to always know where and who your child is with. We don’t let our child go to any one’s house unless we (the parents) have a close relationship with the parents and have a full understanding of the situation. Accidents happen, and it’s essential to know these details in case something goes wrong.

Traveling: While being a helicopter parent can be safer, we must also teach kids to be independent rather than sheltering them excessively. There are times when they’ll be completely out of our control. An example would be field trips, business trips, and babysitting. Teaching your children to look out for and take care of each other is crucial. Even small children can identify something normal and abnormal. They may not be able to articulate why, but they have a great “spidey sense” built in. We can teach them the principles behind the color codes and OODA loop (observe-orient-decide-act) and remind them to have their head on a swivel. You can also make this a fun game. My son and I used to play “head on a swivel” when we were driving to and from the grocery store, school, or church. I would randomly say, “head on a swivel!” and my son would assess his environment and tell me everything he saw. This is a great tool use to get them in the habit of taking a periodic assessment of their surroundings.

Nila Rhoades
www.milspecmom.com

More From Issue 31

Don’t miss essential survival insights—sign up for Recoil Offgrid's free newsletter today!

Read articles from the next issue of Recoil Offgrid: Issue 32

Read articles from the previous issue of Recoil Offgrid: Issue 30

Check out our other publications on the web: Recoil | Gun Digest | Blade | RecoilTV | RECOILtv (YouTube)

Editor's Note: This article has been modified from its original version for the web.