Statistics of Survival: Analyzing 100 Hikers’ Survival Stories

It's often said that those who cannot learn from history are condemned to repeat it. This statement isn't just applicable to shortsighted warlords who choose to invade Russia during the winter — it also holds true when we discuss individual survival.

Studying the mistakes and misfortunes of hikers, backpackers, campers, and hunters who ended up in survival situations can often help us avoid them entirely. Even if we end up in a disastrous circumstance through no fault of our own, knowing survival statistics can guide us to make wise choices and increase our odds of making it home safely.

Survival statistics lost hiker shtf prepping emergency rescue 2 signal helicopter plane

A recent article on SmokyMountains.com titled “Safe & Found” compiled and analyzed the survival stories of more than 100 individuals. These experiences ranged from 1 to 90 days in duration, and occurred throughout the United States and Canada.

First, the article delves into how these hikers got lost or stranded:

Survival statistics lost hiker shtf prepping emergency rescue 5

The majority left the established trail and were unable to get their bearings, as was the case in the story of Sajean Geer. Weather was the second-most likely cause of trouble, so if you're able to stick to the path and watch for incoming storms, your odds of survival will increase substantially.

Survival statistics lost hiker shtf prepping emergency rescue 1 dog rain weather

Several individuals said they huddled together with their pets to stay warm.

Next, the article explains how each person found warmth, shelter, water, and food, assuming they were able to do so.

Warmth — 12% relied on clothing alone, 10% built a fire, and 10% used camping gear they had on hand. Other heat sources included body heat from other people or pets, physical exercise, or digging in to shelter from the elements.

Survival statistics lost hiker shtf prepping emergency rescue 9

Shelter — 11% of survivors used camping gear, while 9% found existing shelter in the form of caves or structures. The remainder improvised shelter from trees, rocks, snow banks, or the ground itself.

Survival statistics lost hiker shtf prepping emergency rescue 6

Water — Unsurprisingly, most were able to find natural water sources, either as large bodies of water or small deposits of snow or rainwater. Those who weren't so lucky tried to make existing supplies last as long as possible, or returned to safety fast enough that they didn't need a water source to survive. A handful drank their own urine — as we've said many times before, this is never a good idea, yet the harmful myth persists.

Survival statistics lost hiker shtf prepping emergency rescue 7

Food — Aside from those who relied on existing food supplies or their bodies' fat reserves to sustain them, this graph is pretty much an upside-down food chain. Finding berries, fruit, or other edible plants is usually possible, while hunting for a consistent source of calories is much more difficult.

Survival statistics lost hiker shtf prepping emergency rescue 8

The SmokyMountains article also discusses how these survivors returned to safety. While most experts agree that it's best to stay put if there's a reasonable likelihood of being found, a majority of the study's subjects kept moving. More than three quarters were rescued — only 23% managed to get out on their own.

Survival statistics lost hiker shtf prepping emergency rescue 10

Finally, SmokyMountains asked survival instructor Andrew Herrington to share his overall recommendations and advice on each of the above categories. He extols the importance of preparedness before any adventure, and shares numerous valuable tips that are simple enough for anyone to remember. To read Herrington's input and browse a table of the data from all 103 survivors, go to SmokyMountains.com/safe-and-found.


Pocket Preps: Knife Sharpener

A sharp knife is a safe knife — this saying may sound counterintuitive to some, but anyone who has ever struggled with a dull knife knows just how dangerous it can be. A razor-sharp blade glides effortlessly through materials with surgical precision, while a chipped and rolled edge tends to wander and snag with every slice. At best, this makes using your knife frustrating and tedious; at worst, it can lead to serious injury as you apply more force in an effort to persuade the tool to do its job. A pocket-sized knife sharpener easily makes an every day carry knife more safe.

Choosing a knife with appropriate edge geometry, durable steel, and properly applied heat treat will go a long way in keeping its edge sharp. It’s also advisable to avoid abusing your knife by cutting against abrasive surfaces, pounding it through hard materials, or using it as a prybar. However, even if you follow every one of these best practices, all knives are bound to require maintenance eventually. This is where sharpeners come in.

hex-grid-blk

You may already have a sharpening system in your kitchen, workshop, or garage, but these tools are generally far too large and elaborate to take into the field. For the times when you may not have access to your home sharpening system — whether that’s during a normal workday or a long-term survival situation — it’s wise to have a portable knife sharpener in your pocket or backpack. These compact tools can keep your knife cutting smoothly and safely, no matter where you are.

We collected seven pocket-sized knife sharpeners and evaluated each tool’s effectiveness on a variety of blades. Read on to see if one of them can help your favorite cutting implements stay sharp.

CRKT Knife Maintenance Tool

OFGP-190400-POCKET-01.jpg

Sharpening Materials
Tungsten carbide & ceramic

Dimensions
2.8 by 1.2 by 0.6 inches

Weight
2.2 ounces

MSRP
$30

URL
www.crkt.com

OFGP-190400-POCKET-02.jpg

Notes
As indicated by its name, the Knife Maintenance Tool is more than just a knife sharpener. It was designed by mechanical engineer Tom Stokes for CRKT, and features two draw-through notches for edge repair and maintenance: a tungsten carbide sharpener and a ceramic honing surface. CRKT doesn’t advertise the angle of these notches, but they appear to be about 20 degrees. It also includes two flip-out bit drivers with T6 and T8 Torx bits — these are handy for adjusting a knife’s pivot or tightening clip screws. The bits are removable and retained magnetically. The top of the tool has a bottle opener, flat screwdriver/pry bar, and key ring or lanyard hole.

Pros:

  • Perfectly sized for a keychain accessory
  • The bit drivers are very handy, but …

Cons:

  • … the included hex bits are 0.9-inch long; standard bits are 1 inch. Replacement bits fit extremely tight unless filed down.
  • Draw-through carbide sharpeners don’t produce the cleanest edge and can be destructive if used excessively.

DMT EDC-Sharp

OFGP-190400-POCKET-03.jpg

Sharpening Materials
600-grit diamond

Dimensions
5.5 by 1.2 by 0.2 inches

Weight
3.6 ounces

MSRP
$22

URL
www.dmtsharp.com

OFGP-190400-POCKET-04.jpg

Notes
New from DMT, the EDC-Sharp is a multipurpose pocket tool with an integrated diamond sharpening surface. It’s constructed from 1/8-inch-thick 5CR steel and features a 5-inch ruler on one side, a metric ruler on the other side, a wire stripper/cutter, bottle opener, two flat screwdrivers, and a small file edge. A cutaway in the center serves as a 7mm, 8mm, and 10mm wrench. A lanyard hole is also present, although this tool’s size would be excessive for a keychain item. The sharpening plate is 1 by 2.7 inches and has a fine texture suitable for touching up slightly dull blades. This diamond sharpener is made in the USA; the rest of the tool is made in China.

Pros:

  • Recessed holes in the knife sharpener keep its surface clear and maintain abrasive performance
  • All-metal construction feels solid

Cons:

  • We like the multi-tool concept, but wish there was slightly more focus on the primary function. Adding features doesn’t always add value.
  • Flat surface isn’t ideal for recurve blades

Lansky Blademedic

OFGP-190400-POCKET-05.jpg

Sharpening Materials
Tungsten carbide, 600-grit diamond, 1,000-grit ceramic

Dimensions
4 by 1.2 by 0.5 inches

Weight
3.5 ounces

MSRP
$16

URL
www.lansky.com

OFGP-190400-POCKET-06.jpg

Notes
One of the most popular portable knife sharpeners on the market, the Blademedic fits easily on a keychain and includes four sharpening features in a metal case. The carbide and ceramic draw-through notches are set to 22.5 degrees on each side; instructions recommend three or four strokes through each to restore an edge. An additional ceramic section fits into serrations. Lastly, the tapered diamond rod can be used on serrations or for general sharpening. We’d favor this rod over the carbide notch as a starting point for sharpening, since it’s much gentler. It’s held in the open or closed position by strong magnets inside.

Pros:

  • Good variety of tools in a small package
  • Magnets ensure the diamond rod stays put while you work and doesn’t rattle loose in transit

Cons:

  • Surprisingly heavy for its size
  • Be careful how often you use the carbide knife sharpener, since it aggressively removes steel.

Mora Diamond Sharpener S

Sharpening Material
600-grit diamond

Dimensions
4.1 by 0.4 by 0.3 inches

Weight
0.4 ounces

MSRP
$25

URL
www.moraknivusa.com

OFGP-190400-POCKET-08.jpg

Notes
Contained in a diminutive pen-shaped case, the Diamond Sharpener S can be carried almost anywhere. It features a small diamond rod with one flat side and a groove for fish hook sharpening. After close examination, we spotted something strange. The packaging says “Made in Mora Sweden,” but the pocket clip says “EZE-LAP Carson City, Nevada.” After some Googling, we found that this knife sharpener appears to be identical to an EZE-LAP Model S sharpener except for a Morakniv logo. Private-labeling is nothing new, but the EZE-LAP tool retails for $7. You could buy three of them for the price of one Mora-branded sharpener, and still have money left over.

Pros:

  • Extremely small and lightweight, fits anywhere a pen would
  • Grooved shaft can be used to sharpen fish hooks

Cons:

  • Mora products usually offer excellent value, but not this time. You’d be better off buying an EZE-LAP Model S … or three.

Spyderco Golden Stone

OFGP-190400-POCKET-09.jpg

Sharpening Material
Fine ceramic (approx. 1,200 grit)

Dimensions
7.2 by 3 by 0.3 inches

Weight
8.8 ounces including pouch

MSRP
$100

URL
www.spyderco.com

OFGP-190400-POCKET-10.jpg

Notes
To use the Golden Stone, grab the narrow end with one hand and hold it upright. Then place the scalloped end of the stone against a flat surface and tilt it to the left or right. With your other hand, hold your knife blade vertical and draw it straight down along the edge of the stone. This creates an even 20-degree sharpening angle on either side. There’s also a groove for sharpening fish hooks, as well as radiused and flat surfaces that can sharpen virtually any other blade. The included suede leather case doubles as a non-slip tabletop pad. We noticed that Spyderco’s site lists this product (#308F) as a 1×5-inch stone, but it’s substantially larger than that.

Pros:

  • Easy to use while maintaining a consistent angle
  • Leather case doubles as a strop to remove burrs
  • Made in the USA

Cons:

  • Must be used on a bench or other flat surface
  • Ever dropped a plate and watched it explode into fragments? Dropping this slick ceramic stone would be equally disastrous.

Victorinox Dual Knife Sharpener

OFGP-190400-POCKET-11.jpg

Sharpening Material
Medium stone, fine ceramic

Dimensions
5.6 by 0.4 by 0.7 inches

Weight
1 ounce

MSRP
$14

URL
www.swissarmy.com

OFGP-190400-POCKET-12.jpg

Notes
Victorinox is known around the world for its multi-function Swiss Army knives, but the European company has a wide range of other products to offer, including a few different knife sharpeners. As you probably guessed from its name, the Dual-Knife Sharpener has two functions. An oval 3.2-inch stone serves to grind away larger edge imperfections; its narrower sides can be used on serrations, and its grooves can sharpen fish hooks. Opposite the stone, there’s a V-shaped ceramic notch for refining a blade’s edge. These items are packaged in a tough black polymer case with the Victorinox logo emblazoned on a bright red pocket clip. Made in Germany.

Pros:

  • Oval stone makes it easy to sharpen a variety of blade and serration types
  • Simple and durable case fits easily into a pocket

Cons:

  • Using the ceramic hone necessitates working with the blade pointed down at the support hand. Most other tools avoid this by turning the notch 90 degrees.

Work Sharp Guided Field Sharpener

OFGP-190400-POCKET-13.jpg

Sharpening Material
220-grit diamond surface, 600-grit diamond surface, coarse and fine ceramic rods, leather strop

Dimensions
6.8 by 1.7 by 1 inches

Weight
4.7 ounces

MSRP
$35

URL
www.worksharptools.com

OFGP-190400-POCKET-14.jpg

Notes
This compact tool from Work Sharp offers an impressive array of five stages. First, the coarse and fine diamond surfaces are used to remove large imperfections and restore the edge. Next, turn the red knob to “C” or “F” to reveal coarse and fine ceramic honing surfaces. Each of these stages includes a 20-degree angle guide. Lastly, run the edge against the leather strop on the side to polish away burrs with the embedded micro-abrasive compound. There’s also a ceramic rod for small serrations, a fish hook sharpening groove, and — after removing the diamond plates from their magnetic retainers — an arrow broadhead wrench and a small storage compartment for hex wrenches or other items.

Pros:

  • Five-stage system can quickly revitalize even the dullest blades
  • 20-degree guides help maintain edge geometry

Cons:

  • Coarse plate is highly abrasive and should be used sparingly
  • Thumb grip could be more comfortable

Web Exclusive: More Sharpeners

For our thoughts on three more knife sharpeners that didn't make it into this guide, refer to our web-exclusive article, Review: 3 EDC Knife Sharpeners.

More From Issue 30

Don’t miss essential survival insights—sign up for Recoil Offgrid's free newsletter today!

Read articles from the next issue of Recoil Offgrid: Issue 31

Read articles from the previous issue of Recoil Offgrid: Issue 29

Check out our other publications on the web: Recoil | Gun Digest | Blade | RecoilTV | RECOILtv (YouTube)

Editor's Note: This article has been modified from its original version for the web.


Roof Tap: How to Make & Install a Rain Barrel

Illustrations by Ced Nocon

This article originally appeared in Issue 3 of our magazine.

City dwellers are well accustomed to — and largely spoiled by — the conveniences and wonders of modern plumbing. A twist of the wrist unleashes a never-ending flow of the wet stuff for drinking, cooking, bathing, cleaning, and more. The benefits and convenience of having large quantities of fresh water available to you at an instant are obvious. However, in an environment where clean water may not flow freely from the tap, those benefits become a necessary luxury and rare commodity.

DIY rain barrel water collection system gutter emergency storm survival prepper 2

On January 9, 2014, a massive chemical spill near a water treatment facility in West Virginia affected roughly 300,000 people spanning nine counties. The root of that spill came from a single source, a company that produces chemicals used in the mining, steel, and cement industries. The chemical spilled was toxic enough that warnings went out to not use the contaminated water even after it was boiled.

Government officials immediately ruled area tap water off limits, bottled drinking water disappeared from store shelves just a couple of hours later, and the National Guard was called upon to truck in fresh water. Although the water was ruled safe to use about a week later, the effects of a regional water disruption were clearly felt. Considering the spill was an accident that originated from a single source, the consequences of a more widespread event would be more devastating. Surely the effects of a deliberate attack or large-scale environmental disaster on water resources in multiple areas would cause much more strain on clean water supplies.

This is where being prepared for the unimaginable comes into play. Unless you’re blessed with a sixth sense, you don’t have a crystal ball that tells you what calamities will fall upon you. You do, however, have the benefit of foresight and the ability to be proactive. There’s no question that having extra water stored for a rainy day (bad pun intended) can be a lifesaver. Sure, storing water in bottles in your closet or garage are viable options, but if you want to store water in real quantities (like 55 gallons at a time) you’ll need a viable alternative.

Rainwater Diverter Kits

DIY rain barrel water collection system gutter emergency storm survival prepper 10

Our gardening friends have long discovered the easy answer to storing respectable quantities of water — best of all, the water is free. Rain barrels can be set up to trap and hold rain water. The water comes from rain collected on your home’s rooftop and funneled directly into storage barrels. Garden aficionados store rainwater during the rainy months and use this water to keep their gardens watered — and their water bills down — during drier seasons. Adapting this concept to fit the survival mindset is simple enough.

Rain barrel kits are readily available at hardware and gardening supply stores. The methods of installation for our purposes are the same, with a couple of exceptions. While gardening water doesn’t need to be potable, we need to take into consideration the drinkability of the water for survival purposes. Instead of using any old barrel, we want to use food-grade barrels, which can be found at restaurant supply stores and at various online retailers. Make sure you get one where the top can be removed so that it is easier to work on and clean.

DIY rain barrel water collection system gutter emergency storm survival prepper 12

Most rain barrel kits come with filters that take out large debris, but we want to add finer filters or mesh to further keep debris out. After all, the water is rolling down your roof into your rain gutter and finally into your barrel. If the water is being used to wash up or to do the dishes with, you should be good to go. If you intend on drinking or cooking with it, you’ll want a separate water filtration system too. Boiling works, or you can get fancier with the many water filtration methods and gizmos on the market.

We took a look at the many rain barrel kits on the market and decided to go with a unit by Fiskars. We like how the Fiskars DiverterPro Rainwater Diverter fits different-sized rain gutters and especially liked the built-in filter that is easy to view, access, and clean. The filter’s slats are pretty fine so we didn’t need to enhance it any further. Also, when the rain barrel fills up, the water diverts back into the downspout and is directed away from your home as usual.

Fiskars DiverterPro Rainwater Diverter

MSRP
$40

URL
www.fiskars.com

Barrel Preparation

Each kit differs slightly, so make sure you go through the instructions of your chosen kit carefully. Here, we detail the installation of the Fiskars diverter kit. We begin by preparing our food-grade barrel. You can choose a size that best fits your needs; we chose a larger 55-gallon size to maximize the amount of stored water.

DIY rain barrel water collection system gutter emergency storm survival prepper 1

What you’ll need:

  1. Food-grade barrel
  2. Water spigot for 3⁄4-inch opening
  3. Trap adapter with nut
  4. Teflon tape
  5. Hose connector from Fiskars kit
  6. Caulking
  7. Power drill
  8. 3⁄4-inch spade drill bit

DIY rain barrel water collection system gutter emergency storm survival prepper 3

1. Being mindful of how much room you will need under the spigot to fill a water container such as a pitcher or bottle, use the ¾-inch spade drill bit to drill a hole at the bottom of the barrel for the water spigot. We drill our hole about a foot from the bottom.

DIY rain barrel water collection system gutter emergency storm survival prepper 4

2. Spread caulk around the hole inside and outside of the barrel. Apply Teflon tape to the trap adapter’s threads and attach the spigot to the coupling.

DIY rain barrel water collection system gutter emergency storm survival prepper 5

3. Install the water spigot onto the barrel and secure it on the inside with the trap adapter nut. You may need a wrench to get it on tight enough to avoid water leakage.

DIY rain barrel water collection system gutter emergency storm survival prepper 6

4. Near the top of the barrel, about 2 inches down from the lid, drill another hole for the kit’s hose connector.

DIY rain barrel water collection system gutter emergency storm survival prepper 7

5. Again, spread caulk around the holes inside and out.

DIY rain barrel water collection system gutter emergency storm survival prepper 8

6. Install the hose connector according to the kit’s instructions. (Basically, screw it onto the barrel snugly.)

DIY rain barrel water collection system gutter emergency storm survival prepper 9

7. Your barrel is ready.

Location Prep and Installation

Select a location near your rain gutter’s downspout. Rain barrels are very heavy when full of water, so you want to make sure the area is flat and firm.

What you’ll need:

  • Fiskars DiverterPro Rainwater Diverter Kit
  • Concrete tiles
  • Marker
  • Tape measure
  • Shovel
  • Hacksaw

DIY rain barrel water collection system gutter emergency storm survival prepper 13

8. If the surface isn’t flat, take the time to prepare the ground so that it is.

9. You want the barrel to sit on a firm surface. If the area isn’t, lay down some hard material such as concrete tiles. It’s a good idea to have your barrel slightly higher than ground level to allow gravity to help the water flow out, especially when the water level is low. If you want to put your barrel on a higher surface such as a platform, now’s the time to do it.

DIY rain barrel water collection system gutter emergency storm survival prepper 16

10. Now saw the downspout at the same height as the barrel. (You might want to measure and mark the height before you begin sawing.)

DIY rain barrel water collection system gutter emergency storm survival prepper 17

11. Next, slide the Fiskars diverter up onto the upper piece of the downspout. Measure and cut the lower downspout piece to make room for the diverter. Reattach the remainder of the lower downspout.

DIY rain barrel water collection system gutter emergency storm survival prepper 18

12. Measure, cut, and connect the connector hose to the barrel.

DIY rain barrel water collection system gutter emergency storm survival prepper 19

13. Then connect the hose to the diverter.

DIY rain barrel water collection system gutter emergency storm survival prepper 20

14. You’re done. Now all you need is some rain.

More Storage

DIY rain barrel water collection system gutter emergency storm survival prepper 21

If you want to collect even more rainwater, you can daisy chain barrels together by attaching them together on their opposite sides with connector hoses. When one barrel gets full, it will overflow to the next.


15 Household Survival Items You Already Own

This article originally appeared in Issue 3 of our magazine.

Don’t let the hyped-up doomsday television shows fool you. You don’t need to have a bunker full of olive drab-colored gear crates and radiation-proof water barrels to consider yourself wealthy in the realm of survival gear. To a creative and resourceful survivor, the average broom closet, kitchen pantry, and bathroom cabinets are already loaded with useful items. Many of these everyday household supplies can be repurposed into vital survival gear, home remedies, and emergency equipment, should you ever find yourself in a disaster setting or be faced with an urban survival scenario such as a pandemic. Get ready to look at the ordinary things around you in a whole new way.

In the Closet

Shelves in pantry with cleaners for home close-up

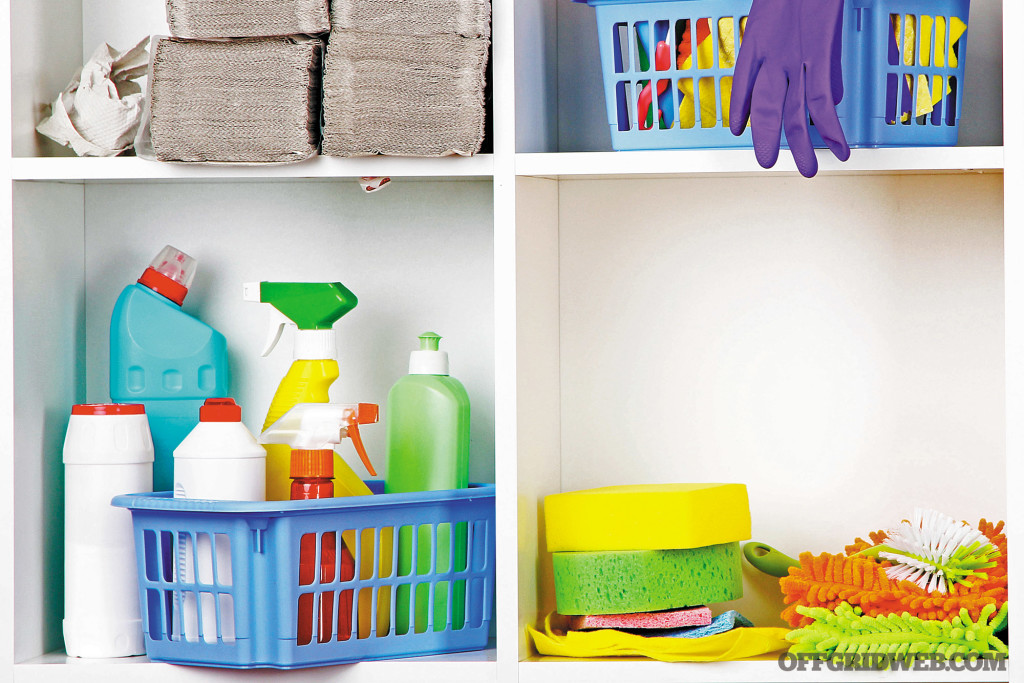
Linen closets, broom closets and hall closets can all contain a treasure trove of good stuff. From towels and bedding, to cleaning chemicals and tools, closets are always a grab bag of the random items that are so handy in everyday life — and even handier in an emergency, pandemic, or disaster.

Bleach

Household survival supplies tools scavenging shtf prepper 19 bleach

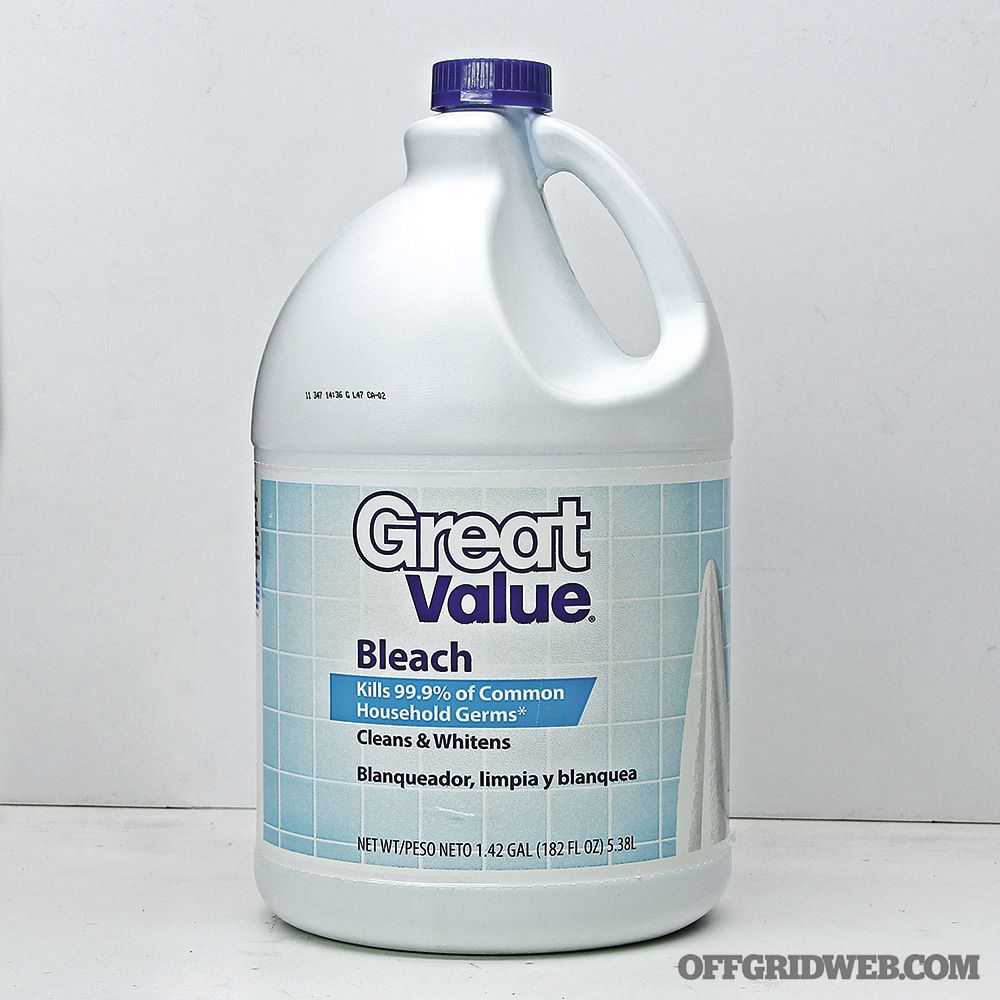
Common, unscented bleach is about 5-percent sodium hypochlorite. This powerful disinfectant can be used for a number of tasks that involve dangerous germs or viruses. The same bleach that you pour into your laundry can also make a disinfecting solution to use on people, pets, surfaces, and supplies in the event of a pandemic or biological terrorist attack. Use 1 tablespoon of bleach added to 1 quart of water to make a wipe or spray for intense disinfection.

Disinfecting drinking water can also be achieved with bleach. Add two drops of bleach to 1 quart of water, if the water is warm and clear. As the water gets colder and/or dirtier, you could increase the bleach from two drops to three or four drops per quart. Shake the water to disperse the bleach and allow it to sit for one hour prior to consumption. By no means will you confuse the concoction with Evian, but it’s better than the alternative.

Towels and Linens

Household survival supplies tools scavenging shtf prepper 8

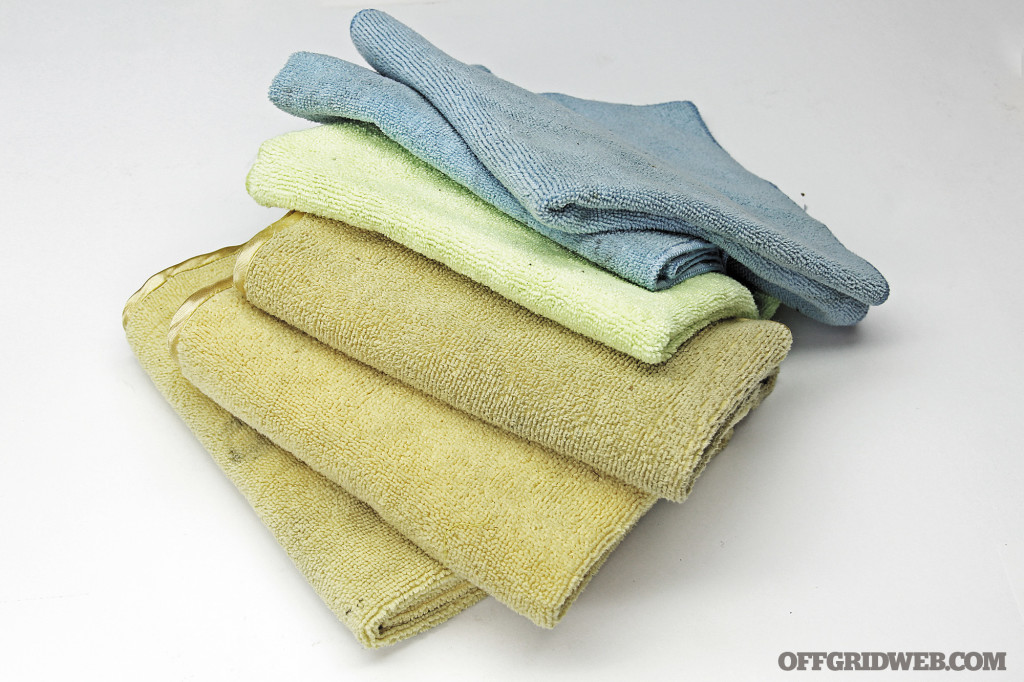
Hand towels, bath towels, beach towels, and bed linens represent an almost unlimited resource to crafty and creative people. This kind of absorbent fabric can be used for wound dressings, insulation, baby blankets, fire starter, and hundreds of other applications. For someone who can sew by hand, the fabric can be cut into pieces and stitched into an infinite number of handy items.
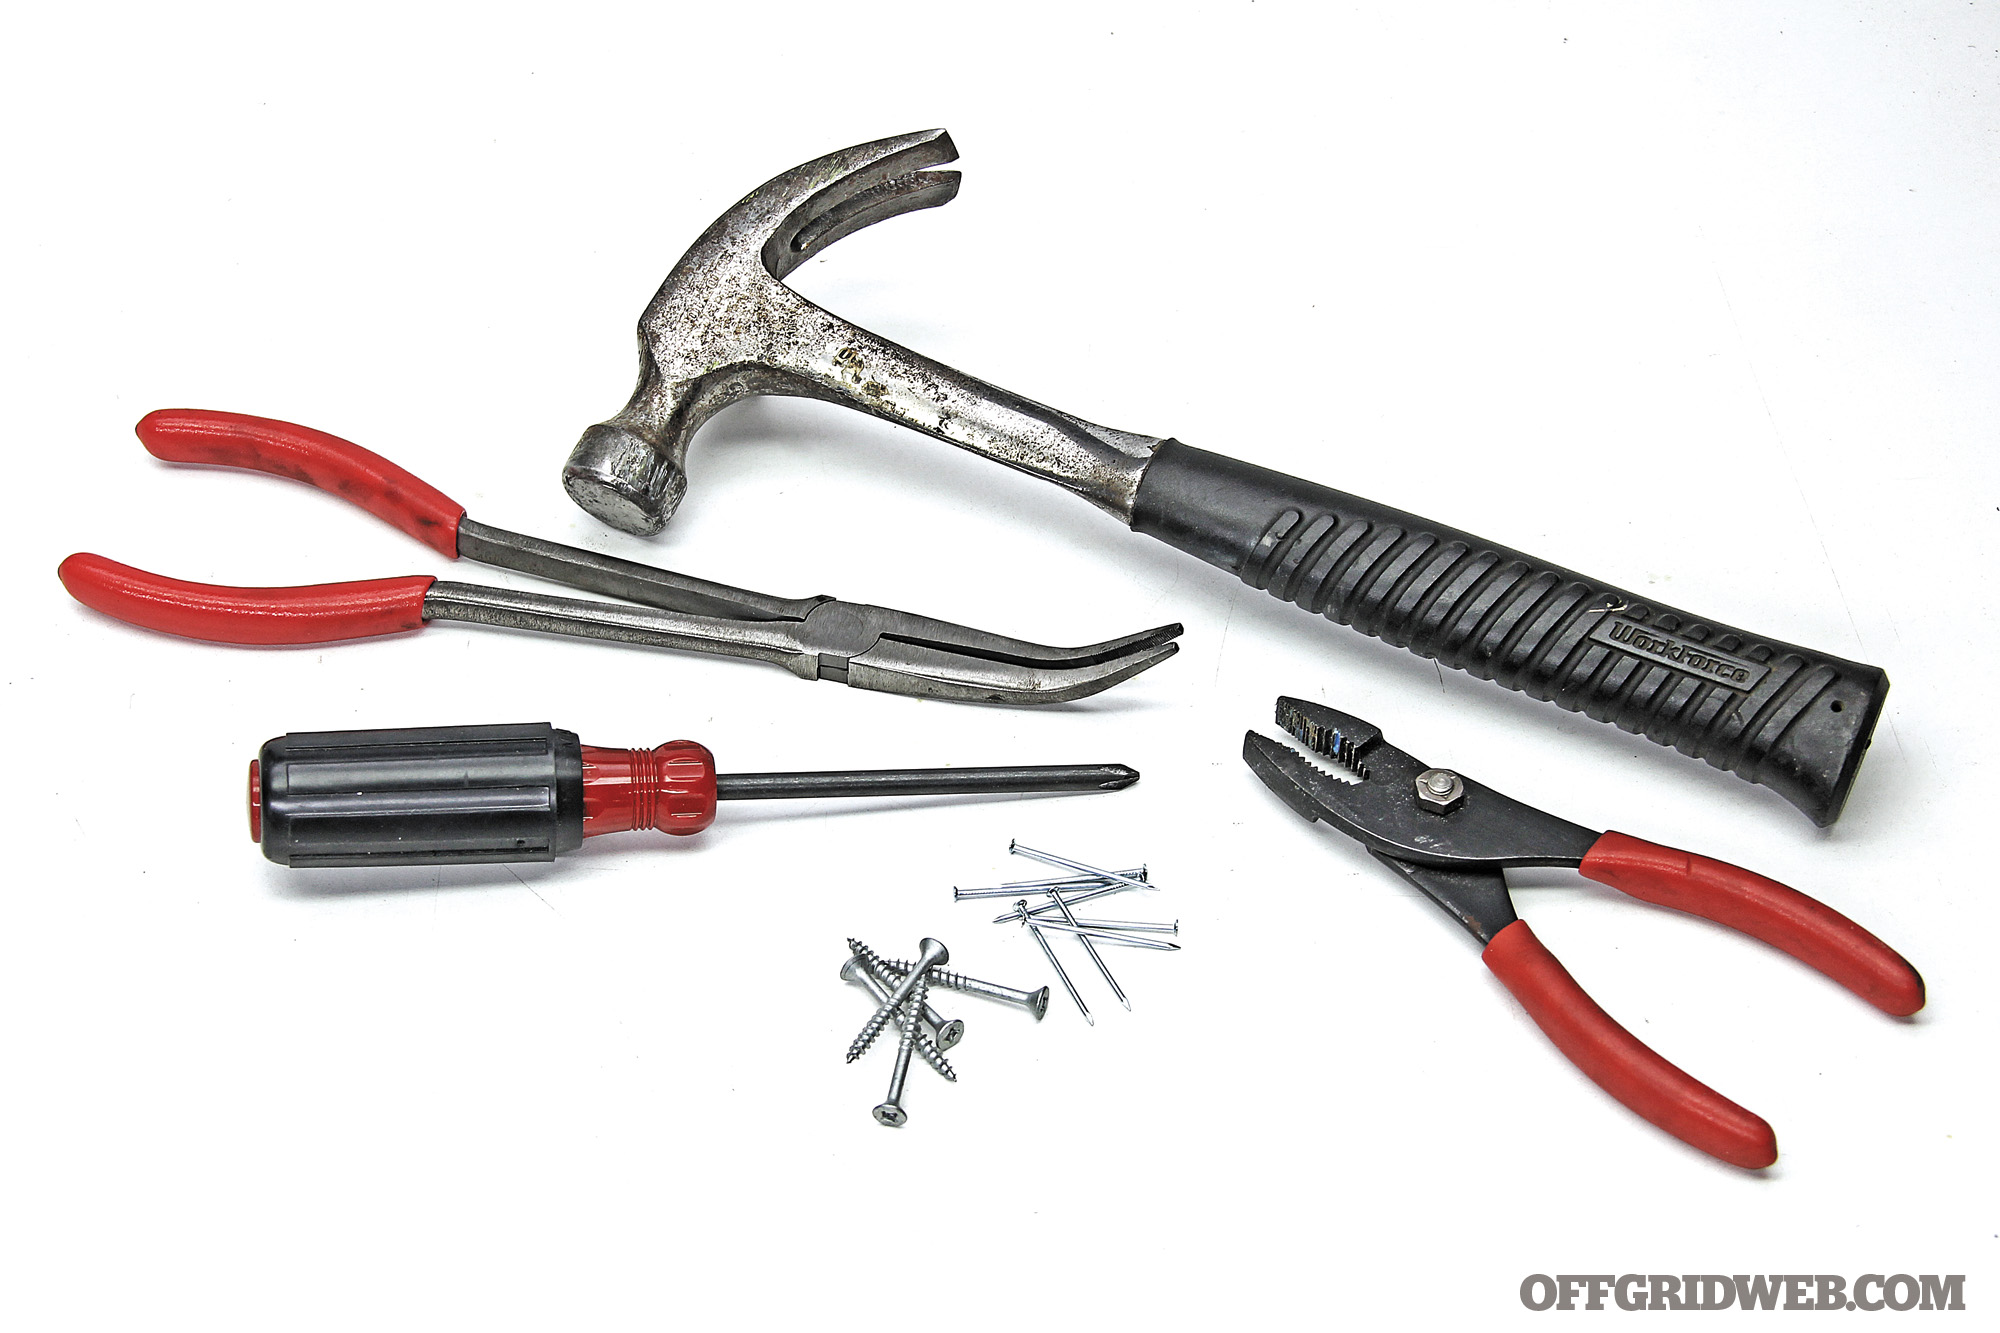
Tools

Household survival supplies tools scavenging shtf prepper 17 tools

Even if your home is small, you probably still have a basic tool kit for simple repairs. If not, then you now have a homework assignment to complete after reading this article. The average toolbox should contain things like hammers, nails, screws, screwdrivers, pliers, and other handtools, which can be important for their intended uses, but they can also be repurposed.

To help with cooking tasks, you can use the pliers to pick up hot metal food containers (like the food cans) by the rim. For defensive applications, use your nails and hammer to nail windows and unnecessary doors shut. And for offensive applications, hammers make serviceable weapons, as do utility knives, screwdrivers, and larger wrenches. Again, sheaths and holsters for these makeshift weapons can be made out of cardboard and duct tape in a pinch.

In the Kitchen

Household survival supplies tools scavenging shtf prepper 2

Water and food are critical priorities in an emergency setting. And while you may logically turn to your kitchen for these life-sustaining commodities, there are plenty of other supplies in the average kitchen just waiting to be reimagined and used.
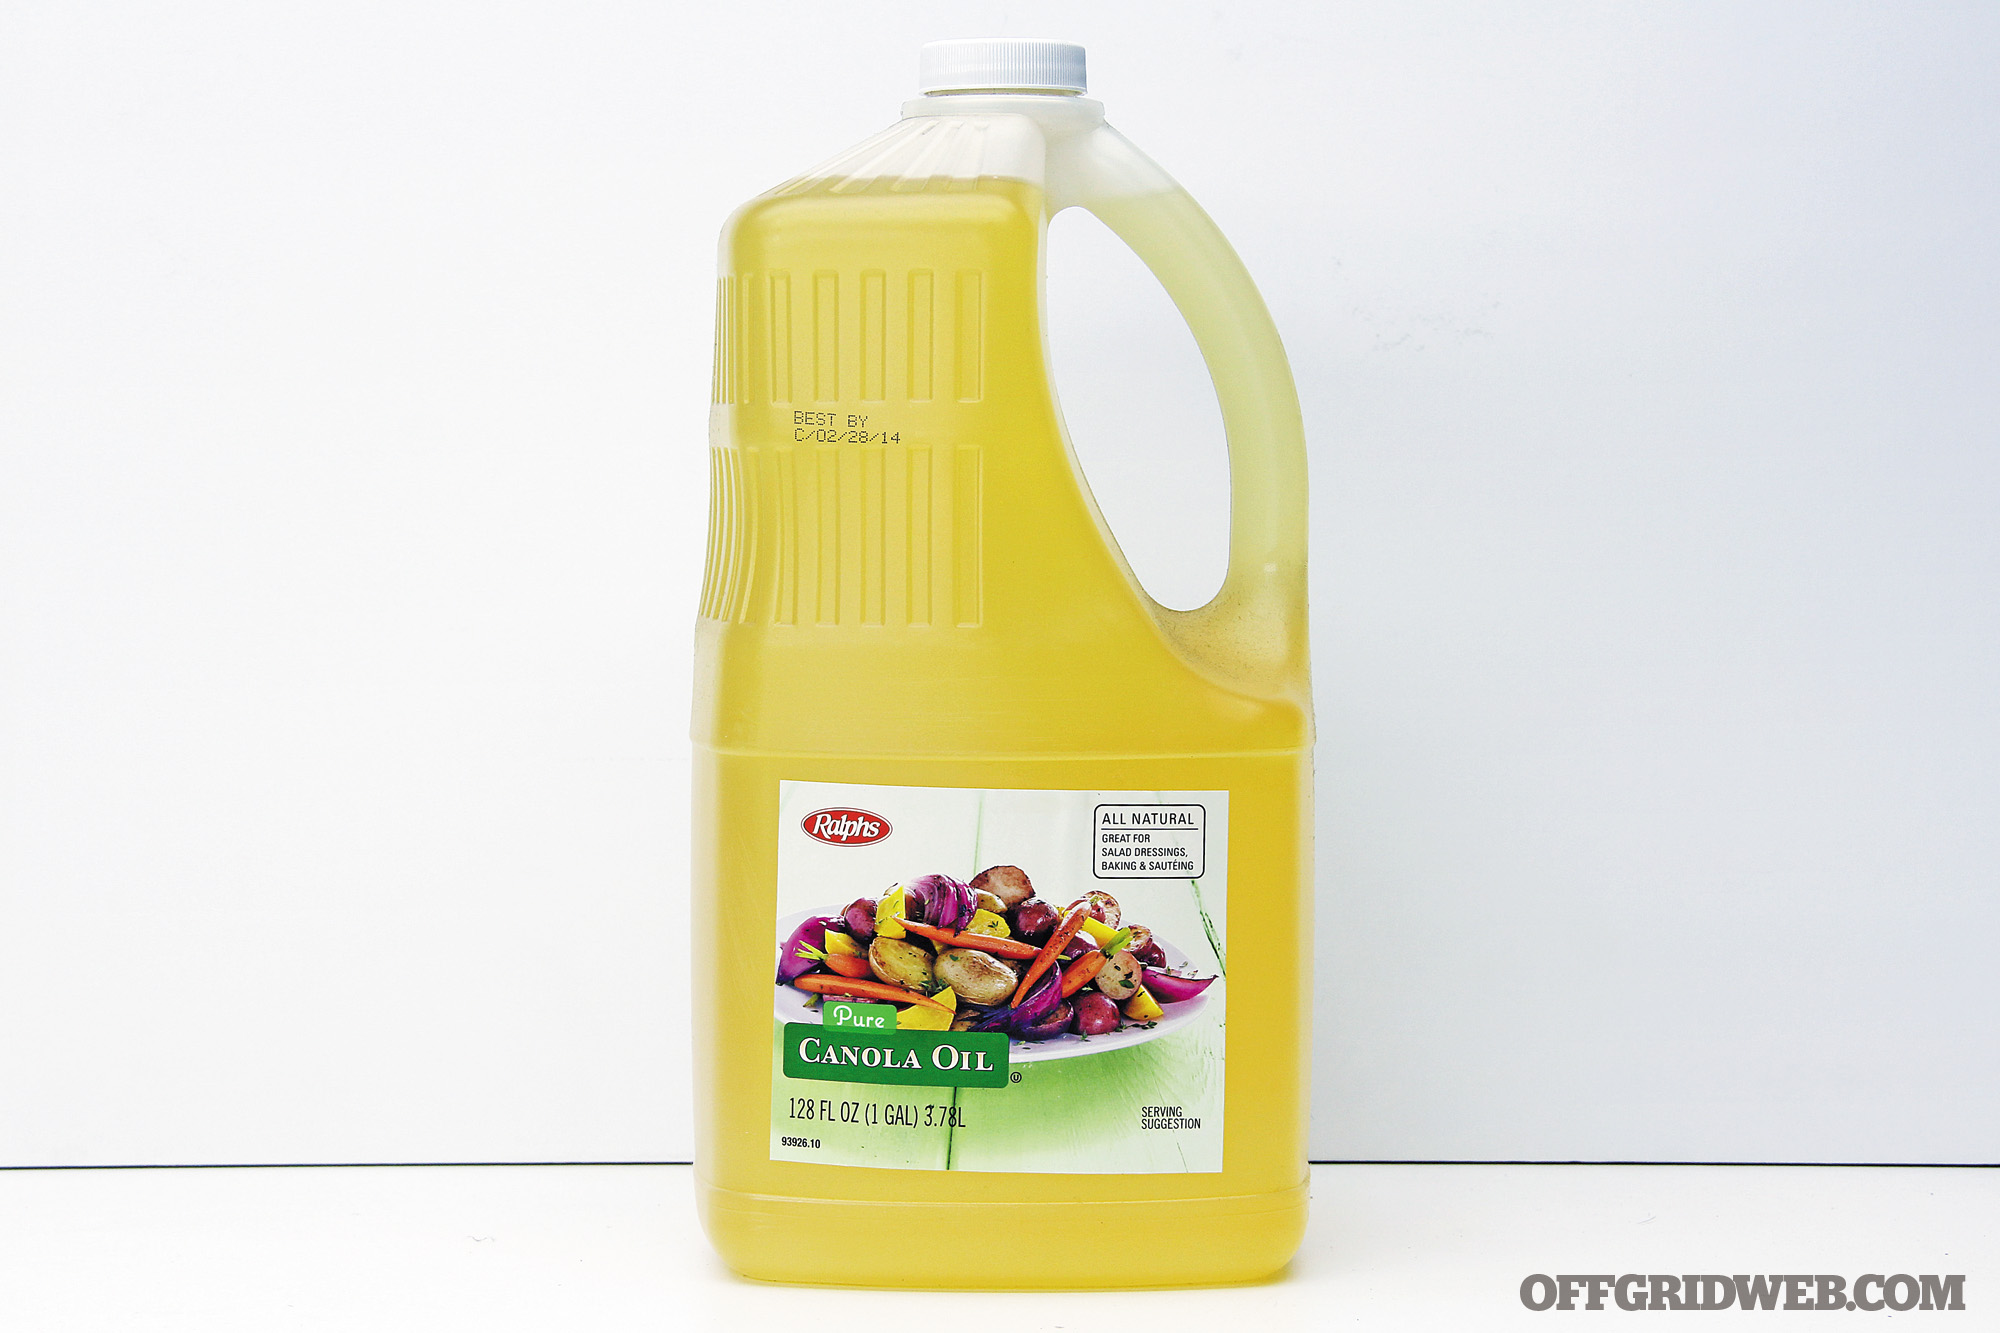
Oil

Household survival supplies tools scavenging shtf prepper 22 oil

With so much emphasis these days on healthy lifestyles, many people focus on low-calorie and low-fat foods in their daily life. But in a survival situation, it’s all about high calories. Cooking oil from your kitchen can be used as intended for cooking and baking, but it can also serve as a high-calorie food supplement. One tablespoon of any food-grade oil contains approximately 120 calories. As your metabolism and workload go up due to the strain of an emergency, your calorie intake should also increase. Add a spoonful or two of oil to any foods to spike up the calories.

Food-grade oils are also useful as a lotion or balm for dry, cracked skin and lips. And that same oil can be used for lighting as the fuel in oil lamps. You can pour liquid forms of oil into traditional kerosene lanterns.

Household survival supplies tools scavenging shtf prepper 20 oil lamp fire candle

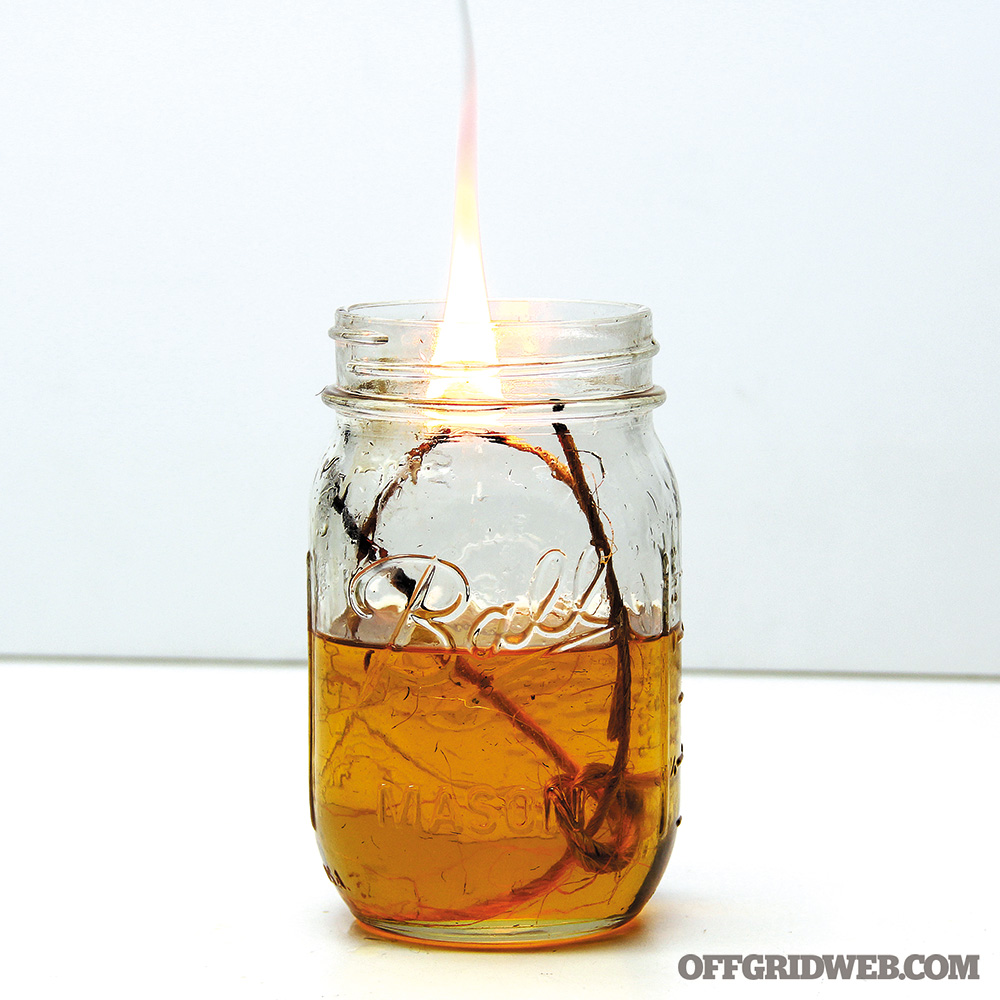
You can also create your own oil lamps from scratch. Using a glass, metal, or ceramic bowl or cup as a fireproof container, add a few ounces of liquid or solid oil (anything from olive oil to Crisco) and insert a fiber wick. Cotton twine or twisted-up paper towels make quick and effective wicks. Once the wick has soaked up some oil, light it with an open flame, and you’ll have a light that performs just like a candle.

Knives

Household survival supplies tools scavenging shtf prepper 24 knife

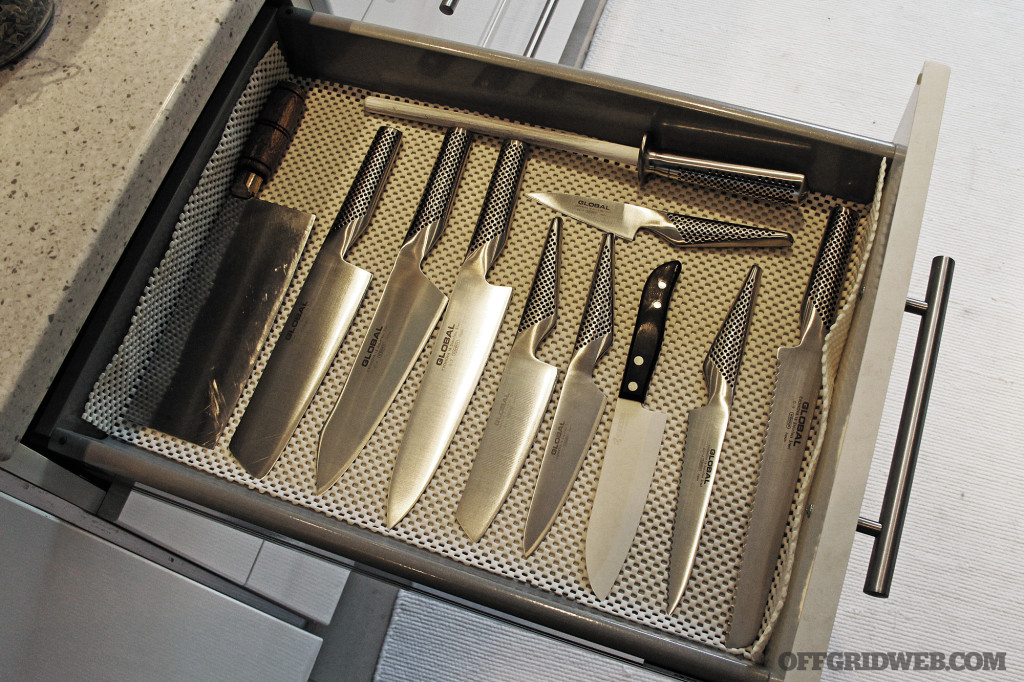
The jangling drawer full of kitchen knives can be easily be used as tools and weapons, should the need arise. Twist a knife, and it becomes a drill. Chop with a cleaver, and it performs like a hatchet. Steak knives and paring knives can be a passable replacement for a pocket knife, after you fit them with an improvised sheath.

Household survival supplies tools scavenging shtf prepper 23 knife

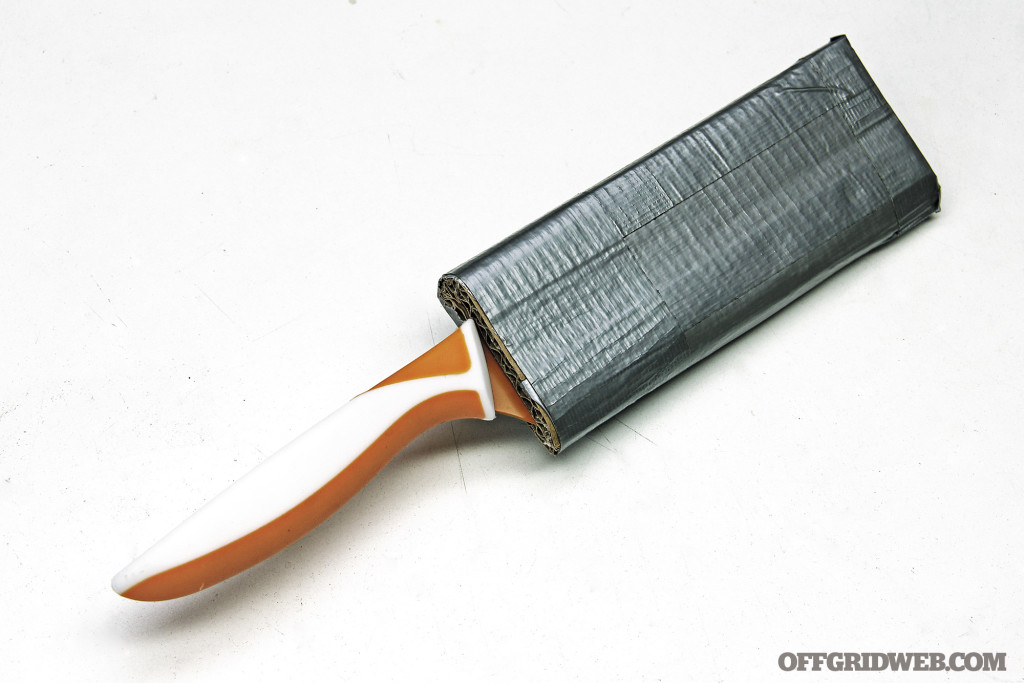
Use two strips of cardboard or plastic, and a generous amount of duct tape, to put these quick and dirty sheaths together. As anyone who’s seen Psycho would know, the bigger knives in your culinary collection could pass for weapons, but they will need to be outfitted with sheaths, similar to the smaller knives.
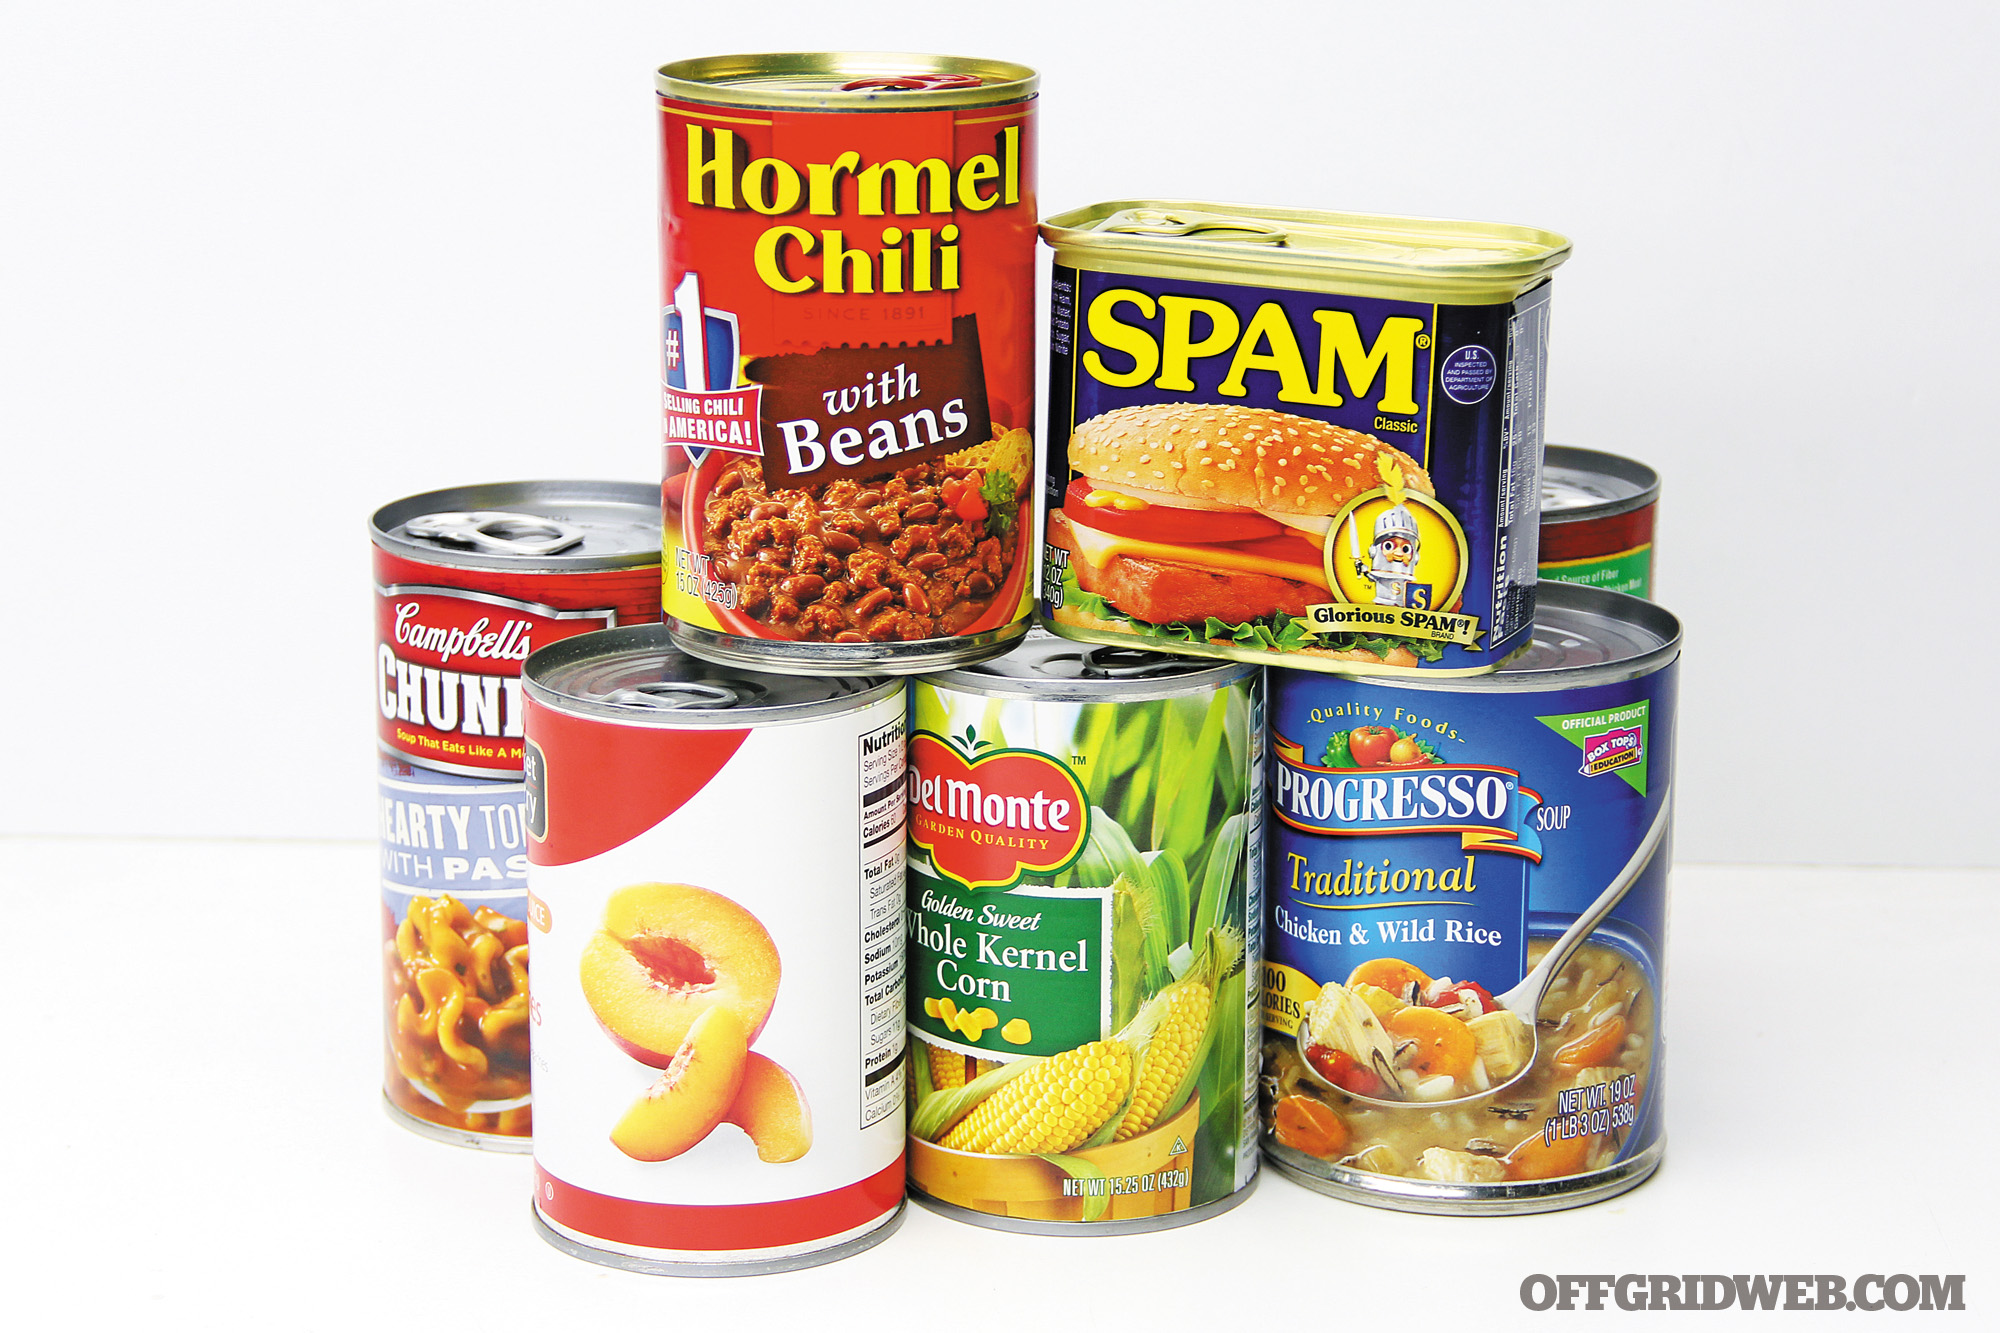
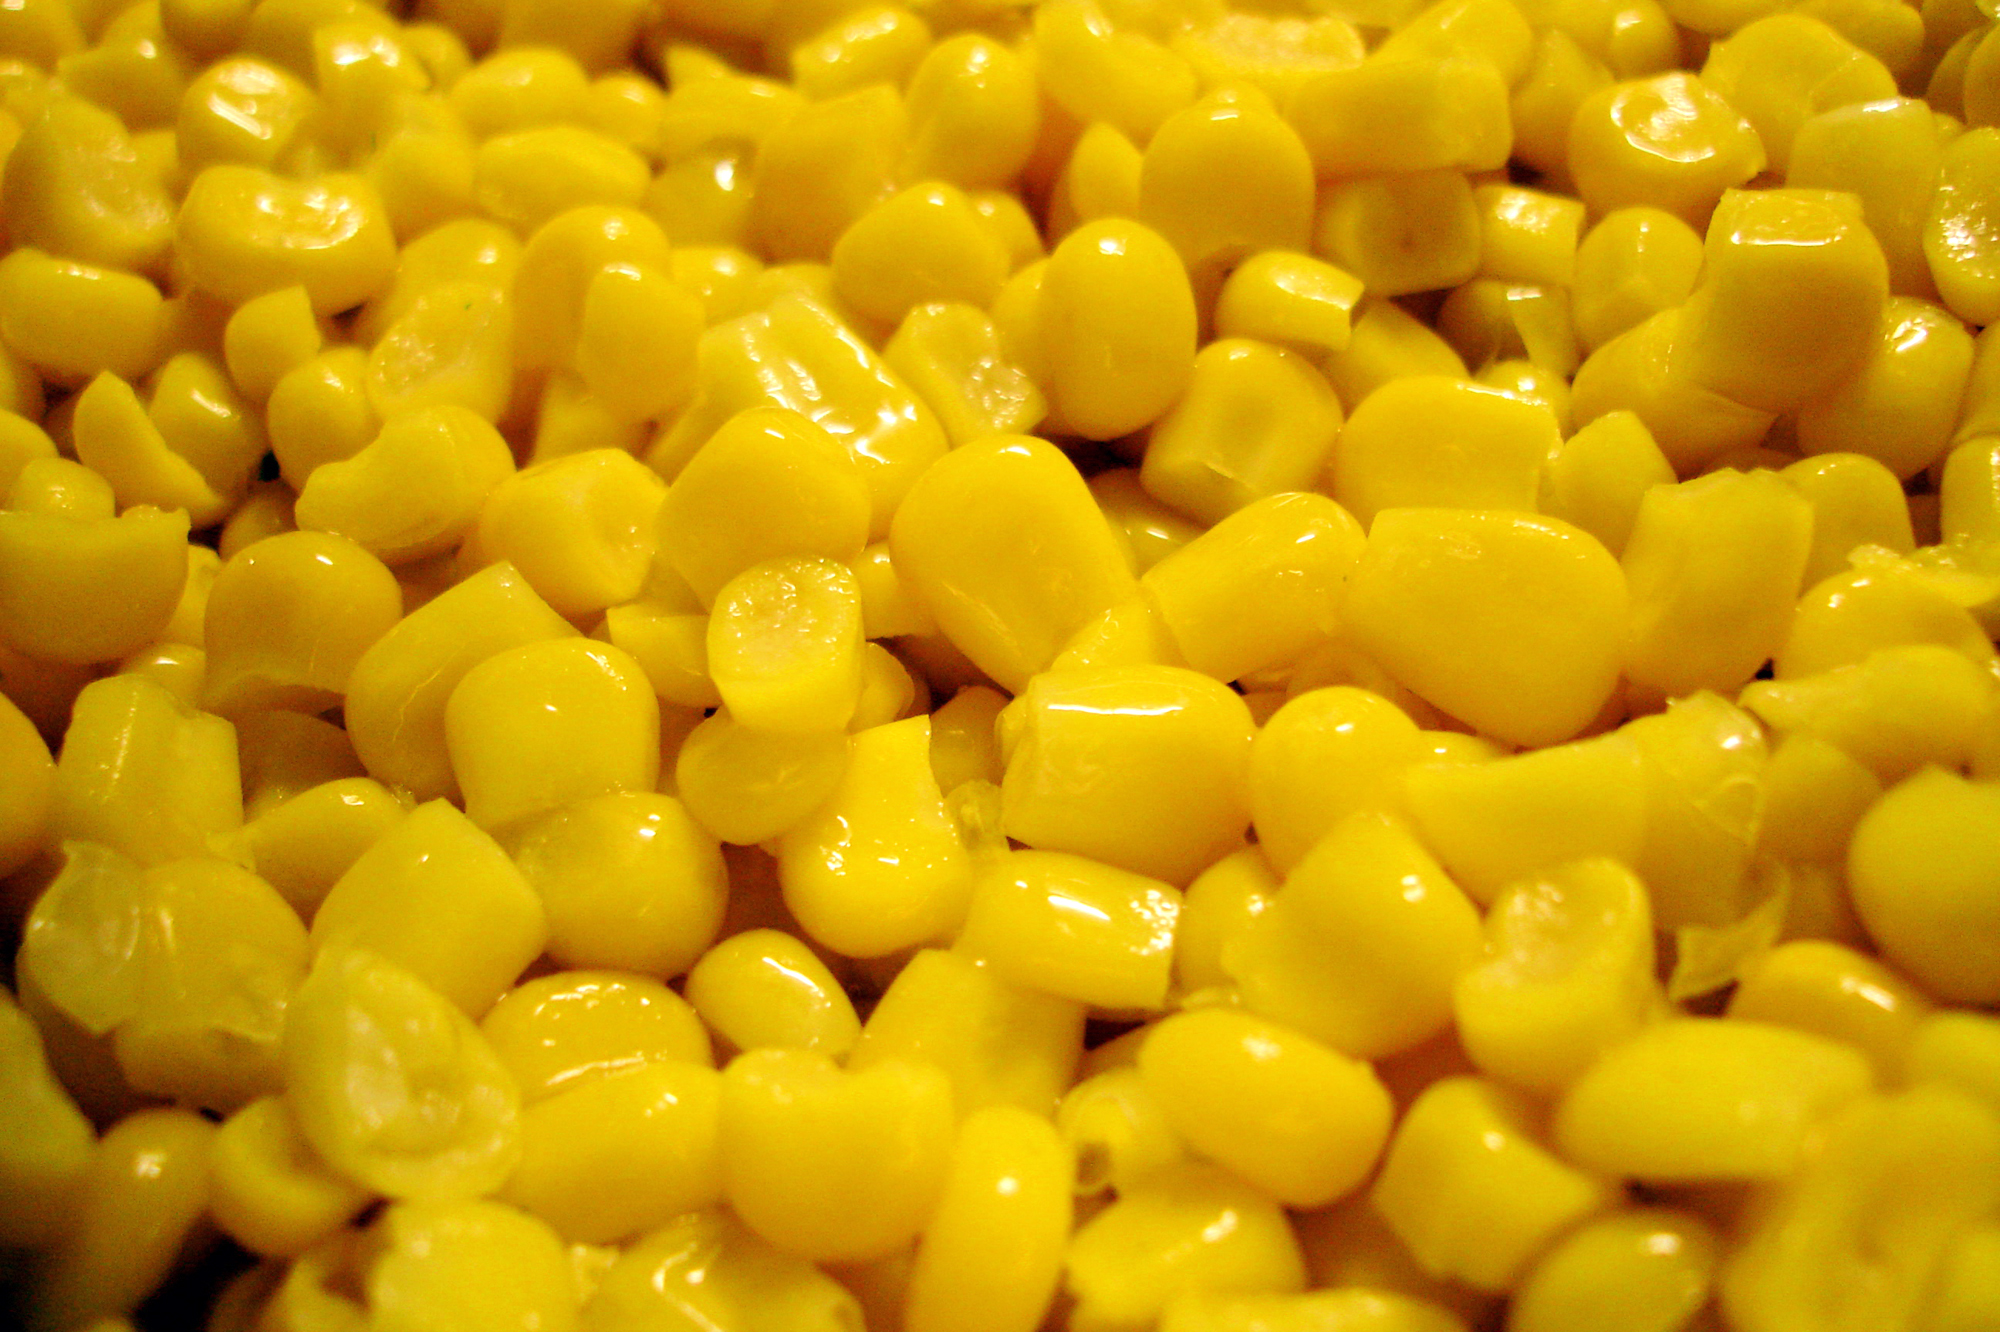
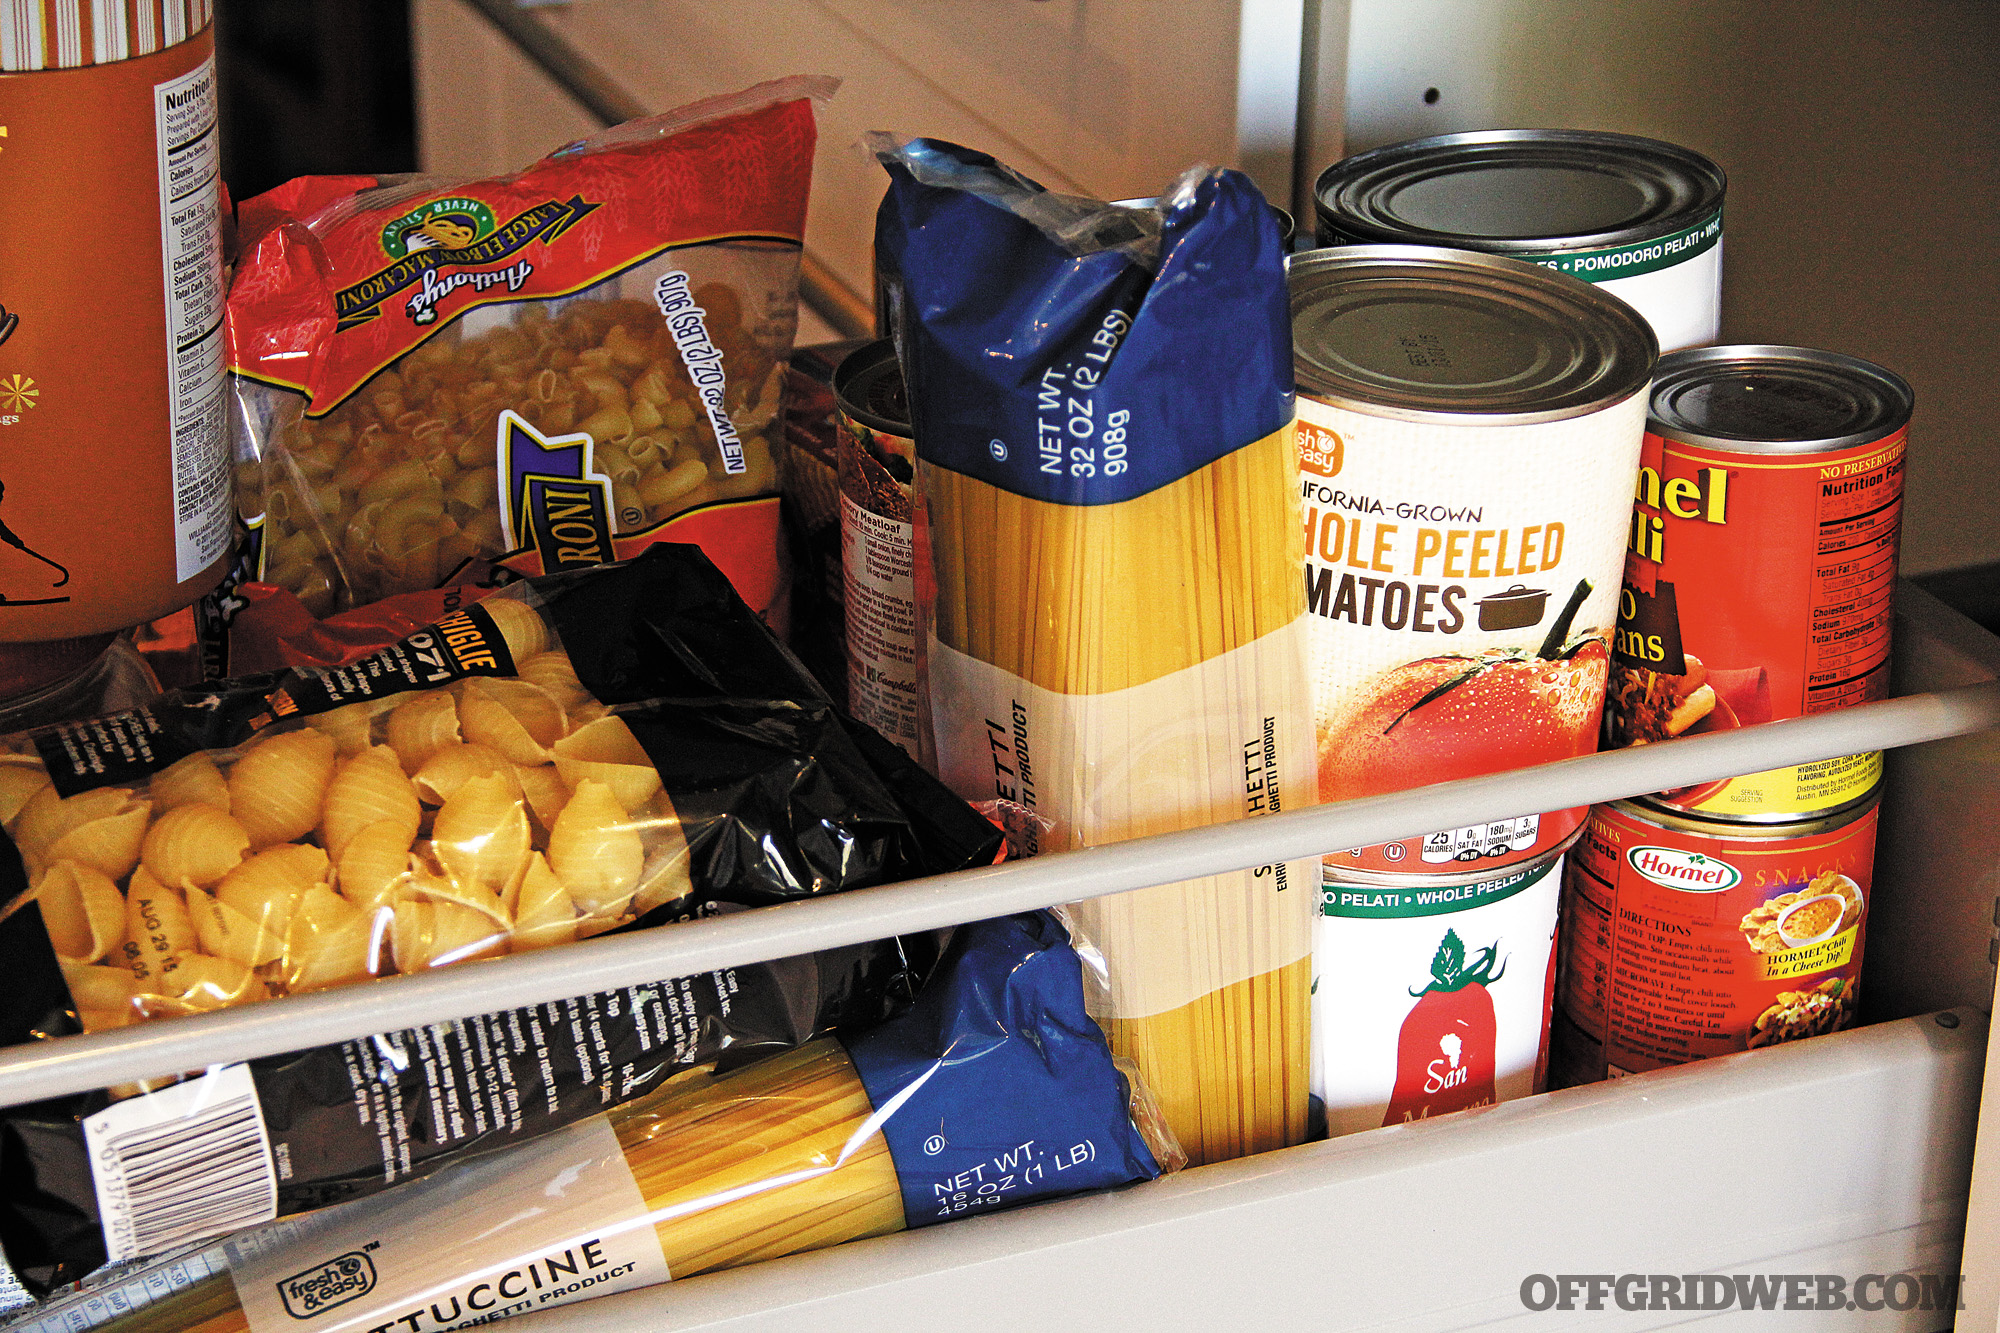
Canned Food

Household survival supplies tools scavenging shtf prepper 7 cans food

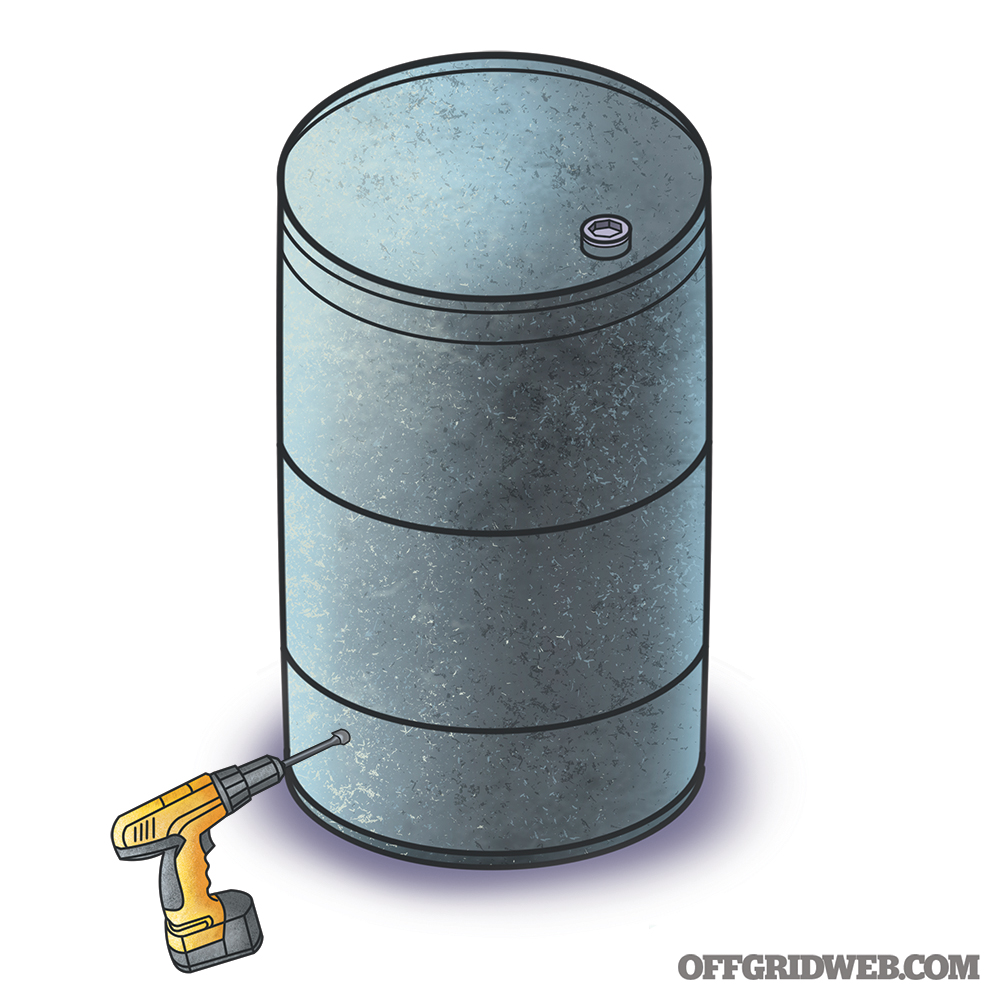
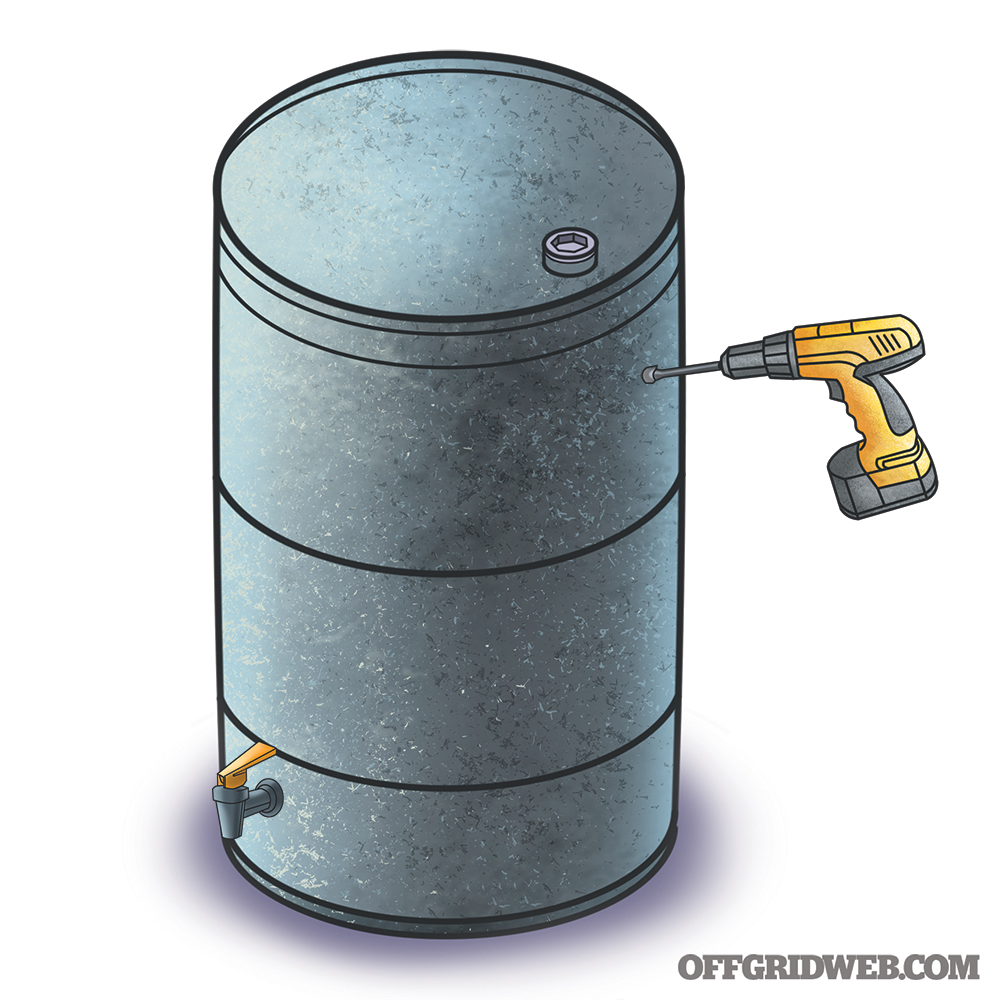
While MREs may seem to be the survival food of choice (see OFFGRID Issue 1), don’t ignore their forerunner, canned foods. Besides being a bug- and rodent-proof source of nourishment, canned food will also give you a reusable container once the can is empty. These metal containers can be used to serve food and drink. They can also be safely used over a fire or stove, allowing you to boil water and cook other foods.

An empty food can easily converts to a small cook stove, too. Pack a cotton rag or insert a partial roll of toilet paper into the can. Pour in melted wax or high-proof alcohol and then light up your new emergency stove.

Household survival supplies tools scavenging shtf prepper 21 canned food

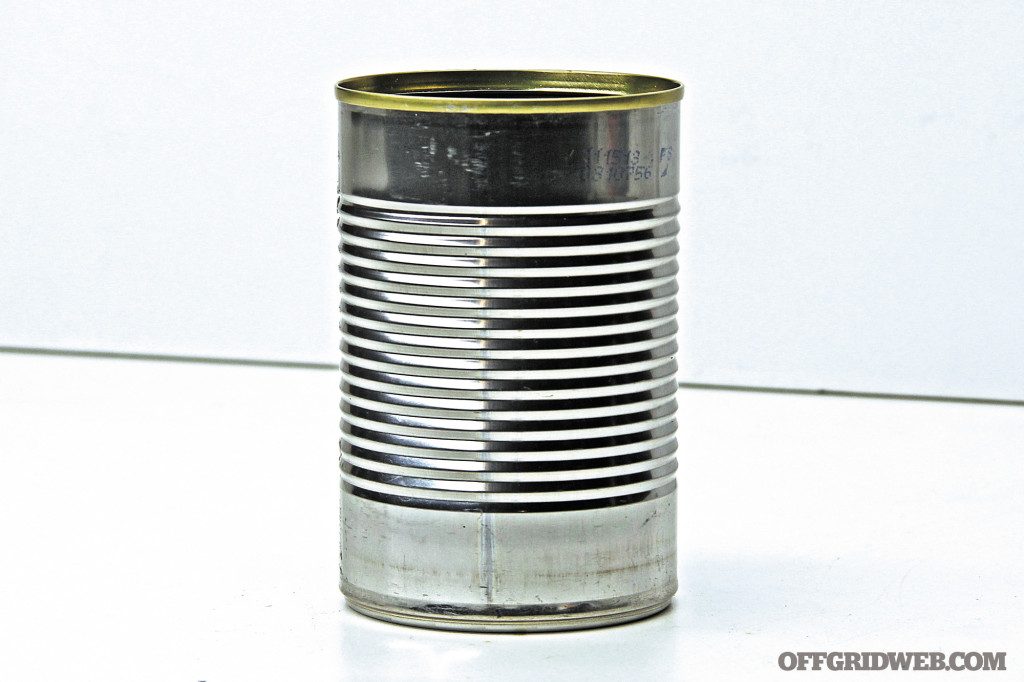
Once you have an abundance of cans, you can use a few to create a low-tech alarm system. Tie several cans at the end of a length of fishing line or a dark-colored thread. Use two pieces of duct tape to stretch this line across your walkway, hall, or driveway, leaving the cans stacked or piled off to the side. When someone hits this homemade tripwire, you’ll hear the cans clanging together and know that company is coming.

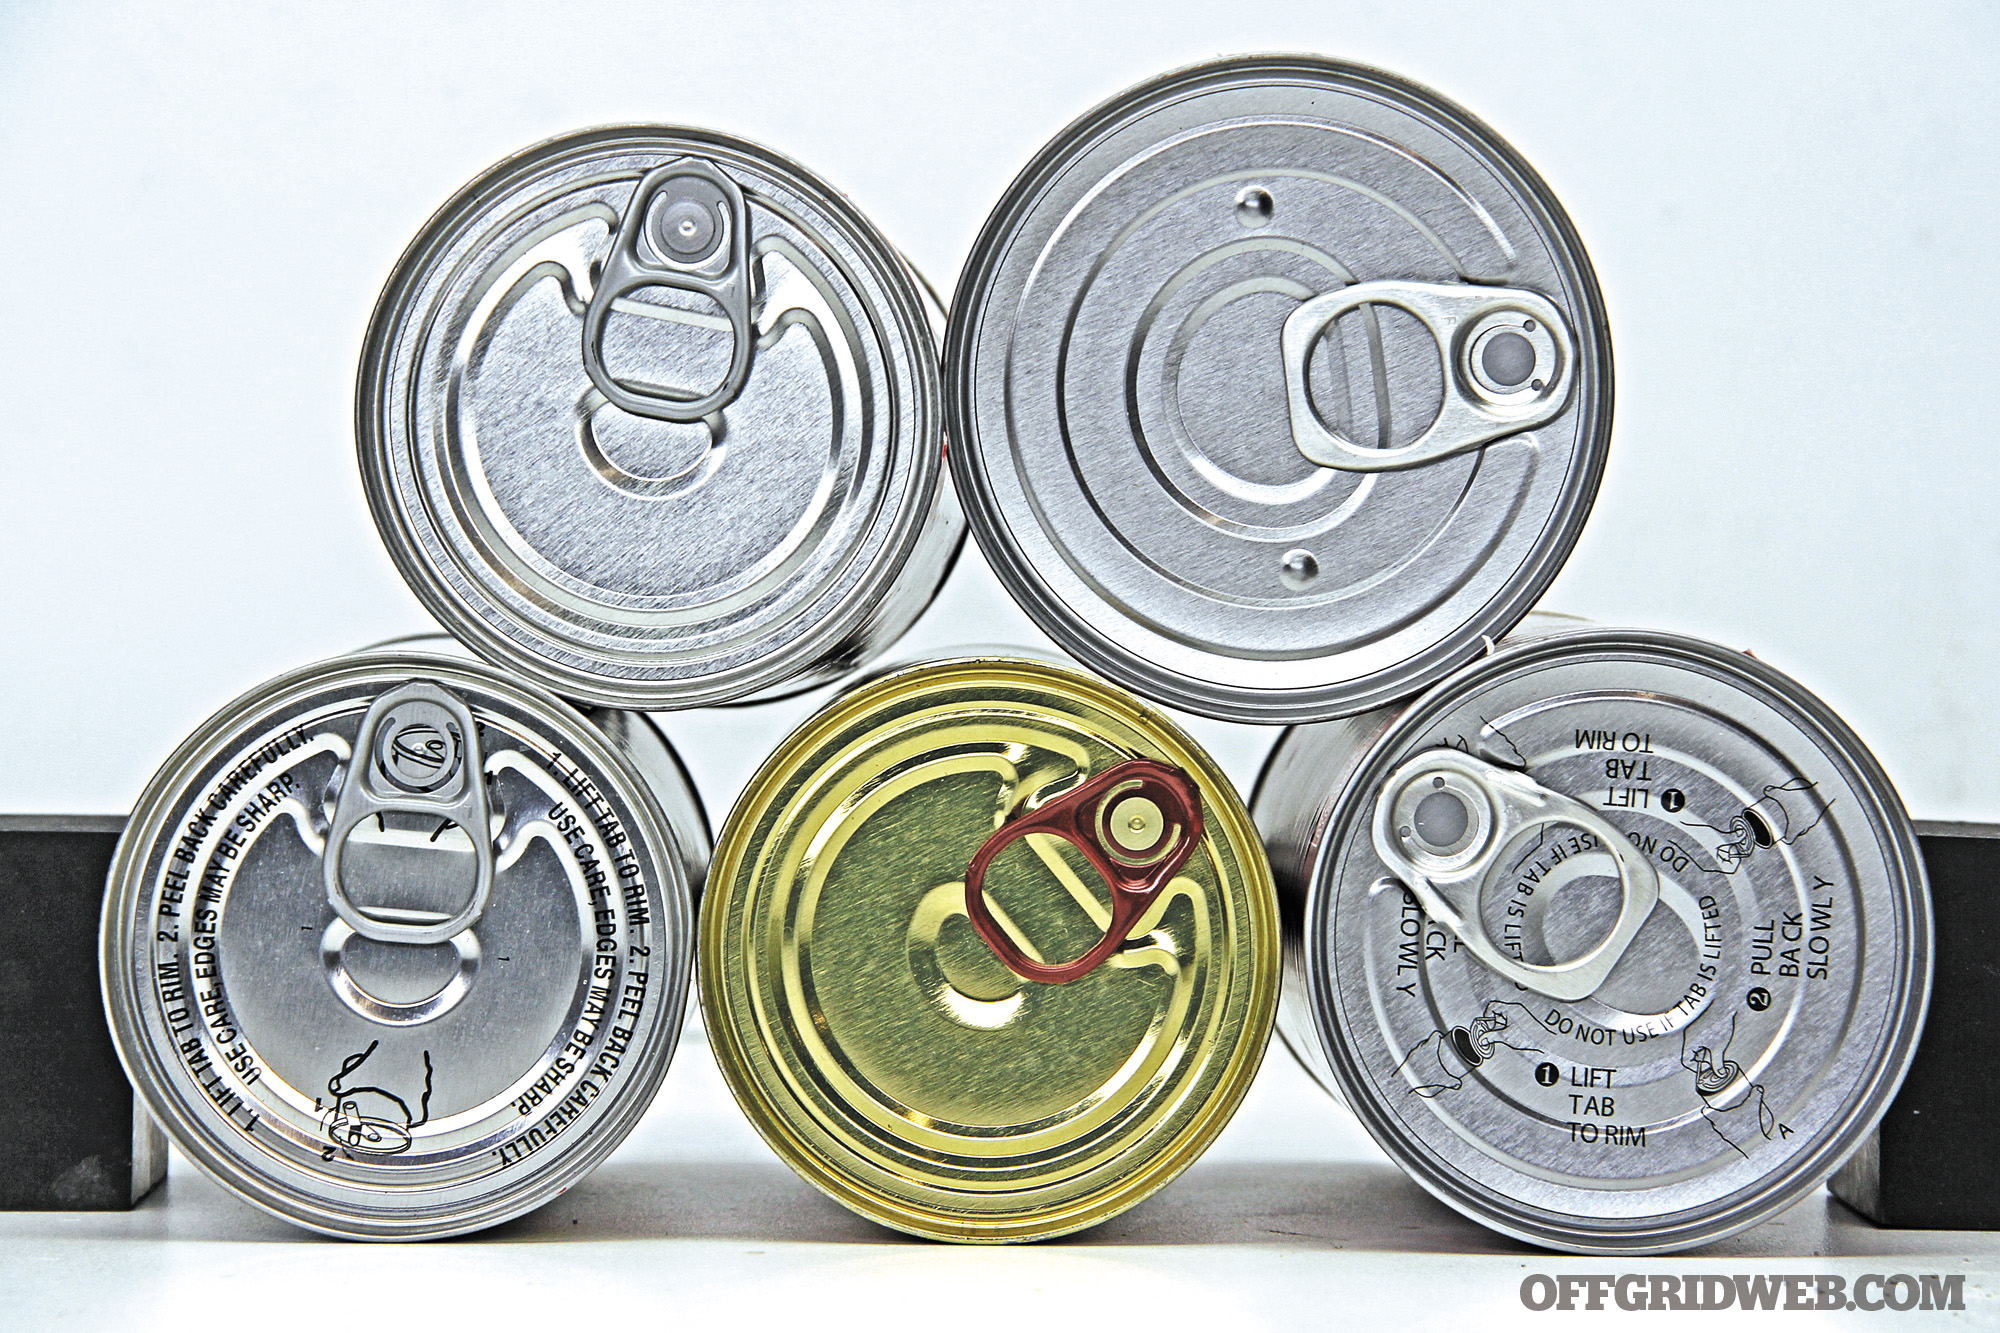
Tip: Pull-Tab Top Canned Food

Household survival supplies tools scavenging shtf prepper 5 cans

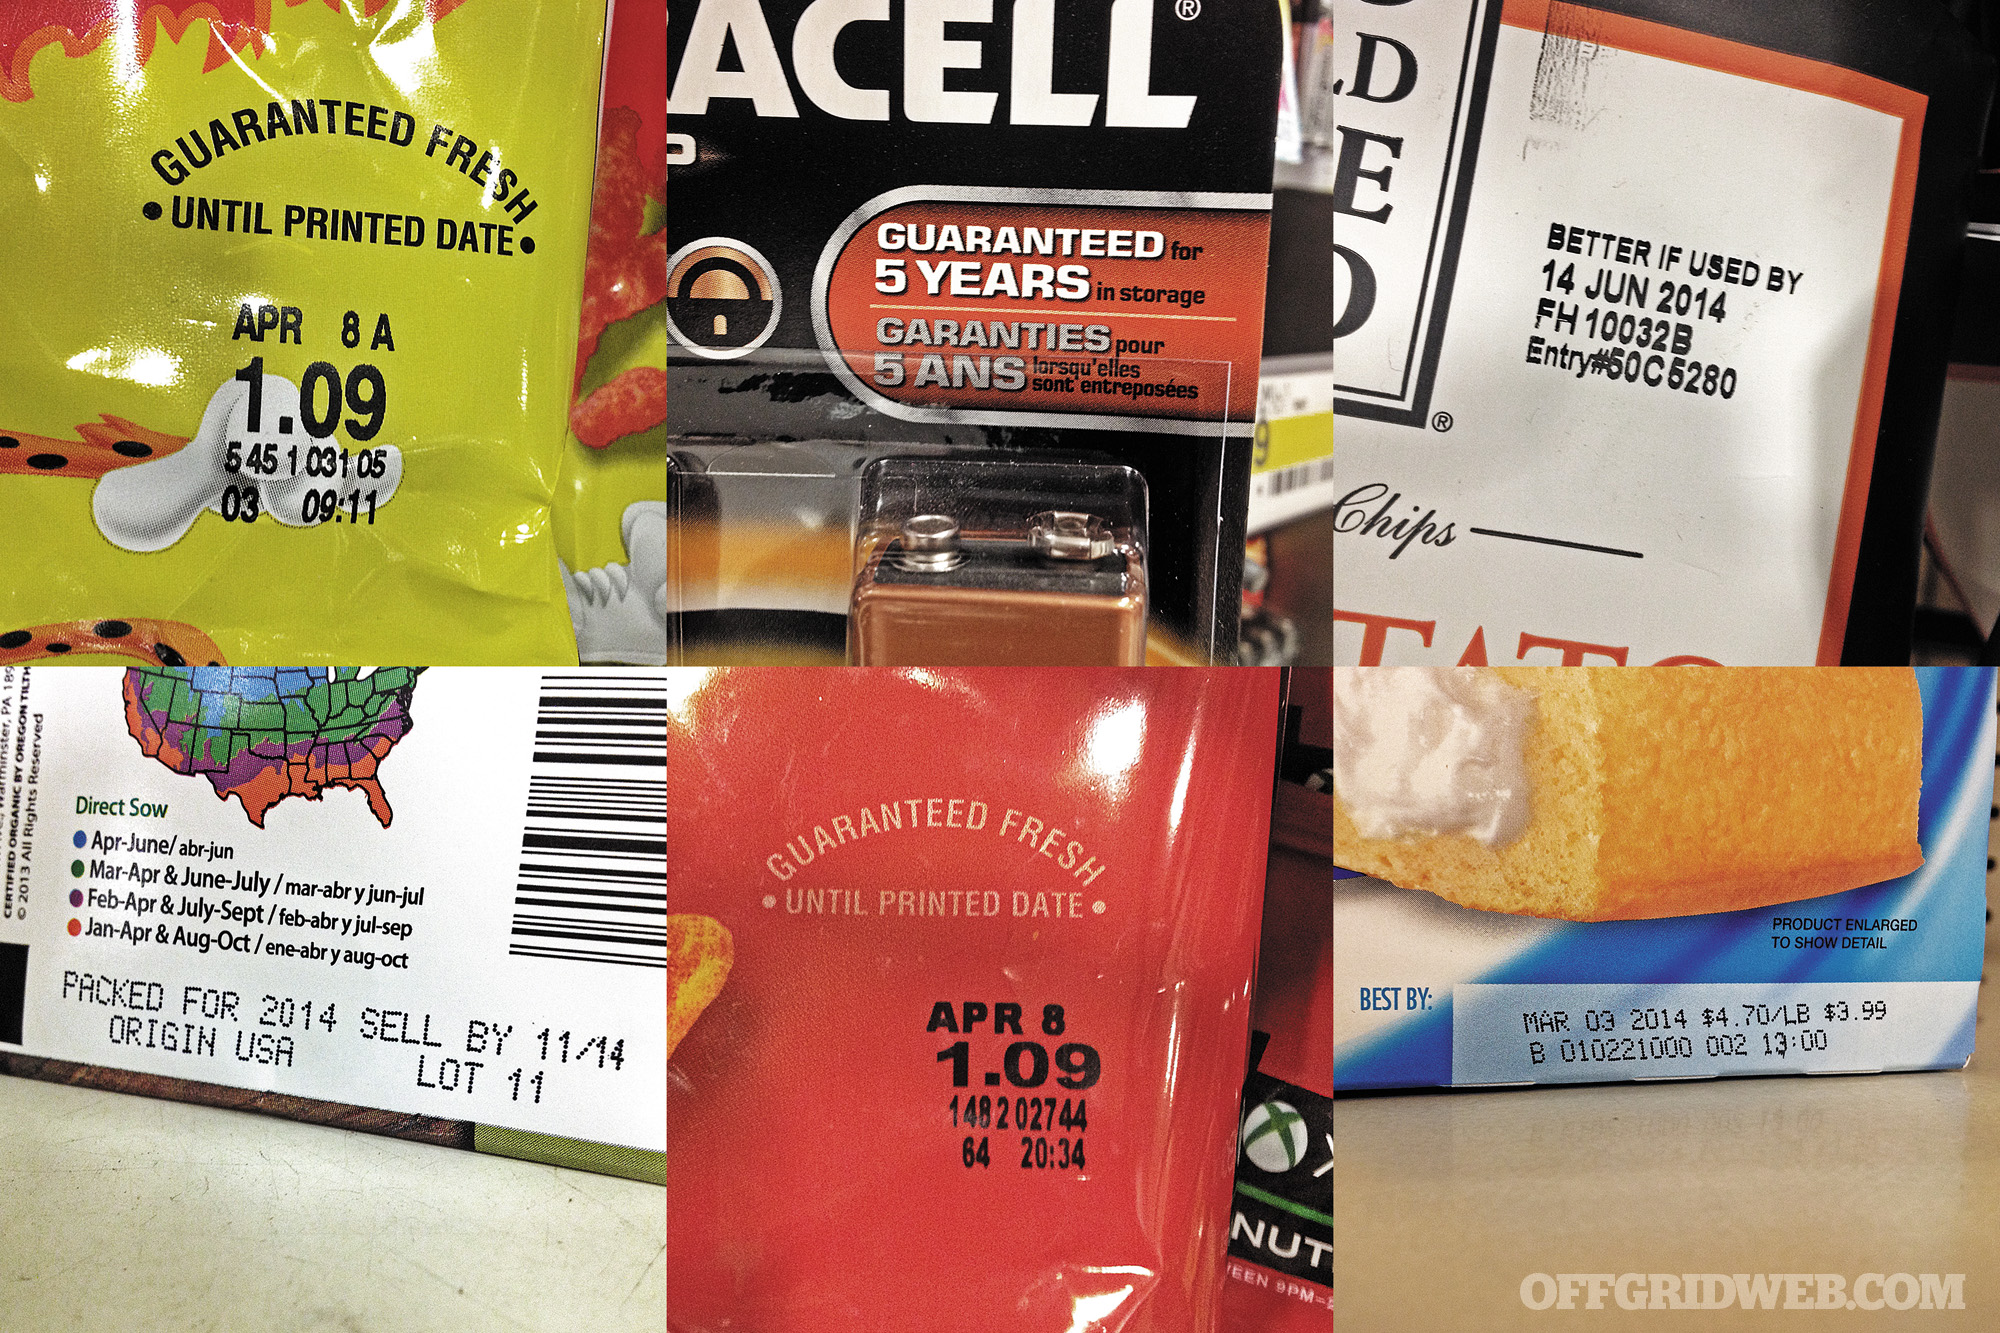
When shopping for canned food, you might have noticed that some cans are equipped with easy-to-open, pull-tab tops. These types of cans have the advantage of being opened without any tools, which is an obvious advantage. While these types of cans seal and protect the contents just as well as standard cans, they are more susceptible to damage from being dropped. If damaged, the tops have a chance of opening or buckling. So, which type is best? The tradeoff between convenience and sturdiness is something that you’ll have to decide.
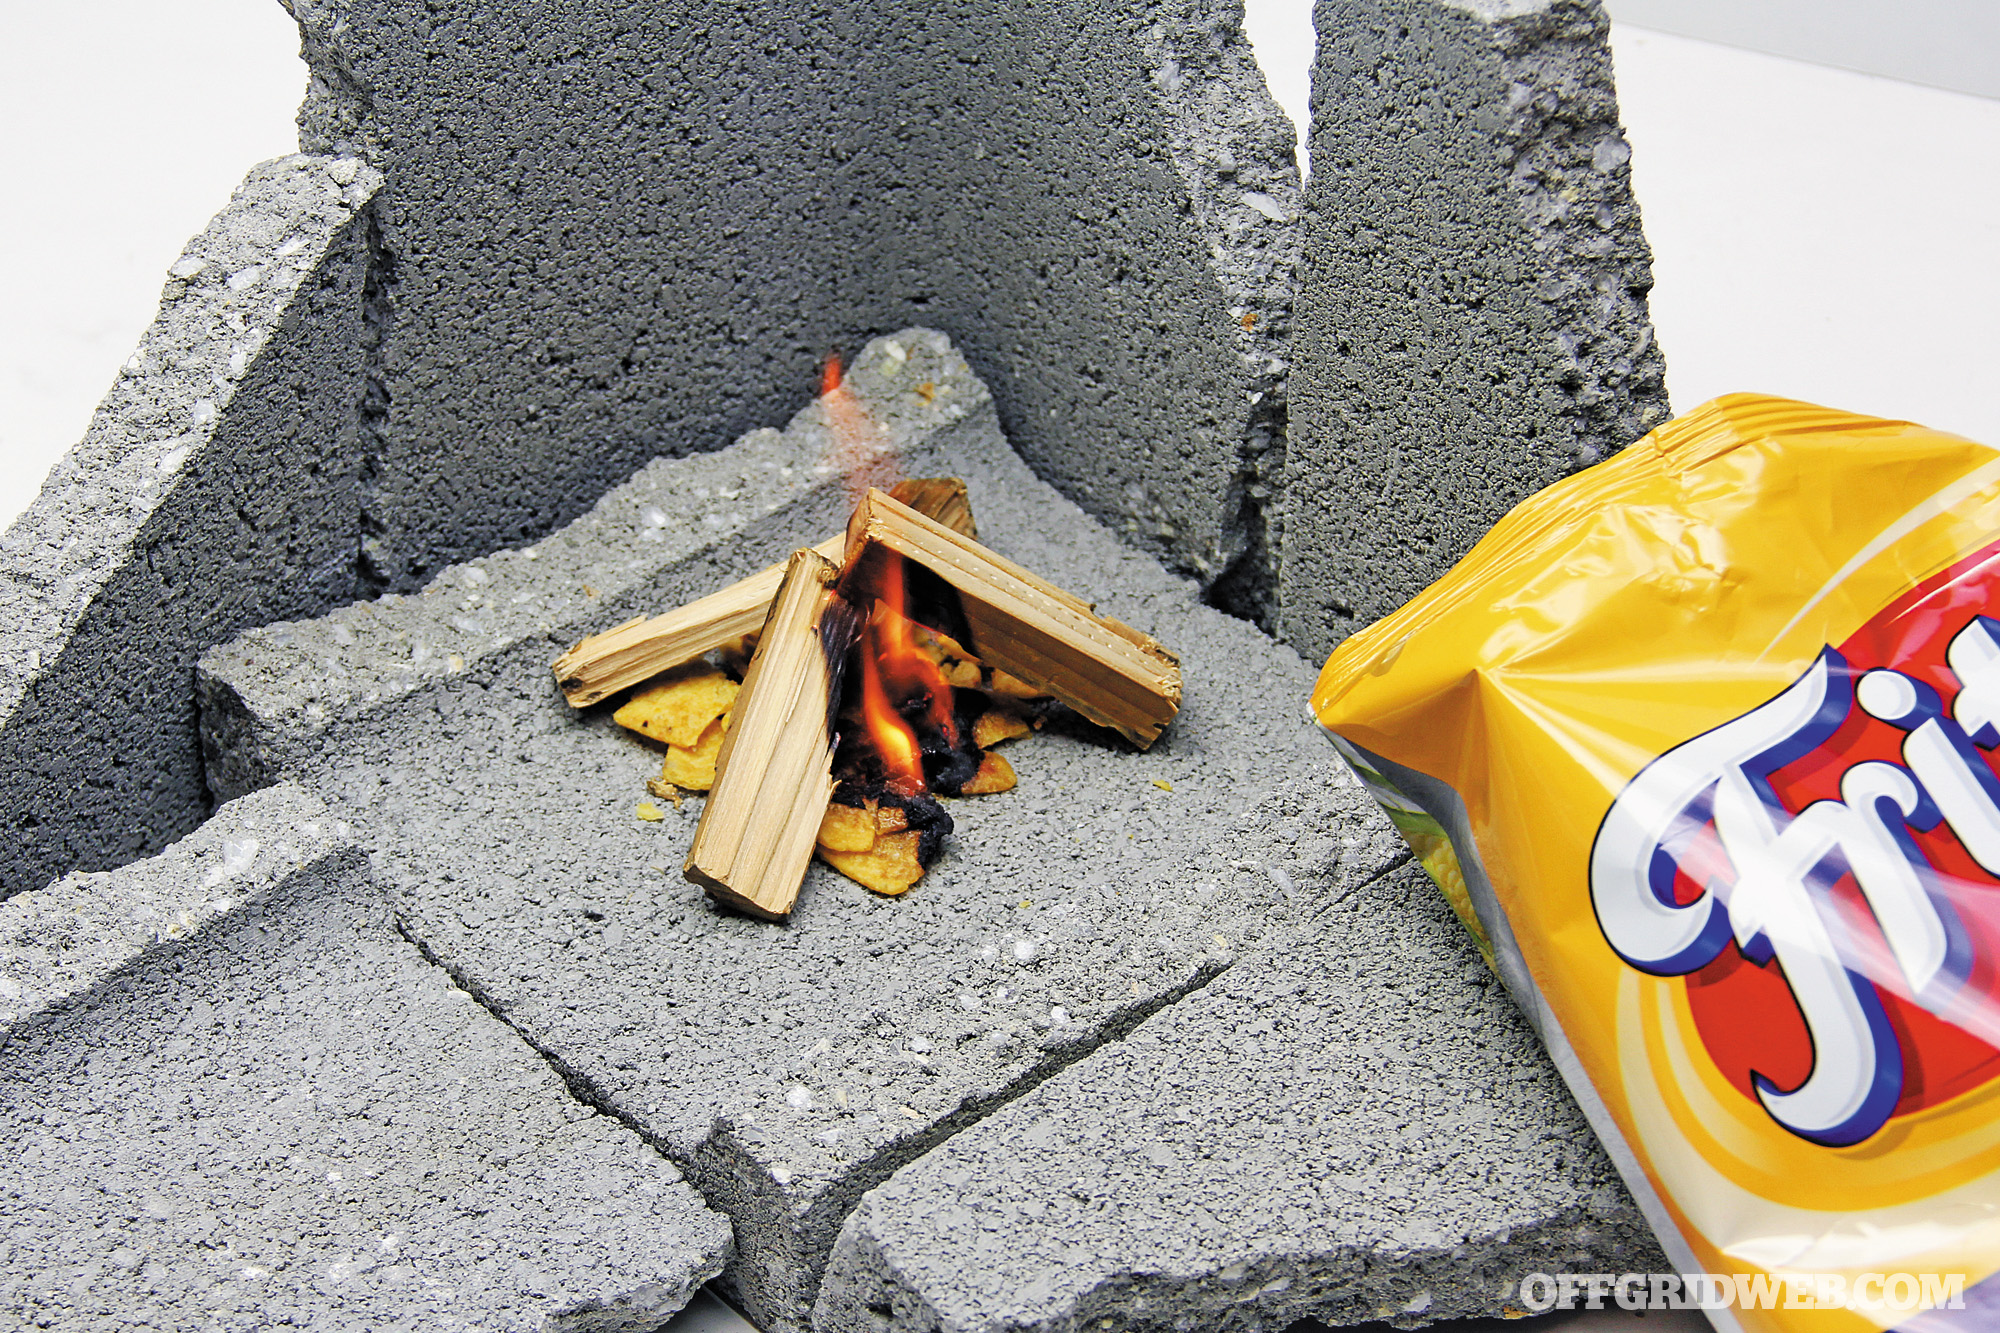
Snack Chips

Household survival supplies tools scavenging shtf prepper 6 chips snack fire tinder

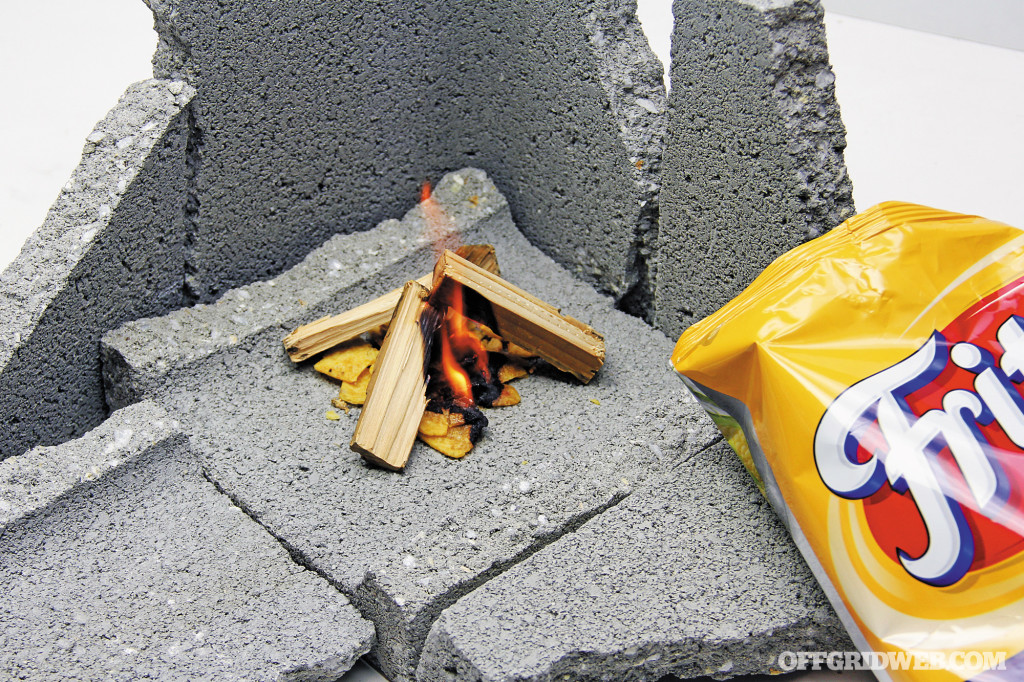
Sure, they’re tasty and provide a lot of caloric energy — bet you can’t just eat one. But they also make a tempting trap bait and burn like hellfire. To use chips as fire starters, make your selection by looking at the labels. The chips with the highest calories per serving are your top choice to burn. This is due to the insane amount of fat that each oh-so-tasty crunchy chip holds. Fat equals fuel value in the world of fire making, and Fritos are my fire-building favorite. Just place a few of these precious snacks underneath some twigs or tiny pieces of split wood. Apply an open flame to the chips, and you’ll have your grill, stove, fireplace, or backyard bonfire started in no time.

Fire Extinguisher

Household survival supplies tools scavenging shtf prepper 18 fire extinguisher

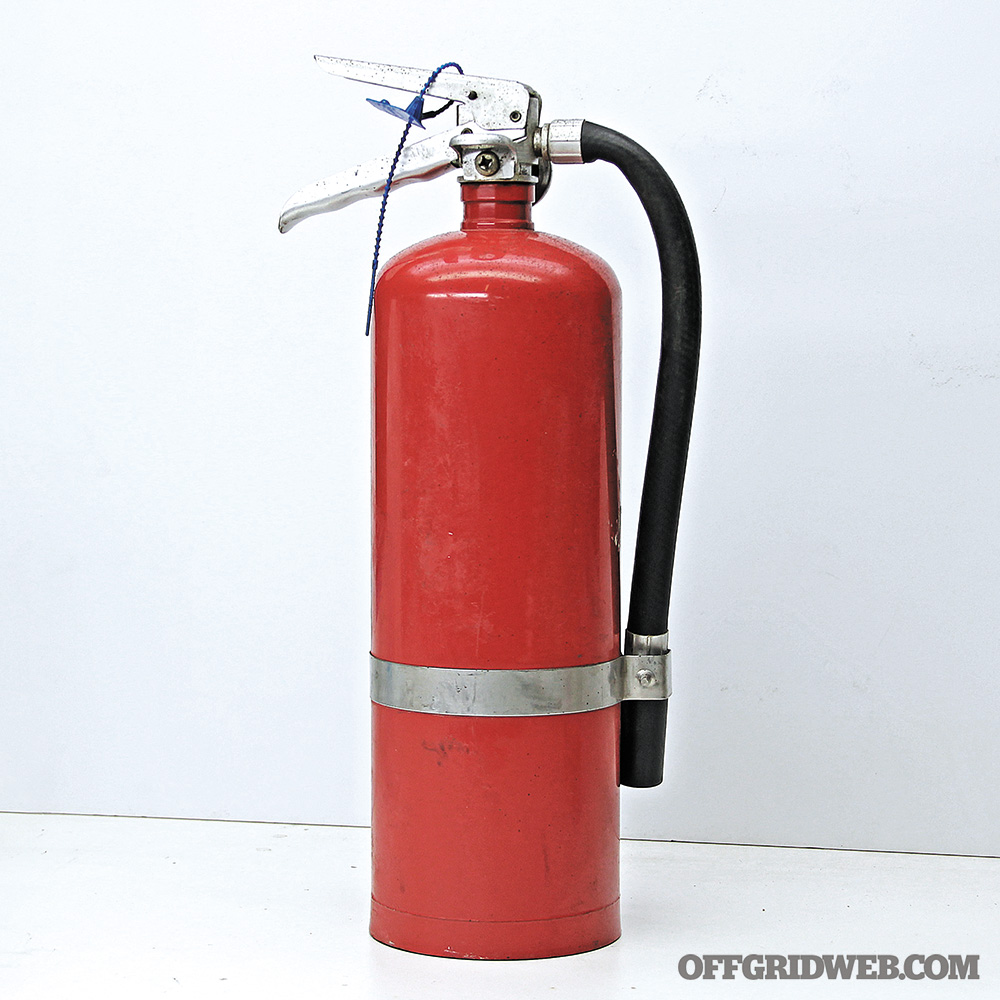
Aside from the intended use of a fire extinguisher, these pressurized vessels of powder and air can be a startling defense against an assailant. Aim for the face, spray them liberally, immediately follow up with a strike (or more) to the head using the butt-end of the extinguisher. Then make a hasty retreat. Unorthodox tactics like these might just buy you enough time to escape from looters and home invaders.

Tea Bags

Household survival supplies tools scavenging shtf prepper 15 tea water

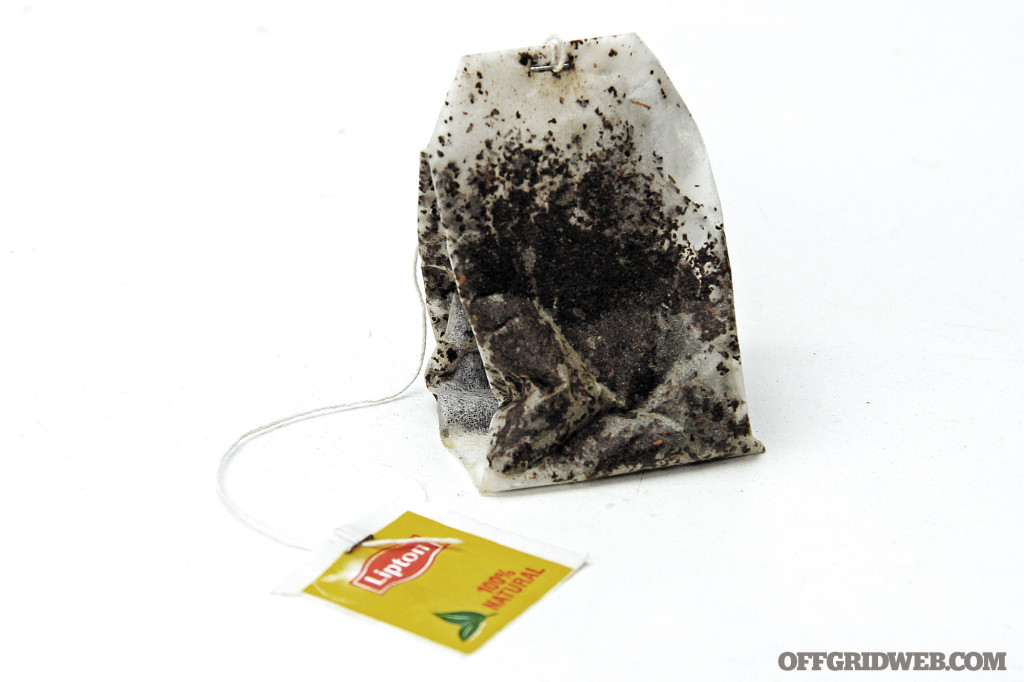
A cup of tea may not seem like a survival item, unless you’re being blinded by a caffeine withdrawal headache. But a wet tea bag is another story. A regular black tea bag contains tea leaves that are full of valuable tannic acid. This acid shrinks inflammation when used topically as a wet compress. In the event you cannot get to a dentist or doctor, you can use the wet tea bag on boils, ingrown toenails, hemorrhoids, and other inflamed skin maladies. You can even get toothache relief by placing the wet tea bag against a painful tooth in your mouth (but please don’t use the same one that you previously used for a hemorrhoid). This dental remedy can be boosted by adding whole or powdered cloves (the spice) to the wet tea bag. Cloves contain an anesthetic oil that works well for temporary relief of dental pain.

In the Bathroom

Most bathrooms contain a very diverse assortment of goods. After analyzing your needs, and all of the random stuff in the cabinets, you might just find some items in the bathroom that will help you out of a jam.

Dental Floss

Household survival supplies tools scavenging shtf prepper 16 cordage string

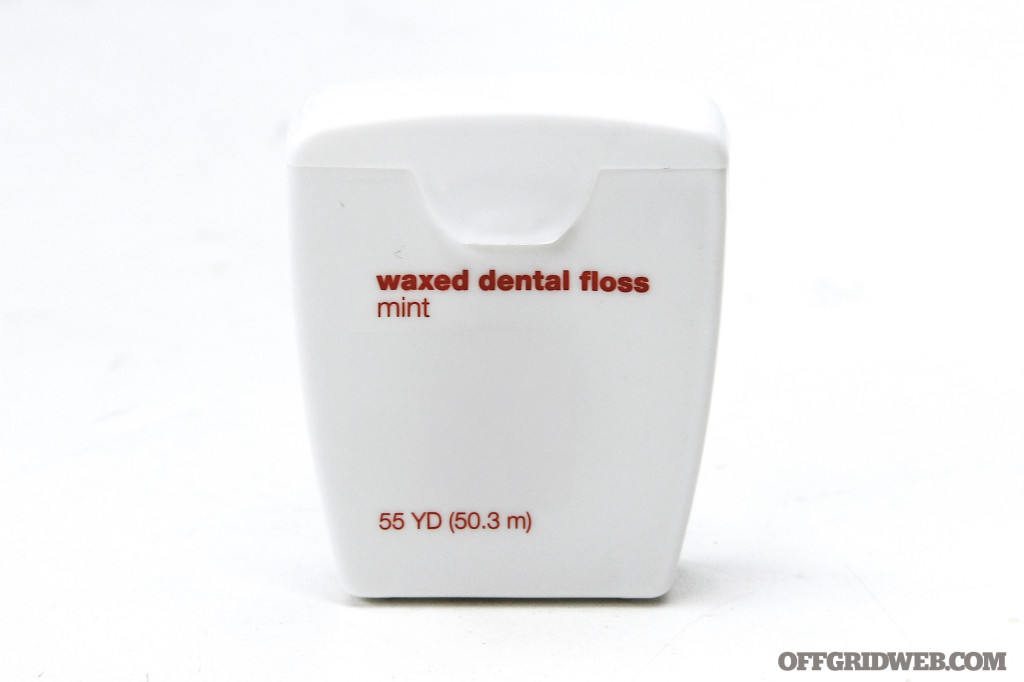
Need some strong string? Or something to actually floss with? Dental floss is made from amazingly strong fibers, allowing floss to be used for emergency cordage, fishing line, trap components, suture material, sewing thread, and a host of other purposes (perhaps a Borat “man-kini” if you wish to frighten women and young children).

Hygiene Supplies

Household survival supplies tools scavenging shtf prepper 10

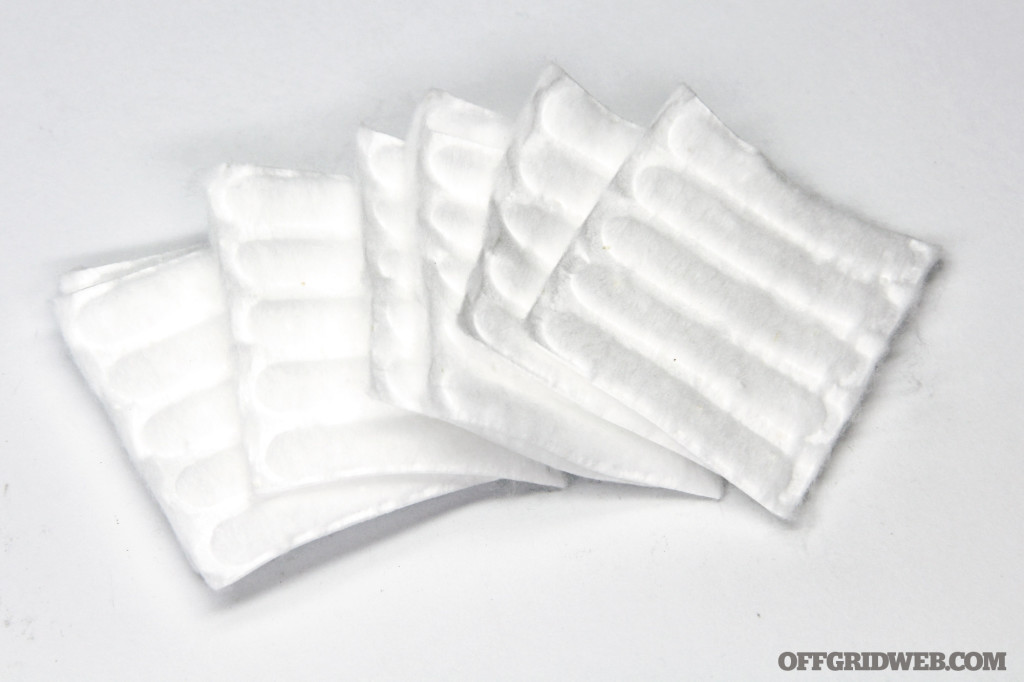
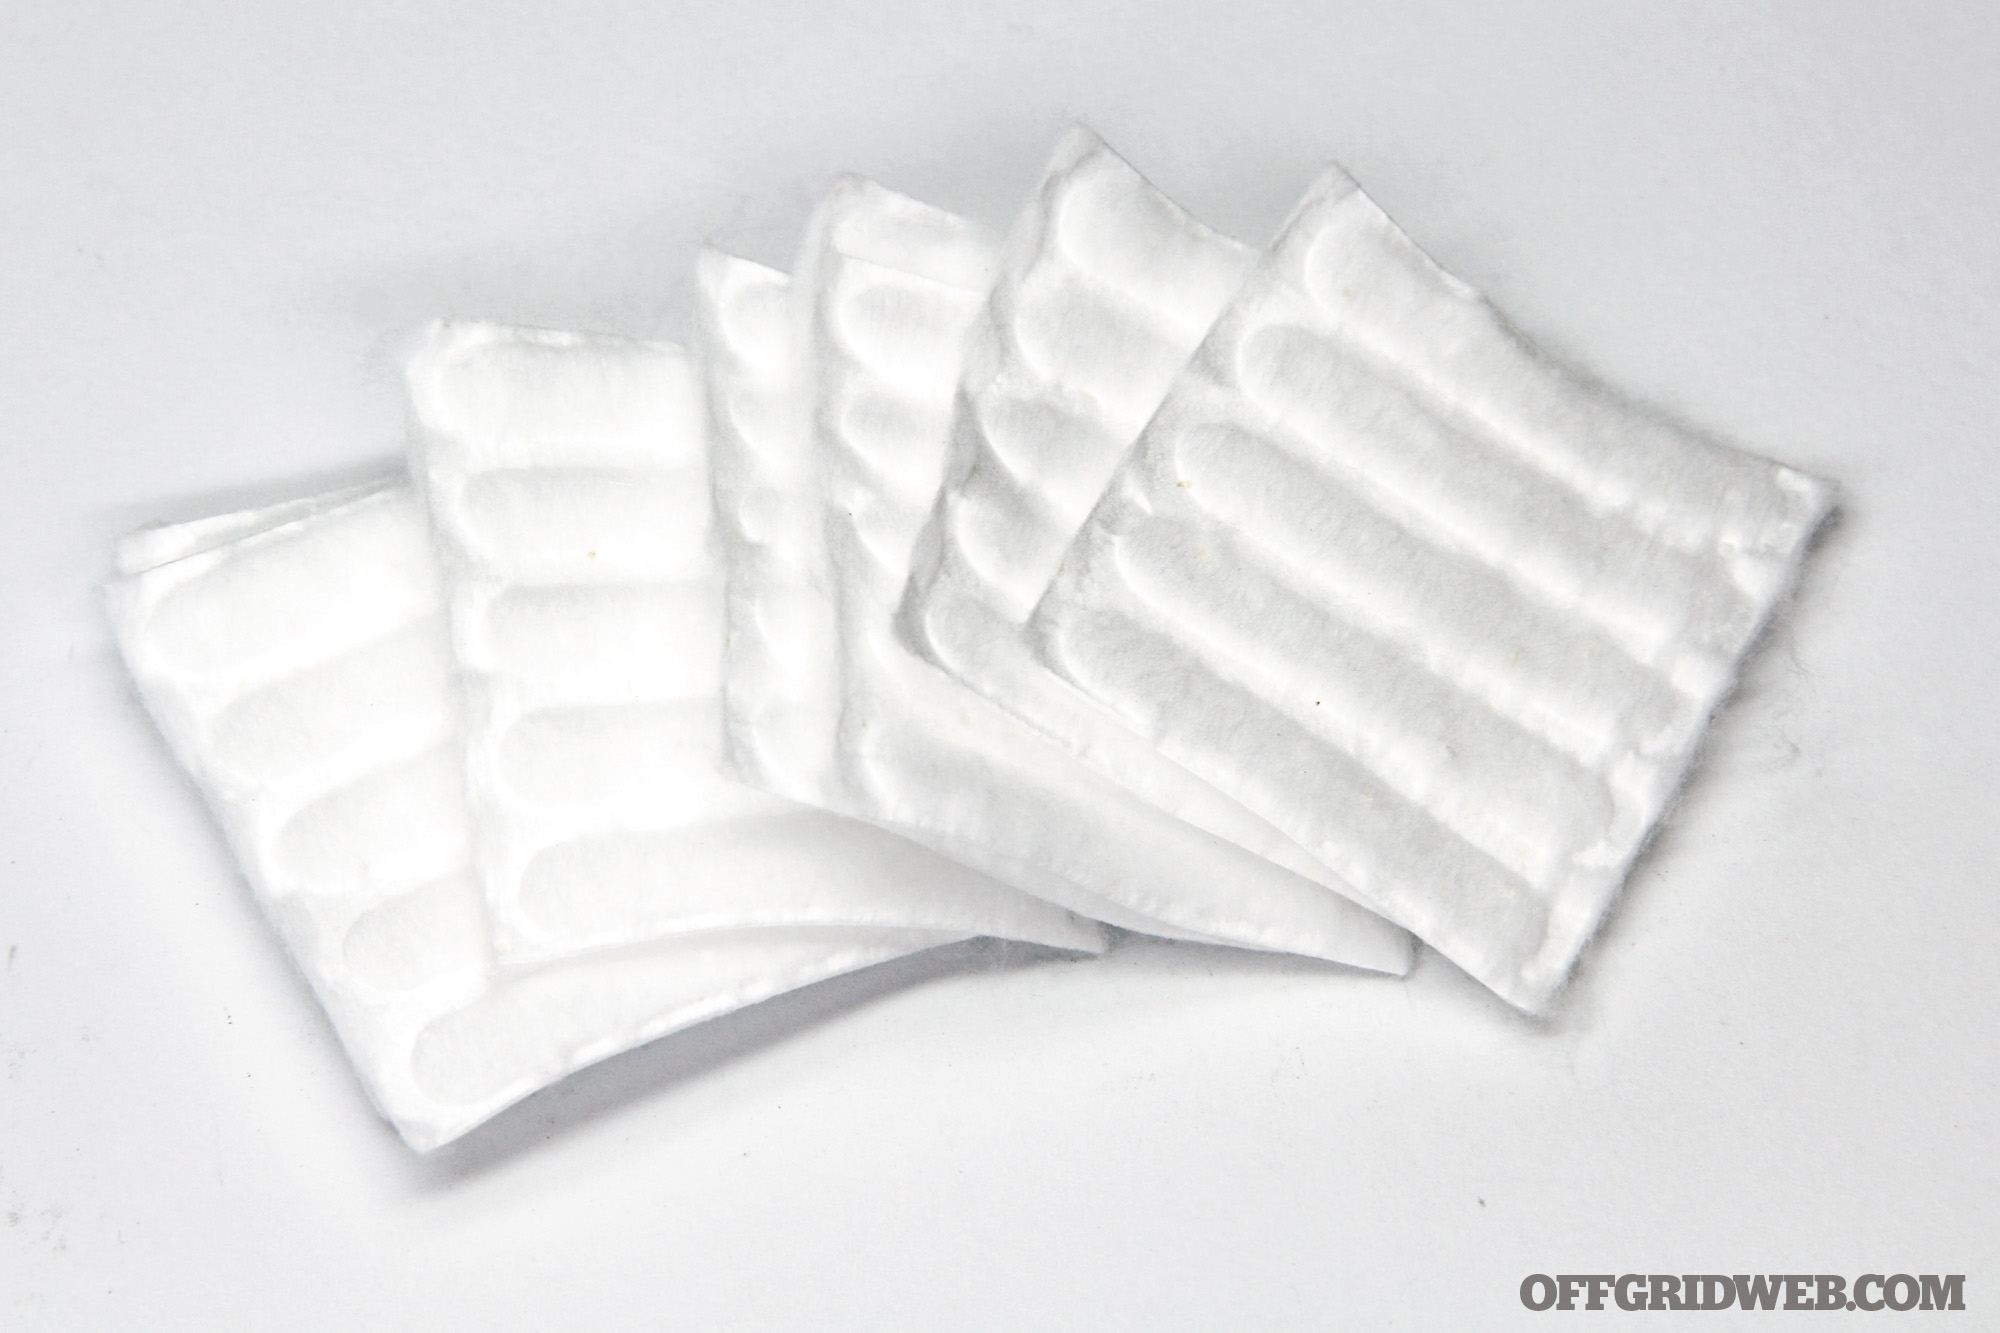
Many feminine hygiene items like pads and tampons have alternate uses for first-aid. Pads make a fine dressing for wounds and tampons can be opened up to act as a replacement for gauze and sponges to stop bleeding. Guys, no longer will you feel embarrassed at the drug store when purchasing feminine hygiene products. Cotton balls, makeup pads, and similar bath and beauty supplies can also serve medical and fire-building functions.

Household survival supplies tools scavenging shtf prepper 11

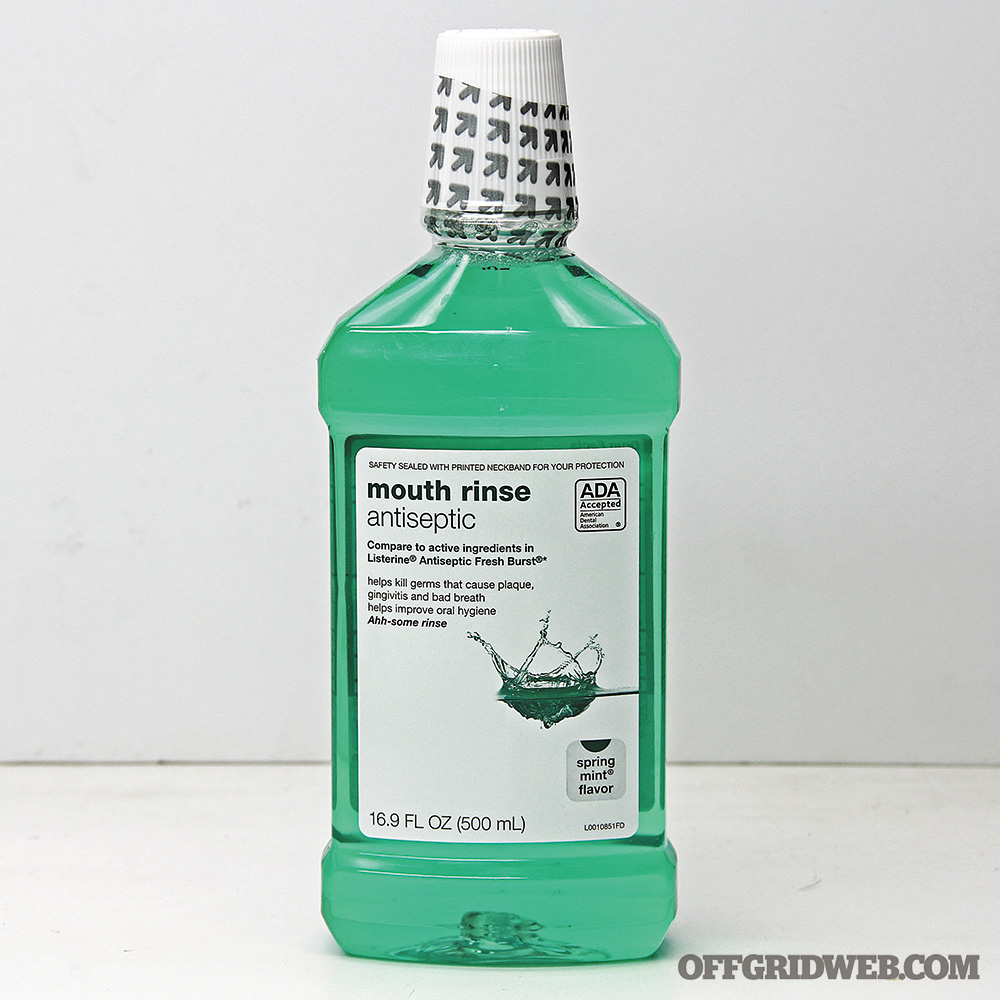
Alcohol-based mouthwash, hydrogen peroxide, and other related products can be used as improvised disinfectants.
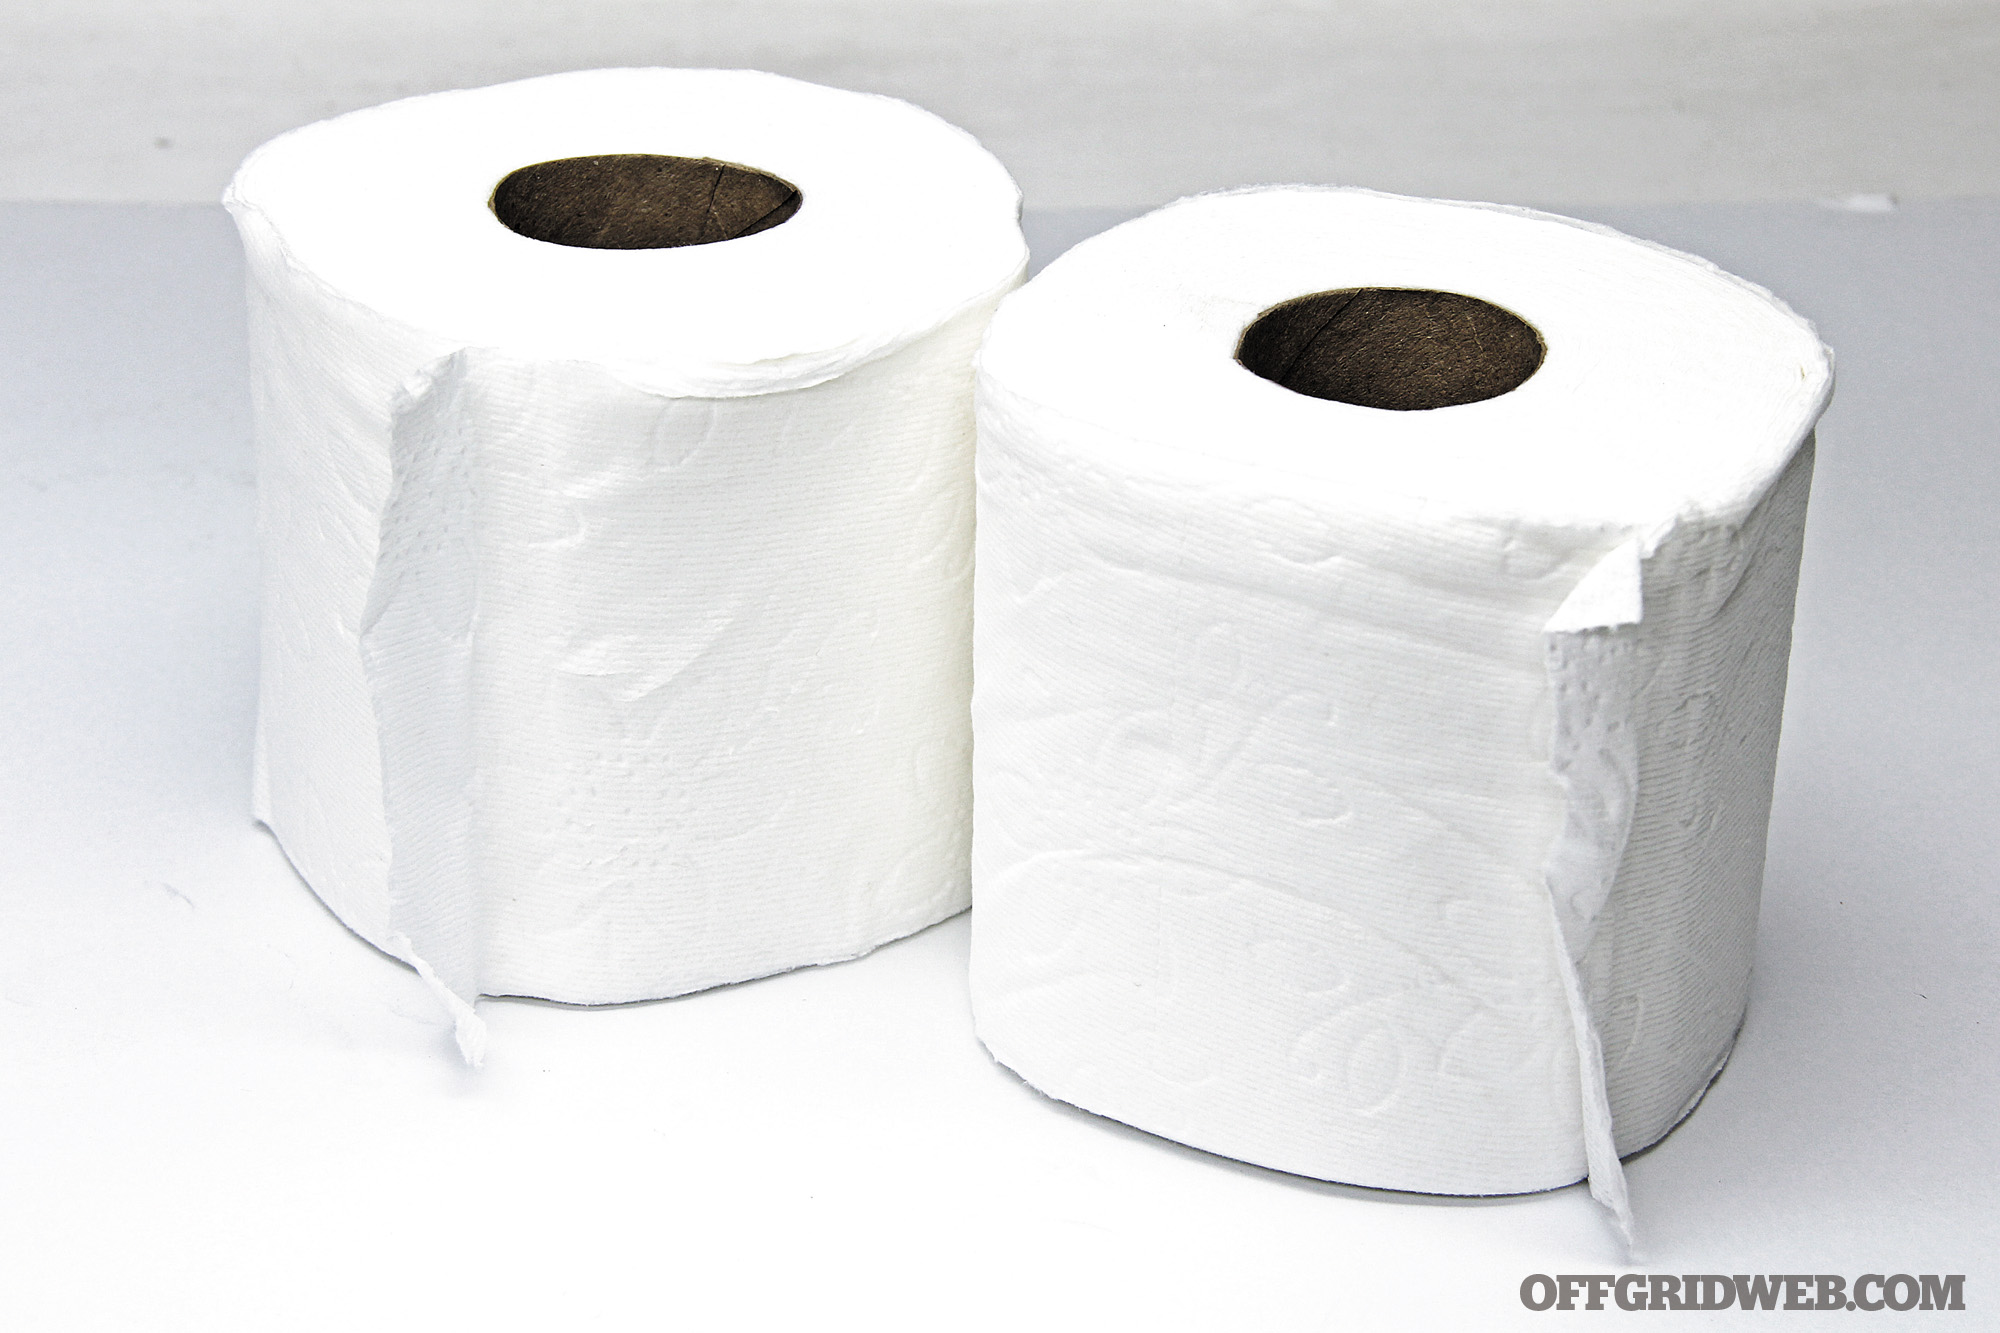
Toilet Paper

Household survival supplies tools scavenging shtf prepper 9

This ubiquitous stuff serves its everyday task very well, yet most people don’t give it proper recognition for its versatility. Toilet paper can be used as wick material for the oil lamps and alcohol cooking stoves already mentioned in this article. It can be an insulating material for bedding and clothing, providing it stays dry. Toilet paper also helps with fire building, applying medicines, and signaling for help in a dry climate (toilet paper a prominent tree, as you would for a prank). TP also makes a great trade good — since anyone that has run out will really want to get some.

Three Items to Stock Up On

It’s not necessary to be a hoarder of survival gear to feel more confident about your ability to fend for yourself. Since planning ahead is one of the most important aspects of a survivor mentality, you should seize the opportunity to plan ahead before a pandemic or other disaster strikes by picking up some multi-use supplies on your next trip to the store.
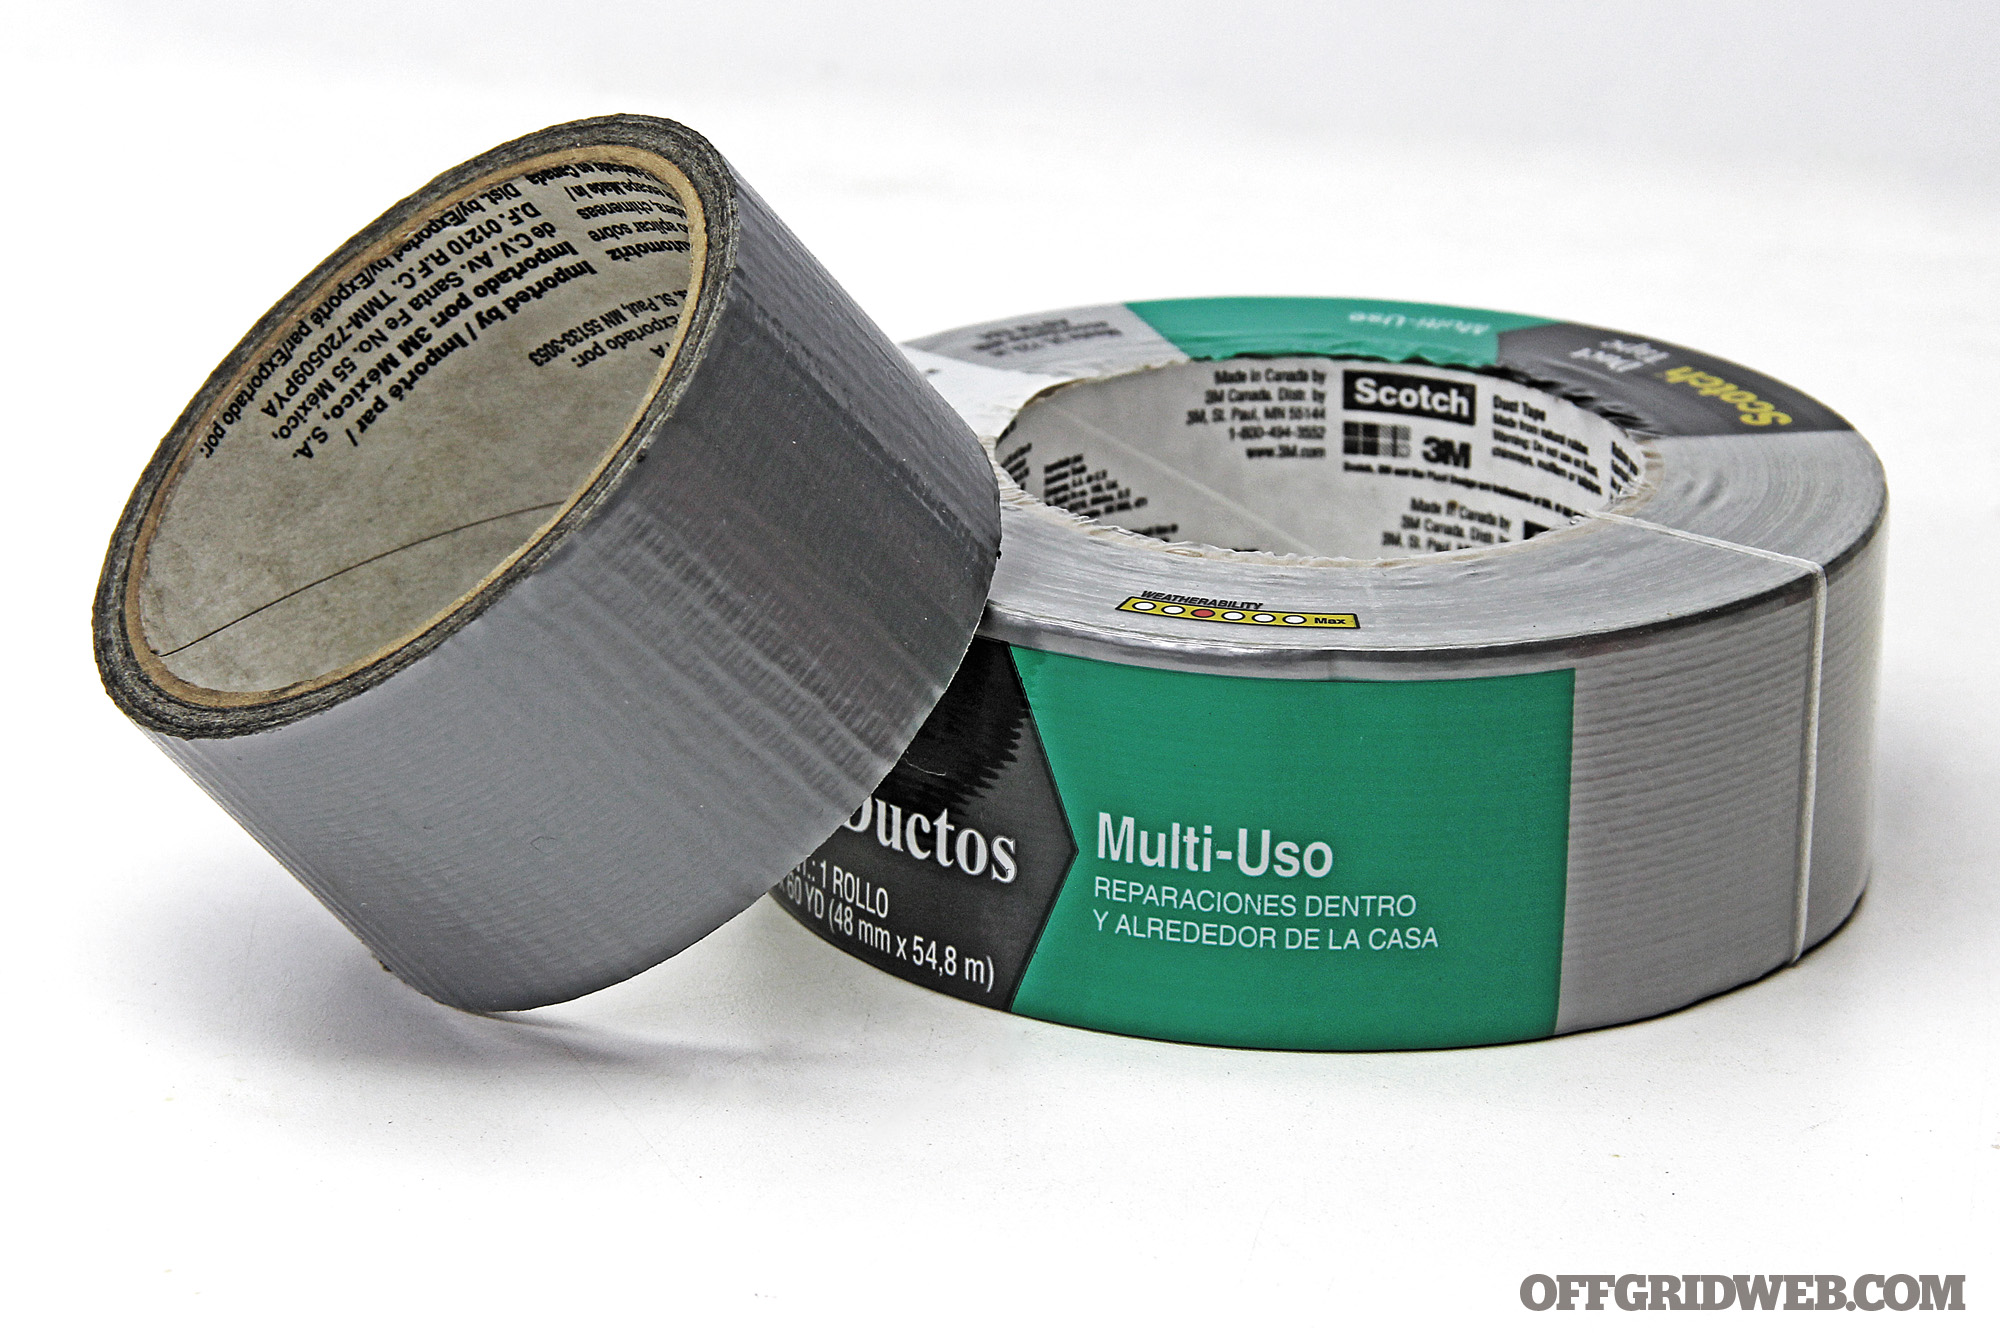
Duct Tape

Household survival supplies tools scavenging shtf prepper 14 duct tape

This modern wonder can repair, replace, and revitalize almost anything. Duct tape can mend your clothing, your cracked water bottle, and your footwear. Duct tape can be used as tinder to start fires, a binding to attach items together, and it can be twisted into strong rope. A few rolls of duct tape are a great addition to any home survival stash. And don’t forget to add some tape to your vehicle emergency kit and bug-out bag.

High-Proof Alcohol

Household survival supplies tools scavenging shtf prepper 12 alcohol

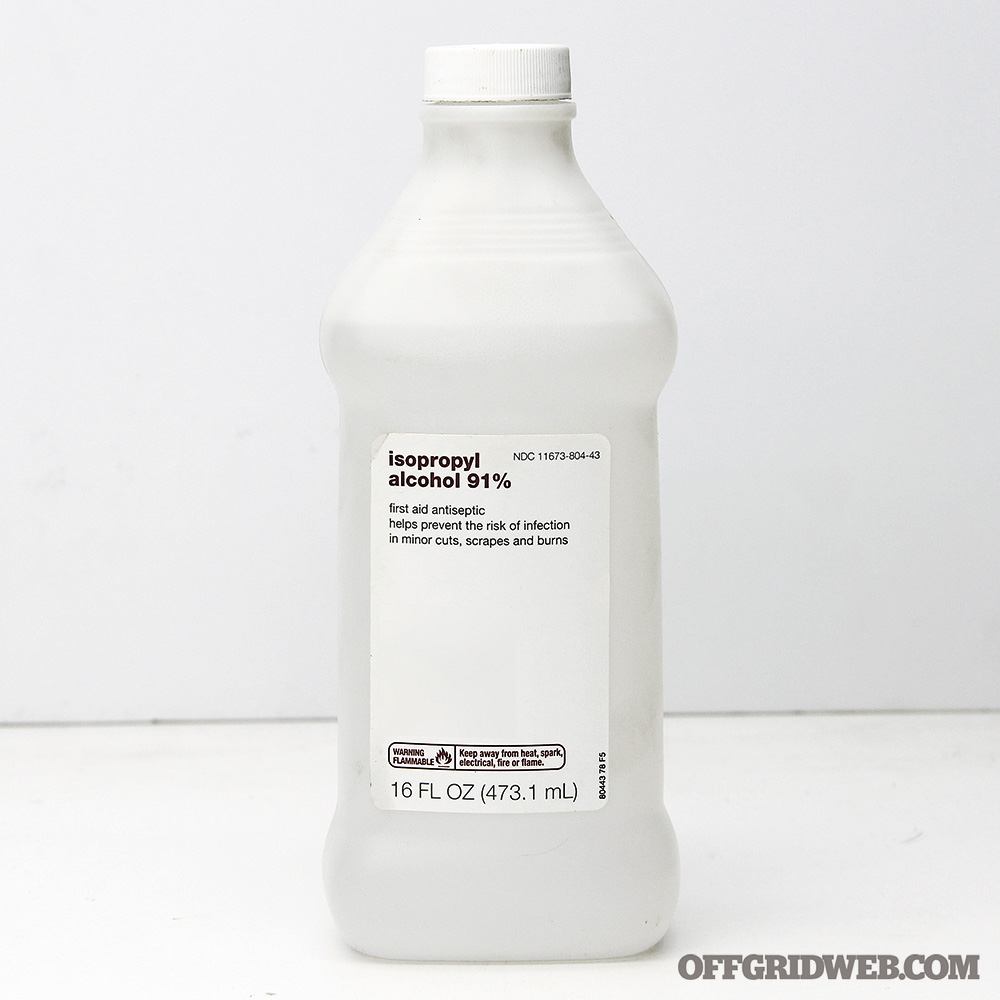
If you’re at the drug store, you can pick up high-percentage rubbing alcohol. And if your shopping trip takes you to the hardware store, you may be able to find a can of very high-proof denatured alcohol (ethanol). These can be used as stove fuel, fire starter, and disinfectant for surfaces. The rubbing alcohol can even be used to (painfully) disinfect wounds. Just make sure you read the labels before performing medical tasks with alcohol. Denatured alcohol and anything containing methanol should not be used on the skin or imbibed due to their poisonous nature.
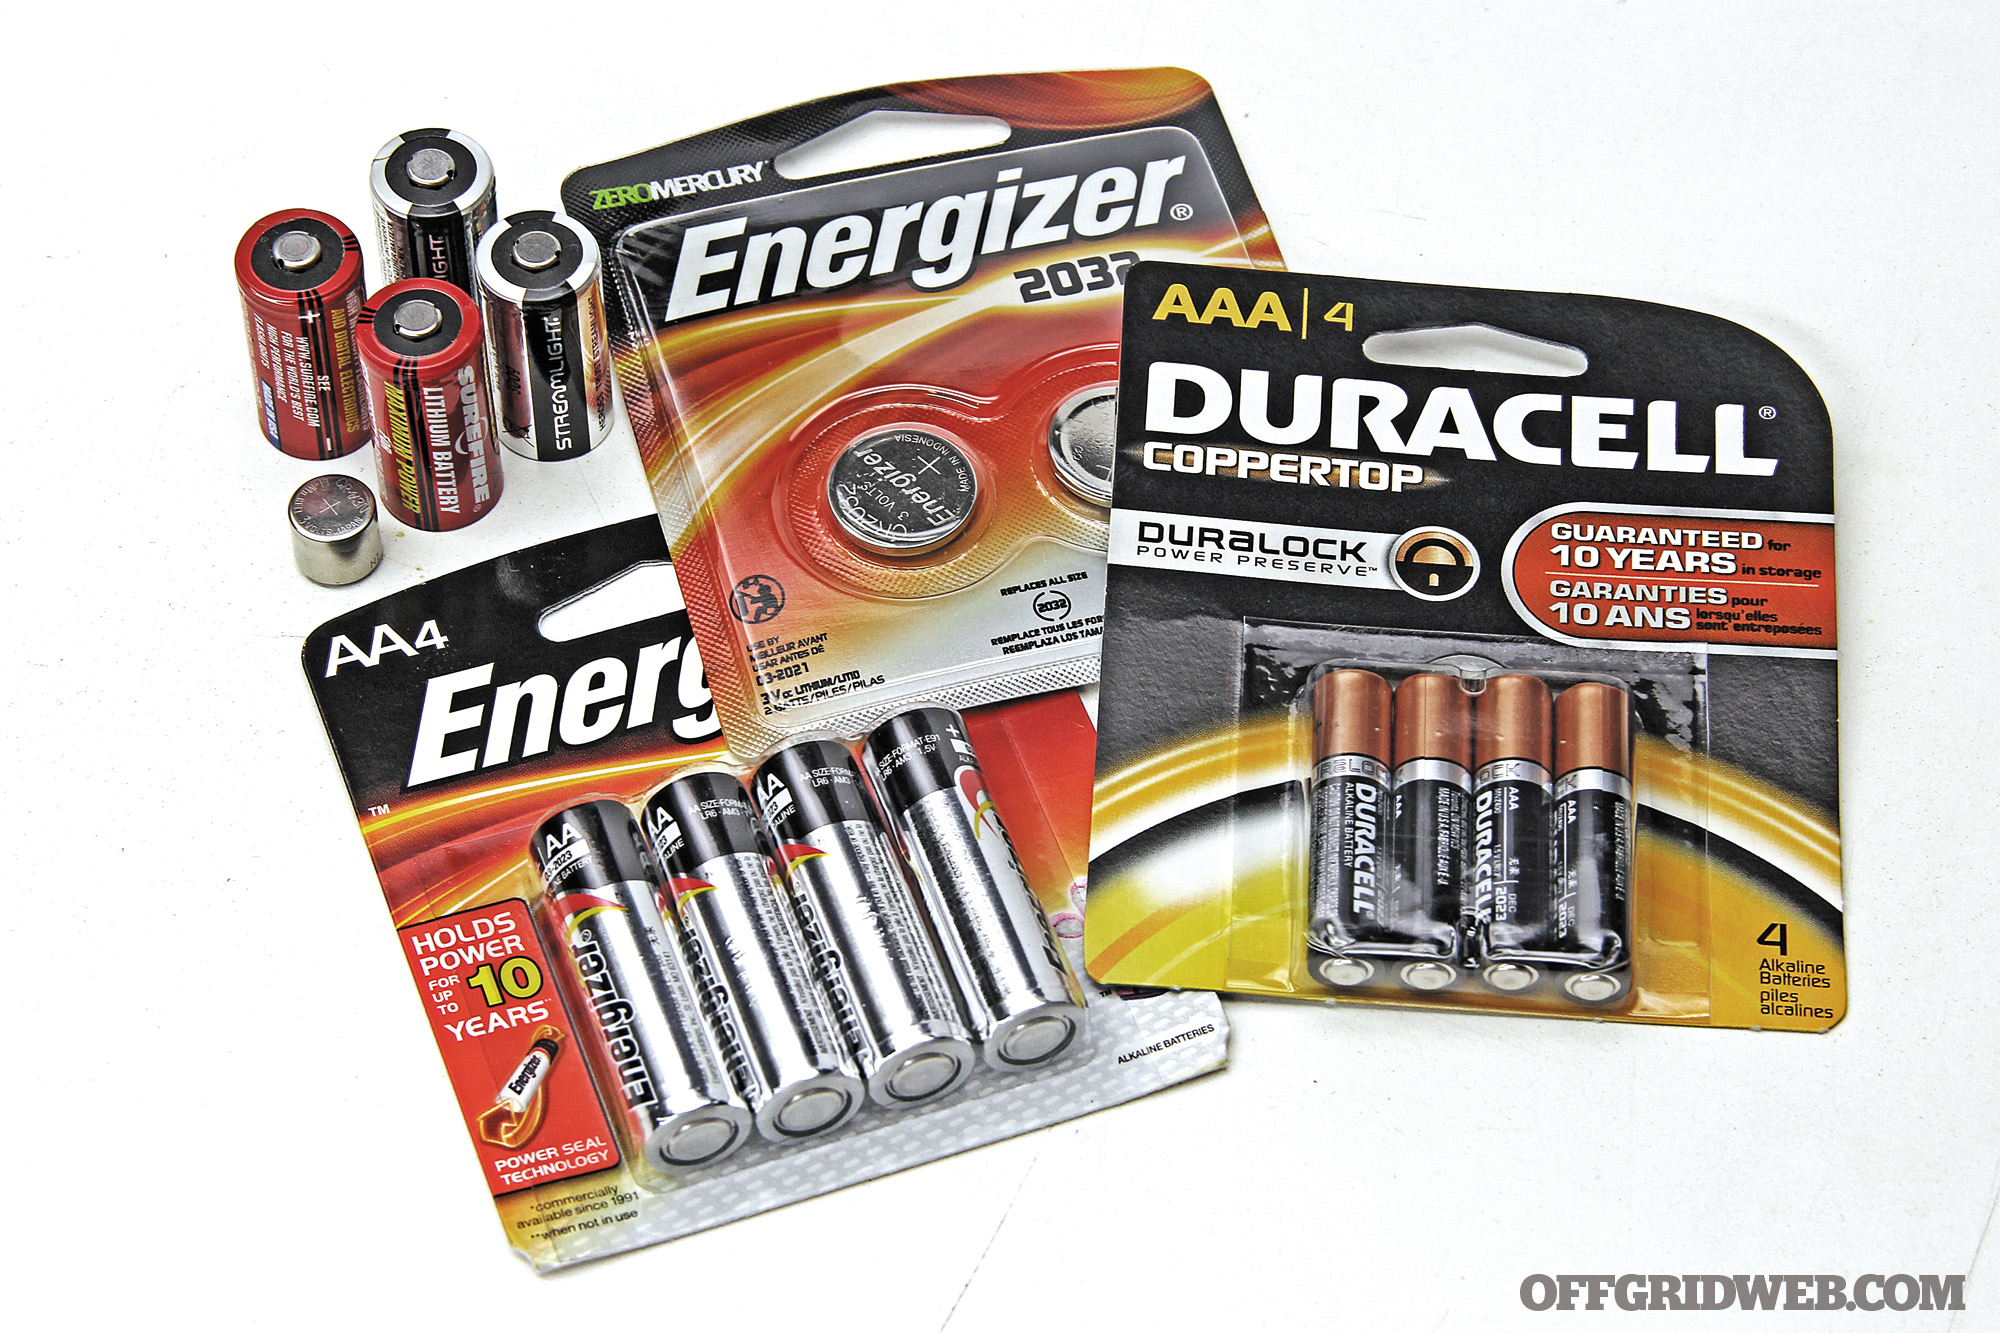
Batteries

Household survival supplies tools scavenging shtf prepper 13 batteries

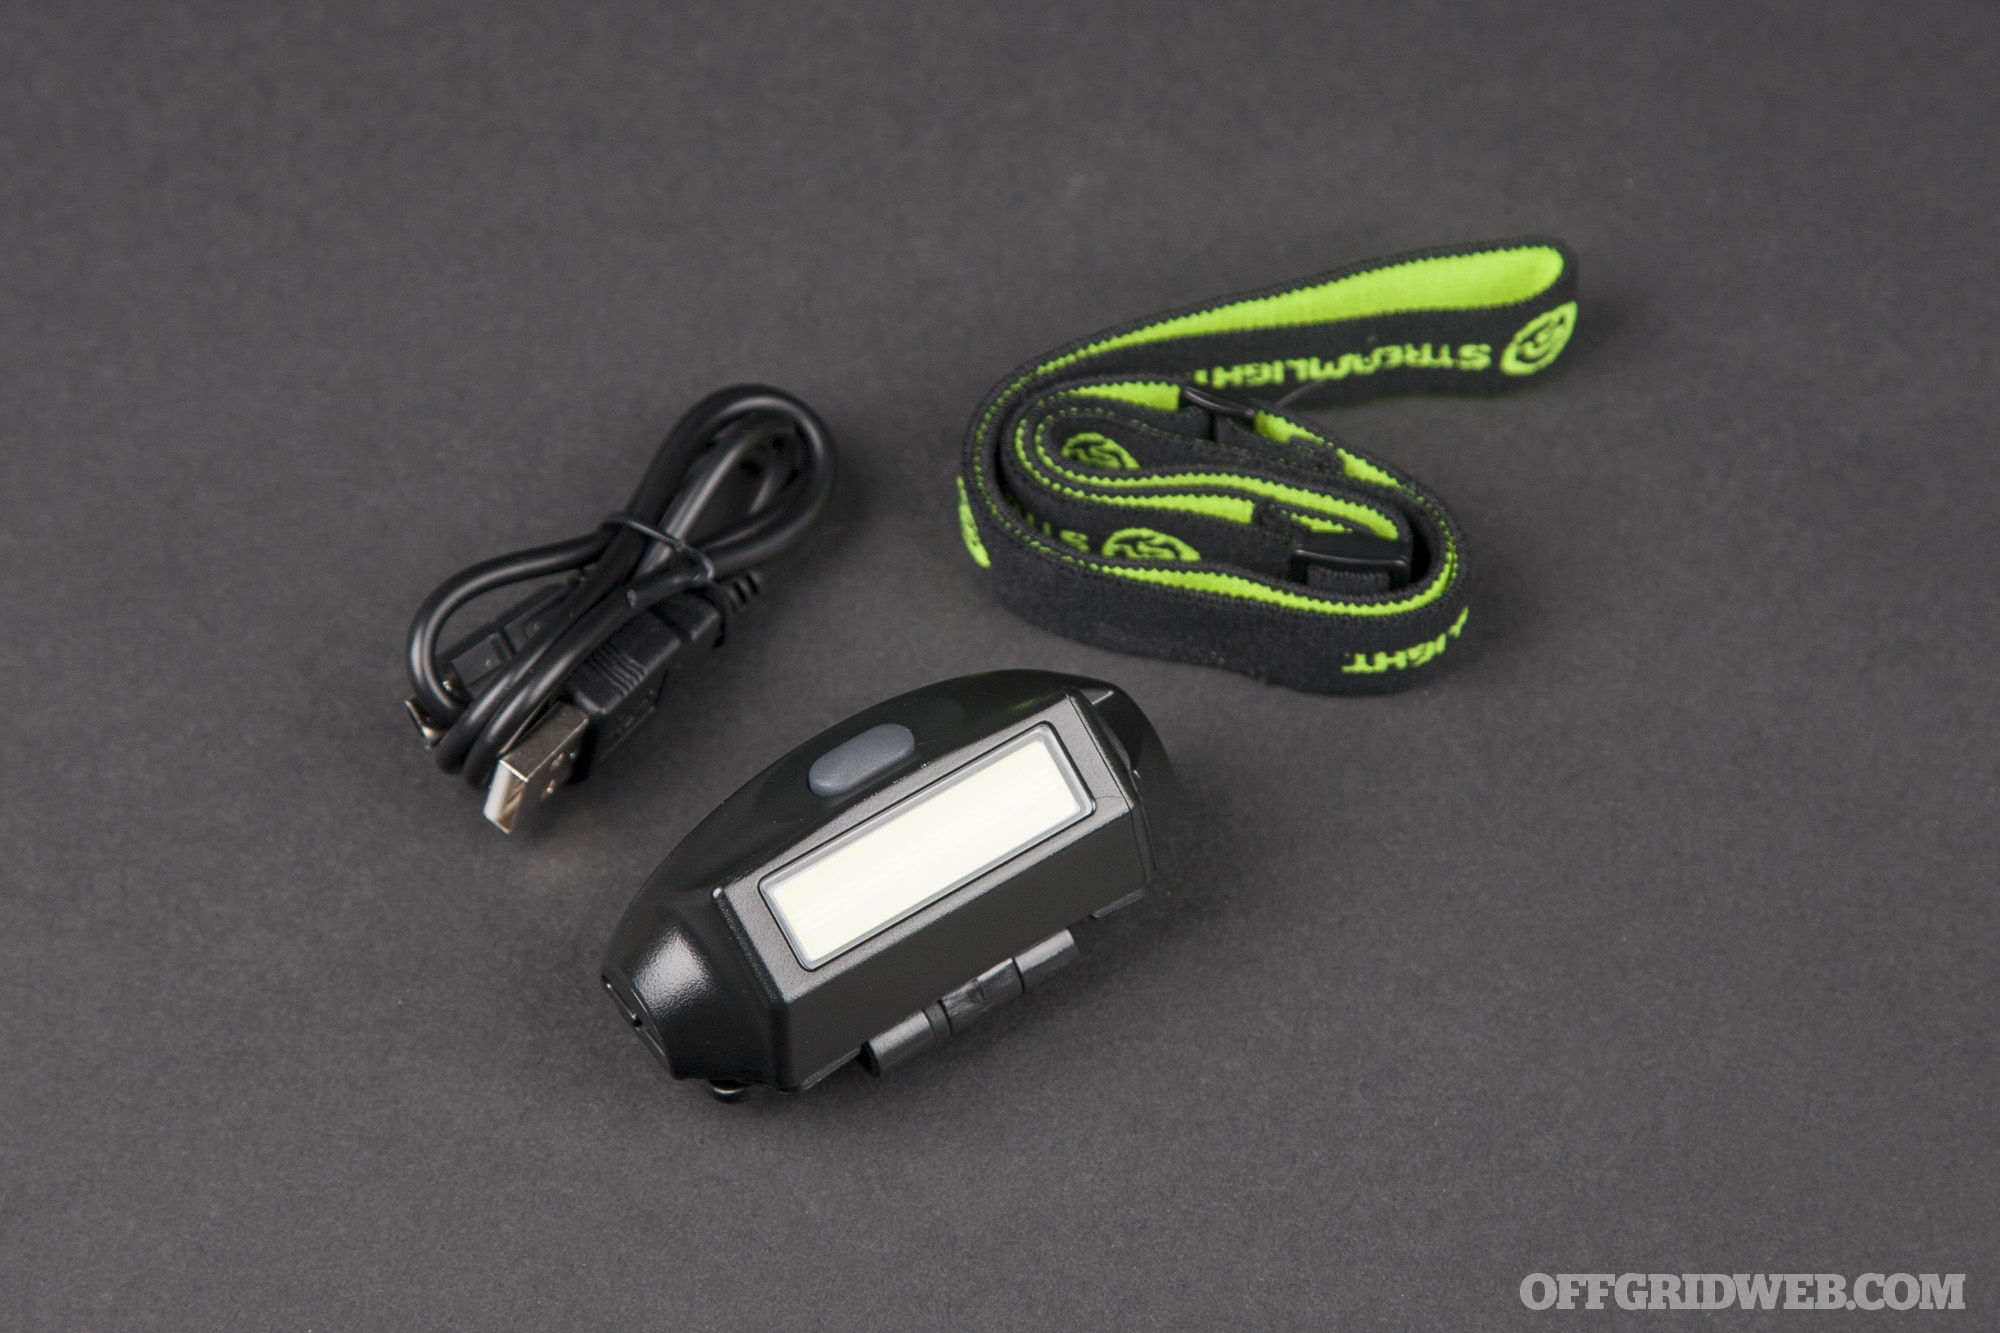
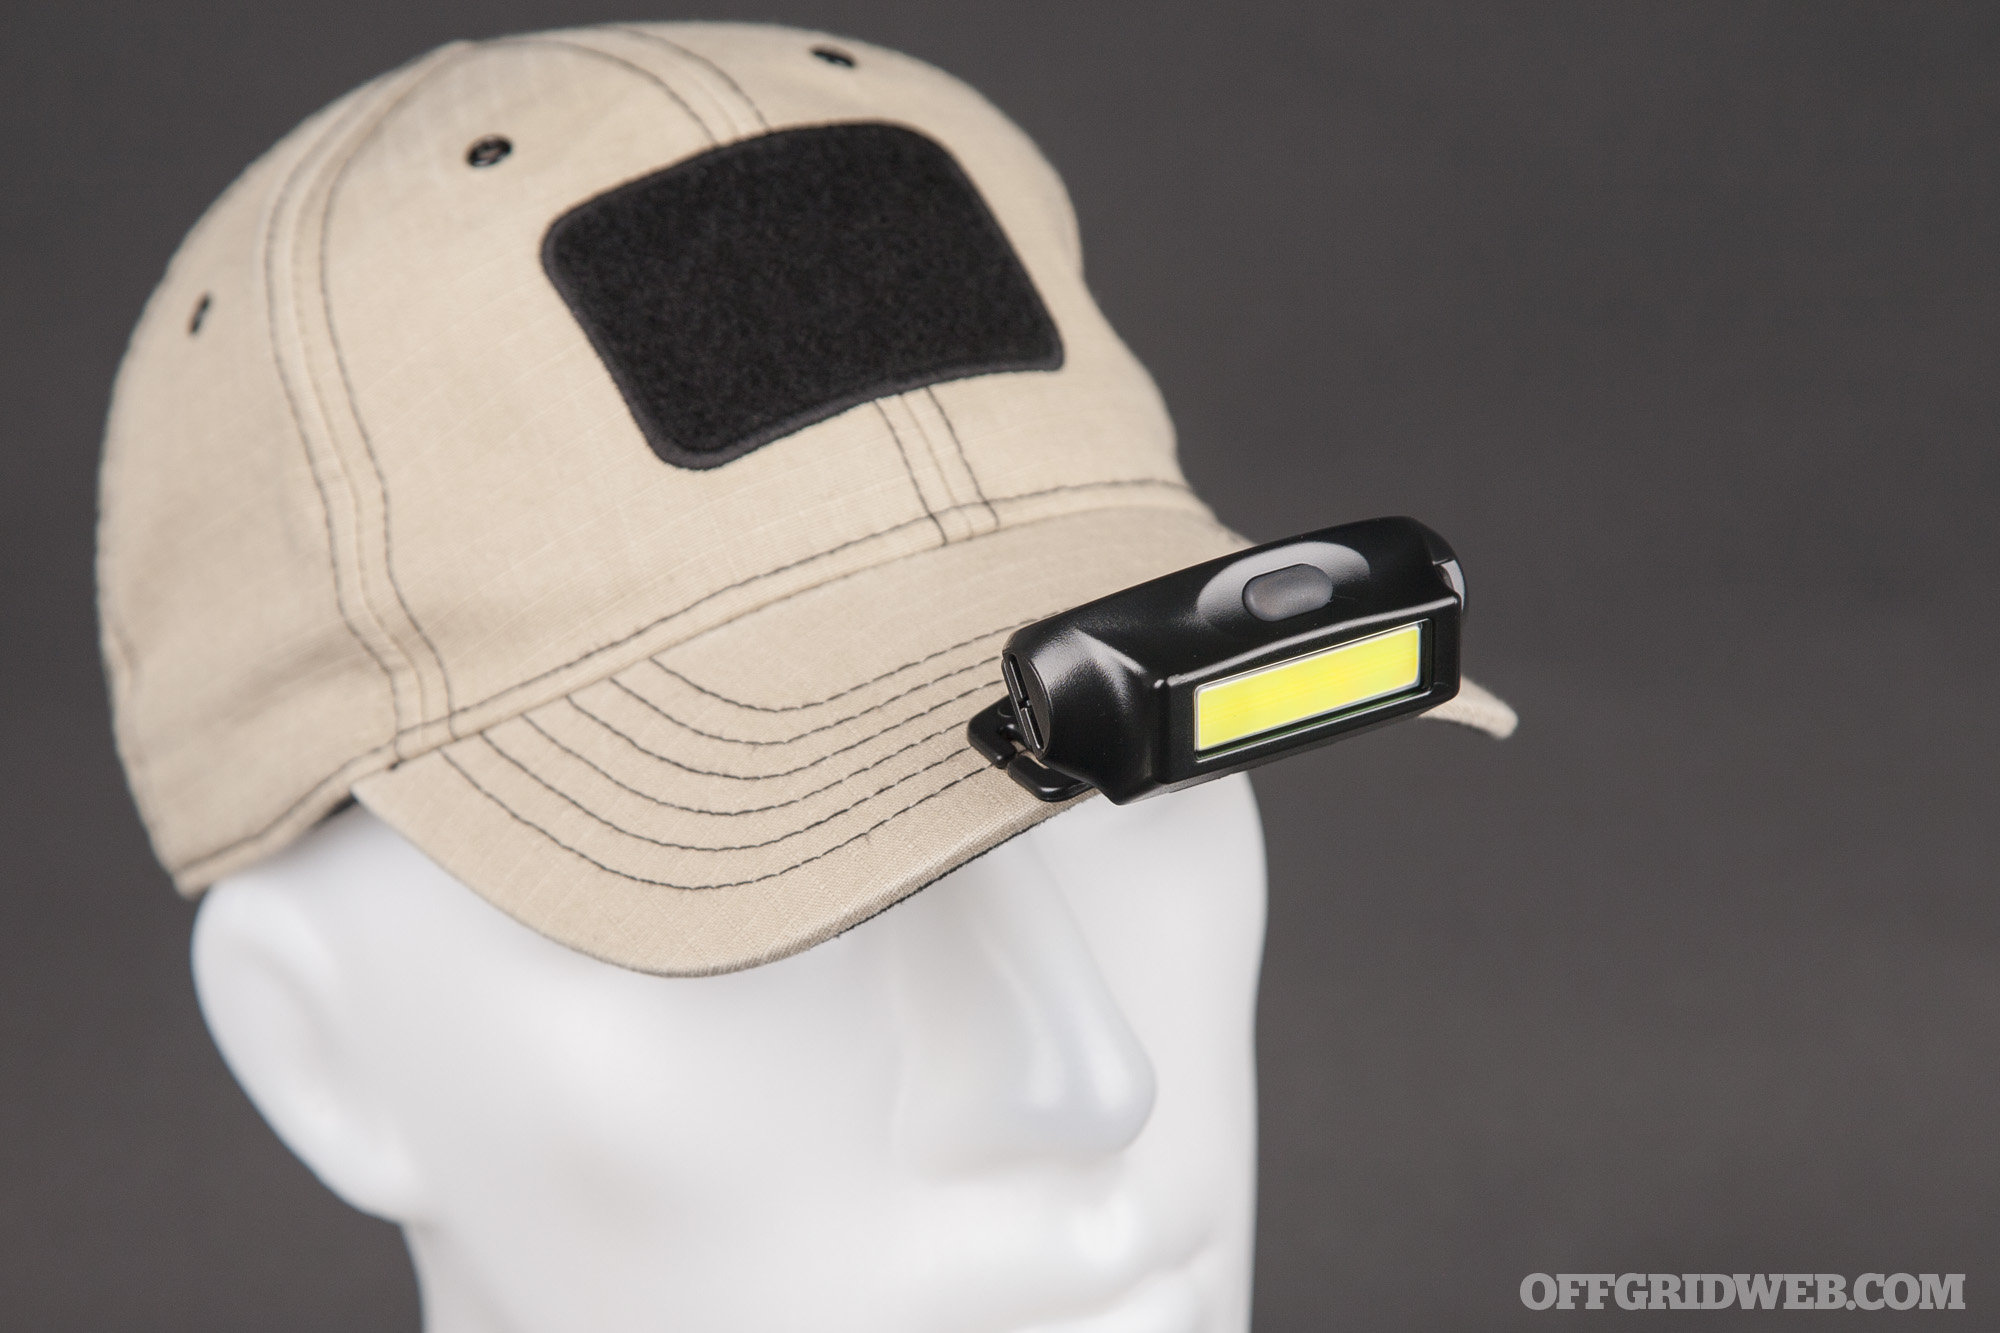
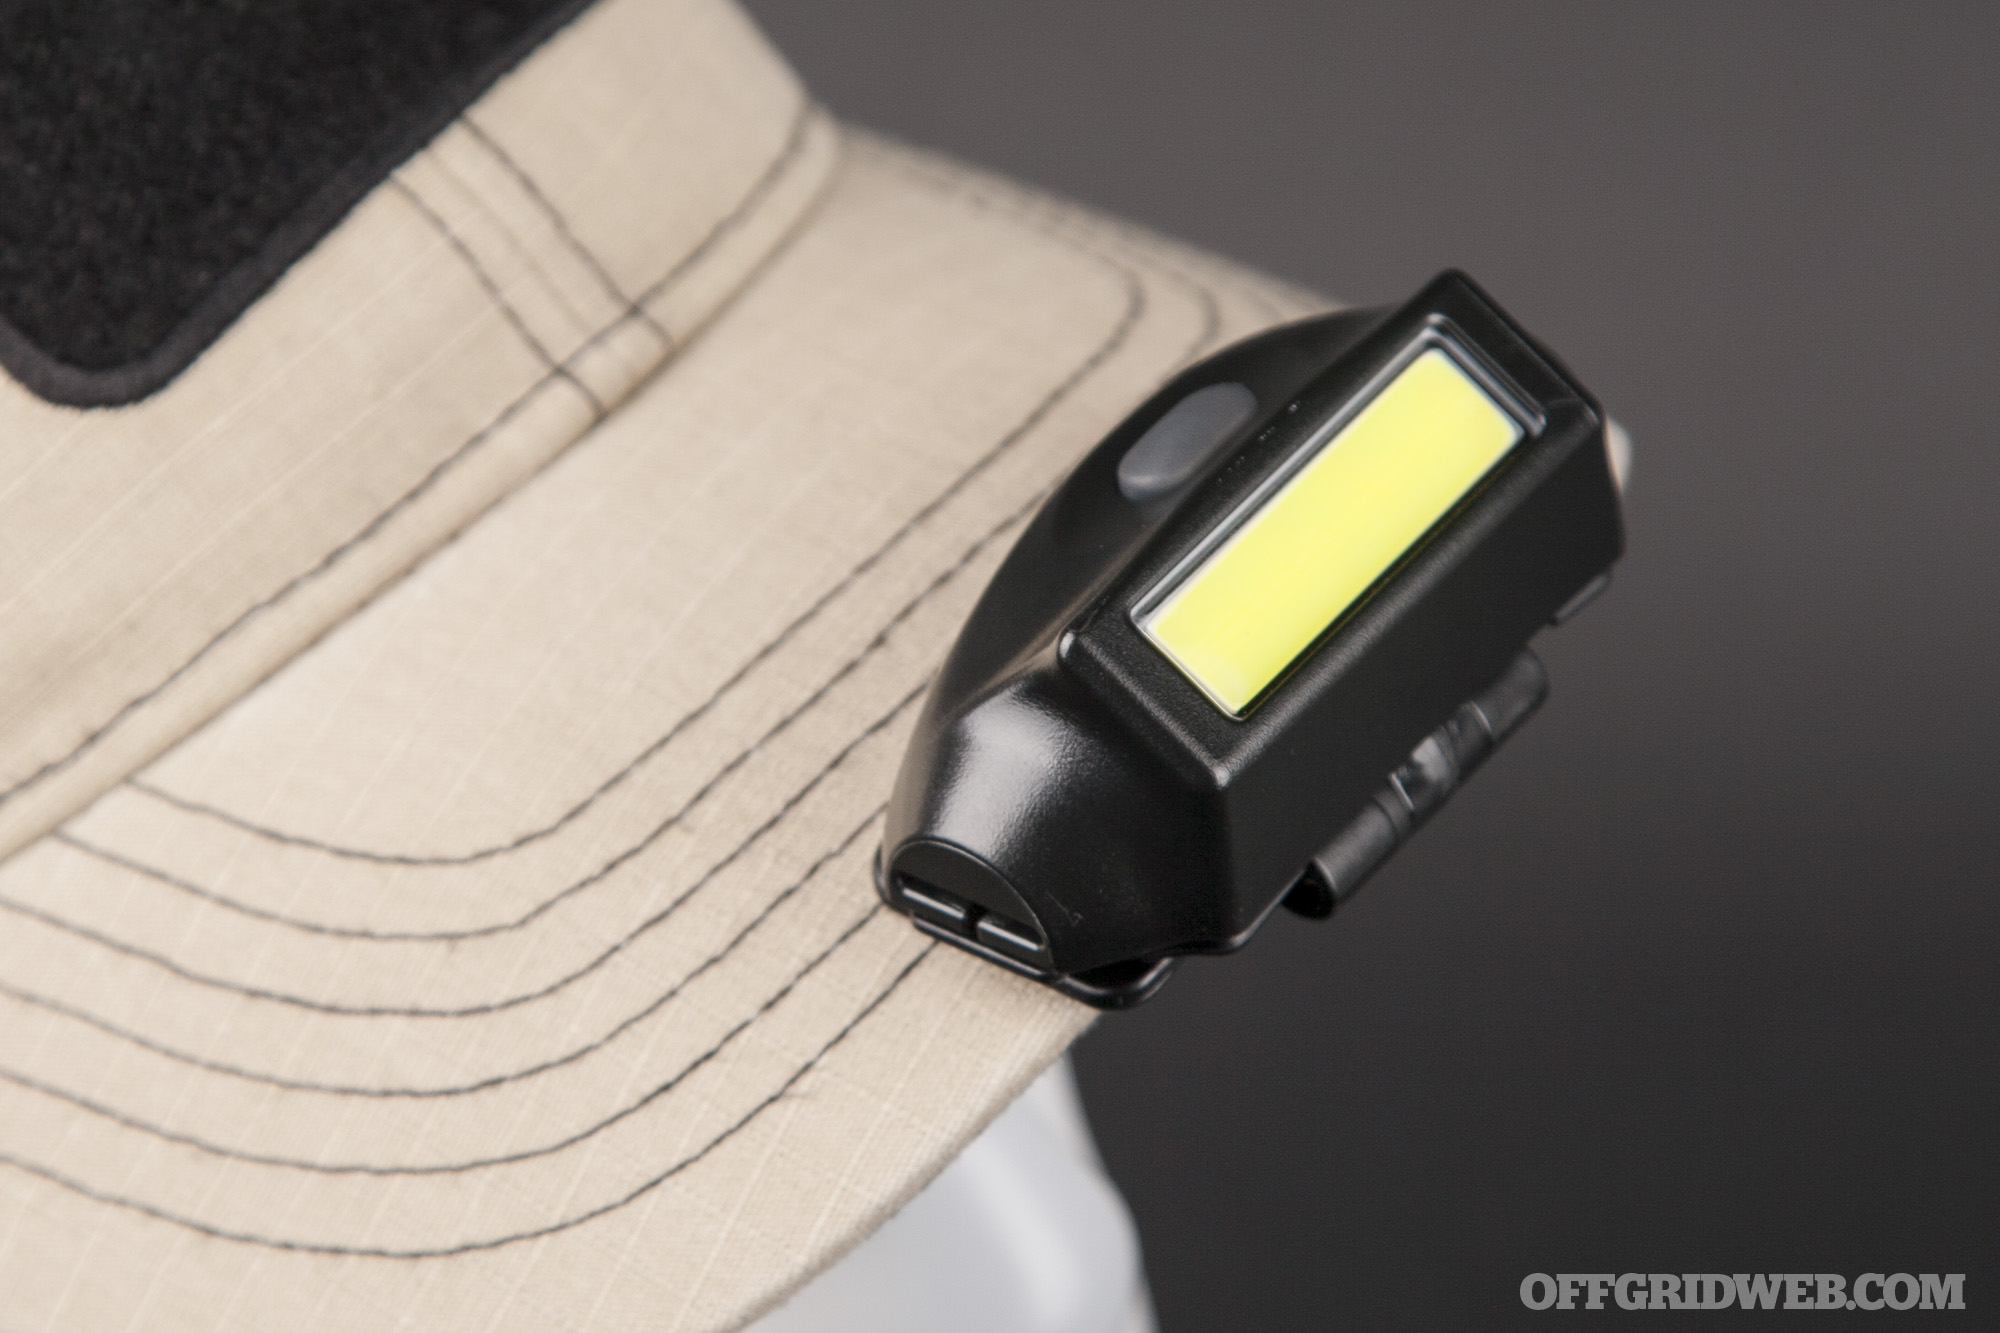
Your flashlights, radios, and many other useful items will be in heavy use during an emergency situation. Make sure you have dozens of spare batteries of each size that your equipment requires. Sure, you could steal some out of the TV remote, but it’s better to have fully charged batteries that are ready to use. If you have high-intensity flashlights or other gear that requires odd batteries, stock up on a few packs of those while you’re at it. Your $200 tactical flashlight isn’t much good without the special batteries.


Review: Streamlight Bandit Pro Headlamp

A quality headlamp is a valuable investment, whether you're planning to tackle some home-improvement projects in tight quarters, illuminate the trail on a night hike, or prepare for a long-term power outage. The market is awash with headlamps that offer multiple LED arrays, beam-focusing lenses, remote-mounted power packs, and more modes than you can keep track of — but these features aren't always necessary. They increase complexity and cost, and may also affect physical size and weight.

In many cases, all you need is a clear source of hands-free light for your immediate surroundings, rather than a bunch of features intended for alpine climbers or industrial technicians.

The First-Generation Bandit

Survival headlamp buyers guide review flashlight LED lumen camping hiking backpacking night 21

The original Streamlight Bandit, as seen in our Survival Headlamp Buyer's Guide.

The Streamlight Bandit was originally released in early 2017, and we first laid hands on it at SHOT Show that year. Its simplicity, light weight, and affordable price led us to name it one of our Best Products of SHOT Show 2017. We later gave it a full review in our Survival Headlamp Buyer's Guide, awarding it as “Best Value” in a group of 11 competitors. However, we still felt there was room for improvement, specifically regarding its short 2-hour run time at full output.

Over the last two years, Streamlight has listened to user feedback about the little headlamp. These suggestions were applied to create an improved second-generation model that Streamlight has dubbed the Bandit Pro.

Streamlight Bandit Pro

Steamlight Bandit Pro USB headlamp review flashlight camping survival shtf 3

So, what has changed? Before we get to that, let's discuss what has stayed the same.

The Streamlight Bandit Pro still produces a maximum of 180 lumens of white light in a wide flood pattern from a flat array of LEDs. It offers high and low output modes, controlled by a single rubber button on the top of the body. There's also a shielded micro-USB port for recharging the built-in lithium-polymer battery. The power button lights up red while the light is plugged in to a power source, and green when it's fully charged.

Steamlight Bandit Pro USB headlamp review flashlight camping survival shtf 6

The mounting system, which is unique to the Bandit series, is also unchanged. It features a removable pivot mount that clips onto the back of the headlamp, allowing it to be mounted to the brim of a hat or adjusted downward while using the included elastic headband. The light can be used on the headband without this pivot bracket installed, but we see no reason to do so unless you're looking to cut half an ounce of weight by leaving it behind.

Steamlight Bandit Pro USB headlamp review flashlight camping survival shtf 8

The Bandit Pro can be worn on a hat brim and pivoted out of the way when not in use.

At this point you may be thinking that there can't be much new about the Bandit Pro, but the main upgrade is one that's not readily visible. The Bandit Pro uses a 950mAh battery, as opposed to the original's 450mAh unit. This more than doubles run time at full output (4.5 hours) and extends run time on low to 21 hours. Streamlight also integrated a new low-power warning system — when the battery is nearly depleted and has roughly 5 minutes of run time left, output will blink three times every 30 seconds to alert the user.

Steamlight Bandit Pro USB headlamp review flashlight camping survival shtf 2

Above: A 25,000mAh RAVPower solar power bank (reviewed here) serves as a renewable off-grid charger for the headlamp.

The other noteworthy design change is the relocation of the micro-USB charge port from the bottom of the housing to the side. It's now recessed and features a more substantial rubber cover. Weather resistance is still rated at IPX4, meaning it won't have issues in a rain storm, but you shouldn't submerge it completely in water. If you need a light for SCUBA diving or storming beaches after nightfall, look elsewhere.

Steamlight Bandit Pro USB headlamp review flashlight camping survival shtf 7

Understandably, doubling battery capacity increased weight, but we're glad to report that the Bandit Pro is still extremely compact and light.

Dimensions are virtually identical, although the Pro is a tiny bit thicker than the original (0.9 inches versus 0.75 inches). We placed the Bandit Pro and original Bandit on a digital scale, each with pivot mount and headband installed, and received readings of 2.0 ounces and 1.6 ounces respectively. The huge increase in run time is well worth 0.4 ounces of added weight.

Steamlight Bandit Pro USB headlamp review flashlight camping survival shtf 4

MSRP for the original Bandit is $35 compared to the Pro's $39, so the price difference is also negligible. Again, $4 for the same brightness and double the run time? That's an easy decision.

The Color Drawback

Survival-headlamp-buyers-guide-review-flashlight-LED-lumen-camping-hiking-backpacking-night-26

Coyote versions of the regular Bandit offer two-color output.

That said, there's one remaining advantage of the original Bandit series. Streamlight offers dual-output models of the original Bandit, identifiable by their Coyote brown housings. These feature the regular white LEDs plus your choice of either red or green secondary LEDs. This additional color is a major advantage, since it'll preserve your night vision while reading maps or moving around your campsite.

Currently, the Bandit Pro is only available with white light output. We suspect that Streamlight will eventually release a dual-output Bandit Pro, but it's not available at the time of this review. If (or when) it does become available, we'll definitely be picking one up.

Conclusion

Steamlight Bandit Pro USB headlamp review flashlight camping survival shtf 1

The Streamlight Bandit series proves that “good enough” doesn't have to be an insult — in this case, it's a compliment. This isn't a 1,000-lumen monster with three different LED arrays, twelve modes, enough throw to span the Grand Canyon, and a massive battery pack that feels like strapping a brick to your head. It's not trying to be any of those things, because such a light would be overkill for most of us. Instead, it's a simple and effective means of illuminating your camp site, tent, work bench, or other nearby objects.

Steamlight Bandit Pro USB headlamp review flashlight camping survival shtf 5

We like the original Bandit and — with the exception of wishing for a secondary output color — we like the new Bandit Pro even better. It isn't ideal for lighting up long dark trails or scanning the horizon, but it works great for most other tasks. If you occasionally need a long-range light source, pair it with a flashlight with a spot beam (Streamlight's ProTac HPL, for example) and you'll have your bases covered.

Pros:

  • Soft 180-lumen flood beam works well for up-close tasks
  • Much improved run time — 4.5 hrs on high, or 21 hrs on low
  • Minimalist design keeps things simple and lightweight
  • Hat clip is a helpful feature for those of us who wear ball caps often

Cons:

  • Only available with white light output (at least for now)
  • Flood beam isn't effective for mid- and long-range illumination

For more information about the Bandit Pro headlamp, go to Streamlight.com.


RECOILtv: Shooting Around Barriers

If you carry a handgun on a daily basis, it's critical to be familiar with the tactics that go along with that weapon. Preparedness is about much more than having the right tools — it's about knowing how to use them, especially in a high-pressure situation. One of the keys to self defense is the ability to stay safe while responding to a threat. Instead of leaving yourself exposed out in the open, using cover can keep most of your body protected and increase your odds of survival.

RecoilTV shooting around barriers defense survival handgun pistol ccw 3

However, if you just stay behind that cover and don't react, you'll become a sitting duck. You'll need to use it to your advantage as you shoot back at your attacker. Tom Marshall of RECOIL recently attended a class with Team Torn that covered the topic of shooting around barriers. The instructors placed students behind various walls, as well as inside a car, and challenged them to shoot around these objects.

RecoilTV shooting around barriers defense survival handgun pistol ccw 2

Check out the full video from our SHTF/OFFGRID channel on RECOILtv below:


Morse Code: Dits, Dahs, Dots, and Dashes

This article originally appeared in Issue 3 of our magazine.

Long before the epidemic of tweeting duck-faced selfies with the Prime Minister of Denmark or posting your latest pasta selection at Olive Garden, Sam Morse (with some help from Joe Henry) was posting status updates to his BFFs as early as 1836. This partnership of a struggling artist and nerdy physicist would match letters of the alphabet to the varying durations between switching an electric current on and off. What they created was a binary encrypted alphanumeric code that could be just as easily transmitted visually, sonically, or tactilely. That’s tech talk for a system of “dots” and “dashes” that represent numbers and letters.

Unless you’re a radio operator, Eagle Scout, or grew up in a telegraph office, your exposure to Morse code has probably been limited to RUSH pounding out the call letters for the Toronto Airport (if you’re not familiar, search YouTube for “YYZ”). It’s been a while since Morse code revolutionized long-distance communication and has since fallen to the wayside, replaced by more modern methods of communication, including smartphones, text messages, and email.

Why should anyone even learn, much less take time to master, such an antiquated system? Wouldn’t it be like learning conversational Latin … “fun” to learn, but something you won’t ever have a use for? But it’s precisely the barebones low-tech/no-tech nature of Morse code that makes it an essential skill to hone when preparing for WTSHTF. Morse code adapts to multiple forms of communication easily and can be used visually with a flashlight, a mirror reflecting sunlight, by blinking one’s eyes (see side bar), or even plainly drawn out as a pictograph of dots and dashes. Audibly, Morse code can be utilized by anything that makes noise. Banging on a pipe with a chunk of concrete or using the beeping feature on some two-way radios comes to mind.

Deciphering the Code

Morse code chart dit dah dot dash communication shtf survival prepping 1

At first glance it looks as if ol’ Sammy put a bunch of dots and dashes in a hat and randomly assigned them to letters wherever he felt like it. Believe it or not, there’s a method to his madness. Morse did some studying and discovered that (as any Wheel of Fortune fan knows) T and E are the most frequently used letters in the English language. He assigned those the simplest code: a single dash or “–” for T and a single dot or “•” for E. From there the letters were assigned a code. In theory, the more frequently the letter is used, the more memorable the associated dots and dashes, vocalized as dits for dots and dahs for dashes.

How we represent the dots and dashes in relation to each other is also very specific. The timing of the Morse code sequencing uses the “dot” as its basic unit. The dot is of an arbitrary duration with everything else being relative to that common unit. For example: The dash is three dots long. The spacing between elements of the same letter is one dot. The space between letters is three dots, and the space between words is seven dots.

Antique Telegraph Machine

How do you learn Morse code? The same way you get to Carnegie Hall. PRACTICE. There are various mnemonic devices to help you remember what combinations of dots and dashes go with which letters, but nothing will be a substitute for rolling up your sleeves and repeatedly going over the code. It may help to say the sequence out loud, but instead of saying “dot” and “dash,” say “dit” and “dah” since that more closely represents what you’ll hear over a receiver. For example, the sequence for S when written out is “• • •,” but when said out loud is “dit dit dit.”

If the time ever comes where you find yourself banging on a pipe or cavern wall to get lifesaving communications out to rescuers, you’ll come to appreciate this old-fashioned way of texting.

Above: Here’s an easy learning tree from LearnMorseCode.com. As you move from the start and move down the tree, every move left is a dah (dash) and every move right is a dit (dot). For example, to get the code for O you move from the start position to the T (dah) to the M (dah, dah) and land on O (dah, dah, dah). Now something more complicated, the letter P: right to E ( • ), left to A ( • – ), left to W ( • – – ), and right to P ( • – – • ). Give it a try; figure out the dits and dahs to spell out your favorite four-letter word.

Language of Morse Code

Because spelling out sentences letter by letter in the form of dots and dashes can get ridiculously long, there are a few forms of Morse code shorthand that have been developed over the years. The most well known is the distress signal, SOS (• ––– ).

SOS is a form of “prosign.” Prosigns are two- or three-letter designations that indicate Morse code formatting and signal procedure and not actual text. They are sent without a space between the two letters. So a prosign of SN (• ) means “understood” and CT (–• –) means “commencing transmission.”

Another form of Morse code shorthand is called “Morse code abbreviations” and it replaces longer words with one- to four-letter combinations. 73 (–– ––) means “best regards,” B4 (– –) represents “before,” TNX (– –• –) means “thanks,” and 88 (––– –––) stands for “love and kisses.” Charts covering both forms as well as others can be found on the worldwide interwebs.

Practice On Your Smartphone

Morse code chart dit dah dot dash communication shtf survival prepping 4

There are also many apps for Android and iPhone that make practicing very easy and give you immediate feedback and correction. In our opinion, the free apps are just as good as the ones for which you’ll spend a few bucks. A few of the ones we tested and found to be worth of checking out are:

iPhone

  • Learn Morse Code — RosMedia (free)
  • Morse Code Driller — Kevin Neelands (free)
  • Study Morse Code — Ichiban Mobile (free)

Android

  • Morse Code Trainer — Todd Anderson (free)
  • Morse Code Toolbox — Felix Innovation (free)
  • Morse Audio Trainer — MaxiStar (free)

Morse Code in the Real World

One of the most compelling stories of Morse code in real-world use is the story of Jeremiah Andrew Denton Jr. Mr. Denton is a retired United States Navy rear admiral, naval aviator, and a former Republican U.S. senator for the state of Alabama. He was held captive in Vietnam for eight years, more than half of which were spent in solitary confinement.

In 1966, North Vietnamese officials aired a television interview with Mr. Denton as an obvious propaganda ploy. When asked how he was being treated, Mr. Denton stated that he was getting “adequate food” and “medical attention when needed,” but his eyes told a different story. During the interview Mr. Denton can be seen blinking the word “TORTURE” in Morse code, confirming to American Intelligence that U.S. military personnel being held as POWs in North Vietnam were indeed being subjected to physical abuse and torture. Learn more about this great American in our previous web-exclusive article on Morse Code.


A Prepper’s Guide to Shelf Life & Expiration Management

No one has to tell you that being able to successfully execute your SHTF plan means being organized down to the last detail. We go to great lengths to make sure we have everything we’ll need to get us through whatever crisis comes our way. We all know that the kits, bags, gadgets, and food are of no use if we can’t find them or if they’ve outlived their usefulness. So, we fold, roll, and stack our goodies and put them in an accessible place where they’ll remain good to go until SHTF.

Sometimes, though, out of sight can also mean out of mind. Some of us, out of habit, take for granted that our bug-out bag and supplies will always be at the ready. Nothing could be further from the truth. Unless your emergency supply consists entirely of nuclear war-resistant Twinkies, a large portion of it has limited shelf life. Some things last longer than others, but eventually everything comes to the end of its edible, usable, and/or effective life. Foodstuffs, batteries, medication and, yes, even water go stale (the latter mostly due to its packaging).

Survival food canned corn

The question then becomes how do we manage our stash so that when there is a crisis event, we’re not getting the trots from noshing on canned veggies whose best days were when the war was cold and Carrie Fisher was hot.

We assume you have a safe, dry place to store everything, and it won’t be piled up in the corner of some junk closet. There are many different storage racks, systems, and DIY projects to store and organize everything, but that’s an entirely different discussion. We’re focusing on managing all those “best by,” “sell by,” and “use before” dates.

If you want to see some pretty efficient shelf life management systems, stroll down to your local BigBuy SuperMegaloMart. These guys live and die by making sure the older stuff goes out and that there’s fresher stuff backing it up. They’ve got it down to a science, literally! Seriously, guys have degrees in that stuff.

Degree? We don’t need no stinking degree! All we need to do is reverse engineer what we see at Wally World.

Shelf life expiration best before date survival prepping shtf stockpile supplies food 3

Nothing is Random

Organize your supplies according to their use and what they can be used with. It’s no use to arrange everything alphabetically if you end up having sugar right next to the spaghetti. Instead, arrange it with the flour and other baking goods — boom, aisle 15 at your fingertips. Breakfast bars and cereal pair well, all the medical supplies get grouped together, and so on. You should also maintain a category for stuff you plan on using for barter and trade. If you have a large SHTF food supply you may even want to label the locations of your categories, like the aisles at the market.

Old Guys to the Front

Within your organized groups you’ll want to put the items closest to their expiration where you can use them first. Duh, right? But here’s the tricky part — getting line of sight to pending shelf death well before it happens. How many times have you found and tossed cans that have expiration dates with a year starting with 200X?

This technique is often referred to as FIFO, or First In First Out — refer to our previous article for more info.

Rolling can racks, such as this one from Amazon.com, make FIFO organization easier.

Rolling can racks, such as this one from Amazon.com, make FIFO organization easier.

Write it Down

A simple inventory management and expiration date spreadsheet can help you do your part to keep all those less-than-shelf-stable sundries from hitting the landfill. It doesn’t have to look like Apple’s financial prospectus. Simple is better. A column for what it is, one for how much of it you have, one for where it is, and another for the month of the oldest item’s pending demise. Order the list with the items closest to expiration on the top. Don’t forget to include all the items in your bug-out and return-to-home bags.

Shelf life expiration best before date survival prepping shtf stockpile supplies food 5

All that’s left is to get in the habit of regularly checking the list. You want to have plenty of time to make sure the items with one foot in the grave are taken care of. Mark your calendar, set an alarm, or pick some sort of semiannual event (daylight saving changeovers are handy) that will serve as a reminder to check the list and do it.

Use it or Lose it

A lot of us get in the mindset that our emergency food supply should never be touched except in an emergency. True, but as items reach the end of their lifespan, they should make their way into the pantry for everyday use. If you can’t use it before it expires, consider donating it to a food bank. Just make sure you replace everything with fresher items that … you guessed it … go to the back and everything else moves forward. Adjust your spreadsheet as necessary.

Shelf life expiration best before date survival prepping shtf stockpile supplies food 4

Managing your inventory needn’t be a complicated or herculean task, but it does take some discipline. Then again, so does making sure you’re prepared for whatever nature or man throws your way.

Shelf Life: A Quick Reference Guide

<5 Years – These are common categories of emergency supplies with a finite shelf life; about five years or less depending on the item and condition of storage:

  • Cheese/soy storable dairy, including powdered eggs
  • Canned foods (commercial or self-canned)
  • Baking goods (sugar, flour, grains)
  • Condiments, peanut butter, jams, and jellies
  • Pastas, grains (such as rice), and legumes (such as beans)
  • Pharmaceuticals/medicines
  • Sports drinks/soda/non-alcoholic and some alcoholic beverages

>5 Years – Items with longer-term effective dates; many are five years and beyond, depending on item and condition of storage:

  • Batteries
  • First-aid supplies
  • Fuel
  • MRE, dehydrated, and freeze-dried foods
  • Seeds, fertilizers, and items for self–sustainability
  • Some alcoholic beverages
  • Ammo
  • Candles
  • Water purification systems

Use By, Sell By, Best Before… What Do They Mean?

Shelf life expiration best before date survival prepping shtf stockpile supplies food 2

“Sell By”

This date has nothing to with the spoilage of an item, and everything to do with how long the seller wants it to stay on the shelf. It’s not mandatory to label items with a “sell by” date. That being said, if you want the best of what’s on the shelf (freshness, taste, brand-consistent quality) and to avoid the one that’s been looking for a home the longest, reach to the back.

“Best By”

This too has nothing to with the shelf stability or safety of an item. This is kind of like the manufacturer’s booty-covering move, telling you how long they feel the quality of their product is at its peak. In some cases there should be a “better if used after” date — think wine, cheese, bourbon, even sour cream can get better with time (gets a little more tangy). Isn’t sour cream, by definition, cream that’s spoiled?

“Guaranteed Fresh Date”

You’ll find this in that piece of heaven we call the bakery department. Items will be edible long after this date, but only some wild wolf-raised heathen would even consider eating a lovingly made double-stuffed chocolate chip cookie a whole 24 hours after it first slid down the wax paper in its fluorescently lit, slightly dusty, 1970-ish display case.

Shelf life expiration best before date survival prepping shtf stockpile supplies food 1

“Use By”

Again, this date has little to do with the safety or lifespan of the product. It’s just another way for the manufacturer to suggest when they think it’ll taste better. Seems like a marketing scam to get you to replace perfectly good stuff you forgot to use.

“Expires After” AKA “Effective Until”

This is the big one! You’ll most likely find this on pharmaceuticals. Does it mean if you eat a Flintstone chewable from the Bush administration you’ll die some horrible Ebola-like death? Probably not. In 1979, the U.S. government required drug companies to stamp an expiration date on their products. It is what the drug company has determined to be the lifespan of the drug’s full potency, not the point at which it’s no longer effective. In fact, the FDA did a study and found 90 out of 100 prescription and OTC drugs they tested were perfectly good to use even after 15 years. With the exception of nitroglycerin, insulin, and liquid antibiotics, medical authorities say most drugs maintain effectiveness for years.

Smells like another marketing ploy to get us to throw out perfectly good feel-good pills and buy the new “feel better because they’re fresher” pills. Caveat: you should store medications in a cool, dry place out of the sunlight to extend effective dates. Do not use medicine that requires refrigeration after it’s warmed to room temperature (talk to your local pharmacist).

So how do we really know when something actually has gone bad? The “Honey, smell this” test is a tried-and-true method. If it smells funky, doesn’t look right, has a furry layer of mold, or your cat just died after accidentally eating it, exercise your good judgment. When in doubt, toss it out.


Video: Russian Bushcrafter’s Log Cabin Build

Max Egorov considers himself to be a regular guy — he's not a professional carpenter, builder, or survival instructor. In fact, he's actually a lawyer from St. Petersburg, Russia. Each year, he takes one month off work to trek into the remote forest and work on his hobby of bushcraft projects. He also takes the time to film these projects, and uploads them to his YouTube channel Advoko Makes. Most of Max's content has been created in his native language, but he has been working to provide English-language voiceovers for these videos so more people can learn from them.

Advoko Makes Russian bushcraft log cabin DIY project woodworking survival 5

We've previously written about Max's videos on fire-carved log furniture and vertically-grilling shish kabobs inside a Swedish torch. His latest project is a much larger undertaking — building a custom log cabin from scratch with basic tools. As with his other videos, he's doing all the work solo, including cutting and moving massive fallen logs. That's actually the subject of the first video in his series:

The A-frame device he creates to move these 1,000-pound logs over rough terrain is pretty clever. And although he uses a chainsaw to speed up the work, most of the rest of the cutting is done with hand tools such as an axe, chisel, and adze.

Advoko Makes Russian bushcraft log cabin DIY project woodworking survival 4

In the second part of the series, he processes these logs by cutting large copes in each end and a flat notch along the length. Moss is added to the notches for insulation, and pegs are hammered into holes at the joints to hold the logs in place.

The third part of the series shows how Max built doors in each end of the cabin, allowing for easier access and a means of escape if a bear attempts to break into his cabin during the night. Jack studs are shaped from logs and erected vertically, using a pendulum on a string to ensure they're level. A gable at the top of the door holds the jack studs together.

In the fourth and latest part of the series, Max adds more gables to accommodate for the slope of the roof, and discusses some of the hiccups he encountered during this process.

This is an ongoing project, so we plan to keep an eye on the progress. If you'd like to see more of Max's log cabin videos when they're released, you can do so through this playlist.


Archery 101: An Overview of Survival Bows & Arrows

This article originally appeared in Issue 3 of our magazine.

Photography by Michael Grey and Courtesy of AMC

Long before gunpowder forever changed the way man waged war and killed food, a pointy stick propelled down range was the pinnacle of ballistic technology. For tens of thousands of years, nations were won and game taken down using a simple bow and arrow. With all the different shotguns, rifles, and pistols to choose from, does a limited range, non-concealable, and low-power weapon have a place in your TEOTWAWKI game plan? The answer is “Yes” — for many reasons.

Photo Credit: Gene Page/AMC

Photo Credit: Gene Page/AMC

If you’re one of the many who enjoy watching Southerners being chased around Atlanta by the undead, you’ll know that a bow and arrow is a must-have badass weapon in a post SHTF world. Don’t get me wrong, guns have their rightful place in these scenarios too. But there are those rare occasions in which your favorite heater may not be the best choice of weaponry. Whether you need to be completely silent (even a gun with the best sound suppressor on it still makes a noise), have no access to ammo, or need to send a line over a high tree limb, it is nice to have a tool available to do all those things and more.

Unless you’re a bow hunter, way into The Hunger Games or a big Geena Davis fan, chances are you’ll need to brush up a little on your archery skills. For most of us, our first and maybe only exposure to archery was in summer camp, and the skills we learned then have fallen to the wayside along with playing tetherball. So where do we start our exploration into the ancient art of the curved stick and feathered twig?

Archers to the Line, Nock Your Arrows

First, let’s clear the waters. We’re in no way implying that a bow and arrow could take the place of your direct-impingement, multi-railed lead thrower. Given the choice of only carrying one weapon, a 1911 or a crossbow, we’d bet good money that all of us would choose the pistol. However, one of the first things we learn is that in order to survive and thrive, you first need a plan, then a backup plan, and finally a backup for your backup. Having access to a bow and some well-fletched arrows is a great alternative means of hunting and defense.

Archery 101 survival bow arrow hunting shtf prepper weapon tool 8

Secondly let’s not get bogged down in the pros and cons of archery. We’ve already established that most would readily reach for a firearm before a bow. Instead let’s explore the upside of knowing the methods and means of sending projectiles down range without a bang. And why a bow, in whatever configuration you choose, should have a place in your arsenal.

Archery is a good way to get kids involved in preparation and planning. Everyone should know how to shoot a gun, but sometimes there isn’t always an easy way to get the kids the range time they need. With bows coming in different lengths and draw weights, kids have easy, inexpensive access to learning how to contribute to the defense or the hunting needs of your family. As a bonus, it’s a great bonding experience when you can calmly converse with and teach your kids without having to yell through ear protection.

As with any weapon system, to effectively use a bow and arrow you need to commit to properly learning the techniques and equipment options. You don’t need to be William Tell or Robin Hood to consider having a bow in your arsenal. You should, however, practice until you are comfortably proficient. One of the advantages of practicing archery is that it can be done in suburban or urban surroundings without drawing attention to yourself. With a gun, it’s not so easy to run out to the backyard or garage and start practicing, especially if you’re in more dense living conditions — in fact, in many jurisdictions it would be illegal.

Stealth

The bow and arrow was the first stealth weapon system (the jawbone of an ass is hardly a weapon system). There are many potential situations in which you might need to put down a threat or your next meal without the percussive report of a firearm. This is especially true in a suburban or urban setting where you would want to maintain a low sonic profile and not draw attention to yourself, whether defending your home ground or hunting for game near your base camp.

Archery 101 survival bow arrow hunting shtf prepper weapon tool 12

These are real world, plausible scenarios. There are plenty of real world SHTF threats to prepare for that have nothing to do with reanimated corpses trying to devour you. For example, everything has been off grid for an extended period of time and your food supplies are depleted; you’re in the local park’s nature trail looking for food. Elsewhere there are whole groups of starving, angry, unprepared, and less self-sufficient people waiting for food to come to them. A gunshot could bring the attention of those who would be less than polite in taking what you worked so hard to stalk (think kids fighting over the last cookie and multiply that times the population of your town). A stealthy takedown would ensure your return to your base camp with dinner.

Bow of All Trades

The bow is also a versatile tool that can be used for things other than hunting and defense. Takedown recurve bows, like the industry-leading Hoyt Buffalo, break down into pieces that can be easily put in a pack and carried more easily than a cumbersome longbow or compound bow (see “Types of Bows” below).

Archery 101 survival bow arrow hunting shtf prepper weapon tool 20

Above: Crossbows use bolts (bottom) while bows use arrows (top). Bolts and arrows feature different flight characteristics and vary in overall size and weight. Many variations of each are available to suit a variety of uses. 

A bow and flaming arrow was the first flamethrower. There may be times when you want to reach way out and set something on fire, but a flaming arrow shot high in the air can also be a great way to signal others. Of course, remember what comes up must come down, and small flames tend to create bigger flames. You can also attach a string to an arrow and shoot it over a high limb or across a gap anytime you find yourself needing to get a rope out farther than you can throw it.

Bows can be configured in many different ways and are adaptable to a wide variety of purposes. Debate always rages as to which type of bow is best suited for SHTF. It’s like debating which calibers are best; there are compelling arguments for and against each choice. Ultimately it’s a personal preference depending on what you’re comfortable with and what you intend to use it for.

Types Of Bows

Longbow

Archery 101 survival bow arrow hunting shtf prepper weapon tool 5

The oldest, longest used and simplest of the bow types. A long semi-flexible plank of wood is put under tension by a length of string. As the bowstring is drawn back, the bow is put under increased tension. When the string is let go the release of tension propels the arrow.

Recurve

Archery 101 survival bow arrow hunting shtf prepper weapon tool 4

An upgrade to the longbow, the recurve has the basic shape of the longbow, but curls (recurves) the tips in the opposite direction. As the bow is put under tension not only does the bow itself bend, but the recurved tips also straighten out. When released, the bow goes back to its original state with extra oomph imparted to the arrow as the recurved tips return to their original state.

Takedown Recurve

Archery 101 survival bow arrow hunting shtf prepper weapon tool 2

This bow is born for those preparing for crisis events. The best of the bunch and our recommendation is the Hoyt Buffalo. It breaks down into three parts (plus the string) that can easily be packed away and transported more discreetly than a traditional recurve or longbow. Takedown bows have the advantage of having interchangeable limbs, great for kids (or adults) progressing in skill level.

Compound

Archery 101 survival bow arrow hunting shtf prepper weapon tool 6

The compound bow is the high-tech Formula 1 solution to an ancient design, using cams and pulleys to increase arrow speed while making it easier to draw. There are also more customizable accessories and accouterments that make the compound bow more accurate than its forefathers. Stabilizers, fiber-optic sights, string and limb silencers all combine to increase accuracy and ease of use. The downside, like any high-performance tool, is that it needs regular tuning. But with some education and guidance you needn’t be tethered to your local pro shop for service.

Crossbow

Archery 101 survival bow arrow hunting shtf prepper weapon tool 7

If you’re used to rifles and don’t want to make a big departure, the crossbow may fit your needs. The crossbow, when cocked, is at much higher tension than any of the other types of bows, sending bolts down range at speeds up to 450 fps. This is easily the most lethal of the bunch. One of the coolest developments in crossbows uses the lower receiver of an AR-15 and marries it to a long, high-tension crossbow “upper.” The result is a long-distance “sniper” crossbow. We’re not sure about making a non-regulated weapon like a crossbow into a regulated one by attaching it to an actual lower receiver, but it is a pretty neat system.

Sling Bow

Basic CMYK

The new kid on the block and arguably the most fun — think of it as the love child of a sling shot and recurve bow. It’s easily the most portable of all the options, possibly even more than the takedown recurve. Better suited for CQB and taking down small game, the sling bow uses industrial elastic to send a wide variety of arrows down range. The three-piece takedown arrows are by far the most packable and practical. We like the Montie Gear Tactical / Modular Slingshot fitted with a whisker biscuit arrow rest and three-dot sight — it is the pinnacle of sling bow design and well worth the price tag.

The Cost Factor

Perhaps the most compelling reason for adding a bow to your stable of weaponry is the cost factor. Unlike a gun, you can readily find simple materials to make your own bow and some arrows (check out the video below). The homemade stuff is certainly not as good as the name-brand gear, but when constructed well, it can be an effective, make-do solution.

The point is that you needn’t run out and spend thousands of dollars on the latest over-hyped stick slinger. If you love archery and bow hunting, by all means get the latest and greatest top-of-the-line gear. But just remember that whole nations were conquered and millions of deer made into supper long before there were skeletonized risers, unobtainium limbs, and strings made from precious metals.

Archery 101 survival bow arrow hunting shtf prepper weapon tool 10

Surfing Craigslist turns up some great deals on models that were once the latest craze. My 15-year-old Craigslist find (seen above) doesn’t look slick, but it gets the job done, and none of the deer it’s taken down cared how old the bow is. If you’re looking to be the first one who plucks your bow’s strings, manufacturers such as Hoyt offer high-quality but inexpensive bows in every category.

There’s no need to hang up the ol’ Winchester and run out to start developing Apache-like skills. But there’s no doubt that the bow has a place in your toolbox. Think of it like this — even if you have a Phillips head screwdriver that handles most of your jobs, there are times when the situation calls for a flathead.

Types of Arrowheads

One of the most compelling reasons to include bow and arrows in your TEOTWAWKI plan is the flexibility of using interchangeable arrowheads. Below is a rundown on arrowhead types:

Bullet

Archery 101 survival bow arrow hunting shtf prepper weapon tool 13

The simplest and least intimidating of the group. Used for target practice and occasionally small game (very small and frail game).

Blunt

Archery 101 survival bow arrow hunting shtf prepper weapon tool 14

A flat or bulbous tip made of metal, rubber or plastic. Used for knocking the crap out of small game that would be torn apart by other types.

Snare

Archery 101 survival bow arrow hunting shtf prepper weapon tool 19

This arrowhead screams, “to hell with aerodynamics.” Loops at the edge of the arrowhead entangle a bird’s wings to bring them down.

Field

Archery 101 survival bow arrow hunting shtf prepper weapon tool 15

A little bit more aggressive tip used mostly for target shooting and small game.

Judo

Archery 101 survival bow arrow hunting shtf prepper weapon tool 16

The most, steam-punk, Whiskey Tango Foxtrot-looking of the bunch. Spring activated arms catch leaves and grass so the arrow doesn’t get lost by burying itself in the under brush or embedding itself in soft ground. Used for “stump” shooting small game.

Fish

Archery 101 survival bow arrow hunting shtf prepper weapon tool 17

Pretty self explanatory as to its use. Spring-loaded barbs secure the fish as the arrow is reeled in using an attached string.

Broadhead

Archery 101 survival bow arrow hunting shtf prepper weapon tool 18

The most aggressive and “high-tech” of the group. Razor-sharp blades tear through the hide of big game. Size and number of blades vary. A variation of this type of arrowhead employs spinning blades that act as a guillotine, painlessly taking down gobblers and other fowl. Broadheads are the tip to use for both defense and bringing dinner home.