This article originally appeared in Issue 10 of our magazine.
Warning! The following article is a brief overview on setting traps and snares and is not meant to be a thorough in-depth guide. Some traps may be illegal or dangerous and are set at your own risk. For more information, consult with a reputable trapper or survival instructor.
It doesn’t get much worse than this. The collapse of society has come and gone. What’s left is a wasteland of devastated metropolises, a loose society ruled by roving warlords, and scattered remnants of resources. You now subsist on what you find in the urban jungles and the surrounding wilderness.
But how did you go from clueless cubicle monkey to keen trapper?
Your transformation from John in the IT department to Grizzly Adams wasn’t easy, but it had a powerful driving force — hunger is a very persuasive motivator. If we can stay alive long enough to figure out a new skill through trial and error, then we’ve learned what to do and what not to do. But there’s another path. We can try door No. 2. Learn a new skill and move toward mastery of it while we still have expert guidance and a safety net in place. If door No. 2 sounds like a smart way to learn how to secure some food, then read on.
Trapping is the ancient art form of harvesting animal foods while you’re absent from that area. It dates back thousands of years. Many of the different traps that our forebears used have survived into modern times, still used by traditional cultures around the globe — and for good reason.
Traps are like little mechanical hunters that you set out on the landscape. They hunt for you while you’re off doing other tasks. They hunt throughout the night while you’re sound asleep. They hunt in places you wouldn’t want to sit in for very long, like swamps and icy woodlands. With the proper construction, de-scenting, placement, and baiting, your “automated hunting machine” can be just as effective as the devices of the old-time trappers.
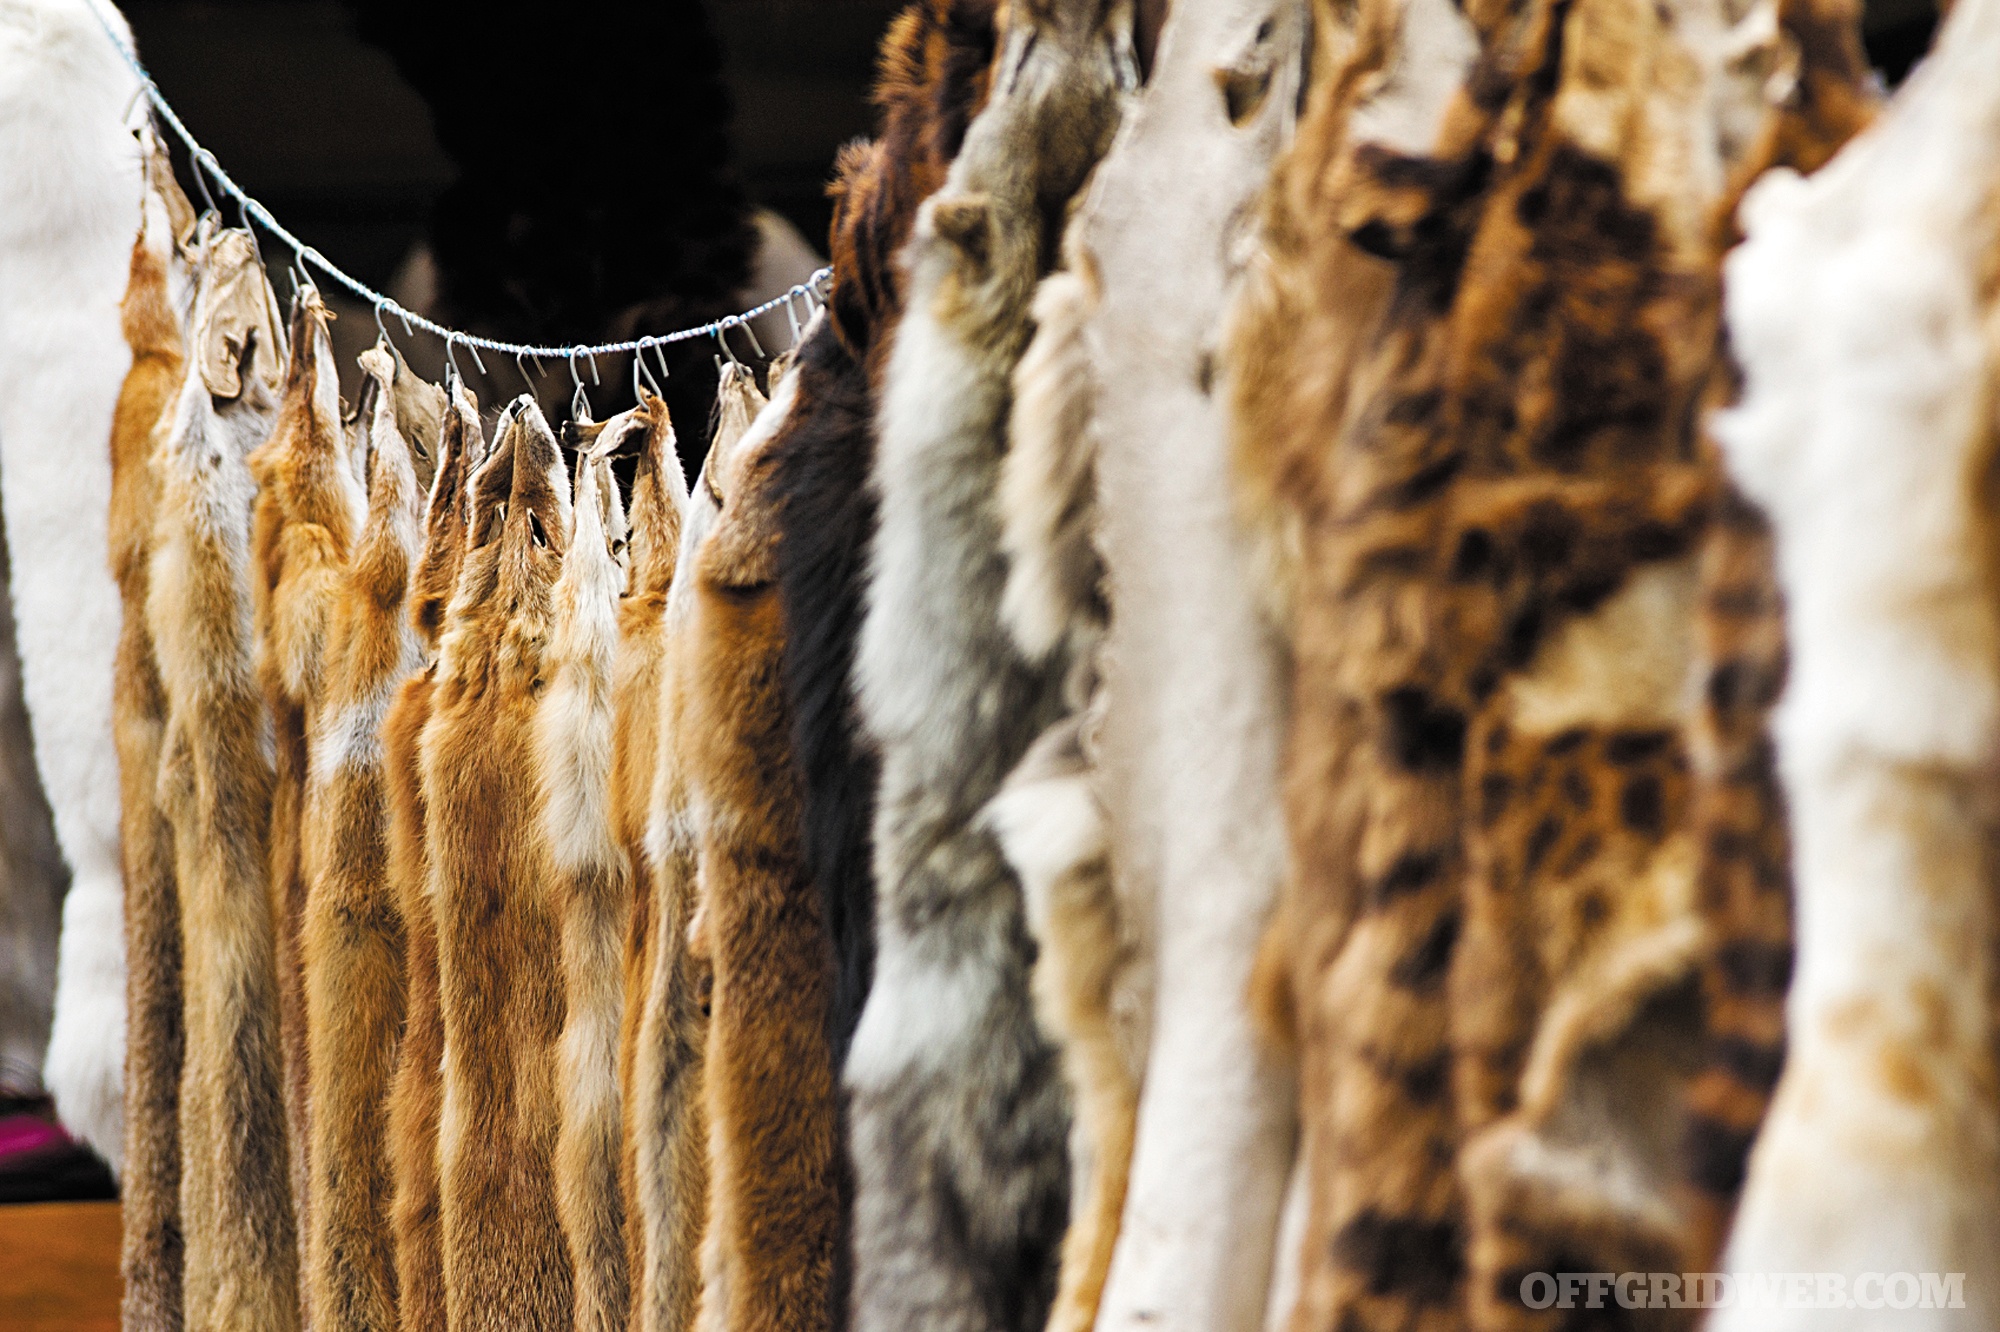
And there’s no shortage of traps to try. There are foothold traps, body grip traps, “live catch” box traps, and traps that defy classification. There are also snares and deadfalls, which are the two common types that we will discuss here. Just follow these steps, and you can set traps to provide yourself with meat, fat, and useful hides.
Seek the Best Quarry
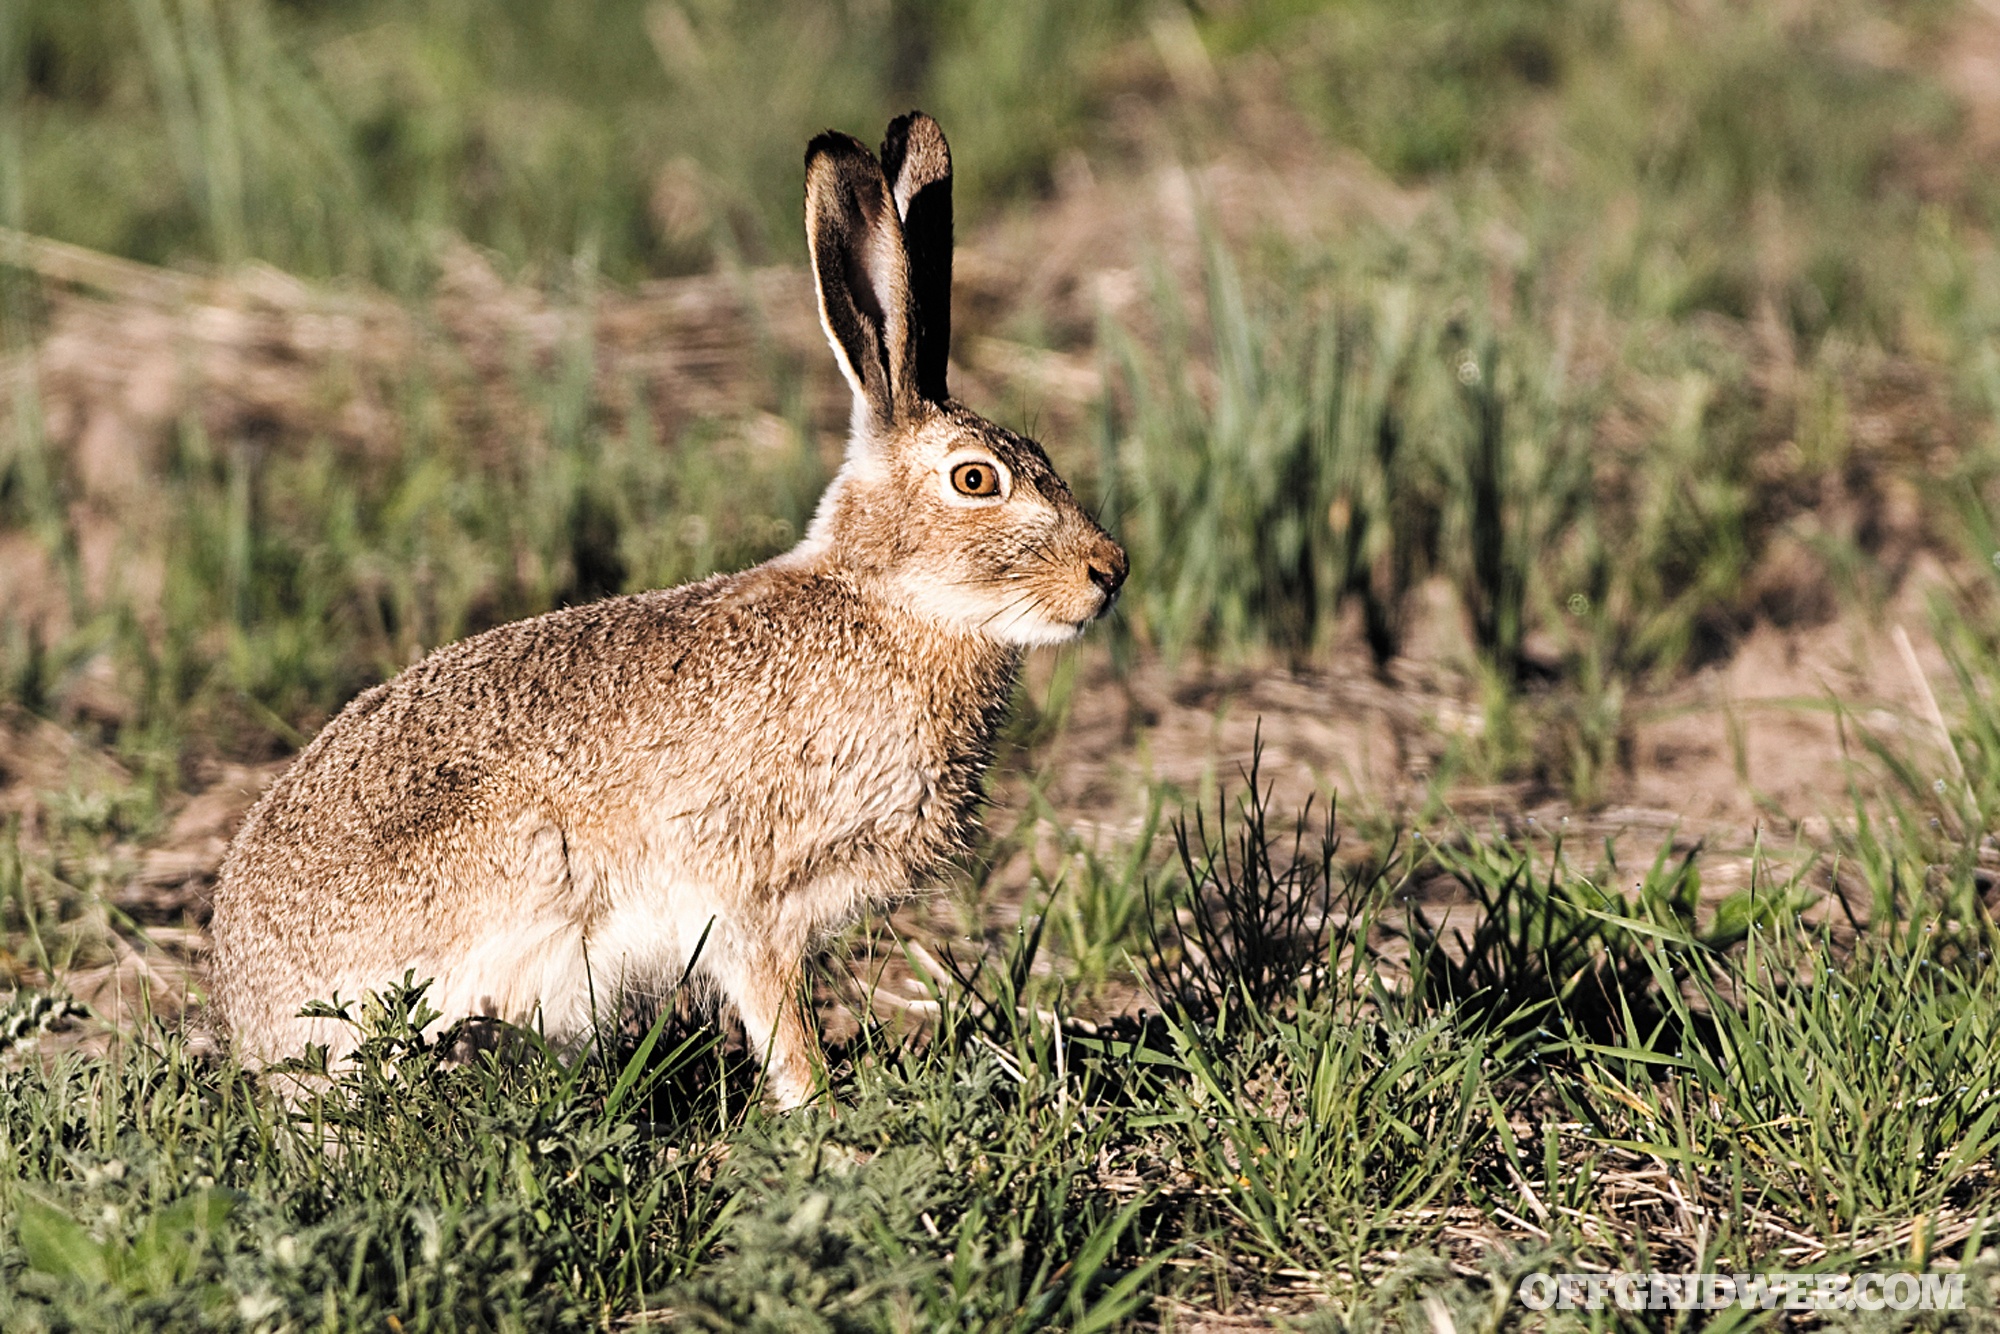
If you’re trapping for food, then this is all about the calories. In that context, the best animals to trap prey are fatty animals. Raccoon, porcupine, and beaver have much more body fat (and therefore calories) than rabbits, squirrels, and groundhogs. People have literally starved to death eating only lean rabbit meat (look it up, it’s called “rabbit starvation”). Now this doesn’t mean that you should avoid trapping rabbits and other lean game. It just means you need to diversify your menu.
Another aspect to consider is the animal’s gullibility. “Will they fall for this trap?” is what you should be asking yourself when you select a target game species and set the trap to match your target. Some animals aren’t too bright and will fall for anything, like porcupines and groundhogs. Other animals are very discerning and intelligent.
Avoid Common Mistakes

Poorly crafted traps are a big problem in trapping. So are traps that are loaded with human scent and traps placed in “dead zones.” The first problem of craftsmanship can usually be remedied by practice and with patience. Make these traps over and over, until it becomes second nature and they function perfectly. And take your time with the work, it’s not a race.
The second problem is human scent. Wary animals will avoid a trap with too much human skin oil and skin flakes on it (yes, their noses can be that sensitive). Wipe your hands and the trap with dirt, crushed charcoal, and local non-toxic aromatic plant parts (like pine needles) to cover the human scent. Do this to your hands before collecting the materials to make traps. Do it to hands your and traps before you go out to set them.
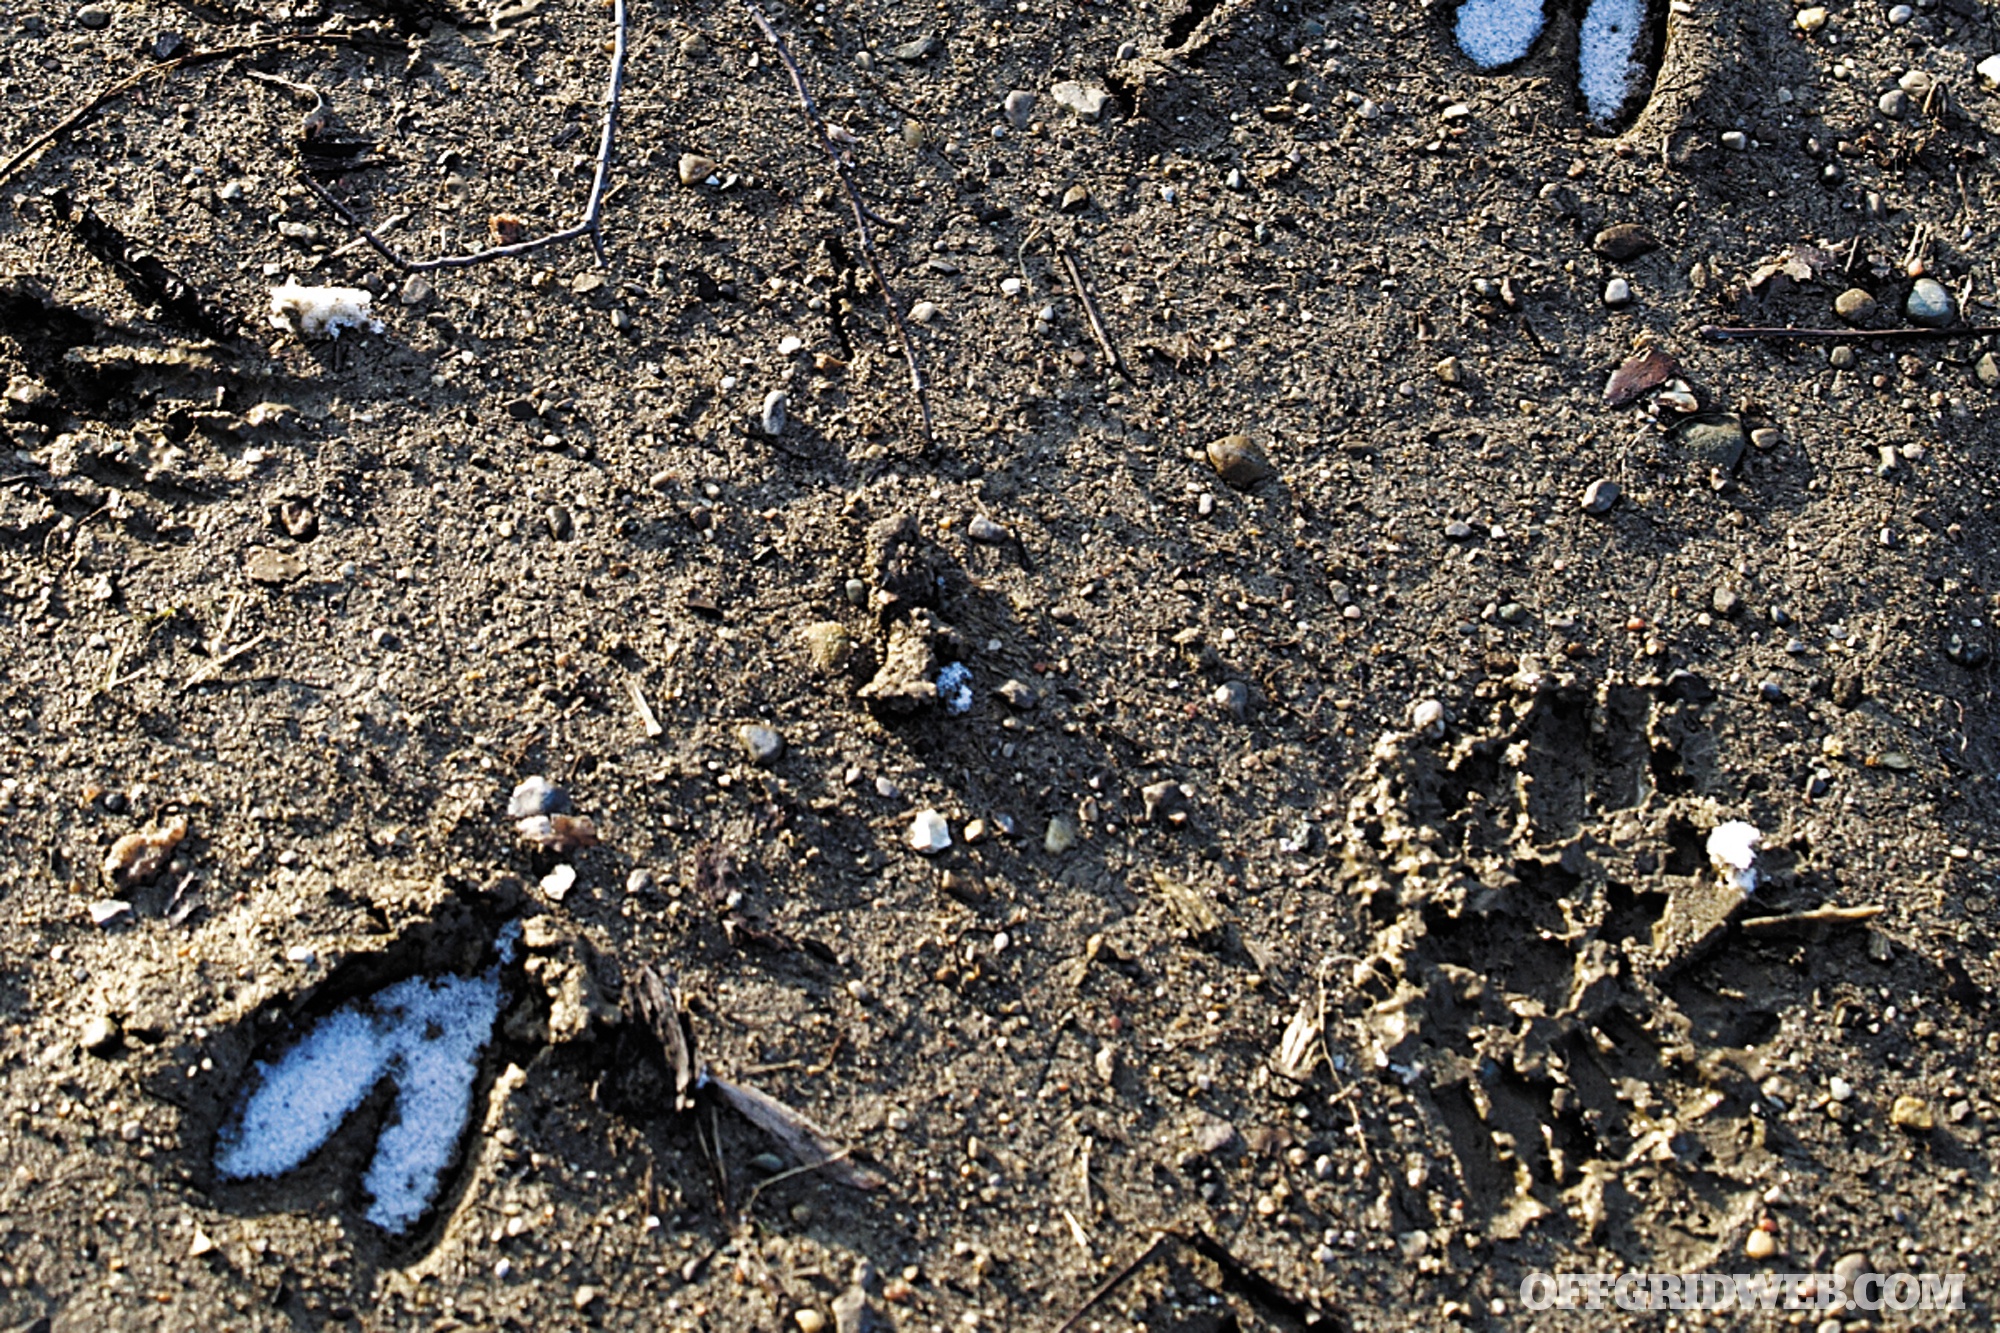
Finally, avoid trapping in “dead zones” by selecting trap sites with plenty of tracks and other animal sign in the area. Some places just don’t have that many animals, and this is a poor place to trap.
Play Your Numbers
Since our first ancestor figured out the first trap, the art of trapping has always been a numbers game. You’re living in a fantasyland if you think you can just set out one trap and feed yourself with it. Professional trappers with modern traps enjoy only about a 10-percent return on their activities. They have to set out dozens of traps to catch just a couple of animals each day. And historic trappers during the American fur trade era probably had even less success with their field-built snares and finicky old-fashioned footholds.
Use Better Baits

Not all traps use bait to lure in your quarry. Some traps are simply placed in trails and rely on the animal’s passage to engage the trigger. But with the traps that are bait driven, that bait had better be just right. You want to bait with something that matches the animal’s diet. Use red meat, fowl, and fish for carnivores and omnivores. Use nuts, roots, and fruits for herbivores (rabbits don’t care for bloody meat chunks). It’s very helpful to use something that’s out of season or out of their reach. This scarcity will entice them further. Just remember the old trapper’s adage: Don’t bait with corn in the middle of a cornfield. This means that you should avoid using a common bait item that the animal can easily get without going toward the strangely scented and ominous-looking contraption.
Follow the Rules
In an emergency, you’ll do whatever you must, rules be damned. But in normal circumstances, check your local trapping regulations before engaging in any trapping activities, practice, or otherwise. Get a trapping license, as many areas require this. Get a signed letter that grants you permission if you are trapping on private land that you do not own. And obey the trapping season for your target game species. Certain animals are only legal to trap at certain times.
Fixed Snare
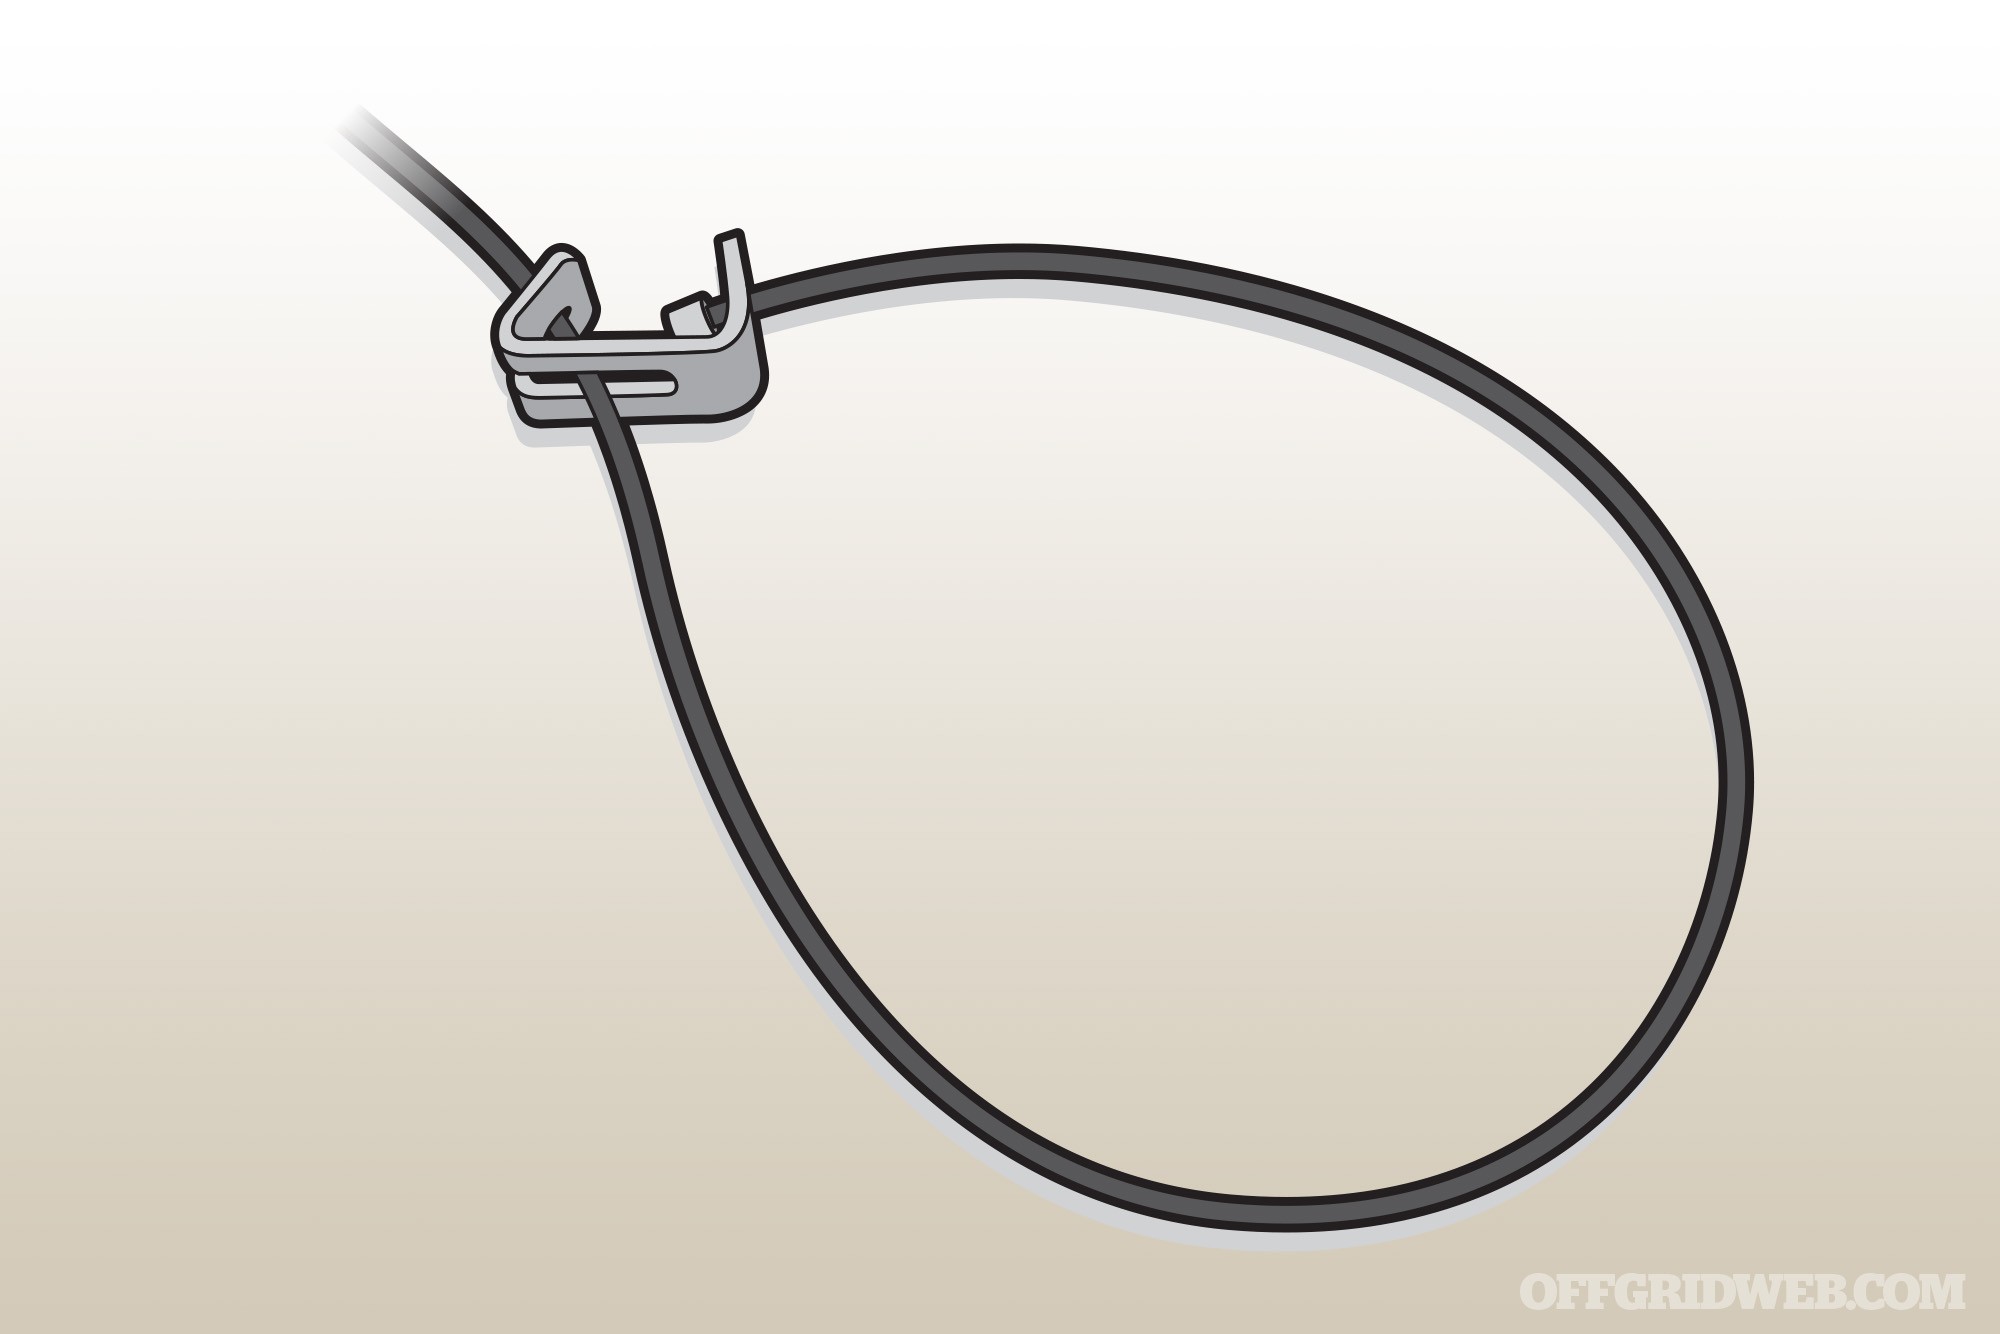
Snares are a type of trap that constrict around an animal and either hold them securely or actually kill them. Snares can be made with rope or wire, easily scavenged from modern homes, businesses, and vehicles. But for best results, we should stock up on actual snare sets made from braided steel cables with metal locking mechanisms. These are far stronger and more durable than most improvised snares, and any quarry you’ve caught is less likely to escape.
The fixed snare is typically set along small animal runs and paths, or over the mouth of animal burrows. There are typically no baits involved, we just catch the animal because it runs through the snare loop, gets hung up, and then tightens the noose by trying to run away. This snare can work well for rabbits (who are always moving quickly and likely to tighten the noose fast). It also works for slower creatures like raccoon, groundhog, and possum.
Step 1: Find an animal run or burrow opening as a trapping site. Look for tracks to confirm that it’s active and to get an idea of the species that are using it.
Step 2: Find a nearby sapling or shrub to use as an anchor for the snare. You could also drive a stake in the ground for attachment if nothing suitable is available.
Step 3: Attach the snare to the anchor and use twigs to prop the loop open in the run or over the burrow mouth. Make the opening the right size to fit your target species’ head. Too small, and they can’t fit in the noose. Too big, they simply jump through the “hoop.”
Step 4: Check the trap once or twice daily from a distance. Reset it if it gets knocked down. Collect any dead animals and butcher immediately. Use a spear, bow, or firearm to dispatch any live-caught animals.
Spring Pole Peg Snare
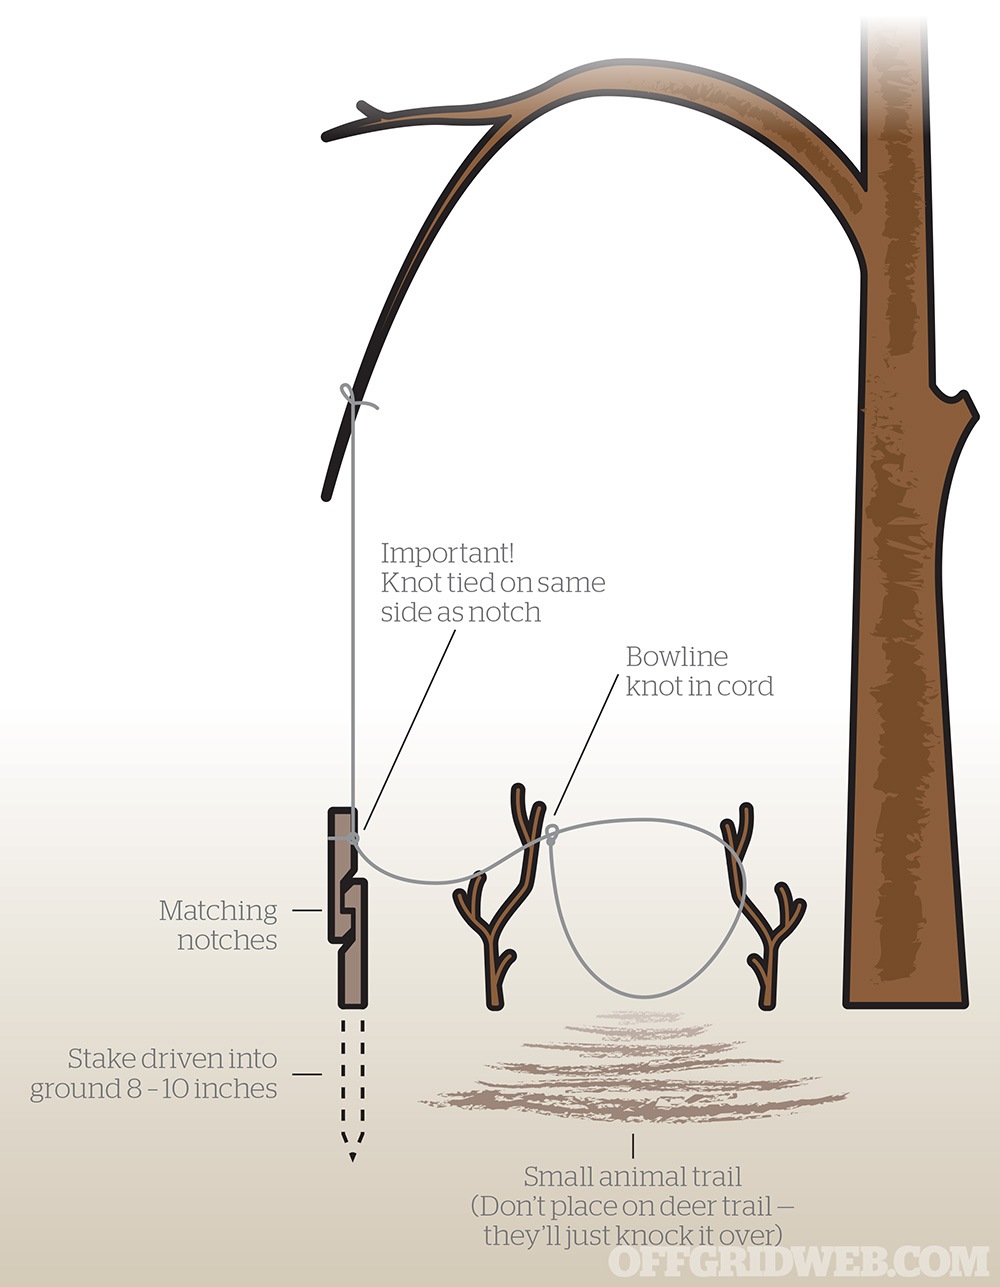
This versatile snare can be activated by an animal running down a trail (like a fixed snare), or it can be baited to lure in an animal. This trap includes the addition of a spring pole, which is a flexible sapling tree that lifts the snared animal up off the ground. Ideally, the spring pole should be strong enough to lift the animal at least 5 feet off the ground to keep it out of the reach of scavengers. Here’s how to set up the spring pole peg snare.
Step 1: Tie a bowline knot or similar loop in the end of a 3-foot rope and pass the free end of the rope through it (or better yet, get a manufactured cable snare noose). Carve two sticks to have hook-like notches. One stick needs to be only about 6 inches, and the other will need to be about 1 foot with a point at the non-notched end. This longer stick will be driven into the ground like a stake.
Step 2: Find a flexible sapling tree in a suitable trapping area (an area with obvious animal tracks and traffic — or a spot with food, water, and cover for animals). Bend the small tree down and trim the leaves and branches from it. This reduces drag when the trap goes off.
Step 3: Tie your snare line to the tip of the sapling tree. If using a rope noose, tie your 6-inch trigger peg stick to the snare line about 1 foot away from the tip of the sapling tree. Make sure you tie the knot on the 6-inch trigger peg on the side of the peg into which you cut the hook. Tying the line on any other side of the peg will pull the trigger at an odd angle, and you’ll never be able to set the trap.
Step 4: Drive your foot-long, notched stake into the ground with a rock or hammer. Make sure the stake is placed in a spot where the line from the tree will be plumb (completely vertical, not pulling sideways). If the stake and the line from the sapling tree aren’t plumb, they’ll be very hard to set.
Step 5: Bend the sapling down and put it under your armpit so you can safely hold it and use both hands. Set your noose in the animal’s path, propped open with sticks. Set the trigger and carefully withdraw.
Important Safety Note: Once a trigger is set and the spring pole is pulling on it, never touch an open noose with your fingers. Use a stick to adjust the noose. If you try to hold the noose or fiddle with it by hand, and the trap goes off unexpectedly, the noose can tighten around one or more of your digits. As the spring pole goes up, the noose will either skin your fingers or remove them. Remember that traps can be dangerous not only to the prey, but to the trapper as well. Be very careful and respectful of all traps.
Greasy String Deadfall
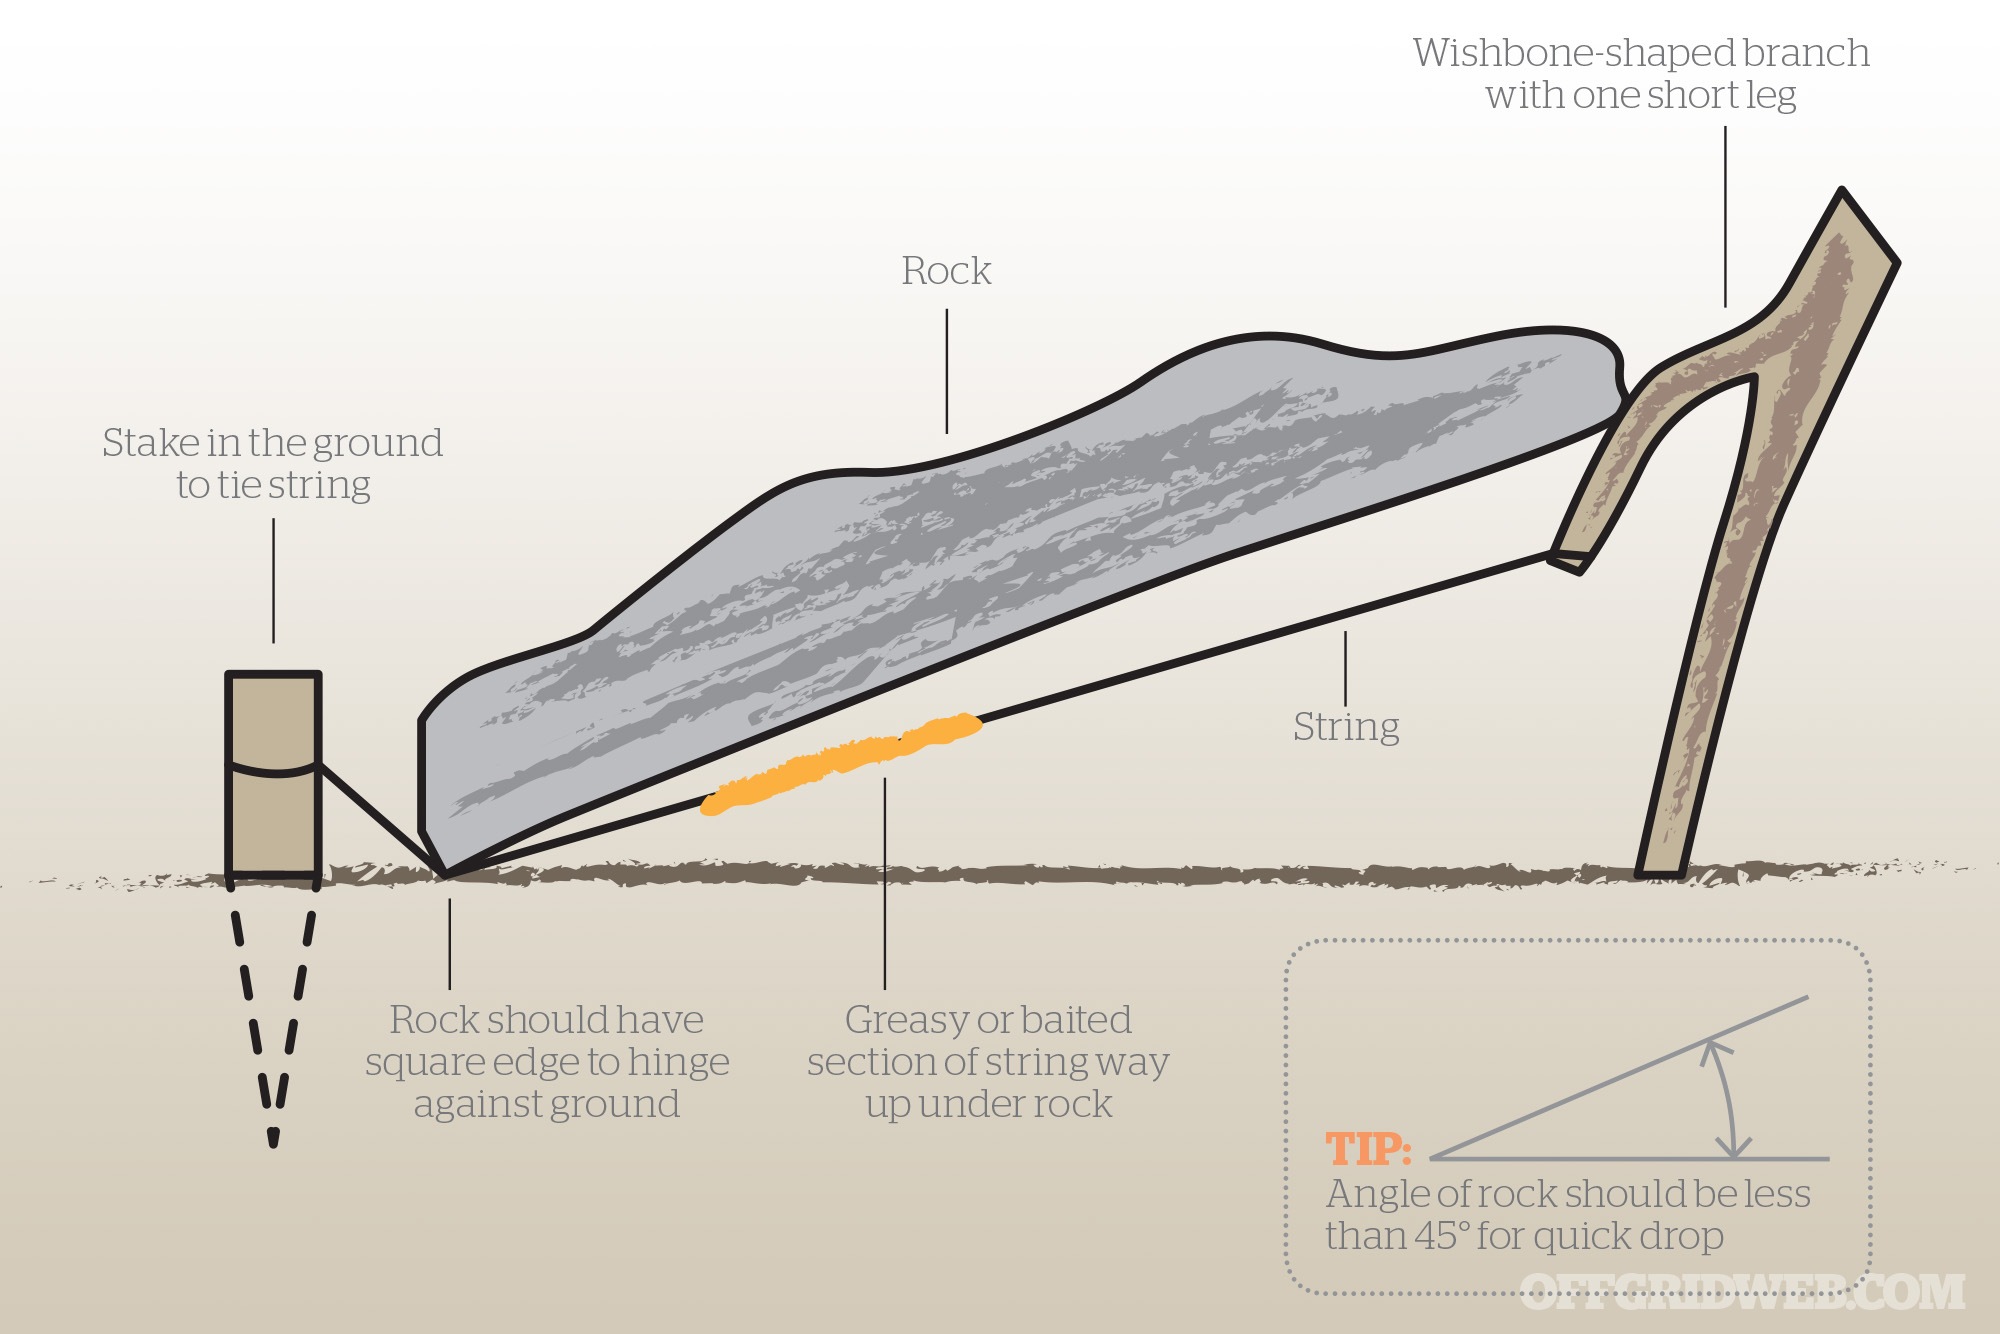
Our remote ancestors never had steel cables or Internet websites where they could buy a jar of mouse paste for trap bait (yes, that’s a real product). They worked with basic natural materials that were found all around them, and they worked with the things at hand. This trap is part of a class called deadfalls. These traps involve a trigger system that holds up a rock, log, or similar weight.
When the trigger is tripped, the weight falls upon the prey and crushes it. It’s not a pretty kill, but it gets the job done.
The greasy string deadfall is the least complicated trap in this article, best suited for small creatures, particularly rodents. For this trap, the bait is mashed into a piece of twine (which is holding up the weight). The animal goes under the weight to chew on the twine, and it breaks — dropping the rock.
Step 1: Gather your components. This trap consists of a forked stick, a deadfall weight, a length of thin twine, and suitable bait. You also will need something to secure the free end of the twine. We can get the best results by choosing a forked stick that has nearly parallel branching, and one long fork leg and a shorter one. The twine should be thin and barely able to support the weight of the deadfall. It could be hand-woven string, or a piece of cord you scavenge. The bait should be a good match for your target species.
Step 2: Tie one end of your twine to the shorter branch on the forked stick and the other end of the twine to a small shrub or stake in the ground. The deadfall weight should be placed against the forked stick so that the twine is tight and running under the weight, but not touching it. You’re not done yet, but simply placing the deadfall weight in position so you can determine where to place the bait. Remove the weight and add the bait.
Step 3: Squish the bait into the twine deeply, in a spot deep under the weight. Replace the weight and check the trap daily.
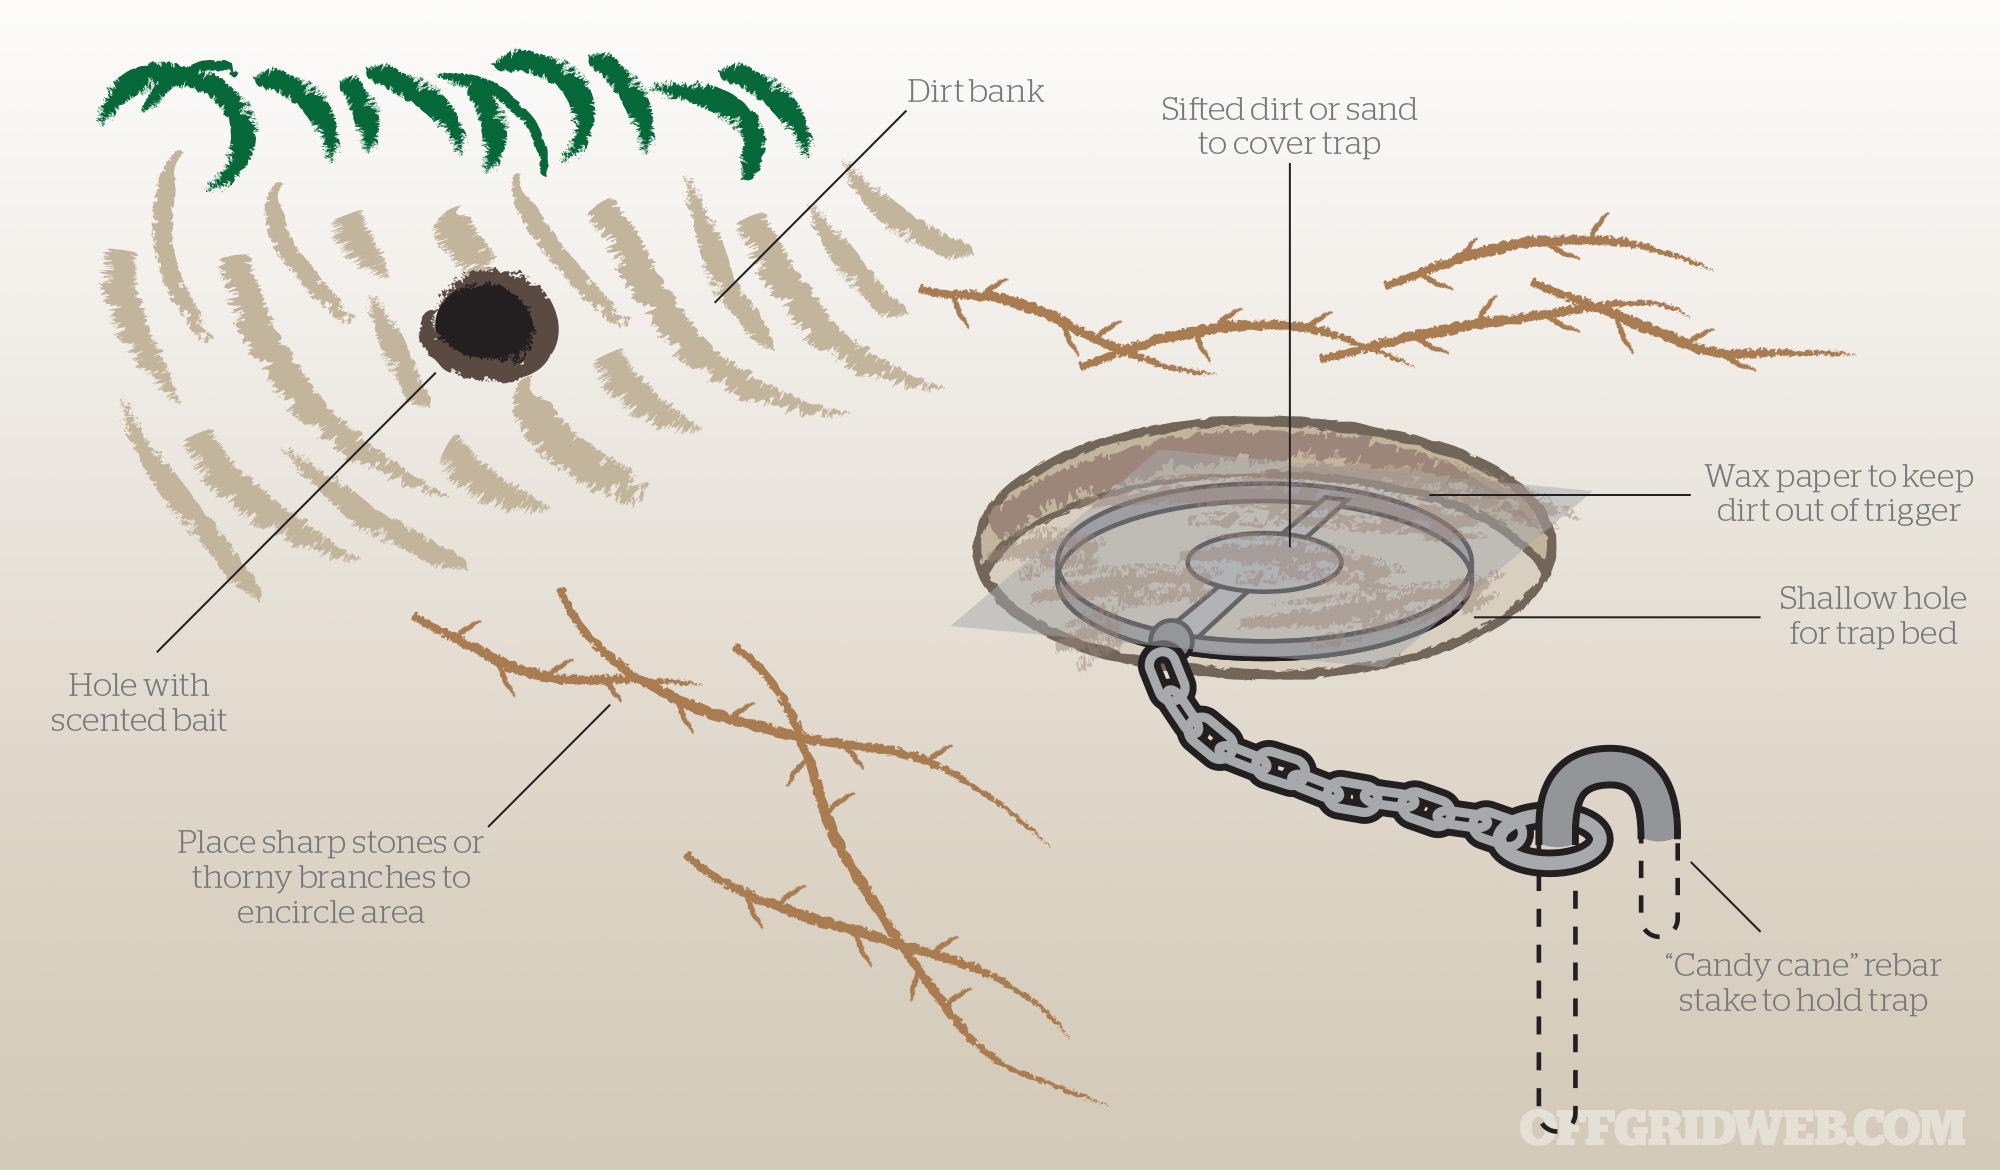
The foothold trap dates back centuries, showing up at least as early as the 1600s. These traps consist of clamping jaws that hold an animal’s foot after they set on it. These traps have been used for catching small game and larger animals, even bears. Foothold traps don’t usually kill an animal (unless they die of stress). The quarry is typically dispatched by the trapper. While you can’t make a reliable foothold trap from scratch in the wild, they’re still a great trap to know — and a better trap to stockpile. Here’s how to set one, tailored to catch predators.
Step 1: Locate a good site for this trap. A stream bank or small hillside works well. Drive a wooden stake into the bank, wiggle it around, and pull it out. This makes a hole in the dirt that resembles a rodent hole. Insert bait deep into the hole. It’s OK if you leave a little fresh loose dirt at the mouth of the hole — this makes it look “lived in.”
Step 2: Dig a shallow hole, large enough to hold the open jaws of the foothold trap, near the fake rodent hole. Drive a stake into the ground and attach the foothold chain to it. Place a piece of wax paper over the set foothold trap. This keeps the cover dirt from filling in the space under the foothold trigger. Cover lightly with dirt or sand. The ideal distance from the fake rodent hole to the foothold is the same distance from the target species’ nose to its front feet, and slightly right or left of center.
Step 3: Set up a fence or funnel. Place rocks, logs, thorny branches, or other natural obstructions near the foothold, but not over it. This will help to persuade the animal to step in the right spot. Check your trap daily and dispatch any trapped game.
Conclusion
Trapping is just like any other survival skill. The more you practice it, the better you’ll get. And you can even get in some practice time in the city and suburbs. Set traps without their harmful component.
For example, create a foothold set without burying the foothold. Just create a patch of damp sand, a baited fake rodent hole, and set up obstructions to direct the animal to set in the “track trap” to catch only their footprint. You could also set up snares with thread instead of cables or rope. Wipe a little sticky pine pitch on the tread and see what happens. If an animal gets caught, the thread will break. This shows you that your trap could have worked, and the sticky sap may give you a hair or two so you can see which species tripped the trap.
Keep these trapping tips in mind and practice your traps often — the skill will always be there to serve you.
Sources: