RECOILtv: Surefire’s New Products at SHOT Show

Every year at SHOT Show, the guys at Surefire have some cool new gear to show us, and this year was no different. Dave Merrill stopped by with the RECOILtv camera crew to talk with Andrew Wright, and get a closer look at some of the items the company will be releasing in 2019. These include the 300Ti lightweight suppressor, the XVL2 weapon light/laser/IR illuminator, the XR1 rechargeable weapon light, and the upgraded Stiletto Pro flashlight.

Surefire Stiletto Pro SHOT Show 2019 flashlight new products 6

As you can guess from its name, the Surefire 300Ti suppressor is constructed out of titanium. While this won't have the same longevity as a traditional can if it's subjected to repeated full-auto mag dumps, it's better-suited for those who are trying to cut as much weight as possible from their weapons.

Surefire Stiletto Pro SHOT Show 2019 flashlight new products 2

The XVL2 acts like a miniature pistol-mounted counterpart to the rifle-mounted AN/PEQ-15 laser/illuminator. It offers four outputs: white light, a green visible laser, an infrared illuminator, and an infrared laser. The latter two outputs are designed for use with night vision systems. For more details on the Surefire XVL2, check out this article on RECOILweb.com. You'll also see this light featured on the cover of RECOIL Issue 41, on sale now.

Surefire Stiletto Pro SHOT Show 2019 flashlight new products 4

The XR1 is essentially an update to the XC1 compact weapon light. Rather than a AAA battery, it features a rechargeable battery. This also makes room for a second LED where the AAA battery previously resided, and increases output to 600 lumens. There's also an XR2 variant with a laser that acts as an update to the XC2.

Surefire Stiletto Pro SHOT Show 2019 flashlight new products 3

Lastly, the Stiletto Pro is an improved version of the Stiletto that was released last year. It's built with an aluminum body instead of polymer, and now has a reversible pocket clip.

Surefire Stiletto Pro SHOT Show 2019 flashlight new products 1

Left: an original Stiletto. Right: the new Stiletto Pro.

Output of the Stiletto Pro has also been increased to 1000 lumens. The Stiletto's unique 3-switch design and built-in USB port are retained, although the button shapes have changed slightly. Refer to this article on RECOILweb for more details about the Surefire Stiletto family.


Book Review: “Waste Land” by David T. Hanson

The Premise: Sometimes only imagery has the power to describe things with the poignancy that words often lack. While the subject matter of David T. Hanson’s Waste Land might deviate from the traditional coffee table book, it vividly and shockingly displays man’s apathy for the consequences of destroying Mother Nature. Hanson photographically documents various toxic waste locations across 45 states known as “Superfund” sites that require a long-term abatement plan.

To get a little granular, in 1980 the Comprehensive Environmental Response, Compensation, and Liability Act (CERCLA) designated a list of sites that are ranked ranging from 1 to 100 of their actual or potential release of hazardous substances. A score of 28.5 or greater puts a site on the National Priorities List, which makes it eligible for “long-term remedial action” under the Superfund program. Nearly half a million known toxic waste sites exist in the United States, and according to the book, 400 of these were declared highly hazardous and in need of immediate attention — a number that has at least tripled since 1980. Hanson shows us 67 of these Superfund sites and leaves our minds wondering what others must look like, and if we’re living near one. (If you’re that curious, you can always check www.epa.gov/superfund/search-superfund-sites-where-you-live.)

Hanson’s approach is primarily visual impact, which Waste Land does exceptionally well. Aerial photographs of the sites are flanked by a USGS topographic map of its location as well as the EPA’s own description of its history and current status. Some are as well known as Love Canal, while others are as innocuous looking as a major airport in Tucson. The sites shown, both active and abandoned, encompass illicit landfills, wood processing plants, uranium mines, smelters, military bases, and various other locations where pristine land became a receptacle for toxic chemical production and/or disposal.

The 411: Waste Land gives us a glimpse of events and locations we usually only stumble upon through random internet searches. While the book contains information that’s totally public record, as the reader you feel like you’re looking at some clandestine government file. The seemingly absent media coverage on this ongoing problem stimulates one’s conspiracy speculation as to whether or not there’s really an agenda at work to keep these horrific images out of the public conscience. The book truly delivers a knockout punch in its striking, 11 ¾ x 9 ¾-inch pages of pictorial depiction, and yet gives you only a taste of a dilemma that could comprise several dozen volumes.

We see how many of these sites are situated on or near major waterways and wildlife habitats, while others are in close proximity to residential areas or have often been swept under the proverbial rug and built over with new neighborhoods. Many of Waste Land’s site descriptions outline known contamination in local aquifers, denote that the full extent of the pollution is in some cases unknown, and leave the reader hanging with typical vague government language that cleanup may still be decades away. It shows how modern industry operates with little if any consequence for their ignorant, and often intentional, degradation of our landscape. The bureaucratic uncertainty of what can be done about it, where the money will come from, who will do the work, or if the work will ever be done definitely leaves the reader with a great deal of anxiety.

The Verdict: It’s a pessimistic topic, but one that isn’t going away anytime soon. Waste Land is the kind of book that reaffirms why it’s critical to have a survivalist mindset. As these types of sites only grow in number and government intervention can’t seem to keep up with their expansion, Hanson’s work serves as a tool to promote awareness, discussion, and action. Hopefully Waste Land readers will be inspired to follow in the footsteps of Erin Brockovich as well as be more proactive about preparing for the long-term effects this type of activity will have on our health and ecosystem. Pick up copy of Waste Land, leave it out when company comes over, and share with others what goes on everyday in our country and has no end in sight. Without books like this to help facilitate taking the fight to those who cause these problems, this kind of opportunism will continue unmitigated and turn our country into a giant landfill.

Book & Author
Waste Land
David T. Hanson

Publisher
Taverner Press

MSRP
$50

URL
www.tavernerpress.com

Pages
176 pages

Rating
>Thrive
Survive
Die

OFFGRID Library of Recommended Books

More From Issue 30

Don’t miss essential survival insights—sign up for Recoil Offgrid's free newsletter today!

Read articles from the next issue of Recoil Offgrid: Issue 31

Read articles from the previous issue of Recoil Offgrid: Issue 29

Check out our other publications on the web: Recoil | Gun Digest | Blade | RecoilTV | RECOILtv (YouTube)

Editor's Note: This article has been modified from its original version for the web.


Review: 5.11 Tactical Rapid Origin Pack

Shopping online for gear is often more convenient than driving to a brick and mortar store, but trying to weed through the thousands of options listed online is a daunting task, especially when many product pages seem to be awash with vague 5-star reviews. To make this selection process a little less overwhelming, we test gear and report our findings with total honesty. If our time with an item reveals its flaws, we'll tell you all about them, and if it's good to go we'll say so. What you won't get here on OFFGRIDweb is a bland marketing-friendly review that deems every item to be good enough.

The latest product on our review itinerary is a compact EDC-friendly backpack from 5.11 Tactical. Over the last few weeks, we have traveled with and tested the Rapid Origin Pack extensively. Read on for a summary of our findings.

The Rapid Origin Pack

511 Tactical Rapid Origin backpack review edc survival gear bag pocket 8

Despite its small 25L capacity, this pack offers a good combination of roomy storage and organization. It's ideal for use as part of your EDC loadout, as an extended weekend getaway bag, or as an airline carry-on. The pack features a lightweight, minimalistic design with a large main pocket, small outer pocket, and hidden hydration/CCW pocket. Available in four different colorways (pictured in Coal), the Rapid Origin Pack is constructed from 600D polyester making it a durable backpack with a good degree of wear resistance.

511 Tactical Rapid Origin backpack review edc survival gear bag pocket 9

The main pocket is roomy enough to hold a few days worth of clothes, while also keeping your small items organized. Two small mesh, zippered pockets are found on the inside front of the main compartment to keep your smaller items together in one place. Finally, a padded laptop sleeve and water bottle pocket retain these important items. However, the fact that the water bottle pocket is inside the pack is an interesting choice, as it requires the wearer to zip open the main compartment and push aside gear to access a bottle. It also makes re-inserting the bottle a challenge, especially if the pack is fully-loaded.

The water bottle sleeve is along the inside edge of the main compartment.

The water bottle sleeve is along the inside edge of the main compartment.


One of the best features of this pack is the full-opening drop front. This gives you full view of everything in the main compartment, as well as access to the smaller zippered pockets without having to dig down to the bottom to find anything. If you don't want to open that pocket all the way, a set of compression/retention straps on the sides keep everything secure even if the pack isn't fully loaded.

511 Tactical Rapid Origin backpack review edc survival gear bag pocket 13


On the outside of the main pocket is a small, quick-access admin pocket. Inside you'll find several small sleeves and pen holders as well as a key retainer hook handy for keeping your EDC loadout organized. This pocket is a good size without being overly large and cavernous. Stitched onto this quick access pocket is a hook-and-loop field in the shape of the 5.11 Tactical logo, enabling the wearer to add morale patches and other personal touches. There's another strip of hook-and-loop at the bottom of the PALS webbing on the front of the pack, which can be used for name tape or small patches.


The top of the main compartment features a snug fleece-lined pocket for sunglasses, goggles, or anything else you don't want crushed or scratched up. The back pad hides a hydration pouch with hook-and-loop hanger strap.

511 Tactical Rapid Origin backpack review edc survival gear bag pocket 7

5.11 Tactical also says you can store your CCW in this pocket, however we found it to be a bit uncomfortable since it adds a noticeable bulge along the back while carrying. In all honesty, this pocket could be removed all together. We've found that when we need a small pack with a hydration pouch, it's better to use a dedicated hydration pack, as opposed to converting an EDC pack for that use.

511 Tactical Rapid Origin backpack review edc survival gear bag pocket 5

On the Move

Even when fully loaded, the pack fits and carries very comfortably. The wide, padded shoulder straps distribute weight evenly and the supportive back pad prevents any of the cargo in the main compartment from putting excessive pressure on one spot. Both sets of pads are covered with a thick mesh layer, which keeps the skin these pads ride on dry and cool. One interesting note about the shoulder pads is the addition of a buckle at the base of the pads. We couldn't find an exact reason for this, as the top ends of the straps are permanently affixed. What we've used this for is to disconnect the pads and tuck them inside for travel when using the pack as a carry-on or truck bag.

511 Tactical Rapid Origin backpack review edc survival gear bag pocket 2

If you desire more storage options, the Rapid Origin has you covered there too. The front and sides of the pack are covered in PALS webbing. This allows you to attach countless pouches, pockets, and other attachments to customize this pack to your needs. That said, we didn't find ourselves wanting additional capacity. We used this pack on several day and weekend trips and found it to be the right size, shape, and weight for its purpose. At 25L, it is small enough to take almost anywhere but with the large main compartment and several smaller organization pockets, it holds more than it seems at first glance.

511 Tactical Rapid Origin backpack review edc survival gear bag pocket 1

Conclusion

The 5.11 Rapid Origin pack is a solid choice for a compact, short trip pack. During our testing we compared it to the 5.11 Rush 72 that we've had for years. Unsurprisingly, the Rush 72 is a lot bigger with a lot more pockets, making it good for longer trips with more necessities. Even with the few small tweaks we would like to see made, this Rapid Origin pack is priced right and comes with features that we appreciate. For more information on this and the rest of the products that 5.11 offers, visit 511tactical.com.

Pros:

  • Priced under $100
  • Large main pocket with full drop front
  • Plenty of smaller pockets for organization

Cons:

  • Odd location of water bottle pouch
  • Hydration pouch isn't particularly helpful — if that's a top priority, you may prefer the RUSH or AMP series packs

Traumatic Shock Treatment & Survival

WARNING: This article is meant to be a quick overview and not a detailed guide on how to deal with shock in an emergency situation. Professional medical treatment should always be sought first before attempting any of these methods.

Shock has many different possible meanings. You could be shocked at the turn of events in a movie. You could be shocked by touching a live wire. You could be in shock after receiving news of the death of a loved one or due to trauma. For me, shock is a chilling term that portends poor outcomes despite our best medical efforts. Mortality can be 40 to 50 percent, despite the best medical care in the best hospitals. What will you do if your partner or family member has an accident or heart attack and goes into shock? Perhaps the most important part of treating shock is learning to identify it as soon as possible. The earlier the identification, the earlier the treatment can begin.

What is Shock?

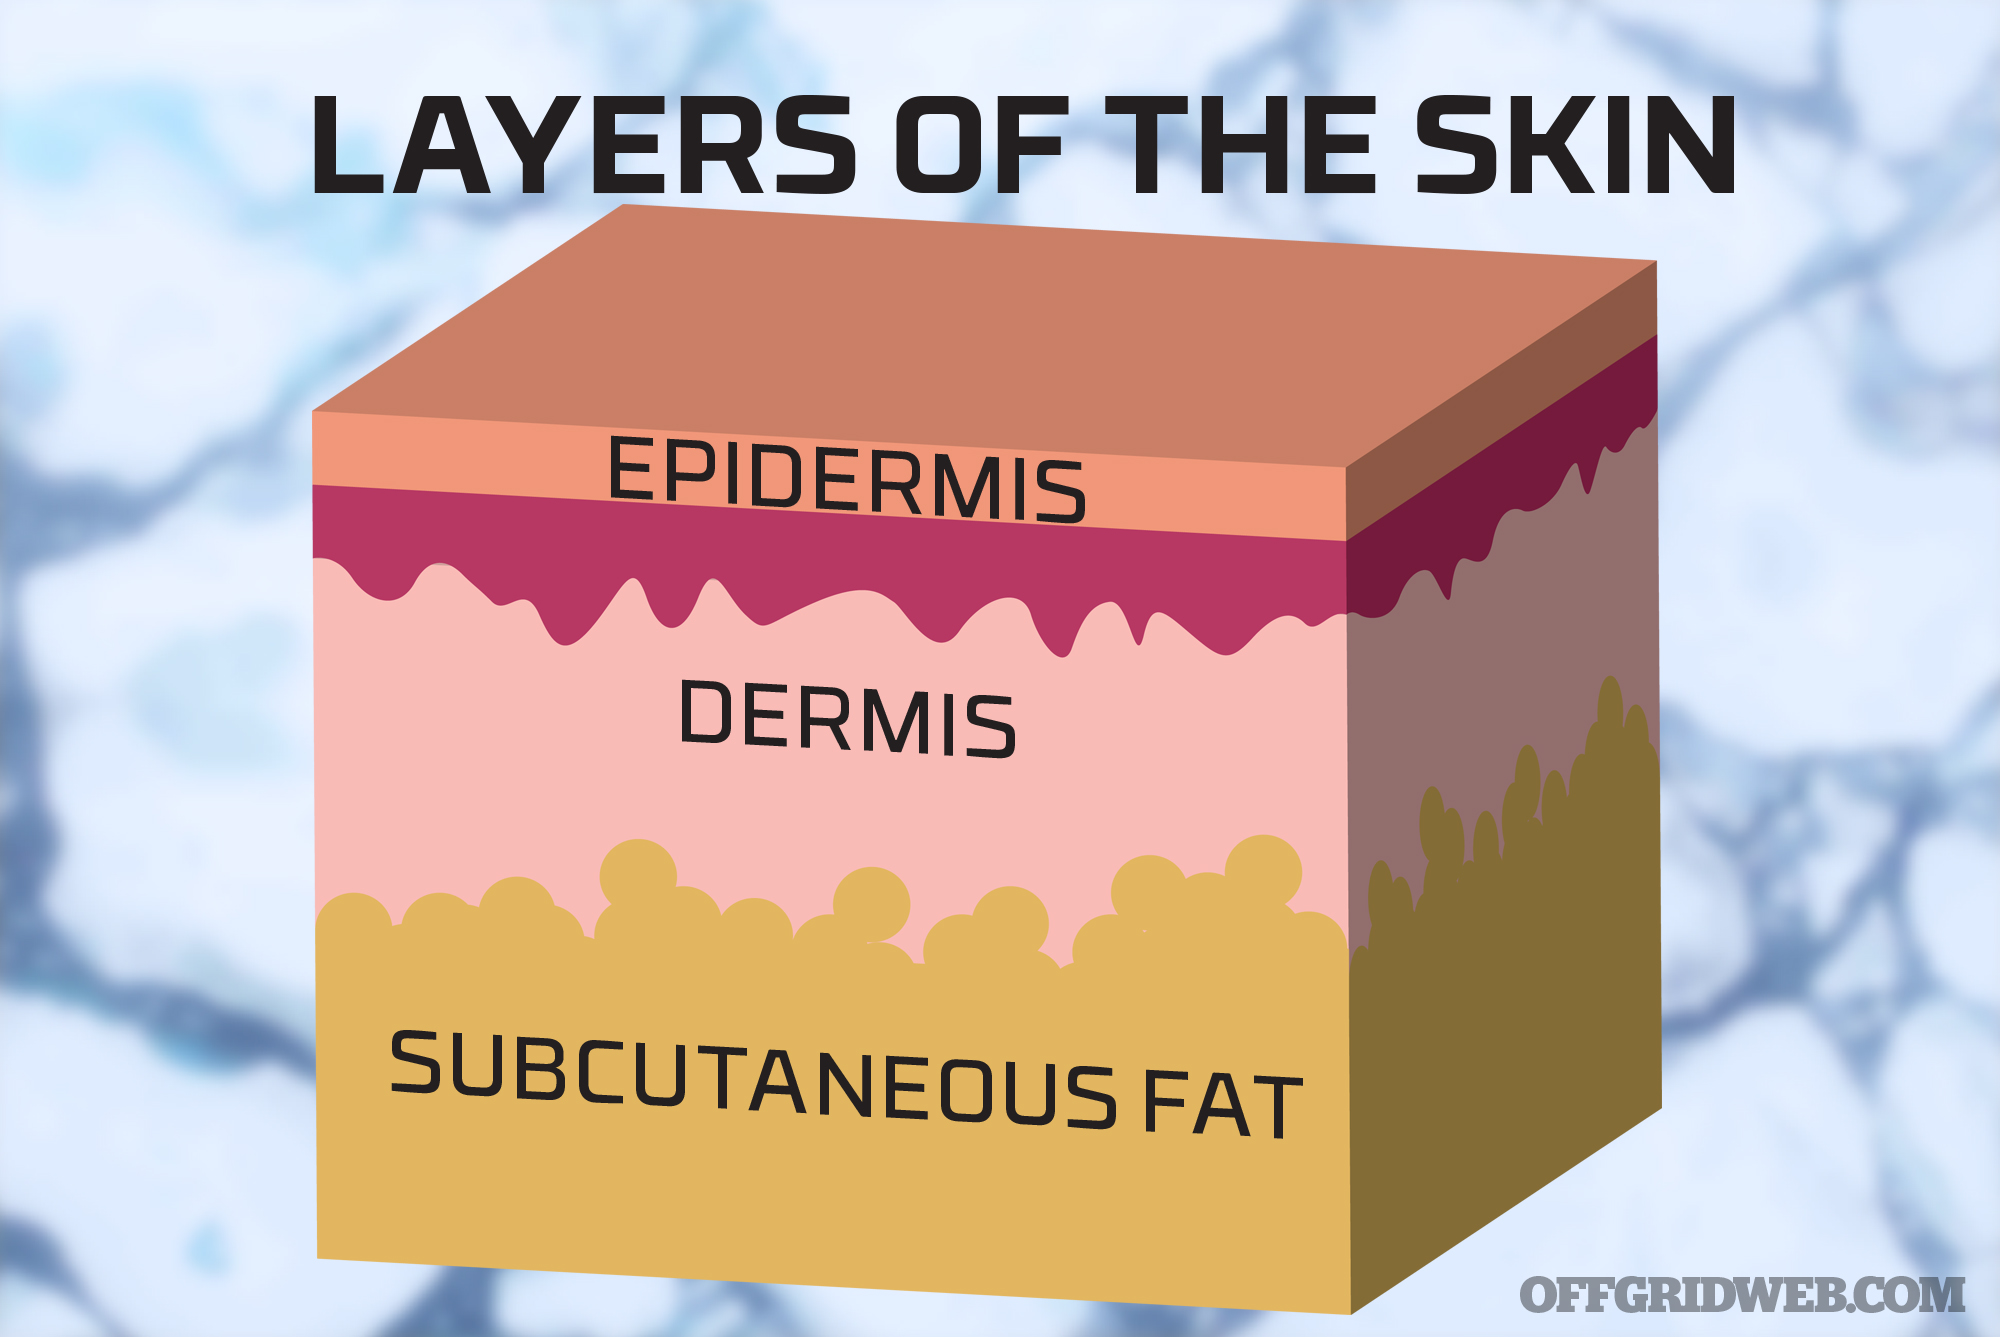
First off, shock is essentially a lack of blood and oxygen supply to the tissues. The lack of these nutrients causes tissues and cells to starve. When this occurs, the tissues and organs lose function. The more organs that fail, the higher the mortality rate. The sooner the cells can restore their nutrients and function, the better the chance of survival.

The body has several mechanisms to attempt to compensate for the lack of tissue perfusion in order to minimize the damage to the cells. Although many organ systems are involved in the compensatory mechanisms, it’s the cardiovascular system that’s the foundation of the process. In order for the cardiovascular system to maintain its pressure in a closed loop, there has to be a pump (the heart), pipes (the blood vessels), and fluid (the blood). If there’s something wrong with any one of these components, then there’s a loss of pressure in the system. If that loss of pressure is severe, the tissues and organs won’t be nourished with the essential components that allow for proper function of the organs and our body.

Let’s look at this in a little more detail. The pressure in the system is controlled by the output of the pump (cardiac output) and the systemic vascular resistance (changes in vessel diameter or changes in blood viscosity). The cardiac output is determined by the heart rate and the stroke volume (how much blood is pumped out with each contraction of the heart). The equation is as follows:

  • Mean Arterial Pressure (MAP) = Cardiac Output (CO) x Systemic Vascular Resistance (SVR)
  • Cardiac Output = Heart Rate (HR) x Stroke Volume (SV)
  • Therefore, MAP = (HR x SV) x SVR

In order to raise the pressure in the system, we need to increase heart rate, increase stroke volume, or increase systemic vascular resistance (or some combination of the three). What often happens in an injury or disease is that one of these components falters and the other two attempt to compensate. This equation is paramount to understand what’s happening physiologically to someone in shock.

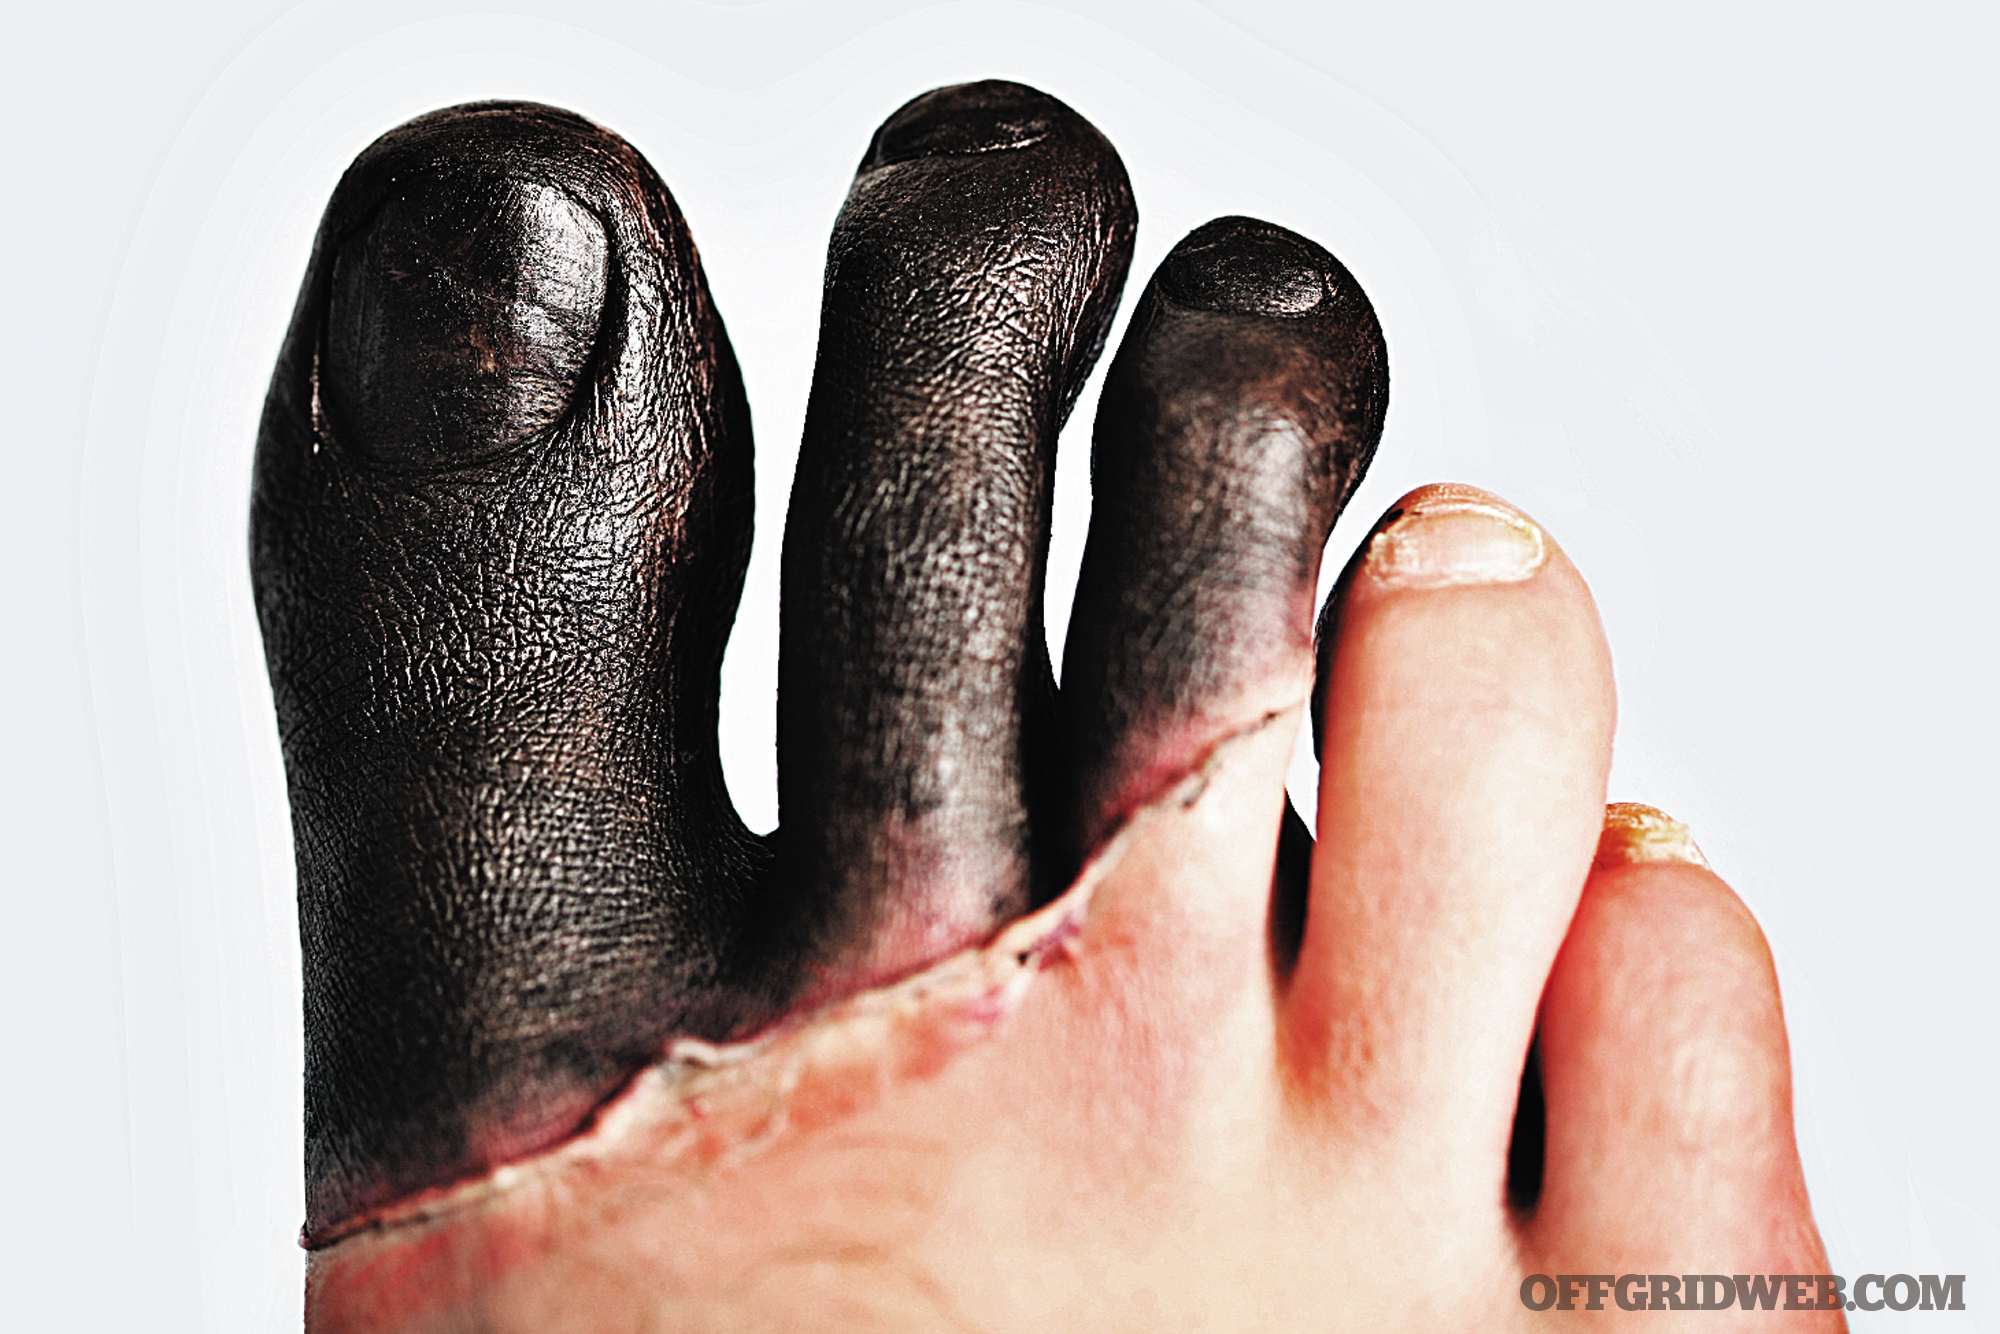
With that in mind, the symptoms of shock should make sense. Hypotension (low blood pressure) is prevalent. The person may experience extreme fatigue, dizziness when standing, or faintness. Low blood pressure causes the body to shunt blood away from less essential organs like the skin. The skin becomes pale and cold. In order to attempt to compensate for the low blood pressure, the heart rate increases. This pushes the blood faster around the system to utilize the remaining oxygen within the system. The respiratory rate increases to bring more oxygen into the system and to lessen the effects of increased acid buildup from lack of tissue perfusion. A person may become disoriented or confused due to lack of blood or oxygen to the brain.

Stages of Shock

The whole process can develop rapidly and has three stages to focus on. The first stage is the initial, or pre-shock, stage. This is the moment an injury occurs to the person. In an example of trauma, blood is being lost through a wound. This is essentially a decrease in the stroke volume from the equation above. This in turn decreases the cardiac output. The body will attempt to compensate by increasing the heart rate and increasing the systemic vascular resistance (via vasoconstriction). The latter mechanism attempts to control the bleeding and shunt blood away from less essential tissues.

In the second stage (compensatory stage), the body continues to minimize the damage being done. This stage is reversible (by acting quickly, there’s a good chance tissue and organs can be saved). The body activates the sympathetic nervous system due to the decreased cardiac output, and hormones such as epinephrine are released to increase the contractility of the heart. When the body fails to compensate, the progressive stage ensues. This is where the tissues suffer increased ischemic damage, and lactic acid builds up in the bloodstream. The further along this stage goes, the more likely it becomes irreversible and organs start to fail. Urine output drops initially as the body tries to retain all the volume it can. Later, urine production stops due to the death of cells in the kidney. The liver fails, which causes a disturbance in the coagulation cascade, and it’s easier to bleed. Death is imminent.

So, with the physiology of shock outlined above, let’s look at how that physiology is affected by various causes of shock. There are two different classifications of shock: differentiated and undifferentiated. Many times when someone is in shock, we say it’s undifferentiated because the patient exhibits signs of shock, but we may not know the exact cause. We start treatment protocols immediately because time is off the essence. When we do know what is causing the shock (differentiated shock), we break it into four general categories: distributive, cardiogenic, hypovolemic, and obstructive.

Distributive Shock

Referencing the aforementioned equation, distributive shock is where the systemic vascular resistance decreases, and blood vessels generally dilate. The body tries to compensate by increasing the heart rate. We further break distributive shock down into septic and non-septic causes. Sepsis is the effect of the body’s response to infection. Common sources of infection are urinary tract infections, pneumonia, and even skin infections. With treatment in the hospital setting, the mortality is roughly 40 percent. For non-septic causes of distributive shock, mortality depends on the initial insult.

There are four categories of non-septic distributive shock: inflammatory, neurogenic, anaphylactic, and “other.” The inflammatory portion could also be a component of sepsis, or could be associated with a severe burn, trauma, or heart attack. Neurogenic shock is usually due to a spinal cord injury or traumatic brain injury. The autonomic nervous system is altered, leading to decreased systemic vascular resistance and unopposed vagal tone.

Because of these changes, the distinguishing feature of neurogenic shock is usually a slow heart rate, which makes it difficult for the body to compensate. Anaphylactic shock can be caused by food allergies, environmental allergies, medication allergies, or idiopathic reasons.

Injectable epinephrine at the onset of anaphylaxis is critical to survival. Venomous stings (e.g. bees, scorpions, and snakes) are often considered in the “other” category. Interestingly, carbon monoxide, myxedema (due to extreme hypothyroidism), and narcotics are also included in this category due to their effect on systemic vascular resistance.

In a survival setting, many of the causes of distributive shock could be prevented or prepared for prior to the irreversible portion of shock. Carrying antibiotics and keeping wounds clean can minimize risk of infection. You could also try eating garlic or onion at the first sign of infection. This won’t do anything once you’re very far into the pre-shock stage, though. You could also try apple cider vinegar, Echinacea, hydrogen peroxide, or turmeric to help keep a wound clean. Keep in mind that these are very early interventions. Readily available epinephrine for anaphylaxis is a no-brainer, especially if you know you have such reactions. If you have a thyroid condition, ensure that you have enough medication. People who are on chronic steroids must also ensure they don’t run out of these, or they risk adrenal insufficiency, shock, and death.

Hypovolemic Shock

This occurs when there’s a loss of fluid and, in essence, a decrease in stroke volume due to the loss. In order to maintain blood pressure, the heart rate increases to maintain cardiac output, and the arteries constrict to maintain systemic vascular resistance. There are two classifications in hypovolemic shock: hemorrhagic and non-hemorrhagic. In hemorrhagic shock, there’s a disruption of the vascular system, causing a leak. While this can be easily identified by severe external bleeding, don’t forget that internal hemorrhage may not be as apparent.

This could be due to blunt force trauma that causes a rupture in an organ such as the spleen, or a tear in a major vessel from a motor vehicle crash. Pelvic fractures are also known for internal bleeding. Look for bruising on the abdomen or flank, as well as for abdominal distention, as potential indicators of hemorrhage. Stabilizing a pelvic fracture at the scene when there’s evidence of internal bleeding or shock can help slow the hemorrhage. You could consider using a sheet, blanket, or the SAM Pelvic Sling.

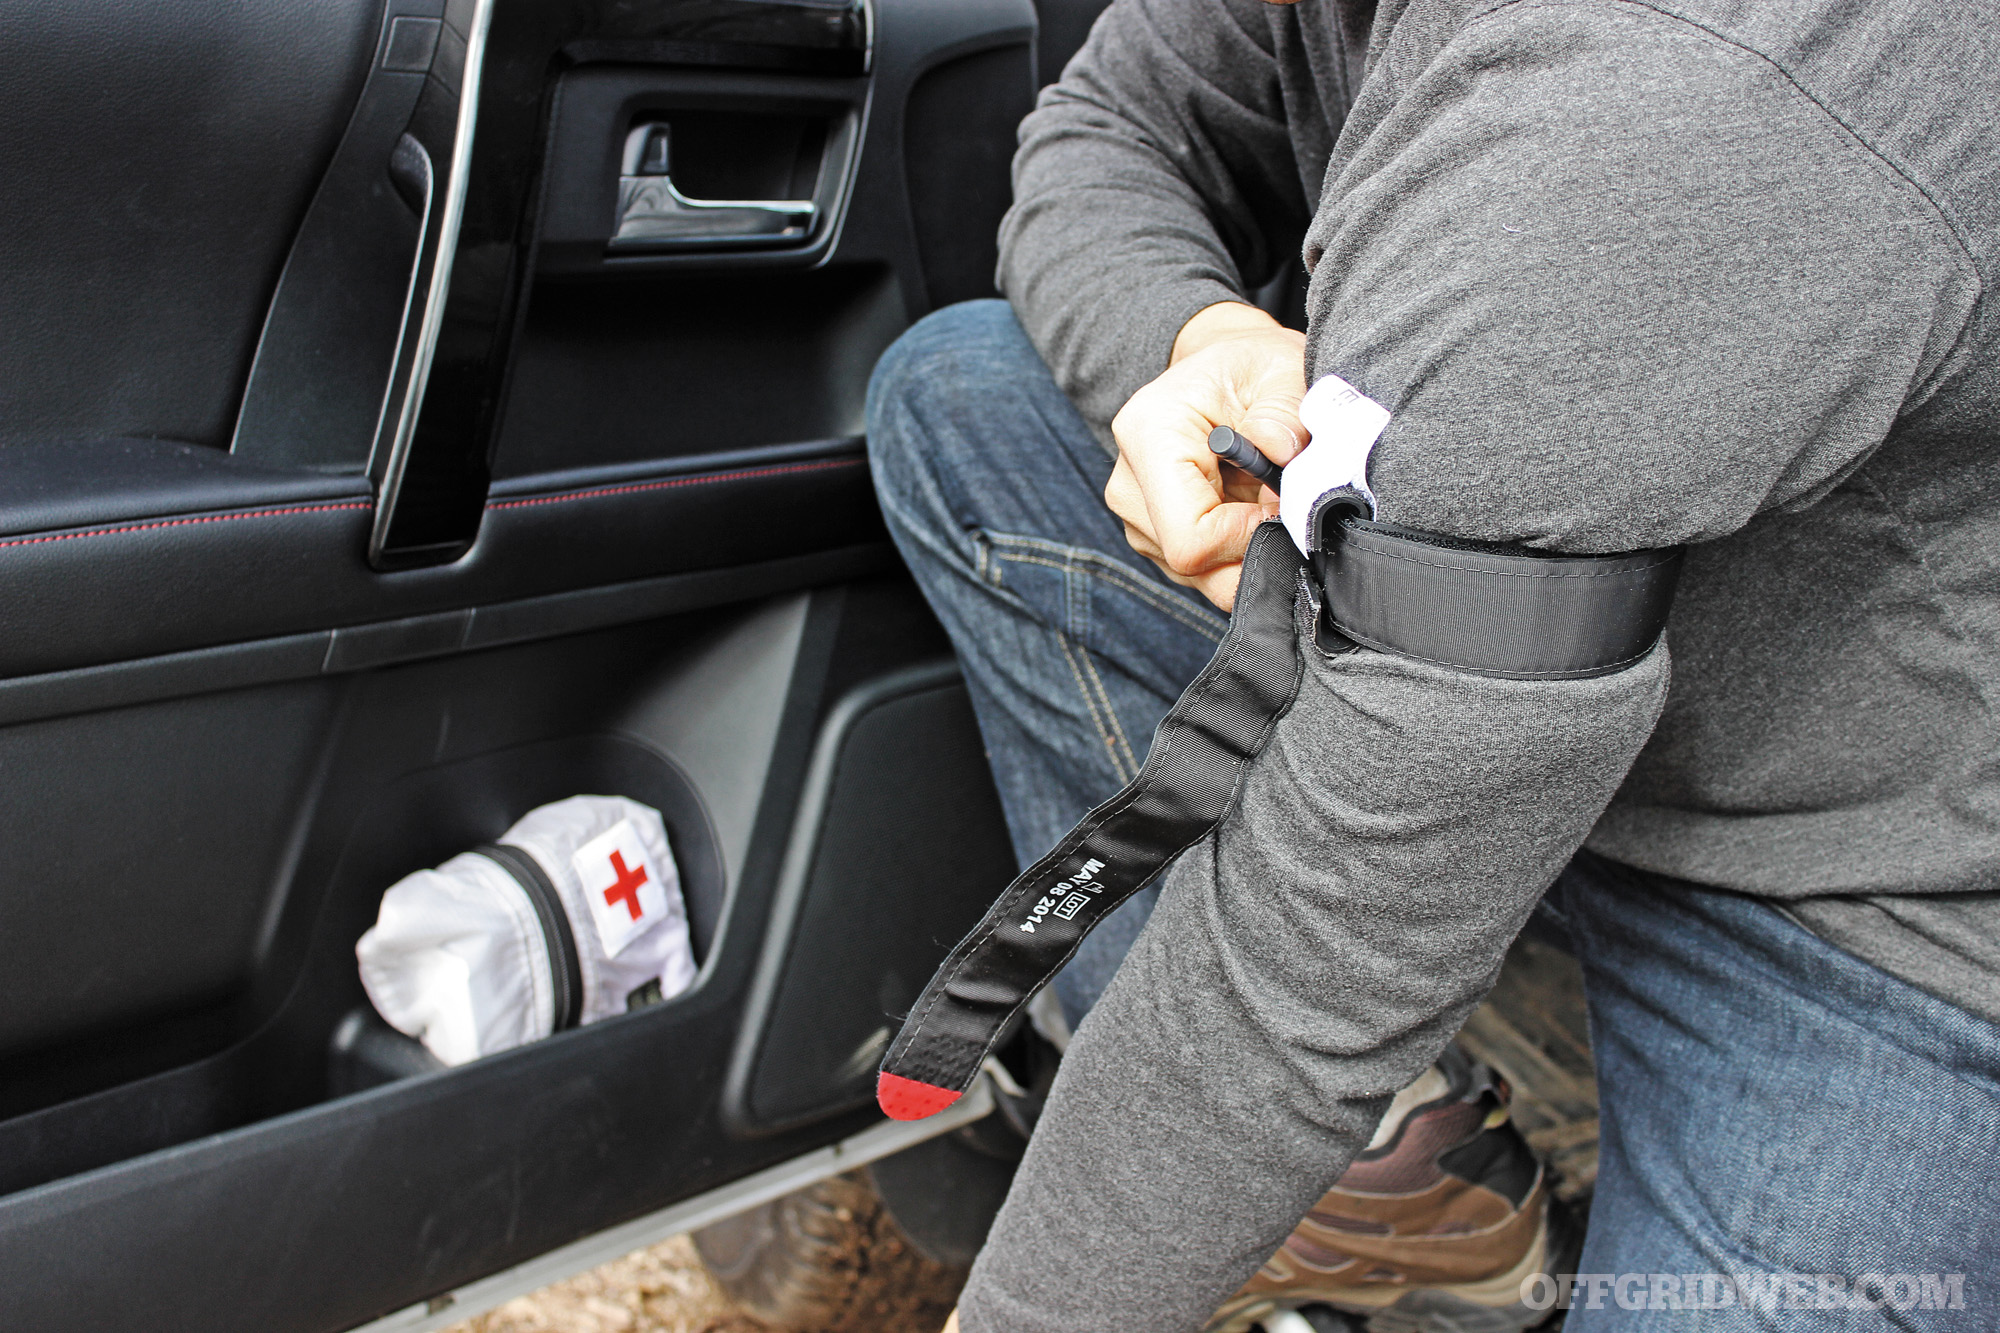
Remember that people on any type of blood thinner, including aspirin, are at increased risk of more significant bleeding. Other treatments involve stopping the bleeding by holding pressure to obvious sources of bleeding. If a tourniquet is needed for injuries to the extremity, apply it if you have the proper training on their use. Coagulant powder is also an option. If you don’t have any, remember that cayenne pepper, turmeric, juniper sap, and other natural remedies could also help. Because you might be miles from help, the key is to stop the bleeding rather than replace the fluids.

Surviving the night sunset dusk dawn survival tourniquet first aid medical emergency prepping 8

In non-hemorrhagic shock, the loss of total body water is profound. Because of the water loss (as opposed to blood loss), the viscosity of the blood increases, and thus systemic vascular resistance increases. Fluid loss can be severe due to vomiting and/or diarrhea due to enteritis from bad food or water. Heat stroke can also cause profound dehydration, leading to shock. Mortality for heat stroke can be as high as 80 percent if it’s not treated promptly.

In cases of heat stroke in the wild, sitting in a cold stream may help cool core temperatures. Burns can also cause significant water loss. Due to the loss of the skin barrier, the evaporation of fluid is much greater from the burned area. The larger the area of the burn, the more water is lost. A burn can also increase the risk of secondary infection due to the loss of the protective skin barrier. Even in a hospital setting, someone with a severe burn (third degree) over greater than 40 percent of their body can have a 40 percent chance of mortality.

In a survival situation, honey would be a good makeshift barrier for a burn, serving as a barrier as well as providing some antimicrobial coverage. Lastly, in a prolonged survival setting, the ability to maintain nutrition decreases, as does the amount of protein stored in your body. As the protein levels drop, it becomes more difficult to keep fluids in the vascular space and can lead to hypovolemia (a decreased volume of circulating blood in the body).

Cardiogenic Shock

This is when the heart fails to function efficiently. When the heart weakens acutely because of a heart attack, there’s less muscle available to do work. Sometimes the cardiac muscle becomes weak over time due to heart failure, and no longer can meet the demands of the body. These situations decrease the heart’s ability to pump blood with each contraction and thus decrease stroke volume. Another reason the pump cannot meet demand is if the heart rate is too slow. As the heart rate drops, the heart muscle has to contract harder to push the volume of blood out to maintain cardiac output. Conversely, if the heart rate is too fast (over 200), the heart doesn’t have enough time to fill with blood between contractions, and the stroke volume decreases.

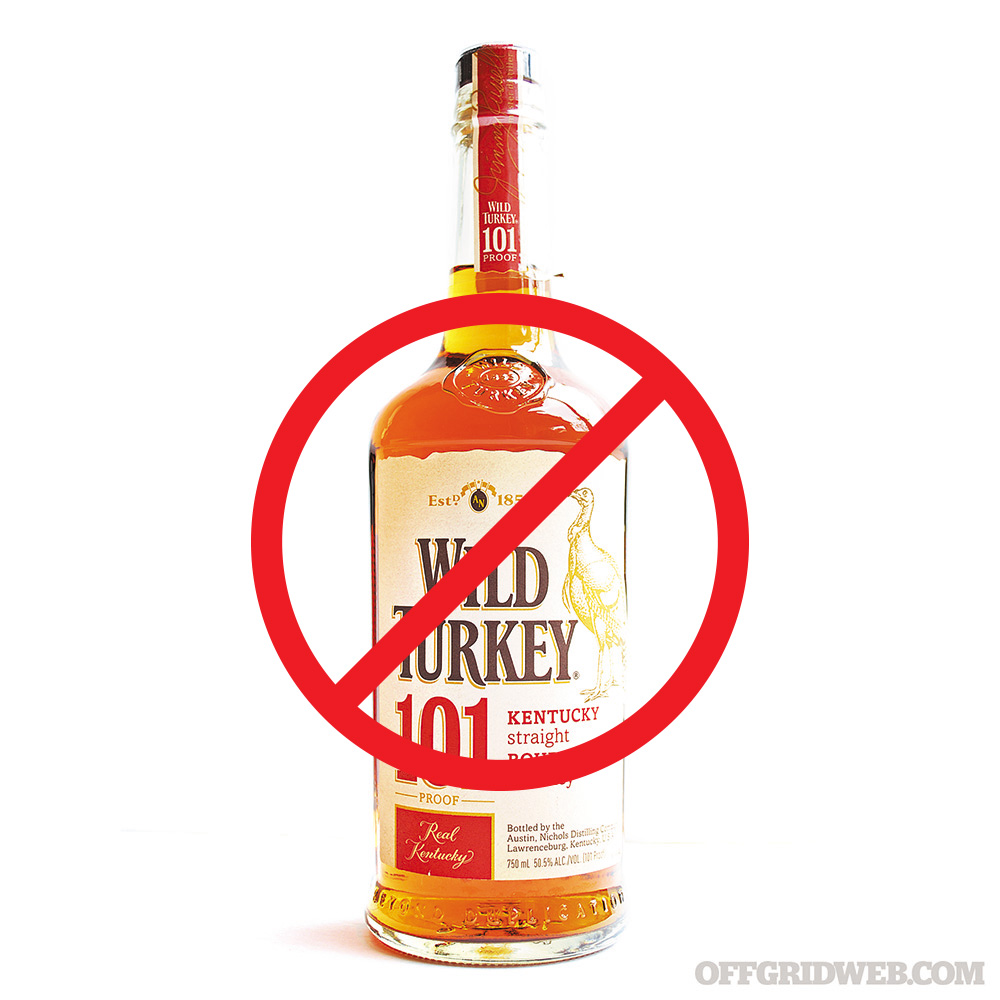
Mortality for cardiogenic shock in the hospital is around 50 percent. Normally, aspirin is given at the onset of a heart attack; however, if there’s no aspirin, natural salicylates would include willow bark, blackberries or red raspberries, cayenne pepper, and almonds. Several days rest would also be important for the patient. Using a drug to increase heart rate wouldn’t be wise. It’s likely a heart attack affected the pacemaker area of the heart, and putting chemical stress on the heart could further expand the area of heart muscle involved.

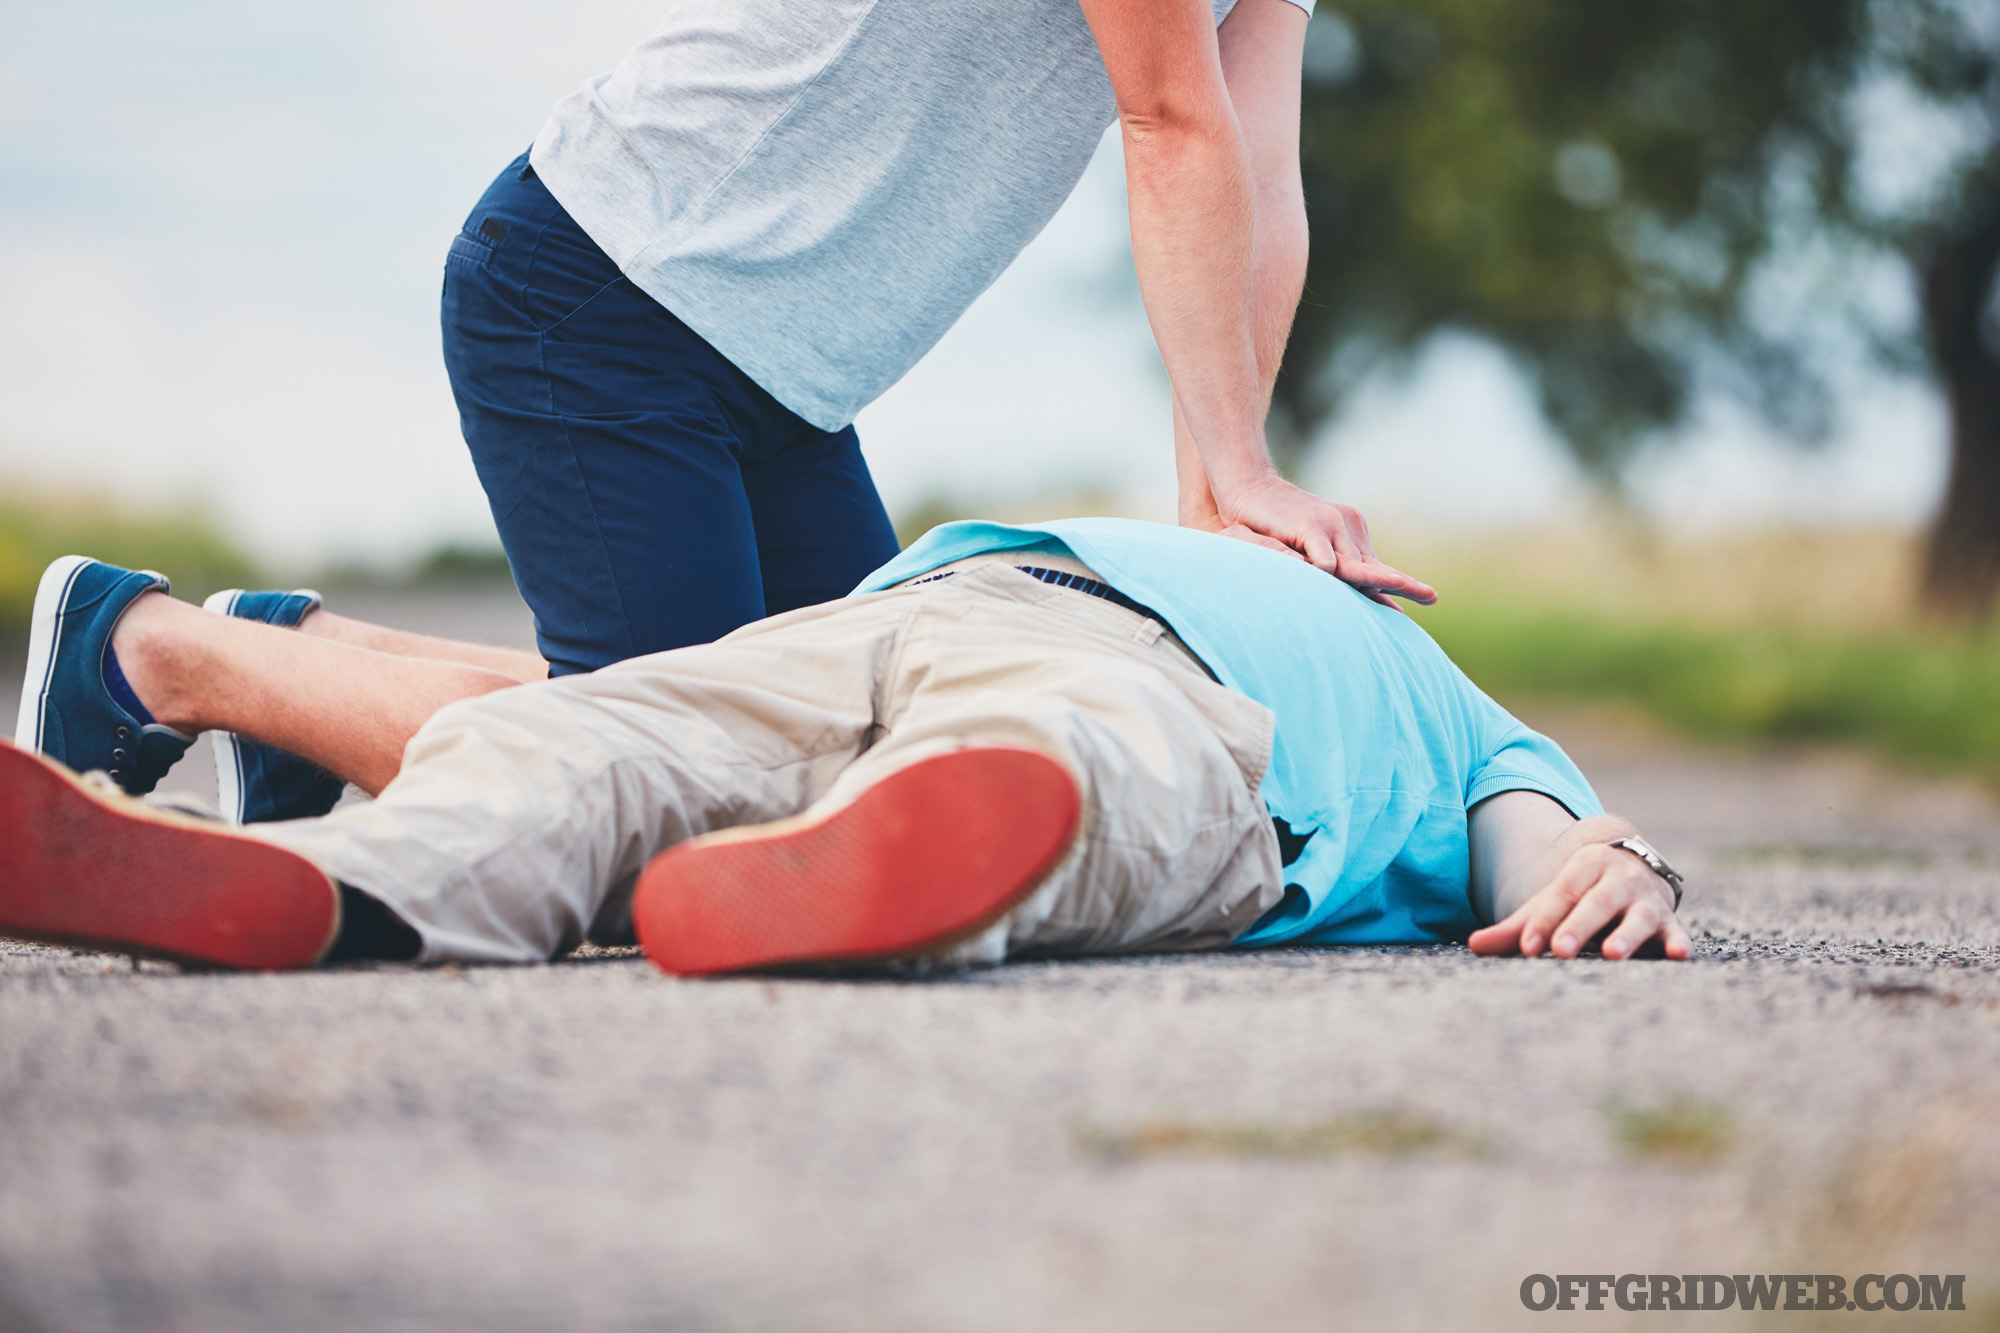
While external bleeding may not be present after bodily trauma, internal bleeding can often lead to the onset of shock.

Obstructive Shock

This occurs when compression of the heart prevents it from filling with blood. This decreases the stroke volume, because the heart cannot generate enough force to contract. Examples of this would include tension pneumothorax and pericardial tamponade. In a tension pneumothorax, air leaks from a hole in the lung into the space between the lung and the chest wall. If the air cannot escape, then pressure builds within the space and creates the “tension.” The increased pressure in the chest doesn’t allow the heart to fill, and blood pressure falls. The neck veins (jugulars) become distended, and the trachea may even deviate away from the side of injury. The lifesaving measure is to use a decompression needle to allow the air to escape and decrease the tension. The decompression procedure is much more risky in a non-hospital setting.

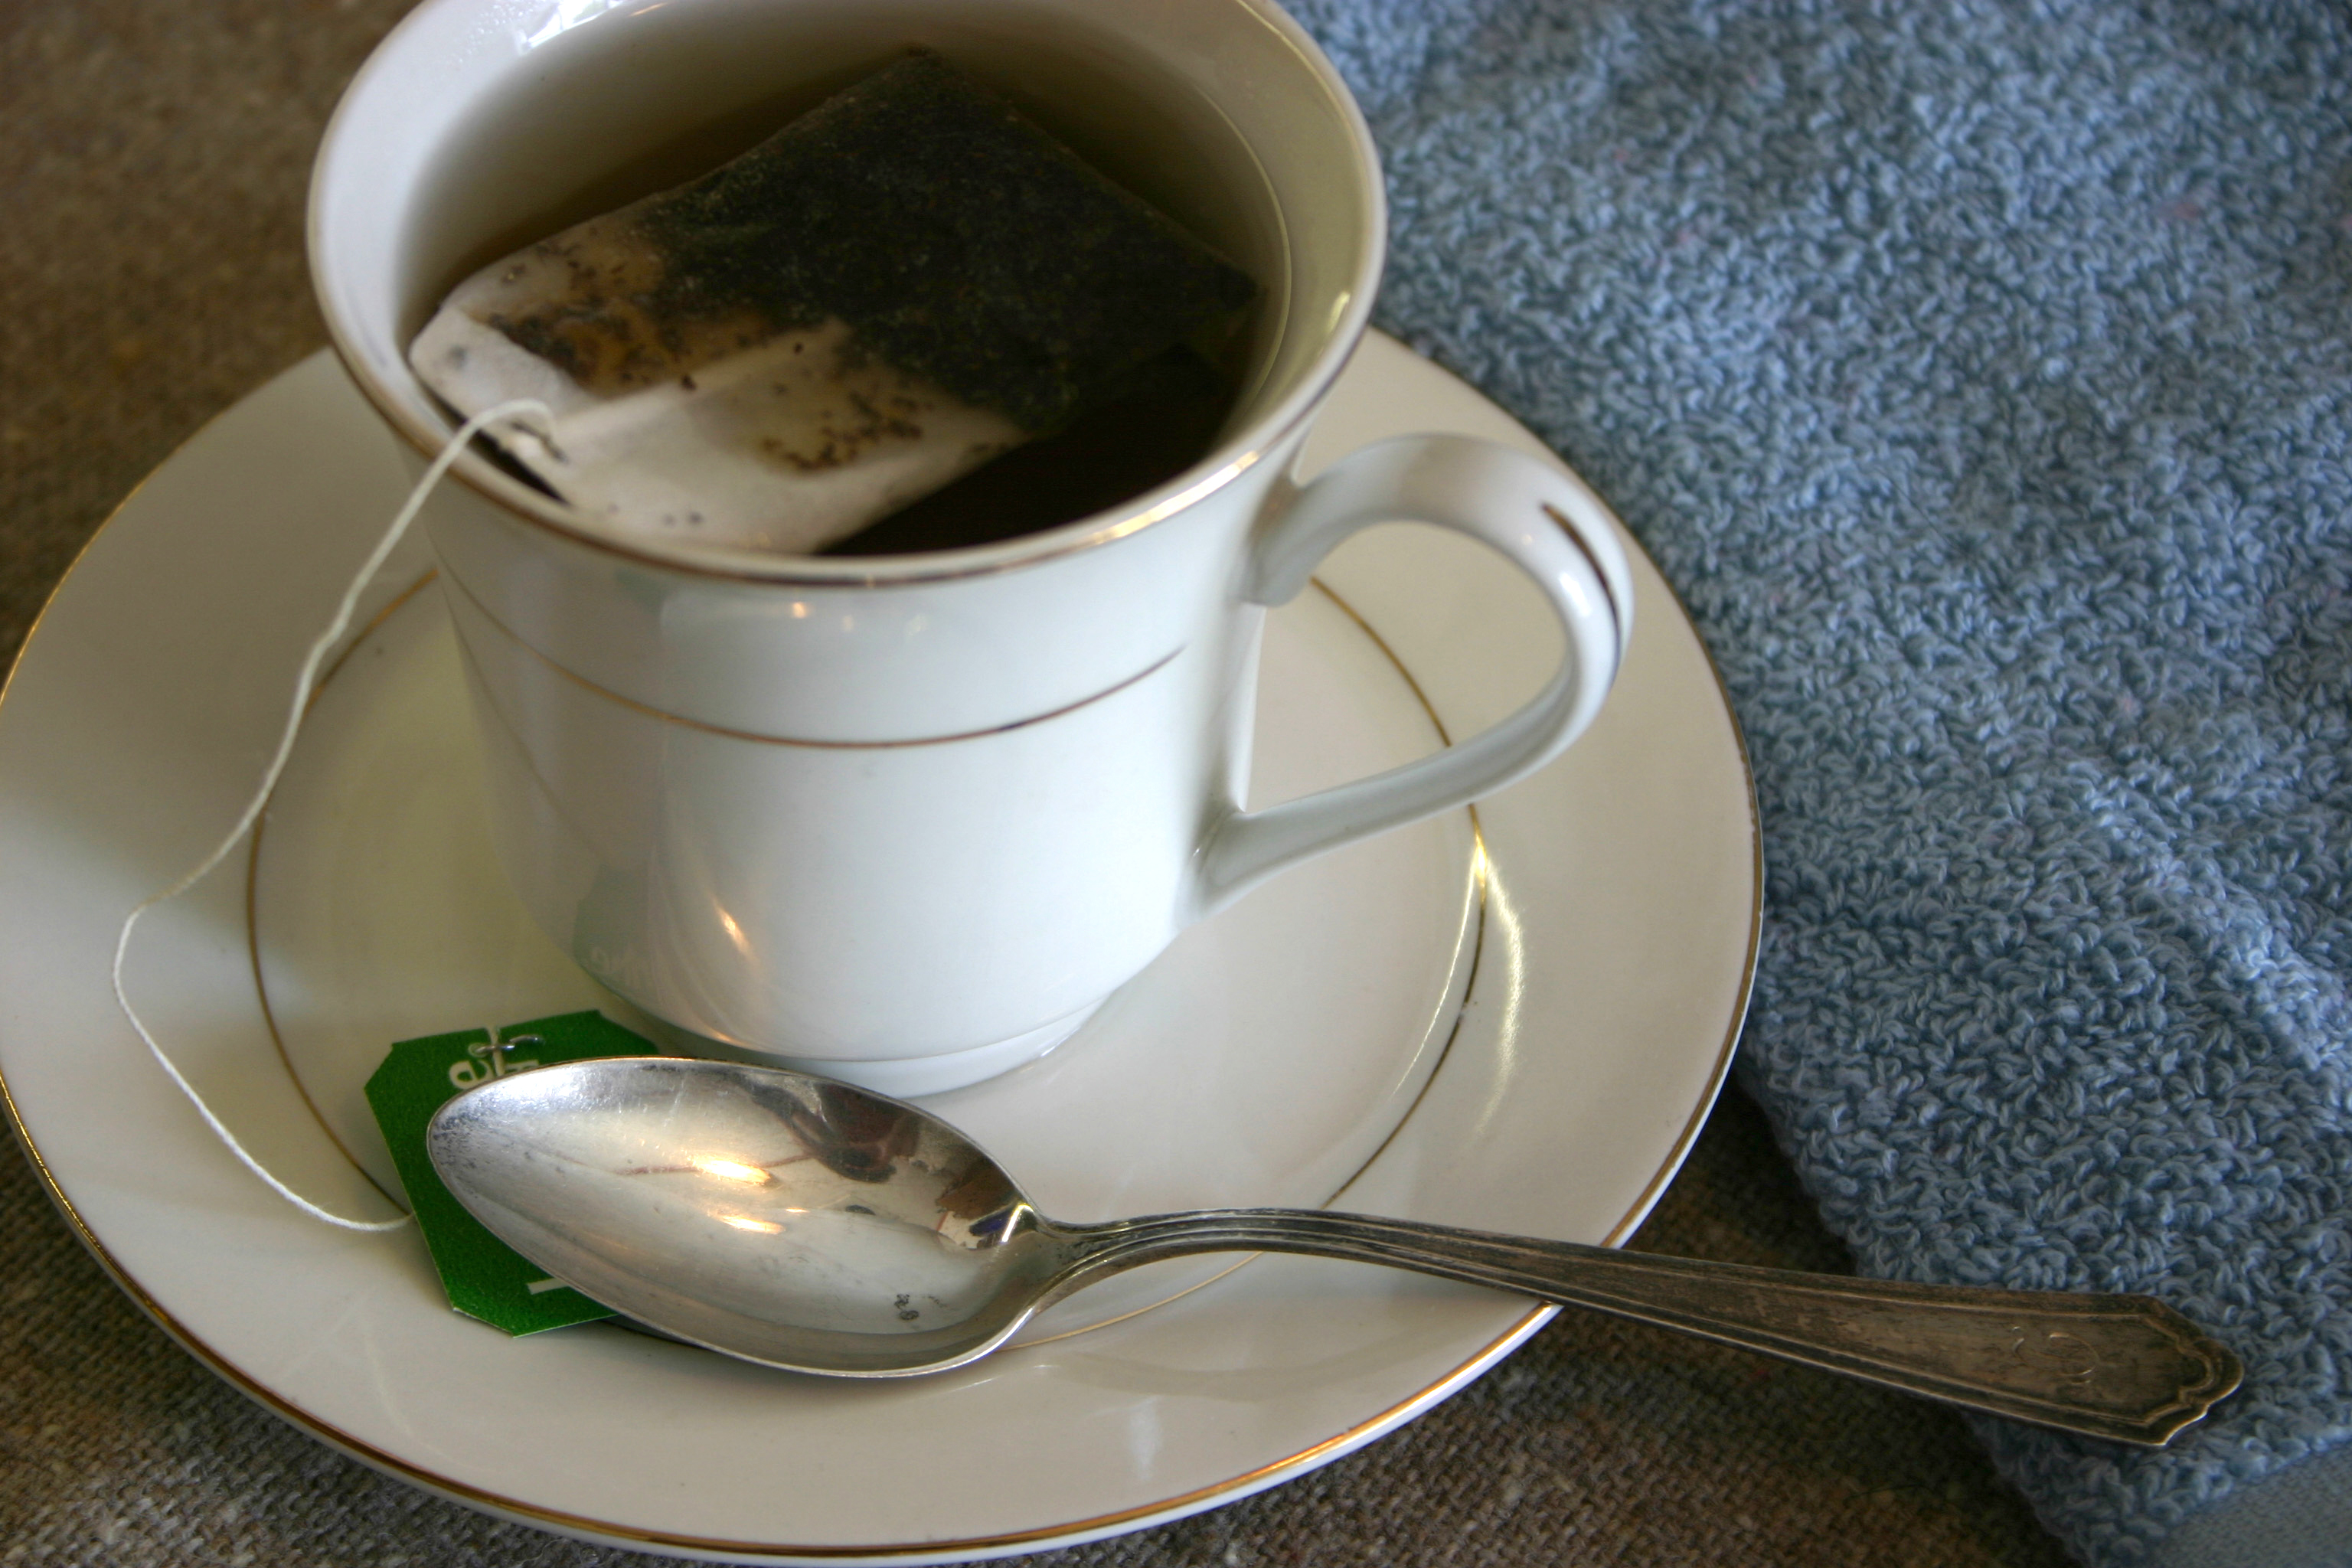
Pericardial tamponade occurs when fluid builds up within the pericardial sac surrounding the heart. When this fluid accumulates (from trauma, infection, inflammation, or cancer), it prevents the heart from filling with blood due to the constriction and increased pressure in the pericardial space. This can also cause a decrease in blood pressure or signs of congestive heart failure. Natural diuretics like grapes, garlic, onions, dandelion, and green tea could be used to help with congestive heart failure; however, the likelihood that these will be strong enough or act quickly enough to overcome the effects of pericardial tamponade is very low.

In Summary

Shock is a devastating process that has about a 50-percent mortality rate in the hospital setting. In a survival situation with no immediate help, the chances of survival are poor. The best chance of survival is to prepare for causes that can be reversed (e.g. anaphylaxis, hypovolemia, and hemorrhage). Ensure adequate hygiene to prevent even the simplest of scratches from leading to sepsis. Natural plants are helpful for many situations, but aren’t likely to be potent enough or work fast enough to make a difference in the case of shock. And if you haven’t already, take a basic first-aid course and continue with more advanced education so you’re better prepared to handle an emergency.

About the Author

David Miller, DO, FACOI, is an internist in private practice. Diagnosed with Type 1 diabetes in 1990, he has a unique perspective on patient care and disease management. Experiences away from the office include being a fight doctor for regional MMA bouts and a team physician for a Division I university in west central Illinois. Dr. Miller is an instructor for the Civilian Crisis Response Team (medical section) based out of Indianapolis.

More From Issue 30

Don’t miss essential survival insights—sign up for Recoil Offgrid's free newsletter today!

Read articles from the next issue of Recoil Offgrid: Issue 31

Read articles from the previous issue of Recoil Offgrid: Issue 29

Check out our other publications on the web: Recoil | Gun Digest | Blade | RecoilTV | RECOILtv (YouTube)

Editor's Note: This article has been modified from its original version for the web.


New: Kel-Tec KS7 Lightweight Shotgun

Kel-Tec has become famous for its unconventional gun designs, especially the dual-magazine-fed KSG shotgun — check out our detailed analysis of that weapon in “Battle of the Boomsticks” in Issue 30 of our magazine (on sale February 8th). While the KSG can be considered controversial, it also has some appealing characteristics. Compared to a run-of-the-mill Remington 870 or Mossberg 500, its bullpup design results in a dramatically reduced overall length with an 18.5-inch barrel. Also, its dual magazine tubes provide a substantial 12-round capacity.

Top: The KSG. Bottom: the new KS7.

Top: the KSG. Bottom: the new KS7.

This year at SHOT Show, the company showed off a new twist on the KSG format: the Kel-Tec KS7. This shotgun retains the small footprint of its predecessor, but uses a single 6-round magazine tube to reduce weight and bulk. Specifically, the KS7 is considerably slimmer and a full pound lighter than the KSG (5.9 pounds vs. 6.9).

Kel Tec KS7 SHOT Show 2019 pump shotgun 12 gauge lightweight survival 5

Another noteworthy change to the KS7 is its removable carry handle, which includes M-LOK slots along each side for lights and other accessories. The carry handle also serves as a channel sight with a triangular green fiber optic bead. The KSG has a BYO-optic bare Picatinny rail setup without iron sights, so we appreciate this addition.

For those who prefer to run an optic instead of the bead sight, Kel-Tec has plans to offer a rail that will replace the carry handle.

Kel Tec KS7 SHOT Show 2019 pump shotgun 12 gauge lightweight survival 4

The Kel-Tec KS7's pump handle is a new design with hand stops at front and rear. Since our previously-mentioned review of the KSG specifically recommends adding a hand stop or foregrip to the picatinny rail on its fore-end, we're glad to see it's built in on the KS7. The remainder of the gun's controls should be familiar to KSG users, although it obviously lacks a magazine selector lever.

Kel Tec KS7 SHOT Show 2019 pump shotgun 12 gauge lightweight survival 1

Overall length of the KS7 is 26.1 inches, the same as the KSG, so it should fit into your backpack, truck, or safe with relative ease. MSRP is $495. For more information on the KS7, go to KelTecWeapons.com.


Frozen Stiff: Identifying & Treating Hypothermia

This article originally appeared in Issue 2 of our magazine.

What is hypothermia and how does it affect the human body? Have you experienced a form of hypothermia and did not know it?

Most people walking this planet have no idea what hypothermia really is or what its signs and symptoms may be. Let’s say you and your buddies decide to go to a football game, and sometime between the tailgating and the sun setting you begin to feel cold. Next thing you know, your teeth are chattering and you start to shiver, but you suck it up because your buddies are powering on. Now your skin hardens, your fingers become hard to move, and your lips feel like they are burning. Whether you realize it or not, these are some of the beginning stages of hypothermia.

Hypothermia occurs when your body loses heat more rapidly than it can replace it. Commonly caused by exposure to cold weather or even being dunked in cold water, your bodily functions (heartbeat, blood flow, nervous system), and organs will rapidly start to degrade, which will lead to death. The human body operates best at 98.6 degrees Fahrenheit, but when your body is headed south of 95 degrees F, you’re in hypothermia territory.

Hypothermia first aid medical skin winter ice snow survival preparedness 3

The cold can injure or even kill you just as heat does, and in some cases, the cold can do it faster and more painfully. Like other medical conditions, there are different severities of hypothermia, and just as with heat-related emergencies, cold-related emergencies are affected by your body’s thermostat, the hypothalamus.

Symptoms

There are three levels of hypothermia. In mild cases, you’ll see some shivering and hypotension. If it gets worse, moderate cases will demonstrate more intense shivering, along with paleness of the skin, bluing of lips, ears, fingers, and toes. You’ll also notice that the patient will seem alert, but steadily lose their coordination and display confusion and less agility. When things get even more serious, the skin will become blue and puffy. Severe cases also show difficulty in speaking and thinking as well as low blood pressure, slowed breathing, and in many cases, irrational behavior and labored walking. Strangely enough, sometimes victims suffering from severe stages will begin to strip off their clothes, believing that they feel overheated. The stripping of the clothes increases heat loss, which leads to death.

Hypothermia first aid medical skin winter ice snow survival preparedness 8

Treatment

Treatment of all types of hypothermia and other cold-related emergencies is simple. Attempt to get out of the elements as quickly as possible. If you are stranded, you must find shelter or make shelter and get warm by bundling up and, if possible, building a fire. If you’re wet, get dry as soon as possible. Bundle up, under blankets without direct contact with the cold ground. Thermal balance must be maintained for survival. Getting out of the elements and creating a warming environment around you will take care of mild cases.

Water additives coffee tea drink beverage 1

Don’t be too shy to share body heat by initiating skin-to-skin contact. Also, drinking warm, non-alcoholic, non-caffeinated drinks will help. Application of hot water bottles in the armpit and groin areas would help sufferers of moderate hypothermia. If the patient is suffering from a severe case, professional medical assistance will be required to introduce warm fluids into the patient intravenously. Dangerously shallow breathing might require CPR.

Prevention

The best way to avoid hypothermia is to stay warm, dry, and hydrated. It’s important to wear the proper clothing and shoes or boots for the elements. A good rule of thumb is to maintain a good, comfortable level of body heat in cold temperature. Don’t overdo it and bundle up until you’re sweating. On the other hand, don’t go out in the cold in your birthday suit, either. It’s also probably a good idea to pass on the next polar bear plunge, too.

Hypothermia first aid medical skin winter ice snow survival preparedness 6

Maintaining Body Temperature

In cold weather, your body burns more calories faster than in warmer climates. The more you move, the more energy you burn, and the more your body needs to be hydrated. Your primary objective is to stay hydrated. Maintaining a level body temperature goes hand in hand with hydration. Layering clothing is also very important to help maintain your body’s core temperature. Excessive sweating in cold environs is not a good thing since it makes it harder for your body to stay warm. The best way to balance your body warmth is to make adjustments to your clothing as necessary by putting on or taking off layers.

Alcohol

Alcohol can play a role in dehydration. Alcohol when consumed is absorbed rather quickly by the body because of its smaller molecular makeup. Your body wants to process this foreign substance faster, and it then uses water to process the alcohol. That’s why you have to pee when you get hammered. Your body wants to pee it out — and quickly. In a hypothermia situation, depleting water from your body has the opposite desired effect of what we are attempting to achieve. So when you’re freezing, it’s a good idea to avoid that bottle of bourbon or vodka. It may feel like it’s warming you up, but in the end, it’ll freeze you, maybe even to death.

Even after one recovers from the symptoms of hypothermia, it’s a good idea to have a trained medical professional examine the patient to make sure they are fully recovered. Hypothermia is a dangerous killer that can be avoided with proper preparation. When it’s cold out, make sure you take in water and you are properly bundled up. But, hypothermia isn’t the only condition to keep an eye out for. There are other dangers to cold environments, as well. Take a look at the sidebars on these pages to learn what else to avoid.

Other Cold-Induced Injuries

Frost Nip

Hypothermia first aid medical skin winter ice snow survival preparedness 7

Frost nip by definition is damage to the skin and underlining tissue as a result of exposure to severe cold. The signs of frost nip are:

  • Possibly red or pale grayish skin tone
  • Hard and waxy appearance with a burning sensation
  • Numbness and stiff joints
  • Cracking and painful skin

This usually occurs to exposed areas of the body, such as the hands, fingers, toes, noes, ears, or cheeks. While this is occurring, you may not even be aware of it once the numbness sets into those areas. If exposure to the elements continues, the next level of severity would be frostbite.

Frostbite

Hypothermia first aid medical skin winter ice snow survival preparedness 4

Frostbite is an injury to body tissues caused by exposure to extreme cold, typically affecting the extremities. Prolonged exposure could result in gangrene or tissue death.

Frostbite signs are:

  • Reddening of the skin that turn white or pale
  • Direct exposure would have an icy appearance
  • Stinging, burning sensation with swelling to the affected area
  • Over a 24-hour period, you could develop blisters
  • Loss of sensation with continued pain
  • Reduced movement or range of motion in joints and muscles

As the skin continues to be exposed to the extreme cold, the tissue on the surface will be damaged. However, the real problems start with extended exposure to the cold and when the underlining layers of skin are damaged. This could result in damage to blood vessels and capillaries, and it will eventually kill the cells. This is where gangrene starts to set in. If it does, professional medical assistance must be sought immediately.

Basic CMYK

Trench Foot

Trench foot is a painful condition to the feet caused by long exposure to cold water or mud and marked by blackening and death of surface tissue. It also leads to gangrene or tissue death occurring at the affected area. Keep in mind these are the worst-case situations to extreme cold exposure. The key point here is exposure as it’s related to time and temperature. The colder it is, the worse the damage to the body.

Trench foot signs and symptoms are:

  • Tingling or itching sensation with pain and swelling
  • Numbness, prickly needle feeling in the feet
  • Tissue death may occur and start to peel off
  • Blisters surrounding affected area

Gas Relief: Siphoning Fuel in an Emergency

This article was originally published in Issue 1 of our magazine.

WARNING: The content in this story is provided for illustrative purposes only and not meant to be a detailed guide on fuel transfer or vehicle repair. Any use of the information contained in this article shall be solely at the reader’s risk.

Urban preppers face many unique challenges that their rural cousins need not consider. Urban living has its perks for sure, but ample and adequate space to store certain items is not one. Things like food, water, and medical supplies are manageably stored in a closet or cupboard. Gasoline is not so easy to store if you’re eight floors up and hurtin’ for closet space.

If your plan is to “bug in,” your food and water stockpile can keep you comfortable for however long you’ve prepared to stay. But, what about when you have to bug out? How far can you go on what’s left in the tank of your vehicle? Is it far enough? How can you get the gas you need to go farther?

Siphon gas fuel gasoline bugout vehicle car truck shtf survival emergency 4

Here’s a likely scenario: You have to get mobile, and your car… well, let’s say you haven’t been as diligent as you should’ve about keeping it above the 3⁄8 mark. Your saving grace? You spot an abandoned car in a parking lot. You know chances are it has at least a little gas in it. Assuming the fuel hasn't expired, it's liquid gold. Now you just have to figure out the best way to get those tigers into your tank.

Suck It?

We’ve all seen it, someone sticking a hose into the gas tank and creating a siphon by sucking on it madly until they get a mouth full of 87 octane. Don’t do it. The whole idea is to survive — not to become a rotting corpse, collapsed in a heap, dead from either respiratory arrest, being eaten from the inside out by the petrol in your stomach, or suffocating because of a vapor-burnt esophagus.

Siphon gas fuel gasoline bugout vehicle car truck shtf survival emergency 3

There's no need to put mouth to hose when there are plenty of other ways to appropriate gas. The easiest and most portable way is with a simple hand pump like the one pictured. There are a number of designs and sizes; any home improvement store or auto center will have a good selection.

Siphon gas fuel gasoline bugout vehicle car truck shtf survival emergency 1

Our advice? Get the smallest most packable siphon pump you can find, and keep it in your vehicle emergency kit. We chose an Arnold 490, mainly because of its size, but also because it comes with two different hoses: a large one for gas and a smaller one for Texas tea (oil, that is). It’s efficient, simple, and person-powered. All you do is hook a hose at each end of the pump; the in tube goes into the source tank and the out tube belongs in the gas can, car, or wherever you’re storing your bounty. Now, you’re ready to pump away.

Siphon gas fuel gasoline bugout vehicle car truck shtf survival emergency 2

Another source for a simple siphon pump is your local pet store in the aquarium section. Look for a hand-powered aquarium vac. Instead of pumping out fish poop-laden water, it’ll be suckin’ up gas. It’s also a bonus that they come with the clear tubing, so you can see that it’s actually gas you’re getting.

It’s Never As Easy As It Should Be

Chances are it won’t be as easy as sticking a tube into the gas tank and pumping away. In general, car companies consider the filler tube a one-way street. They make it easy to put gas in, but frown on the ability to take it out.

Several late-model cars have one or more devices to discourage the transfer of fuel out of the tank. The first line of defense you’ll need to get around is the lockable filler door and/or filler cap. Without going into too much detail, the only way past them may be the brute force required to pry, pick, and break your way past the doors and locks.

car-scavanging-gas-filler

Now that you have access to the filler tube, you notice there’s a little flapper thing covering the top of the filler tube. Sure, the siphon hose will push it aside as it goes in, but much like Chinese finger cuffs, the more you try to pull the hose out, the more the flap pinches it. Be prepared to use your screwdriver to push the flap up when taking the hose out.

Now that we’ve dealt with the easily-beatable first lines of defense, a much more defiant adversary awaits. If you start to feel some resistance as you put the hose down into the tank, chances are you’ve hit one of two things: an anti-siphon screen or an anti-siphon valve.

The anti-siphon screen is merely a piece of perforated metal that prevents anything solid from going into the tank. That’s easy enough to get around. All you need to find is a long enough screwdriver or any sturdy stick thin enough to fit on the tube and long enough to hit the screen with room to spare. You can guess what happens next; you’re going to use what you have to break the screen. Caution! Gas vapor is extremely flammable, so using a metal rod to puncture the screen may cause sparks, followed by a flash, followed by you doing an impression of the human torch. Again, the object is to survive, so common sense should be applied abundantly.

The Anti-Siphon Valve

If there’s still resistance while pushing the hose down the filler tube, then you’ve most likely come across an anti-siphon valve. Though exact designs vary with manufacturers, the most basic and efficient valve is a simple ball valve. Push against it, and it closes the filler tube. When gas is flowing it floats up, and the gas gets to the tank.

syphon

So, how do you get through the anti-siphon valve? Short of disassembling the filler tube, you can’t go through the valve. Instead, you’ll have to go around. The easiest but least comfortable way is to climb under the car, and if it’s a polymer tank, drill into it with the battery-operated drill you always have with you.* What? A cordless drill isn’t part of your bug-out bag. No worries, it’s not in ours either. So, how do we tap that gas?

*Note: Never attempt to drill a hole into a metal fuel tank with a metal drill bit. Sparks from a bit and from the electric motor may ignite fuel vapors in the tank, causing explosion and death.

Since you’re always prepared, your multitool has various ways to create holes in the tank. Depending on the tool, you can use an awl, a corkscrew, a screwdriver, or a knife to get into the tank. Basically, any sharp pointy object can be used to work or punch your way in. Remember these tanks are designed to withstand a good amount of damage before being punctured. Any method of putting a hole in the tank is going to require a little muscle and a lot of patience.

Siphon gas fuel gasoline bugout vehicle car truck shtf survival emergency 5

If you’re so inclined, an alternative method to get around the anti-siphon valve is to attack the tank from the other end. This requires you to be a little more mechanically adventurous. You’ll need to find the fuel line coming out from the tank to the engine. You’ll see that it’s attached to the tank with a metal clamp. With the pliers on your multitool, remove the clamp and, bingo, you’re in. Put the siphon hose where the fuel line was and away you go. If you found the keys to the car, you can crank the ignition with this hose disconnected to let the fuel pump force fuel through the hose.

It’s worth noting that not all of these methods work on all models of cars. It’s easier to get gas out of some cars (especially pre-1990s models) than others. If you have time you may need to exercise some creativity to get what you need. It’s important to remember, however, the longer you’re trying to figure it out, the longer you’re not moving forward. Moving on to easier pickins may be the best option. Needless to say, the essence of functioning effectively in any emergency or crisis is being prepared to adapt and overcome.


Reader’s Tip: Considerations for Going Gray

Editor's Note: I recently received the following email from a reader regarding my On the Grid column in Issue 29, When Going Gray is a Red Flag. In that column, I responded with an open letter to an acquaintance who had ridiculed the “gray man” concept — you can read my counterpoint on page 104 of that issue. This reader, who wishes to stay anonymous, offered some helpful insights into his experience with this principle as a plainclothes law enforcement officer.

The Gray Man silhouette


My apologies for being so far away from the release date of Issue 29, but I wanted to pass along my thoughts on going gray.

First, my background. I am a military veteran who did serve overseas (Cold War), and have over 18 years in federal law enforcement with over 13 of those years in plain clothes.

To me, it is a balancing act. A person should have clothing that is practical, good quality, long wearing, and comfortable. It should also match and reflect a persons style and taste, as we all have preferences that make us unique and comfortable. Your clothing should be appropriate for the area, but versatile enough for movement to other areas. A tuxedo and a business suit are similar in having a coat, shirt, tie, and pants, but they are not necessarily interchangeable. And no matter how good Cary Grant looked in “North by Northwest,” you wouldn't really go mountaineering in that apparel.

Cary Grant looking dapper in the classic 1959 Hitchcock thriller

Cary Grant as Roger Thornhill in the classic 1959 Hitchcock thriller “North by Northwest”

I agree with, and enjoyed, your article. Just as a military veteran can often spot another, so can a true veteran spot a charlatan. The way a person moves/looks/carries themselves says volumes about who they are. And even those who have made careers out of deep cover assignments, understand the limits to going totally dark and yet still be engaged and relevant.

Another point to consider is this: in addressing crime deterrence, it's recommended that the more hardened a target is, the greater deterrence it is to a criminal. If your home has alarm company signs posted, visible cameras (even fake ones), well trimmed landscaping, and visible quality locks, a thief would possibly pass it by in favor of a less prepared looking residence. The same can be said about a person. But a caveat is that there will always be an outlier that is not fazed one way or the other.

I would stress more emphasis on situational awareness and environment awareness, than stressing a “gray man” concept. One also needs to be within their comfort zone. Some people want/need a fairly comprehensive EDC to feel comfortable, while others are more minimalist.

Anyway, that is some of my two cents to a nickel's worth of thoughts. If you wish to use any of my comments, feel free.


Review: TOPS Hammer Hawk Tomahawk

Contrary to what we may often see on TV, real survival isn’t scripted. It never will be. Staying alive in adverse conditions requires knowledge, skills and a plan; having the right tools certainly doesn’t hurt, also.

Topping the list of desirable SHTF gear is the venerable knife. Few tools are more closely associated with survival, and for good reason. Fixed blade or folder, this one piece of survival equipment has probably contributed to saving more lives than any other. From fire starting, to shelter building and defense, in the world of survival the knife is the original multi-tool. But depending on the task at hand, even the best knife can have practical limitations. And no matter how capable your knife — and some are very capable — there may be times when the situation requires something much more robust. Think heavy-duty chopping, hammering or smashing.

TOPS MSF 4 and Fieldcraft bushcraft knives review 28

Above: TOPS offers many survival-oriented knives, including the Fieldcraft fixed blade and MSF 4.0 folder we previously reviewed.

While you can certainly improvise and use your knife for all sorts of tasks, essentially you may be forcing it to do the work of a much larger and heavier tool, and hoping it will hold up to the abuse. Push the limits of your knife too far, however, and you risk damaging or even losing a vital piece of your survival kit just when you need it most. When the situation demands next level durability, strength and performance, you may want to take things up a notch. Enter the tomahawk.

OFFGrid TOPS Hammer Hawk Hands On Review (10).JPG

Today we'll review the TOPS Hammer Hawk Tomahawk, exploring the many features that set it apart from other tomahawks and make it a definite asset in just about any survival situation.

TomaWhat?

A tomahawk is commonly defined as a general purpose, single-handed, light axe used by, and often associated with, Native Americans. The earliest known designs consisted of a stone or deer antler head attached to a wooden handle using strips of rawhide, and are believed to be among some of the oldest tools made by humans.

A tomahawk produced by the Hudson' Bay Company in the 1830s. Source: FBI.gov

A tomahawk produced by the Hudson' Bay Company in the 1830s. Source: FBI.gov

When Europeans arrived in North America the metal blades they brought with them helped propel early tomahawk designs to a whole new level. These advancements ushered in huge improvements in efficiency, durability, and lethality. The updated tomahawks could be used for cutting, chopping, hunting, and for battle, but they also served as a key tool for everyday survival needs.

While the tomahawk’s compact size made it easy to carry and use in confined spaces, their effectiveness and power was unmatched by anything that had come before. The improved designs incorporated the best aspects of the originals, with modern materials and a broader range of multi-function features.

Modern Tomahawk Design

The design of many modern tomahawks usually consists of a steel head attached to a wood or composite handle. Some designs incorporate a single (full-tang) piece of steel with no traditional head-attachment points, and use wood or composite materials on the handle to provide a secure grip, as well as comfort and durability.

TOPS Hammer Hawk backup knife tomahawk blade combo 4

Advances in metallurgy, design, materials, and fabrication methods have helped the tomahawk evolve and take its place in the 21st century as an important multipurpose tool that is still widely used by the military, law enforcement, and private citizens. It’s no secret that U.S. soldiers have used tomahawks in Vietnam, Iraq, and Afghanistan. One news article even quotes former Navy SEAL team members confirming that some on the teams have used tomahawks on missions for breaching and hand-to-hand combat, among other things.

OFFGrid TOPS Hammer Hawk Hands On Review (16).JPG

The Hammer Hawk is a prime example of this evolution, and how computer aided design, modern materials and hand-finished details have all come together to create a superior tool that is just as relevant and useful today as it was in its earliest forms.

The 411 on the TOPS Hammer Hawk

The Hammer Hawk is made by TOPS, an American company based in Eastern Idaho that was founded in 1998 by several combat veterans who served in Vietnam. These guys are intimately familiar with what works in the field, and more importantly what doesn’t. (When your life depends on the gear you carry, you tend to be very particular.) So when they got together to start TOPS the mission was crystal clear – produce quality, overbuilt, functional tools that exceed expectations in real-world conditions.

OFFGrid TOPS Hammer Hawk Hands On Review (3).JPG

Leo Espinosa, who designed the Hammer Hawk, is also the President and lead designer for TOPS Knives. Leo is very passionate about the products that come out of the TOPS facility in Idaho, and the Hammer Hawk is just one example.

The Hammer Hawk features a full-tang design, incorporating a 3/8 inch thick piece of 1075 carbon steel. TOPS usually uses 1095 for most of its knives, but they decided to use 1075 for this tool, since 1075 is less brittle and can still be sharpened in the field. This steel features what TOPS calls an “Acid Rain” finish which looks great and allows the unique character of the metal to come through.

All TOPS knives and tomahawks, including the Hammer Hawk, are differentially heat treated by hand to increase hardness at the cutting edge while maintaining a more flexible spine/handle. This results in excellent durability under hard use. On the opposing side of the Hammer Hawk's edge is a heavy-duty hammer head, which offers a large surface area for blunt-force impact, and is also differentially heat-treated by hand.

OFFGrid TOPS Hammer Hawk Hands On Review (12).JPG

The handle is topped off with textured green canvas Micarta scales that are hand-fitted and hand-sanded/polished. The scales cover almost the entire length of the handle for comfort, safety and added confidence during swings. Their thick contours provide an excellent no-slip grip in all conditions, with or without gloves. At the bottom end of the handle are two lanyard holes suitable for lashings or lanyards.

Overall length is 14.5 inches – long enough to get a good swing, and short enough to permit choking up for added control of the razor sharp, 4.25 inch cutting edge. This size is ideally suited for getting into tighter spaces, and requires much less backswing to deliver effective strikes, when compared to a larger two-handed axe. The large cutting edge comes to a point on the bottom and is excellent for hacking through rope, twine, and other similar materials.

OFFGrid TOPS Hammer Hawk Hands On Review (17).JPG

The head is CNC-machined to help reduce the weight, but the guys at TOPS used the opportunity to mill in a detailed Native American spear design right into the head. The tomahawk weighs 36.3 ounces (2.27 pounds).

The two-piece brown leather sheath system allows a comfortable carry option and quick access. The sheath covers the entire head and uses a two-snap design that is not only attractive, but also highly functional. The belt-loop portion is also well designed and provides a generous amount of leather to hold the Hammer Hawk in place, while providing ease of movement. The sheath weighs 6 ounces, bringing total weight of the tomahawk and sheath to 42.3 ounces (2.64 pounds).

The Verdict

OFFGrid TOPS Hammer Hawk Hands On Review (14).JPG

The TOPS Hammer Hawk Tomahawk is a serious, full-tang monster that combines practical performance with style and superb workmanship.

We were very impressed with the strength and durability of the entire package, especially the extremely robust 0.38 (3/8) inch thick piece of 1075 carbon steel, and the very secure and comfortable, hand-fitted Micarta scales which cover the majority of the handle and facilitate multiple grip options.

OFFGrid TOPS Hammer Hawk Hands On Review (11).JPG

This hatchet-sized tomahawk can easily perform the work typically done with a much larger axe. It incorporates serious chopping and smashing power in one compact and multi-function tool that’s just as much at home at camp as in an evacuation bag. While it will absolutely chop and cut, it can also be used as an evacuation/breaking/breaching tool to take on doors, windows and many other obstacles with blunt force impact strikes using the hardened hammer on the back end. It's also helpful for more mundane tasks such as pounding in tent stakes.

OFFGrid TOPS Hammer Hawk Hands On Review (18).JPG

The Hammer Hawk has a suggested retail price of $350, and for an extra $20 you also get the TOPS Backup knife. With a bit of shopping around we were able to find a number of vendors offering prices around $250.

The Hammer Hawk is a high-quality, American-made tool that we feel confident would last a lifetime. A big thumbs up on this one. For more information on the Hammer Hawk, go to www.topsknives.com.

About The Author

Richard is a practicing attorney, urban survival consultant, writer and firearms enthusiast. He’s the author of Surviving Doomsday: A Guide for Surviving an Urban Disaster, and The Quick Start Guide for Urban Preparedness. www.quickstartsurvival.com

Read More

Don’t miss essential survival insights—sign up for Recoil Offgrid's free newsletter today!

Check out our other publications on the web: Recoil | Gun Digest | Blade | RecoilTV | RECOILtv (YouTube)


Video: Steve1989 Tastes a Russian Spetsnaz MRE

Many of us have eaten American MREs, whether it was during military service, on a camping trip, or as an emergency ration. While there are plenty of jokes along the lines of “meal ready to excrete” or “meal rejected by everyone,” most MREs we've tried are reasonably palatable. That said, it's always interesting to see how other countries and cultures approach the MRE formula. The YouTube channel Steve1989MREInfo provides a look into these often-strange international culinary adventures.

Steve1989 MRE emergency ration food Russian Spetsnaz special forces 2

We recently came across one particularly interesting episode where Steve samples the contents of a rare Russian Special Forces 24-hour Mountain Ration. This was reportedly produced for members of the Spetsnaz operating in challenging high-altitude environments, and it contains some food that those of us in the west might consider a bit unorthodox. Namely, there are two types of pork brain pâté, one of which also contains liver.

Despite these ingredients, Steve calls this one of the best military rations he's ever had. Here's an outline of the surprisingly comprehensive spread of items inside this 24-hour ration:

  • Beef porridge
  • Beef goulash with potatoes
  • Minced sausage (appears similar to Spam)
  • Pork brain pâté
  • Liver and pork brain pâté
  • 3 packets of cereal/porridge
  • Nut and apricot bar
  • Cheese spread
  • Apple spread
  • Chocolate hazelnut spread
  • 5 packets of crackers
  • 5 bars of dark chocolate
  • Cherry drink mix
  • Coffee packets and tea bags
  • Sugar, salt, pepper
  • Multi-vitamins
  • Water purification tablets
  • Matches and mini solid-fuel stove
  • 2 flameless ration heaters
  • Plastic spoons and pouch-opening tool
  • Antiseptic towelettes for cleaning skin and utensils

What are your thoughts? Would you give the pork brain pâté a try, only eat it in an emergency, or would you rather starve? Let us know in the comments. For more ration reviews, follow Steve1989MREInfo on YouTube.