RECOIL Features Editor Dave Merrill is what some might call a silencer aficionado. Others would probably call him a silencer hoarder. He recently showed up to a hunting trip with a Pelican case full of an almost-comical quantity of cans (pictured below). As you might expect, he has accumulated quite a bit of experience installing and uninstalling various types of silencers over the years.
You probably figured mounting a silencer on a weapon is a straightforward task, and that's often the case, but there's more to it than you might think. In the following RECOILtv Gun Room video, Dave shows how to correctly install a direct thread can and ensure it doesn't work its way loose. He also talks about quick-disconnect systems, hybrid systems, and the unusual birdcage flash hider mount used on some old-school silencers such as the Knight's Armament NT4.
This article was originally published in Issue 1 of our magazine.
So, you’ve made all your plans in case of a major disaster. You’ve got your plan of action, your bug-out bag, your drinking water, your rations, and even extra batteries for your flashlight. But, what happens when the disaster doesn’t cooperate with your plan? Perhaps, your family’s meeting point has been compromised. Perhaps, the streets have become unsafe to travel. Perhaps the phone lines are down. What are you to do then? How are you going to be able to change the plan and let your loved ones know about it?
We can tell you from recent experience that trying to reach someone right after an emergency was an arduous task. It took this author more than an hour to get through to someone just after the Boston Marathon bombings by cell phone. The kicker is that the person we called was not even in the vicinity of Boston. Although there was no physical damage to telecommunications infrastructure, we still couldn’t get through for some time. Considering that was a regional disaster, one affecting a single city, it is fair to predict that in the case of any disaster, regional or greater, you are going to need an alternate form of communication.
Based on this need, let’s take a look at amateur radio, more commonly called ham radio. We are all familiar with CB (Citizens Band) radios that you have seen at the local electronics store and on big rigs traveling down the highway. Compared to CB, ham radio takes radio communications to the next step. Ham radios are capable of using much more power than CB radios, and in radio, power equals transmission distance.
License
First of all, you need to know that becoming a ham radio operator does require a license from the FCC. There are three different classes of licenses: Technician Class, General Class, and Amateur Extra Class. The more advanced your license, the more frequencies are opened up for you to use. Most people start with a technician license and upgrade as needed. Courses and study guides to get a license are widely available.
Power and Distance
How much power you can supply your ham radio is key. The more power you have available, the farther your transmission will carry. In addition, what type, length, and quality antenna your radio is equipped with also affects transmission distance and clarity. Transmissions can be done via two radios directly on the same frequency, called simplex, or they can use a transmitter in between, called a repeater. Different frequencies travel different distances and can even bounce off the Earth’s atmosphere to reach people halfway around the world. You can check in your area for clubs and repeater systems that are available.
Repeaters
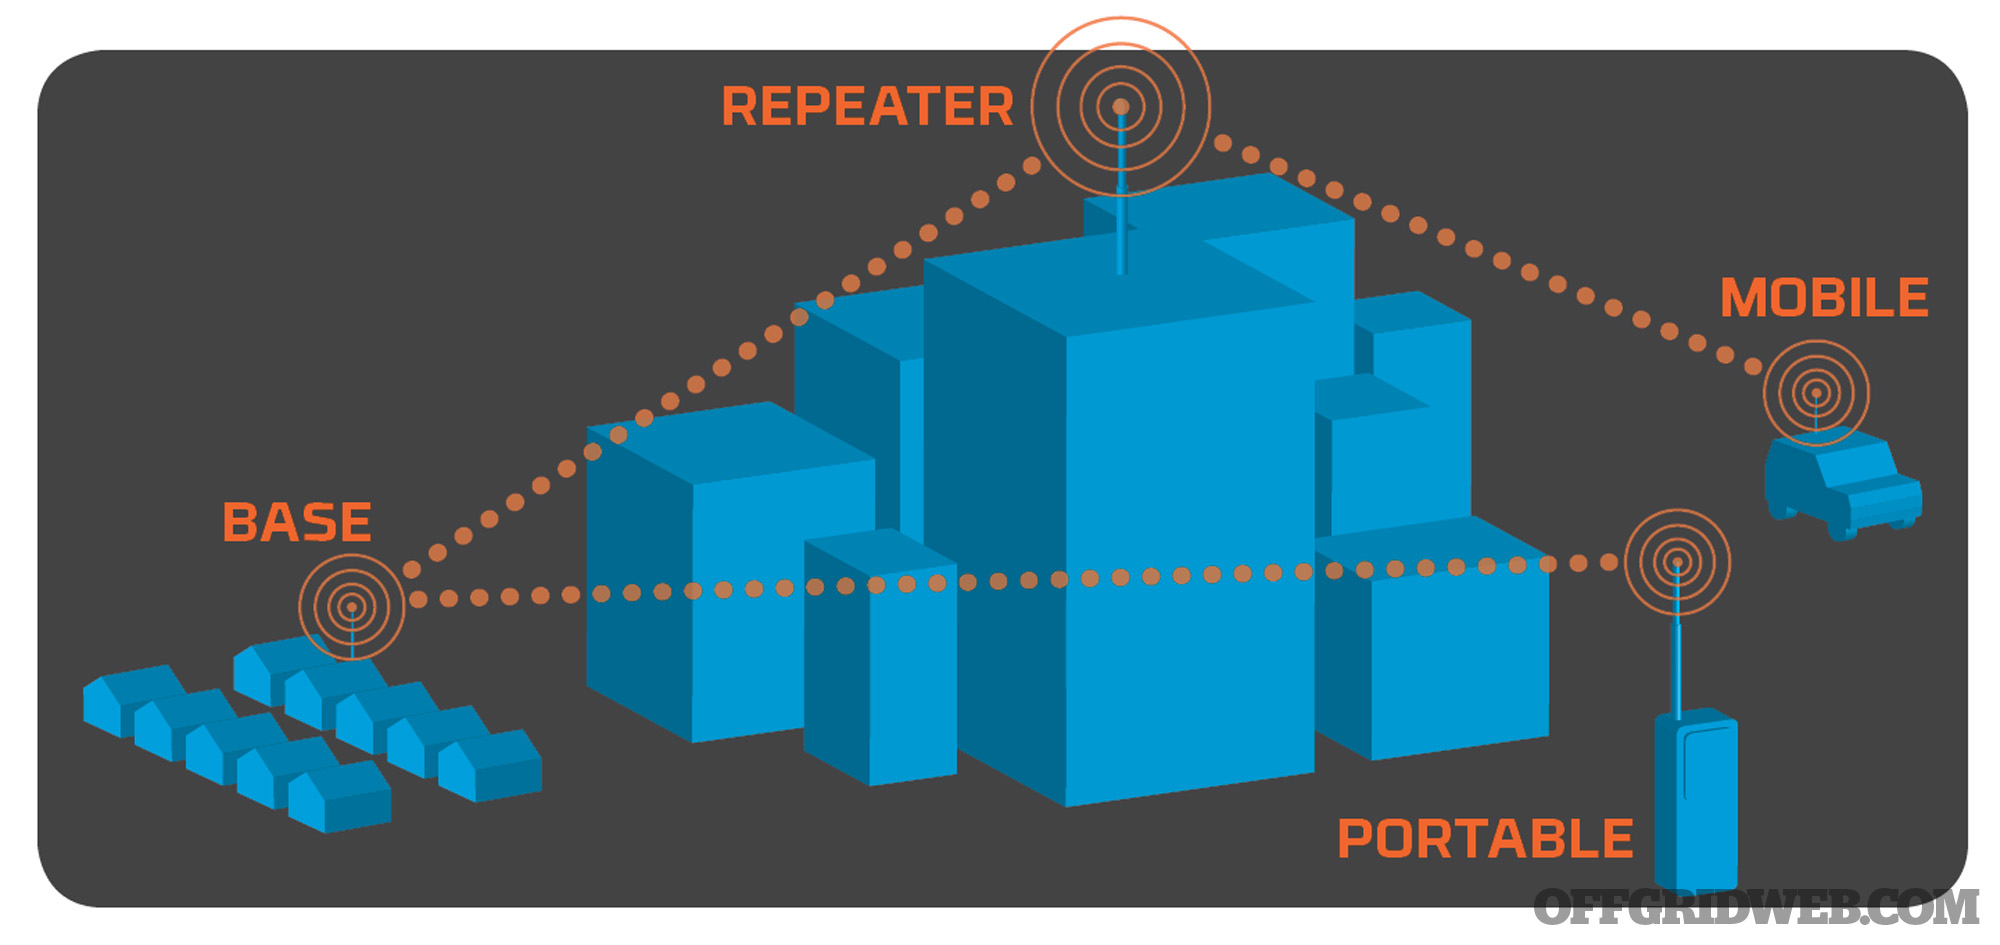
It is important to pick the best mix of licensing and types of radio units for your needs. For our family, we utilize a couple of smaller handheld radios. We also pay an annual membership to a repeater system. Repeaters are generally set up by amateur radio clubs in places with high vantage points such as tall buildings or on mountains. Like their name implies, repeaters repeat the transmission from your radio and broadcast it through their more powerful and better positioned antennas. This has the potential of increasing your range from a couple of miles to hundreds. If a major event occurs, we are not limited to communication by phone or wireless device. We will be able to contact our friends and family, who are also equipped with ham radios, at a moment’s notice.
Above: Repeaters are generally set up in places with high vantage points such as tall buildings. They repeat the transmission from your radio and broadcast it through their more powerful and better positioned antennas.
Equipment
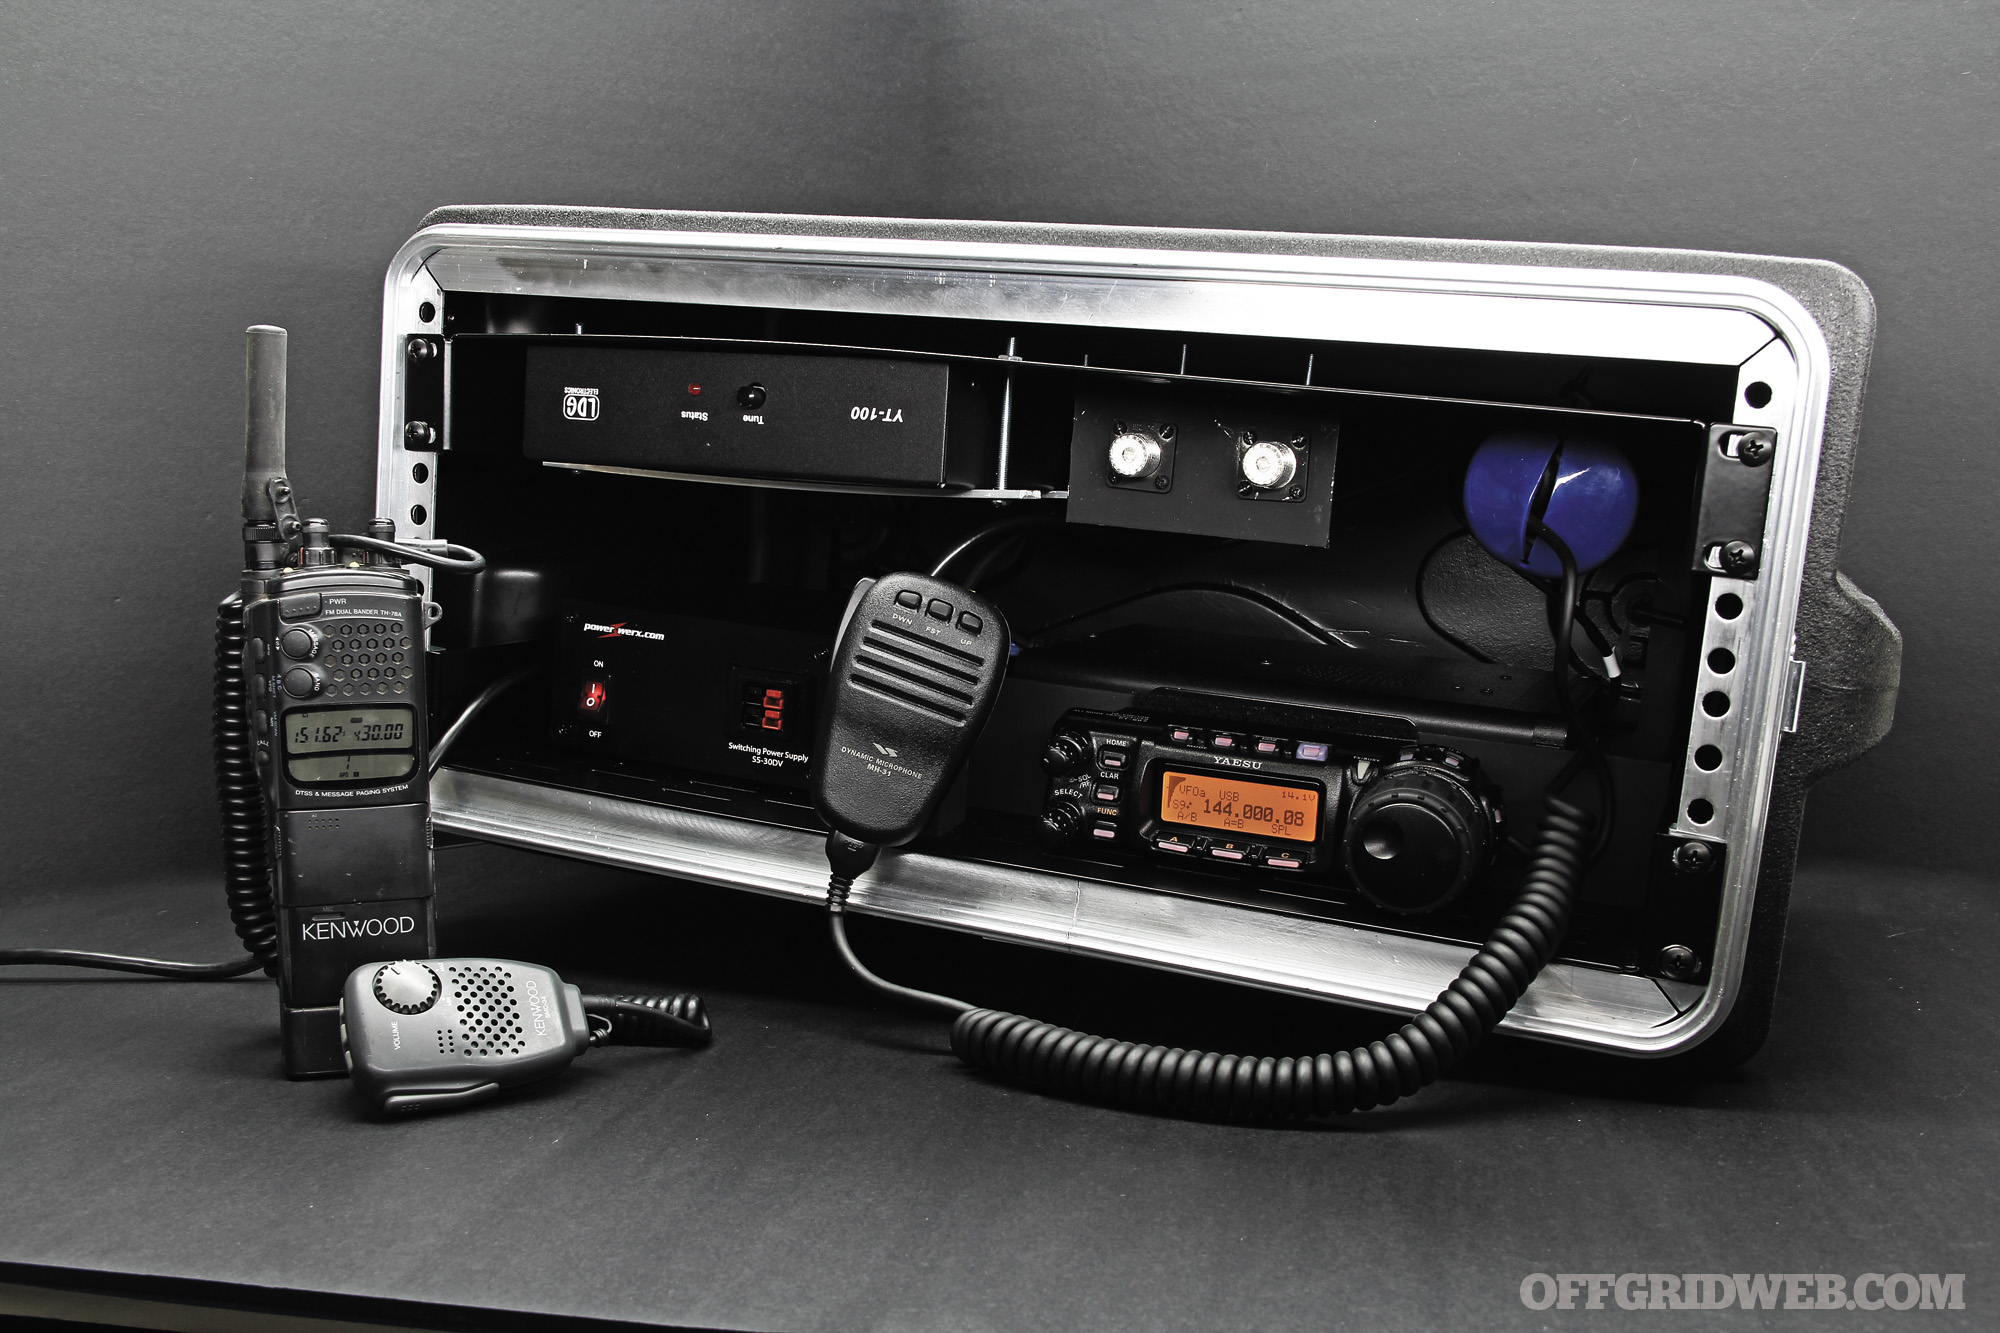
There are all kinds of models of radios that are available to the over-the-counter consumer. Everything from small handhelds to car-mounted units and to big base stations in your house or “shack.” Here are some benefits and downfalls of the different radios available.
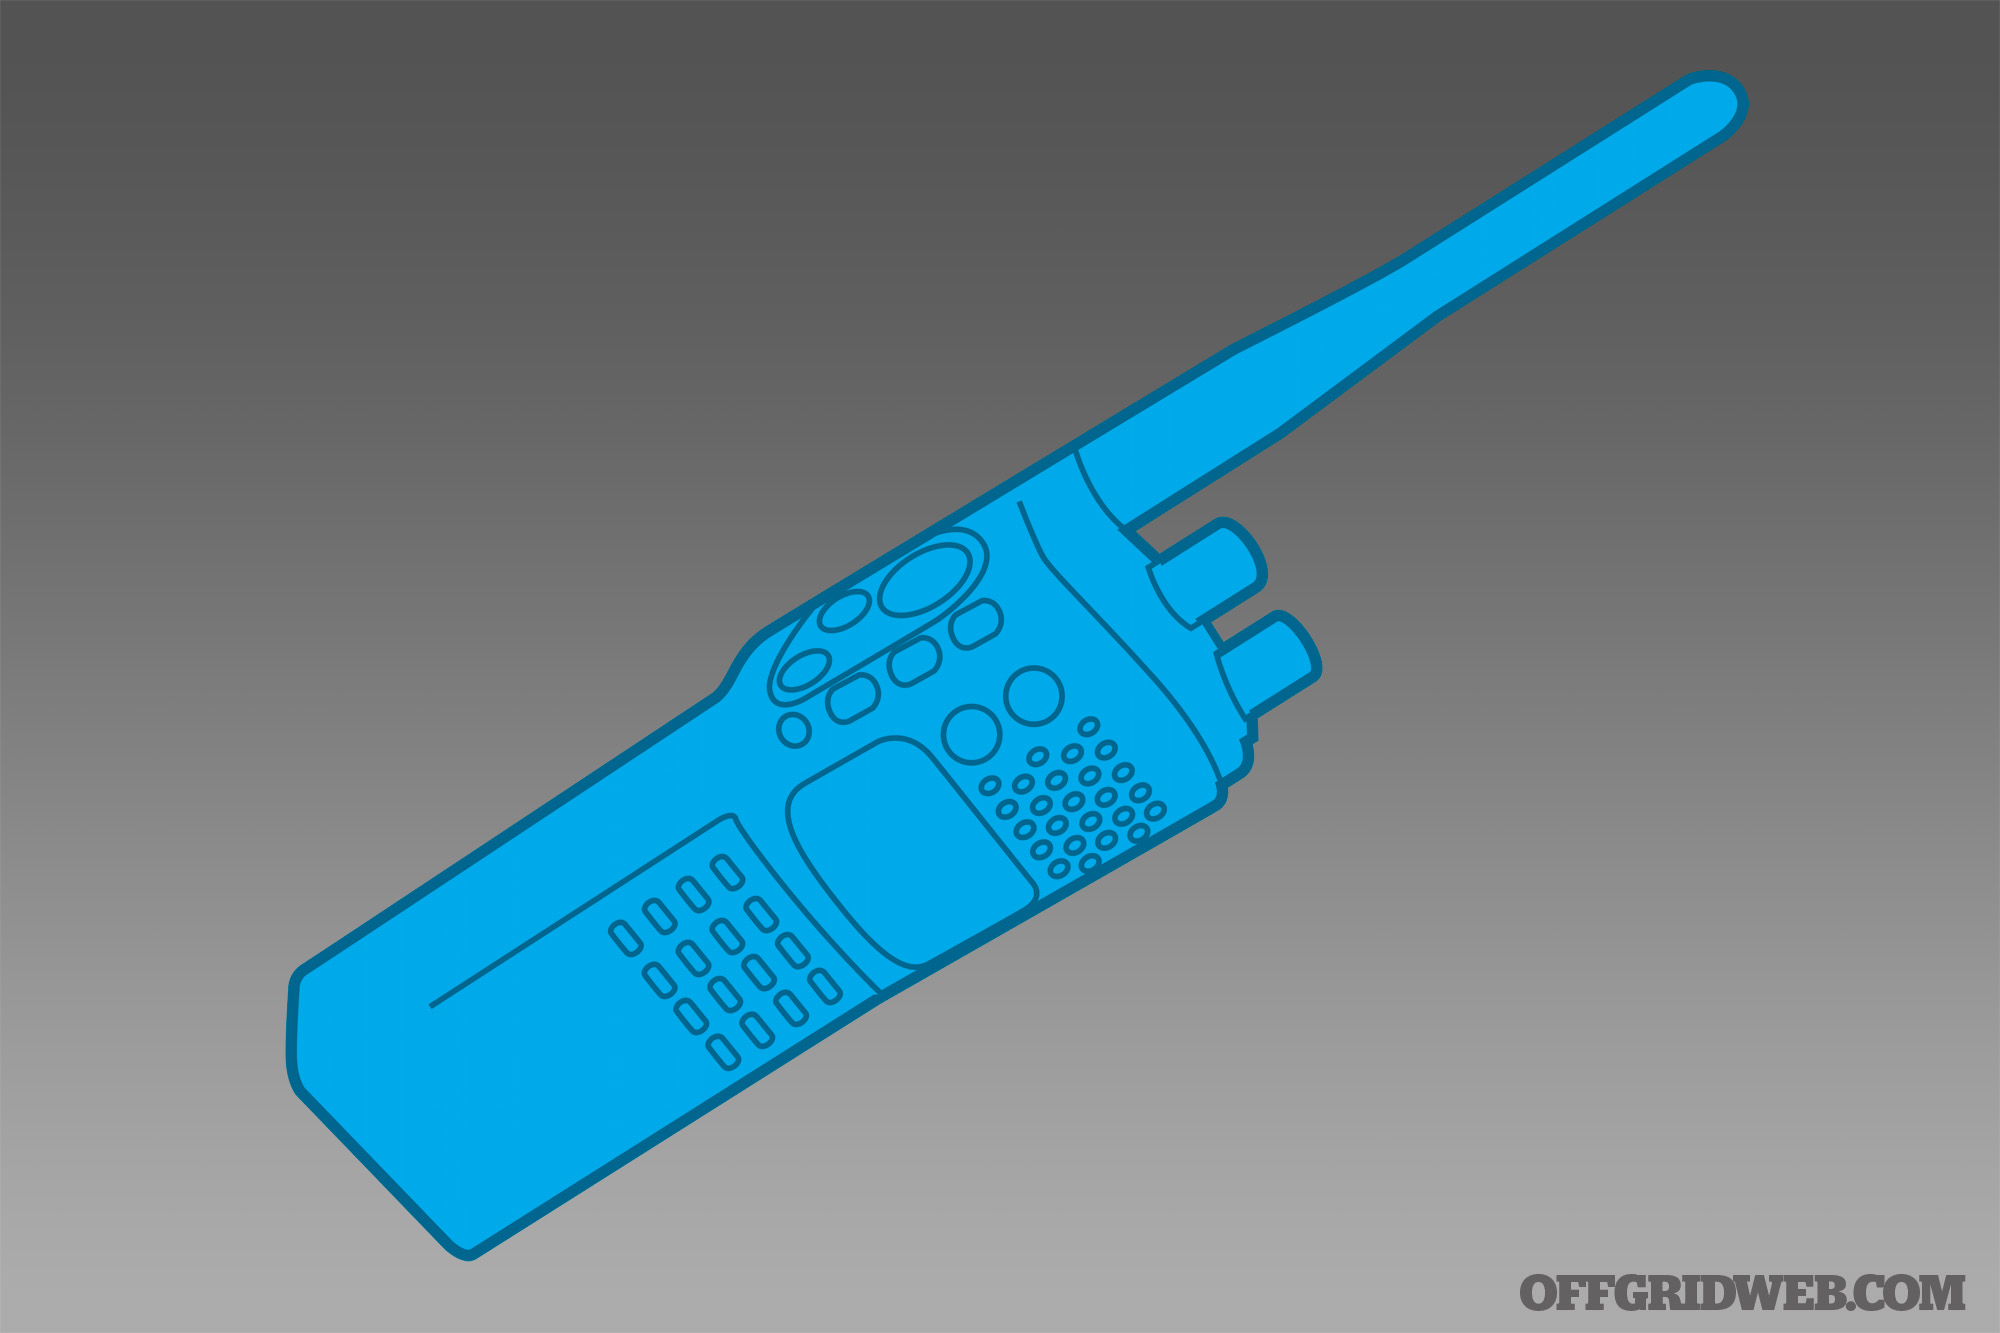
Handheld Radios
Pros: These are often small and portable. They are available in many frequency ranges. They are all-inclusive and work right out of the box. These are definitely one of the most affordable options.
Cons: Handhelds tend to be light on power. They use a battery that needs to be charged and maintained.
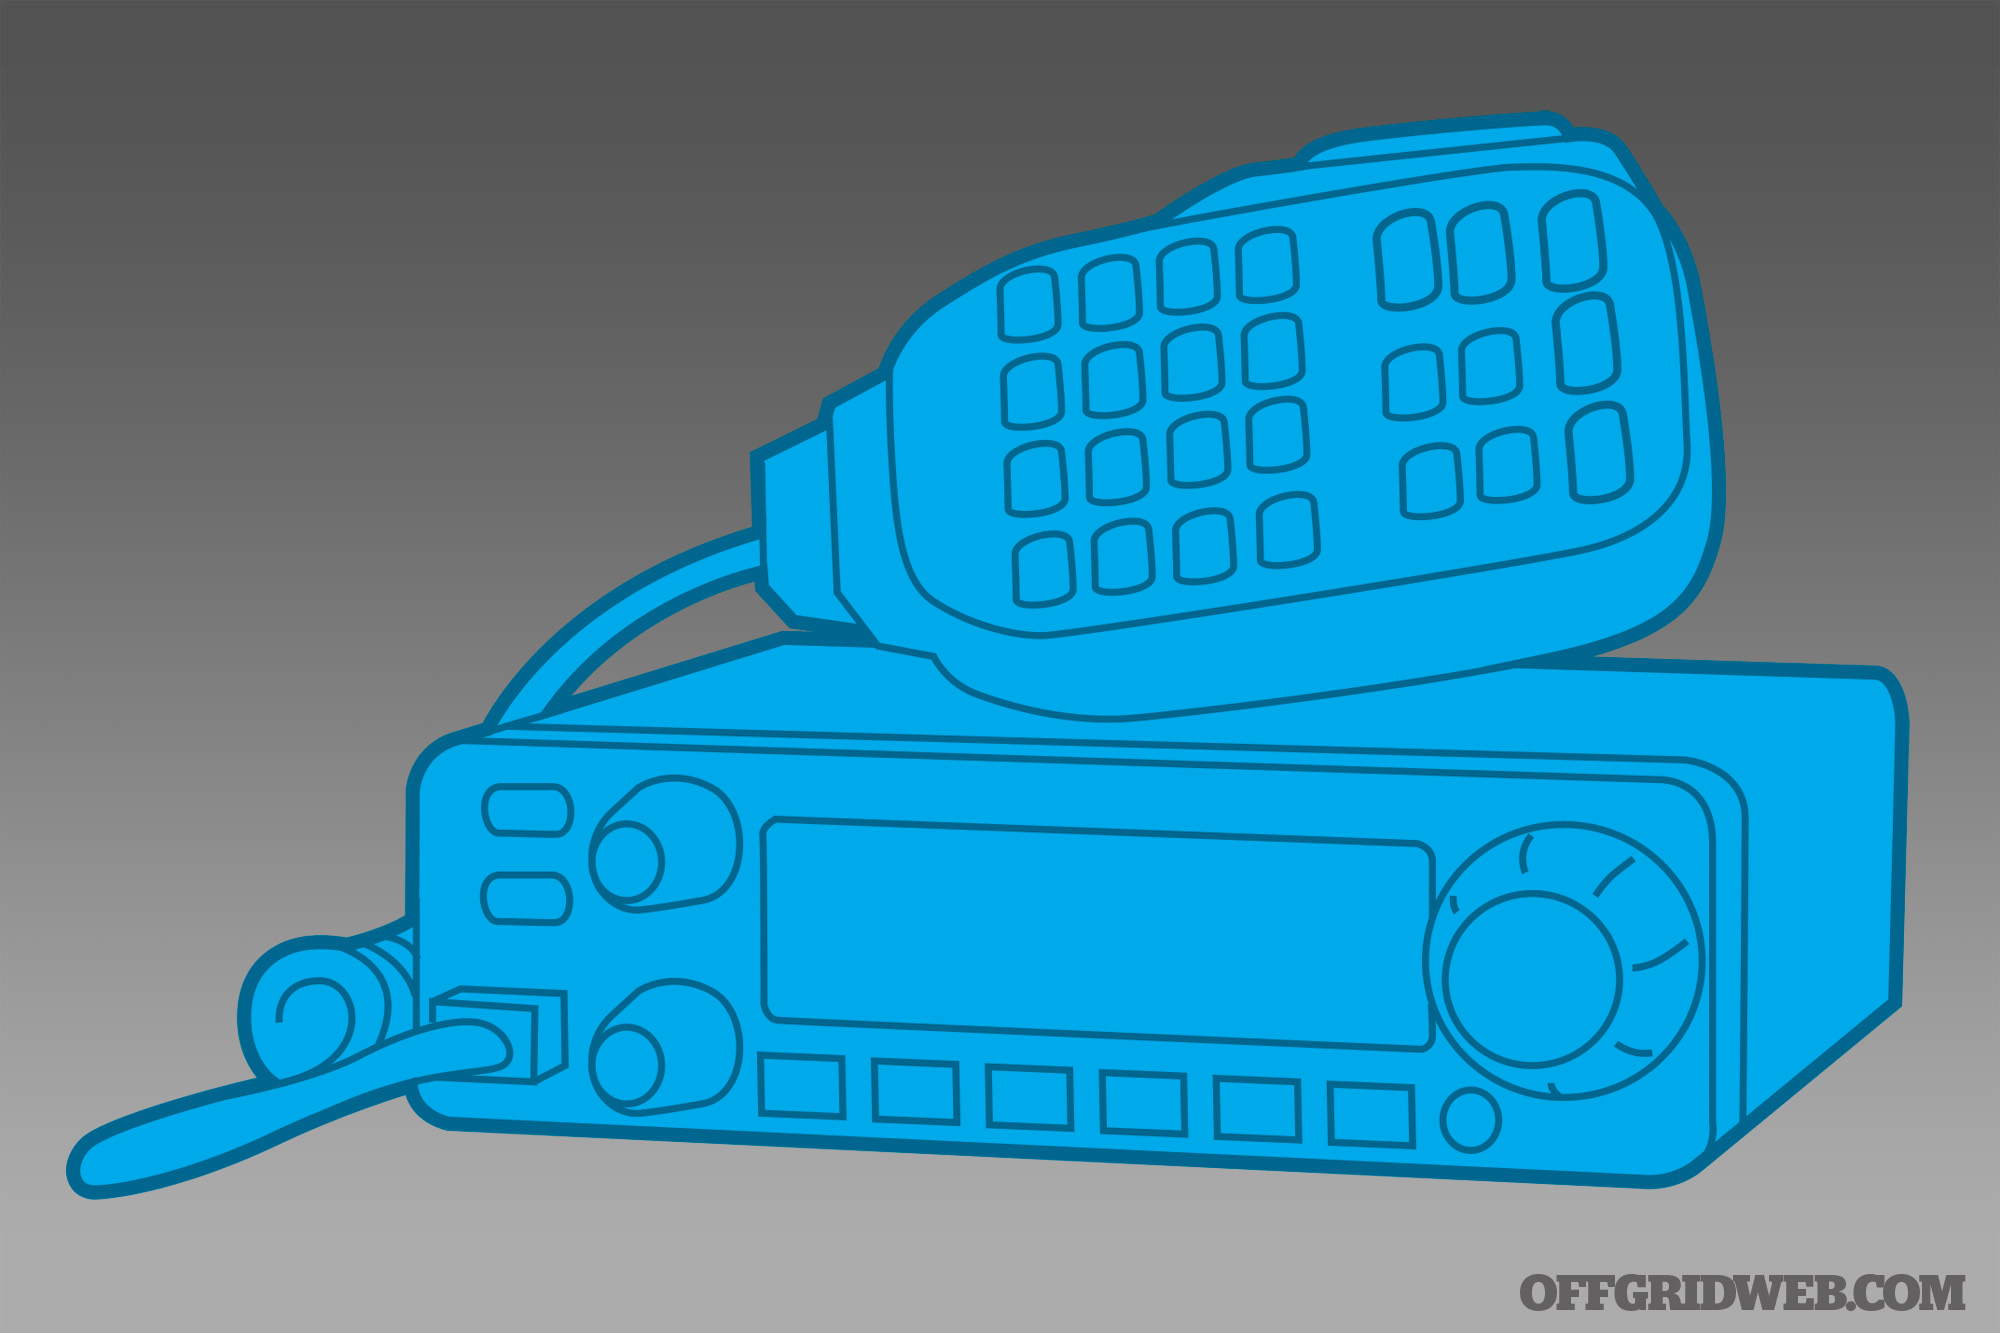
Vehicle or Mobile Radios
Pros: More power! They can support larger antennae, which means longer transmission reach. They run off of the car’s electrical system, so there isn’t an extra battery to maintain, just your vehicle’s.
Cons: A mobile radio is attached to the vehicle and can’t easily come with you when you leave it. Even if you do make it mobile, it is dependent on the vehicle’s power source, which means that you will have to run some sort of power cable either from the battery (preferred) or via a cigarette lighter adapter, and you can bring it only as far as your power cable is.
Base Stations
Pros: These babies have as much power as you need. Usually, they are able to tune the frequency a little better. They tend to be used in conjunction with very large antennae.
Cons: Base stations are tied to one location. These can be big and require a significant power supply.
Ham Radio Slang
“Who was that YL you were rag chewing on your boat anchor with last night?” If that means anything to you, you’re a ham. The ham radio world is full of codes and phrases that are incoherent to those who don’t dable in it. Ham slang is unique and fun to figure out. In case you were wondering, YL stands for young lady but means any female ham radio operator, rag chewing is casual conversation, and a boat anchor denotes old, large radio equipment. With that, we’ll leave off with 73! (You’ll have to look this one up yourself.)
Learn More
A great resource to get you started is The National Association for Amateur Radio (also known as the American Radio Relay League or ARRL). The association provides a good amount of information on testing, licenses, and privileges. Its website is really user-friendly. You can also find more information at the FCC’s website.
By Michael Penhall and Martin Anders Photography Courtesy of Iridium Communications, Inc.
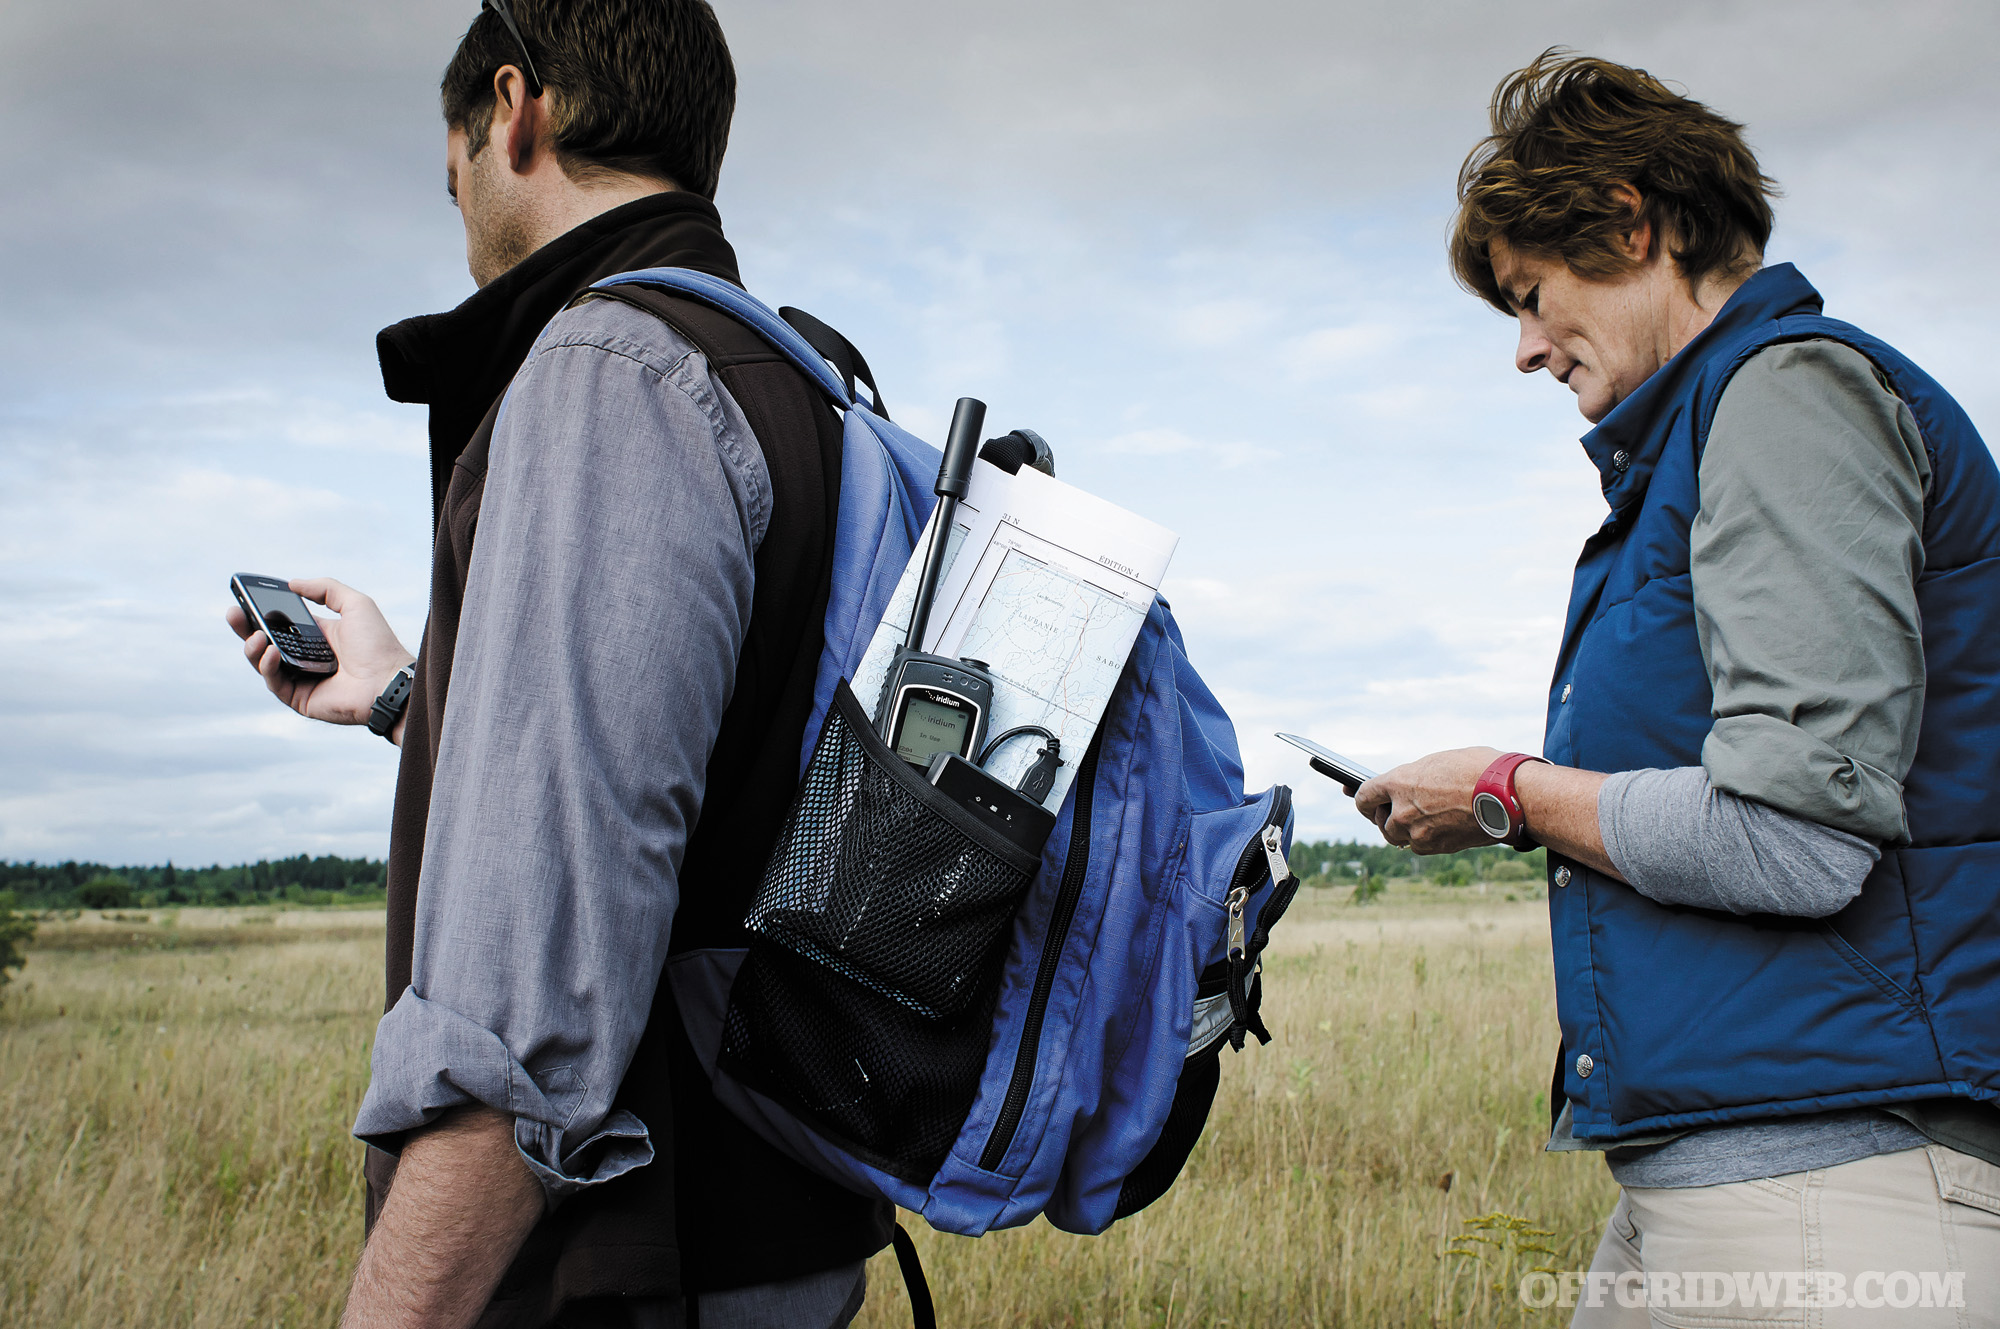
Just because you’re off-grid doesn’t mean you have to be out of touch. Previously we covered using ham radio as an alternative to cell phone and other wireless communication (see OFFGRID Summer 2013) — but there’s another option. Satellite phones will allow you to keep in touch with everyone you need to, and it is as simple to operate as dialing a phone.
Advantages to satellite phones over traditional mobile phones in times of emergency or disaster are obvious. Because they communicate directly with orbiting satellites, satellite-based phones are not dependent on terrestrial cell towers. This means they are completely independent of the power grid and traditional mobile telecommunications infrastructure. As long as you have a charged battery, you can not only make and receive calls, but texts and email as well. With an extra battery and off-grid charging capabilities, outlasting a power outage while staying connected is a viable option. Inclement weather isn’t much of a factor either. Unlike satellite television reception during a storm, satellite phones can even be used in even extreme weather, such as rain, hurricanes, ice storms, and blizzards.
Satellite phones work by connecting to a series of satellites in space. It’s important to know that depending on your location, the satellites’ orientation in the sky, and their relationship to you, you might not always have coverage. In order to use a satellite phone effectively, you must have a clear line of sight from the phone to the satellite. Also, since the carriers themselves maintain the satellites, some carriers have better coverage in different parts of the world than others. Some carriers’ satellites are based around the equator and some cover the entire globe.
Carriers
The first thing to address is what carrier we are going to use. Different carriers offer their services with different devices. Just like with mobile phones, different carriers offer different levels of coverage, reliability, and pricing. There are three major satellite phone providers: Iridium, Inmarsat, and Globalstar.
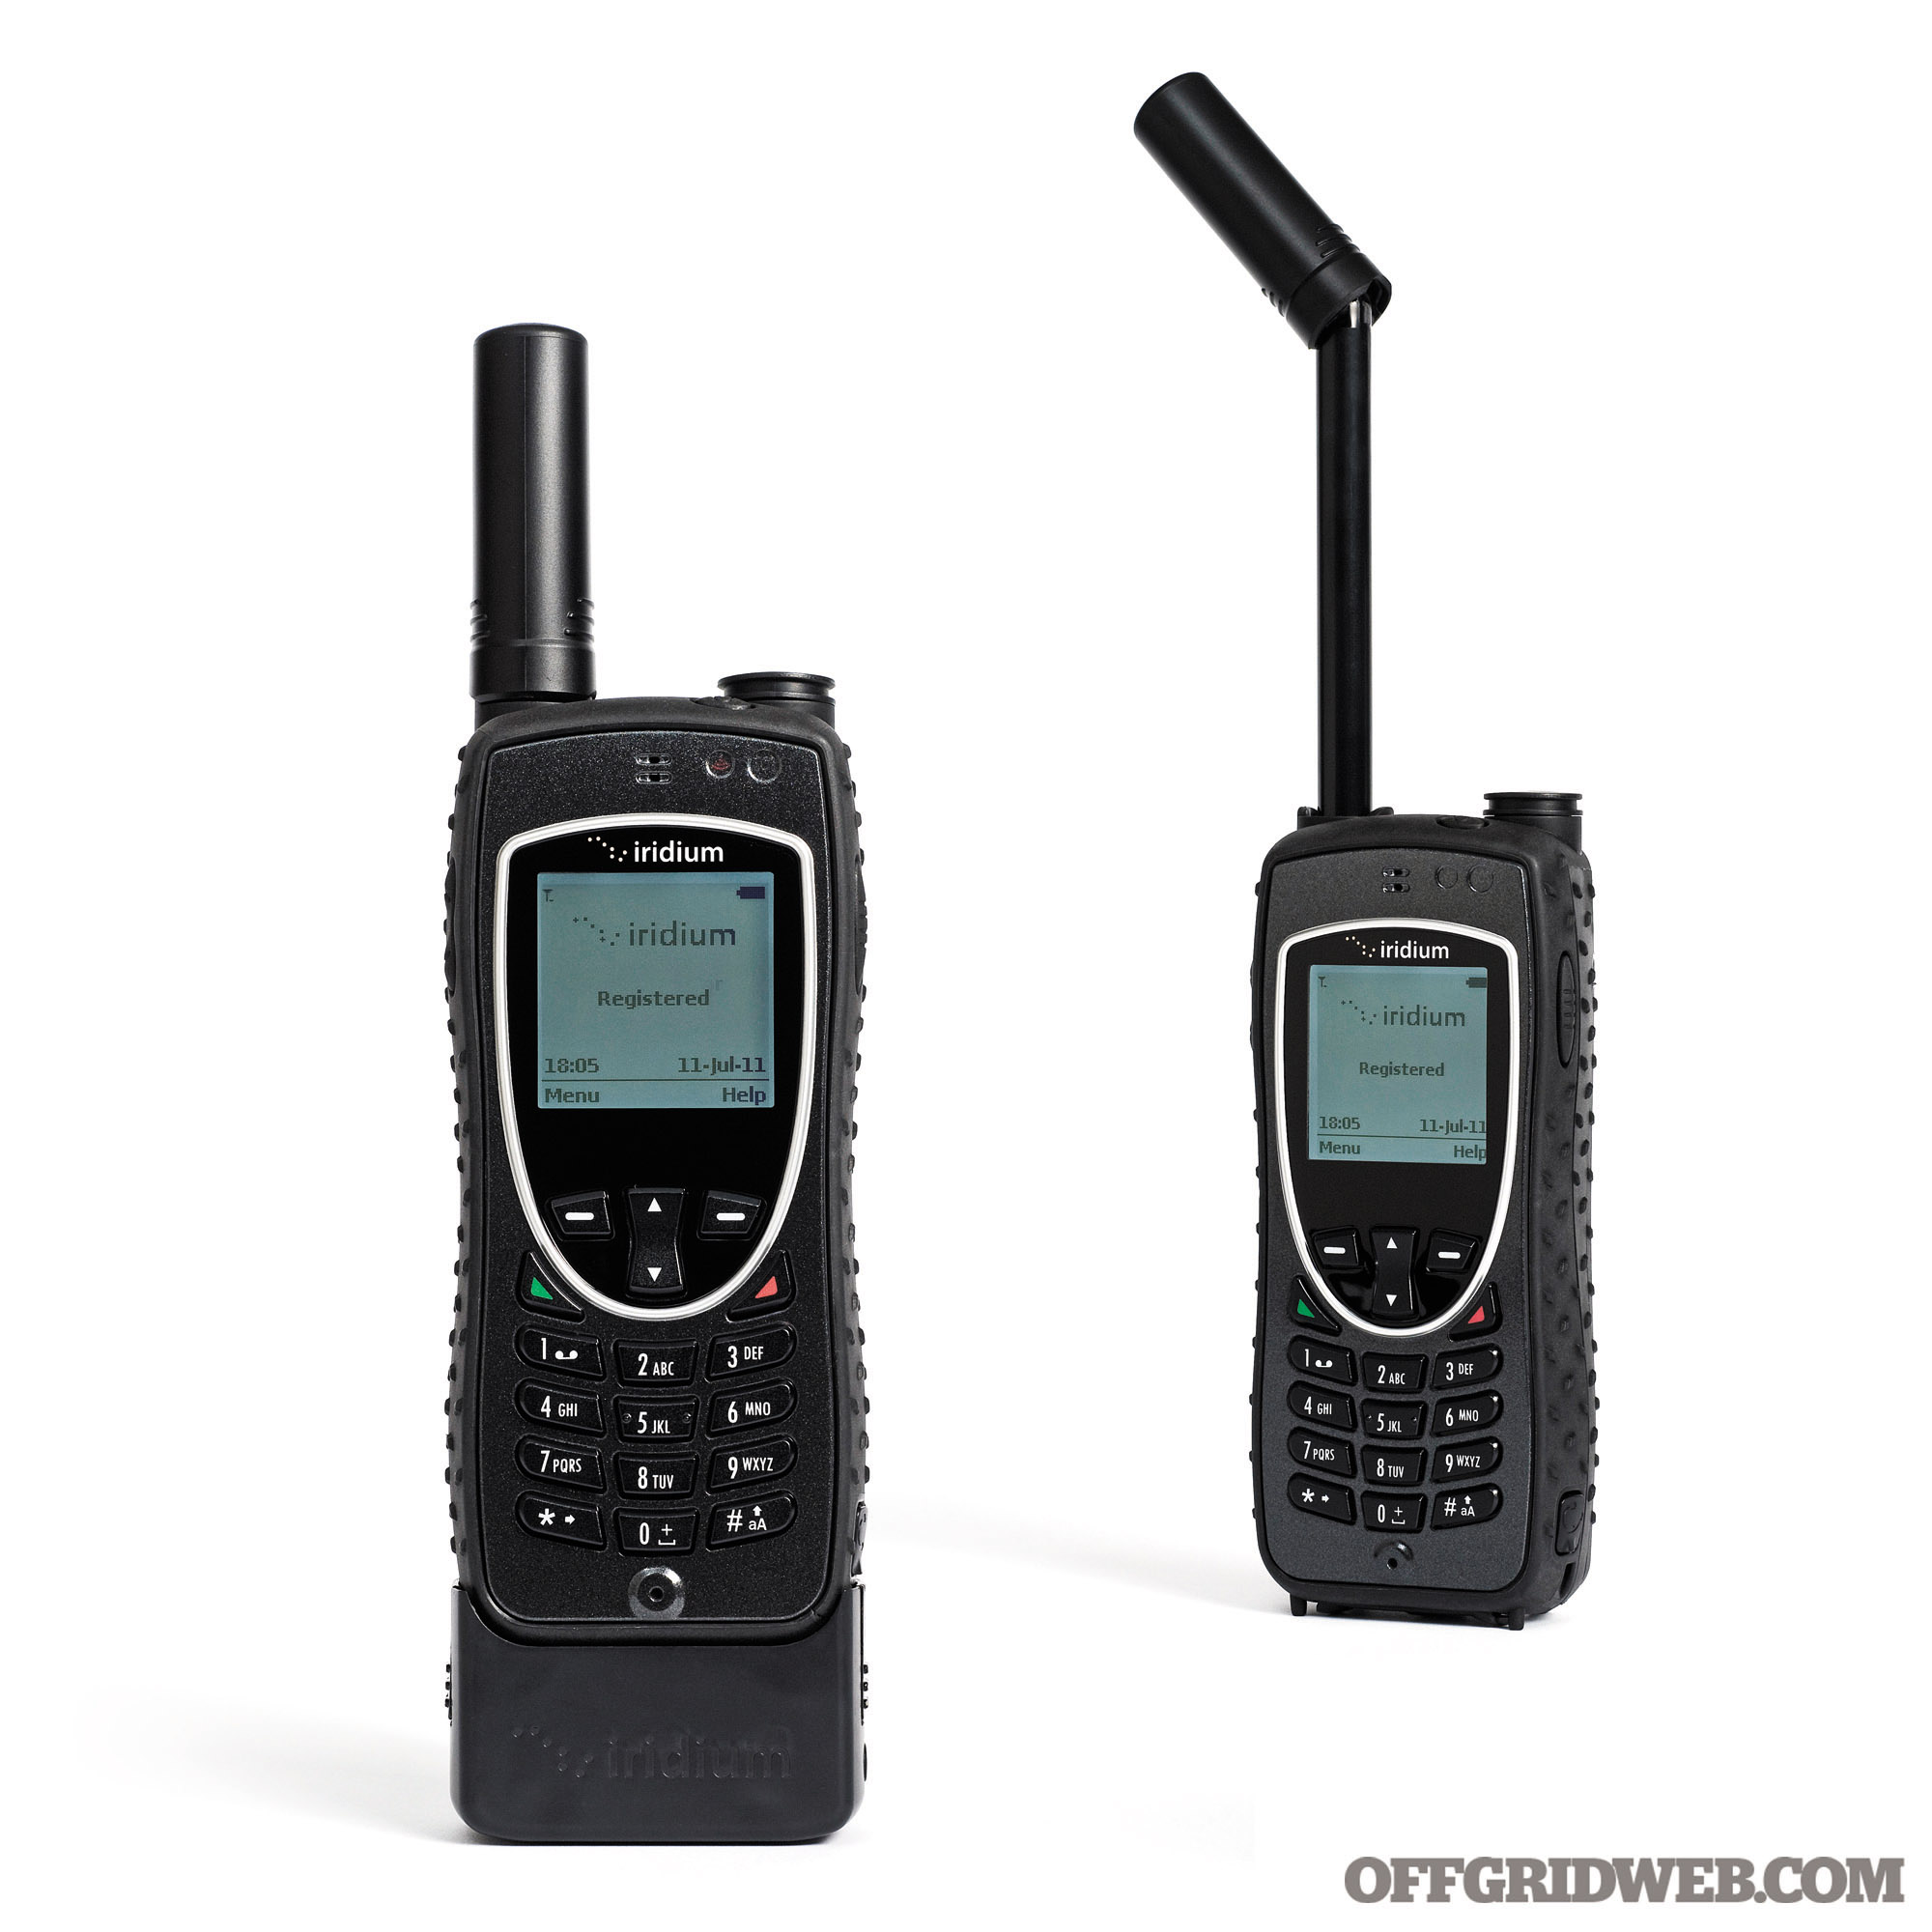
Iridium
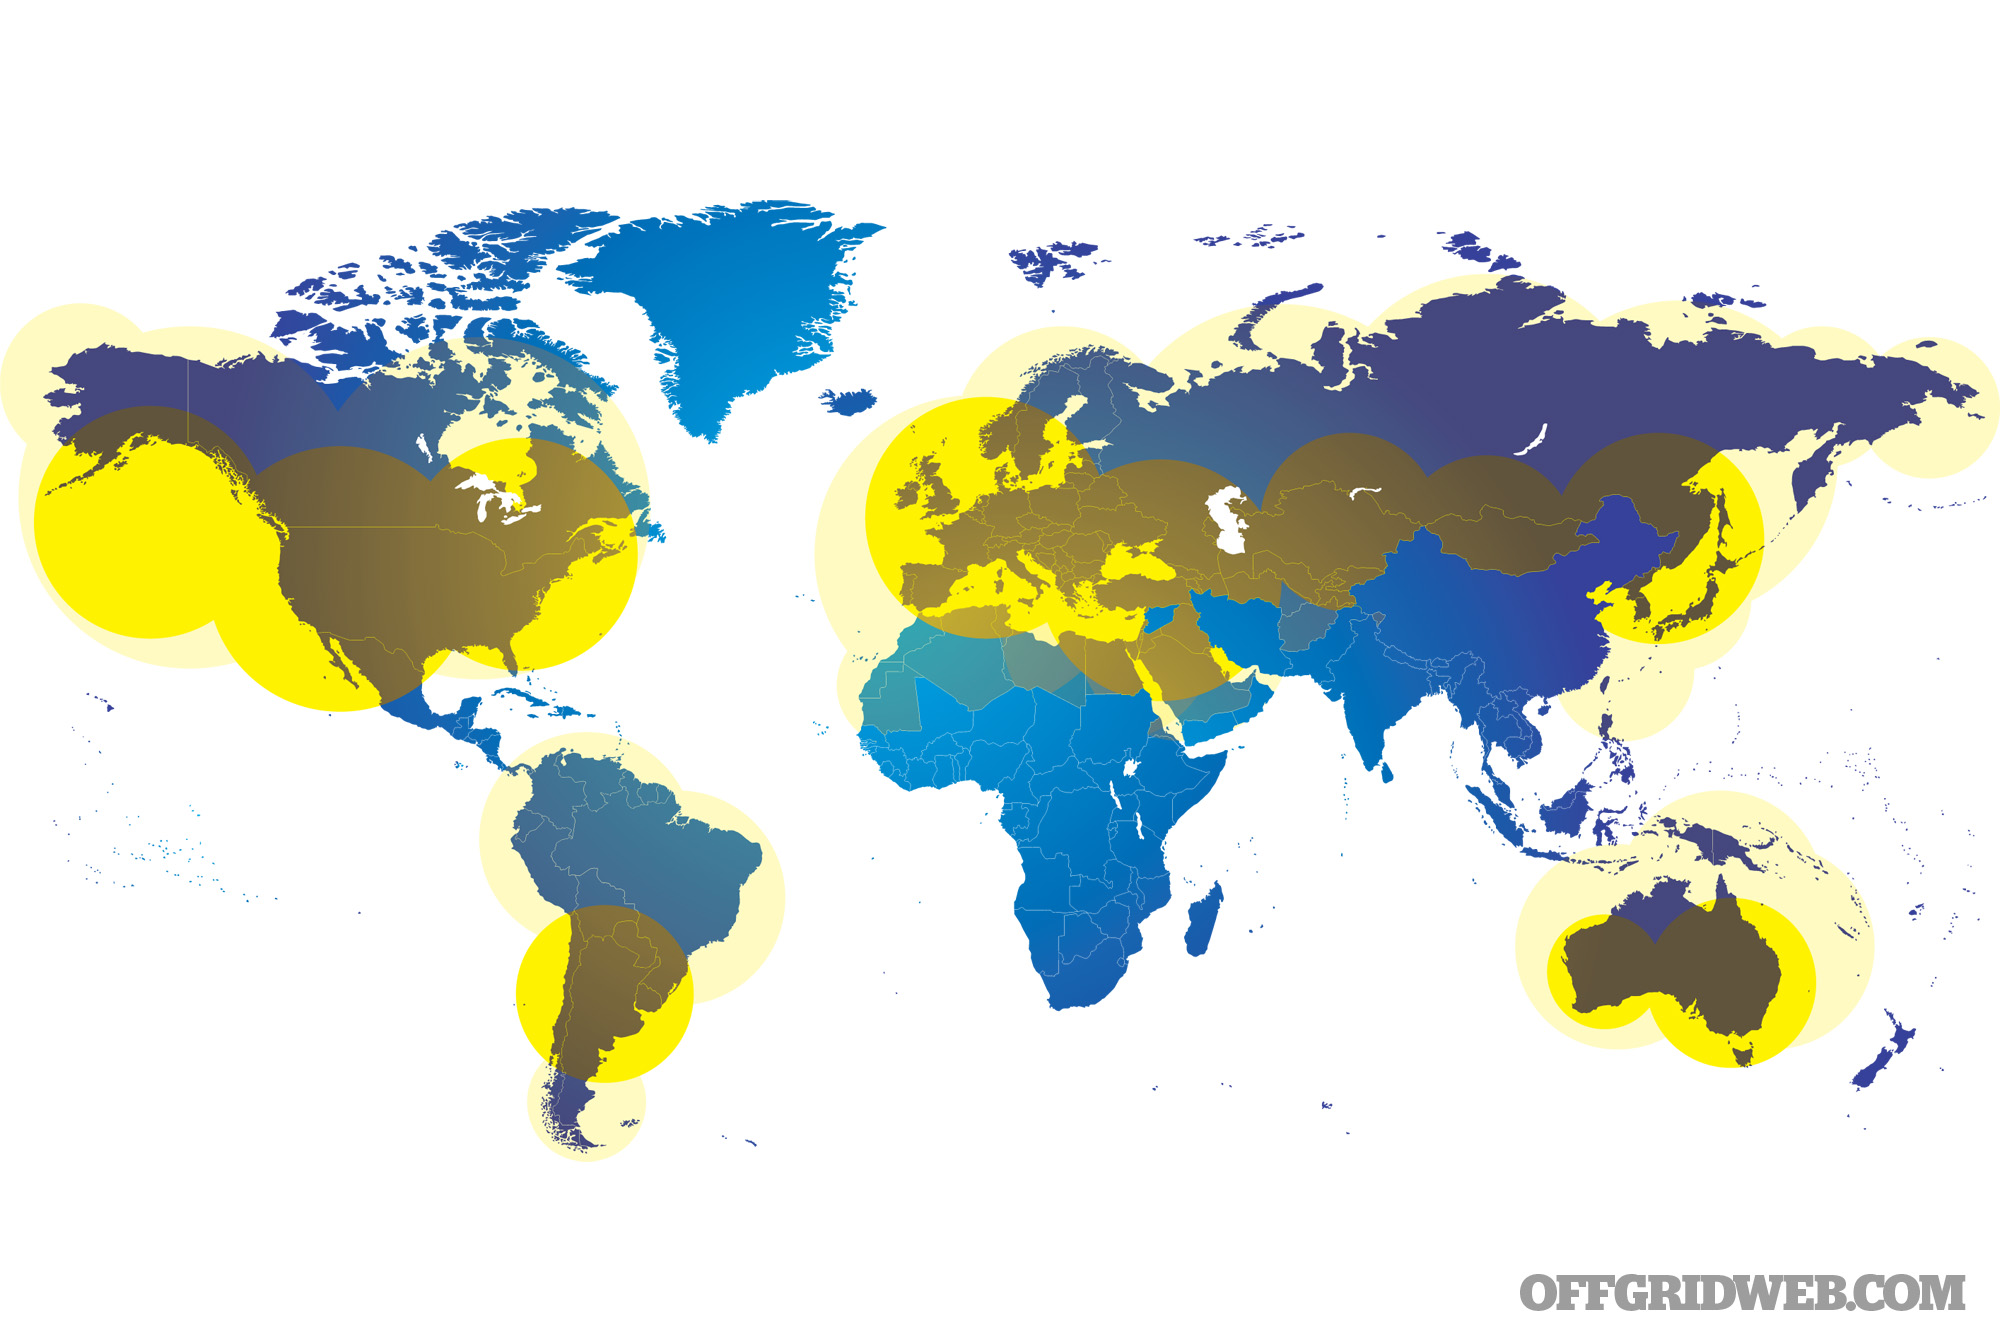
Iridium is by far the largest satellite communications provider with a series of 66 satellites that cover the entire globe. Their satellite system orbits at low altitude, with satellites constantly crisscrossing one another and keeping the planet blanketed with their service. Because the satellites are consistently on the move, it means that they come to you — so you are not required to move to a particular location in order to find service. Iridium has a fairly good selection of handsets and devices that are readily available for rent. Yes, that’s right; satellite phones are available for rent — more on that later. Iridium offers prepaid service plans, as well as month-to-month plans. Other device manufacturers such as Garmin rely on the Iridium network for satellite communication.
Above: Iridium Communications Inc.’s global satellite network of 66 low-Earth orbiting cross-linked satellites is the world’s largest commercial constellation.
Inmarsat
Inmarsat, which primarily started out in the data market, has three constellations of 10 geostationary satellites orbiting the Earth at very high altitudes. Their satellites orbit over the Equator, which is great if you use their phones around the Earth’s waistband. But the farther you go toward the North or South Poles, the less reliable their service is said to be. At the Equator, Inmarsat’s satellites are orbiting about 22,236 miles above you, giving them broad reach over most oceans and major land masses. But the closer you are to the Poles, the lower in the sky the satellites become in relation to you, thereby giving them a much smaller line-of-sight window. The geostationary satellites don’t move in relation to the planet, which means you will need to bring the phone within line of sight to one of the satellites for optimum service. On a positive note, if you are communicating via a single satellite, your service will be more stable and less likely to experience dropped calls. Inmarsat’s service costs are less expensive than other providers, but they also have a limited selection of handsets available for voice options. They also provide good high-speed data solutions.
Above: Inmarsat’s 10 geostationary satellites provide service over most of the Earth’s major oceans and landmasses.
Globalstar
Adventurers and outdoorsmen may have heard of the SPOT line of personal locator beacons. They are compact satellite communication units that can broadcast your whereabouts to those you choose, including emergency rescuers worldwide. What you may not know is that SPOT’s maker, Globalstar, also offers satellite phone and coverage. While Globalstar has a smaller coverage area compared to the other two providers, they have recently been upgrading and expanding their satellite service. They offer both prepaid and month-to-month plans, but service areas do differ between the two services. For instance, as of the writing of this article, Globalstar’s prepaid plan does not offer coverage in Mexico and large parts of South America, while their month-to-month plan does.
Above: Globalstar’s map of their voice and duplex data service areas.
Rent or Buy
One thing you have to decide is whether you are going to rent or buy your handset or device. That’s right, there’s no purchase necessary — you can rent satellite phones. There are several companies online that offer a broad selection of rental devices. This is a great option to keep your costs down; for example, if you only need the phone for a limited period of time. If you are driving cross-country or knowingly headed to an area with spotty cellular coverage, such as when camping or hiking, you could consider renting a satellite device for the trip.
While the rental option keeps the budget down, you obviously must know in advance when you’ll need satellite service. This leaves you in the lurch for spontaneous trips or emergency situations. Buying the device will allow you access to different plans as well as being able to activate it when you want or need to. Say for instance you’re going to use it for a trip — you can activate your phone for just that period of time without recurring charges. Your rate per minute will be significantly higher than a month-to-month or annual plan, but in the end it might be the least expensive route. The decision to rent versus buy a satellite device is similar to any other product — estimate your anticipated usage, break out the calculator, and figure out which is a better deal.
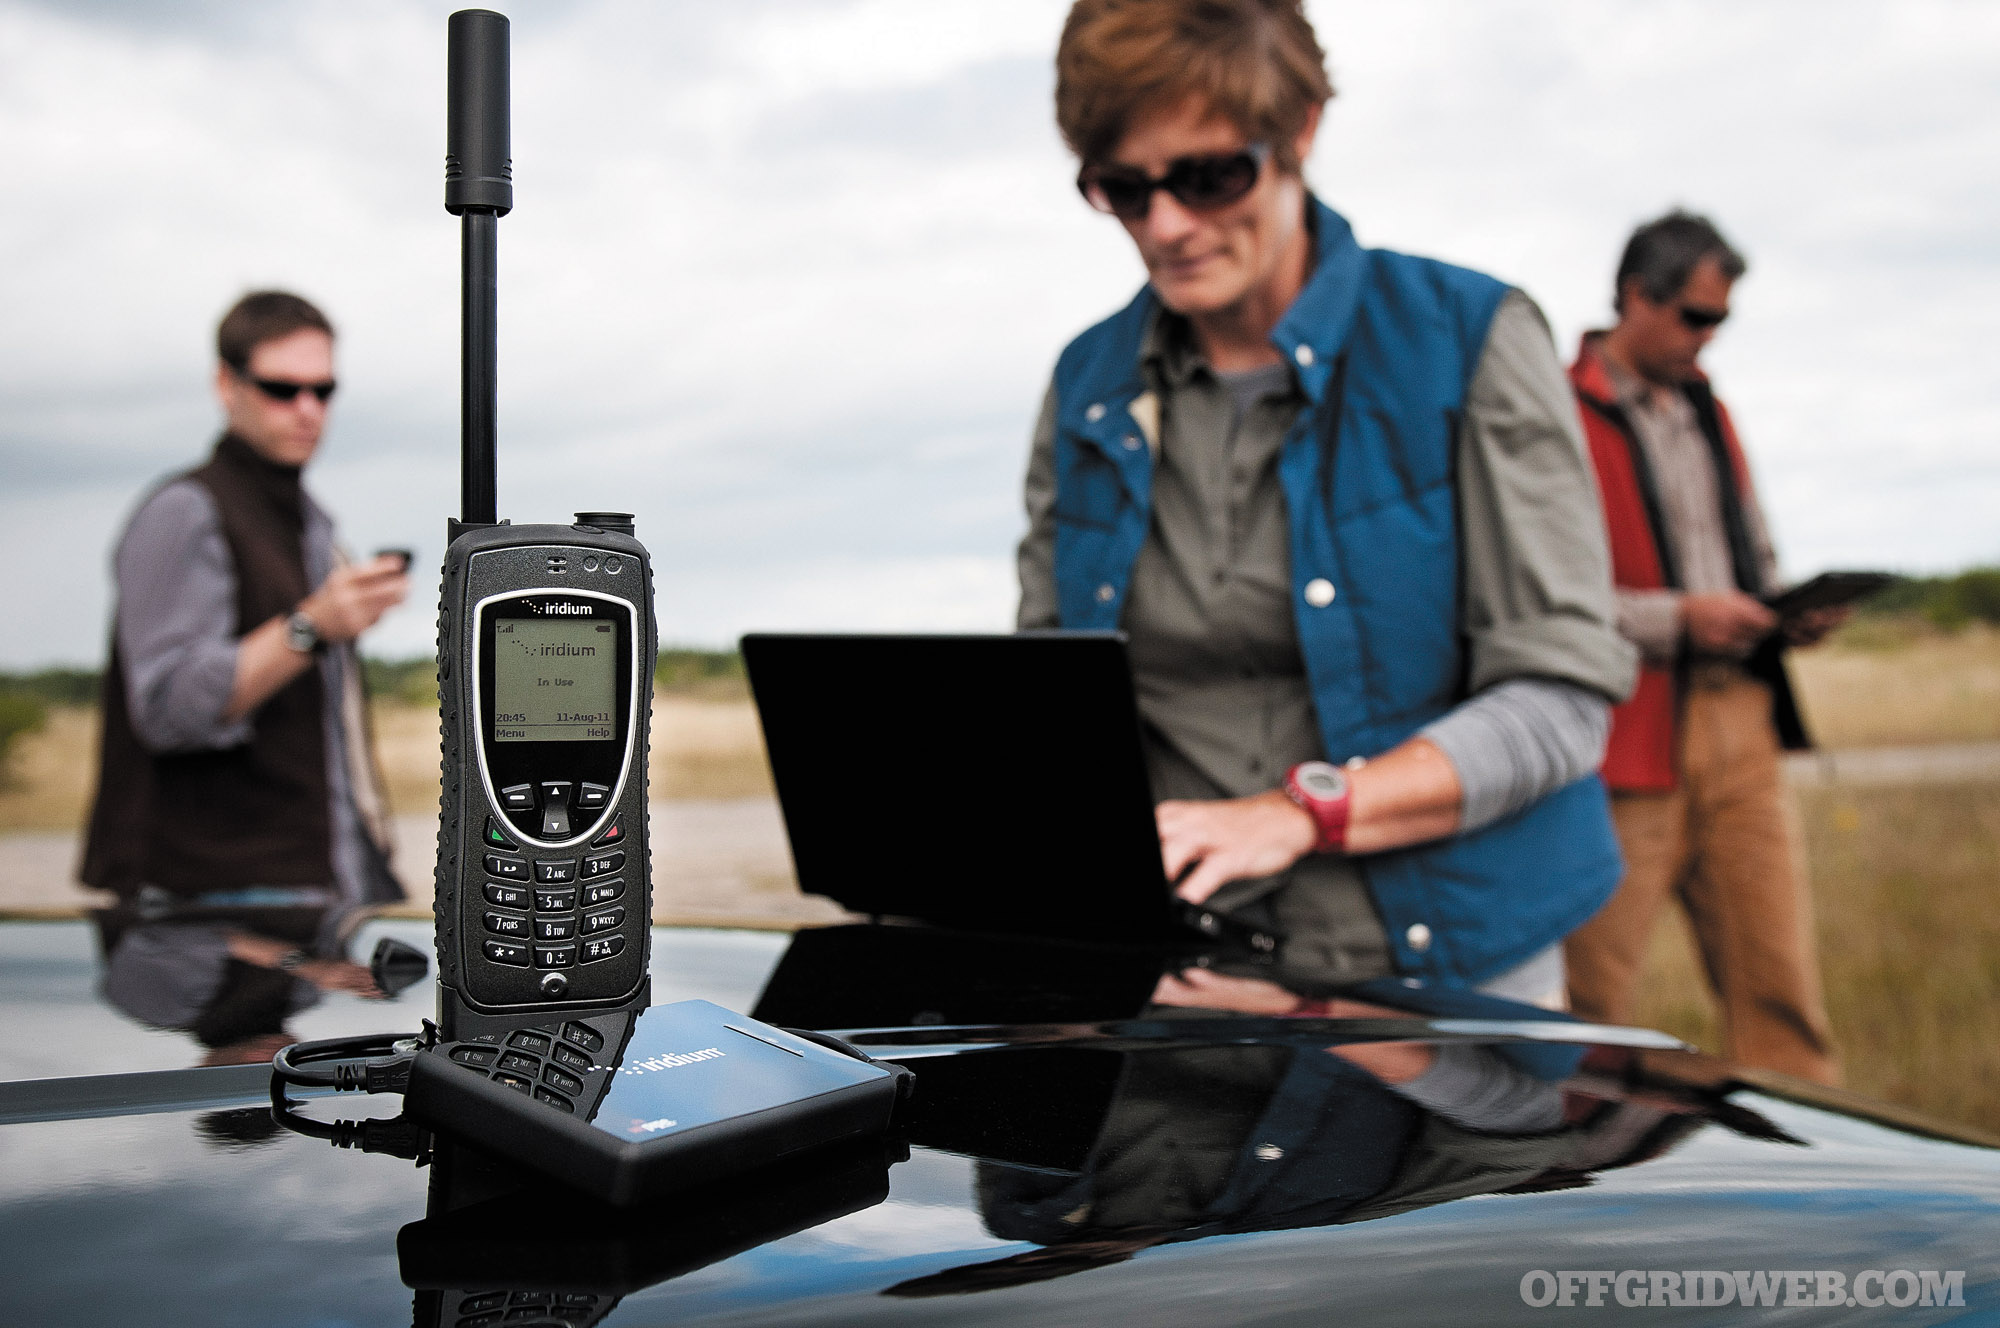
Iridium’s GO satellite hotspot gives your regular mobile phone satellite capabilities.
Handsets or devices are not usually sold directly by the companies themselves, but rather by distributors. There’s also a large supply of secondhand devices on secondary market websites such as eBay. When looking to buy used, as with pretty much everything else, you’ll want to carefully consider the condition of the phone and its battery prior to purchase. Standby and talk time can be severely limited by an old or out-of-shape battery.
Costs
Rental prices for satellite phones vary greatly depending on the device, service provider, and type of service. From what we observed, phone rentals can range from $8 to $20 per day, $30 to $90 weekly, and a little over $300 per month, with longer-term rental agreements available.
If you’re looking to buy a device, new units sell from about $600 all the way up to $1,700 and beyond. Of course, features and the network the phone runs on will affect pricing. As mentioned before, a good option is to look for secondhand units, which can cost drastically less.
Satellite phone service is sold in various manners, including prepaid phone cards that start at $50. For the pay-as-you-go type of service plans, service is sold in units, with a typical unit costing you about $1 to $4 per minute, depending on where you are calling. SMS text messages are about $0.50 each. Other types of plans are similar to your standard mobile phone plans and can include a subscription fee that includes a set number of minutes per month. Those can start at $35 a month for 10 minutes to $65 for 60 minutes. Of course, other charges and options will affect pricing, so do read your fine print.
Summation
This is an exciting time for satellite devices and technologies. Companies are starting to make satellite “hotspots” that actually allow you to use your smartphone as a satellite phone. This allows you to keep your email and other data as well as your contacts with you in just one device. For those who need Internet access on a computer or laptop, portable satellite modems provide cell tower-independent Internet access on the go and are a viable option too. With so many methods of communication floating above our heads, it’s easy to forget the many ways we have access to communications.
Pre-made survival kits are a subject that breeds controversy. Some say that these kits offer a simple starting point for those who might be new to prepping, or serve as a last-resort fail-safe for those who are unable to prepare on their own (an elderly relative, for example). Others will point out that they're needlessly expensive as opposed to building your own bug-out bag, and that the supplies within won't be much good if the recipient isn't familiar with their organization and proper use. As we've said in the past, we firmly believe that the best survival kits are the ones you assemble yourself, but we can also understand that off-the-shelf BOBs may have their place in some cases.
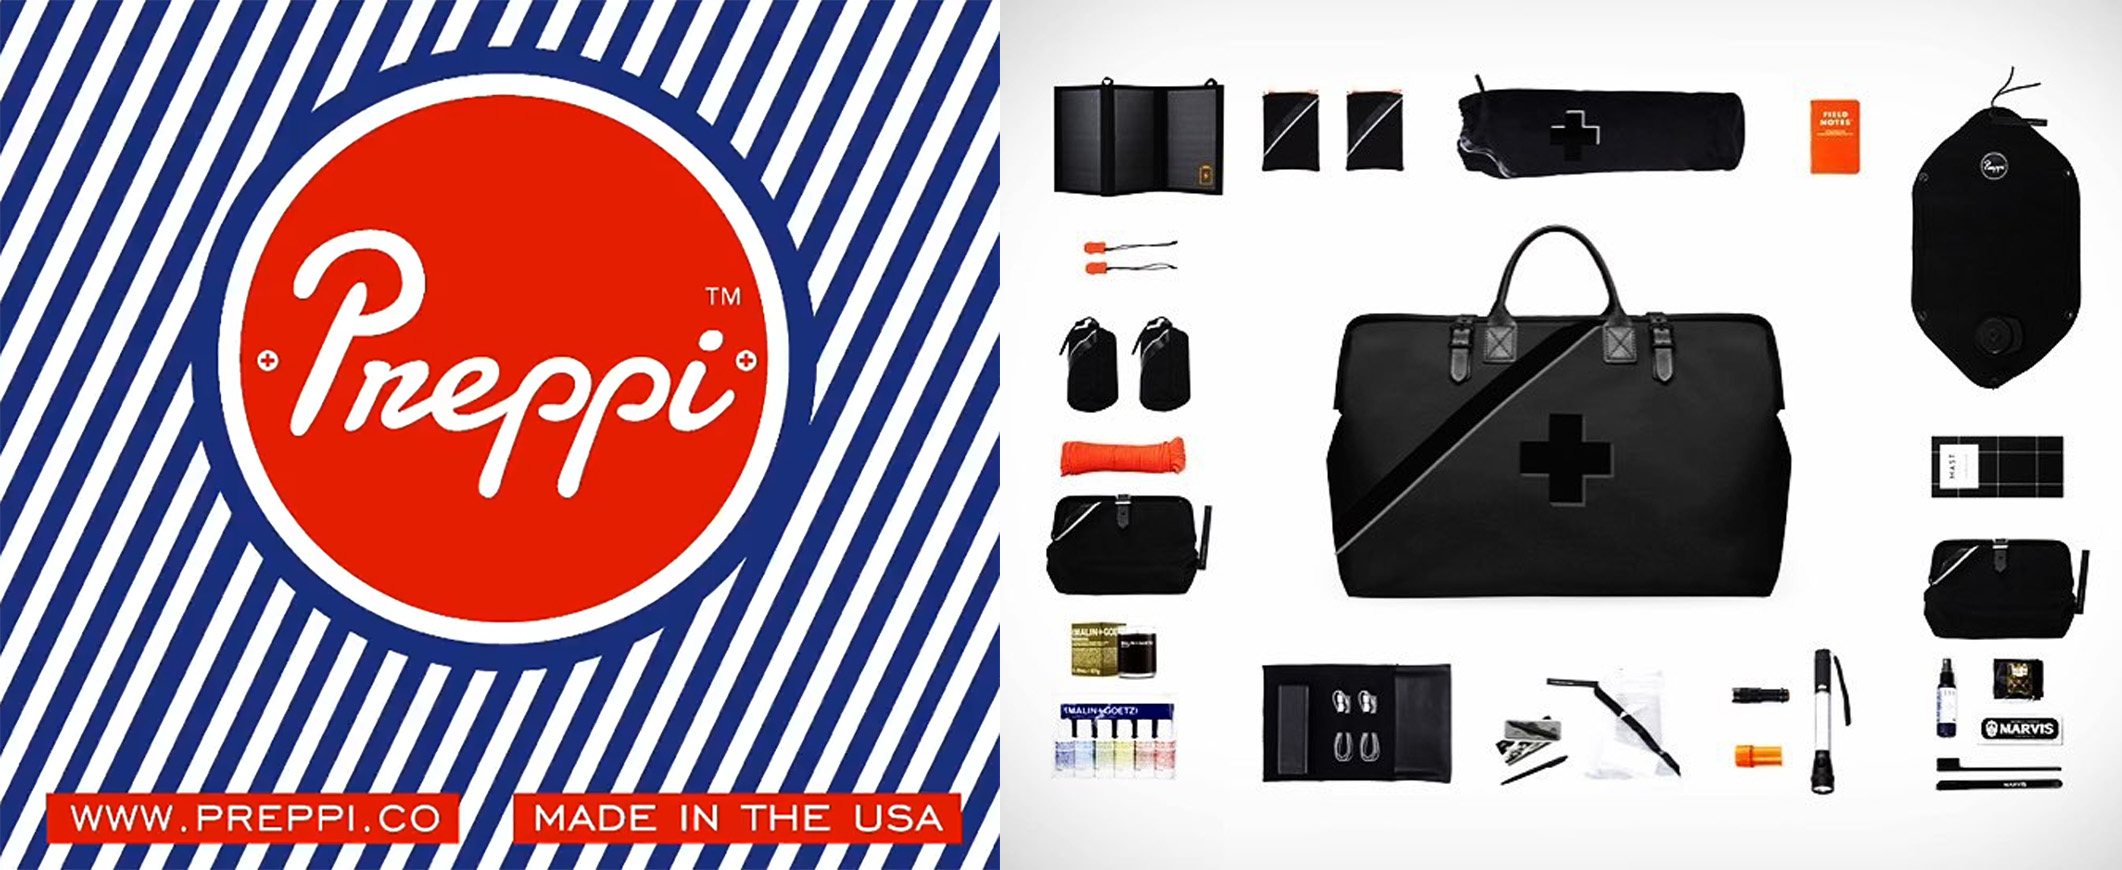
Regardless of your stance, today we're going to show you one pre-made bug-out bag that is, in our humble opinion, a massive waste of money. Today we're going to take a look at the Preppi Prepster Ultra Luxe.
About Preppi
Founded in 2014, Preppi is a Los-Angeles-based company that offers various survival kits, including their flagship product line called The Prepster. The About Us page on the company's web site seems reasonable enough at first:
“At Preppi we want everyone to be prepared when the unexpected happens… We seek to inspire more people around the world to be prepared for any situation. With extreme weather and unpredictable emergencies being commonplace globally it is no longer an option to treat the topic of preparedness lightly.”
We're on board with these goals. So far, so good.
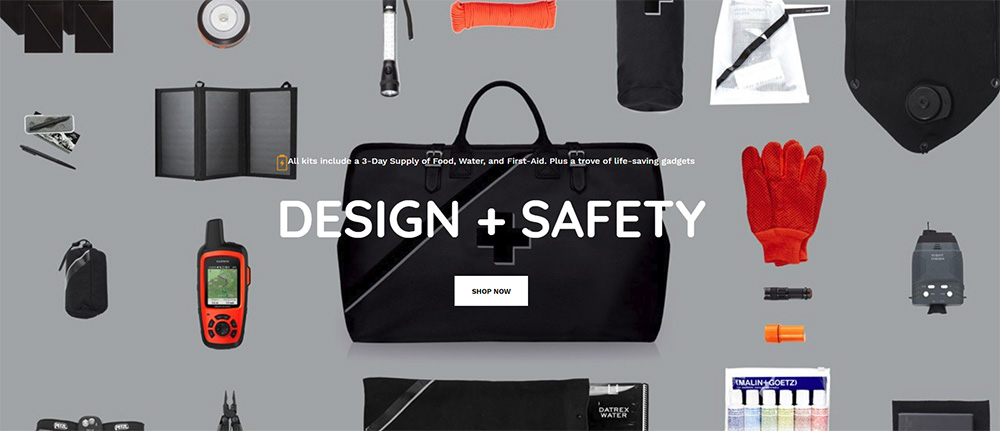
“The core of every Preppi kit is a military grade 3-day supply of food and water with a 5 year shelf life as outlined by survival experts and government agencies. We then add everything from basic necessities such as rain ponchos to advanced tech such as satellite messengers — helping you and your family smoothly manage any scenario.”
Again, not bad. “Military grade” is an overused and meaningless buzzword — not to be confused with mil-spec — but aside from that this sounds OK. Intrigued, we headed over to the Products page to see what these kits are all about.
Preppi offers a range of emergency kits, including the entry-level Prepster Lite and the original Prepster (available in backpack and handbag form). But the one that immediately caught our attention is the Prepster Ultra Luxe, which is available at a retail price starting at $4,995. No, that's not a typo — this bug-out bag costs as much as a used car.
At this point we were wondering, what gear could a $5,000 bug-out bag possibly contain? Perhaps it would be a high-end personal-defense weapon and several boxes of ammo, lightweight body armor, or state-of-the-art thermal optics. Surely it had to be something good to justify this stratospheric price, so we dug deeper to find out.
The Prepster Ultra Luxe
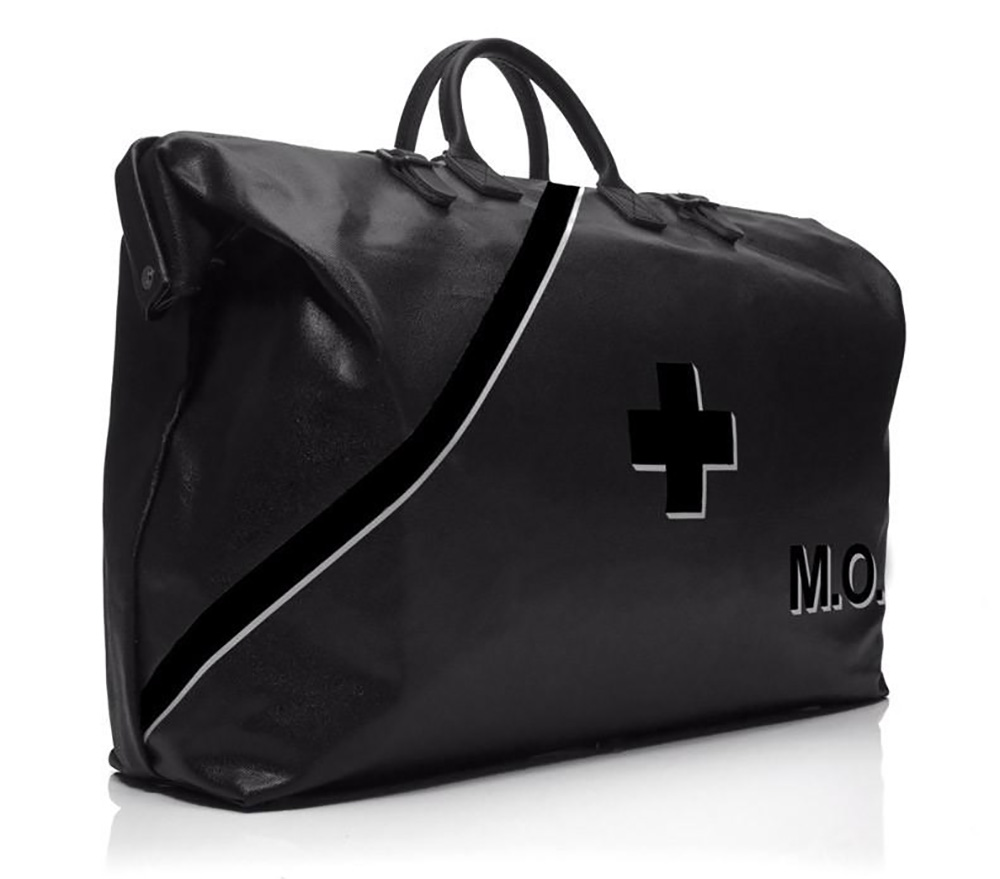
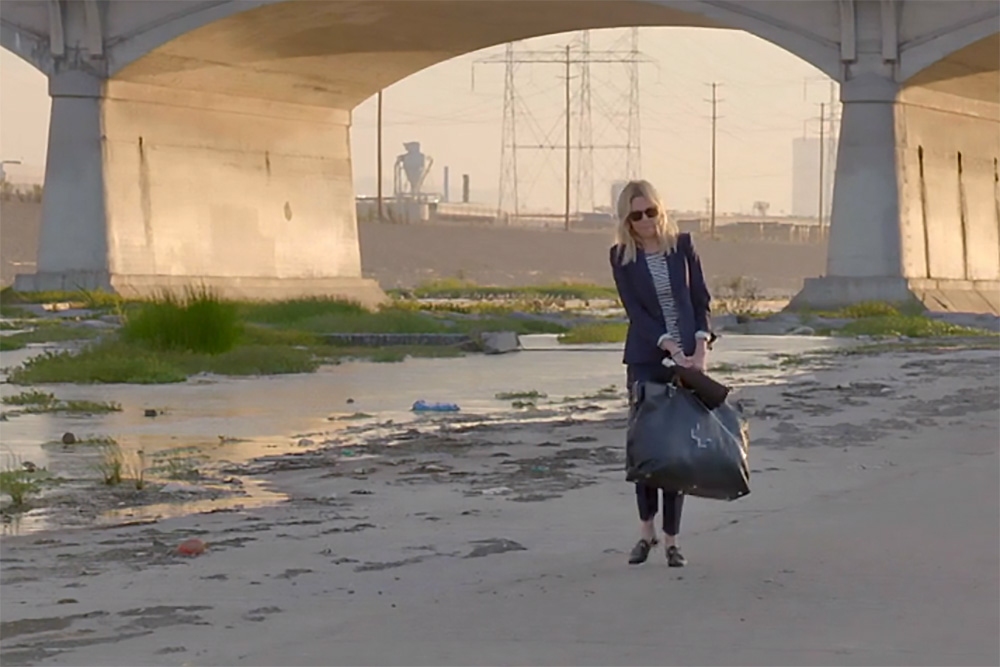
The product description calls this “a dramatic upgrade from our classic Prepster Bag [with] Bond-like gadgets and stylish all-black amenities.” It's said to contain “all the essential supplies to sustain nutrition, hydration, power, shelter, and communication for two people with ample luxe comforts.” The bag is made from “handcrafted coated waterproof canvas and natural bridle leather” with a top-mounted handle. It lacks a sling or shoulder straps, so you'll need to carry it like a giant purse.
A correspondent from The Daily Show shows the ease of carrying the Prepster Ultra Luxe.
The bag is finished with a complimentary monogram — you know, so you won't be confused about whose $5,000 bug-out bag this is.
As for its contents, we reached out to Preppi to request a sample of the Prepster Ultra Luxe for detailed analysis and review. After all, Preppi products have already been reviewed by the likes of TIME, Forbes, and The Wall Street Journal:
Editor's Note: A reader named Stuart pointed out that the above quote selectively omits parts of the original — “Technically not full of technology, the $95 Preppi GoBox is laden with every other must-have for surviving difficult situations…”
Disappointingly, we did not receive a response by this article's publication date. So we'll discuss the contents solely based on the specifications and images on Preppi's web site. It's time to find out exactly what you get in your five-grand survival kit.
Bug-Out Bag Contents
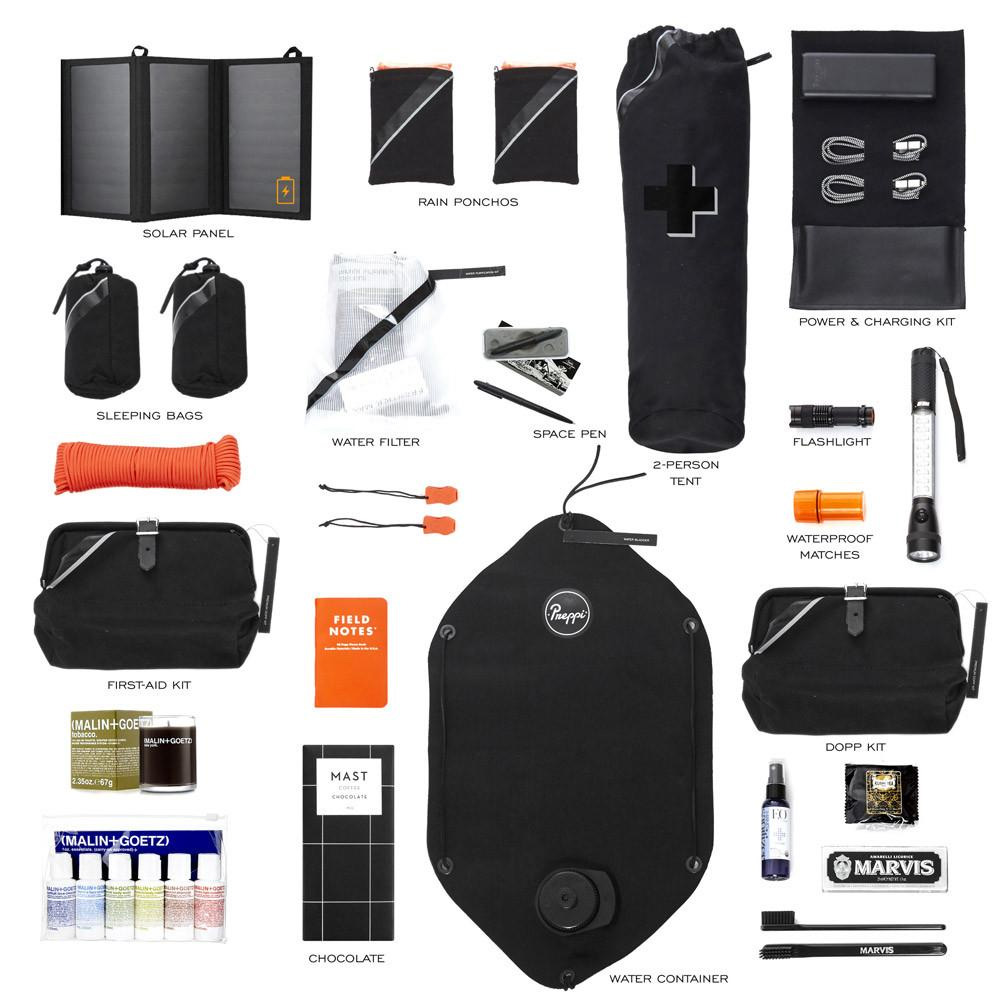
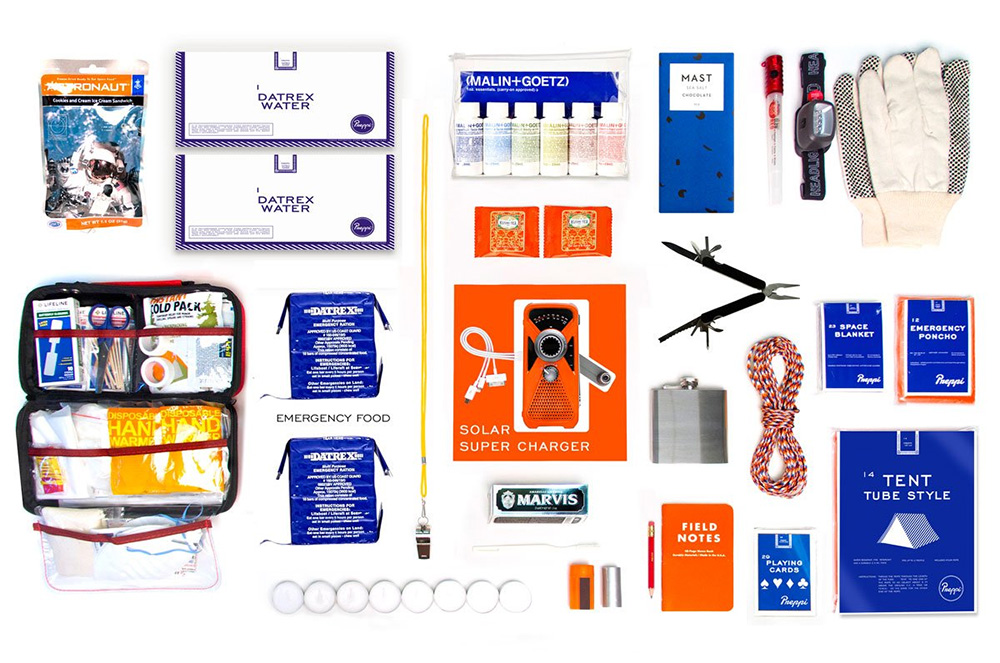
Click to expand these official photos of the Prepster Ultra Luxe's contents. We'll analyze each item below.
Shelter Right off the bat, there's an “ultra compact full size tent,” two “compact space sleeping bags” (probably prototypes for the Space Force) and two rain ponchos.
No brand name is mentioned for these items, so we can't comment on their quality — get used to this, because it's a recurring issue with Preppi products. You might think you'd be told exactly what you're getting at this price point, but Preppi makes it an exciting surprise. How fun!
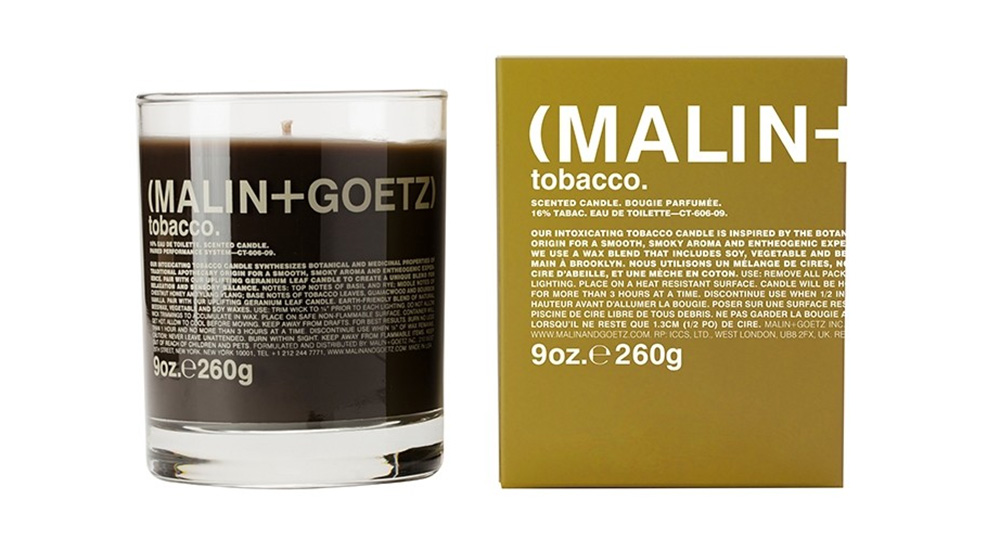
Fire A case of UCO waterproof matches ($8) serves as the sole fire-starting tool. These can be used to light the included Preppi Survival Candles or the scented Malin + Goetz Tobacco Votive Candle (a $55 value) for some relaxing aromatherapy.
This candle's manufacturer says it provides an “entheogenic experience.” An entheogen is defined as “a psychoactive substance used in a religious or shamanic context.” If you're struggling to survive, you can just light this up and ascend to a higher plane of existence beyond the mortal world.
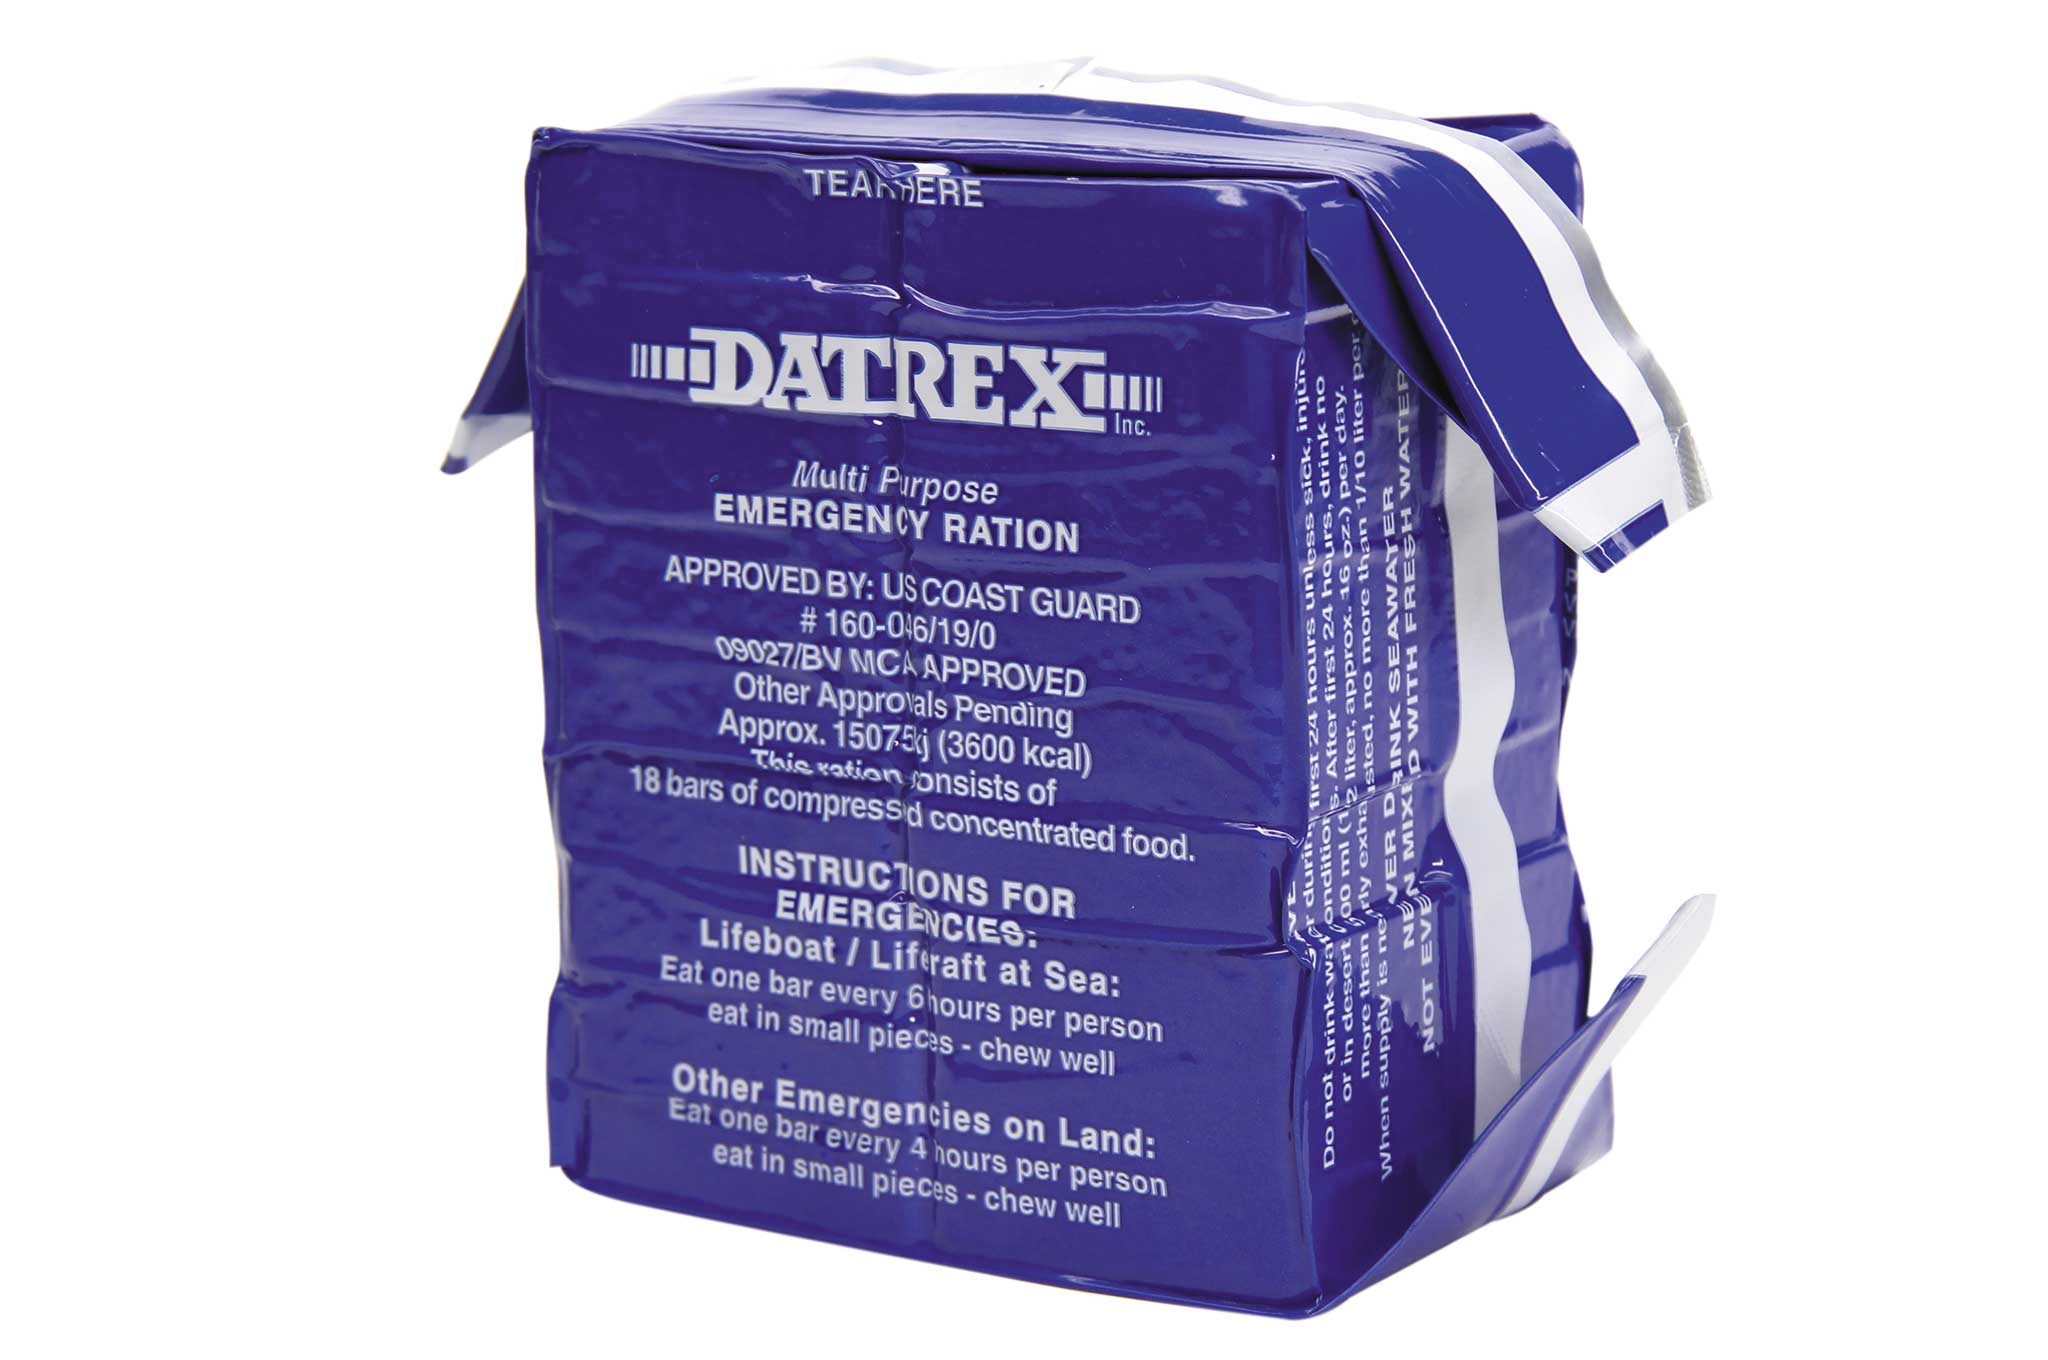
Water The kit contains an unspecified amount of Datrex emergency drinking water pouches ($31 for a 64-pack of 125ml pouches). There's also a water purification kit of unknown origin, plus a Preppi-branded MSR Dromedary hydration bladder ($50). A “hydroformed black matte flask” is included; sadly, it doesn't come pre-filled with 50-year-old single malt scotch. There is some Kusmi Darjeeling No. 37 organic black tea ($22), however.
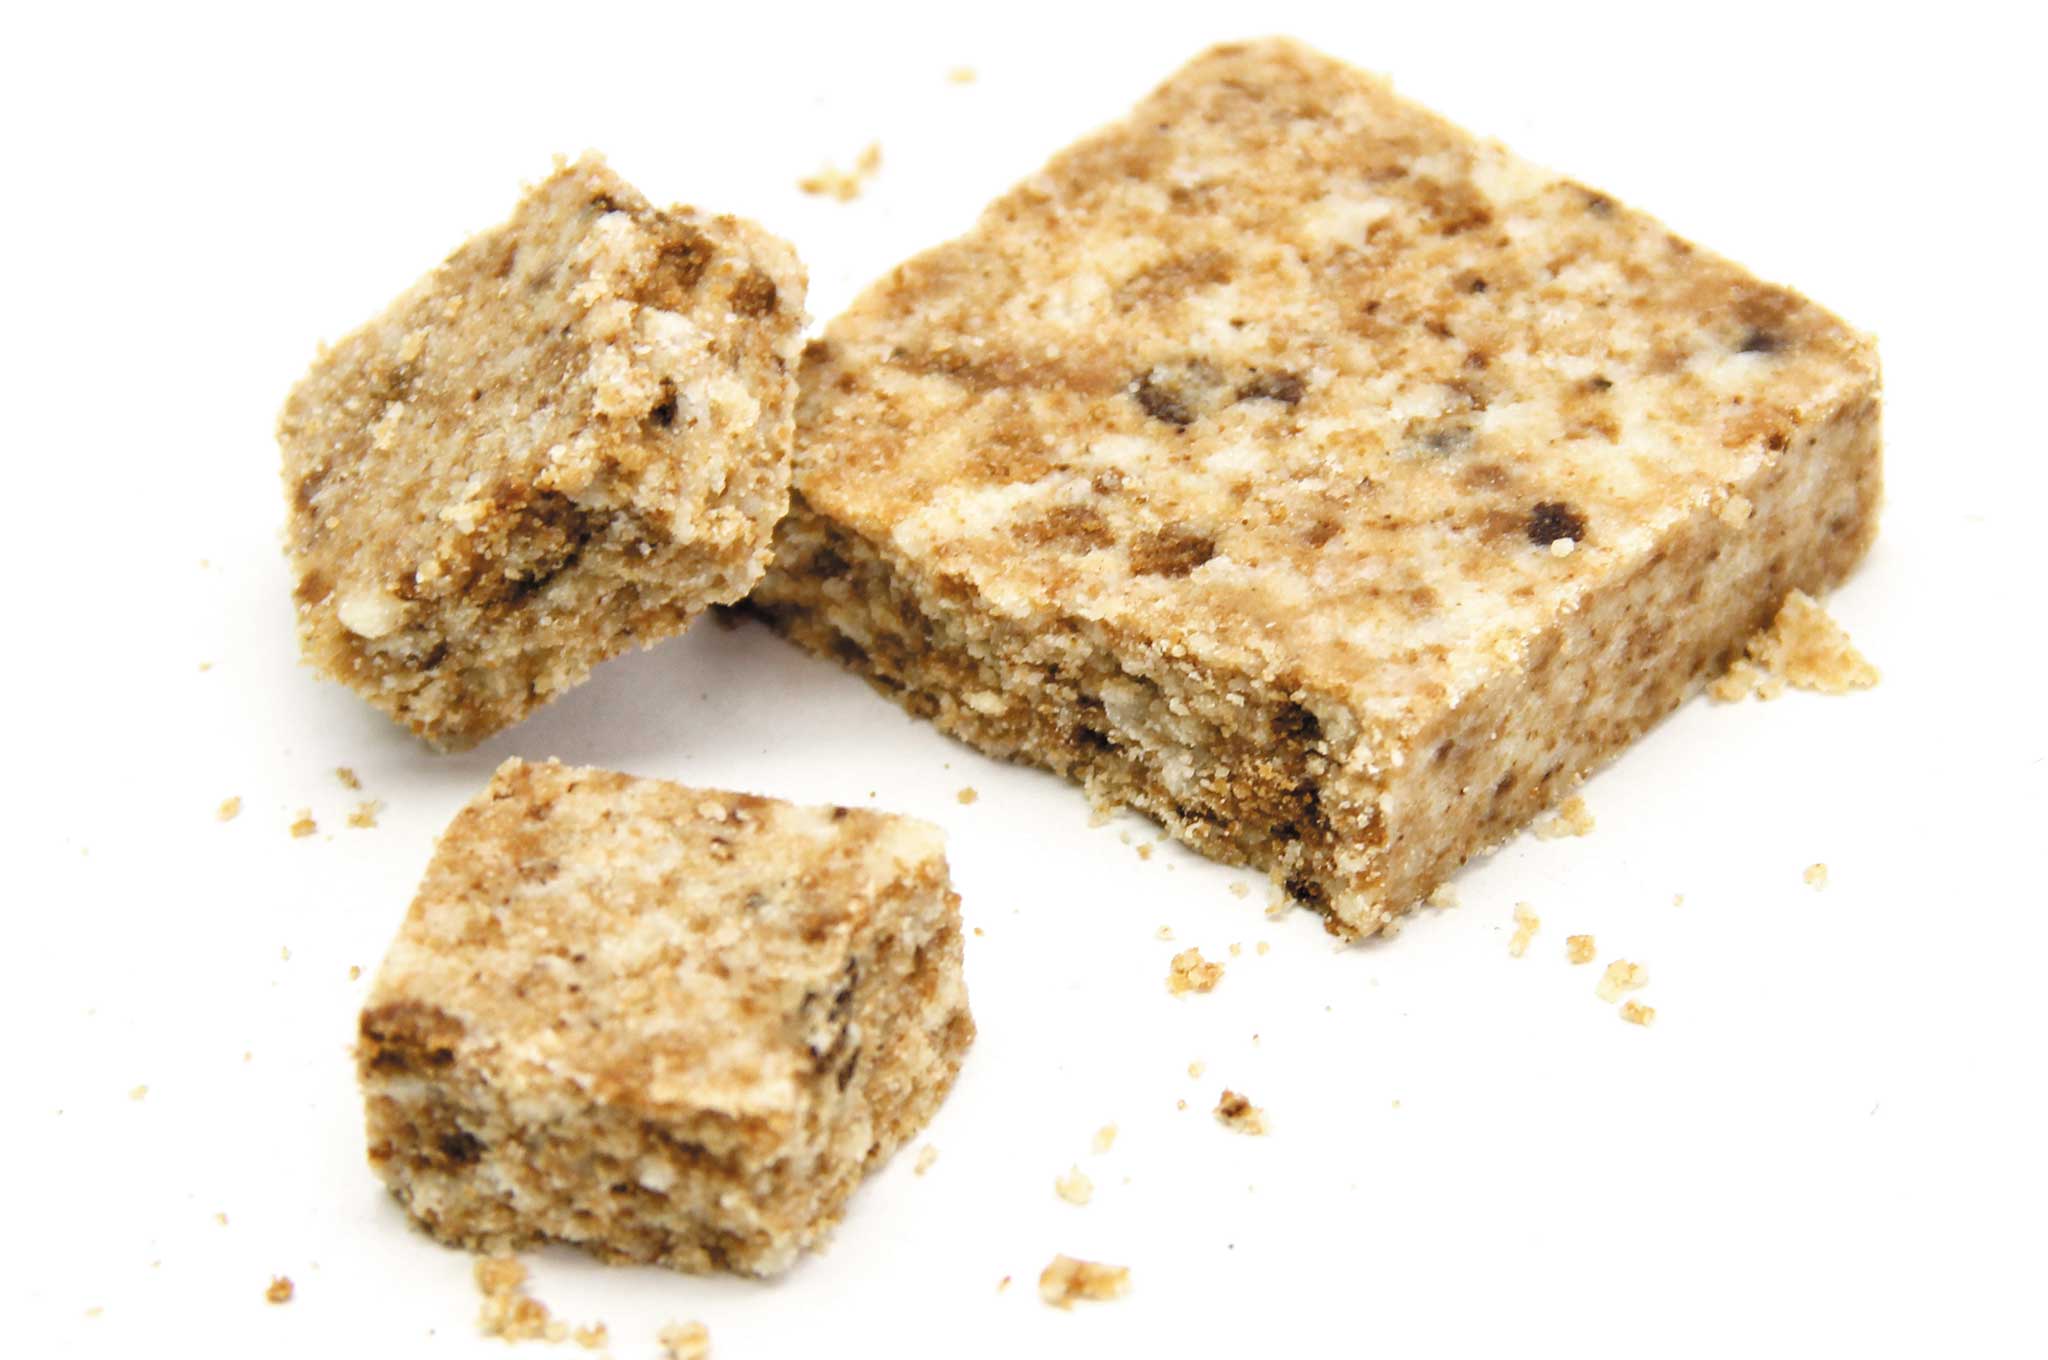
Food Emergency food rations were also sourced from Datrex, and appear to be 3,600kcal bars (see our review from Issue 7). Images also show PROBAR Meal bars, though there is no other mention of these in the product description, so we're not entirely sure if they're included or not.
Above: Datrex emergency rations, as seen in the Emergency Ration Buyer's Guide from Issue 7 of our magazine.
For dessert, there's a $10 organic chocolate bar from Mast Brothers. You may not get flavorful freeze-dried meals or even MREs, but at least you'll have a few bites of artisanal chocolate before digging in to several bricks of crumbly lifeboat rations.
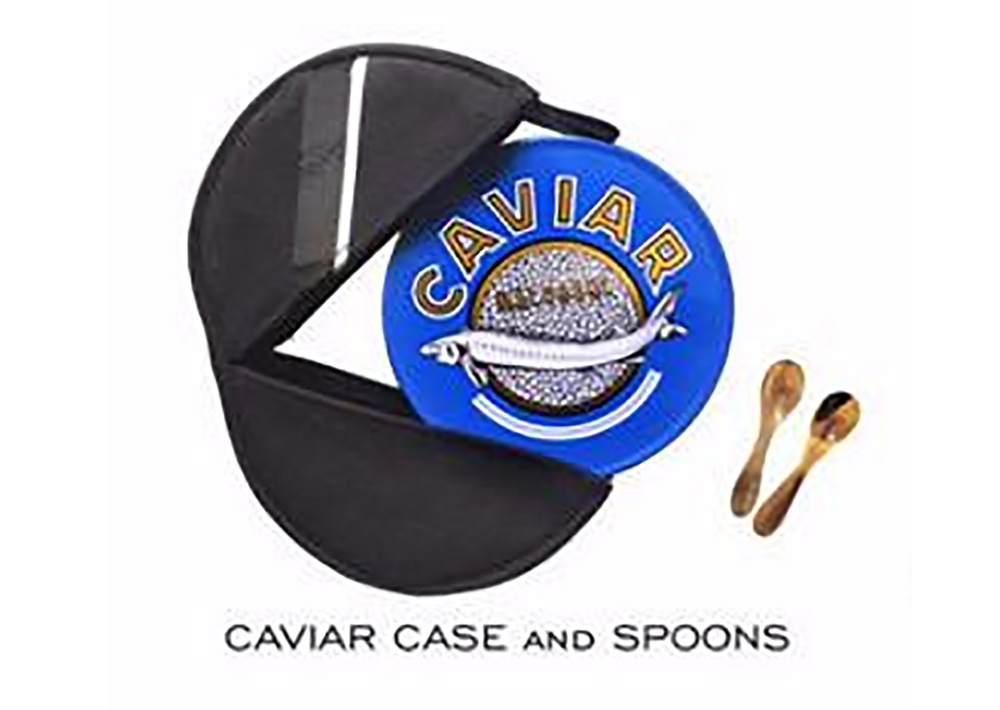
Last but certainly not least, there's a Preppi brand caviar cooler case and two spoons (a can of imported beluga is not included). We assume these are intended for spreading some chilled caviar onto your ration bars to elevate their gourmet flavor.
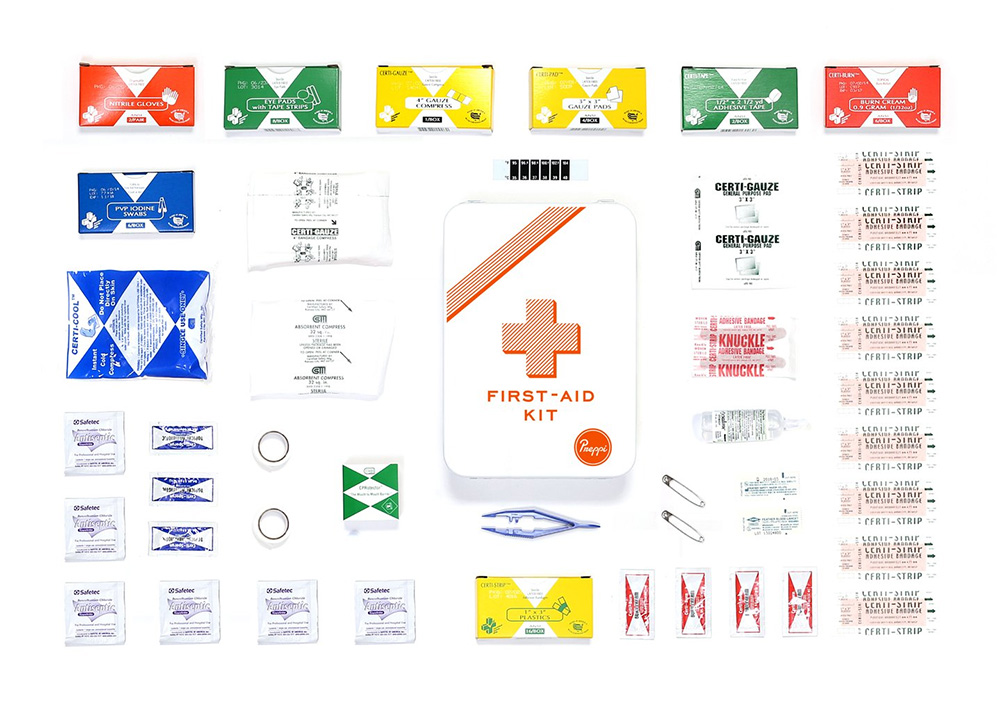
First Aid The Prepster Ultra Luxe includes a Preppi First Aid Kit. No details are provided about its contents, but we'd bet they're the same as Preppi's $95 standalone first-aid kit. It comes with various bandages, gauze, antiseptics, tape, safety pins, nitrile gloves, eye wash, and a cold compress — no need to fear boo-boos during your harrowing survival adventure.
The Preppi First Aid Kit
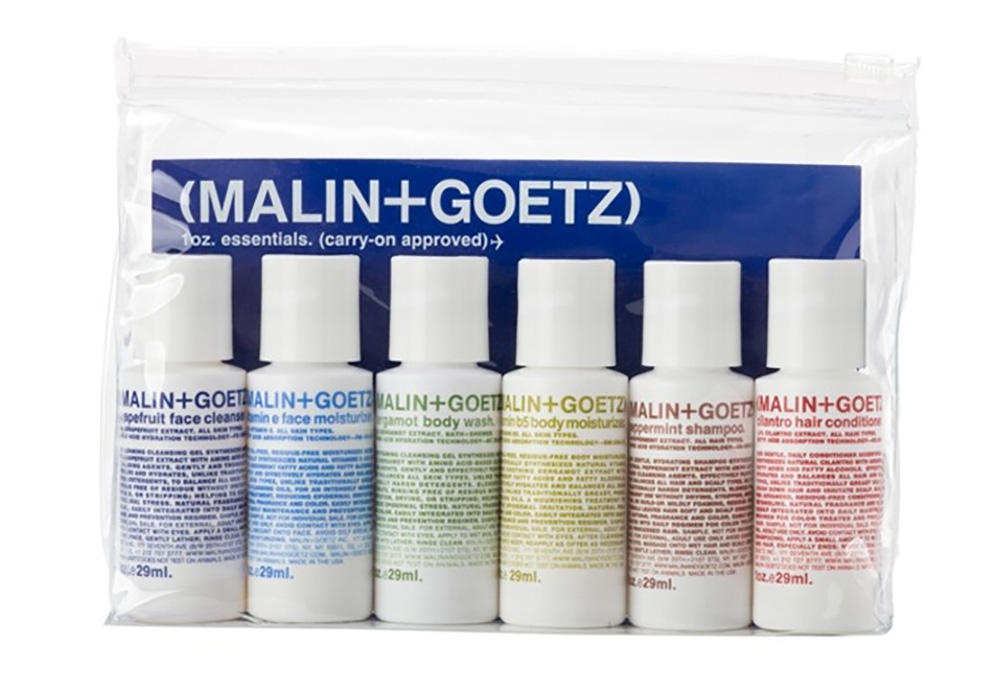
Personal Hygiene Most survival kits contain some basic hygiene items, but Preppi takes it to the next level. There's a Preppi Canvas and Leather Dopp Kit bag ($95) that you'll need to fill with your own posh toiletries, as well as a Marvis Black Toothbrush ($6) and Marvis Toothpaste ($13). You also receive a Malin + Goetz Essentials Kit ($32), which contains the following:
Grapefruit face cleanser
Vitamin e face moisturizer
Bergamot body wash
Vitamin B5 body moisturizer
Peppermint shampoo
Cilantro conditioner
The elegant aromas of bergamot and cilantro will surely do wonders to cover up your post-apocalyptic stank. (Before you head to Google to figure out what the heck bergamot is, we'll save you the trouble. It's a type of orange. We didn't know either.)
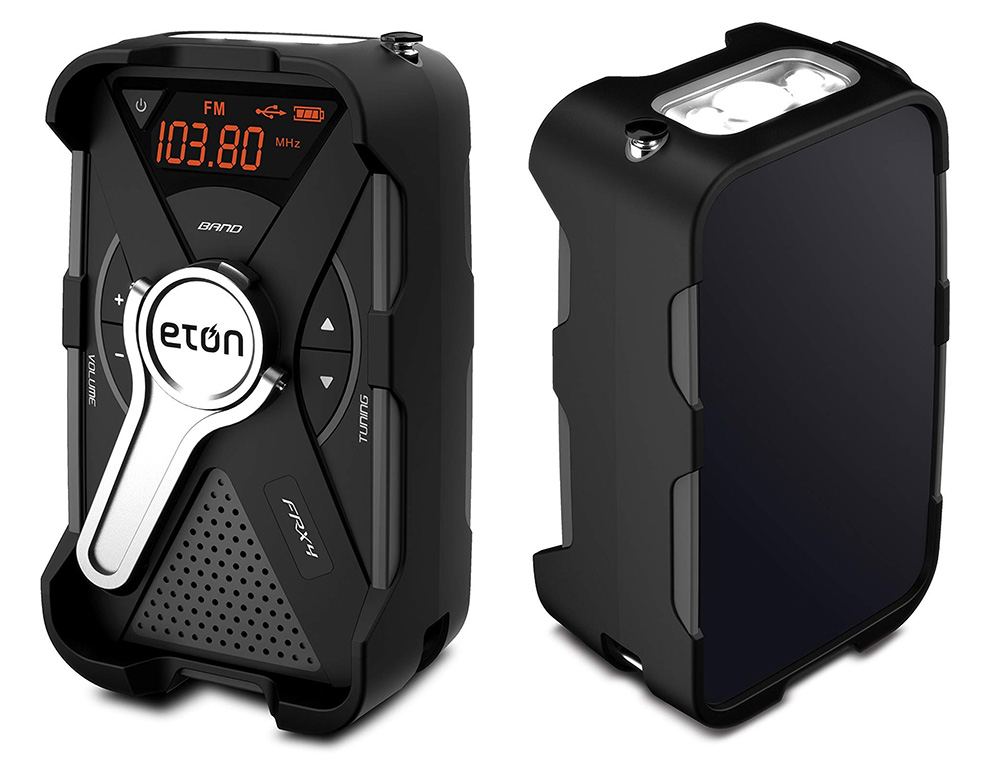
Communications & Tech Is your gold iPhone XS Max running low on juice from one too many last-minute selfies? Not to worry! The Prepster Ultra Luxe has you covered with an Anker power bank, USB cables, and a folding solar panel of unknown origin. You could also charge it from the included Eton FRX4 solar/hand crank emergency radio ($80). This product is currently discontinued, making it extra rare.
The Eton FRX4 hand-crank/solar radio
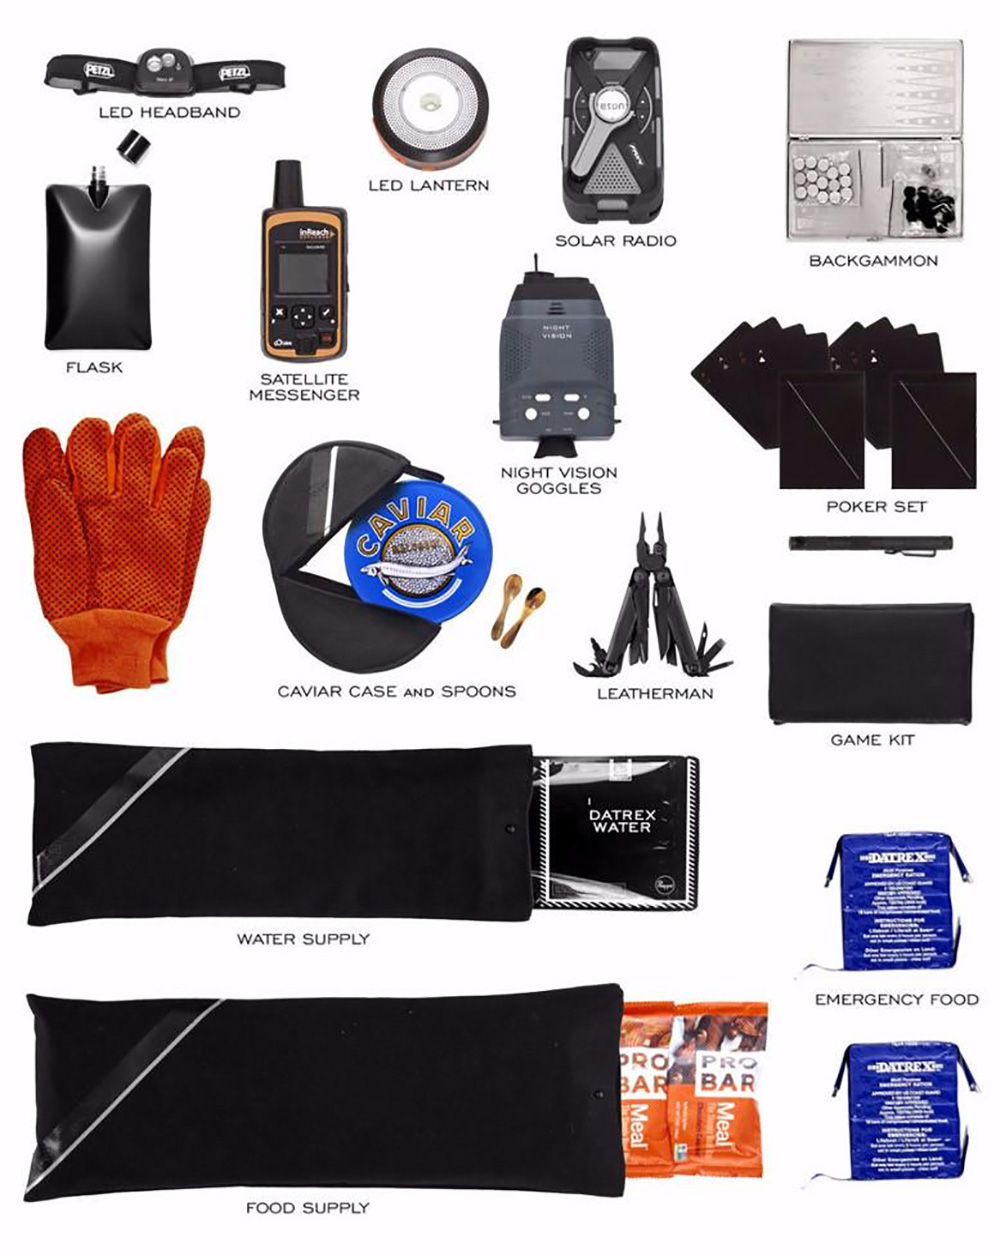
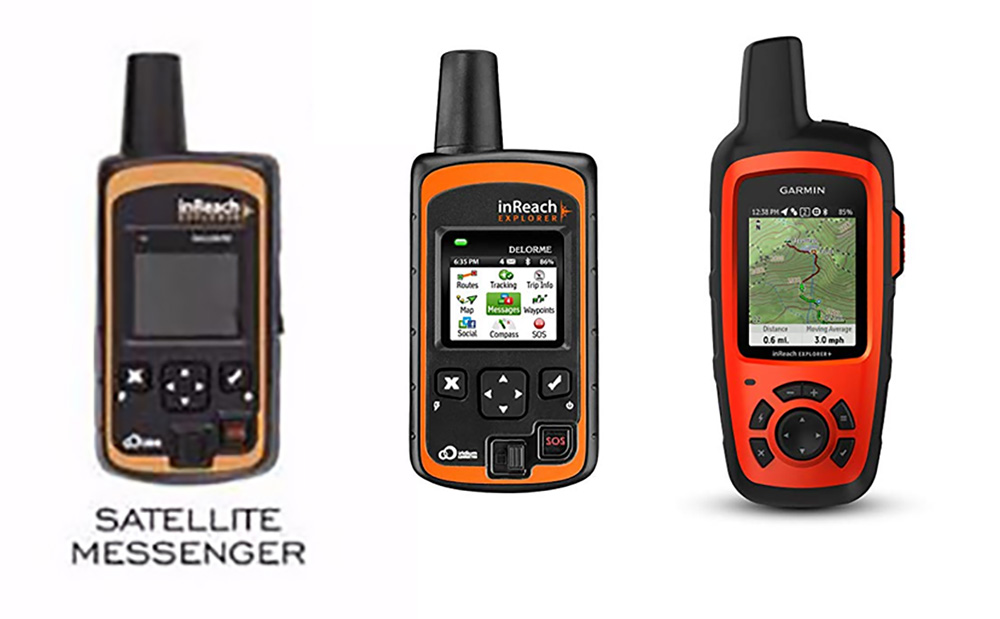
The specifications also mention a Garmin InReach handheld GPS/satellite messenger ($450). Strangely, the images show a now-discontinued Delorme InReach, so we're not sure which is accurate. Another surprise you'll have to wait to discover! You'll also need to buy a subscription to Garmin's satellite network, which ranges from $12 to $100 per month (sold separately).
From left to right: Preppi's advertised GPS unit, discontinued Delorme InReach Explorer, Garmin InReach Explorer+
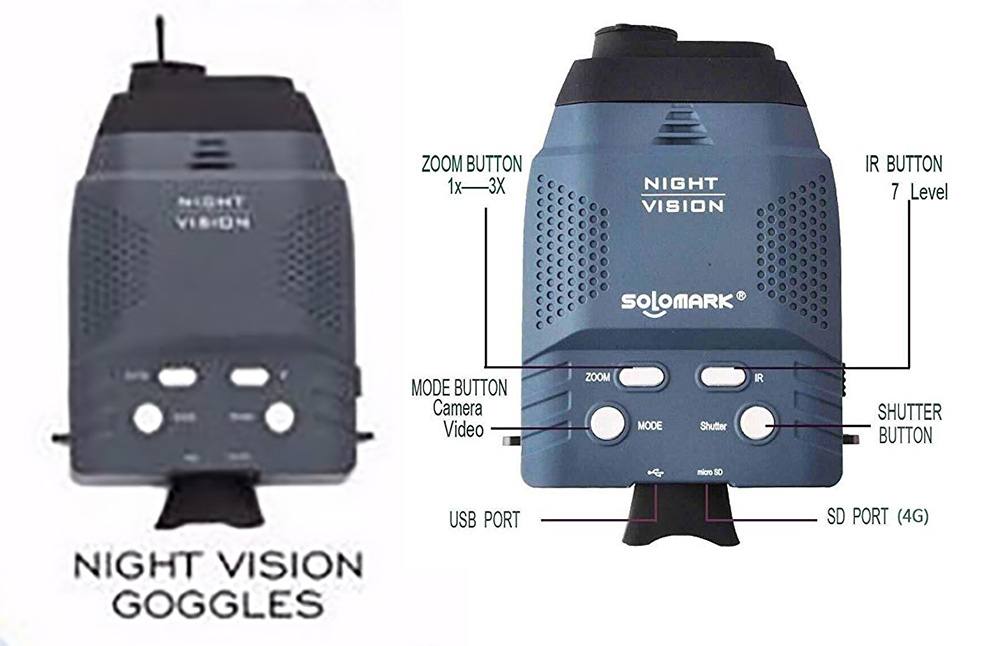
We were hoping for some fancy thermal optics, but no such luck. Preppi does include a handheld night-vision unit, although they make no mention of its make or model. However, it bears a very striking resemblance to this $130 Solomark device we found on Amazon.com. What a strange coincidence.
Left: the “night vision scope” from Preppi's site. Right: a Solomark night vision device found on...
If this is one of the “Bond-like gadgets” Preppi advertises, Q branch must be undergoing some catastrophic budget cuts.
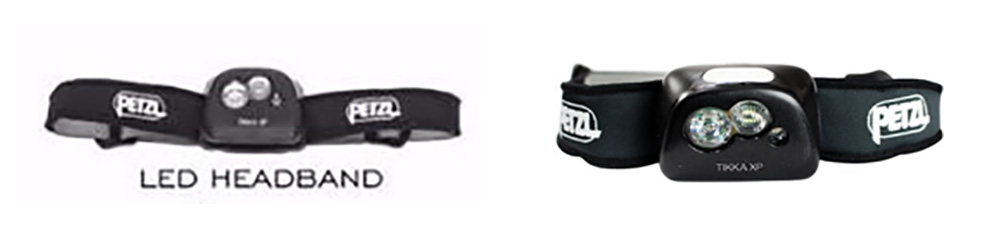
Lighting In the extremely unlikely event that your top-of-the-line night vision unit malfunctions, Preppi has provided numerous other light sources. These include a Petzl “LED headband” — the image appears to show a discontinued Tikka XP headlamp, which retailed for $50.
Left: Petzl “LED headband” from Preppi. Right: Discontinued Petzl Tikka XP headlamp.
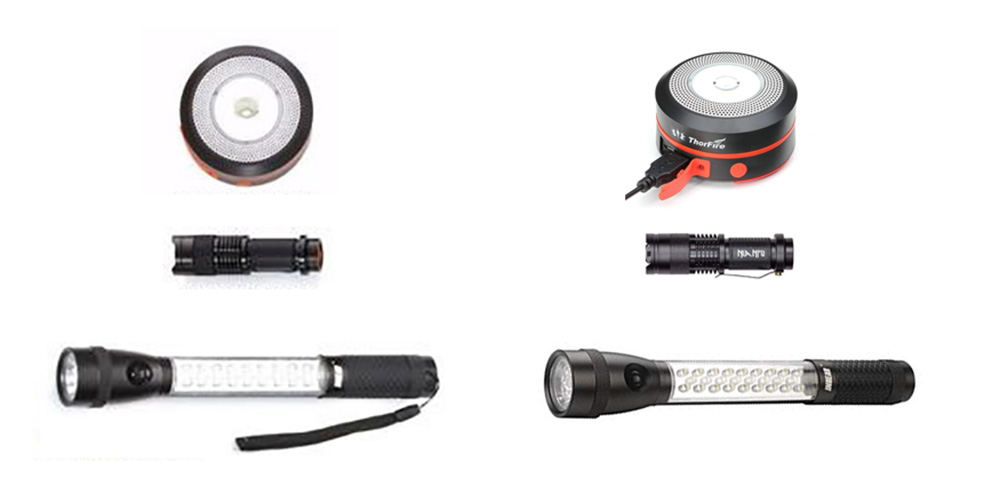
You also get a “solar pop-up lantern, tactical flashlight, and torch LED flashlight.” Again, brand names are conspicuously absent for these three items, but the pictured examples bear an uncanny resemblance to the following items from Amazon.com:
Left: Preppi Prepster flashlights. Right: inexpensive flashlights from Amazon.com.
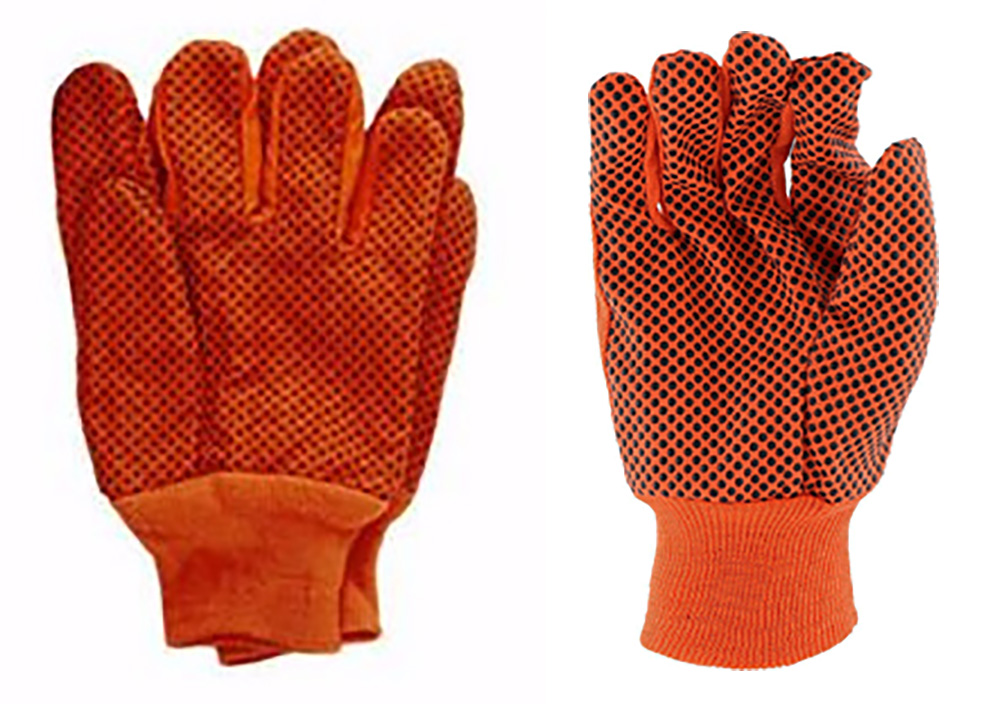
Tools A black Leatherman Rebar ($70) is the only cutting tool in the kit, and can be used for opening caviar tins and other critical tasks. You'll be able to keep track of items you need to scavenge from the local Whole Foods in the Field Notes Expedition notebook ($4.33 each / sold as a 3-pack for $13) with a Fisher Space Pen ($26). There's also an unspecified amount of “tactical paracord rope 550” for all your tactical knot-tying needs, as well as “utility bags” (not pictured; we assume they're contractor trash bags) and utility gloves that look suspiciously like a $14 pair from Amazon.
Left: Preppi gloves. Right: hi-vis canvas gloves from Amazon.
Why buy a pair of tried-and-true Mechanix gloves when you can spend the same amount on a pair that's one step above oven mitts?
Entertainment Preppi anticipated that you'll be bored senseless due to the ease of surviving with your Prepster Ultra Luxe bag, so a game kit is included. It features a poker set and backgammon.
Meet Preppi's Founders
Now that you've seen what's inside the Preppi Prepster Ultra Luxe, you may be wondering about the seasoned preparedness experts who developed this product. Rapper 2 Chainz interviewed these L.A. entrepreneurs on his VICELAND show Most Expensivest:
“We make everything ourselves in downtown L.A.” — Actual quote from Preppi co-founder Ryan Kuhlman
You may have noticed that this video lists the kit's price at $10,000. That's because it includes optional credit-card-sized gold bars, each with a claimed value of $2,500. These feature perforations so they can be broken into smaller pieces for bartering. Preppi's site says that customers who want this upgrade should email them after placing an order for the standard $5,000 kit.
In the following supposedly-comedic yet painfully-unfunny Daily Show segment, correspondent Desi Lydic conducts a brief interview with Preppi's Ryan Kuhlman (the relevant bit starts at 3:41). During this segment, Kuhlman name-drops Ben Affleck as a Prepster bag buyer.
We're disappointed to see that the champagne bottle koozie featured in this clip doesn't appear to have made it into the final version of the kit.
Conclusion
In case you haven't noticed by now, we're not singing Preppi's praises here. We could make fun of it all day, but there are still lessons to be learned.
Obviously value isn't the primary concern for luxury products, but even in this realm the Prepster Ultra Luxe is overpriced to a laughable degree. We'd generously estimate the actual cost of the items within this kit, purchased at full MSRP, to be less than $2000. Roughly a fourth of that cost is the $450 Garmin InReach GPS unit; much of the rest can be attributed to completely unnecessary items like the $55 scented candle. You'd definitely have an easier time surviving with $1,000 in gear and $4,000 in cash. You might have an easier time surviving by burning the excess cash for warmth.
Alternate survival strategy: deploy wads of cash like a smokescreen to distract anyone in pursuit.
But regardless of the sticker shock, Preppi is a prime example of a company using creative marketing to sell mostly-mediocre gear at an insane markup. Even Preppi's mid-range $495 Prepster bag contains plenty of off-brand and otherwise questionable items — the pretentious skincare set will be little consolation when you're sleeping on the hard ground in a flimsy tube tent with nothing but a mylar blanket and thin plastic poncho for insulation. Last we checked, chocolate and conditioner aren't part of the 5 Cs of survival.
Contents of the $495 original Prepster.
This is why it's essential to know exactly what you're getting if you buy a pre-made survival kit. Or better yet, cut out the middleman by making your own bug-out bag. You'll save yourself hundreds if not thousands of dollars, and you'll actually learn something about emergency preparedness in the process.
In a real emergency, the Prepster Ultra Luxe is only going to help one person survive: the criminal who takes it by force from the sucker who spent $5,000 on it.
Special thanks to reader Ben Badgett for the tip that led to this article.
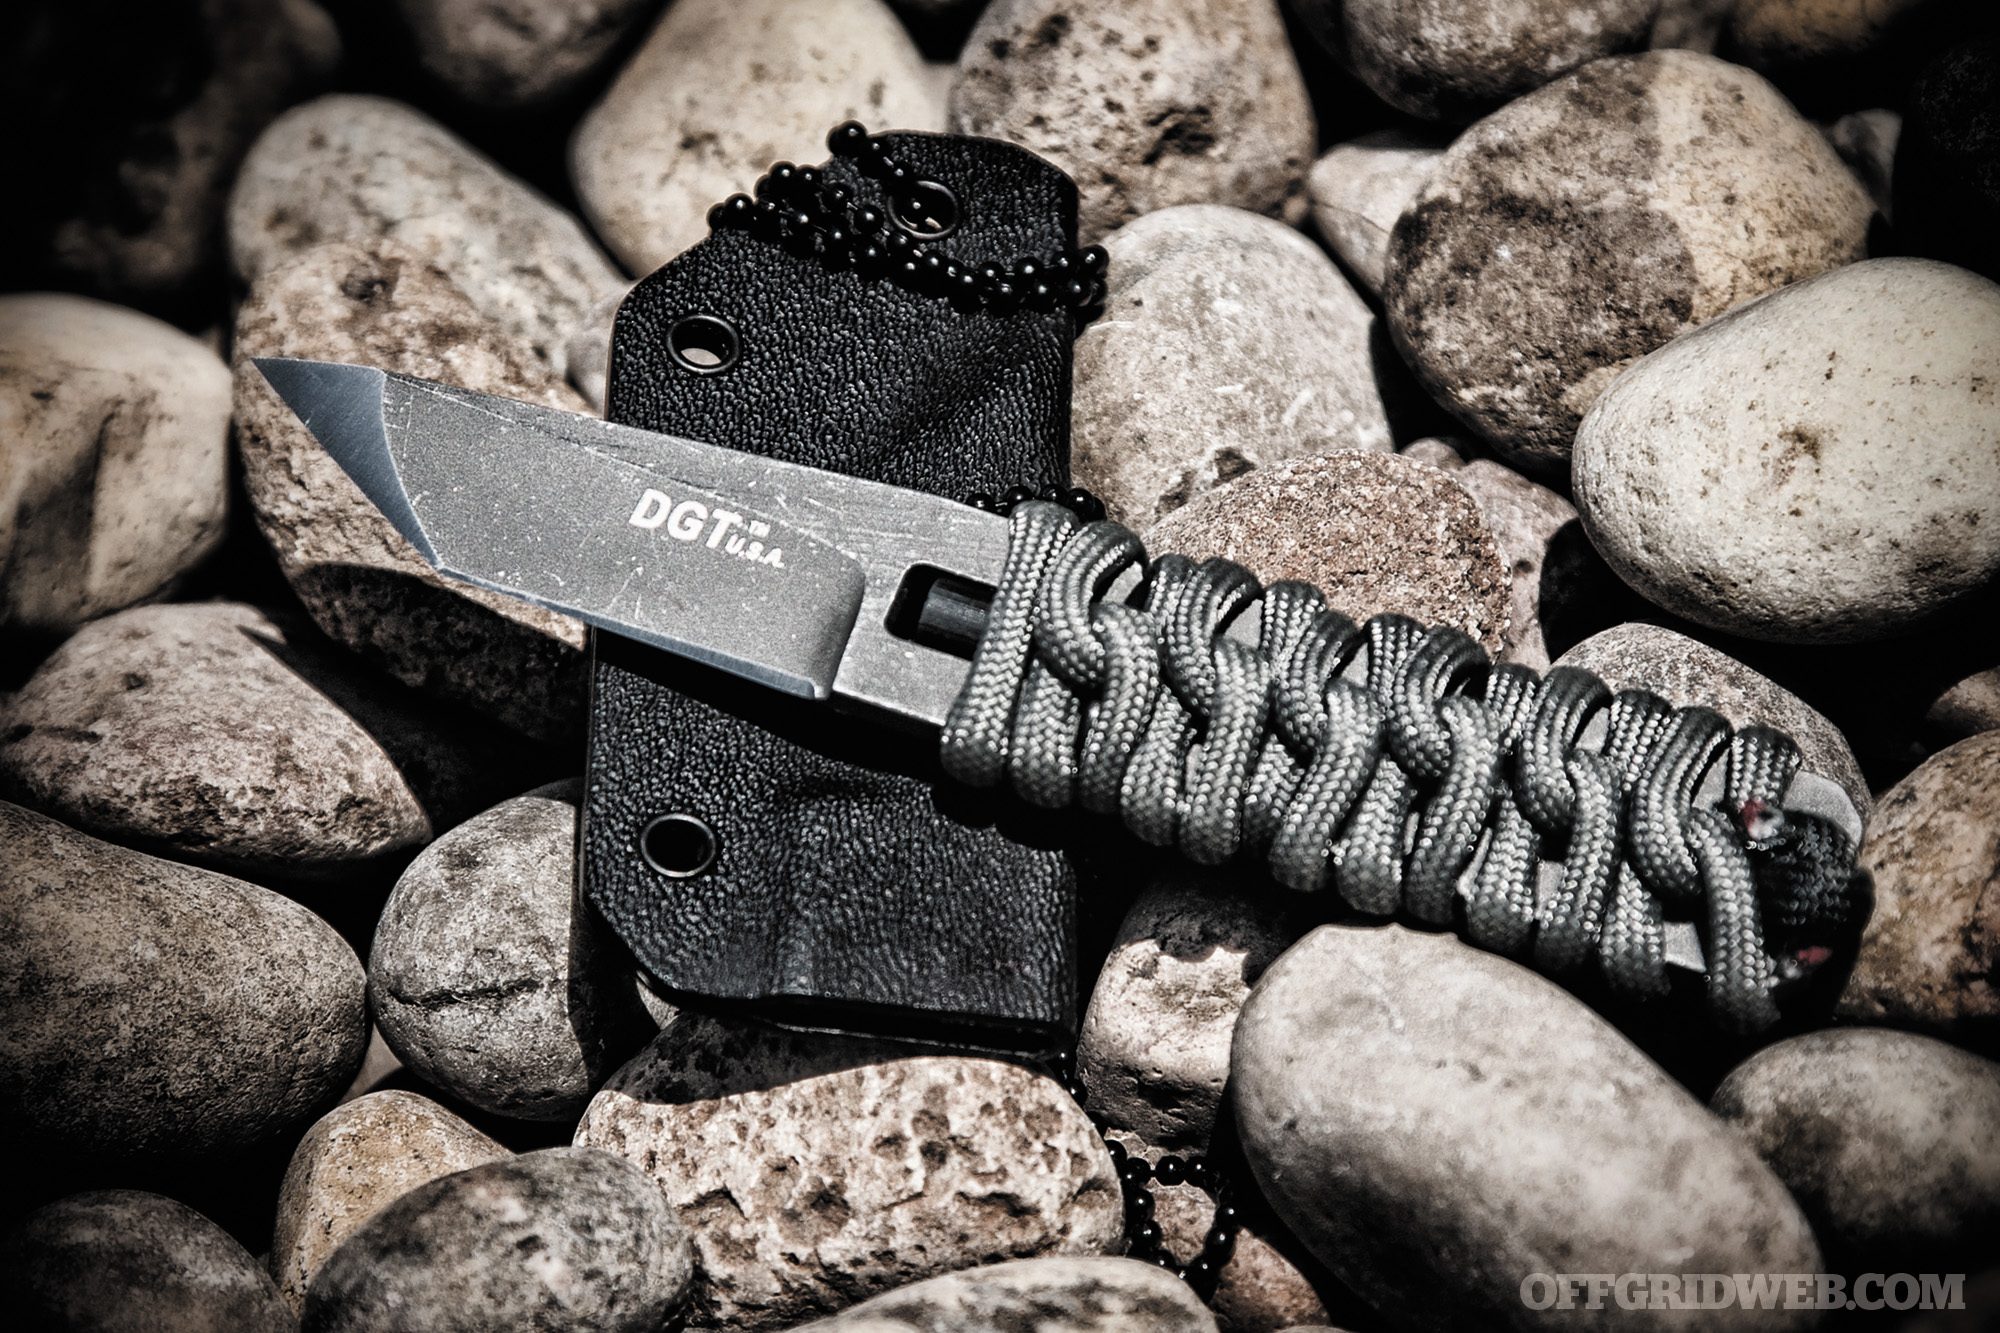
If you ever attended church Sunday school as a kid, you may remember the Old Testament Bible story of Shadrach, Meshach, and Abednego. According to the story, these three men were thrown into a blazing furnace as punishment for their refusal to bow down to the egotistical king, Nebuchadnezzar. Miraculously, they were spared an agonizing death — instead, the king watched as the men walked through the flames unharmed.
We mention this tale because it served as the inspiration for the latest collaboration between blade designer Grady Burrell (of Master Proven) and blade maker Darrel Ralph (of DDR and DGT). This small knife is called the Shadrach, and just like its namesake, it has some fiery surprises in store.
Grady Burrell and Master Proven
The Shadrach blade started out as the brainchild of Grady Burrell. An avid outdoorsman, he served 20 years in the U.S. Army, reaching the rank of master sergeant before he retired. His career assignments included military police, MP investigator, company armorer, Department of the Army senior advisor, and recruiting and retention non-commissioned officer. After retirement, he acted as military liaison, government law-enforcement representative, director, and vice president for various U.S. military contractors.
Given this background, it should come as no surprise that Grady knows a thing or two about the importance of quality gear. These days, he puts this knowledge to use as a team lead at Master Proven, an independent gear testing and evaluation company. Master Proven tests gear under extreme conditions in the hands of seasoned professionals, then gives a seal of approval to the items that survive the punishing ordeal. The company works with big names like 5.11 Tactical, CamelBak, and Leatherman.
However, rather than solely testing third-party products, Grady has branched out into designing products of his own — specifically knives. The Shadrach is one such creation, drawing on all his experience in the military, outdoors, and survival scenarios. It also bears the Master Proven seal of approval on the flat of its blade.
Darrel Ralph and DGT
While Grady is familiar with designing blades, he elected to partner with an experienced craftsman to bring the Shadrach’s design into reality. Enter Darrel Ralph, who has been producing handmade blades since 1987 under his DDR brand. Grady and Darrel have been working together for eight years now, having collaborated on several previous knife builds that bear the DDR/Master Proven designation.
More recently, Darrel has created a separate line of military-inspired knives known as DGT, or “DDR Goes Tactical.” The new Shadrach falls under this line, carrying the DGT logo on its blade opposite the Master Proven seal.
The Concept
The Shadrach was born out of Grady’s desire for a compact and simple tool that could serve multiple survival purposes. It needed to slice and pierce effortlessly, while holding a razor-edge and remaining easy to sharpen in the field. Grady also wanted the blade to stay compact enough to be easily concealable, whether on a neck lanyard or a horizontal belt mount.
In addition, Grady wanted a blade that could help survivalists stay alive in frigid conditions, such as the area surrounding his home in Tok, Alaska. Tok is both extremely isolated and often bitterly cold. Needless to say, starting a fire is a top survival priority there, so Grady integrated a ferrocerium rod and tinder material into the Shadrach’s design.
The 411
We first got our hands on a Shadrach fixed blade after meeting with Grady at Blade Show 2016. If you follow @recoiloffgridmagazine on Instagram, you may have seen our slow-motion video of it throwing some sparks. Since then, we’ve had time to thoroughly examine and test the knife.
The starting point of each Shadrach is a 1⁄8-inch-thick bar of 154CM stainless steel, a durable material that blends high carbon content with chromium and molybdenum. A 51⁄4 by 3⁄4-inch blank is cut from this stock, with a 21⁄2-inch cavity in the handle, flanked by three pairs of notches and a lanyard hole. The leading 21⁄4 inches are formed into the blade, while the trailing 3 inches remain as a handle. The steel is also coated with a matte gray finish that exhibits fine scratches for a well-worn appearance.
Speaking of the blade, the business end of the Shadrach has a very distinct profile and grind. The silhouette looks like a simple tanto design with a compound bevel — that’s not entirely accurate, though. One side of the knife is indeed compound-beveled, with a deep main bevel ground into the flat of the blade and a finer bevel applied to the cutting edge. The tip’s grind is also interesting, with a chisel cut similar to that of a Japanese kiridashi utility knife. On the opposite side, the blade is almost entirely flat, except for a fine bevel applied only along the cutting edge.
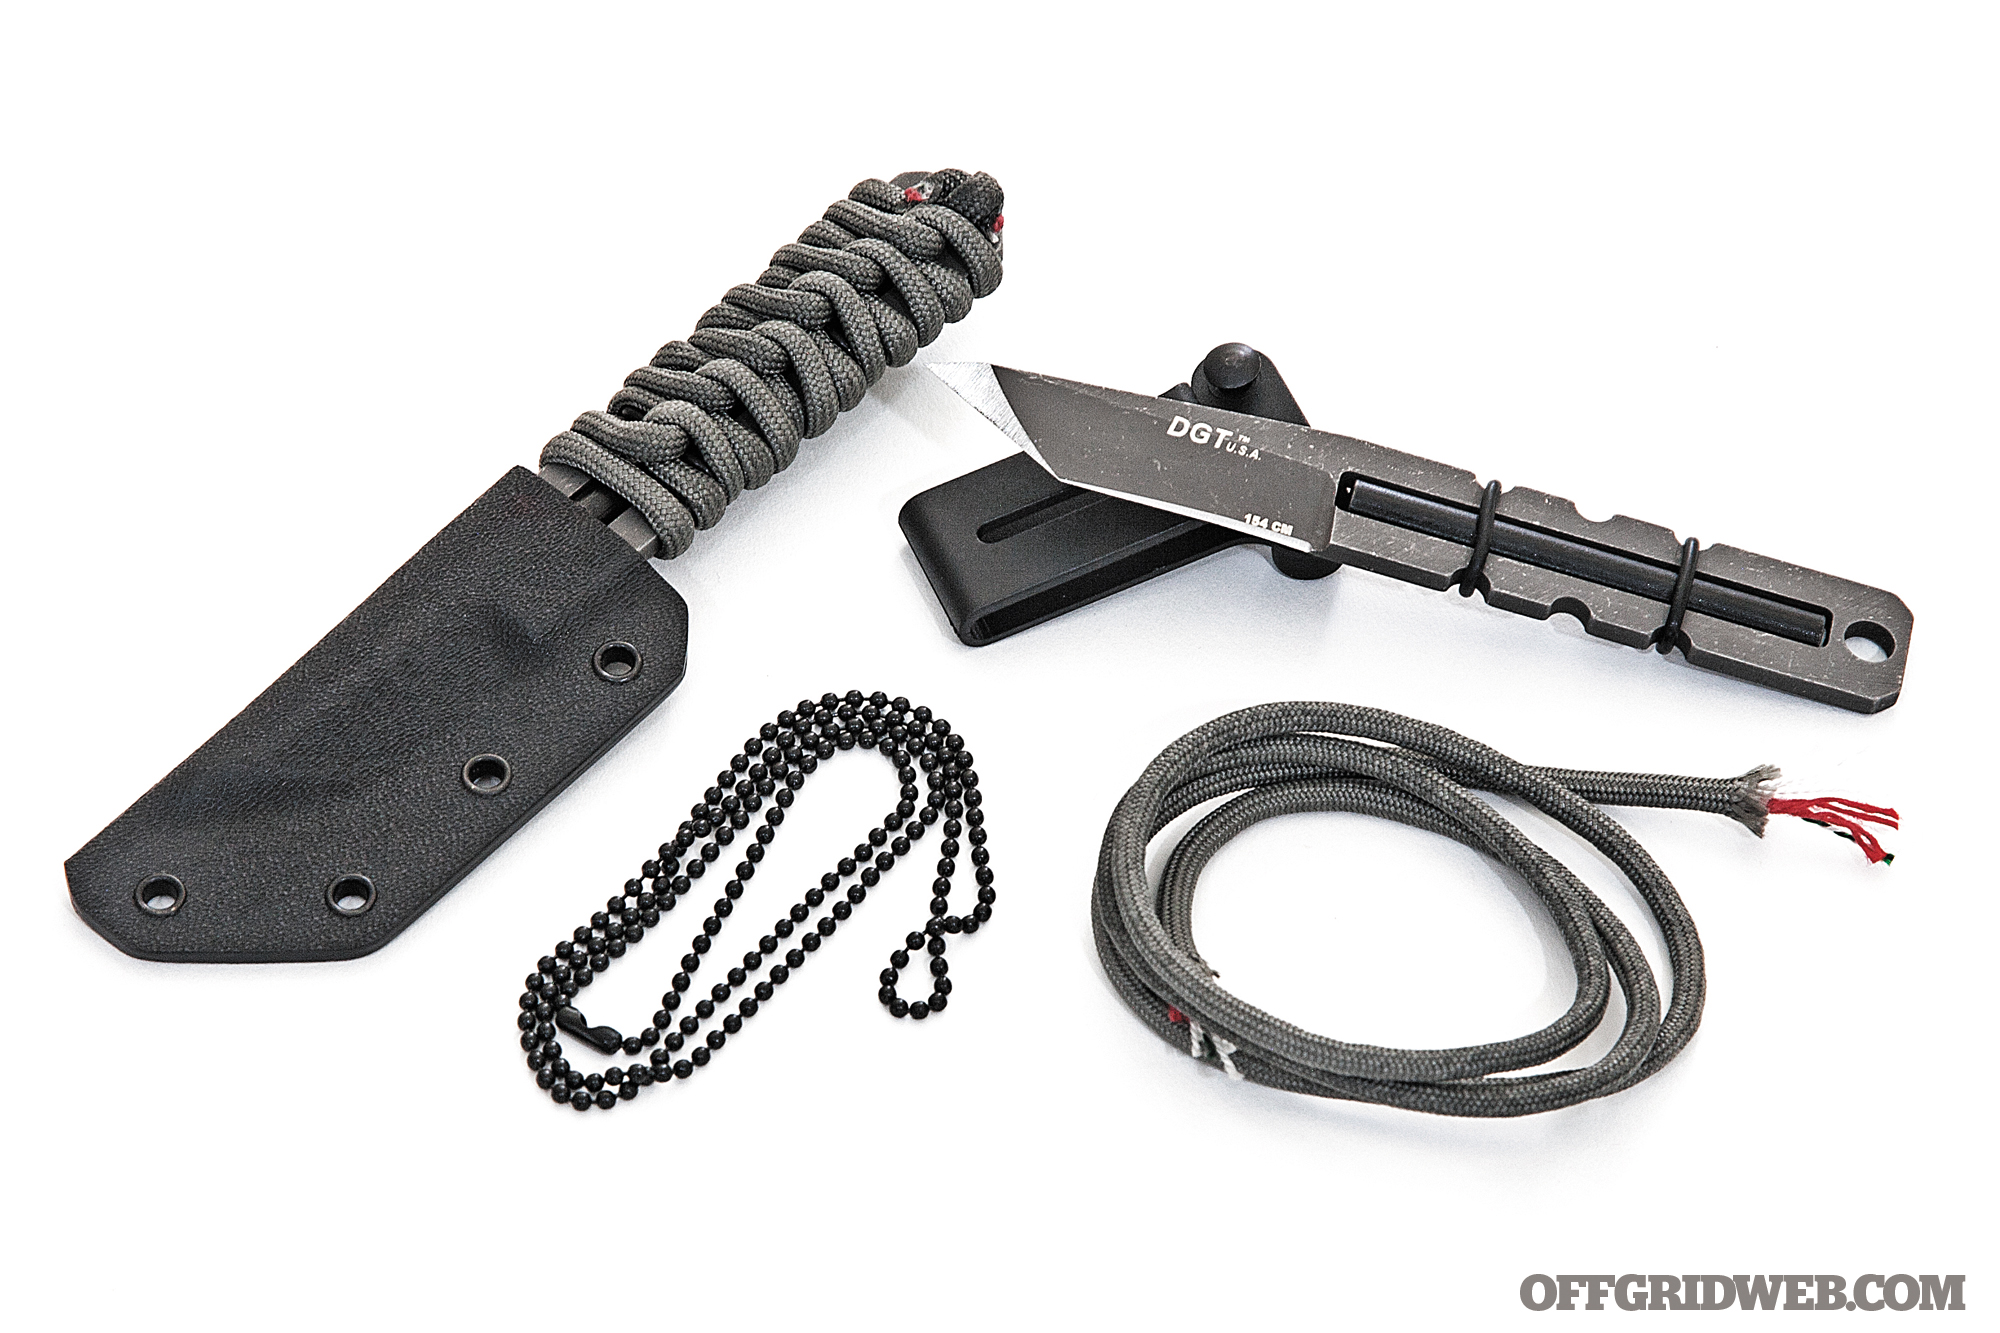
Finally, several fire-starting components have been built into this knife. A 2 ½-inch ferrocerium rod slots into the handle cavity, held in place by two rubber O-rings. The entirety of the handle is then tightly wrapped in paracord, but not the run-of-the-mill sort. This is 550 FireCord, containing the standard seven braided nylon strands in an outer sheath with an added bonus of an eighth strand of tinder wick. This red strand is coated in an easy-to-ignite and waterproof waxy material. Combined with the ferro rod and the blade as a striker, this produces a quick and reliable recipe for fire.
Each Shadrach also comes with a fitted Kydex sheath, removable belt loop, and bead chain neck lanyard.
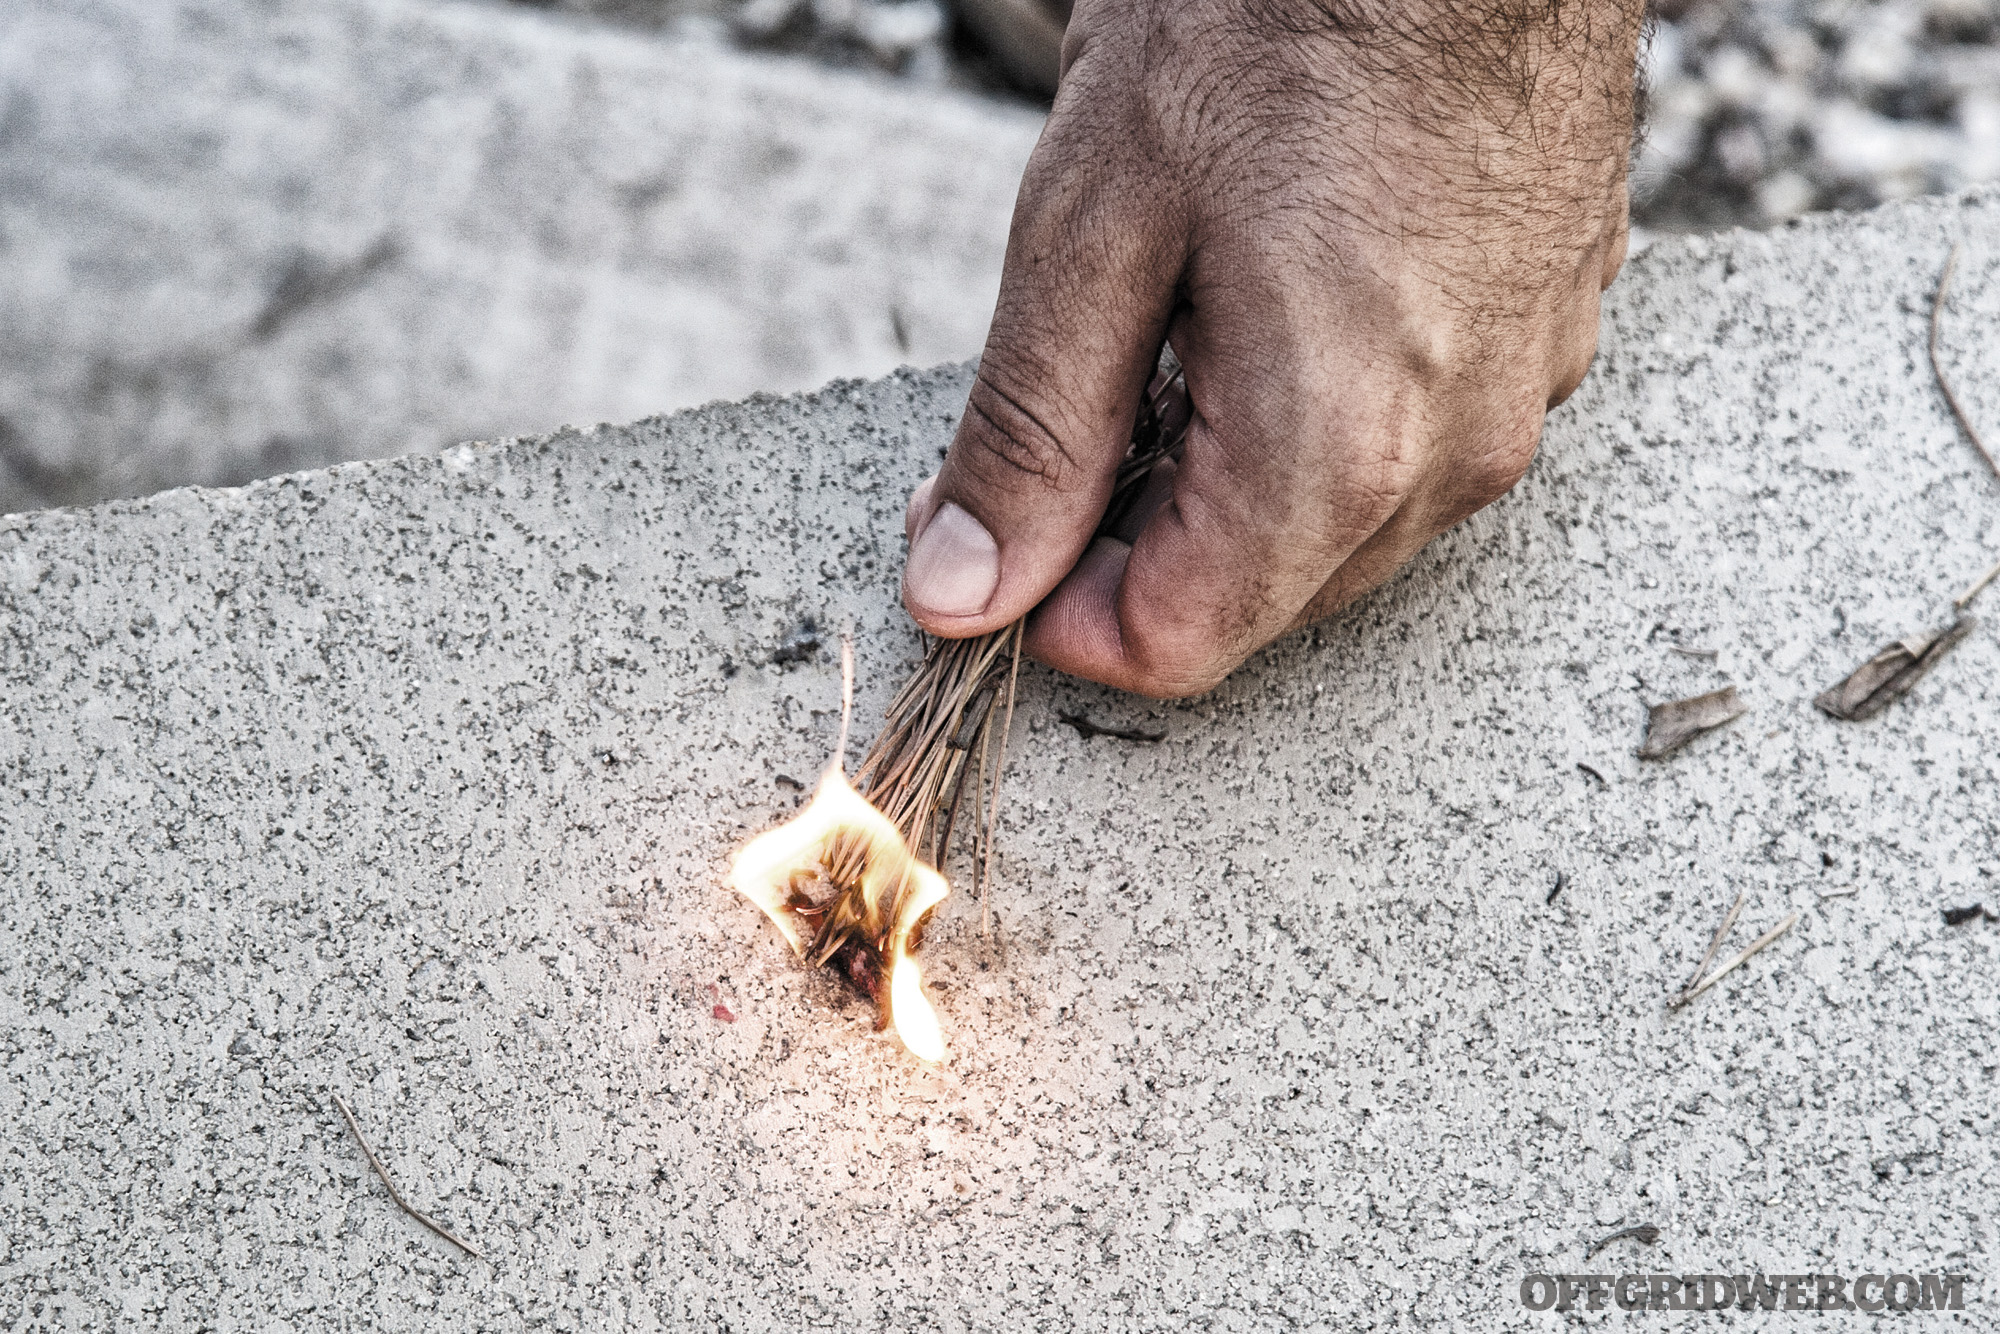
Fire-Starting with the DGT Shadrach
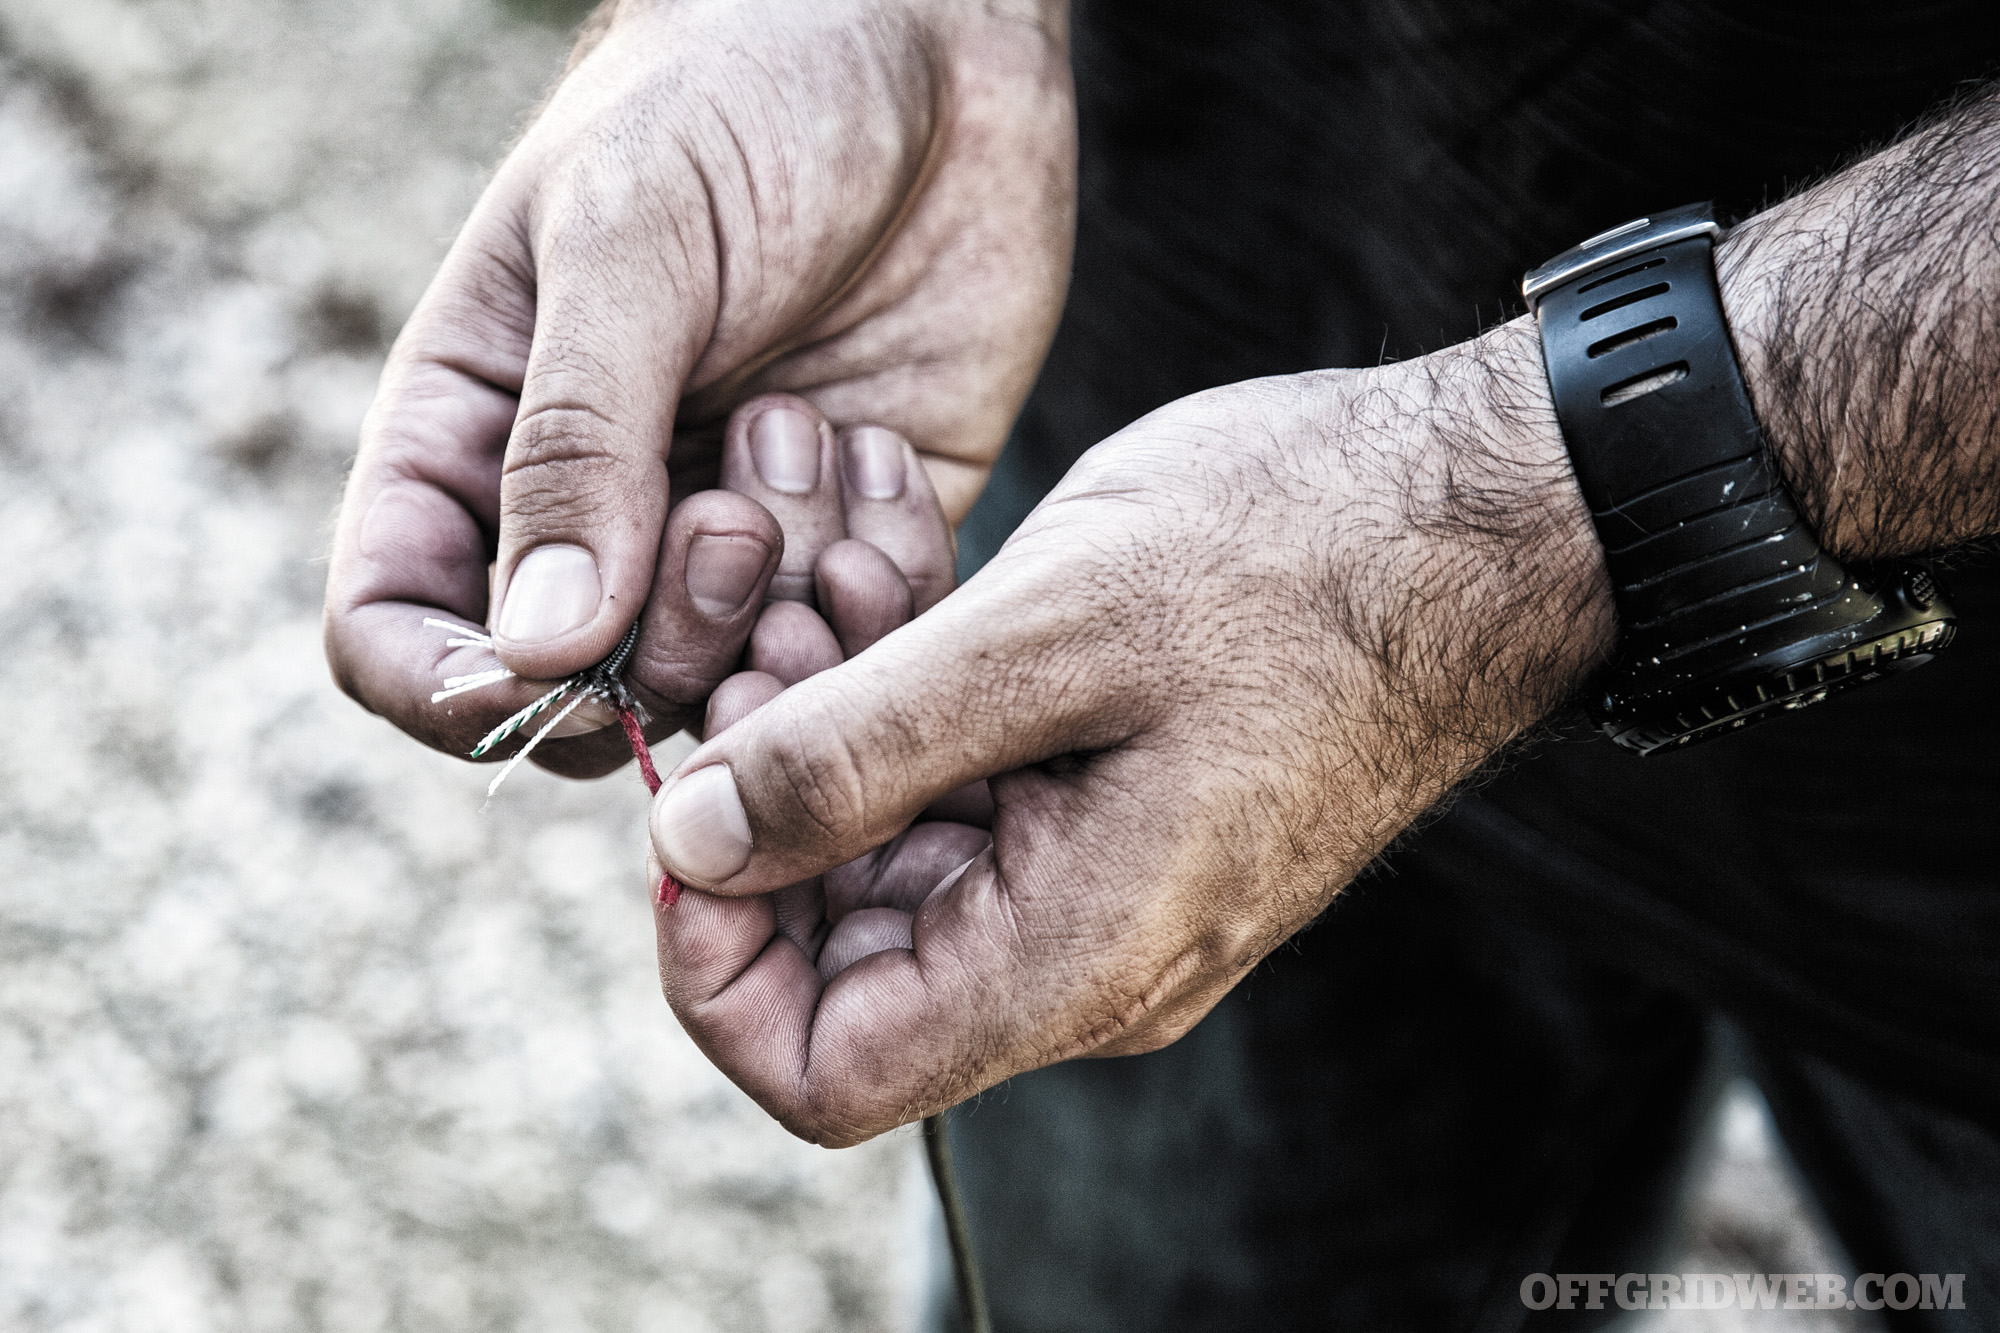
1) Cut the FireCord and remove some red tinder strand.
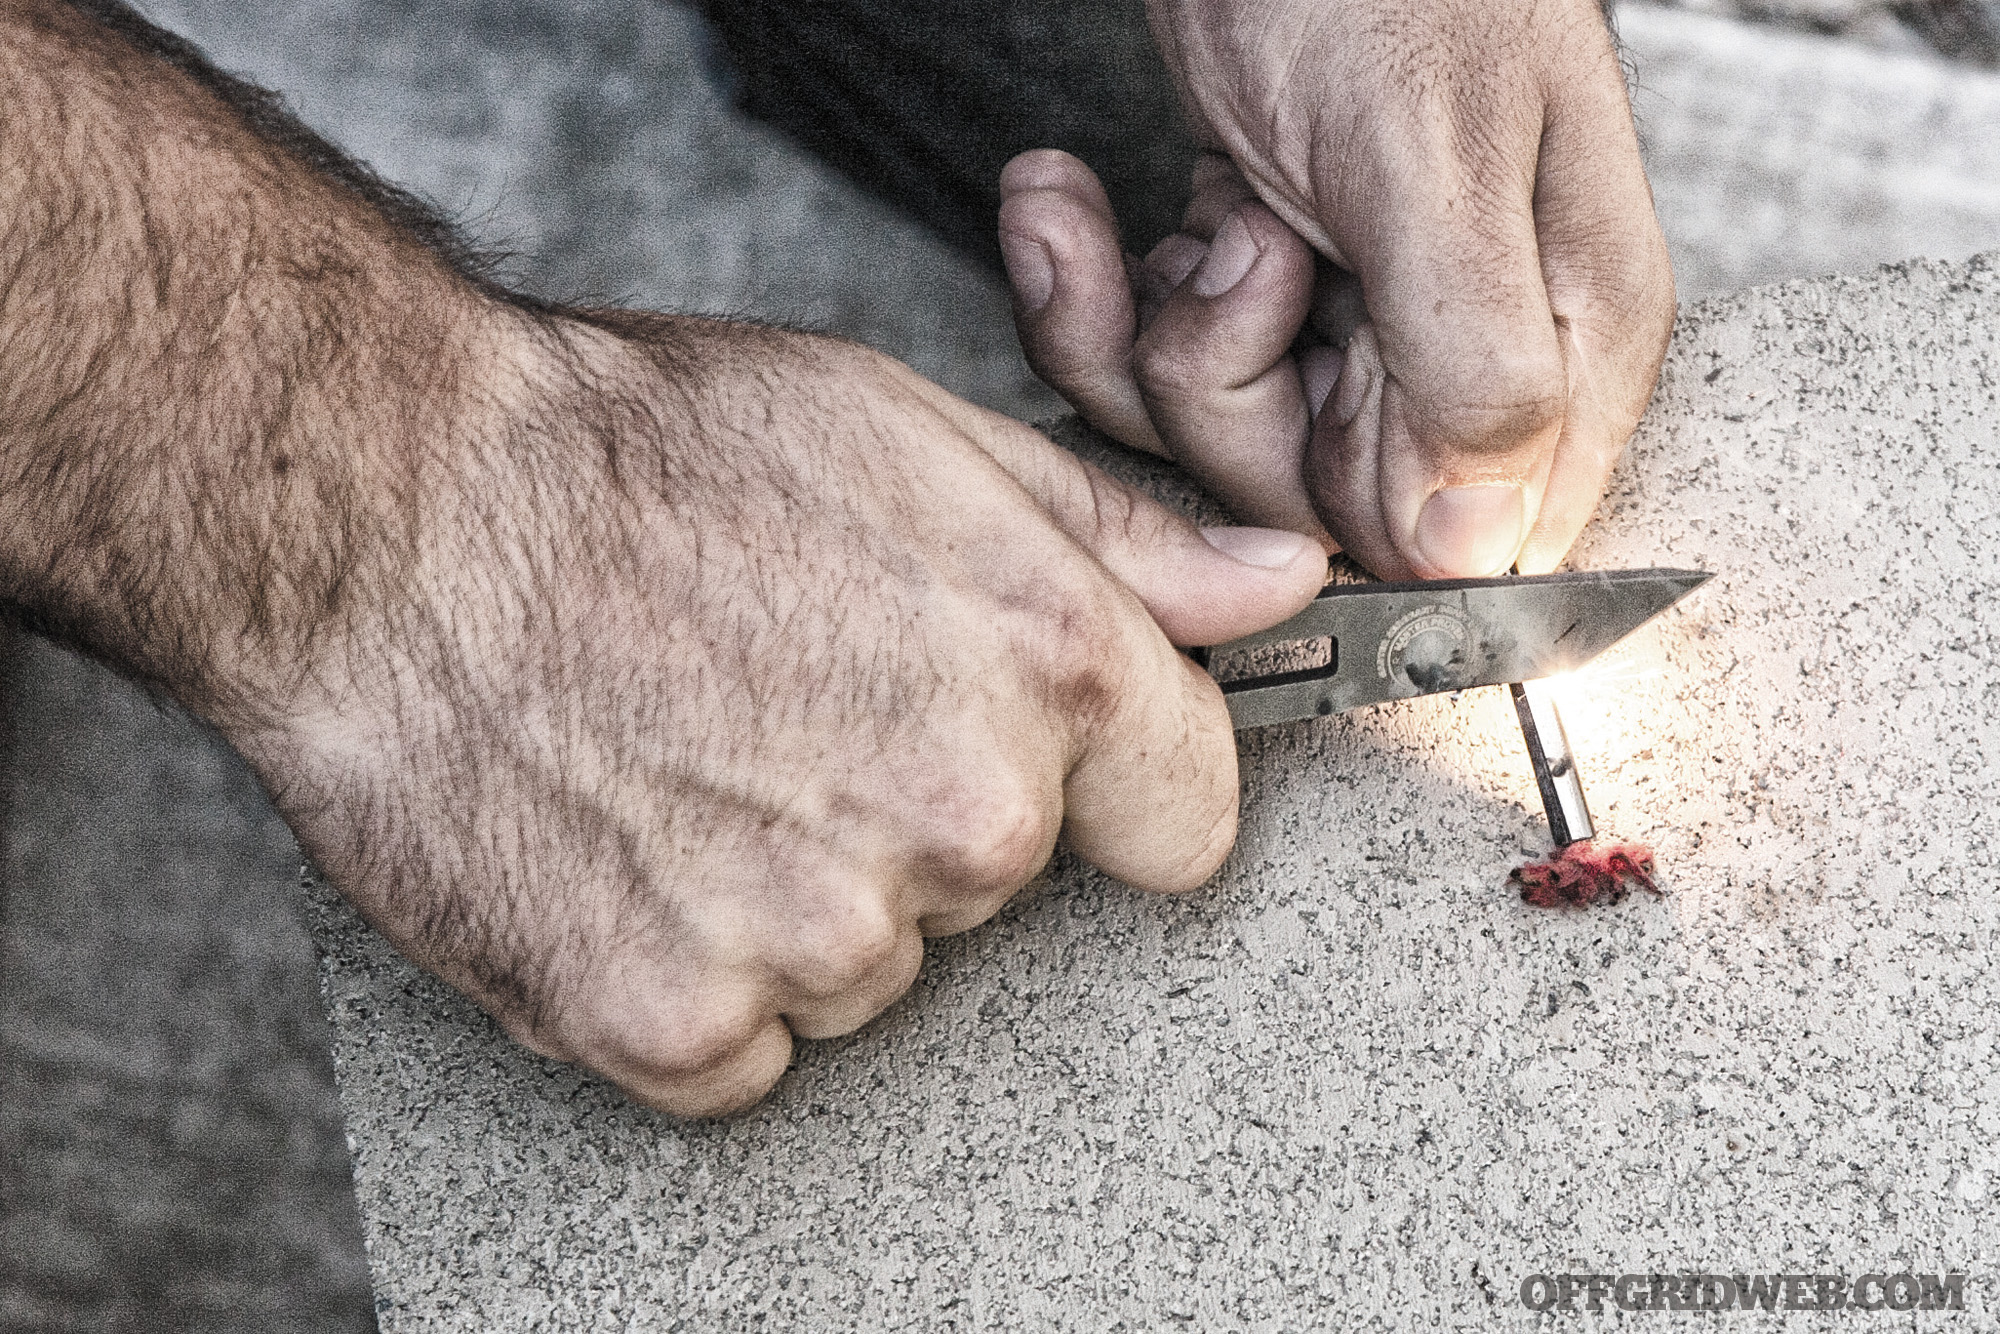
2) Shred the strand, then strike the included ferro rod.
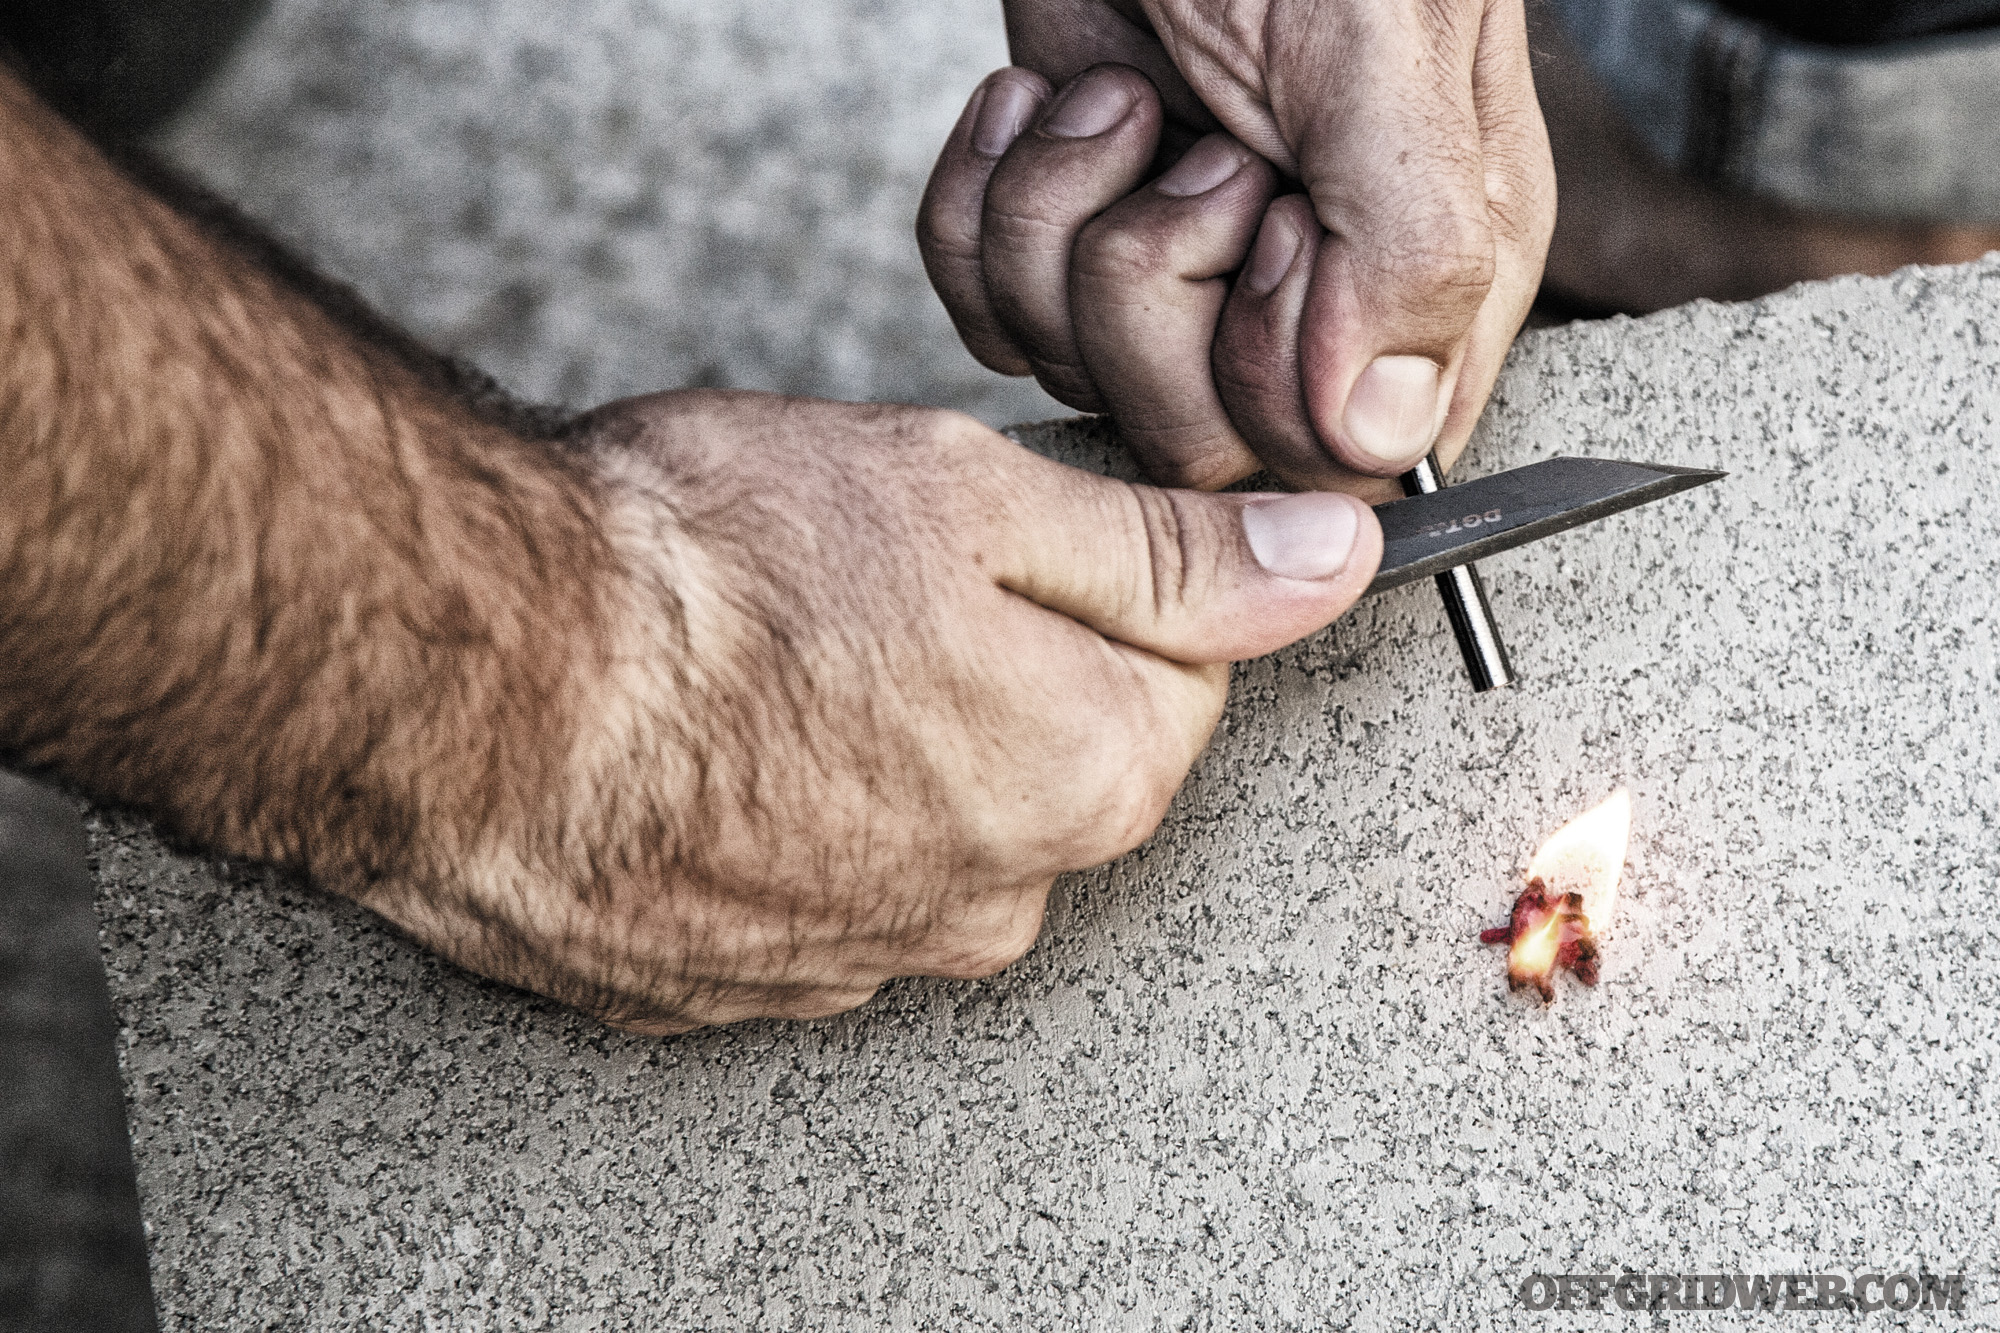
3) Sparks will eventually ignite the tinder.
4) Nurse the flame by slowly adding collected dry tinder.
The Verdict
After field-testing the Shadrach, we can say that it’s certainly a versatile little survival knife. It’s great for precise tasks like carving wood, skinning game, or something as mundane as slicing open an MRE bag. The chisel tip works well for piercing or drilling like an awl, but you’ll need to be careful with your grip — there’s no guard to protect your index finger if it slips forward during use.
Obviously, you’re not going to hack through brush or baton logs with this knife, so we’d recommend complementing it with a larger fixed blade, machete, or hatchet for heavy-duty work.
However, the Shadrach’s small size and light weight make it an excellent choice for its intended purpose as a backup blade that’s worn around the neck, on a belt, or attached to a pack. The Kydex sheath fits tightly, providing enough friction to securely retain the knife, but not so much that it becomes hard to draw quickly.
The knife’s fire-starting features work well, though much like paracord survival bracelets, it’s a bit of a hassle to unravel the cord any time you want to access the ferro rod. If you need some of the tinder wick, it would be understandable to remove and cut the paracord, but there are plenty of instances where tinder is readily available and all you need is a spark. In those cases, you’ll still have to unravel the handle wrap. If the wrap were just a hair looser, or knotted one less time at the front of the handle, you might be able to slip the ferro rod out with the paracord in place. Then again, you can always leave the handle unwrapped, and rework the cord into a lanyard if you prefer.
Overall, our Shadrach blade held up admirably to testing. The 154CM steel does a good job holding its edge, even when grinding against the ferro rod repeatedly, and it’s easy to maintain the edge with a few strokes against a ceramic rod or whetstone. Although some may see the $90 price tag as high for such a small knife, keep in mind this is no mass-produced item or fragile display piece — it’s a handcrafted American-made blade that uses high-quality materials and has undergone thorough testing in the hands of veterans. If you have the cash, the Shadrach will no doubt serve you well in any scenario, from everyday carry to extreme survival.
Specifications
DGT / Master Proven Shadrach
Overall Length 5.25 inches
Blade Length 2.25 inches
Blade Material 154CM stainless steel
Weight 2.5 ounces with sheath (3 ounces with belt loop and chain)
Water is one of the heaviest items we carry, and any experienced hiker or backpacker can attest to this fact.
The U.S. Army recommends that an active individual consume approximately 75 percent of his or her body weight in ounces of water per day — about 112.5 fluid ounces for a 150-pound person, or even more under particularly hot or strenuous conditions. This amount of water weighs about 7.3 pounds; this doesn’t seem like much, but it belies an aspect that’s often overlooked: the space that water occupies.
Once you drink every drop, hard plastic or metal water bottles get lighter, but they don’t get any smaller. A 32-ounce canteen still occupies the same amount of space in your backpack, whether empty or full. Between refills, you’re hauling containers of air.
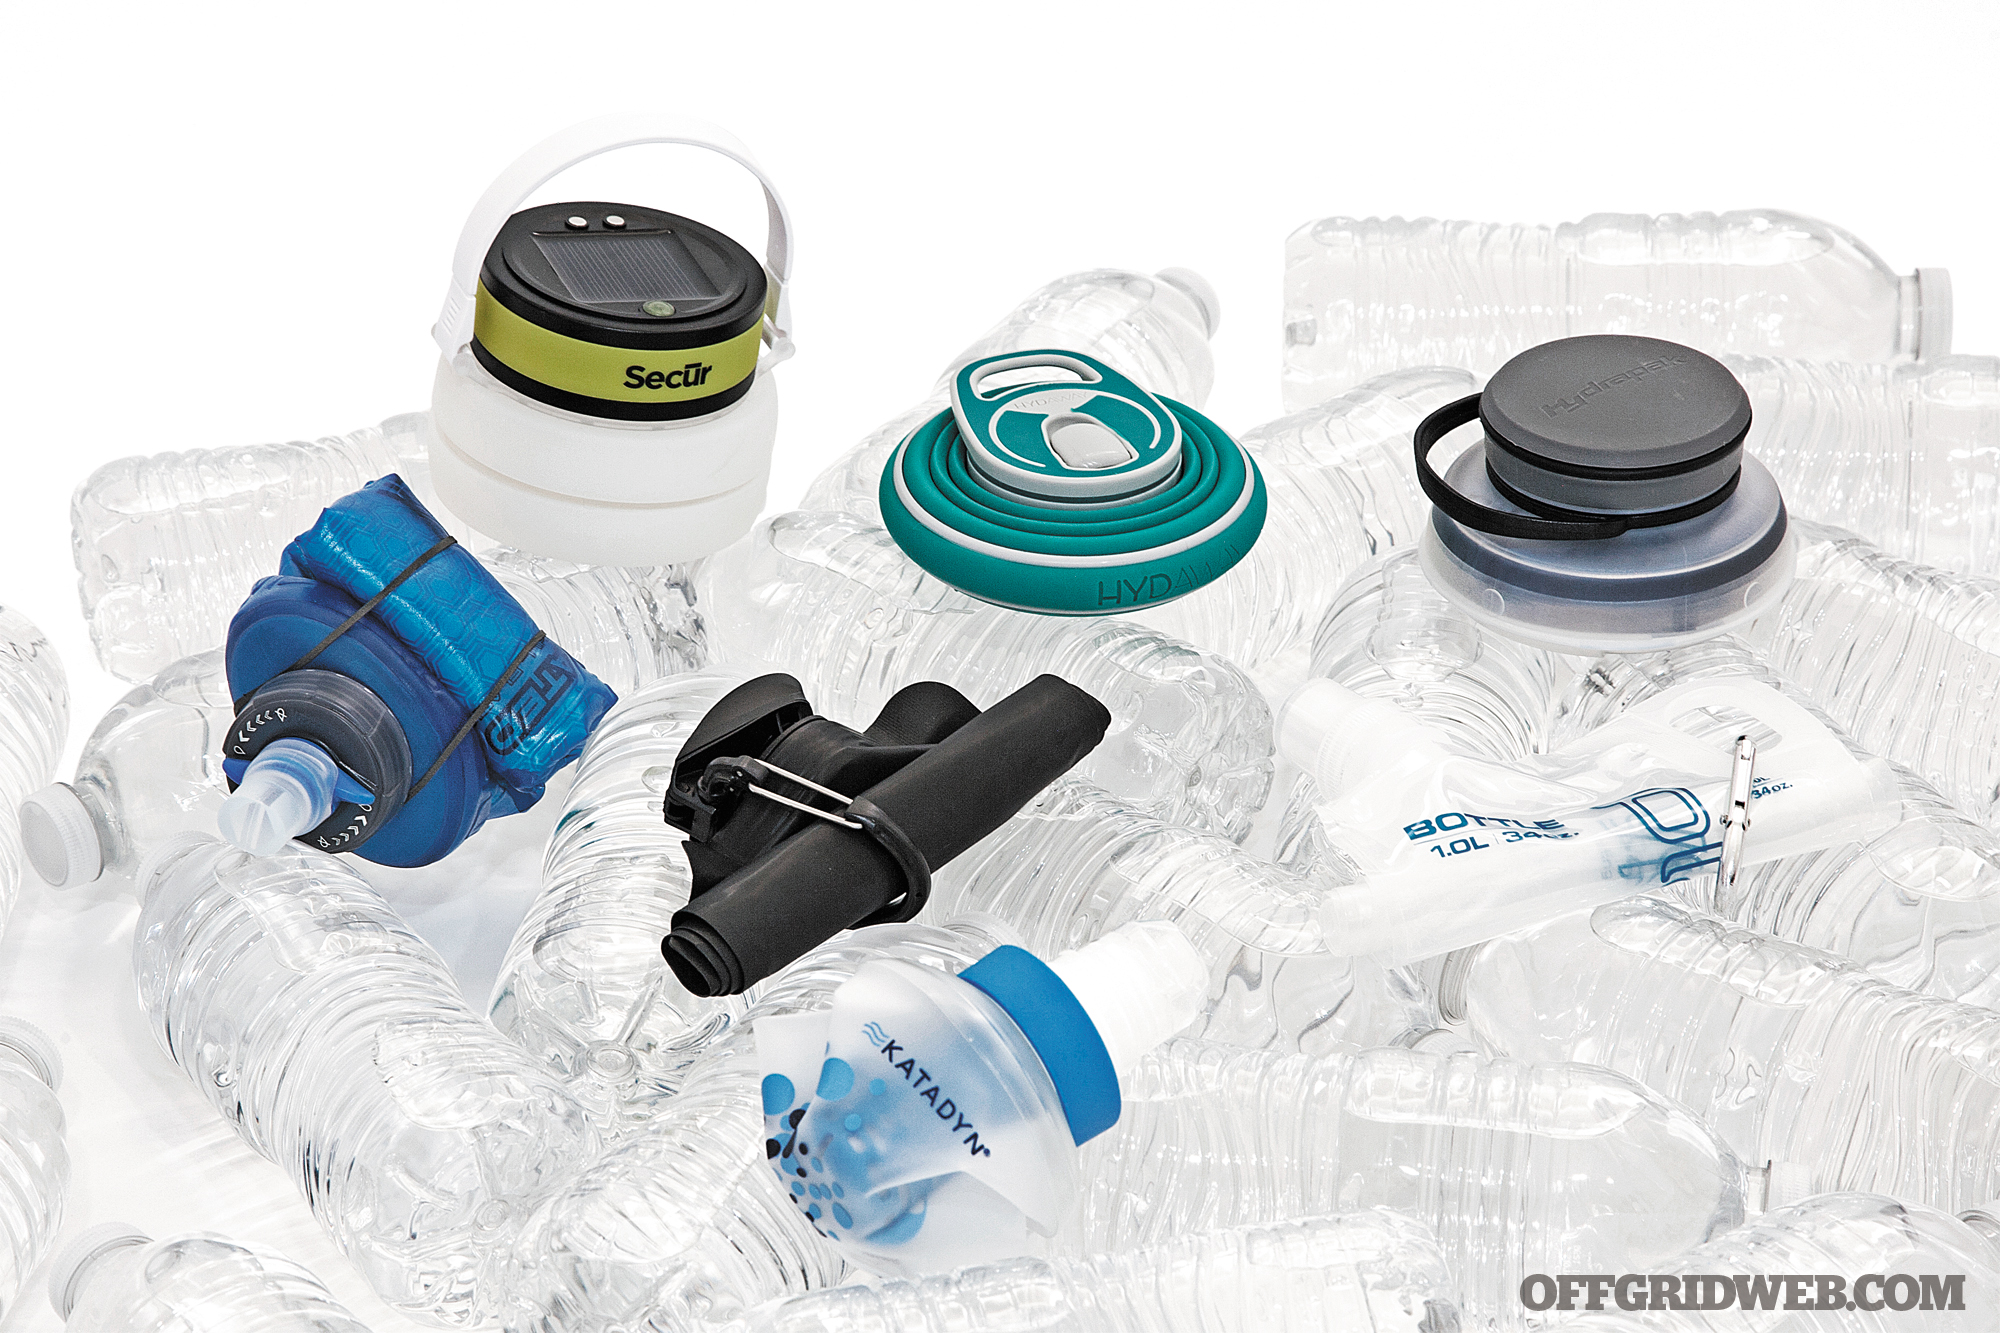
The impracticality of this situation led to the development of collapsible water bottles. These soft-sided vessels expand when filled with liquid, and compress down to fit in small spaces when they’re not in use. They’re ideal for everything from everyday carry (EDC) to ultralight backpacking to action sports, and they can provide added water-carrying capacity when you need it most. Best of all, they keep the weight and bulk of your pack to an absolute minimum, so you can carry more of other items you need.
We obtained seven different collapsible bottles and tested each thoroughly. Read on to see which bottle came out on top.
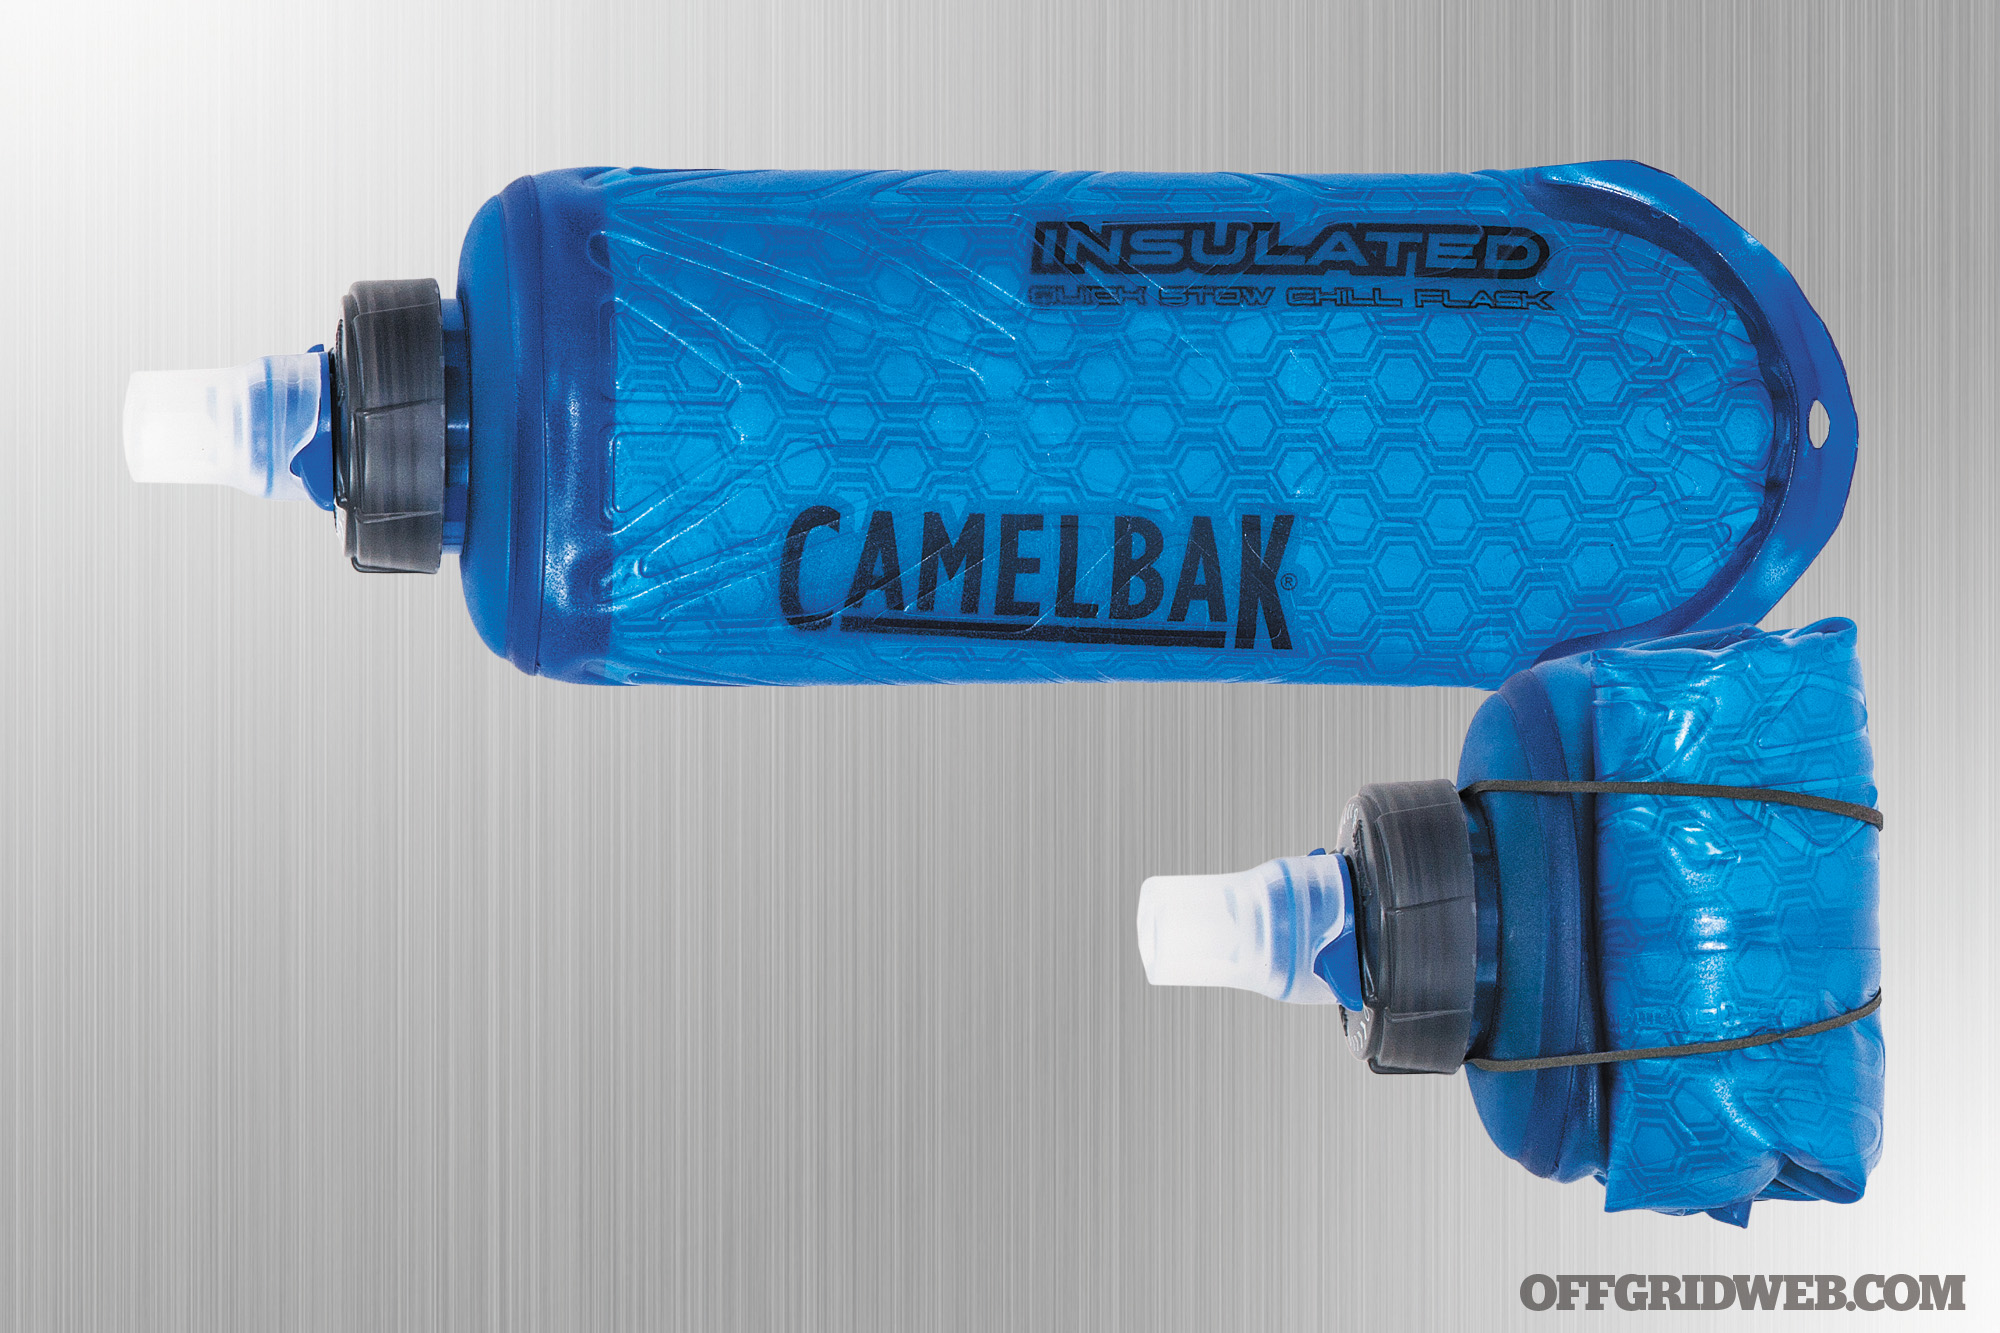
CamelBak Quick Stow Chill Flask
Dimensions – Empty / Full 4.5 by 3.3 by 1.6 inches / 10.8 by 3.3 by 2 inches
Dry Weight 2 ounces
Capacity 14 fluid ounces (0.41 liter)
Body Material Dual-layer bonded polyurethane with foam insulation
Dishwasher / Hot Liquid / Freezer Safe No / No / Yes
Special Features Chill foam insulation, Big Bite valve with lockout function
Notes CamelBak is well known for its excellent hydration packs and reservoirs, and the company has expanded its 2017 lineup to include a new collapsible bottle. It’s known as the Quick Stow Flask, available in non-insulated and insulated Chill variants. We tested the latter model, which uses two layers of the same polyurethane material as full-size CamelBak reservoirs. Sandwiched between these layers is a thin sheet of Chill foam, which does a great job insulating the vessel. This is beneficial if you’re storing the reservoir in a pocket, as it repels body heat. Unfortunately, the added insulation also shrinks the capacity to 14 fluid ounces — barely larger than a can of soda. Aside from the borderline-impractical capacity, this is a strong contender.
Pros:
Insulation keeps drinks ice cold, even on hot days.
Bite valve makes drinking easy, lockout function stops leaks
Cons:
All Quick Stow flasks are marketed as 500ml capacity, and the non-insulated version does match this specification. However, our insulated flask actually held only 415ml when filled to the brim.
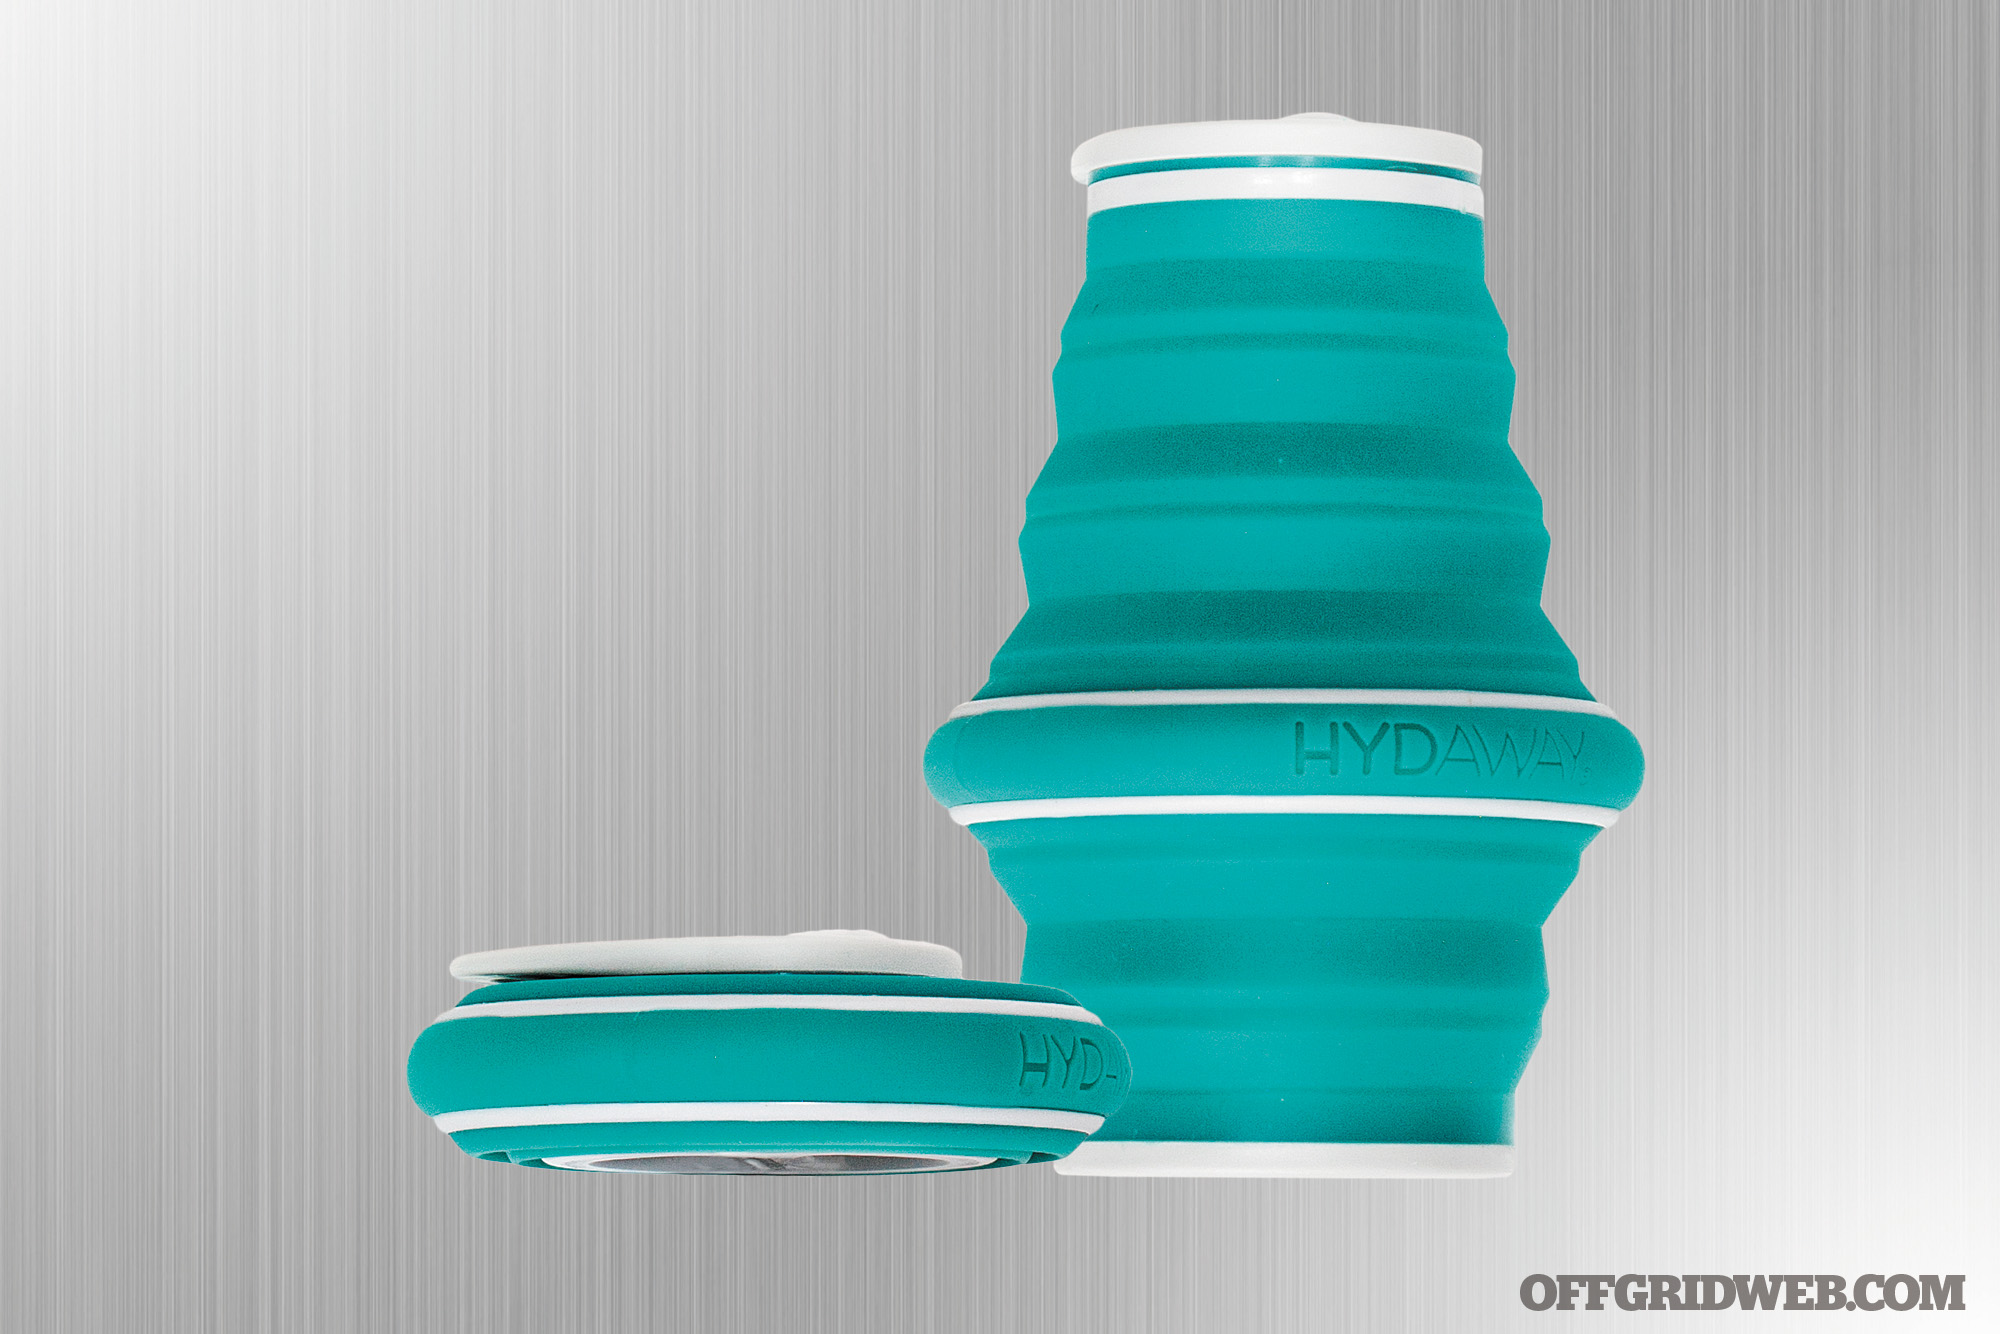
Notes The Hydaway collapsible bottle was launched on Kickstarter by inventor and product designer Niki Singlaub. In his words, it’s intended to be “a durable, stable, fully functioning water bottle that collapses enough to fit in a back pocket.” We confirm that the flat disc-like structure of the Hydaway is ideal for back pockets — it’s not much thicker than a full wallet, and the silicon rubber provides compressible give. To expand the bottle, just flip open the straw, then pull apart the lid and base like an accordion. After use, it’s easy to clean by placing in the dishwasher on the top rack. Unfortunately, it reminds us of a child’s sippy cup. If you can overlook the aesthetics, it’s an easy-to-use bottle with solid ergonomics and an affordable price.
Pros:
Thin disc-shaped design fits comfortably into a pocket.
Eight high-visibility color choices
Cons:
Exterior appearance seems more kid-friendly than survival-oriented.
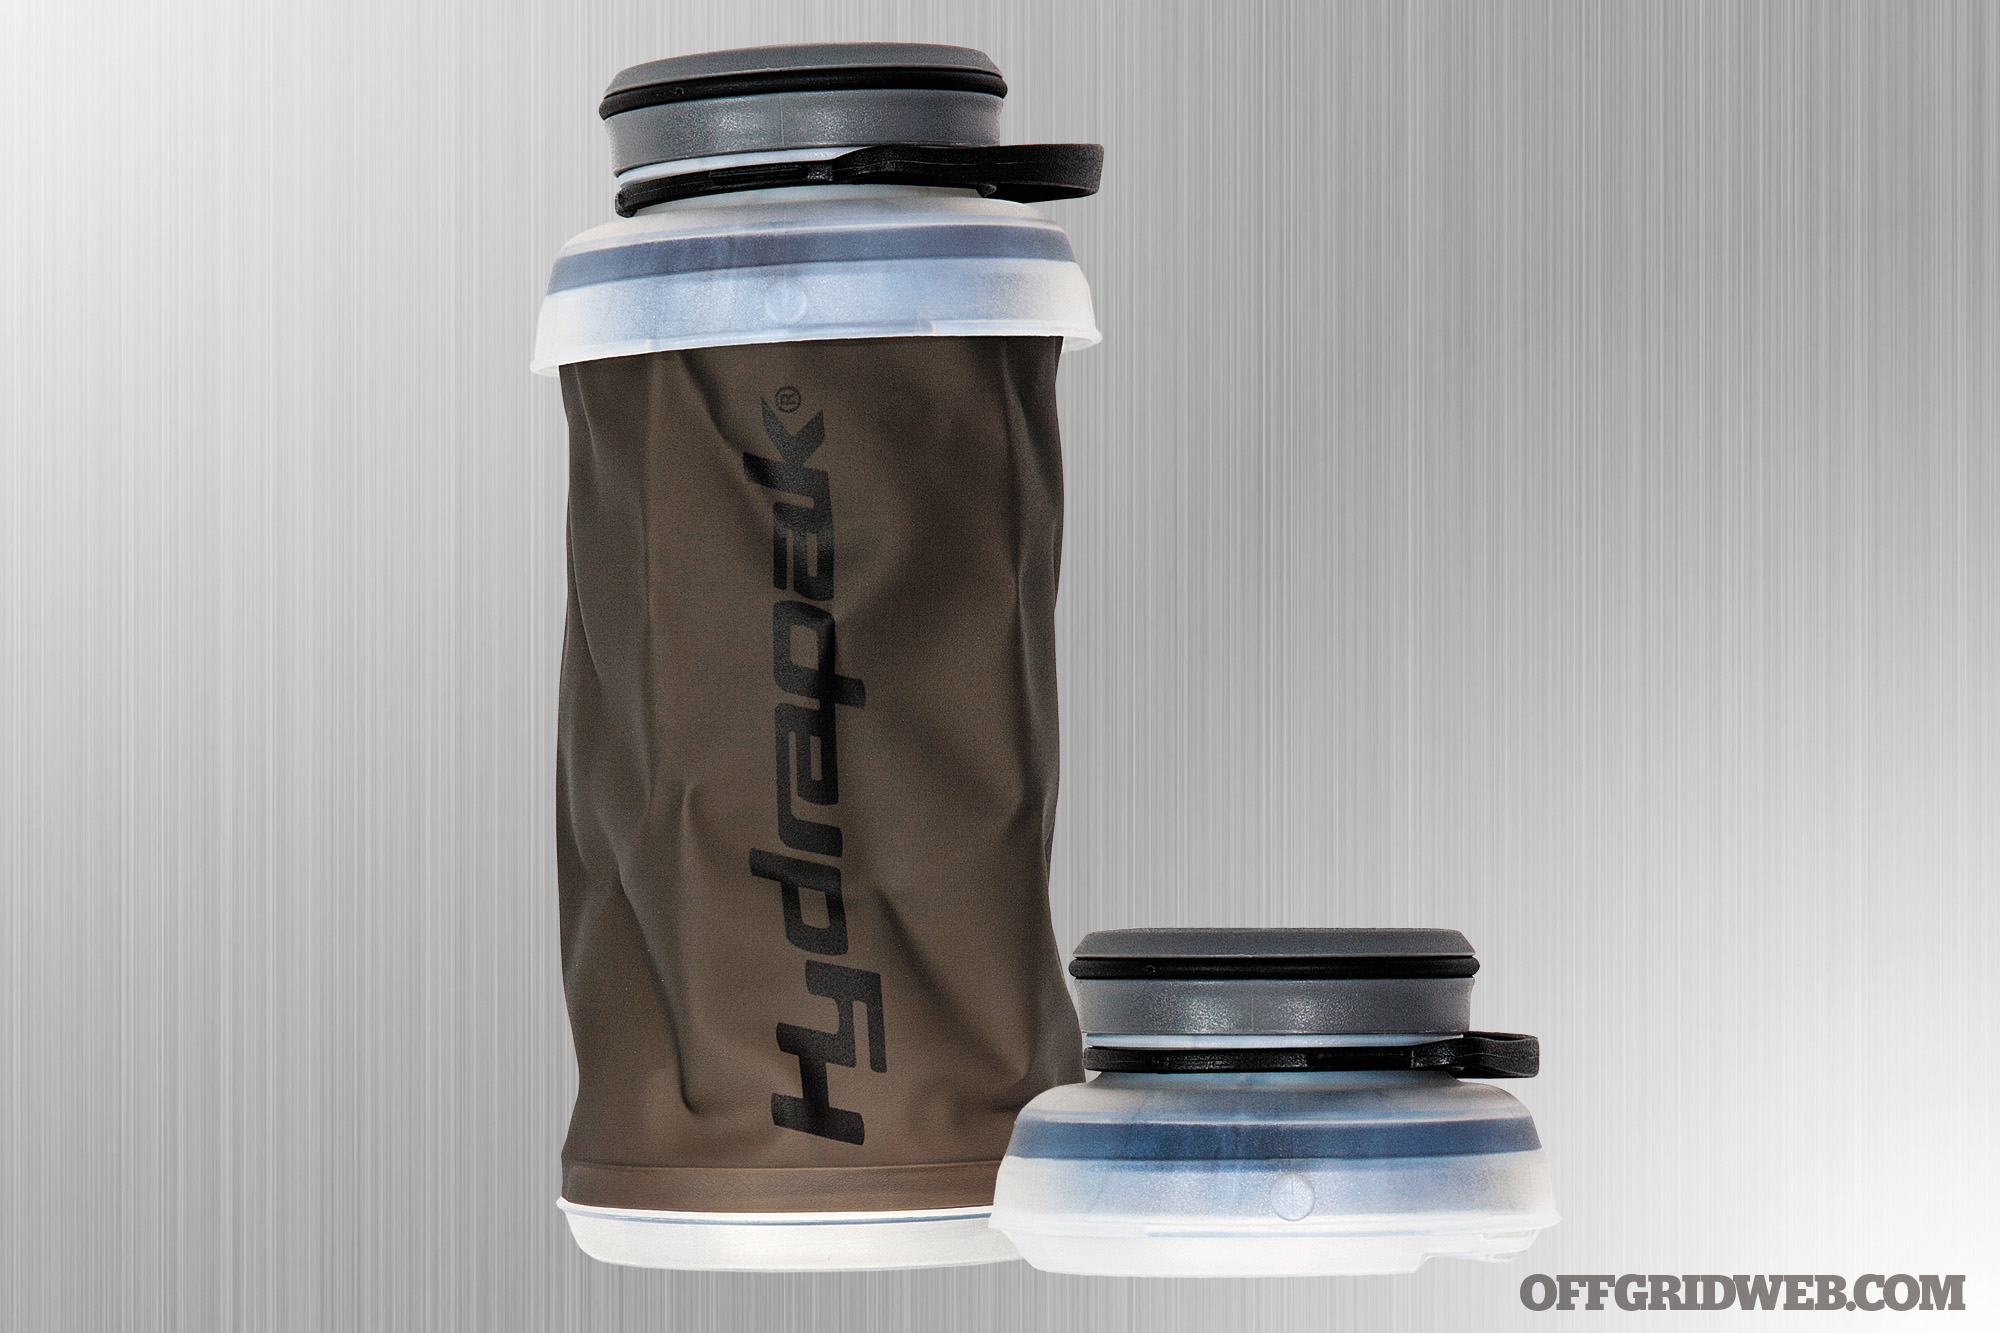
Notes The Hydrapak Stash is a 1-liter bottle that pairs thin and flexible 0.4mm film sides with a rigid neck and base. To expand, unscrew the cap and squeeze the midsection to pop open four radial tabs. The base then twists 180 degrees as it expands outward. This bottle’s industry-standard 63mm threads adapt to other caps, so you can easily add a straw, flip-top, or bite valve if you prefer. It also allows the attachment of water purifiers, such as the MSR Guardian featured in Issue 15. The thermoplastic polyurethane film sides seem quite durable and are backed by a lifetime guarantee against leaks, but they also proved difficult to grasp without squeezing. With a hard-sided bottle, we tend to grip the sides, but this bottle requires the user to hold it by the neck when uncapped. It’s also slightly tricky to clean thoroughly, due to crevices in the plastic base. Otherwise, the Stash is a compact bottle with a nice wide mouth and a lot of adaptability potential.
Pros:
Standard 63mm wide mouth is compatible with many water filters, purifiers, and replacement caps.
No-Leak lifetime guarantee provides peace of mind.
Cons:
Soft sides can be tricky to grasp without compressing inward.
Ridges in the base are difficult to thoroughly clean, although the wide mouth does make this easier.
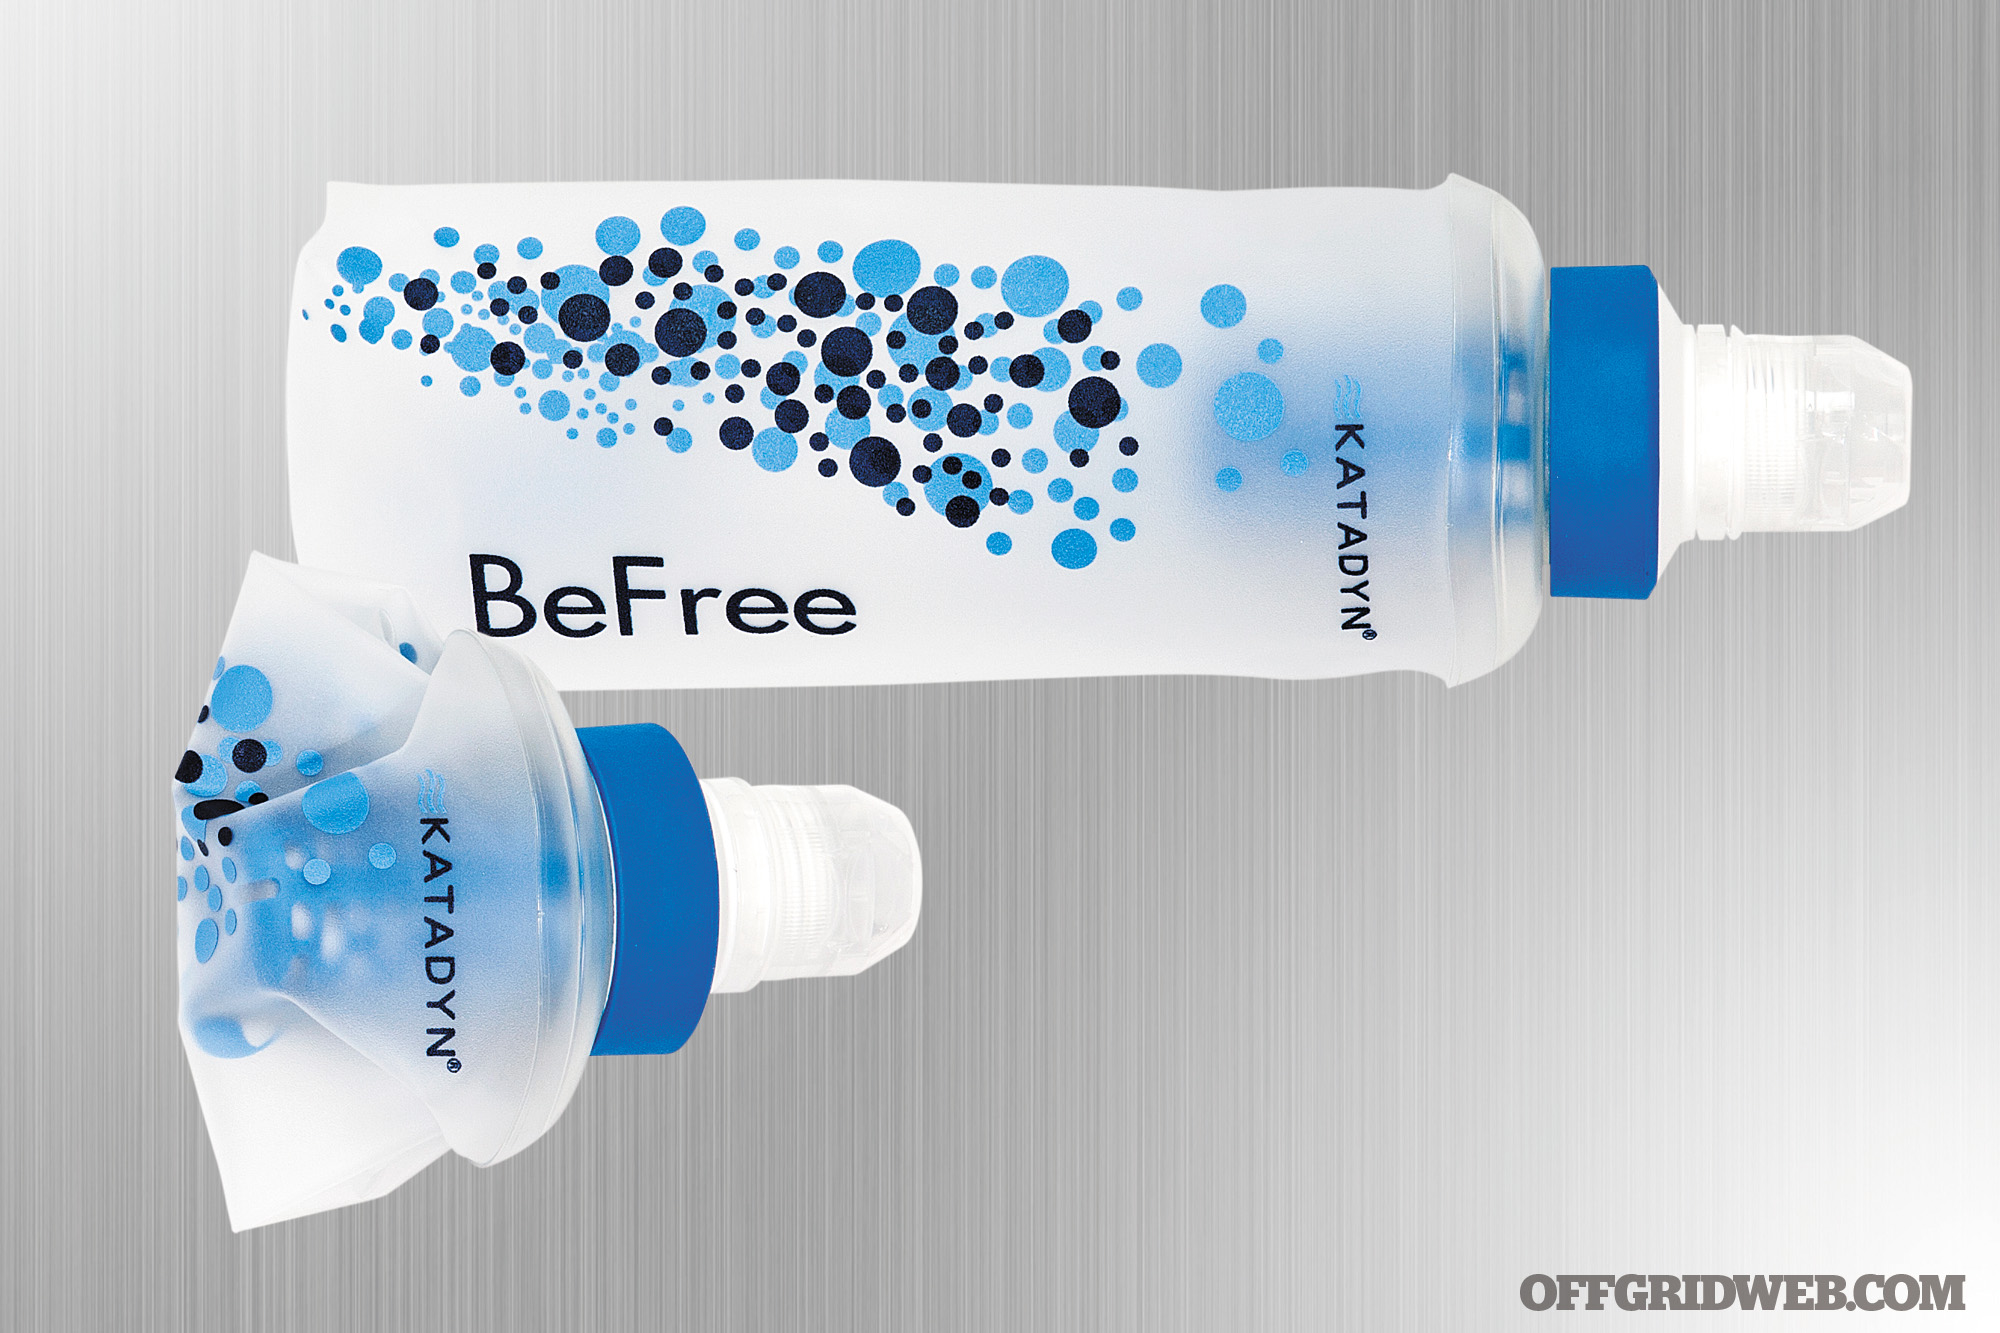
Katadyn BeFree Filtration System
Dimensions – Empty / Full 4 by 2.8 by 2.4 inches / 9.3 by 2.8 by 2.4 inches
Dry Weight 2 ounces
Capacity 21 fluid ounces (0.6 liter)
Body Material Thermoplastic polyurethane (TPU) produced by Hydrapak
Dishwasher / Hot Liquid / Freezer Safe No / No / No
Special Features Hollow fiber filter rated for up to 1,000L or 264-gallon lifespan, flip-top cap, measurement markings
Notes Katadyn’s BeFree system is the result of a collaboration with Hydrapak. Hydrapak produces the flexible SoftFlask pouch, while Katadyn supplies the 42mm cap, flip-top drink nozzle, and hollow-fiber filter that purifies water as you drink. This integrated filter removes 99.9999 percent of bacteria and 99.9 percent of protozoa, meeting the NSF/ANSI P231 standard for water purification (see our water filter buyer’s guide in Issue 15 for more on this topic and why all those numbers after the decimal point matter). It also removes particulates and sediment, and retains an impressive 2-liters-per-minute flow rate. The filter can easily be cleaned by shaking or swishing in any fresh water source, or by backflushing with clean tap water. Aside from its ability to reduce the risk of waterborne illness, the BeFree system serves as an effective — albeit small — water container for active lifestyles. If your bug-out bag already contains a small canteen and a water filter, this could potentially replace both, while saving space and reducing pack weight.
Pros:
Integrated water filter can help keep you hydrated and healthy.
Cap and filter can be installed on any 42mm-mouth Hydrapak SoftFlask, with capacities ranging from 0.15L to 3L.
Cons:
Larger-capacity SoftFlasks are available, but only sold separately by Hydrapak without the Katadyn filter. We wish there had been a few capacity options to choose from at the time of purchase.
Not freestanding
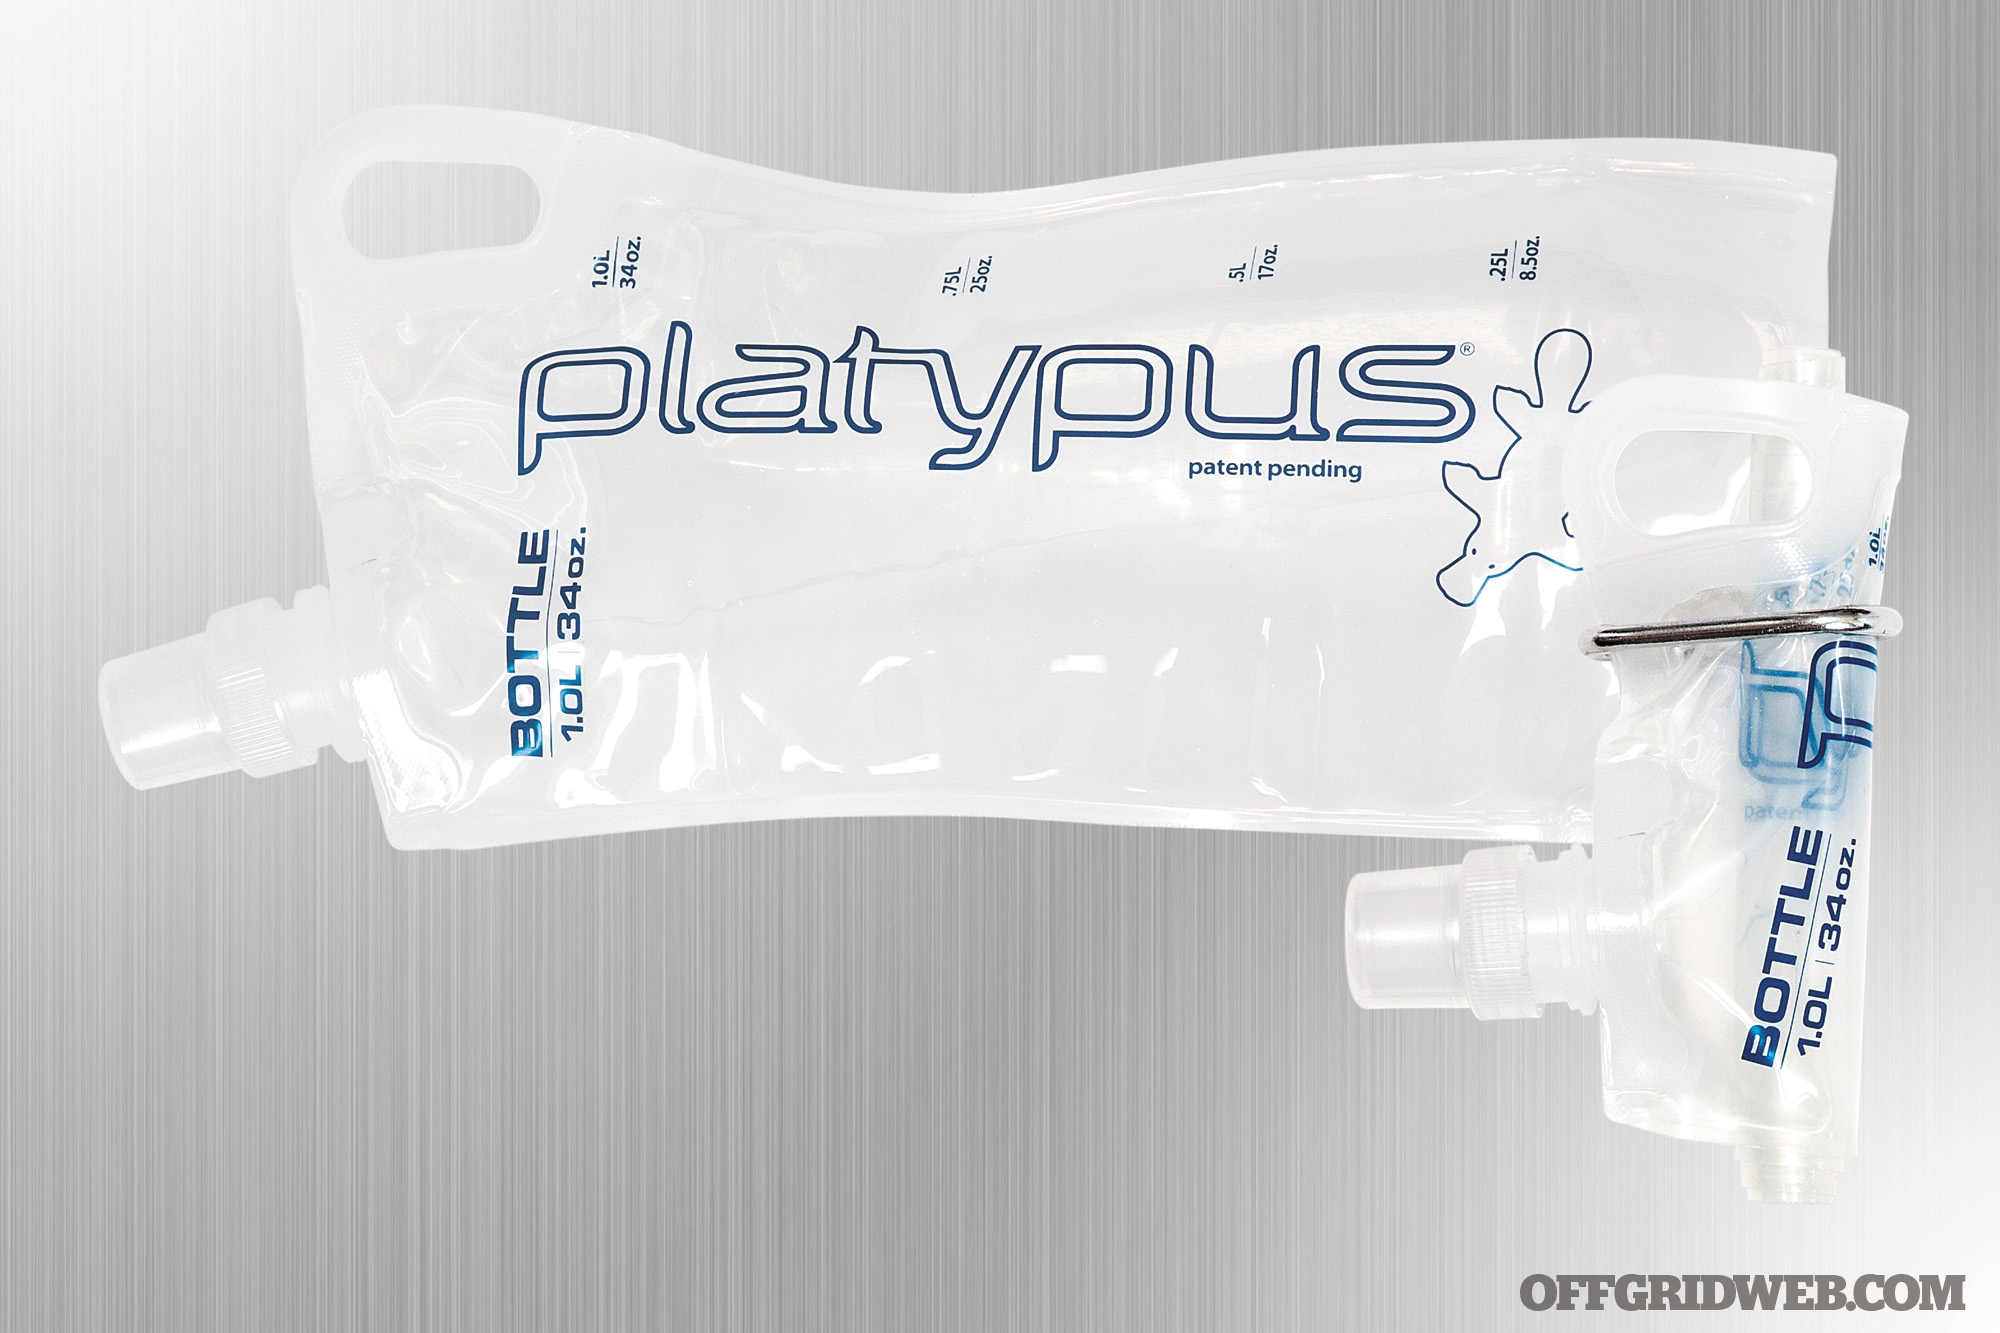
Platypus PlusBottle
Dimensions – Empty / Full 3.6 by 6 by 1.2 inches / 11.8 by 4.5 by 3.2 inches
Notes The Platypus PlusBottle is a 1-liter reservoir constructed of flexible laminate, impregnated with a silver-ion material that’s said to resist mold and bacteria growth. (Silver has been used as a germ repellant for thousands of years.) The body feels pliable yet tough and can be packed flat or rolled up. The PlusBottle is available with your choice of either a screw-on cap or a push-pull cap. If you’re willing to spend an extra $13, an optional drink tube kit can turn this into a compact hydration bladder. The PlusBottle is also dishwasher- and freezer-safe, and it makes a great ice pack for hot days — just fill halfway and purge all air pockets inside before freezing. The narrow mouth isn’t ideal for cleaning, but it does conveniently adapt to standard vending machine bottle caps and threaded water filters. This bottle is great for the ultralight crowd, since it weighs next to nothing and occupies minimal space.
Pros:
Ultra lightweight
Made in the USA
Cons:
Narrow mouth makes it difficult to thoroughly clean every nook and cranny
Great for flat-packing, but won’t stay rolled-up unless you add rubber bands or a carabiner
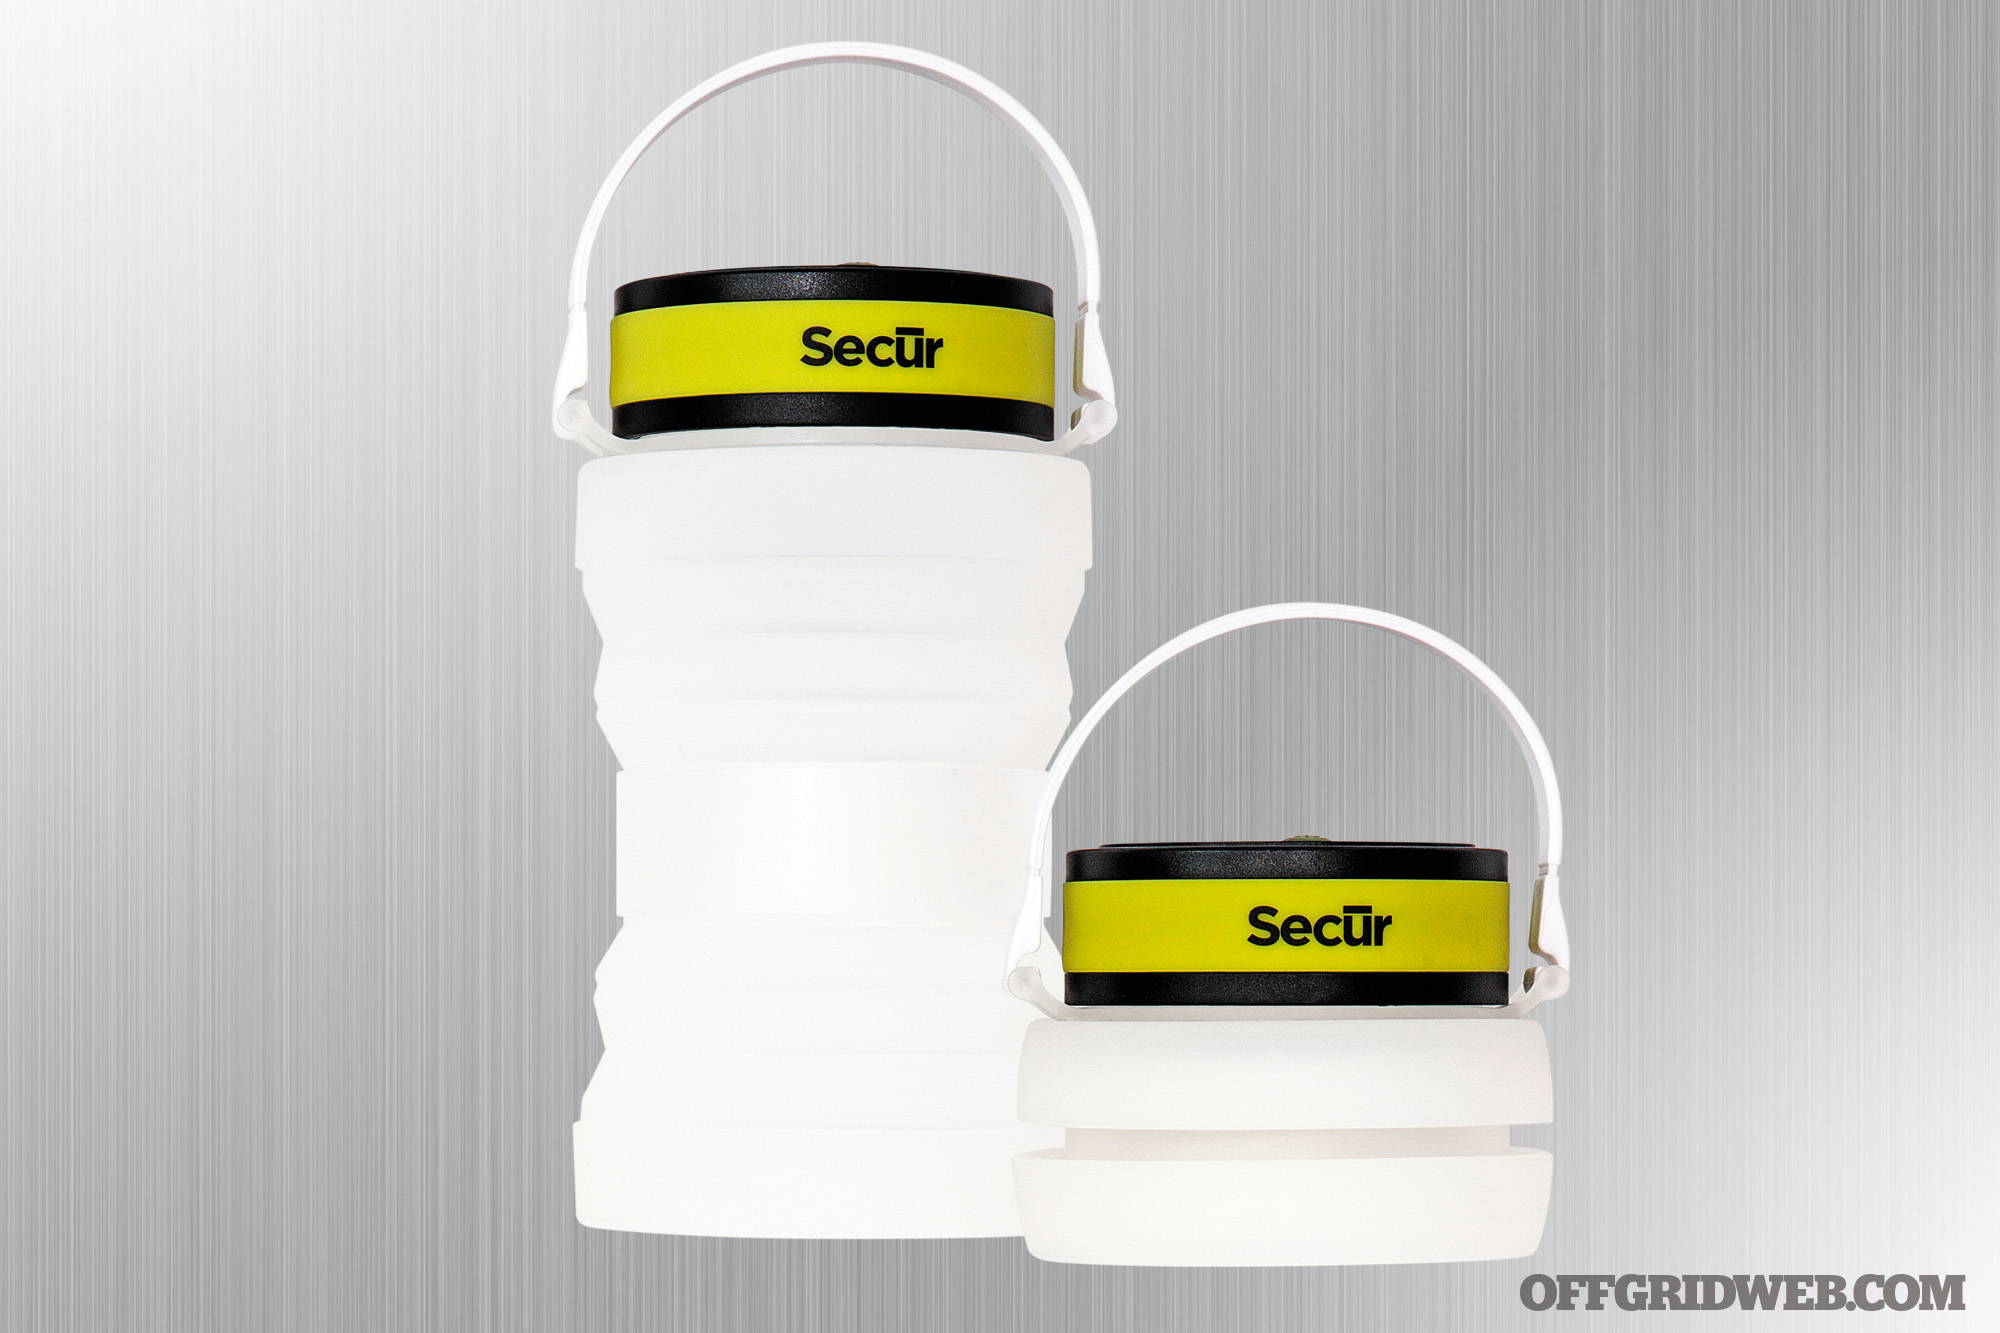
Notes The SP-1108 water bottle lantern is a brand-new release from Secur, and we got our hands on one of the first production models. In the past, we’ve lamented multi-functional products that are a jack-of-all-trades and master of none, but this bottle manages to add valuable features without compromising where it counts. Sure, it’s moderately heavier and larger than the other bottles here, but it manages to add a three-mode LED that’s surprisingly effective as a lantern or can be removed and hand-held as a flood light. The cap recharges via USB in three hours or via the built-in solar panel in 24 hours. The bottle itself is composed of silicone rubber and expands easily to hold 0.7 liter. The SP-1108 did produce an off-putting chemical odor when new, but this improved a bit with time. That said, we’d say this bottle would make a good multipurpose addition to a bug-out bag or emergency kit.
Pros:
LED-lit cap can illuminate a whole room, runs for up to 12 hours, and recharges two ways
Even without the extra features, it’s a very good collapsible bottle.
Cons:
Bottle produces noticeable plastic odor and taste, although it dissipated somewhat after a few uses.
Bulkier and heavier than other bottles here
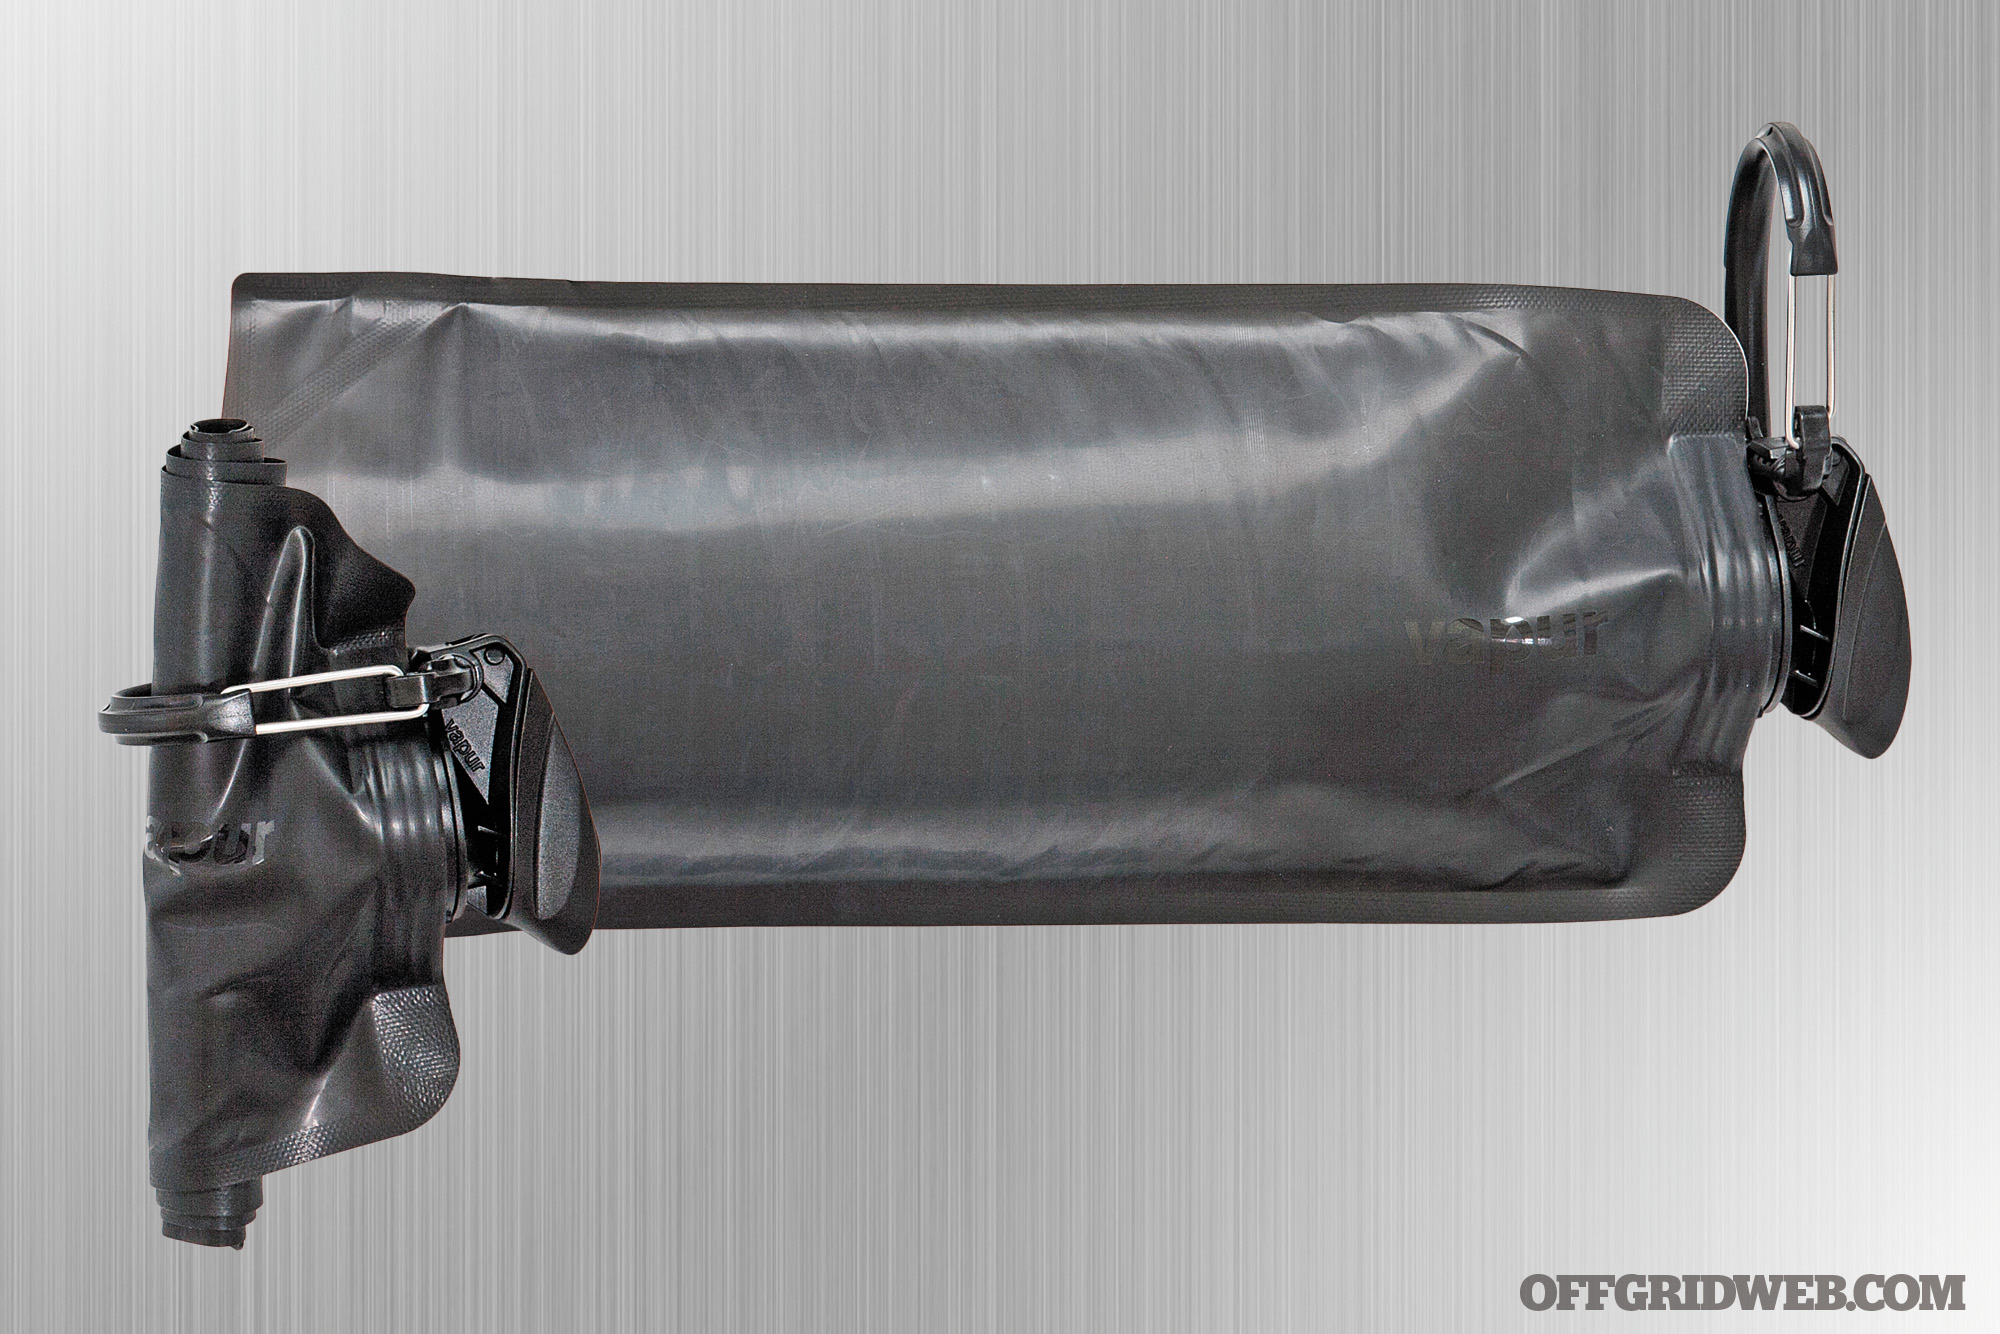
Vapur Eclipse Blackout
Dimensions – Empty / Full 3.2 by 5.7 by 1.8 inches / 11.3 by 5.7 by 3 inches
Dry Weight 1.3 ounces
Capacity 34 fluid ounces (1 liter)
Body Material Bonded three-ply (two outer nylon layers, inner layer of polyethylene)
Notes Eclipse Blackout sounds like it could be the title of a heavy metal album, but it’s actually the latest in Vapur’s line of “anti-bottles.” Appropriately, this 1-liter vessel is constructed of flexible three-ply material with a stealthy matte black finish. Cosmetics aside, the Eclipse packs almost completely flat or can roll into a compact bundle. When filled to the brim, the base expands and allows it to stand freely with minimal risk of tipping. A DrinkLink hydration tube has also been announced and will allow conversion of this bottle into a hydration reservoir by screwing on a new cap. The bottle’s integrated carabiner is one of our favorite features, since it provides a way to attach it to your belt loop or backpack, while keeping it from unrolling while stored. Even with the carabiner, the Eclipse barely nudges the scales at only 1.3 ounces. This “anti-bottle” is made in the USA, shipped and packaged with eco-friendly methods, and affordably priced — we had a hard time finding any major flaws while testing the Vapur.
Pros:
Ultra-lightweight, but still manages to include a useful integrated carabiner
Made in the USA
Cons:
Vapur says the matte finish “will develop character resulting in a unique patina.” That’s a creative way of saying it will accumulate cosmetic scuffs — if you care about that sort of thing.
Many aspects of emergency preparedness are universal, but our views on this subject are also heavily affected by our surroundings. If you've spent most of your life living in the American southwest, you'll tend to prepare for disasters differently than someone who lives in the cold mountains of Canada. City-dwellers will approach prepping differently than those from rural areas. Cultural differences can even affect your perspective, depending on the country or region you reside in. Learning about some of these different perspectives can help us broaden our viewpoints and improve our own preparedness.
If you've been following our publications for a while, you've probably seen some of the public service announcements and preparedness guides created by United States government organizations such as FEMA or the Department of Homeland Security. But have you ever considered how other countries' governments promote preparedness for their citizens?
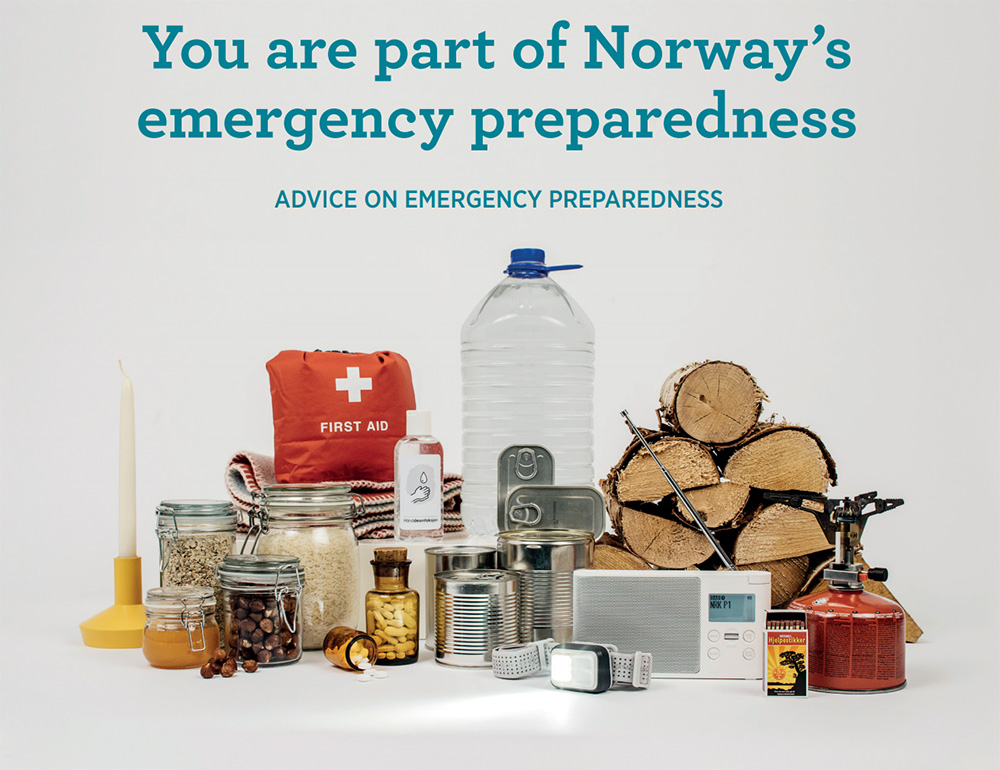
We recently came across an English-language PDF published by the Norwegian Directorate for Civil Protection (DSB) and the Municipality of Oslo (Norway's capital). This 12-page guide explains the importance of personal emergency preparedness, outlines the basic gear suggested by the Norwegian government, and shares some other tips about preparing for a disaster. You're probably already aware of a lot of this info, but there are also some elements that may surprise you.
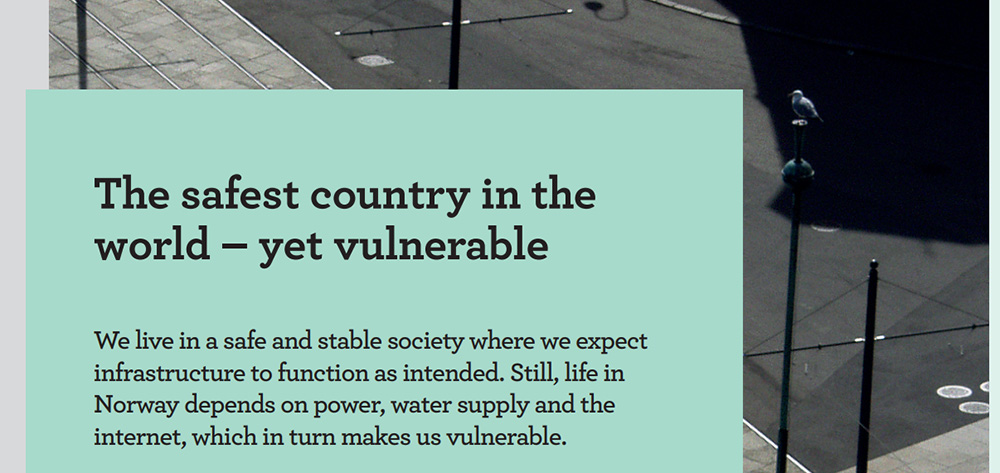
This “safest in the world” statement is probably a bit heavy on the hyperbole.
The first thing that struck us about this guide is its strong focus on the community element of survival. The introduction makes this clear: “If a larger part of the population is able to take care of themselves and those around during an emergency, immediate help is more likely to reach those who need it most first. In this way, you make a part of Norway’s emergency preparedness.” This is also mentioned as a form of cold-weather preparedness, encouraging Norwegians to establish an “agreement with neighbours, family or friends to give you shelter.” There are many other references to actively looking for ways to contribute to anyone who needs help during an emergency.
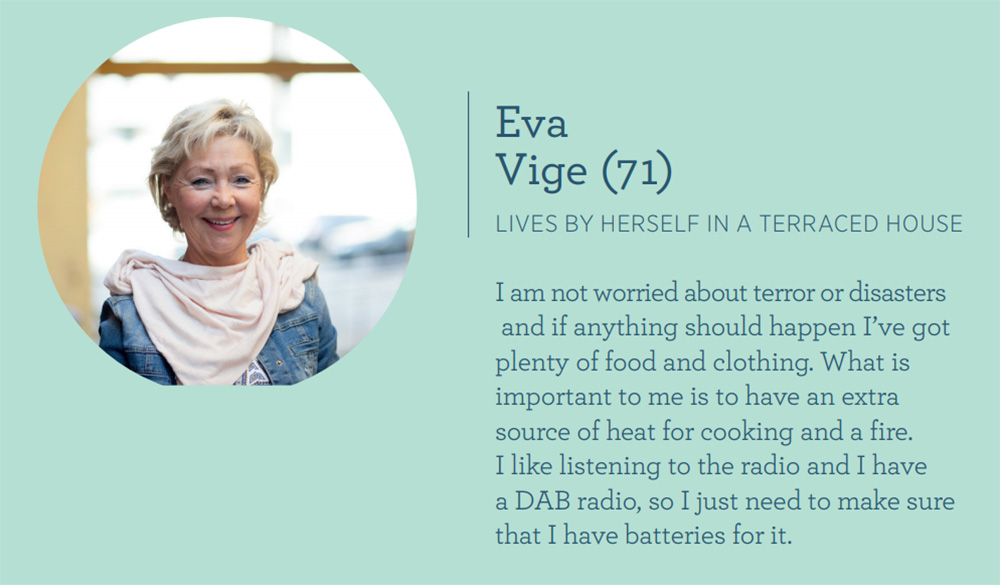
The section titled “Are You Prepared?” provides some quotes from ordinary Norwegians on the subject of prepping. Some sound substantially more prepared than others — 71-year-old Eva lives alone and boldly says she is “not worried about terror or disasters.”
A few other items we noticed:
The food suggestions are pretty unusual from our perspective, with “two packs of crispbread” and “three boxes of sandwich spreads or jam” near the top of the list
“Iodine tablets in case of a nuclear event” — this is a rather advanced prep that we weren't expecting to see
The guide mentions the spread of deliberate misinformation and propaganda during a disaster: “Hostiles may have interest in spreading misleading or false information… make sure you obtain information from reliable sources.”
Click here to download the PDF, and consider how its suggestions compare and contrast with your existing emergency plans.
WARNING: Some of the content described in this story involves making fire with accelerants, which is inherently dangerous. The materials provided are for illustrative purposes only. Any use of the information contained in this article shall be solely at the reader’s risk. This publication and its contributors are not responsible for any potential injuries.
When I was young I remember people using cough-drop tins to carry or store all sorts of things. I have a dim recollection of grandma having some sewing supplies in one that she kept in her purse. Several people I knew had those cans rattling around in tackle boxes and on workbenches. They worked great for keeping little odds and ends at least somewhat organized.
The modern equivalent today is the Altoids mint tin. To the prepper and survivalist, these little containers are almost as useful as duct tape. Altoids tins have been turned into flashlights, radios, and more. We’re going to take a more tech approach, though, and look at a handful of projects you can do with these cans using what you probably have sitting around the house.
1. Alcohol Stove
This project takes a little more effort than the ones that follow, but it’s worth it in the end. The Altoids tin alcohol stove is small in size, but large in efficiency.
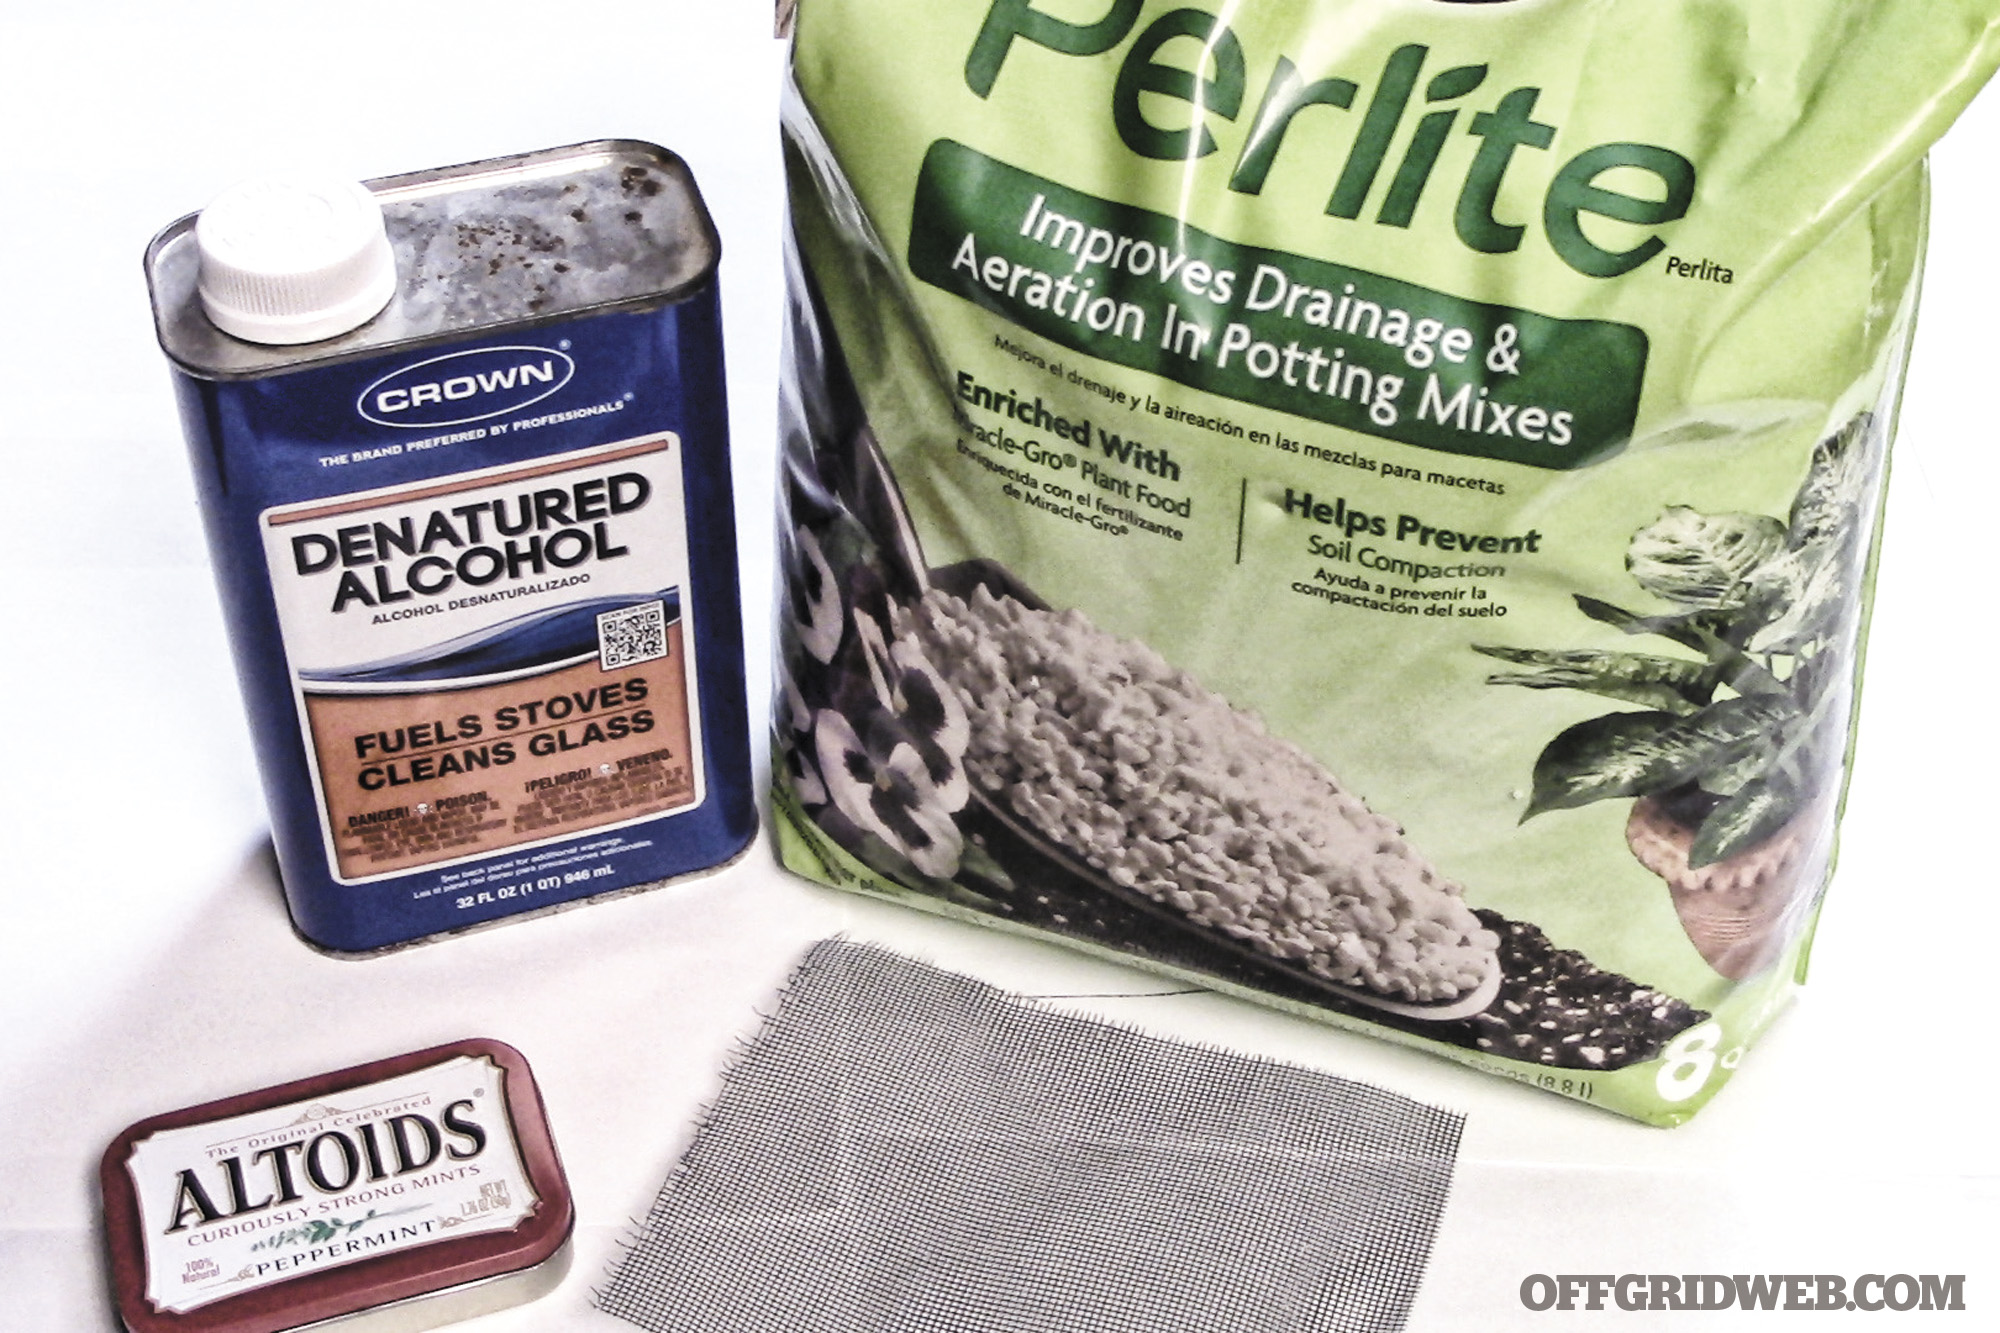
Supplies:
Altoids tin
Perlite or vermiculite
Metallic window screen
Marker
Scissors
Denatured alcohol
Perlite and vermiculite are both soil additives that are commonly found in any lawn and garden store. While they’re different substances from one another, either will work equally well in this project.
If you don’t have an old window screen collecting dust in the garage, head to the hardware store and pick up a metal window screen patch kit. That will have enough screening for this project, so you don’t have to buy an entire roll of material.
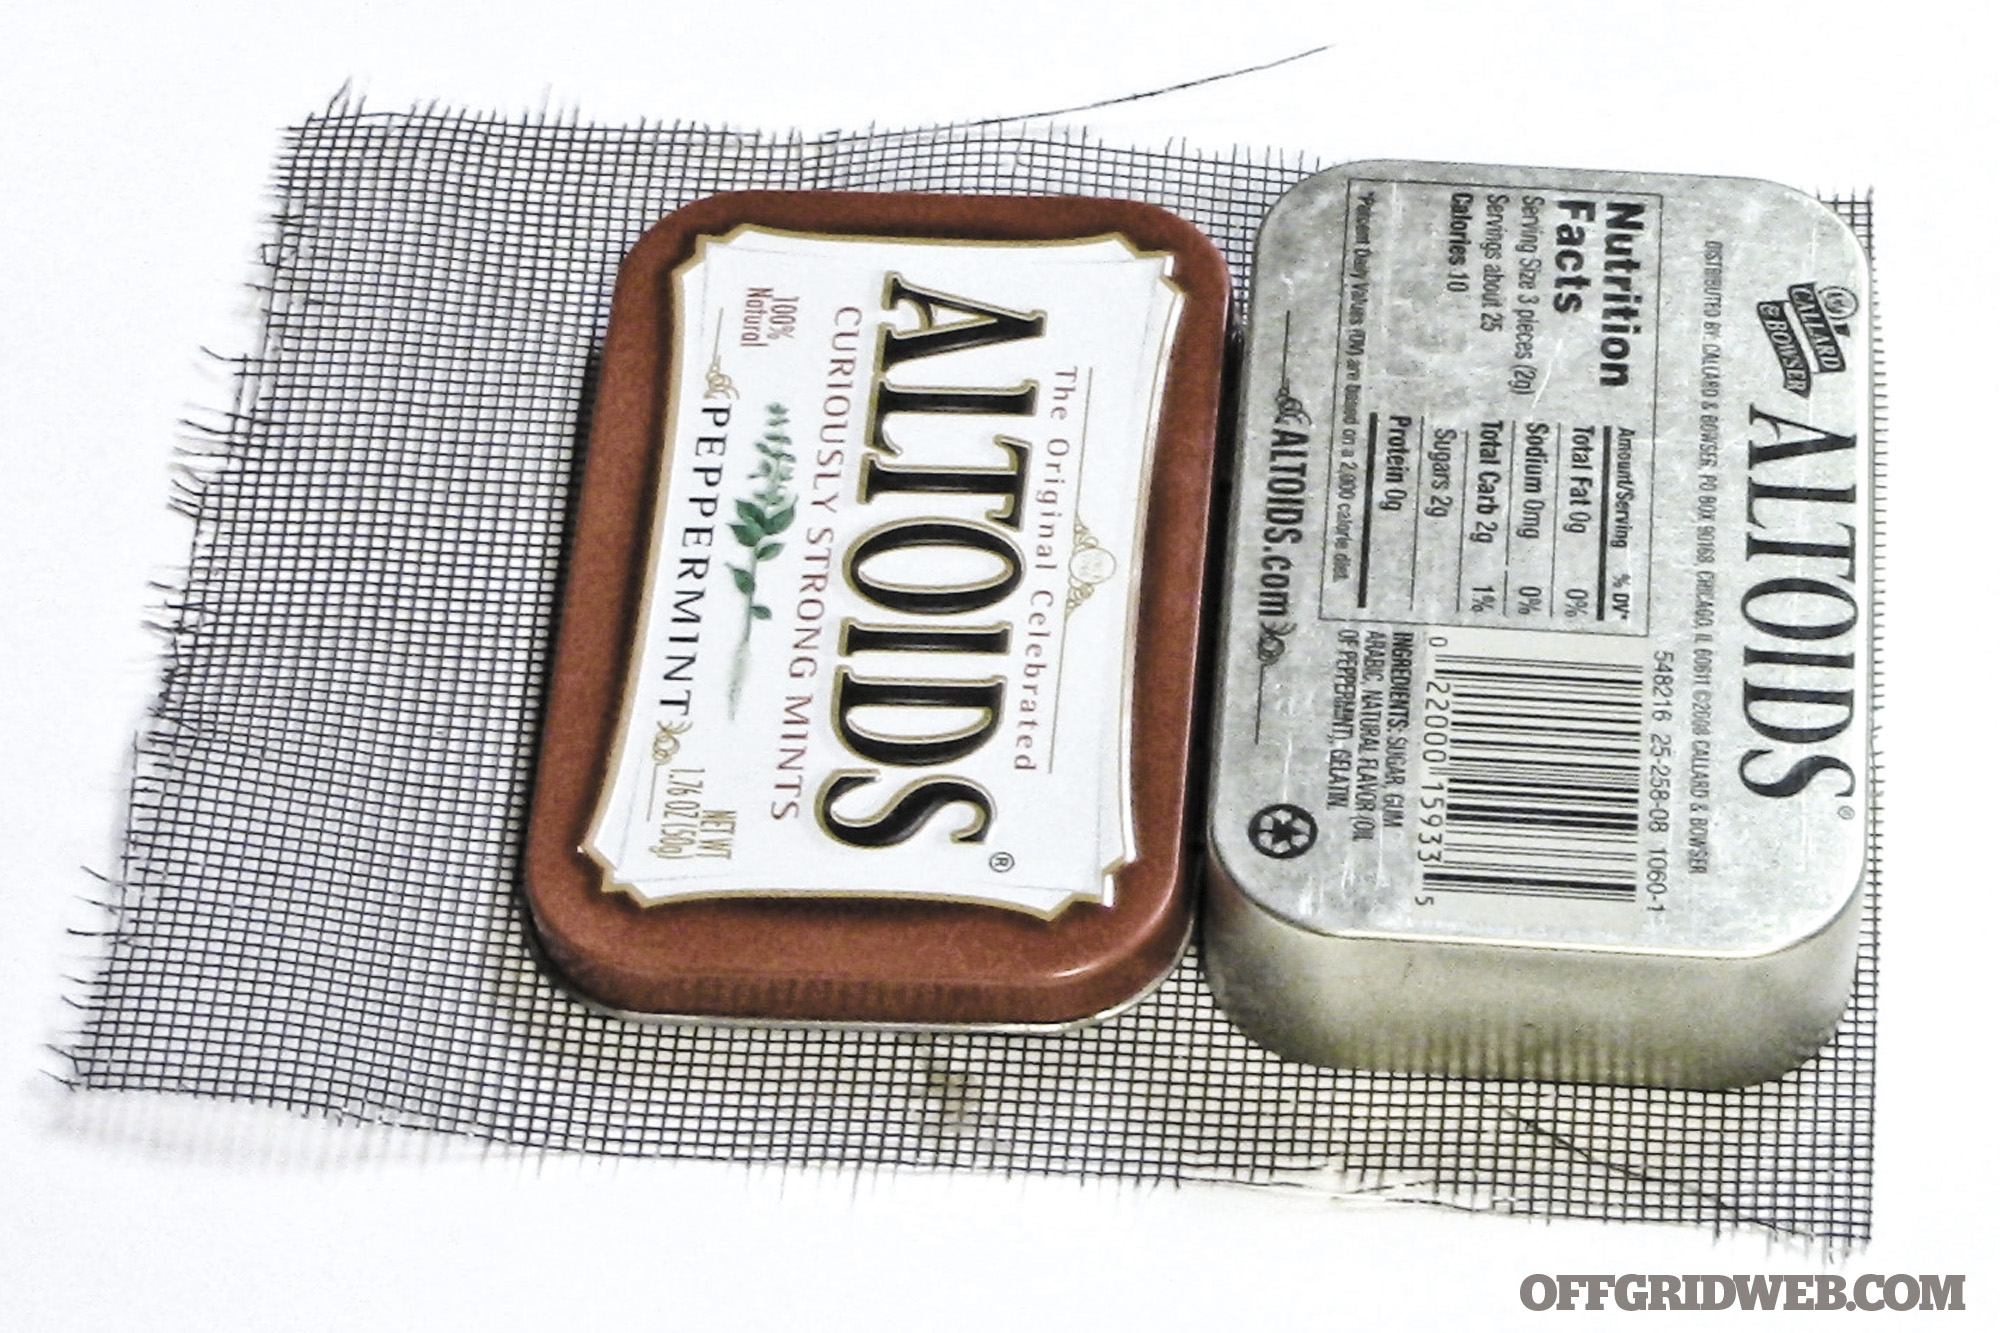
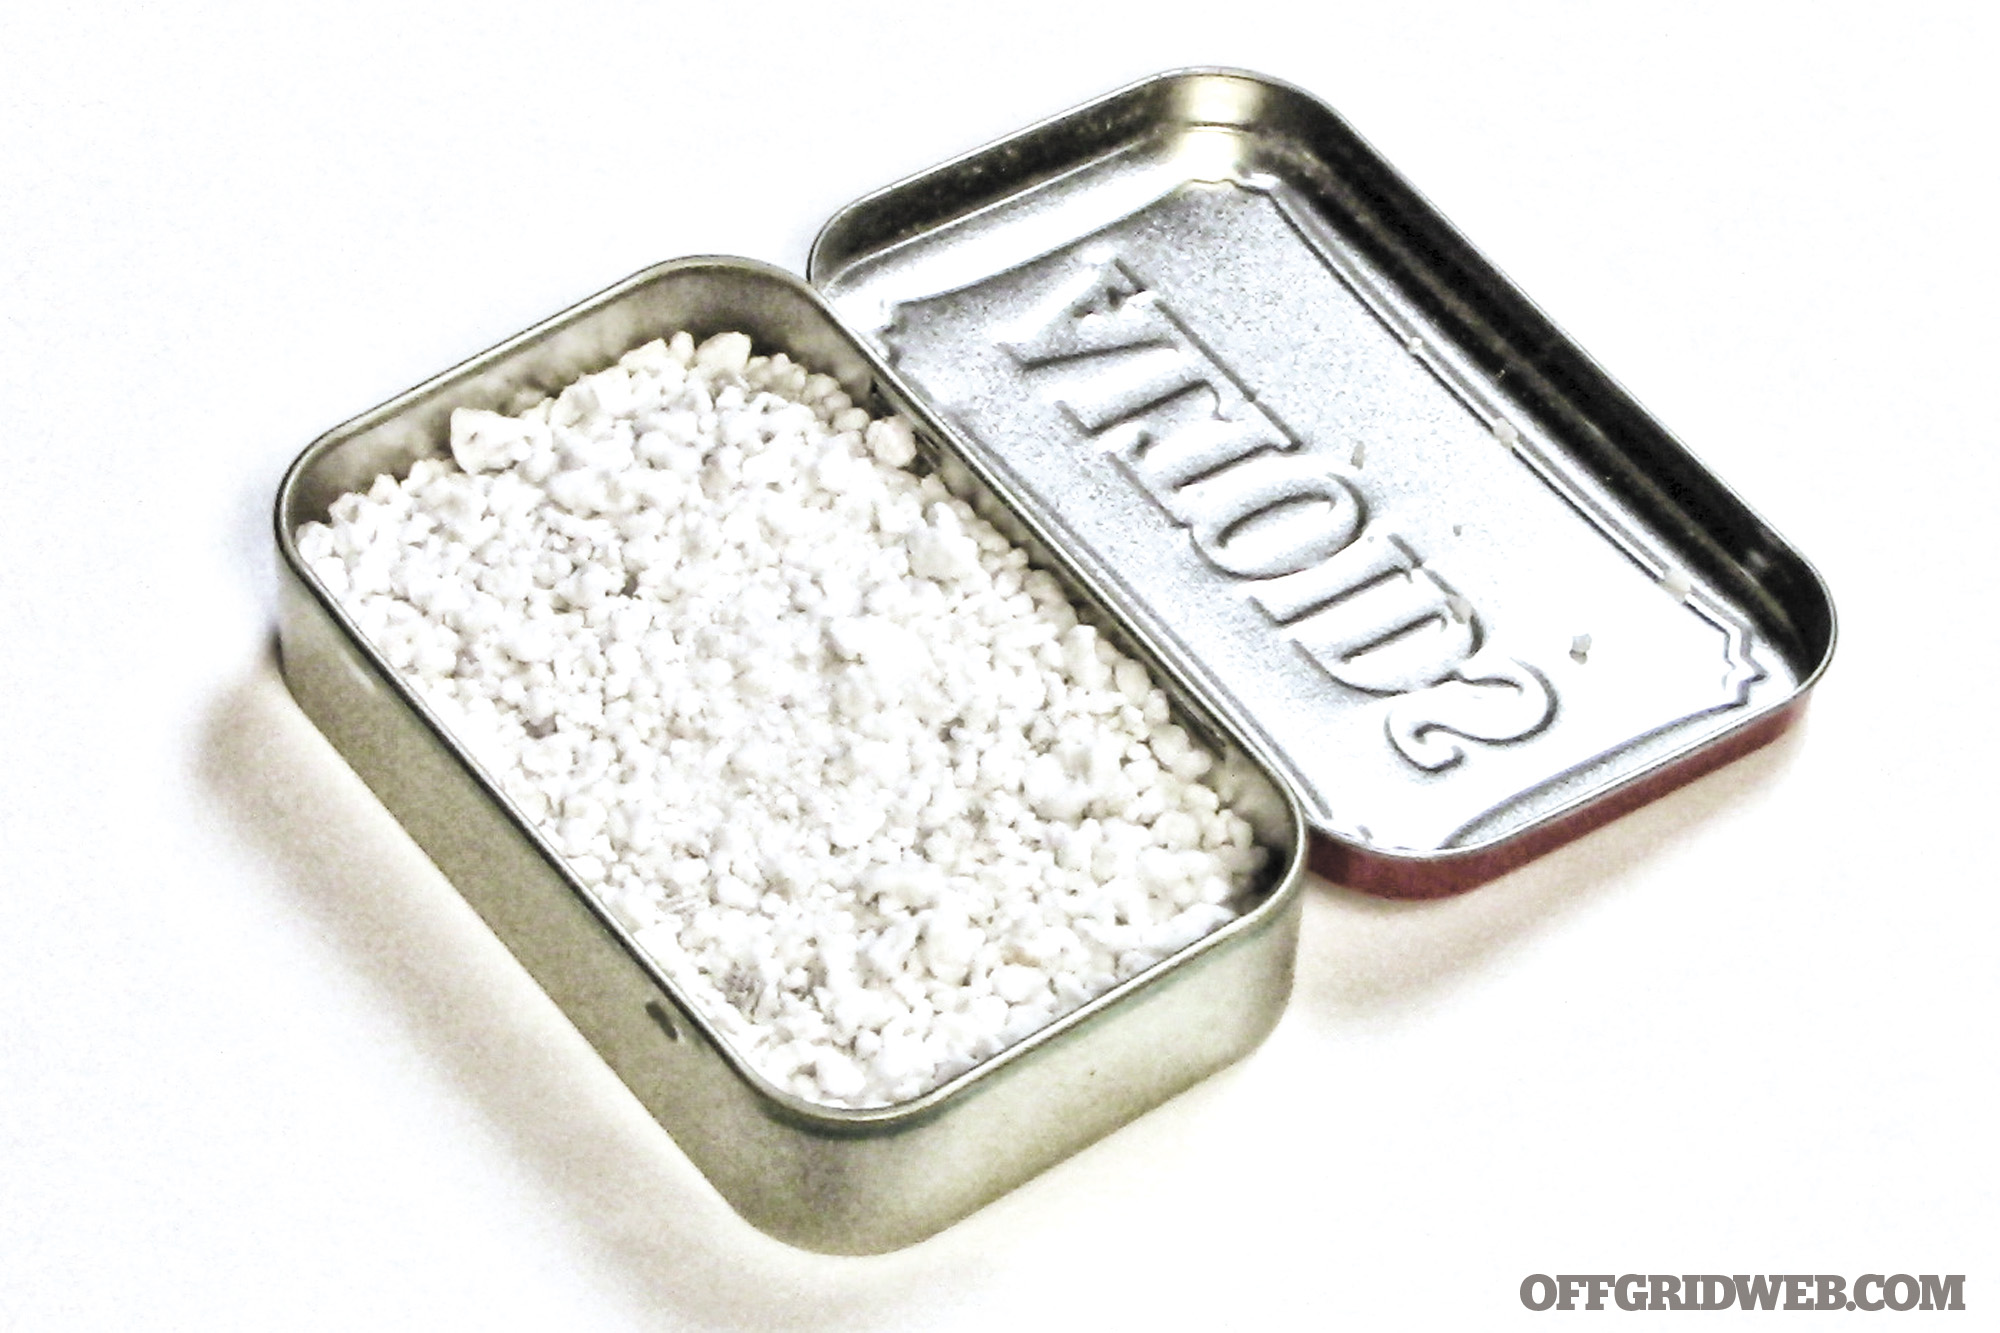
Open the Altoids container and place it face down on the screen. Use a marker to trace the outline of the can on the screen, then cut it out.
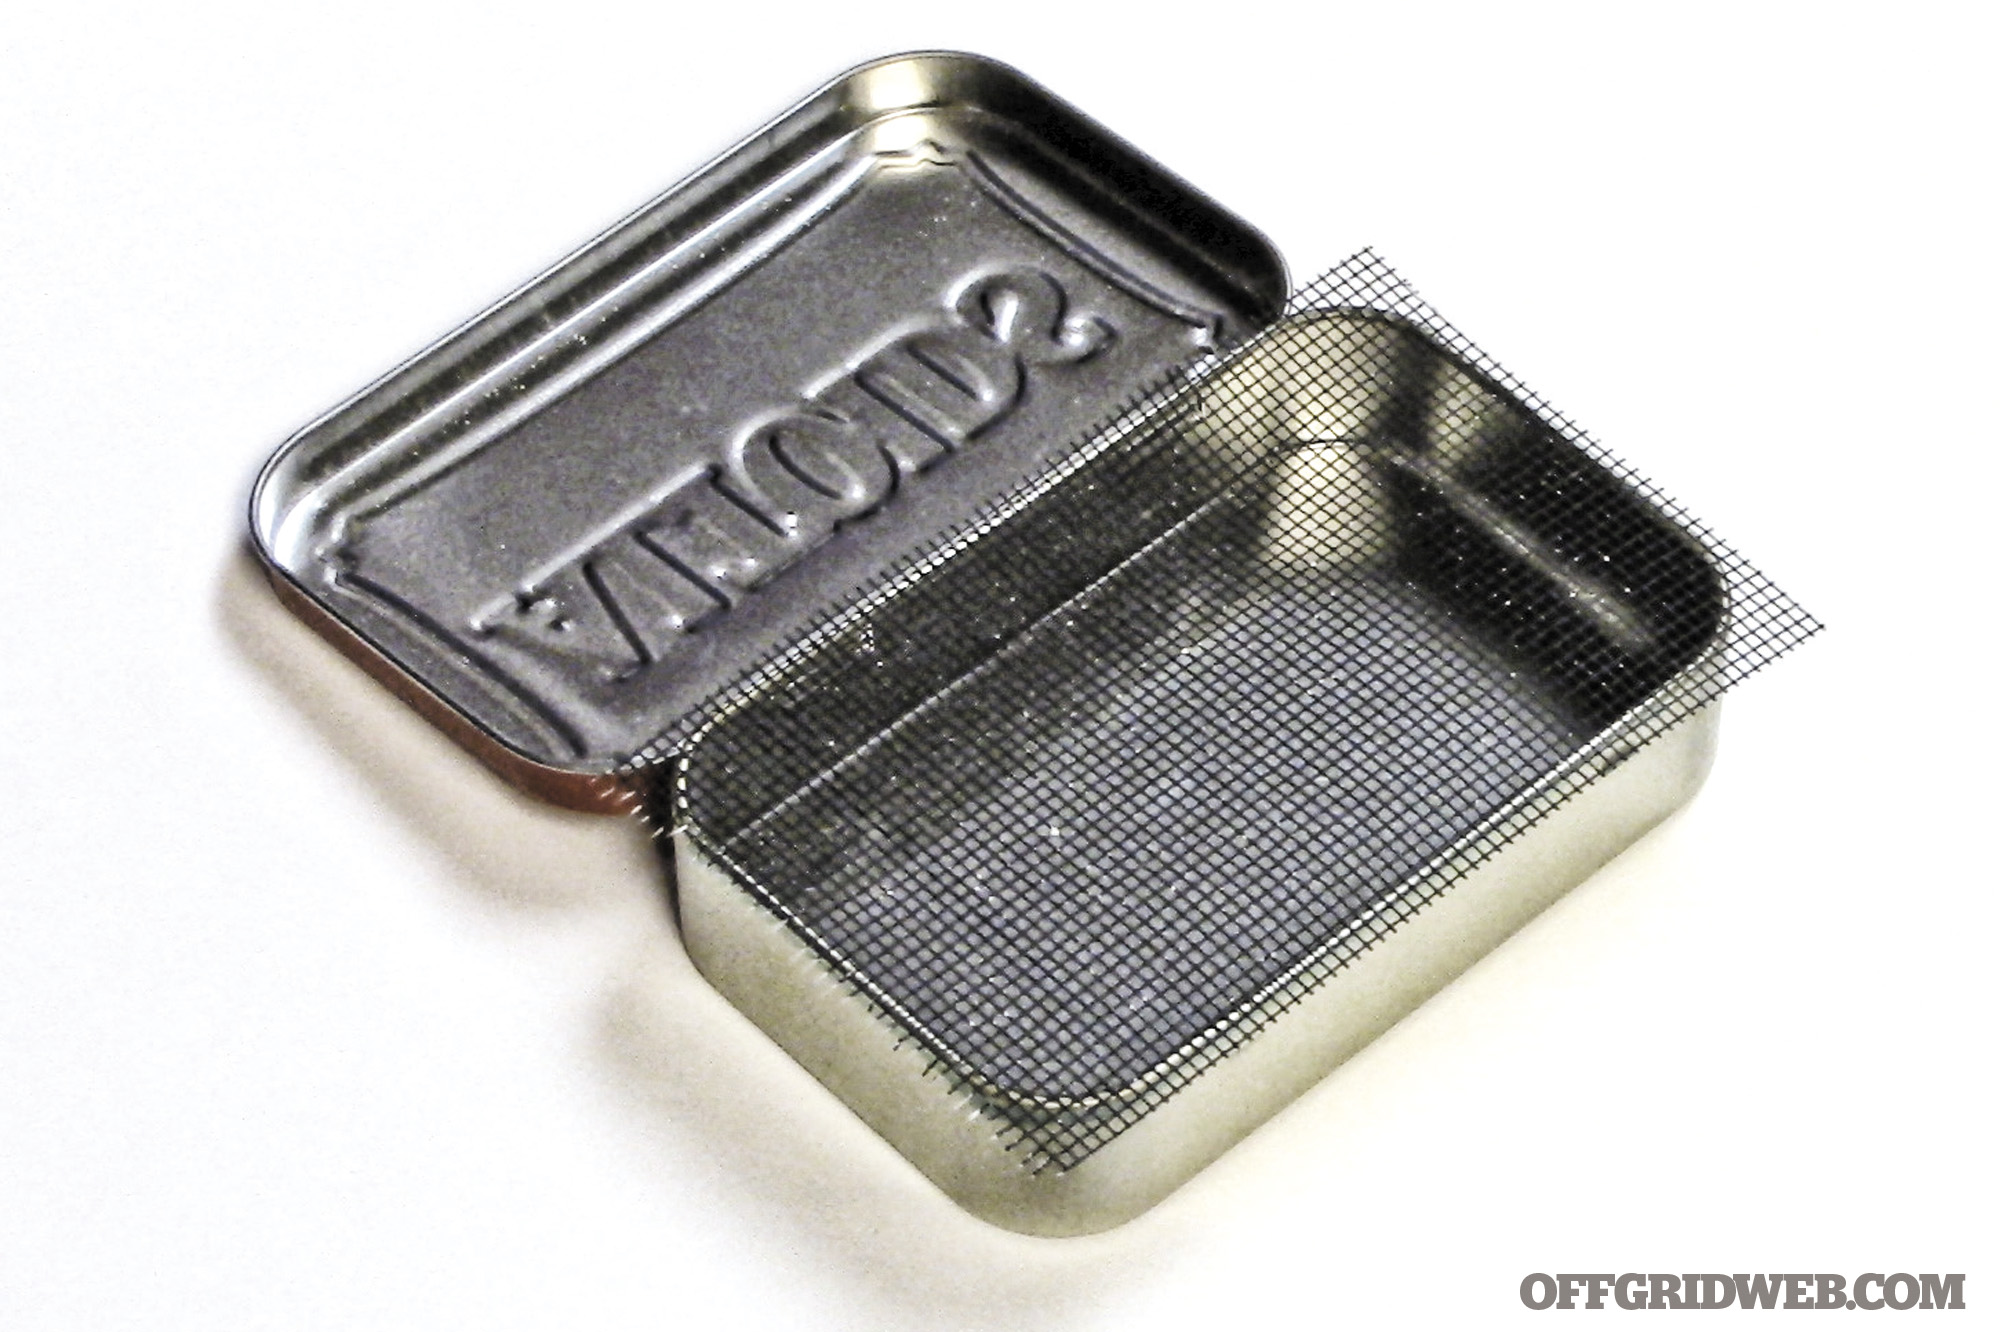
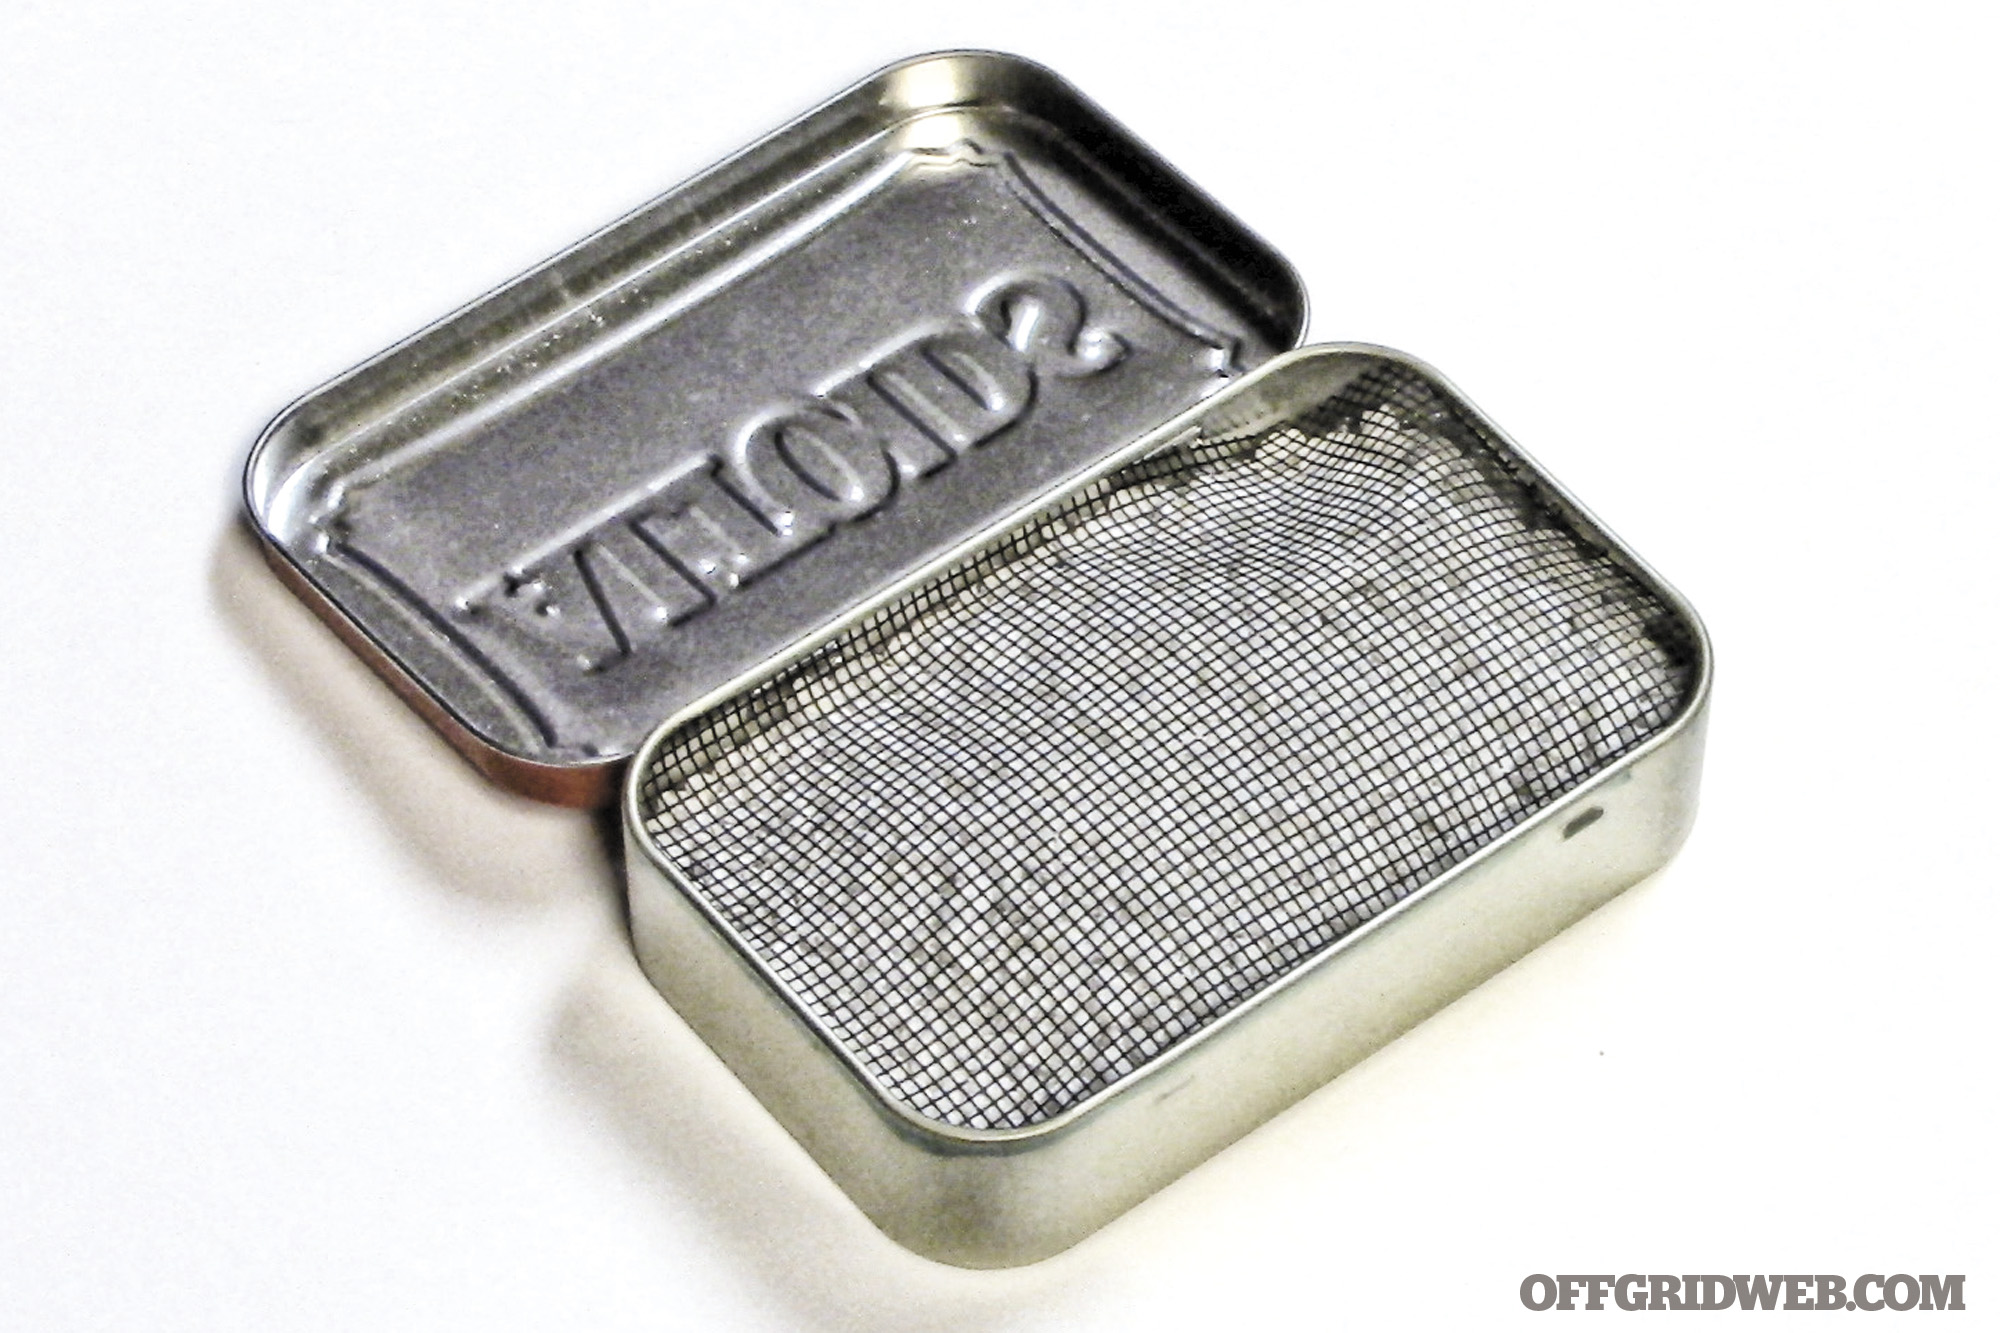
Fill the tin to just below the rim with the vermiculite or perlite. Gently shake the tin to settle the contents, then place the window screen over them. Use a finger or a Popsicle stick to tuck the screen down along the edge all the way around.
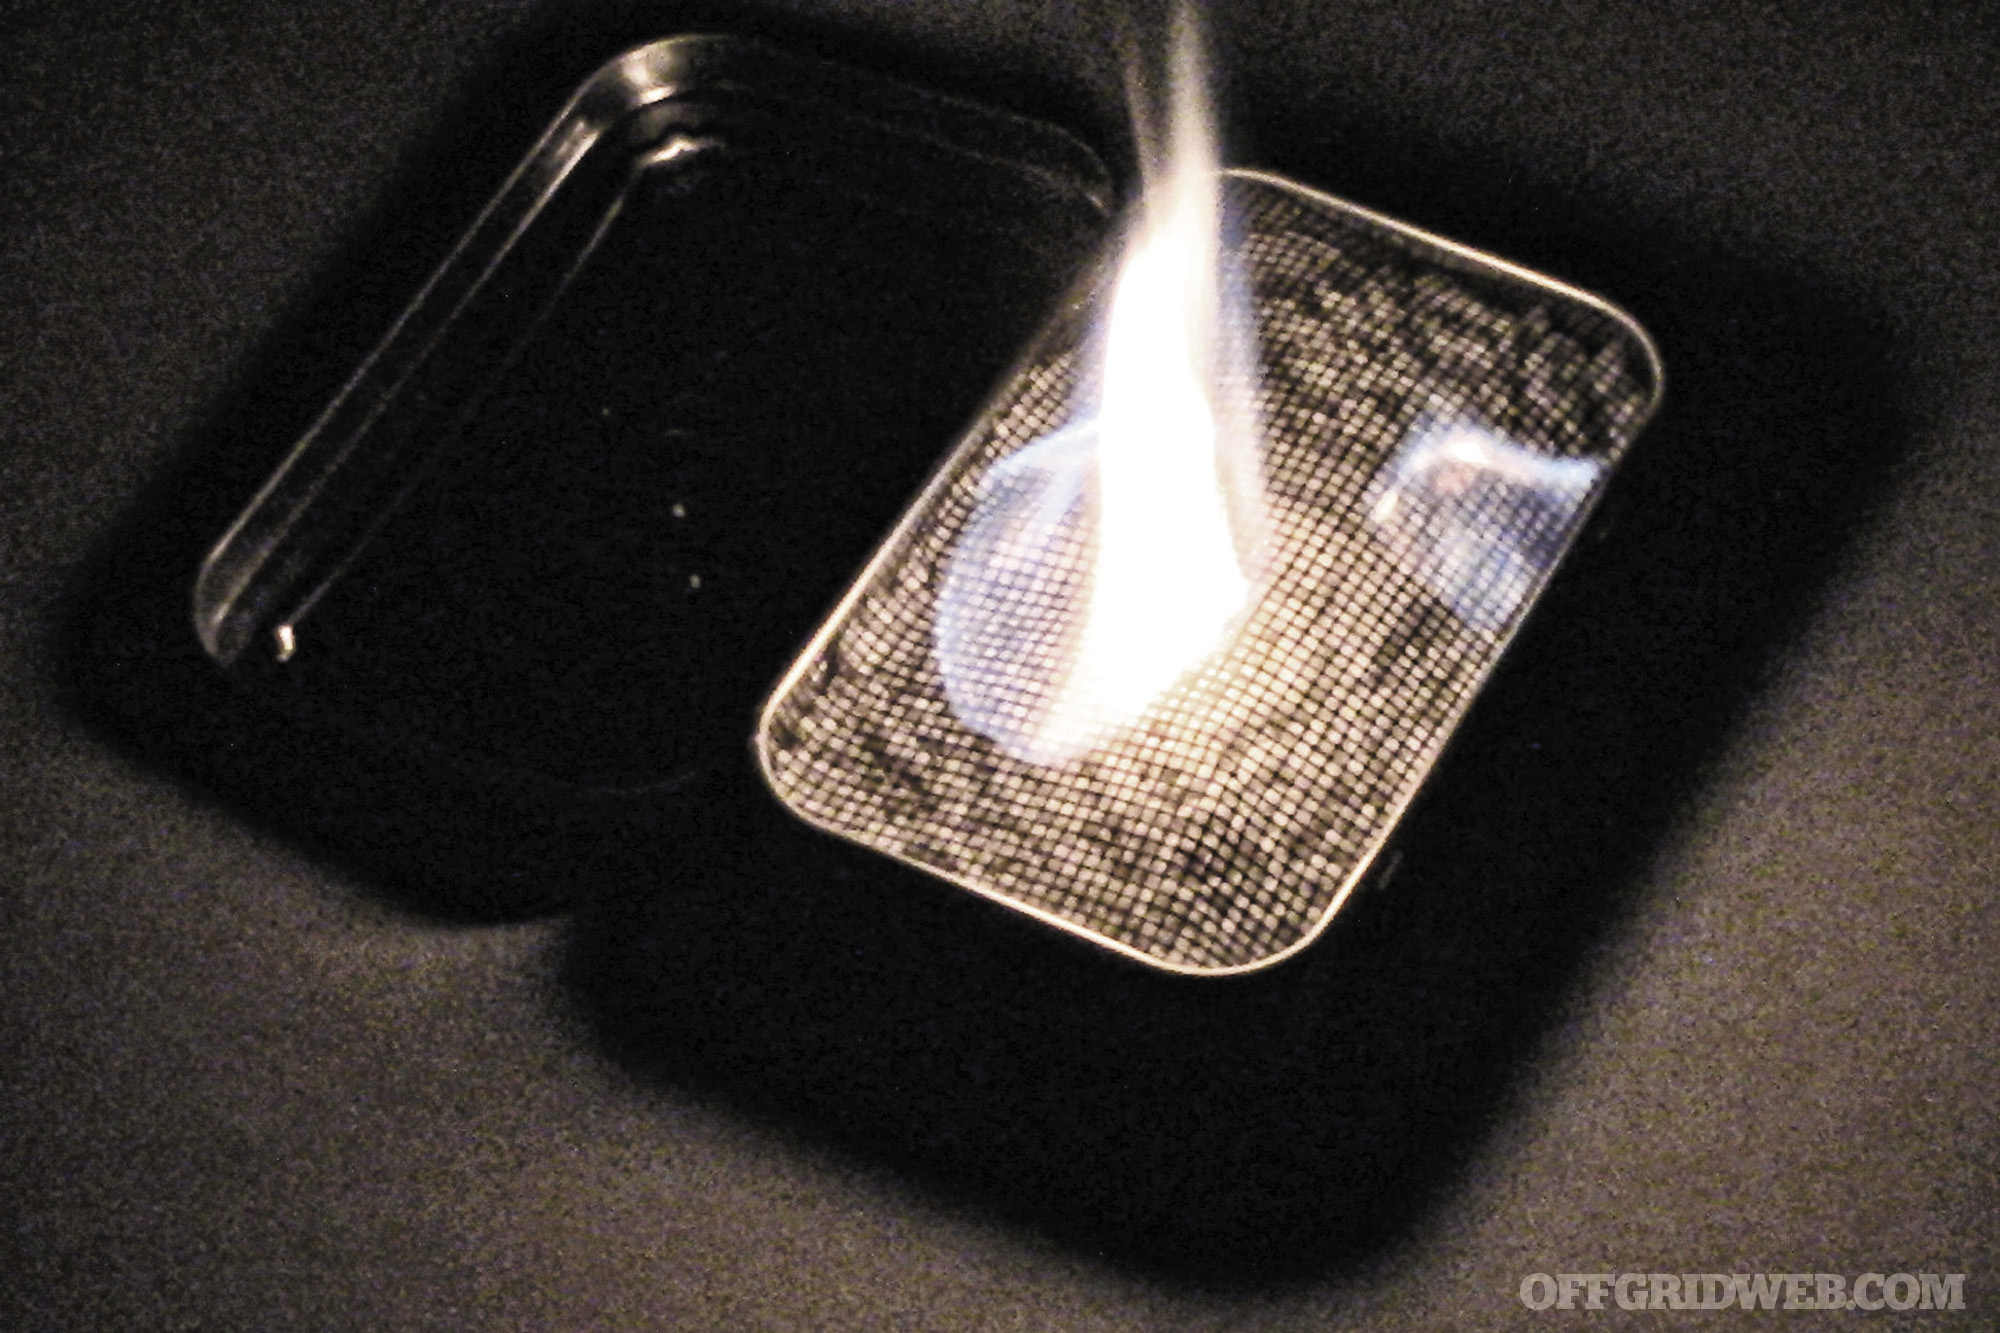
The stove is now assembled and just needs fuel. Denatured alcohol is best as it burns the cleanest. Rubbing alcohol will work but will be smoky. HEET, an automotive fuel additive, is also an option, but stick with the yellow bottle rather than the red. The yellow bottle contains methanol, which burns a lot cleaner than the isopropanol in the red bottle.
Pour a few tablespoons of fuel into the tin. The vermiculite or perlite serves to absorb the fuel and release it slowly, just as it would water in a flowerpot. Light a match and lay it right on the window screen. The alcohol vapors should ignite immediately. Be careful, though. The flames may be nearly invisible. Hold your hand several inches above the stove to feel for heat if you need to check if it’s lit.
A pot placed directly on this stove will smother the flame. Grab a couple of bricks, flat rocks, or similar objects to place on either side of the stove, then place the pot on top of them. To extinguish the stove, simply flip the lid closed.
When transporting the stove, wrap a ranger band around the tin as recommended with the fire kit. Store it in a Ziploc plastic bag, too, just in case of leaks. Also be sure to pack a small bottle of fuel.
2. Candle
Turning an Altoids container into an easily transported, long-burning candle is a piece of cake.
Supplies:
Altoids tin
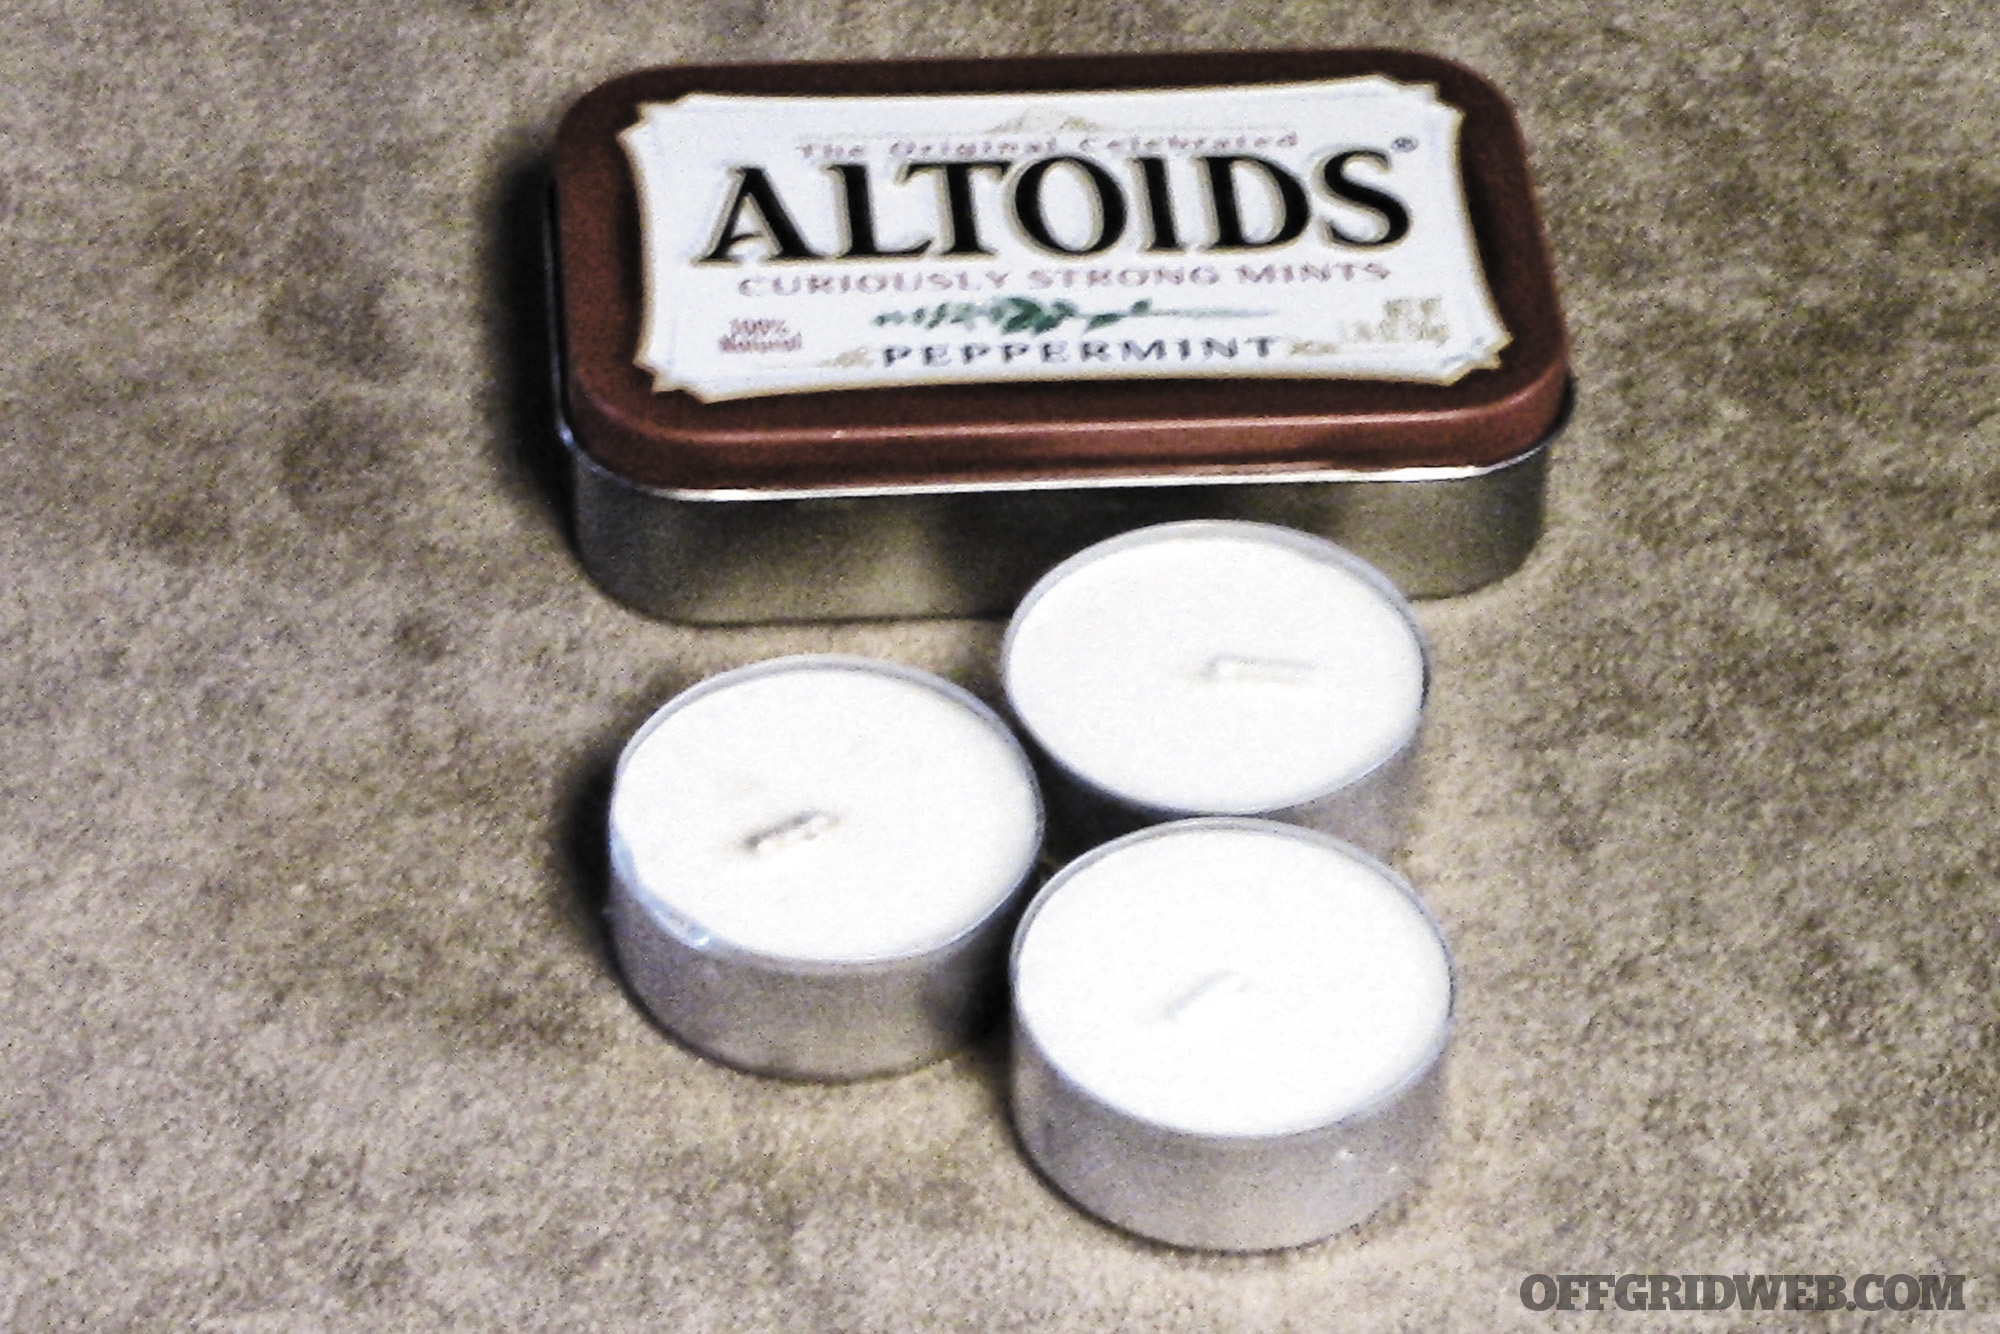
Two to three tea light candles
Wax
Tip the candles out of the metal cups. Turn the candles over and pry the small metal disks out to remove the wicks. Then melt the wax (see sidebar). Note that you’ll need more wax than just what you recover from the tea lights.
Position the wicks in the bottom of the tin. Space them evenly. Slowly pour in the melted wax and continue adding until the container is full and just the tips of the wicks are visible. Let the wax cool and harden before use.
While at first it might seem easier to just toss a few tea lights into the can and be done with it, this DIY candle will actually burn far longer than the tea lights would alone. Plus, with three wicks, the amount of light and heat can be adjusted. The Altoids box can get a little warm with all three wicks burning, so be sure to place the tin on a rock or, if indoors, on an insulated hot pad or oven mitt.
The inside surface of the can’s lid is, if kept clean, very reflective. Propping it up so the light reflects off of it will increase the overall brightness of the candle.
Wax On
When making homemade fire-starters, wax is a common ingredient. Fortunately, most homes have an abundance of old candles and broken crayons. Failing that, thrift stores usually have a ton of candles that can be had very inexpensively. Do not, however, rely on cheap crayons, such as those found at dollar stores. The wax used in making those doesn’t work as well for fire-starters — not to mention they could potentially be made of toxic materials.
The easiest way to melt wax at home without ruining a pot and thus incurring the wrath of the family cook is to create a homemade double boiler. Procure an empty soup can and wash it out. Be careful, the inner rim is often sharp. Ask us how we know. Dry the inside of the can, then fill it about halfway with pieces of candle and/or crayons.
Fill a small pot with a couple of inches of water. Put it on the stove and turn on the heat. Place the can with the wax into the water. As the water comes to a boil, the wax will start to melt. Use a stick to stir the wax from time to time and break up the larger chunks.
Once the wax is fully melted, remove the can from the water while wearing an oven mitt to avoid burns.
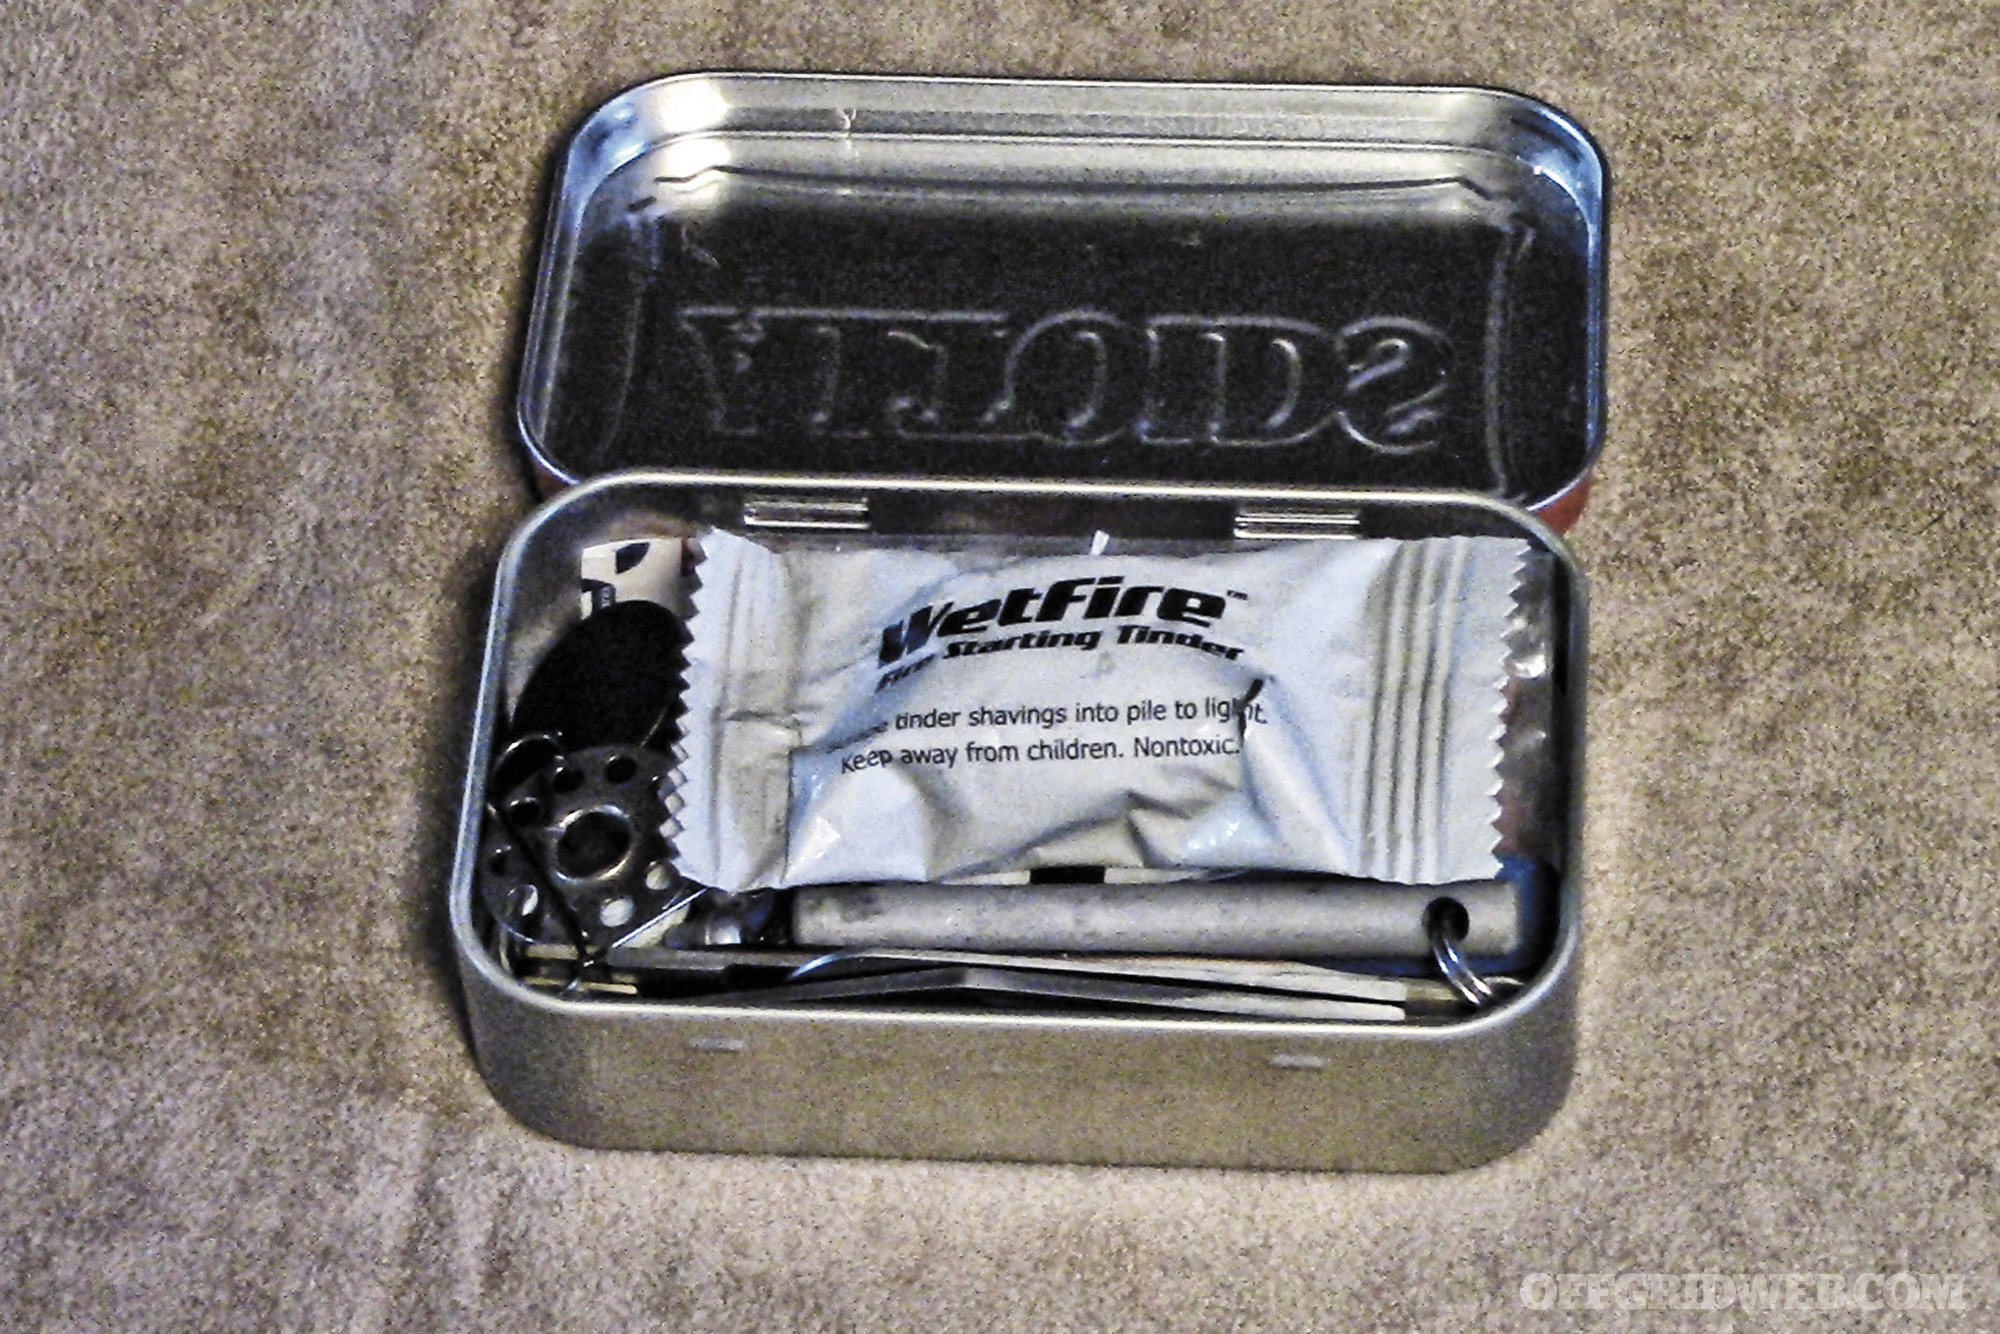
3. Fire Kit
Having the means to make a flame reliably in all conditions is a survival priority. Assembling a small kit ensures you can always carry everything you need to get a fire going, no matter what.
The general rule when it comes to prepping is to strive for three methods or tools to accomplish basic survival needs — in this case, three ways to light a fire, along with several types of tinder. Note that the supply list isn’t set in stone. Choose what works best for you. A butane lighter is a given in all fire kits, of course. A ferrocerium rod and striker, as well. Beyond that, the choice is yours. One of my personal favorites is a few self-igniting fire-starters (see sidebar below).
Placing a strip of duct tape inside the lid gives you extra tinder since duct tape burns very well. It can also be used to repair a hole in your tent or even clothing in an emergency.
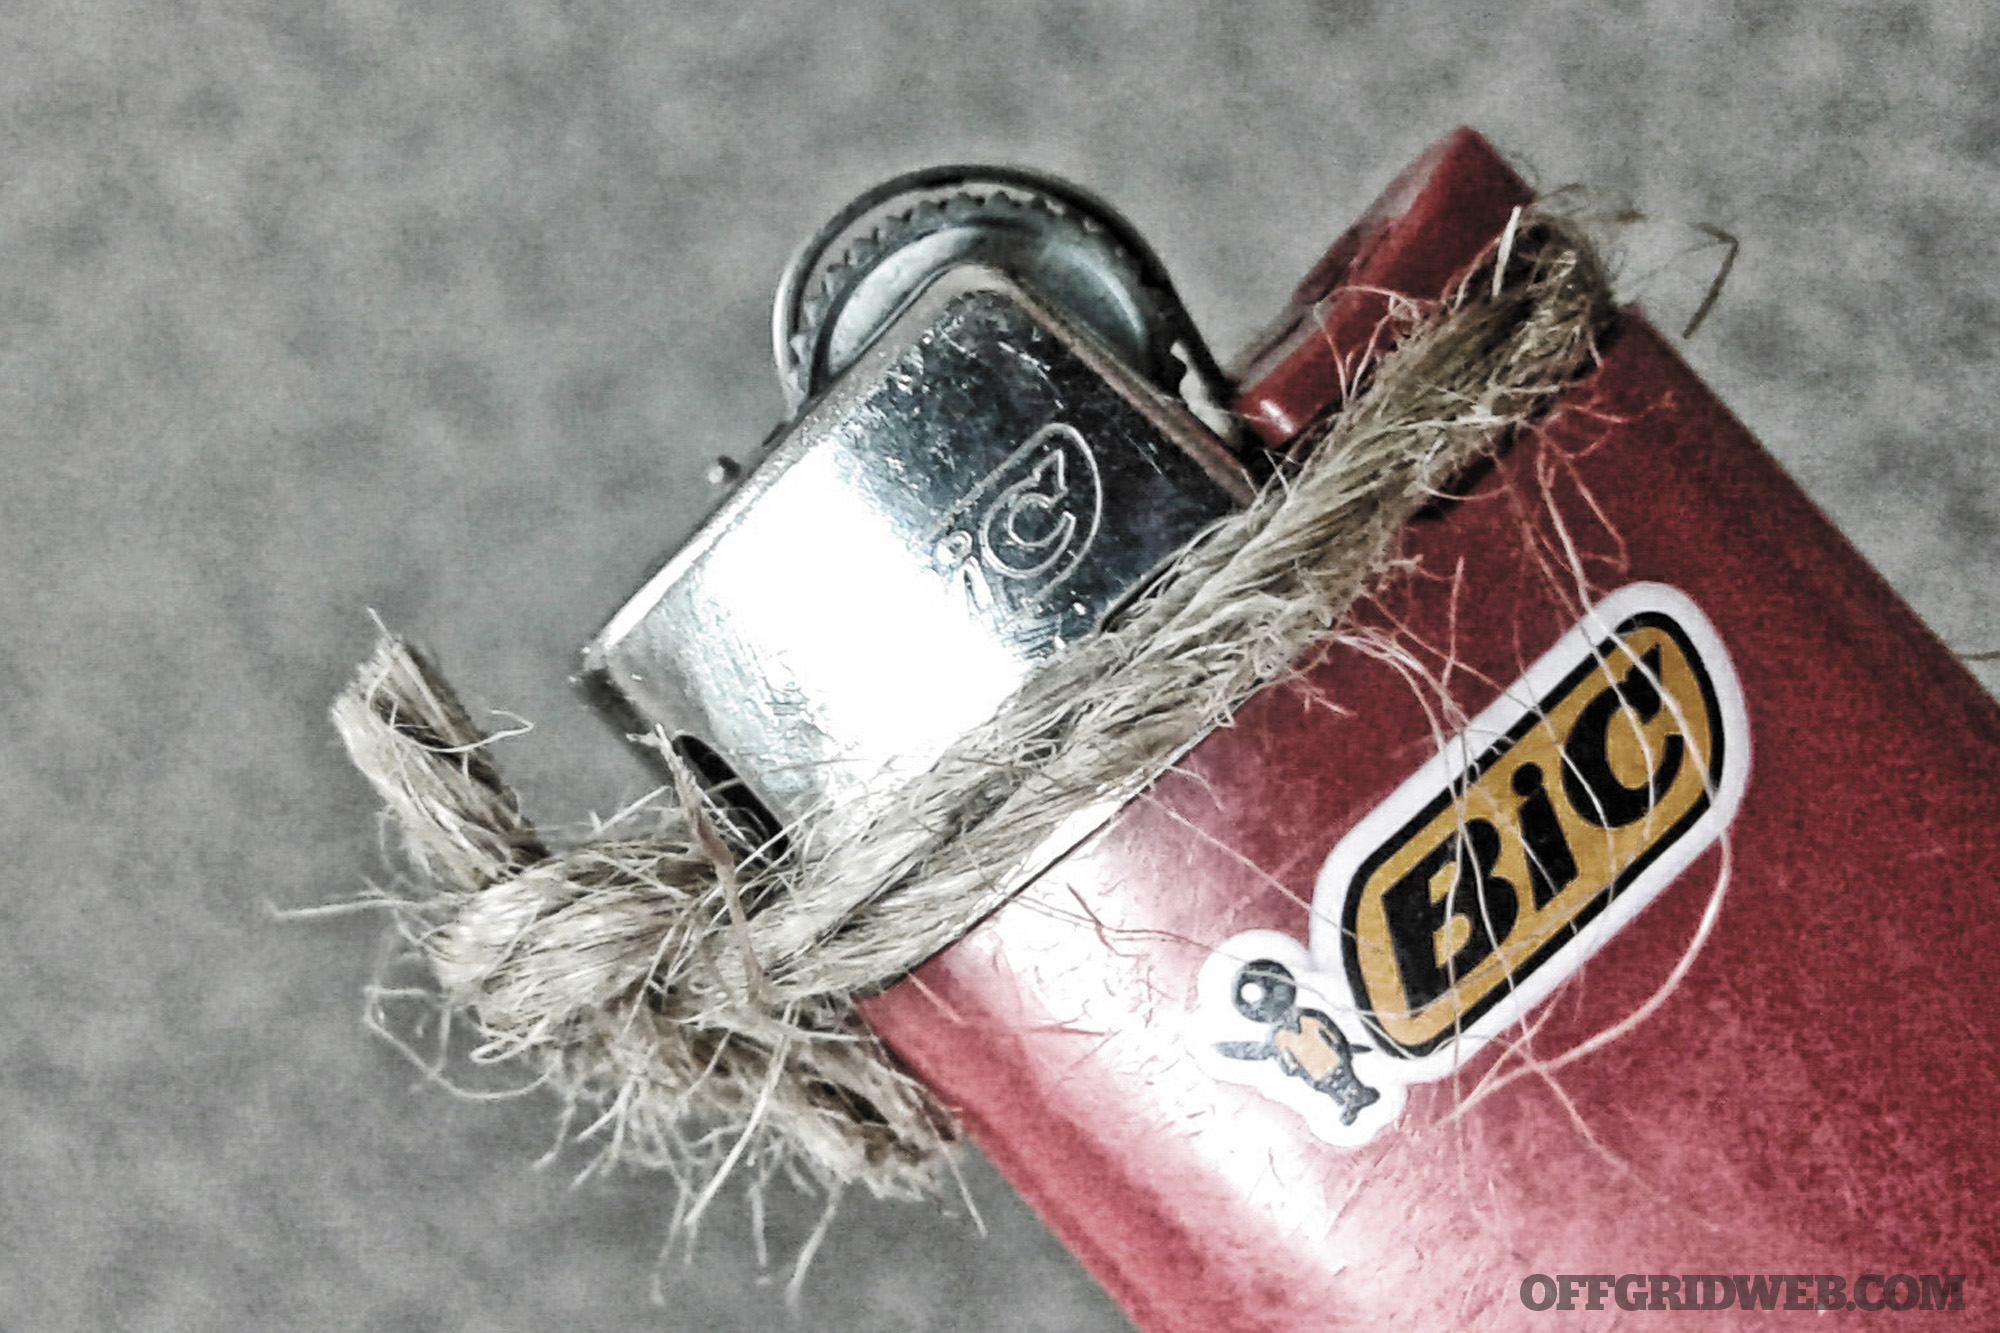
Consider wrapping some jute twine just under the lighter’s valve button to prevent the button from discharging fuel. The twine could also be used as tinder in a pinch.
Use the ranger band or a wide rubber band to seal the tin. This provides protection against water, keeping your tinder dry and ready to light. A piece cut from an old bicycle inner tube works very well.
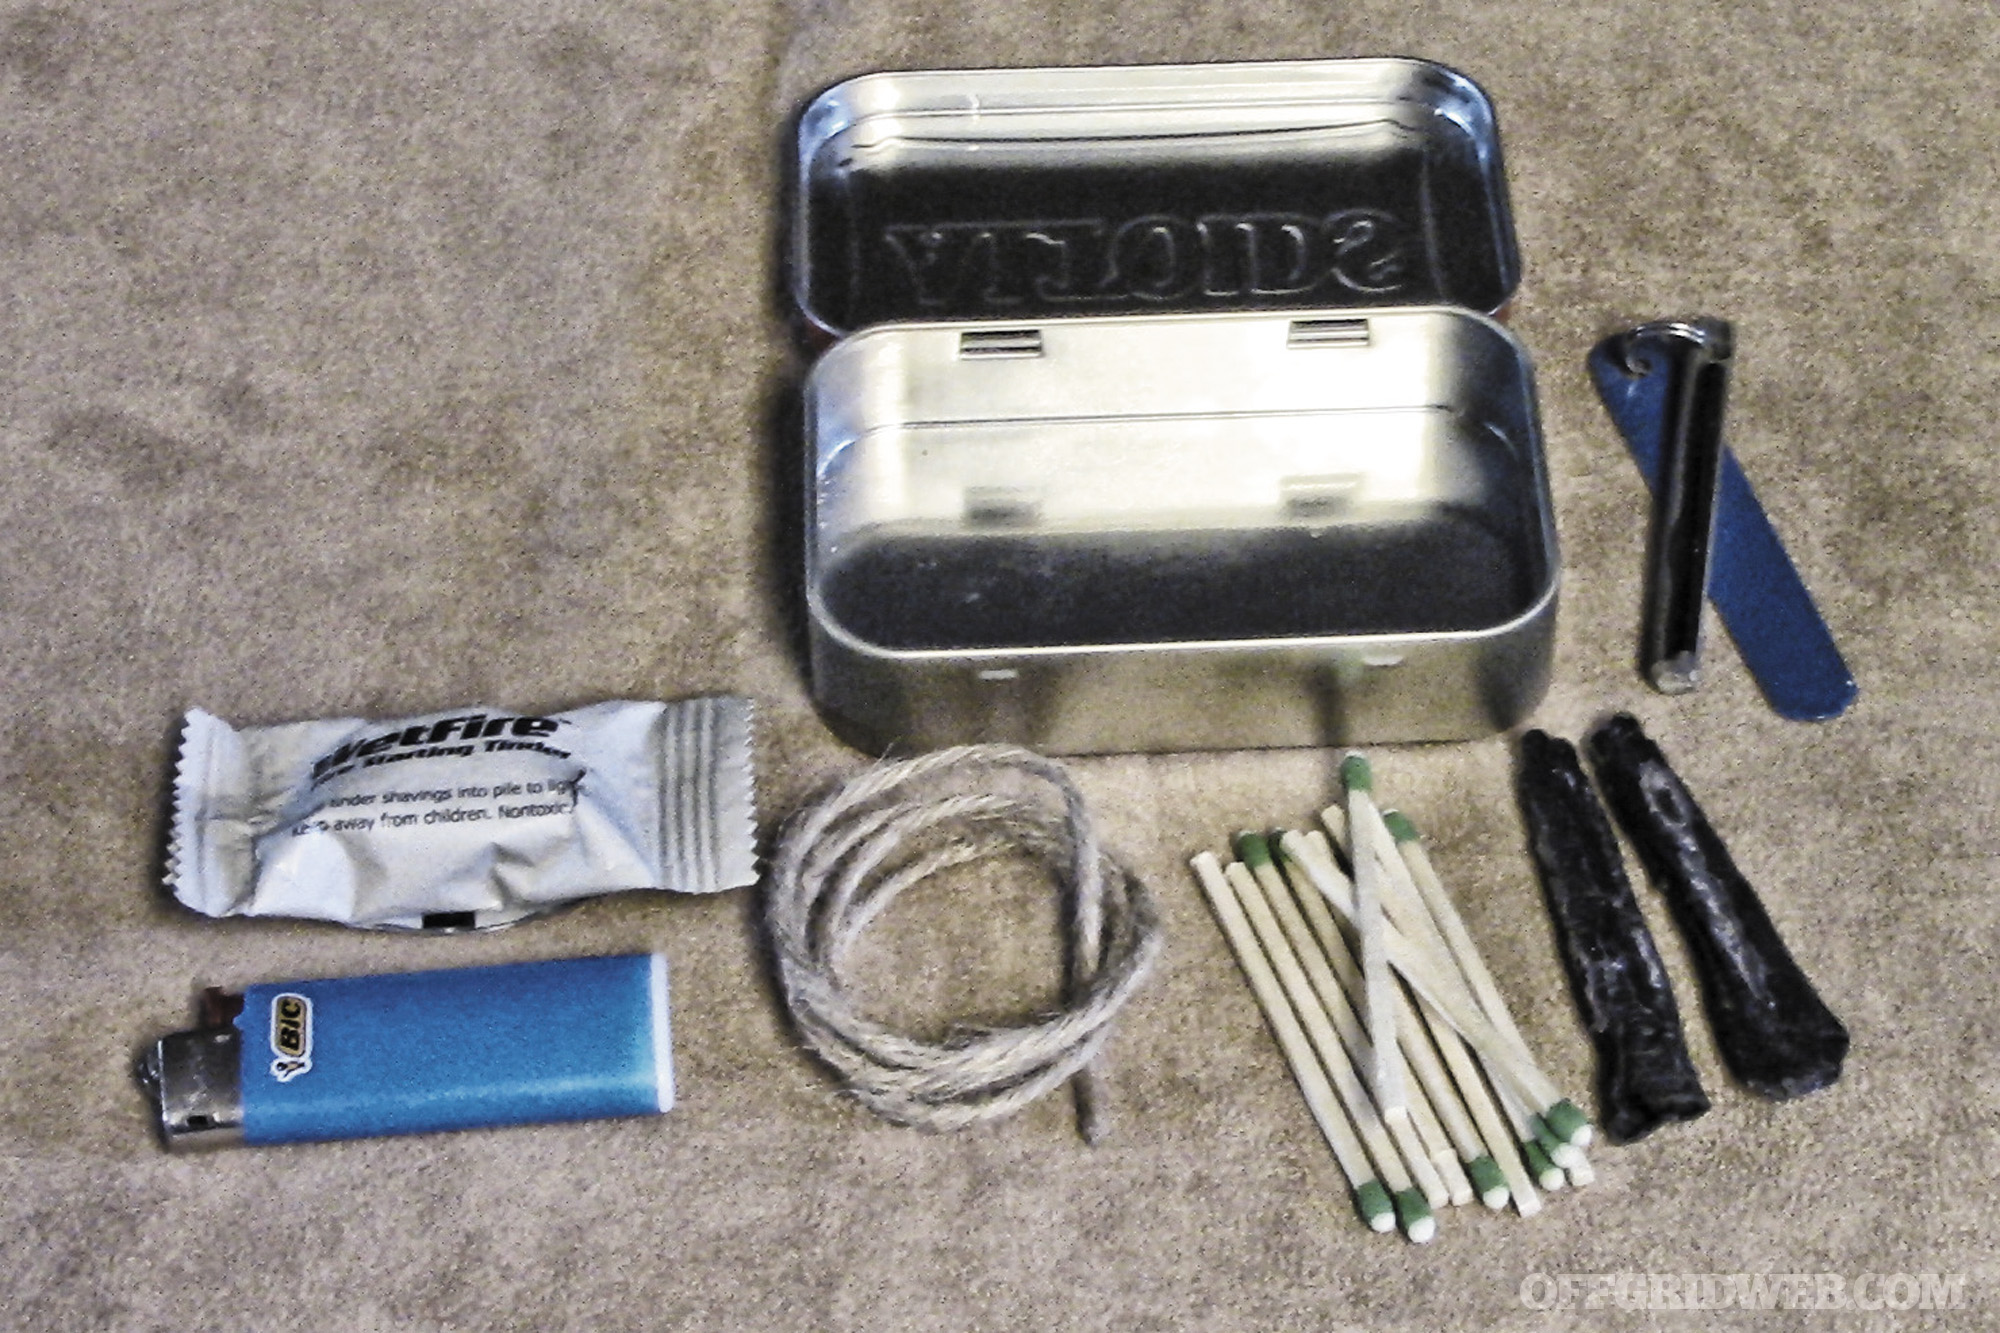
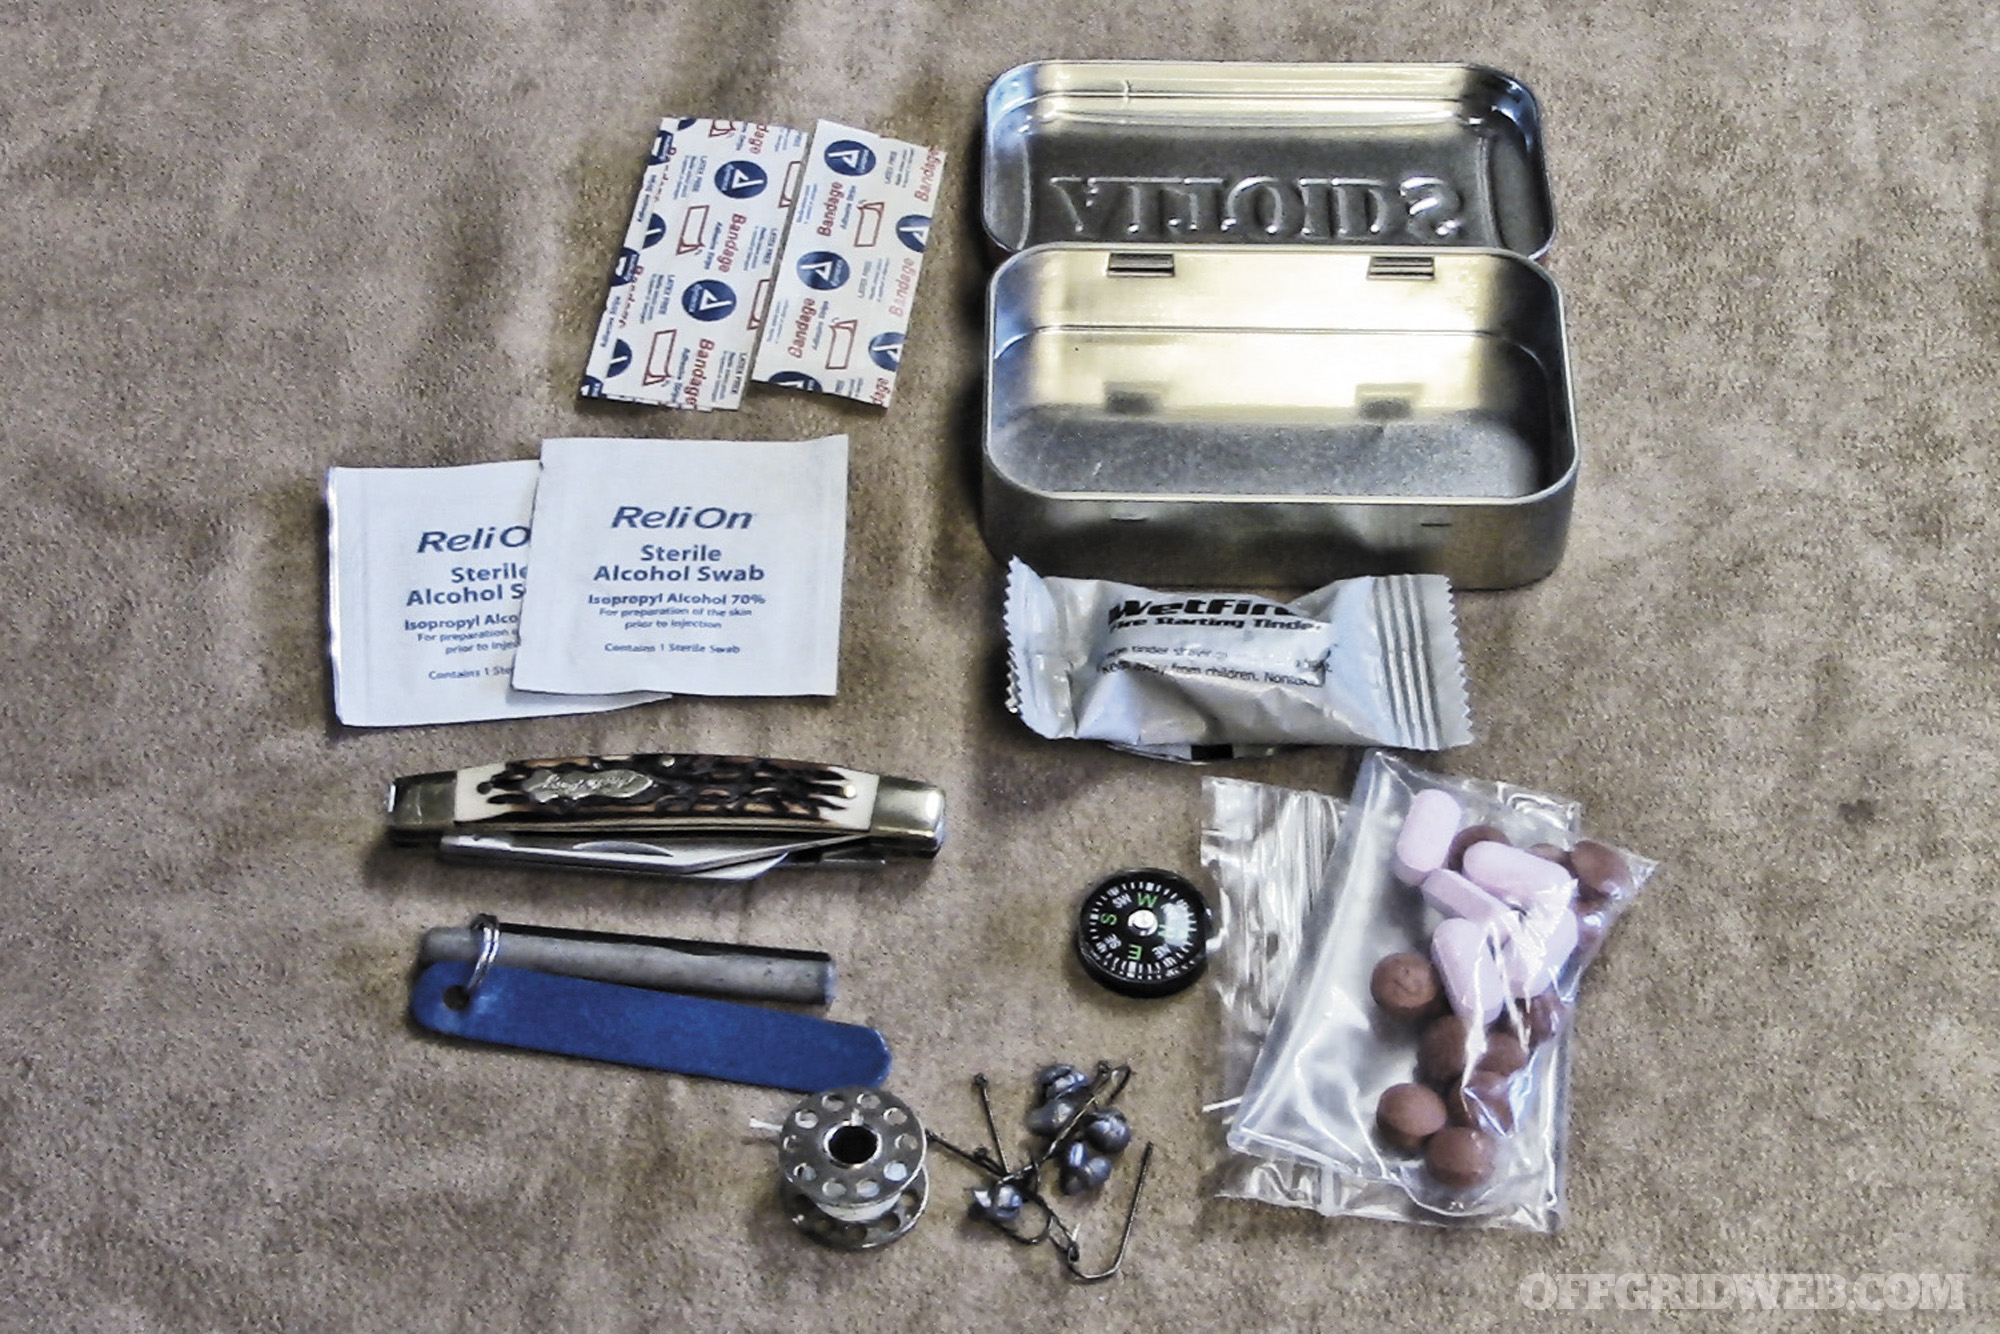
4. Survival Kit
This is likely the most common prepper use for a mint can. Many survivalists carry a small kit like this in their pocket, just in case. The idea behind an Altoids tin survival kit is not to give you the magical ability to run off into the woods and live for weeks on end using the contents. Instead, it’s intended to provide the bare necessities in case the unexpected happens, such as getting lost in the woods overnight.
Other than the Altoids tin, the contents here will vary. The kit’s contents will depend upon your location and your skill level when it comes to survival. In general, the kit should contain:
Small knife
Butane lighter or a ferrocerium rod
Some form of tinder
Fishing line
Hooks and sinkers
Adhesive bandages
Alcohol pads
Pain relievers, such as ibuprofen
Anti-diarrhea medication
Button compass
In this example, the knife is an Uncle Henry Rancher. The fishing line is wrapped around a sewing bobbin. The medications are in a sealed plastic pouch, along with the adhesive bandages and alcohol pads.
Realistically, the fishing gear likely wouldn’t get used on an unexpected overnight spent outdoors. But, the hooks and such weigh almost nothing and fit quite well into the kit. If nothing else, the fishing line could be used in building a quick shelter.
Self-Igniting Fire-Starters
I first learned how to make these fire-starters from noted survival authority John D. McCann (www.SurvivalResources.com). They remain my very favorite homemade fire-starter as they incorporate the ignition right into the mix.
Supplies:
Strike-anywhere matches
Toilet paper
Melted wax
Aluminum foil or wax paper
Tear one square of the toilet paper into two roughly equal pieces. Take two of the matches and hold them side by side, pinching one end of the piece of toilet paper between them. Tightly roll the toilet paper around the matches. Then, dip the whole works into the melted wax. Place it on foil or wax paper to cool, then dip the other end, completely sealing the matches in wax. Let it cool and harden.
To use, gently scrape or rub the wax from the heads of the matches, then strike the matches as normal. As the matches burn, they’ll ignite the wax and toilet paper. One of these fire-starters will burn for several minutes, easily igniting your tinder and getting your fire going.
The Wrap-Up
Recycling mint cans has never been more fun, or potentially life-saving. Next time you pop that last Altoid in your mouth, don’t chuck the tin in the blue bin. Instead, clean it up and use it for one of these four survival uses. Of course, as grandma taught me, these aren’t the only ways to reuse a tin. Like most aspects of survivalism, it’s all about adaptation. No doubt you’ll find a half-dozen other survival uses for our favorite curiously strong mint container.
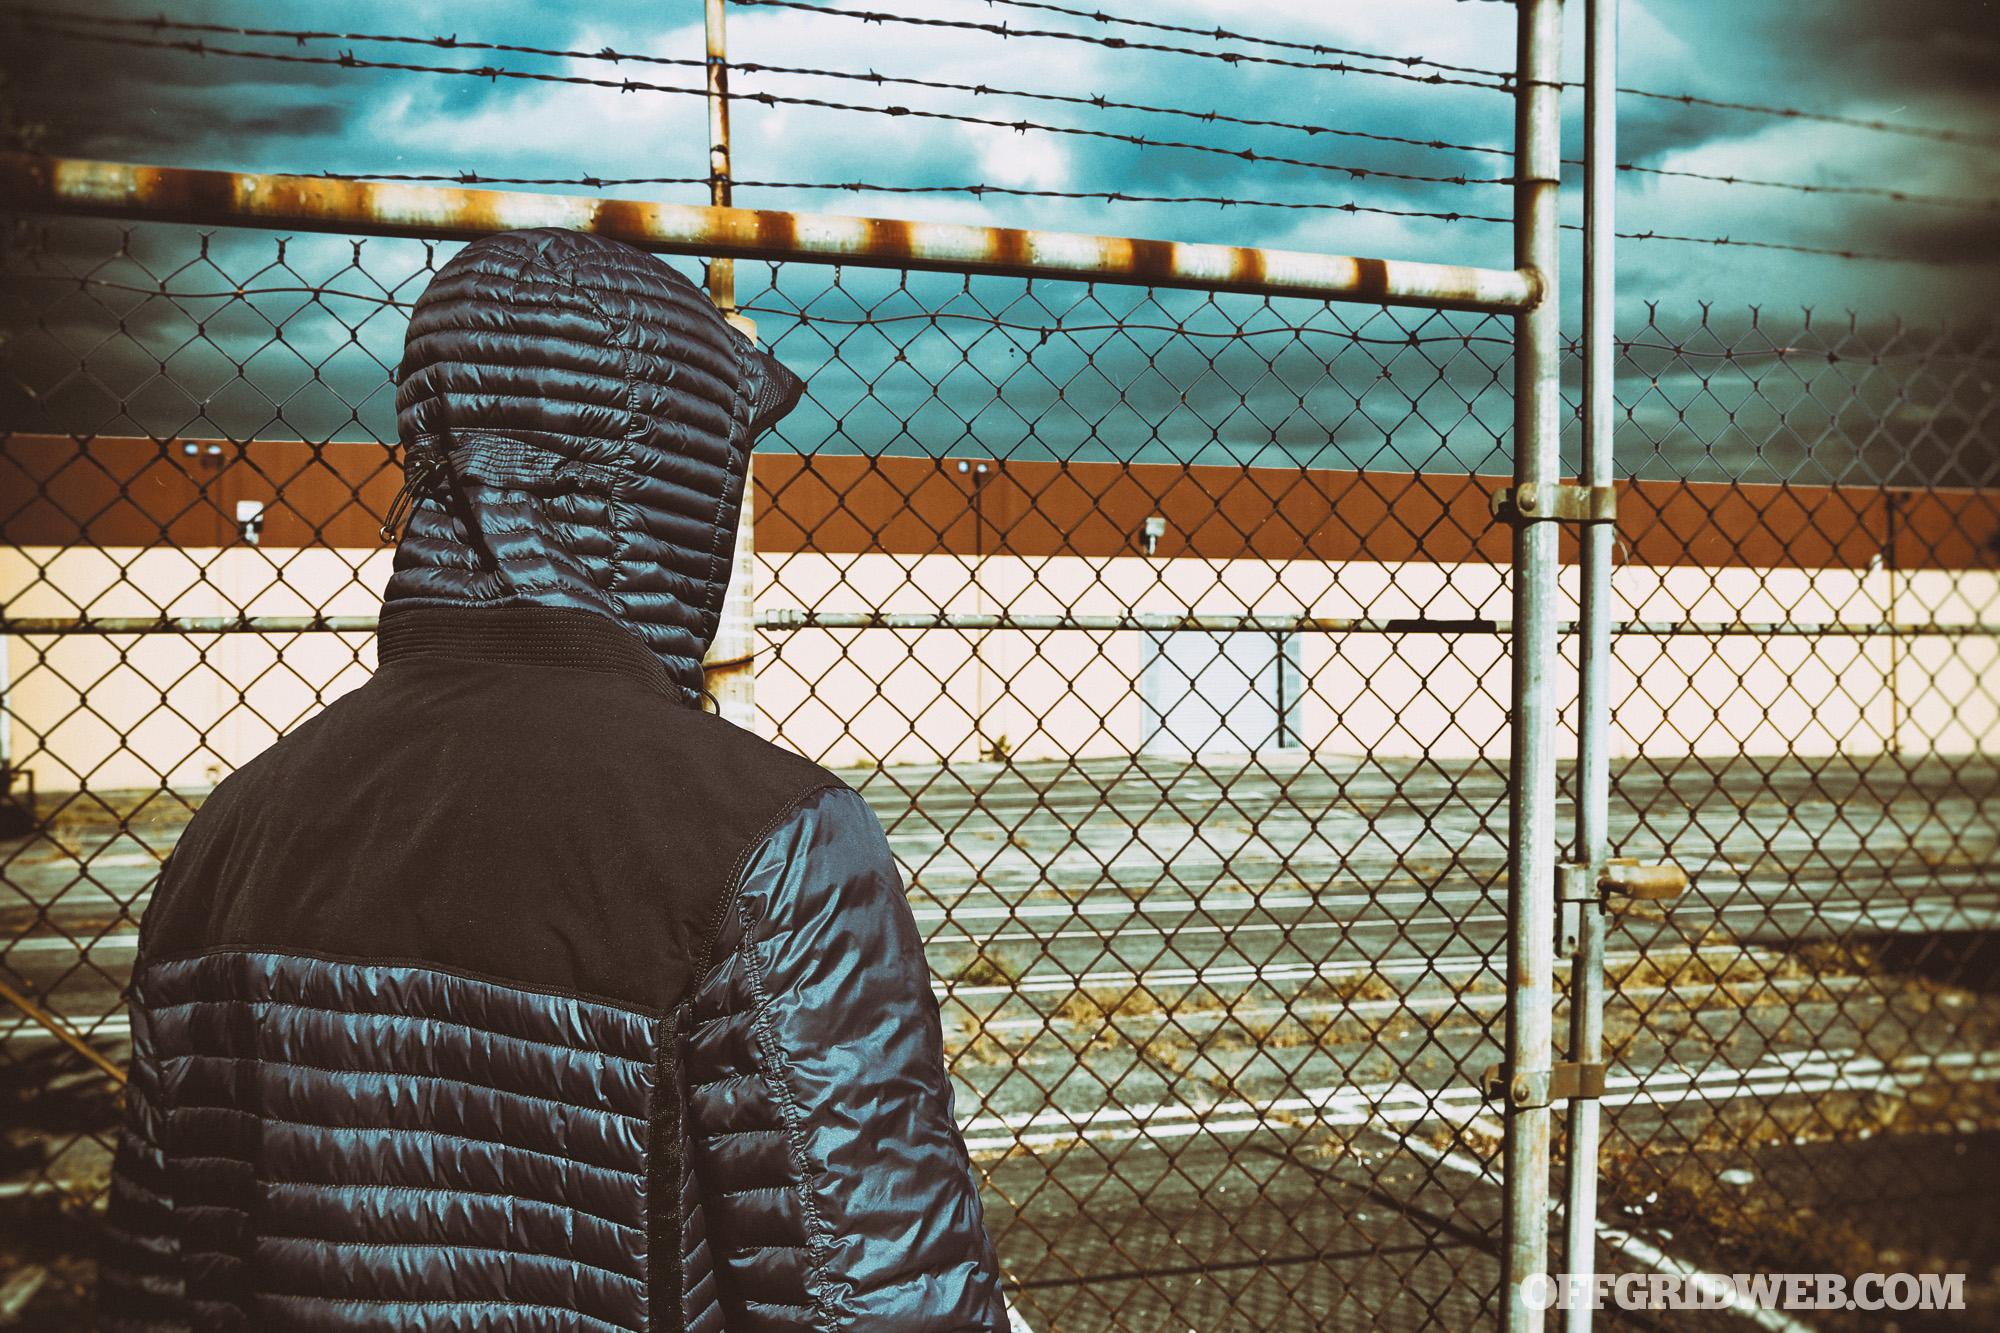
With the temperature dropping and wetter weather on the way — if it hasn't already arrived in your region — the need for warmer clothes creeps back into our lives. Enter hoodie season.
While many people these days see hooded jackets and sweatshirts as fashion staples rather than as prepper apparel, this versatile piece of clothing has long proven that function can indeed match form.
Utility
Hoodies are warm enough to keep us from catching a chill, but light enough so that we aren’t suffering in our own personal saunas. They offer cover from the elements and a way to warm up our noggins in a hurry. But wait, there’s more.
Some hooded jackets are not only good for protection against inclement weather, but also provide camouflage opportunities. Want to blend into a crowd? A non-descript hoodie can help you look like an everyman. Need to draw from concealment? There’s one with built-in features for that, too. Carrying $1,000 worth of gear but don’t want to look like you have anything valuable? Read on to discover a hoodie that is actually designed for that purpose.
Selection
Shopping for a hooded jacket is like shopping for anything useful; it’s best to pay particular attention to your needs and what the intended use is. A thick cotton hoodie won’t be great if you’re hiking in pouring rain, while a non-insulated windbreaker won’t do much to keep you warm when you’re out in the snow — get the picture? Weather, terrain, overall comfort, useful features, as well as your aesthetic preferences should dictate which hoodie is best for you and when.
Whether you’re preparing for a trip to a foreign city or a day trek out into the wilds, there’s a suitable hooded jacket that’s right for the job. Therefore, we try on several hoodies to find out which one can help you stay prepared.
A Brief Hoodie History
Where did the hoodie get its start? The skateboarders of the 1980s? Nope. The graffiti artists and break-dancers of the 1970s? Go back further. Much further — you can thank medieval monks for your favorite hoodie. Well, sort of. Monks wore hooded robes for warmth in unheated churches, and the style eventually spread throughout Europe. However, it wasn’t until the 1930s that the hoodie that we now know and love came to be. The Knickerbocker Knitting Company claims to have made the first hooded sweatshirt in the Dirty ’30s to protect athletes and laborers from bad weather. You know that company today under the brand name Champion.
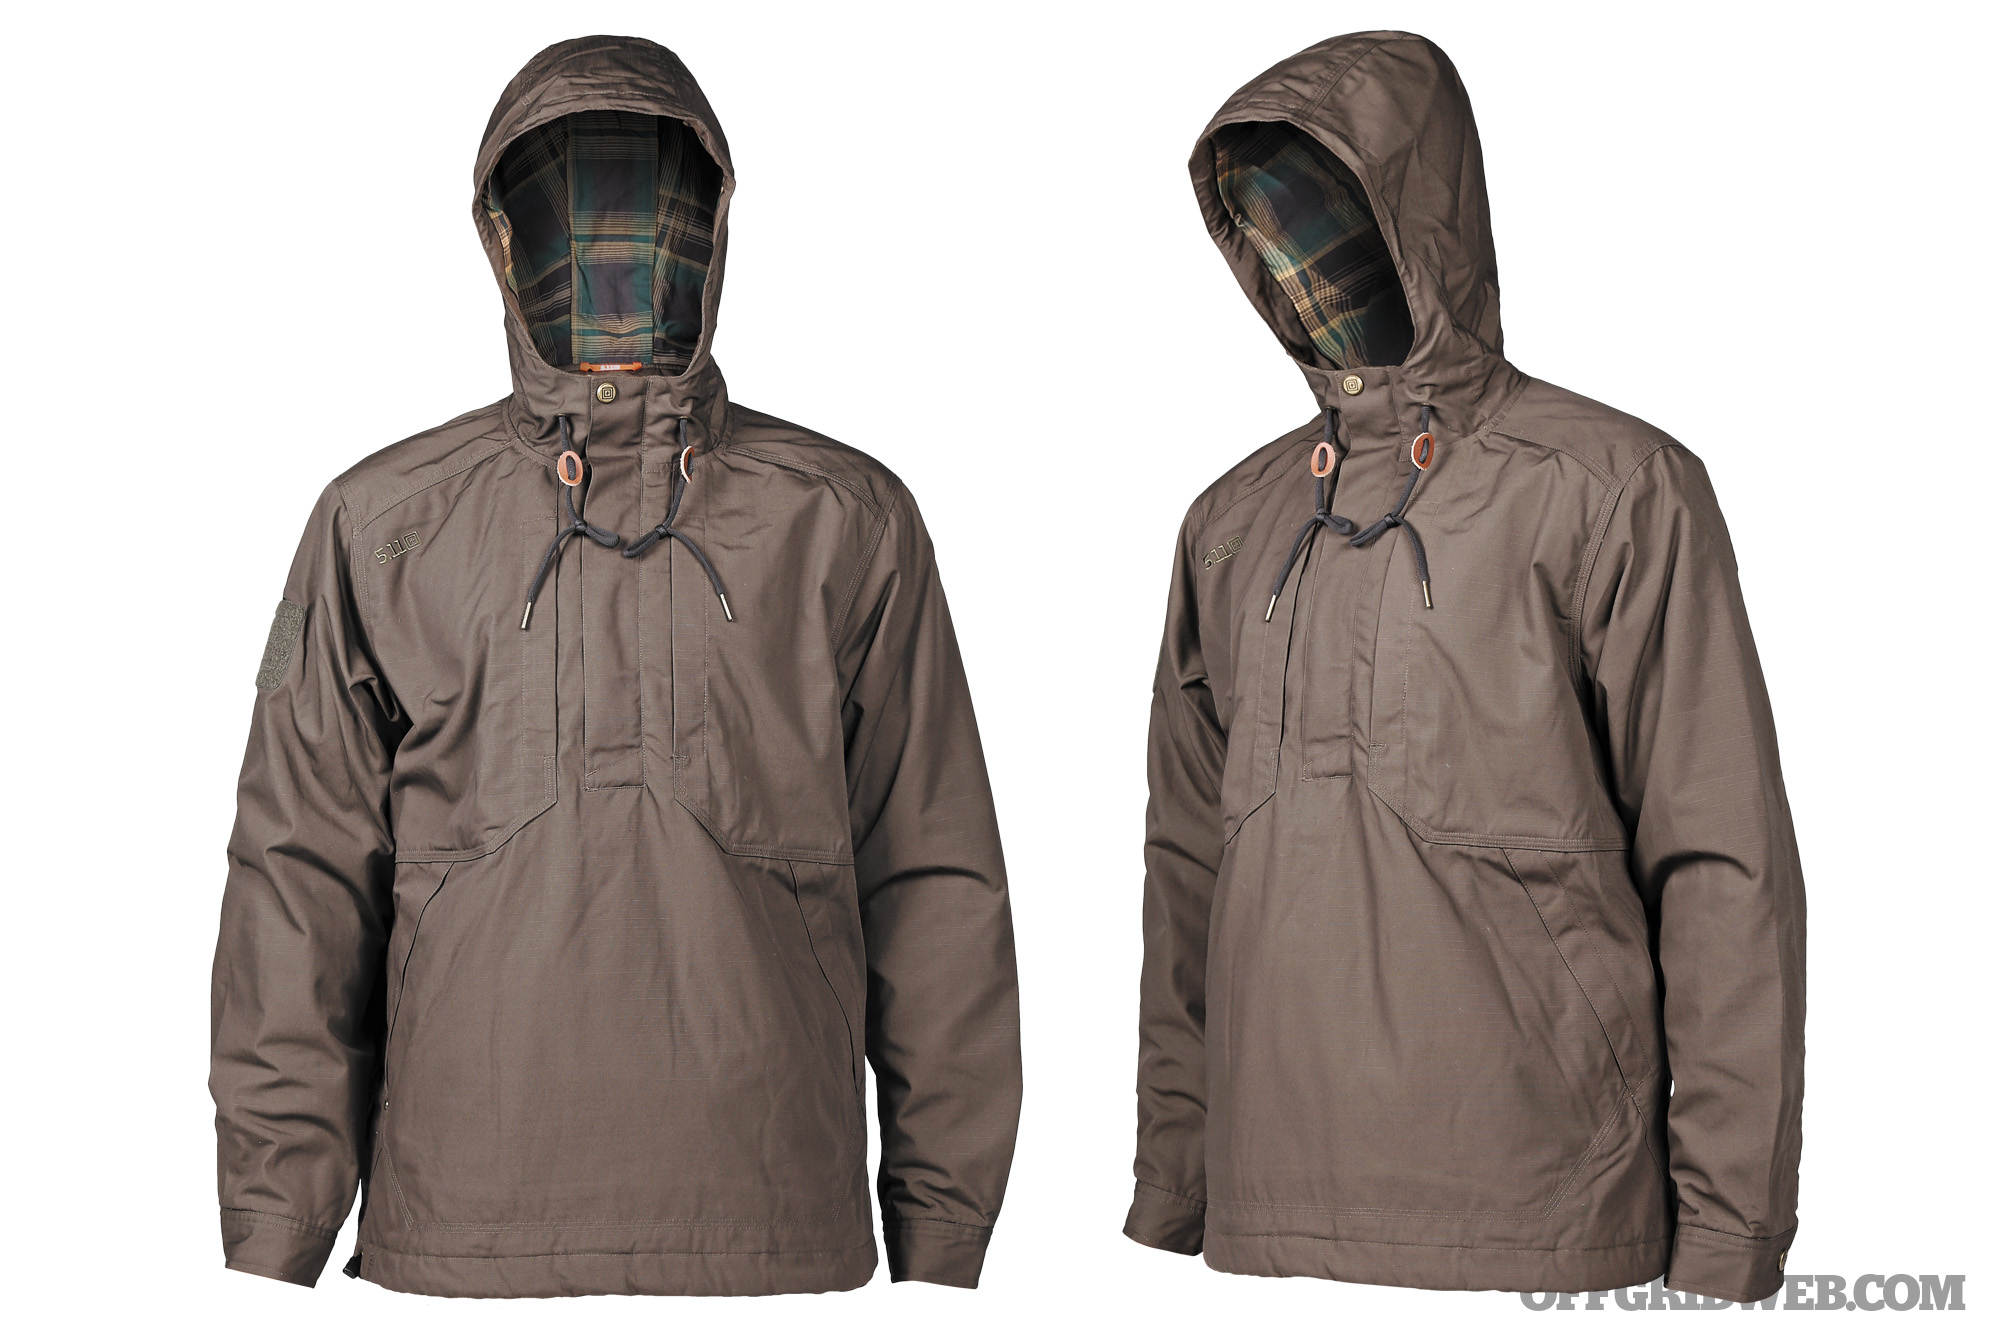
5.11 Tactical Taclite Anorak Jacket
Colors Brown, stone, tundra (shown)
Material Polyester/cotton shell with cotton twill lining
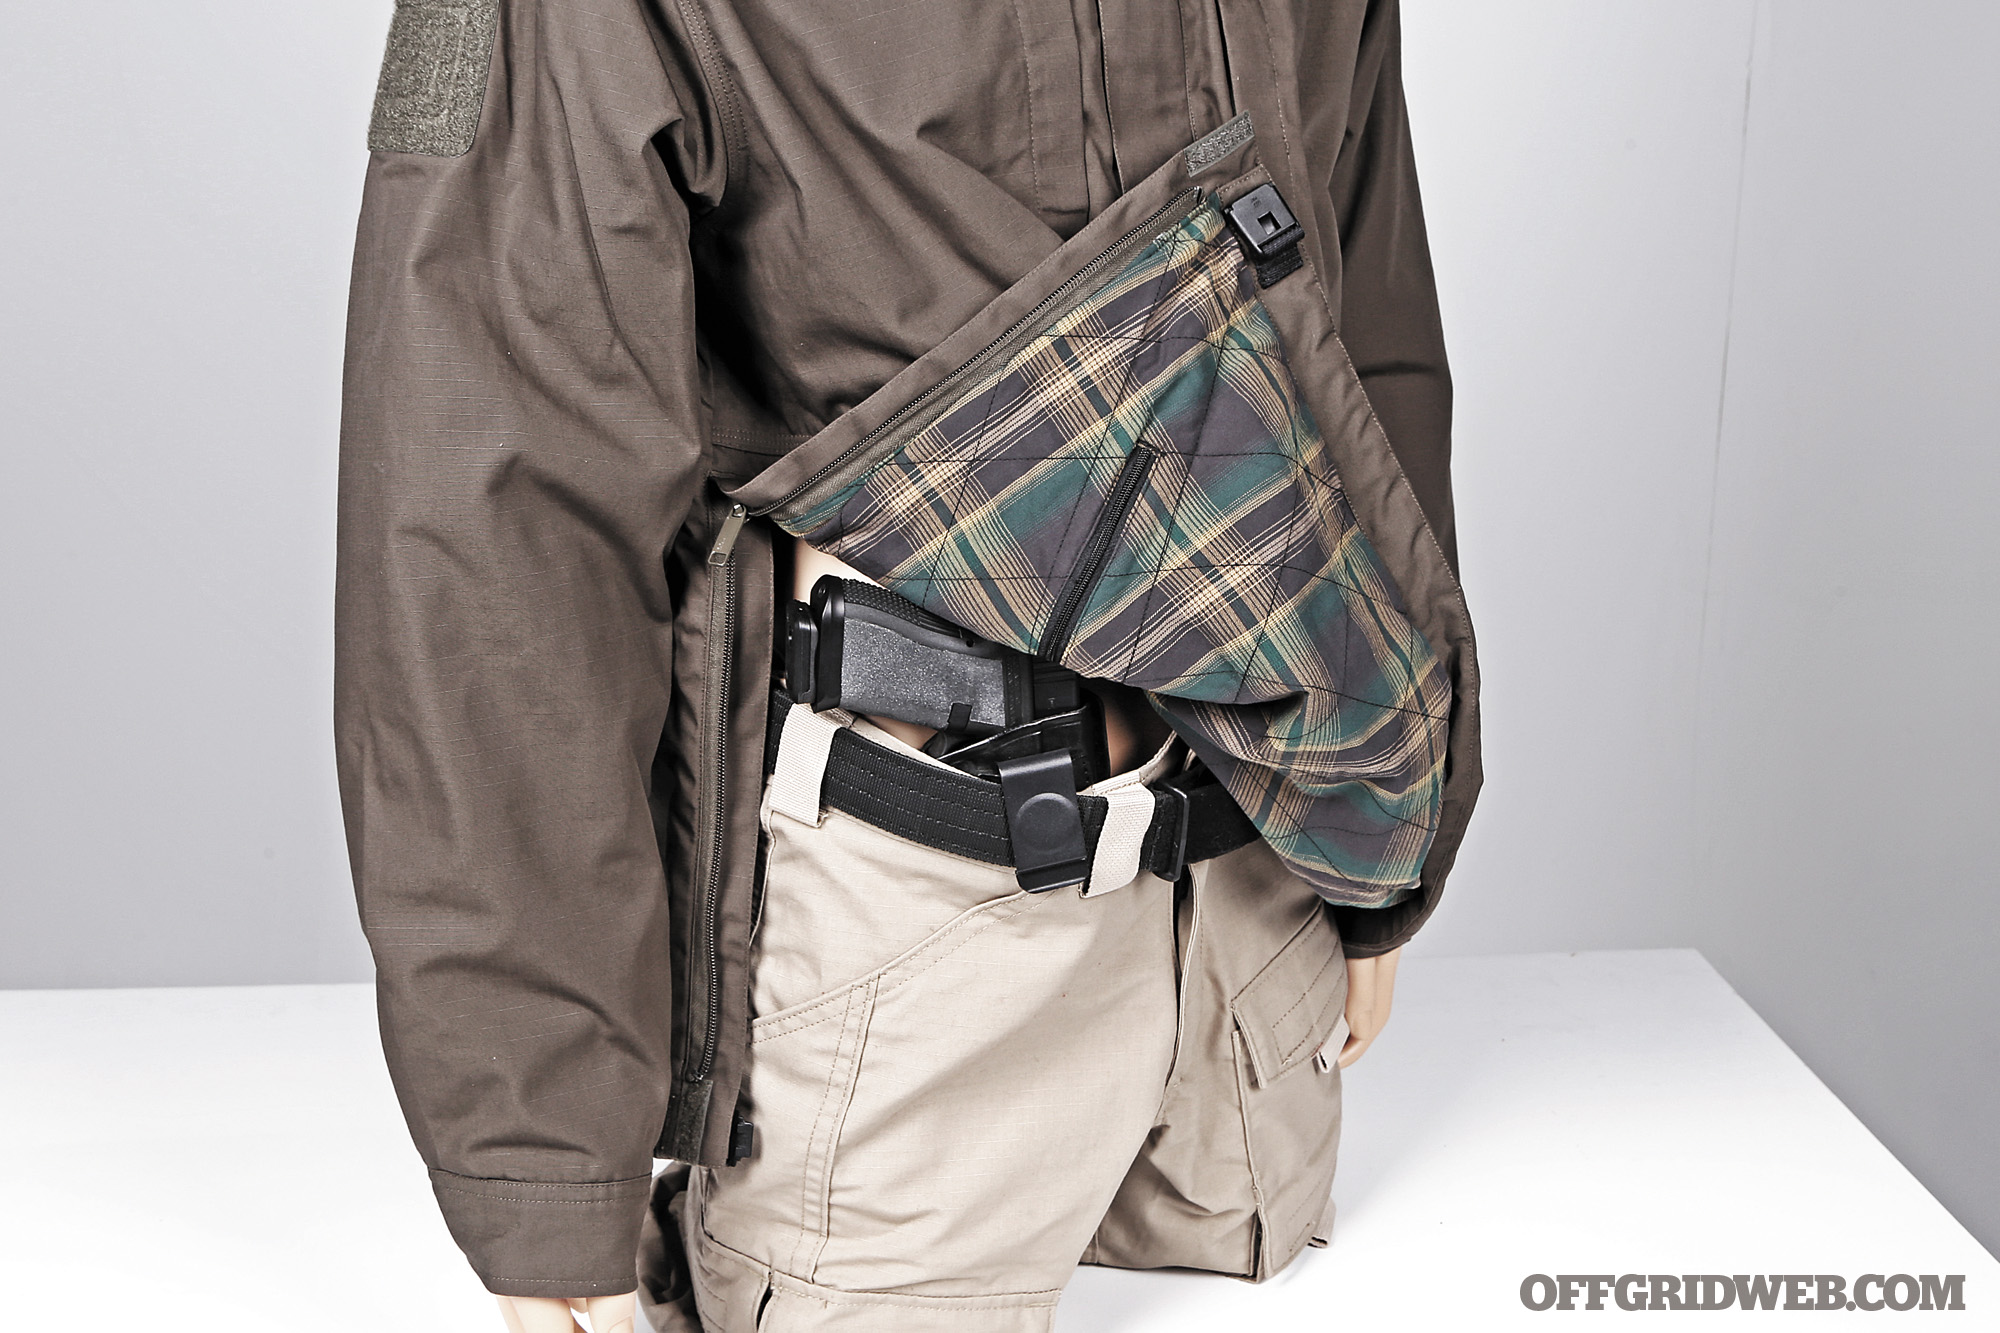
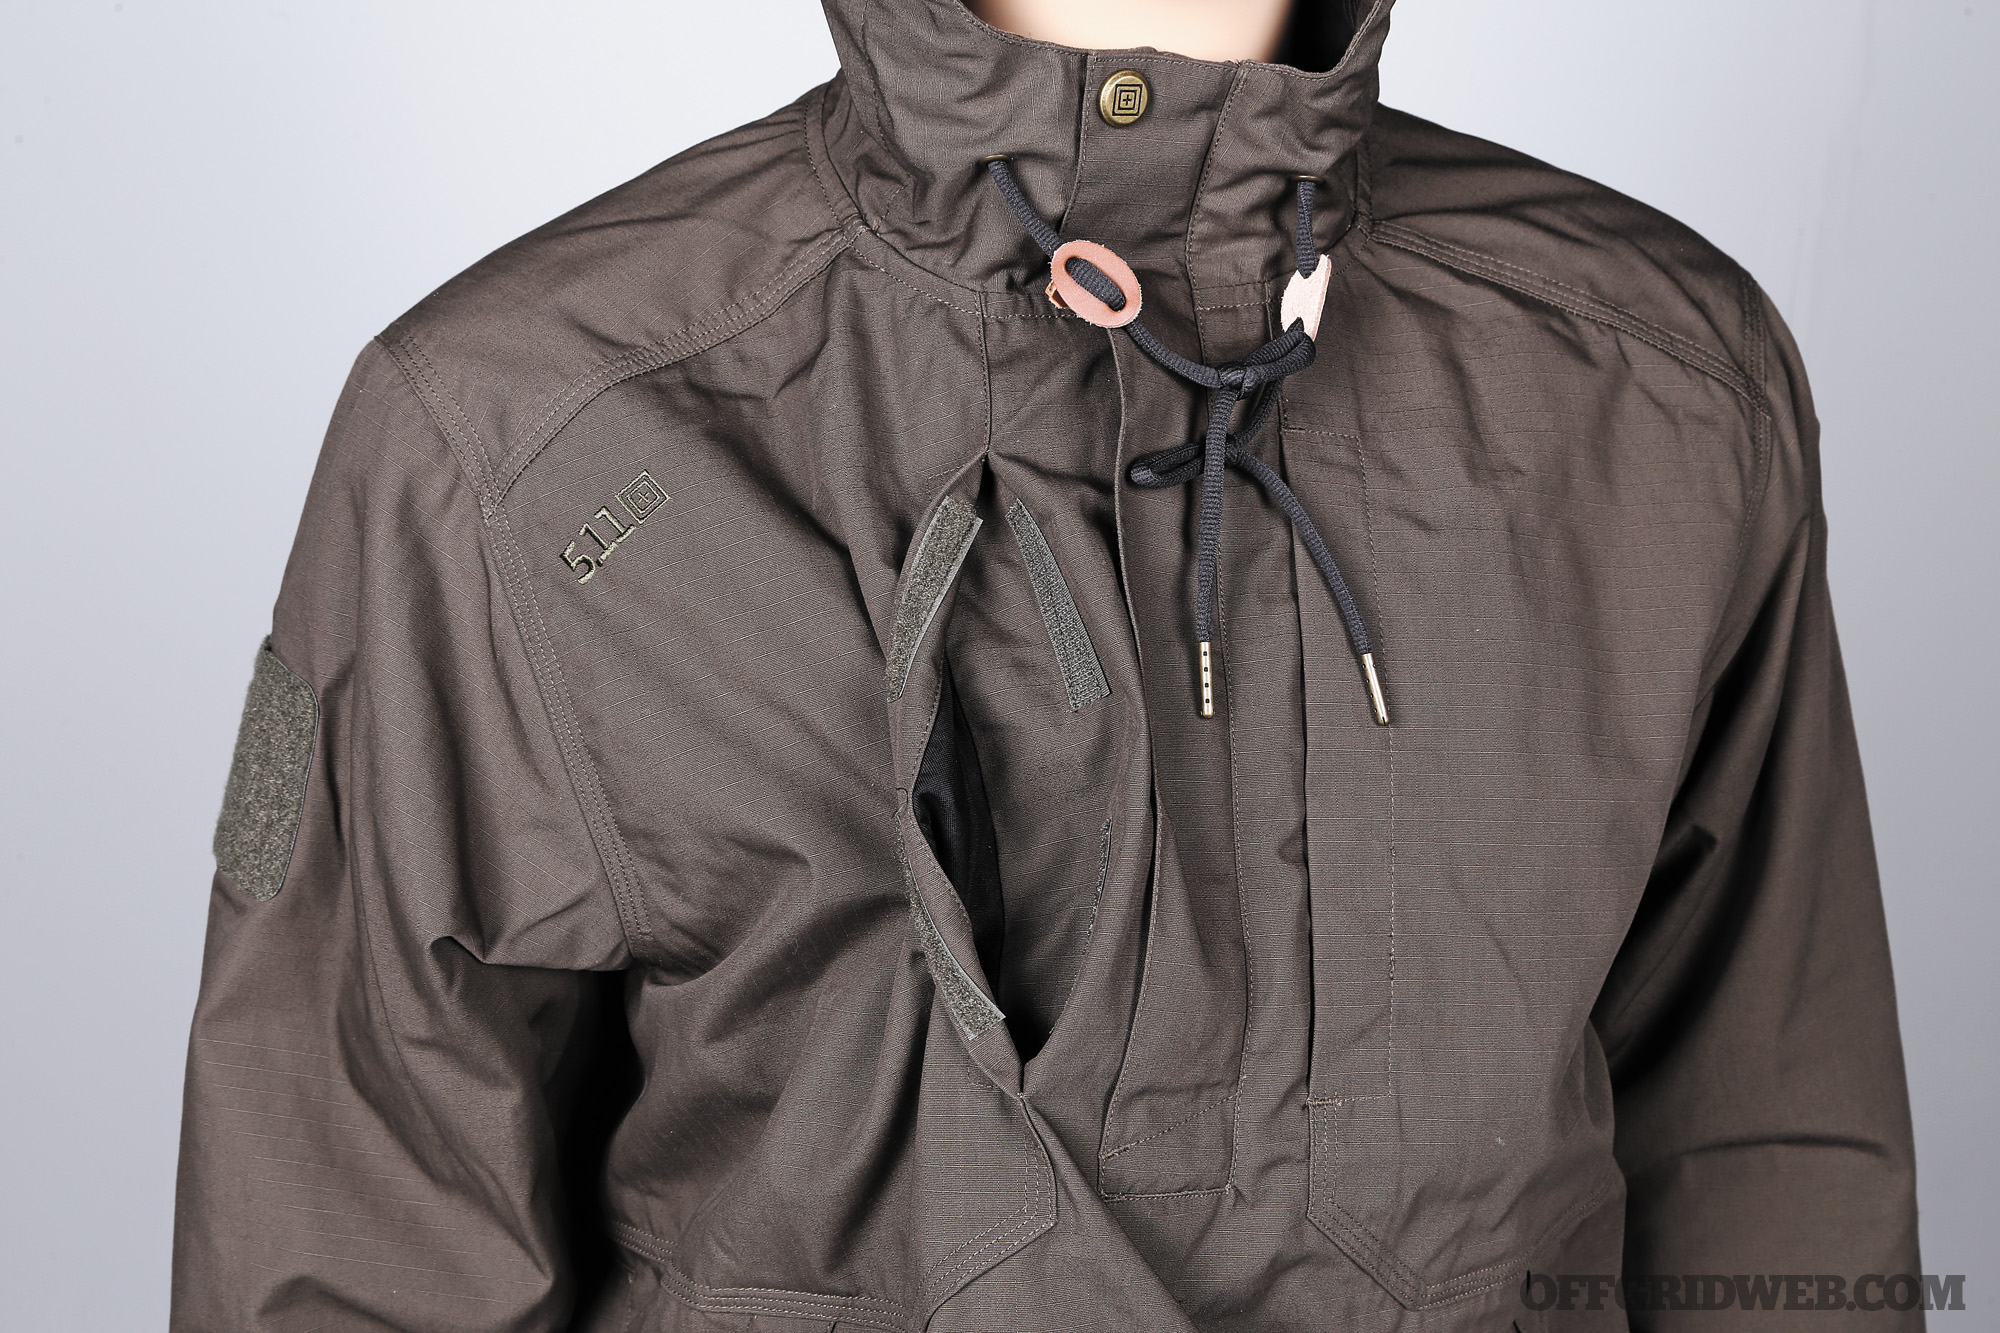
Notes Featuring reinforced stitching throughout its construction, this jacket is clearly designed for hard use. It does a good job keeping wet weather out with its three-panel hood, storm flaps, and adjustable cuffs. Unlike other jackets in this guide, the Taclite Anorak is built to let you quickly reach a concealed-carry weapon (CCW). Its front pass-through pocket allows for access to gear by both hands, and a covert pass-through at the bottom of the pocket allows you to draw from the waist. The jacket also has full-length zippered side vents that allow for access to waist-worn sidearms.
Pros:
If staying warm and dry without sacrificing CCW capability is important to you, this is certainly a worthy option to consider.
CCW compatibility
Insulated throughout
Cons:
The all-over insulation comes at a cost. It’s on the heavier side, and its frumpy look doesn’t score any points in the style department.
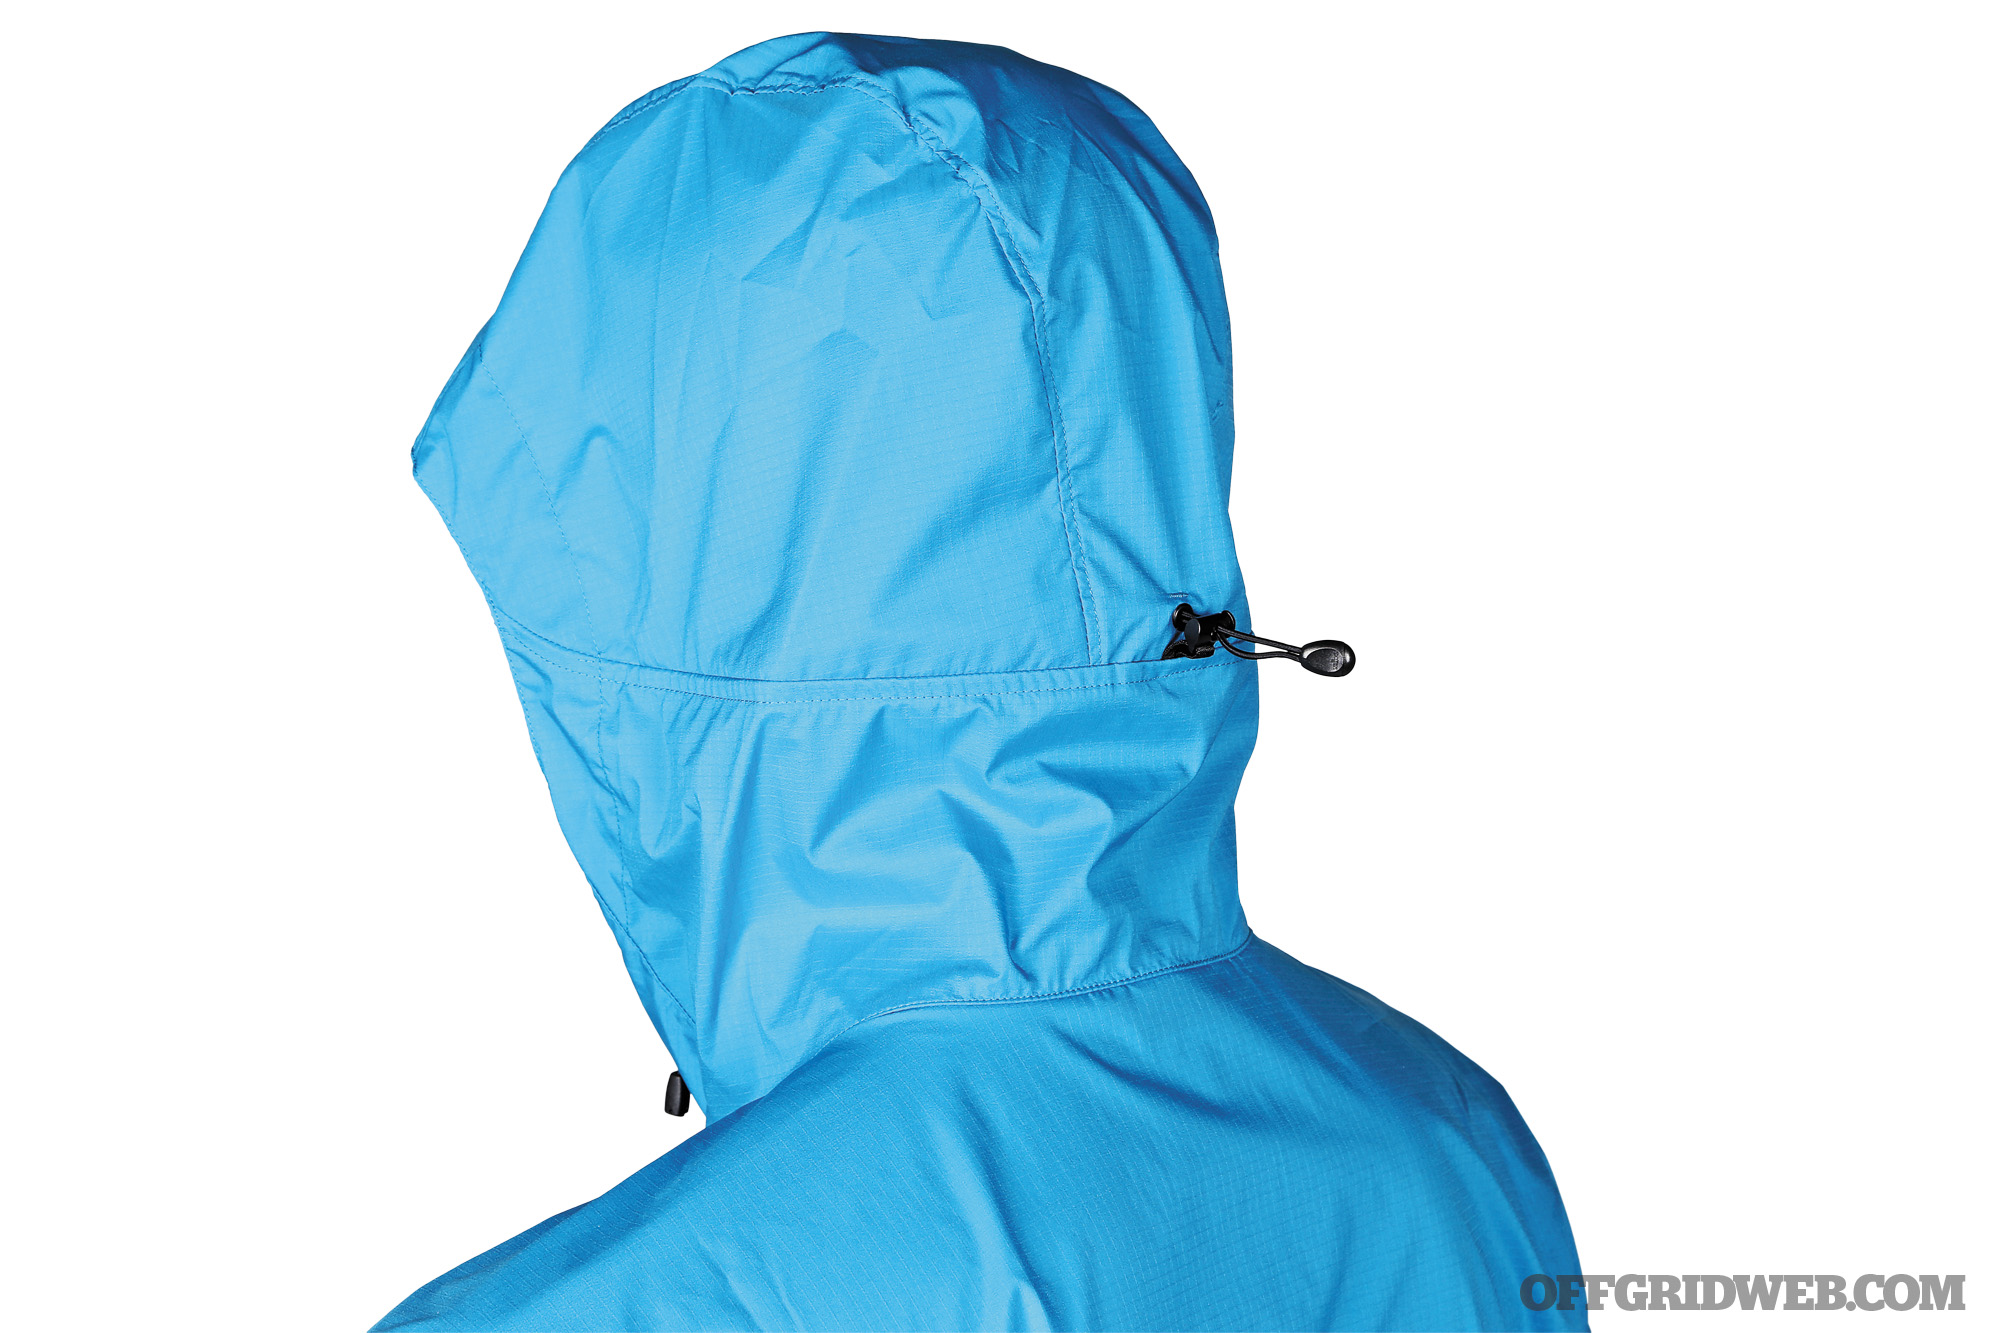
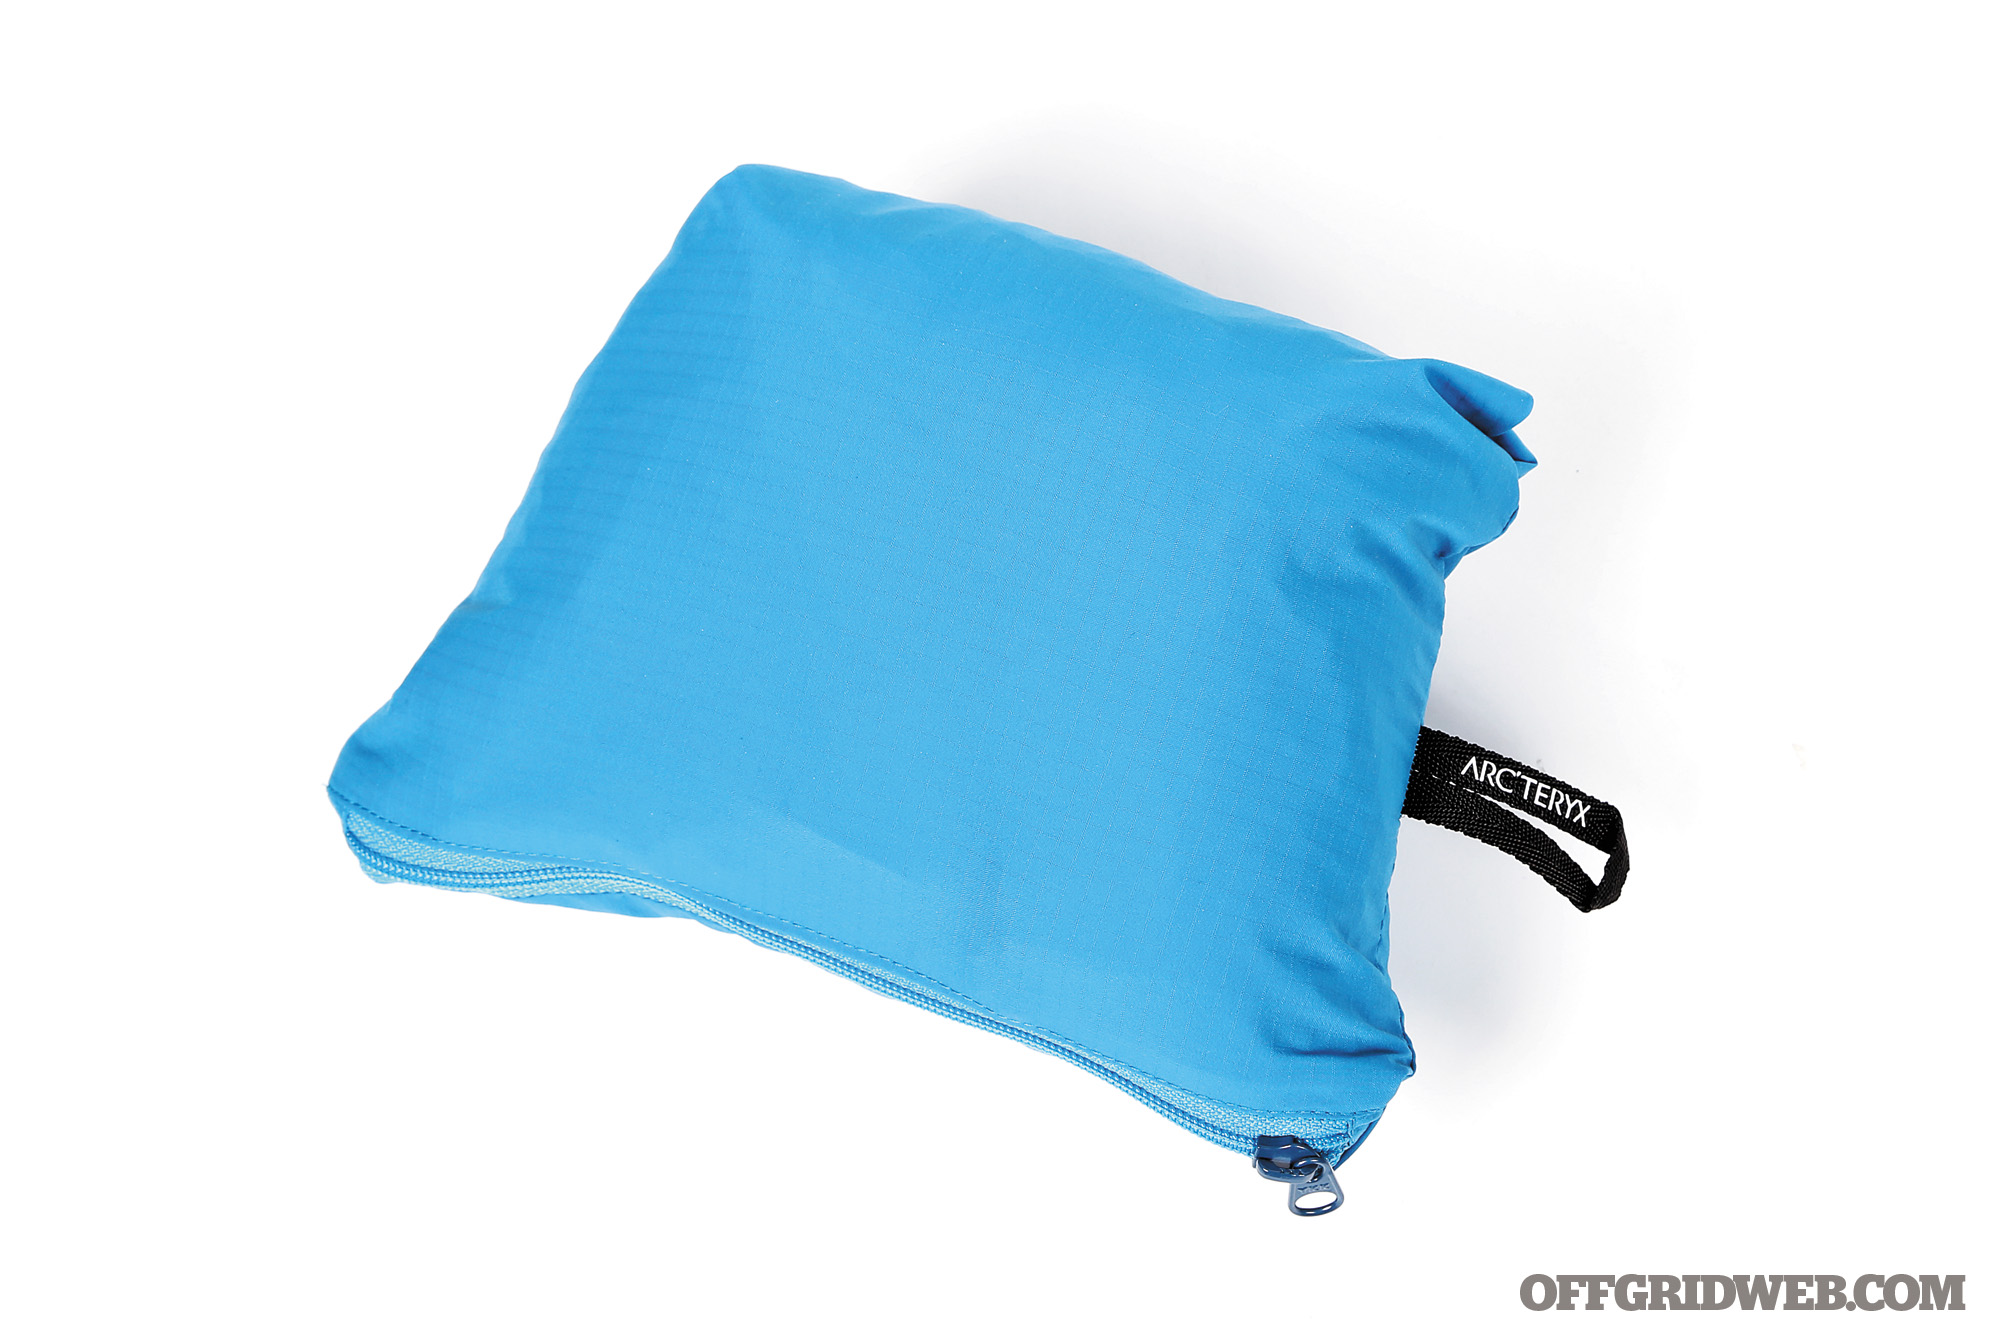
Features Gusseted underarms for enhanced movement, lightweight construction, compressible and packable, wind resistant, water repellent, hood is helmet compatible, stows away in its own pocket
Notes Arc’teryx calls this hooded jacket a “hooded windshell,” which is a perfect description for it as it feels more like a shell than a full-on jacket. The Squamish Hoody is an extremely lightweight and compressible jacket, constructed of durable wind-resistant and water-repellent nylon fabric. In fact, it’s so light and packable that it can actually be stowed in one of its own pockets for compact storage. We’d be remiss if we didn’t point out that its lightweight design means that its not insulated, but if ounces and space are a premium in your pack, this jacket is a viable option. Arc’teryx designed it with freedom of mobility as a key feature. The Squamish Hoody’s cut and gusseting provides ease of movement for just about any activity. It is equipped with Arc’teryx’s StormHood, which is helmet compatible and can be cinched with one-handed draw cords.
Pros:
A jacket that’s lightweight, wind-resistant, water-repellent, and small enough to be packed into one of its pockets is a keeper in our book. The fact that the hood is helmet compatible and can be cinched one-handed puts it over the top.
Lightweight
Packs into its own pocket
Wind and water resistant
Cons:
This jacket might be great for warmish to cool, windy environments, but this uninsulated windbreaker won’t do anything to ward off the cold when the mercury really drops.
Limited application
Light, thin construction may lack durability
Athletic fit makes layering underneath a challenge
Beyond Clothing Alpha Lochi Jacket
Colors Navy/grey
Material Nylon with synthetic insulation
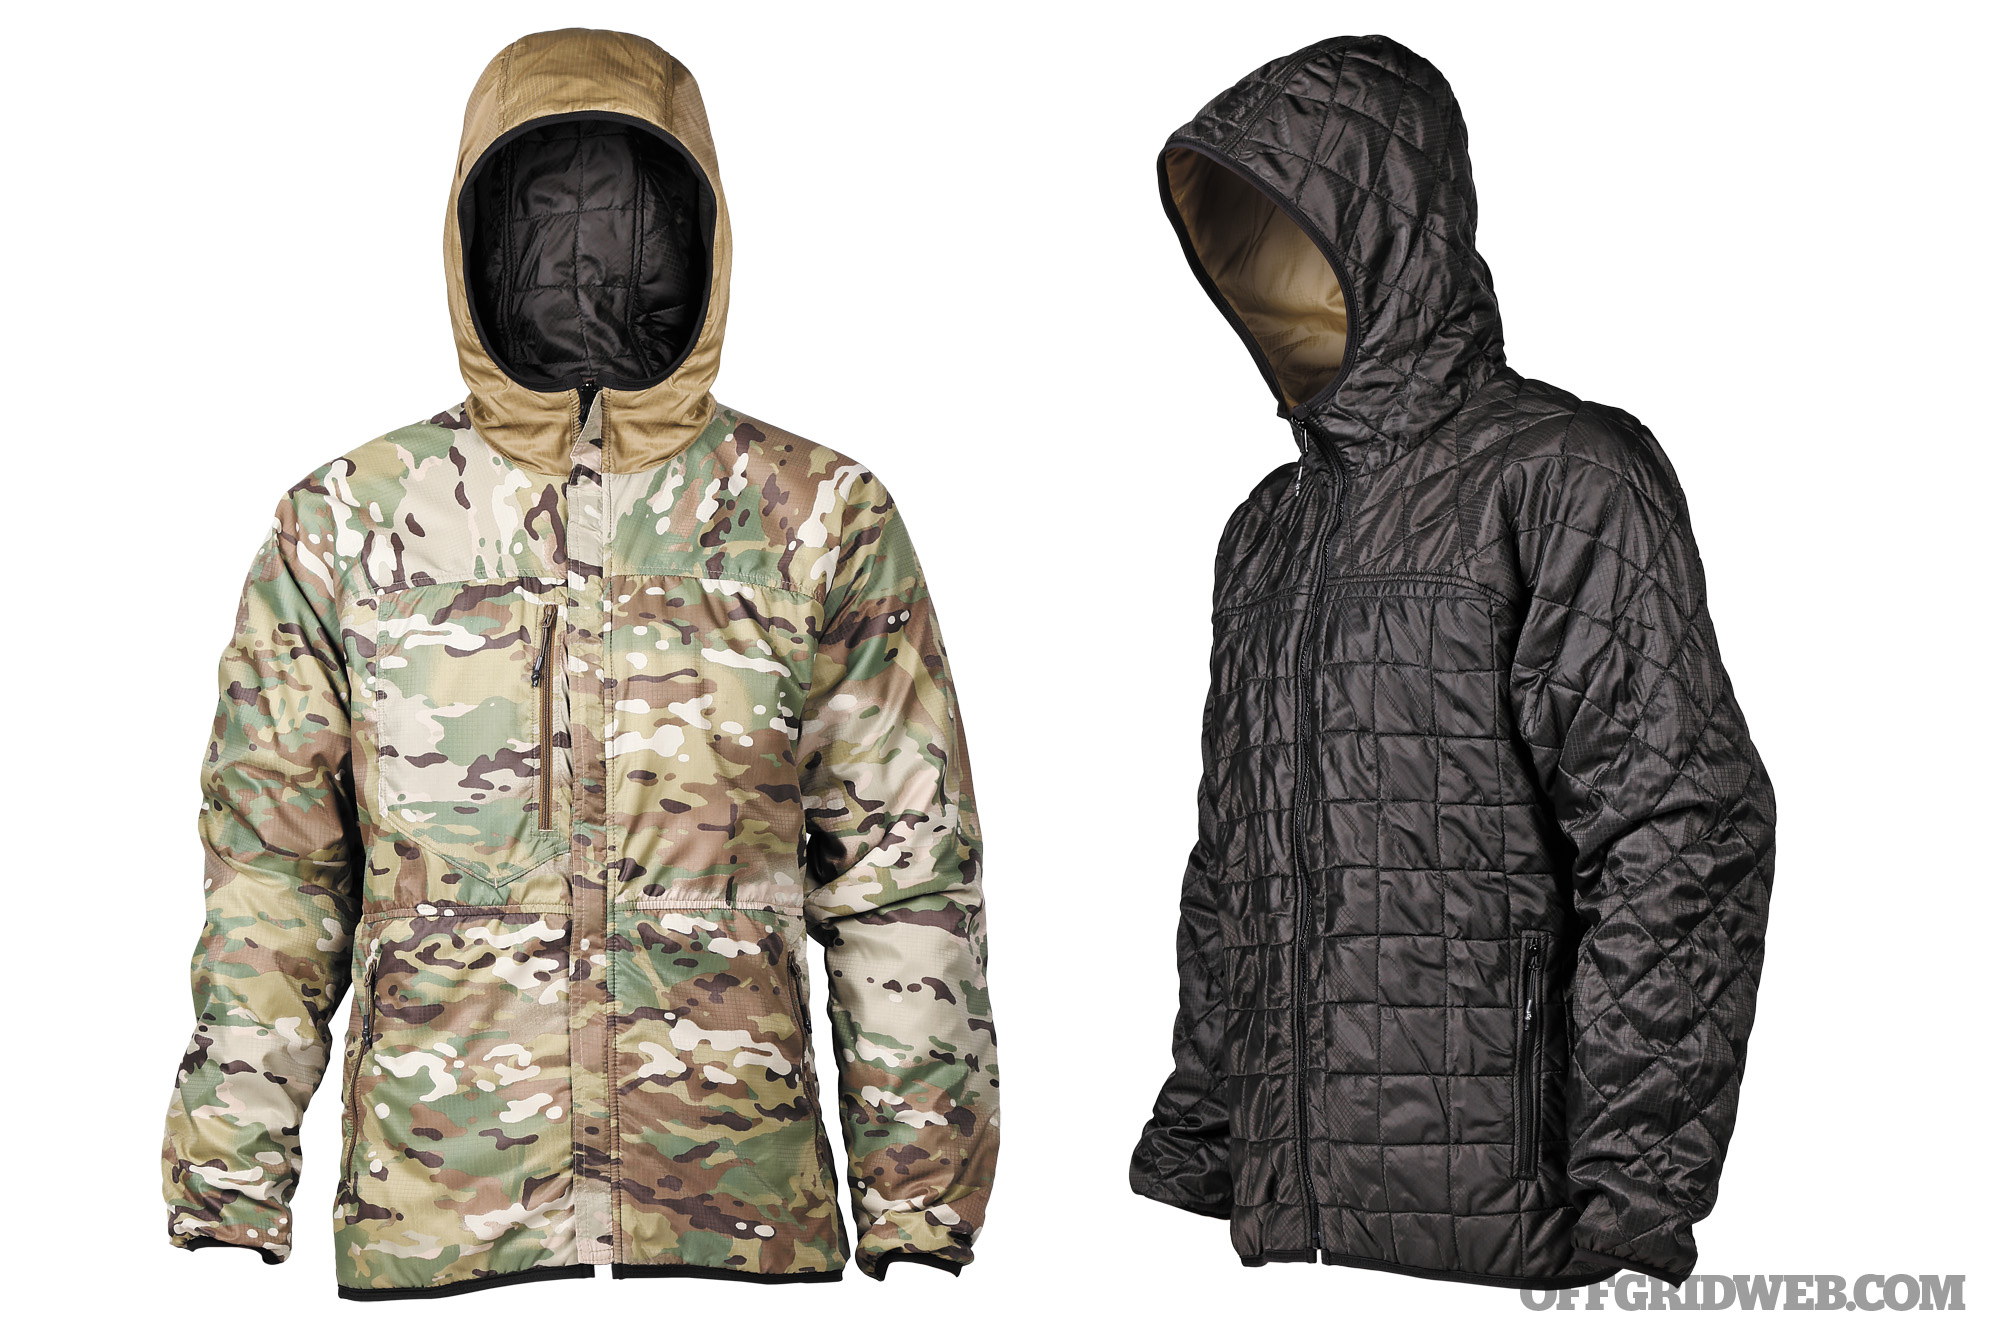
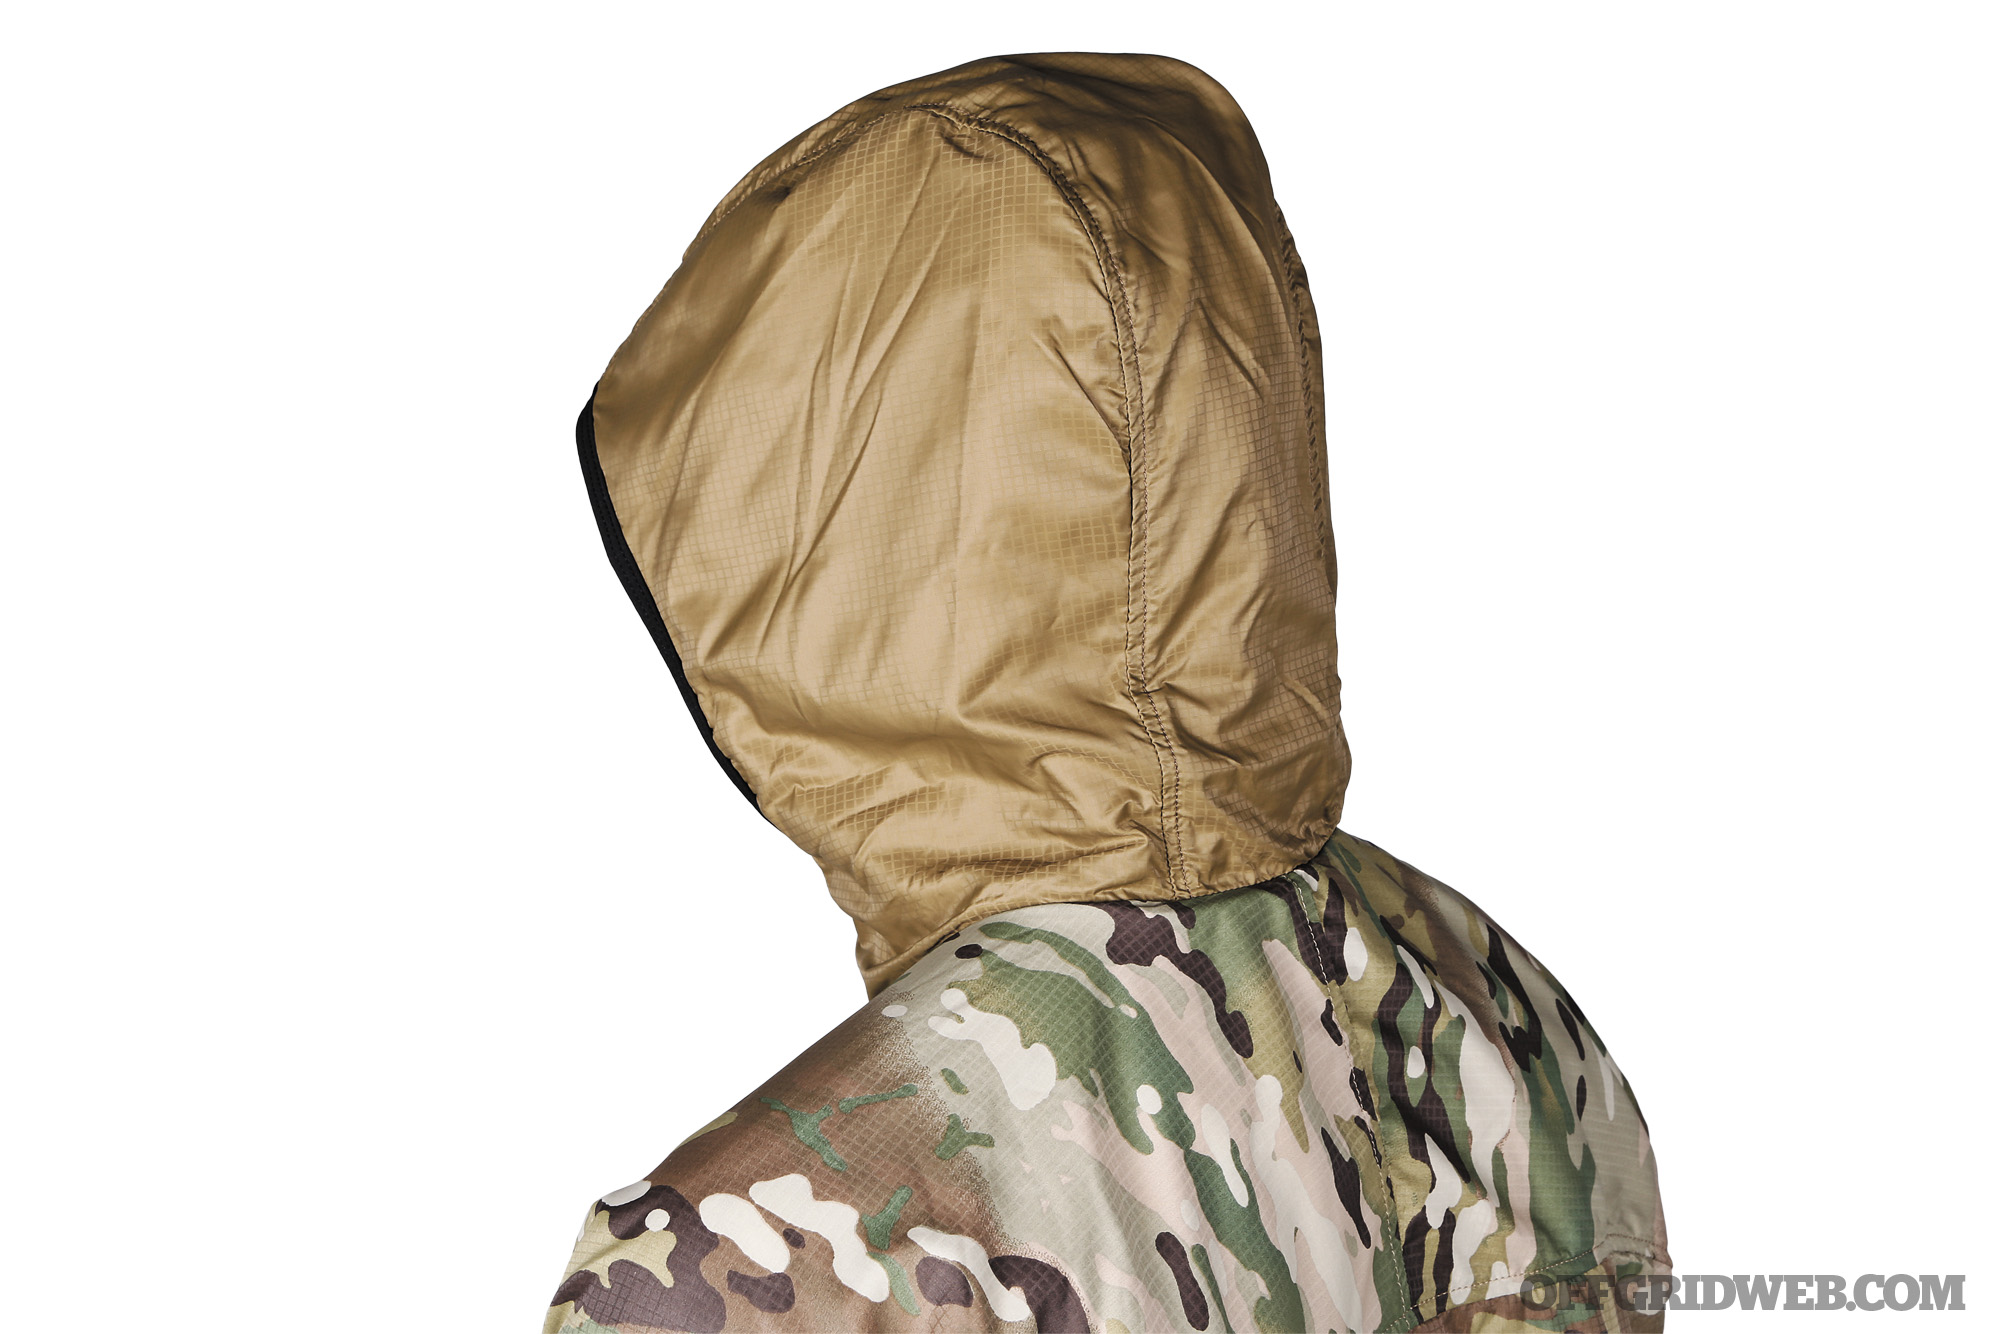
Features U.S. made, reversible, insulated with Polartec Alpha, water repellent, compressible, breathable
Notes Beyond Clothing’s line is based on a concept called Axios, a seven-layer system for varying activities. The Alpha Lochi Jacket falls within the A3 layer, which is primarily for active insulation. Developed with cold environments in mind, this jacket features Polartec Alpha insulation that transfers moisture away from the body to keep you both dry and warm, even when you’re active in cold climates. It is reversible for low-profile use and features zippered pockets both inside and out. Its outer surfaces are treated with durable water repellent (DWR) to keep you protected from wind and rain.
Pros:
The Alpha Lochi can tackle it all. It’s water and wind resistant, insulated for warmth, and compressible for easy storage. On top of all that, it’s reversible and made in America, too. What’s not to like?
Insulated and compressible
Made in the USA
Reversible
Cons:
What’s not to like is the price — ouch! Also, the hood lacks drawstrings and cannot be cinched tight.
Steep price … but you get Jekyl and “hide” with this one.
Lack of cinchable hood
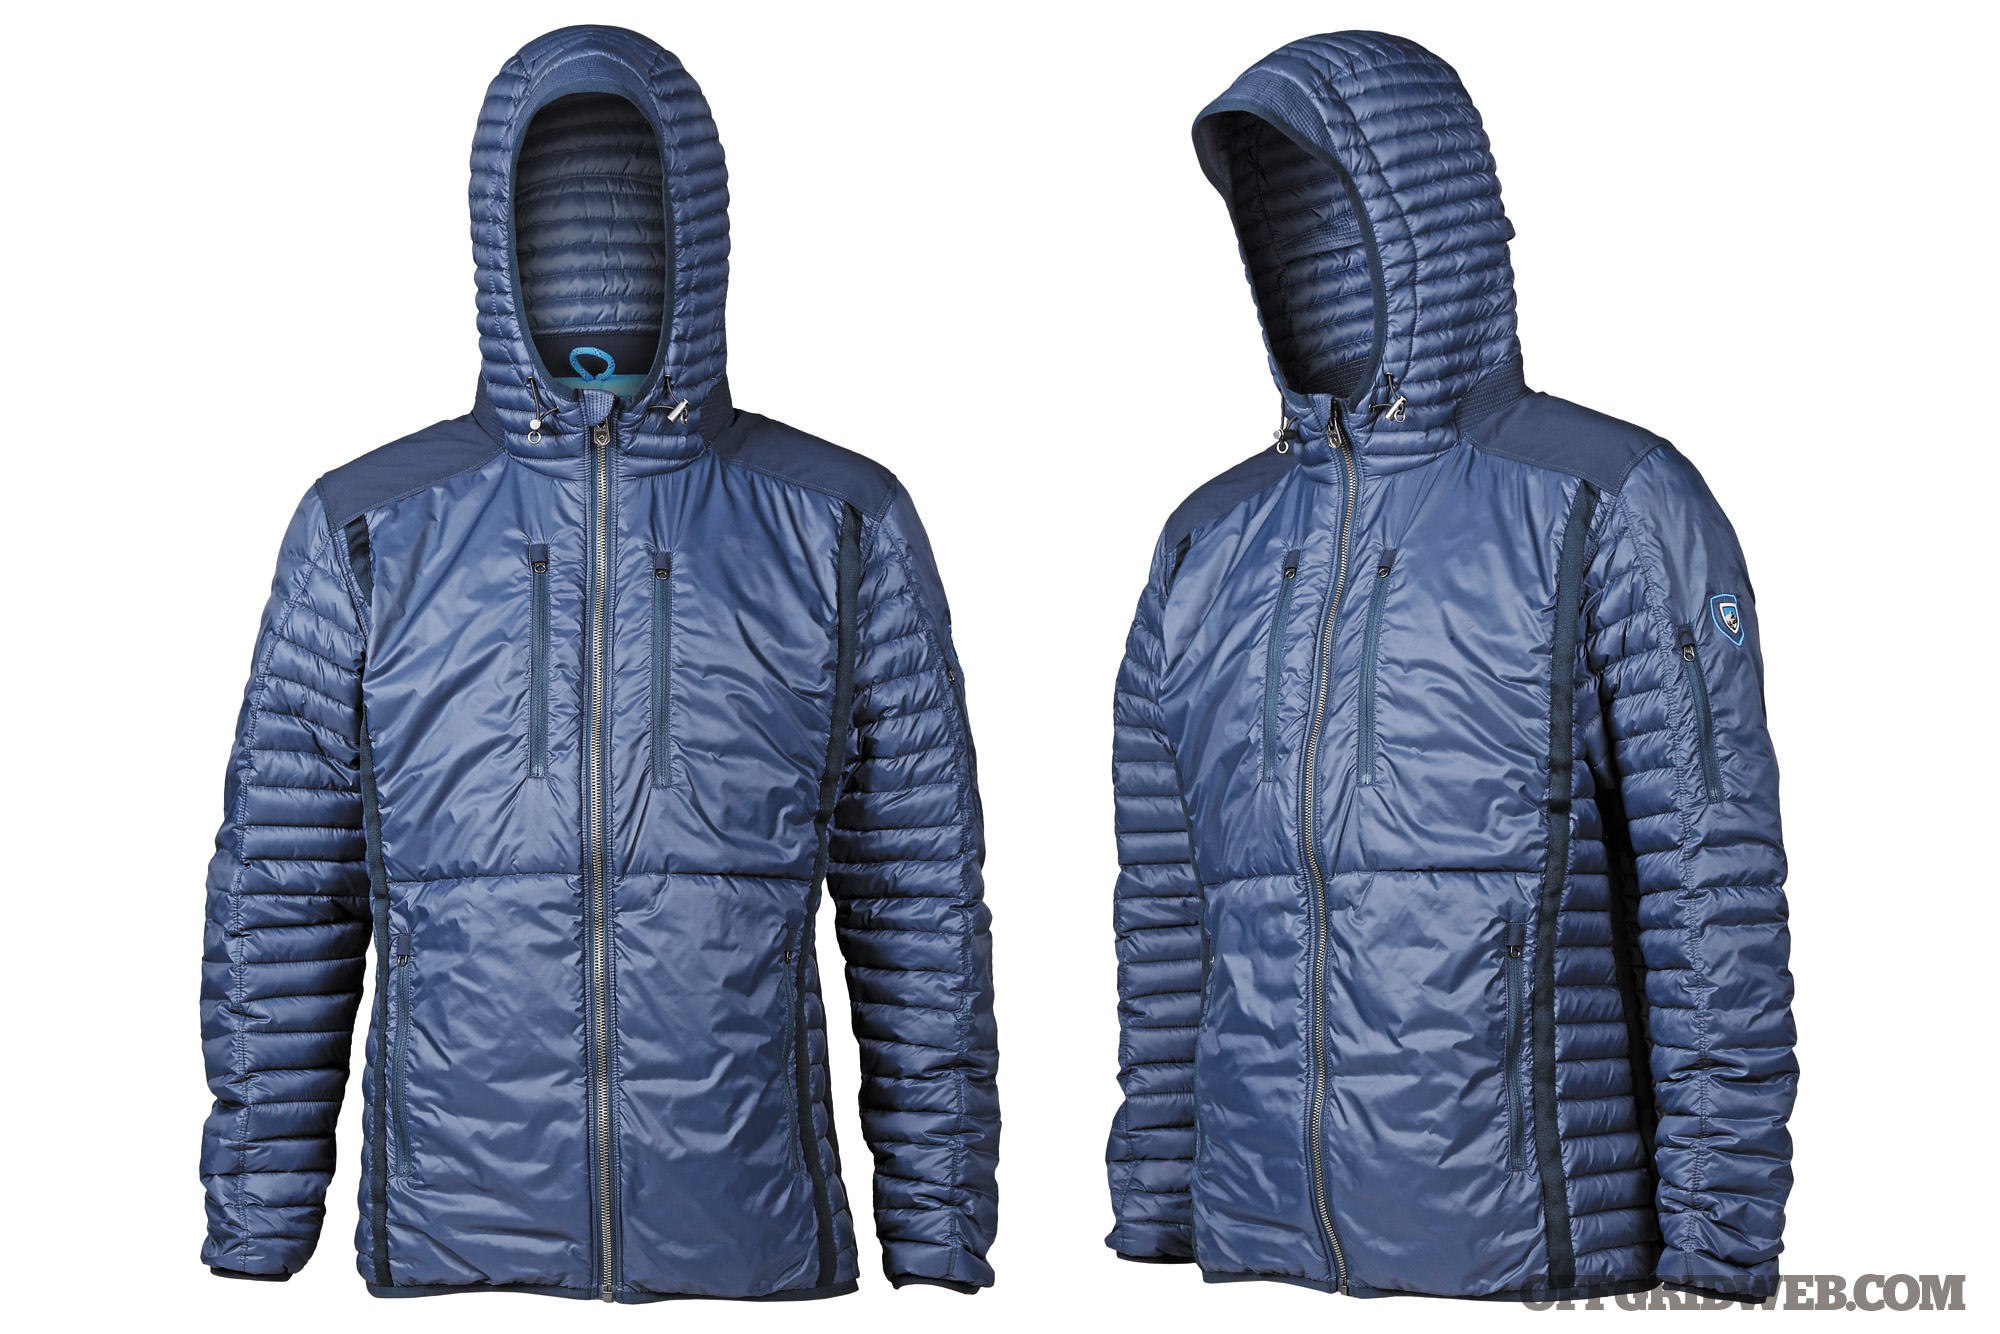
Kühl Spyfire Hoodie
Colors Olive, pirate blue (shown), raven
Material Nylon with down insulation
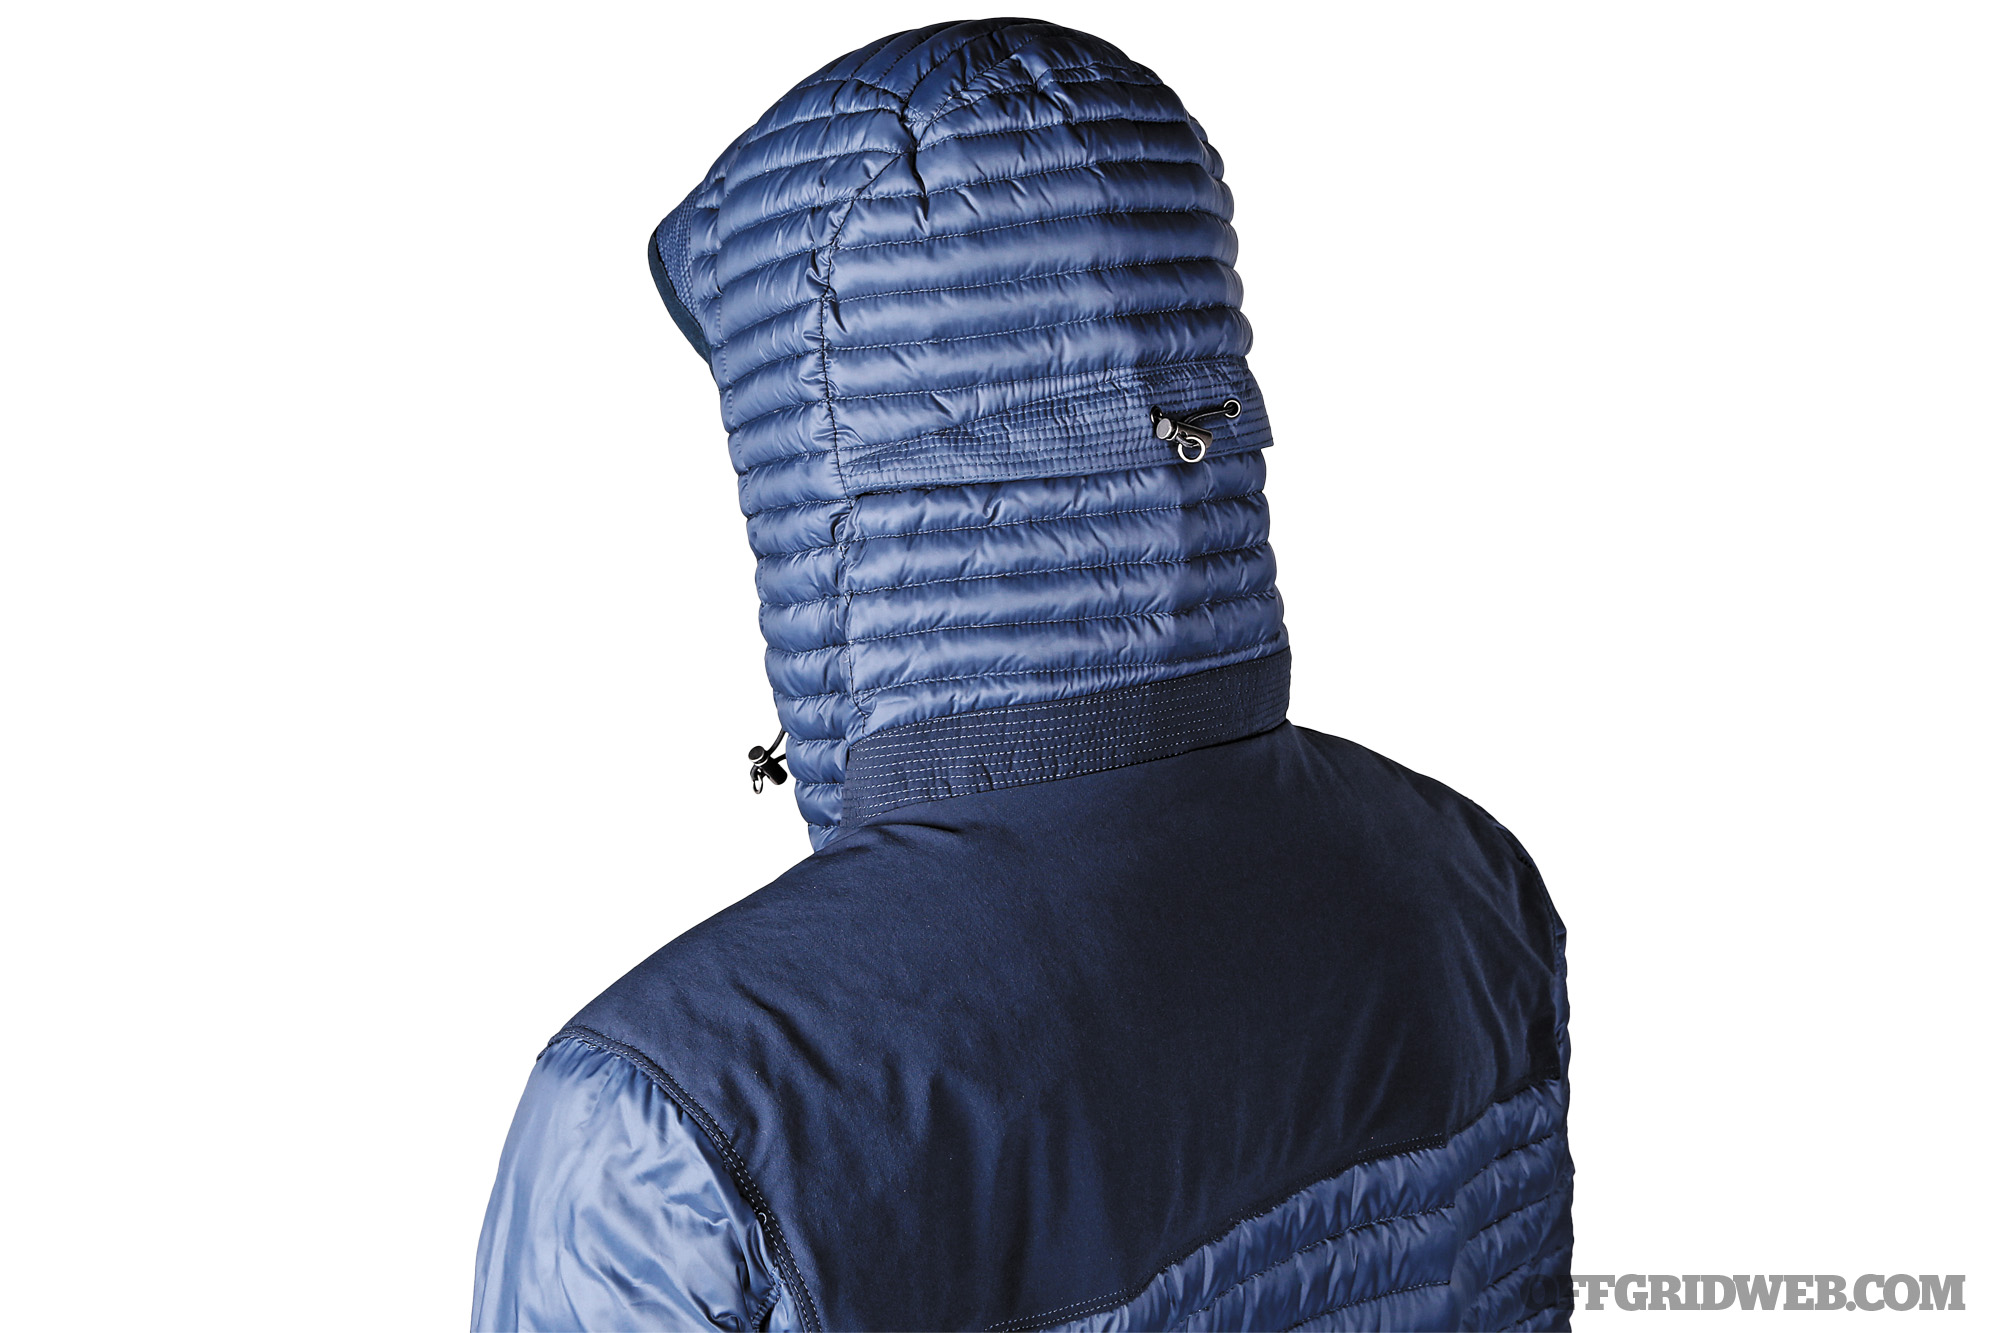
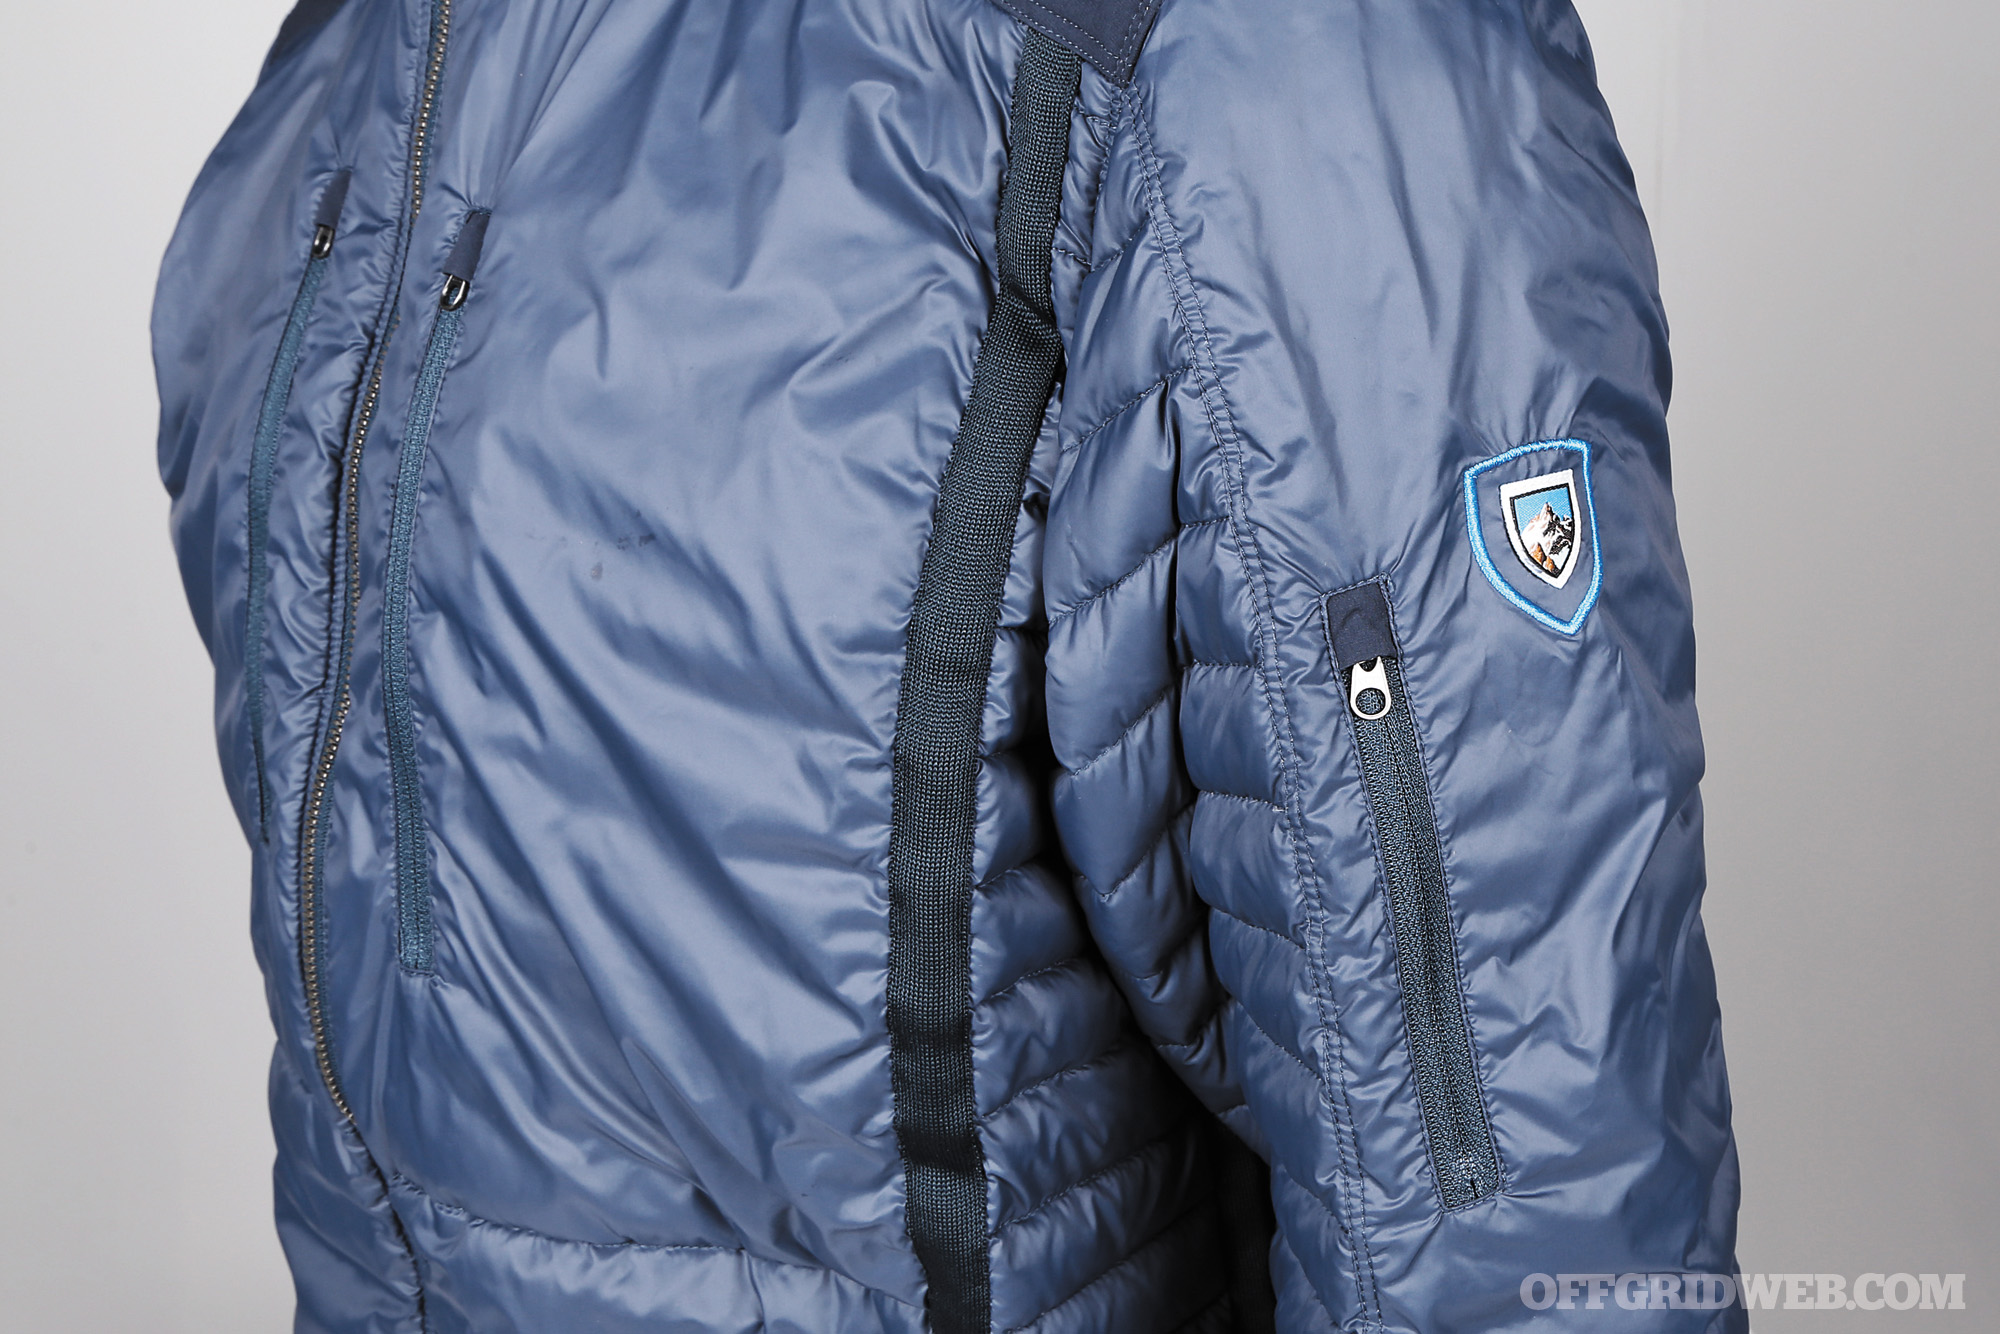
Features Water resistant, windproof, 800-fill goose-down insulation, advanced materials, five-panel adjustable hood, precision 3D fit, underarm zippable cooling panels
Notes The Spyfire Hoody is made up of four different fabrics, each engineered for a specific purpose. Its “precision 3D fit” is designed to naturally follow your body’s shape for the ultimate in fit and comfort. The goose-down-filled baffles are sized differently for better heat distribution. For example, you’ll find thinner, smaller baffles on the inside underarm panels to reduce bulk and overheating. The hood has a protruding brim, is made of five panels, and is adjustable at its opening and at the back for a fine-tuned fit. When not in use, the hood lays flat. The Spyfire Hoody is built with two zippered chest pockets, two zippered hand pockets, one zip pocket on the sleeve, and an inside mesh pocket.
Pros:
Kühl has another winner on its hands. The lightweight Spyfire Hoody features a two-way adjustable hood and has ventilation options to keep the user from overheating.
Insulation and ventilation features
Lightweight
Cons:
This jacket’s slim profile isn’t for everyone. We’re also pretty sure that it prices itself out of a few budgets.
Fit isn’t for everyone
On the pricey side
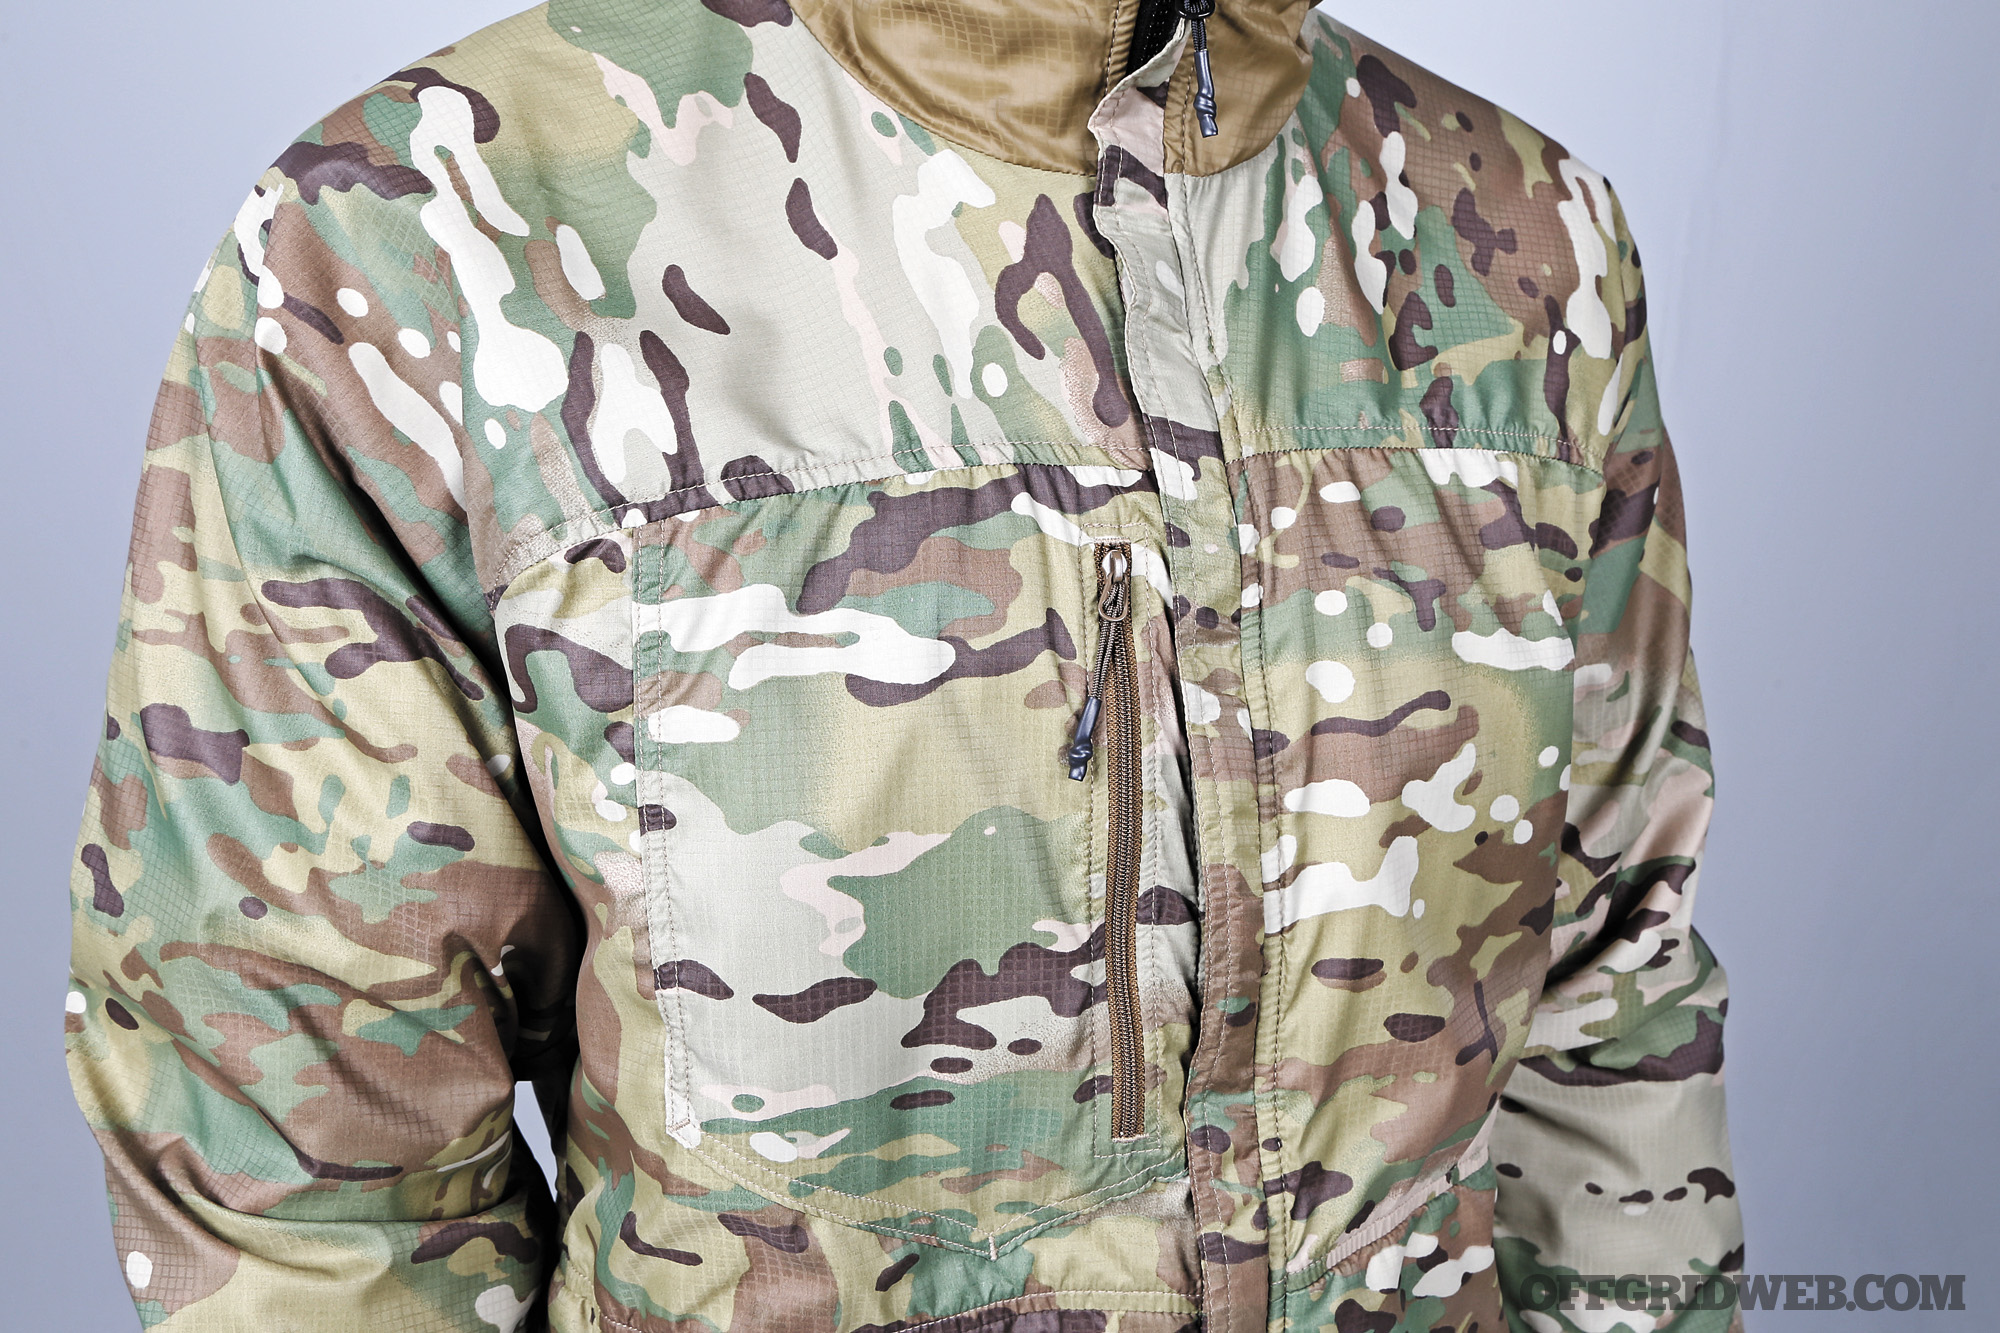
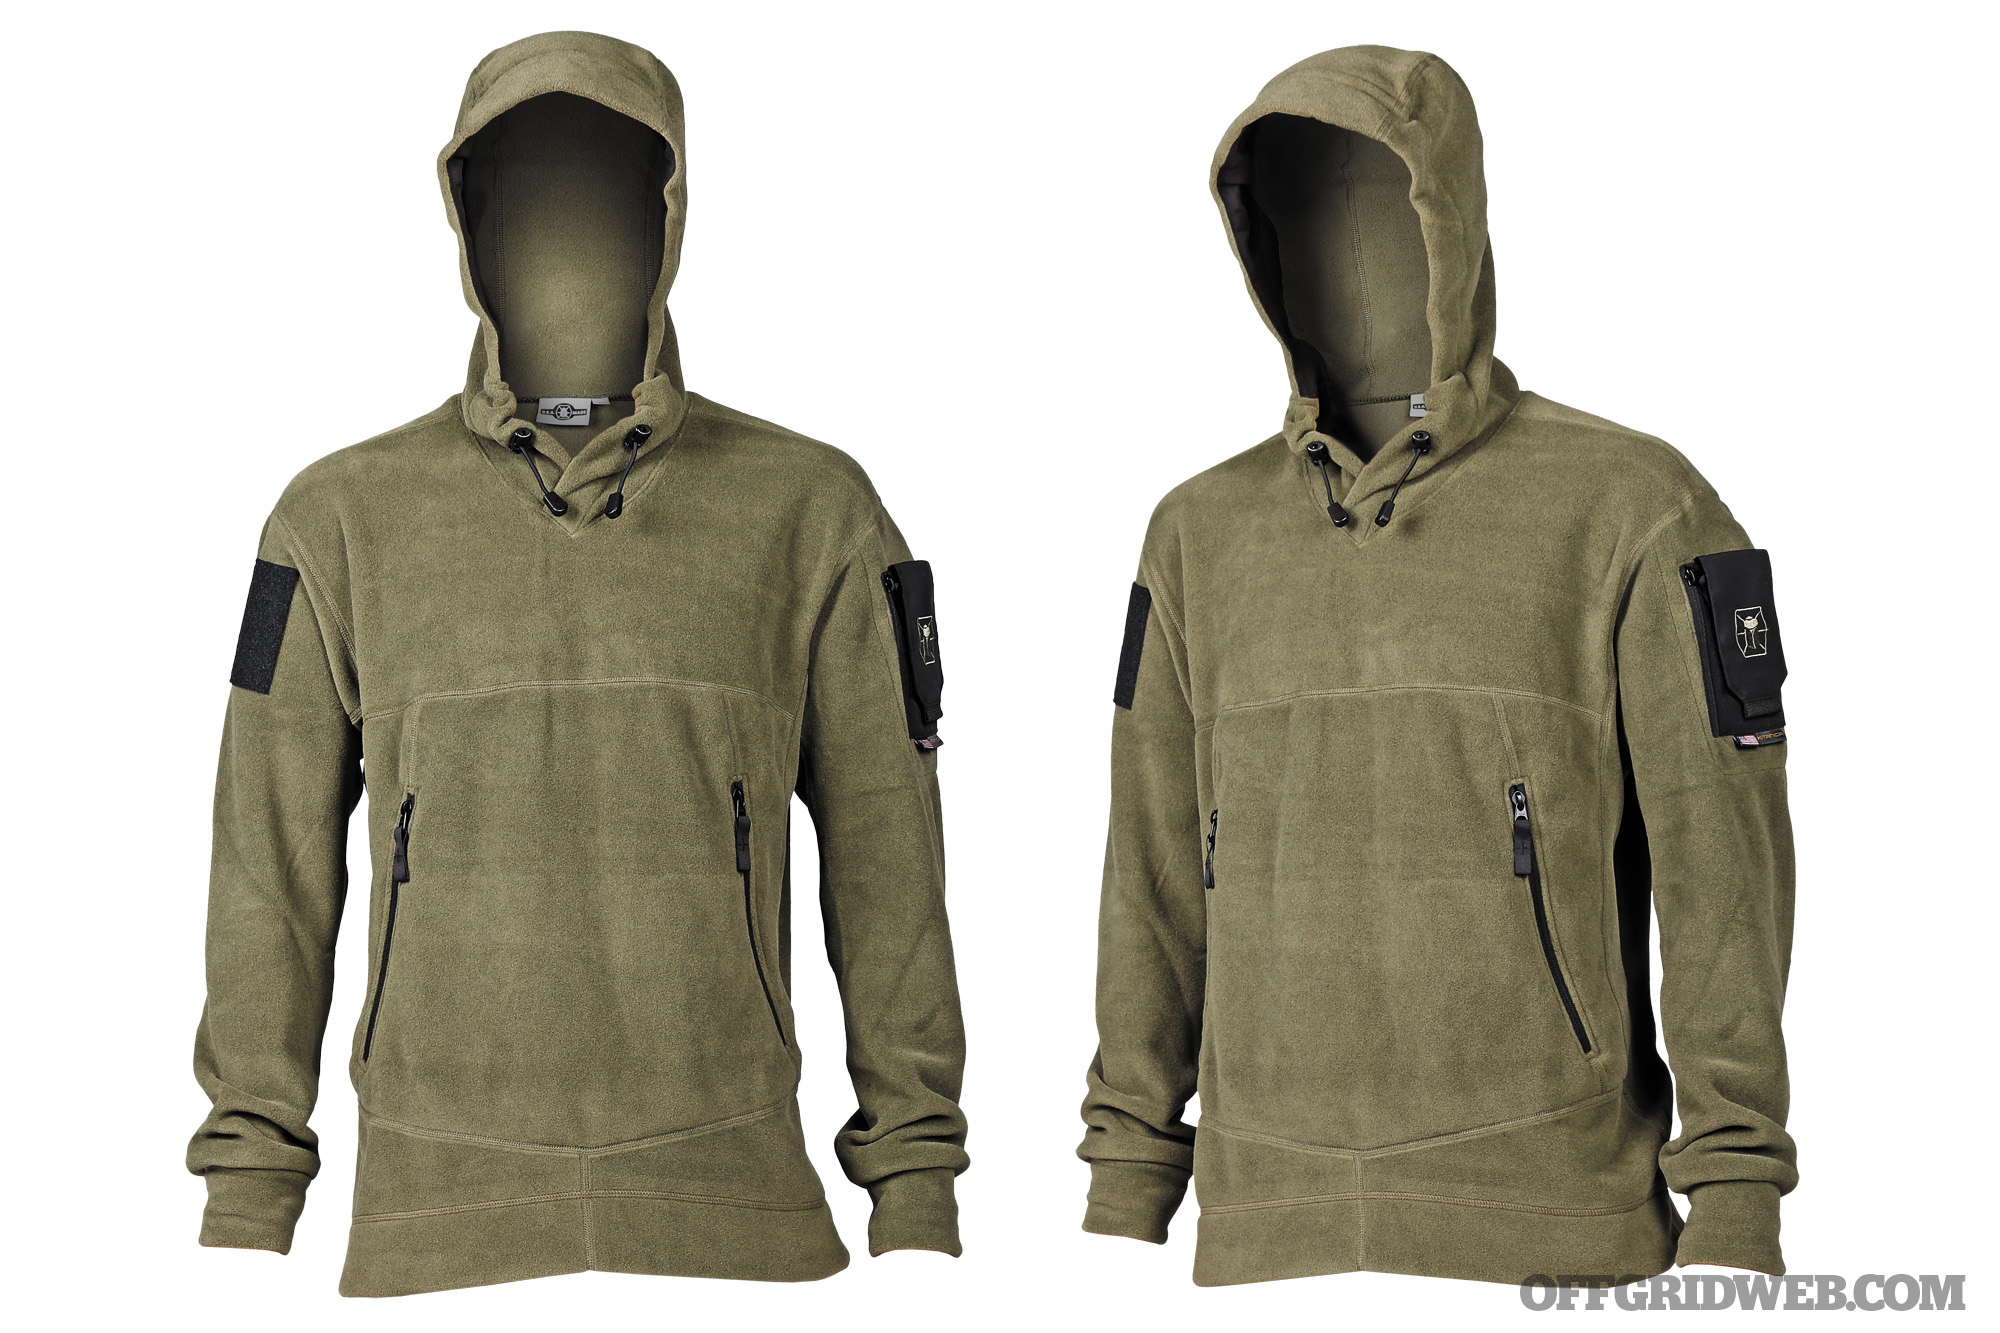
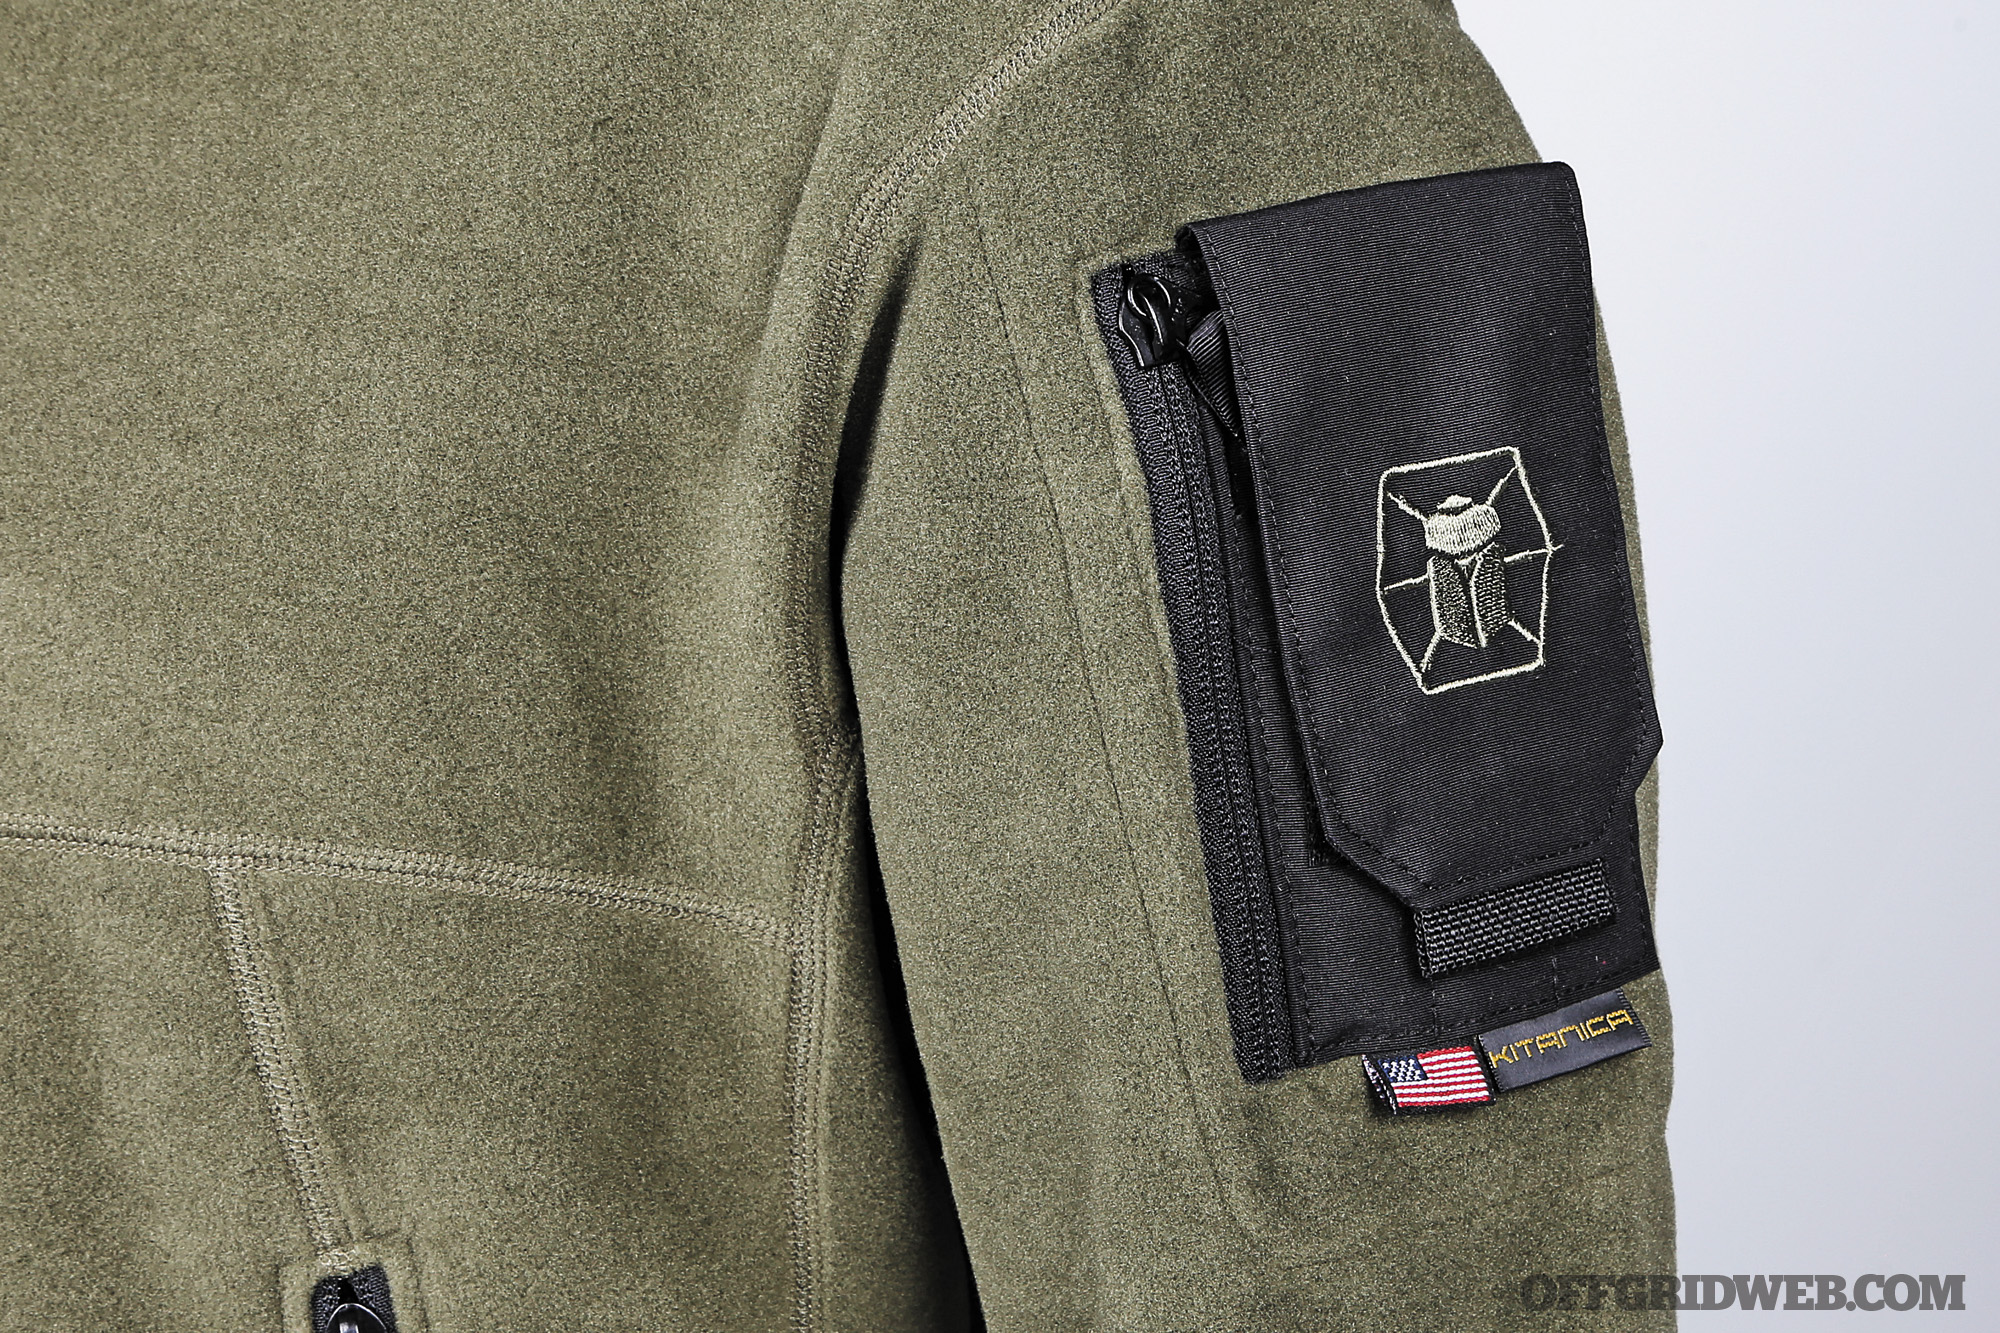
Kitanica American Hoodie
Colors Black, flat dark earth, stone green (shown)
Material Polyester
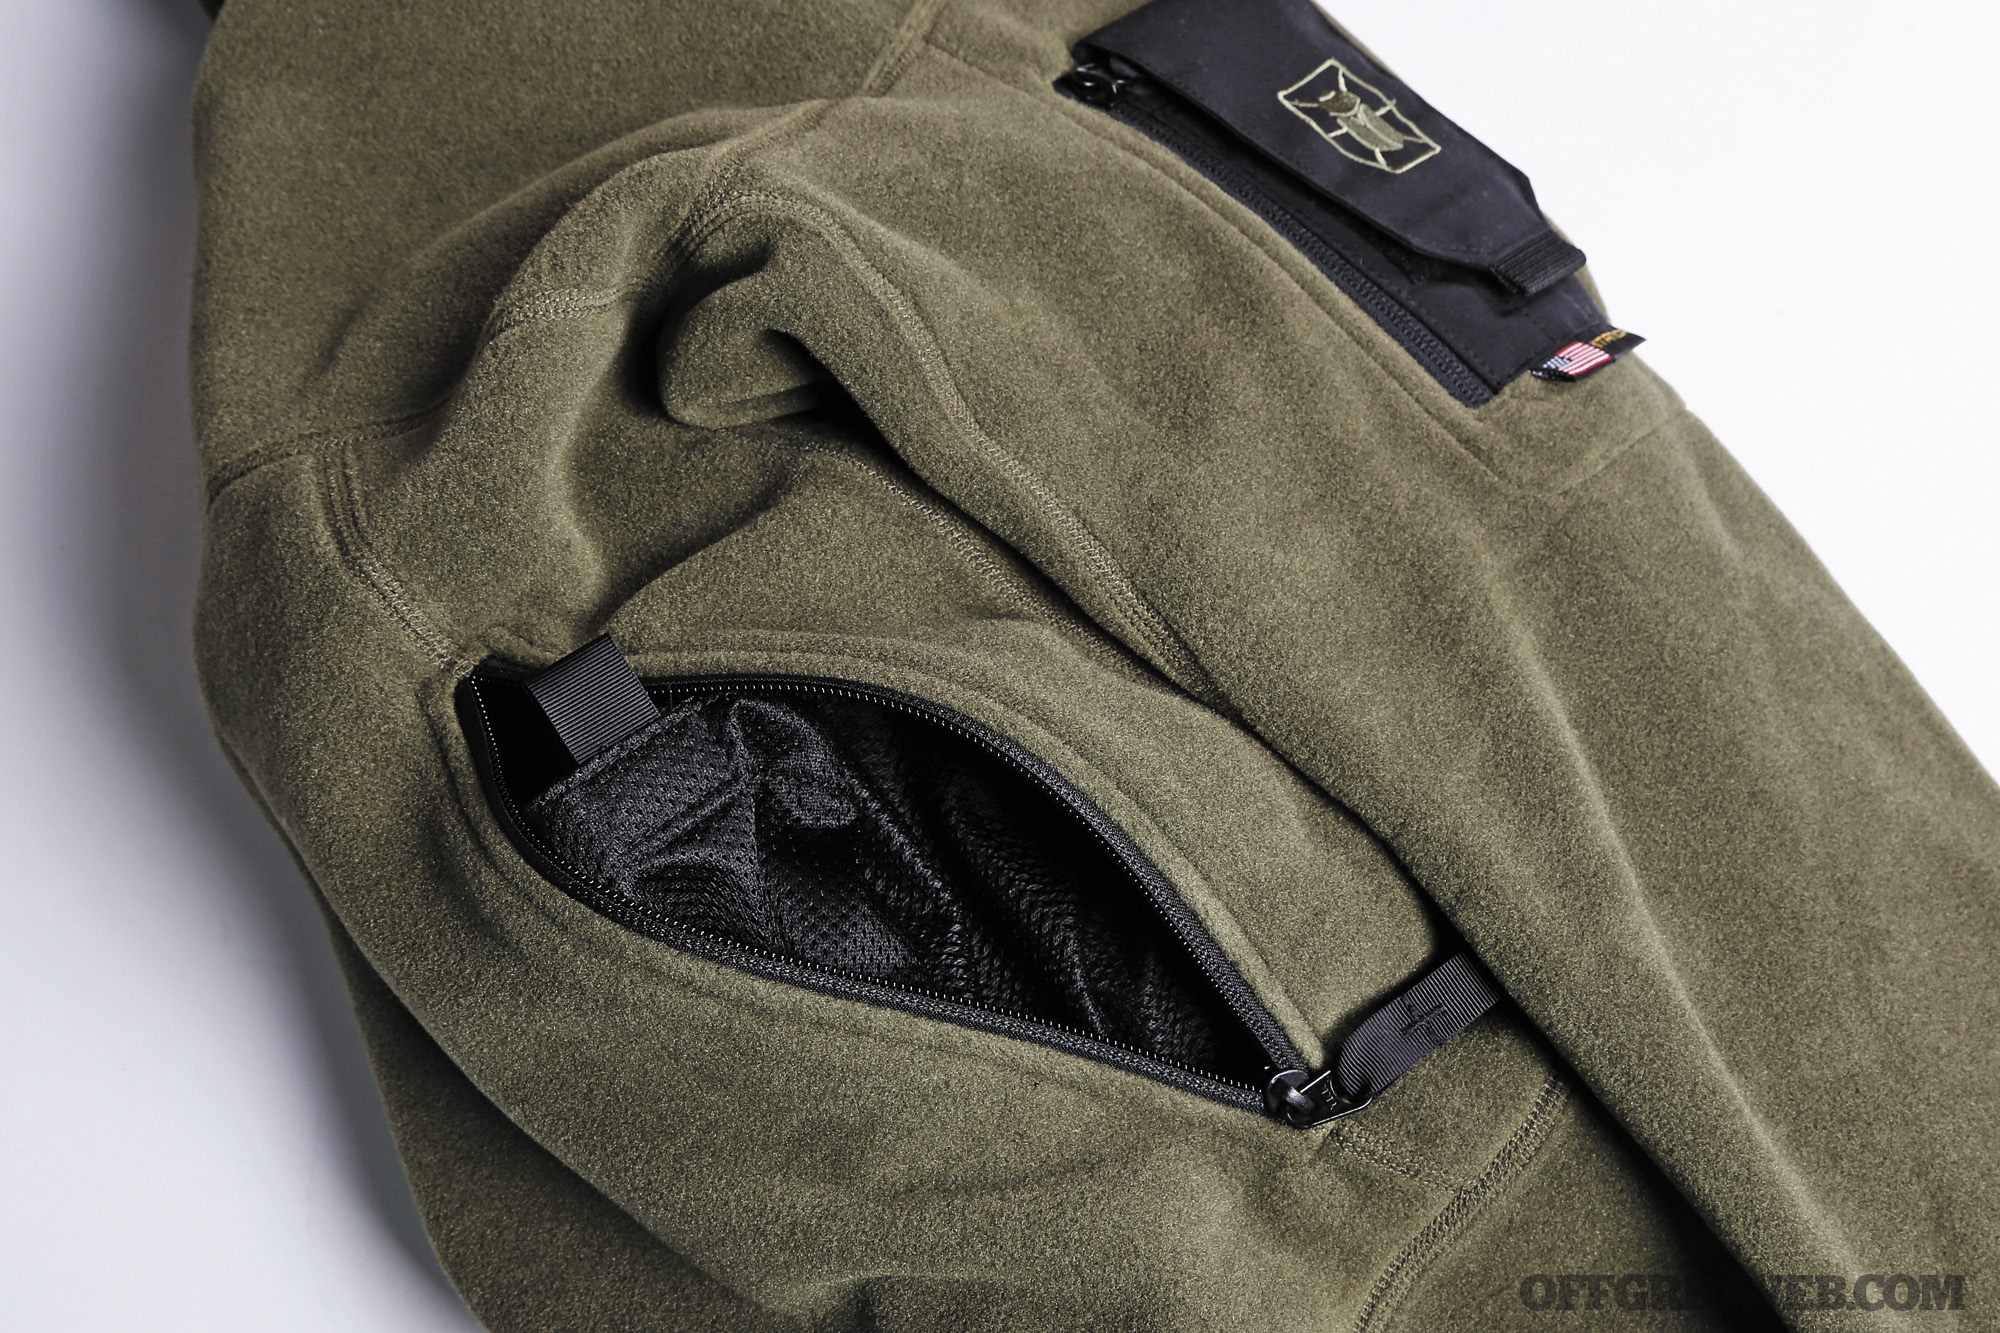
Features USA made, 200-weight fleece, flat lock stitching, ventilated front pocket with admin features, covered pen tube
Notes Made in America of 200-weight fleece and constructed with flat lock stitching, the American Hoody is as warm as it is comfortable. Its gusseted hood has a stiffened brim with an adjustable cinching shock cord. The left bicep features Kitanica’s signature covered pen tubes mounted on a zippered pocket and the right arm has a Velcro patch field ready to accept your morale patch of choice. The large pocket on the front can be accessed from either side and features a mesh backing, serving as front ventilation in warmer temps when the pockets are left unzipped. The neatest feature is found on the interior of the front pocket. On the mesh backing is a Velcro enclosed small admin pocket used to help secure smaller items like keys, wallet, or phone.
Pros:
There are plenty of storage options in and on this hoodie; our favorite is the admin pocket inside the large front pocket. Ventilation is available for warmer temperatures.
Pocket within a pocket
Ventilation option
Cons:
Those who live a “tactical lifestyle” can probably pick this hoodie out of a crowd, possibly making it more difficult for the wearer to remain unnoticed.
Tactical look
Pen pocket can snag when putting on a backpack or walking through rough terrain.
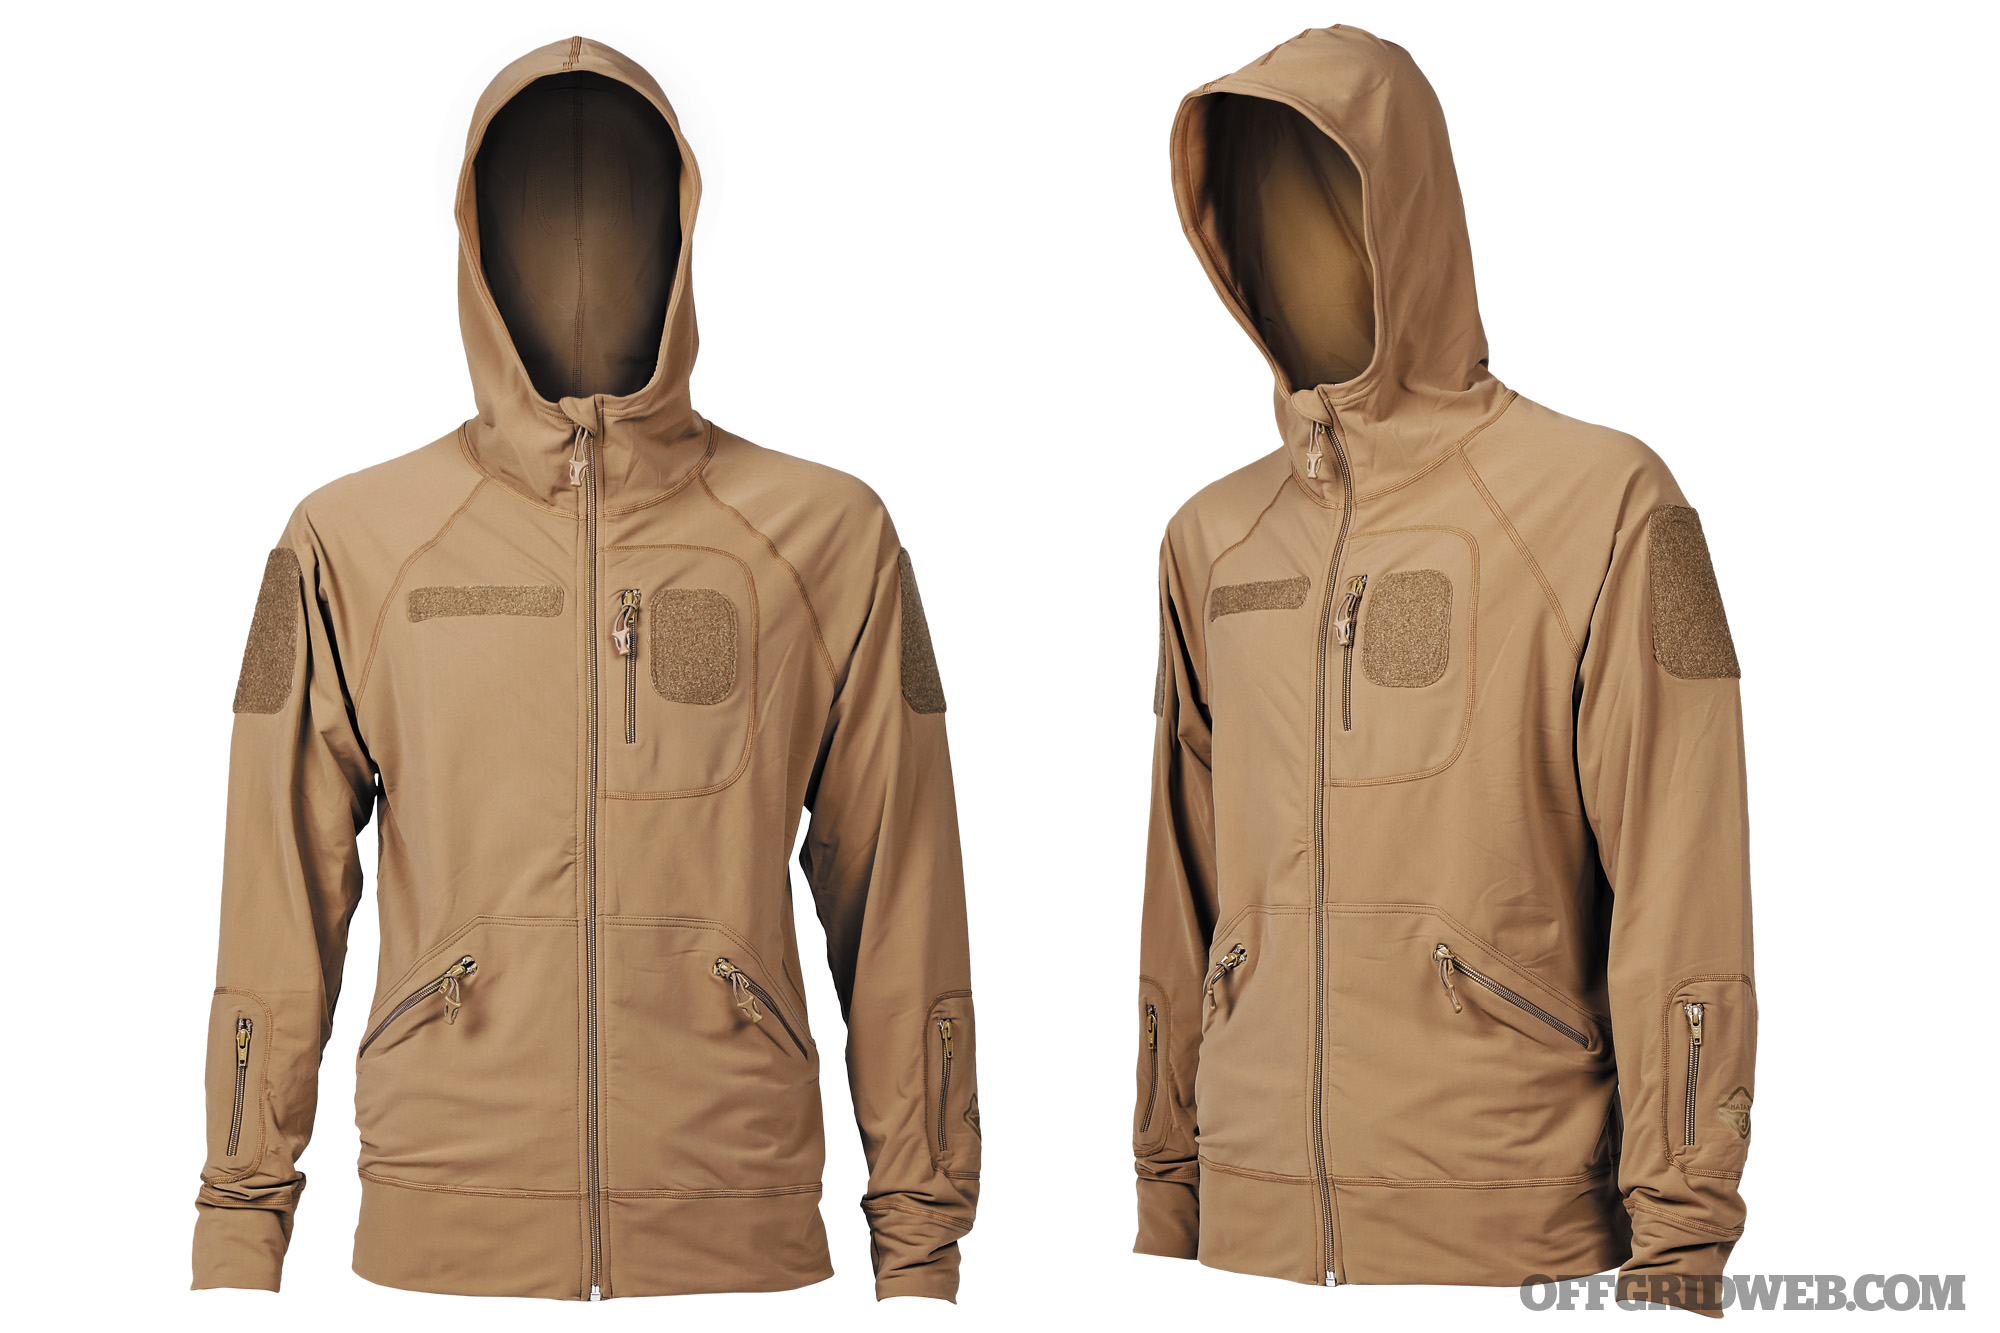
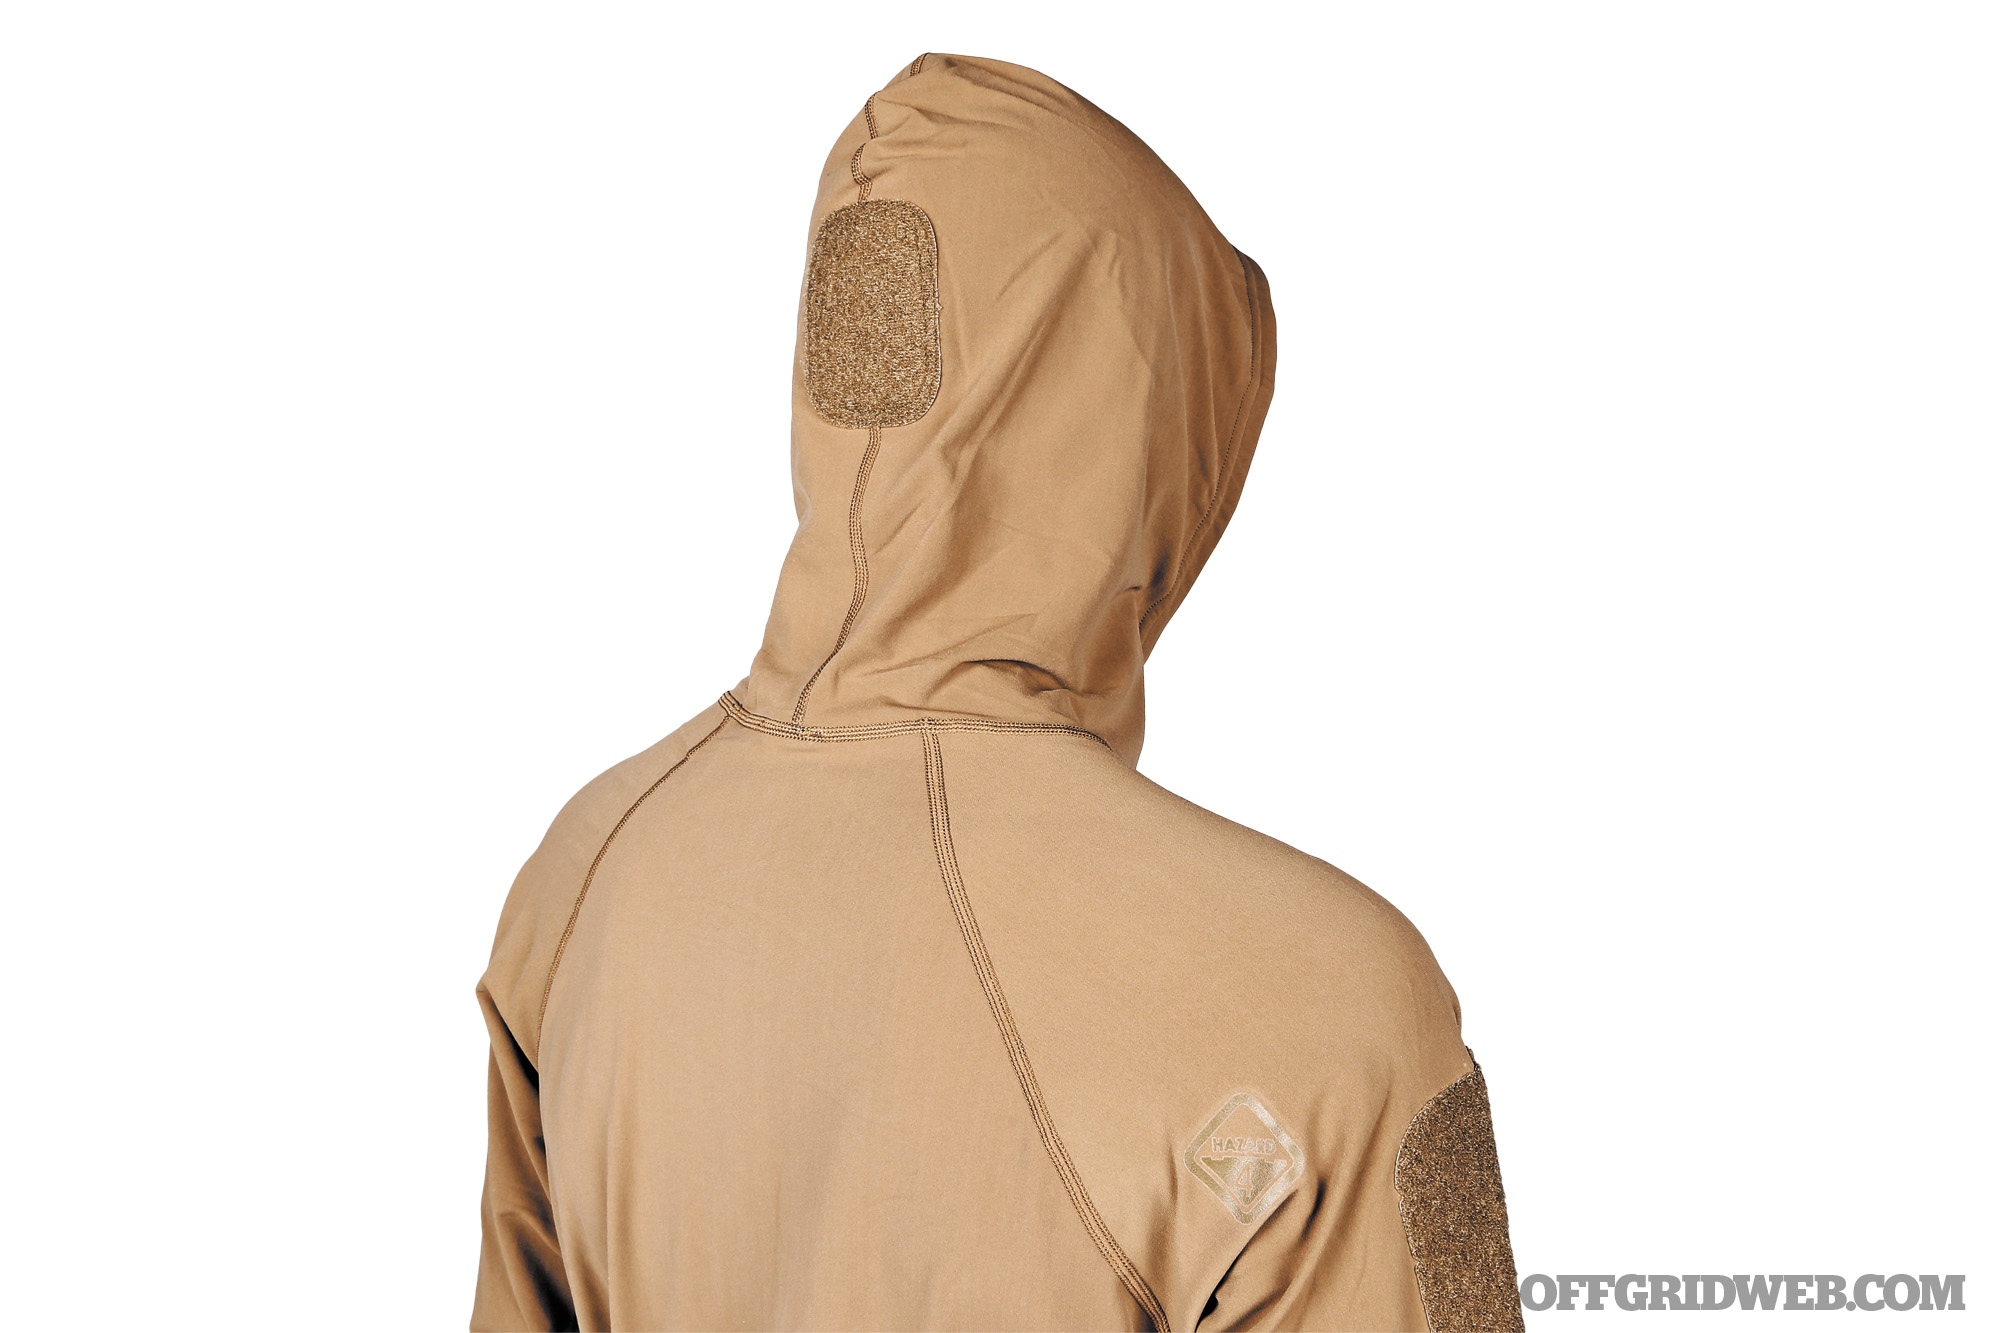
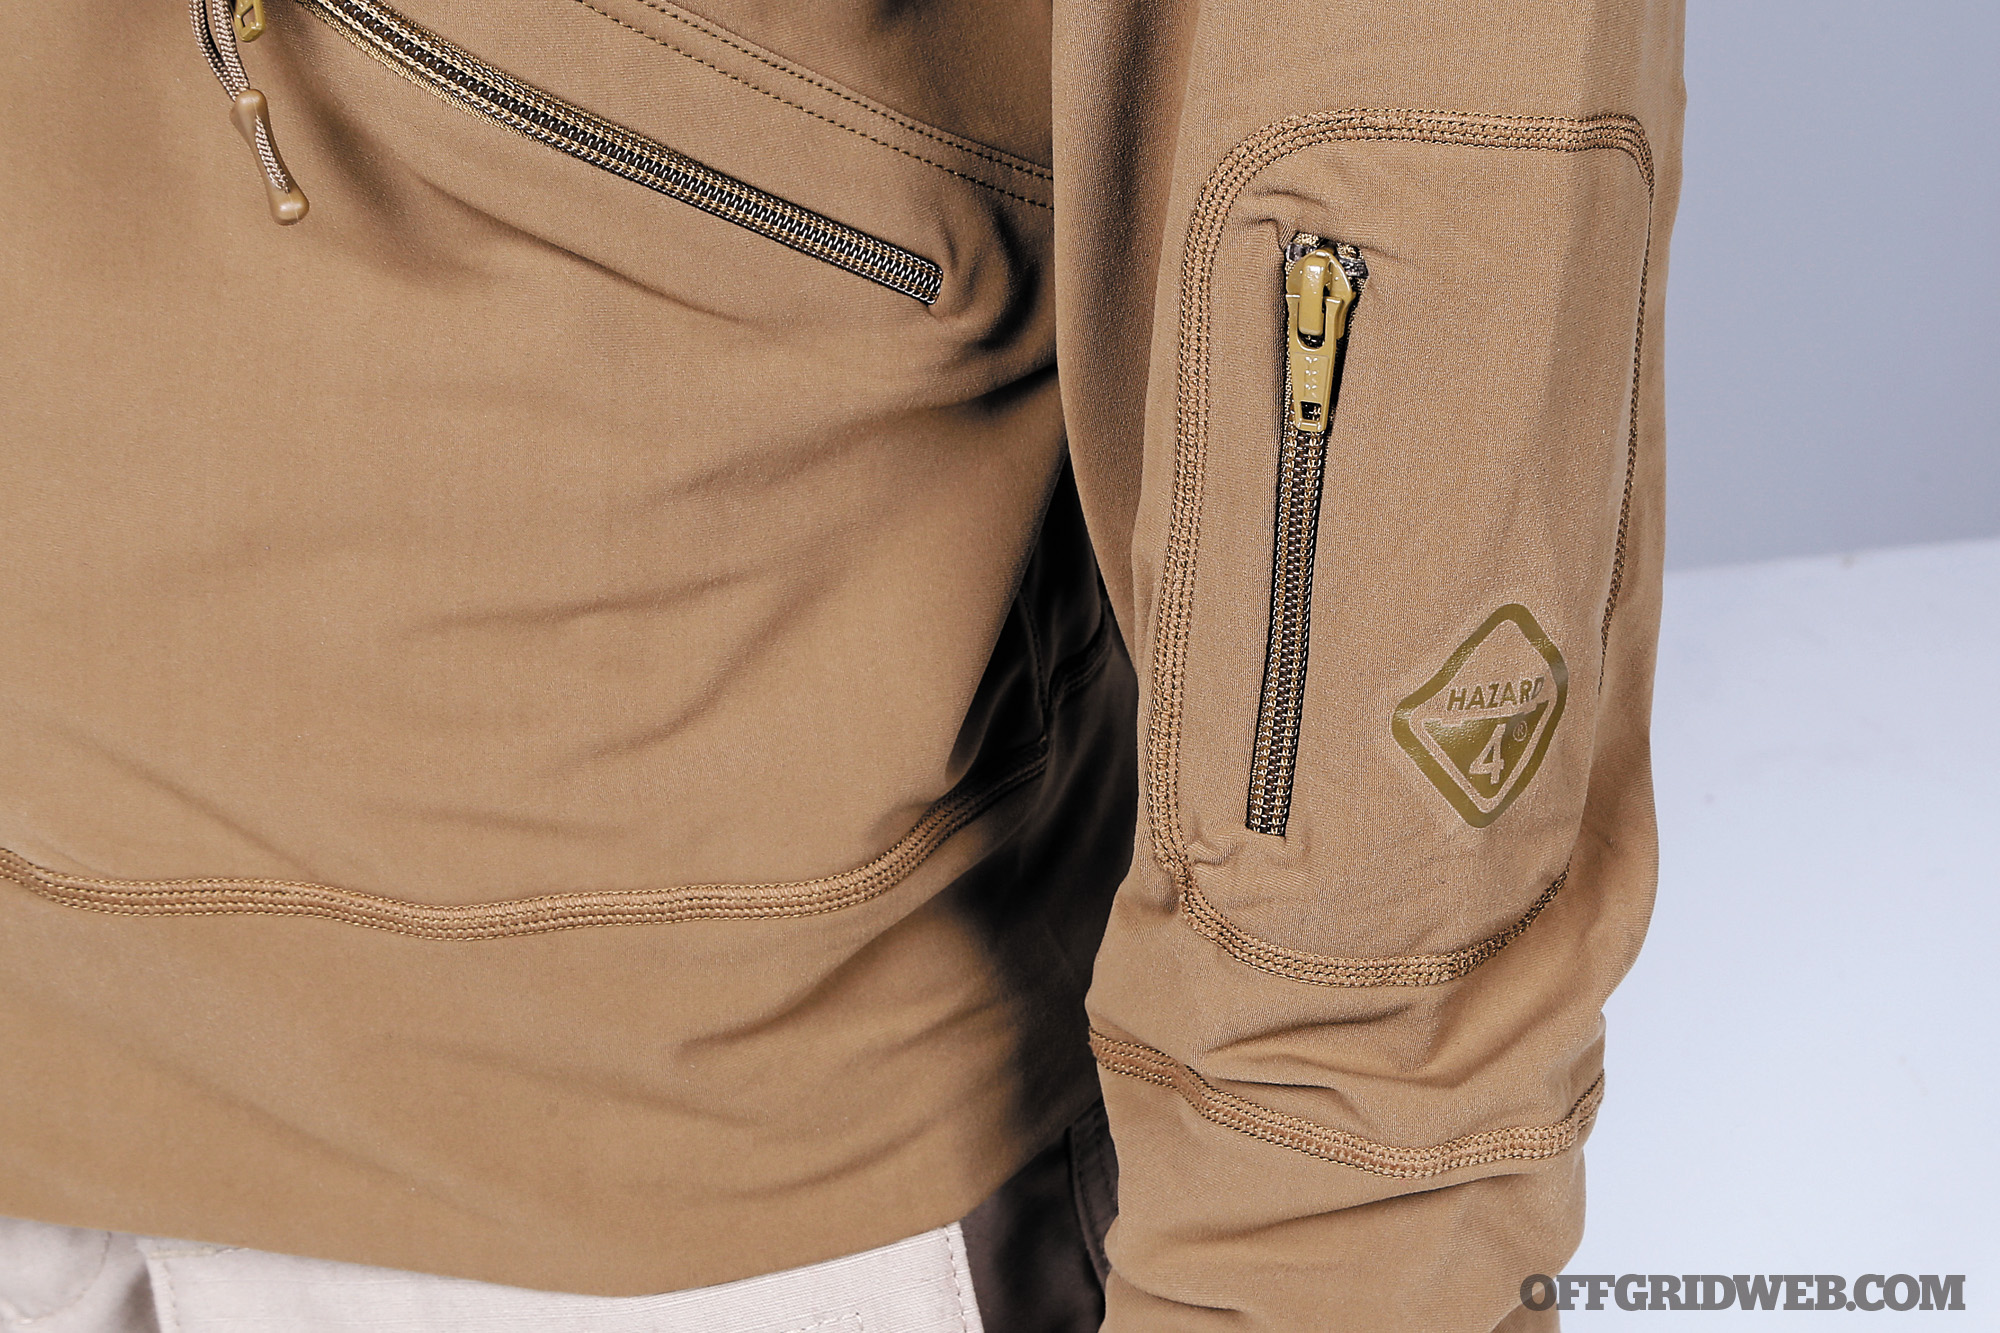
Hazard 4 Beachhead Fuzzy Lycra Hoodie
Colors Black, coyote (shown)
Material UV-Protection Fuzzy Lycra
Features Breathable, moisture-wicking interior, highly UV-protective, forearm zip-pockets, Raglan sleeves for ease of arm movement, won’t shrink or fade, dries quickly
Notes Hazard 4’s Beachhead hoodie has a stretchy feel and features a smooth exterior and a unique, breathable, moisture-wicking fuzzy Lycra interior. The interior’s fuzz is comfortable and adds additional warmth while not absorbing moisture. The hoodie is feature rich and includes plenty of pockets, as well as Velcro panels for your choice of patches. Its long zipper pulls make zipper manipulation with gloves on a breeze. The Beachhead is UV protective and quick to dry when wet. Hazard 4 promises that this hoodie will not shrink or fade, which makes it great for long-term wear.
Pros:
The Beachhead’s raglan-style sleeves allow for ease of arm movement, and its fuzzy Lycra interior certainly is very comfortable. We especially like its lightweight and quick-drying properties.
Interior is warm and comfy
Lightweight
Cons:
The form-fitting cut may not be everyone’s cup of tea. Its tactical look could be a turn off for those looking to blend in.
Slim fit can be an issue for some
A little too tactical looking for those who prefer something more discreet
“If the monster hides under your bed, it must be afraid of you,” a father says to his 6-year-old son during Hurricane Katrina. The family had been sitting in the living room for the past four hours watching the emergency weather reports and the local news as it covered what they termed “the impending disaster” when the Break Falls River crested its banks.
This had happened three times in the past six years, and each time, the family had waited for the evacuation signal, knowing that they could lose everything. But this time seemed different, and 10-year-old Margaret saw it in her parents’ faces.
The whispers back and forth and the furtive looks at the television left her with “scary feelings” that were growing worse — as if 100 butterflies were trying to get out at the same time. She began to cry and couldn’t stop. Suddenly, she felt the wetness running down her leg as her sobbing became uncontrollable. She had wet herself and began to shake as both parents turned away from the television. Her 3-year-old brother, who had been contentedly playing on the floor, looked at his sister and began to cry.
The fear response had completely taken over.
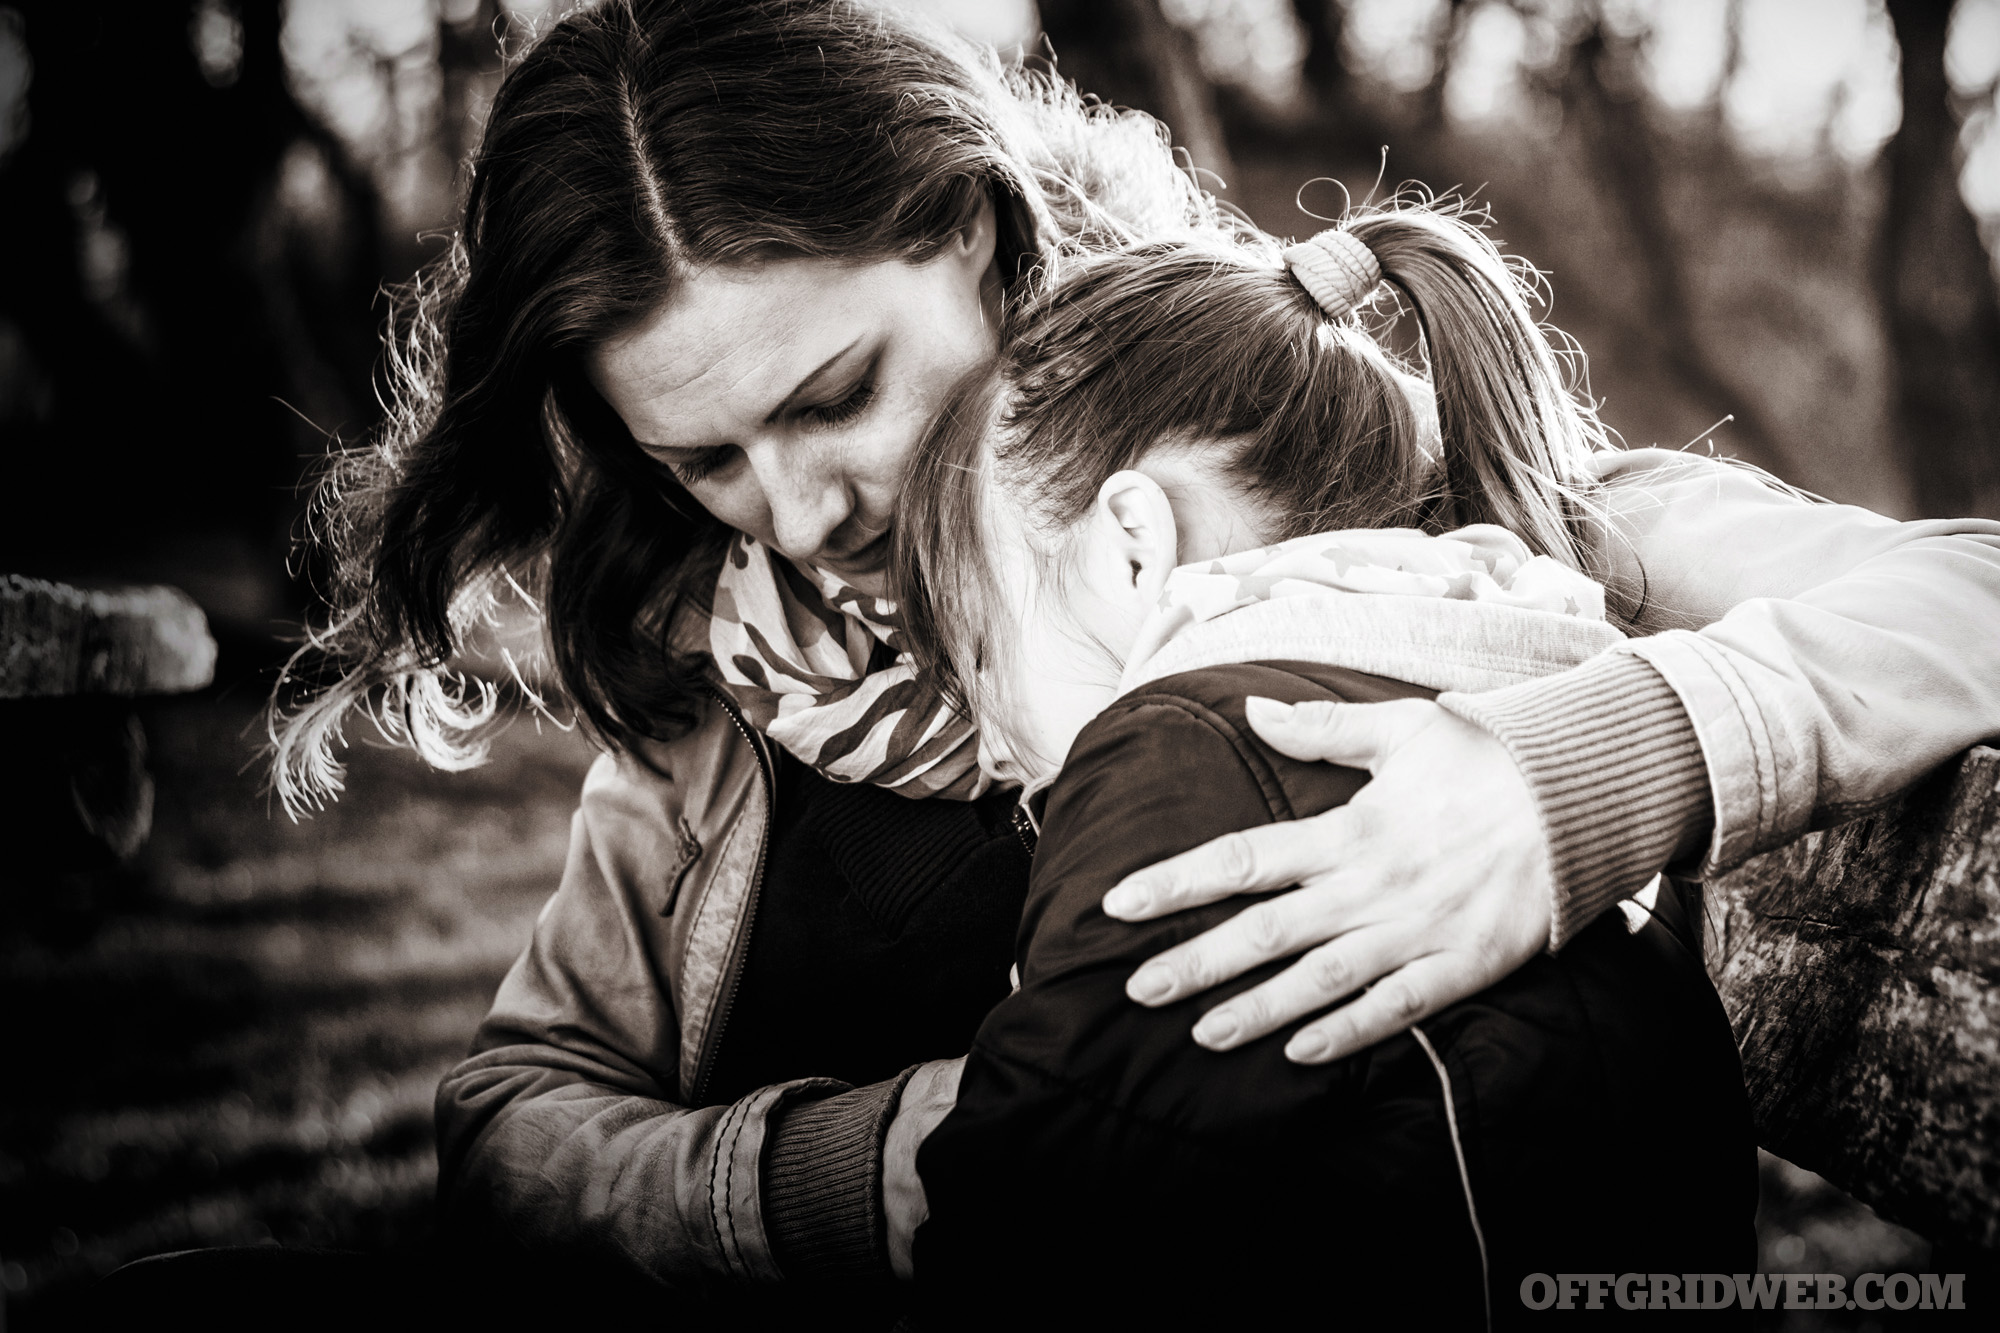
Going off-grid with children on board can present a myriad of problems, and one of your greatest concerns will be how to cope with, reduce, and prevent children’s fear reactions from endangering their lives and those in the group. For the purpose of this article, we’re talking about children 12 years of age and under. When the “fear response” is triggered, you need specific tactics to cope with a child’s fear. Unfortunately, when one child begins to scream, refuses to move, and becomes physically sick, other children will observe this and likely soon follow.
Knowing how to recognize a child’s fear response and what you can do to help should be an essential part of your mental bug-out bag. Knowing what to do when a child experiences fear may be essential for everyone’s survival, even if you don’t have children of your own.
Identifying a child’s fear response is the first step.
Children’s Fear Response
Any kind of natural or manmade disaster can be a frightening experience for any adult. But take a moment and imagine what it must be like to be a child under the age of 12.
Children have very little control over their environment simply because they can’t drive, operate complex machinery, and don’t physically have the strength, stamina, or speed of the average adult. They have to rely upon adults and parents for physical strength, emotional strength, and (most importantly) decision making.
Kids below the age of 12, and especially younger than 5, are still in the process of accurately separating reality and fantasy. Bottom line: They just don’t understand what’s happening, and parents don’t explain everything because it may be more frightening to the child and there may not be time.
How can you tell if your child is experiencing a fear reaction? Many of the indicators are similar to those experienced by adults, yet some may be even greater in intensity, such as crying, screaming, or acting out. They include:
Dry mouth
Sweaty hands
Upset stomach
Urinary accidents
Loss of control of bowels
Trembling arms and legs
Incoherent speech or stuttering
Fear of the Dark
This fear typically affects children between the ages of 2 and 3 when they’re not old enough and don’t have enough experience to distinguish fantasy from reality. For a child (and sometimes adults), the dark is where everything that can hurt you dwells and the place where nothing good happens. All manner of scary aberrations may appear to a kid in the dark, and some of these fears may last into adulthood.
Note: Children’s fears change as they grow, mature, and experience the sometimes cruel unpredictability of life. In this article, we’ll use various words and word combinations to describe children’s fears such as: scared, frightened, spooked, fearful, and some others. They all refer back to the basic children’s fear response.
What Not to Do When a Child is Fearful
Don’t yell or speak sternly or sharply. For example: “Stop shaking,” yelled the mother to her 7-year-old as the thunder became louder.
Don’t belittle or compare. For example: “Stop crying. You’re acting like a baby.”
Don’t use prescription or over-the-counter drugs to try to sedate your child unless prescribed by a physician for a chronic issue.
Don’t say, “You’re too little to understand,” as a response to questions by children.
Five Keys to Reducing Children’s Fear Response
Key #1: Reduce separation anxiety
Try to stay with your child. Brief separations (running into the store, using the bathroom) are OK, but let them know where you’re going and how long you’ll be gone. Don’t just say, “I’ll be right back,” and leave. For longer separations, have your kid stay with relatives or trusted friends, if possible. Of course, the key is to stay with your youngster and avoid separations.
Key #2: Learn one of the many simple techniques to control breathing and reduce heart rate
This needs to be learned and practiced ahead of time. There are numerous books and audio learning tools that will help you to teach a breathing technique that will calm children both emotionally and physically. There’s also the added benefit that breathing and relaxation techniques reduce heart rate, which, in turn, reduces the body’s physiological response to fear. Learning to control breathing may also have an added side effect of helping your kid become a better test-taker, reduce fear of talking in front of a group, and reduce performance anxiety. (See resources sidebar below.)
Key #3: Be a role model
They’re watching you! Help your child get rid of energy: stretching, running, and playing are good strategies. Take the time to sit with him or her and do an activity you both enjoy such as reading, playing games, or drawing and coloring.
Key #4: Make children part of the family’s decision-making process
Children don’t need to know everything, but give them information appropriate for their age and maturity level. Correct any misinformation that kids have about present and future dangers. “I know other kids said that more tornadoes are coming, but we’re now in a safe place,” you might say. Have your children crosscheck any information with you. Give clear explanations of what happened or is happening whenever your youngster asks, but try to avoid details that would frighten them.
Remind your son or daughter that there are people working to keep your family safe and that your family can get more help if needed. Try to talk about a positive future (even if not felt) rather than a traumatic past. But don’t give false hope.
Key #5: Physical contact
Hug and hold them close. Physical contact is one of the most powerful ways to say, “I’m here, and I won’t let anything bad happen to you.”
Note: I strongly recommend that no parent or adult purposely subject children under the age of 12 to what is called stress or fear inoculation whereby SHTF scenarios are artificially created. Think about putting your child in a Lord of the Flies-type situation. How well did that work out for the kids?
Resources
Make Your Worrier a Warrior: A Guide to Conquering Your Children’s Fears by Daniel B. Peters
The Wolf and the Shadow Monster: Helping Children Deal With Fears and Anxiety (Feel Brave series) by Arvil McDonald and Tatiana Minina
What to Do When You’re Scared and Worried: A Guide for Kids by James J. Crist
When the Ground Shakes — Earthquake Preparedness Book for Physical and Emotional Health of Children by Irit Almog and Shoshana Wheeler
Where is My Mommy?: A Book About Children’s Fears by Mary Kilgore
Helping Your Children Overcome Fear by Neal H Olshan, Ph.D.
Our author has a series of audio recordings for both children and adults to help cope with fear responses. For further information, contact Dr. Olshan at mindsetdoc@gmail.com or go to www.olshansbehavioral.com.
Final Thoughts
Everyone needs to be on the same page. You just spent time calming your 7-year-old after getting to higher ground and away from the flooding. Your wife has been reassuring the child by speaking slowly, softly, and using calming images. Enter older sister who yells out in a panicked voice, “We’re all going to die!” What can you do in this situation? The answer — be prepared. That’s the time to learn about children’s fears … it could be a lifesaver when you have to go off-grid.