Review: BioLite HeadLamp

This week, BioLite snuck out a Kickstarter campaign to launch their new low-profile HeadLamp to the public. A company mostly known for impressing the ultralight camping crowd with its smart backpacking stoves, BioLite has decided to show some attention recently to lanterns and other outdoor lighting products. We had a feeling that a lightweight headlamp was bound to come, and our suspicions were confirmed with a pre-release peek at their first entry to this segment.

BioLite HeadLamp review hiking camping backpacking survival flashlight LED 1

The campaign fired up late at night on September 17th, and was funded almost immediately. The HeadLamp’s crowdfunding campaign will run through October 19th with the bonus benefit to backers of assured delivery in time for “Holiday 2018” gift season. Beyond the Kickstarter, a full commercial launch of the product is planned for Spring 2019. (See the Conclusion for an update on its retail release.)

So that’s how you can get one. But do you want one? We got our hands on a pre-release sample to help you decide.

The BioLite HeadLamp

There are plenty of small headlamps out there, but BioLite is taking a wise approach to the genre with this new unit. If you're anything like us, you've got a closet full of lights. This would include at least a few you don't use, because they're dim, uncomfortable, or flop around on saggy elastic when you move your head. BioLite is calling their construction “3D Slim Fit” which to them means the following:

  1. A flush / integrated light module up front
  2. Balanced weight front-to-back for stability
  3. Smart fabrics throughout

It's not just lightweight — there's already plenty of light… lights… but this unit stays put to an impressive degree. It's not a tight head-grabber torture device either.

BioLite HeadLamp review hiking camping backpacking survival flashlight LED 6

When BioLite makes their pitch that they're using “smart fabrics,” that means it's more than an ordinary elastic band that sags and bounces around. And we found this to be a legit claim. The fabric is definitely a modern feel, super soft, without any hard seams or abrasion points. It feels like the high-quality, seamless fabric you'd find on athletic apparel. The LED lamp portion is integrated directly into the headband, not just clipped to it. Most of its cabling is seamlessly channeled through the band to prevent snags. The multiple low-profile adjustment buckles don't get in the way or stick out at all.

As we've mentioned it's really light, tipping scales at 2.4 ounces. It’s not just the weight though: the whole design philosophy is about integration and modernization of the system.

BioLite’s co-founder and CEO Jonathan Cedar says, “You look at where wearables have evolved, like headphones and footwear, and you can see real strides in design and how these products integrate onto a users’ body. The headlamp category has been stuck in the same basic design for decades, and it was time to look at it with a fresh perspective. If you forget you’re wearing our HeadLamp, we’ve done our job.” The whole unit shows low-profile design cues throughout: you can definitely wad this up and fit it in a pocket with nary a tangle.

BioLite HeadLamp review hiking camping backpacking survival flashlight LED 5

Power Source

The BioLite HeadLamp is USB rechargeable, with decent run times as well as output levels for how small it is. They’re claiming 330 Lumens, with a 3.5 hour run time on high output. Or you can squeeze out 40 hour run time on low.

A rubber door covers the charging port, and the whole system is IPX-4 water-resistant. Although you won't be snorkeling with it, it will keep sweat and moisture from zapping the electronics. There are also tiny indicator lights on the battery pod, showing the remaining power level and charging status.

BioLite HeadLamp review hiking camping backpacking survival flashlight LED 4

The battery is a lithium-ion setup. It can recharge via any micro-USB power source, eliminating the need for wasteful alkaline batteries. While some users might value the ability to pop disposable batteries in to assure (and extend) operation whenever, BioLite’s eco-friendly side made the call to opt for less waste and batteries in the trash. If it’s really an issue for you, the option is always there for you to recharge it with a portable USB powerbank in your pack that weighs the same as a bag of AA’s. In truly off-the-grid settings, the battery can also be charged via a solar panel.

Operation & Adjustment

One button handles all the the light selections. There's a narrow white spotlight as well as a wider soft white flood. You can max out lumens by turning both white lights on at once. A soft red mode is great for hunters, or if you just don't want to phosphene out your night-adapted eyesight. Conversely, if you're signaling that you're lost (or want a backcountry rave), there's that near-seizure-inducing strobe mode.

BioLite HeadLamp review hiking camping backpacking survival flashlight LED 2

Brightness for each of the white lights is adjustable — just press and hold down the button to gradually brighten or dim the active light. The lights blink once when you've reached the end of the minimum or maximum output level. As for the red mode, it only offers a fixed low-level of output.

Print

The lamp itself has five positions of adjustment, allowing the user to point the light down at work surfaces or ahead to the trail. The LED head tilts downwards in solid increments, each with a tactile “click”. Both the button and the little ridge used to click the head into positions are on the tiny side, so the HeadLamp might be a little hard to operate with gloved hands. On the plus side, there’s a lockout feature where you can hold down the switch for a few seconds and it won’t turn on accidentally in a pack, draining the battery, etc. if the button is pushed unknowingly.

The LED light element itself is slim at less than half an inch thick, and the battery pod is right at one inch thick. When donned, it balances nicely. The whole unit really feels like you're wearing a second-skin headband, not a bouncy head lamp. No center headstrap needed, nor headache-tightness to keep this in place. Metal fans in need of illumination are in great luck: headbanging and jumping up and down did not result in the light shifting around. In fact, our two testers reported zero movement, and the band was not torqued down — all was comfortable. Good fit, good kit.

BioLite HeadLamp review hiking camping backpacking survival flashlight LED 3

Conclusion

The BioLite HeadLamp will be offered at an MSRP of $50, which should put its street price at a decent point for what looks like a really smart piece of gear. The unit pictured is a pre-release sample, but the HeadLamp will be available for everybody in Spring 2019 through normal retail channels. If you go the Kickstarter route, you get first crack at them now, delivering soon. The Kickstarter backers also get a freebie carry bag that also doubles as a hanging “lampshade” you can string up in a tent for diffused light.

For more info on the BioLite HeadLamp, go to BioLite.com or check out the Kickstarter page.

UPDATE 2/23/19: The BioLite HeadLamp is now known as the BioLite Headlamp 330. It’s no longer only available on Kickstarter, and can be purchased at select retail outlets including REI, Amazon, and BioLiteEnergy.com.

Specifications

Print

Weight: 2.42oz (69 grams)
Output: 330 Lumens
Run Time: 3.5 hours on high, 40 hours on low
Battery: 900mAh Rechargeable Lithium-Ion
Beam Distance: Flood – 16 Meters, Spot – 75 Meters
Modes: Dimmable White spot, Dimmable White Flood, Dimmable Spot/Flood, Red Flood, and Strobe
MSRP: $50


New: Zenbivy Light Bed

Sleeping bags are great for camping and backpacking, but there's a reason we don't sleep in them at home every night — they're far more restrictive and stifling than a loose quilt. Mummy bags are especially tight-fitting, while rectangular bags offer more room. Last year, Zenbivy developed a system that blends the features of a quilt, rectangular bag, and mummy bag into one modular sleep system.

Zenbivy light bed quilt indiegogo shelter sleeping bag 1

Based on feedback from the original Zenbivy, the company has created a second model that offers reduced weight and a zipperless design. The new Zenbivy Light Bed recently launched via a crowdfunding campaign on IndieGoGo. It will be available in either a 10°F or 25°F temperature rating, each filled with 800 fill power HyperDRY water-resistant duck down.

Zenbivy light bed quilt indiegogo shelter sleeping bag 2

Like the original, the Zenbivy Light Bed is designed to be used in tandem with an air mattress. The lower layer of the Zenbivy system attaches to the mattress, providing a hood and under-body sheet, while the upper quilt layer attaches to the lower layer with hook-and-loop fasteners. This allows the Zenbivy Light Bed to be used as a flat standalone quilt, a wide rectangular bag, or a sealed mummy bag.

Zenbivy light bed quilt indiegogo shelter sleeping bag 3

To see how it works, check out the video below:

The Light Bed is available in Regular, Large, or Extra Large for either 20×72 or 25×77 mattress sizes. Weight ranges from 1lb 13oz to 2lbs 12oz; MSRP ranges from $359 to $469. “Early Bird Special” prices of about 20% off are available for a limited time via IndieGoGo. For more information, go to Zenbivy.com or check out the IndieGoGo campaign.


Video: Super Glue Strength Testing

Whether we're consciously aware of it or not, brand names, packaging, and marketing strategies can play a major role in determining the products we buy. When faced with a dozen options on a store shelf, we might reach for the brand we're most familiar with, or the one with colorful packaging that catches our eye. Or, putting all this psychology aside, we might make a decision based on price alone. The real challenge is determining the item that provides the most value or “bang for the buck” — and this often requires some testing and research.

Super glue comparison test review adhesive cyanoacrylate 3

Project Farm used weights to test the strength of a super glue bond on PVC pipe.

Super glue is a substance that has a place in just about every home toolbox. It's also valuable in survival kits, since a single vial can quickly repair broken gear or even seal cuts. But, considering the above points, have you ever done any research on which glue performs best for your needs? In the following video from Project Farm, six brands of super glue are tested head-to-head for adhesion to both metal and plastic surfaces.

We appreciate this unbiased performance-based approach to evaluating the glue, as well as its inclusion of multiple types of strength tests — lateral, tensile, and torsional. Price is also a consideration, since it's important to remember that an expensive glue with mediocre performance will offer less value than an average-priced glue with that same performance.

Super glue comparison test review adhesive cyanoacrylate 2

Although Project Farm doesn't make a judgement on which glue is the best all-around choice, the Loctite brand seems like a strong contender, especially if you frequently use glue on plastics.

For more product testing along these lines, check out Project Farm's head-to-head duct tape tests.


Eye for an Eye: Hurricane Preparedness & Survival

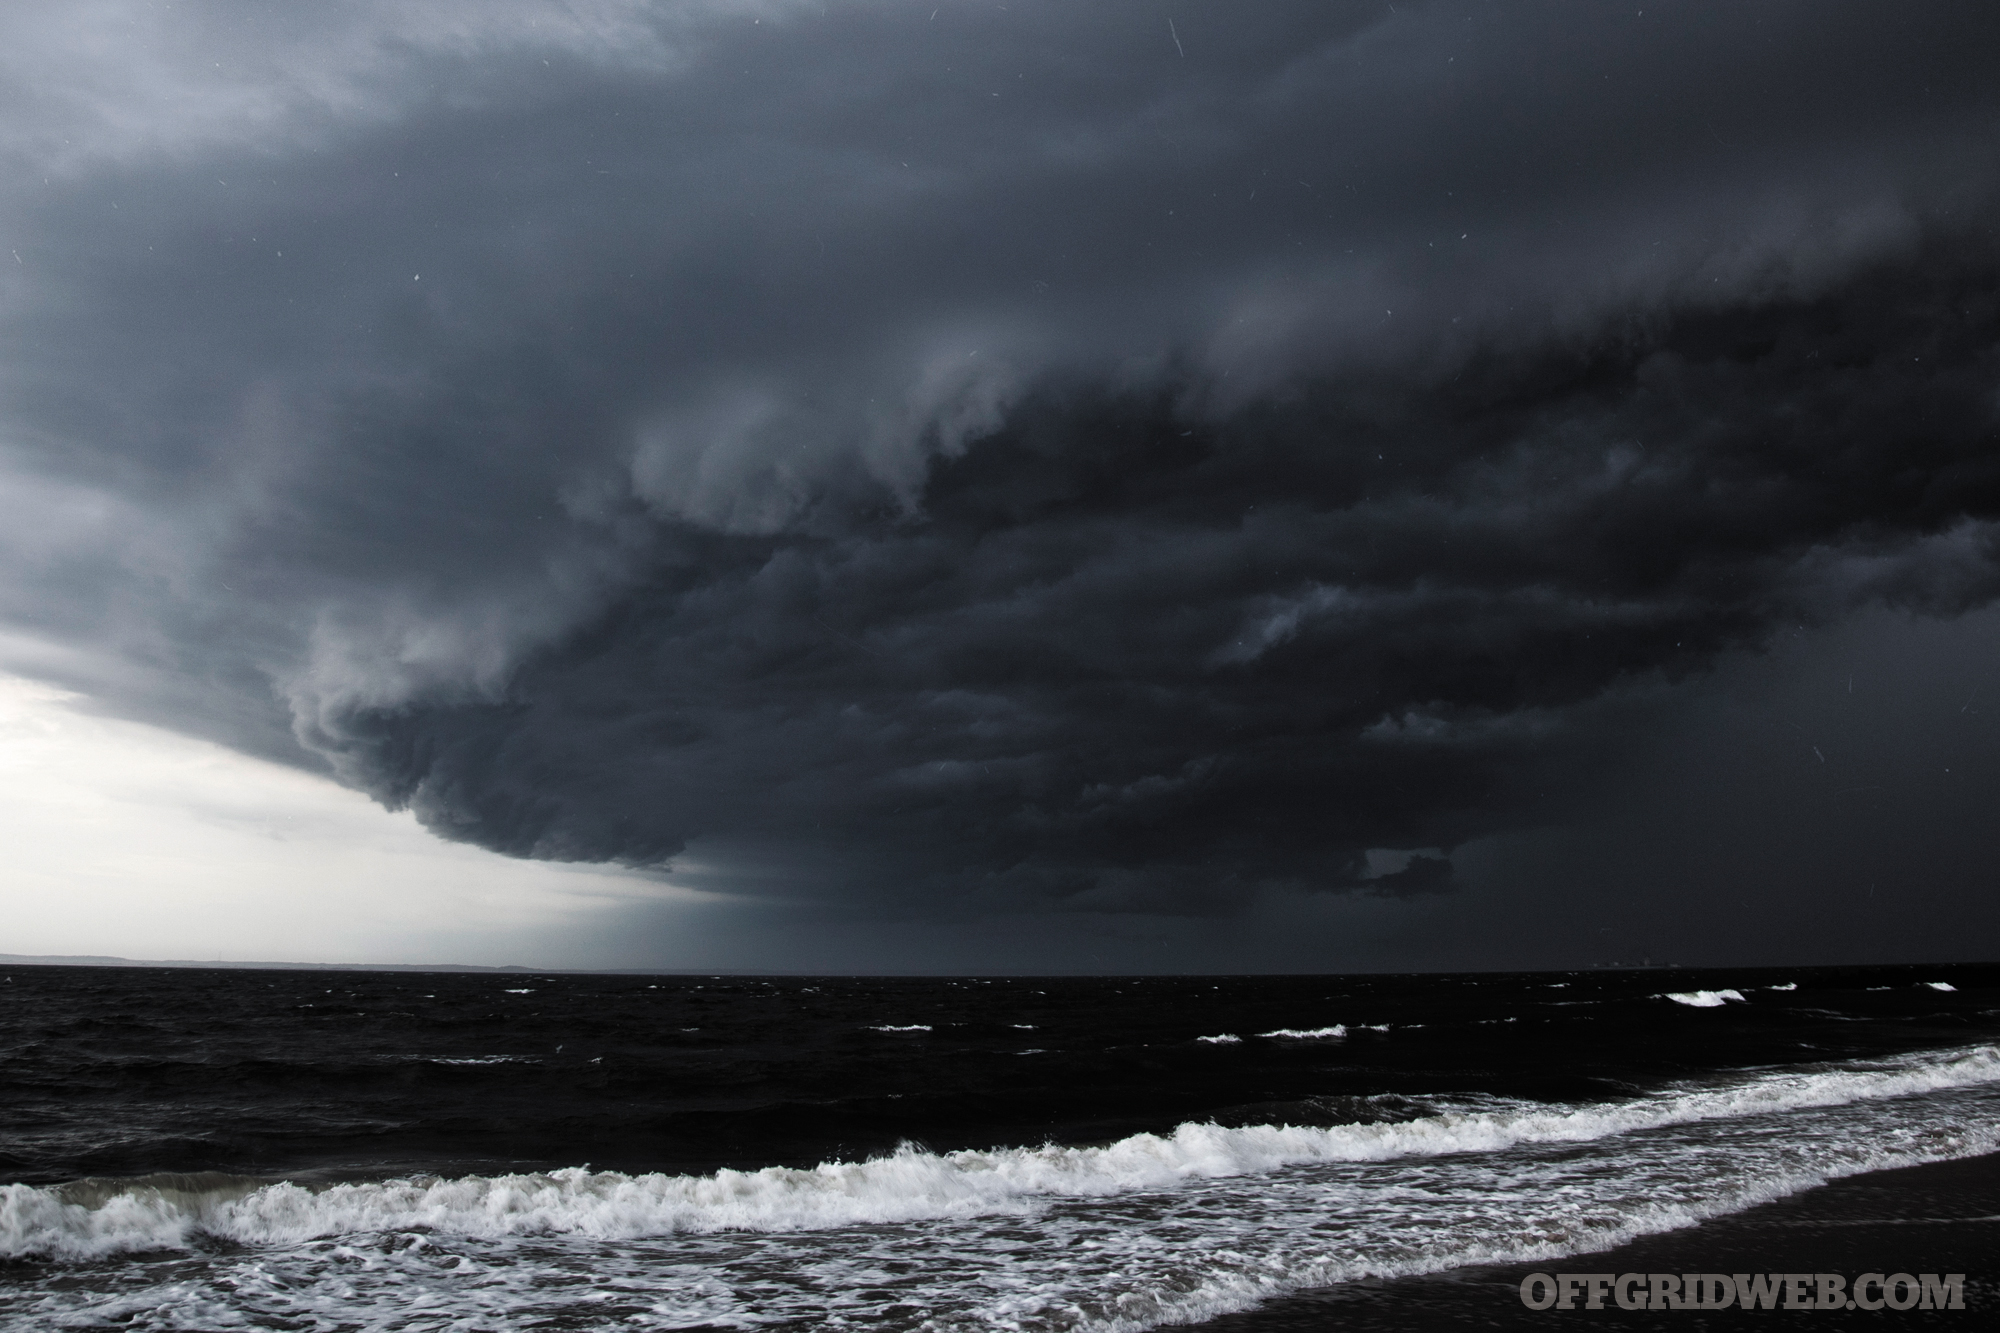
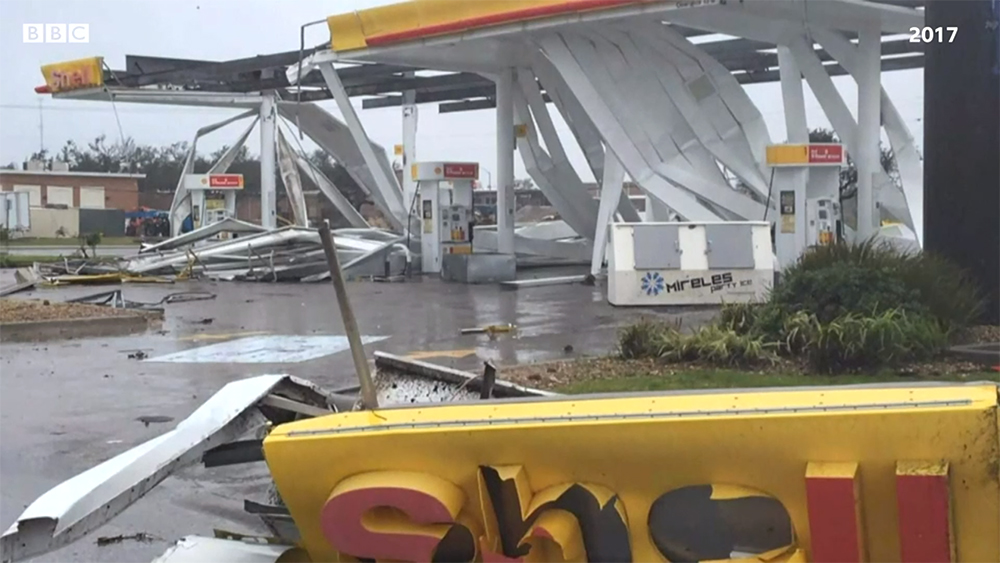
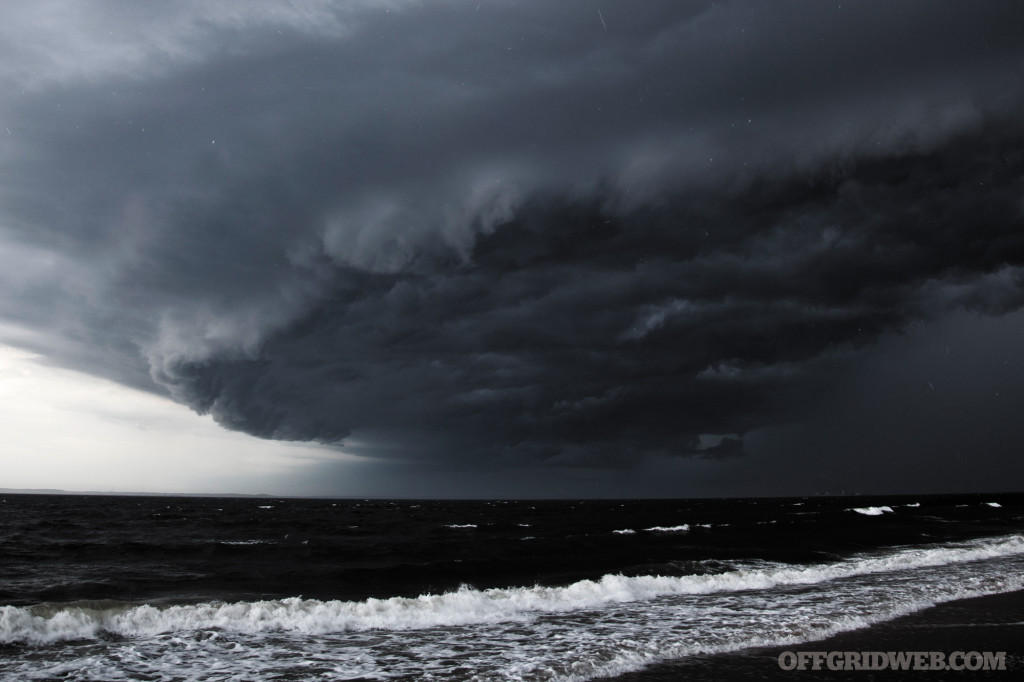
A hurricane is the haymaker of sucker-punches; nature’s fist of fury. Starting low, loose, and below the belt, it loops upward and lands in an arcing trajectory with enough force to take off your head. At worst, winds and waters combine for a one-two punch that leaves you for dead in a blind alley — Hurricane Alley.

Can you take the hit? Will you be caught flat-footed? Survival for you and loved ones may depend on developing the ability to stay aware and stay prepped prior to and during the six-month Atlantic hurricane season. It runs June through November, when hurricane eye walls narrow into deadly killing funnels, with nice sounding names like Florence, Harvey, and Katrina.

To learn how to prepare for and move (or not) before, during, and after a hurricane, we look at hurricane formation, what’s new in tropic storm survival techniques, and what might be called the hurricane mindset. By developing what we call the “eye for an eye,” you reduce the probability that you’ll end up posting a cardboard sign on your roof reading, “Rescue Us!”

Prepping for a hurricane survival natural disaster shtf bug out preparedness storm 3

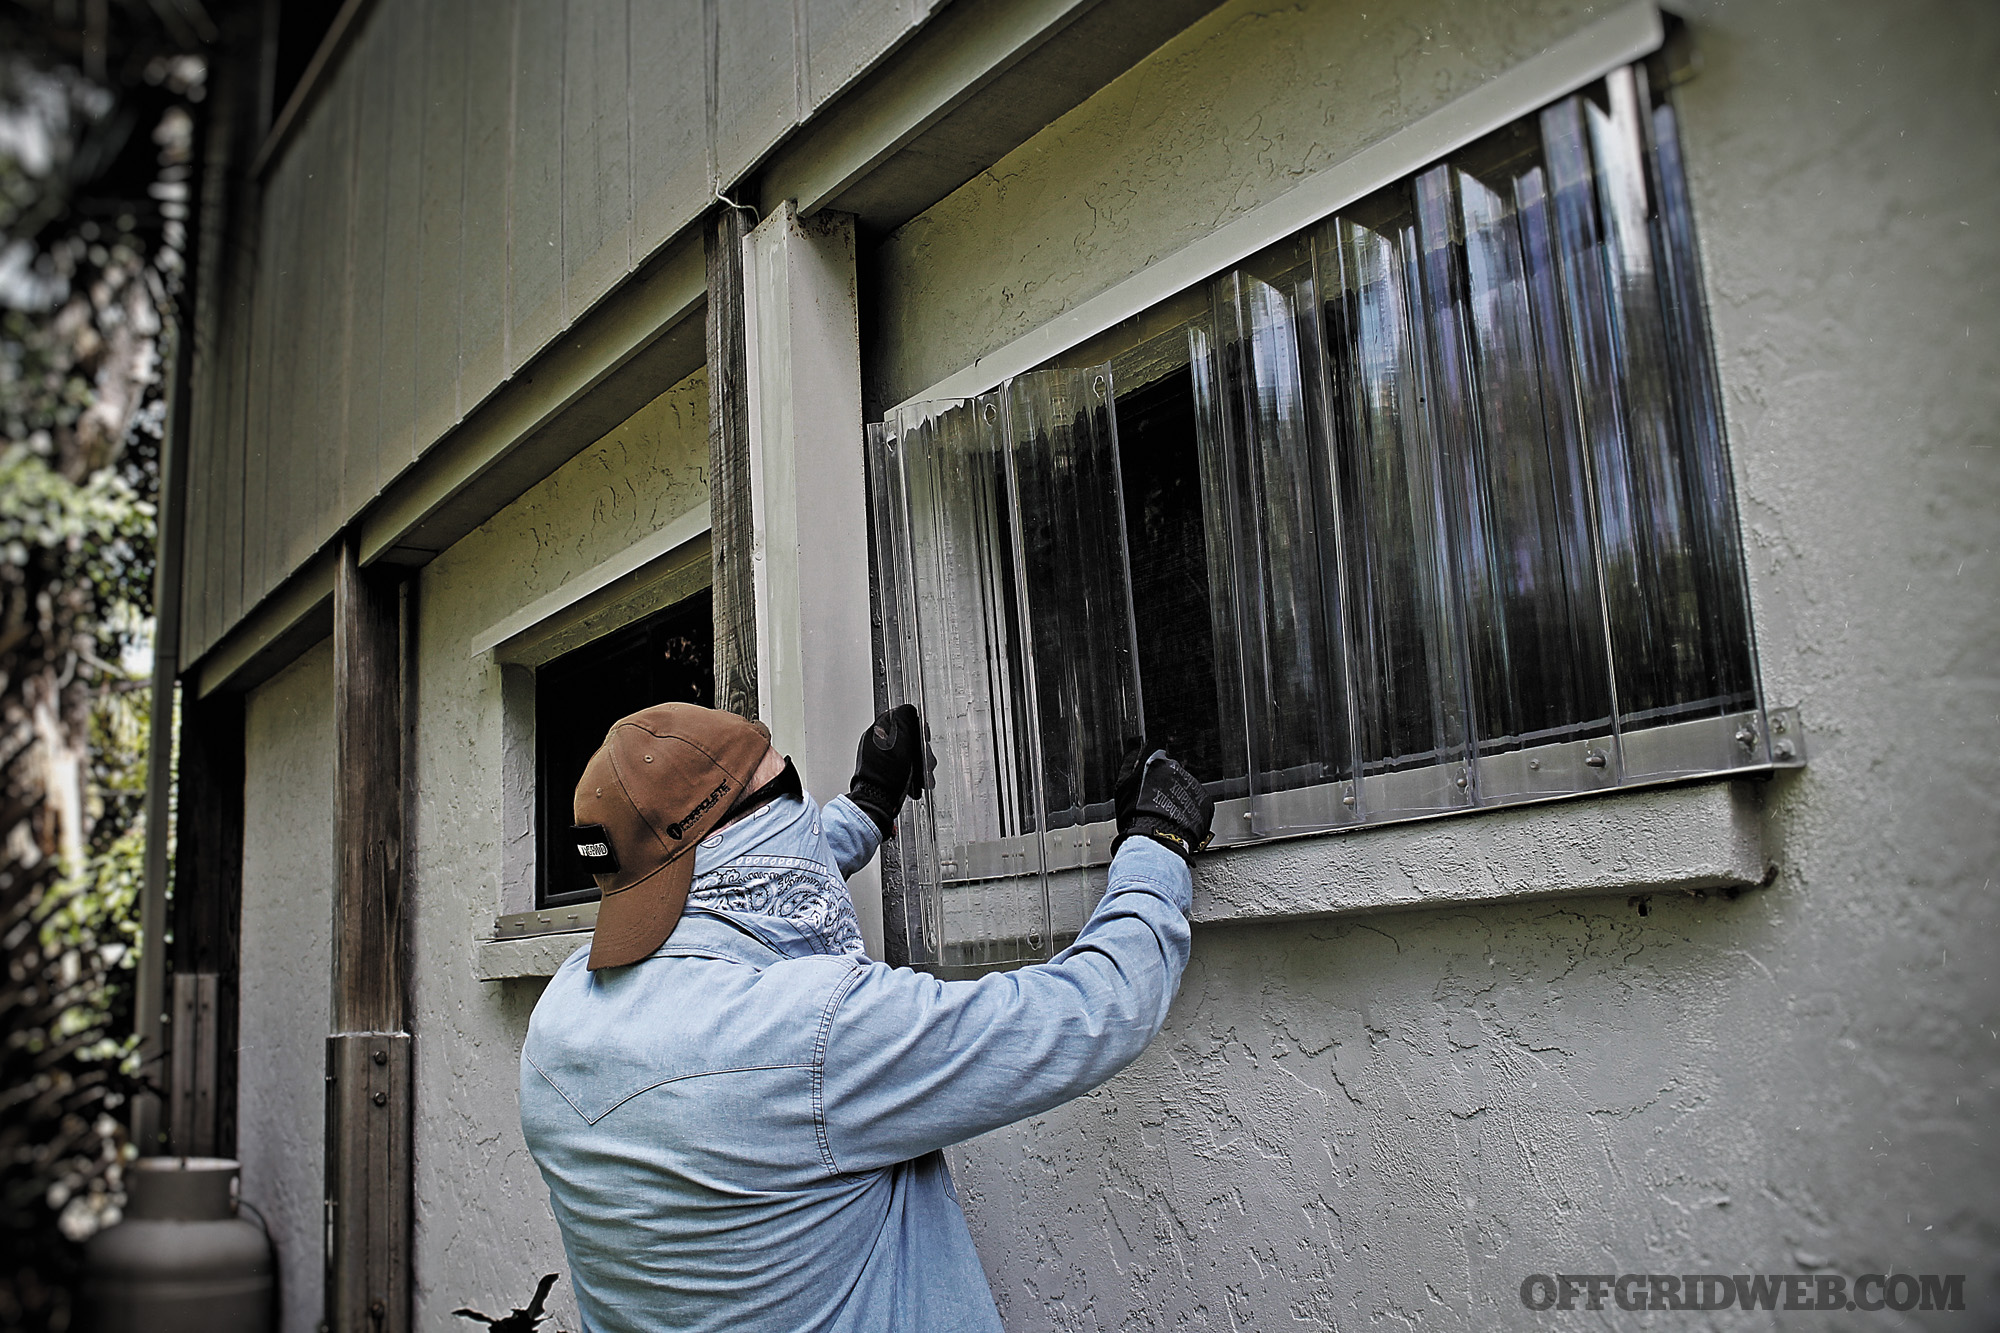
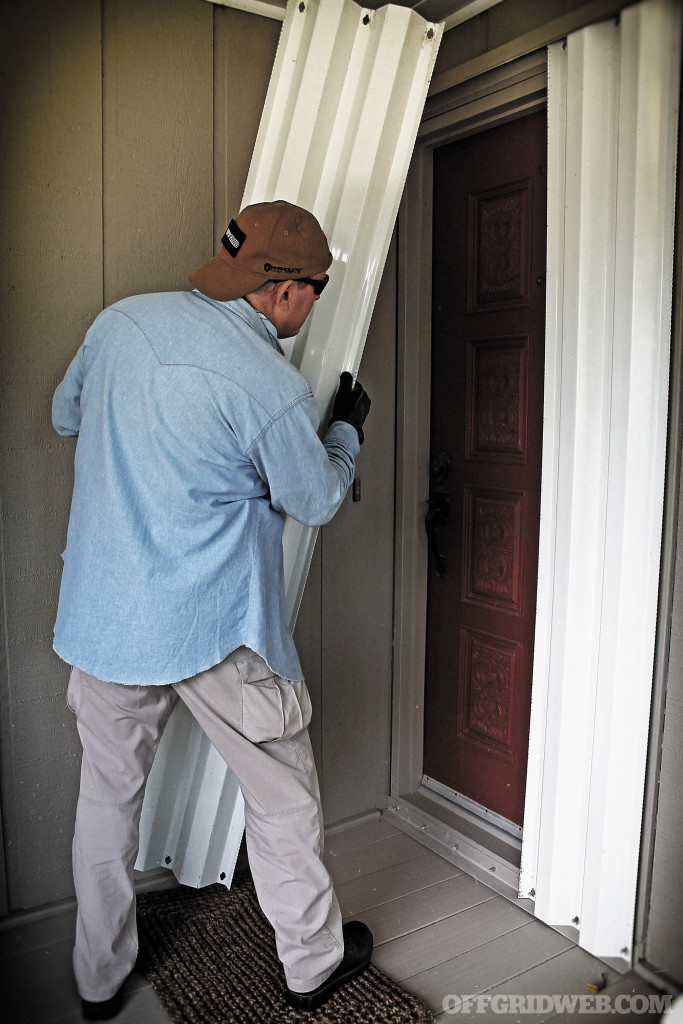
Above: Before the hurricane winds make this task impossible, install high-impact plastic window coverings and aluminum-door coverings, using pre-installed aluminum channels above and below the door with wing nut anchors. A 4×8 sheet of plywood is a sail when climbing a ladder and has sent many last-minute preppers airborne.

Hurricane Mindset

For 2016, disaster planning officials say the No. 1 public danger during hurricane season is the same vulnerability evident years after the September 11 terrorist attacks: complacency. Just as the warnings of a global jihadist movement may be dismissed at our own peril, disaster officials say ignoring the threat of widespread yet unpredictable hurricanes is to woefully turn a blind eye to the inevitable.

The key: prepare intelligently and show a little respect. Hurricane mindset takes the long view, recognizing that almost one-third of hurricanes historically reach major strength. Envision a hurricane up close and personal and plan or practice moves prior to threats becoming real. Get in the zone now so you won’t zone out later.

Prepping for a hurricane survival natural disaster shtf bug out preparedness storm 2

’Cane Patch

A hurricane is a tropical cyclone formed over the Atlantic Ocean or eastern Pacific Ocean, sometimes referred to around the world as typhoons or tropical cyclones. Hurricane strength refers to a tropical cyclone with defined circular winds of Force 12 on the Beaufort Wind Scale, equal to or exceeding 64 knots (74 mph or 119 kph), accompanied by rain, lightning, and possible storm surge even before making landfall.

Atlantic hurricane formation occurs in four stages, requiring warm moist air for fuel, a surface temperature of 80 degrees F to a depth of about 50 meters (165 feet), combined with warm westward winds from Africa. Winds lift water vapor upward, condensing into cumulonimbus cloud towers. This causes heat to release into the air and to form a circulating wind pattern, producing a cluster of thunderstorm clouds called a tropical disturbance.

In stage two, winds within the cloud column increase in a circular motion, reaching speeds of 25 to 38 mph. Once wind speeds hit 39 mph and twist around the eye (counterclockwise in the northern hemisphere and clockwise in the southern hemisphere), it enters stage three. This is when the tropical storm gets named by the World Meteorological Organization.

Stage four occurs when wind speeds hit 74 mph. Here, the hurricane is at least 50,000 feet high and 125 miles across, with an eye that’s 5 to 30 miles wide. In 2004, Hurricane Charley covered Florida, coast to coast, and its eye crushed Charlotte Harbor with 100-mph winds.

A Five-Step Approach

This year you don’t have to make that midnight run to Walmart and enter the shopping cart demolition derby. In hurricane season, forewarned is forearmed. The five-step plan below launches any time of year based on risk, lifestyle, and construction budget. Some common denominators apply fairly consistently among single- and multi-family homes, offices, or even while traveling on vacation or a business trip.

1. Determine your risk and tolerance

For coastal and inland residents alike, this is a rapid, research-based phase using existing flood zone mapping available from local, state, and federal agencies for your home, school, or business property. Start with the FEMA flood and storm surge mapping, then zero in using state and county water management or flood control districts. Cross-reference with emergency planning information for all family work locations.

This baseline info can drive decisions from insurance policies to safe-room construction. Evaluate the threat, vulnerability, and availability of utilities, law enforcement, emergency medical response, hospital access, potential impassable roadways, and any other obstacles — including criminal activity like trespassing — that may influence your decision matrix during changing conditions. Identify key players and actions needed for information, including the availability of hurricane home mitigation projects to reduce potential damage and possibly lower insurance rates.

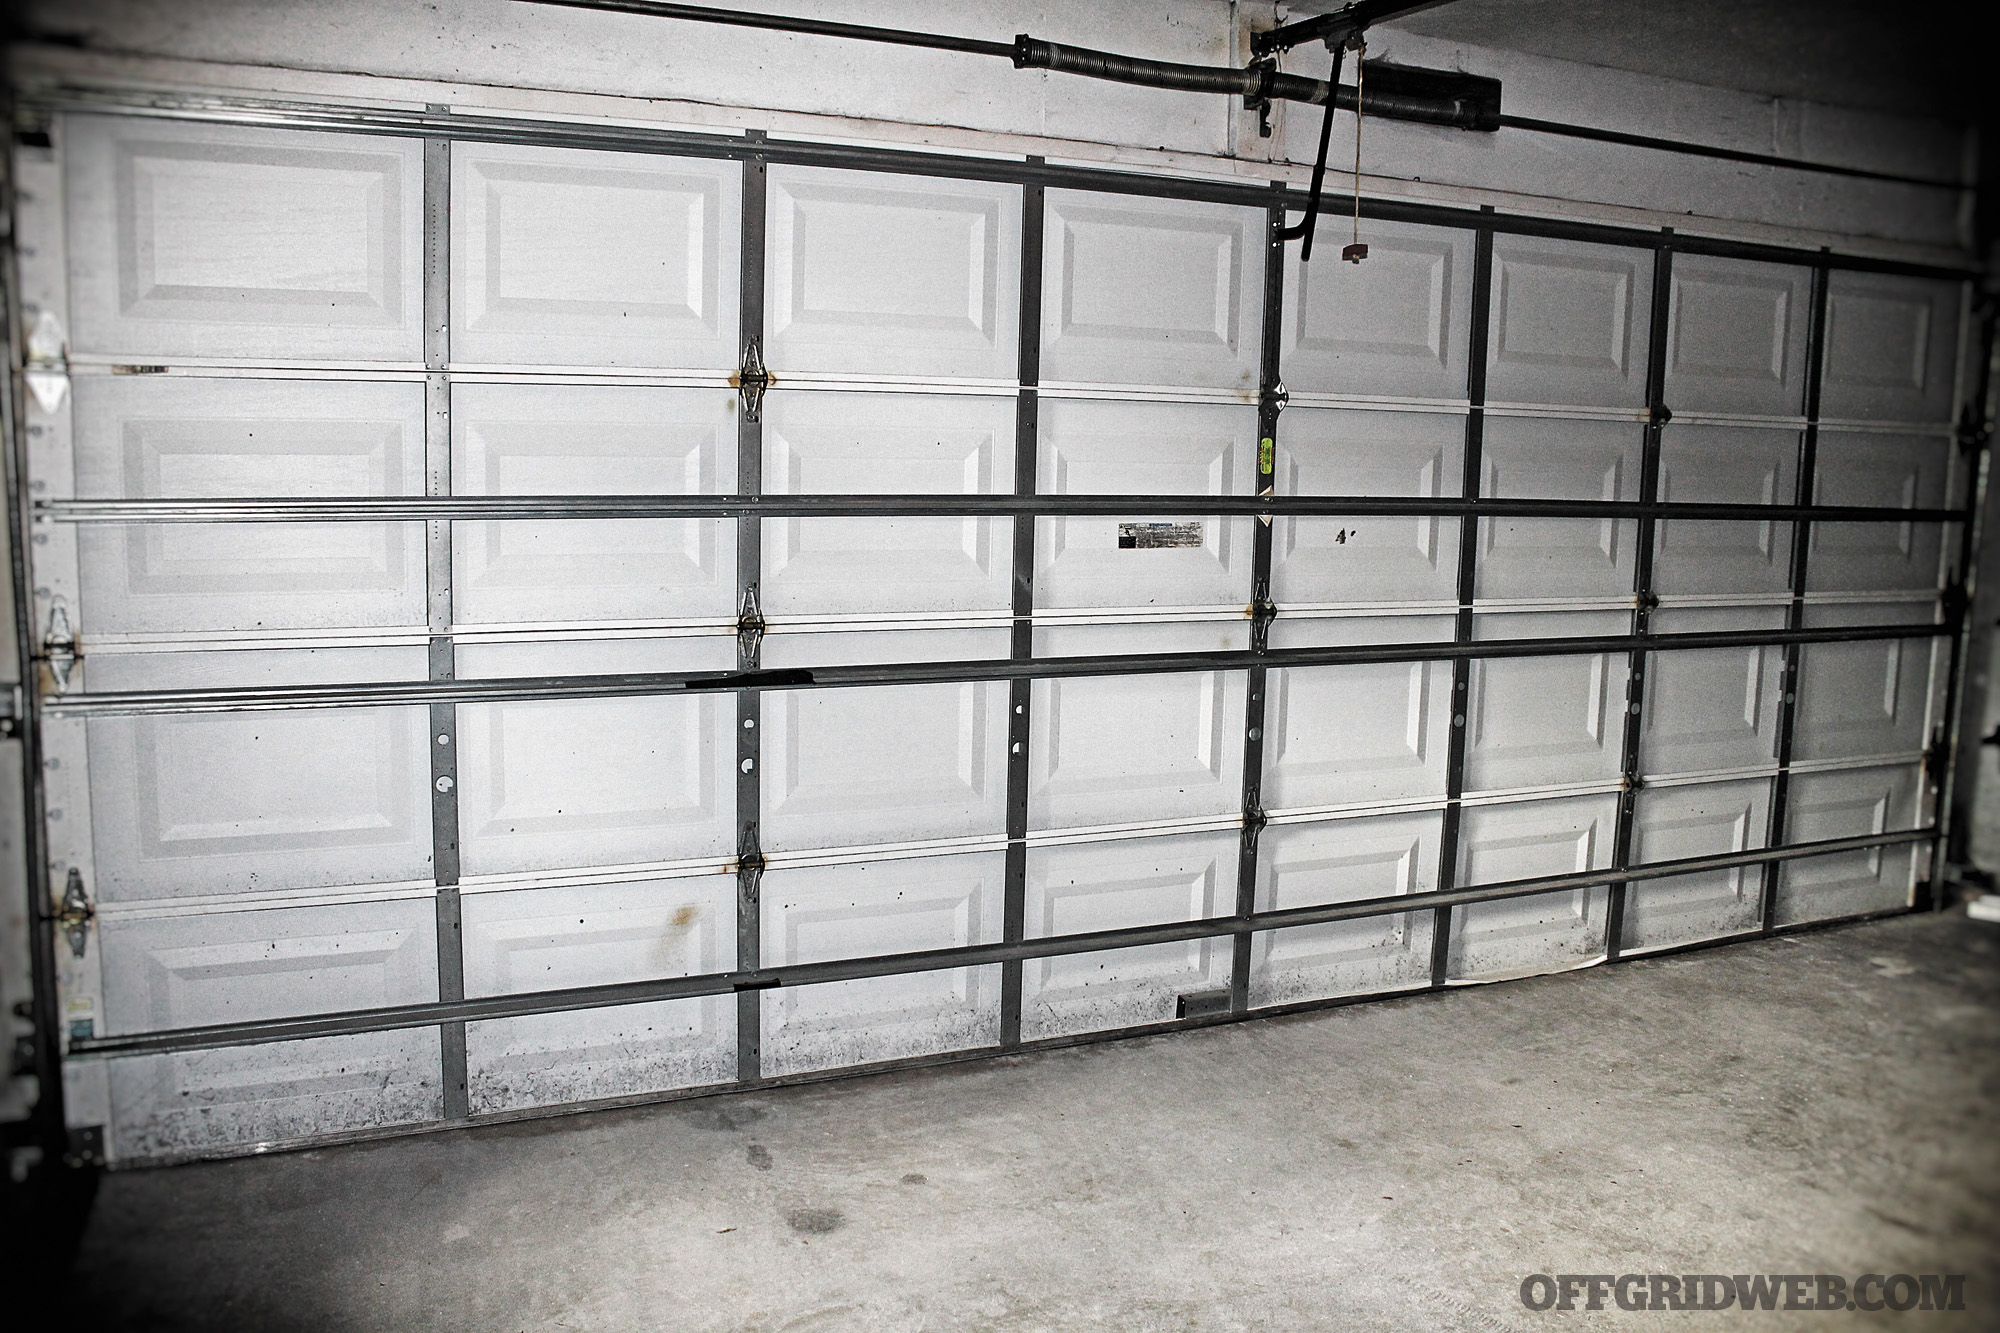
Above: Garage doors easily collapse and cave during hurricane force winds, providing an open invitation for winds to pressure your internal home walls. Guard against this with a steel- grid-reinforced door. 

2. Develop an evacuation/communications plan

This is tough, possibly requiring you to leave while the sun is still shining when ordered to do so, even when you want to shelter in place. Still, if the storm surges, or you’re ordered to leave, you should have a backup or alternate location. Run the drills, north, south, east, and west with your family (for when you’re home) or coworkers (for when you’re at the office). Establish contact points with relatives and make sure elderly relatives are on early evacuation lists, if they have special needs or are in assisted living facilities.

You should devise similar plans when on vacation. This author has twice experienced this in Monroe County (Florida Keys) when a knock on the motel door after check-in resulted in an early, same-day checkout. Don’t tune out local news and weather sources just because you clock out for a few days of R&R.

Determine your threshold and be prepared to lead rather than be passive. A communications component will ensure you have multiple levels of two-way comms, as well as capability to monitor weather broadcasts and security instructions. This can include radios or sat phones for when landlines and cellphone towers fail. Know the exact GPS coordinates of your family’s safe room to provide to emergency responders when the street signs blow away.

3. Conduct insurance check

While the sun is shining, place insurance policies for all property (and vehicles) into a safe place. Review them with a trusted attorney and insurance agent to make sure your coverage is adequate. Photo and video record all valuables and home conditions to establish your baseline. Specifically ask “what if” questions regarding wind and wave damage, and differentiate between FEMA-related relief, Federal Flood Insurance, and separate policies, including riders for specialty items. Be prepared to bug out with these documents.

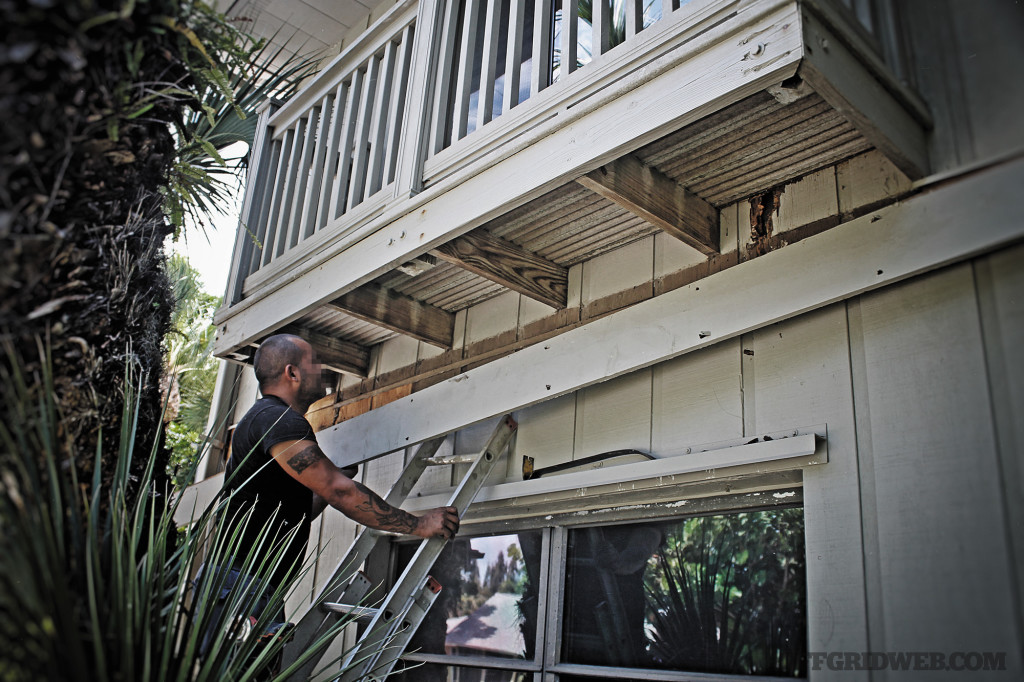
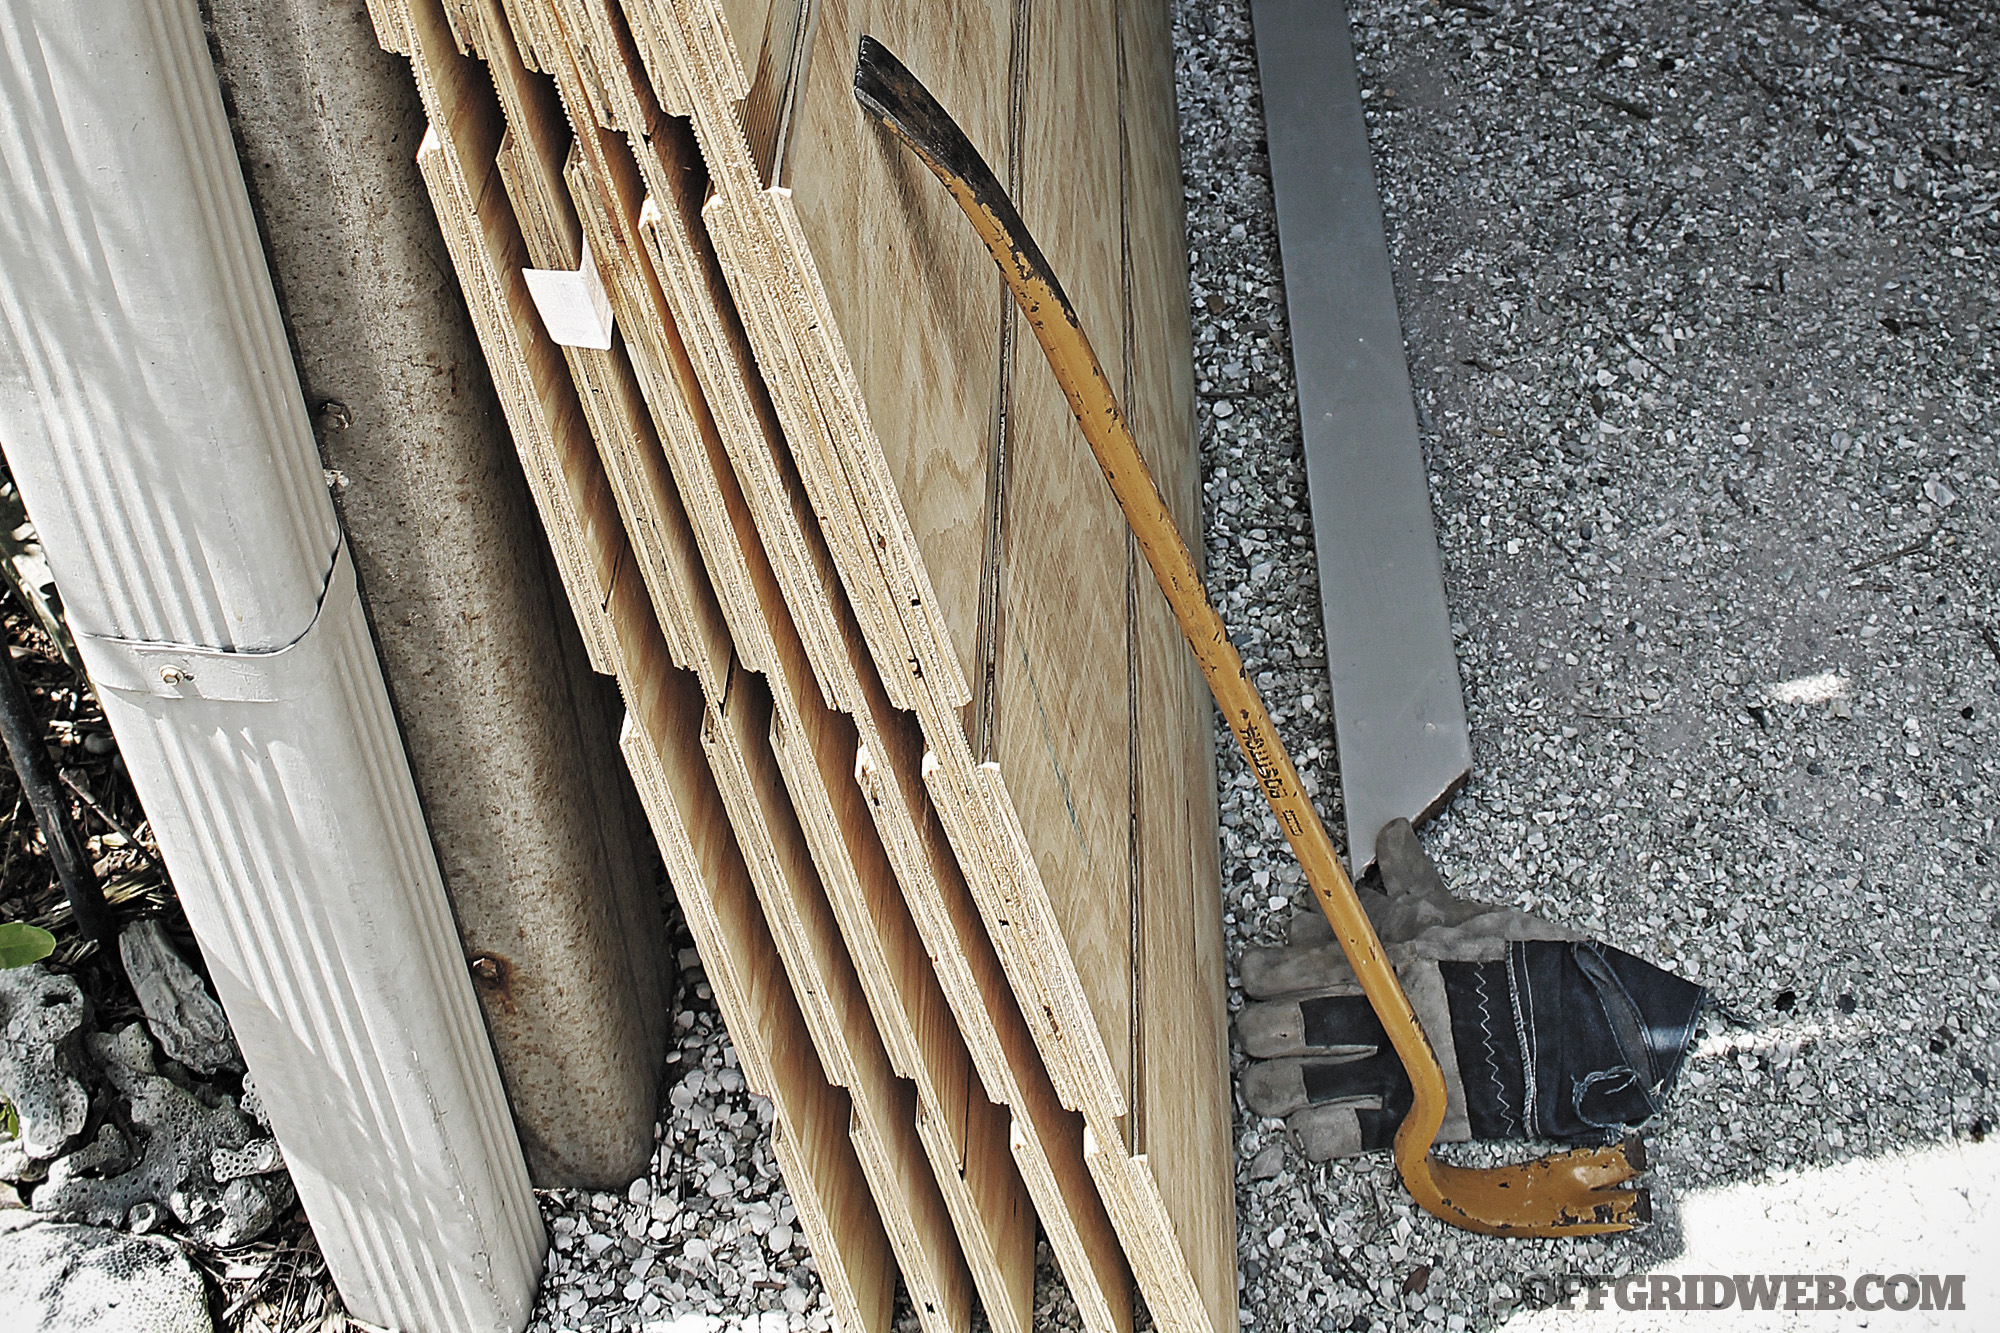
Above: Damaged wood from the previous storm season needs to be fixed long before the next hurricane.

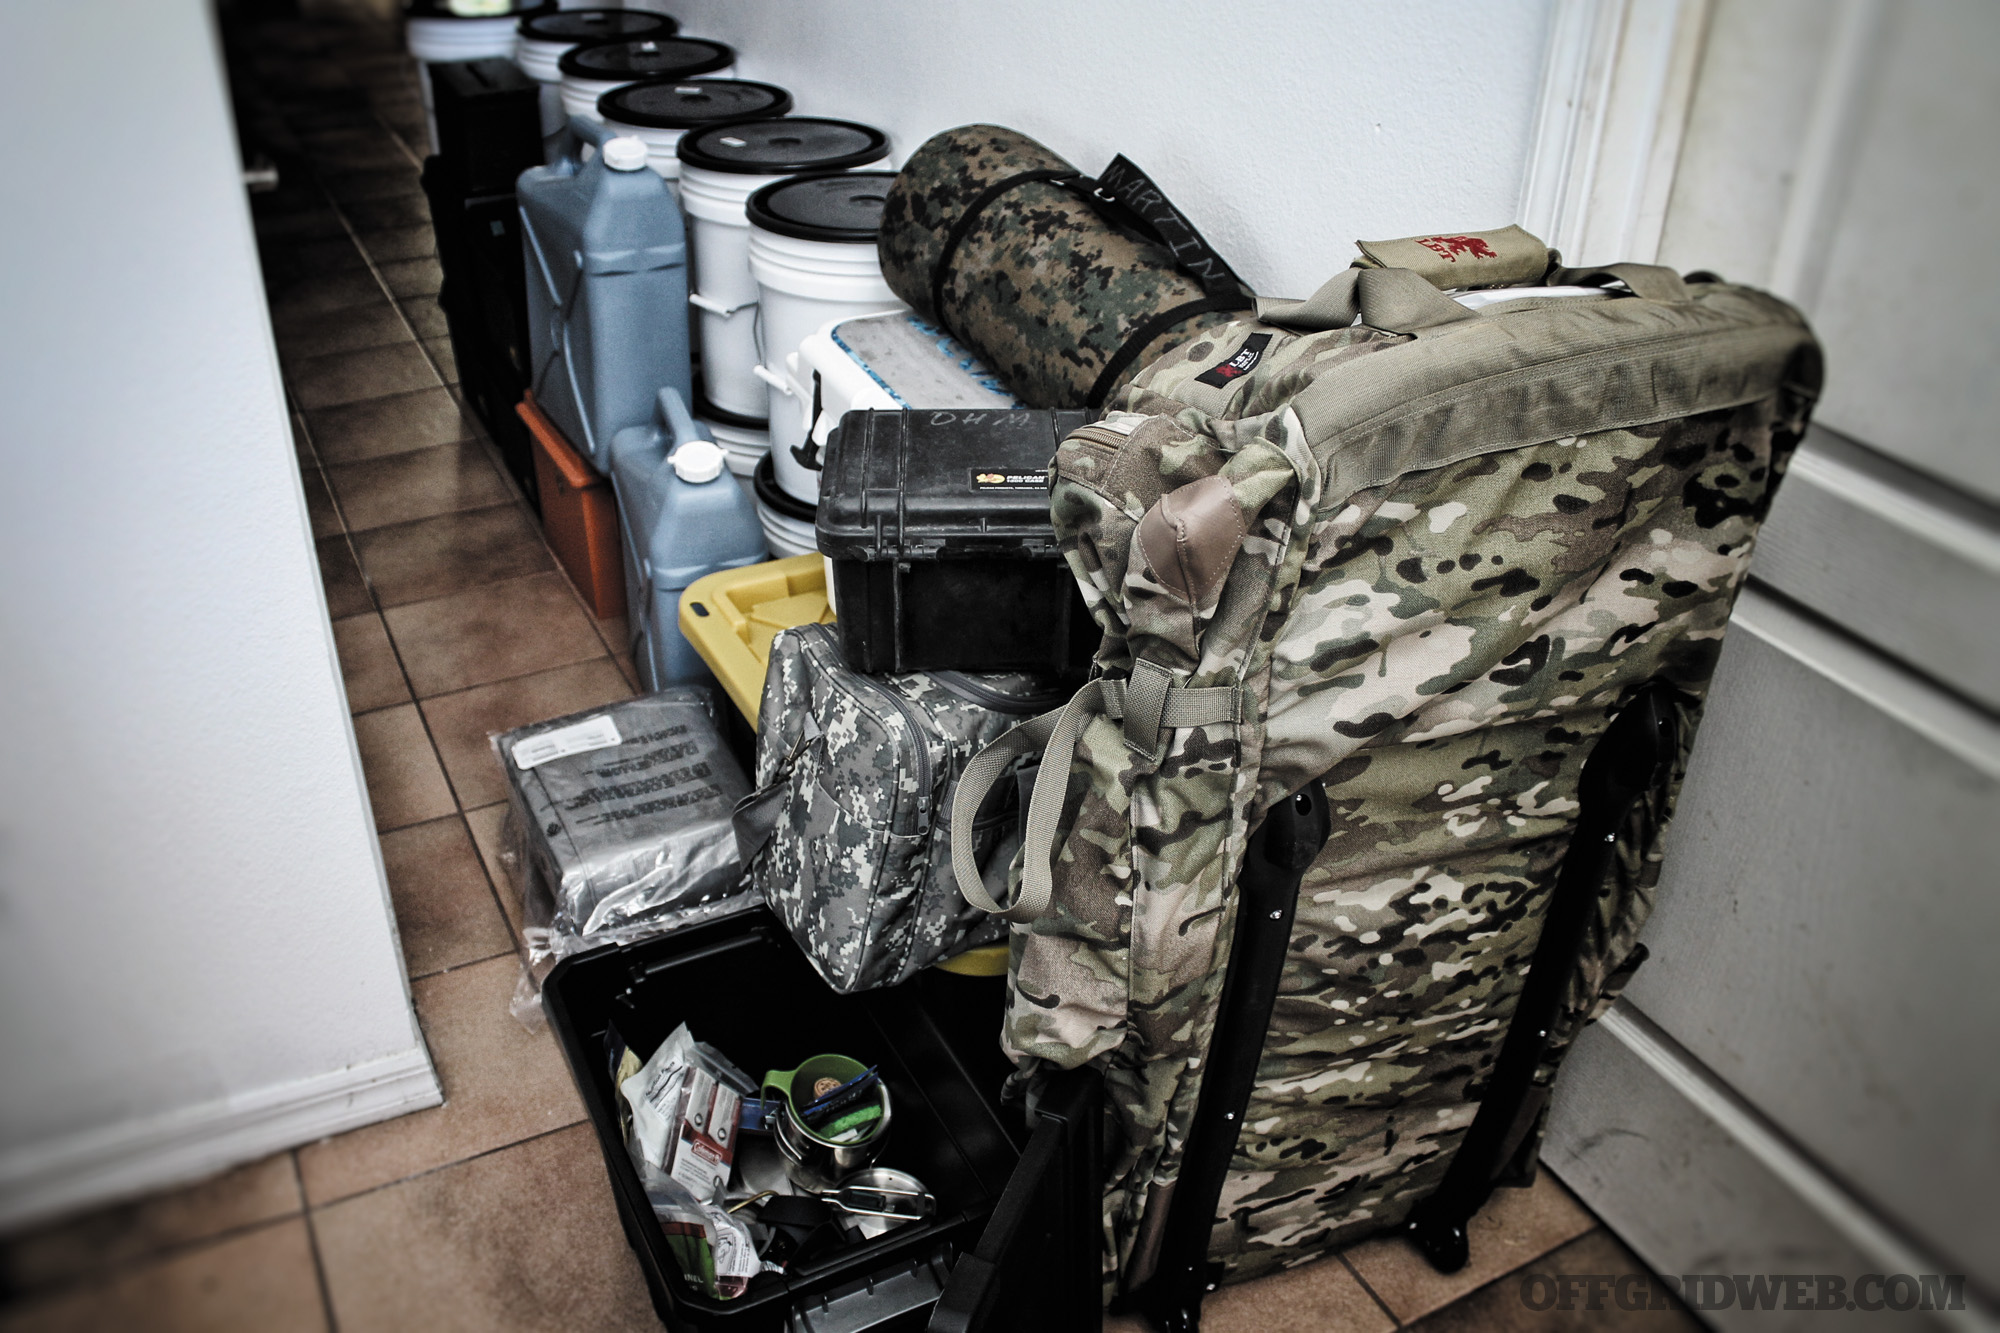
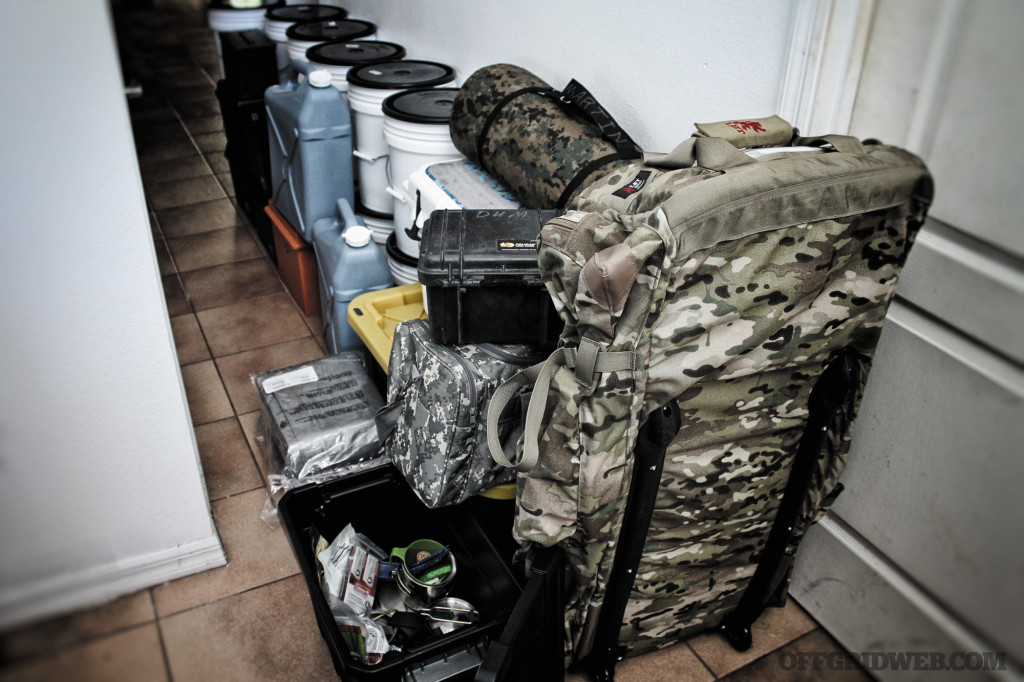
4. Assemble disaster supplies

Gradually rotate and build your emergency supplies, from food to batteries, for short- and long-term duration. If needed, consider generators for maintaining electricity, and don’t forget medicine customized for your family. Keep separate lists and dates for restocking, and help family members build their own kits.

Prepping for a hurricane survival natural disaster shtf bug out preparedness storm 7

5. Identify trusted sources for hurricane information

Authoritative weather information should come from the emergency management pros, and not necessarily secondhand through local news reporters. Go to the source, and buy or acquire the tools to own and maintain your awareness 24/7. This includes weather apps for your phone, plus separate VHF-capable weather radios, including hand-crank or solar-generator varieties. Some may have satellite phones and rescue beacons — all good to go if it fits in the budget, and you have the time and discipline to keep them operational.

Use the info you gather to fine-tune your plan and to make that stay-or-go decision, even if for a moderate distance to a safe comfort zone. Be aware, and weigh the mobility-versus-gridlock factor, because a vehicle is seldom the optimum place to ride out a cyclone or flash flooding. And even then, watch your six until it’s safe to return home.

Bugging In

Prepping for a hurricane survival natural disaster shtf bug out preparedness storm 8

Space is tight in a safe room, a bug-out vehicle, or your interior bathroom, if that’s where you decide to hunker down and ride out the storm. Pre-staged gear should allow for basic hydration and nutrition without elaborate preparation, perhaps for one to three days before the storm passes, with reserves on hand. Essentials should include:

Water: 1-gallon potable water per person for three days, plus 1 gallon for washing

Food: Three meals per day per person plus utensils

Sanitation: Bathroom facilities and trash storage, or disposable wipes, anti-bacterial hand sanitizer, and bleach, used for water treatment and as a general disinfectant

Apparel: Dry change of clothes with waterproof shell, strong-soled boots or hiking shoes, gloves, respirator, and protective glasses

Personal Kit: Individually selected items of value and need — i.e. cash, documentation, and reading glasses

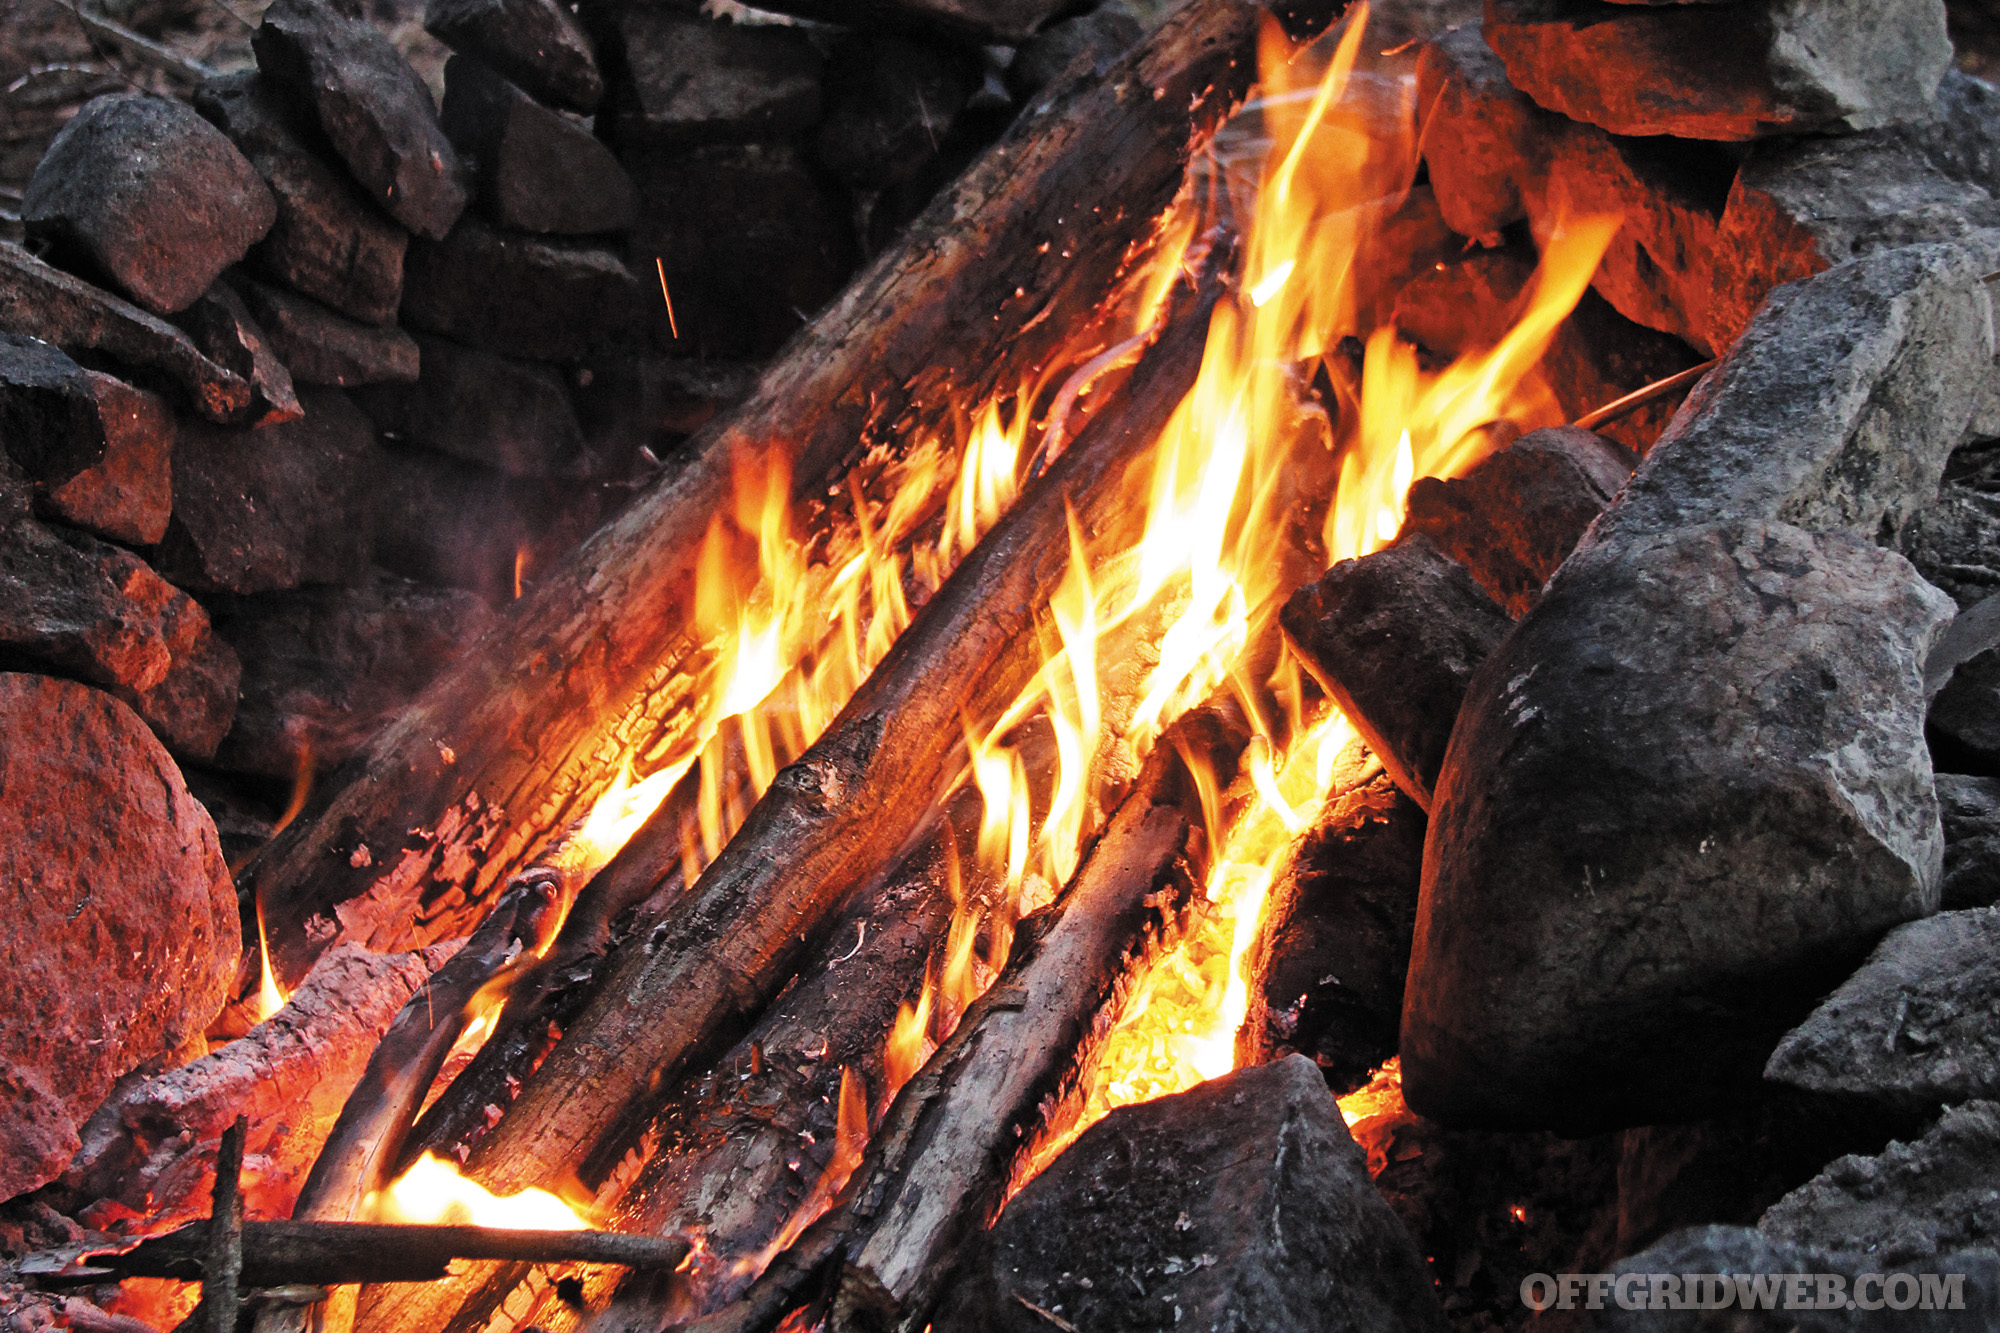
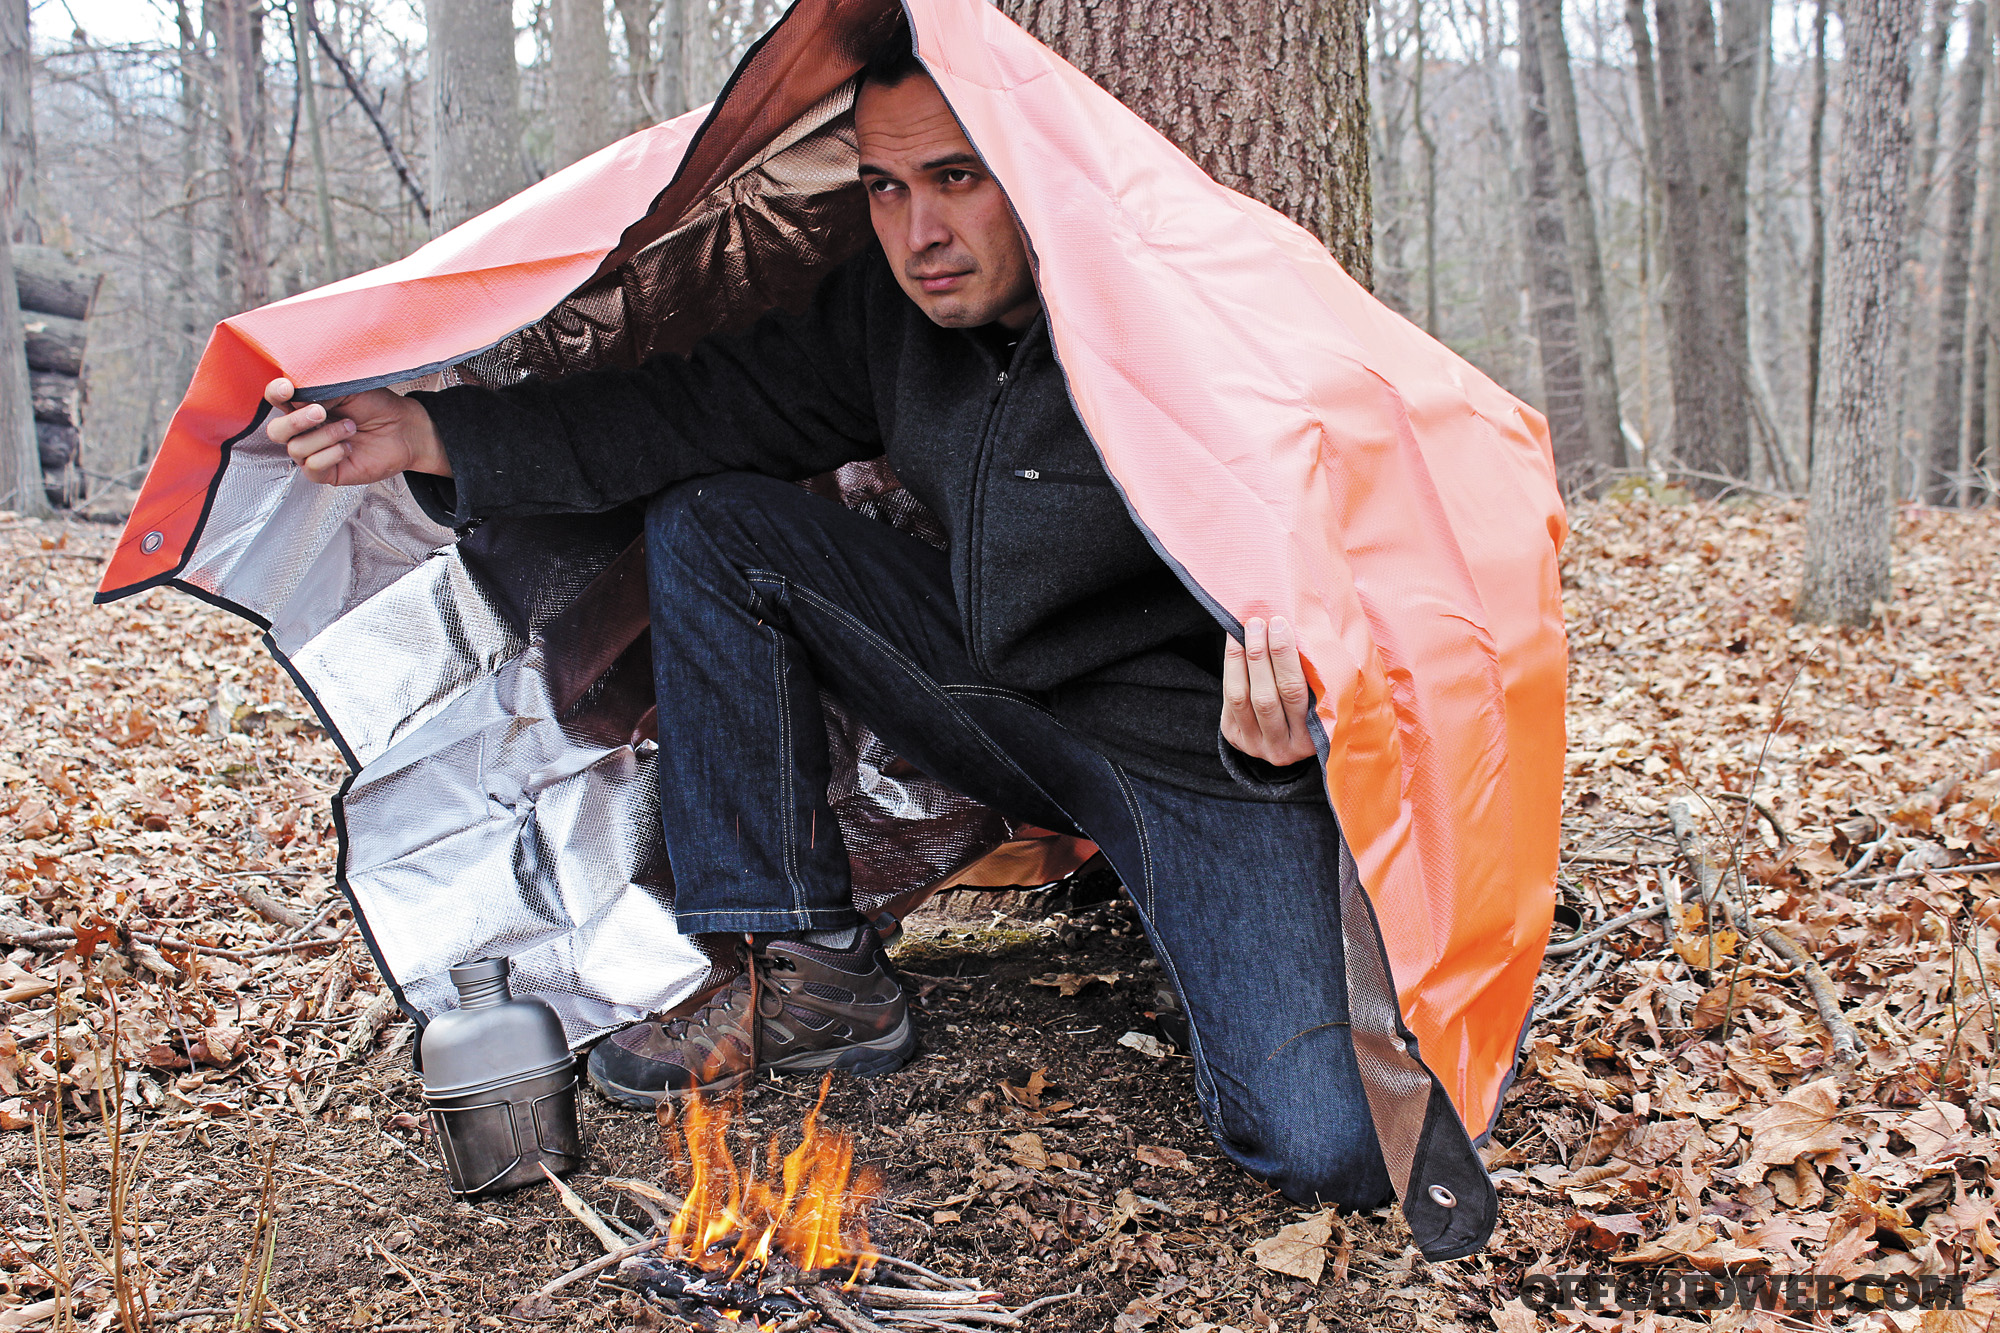
Medical: First-aid kit, medicines and prescriptions, sunblock, bug repellent, compact reflective blanket (space blanket), etc.

Self-Defense Tools: Firearms, ammo, knife, etc.

Prepping for a hurricane survival natural disaster shtf bug out preparedness storm 12

Above: Ammo in popular calibers is the first to disappear from store shelves before a huge tropical storm. Before one incoming hurricane, this author found that the only remaining ammo was three boxes of 170-grain .30-30 — perfect for his old 16-inch Winchester. (Also shown is a newer 24-inch Winchester, with John Browning’s .45-70 loaded with Federal .300-grain Trophy Bonded Bear Claws.)

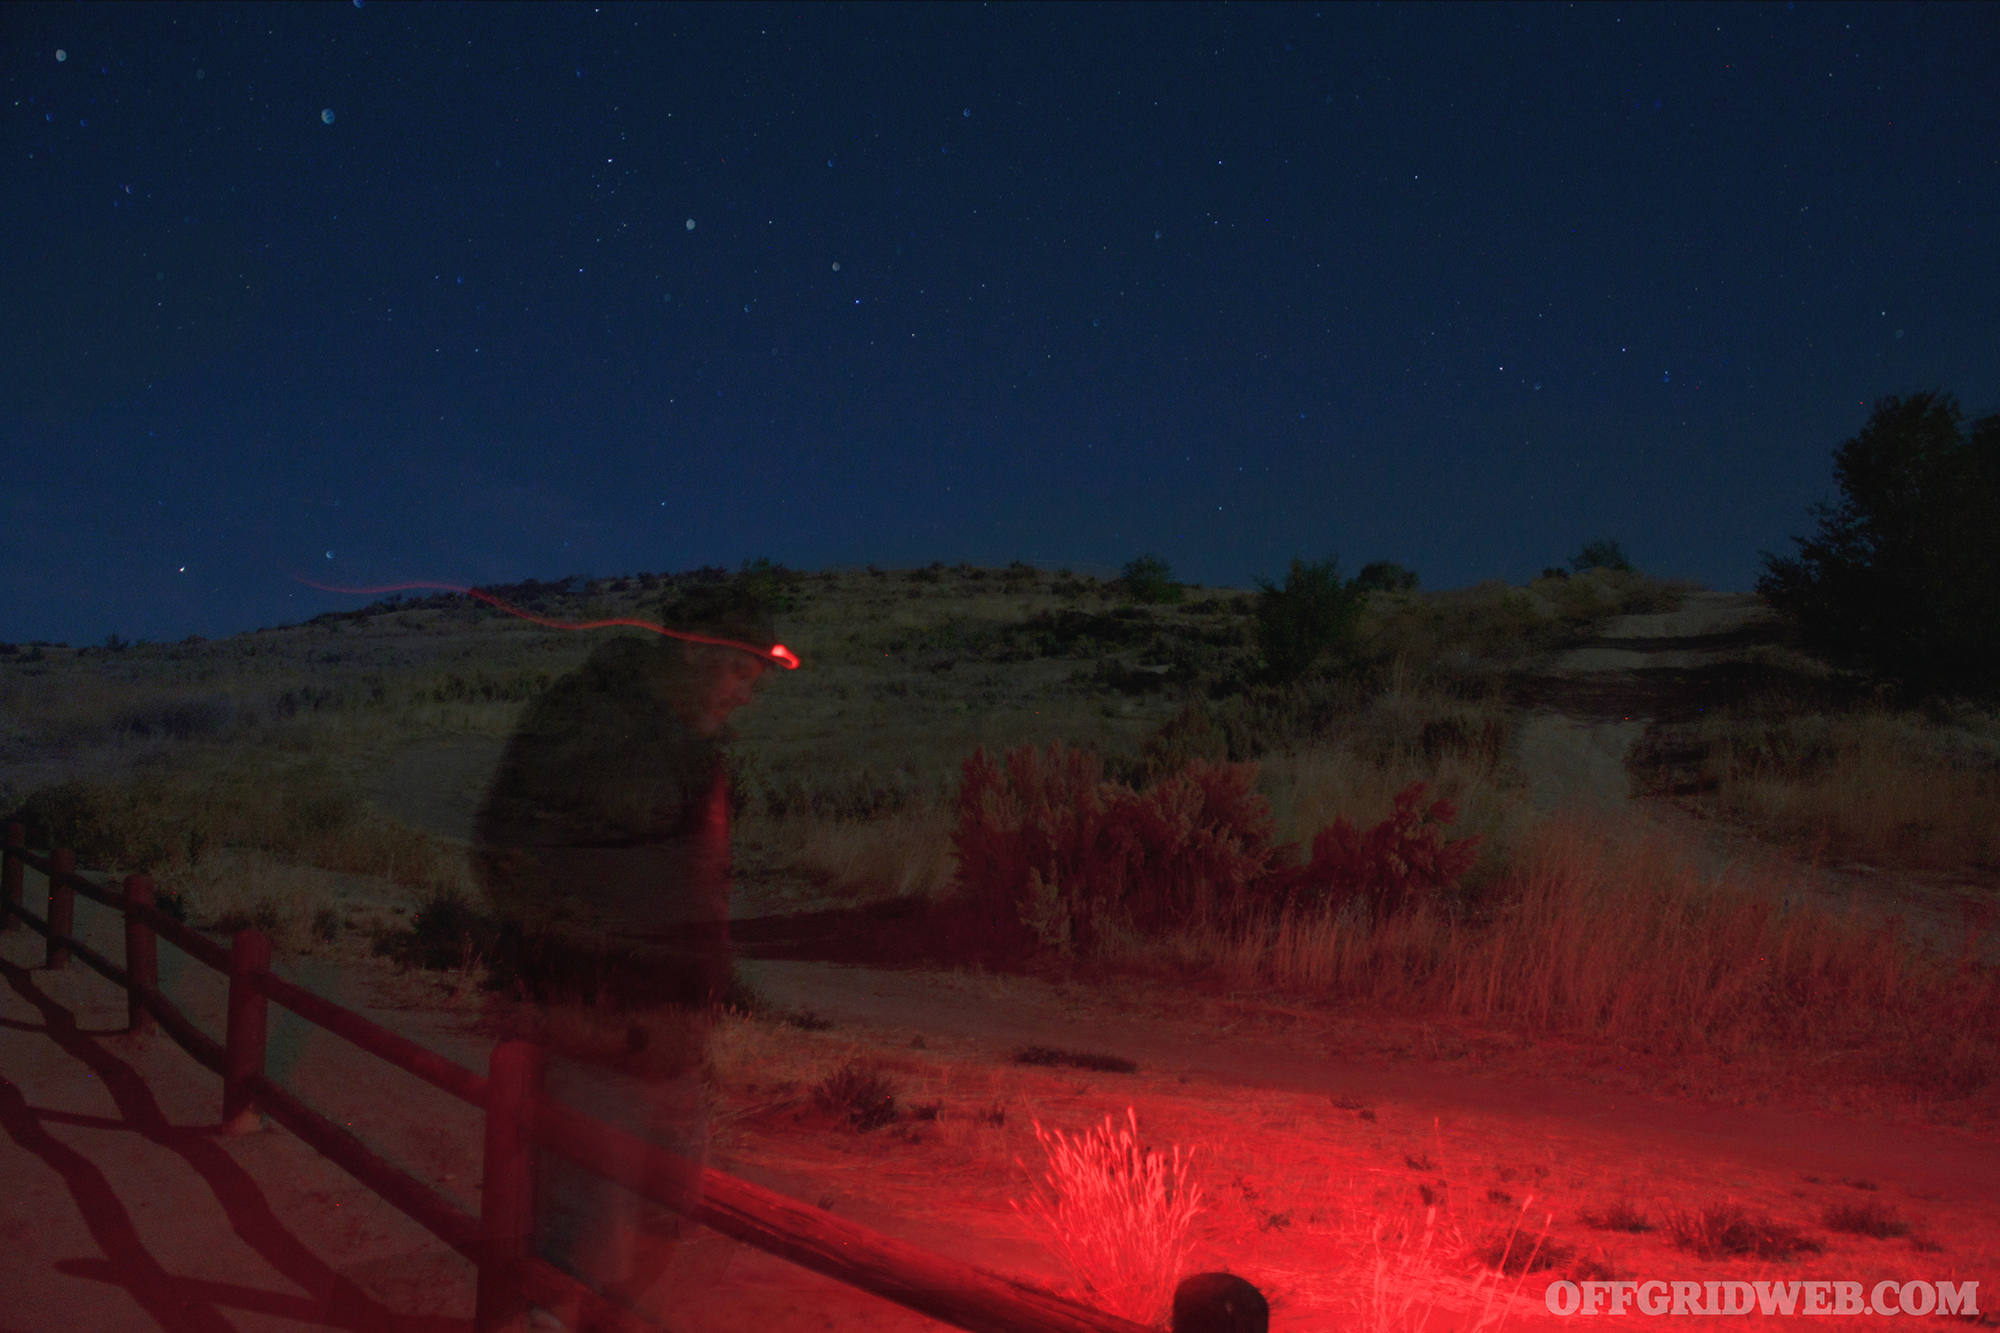
Electronics: Chargers, batteries, communications (radios, mobile or satellite phones), self-charging weather radio, flashlight, headlamps, chem lights, etc.

Also consider:

  • Signaling Devices: Whistle, flare, mirror, air horn, fire-starter
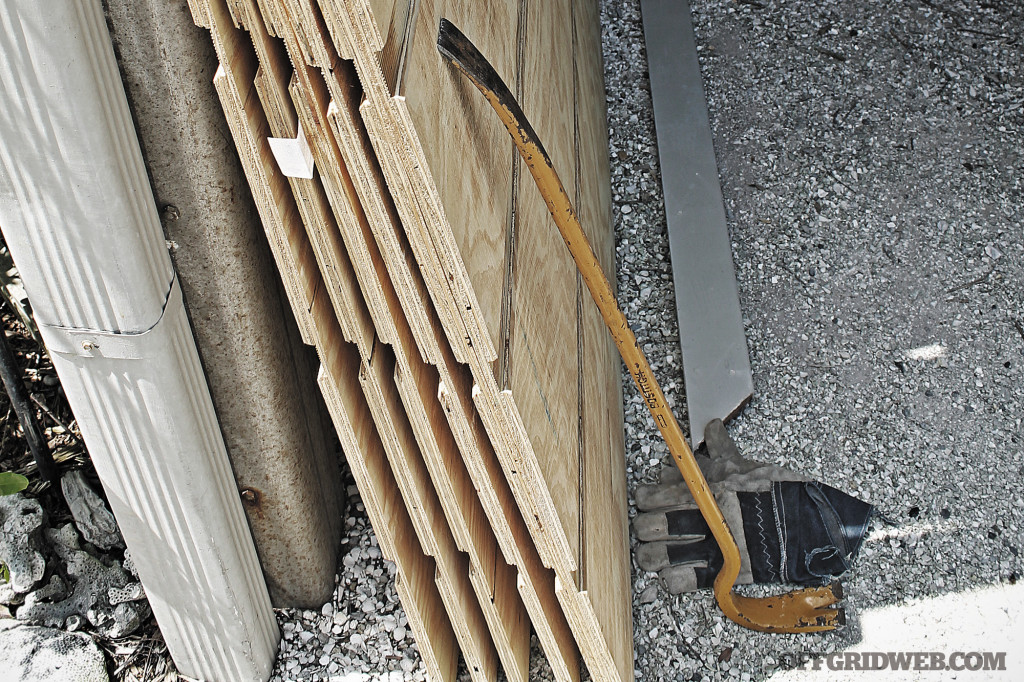
  • Evacuation Tool(s): Axe, pry bars, saws, wrenches, etc.
  • ABC-rated fire extinguisher

Bugging Out

Whether you choose to GTFO early or you’re ordered by local authorities to evacuate, make sure your vehicle (preferably a capable 4×4) is in good working order. And much like the items outlined in the “Bugging In” sidebar, you should pack essentials in your vehicle such as food, water, fire-starter, medical supplies, and self-defense tools. Also consider loading your ride with the following:

BOB(s): Fully packed bug-out bag for each family member

Spare Fuel

Vehicle Recovery Tools: Air compressor, tire-repair kit, tow strap, come-along, tallboy jack, rope

Additional Tools: Toolkit, shovel, chainsaw, pry bar, or axe

Visibility Tools: Spotlight, binoculars, and protective eye wear

Overnight Considerations: Cash, tape, window screening, tent, camp stove, cook set

Prepping for a hurricane survival natural disaster shtf bug out preparedness storm 9

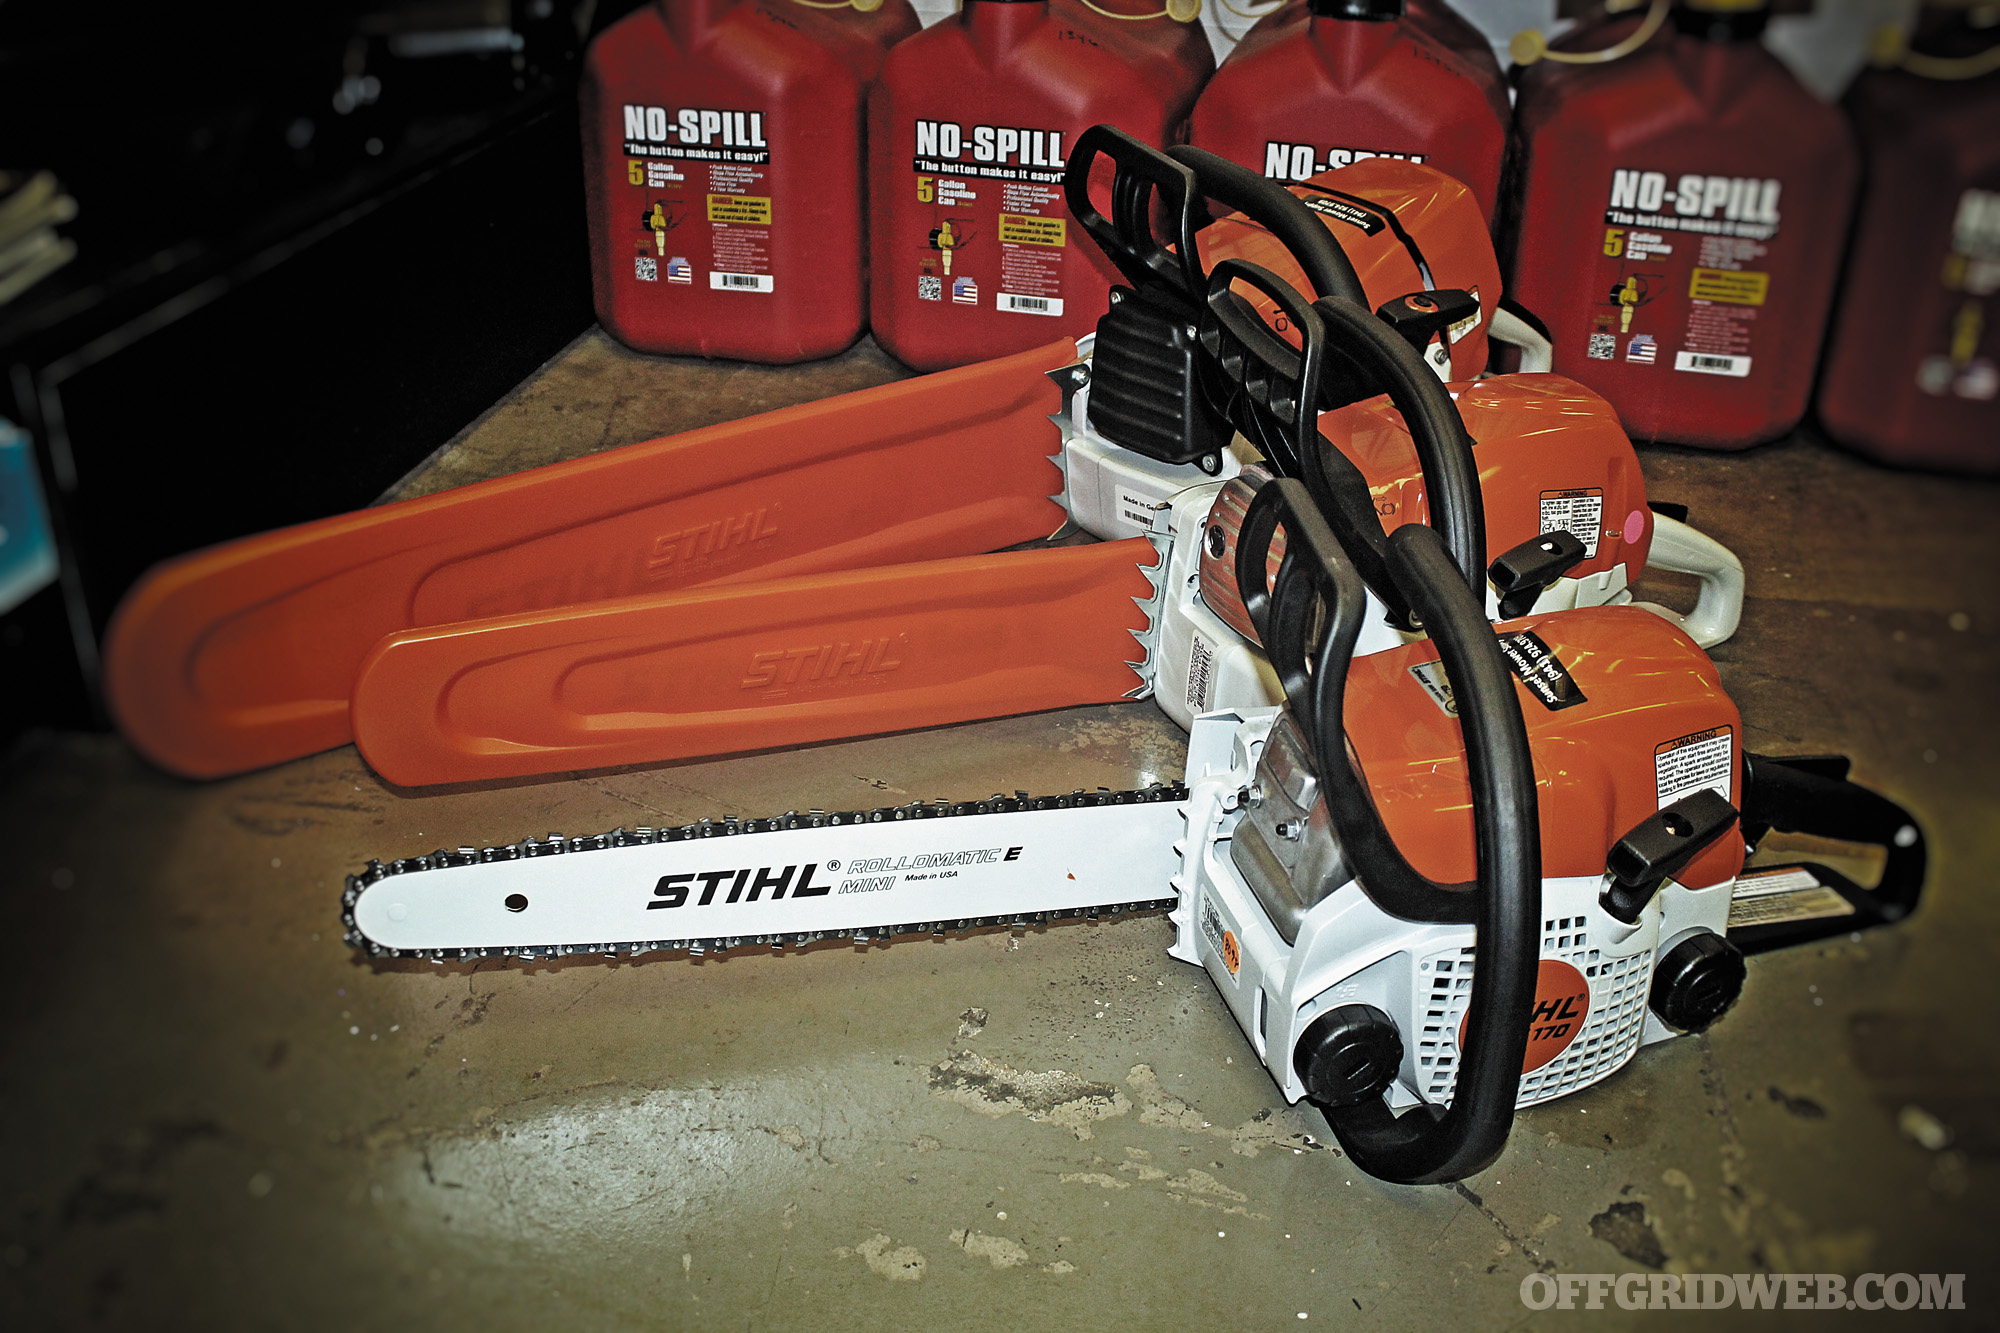
Above: Reduce potential tree damage to your home by trimming early with a professional-level pruning tool like this Stihl chainsaw. If you have room, you can also pack it in your off-road rig to clear branches blocking roads. A winch, chainsaw, and spare fuel make a vital mobility combo when nature attacks.

Prepping for a hurricane survival natural disaster shtf bug out preparedness storm 10

Above: Don’t forget eyewear, like the author’s personal Mil-spec prescription glasses from Wiley X that also provide protection from flying storm debris or hot brass.

Prepping for a hurricane survival natural disaster shtf bug out preparedness storm 11

Above: A fixed blade — like this Benchmade Bushcrafter — should be a part of every prepper’s bug-in or bug-out kit. The S30V blade with a G-10 handle makes for a great camp knife, survival blade, and self-defense weapon.

Returning Home

After the “all clear,” you might be tempted to rush home to see if your house is still standing or to just collapse in your own bed. But caution is needed. Here are some brief tips:

  • Approach your home with gloves, boots, mask, and eye protection
  • Prepare to evaluate damage while avoiding injury due to utilities/hazards
  • Prepare to install rolls of nylon screen for mosquito/disease control
  • Document damage with digital photos and lists, prepare claims and guard against looters and predators, contact and initiate all claims
  • Apply storm tarps, tie-down cords, post signage
  • Communicate with family, emergency plan contacts

Web Exclusive: For additional content and more detailed information on what to do after a hurricane hits, go to www.offgridweb.com/survival/hurricane-aftermath.

Mistakes to Avoid

Thinking You Can Fuel Up: Chosen or ordered to evacuate? Then you better understand the capacity and range of your vehicle, and the need for space for fuel in the event none is available en route. Follow the boater’s rule of thirds: one third to reach your destination, a third to maneuver, and one third to return. Fill up spare cans for alternate destinations.

Staying Clueless About Flats: Emergency responders have discovered that storm debris can often result in punctured tires. Carry a patch kit as well as a hand pump or onboard compressor, plus blocks and a working jack and tire tool for each vehicle.

Forgetting That Looters Are Shooters Too: If you’re hunkering down, don’t set up a lawn chair and an umbrella on your front porch and sit beside a spray-painted plywood sign reading, “Looters will be shot. Survivors will be shot again.” There are few things more desirable to robbers than money and guns. Not only will this sign mark you as gun owner, but shade and sunscreen don’t qualify as concealment or cover. And no need to make first responders reluctant to respond to emergency calls in your ’hood.

Cracking Open a Window: This popular misconception results from post-storm images of buildings that appear to explode during hurricane force winds. Like blowing into a balloon, fast-moving air entering a building applies pressure inwardly, potentially lifting roofs and blowing out walls. Seasonal storm shutters, or even plywood, can block the forces and protect you against flying debris.

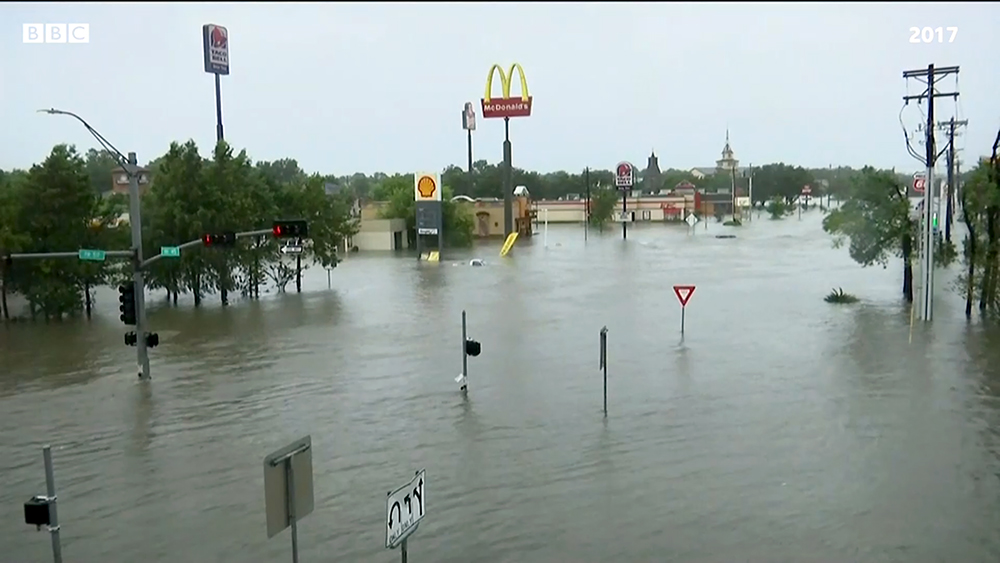
Lacking large-scale situational awareness: Don’t focus so intently on the hurricane eye coordinates that you lose perspective on peripheral threats. Even when avoiding potential storm surge, many deaths still result from drivers and even pedestrians underestimating inland freshwater flooding on roadways, 100 miles from the eye.

Procrastinating About Protection: Many homeowners are injured immediately prior to storms when attempting to climb ladders to install 4×8-foot plywood panels during high winds. Beef up your home in the spring, or as a year-round home improvement project. Things like storm shutters, fortified garage doors, and impact-resistant windows can fortify your residence or office and provide potential insurance advantages.

Conclusion

“Don’t let it get you down and keep you down” sounds cliché, but that is what you must do. If a hurricane is on the horizon, show strong leadership and a caring face to those around you. Fortify and strong point your patch of earth; prepare to stand your ground or maneuver. Sometimes you must get knocked flat and a little broken before redemption. Get back up.

About the Author

David H. Martin’s earliest hurricane memories are of candles and power outages in his boyhood Houston home. He weathers the storms of Southwest Florida as a Sarasota kayak and canoe fishing guide, paddle skills teacher, and firearms instructor. He has worked in local, state, and federal emergency management, planning, and disaster response and recovery. He can be emailed at davidhmartin@me.com.

More From Issue 15

Don’t miss essential survival insights—sign up for Recoil Offgrid's free newsletter today.

Read articles from the next issue of Recoil Offgrid: Issue 16

Read articles from the previous issue of Recoil Offgrid: Issue 14

Check out our sister publications on the web: Recoil | Gun Digest | Blade

Editor's Note: This article has been modified from its original print version for the web.


Grid-Down Chef: 6 Outdoor Cooking Methods

Let’s see a show of hands. After a long, hard day, who doesn’t like a hot meal? Yep, that’s what we thought. Make no mistake, the aftermath of a crisis or disaster will require large investments of sweat equity in order to put things right again. From cleaning up storm debris to helping neighbors track down lost pets, you’ll be burning quite a few calories. A protein bar and sack of trail mix won’t cut it, not after the first day or so. You and your family will want to be able to prepare at least some semblance of a real meal.

On top of being able to cook actual food, having a heating source means you can boil water for disinfection. Run the water through a coffee filter to remove sediment and dead bugs, then boil it to kill off all the nasty stuff you can’t see that could surely make your day a whole lot worse.

When your oven, stove top, and microwave aren’t viable options due to interruptions in utility services, you’ll need one or more backup methods for food preparation. Even those who have stockpiled loads of dehydrated and freeze-dried meals will need boiling water to reconstitute them before eating.

Fortunately, there are several options available for off-grid cooking. Follow along, and we’ll show you how to become a grid-down Gordon Ramsey.

1. Patio Grills

Grid down chef outoor cooking stove grill burner fuel fire 7

You do realize you can cook far more than just steak and ribs on a patio grill, right? Yes, that ubiquitous piece of equipment taking up space on decks and in backyards from coast to coast can do more than just turn chicken breasts into chicken briquettes. Whether yours is propane or charcoal, make sure you always have plenty of fuel on hand. For our gas grill, we like to have at least one, but preferably two full tanks sitting in the garage in addition to the one hooked up to the grill.

Watch for sales on charcoal, typically just before Memorial Day, Fourth of July, and Labor Day. It’s a good idea to keep a minimum of four full bags on hand at all times. Charcoal is nice to have as a backup, even if you don’t have a charcoal grill. The next time you’re at the dollar store, pick up a few of the disposable aluminum baking pans, the ones that are a few inches deep like you’d use to bake a chicken. Fill the bottom of one with charcoal, toss on some lighter fluid, and let her rip. Voilà — instant grill. Do this outside, of course. Trying this inside, say on your stovetop, will invite very bad things into your life. You can buy folding grill grates that work great to put over this type of makeshift grill.

Another helpful tip: Charcoal isn’t the only fuel you can use in a charcoal grill. If you lack briquettes, bust up some dry branches and make a campfire inside the grill. Sometimes you need to think outside the box, right?

Patio grills are admittedly not the most efficient tools for boiling water or cooking pasta, but most of us already have them on hand so there’s little to no extra investment involved.

Camp Stoves

What we might consider traditional camp stoves usually come in a couple different styles. The first is a single burner that rests on top of the fuel bottle. These are very popular with hikers and backpackers as they’re small, light, and easy to pack. The other style is larger, roughly akin to a small briefcase. These will have two burners, which obviously allow you to use more than one pot or pan at a time.

As you shop around, pay attention to the fuel needed for each stove. Some use propane, others use butane, or perhaps unleaded gasoline. There are dual-fuel stoves, too. For our money, if we were buying a camp stove to use as a backup cooking method at home, we’d go with a two-burner propane-fueled model.

Why? Well, a simple 5-foot adapter hose allows you to connect the 20-pound propane tank from your grill straight to the stove. That way, you don’t have to mess with the smaller tanks that are made specifically for these stoves. Cooking on these stoves requires no investment in special camp cookware, either. If you can use it on a gas stove in the house, you can use it on one of these camp stoves. The heat is easy to regulate, too, so you’re less apt to burn your meal.

2. Campfires

Web

If you have a spot in the backyard for it, a campfire can provide nice ambience as well as the ability to cook a meal. If your backyard is more of postage stamp rather than a pasture, perhaps you have one of those patio fire pits that can stand in for the role of the campfire. Either way, you’ll need plenty of fuel on hand, so don’t toss every leaf, twig, or downed branch into your yard waste recycling bin.

Fair warning, though. If the extent of your campfire cooking ends at s’mores, get some practice before you truly need to cook a meal over an open flame. There’s just as much art as there is skill with campfire cooking. Cook over the glowing coals, not over the actual flames. The heat will be higher, but far more stable.

3. Biofuel Stoves

Web

Biofuel means sticks, twigs, branches, pinecones, that sort of stuff. Think of a biofuel stove as a contained and controlled campfire. These stoves tend to be rather small, so your fuel won’t be much larger than what you’d use for kindling in a normal campfire or fireplace.

The advantage these stoves have is their compact size. Stocking up on fuel means gathering up branches the storm brought down in your backyard. The stoves are easy to store until needed. The Vargo Hexagon Wood Stove, for example, folds up flat when not in use and will fit just about anywhere.

The downside, though, is that these stoves are pretty much one-pan-at-a-time deals. You won’t be cooking any elaborate meals with these little stoves. But, let’s face it, our need for calories in the wake of a disaster will far outweigh the disappointment of not seeing seven separate courses being served at the dinner table. One-pot meals will be the recipes of choice.

BioLite Stove

Grid down chef outoor cooking stove grill burner fuel fire 6

The BioLite Stove has been on the market for a couple of years now and is a remarkable piece of kit. In essence, it allows you to charge your cell phone or other device while cooking your dinner at the same time. The BioLite converts heat energy to electricity. This power is first used to run a small fan in the base of the stove, which greatly increases the efficiency of the BioLite, turning it into a small rocket stove.

Excess electricity can then be siphoned off and into your device by means of a USB port on the side of the stove. While you won’t be powering your refrigerator with the stove, it’ll let you keep tabs on news or weather reports via your smartphone.

4. Fuel Tab Stoves

Web

These are very similar to biofuel stoves in size. Instead of twigs and pinecones, though, these stoves use small hexamine tablets for fuel. These tablets burn hot, are smokeless, and store almost indefinitely under the right conditions. Despite the small size, one tablet will burn at least 10 full minutes and will bring 16 ounces of water to a boil in less than that.

One of the most common configurations of this type of stove is a folding model that, when closed, isn’t much bigger than a deck of cards. As a bonus, extra fuel tabs will fit inside the stove for transport.

If you’re lacking the stove, you can improvise by placing the fuel tab on an overturned tuna can or other surface. Place a couple of rocks or bricks on either side so you have something to keep your pan above the flame and you’re good to go.

In my experience, you need a flame, such as a match or butane lighter, to get the fuel tab burning. A ferro rod won’t light a fuel tab by itself. However, if that’s all you have, take a small piece of tinder, such as a cotton ball, and place it on the stove. Place your fuel tab leaning on the tinder, then light the tinder with the ferro rod. A couple of boxes of these hexamine cubes aren’t too costly, and if you keep them cool and dry, they’ll last for years.

5. Alcohol Stoves

alocohol

Alcohol stoves provide a steady flame, which can be an important consideration for those who aren’t used to cooking over campfires and the like. However, these stoves can be a little more temperamental than some of the others we’ve discussed. Cold conditions in particular can prove to be vexing. Priming the stove, which involves warming the fuel prior to lighting, helps, but in some situations it becomes a case of lighting a small fire to warm your fuel to light your stove.

While the rubbing alcohol in your first-aid kit will burn, it isn’t the best fuel for an alcohol stove. Far better is a bottle of HEET from the automotive department at your local discount retailer. Just make sure you get the yellow bottle, which is methanol. It will light faster and burn hotter and cleaner than rubbing alcohol.

You can find all sorts of videos online showing how to make an alcohol stove out of a soda or beer can. When done right, they do work fairly well. Both Vargo and Esbit make very nice alcohol stoves that aren’t very expensive and are made to last. Another option is to take one of the ever-popular Altoids tins, fill it with perlite or vermiculite, then pour in a few tablespoons of alcohol. Light the vapors and you’ll bring water to a boil shortly.

6. Solar Ovens

solar stove

There’s little in life that preppers and survivalists love more than the word “free.” Solar ovens allow you to cook your food using a free fuel: sunshine. These hot boxes are great at slow cooking your lunch or dinner. Provided, of course, it isn’t the middle of the night.

There are numerous plans online detailing how to build a solar oven out of a cardboard box and some aluminum foil. It’s important to pay attention to the placement of the oven to ensure you’re gathering the most solar energy as possible. Rotate the oven periodically as the sun moves across the sky.

The drawback with solar ovens is that they aren’t suited for any sort of quick meal. They’re also very dependent upon the amount of sun peeking through the clouds. Because of these factors, your best option is to plan ahead and set it up right away in the morning so your food will be ready come lunchtime.

Foil-Pouch Cooking

One of the easiest meals to prepare over a fire uses nothing more than aluminum foil. Tear off a sheet about a foot long and coat the inside with nonstick spray or bit of cooking oil. Grab a bowl and crumble in a half pound of raw hamburger, a diced potato, a chopped carrot, and half a can of cream of mushroom soup. Mix it all together, then pour it onto the center of the foil. Sprinkle with garlic powder, salt, and pepper to taste.
Bring the long sides of the foil up, fold them together, and roll it down to the food. Then, roll up the short sides, making a nice compact package. Toss it right onto the coals of your fire for about 25 minutes or so.
Play around with different food combinations. The recipe above incorporates common ingredients, but there are many others utilizing various types of proteins and vegetables.

Cookware

Like a Russian doll, the Pinnacle Base Camper Large from GSI Outdoors can reveal smaller treasures nestled inside.

Like a Russian doll, the Pinnacle Base Camper Large from GSI Outdoors can reveal smaller treasures nestled inside.

In addition to the cooking solutions of your choice, you might consider investing in some cookware specifically for emergencies. Most of the pots and pans in the average household will not stand up to the higher heat generated by many of the stoves we’ve discussed, much less an open campfire or a charcoal grill. Plastic handles will melt and your pans could actually warp.

Any of the methods mentioned that involve a flame or coals may also leave a black residue on the bottom of your pots and pans. There’s really no way around this happening but if you rub the bottom of the pan with a bar of soap prior to putting it on the fire, the soot will wash off easily.

Cast-iron cookware is the best way to go, if you can afford it and you don’t plan on lugging it around anywhere. It’s very heavy, of course, so it isn’t really suited for the bug-out bag. On the upside, if you maintain it properly, a good set of cast-iron cookware can be passed down for generations. Bacon, cooked in a cast iron skillet over a campfire, is so good even the vegans in your group may break down and say, “OK, gimme a piece.”

Grid down chef outoor cooking stove grill burner fuel fire 10

For those looking for something a little lighter, GSI Outdoors offers a great nesting set in the Pinnacle Base Camper Large, which includes two different pots, including lids, for boiling water or making soup, a good-sized frying pan, and a cutting board. As mentioned, everything nests together and fits into a nice carrying bag. There’s even room to add in a couple of small utensils.

If you’ll be cooking over a campfire at home, a tripod grill is a great investment. They allow you to place a few different pots and pans over the fire at the same time. You can also adjust the height of the grill to heat things up or cool them down a bit.

Keeping in mind that the most common cooking you’ll likely be doing when on the road will be heating water — for disinfection or for adding to a dehydrated meal — a bush pot alone might suffice for the get-home bag. I like to have a stainless steel water bottle too, as that allows me to boil water while also heating up a can of stew or soup at the same time.

Outdoor Cooking

Outdoor Cooking

Off-grid cooking is not something you’re likely to be entirely successful with the first time out. You’re going to burn a meal or two in the beginning. You’ll also run into problems keeping the fire going steadily, not cooking food long enough, or even dropping food right into the ashes. We all make mistakes; that’s part of what makes us human. However, do yourself and your family a favor and practice using these stoves and other cooking solutions now, while you still have the option of having a pizza delivered if things don’t go your way.

Sources

More From Issue 14

Don’t miss essential survival insights—sign up for Recoil Offgrid's free newsletter today.

Read articles from the next issue of Recoil Offgrid: Issue 15

Read articles from the previous issue of Recoil Offgrid: Issue 13

Editor's Note: This article has been modified from its original print version for the web.


Pain-Free Programming: Safely Train Through Injuries

WARNING: The exercises and content expressed in this column are for illustrative purposes only. Consult a medical professional before trying any physical activity or nutritional plan.

You’re bound to suffer an injury. It’s more a “when” than an “if.” Especially in a fight for your life, you can’t play it safe. But, you can’t let an injury stop you from getting in shape and staying that way. After all, your physical ability may be the deciding factor in your survival. Catastrophes and crises don’t call timeouts, and neither should you. You need to learn how to safely train through injuries if at all possible. Here’s how.

Injured? Keep Sweating

So, you hurt yourself. It sucks, but it doesn’t mean you need to quit all physical activity. Especially with uncertainty ahead, you can’t afford to cease training. When you think about it, many injuries you may get don’t involve your entire body. Take, for instance, an injured knee. You still have upper body, core, and even some single-leg exercises you can do on the non-injured side (we’ll go more into this later). It’s not the end of the world (or perhaps it is). We’ll just discuss a different way of looking at it.

Deadlift

To continue training safely, consider what types of exercises you’ll have to avoid. Continuing the knee analogy since it’s a common injury, we’ll avoid all exercises that involve or stress the knee joint on that leg. Be aware that this may also involve positions that stress the leg, such as kneeling.

Next, you’ll pick exercises that don’t involve those areas, such as a dumbbell bench press, chin-up, single-leg squat on the uninjured leg, or hanging knee raise. With this plan of exercises, visualize yourself in each position for each exercise, taking note of what parts of the body the exercise is stressing, the position your body is in, and what the injured area is doing relative to the exercise. You can also do this physically depending on the exercise and what is required to do it.

A decent whole-body workout should include an upper-body push, an upper-body pull, a two-leg exercise, a single-leg exercise, and a core exercise. Now, given that you could have injured any number of joints or areas, we can’t possibly cover every scenario. That being said, your goal in training is to address as many of these five categories as possible, letting pain be your guide. Because this is somewhat subjective, we define pain as anything you wouldn’t answer “no” to if someone asked if it hurt. When you’re designing your program or workout, keep that in mind.

Single-leg squat

Single-leg squat

This last part is somewhat controversial, but training the uninjured limb (depending on the injury) is a good way to build or maintain strength in the injured limb and remain at a decent training level. It’s common in the physical therapy and sports medicine fields to rest both the injured and uninjured limbs to make sure there’s no more than a 20-percent difference in strength between the two limbs. This is a poor choice, in my opinion. Not only does neglecting a perfectly healthy limb not make sense, but you can actually improve strength of the injured limb. It’s called Cross Transfer, and it works.

Area-Specific Programming

Now that we have some of the conceptual stuff out of the way, let’s take a look at some specific areas that are commonly injured and how we can train around them and still improve.

Shoulder Injury

Step-ups

Step-ups

You have two legs and an arm that are perfectly healthy, making essentially 75 percent of your body safe to train. For lower-body exercises, we want to include anything that doesn’t put the shoulder in jeopardy, such as the traditional back squat. In this exercise, holding the bar on your back puts your shoulder in a less than desirable position and may aggravate an injury. So, we could include exercises like dumbbell forward lunges, step-ups, front squats (if pain free), and barbell deadlifts. These all include safe arm positions, either at the sides or in front of the shoulders.

Reverse lunge

Reverse lunge

In terms of upper-body exercises, one-arm exercises will do. For two-arm exercises, safe ones include low elbow rows, low elbow chest presses, and occasionally pull-downs if it’s more of a 45-degree pull instead of vertical. This all depends on pain levels though, so if there’s pain in pushing and pulling, just train the uninjured side.

Barbell deadlift

Barbell deadlift

Core training is safe as long as you’re not hanging or putting undue pressure on the shoulder. Safe examples include dead bugs or planks (assuming this isn’t painful). Steer clear of things like hanging knee raises or side planks.

Lower-Back Injury

Low elbow chest presses

Low elbow chest presses

Just about everyone has back pain at one point or another in his or her lifetime, so if it hasn’t affected you yet, it probably will. It’s good to be acquainted with these strategies to keep improving even if you do get some issues down the line. Before moving forward, make sure to use common sense here. If your back injury is so severe it hurts to move, exercising is not what you need. Back injuries can vary greatly in severity, so use your best judgment and always avoid painful movements.

Dead bug

Dead bug

From a training standpoint, the general rule of thumb for back injuries and pain is to stay as upright as possible during training. Movements that involve bending over, unless supported, can be very problematic and uncomfortable. Adding weight to these movements or postures is even worse.

Anti-rotational press

Anti-rotational press

First things first, let’s discuss what we want to avoid. Most types of deadlifts, barbell back squatting, good mornings, and bent-over rowing should be taken out right away. These put the most stress on your lower back. While occasionally there are variations that don’t hurt as much, such as a sumo deadlift, if you don’t have much training experience, it’s best to avoid these altogether until you feel better.

Chest-supported dumbbell row

Chest-supported dumbbell row

Next, we’ll cover some of what we can do. Think of some exercises where you’re very upright. Lunges, step-ups, cable rows, and front squats are all good choices. Core exercises that don’t involve motion such as anti-rotation presses or planks are great to provide core work without motion at the spine. These are all fairly safe when done properly. When in doubt, exercises that generally require the weights to be at your sides or in front of your body at roughly shoulder-level are safe.

Bench presses

Bench presses

Aside from staying upright, we can also include anything where you’re supported like bench pressing, chest-supported dumbbell rows, or bench-supported one-arm dumbbell rows.

Low elbow rows

Low elbow rows

The other exercise that bears mentioning is more of an unconventional one, but it’s a great way to still work your backside without risking further pain or injury. The exercise is a hip thrust, and it can be done with no weight, heavy weight, bands, on one leg, or two legs. Because the pull of gravity (therefore, the weight) is from front to back, this won’t bother your back. Just make sure you’re doing it correctly. Here’s how to do the double-leg hip thrust:

  • Begin with your shoulders across a bench. The edge of the bench should be just below your shoulder blades.
  • Position your feet below your knees, about 3 to 5 inches further forward.
  • If using a weight, place it right on the lower part of your stomach or in front of your hips. You should use a pad for comfort.
  • Drive your heels through the floor, exhale forcefully, and squeeze your butt at the top.
  • Hold for a two-second count, and slowly return to the starting position.
  • If you feel this in your back, you’re arching it to move the weight up. Emphasize exhaling and you press, and make sure you’re pushing through your heels.

Knee Injury

Double-leg hip thrust

Double-leg hip thrust

Knee injuries should be handled in an opposite way compared to back injuries. Avoid lower-body movements that keep you very upright because that will put more stress on your knee joint. The same exercises discussed previously in the back pain section that we should incorporate are the ones we should avoid with knee injuries. We want to include movements that require our hips to move backward (with a flat lower back) because now we’re making a tradeoff — less stress on the knees and more stress on the hips.

Plank and variations

Plank and variations

Generally speaking, exercises where the weight is on your back or in front of you below waist-level are safer. Some great lower-body exercise options for knee injuries include the deadlifting variations (particularly the Romanian Deadlift), hip thrusts, and reverse lunges (when done properly).

Here’s how to properly perform the Romanian Deadlift:

  • Begin with dumbbells or a bar in front of your thighs at arms’ length. If using a bar, your hands should be just outside your thighs.
  • Soften your knees and drive your hips straight backward keeping your lower back flat.
  • Lower until you feel a decent stretch in your hamstrings, or until the bar is just below your knees.
  • Forcefully push your feet through the floor and squeeze your butt to stand up. Stand tall at the top.
Romanian deadlift

Romanian deadlift

Remember, too, we also have a perfectly healthy leg to train. Don’t neglect it.

Sample Programming For Common Injuries

Let’s put everything together, and see what a program would look like for each area.

Shoulder Injury Program

EXERCISESETSREPSREST
A1. Barbell Deadlift4-53-560-90 Seconds
A2. Standing Low Cable Row4860 Seconds
B1. Dumbbell Step-Up38 Each45-60 Seconds
B2. Standing Low Cable Chest Press31045 Seconds
B3. Dead Bug35 Each30 Seconds

Lower Back Injury Program

EXERCISESETSREPSREST
A1. Barbell Bench Press4-5460-90 Seconds
A2. Double-Leg Hip Thrust4860 Seconds
B1. Chest-Supported Dumbbell Row3845-60 Seconds
B2. Dumbbell Reverse Lunge38 Each45 Seconds
B3. Standing Anti-Rotation Press310 Each30 Seconds

Knee Injury Program

EXERCISESETSREPSREST
A1. Barbell Romanian Deadlift4660 Seconds
A2. Chin-Up3660 Seconds
B1. Single-Leg Hip Thrust38-10 Each45-60 Seconds
B2. Push-Up310-1245 Seconds
B3. Plank335 Seconds30 Seconds

Tips to Accelerate Recovery

Pain free programming workout training injury safety fitness strength medical 1

During the early stage of injury when inflammation is present, consume healthy, anti-inflammatory fats, such as:

  • Avocados
  • Nuts
  • Fatty fish or fish oil
  • Seeds like flax

Once the inflammation has subsided, shift the focus to recovery and repair by eating more of these:

  • Calories in general, with extra protein
  • Vitamins A and C
  • Zinc

In general, make sure you’re getting at least eight hours of sleep.

Conclusion

When it’s all said and done, training when injured isn’t all that difficult, is it? Some common sense mixed with an intelligent plan is all you need. When in doubt, use the “does this hurt?” test, which is quite simple. If it hurts, don’t do it. Other than that, be careful, and use this article as a reference to keep making progress, both in your fitness level and injury recovery.

About The Author

Ryne Gioviano is the owner of Achieve Personal Training & Lifestyle Design. He holds a master’s degree in exercise physiology and is a certified personal trainer through the National Strength and Conditioning Association. For more information, visit www.achieve-personaltraining.com. You can find Ryne on Twitter and Instagram at @RGioviano.

More From Issue 14

Don’t miss essential survival insights—sign up for Recoil Offgrid's free newsletter today.

Read articles from the next issue of Recoil Offgrid: Issue 15

Read articles from the previous issue of Recoil Offgrid: Issue 13

Editor's Note: This article has been modified from its original print version for the web.


Infographic: 7 Ways to Build a Campfire

Controlling fire was one of the first skills developed by primitive man, and on the surface, it may appear simple. Just gather some combustible tinder, ignite it with a spark or ember, place your fire bundle beneath some kindling twigs, and gradually feed in larger pieces of wood fuel until the desired size and heat output is achieved. However, if you've been reading our publications or studying survival skills, you'll know that every one of those steps can be modified with dozens of techniques and variations. Building any old fire is simple — building a reliable, long-lasting, and efficient fire requires much more forethought.

charcoal-burning-fire

While we've discussed ignition sources, tinder, kindling, and fuel many times in the past, it's also important to consider how these elements are structured. The conical tipi (or teepee) style is well-known, but other styles offer distinct advantages over this default layout. The following infographic from Rolling Fox provides illustrated examples of seven different ways to build a campfire. Click here to download a full-size version of this graphic.

Campfire styles infographic fire wood heat weather fuel kindling tinder 2Campfire styles infographic fire wood heat weather fuel kindling tinder 3Campfire styles infographic fire wood heat weather fuel kindling tinder 4

We've discussed a few of these in the past, but here's a quick recap of some of the advantages and disadvantages of each campfire layout:

  • The Swedish torch is long-lasting and offers a flat cooking surface, but requires felling a tree and cutting it with a saw (or splitting it with an axe).
  • The tipi/teepee is efficient and easy to build, but susceptible to collapse due to weather or uneven feeding. It also burns out faster than some of the layouts below.
  • The star is even easier to build than a tipi, and allows large pieces of fuel to be gradually fed inward to maintain the fire for longer periods, but its heat and light output isn't the best.
  • The lean-to is another long-burning option that allows for progressive feeding, but requires large fuel logs and powerful heat to start. We've also heard this style called a Siberian log fire.
  • The platform offers a flat cooking surface and long burn time, but requires more heat to ignite and may restrict airflow if fuel logs are packed tightly.
  • The log cabin burns evenly and reduces airflow restrictions, but can turn into a leaning tower of campfire if it's not built carefully.
  • The modified lean-to incorporates a self-feeding stack of logs that will drop in as the fire burns lower. This requires more prep but can extend burn time.

For a more detailed explanation of these fire styles and other fire-starting considerations, check out the article “How to Build a Campfire” from Rolling Fox.


6 Timeless Survival Lessons from the Great Depression

We’ve all heard about the tragedy of the Great Depression and the devastating economic impact it had on the United States and countless other countries. During this time, the worldwide gross domestic product (GDP) fell by an estimated 15%, causing mass fallout that included a staggering U.S. unemployment rate of 25%.

The 1930s also brought a period of severe drought and incredible dust storms known as the Dust Bowl. These conditions affected farms in Colorado, Texas, Kansas, Nebraska, New Mexico, and Oklahoma causing them to have little to no production or shut down completely. Tens of thousands of poverty-stricken families were forced to flee their homes and farms and seek work elsewhere in the haggard country.

Drought refugee families from Oklahoma on the highway near Lordsburg, New Mexico. (Dorothea Lange / Library of Congress, FSA-OWI Collection)

Drought refugee families from Oklahoma on the highway in New Mexico. (Dorothea Lange / Library of Congress, FSA-OWI...

As these stalwart people settled in new areas under scant resources, they adapted admirably to hardships and simply did their best with what they had. This mindset is a valuable one for any prepper who wishes to be ready for adverse circumstances. Today, we examine six beliefs that got our ancestors through these bleak circumstances.

If It’s Broken, Fix or Salvage It

Two men repairing a tractor component, Colfax, Washington, 1941. (Russell Lee / Library of Congress, FSA-OWI Collection)

Two men repairing a tractor component. (Russell Lee / Library of Congress, FSA-OWI Collection)

Our current society is heavily based on single-use items. There's truth behind that old saying that “things aren't built the way they used to be”. Hard times prove that these single-use items will not hold up to rigorous daily use. During the Depression, families did not have the money to replace items that broke — in a survival situation, it’s likely we won’t be able to either. The ability to repair your possessions and tools becomes paramount during these moments.

Simple tasks like sewing a button or repairing a torn trouser knee could very well mean the difference between wearing pants during winter or being uncomfortably frigid. When our belongings break now, we throw them away, but in the ‘30s every part of that item would be salvaged and stored for future use or fixed to working order. Small engine repair, plumbing, welding — these are only a few skills that can be vital during grid-down situations. We can’t be experts in all these fields, but as responsible citizens we should have baseline knowledge.

Learn to Cook Creatively

Easy-to-grow plants such as kale and basil can add nutrition as well as flavor to bland meals.

Easy-to-grow plants such as kale and basil can add nutrition as well as flavor to bland meals.

Besides being a necessary part of living, food has always been a source of morale for humans. When families were living off scraps and meager portions during the Depression, it was typically up to women to learn how to make food last, stretch, and be mostly palatable. The Dust Bowl wreaked havoc on the food system, making staple vegetables scarce and meat extremely rare.

Understanding how to prepare and cook meals is vital to survival and wellbeing, physically and mentally. The YouTube channel Great Depression Cooking is an excellent source of inspiration for recipes on a tight budget or when food is scarce. As with all skills cooking is learned through practice. It is better to burn your meal now than when you are starving.

Great Depression prepper survival lessons unemployment financial disaster 10

Roadside food stand near Birmingham, Alabama, in 1936. (Walker Evans / Library of Congress, FSA-OWI Collection)

Waste Not, Want Not

It’s undeniable that a great deal has changed from the Depression to present-day. Our country’s infrastructure is larger and more complex than ever before, and goods are readily available in a way the people of the 1930s could never have imagined. This is both a blessing and a curse for the modern prepper.

The WPA Gardening and Canning Project in Mississippi helped preserve food to reduce waste. (Mississippi Department of Archives and History)

Regional canning projects helped preserve food to reduce waste. (Mississippi Department of Archives and History)

Modern-day resource availability has certainly made people lazy and numb to the need to be prepared. We see this anytime there is a hurricane coming — no matter how often it happens, people are always rushing to the store to stock up on what they can. Even having a marginal amount of supplies on hand will help avoid last minute rush.

In the ‘30s, however, many supplies were not available readily from the start. Families were forced to make everything they had stretch and get as much use out of items as possible. Simple things we throw away were used for several purposes. For example, food scraps would be boiled to create broths, then the remnants would be composted to create richer soil. Items such as aluminum foil would be wiped clean and reused numerous times for food storage similar to how we use modern Tupperware. Women were encouraged to reuse flour sacks to make clothing for themselves and their families, so much so that flour manufacturers began to print patterns on their sacks.

Great Depression prepper survival lessons unemployment financial disaster 3

Families often repurposed fabrics and made their own clothing. (Russell Lee / Library of Congress, FSA-OWI Collection)

Be Resourceful and Imaginative

Modern conveniences have lulled many of us into a lack of creativity and resourcefulness. In the 1930s this was simply a way of life. Getting by during such a difficult time came from a family’s ability to adapt and improvise. Simple tasks such as collecting wild dandelions and clover to help give a meal more nutritional value were everyday acts we might never consider today. Healthcare during this time was expensive and not an option for many. Being able to identify and implement home remedies for common illnesses proved imperative and saved the families resources.

A typical garden patch in Hooverville. Portland, Oregon, 1936. (Arthur Rothstein / Library of Congress, FSA-OWI Collection)

A typical garden patch in Hooverville. Portland, Oregon, 1936. (Arthur Rothstein / Library of Congress, FSA-OWI...

Imagination is not just for children, especially during austere conditions. Using your imagination to create positive events in your mind will help you stay motivated and on the right track to survive. Positivity will help vanquish fear and panic, and should also increase your value in keeping yourself and your family alive.

Community is Key

Great Depression prepper survival lessons unemployment financial disaster 9

A view of Hooverville shacks in 1931. (June Hayward Fifield, Washington State Historical Society)

In areas hit by the Great Depression the hardest, communities — ranging in size from a few families to 15,000 people — cohabited in shanty towns pieced together from scraps. These refugee camps were named “Hoovervilles” after Herbert Hoover, the President at the time. As stated previously, we as individuals cannot be experts in all fields. We must rely at some point on others. Isolation is not a great survival tactic when communities can bring necessary skillsets together. It is also important to understand that these shanty towns helped in creating and organizing barter systems that would help people get goods and services that were in desperate need.

Never Give Up

Unemployed lumber worker, Oregon, 1939. (Dorothea Lange / Library of Congress)

Unemployed lumber worker, Oregon, 1939. (Dorothea Lange / Library of Congress, FSA-OWI Collection)

The most important lesson to take away from our ancestors who survived the 1930s is an unyielding refusal to give up. Men would go out every day looking for work, trying to provide for their families. They didn’t stop. And at the time when secretaries, teachers, and nurses were all female-dominated fields, women would often become the only bread winners in a multi-generational family. These harsh times created strong men and women who persevered because they had the right attitude and mindset for survival.

Bring it All Together

The Great Depression is an immensely important event in United States history, as well as world history. The hardships endured by the population have not been replicated since, but that does not mean that we won't face them again in the future. We as a prepared society should heed warning signs and try to maintain our vigilance, even in times of plenty. We cannot prepare for every possible situation, but by keeping the mindset of our stalwart ancestors we can be that much more ready to survive.

About the Author

Alexander Crown OFFGRIDweb author photo

Alexander Crown served as an Infantryman with the Scout/Sniper Platoon of the 3rd Battalion, 509th Parachute Infantry Regiment in Ft. Richardson, Alaska, where he specialized in radio communications and reconnaissance. Since separating, Alexander spends his time as an avid outdoorsman and hunter with an appreciation for self-sufficiency in the form of gardening. He also enjoys woodworking, firearms, and reloading. You can follow him on Instagram @acrown509.


Video: Why Do People Ignore Hurricane Warnings?

When faced with any natural disaster or survival situation, one of the most critical decisions we must make is whether to stay or go. Unfortunately, deciding between hunkering down or bugging out often isn't an easy choice, and making the wrong decision can have devastating consequences.

Hurricane warning storm flood natural disaster survival preparedness 2

Trying to ride out the disaster may put your family in mortal danger, or leave you stranded without adequate food, clean water, or medical care. On the other hand, hitting the road means abandoning your home and most of your possessions for an unknown amount of time. There's also the risk of looting and vandalism following the disaster. If the disaster worsens, your choice to evacuate may be vindicated; if it quickly blows over, you may be left feeling as though you overreacted.

Hurricane warning storm flood natural disaster survival preparedness 1v2

As a result of this conundrum, many people in the evacuation zones for Hurricane Florence and other major storms choose to ignore the warnings and remain in their homes. In the following video, the BBC asked author and disaster expert Robert Meyer for some insight into why this occurs. He provides three reasons: optimism, uncertainty, and herd thinking.

Have you ever been advised to evacuate due to a natural disaster? What choice did you make, and why? Let us know in the comments below.


From Dusk Till Dawn: The Basics of Surviving the Night

WARNING: This is a brief overview on the topic of being stranded overnight and not meant to be a detailed guide. You should do your research on each aspect of overnight survival, train with a reputable instructor, and practice often.

It’s 3 p.m. and you’re not out of the woods yet. You only have a few hours left before sunset, and you have a decision to make; make preparations to spend the night or carry on. Everyone knows that in winter the days are short and nights are long, but being stranded overnight is dangerous any time of year. The temperatures at night are drastically different than those during the day, and survival demands more planning and grunt work from the survivor to survive the night.

In warmer weather, mistakes and lack of effort are more forgivable with less concern for hypothermia, but the threat is never completely gone. You may be lost, separated from your group, poorly equipped, injured, or stranded with a broken vehicle. It’s easy to forfeit, submit to the elements, ball up, and die. The true survivor will dig deep, harness the will to live, hustle to procure the necessary supplies, and make it through the night. The goal isn’t getting the required eight hours of sleep, but rather living to see the sunrise.

So, we’re tackling techniques and concepts for surviving the night by focusing on the gear, the training, and (perhaps most importantly) the mindset you need to succeed. If you’re stranded, there’s no doubt it’ll suck. But follow these steps, and you’ll make it to the morning. Here’s how.

Mindset

The first step in dealing with a problem is recognizing there is one. With fading daylight, a person’s work capacity is limited. It becomes harder to see, the temperatures drop, and anxiety builds. The body starts to sweat and a chill sets in. Staying active will keep you warm. As stress builds, the possibility for making mistakes does as well. The thought of an emergency bivouac may not register amid the changing conditions surrounding you. It’s time to decide and time to act.

Surviving the night sunset dusk dawn survival forest woods fire wilderness emergency prepping 2

Above: When you think you have enough wood, get more. Fire is life and the psychological and physical effects of losing fire during the night can be devastating.

However, if the idea of an emergency night out is taken seriously, you’ll always leave home prepared for an unscheduled bivouac.

When you’ve determined that creating a bivouac (temporary shelter) is inevitable, you can let emotions control you, or you can control your emotions. Fear in this time-sensitive situation is natural — as is stress. How fear is used will determine survivability. Instead of viewing the predicament pessimistically, you can reframe it optimistically as a challenge previously accomplished. You can use fear to motivate you. With prior training and preparation, you can treat this situation as routine and simply a repeat of past experiences. By testing oneself, the fear of the unknown is taken out of the equation. You have to fall back on your confidence and collective experiences. You’ve done this before — time to roll.

Surviving the night sunset dusk dawn survival forest woods fire wilderness emergency prepping 3

The initial mindset is important in a survival situation, but equally as important is maintaining positive mental attitude. Little victories like acquiring water, creating artificial light, finding something to eat — all of these register on the morale meter. On the flip side, there are little defeats that, left unchecked, can aggregate and become a significant blow to self-esteem.

Determination is a trait impossible to purchase or acquire easily. It’s found through understanding worth, remembering your place in the normal world, understanding the importance of returning to normalcy post-emergency, and assuming those roles left vacant by this predicament. Mindset will carry you through seemingly impossible odds.

Preparedness

Recognition is the first stage of readiness; the next is preparedness. This includes being ready to spend the night out with nothing more than the clothing worn on your back. Each day, countless numbers of people leave their home prepared only for their workday in front of them. Should a situation arise, they’ll lack the first line of shelter defense from the elements.

In November 2006, James Kim and his family became stranded in their vehicle in Oregon while driving home to San Francisco. After burning all four tires of the car and rationing supplies, Kim started what would become a 10-mile-plus walk to safety. He never found it and ultimately died of hypothermia. Luckily, his wife and daughters didn’t suffer the same fate when they started to walk to safety days later and were spotted by a helicopter pilot.

The rule of three applies to an emergency bivouac. Since a person, on average, can survive three hours exposed to the elements, one should take steps to extend this time with the right gear. Prior to leaving the house, one should check forecasts for the overnight weather and temperature. This takes a matter of minutes, if that, online or while watching the morning news. It’s a minor habit, but it’ll allow you to plan accordingly.

Clothing: At the very minimum, an exterior layer should be worn or carried. This protective layer can be worn on its own, or additional insulation material can be stuffed between it and your body. The exterior layer should also include a head cover. Also, this cover can provide some protection for vulnerable exposed skin.

Depending on the time of year, these layers will vary based on the amount of insulation necessary to stay warm. The style of clothing worn should blend in with normal attire if you want to adhere to basic gray-man principles. In other words, wearing Mil-spec parkas in a sea of business suits may cause additional eyes on you when a large wool overcoat will work equally well.

Fight Night: As you’re trying to survive, wild animals in the woods or the criminal element in the city are looking for prey to eat, rob, or maim. It’s never a bad idea to be ready for a fight.

For this reason, a pistol with night sights will help you acquire them in low-light conditions. They alone won’t help you see better, which is why you should have a good weapon light and/or hand-held flashlight. Should you be without a firearm, you can always use your blade to fashion a thrusting, striking, or throwing tool from the woods or materials usually found discarded.

Surviving the night sunset dusk dawn survival gun pistol prepping 10v2

Above: Have a handgun? When low-light conditions set in, you’ll be better prepared with night sights, such as these Trijicon HD Night Sights, to acquire your target faster. A flashlight is also a must. Should you seek shelter in an abandoned building, you may not be the only one to consider the structure home.

Two is One: Once an emergency kit is assembled based on realistic needs, it should be carried religiously. A second kit should then be created identical to the first, which should be practiced with. Whenever a kit is assembled such as this, the prepackaged emergency items (such as emergency blankets and ponchos) are generally unable to be taken out, used, and refolded or packed to the same size as the original dimensions. Also, some items shouldn’t be consumed for practice if they’re meant for single-emergency use only, such as candles. By having a second kit, the inclination to avoid using essential gear is taken away. Testing out the limits of the secondary kit will determine if the primary requires upgrading and adjusting.

Surviving the night sunset dusk dawn survival forest woods fire wilderness emergency prepping 7

Above: One of the best emergency kit containers available is the SUMA Container from SOLKOA Survival Systems. Emergency kits can be purchased pre-made, but they should always be customized to the individual.

Prep Your Car: If a vehicle is driven on a daily basis, it should be prepared with the same intent. A vehicle should always be equipped with the means to process firewood and get a fire started. A fire alone can warm the body directly, with rocks heated, covered in a protective layer of cloth, and tucked under the arms or placed by the kidneys. Ideally, a sleeping bag and pad should be carried as well. But carrying gear means nothing though if the survivor isn’t prepared or trained to use it.

Training

Surviving the night requires skill, and skills come from training. Before an emergency, it’s wise to train in controlled conditions. This starts in a known setting like your backyard or a public space. While it’s impossible to duplicate the actual conditions of an emergency, training should be considered real. By working in a controlled setting, you can push the envelope of stress and difficulty while having the ability to “tap out” and move to safety. The more you’re willing to work outside your comfort zone, the easier it’ll be when the reality of an emergency sets in. Train hard now so the fight of your life will be easier later.

First Aid: Since many bivouac situations stem from medically induced emergencies, it’s important to train in first-aid and trauma techniques. Administering self-aid is critical, and an often-overlooked skill is self-administration with only one working arm. Assuming you’re in the driver seat of a vehicle that goes off road and crashes, it’s difficult to avoid bracing against the steering wheel. Hand and arm injuries are likely. Can you apply a tourniquet with your strong hand? Your other strong hand? Learn to take care of your health as it may be the first survival need you address in an emergency bivouac.

Surviving the night sunset dusk dawn survival tourniquet first aid medical emergency prepping 8

Above: You have first-aid training? Great. How about self-administered first aid?

Fire Starting: Fire starting in normal conditions is easy. The right combination of fuel, heat, and oxygen will yield what you’re looking for. To prepare for the emergency bivouac, try using alternative means of starting and maintaining your fire. Can you ignite a fire with your cigarette lighter? Jumper cables and oiled rag? What happens if you can’t have a fire outside of your car? How can you safely light a candle inside your car to bring up the cabin air temperature? All of the answers from these questions come from training.

Surviving the night sunset dusk dawn survival ferro rod fire tinder prepping 6

Above: A quality fire kit is a lifesaver. A fire-kit should contain at least one spark-based fire-starter (like SOLKOA Survival Systems’ Faststrike Maxx) as well as quality tinder.

Surviving in Your Vehicle: Shelter training takes on a different approach than traditional outdoor survival skills. Your vehicle is your first line of shelter and learning to maintain the integrity of the sealed environment must be part of your training. In a vehicle-based emergency, a broken window can lead to a dangerous body-chilling draft. In a controlled setting, you can practice sealing the window, preventing unnecessary heat loss with what you have in your vehicle. While you’re at it, you can practice partitioning off the compartment you’re surviving in with a spare emergency poncho or space blanket. This will conserve the heat necessary to warm the reduced space instead of heating the entire compartment.

Remember, your vehicle is a conductive metal coffin that will hold the cold and work against your body’s natural furnace if you don’t take steps to prevent this. Should you have to leave your vehicle because it’s unsafe, what can you grab to erect a shelter and insulate from the ground? When is it better to be inside your vehicle? Outside? Again, these answers and the understanding of how to survive come from training.

Surviving the night sunset dusk dawn survival forest woods fire wilderness emergency prepping 9

Above: Prepare to spend the night in a vehicle by closing off part of the passenger compartment with an emergency blanket. This reduces the volume of airspace, making it easier to raise and maintain the temperature.

Hydrating: Aside from the basic need of shelter, how have you made yourself ready to deal with the ongoing demand of hydration? If you warm your vehicle intermittently by running the engine, are you maximizing productivity by melting water from the heat of the engine too? What containers do you have in your vehicle to collect water? A water generator can be constructed with only a few sections of cloth and a tripod lashing. You can use your emergency candle that prevents condensation inside your car to also melt snow. Make sure to put a small amount of water in your metal container before attempting to melt snow to prevent burning your pot. To offset the lack of flavor, powdered drink mixes or natural harvested teas such as wintergreen, pine needle and willow tea can be utilized.

Food Supply: Just because starvation is not a concern in a short-term situation doesn’t mean you should leave food out of your emergency bivouac plan. Just like flavored drinks, good food boosts morale. Plus, it provides energy. Your body will metabolize the carbohydrates, fats, and proteins warming your internal furnace. Your training should include testing foods that are unaffected by the cold and those with the highest concentration of fat, as they are most calorie dense. At the very least, it’s good practice to never leave your home without energy bars at the very least. In an emergency, you can always ration portions and keep your mind off the idea of not eating food.

Distress Signal: Signaling skills extend beyond calling for help with your smartphone. While we’ve addressed this topic last, it’s no less important, as knowing how to signal may actually shorten your emergency so that you won’t have to spend the night. Depending on where you are, knowing how to utilize a whistle, mirror, surveyor’s tape, or any of the reflective or noise-making devices around you could mean the difference between life and death.

It’s easy to practice building a smoke generator anytime you build a fire. Experiment with different vegetation to see which produces the thickest plumes of smoke. Green leaves work well, as do green grass and wet hemlock boughs. Signaling is an important skill to learn not only for you, but for those awaiting you at your destination. Part of signaling is developing a travel plan someone reliable knows about. If you can’t signal, but someone reliable can, they will initiate the search by calling the authorities who will ultimately save your ass.

Conclusion

As you can see, while mindset might be the most important factor in surviving an overnight emergency situation, gear prep and training take up a significant amount of investment — of both time and money. While we didn’t have the space to list every brand of kit to buy or explain every step of each aspect of training, it’s important to understand that you need to do the research and find a reputable instructor or an experienced friend to train with.

Then, once you’ve become prepared and put in the training time for a bivouac, all that’s left is the willingness to test your skills. Test yourself on your terms before Mother Nature does on hers. Learn to survive the night or you will not.

The Morning After

Surviving the night sunset dusk dawn survival forest woods fire wilderness emergency prepping 5

Above: Tea isn’t just for stiff-upper lipped Brits named Iain. During an emergency bivouac, improving the flavor of water can boost morale and, indirectly, your chances of survival. Teas can be packed or provided by the land. Pine needle, St. John’s Wort, and Wintergreen all improve the flavor of purified (boiled) water.

The sun has risen, and you’ve just successfully spent the night out. The initial reaction to daylight is to get moving, but you should have a plan. Some say, “any plan is a good plan.” What if your plan is to wander around in fear? A better plan is to collect yourself, find your bearings, size up your situation, and logically determine what’s needed to prevent spending a second night out.

Depending on your situation, think about what caused you to spend the night out. Do you have the means to address that issue? If not, should you plan to stay a second night waiting for assistance or move to a new location?

These are all questions to ask yourself in determining your plan. What supplies do you have leftover? What’s running out? Your level of preparedness will also factor into your plan. Since most emergencies are resolved in 72 hours, how much of your reserve supplies did you use up in this overnight period? During the morning after, rather than rushing and potentially making a mistake, take your time to solve your situation. Keep a level head and you’ll find a way.

Don’t-Leave-Home-Without-it Gear

There are some things you should never leave behind when walking out your front door:

Print

Knife and Fire-Starter: The most basic emergency bivouac kit should include a blade and a fire-starter. Even in an urban area, a politically correct knife like a Swiss Army Knife and a BIC lighter or key-chain sized firesteel should always be carried.

Print

Light Source: Since a bivouac will likely take place in darkness, a small AAA-sized light should be carried to help see in the dark and illuminate your surroundings.

Print

Emergency Blanket: A quality emergency blanket along with a long-lasting candle will ensure the ability to block the wind and raise the ambient air temperature inside a makeshift shelter. When paired with proper clothing, this protective barrier will create a water-resistant and artificial climate to survive in.

The purpose of this kit is to survive, not thrive. Space is saved by separating items meant for long-term survival. These luxury items may help in the short term, but will likely have limited use. The emergency bivouac kit need not be carried all in one place, but rather it can be spread out on the body or EDC bag to eliminate the need for a single pouch to hold everything. The multiple pockets in a jacket or cargo pants can help distribute the load out to make it more bearable.

About the Author

Kevin Estela is the owner/head instructor of Estela Wilderness Education. He’s the former lead survival instructor at the Wilderness Learning Center in Chateaugay, New York, prior to its closing, and one of the only certified instructors under survival authority Marty Simon. He’s an accomplished bushcrafter, martial artist, and freelance writer. Estela spent many summers guiding and instructing canoeing/kayaking in Connecticut and years working in outdoor sports retail. He’s a trustee of the Environmental Learning Center of Connecticut and a full-time high school history teacher. www.kevinestela.com

More From Issue 14

Don’t miss essential survival insights—sign up for Recoil Offgrid's free newsletter today.

Read articles from the next issue of Recoil Offgrid: Issue 15

Read articles from the previous issue of Recoil Offgrid: Issue 13

Editor's Note: This article has been modified from its original print version for the web.