Projectile Protectors – Part I: Armor Plates

According to the Small Arms Survey, American civilians owned an estimated 393 million firearms in 2018 — that number has undoubtedly grown considerably in post-COVID years. The vast majority of those firearms will never be used maliciously against another human being, but as with any tool, some will inevitably be misused to harm the innocent. If you consider yourself a prepared individual, are concerned with protecting your family from violence, have an active shooter plan, or are just a firearms enthusiast — and I imagine you’re one or all these things if you’re reading this magazine — you should seriously consider owning a set of body armor, or “plates” as they’re often referred to.

Illustration showing the protective coverage armored plates give to an adult.

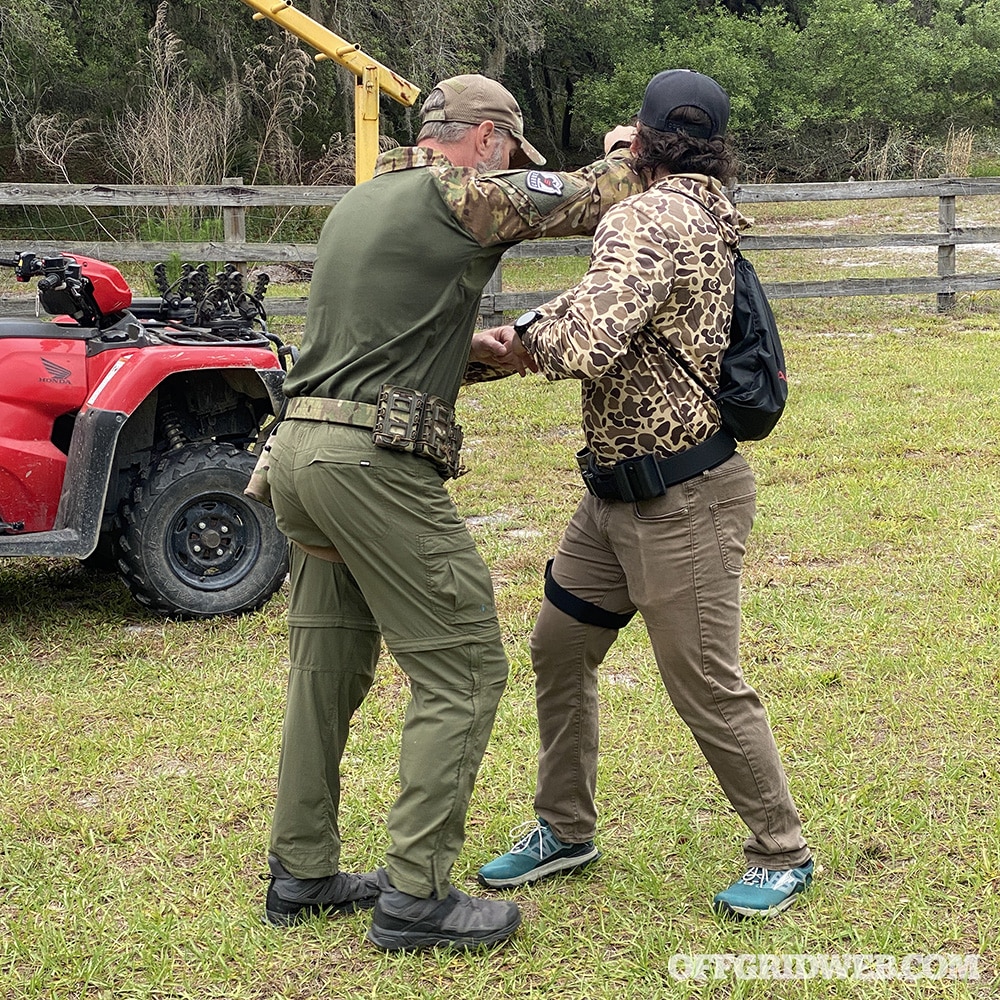
Above: Ideally, your front armor plate should be positioned just under the notch at the top of your sternum and should be at least wide enough to cover both nipples.

With advances in ballistic technology, rumblings about legislation banning civilian body armor ownership, and recent violent crimes around the country, responsible and discerning citizens are considering their need for body armor more than ever. As with most big purchases and competitive industries though, there’s a litany of misinformation, snake-oil, and ratings that frankly confuse the consumer. Today, I’d like to cut through the marketing jargon and talk about real-world performance and applications of body armor. I’ll also outline the different materials that plates are made from and their trade-offs and explain the different rating systems associated with body armor.

While researching this article, I spoke with several different companies to get varied perspectives on this ancient technology, which dates back to the Mycenaean area around 1400 BCE.

Types of Armor

Jeremy Gray, former president of HESCO, gave the most concise explanation of body armor I’ve ever heard: “Armor is a mechanical system designed to fail.” It defeats ballistic threats (primarily bullets) by doing one of two things: abrading the projectile or shattering it.

Steel armor essentially shatters the bullet. But as we all (should) have learned in high school physics, a couple things happen as a result. Energy is never created or destroyed; in this scenario, it’s transferred. Some of that energy is the punch you’d feel when the armor takes a hit, but most of that energy makes the round explode on impact, sending spall — tiny lead, copper, or steel fragments — everywhere. “Everywhere” can include your face, head, neck, or other less-than-ideal locations. Secondly, for every reaction there’s an equal but opposite reaction. So, for the energy to be absorbed, it must go somewhere. Hopefully, most of it is transferred into the plate and not your body cavity.

Director of Special Projects at Survival Armor Gary Hughes explained:

“AR500 Steel plates have become popular because of their low cost and their relative thinness and, most of all, likely because of their availability to the mass consumer market. This is the same heat-treated steel that is used in varying thicknesses for steel targets. Your average ¼-inch-thick, AR500 steel rifle plate will pass an NIJ Level III certification, and many manufacturers have chosen to do so.

“As mentioned above, however, that cannot be the only consideration, because steel personal protective inserts have a couple of major downsides.

“In my opinion, the biggest of those is that it has a horrible Achilles’ heel. It will not stop 5.56 M193 55-grain FMJBT [full metal jacket boat tail] ammo out of a 20-inch rifle barrel. Oftentimes, it will stop it out of a carbine, SBR or pistol-length barrel, but a rifle-length-
barrel AR-15 will eat [through] it. We’re talking holes that look like they were professionally put there.”

Gunnery Sgt. Sean M. Dempsey, a platoon commander from Jersey City, N.J., assigned to Weapons Company, 2nd Battalion, 8th Marine Regiment, Regimental Combat Team 5, shows off the bullet hole in his small-arms protective insert. Dempsey was shot in the back by an insurgent and walked away with only a bruise on his back.

Above: U.S. Marine Corps Gunnery Sgt. Sean M. Dempsey shows off the hole in the armor plate that saved his life. He was shot in the back by an insurgent in Iraq and walked away with only a bruise. (Photo via U.S. Department of Defense)

Essentially, Hughes commented, some savvy gun guys or Eugene Stoner purists keep 20-inch AR rifles around, and those can easily defeat AR500 plates with your standard 55-grain plinking round. Additionally, and more pointedly, bullets shatter on steel. As a result, many manufacturers coat their plates in aramid — the same compound used to line truck beds — to try and capture the spall. There are certain steel plates, Hughes explained, that are designed specifically to mitigate a M193 cartridge traveling at 3,250 feet per second. However, these are not the run-of-the-mill, low-budget steel plates you’ll find at most retailers. Hughes doesn’t generally recommend steel plates at all, but if you insist on buying some, he says you “should be looking at AR1000 or 647 hardness plates.”

Many traditionalists will claim that steel is the standard, and modern materials like polyethylene (“poly”) plates or ceramic plates are merely fads. However, with innovations in ballistic technology, these plates have their benefits over their steel-clad brethren; they’re lighter, for one, and stop a wider array of threats, especially multiple hits. Of course, many of the diehard steel fans will be the first to point out that with poly or ceramic plates you can’t stack rounds on top of one another.
While this may be true, if you’re standing there letting someone shoot you in the same place repeatedly, something, somewhere, has gone horribly wrong. It’s wise to consider the most likely scenarios under which your armor will be shot in the real world and choose armor accordingly.

Studio photo of an armor plate carrier.

Above: These plate carriers from Tyr Tactical demonstrate two variations in armor integration. The minimalist PICO-DS (left, also pictured in this article's lead photo) only carries hard ceramic plates, while the EPIC (center) features ceramic plates plus a layer of soft armor that encircles the torso.

Ceramic and poly plates, by contrast, abrade or shear incoming bullets over a very, very quick period of time.

“The ceramic portion of a ceramic plate shears that bullet, and the armor itself shatters a bit (it’s meant to) and then the backer material captures those fragments so that it doesn’t go through the armor and obviously go into you. It acts like a catcher’s mitt. Those fibers pull apart, and they create a lump on the back of the plate. That’s that ‘backface signature’ that you talk about when you’re talking about NIJ certification where they want a maximum of 44 millimeters backface,” explained Jeremy Gray of HESCO.

But what about poly plates? Surely, they aren’t making a bullet shatter. Correct, they’re shearing and abrading it and doing so very fast with very little weight. “If you have a pure polyethylene plate, you obviously don’t have that strike face to shatter the bullet. It’s a different method, but fibers also actually pull the bullet apart. The polyethylene materials that are used consist of fibers — really long chains of carbon and hydrogen — as well as some sort of resin system that holds those fibers together. When you consolidate those with heat, that’s what is doing the work of defeating the round,” Gray elaborated.

Studio photo of ceramic plates.

Above: We spoke to Jeremy Gray, former president of HESCO, one of the biggest names in the armor business. HESCO plates have been worn daily by members of the military and law enforcement agencies for more than 20 years.

If you want to geek out on this a bit more, this is called the Van der Waals effect. The materials and chemical processes to make ceramic and poly armor are so strong that they literally pull the bullet apart in milliseconds as it contacts the strike face. Just think about how small a M193 55-grain bullet is, for example, and how fast it moves (up to 3,250 fps). These systems have to do a whole lot of work in an incredibly short period of time. On top of that, many Level III plates are multi-hit rated. That’s nothing short of amazing when you stop and think about it.

“The biggest downside to an all poly, lightweight NIJ-certified Level III rifle plate? A 16-inch AR-15 with M855 ammo will shoot right through it. When people brag to me about their expensive super lightweight Ultra-High-Molecular-Weight Polyethylene (UHMWPE) plates, I generally tell them that’s great, it will make it easier to drag your corpse,” Hughes commented.

“I would wear steel plates before I wore an all-poly plate,” he continued. “The reason for that is simple, I know the American firearms market and community. I know the odds of encountering a 20-inch AR-15 firing M193 ammo is significantly lower than encountering a 16-inch one firing M855. We’re talking about the most popular rifle in the country, and one that’s firing roughly 50 percent of available commercial ammo that would be able to render it useless. We don’t like 50/50 odds in body armor. I wouldn’t wear one, regardless of how nice and light they are. I’d wear steel first … and that’s saying something, because I generally only recommend steel in very narrow circumstances, such as horrific storage conditions, hard use, impacts, drops, etc.,” Hughes continued. This, for context, is why we see the designation Level III+. More on that next.

Studio photo of armor plates made for ems personnel.

Above: Armor can be worn covertly or overtly. HighCom offers a Rescue variant of its Trooper ACAP plate carrier that includes high-vis reflective material. It’s designed to be worn by fire/EMS personnel during active shooter and critical incident responses.

Armor Ratings – What Do They Mean?

One of the biggest hang-ups and puzzles that surround buying plates are the ratings. There are five NIJ ratings you should be aware of: IIA, II, IIIA, III, and IV. These armor ratings are written as Roman numerals but read as numbers (e.g., 2A). The first three relate to handgun calibers, while the last two apply to rifle calibers.

Let’s be clear on something right out of the gate. There is no “+” designation from the National Institute of Justice (NIJ). They’re the governing body that does most — if not all — of the armor certifications in the U.S. Specifically, body armor has to reach the NIJ 0101.06 standard. However, a new system (0101.07 — got to love the government and their easy-to-remember designations) is allegedly on the way.

“The NIJ Standard 0101.06 is the latest standard published by the National Institute of Justice and sets minimum resistance requirements for soft body armor as well as hard rifle armor. Products that are certified compliant by NIJ can be found on the NIJ CPL list. We explain it a bit more on our NIJ web page and on our blog,” Kelly Gordon, marketing and creative director from HighCom Armor explained.

Photo of Oregon Ballistic Labratories.

Above: Oregon Ballistic Laboratories (OBL) is a full-service armor testing facility that’s certified by the National Institute of Justice and the U.S. Army Aberdeen Test Center.

“Generally, handguns and assault rifles can fire relatively rapidly, and there is a chance the armor will be hit more than once, so having multi-hit performance with armor is important when the operator comes in contact with those threat levels. Even though our Level IV plate is a single hit for that level of protection, there is still multi-hit protection at lower threat levels,” Gordon explained further. The plus (+) — in the case of HighCom armor and many other manufacturers — indicates that they have performed additional testing above the standard requirements, which we will discuss shortly.

Soft armor ratings, from “weakest” to “strongest,” are arranged as follows: IIA – II – IIIA. One thing we glossed over thus far is handgun rounds, since much of the hard armor has rifle threats in mind. Level IIA soft body armor can stop most standard handgun rounds (9mm, 40 S&W, .38 Special, etc.) with the exception of magnum rounds or perhaps a 9mm from a PCC where it will gain a lot more velocity in a 16-inch barrel than a 4-inch handgun. Level II increases protection to defeat a 9mm doing over 1,100 fps or a .357 Magnum jacketed soft point; IIIA can defeat all of the previous rounds as well as a faster moving 9mm (about 1,400 fps) and a .44 Magnum. In short, IIIA soft body armor can defeat pretty much any handgun round.

Hard armor ratings get a bit more complicated. Level III plates are designed to take multiple hits from a variety of calibers as a rule (all manufacturers differ, so please, please, please look at their tech sheets and understand what they say). For the most part, Level III plates that are NIJ certified can take six hits from the common threat rifle calibers — XM193 (5.56 55-grain ball ammo), M80 (7.62×51 or .308 civilian) and 7.62×39 (common AK rounds, although this gets weird due to quality controls with this type of ammo coming from overseas factories). All the other rounds that are outside of those main rifle threats are why you see the + or ++ designations — they fall out of the NIJ bubble and manufacturers want to denote that their plates may defeat more common calibers that aren’t on the list (for example, .300BLK).

Photo of an Oregon Ballistic Laboratories worker.

Above: OBL provided these behind-the-scenes photos of one of the ranges where they perform rigorous NIJ armor tests.

Level IV plates can take a single hit from 30-06 M2AP (armor piercing) ammunition. “For Level IV, the only round that NIJ recognizes is 7.62×63 — or 30-06 as it’s commonly known — M2AP. That’s a hardened steel core round traveling at roughly 2,880 fps. The interesting thing for all the velocities for the NIJ is they’re above the muzzle velocity for most of your standard rounds. And when NIJ is talking about velocity, it’s striking velocity, not muzzle velocity,” Gray of HESCO humored me and explained. I learned more from our conversation about muzzle versus striking velocity and ballistics than I did in hours of reading.

“Not all Level III plates will stop green tip but all Level IV plates will. It’s a harder threat to stop and popular. We offer several Level III plates that all stop green tip — 3s14m, 3s9, 3s9m, RSTP, RSTPSA+, RSTPG2. The new NIJ 07 Standard, however, will list green tip as a required threat for Level III plates,” Gordon of HighCom security explained further about their offerings. To be clear, “green tip” is the common term for rounds that are M855 American designation or SS109 everywhere else — mild steel core penetrator rounds. HESCO also calls any of their Level III plates that can defeat a M855 round a Level III+, as you can see on their tech sheets. For example, they also list 7.62×39 HSP (M43) and 7.62x54R — which are commonly fired from AKs and Mosin Nagants respectively — as capable of being defeated by Level III+ plates, but these again are not within the NIJ 06 certification bubble.

Photo of OBL testing equipment.

Above: OBL testing equipment.

There are also products that are DEA or Rifle Special Threats rated. These don’t fit within the guardrails of the NIJ 06 rating, and thus can’t be certified as such, but that doesn’t necessarily mean they can’t stop rounds or are otherwise unsafe. The DEA, in fact, has some pretty high round-stopping standards, and you can see some of this on HESCO’s tech sheets.

The biggest takeaway when it comes to ratings is the following: figure out what you’re trying to stop, your likely use case, your probable threats, weight, and budget. If you’re wearing armor all day or using it in a professional setting, you need to give careful consideration to how much weight versus protection you want, but you probably want to stop rifle rounds and quite a few of them. Personally, I’d opt to have a little more weight and be better protected, but that’s just me. If you’re a civilian and will likely only need to throw your plates on in a SHTF situation, that’s a different story. In that case, you may be using armor more to defend a static position (e.g. your home) and it may be wiser to go with the most protection you can afford while considering weight a lower priority. It’s all about trade-offs.

Photo of OBL testing armor plates.

Above: OBL testing equipment.

How is Armor Tested by the NIJ?

NIJ certification testing, as you can imagine, is a robust, brutal, and very specific series of tests that armor must pass to earn the NIJ seal. The new standard, NIJ 07, has been promised since 2016, but right now they’re abiding by the NIJ 06 standard.

“The process to get a plate certified is quite lengthy. Last time we got a plate certified it took about four months,” Gray of HESCO said. “There are a lot of things the NIJ does. As a manufacturer, you have to submit nine plates for a Level III certification — eight for testing and an extra. The new standard [0101.07] will increase the number of plates for RF1 and RF2 significantly. The original draft called for 27 plates for testing (nine for each threat), but the rumblings about the revision to the draft is that there will be twice that number because NIJ now wants to test obliquity. So, that’s 54 plates, which is a lot. The Level IV or RF3 will call for 37 plates for V0 and V50 and another 37 for obliquity,” he continued.

Those plates will go into a conditioning chamber for 11 days and are subjected to various temperatures, humidity, and the like. Then comes the drop test.

The plate is attached to a 4-foot-tall arm with a weighted back, and each plate is then slammed down twice. And don’t forget, that’s after 11 days of being subjected to all of the differences in temperature and humidity.

If a plate survives to this point, then and only then does it get shot. For a Level III, it needs to get shot six times. After it takes rounds, they perform what’s called a V0 test — basically, is there a penetration or not? Four plates go through this process.

Studio photo of an AK rifle.

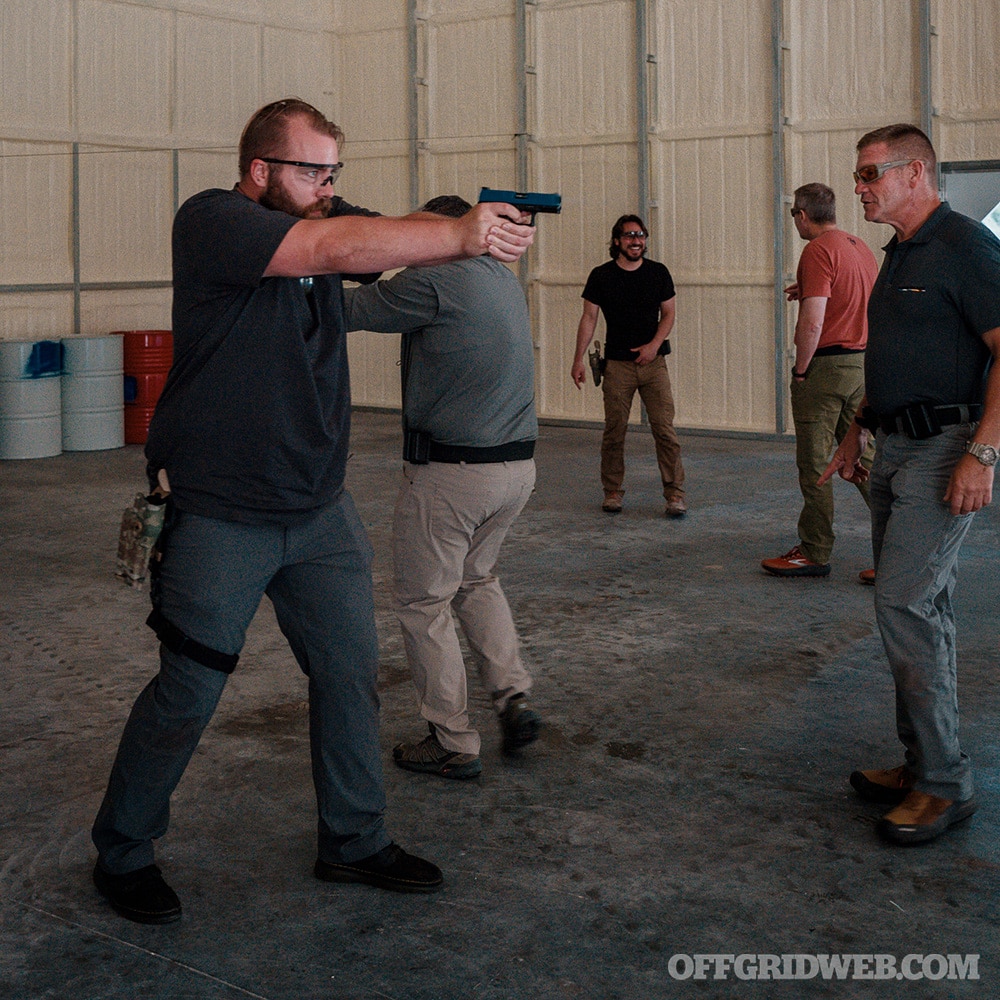
Above: It’s wise to consider the calibers and weapon configurations you might be up against. Understanding armor ratings — including the unofficial “+” designations — can help you determine what you truly need.

Then, there’s a V50 test. This test is wild in that they increase the velocity of the threat projectile until you get 50 percent of the rounds passing through the plates. Sometimes to achieve this V50 failure velocity, the case is maxed out to the point that no more powder can be crammed in, or the barrel/weapon system simply can’t take it. This is more theoretical, as opposed to being something that would ever happen in real life. It’s simply establishing what the safety factor is for that plate. Another four plates go through this process.

“The NIJ wants a calculated failure rate of below 5 percent for a given plate. Most of our [HESCO] plates are less than 0.1 percent failure rate,” Gray mentioned in a matter-of-fact manner. That’s 50x better than the NIJ standard. You can double check my math.

From a laboratory perspective, you need to reproduce reliable results every single time with these plates. The NIJ takes it seriously, and rightfully so — there are lives on the line. If a manufacturer is ISO certified, they tell the NIJ they can test their plates every 24 months, off the line, at the manufacturer's expense, to ensure their quality controls are up to par. If not ISO certified, this happens every 12 months. For even more context, they send the plates out to one of a handful of companies to inspect and test them, and the manufacturer can go and watch the tests to be a witness.

Photo of an adult male checking his phone while wearing armor plates and holding a rifle at the back of his open SUV.

Above: Body armor has many applications for numerous vocations (Photo by Joey Skibel).

This is the difference between NIJ certified and NIJ compliant. Clearly, certification is far more rigorous, costly, and time-consuming.

When we talk about the standard a Level IV plate needs to pass — defeating a 30-caliber M2AP round — we’re really talking about a .30-06 round with a hardened steel core that was made in the 1950s. There aren’t many of them floating around. Even for testing in the factory, many of these rounds were pulled from old ammunition stockpiles. Each round is loaded individually, they measure the amount of powder that is poured into it, etc. There are strict lab standards, and furthermore, in testing they upcharge these rounds to obtain a striking velocity of 2,880 fps — roughly 5 percent faster than a standard round would produce at the muzzle. Said another way, they’re testing in a worst-case scenario type of way. But for this reason, Level IV plates are only tested to be hit one time by M2AP rounds. That might not sound like a great stat, but a standard M2AP round is capable of penetrating half an inch of steel from nearly 100 yards.

The tests are absolutely brutal before they’re even shot, and then during.

Next Generation Armor Ratings

The new NIJ 0101.07 standard will be much easier to navigate than current armor ratings, as it’s supposed to break down what armor can defeat a threat level from HG (handgun) 1-3, with 3 being the most robust, and the same for rifle. The chart below outlines the new designations, test threat ammo and reference velocities for NIJ 07. Once more, this rating system hasn’t officially been put in place yet.

Illustrated table of next generation armor ratings.

So … What Plates Should I Buy?

Like pretty much everything, there’s no easy button. You need to think about your use, how much weight you want to carry, and what you want to stop. While budget is and should be a concern, you must ask yourself: how much is your life, or your loved one’s life worth? Would you really want to go to all the trouble of buying and wearing armor, only to end up laying on the ground with holes in you wishing you sprang for better plates with high-velocity hit capabilities?

As I mentioned at the outset, the purchasing decision is all about you and your personal use, but also about trade-offs. Steel is cheaper and has multi-hit capabilities, but is heavy, there’s a spall factor, and if not finished right, the steel becomes brittle. Also, as many of the industry experts in this article have pointed out, 20-inch barrels shooting XM193 can bore through some of the steel plates easily. With poly plates, of course, they’re lighter, but historically don’t handle multiple hits from green tip unless you go the more expensive route.

Ceramic is a great do-all plate. Across the industry with all of the professionals I spoke to for this article, it seems to be the best way to balance performance and weight while having an eye toward cost. Everyone thinks of ceramic and thinks of dinner plates that crack if they’re set down on the counter too hard — they’re nowhere near that fragile. Not even close. You could hit many of them full-force with a sledgehammer, and they would still be operational. There are some formulas that are more brittle than others, but all of them will stand up to normal wear and tear just fine. You mostly need to be cautious if you work in a high-tempo, high-speed operational environment like a QRF or military unit, as ceramic can break or become brittle with years of heavy use. Many plates are marked with a 5- to 10-year shelf life, but that’s more for liability purposes than anything — your plates can last a lot longer if they’re stored appropriately and not abused.

Read More

Subscribe to Recoil Offgrid's free newsletter for more content like this.

Editor's Note: This article has been modified from its original print version for the web.


Gear Up: New Survival Gear For June 2024

Welcome back to our dive into the world of gear! In this edition of Gear Up, we explore the latest innovations and reliable classics that are key to staying prepared for any challenge. From cutting-edge technology to time-tested tools, our focus is on equipping you with insights and information that keep you one step ahead wherever the journey of life may take you. Whether you're bracing for the unknown or fine-tuning your preparedness kit, join us as we unpack the must-haves for this month.

Burris Veracity: PH 4-20X50

Studio photo of the Burris Veracity scope.

Notes:

Burris Optics’ Veracity PH 4-20×50 riflescope is crafted for precision with a Rapid Cross MOA illuminated reticle and ED glass for clear vision. The illumination is powered by a CR2450 battery, and the reticle can be adjusted in 1/10 MOA increments. This high-tech optic features integrated PEK (Programmable Elevation Knob) technology that computes elevation adjustments and indicates them on a heads-up digital display. It weighs about 29 ounces, is 13.8 inches in length, and uses a 30mm main tube, making it compatible with many styles of optic mounts. This model seamlessly integrates with the BurrisConnect app, providing essential ballistic data for accurate shots without manual input, suited for shooters who value precision and innovation in their outdoor gear.

Reticle: Rapid Cross MOA

MSRP: $1,560

URL: BurrisOptics.com

Benchmade: Bailout

Studio photo of the Benchmade Bailout knife.

Notes:

The Benchmade 537FE-02 Bailout knife is tailored for those who prioritize both strength and lightness in their tools. Featuring a CPM-M4 blade steel, it offers exceptional edge retention and durability. The handle is crafted from anodized aluminum, ensuring a secure grip while maintaining minimal weight. The knife includes a Cerakote blade finish for added corrosion resistance, making it a reliable companion in various environments. A lanyard loop is featured on the handle's end, allowing the user to secure it for repetitive or slippery tasks. It’s lightweight and has a tanto blade design that gives it stylish looks along with its versatility as a blade.

Steel: CMP-M4 Super Steel

MSRP: $200 – $300

URL: Benchmade.com

Bushnell: 40L Convertible Duffel Bag

Studio photo of the Benchmade Bailout duffle bag.

Notes:

The Bushnell 40L Convertible Duffel Bag is designed to cater to anyone seeking versatility and resilience in their gear. This bag stands out due to its ability to transform from a traditional duffel into a duffel backpack, providing flexibility for various travel needs. Crafted from coated polyester, the bag offers near-waterproof durability against the elements, making it a reliable choice for outdoor adventures. It also features anti-skid rubber feet to minimize wear and tear. The bag includes five additional pockets alongside the main compartment, ensuring there's a place for everything. Among these, a mesh internal pocket is specifically designed for smaller items that require easy access. Whether used as a gym backpack, an overnight bag, or a tactical duffel, it's built to meet a wide range of needs while providing comfort and convenience.

Material: 10500 Polyester

MSRP: $75

URL: Bushnell.com

Crystal Creek Gear: GoReel Rodless Hand Reel Fishing Kit

Studio photo of the Crystal Creek Gear GoReel Rodless Hand Fishing Reel.

Notes:

Crystal Creek Gear’s GoReel Kit is a rodless hand reel system that’s innovative and incredibly easy to carry. Its compact, cylindrical design — measuring 4 inches in diameter, with a depth of 2.5 inches — means that it can be tucked easily in a pocket or backpack. This design choice emphasizes portability, making it an ideal choice for spontaneous fishing trips or just enjoying a peaceful moment near water. The reel comes housed in a container equipped with built-in tackle dividers, ensuring your hooks and small tackle remain organized and readily accessible. Additionally, the kit provides 30 yards of premium braided fishing line. Each GoReel comes complete with a premium trout fishing tackle kit, which includes two Leland's Lures E-Z Trout Floats, six Trout Magnet bodies, and three Trout Magnet hooks.

Colors: Blue, Green

MSRP: $40

URL: CrystalCreekGear.com

Helly Hansen: Women's Isfjord Insulated Shacket

Studio photo of the Helly Hansen Women's Isfjord Insulated Shacket.

Notes:

Staying comfortable in the outdoors while remaining stylish isn’t an easy feat. Helly Hanson, however, does just that with their Isfjord Insulated Shacket. This article of clothing is part shirt, part jacket, keeping the wearer warm and comfortable. Featuring PrimaLoft BLACK Eco insulation, this shacket is warm, soft, lightweight, and environmentally friendly. The presence of internal chest pockets with snap buttons, alongside hand pockets offers functionality and convenience. Adjustable cuffs with snap buttons create a customizable fit, making it a versatile garment to keep the elements at bay. Perfect for transitional weather, it provides enough insulation for warmth yet designed for layering under heavier outerwear in colder temperatures.

Colors: Ebony, Hickory, Ocean

MSRP: $180

URL: HellyHansen.com

Garmon: Tactical Nemesis 4 G-Dry

Studio photo of the Garmont Tactical Nemesis 4 G-Dry footwear.

Notes:

Crafted for durability and protection, the Nemesis 4 G-Dry by Garmont Tactical is suited for those who engage in operations where speed and agility are in high demand. It integrates features like G-DRY waterproofing to keep feet dry in adverse conditions and an abrasion-resistant synthetic mesh upper for toughness. A soft Lycra collar ensures comfort around the ankle, while the rubber toe cap offers additional security against rough terrain. Designed to be lightweight at just 490 grams for a half pair of size US 9's, it supports quick movements without sacrificing support or comfort. This boot offers a blend of high-tech materials and an innovative design to ensure optimal performance in many situations.

Fit: Regular

MSRP: $170

URL: GarmontTactical.com

Prepper All Naturals: Variety Pack

Studio photo of the Prepper All Naturals Variety pack.

Notes:

When refrigeration isn’t a guaranteed amenity, finding protein-rich, nutrient-dense sources of food can be a challenge. Prepper All Naturals created a solution that aims to get fresh beef to those who need it most. Each 12-ounce packet rehydrates back to its original 48 ounces, offering 12 servings with a substantial 24 grams of protein each. Using a combination of sous vide cooking and freeze-drying, this product ensures that the beef retains its flavor, texture, and nutritional value, even after rehydration. Each combo box contains beef cubes that expand back to their original size and weight when rehydrated, providing a protein-rich food source that can be stored for years without refrigeration. Ideal for emergency preparedness, disaster relief, humanitarian aid, or simply for having a high-quality protein source on hand, it's tailored for those looking for reliable food storage solutions without compromising on the quality of their diet.

Cuts: Steak, New York Strip, Ribeye, Filet Mignon

MSRP: $550

URL: PrepperBeef.com

Mission First Tactical: Belly Band Holster

Studio photo of the Mission First Tactical Belly Band Holster.

Notes:

Designed for active lifestyles, the MFT Belly Band Holster offers a no-belt-needed carry solution for activities like walking, jogging, or biking. The comfortable 3D Spacer Mesh Fabric allows for better airflow. Soft hook and loop construction avoids chafing, and open-air weave prevents bacterial growth. It features a hard laminate trigger shield for increased safety, elastic pockets for accessories, and secure YKK zippered pockets for essentials. Ambidextrous and adjustable for waist sizes 26 to 52 inches, it's hand or machine washable. Compatible with a wide range of firearms, it’s a versatile choice for concealed carry.

Fit: 26 to 52-inch waist

MSRP: $50

URL: MissionFirstTactical.com

RTS Tactical: Bulletproof Memory Foam Pillow

Studio photo of the RTS Tactical Bulletproof Memory Foam Pillow.

Note:

By combining comfort with defense, the RTS Tactical Bulletproof Memory Foam Pillow is an unexpected safety product. It integrates a ballistic armor panel into a premium memory foam pillow, designed to offer both a comfortable night's sleep and protection against firearm threats. Between two layers of memory foam is a high-performance 20×13 Soft Armor Panel. Available with a IIIA panel — rated to stop rounds such as 9mm, .44 Magnum, and .357 SIG — or IIIA+ which is rated to stop full metal jacket rounds and point-blank shots. Beneath the pillowcase are integrated carrying straps so the pillow can be manipulated and used in a similar manner as a riot shield. The overall size is 23.6 inches in length, comparable to an average-sized pillow, making it a discreet personal defense addition to the bedroom. Weighing in at 7.3 pounds, it can be manipulated with relative ease should the need arise.

Armor Levels: IIIA, IIIA+

MSRP: $330 – $430

URL: RTSTactical.com

SimpleShot: Scout X

Studio photo of the SimkpleShot Scout X slingshot.

Notes:

Sometimes the best solutions derive from tried-and-true designs, and few things are as time tested as the sling shot. The Scout X Slingshot from Simple-Shot is a modern take on a classic design, made for versatility and ease of use. It features next-generation design improvements, adaptable grip options for various hand sizes, and an integrated band attachment for easy band changes. The slingshot also comes with precision sighting aids for accuracy and removable scales for enhanced customization. Whether you're new to slingshots or an experienced user, the Scout X's design is both traditional and innovative, ensuring a comfortable and effective grip for all shooters.

Colors: Black, Green, Slate

MSRP: $45

URL: Simple-Shot.com

Sitka: Equinox Guard Hoody

Studio photo of the Sitka Equinox Guard Hoody.

Notes:

Designed for outdoor enthusiasts looking for that perfect blend of comfort and protection, especially in hot weather, this hoody has a little bit of everything. The Equinox Guard Hoody by Sitka Gear integrates cutting-edge technologies to protect against insect bites without compromising on comfort, especially in warm, humid environments. It's crafted from an ultra-lightweight, breathable, and stretchy fabric designed to reduce mosquito bites, with a built-in Insect Shield for repelling a wide range of insects. Features include a breathable mesh facemask, a long tail for added protection when tucked into pants, UPF 50+ sun protection, and odor control technology, making it ideal for outdoor activities where insects are prevalent.

Colors: Aluminum, Black, Elevated II, Olive Green, Pacific, Subalpine, Waterfowl Timber

MSRP: $149

URL: SitkaGear.com

War Bird: Ghost Wolf

Studio photo of the War Bird Ghost Wolf eye protection.

Notes:

Ghost Wolf sunglasses from WarBird are engineered for performance and protection. Featuring 4SHADOW lens technology, they offer high-contrast lenses to enhance sight and reaction times. These glasses meet ANSI Z87.1 safety standards for impact resistance, ensuring durability and safety. The Kaiwall Bio-based TR90 frame material is lightweight and comfortable, designed for long wear. With a mono shield-style lens for an expansive field of view and vented temple pieces for breathability, these sunglasses are built for active use in various light conditions, including full sun and variable light scenarios. Available in a variety of lens styles, the Ghost Wolf can allow light transmittance anywhere between 11 and 88 percent depending on if a variable-light or full sun lens is selected.

Frame Colors: Black, Green, Navy, White

MSRP: $159 – $189

URL: WarBirdPro.com

Read More

Subscribe to Recoil Offgrid's free newsletter for more content like this.

Editor's Note: This article has been modified from its original print version for the web.


10/22 Takedown Pack

The concept of a “bug-out bag” is one that can be interpreted a variety of different ways. Some take it as a complete survival kit for living in the woods indefinitely, in which case it’s usually a huge pack crammed with a wide range of sustainment gear and heavy tools. Personally, I like a more limited approach — I don’t see a lot of scenarios where I’d need to live off the land for months without resupply, but I can think of many where I’d want to be out for two or three days with the essentials for safety and comfort. So, that’s the role this pack fulfills. It covers water, food, shelter, fire, and defense — each with redundancies — as well as some lower priorities like entertainment.

Studio photo of the 5.11 LV18 Backpack

10/22 Takedown Pack Info

  • Make and Model: 5.11 Tactical – LV18 Backpack 2.0
  • Capacity: 30L
  • MSRP: $145
  • URL: 511Tactical.com

Backpack & Contents

I chose the 5.11 Tactical LV18 because its 30L size is more than enough for what I need, and because I like its layout. It features a large side-opening clamshell rear compartment that’s designed to retain an AR-15 upper and lower. In my case, it holds my trusty Ruger 10/22 Lite Takedown that I’ve owned for close to a decade, plus two 25-round magazines. But I’ll discuss the rifle more later. The rear compartment also holds my warm-weather sleep system: a Snugpak Jungle Bag, Snugpak Bivvy, and a Serac hammock. If necessary, I can lay out on the ground, with the sleeping bag’s integrated bug net and the waterproof bivvy keeping me protected from insects and unexpected rainfall. Better yet, I’ll rig the hammock between some trees and hang out in comfort.

The pack’s middle compartment is a more traditional top-opening configuration with zippered pouches and organizer pockets for loose items. The latter holds a super-light Montana Knife Co. Speedgoat 2.0 fixed blade, a BIC lighter in an Exotac FireSleeve, a ferro rod, a pen, and a Spyderco Double Stuff pocket sharpening stone. The laptop sleeve behind it holds some reading material to stave off boredom, as well as a Rite in the Rain notebook for drawing, journaling, and so on. A zippered pocket contains some protein bars, a Princeton Tec headlamp, a Mylar emergency blanket, and a CANA Provisions Personal Water Decon Kit. Remaining space in this compartment is filled with a 5.11 Tactical XTU LT3 puffy jacket for chilly evenings, a lightweight Kitanica Bug-Out Breaker windbreaker for milder weather, and a Tilley LTM6 Airflo wide-brim hat for daytime sun.

Contents inside the 10/22 Takedown Pack.

Above: In addition to the 10/22 Takedown rifle, this pack contains a sleep system and additional layers of clothing for comfort in any weather.

Finally, the outermost compartment on the front of the LV18 contains only one item: my LAS Concealment holster with my Glock 45 and a spare magazine. Stitched-on webbing allows me to simply attach the holster’s belt clips to the pack to secure it in place. Obviously, I wouldn’t put the pistol here in any setting where I might need to access it quickly — I almost always wear it concealed for that purpose. But it’s a good storage spot for when I’m sleeping or need to temporarily remove the gun while keeping it reasonably accessible. Also, on the front of the pack, just below the CCW compartment, is a GRAYL UltraPress Titanium water bottle/purifier. The outer cup can be used to boil and cook ramen or backpacking meals, while the inner cylinder can render 16.9 ounces of water potable in seconds by simply pressing downward to force it through the purifier cartridge.

The Rifle

My 10/22 Takedown is a bit of a self-contained bug-out kit in its own right. It features a Vortex Crossfire II 2-7×32 rimfire scope, a tiny Bowers Bitty suppressor, an Echo Nine Three sling, and an adjustable Volquartsen TG2000 drop-in trigger with Rapid Release (a significant improvement over the fiddly paddle mag release that came with the gun). A Magpul X-22 Backpacker stock allows both halves of the rifle to snap together for easy transport and contains hidden compartments for extra magazines and tools.

Studio photo of the 10/22 takedown rifle.

A stopper at the base of the grip can be pulled out to reveal a BIC lighter wrapped in duct tape, with a little loop of paracord for easy removal. The cheekrest opens on a hinge to reveal even more storage. In there, I’ve got a loaded 10-round magazine, a 50-round box of .22LR hollow point ammo, and a packet of gun oil. There’s also an LED keychain light, a small folding knife/sawblade, a diamond sharpening stone, Vaseline-soaked cotton ball tinder in a plastic bag, some Kevlar cord, water purification tablets, and a large Ziploc bag for carrying and purifying water if I don’t have another container. To prevent rattling of loose items, I stuffed the remaining space with scraps of cotton T-shirt that can be used for fire-starting or as cleaning patches for the rifle.

Final Thoughts

If I’m heading out somewhere remote, I’ll throw this pack into my truck to supplement my EDC gear (folding knife, flashlight, etc.) and the equipment in my vehicle (water bottles, large first aid kit, trauma kit, etc.). The 10/22 plus more than 100 rounds of ammo on deck are perfect for dispatching rattlesnakes and varmints, and my Glock is ideal for defense against larger threats. This pack bridges the gaps in the other gear I typically carry, doesn’t take up too much space, and makes sure I’m always ready for an unforeseen overnighter in the field.

READ MORE

Subscribe to Recoil Offgrid's free newsletter for more content like this.

Editor's Note: This article has been modified for the web from its original print version.


Book Review: The Citizen Manual Series

“Being a Professional Citizen is not a hobby for you, it is your personal commitment. A promise to yourself and your family to be tactically and technically proficient with all the tools you have available.” These words are pulled directly from the pages of The Professional Citizen Project website. This site, and the project it supports, is the brainchild of veteran Jack Morris, who is passionate about passing on the preparedness and tactical skills he learned in the military to all Americans.  This ideal that all upstanding citizens should be “tactically and technically proficient” is literally a founding principle of our nation. A principle that harkens back to the time when farmers and blacksmiths grabbed their muskets from over the hearth to defend their families and their freedom. To make these skills more widely accessible, Morris is publishing a line of “Citizen Manuals.” We got our hands on the first two installments: CM-1: Individual Tactical Skills and CM-2: Reconnaissance.

The 411

These books are styled after military field manuals, both in physical appearance and structure, right down to font selection and chapter/section breaks. There’s no storytelling here, just straight-forward “how-to” information. CM-1 is a primer for folks who maybe haven’t had much, or any formal tactical training. It includes chapters covering skills such as “Shoot,” “Move,” “Communicate,” and “Survive.” The “Shoot” chapter is pure fundamentals, with sections on fratricide prevention, rifle setup, and zeroing advice. (This is not a manual on how to shoot.)

Likewise, the “Move” chapter talks about fundamental land navigation, as well as dismounted patrolling formations and a brief overview of “actions on contact” — what to do if you encounter an enemy during movement. Other sections include shelter, water, first aid, hand signals, and radio security protocol.

The Reconnaissance manual, CM-2, is clearly meant to build directly on the skills from CM-1. Chapter 1, Section 1 is titled “Organizing For Combat” — with a focus on squad-level organization and tactics which carries forward through the duration of the book. This book also includes more of those “minuteman” or “partisan” skills, including personal camouflage, recon-specific carbine setups, how to build and deliver proper mission briefings, and the different types of reconnaissance patrols.

That being said, there’s also some really good general survival/preparedness information, such as reverse planning, the light cycle of the day, and how to observe objects at night, both with and without NVGs. These latter skills might come in handy in a wide variety of scenarios. (We’ve used reverse planning for everything from training days to family vacations.) 

Featured image of the citizen manual.

The Verdict

Morris and the team at Professional Citizen Project should be commended for the time and effort they’ve invested in this book line. For military veterans, these books are great refreshers that cut out a lot of the extraneous doctrine and policy found in issued Field Manuals. For citizens who lack formal military training, this is a great way to learn some foundational survival and tactical skills in a way that’s both accessible and written specifically for civilians. Rounding up a half-dozen friends and drilling regularly as an independent minute-squad might not be in your preparedness plan, but there’s still plenty of good information for the individual citizen in these manuals, and the low cost makes them well worth the investment to keep on your shelf for quick reference or regular perusal.

About the Book

  • Book & Author: Individual Tactical Skills & Reconnaissance Manual by Jack Morris
  • Publisher: The Professional Citizen Project
  • MSRP: $23 ea
  • URL: tpcproject.com
  • Pages: 225 (CM-1) 239 (CM-2)
  • Rating: Thrive | Survive | Die

READ MORE

Subscribe to Recoil Offgrid's free newsletter for more content like this.

Editor's Note: This article has been modified from its original print version for the web.


Review of the Black Bunker BM8 Foldable Air Rifle

Before we dive into the Black Bunker BM8, lets review a little history. Humans have been developing handheld projectile weapons for a very long time, from the spear-throwers of the Paleolithic period to the gunpowder-loaded “hand cannons” which appeared in China around the 10th century. Air-powered projectile weapons are a newer development, but not as new as you might think.

They’re actually one of the oldest types of pneumatic technology. You can find the earliest known example of an air rifle, which dates back to the late 1500s, in a museum in Stockholm. In the 1700s, the Lewis and Clark expedition utilized a Girandoni repeating air rifle — a 10-pound, 4-foot-long, .46-caliber behemoth of an air rifle — on their 8,000-mile voyage across the North American continent. The Girandoni took about 1,500 individual pumps to fill up the reservoir with enough air to fire a 22-round magazine, but it didn’t require a supply of consumable and highly volatile gunpowder.

Black bunker bm8 partially folded.

Above: Before the BM8 is locked into its functioning position, the front of the barrel and buttstock pivot to reduce its overall size for ease of storage and transportation.

These days, modern air rifles have powerplants much more efficient at pressurizing air, and there are several methods to accomplish this task:

  • Spring Powered: Also known as a “springer,” this style uses a coil spring and pump piston to compress air in a chamber separate from the barrel. Typically, a user must use a cocking lever to pull the piston back, compressing the spring. Pulling the trigger releases the spring, pushing the pump piston forward, and generating the pressure needed to fire a pellet or BB.
  • Pneumatic: Pneumatic air guns use air that’s been pressurized beforehand, either by pumping by hand, or by charging with an external source, which is then released in a controlled way to fire the round.
  • Compressed Gas: This style of air gun works in a similar manner as pneumatics, except they make use of external, pre-charged gas cylinders, typically CO2.
  • Gas Ram: Is an amalgamation between a springer and a pneumatic air gun. They need to be cocked like a springer, but the effort fills a gas chamber like a pneumatic.

Growing up, you may have taken out a soup can or two with your Red Ryder BB gun, but there have been some impressive strides in modern air gun technology. So, when we got our hands on one of the latest models, the Black Bunker BM8 Survival Air Rifle — a foldable, break-barrel, gas ram air gun — we were excited to take it for a test drive. Black Bunker let us take a look at both of their variations, the .177 caliber and the .22 caliber.

Photo of the bayonet which can be added to the air rifle.

Above: The bayonet has integrated hex wrenches, oxygen tank wrench, and a bottle opener on the top.

Unfolding the Black Bunker BM8

Looking at the triangular configuration of the BM8 definitely raises some eyebrows. There really isn’t anything quite like it. Broken down, the barrel and the buttstock fold around an odd-shaped carrying case, and lock into place with its cocking link arm. A simple metal release lever in the buttstock detaches the arm, and the three sections of the air gun pivot and snap firmly into place. There is no wiggle once fully assembled, giving it the feel of sturdy, one-piece gun.

Unfolded, it’s longer and a bit heavier than the traditional rifles you may be used to, but this is to be expected because the receiver houses a chamber strong enough to compress and store air. The feel of shouldering the BM8 is comfortable enough, and there are a few features worked into its design. For starters, it has three Picatinny rails — one on top to mount an optic, and two shorter rails on the side for accessories. At first, their placement  seemed odd, but there is a good reason for it.

Two models of the Black Bunker BM8, one black and one tan, side-by-side for comparison.

Above: The Black Bunker BM8 comes in two colors, can be fixed with a bayonet or silencer, and can be tuned to different Joules depending on which country it’s being sent to.

Because the BM8 is a break-action, the front third of the air gun has to be hinged down, both to charge the gas chamber, and to load the ammunition. If the accessory Pic rails were any farther forward, not only would they get jostled during operation, but any lights or lasers would have to temporarily aim away from the target. It comes with stock iron sights, which seemed a bit on the low side when I first aimed down the length of the barrel. There is a sweet spot for a cheek weld when using the irons, and it took a few repositions to find it.

To get the BM8 operational, the cocking link arm needs to be folded back toward the trigger, where there is a locking switch that holds it in place. Initially setting the switch to the “Unlock” position allows the link arm to fall into a dedicated groove; moving the switch to “Lock” keeps it there.

To charge the air gun, while holding the body of the rifle with your firing hand, the front of the barrel needs to be smacked downward with your other hand — this opens the breech to insert a pellet. Pulling the barrel further rearward engages the gas ram powerplant and charges the chamber with compressed air. It only takes a single pump to completely charge the air gun. The safety is a small lever in front of the trigger that gets flicked forward to fire.

The desert tan .22 air rifle in the folded configuration.

Above: While folded in its storage configuration, the BM8 holds the included storage case securely in place.

For a conventional rifle shooter, charging the air gun is the most challenging task. Out of the box, it takes a decent amount of effort to break the action and pull the barrel back far enough to charge. There was so much resistance the first few times it was charged, I was worried I might break it. A few dozen charges later, it started to loosen up, and it became easier to perform this function. According to Black Bunker’s manual, the BM8 could have a break-in period of up to 250 rounds, which means it could take a few days at the range to get the action moving comfortably.

Breaking down and packing up the BM8 is relatively straightforward. Break the action and press a release button by the start of the buttstock to cause each third of the air gun to fold. It doesn’t require the storage case to be in the middle to connect it together. However, the case is uniquely designed to fit in that space, so why leave it out? If the case isn’t seated properly, the air gun will let you know by not clicking together securely. Once everything is in its storage configuration, the point where the handle of the case meets the buttstock is the best place to carry it around.

Air rifle pellets.

Above: Ammo for air guns is very inexpensive, even in bulk. Pellets come in different shapes depending on the desired application.

BM8 Specs

Black Bunker offers the BM8 in two calibers (.177 and .22) and two colors (Coyote Tan and Full Black). There are also several configurations to choose from beyond the stock model that include ½-inch UNF threading for a silencer, or a knife attachment — more on that feature later in this article — or a combination of the two. They also have several different series which cater to the laws of whichever region of the world they are being sent. For example, if it’s being sent to Germany, its calibrated to fire rounds at 7.5 Joules, Sweden gets 10, and the US of A gets 21 (for .177 cal) to 24 (for .22 cal) Joules.

Features:

  • Picatinny optic rail and two accessory rails
  • Adjustable rear sight
  • Two-stage safety lock system
  • Textured polymer buttstock
  • Optional knife and bayonet attachment
  • Water resistant case

Overall Length: 42.7 inches

Weight: 7.5 lbs

MSRP: $280

URL: black-bunker.com

Rounds Downrange

Before bringing it to the range, I needed some ammo. Sourcing pellets in the U.S. is easy and inexpensive compared even to .22LR ammo. A box of 1,250 rounds of .177 was $35, and a box of 500 rounds of .22 pellets was $10 on Amazon — less than $0.03 per round. Each of those boxes is about the same volume as my closed fist, which means I could plink away at targets for the foreseeable future without needing to worry too much about cost or storage. Using an air gun also means not having to consider the risks associated with combustibles like primers and gunpowder (as miniscule as those risks are).

The bayonet attached to the end of the black bunker bm8.

Above: A bayonet can be attached to the BM8, if you’re into that sort of thing.

Difficult initial charging aside, my first real point of contention actually came from trying to pack the BM8 up for the range. Because I live in a densely populated urban area, walking around with what appears to be a folded gun — or even a gun in a case — may attract the wrong kind of attention.

With discretion in mind, I attempted to place the folded air gun into a backpack. Additionally, I was thinking that if transporting it this way would work, it would make for an interesting camping or bug-out gun. But the dream of walking to the range or the woods with my air gun discreetly concealed died as soon as it began. Because of the length and inflexibility of each section, it simply wouldn't fit any of the packs I had lying around. Despite my best efforts to make it work, there was just no way it was going fit without sticking partially out of a zipper, or having to strap it to the outside, defeating the purpose. The most discreet container I could find that fit its odd shape was a large, blue IKEA shopping bag.

Streamlight attached to the pic rail of the BM8.

Above: Lights and lasers, like this Streamlight TLR RM-2, can be mounted to the side Pic rails.

Once I arrived at the range, I threw a Hawke red-dot sight on the .177 and left the .22 model with iron sights. As I got ready to cock and load the air gun, I experienced my second sticking point: occasionally, the cocking link arm on the .22 would loosen from its locked position just enough to prevent charging. In an effort to eliminate the possibility of operator error, I did everything I could to make sure it was properly seated in the “Locked” position.

It takes just the right amount of force to open the breech, and doing so while keeping the muzzle in a safe direction is trickier than it sounds. Think of it like jabbing a heavy bag — you want the point of impact to connect just at the surface and not much further, which requires holding and standing just right. Otherwise, you risk accidentally flagging someone as you move around grappling with the barrel.

Close up of the charging lever of the BM8.

Above: To charge the BM8, the cocking link arm needs to be folded back to the rear while in the “Unlocked” position.

Loading and charging seemed easier from a seated position versus standing. This was because I could anchor the buttstock in the bend of my hip, which made pulling the barrel downward less strenuous. Conversely, having to smack the action open was more challenging from seated compared to standing. Either way, this wasn’t the type of gun that was going to send pellets down range in rapid succession. It forces the user to focus on making every shot count rather than shooting more haphazardly.

Flicking the safety on and off, or away from and toward the trigger respectively, is a satisfying motion. The trigger itself is not in the realm of a performance trigger, as there was a noticeable amount of creep. Sending .177 down range hardly produced any amount of perceptible recoil, and the .22 was only slightly stronger.

Black bunker bm8 breach exposed. Loading a pellet into the BM8.

Above: Pellets have to be loaded individually between each shot.

As far as accuracy is concerned, regardless of weather conditions, I would say the BM8 would hit any target within 50 yards consistently. Beyond that range, the wind really wreaks havoc on the trajectory of those tiny lead pellets. If the weather is calm, or you wait for a lull in any crosswind, ranges of 50 to 100 yards are more feasible but not guaranteed. With a dialed-in scope, it would probably make a pretty decent varmint slayer, but it certainly falls short of any kind of reliable defensive tool.

The BM8 did manage to draw a lot of attention to itself, as the combination of its unusual folding configuration and modern tactical looks is not something you see too often. It even got a few nearby shooters excitedly talking about wanting to pick up an air gun at some point in the future. One person made the comment, “It looks like something out of Call of Duty,” which elicited some amused laughter from a few passersby. But it seemed like the common reaction most people had was serious curiosity.

Final Thoughts

Let’s start with the elephant in the room: combining the break action with the powerplant makes for an interesting design, but also a challenge to charge and load. Although it did become progressively easier, the initial stages of the break-in are tough, even for someone with ample upper-body strength. For younger, lighter, or more physically challenged shooters, the BM8 is not going to be a great option.

Charging the black bunker bm8.

Above: Charging the BM8 can be challenging while working through its break-in period. However, the fact that it only needs to be charged once to fire is a nice feature.

Strangely, Black Bunker offers an optional knife/bayonet attachment — this seems counterintuitive. One of the BM8’s biggest selling points is that it’s available in places where traditional firearms might be hard to get; Black Bunker even detunes the rifle’s power on a country-to-country basis to stay within legal limits. With a bayonet attached, it’s not hard to imagine pearl-clutching politicians and activists labeling it as a “tactical assault airgun” or some equally stupid moniker. I’d much rather have a fixed survival blade that accompanies the carrying case, as opposed to an impractical bayonet attachment I’ll never affix.

Speaking of the carrying case, I do think this is a useful accessory. Not only does it fit nicely within the collapsed configuration, but it easily stores all the ammo you would ever need for a day of shooting, plus room for basic maintenance tools. Black Bunker recommends using it as a survival kit, which is a great idea, and the whole setup could be a nice addition to an overlanding rig or long-term campsite.

Shooting the BM8 at the range.

Above: Firing the BM8 offers an enjoyable experience at a budget friendly cost.

Picatinny rails are a nice touch, but the side rail location is so far back that you’re bound to get some shadow from the barrel if you mount a light to it. This isn’t really a deal-breaker since you wouldn’t want to do any CQB with the BM8 anyway. Mounting an optic is an improvement over the basic iron sights, and the top Pic rail has plenty of space for whatever optic you decide to go with. One consideration, though: if you mount a scope, and the air gun is folded into thirds, that scope is directly on the bottom, and you need to be careful when setting it down.

Not having to worry about carrying along a bunch of CO2 cartridges works in the air gun’s favor, making it a truly self-reliant survival gun. Combine the low MSRP and low cost of ammo with its modern looks and its ability to fold up for easy carrying and transport, and the BM8 makes for a unique air gun with a lot of potential for utility and fun.

READ MORE

Subscribe to Recoil Offgrid's free newsletter for more content like this.

Editor's Note: This article has been modified from its original print version for the web.


Overland 4Runner: Part 3

Where the rubber meets the road” is a saying that indicates a critical point of success or failure — in other words, the moment of truth. The logic behind this phrase is instinctual to anyone who has ever driven a vehicle  and struggled to maintain traction in rain, snow, mud, or sand. Four tiny rubber-to-road contact patches are the only things that keep your two-ton vehicle under control, and by extension, keep yourself and your loved ones inside the vehicle safe.  This is why good tires should be at the top of your priority list for every vehicle you own (like our overland 4Runner), especially for those of us who enjoy off-roading, overlanding, and driving through remote and challenging environments. In the city, bad tires might cause you to lose control and get into a fender-bender, but if you’re driving on a treacherous mountain road dozens of miles from civilization, bad tires could leave you stranded in a life-threatening predicament or cause you to slide off the edge of a cliff.

Composite studio photo of a wheels and suspension parts for an overland 4runner.

Above: In addition to the wheels, tires, and suspension, I bought a set of Westcott Designs rock sliders, which protect the truck’s lower rocker panels from impacts and also serve as convenient steps to reach the cab and roof rack. I also installed a pair of Morimoto LED “Gen 2” taillights, which give the truck a cool visual signature at night, as well as brighter reverse lights and sequential turn signals.

Choosing the Right Tires

So, what makes a good tire? As with many things in life, it’s situational. The tires you’d want on a sports car are drastically different than what you’d want on a semi-truck. One maximizes grip for cornering and acceleration on smooth, dry roads, while the other prioritizes load-carrying capacity and longevity. Aside from the fact that they’re both round and made of reinforced rubber, they couldn’t be more different.

When it comes to pickup trucks and SUVs, there are a few different types of tires to consider, each with different characteristics and capabilities.

  • All Season tires are usually what your vehicle comes with from the factory. These have a relatively smooth tread pattern designed to be quiet, comfortable, and lightweight enough to maximize fuel economy. Put simply, these are road tires meant for nothing more difficult than wet asphalt, a dusting of snow, or smooth dirt roads. If that doesn’t describe how you use your truck, it’s time to upgrade.
  • Mud Terrain (M/T) tires are the opposite end of the spectrum from all season tires, with big, blocky tread patterns, more resilient rubber compounds, and heavily reinforced sidewalls. They offer outstanding performance over deep mud, snow, sand, and rocks, so they’re the best choice if you do a lot of serious off-roading. However, this results in some substantial compromises for normal road use — usually continuous noise at highway speeds and reduced fuel economy.
  • All Terrain (A/T) tires are about halfway between an all season and an M/T. They’re much better than an all-season for driving beyond the pavement, but they’re still relatively quiet for day-to-day use and won’t hit your mpg too hard. Some off-road-oriented vehicles or trim levels (for example, the Jeep Wrangler Rubicon) come standard with A/T tires; for others, it’s an optional upgrade. If your vehicle is used for a mixture of on-road and off-road purposes, or if you simply don’t plan to do a lot of hard-core mud-bogging and rock-crawling, an A/T tire will serve you well. Keep in mind that this category covers a wide range of designs. Some will be only a tiny bit more aggressive than an all-season, while others will be very close to an M/T (these are sometimes called Rugged Terrain or R/T tires).

A toyota 4runner parked in a driveway. Above: With stock wheels, tires, and suspension, the 4Runner looked a little like it had been skipping leg day. And on the trails, it frequently bottomed out and struggled to maintain traction over bigger obstacles.

New Shoes for the 4Runner

Despite the fact that my 2022 4Runner has the TRD Off-Road Premium package, it came with a set of Dunlop AT20 all-season tires. Frankly, these are terrible, even within the all-season category — in Tire Rack’s ranking of 57 all-seasons from best to worst, the AT20 took 54th place with an overall rating of “poor.” Toyota offers an optional upgrade to A/T tires, but it’s much more cost-effective to swap tires on your own after leaving the dealership. You’ll also be able to shop around and find the exact tire that fits your needs, and you’ll be able to consider different tire sizes as well.

A piece of suspension being installed on an overland 4runner.

Above: Once the truck was up on the lift at SL3 Customs and the wheels were removed, the first order of business was to remove the original rear springs, shocks, and bump stops.

Speaking of which, many trucks can accommodate tires at least one size bigger than the originals without any modifications, or two to three sizes bigger with a mild suspension lift. Larger tires provide increased ground clearance and more cushioning against potholes, rocks, and other obstacles. My 4Runner came with 265/70R17 tires, and after reading about tire fitment on the forums, I decided to go up to a 285/70R17 (two sizes larger). This would require a slight lift and some other modifications I’ll discuss later.

A piece of suspension being installed on a toyota 4runner.

Above: The +200-pound springs, load-leveling collars, and bump stops were installed above the rear axle. Bump stop positioning was checked to ensure they were in the right spot to make contact with the axle at full compression.

My tire of choice was the Nitto Recon Grappler. It features a relatively aggressive tread pattern for an A/T tire, but it’s not quite as deep and blocky as a full-blown M/T — in my opinion, that’s the sweet spot for an overland vehicle. Unlike a rock-crawler or dedicated trail rig, an overland truck still has to be capable of driving hundreds if not thousands of miles on the highway before heading out on the trails, and many of them (including mine) are also driven around town every day. The Recon Grappler offers a nice compromise between off-road capability and on-road manners, and it even comes with a 55,000-mile treadwear warranty.

A piece of suspension installed on an overland 4runner.

Above: Both collars were measured and set to roughly 1 inch of lift. Later, once the truck was on the ground, the included adjustment tool could be used to rotate the collars and fine-tune the rear ride height.

Since I was already swapping tires, I decided to pick up a new set of KMC Impact OL wheels at the same time. Their silver machined finish looks awesome and feels reminiscent of the early ’90s Toyota trucks I grew up around. They’re also roughly 5 pounds lighter per wheel than the 4Runner’s original wheels, which reduces the side effects of adding heavier tires. Swapping wheels allowed me to sell the original wheels and tires on Craigslist as a complete set, effectively reducing the cost of the upgrade by a few hundred dollars. The 17×8.5 KMCs are slightly wider than the stock 17×7.5 wheels. Their 0-millimeter offset also creates a slightly wider stance, but not so wide that it rubs on the body when the steering is turned to full lock.

Suspension parts being installed on a toyota 4runner.

Above: The Eibach Pro-Truck reservoir rear shocks were bolted on to complete the rear suspension. These are an optional upgrade over the shocks that come with the standard Pro-Truck kit.

Suspension Upgrades

The fifth-generation 4Runner has been around since 2010 with minimal changes, and more than 1.3 million of these SUVs have been sold in the United States since then. This means that just about every possible modification has already been tried and documented on the internet. A bit of quick research told me that in order to clear my chosen wheels and tires without any rubbing, I’d need to lift the front end about 2.5 inches, remove the front mudflaps, slightly trim the bottom edges of the front bumper, and possibly cut a small portion of metal out of the body mount (known as a “body mount chop” or “BMC”).

Close up photo of the suspension of a toyota 4runner.

Above: Remote reservoirs — the smaller cylinders attached to the shock body — contain more shock oil. During prolonged high-speed driving over rough roads, the oil inside shocks heats up, leading to lack of dampening performance and a bumpy ride, but more oil reduces this effect. It also offers slightly longer suspension travel and reduces wear, leading to longer shock lifespan.

That might sound imposing if you’re not mechanically inclined, but it’s the type of work custom truck shops do all day long. So, I headed to one such local shop, SL3 Customs, in Queen Creek, Arizona. Scott, the owner, said he’s done this work to many 4Runners, so I knew he could handle the labor much better than I could in my own garage.

A piece of suspension being installed on an overland 4runner.

Above: Moving on to the front suspension, Scott unbolted the swaybar end links and removed the old coilover shocks and upper control arms. A ratchet strap was used to hold the hub up temporarily.

For parts, I turned to one of the biggest names in the suspension business, Eibach. I started with their Pro-Truck Lift Stage 2R system, which includes adjustable front coilover shocks and reservoir rear shocks. I added Eibach’s optional Load-Leveling System, which comes with rear springs, bump stops, and height adjustment collars. This combination offers height adjustments on all four corners of the truck, with 2 to 4 inches of lift in front and 0.5 to 2 inches of lift in the rear. This adjustability ensured I got an even ride height and the exact amount of lift I needed to clear the tires.

A mechanic working on the suspension of a toyota 4runner.

Above: Eibach’s Pro-Truck 2.0 coilovers feature anodized billet aluminum mounts, a monotube design with 46mm piston, and nitrogen-filled variable-force valving. They’re engineered, individually dyno tested, and manufactured in the USA. Scott set the adjustment collars to about 2.5 inches of lift.

The Load-Leveling system also offers three different spring choices — 0, +200 pounds, and +400 pounds — to support truck builds that are carrying added weight over the rear axle. On road trips, my 4Runner usually has a Dometic fridge full of food, a Goal Zero battery, 5 gallons of water, and a bunch of other gear in the back, so I selected the +200-pound spring option. Lastly, I added a set of Eibach Pro-Alignment upper control arms with factory-style sealed ball joints. These made it easier to get the camber and caster alignment settings dialed in to appropriate specs after the lift was installed.

Two hands installing a suspension part on an overland 4runner.

Above: The new Pro-Alignment upper control arms weren’t strictly necessary with the amount of lift we were going for, but they’ll make getting the correct alignment specs much easier. After attaching the ball joint to the spindle, don’t forget to pass a cotter pin through the upper hole and bend it to secure the castle nut in place. You don’t want it falling off on the trail!

On the Road Again

I’m a firm believer that good tires might be the single best modification for any vehicle, but strong, lightweight wheels and a properly tuned suspension system aren’t far behind. These three modifications completely transformed the 4Runner, both visually and in terms of on-road and off-road performance. I no longer have to worry constantly about losing traction on rutted or muddy trails, or about puncturing a sidewall on sharp rocks in the desert (but as always, it’s wise to air the tires down to reduce the risk further).

Fully installed suspension on a toyota 4runner.

Mechanic installing a tire back onto a toyota 4runner.

Above: After re-attaching the swaybar and making sure everything was reasonably tight, Scott could finally put the wheels and tires back on. All hardware was tightened fully with a torque wrench once the truck was on the ground and the suspension was under load.

On the highway, the Recon Grapplers are very comfortable and relatively quiet — certainly nowhere near the obnoxious hum of an aggressive mud terrain. Fuel economy took a hit, as will always be the case with a lift and larger tires, but it averaged out to only about 2 to 3 mpg. I consider this a small price to pay for the increase in capabilities, and even in stock form, it was never going to sip fuel like a Prius.

Overland 4runner raised on a lift while a mechanic works on the rear of the vehicle.

Above: I made sure to get a full set of five wheels and tires so that I’ll have a matching full-size spare if I ever need it. The forums were helpful yet again, since they informed me that a 285 tire will still fit in the original location under the rear end.

I anticipated that I might need to have the body mounts cut to prevent rubbing against the tires, but Scott at SL3 Customs convinced me to wait and see after the alignment. I’m glad he did, because it turns out that the tires don’t rub at all, especially after the alignment shop was able to dial in 4 degrees of caster using the added adjustability of the Eibach upper control arms. This changes the angle of the wheels very slightly and gives a little more breathing room at full steering lock.

Mechanic taping off the trim of an overland 4runner.

Above: After a quick test drive, Scott noticed that the front tires were making contact with the lower edges of the bumper at full steering lock. He taped off the area that needed trimming and used an angle grinder and sander to carefully remove the excess material.

As for the suspension, the 4Runner rides much smoother, feels more planted, and doesn’t nosedive as much under heavy braking. With the stiffer rear springs, it also doesn’t sag once I’ve loaded a bunch of gear into the cargo area. I’m glad I went with a 4-wheel-adjustable setup, since it allowed me to even out the ride height front-to-back and side-to-side. The driver-side rear corner of the fifth-gen 4Runner tends to sag a little due to the fuel tank placement, and this was easily corrected.

I’m really happy with the current state of the 4Runner, and it has served me well on many road trips and trail excursions throughout the last year. In the next part of the build series, I’ll discuss the items I’ve added to the Westcott Designs roof rack, some of which are already visible in these photos. Stay tuned for more!

Sources

Read More

Subscribe to Recoil Offgrid's free newsletter for more content like this.

Editor's Note: This article has been modified from its original print version for the web.


Rimfire Pocket Pistols

Rimfires have always played a crucial role in preparing for disasters. The ammunition and even the guns themselves are lighter than their centerfire counterparts. They are accurate, have virtually no recoil impulse, and excel at pest control or taking small game such as squirrel and even grouse. Most intelligent shooters understand this and own rimfire rifles and target pistols for these reasons. But what about a pocket pistol? Not too long ago, if you asked a self-defense instructor what their favorite rimfire pocket gun might be, you would hear a derisive laugh followed by, “I’d rather have a knife.” However, times change and materials improve, as do manufacturing methods and ammunition. Compared to a centerfire handgun, a rimfire pocket pistol’s range might be decreased, and applications might be more specific, but these tiny rimfires can fill a role for anyone’s loadout. If you’re walking in the woods and step near a rattlesnake, must check a trap line, or even come across a critically injured large animal that needs to be put down, a pocket .22 can be ideal for those needs.

In the past, most of these pistols — like the Jennings J-22 or cheap imports prior to 1968 — were made of dubious materials that would not hold up over the long term without constant maintenance. Rimfire ammunition tends to be dirty, which impacts its performance and reliability. In the case of .22 LR, reliability was often a concern with cheaper brands of ammunition. Yet, due to improvements in ammunition and bullet design paired with the fact that rimfire pistols are currently made to be more reliable than the ghosts of .22 pistols past, they can also play a role in self-defense as a backup gun or even an option for the recoil sensitive.

This is possible due to a few new flavors of rimfire ammunition that have come on the market in recent years such as Federal Punch (.22 LR and .22 WMR), Winchester Silvertip (.22 LR) and Hornady Critical Defense (.22 WMR). These rounds are optimized for firearms with short barrels and their penetration and expansion (for the latter two brands) looks pretty impressive so far. Accuracy with these little pistols will vary from shooter to shooter, but most should be able to achieve a 3- to 4-inch group out to 10 yards, apart from the LCP II which is good out to 25 yards or possibly further.

It seems safe to say that rimfire pocket pistols have finally arrived as a reliable, capable, and concealable option. Just make sure they’re not all you have on you if you venture into grizzly bear or mountain lion country.

Bond Arms: Honey B

Studio photo of the Bond Arms Honey B.

Bond Arms is an innovative manufacturer of firearms based in Texas. Although mostly known for their improved versions of the classic Derringer, Bond makes semi-auto pistols and is debuting a radical new lever gun sometime this year (we hope). Having personally viewed some prototypes from Gordon Bond’s “skunkworks,” I can attest to the brilliant minds behind their firearms. The Honey B is an entry-level Bond Derringer with a matte bead-blasted frame as opposed to a shiny finish. A full-size grip frame and a decent front sight make it easy to hold and shoot. Interchangeable sets of barrels chambered in .22 LR, .380 ACP, .38 Special, and 9mm can be ordered as well.

  • Caliber: .22 WMR
  • Barrel Length: 3 inches
  • Dimensions: 5.5 by 4.2 inches
  • Weight: 17.5 ounces
  • Capacity: 2 rounds
  • Price: $320
  • URL: bondarms.com

Studio photo of the Bond Arms Honey B.

Pros:

  • Very comfortable with the checkered grips made of B6 resin
  • Slim enough to stow in the back pocket
  • Impressive safety features

Cons:

  • Capacity limits you to two rounds
  • Reloading can be slow until you build up a manual of arms
  • Single-action, requiring the shooter to manually cock the hammer for each shot

North American Arms: Ranger II

Studio photo of the Ranger.

North American Arms built its reputation by manufacturing tiny five-shot single-action rimfire revolvers. Common complaints were that they were slow to reload, slow to eject spent casings, and hard to get a good grip on. They addressed the grip issue early on by offering larger grips, but for the most part, loading, unloading, or ejecting empty cases meant completely removing the cylinder from the gun. The company’s answer was to release a top-break model that could be loaded or unloaded by moving a latch on the top of the frame. The Ranger II completely transformed this design by going back 150 years in time. An optional .22 LR cylinder is available.

  • Caliber: .22 WMR/22 LR
  • Barrel Length: 1.6 inches
  • Dimensions: 5.2 by 2.8 inches
  • Weight: 6.9 ounces
  • Capacity: 5 rounds
  • Price: $574
  • URL: northamericanarms.com

Studio photo of the Ranger in the open position.

Pros:

  • Thumbing open the latch allows the shooter to load or empty the gun instantly, as opposed to removing the cylinder
  • Aftermarket Boot Grips offer a better hold without compromising concealability
  • Stylish appearance more reminiscent of a fine watch or custom knife

Cons:

  • Brass bead front sight isn’t very effective beyond 10 yards. A blade type or tritium dot would be more effective.
  • The factory grip is a little too small if you have XL sized hands
  • Single-action, requiring the shooter to manually cock the hammer for each shot

Standard Manufacturing: Switch Gun

Studio photo of the Switch Gun.

Standard Manufacturing is the manufacturing arm of Connecticut Shotgun, a purveyor of fine sporting shotguns. In addition to craftsmen renowned for engraving and metal finishing, they have a staff of engineers who bring to life one-of-a-kind firearms from classic single-action six-guns and 1911s to unique concepts geared toward personal protection. Such is the Switch Gun, a compact five-shot single-action rimfire revolver that folds into its own grip and deploys with the press of a button into firing mode like an automatic knife. This model is .22 WMR, but a .22 LR version and a conversion cylinder are available.

  • Caliber: .22 WMR
  • Barrel Length: 0.75 inch
  • Dimensions: 2.1 by 2.8 inches (folded)
  • Weight: 9 ounces
  • Capacity: 5 rounds
  • Price: $459
  • URL: stdgun.com

Studio photo of the Switch Gun in the closed position.

Pros:

  • Compact, reliable, and easily stowed safely in a pocket, pouch, or sheath
  • The revolver is extremely safe to carry in a compact fashion that protects the trigger from an accidental discharge.
  • Unique gadget factor of deploying the barrel by pressing a button

Cons:

  • Trigger is on the small side and can easily be missed unless you devote time to practice.
  • Likewise, the guttersnipe sights will take some training to get used to.
  • Single-action, requiring the shooter to manually cock the hammer for each shot

Rugler: LCP II

Studio photo of the LCP II.

Ruger ventured into bold new territory over a decade ago when they released their LCP pistol in .380 ACP. It was the company’s first true concealed carry pistol. Different variants have been offered but the one we’re looking at here is the LCP II chambered in .22 LR, which holds 10+1 rounds of ammunition. Recoil is mild and accuracy may be the best of all the others in this review. An aftermarket threaded barrel is available for suppressed shooting. Stainless and polymer construction allow for ease of maintenance on this blowback-operated pistol. It ships with a branded nylon pocket holster.

  • Caliber: .22 LR
  • Barrel Length: 2.75 inches
  • Dimensions: 5.2 by 4 inches
  • Weight: 11.2 ounces
  • Capacity: 10+1 rounds
  • Price: $439
  • URL: ruger.com

Studio photo of the LCP II holstered.

Pros:

  • Reliable, easy to shoot, and somewhat accurate. It is definitely not a target grade pistol, but that’s not its intent.
  • Very light and concealable with the included pocket holster
  • A magazine capacity of 10 rounds on what is still a slimline grip makes for a perfect pocket plinker.

Cons:

  • Has a magazine disconnect safety. I truly hate these but can see their application for some shooters.
  • Trigger takes a bit of getting used to — it’s not great, but usable.

Trailblazer Firearms: Lifecard .22 WMR

Studio photo of the Lifecard.

Trailblazer Firearms is another company that makes unique firearms that can be folded and stored safely in a compact mode, ready to unfold in seconds. Resembling a camera battery when folded, the Life Card can be stored in a pocket, pouch, or an empty Altoids tin until needed. By manipulating a few levers, the Life Card can be deployed in a matter of seconds. It is available in .22 WMR and .22 LR. There is even a threaded barrel version intended for use with a silencer. Even though it is a single-shot and requires manual cocking of the striker, there is an onboard compartment allowing for the storage of three extra rounds of ammunition.

  • Caliber: .22 WMR
  • Barrel Length: 2.5 inches
  • Dimensions: 3.4 by 2.1 (folded)
  • Weight: 7 ounces
  • Capacity: 1 round
  • Price: $389
  • URL: trailblazerfirearms.com

Studio photo of the Lifecard.

Pros:

  • Conceals well, to the point it does not even resemble a firearm when folded
  • Trigger is not bad — it’s no Thompson Center but a decent single-action, single-shot type.
  • Has a Spy vs. Spy type of vibe and is a masterpiece from a concept point of view

Cons:

  • Sights are a guttersnipe type, not the best but better than nothing.
  • Although the grip is a good size, it has poor ergonomics.
  • Single shot, so you’ll spend more time loading and unloading than shooting

Mosberg: Brownie

Studio photo of the Brownie.

This one hasn’t been made in over 90 years, but it was almost perfect for its time. This was Mossberg’s first effort at a handgun over 100 years ago. About 30,000 were produced. It is essentially a four-shot .22 LR Derringer with an internal hammer and rotating firing pin. There are no external moving parts, meaning it can be fired from inside a pocket without worry of a malfunction. There are no ejectors or extractors, so empty cases (or unfired live ammo) need to be poked out with a cleaning rod. They originally included a piece of spring steel in the grip panel to accomplish this, but they’re as rare as hen’s teeth.

  • Caliber: .22 LR
  • Barrel Length: 2.5 inches
  • Dimensions: 4.1 by 4 inches
  • Weight: 10 ounces
  • Capacity: 4 rounds
  • Price: $5 in 1930, current value $200 to $500
  • URL: mossberg.com

Studio photo of the Brownie open.

Pros:

  • Lightweight and conceals well
  • No external moving parts and a rugged design keeps these chugging along for over a century
  • Has a retro if not kitschy vibe to it

Cons:

  • Sights are crude and don’t exactly correspond to the four barrels.
  • Metallurgy in old firearms wasn’t up to snuff by modern standards, so avoid using high-velocity ammunition.
  • Spare parts can be difficult or pricey to come by.

Read More

Subscribe to Recoil Offgrid's free newsletter for more content like this.

Editor's Note: This article has been modified from its original print version for the web.


Dynamic Shooting Skills with Safariland & Full Spectrum Warrior

Shoot, move, communicate — these three skills are critical to your success in any gunfight. Unfortunately, many modern firearms training programs only address shooting, encouraging students to build technical proficiency by standing on a flat range and punching holes in paper targets, month after month and year after year. Retired U.S. Navy SEAL Rich Graham set out to build a more well-rounded and realistic curriculum through his training company Full Spectrum Warrior. Rather than only three skills, the FSW program is based on twelve pillars which include health (diet, physical, and mental), movement and strength, communication and teamwork, situational awareness, work ethic and attitude, integrity, and of course, being dangerous enough to “be a victor, not a victim.” Recently, Safariland invited me to attend an intense two-day training event at the Full Spectrum Warrior ranch in central Florida. Read on for some lessons learned from this experience.

Arriving at Deep Woods Ranch

After flying into Orlando and driving about an hour north, I arrived at Deep Woods Ranch, a piece of private land owned and operated by Full Spectrum Warrior. The name is certainly fitting, since it's surrounded by the Ocala National Forest and features a mixture of sandy terrain, dense forest, and open swampland. Graham has put in years of work to transform it into his ideal training playground, complete with dozens of steel targets, an obstacle course, various decommissioned military and police vehicles, a driving course, multiple climbing walls, conex boxes, elevated shooting platforms, and a CQB shoot house. Naturally, when Safariland wanted to gather some media personnel to try its latest holsters and gear, this was the perfect place to do it.

Each attendee loaded up with a loaner Walther PDP handgun, which was equipped with a direct-mount red dot from C&H Precision and a prototype of the new PL350C weaponlight from Modlite. For close-range drills, we used frangible 9mm from Federal; the rest of the time we shot Remington Range ammo.

We were also outfitted with Safariland Liberator HP 2.0 ear protection, a Bianchi nylon web belt, a Bianchi double mag pouch, and a light-bearing Safariland 6000-series holster with Level I retention. Speaking of which…

A Note About Retention Levels

Photo by Willie Simmons

Safariland says that one of the most common questions they receive from new holster buyers is “What's the difference between retention levels 1, 2, and 3?” Let's take a moment to clear that up.

A standard molded Kydex holster, such as those often used for competition and concealed carry, is not considered an active retention holster — friction is the only thing holding the gun in place. To enhance security, levels of active retention are added so that the weapon requires more deliberate actions before it detaches from the holster. Per Safariland's definition, each level of active retention requires an additional hand movement before the user can remove the weapon.

Above: During his time as a sniper with SEAL Team 10, Graham learned that being a true warrior is about much more than shooting or simple combatives. This led to the development of Full Spectrum Warrior and its multi-disciplinary training program.

  • Level I is the Safariland ALS system, a thumb lever which must be pressed forward as the gun is drawn. The 6354RDSO holsters we used at this event were set up with ALS only (Level I).
  • Level II adds a secondary guard that must be disabled with two movements. For Safariland, this will be either the SLS strap alone or an ALS system with the optional ALS Guard add-on.
  • Level III requires three manual hand movements to release the weapon. Safariland's popular ALS/SLS duty holsters are a good example of this level.

Obviously, each of these levels is a compromise between speed and security. A Level I holster makes it easier for the user to draw the weapon quickly, but also creates less barriers for a bad guy who might want to fight you for that weapon. Whether you're a prepared citizen, competition shooter, cop, or member of the military, you should keep this delicate balance in mind as you choose a holster.

Hand-to-Hand Skills

Our first training exercise involved learning to defend against something anyone who open-carries a firearm should prepare for: a bad guy attempting to take your gun.

Thankfully, working with an active retention holster makes this task much less daunting. I was paired up face-to-face with a partner who was tasked with deactivating the Safariland ALS Level I retention on my holster. This is not an easy task, especially with the included ALS Hood Guard blocking access to the ALS release lever. Once I realized that the “bad guy” wasn't going to be able to snatch my gun quickly, I developed enough confidence to focus on defending and counter-attacking rather than protecting the gun.

Photo by Willie Simmons

While old-school law enforcement training taught officers to pin the gun into the holster in the event of a hands-on fight, Graham encouraged us not to do this with our Safariland ALS holsters. Instead, I learned to use one forearm to deflect the hand that's reaching for the gun, and the other forearm to redirect the bad guy's head. As soon as my opponent couldn't see me, it opened the door to move away or strike other weak points.

It's also wise to use footwork to make the holster harder for an opponent to access. Rather than turning my dominant side towards my opponent, I rotated that side of my body away from the attacker to put the gun further out of reach as I defended myself. Above all, I made sure not to let my partner get behind me, as this would make it relatively easy for him to take my gun out of the holster, given that he knows how to operate its retention system. This may sound obvious, but it's something you might not do in the heat of the moment unless you've practiced it.

Next, I learned what to do if my gun is already out of the holster when a physical fight takes place. A circular “hack” strike with the muzzle of the gun, similar to the motion of repeated overhand stabs with an icepick, can be used to disorient an assailant long enough to take a few steps back and shoot. I practiced this on a padded stick swung slowly towards me by my partner, using my peripheral vision as a cue to react.

The absolute worst-case scenario is when an opponent manages to get his hands on your gun while it's drawn. With good situational awareness and spatial management, this shouldn't happen, but Murphy's Law still applies. In one simultaneous movement, strike the opponent's forearms with your support hand forearm and violently pull the pistol back towards your body — this should be enough to break his grip. As a bonus, the front sight and slide serrations will cut into his hand if he attempts to hold on tight. I practiced each of these movements with a Umarex blue gun PDP replica, and learned how hard it can be to wrestle for control of a weapon.

Movement & Muzzle Discipline

Photo by Willie Simmons

“Always keep the muzzle pointed in a safe direction.” This is a safety rule we've all heard, but what constitutes “a safe direction” in a real-world setting like a crowded mall or multi-story office building with people above, below, and all around you? That's a lot more complicated. You may need to keep the gun pointed up, down, in a very specific direction, or switch seamlessly between these positions. It's not like a flat range, where you know you can always keep the gun aimed into the berm.

To practice these skills, I was given a Umarex paintball training pistol and instructed to shoot targets while walking through a crowd of other students milling around at random. Some walked slowly, while others ran or even bumped into me. Whenever someone approached my line of fire, I immediately diverted the gun to a safe direction. During this exercise, Graham occasionally shouted “Behind you!” to prompt a quick 180-degree turn and engagement of another target, all while maintaining continuous muzzle discipline.

This visually and mentally challenging exercise is one of the best ways I've seen an instructor teach muzzle awareness in a realistic setting.

CQB Techniques

The Full Spectrum Warrior facility has a plywood shoot house with a variety of rooms, corridors, and intersections, and we made good use of it to learn two-man close quarters battle (CQB) skills. Anyone who's worked on CQB knows this is a skill set that can't be mastered in a few short hours, so we worked on the most fundamental aspects. Students practiced leaning or hinging around corners to methodically “take bites” of the room while minimizing their own exposure, and learned the basic steps of entering closed rooms.

In general, for an inward-opening doorway…

  1. The #1 man (a.k.a. point man) approaches the door from the hinge side, staying close to the wall.
  2. The #2 man approaches from the opposite side, and waits for a “ready” nod from the #1 man to open the door.
  3. #1 man keeps his muzzle up at the ready while #2 man quickly pushes open the door.
  4. As the door swings out of the way, #1 man moves in, staying close to the inside wall and rapidly scanning the perimeter of the room.
  5. #2 man enters immediately behind him, moving the opposite direction along the inside wall and scanning the other half of the room's perimeter.

Once inside a room, students looked for — in order of priority — armed subjects, unarmed subjects, dead space (e.g. a couch or counter that creates a visual obstruction), open doors, and closed doors. To confirm successful clearance of a room, we communicated “clear left,” “clear right,” and eventually “all clear.” Each pair of students had the opportunity to work through the shoot house with Unit Solutions paintball carbines as well as the Walther-PDP-style Umarex pistols in our Safariland holsters.

Low-Light Shooting

At the end of the first day of training, students stayed after sunset to practice shooting with white light. I worked around VTAC barricades to shoot over, under, and through their various openings. The Modlite PL350C on my PDP cut through the darkness and gave me a clear view of the steel plates downrange.

Vehicle Combatives

Here's another skill set many of us haven't had an opportunity to practice. The FSW facility allowed me to get in some reps shooting out of and around vehicles, and also to practice evasive maneuvers while driving between shooting positions. Students worked in driver/passenger pairs, learning how to shoot through a side window or windshield. The latter tends to deflect outgoing rounds upwards due to its steep angle and laminated layers, but Graham also noted that this isn't a guarantee — he says “bullets do crazy shit” sometimes after passing through objects.

Above: Most instructors yell “up” or “threat” to start a drill. Rich Graham started our drills by tossing a Pamax Tactical L.I.O.N. — an extremely loud diversionary device that some might compare to a flashbang grenade — into the back of our cruiser. That's one heck of a wake-up call.

However, Graham explained that shooting out of your vehicle should be a last resort, because…

  1. If you can drive away from the danger, drive!
  2.  If you can't drive away, get out and move to cover!
  3. If you can't get out, only engage the threat for as long as it takes to buy enough time to do one of the above.

To escape a vehicle, I practiced unbuckling the seatbelt with my support hand and holding the door open by planting my outside foot near the hinge. Once a gun is drawn, the dominant hand's job is good muzzle discipline; don't use it for leverage against the steering wheel as you climb out of the seat. As I bailed out, I stayed as low as possible and kept my gun pointed in a safe direction (in this case, up).

Once you're outside a vehicle, Graham recommends backing away from it at least 1-2 steps, since this provides more field of view and more room for incoming rounds to deflect as they pass through the sheetmetal or glass. Remember that vehicles don't provide much hard cover — the engine block is the only part that's likely to completely stop incoming rounds reliably — so you should take cover elsewhere if there's a better alternative nearby.

For our final vehicle-based exercise, we paired up in squad cars and drove rapidly through an obstacle course that involved slaloms, reversing, shooting targets out the side windows, and eventually bailing out to cover each other as we retreated to safety. This ties in with the “tactical triad” mentioned in the introduction: shoot, move, communicate. Each partner had to shoot targets, be aware of the other's movements, and communicate to maintain safety and provide continuous covering fire. For example, after I got into position outside the vehicle, my partner yelled “moving” and waited to hear my approving “move” command (or a disapproving “hold” command) before moving. Once he reached his next position, he shouted “set” to let me know he'd be able to cover me if I needed to move or reload.

The Obstacle Course

Speaking of movement, Rich Graham places a clear emphasis on physical strength and agility with his Full Spectrum Warrior curriculum, and it's not hard to see why. The ability to move quickly without exhaustion or injury is essential in a combat environment, as well as in the contexts of law enforcement and civilian self defense. During the course, students tested ourselves by leaping over walls, crawling under barriers, sliding through pipes, and climbing up and down various platforms.

Shooting stations were present between each obstacle, and it became increasingly tough to get good hits as my heart rate elevated from the exertion. Elements such as monkey bars and gymnast-style parallel bars tested my upper body and grip strength, and I had to climb on top of a conex box to reach one of the shooting stations.

If your idea of strenuous physical activity is jogging between two positions at the range, you may be in for a rude awakening in a real-world gunfight. Pushing myself through the FSW obstacle course was difficult and humbling, but it left me excited to work harder on these important aspects of dynamic shooting in the future.

A Full Spectrum of Skills

After two days of intense training with Rich Graham and his FSW instructor cadre, the holsters and gear provided by Safariland held up to all the training with ease — not once did a student's pistol go flying out of a holster, even while grappling, climbing over walls, clambering out of a vehicle, or somersaulting out of the drainage pipe on the obstacle course. The Walther PDP ran flawlessly with both the Federal frangible ammo and Remington ball ammo, and its C&H red dot kept shining brightly through the Florida sun. Most importantly, I walked away tired and bruised but satisfied in a way that few training experiences can provide. I could have happily spent several days drilling down into any one of the topics Graham covered, so I can't wait to return to Deep Woods Ranch for another course in the future.

SOURCES


Engineered Unrest: The DIY Occupation Guide

To say we live in tumultuous times is an understatement. War rages across eastern Europe, the Middle East, and Africa. Several major economies teeter on the brink of collapse. And here in the U.S., division between Americans is running rampant. In recent months, over 50 college campuses and dozens of cities across the U.S. have seen pro-Palestinian protests, many of which have escalated to violence as participants clashed with counter-protestors and law enforcement. The sudden spread of these protests has led politicians and pundits to claim that third-party agitators are co-opting the movement and using it to deliberately fan the flames of unrest in an election year. Lending validity to these concerns, there is a guide circulating the web which instructs these groups how to further exploit these feelings: the Do-It-Yourself Occupation Guide.

(Lead photo via Flickr – C64-92)

The graphics on the front of the DIY Occupation Guide, featuring a crowbar.

Above: On the cover of the DIY Occupation Guide, imagery of a crowbar indicates the underlying intent of the Guide.

This guide suggests tactics, techniques, and procedures for anyone who is upset with their quality of life and who may be looking for a cause to join. If that scenario sounds familiar, it’s because almost every attempt at a social movement purports to stem from one’s discontent at the way things are. Although these efforts often originate from real and serious issues and are perpetrated in the name of “justice” or “equality,” certain actors with a darker and more violent agenda creep in to take advantage of the situation. As Saul Alinsky, famous activist and author of “Rules for Radicals” once wrote, “An organizer must stir up dissatisfaction and discontent; provide a channel into which the people can angrily pour their frustrations.” The DIY Occupation Guide is a testament to this fact, and it brings to light much deeper problems our society faces.

Photo of a group claiming to be Democratic Socialists of America carrying their banner in a protest march.

Above: Protests become a convenient way for organizations to get media coverage. (Photo via Flickr – David Shankbone)

It's not a long read, and the order of the pages is a bit odd, but this guide briefly covers several topics — organizing the illegal occupation of a building, how to defend an illegally occupied space, and what to do when it comes to an end. The author assumes that if you are reading the DIY Occupation Guide, you are upset with society and can think of no other constructive way to solve problems besides becoming a professional agitator. Techniques discussed in the Guide are all about exploiting vulnerabilities, gaining access to buildings, targeting weaknesses in police tactics, and more importantly, manipulating the vulnerable minds of other people who perceive themselves as suffering in order to expand the movement.

The guide concludes with a clear statement of purpose:

“The occupation must spread to survive. What would happen if we could take over the whole city, living without the imposition of the state or capitalism?”

Unraveling the DIY Occupation Guide

Knowing that the DIY Occupation Guide exists, let’s take a closer look at what it recommends as a course of action, and how you can make sure that these tactics aren’t used against you.

Instructions on how to build a shield out of a 55 gallon trash can.

Above: Commonly seen in media coverage of protests, readers of the Guide are given instruction on how to build makeshift shields out of commonly found public items.

Originally birthed in the wake of the 2011 Occupy Wall Street movements, the Guide is a comprehensive playbook for organizing sit-ins and occupations. It covers a range of tactics from simple sit-downs to elaborate takeovers of abandoned buildings, specifically citing lessons learned from J28 Occupy Oakland, where organized anarchists targeted the Henry J. Kaiser Convention Center as the building they would take over. The guide has since been updated for 2024 to reflect lessons from past movements, such as Seattle’s Capitol Hill Autonomous Zone (CHAZ), and can serve as a tool for both activists and those looking to safeguard themselves from said activists.

A list of suggesting reading for anarchist behavior.

Above: The Guide includes a recommended reading list to help give illegal activities a boost. According the Handbook of Terrorist Prevention and Preparedness, this type of thing falls right in line with the way terrorist organizations groom potential recruits.

It starts off by appealing to the reader’s need to feel understood. Has it ever crossed your mind that planet Earth was a confusing, crazy, and scary place to live in from time to time? This is a universal symptom of the human condition as we struggle to make our way in the world. Unfortunately, this guide takes advantage of those who haven’t found healthy ways to cope with this chaos by encouraging organized civil unrest, trespassing, and vandalism as an outlet for existential dread. It explains that its purpose is not to address any single issue, but rather to help readers reshape society on a larger scale:

“We can no longer simply protest to demonstrate our rage; decades of activism have come to the point of an impasse. To fight for single issues without addressing the state and capitalism in its entirety will not be able to make the transformations we wish to see possible. Politics turns our lived experiences into useless abstractions and uses those abstractions to fuel meaningless ideological battles. It is time to bow out of the theater of politics.”

Ironically, it attempts to defy traditional societal structures by explaining how to organize and build a new society based loosely around common corporate or military structures.

Pro Palestine protesters stand on a rocky outcrop with the Palestine flag.

Above: Protests, regardless of the cause, are a way for people to experience a social bond and unite behind a singular purpose. Because of this, they are often used by behind-the-scenes individuals to foment discord among a population. (Photo via Flickr – Alisdare Hickson)

DIY Occupation Guide Tactics

Organization starts by establishing a group of likeminded individuals and separating them into committees:

  • Entry/Tactical Committee: Charged with deciding which building to occupy and coordinating defenses.
  • Building Committee: Is tasked with decorating, defending, and maintaining the building once it’s been occupied.
  • Logistics Committee: Oversees the procurement and distribution of supplies, such as furniture and food.
  • Festival Committee: These are the people in charge of making an illegal occupation seem like a legitimate event by scheduling guest speakers, performers, or hosting panels.
  • Media: Manages all the publicity for the event, creates an online presence, comes up with statements and coordinates outreach.

Instructions on how to pack a protest go-bag.

Above: Within the guide are numerous tips, like this one instructing participants to bring their own protest themed go-bag.

The DIY guide then turns from event management to guerilla military tactics by outlining how to seize a piece of property illegally and maintain it.

  • Reconnaissance: Identifying potential targets by looking for signs that a building is unoccupied. This involves locating alarm systems, possible points of entry, and even gaining access to public tax records. Posting members of the Tactical Committee on high vantage points is also recommended to observe the movements of authorities and control crowd movements.
  • Entry: Utilizing soft methods like unlocked windows and doors to gain access to the building, to hard methods like angle grinders, bolt cutters, and crowbars to forcibly make your way in.
  • Defense: Accumulating a well-defended crowd prevents the authorities from taking the occupied building back, and the DIY Guide shows how to construct makeshift shields out of corrugated metal panels and 55-gallon garbage pails.
  • Barricades: Once the building has been taken, the guide shows how to use simple items like C-clamps and ratchet straps to prevent the doors from being opened from the outside. The guide also outlines the “Zone of Defense,” breaking the building’s defense into three distinct sections. The First Zone is the people occupying the building. The Second zone is the crowd immediately around the building and includes people who want to participate in a non-violent capacity. The Third Zone are people in the streets physically fighting the cops and diverting attention away from the occupied building.
  • Support: Those involved are encouraged to have a lawyer lined up before the event, and to have that lawyer’s number written somewhere on their body in case their phone gets confiscated. In another ironic twist, the Guide recommends knowing legal rights and recommends reading “Beat the Heat” by Katya Komisaruk. It is strongly recommended that people with medical training, like RNs and EMTs participate and be on hand in case of emergencies.
  • Propaganda: Preparing statements, managing websites, and promoting the event on social media are ways to affect public support and possibly attract more supporters to the area.

If it seems odd to you that a publication would encourage disruption of a system that works when everyone gets along by developing something that mirrors a terrorist insurgency, you’re not alone. Terrorist attacks are planned and orchestrated as communication tools to spread fear among a population and convey a message through violence. By following a typical terrorist recruitment cycle — attack, seek media coverage, create propaganda, recruit new members, repeat — the Guide invariably exploits human nature by attempting to perpetuate this cycle.

The Subversion of Protests

Pro Israel protesters stand across from pro Palestine protesters.

Above: Protests are the perfect opportunity for nefarious individuals and organizations to exploit gatherings for their own agendas, spreading misinformation and potentially inciting violence at an event that may have started out as a legitimate nonviolent protest(Photo via Flickr – Bruce Emmerling)

Let's make one thing clear — “the right of the people peaceably to assemble, and to petition the Government for a redress of grievances” is a form of free speech protected by the First Amendment. The Founding Fathers of our nation acknowledged the importance of this right for every American. However, it's also important to recognize that these legitimate protests are often deliberately hijacked by outsiders who wish to polarize participants and push them towards more extreme beliefs and actions, up to and including terrorism or mass murder.

According to “Anarchist/Left-Wing Violent Extremism in America: Trends in Radicalization, Recruitment, and Mobilization” a 2021 paper by the National Counterterrorism Innovation, Technology, and Education Center (NCITE):

“Today, in the United States, reciprocal radicalization at the micro-level between left-wing and right-wing extremists is apparent in street violence during protests between right-wing [Anti-Government and Anti-Authority Violent Extremist] AGAAVE and [Racially and Ethnically Motivated Violent Extremist] RMVE groups on one side and [Anarchist Violent Extremists] AVE on the other.”

Issues To Consider

Within the 16-page document, several points are made that suggest the author fancies themselves some sort of social psychology tactical guru. After paraphrasing Sun Tzu’s “know thy enemy,” the Guide highlights the obvious by recommending fellow occupiers exploit weaknesses in police formations, to stay alert for changing tactics used by authorities, and to make use of important terrain features. It also recommends utilizing the “Black Bloc” technique, which involves concealing your identity with black clothing and a face mask, a tactic made popular in the German anti-police riots of the 1980s and used extensively by modern anti-fascist, anarchist, and anarcho-communist groups.

Additionally, the DIY Occupation Guide recommends setting up alternative and emergency means of communication, packing a go-bag, and recruiting tradespeople with specialty knowledge to bolster the effectiveness of the occupation. In other words, within its pages are common self-reliance techniques with the goal of establishing a long-term occupation free of counter-disruption from authorities.

Within the DIY Occupation Guide are numerous instructions like this one, showing how to barricade a door.

Above: Within the DIY Occupation Guide are numerous instructions like this one, showing how to barricade a door.

DIY Counter-Occupation Guide

So, as a regular individual or small business owner, what can you do to stay safe? In the game of chess that is urban occupation, knowledge is your most powerful piece. Staying informed about the strategies being leveraged against you may help ensure that you're always a move ahead. Recognizing the early signs of an occupation can help community members rally together, alert local authorities, and prevent potential disruptions. Thankfully, despite the thought and planning that seems to be going into these movements, they can be easily discouraged before an occupation takes root.

  • Counter Occupation Tip 1 – Check Your Security: If a building you own is largely unoccupied, start by making sure any access point that even a small child could squeeze through is blocked and locked. Avoid placing keys near the facility, even if it’s in a lock box. Lock boxes can be broken into, the keys copied, and the whole thing replaced with an exact duplicate, with the owner none the wiser. Cheap commercial padlocks and combination locks from big-box stores can be defeated by a skilled individual in only a few seconds; professional-grade locks with anti-picking and anti-shimming features are much more secure. Utilize several layers of security in case a phone line is cut or a camera is covered, and consult a security professional for guidance if the task seems overwhelming.
  • Counter Occupation Tip 2 – Stay Alert: Suspicious activity should not be taken lightly. Be on the lookout for strangers wandering around the neighborhood or the facility. They may be scoping things out and assessing for vulnerabilities. Encourage your community to report suspicious behavior to the authorities. This includes watching for people moving in small groups, scouts on rooftops or in high-rise windows and balconies, and trusting your gut when something doesn’t feel right. Thankfully, even anarchists and terrorists want to feel like they belong to a group and will often dress in a similar way. This could be as simple as donning identical masks or other accoutrements that they can identify their counterparts with. Being able to recognize these signs will aid in your attempt to stay away from potentially violent groups, and possibly even put a stop to organized mayhem.
  • Counter Occupation Tip 3 – Stay Informed: All the major civil unrest we hear about in the news is coordinated on a semi-professional level, and you can leverage the internet to find out what is happening in your area. Start by searching activist buzzwords like “community action”, “mobilized response”, “progressive action” or “vigil for,” plus your town or region. You might be shocked by the websites that exist where people are literally planning protests and occupations. There are also groups that form on social media, and even in video game chat rooms to plan their moves. By keeping an ear to the ground and remotely monitoring for nefarious organizing nearby, you potentially have the power to disrupt the disruption by letting appropriate law enforcement know before the chaos even takes flight.
  • Counter Occupation Tip 4 – Know Your Rights: Have a discussion with your insurance and/or legal advisor to learn what the best response is to a potential occupation, or if you’re the unwitting target of civil unrest. The law is a shield, but only if you know how to wield it. Understanding local ordinances related to trespassing, public assemblies, and property rights can empower residents to effectively navigate and counter unauthorized occupations. Hosting legal workshops or inviting experts to speak at community meetings can spread this crucial knowledge, ensuring everyone knows their rights and the legal avenues available to protect their homes and neighborhoods.
  • Counter Occupation Tip 5 – Do Not Fight Fire with Fire: Don’t assume that you know what the agenda is of an occupying force. Responding with the intent to aggress the aggressor may result in vindicating the occupiers and could possibly result in physical damage or injury. In many cases, a violent response is exactly what they want — they’ll use it to create propaganda, reinforce their victim narrative, and radicalize more people. Instead, let law enforcement do their jobs and stay out of their way. Since it is stated in the guide that the point of occupation is the occupation itself, and not for a desired end goal, there is no way to negotiate or rationalize your way to a peaceful conclusion. It is crucially important to understand that illegal occupiers do not want a rational outcome, they want a target for their pent-up frustration at a world they perceive is unfair. Without the fuel of annoyance (i.e. attention) from the public, their fire will extinguish itself soon enough.

Instructions on how to break into a deadbolt lock.

Above: Think your building is safe because it has a deadbolt lock? Think again! The Guide explains how easy it is to defeat these types of locks with common tools.

Think of your community as a castle. The walls are only as strong as their weakest point. Upgrading physical security measures — stronger locks, better lighting, surveillance cameras — can fortify your defenses. But beyond the physical, there's also the communal bond. Organizing neighborhood watches or community patrols can act like the sentries on your walls, keeping an eye out for unusual activities and ensuring swift collective responses. For business owners, discuss this topic with nearby tenants and consider ways you can help each other.

The heart of countering occupation tactics lies in strengthening community ties. When people know and trust each other, they cooperate better and act more decisively in times of crisis. Initiatives like community centers, regular meetings, and social events can knit neighbors closer together, creating a fabric tough enough to withstand external pressures. Even engaging in friendly, casual discussion as you pass a fellow neighbor is a move that can have long lasting positive effects. Moreover, these connections turn neighbors into allies, making it difficult for external groups to disrupt the harmony.

Photo of a sign amongst a protesting crowd that reads

Above: The right to protest peacefully is protected by the First Amendment of the U.S. Constitution. However, with the right prodding from outside sources, these protests can quickly turn from calm to chaos. (Photo via Flickr – Harrie van Veen)

That Sad Truth About Civil Unrest

Tearing down flags, defacing buildings, demolishing statues, and disrupting traffic do little to affect the decisions of policy makers thousands of miles away. If anything, it makes the situation worse, as legislators find ways to harness the power of civil unrest into fulfilling some pre-ordained agenda that has nothing to do with the original movement. By doing some preliminary research into who is funding a cause, the desired outcome becomes a little less murky. Most of the violent and destructive protestors we see in the news would not participate if they weren’t being incentivized in some way. We all need to put food on the table somehow, and unfortunately, being paid by an outside organization to sow the seeds of civil unrest is a more convenient way to provide than finding and keeping more wholesome work.

If we are being completely honest with ourselves, especially after reading something like the DIY Occupation Guide, then a sad reality becomes apparent: these incidents are a byproduct of our society’s tendency to hate one another rather than to work together. Participants of civil unrest can be generalized into two categories, those who are looking for a sense of purpose to fill a void in their lives, and those who are either paid or ideologically motivated to exploit them. As we have become increasingly disengaged with our neighbors, we have been slowly losing a support network that we once relied on to help navigate through life’s turbulent times.

A student protester throws a tear gas canister towards riot policemen during a demonstration against the government to demand changes in the public state education system in Santiago, August 8, 2012. Chilean students have been protesting against what they say is profiteering in the state education system. REUTERS/Eliseo Fernandez (CHILE - Tags: POLITICS CIVIL UNREST EDUCATION)

Above: A protestor, making use of the Black Bloc tactic, throws a canister of tear gas back towards a police line. (Photo via Flickr – C64-92)

In a final twist of irony, the authors of the Guide acknowledge the importance of this fact in their sidebar titled “Notes on Us and Them.” It reads:

“We must be careful with ‘us versus them' logic, which oftentimes lapses into the logic of demanding something from ‘them' (those in power). While there are still social and class enemies, we must remember that our power to accomplish whatever project depends ultimately on an ‘us' and not a ‘them.'”

Instead of dumping gasoline on the flames of discontent, perhaps we can glean some insights from this guide that will help direct us towards a future where people are drawn towards a more constructive purpose.

Read More

Subscribe to Recoil Offgrid's free newsletter for more content like this.

Editor's Note: This article has been modified from its original print version for the web.


Projectile Protectors – Part II: Ballistic Helmets

In the first part of this deep dive into ballistic protection, we talked about body armor. What about protecting your dome? Let’s take a brief look back at the history of helmets to better understand their value.

The first documented use of helmets in combat was found in ancient Sumeria and Akkadian civilization, both from the region we would call Mesopotamia, circa 2300 BCE. The earliest bronze helmets are reported to have come from the Mycenae in 1700 BCE, and these Greeks were also believed to be the inventors of the first plate armor set.

Use of combat helmets was prolific within the Ancient Greek and Roman Empires, at first being made of leather and eventually various types of metal and metal-alloys — initially leather and brass, then bronze and iron. As weaponry became more sophisticated, so too did the need for more robust protections of soldier’s heads. Military use of helmets was initially employed to prevent the wearer from cuts, arrows, and low-velocity musketry.

Eventually, in the 17th century, the use of military helmets declined as rifled firearms entered the battlefield. While some holdouts, like Napoleonic era cavalry, still wore ornate helmets, they served more as status symbols than protection from ballistic threats. However, in the early 20th century at the start of World War I, the widespread use of battlefield artillery resurrected the need for helmets — steel ones. Modern battlefield hazards included lateral frag from artillery and falling debris, as well as bullets (the latter would not be defeated until much later in the late 20th and early 21st century).

After steel, modern battlefield soldiers wore PASGT (Personnel Armor System for Ground Troops) and similar helmets crafted from Kevlar, Aramid, or a similar synthetic fiber. More recently, they are crafted from ultra-high-density polyethylene. The lightweight yet ultra-strong materials protect against lateral frag and shrapnel, many pistol rounds, and even rifle rounds, as we will discuss in this article.

Another major adaptation has been protection from non-ballistic threats, like a concussive shockwave, as well as the internal padding. Sufficient padding inside a helmet helps absorb the inertia from ballistic threats and mitigate backface deformation (more on this later), as well as making the helmet more comfortable to wear.

Photo of ballistic helmets on mannequin heads on an artistic gray background.

Above: The Crye Precision AirFrame uses a unique two-piece overlapping shell that offers improved ventilation. Crye says it can also “reduce the damaging effects of explosive blast waves.”

Helmets vs. Body Armor: How Are They Different?

Both stop bullets and shrapnel, but there are some inherent differences. While some body armor may be curved, it has nowhere near the curvature of a helmet, which essentially needs to be a partial sphere. This creates challenges with any ballistic material and is where the art and science of ballistic protection meet. In order to have a robust armor system on your head, there needs to be consistency in the layers and density throughout the armor system so as not to have any failure points.

“If you want a quarter-inch helmet, it needs to be a quarter-inch all the way around. With the fabrication process, without crown-reinforcements the thickness of your helmet will vary from crown [of the head] to sides. We add crown reinforcements to help prevent that,” Dub Robertson, retired Master Sgt. (USMC), Plant Manager for Hard Head Veterans, elaborated.

This is a delicate balance, Robertson said, in that if you add more plies (additional layers) or you don’t pay attention to this balance, you can get cosmetic deformations like wrinkles and bubbles, which may or may not lead to a ballistic failure. Specifically, he said you want the inside of the helmet to be as smooth as possible. This is why helmets that defeat ballistic threats are much harder to fabricate than non-ballistic helmets.

Director of Research & Development of Engineering at HighCom Ed Clark explained their proprietary helmet fabrication process: “The technology we utilize is the XTclave, which is our proprietary technology. It’s a different method of consolidating the materials together to create the helmet. As you probably are aware, when these raw materials come in, they’re on a roll and they’re relatively flexible. They’re effectively like a big sheet of fabric. We then put those fabrics onto a ply-cutting machine to form the desired shapes, then stack multiple layers of material on top of one another.

This material stack is then put into a pre-forming press to give it an initial shape. Then, we do a final consolidation stage through our XTclave, which imparts the full consolidation pressure and temperature into the shell. Traditionally, most manufacturers will utilize only a press, so in effect they’re applying the consolidation pressure only through one plane.”

What’s more, the ultra-high-molecular-weight polyethylene (UHMWPE), colloquially known as poly, doesn’t paint well. Unlike armor, helmets are often worn outside of a carrier and are exposed to the elements, so the exterior finish is an important consideration. This is where “skins” come in.

Typically, skins are an aramid material, aka Kevlar. [Hard Head Veterans] typically do one skin inner layer, and one skin outer layer. Obviously, using aramid helps with the ballistic properties of the helmet. We do know some companies out there are using carbon fiber; they do the ‘guts’ of the helmet in [UHMW]PE, but their first or second skin is carbon fiber. We’ve seen some videos of them shooting a helmet with this type of a configuration, and while there is no dent in the helmet, since it helps with compression, there is no ballistic protection offered from carbon fiber.

It helps with blunt impact, due to the lack of compression in the material, but has no ballistic protection advantages, so we haven’t used it in our helmets,” Robertson from Hard Head Veterans explained on a call. Also, carbon fiber is pretty expensive, which adds to the cost of the helmet.

Helmets are about as extreme of a curve as you’re going to get and are not as straightforward as something like pressing body armor — even curved plates. Fabrication processes like the proprietary XTclave use a fluid medium to transfer pressure, which works well when creating things with compound curves and complex geometries. However, other standard methods of fabrication, such as layering plies of UHMWPE, are still strong. As long as the manufacturer understands the dynamics of crown reinforcement and it passes ballistic testing, you should be good to go.

Studio photo of a ballistic helmet.

Testing Protocols for Helmets

Ballistic helmets go through a similar testing protocol to body armor, with some slight nuanced differences. Most of the helmets on the market are only rated to defeat pistol rounds, which technically is a Level II or IIA rating. Per NIJ 0106.01 for ballistic helmets, to obtain a Type II rating, the helmet must defeat high-velocity pistol-caliber rounds such as the .357 Magnum or high-velocity 9mm (+P or +P+).

One company who I interviewed for this piece manufactures a rifle rated helmet — HighCom Security’s RCH helmet. The RCH is rated against common rifle threats and boasts a Level III rating, able to defeat 7.26×39, 5.56×45 XM193, and even the hard-hitting 7.62×51 NATO.

A table of ballistic helmet test results.

Another consideration when it comes to ballistic helmets is protection from shrapnel, often referred to as lateral frag. The benchmark for this is MIL-STD-662F, and this tests against different weights of shrapnel that one would see on the battlefield or in an area of operation, going from 2 grains to 44 grains in weight, at varying velocities.

The MIL-STD-662F framework is utilized to grade armor — that includes body armor, armored seats for aircraft and ground vehicles, crew station armor on military vessels, aircraft armor, bulkheads, tactical shelters, and even “clear armor” like windshields, shields, or windows. The RCH abides by the MIL-STD-662F in addition to NIJ 0101.06 Level III Rating.

Considering the extreme curvature of a helmet, the NIJ’s testing is incredibly in-depth, and requires different hit angles to pass — basic plane, coronal plane, sagittal plane, and also takes into account the angle of attack when testing. There’s an NIJ standard for Ballistic Helmets published if you want to go deep on the specs, but refer to the table for an excerpt.

Studio photo of the front of a helmet.

Above: Hard Head Veterans (HHV) newest ATE Lite helmets are made in Sweetwater, Texas, using a combination of UHMWPE and aramid fibers.

What About Backface Deformation?

As with body armor, backface deformation is top of mind for ballistic helmets as well. While there’s more “padding” with a helmet — both the structural “impact layer” and the softer padding that’s used for comfort — backface deformation is a non-trivial consideration with ballistic helmets. This started from a research and development paper from the U.S. Army where 25mm was the standard, but many companies today have gotten down to 15mm at max, and in some cases 8mm or less with high-velocity pistol rounds, well below the U.S. Government standards.

Per HHV’s spec sheet on their HPE helmet, which I had the chance to test, the backface deformation of a 9mm 124-grain round screaming at over 1,400 feet per second — far above most factory loads — is at max 15mm on the crown, and only 8mm at the back of the head.

This deformation is typically not seen unless you peel off the protective padding of the helmet post-gunshot anyway, but it’s comforting (as comfortable as you can get with getting shot in the head) to know that the structure of the helmet will deform only about ⅓ of an inch.

“Sometimes, we get helmets back for a size exchange, and we notice the impact pads are out of there. The impact pads are there for a reason! They’re specifically designed to reduce backface deformation. The comfort pads aren’t even involved in the testing, we just send the helmet and the impact pads,” Robertson stated.

Studio photo of the right side of a ballistic helmet.

Helmet Weight: It Matters!

Considering the human head itself weighs about 8 pounds, and every inch you move your head forward from vertical alignment functionally adds 10 pounds to your dome, any ballistic helmet you put on your head will need to be lightweight in order for you to be combat or mission effective. This is just as important, if not more important than body armor being lightweight. Helmet weight has been proven in studies to affect cognitive performance. When in a hostile engagement, your most valuable weapon is not your rifle or sidearm, but your brain; helmet weight and cognitive fatigue are correlated.

Moreover, even the strain that is placed on your neck affects cognitive performance. There are also muscular considerations as multiple studies have found that the heavier the helmet, the more muscular fatigue and/or risk of injury while operating in the field.

“There is a big drive toward lightweight protection recently, and it is becoming more and more apparent with a lot of armed forces … As forces are becoming more advanced, they’re using more equipment to assist — headsets, NVGs, augmented reality. All that equipment is adding weight. And if it’s going on the head, it’s putting more load on the head, which means your endurance isn’t going to be as long as you’d like, and you might suffer neck trauma down the line.

So, taking what we term ‘dead weight’ out of a helmet shell is a benefit because it means you can either put more gear back onto your operator’s head, or you’re allowing them to wear it for longer,” Clark of HighCom explained, underscoring the importance and validity of the previously mentioned studies.

Photo of a helmet being painted.

Above: Oregon Ballistic Laboratories (OBL) also tests helmets according to NIJ standards. Each helmet is tested from a variety of angles.

So … What Helmet Should You Buy?

Just like with body armor, the helmet that’s right for you is the one that fits your needs and budget. If you don’t need ballistic protection, an unarmored “bump helmet” provides basic impact protection and the ability to wear head-mounted accessories like night vision. If you’re not operating where you can expect to see rifle fire and lateral frag, or just want a layer of protection for your most valuable weapon (your brain), a pistol-rated NIJ Level II helmet may be perfect for you, and will only run you a few hundred dollars.

If you want something that can stop incoming fire from an AK and only weigh a couple of pounds, you’re in luck — they make those now. Just be realistic about the threats you’re likely to face and remember that higher levels of protection always come with at least a few minor trade-offs.

Read More

Subscribe to Recoil Offgrid's free newsletter for more content like this.

Editor's Note: This article has been modified from its original print version for the web.