Disclaimer
This article is meant to be a brief overview and not a detailed guide on improvised fishing, hunting, and trapping in survival situation. Check local regulations before attempting to use any tools or techniques discussed in this story.
Sport fishing and hunting isn't the same as survival fishing and hunting. “Sport” implies there is an element of chance and fair play. To a survivor, the concept of rules and regulations should seem ridiculous. After all, why would a survivor or someone in an emergency consider the confines of sport fishing and hunting if they're starving? In a real disaster, there is no such thing as a bag limit, minimum length, or poaching.
As majestic as they are, in the absence of wildlife protection, even the bald eagle might be on the dinner table if you're hungry enough. We've been field tested and we know the frustration of watching supper run, swim, or fly away. We've also learned that with the right tools and a few no-nonsense ways of fishing and trapping, it's easy to make sure your dinner plate isn't empty at the end of the day.
The differentiator between frustrated and fed is preparing like a predator and casting aside socially acceptable methods of food procurement. We're not going to apologize for telling you how to kill prey and feed yourself with the gear and methods that follow. It's been said Chuck Norris doesn't hunt or fish because there's a chance for failure in those sports — he just kills sh*t. Follow our lead and you too can be like Chuck.
Fishing
Sport fishing rules and regulation books may define fishing as a single baited hook attached to a pole held by an angler. This is meant to protect a species from overfishing. A lone survivor should not be limited. Some basic equipment provides an advantage over a single hook, line, and sinker setup.
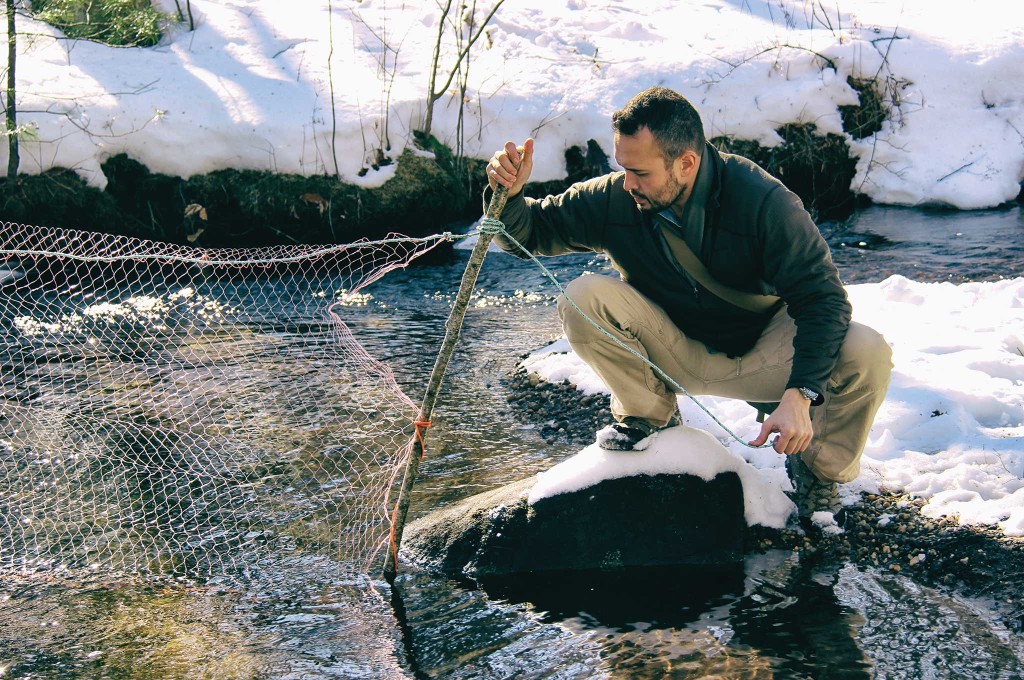
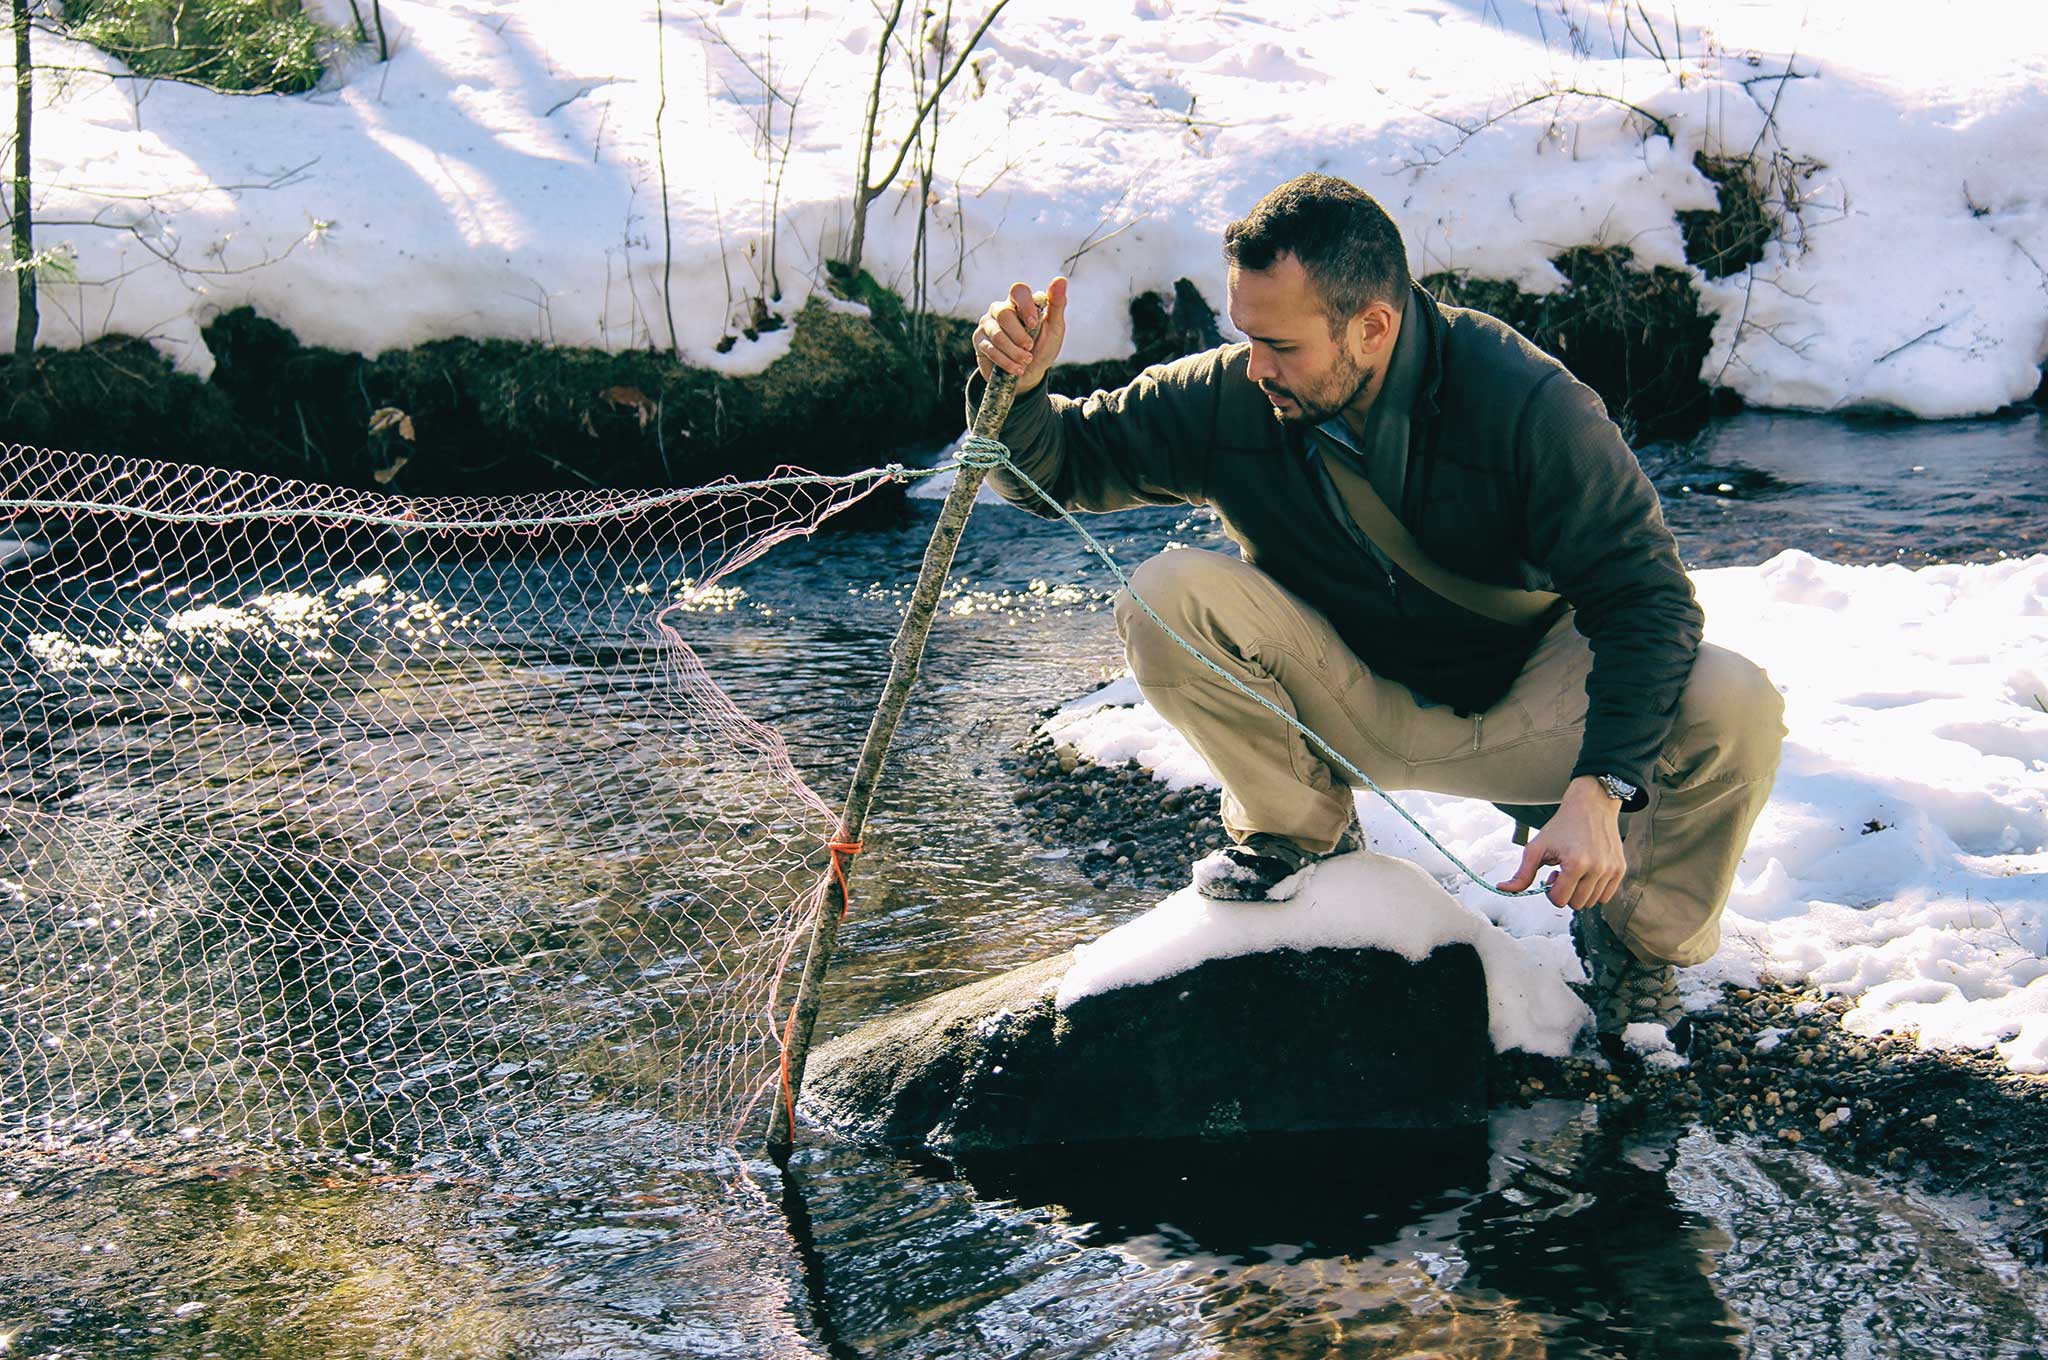
A gill net can be set above water or below water. When used with two poles, it can be moved through the water by two...
Gill Net: Anyone who has seen the History Channel show Alone knows the concept of a gill net. Designed to capture fish by the gills, these nets work wonders if they're constructed to match the fish in your area. A gill net can be used in a stationary location, or it can be anchored on one side and walked through the water in an arc by holding the other side. A gill net can be set discretely underwater as well, if traveling unnoticed is a concern. It can also be fashioned into a scoop net or a net supported by a frame, and raised in and out of the water by a central point.
Frog Spear: Made from steel and used for nighttime frog hunting, a good 3- to 5-prong frog spear will outperform any wooden spear crafted in the bush. Frog spears can be used on reptiles, amphibians, and small fish. They work exceptionally well when paired with a flashlight to temporarily blind your prey. Inexpensive Eagle Claw brand gigs are widely available and custom spears made from higher-quality steel ensure you have the right point for your spear.
Hawaiian Sling: A Hawaiian sling is a long thin-shafted spear with an elastic band attached to one end and a pointed barbed end on the other. The elastic band is looped around the hand, stretched, and the spear is held holding the energy back until the hand is relaxed and the spear is launched forward. These are highly effective as they don't require easily telegraphed body motions to thrust. The Mako 3-in-1 Take Down Pole Spear is an excellent choice if space allows. Otherwise, the survivor can pack surgical tubing, spear head, and lashing twine to make his own.
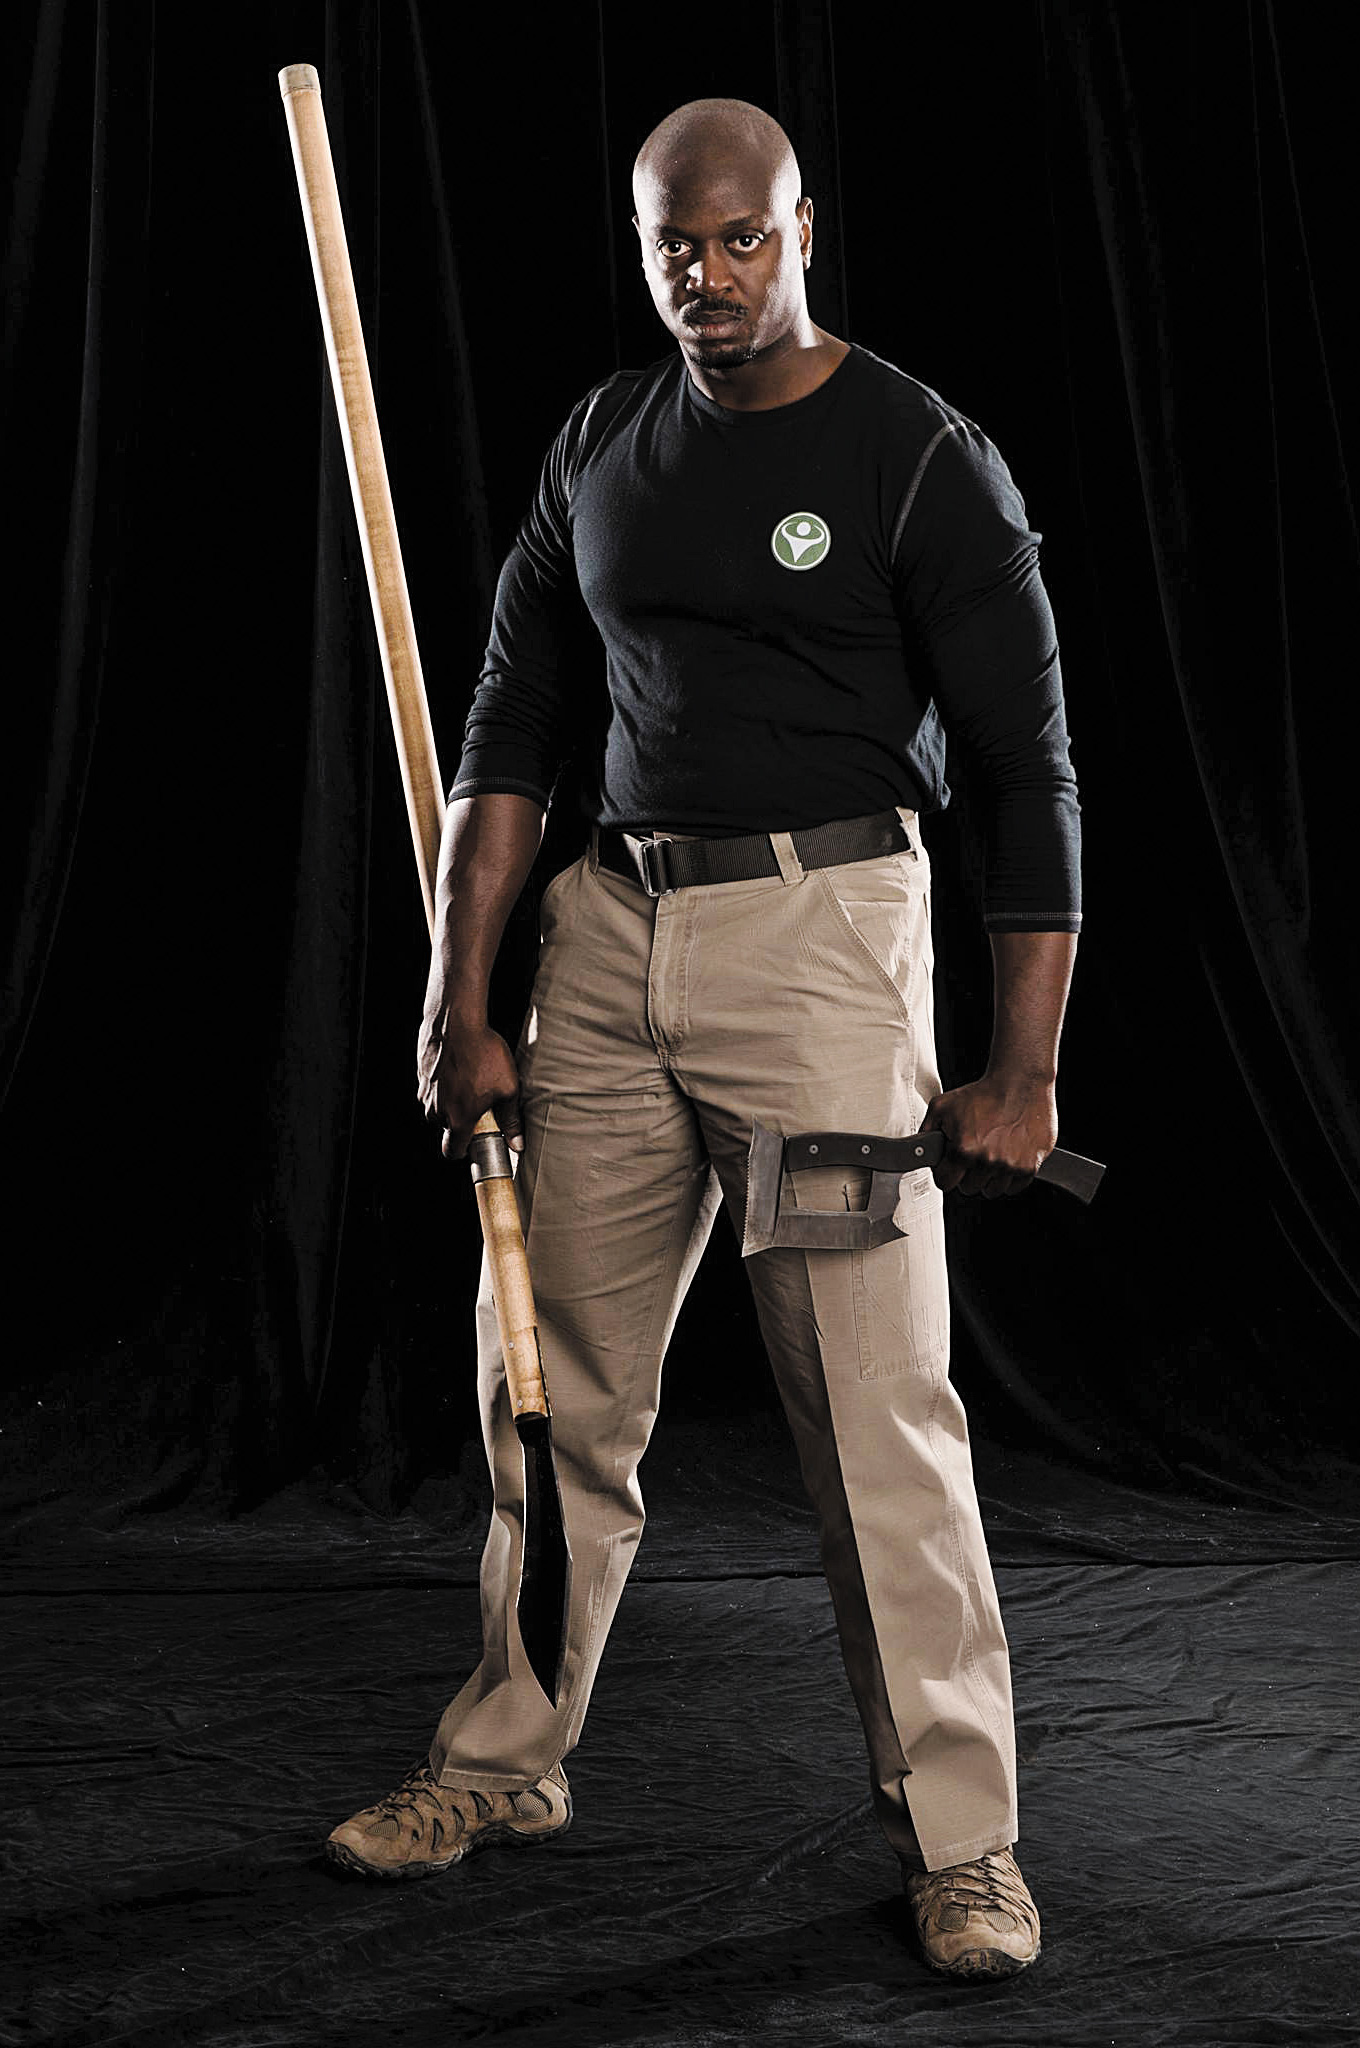
Hacking: This method of fishing involves using the back of a machete in a chopping motion against a fish spine in order to break it, making easy retrieval of your fish. The back of the blade is used to avoid accidentally cutting your leg. While blood works great as chum, using your own blood isn't advised. Attract fish with a lantern, LED headlamp, or a torch made from folded birch bark.
Long Line: Imagine a length of paracord with pieces of fishing line hanging off of it at different intervals and depths. These lines are just short enough to avoid tangling with one another, and since they're attached to a single long line, multiple fish can be caught with a single retrieve. The long line works well — so well that it's on the radar of the humane society. That's good for you if you need to indiscriminately catch to put on your plate.
Automatic Fisherman Reels: Operated by a spring, these lightweight fishing reels automatically retrieve your fish after they swim away and trigger the mechanism. These reels do your work while you tend to other survival needs. They can work above water or underwater in iced-over conditions. The constant spring tension “plays” the fish and your prey will be tired when it's time to retrieve the unit from the water.
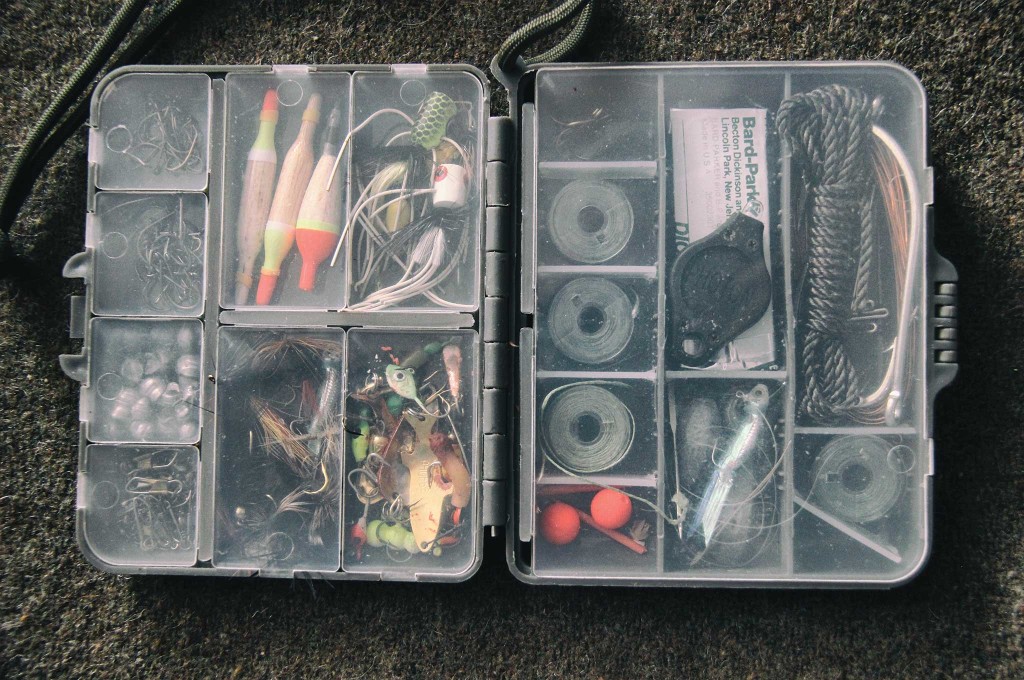
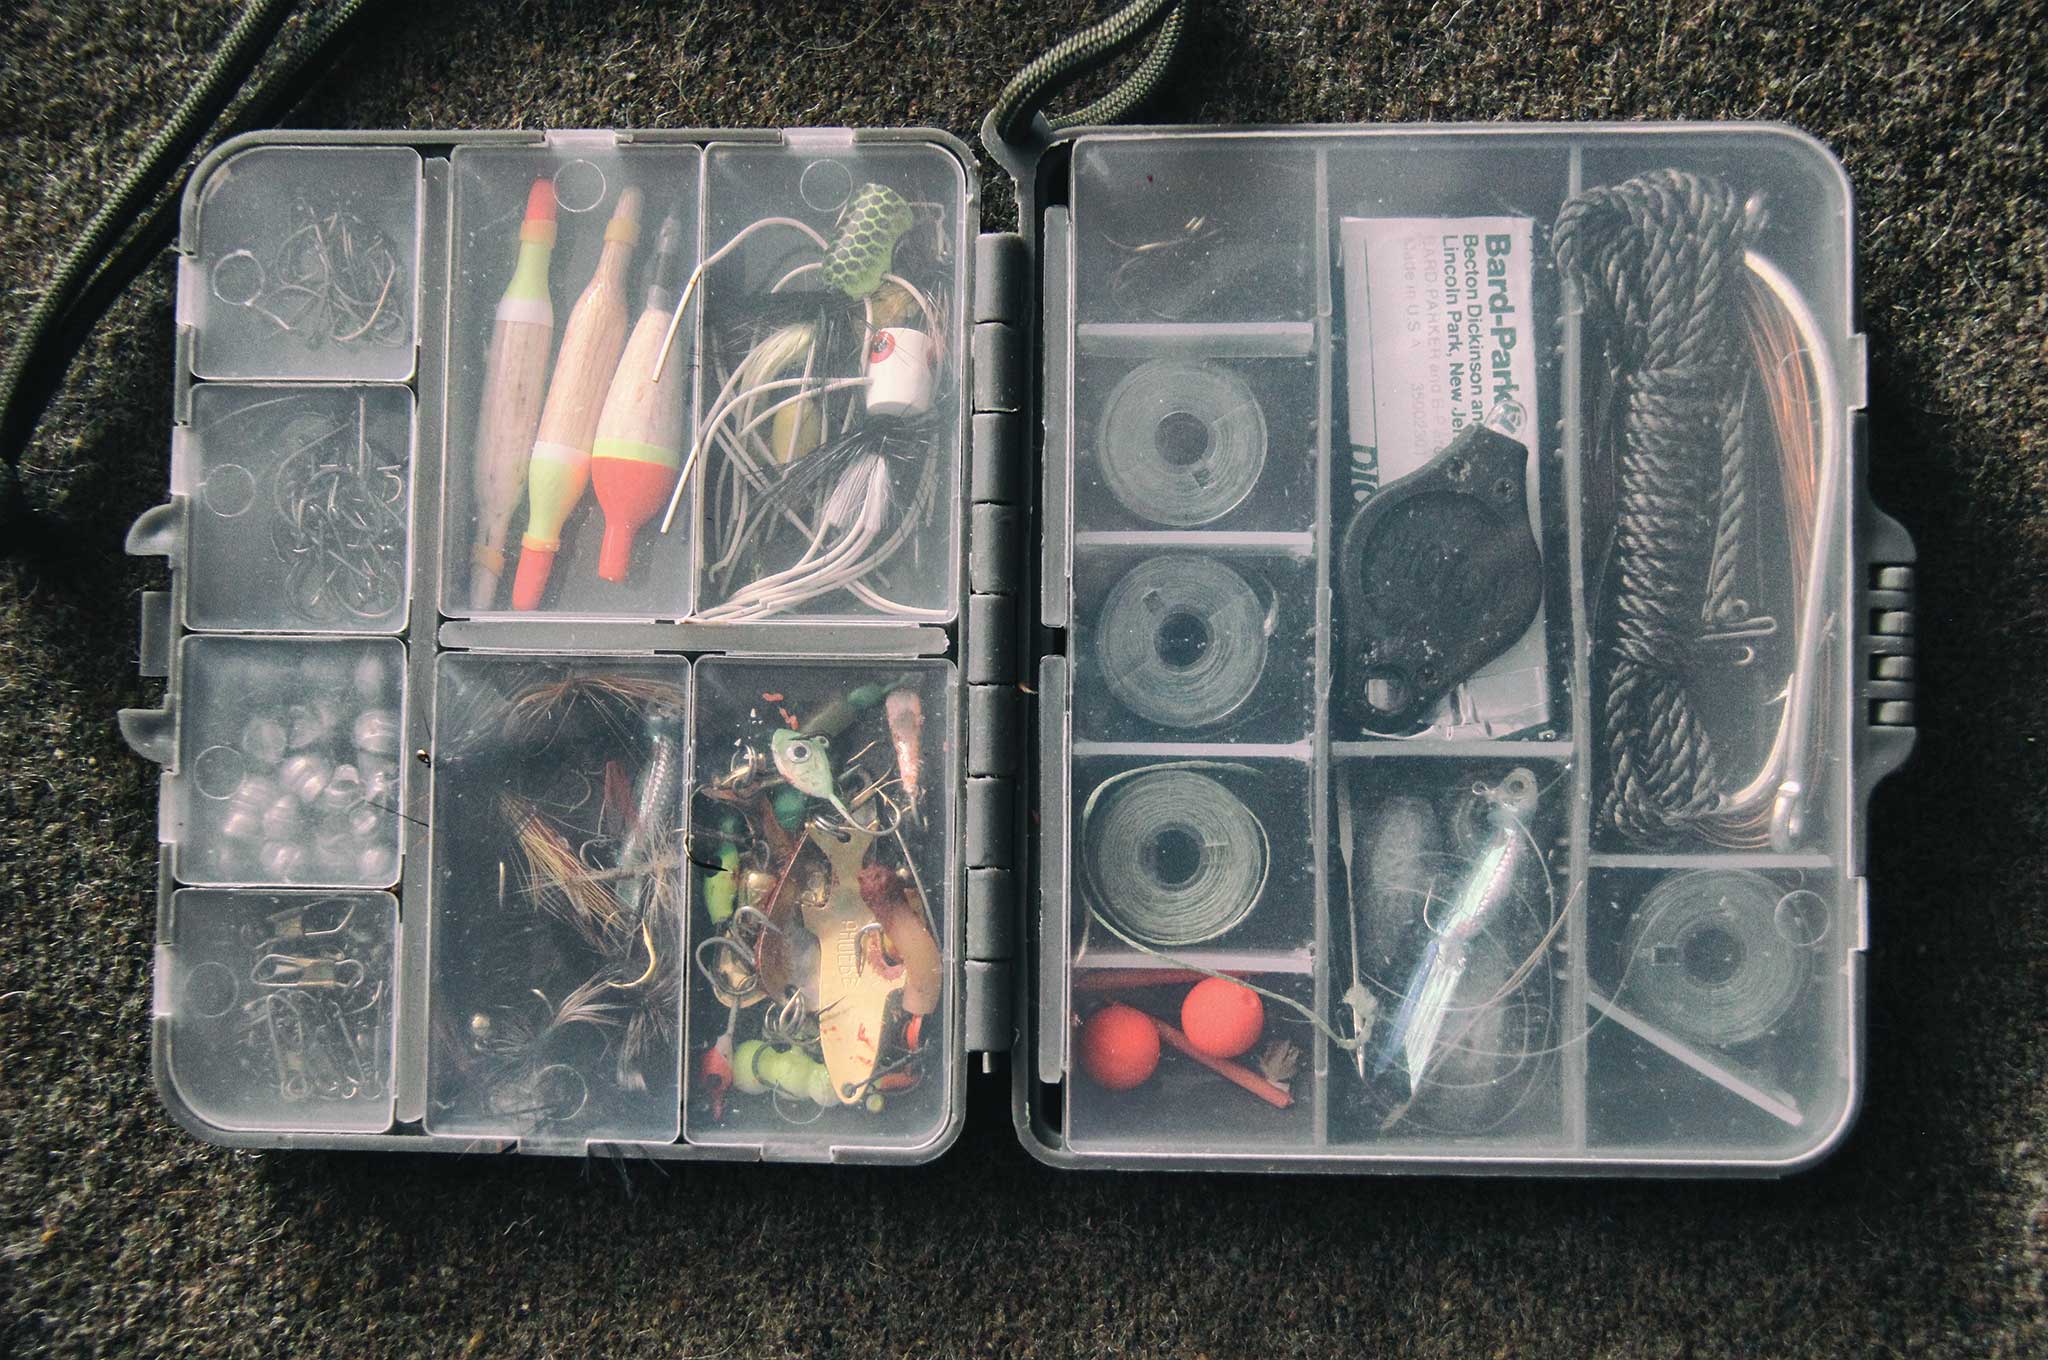
A well-stocked small fishing kit will take up very little space. A combination of dry fly poppers for bass, nymphs for...
Collapsible Fishing Rod: Sometimes, you still need a good fishing rod to reach out to the fish biting just outside your reach. Three-piece (or more) fishing rods break down to less than 24 inches and are easily packable on the outside of a small ruck. From the inexpensive and durable Ugly Stick brand to higher-priced St. Croix Rods, there's an option for everyone. If space allows, it can't hurt to pack a small, ultra-light fishing rod and reel with some basic tackle. This combination this author used while in Alaska to feed himself for two weeks in the bush.
Trapping
A survivor should consider trapping before he considers hunting. It's easier to fashion traps than it is to make projectiles. A properly constructed trap can be just as effective as (or even more effective than) a hunter seeking out prey while burning calories and launching a projectile with questionable accuracy at a target, which may be situated in an awkward position.
Rat Traps: Inexpensive, lightweight, and crazy effective against small rodents — do you need more reason to pack these? Oh that's right, if you have special skills, they work well to close circuits and make other traps for bigger threats. They can be baited with camp scraps or wild edibles gathered on the move.
Braided Picture Wire: The same wire you used to hang that painting of dogs playing cards is the kind you can use for creating snares. Braided wire is much tougher to break than solid copper or stainless wire of equal strength. The braid also grabs onto animal hair as your prey fights for its life. Depending where you are, the braided wire can also serve as fishing leader for fish with sharp teeth that would otherwise cut through your line.
Commercial Rabbit Snares: If space allows, carry real snares. They are often equipped with locking cams that prevent the snare from loosening after the animal realizes it's caught. These snares also have hardware designed to swivel to prevent the wire from kinking and breaking. If space allows, you can't beat a half dozen or more real snares. Just learn where and how to place them.
Flashlight: A high-intensity flashlight can help you confuse animals like … well, a deer in headlights. There's a reason why hunting some game with a flashlight is often illegal — it's simply effective. A good flashlight can help the survivor catch animals by hiding behind the wall of light. Paired with a spear, club, firearm, or other hunting tool, a flashlight is a game-changer.

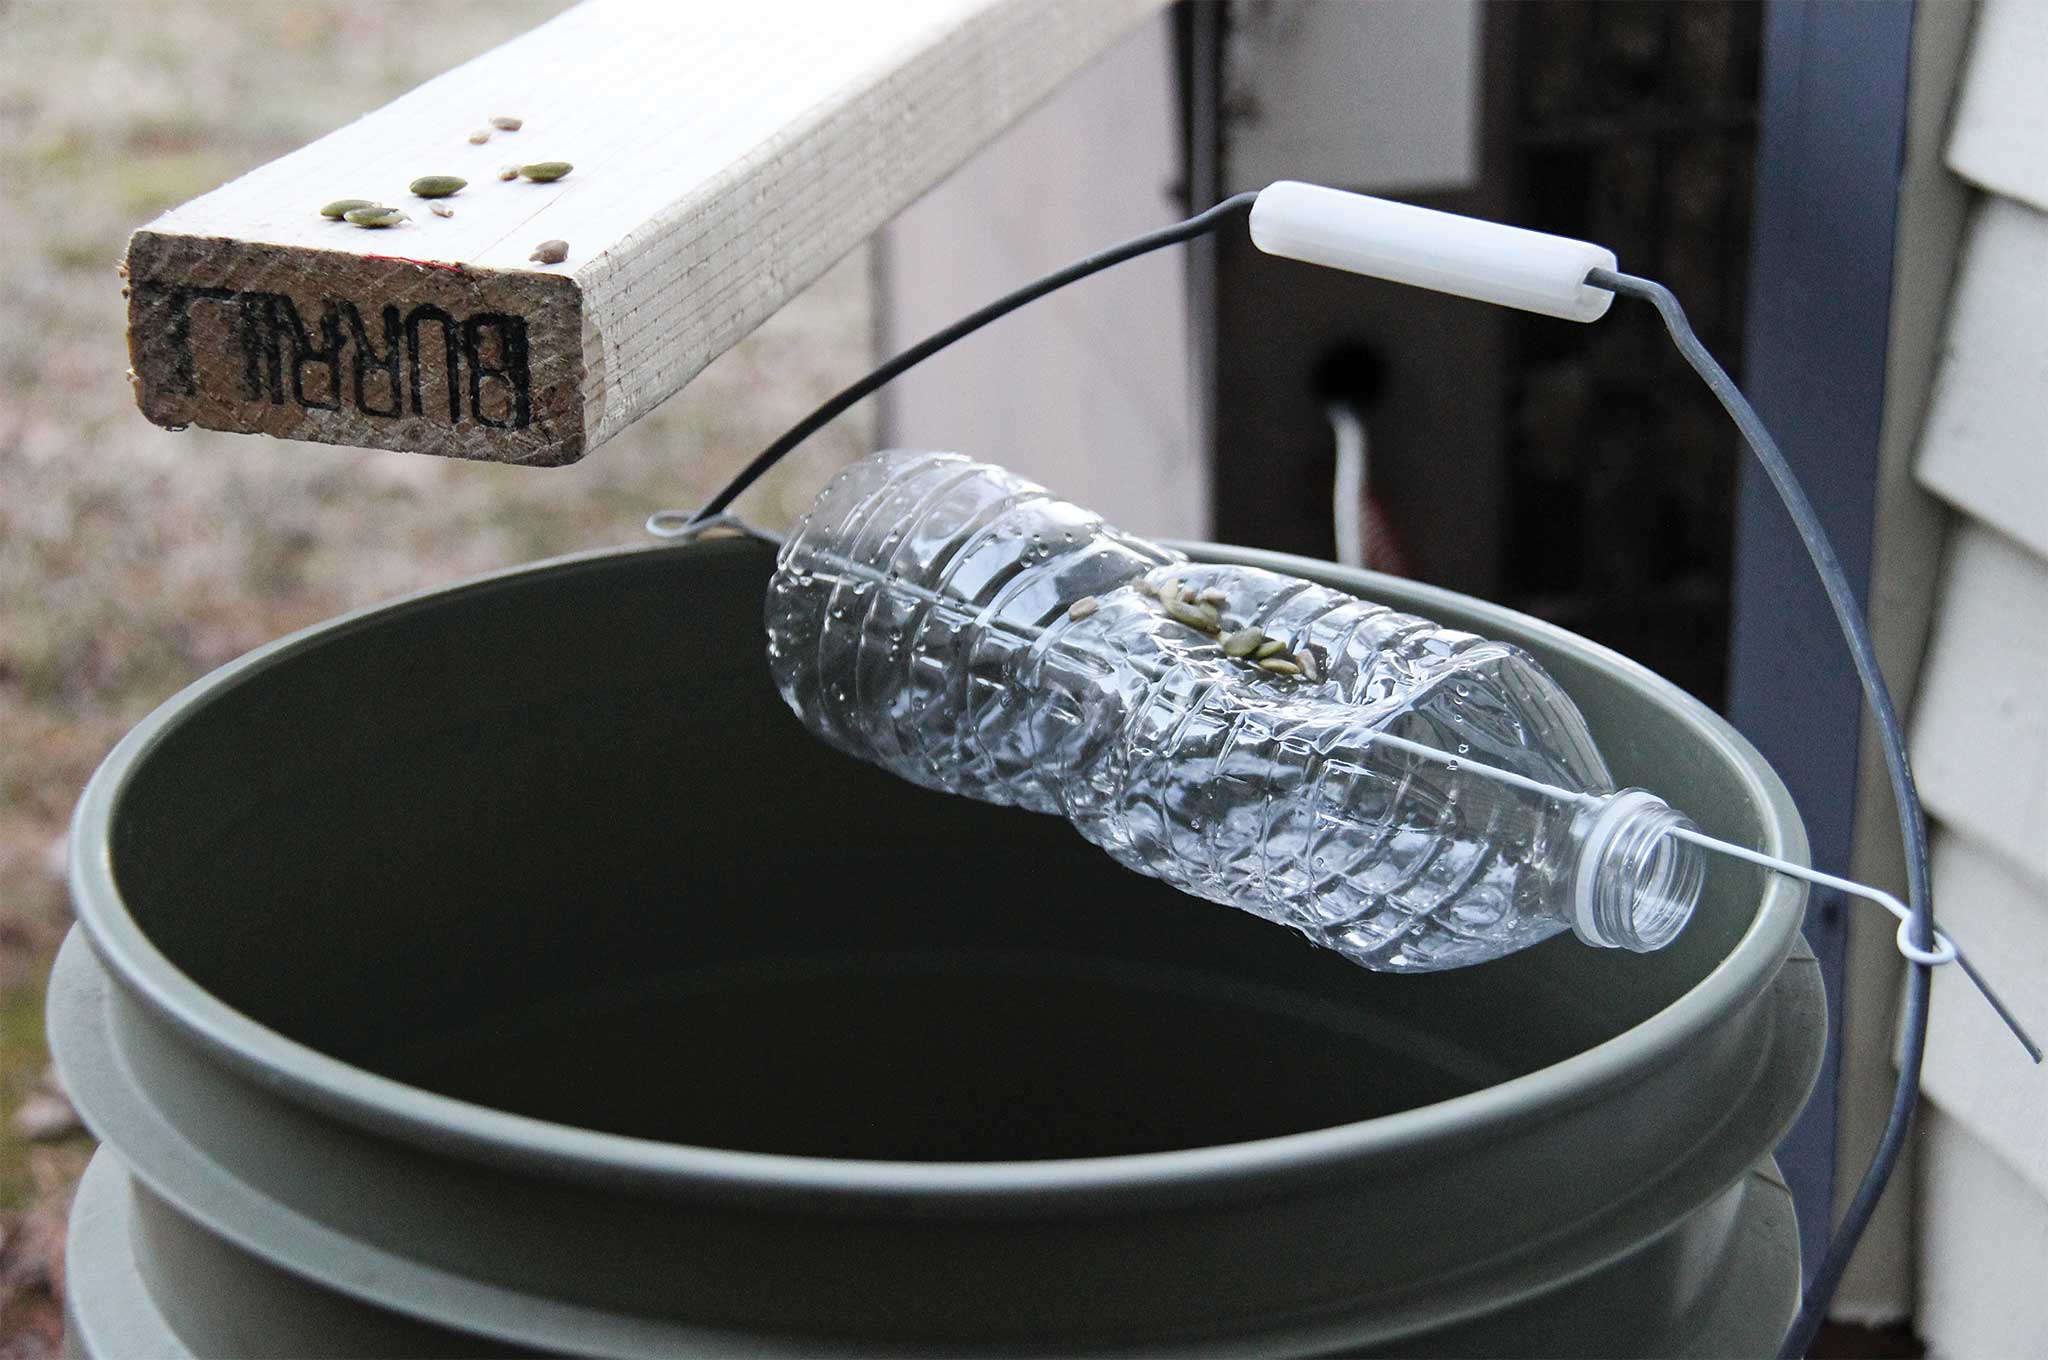
With a few scavenged materials, a survivor can create a highly effective rodent trap. Rodents are numerous, nutritious,...
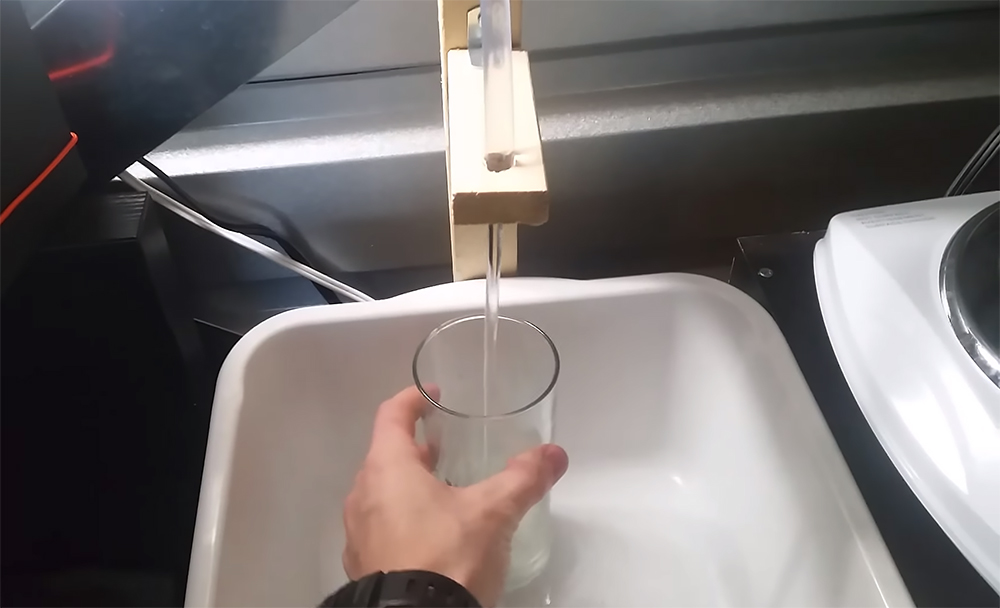
Build a Better Mousetrap: Litter is found in the most remote places around the globe and some of the best traps are repurposed garbage. An easy but highly effective mousetrap requires a bucket, a piece of wire, and a bottle. The wire is inserted through the bottle and poked through the bottom. The wire is extended over the top of the bucket and you're left with a roller like those found on American Ninja Warrior. The bottle is baited with seeds, nuts, or scraps of leftover food. When the mouse stands on the bottle, it rolls off into the bucket. If you fill the bucket with water, the mouse drowns. These traps have been used in farmhouses and barns for years and for good reason.
Hunting
We've all known that one guy in our camp who takes the nearest piece of wood and sharpens it to a point for “bear protection.” An equally comical explanation may be given about how he'll use that spear to get dinner. Aside from scratching his ass, that “spear” won't work nearly as well as some of the hunting implements that'll put meat in the pot with a little practice. As previously mentioned, hunting does require energy and it burns calories, but this doesn't mean you should leave the hunting tools at home. Sometimes, shots present themselves, and you'll kick yourself if you could have taken it with any of the following.

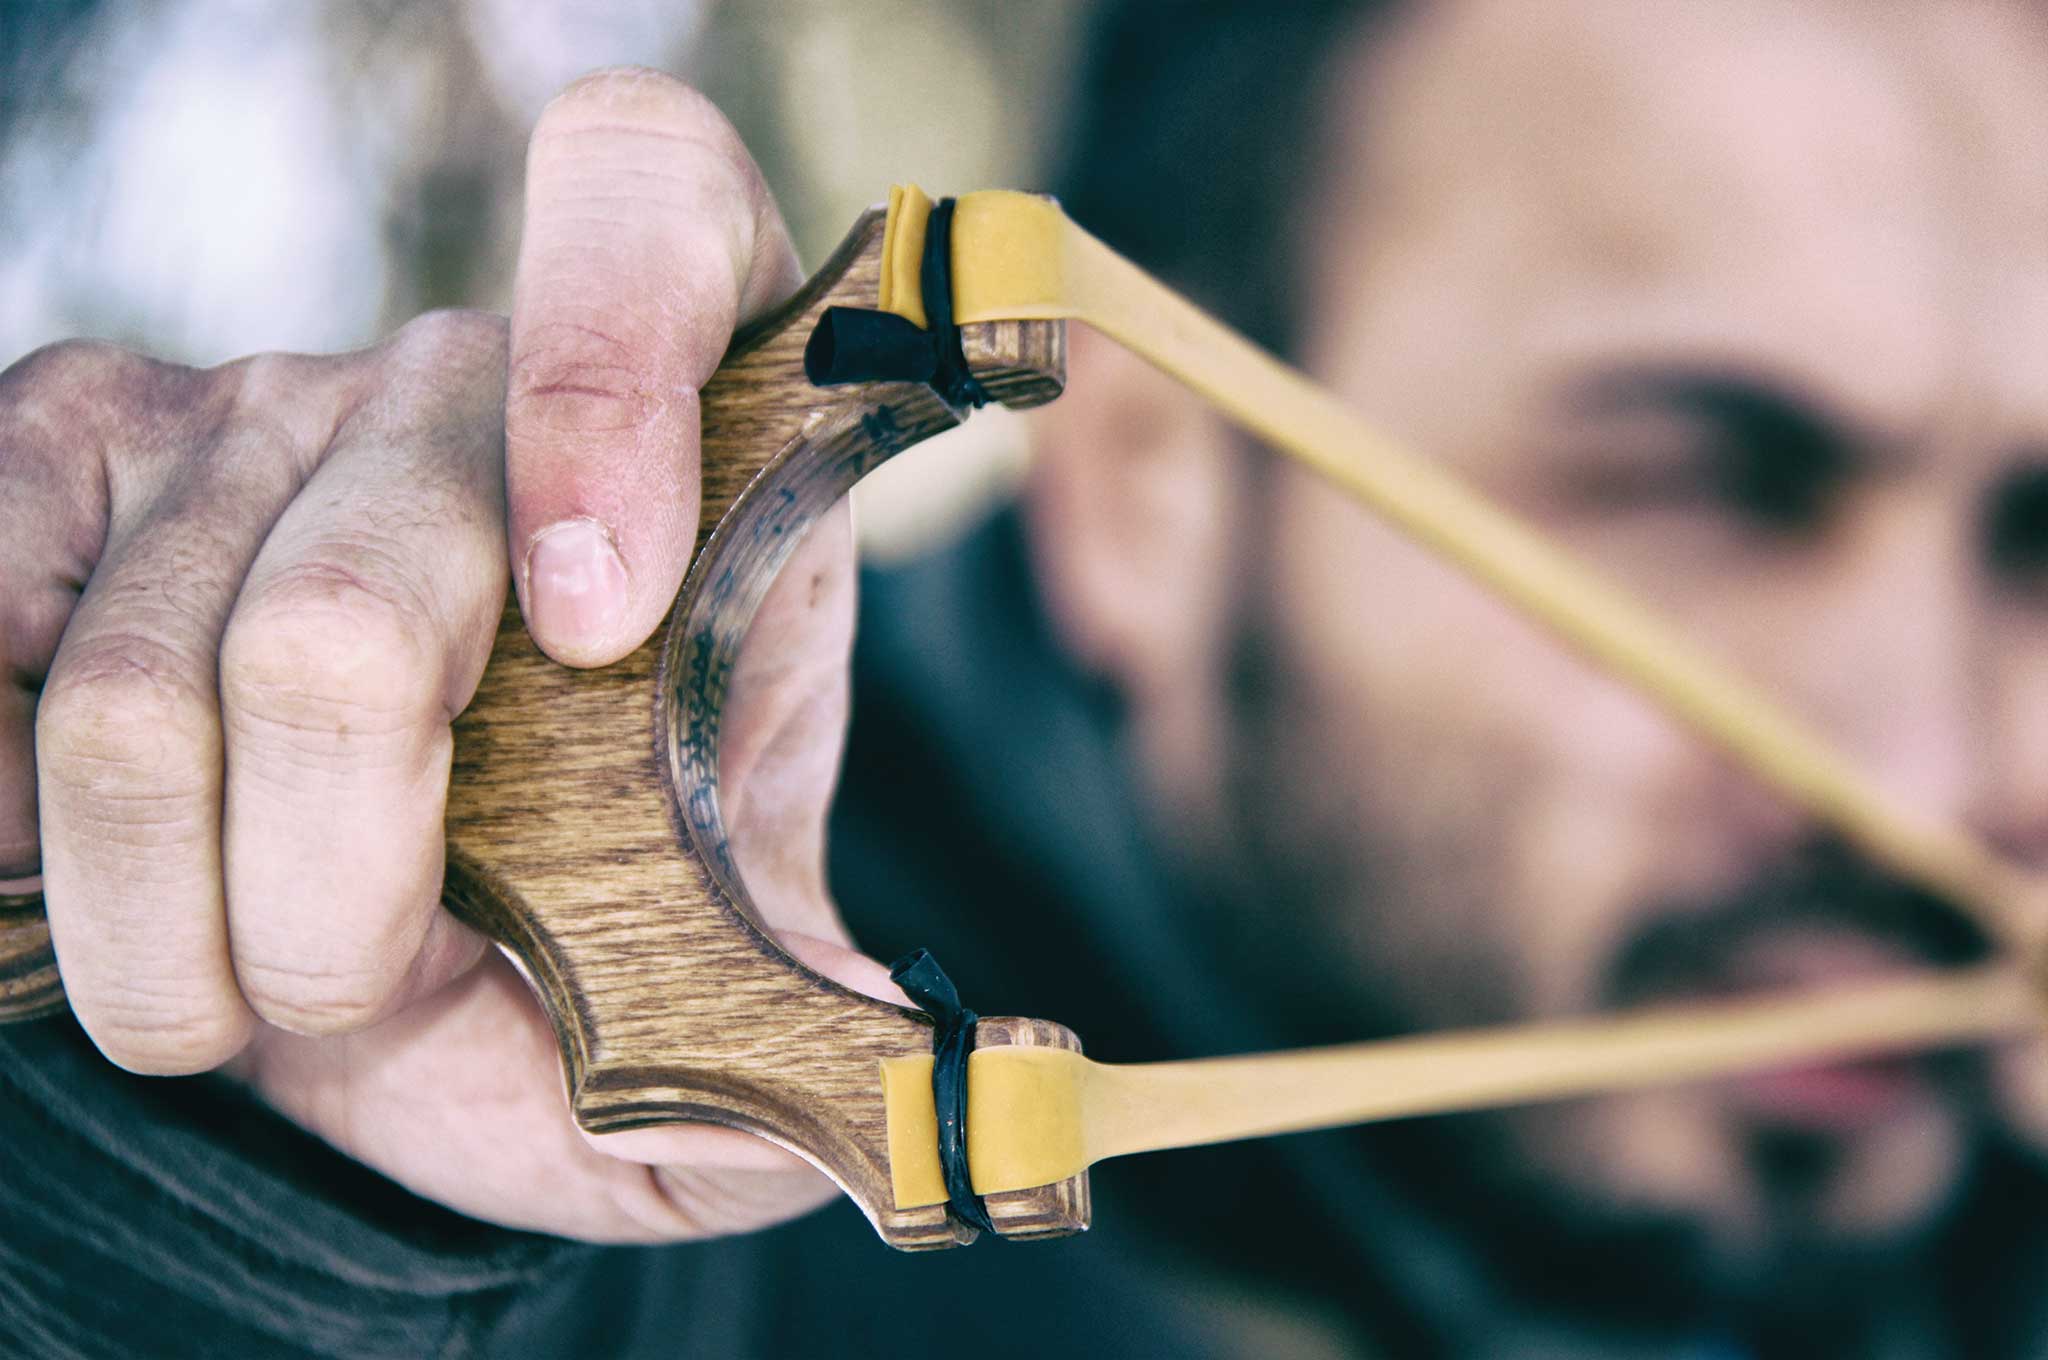
Slingshots are not just kids' toys. When powered with modern bands, they're capable of dropping small game...
Slingshot: Unless you grew up in a sheltered household with overbearing parents, you probably had a slingshot as a kid. At some point, you probably noticed how well it worked on soda cans, or managed to scare off the neighborhood cat or the birds that cat was chasing. Since your childhood, slingshots have come a long way and are now equipped with more powerful bands cut from Theraband Gold. As long as you practice, you can become extremely proficient with one, and it's possible to kill squirrels, rabbits, snakes, ducks, and other small game. Keep a spare set of bands in an airtight bag and use marbles, steel or lead shot, or small pebbles as ammo.
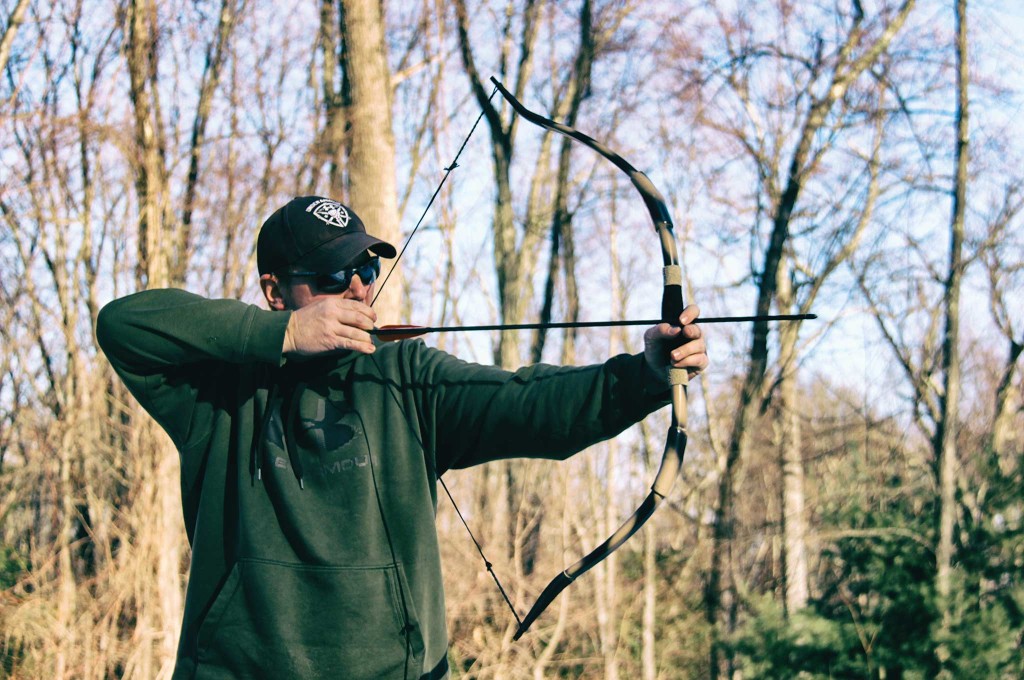
Broadheads, field points, and bludgeon points can all be used from the same bow and arrow. If you have the room, a...
Bow and Arrow: While the slingshot works well and operates quietly enough for discreet hunting and undisturbed follow-up shots, the bow and arrow is the right tool for larger game and greater impact. The survivor can select field points, broadheads, or bludgeon points, depending on what animal is hunted. A good takedown bow that needs little maintenance along with a few arrows is easily packed opposite of the takedown fishing rod to balance out your pack.
.22 Pistol: If you're legally able to pack a quality .22 pistol, do it. In our experience, the .22 pistol is the king of compact survival firearms. Not quite rifle accurate, but accurate enough, the .22 is capable (with the right shot placement, of course) of putting food in your belly. A 4-inch barrel cuts velocity down, but not to a point it becomes impotent. Of course, if you can carry a longer barrel, do it. The increased sight radius will help you if you aren't running a micro red-dot.
Conclusion
There's no such thing as fair in the animal kingdom. Lions don't discriminate and will eat any easy meal they can sink their claws into. Wolves gang up and seek out the weaker animals, and sharks will hunt out the source of blood in the water even if it comes from one of their own. When a survivor takes on a predator mindset, he or she must be willing to accept the psychological conflict of killing immature or undersized game, destroying a nest for eggs, or maiming a cute and fuzzy animal and hearing it sound off in pain.
One must be willing to break sport hunting and fishing rules and regs if they want real results. From our experience, hunger is a great remedy for the guilt associated with cheating, and hunger can motivate the average person to unlock their primal self. Primal man existed long before sporting fair play. Next time you venture out, be prepared with your predator pack when you need to fill your belly at any cost.
About the Author
Kevin Estela is the owner/head instructor of Estela Wilderness Education, a bushcraft and survival school in New England. He's a Sayoc Kali Associate Instructor, Brazilian Jiu-Jitsu practitioner, and an avid marksman. When not teaching outdoor skills, he's a full-time High School History Teacher and the Founder of the Estela Wilderness Education Fund.
www.kevinestela.com
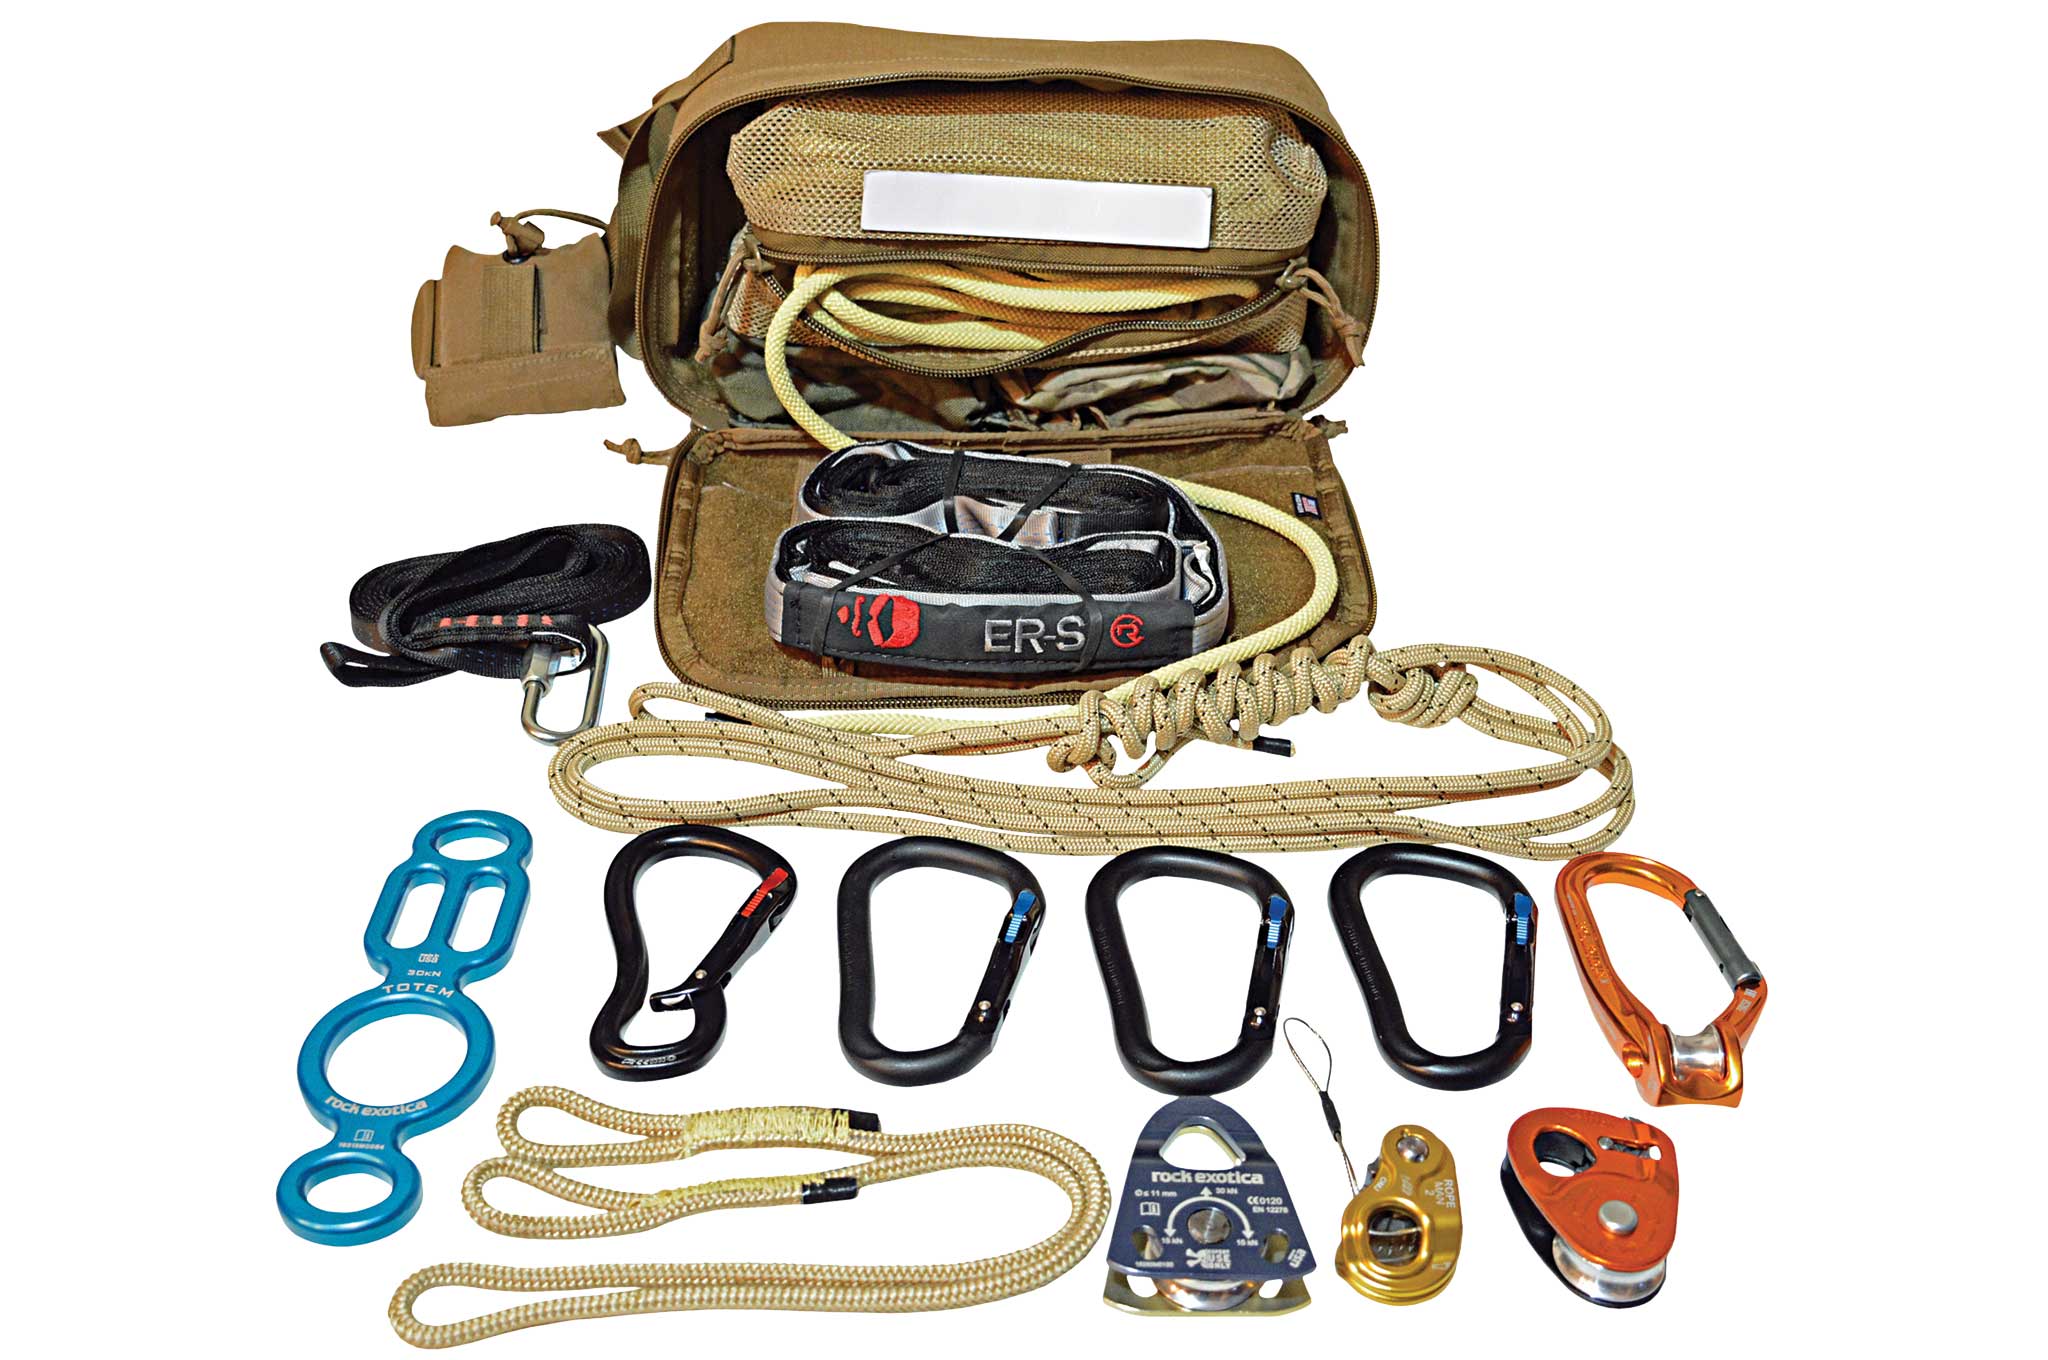
10 Essentials of the Predator Pack
1. Mosquito Head Net: For use as a dip net
2. Kevlar Thread: Combined with gaff hooks for turtles
3. Rat Traps: Two to four for small game
4. Gil Net: Helps in catching larger fish
5. Automatic Fisherman: Great triggers for fishing or for small game
6. Rabbit Snares: Commercial grade (eight weigh approximately 1 pound)
7. Sling Shot with Spare Bands: For use as-is, or to rig up a Hawaiian sling
8. Treble Hooks: For predators or weight with split shot for snagging
9. Flashlight: Use with firearm for jacking or for frogging
10. Frog Gigs: for spearing frogs, fish, lizards, etc.
Luxury Items if Space Allows:
1. Extra fire-starter
2. Salt, pepper, oil, balsamic vinegar, and various spices to offset food boredom
3. Edible plant reference cards — no, one can't live on meat alone
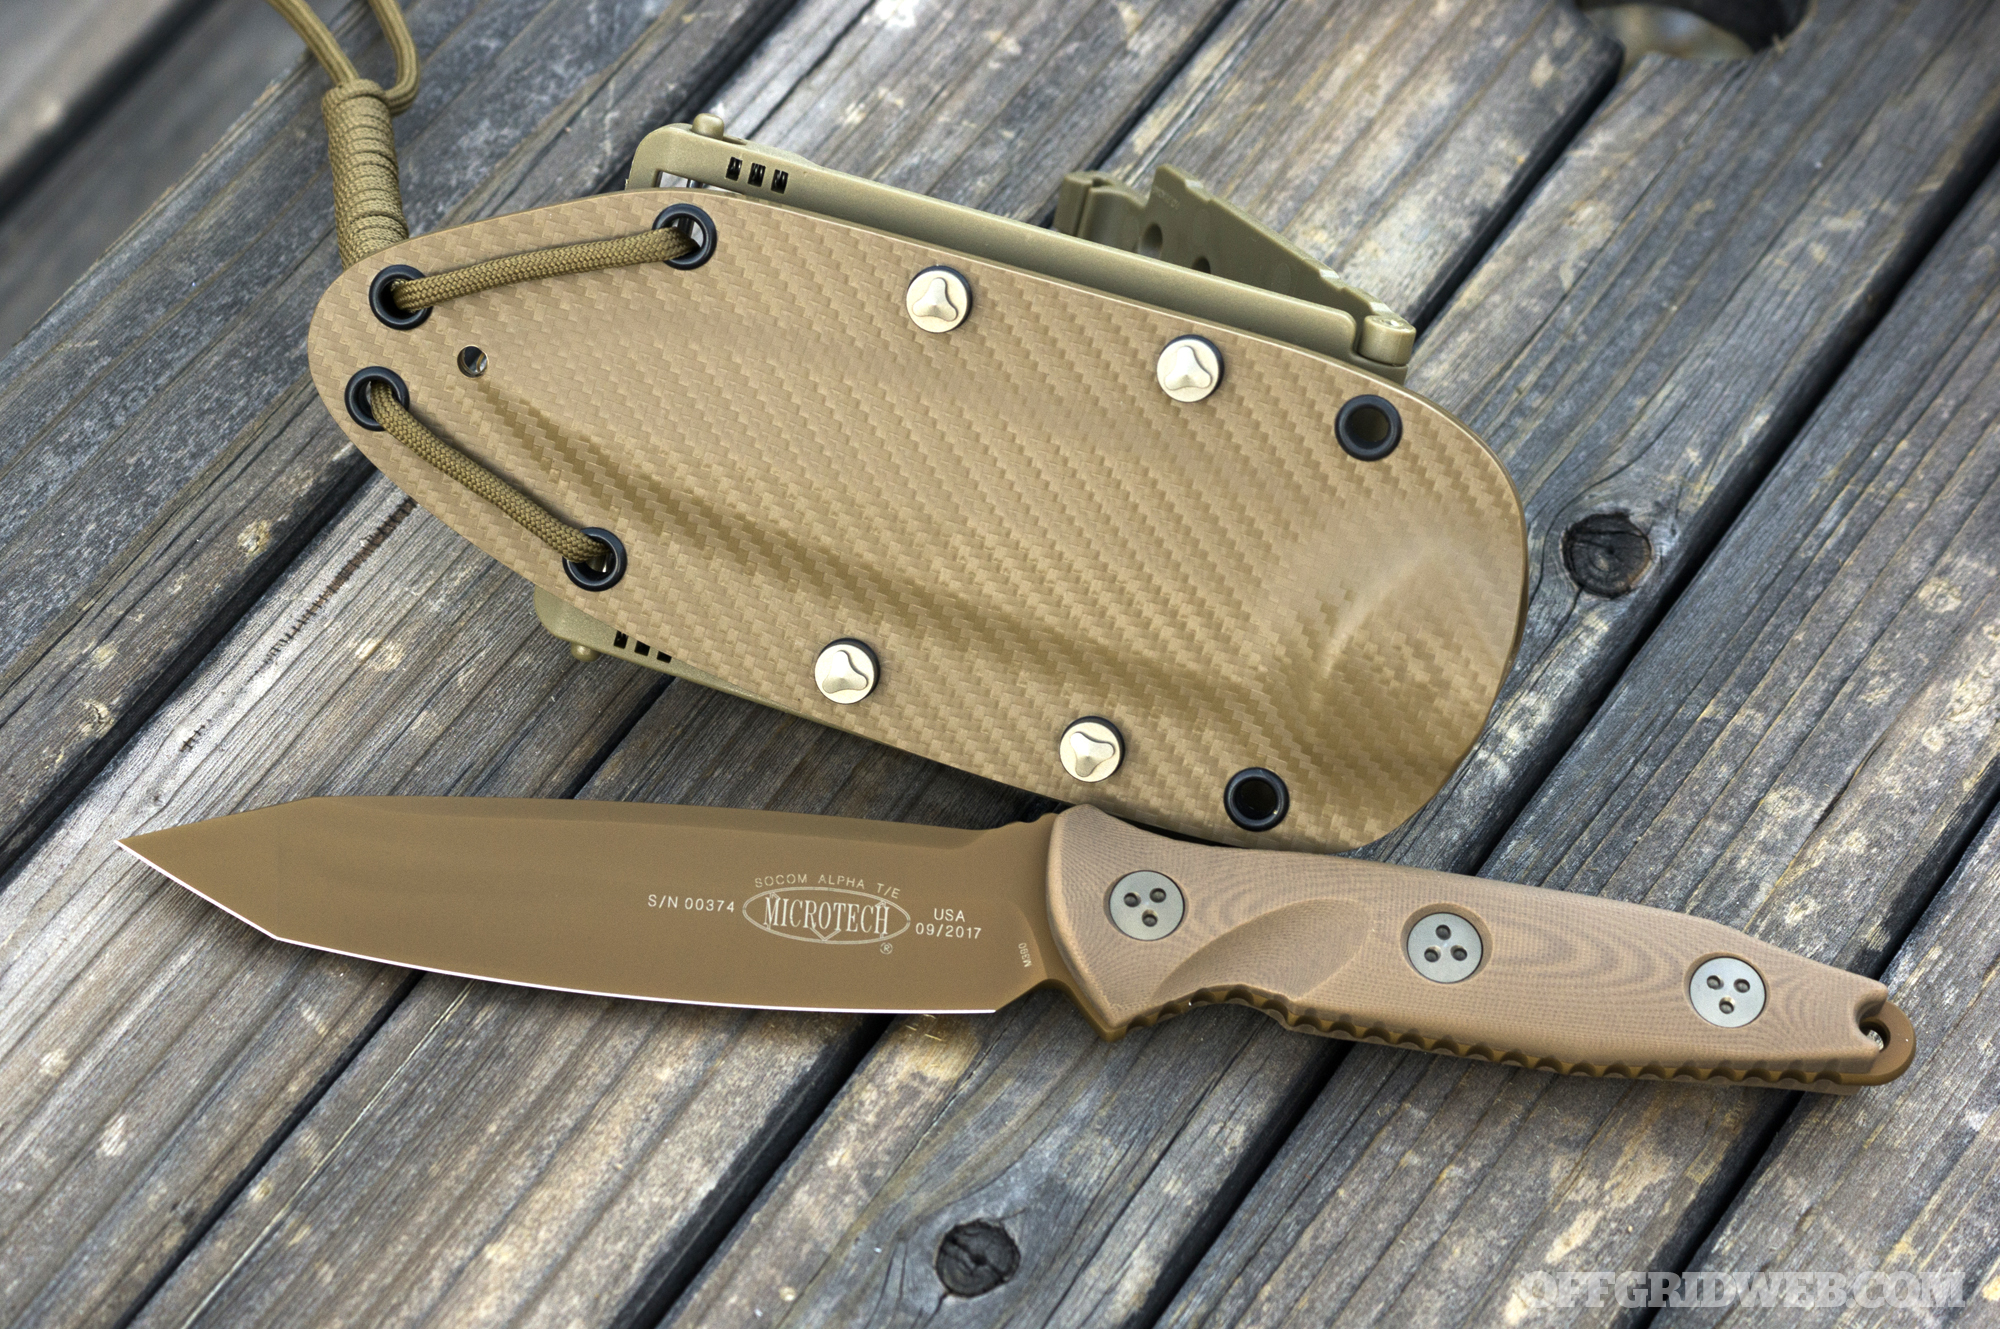
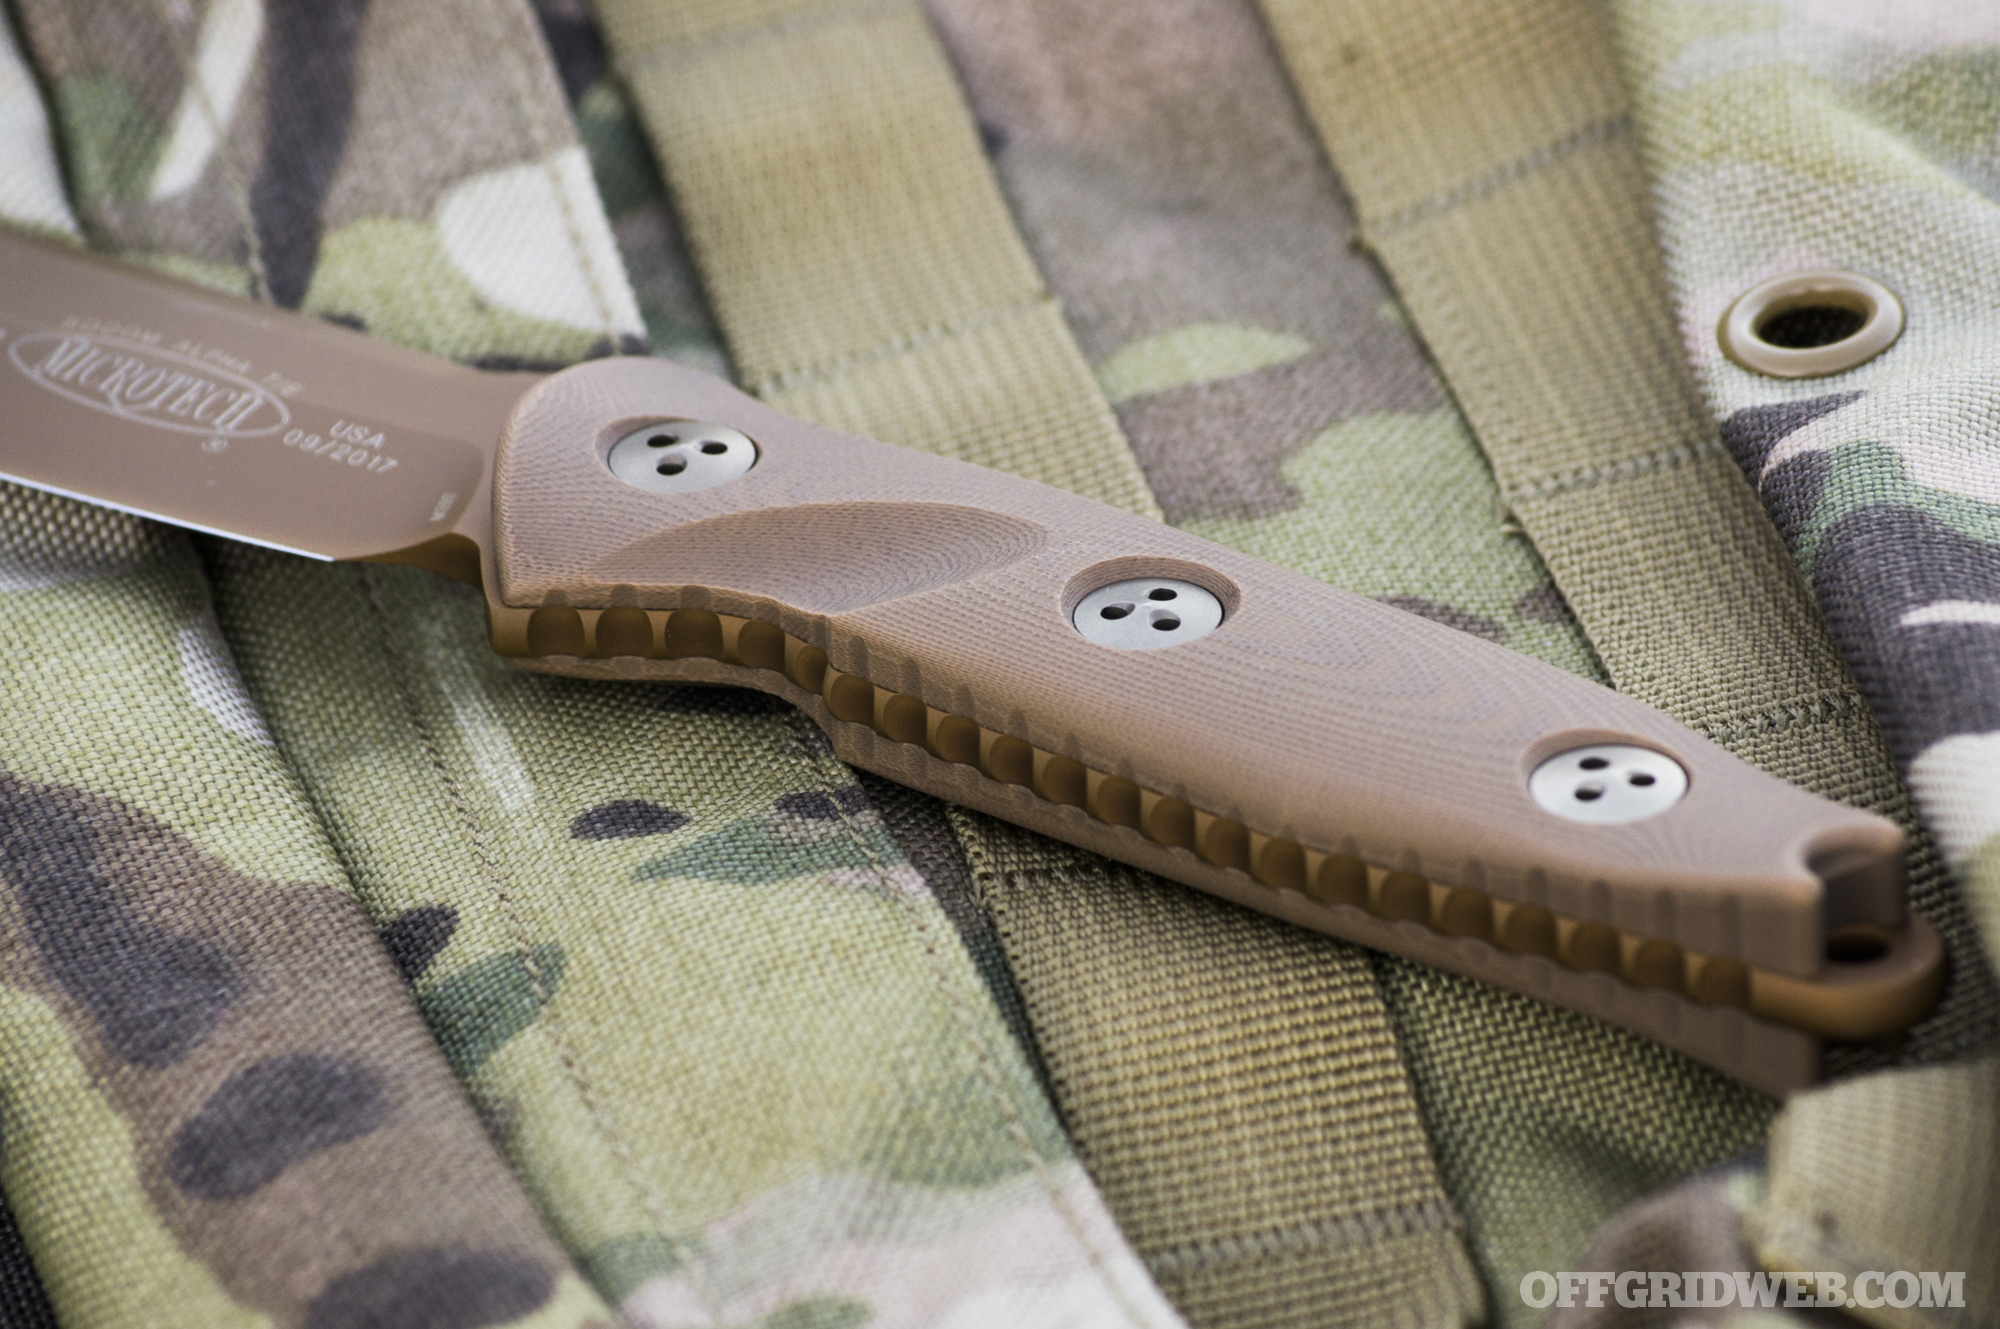
4. Game processing blades, such as a small fillet and skinning blade
5. 110 Conibear: This trap is king, but each is heavy and bulky
6. .22 Pistol: Minimum 4-inch barrel. Browning Buck Mark shown here.
5 Ways of Stacking the Odds in Your Favor
Hunt at morning/night: Animals are most active during the early morning and late hours of the day. They tend to hunker down during the brightest hours of the day. To be more effective, avoid hunting and fishing when the sun is high. Spend your time building your kit and planning your predation during these hours.
Camouflage: Animals aren't foolish and unless it is injured or ill, you probably won't be able to walk right up to it. Camouflage yourself to the environment. Use natural concealment to hide your presence. Minimize your footprint and blend in.
Bait/chum: Baiting or chumming animals is often illegal in many jurisdictions. Don't discard, burn, or bury the entrails of an animal. Use the unwanted bits for scavenger bait. Racoons and catfish are fond of scraps and both are edible.
Overset (quantity of traps): There's no such thing as too many traps. If you're capable of setting 10, set 10. If you can set 15, set 15. Set as many as possible and learn to set them correctly. Assume some of your traps will be triggered, but won't harvest game. Even a 20-percent chance of success out of 10 traps is better than 100-percent success on one.
Ambush (driving game): Many survival scenarios involve a single person. With a team of two or more stuck in an emergency, a team can be coordinated to drive animals into nets or toward an ambushing member with a club or spear. Utilize natural choke points and create a strategy. Work like a pack of wolves and be lethally efficient.
When Manuals Get it Wrong, Get it Right
Too many survival manuals are butchered and doctored from their original source. Once information leaves the author's control, editors and art layout folks have the potential to tweak a factually correct point into something foreign that's more pleasing to the eye than it's effective in the field. Here are a couple common mistakes leading to misconceptions we've found in the survival manuals in many bookstores today.
Spearing a fish: Have you ever tried hooking a minnow through the body with a steel hook? It isn't easy, and this is when you have one hand on the fish and one on the hook. How many survival manuals show a single “pencil-point” type wooden spear going through a fish floating in the water? The best type of fish spear is a forked spear that pins the fish to the underwater bottom.
Complicated trap triggers: Some of the best trap triggers can be learned from classic poorly drawn survival manuals from true outdoorsmen. Many survival manuals today feature traps we've never seen a single person construct and set on their own (though it may be possible with a steady-handed team of two or more). Intimate knowledge of a handful of triggers is better than limited knowledge of many. Don't try constructing anything that looks like the boulder Wile E. Coyote balanced upon a sharp point in the cartoon world to kill the Road Runner.
“M”-shaped fish trap: We've all seen that sketch in manuals. A set of sticks is driven into the ground to create a trap that resembles the letter “M.” Sometimes the back of the trap is also cordoned off with a “C” shape to create a pen. This trap works as long as the conditions are right. It sucks in rocky creeks, it sucks when the fish sought are able to wiggle through the gates (weave some horizontal branches between the vertical), and it sucks when fish won't swim into it. In rocky conditions, build a trap out of rocks and to get the fish to swim into the trap, beat the water with evergreen boughs walking from upstream down.
Odinson Archery Takedown Bow and Arrows
Just like the samurai sword was the embodiment of the samurai, an Odinson Archery bow is the embodiment of bowyer and master archer, Alan Odinson. Both are tough as nails and highly capable. Odinson has taken his passion for archery and turned it into his company that provides PVC bows at a fraction of the cost of wooden counterparts without sacrificing performance. A quick YouTube search of Odinson Archery will reveal trick shots and performance tests all done with one of the PVC bows offered.
We tested out the Take Down Assassin bow along with some of his broadheads. The bow takes down into three pieces and draws approximately 40 pounds at 28 inches. The average velocity of arrows fired is 150 feet per second. When used with the optional broadheads, the penetration on foam targets is impressive. According to Alan Odinson, “Two-blade designs offer a few benefits over the classic four-blade broadhead.” This includes penetration comparable to that of four-blade designs shot from more powerful bows. In a weakened survival state, a lower draw weight will be easier to use for obvious reasons.
After testing, it's apparent Odinson Archery has perfected the process and execution of blending nontraditional materials to make traditional bows. Lightweight, water-resistant, inexpensive, and ambidextrous, Odinson's bows are perfect for survival. His bows do what they are designed to do and with enough practice, instinctive shooting is preferred over complex sights. For less than $100, the survivor can add another game-getting tool to their kit.
www.odinsonarchery.com
More From Issue 23
Don’t miss essential survival insights—sign up for Recoil Offgrid's free newsletter today!
Read articles from the next issue of Recoil Offgrid: Issue 24
Read articles from the previous issue of Recoil Offgrid: Issue 22
Check out our other publications on the web: Recoil | Gun Digest | Blade | RecoilTV | RECOILtv (YouTube)
Editor's Note: This article has been modified from its original version for the web.


