Think of a one-piece pocket tool as a sidekick to your knife. At first glance, they're often just a funny-shaped piece of steel small enough to slip on a keychain or drop in your pocket. They might not look like much, but they're designed to shrink a handful of tools into an easy-to-carry package that keeps you running light and always prepared.
Even though a knife is the No. 1 tool you must carry in a survival situation, a blade has its limitations. A knife can chip, bend, or snap if used as a pry bar or screwdriver. And yes, if there are no other tools available, there may come a time to push your trusty blade to breaking point. But pocket tools are designed to pick up those tasks and then some, like turning hex bolts. Additionally, many pocket tools, because they don't have sharp edges, can travel with you as you board planes, drop your kid off at school, or otherwise go where a knife is viewed as a weapon.
The result? For an ounce or two of weight, you'll have more tools at your disposal than most college students can find in their dorm room. How's that for preparation? Here, we examined seven tools to see how they navigate modern life.
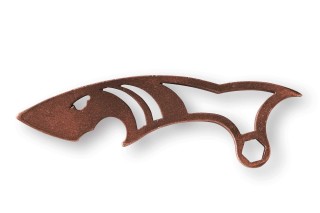
Make & Model - Cu Healthy Products The Copper Shark Utility 2nd Generation OAL - 3.375 inches Materials - Antimicrobial copper Weight - 1.45 ounces MSRP - $60 URL - http://www.thecoppershark.com
Thanks to pure copper's documented antimicrobial properties, the Copper Shark is said to provide a barrier between your hand and the germs that can make you sick.
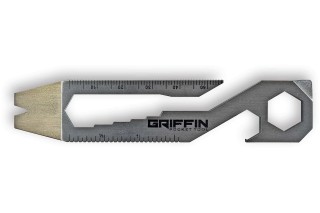
Make & Model - Kershaw PT-2 OAL - 3.25 inches Materials - 8Cr13MoV and glass-filled nylon Weight - 0.8 ounces MSRP - $10 URL - http://www.kershaw.kaiusaltd.com
It's clear how to use Kershaw's PT-2: Hang it from your key chain with the key ring and when duty calls, hold the tool by pinching it in the middle between thumb and forefinger.
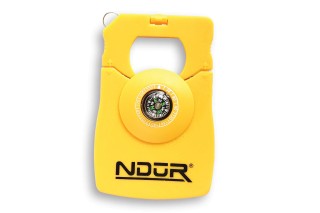
Make & Model - NDuR Survival Tool with Compass OAL - 3.3 inches Materials - Stainless steel and a hard-plastic casing Weight - 1.5 ounces MSRP - $6 URL - http://www.proforceequipment.com
NDuR's Survival Tool has 12 useful functions. The portion of the tool encased in yellow plastic contains the sharp bits, such as a box cutter and can opener. I
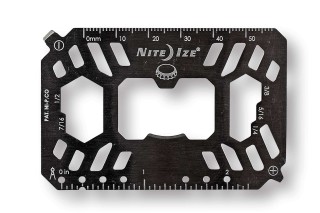
Make & Model - Nite Ize Financial Tool Multi Tool Card OAL - 3 inches Materials - 420 stainless steel Weight - 0.6 ounces MSRP - $6 URL - http://www.niteize.com
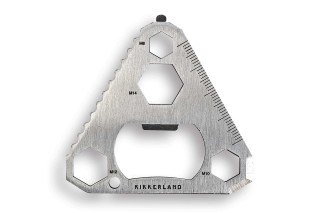
In the age of computer-aided designs and drawings, Nite Ize goes analog by adding a drafting compass, protractor, and ruler in its Financial Tool Multi Tool Card.
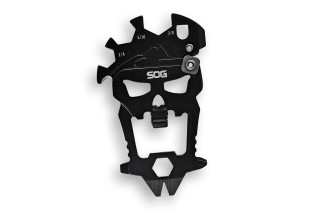
SOG packs 12 functions in a 2.25-inch-wide tool that resembles the beret-wearing skull
Cash Carry Considerations
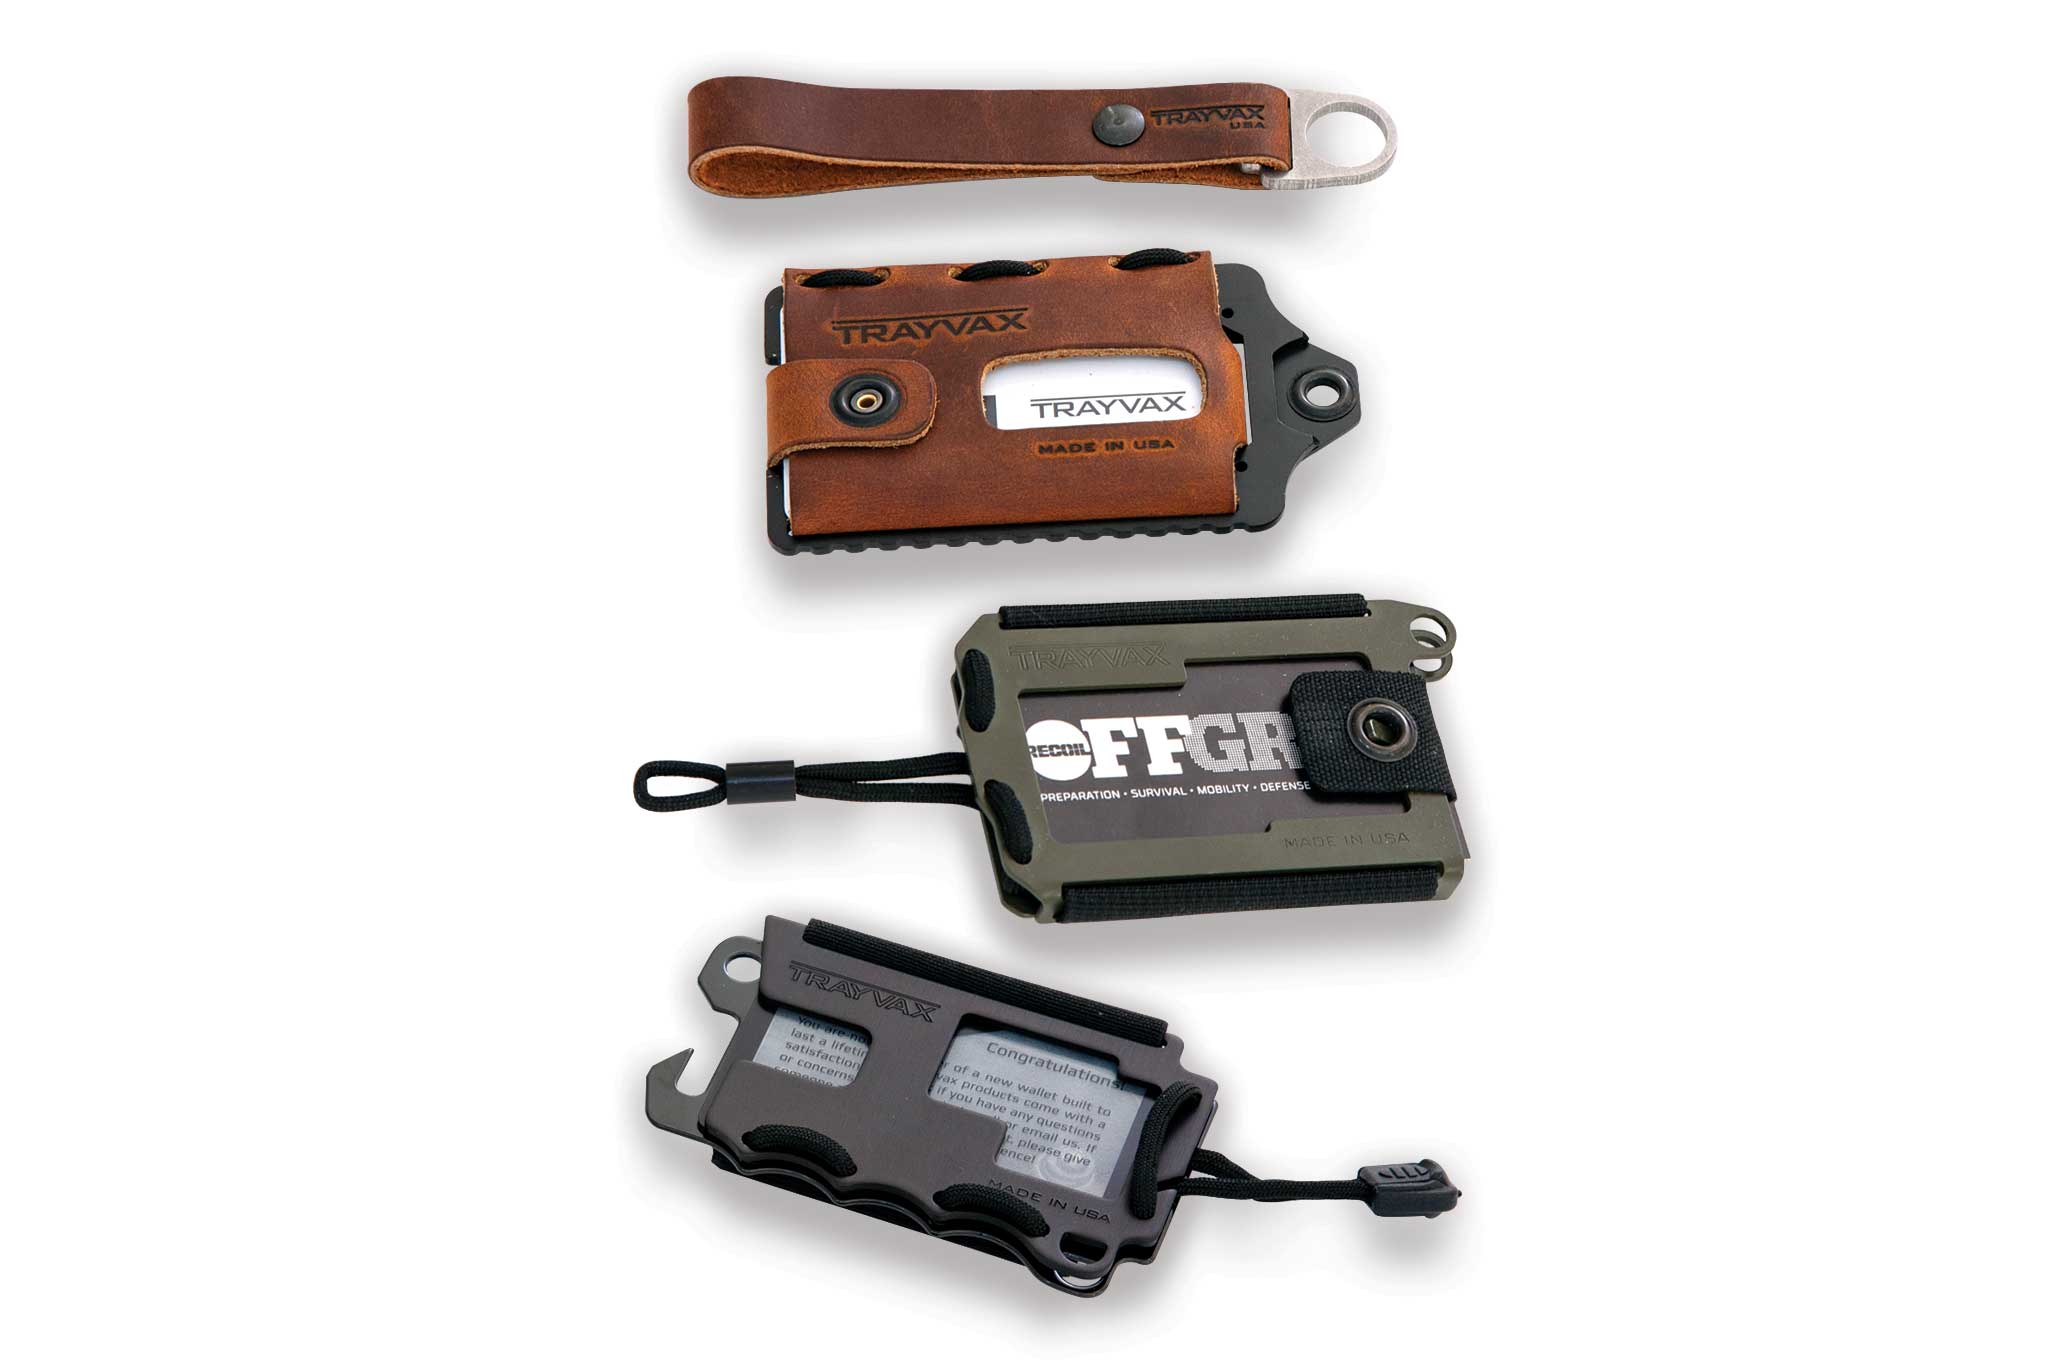
If you read our Survivalist Spotlight on Les Stroud in Issue 21 you'll remember how critical he said it is to carry cash as part of your EDC. However, we often overlook the importance of the tools we use to carry our money, credit cards, and IDs until they're lost or stolen. Ask anyone who has experienced that headache and they'll tell you it's no laughing matter, particularly if you're away from home. For more ways to integrate one-piece tools into your EDC gear, check out our OFFGRIDweb-exclusive review of three metal-framed minimalist wallets and a leather key fob bottle opener from Trayvax.
Hiking long distances is hard work, and this difficulty is amplified by steep inclines, uneven terrain, or a heavy pack. Each time you hit the trail, you depend on your legs to do a whole lot of heavy lifting and carry you to your destination. Rather than letting your arms flop along at your sides, you can get a whole-body workout and take some of the strain off your legs by using trekking poles. As we've said in the past, they're not just for hiking — they make a huge difference by supporting your body and reducing the risk of twisting an ankle or spraining a knee.
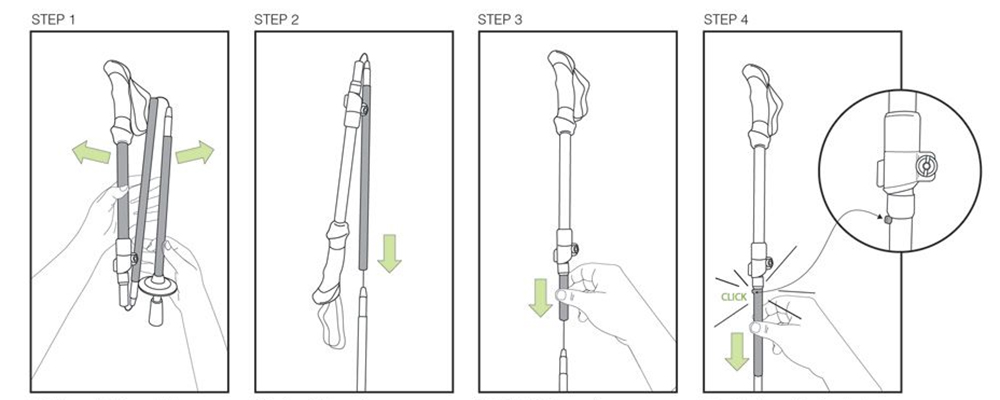
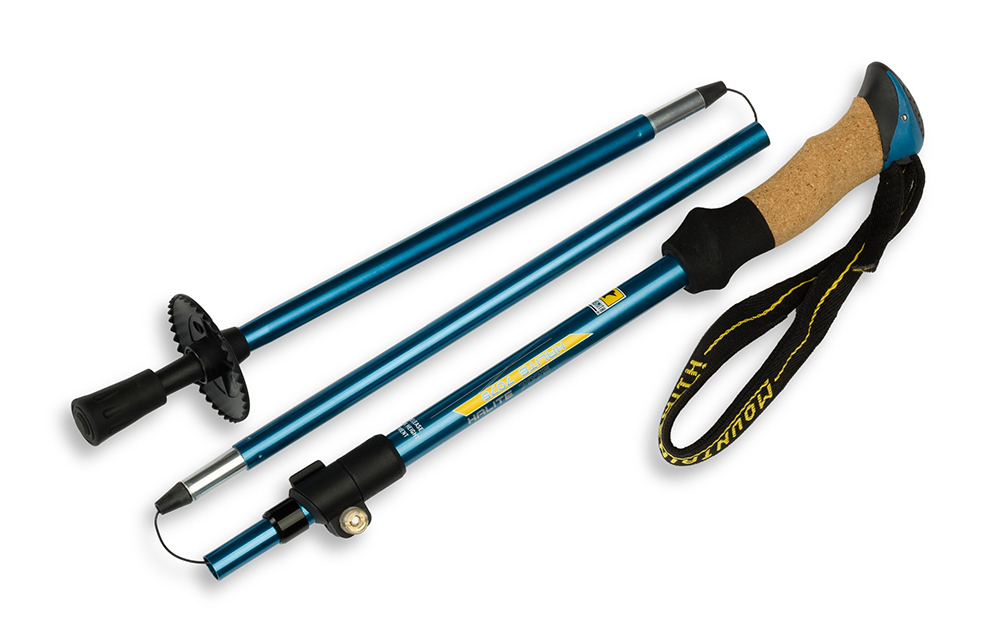
Most trekking poles are telescoping, meaning they can be adjusted in length. Some collapse or can be disassembled for easier transit, but they can still be tricky to fit into a small backpack. Mountainsmith has released a new set of trekking poles which compress down to just 16 inches long, so they can even fit into carry-on luggage.
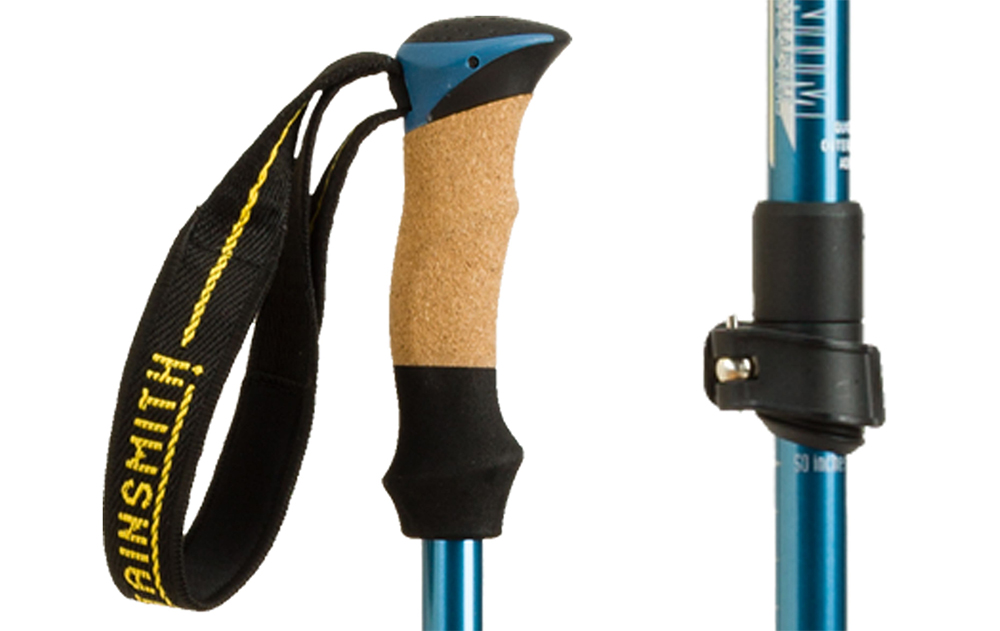
Each new Mountainsmith Halite trekking pole is made of five segments of 7075 aluminum, and snaps together like a set of tent poles. Vinyl-coated cables make sure the collapsed poles don't get separated in your pack. They offer carbide tips, as well as included rubber tip covers, hiking baskets, and wide snow baskets for terrain ranging from hard to soft.
The Halite's grip covers are a combination of natural cork and EVA polymer, with adjustable neoprene wrist straps. Height is adjustable, and load capacity is up to 160 pounds.
The pair of poles weighs 1 pound 5 ounces. MSRP is $80 for the pair. For more information, go to Mountainsmith.com.
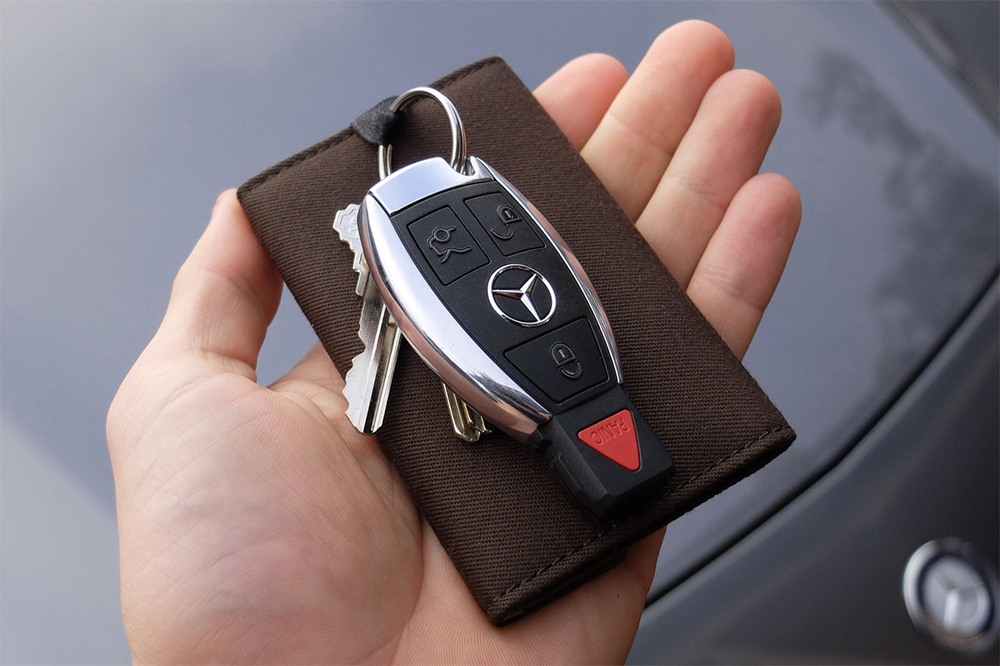
Go to any new car dealer and sit down in one of the vehicles on the showroom floor, and you'll likely notice the absence of one feature that was once universal on all cars: an ignition key hole. While some new cars still retain key holes on the steering column and driver's door in case of battery failure, most new cars these days rely on keyless entry and ignition. It's undeniably convenient to have your car unlock automatically as you walk up, and to start at the push of a button, all while the key fob is still in your pocket.
An example of an RFID-blocking key fob guard from Silent-Pocket.com
However, this entry and ignition system poses a potentially serious security threat due to the growing risk of keyless car theft. Car manufacturers have made it difficult for criminals to start from scratch and spoof a specific vehicle's key signal out of thin air. But it is possible to bounce the real key's signal over long distances, and tech-savvy thieves are doing just that.
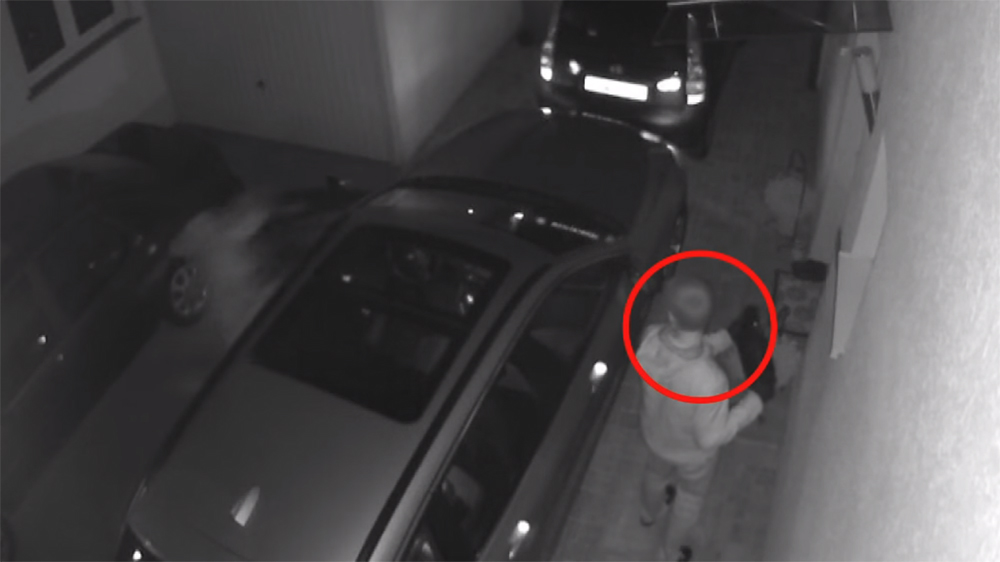
By getting within the signal radius of your car key — usually a few yards — a criminal can use a range-extender or repeater device to amplify that signal to ten times that range. Say your car is sitting in your driveway while you're asleep, and your keys are inside the house behind your locked front door. Thieves can stand outside the house, pick up the signal, and bounce it in real time to make your car think the key is right next to it. The car unlocks, and they hop in, press the start button, and drive off.
One criminal stands near the house with the repeater device, while the other opens the door.
In case this sounds hard to believe, here's a video of this exact scenario happening to a new Mercedes sedan in England last week. It took the masked perpetrators just 20 seconds to enter the car, and about a minute to make a clean getaway.
You might be thinking the car will shut off once it realizes the key isn't inside, but that's not normally the case. For safety reasons, most cars will sound a chime and give a warning about the key, but will remain running until they're turned off. This is so the owner won't crash or end up stranded if the key fob battery dies while driving. Unfortunately, it also allows car thieves to sneak off to a chop shop or even flee the country.
This video from ADAC, a German automotive organization, explains how these attacks work and demonstrates another scenario:
So, what can you do to prevent keyless car theft? Until vehicle manufacturers establish a standard way to prevent these attacks, the best solution is to block your key's signal when it's not in use. This can be accomplished by placing your key in a faraday cage or thick-walled metal box at home, ideally away from the exterior walls of your house. You can also carry your keys in an RFID-blocking sleeve or pouch — this limits convenience slightly but can prevent attacks like the restaurant example in the video above.
While this form of car theft is still somewhat rare, it's worth considering that your shiny new car and its fancy security system can be easily defeated if a determined criminal tricks it into thinking you've handed him the key fob.
Whether you're getting ready for a routine day at the office or crawling out of your frosty tent in the woods, a piping-hot cup of coffee can make any morning better. We've always made a point to bring coffee on our overnight expeditions, and while the instant variety is better than nothing, it's a far cry from the real deal. Fortunately, there are many ways to brew coffee in the backcountry — check out the Backwoods Brewing poll we published for an analysis of the most popular methods.
Coffee might not make you look as chipper as this guy in the morning, but it certainly helps.
We recently came across a portable way to brew coffee that's unlike any other we've seen before. In fact, it's so outlandish that its mere existence caught our attention immediately. But after using this unusual copper device, we found it wasn't as ridiculous as you might think.
The Bripe
Coffee brew pipe — these are three words you don't normally see in succession. As you might have noticed, the name Bripe is a just a portmanteau of brew pipe, and it's the moniker that Tim Panek came up with when he invented this device in 2015. Panek, an avid outdoorsman, thought up the Bripe while considering ways to make high-quality coffee without lugging around devices that were “too complex, too bulky, and weighed too much to fit into a backpack or river kayak.”
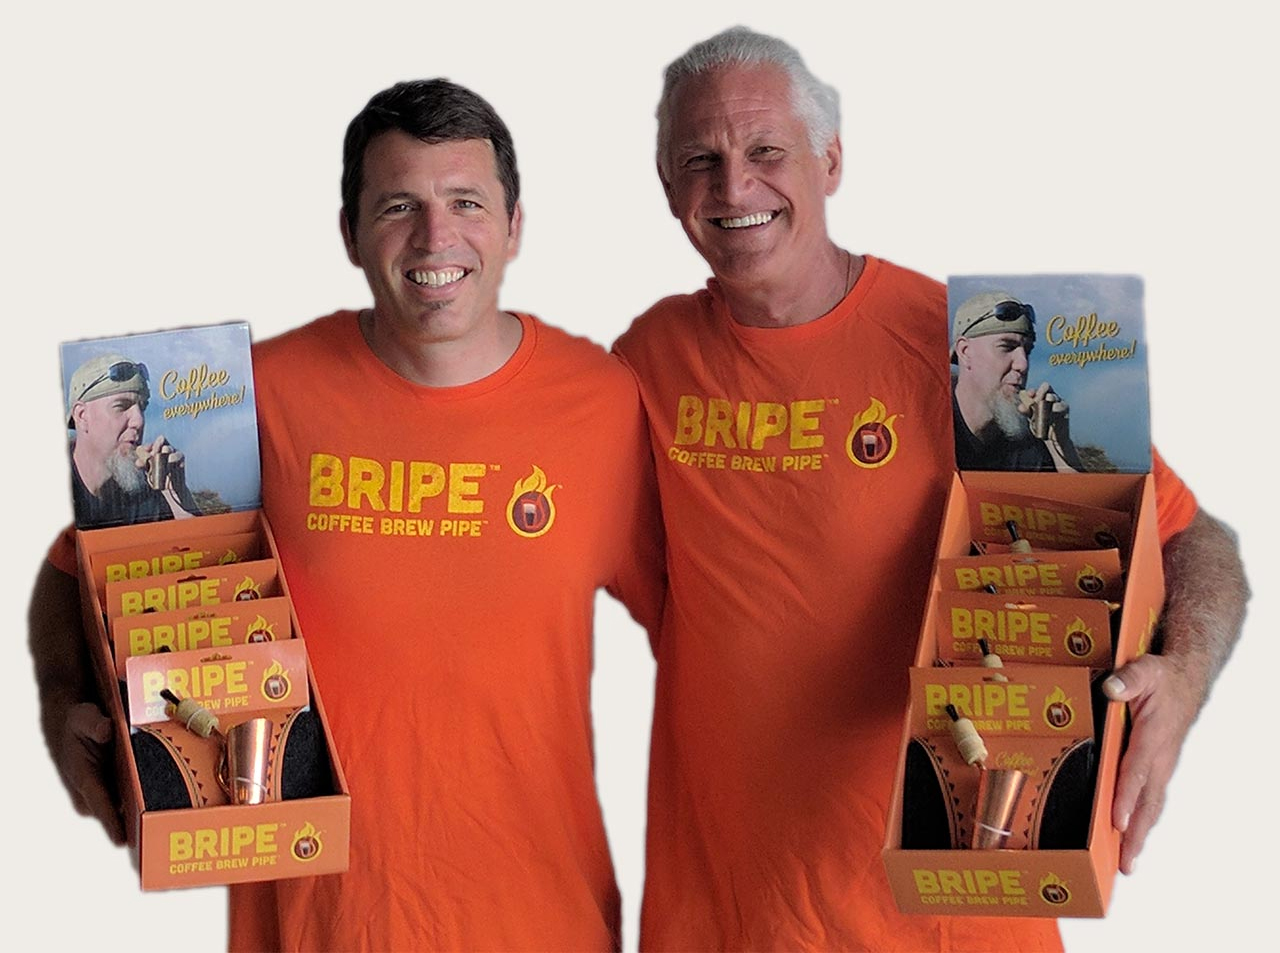
Craig Hall (left) and Tim Panek (right)
Panek made a prototype out of paper, then fabricated a working version from heat-conductive copper. With the aid of his friend Craig Hall of Equator Coffee Roasters, the Bripe prototype was soon patented and developed into the version seen here. Funding from a successful IndieGoGo campaign in 2016 allowed the duo to start manufacturing and distributing the Bripe on a larger scale, but it's still relatively new to the market.
We met Panek and learned about the Bripe after spotting the company's booth at the Outdoor Retailer trade show. A few weeks later, he sent us a sample to try out. We were admittedly skeptical, but figured we'd give it a shot… no pun intended.
How it Works
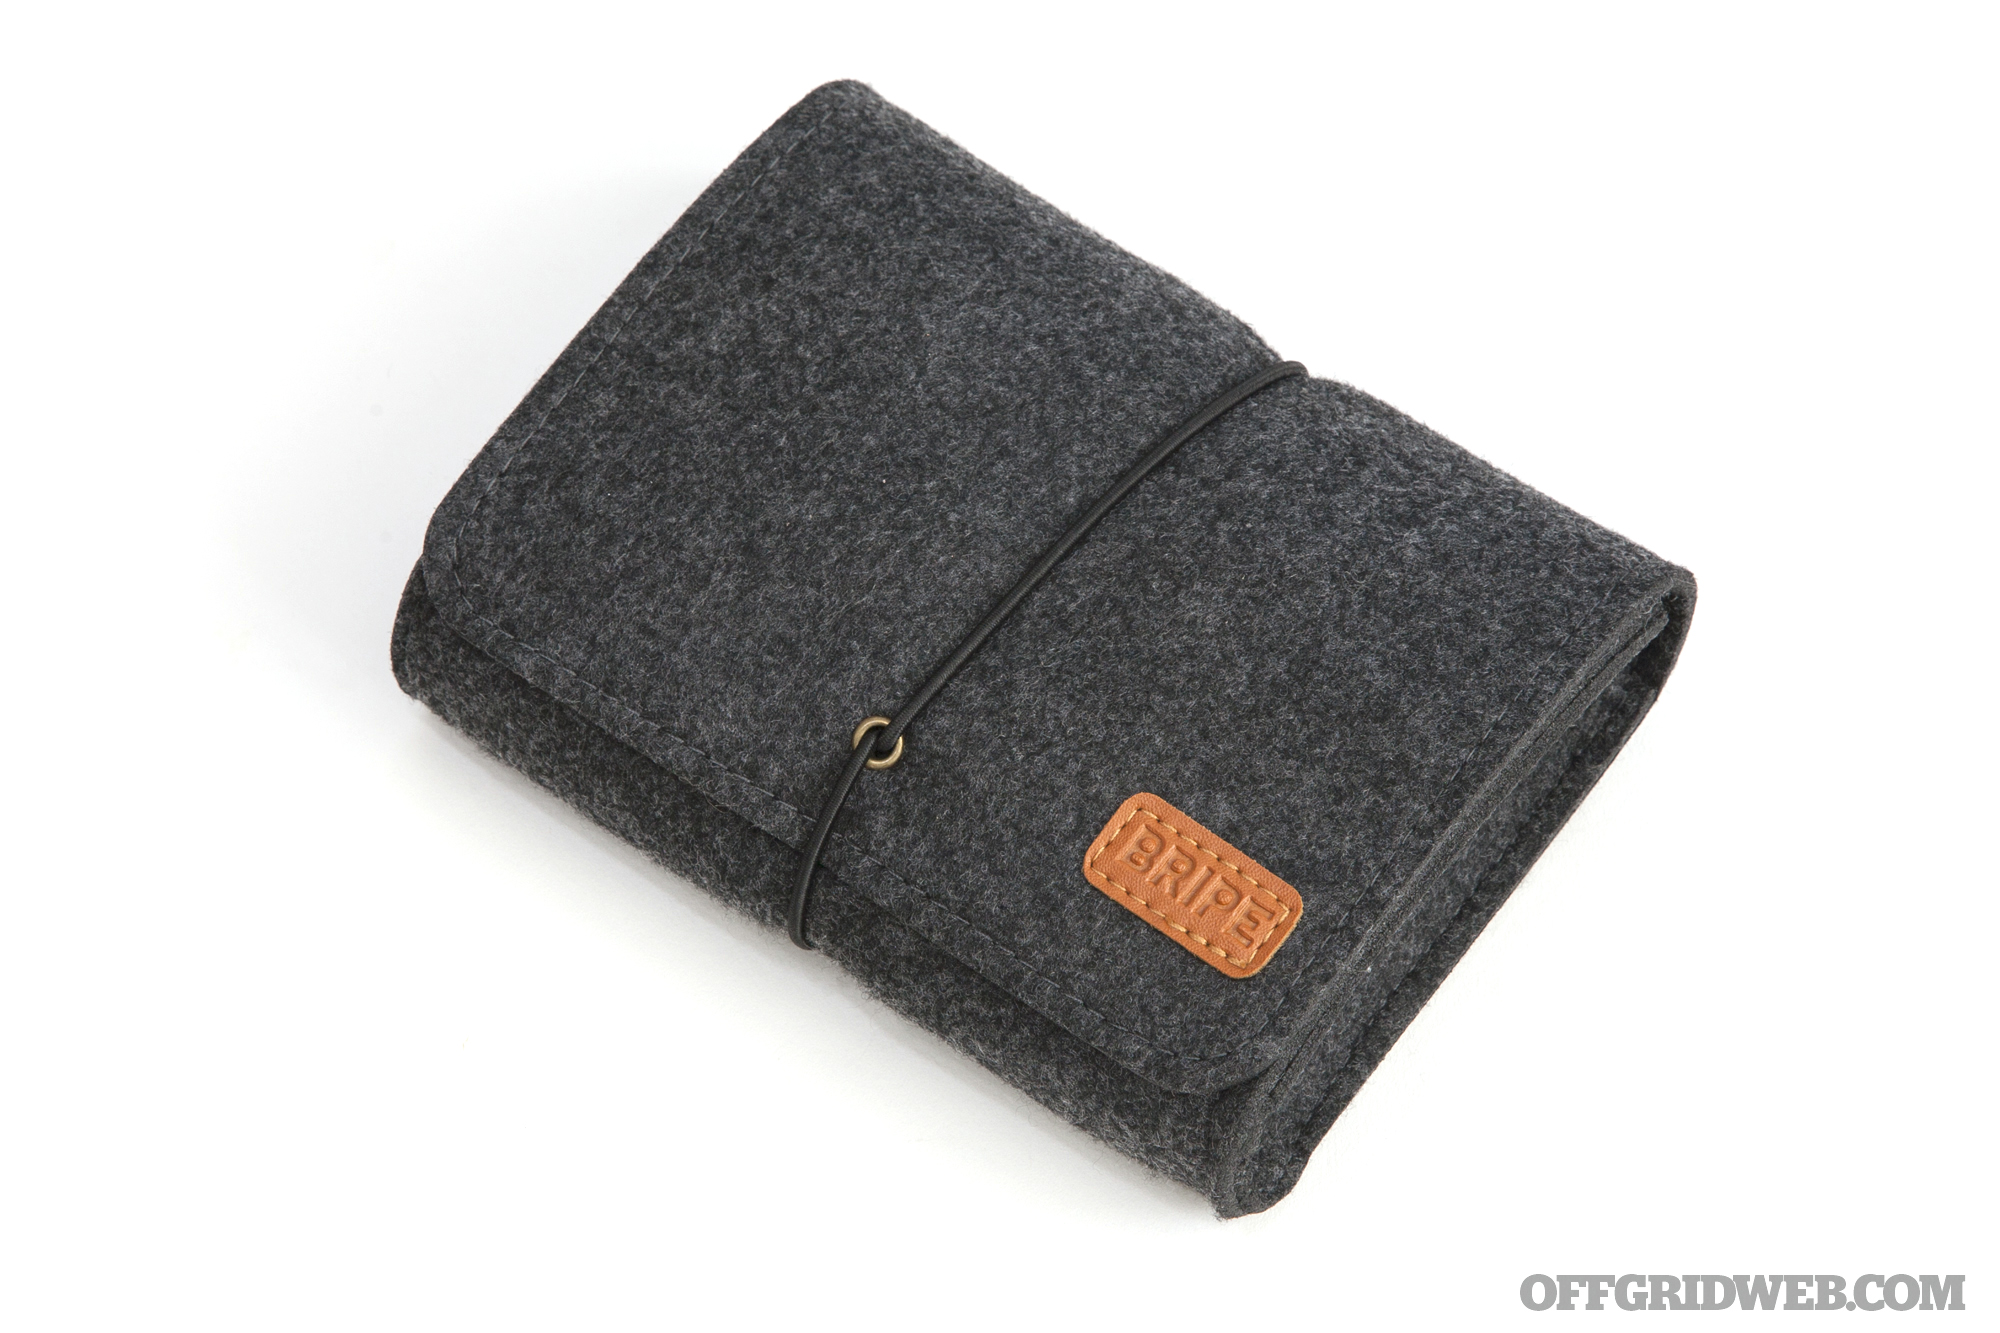
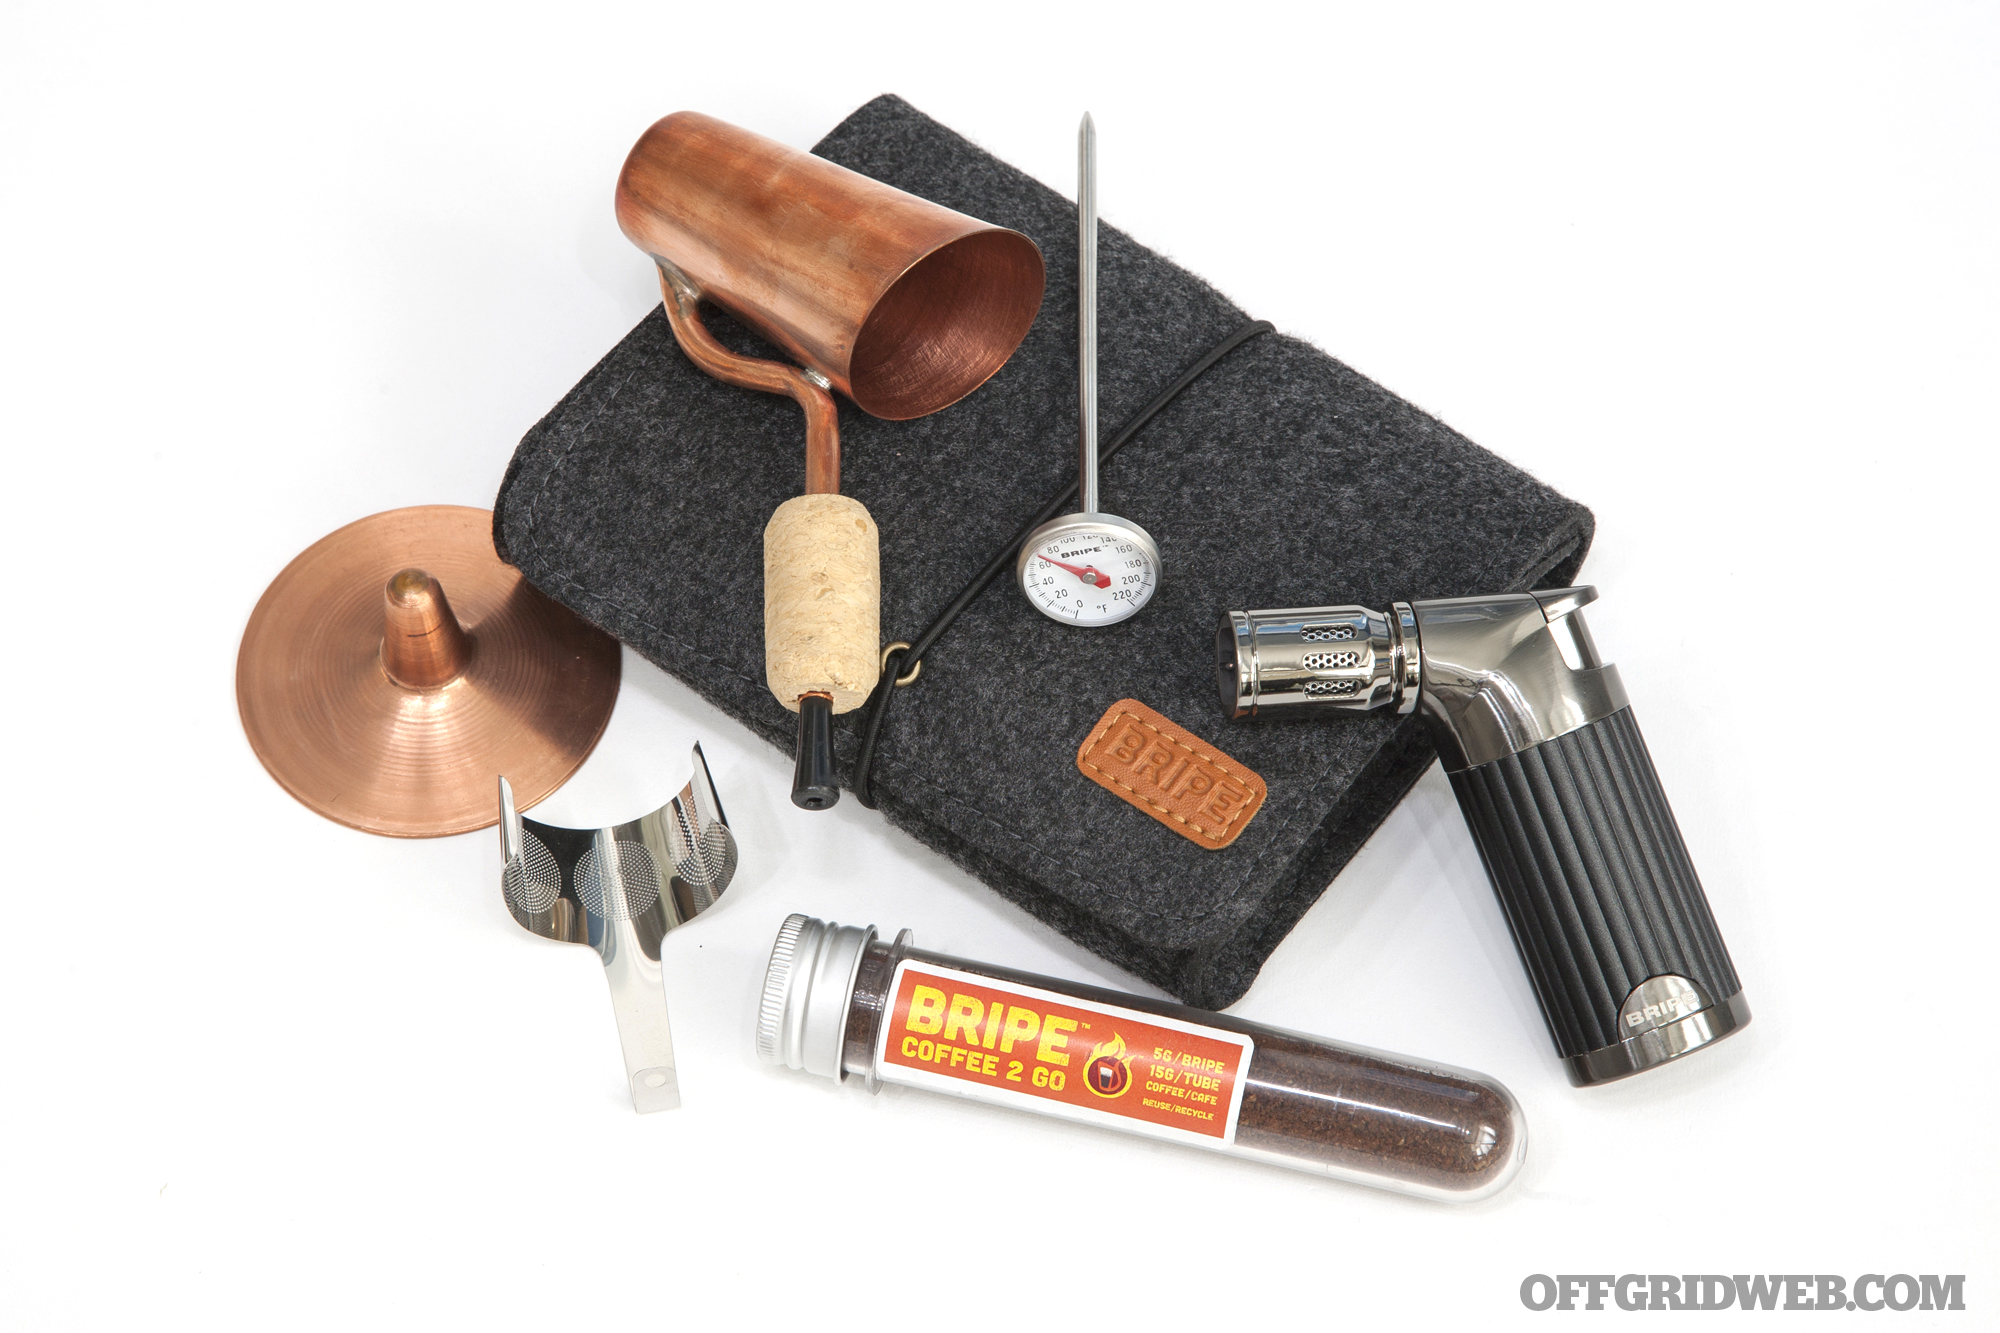
The Bripe kit arrives in a neat little felt pouch.
It's a coffee pipe, but don't worry — you don't burn dry coffee grounds and inhale the smoke. Yes, that's an actual question we were asked, and no, we never plan to try it. Another onlooker referred to the device as a “coffee bong”. While that's not really accurate either, it's getting closer.
Without further ado, we'll share some photos of the step-by-step process of using the Bripe — or, as the founders call it, briping (bry-ping, not brip-ping).
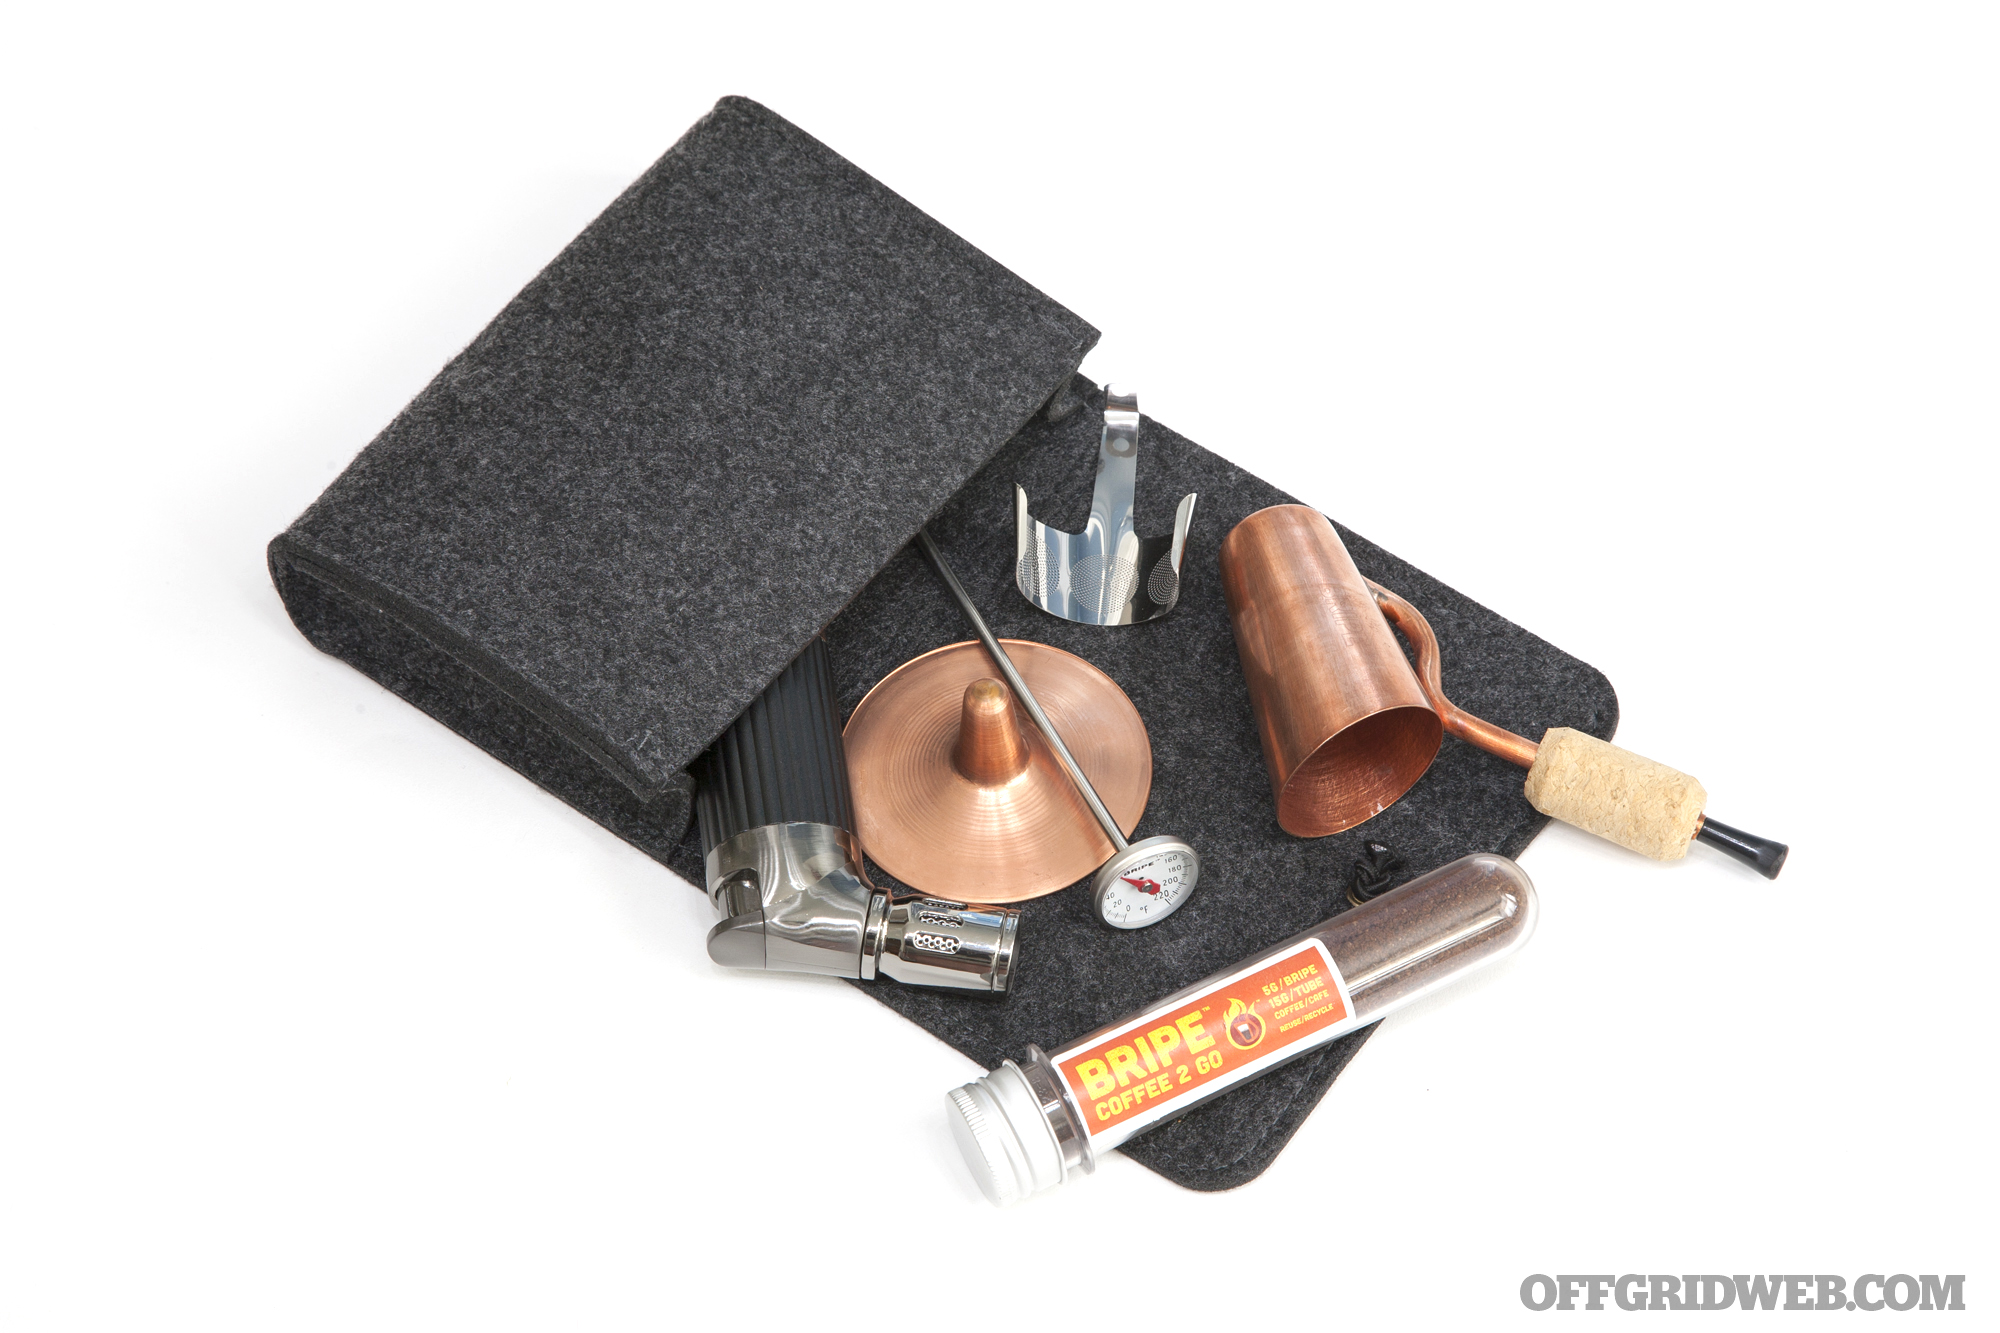
This kit contains six basic components, pictured above and listed clockwise from left. It retails for about $80, though it's currently on sale for $60 during the holiday season.
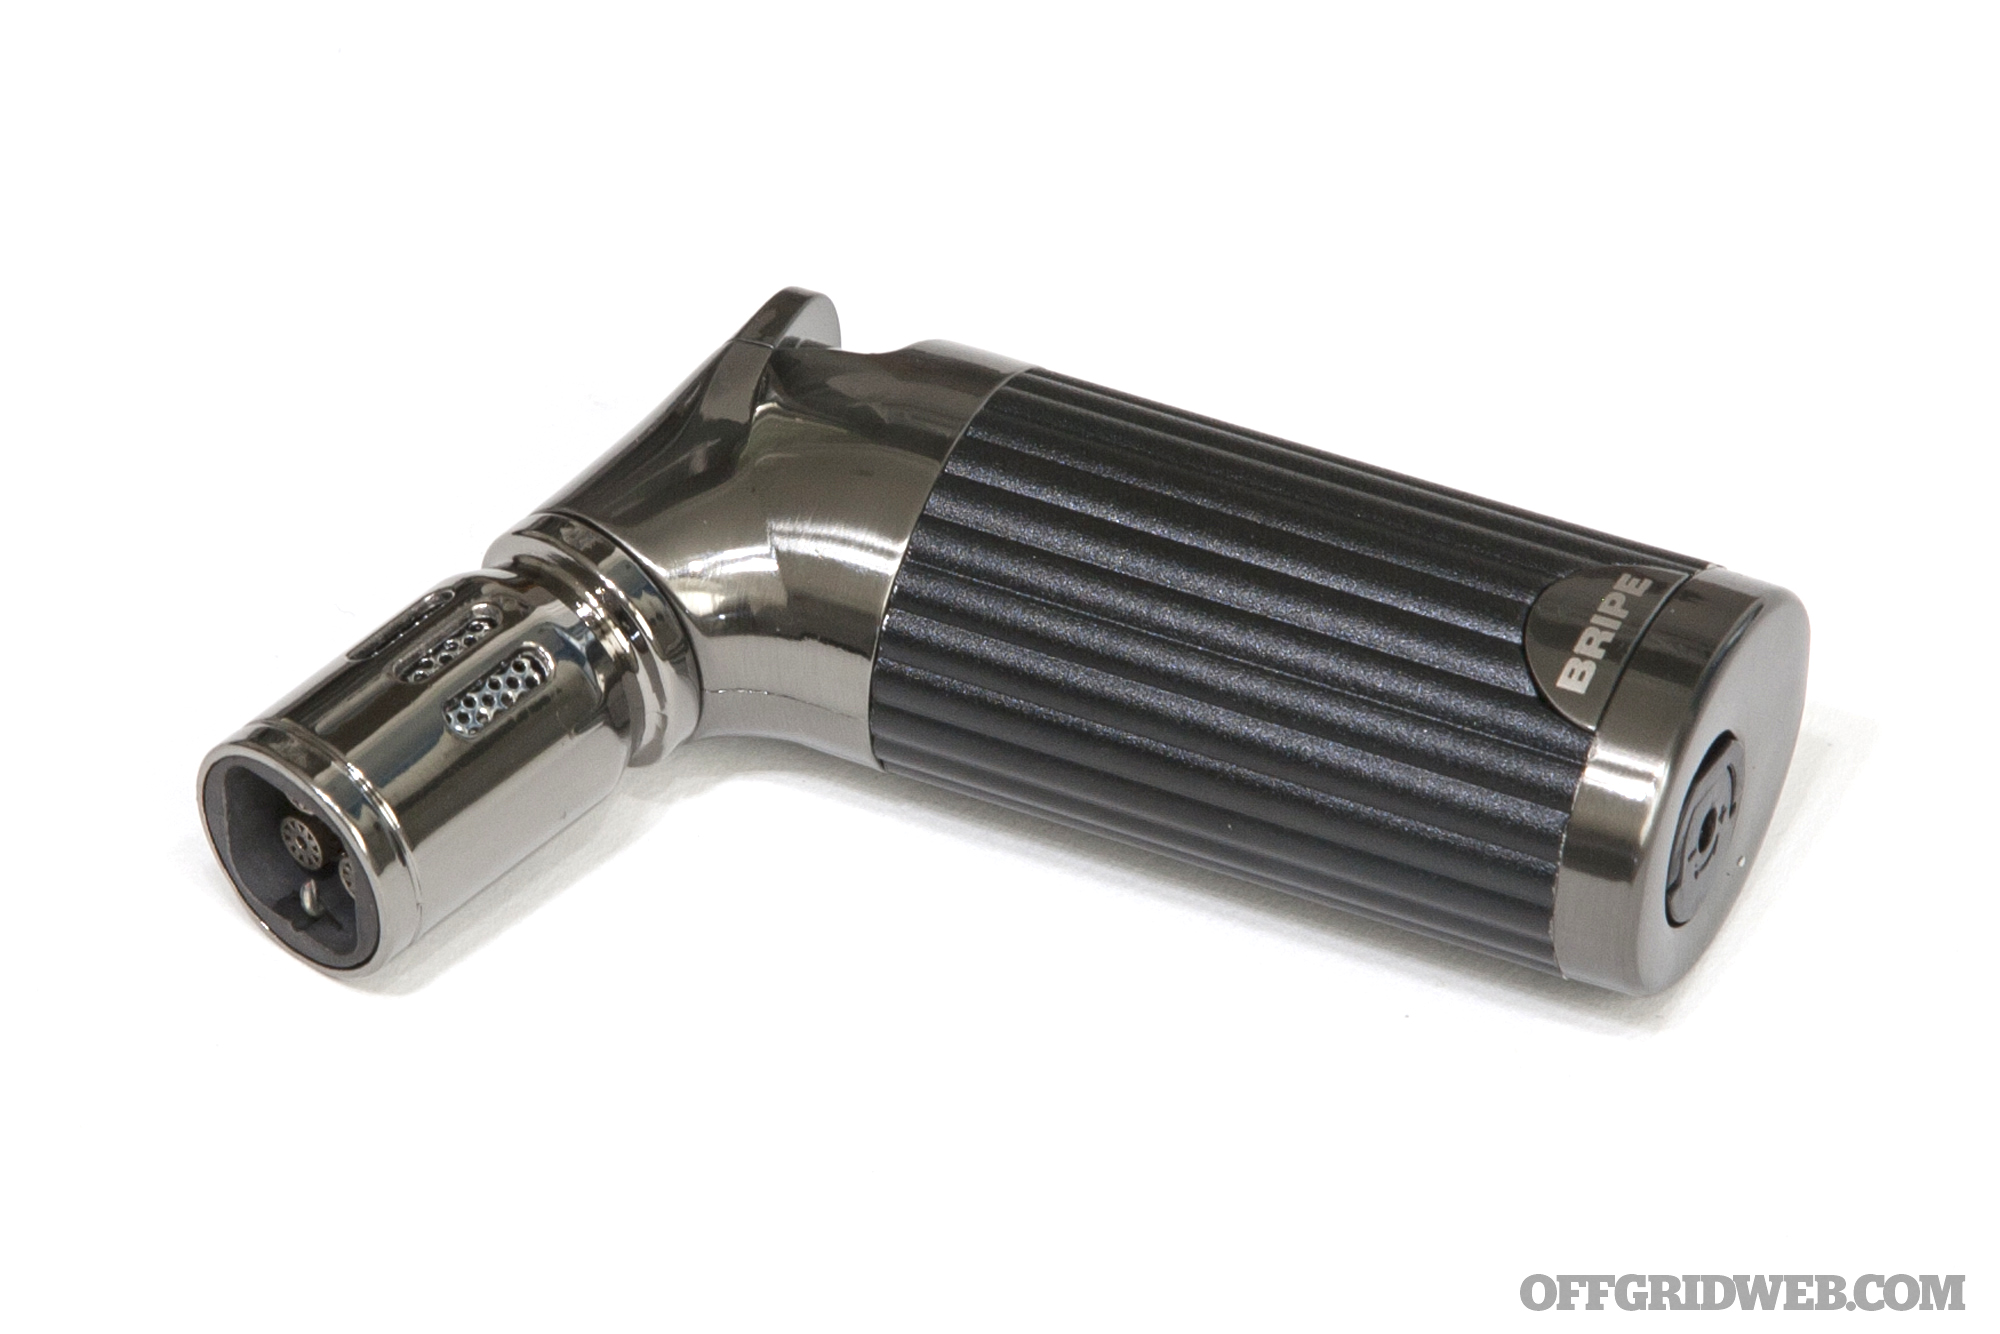
Quad-jet butane torch
Copper cooling stand/base
Thermometer
Reusable metal filter
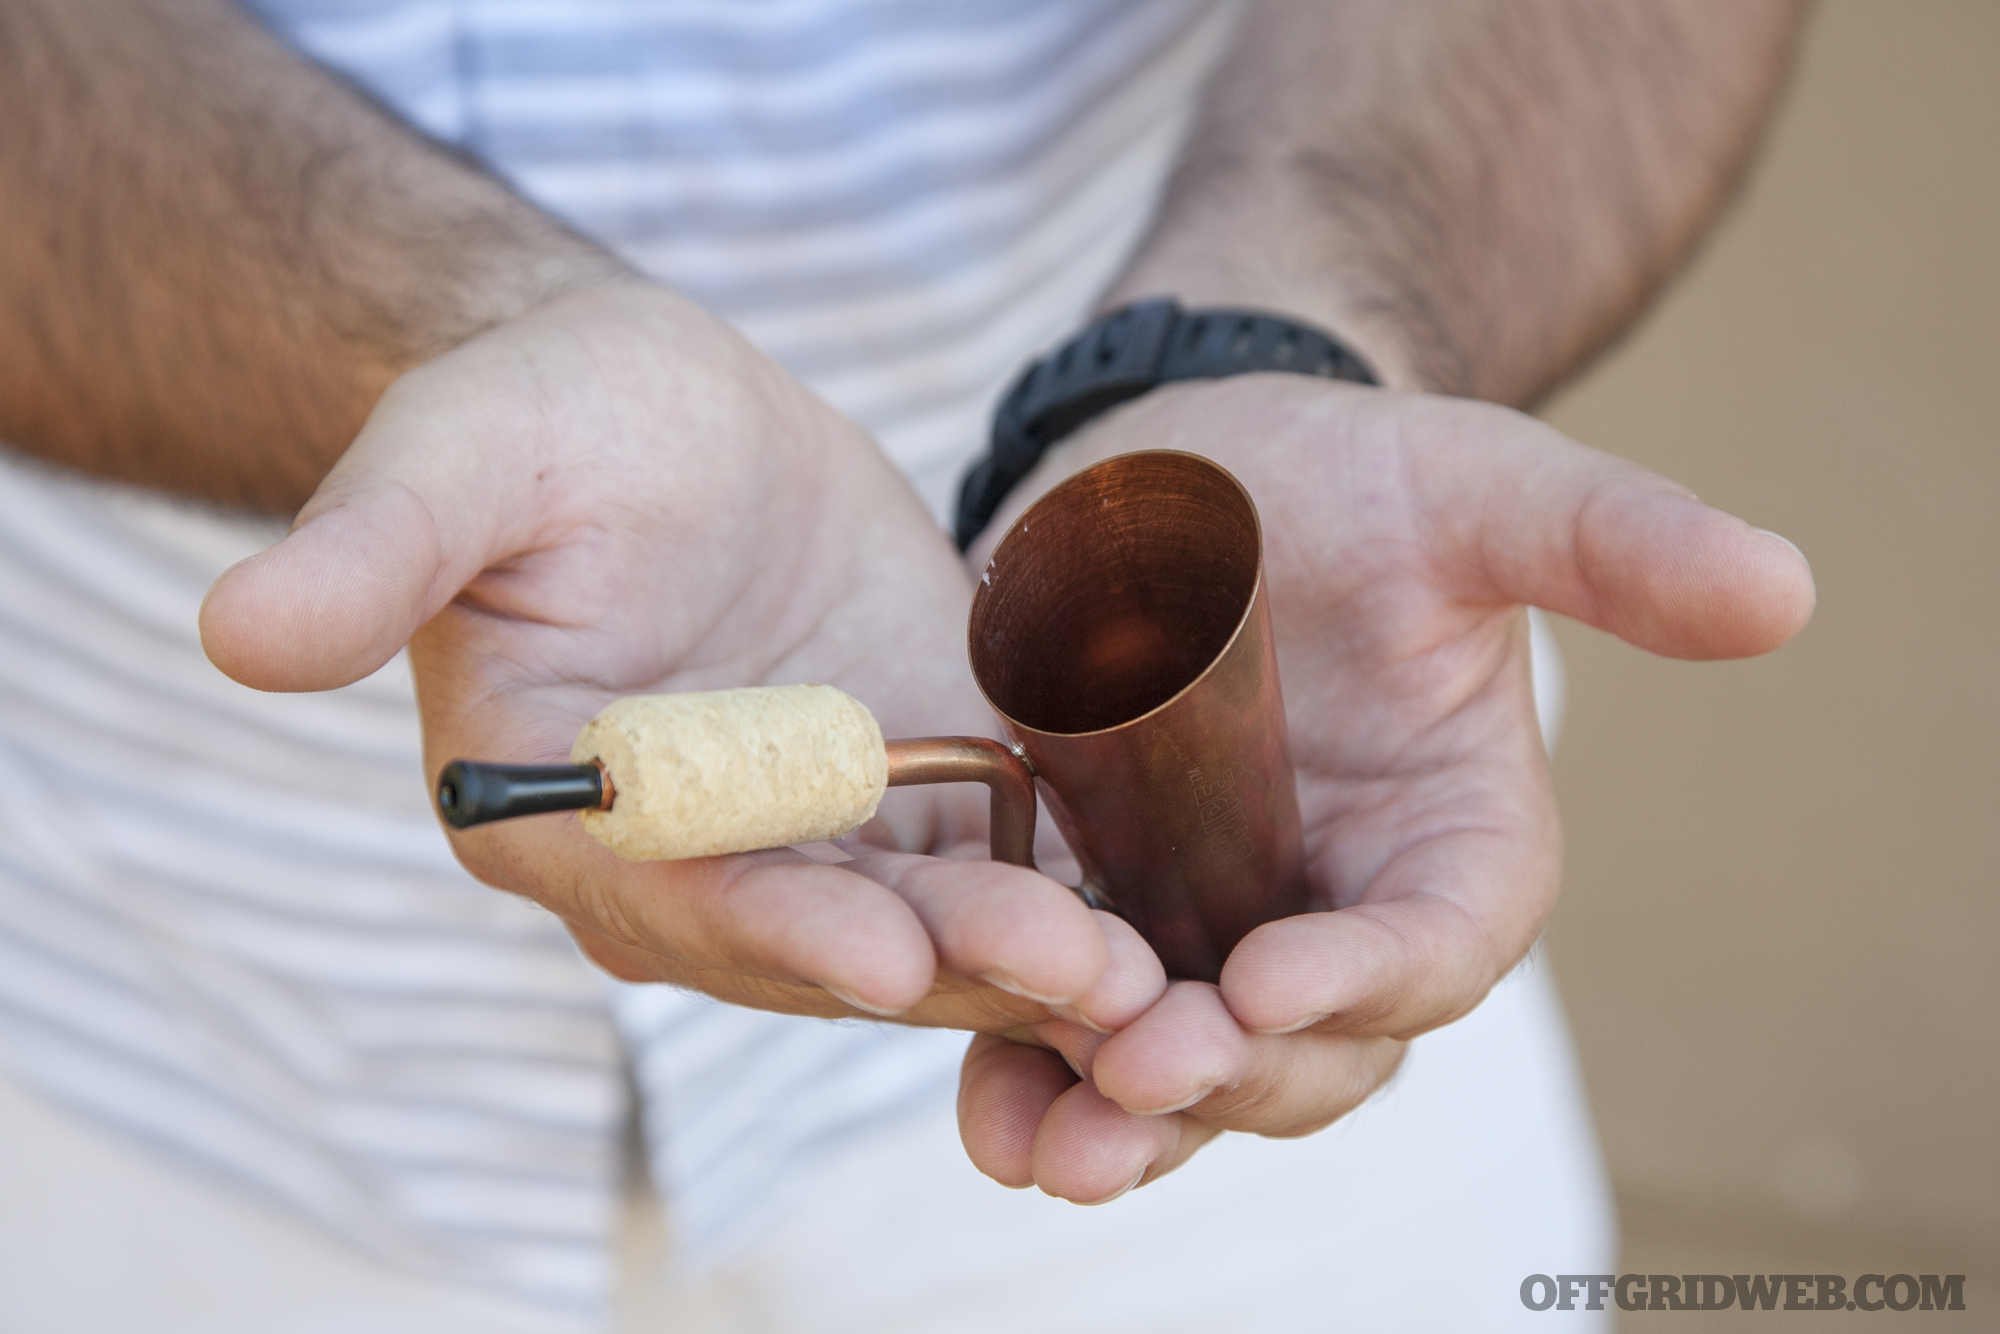
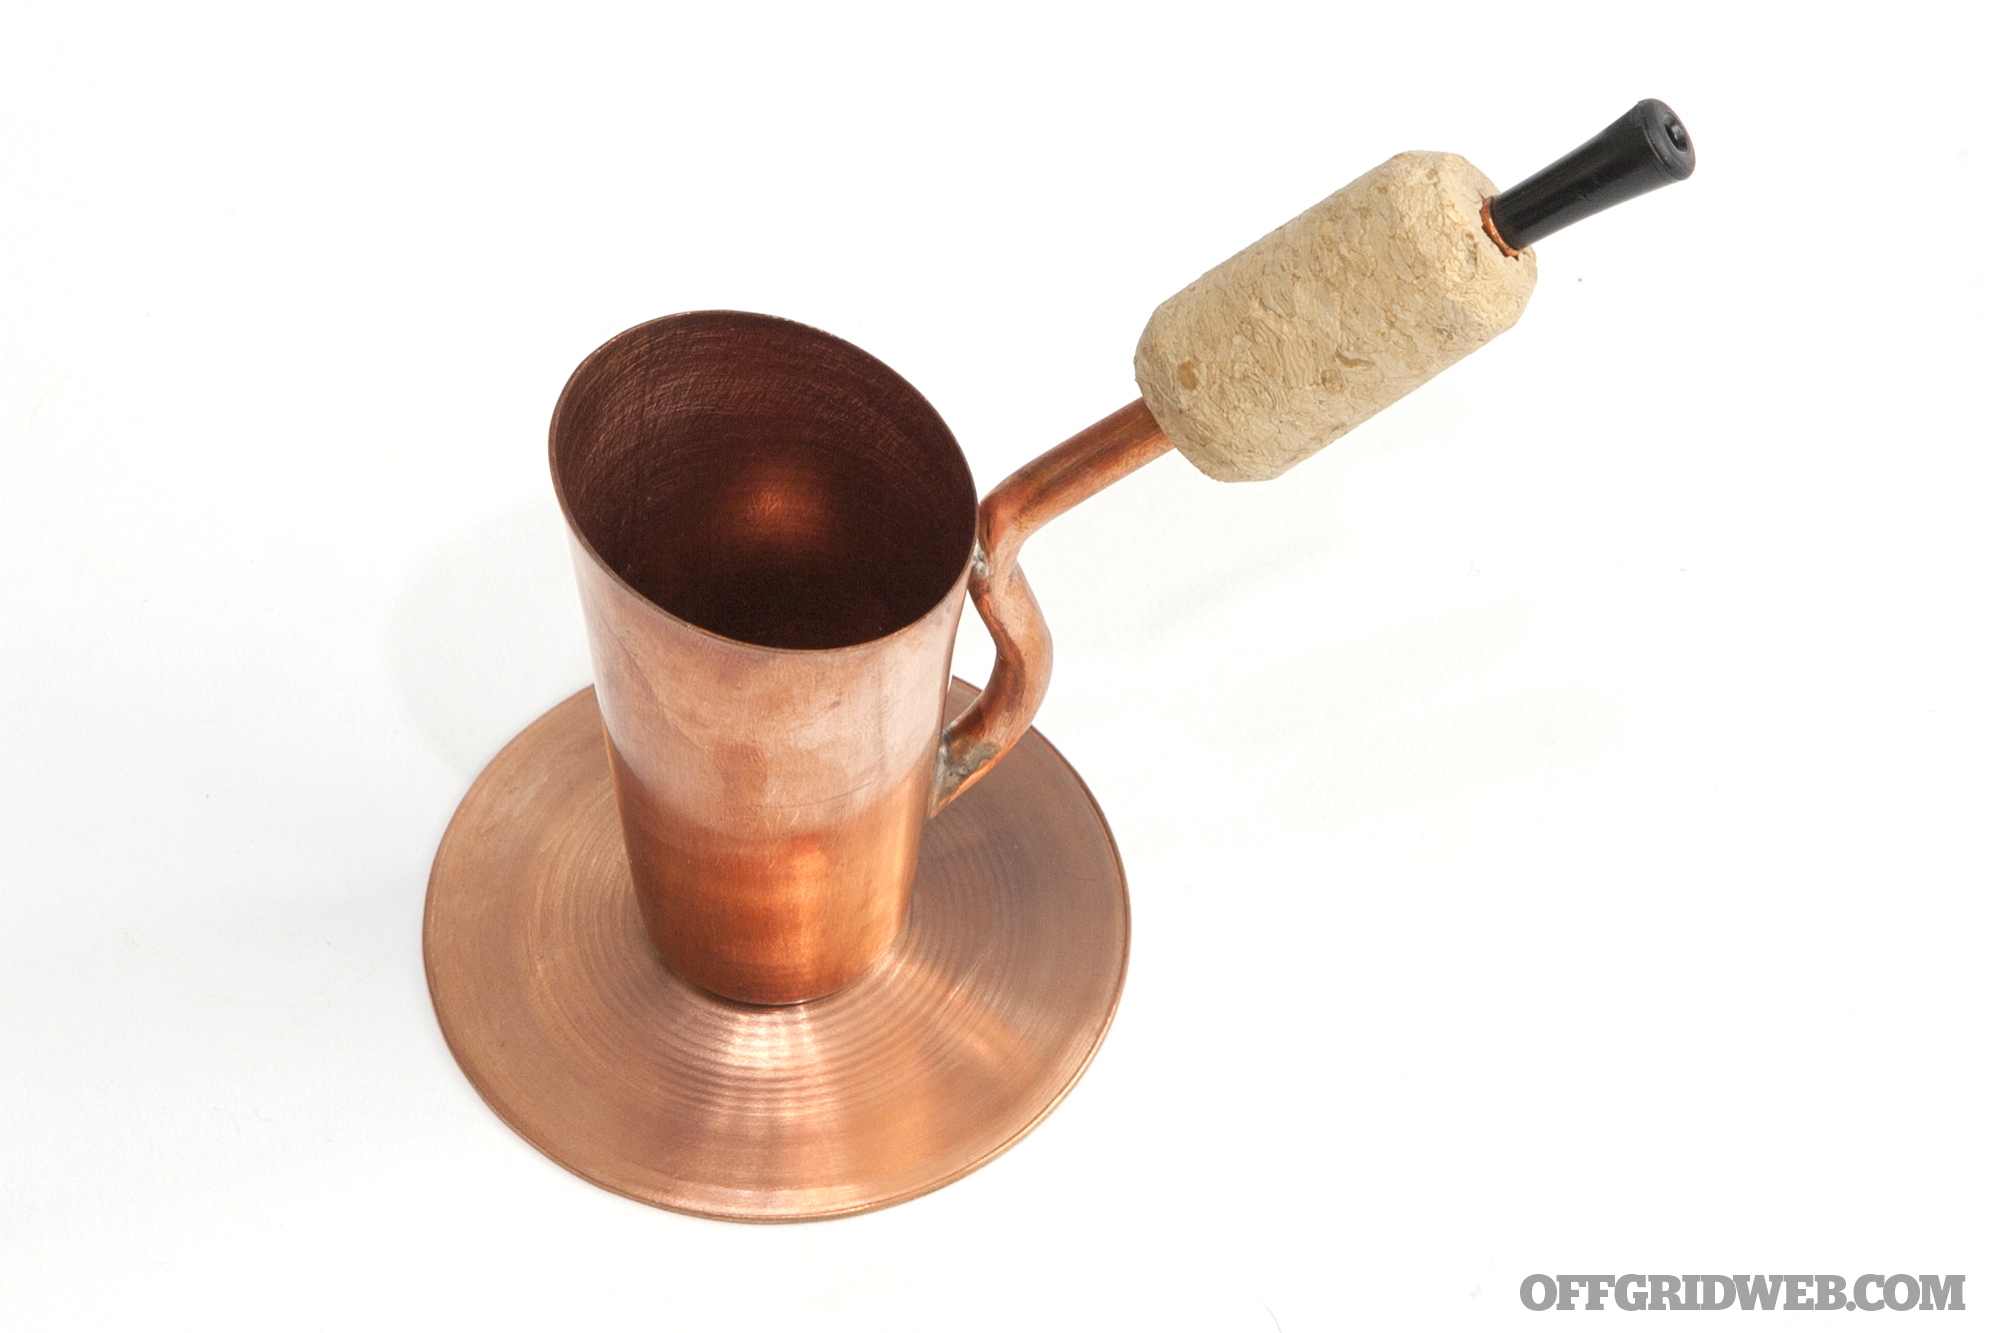
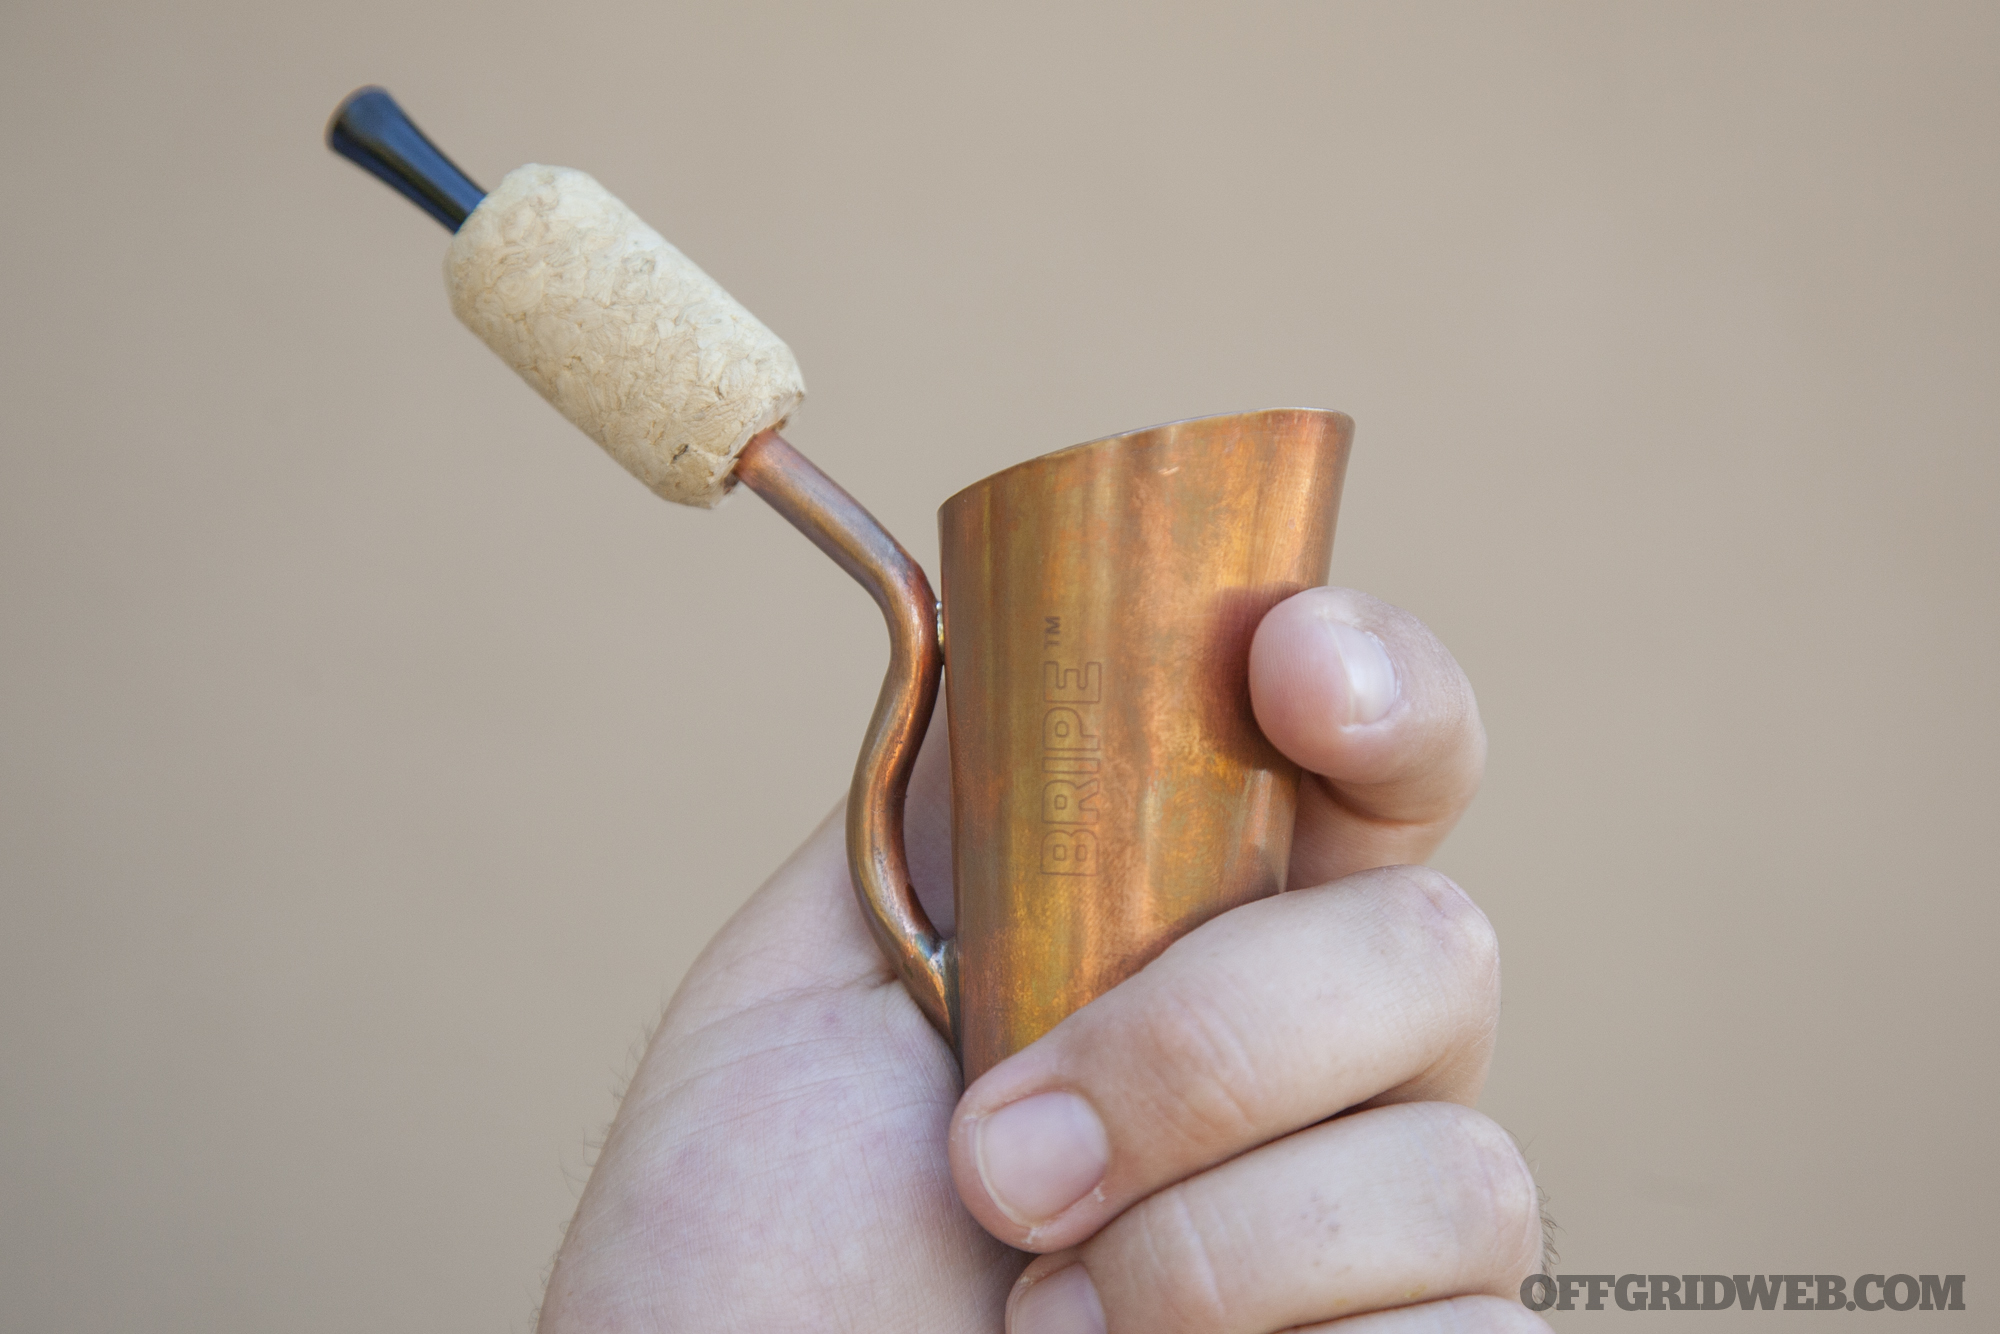
Bripe brew pipe
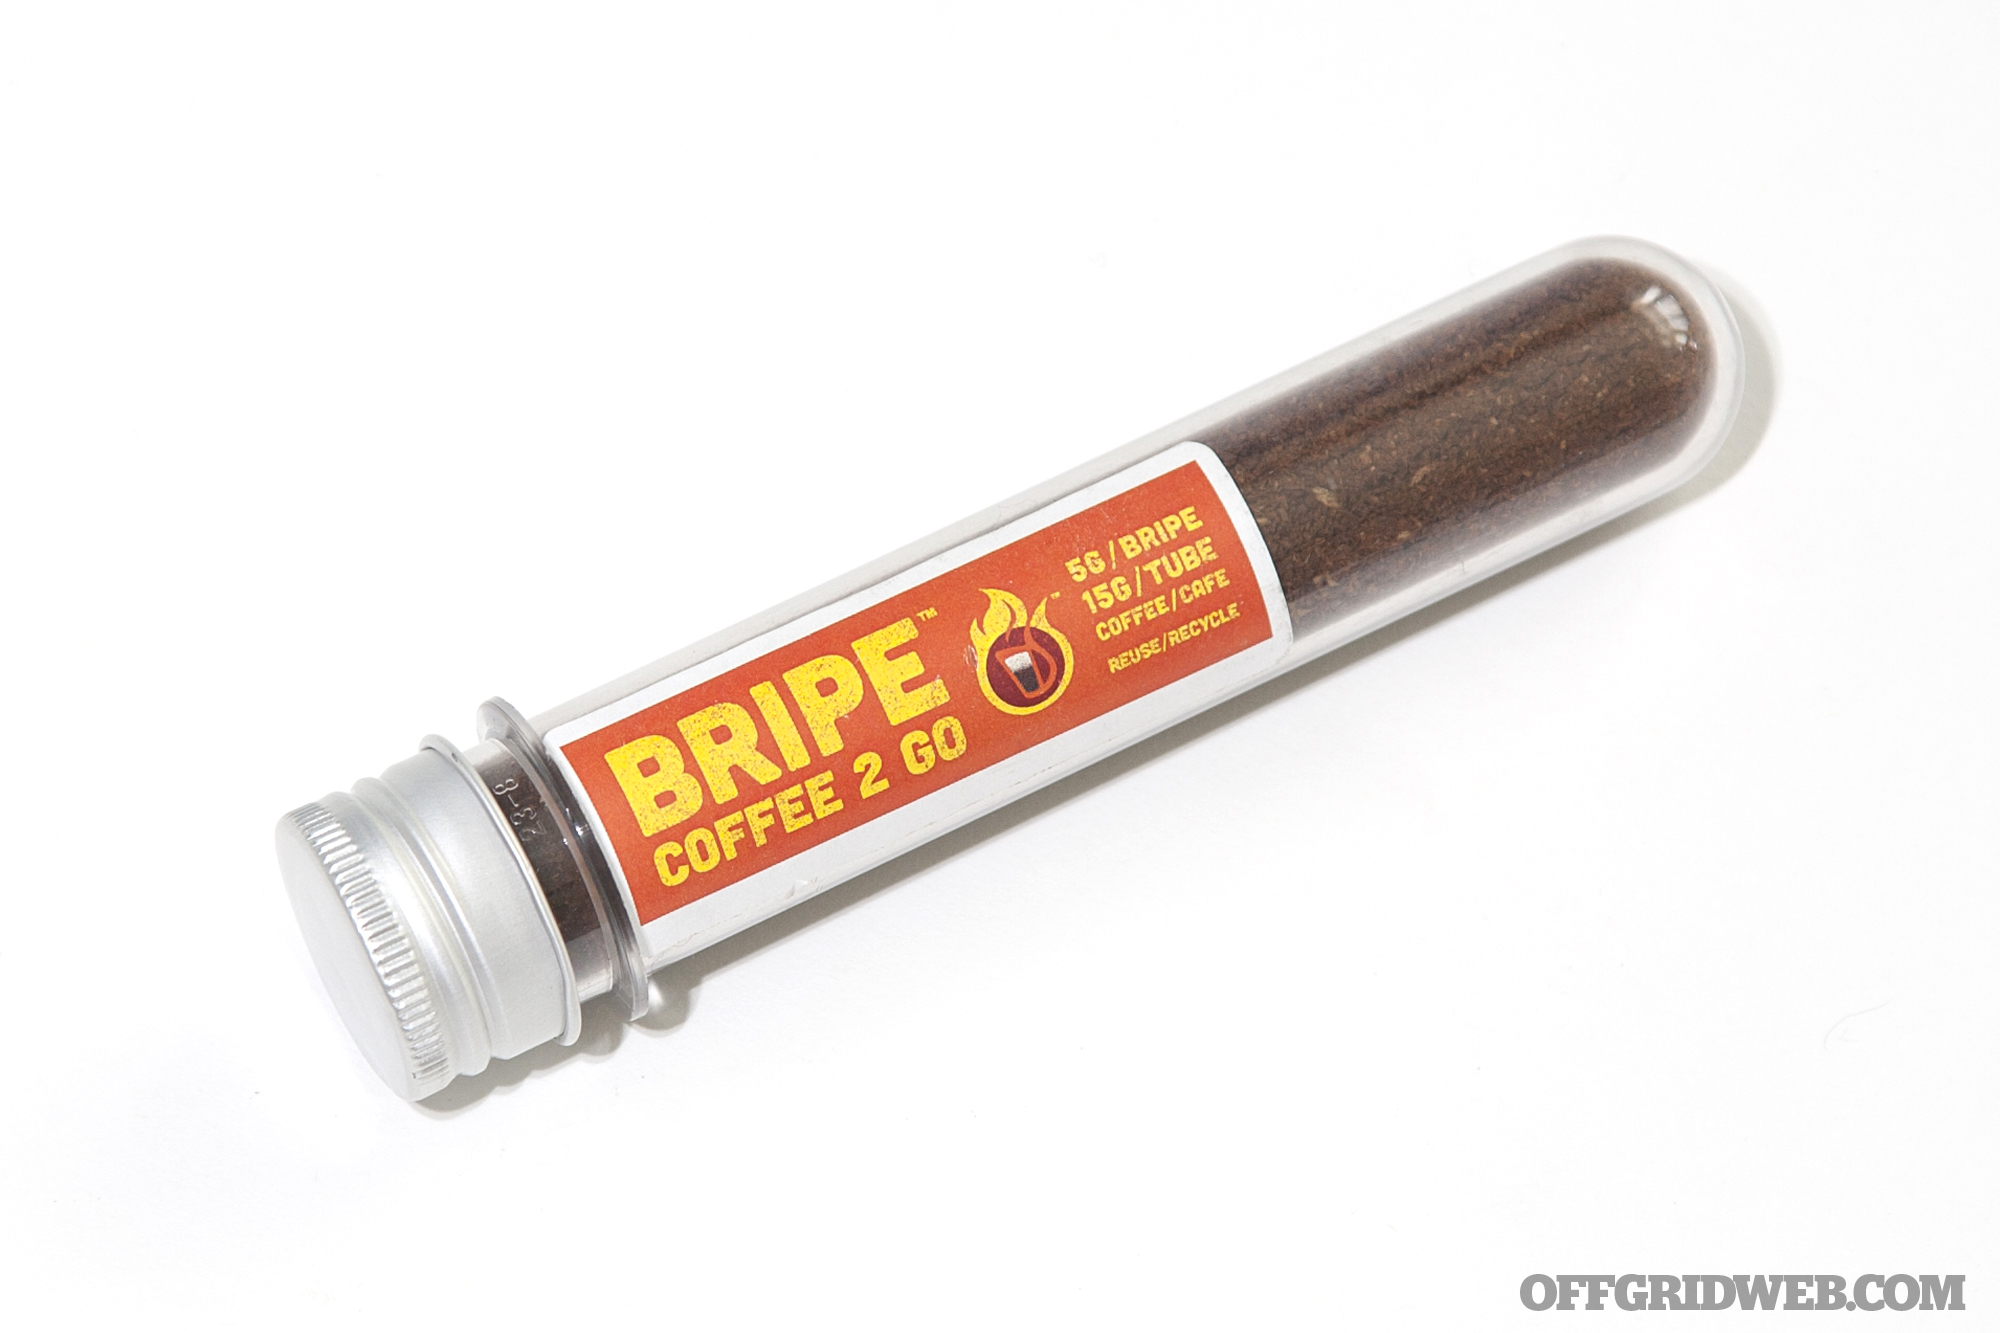
Coffee vial (contains three servings)
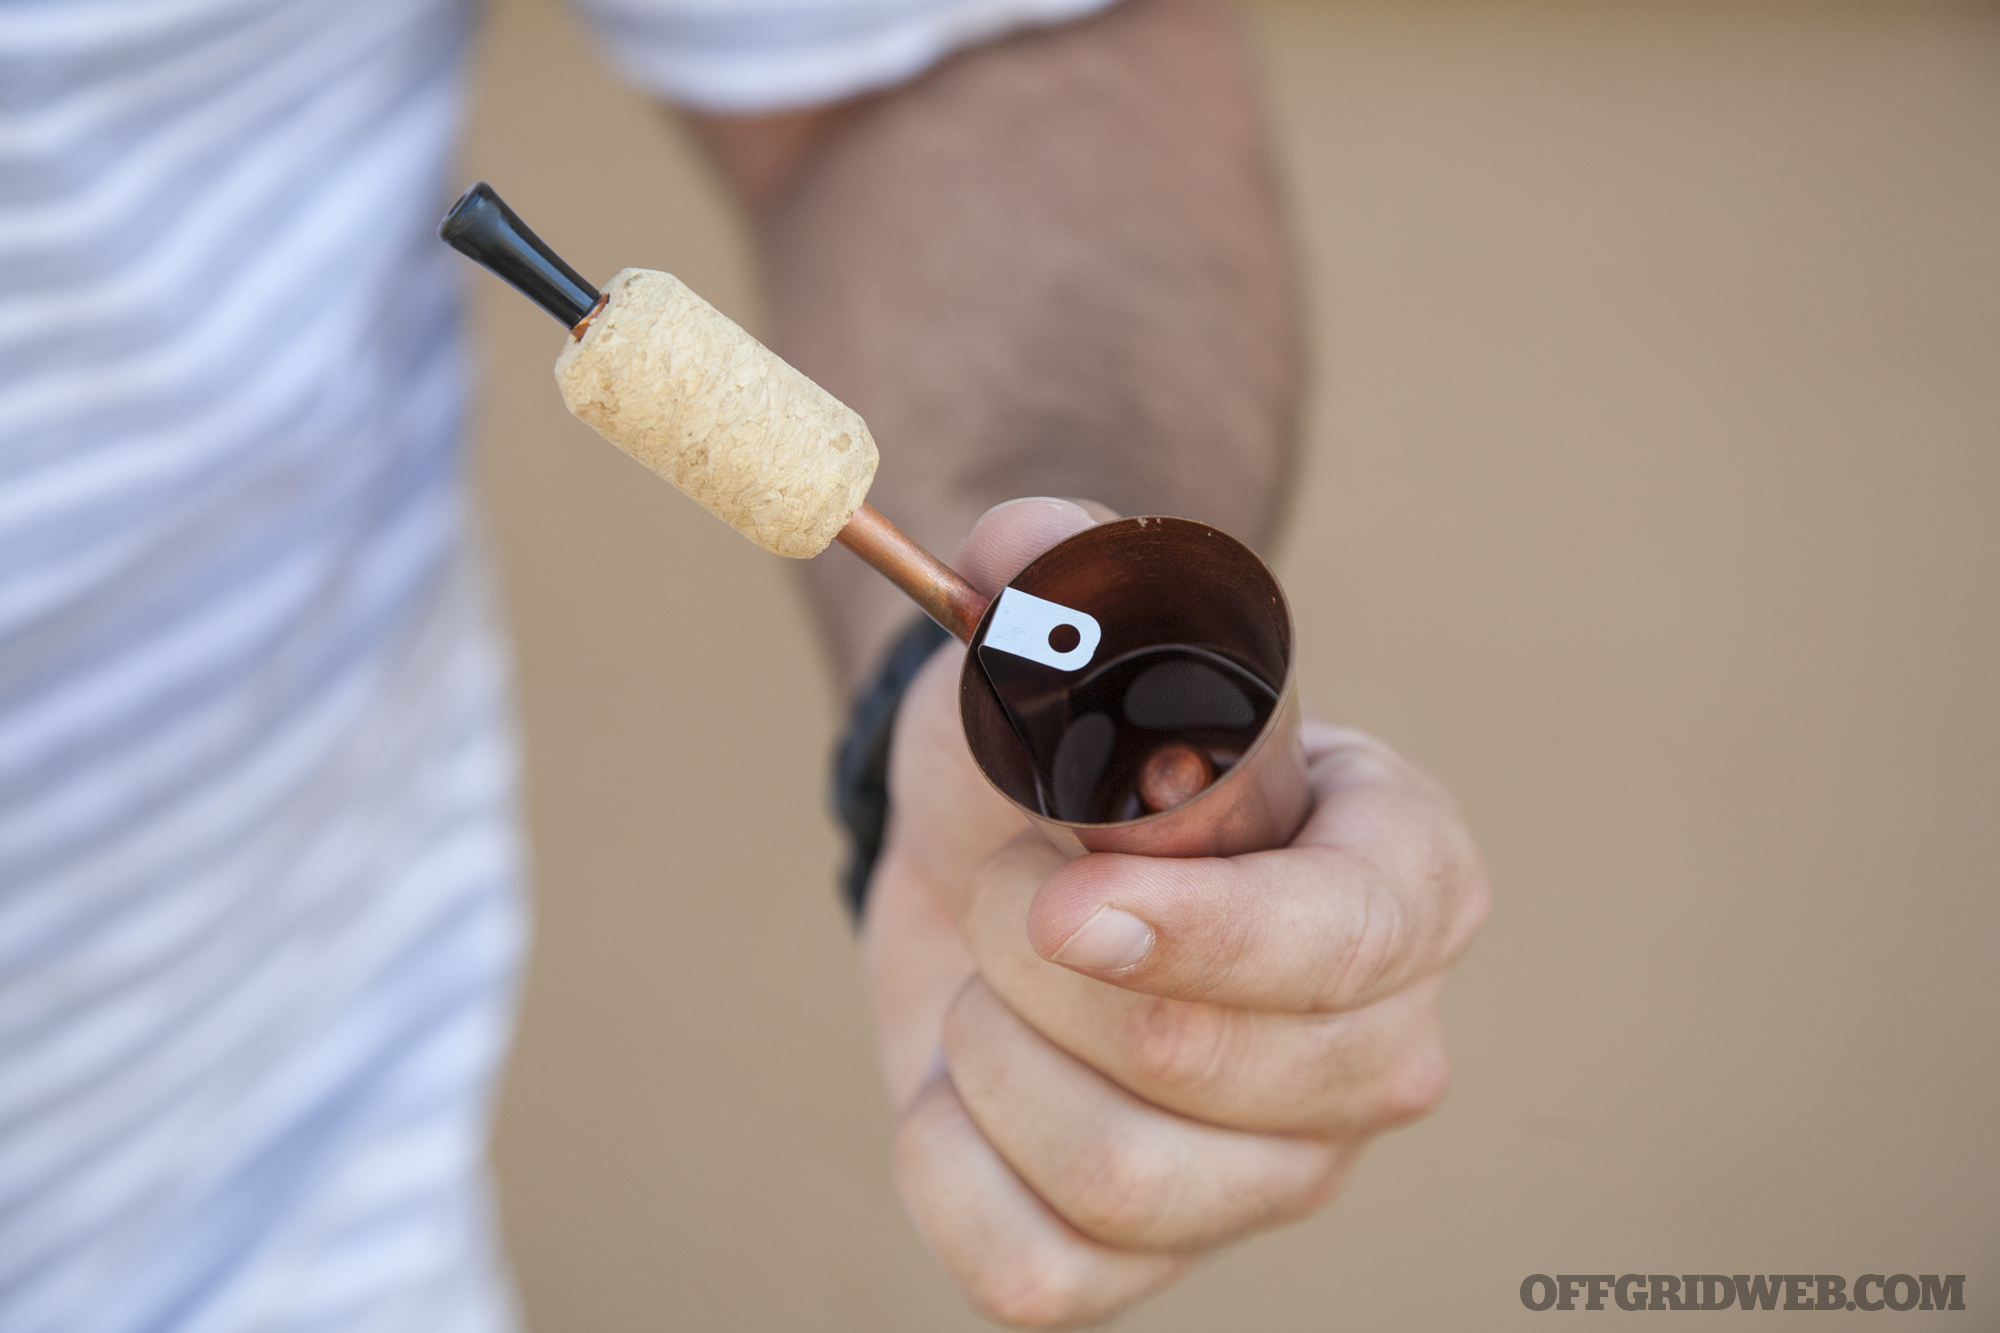
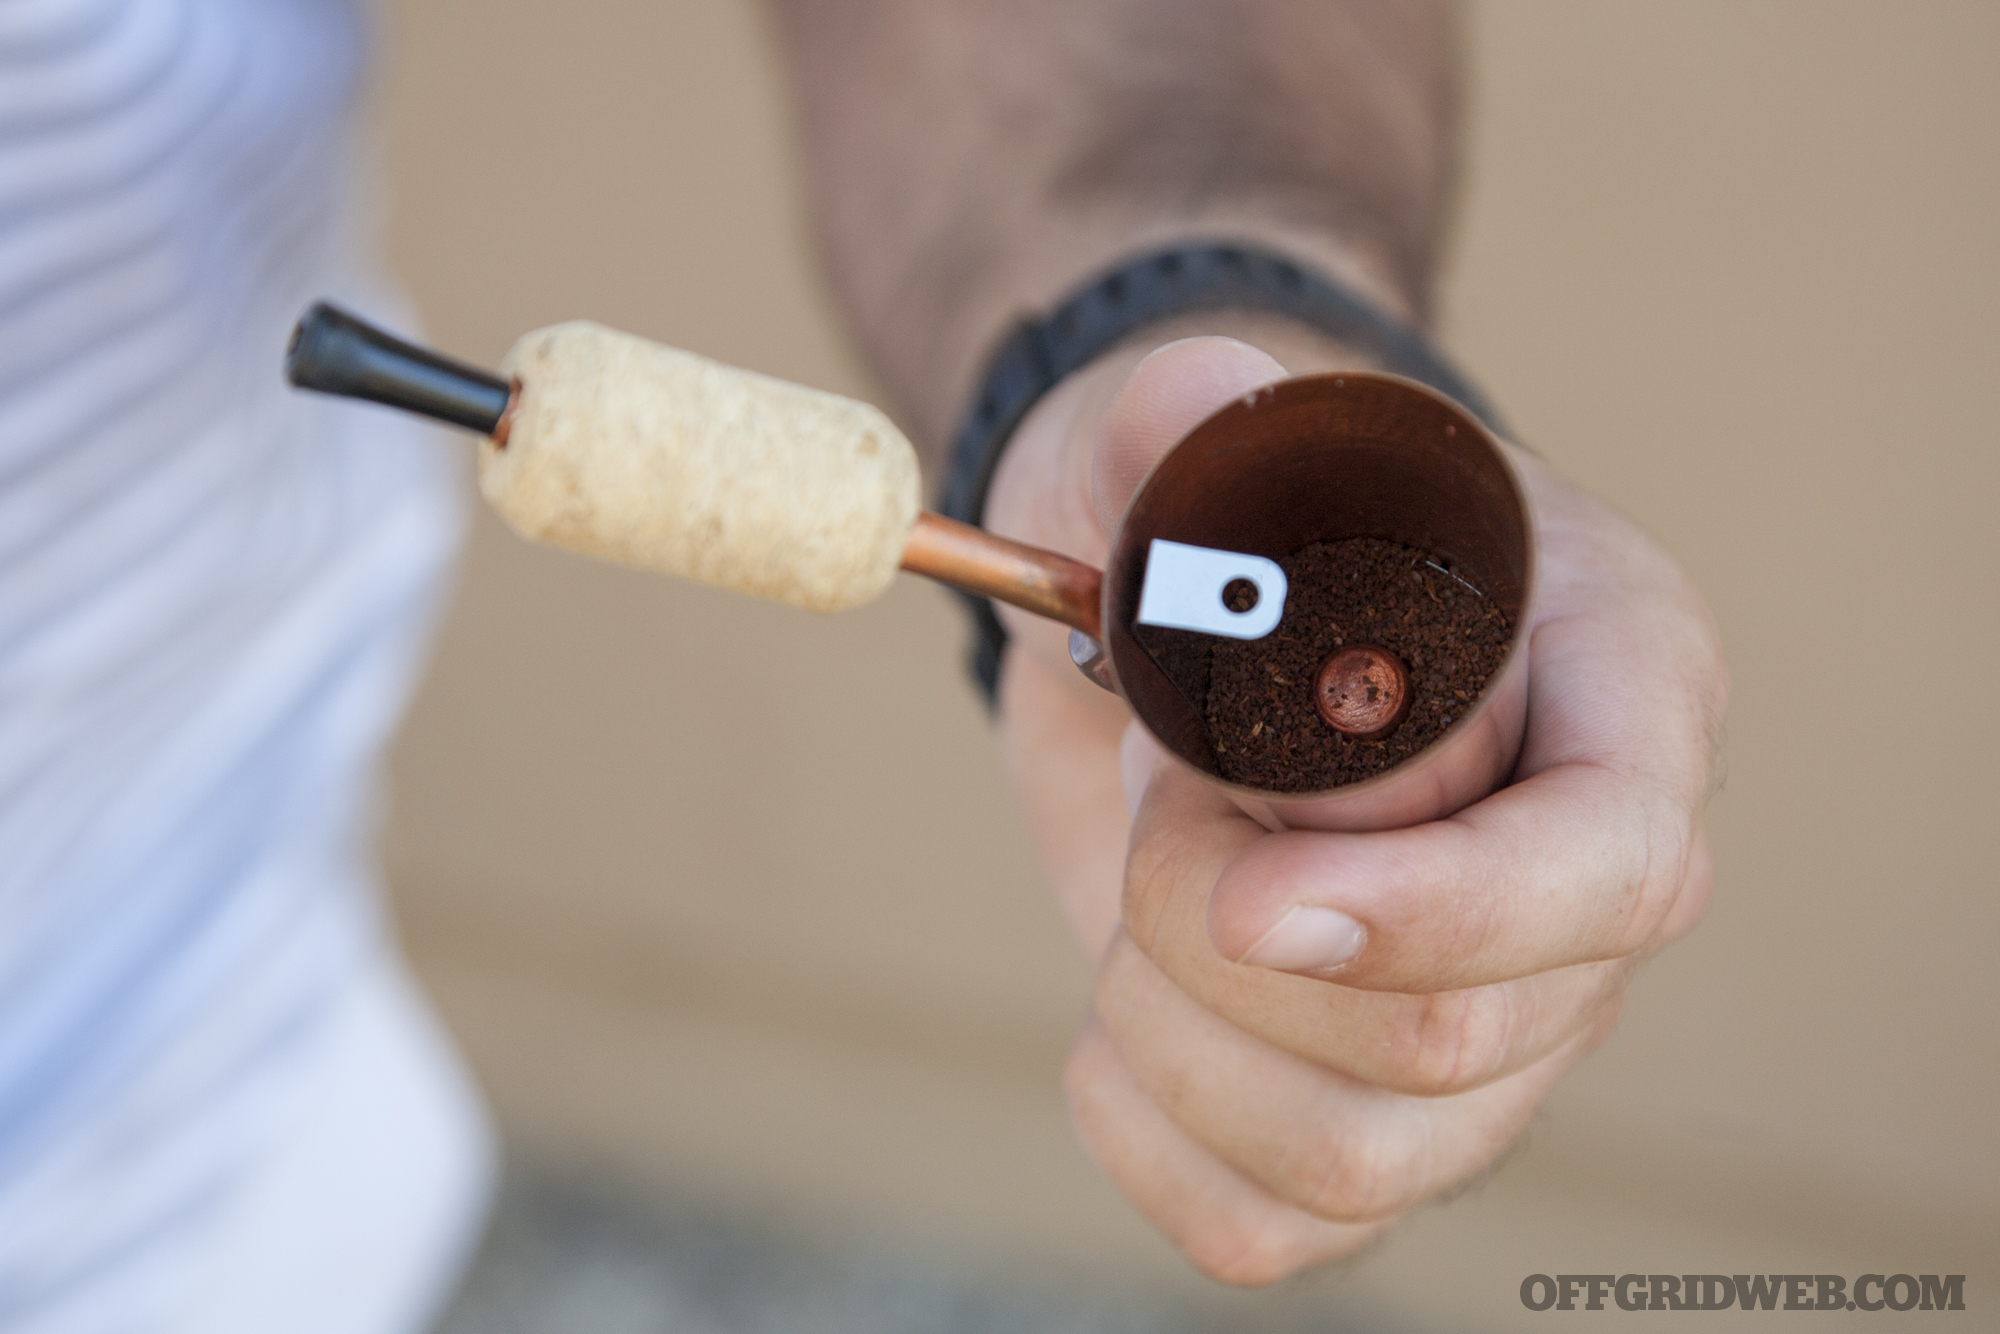
The first step to use the Bripe is to insert the filter into the bowl of the pipe, aligning one of the three perforated sections with the hole leading to the stem. This will keep the grounds in the bowl so they don't end up in your mouth. Depending on the grind of your coffee, you can rotate the filter to the finer or coarser perforations.
You'll notice that there's a tab with a hole on the top of this filter. This will be important later.
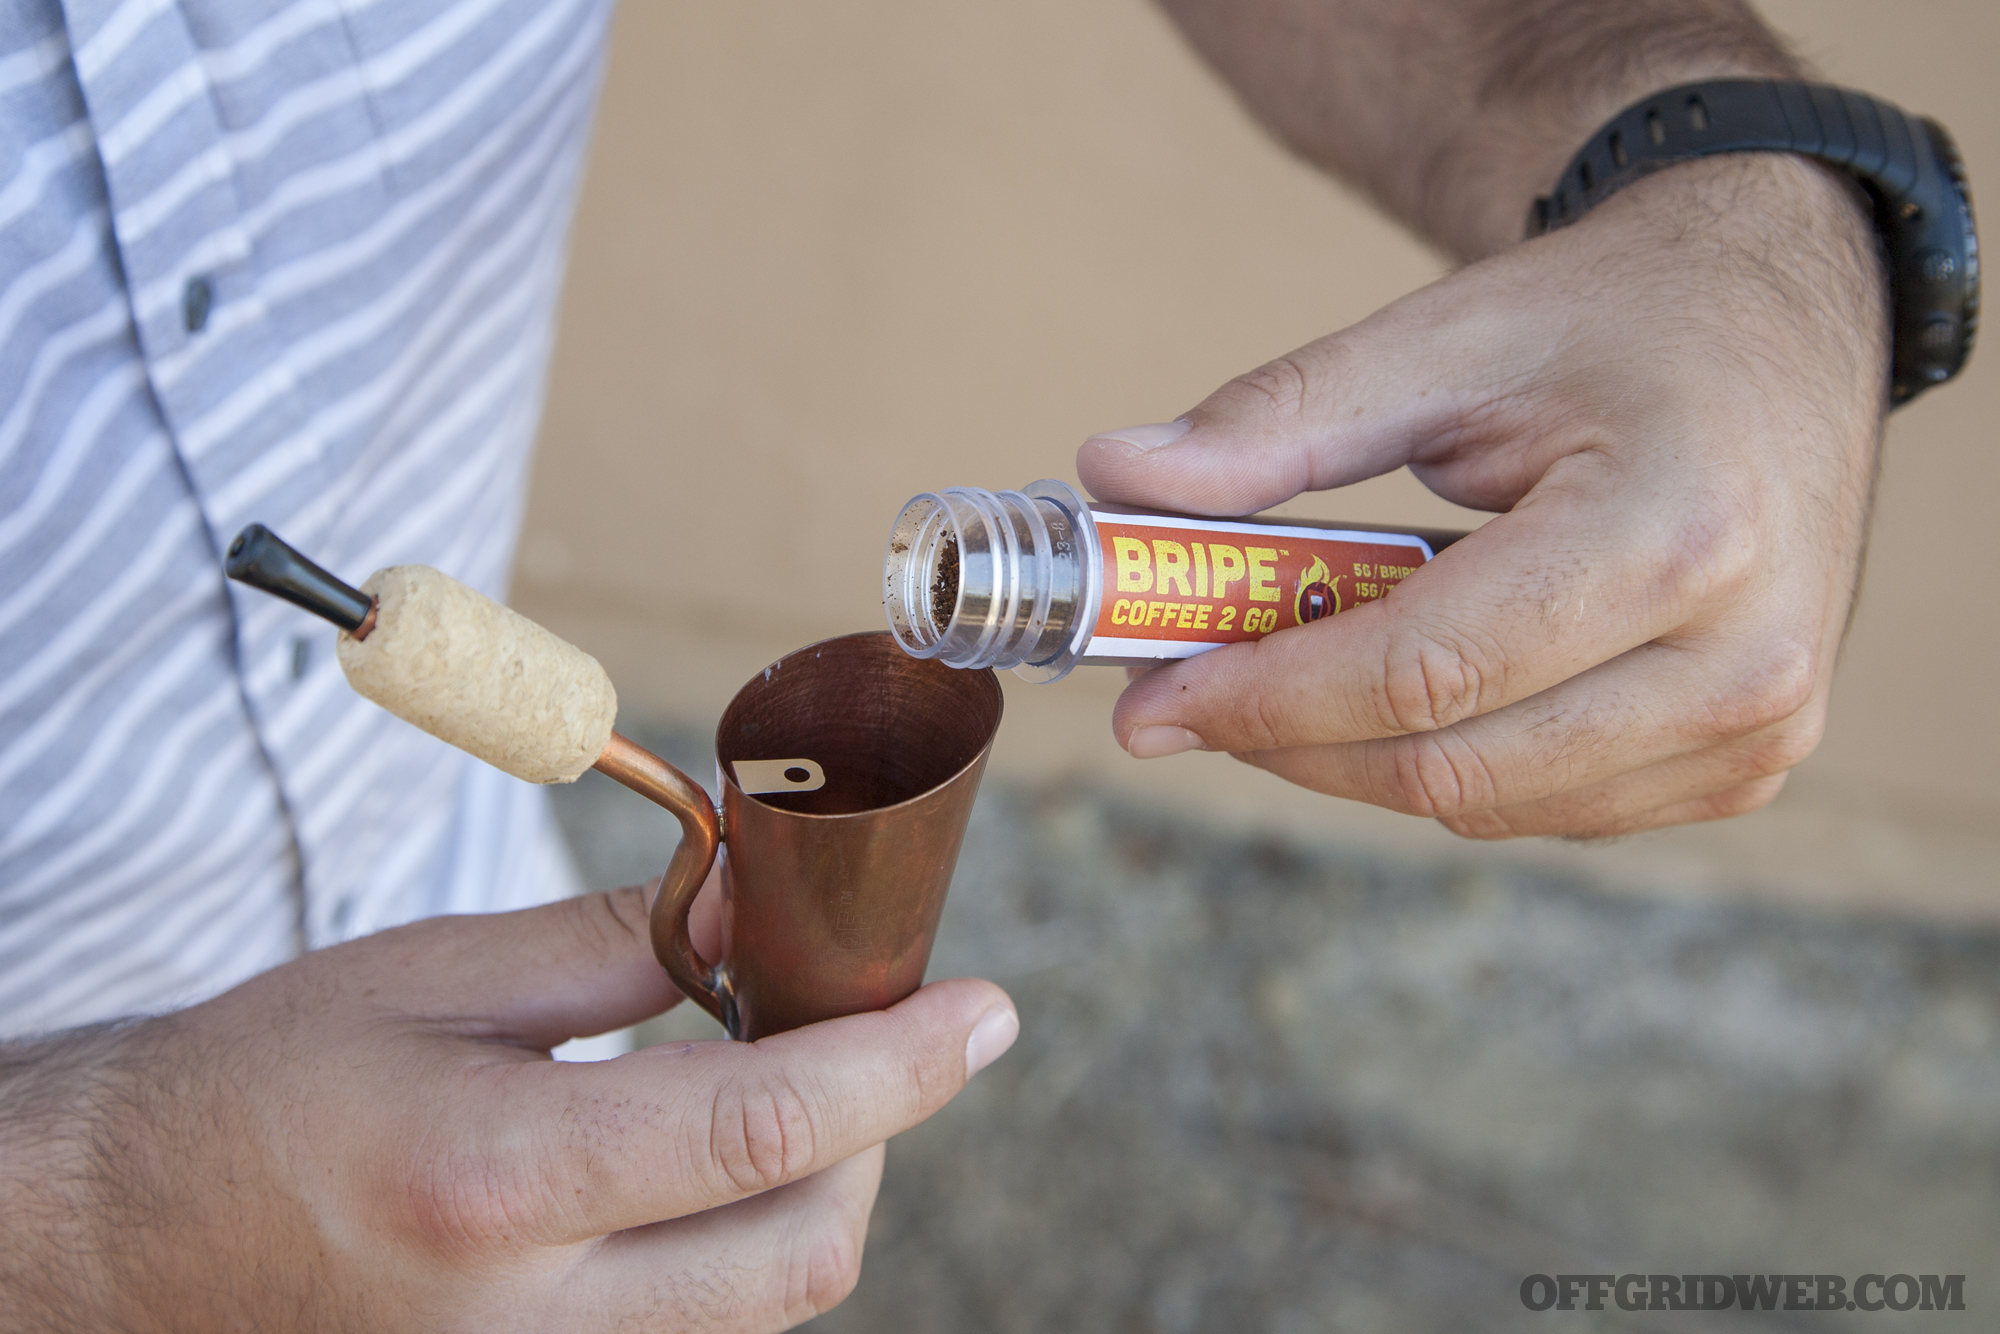
Next, pour some grounds into the Bripe, filling it up to the top of the mound in the center of the bowl. This will be about 1/3 of the grounds in the included vial.
Here's what it looks like at this stage:
Now we need the second component of our coffee — water. Pour a few fluid ounces of water into the bowl until the level nears the rim.
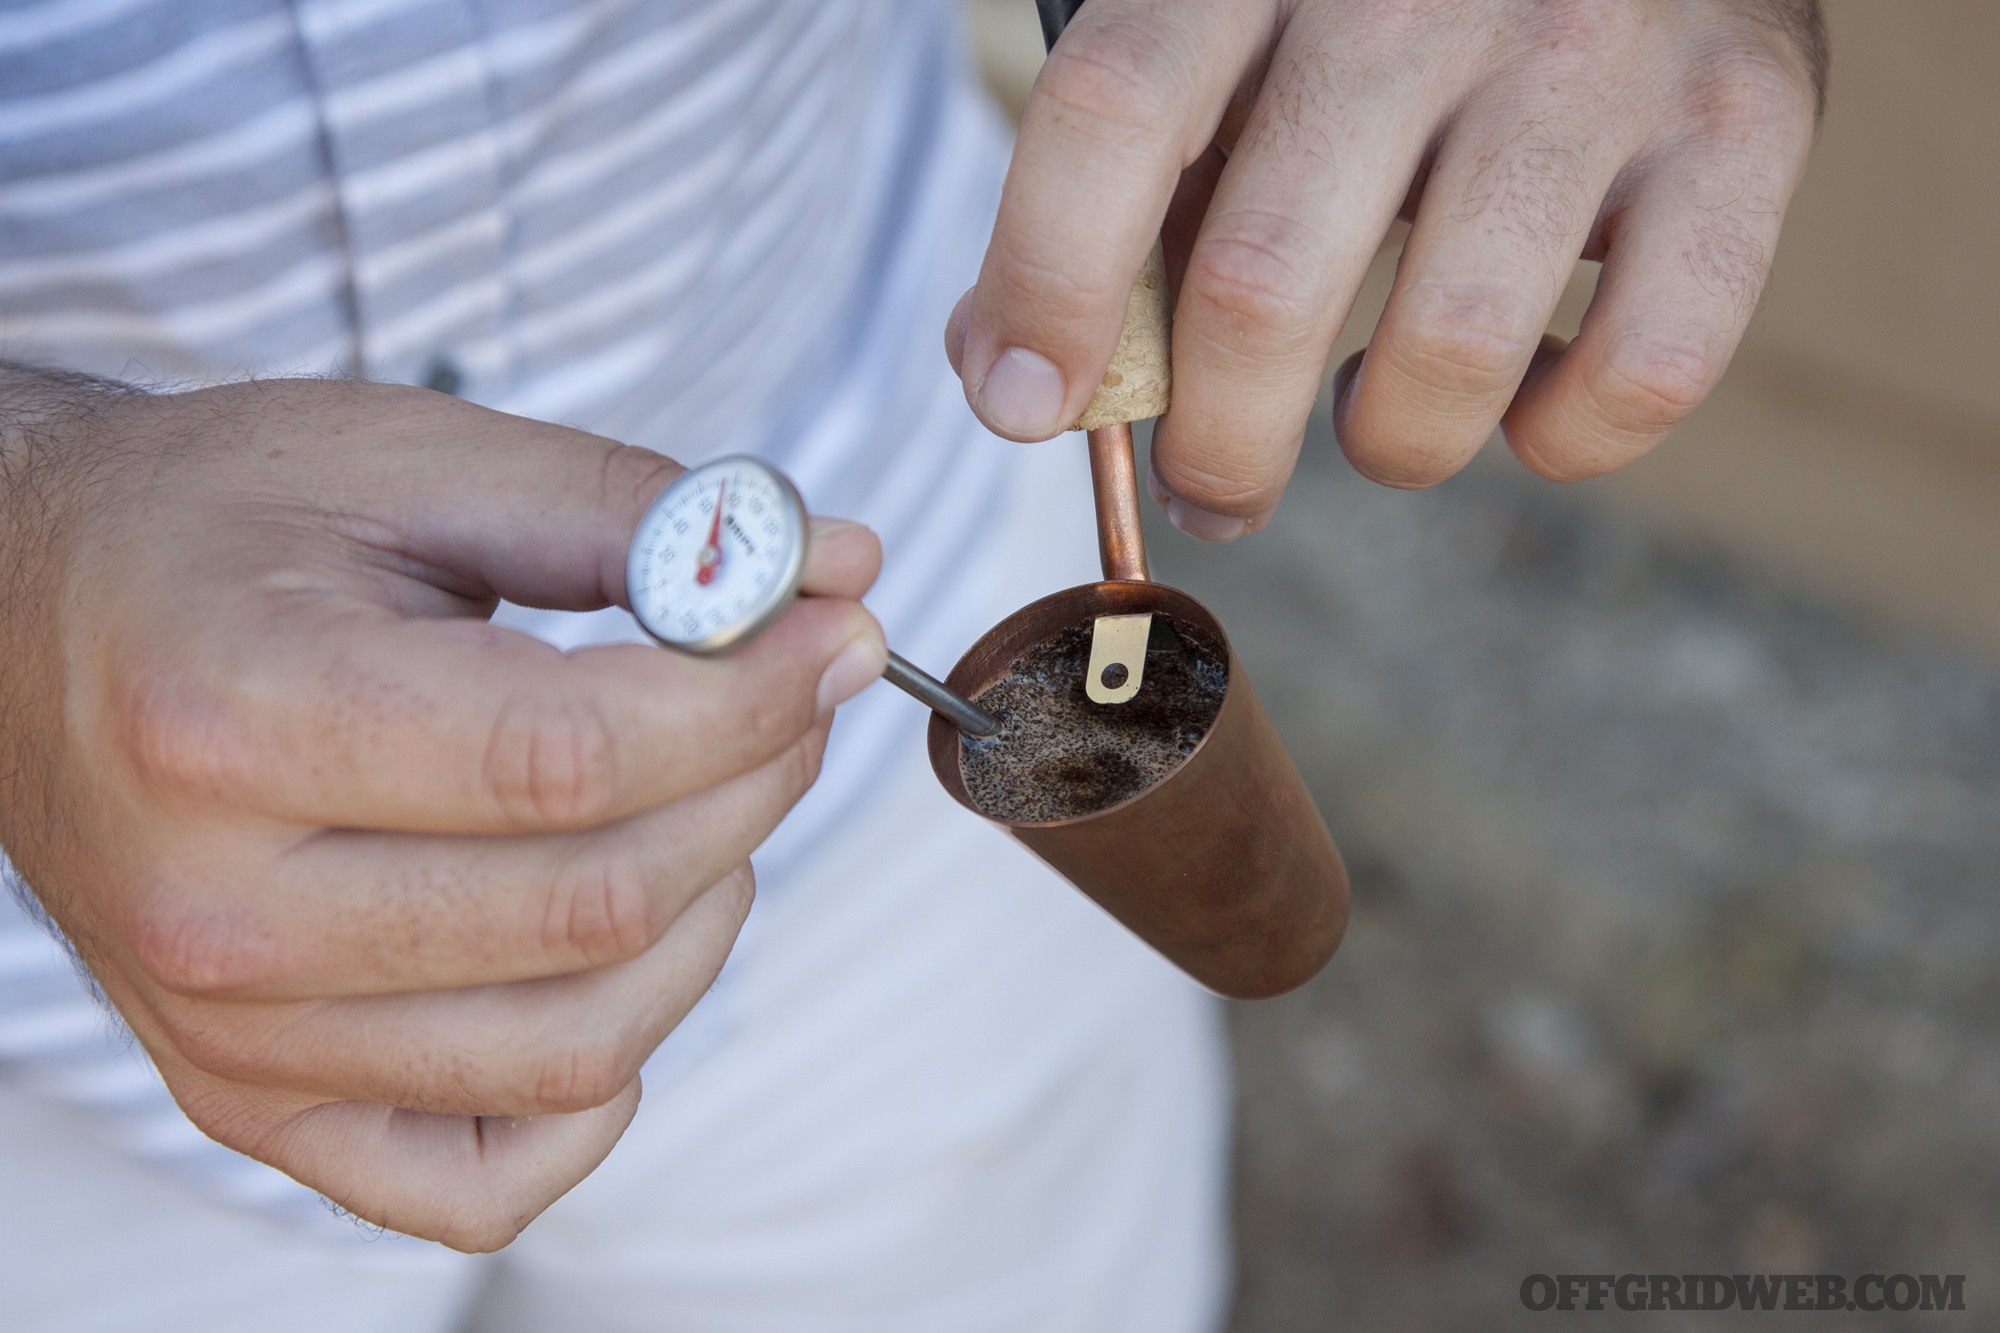
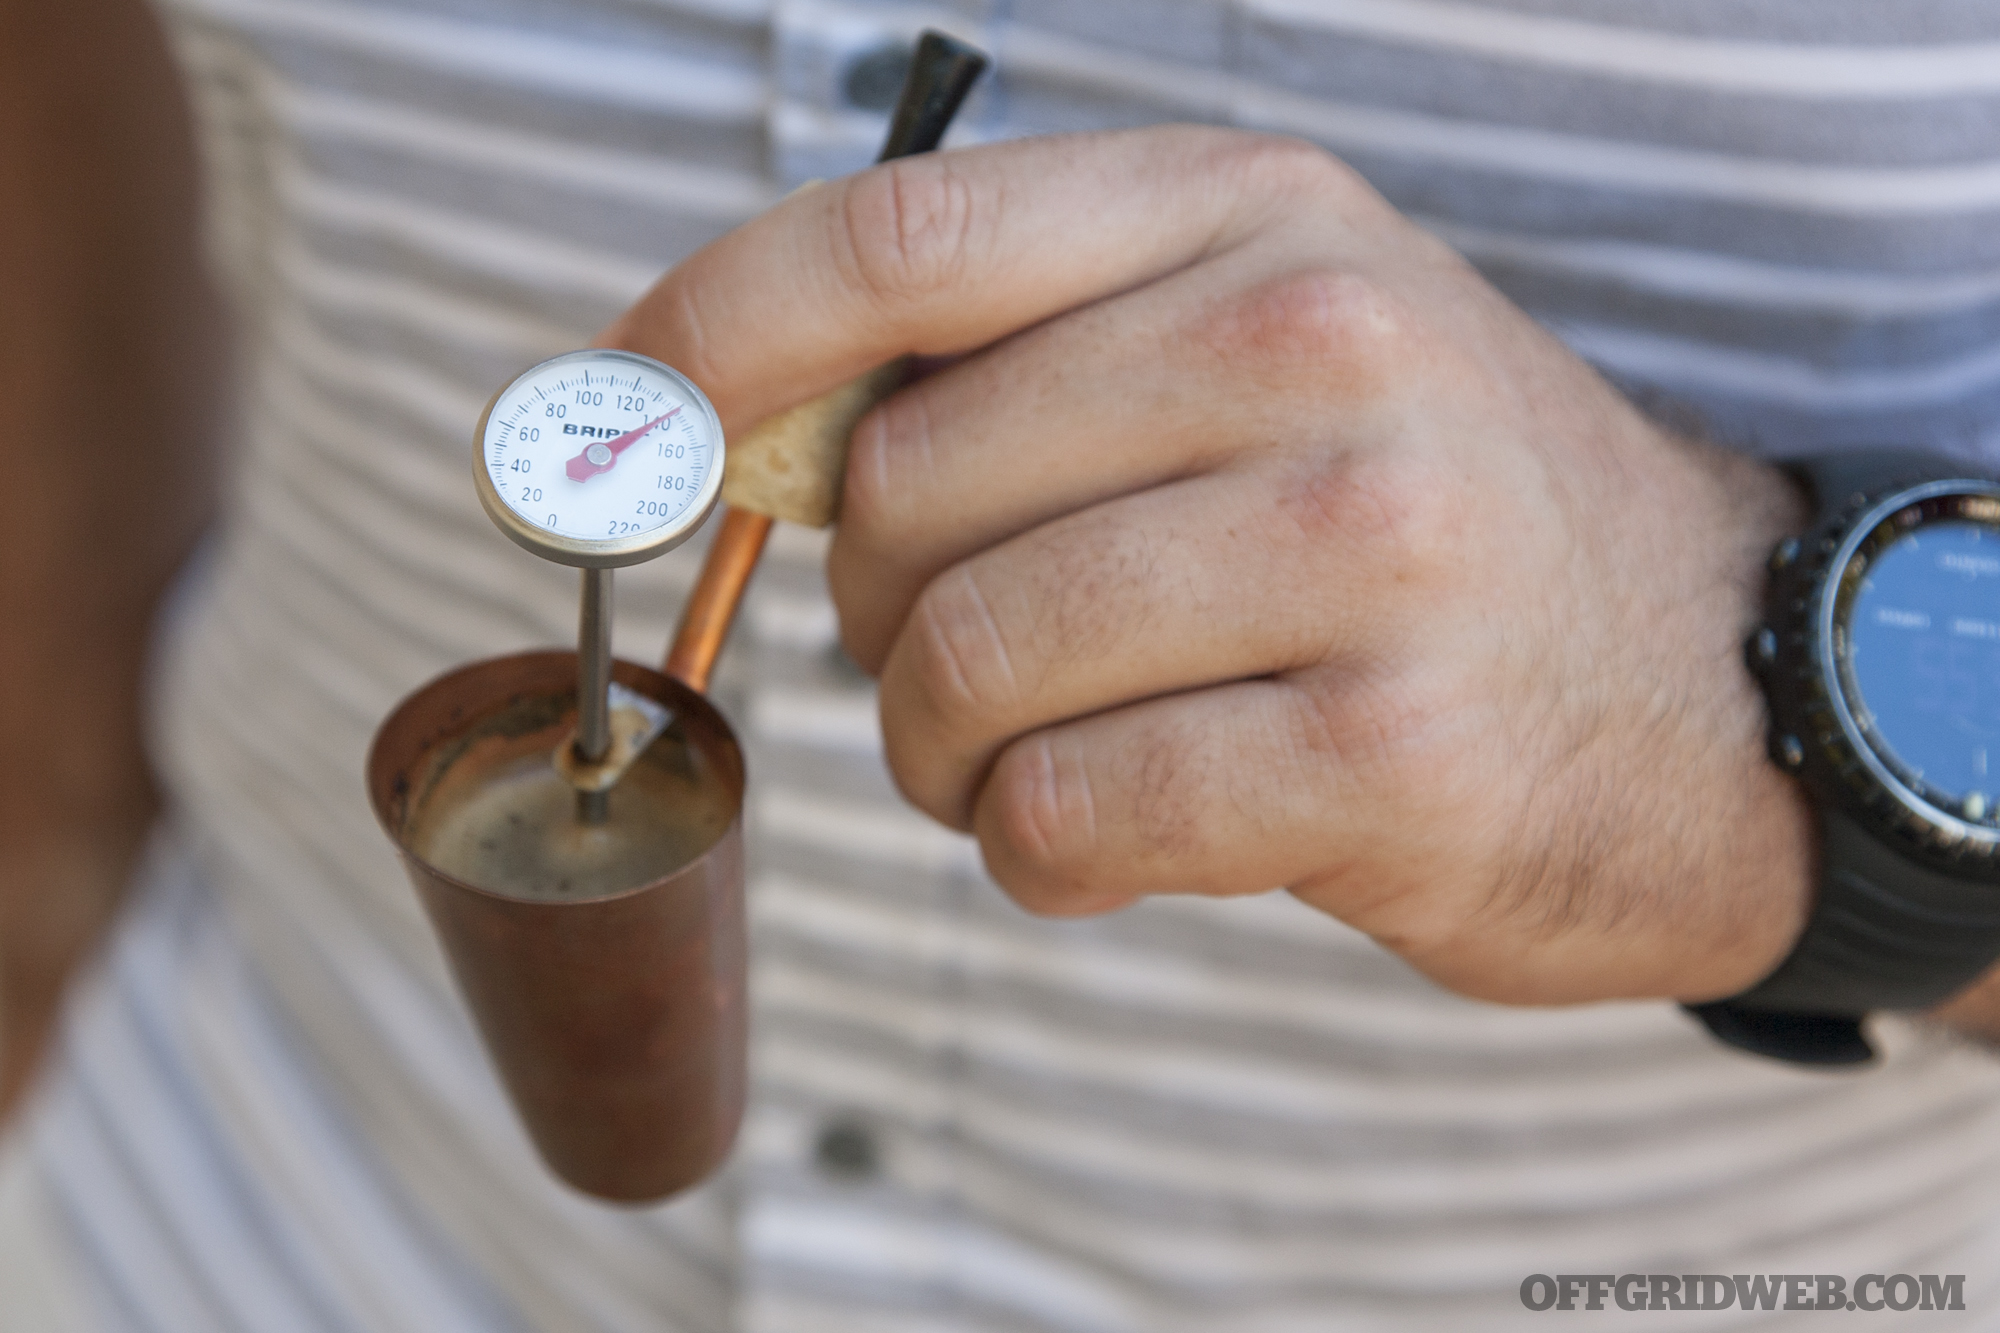
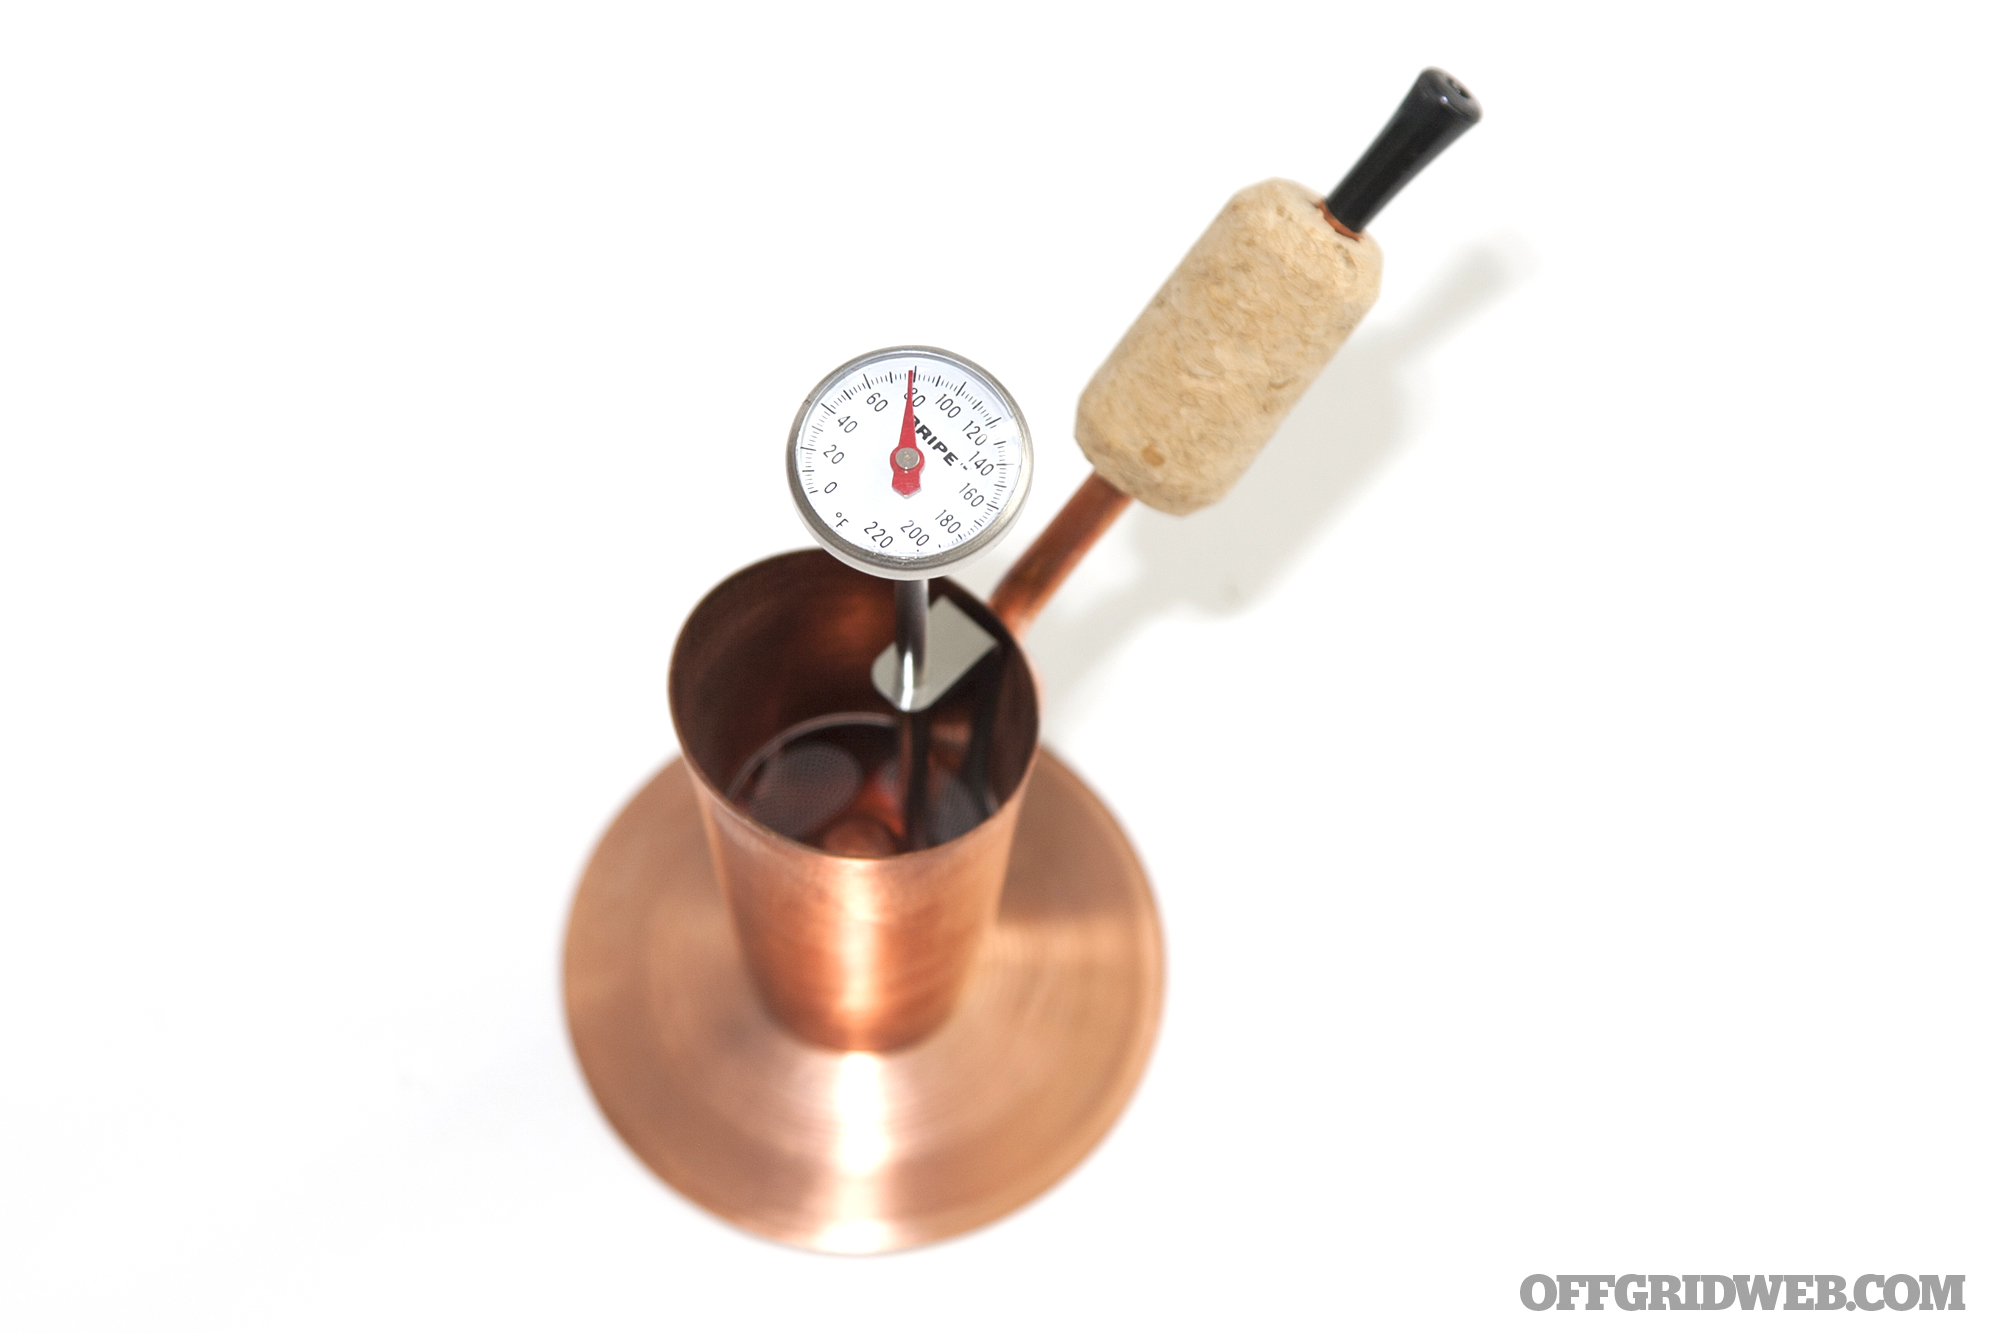
Now grab the included thermometer and use it to stir together the grounds and water.
Once everything is mixed, insert the thermometer probe down through the hole in the filter tab. This will let you keep an eye on the temperature as you brew.
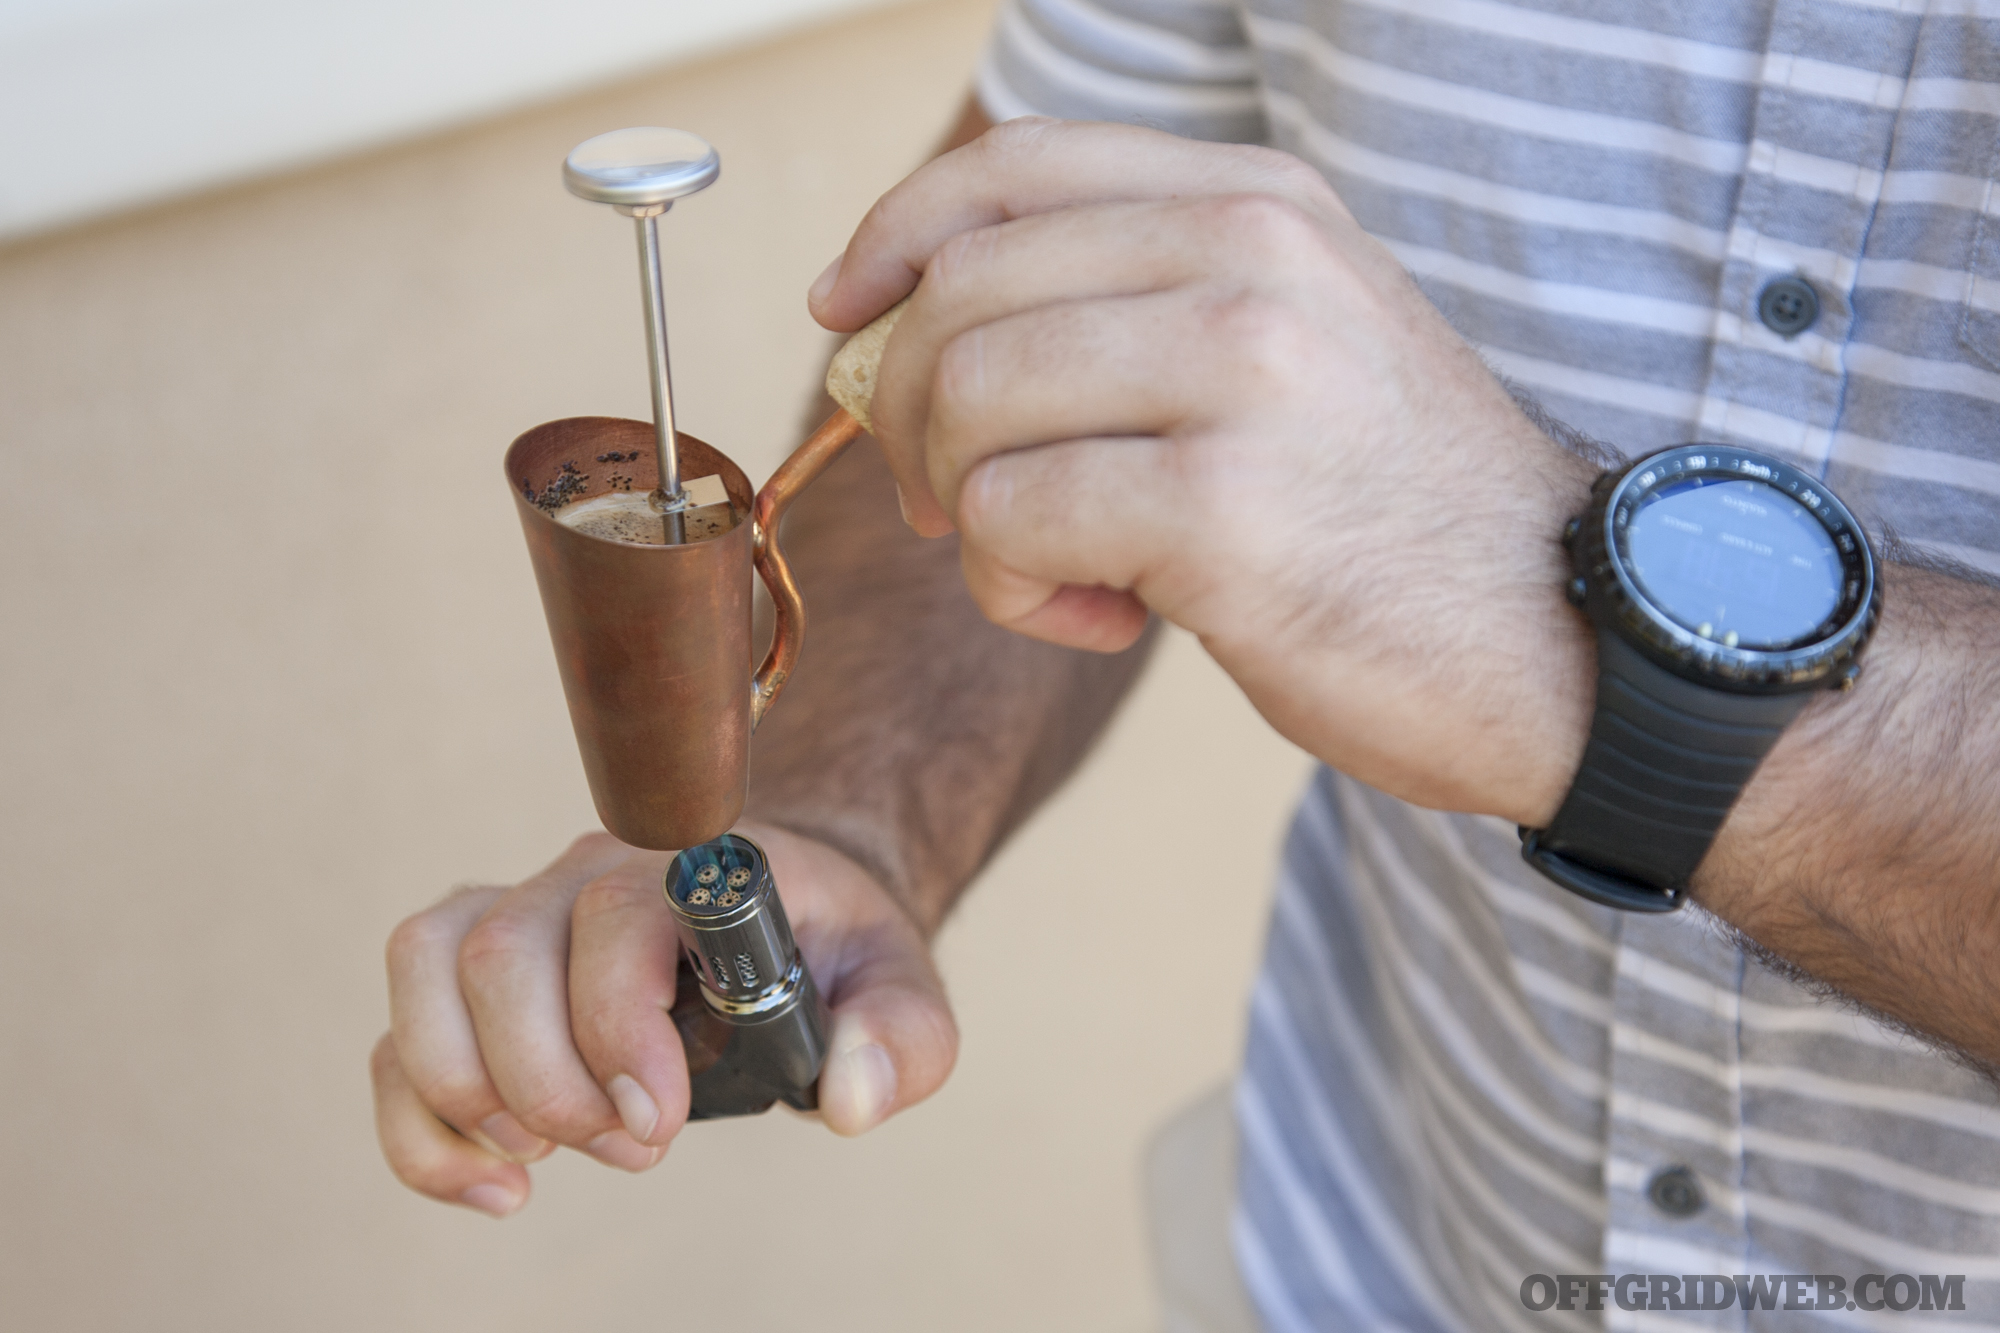
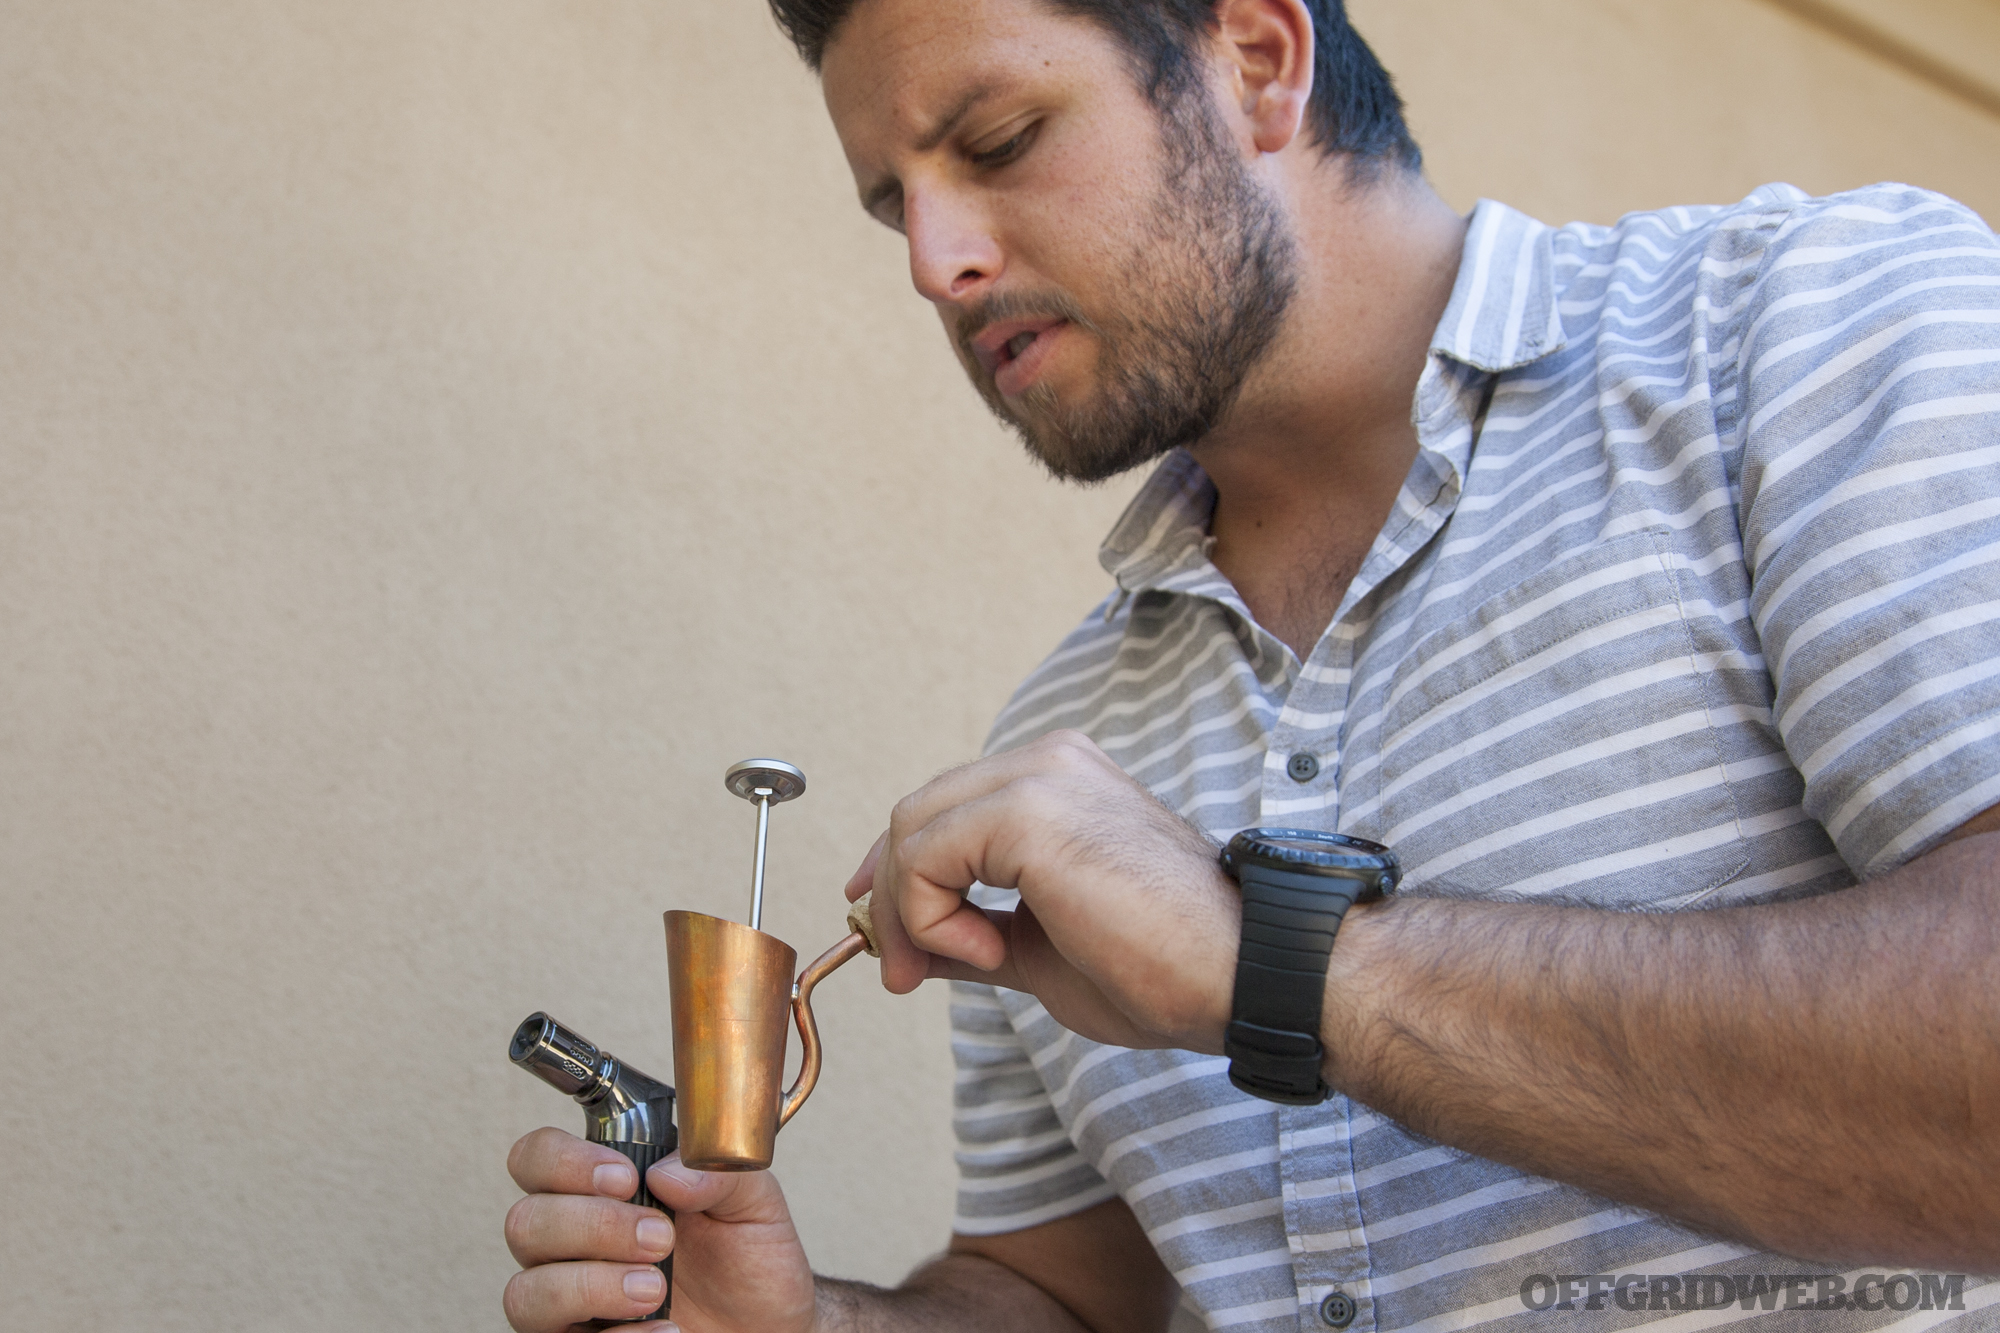
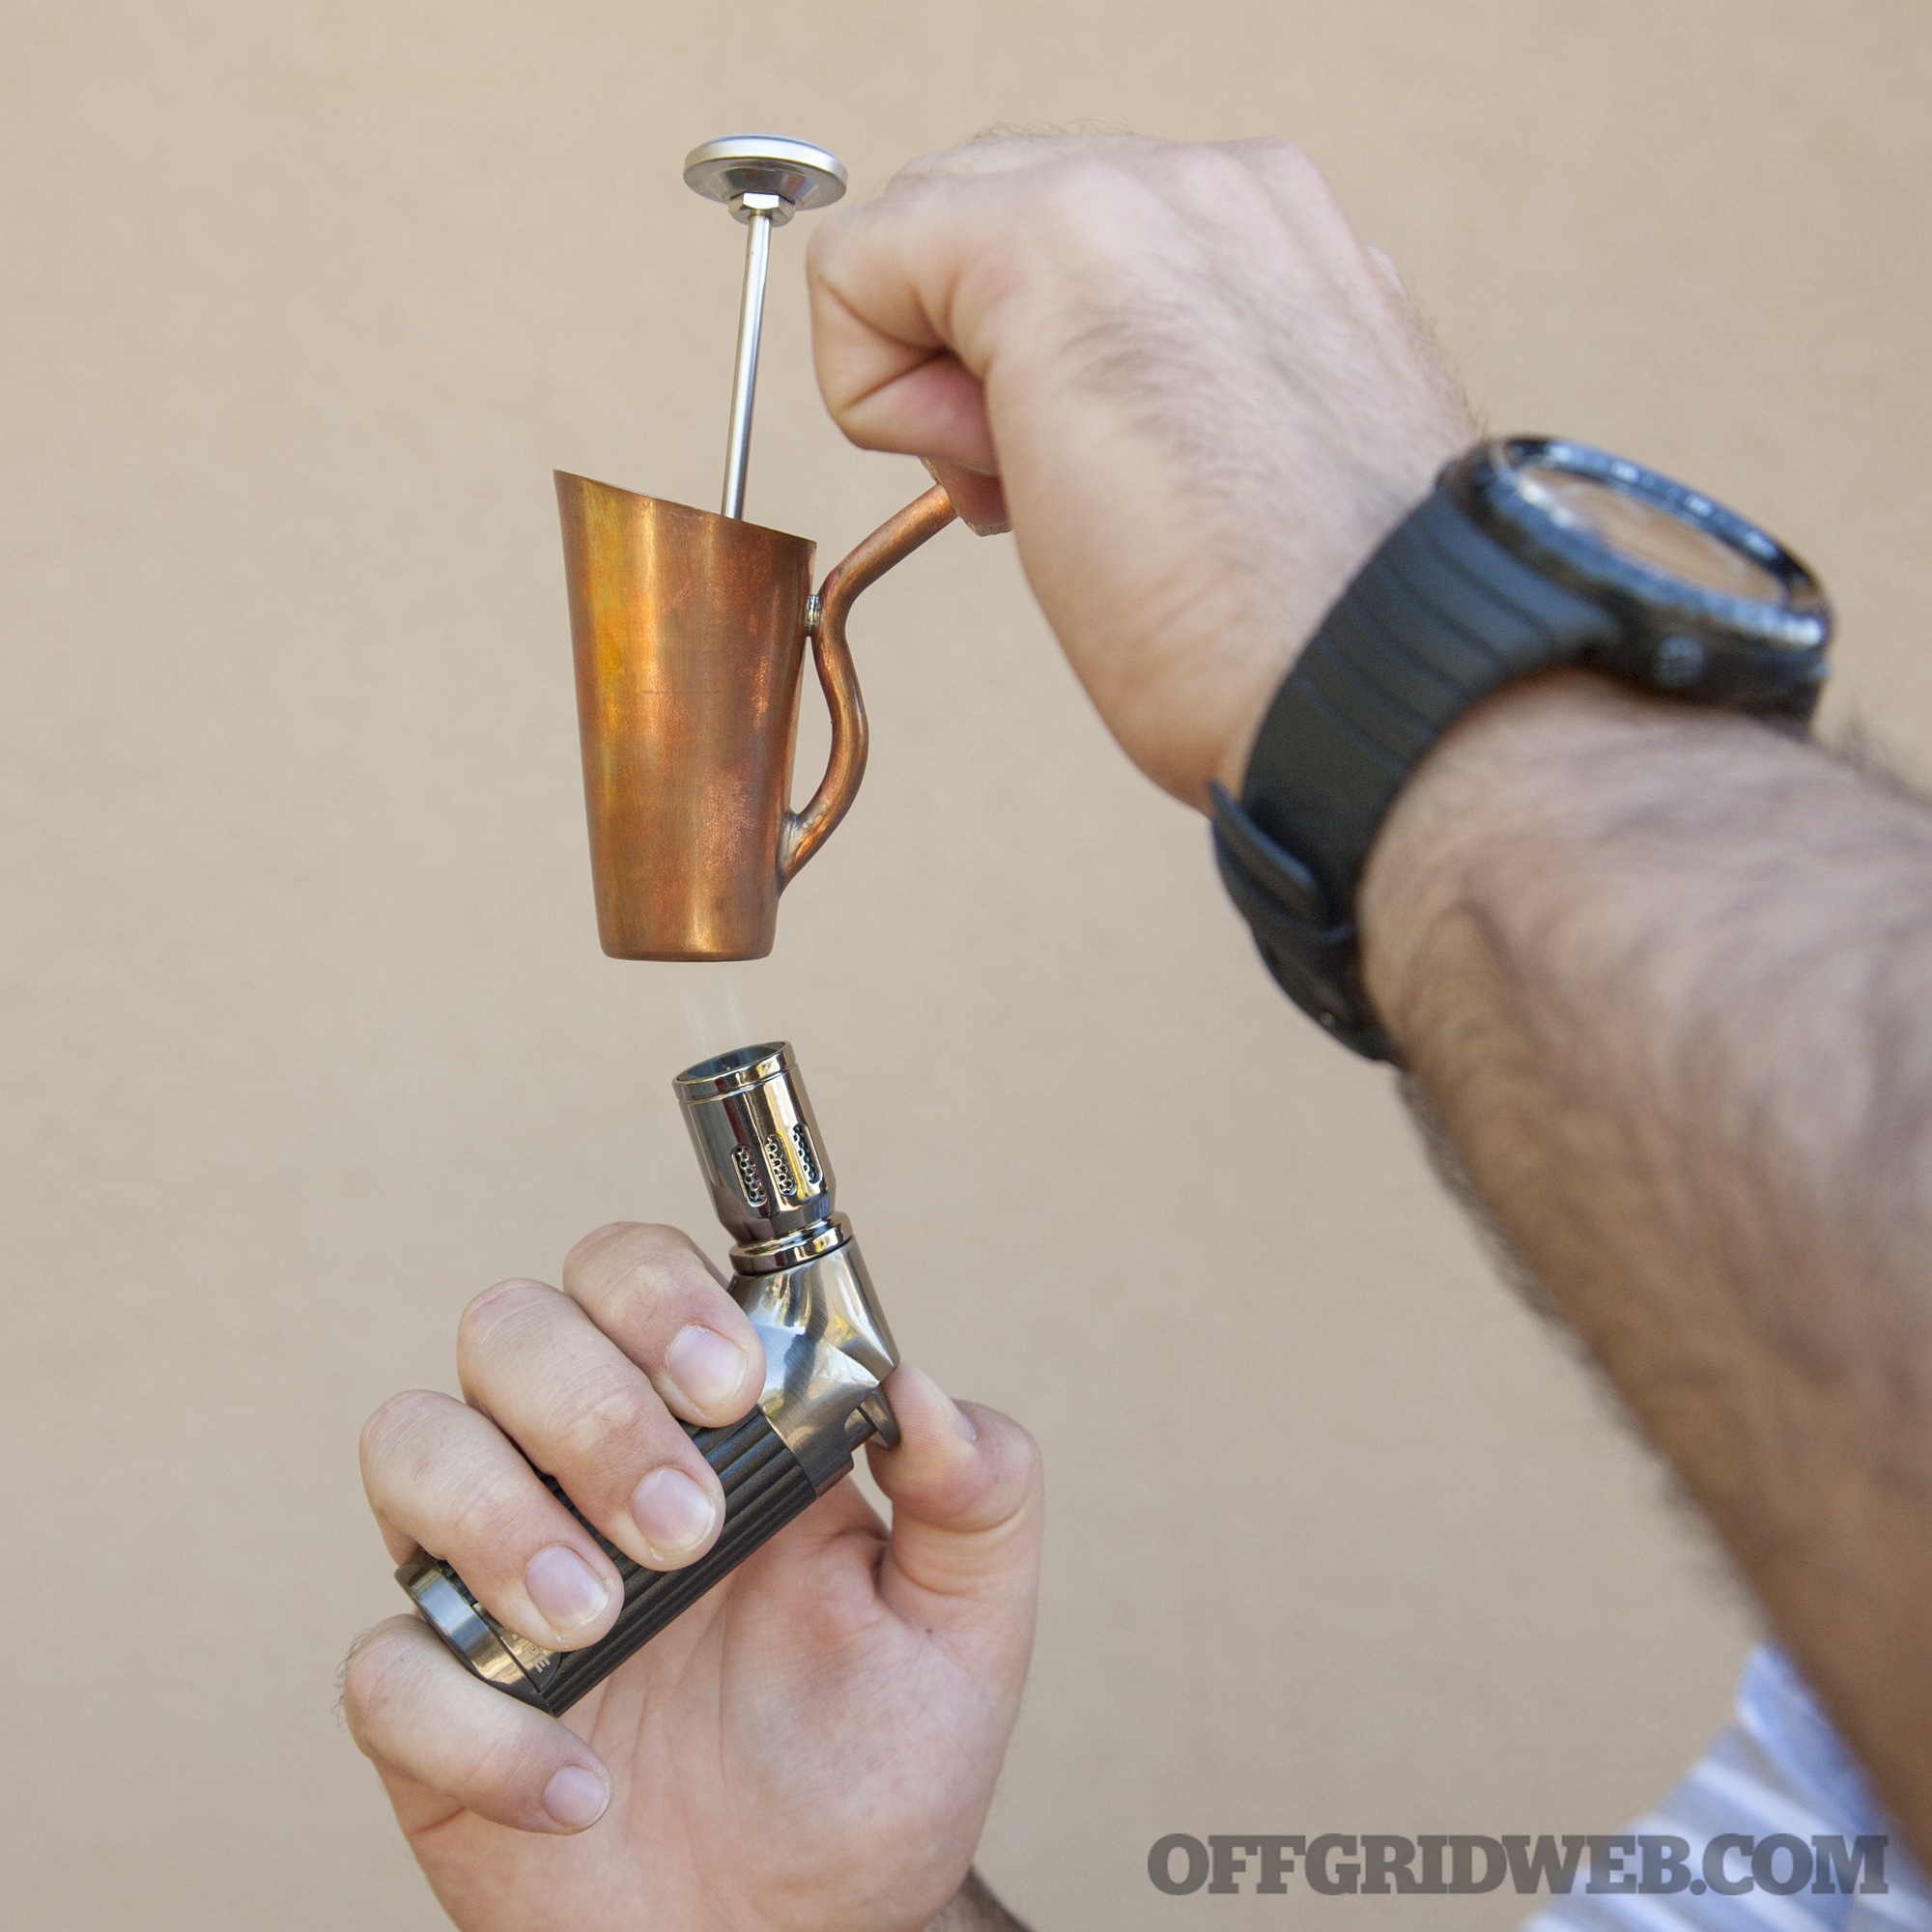
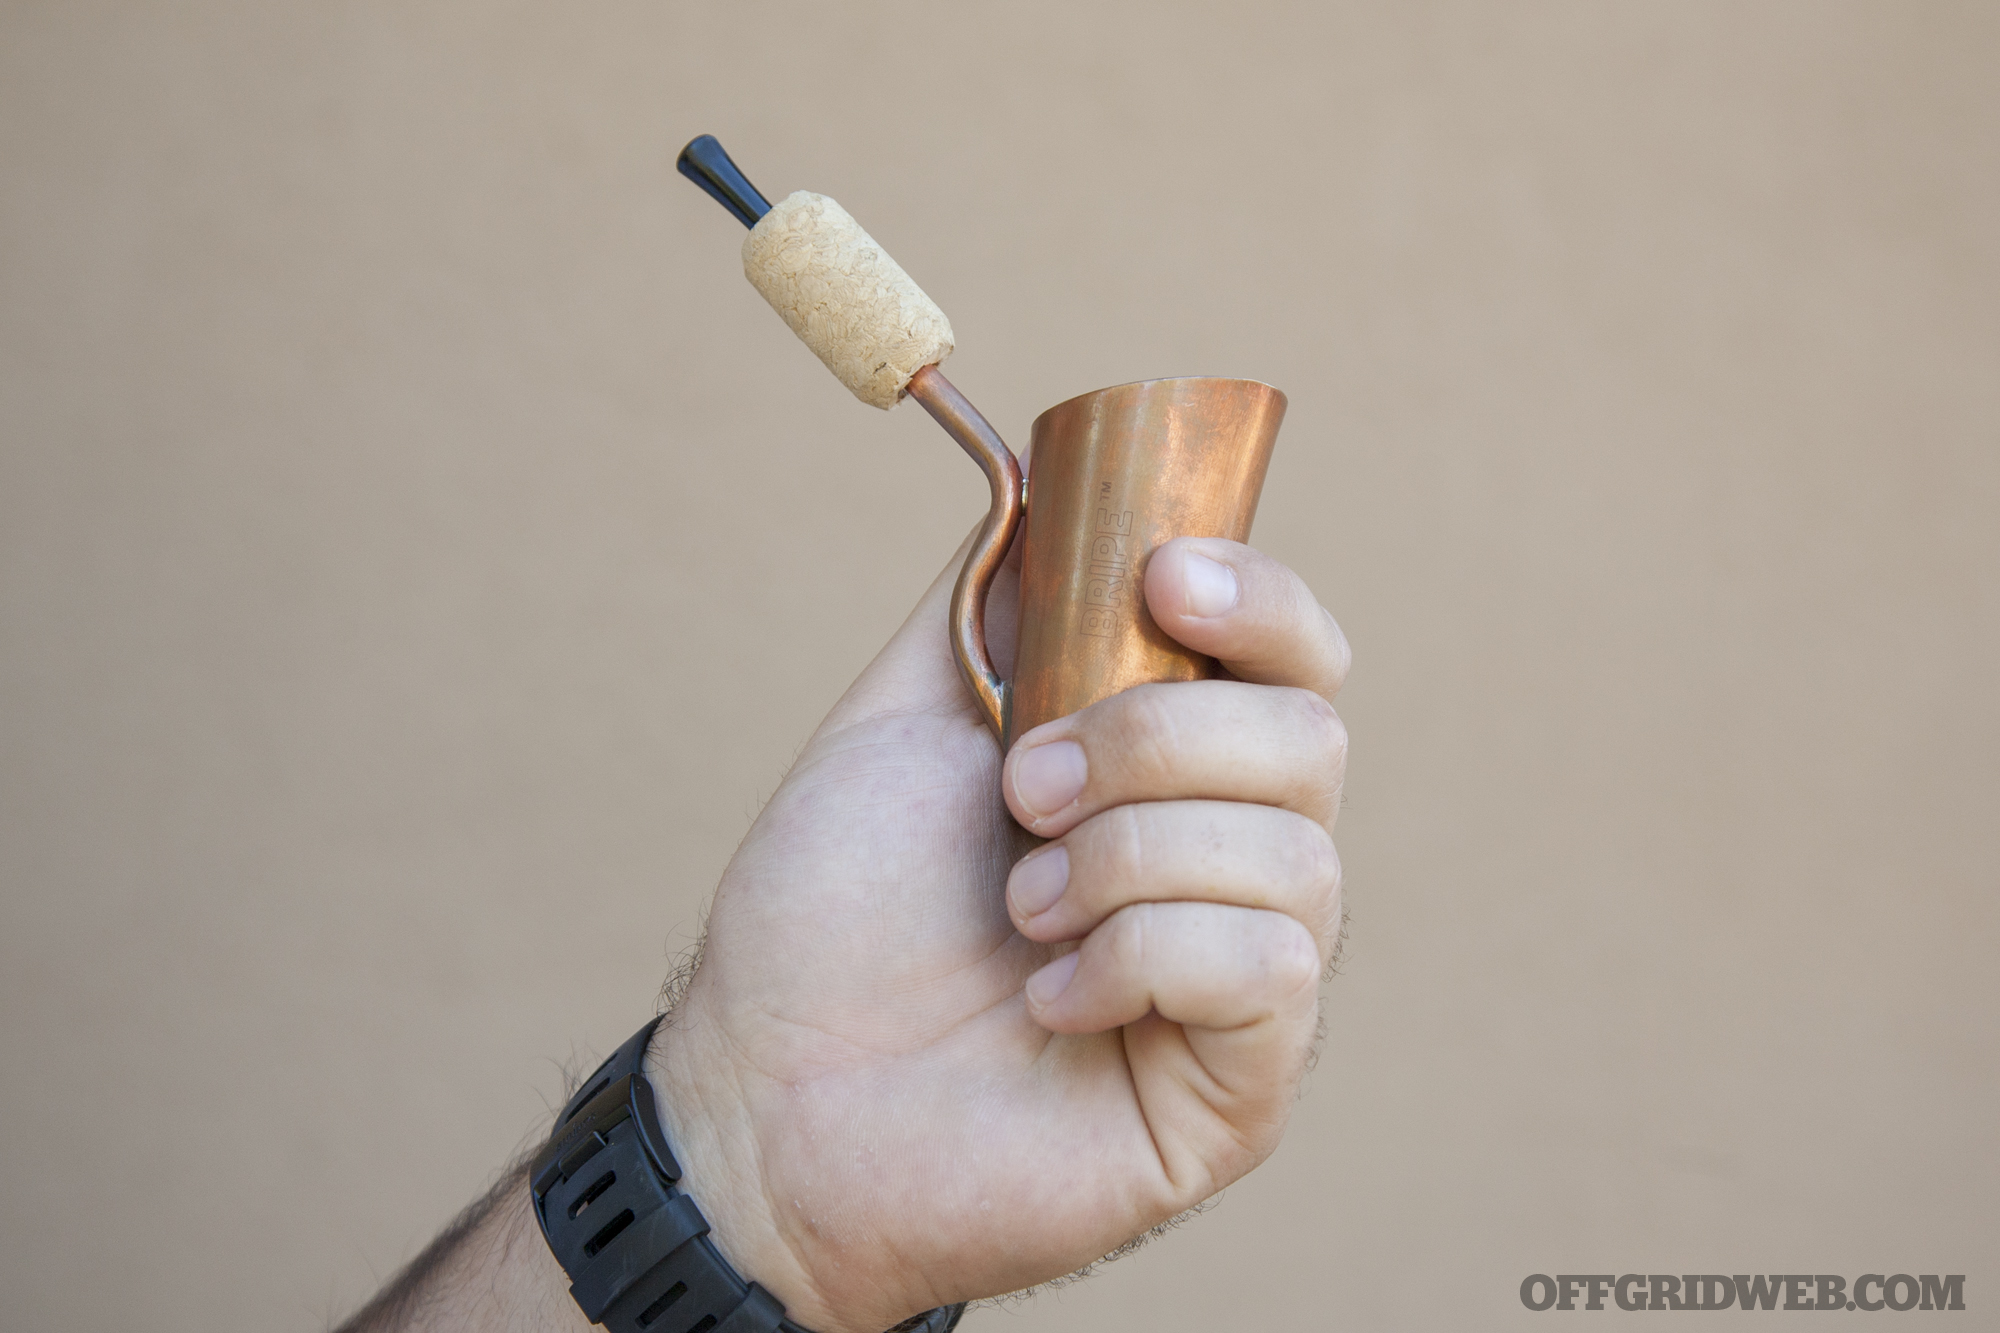
With one hand, hold the Bripe by the cork section on the stem — this insulates your fingers from the metal, which will be getting very hot in the next steps. With your other hand, hit the button on the quad-jet torch and aim the blue flame at the base of the pipe.
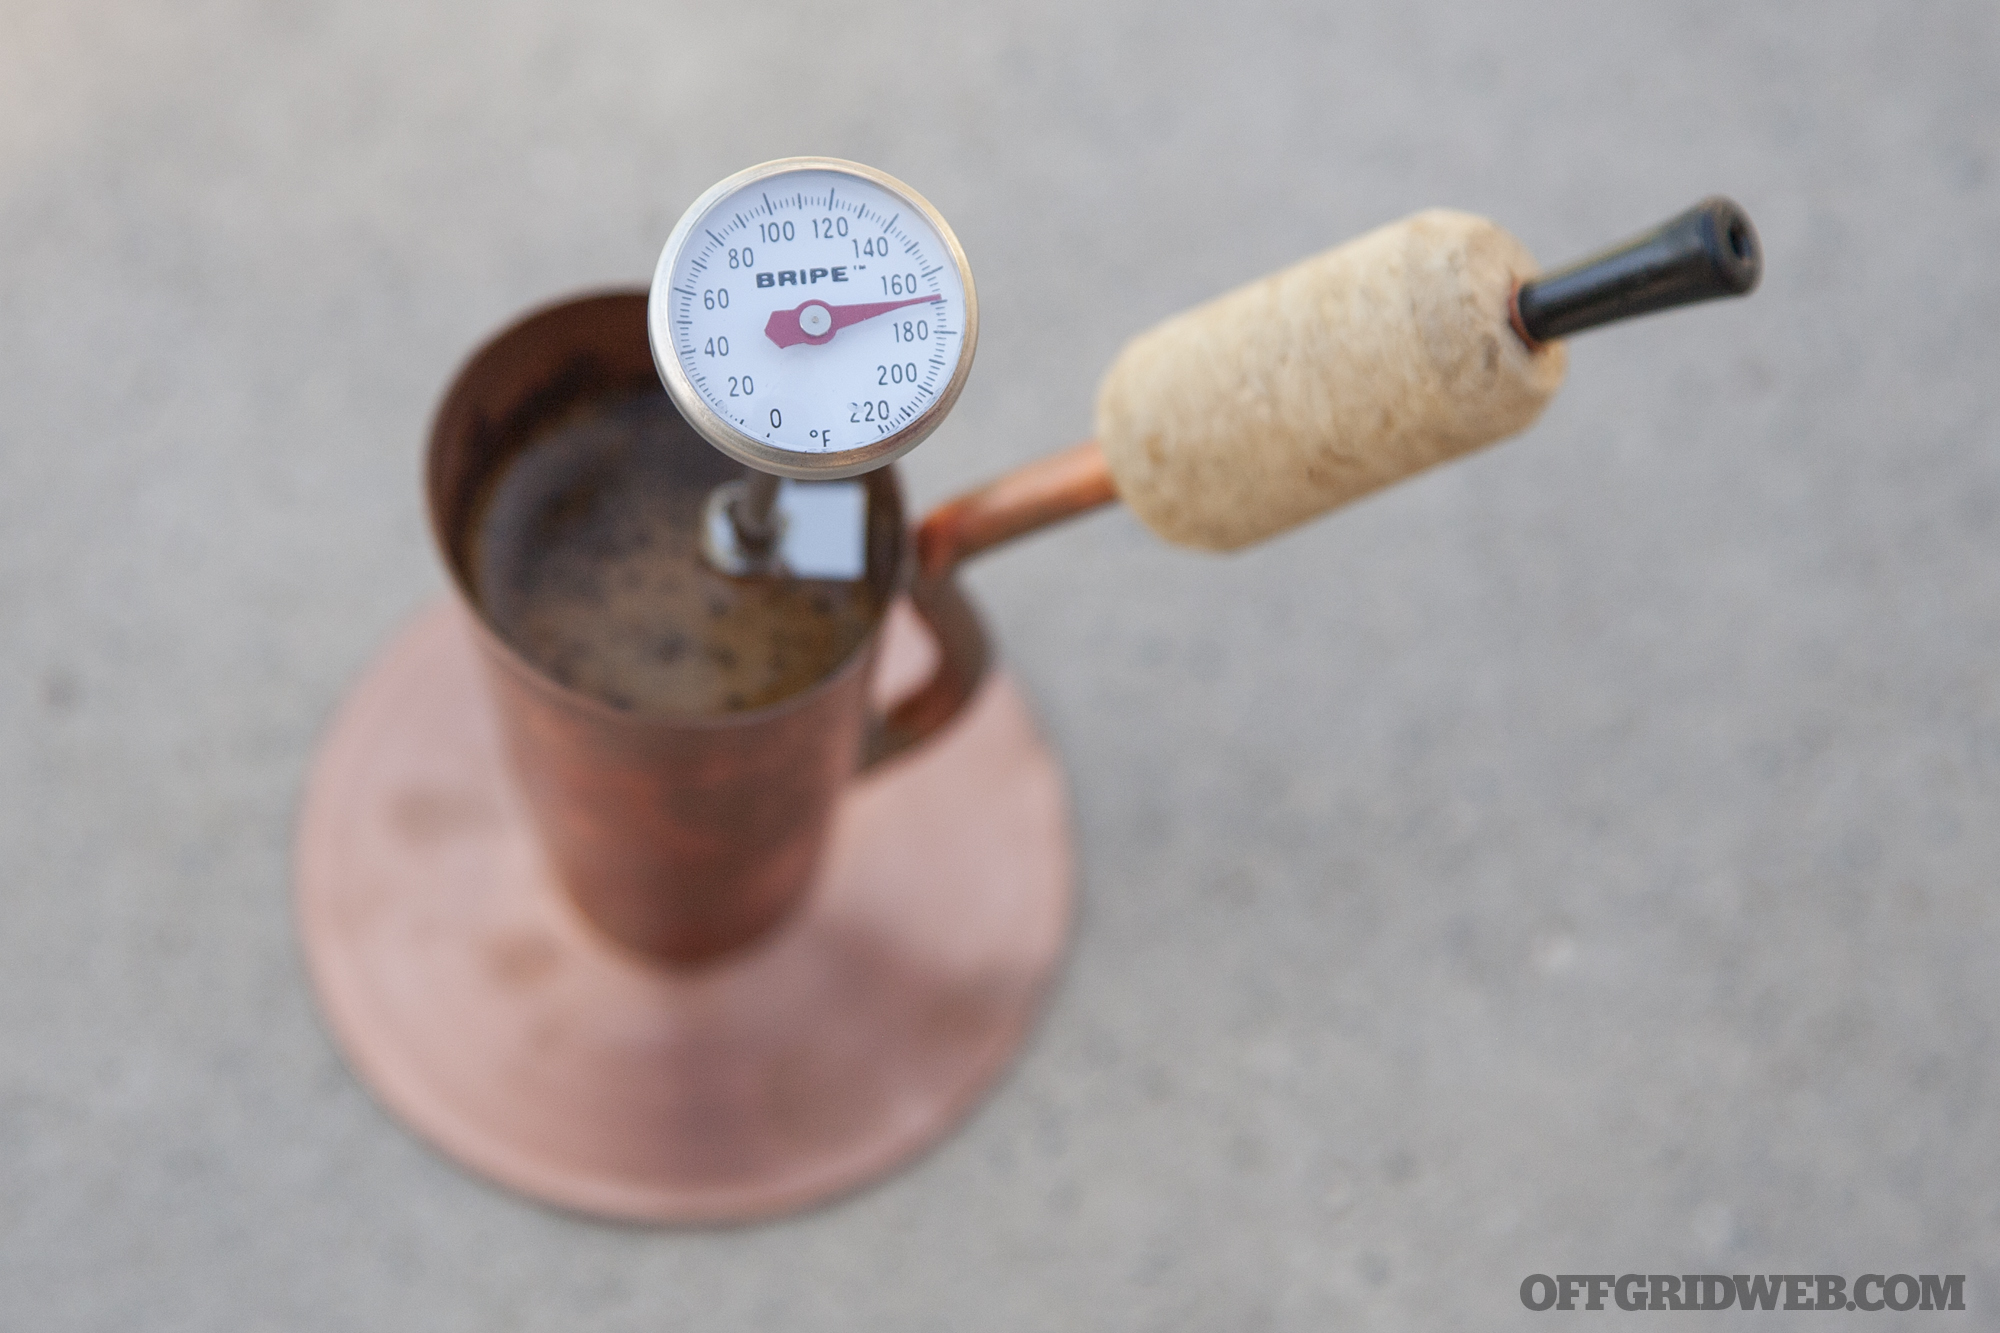
Keep an eye on the thermometer's reading. You're looking for it to display about 185°F (85°C). Stirring occasionally may speed the process.
After 1 to 3 minutes, depending on ambient temperature, you should hit the appropriate reading. Now place the Bripe onto the copper base plate on a flat surface, and let it cool down to around 140°F (60°C). Remember not to touch the copper during these steps. It will still be extremely hot.
Cooling takes a few minutes. During this time, you can prepare other parts of your breakfast or afternoon snack.
When the dial reads 140°F, pick up the Bripe. You can set aside the thermometer at this point.
The instructions say you can add sugar or creamer if desired, but residue in the stem sounds like a hassle to clean. We prefer our coffee black anyway. Also, this ain't Starbucks, so leave the pumpkin spice syrup, whipped cream, and sprinkles at home.
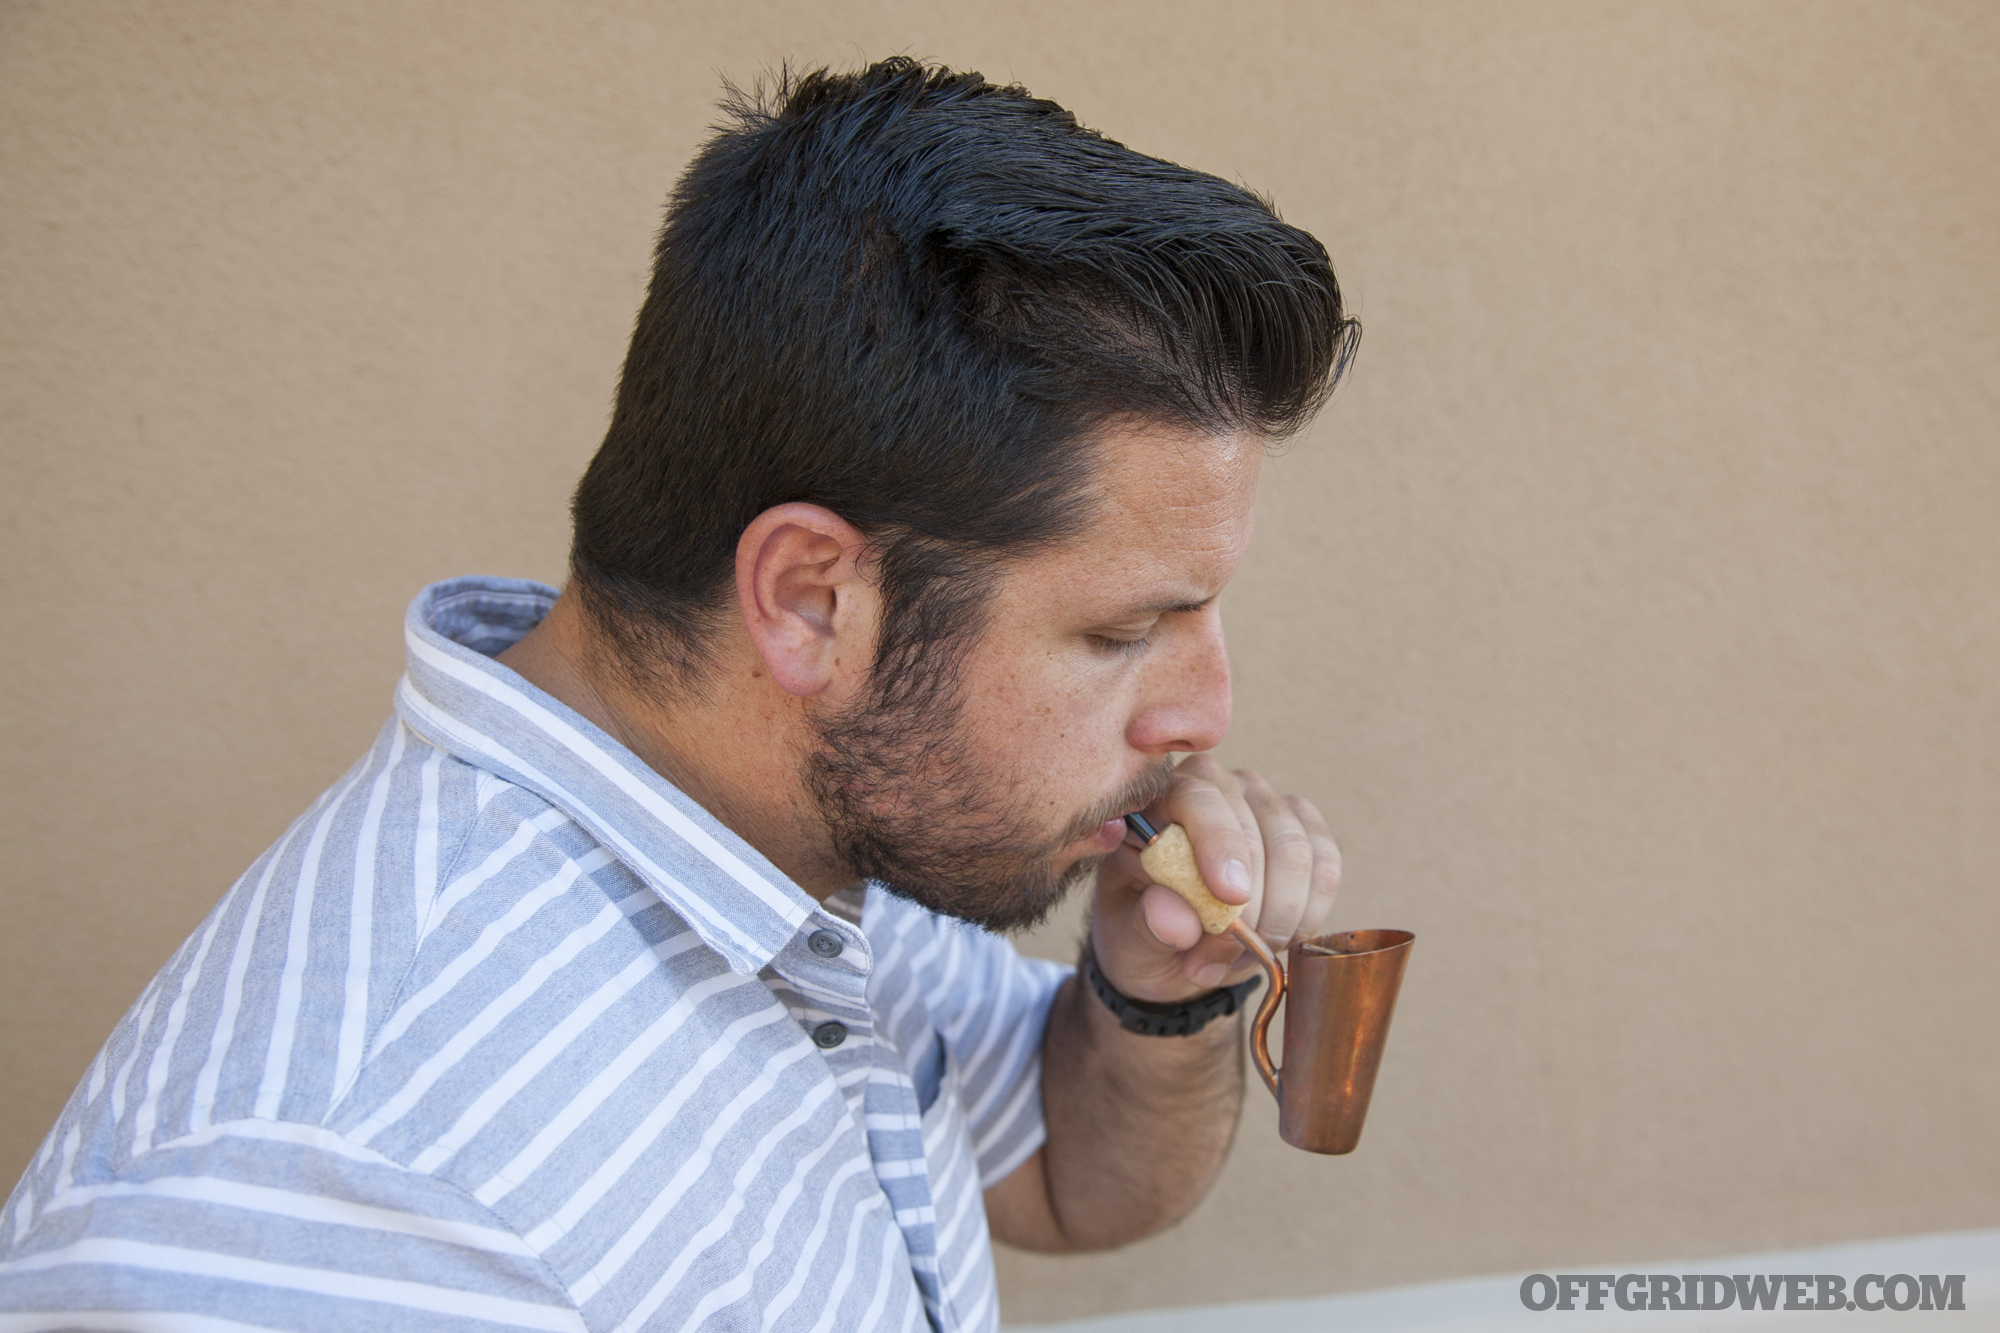
Before drinking, you'll need to blow lightly into the stem to produce bubbles and push any clumps of grounds away from the filter. Then take a sip and enjoy your shot of coffee.
Pros & Cons
When we first found out about the Bripe, our initial impression was a combination of interest and apprehension. On one hand, it seems like a clever way to make a single-serve shot of real coffee on the trail without carrying a French press, percolator, or stove. On the other hand, it seemed like it might be another silly gimmick targeted at man-bun-clad outdoorsy hipsters. We had to use one to find out.
We really enjoyed some aspects of the Bripe, and weren't so fond of others, so we'll break our thoughts down into some pros and cons below.
Pro: The coffee tastes awesome. With the first sip through the stem, we were legitimately amazed by how good the coffee tasted. It's a night-and-day difference from instant — that should be obvious — and on par with what you'll get from a nice French press. There's no metallic taste or notable flavor from the hot copper, and the filter does a nice job keeping the grounds in the bowl.
You can even use it to brew tea, if you feel like mixing things up — click here and scroll down for the instructions.
Pro: It's compact and lightweight. Including butane fuel, coffee grounds, and all six items in the pouch, this kit weighs approximately 12 ounces. It fits nicely into your hand or a side pocket on your backpack, and the soft felt protects the items inside. We also liked the inclusion of a vial to contain your coffee grounds — it's just the right size for the pouch, and the screw-on cap ensures you don't spill grounds in your pack.
Pro: Once you get the hang of it, it's easy to use and clean. The kit contains everything you need, aside from clean water. The first time we used it, we were a little uncertain, but after that it's simple to recall the steps. It takes just a few minutes to make coffee, less than you'd spend boiling a bigger cup full of water over a camp stove.
Once you're finished using the Bripe on the trail, you can empty the grounds, rinse everything in water, blow through the stem a few times, and let it air-dry. Copper is antimicrobial, so it naturally fends off most surface bacteria. For more thorough cleanings or to restore the shiny exterior finish, just hit it with boiling water, salt, and lemon juice as seen in the video below.
Con: A few sips, and it's empty. After around 5 minutes of prep time, you're left with roughly a single shot of coffee. As mentioned earlier, it's delicious, but we still found ourselves wishing there was more. If you lean towards drinking an espresso in the morning instead of an extra-large coffee, you won't mind this, but we still prefer a bigger cup to wash down breakfast.
Con: It's not exactly discreet. There's no getting around it — the Bripe is a conversation-starter. If you're sitting on a park bench and start heating it with the butane torch, you're going to get some strange looks. In some places, you might even wind up with a paraphernalia charge. Caffeine is the world's most popular psychoactive drug, and this pipe may make bystanders uncomfortably aware of that fact.
Even after it's heated up and you're sipping from the stem, it's hard not to look like Popeye gone steampunk. Some people will think it's cool, many others will think you're a weirdo. Either way, you're bound to draw attention to yourself if there's anyone nearby.
Conclusions
Despite our initial skepticism, we actually found ourselves liking the Bripe. It's undeniably unusual, and definitely gives off a hipster vibe that some traditionalists will loathe. But at the end of the day, it does exactly what it's supposed to — it produces a fast and tasty single serving of coffee. And it accomplishes this without adding much weight or bulk to your pack.
Although we're definitely not throwing our French press into the garbage can after writing this article, we do plan to keep using the Bripe on future outdoor excursions. We'll just make an effort to find somewhere secluded before lighting up, so we don't go starting too many conversations before our morning coffee.
For more info on the Bripe coffee brew pipe, go to Briping.com.
For those of us who head out into remote locations to hike, camp, hunt, fish, or practice survival skills, the possibility of becoming stranded is always a consideration. This nightmarish situation is more likely than we might want to admit — a study in the Journal of Wilderness and Environmental Medicine showed an average of 11.2 search-and-rescue (SAR) incidents each day between 1992 and 2007 in the U.S. National Park system alone. The study also found that without aid from SAR teams, “1 in 5 (20%) of those requesting SAR assistance would be a fatality,” and that's just among those who were able to call for help.
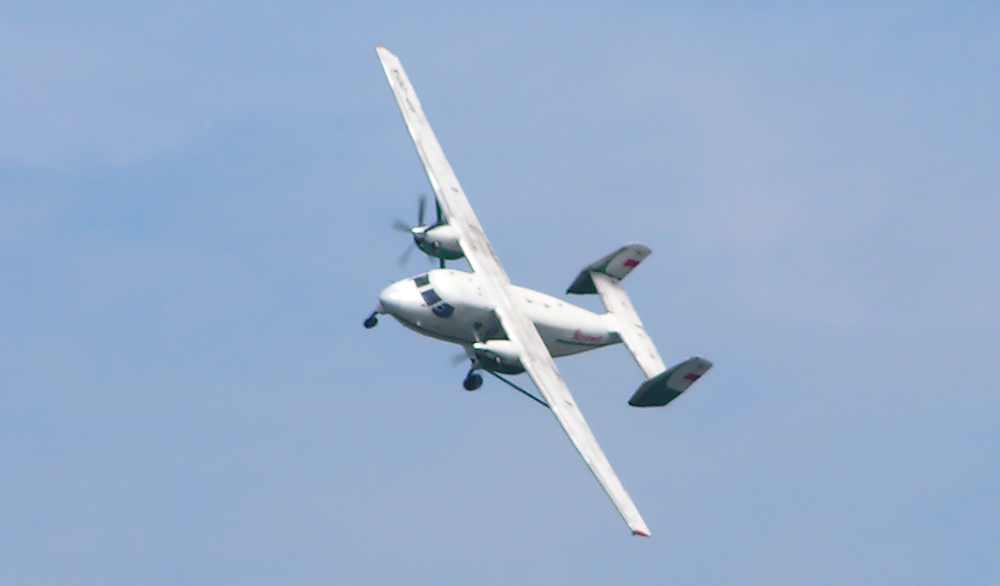
In a truly remote location, a passing aircraft may be your best hope of rescue.
Whether it's due to a broken bone, sudden illness, severe weather, animal attack, or some other dire emergency, there are many instances where self-rescue may not be possible. We often over-confidently assume we'll be able to make it to safety under our own power, but if something catastrophic happens, you'd better know how to call for help. We've previously discussed signal mirrors, smoke canisters, and electronic beacons, but there's an even more basic system you should know: the international ground-to-air signaling code.
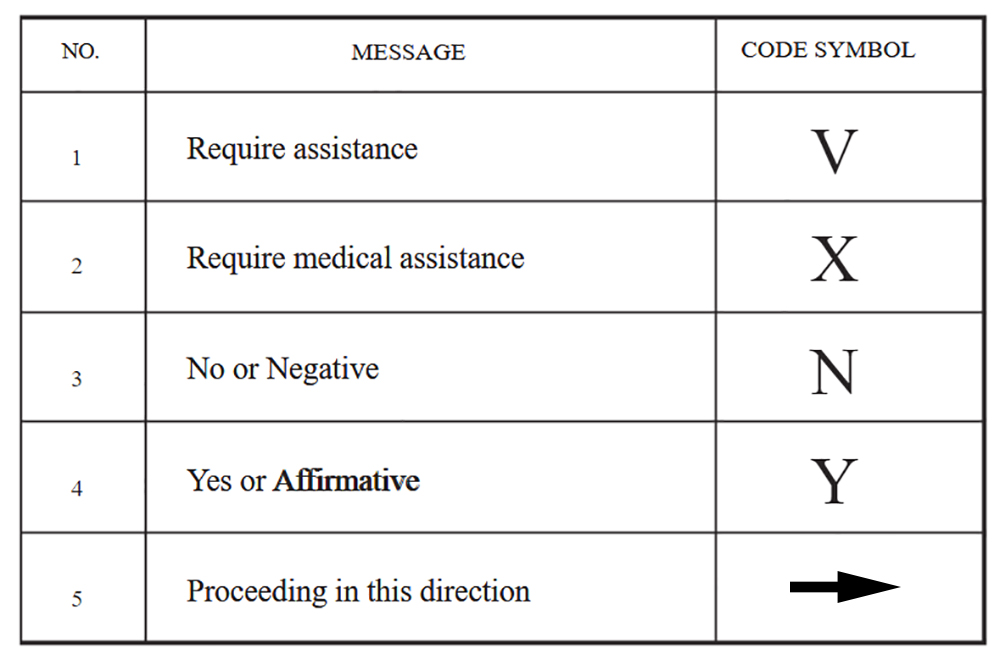
This standard system is designed to send a clear visual message to any aircraft that might pass your location. Here's a quick reference guide from FarAim.org on the five signals you should know:
X can also be interpreted as “unable to proceed” — in other words, V can be used when you need help but are still mobile, while X indicates that you're severely injured and cannot move. Y and N may be used to respond if the aircraft uses a loudspeaker to provide instructions.
These letters should be constructed on a clear patch of ground, with as much contrast between the symbols and backdrop as possible. Bright strips of parachute or pieces of dark wood on a light sand beach are good examples of this principle. In snow, this can be accomplished by walking or dragging an object to create a depression in the shape of the symbol. Also, remember to make the symbol as large as you can — at least 10 feet wide is recommended.
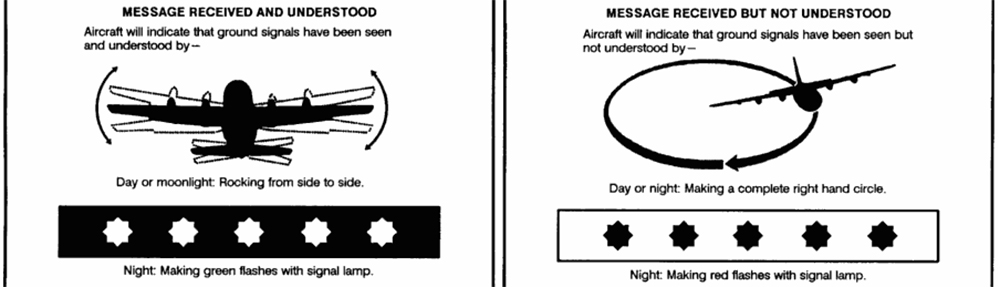
If a pilot spots your distress signal, the internationally-accepted acknowledgment is to rock the plane's wings from side to side. In low-light conditions, the aircraft may flash green exterior lights, or turn its landing lights on and off two times. Refer to the following figure from the U.S. Army Field Survival Guide for a visual depiction.
Warning! The exercises and content expressed in this column are for illustrative purposes only. Consult a medical professional before trying any physical activity or nutritional plan.
You're holed up waiting for help to arrive, and it's taking much longer than expected. You can't just wait idly by, though. You need to maintain your physical abilities because you have no idea what's in store for you ahead. Don't worry. While your space and resources may be limited, we can still keep you physically prepared for the steep road ahead. Here's what you need to know.
What is a Complex?
A complex is a series of exercises with the same implement (dumbbell, barbell, kettlebell, bodyweight, etc.) with little to no rest in between exercises. You'll only rest at the end. That's right, you don't even get to set the weight down. Traditionally, complexes have been used for athletes who are in-season, where time is limited, as a great way to maintain strength without fatiguing athletes to the level a typical training session might. Of course, there are many other times you might want to use complexes in training.
That being said, there's one significant reason a prepper might be interested in using this type of training — it's a great choice for limited space or equipment. Outside of that, the structure also provides a significant challenge to your conditioning. So, it's perfect for anyone looking to improve in this area or to lose weight. They can even be modified to improve strength simply by increasing the weight and lowering the repetitions, which we'll discuss later in the article.
How Do You Structure a Complex?
There are many different ways to structure a complex; it really just depends on what you are looking to get out of it. For our purposes, we'll focus solely on physical preparation for the unknown.
First, you should ideally hit all major muscles or movement patterns in the complex. This means getting lower body and upper body throughout the exercises. Generally speaking, it's best to alternate between upper and lower body, or at least separate competing exercises like two consecutive pressing movements (i.e. overhead press and a horizontal press). It's also a good idea for at least one of those lower body exercises to be single-leg, such as a lunge.
Next, you should prioritize power first in the complex just as you would typically put a power exercise before a strength exercise in a program. Power is a quality that isn't as fatiguing on your muscles, but is dependent more on your nervous system. It's best to do these exercises first when the muscles and nervous system are fresh, as power production will be much more limited when you're tired. Some examples of a power exercise would be a kettlebell swing or any kind of explosive movement.
Choose the most challenging movements earlier in the complex. After fatigue sets in, these movements tend to break down. So, it's best to do these near the start of the complex to make sure you're fresher.
Repetitions will vary based on what you're looking to accomplish with the complex. The same rules that apply to traditional strength training are used for this style of training as well. If your goal is to improve strength, we'll use heavier weight for five to six repetitions per exercise. On the other hand, if you need to shed some excess body fat or work on general conditioning, bump the repetitions up to 8 to 12 per exercise and lower the weight a little bit.
Lastly, choose your weight based on the most limiting exercise in the series. So, if an overhead press is the weakest movement you'll complete, you're going to choose a weight that's appropriate for that exercise, and you'll use that for the rest of the exercises as well.
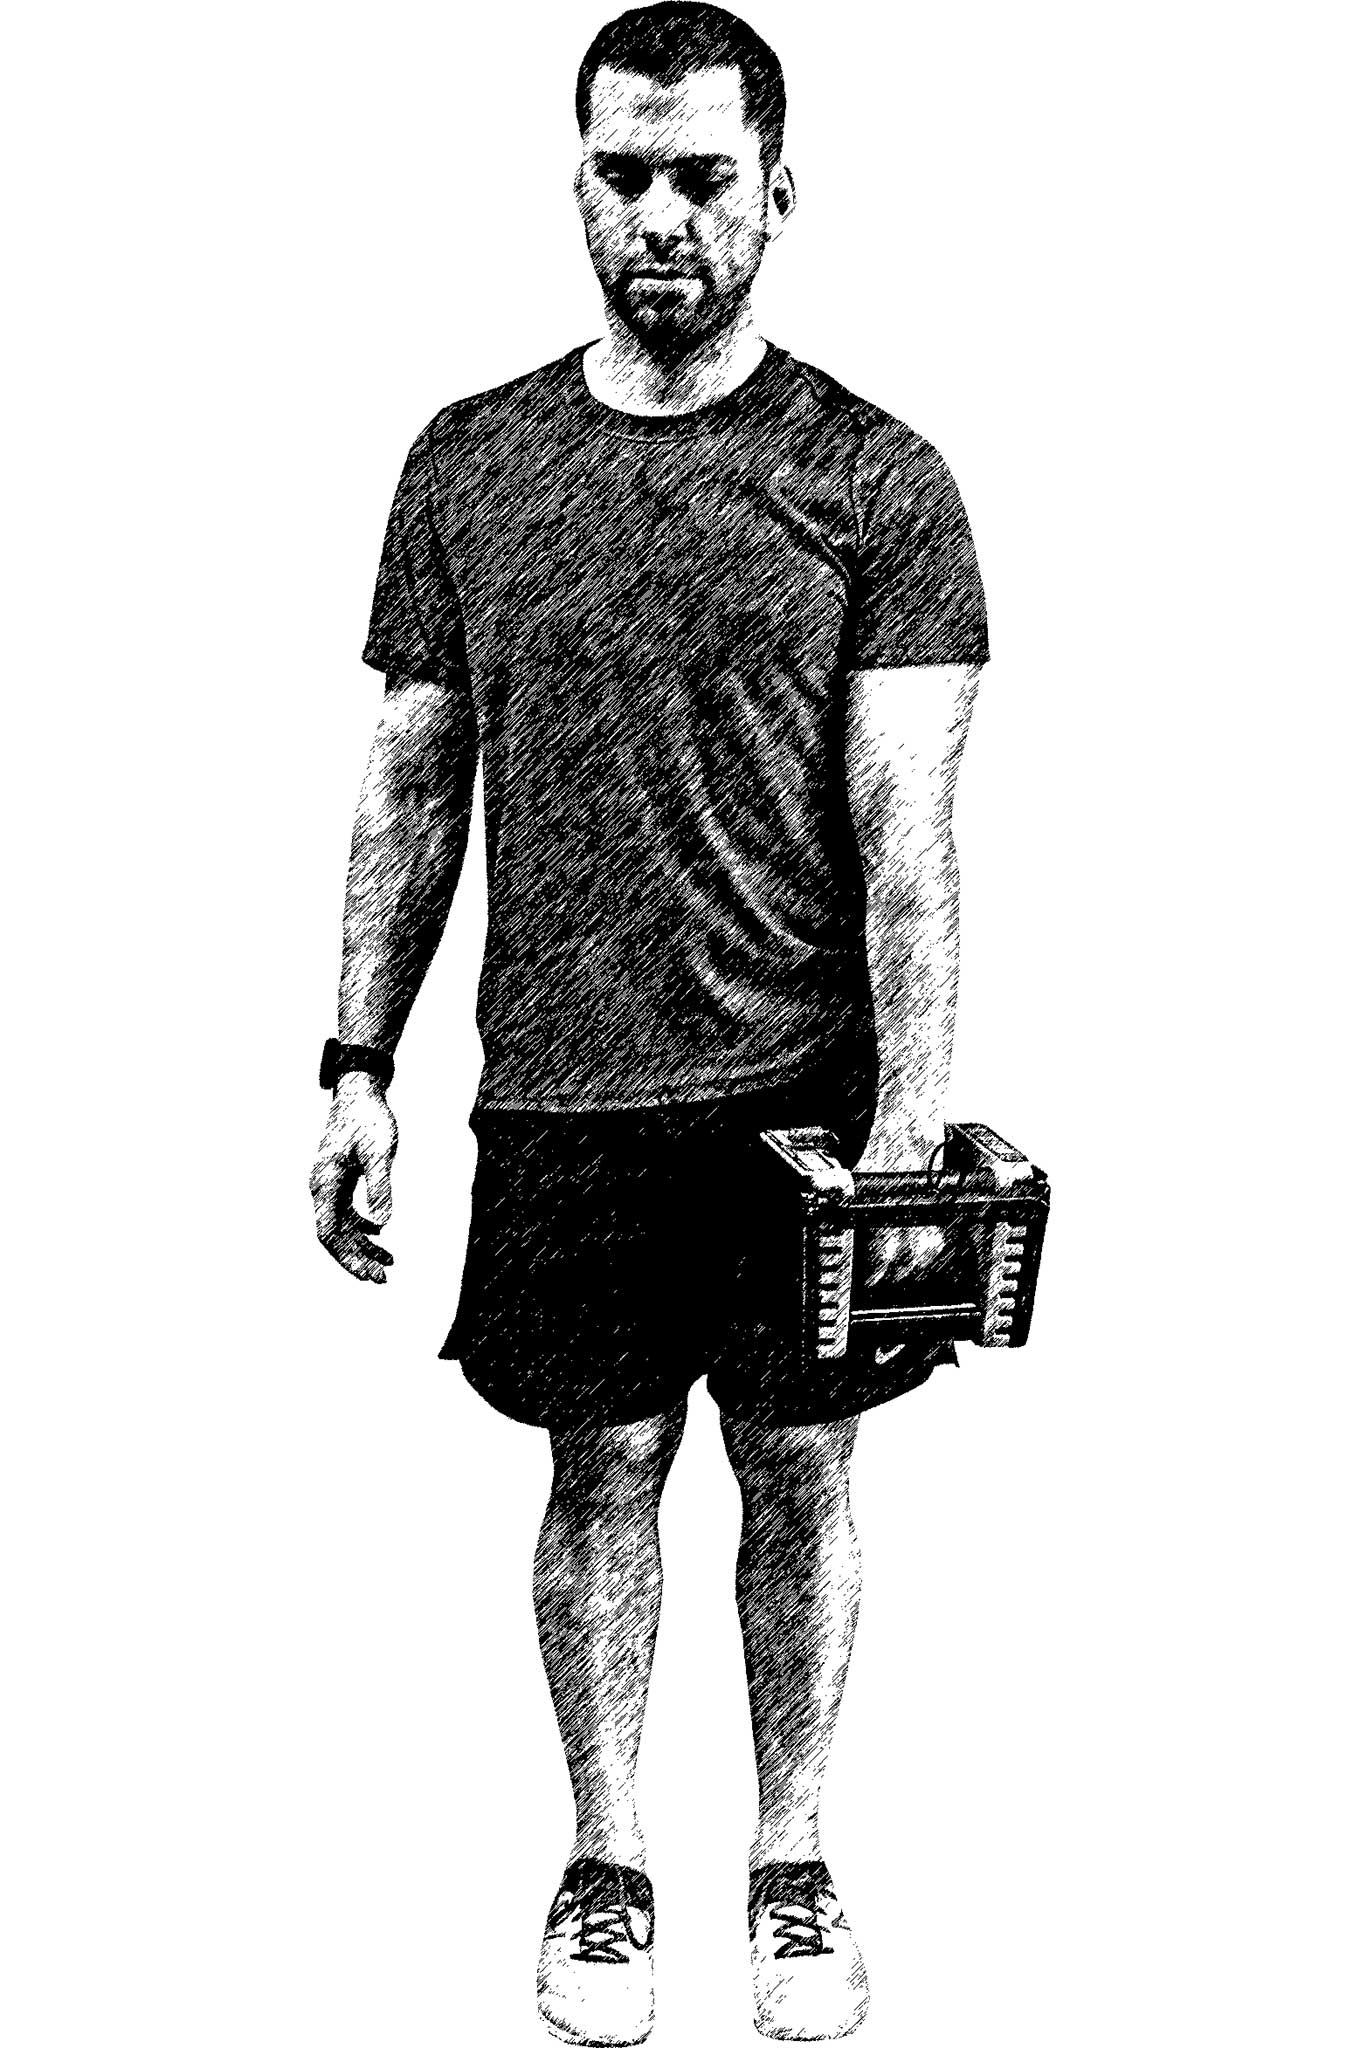
Sample Complex for the Prepper
While this should probably go without saying, make sure the exercises you use with a complex are ones that you're competent in completing. If not, doing multiple exercises with bad form and combining them with little to no rest is a recipe for disaster. The below exercises are suggested to provide an idea of how the flow of a complex would go. Feel free to substitute your own exercises for the ones listed.
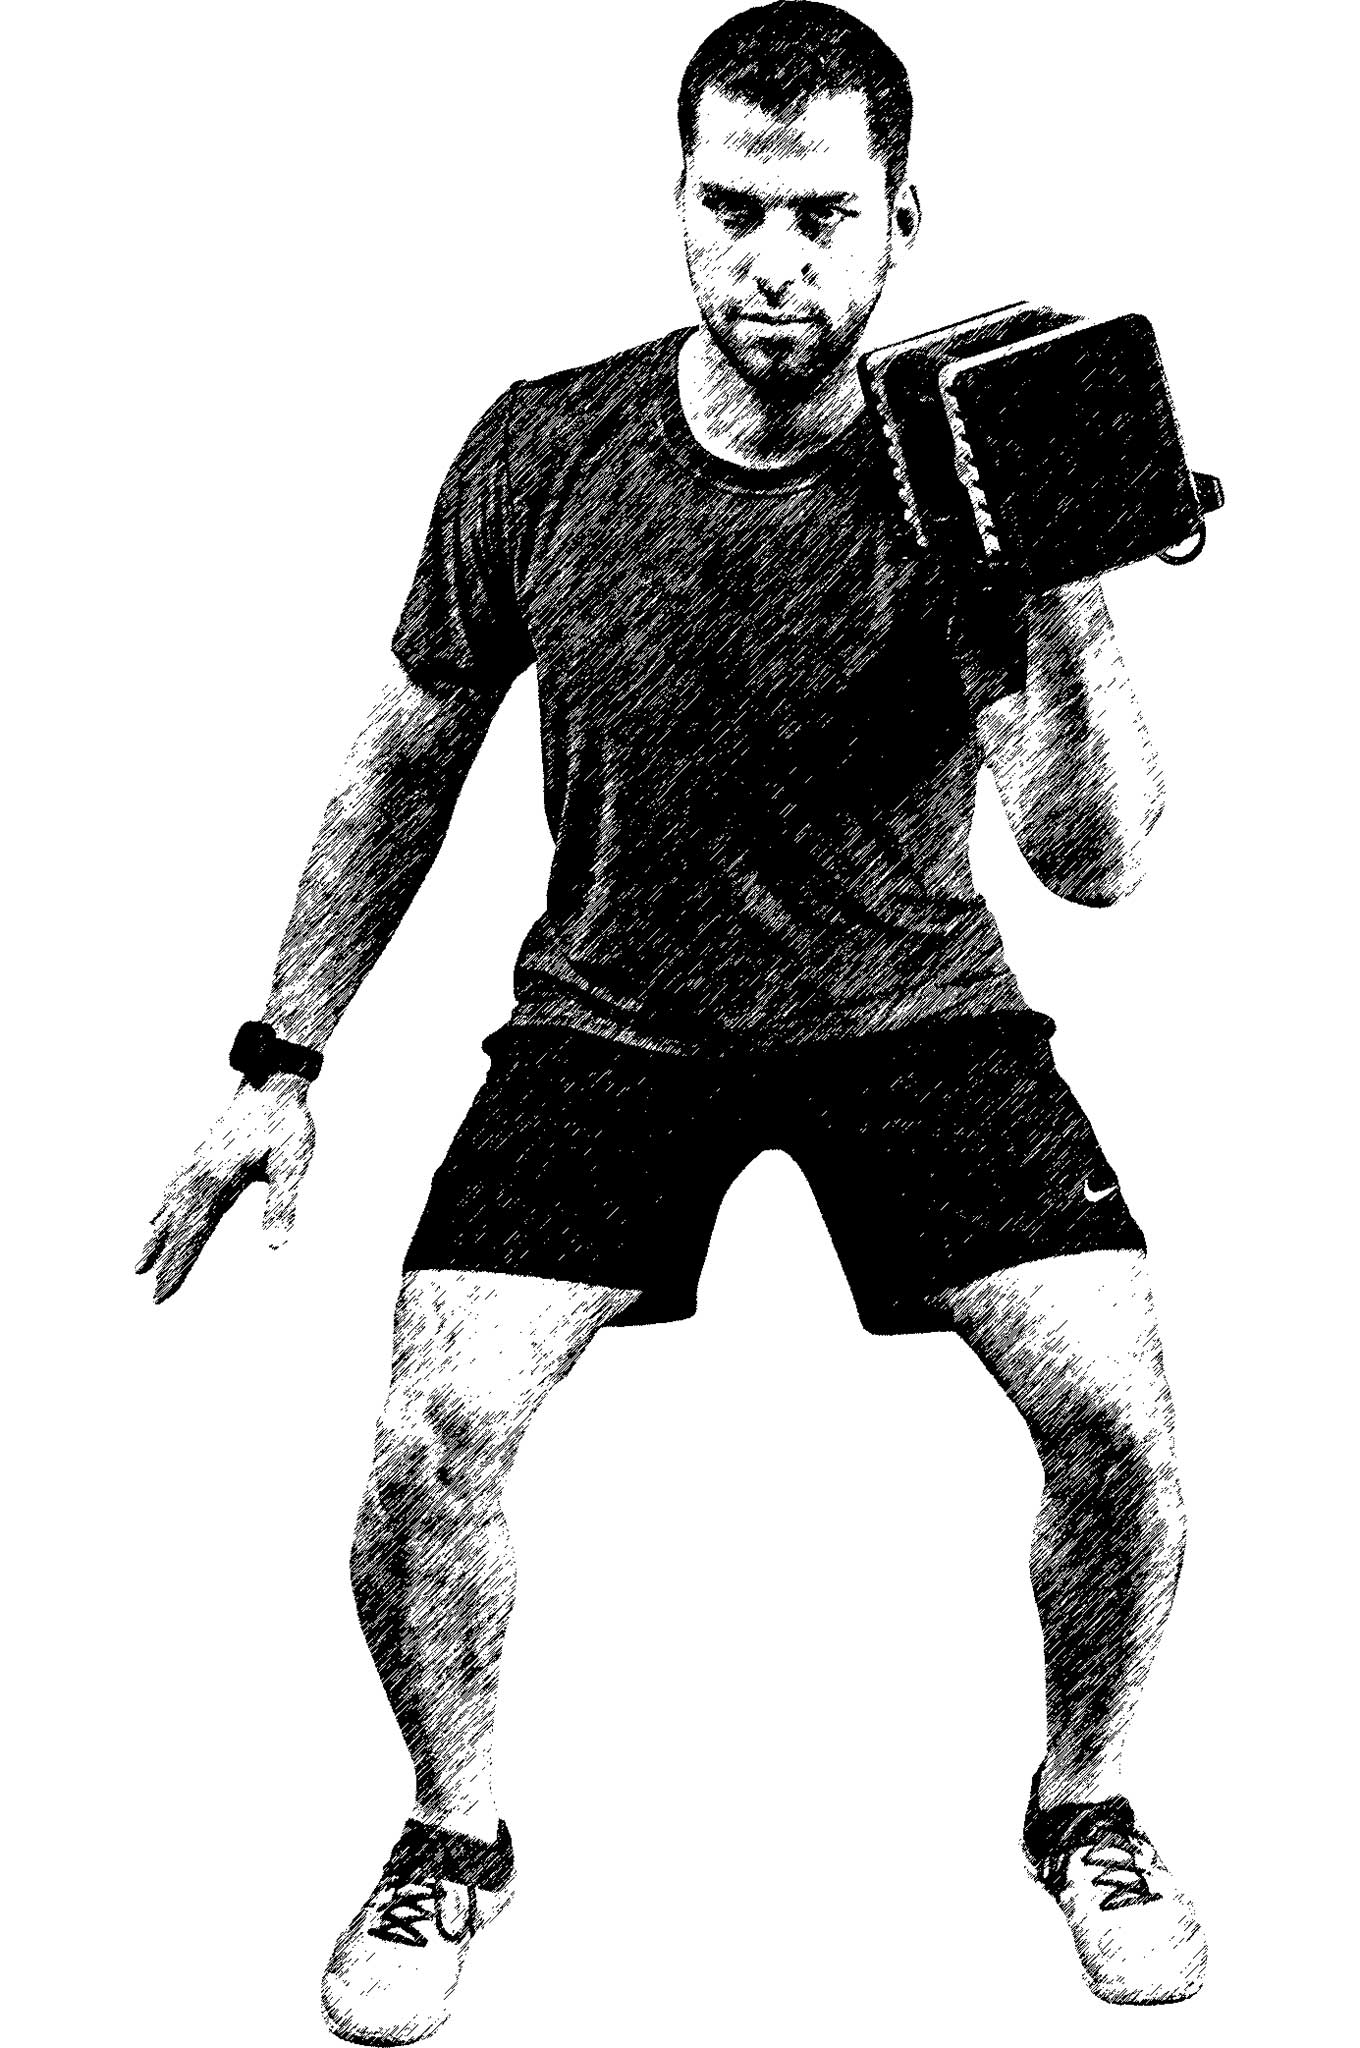
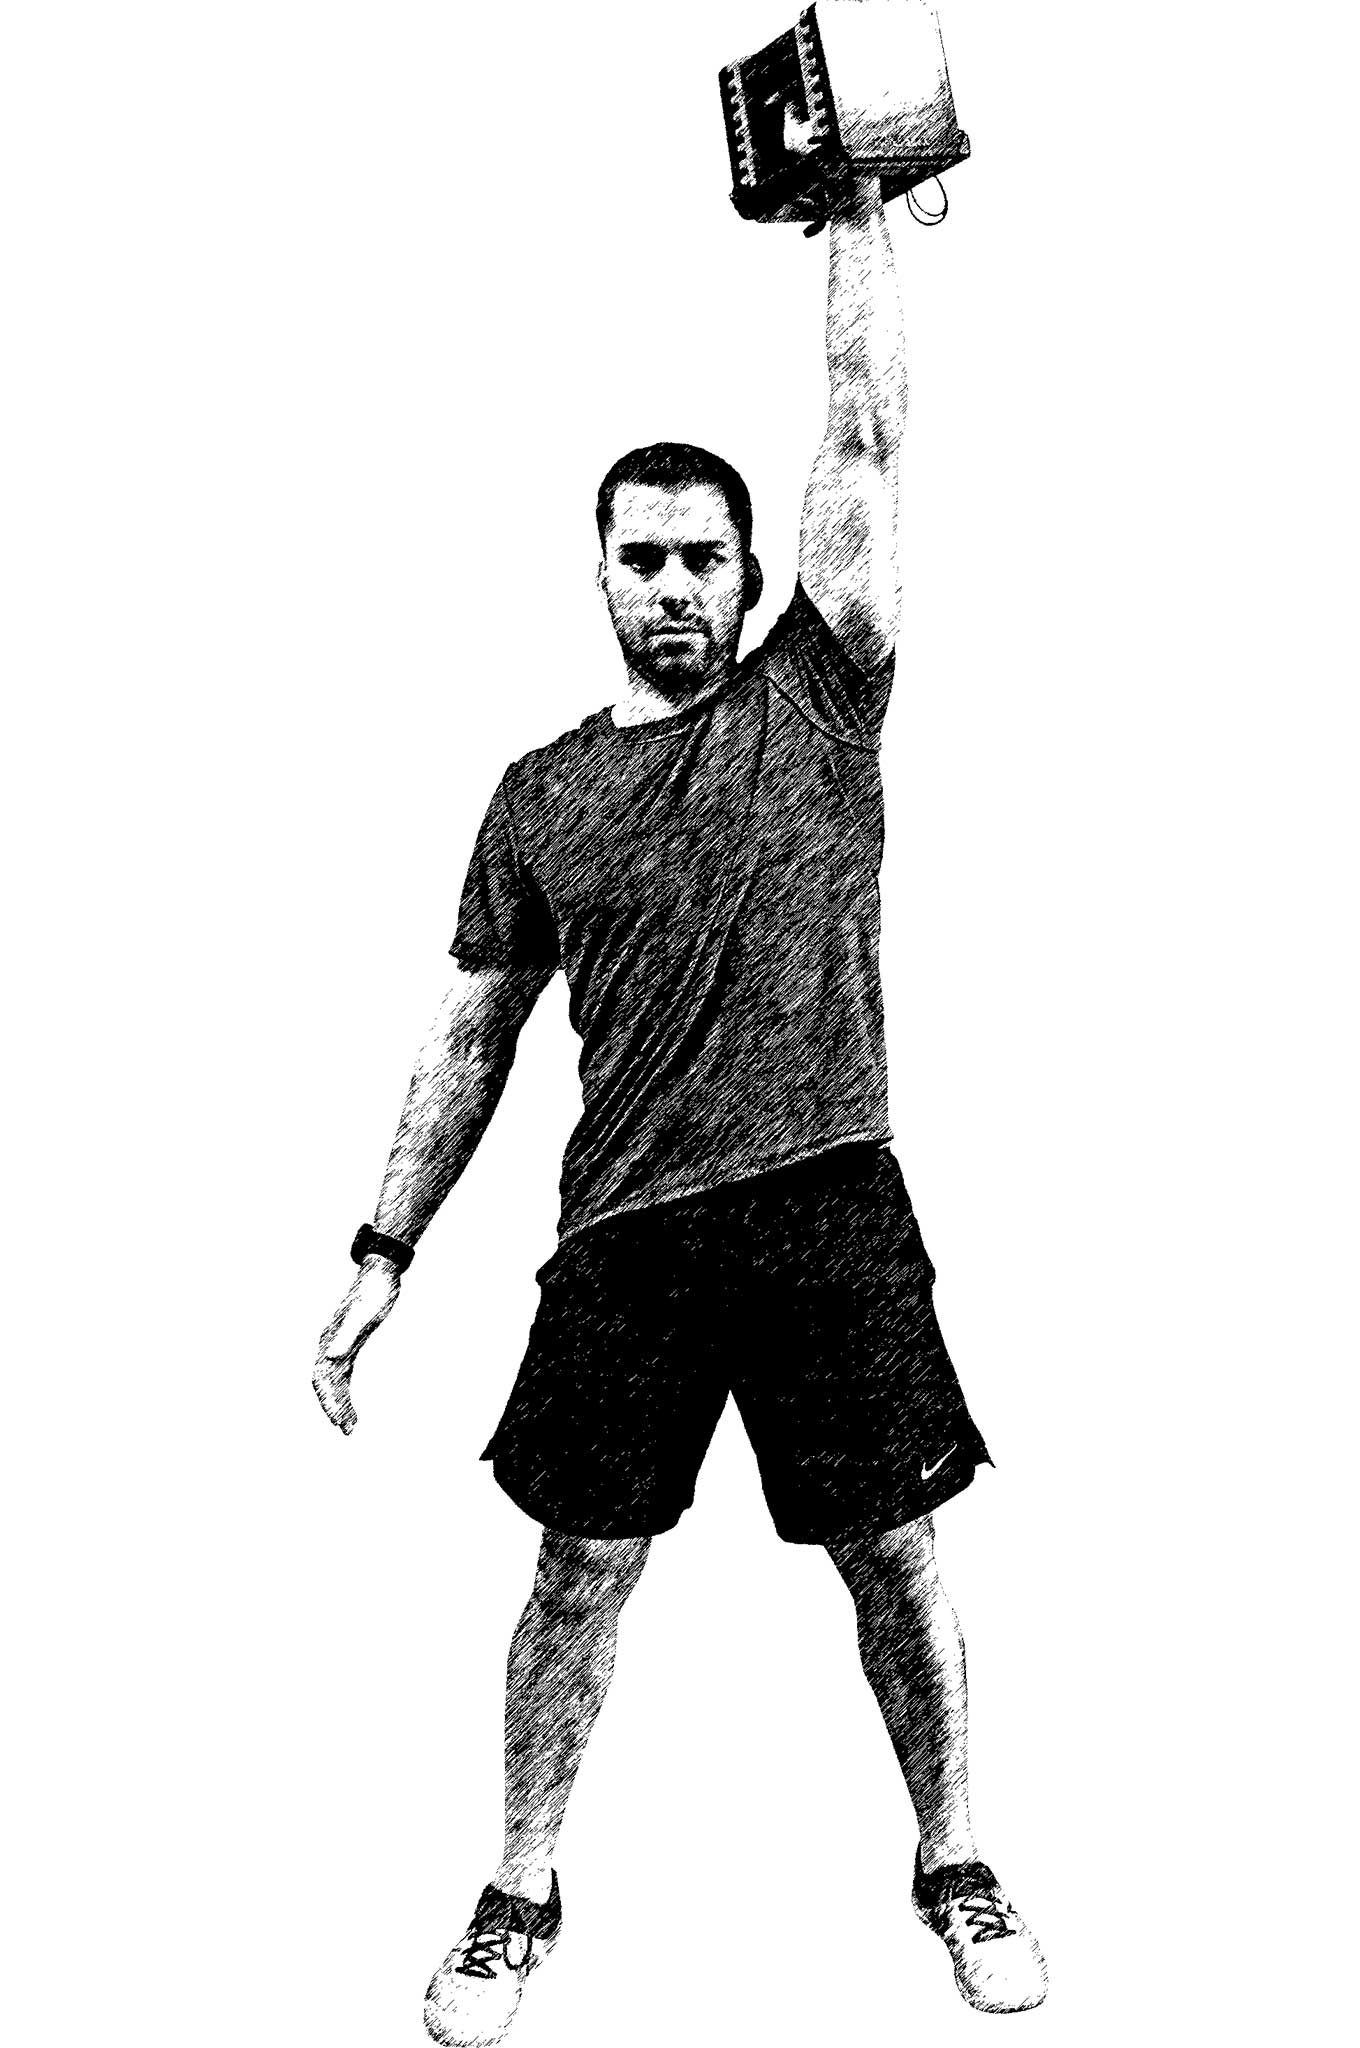
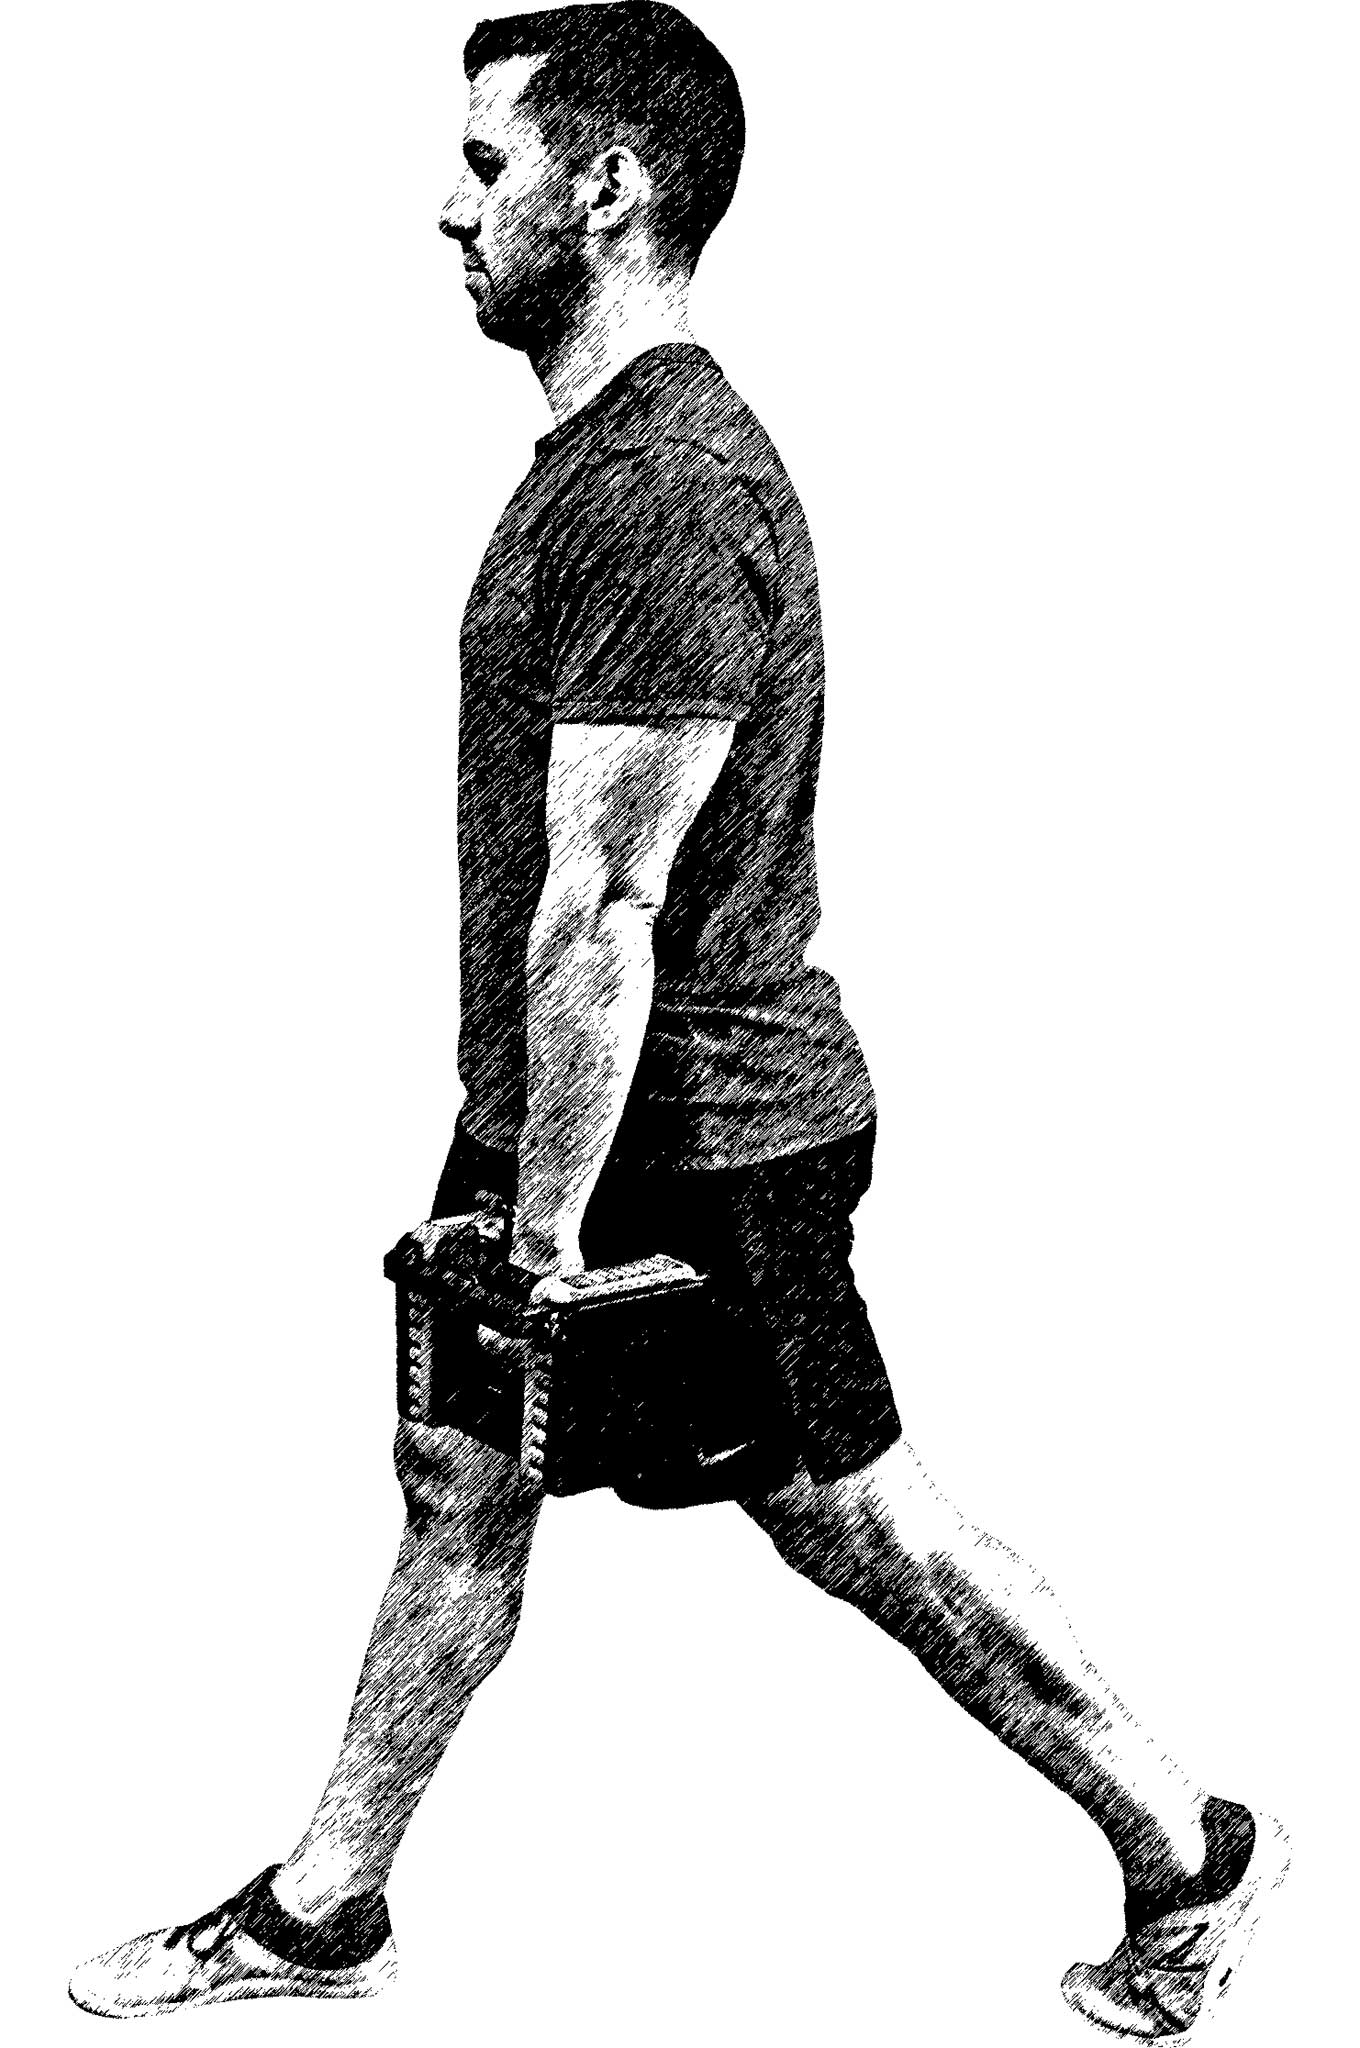
One-Arm Dumbbell Push Press
Six repetitions on each side
Begin with the dumbbell in one hand and resting on your shoulder.
Quickly bend your hips and knees slightly and explode up as you press the weight overhead.
Slowly lower the dumbbell back to the starting position, using your other hand to assist if need be.
Repeat for six repetitions on each side.
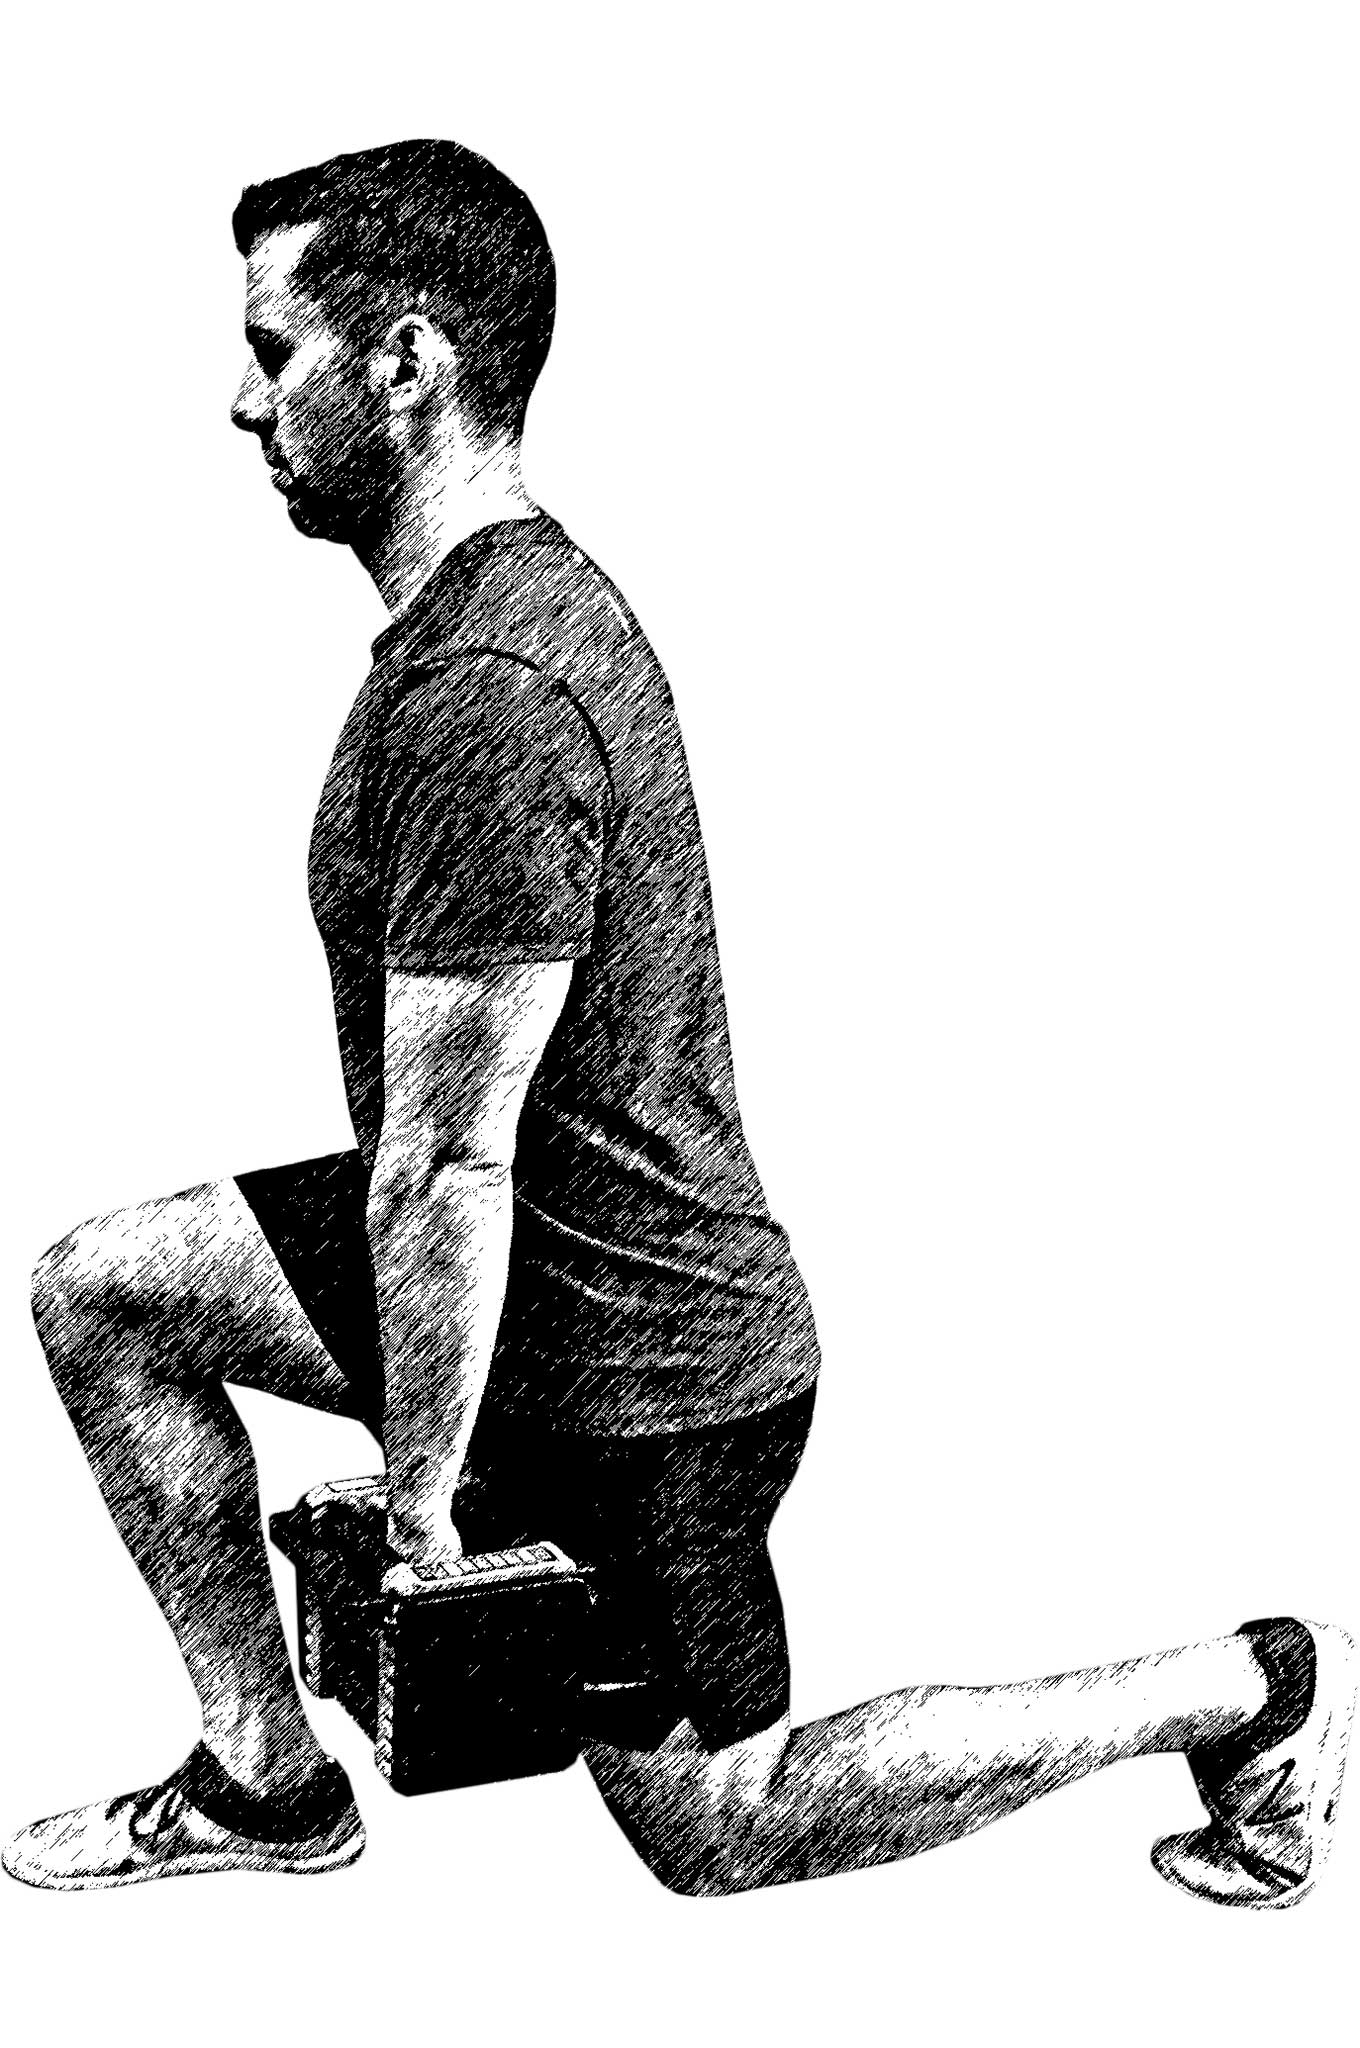
Dumbbell Split Squat
Six repetitions per side
Begin in a lunge position with one leg forward and the other back.
Hold the dumbbell with one hand in front of your back leg.
Slowly descend straight down keeping the weight in your front foot. Make sure to feel the whole front foot in contact with the ground.
After gently tapping your back knee to the floor, press your front foot through the floor, and return to the starting position.
Complete six repetitions per side.
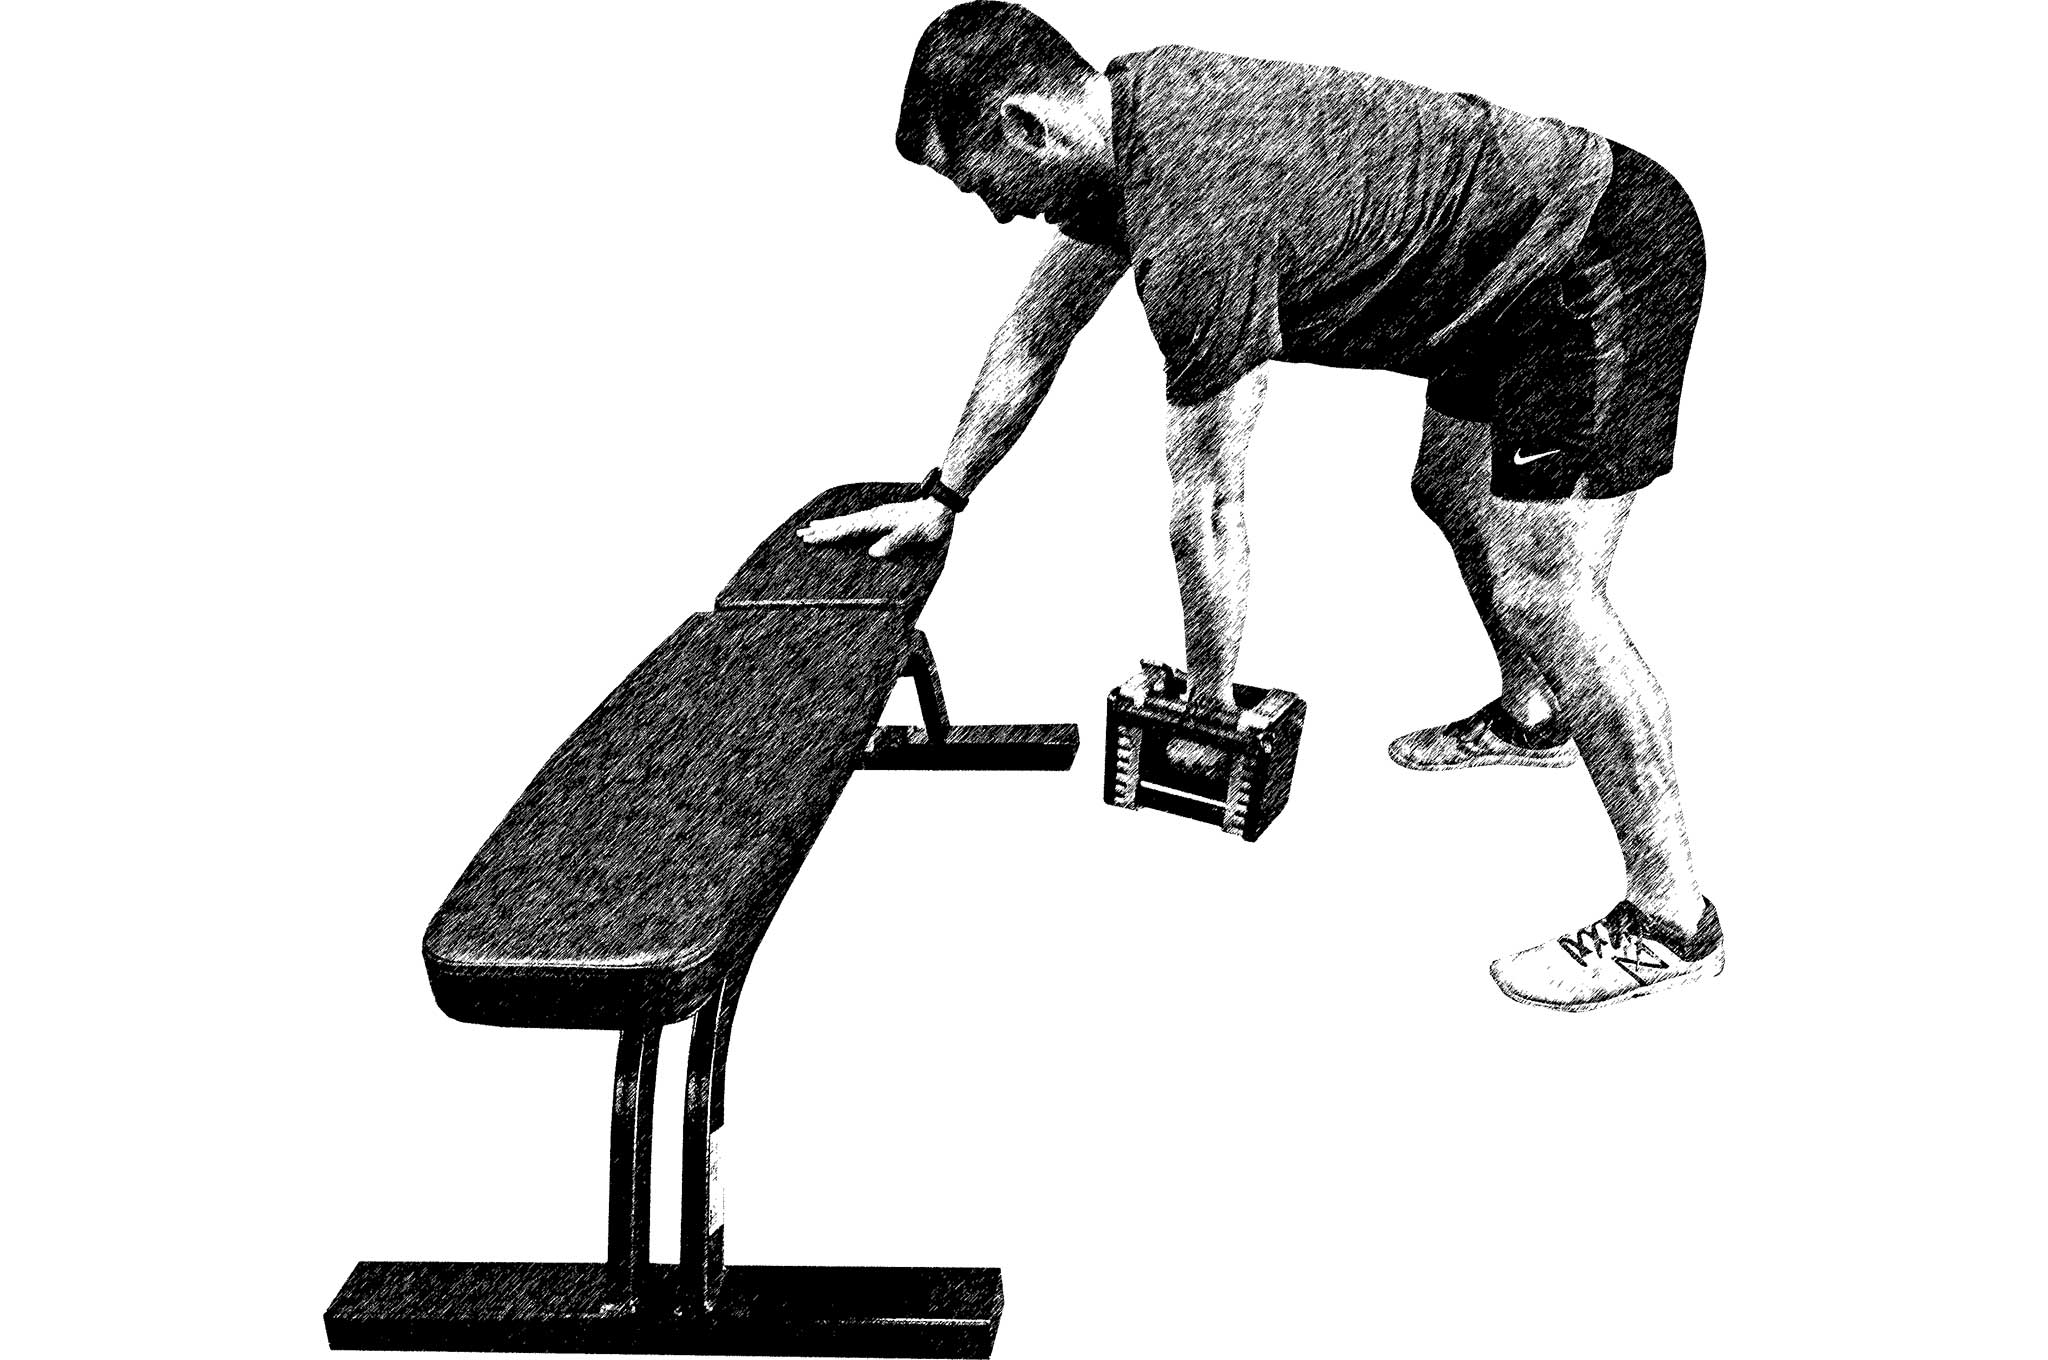
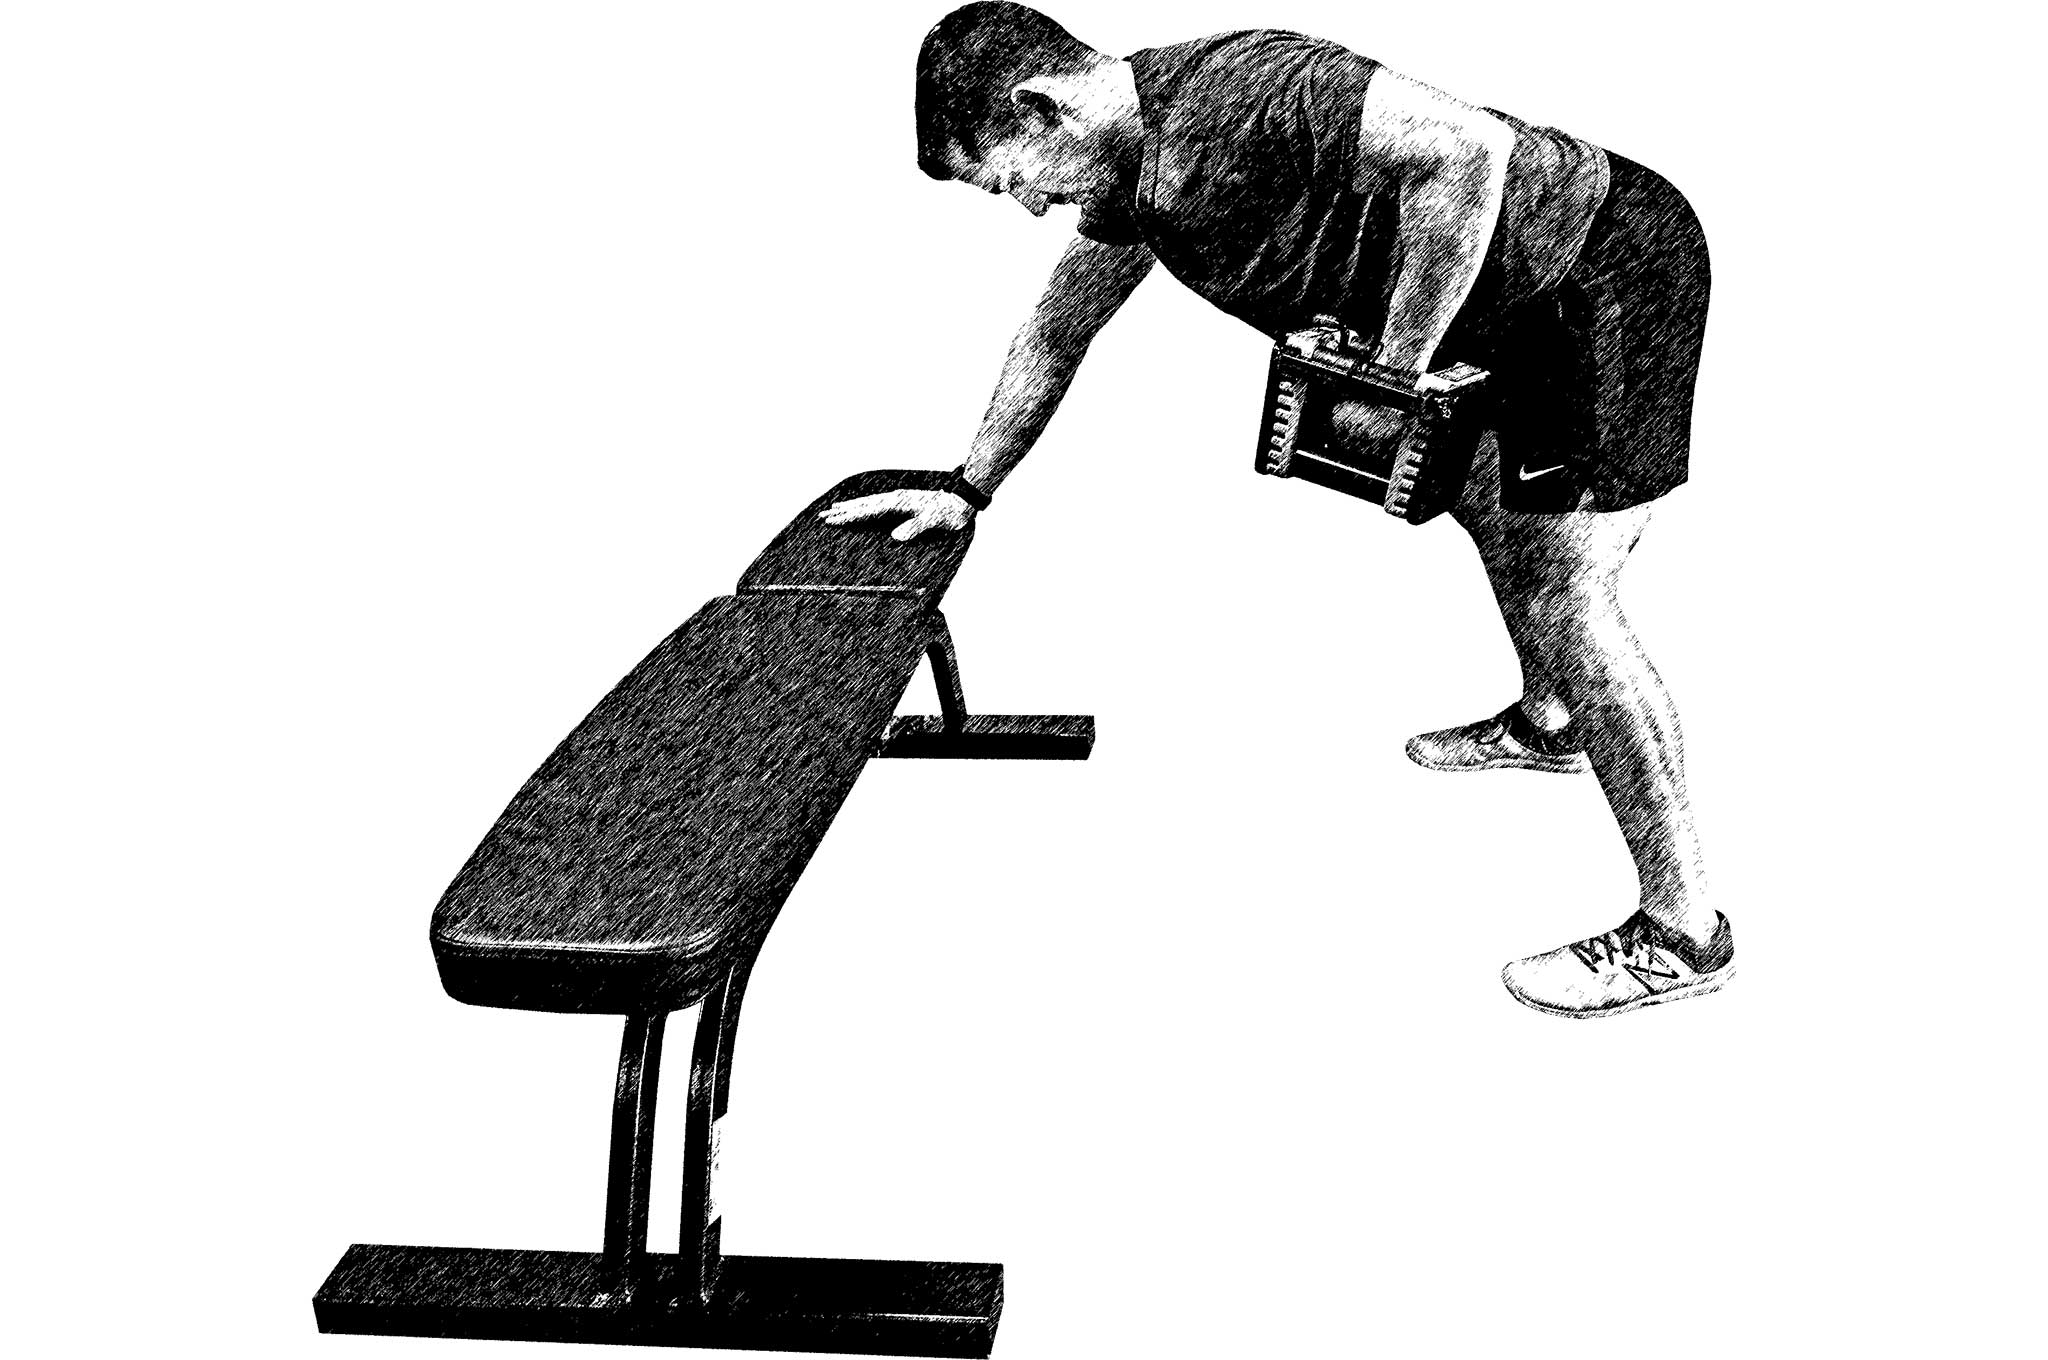
Three-Point Dumbbell Row
Six repetitions on each side
Begin with one arm supporting you on a bench or other sturdy surface roughly knee height.
Sit your hips back with your back flat, and grab a dumbbell in the free hand.
Drive your shoulder blade and elbow back, stopping just before your elbow is about to pass your torso.
Slowly return to the starting position.
Complete for six repetitions per side.
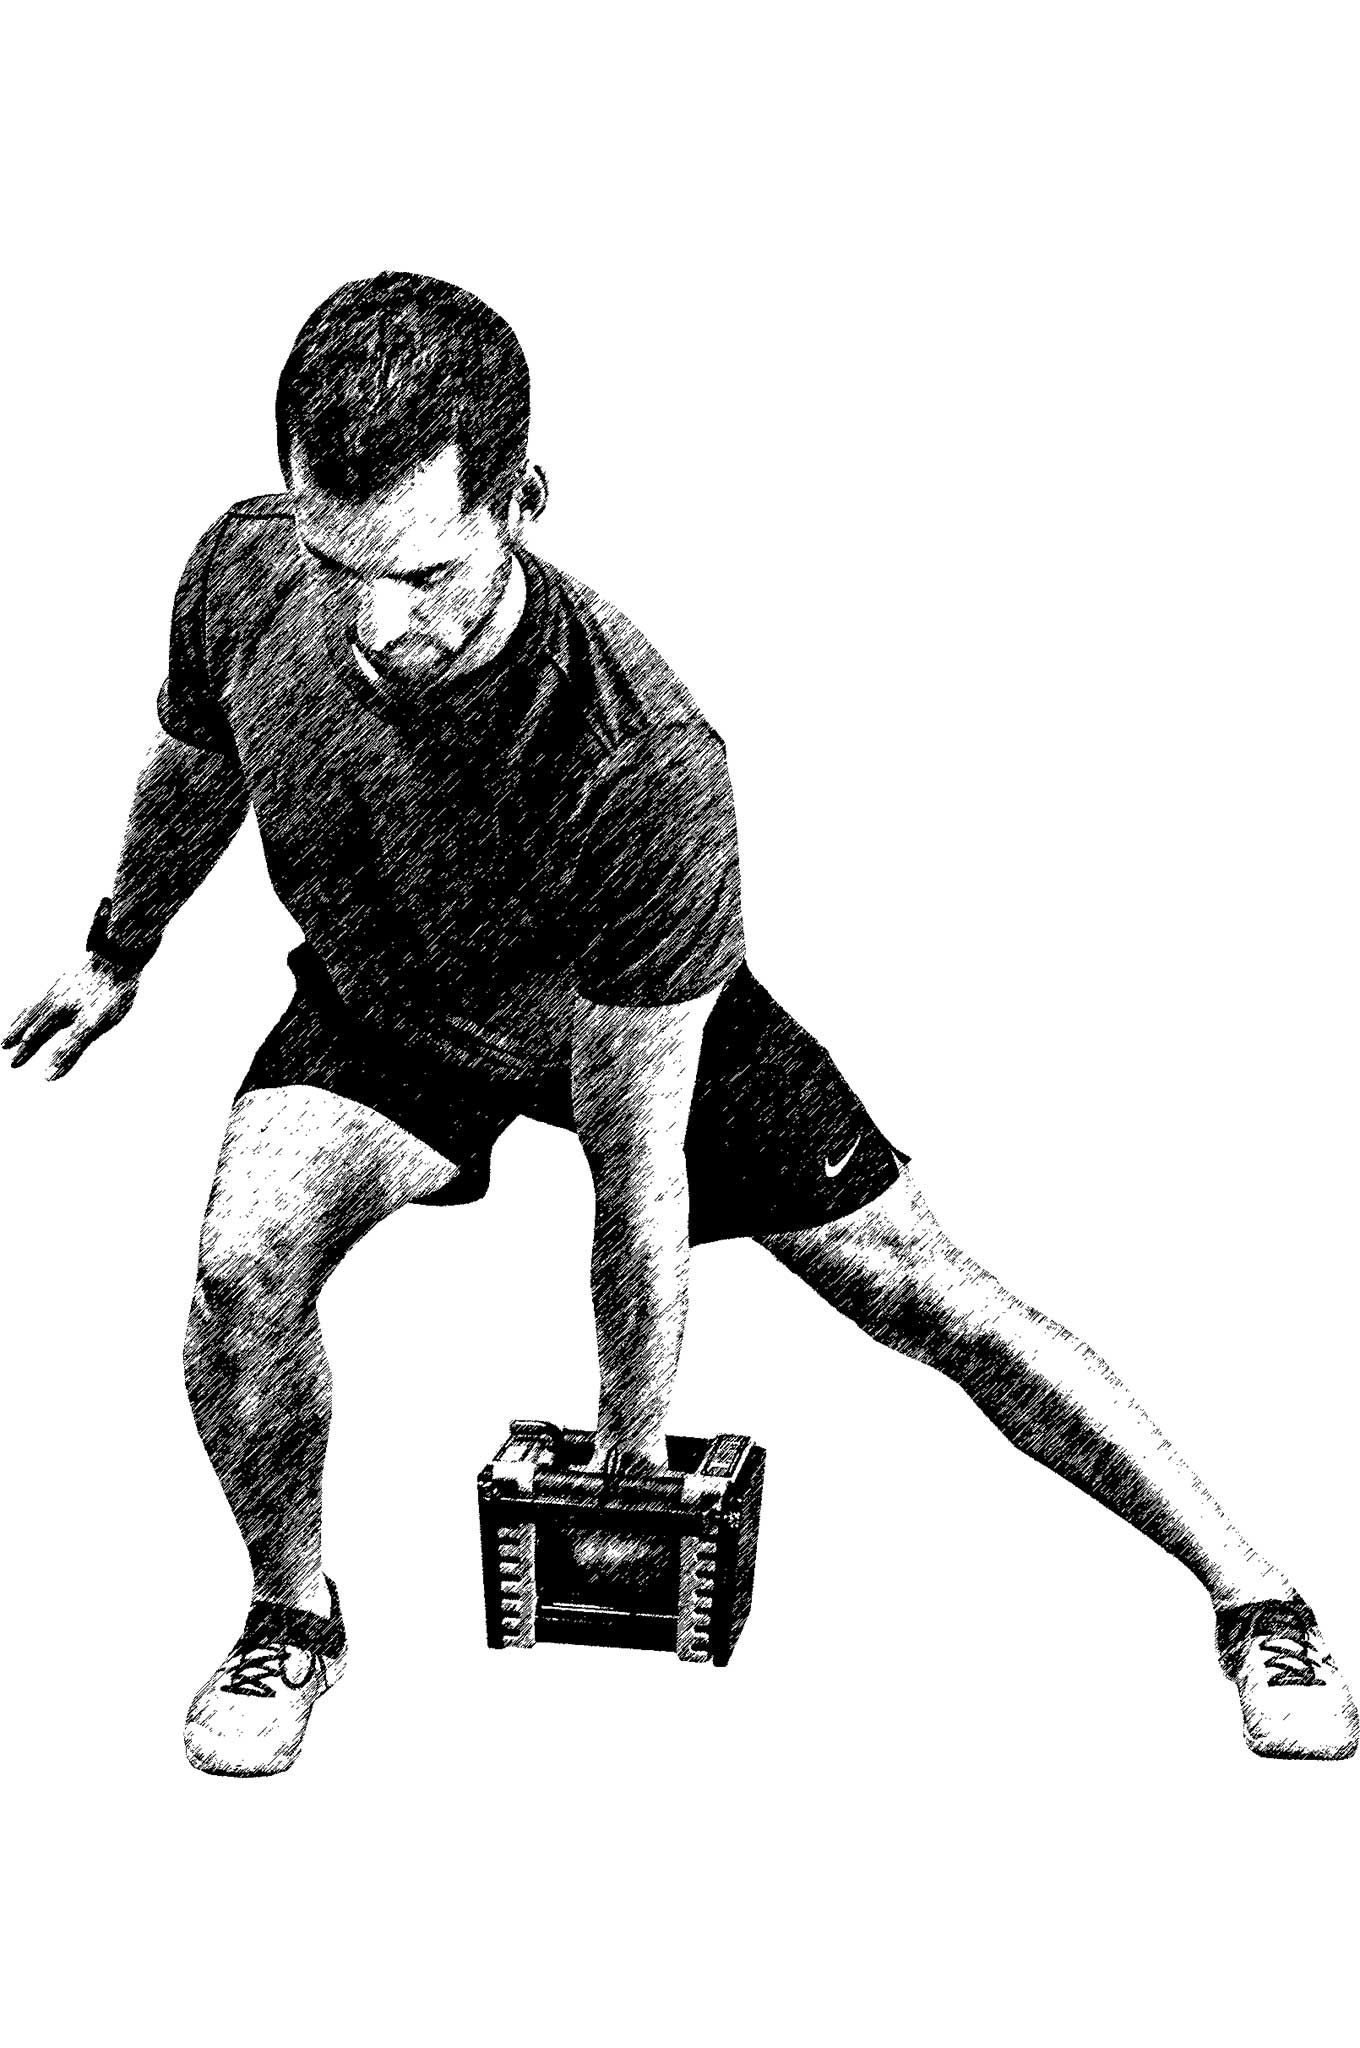
Dumbbell Lateral Lunge
Six repetitions on each side
Begin by standing with a dumbbell in front of your left thigh.
Take a large step out to the right. Make sure your toes are facing straight ahead.
Sit your hips back as you squat down on your right side. Your left knee should be straight, and you should feel a stretch in your left inner thigh.
Explosively push your right foot into the floor and return to the starting position.
Complete six repetitions on each side.
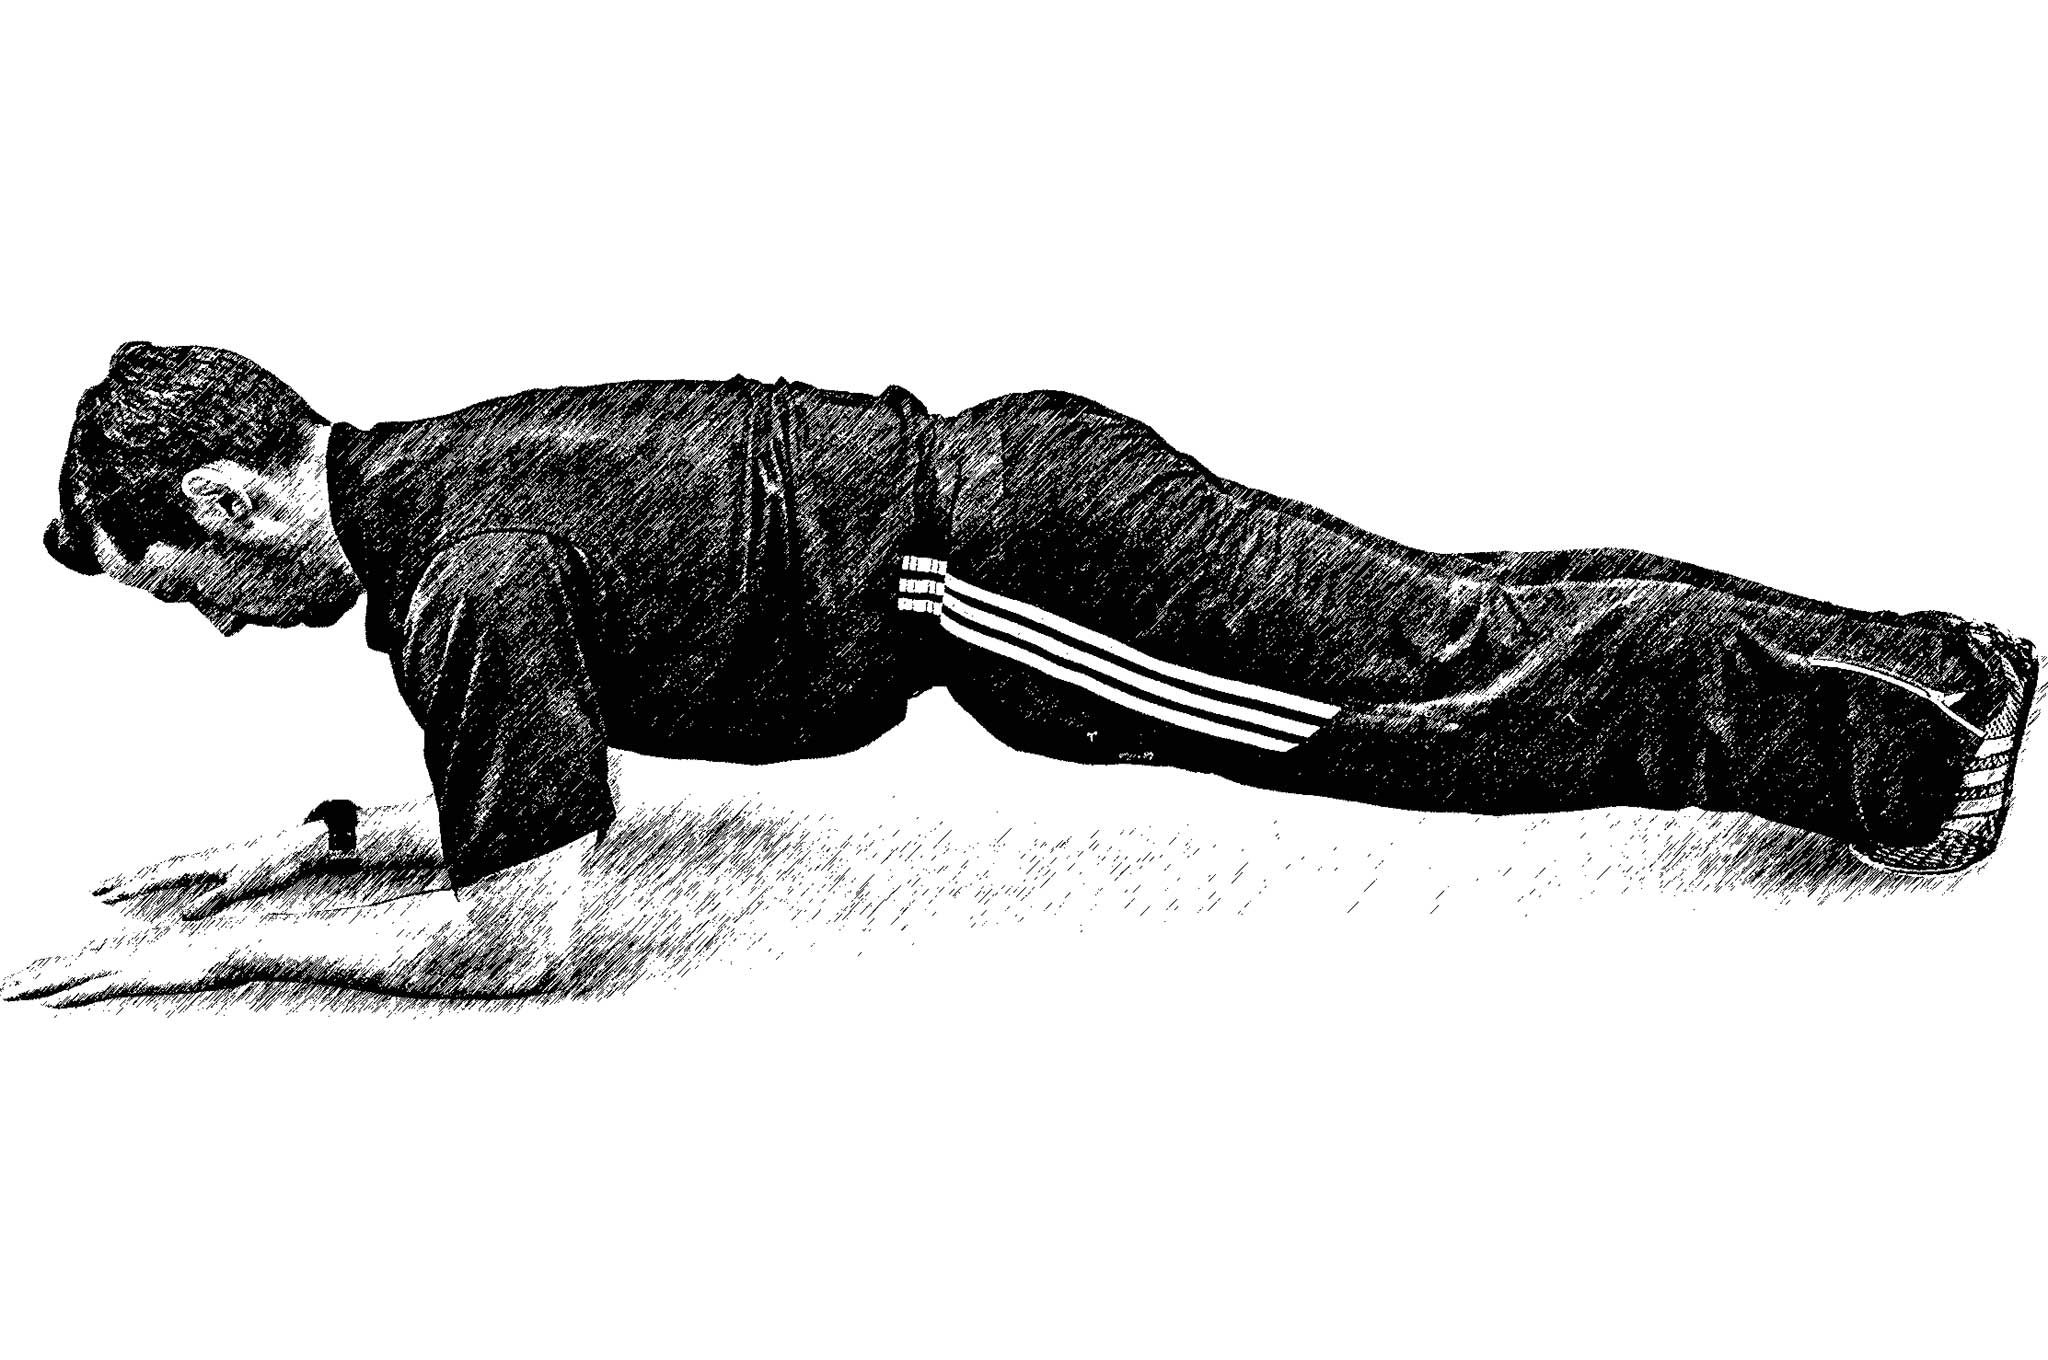
Plank
Hold this position for 30 to 40 seconds
Set the dumbbell down and get on the floor on your toes and elbows.
Reach your elbows through the floor, lock your knees, squeeze your butt, and look at your hands.
Hold this position for 30 to 40 seconds.
Conclusion
While you're using a structure called a complex, it's anything but that. Keeping the movements simple, focusing on good technique, and progressing slowly are surefire ways to see some great gains. After all, if you're holed up for a while, this is a great way to both pass the time and keep yourself healthy and prepared.
About the author
Ryne Gioviano is the owner of Achieve Personal Training & Lifestyle Design located in Aurora, Illinois. He earned his master's degree in exercise physiology and is a certified personal trainer through the National Strength and Conditioning Association. You can find more information at www.Achieve-PersonalTraining.com or reach him on Facebook or on Twitter and Instagram at @rgioviano.
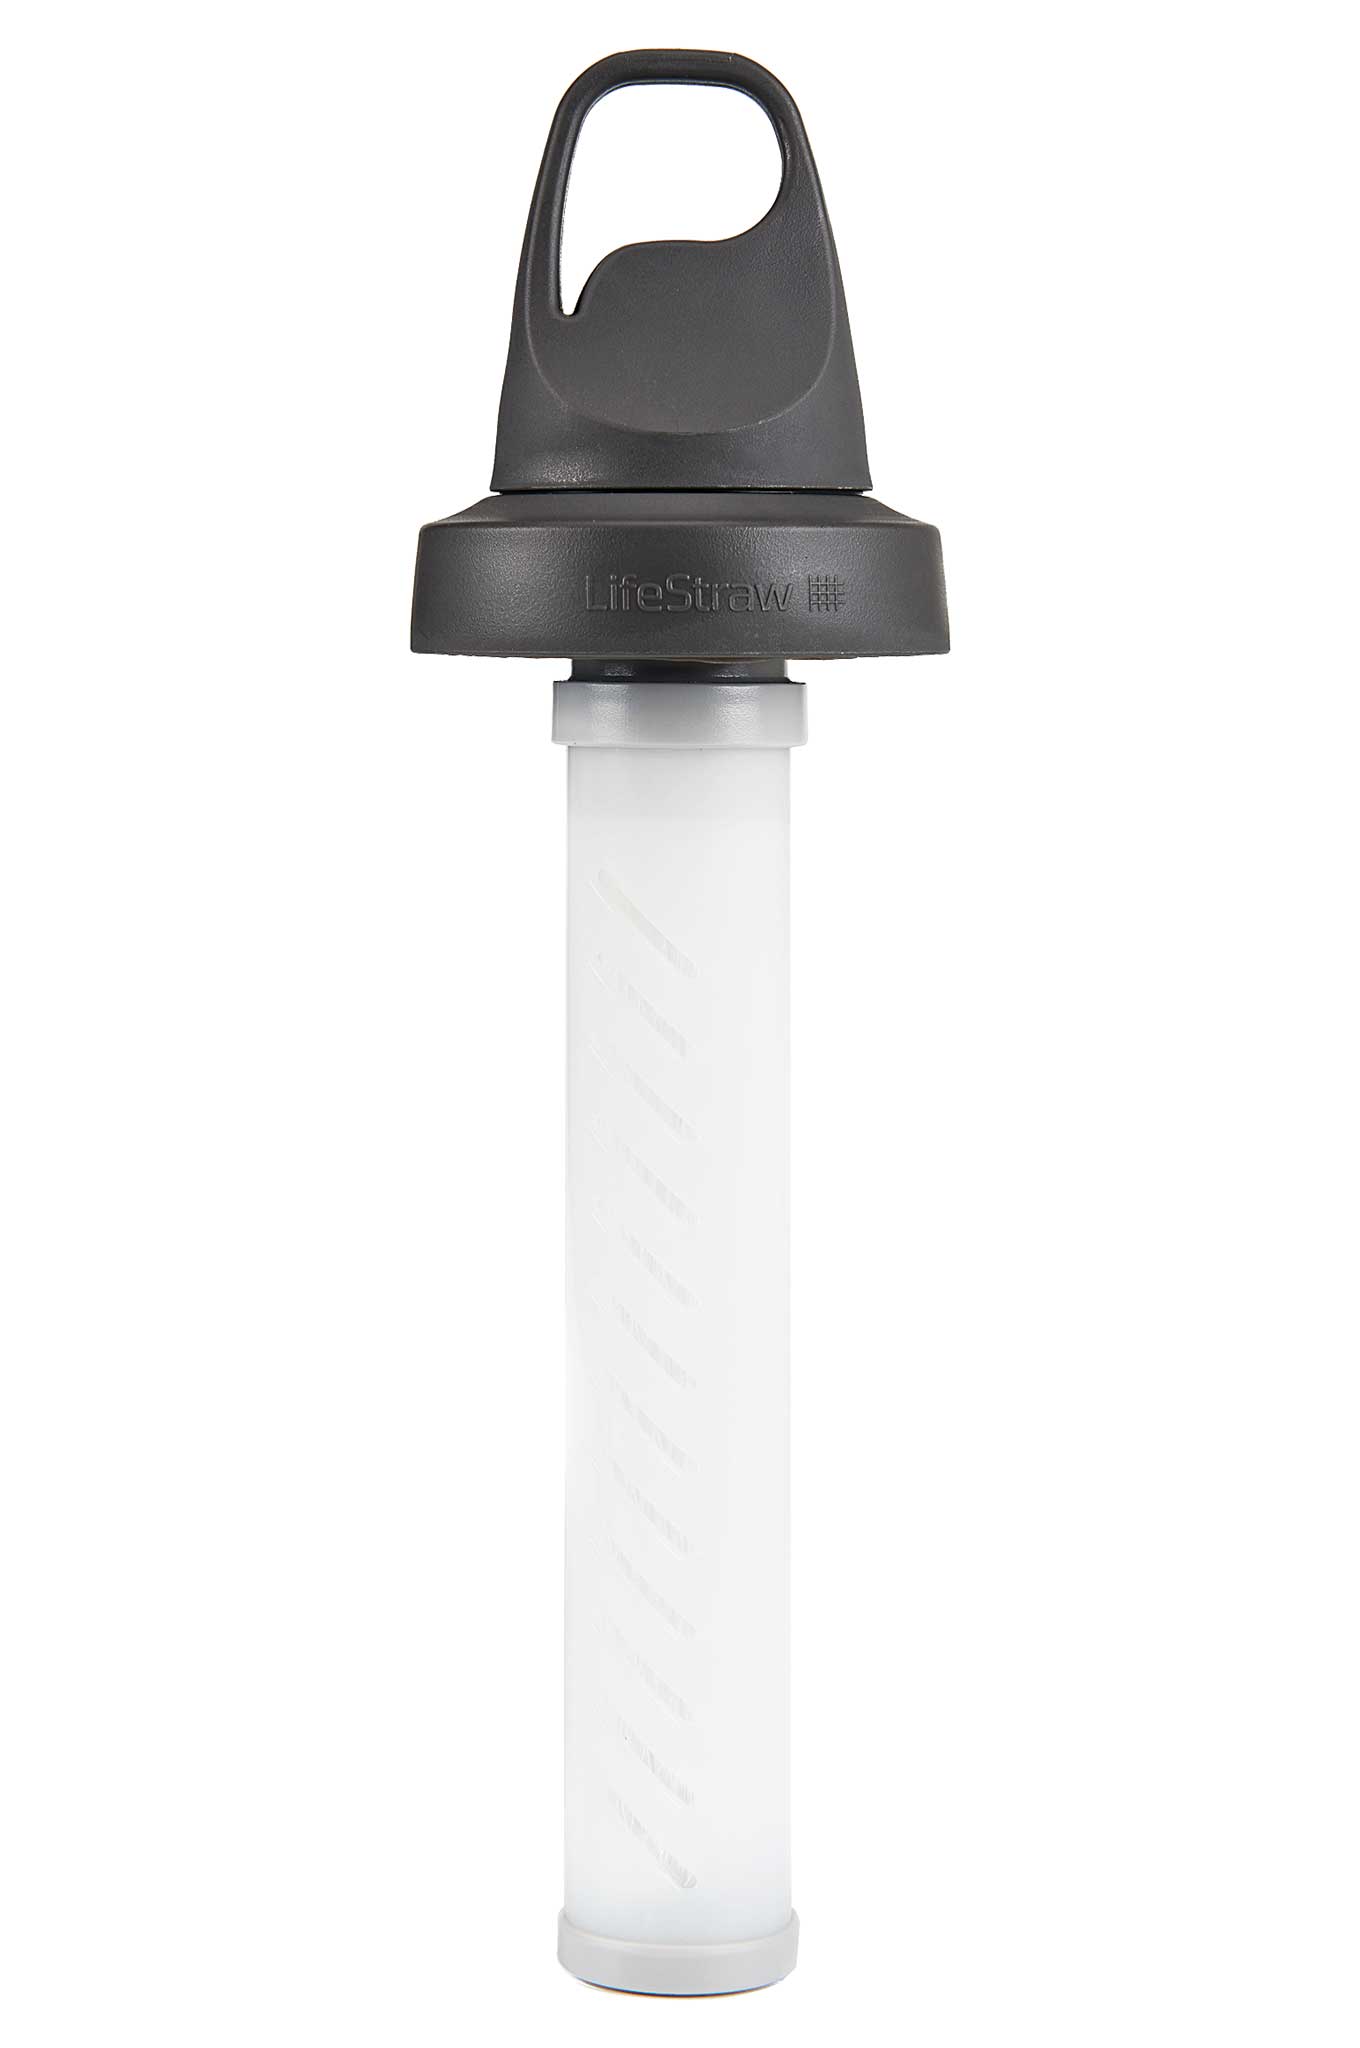
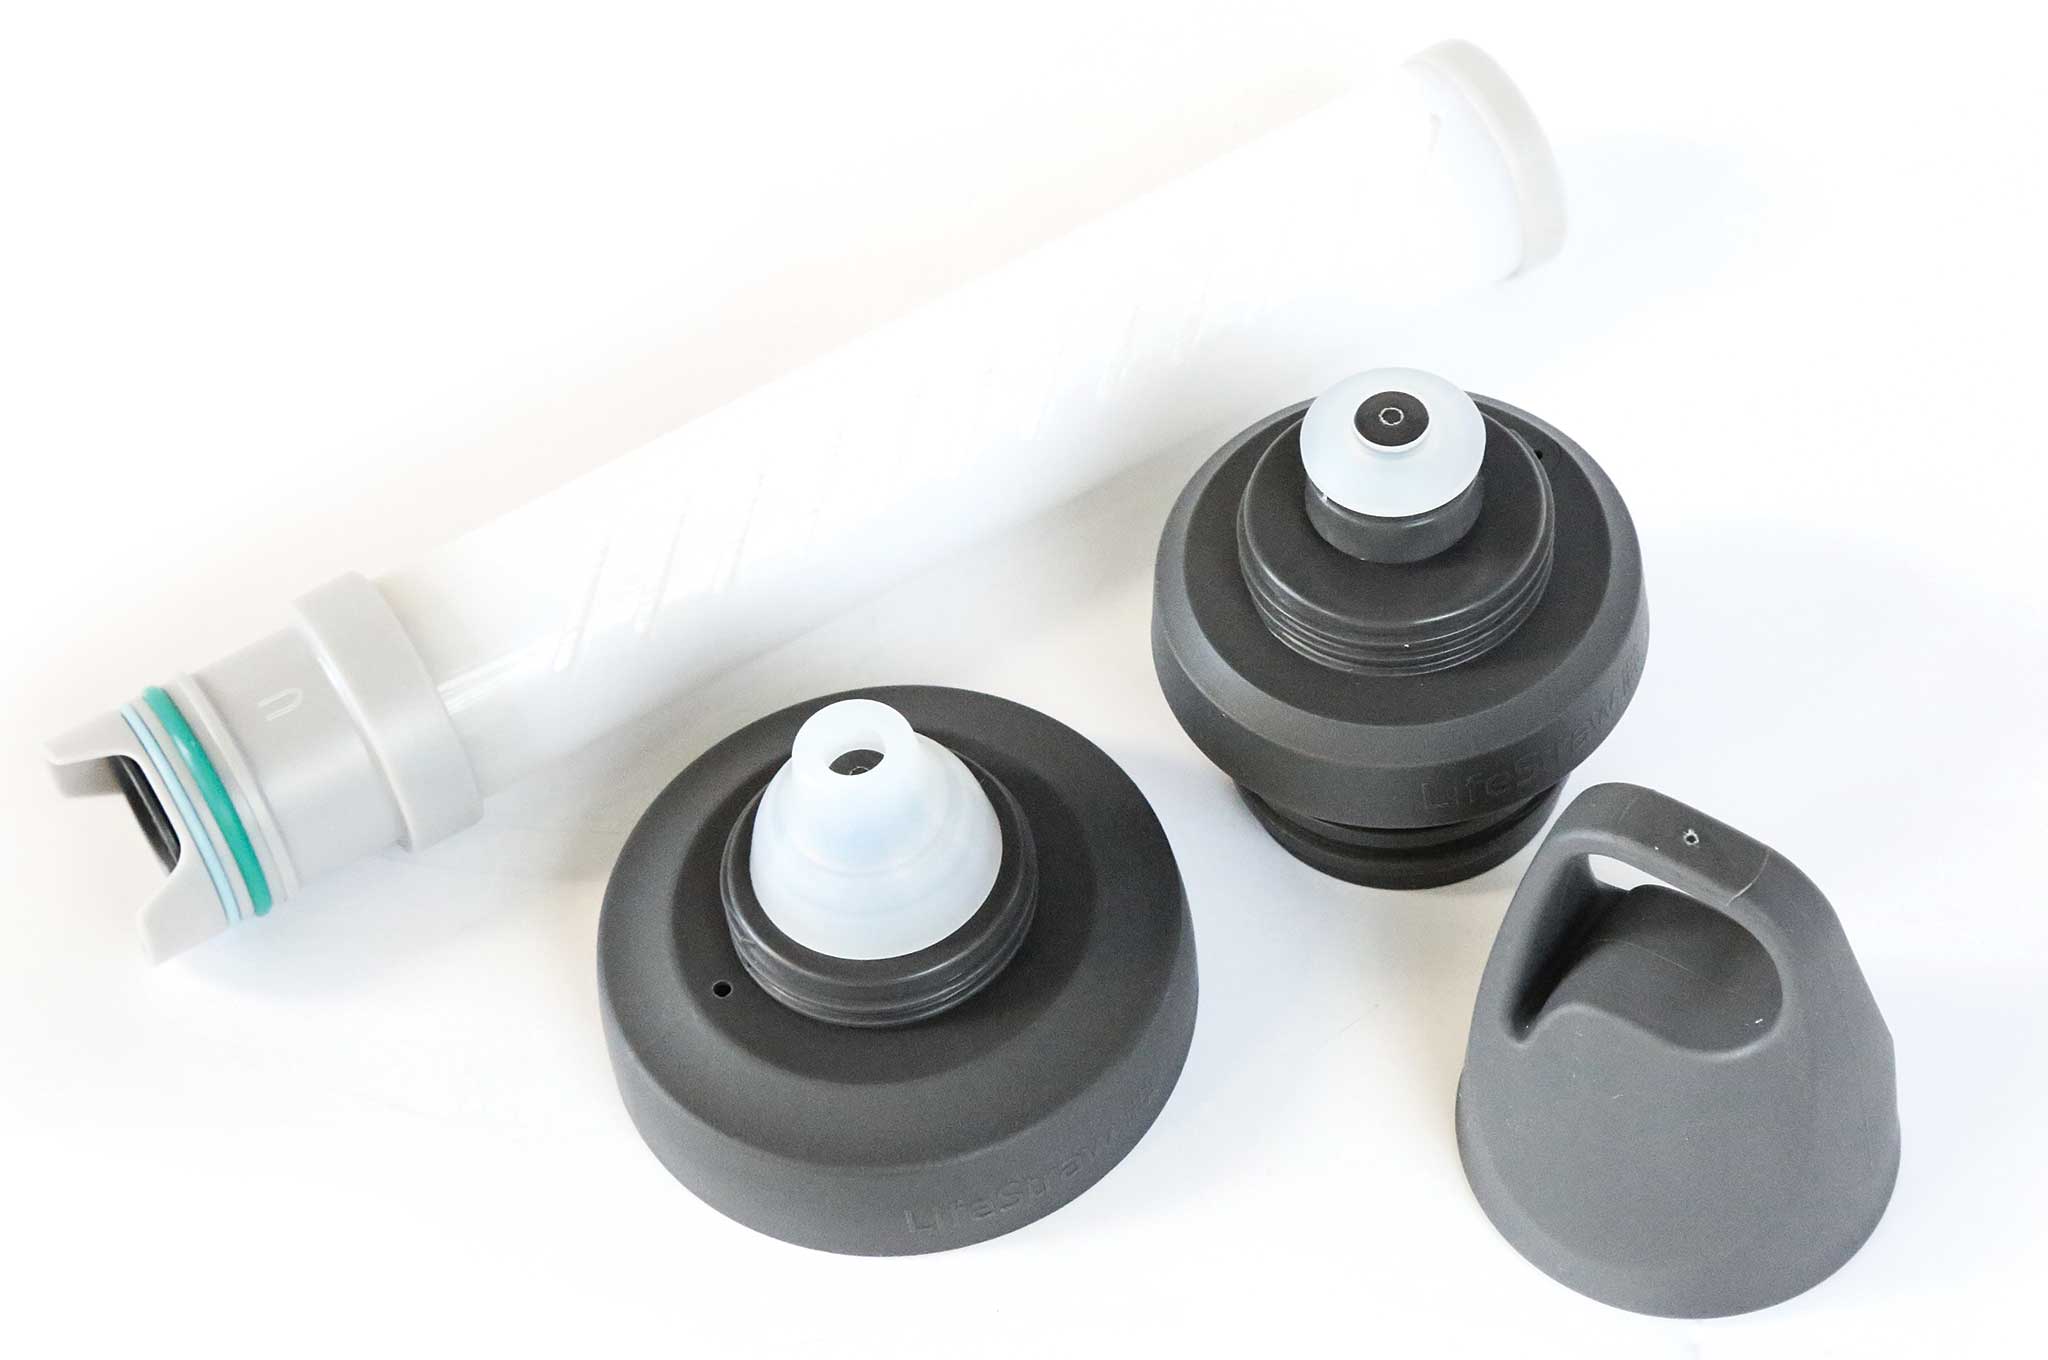
Notes Outdoor enthusiasts rejoiced a few years ago when LifeStraw released the LifeStraw Go, a water bottle with a two-stage filter integrated in its mouthpiece. It lets you use the bottle to scoop up pond or river water and filter the H20 as you suck it up through the mouthpiece. The company breaks ground again with its LifeStraw Universal, the first bottle adaptor kit with a two-stage filter. It transforms your favorite bottle – be it a Klean Kanteen, Hydro Flask, or Nalgene – into a convenient water filter, which removes 99.9999 percent of bacteria and 99.9 percent of protozoan parasites. The kit comes with a standard cap, wide-mouth cap, standard mouthpiece, sport mouthpiece, two-stage filter, and a carry bag.
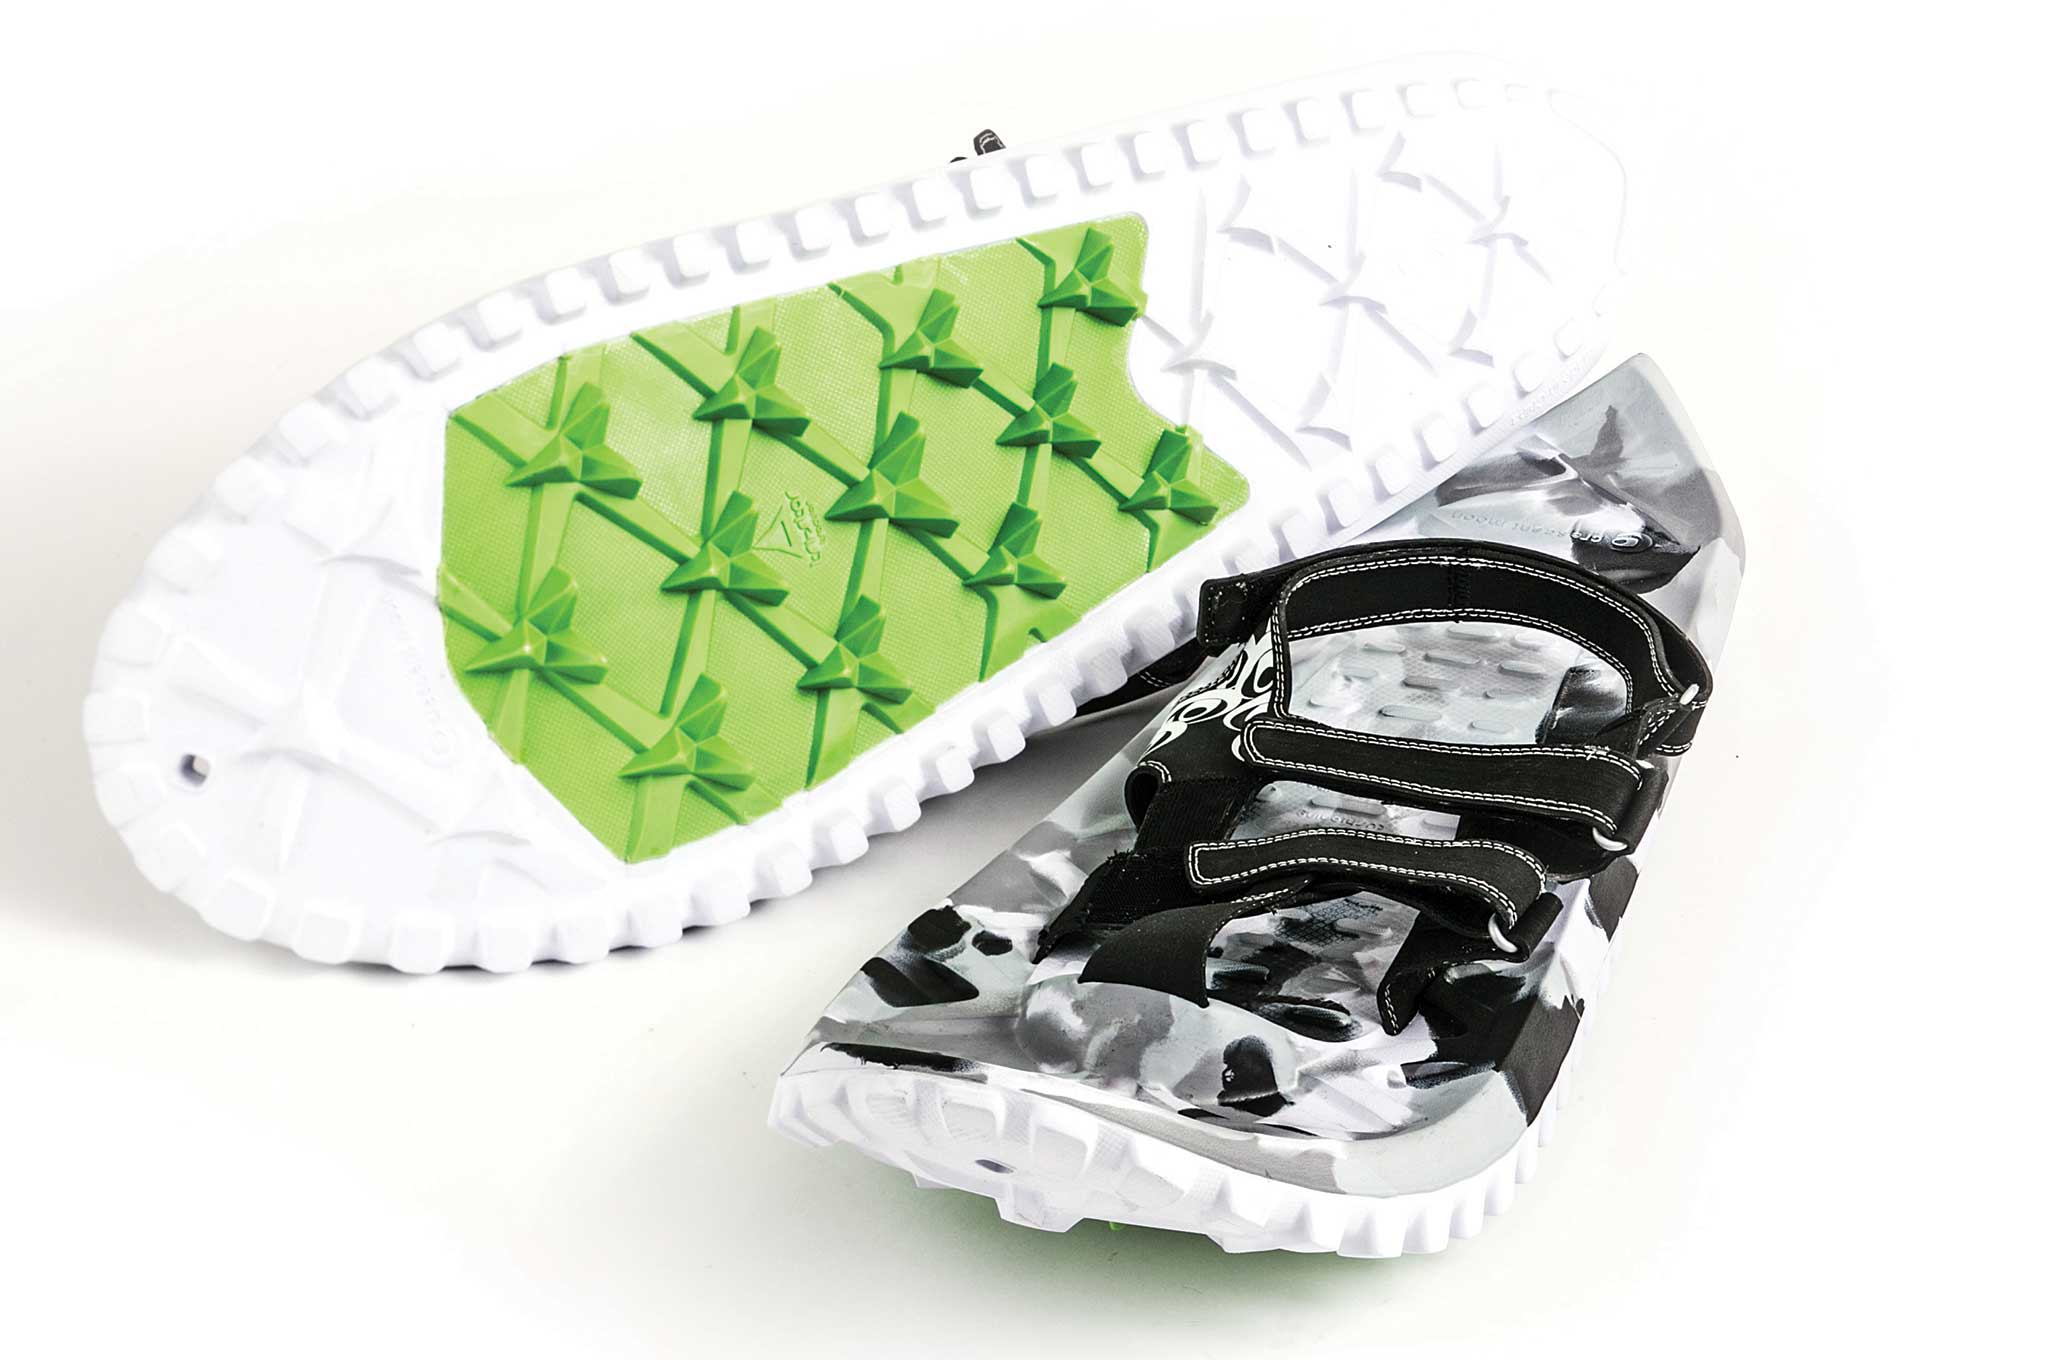
Notes You don't usually think of the snowshoe industry as a hotbed of high-tech development. But, this season brings the next generation of deep snow mobility. Crescent Moon's EVA All-Foam is a massively simplified, lighter and faster snowshoe ideal for grab-and-go use. There's no hinge or lifter to adjust (or break), they're light, and offer more traction than most framed snowshoes because of the continuous, treaded sole that's similar to a football cleat. When it gets deep and cold, the foam not only offers a cushioned stride, but it also provides a bit of insulation from the snow. Although these are a lot lighter and easier to use than traditional snowshoes, the EVA All-Foams won't stand up to the abuse an aluminum-framed shoe can take. They're best suited for use by people under 200 pounds.
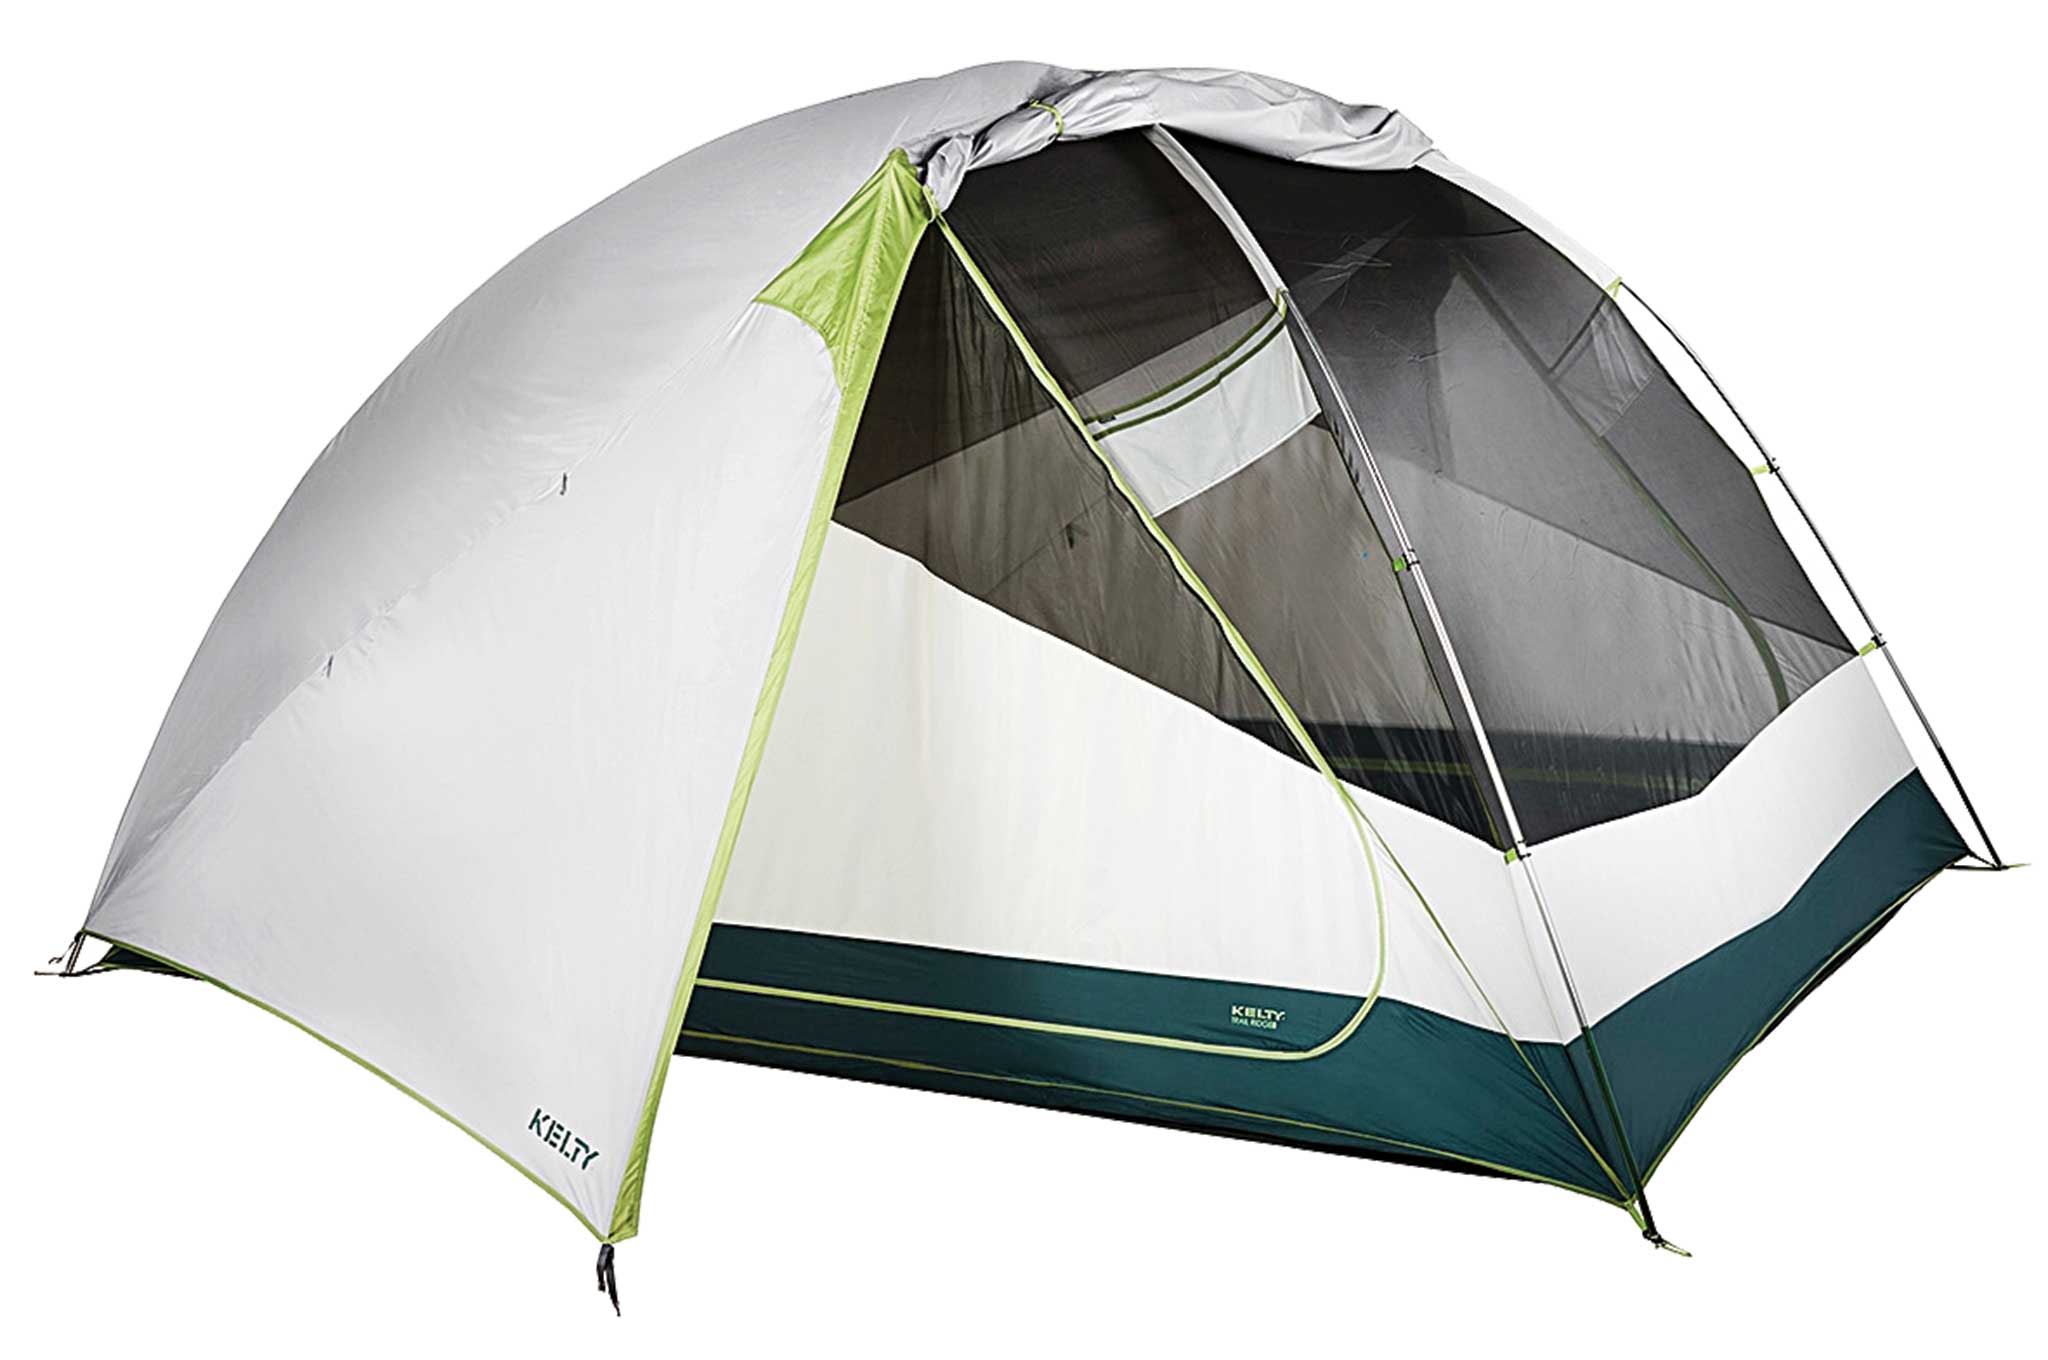
Notes Shelter is essential to survival. It can be as simple as the clothes on your back or as sophisticated as the 70-acre bug-out property. But for most of us, a tent was our first example of a backcountry shelter. And for those who now have young children of their own and want to share both survival skills and the majesty of Mother Nature, tent camping is often the way to go. As the name implies, the Trail Ridge 8 can house eight people in a spacious freestanding design that's easily accessed from two D-style doors. There's also small but smart features, such as a gear loft and a lantern/flashlight pocket. Setup is easy thanks to a color-coded clip-and-sleeve construction, but the Trail Ridge truly shines after dusk when you can undo the Stargazing Fly to enjoy the night sky with your loved ones.
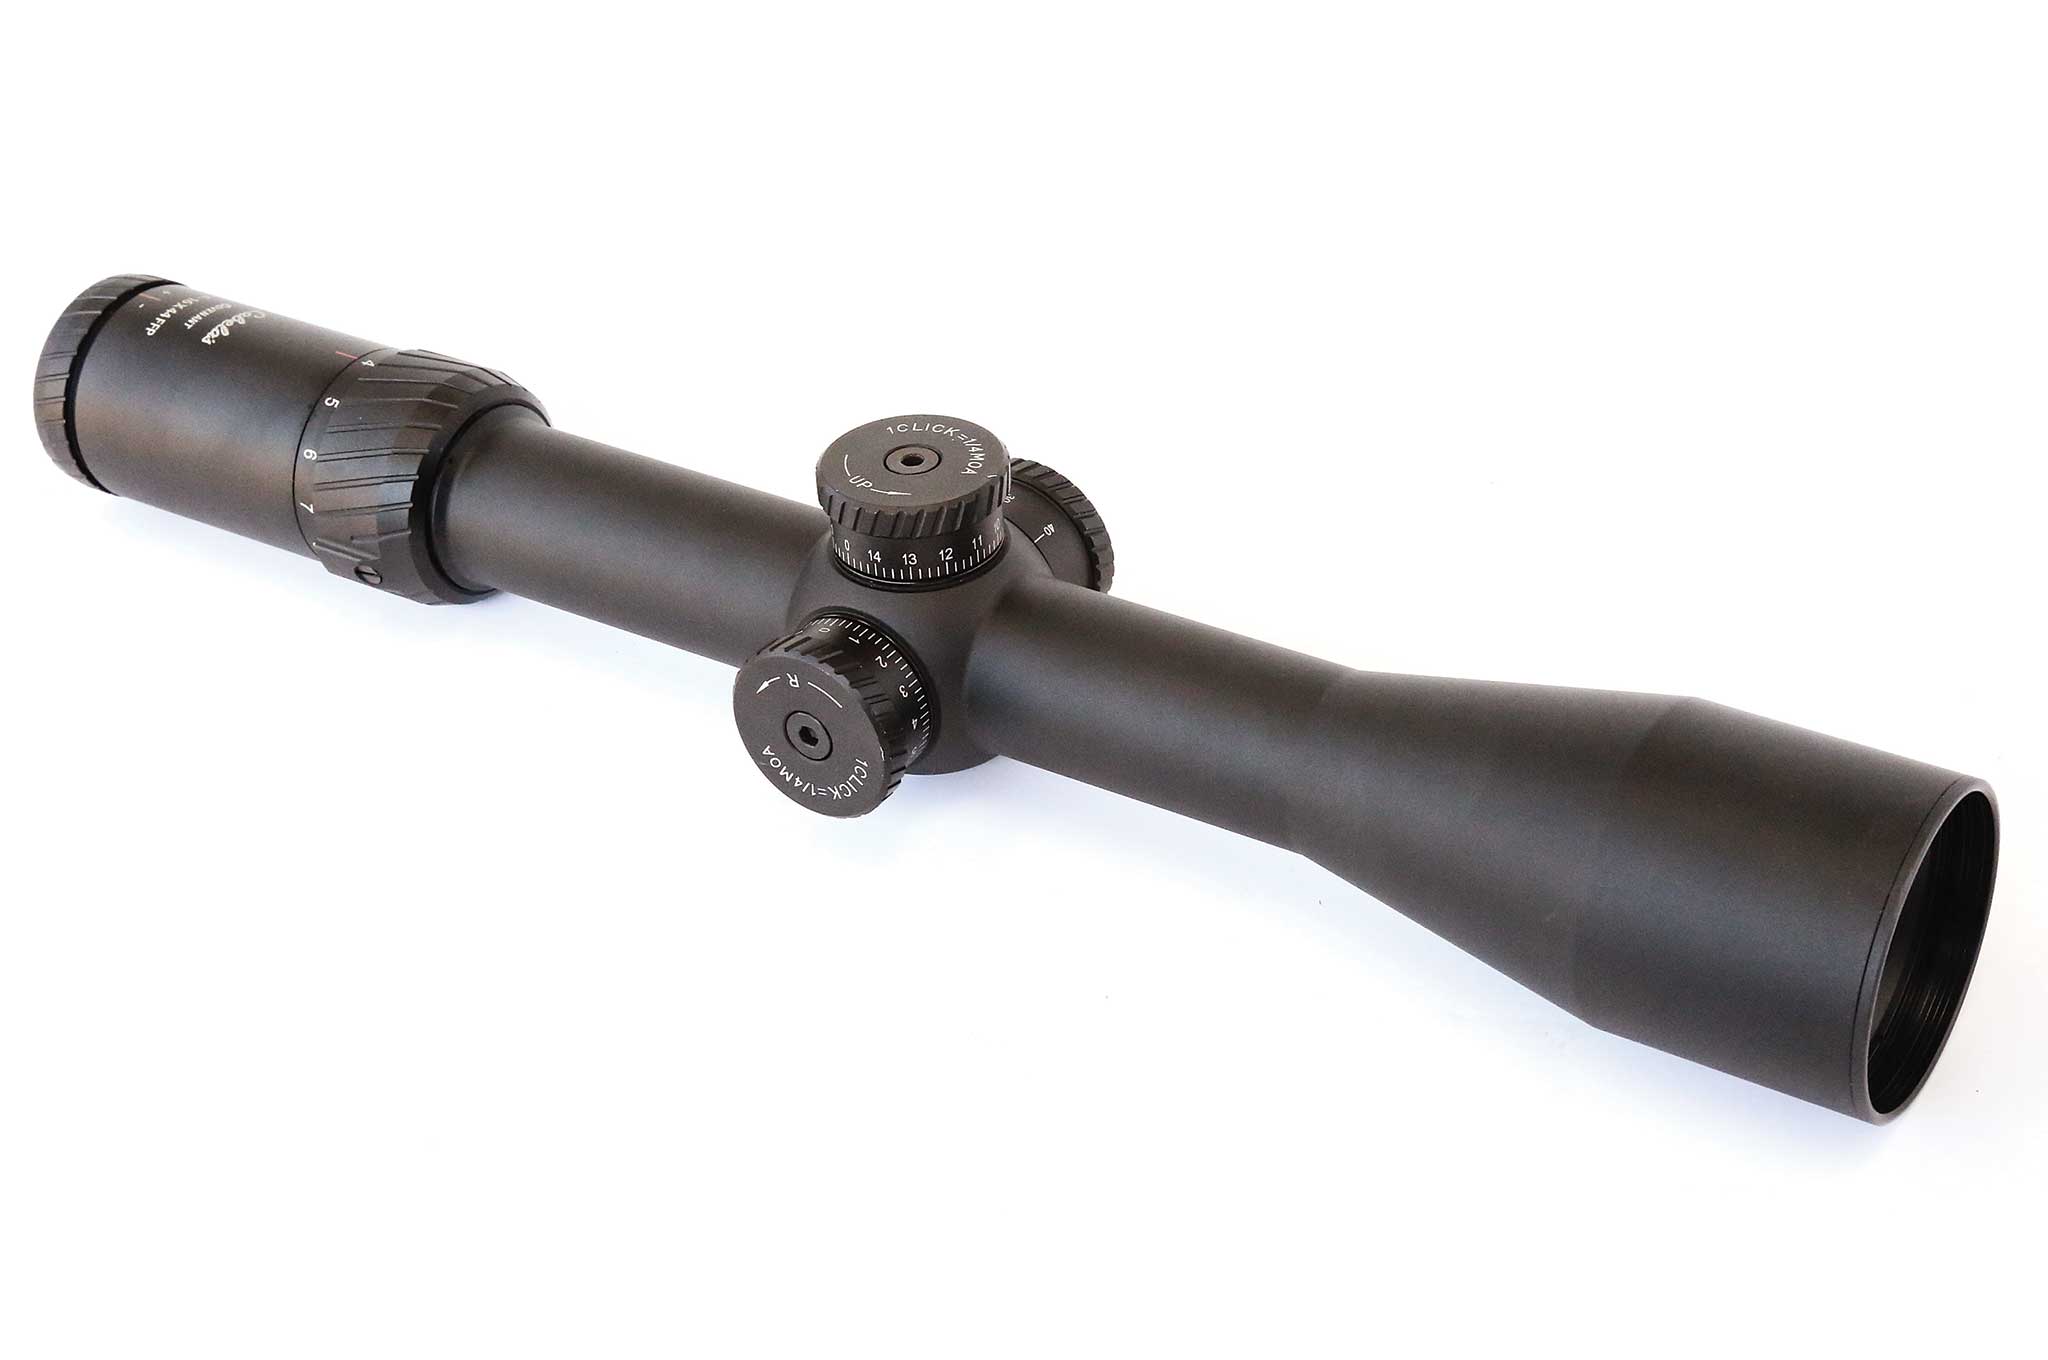
Make & Model Cabela's Covenant Tactical FFP Riflescope
Notes Whether you're looking for varmints wreaking havoc on your property or hunting for dinner in a post-SHTF world, a firearm with an optic can make all the difference. But not everyone can shell out two grand for a high-end scope. After all, we all need to pay the rent, let alone save up for a food cache and supplies. Enter budget scopes such as Cabela's 4-16×44 Covenant Tactical FFP Riflescope. The FFP in its name refers to first focal plane – meaning its reticle size changes as you zoom in. This allows ranging a target with the scope set at any magnification. It has a wide magnification range, turrets with 1/4-MOA adjustments, and a nitrogen-filled tube for waterproof, fogproof, and shockproof performance.
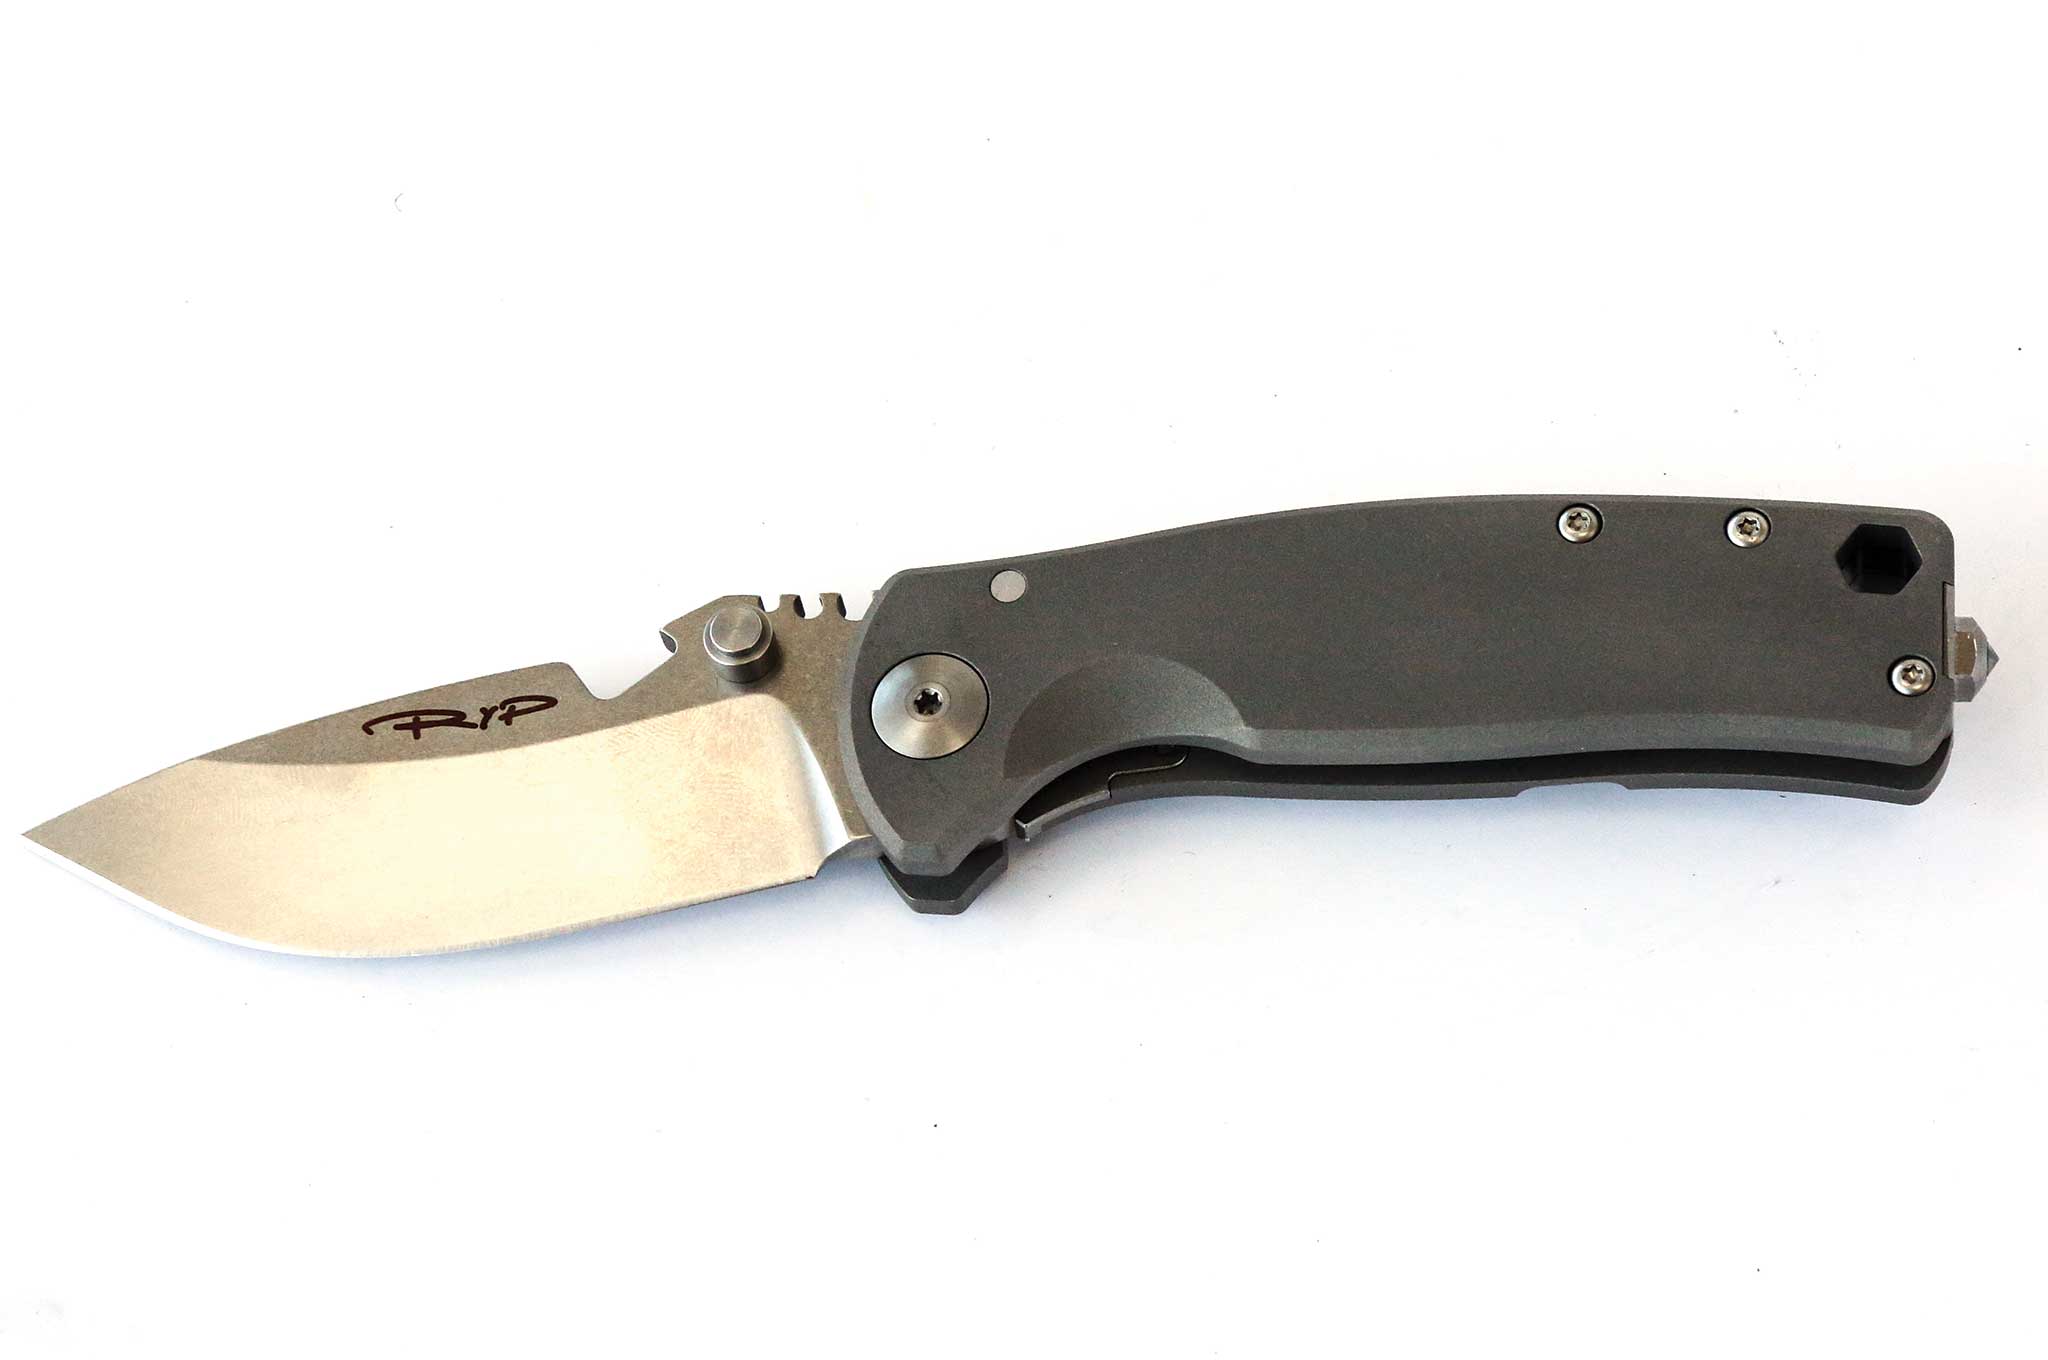
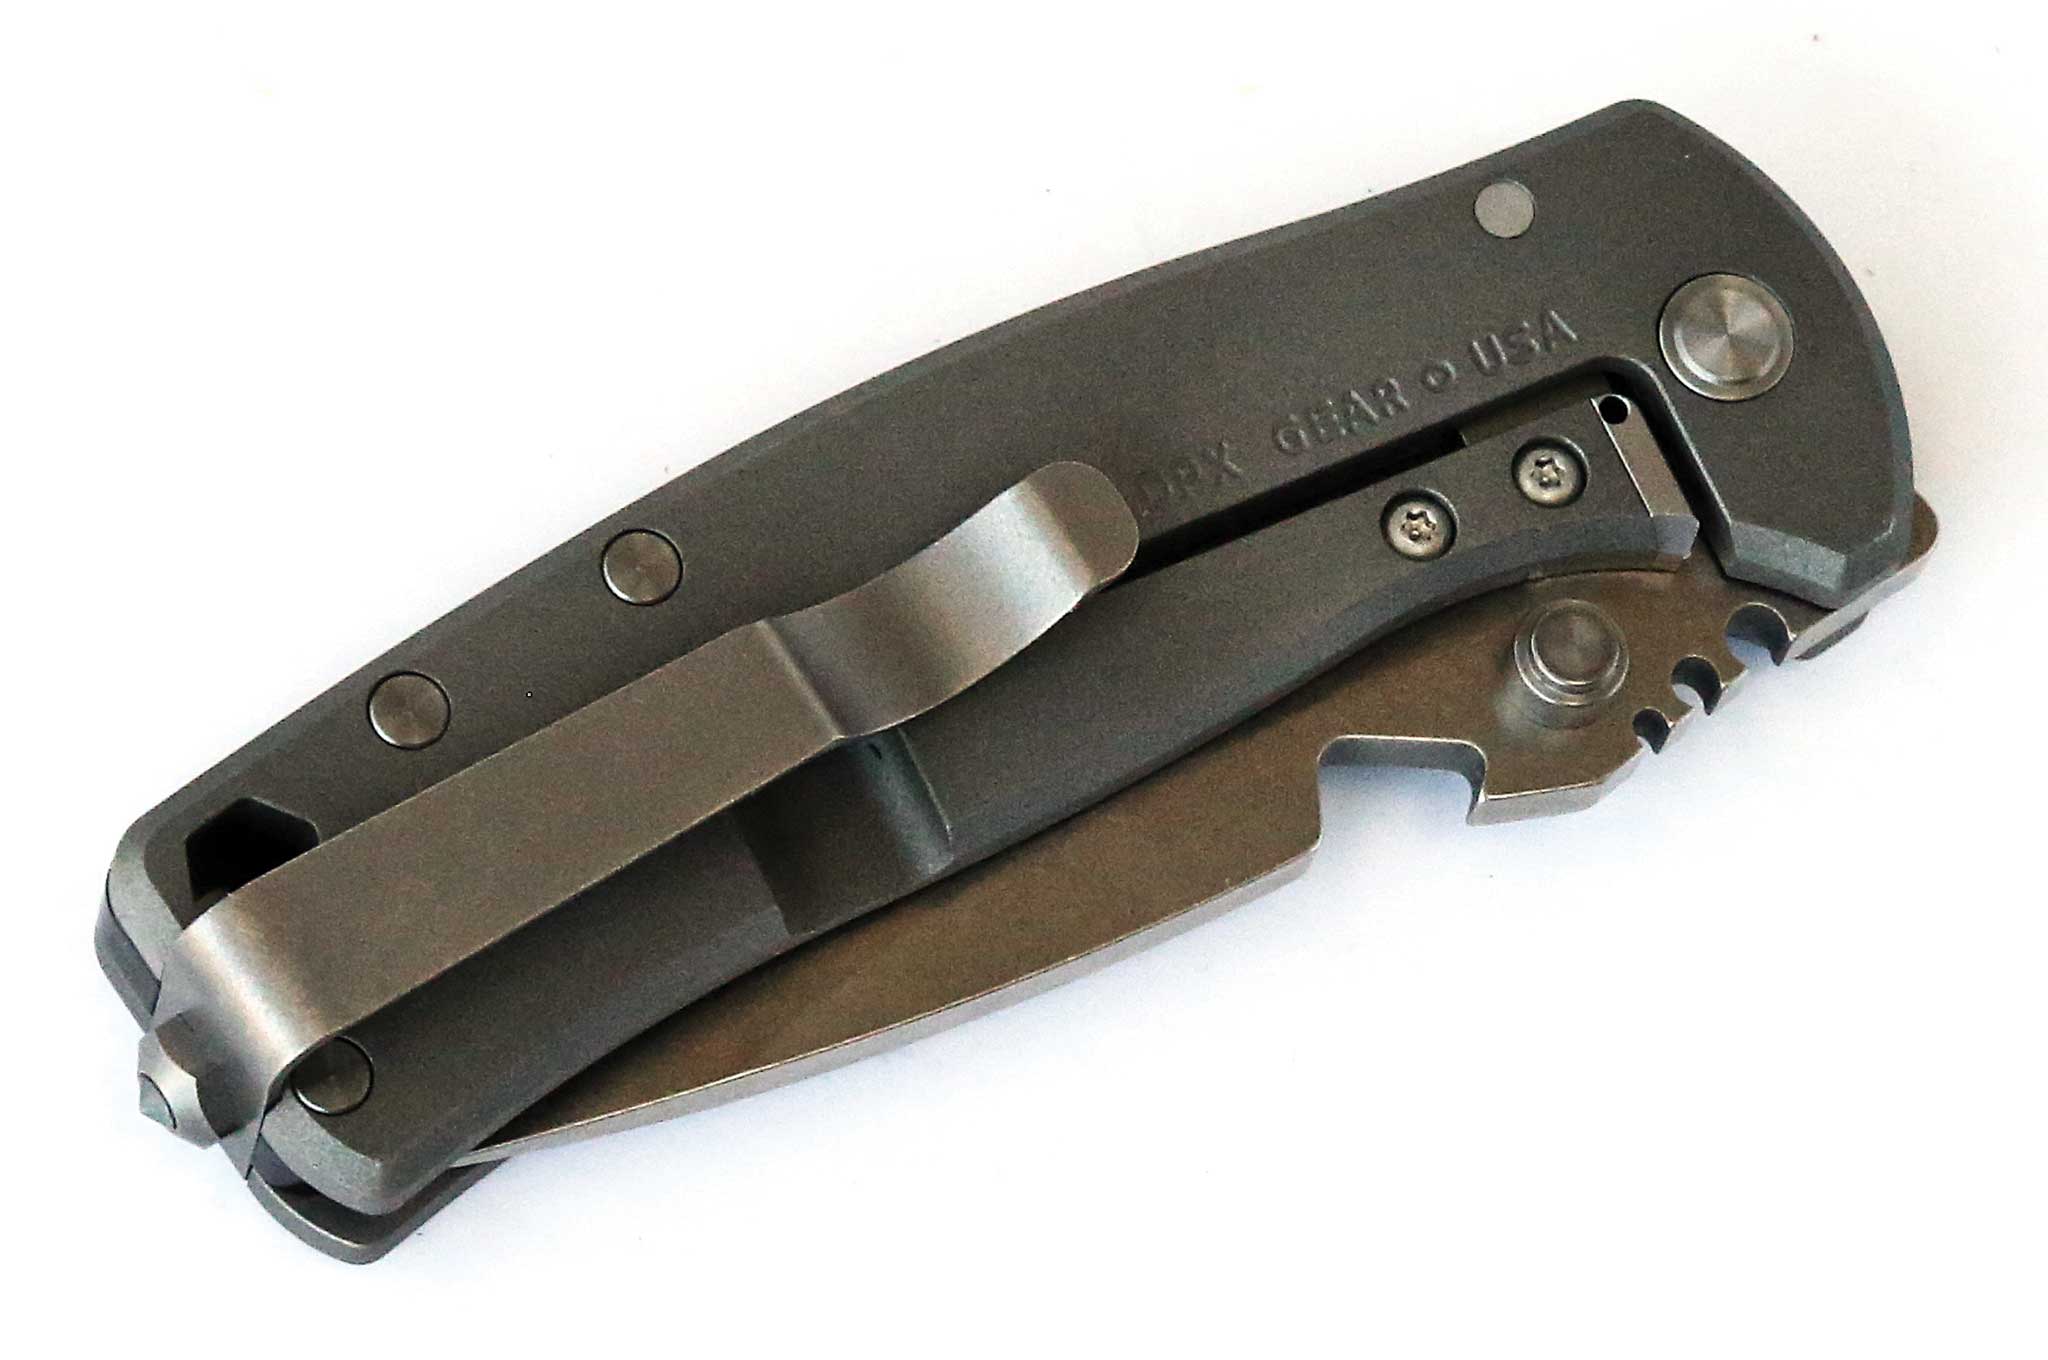
Notes It's always a bonus when your everyday carry (EDC) knife can do more than cut an apple and open up the occasional Amazon package. The HEST/F Urban Ti is a versatile utilitarian tool disguised as a slick daily carry folder. The S35V stainless steel drop-point blade can slice and pierce like a lightsaber, while offering outstanding corrosion resistance and toughness. On its spine is a tri-gauge wire stripper disguised as jimping for added grip. It also has a bottle opener that (with some practice) you can snag on your pant's pocket to open the blade as you draw the knife. The titanium handle is ergonomic in its simplicity and has an integrated 1/4-inch hex driver and glass-breaker for those “oh sh#t” moments. The deep-carry pocket clip is reversible and sturdy. Made in the USA.
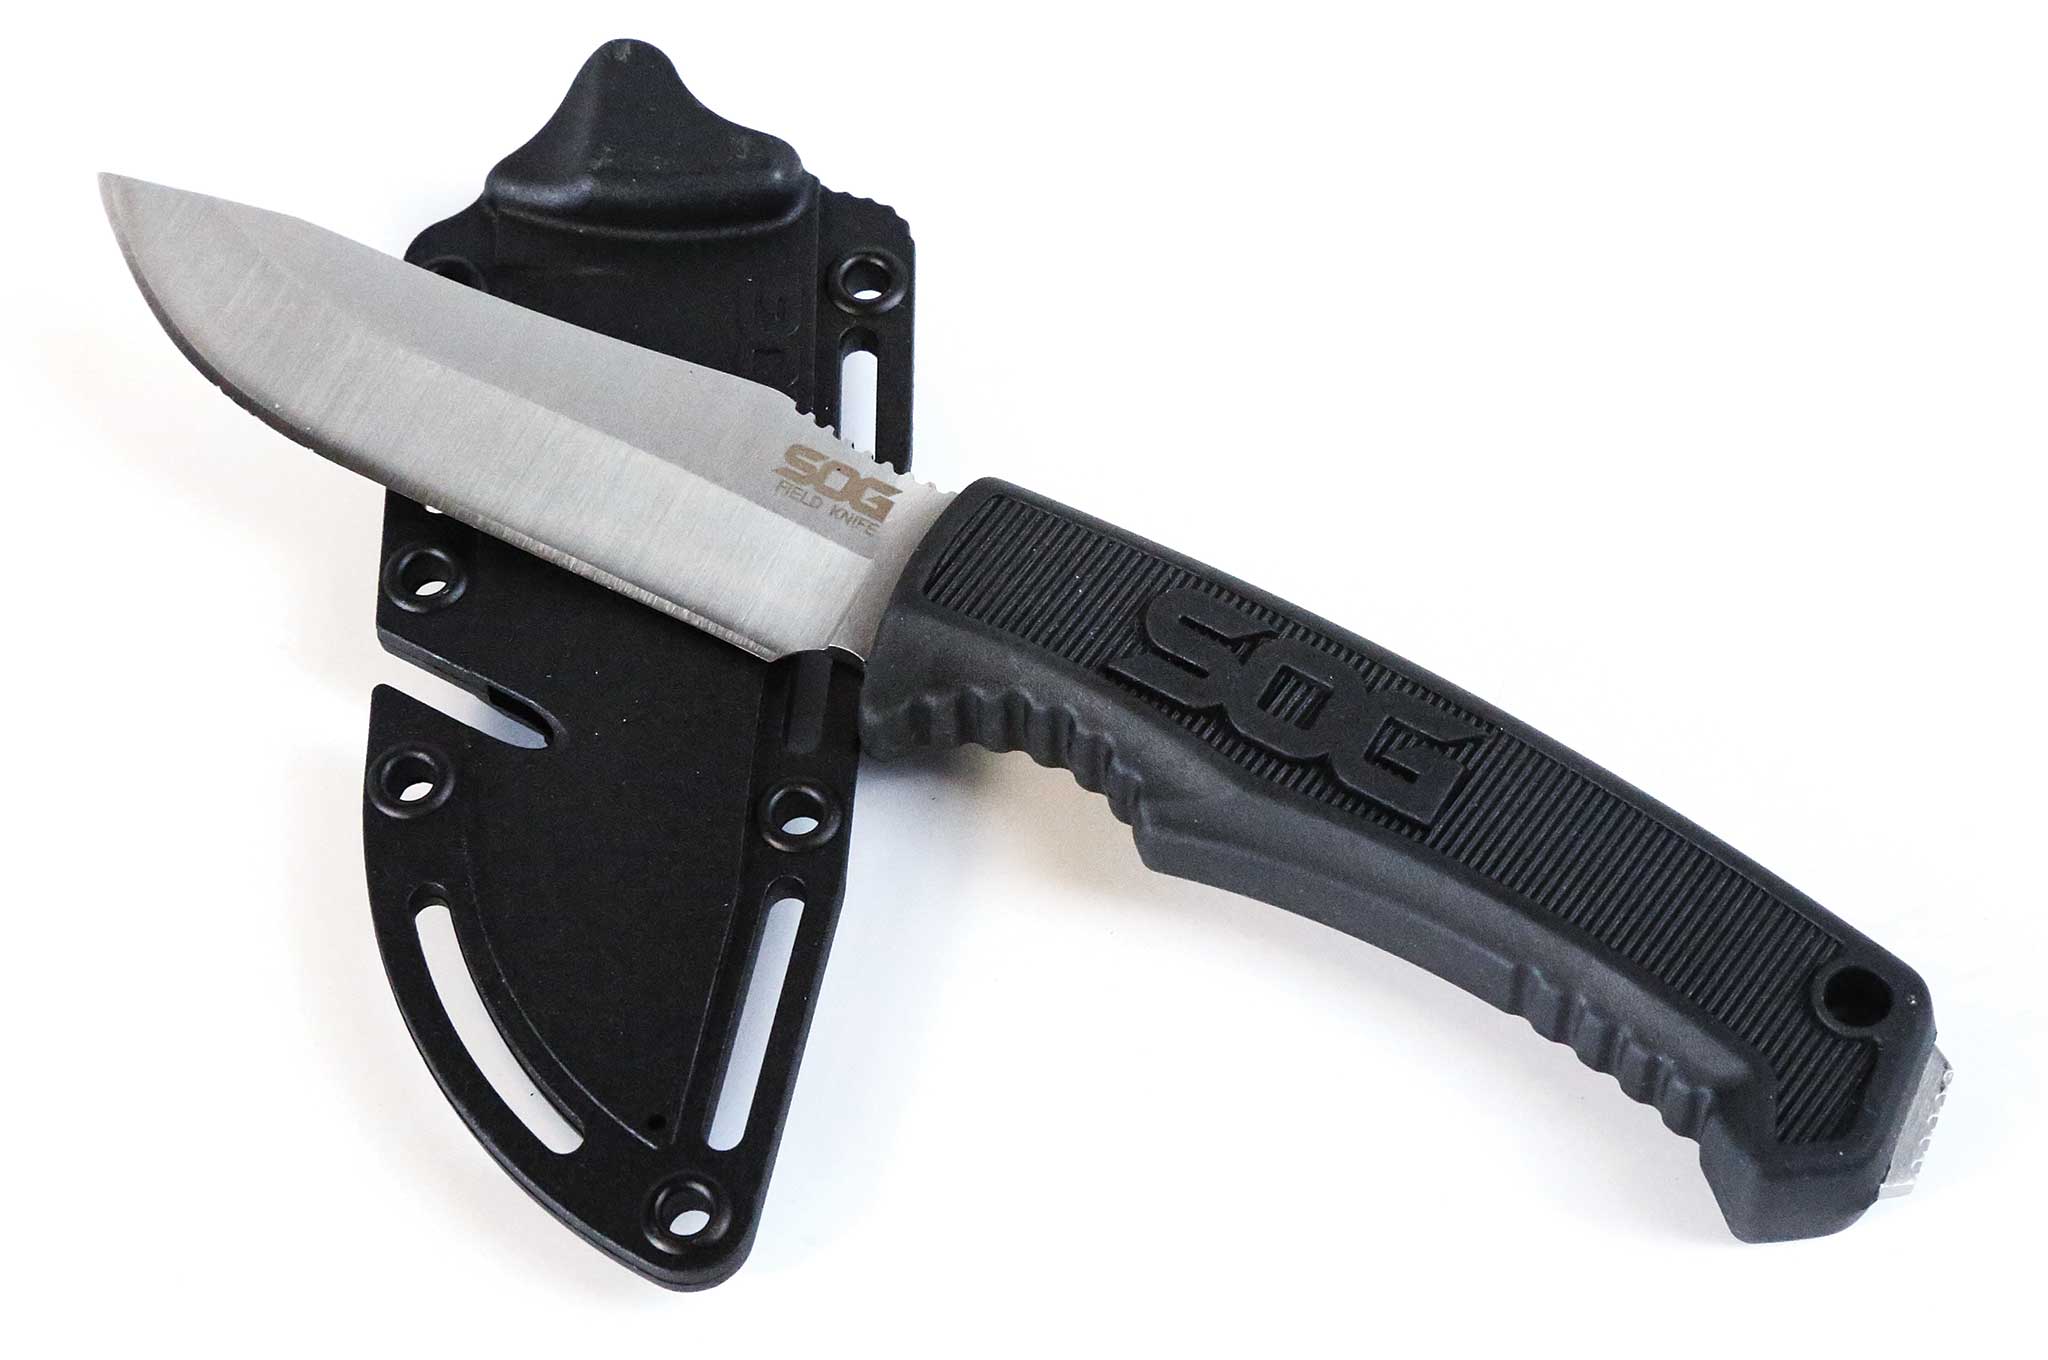
Make & Model SOG Specialty Knives & Tools Field Knife
Notes If the DPx HEST Urban is too small or expensive for your tastes, consider the Field Knife. It's a minor investment at just 40 bucks, but has all the features most outdoor adventurers look for. The 4-inch-long, clip-point blade has a sizable belly for slicing but a tip that aligns more closely with the spine for greater piercing power. The included sheath comes with a belt clip but has numerous secondary attachment points so you can latch it to a pack or wherever you see fit. It even has a notch that exposes a small portion of the blade for cutting paracord or a fishing line without having to unsheathe the entire knife. Of course, the lower price tag means lower-quality materials – Chinese 7Cr17MoV stainless steel instead of U.S.-made 154CM and a soft thermoplastic rubber handle instead of G-10 scales. But for $40, you're getting plenty of bang for your buck.
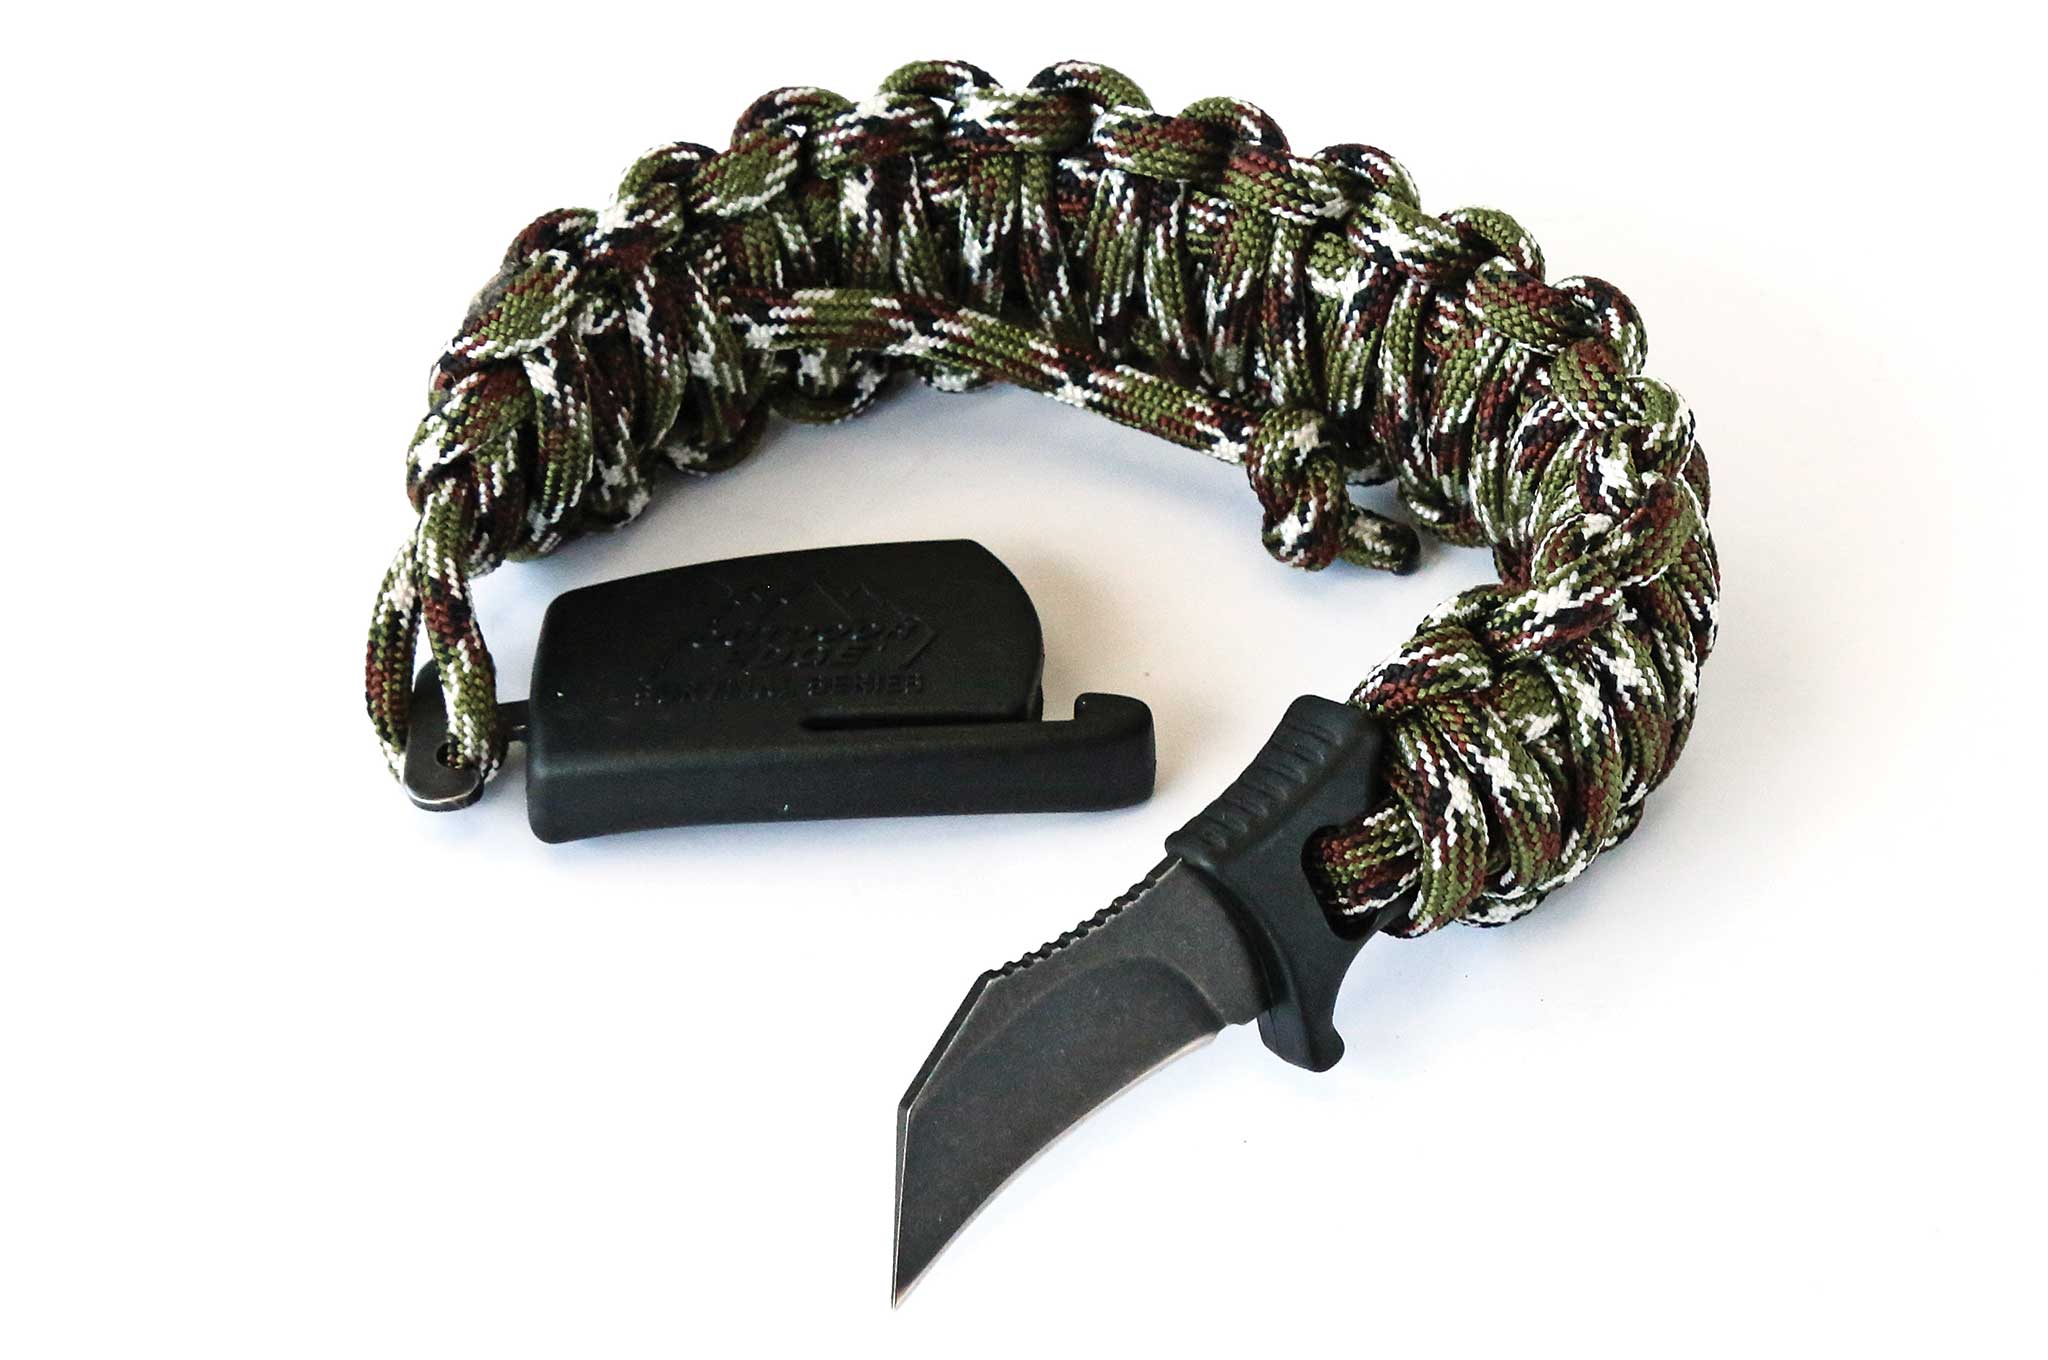
Notes When paracord bracelets became all the rage in the tactical/survival world a few years ago, it seemed like everyone and their mother was coming out with the “latest and greatest” model even though it truly wasn't that much different from the last. Well, Outdoor Edge is looking to slice through the status quo with the new Para-Claw, a paracord bracelet that features a 1.5-inch hawkbill blade that nestles into a patent-pending glass/nylon sheath that's integrated with the cordage. The knife is easy to deploy, with the paracord doubling as the knife handle and jimping on the blade's thumb ramp providing positive traction. While a 1.5-inch knife won't seem like much at first blush, the Para-Claw packs plenty of punch as a last resort when you've lost or can't access your primary blade. Available in black or camo colors.
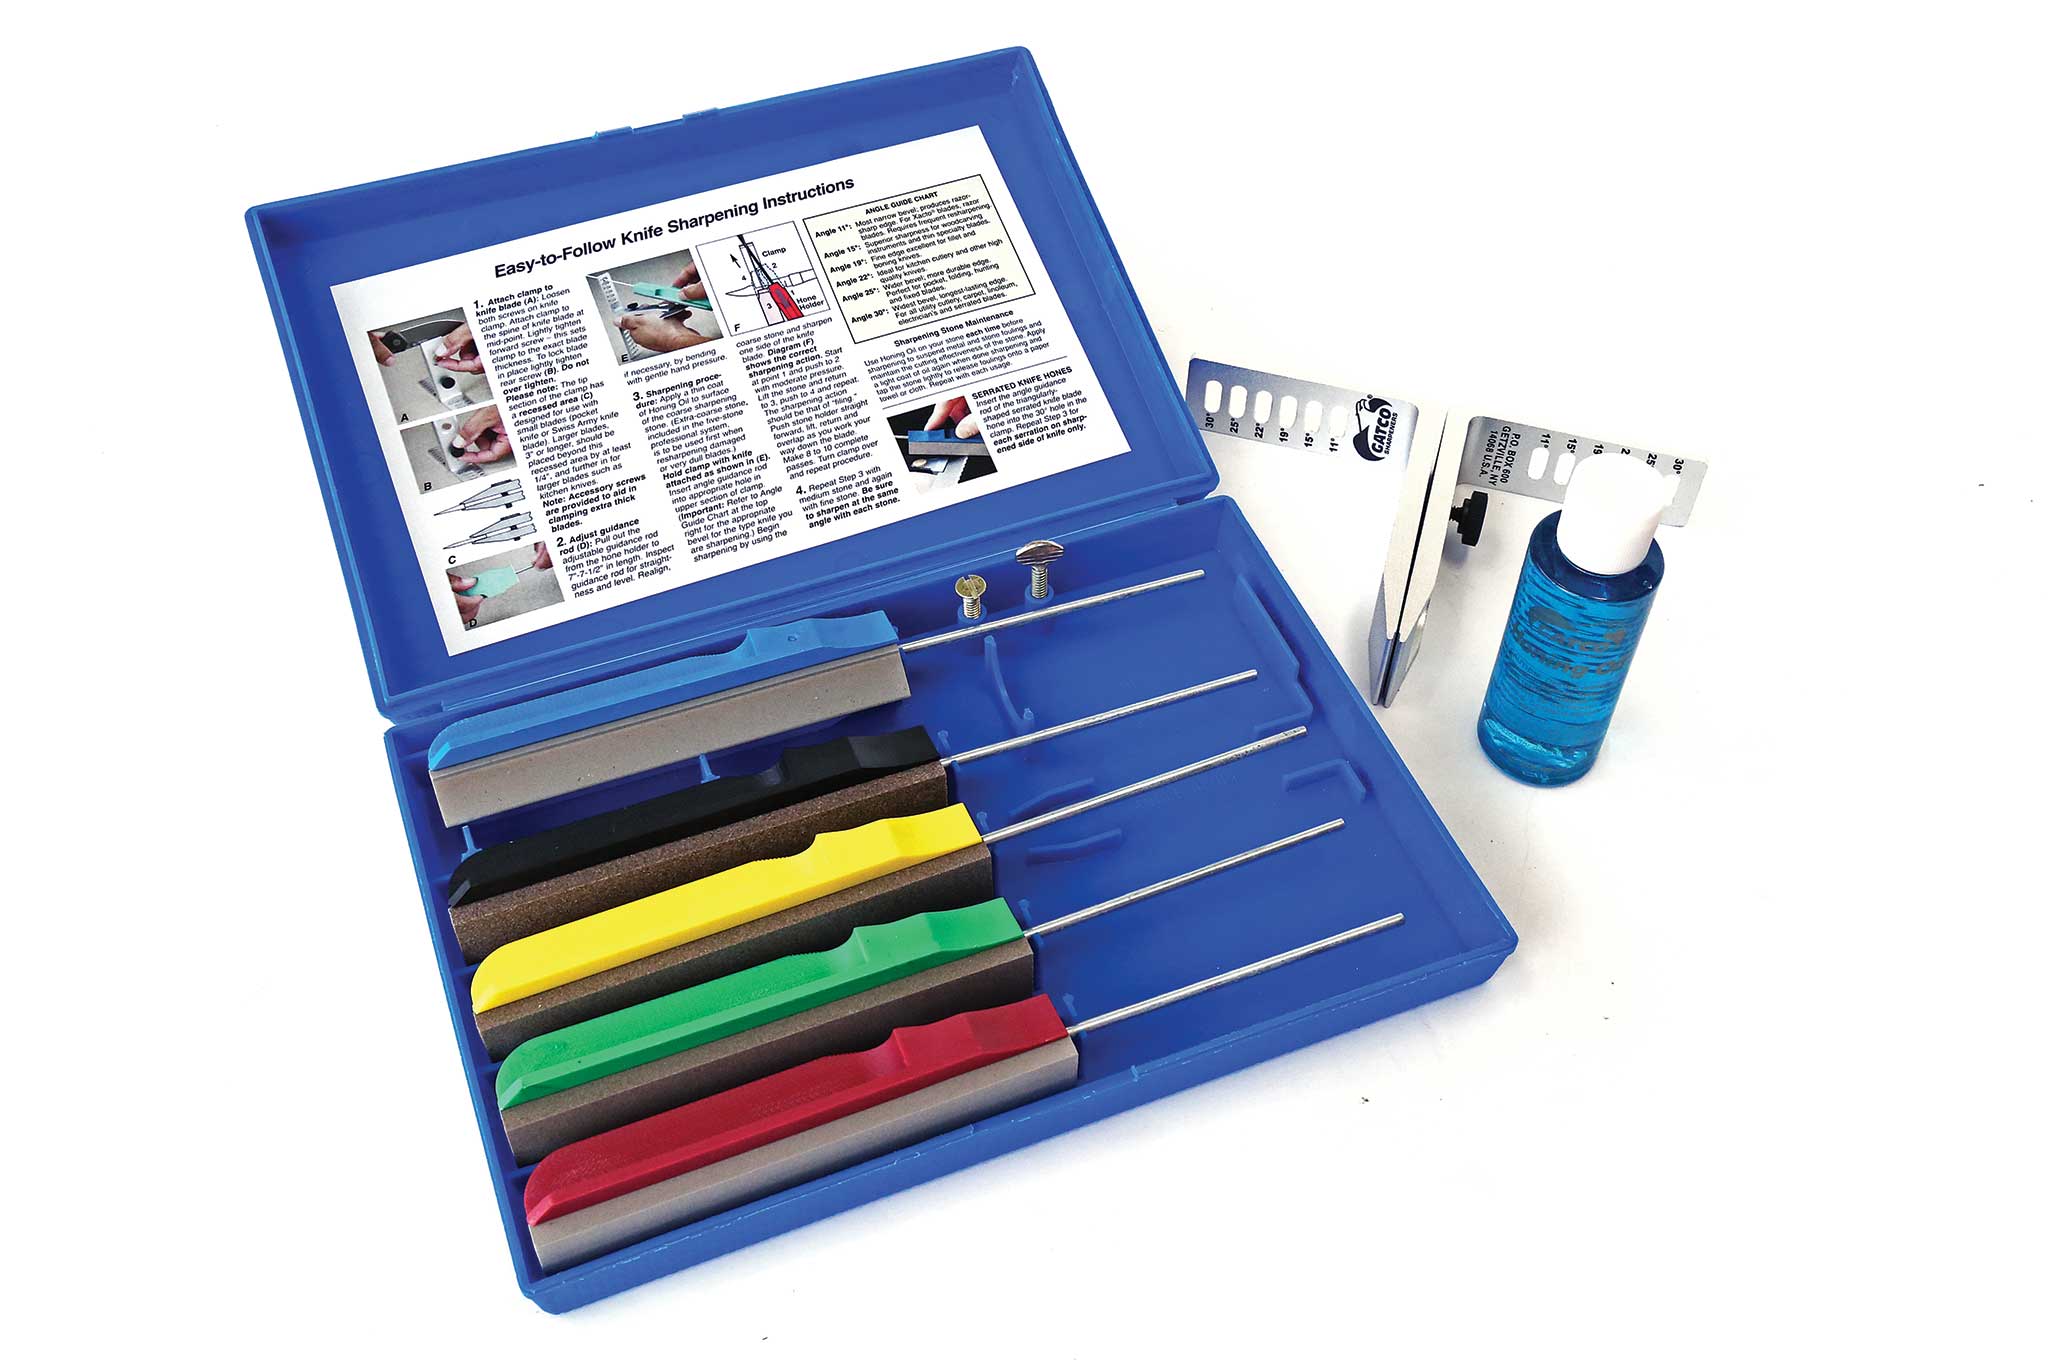
Make & Model GATCO Shapeners 10005 Edgemate Professional Knife Sharpening System
Notes Having a dull blade is like have a firearm with an empty magazine. That's why it's important to keep your knives sharp, especially those that you'll use in emergency or post-emergency situations. GATCO's 10005 Edgemate kit lets anyone sharpen like a pro, whether their knife is for sport, utility, or the kitchen. It features five sharpening hones with aluminum oxide abrasives: fine, medium, coarse, extra coarse, and one for serrated blades. The easy-to-use system also comes with a GATCO-exclusive clamp/angle guide, honing oil, and a custom case for convenient storage and portability. Made in the USA.
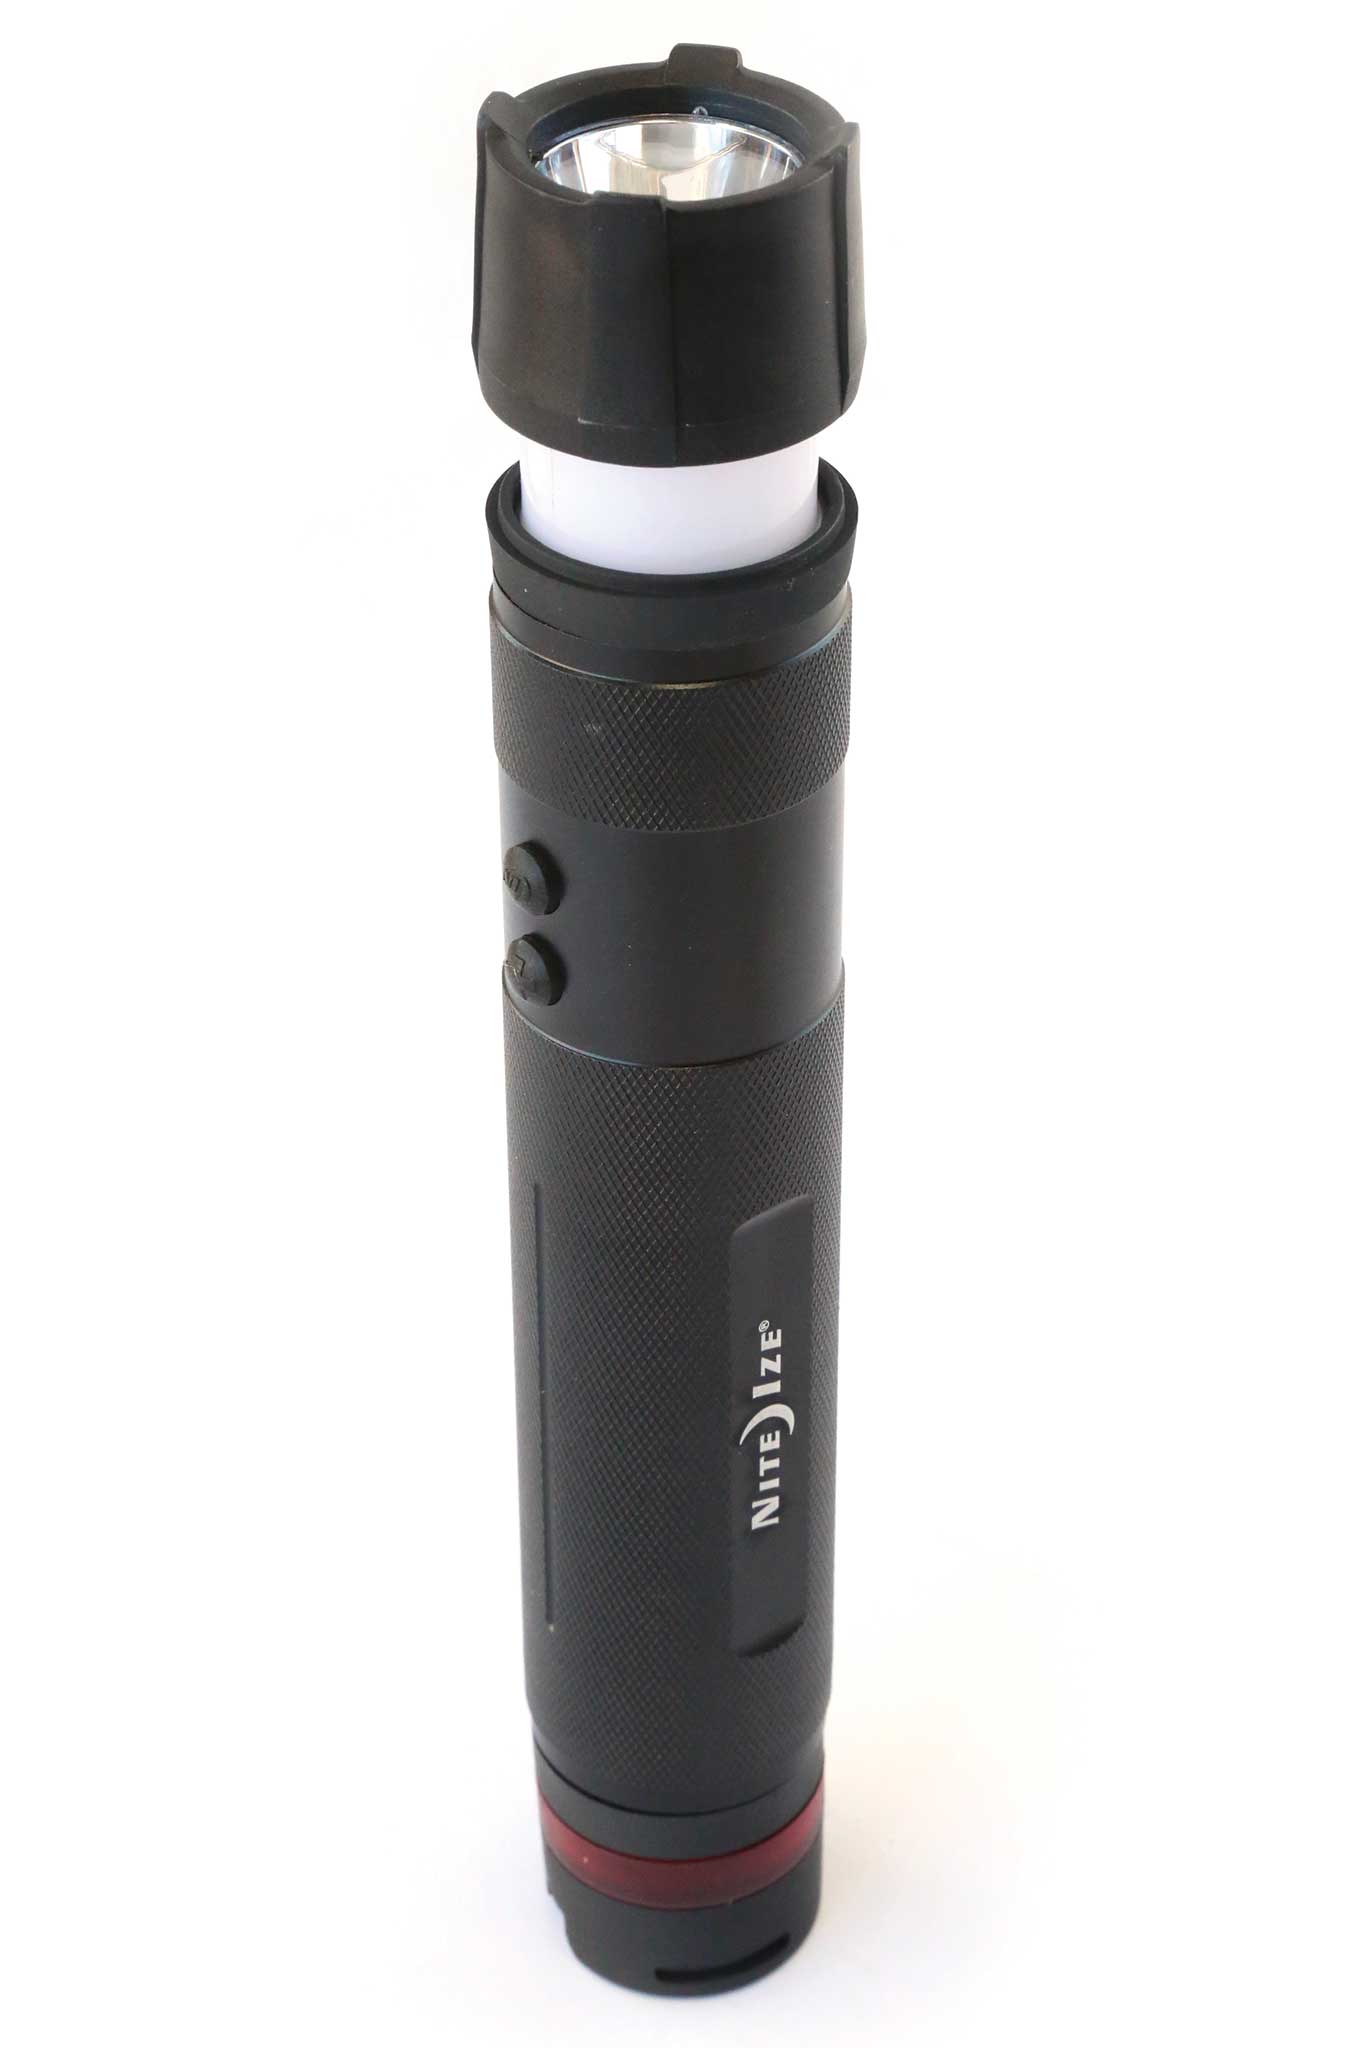
Make & Model Nite Ize Radiant 3-in-1 LED Flashlight
Notes Nite Ize has built a reputation for bringing subtle yet innovative updates to tried-and-true designs. Take for example the Radiant. As its full name implies, it has three types of illumination with seven modes. The most obvious is the 250-lumen flashlight, which might not seem like much in a world where 1,000-lumen torches are quickly becoming the norm. But pull up on the head, and it's instantly transformed into a lantern, providing a much-needed diffused glow inside a tent, backyard, or garage. On the other end, there's a red safety light that has glow, flash, or SOS modes, all of which retain our natural night vision. It can stand up on either end, is housed in a durable aluminum body, and works off of three common AA batteries.
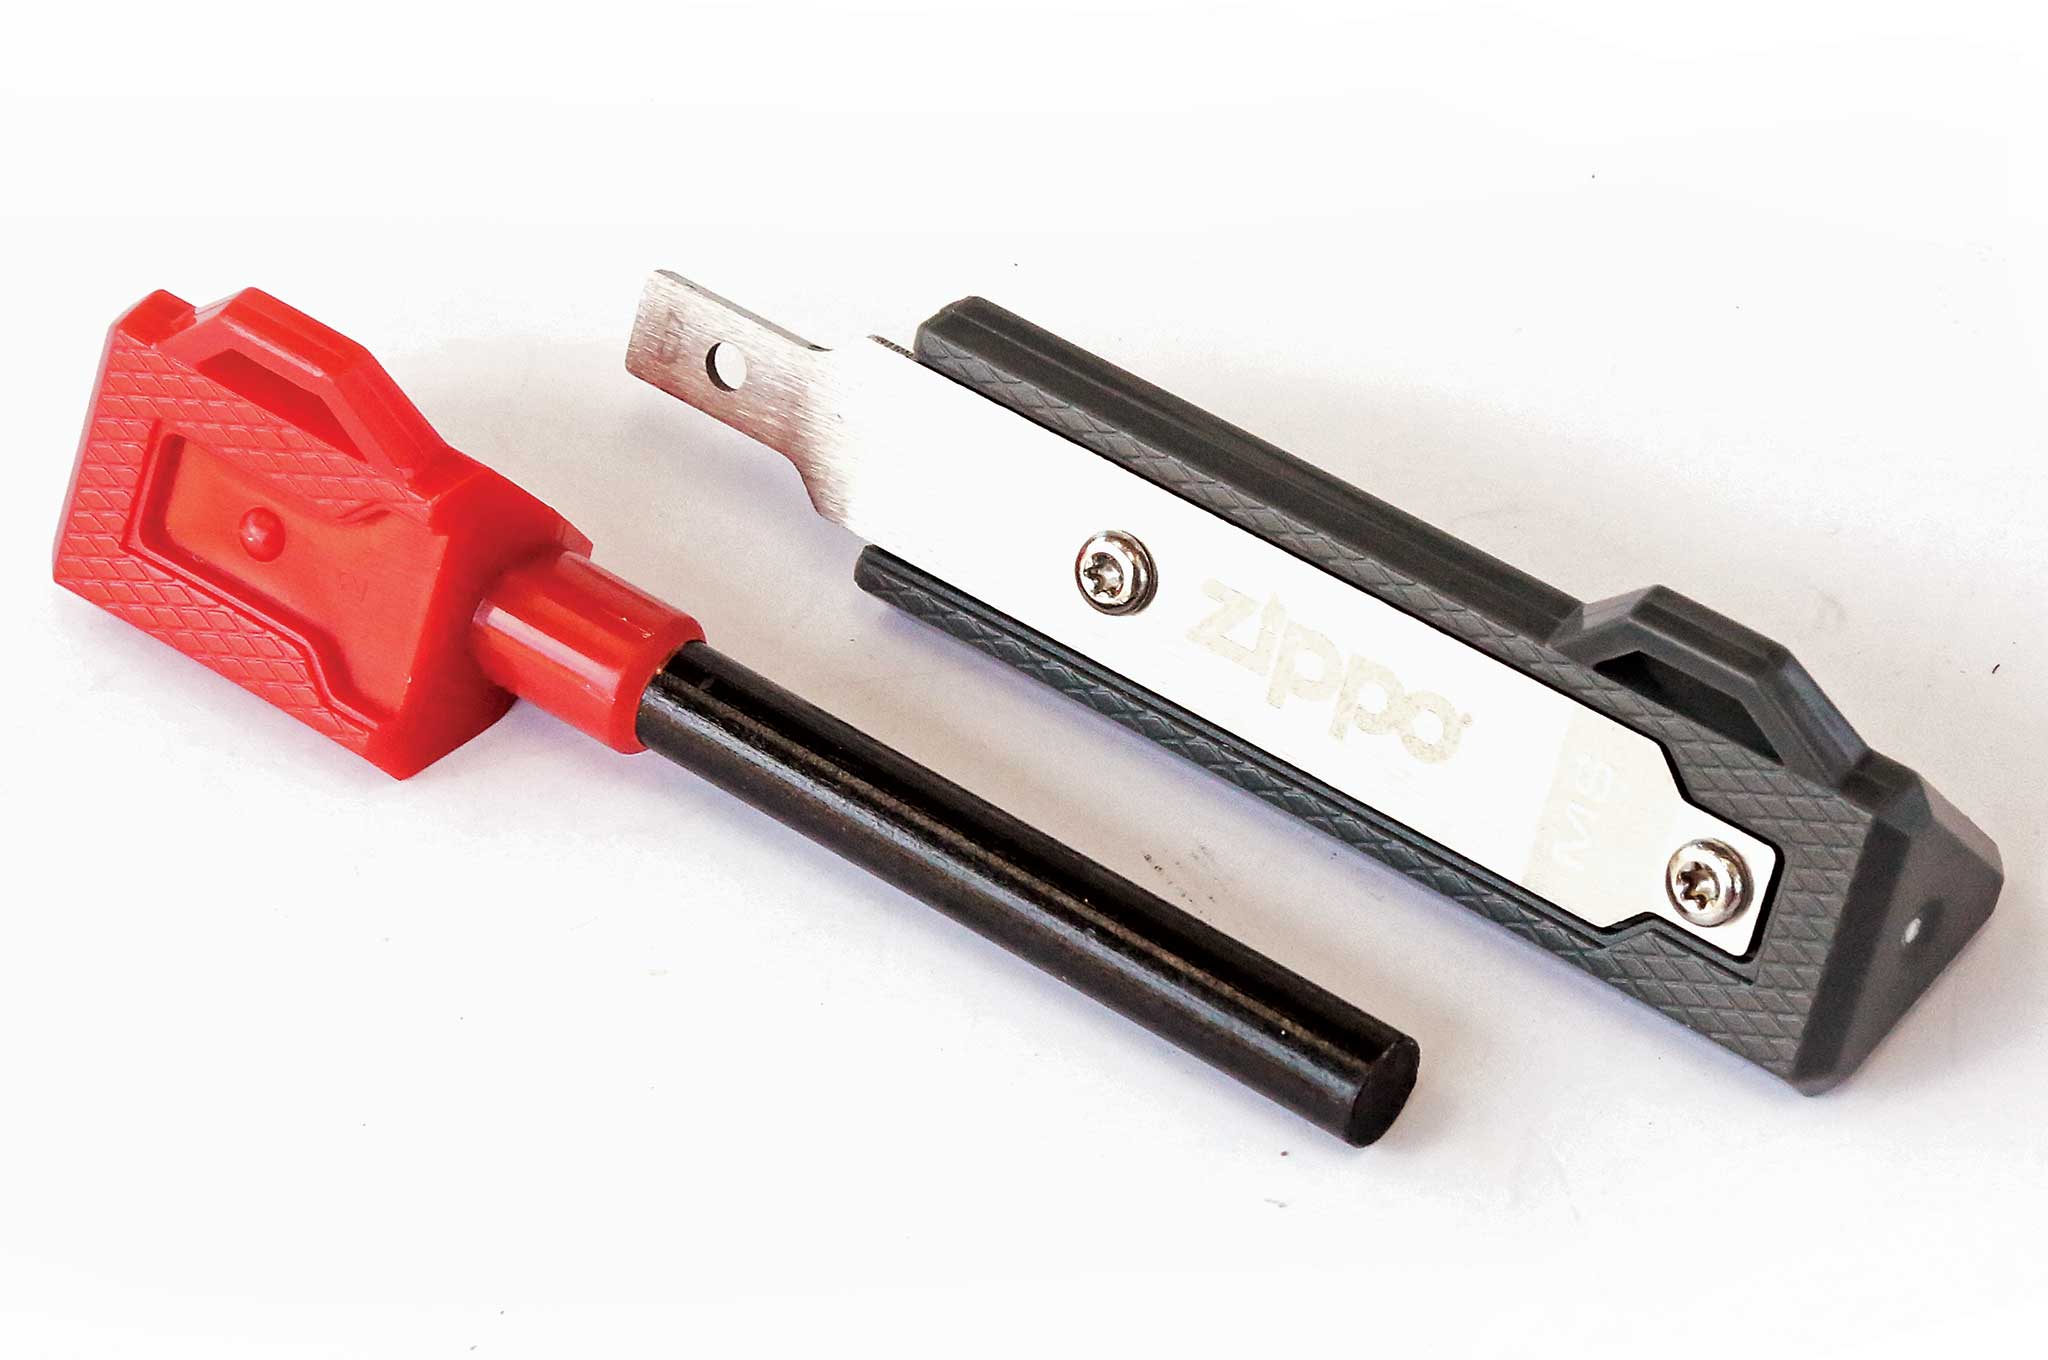
Notes Few brands make you think of lighters like Zippo. Thanks to portrayals in books, movies, and TV shows, the company's products are practically synonymous with sparking a flame. But these days Zippo is more than just metal lighters. It makes all kinds of tools, including the Mag Strike. This firestarter unleashes a shower of sparks when you scrape the 420C stainless steel striker along the magnesium ferrocerium rod, allowing you to ignite your tinder with ease. Both the striker and the ferro rod have triangular-shaped ABS plastic bodies, maximizing traction and leverage with less force. Plus, the rod fits inside the striker's handle with a snap-lock closure, shielding them from the elements and increasing portability. Attachment points on each lets you connect them to your belt, keychain, or go-bag.
Notes We're not gonna lie. When women started wearing jeggings, we got jealous. Why can't men's jeans be flexible and comfortable, too, instead of just heavy and rigid? Fortunately for guys who like to stay on the move (either on the trail, the range, or just about town), Ecōths's Trace Pant is a blend of 98-precent organic cotton and 2-percent Lycra. This means it's rugged yet soft, with just enough stretch so that it doesn't pinch at the crotch, knees, or waist like traditional denim would. It has two deep front pockets, two rear pockets, a coin pocket, and a slit pocket behind the right leg for your smartphone, pocketknife, or multi-tool. On a side note, for every Ecōths garment purchased, a minimum of three meals is provided to regional food banks across the USA.
Notes Whether you're enjoying a sunny 65-degree F winter day in Arizona or fighting snow blindness in Minnesota, you'll need to protect your peepers. After all, unless you've practiced bug-out runs while blindfolded, you'll need to see where you're going if you're fleeing a disaster. The Wiley X Nash shields your eyes in a variety of situations. Its Shatterproof Selenite polycarbonate lenses provide 100-percent UVA/UVB protection while also meeting ANSI Z87.1-2010 and U.S. Federal OSHA 1910.133(b)(1)(1) standards. Its T-Shell lens coating resists scratches and reduces glare without color distortion. The Nash comes with a zippered case, leash cord with rubber temple grips, and a microfiber cleaning cloth.
Notes CLENS (pronounced “cleanse”) is a set of heat-resistant, clear polymer circles that adhere to the lenses of popular flashlights and weapon-mounted lights. The idea is to protect the lens from carbon, and other occlusive or abrasive debris that can build up during firearms training or extended trips in the backcountry. When the accumulated carbon (or scratching) is enough to reduce the light's performance, CLENS is removed and replaced with fresh clear sticker. Codesigned by Aaron Cowan of Sage Dynamics, the CLENS has a mild adhesive backing that tends to stick better to polymer than glass, making it easy to position without leaving adhesive on the glass lens. Each set comes in three common sizes (four cutouts per size). For example, the large will fit a SureFire Fury or Streamlight Protac HL, the medium will fit a SureFire G2x or Streamlight TLR, and the small will fit a SureFire x300U.
Although it was never confirmed, if you've ever seen the movie Into the Wild, it's speculated that Christopher McCandless' journey into Alaskan Wilderness ended with possibly ingesting toxic plants in his location that he was trying to survive on in the absence of other, succumbing to the foraging myth. While it may seem that plants offer enough nutrients to exist on during the harsher months of a survival situation, you may ultimately meet your demise by slow starvation or inadvertently poison yourself.
The Foraging Myth
There's a belief among certain preppers and survivalists that an experienced forager can survive indefinitely by eating nothing more than wild edible plants. These starry-eyed weed-eaters seem to believe that you can always receive enough nutrition and calories from the plant kingdom, anytime and anyplace. But is the grass always greener (pun intended), or will this strategy leave you malnourished or dead?
Reality
You and I are living proof that nature provided the necessary food for our ancestors to live long enough to procreate; but you have to understand that beggars can't be choosers.
Our remote forebears harvested both plant and animal foods to sustain themselves. That's why they're labeled “hunter/gatherers” in the history books. Today, overeager botanists and vegans might think that they can subsist on wild edibles in any long-term survival situation, but they're forgetting one critical detail — intermittent availability. You see, there are certain times and places that you could live off wild plant foods for months at a time (like an autumn forest with a bountiful nut harvest or fruiting season on a lush tropical isle). However, these “feast” times are always separated by generous stretches of “famine,” when only low-calorie plant foods are available.
Winter is the most brutal example of this cycle of natural deficit, and the time of year when the foraging myth shows its true colors. When snow blankets the land, hiding or killing most wild edibles, your caloric needs skyrocket as your resources plummet. Even if you could find enough plants to fill your belly, it's unlikely that they would offer enough calories for survival. As a second example, let's look at springtime.
When I teach foraging classes in April, I have the greatest annual diversity of plants to show my classes. And I always tell them how our ancestors thought of spring as the “starving season.” Despite all the new green growth, the young plants are mostly water and they lack sufficient calories for subsistence. Eating only spring greens is like starving to death slowly in a field of iceberg lettuce — all water, no calories. Many cultures made it through winter by storing food, and they made it through spring by taking advantage of wild animal foods (like wild bird eggs and migratory spring fish runs).
As a final example to scare you straight, you simply may not have the necessary understanding to use the resources around you. Case in point, you may find yourself in unfamiliar territory and you won't know which local plants are safe to eat. Plant identification can be difficult enough in your normal stomping grounds. Add in the stress of a survival event, a strange environment and a splash of desperation, and you have a recipe for disaster. This idea of a wilderness that's always filled with high-calorie plant food is nothing more than wishful thinking.
Alternatives
If you find yourself in a survival situation with only wild food as a source of sustenance, don't give up! And don't fall prey to a foraging myth! This scenario is survivable, if you're not too squeamish. Here's what you can do to survive on wild foods.
Focus On Calories: Whether you're trying to live on plants, animals, or a blend of both, focus on collecting safe high-calorie foods. Make a positive identification of edible tree nuts, starchy roots, and nutritious berries, then collect as many of those calorie dense foods as possible. And maybe don't worry so much about collecting wild edible plants for teas and salads. These may taste delicious and provide vitamins and minerals, but they are never going to provide high calories.
Eat It All: There were plenty of ways to die on the early American frontier — but one of the weirdest was called “rabbit starvation.” Novice trappers, hunters and wanna-be mountain men would occasionally die from eating only lean meat (no fat or carbs) for weeks on end. For a more contemporary example of this, author Jon Krakauer speculated in his popular book Into the Wild that Chris McCandless might have died from this odd form of acute malnutrition. The take away here is very simple. When hunting, fishing, or trapping strive to collect animals with higher amounts of body fat, then eat ample amounts of fat and organs along with the meat. An animal-based menu of meat, organs, and fat sustains our cousins in the arctic who are eating a traditional diet, and it can keep us alive too.
Don't Be Picky: In a grid-down situation, you may have to get creative. Bugs are surprisingly nutritious and safe to eat — if you choose edible species and cook them thoroughly. Termites are my top recommendation, as they have the highest calorie count of commonly available insects and arthropods (up to 6 calories per gram). Do your research, determine edible species, and cook them to destroy pathogens and parasites. By doing your due diligence, you can avoid those pesky foraging myths that can get you or your loved ones killed.
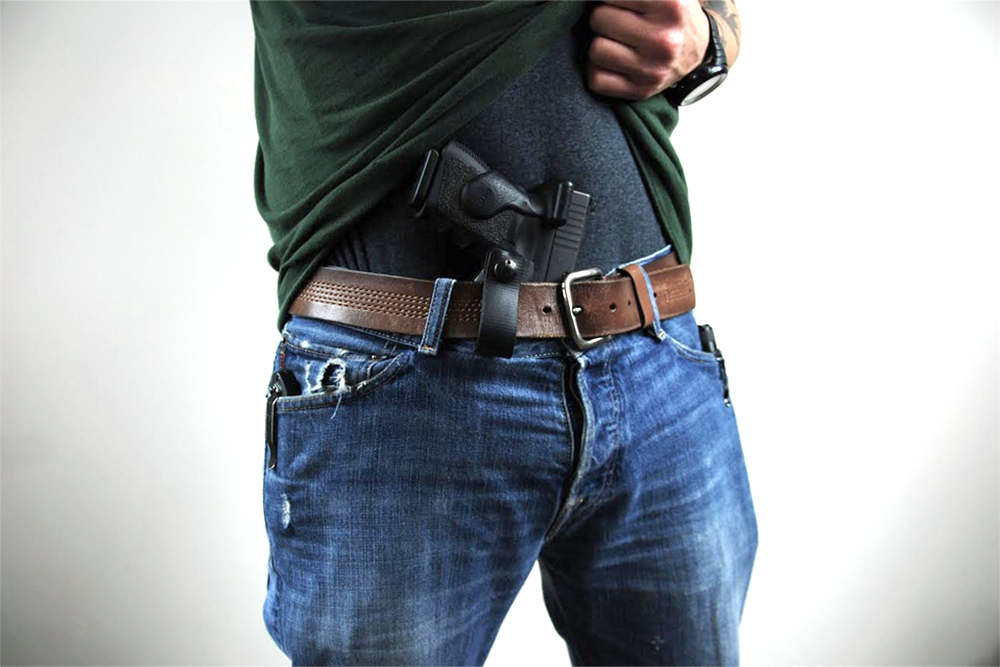
In a self-defense situation, it's imperative to use the appropriate amount of force to stop the threat. As the saying goes, it's less than ideal to bring a knife to a gun fight. Using too little force to defend yourself means you're likely to lose the fight and end up shot, stabbed, or curb-stomped. On the other hand, if someone throws a punch at you, escalating the fight by drawing a knife or gun without legal justification might land you in prison.
The point is that you need to have several self-defense options at your disposal. These should range from no force (running away) to lethal force (knife or gun).
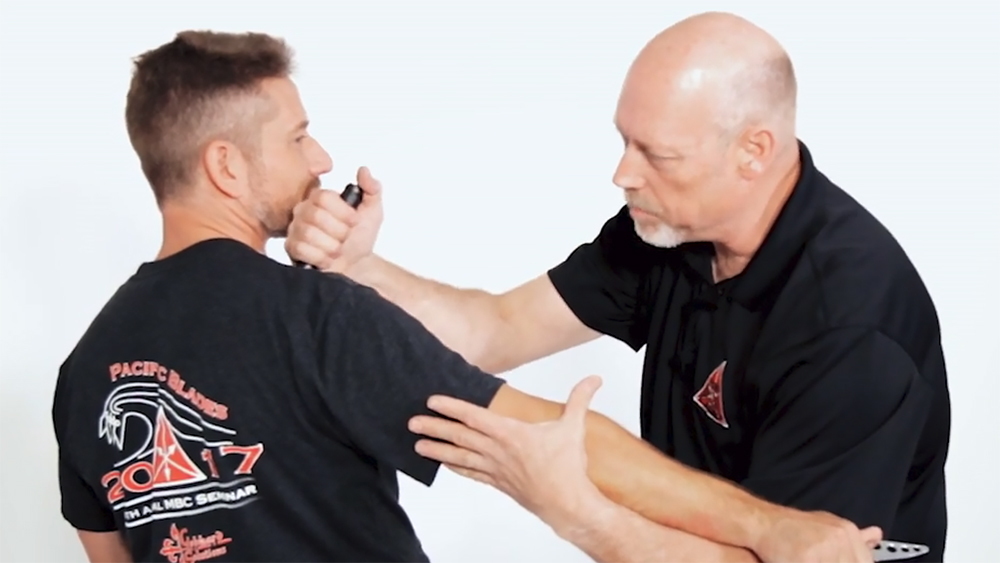
Impact weapons are a helpful intermediate tool — they'll give you a force-multiplier that allows you to stop the threat safely and in a controlled manner. Many impact weapons can also be carried in non-permissive environments where you wouldn't be able to carry a knife or gun.
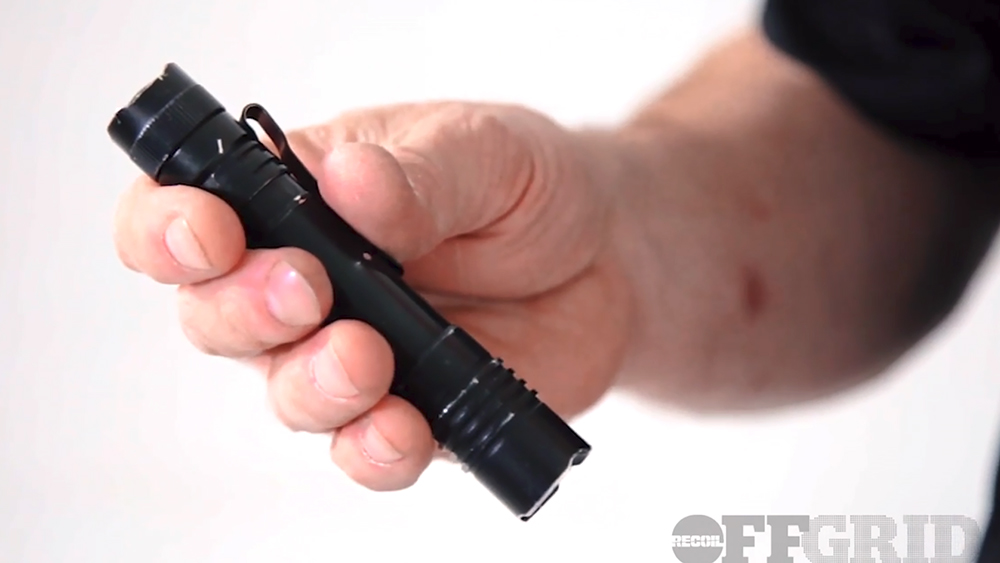
We've shared several videos from instructor Michael Janich about self-defense tools and techniques, including how to use tactical pens and how to fight back if you're knocked to the ground. The latest RECOILtv SHTF/OFFGRID video covers self-defense with flashlights. In the video below, Janich discusses why a flashlight can be a useful part of your every-day carry gear, and how you can use it in hammer-fist strikes to disable an attacker.
For most people, a pen is just a writing tool that we think about only when we need it. In other words, a pen is just a pen. But sometimes a pen is a badass writing tool that can also be used for personal safety, like in the instance of these Collective Carry EDC Pens. You're likely already carrying a pen around with you most places you go, so why not have a cool, useful one?
Forged from 6061-T6 aerospace aluminum, and available in all-black, gold, and gunmetal, these tactical pens are an extremely sturdy companion. The short, round head, along with its beveled edge, make it easy to grip when writing. And if you flip it over, there's an additional pointed edge which provides an effective means to break glass in an emergency situation. Each purchase even comes with an extra ink refill, so you don't have to worry about buying a new one every six months. And weighing in at just 42g, they're the perfect EDC pen. They're the kind of pen that brings new meaning to the phrase “the pen is mightier than the sword.”