For those of us who study survival skills, history can provide some powerful success stories. Some of these historical accounts are recent, such as Mauro Prosperi’s journey through the Sahara desert, while others date back hundreds of years, like the tale of Alexander Selkirk (whose true story served as inspiration for the castaway novel Robinson Crusoe). Either way, they yield many survival lessons that remain valuable to this day, and provide insight into the mindset that’s needed to endure dire circumstances.
One particularly incredible survival story is that of polar explorer Sir Ernest Shackleton and the crew of his Trans-Antarctic Expedition. Despite being stranded for more than a year in a barren frozen wilderness, these men improvised, adapted, and survived.
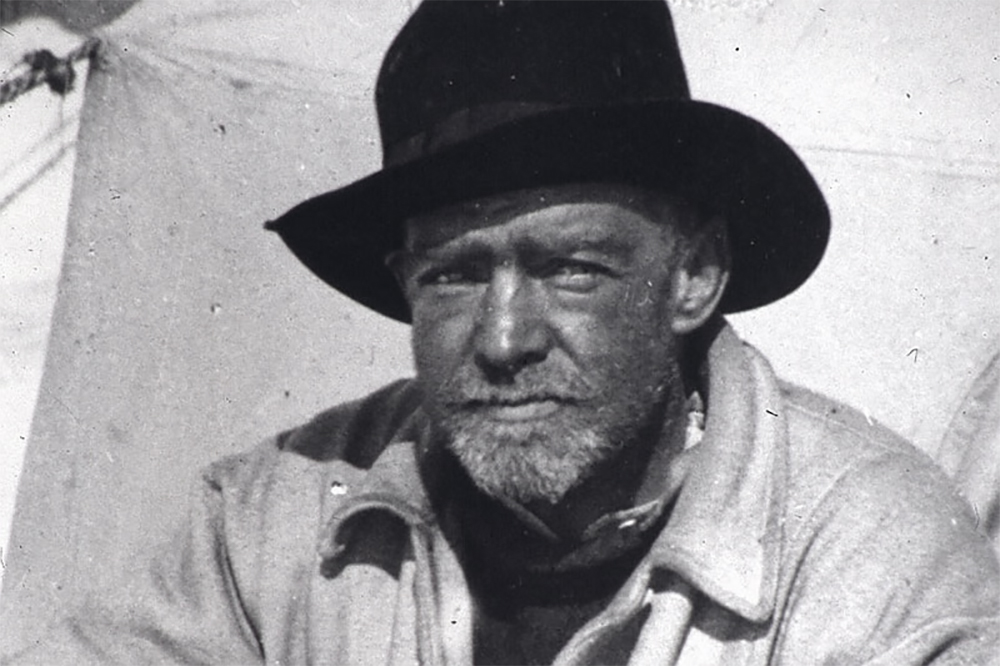
Sir Ernest Shackleton
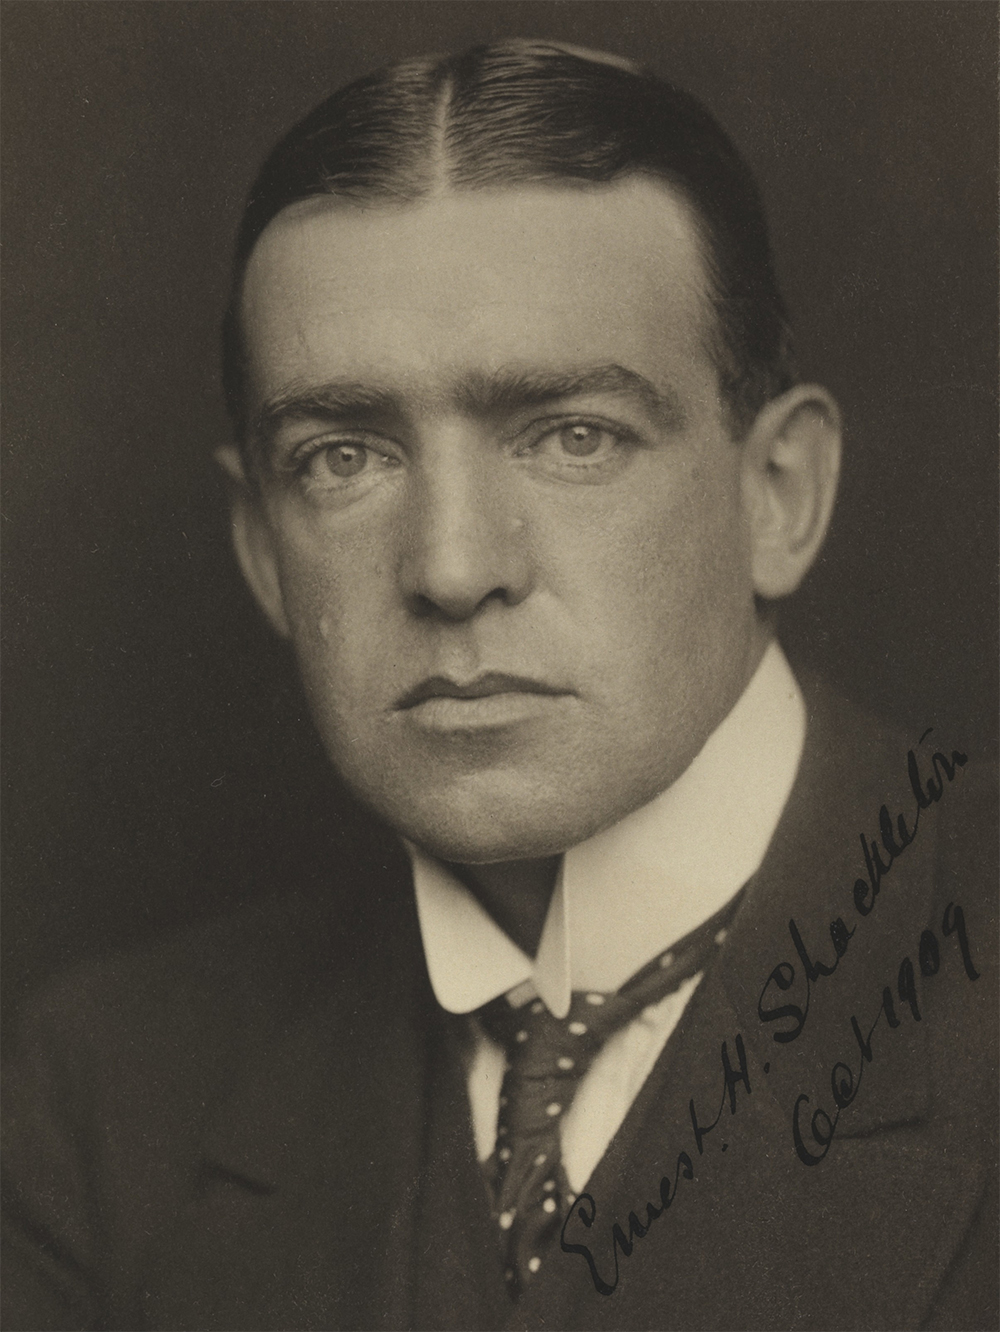
Born in Ireland in 1874 and raised in England, young Ernest Shackleton struggled with boredom and restlessness in school, and eventually got his father’s approval to join the crew of a commercial sailing ship at age 16. This would be the beginning of a lifetime of adventures at sea.
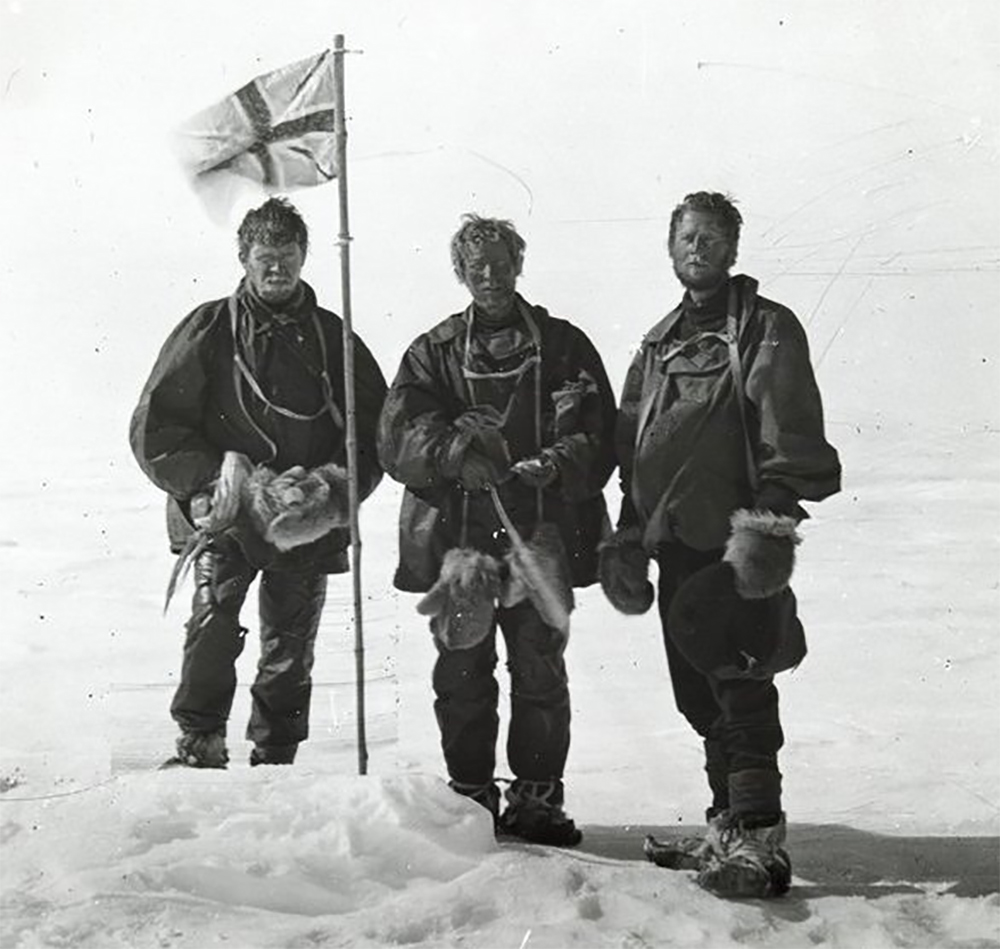
After rising to a position as an officer in the Royal Navy, Shackleton participated in and led several successful British expeditions to Antarctica between 1901 and 1909. The last of these, the Nimrod Expedition, marked the first ascent of the colossal volcano Mount Erebus and the discovery of the Magnetic South Pole.
After returning to England, he received multiple medals, was honored as a Commander of the Royal Victorian Order (CVO), and was knighted Sir Ernest Shackleton.
However, Shackleton wasn’t content to live an easy and sedentary life as a hero. He was still determined to explore further and complete a task others had failed to accomplish — crossing the continent of Antarctica. He began planning this Imperial Trans-Antarctic Expedition, gathering funding, and hiring a crew of sailors who could handle the arduous journey.
The Imperial Trans-Antarctic Expedition
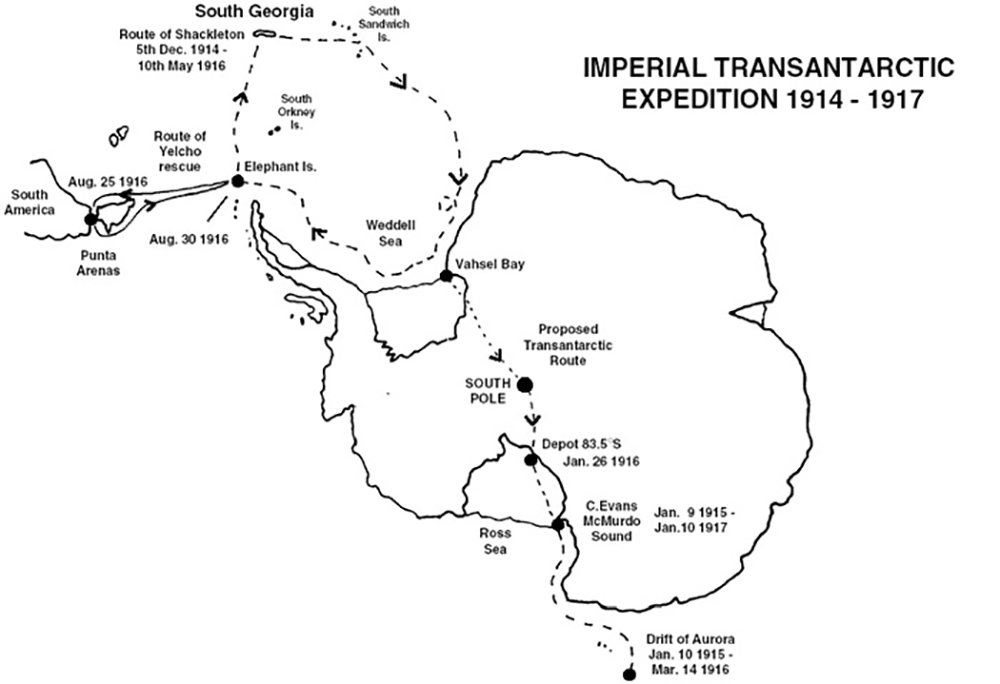
Shackleton’s plan to cross the frigid 1,800-mile expanse involved two ships and a total of 56 men split evenly between them. The first, Endurance, was under his direct command. It sailed from the remote South Georgia Island in the Southern Atlantic ocean. The second, Aurora, sailed from Australia to the opposite side of the continent. While Shackleton and the crew of the Endurance would be the ones to complete the journey, the Aurora’s crew would journey inland to set up supply depots and assist the explorers when they arrived.
This plan was set into motion in December of 1914 — the beginning of summer for the Southern Hemisphere.
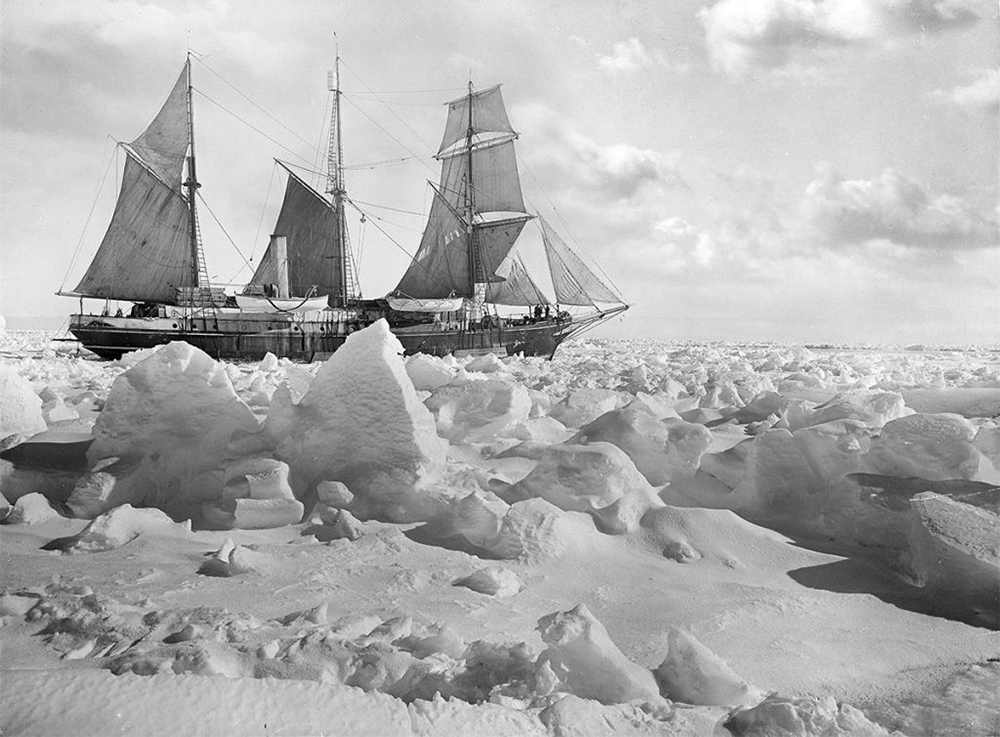
To reach the shore of Antartica, the Endurance had to carefully weave through impassable pack ice and endlessly shifting ice floes. The density of this ice grew unexpectedly thick as they sailed on, slowing progress to a crawl. Shackleton would later write in his autobiography, “I had been prepared for evil conditions in the Weddell Sea, but had hoped that the pack would be loose. What we were encountering was fairly dense pack of a very obstinate character.”
The Disaster Begins
After more than a month of sailing, Shackleton could see land on the horizon. However, inclement weather and currents forced the Endurance to redirect, and in mid-January 1915, progress toward shore ground to a halt. Ice crushed in from all sides, trapping the ship completely. In February crew pounded away at the ice with picks and chisels to free the Endurance, but these efforts proved futile. They were stuck — worse yet, the ice around them was drifting north.
The ship’s primitive wireless communications equipment had no hope of calling for rescue at this distance, so Shackleton and his crew had to wait for the ice pack to release them. But months passed, and the pack continued to forcefully carry the Endurance away from shore. Soon it was May and winter had arrived. By July, the ice began to break up somewhat, but storms in August and September made the situation even worse, pounding the hull with massive chunks of ice.
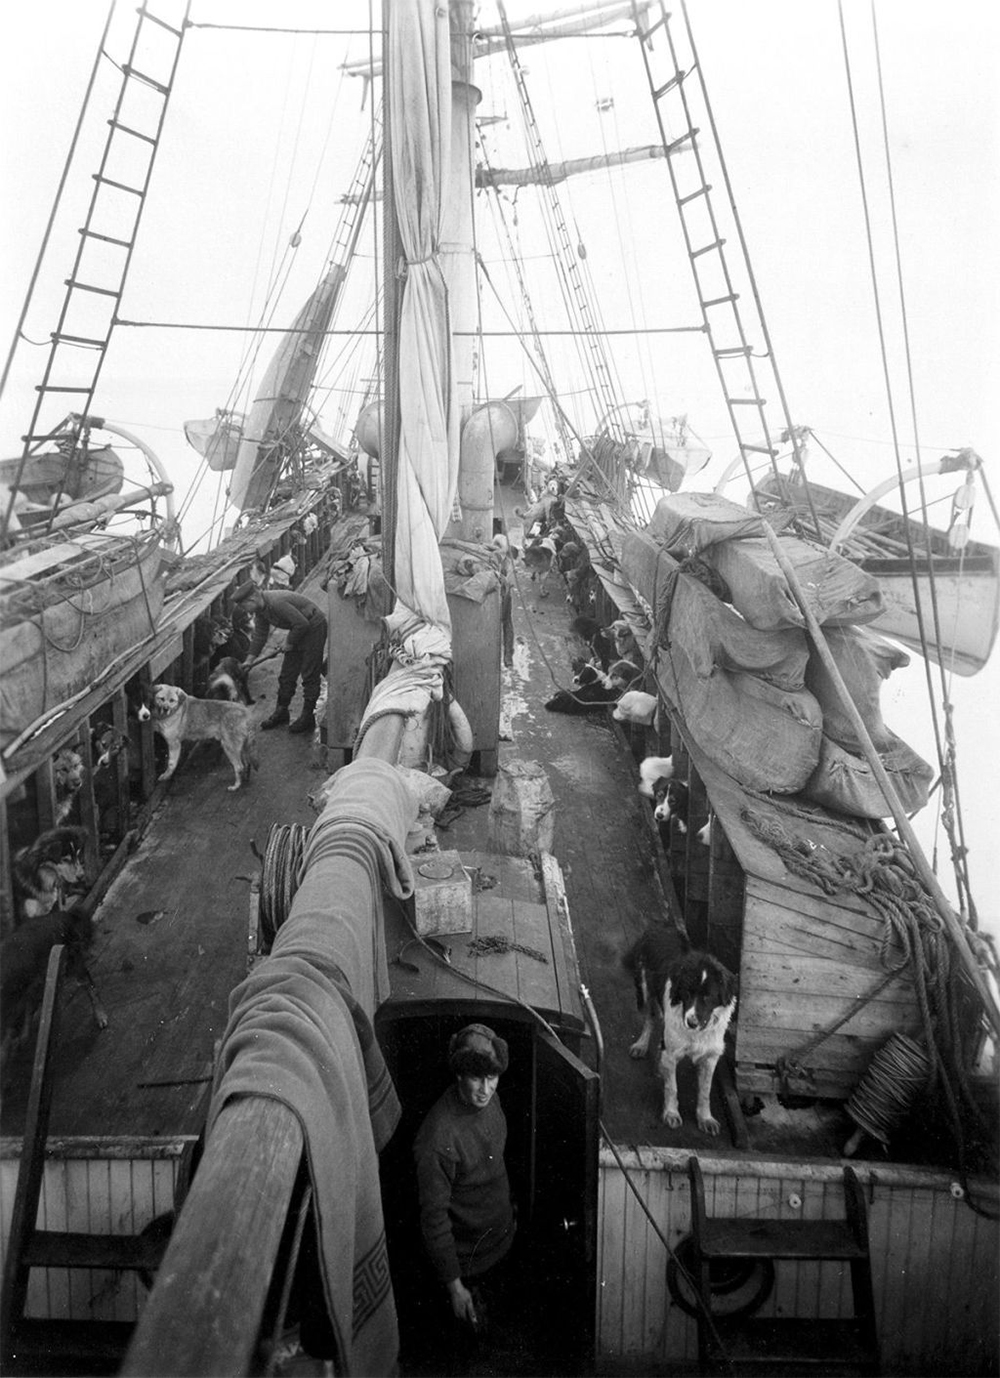
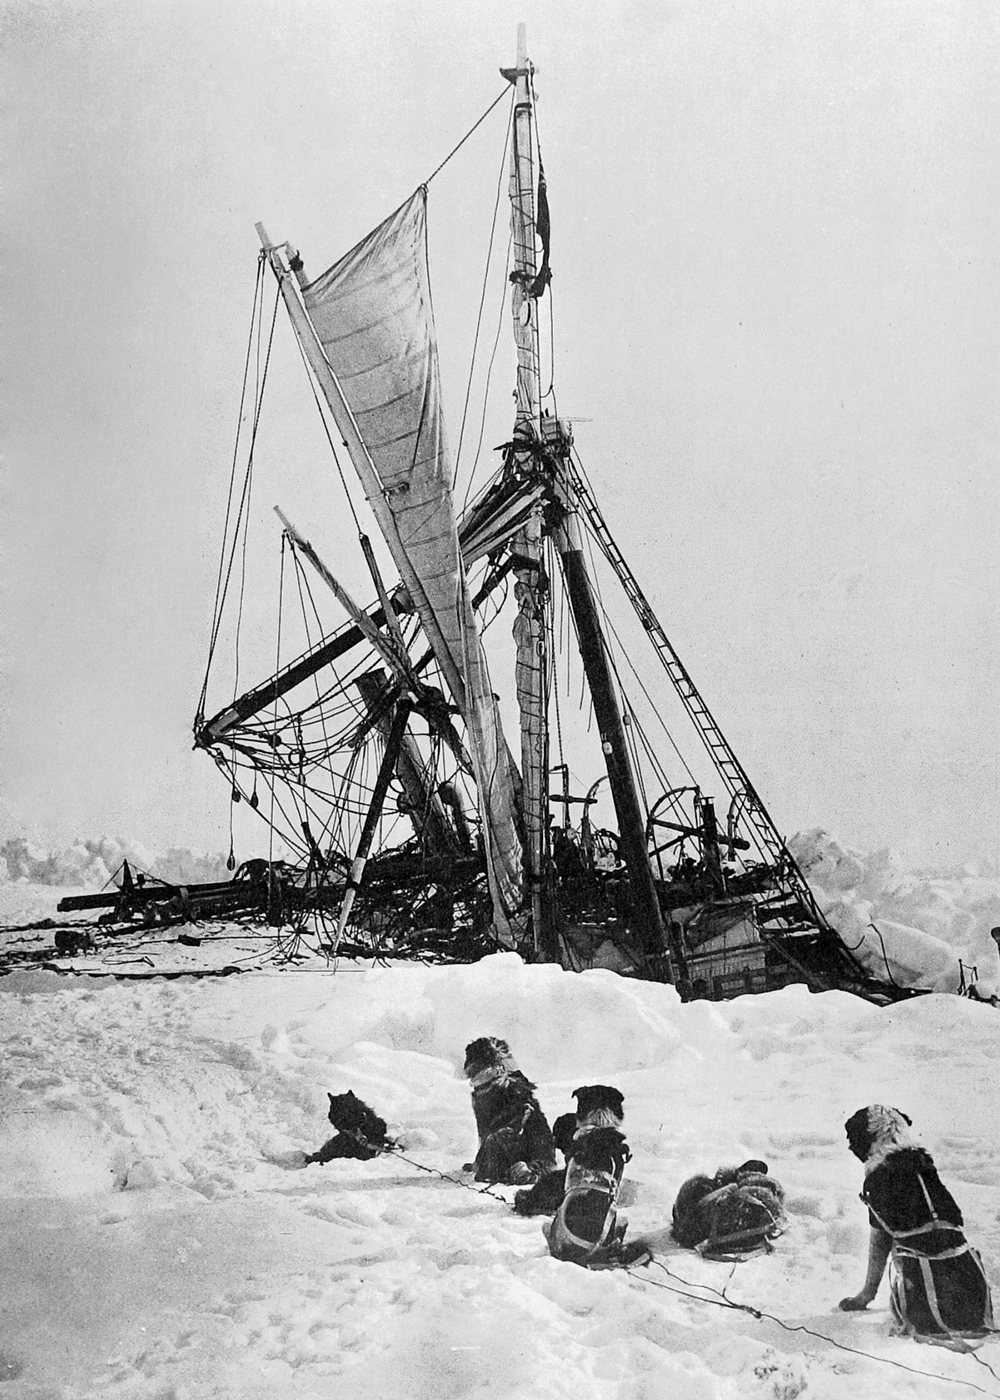
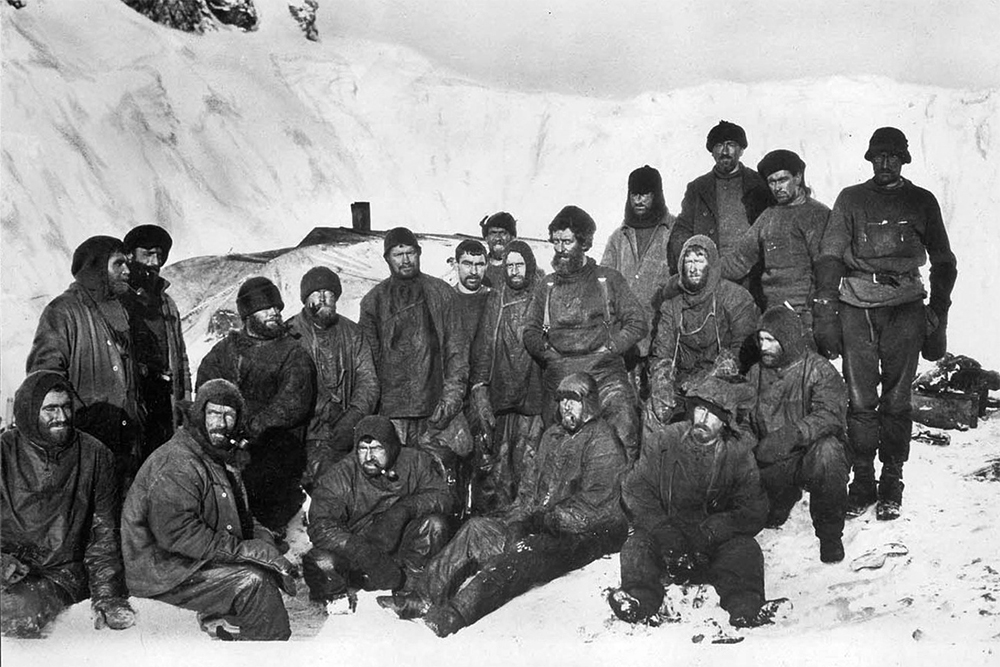
On October 24th, the Endurance could endure no more. Ice punctured the hull and water began steadily seeping in. Shackleton ordered all 28 of his men to abandon the ship and bring all supplies to camps on the ice. This included their remaining food, several packs of sled dogs intended for the trans-continental journey, and three 20-foot lifeboats.
In late November, the Endurance sank to the bottom of the Weddell Sea, leaving the men stranded on the ice hundreds of miles from shore.
The crew’s photographer, an Australian named Frank Hurley, was able to save his cameras, photo plates, and 150 existing photographs from the sinking ship. All of the powerful behind-the-scenes images from the Trans-Antarctic expedition are thanks to Hurley’s unwavering dedication to documenting the story.
Struggling Ashore
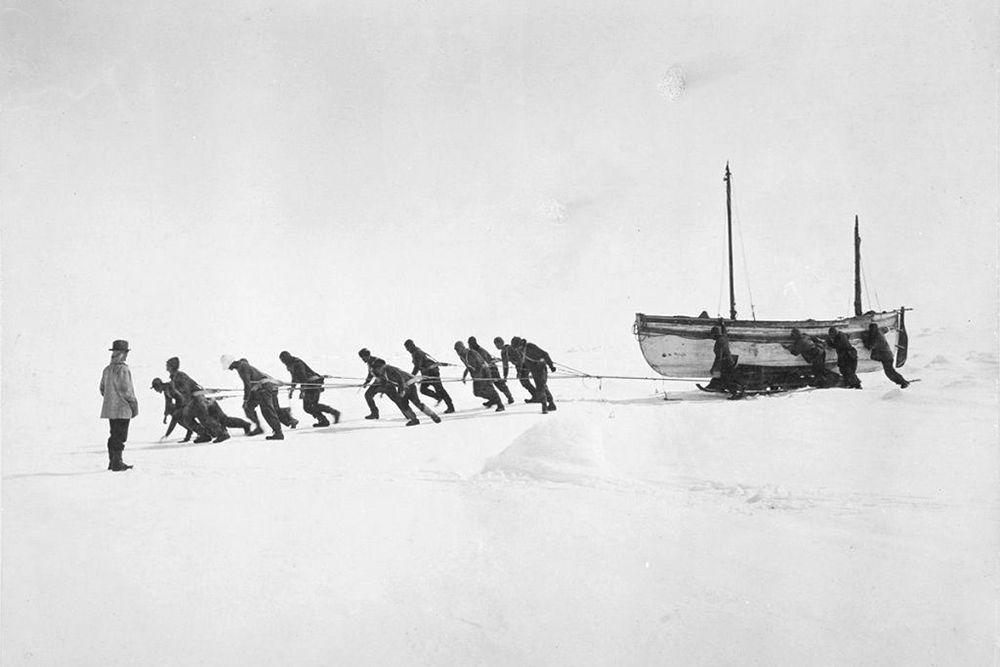
At this point, various destination options were considered, but none looked good. Shackleton eventually decided to march with his men across the ice, dragging the lifeboats behind them. Once they reached open water they would attempt to reach Paulet Island, which was 250 miles away.
Ironically, December brought warmer temperatures that made the ice soft, slowing their progress yet again. This led to a near-mutiny and caused Shackleton to abandon the plan. The crew of the Endurance set up the appropriately-named Patience Camp and waited for the ice to provide an opening.
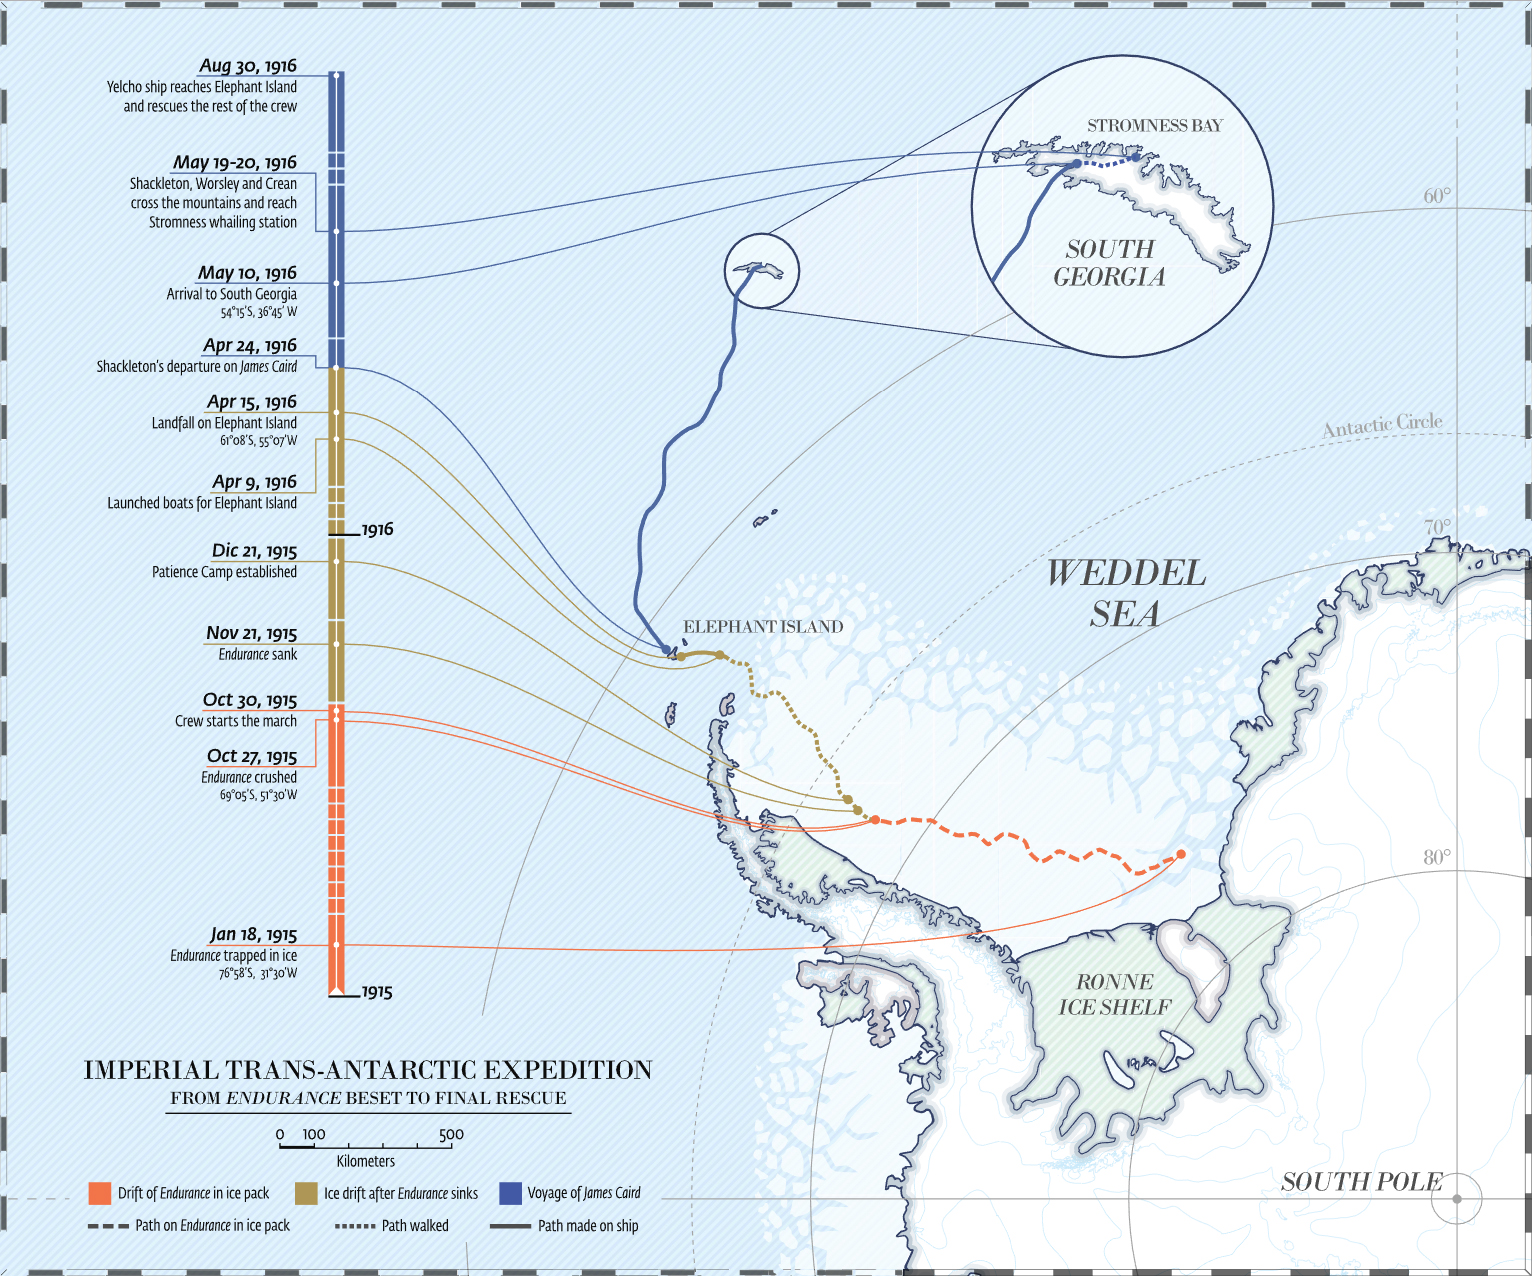
Two more months passed and supplies dwindled. The men hunted seals and penguins to stay alive, and were eventually forced to shoot and eat the sled dogs. Finally, on April 8th, 1916, the ice split, allowing Shackleton and his crew to board the lifeboats. They set out for the nearest accessible piece of land, Elephant Island.
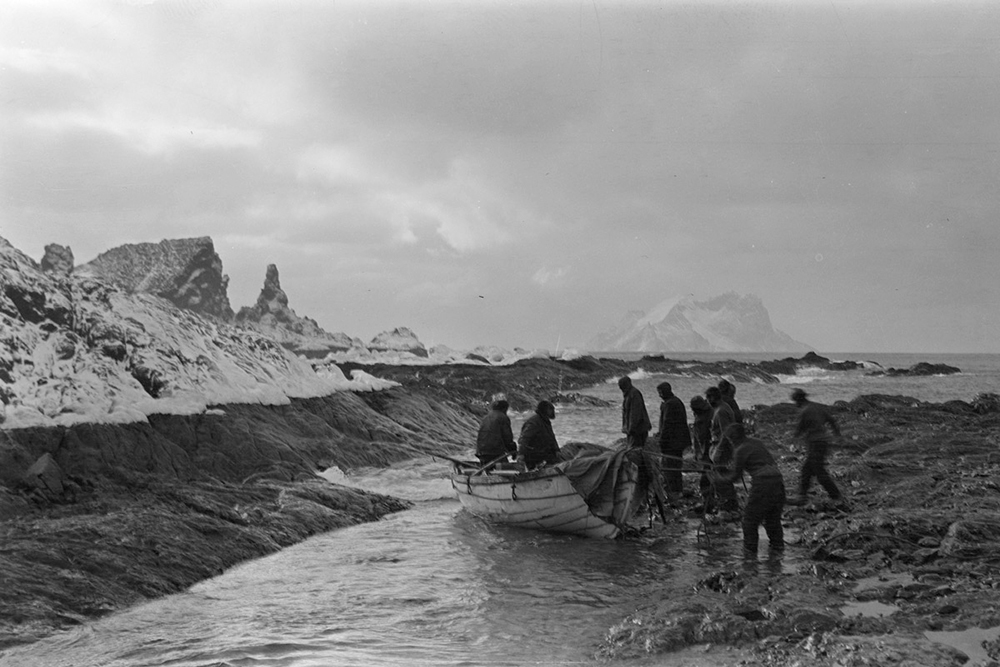
After five grueling days at sea, with little remaining food and temperatures as low as -20°F (-30°C), they set foot on land for the first time in over a year. All 28 men had made it alive.
Out to Sea Again
Although they were now on land, Elephant Island was uninhabited and barren. Frank Hurley wrote, “Such a wild and inhospitable coast I have never beheld.” Shackleton knew that there was no chance of rescue if they stayed put, so he made the decision to set out again in one of the three lifeboats. He would attempt to travel 800 miles to return to South Georgia Island.
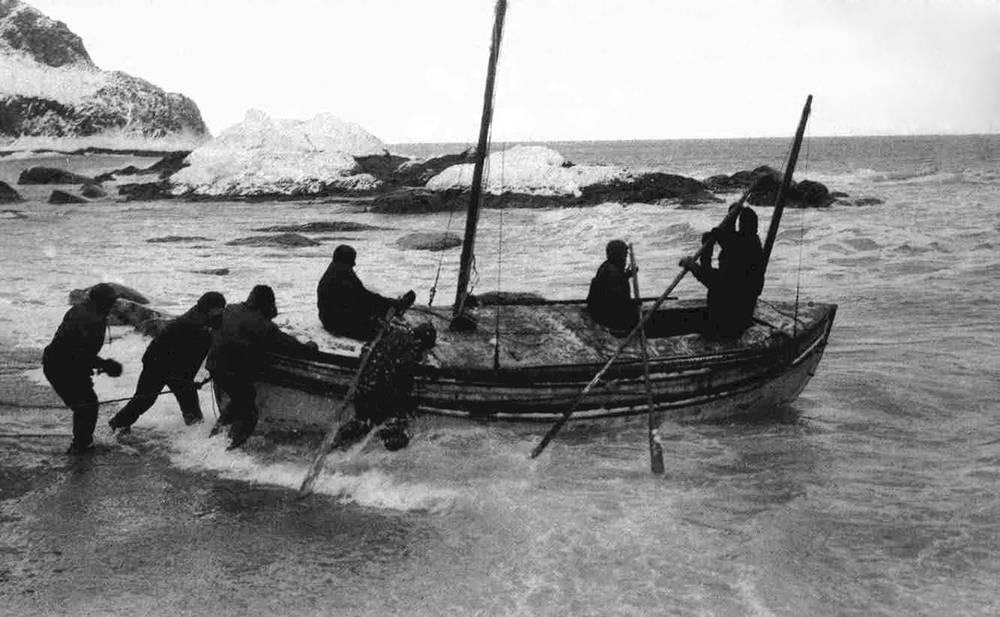
The boat with the least damage was selected, and dubbed the James Caird after the trip’s chief financial sponsor. The crew’s carpenter reinforced it with wood and canvas scavenged from the other lifeboats, and coated its hull with oil paint and coagulated blood from the seals the men had been hunting. Four weeks of supplies were packed. On April 24th, Shackleton boarded with five other men and set out to get help.
The remaining 22 men stayed on Elephant Island and waited. If the James Caird capsized or Shackleton failed to find help, the remaining survivors would almost certainly die.
Making Contact
Battling high waves and brutal winds, it took the James Caird 16 days to reach the southern shore of South Georgia Island. Unfortunately, they still needed to make contact with the whaling stations on the north shore of the island. This meant one of two choices: get back in the battered lifeboat and try to sail around the island, or attempt to hike across the island’s uncharted interior.
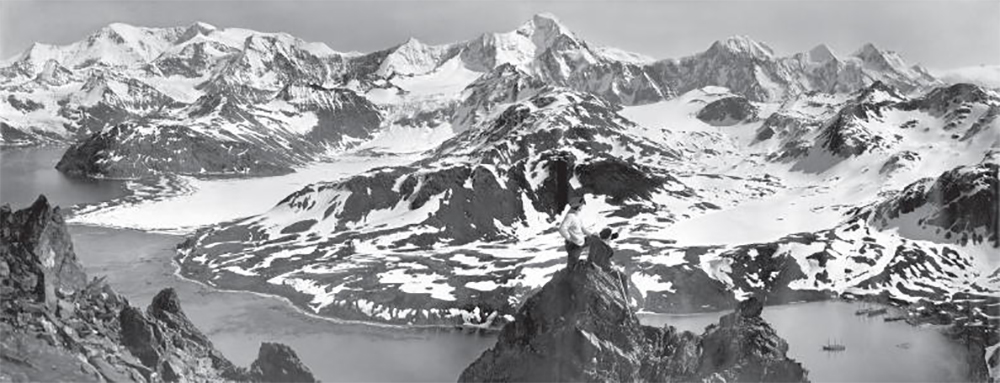
Shackleton felt making the trek on foot was the best option, so three of the men stayed with the boat while Shackleton and the other two began walking. To prepare for the mountainous and icy terrain, they pushed screws through the soles of their boots to serve as improvised crampons, and brought along a length of rope and a carpenter’s adze.
Impassable cliffs, frozen waterfalls, and other obstacles repeatedly blocked their route across the island. After a day and a half of sleepless marching, they made human contact at a whaling station. The whalers helped Shackleton rescue the remaining three men on the southern shore, but they couldn’t reach the 22 at Elephant Island.
Shackleton would make three more attempts to rescue his crew — first with a ship borrowed from Uruguay, then with one from a British expatriate in Argentina, and finally with one from the Chilean government. The first two attempts were blocked by ice, but the last attempt succeeded. On August 30th, 1916, Shackleton rescued the stranded men.
The Fate of the Crew
In the end, all 28 crew from the Endurance survived — but only by a narrow margin. The 22 survivors on Elephant Island had overturned their two lifeboats to form improvised shelters, and subsisted on meat from seals and penguins they hunted. However, when meat became scarce, they were nearly forced to cannibalism. One of the crew wrote, “We shall have to eat the one who dies first.” Just days before they were planning to embark on a suicide mission to get help, Shackleton returned to rescue them. He had been away for more than three months.
On the other side of the continent, the 28 men from the Aurora had also suffered considerable difficulties. A powerful storm broke the Aurora from its mooring, leaving a 10-man shore party stranded on land with minimal supplies. Nevertheless, knowing that Shackleton would die if the Aurora’s mission failed, these men journeyed inland and deployed the supplies as planned. As we now know, Shackleton never reached them.
The 10 men from the Aurora would remain stranded in Antarctica until rescue arrived in January 1917. By that time, three of them had perished — one as the result of scurvy; the other two simply disappeared (it is believed they may have fallen through thin ice).
Shackleton’s Final Years

Shackleton returned home to England in 1917, and found that the war he heard about just before leaving in 1914 had grown into the First World War. True to form, he immediately volunteered for the Army and is said to have repeatedly requested to be sent to the front lines in France. Due to his deteriorating health and increasing alcohol consumption, he ended up serving Britain in a diplomatic role in South America, and later as a cold-weather survival adviser for troops in Russia.
In 1919, Shackleton did what most would consider unthinkable given his prior experience — he organized another expedition to the Antarctic. This time he planned to circumnavigate the continent, map 2,000 miles of uncharted coastline, and investigate islands for possible mineral resources. After obtaining funding, a ship, and a crew for this mission, Shackleton was once again on South Georgia Island making final preparations for his voyage.
On January 5th, 1922, Sir Ernest Shackleton died suddenly of a heart attack. He was 47 years old. Alexander Macklin, one of the physicians from the Endurance who continued to serve Shackleton, wrote that the death was a result of “overstrain during a period of debility”.
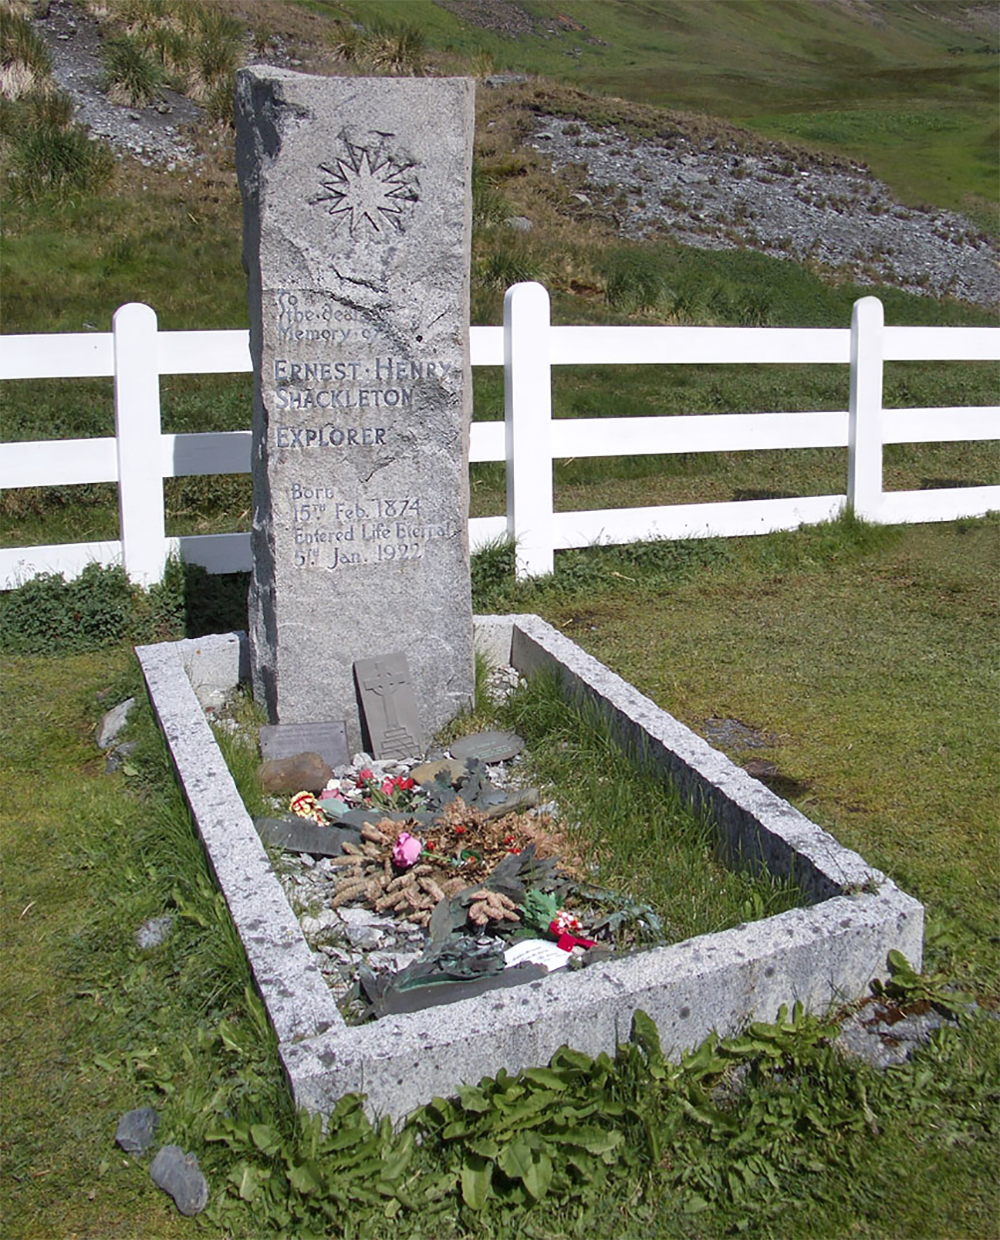
At the request of his widow, Shackleton was buried on a hillside on South Georgia Island. Macklin wrote, “I think this is as ‘the Boss’ would have had it himself, standing lonely on an island far from civilisation, surrounded by stormy tempestuous seas, and in the vicinity of one of his greatest exploits.”
The Expedition’s Completion
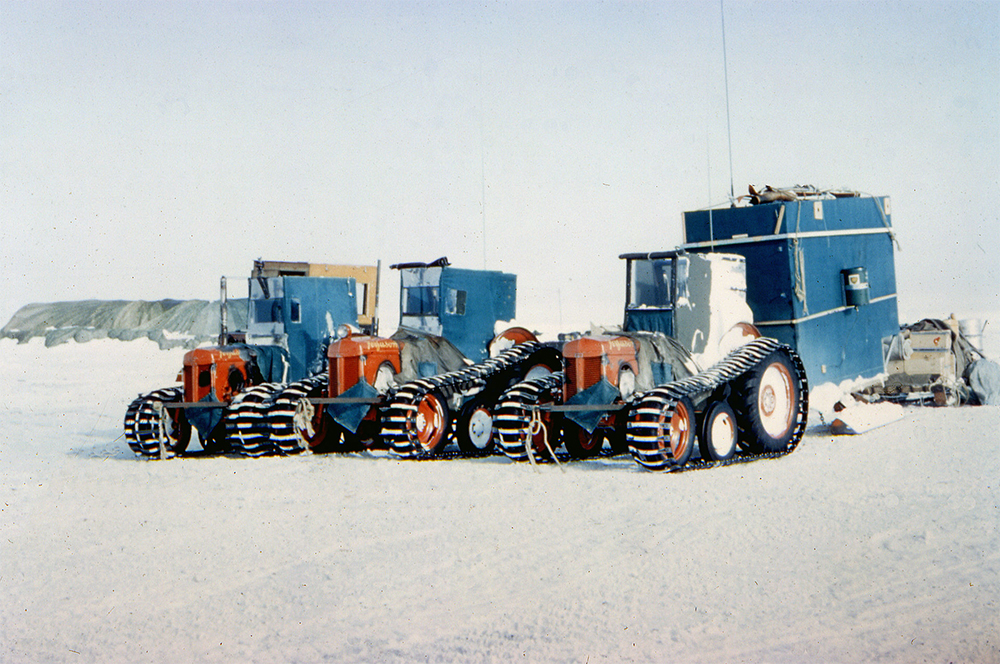
A successful trans-Antarctic expedition was not completed until 1958, 36 years after Shackleton’s death. The internationally-sponsored Commonwealth Trans-Antarctic Expedition was made possible by use of tracked snow vehicles, aerial reconnaissance, and logistical support from a permanent research station built at the South Pole. This feat would not be repeated until 1981.