Jacques Cartier, Conifer Tea, & Vitamin C

Today, modern medicine and nutrition have drastically improved our health compared to that of previous generations. For example, consider scurvy. This degenerative disease was a major problem for sailors and pioneers whose occupations restricted their diets. We now know scurvy is caused by a vitamin C deficiency, and can be cured by consuming citrus fruits such as lemons, limes, and oranges. But back in the 1500s, the disease was a mysterious and terrifying killer.

Scurvy vitamin C diet citrus pine needle conifer tea health fruit lemon 4

In the frigid winter of 1536, the crew of French explorer Jacques Cartier began to suffer from an unknown sickness. An account of the voyage tells the grisly tale: “some did lose all their strength, and could not stand on their feet, then did their legs swell, their sinews shrink as black as any coal. Others also had all their skins spotted with spots of blood of a purple colour: then did it ascend up to their ankles, knees, thighs, shoulders, arms and neck: their mouth became stinking, their gums so rotten that all the flesh did fall off, even to the roots of teeth, which did also almost fall out.”

Scurvy causes weakness, gum disease, and bleeding from the skin.

Scurvy causes weakness, gum disease, and bleeding from the skin. Photo: Wikipedia

Luckily for Cartier and his crew, their ship reached the Iriquois village of Stadacona — a region we know today as Quebec City, Canada. One native man, Domagaia, introduced them to a medicinal beverage made from a tree they would come to call arborvitae, or the Tree of Life.

The men drank the decoction, and were almost immediately cured. The account states, “as soon as they had drunk it they felt better, which must clearly be ascribed to miraculous causes; for after drinking it two or three times they recovered health and strength and were cured of all the diseases they had ever had … When this became known, there was such a press for the medicine that they almost killed each other to have it first.”

Scurvy vitamin C diet citrus pine needle conifer tea health 2

The white cedar or eastern arborvitae is rich in vitamin C and known for its medicinal properties.

Today, the exact species of tree Cartier's crew called the arborvitae is not known, but it was almost certainly some form of evergreen conifer — likely either the white pine or the eastern white cedar. However, we now understand why this beverage cured the men of scurvy. Conifer tea, made by mixing needles and bark into hot water, is extremely rich in vitamin C and other dietary nutrients. A study from the Journal of Ethnobiology and Ethnomedicine concluded:

Scurvy vitamin C diet citrus pine needle conifer tea health 3

Researchers suspect the white pine may have been the conifer known as arborvitae.

“When food was short and the winter most severe, the candidate trees of life in eastern Canada provided a source of vitamins, arginine, proline, other conditionally and essential amino acids, antioxidants, and other biofactors, which aided in the recovery from of scurvy.”

Vitamin C is also a necessary part of your immune system, and consuming it may reduce the duration of illnesses like the common cold. So, next time you're out in the woods this winter, keep conifer tea in mind so you don't end up like Cartier's weak and toothless crew. (Note: Study the health effects of any wild plant before consuming it. Some types of evergreen conifers can be toxic, and others can harm pregnant women.)


New: SureFire EDCL2-T 1,200-Lumen Flashlight

How much is too much? It's a question that should be considered in all aspects of emergency prep, from the amount of weight in your backpack to the number of extra magazines you carry for your weapons. In the realm of flashlights, lumen output is the key variable to consider, since it affects both nighttime visibility and battery life. As you'd expect, more of one means less of the other, so picking a light with the ideal lumen output for your needs is essential.

SureFire offers lights with a wide range of output levels for different applications. (Pictured: SureFire Scout light)

SureFire has announced a new every-day carry (EDC) flashlight that pushes the boundaries of lumen output for a compact pocket-sized flashlight. The SureFire EDCL2-T, also known as the Every Day Carry Light 2, is an upgraded version of the company's well-known EB2 Backup light. While the EB2 produces 600 lumens from two CR123A batteries, the new EDCL2-T pumps out an incredible 1,200 lumens from the same power source.

SureFire EDCL2-T flashlight edc tool tactical light lumen 2

Some may claim that 1,200 lumens is too much for a light this size, but that all depends on your needs. If you're outdoors in a pitch-black wide-open space, this output will help you clearly illuminate faraway objects. It's also useful in self-defense situations for blinding attackers — we can attest that getting flashed head-on by a light this bright is sure to be disorienting. However, this power comes at a price, as the maximum claimed run time at full output is 1 hour.

SureFire EDCL2-T flashlight edc tool tactical light lumen 1

The SureFire EDCL2-T uses the company's Total Internal Reflection (TIR) lens design, which is said to focus the light for a versatile blend of long throw distance and broad situational awareness. This light also offers a low-output mode of 5 lumens for map-reading and other close-up work. Run time in low mode is 60 hours.

SureFire EDCL2-T flashlight edc tool tactical light lumen 4

The EDCL2-T is constructed from hard-anodized aluminum with a grippy knurled texture, and offers a two-way clip that allows the user to carry the light bezel-up or -down. The last notable feature on this light is its tail cap switch. Unlike the EB2, it doesn't click in for constant-on — instead, it works as follows:

  • Slight press – momentary 5-lumen low output
  • Full press – momentary 1,200-lumen high output
  • Twist – constant on

SureFire EDCL2-T flashlight edc tool tactical light lumen 3

The new SureFire EDCL2-T is currently available at an MSRP of $179. For more information on this high-output EDC flashlight, go to SureFire.com.


Curated Offers: 4 EDC Knives To Cover Your Butt In Any Situation

Knives are incredibly handy instruments, ones that we use for a huge number of tasks. And while there are plenty of knives created for specific purposes, the everyday carry knife is a must-have—a necessity. Enter Tekto. Their EDC knives are made from stainless steel, and are light and easy to carry, yet strong enough for most tasks. Take a look here some of Tekto's top EDC knives.

The Cutter

edc-knives-the-cutter

A short but sharp knife, the Cutter clocks in at just .22 lbs (100 g), and can easily be wielded via its spring-loaded release. This 1.9 in blade is small enough to fit easily inside a coat or pants pocket. It even has a hole cut out for carry on a key-chain, giving it increased portability.

Buy Now: An amazing deal for just $59.99. That's a savings of 40%. Recoil readers can save an additional 15% with coupon code SAVE15.

The Rapid

edc-knives-the-rapid

The Rapid is always ready to go, just one easy slide away from danger. This 0.7 lb blade features a serrated edge, perfect for quick cuts, not to mention retaining its cutting edge much longer than a smooth blade. The rapid also boasts a hip clip and non-slip handle, decreasing the amount of time needed to spend fidgeting around for your blade.

Buy Now: A quick deal for only $84.99, a savings of 43%. Recoil readers can save an additional 15% with coupon code SAVE15.

The Takt

edc-knives-the-takt

Looking for a knife that can be both strong and durable, not to mention, fast? Then the Takt is the knife you should be swinging for. Measuring in at just under a pound in weight and a 3.93″ blade length, the Takt is a knife-owner's dream. It comes well designed with a serrated edge, hip clip, and window breaker on the bottom end for any emergency situations. The Takt is a versatile combo of strength and reliability, making it a strong choice for everyday carry.

Buy Now: A solid deal that saves you 43%. Available now for $89.99. Recoil readers can save an additional 15% with coupon code SAVE15.

The Spry

edc-knives-the-spry

How do you make a knife twice as cool? You put two cutting edges on it. The Spry is a visual pleasure, but a situational treasure. Along with its double-edge, this knife features a hip clip, window breaker, and supportive grip handle, allowing you to maneuver seamlessly through any treachery. Keep the Spry with you at all times and you'll have nothing to worry about.

Buy Now: Pick up this versatile knife for just $89.99 (43% off). Recoil readers can save an additional 15% with coupon code SAVE15.


Video: Overnight Camping with a Mystery Get Home Bag

We've often said that survival is primarily about what you know, not what you have. Knowledge weighs nothing, and it's the key factor that will allow you to think your way through challenges and overcome them. Quality gear can obviously give you an advantage and make the work easier, but with the right knowledge you should be able to improvise or scavenge most items.

Bug out get home bag backpack survival gear camping 3

We recently came across a YouTube video by an outdoorsman named Trip Smith (formerly SailingandSuch), and this video posed a thought-provoking survival challenge. You've probably got a carefully-prepared bug-out bag or get home bag in your closet at home, one stowed in your vehicle, or one at your workplace. You might even have all three. But how would your odds of survival change if you needed to head off the grid with a mystery backpack full of unknown gear?

Check out Trip Smith's 39-minute video below, and see how he fares with his friend's pack.

This is an interesting challenge that can prepare you for a number of potential scenarios:

  • Dealing with lost or inaccessible gear — how would your survival plan change if you didn't have access to your own backpack?
  • Utilizing scavenged items — how prepared are you to work with gear you found abandoned by someone else, especially items you haven't trained with?
  • Surviving with friends —  how ready would you be to integrate your existing gear with unfamiliar equipment carried by group members?
Bug out get home bag backpack survival gear camping 4

Borrowing a friend's meal kit can expose you to new packable foods you might enjoy.

Note: Any time you attempt a survival challenge, make sure you have safeguards and an escape plan in place. If you find the challenge too difficult to overcome, you should have several contingency plans to make it back to safety or call for help. You don't want this fun learning experience to turn into a real life-and-death situation.

In this case, Trip had to improvise due to the lack of an insulated under-quilt.

In this case, Trip had to improvise hammock insulation due to the lack of an under-quilt.

Surviving “blind” with a mystery get home bag will also help you streamline your own survival kit. You might find a superior alternative to the gear you carry, or you may find a type of gear that's totally absent from your own pack. By swapping packs with a friend, you can also test the viability of their gear, and give them an outside perspective on items you'd suggest.

Bug out get home bag backpack survival gear camping 5

So, next time you go out into the woods for a camping trip, it may be helpful if you agree to switch packs with a trusted buddy. You'll certainly learn some things — hopefully not that one of you is woefully underprepared. But even if that's the case, you'll improve your improvisational skills.

For more videos, check out Trip Smith's YouTube channel.


Last Man Projects: DIY Power Pack Upgrades

A few weeks ago, we posted a guest article submission from Brandon Barton, the man behind an emergency preparedness Facebook page known as Last Man Projects. With a budget of just $200, Brandon constructed his own DIY emergency power pack for charging electronics in remote areas. Off-the-shelf products exist for this purpose, but Brandon saved hundreds of dollars and got more of the features he wanted by creating his own solution — click here to read the original article if you haven't already.

Last Man Projects emergency vehicle power battery electronics tech 7

Brandon's power pack was built to sit in the back of his '78 Ford Bronco bug-out truck project, Lucille. At the end of that article, we mentioned that Brandon planned to integrate the battery pack into a solar panel on his truck so it will always remain charged and ready to use. This weekend, he posted an update that showed how he did just that.

Last Man Projects Ford Bronco bug out truck vehicle solar battery tech 6

In a Facebook post detailing phase two of the build, Brandon wrote:

To finish up this project, I wanted to mount a solar panel to Lucille's roof rack with a charge controller that monitored the battery and kept it topped off. That way it would always be ready to use; I could take off in Lucille for weekend of truck camping and have power ready to go, or remove the pack from my truck during short-term power outages when firing up the generator isn't necessary.

Last Man Projects Ford Bronco bug out truck vehicle solar battery tech 2

In keeping with the intent of the project, I wanted it to be as easy and cost effective as possible to encourage the most people to build one. This portion of the project… is a little more involved than simply hooking up prefab components as I did with the battery pack itself. It's not hard though. All you really need is a pair of wire strippers.

Last Man Projects Ford Bronco bug out truck vehicle solar battery tech 3

Here's a list of the parts and costs associated with rigging the $200 DIY power pack to a solar charger:

  • ECO-WORTHY 100 Watts 12 Volts Monocrystalline Solar Panel – $114
  • ALLPOWERS 20A Solar Charger Controller Solar Panel Battery Intelligent Regulator with USB Port Display 12V/24V – $20
    Last Man Projects Ford Bronco bug out truck vehicle solar battery tech 4
  • Sun YOBA 5 Pairs of MC4 Male/ Female Solar Panel Cable Connectors – $8
  • 30′ Bulk Solar cable Black #10 Copper wire 19 strand 1000VDC with Tough XLPE insulation, UL Listed – $30
  • Assorted mounting hardware specific to your application

Last Man Projects Ford Bronco bug out truck vehicle solar battery tech 5

Brandon goes into much more detail about why he chose these items and how he assembled everything in a Facebook post — click here to read more. He also leaves his readers with some wise advice: Always be safe! Don't try anything that's beyond your skill level. If you have a question, research it online, ask a professional, or get group feed back. Have fun and send pics of your applications!

Also, ensure your battery setup is properly-ventilated if you're storing it inside a vehicle. Repeated charge and discharge cycles can lead to the release of hazardous gases into the sealed interior, so be cautious of this. Brandon says his Bronco's cab is far from air-tight and he takes relevant precautions, so it's not an issue for this application, but it would be on a newer vehicle.

For more prepper projects, survival tips, post-apocalyptic artwork, and more, be sure to follow Last Man Projects on Facebook.


3MR Event Recap Part 2: Wild Edibles, Meat, and Medicine

Last weekend, we shared Part 1 of our 3MR event recap — check it out if you haven't already. Today, we'll continue to share some of the lessons learned from the Fall 2017 Modern Mountain Man Rendezvous. These include foraging for edible plants, skinning and cleaning small game animals, and trauma care for wounds or broken bones in the backcountry.

Mountain Man Rendezvous 3MR October 2017 group photo

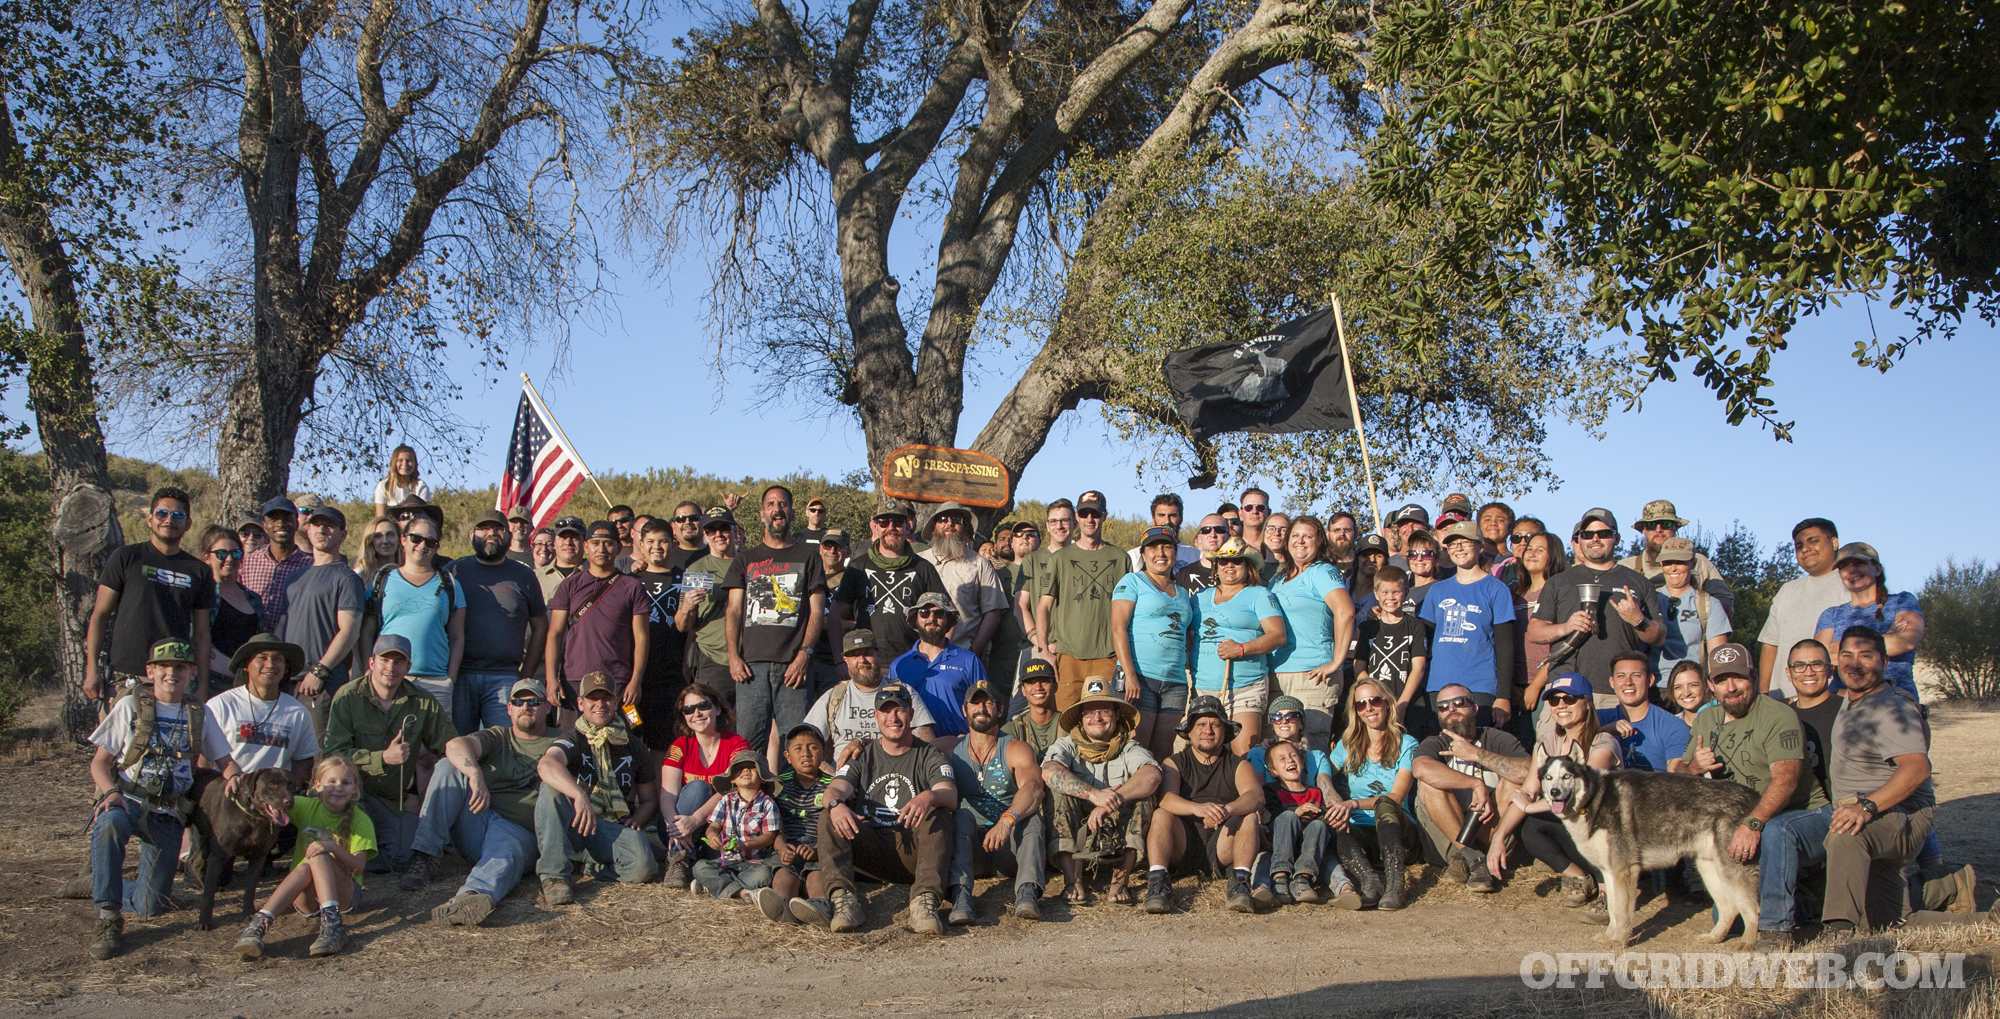
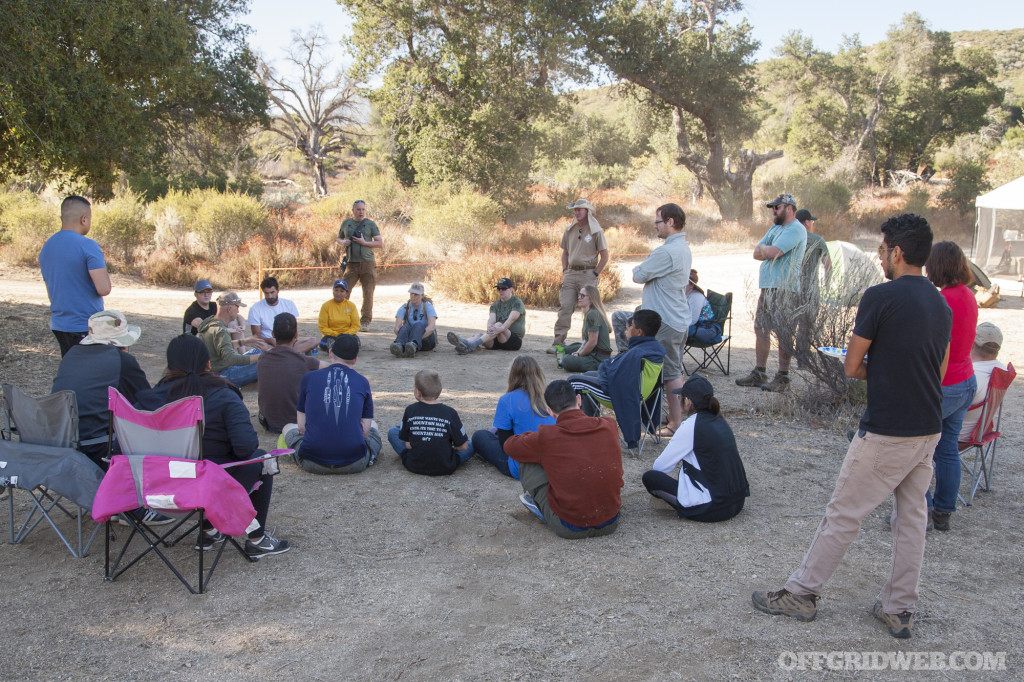
We had a great time at the event, and really appreciated the friendly and informal atmosphere. You don't have to be a hardcore survivalist or have military experience to enjoy these courses, even though many of the instructors and attendees fell into these categories. Whole families came out and had fun learning, training, and chatting with like-minded folks around the campfire. If you've got a spouse or kids who are just starting to get into the outdoors, an event like this can be a wonderful bonding experience.

3MR survival training event 2017 fire water food tools 18

Without further ado, here's part two of our recap of the 3MR courses.

Wild Edibles

Taught by Todd (a SERE instructor)

Todd returned to teach the first of a pair of courses on finding food in the wilderness. In this part of southern California, resources are more scarce than they might be in a lush forest, but edible items can still be found if you know where to look.

3MR survival training event 2017 fire water food tools 24

First, Todd went over the Universal Edibility Test. If you're not familiar with this technique, check out our article to learn the step-by-step process of safely testing suspicious wild edibles.

In general, he said that the edibility of berries can be estimated based on their color. Obviously, this is not a hard and fast rule, and there are exceptions. Don't take these sayings as gospel and chow down on some deadly nightshade or pokeberries solely based on color.

  • Green, white, or grey = stay away
  • Black or blue = good for you (probably)
  • Red = about a 50/50 chance of being poisonous or edible, so be very careful

Todd also emphasized the importance of varying your diet — even if you find a perfect patch of juicy blackberries, you'll soon regret it if that's the only type of food you consume.

Walking around the campsite, he pointed out various edible plants. Sugar bush, pictured above left, is a green plant whose ironically bitter leaves are high in vitamin C.

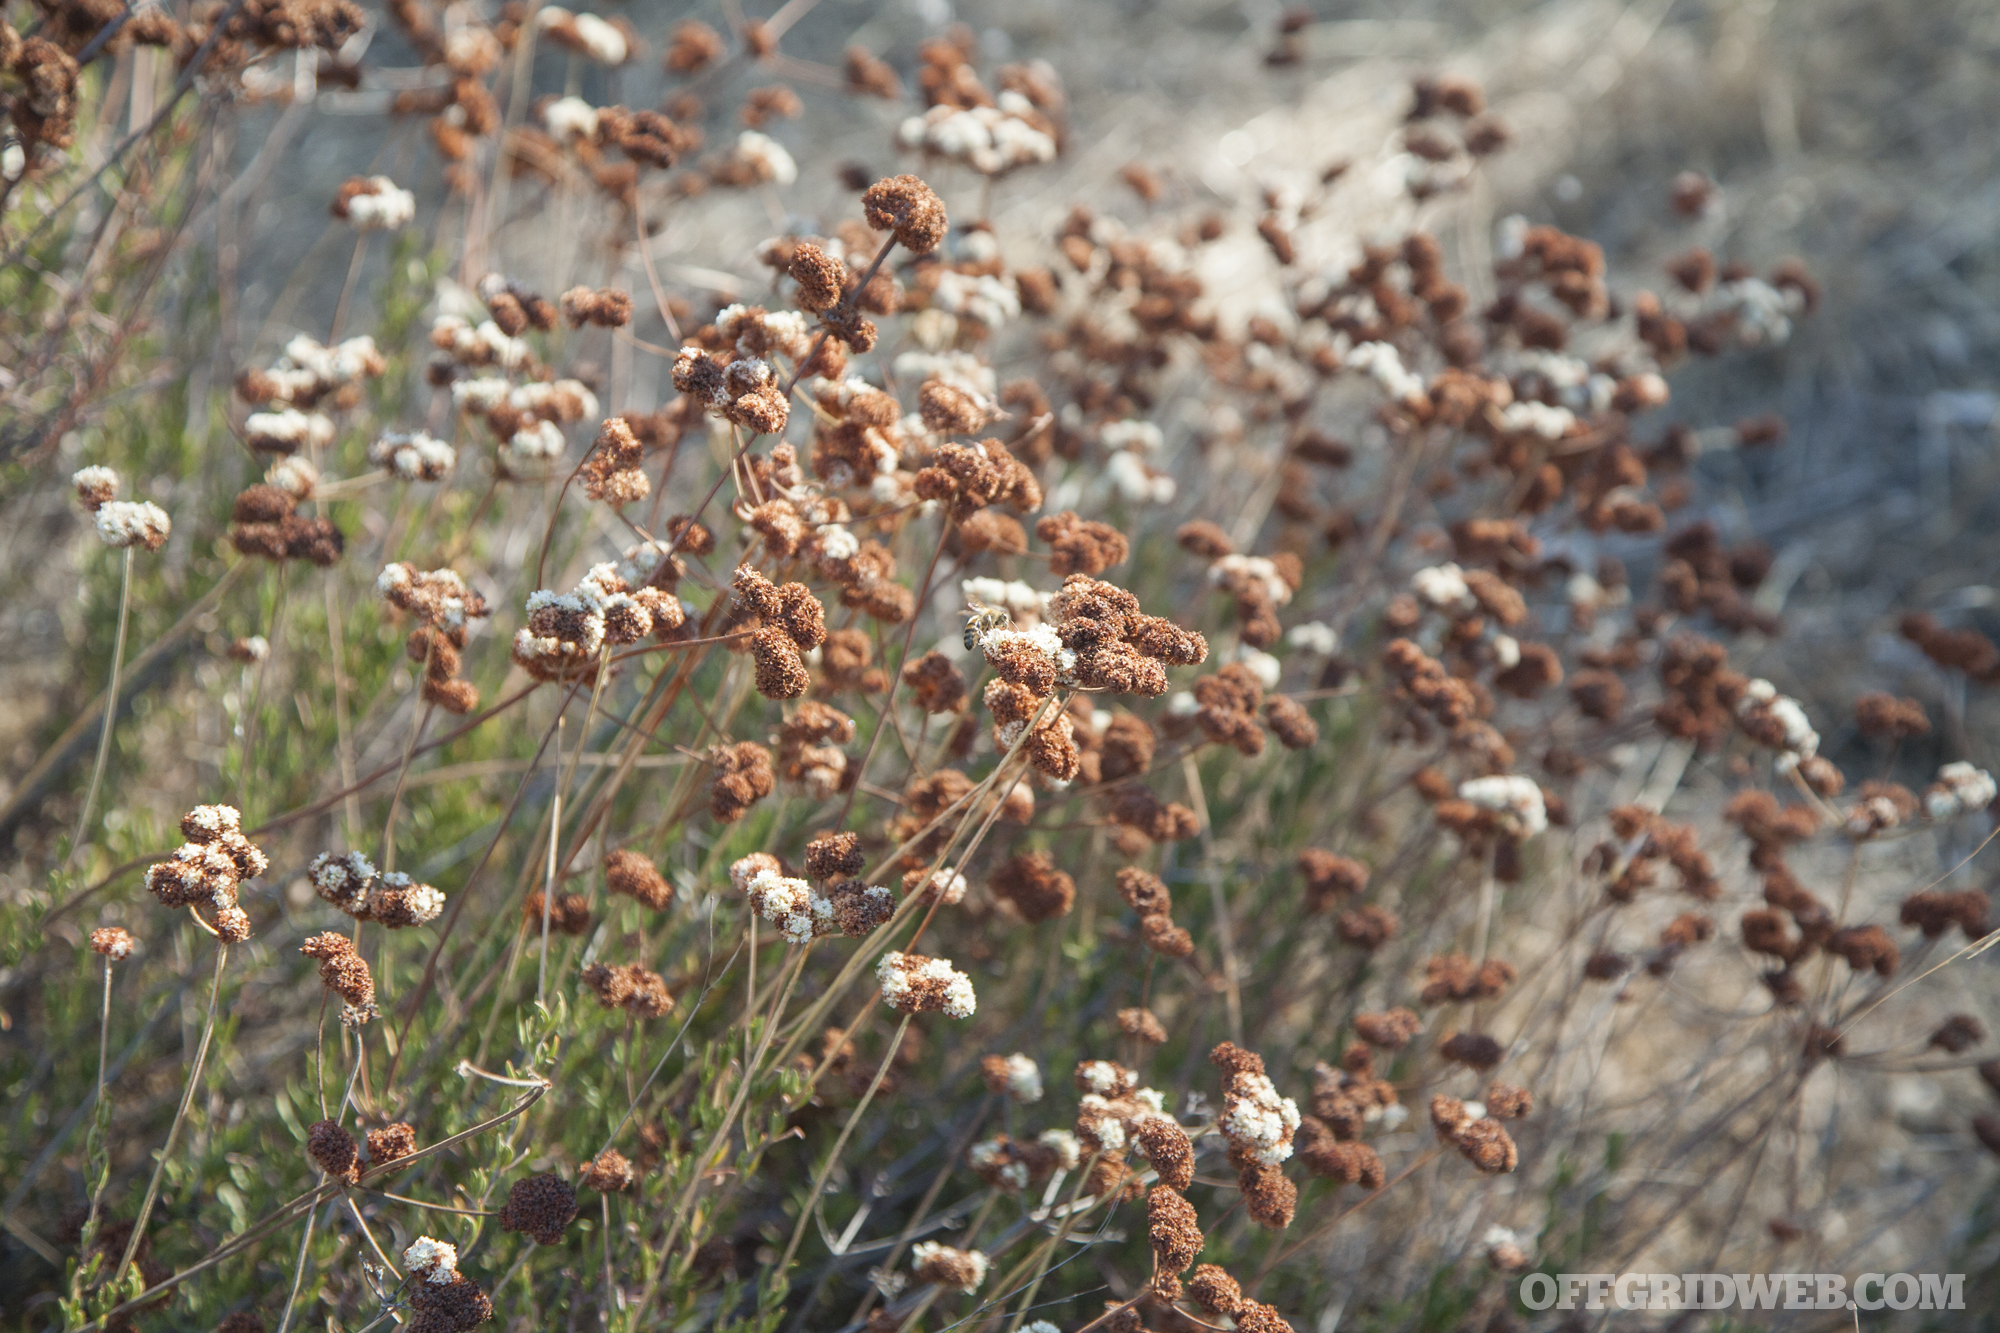
Wild buckwheat, pictured above right, was plentiful in the area. When green, its leaves and stems can be eaten raw; the seeds and roots can be ground into flour and made into cakes. Coastal oak trees provide acorns, though these must be processed to remove the high levels of tannic acid within.

3MR survival training event 2017 fire water food tools 69

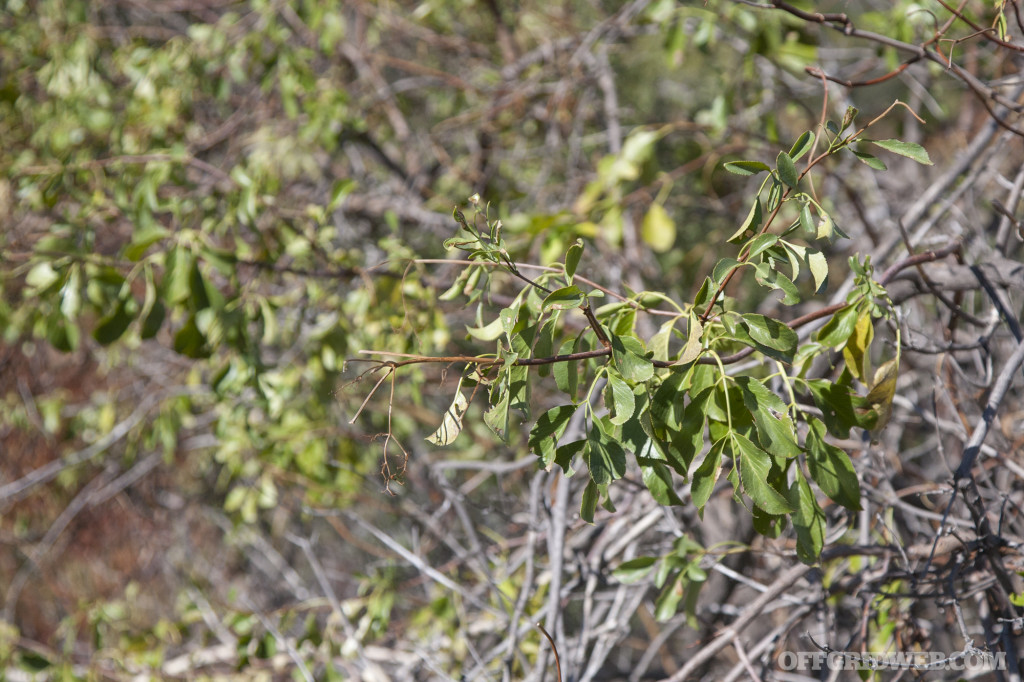
Other edibles in the area include squaw potatoes, wild onions, our Lord's candle (a type of yucca), mustard grass, and elderberries. The elderberry plant, pictured above without berries, contains potentially dangerous levels of cyanidin glycoside. While you shouldn't eat the leaves or stems, the ripe black berries can be eaten safely (cooking them is recommended).

3MR survival training event 2017 fire water food tools 27

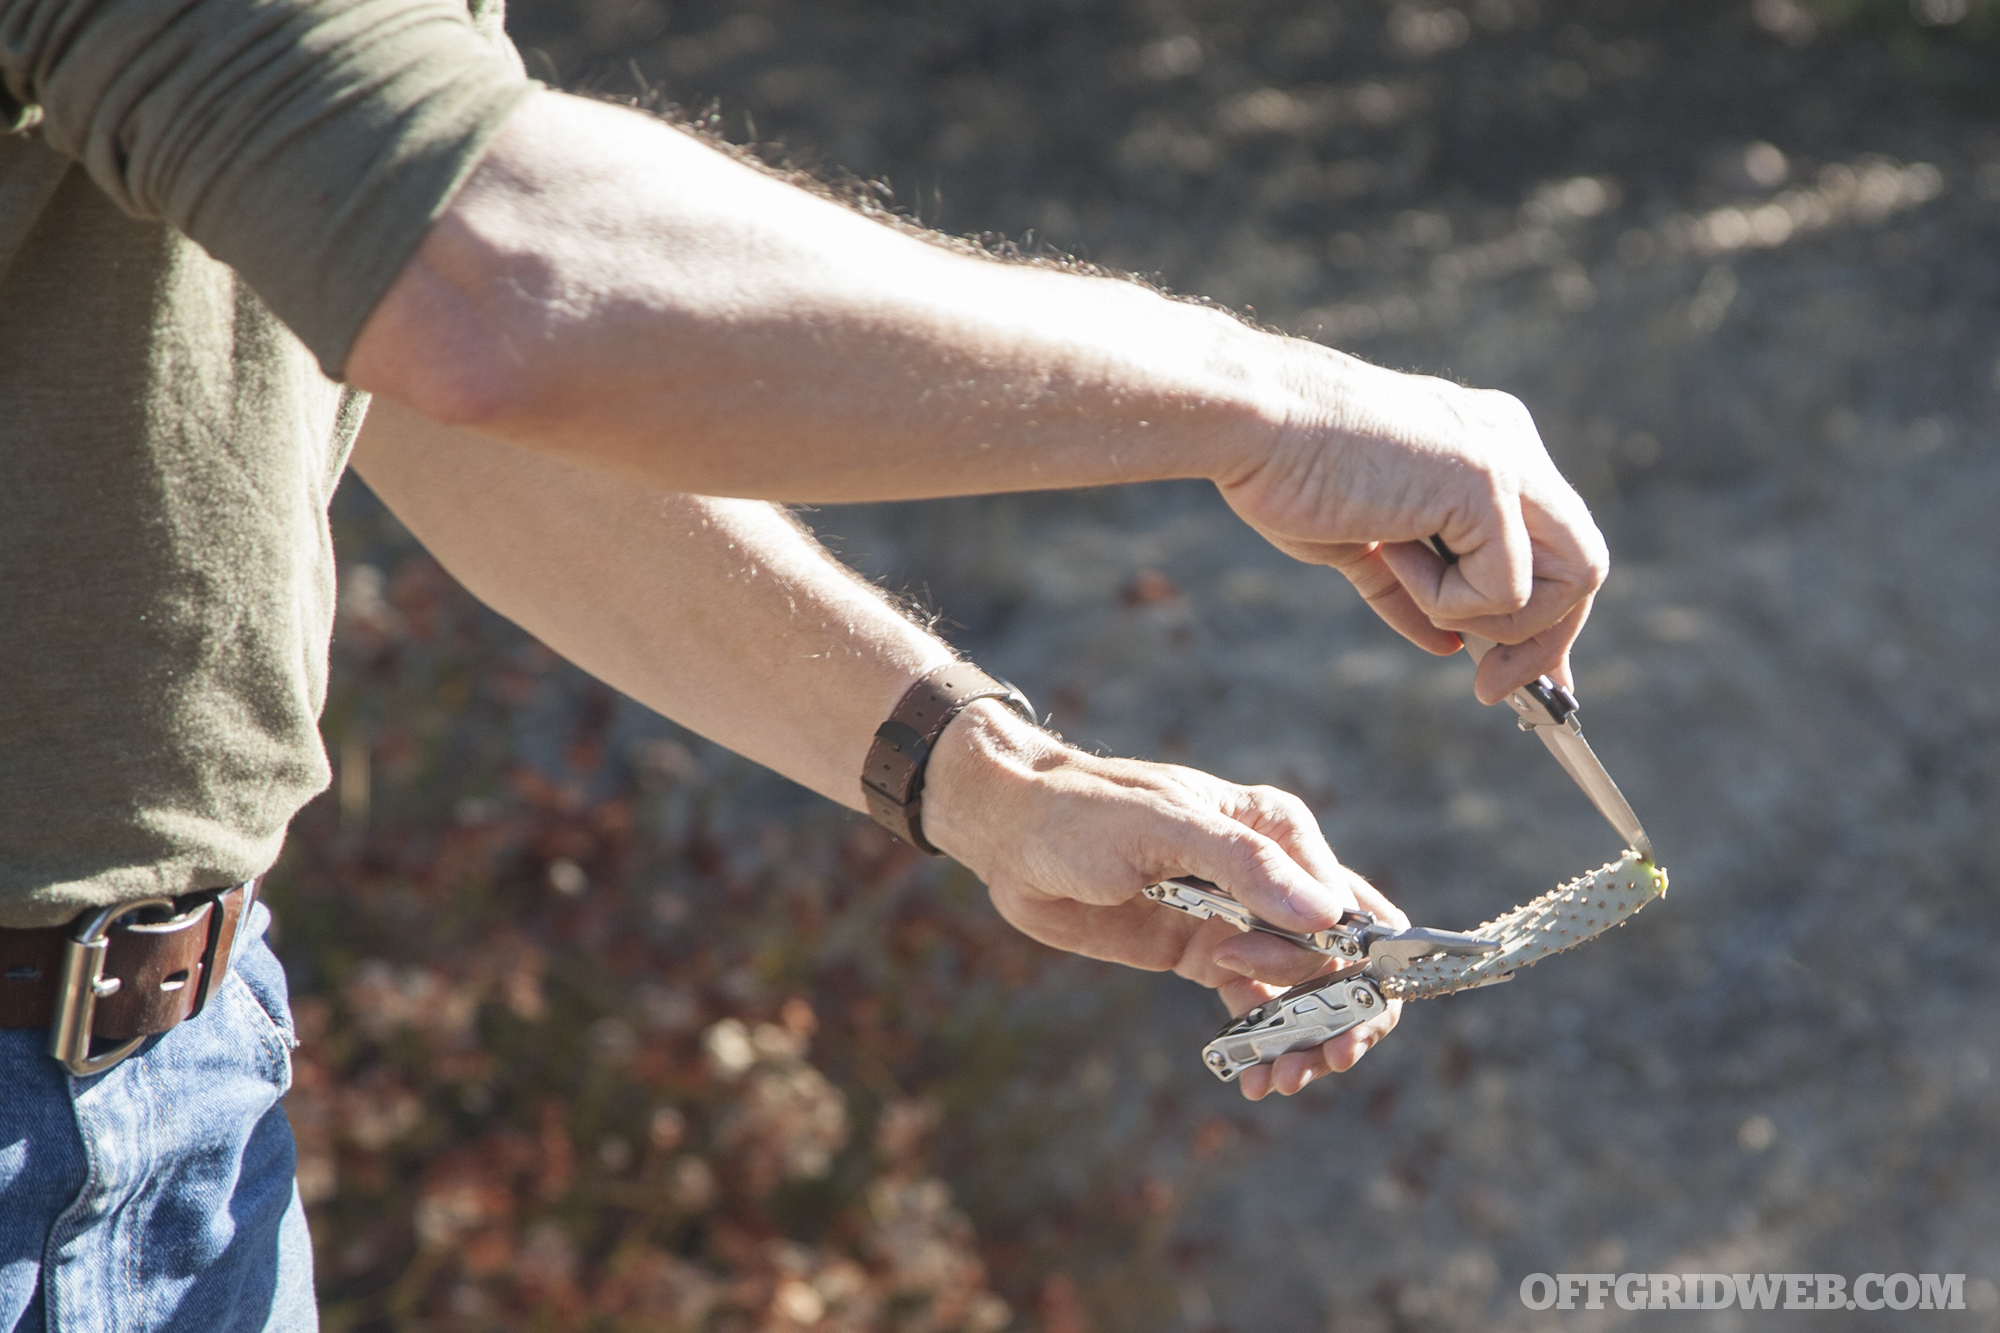
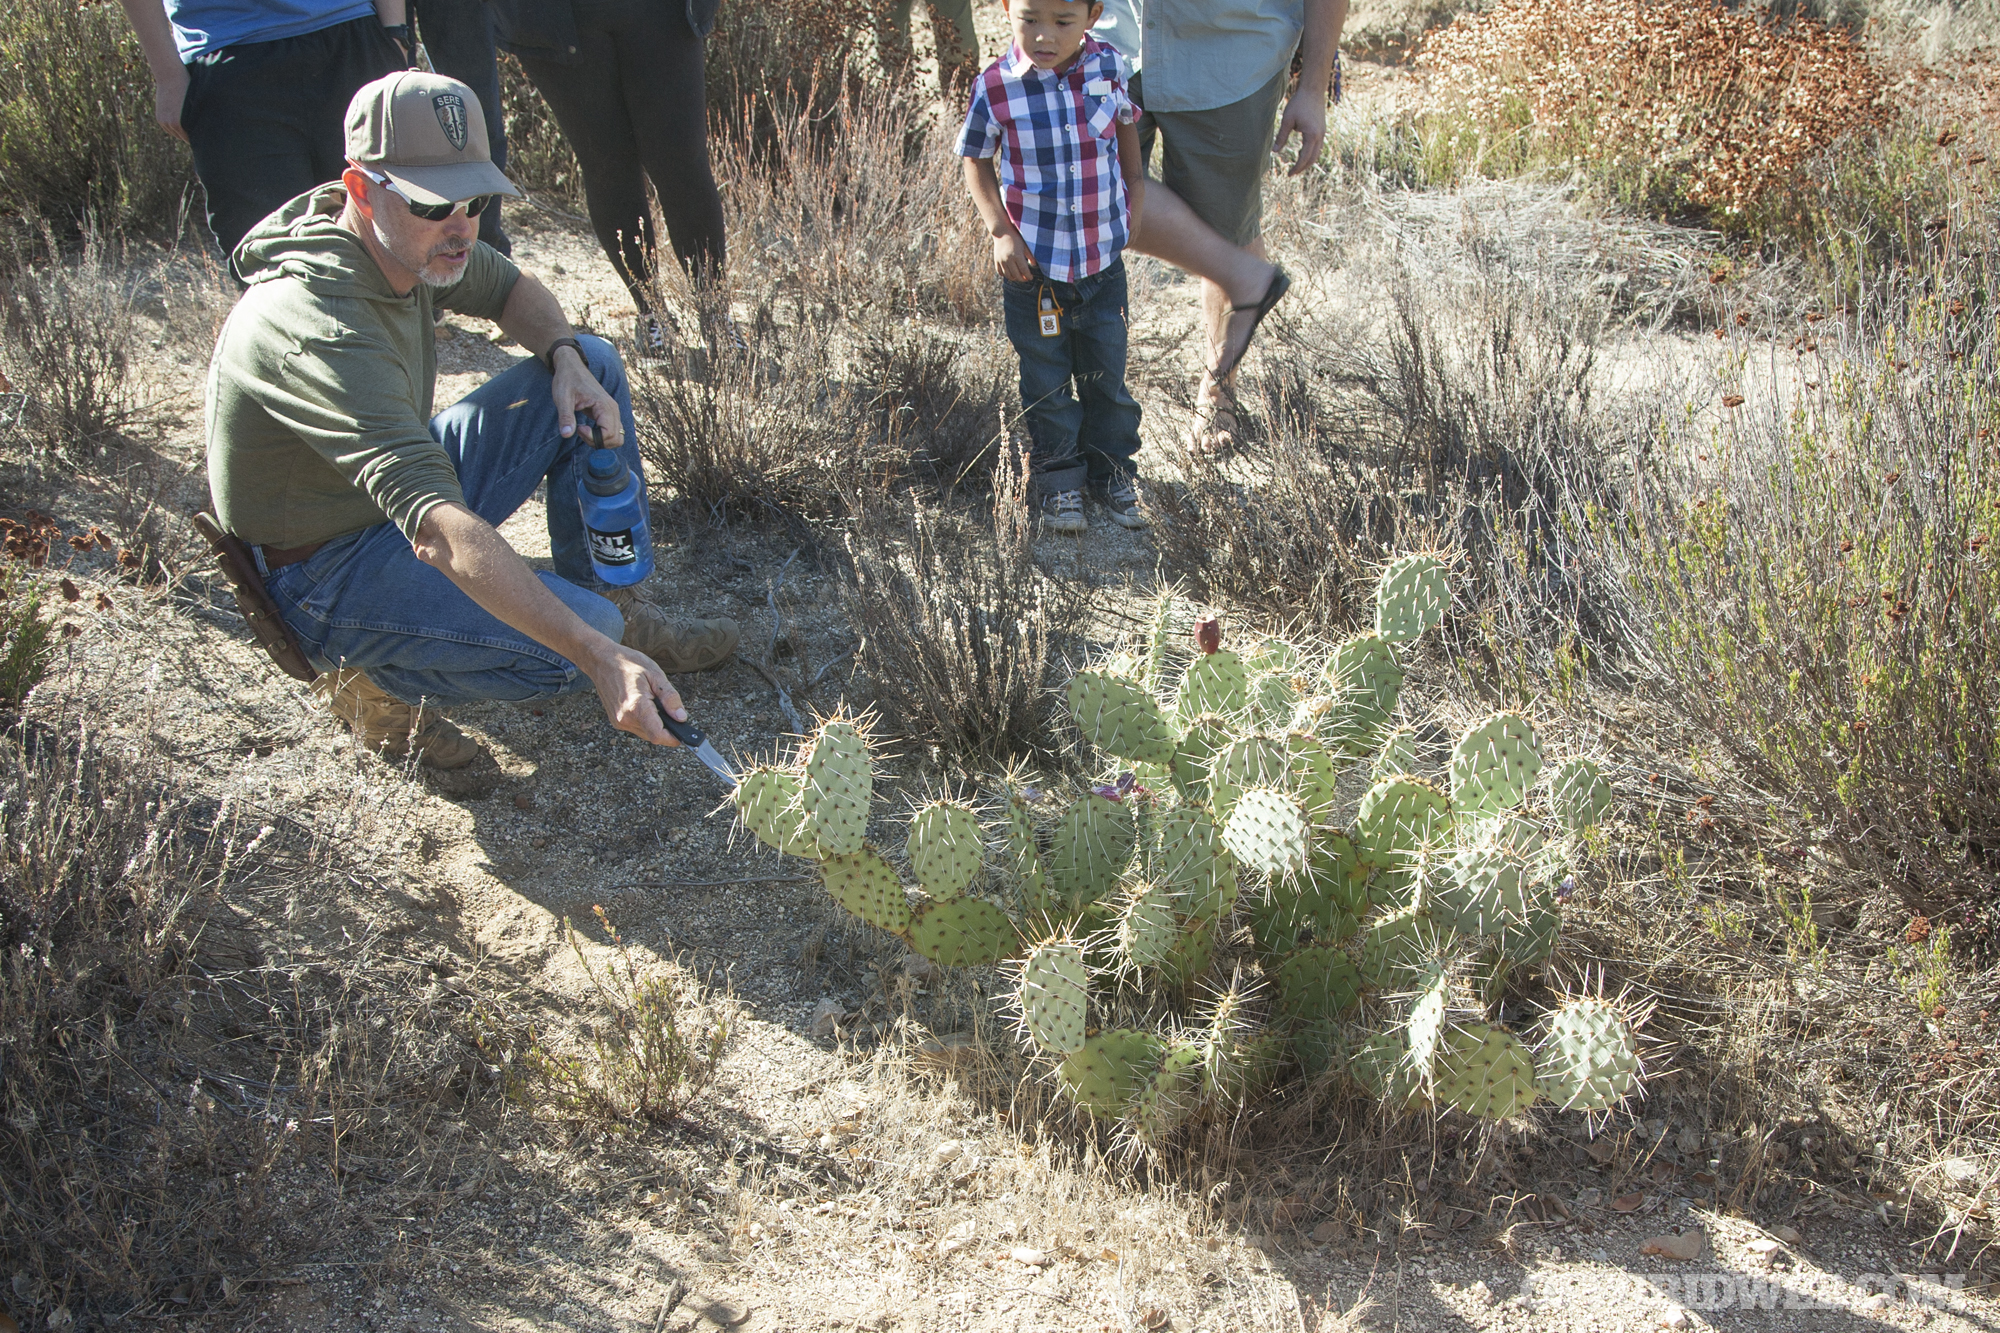
Next, Todd examined a plentiful resource in the area: cacti. The beavertail cactus (above) is one variety of prickly pear. Its flesh can be cooked and eaten after carefully scraping off all the tiny needle-like spines — this green part of the prickly pear cactus is known as nopal in Mexican cuisine.

3MR survival training event 2017 fire water food tools 28

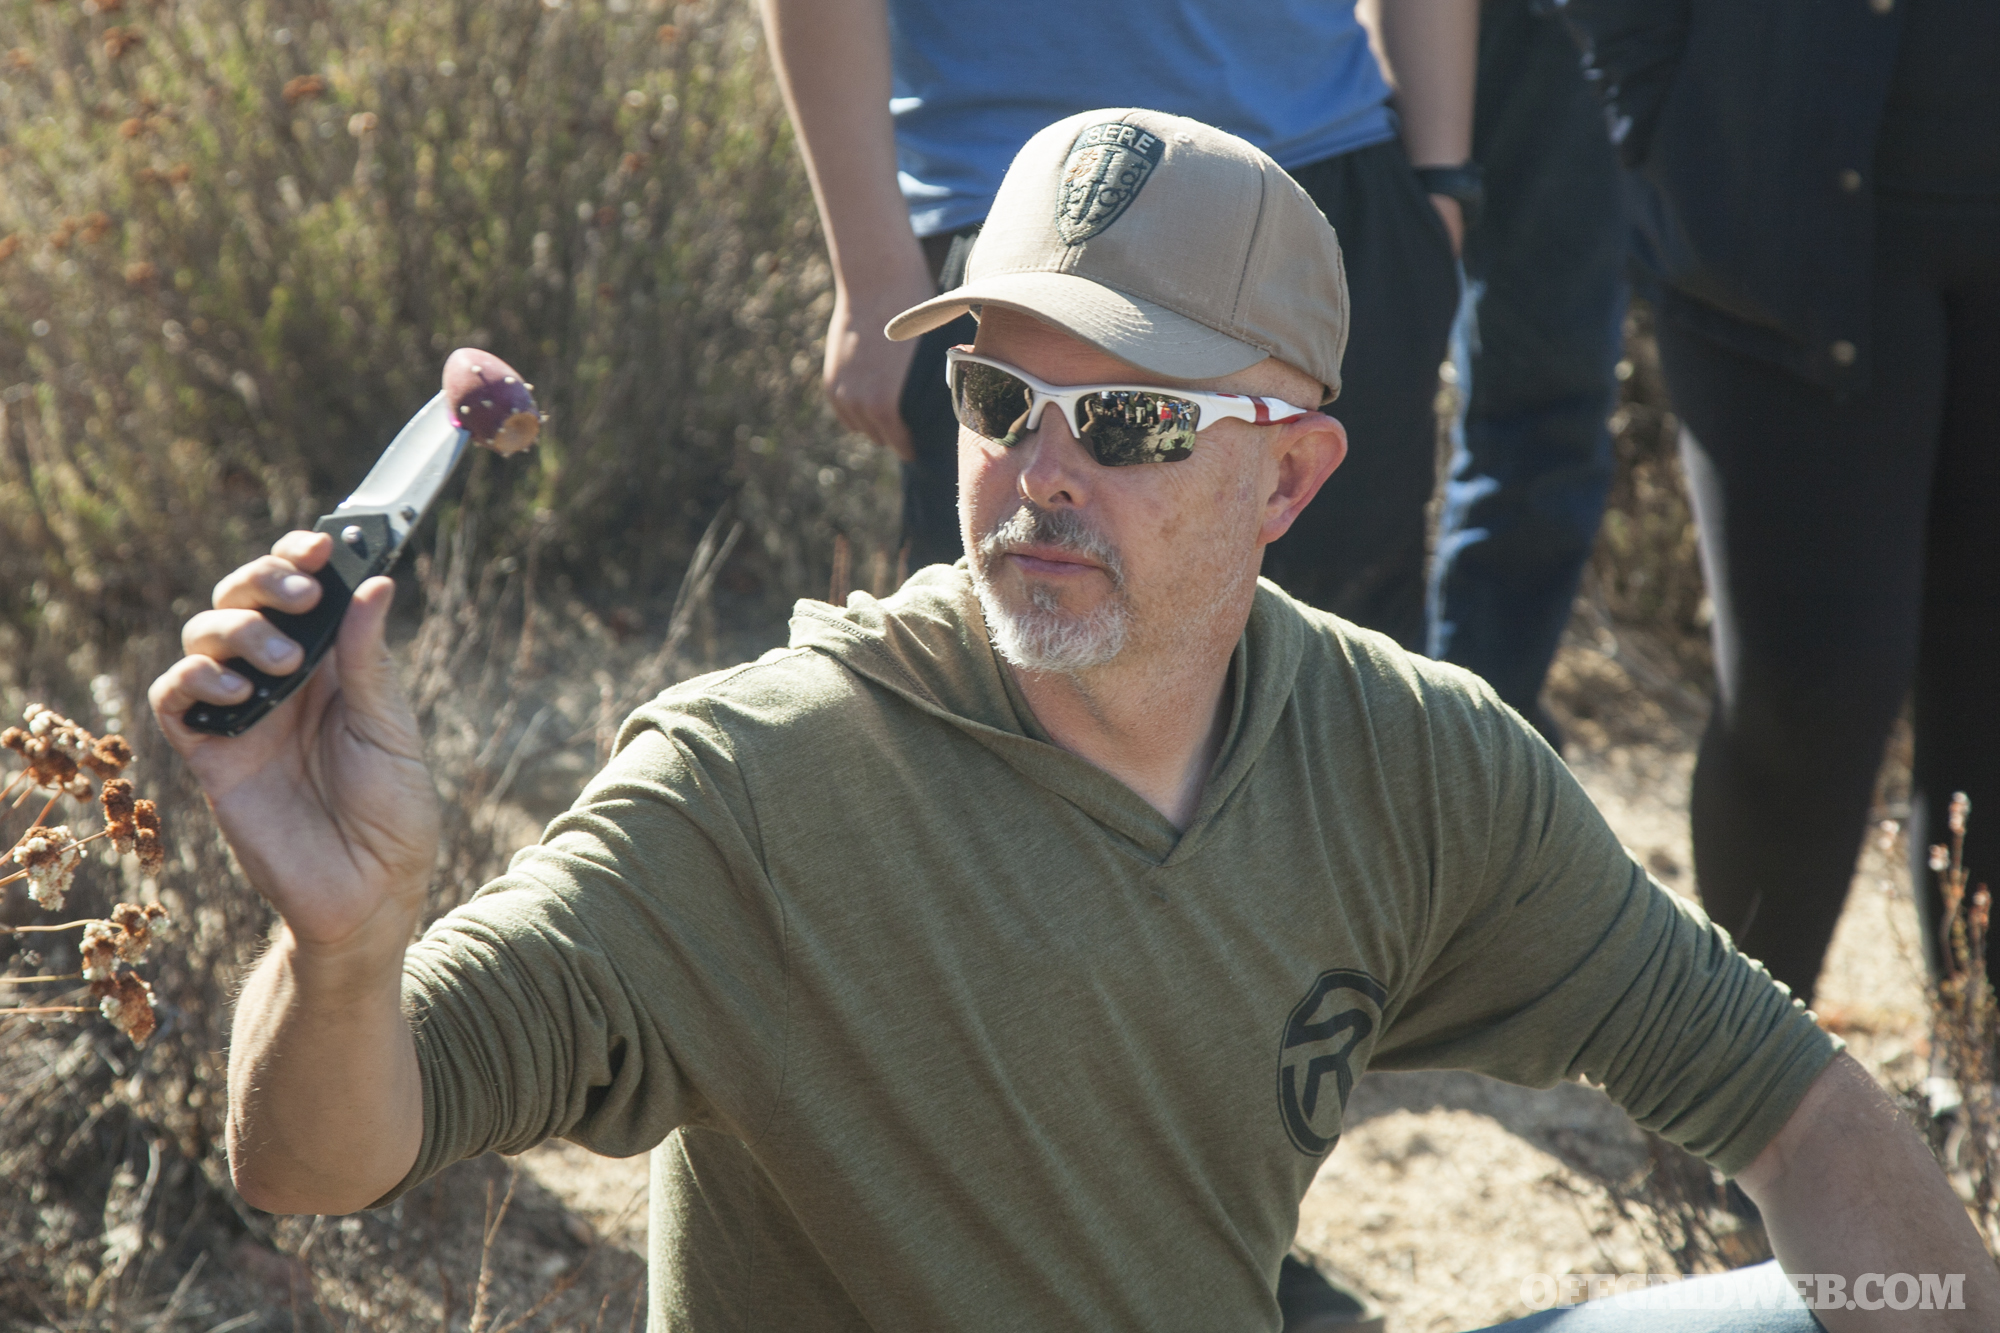
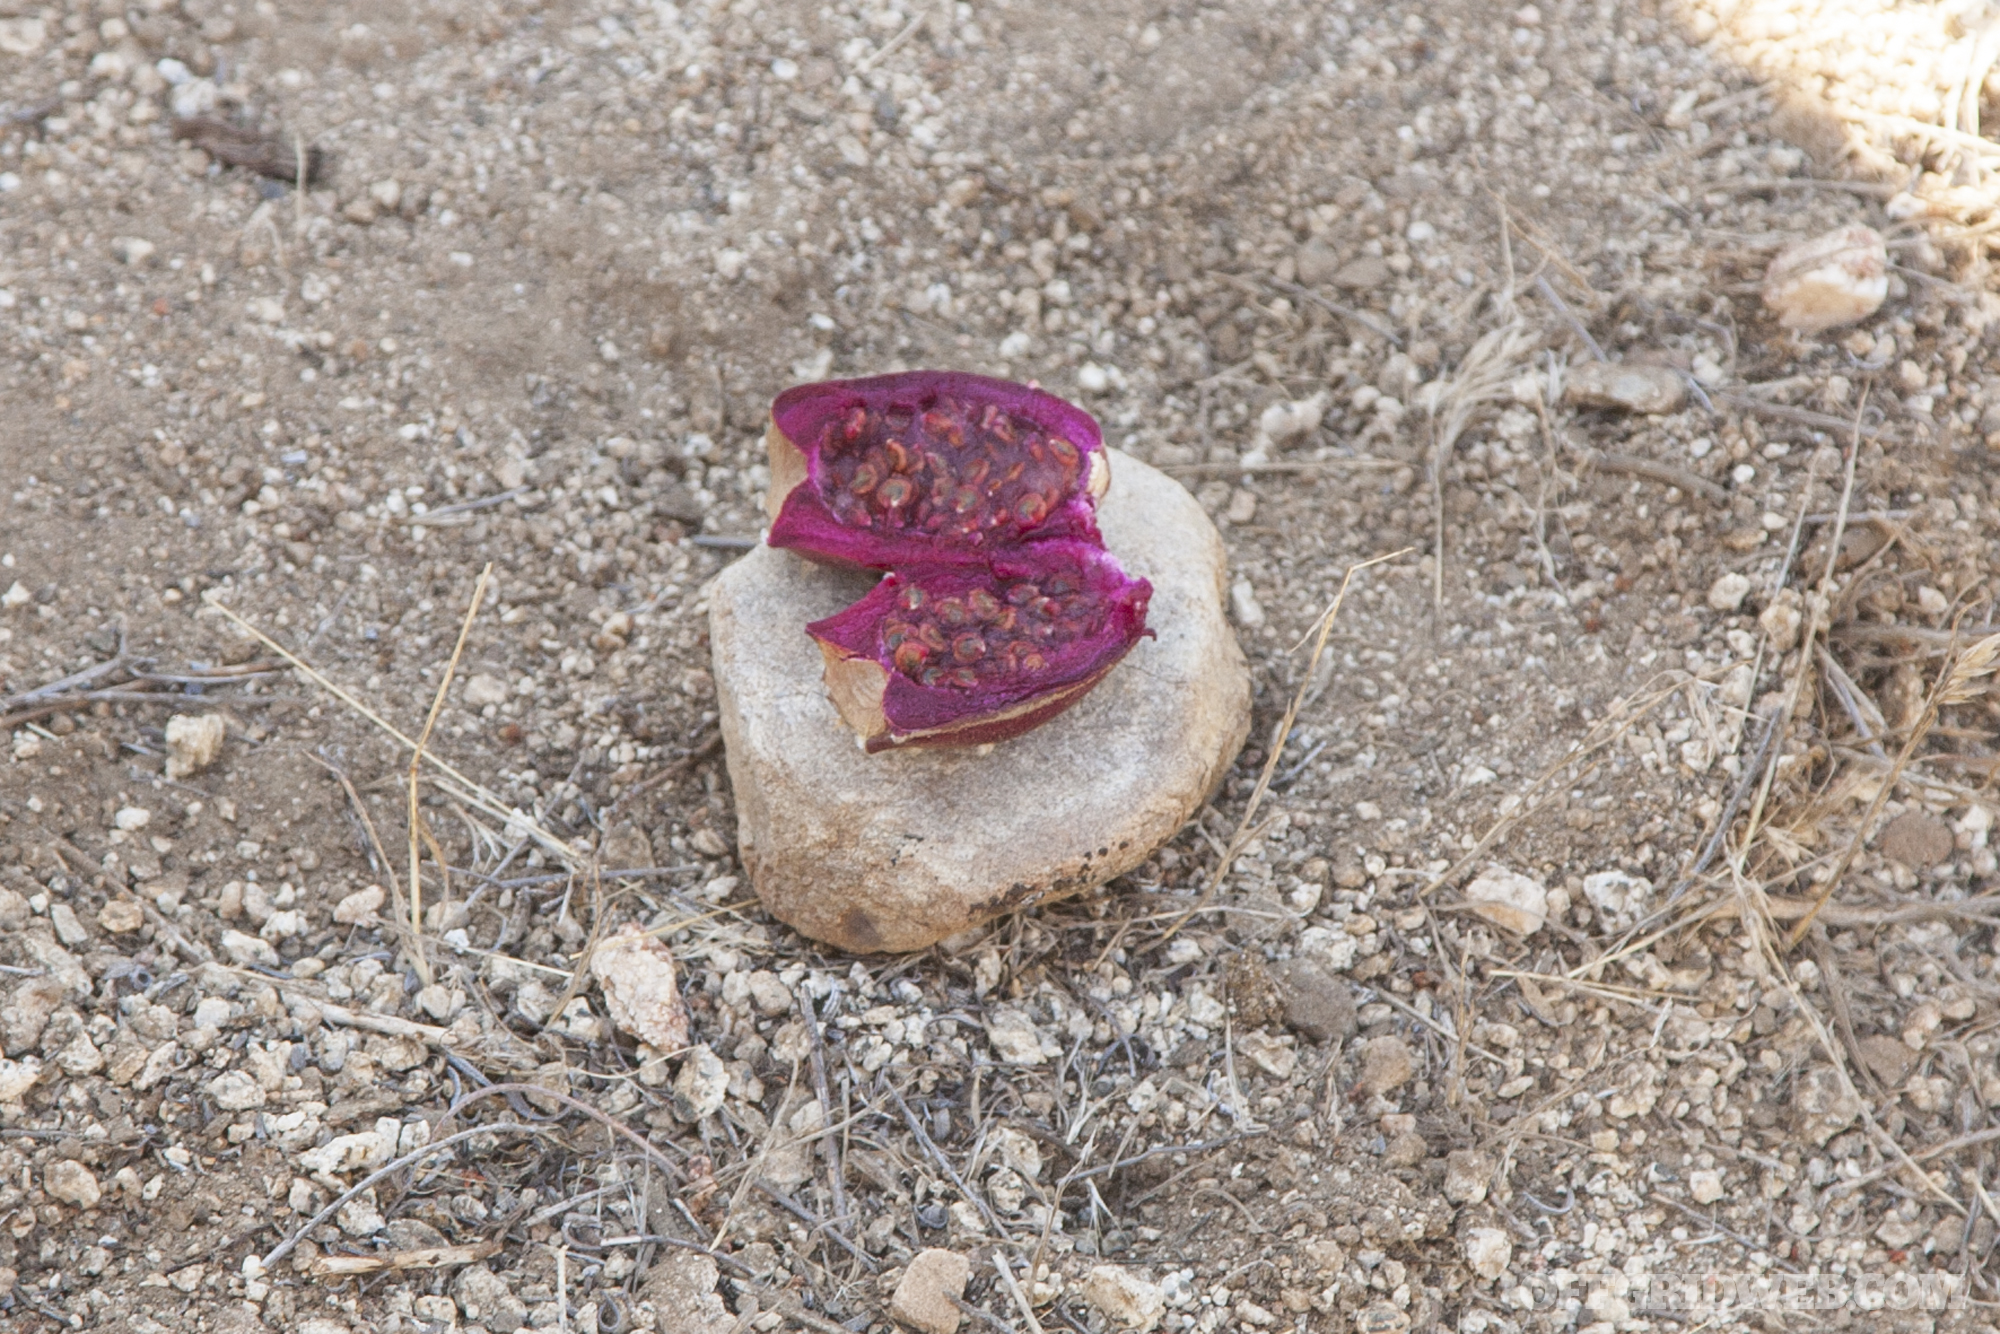
Another part of this family of cacti gives it its name: the bright red prickly pear fruit. These fruits can be cut off the cactus and sliced open, revealing juicy seeds similar to a pomegranate.

3MR survival training event 2017 fire water food tools 31

We tasted these seeds, and while the core is hard, the surrounding fruit is sweet and delicious. All cactus fruits are edible, but the prickly pear is said to be one of the best-tasting. This is at the top of our prioritized list of wild edibles in the area.

3MR survival training event 2017 fire water food tools 32

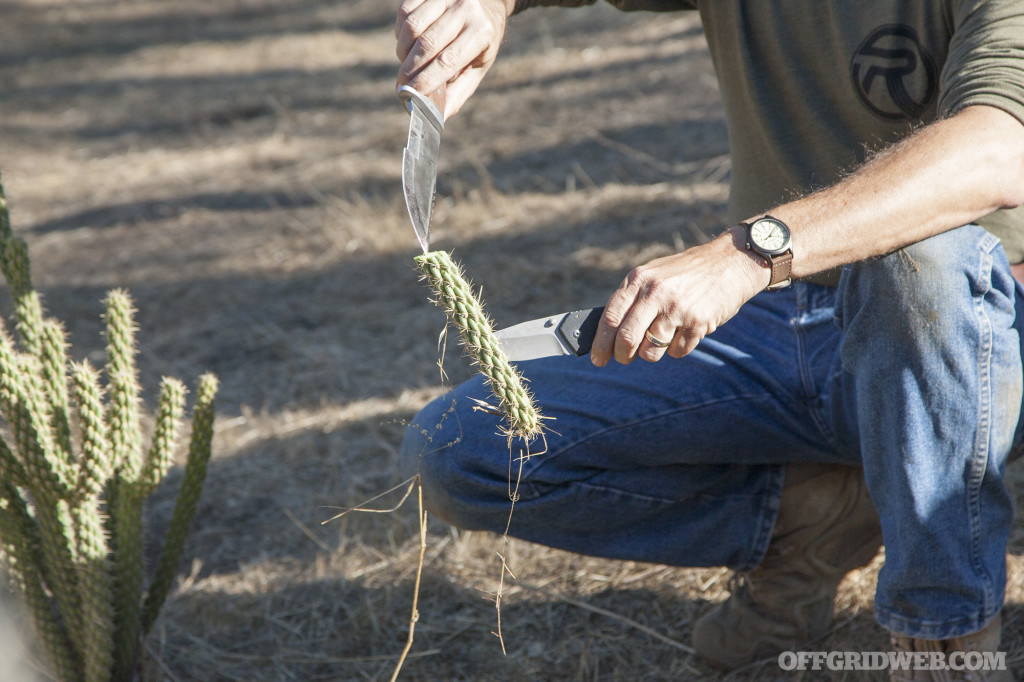
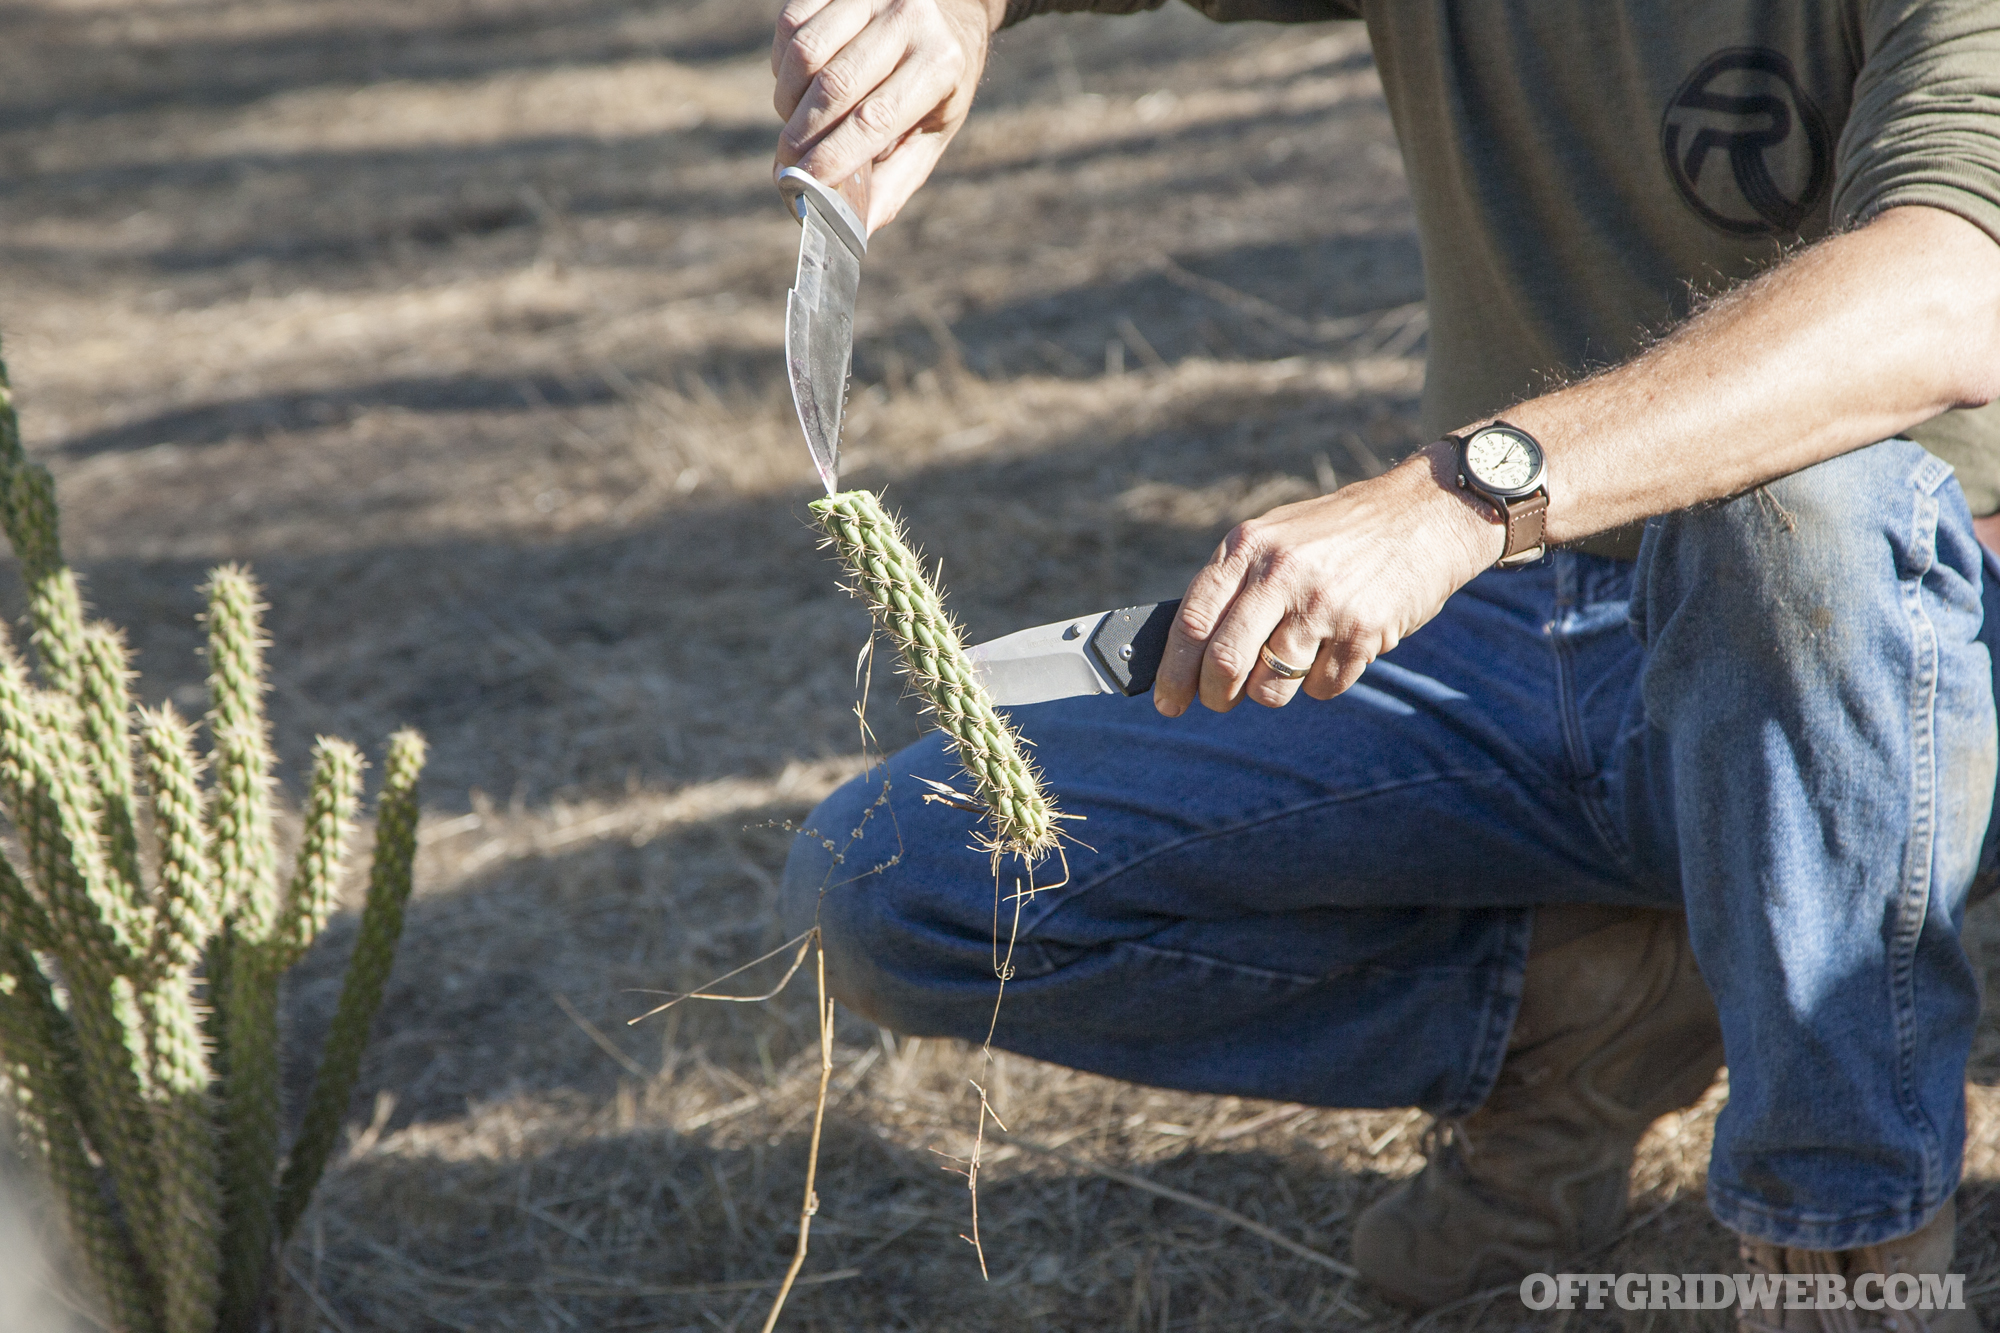
If you're more desperate, the flesh of the jumping cholla cactus (above) is also edible. However, this plant can easily cause you excruciating pain, since its sharp spines cause its stems to “jump” off the plant and attach to your skin or clothing. Approach and remove spines with caution.

3MR survival training event 2017 fire water food tools 25

One last point about cacti: don't drink cactus water. The plants do not contain large reservoirs of clear water like you may have seen in old western movies, and any water you're able to squeeze out may contain high levels of tannic acid or other toxins. Small quantities of this liquid in the flesh may be palatable, but drinking large amounts directly can cause diarrhea or vomiting.

Killing & Processing Small Game

Taught by Todd

3MR survival training event 2017 fire water food tools 34

For the second portion of the food course, Todd discussed the basics of catching small game. Purpose-built locking cable snares are preferable, but improvised snares can also be constructed in a pinch. Once you've trapped an animal, however, it's important to know how to break it down and use each part to aid your survival. So, this was the primary focus of the lesson.

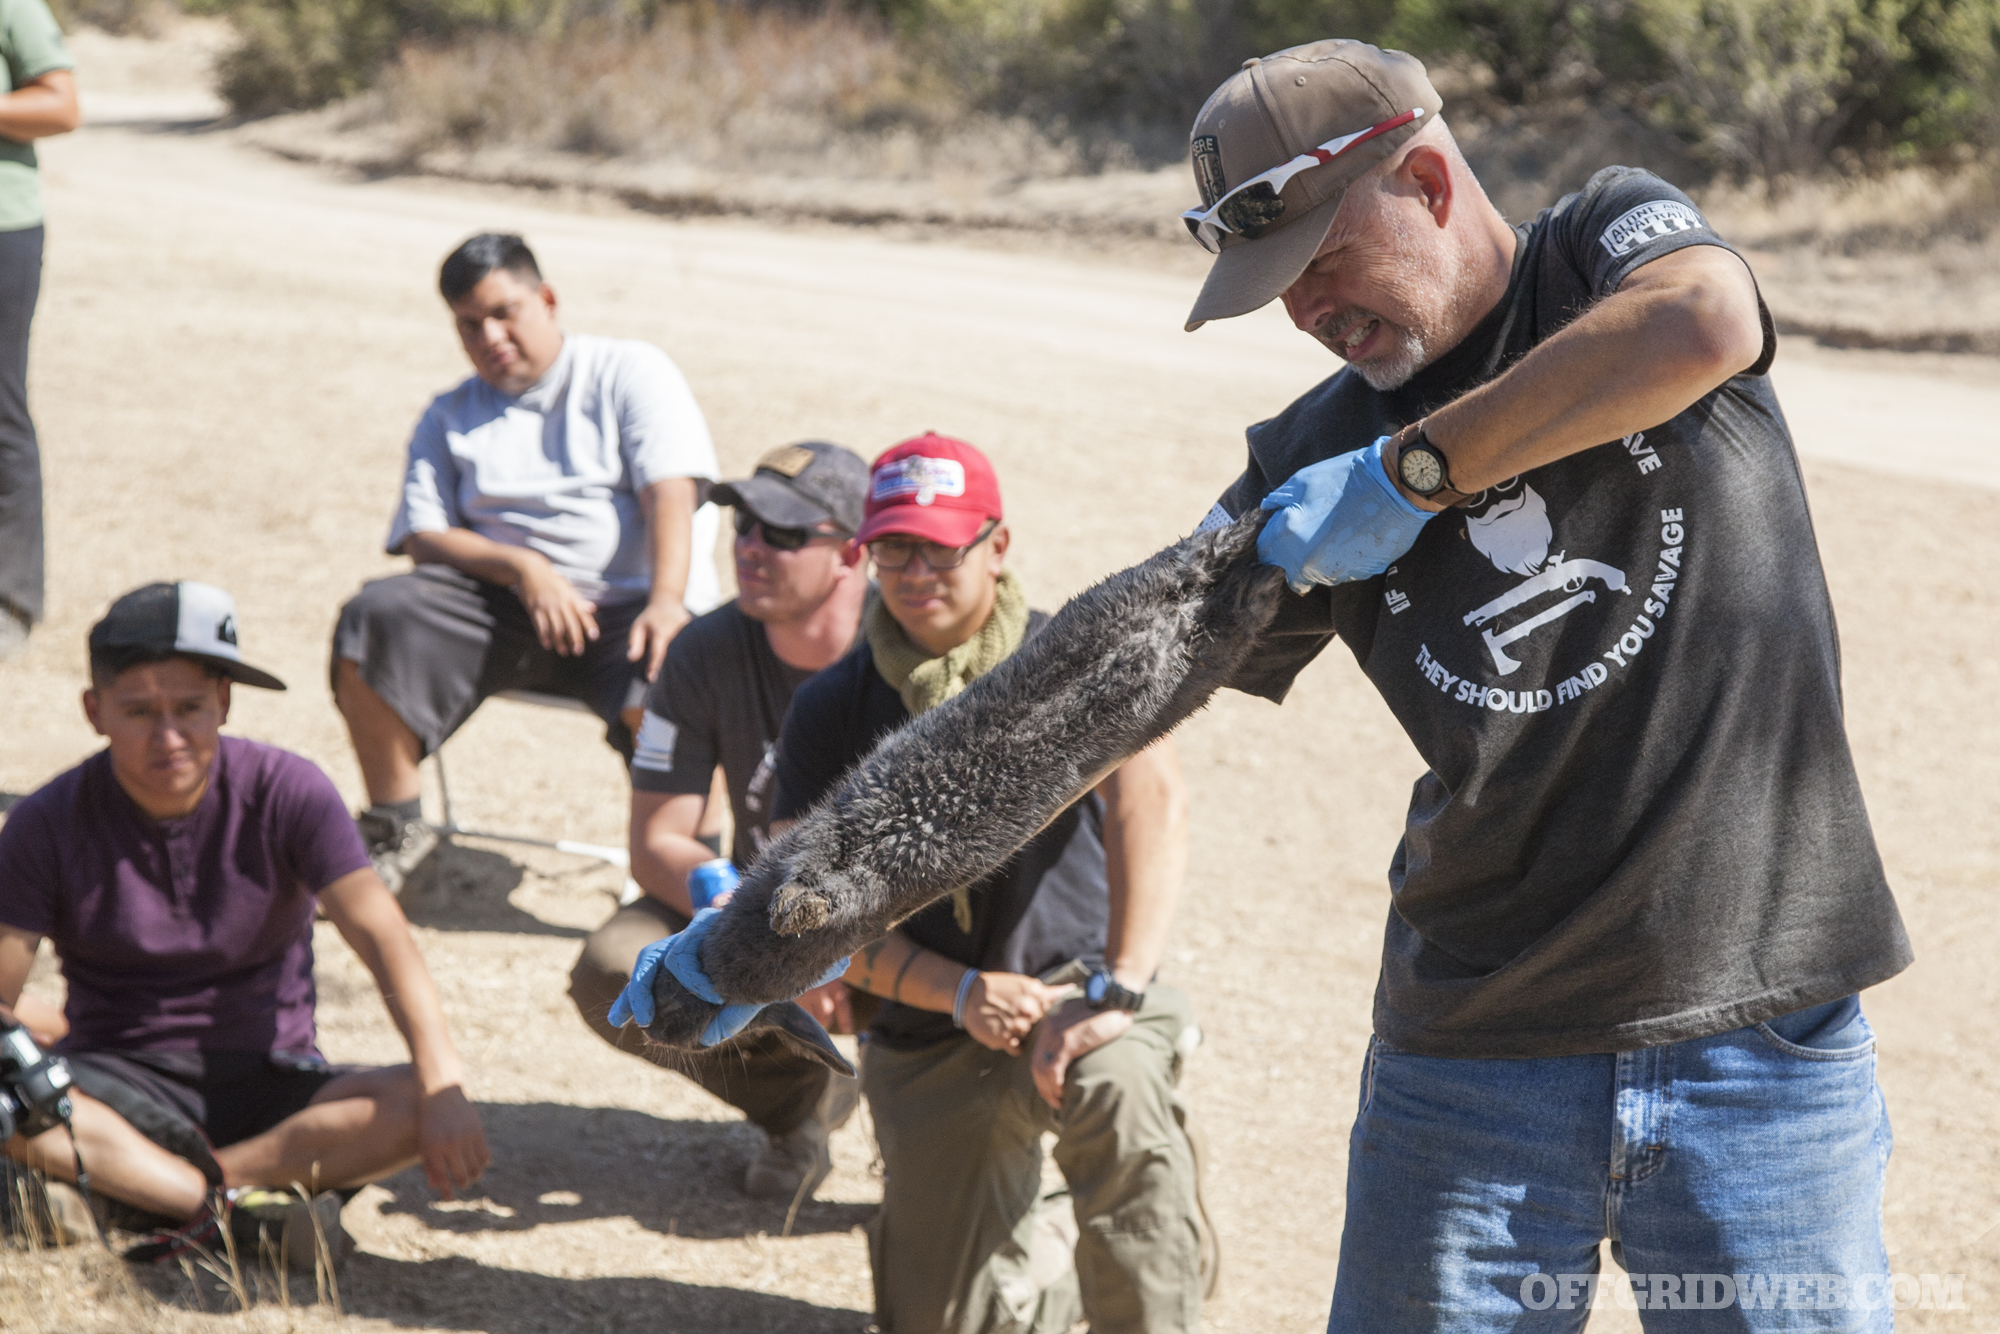
Todd had obtained two rabbits from a local breeder. These animals were bred specifically for their meat, and we'd be learning how to use it. It's worth noting that wild rabbits should be inspected for tularemia, an infectious disease that will cause the animal to look sick with mangy, matted fur. If these signs are present, don't take a chance by eating the animal.

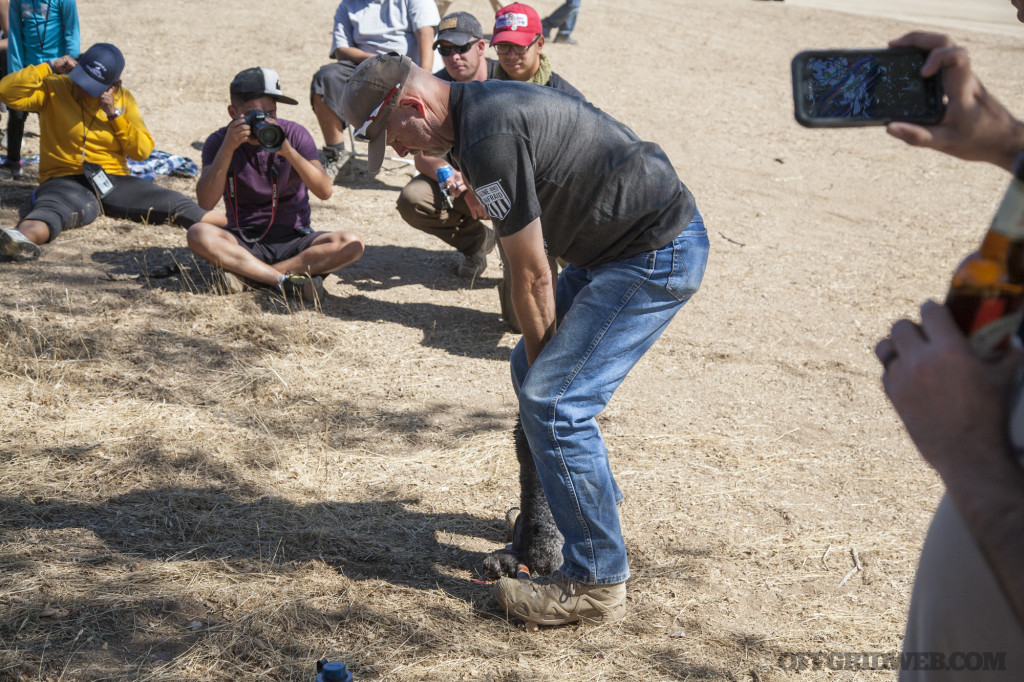
The following task isn't for the faint of heart: humanely killing the first fuzzy bunny. In a survival situation, you do what you must to put food on the table, so it was time to swiftly deal a killing blow. Todd struck the back of the head with a stick to stun the animal, then pinned the neck to the ground with the stick (pictured above). He rapidly pulled the legs upward to sever the spine with an audible crack.

3MR survival training event 2017 fire water food tools 35

In order to ensure the animal was dead and would feel no pain, he pulled the neck to confirm it was fully broken. Now it was time to begin skinning the rabbit.

3MR survival training event 2017 fire water food tools 36

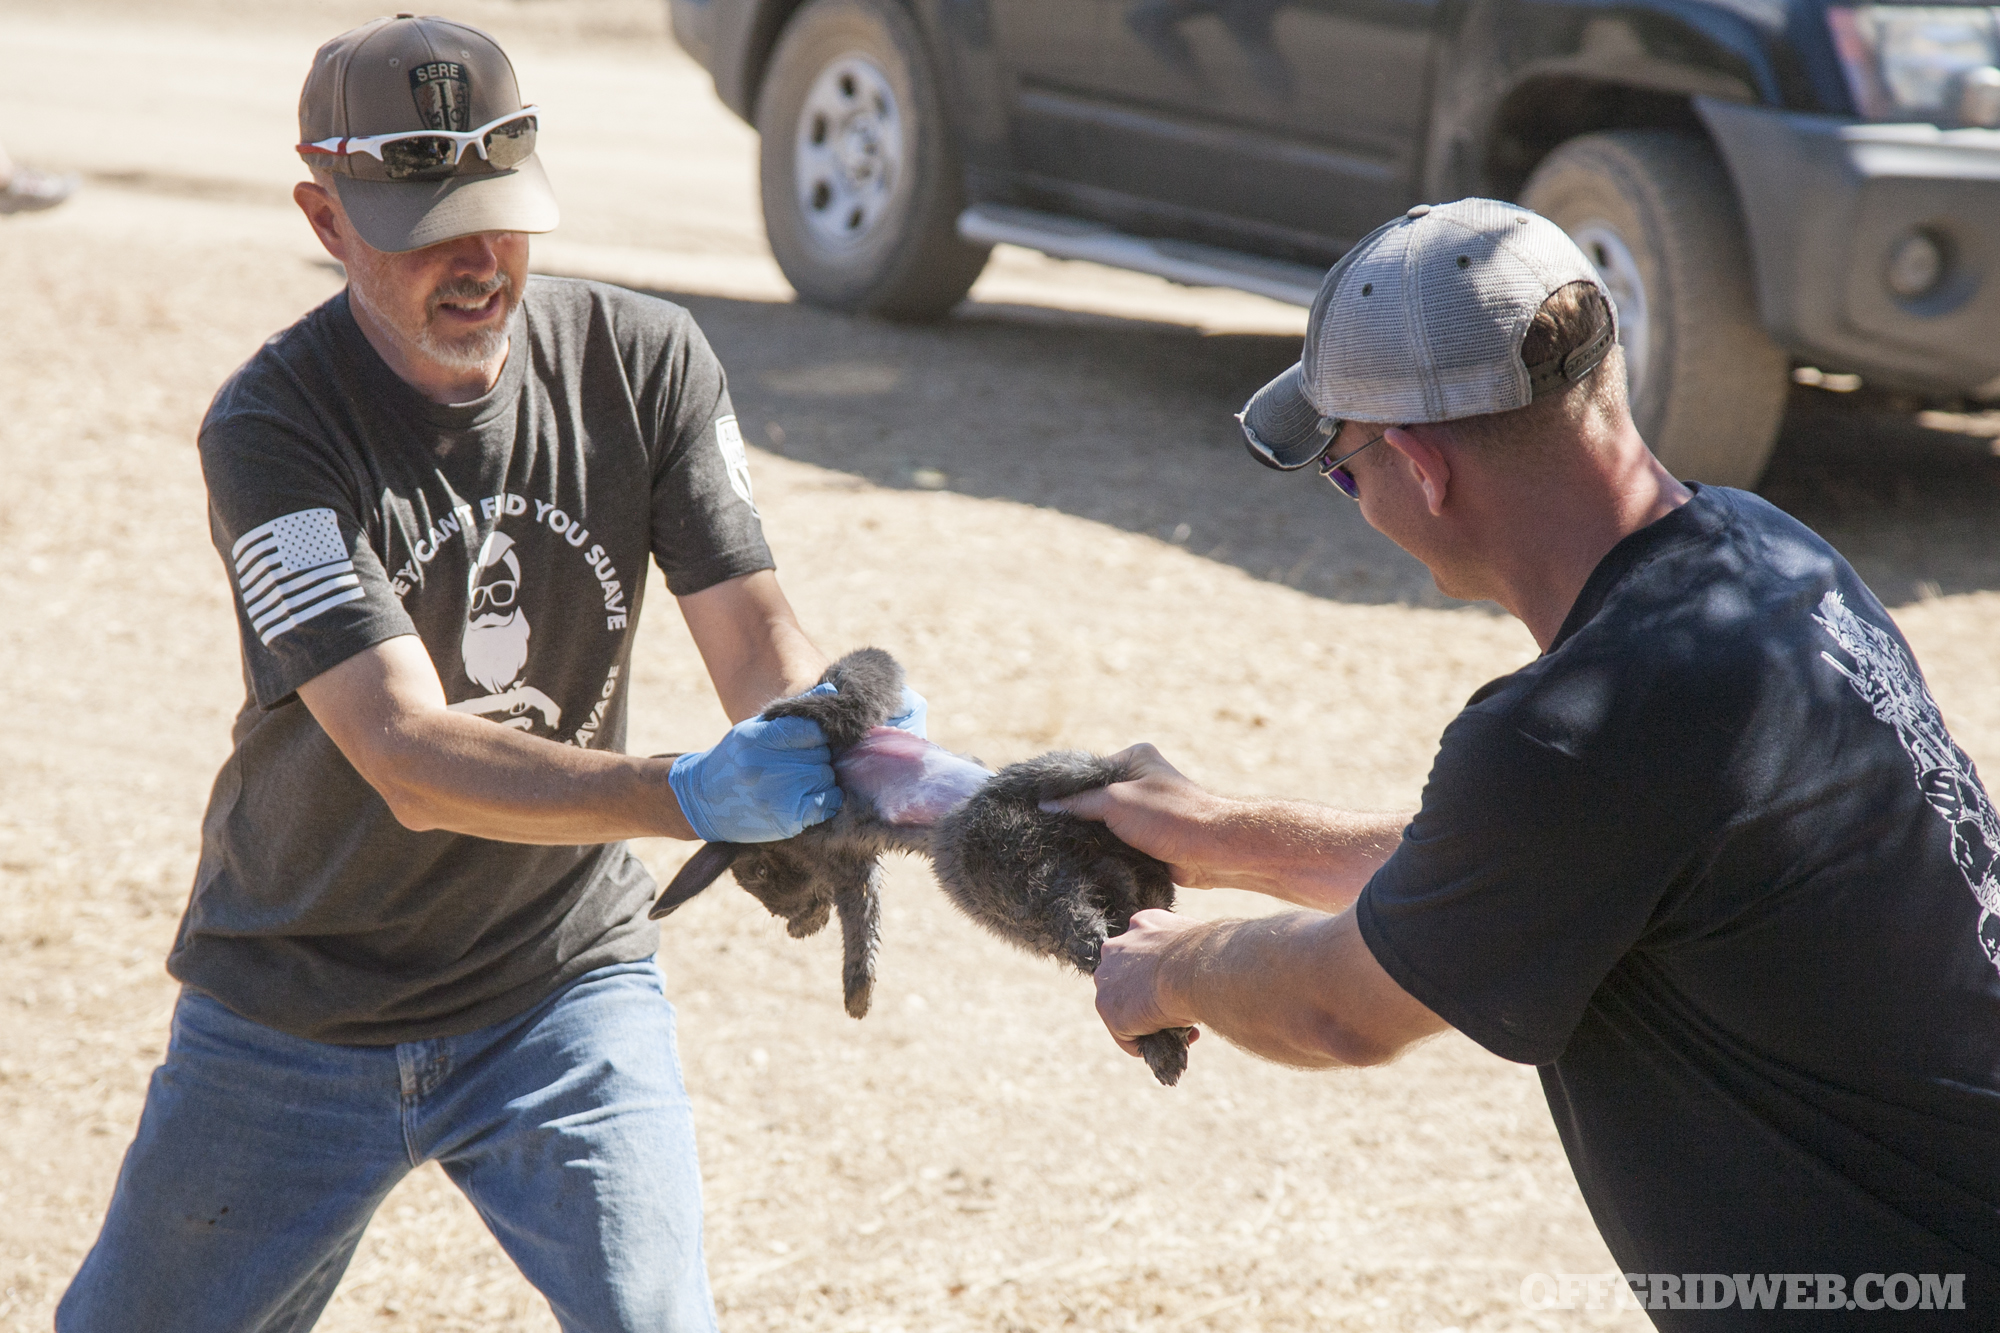
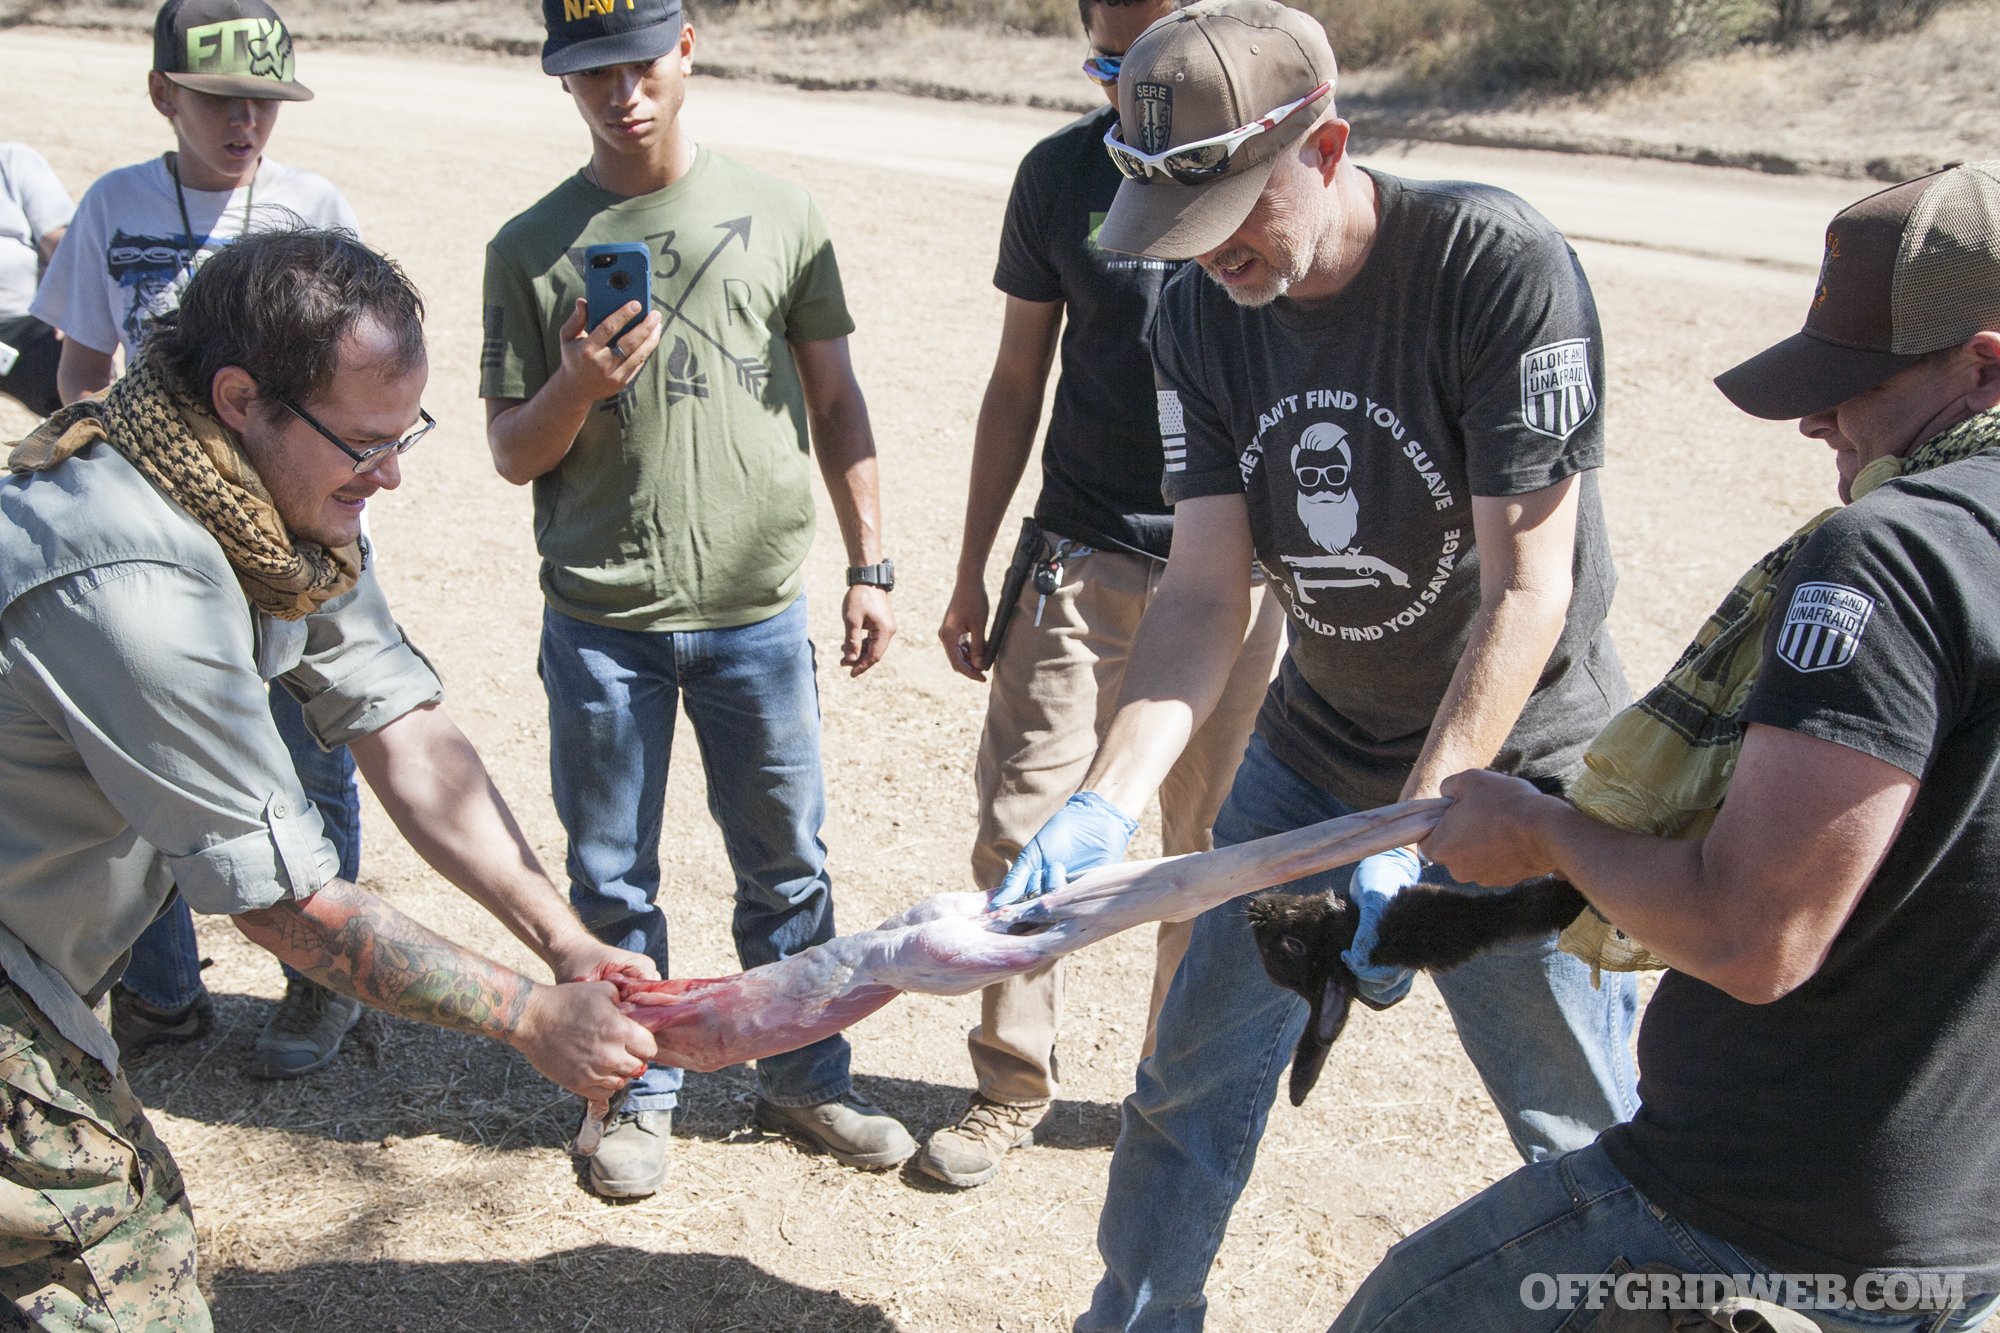
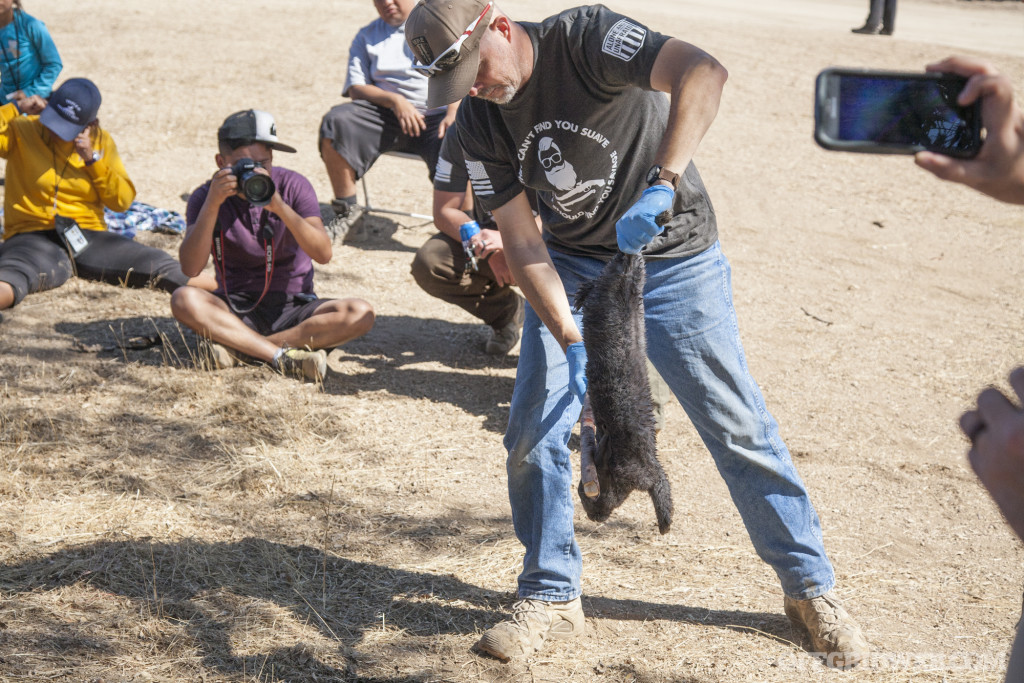
Many methods of skinning exist — as the saying goes, there's more than one way to skin a cat. Rabbits are no different. Todd used an incision on the back, and began pulling the skin apart towards the front and rear. The head was cut off, and additional cuts were made around the paws to fully remove the skin. This method is quick, but doesn't keep the pelt in one piece.

3MR survival training event 2017 fire water food tools 37

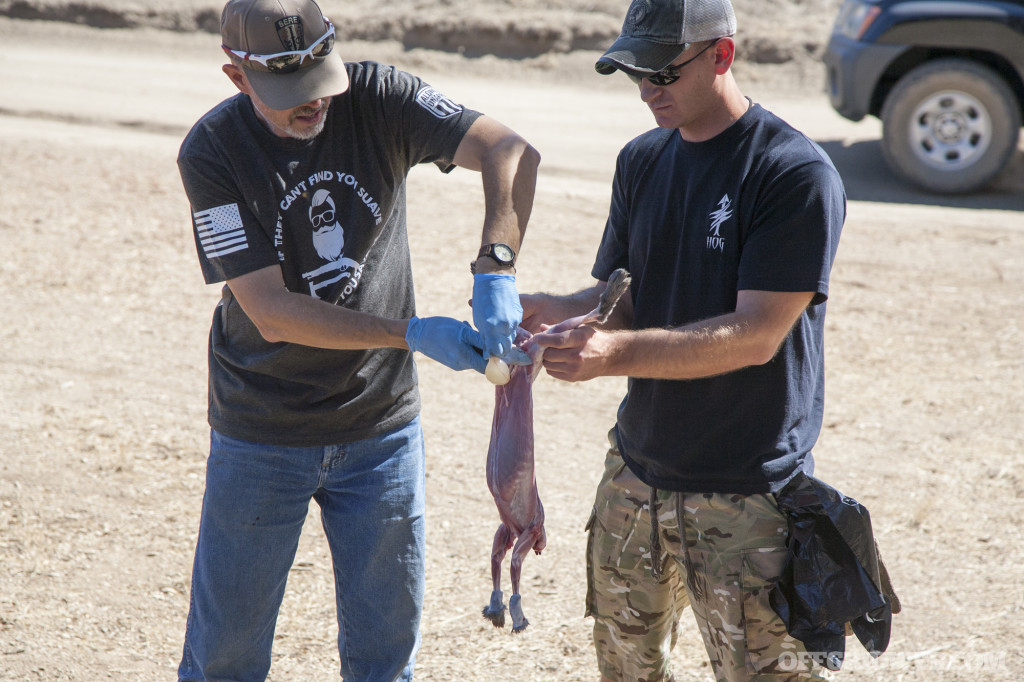
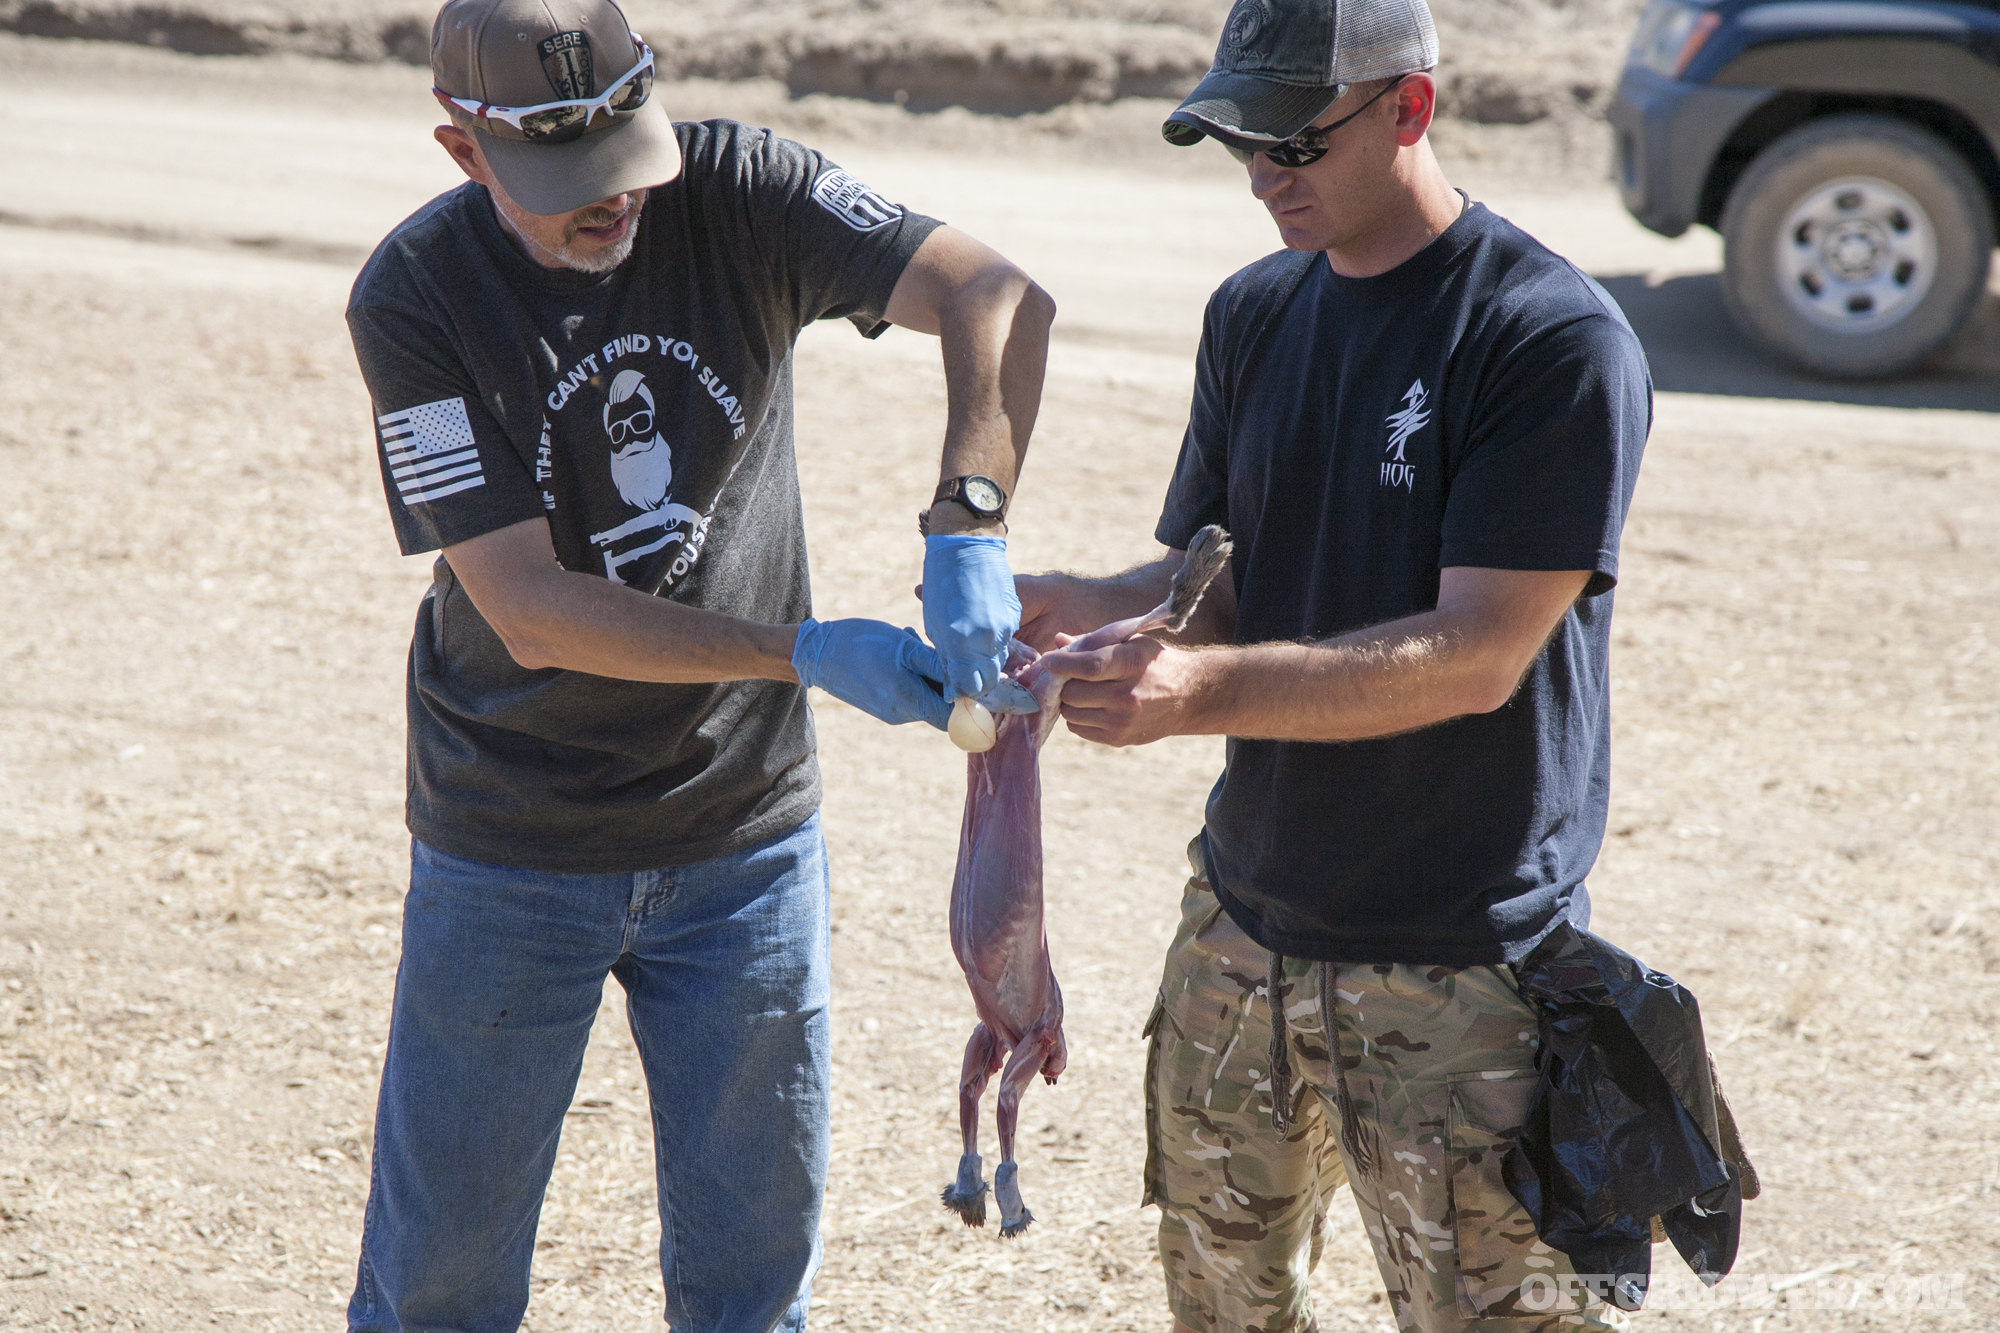
The skinned rabbit's body cavity was cut open to begin removing the guts and organs.

The bladder, pictured above, was very full on this particular rabbit. The urine inside can be used to tan and preserve the hide. Todd demonstrated an improvised use of another organ: the bunny's lungs. Simply blowing into the trachea fills them with air, allowing them to function as a float or bobber for fishing.

3MR survival training event 2017 fire water food tools 38

The feet, tail, and area around the animal's anus should be cut away and discarded, as they are likely to contain more bacteria. The remaining parts of the bunny can be used as follows:

  • Brain – cook and eat (it's full of protein)
  • Eyes – edible raw
  • Ears – with slits cut in the center, these can be fashioned into rudimentary blinders to protect your eyes from the sun
  • Intestines – use as bait for traps or fishing
  • Kidneys – boil and eat
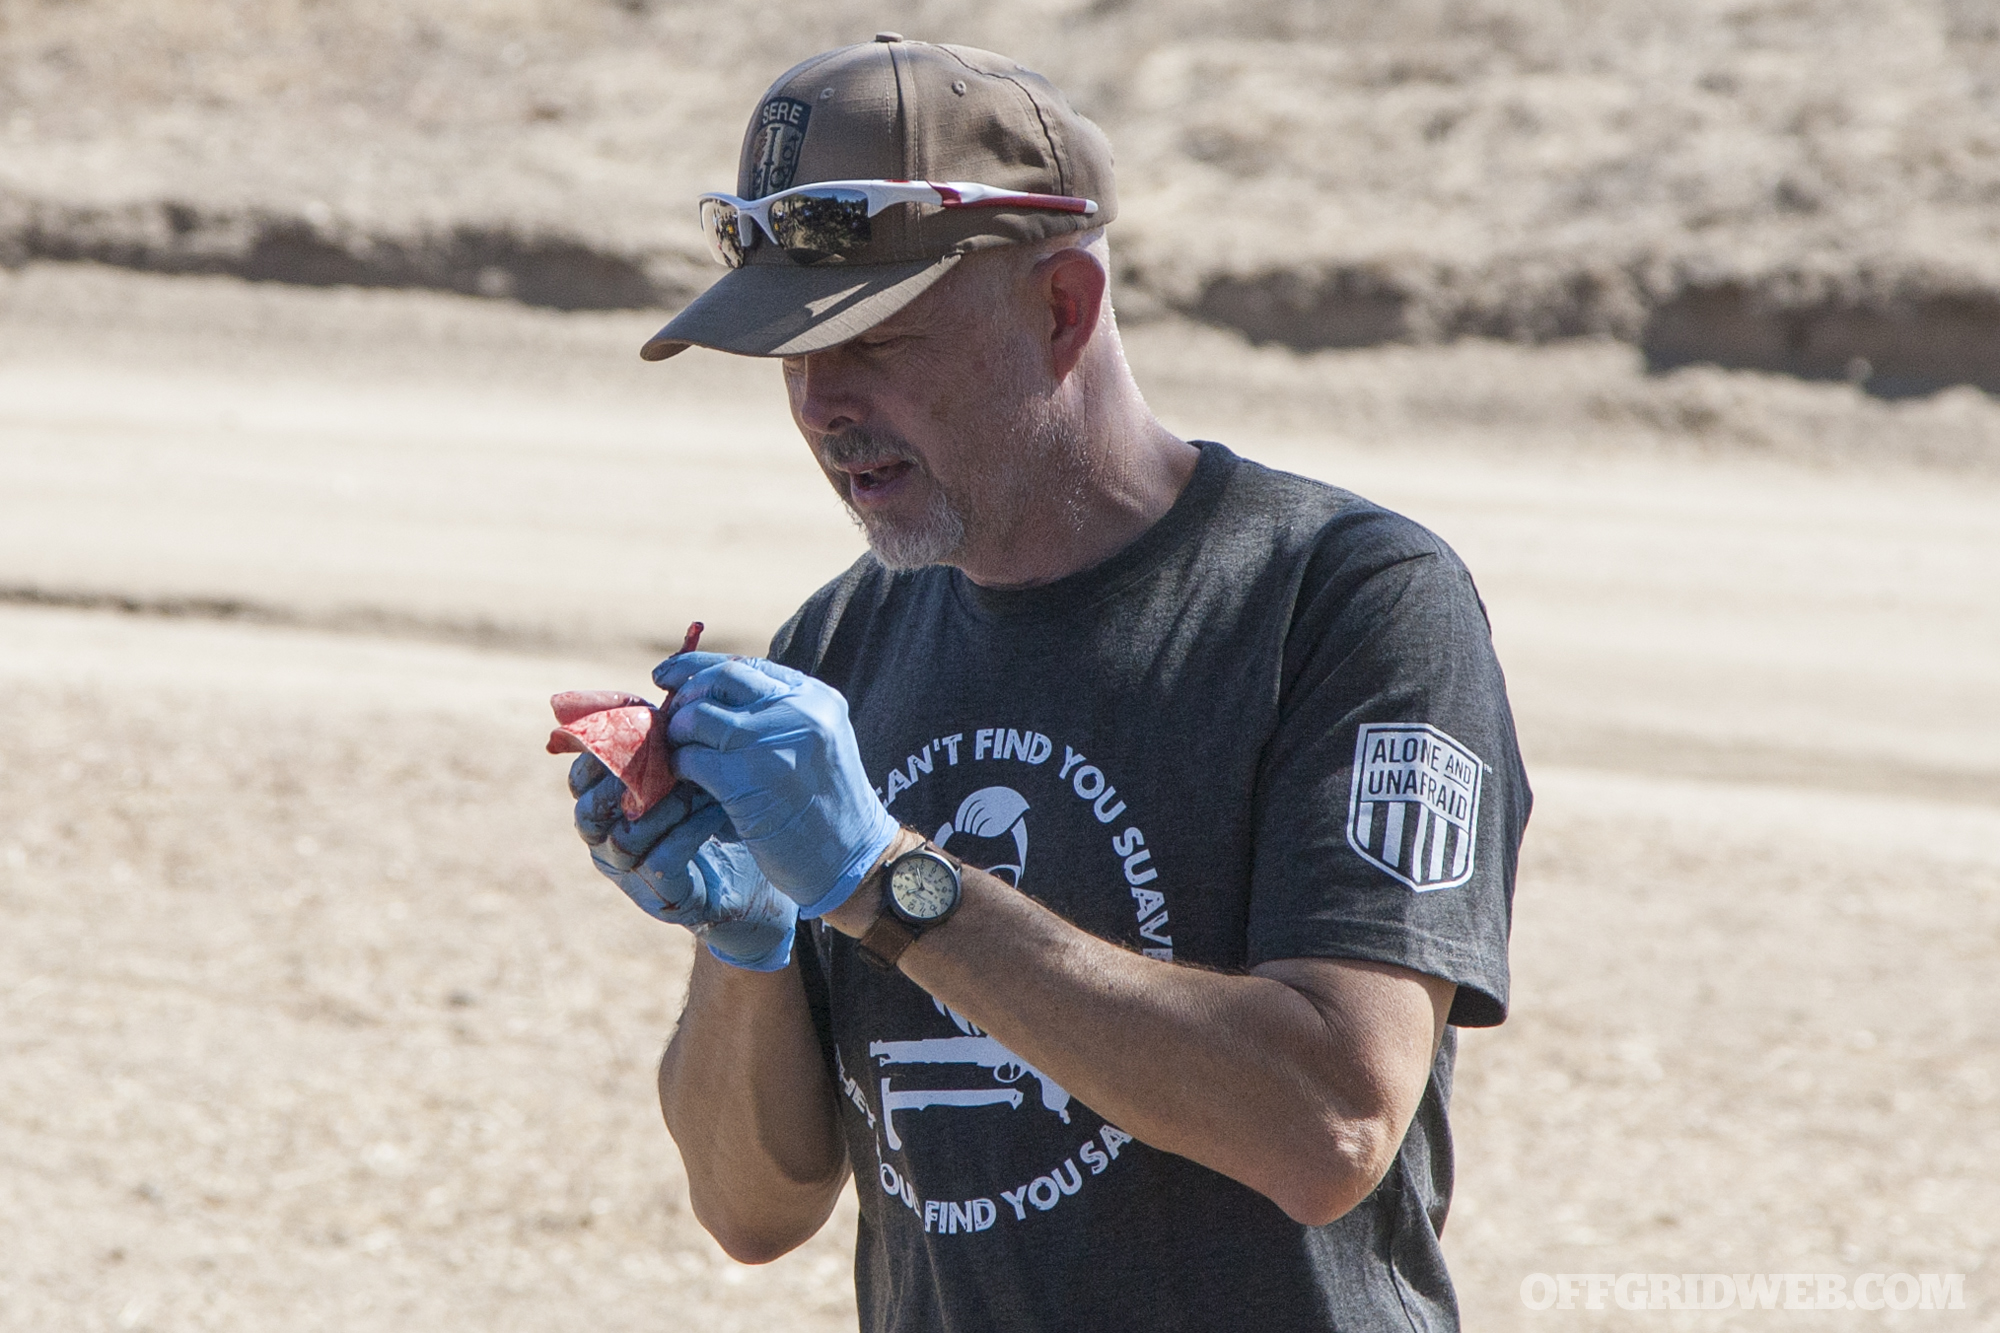
  • Liver – Inspect for white spots (a sign of illness). If none are present and it's a normal dark red color, it can be cooked and eaten.
  • Gall bladder – remove from liver and discard
  • Bones and ribcage – break and cook with other food to extract nutritious marrow

3MR survival training event 2017 fire water food tools 39

The second rabbit was brought out, and students stepped up to replicate the procedure Todd just demonstrated. The rabbit was killed and broken down, and both animals' meat was put into a stew for dinner that night. All parts of these animals were put to good use.

Of course, if you're looking for an easier way to enjoy some meat while camping, check out our previous article on the 3MR demo that showed how to make bacon and eggs in a paper bag.

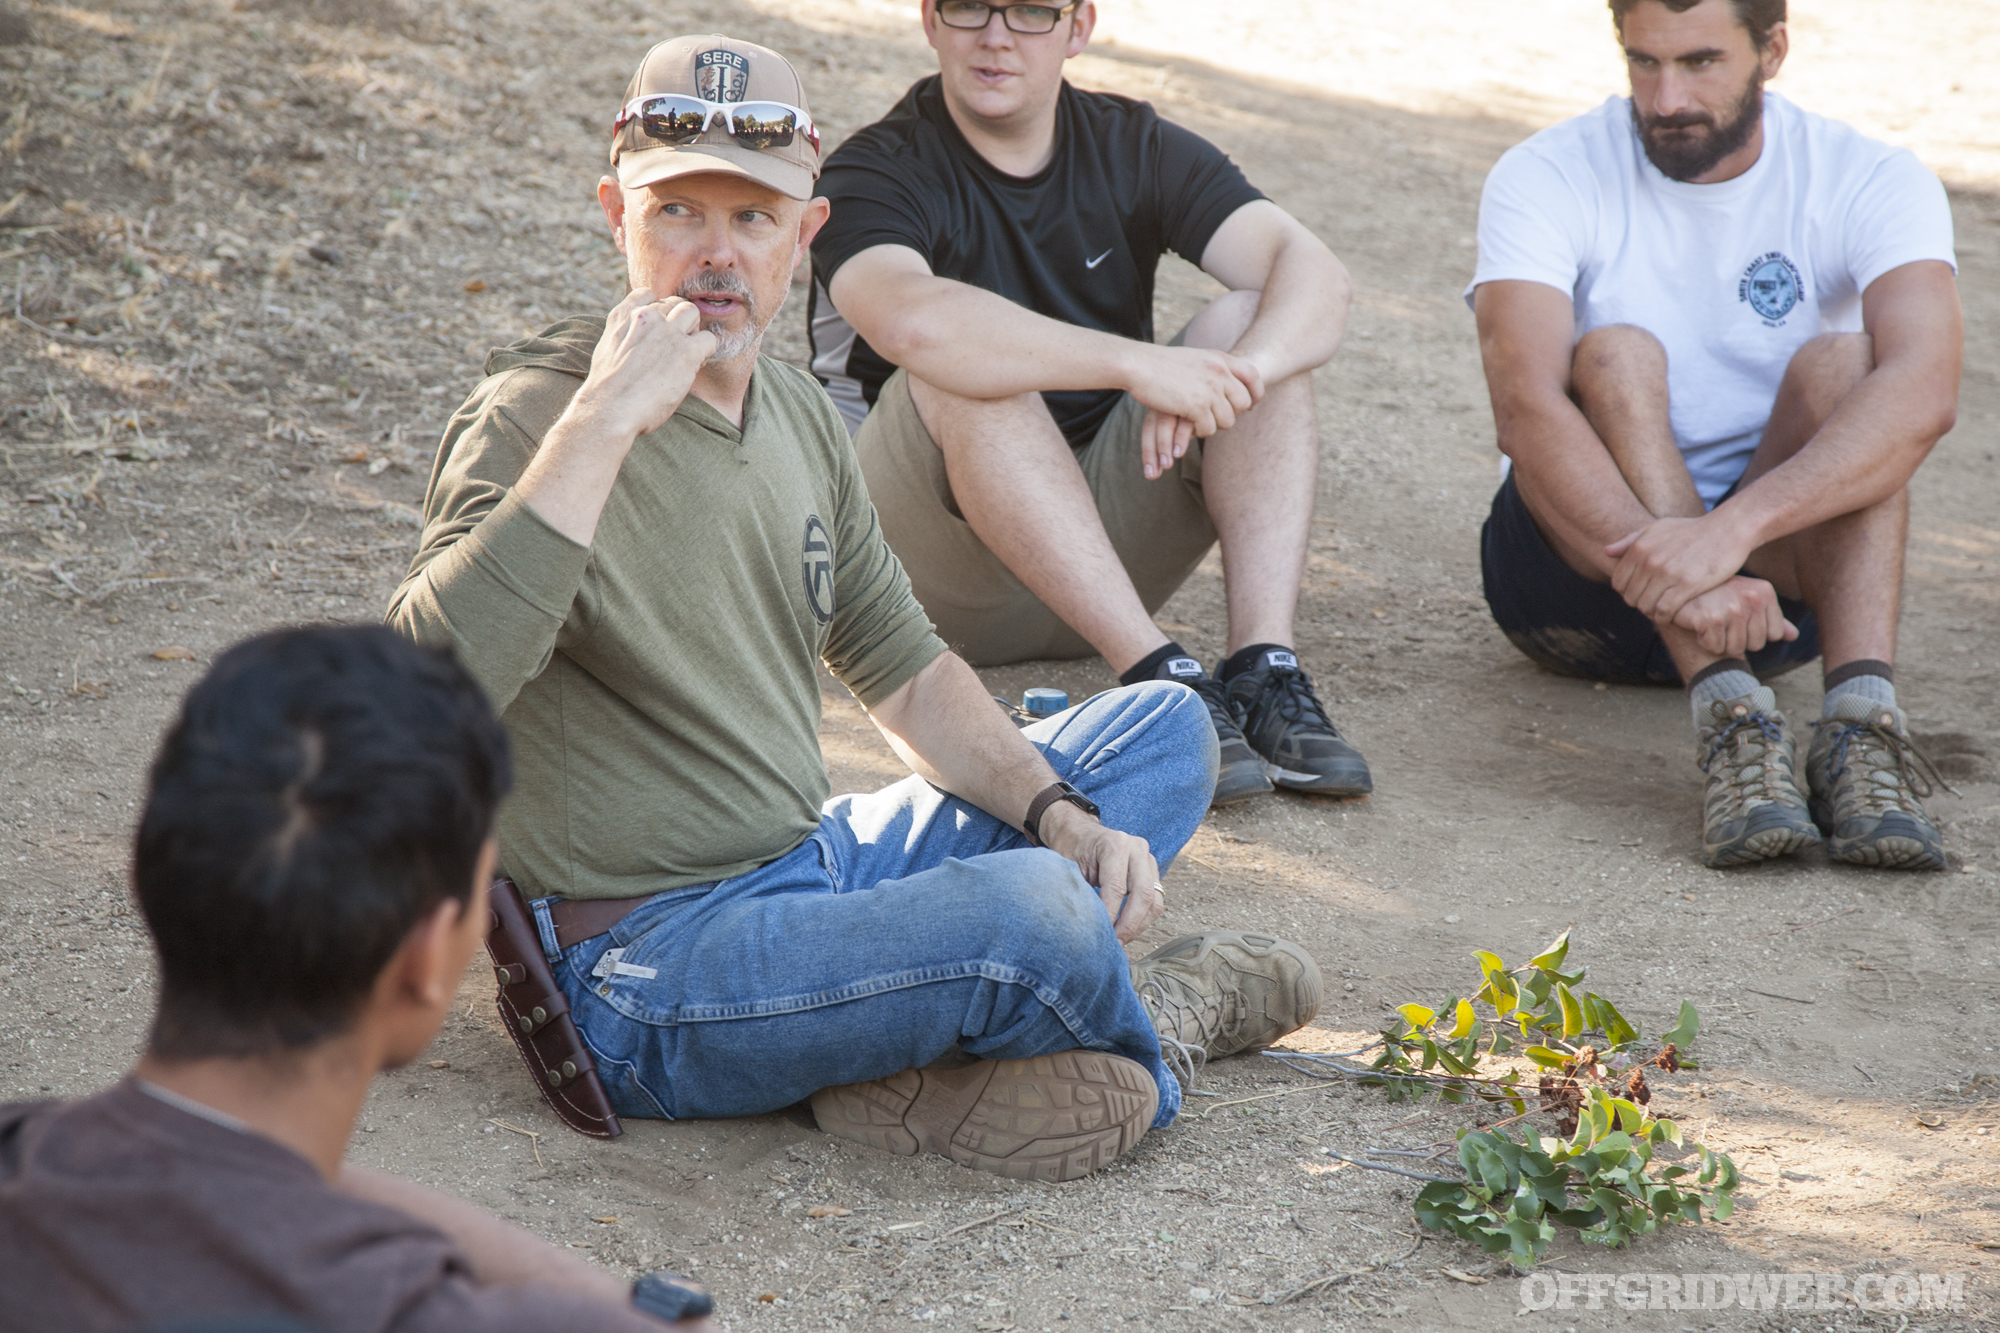
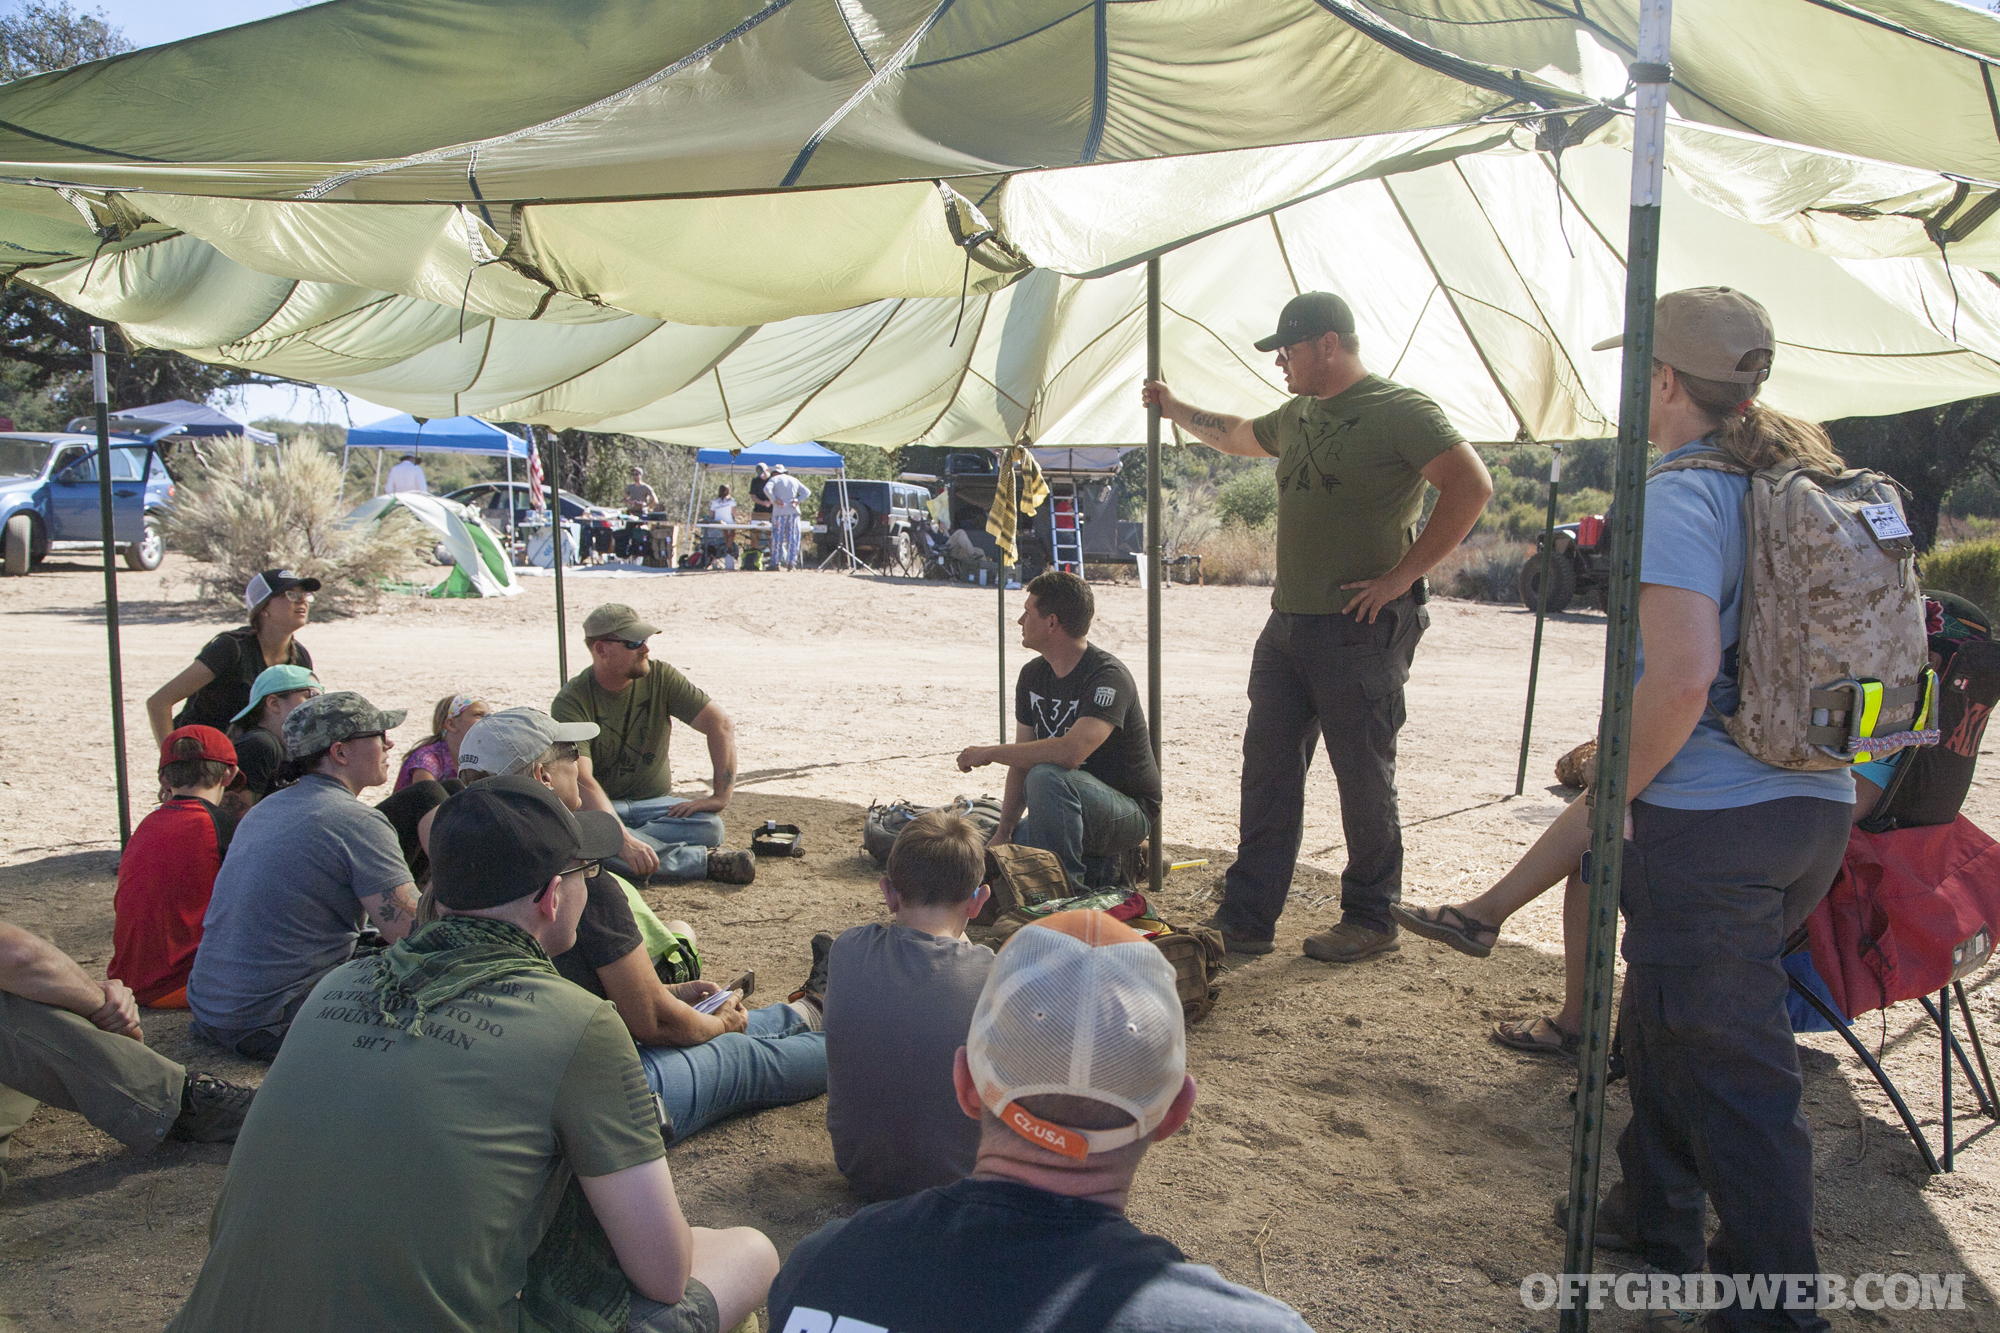
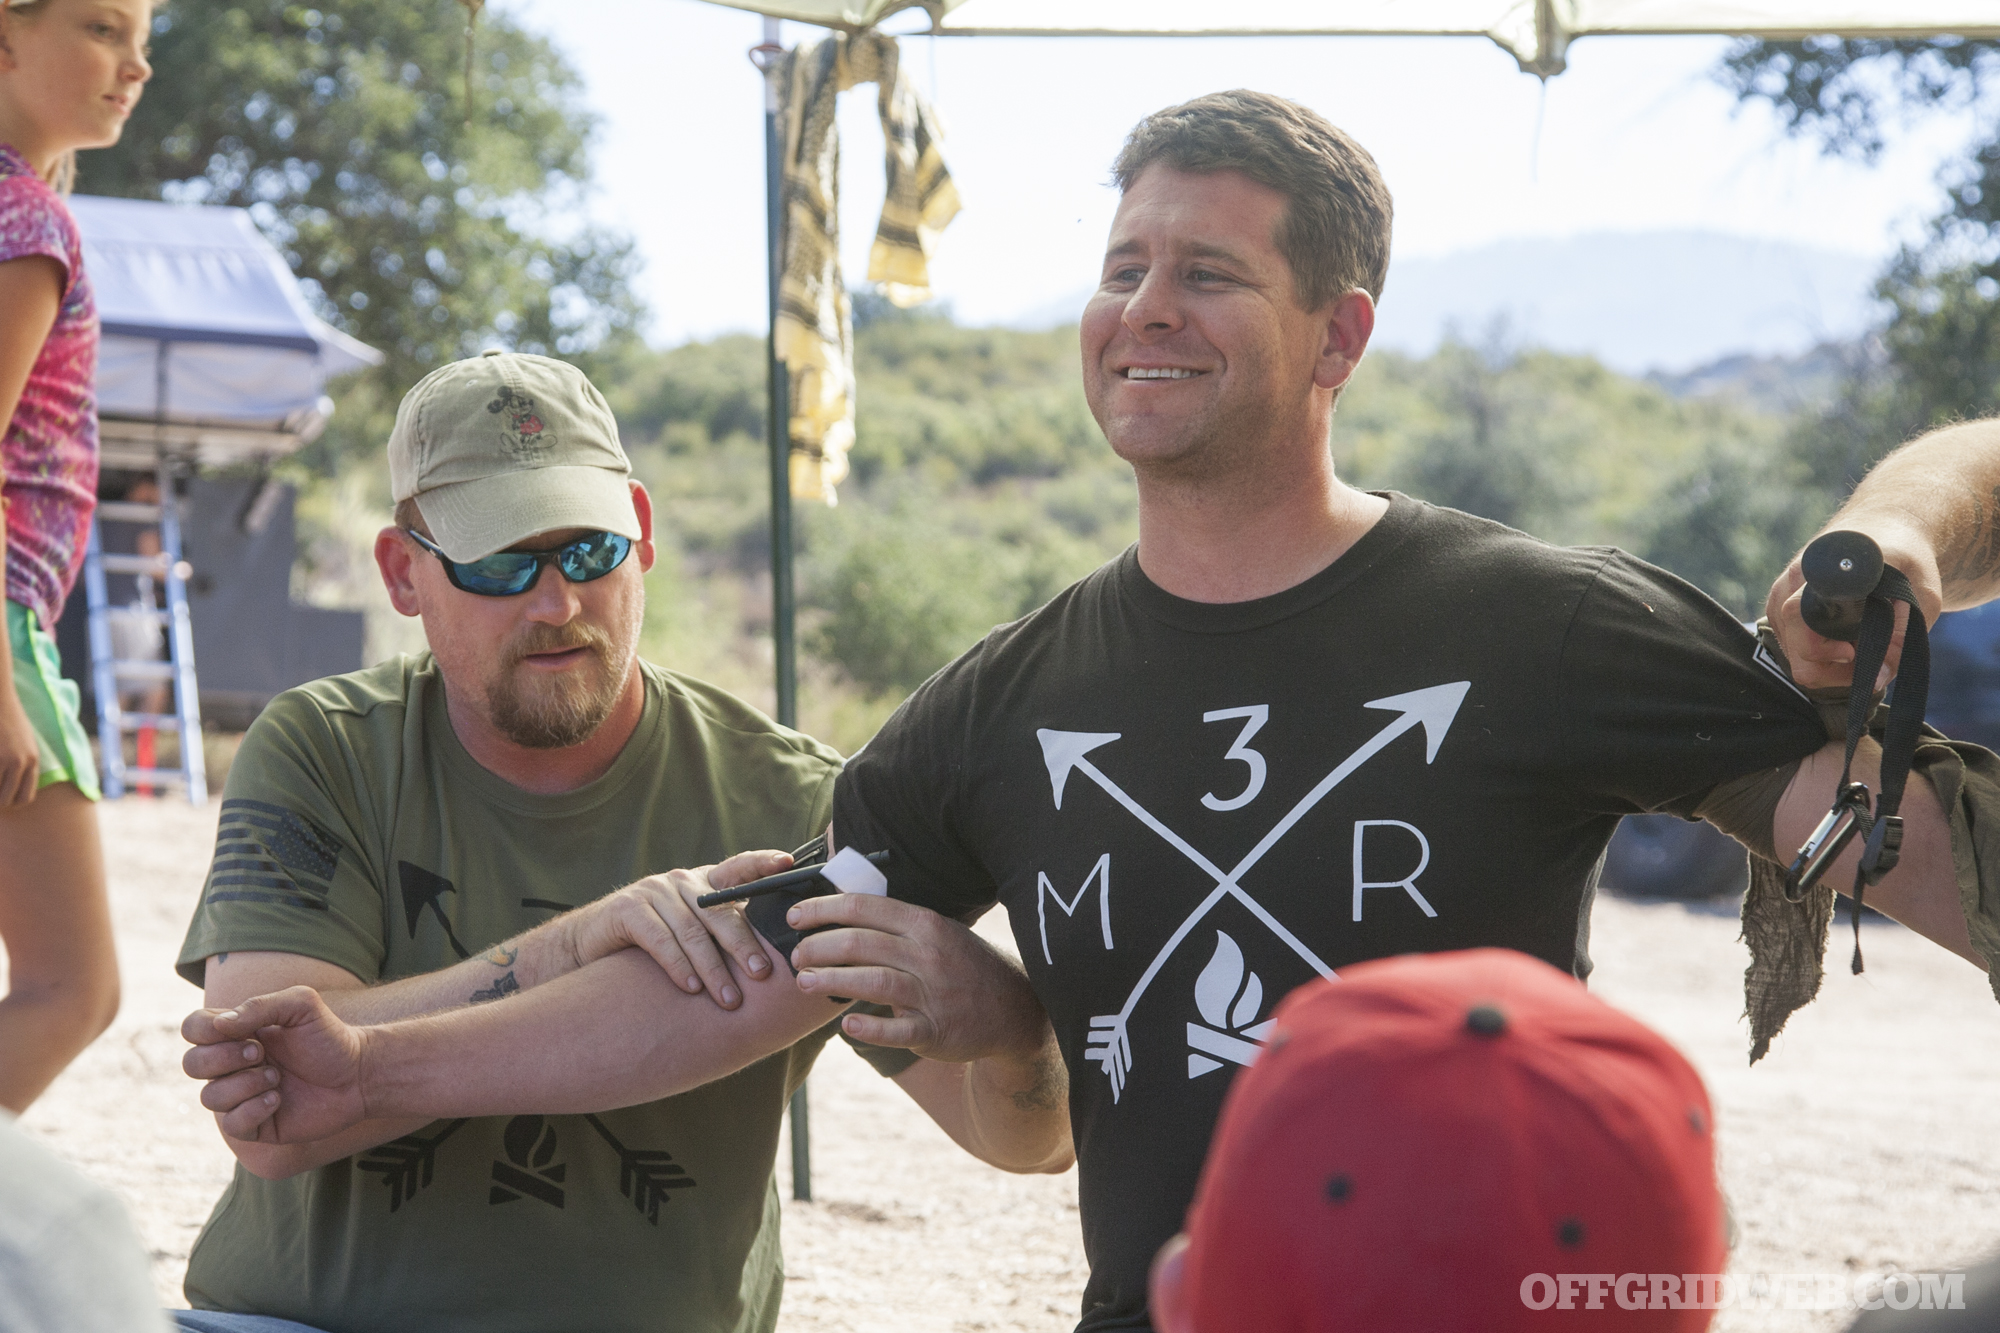
Wilderness Medicine & Trauma Care

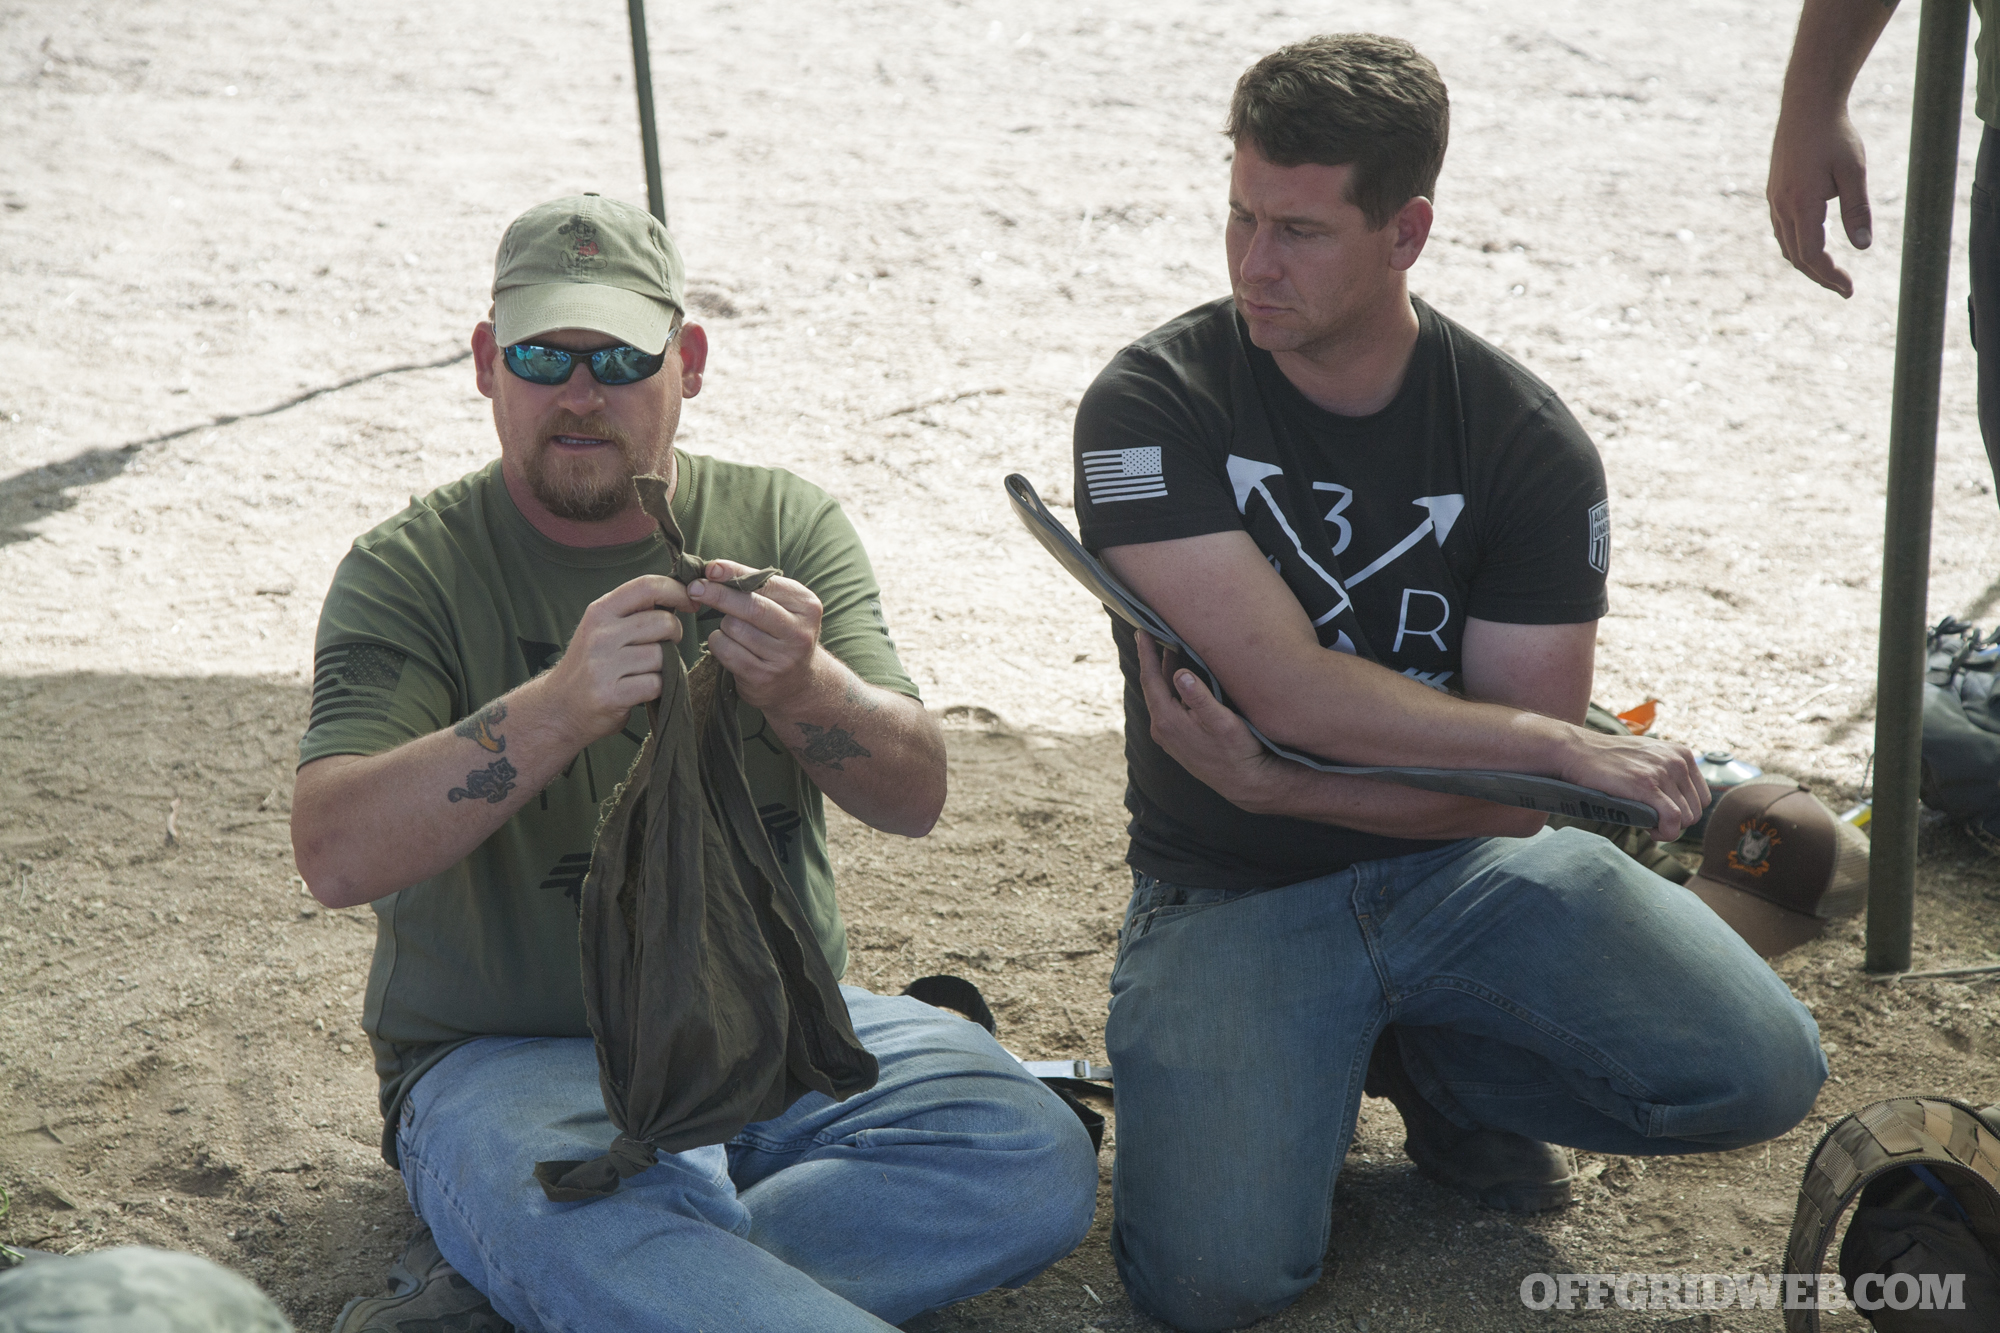
Taught by Austin (an EMT, pictured at right) with assistance from Raul (center, black shirt) and Pete (left)

3MR survival training event 2017 fire water food tools 40

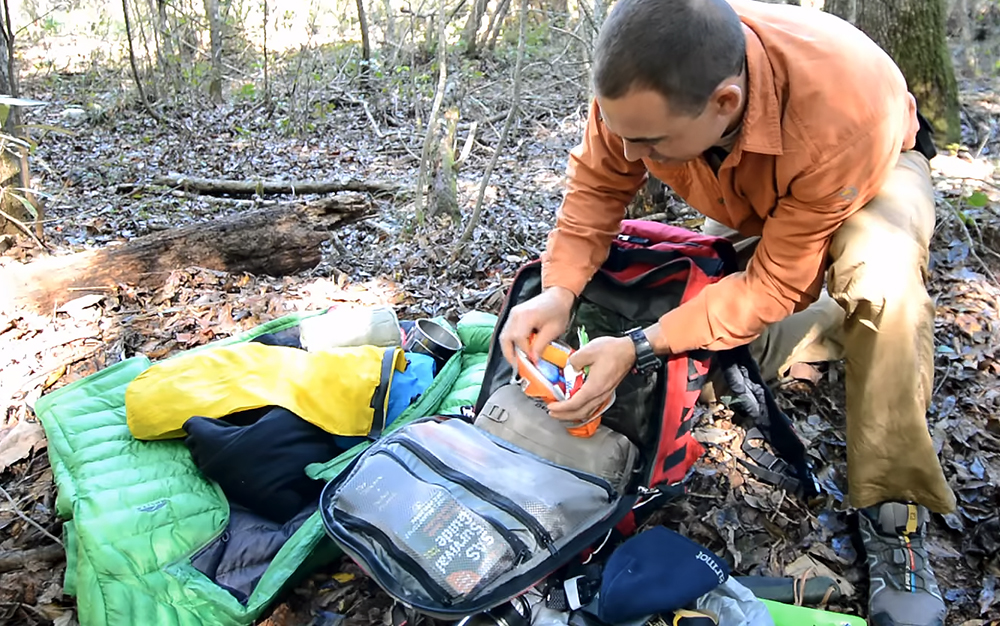
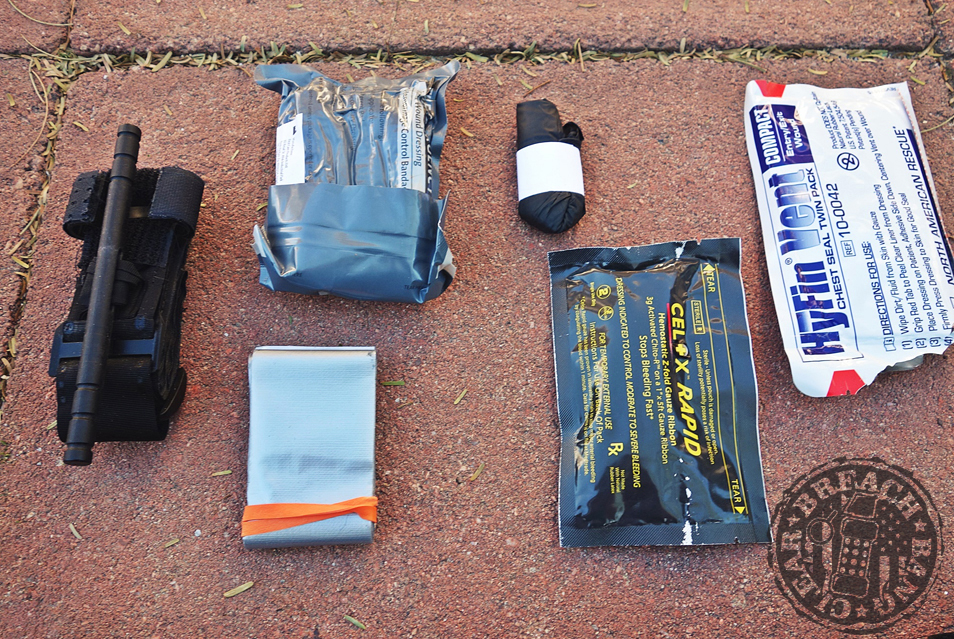
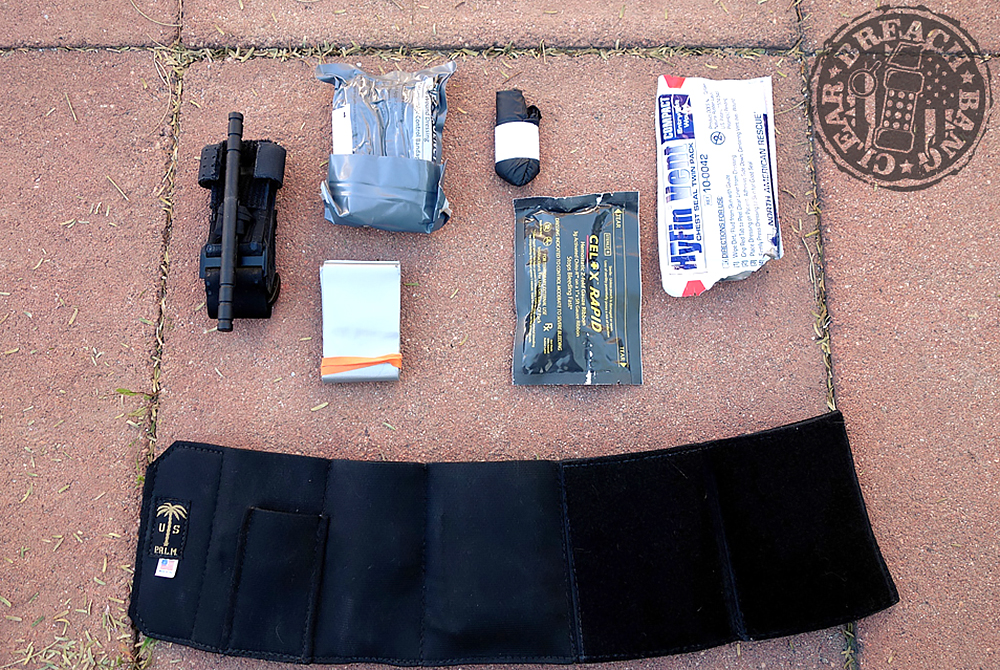
First, Austin went over some of the gear in his wilderness first aid kit. As an EMT, his list was more extensive than you might expect to find in an ordinary hiker's pack, but it covers most injuries that could occur. The pack included countless rolls of medical tape, hemostatic gauze, Dynarex compression wrap, Kerlix rolled gauze bandages, Telfa pads for smaller wounds, and a variety of other items for treating small wounds.

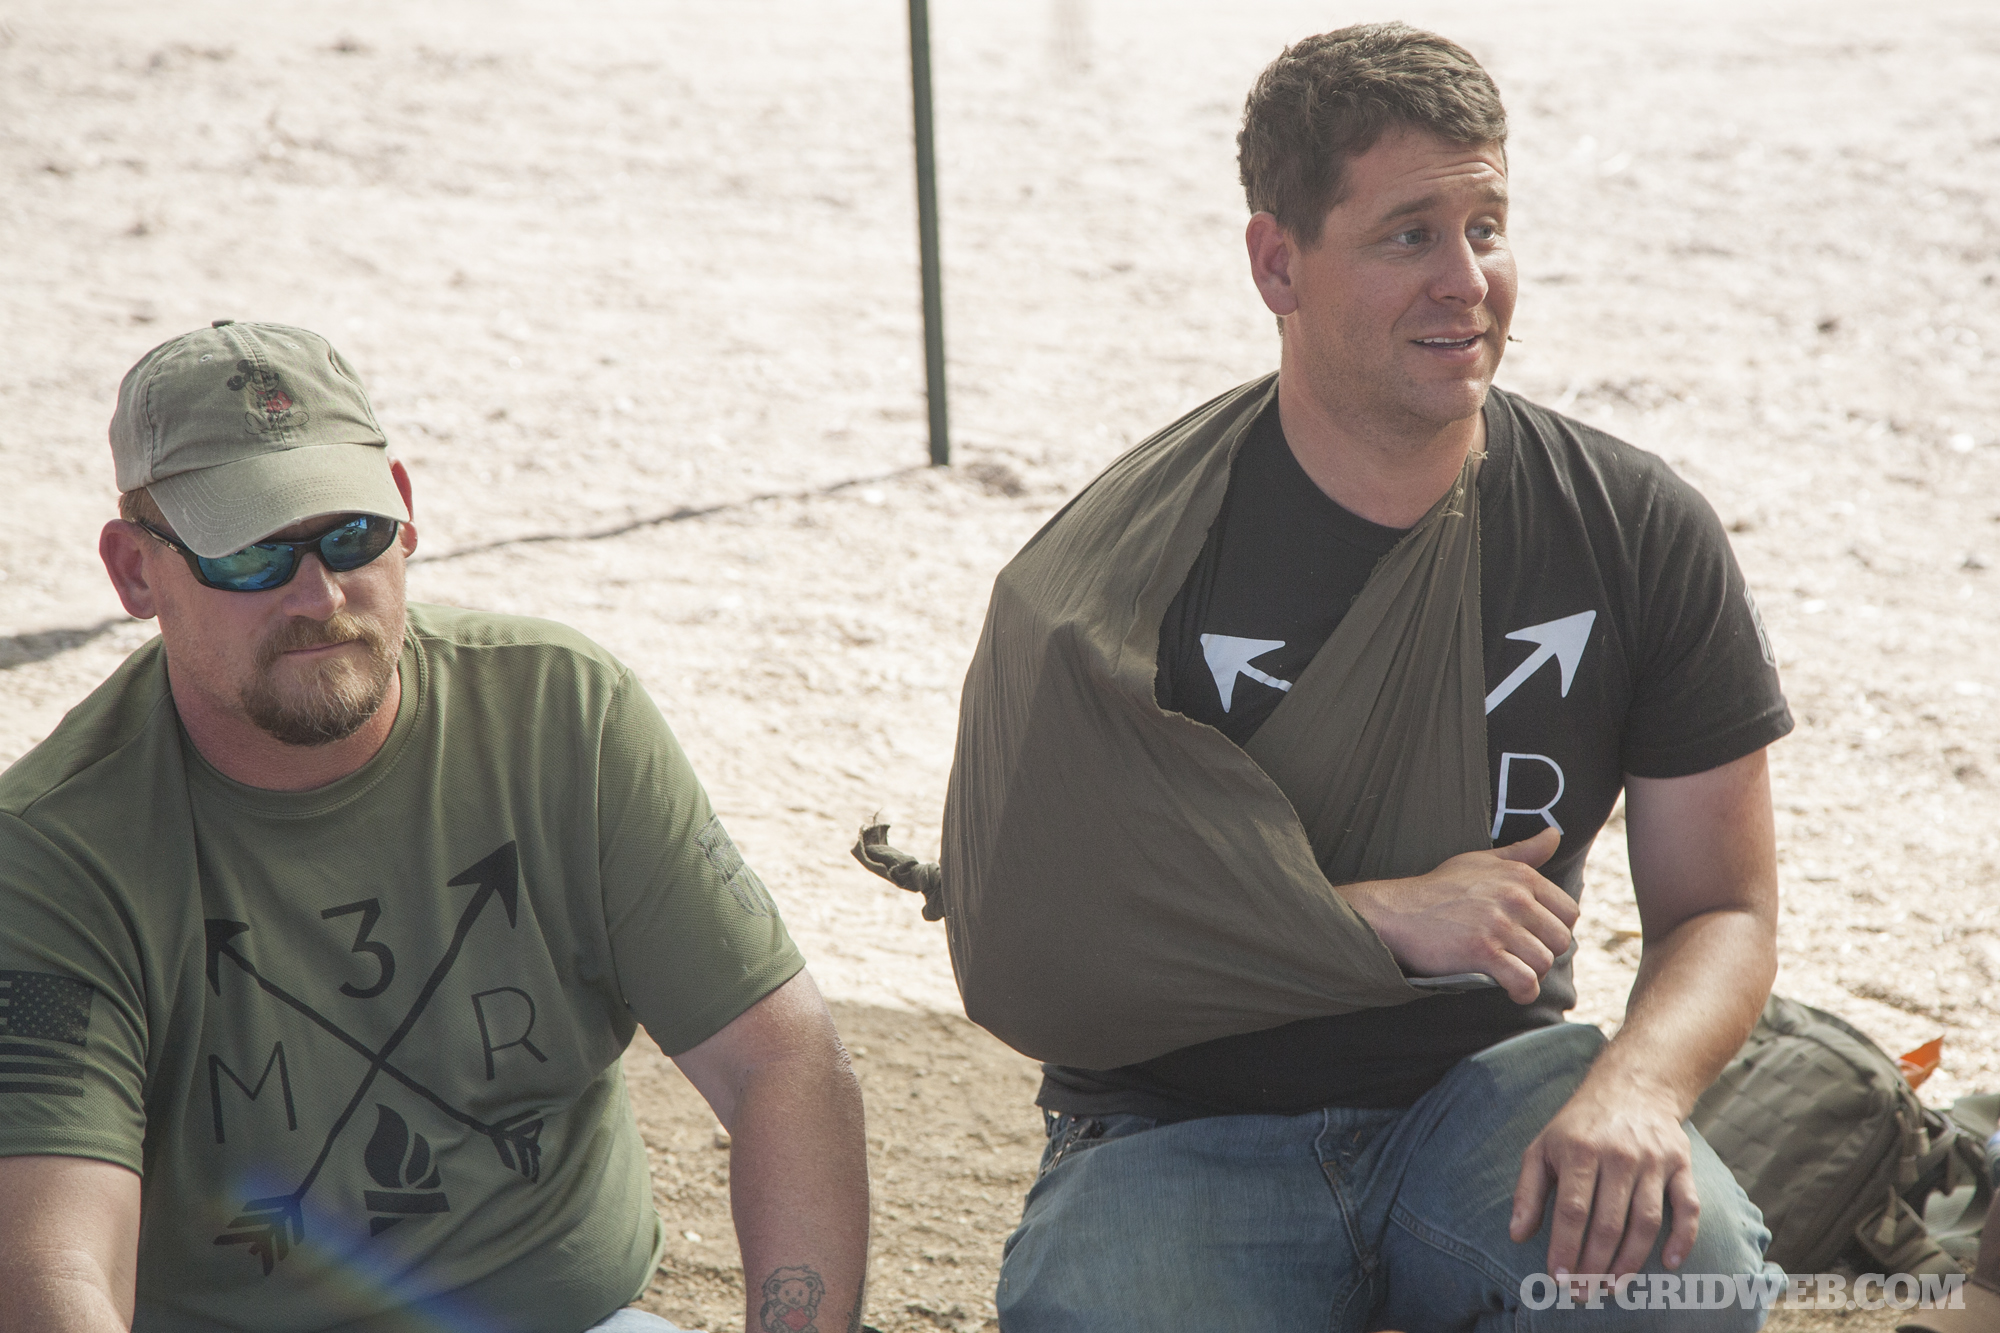
In case of broken bones, a flexible SAM splint was also in the pack. Raul held it in place on his arm, while Pete tied some cloth into a sling. Austin noted that the SAM splints are radiolucent so they don't interfere with X-ray machines — good to know, since it means you won't need to remove it once you reach a hospital for diagnosis.

3MR survival training event 2017 fire water food tools 44

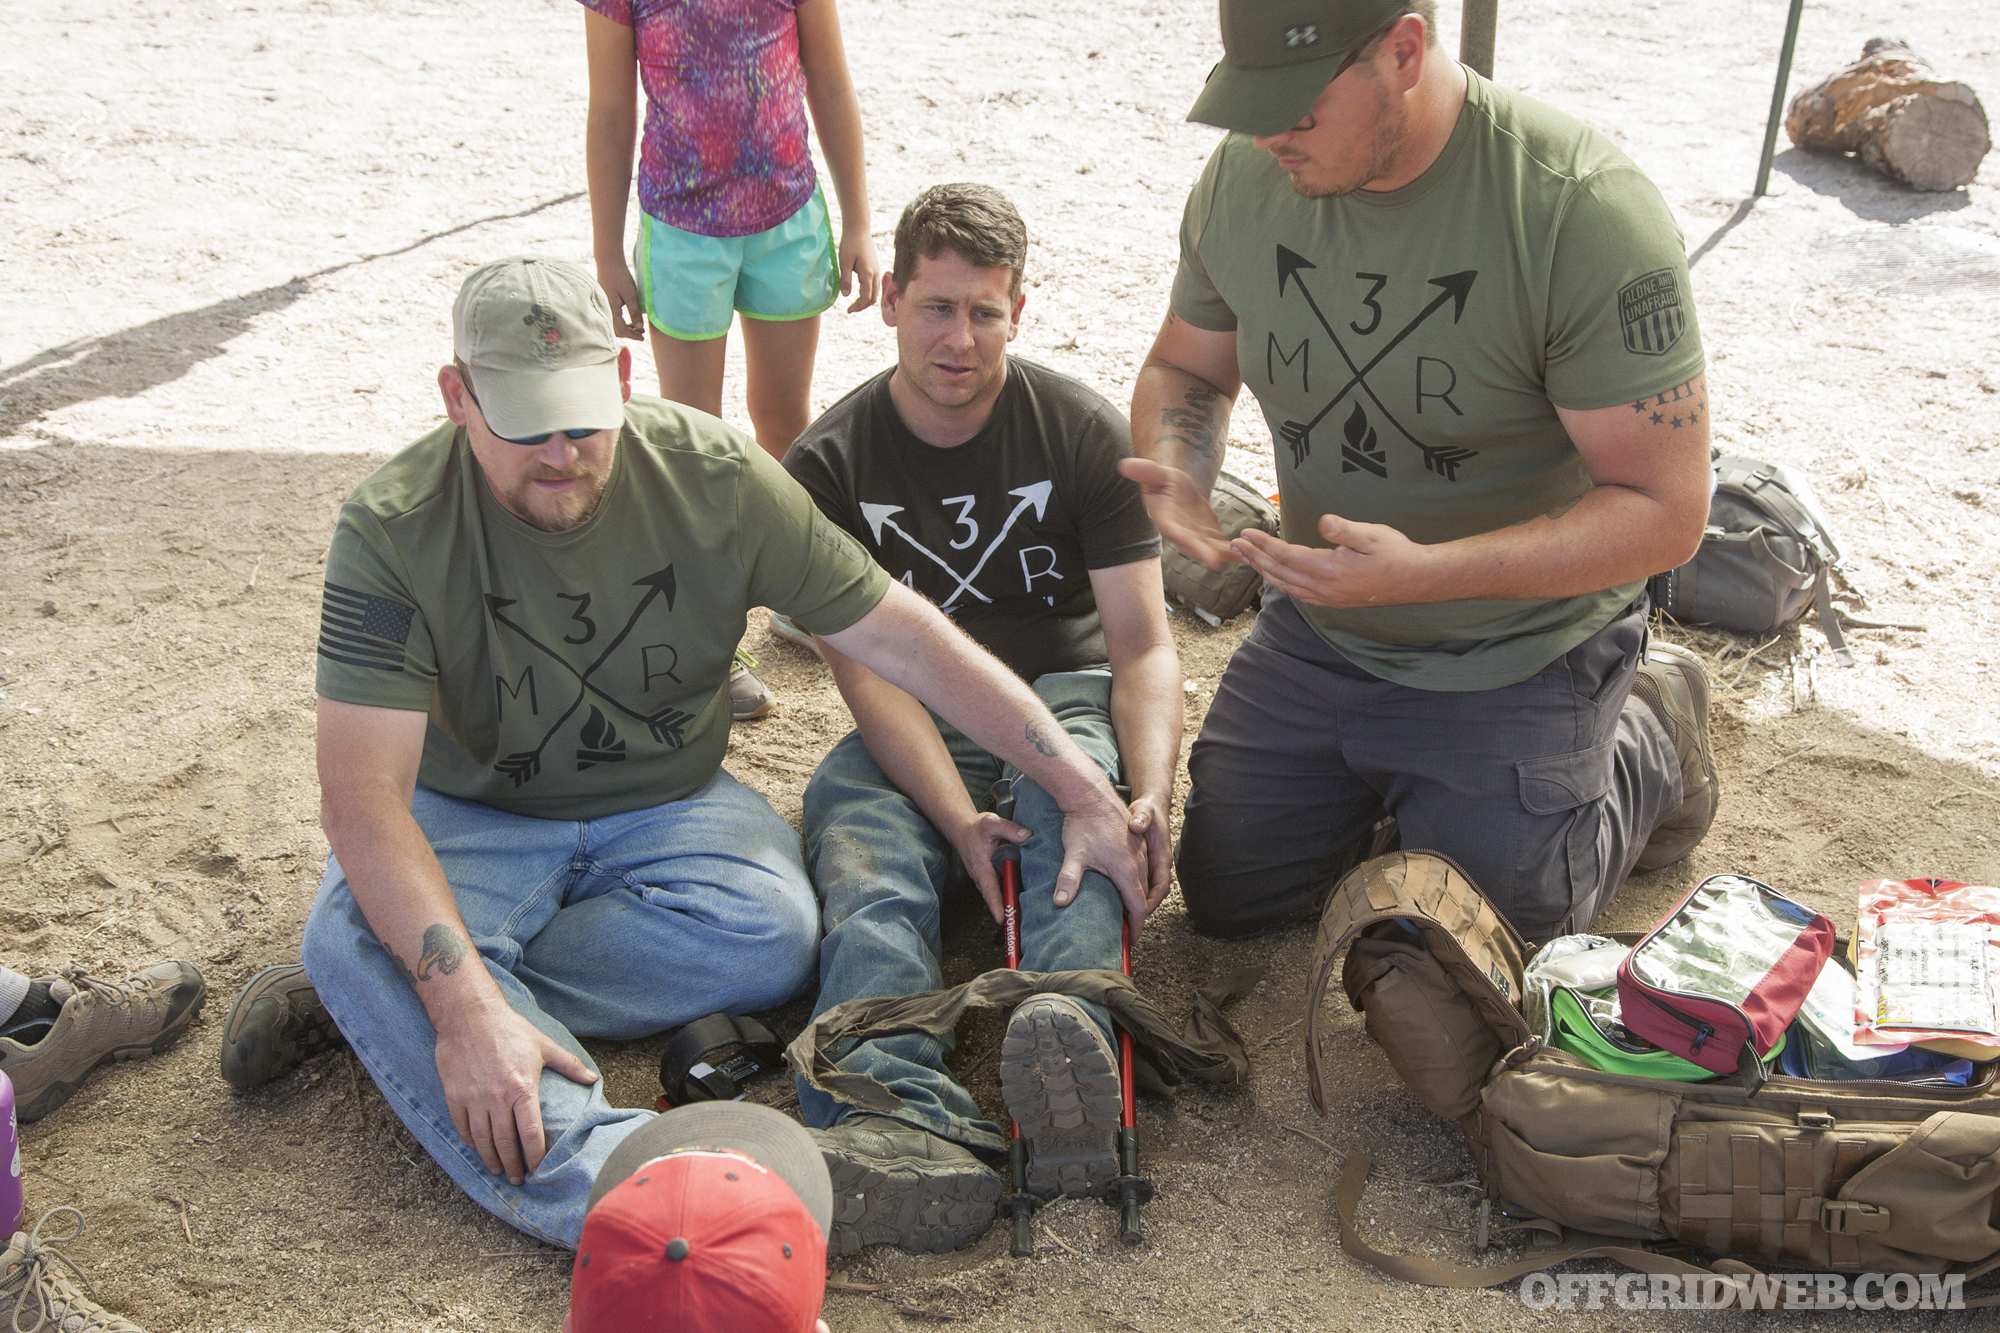
In cases where a SAM splint is too small or unavailable, an improvised splint can be made with trekking poles. The poles are placed alongside the bone, and tied firmly around it with strips of cloth.

3MR survival training event 2017 fire water food tools tourniquet 71

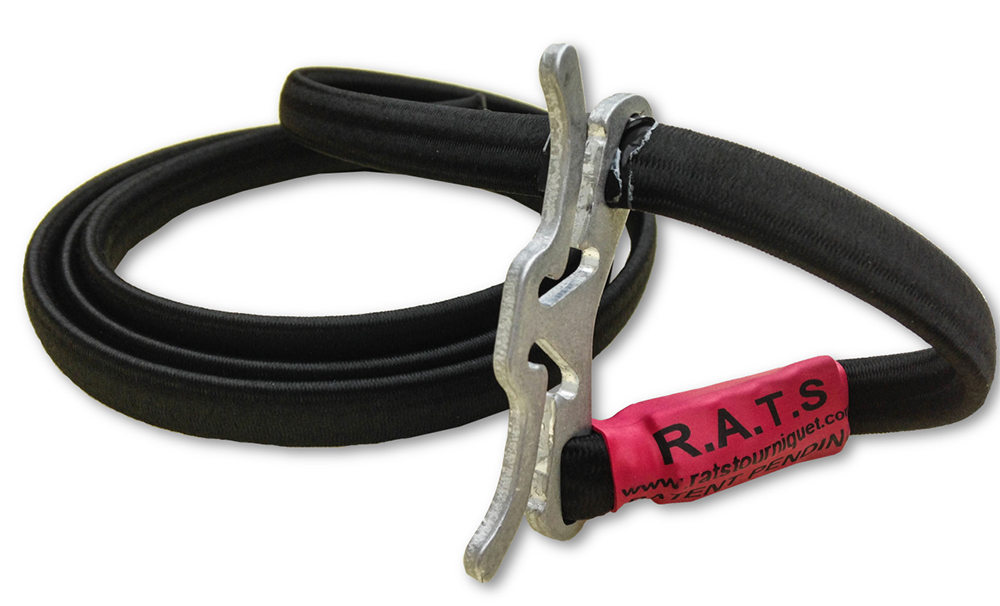
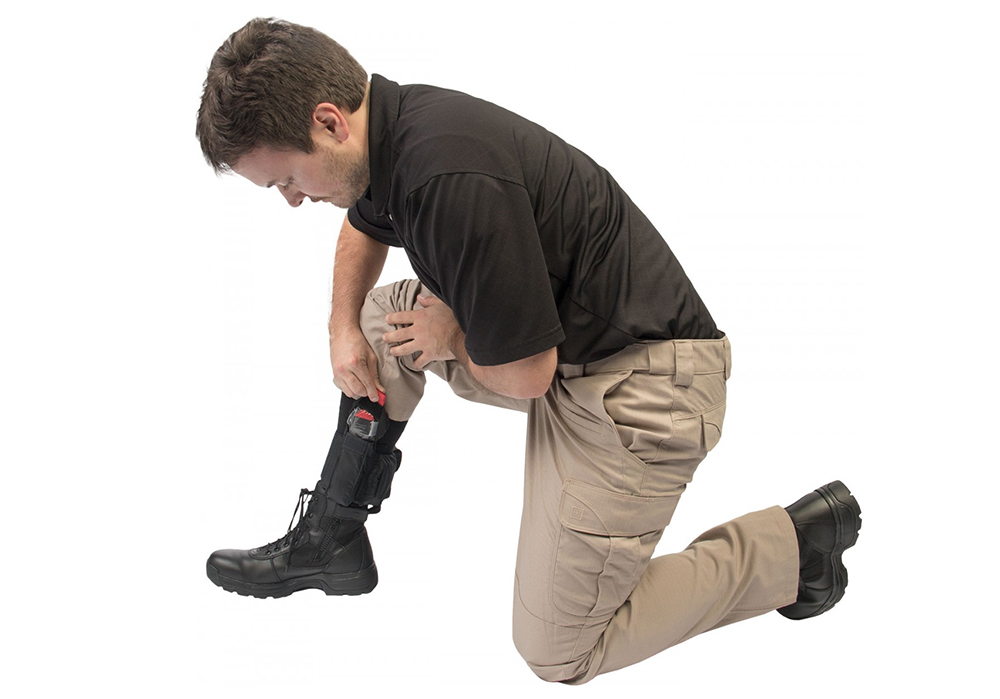
For major injuries, sudden blood loss poses an immediate threat. A tourniquet can stop the flow and spell the difference between life and death. Austin carries a RATS tourniquet, a compact TQ that uses a metal locking mechanism and nylon-coated rubber strap. However, he also showed how to use the more conventional CAT (Combat Application Tourniquet) and how to fashion an improvised TQ.

Pete applied the CAT to Raul's right arm, cinching the strap and twisting the windlass to apply pressure above the imaginary wound. The windlass rod on the CAT locks into a plastic notch, and there's a blank area where the user can write the time of application.

3MR survival training event 2017 fire water food tools 42

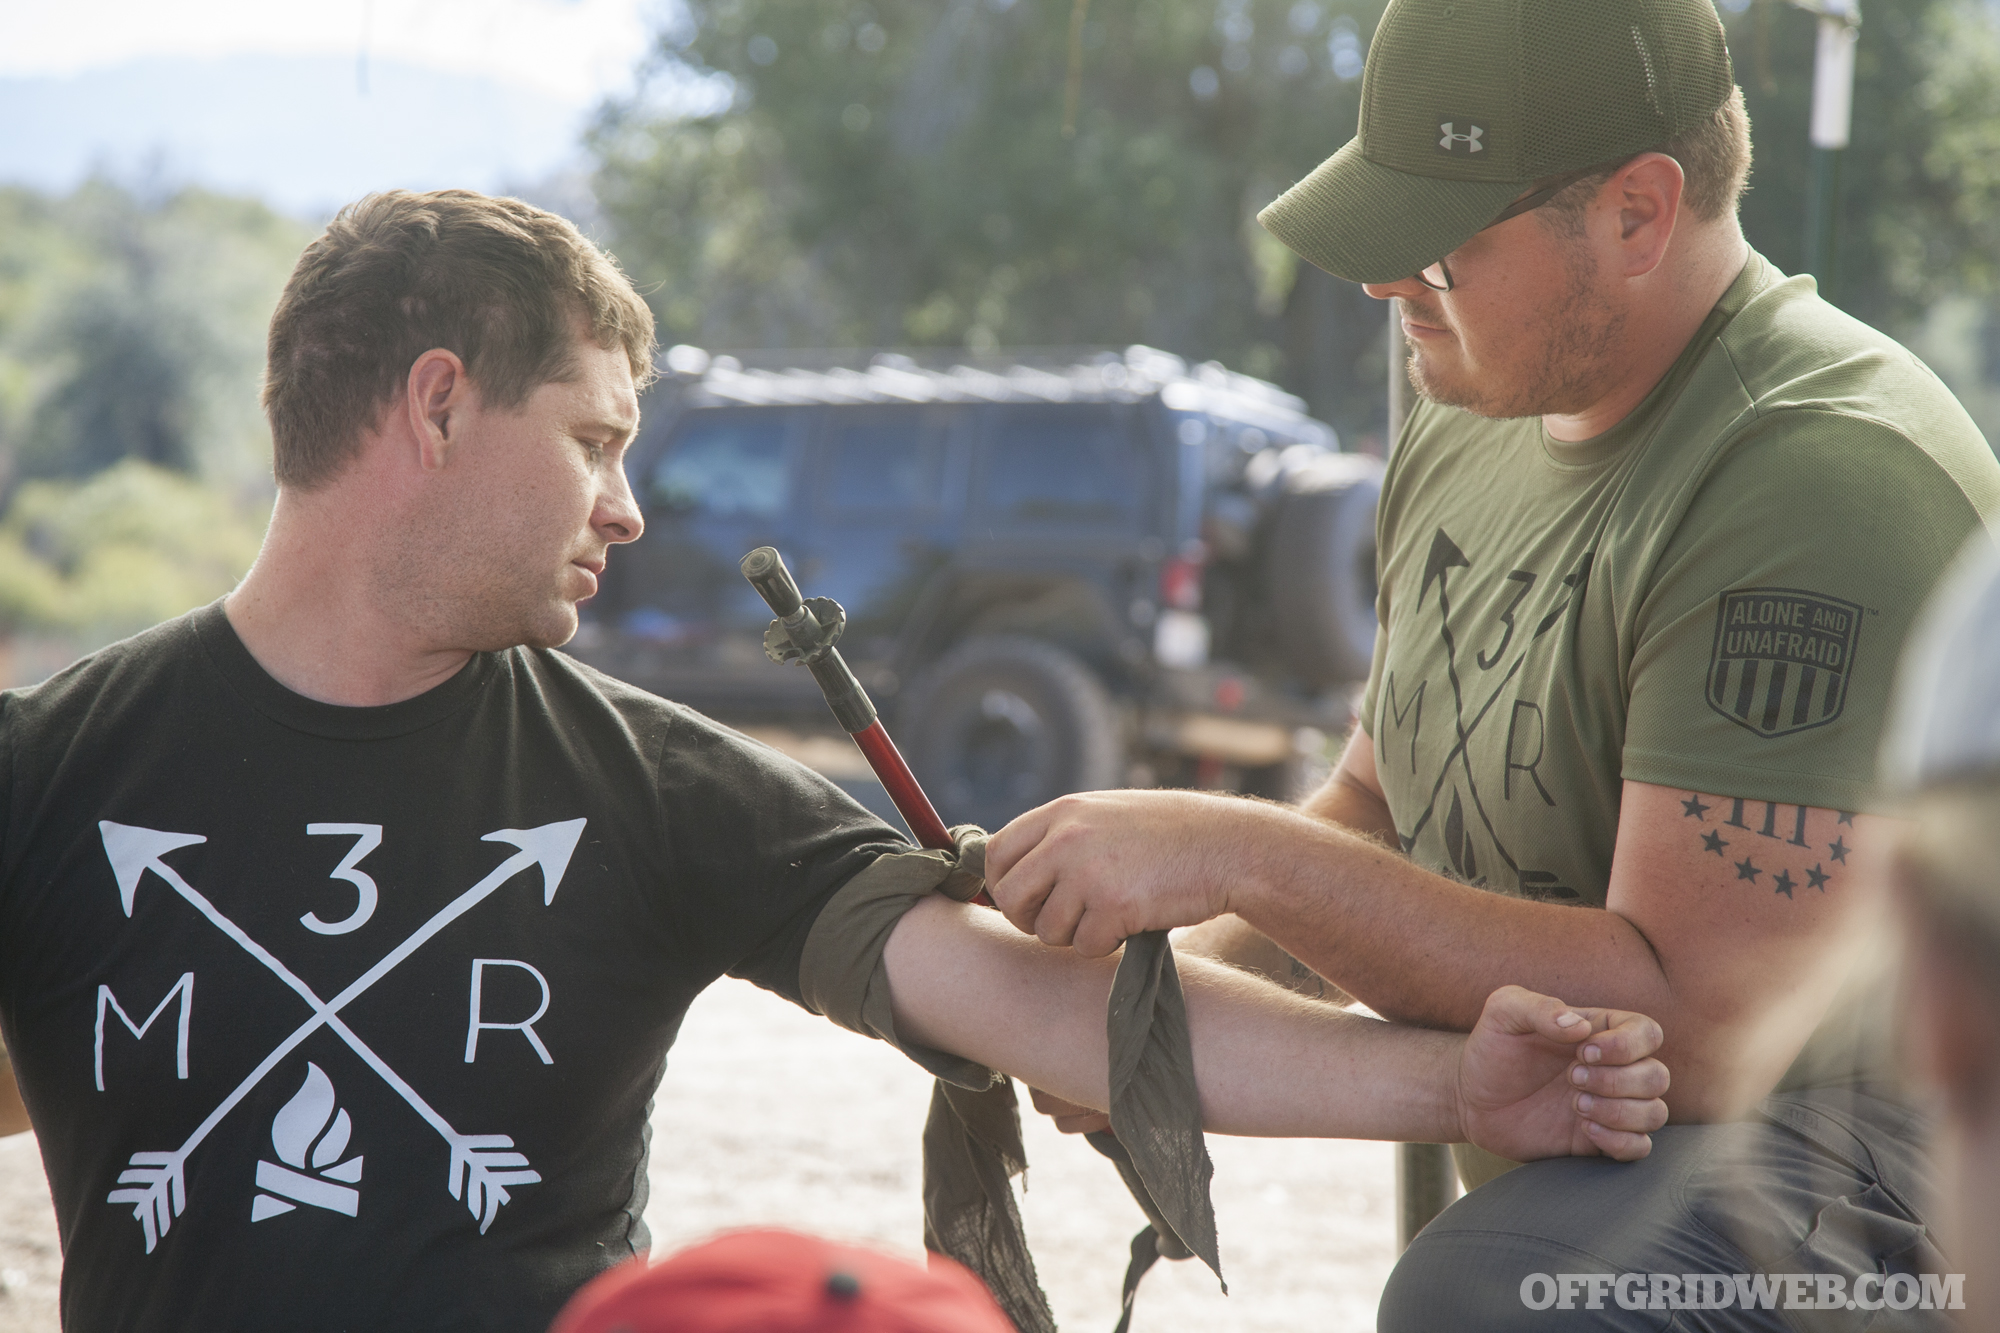
On Raul's other arm, Austin used a cloth tied to a trekking pole for an improvised tourniquet. Twisting the pole tightened the cloth, and it was locked in place with a carabiner attached to the pole's wrist strap. This setup isn't as precise or effective as a purpose-built TQ, but it's better than nothing if a patient is going to bleed out.

Austin also noted to always write down the time the tourniquet is applied, even if it's on the victim's forehead with his or her own blood.

3MR survival training event 2017 fire water food tools 43

While tight tourniquets aren't exactly comfortable, Raul was a good sport throughout the demo.

That wraps up our coverage of the Fall 2017 3MR survival training event. For details on future Triple B Adventures events in California, go to 3MR.vet or follow the Modern Mountain Man Rendezvous page on Facebook.


New: Browning Upland Hunting Boots

If you've spent enough time outdoors, you're probably familiar with the unpleasant feeling of water seeping into your shoes. Maybe you lost your footing while crossing a creek, got caught in a sudden rainstorm, or simply walked through a field full of dew-soaked tall grass. Whatever the case, it's always miserable to feel the water saturate your sock like a sponge, and know that you're going to have to live with wet feet until you can dry them out over a fire.

Browning Watson Hastings hunting boots footwear 2

The Wellington style of slip on boots has been used by hunters since the early 1800s, and Browning has released two new upland hunting boot designs inspired by this classic Wellington format. The Browning Watson and Hastings boots are both outfitted with Climate Command waterproofing, so they'll keep water away from your feet in the situations we mentioned above.

Browning Watson Hastings hunting boots footwear 4

Both of these new Browning boots offer all-leather construction, and are embossed with the Browning Buckmark logo at the heel. The difference between the models visible at the toe section — the Watson boot has a smooth toe, while the Hastings has a moccasin-style toe with additional stitching.

Left: Browning Hastings boot. Right: Browning Watson boot.

Left: Hastings boot. Right: Watson boot.

The Browning Watson and Hastings hunting boots are available in men's sizes from 8 to 13, including three half sizes: 9.5, 10.5, and 11.5. Both boots are available at an MSRP of $150. For more information, go to BrowningFootwear.com.


Animal Calls: Do You Carry These Hunting Tools?

In a true life-and-death survival situation, there are no holds barred when it comes to staying alive. You'll need every advantage you can get over Mother Nature if you expect to find shelter, build a fire, purify water, and collect enough calories to keep your muscles moving. In these situations, you'll be far better off if you can actively fish and hunt game, instead of relying on foraging alone.

Foraging for wild edibles and hunting small game can only sustain you for so long.

Foraging for wild edibles and trapping small game can only sustain you for so long.

Sport hunters usually enjoy an element of challenge, and may shy away from tools that provide an unfair advantage over their prey. Hunting laws also dictate what tools can be legally used to attract and kill game in a sportsmanlike manner. When you're surviving, all these restrictions are cast aside. Tactics such as large gill nets, steel traps, hunting spotlights, and even the use of chemicals to stun prey are all fair game.

Animal Attack 4

Animal calls are another tool which can provide an advantage while hunting to survive. Manual game calls have long been used to hunt ducks, geese, turkeys, and other birds. They're a great affordable and compact option to include in your survival kit — just be sure to study species in your area, and learn how to use the calls effectively. Here's a clip from Bass Pro Shops that shows a few duck call techniques:

For a more powerful and versatile option, electronic game calls are worth considering. These devices can reproduce a wide variety of animal vocalizations at high volumes, and bring larger prey to you instead of relying on your ability to track it down. The speaker can be placed downrange in an open field, and remotely activated using a handset to play a sound that will attract animals. However, they require batteries, and may be difficult to repair in the field if they break.

Billy Birdzell of RECOILtv discusses an Inferno electronic call from FoxPro in the following video:

So, while you may already have a fishing kit, snares, traps, and a survival rifle in your emergency kit, have you considered game calls as a survival tool? Let us know your thoughts in the poll below.


Ankle Carry: EDC Beyond Pockets

Every-day carry gear, or EDC, is all about being prepared for situations you might encounter throughout your daily routine. Some tasks, such as cutting open a box, jotting down notes, or illuminating a dark corner can be accomplished with conventional EDC tools — folding knives, tactical pens, and flashlights.

Recoil EDC mayhem 4

On the other hand, some events we prepare for are extremely rare. While getting mugged or carjacked is (hopefully) not a common occurrence in your life, you might carry a concealed weapon for self-defense in these unusual but life-threatening scenarios. In the same way, it's wise to carry a blow-out kit or personal trauma kit to stop blood loss in case things really don't go according to plan and you find yourself with a major injury.

The conundrum with EDC medical items — e.g. a tourniquet, hemostatic gauze, Israeli bandage, and gloves — is their size. These items are about as small as they can get while remaining functional, and carrying them in your pockets can be bulky and uncomfortable. In the article below from Breach Bang Clear, contributor Tom Marshall talks about the potential value of ankle carry for an EDC blow-out kit.

Editor's Note: The following article was originally published by our friends at Breach Bang Clear. It appears here in its entirety with their permission. For more from the Mad Duo and crew, go to BreachBangClear.com or follow them on Facebook or Instagram.


Ankle carry EDC medical tourniquet gun revolver tool 4

The evolution of concealed carry has, in recent years, taken to an approach we’re huge fans of. Those of us who’ve EDC’ed rucks, IBAs, duty belts and patrol bags have known for years that a compact pistol and a couple extra bullets just isn’t enough. The real world’s infinite variables demand more forethought, and more preparedness. Fortunately, those lessons are now making their way into the knowledge banks of the responsibly armed citizen community. A number of high-profile incidents over the last several years highlight potential disasters that have been successfully thwarted by quick-thinking citizens willing to be more involved in safeguarding their own safety.

But there’s a flipside to every coin. What comes with being prepared versus simply being armed is the ever-increasing complexity of the carry “loadout”. To put it another way, the more situations we want to be prepared for, the more stuff we have to carry. For better or worse, the idea of citizens wearing full gun belts fell out of fashion somewhere around the 1880s. Just like so many fashion trends, we think (hope) it’s destined to make a comeback. Until then, the race is on for more compact, efficient and innovative methods to carry what we need.

Enter US Primary Armament Logistics and Manufacturing, or US PALM for short. Known primarily for their built-like-a-tank AK mags, they’ve stepped their game up exponentially over the last couple years and now offer a complete line of products designed for what professionals would call “low signature load carriage”. The line includes belts, bags and their ankle-based carry systems. They sent us a sample of their AIFAK – Ankle Individual First Aid Kit.

[Editor's Note: Unfortunately, US PALM is no longer selling gear, so you won't be able to buy this exact setup. However, the concepts discussed in this article remain valid. For alternative ankle carry kits, check out TacMed Solutions and North American Rescue (makers of the CAT tourniquet).]

North American Rescue's Ankle Trauma Kit is available for $39.

North American Rescue's Ankle Trauma Kit ($39) is similar to the discontinued kit seen in this article.

The platform is a stretchy cuff that secures around your ankle via hook-and-loop with pockets sewn across its length. What you put in it is up to you; for our test, we were able to fit 90% of a deployment-ready blowout kit around our lower leg. Here’s what we put in ours:

  • CAT Tourniquet
  • Israeli bandage
  • HyFin compact chest seals (pack of 2)
  • Celox rapid ribbon
  • 36” strip of duct tape with hi-viz rubber band
  • Nitrile gloves

When compared to our mil-issued IFAK from OIF ’09-’10 the only things missing are Z-fold gauze, NPA with surgi-lube and a chest needle. We could probably have fit the needle and NPA if we really tried, and we may or may not keep a travel bottle of KY in the glove box anyway. (Some emergencies are personal. Don’t judge.)

Ankle carry EDC medical tourniquet gun revolver tool 2

We got our AIFAK right after SHOT Show and have been running it pretty faithfully ever since. Whether your pants are made by Wrangle, Kuhl or Jos. A. Banks, the AIFAK fits comfortable and prints minimally. In fact, short of wearing skinny jeans the AIFAK will fit under almost any pant leg with no obvious presentation.

Previously, we’d tried a number of other options that just didn’t work in civilian attire. Belt-mounted IFAKs make you look like tactical-creepy-uncle no matter how hard you try not to. Back pocket works, but severely restricts what you can carry. There’s the man-bag, which can be a pain to lug around everywhere and may not be permitted in places like malls and movie theaters. Pre-staging stuff in your car is a great secondary care option but will likely be out of reach at the exact moment when SHTF. All in all we think the ankle cuff is the best compromise between being the point man or the gray man. It’s clean, comfortable, and concealable under any dress code.

The only time it became uncomfortable was during a 7-hour rehearsal of vehicle bailouts in preparation for exigent circumstances. Lessons learned: 1) it can get hung up on a vehicle console if you’re not used to wearing it and 2) if you’re going to wear the AIFAK for extended periods, you might not want to go with ankle socks that day.

Despite that friction point (get it?) we’re still in love with US PALM’s EDC medical solution. It’s elegantly simple and offers immense response capacity when loaded properly.


Curated Offers: These Mini Cannons Are A Blast

Mini cannon: Is there a cooler combo of words? Well, now those words are more than just letters on a page—they're a reality. If you have a desk, a coffee table, or any flat surface, then you're going to want one of these fun handheld cannons. Check out these novelty cannons and fire away.

Modern Mini

mini-cannons-mini-cannon

This .25 caliber Mini Cannon provides a modern take on this classic weapon of war. Just add some 3F black powder and let the fun explode. It even comes with 2 sets of cannonballs. Whether you're at the office, the park, or elsewhere, blast away boredom with a mini cannon.

Buy Now: A great deal for only $59.99. A savings of 33%. Recoil readers can also save an additional 15% with coupon code SAVE15.

Historic Mini

mini-cannons-combat-cannon

History buff? The Combat Cannon is a miniature version of the classic 19th century cannon. At just under a half pound, this antique style is a perfect compliment to your collection, or just a cool desk item. This classic handheld cannon comes with 2 sets of cannonballs, meaning you can start the fun right away.

Buy Now: Pick on up for just $99.99 (23% off). Recoil readers can also save an additional 15% with coupon code SAVE15.