Games involving hiding are a core memory for most people’s childhoods, and this fact holds true across all recorded human history. Why? We think it’s a function of having to learn early on in our lives how to effectively avoid predators who may be actively hunting us. Likewise, we must also learn how to effectively hunt prey (or other predators) who are determined not to be found. Both halves of hide and seek can be directly tied back to evolutionary adaptations required to survive in a hostile world. Unfortunately, while the world has grown more developed, it hasn’t become any less hostile. Yet there are very few outlets in adult life that require us to rehearse or hone those hiding and seeking skillsets. One of those outlets is the Special Forces Sniper Course, or SFSC (pronounced siff-SICK). While most of us will never have access to this training, the active-duty Green Beret who runs BRVO Tactical does. He has chosen to pass some of these skills onto the prepared citizen in his unique training class, “The Objective.”
While most military and law enforcement snipers choose to enter the public training community with a precision rifle course, BRVO Tactical’s The Objective takes the complete opposite approach. There’s no shooting whatsoever in this course. Rifles aren’t even on the packing list. This class focuses instead on some of the “soft skills” taught to sniper students — directed observation, camouflage, concealment, and covert movement. We had the opportunity to attend the flagship iteration of this course, which gave us some very hands-on experience that was a little more developed than hiding in a bedroom closet from our siblings.
Above: Observed from the side, as seen in the first image of this article, the author is clearly visible. But from the perspective of his target, he disappears into the surrounding foliage.
Don’t Look. See.
The first exercise of the course was an observation lane. Instructor cadre hid several objects out in our wooded training area, mirroring potential discarded or cached equipment left by adversaries. Ammo pouches, hand tools, food wrappers, and ordnance were all placed throughout the terrain at distances between 10 and 30 yards. This may sound like it’s close enough to spot with ease, but it still proved quite difficult. Students were lined up shoulder-to-shoulder and given a fixed period of time to find as many of the objects as possible. Each student was required to keep a written map that showed what objects they believed they could see in what locations. This was, ironically, perhaps the most difficult exercise of the entire course for us, scoring a meager 3 out of 10 items. But we learned a lot of valuable information about what’s known as the 7 S's of camouflage:
Silhouette
Shine
Shadow
Shape
Shade
Sound
Speed
These are the characteristics outlining how objects fit (or don’t fit) into their surroundings. When you don’t know specifically what objects you’re supposed to see, or where you’re supposed to see them, you must start looking for visual anomalies — irregular shadows, excessive shine, odd shapes, unnatural shades. These are all examples of signs to look for that might indicate something is out of place, even if you don’t know what that is.
Above: In the observation lane exercise, students searched an area for hidden items, taking notes, drawing diagrams, and reporting what they found to the instructor.
Behind the Veil
Understanding these concepts and seeing first-hand how difficult they can be to pick up on led the class directly into our next exercise: ghillie suit construction.
While we did not build full suits like you might see in the movies, each student was provided a “cobra hood,” which includes a hood and sleeves to cover the wearer’s upper half. It should be noted here that, while The Objective isn’t an inexpensive course, the tuition includes several hot meals as well as an impressive amount of gear. Every student received a cobra hood, burlap fiber kit, camouflage mesh, pruning shears, binoculars, laser range finder, spotting scope, tripod, and backpack, which we got to keep at the end of the class.
These were not top-tier, name-brand items, but they were up to the task for the two-day course and are meant to be knocked around and used in any kind of follow-on training or rehearsal you might do at home. We like this strategy because, even if you do have multi-thousand-dollar optical equipment, you don’t have to worry about damaging or losing it during this course.
Above: Finnish gear manufacturer Varusteleka provided these warm and comfortable Merino wool garments for Editor Patrick McCarthy to use during the course, along with a packable rain poncho and small neck knife.
Students learned how to use both burlap strips and natural vegetation to build out their ghillie hoods to match the terrain. We also learned how to use these same materials to cover spotting scopes, tripods, and rifles. RECOIL OFFGRID Editor Patrick McCarthy made excellent use of the provided Cobra hood along with MultiCam outerwear from Beyond Clothing and Merino wool mid-layer apparel from Varusteleka.
Weather during the class hovered around freezing with occasional snow flurries, and we were often laying perfectly still or crawling across the cold ground. So, donning multiple layers over moisture-wicking Varusteleka wool long johns helped him stay dry and comfortable while he was concealed. Similarly, the Finnish company’s wool socks, glove liners, and wool balaclava kept every bit of exposed skin concealed and fully protected from the chilly air.
Above: Each student received a backpack loaded with basic gear for use during the course, including camouflage materials, binoculars, and a spotting scope.
The author decided to test out a piece of gear we’d been sitting on for just such an occasion — a Propper M65 Field Jacket specially modified by a one-man tactical sew shop that goes by the handle @night_fighter_0 on Instagram. The Night Fighter Field Jacket mod package includes several handy upgrades like sewn-in elastic mag pouches, MOLLE webbing channels, and a ghillie net modification sewn into the M65’s roll-out hood. When not in use, or built out with vegetation, the M65’s hood stowed in the zip-close collar.
Above: The author wore this Propper M65 field jacket at the course. It was modified by @night_fighter_0 to add concealable pouches for rifle magazines and other tools, as well as a stowable ghillie hood.
If needed, simply unzip the collar, unfurl the hood, and attach natural vegetation as needed for maximum concealment. While the M65’s olive drab won’t work in all environments, it worked great in our training terrain — a mountainside at approximately 5,000 feet in wintertime, with plenty of greenery left on the land.
We were actually surprised at just how effective a giant single-color jacket was in this class, considering that all the other students were wearing full camouflage outfits. Likewise, the M65’s hood doesn’t offer the shoulder and arm coverage of a dedicated ghillie hood or half-suit, but as a rapid-deployment solution that can be stowed away and still let you fit into a suburban environment, the Night Fighter mod worked great.
Once the students built-out their ghillies and applied camouflage grease paint to their faces and hands, we were given the chance to test our concealment skills in a couple of back-to-back exercises with the instructors trying to spot students who had settled into their hide sites.
Above: Grease paint is an essential tool for concealing areas of exposed skin. We blended light and dark colors to match the colors of the surrounding forest.
On Objective
The final training exercise was modeled after a standard U.S. Military graded stalk. Students were assembled at a rally point that was an unknown distance from the target area. A visual description of the target (in this case, BRVO Tactical’s founder standing in a trailer hitched to his pickup truck) and GPS coordinates to that position. The trailer had several HAZMAT placards with symbols, colors, and numbers attached to it. Students had to get close enough to read each sign clearly, recording what they saw in their field notes.
As an added level of difficulty, there were multiple placards attached to all four sides of the vehicle, which meant students would have to maneuver in and out of multiple positions to record all the placards. Students had three hours to traverse the terrain and move into multiple concealed positions to annotate the letter/number/color combinations on each side of the truck without getting spotted by the instructor who was continuously observing with magnified optics.
Above: As the camera moves closer, the lens of a spotting scope slowly becomes visible among the brush. Even from 10 yards away, you’d have a hard time noticing it.
Students weren’t told how to complete the mission and were allowed to use any of the optical equipment issued to them at the start of the class. The high-power spotting scope would allow a student to stay further away from the cadre but would have to be loaded into a pack or dragged behind by its tripod for the duration of the exercise, increasing the likelihood of getting caught.
Binoculars could be placed into a pants pocket, allowing a student to pack lighter and move quieter, but their lower magnification would require getting much closer to the target vehicle. Balancing the limitations of equipment against the ability to move covertly, applying camouflage correctly, and utilizing the terrain to your advantage, was a highly individual thought exercise that produced unique lessons for each student.
Above: For the final exercise, students had to get close enough to this truck and trailer to read the HAZMAT signs while being careful not to get spotted by the BRVO Tactical instructor.
Lessons Learned
When framed in the context of “learning sniper skills,” it’s a logical pitfall to dismiss this course as tactical tourism or enter-train-ment. But, as we pointed out in the beginning, learning how to move undetected and identify hide sites is a fundamental survival mechanism that remains programmed into our earliest playground socializations. Even current Homeland Security guidelines tell us to Run-Hide-Fight … in that order. The movement and concealment skills taught during The Objective will make you better at the first two.
Above: Get out and train! It's a great way to build skills and develop friendships with like-minded individuals in the community.
If you must fight, wouldn’t you rather fight from a position of surprise than a position of reaction? The Objective is a 36-hour immersion course in evolutionary survival skills that have been keenly weaponized by years of battlefield testing. We applaud the cadre at BRVO Tactical for taking their years of military and law enforcement special operations experience and paying it forward to the citizens they’ve sworn to protect.
Milk and cookies, peanut butter and jelly, Jack Daniels and Coke — some things just seem to be made for each other. We have an addition to that list: rimfire pistols and suppressors. The former is an excellent tool for schwacking varmints, affordable plinking at the range, and teaching new shooters how to use a pistol; the latter enhances each of those functions.
With a suppressed .22LR pistol, you can control the pest population discreetly without alerting everyone who lives near your property, plink safely without ear protection, and introduce those new shooters to a weapon that’s quiet and less intimidating to use. If you own a rimfire pistol, it’s easily the number-one accessory we’d recommend.
That said, there are still a few drawbacks to installing a suppressor on your pistol. First and foremost is the process of buying one, which involves filling out an NFA Form 4, paying for a $200 tax stamp, and waiting several months for the paperwork to clear. Until America is able to abolish the NFA and its unconstitutional restrictions on hearing protection devices, there’s nothing we can do to avoid this process. The other downside is the fact that the suppressor will add length to your pistol, making it less compact, portable, and discreet — this one is something we can alleviate.
Size Matters
By chopping a pistol’s barrel to a shorter length, its size and balance can be mostly (if not entirely) maintained once a suppressor is added. This has been a relatively common modification for owners of Ruger’s popular Mark IV .22LR pistols, but it requires paying a gunsmith roughly $200 to cut and thread the barrel. The front sight will also need to be relocated if you expect to use the iron sights again. This permanent modification voids the pistol’s warranty, and depending on the length and the quality of the gunsmith you choose, might lead to unforeseen reliability problems.
Another option is to purchase a complete replacement upper and simply swap it onto your Ruger Mark IV lower. A few aftermarket companies offer threaded Mark IV uppers ranging from 3.5 inches to 2 inches, and some include Picatinny rails or micro red-dot mounts as well. However, these uppers can cost $150 to $400, and the shorter variants may not be able to cycle properly with certain types of ammo. They’re also serialized parts, so they must be shipped to a licensed dealer, and you’ll likely have to pay transfer fees upon arrival. It’s still not an ideal solution.
All this demand for a short, suppressor-ready Mark IV did not go unnoticed by the product development team at Ruger. In late 2022, Ruger representatives showed up at RECOIL’s CANCON event in Georgia with a pre-production prototype of a Mark IV 22/45 model with a 3-inch threaded barrel, no iron sights, and a Picatinny rail optic mount. We didn’t know it at the time, but this would go on to become the new Silencer Shop exclusive Ruger Mark IV SSH.
Above: This Sightmark red dot offers wide field of view for daytime shooting, and its night-vision-ready brightness settings work well alongside the infrared weapon light.
A Better Host
Ruger and Silencer Shop teamed up to release the SSH, which stands for Silencer Shop Host — it’s a fully warrantied, factory-built platform for mounting your favorite rimfire suppressor. It’s based on Ruger’s existing Mark IV 22/45 Tactical, which features adjustable iron sights, Picatinny rail optic and light mounts, a 4.4-inch threaded barrel, and the classic 1911-style 22/45 pistol grip. For the SSH package, Ruger removed the underbarrel light mount and iron sights, and chopped the barrel down to only 3 inches.
The SSH is available in three finish choices: standard blued finish, flat dark earth Cerakote, or olive drab Cerakote. MSRP is $749, but at the time of writing this article, it’s available directly through Silencer Shop for $559.
The SSH seen in these photos was essentially an impulse buy. I went in to a local dealer, The Shooting Range in Queen Creek, Arizona, for a routine transaction and ended up walking out with an SSH order on the books. Ever since shooting the prototype at CANCON, I had my eye on it, and although they didn’t have the FDE-finished model in stock, they put in an order for one. A few days later, I picked up my new pistol.
Above: The Volquartsen Competition Bolt includes three recoil springs: reduced power with a dark finish (installed in this photo), standard power with a silver finish, and extra power with a gold finish.
I already owned a JK Armament .22-caliber modular suppressor, so I immediately threaded it onto the Ruger’s short barrel. Since the gun has no iron sights, I also installed a Sightmark Mini Shot A-Spec M2 reflex sight and headed to the range for some initial impressions. With standard velocity Federal 36-grain .22LR ammo, it ran flawlessly as expected.
My JK Armament suppressor can be configured with up to nine baffles, so I experimented and found that five felt like the ideal compromise between sound reduction and length. This adds roughly 4 inches to the SSH’s 3-inch barrel, leaving it at a very manageable size, and while it’s not whisper quiet, it’s comfortable to shoot without ear protection.
In standard form with a suppressor and red-dot sight, the SSH was a fun little pistol, not too different from its 22/45 Tactical siblings. It didn’t need anything else … but the massive aftermarket support for the Mark IV was too tantalizing to ignore. So, I dove into the realm of upgrades.
Above: I paired the 3-inch barrel with a JK Armament modular .22 suppressor. Five baffles is enough to reduce sound substantially, but I can install the remaining four to keep it even quieter.
Building a Space Blaster
The first order of business was to restore something I think Ruger never should have deleted: the light mount. The addition of an infrared weapon light and night vision goggles turns this from a good varmint control weapon into a straight-up varmint assassination machine. Groundhogs and possums will never see what hit them. Beyond that, shooting this pistol while wearing NVGs is a good way to train without blowing money on more expensive calibers. Unfortunately, a 22/45 Tactical factory light mount can’t fit on this stubby barrel, so I had to get creative.
A company called Performance Services makes a Mark IV light mount that attaches to the barrel with a 1-inch ring clamp, but it’s $60 plus shipping, and I figured I could make something equally effective using a cheap Picatinny rail scope ring. After spending $13 on a Monstrum Tactical 1-inch Picatinny ring mount on Amazon, I unscrewed the rail segment, filed down the alignment tab, and drilled a new hole to secure it in a cantilevered position on the ring (rather than centered, as it originally was).
Then, it was as simple as tightening the ring onto the barrel and sliding on a SureFire X300V white/IR light. I’d say this setup is even stable enough to keep a laser zeroed once all the hardware has been threadlocked and torqued.
Next, I decided to swap the rubberized Ruger-branded grip panels to something with more texture and durability. These Hogue Extreme Series grips are made from tough G10 material — the same stuff as my favorite pocketknife handle scales — and they’re machined with an aggressive Piranha pattern that feels great in the hand. Hogue offers a few different colors, but I went with plain black to match the rest of the gun’s color scheme.
For some mechanical upgrades, I turned to one of the biggest players in the rimfire aftermarket world: Volquartsen. Their Mark IV Accurizing Kit replaces most of Ruger’s original trigger components with more precise, CNC-machined, and wire-EDM-cut parts. The kit includes a new disconnector, target hammer, hammer bushing, target trigger, and trigger plunger and spring.
The result is a trigger that snaps like a glass rod at 2.25 pounds, and it also has two tiny screws to adjust pre-travel and over-travel (see sidebar for details). Installing this Accurizing Kit was definitely more complex than your average Glock or AR trigger install, but with a set of needle-nose pliers, a small metal pick, and a little patience, it’s very doable for a mechanically inclined owner.
The original bolt was replaced with a complete Volquartsen Competition Bolt, which features a super-slick black DLC coating and an extended charging knob for racking the bolt more easily. This CNC-machined bolt is built with a handful of Volquartsen upgrades, such as their Exact Edge Extractor, SureStrike Firing Pin, and Recoil Rod and Spring Kit with three spring options. The standard silver recoil spring mimics the factory spring rate, the gold spring is intended for use with high-velocity ammo, and the dark-colored spring enables the use of most subsonic ammo (it also reduces recoil slightly with supersonic ammo, though .22LR has almost zero recoil in the first place).
Finally, I picked up Volquartsen’s Extended Magazine Release and Base Pad Kit. It includes two machined, black anodized aluminum baseplates for the factory Ruger mags. These don’t increase magazine capacity, but they do add weight and help the thin metal mags drop free for faster reloads. Subjectively, they look cool too. The kit also comes with a knurled mag release button; in addition to being easier to press, it causes the mag to sit higher in the pistol’s frame. The company says this improves feeding by preventing the bolt from sliding over rounds in the magazine.
Above: These machined aluminum Volquartsen baseplates help the magazines drop freely for faster reloads and add a contoured edge to keep the shooter’s hands in place on the grip.
Trigger Adjustment
Unless you do a lot of competition or precision rifle shooting, you may not be familiar with how to adjust a trigger like the Target Trigger included in Volquartsen’s Accurizing Kit. This trigger offers adjustments for both pretravel and overtravel.
Pretravel is any movement from the resting position up to the point where the shot breaks. This includes take-up or slack (trigger movement before meeting the resistance of the sear) and creep (trigger movement after meeting the sear up to the break point where the hammer drops). Adjusting pretravel makes it faster and easier to predict exactly how much the trigger must be pressed until the gun will go “bang.”
Overtravel is movement of the trigger after the shot breaks until it physically can’t move any further back. Reducing over-travel makes it faster and easier to return the trigger to its reset point, allowing the gun to be fired again.
Above: Extended Magazine Release and Base Pad Kit. It includes two machined, black anodized aluminum baseplates for the factory Ruger mags. These don’t increase magazine capacity, but they do add weight and help the thin metal mags drop free for faster reloads. Subjectively, they look cool too. The kit also comes with a knurled mag release
Here’s a summary of how to adjust pretravel and overtravel with a Volquartsen Mark IV trigger:
Ensure the gun is unloaded and safe. Remove all live ammo from the area. Tip: If you’re not comfortable dry-firing your pistol a few times on an empty chamber, insert a .22LR snap cap. Ruger says on page 14 of the manual that “the Ruger Mark IV can be dry fired but a snap cap is strongly recommended for anything more than occasional dry fire practice.”
Use the included 1/16-inch Allen wrench to turn the pretravel screw (located at the top of the trigger) clockwise in small increments until the trigger is unable to reset, dry-firing and cycling the bolt repeatedly with each adjustment.
Once the trigger is “dead” and will not reset, turn the pretravel screw counterclockwise slowly until the trigger resets. You’ll hear a faint click.
Use the same Allen wrench to turn the overtravel screw (located on the face of the trigger) clockwise in small increments until the trigger is unable to break, dry-firing and cycling the bolt repeatedly with each adjustment.
Turn the overtravel screw counterclockwise until the gun is able to dry fire normally.
Cycle the bolt and dry fire again. Hold the trigger down and cycle the bolt, then slowly release the trigger until you hear and feel it reset. Repeat a few times to ensure it’s working normally. Tip: For improved reliability, don’t try to eliminate 100 percent of pretravel and overtravel — you may need to back out each screw another quarter or half turn past the “ideal” position.
If the Holster Doesn’t Fit …
I’m not the type of guy who really enjoys bench shooting pistols — in other words, picking the gun up off a tabletop and firing slow groups at a static target. I’d much rather be outdoors, running dynamic drills and shooting targets on the move. And for practical purposes such as varmint hunting, it’s a good idea to have a holster in case you need both hands for a task. Unfortunately, finding a sturdy Kydex holster for a suppressed pistol is hard enough, and adding a Frankenstein DIY light mount makes it even more difficult.
After shopping around, I found a holster that looked close enough to what I needed — the Ragnarok SD from T-Rex Arms. It’s designed to be a universal solution for most suppressed pistols, and it indexes off the SureFire X300 light. That means as long as the light locks into place securely, I don’t have to worry about the holster fitting the gun perfectly. But after receiving the holster, I noticed that the upper edges of the holster’s Kydex interfered with the ring mount around the barrel.
I used a Sharpie marker to trace the areas that needed to be trimmed to fit the gun, and then fired up my Dremel. Before you cut anything, remember that it’d be easy to ruin your holster with this modification, so be sure to go slow and take off as little material as possible. I used a cutting wheel to carefully trim about ½ inch of Kydex out of the midsection, then switched to a sanding bit and ground all the edges smooth, checking the fit of the gun repeatedly as I worked.
Lastly, I used a heat gun to soften the “wings” at the front of the holster per T-Rex’s instructions and formed them around the suppressor to add more support. The end result is a holster that features a Safariland QLS fork, and can clip into any of my belts, from a loop on my everyday belt, to the mid-ride carrier on my Snake Eater Tactical range belt.
Above: The T-Rex Arms Ragnarok SD was one of the few holsters we figured might work with our Frankenstein light mount. It did require a little trimming with a Dremel, but it fits like a glove now.
Closing Thoughts
The Mark IV 22/45 already has an atypical silhouette, so pairing that with a modular suppressor and optic only accentuated its looks. By the time I was done working on it, this pistol ended up looking a bit like a futuristic sci-fi movie prop. I’m not complaining — where we’re going, we don’t need ear pro.
At the range, this Mark IV is giggle-inducing for anyone who shoots it. Standard velocity rounds sound like the snap of an air rifle; with subsonic rounds, all that’s audible is the click-clack of the bolt reciprocating and the sound of the bullet impacting its target. Although this pistol certainly wouldn’t be my first choice for concealed carry or defense against larger predators (especially the two-legged kind), it can help me train fundamentals like sight picture and trigger press while only spending about 4 cents per round.
Fear of flying is a relatively common phobia, but in most cases, air travel is actually quite safe. Each year, commercial airline travel accounts for less than 0.001 passenger fatalities per 100 million vehicle miles traveled, vastly lower than passenger trains (0.05) and cars (0.57). The likelihood that you’ll ever experience anything beyond an uncomfortably hard landing on a commercial aircraft is extremely low. However, there’s an exception to this comforting statistic: small private planes, such as an Alaskan bush plane.
According to the National Transportation Safety Board’s 2022 report, scheduled commercial airline flights experienced only 20 accidents and one fatality (a ramp worker, not a passenger) over the course of 17 million flight hours. That equates to an accident rate of 0.117 and death rate of 0.006 per 100,000 hours. In comparison, general aviation — the category which includes private planes — experienced 1,205 accidents and 358 fatalities in 22 million flight hours. That’s 5.336 accidents and 0.945 deaths per 100,000 hours. In other words, you’re 45 times more likely to experience a crash in a private plane, and the likelihood of a fatality is 157 times greater.
The vast wilderness of Alaska is one of the most remote and inhospitable regions in North America, and those who travel there to hunt and fish often rely on small bush planes to reach their destinations. The frequency of these flights, combined with the rugged terrain and challenging weather conditions, also makes Alaska a common location for small plane crashes.
In 2022, there were 83 general aviation accidents in Alaska, including 7 fatalities. These fatalities aren’t always the result of inexperienced pilots — last year, Jim Tweto, one of the stars of Discovery’s Flying Wild Alaska, died after his Cessna 180 crashed near a remote airstrip. Initial reports indicate it may have been the result of unusually strong winds.
If you experienced a small plane crash and found yourself isolated in the Alaskan bush, what would you do to survive? Would you be able to treat your injuries, withstand the elements, and signal for rescue? If electronic methods of communication failed, how would you indicate distress to nearby aircraft?
The Scenario
The Scenario: Bush plane crash
Your Crew: Yourself
Location: Central Alaska
Season: Late summer
Weather: Light winds, and scattered showers; high 58 degrees F, low 42 degrees F
The Setup
Your brother-in-law Nick lives in Alaska and has worked as a bush pilot for as long as you’ve known him. At a recent family gathering, he convinced you to come visit and go on a fishing trip in the backcountry. Excited for a fun weekend off the grid, you packed up your tent, clothes, freeze-dried food, emergency survival gear, and a few guns before flying to Fairbanks to meet him. At the airport, he showed you around his pride and joy, a Piper Super Cub. He conducted the usual pre-flight checks, got clearance for takeoff from the tower, and the two of you roared down the runway before rising into the cloudy blue sky.
The Complication
During the flight, you were enraptured by the beauty of the landscape below. After a while, Nick checked his charts and began descending toward the remote landing site he chose. However, as the plane passed 2,000 feet of elevation, a shrill alarm rang out through the cabin. Nick immediately went to work diagnosing the problem, but you felt the plane start to shudder. Then, to your horror, there was a loud clunk and the roar of the engine was replaced by a deafening silence. The propeller began free-spinning in the wind, and Nick simply said “oh sh*t.”
As precious seconds ticked by, Nick did everything he possibly could to restart the engine and maintain enough altitude to glide to a safe landing, but it was impossible. He attempted to declare a hurried Mayday over the radio, then shouted “Hold on!” and you braced for impact as the plane swung low over the rocky terrain. The landing gear made contact with a boulder, slamming the fuselage forward into the ground. Dazed from the impact, you looked at Nick in the front seat and realized his half of the cockpit had taken the hardest hit — then you saw his leg was crumpled and spurting arterial blood onto the shattered instruments.
Before you could find or apply a tourniquet, Nick died from blood loss. You’re on your own now.
After managing to pry open the door, you crawl out and attempt to stand up. You’ve got several deep lacerations, a concussion, and what feels like a badly sprained ankle, but you’re alive. Gear and pieces of fuselage are strewn everywhere. You manage to recover a Pelican case with your fishing gear and a gun, plus a backpack full of clothes, a handful of snacks, and a Nalgene water bottle. The tent and the rest of your food are nowhere to be found, and rain is starting to fall.
Assuming someone heard Nick’s Mayday call, it seems likely that help is on the way, but you’re not certain they’ll arrive anytime soon. How will you stay warm, dry, and safe from predators until the cavalry shows up? What can you do to make yourself easier to find from the air? And if authorities didn’t actually receive the rushed Mayday call, what’s your backup plan to call for rescue?
Survival Instructor Kevin Estela’s Approach
Preparation
This time of year, the salmon run is in full swing. Depending on where and when you go, some stretches of water are teeming with fish, making it easy to limit out in a short time. Outfitters have spent months scrambling to match clients with pilots and pilots are getting plenty of flying hours. It’s easy to say, “Look for the most reputable aviation company,” but the reality is, all those companies are booked and extra help is brought in. Bush plane travel is what it is, and despite the stress and work requirements, the pilots get it done.
As a passenger, all I can do is have faith that the planes are kept in good order, and the pilots are up to the task. Prior to this trip, I set up a shared document both Nick and I could edit with our packing list. In this list, we could keep track of the gear weights since we will be weighed in addition to our bags prior to departure. Much like my previous trips to Alaska, I like to carry the bare-bones survival gear in my well-worn Kifaru Koala Lite chest pack.
Not only will this hold a 10mm pistol, it carries my Garmin inReach, heavy-duty Ziploc bag with purification tablets, firestarter, knife, small flashlight, whistle, mirror, basic med kit with a tourniquet, and some other essentials. My waders and rain jacket create a practically water-resistant shell that will keep me dry as long as I stay hairy-side up. Anything that can’t be comfortably worn on my person gets tucked in an Ocoee shoulder bag from Watershed Bags. This dry bag is my “bailout bag,” and it contains additional supplies like a Grayl water filter, high-calorie Range Meal Bars, a small sil-nylon tarp, and larger survival equipment including a folding Silky Saw.
Gear isn’t the only thing I’ve prepared prior to this trip. I like to print out 1:50,000 scale maps of the general area I’ll be in. These maps provide a significantly greater visual representation of the surrounding area. While my plan is to stay with Nick, I’ll never forget the advice of my friend and former Navy SEAL Kodiak Island Survival Instructor, Todd Peters. He told me, “Plan to self-rescue if your guide goes down.”
Those words have never escaped me, and I always prepare to walk to safety alone. Prior to any trip, I always leave a detailed travel plan with at least two responsible parties, and I use Gaia GPS online to include UTM coordinates of where I’m leaving from and where I’m headed.
On Site
I don’t like waiting until the last minute or when it’s too late to discuss emergency plans. My closest group of friends knows exactly what I carry because we travel and train the most. For strangers — and yes, I consider Nick a stranger since we don’t see one another often — I give the 30-second rundown of what I have and where it is on me. I also play extremely curious and ask Nick about his plane, what kind of “cool stuff” he carries for emergencies, and ask him about his plane in depth. Once I get an idea of the orientation of the plane, I start staging my equipment where it makes the most sense.
The bulk of my gear that isn’t necessarily for emergencies goes in the back and is secured with a cargo net. Space is extremely limited so I make sure my grab-and-go or bailout bag will fit in the natural gap I have between my legs.
Since bush plane travel is so common in Alaska, you don’t give too much thought to your pilot’s ability when you get in the backseat. As an outsider from the lower 48, I can only get in the way as Nick performs preflight checks and gets the plane airborne. I would love to say I did all I could prior to the accident, but I trust the process like the majority of the population does.
During the emergency, I sat back and listened to the pilot’s orders. His Mayday pierced the air when the alarm went silent and the only other thing I could hear was the wind rushing around the fuselage. In that short time, we descended rapidly — it felt like hours but my memory of the event is crystal clear. I didn’t hear anyone on the other end of that radio transmission, and here we are now.
Crisis
I woke up on the ground with my face buried in the mud with an odd combination of blueberry and metallic scents. The Alaskan bush is filled with blueberries and bear berries easily harvested, but that other odor caught my attention. When I stood up on rickety legs, I caught a glimpse of my face and immediately understood that metallic smell was my own blood. Concerned about other cuts, I ran my fingers over my entire body doing a blood sweep. Using my mirrored compass and the reflection in the unbroken glass, I didn’t see any cuts to the back of my head. I did, however, have some deep lacerations that direct pressure addressed.
I could deal with avulsions — flaps of skin in layman’s terms. I prefer not to deal with arterial bleeding and luckily, I didn’t have to. One thing that was driving me crazy was my head. I hit it hard and I knew I had a concussion because the bright light of the land of the endless sun is killing me. I rifled through the med kit that littered the area around the plane and found a cheap mylar blanket. While not great for durability, they can be cut to form protective eyeglasses you can tie around your head to limit light transmission.
Once I addressed myself, I moved on to Nick. I braced myself for the worst and that helped dull the grief and pain of finding his lifeless body. Nothing hits quite like seeing a person recently passed, and after a brief prayer, I looked through his pockets and removed his outerwear, leaving him with his undergarments to protect his dignity. These were largely soaked in blood anyhow. The emotional side of me said, “Don’t take a dead man’s belongings,” while the practical side of me said, “He would want me to have them.”
It gets cold at night and I knew I’d need all the warmth I can find. Even though the nights are extremely short, I wanted to close my eyes when I could to rest from the sheer mental and physical exhaustion. I could get to my survival priorities tomorrow. For the first night, I slept inside the damaged Piper Cub body and plugged up the holes with whatever I could find to keep the cold out.
After a sleep cycle, my head felt somewhat better, but it was far from recovered. I thought I’d have an easy self-rescue hitting the “S.O.S.” feature on my inReach device. Somehow in the crash, my inReach shattered. The device that I planned on using to save my life with an electronic signal saved it by preventing a piece of the fuselage from piercing my chest at the expense of the communicator body. I would have to signal another way. Rather than obsess over a signal, I started with the basics of survival. I couldn’t find my ditch bag and assumed it is under the wreckage I can’t lift. Walking around the area hurt, but hobbling was doable.
We could have hit the nearby tributary to the river, and I never would’ve woken up due to drowning upon impact. That tributary could provide me with plenty of water to treat with my Ziploc and Aquatabs. There was plenty of willow driftwood I could burn at night to stay warm, and I wouldn’t need to burn much as the days are so long. Food was low on my priority list, but I knew the longer I went without it, the weaker I would become.
At the riverside, I noticed some bear ground sign, but I couldn’t pinpoint the age of it beyond saying it was older than a day. I didn’t know how frequently to expect them, but I knew they could be back. I wasn’t in any condition to dig a deep enough hole to bury Nick’s body or even his bloody undergarments, and I’ve seen bears flip over rocks like they were toy blocks. I also wasn’t able to remove the plane’s seat cushions that were soaked with blood.
A bear’s sense of smell is pretty powerful, and I felt like I couldn’t do enough to eliminate the scent with a cleansing fire in the burn pile. Since I couldn’t remove the attractants from my environment, I began thinking about removing myself from the environment.
Contrary to popular belief, there are a lot of backcountry fires in Alaska and I wouldn’t be able to build one large enough to signal for help. I also couldn’t maintain my energy to gather wood and wait around with limited rations. Gunfire from my Glock 20 also wasn’t a viable audible signal method. Even though we left a detailed plan of where we were headed, I haven’t seen a single plane fly overhead. With hope dwindling, I made the decision to walk to safety. Using pre-trip planning knowledge, I knew a southwesterly emergency azimuth will get me to the Dalton Highway.
I made a makeshift crutch from pieces of the fuselage and created an arrow in the ground with debris to indicate my direction of travel. I packed my gear to cover the basics and focused on traveling light. I slept one more night by the plane before departing in the morning. Prior to leaving, I took Nick’s wedding ring for safekeeping should an animal desecrate his body before a recovery team returns. I want his wife to have it.
The walk out was slow but I made progress. Walking in the tundra is unpredictable. When I got thirsty, I stopped to tank up on water. I foraged for berries along the way and the sugar kept me going. Instead of sleeping for 8 hours, I took naps for 30 minutes here and there. My waders and rain jacket were my shelter and I blocked out the rain with them. I had to travel slowly to avoid overheating and sweating.
On the horizon, I saw white and silver specks moving along a line and knew I was looking at a road. That’s it! I kept my hopes measured though, as I knew it is hard to gauge distance in the tundra. That road could still be a day’s walk away. Far from the river and the food, the bears weren’t present and the only animal wildlife I saw are musk ox and the occasional curious fox. I pressed on knowing this ordeal would be over soon.
I reached the road by 11:30 p.m. and stumbled into the Happy Valley Landing Strip. I was helped by the seasonal oil workers who gave me a warm meal, a bed to sleep in, and medical attention. They plan to drive me to Fairbanks, and I’ll gladly take that mode of transportation before I take another bush plane flight anytime soon.
Hunting Guide Caleb Stillians’ Approach
Preparation
The first thing that I do to prepare for a bush plane crash in the Alaskan wilderness is to always try flying with experienced pilots who prioritize safety and proper maintenance of their aircraft. It’s crucial to know the capabilities of the plane I’m boarding, including its weight limits, and to avoid flying in adverse weather conditions. As they say in Alaska, “There are old pilots and bold pilots, but no old, bold pilots.” I understand that second chances are rare when it comes to plane crashes.
Whenever I fly into the backcountry, I ensure I have everything I need for survival in my backpack. This includes a tent, sleeping bag, extra clothes, sleeping pad, lightweight tarp, firearm with extra ammunition, stove, lighters, rain gear, knife, a Garmin inReach device with SOS capability, tourniquet, and a first aid kit with wound-stopping capability (something that helps your body’s natural ability to clot blood). I also carry an extra roll of electrical tape. Electrical tape comes in handy to tape up cut fingers. This kind of tape is also great to put on the end of gun barrels to keep debris from getting inside.
Before the flight, I would coordinate with Nick in person. Together, we would empty out our backpacks, and decide together what essentials need to be brought along. There’s no substitute for face-to-face communication when planning for a trip like this.
To study the region we’ll be flying through or into, I use apps like OnX to download maps, and also save hard copies of the maps by taking screenshots as an extra precaution. During the flight, I pay attention to the landscape and take photos of notable landmarks. Dropping GPS pins on interesting features along the way, such as remote cabins, is a handy thing to have for future reference.
Preparing for and dealing with inclement weather is essential, and I begin by knowing my gear inside and out. I never bring anything into the field that I haven’t tested beforehand. Leading up to the flight, I try to stay updated on weather reports and adjust my loadout accordingly. No matter what, I bring things like puffy jackets and rain gear, considering Alaska’s unpredictable climate.
Back at home or at basecamp, I have trusted individuals who I inform of my plans. During the trip, I keep in touch with them via text on my inReach device. That way, if they don’t hear from me within a couple of days, they know to start reaching out to others or the proper authorities to get a search started. I also make sure they have the right contact information for people in the area for quick access to rescue resources.
Ideally, Nick would connect me with trusted pilot buddies and outline a flight path. This collective effort would not only ensure that we are taking the best route, but it would also keep more people looped in to where we are going, and for how long. We’d also inform friends of our plans before we leave so they can initiate a search if necessary. If we did this the right way, it should minimize the time it takes for help to arrive.
On Site
Understanding how to exit the airplane safely is crucial. In a tight plane like the Super Cub, I need to know how to crawl forward over the pilot and exit efficiently. You’ve got to get your body as far forward up toward the front of the plane as possible, then move your legs up. Trying to egress the opposite way will get you fighting a losing battle, and you’ll be unable to get out as quickly as possible. In a crash, the priority is to move away from the plane fast, just in case of fuel leakage. Grab your gear if you are able, but avoid lingering around the wreckage in case it decides to go up in flames.
Since I may have to leave my pack behind in an emergency, I wear a chest rig containing life-saving essentials like a knife, tourniquet, extra ammunition, a lighter, and my binoculars. I like to have this stuff on my chest as it helps ensure I have everything that I need extremely accessible. For example, if I need to cut seatbelts, I have a knife handy. If I need to apply a life-saving tourniquet, I have it right on my chest. The rest of the gear is in the back of the plane, with the lighter items stowed as close to the back of the tail, and the heavier gear placed directly behind my seat.
During the flight — especially in a Cub — there’s usually little I can do to assist Nick besides engaging in conversation. During takeoff and landing, or in an emergency situation, it’s best to remain silent so that he can focus on vital piloting tasks. When an emergency occurs in a Super Cub, I’m relatively helpless in the backseat. The best thing I can do is keep quiet, try to remain calm, and ensure my feet aren’t obstructing any of the aircraft controls. Without a response through a connected headset, there’s little I can do to know if a Mayday call was received.
Crisis
After crawling out of the wreckage and getting a safe distance away, I prioritize stopping heavy bleeding. If necessary, I apply a tourniquet and bandage wounds. It’s advisable to get some medical training, like Stop the Bleed, or Wilderness First Aid just for a potential scenario like this. Once any major bleeding is stable, I tend to any other less severe injuries, and gather any gear that managed to survive the impact.
Because exposure and hypothermia are a concern, I’d use rain gear and a tarp to improvise a shelter if I couldn’t salvage my tent. If the plane’s wings are intact and safe from fire, I might use them for cover as well. There may be other pieces of wreckage or gear that could make useful shelter materials. It’s important to stay dry and reduce the amount of wind blowing against you.
Securing a firearm would be an immediate concern. In Alaska, I’ve made a handy rule to help prioritize actions, which is a spin on the rule of threes: the 4-4 Rule. Four seconds before a predatory animal kills you, four hours before hypothermia kills you, four days before dehydration kills you, and four weeks before succumbing to starvation. Since apex predators present the first immediate danger after stabilizing life-threatening injuries, I need to make sure my firearm is on my person and operational.
Getting rescued is my next priority. To make my location more visible, I scatter shiny objects from the plane and use orange flag tape to mark my position. Colorful gear can also be laid out to enhance visibility. Use anything available to make your position stand out against the terrain. If there is snow, white wood smoke might blend into environment, and burning petroleum-based objects to create black smoke might stand out better. The reverse is true for wooded areas without snow.
If for some reason the Mayday call was not received before the crash, staying by the plane, and focusing on survival priorities becomes even more crucial. At this point, patience is key, especially if injured and far from civilization.
A SOS device, like a Personal Locator Beacon (PLB) or Garmin inReach, is a great backup emergency communication option. If for some reason I’m having a really bad day and those fail to work, I focus on signaling by whatever means available, and relying on trusted contacts to initiate a search if I haven’t responded within a few days.
When it comes to dealing with curious apex predators like bears, it’s important to keep in mind that you are the boss, not the bear. As long as you’ve taken the time to secure your firearm, you should stand a decent chance of surviving an encounter. If the salmon are running, the bear should not be hungry and will probably leave you alone. If a hungry bear decides to show up anyway, you will have to decide if you want to protect Nick’s body from the bears, since they will view it as food.
It’s important to always stand your ground. Make yourself look as big as you can. Yell and throw rocks, and if need be, shoot warning shots at the bear. If the bear does not back down in this situation, be prepared to DLP (Defense of Life and Property) the bear. The absolute most important thing to remember is to stay calm. Panicking has never helped anyone.
People who adhere to the seven P’s — Proper Planning and Preparation Prevents Piss Poor Performance — when they are in the backcountry typically do better when things don’t go their way. Planning and preparation are essential for surviving wilderness emergencies. Having backup communication devices and knowing survival priorities can make all the difference. This aligns with any situation where being stranded in the wilderness is a possibility — preparedness is key to survival.
If you took the time to put the people and systems in place to notify rescue personnel upon the event of no communication, you will be fine in this situation because help will be coming. If you did not establish a plan and were just totally “cowboying it” and you didn’t let anybody know where you are flying to, you may be up a creek without a paddle in this situation. It is always worth it to take the time to lay out a plan to prevent bad things from turning into really bad things.
Conclusion
Flying in a small aircraft over the vast wilderness is awe-inspiring, and in most cases, everything will go smoothly from takeoff to landing. However, as prepared individuals, we shouldn’t rely on that likelihood alone — we should consider the worst-case scenario and be ready for it. While we may not be able to prevent a plane crash as it’s unfolding or ensure the pilot’s distress call is received, we can be ready to react quickly in its aftermath.
Even if the forecast looks good, always bring gear to stay warm and dry in inhospitable conditions. Establish a clear communication plan with loved ones before your trip, including what to do if you go missing, and prepare at least one backup method to reach authorities directly. Injuries in the backcountry can become life-threatening if you’re not able to stabilize them, so get some basic medical training and be sure to pack a trauma kit.
Also, seek training on how to deal with grizzly bears and other predators that may be present near your destination. These steps, along with developing the mental fortitude to stay calm and focused when things go wrong, will greatly increase your chances of survival in America’s last frontier.
Meet Our Panel
Kevin Estela
Kevin Estela is the director of training for Fieldcraft Survival in Aberdeen, North Carolina. He’s the best-selling author of 101 Skills You Need to Survive in the Woods and an accomplished magazine writer. He’s the host of the Fieldcraft Survival Podcast and a regular guest on others. Estela has been a professional bushcraft and survival instructor since 2007 and has tested his skills in a wide range of environments. Highly sought after for product testing, designs, and feedback, he’s regarded as a subject matter expert and authority in outdoor skills who conducts regular courses around the country. You can follow him on Instagram at @estelawilded
Caleb Stillians
Caleb Stillians, a seasoned professional in the realm of hunting, calls Alaska his playground. Specializing in guiding ventures across the state’s vast interior, peninsula, Kodiak, and coastal regions, Stillians leads hunting expeditions targeting grizzly bears, brown bears, mountain goats, Dall sheep, and moose. Embarking on his guiding journey at a young age, he finds his true calling in the wilderness, where he thrives on helping others realize their dream hunts, often spending months living in the backcountry. Beyond his guiding endeavors, Stillians is the visionary behind Outfitter Services, an online platform connecting adventurers with their next epic trip. He’s also the founder of Rise Up with Caleb Stillians, a production company crafting captivating films centered around the art of hunting.
Read More
Subscribe to Recoil Offgrid'sfree newsletterfor more content like this.
If you blinked, you might have missed it—VIP tickets for CANCON AZ 2024 were gone faster than you can say “lock and load”. In just three minutes, enthusiasts snapped up the passes, each eager to get their hands on a VIP Bag bursting with more than $2300 worth of top-tier tactical gear.
So, what’s in this treasure trove? Let’s take a peek inside and find out why this bag’s got the community buzzing.
A Toolkit Fit for the Tactical Enthusiast
Every item in the VIP Bag is a testament to the support of the 2A community, and a tip-of-the-hat to some of the best customers the industry could ask for. Here is a breakdown of what made it inside this year:
ANECHOIC: Those with VIP bags are given a suppressor of their choice from their entire line of suppressors. Potentially a $1200 value! URL:asilencer.com
Mission First Tactical: MFT provided VIP's with several goodies, including Clear 30rd Magazines, two ACHRO 10L EDC Sling Bags, and a 32oz. M18 Red Smoke tumbler. URL:missionfirsttactical.com
B5 Systems: A B5 Bravo Stock and a Type 23 Pistol Grip were added to the VIP bag courtesy of B5 Systems. URL:b5systems.com
SilencerCo: Although not physically present, Silencer Co. provided a voucher allowing VIP's to choose and receive a threaded barrel of their choice directly from the website. URL:silencerco.com
Breek Arms: Provided their Sledgehammer Charging Handle, specifically designed for gas regulation. URL: breekarms.com
True Blue Gun Lube: To keep things running smoothly, True Blue added 3oz bottles of gun lube to the VIP bag. URL:truebluegunlube.com
CRKT: Knives are to firearms as cheese is to wine, and CRKT paired this VIP bag with their own Cinco Knife. URL:crkt.com
5.11 Tactical: To ensure there was enough storage for all the product and merch being dished out, 5.11 added their RUSH 12 2.0 BACKPACK 24L to the mix. URL:511tactical.com
FN Firearms: Beneath everything on the VIP table is an FN shooting mat. FN also provided their thick, hardcover edition of “The Ultimate FN Book”, and a custom etched shot glass. URL:fnamerica.com
EOTECH: A custom branded EOTECH mouse pad was added to the VIP bag to enhance the office workspace. URL:eotechinc.com
Aimpoint: Provided a custom branded coffee tumbler. URL:aimpoint.com
Dead Air Silencers: What better to keep the blazing Arizona sun off your face than a baseball cap, courtesy of Dead Air Silencers. URL:deadairsilencers.com
Langdon Tactical: The VIP bags had a bunch of swag, including appropriately themed velcro patches from Langdon Tactical. URL:langdontactical.com
Silencer Central: Keeping things cool, Silencer Central threw their custom branded koozie into the VIP bag. URL:silencercentral.com
Armaspec: Provided their ambidextrous charging handle for a potent URL:armaspec.com
Four Branches Bourbon: Provided a discount card for 10% off of a bottle of Four Branches Bourbon. URL:fourbranches.com
Maxim Defense: Provided a $250 discount card for use at the Maxim Defense website. URL:maximdefense.com
SDI: A custom branded Sonoran Desert Institute tumbler was Included in the with VIP bag. URL:sdi.edu
Tion: Along with some vinyl velcro patches, Tion Suppressors also included a voucher for 30% off any Tion Supressor. URL:tioninc.com
Sig: Provided several custom branded decals. URL:sigsauer.com
Timber Creek Outdoors: Too help upgrade the versatility of the VIP's firearms, Timber Creek Outdoors included their ambidextrous safety selector in the VIP bag. URL: timbercreekoutdoorsinc.com
2A Gear For the 2A Lifestyle
The CANCON AZ 2024 VIP Bag is indicative of a lifestyle of preparedness, self-reliance, and the right to bear arms. It’s about ensuring you're as ready for the range as you are for the unexpected. In addition to the cool swag and sexy merch, this bag was packed with purpose.
Those lucky few who snagged one managed to get a kit that’s as serious about shooting as we are. To everyone else? Keep your eyes peeled for CANCON Georgia later this year—you won’t want to miss out twice.
Read More
Subscribe to Recoil Offgrid'sfree newsletter for more content like this.
The Baofeng UV-5R and its derivatives are perhaps the most prolific handheld radios in use today due to their simplicity, versatility, and low price. In a SHTF or grid-down scenario, a Baofeng may be one of the few widely available communication tools. The Guerilla Guide is written for all levels of experience, using techniques taught to special operations personnel, but with the end user in mind.
The 411
The guide consists of seven chapters and three appendices. Topics include field programming, improvised antennas, operation, and communications security.
Chapter one starts with an introduction to the Baofeng radio and its capabilities and continues with communications basics and the three roles of communication: sustainment, tactical, and clandestine/strategic. The author explains that the Baofeng operates as a dual-band radio, transmitting in VHF and UHF, and that both bands have their own pros and cons.
In chapter two, functions and field programming, the author goes over frequency and memory modes. Remember: All data that you input into your radio is potentially exploitable. The author gives real-life examples of this from his service overseas, stating, “Every Taliban member with a radio in Afghanistan became a target for us.” Any radio captured was given to the Signals Intelligence (SIGINT) officer to search the memory and analyze their communication protocols. In short, “Do not, under any circumstances, program the memory of a radio you intend on using for tactical or clandestine purposes.”
Another pro tip by the author is “Lock that keypad!” While conducting night training, a squad leader had an unlocked keypad that resulted in him losing his frequency when his radio shifted on his gear. Now, in the dark, with lost comms, an exercise that was going smoothly quickly went south.
Chapter five on the construction of improvised field antennae is extremely valuable information, as many people think the radio range is fixed at a certain distance. The author breaks it down so that anyone can learn the basic concepts of antennae in an improvised environment. The most critical and often overlooked element while using the Baofeng — or any other radio — is the antenna. In many cases, it’s more important than the radio itself.
Regarding “how much range does it have,” radio theory should be understood. In layperson’s terms, three factors are involved: the operating environment, the obstacles between you and the intended receiver, and the efficiency of your antenna. The author keeps the technical data to a minimum so anyone can grasp the basics and goes into detail on the pluses and minuses of different antenna types.
The chapter on communications operations stresses specific considerations for the three types of communications. Failure to know this principle is the most devastating failure of communication security (COMSEC). The Baofeng radio can save your life or get you killed if used in an undisciplined way. When using the Baofeng in a tactical role, keep transmissions short, use codewords, and always operate with separate receive and transmit frequencies.
Chapter seven covers the difference between encoding and encryption. As the Baofeng has no built-in encoding or encryption capabilities, the author goes over transposing a message into a code, aka encoding. This can be done digitally via software or manually via pen and paper.
The Verdict
I recommend this guide to anyone looking to get their comms game in order. It is an invaluable guide to the communications world that will help keep you alive. The Guerilla’s Guide to the Baofeng Radio will get you on the path to communications proficiency in no time. It’s available in paperback, and a field edition that’s spiral-bound and pocket-sized for carrying into the field is also available.
The author’s pen name is NC Scout. He’s a former member of one of the U.S. Army’s Special Reconnaissance Units and the owner of Brushbeater Training and Consulting. NC Scout conducts hands-on training, and anyone interested in a course in communications as well as several other topics can visit www.brushbeater.org and view his training schedule.
About the Book
Book & Author: The Guerrilla's Guide to the Baofeng Radio, by NC Scout
It has been said that rendering aid during a mass casualty incident (MCI) is trying to create order out of chaos. When most people hear the term “mass casualty incident,” it conjures up images of major catastrophic events: hurricanes, terrorist attacks, plane crashes, etc. Those are all prime examples to be sure, but an MCI can happen anytime and anywhere. Simply put, an MCI is any scenario in which those needing aid outnumber those able to provide it. In these scenarios, the SALT triage technique is a powerful tool.
The occurrences of MCIs are few and far between. But sadly, not as few and not as far between as one might think. They can be naturally occurring or man-made, accidental or intentional. Natural disasters, hostile events, civil unrest, even multi-passenger vehicle accidents — to name a few — happen all around us at an alarming rate. Imagine you’re near, or even involved in an MCI, but are fortunate enough to be minimally injured or completely unharmed. In many situations, first responders are immediately on their way. In others, emergency response resources are far away or overwhelmed and help could be hours or even days away.
Above: Mass casualty events aren’t just shootings or terrorist attacks. They’re often accidental — for example, vehicle crashes involving multiple pedestrians.
There are a few options at that point: You could determine the catastrophe is the responsibility of those who are trained to provide aid and stand aside, or you could do whatever you can, regardless of training, to provide assistance. Obviously, performing advanced medical procedures outside of your scope of training is a bad idea, but there are many things you can do as a bystander that could immensely help a situation. In those scenarios, Good Samaritan laws provide cover for those acting in good faith and not gross negligence.
DISCLAIMER
This is a general overview and not a comprehensive guide to triage or trauma care. Whenever possible, call paramedics and defer to their expertise once they arrive.
What You Can Do
First things first — always perform within the scope of your training. Despite what you see in the movies, using a knife and a straw to perform an emergency tracheotomy, for the vast majority of us, is a really bad idea. Likewise, employing a makeshift electrical cord defibrillator or stabbing someone in the heart with anything, Pulp Fiction style, should be avoided in every circumstance. That said, even though the majority of the general public has little to no formal medical instruction, there’s still a lot of good that can be done.
Above: Natural disasters such as earthquakes and tornadoes are another common source of mass casualty incidents.
For the sake of this article, let us assume you have no medical training or certifications that would allow you to perform any procedures beyond fundamental first aid. Being a first responder for the past 25 years, I can tell you there are basic skills and actions the general public, without medical credentials, are able to perform which can have a great impact on the overall outcome of an MCI. The overarching goal will be to help as many people as possible by spreading and utilizing the available resources as efficiently as possible. Sometimes, the available resource is simply you.
Location
There are many factors when it comes to sorting patients. While you may not know the exact number involved, you can make rough estimates. Did this incident happen at a crowded shopping mall or at a bus stop? The reason it matters is because you’ll need to identify a safe location to evaluate injuries. It’s imperative that you have the safest possible place to corral them. The ideal location is uphill and upwind of the incident that’s safe, secure, and allows easy ingress and egress for transporting units. It isn’t often, though, that an ideal location is available. Choose the closest safe location that you can find.
Treatment and Transport Location Considerations:
Physical location: safely away/close enough to be practical
Protected from ongoing/additional danger
Access and egress
Structural hazards
Weather exposure
Wind direction
Time of day/lighting
Hazardous materials runoff
Access to first aid supplies if available
Above: Professional first responders can’t be everywhere at once. As a prepared individual, you should be ready to render aid and stabilize patients until the cavalry arrives.
Personal Protective Equipment
Stating that one shouldn’t render first aid without full personal protective equipment, although accurate, would be impossible in most mass casualty scenarios. Those who carry first aid kits on their person, in their packs, or in their vehicles will be better prepared than most to protect themselves from blood-borne pathogens, airborne contaminants, and environmental factors like the weather and the harsh incident environment. The unpredictability of an MCI pretty much assures us that we won’t have all the needed PPE supplies with us in the moment. The take-home message: Do the best you can to protect yourself and others when providing aid.
Minimal Recommended PPE:
Work gloves or nitrile medical gloves
Safety glasses
Surgical mask or respirator
Hearing protection (for loud environments)
Weather and environment appropriate clothing
Triage
As previously mentioned, doing the greatest good for the greatest number of people is the objective in a mass casualty scenario. One of the most effective ways to do that is to determine who has immediate medical needs versus those whose injuries aren’t life threatening and therefore treatment can be delayed. Triage is a French word meaning “to sort.” Origins of triage date back centuries but the modern practice is believed to have been traced back to Napoleon’s army. In any scenario where the number of patients outnumbers those who are there to provide aid, they must be “sorted” by order of medical priority.
Sorting patients can be a fluid and somewhat subjective experience, particularly without the aid of medical equipment to make any specific and verifiable diagnosis. The fluidity of triage lies in the fact that it’s ongoing. It’s not a one-time occurrence. The environment can improve, adjust, or deteriorate, sometimes drastically. The same can be said for the condition of a patient, which is why a consistent cycle of triage and re-triage is important. It begins with the initial division of those affected.
Above: Individuals who are breathing but not moving are categorized as “Red” and should be assessed first.
SALT Triage
There are a variety of ways to divide patients by medical priority. One of the most widely adopted methods to quickly determine the potential severity of injuries to patients and triage them into prioritized categories is to use SALT Triage. Sort, Assess, Lifesaving interventions, and Treatment and/or Transport give us the acronym: SALT. This method was developed in 2006 by a Center for Disease Control (CDC) workgroup made up of the National Association of EMS Physicians (NAEMSP) and has been proposed as the national standard for mass casualty triage. SALT is scalable — it can be used in a catastrophic MCI or when it’s simply you with two patients.
SALT outlines a common-sense approach to managing a mass casualty incident by presenting simple yes or no questions, allowing you to rapidly determine who potentially has the greatest medical needs and should receive priority treatment. The term “potentially” is used because, although SALT is widely adopted, it’s less an advanced medical process and more of a down-and-dirty, in-the-field, best-educated guess.
It should be noted that SALT Triage is a diagnostic tool for use with adult patients only. In an MCI, you may have to apply some judgment when determining if a patient is considered an adult or child. As a basic rule, if the patient is big enough to be or looks like an adult, treat them as an adult.
Sort
The first step in SALT Triage is to sort patients into manageable groups by dividing them into four categories: Those who can walk, those who cannot walk but can make purposeful movement and follow simple commands, those who are breathing but not moving, and those who aren’t breathing. Patients are divided into four colored categories:
Green: walking wounded. Assess third.
Yellow: injured but with purposeful movement. Assess second.
Red: breathing but not moving/still. Assess first.
Black: not breathing and/or with injuries consistent with obvious death. Deceased. Leave in place.
To begin, shout something like, “If you can walk, come over here!” Direct those people to a safe location to await treatment and transport. Those people will still require evaluation but are third on your priority list. In fact, in many cases, your greens, or the “walking wounded,” can be used to help you sort and treat your reds and yellows. Put them to work.
Next, ask anyone who is hurt, but cannot walk to follow a simple command. “Raise your hand if you are hurt but cannot move.” Those who respond will be your “yellows” and, if safe to do so, should be left in place for the moment. You and those who are available to help you, should immediately address those who aren’t responsive. They’re likely critically injured or deceased. There will be exceptions to these rules, but this is a time-critical process of numbers. It’s going to consist of making assumptions and educated guesses.
Above: If a patient isn’t breathing after you’ve adjusted their airway, you’ll have to move on to the next patient. There’s no time for CPR in a mass casualty event.
Assess – Red: The patients you deem should be assessed first.
Are they breathing? If not, you should adjust the airway. If there are still no respirations, they’re deceased. There’s no time for CPR in a mass casualty incident. Do they obey commands? Do they have a peripheral pulse? Are they breathing normally? Can their bleeding be simply managed? If the answer is no to any of these questions, they’re a “red” priority patient and quick lifesaving interventions should be performed. The assessment of a red patient is somewhat basic: adjust the airway if they aren’t breathing or struggling to breathe, control major bleeding, and have them transported as quickly as possible. The sorting, assessment, and interventions should take no more than 1 minute per patient.
Lifesaving Interventions:
Adjust airway (head tilt/chin lift)
Control major bleeding (tourniquet/pressure points)
Treatment and/or Transport:
Move immediately to a treatment area for treatment and expedited transport.
Assess – Yellow: The patients you deem to be assessed second.
What are the extent of their injuries? A yellow patient can simply be anyone in between the walking wounded and critical. If your confidence and comfort level allow, there are some basic assessments you can execute in order to better evaluate the status of the patient. In this series of rapid assessments, patients can be re-triaged as red or green. There are three areas to evaluate:
Mental Status: A quick way to determine the mental status of a patient is the AVPU scale. The AVPU acronym stands for alert, verbal, painful, unresponsive. This evaluation indicates if a patient is awake and can follow commands (alert), they respond to verbal stimulus but aren’t able to answer simple questions or follow commands (verbal), they respond to painful stimulus such as a sternal rub (painful), or are altogether unresponsive. Any patient who falls under V, P, or U should be re-triaged as red.
Respirations: If patient respirations are over 30 per minute, they should be re-triaged as red.
Perfusion: Press the fingernail bed of the patient (if there’s no nail polish present). The pressure will cause the nail bed to turn white and should return to pink in less than 2 seconds after your release. This is a measure of capillary refill. If color does not return in under 2 seconds, there could be an internal perfusion issue and they should be re-triaged red.
Above: Pressing and releasing a patient’s fingernail can help you gauge capillary refill. If color remains white for more than 2 seconds, there may be a circulatory problem.
Lifesaving Interventions:
Not needed for yellow patients. Care of the “yellow” patients will occur once the critical patients have been addressed. Yellow treatment will occur in place, or preferably, in a designated treatment area.
Treatment and/or Transport:
Move, when possible, to the treatment area for transport after priority patients (reds) are off the scene and en route to advanced care.
Tagging Patients
This is an example of a triage accountability tag used by first responders after quickly performing a SALT Triage and determining the triage “color” of the patient.
Documentation
Without question, documentation will be the lowest priority and last step of any type of MCI. It is, however, an important one. If resources allow, it’d be greatly beneficial to first responders, family members of those involved, and post-incident investigators to designate a scribe. Patient names, descriptions, extent of injuries, location they were found, and where they were transported to are all meaningful pieces of information. The likelihood of getting all necessary information is minimal, but anything you can document would be far more reliable than your memory after a major stressful event.
It could be something as simple as: Hispanic male, 40s, blue jeans, and long-sleeve white shirt. Found unresponsive near the south door. Relocated to treatment center. Unknown transport destination. Before the incident winds down, you can be sure family members are going to be desperate for information regarding their loved ones.
Summary
There isn’t much that can prepare you for the impact of experiencing firsthand injury and death on a mass scale. You can expect an MCI to be both chaotic and emotional. There will be thoughts, feelings, and reactions that you may not expect or be prepared for. First responders are trained and equipped to manage a crisis — you may or may not be. What you can do, though, is be diligent in your readiness and, when the tragic situation presents itself and you can do some good, do good for as many as you can. Lives may depend on it.
Read More
Subscribe to Recoil Offgrid'sfree newsletterfor more content like this.
Many worship at the altar of Stoner, exalting the AR-15 platform’s ergonomics, versatility, and modularity. But with a receiver extension and buttstock that can’t be folded, since the bolt carrier group reciprocates into it, compactness for transport wasn’t Stoner’s first priority. The aftermarket has come up with solutions for this — but what if you’re looking for an even smaller footprint than a folding stock will provide? That's where the AR-15 Takedown comes in.
If you don’t mind disassembling your weapon, Stoner’s original design gets you halfway there, as you can easily detach the upper and lower into two pieces. However, it’s fiddly and not the quickest to deploy, and you’re still constrained by the length of the entire upper assembly, essentially the barrel plus the upper receiver — which itself accounts for about 8 inches of length.
Since the barrel is typically the longest component on an AR, several companies have come up with take-down systems to quickly detach and reattach the barrel and handguard assembly from the upper receiver. Combine this with a folding or PDW-style stock or brace, and you’ll have the shortest overall footprint short of sawing your barrel in half (we don’t recommend this unless you’re a hapless virtue- signaling congressional candidate). Something to keep in mind is that systems like this may have some zero shift, though none tested were terribly noteworthy due to the short-range requirements typical of a hideaway rifle.
In this article, we look at take-down offerings from Cry Havoc Tactical, FoldAR, LEO TakeDown, and Pantheon Arms.
Cry Havoc Tactical
If you’re seeking a take-down system that’s currently fielded by the U.S. military, look no further than Cry Havoc Tactical’s offering. Their QRB system is used in the U.S. Air Force’s GAU-5A Aircrew Self Defense Weapon, custom built by the Air Force Gunsmith Shop to equip aircrews with a 5.56mm carbine that can be broken down and stowed in the tight confines of an ACES II ejection seat. Packaged with four 30-round magazines, the reconstituted rifle provides a downed pilot with far more firepower than the 9mm M-9 pistol that it replaced.
Cry Havoc’s system utilizes two tensioning levers that secure the barrel assembly to the upper receiver. The receiver plate attaches to the upper with a star nut, retained by a set screw that sits in one of the nut’s grooves to prevent it from rotating. The barrel plate keeps the barrel firmly captured with three set screws and has standard threading on the muzzle side to attach the barrel nut for your handguard of choice. A clever two-piece gas tube arrangement solves the problem of the otherwise-vulnerable standard AR gas tube, with a shortened gas tube attached to the gas block slotting into an extension in the QRB’s receiver plate that feeds gas back to the bolt carrier group.
Slide the barrel extension into its home on the upper receiver and hooks on the levers on the barrel plate grab on to slots in the receiver plate, snapping down to lock into place. Two stout locator pins ensure you line everything up properly and also further protect the gas tube. To tear down your gun, lock back the bolt, flip open the levers, push them backward if you need help unseating the barrel from the upper, make sure the hooks are free, and yank out the barrel/handguard assembly.
You can use a wide variety of handguards; they just need to be slim enough to leave room behind the locking levers to get enough purchase to open them. There are recesses on the barrel plate to accept small anti-rotation tabs. Note that due to the beefy barrel plate, you’ll need to use a handguard that’s 1.5 inches shorter than you would otherwise. If you want a complete upper with the Cry Havoc system, their sister company, Weaponstech Engineering, offers a variety of configurations, including one-stamp suppressed uppers.
For our build shown here, we wanted to create our own, even smaller version of the GAU-5A — and in .300BLK as befits such a small gun. To match the GAU-5A, we used a Midwest Industries 4.5-inch M-LOK Combat Rail (effectively becoming a 6-inch rail with the QRB barrel plate) along with one of their upper receivers. The latest MI handguards have large anti-rotation tabs, unlike those used by the Air Force, so we cut them down to fit with an end mill and files, then hit it with Alumablack.
Instead of a 12.5-inch 5.56mm barrel, we fitted a 7.5-inch Faxon gunner profile barrel in .300BLK along with one of their gas blocks, topped off with a Midwest Industries muzzle device. The assembled upper went on one of our pistol lowers, equipped with a LAW Tactical folding stock adapter and the same FAB Defense folding pistol grip seen on the GAU-5A. The resulting package is insanely compact when broken down.
We were very impressed with the Cry Havoc take-down system, in particular the consistent locking levers, the two-piece gas tube and locator pins, the ability to use a variety of handguards, and its overall robustness.
Make: Cry Havoc Tactical
Model: AR15 QRB Kit 2-Pin Military Model
MSRP: $425 with pistol, carbine, or mid-length gas tube; $435 with rifle-length gas tube
Available as a complete double-folding rifle or pistol as well as a proprietary upper receiver unit, the FoldAR is a seriously small unit. The Double FoldAR pistol seen here breaks down into a tiny package of a mere 10.75 by 5.75 inches, perfect to fit into a lunch box-sized bag — exactly like the one that comes with it.
The FoldAR is a complete system, not a conversion, as it uses a proprietary upper receiver, handguard assembly, and adjustable gas block. True to its name, the FoldAR is a hinged system with a lever latching system integrated into the right side of the M-LOK handguard for takedown. Folding the barrel assembly first requires you to lock the bolt to the rear and then pull the SHUT lever outward to unlock the barrel. The barrel now can be folded along the hinge, closely hugging the left side of the upper receiver. FoldAR includes a convenient pull tab on the lever for an assist, though it can be removed if that idea makes you squirrelly. However, they added it for a reason, as it’s not easy to open without it.
To deploy the FoldAR’s barrel, swing the barrel assembly forward until it clicks in place. Note that because the barrel swings into place rather than sliding straight into the upper receiver, the custom barrel extension is beveled. Then, pull and release the SHUT lever to ensure the lock is properly engaged. At that point, the bolt can be released, and you’re ready to go. While you lose the flexibility of arranging the broken-down pieces however you’d like, it’s handy to have a single unit that folds open.
For the folding stock on the complete double-folding rifles and pistols, FoldAR uses a Dead Foot Arms MCS adapter, whose standout feature is the ability to fire and cycle the weapon with the stock/brace folded. If purchased outright, this system would require modification of your bolt carrier group, but since FoldAR produces complete weapons they do the work for you. Instead of a typical BCG, FoldAR ships with a four-position gas-adjusting carrier from Bootleg Inc. All of these custom, proprietary parts results in a hefty price tag, but it avoids the requirement of having the requisite skills and tools of an armorer.
On our example, we added a SIG Romeo optic, Magpul AFG, folding offset sights, and a muzzle brake/silencer mount made by Elite Iron for their War Dog can. When not going suppressed, a sleeve fits over the brake to convert it to a linear compensator.
Rifles, pistols, and upper assemblies from FoldAR are available in 5.56mm or .300BLK in barrel lengths of 9, 10.5, and 12 inches.
LEO TakeDown doesn’t offer a folding system but instead the ability to quickly detach and remove your barrel and handguard assembly from the upper receiver. Available as conversion parts or in a limited selection of complete uppers, the LEO TakeDown system reminds us of quick connect couplers that attach the hose from your air compressor to a pneumatic tool.
To remove the barrel assembly, first retract or lock the bolt to the rear. Then, rotate the circular locking nut to the marked “unlock” position and pull it back. The spring-loaded assembly retracts locking bearings, and the entire barrel and handguard can be pulled out from the front. There are storage covers for both the barrel assembly and upper receiver to keep crud out if they’re stored in two pieces, and importantly they protect the now-exposed, relatively fragile gas tube from damage.
Once the LEO TakeDown system is installed on a barrel and upper receiver, it should be considered a permanent installation. The official installation documentation includes a considerable amount of permanent red thread locker in virtually every step, and the barrel coupling is pressure fit. We tried our hand at a barrel swap and quickly ran into issues. On the plus side, additional barrel couplings (to change barrel lengths and/or calibers) are currently available for $59 each.
If you’re performing a conversion, any caliber and barrel that’ll fit into a standard AR-15 upper will work. There’s no comprehensive list of handguards that are compatible with the system, but we’re told most compression-type free-float models will work. If a handguard has anti-rotation tabs, they’ll need to be modified. Also, bear in mind that the handguard itself will be an inch further along the barrel, as the rear of it now starts at the front of the takedown system rather than the receiver.
Our recommendation for the LEO TakeDown system would be to go with a pre-converted upper receiver and barrel from the company, as installation is a lengthy process and significantly different than normal AR-15 assembly.
Make: LEO TakeDown
Model:LEO TakeDown conversion (user-provided upper, barrel, and handguard)
Pantheon Arms offers its DOLOS take-down system in a few flavors — as a complete upper (the Exodus shown here) or a DIY kit with or without a handguard. Pantheon’s design features a lock collar on the barrel side that essentially acts as a coarse-threaded barrel nut with a short arc of rotation to secure the barrel to a tri-lug attached to the upper receiver. A pawl on the bottom engages grooved teeth on the lock collar to securely ratchet into place.
The tri-lug assembly is attached to the upper receiver with a castle nut and set screws. The lock collar slides over the barrel, with a semi-circular slot so it can clear the gas tube while rotating; the handguard is secured to the lock collar. Align the gas tube and barrel extension, lock collar, and tri-lug and slide it home into the upper receiver. Then, crank down the lock collar, which pulls the barrel into the tri-lug, while the pawl locks the lock collar in place. To take down the DOLOS, lock back the bolt, pull down on the lock release below the tri-lug, twist the lock collar, and pull it out of the upper.
The barrel (and the gas block and standard gas tube attached to it) rotates and is loose within the lock collar and handguard assembly until it’s cranked into the tri-lug; Pantheon provides a retaining ring for the kit that slides over and bites into the barrel to capture it so it doesn’t slide around too much. This is a bit of an annoyance while your gun is torn down, though Pantheon’s molded gas tube cover mitigates this while also protecting your gas tube, which extends out quite a bit.
Since the gas tube rotates within the lock collar, the handguard needs to be circular-ish on top to clear it. Many slimmer handguards have a square channel for the gas tube that won’t work. For the DIY kit, you can choose from handguards with and without a top rail from Pantheon or other roomy options from companies such as Rock River Arms, YHM, and Unique ARs.
The Exodus complete upper has some unique features compared to the kit since Pantheon controls the whole build. The lock collar and barrel are modified to reduce the rotation required and capture the barrel. Also, the handguard is slim with an arc on top to clear the gas tube. It’s currently offered in one configuration with a 7.5-inch barrel in .223.
Our test build has the Exodus upper mounted on a pistol lower with a Dead Foot Arms SCW shortened system and Gear Head Works Tailhook brace, resulting in a very cool little blaster. Once you get the hang of using the DOLOS, you can muscle it into place. It’s a simple motion, just insert and twist. However, be sure to go to the same spot every time for your zero; we often missed it and had to either sit on the lower to get enough leverage for that last click or redo it harder (that’s what she said).
One of the fundamentals of fighting well is to know your enemy. When we’re talking about fighting violent crime and criminals, there are a lot of varied opinions. Some people see violent criminals as victims of a flawed economic system or argue they’re just mentally ill, while others see them as cunning rational actors engaged in rational acts. Hopefully, the essay that follows will give you a quick summary of who criminals are, how criminals think, how they pick their victims, and how to truly win confrontations with them.
Any time we’re generalizing, we must be careful to remember there are always exceptions. The discussion that follows reflects the reality of a Western country with a somewhat intact legal system and a place where scarcity is a forgotten concern. As we move away from these realities, the general advice that follows will likely change.
Criminal Motivations
The first question we must ask ourselves is what drives someone to commit a violent crime? When violent crimes are committed, most experts agree there are two main motivations and a third special category that’s a combination of both. Generally, violent crimes are either instrumental or expressive.
Instrumental Crimes
In these crimes, the criminal is looking to achieve a rational goal. For instance, the criminal will use force or the threat of force to take something of value. Whatever is taken is then sold or traded to obtain something the criminal really wants, from drugs to groceries. Crimes such as these are easy to understand — we may not agree with the methods, but the desired end state is something we all pursue by going to work.
Expressive Crimes
The other common motivation for violent crimes is known as expressive. In an expressive crime, the crime itself is the goal, mostly to send a message. These crimes are scarier because the act used to send the message doesn’t seem rational to the normal person. The non-criminal just can’t understand what the desired end state was and why such methods would be used to achieve it. Expressive crimes tend to be more horrific — such as a Jihadi motivated bombing, a drug cartel decapitation, or a mass shooting. What normal people see as “overkill” is actually part of the message — it reinforces the communication that the criminal wants to send.
What many people don’t understand is that the criminal may be seeking something other than easy financial reward. Unless one is robbing drug dealers, it’s very hard to “make a living” committing street robberies. Most people don’t carry that much cash these days and the return on selling stolen goods just isn’t that great. It’s important to remember that what the criminal seeks to gain is the thrill of power, of watching another person cower and bend to their will. While the criminal will take your iPhone or wallet and gladly spend the money, they’re also gaining a hedonistic thrill by doing so.
Above: Avoid focusing on your cellphone in public. It communicates a lack of awareness, and also displays a valuable item that can be snatched from your hand.
Instrumental-Expressive Crimes
Such circumstances create the peril of the third type of criminal motivation — the instrumental-expressive crime. In an instrumental-expressive crime, the criminal starts out with a very rational motivation — typically, they want to get paid. At some point during the crime, the victim does something that offends the criminal. It could be ineffectively offering physical resistance or saying something that’s seen as disrespectful. Very quickly, the crime turns to an expressive one — the victim has done something that makes the criminal take the affront personally. What was a forced business transaction suddenly becomes the need to send a message that the bad guy isn’t someone to be trifled with.
For this reason, initial compliance is almost always the best response to a violent crime when it cannot be avoided and when you don’t have the initiative to retake control of the situation. In that case, you need to give the criminal what they’re looking for — both your valuables and the meek demeanor of compliance they have come to expect (possibly the main reason they’re engaged in the attack).
Half efforts of resistance and verbal barbs aren’t appropriate here — they’ll cause the robber to take your attack personally, and the violence will often escalate from that of a threat to an actual act. It’s essential that you “wait your turn.” Don’t resist until you’re reasonably sure of success or you’re convinced you have nothing to lose.
Types Of Criminals
If those are the motivations, the next question we need to answer is what kind of person would have such motivations. While there may be a lot of agreement on the motivations that drive criminality, how to classify criminals and if such classification is even possible is a hotly contested subject. What follows won’t be found in any contemporary psychology textbook but will be a very useful way to think about this topic.
We can think of criminals as the result of the culture in which they were raised, the wiring of their brain, and an early exposure to violence. For some, their criminality will be driven almost exclusively by the culture in which they’re raised. In others, the actual structure of their brain may better explain their criminality. In either case, an early exposure to violence will be the final determinant.
Coleman Hughes once said, “culture is another name for all of the values, desires, aspirations, and habits you grow up with.” Even a person with a typical brain will tend toward criminality if they are immersed in an environment where guile, deceit, and violence are part of their everyday existence. Criminals from this background honestly believe that such behavior is normal. It is their standard way of interacting with the world. While people with a more conventional upbringing (from communities where violence is rare) may see this behavior as maladaptive, it is not maladaptive for the world of the criminal.
Criminals are adapting to their environment, and the ability to use violence is a highly effective tool in their ecosystem. As part of this cultural indoctrination, in-person exposure to violence is arguably the most important factor. Someone whose environment is filled with the use force to coerce others and who experiences violence themselves will develop the ability to offer violence as a natural survival mechanism. And their willingness to use violence will skew toward the proactive side.
Above: Gang members have often been immersed in a culture of violence since childhood and are more likely to use it expressively to send a message than an average street criminal.
Thanks to complex brain imaging devices, scientists can examine the structure of one brain and see how it compares to other brains. They can see if certain parts are over or underdeveloped. We have learned that upon careful examination, the brain of a psychopath is objectively different. The overall differences can best be thought of as controlling how much empathy a person can generate.
The more the brain structures deviate from what’s typical, the greater the potential for antisocial behavior, including violence, will be. It’s important to note that having an atypical brain structure doesn’t guarantee criminality. Plenty of people with atypical brains lead law-abiding lives. It typically takes an event or series of events, such as exposure to violence or sexual assault, to reach the tipping point toward criminality.
When we try to understand criminality, what we see is a complex interplay between someone’s culture and their actual brain structure. We can think of criminals as falling into three broad categories:
Antisocial
Sociopathic
Psychopathic
Antisocial criminals are the overwhelming result of their culture and may have totally typical brains. Psychopaths are the opposite. They tend to be the overwhelming result of brain structure with minor cultural influences. Sociopaths are a middle ground between the two. Sociopaths are a more even mix between culture and wiring. People with the wiring to be sociopaths aren’t always criminals. The determining factor seems to be an immersion in a world of violence when they’re younger. There are many professions where sociopaths can flourish, essentially the lack of empathy for others can be an advantage in occupations such as CEO of a large company.
When discussing those whose criminality is more the result of brain structure, there’s an important difference to note. Both sociopaths and psychopaths show an ongoing lack of empathy for others. Both sociopaths and psychopaths will hurt others to get what they want. What separates the two is that a psychopath will enjoy the hurting of others. The sociopath will see the infliction of pain as something that was necessary to get what they want. The sociopath simply won’t care about the suffering of others, but they won’t necessarily enjoy the act itself. They certainly won’t seek to inflict pain to amuse themselves in the sadistic fashion associated with psychopaths.
What About Gangs?
There’s one more special case you should be aware of and that’s the gang member. Gang members are a particularly dangerous subset of criminals. Their danger comes from their life experiences, their motivations, and their tendencies toward expressive violence. The FBI has done extensive research on gang members who attacked police officers. They found that when gang members assault police officers, their primary goal is to kill the officer instead of the more typical goal of escape.
The gang lifestyle means that gang members have been committing crimes since they were young, typically starting at age 9 and carrying weapons since age 13. Many have already engaged in violence, earning the title of “street combat veteran,” and almost 40 percent have committed a prior murder.
Above: Instrumental crimes are easy to understand and have a rational goal — typically money or valuables. The goal of expressive crimes is less tangible, such as a feeling of power or superiority.
For gang members, their personal reputation and the reputation of the gang is everything, and much of that reputation is built on expressive violence. One of the easiest ways to encounter a sociopathic person with vast experience in applied violence is to offend a gang member over something you see as minor or insignificant. Your values will not be used to judge the desired outcome of such an event.
I offer this explanation of the different types of criminals to make an important point. You never know what kind of criminal you’re going to encounter, and often, the type of criminal is only apparent by how much mayhem they leave in their wake. What you must absolutely understand is that there are people out there who are more than willing to engage in violence to get what they want. Some will look forward to the use of violence and use it to fuel their warped fantasies. Some of these people won’t stop when they get whatever material good was the target of the initial crime.
There are genuinely evil people who will take profound glee in your suffering and the suffering of your loved ones and will actively prolong that suffering for no reason other than it makes them happy. Just because this doesn’t make sense to you doesn’t make it any less true.
Victim Selection
While we often use the term “random violent crime,” a check of the research on victim selection finds very few truly “random” acts. Going back to 1981, researchers have been developing an understanding of how criminals pick their victims. We can go back even further to 1971 to see a different take on influencing victim selection.
Before we talk about the specifics of victim selection, let’s look at what it takes for a crime to occur. You need three elements:
A criminal
A victim
An environment that facilitates the crime
Since our criminal justice system steadfastly refuses to remove criminals from decent society, we’re only left with addressing the other two options. The best way to avoid a crime is to not be there. Noted trainer John Farnam has offered many great insights, but his most applicable is “don’t go to stupid places with stupid people and do stupid things.” A great way to think of this is if you think you need a gun to go there, don’t go there.
Control the Environment
Certain places just make criminal assault easier. Poorly lit businesses are a great example. While 2 a.m. trips to the ATM are always a bad idea, driving a little further to the well-lit ATM with no nearby hiding places is the best way to improve a bad situation. A little scouting and foreknowledge goes a long way — like enough foreknowledge to not need cash at 2 a.m.
It shouldn’t be necessary to say in 2024 but “stupid things” includes consuming enough alcohol or drugs to impair our judgment and to make it noticeable to others. Also, think about where you live and the property you control. Simply making sure an area is well-lit and has a few cameras (which are extremely cheap and easy to install these days) goes a long way to minimizing its appeal to the criminal class.
Above: Sociopathic criminals perceive their crimes as a means to an end, and don’t care about the suffering of anyone they victimize.
Control Your Appearance
In most areas, there will be a lot of potential victims, so we need to understand what makes one person more likely to be picked than others. Researchers can offer explicit details on the factors in one’s walk that makes them mostly likely to get picked. We know that people assess someone for victimization very quickly – like in 1.5 seconds. If I could summarize all the research, it’s simply how “fitly” one walks.
Criminals want to know your overall level of physical fitness — to answer the question of how well you could physically resist an assault and how effectively could you flee. If opportunistic criminals were lions at the watering hole, they simply pick the gazelle with a limp, not the one in the running shoes.
This is a great example of how we subtly, and often unconsciously, broadcast information into our environment. Researchers have found that the clothing women wear can affect their selection as victims. For instance, wearing clothing such as skirts and high heels that limit one’s ability to run or fight, can increase the odds of being picked if the wrong person is paying attention.
There are other ways we communicate our suitability as potential victims. Criminals prefer to attack from a position of surprise and don’t want victims who could potentially identify them. If you simply pay attention to who’s around you and what they’re doing, you send the subtle message that you’re not easy prey.
As part of this, you have to accept that public cell phone usage sends the message that you’re easier pickings than most. Not only does the cell phone distract you, but you’re waving around an expensive electronic device that can be sold for quick cash. Similarly, another message you may be sending reveals whether you’re a high-value target or not. Ostentatious displays of wealth are great for a social gala where violent predation is less of a concern. However, when transiting unknown areas, such displays are less desirable as they may shift the risk/reward analysis in favor of an attack.
Above: Do your best to avoid environments that facilitate crime. This includes places like isolated alleyways, but it can also refer to times of day or the presence of security/surveillance systems.
Strategies For Winning
Before delving too deep, we need to recognize what exactly “winning” means. The stakes are different if you have an obligation to render violent criminals to the criminal justice system — in other words, if you’re a law enforcement officer. For anyone who isn’t a cop, your goal is to make it home to whatever you hold dear in the most intact way possible.
You really don’t want to be involved in a shooting or gunfight even if you “win.” Besides the obvious danger of the event itself, there are very real risks posed by the criminal side of the courts as well as the civil side of the courts. You need to stay out of both criminal court and bankruptcy court. It’s entirely possible for you to “win” your gunfight but end up destitute.
Depending on where you are geographically, the old saying “the process is the punishment” applies when it comes to dealing with the aftermath of a shooting. Even if you’re eventually found not guilty of criminal charges and any civil suits are thrown out, the process of defending yourself in court is tremendously expensive, time-consuming, and disruptive to your life. Until our nation’s attitudes about pro-social violence change, this is the world in which we live. We have to accept it and adapt to it.
Deselection
As a rule, our goal is deselection. When the criminal encounters us, we want them to form a “restraining judgement.” We want the criminal to look at us and say to themselves “not that one.” The criminal may very well attack the next person who comes along, but that’s sadly not our problem — see the paragraph above for the reasons why. To be deselected, we really need to be facing an instrumental criminal. An instrumental criminal will be a rational actor making rational decisions and is likely weighing their options from a risk versus reward perspective.
If you’re dealing with an expressive criminal, the calculus is entirely different. The expressive criminal is far less likely to form a restraining judgement. In fact, victim selection may be part of the message that’s being sent. Expressive crimes are resolved by overwhelming violence, not by sending subtle messages. When you’re faced with being the victim of an expressive crime, the final outcome has already been determined — it’ll be violence. The only question at hand is whether you’ll be giving or receiving. The more quickly and definitively you can offer violence, the better off you’ll be.
As long as you’re dealing with an instrumental criminal, you have different types of deselection that may help form the restraining judgement you want.
Above: Deselection is the best way to “win” an encounter with a criminal. It can be general, specific, or — if all else fails — violent.
General Deselection
The first form of deselection is mostly what you broadcast into the environment that conveys you are not “worth it.” Examples of general deselection include appearing alert and capable. The FBI was nice enough to codify these traits for us. They recommend conveying that you are:
Alert and attentive
Formidable and physically fit
Prepared
The other aspect of general deselection is to not appear as “high value.” As noted above, if the criminal is weighing the risk versus reward aspects of an encounter, you don’t want to announce you’re a more lucrative target than most.
Specific Deselection
This is the next level of deselection. While there are exceptions, not all violent crimes are marked by unannounced, sudden violence. In wild oceans, sharks will often “bump” potential prey to determine what it is and how much threat it poses. The shark is essentially interviewing the object of its interest to make a risk versus reward determination. In much the same way, criminals will interview or “bump” potential victims. They’ll do this by attempting to engage potential victims in conversation such as asking a favor or making a benign demand.
In the process, the criminal will close the distance to one that favors them. If the victim engages in conversation and/or allows the criminal to get too close, the criminal’s assessment of vulnerability is being confirmed. For a variety of reasons, crime tends to take place at close distance — an arm’s length or two away. Your goal as the defender is to thwart these attempts through verbal agility and maneuver to avoid proximity.
As you move, make sure a second criminal isn’t closing in on your blind spots. The master of specific deselection is Craig Douglas of ShivWorks and his MUC (Managing Unknown Contacts) material. Douglas has a four-hour-long curriculum to address this problem, and it cannot be recommended highly enough.
Above: If you appear alert to your surroundings, physically fit, and prepared to defend yourself, you’ll greatly reduce your likelihood of being victimized.
Violent Deselection
Our final form of deselection can be thought of as “violent deselection” or “forced deselection.” At this point, our general and specific attempts at deselection have failed and an attack is under way or imminent. At this stage, you’ll have to offer force or the threat of force that shows an equal or greater commitment to violence than that of your opponent. Your attempts must be sincere and credible. Threatening someone with a gun may not be enough. Shooting someone may not be enough.
The same FBI research tells us that 36 percent of serious criminals have already been shot at least once, either by the police, other criminals, or both. You have to convince your aspiring attacker that they have miscalculated the risk versus reward analysis, and they need to leave you alone and retreat or face certain destruction.
Our goal is to break contact as quickly as we can do so safely. We don’t want to hold criminals at gunpoint. Most already have plans on how to handle such situations and most will have more experience than you. Also, if you’re in public, you don’t want to be the one holding a gun when the police eventually show up. You have no obligation to render anyone to the criminal justice system. Your best bet is to convince the criminal to leave the area posthaste and then do the same yourself. If you displayed a weapon, make sure you report it, as you do not want a retaliatory 9-1-1 call to report that you committed an aggravated assault.
Above: Much like sharks “bump” foreign objects in the water before taking a bite, criminals may approach potential victims to gauge their response immediately before an attack.
Closing Thoughts
Hopefully, you now have a better understanding of what the typical motivations for violent crime are, what types of people commit violent crime, how victims are selected, and some of the more effective responses to violent crime. As the briefest scan of the headlines will show you, violent crime is an ongoing, legitimate concern that appears to be worsening. Your best bet is to accept the reality of the threat and carefully consider what messages you’re sending. You’ll send information whether you want to or not.
You must decide whether you wish to communicate that “you aren’t worth it.” There are those out there who will seek to capitalize on your decency and naivete for their own benefit. Let them know that you’re aware of them and that you’re not an easy target — let them pick someone else. Remember, you aren’t an action hero, and this isn’t a movie — get back to what you hold dear in the most intact way possible.
Note: This essay owes a huge debt to the prior work of William Aprill (1966-2020). Any brilliance is likely the result of his work and his previous contributions to the field of pro-social violence.
Above: FBI research shows that more than a third of career criminals have already been shot at least once. For these individuals, showing that you’re armed may not be enough of a deterrent to stop an attack.
About the Author
John Hearne was a federal law enforcement officer for more than 30 years, serving primarily in uniform patrol. During that time, he was an instructor for firearms, tactics, active shooter response, and use of force as well as an armorer and a field training officer for his agency. Hearne has helped teach armed citizens, law enforcement officers, and military personnel across the country for more than two decades. He’s also a noted researcher and speaker and has been speaking at a variety of national and international venues since 2005. For upcoming seminars and webinars, visit twopillarstraining.com.
Read More
Subscribe to Recoil Offgrid'sfree newsletterfor more content like this.
The year is 1964 — the same year the Colt M16 officially entered U.S. military service. In West Germany, engineers at Heckler & Koch have begun developing a new submachine gun based on the architecture of the H&K G3 battle rifle, which had become the Bundeswehr’s standard-issue weapon in 1959. The new SMG uses the same roller-delayed blowback architecture as the G3 (and the G3’s predecessor, the CETME). However, instead of coping with the stout recoil of a 7.62x51mm NATO rifle round, this operating system would be set up for the 9mm Luger pistol caliber. The resulting SMG was designated the MP64 after its first year of development, but later renamed the MP5.
Over subsequent decades, the MP5 would rise to prominence as the world’s most widely used submachine gun. It was adopted by military organizations in more than 40 countries, as well as a nearly endless list of law enforcement and private security entities. By the time the ’90s arrived, it seemed like everyone was using it — from British SAS to American Navy SEALs — and this is reflected in its countless pop culture depictions in movies, TV shows, and video games. The popularity also spawned more than 100 variants of the MP5 platform, including dozens of third-party clones. Some — such as those made in Greece, Iran, Pakistan, Turkey, Sudan, Mexico, and the UK — were manufactured with H&K’s blessing under license, while others were unofficially reverse-engineered (for example, China’s Norinco NR08).
Above: Paired with an MFI ultra-low-profile claw mount from HKParts, the B&T skeletonized riser on our Aimpoint ACRO red dot allows unobstructed use of the factory iron sights.
K is for Kurz
In 1976, the security detail for an unnamed South American head of state reportedly reached out to H&K to request a special variant of the MP5. They wanted a weapon that was small enough to conceal under a coat, but which was still ergonomic enough to be fired in controlled full-auto bursts. The resulting weapon was designated the MP5K, which stood for kurz — the German word for “short.”
The MP5K is characterized by its replacement of the MP5’s fixed stock with a flat buttplate and sling swivel, as well as a shortened 4.5-inch barrel up front. The K also had a shorter receiver and bolt carrier to reduce the weapon’s length as much as possible. In order to keep recoil manageable, a unique vertical foregrip was added. This grip includes a protrusion at the front to reduce the risk of the shooter’s fingers slipping forward past the muzzle. (Fun fact: The very first MP5K had a prototype grip made out of wood with a full-length knuckle guard that resembled a staple gun.) With its tiny size, lack of buttstock, and rate of fire of 900 rounds per minute, it’s a weapon that demands respect from the shooter.
Above: B&T’s telescopic stock has a one-way ratcheting mechanism with six possible positions. Simply pull to extend the stock; to collapse it, press the release button on the receiver buttplate.
Later versions of the MP5K added a longer tri-lug barrel that allowed users to mount a quick-detach suppressor, as well as an optional side-folding stock. There was even a special MP5K Operational Briefcase released in 1978, which completely concealed the weapon inside an ordinary-looking briefcase and allowed the user to fire it by pressing a trigger built into the carry handle. (See it in action here.)
Clone Wars
Remember the note about MP5 clones? Well, the weapon seen here is one such clone manufactured in Turkey by MKE and imported to the United States by Century Arms. It’s called the AP5-P, which is apparently short for “Apparatus Pistol” — a pretty silly name, but also a clear attempt to harken back to its origin without infringing on any trademarks. Century Arms’ product description makes the connection clear by stating that the AP5-P is “based and built off of the original and historic design from the 1970s.”
MKE, short for Mechanical and Chemical Industry Corporation, is a company that produces weapons for the Turkish military. Since the 1950s, they’ve made everything from aircraft and artillery systems to sniper rifles and belt-fed machine guns. But MKE’s MP5 clones aren’t just imitations; they’re made with original German tooling that was given to MKE under a license from H&K themselves. That license, under which MKE was fully trained and equipped by H&K to produce MP5s for use by the Turkish government, is long expired. However, when that license ended, MKE retained the manufacturing equipment and training that’s still in use today.
Our sister publication RECOIL toured the MKE facility in 2015 and saw some of this tooling firsthand, complete with a 1974 H&K data plate riveted onto it. Granted, the manufacturing of these guns may differ from H&K’s current tooling specs and procedures, but the original DNA is undoubtedly present. Additionally, as you’ll read about momentarily, the AP5-P is compatible with standard parts and accessories made for H&K MP5s and semi-auto SP5s.
Century Arms currently imports two other versions of this weapon, the AP5-M and regular AP5. The former mimics the original MP5K with a 4.5-inch flush-cut barrel; the latter matches the proportions of a standard MP5, only with a buttplate at the back of the receiver. If you decide to convert one of these guns from a pistol to a short-barreled rifle, adding a stock is as simple as popping out one or two pins at the back of the receiver and replacing the buttplate. For K-style variants, adding a vertical foregrip is equally simple.
First Impressions
When I picked up this AP5-P, I immediately took it out to the range for a quick break-in. After inserting one of the two included 30-round metal mags and slapping the charging handle — an action that still puts a smile on my face every time — I went to work on some steel plates at 25 yards. Anyone who has shot a roller-delayed blowback gun side-by-side with a direct blowback 9mm AR can attest how much smoother the recoil impulse feels, and the AP5-P was no exception. It shoots well, although the standard trigger is what you’d expect from a submachine gun designed in the ’70s (i.e., vague and heavy). The adjustable iron sights work great, and Century Arms includes a claw-style Picatinny optic mount to allow installation of your favorite red-dot sight.
Above: The front sight post light mount from Gibbous Outfitters serves as a low-profile, sturdy attachment platform for a Scout-style light body and tape switch.
Shooting an MP5K without the vertical grip feels odd, but thanks to the ATF’s unconstitutional regulations, I couldn’t legally add one until I paid for a $200 tax stamp and waited for an approved NFA Form 1. The same is true for adding a stock, but at least stockless is the MP5K’s natural condition. For the best shooting experience, I attached both hooks on the included MKE sling to the swivel on the buttplate and pressed the gun out, using sling tension against my body to stabilize it. This technique had me ringing steel with each trigger press in no time.
Foregrip & Stock
The first order of business was to return this AP5-P to its classic form by adding a vertical grip, and that meant registering it as a short-barreled rifle. Once the gun was an SBR, I reached out to a company that would become extremely helpful with the rest of this build: HKParts. As the name implies, they offer just about every part you could possibly need or want for any MP5 variant, including original German H&K components and clone parts that are made in the USA. I selected an HKParts-branded K vertical foregrip (HKP-20957) for my AP5-P, which was easily installed in place of the original MKE handguard. This version even has built-in M-LOK slots on each side for adding accessories.
Above: The AP5-P’s cold hammer forged barrel is threaded for direct attachment of a suppressor, but the quick-detach tri-lug mount is a better option. Our tri-lug-equipped Omega 9K snaps into place with ease.
Since my AP5-P was now an SBR, I could also add a stock. I considered a few options, including the original-style side-folder, but decided on an even more compact telescoping stock from Swiss manufacturer Brügger & Thomet. B&T has a long history of producing high-end aftermarket parts and suppressors for H&K guns, and even made their own clone of the MP5 called the B&T 96 (like I said, at one point everybody was using the MP5). This B&T telescopic stock collapses almost completely flush with the rear of the receiver and snaps out to any of the five positions in the blink of an eye. It’s surprisingly sturdy and comfortable but comes at a steep price of $518 MSRP.
Above: standard MKE pistol handguard and Gibbous Outfitters vertical grip with integrated SureFire tape switch cutout.
I also wanted to try a modern side-folding option, so I picked up a Picatinny MP5K stock adapter and SS-8R skeletonized aluminum stock from JMac Customs. The JMac stock fits the MP5K perfectly and even has the option of adjustable cheek riser attachments.
More Upgrades
The AP5-P comes with a pistol grip/trigger housing that mimics the style of early MP5s, complete with finger grooves and a contoured thumb rest (sometimes called the SEF lower due to its original selector markings). Later in the MP5’s production, H&K switched to a smoother trigger housing without finger grooves on the pistol grip. This is usually referred to as the Navy lower, in reference to its use on the MP5-N designed for a U.S. Navy contract. Having tried both styles, I decided to replace the lower on my AP5P with a Navy-style lower from HKParts (HKP-02463).
Above: From top to bottom: B&T telescopic stock, standard MKE buttplate with sling swivel, JMac Customs Picatinny stock adapter and SS-8R stock.
Since I was already replacing the trigger housing, I figured I might as well upgrade a few other components. The stock trigger was replaced with a much lighter and more precise drop-in two-stage trigger assembly from Timney Triggers — it’s a night-and-day improvement, and an upgrade I believe every semi-auto MP5 deserves. While installing the trigger, I also installed a new HKParts U.S.-made ejector lever (HKP-19660), ejector lever spring (HKP-00059), and enhanced safety selector (HKP-18065).
Fine-Tuning Bolt Gap
Bolt gap — the tiny sliver of space between the rear of the bolt head and the front of the bolt carrier — is a topic that H&K enthusiasts will debate in agonizing detail online. In simple terms, it should be within H&K’s recommended spec of 0.010 inch and 0.018 inch, as measured by sliding a feeler gauge into the bolt while it’s in battery with the hammer forward. Ideally, you’ll want to split the difference at 0.014 inch, since the gap will shrink over time as components wear.
Above: From the factory, the AP5-P’s bolt gap was right on the edge of the ideal tolerance range. These HKParts +2 rollers, along with a new pin and retainer spring, adjusted it for better long-term performance.
Out-of-spec bolt gap can lead to malfunctions and, in rarer cases, can even cause damage to the inside of the gun’s receiver over time. After learning this, I decided to check it on the AP5-P. It measured at 0.010 inch — right on the edge of the recommended spec and seeming likely to go out of spec after a few years of frequent use — so I decided to calibrate the gap by adding a set of U.S.-made +2 rollers from HKParts (HKP-19423). I installed the rollers into the AP5’s bolt along with a new HKParts roller pin (HKP-00066) and roller retainer spring (HKP-00068). Measuring again showed exactly 0.014 inch on the feeler gauge.
Finishing Touches
Although the HK-style iron sights work well, I still prefer a red-dot sight for better spatial awareness and faster target acquisition. I picked up an MFI Ultra-Low-Profile red-dot mount from HKParts (HKP-17962) and paired it with an Aimpoint ACRO P-2 sight on a B&T Skeleton QD mount. This setup allows me to look straight through the optic mount to use the original irons or lift my head slightly to use the red dot.
Mounting a flashlight on an MP5K is tricky due to the limited space and lack of accessory rails, so I spent quite a while researching options. Eventually, I came across the MP5 Front Sight Mount from Gibbous Outfitters, a small specialty manufacturer based in Oregon. This clever attachment system clamps a SureFire Scout-style weapon light body onto the MP5’s front sight post, using two screws and a titanium plate to keep it securely in place. Gibbous Outfitters offers another variant of the mount that holds a SureFire pressure switch on top of the cocking tube for easy access; it even has a retaining clip to keep the switch cable neatly stowed.
I used an Arisaka Defense 300 series light body, Malkoff Devices E1HT light head, and SureFire UE07 tailcap/switch assembly with the Gibbous mount. Gibbous Outfitters also makes an MP5K vertical grip with an integrated pressure switch mount for users who’d rather activate their light with a squeeze of the support hand, as opposed to placing a thumb over the cocking tube.
Above: A Haley Strategic FlatPack Plus backpack fits the AP5-P like a glove, even with a 30-round magazine installed. It’s no Operational Briefcase, but it serves as a great range bag.
With the light mount and optic installed, the standard rounded cocking handle was a little difficult to access, so I added an extended, knurled charging handle from HKParts (HKP-16999). I also picked up a single-point sling (HKP-02644) to replace the two-point sling included with the AP5.
Every SMG or PDW is more enjoyable to shoot with a suppressor, so I topped off my AP5 with a SilencerCo Omega 9K. With SilencerCo’s low-profile tri-lug mount, attaching it to the gun is as simple as a quick press and twist. The compact Omega 9K feels like a match made in heaven for an MP5K.
Finally, I needed some more magazines to keep my AP5-P fed with a steady supply of 9mm ammo. Overwatch Precision makes some excellent 32-round MP5 mags. They’re molded from sturdy polymer with slip-resistant texture, and unlike standard MP5 mags, they can be loaded with 30 rounds and inserted on a closed bolt. Better yet, at $20 each, they’re vastly more affordable than MKE mags ($70 MSRP) or H&K mags ($80 MSRP).
Pistol, SMG, or PDW?
You’ve probably seen the MP5K referred to as a PDW, short for Personal Defense Weapon. H&K themselves currently offer a variant called the MP5K-PDW. So, what does this term mean?
By the most modern definition, a PDW is a compact submachine gun-style weapon that fires a high-velocity, bottlenecked, rifle-style cartridge. The FN P90 (5.7x28mm) and H&K MP7 (4.6x30mm) are good examples of the category, offering excellent concealability and high-velocity, armor-penetrating capabilities. By this specific definition, the MP5K is not a PDW solely due to the 9mm round it fires. It’s just a compact submachine gun. However, since civilian MP5K variants (e.g., H&K’s SP5K or the AP5-P) are semi-auto only and lack select-fire capabilities, they’re not exactly SMGs either.
Legally, my MP5K clone started life as a pistol with no buttstock and no vertical foregrip — two modifications that aren’t legal in the U.S. unless the weapon has been registered as a Short-Barreled Rifle (SBR). So, that’s exactly what this AP5-P is now: a registered SBR that happens to be chambered in a pistol caliber.
Would I call this a PDW? Sure. Aside from its caliber, it fits the modern definition to a T, and it was designed to fill the same role as most PDWs. Many other 9mm weapons fall into this category, such as the B&T MP9 and Russian PP-2000. Only the most pedantic keyboard commandos will take issue with this designation, and I don’t really care what they think anyway.
Closing Thoughts
As a kid growing up in the ’90s, the MP5K was immortalized in my mind by movies such as Terminator 2, Air Force One, and The Matrix, as well as video games including GoldenEye 007 and Rainbow Six. There were lots of weapons that received similar pop culture coverage that didn’t live up to the hype in reality (looking at you, Franchi SPAS-12). Just as you might be disappointed by meeting your heroes, you might not always enjoy shooting their signature guns. Thankfully, the MP5K is just as much fun to shoot as I had hoped, and the AP5-P captures that same look, feel, and performance. The modifications shown here add a new level of modern refinement to this nearly 50-year-old classic weapon.
Above: The HKParts Navy-style trigger housing eliminates the finger grooves and contours of the original SEF pistol grip. I find it more comfortable, and I prefer the modernized look as well.
So, to address the elephant in the room, should you buy a new German-made H&K SP5K or a clone like the Century Arms AP5-P? That’s a question only you can answer. On one hand, an original H&K will be manufactured using the latest tooling and quality control procedures; most clones are using old tooling that may be worn after decades of use, or tooling that has been replicated. On the other hand, the MSRP for a new H&K SP5K-PDW is a staggering $3,389. H&K also has it listed as a “limited production” model, and many sell for above MSRP due to scarcity.
MSRP for the AP5-P — including two 30-round mags, sling, optic mount, quick-detach flash hider, cleaning kit, and hard case — is $1,360. H&K’s product page confidently asks, “Who wants a copy when you can own the real thing?” When the real thing (or at least the “civilian sporting version” of it) is roughly 2.5 times the price of a functionally identical clone made with original tooling, the answer to that question is “a lot of people, including me.”
Read More
Subscribe to Recoil Offgrid'sfree newsletterfor more content like this.
The term “technical” is often used to describe a civilian vehicle — usually a 4×4 pickup like the venerable Toyota Hilux — that has been modified to carry an onboard weapon system such as a heavy machine gun, anti-aircraft cannon, or anti-tank rocket launcher. The underlying light, mobile weapon concept dates back far beyond the automobile to horse-drawn tachanka carts of the First World War and carroballistas (essentially huge crossbows mounted on carriages) of the Roman Empire.
However, according to the book Technicals: Non-Standard Tactical Vehicles from the Great War to Modern Special Forces by Leigh Neville, this descriptor originated during the Somali Civil War in the early 1990s, where NGOs hired local gunmen in “Mad Max-style armed pickup trucks” for protection under the guise of being “technical advisers.”
2021 Ford Ranger XLT Supercrew 4X4
Drive Train:2.3L EcoBoost 4-cylinder with 10-speed automatic transmission
Suspension:Fox Performance Elite Series 2.5 remote reservoir coilover shocks
Armament:Dillon Aero MMC turret system equipped with Dillon Aero M134D Minigun and Trijicon MGRS sight
Body Modifications: Dillon Aero custom bed cage, Coastal Offroad front/rear bumpers and skid plate, ShrockWorks rock sliders, Prinsu roof rack, Roam Adventure Co. awning, Rotopax fuel containers
Electronics: Baja Designs Squadron Pro bumper lights and S2 Pro A-pillar lights on SDHQ brackets, sPOD HD light/accessory controller, PRC-113 radio with VRC-83 amplifier and bumper-mounted antenna, Warn winch
Lighting & Electronics:Dual AGM house batteries, two 100W SunWare solar panels, Victron Energy 2,000W power inverter, Alpine Halo 11-inch head unit/navigation, Simarine PICO touchscreen information panel, two Dometic refrigerators, LED camper lighting with charge ports, Warn Zeon 10-S Platinum winch with Factor 55 fairlead and FlatLink E, Baja Designs S1 bumper lights and LP9 Pro driving lights, KC Hilites Cyclone rock lights
Owner & Builder:Dillon Aero Inc. Scottsdale, Arizona
As with other weapon concepts that have persisted through history, technicals still appear in nearly every modern conflict because they’re extremely effective. Unlike purpose-built military vehicles that require specialized, expensive parts and complex maintenance routines, technicals are based on vehicles that can be purchased locally and serviced at any Jiffy Lube (or its third-world equivalent). Their weapon components are bolted or welded in place, so they can just as easily be removed and exchanged. And if the vehicle is damaged in combat, repairing or replacing it is a matter of tens of thousands of dollars, not hundreds of thousands.
Above: The bed cage was designed to accommodate overland accessories such as these Rotopax fuel canisters.
Arizona-based weapon manufacturer Dillon Aero recognized the merits of the technical formula, but wanted to put its own spin on it — literally. The Dillon team purchased this 2021 Ford Ranger and equipped it with the company’s Multi-Mission Capable (MMC) system, which is a modular, power-operated turret that can accept a wide variety of weapons. The compatibility list includes M240 and M60 medium machine guns, an M2 .50-caliber heavy machine gun, MK19/MK47/H&K GMG automatic grenade launchers, the Russian PKM, and many others.
Above: Fox coilovers with remote-reservoir shocks allow this Ranger to handle washboard desert roads smoothly at speed.
But this truck features the cream of the crop — Dillon Aero’s M134D minigun, which doles out a staggering 3,000 rounds of 7.62 NATO per minute. That’s 50 rounds per second, or about four times the rate of fire of an M240. While taking photos for this article, we had the opportunity to send some rounds downrange with the M134D in the MMC turret, and we can only describe it is as a firehose of hot lead. If you can use one without grinning ear-to-ear, we can’t be friends.
Above: This high-clearance Coastal Offroad rear bumper includes a swing-out with a full-size spare tire, trash bag, and antenna mount.
As cool as the minigun is, there’s more to this truck than its armament. A representative told us, “The Dillon Aero Ford Ranger goes a step further with the engineering effort to mount field-deployable communication systems that allow for ground control of military and civilian aircraft. We also implemented overland features that allow for extended capability in various mission settings.” The most noticeable upgrade is a one-of-a-kind custom bed cage that supports the MMC system; Dillon engineers designed and prototyped it using CAD files provided by Ford.
The truck also features Coastal Off-road front and rear bumper sheetmetal kits, which were welded and finished in-house. The front bumper contains four Baja Designs LED lights and a Warn winch; the rear bumper has a swing-out spare tire carrier and antenna mount. That antenna is connected to a Mil-spec PRC-113 VHF/UHF radio that sits atop the truck’s dash.
Above: A Mil-spec PRC-113 radio adds communication capabilities to this truck. To save space on the dash, its bulky amplifier was relocated to the floor behind the center console.
For improved off-road capability, the Ranger was equipped with ShrockWorks rock sliders, a Coastal Off-road skid plate, Fox remote-reservoir shocks, 17-inch Fifteen52 wheels, and 33-inch BFGoodrich all-terrain tires. Additionally, a Roam Adventure Co. awning was bolted onto the Prinsu roof rack, and Rotopax fuel canisters were installed on the bed cage.
Above: The Dillon Aero MMC turret system built into this custom bed cage helps the operator maintain control of the M134D as it spews a near-continuous beam of rounds downrange. This weapon produces a considerable pile of spent brass and belt links after a few short bursts.
Although technicals are typically the work of “austere” mechanics and fabricators in war-torn countries, it’s not hard to see why mainstream manufacturers like Dillon Aero (and Global Military Products, distributors of the Scorpion mortar truck featured in Issue 61 of our sister publication RECOIL) are getting on board with the idea. It’s much easier and more cost-effective to install a weapon system on a locally sourced civilian truck than it is to send a custom-built military vehicle halfway across the globe and keep it running.
Above: The turret accepts a variety of weapons, including heavy machine guns and grenade launchers, but this Ranger is equipped with Dillon’s own M134D Minigun. We’re told they also have plans to try it with the .50-caliber 503D Gatling gun in the near future.
Kyle Goodale of Dillon’s Special Projects skunkworks explained, “We’ve had many vehicle platforms come into the shop, usually built for one purpose or another … The Ranger represents the first project of its type for Dillon Aero, where the Special Projects division was given a blank slate to build upon. We look forward to implementing it in our testing processes for various weapon systems such as the 503D (.50-caliber Gatling gun) platform and having a good time with it as well.”


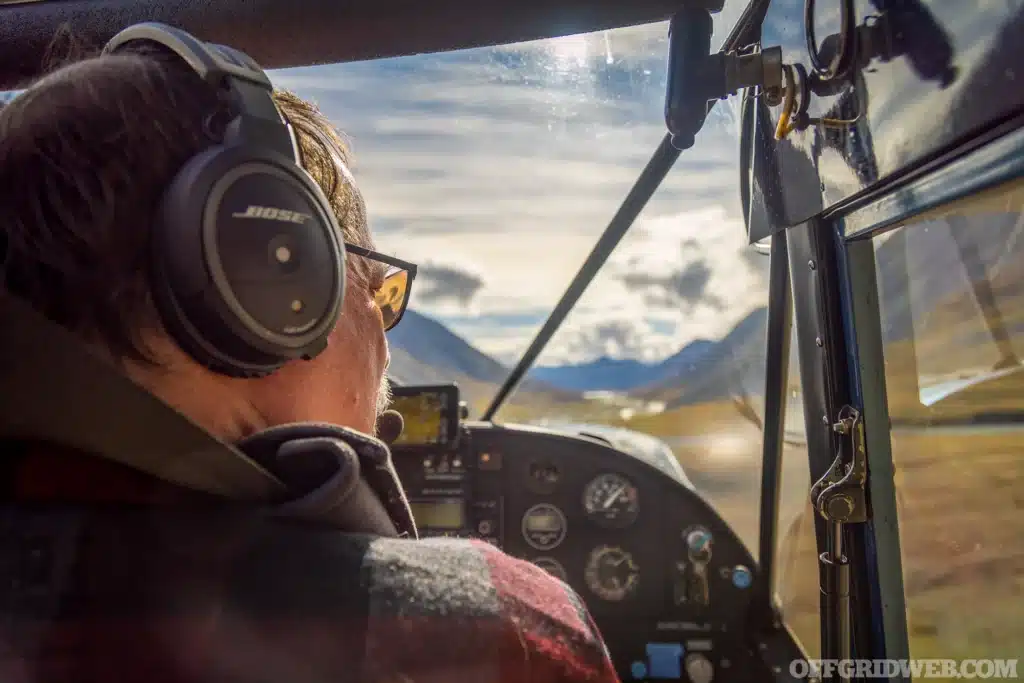
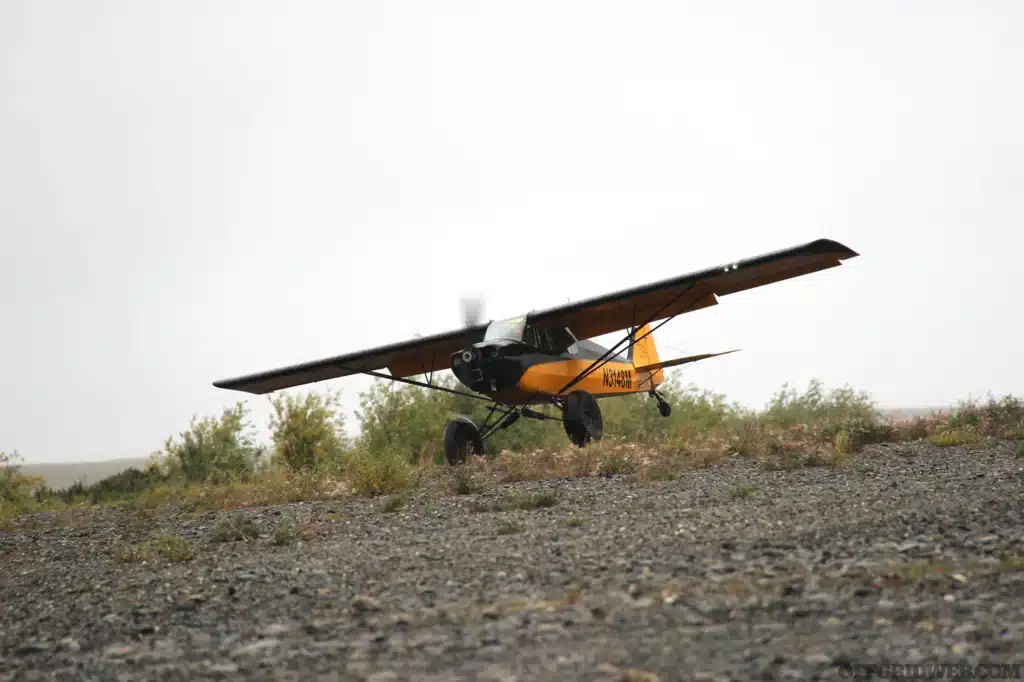
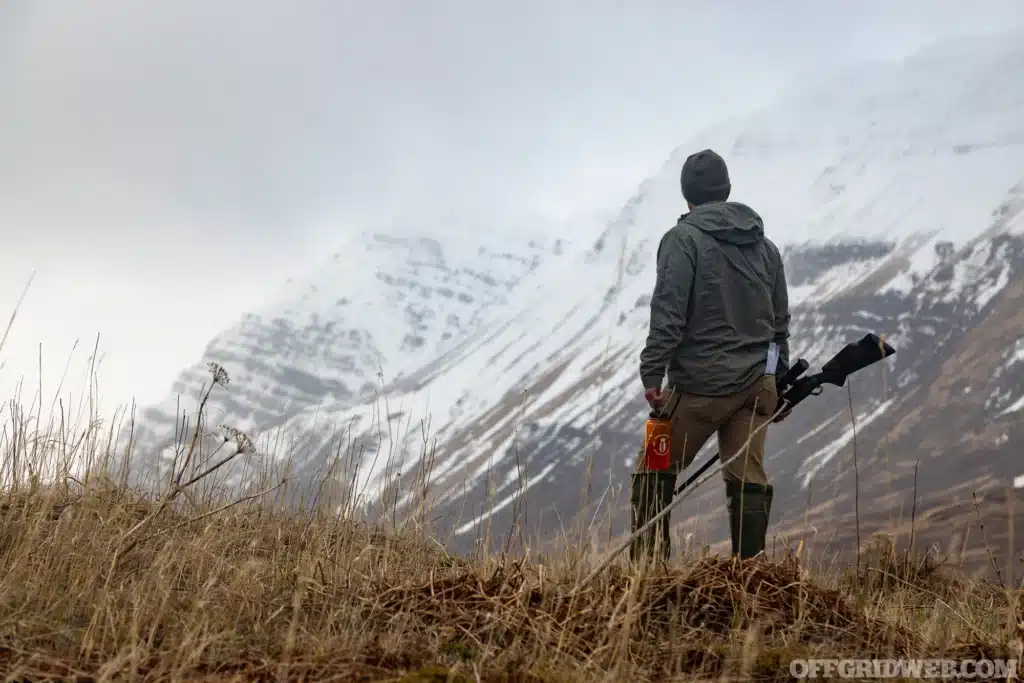
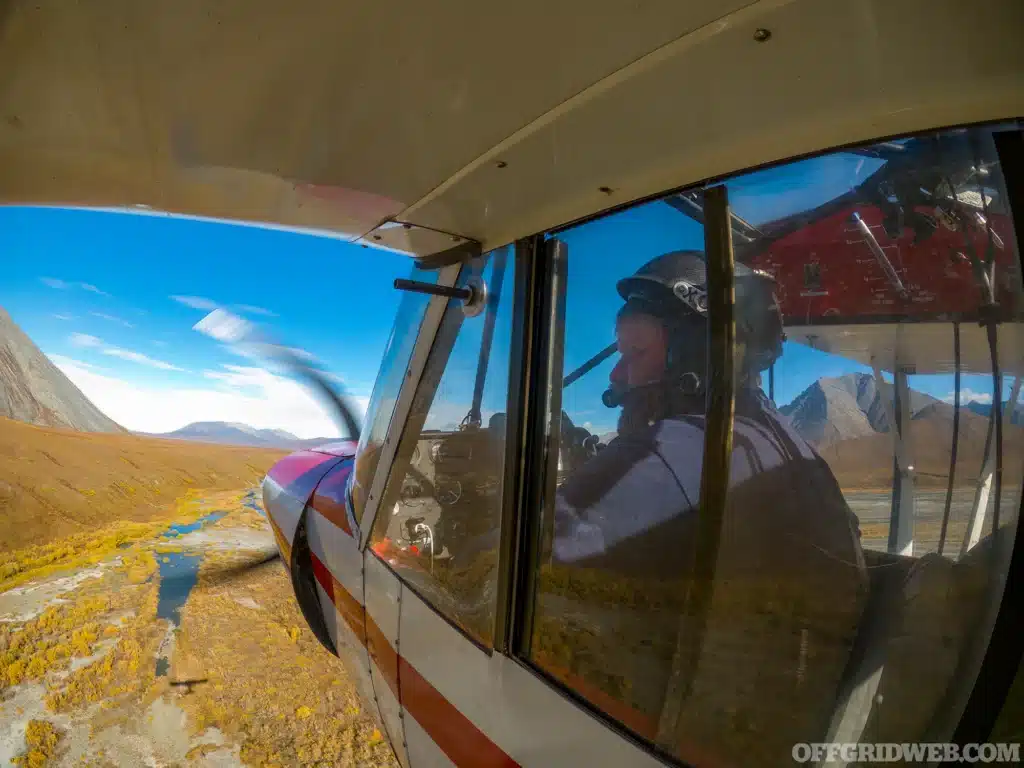


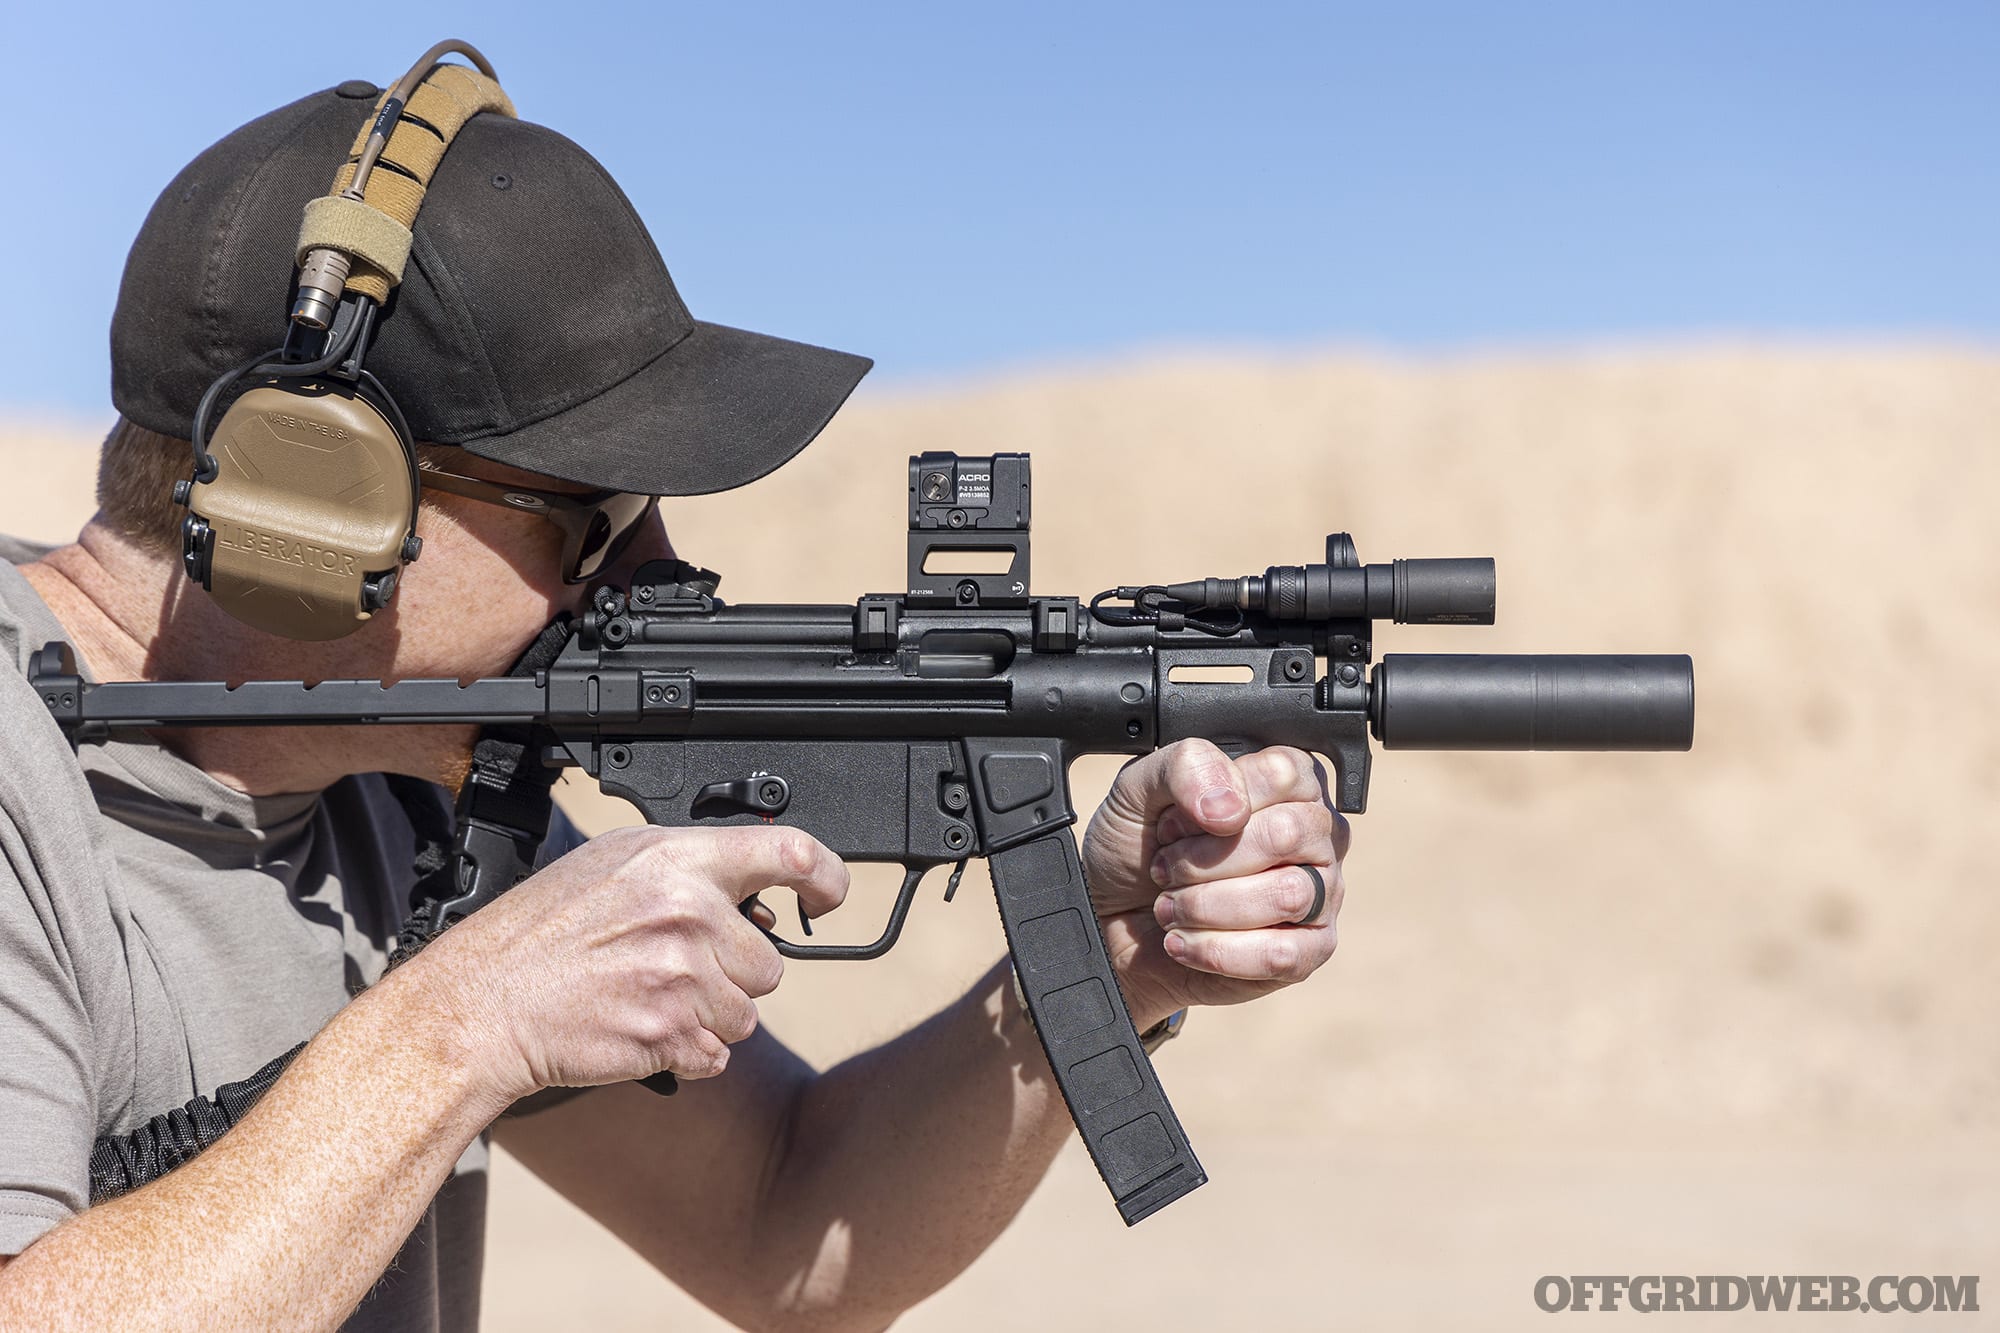


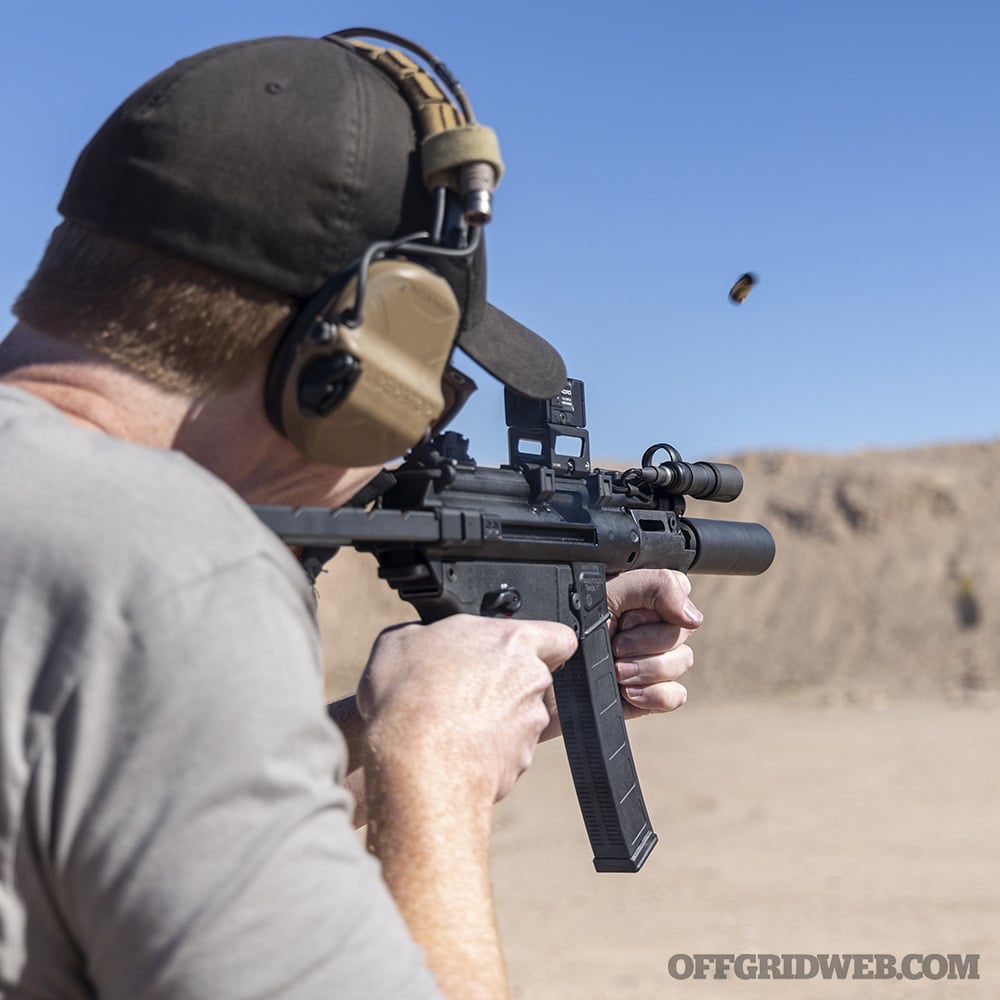


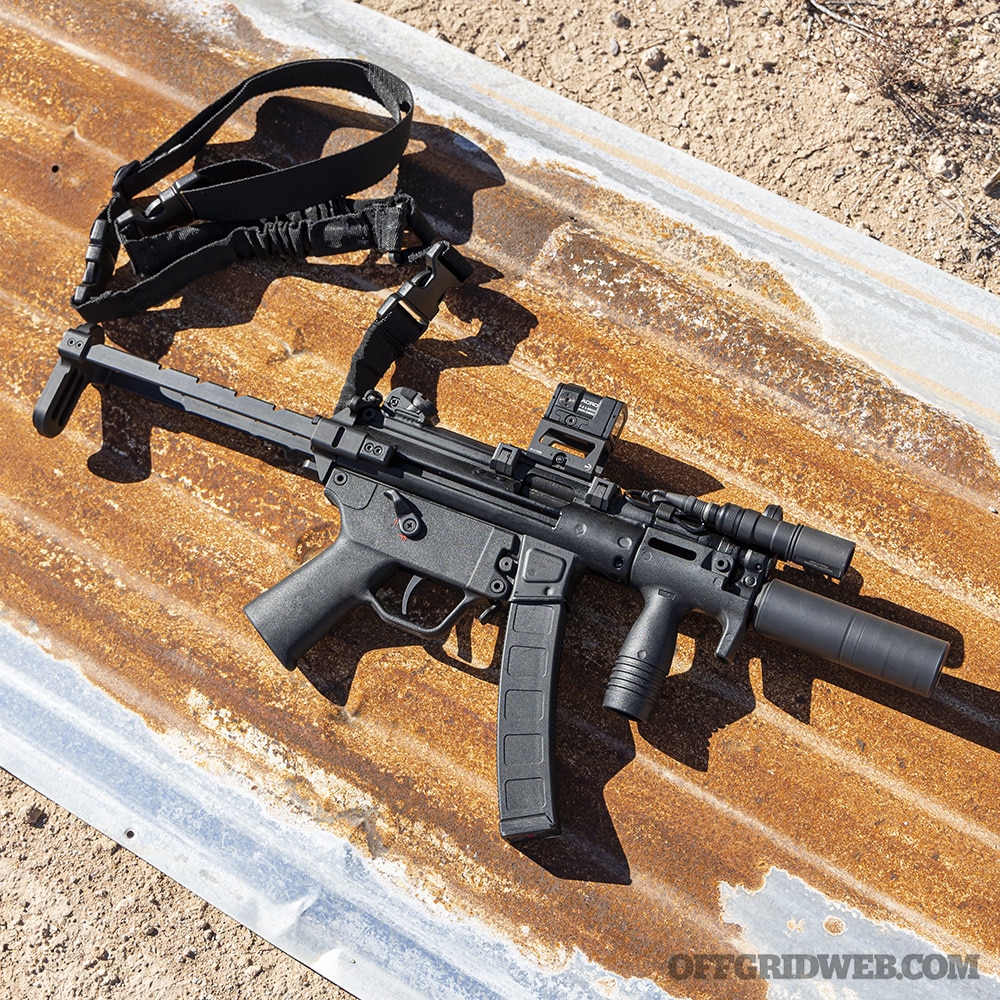

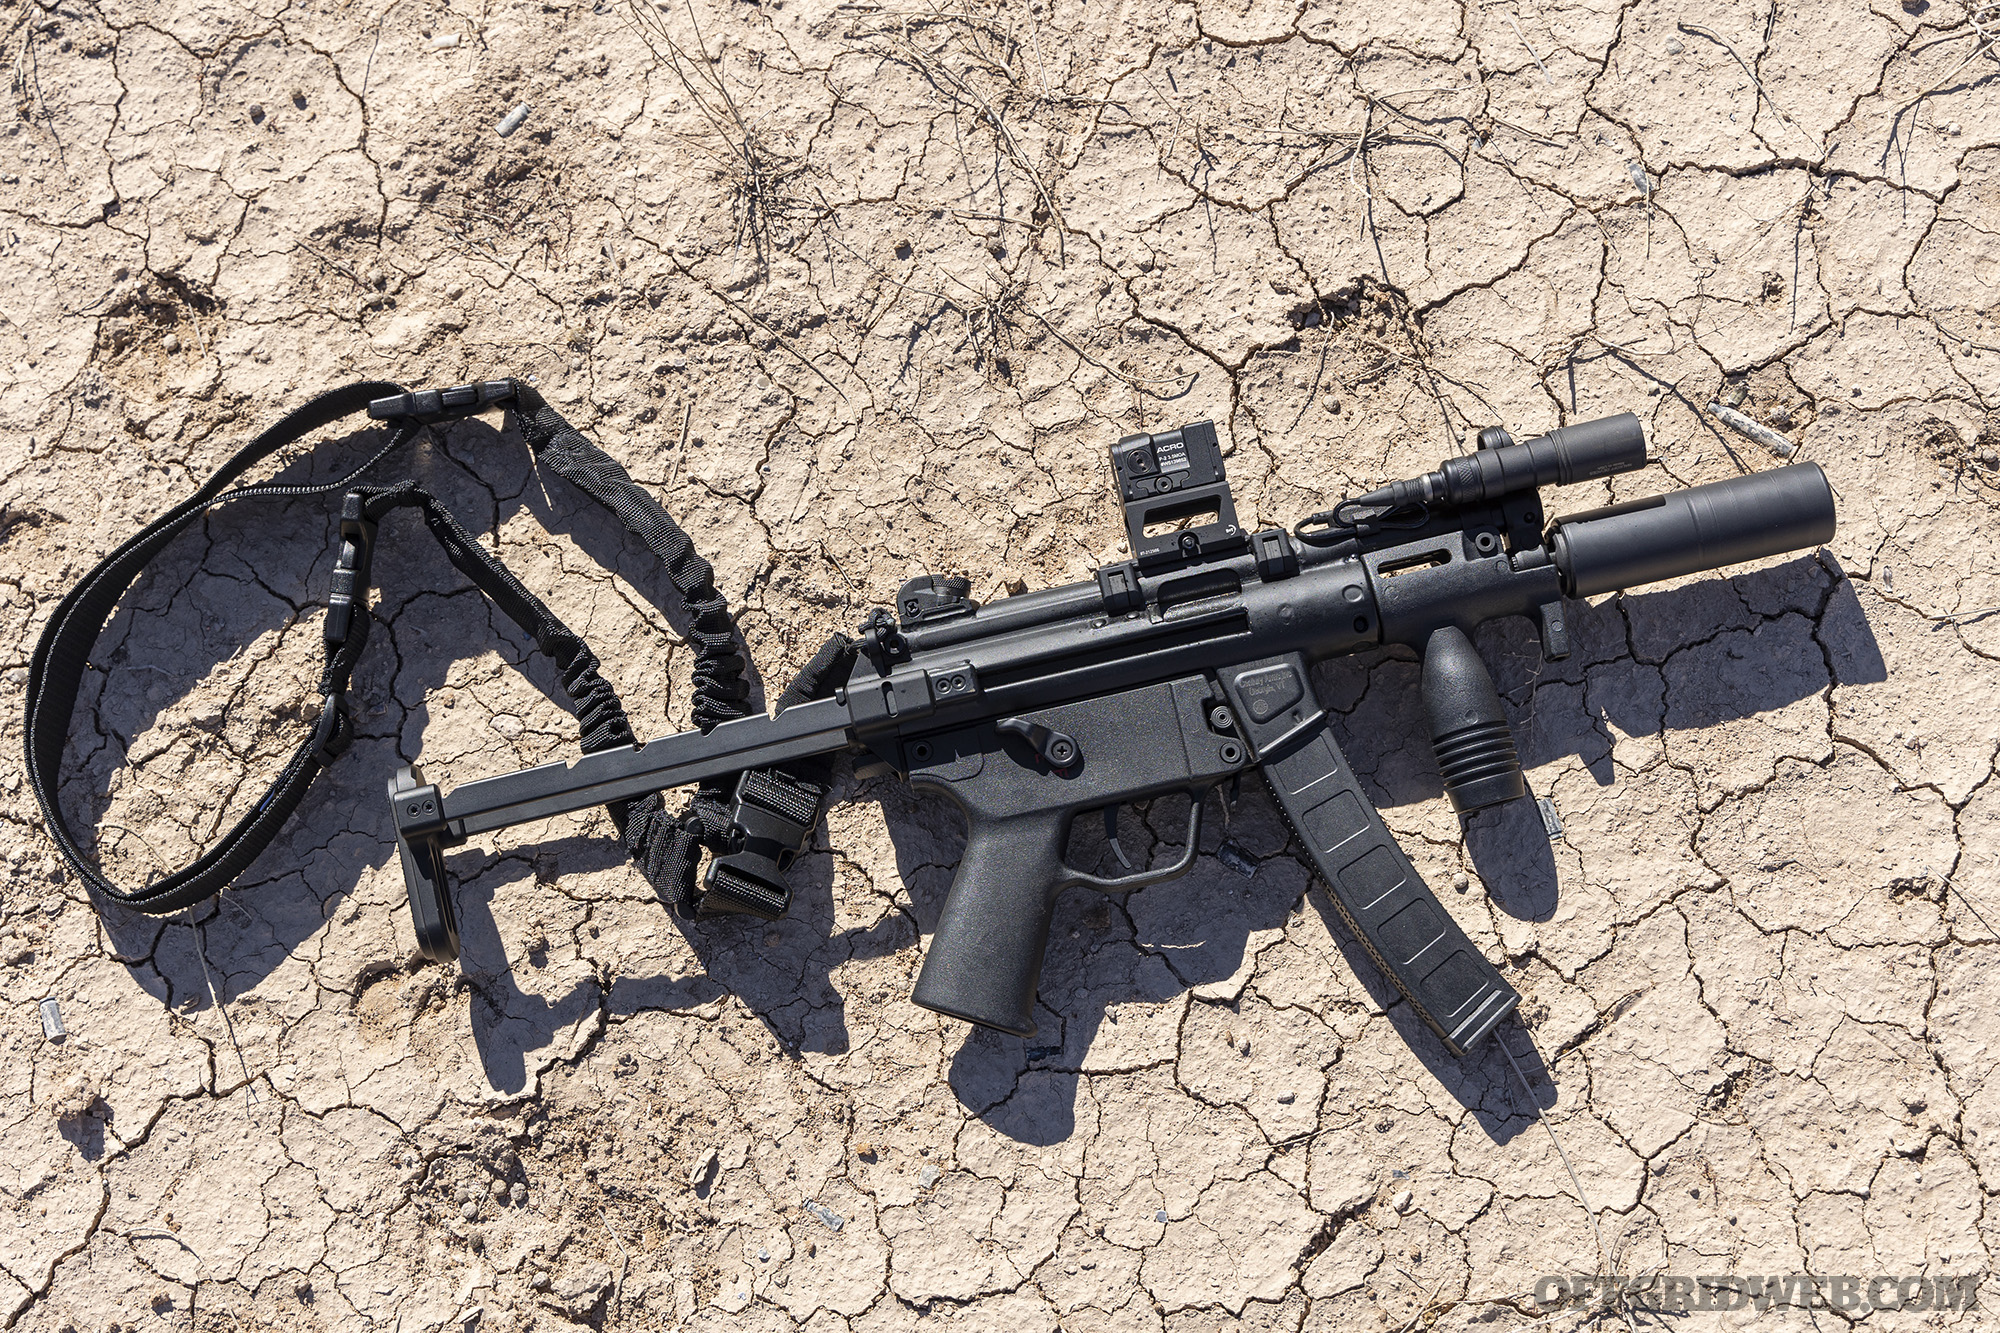


