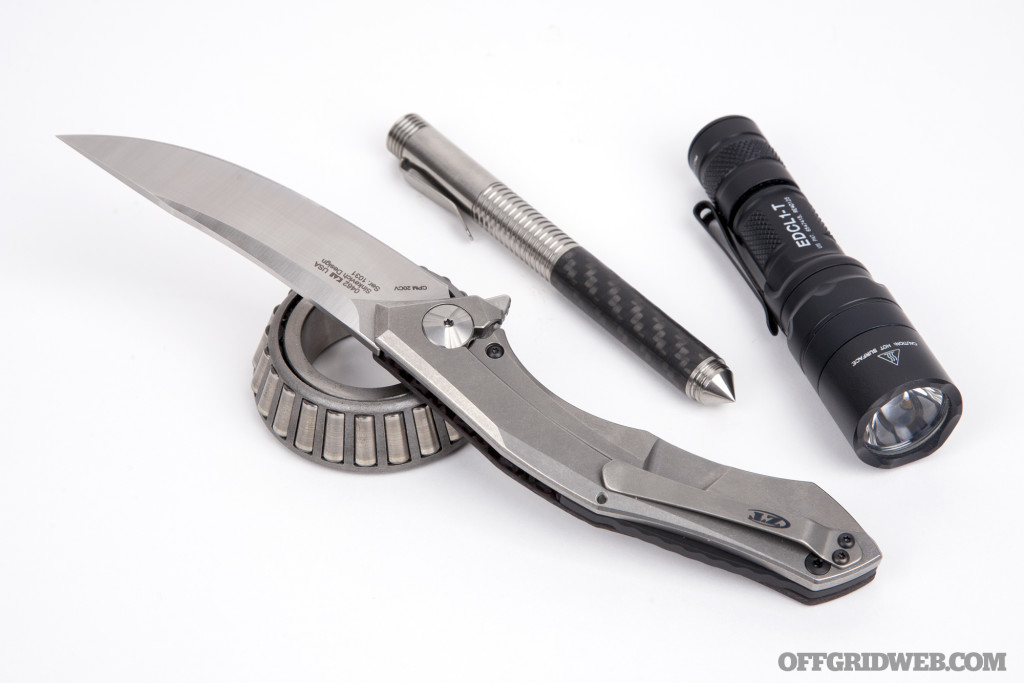
We’ve handled and carried a lot of knives over the years — flimsy entry-level folders we wouldn’t think twice about losing, exotic custom blades we shudder to think about scratching, and countless examples in between. There’s a virtually-unending supply of choices in the folding knife market, to the point that it can feel overwhelming at times. Although every buyer’s budget and needs are different, we’d argue that there’s a $200 to $300 sweet spot where build quality, materials, design, and value coalesce. Now, before you remind us about all the great knives outside that price bracket — and there are undoubtedly many of them — hear us out.

In this $200 to $300 range, you’re primarily going to find the upper end of the mass-produced knife spectrum, since mid-tech (i.e. partial custom) and full custom designs from well-known makers are generally more expensive. However, this range affords a high degree of precision and quality control. A sticky lockbar, loose pivot, or visual blemish that might be overlooked on a less expensive knife isn’t acceptable at this point. Most knives in this bracket will also be made in the USA, constructed from durable high-end materials, and will exhibit some more aggressive design cues to stand out from the pack.
There’s substantial competition in this segment from big players such as Benchmade, Spyderco, and the subject of today’s review, Zero Tolerance. In fact, ZT’s folding knife offerings reside almost entirely in the $200 to $300 range. We’ve praised the company in the past for its painstaking attention to detail and outstanding fit and finish — we even toured the Oregon factory where it makes all its components and builds its knives. But it’s been a while since we’ve tackled an in-depth review of a ZT knife, and the company’s releases have seemed more evolutionary than revolutionary in recent years.
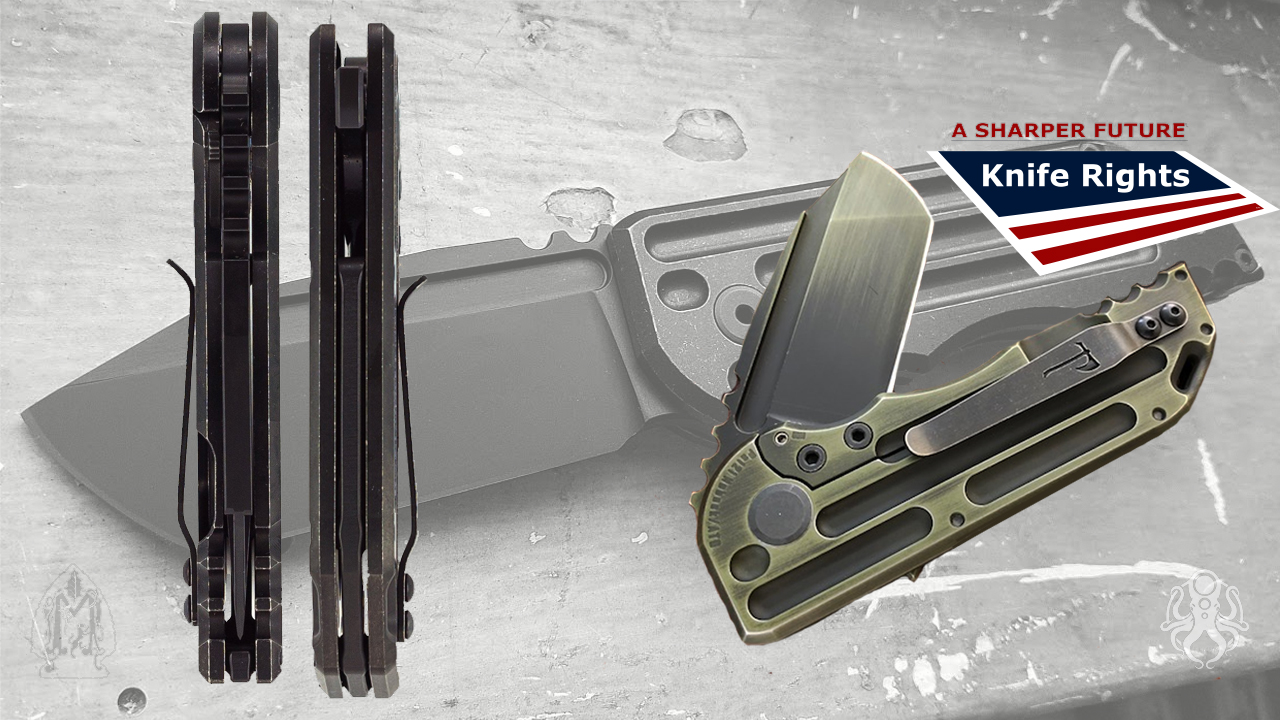
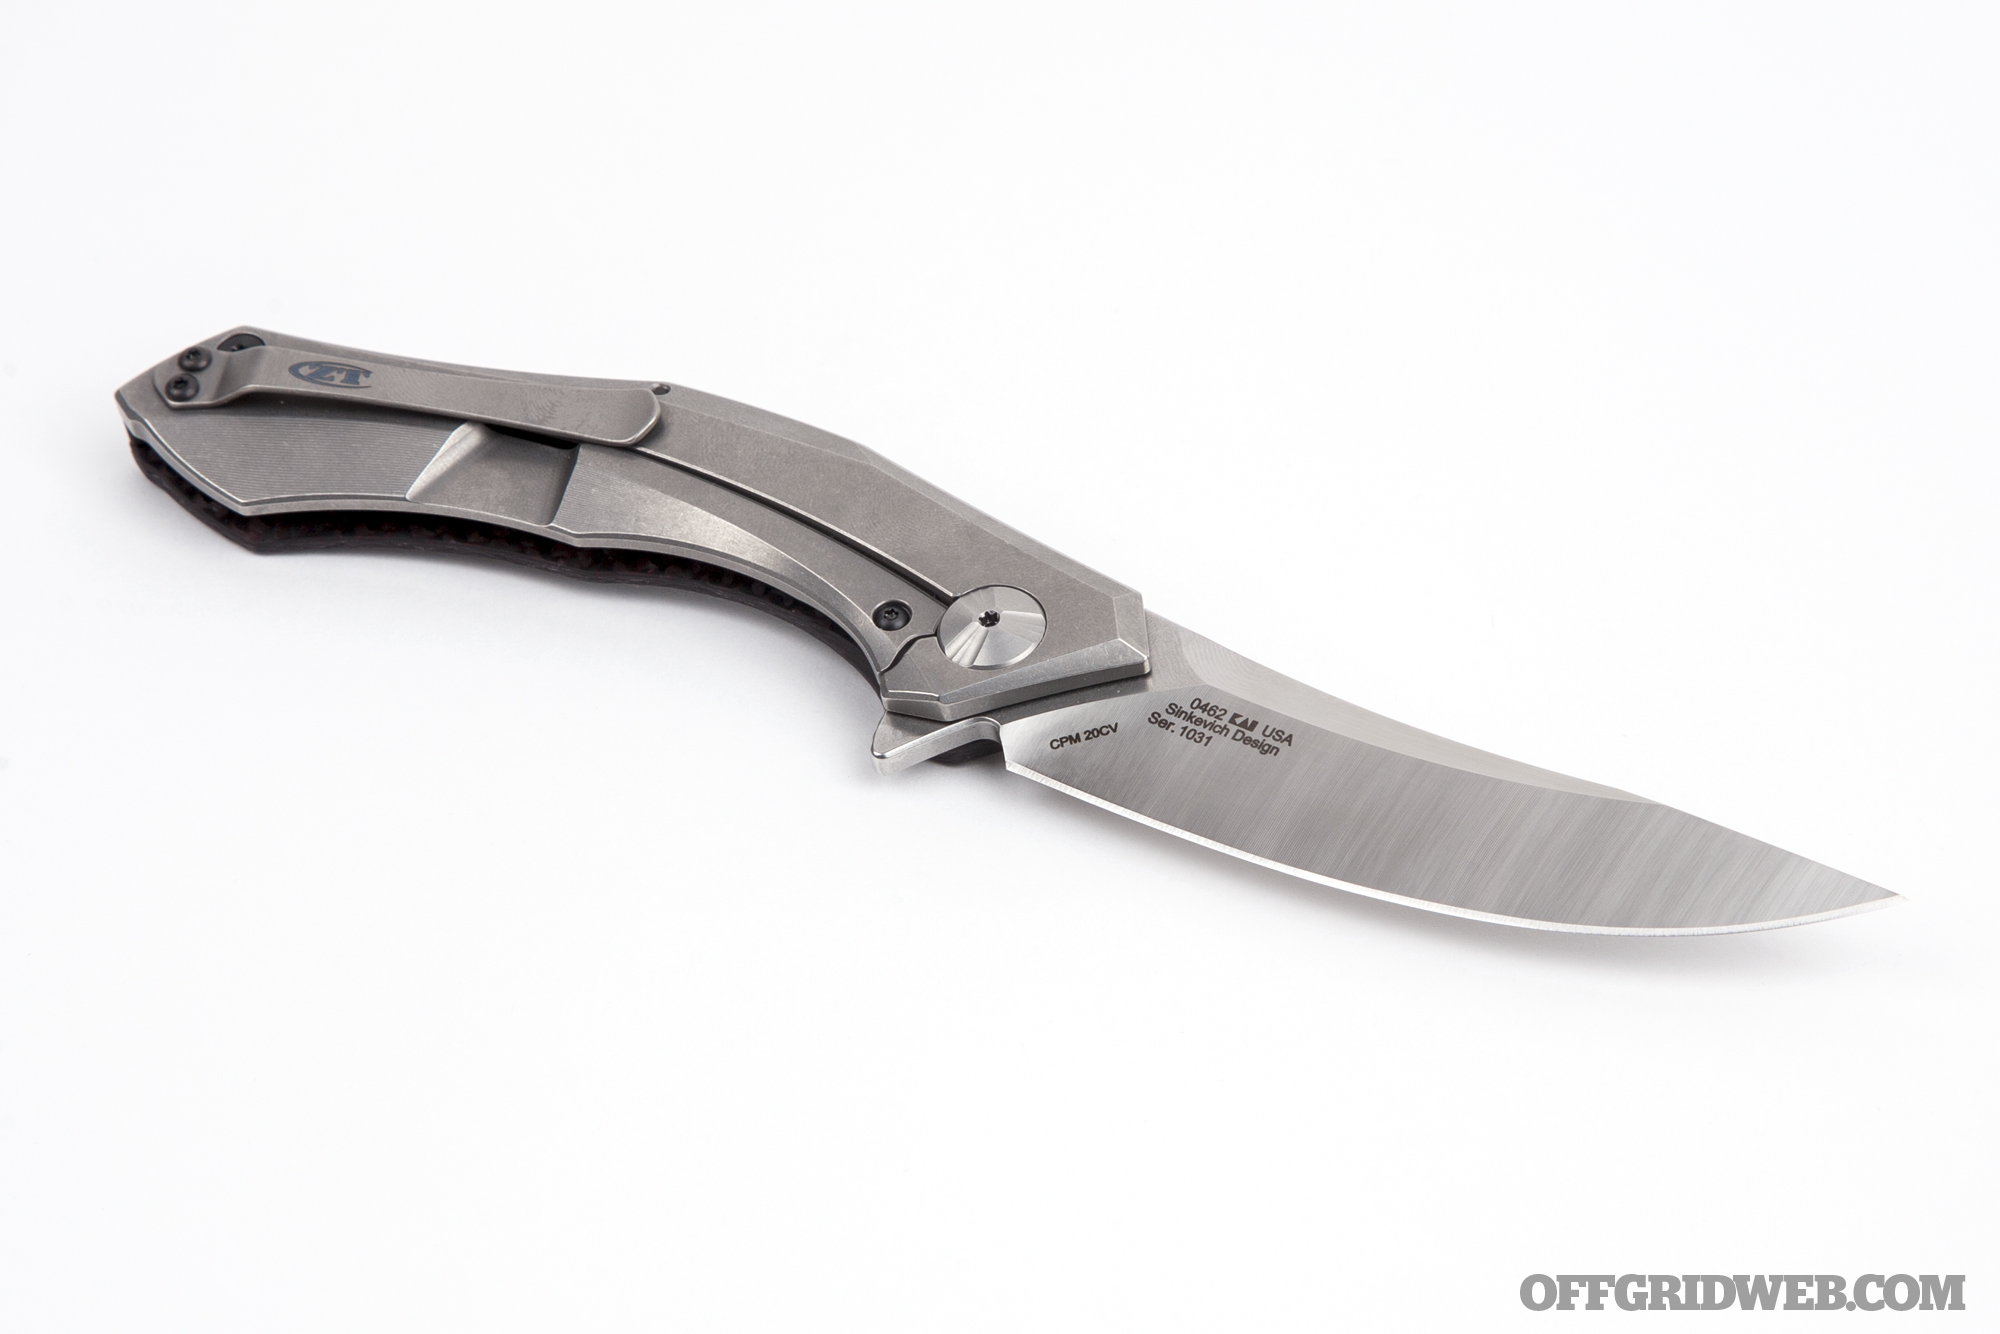
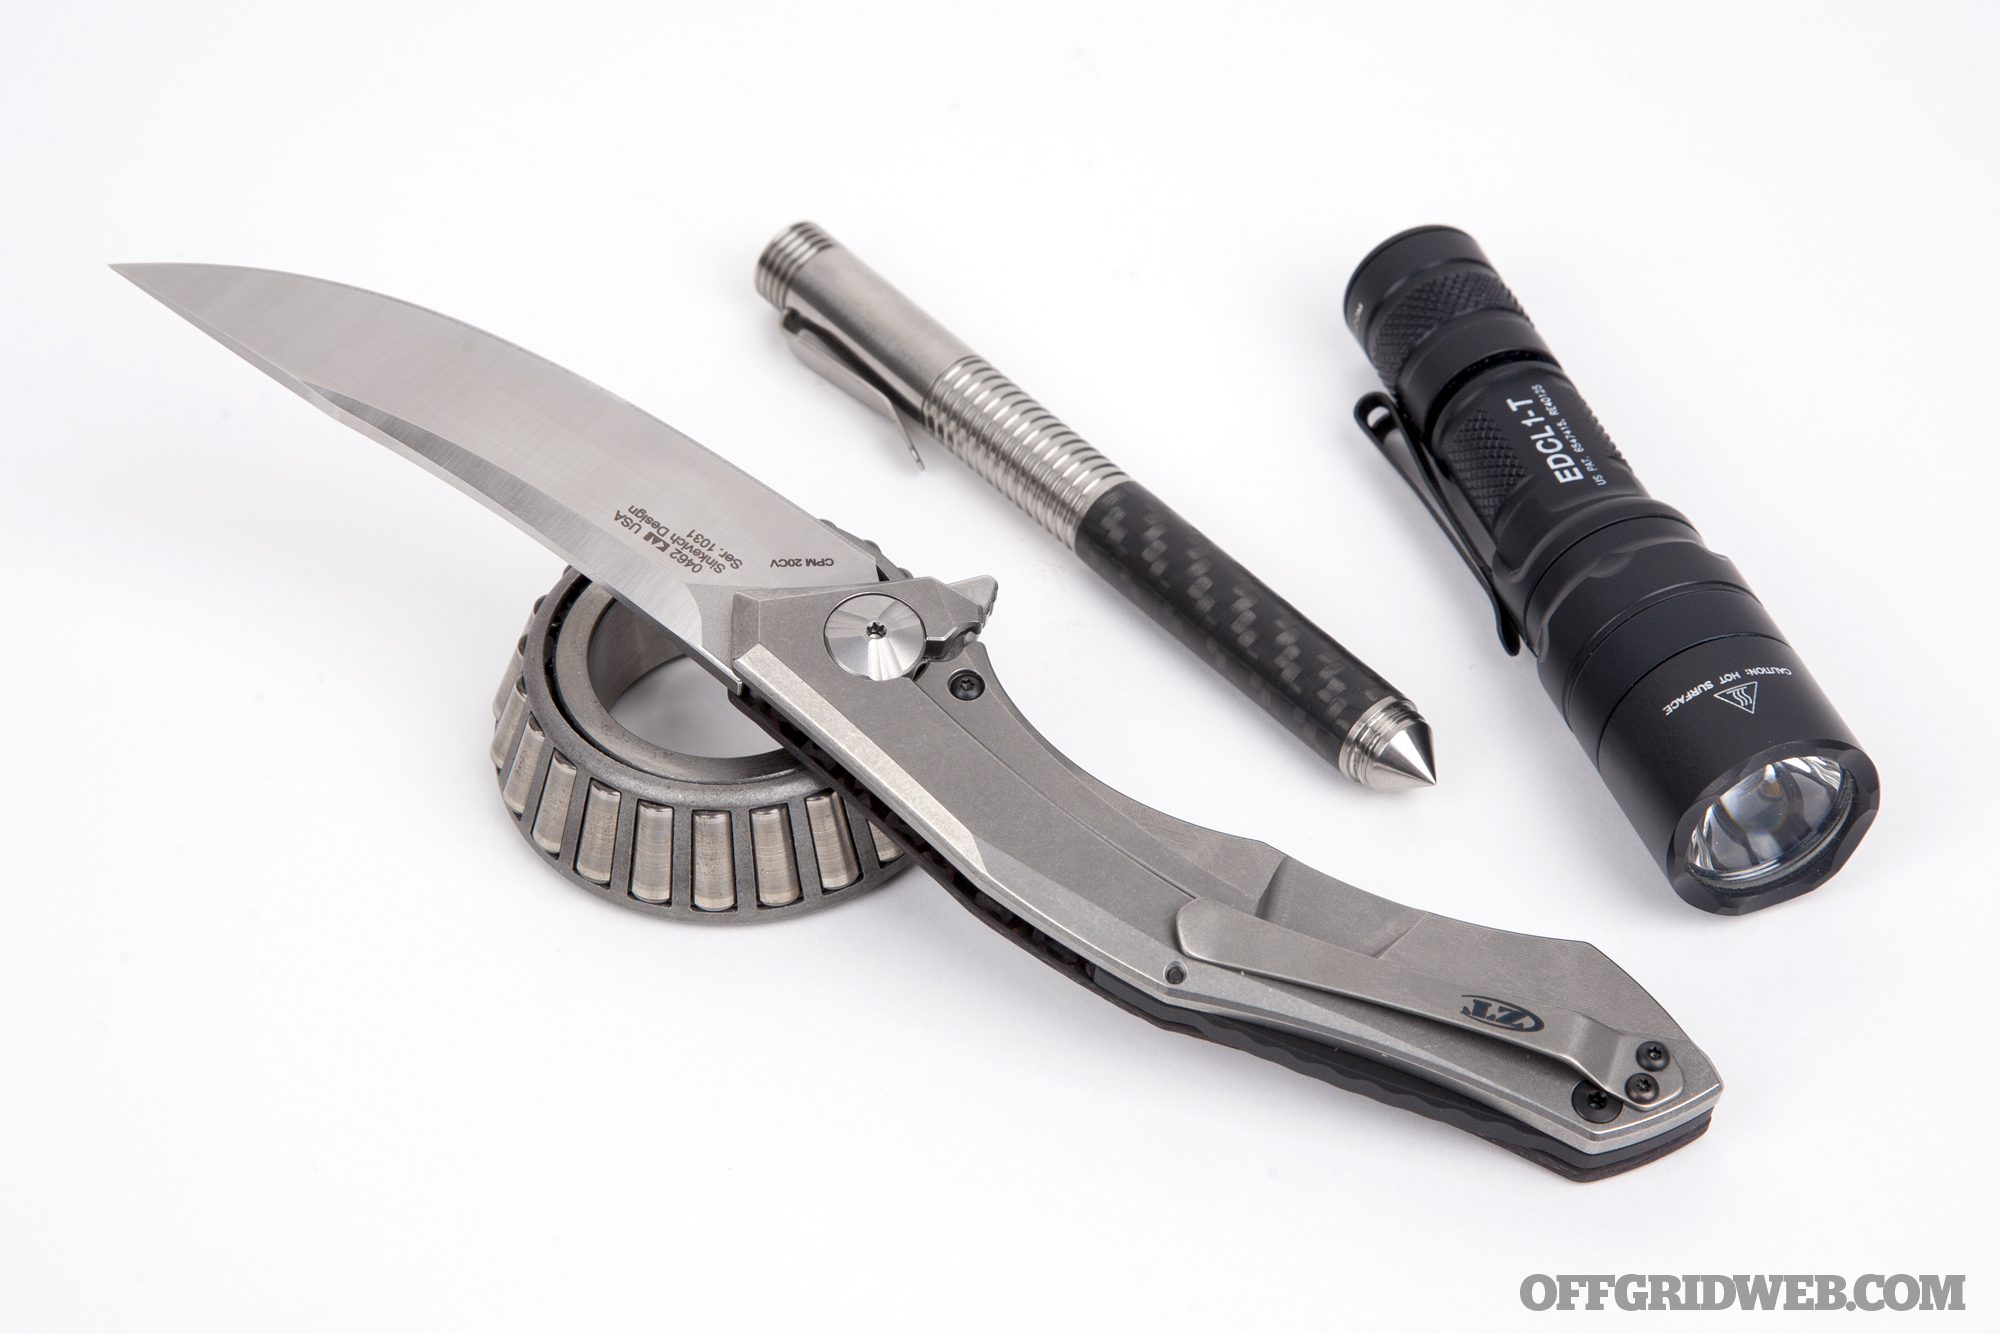
Zero Tolerance 0462
At SHOT Show earlier this year, we stopped by the booth shared by Zero Tolerance and its sister company Kershaw to see what new blades each had released. Kershaw had more than a dozen new knives to show off, mostly priced under $60, while ZT had just three new designs. Of the three, the one that caught our eye was the new 0462.

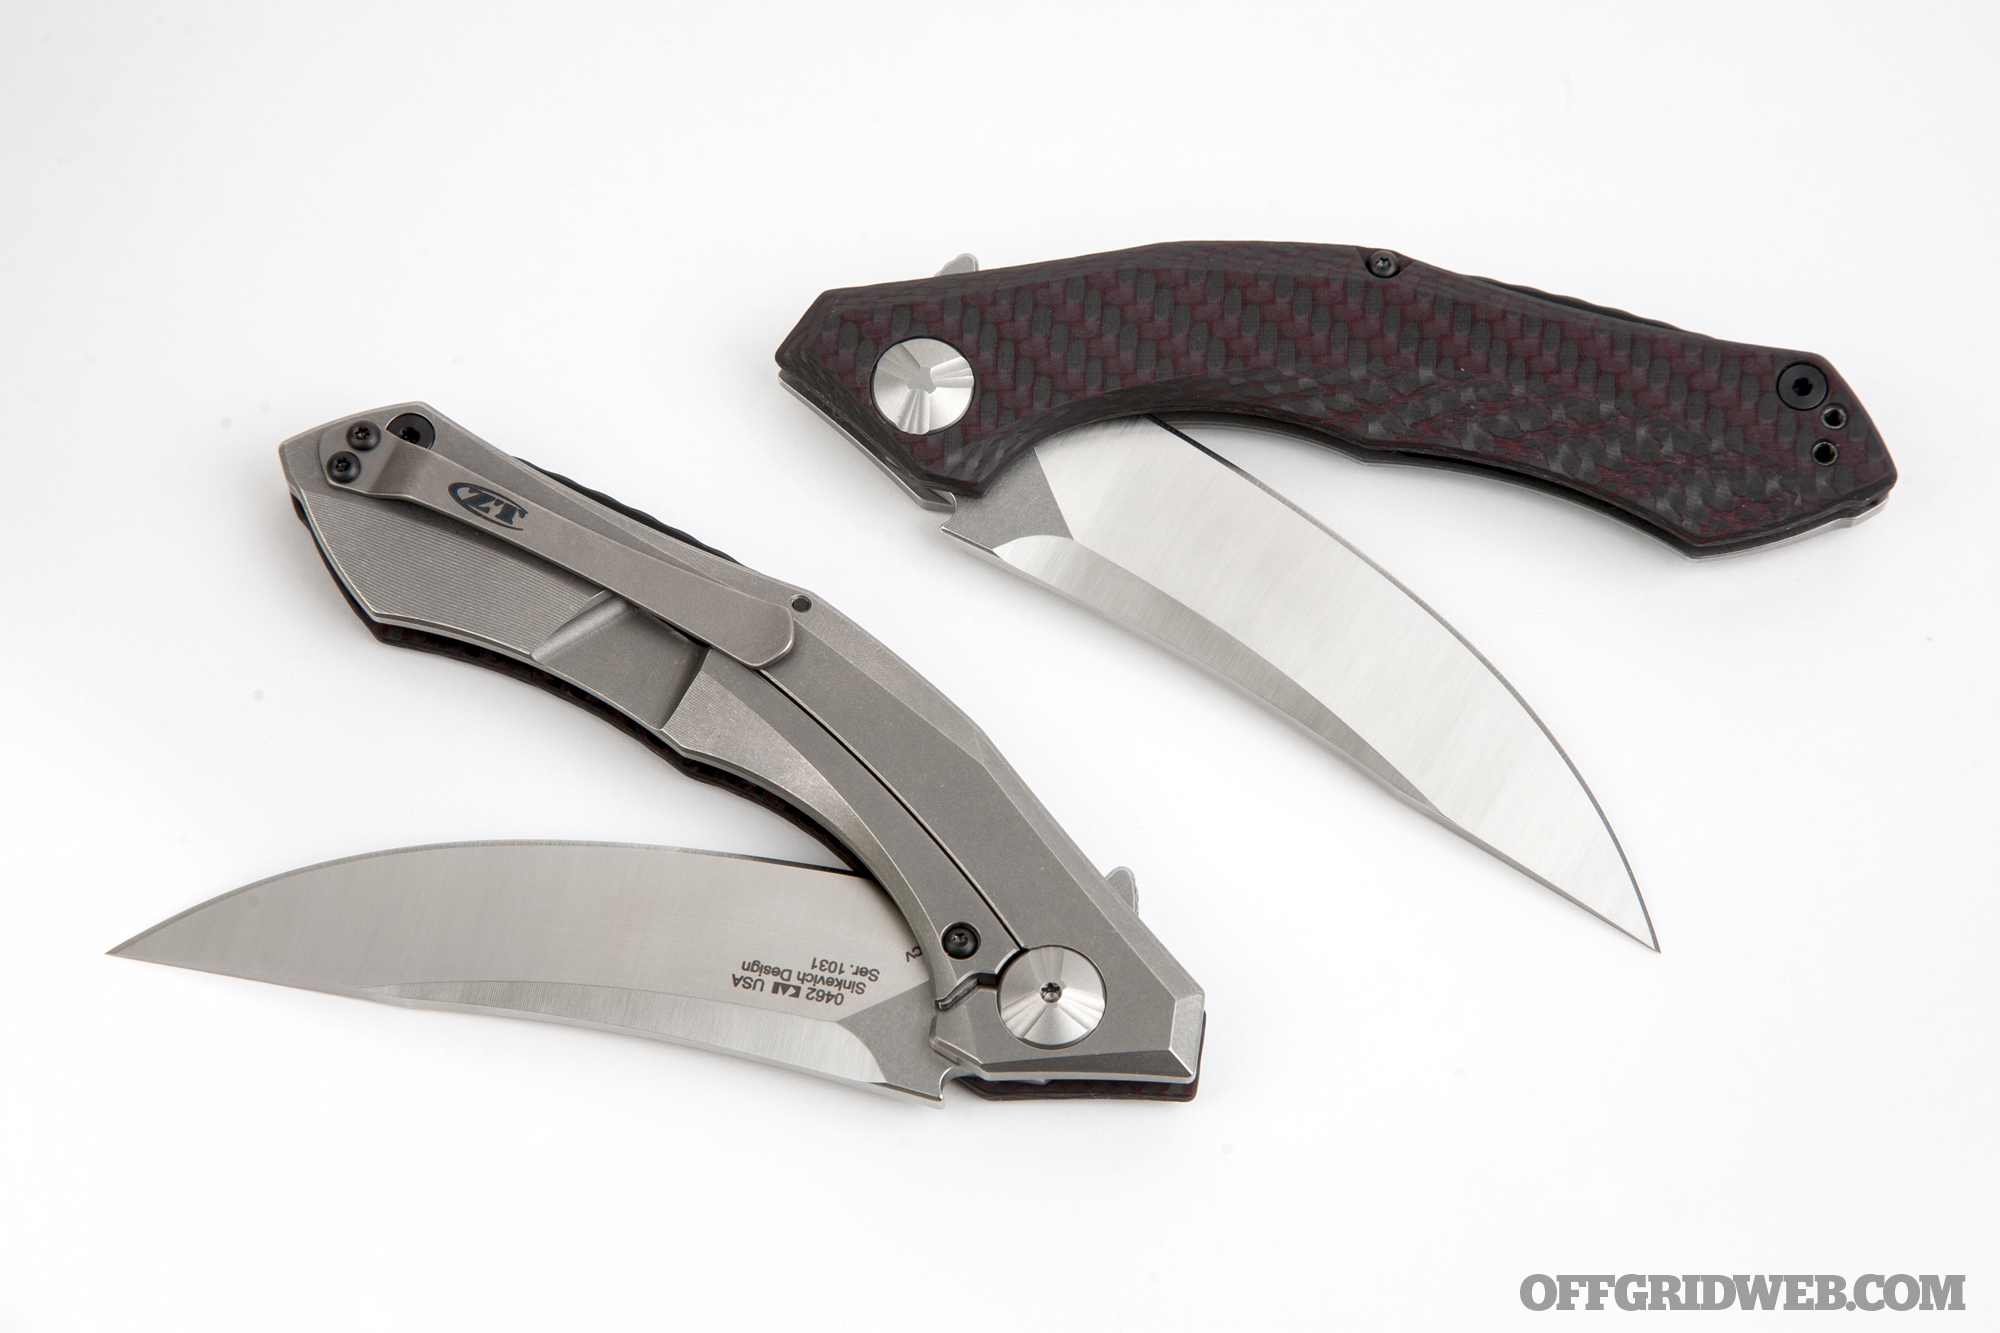
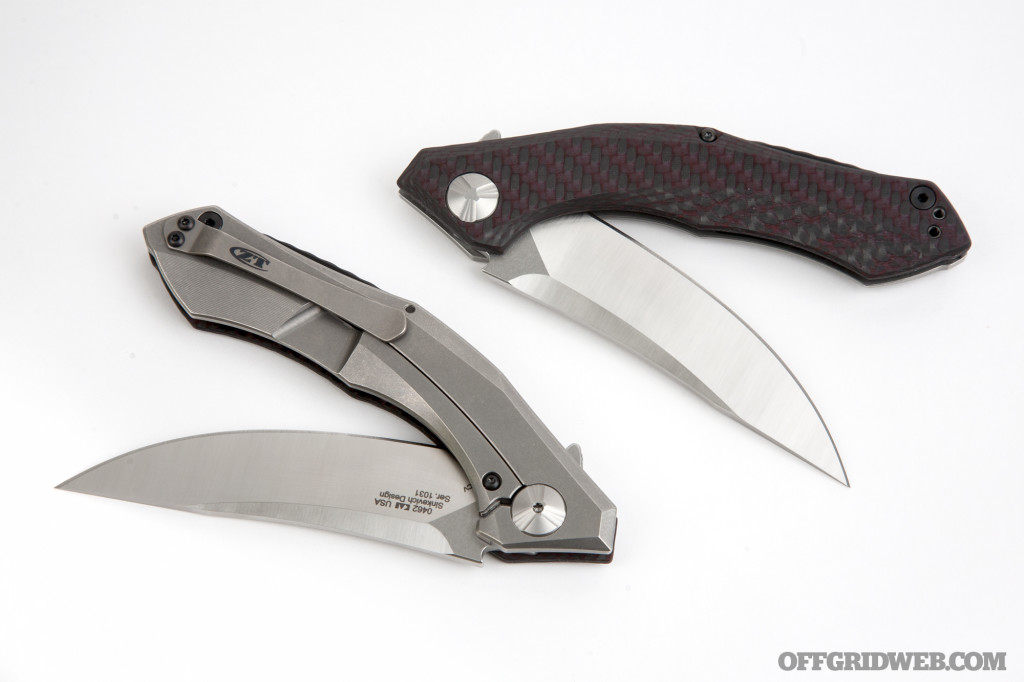
The ZT 0462 bears a somewhat familiar shape to one of the company’s previous folders: the 0460. Both knives were designed by Belarusian knife-maker Dmitry Sinkevich, and feature a similar curvature. We had tried out the 0460 in the past, but found its 7.5 inch overall length to feel rather small in the hand, partially due to its slender and lightweight handle.
The first thing we noticed is that the new 0462 is about 15% larger than its predecessor. That may not sound like a lot, but it feels significant in person. Several other subtle adjustments have also been made to the design. MSRP for this knife is $300, placing it at the top of our “sweet spot” price range. Intrigued, we picked one up for a closer examination.
A Modern Handle
Dmitry Sinkevich has a very distinct design language, with a blend of sharp angles and organic curves. Many of his knives have been long and slim with a sharp piercing point — for example, the ZT 0450. Sinkevich also favors modern materials over traditional ones. The opening page of his web site states, “I give preference to high quality corrosion-resistant stainless steels, titanium, modern laminates: carbon fiber and G10.”

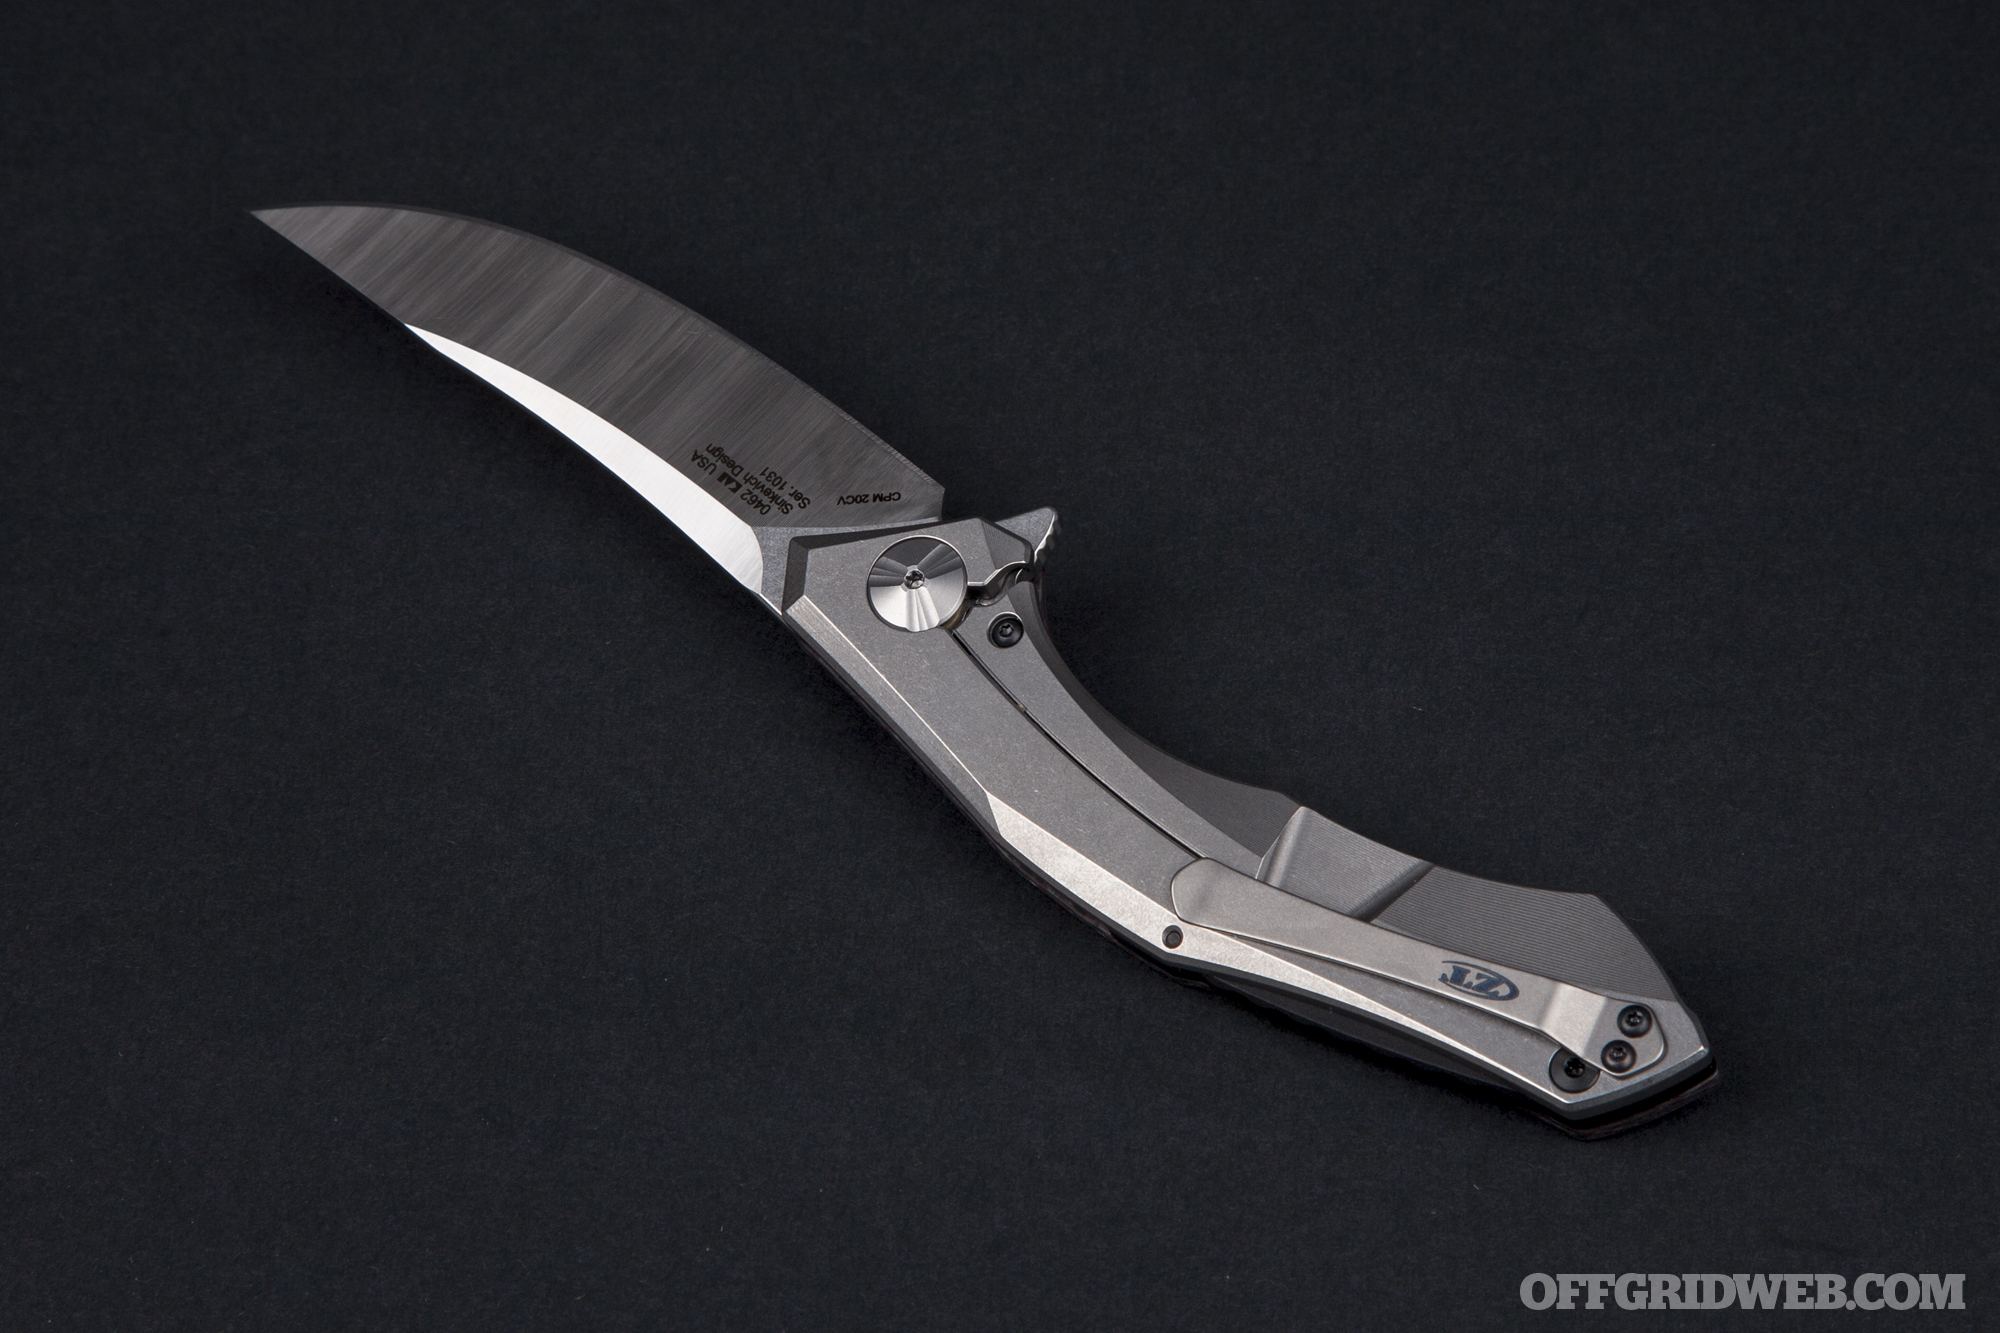
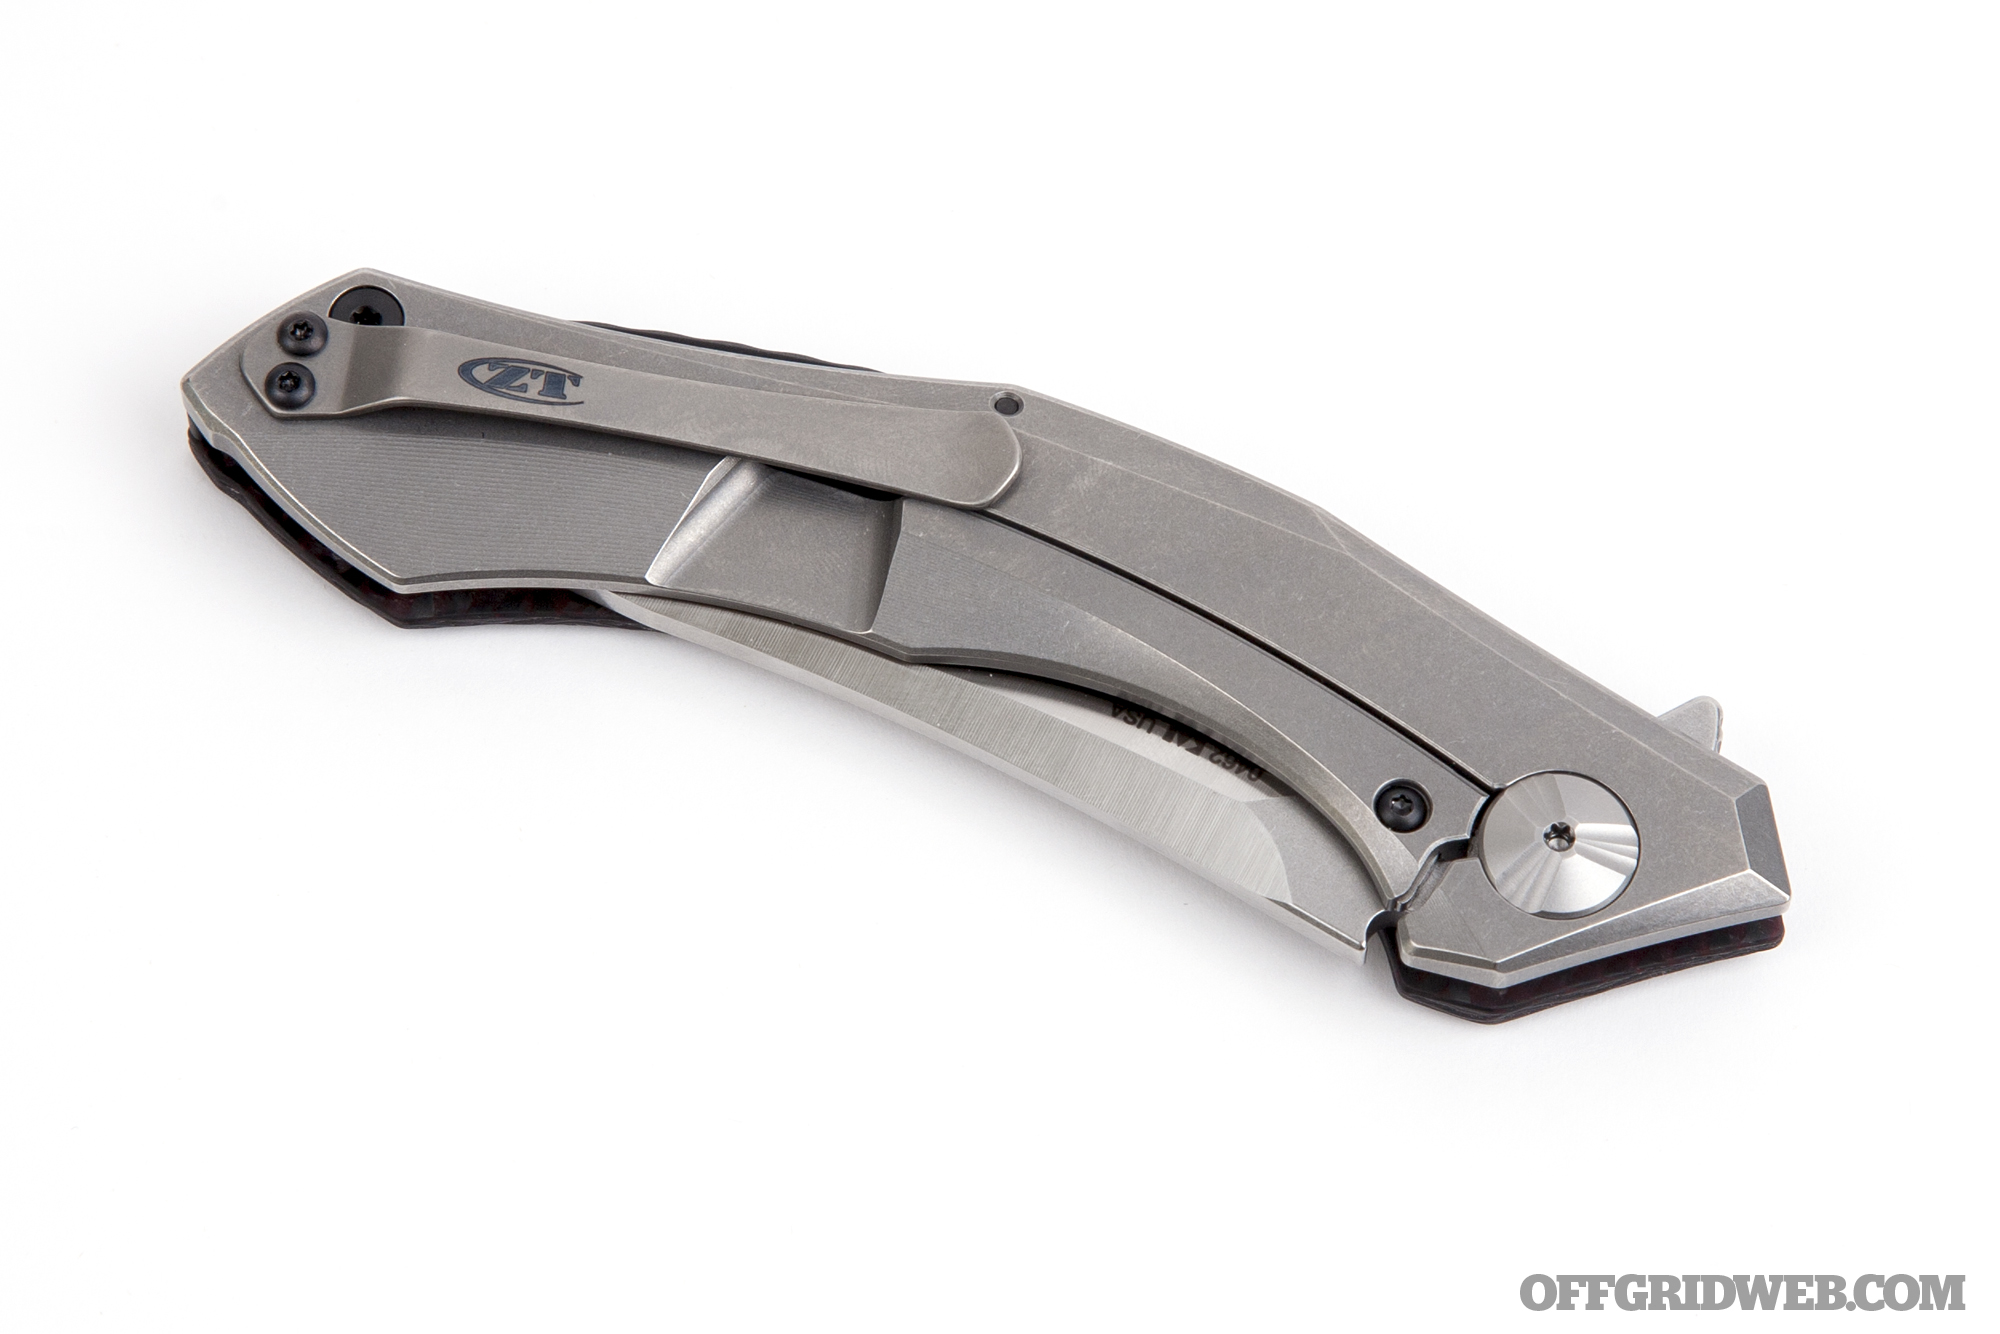
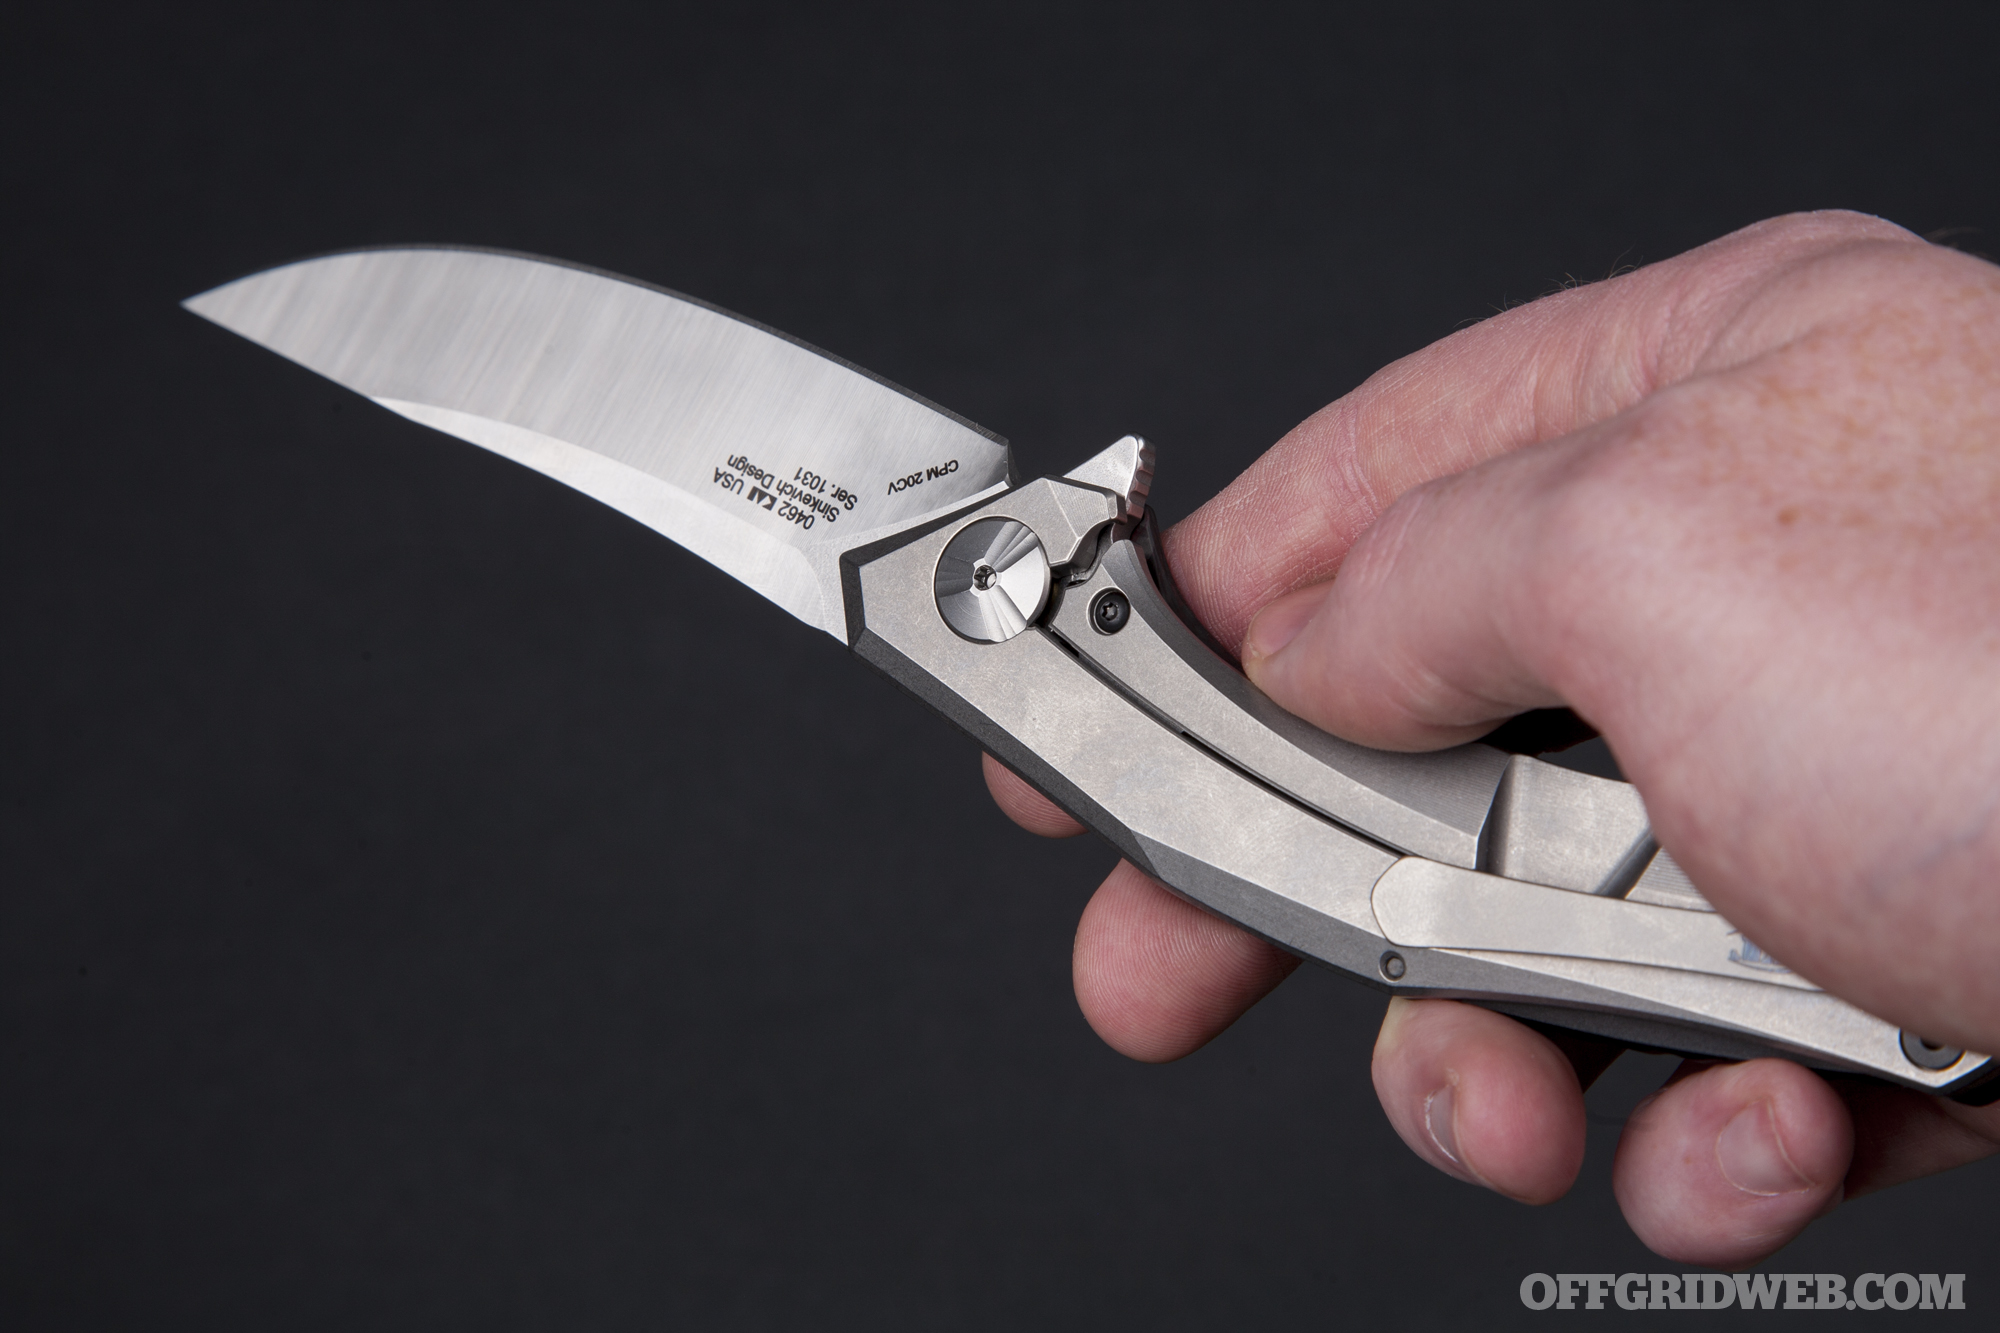
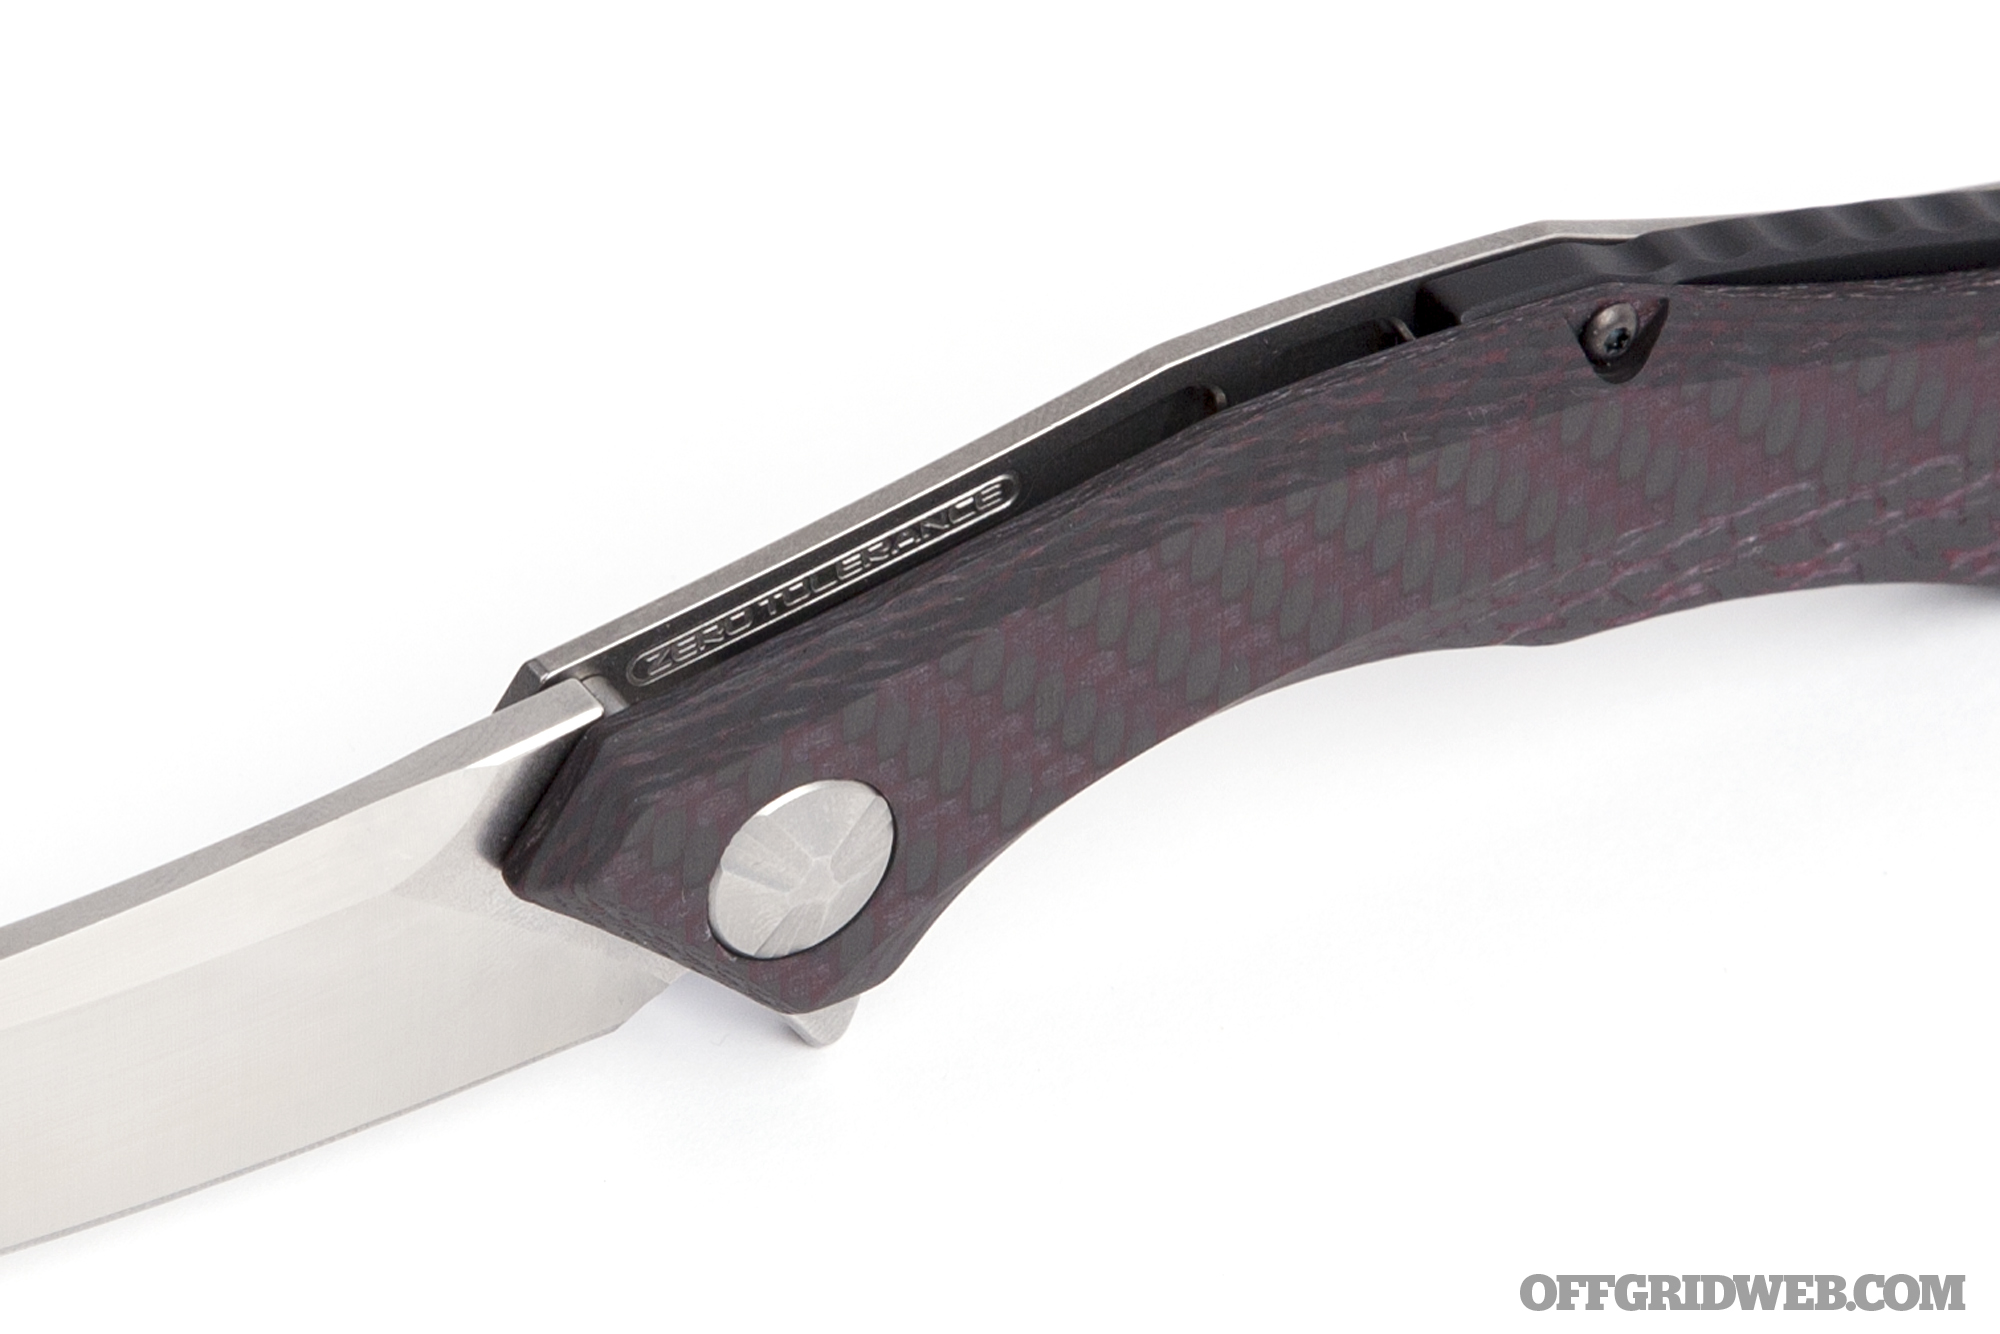
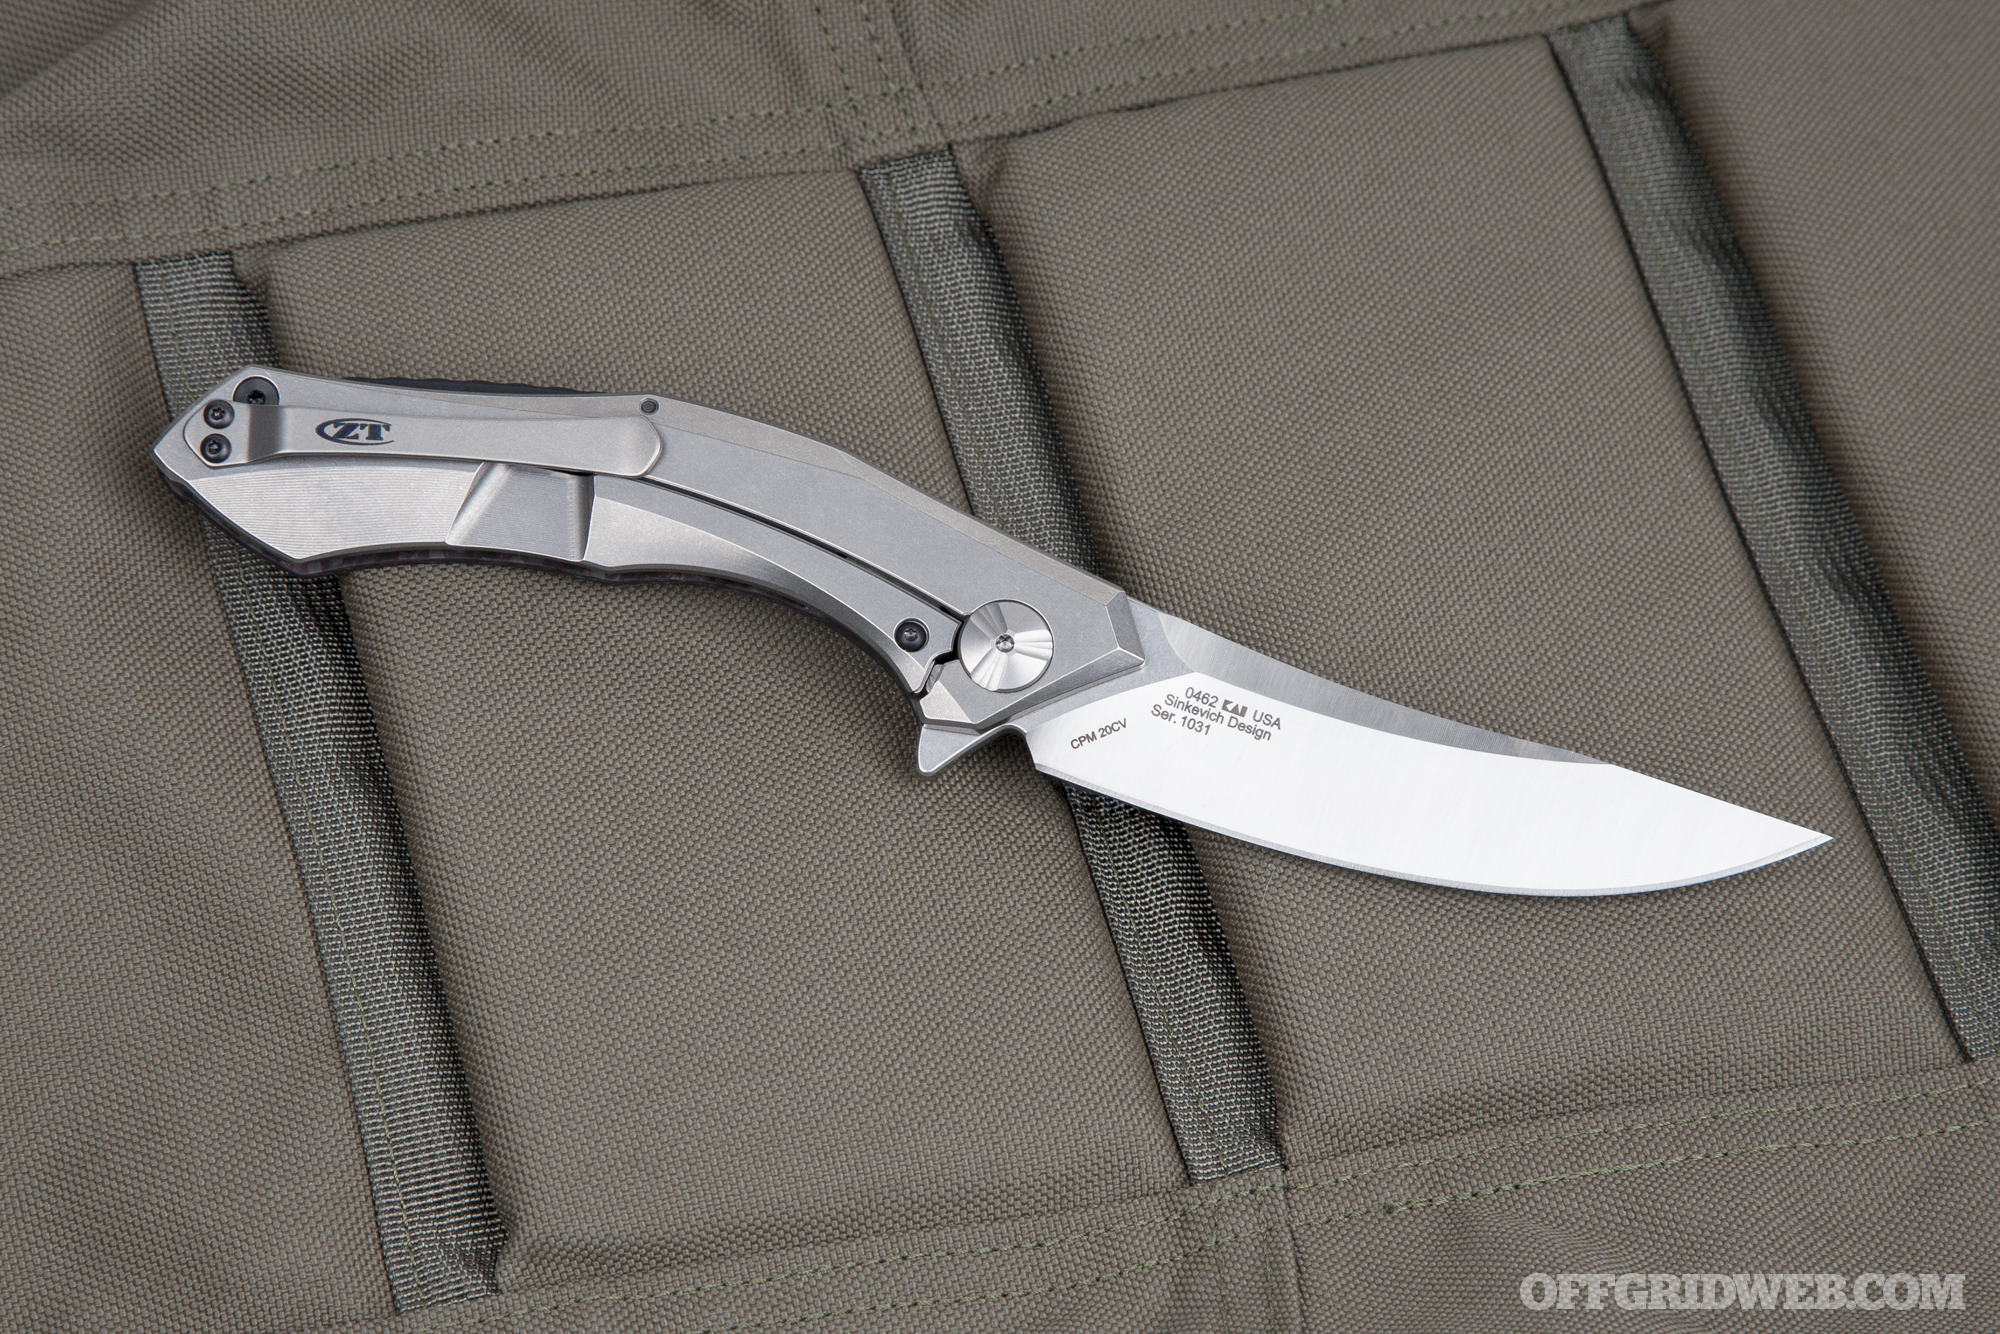
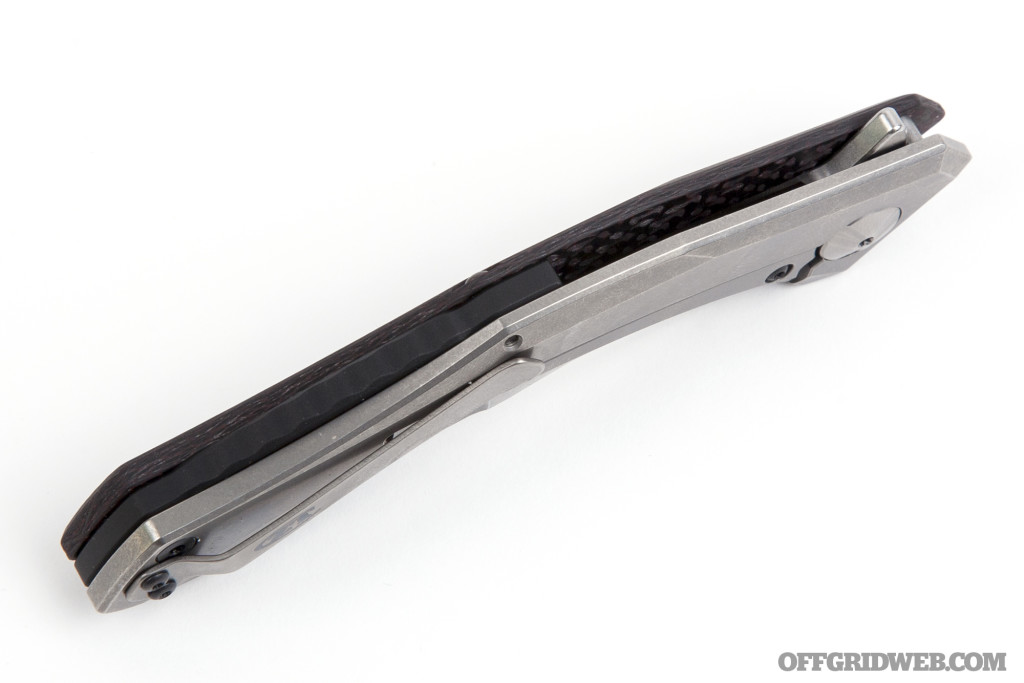
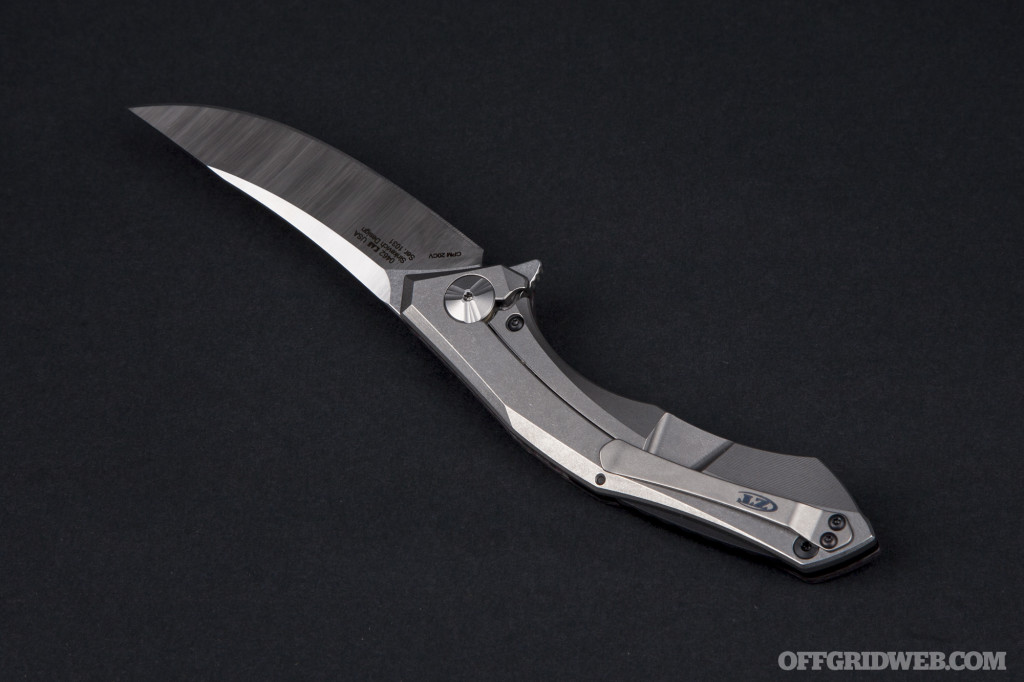
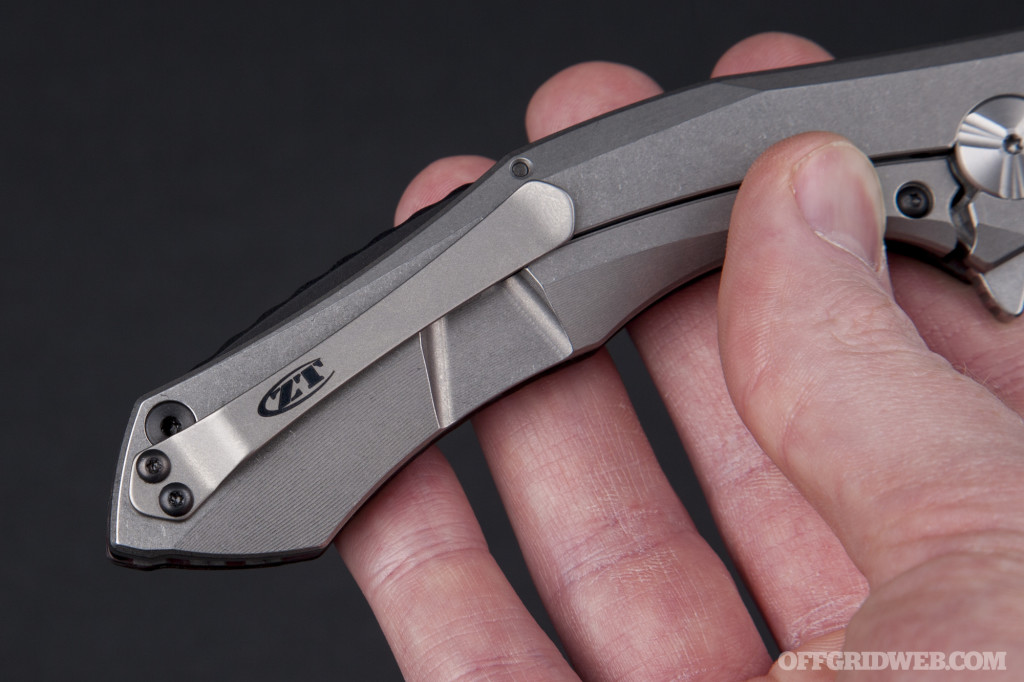
Like most Zero Tolerance knives, the 0462 starts with a titanium frame with integrated framelock. The lock bar is fitted with a bolted-on hardened steel insert to prevent galling, a form of microscopic wear that would otherwise occur between the hard steel blade and softer titanium lock surface. This insert is common on ZT knives, and in our experience it has an impressive ability to maintain secure lockup despite continuous hard use.
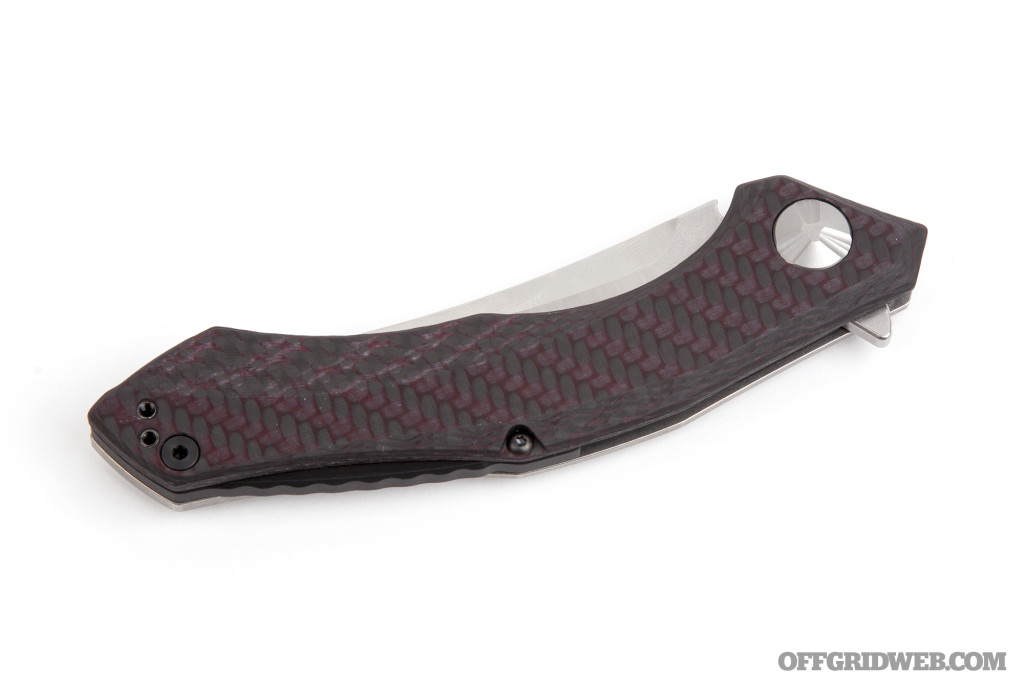
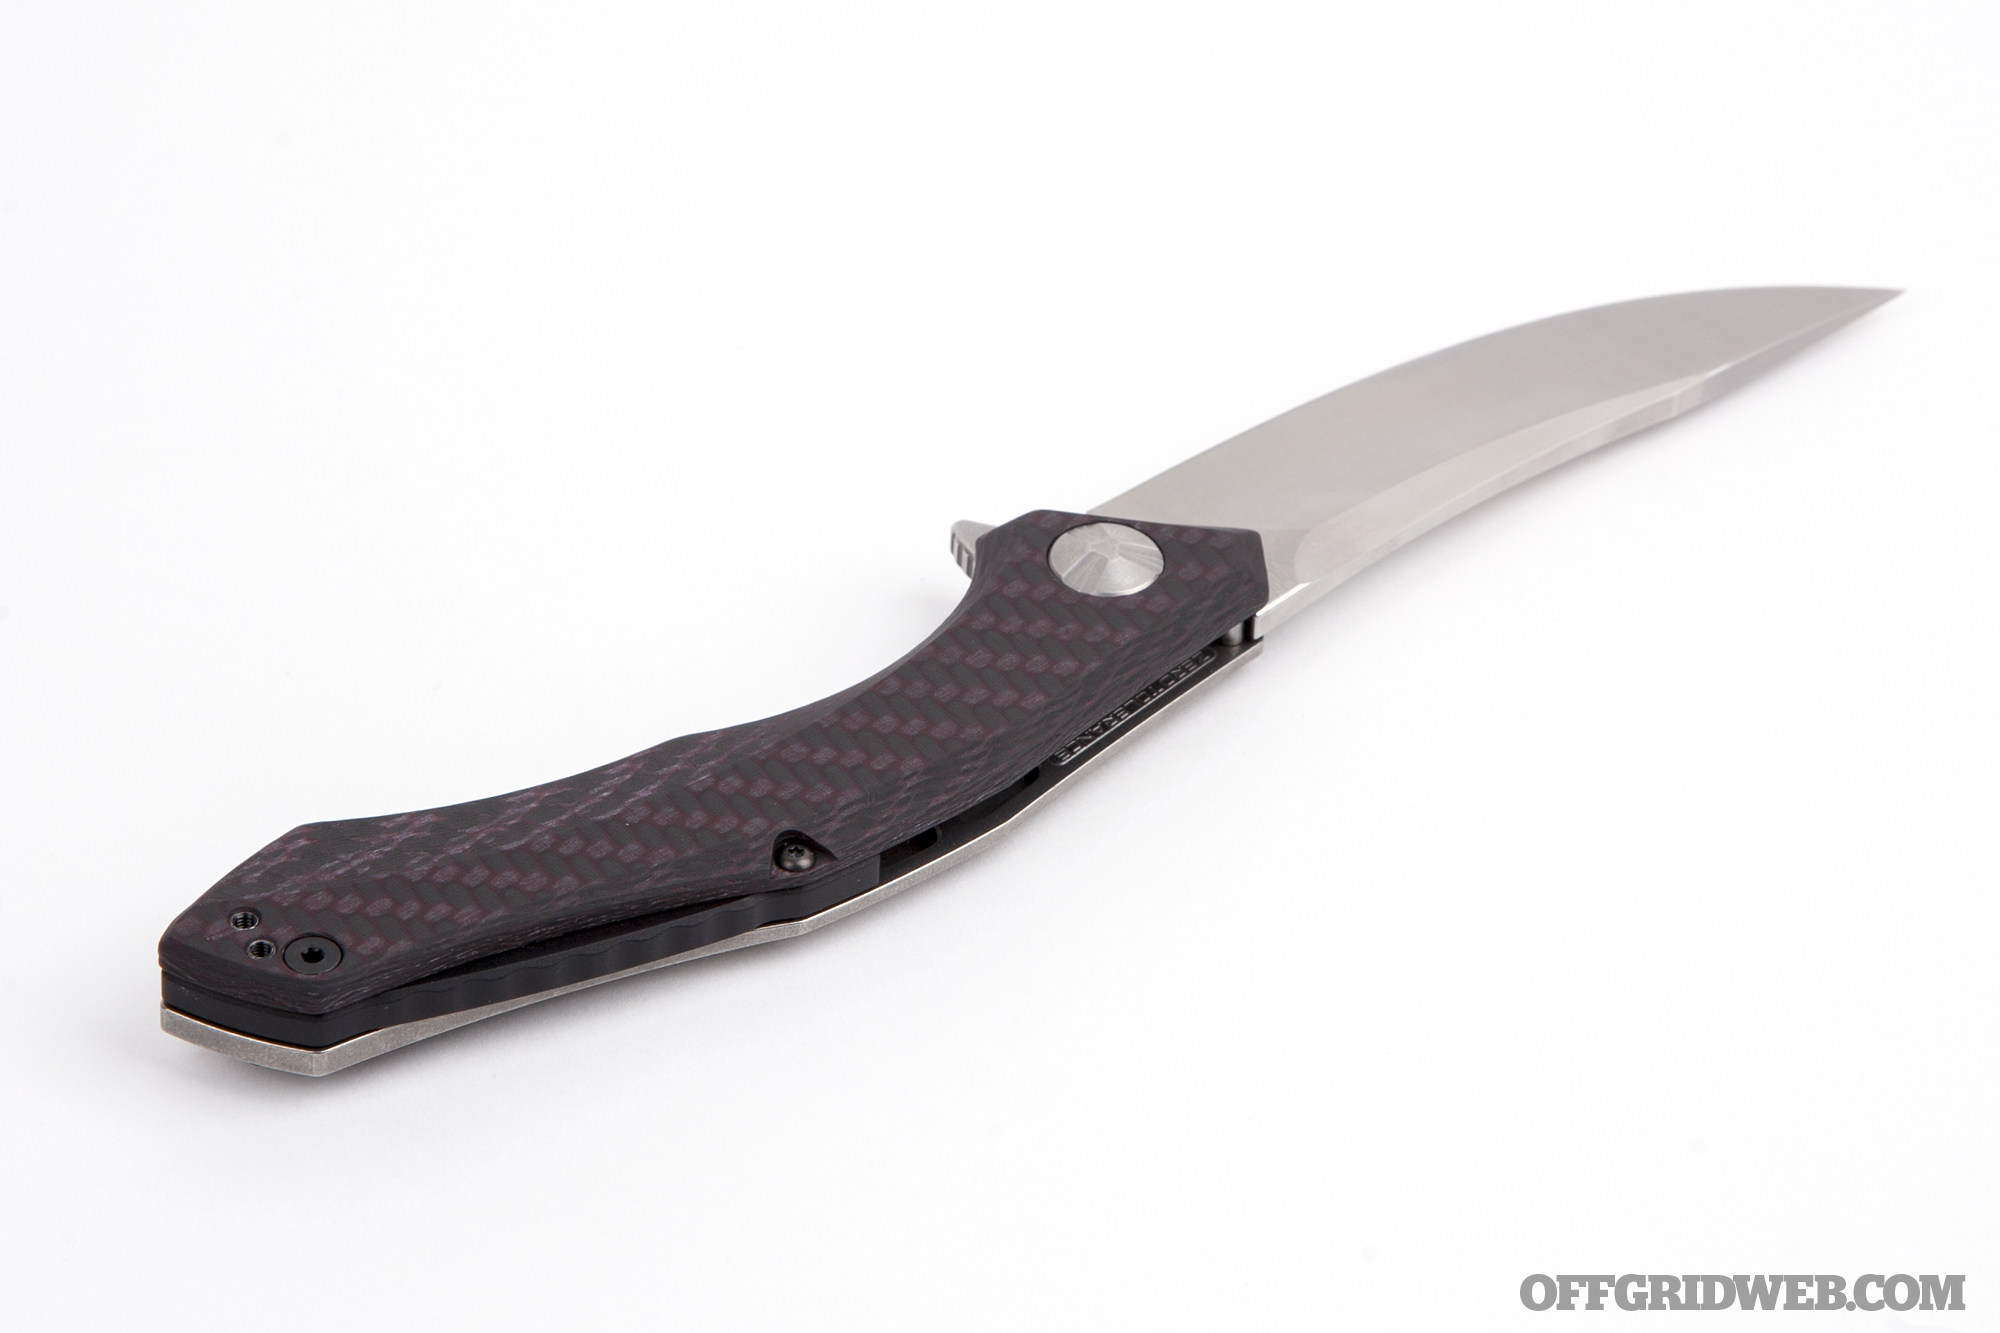
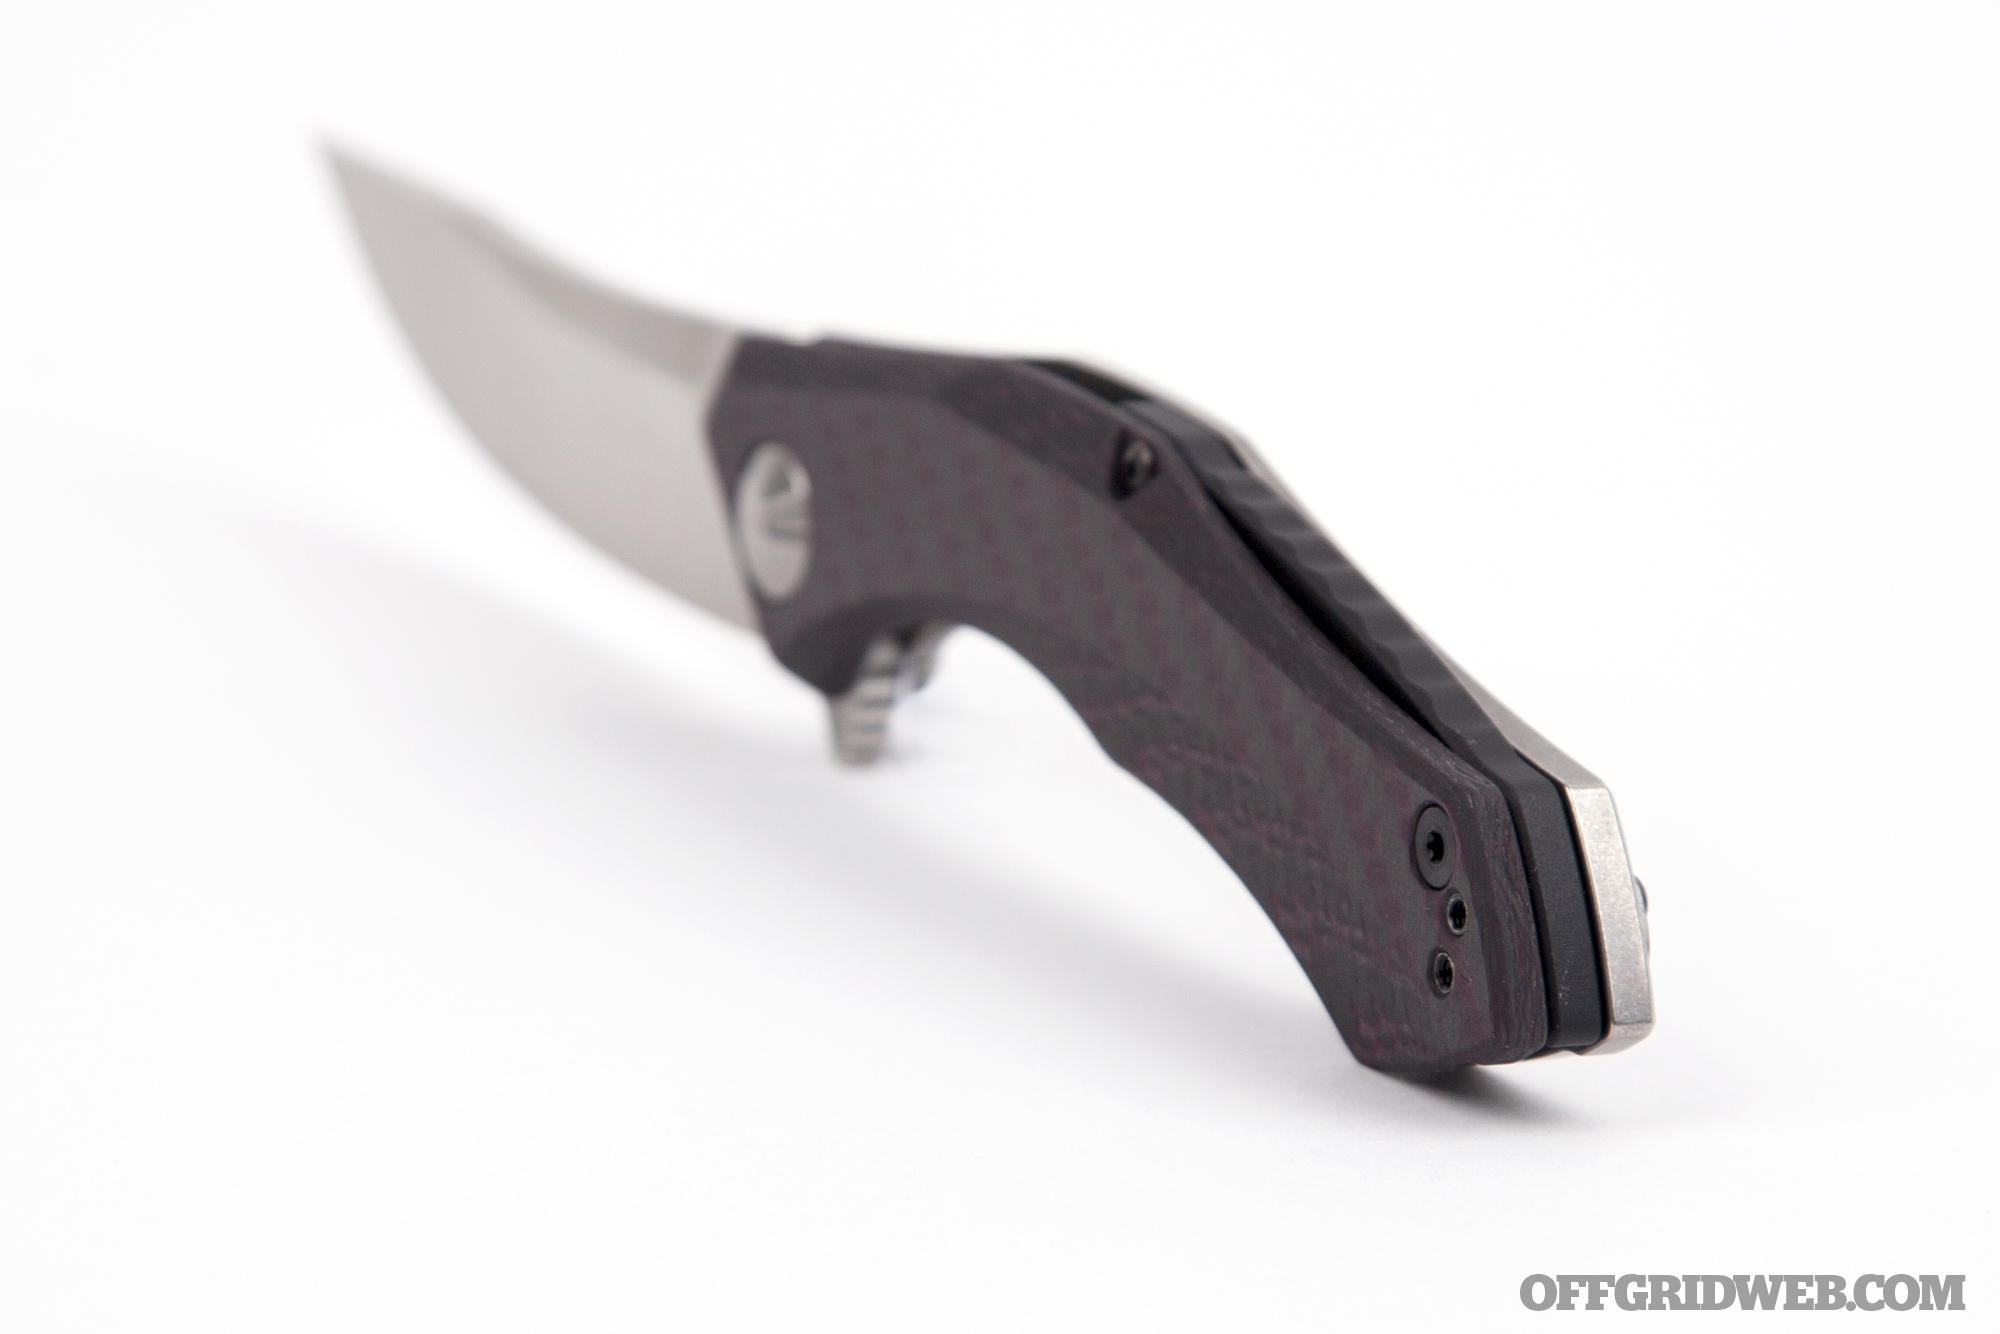
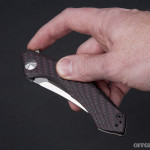
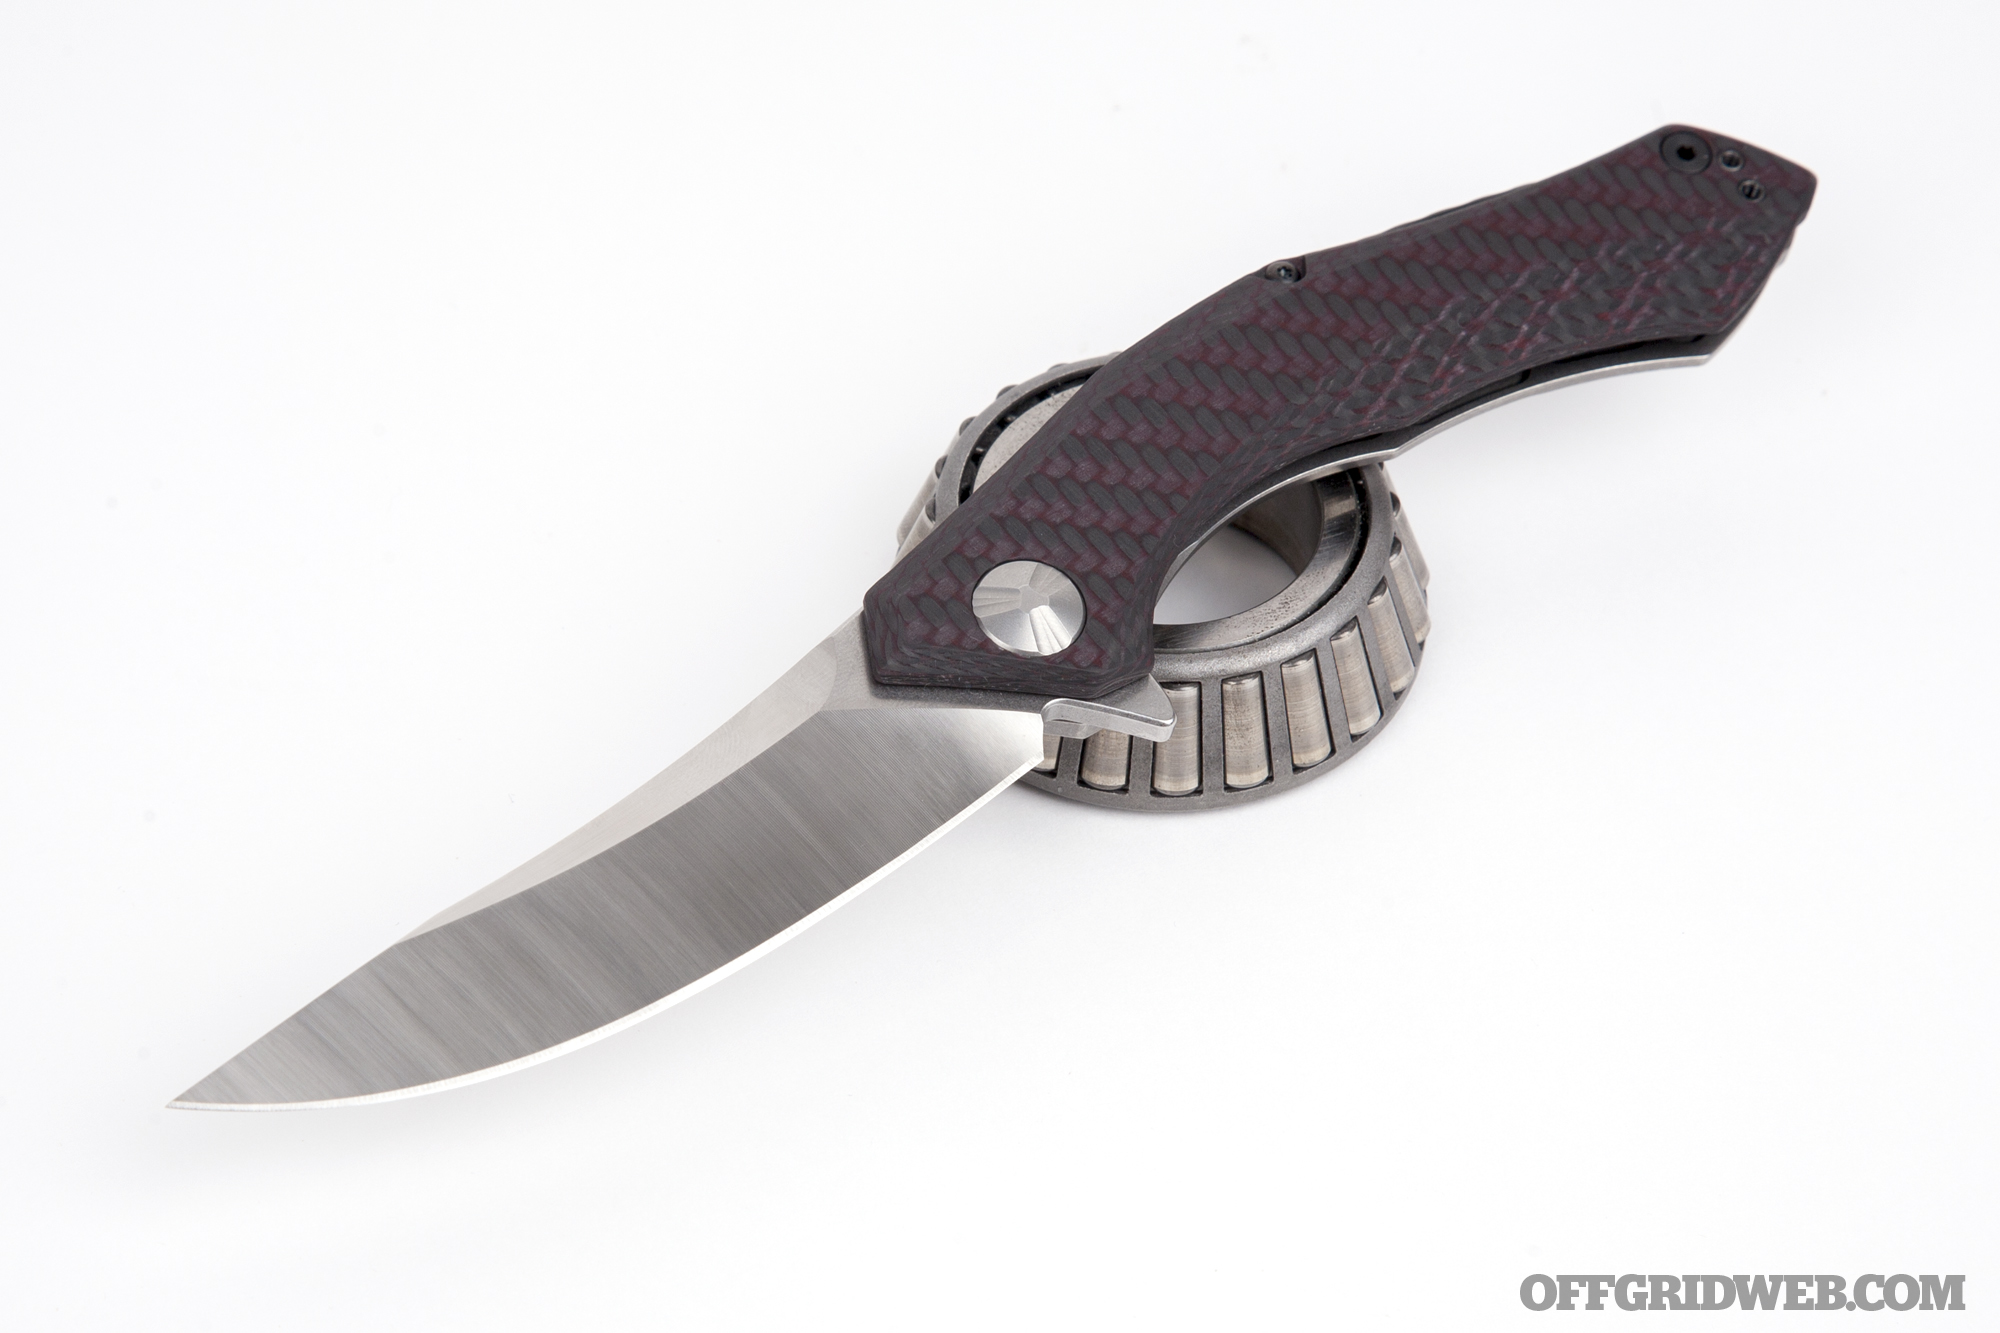
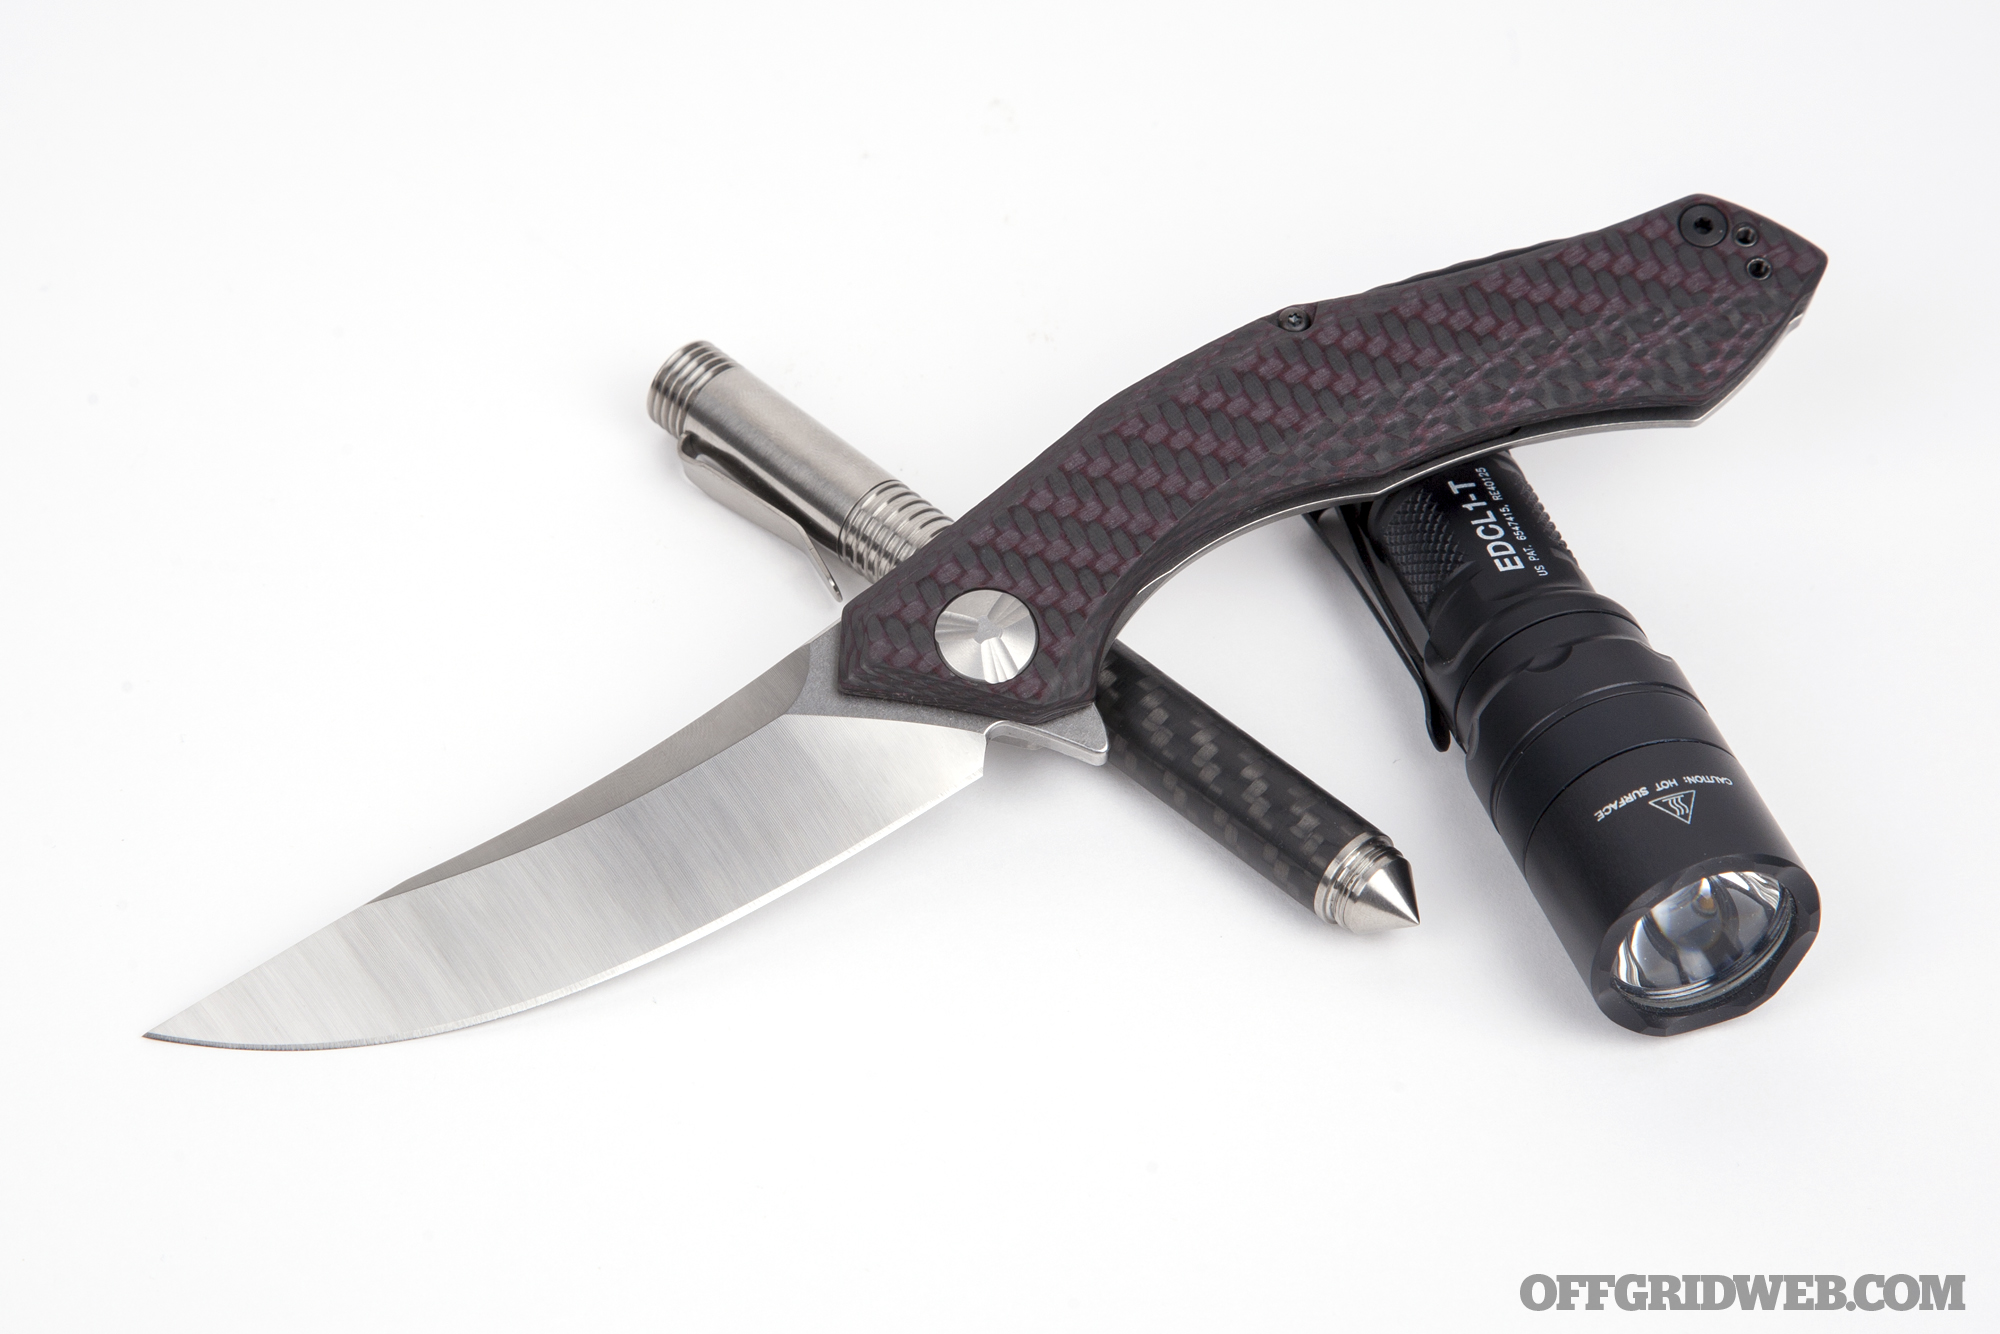
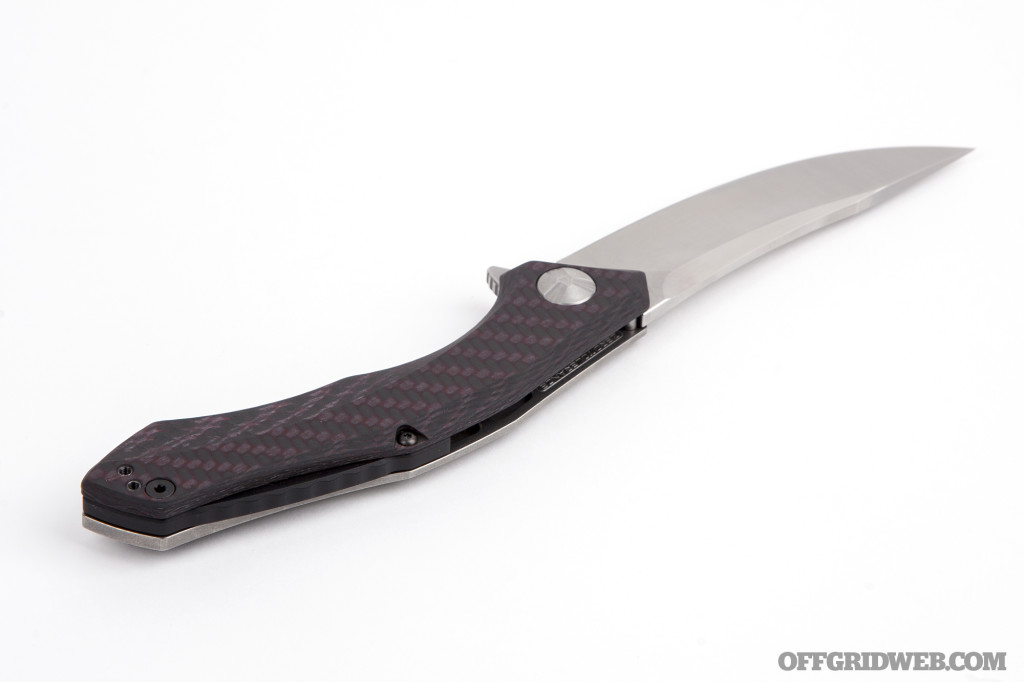
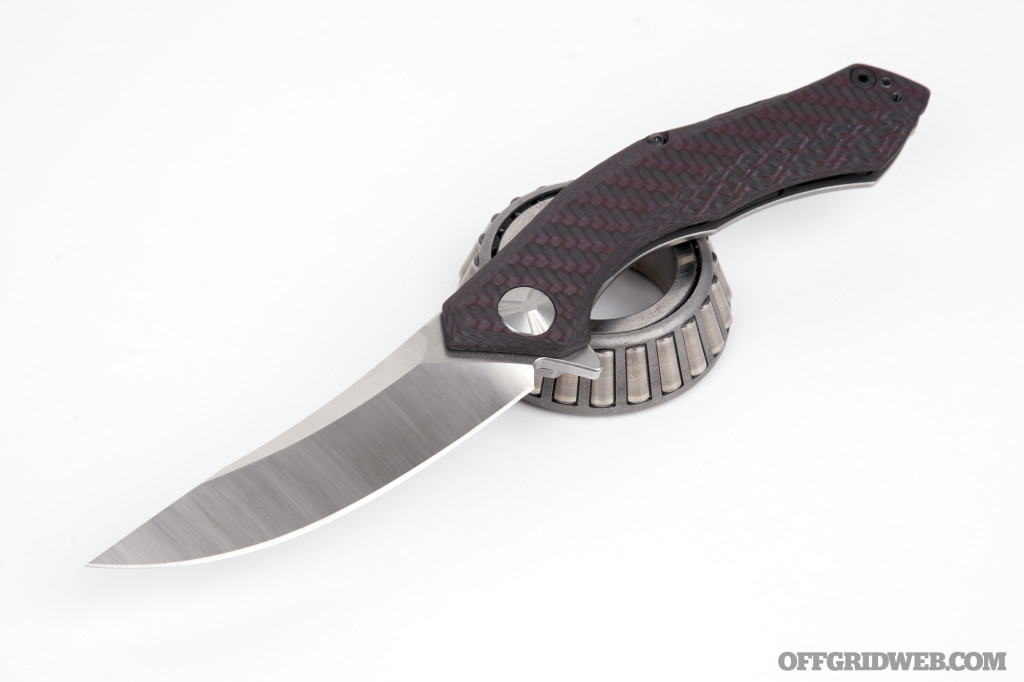
The opposite side of the Zero Tolerance 0462 features a solid piece of lightweight carbon fiber, which has been machined and contoured almost as extensively as the titanium frame. Like the old 0460, this knife’s carbon weave displays a subtle two-tone color scheme — this knife is accented with red, while the 0460 was accented with bronze. At more than 1/8 inch thick, this carbon fiber is sturdy enough to remain unsupported, so there’s no metal frame beneath it. There is, however, a matte black backspacer that spans half the length of the handle.

Sculpted caps on each side of the knife resemble a three-finned propeller, and they contain the KVT ball bearing pivot that lets the knife open and shut smoothly. Near the butt of the handle, a simple and slender deep-carry pocket clip is formed from stonewashed titanium. Unlike the 0460, the 0462’s pocket clip is reversible for left-handed carry.
An Ancient Blade Shape
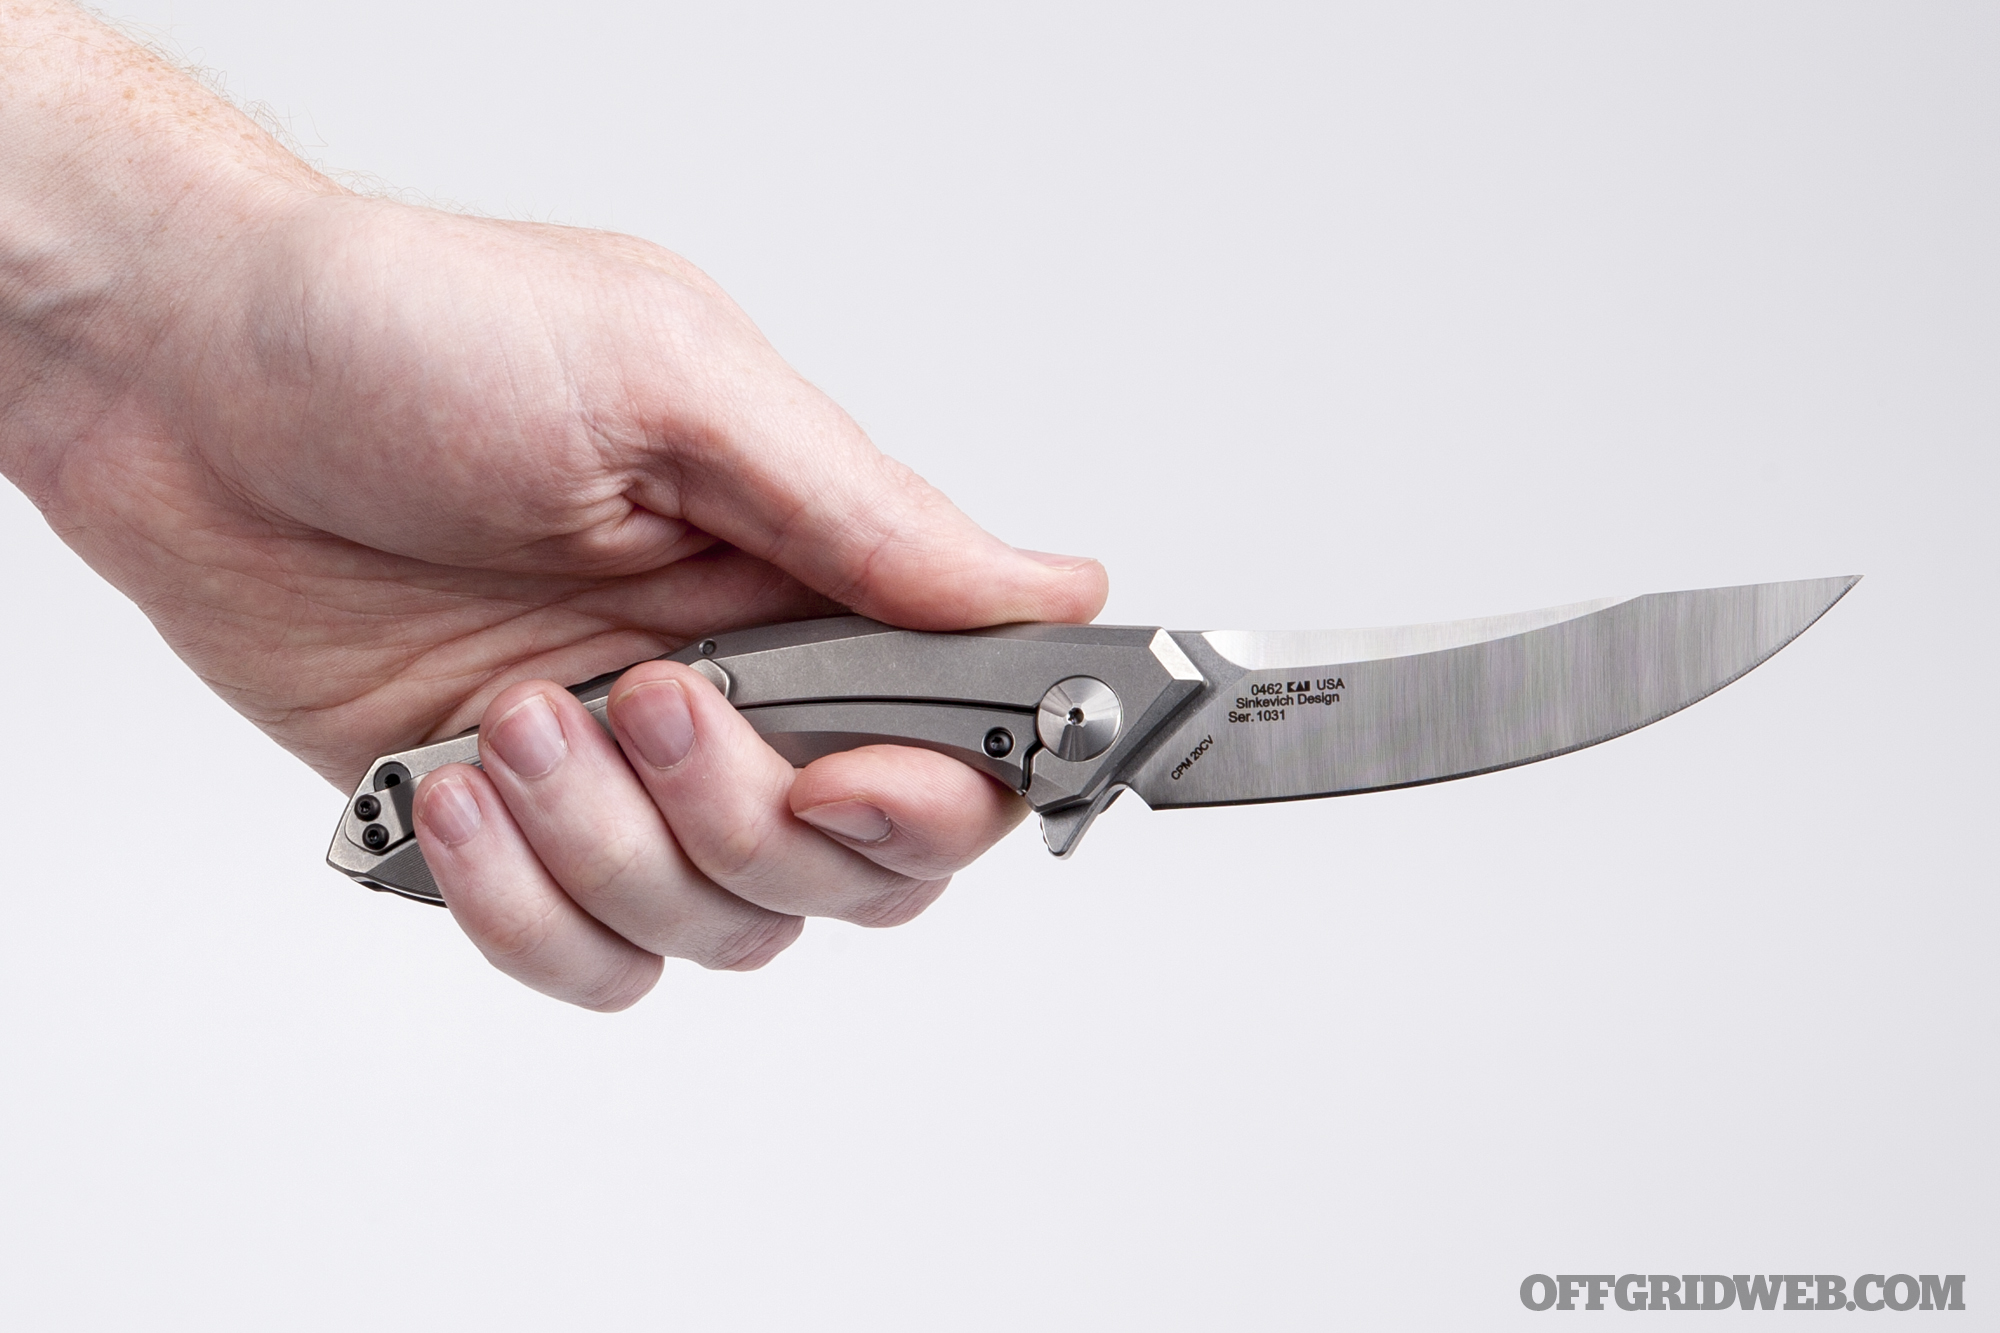
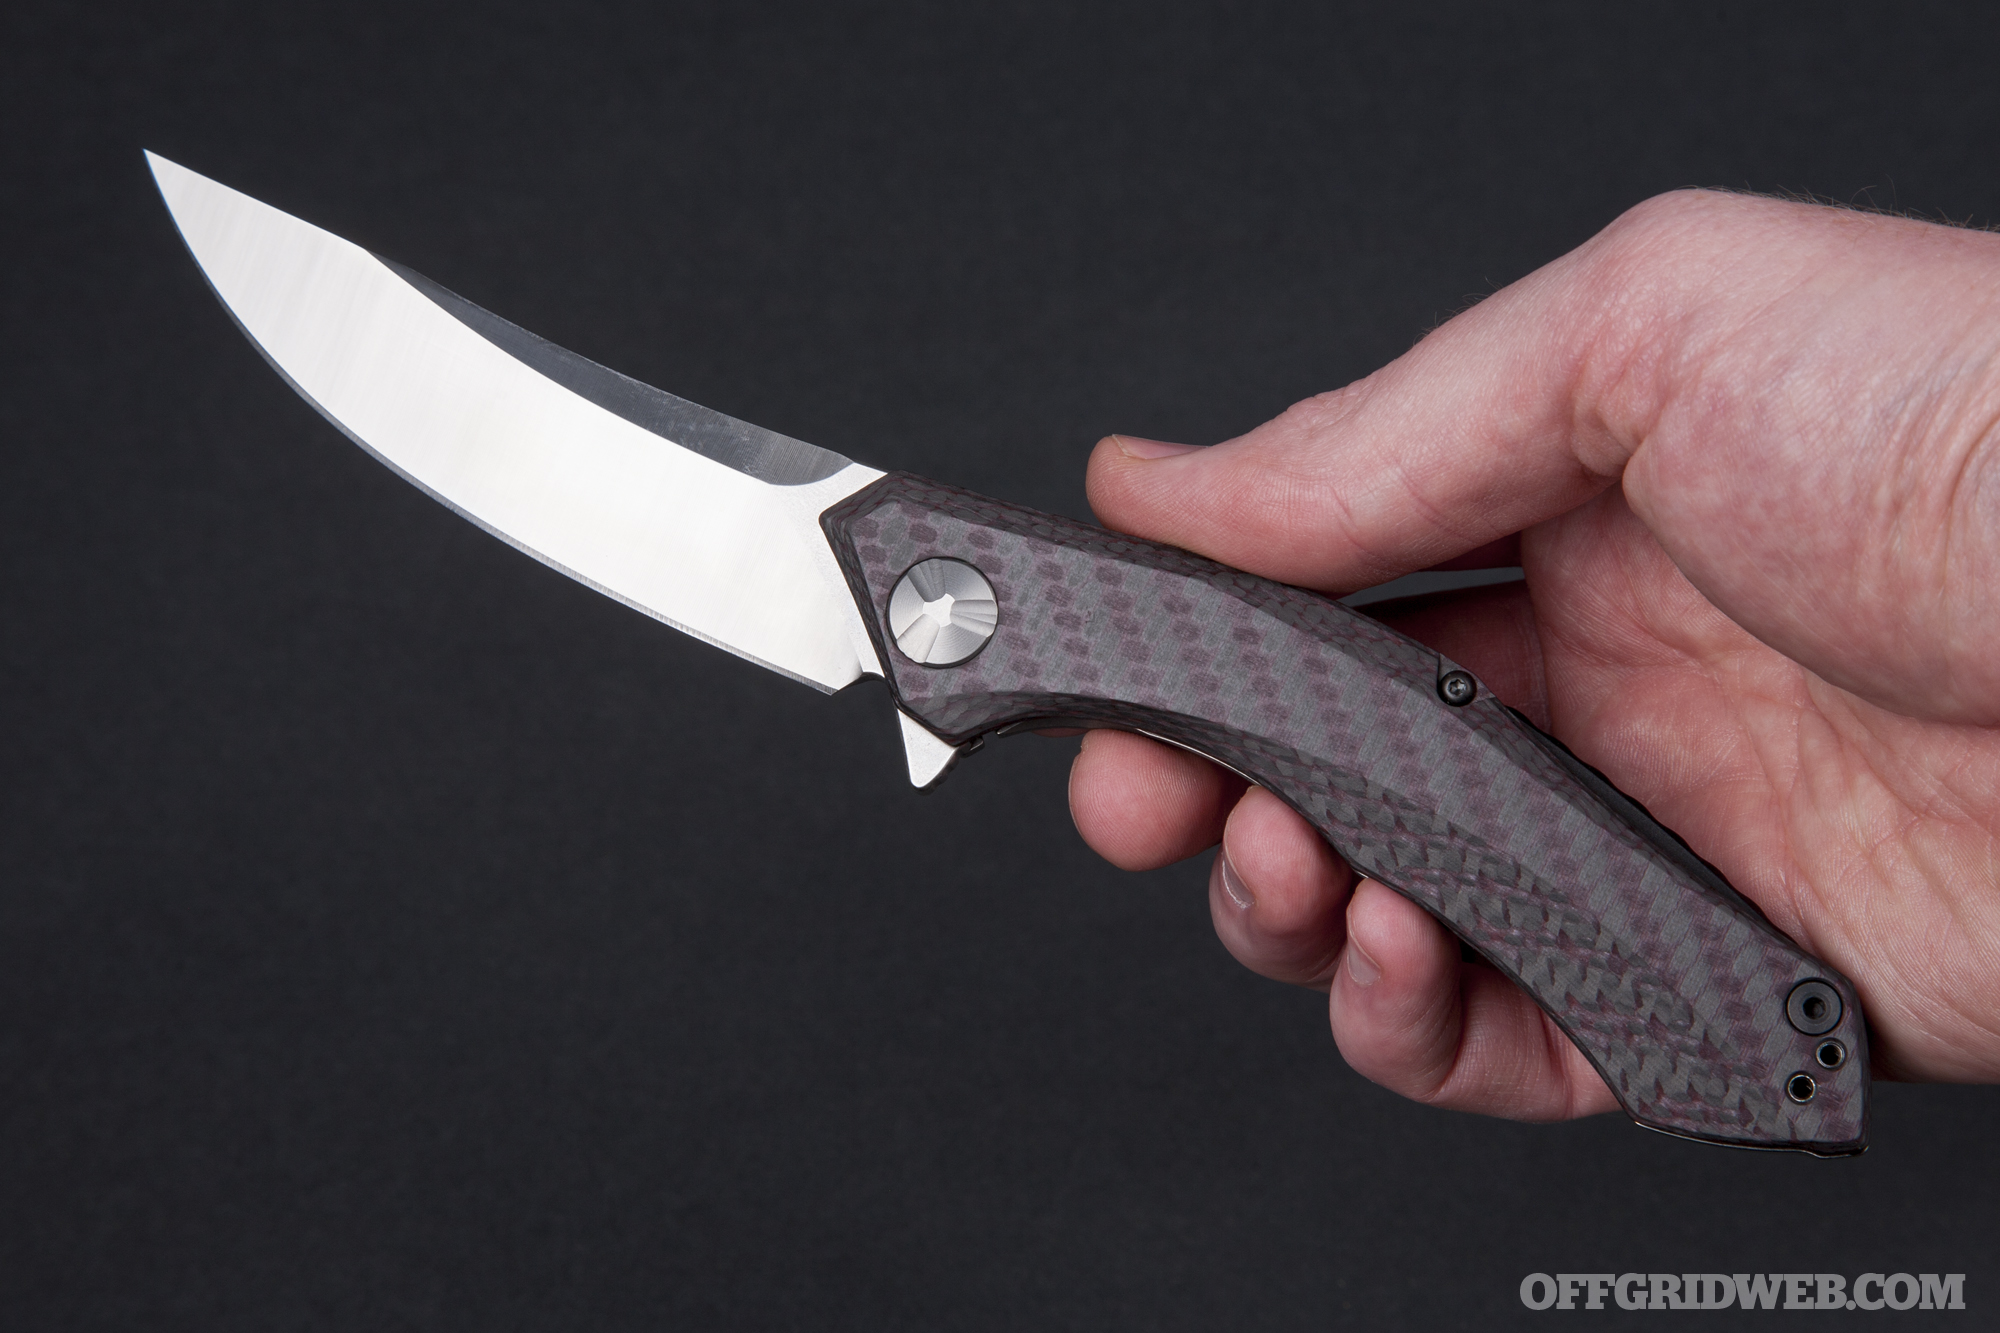
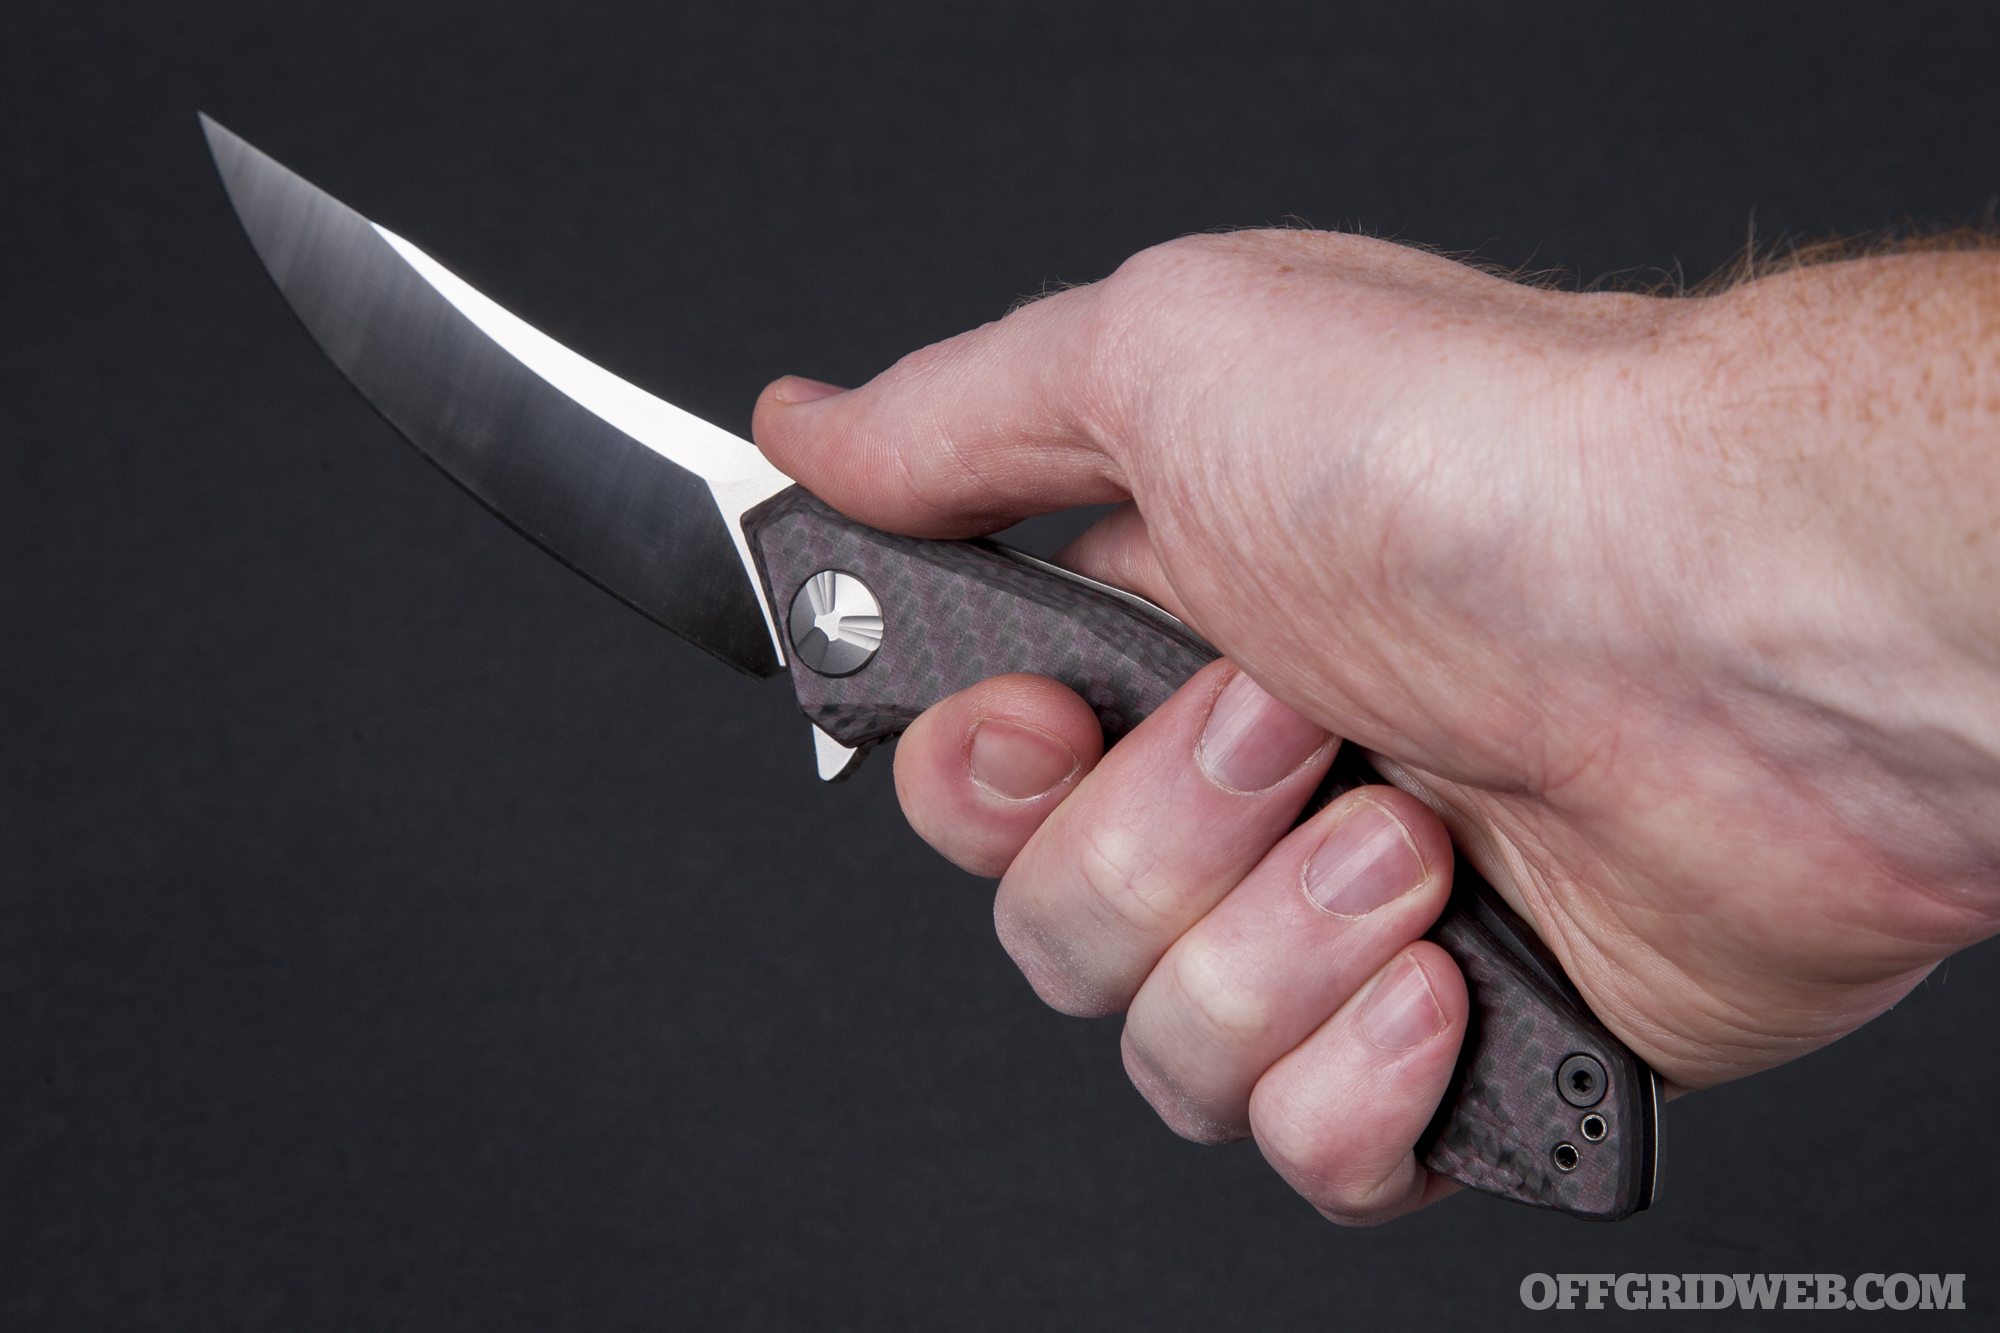
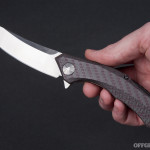
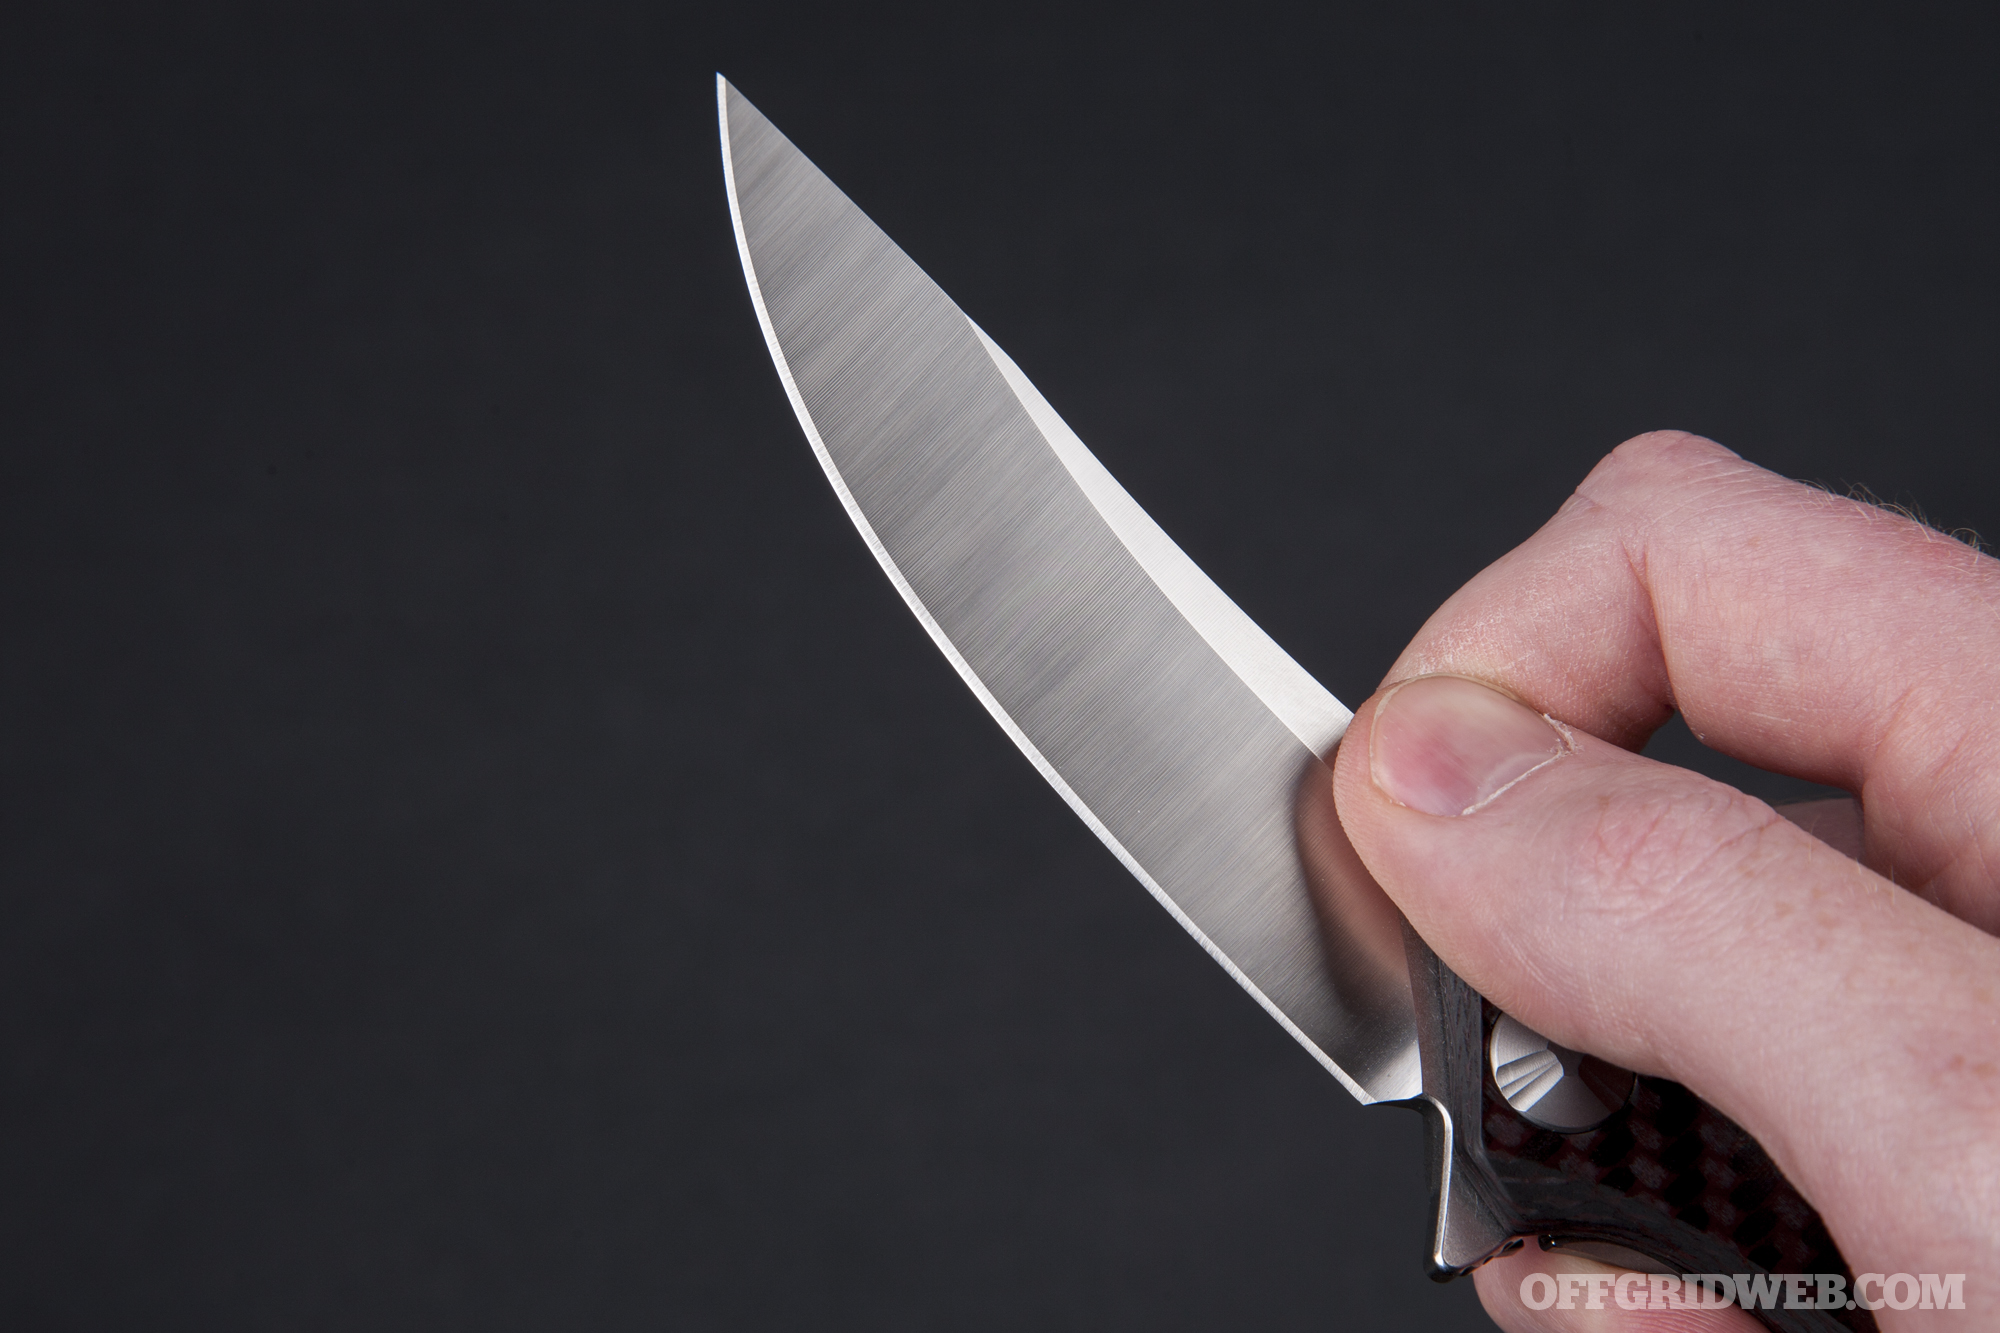
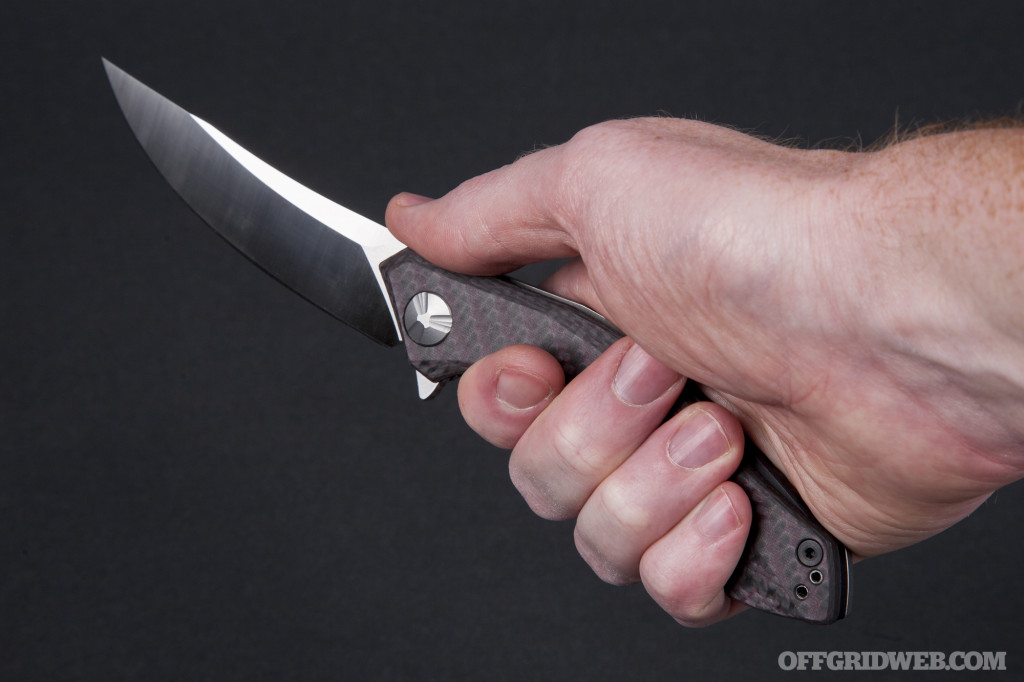
Pressing the ridged flipper lever flicks the knife’s 3.7-inch blade open, reaching a total length of 8.9 inches. There’s no question that this is a long knife, though we’d hesitate to call it large given its narrow profile. The materials and aggressive grind keep weight to just 3.7 ounces — quite light for its size.

The 0462’s blade is composed of CPM 20CV, a steel categorized by Knife Informer as “Ultra Premium” alongside pricey options such as Bohler-Uddeholm Elmax. We’d call this a Persian-style blade profile, with an upward curvature and pointed tip that causes the overall shape of this knife to seem almost serpentine. The primary flat grind is similar to that of the smaller 0460, but the ZT logo isn’t etched atop the grind on this knife. Also, a swedge has been ground into the spine, removing more steel to reduce weight and improve balance.
Our Impressions
As mentioned above, we can’t help but notice this knife’s resemblance to Persian fighting knives such as the peshkabz. Those ancient designs featured a similar downward-curved handle and upward-curved blade. Their purpose also seems to match that of Sinkevich’s design: deep piercing from the sharp tip and powerful slashing cuts from the wide belly.

Admittedly, you probably won’t be piercing chain mail or slashing enemy combatants with this folding knife, but it’s cool to see the historical influence applied to its design. We also appreciate some of the subtler visual touches, such as the sculpted pivot caps and the fine machining grooves on parts of the titanium handle. Compared to many of ZT’s other designs that feel (to use the company’s own words) bold and hefty, the 0462 seems slick and refined.
We have mixed feelings about the red-and-black two-tone carbon fiber. On one hand, it’s aggressive and modern. On the other hand, we feel like those qualities detract from the knife’s elegance. Even if we might have preferred a piece of stonewashed or black-anodized titanium in its place, the ancient-meets-futuristic styling comes through in this material choice.

Beyond its appearance, the build quality of the Zero Tolerance 0462 doesn’t disappoint. The flipper action is smooth, lockup is solid, and there’s no flex or wiggle to be found anywhere on this knife. Actually, we’d go as far as saying we’ve yet to be disappointed with the build quality of any ZT knife we’ve used. They’re consistently spot-on.
The 0462’s blade slices beautifully, gliding through boxes and plastic packaging and shaving wood easily. Despite its aggressive shape, this knife is quite practical for everyday use, and its curved handle locks into the user’s grip. However, we wouldn’t complain if the blade were a bit shorter (but not quite as short as the 0460).

As for the steel, CPM 20CV is quickly becoming one of our favorites, and we’re glad to see ZT adopting the material for its other new-for-2018 models, the 0393 and 0609. Edge retention is excellent, and its elevated chromium content resists corrosion. We’d place 20CV a solid step above the S35VN ZT has been using on most of its previous knives.

Conclusions
Overall, the Zero Tolerance 0462 is a sleek, modern flipper with a nice nod to Persian blade designs of the past. Although the “cool factor” of this knife is high, we still prefer a basic drop-point folder for mundane every-day cutting tasks. That said, this knife remains surprisingly practical despite its aggressive profile. It improved upon the old 0460 with a larger and more comfortable handle, reversible pocket clip, better blade steel, and a few visual upgrades.

As for the price, it’s understandable that many will balk at spending $300 on a knife. But when you look at the materials, build quality, and sophistication of its design, it’s hard to ignore that ZT gives you a lot for that money. We won’t name names, but we’ve used $500 knives that don’t feel this sturdy or smooth, and that’s the sort of thing you won’t learn from ogling Instagram photos. So, if you’re willing to spend the money and you want a knife that’s stylish yet capable, the 0462 is a good choice.