What If You’re Surrounded by Aggressive Rioters?

For all of life’s biggest and heaviest decisions — changing careers, moving out of state, choosing a college to attend, proposing to a spouse, and so on — it’s wise to take a moment to consider your options. Some of us make lists of pros and cons, ask friends or mentors for insight, or “sleep on it” before committing to a choice. But no matter what, we avoid making split-second decisions about any situation that’s likely to change our lives for years or decades. There is, however, one instance where this level of deliberation will not be possible: deciding to pull the trigger in a self-defense situation.

When you’re thrust into one of these life-threatening situations, there’s usually no time to pause and ponder what to do. You’ll need to react immediately and decisively, knowing exactly how much is on the line. If you hesitate to use deadly force when you need to, you or your loved ones may be permanently disfigured or killed. But if you pull the trigger without adequate legal justification, you may be convicted of murder and spend the rest of your life behind bars.

In recent years, there have been many instances of riots, protests, or civil unrest which led to defensive shootings. Most of us know of the August 2020 events in Kenosha, Wisconsin, where Kyle Rittenhouse shot three men who pursued and assaulted him. Rittenhouse was charged with multiple counts of homicide and attempted homicide, and while he was eventually found not guilty on all counts, the aftermath and media circus undoubtedly changed his life forever.

On the other hand, take a look at the July 2020 case of 30-year-old U.S. Army Sergeant Daniel Perry, who was working as an Uber driver while BLM protests spread through the streets of Austin, Texas. When he attempted to drive through an intersection blocked by protesters, a 28-year-old U.S. Air Force veteran named Garrett Foster approached the driver’s side of his vehicle while open-carrying an AK-pattern rifle. Perry drew his firearm and shot Foster, killing him; he argued that this was an act of self-defense, but prosecutors claimed he “intentionally drove into the protestors.”

If you and your family found yourselves in the middle of a group of hostile rioters, how would you decide the best course of action? It’s easy to say you’d go directly to using deadly force, but would you be fully prepared to deal with an enraged crowd, speak to law enforcement officers and lawyers, and justify your actions in front of a jury? If an opportunity for non-violent escape or de-escalation appeared, how would you capitalize on it? How might you avoid getting cornered and confronted in the first place?

The Scenario

  • Situation Type: Confronted by rioters.
  • Your Crew: Yourself, your wife, and your newborn son.
  • Location: Baltimore, Maryland
  • Season: Spring
  • Weather: Cloudy evening, high 65 degrees F, Low 47 degrees F

The Setup

It’s a happy occasion, but also a stressful one — your wife just gave birth to your firstborn son at Johns Hopkins Medical Center in Baltimore. In the third trimester of the pregnancy, some concerns arose, and after his birth, your son was placed into the neonatal intensive care unit for a few days. Thankfully, the situation improved, and you were cleared to take him home today. Around 6:30 p.m., you helped your wife and son into your Honda Civic in the hospital parking lot, feeling exhausted and thinking that you can’t wait to be back home. After leaving the hospital, you began the 15-minute drive back to your house in the suburb of Towson.

The Complication

A few minutes down the street from the hospital, you notice several groups of protesters massing on the sidewalk, heading the same direction you’re driving. Many of them are carrying signs and shouting. A few are holding objects that could be used as impact weapons — signposts, skateboards, metal water bottles, and so on. Before you can decide to change your route home, you pull up to the next intersection, where the protesters have rushed out into the street to form a human wall and block traffic.

Agitators with megaphones are screaming at drivers in nearby cars, clearly intent on preventing them from passing through. In the background, you can see two rioters lighting a fire inside a trash can and tipping it over into the street. Another teen lights a smoke bomb and flings it past your vehicle into the traffic jam that has formed behind you. Others are shining high-powered green and blue lasers at motorists to blind or disorient them.

Your heart rate rises, and you realize you need to find some way out of here immediately, but the only way out seems to be past the crowd ahead. As you contemplate this problem, a masked man leaps onto the hood of your car and begins stomping and kicking the windshield. Your wife sobs in fear as the glass cracks. Your immediate response is to hit the gas pedal, accelerating partway into the intersection and causing the rioter to roll off your hood. But now you’re faced with more than two dozen angry individuals closing in on your car from all sides.

Although the crowd is clearly furious, they haven’t used deadly force against you yet, and even if you decide it’s necessary to plow through them, you’re not sure your little Civic will be able to make it all the way through to safety. You can’t see the other side of the intersection, but there may be more obstacles and roadblocks preventing your escape, and you can’t back up due to the traffic behind you. You’re armed with your concealed-carry pistol — a Glock 19 with one spare magazine — but you understand that shooting out into the dense crowd from your vehicle is risky to say the least.

How will you and your loved ones get out of this situation safely? What options do you have for de-escalation or non-violent escape? If you conclude that lethal force is necessary, at what point would you use your vehicle to ram through the crowd? Under what circumstances, if any, would you use your pistol? What should your immediate actions be once you get to a safer location?

Retired NYPD Detective Joey Nickischer’s Approach

Saying this is a bad situation to be in would be a gross understatement. These kinds of situations can turn deadly very, very quickly. You’re already in legal trouble for having thrown somebody violently off your car and every decision you make from this point forward will impact how much you’re going to be prosecuted in our ever-increasing bad-guy-is-the-victim society.

There’s also a very real probability you and your family will be violently attacked if you do nothing. You’ll be fortunate to get out of this situation physically unscathed and will have to deal with the legalities later. But this is no time for bravado, this encounter will best be solved by making smart decisions to protect your precious cargo.

Preparation

The mission of bringing your baby and spouse home during times of civil unrest is about as high-risk and personal as it gets, and it should be treated as such. This is a VIP executive protection detail. Having done executive protection for foreign heads of state as a New York City Police Detective, I’m a little ahead of the curve on these types of events. Without spoiling all the tactics of executive movement, I’ll share some tips with you.

Start off with intelligence gathering before the VIP mission. What’s the weather supposed to be? Bring an extra umbrella or jacket if it’s going to be rainy. Bring a hat and sunglasses if it’s going to be sunny. And bring appropriate extra clothing for your teammates. Does this weather impact our travel? Some areas are prone to flooding during wet weather, and there could be areas negatively affected if there’s high wind. Snow and ice can also affect travel, particularly on secondary roads. Even light rain can affect travel time, visibility, and vehicle stopping distance.

What’s the current situation locally? Watching the local news on TV or reading local daily newspapers that cover your geographic area are vital sources of information. And one day worth of news isn’t enough, you need go back many days, preferably a week or more. You want to know what typically goes on locally on the day of the week you intend to travel, so you can compare that with the day you actually travel. Obviously, there’s civil unrest with the protest and that was likely covered in the news. But other local events can hinder your plans, including concerts, sporting events, parades, and the like.

What’s the most direct route? If this route has potential obstacles, identify them and go around them. When I say go around, we’re not talking about detouring by just a block or two — give them all a wide berth as events tend to spill over. Watch for those flood prone areas and avoid them. Watch for those major sporting events and the huge traffic snarls they can cause. Identify parade routes, their staging areas and spill out zones. Plan your best driving route, then come up with two or three alternates in case you run into something unexpected that closes the road, like a water main break or a bad car accident.

With this, calculate the travel time and allow an extra 30 minutes for trips under one hour. Don’t discount daily big city problems, like rush hour traffic that crawls along significantly under the speed limit, or roving pothole repair crews. And if time allows, drive the anticipated route beforehand, preferably at the same time of day and on the same day of the week.

Where are the safe havens? A safe haven is any place that you can go into that can protect you from a given threat. In this scenario, a police station, military facility, or hospital are the most likely safe havens, but a shopping mall, subway station, or government building could also suffice for other potential threats.

What’s your physical condition and mental state? If you’re sick, injured, exhausted, or otherwise distracted, find somebody else to drive and be cognizant that your condition can impact your thinking. While cold medicine, a cup of coffee, or energy drink can help in the short run, they do have negative effects, too. Recruiting a trusted (and properly briefed/trained) family member or friend to drive is a good idea in this scenario, considering all you’ve been through with the birth of your son and his medical complications. Be willing to admit when you’re too exhausted and mentally drained to drive.

Is your vehicle ready? If your vehicle’s mechanical condition is somewhat spotty, it’s not the best choice to utilize for a priority movement. Again, consider finding a trusted friend or family member to drive in their reliable car or rent one. The last thing you need is a mechanical breakdown or to run out of fuel at a crucial point. You should also consider what kind of vehicle you’re in. There are better sight lines out of a taller vehicle, like a full-size SUV, than there are out of a low sports car. An SUV is also typically a lot easier to get in and out of.

The added bonus of the full-size SUV is a strong engine, robust drivetrain, and higher ground clearance, all of which make for a more survivable bubble when things go bad. For really high-risk scenarios, some executive protection SUVs are equipped with run-flat tires, bullet-resistant armor, and various countermeasures. While that type of vehicle is overkill for 99.999 percent of the world, adding liquid tire sealant, skid plates, and security window film to the glass can give us a poor man’s “up-armored” vehicle.

On-Site

While driving, keep your head on a swivel. Think in three dimensions by looking forward, backward, left, right, up, and down. Pay attention not just to other vehicles, but to the pedestrians around you. Don’t box yourself in when stopping at lights and such. Endeavor to maintain an escape route by leaving sufficient space between you and the car in front of you.

If you’re on a multi-lane road without a raised median, stay in the left lane so you can drive over the double yellow lines if you need to escape. If the roadway has a shoulder, staying right can give you access to the breakdown area if you need space to get out of harm’s way. Try not to stop in a blind spot of a tall building where you can’t see down the street and sidewalk to the left and right of you.

Use camouflage. We’re not talking about painting your vehicle in the gray shades of urban camouflage or wearing a ghillie suit — we’re talking about blending into the surroundings. If your threat area is full of black painted upscale vehicles, drive a black upscale vehicle. If your threat area is full of anarchists, you might consider plastering your vehicle with a few stickers for bands, clothing companies, or local hangouts that are popular among that crowd — these aren’t openly political or divisive statements, but they’re a subtle signal that you might not be an enemy.

A new Mother sits up in her hospital bed shortly after delivery as she holds her newborn out in front of her and studies his features. She is wearing a hospital gown and is laying in her hospital bed with the infant.

Above: The birth of a child is an emotional time, and the protective instincts of new parents are heightened. If you faced a violent attack under these circumstances, how would you react?

Your attire is another level of camouflage; blend in with what the people in your threat area are wearing so you don’t stand out. You can also use verbal camouflage by shouting your support or approval for whatever their cause is, buying yourself time to get out of harm’s way. You could even beep your horn in sync to their chant, if necessary.

Record the encounter. Dash cams and body cams are everywhere these days. Some of the higher-end vehicles can even record multiple angles around your vehicle. If you have a dash cam or body cam, make sure it’s recording. If not, position your cell phone as best you can and hit record. Your copilot should also be recording, focusing on the highlights.

In our scenario, the first glimpse of people carrying signs should have registered alarm bells. At the first sight of this, it’s time to stop or make a U-turn. Don’t throw yourself obliviously into danger.

But right now, we’re in trouble as we don’t want to become the next Reginald Denny, the truck driver who was severely beaten during the 1992 Los Angeles riots. But we’re also not yet in a position where our use of deadly physical force is warranted. While there are still many options you can try, none of them are guaranteed and all of them are less than ideal.

Crisis

Shooting your way out at this point is a guaranteed ride to prison, even if you do manage to escape the rioters. While you’re certainly in fear for your safety, the window stomping protestor only damaged your property, while you likely caused a physical injury to him. Will the sight of a firearm dissuade the protestors? Probably not. Look what happened to Kyle Rittenhouse, attacked by a mob of mostly unarmed rioters even while Rittenhouse wielded a rifle. What about firing some warning shots in the air like they do in the movies? Bad idea. For starters, you don’t know where those bullets will land.

Secondarily, you’re now the one escalating the encounter with the threat of deadly physical force. Others are suddenly more justified in their use of force against you and your family, as they can say they’re in fear for their lives. Plus, what if a cop is on scene monitoring the crowd and suddenly sees you and your gun as a threat to everybody around? That warning shot might make the rioters scatter briefly, but it also might enrage them further and now you have several fewer bullets should this become a true use of deadly force situation.

Trying to slowly drive through the crowd might be your choice. You have the safety bubble of your vehicle, at least until all the windows are smashed in. While the Civic is no SUV, it’s certainly strong enough to push people out of the way. In this scenario, consider the car sacrificial as they attack it. But be aware that professional protestors are known to block routes with hard barricades, like garbage cans and cinder blocks, as well as by laying themselves down in the street.

Waiting out the ire of the crowd from the safety of your vehicle might be an option, but one to approach very cautiously. If you’re lucky, they’ll just smash the windows, dent your fenders, pick up their windshield stomping friend and go on with their protest. If this is your choice, be sure your spouse is immediately calling 911, and let 911 know there’s a windshield stomping person who is injured, that you’re in fear for your life, and have a helpless newborn baby on board.

Photo of a man behind the wheel, driving down a dark street at night.

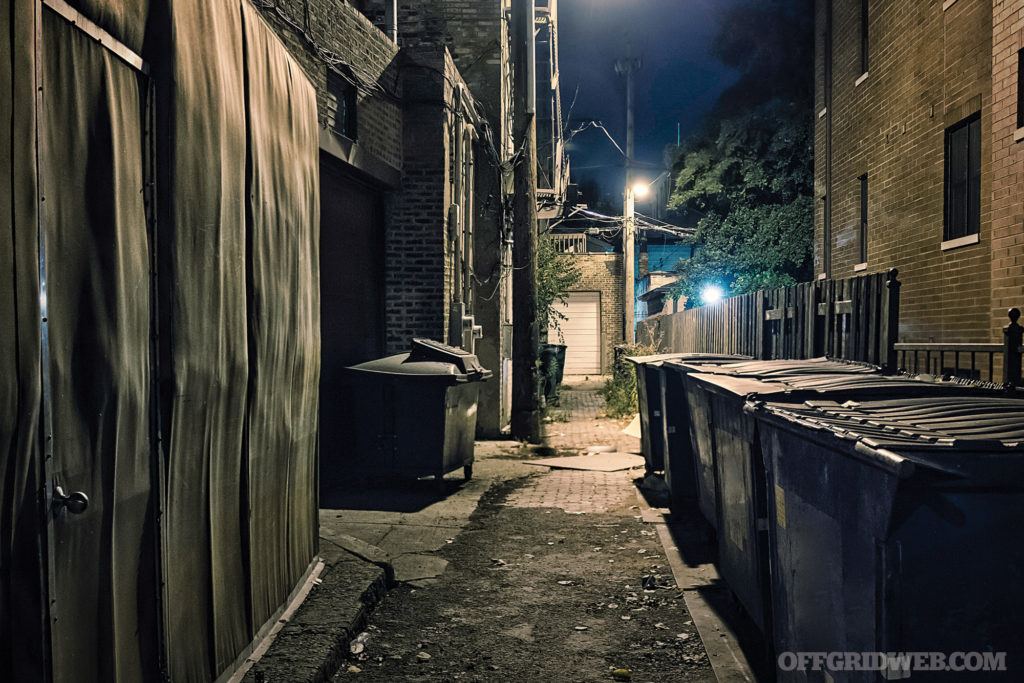
Above: If protests are expected in the area, plan your route carefully and be ready to redirect around congested streets. By the time a traffic jam forms, it may be too late to escape.

Mentioning that there’s a firearm on board could expedite the police response, plus the response is likely to be more numerous and heavily armed. Just be very careful with the words you use to explain this — “I’m a concealed carry permit holder, and I’m legally armed” will be taken very differently from “I’ve got a gun, and I’m ready to use it!” If this is a publicized protest and not a spontaneous one, the police are most likely very nearby for event monitoring, thus can quickly come to your aid.

If the irate crowd isn’t totally upon you yet and you can’t drive away, you could consider running away on foot. Crowds aren’t likely to chase you for more than a block or two as they get tired and dissuaded when their peers aren’t with them. There’s also a possibility the crowd will be more merciful at the sight of parents cradling a newborn, but putting your family at their mercy is a dangerous gamble. If you don’t feel you can outrun the protestors to a safe haven with your wife and newborn in tow, don’t.

Whichever method of escape you choose, make your next stop the police station. Give them your name, tell them where your vehicle is if you abandoned it, that you and your family were attacked by a rioting mob, and then shut up. Make sure your spouse also knows to shut up. If the police start asking questions, be polite, and tell them you need an attorney before answering any further questions. If you’re in a jurisdiction that’s sympathetic to “mostly peaceful” protesting, even if the cops are on your side, the district attorney might not be. It’s the district attorney who decides if, when, and how much to prosecute you.

Defense Attorney Jason Squires’ Approach

Preparation

There is a motto that applies to these situations that will serve you well: “When in doubt, GET OUT!” This motto suggests that good judgment — your brain — is the most effective weapon you will ever employ. By thinking ahead and working through scenarios in your mind, you can avoid a tremendous amount of trouble.

For the purposes of this unique situation, I’d say avoidance will serve a person well. For example: I need fuel in my vehicle. This need requires me to exit a freeway in a troubled part of town. What did I do wrong? I did NOT think ahead and stop for fuel in a safe part of town and avoid having to stop in the bad neighborhood. While fueling, my back can be turned while I work the nozzle and I can be approached by a bad actor. This has happened to me. I wear a suit for work and look like a guy with money. This makes me a target for panhandlers or troublemakers. This is a simple example of not thinking ahead.  The point is subtle “mistakes” can cause irreparable injury.

On-Site

In this scenario, you weren’t able to plan ahead enough to avoid the situation. Now you’re traveling down a street and find yourself in the middle of a riot.

First, I’ll say it again: “When in doubt, get out!” At the very first sign of trouble, you must do everything you can to remove yourself from the equation. Use your most important tool, your brain, and your accelerator and speed your way to safety.

Let’s assume you’ve been surrounded and didn’t see this event coming your way. I’d immediately dial 911. Don’t anticipate much of a response from law enforcement. Law enforcement will likely be preoccupied if a riot of any magnitude occurs. The 911 call serves to preserve a record that you’re seeking help. This step is for a post-event analysis to document fear and concern for your personal safety. Further, don’t merely say “I’m surrounded by angry people.” But rather: “I’m surrounded by angry people, and they are going to hurt me.” This description might prioritize your event over other calls for assistance to the 911 call center.

Analyze the possible threats using a 5-foot, 15-foot, and then 50-foot scan radius. Meaning: What are the threats at 5 feet up to 50 feet away from you. Also, analyze the ingress and egress routes (turns, side streets, avenues to flee, etc.). Look for weapons of the rioters. Are these weapons an immediate threat to you inside the car, like a firearm, or are the weapons more likely to cause damage to property (pipe or brick, etc.). Sacrifice any vehicle damage to protect yourself and your loved ones. It doesn’t matter if you’re driving a Ferrari, sacrifice property to protect people.

Burning street blockade in Hong Kong, China protesters blocked roads

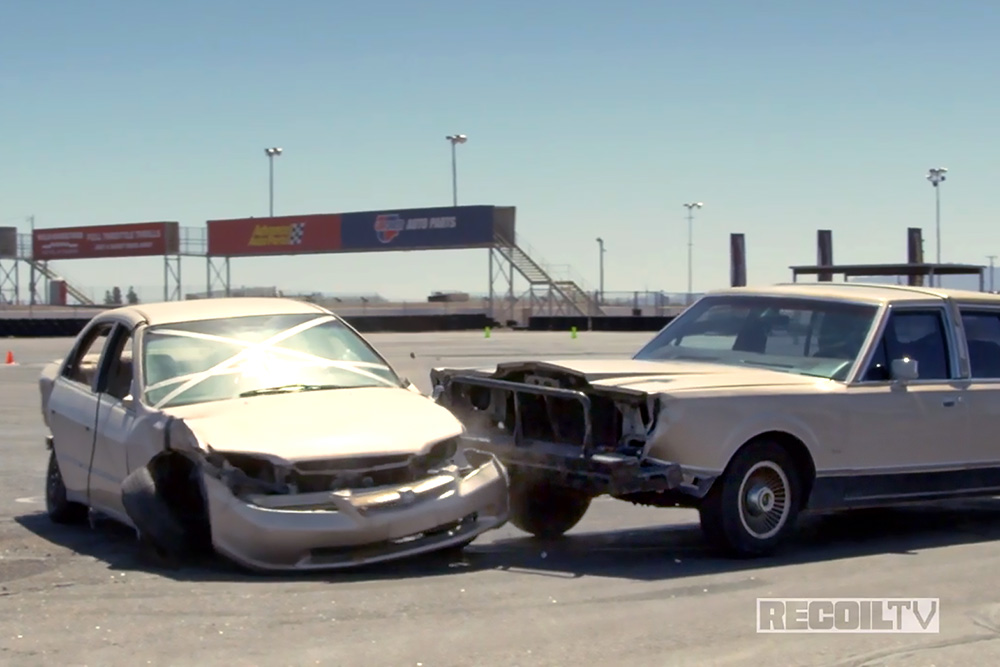
Above: During protests, roadblocks can range from simple human walls to overturned cars and burning debris. Dense crowds may conceal these barriers.

Next, analyze the intensity of the rioters. I’m old enough to remember the L.A. riots and the helicopter footage of Reginald Denny being dragged from his tractor trailer and his head smashed with a brick. God bless Mr. Denny, but I wouldn’t have been traveling during such turmoil even if my job depended on it. I doubt Mr. Denny knew the riot/trouble had risen to such an intensity. So, for the sake of this example, you were caught unaware of trouble and find yourself in the middle of carnage.

Crisis

You’ve prepared as much as possible, taken every opportunity to avoid trouble, called 911, and scanned for threats and intensity. But despite it all, your windshield has been shattered and the angry crowd is closing in around you.  Now what?

Remove yourself. Back your vehicle out of the area, pushing through the crowd without running anyone over. Remember, if a post-event analysis occurs, most injured persons will claim “mere presence.” This legal doctrine says I was merely there, and I personally wasn’t threatening anyone at the time when I was, for example, struck by the defendant’s car. So, avoid any and all injury to rioters. This seems counterintuitive, but threats are analyzed in a person-to-person lens, not as a collective. Each particular person/rioter must be offering a specific deadly threat to justify any significant use of force.

You may not merely claim the group was threatening you. Please let that sink in for future reference. Hurting someone with your vehicle will expose you to civil and likely criminal prosecution. You must show at every level that you exercised the minimum level of force to be legally “justified.”

Another key point: Do not interact or antagonize your rioters. Don’t verbally fight with the rioters. These persons are looking for an excuse to engage. The crowd provides anonymity and camouflages bad actors, as they merely blend in with the crowd. Don’t fight the crowd; you will lose. At every level, seek to remove yourself — at the first sign of trouble and every step thereafter.

The analysis changes with vulnerable persons in your care. Meaning: I enjoy greater legal latitude when protecting my kids and myself. The law recognizes a parent’s obligation to protect their children and law enforcement will almost always apply the “defense of others” analysis when a parent is defending his/her children.

Your vehicle is your shelter — use it. A brick or pipe doesn’t immediately threaten you inside a vehicle. But your car will not provide shelter indefinitely. A few hits with a pipe and your windshield will be compromised. So, the second weapons start striking the vehicle, you’re instantly in a “time is of the essence” situation. You’ll have seconds, maybe a minute, to remove yourself from the situation.

People often ask about the use of firearms. This is legally complicated. Each jurisdiction has restrictions and regulations related to firearms possession and ownership. Study the laws of your jurisdiction to remain legal. Also, learn the Justification Statutes in your jurisdiction. Having a professional relationship with a local defense attorney will serve you well, as you can seek advice and consultation with a qualified attorney.

Motion blur photo of civil unrest on a street at night.

Above: It’s often difficult to distinguish between angry protesters and physically violent rioters. The latter group knows this and uses it to their advantage, committing “hit and run” attacks before disappearing back into the crowd.

But I will say that nationwide, most jurisdictions allow you to protect yourself. The question quickly becomes, to what extent and what implements may I use to protect myself and remain legal. That’s extremely complicated. Here, there’s no clear answer, and it’s so heavily fact dependent. Clearly, using the minimum force necessary to protect yourself will provide the best legal protection possible under the circumstances. Period.

Ask yourself the question: How do I express fear? If I were on a 911 call that’s being recorded, am I going to sound frightened? Will I come off flat and emotionless? Men often try to hide fear and concern. Well, a 911 call isn’t the time to seem tough. A 911 call during a riot is a time to sell fear. Express yourself in an appropriate manner.

I say appropriate because you don’t want to sound like you’re going to die when the local teacher’s union blocks the road holding signs demanding higher pay. But if I were surrounded by an angry mob, I’d be expressing fear to 911 that I’m about to be seriously injured or die, and the frequency and pitch of my voice would reflect my fear. Many clients do themselves a disservice by failing to show emotion in a self-defense encounter.

Often, especially with men, the defender acts almost entitled to cause serious harm in a given situation. No! You can only use force to defend yourself from a similar or higher threat of death or injury. I shall exaggerate the point: I cannot discharge my firearm at a man holding a butter knife 35 feet away and say he had a weapon. The threat must be proportional and very serious to use any serious force.

Lastly, your vehicle is a weapon. Most people, even rioters, will move to avoid being hit by a car. I’d aggressively use the vehicle, without deliberately hurting anyone, to remove myself from the threat. Once removed, ask the 911 operator what they want you to do next (for example: stop at 91st Avenue and Thomas and wait for a patrol officer to take a report). This would suggest that you’ve remained on the 911 call during the entirety of the situation. I’d recommend staying on the phone and preserving the record of fear in the event someone was harmed by my attempts to protect myself.

Some might suggest not calling 911 to hopefully avoid prosecution in the event their vehicle strikes someone. Yes, you’re putting yourself at the scene, and by calling 911 you’re documenting that you are responsible for any harm. Some people would rather remain anonymous and hope law enforcement never finds them. Well, that approach is very difficult in today’s modern age. The amount of video evidence in today’s protests make it unlikely that law enforcement wouldn’t eventually find you. So, run to the law; don’t run from the law.

Disclaimer: The above-listed description is not legal advice. Seek direction from local, experienced attorneys in your jurisdiction. Laws vary from state to state and county to county. Always seek advice from competent and experienced attorneys who specialize in firearms laws.

Conclusion

As is often the case with emergency preparedness, an ounce of prevention is worth a pound of cure. Planning ahead might allow you to avoid areas where protests often occur and recruit someone who isn’t sleep-deprived to take on the responsibility of driving your family home. Do everything in your power to avoid being in the wrong place at the wrong time. You might think, I shouldn’t have to change my plans to avoid protesters blocking the roads. I should be able to drive directly to my destination without worrying about being impeded or attacked.

That’s true — in an ideal utopia, you shouldn’t have to be concerned about your own safety on the roads, but here in the real world you sometimes do. Avoidance is the only surefire way to steer clear (no pun intended) of all criminal and civil liability, both of which have become increasingly serious concerns in cities that aren’t friendly towards armed citizens.

Protesters cast a shadow as they march on a street.

Above: The First Amendment clearly acknowledges “the right of the people peaceably to assemble, and to petition the Government for a redress of grievances.” However, violent and disruptive protests have become a cause for concern in many metropolitan areas.

Remember Daniel Perry, the man involved in the Austin, Texas, shooting we mentioned in the introduction? He was convicted of murder and sentenced to 25 years in prison. During the trial, evidence was presented that showed Perry searching for locations of protests — not an unreasonable thing to do if he wished to avoid them.

However, it also showed him sending friends messages such as “I might go to Dallas to shoot looters,” “I will only shoot the ones in front and push the pedal to the metal,” and “I wonder if they will let my [sic] cut the ears off of people who’s [sic] decided to commit suicide by me.” (He also apparently searched for “good chats to meet young girls.”) Unsurprisingly, this made it extremely easy for prosecutors to show criminal intent and achieve a conviction.

Even if you’re not a scumbag who’s deliberately seeking out a violent confrontation, remember that all your actions leading up to an incident will be closely examined in the courts. Defending yourself may be a split-second decision, but everything leading up to that moment doesn’t have to be. If you have a proven history of being polite, upstanding, and taking proactive steps to stay out of trouble, dealing with the legal fallout of a self-defense incident will be significantly easier.

Meet Our Panel

Jason Squires

Jason Squires is an attorney with over 25 years of defense experience protecting the rights of citizens accused of gun crimes. Squires also represents, advises, and protects members of law enforcement following “deadly force encounters.” He’s an avid firearms enthusiast and when not working, he competes in 3-gun competitions nationwide.

Black and white photo ofJoey Nickischer sitting on cobble stones and rigged up with technical rope gear. Joey Nickischer

Joey Nickischer is a retired detective with the New York City Police Department. He currently works as a technical rescue instructor with numerous organizations, covering topics including high angle rope, mine rescue, off-road operations, and wilderness search. He serves as a team leader with the Westchester County Technical Rescue Team and is the commander of the Putnam County Technical Rescue Team, as well as serving as ex-chief of the Patterson Fire Department.

Read More

Subscribe to Recoil Offgrid's free newsletter for more content like this.

Editor's Note: This article has been modified from its original version for the web.


Pushing the Boundaries of the Tactical Lever Gun

In a true case of “what’s old is new again” the last several years have seen not only a resurgence of the lever action rifle, but an evolution of it. Although this platform was once reserved for ranchers and cowboy action shooters, well-known companies like Midwest Industries have committed significant resources to developing accessories that modernize this oft-overshadowed platform. Smaller custom houses like Mad Pig Customs go even further, offering complete boutique tactical lever gun builds with selectable furniture, accessories, and colorways. With all this effort expended to teach an old gun new tricks, some of you are certainly wondering: why?

Photo of a man taking aim with a tactical lever gun.

We’re not sure there’s a definitive answer. If all you care about is practicality and cost-effectiveness, it’s impossible to deny the advantages of a modern semi-auto rifle with a detachable 30-round magazine. But there are still some genuine merits to an updated lever gun, sometimes colloquially known as “the cowboy assault rifle.”

Speaking assault rifles, a rifle with a manually cycled action and tube magazine can skirt just about any assault weapon restriction in the country. You can forget about fin grips and put flash hiders back on the menu, even in places like California. For those who live in (or frequently travel through) freedom-restricted territory, a tactical lever gun might be a great way to get around draconian legislation while still having an accurate and heavy-hitting rifle with all manner of modern accessories.

Studio photo of a lever gun with a Wilderness Tactical sling.

Above: Tom's rifle features a traditional sling from Wilderness Tactical attached to studs on the underside of the stock and handguard.

Caliber options are many, ranging from rimfire to the behemoth .45-70 that has a documented history of taking down most of the world’s biggest and toughest game — Marlin even jokingly advertised it as effective against a T-Rex. Both of the sample guns you’ll see in this article are in .30-30 Winchester, a highly respectable caliber in its own right for general preparedness. With bullet weights typically ranging from 150 to 170 grains and muzzle velocities around 2,000 feet per second, this caliber has been used on nearly every game animal on the North American continent from mule deer to black bear, elk, and moose.

This translates easily to use as a defensive caliber. While not known for its long-range capabilities, it's generally accepted as a 200-yard cartridge, which is right in line with most mass-issue military calibers. In fact, its trajectory and ballistic data is very similar to that of arguably the most widely used military caliber on the modern battlefield: 7.62x39mm Russian. While a lever gun lacks the capacity or rate of fire of an AK-type rifle, the .30-30 is in very good ballistic company when it comes to in extremis use in mixed terrain environments.

Photo of students at a tactical lever gun shooting class.

Above: During the class, Gunsite instructor Lew Gosnell imparted wisdom and coached us through a variety of drills to improve our lever gun skills.

Preparation is an intensely personal pursuit. Some folks have determined that they simply don’t require the capacity or fire rate of a modern semi-automatic carbine. But many of those same folks think it prudent to have a firearm of some kind around for the ever-ominous “just in case.” A lever-action rifle is easier to shoot than a pistol and reaches farther than a shotgun. But, until a few years ago, this choice meant sacrificing easy access to modern enhancements like suppressors, weapon lights, electronic optics, lasers, modular grips, or adjustable stocks. Those days are over, and we’re here to prove it.

We’re showcasing two separate rifles, both built by Mad Pig Customs, each with different furniture and accessories. Mad Pig refinished each rifle in our preferred Cerakote colors, installed their signature lever and trigger parts, and performed a complete action job to ensure smooth and reliable functionality. We hope to shed some light on the myriad possible configurations available with a modernized lever-action rifle and prove once and for all that this platform hasn’t been relegated to history books.

RECOIL Staff Editor Tom Marshall’s Setup   

This rifle started life as a Marlin 30AW. No longer in production, the 30AW was meant as a more budget-friendly alternative to the flagship Marlin 336. With less expensive furniture material and less refinement in the fit and finish, the 30AW was truly a working man’s gun. The team at Mad Pig Customs stripped this rifle down to the skeleton and rebuilt it, starting with a Midwest Industries M-LOK handguard and a Form Stocks back end.

Studio photo of a tactical lever gun.

The MI handguard offers a full-length, seven-sided M-LOK surface with a continuous top rail. This allowed us to mount both a Vortex UH-1 holographic sight (on an ADM riser) as well as a Holosun LS-321G dual-beam laser/illuminator. Also from Midwest Industries are the universal shell caddies, which each hold a pair of .30-30 rounds. The Form stock retains a modicum of traditional styling with the upgrade of an adjustable-height comb, which comes in handy when using an optic riser.

Studio photo of the buttstock of a lever gun.

A SureFire Dual-Fuel Scout light gave us low-light ability, with a dual-lead remote switch to run both light and laser from one switch. A pair of Walker Defense NILE grip panels and an Emissary Development Handbrake Mini gave us a little customization for support hand control. Finally, a Langolis Rhodesian sling from Wilderness Tactical was mounted to the factory sling studs. The muzzle device is a Rearden Manufacturing brake that also features their suppressor mount.

RECOIL OFFGRID Editor Patrick McCarthy’s Setup

Unlike Tom’s rifle, this one has been a so-called “tactical” lever gun from day one. It started out as a Marlin 336 Dark Series, a special variant that was only available for a short time before Remington went bankrupt, ceased production of Marlin rifles, and sold the brand to Ruger. (Ruger recently announced the re-launch of the Marlin Dark Series, this time with a M-LOK forend and adjustable stock straight from the factory.)

Photo of students reloading at a gun course.

Above: A lever gun's manual of arms is somewhat comparable to that of a pump shotgun, but the half-cock safe position requires an additional learning curve.

Originally, the Dark Series came with a 16.25-inch threaded barrel, XS lever rail with ghost ring sight, and black-painted wood furniture. Mad Pig Customs replaced this rifle’s wood furniture with a machined aluminum stock from Chisel Machining and a LASAI handguard from Hoptic USA. The stock features a soft Kick-Eez recoil pad, adjustable cheek rest, QD sling socket, and an attachment point for a six-round Hoptic LongBow ammo carrier.

The handguard is equipped with a Hoptic USA Quiver carrying two more rounds of .30-30, a JMac Customs HRD handstop, a Burn Proof Gear heat-resistant rail wrap, and a SureFire Mini Scout Light Pro Infrared with selectable white or IR output. Atop the rifle’s original XS sight rail is a Leupold Patrol 6HD 1-6x24mm LPVO in a Midwest Industries 30mm QD scope mount; a Leupold DeltaPoint Pro NV red dot is mounted at the 12:00 position on a Reptilia ROF-SAR ring mount.

Studio photo of the side profile of a tactical lever gun.

Above: The Burn Proof Gear Rail-Rap seen in these photos is our latest addition to the rifle. The suppressed barrel heats up quickly with rapid fire, and this offers protection for gloved or ungloved hands.

The magnified optic’s simple duplex reticle and illuminated FireDot are ideal for daytime shooting, and the top-mounted, NV-capable DeltaPoint pairs with the IR weapon light to make this rifle usable under night vision just like my favorite AR-15s. I topped off my rifle with a JK Armament suppressor attached to the threaded Rearden SPB muzzle brake via a Rearden Atlas adapter, and a Blue Force Gear Vickers padded sling.

Ammo Carriage Considerations

One of the downsides of lever guns is their tube magazines, which make their manual of arms more like that of a shotgun than a modern bolt-action or semi-auto. While we’ve already touched on the idiosyncrasies of reloading, this also affects ammo carriage and load bearing. You won’t be carrying a box magazine in a belt pouch, so you’re left with tossing a fistful of loose rounds in your pants pocket — a compromise that’ll inevitably lead to slow, fumbled reloads — or seeking specialized ammo carriage equipment that’s a little harder to source. We found two companies who offer lever-gun-specific ammo pouches.

Wilderness Tactical offers a simple, low-profile solution called the ZipLoader. This is the equivalent of wearing an ammo butt cuff on your belt. It’s a simple nylon platform with 10 elastic loops for individual cartridges. We paired this with a small, zippered Bug Pack, also from Wilderness Tactical, which was used to carry loose rounds to replenish our other ammo carriers between drills.

Studio photo of lever gun ammunition.

Above: Sellier & Bellot provided the 150-grain .30-30 ammunition we used during this lever gun class at Gunsite.

For those who want a larger supply of organized ammo storage, or more flexibility for carriage, Grim Hunter Tactical makes two products we had the chance to evaluate for this article. The first is their Quick Loader Pouch, a fold-out pouch that carries 24 rounds. There are eight loops hard sewn to the outside of the pouch. Inside the pouch are two more tear-away “cards” that hold another eight rounds each, which attach to the inside of the pouch by hook-and-loop.

We really like this modular design, as it allows you to attach those cards to other places you might want ammo — stick them to the headliner in your truck, the outside of your range bag, or even the sleeve of your combat shirt or jacket. The Quick Loader Pouch can be ordered with either MOLLE/PALS backing or a belt loop and is available in nearly two dozen colors.

Studio photo of the receiver of a lever gun.

Above: The lightweight Patrol 6HD LPVO from Leupold provides plenty of magnification for precise shots, and the top-mounted DeltaPoint Pro NV is suitable for night vision use.

If your lever gun is your dedicated bugout or SHTF rifle, Grim Hunter offers a Lever Gun Chest Rig consisting of two Quick Loader Pouches and a third detachable pouch that can be used as a medical kit or admin pouch. On Grim Hunter’s website, you can choose to have your ammo pouches biased to the left or right side of the rig, based on personal preference. It’s available in a variety of colors with multiple harness options.

Finally, much like a shotgun, it may be advantageous to carry a few extra rounds on the gun itself for speed reloads. These can be carried on a traditional fabric or leather butt cuff or attached to modern M-LOK-mounted carriers such as those seen on our rifles.

While testing and training with our lever guns, we used Sellier & Bellot 150-grain soft-point .30-30 ammo.

Home on the Range at Gunsite

The effectiveness of any tool is contingent on its user’s skill and experience, and our lever-action rifles are no different. The two of us have spent quite a bit of time training with AR-15s, but AR-15s these ain’t. Many of the fundamentals carry over — stance, grip, sight picture, trigger control, and so on. However, the manual of arms is drastically different from an AR, in addition to the reloading and ammo management challenges we mentioned earlier.

This led us to seek training from Lew Gosnell, an instructor who has amassed a variety of vintage and modern lever-actions and spent many years teaching students about the intricacies of these rifles. Gosnell is a Marine Corps veteran who also spent 31 years working in law enforcement on the streets of East L.A. These days, he teaches Defensive Lever Gun and other courses at Gunsite Academy in Paulden, Arizona.

Studio photo of a close up of the buttstock of a lever gun.

In case you’re not familiar with Gunsite, it’s considered by many to be the mecca of firearms training in the United States, if not the whole world. Founded in 1976 by Lt. Col. Jeff Cooper as a location at which to teach his Modern Technique of the Pistol, Gunsite has evolved into an expansive facility with a wide range of pistol, rifle, shotgun, and even edged weapon classes.

It offers everything from classrooms and traditional range bays to run-and-gun Simulator courses, complex shoot houses, and vehicle-based training areas. It’s like an amusement park for shooting enthusiasts, complete with catered lunches, an on-site campground, and a museum built inside Cooper’s home.

After traveling to Gunsite and meeting Gosnell, we headed out to the 50-yard Hanneken range to start working with our lever guns.

Half-Cocked

The first order of business was to learn about manipulating the lever gun’s safeties. Both of our Marlin rifles feature manual cross-bolt safeties — Marlin calls it a Hammer Block Safety — but this feature is a relatively recent addition introduced in the early 1980s. Gosnell and many other lever gun users view this manual safety as redundant and excessive. Historically, the primary safety on an exposed hammer lever gun was the half-cocked position, pulled back halfway to full cock.

Photo of a man cocking a lever gun.

This prevented the hammer from resting against the firing pin, which could potentially fire a round if an object struck the hammer hard enough. It also prevented users from carrying the gun fully cocked and ready to fire at all times, which could lead to a negligent discharge if a foreign object touched the trigger.

To prepare our lever guns for a drill, we went through the following procedure:

  • Half cock the hammer then engage the manual safety.
  • Load the tube magazine.
  • Cycle the lever to chamber a round. The hammer is now fully cocked. (Top off the tube magazine with one more round if necessary.)
  • With the manual safety still engaged and the gun pointed in a safe direction, place the firing hand thumb on the fully cocked hammer and apply pressure.
  • Maintaining firm pressure on the hammer, press the trigger just long enough to carefully lower the hammer into the half-cocked position.
  • Index the trigger finger safely on the side of the receiver and disengage the manual safety.

As soon as Gosnell gave the command to fire, we quickly thumbed our hammers back to fully cocked position and pressed the trigger.

Studio photo of the side profile of a gun.

In a way, the manual safety serves as training wheels — if a shooter lets the hammer slip while returning it to half cock, it prevents the gun from firing. But once we had done enough dry and live fire reps of this process to be fully comfortable with it, we left the manual safety disengaged and carefully returned our guns to half cock after firing. Always be careful to maintain a good grip on the hammer while returning it to half cock; this isn’t something that should be rushed. As Gosnell explained, this procedure may feel strange to us today, but it was the standard modus operandi for more than a century before the introduction of cross-bolt safeties.

Feeding the Beast

Loading a lever gun is similar to loading a shotgun, but the placement of the loading gate on the right side of the receiver (as opposed to the underside) means you’ll have to load with your firing hand. Hold the gun in a low-ready position against the shoulder and press each round into the tube magazine until the loading gate closes behind it. Alternately, you can use a “violin load” position by resting the buttstock sideways over your shoulder, leaving the loading gate facing upward. Gosnell reminded us to keep our heads up and eyes downrange while loading to remain aware of potential threats.

Studio photo of the side profile of a gun.

Also like a shotgun, it’s OK to load a round directly into the chamber while the action is open. This can be useful for speed reloads in conjunction with a match-saver-style ammo carrier directly in front of the ejection port (as seen on both our rifles). However, be aware that lever guns can have trouble feeding if they’re operated at steep angles. So, don’t try to chamber load — or operate the lever at all — with the muzzle pointed at the ground.

To run the lever, be quick and forceful but deliberate. Babying it or failing to run the lever all the way forward may induce a malfunction. We also found that the angle of hand movement is important. Depending on your rifle and lever design, you may need to push your hand down, forward, or somewhere in between to achieve the smoothest action.

Testing Our Skills

Once we were comfortable manipulating, loading, and firing our lever guns on the 50-yard range, we moved on to more complex challenges. After all, that manual of arms may feel comfortable on a flat range, but doing it while running, transitioning between multiple targets, and navigating around obstacles is a different story. This wasn’t just a lever gun class — it was a defensive lever gun class.

We started by setting up a barricade on the range, leaning out from either side to shoot without exposing ourselves more than necessary. Then, we ratcheted up a notch by heading down to The Pit, an indoor Simulator course that most of us would call a shoot house. We practiced clearing the structure, “slicing the pie” around doorways and corners to methodically take in every angle before proceeding.

Studio photo of a man sliding into a shooting position.

Above: Tom Marshall slides into a shooting position.

Admittedly, we’d prefer a semi-auto rifle over a lever gun for these close-quarters applications, since thumbing back the hammer before firing and running the action between shots was tougher than just mashing a trigger. That said, our Mad Pig Marlins had no trouble getting repeatable, accurate hits on the threats in hallways, corners, and windows. The tall-mounted red-dot optics on both rifles were helpful for this purpose, offering a wide field of view and fast sight acquisition.

Next, we headed to Gunsite’s Military Crest, a winding trail with various natural shooting positions and an array of steel targets at distances of 100 to 200 yards or greater. We braced off trees and rocks, and used our rifles in standing, kneeling, and sitting positions. With a slight hold-over for the longer shots, we had no trouble ringing steel from each position. The only challenge we encountered was running the lever in positions where the rifle was rested on a flat surface, such as kneeling behind a stump; it may be necessary to lift or rotate the rifle to make room to move the lever. This is also why lever guns aren’t ideal for prone shooting.

Photo of a man using a tree for support at a standing shooting position.

Above: Whether you're a fan of modern “tactical” lever guns or you prefer wood furniture and iron sights, get out there and train. It's the only way to build lasting proficiency.

For our final challenge, we moved to the Scrambler, a course that continued our work on positional shooting but added an emphasis on speed. With four rounds in our guns and a shot timer running, we sprinted between seven positions and shot steel targets while standing, kneeling, and sitting. Some stations had fallen logs or trees to use for support, but others required unsupported shots. This also tested our ability to load our rifles quickly while moving, and to carefully engage the half-cocked position after each hit — just like any other move-and-shoot drill, it’s essential to make your weapon safe before running ahead with it. By the end of the Scrambler, we were out of breath and grinning.

Final Thoughts

So, the question remains: Is it worth the effort to teach an old gun new tricks? Based on our experience with these two builds and our range time at Gunsite, we’d give an emphatic yes. While we certainly won’t deny there are more efficient, ergonomic, and cost-effective defensive weapons on the market, that doesn’t mean the venerable lever gun isn’t worth owning. And if it’s worth owning, it’s worth modifying and improving with aftermarket parts, just like your favorite semi-auto carbine.

Photo of man shooting at CQB targets inside a door frame.

Above: Some may scoff at the idea of using a lever-action for home defense and CQB, but in states and countries where semi-automatic rifles are heavily restricted, it may be one of the best options available.

These two modernized lever guns were built to deliberately push the envelope and become as AR-like (or “tactical,” if you prefer that term) as possible. They’re unabashedly extreme, like classic muscle cars converted into fire-breathing supercharged dragsters. You may not want a full M-LOK forend and adjustable stock for your lever gun, much less an infrared laser and night-vision-height optic mount, and that’s OK. Our intent was to show what’s possible using existing off-the-shelf components and a little fine-tuning in the hands of lever gun specialists at Mad Pig Customs. The result is a pair of rifles that never fail to stir up controversy on social media or draw a crowd at the local range. More importantly, they’re much more capable for dynamic shooting and defensive use than they were in unmodified form. Sorry, grandpa, you may not like it, but the future is now.

Sources

Read More

Subscribe to Recoil Offgrid's free newsletter for more content like this.

Editor's Note: This article has been modified from its original print version for the web.


NVGs To-Go: OTTE Gear’s V2 OG Helmet Bag

What do you own that costs upward of $10,000 but is fragile enough to break if it’s dropped a few feet onto a hard surface? Unless you’re a collector of Ming vases, antique Waterford crystal, or high-end camera equipment, it’s probably a very short list. But there’s one thing that many military members, law enforcement officers, and shooting enthusiasts wear that fits this category: night vision.

A set of dual-tube night vision goggles (NVGs) can easily set you back $8K to $15K, and this equipment is extremely sensitive to hard impacts, long-term light exposure, and other environmental damage. That doesn’t even include the cost of the related accessories that accompany NVGs — helmet, mount, ear protection, clear eye protection, infrared lights, battery pack, and so on. It’s a substantial investment, so you should protect it accordingly.

I’ve gone through a few different methods of carrying my NVGs over the years, including small soft cases and hard Pelican cases lined with foam. Although these worked fine for the night vision system itself, they still left me with a helmet and pile of accessories I needed to carry separately. But recently, I found a carrying case from OTTE Gear that stows all my NV-related gear in a safe, easy-to-transport package.

  • Make and Model: OTTE Gear V2 OG Helmet Bag w/Nods Box
  • Capacity: Up to an XXL Ops Core ballistic helmet with AMP ear pro attached
  • MSRP: $199
  • URL: ottegear.com

Studio photo of the exterior of the OTTE Gear Helmet Bag V2.

The OG Helmet Bag

Constructed from 500D Cordura nylon sandwiched around a thick layer of closed-cell foam, OTTE Gear’s Helmet Bag is designed to protect a ballistic or bump helmet of any size through XXL. It features a Y-shaped adjustable retention strap that holds your helmet firmly in place inside the bag, and a full-clamshell flap that opens wide to offer easy access to its contents. It’s available in a variety of exterior colors, ranging from the typical black, ranger green, and coyote tan to MultiCam, “chocolate chip” desert camo, and OTTE Gear’s signature Poppies of War pattern. The interior lining is a bright orange 500D Cordura that offers lots of contrast in dimly lit environments.

One inner wall of the OG Helmet Bag is lined with three pockets for small items, such as clear shooting glasses, in-ear hearing protection, chemlights, and spare batteries. The other side is lined with loop material that accepts Velcro-backed accessories like IFF strobes and morale patches. The bottom surface has a small field of PALS webbing for MOLLE-compatible accessories or pouches.

At the back of the bag behind the helmet, there’s a padded divider that fits around a removable OTTE Gear Nods Box — a rectangular zippered case that fits single- or dual-tube night vision, a mount, and other items like batteries or eye pro. The Nods Box has two more adjustable dividers to prevent contents from bouncing around. Both the Helmet Bag and Nods Box are made in the USA.

Studio photo of the interior loadout of OTTE Gear's nvg case.

My Loadout

So, let’s take a quick look at the contents of my OG Helmet Bag. First and foremost is a Team Wendy EXFIL LTP bump helmet (size XL). It’s equipped with a TNVC Mohawk counterweight/battery carrier, as well as a Nitecore NU05-MI USB-rechargeable green/IR strobe on top. The right side rail has an Inforce WMLx Gen 2 white/IR light attached to a Thyrm VariArc swivel mount, providing forward-facing illumination outdoors or upward-facing “umbrella” lighting indoors. The left side has a Streamlight Sidewinder Stalk white/R/G/B/IR admin light.

Stuffed on either side of the helmet in the main compartment, I have a pair of Apex Protective shooting gloves and a set of Gatorz Blastshield ballistic-rated clear shooting glasses. Side pockets contain a few standard chemlights, as well as a Blue Force Gear Marco mini-chemlight dispenser — the latter was designed for LE and MIL users to mark cleared rooms, but it’s also useful for marking shooting positions and obstacles on the range. The last pocket contains a set of SureFire Sonic Defender earplugs.

The double-padded Nods Box contains a set of AGM Global Vision NVG-40 green-phospor night vision goggles, a Wilcox G24 mount, and a few small accessories. There’s a weatherproof Thyrm CellVault loaded with three spare CR123 batteries, plus a SureFire X300V white/IR pistol light that can be swapped onto whichever handgun I bring to the range. Lastly, I have a CR123-powered Fenix CL09 magnetic mini-lantern that can be clipped or stuck near a loading bench or staging area to provide a little red or green light. It’s just enough to make it easier to load mags or clear malfunctions, but not so much light that it interferes with night vision systems.

Studio photo of the contents of OTTE Gear's nvg bag.

Above: Eye and ear protection are a must for any type of firearm training, but nighttime training also requires a variety of white, multicolored, and infrared light sources. I also recommend bringing a set of gloves — cold, numb hands make everything more difficult.

Closing Thoughts

No matter who you are, $10K is a substantial amount to spend. If you’re going to put that kind of money into night vision, you should do everything in your power to keep it safe while it’s in storage or in transit. The OTTE Gear Helmet Bag does just that, while also protecting your helmet and keeping important accessories organized. In addition to the helmet bag, OTTE makes some really nice apparel (like the LV Insulated Hoodie seen in the first photo), utility pouches, chest rigs, and other gear that can make training and range sessions more convenient — day or night.

Read More

Subscribe to Recoil Offgrid's free newsletter for more content like this.

Editor's Note: This article has been modified from its original version for the web.


Gear Up: New Survival Gear For April 2024

Welcome back to our dive into the world of gear! In this edition of Gear Up, we explore the latest innovations and reliable classics that are key to staying prepared for any challenge. From cutting-edge technology to time-tested tools, our focus is on equipping you with insights and information that keep you one step ahead wherever the journey of life may take you. Whether you're bracing for the unknown or fine-tuning your preparedness kit, join us as we unpack the must-haves for this month.

PLANO: Rustrictor All Weather 2 1-Pistol Case

Studio photo of the Plano Rustrictor 2 in 1 gun case.

Notes:

Safely transporting sensitive items requires a special degree of protection. The Rustrictor All Weather 2 1-Pistol Case by Plano is designed to offer that protection for firearms during transport or storage. It integrates Plano's Rustrictor technology, which is said to block rust and corrosion five times longer than competing products. This case is constructed with industrial strength materials, making it highly durable and reliable. It features TSA-approved lockable latches for secure transport and a Dri-Loc seal for watertight, dustproof protection. The interior includes customizable pluck-to-fit foam, allowing for a tailored fit to your pistol and accessories. This case ensures comprehensive protection from impact, water, and dust, thanks to its hard plastic exterior and specialized seal.

  • Interior Dimensions: 12.5 inches L by 10.1 inches W by 4.8 inches H
  • MSRP: $69
  • URL: planooutdoors.com

Vosteed: Racoon

Studio photo of the Vosteed Racoon knife for the Gear Up column.

Notes:

Vosteed’s Raccoon Button Lock Knife features a 3.25-inch 14C28N steel blade, known for its excellent corrosion resistance and toughness. The knife is designed with a simple geometric shape, a drop-point blade for versatility, and a comfortable choil for precision. Its handle is made from Micarta, offering a secure grip, and includes a reversible pocket clip for convenient carry. The knife incorporates a button lock mechanism for smooth operation, alongside caged ceramic ball bearings for effortless blade deployment. This compact and durable tool is ideal for everyday carry, showcasing a balance of functionality and design.

VyperKydex: Sigma Series Glock Holster

Studio photo of the VyperKydex glock holster.

Notes:

A reliable holster with strong retention and plenty of comfort for daily wear is an absolute must when carrying a handgun. The Alpha Series Glock Holster from VyperKydex checks all of these boxes. It’s a high-performance, appendix carry holster designed with the Modwing claw and molded-in wedge for enhanced concealment. It offers versatility through five clip positions and reverse cant options, making it ideal for comfortable and discreet carry. This holster is built for those who prioritize both functionality and comfort in their daily carry setup.

Use Cases: 

We've covered the topic of concealed carry on more than one occasion, and a quick look at some of the concealed carry courses out there may be just the inspiration you need to get you thinking about getting a new holster. Learn 6 Beginner's Training Tips for Concealed Carry to get started, and check out our sister publication Recoil which has even explored the topic of concealed carry for folks with physical limitations.

  • Colors: Black, Coyote, OD Green, Storm Gray, Tiffany Blue
  • MSRP: $65
  • URL: vyperkydex.com

NEXTORCH: Saint Torch 31

Studio photo of the Nextorch Saint Torch 31 for the Gear Up column.

Notes:

Seeing in the dark is crucial, whether it’s finding your way, or finding something you’re looking for. In pitch-black outdoor settings, more powerful lights often make it easier to accomplish the task at hand. The Saint Torch 31 is an ultra-bright searchlight with a maximum output of 20,000 lumens and a beam distance of up to 740 meters. It features a built-in rechargeable battery pack (6 x 4,800mAh) and LED battery indicators for power level monitoring. This high-intensity light is designed for extensive search-and-rescue operations, providing broad and far-reaching illumination.

Moultrie: Mobile Edge Pro Cellular Trail Camera

Studio photo of the Moultrie Mobile Edge Pro Cellular camera.

Notes:

Do you ever wish you could check your game cameras without having to leave the house? Moultrie’s Cellular Trail Cameras are here to save you time and effort, using an affordable cellular plan to send you stills and videos wherever you happen to be. The Moultrie Mobile Edge Pro Cellular Trail Camera is designed for enhanced wildlife monitoring with innovative features like False Trigger Elimination Technology, Nyxel NIR technology for clear low-light images, and Auto Connect for reliable connectivity. It boasts a 36MP sensor, FHD 1080p video with HD audio, built-in memory, and a 100-foot detection and flash range. The camera is easy to set up via QR code, supports multiple power options including AA batteries or solar, and comes with a two-year warranty.

Leatherman: ARC

Studio photo of the Leatherman ARC multitool for the gear up column.

Notes:

The Leatherman ARC is a premium multi-tool featuring 20 tools, including a MagnaCut knife blade for superior edge retention and durability, pliers, bit drivers, a file, and more. It's designed for easy, one-hand operation with all locking features for safety. Built with sturdy materials like 420 and 440C Stainless Steel, DLC Coating, and MagnaCut steel, it promises durability and corrosion resistance. The ARC also includes a four-pocket nylon sheath and a set of nine double-ended bits, enhancing its versatility. Made in the USA, this multi-tool exemplifies Leatherman's commitment to quality, backed by a 25-year warranty.

Use Cases:

There is a reason why about half of the contestants on History Channel's: Alone choose a multi-tool like a Leatherman as one of the 10 items they are allowed to bring with. Learn the potential beyond the individual tool by reviewing Swiss Army Knife Uses or thinking about Choosing a Multitool That Works For You.

VSSL: Camp Supplies II

Studio photo of the VSSL Camp Supplies II survival kit.

Notes:

Survival kits are great for removing the guesswork of kit-bashing your own. The VSSL Camp Supplies II kit is a comprehensive outdoor preparedness tool housed in a durable, water-resistant military-grade aluminum cylinder. It includes a variety of essential gear like a fire striker kit, water purification tools, fishing tackle, and a wire saw, among others. Designed for versatility and ease of use in the wilderness, it also features a 4-mode LED lantern and an oil-based compass for navigation. This kit is engineered to support adventurers in any outdoor scenario, ensuring they're equipped for survival and emergency situations.

  • Dimensions: 9.7 inches tall by 2 inches diameter
  • MSRP: $145
  • URL: vsslgear.com

Protekt: Hydration Everything Pack

Studio photo of the Protekt Hydration Everything Pack for the Gear Up column.

Notes:

Prolonged physical exertion requires more than just water. Your body also needs additional elements to function at an optimal level. The Protekt Hydration Liquid Supplement is designed to maintain optimal hydration and replenish electrolytes lost during activity. It features a proprietary blend with a 10:2:1 ratio of sodium, potassium, and magnesium, essential for preventing dehydration symptoms like fatigue and cramping. The formula is calorie-free, sugar-free, and made with natural flavors, available in Raspberry, Lemonade, and Watermelon. It's easy to use, simply add to water for instant mixing. Ideal for intense workouts, travel, or daily wellness, it comes in convenient single-serving packets.

  • Flavors: Lemonade, Raspberry, Watermelon
  • MSRP: $42
  • URL: protekt.com

Stone Glacier: R3 7000

Studio photo of the Stone Glacier R3 7000 rucksack for Gear Up

Notes:

Although ounces equal pounds and pounds equal pain, there are some cases where more space is necessary. The Stone Glacier R3 7000 is a robust, lightweight expedition backpack designed specifically for military use, offering a spacious 7,000-cubic-inch (114-liter) capacity. It features top access for radio antennae or comms cables, internal Velcro patches for modular storage, and side stretch pockets for additional storage. This pack integrates seamlessly with the R3 Frame, allowing for an expanded load shelf capacity, and is compatible with R3 Side Bags, enhancing its utility for extended missions. Crafted from durable materials, it's designed to withstand the rigors of reconnaissance and rescue operations, making it a reliable choice for demanding environments.

Schnee: Kestrel Women’s

Studio photo of Schnees Kestrel Womens boots.

Notes:

Outdoor gear is typically designed for men, so it’s always great to see products with women as the end user in mind. The Kestrel Women's boot by Schnee's is engineered for early season hunts in warm environments. Featuring top-grain leather and Schoeller fabric for durability, it integrates a 100-percent Waterproof Sympatex Membrane and a Vibram Circuma outsole for traction. Its pLite midsole offers support and shock absorption. Designed specifically for women, this boot is lightweight at 3.4 pounds per pair and handcrafted in Italy, ensuring both comfort and quality for outdoor activities.

Streamlight: Speedlocker

Studio photo of the Streamlight Speedlocker.

Notes:

Streamlight’s Speedlocker is a secure, portable storage box designed for safely locking personal items. It features a patented mechanical keypad for quick, one-handed access without the need for batteries. Its lock is user-programmable with 31 different combinations. The box is made from rugged hard-shell polymer and includes a foam insert to secure valuables. It's designed to fit various compact firearm models, though Streamlight says it should only be treated as a portable locking container, not an approved firearm safe. However, it’s air travel suitable with the included padlock, water-resistant, and has mounting holes for securing to rigid surfaces.

Kokopelli: Moki II R-Deck

Studio photo of the Kokopelli Moki II R-Deck.

Notes:

The Moki II R-Deck by Kokopelli is a two-person inflatable kayak designed for a range of water activities, including lake, calm river, and ocean paddling. It features a removable spraydeck for weather protection, comes with two Alpine Lake paddles, a Nano Barrel Pump for inflation, two EVA seats, and a wheeled carry bag for easy transport. The pack also features a variety of carry handles and shoulder straps to wear it as a backpack. The kayak has a high-pressure drop-stitch floor, Halkey Roberts Valves for easy inflation, and a 9-inch removable tracking fin for better navigation. Weighing 53 pounds, it supports up to 600 pounds and packs down for convenient storage and transport.

Use Cases:

Exploring the open water is exciting, but also perilous at the same time. Stay aware of your surrounding by learning some Cold Water Safety tips, and be ready for the worst by exploring the dangerous force of Raging Waters.

  • Water Rating: Flat Water, Bays & Inlets, Class I
  • MSRP: $999
  • URL: kokopelli.com

Read More

Subscribe to Recoil Offgrid's free newsletter for more content like this.

Editor's Note: This article has been modified from its original print version for the web.


Mastering Urban Defense: Essential Tactics for Modern Warfare

In the high-stakes chess game of modern warfare, the action often takes place within the concrete jungles of urban environments. Both history and the present day foreshadows that future conflicts will inevitably spill into city streets, requiring battlefield planners to develop a mastery of urban defense. This strategic forecast is explored by John Spencer and Jayson Geroux of the Modern War Institute at the West Point Military Academy. They posit, if leveraged effectively, a solid urban defense can decisively tip the scales of war.

Why Fighting in Cities is a Big Deal

Cities are not like open fields or forests. They're filled with buildings, streets, and alleys that make fighting a whole different game. History shows us that battles in cities, like the famous one in Stalingrad or the fight for Mosul, teach us a lot about how to defend these urban jungles effectively. It may sound obvious, but it's all about being prepared, coming up with smart plans, and being able to change tactics when needed. All things easier said than done!

Photo of a narrow ally way.

Above: Narrow routes like alleys, create choke points that can disrupt the flow of an opposing force, and possibly provide an opportunity to employ massing effect strategies.

Smart Moves for Urban Defense

When planning how to defend a city, there are some smart strategies that come from Army guides and history:

  • Disruption: This tactic involves breaking up the cohesiveness of the enemy's forces, making it difficult for them to execute their plans effectively. In urban environments, disruption can be achieved by manipulating the terrain to separate enemy units, degrade their communications, and disrupt their logistics, effectively slowing their momentum and making them more vulnerable to counteractions.This is about making it hard for the enemy to move forward and do what they want. In cities, you can block roads, create diversions, and make it tricky for them to stick together.
  • Massing Effects: This principle refers to the concentration of combat power at the right place and time to achieve maximum impact. In urban defense, leveraging massing effects might mean concentrating firepower in an area likely to be breached by the enemy or organizing forces discreetly to launch a surprise counterattack against an advancing foe. Imagine all your friends teaming up at the perfect moment in a game to make a big move. In essence, its about bringing all your strength to one spot at just the right time to surprise the enemy and have a bigger impact.
  • Flexibility: The hallmark of any successful defense, especially in the unpredictable terrain of urban warfare, flexibility refers to the ability to adapt to changing circumstances rapidly. This includes altering tactics in response to enemy movements, repositioning forces to exploit newly identified weaknesses in the enemy's approach, and adapting defensive measures to accommodate the evolving urban landscape. This means being ready to change your plan based on what's happening around you. If the enemy tries something new, you need to be able to react quickly and smartly to keep the upper hand.

Photo of two cars pressed close together to create a road block.

Above: Urban centers are filled with potential resources to create obstructions to enemy movements.

Learning from the Past to Win Today

Looking back at how soldiers defended “Pavlov’s House” in Stalingrad or how they made use of broken buildings in Ortona gives us insight for defending cities today. Things like:

  • Reinforcing buildings to create impenetrable strong points.
  • Intentionally creating rubble to obstruct and channel enemy movements.
  • Utilizing snipers to inflict significant casualties and disrupt enemy plans.

These simple tactics demonstrate how to use every part of a city to our advantage.

Getting Ready for Tomorrow's Battles

As fighting changes, so do the ways we need to defend cities. Mixing old tricks with new technology will help get ready for future fights. Cities offer so many ways to protect and defend, and using what we've learned from the past will help make smart plans for future conflicts.

This knowledge is not only applicable to military battle field commanders, but the skills and tactics involved in urban defense are also invaluable to civilians trying to survive in the midst of conflict. We explored urban survival in Selco Begovic's interview recorded in the SHTF Anthology, which highlights just how important understanding and mastering urban defense truly is.

Conclusion

Defending a city is a thinking man's game that needs brains as much as strength. Urban defense melds art with science, requiring a deep understanding of both the physical and historical landscapes of urban combat. Looking ahead, the lessons drawn from past urban battles, combined with a solid grounding in military doctrine, will equip today's defenders with the strategies necessary to secure victory.

For a really deep dive into the subject of urban defense, check out John and Jayson's article in its entirety: Defending the City: An Overview of Defensive Tactics From the Modern History of Urban Warfare

Read More

Subscribe to Recoil Offgrid's free newsletter for more content like this.


Blood and Thunder: Reviving Primitive Wilderness Survival Skills

Talk to enough folks who are passionate about self-reliance and you'll stumble into a wealth of strategies on how to endure should the day-to-day systems we lean on vanish. Some swear by hoarding essentials—think provisions and hydration—anticipating the day when convenience becomes chaos. Then there are the stealthy few who suggest stashing supplies in multiple hideouts, always staying a step ahead of troublemakers or dodging temporary danger zones. You'll find voices in the crowd who champion farming with your own hands as the ticket to survival, urging a return to the land. And inevitably, there's the rugged loner who plans to channel their inner woodsman, a rifle at the ready, confident they'll thrive indefinitely, or at least until order is restored by employing primitive wilderness survival skills.

Yet, none of these approaches are foolproof. Reality tends to laugh at our best-laid plans. A quick glance back at 2020 shows us just how delicate our interconnected world is, and how the most meticulous schemes can falter. What would we do if we hit rock bottom, stripped of our stashes and modern tools? What does starting from scratch really mean, and how do we, like our early forebears, turn raw nature into necessary tools?

Photo of Phillip Liebel discussing primitive wilderness survival skills.

Above: Phillip Liebel shares shares his wisdom as the class connects as a tribe.

This brings us to Phillip Leibel, a figure carved straight from the wilderness. He's a familiar face on History Channel’s ‘Alone: The Beast', a master of primal craft, and the brain behind Primitive Wilderness Survival. Phillip's quest is to reclaim the forgotten skills of old-world cultures and pass that legacy on to anyone with a thirst for knowledge. His latest endeavor is a workshop where you can learn to craft bows in the Cherokee tradition, culminating in a hunt against the mighty bison. We got lucky and snagged a spot in his course, making our way to Graham, Texas, where a treasure trove of insights awaited.

Building a Tribe

Graham, Texas is a bit off the beaten path, which makes it an ideal venue for a company like Primitive Wilderness Survival. Out there, away from bustling crowds and the nocturnal glow of city lights, one can start to truly unplug from the technology that has found its way into everything we do. In the morning, we arrived at a ranch on the outskirts of the town, along with several other like-minded individuals, eager to learn and ready to discover the bedrock of self-reliance: creating something from seemingly nothing. Students traveled from all over the country, including several from Wyoming and California, all with unique backgrounds and varying levels of skills. Some were familiar with making primitive tools, while for others it was their first time.

Photo of Phillip Liebel discussing the nuances of traditional bow.

Above: Shooting a traditional bow is much different from a modern compound bow or crossbow.

Our instructor, Phillip, greeted us warmly and encouraged everyone to get settled in for a nine-day immersive experience. As we established camp among the juniper, cedar and locust, Phillip set about getting to know everyone in his class. There is a proverb about community and collaboration often cited that goes something like, “If you want to go fast, go alone. If you want to go far, go together.” With this in mind, Phillip started the first day encouraging us to think of one another as a singular tribe, to help each other along the way, and foster an environment of mutual respect.

Creating a tribe wasn't just a lesson, it was our new reality. Humans are social creatures, and even though we often romanticize going it alone, that scenario seldom comes to a graceful conclusion. However, if we can organize as a group of like-minded individuals (aka, a tribe), we can work towards common goals with greater enthusiasm and tenacity. This would become increasingly important as the rest of course went on, and especially when it came time to hunt one of the largest denizens of the North American continent.

Making a Bow By Hand

To honor Phillip's cherished Cherokee roots, our session kicked off with a dive into tradition. We would be hand-crafting a bow-staff in the Cherokee fashion, using the sturdy osage orange wood. Before our fingers even brushed against the timber, we learned about the art of seasoning—a patience-testing process where the wood is left to surrender its moisture to the air until it's ripe for crafting. This process doesn’t happen overnight. Seasoning timber the old-school way involves basking in the open elements rather than hurrying it along in a kiln. It is a slow dance with time, often stretching over a year. Luckily for us, Phillip, ever the foresighted craftsman, had a stash of these time-tempered pieces at the ready, setting the stage for us to leap into the next phase of our craft-making journey.

Photo of a student of the Primitive Wilderness Survival class determining his draw length.

Above: Before a bow can be made, the draw length of the individual user must be determined. 

Determining Draw Length

Every bow is a custom crafted creation, tailored to the individual who will wield it. As such, you must know the exact tension required as the string draws an arrow back. This isn't a trivial fact to be overlooked—it's the core of the craft, guiding the bow's optimal height and thickness. To master this, we took a completed bow and an arrow, etched with inch marks along its spine, to measure our natural draw length. It was similar to taking a measure of your reach. While there’s a myriad of opinions on the ideal length of a traditional bow, for our purposes, we settled on a simple method. We measured how far we could comfortably draw the arrow back. It's a technique that’s less about numbers and more about feeling, finding that sweet spot where the bow feels like an extension of your own body.

Carving the Staff

Figuring out the perfect length for the bow was just the start. Next, we began to carve the Osage orange, carefully coaxing it into the silhouette of a traditional Cherokee bow. One sage bit of guidance we got was from one of our fellow tribesmen was, “Carve away anything that isn't a bow.” Sounded cryptic at first, but it was spot on. Traditionally, one might have used stone tools for this delicate process. We were lucky enough to have draw knives and rasps on hand. But even with these modern conveniences, the task was a marathon. With each shave of wood, we balanced on a knives edge. Too much left, and the bow wouldn't bend, too little, and you'd hear the heartbreaking crack of failure. Sun dipping low, the first day's end found us still chipping away, not quite there yet.

Photo of a Primitive Wilderness Survival student using a draw knife to sculpt their bow.

Above: With a bow held in place, a draw knife is used to remove would layer by layer until it becomes flexible enough to bend.

The second day's light ushered in an even finer dance with detail. As the bow's shape homed in on perfection, the coarse tools were traded for cabinet scrapers and sandpaper. Every so often, Phillip would put our progress to the test on his trusty tillering jig—our efforts being put to the ultimate stress test. If things did not appear quite right, back we'd go, scraping and smoothing. Each trial was a pulse-quickening moment, wondering if our creation would hold or shatter. But the seasoned osage orange, tough as nails, didn't let us down. We kept on, tillering and sanding, painstakingly inching towards a bow that felt just right in our hands, tailored to our own pull and power.

Stringing the Bow

No bow can launch arrows unless matched with a string. Our forebears crafted bows with sinew, braided into lengths sufficient for strings—meaning they meticulously removed strips from sizeable beasts or intertwined shorter lengths, hoping the intense strain wouldn't snap or untangle the braid. Today, for ease and security, we employ a cord called B-50. This synthetic rope boasts remarkable tensile strength and is favored for crafting traditional bowstrings.

Photo of a variety of B50 cordage used for bow strings.

Above: B50 cordate is use for making bowstrings and comes in a variety of colors.

To fashion a string of proper girth, we interlace six strands each of two colors (totaling twelve strands) employing the reverse-wrap technique. One extremity is woven into a loop secured by notches at the bow's end. The opposite extremity is tied by hand, permitting adjustments to the string's span according to the chosen draw length and tension. For some, this braiding posed a significant test, while others, graced with nimble fingers, did it with less trouble. Fortunately, as members of a tribe, we could solicit assistance from the adept in exchange for aiding in tasks like bow contouring. This collaboration sped our progress beyond solitary efforts.

Crafting Arrows

Various materials can make a decent arrow shaft. Phillip notes the Cherokee preference for river cane, but we used bamboo tomato stakes from a nearby garden shop as a handy substitute. A suitable arrow shaft can be any material with the right diameter and either naturally straight or adjustable to be straight. We each scouted five or six straightish pieces, then gathered by the camp's central fire to refine their alignment.

Photo of a primitive wilderness survival student eyeing the length of an arrow to check for straigness.

Above: Sighting along the length of the bamboo reveals where the troublesome bends and curves are located.

Peering down the bamboo length, its bends and twists become apparent. Brief exposure to the fire's warmth softens the fibers, opening a short window of time to coax the shaft straight, easing out curves. It's a delicate balance—enough force to ensure it sets straight once cool, but not so much it snaps. Occasionally, bamboo with preexisting flaws would crack, despite our caution. Phillip reassured us, it's better for flaws to reveal themselves now, rather than during a high-tension launch from a bow.

Photo of a student using the heat of a fire to loosen bamboo fibers enough to straighten it.

Above: Using heat from a fire loosens bamboo fibers just enough to make it slightly more bendy, making it easier to straighten.

With our shafts straight, we addressed the bamboo's nodal bulges. Using rasps and sandpaper, we worked each one down to achieve uniform diameter end-to-end. Phillip reminded us that in a more primitive setting, this step would involve coarse stones and significantly more elbow grease.

Cherokee Fletching

Feathers are essential for stabilizing an arrow in flight. Contemporary arrows often sport two or three fins crafted from a slender polymer. For our projectiles, we've selected a pair of feathers, either turkey or goose, flanking the shaft. These quills must be sculpted to synergize, ensuring peak aerodynamic stability. Their silhouette typically mirrors that of a rocket fin yet can be tailored to the archer's liking. While many opt for scissors to carve the desired profile, the application of heat via a heated rock or blade can sculpt the feathers just as well.

To secure the feathers, we employ dampened sinew strands interlaced with adhesive—no intricate knotwork necessary. Phillip sheds light on the traditional concoction and application of hide glue for such tasks. However, our modern shortcut involves swift-setting wood glue. Once set, the fletching is remarkably rigid, resisting any attempt to dislodge it with sheer force.

Photo of Phillip and his primitive wilderness survival students using a tillering jig to make sure their bow is bending enough.

Above: Tillering is the process of adjusting how much each arm of the bow bends. By using a tillering jig like the one shown above, the curvature can be measured and adjusted.

As for the arrow's leading segment, we've calibrated it to be weight-forward by embedding weights within the bamboo's inner circumference. Phillip imparts wisdom on the use of sand or clay for weight, enhancing the arrow's impact and in-flight stability. In our case, to maintain momentum in our workshop and to ensure a forceful impact, we substitute sand or clay with metallic rods, sparing us the laborious task of maneuvering granular or sticky substances into the bamboo's narrow bore.

Gathering a bundle of our straightest, and best fletched arrows, we migrate toward the range for an impromptu test of precision. Our target is a rustic round hay bale, its center marked by a crimson bullseye. This venture doubles as a drill for bow stringing, a mildly cumbersome skill to master given the osage staves' reluctance to bend. Each of us are amazed at how powerful our hand-made creations are at this point, easily comparable to a modern traditional-style long bow.

A brief period elapses before the erratic flyers—victims of imperfect straightening or feathers—are singled out, leaving behind those arrows that reach the bullseye's vicinity with remarkable consistency. For a few among us, a pair of trusty shafts suffice. Yet for others, it presents an opportunity to tweak a nudge to the feathers or a twist to the spine. Those deemed true are meticulously segregated, ready for the progression to the next stage.

Photo of Phillip testing the draw length of a handmade bow.

Above: Once a bow has been tillered and strung, its first field test is performed with a reliable practice arrow.

Arrowheads

Four days elapsed, and though we've toiled from the first light to dusk (a few of us even honing our archery in the pitch black, guided by headlamps), a significant challenge still looms. We aim to craft an arrowhead, primitive yet sharp enough to pierce the tough skin of a bison in its prime. Phillip imparts to us the art of stone knapping, a technique crucial to our forebearers.

Stone knapping is an expertise that demands years to master, and the prospect of acquiring enough proficiency to successfully produce an arrowhead within a single day is nothing short of intimidating. However, Phillip, alongside tribe members seasoned in knapping, delivers an exceptional introduction to the fundamentals. We're shown how strategic strikes create ripples in the rock's crystalline lattice, splitting off smaller fragments from the larger mass. Certain stones yield better results, and for our lesson, we select from a spectrum of obsidian, chert, and even glass bottle bases.

Photo of arrowhead making materials used during the primitive wilderness survival class.

Above: A wide variety of tools and materials was provided so that each student could find what works best for them.

With shards in hand, we undertake the painstaking task of whittling them down to arrowheads, sliver by sliver. The implements are aptly named for their purpose—a ‘flaker', tipped with copper and similar in profile to the head of a marker, is for chipping away precise fragments. ‘Boppers', copper-domed ends fixed on dowels, serve to detach heftier sections and smooth out jagged rims. A robust slab of hide safeguards our legs, serving as a workbench for this delicate operation. Mastery of knapping is a gradual ascent which exceeds our limited time frame, yet under Phillip's and our skilled companions' tutelage, we edge closer to fashioning something that echoes the silhouette of an arrowhead.

Photo of finished arrowheads attached to shafts of the arrows.

Above: Finished arrowheads are attached to the straightes and most reliable of the prepared arrow shafts.

To render arrows lethal for felling a formidable bison, arrowheads need to be attached firmly to their shafts. This is accomplished by concocting heated pine pitch—a blend of pine resin blended with the fibrous droppings of deer—within stone vessels positioned adjacent to a fire. Render the pitch too hot, it is prone to bursting into flame since its flashpoint is low. A recess is meticulously chiseled into the shaft, precisely sized to accommodate the arrowhead's base, and the heated pitch is used as an adhesive to secure the arrowhead in its niche. Afterwards, a concoction of wood glue and sinew is utilized to lash the arrowhead firmly, guaranteeing its integrity upon discharge from the bow. With the assembly of arrows and the stringing of bows, a solitary step remained: to track and bring down the colossal quarry.

Hunting a Bison

As the evening unfolded before the anticipated day of the hunt, our campfire glowed, a testament to a week's diligent efforts. We exchanged hearty praise over each other’s bowmanship and eagerly speculated about the forthcoming pursuit. Our conversations stretched into the night, our eyes drawn upward as a shroud of clouds covered the stars, while the distant rumble of an approaching thunderstorm provided a backdrop to our gathering. Hunkering down for the night, we all fell asleep in our tents thinking about the next day, wondering how it would play out.

Photo of primitive wilderness survival students staging at an ambush site.

Above: Students stage and prepare their firing positions at a potential ambush site while Phillip watches for the quarry.

Post-storm, a mist had claimed our encampment, kicking off hunting day draped in overcast skies and the promise of residual showers. Prior to setting out for the territory where we would embark on our quest, Phillip gathered us together, initiating a ceremonial pre-hunt observance. Arrayed in a crescent formation, the moment to express reverence for the existence we were set to claim was upon us. In nature, an animal such as the bison might meet a grisly fate, falling prey to the savagery of the food chain, often only after a battle with the infirmities that come with old age, sickness, or injury. On this day, we aimed to salute its essence, bringing its life to a swift and compassionate end. Our ritual concluded with the cleansing aroma of juniper and the purifying essence of sage, a ritual to obscure our presence from the keen senses of our quarry.

Photo of a bison using a herd of cattle for protection.

Above: The shrewd bison cleverly utilized a herd of cattle as protection and early warning.

As fate would have it, the hunt did not go quite as expected. Bison are incredibly intelligent, clever animals, and the one we were hunting made us work demandingly hard for it. The hunt itself lasted a day and half, despite our tribe of eight (and the rancher who owned the property) tenaciously going after it. Our quarry defied our expectations at every turn. It never set a pattern, never reacted the way we thought it would, and never maneuvered to where we were trying to drive it. Over the course of the hunt, we watched it jump over six-foot high fences, leap over cattle traps, and even use cattle herds as cover. In the open, it never let us get close enough to take a shot. Concealed in woodland, it tread silently on the forest floor, gliding effortlessly through dense underbrush that impeded us.  Sometimes it seemed to vanish into the ether, forcing us to regroup, invent new strategies, and begin tracking all over again.

Eventually, after much frustration and many miles of active tracking, stalking, and hunting, our tribe maneuvered it into a position where it could be safely harvested. For some it was a joyous relief, for others it was a poignant and emotional end. But no matter how everyone felt upon the culmination of our efforts, we were all proud of the work we had put into in, and grateful to have gone through the experience with such an amazing group of people.

Final Thoughts

Curiosity often sparks when pondering the bare-bones lifestyle of living directly from the earth. We might lose ourselves in films like ‘Dances with Wolves' or the historical narratives of trailblazers like Lewis and Clark. Imagining ourselves in their stead, it might seem feasible to emulate their existence. However, the theatre of the mind is vastly different from tangible existence, and the cultivation of skills that our ancestors mastered with apparent ease demands both relentless dedication and time. Our time spent with Primitive Wilderness Survival is testament to this. We took many shortcuts by substituting stone tools with steel, and other modern amenities, otherwise the course could have easily taken twice as long.

Photo of the primitive wilderness survival class students lined up before the hunt.

Above: Being a member of a tribe has numerous advantages, capable of performing tasks faster and with greater efficiency than a single individual could ever hope to accomplish alone.

Grasping the extent of challenges our distant predecessors endured to thrive solely on nature's offerings is not accurately gleaned from the passive acts of reading, or watching tales unfold on screen. I confess, my initial assumptions about the labor involved were naive until I engaged in the actual process of fashioning a hunting implement and the subsequent endeavor to procure game with it. My enlightening journey alongside my tribesmen, and Primitive Wilderness Survival's expert instructor Phillip Liebel, illuminated the astonishing resourcefulness intrinsic to humanity, and the formidable force of collective minds striving toward a shared objective.

To answer the question of whether living solely off the land is possible, the answer is a resounding ‘yes’. Yet the difference between surviving to thriving hinges on whether one chooses solitude, or the fellowship of a tribe of like-minded individuals, unified by purpose. Immersing oneself in the study of primitive skills reveals just how important and intertwined humanity is with another, and during these tumultuous times, it is worth rediscovering that important truth.

About Primitive Wilderness Survival

Interested in getting some hands on experience learning primitive self-reliance skills? Check out Phillips upcoming courses at Primitive Wilderness Survival

Read More

Subscribe to Recoil Offgrid's free newsletter for more content like this.


Unconventional Battles: Impact of Guerrilla Tactics from the 1860s to Modern Conflicts

Picture this: while vast armies in blue and gray faced off on well-known battlefields, a different, shadowy war raged across the South. This wasn't the orderly combat of soldiers in formation but a brutal, chaotic struggle of ambushes, surprise raids, and irregular tactics. From 1861 to 1865, guerrilla warfare tore through the Confederate states, leaving a profound mark on the American Civil War's outcome. By looking into the savage world of the Confederate guerrillas and Unionist fighters of the American Civil War, we can see a pattern that continues to repeat itself into the modern era.

The Dawn of Guerrilla Warfare

As the first shots of the Civil War echoed in April 1861, a different kind of warfare began to unfold across the South. With the shadow of Federal invasion looming, civilians from the Midwest to the Deep South quickly formed guerrilla bands. This mode of fighting offered a sense of freedom and the ability to protect one's home and family, unlike anything the formal Confederate army could offer.

The guerrilla fighters were a diverse lot. The majority were Bushwhackers, notorious for their ambush tactics and lack of formal uniforms, making them indistinguishable from civilians. This ambiguity sowed confusion among Union forces, who struggled to identify friend from foe. Contrastingly, the Confederate Congress legitimized another form of guerrilla, the partisan rangers, through the Partisan Ranger Act of 1862. These fighters, though still employing irregular tactics, wore Confederate uniforms and operated under a semblance of military structure.

The hit-and-run attacks, ambushes, and sabotage operations that characterized Civil War guerrilla actions are mirrored in the operations of modern guerrilla fighters across the globe. These tactics exploit the vulnerabilities of conventional military forces, relying on speed, surprise, and intimate knowledge of the local environment. Today, guerrilla groups and insurgent forces continue to use these methods to challenge larger, better-equipped armies, showing the enduring effectiveness of irregular warfare tactics.

Photo of civil war reenactors on a road march.

Above: Soldiers on the march were easy pickings for Guerrillas.

Guerrilla Warfare Tactics

Civil War guerrillas employed a range of tactics that leveraged their deep familiarity with local terrains, their ability to blend in with civilian populations, and their willingness to engage in warfare that often defied the conventional rules of engagement of the time. Let's look into some of these specific tactics to understand how guerrilla warfare adds a complex layer to warfare.

  1. Hit-and-Run Attacks: One of the hallmark tactics of guerrilla fighters is the hit-and-run attack. These attacks involved quickly striking a target—be it a military unit, supply train, or installation—and then retreating rapidly before the enemy could mount a significant response. This tactic exploits the mobility and local knowledge of guerrilla units, allowing them to harass and disrupt operations with minimal risk.
  2. Ambushes: Guerrillas frequently use the element of surprise to their advantage by ambushing troops and supply convoys. They hide along routes known to be used by the oposing forces, waiting for the opportune moment to strike. Making us of the natural landscape, including dense forests and rugged terrain, provides perfect cover for such ambushes. This not only inflicts casualties and losses on opposing forces but also instills a sense of constant unease and threat among troops operating in guerrilla-active areas.
  3. Sabotage: Sabotage is another crucial tactic, targeting infrastructure such as railroads, bridges, and lines of communication to disrupt support and supply lines. During the American Civil war, Guerrillas would tear up tracks, burn bridges, and cut telegraph wires, significantly hindering the Union’s operational capabilities. This form of economic warfare forced the Union to divert considerable resources and manpower to protect supply routes and repair sabotaged infrastructure. In the modern era, cyberwarfare is employed to disrupt cell-service and other digital infrastructure, sowing the seeds of chaos and confusion.
  4. Psychological Warfare: Guerrillas also understand the power of psychological warfare. By fostering an environment of fear and uncertainty, they aim to demoralize opposition troops and sympathizers. The unpredictability of guerrilla attacks, coupled with their often brutal nature, play a significant role in affecting the morale of opposing forces, and contribute to a wariness and distrust among civilian populations in contested areas.
  5. Wearing Enemy Uniforms: In some instances, guerrillas wear uniforms of opposition forces to deceive their enemies, allowing them to move freely, gather intelligence, and launch surprise attacks. This tactic not only facilitates guerrilla operations, but also contributes to the erosion of trust within the ranks, as soldiers became increasingly uncertain about who is friend or foe.
  6. Use of Civilian Networks: Guerrillas often rely on civilian networks for support, intelligence, and resources. Sympathetic civilians provide food, shelter, and information about enemy movements, significantly enhancing the effectiveness of guerrilla operations. This close relationship with the civilian populace makes it difficult for opposing forces to root out guerrillas without alienating or harming innocent civilians.
  7. Guerrilla Leaders and Their Tactics: During the American Civil War, leaders like William Quantrill, “Bloody Bill” Anderson, and John Mosby (the “Gray Ghost”) became infamous for their daring raids and mastery of guerrilla tactics. Mosby, in particular, was known for his ability to strike quickly and vanish into the Virginia countryside, his operations so effective that the area he operated in became known as “Mosby's Confederacy.” Similarly, modern guerrilla forces like the Viet Cong, the Afghan Mujahideen, the Kurdistan Workers Party (PKK), and countless Islamic groups like Hamas, Hezbollah and ISIS, all employ guerrilla tactics to  combat and demoralize larger conventional forces.

Photo of a Taliban Guerrilla holding an RPG.

Above: Today's modern guerrilla fighters employ the same tactics, but with upgraded weapons and gear.

Response to Guerrilla Warfare

During the American Civil War, the Union army faced a conundrum in dealing with these guerrillas, especially the elusive bushwhackers. The Lieber Code of 1862 attempted to define the legal standing of guerrillas, declaring bushwhackers as illegal combatants. However, this did little to stem their activities, as the guerrillas' knowledge of local terrain and surprise tactics made them nearly untouchable.

Guerrilla warfare was not just a military challenge, it was a deeply personal conflict, pitting neighbor against neighbor. In areas like Missouri and Kansas, the violence became especially barbaric, with figures like William Clarke Quantrill and “Bloody Bill” Anderson leading raids that were more akin to massacres than military engagements. These acts of brutality highlighted the savage nature of guerrilla warfare, where the lines between combatant and civilian blurred.

Just as Union forces had to adapt to the guerrilla threat by developing counterinsurgency tactics and strategies, modern militaries face the challenge of countering irregular forces without alienating the civilian population. The difficulty of distinguishing between combatants and non-combatants, the necessity of gaining local support, and the challenges of operating in often unfamiliar terrains are challenges that modern forces continue to contend with.

A civil war soldier sits, dazed, looking over the battlefield.

Above: The psychological impact of carnage a band of guerrilla fighters can inflict is an effective way to demoralize opposing forces.

Impact on the Civil War and Beyond

The guerrilla war's impact on the Civil War was profound. These irregular fighters harassed Union forces, cut off supplies, and spread fear and demoralization. In response, Union commanders adopted “hard war” tactics, holding civilians responsible for guerrilla actions, which only further escalated the violence.

For years, the role of guerrillas in the Civil War was overshadowed by the battles fought by conventional armies. However, recent scholarship has begun to shed light on the importance of this irregular warfare. Guerrillas, whether bushwhackers, partisan rangers, or Unionist fighters, played a critical role in shaping the war's outcome and the society that emerged from it.

The Lieber Code's attempt to establish guidelines for the treatment of guerrilla fighters foreshadows contemporary efforts to regulate warfare and protect human rights through international laws and conventions. The question of how to deal with non-traditional combatants within the framework of international law remains a contentious issue today, reflecting ongoing debates about the nature of combatancy and the rules of engagement in irregular warfare.

Conclusion: A War Within a War

Guerrilla warfare of the American Civil War was a complex, brutal conflict that ran parallel to the larger, more famous battles. It was a war of shadows, where the fighters were as likely to be your neighbors as they were enemy combatants. This aspect of the Civil War reminds us that the impact of the conflict extended far beyond the battlefields, touching the lives of countless individuals who fought their own wars in the shadows of history.

Echoes of Civil War guerrilla tactics in modern irregular conflicts underscore the timeless nature of certain military strategies and the human capacity for innovation in the face of adversity. While the tools and contexts may have evolved, the principles of leveraging mobility, surprise, and local support remain central to the guerrilla way of war. Understanding these historical parallels offers valuable insights into the challenges and dynamics of contemporary conflicts, highlighting the relevance of lessons learned from the guerrilla warfare of the past.

Read More

Subscribe to Recoil Offgrid's free newsletter for more content like this.


Protecting Our Water: Cybersecurity Threatens Water Safety

Imagine turning on your faucet one morning and finding that, instead of water, you're met with dry silence. For many, this scenario seems far-fetched, yet it's becoming an increasingly possible reality. On March 18th, 2024, the U.S. Environmental Protection Agency (EPA), issued a dire warning to the Governors of every state. The message was foreboding: cyberattacks from foreign actors threatens the safety and stability of our nation's water infrastructure. Infact, these attacks are already happening now, risking the safety and well-being of millions. As we move into the future, protecting our water will be become vitally important.

Understanding the Risk

Cyber threats against water and wastewater systems are escalating, driven by sophisticated actors seeking to exploit any vulnerability. Recent incidents have illuminated the nature of these threats, with actors affiliated with the Iranian Government's Islamic Revolutionary Guard Corps and the People's Republic of China's state-sponsored cyber group, Volt Typhoon, targeting U.S. critical infrastructure. These attacks have not been random but are carefully designed to disrupt essential services and extract political, economic, or strategic advantage.

One of the specific vulnerabilities the letter highlights is a specific type of controller, the Unitronics programmable logic controller (PLC), which was found to be vulnerable to exploitation in November of 2023. PLC's are used to monitor various stages of water and wastewater treatment, turn pumps on and off to fill tanks and reservoirs, and announce critical alarms to operations. 

The vulnerability of water systems to cyberattacks is especially concerning due to their critical role in public health and safety. To make the situation more complicated, many water utilities are challenged by limited resources and technical capacity, making them attractive targets for cybercriminals. The EPA, alongside the Cybersecurity and Infrastructure Security Agency (CISA), has underscored the urgent need for improved cybersecurity practices within the municipal water sector.

Photo of water pouring over an adult human hand.

Securing Safe Water

Access to clean water is crucial for drinking, cooking, and hygiene, directly impacting our ability to maintain good health and prevent diseases. Waterborne pathogens can lead to severe illnesses and outbreaks, underscoring the need for protection measures against any form of contamination, including those arising from cyber-induced failures.

Water is a critical asset not just for individual survival but for the economic engine of communities and countries. Industries ranging from agriculture to manufacturing, energy production to pharmaceuticals, depend heavily on a reliable supply of clean water. A disruption in water services due to cyberattacks can have a cascading effect, halting production lines, affecting food supply, and incurring significant economic losses.

The Centers For Disease Control and Prevention (CDC), suggests several ways to prepare for potential disruptions in municipal water supply:

  1. Make water safe. Even if a water from a municipal source becomes contaminated, there are ways an the individual citizen can take steps to ensure it is safe to consume or use. This includes, boiling, disinfecting, and filtering. The CDC also provides a few handy reference sheets, Make Water Safe During an Emergency and Use Safe Water During an Emergency, to print out and keep incase internet access is unavailable. They are Make Water Safe During an Emergency
  2. Create and store an emergency water supply. The CDC suggests that keeping an ample supply of commercially produced bottled water is the safest way to make sure your water is uncontaminated. When it comes to quantity, the recommended amount is one gallon, per person, per day, for a minimum of three days. More water is needed if a member of the household is pregnant, sick, or if you are residing in a hot climate. It is also recommended to try storing as much as two weeks worth, eleven days beyond the minimum.
  3. Find other sources of water. If you're caught unprepared, there are other ways obtaining water. Some of these sources include:
    • The reservoir in a home water heating tank.
    • Melted ice cubes.
    • A toilet tank (not the bowl).
    • Liquid from canned fruits and vegetables.
    • Pools and spas (for hygiene, not consumption).
    • Decontaminated natural sources (rainwater, streams, lakes, ponds, etc.).

Conclusion

The security of our nation's water systems is not just a matter of smoothly running infrastructure, it affects public health, safety, and national security. As we navigate the complexities of the digital age, we must remain vigilant and proactive in protecting these essential resources from cyber threats. That being said, we must also ensure that we are prepared on an individual level to do without when our protective measures fail.

Read More

Subscribe to Recoil Offgrid's free newsletter for more content like this.


Best Flashlights For Tracking Man and Beast

In the annals of human innovation, few inventions shine as brightly in our daily lives as the flashlight. Its inception dates back to January 10, 1899, when David Misell, a British inventor based in New York, patented a device that would cast light on the future of portable illumination.

This device, characterized by its tubular shape, a bulb at one end, and the alignment of three D batteries, was not merely an invention, it was a beacon of progress. Misell's vision was recognized by Conrad Hubert, a Russian immigrant and fellow inventor, who acquired the rights to this invention for his company, Eveready.

Photo of several people tracking at night with white light.

Above: Conservation trackers utilize white light to create shadows while tracking at night.

Genesis of the Flashlight

The flashlight's debut was marked with a nod to creation itself, featuring the biblical quote “Fiat lux” in the Eveready catalog. This phrase, translating to “Let there be light,” echoed the profound impact of this invention on society. Initially named for its fleeting illumination—offering only a “flash” of light—the flashlight has transcended its early limitations to become a staple of modern life.

The invention of the flashlight stands as a testament to human ingenuity and the relentless pursuit of practical innovation. When David Misell patented the first portable electric light in 1899, it was a revolution in the way people interacted with light. This early version, though primitive by today's standards, laid the foundation for a century of technological advancement.

The initial model, powered by rudimentary batteries and offering only brief illumination, earned its name due to its ephemeral light output. However, the concept of portable light quickly proved indispensable, evolving from a novelty to a necessity. The evolution of the flashlight is a mirror to the technological and material advancements of the 20th and 21st centuries, reflecting changes in battery technology, materials science, and electronic innovation.

Photo of a handheld led flashlight being held close to the waist while working in the field.

Above: Flashlights can be used to create sharply contrasting shadows even during daylight hours.

Anatomy of a Flashlight

Understanding a flashlight begins with its core components, each playing a crucial role in its function:

  • Light Source: Ranging from incandescent bulbs to LEDs and halogen lamps, the evolution of the light source has significantly enhanced efficiency and brightness.
  • Reflector: Typically parabolic, this component focuses the light into a beam, amplifying the flashlight's reach and intensity.
  • Protective Lens: Made of durable materials like glass or plastic, the lens shields the light source from damage.
  • Power Source: Modern flashlights offer a variety of power options, including batteries, photovoltaic cells, and dynamos, catering to different needs and preferences.
  • Switch Mechanism: The evolution of the switch, from push-buttons to slides, reflects a focus on user convenience and reliability.

This fundamental design has given rise to a plethora of models, each tailored to specific uses and preferences. From emergency signaling to varied power sources and brightness levels, the modern flashlight is a testament to innovation and versatility.

Photo of someone using a blue light flashlight.

Above: Blue light is great for finding body fluids such as blood or saliva.

Modern Flashlights

The flashlight of today bears little resemblance to its predecessors. Advances in technology have transformed it into a device of unparalleled utility and efficiency. Rechargeable LED flashlights, in particular, represent a significant leap forward. These devices offer adjustable light beams, emergency modes, and induction charging, embodying the pinnacle of flashlight innovation.

Specialized models, such as right-angle torches, cater to specific needs by allowing hands-free operation, a critical feature in many professional and emergency contexts. Similarly, multi-color flashlights provide versatility with color-specific applications, from tracking to enhancing night vision.

The introduction of LED (Light Emitting Diode) technology marked a significant milestone in flashlight evolution. LEDs offered longer life, greater durability, and more efficient use of power than their incandescent predecessors. This leap forward was complemented by advancements in battery technology, including the shift from disposable batteries to rechargeable lithium-ion cells, further enhancing the utility and environmental sustainability of flashlights.

Modern flashlights now boast features that would have been unimaginable to their earliest users. Variable light settings, waterproof designs, and even integrated USB charging ports illustrate the flashlight's transition from a simple tool to a multifaceted device capable of meeting a wide range of modern needs.

In my personal case as a Tracker, I often employ them in indoor tracking, as they offer a good amount of additional light which allows me to spot micro details of latent tracks.

Photo of a muddy footprint in the dark.

Above: White light is neutral and can be used to find ground or aerial spoor.

Common Flashlight Choices

Right-Angle Torches. Imagine navigating through dense underbrush or precarious terrain where every step counts. Here, the right-angled torch shines—not just literally. Its unique design allows for attachment to a belt, offering illumination without occupying your hands. Crafted from durable yet lightweight materials, these torches are ergonomically designed for ease of use, even with gloves. With impressive light output and reach, they light up the immediate vicinity, making them indispensable for intense situations where focus and free hands are paramount.

Multi-Color Flashlight. Next in our arsenal is the multi-color flashlight, a tool that boasts a palette of possibilities. From the neutral clarity of white light to the stealthy green that pierces the woodland shadows without alarming wildlife, each color serves a purpose.

  • White. The most neutral light, so a Tracker can employ it on different terrains (also in indoor environments), from ground spoors to aerial spoors.
  • Green. Runs longer than many other LED colors. It is massively beneficial in woodland. It is also employed by not scaring away animals when hunting at night.
  • Red. Creates a nice contrast on bright baseline, for example snow and bright-colored sand.
  • Blue. Can be used to track blood evidence and, generally speaking, body fluids (for example, saliva).

Colors can be extremely useful also for improving and consolidating night vision, for hunting, for map reading, for sending SOS signal, for fishing, for observing the constellations in the sky.

Multi-colored flashlights are my artificial light of choice when it comes to tracking in the dark as well as in poor light conditions. By being able to switch from one color to another, I can maximize the lights full capabilities, enhancing details that may be neglected while adopting only a white light.

UV Flashlights. Originally called the Wood's lamp, named after its inventor, a UV flashlight beams out electromagnetic waves, primarily in the ultraviolet spectrum. So, what sets apart a UV LED flashlight from a UV sanitizing gadget? Essentially, UV light from a lamp like the Wood's sticks to UV-A wavelengths. These wavelengths don't interfere with the RNA or DNA of the critters caught in its glow.

That’s not the case with sanitizing gadgets that operate on UV-B and UV-C wavelengths. These devices shatter the molecular chains of microbes and stopping them from multiplying like crazy. UV lights are great for:

  • Analyzing carpets, sofas, armchairs and corners of the house in search of any partial indoor track
  • Identifying damp patches caused by leaks resulting from broken pipes in structures
  • Detecting the presence of animals like scorpions
  • Detecting the presence of saprotrophs, mesophiles, psychrophiles and thermophiles mold

Basic UV flashlights shine in scenarios where you're playing detective with germs, mold, moisture spots, and more. It's a pro at uncovering hidden flaws in materials—think invisible cracks or deep-seated damage that hasn't shown its face on the surface yet. But the user should protect their eyes with special glasses or, at the very least, don't go flashing it at yourself or others, as this wavelength is terrible for your retinas.

Tracking instructor Kyt Lyn Walken uses a headlamp during a night tracking exercise.

Above: Kyt Lyn Walken analyzes a track at night using the light from her headlamp.

Hands-Free Headlamps. Lastly, let's not forget the humble headlamp, a beacon that keeps the darkness at bay while keeping your hands unburdened.  Some headlamps come with different light modes, allowing you to switch between high, low, and even strobe settings. Types of headlamps include:

  • Incandescent: These traditional bulb headlamps are reliable and affordable, but they tend to drain batteries faster and produce a less intense beam compared to newer options.
  • LED: They offer a brighter and more energy-efficient lighting solution. LED bulbs last longer, consume less power, and can produce a wider range of light colors. Plus, they don't get scorching hot like traditional bulbs, so you won't have to worry about any surprise eyebrow singeing incidents.
  • Rechargeable: Say goodbye to constantly buying and replacing batteries with rechargeable headlamps. These nifty devices can be juiced up using a USB cable or a wall charger, making them eco-friendly and cost-effective in the long run. Just remember to recharge them before your adventures.

Whether you opt for the nostalgia of traditional bulb headlamps or embrace the efficiency of LED models, these devices offer a spectrum of light modes tailored to every task. Rechargeable options provide an eco-friendly alternative to battery-powered lights, ensuring you're always prepared. With features like adjustable headbands, waterproofing, and varied light modes, headlamps are indispensable for preserving night vision and maintaining focus on the track ahead.

Photo of a footprint in the dirt.

Above: By creating low angles with the light, a sharp contrast is produced that makes the track “pop.”

Things to Consider Before Buying a Flashlight

When venturing into the wilderness or embarking on a tracking expedition, the flashlight you carry can be as crucial as your compass or your map. But with the myriad options available, how do you select the beacon that won't let you down when you're deciphering tracks under the moon's gaze? Here's a tracker's insight into picking the perfect flashlight, ensuring you're never left in the dark.

Brightness

First up, let's talk lumens. This measure tells you just how bright your flashlight will shine. While a cozy 100 lumens might suffice for a quick peek under the sink, those venturing into the great outdoors will need something with more punch. Think in the ballpark of 1,000 lumens to light up vast spaces like campsites. However, it's not just about the lumens; the design of the reflector and lens also plays a pivotal role in how your light cuts through the darkness.

Battery Life

Next, consider how long your light will stay with you. Whether you're team rechargeable or more of a disposable battery enthusiast, the capacity of your flashlight's battery, measured in milliamp-hours (mAh), is key. A solid 3,000 mAh will keep your night illuminated till dawn, while 5,000 mAh might be your pick for those high-powered luminary beasts that devour energy.

Size

When it comes to flashlights, size does matter. The standard torch might be about 6 inches long and fit comfortably in your grip, but there's also something to be said for the nimble EDC (everyday carry) flashlights. These pint-sized illuminators can easily tag along with you, ensuring you're always prepared, whether it's for a spontaneous tracking challenge or a sudden need to navigate in the dark.

Weather Resistance

Out in the field, your flashlight will face more than just the dark. It'll encounter dust, water, and the occasional drop in the mud. This is where the Ingress Protection (IP) rating comes into play, which indicates how impervious they are to dust and water. The IP rating is typically followed by two numbers, the first indicates its ability to resist dust (1 being the lowest, and 6 being the highest) and the other its ability to resist water (again, 1 being the lowest, and this time 8 being the highest). An IP rating of 68 indicates the flashlight is impervious to dust and can be submerged in water. 

Photo of someone using a red light for tracking.

Above: Different spectrums of light make different tracking sign more visible to the naked eye.

A Tracker's Arsenal

The journey from Misell's initial patent to the high-tech devices of today illustrates a relentless pursuit of improvement and adaptation. Flashlights have become indispensable tools, illuminating our paths, enhancing our work, and ensuring our safety. As we continue to push the boundaries of technology, the humble flashlight stands as a symbol of human ingenuity, a reminder of our ability to bring light to the darkest corners of our world.

For those of us who track, whether it's following an animal across varied terrains or uncovering clues at a crime scene, having a versatile flashlight collection is not a luxury; it's a necessity. The ability to choose the right tool for the job can mean the difference between a successful track and a cold trail. It's about understanding the nuances of the landscape and the subtleties of the substrate you're working with.

Selecting the perfect flashlight is more than just picking a tool, it's about choosing a companion that will stand by you through thick and thin, illuminate your path, and perhaps even reveal secrets hidden in the shadows. Armed with the right knowledge and the perfect torch, the night and its mysteries are yours to explore.

Photo of someone using a UV light during tracking.

Above: UV light can be used to reveal different substances, like mold, moisture or otherwise hidden cracks.

About The Author

Kyt Lyn Walken Allsopp is an official representative and Instructor for Hull's Tracing School (Virginia, U.S.). She also presents Tactical, Forensic and Search and Rescue Tracking courses and webinars across the European continent and South America. She is author of five books on Mantracking, and is recognized worldwide as one of the leading experts of this primordial but effective skill. You can learn more about her work at her website:  www.thewayoftracking.com

Read More

Subscribe to Recoil Offgrid's free newsletter for more content like this.


Review: Orange Knives

When you look at knives these days, especially tactical types, the handles are usually finished in one of three colors: black, green, or tan. Sure, there are variations to each of those like Ranger Green versus OD Green, or Flat Dark Earth versus Desert Tan, but there are plenty of other colors on the spectrum for those willing to break out of this tactical trifecta. Orange symbolizes safety in most situations, because it stands out from everything else, and a blaze orange color has been used by hunters for decades because the color isn’t often found in nature. For this reason, on an orange knife, it makes a great handle or even blade color.

This might seem peculiar, as when Tactical Timmy is gearing up for an Instagram photo, he wants all his colors to blend in and match his outfit. Desert camo apparel means a similarly colored handle on his knife; a woodland pattern means an OD or camo-style handle. That’s great if you’re in a combat setting attempting to conceal yourself from an opposing force, but much less practical in other situations.

While it may look cool, what happens when that drab-colored knife is dropped onto sand, foliage, soft snow, or in a low-light environment where it can’t be seen because it’s blending into the background too well? For this reason, orange can be a better choice if your definition of tactical is less about concealment and more about being able to complete the task at hand. Another reason people like an orange handle is its public perception. If you have to use the knife around “non-knife people,” orange tends to be perceived as a benign tool rather than an intimidating weapon — we know that’s illogical, but it’s still worth remembering. This goes back to the original point of associating orange with safety.

Whether you’re going for the safety aspect, you don’t want to misplace your knife in the field, or you simply like the color, most major knife manufacturers offer orange as an option for the handle or the blade. We’re going to take a look at a few of these high-visibility knives.

Outdoor Edge

Studio photo of an outdoor edge knife.

Razor EDC Lite 2.5

The RazorEDC Lite is a replaceable blade folding knife. It uses Japanese 420J2 stainless steel blades, which provide an excellent balance between corrosion resistance and edge retention. When the edge goes dull, you simply change the blade with the push of a button. Its handle has thermoplastic rubber insets that offer a secure grip, even in challenging conditions. This is several steps up from a traditional box cutter, razor knife, or sheetrock knife because the replacement blades offer a higher-quality steel and are available in a number of configurations.

  • Overall length: 6 inches
  • Blade Length: 2.5 inches
  • Weight: 2.5 ounces
  • Blade Material: 420J2 Stainless
  • Price: $25
  • URL: outdooredge.com

Studio photo of an outdoor edge knife folded.

Pros:

  • Comfortable, ergonomic handle
  • Replacing blades seems a bit odd for an EDC knife, but the blades are sharp and seem to hold up well.
  • This makes for a great backup or alternate knife that has a very benign appearance.

Cons:

  • People have skinned deer and dressed game with these knives, but don’t mistake it for a hard use blade for prying or batoning wood.
  • The clip is set up for right-handed use only.

SOG

Studio photo of a SOG knife.

Ether FX

SOG’s Ether FX is one of those knives that’ll be a favorite with hikers, hunters, and anyone who must minimize the amount of weight that they’re carrying. This small and handy fixed blade comes with a high-tech-looking sheath that works better strapped to a pack as opposed to a belt mode of carry. It’s a very well-thought-out design from the perspective of a minimalist-style blade with plenty of dimples and jimping for tactile manipulation. Its orange scales should prevent you from losing it on a hike or mountain bike ride when you backtrack and see it laying wherever you might have dropped it.

  • Overall length: 7.1 inches
  • Blade Length: 3.1 inches
  • Weight: 2.1 ounces
  • Blade Material: S35VN
  • Handle Material: G10
  • Price: $128
  • URL: sogknives.com

Studio photo of a SOG knife sheath.

Pros:

  • S35VN steel is a good one that offers edge retention, strength, and corrosion resistance.
  • This lightweight knife is unbelievably rugged and capable.
  • The full-length jimping at the top of the blade makes for a very work-friendly type of knife.

Cons:

  • The blade could’ve been sharper.
  • The sheath design is awkward to mount consistently.

Cold Steel

Studio photo of a cold steel knife.

Engage Clip Point

The Engage series of folding knives represents the introduction of Cold Steel’s exclusive, patent-pending Atlas Lock. This is a locking mechanism that has proven itself to be particularly strong and safe. The series is offered with a variety of steels and different blade lengths. The blade has a small indent on the spine that makes for a comfortable hold during precision work. The glass-filled nylon grips are ergonomically contoured for a secure grip and include large integral lanyard holes. The pocket clips are reversible for left- or right-handed use. Overall, it has a nice look with the contrast between orange and black.

  • Overall length: 7.3 inches
  • Blade Length: 3 inches
  • Weight: 2.3 ounces
  • Blade Material: 4116 Stainless
  • Handle Material: GFN
  • Price: $80
  • URL: coldsteel.com

Studio photo of a cold steel knife folded.

Pros:

  • Great performance given its affordable price
  • The Atlas Lock is incredibly smooth and intuitive to use.
  • 4116 steel may not be a top-shelf type, but it came sharp, resharpens easily, and is very rust resistant.

Cons:

  • The pocket clip was a bit tight and took a while to get it to hold just right in the pocket. This might work better in a sheath.
  • The placement of the Atlas Lock takes a little getting used to.

Sniper Bladeworks

Studio photo of a sniper bladeworks knife.

UC Utility

The Weekender is a multi-bladed pocketknife equipped with tools to improve your weekend — or any day. It features a 3-inch clip-point blade for your EDC cutting needs, and a 2-inch drop-point blade for smaller cutting jobs; the bottle opener ensures all your favorite beverages can be opened with ease. The Weekender is a USA-made folder to enhance your life. The blades are made of CPM-S30V steel, ensuring that they stay sharp when you need them. The Micarta handle offers a great gripping surface and will last virtually forever. There are other versions of this model in the works with different blade options and colors of Micarta.

  • Overall length: 7.6 inches
  • Blade Length: 4.3 inches
  • Weight: 6.1 ounces
  • Blade Material: SUJ2
  • Handle Material: G10
  • Price: $150
  • URL: sniperbladeworks.com

Studio photo of a sniper bladeworks sheathed.

Pros:

  • Very sharp out of the box with nice thin edges for slicing
  • CPM-S30V is a premium knife steel with superb edge retention.
  • The bottle opener comes in handy when you need it.

Cons:

  • As good a steel as S30V is, it can be difficult to sharpen.
  • There’s no lanyard hole on this to help you secure the knife.

T. Kell Knives

Studio photo of a a T Kell Knife.

Striker (Hi Viz)

Tim Kell designed this model a few years ago as a compact military fighting knife, but that doesn’t preclude it from being suitable for daily carry. The clip point is a slight one, meaning that it could be confused with a drop point. The balance on this blade is incredible, and the grip fits in the hand well. This version features the Hi Viz color G10, but all the scales on T. Kell knives can easily be swapped out. These knives are designed and built by a Marine Corps veteran who learned what qualities make for a good working knife. The in-house proprietary heat treat is phenomenal with regard to making these knives combat ready.

  • Overall length: 7.8 inches
  • Blade Length: 3.9 inches
  • Weight: 5.8 ounces
  • Blade Material: 80Crv2 with nickel boron coating
  • Handle Material: G10
  • Price: $225
  • URL: tkellknives.com

Studio photo of a T Kell knife sheathed.

Pros:

  • Very light and easy to carry
  • Fantastic balance and works well in the forward and reverse grip
  • 80Crv2 is a great steel that’s easy to sharpen and takes a ton of abuse.

Cons:

  • It’s great for a small concealable blade, but this model should be made as a full-sized fighting knife.
  • These knives are handmade and tend to sell out quickly, so availability can be an issue.

Microtech Knives

Studio photo of a microtech knife.

Ultratech DE

The Ultratech series is the flagship of Microtech’s OTF lines of knives. This one has an orange handle and a perfectly symmetrical double-edged blade. The spring in the firing mechanism is designed to remain at rest whether open or closed to reduce wear on the internals. The blade steel on this one is CTS 204 P, which is becoming the steel of choice for a lot of custom and high-end production knives. This knife carries well and the orange anodized handle on this model makes it easy to spot if you drop it. It also gives it a benign rescue look, at least until the automatic blade is deployed.

  • Overall length: 8.4 inches
  • Blade Length: 3.5 inches
  • Weight: 34.5 ounces
  • Blade Material: CTS 204 P
  • Handle Material: Aluminum
  • Price: $308
  • URL: microtechknives.com

Studio photo of a microtech knife folded.

Pros:

  • CTS 204 P seems to be a very good steel, and we found it easy to touch up the edge a bit.
  • The action is amazing and extremely smooth both opening and closing.
  • The handle has comfortable contours and texturing where you need it. Holding it is like shaking hands with an old friend.

Cons:

  • One side of the double-edged blade wasn’t as sharp as the other.
  • You need a proprietary tool to disassemble the knife.

Spyderco

Studio photo of a spyderco knife.

Assist FRN Orange

Spyderco’s Assist was designed for emergency/fire/rescue professionals who rely on their knives. It has a blunt tip to prevent injuries while cutting someone free of a seatbelt or other predicament. It’s mostly serrated, but the first inch of the tip is a straight edge for detailed cutting. The wavy pattern along the top of the blade lets you place a piece of rope between the half-open blade and handle and scissor the blade shut. The safety orange FRN handle is nicely contoured to your palm. In the closed position, squeeze the blade deeper into the handle and a retractable glass breaker protrudes from the base. Outlined in contrasting black on the handle’s spine is a shrill survival whistle.

  • Overall length: 8.4 inches
  • Blade Length: 3.7 inches
  • Weight: 4 ounces
  • Blade Material: VG-10
  • Handle Material: FRN
  • Price: $172
  • URL: spyderco.com

Studio photo of a spyderco knife in the closed position.

Pros:

  • This model is packed with a survival whistle, glass breaker, and a unique scissor action.
  • A perfect tool for vehicle emergency kits
  • It’s a very safe knife for most people to handle.

Cons:

  • If you don’t like serrations, you won’t like this one.
  • We’d prefer a lanyard hole instead of the whistle.

Read More

Subscribe to Recoil Offgrid's free newsletter for more content like this.

Editor's Note: This article has been modified from its original print version for the web.