We all have that special person in our life who just doesn't get it, right? They don't understand EDC, survival, or anything even remotely related to our lifestyle. It seems like they have no interest in learning, either. It's baffling at times to have a loved one repeatedly brush you off when you're trying to arm them with information that could potentially save their lives in a worst-case scenario. One would think that just watching the news would light a fire under their butts.
As a wife and mother, I can attest that nearly all women already think about worst-case scenarios. They're habitually the storyline of our nightmares and always lurking in the recesses of our minds when we're awake. So even with that innate sense of concern, why then aren't more women into survivalism?
Women are often afraid of confronting the issue because then they'll have to deal with it —hence, why some women don't want to talk about it at all. Ignorance is bliss? Fortunately, knowledge can combat fear.
From Adversary to Advocate
I'm not law enforcement or military, just a wife and a mother who happens to really enjoy learning and teaching survivalism and firearms. Having grown up in Alaska, I'm always mindful of personal protection. Whether you're camping, hunting, or just being vigilant of the state's drug and alcohol problems, you need to be aware or you could very well get killed.
Still, when I first got married, my husband was light-years ahead of me in this survival mindset. It seemed like the only things he wanted to talk about were everyday carry (EDC), firearms, and impending doom. This was a sore spot in our marriage until I bluntly told him that it scared me, and he needed to back off. Those conversations made me nauseous and left me wide awake at night.
Fortunately, my husband listened. He drastically reduced the amount of discussions about this topic, but did it in a way in which I could still ask questions. It took more than a year of processing this information before I was ready to dive in.
I liken it to learning how to drive a car. Sure, the excitement is there, but deep inside there's that inner voice that's terrified of getting in a wreck. Eventually everyone overcomes that hurdle and gains enough experience to make driving practically second nature. So, what changed? Knowledge. You learned how to operate that tool and became comfortable with it. Survivalism is the same way. The more knowledge one has on survival, the less daunting it becomes.
Converting Others
I've spent the last several years trying to get my close female friends and relatives interested in prepping and survivalism. It's been challenging to say the least. There's a certain fear or anxiety that women have when entering a role that's traditionally seen as a man's responsibility —providing the last line of defense for the family.
Here are five of the most common excuses I hear from women for not wanting to prep and train —and how to deal with them:
1. “Bad things will never happen to me.” I wish I could go back to this kind of naivete. Bad things can happen to anyone at any time. If you don't believe me, find a first-responder —they'd surely have many stories to change your mind. More than likely, this is something that ladies will have to come to grips with on their own terms.
2. “I already carry so many things, why add more?” What some women don't realize is that adding a few extra items to their purse, pockets, or diaper bag increases their survivability exponentially. A greater level of preparedness is worth a slightly larger or slightly heavier handbag. Fellas, you might need to go on a purse shopping trip —a win-win for both of you.
3. “I will never use those items.” That's great! Hopefully no one will need them, but it's better to have and not need, than to need and not have. EDC tools are much like a fire extinguisher or a firearm. There's no substitute for some of these tools in an emergency.
4. “It's the husband's job to protect the family.” Many women think this way, but what they fail to understand is that husbands can't protect them if they're not there. Of course, husbands want their wives to be safe and sometimes that comes in the form of harping about bug-out bags, concealed guns, and the right mindset. Instead, be patient. Rather than lecture her, offer her a chance to ask questions or send her to the appropriate courses.
5. “I'm too busy being a mom to think about survival.” Being a mom and/or a wife is tough sometimes. There's laundry, driving the kids, setting up play-dates, shopping, and the list goes on —not to mention our own careers. When a mother says, “Being a mom is my first priority,” she may not make the connection that the safety of the children also rests on her having the proper mindset, equipment, and training. Find a time where she isn't distracted to approach her with this information.

Mothers make natural preppers, as they have to ensure not only their own safety but also that of their children. Some...
Training the Converts
If you've taken your time and eased up on the “sky is falling” tactics, there's a strong possibility you'll eventually seduce your significant other to the survivalism side. If she's ready to prep and start learning, here are some ways to keep her interested:
Keep the Criticism Constructive: If you want the lady in your life to dive into this world, don't make fun of her. There's no better way to turn her off than to ridicule her questions or concerns. We didn't grow up playing with G.I. Joe action figures or pretending to be cowboys and Indians. Most of us were given Barbies and baby dolls and groomed to be nurturers and caregivers. Keep the feedback positive and focused on improvement.
Don't Do it Yourself: Most women don't have that primal survivalist mentality, especially in the presence of their husbands or boyfriends. But if you split up the couple and the woman is put into the position of being the primary protector, her inner mama bear will come out. Oftentimes, she'll be just as fierce, if not more so, than her male counterpart. So, if you're a guy trying to teach your wife, it's often more effective to ask a trusted friend to do so instead. It's hard to go from equals as husband and wife to the power disparity of teacher and student. Better yet, sign her up with a reputable instructor or two who can teach her self-defense and survivalism.
Be an EDC Enabler: How do you get women to carry more survival tools with their EDC gear? Make it easy. My husband put together my first EDC kit. I can't say that I knew how to use everything at first, but over time I asked questions and started doing research. When my husband was deployed with the U.S. Army and I became the sole protector of our children, I used this time to practice. I was given the space to process all the information and soon saw how much it benefited me.
Don't Pink it and Shrink it: There isn't a lot of tactical or survival equipment made specifically for females, relatively speaking. So, we have to tweak some things and make do with others. Many companies think that by making their products pink and small that they become female friendly. That's just condescending. Don't automatically assume women want the fuchsia-colored go-bag. Instead, give her the opportunity to try out as many different models of gear as possible until she finds one to her liking.
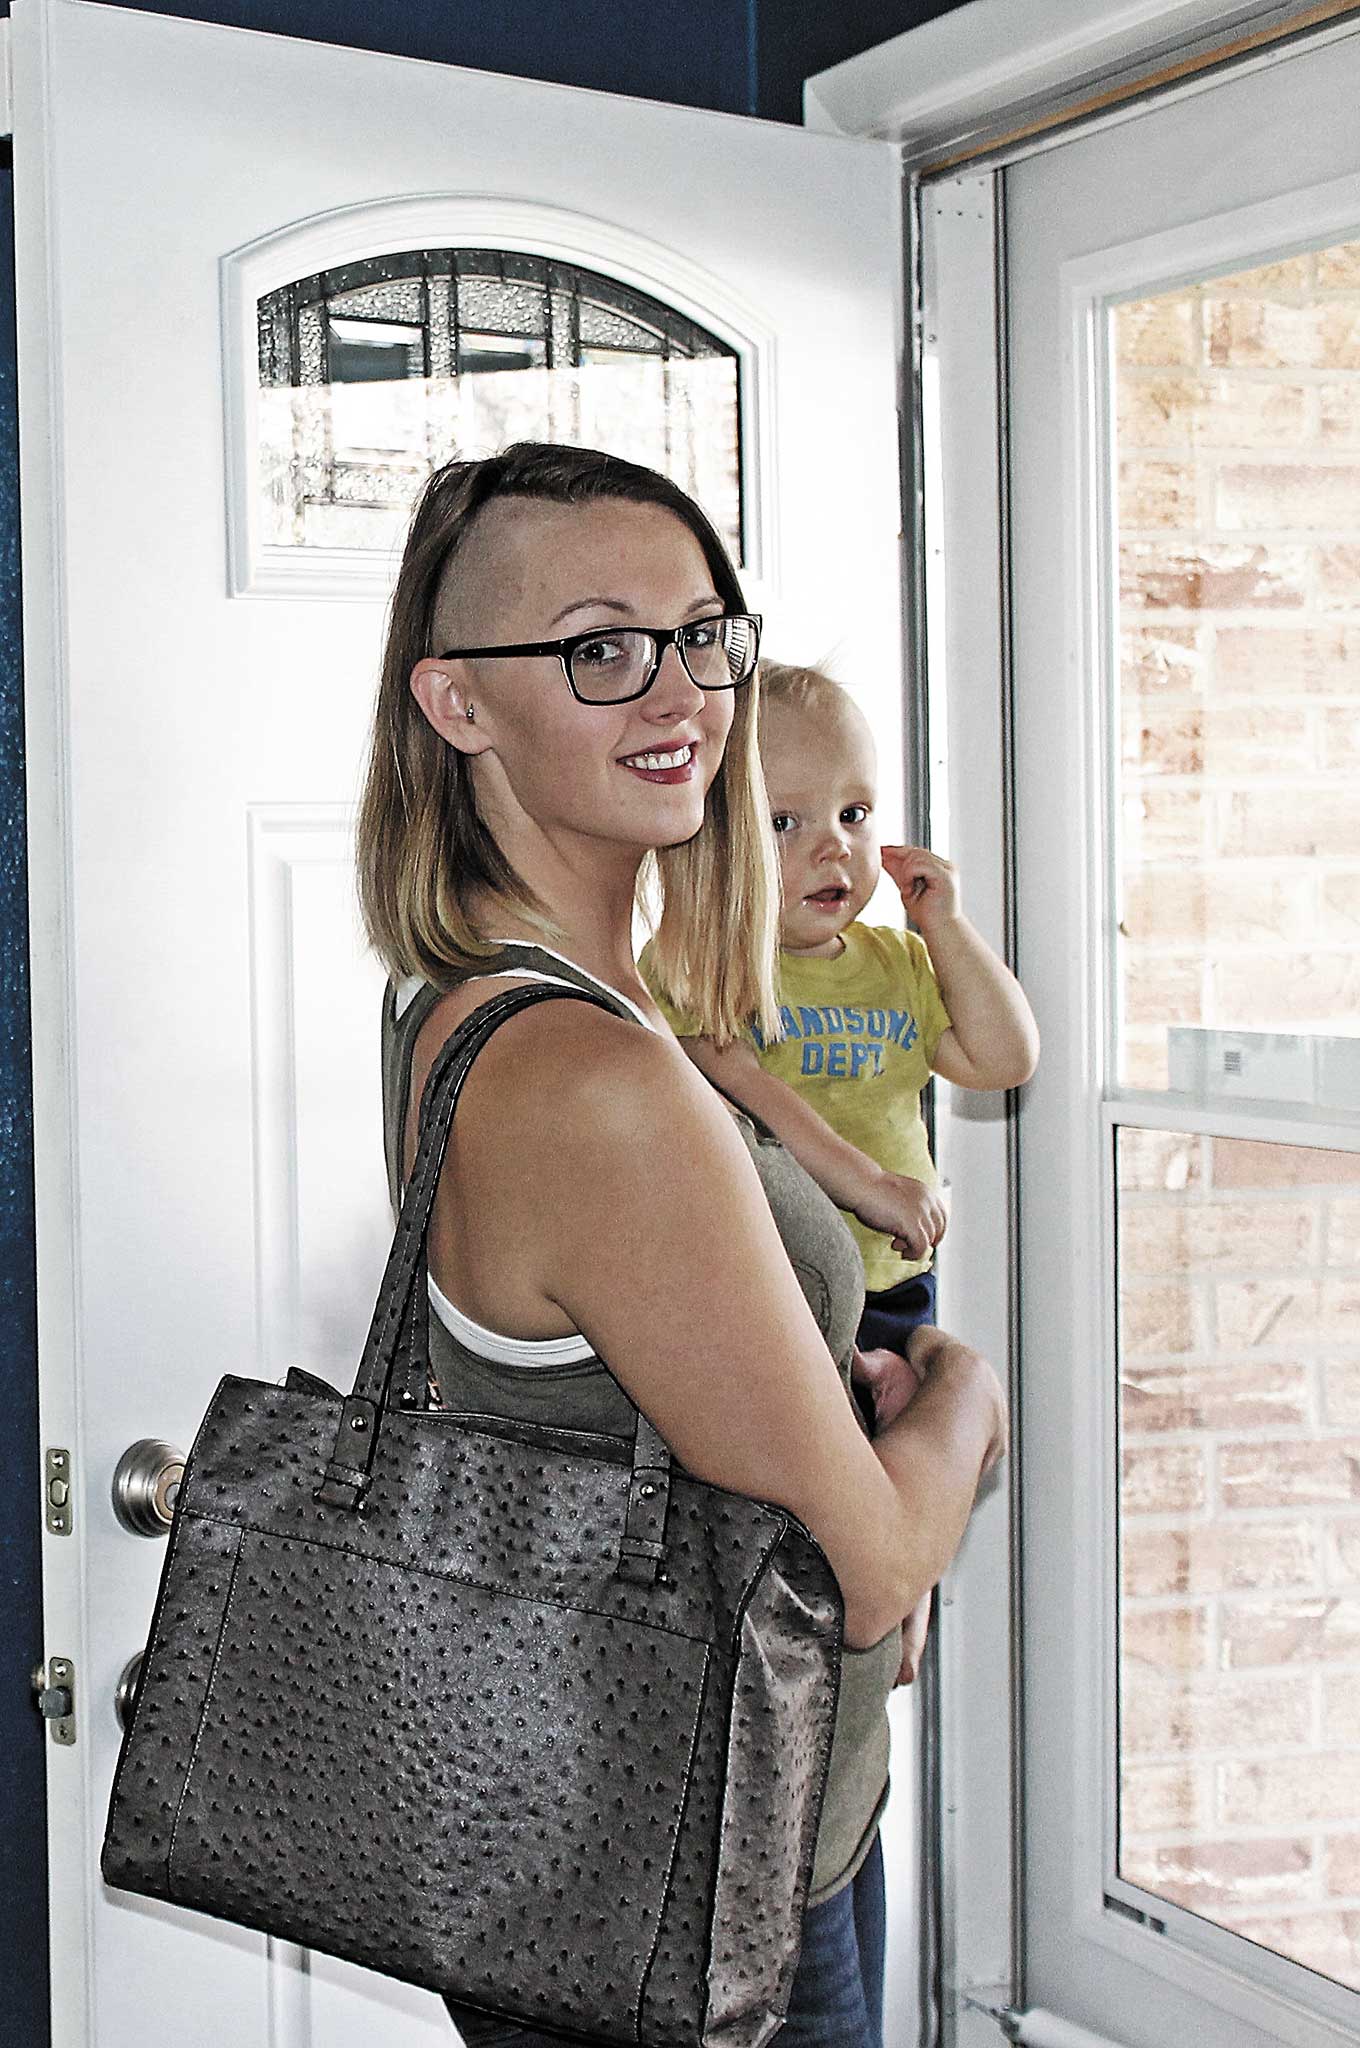
Don't Convert the Diaper Bag: I've never been the kind of mom who just throws her wallet, phone, and keys into a diaper bag. I want a separate pack so I don't confuse a diaper bag with my EDC kit. In a dire situation, if I need to leave an area quickly with my kids, I can drop the diaper bag and replace its contents later.

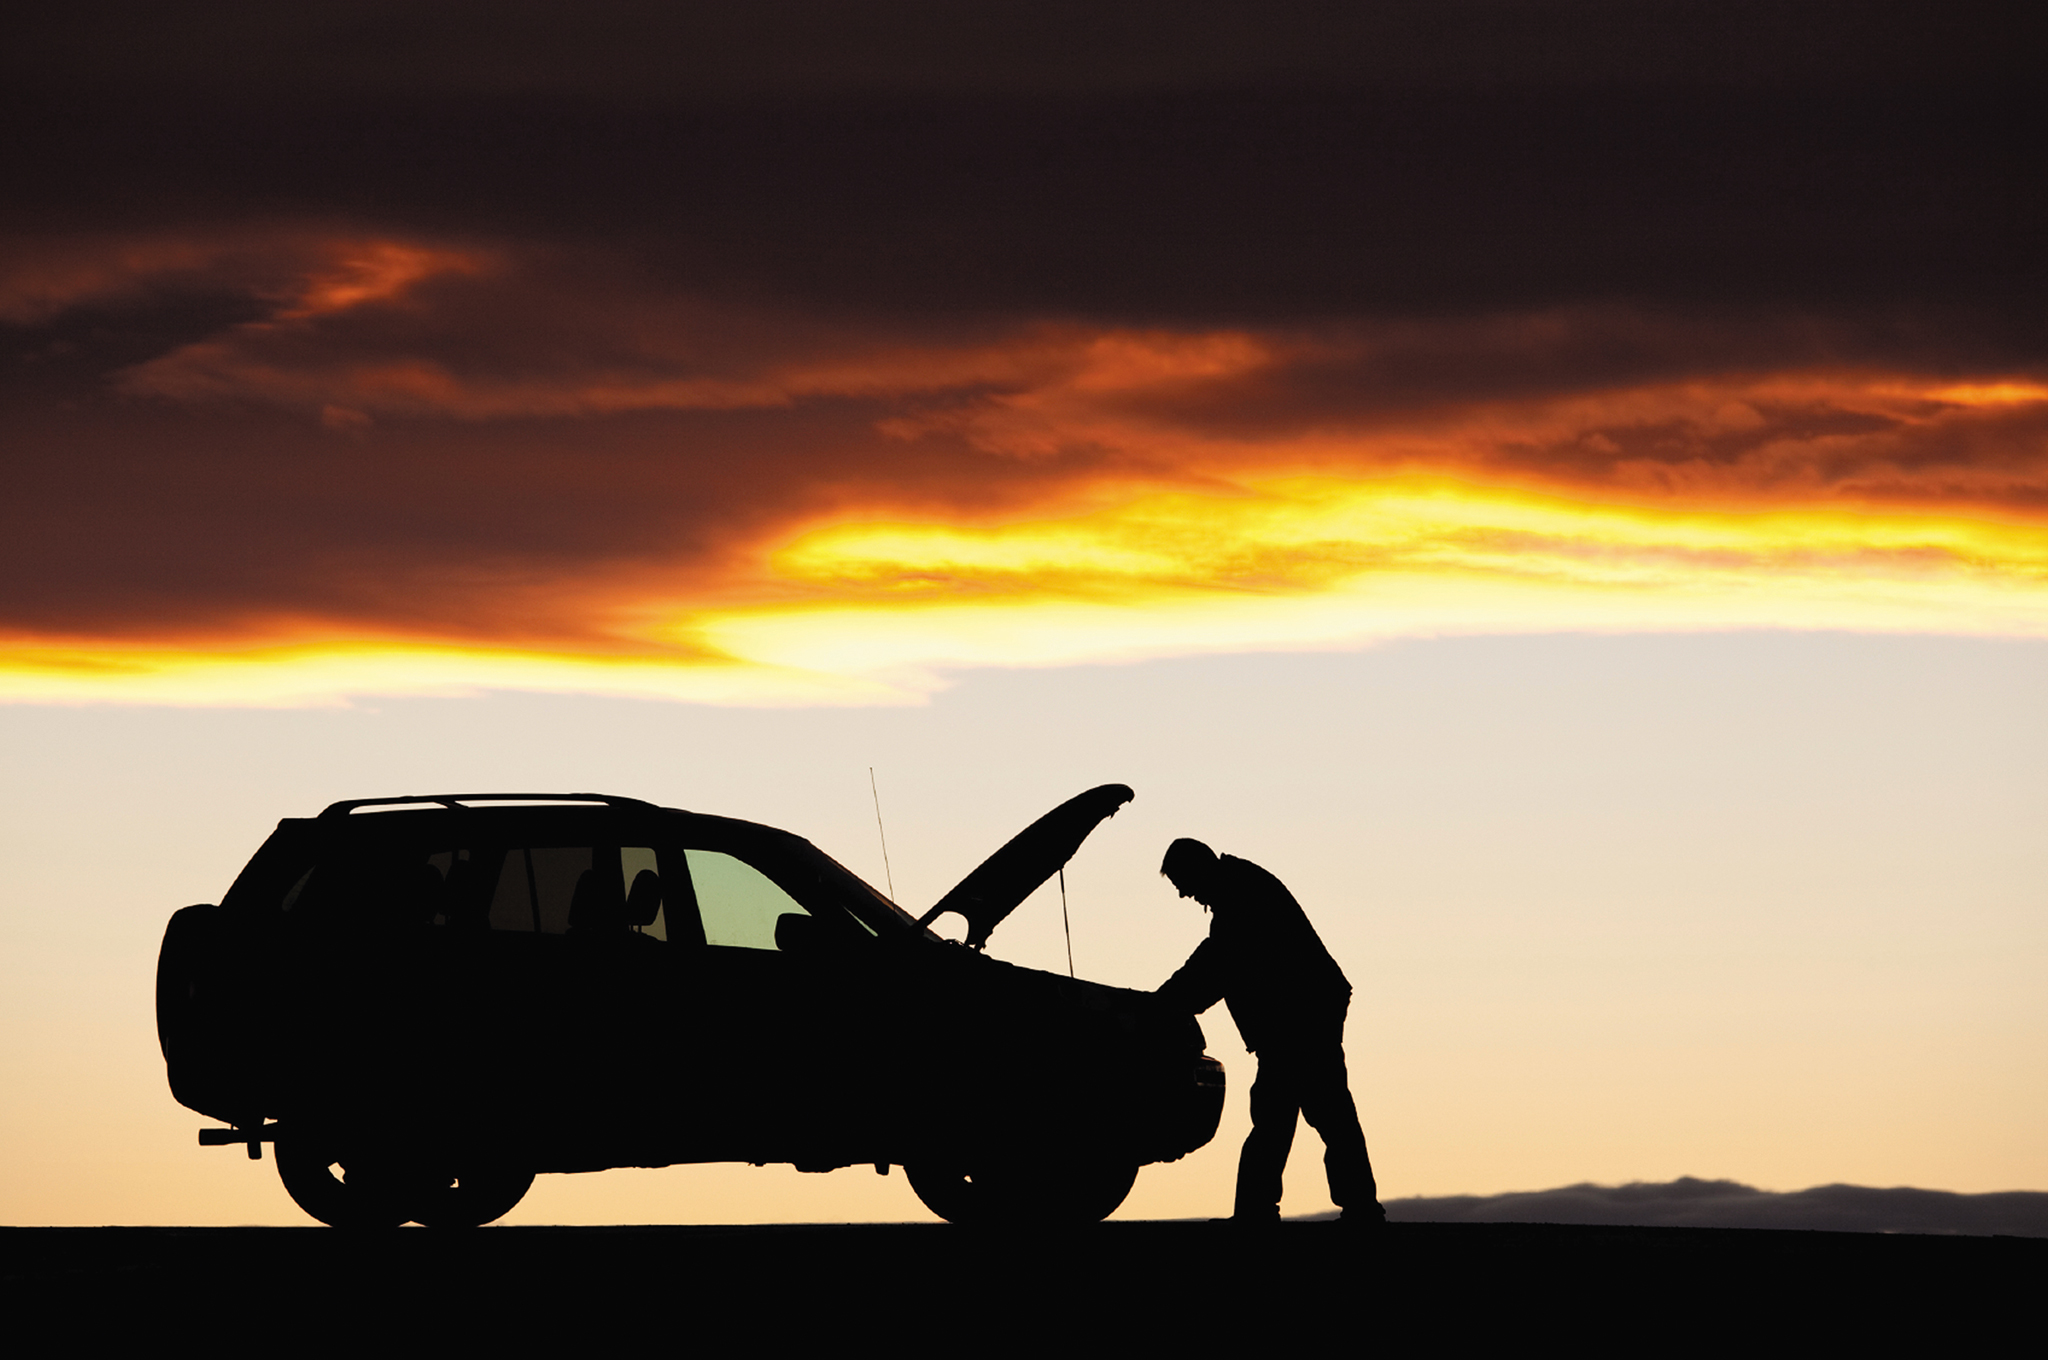
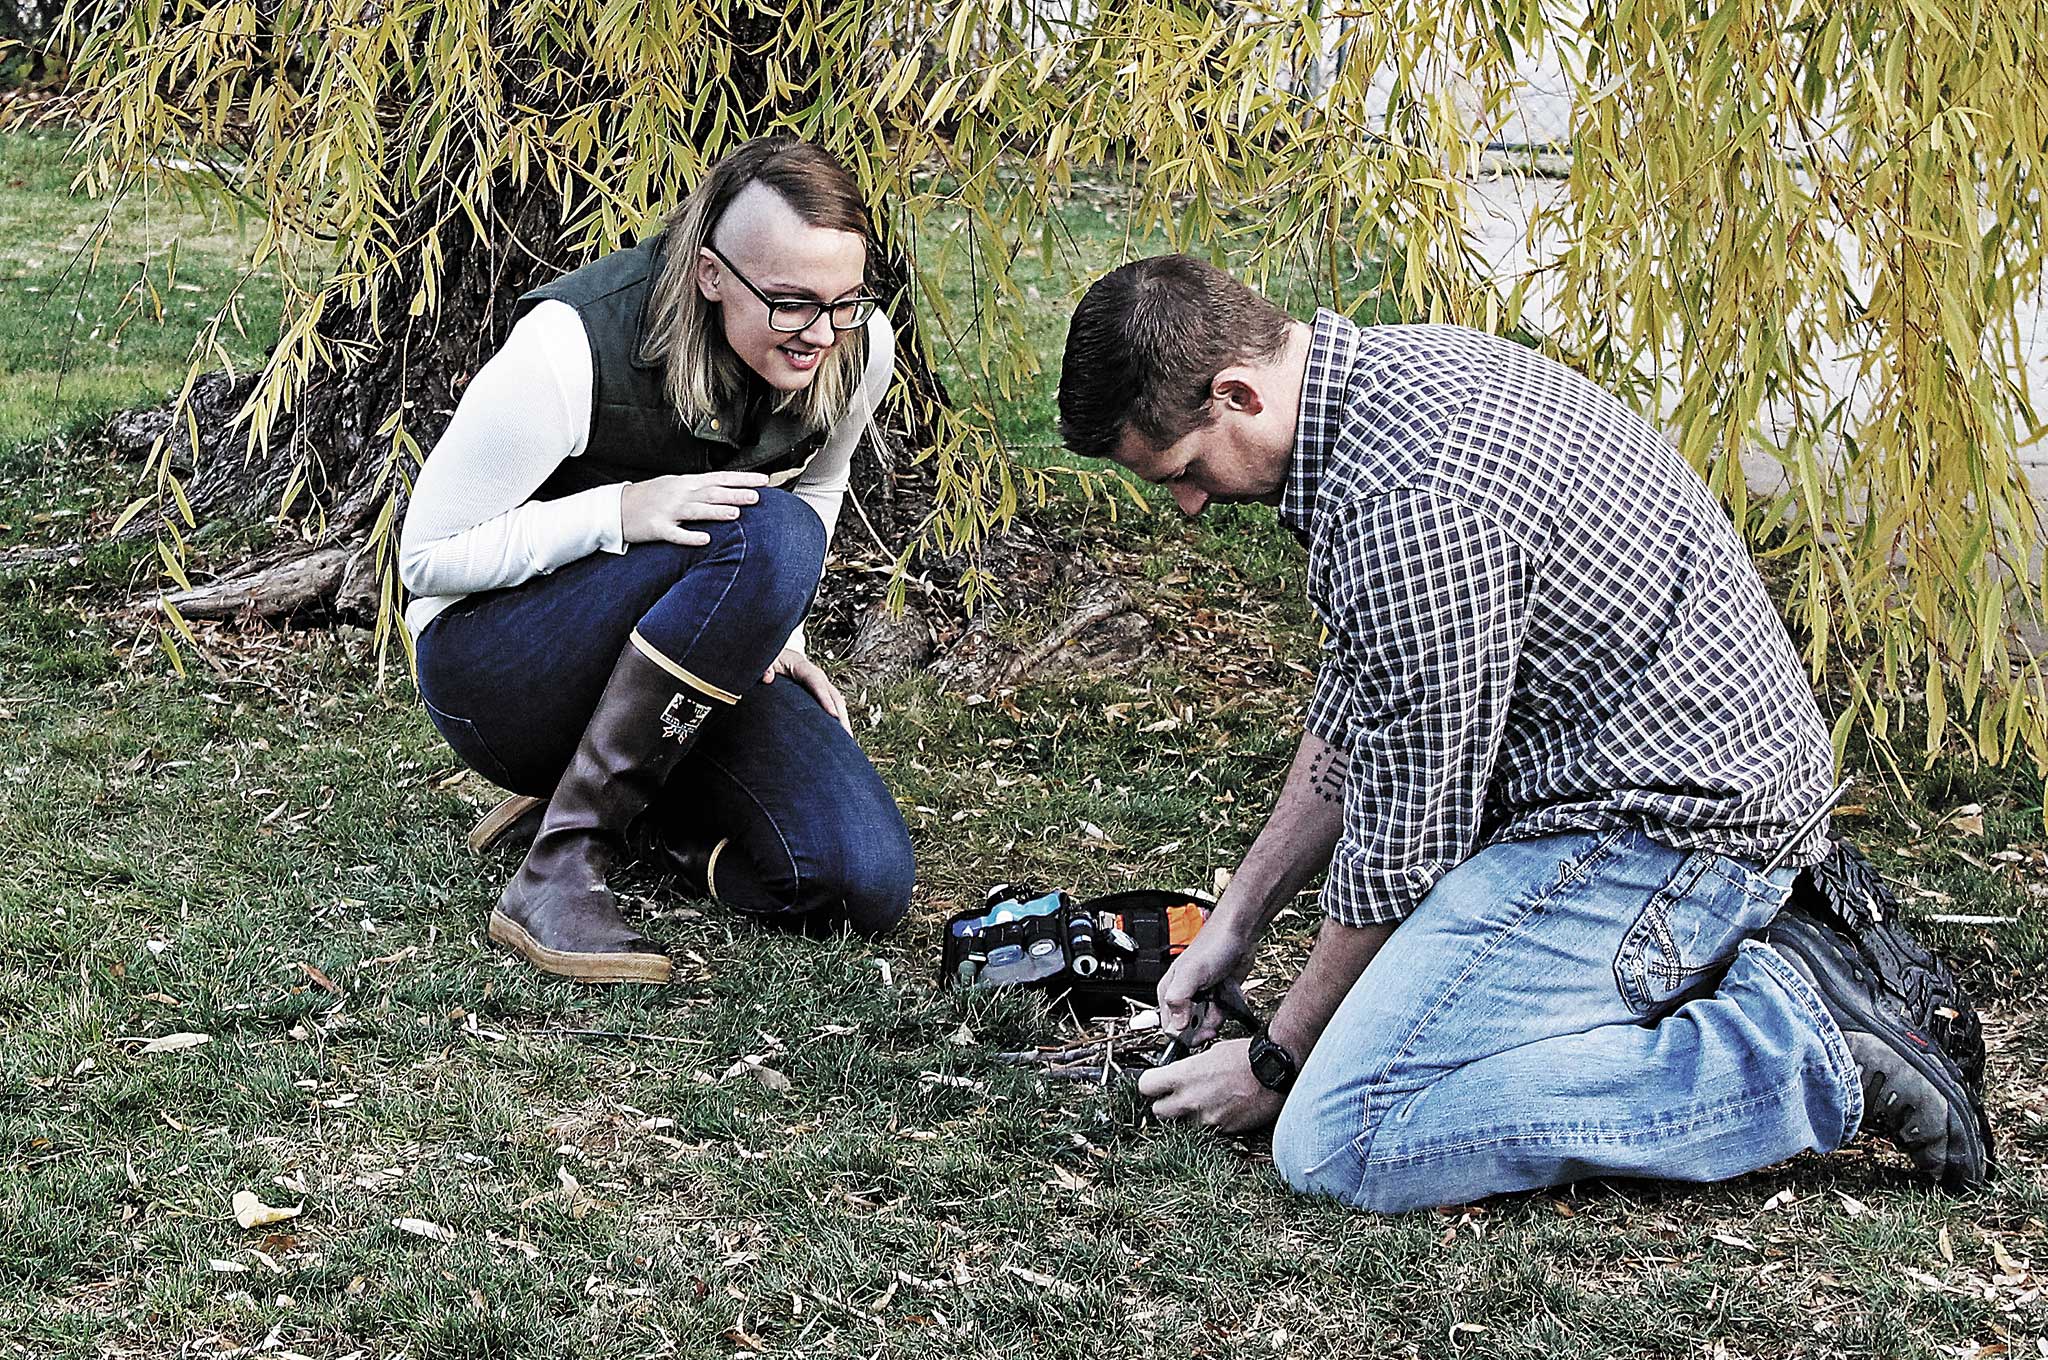
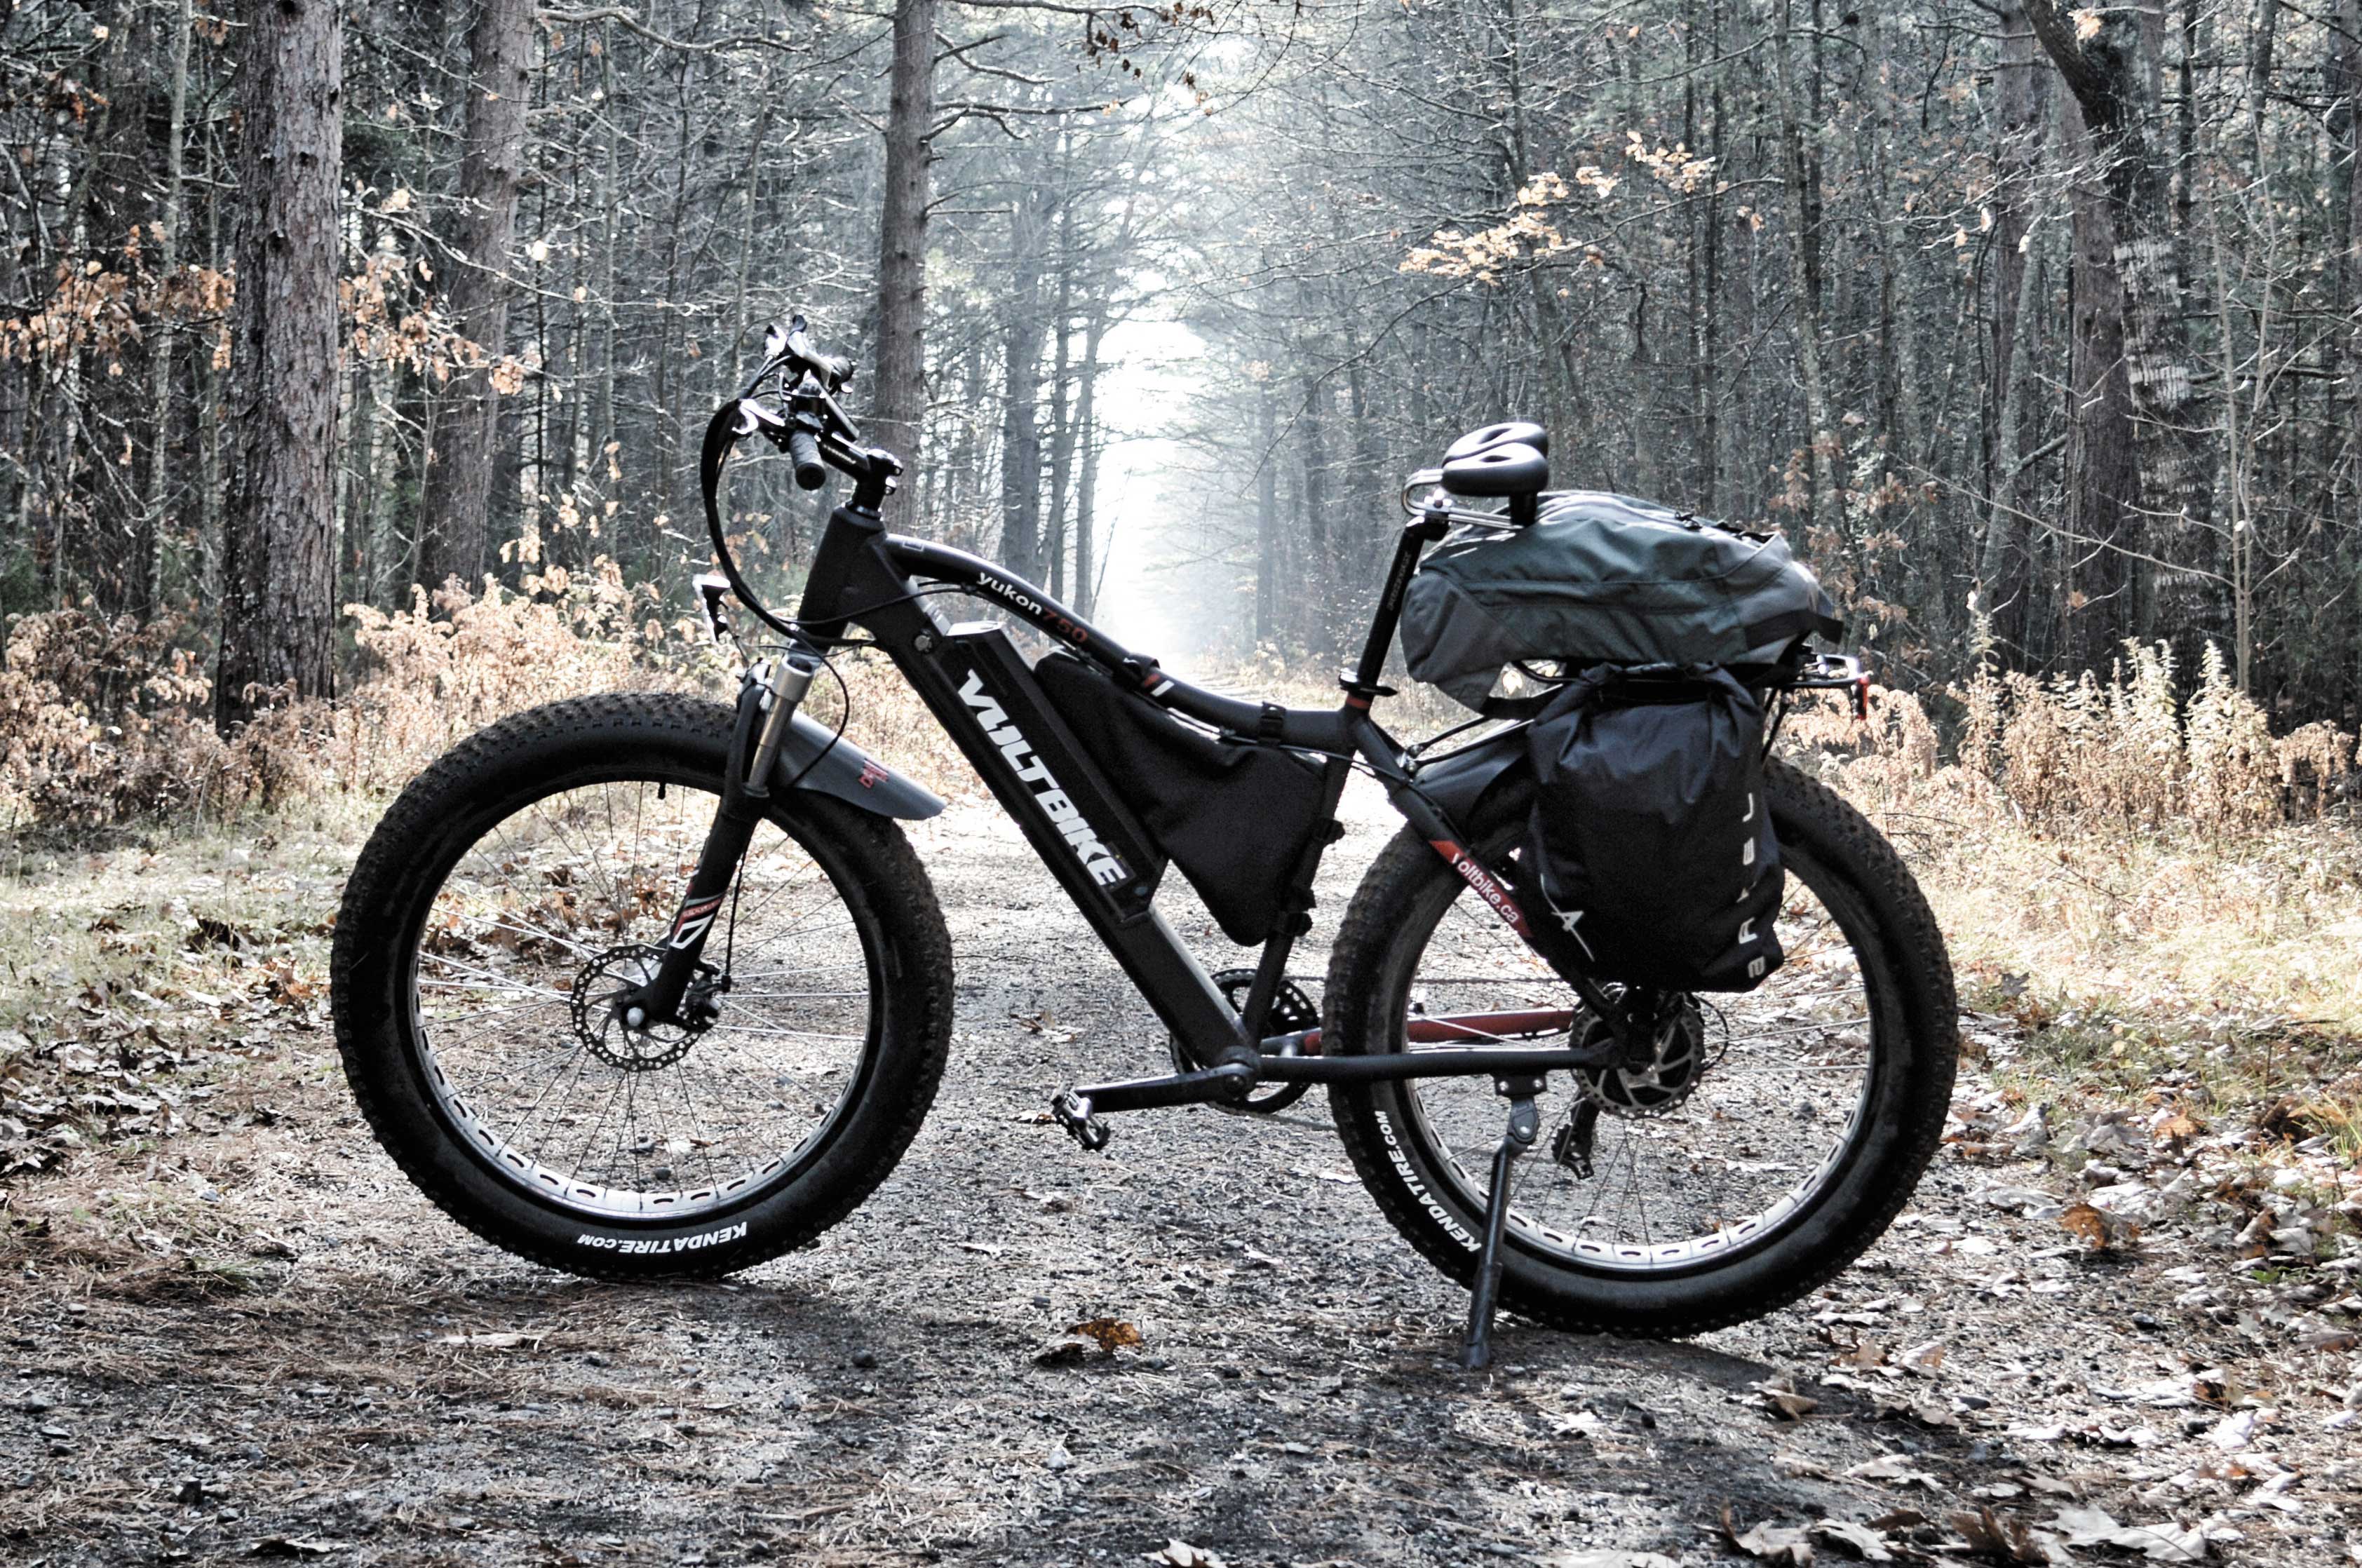
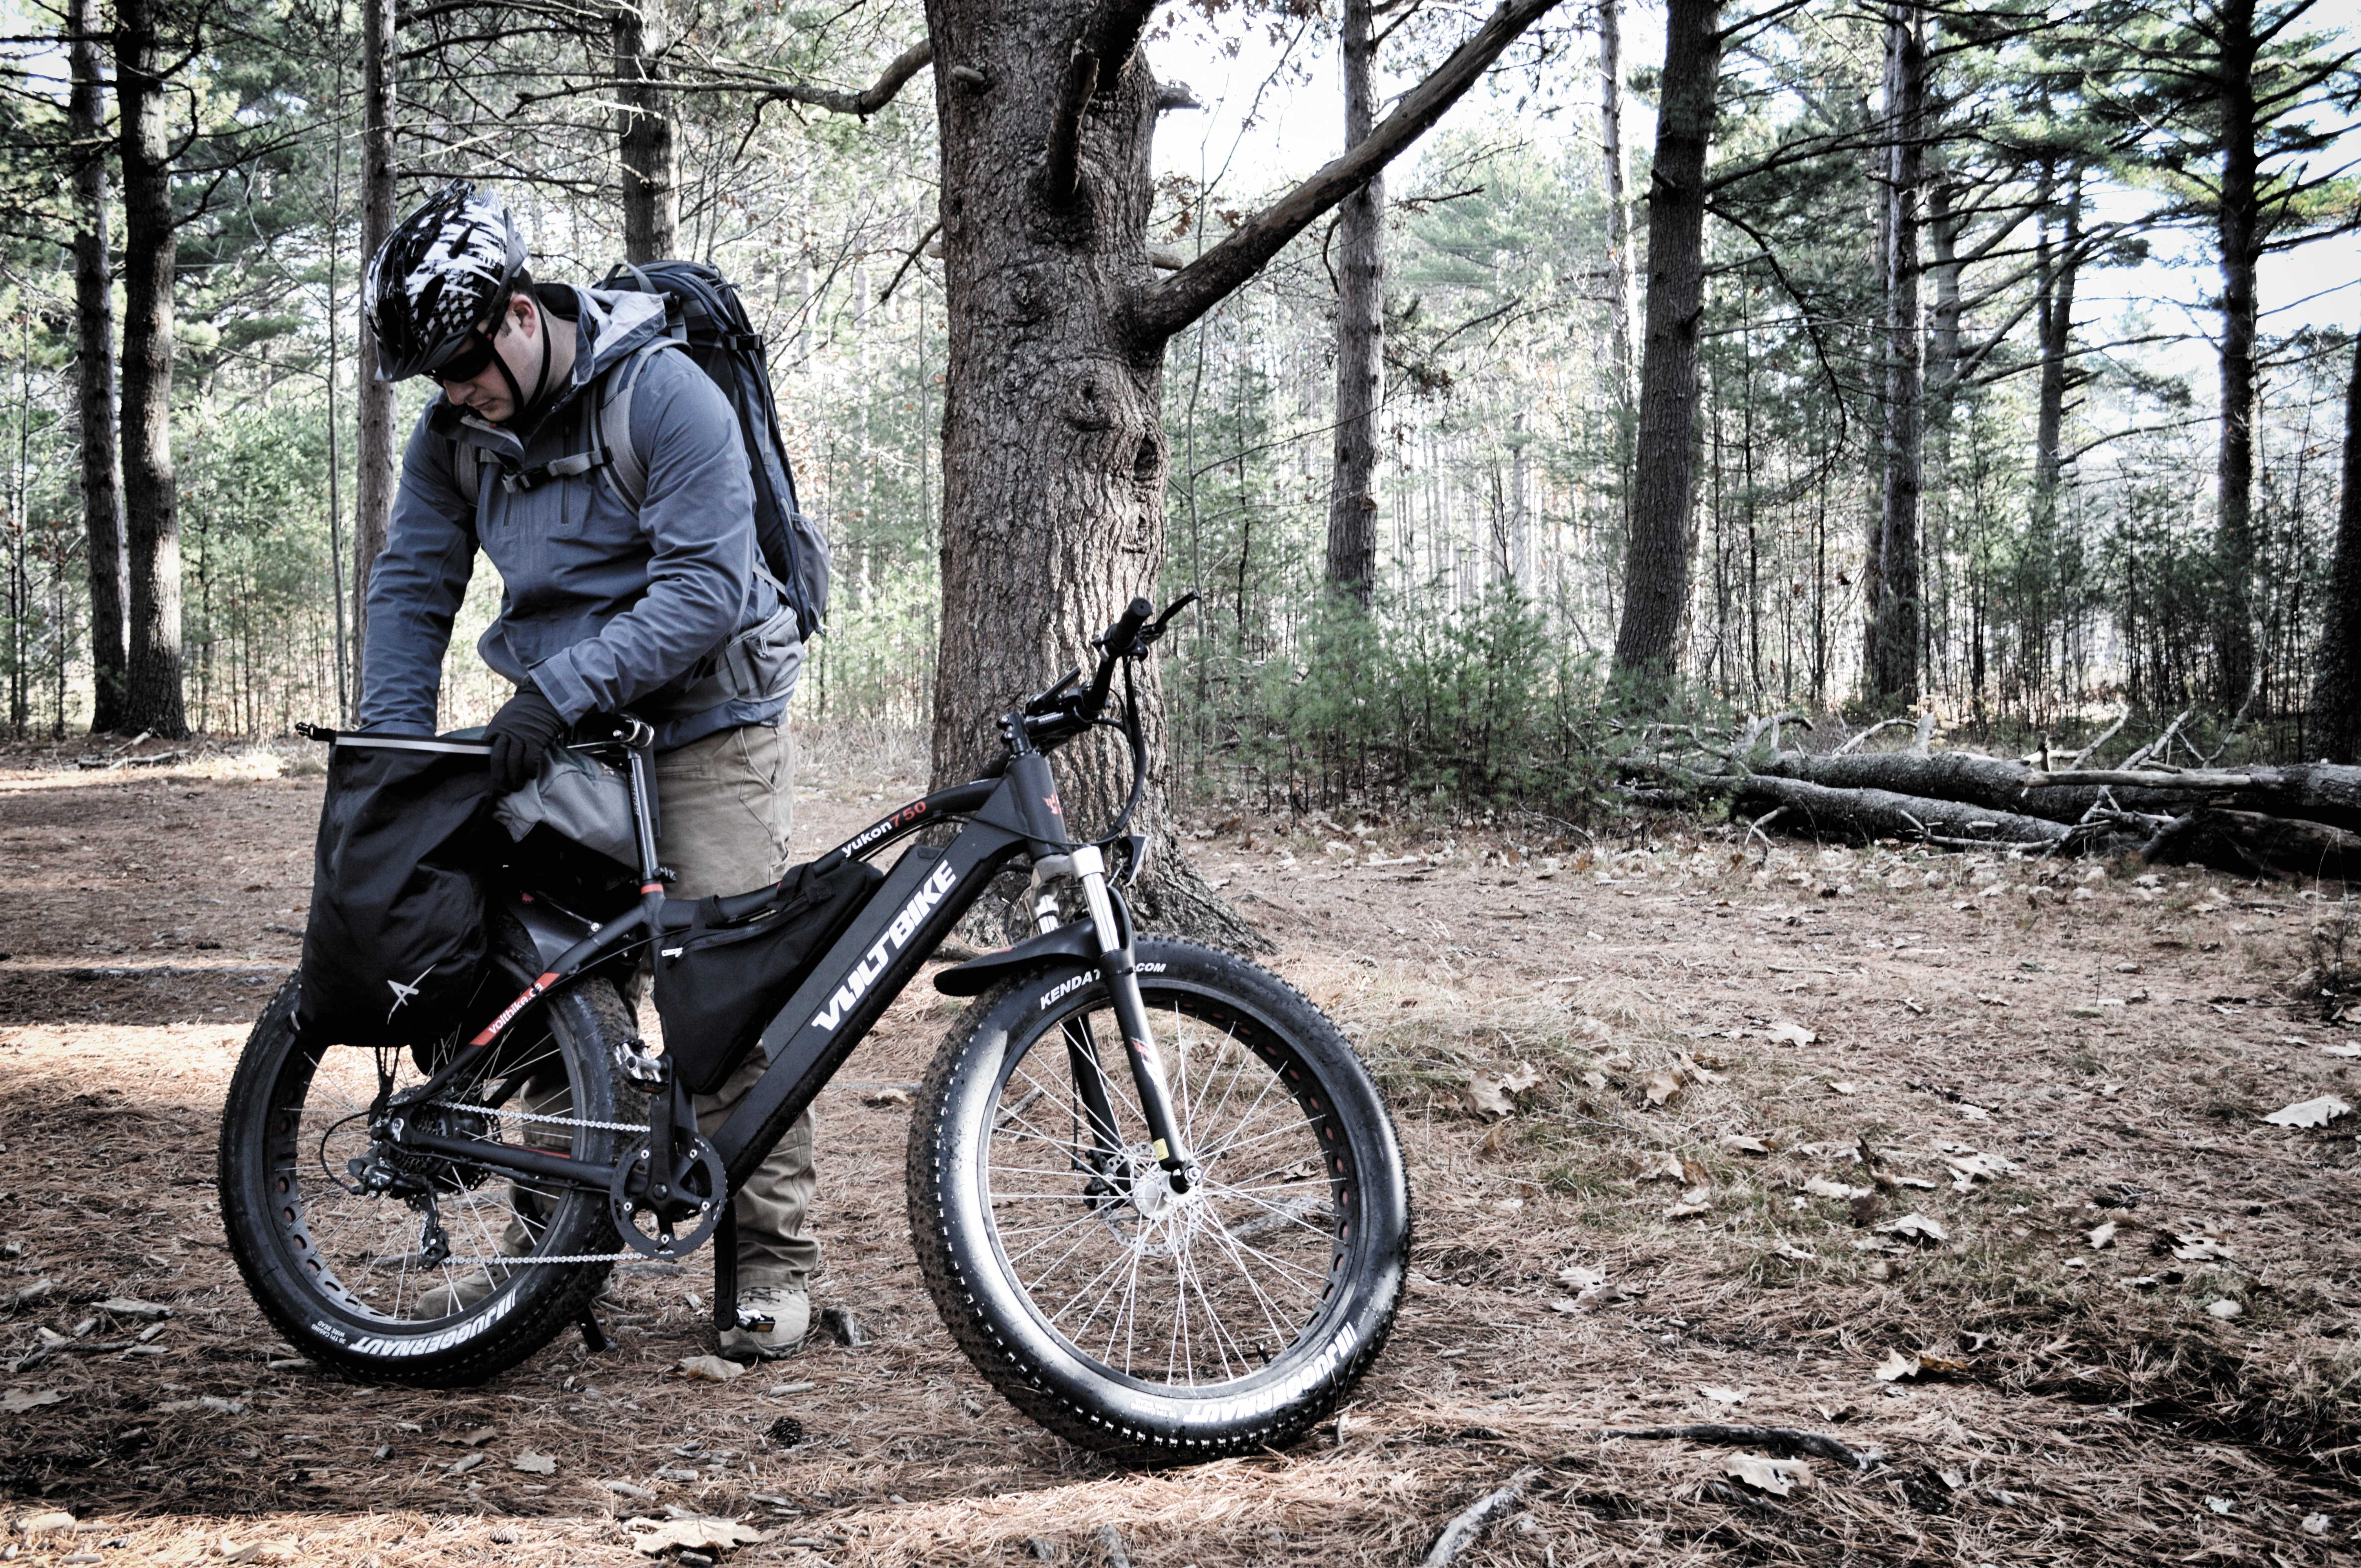
The author and her husband, a U.S. Army paratrooper, practice some fire-starting techniques.
The Sell Job
Getting the lady in your life into prepping isn't rocket science. It just has to make sense to her. Start slowly and present it in a way that shows your concern for her safety. She'll pick up on that. Perhaps start with a flashlight and a multitool. However, don't be that guy. You may be thinking it, but save your hard-core prepper what-if sessions for your guy friends (for now).
Also, don't be offended if she doesn't want to learn from you. After all, it's not easy to take someone seriously as an educator if you've already seen them in their birthday suit. Give your lady space to learn, ask questions, and process their journey to becoming a survivalist. Dont' scare her to death, she needs time to associate the correct response with each potential situation, which is proper EDC and mindset. Remember, knowledge always trumps fear.
About the Author

Nila Rhoades is originally from Alaska, but currently resides in Northern Colorado. She is the wife of a U.S. Army paratrooper and has two handsome boys. She has spent the last several years researching firearms, prepping, and survivalism, and now teaches other women how they can help their family survive a worst-case scenario. She also loves peanut butter ice cream.
www.milspecmom.com
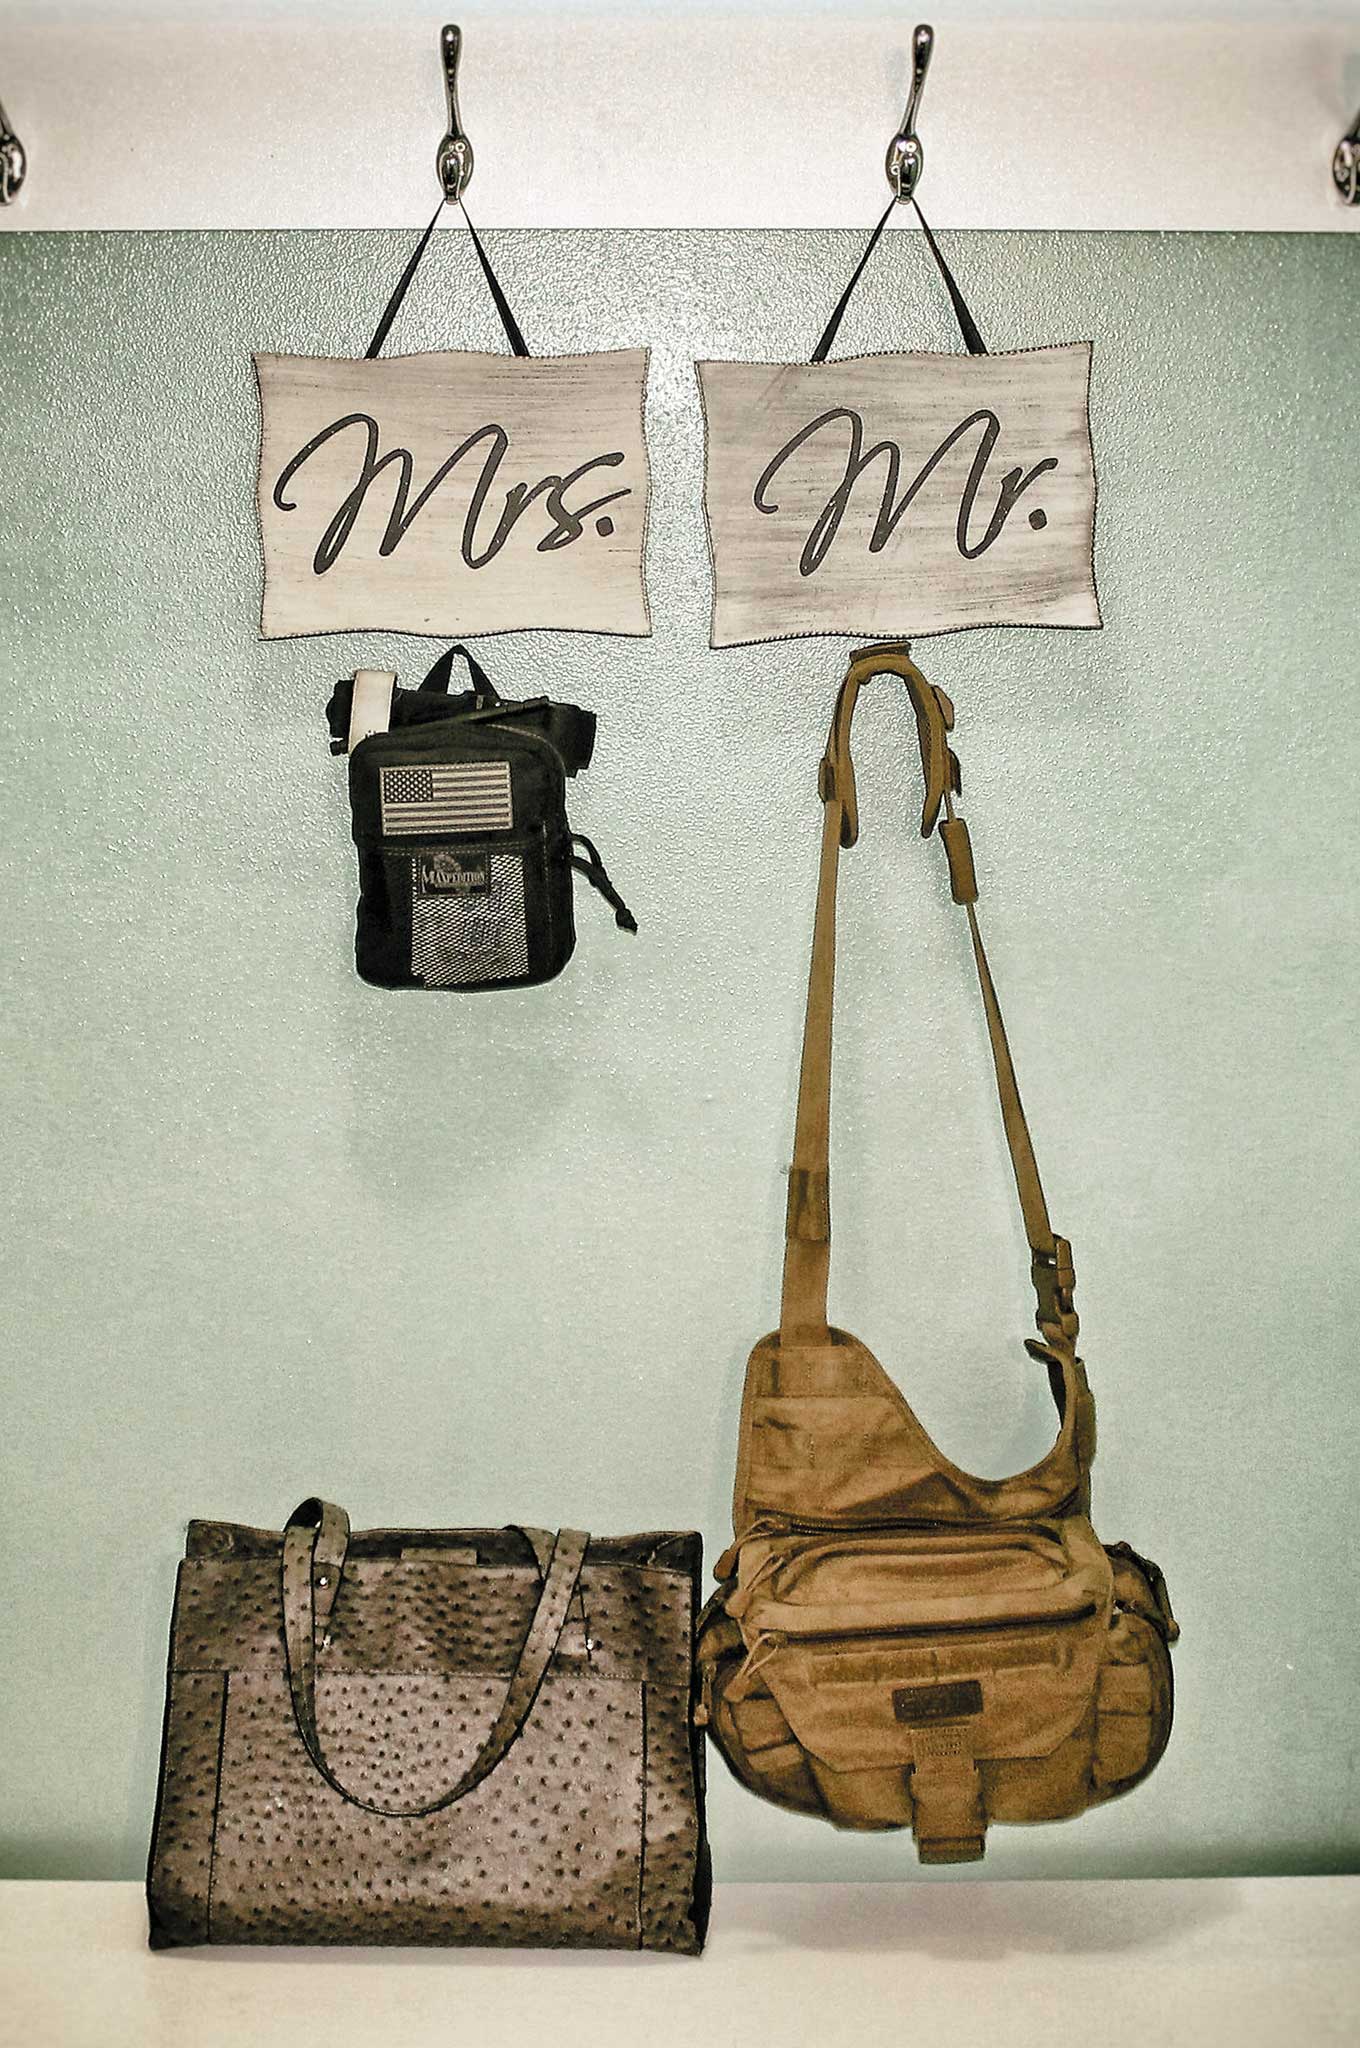
Female EDC
Whether you're a woman looking to supplement your purse with more preparedness-minded accessories, or you're a man trying to figure out ways to entice your lady to get into the survival scene, looking at everyday carry (EDC) gear is one of the most concrete ways to show the value of readiness.
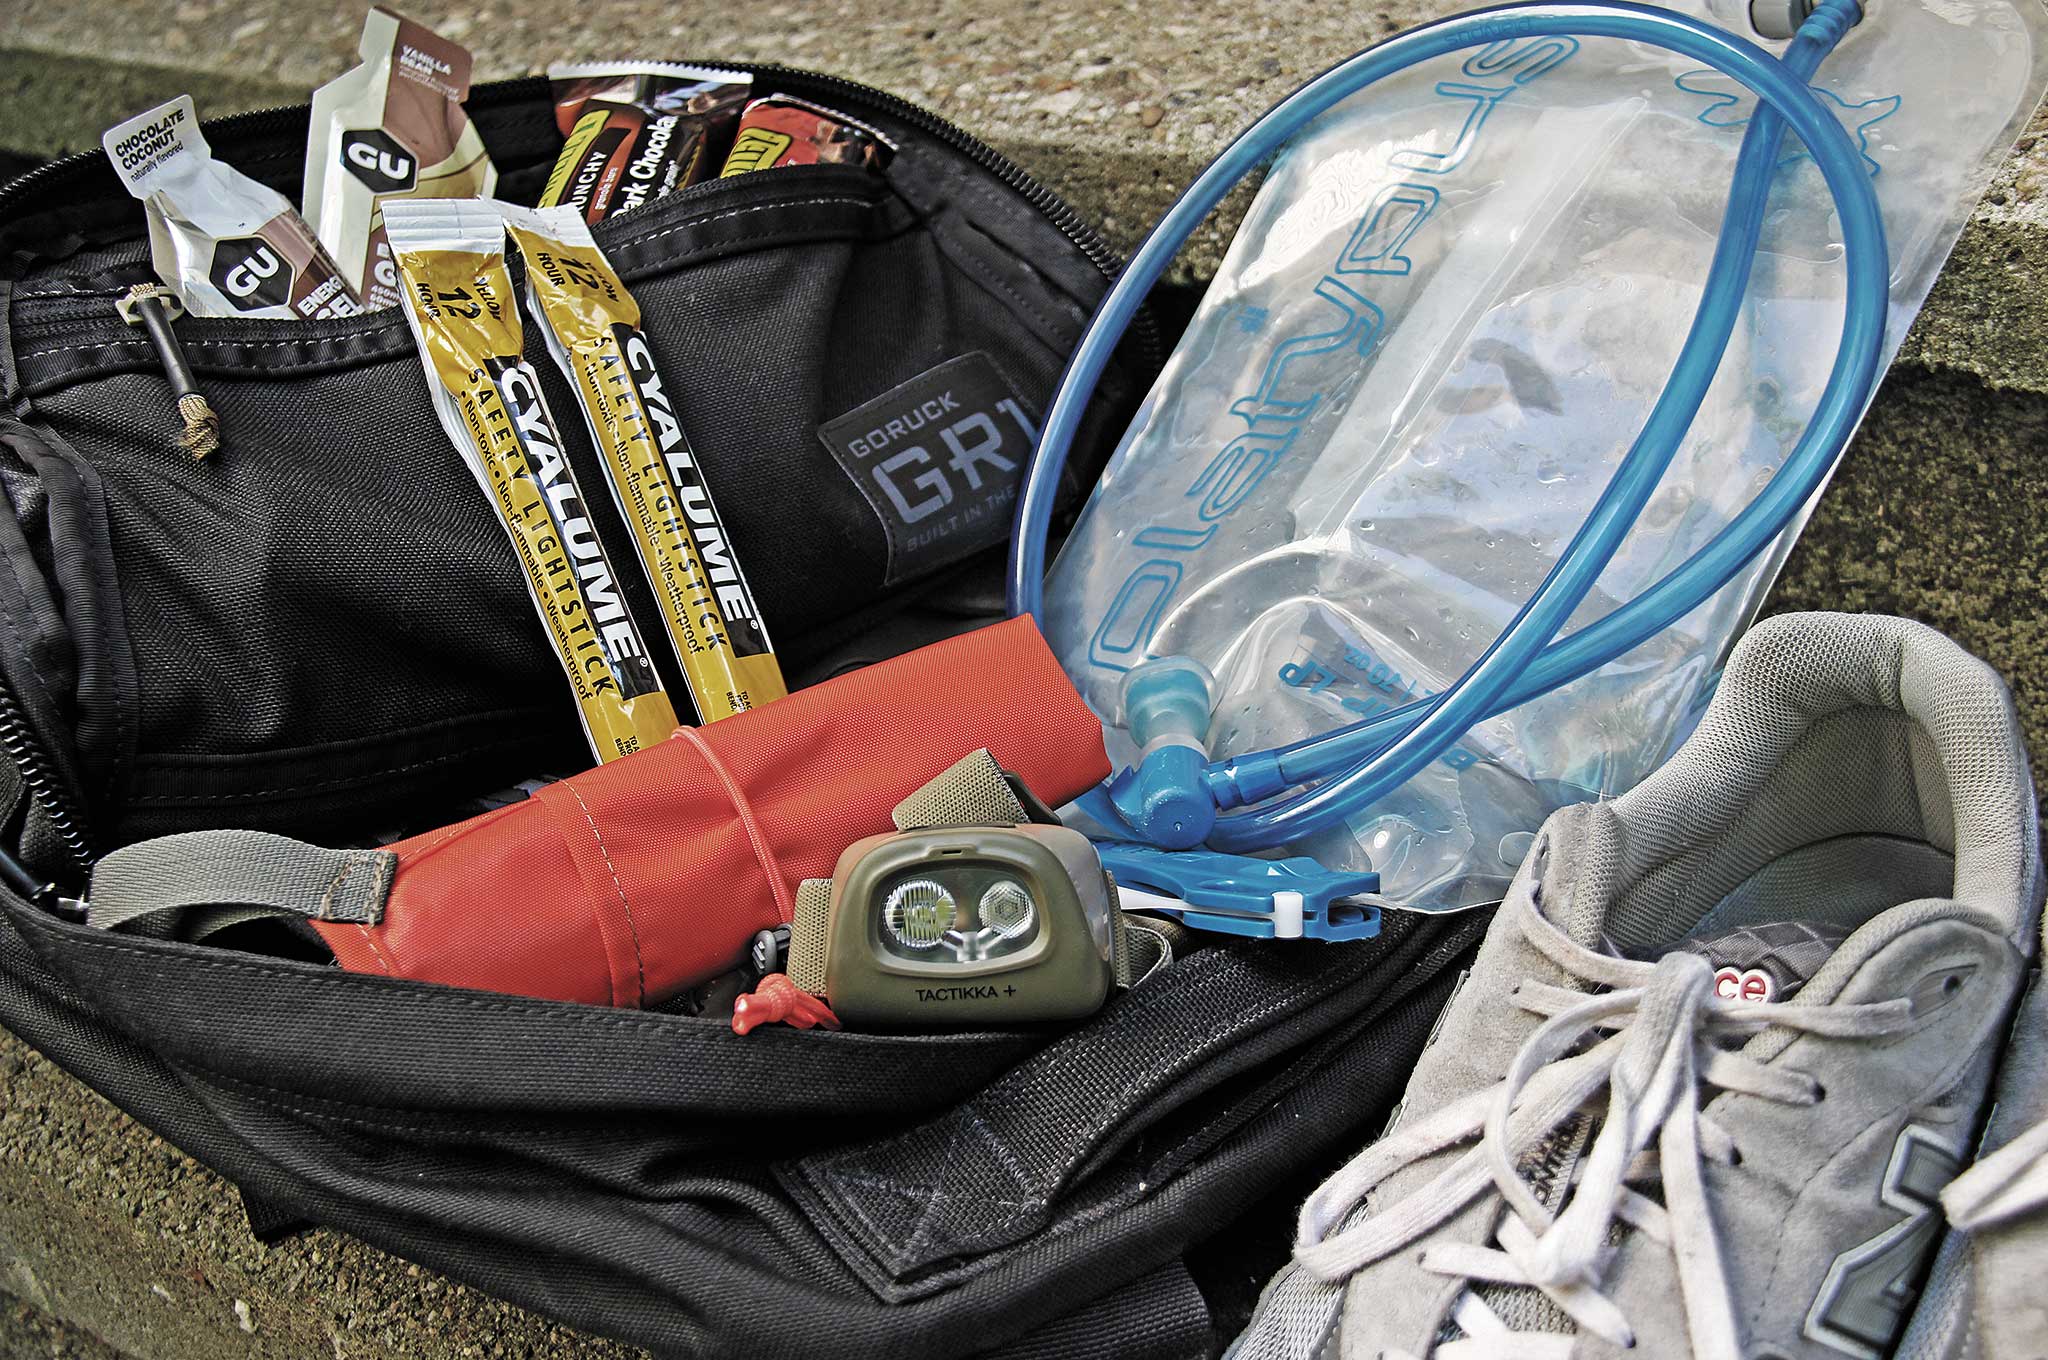
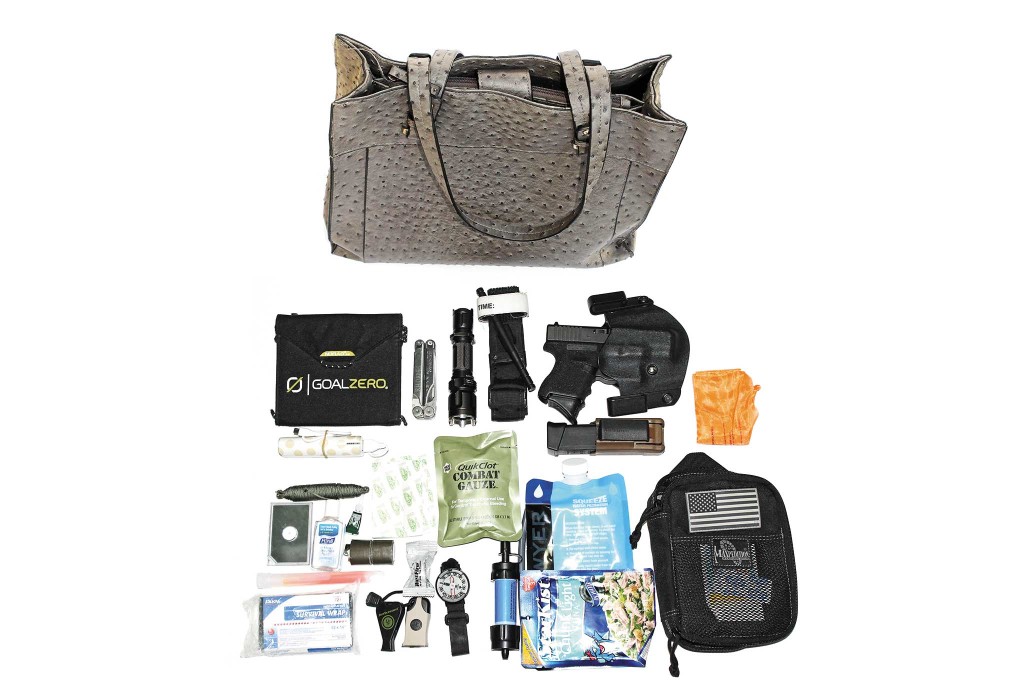
My EDC Kit
Here's a look at what I put in my Maxpedition Fatty Pouch, broken down by basic survival categories:
Water
- Sawyer Mini Water Filtration System
Fire
- Lighter
- UST Little Sparkie Fire Starter
- UST Wetfire Tinder
Shelter
Medical
- QuikClot Combat
- CAT tourniquet
- Band-Aids
Food
Signaling Device
Navigation
Hygiene
Others
- Duct tape
- 225/550 paracord
- Superglue
- Chem light
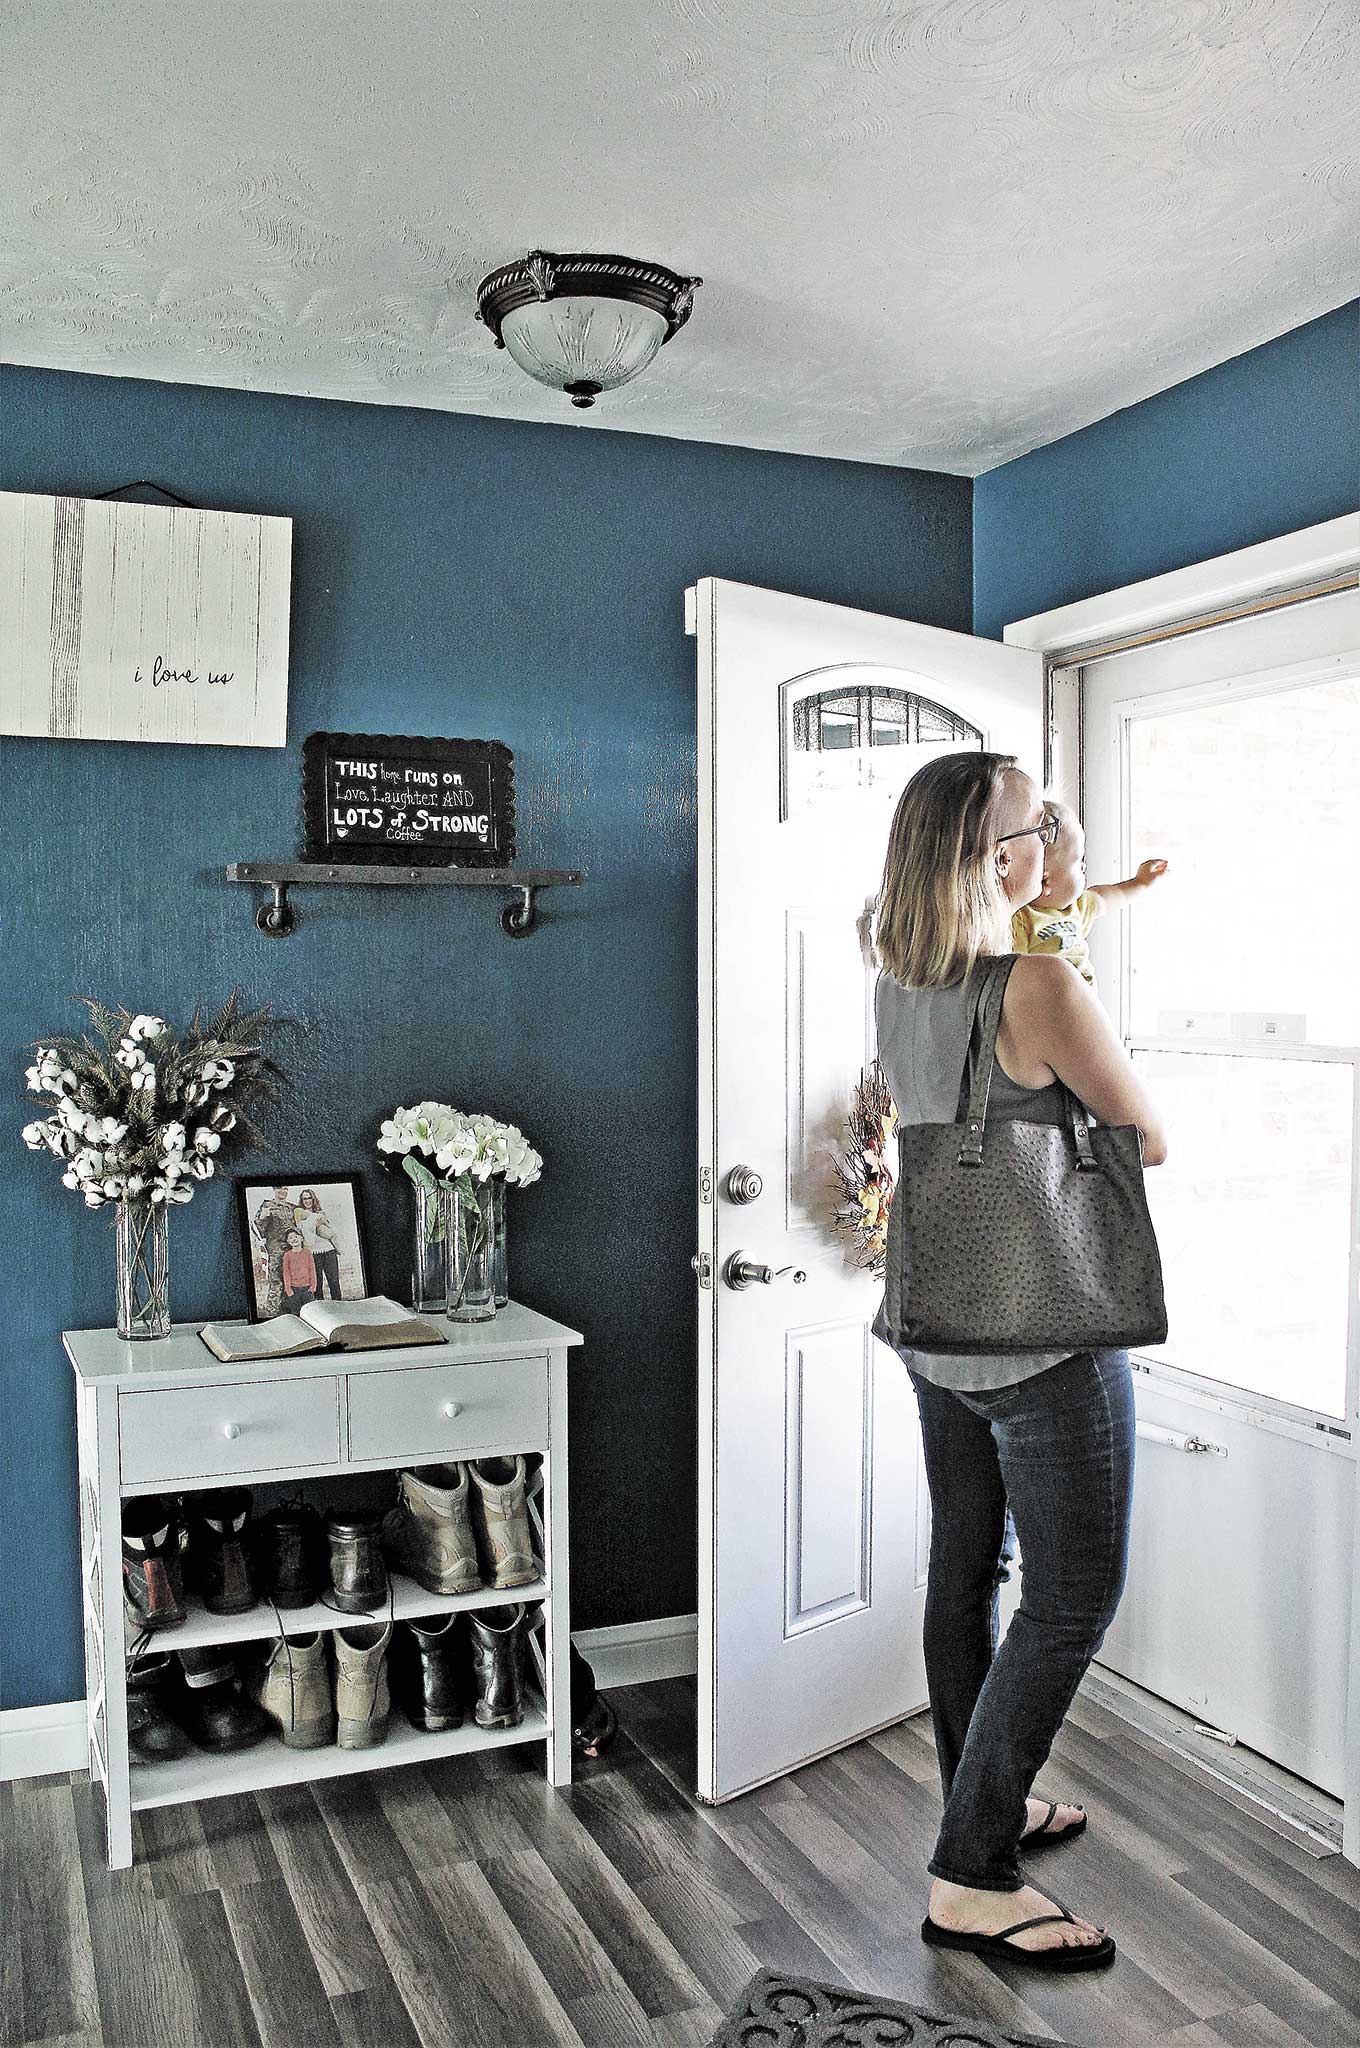
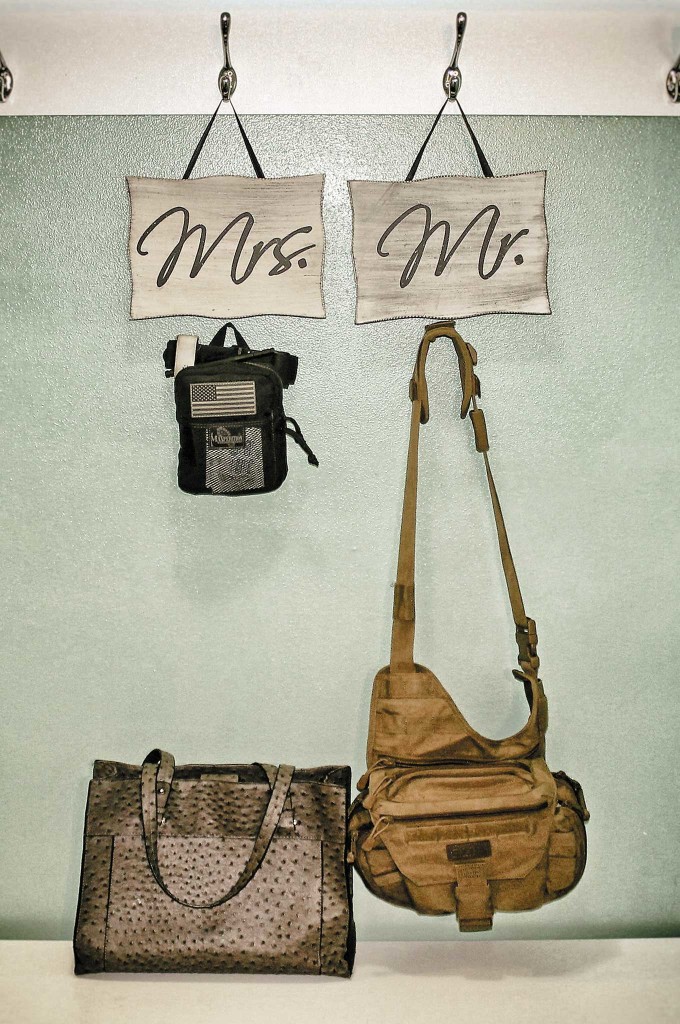
My Purse
Aside from my EDC kit, I also carry a purse. (Hey, I'm a woman after all.) I keep a few items in the main compartments because of the frequency of use:
- Leatherman Wave: a multitool for, well, multiple purposes
- TerraLUX TT5: a tactical flashlight with a strike bezel and strobe option
- Goal Zero solar panel: While I carry a wall charger and a portable charger, this is a redundant method of charging electronics —and redundancy is good in survival situations.
These products don't take up a lot of space. Sure, I wouldn't be able to stuff this gear in a clutch, but not many women I know do carry a clutch on a regular basis anyway.
Any purse can be a concealed carry purse (even one from Target, like mine), but there's one thing that it must have —a dedicated zipper pocket for those off chances that you might be carrying your firearm in your purse. It needs to have a pocket that nothing else goes in. Nearly all clothing and accessories can easily be tweaked to accommodate concealed firearm carry and EDC.
My CCW
My concealed carry weapon is a Glock 26. I love the simplicity of the Glock platform and because my husband's carry firearm is a Glock 17 we can interchange spare magazines. I carry my Glock 26 in an Antero Pistol Holster from Long's Shadow Holster. I've tried dozens of holsters, and this one is more comfortable and concealable for me than anything else I've found. It's slightly curved, so it hugs the curves of a woman's body. It won't fall off your pants and skid across the bathroom floor when you use the restroom either.
My Phone
I always have my phone in a pocket. It's easier to access if I need it. With it in my pocket I'm not rifling through my purse while walking to the grocery store. My eyes are up and on any potential threats, allies, cover, and concealment. Walking confidently and with full situational awareness makes me look like a harder target, too. After all, the best way to get out of a scary situation is to avoid it in the first place.
More From Issue 20
Don’t miss essential survival insights—sign up for Recoil Offgrid's free newsletter today!
Read articles from the next issue of Recoil Offgrid: Issue 21
Read articles from the previous issue of Recoil Offgrid: Issue 19
Check out our other publications on the web: Recoil | Gun Digest | Blade | RecoilTV | RECOILtv (YouTube)
Editor's Note: This article has been modified from its original version for the web.