Animal Traps & Snares: Primitive vs Modern Techniques

We often hear about the virtues of primitive trapping, and on the surface, it seems like an easy way to catch animals for food with limited effort. It's often said that all you need is a looped strand of picture wire, paracord, or even strong monofilament line to create a snare. Then you can place it on a game trail, and wait for animals to get caught. However, in a real survival situation, it won't be so easy.

Snare animal trap hunting paracord knot 7

So-called primitive traps include snares, deadfall traps, and cage-style traps constructed from simple materials. These range from the well-known Paiute deadfall to more sophisticated traps like the bow trap seen above. With substantial training and practice, it's possible to construct these traps from materials found in the wild — plant-based cordage, sticks, and rocks. We also know that Native American cultures used improvised traps like these to supplement their other food sources when hunting became difficult.

Snare animal trap hunting paracord knot 6

Is a strand of 550 cord really all you need to create a reliable snare?

If you look at the traps above and think, that looks easy, you may need to think again. These traps require substantial practice and precision to set up, and those who have watched the survival TV show Alone will probably recall how frustratingly inconsistent they proved to be for the contestants.

Snare animal trap hunting paracord knot 3

Wild animals are cautious, and can easily be deterred if they notice a trap or snare in their path.

If the balance isn't perfect, or the wind changes direction, your trap may fall apart. If the trigger sensitivity isn't spot-on, they may go off prematurely or fail to go off when an animal takes the bait. Or, even if everything else goes according to plan, the animal may still escape the trap after it is triggered.

You really think those teeth can't chew right through your paracord?

A determined animal's teeth can make quick work of paracord, and can even gnaw through thin steel wire.

In many cases, you may expend valuable time and energy building traps, only to find that they produce minimal calories in return. This leads to the question: is it wise to plan on constructing primitive traps in a survival scenario, or should you add modern trapping tools to your bug-out bag?

The following YouTube video from The Wooded Beardsman compares these primitive trapping methods to more modern steel traps. Note: the following video contains footage of live and dead wild animals in traps. Discretion is advised for sensitive viewers.

We're certainly not ready to say that primitive traps are worthless, since they have been used by native cultures for centuries to provide a viable backup food source. Then again, considering all the variables and the wide array of commercial tools available, there's a compelling case for modern steel traps or snares that can dramatically increase your odds of catching food. There's nothing more depressing in a survival situation than spending hours or days to set traps, only to see them fail to catch anything.

What do you think — would you take the time to set primitive traps in a survival situation? Do you carry modern trapping tools in your bug-out kit?


DOT Tire Codes: How Old Are Your Tires?

Have you ever watched a police car chase on TV? The fugitive frantically tries to get away, and the police turn to a tried-and-true method of disabling the vehicle: puncturing its tires. Before officers resort to blocking the vehicle in with squad cars or running it off the road with a PIT maneuver, they almost always deploy stop sticks or spikes to take out the tires — in some cases, they'll even shoot holes in them. This is effective because it's nearly impossible to control a vehicle when it's running on shredded tires or bare rims.

2013-toyota-tacoma-tire-close-up

As we prepare for emergencies, it's important to keep this lesson in mind. Without a dependable set of tires, your vehicle becomes useless, and might leave you and your family stranded on the side of the road at the worst possible time. Tires also dramatically affect your car or truck's handling, braking, acceleration, and off-road traction. So, it's important to ensure they're in good working order before an emergency bug-out situation occurs.

AWD vs 4x4 off road vehicle jeep suv truck 5

Age has a substantial effect on tires, especially when they're exposed to direct sunlight and the elements. The rubber becomes hard and brittle, and may lose traction or puncture unexpectedly. Actor Paul Walker of the Fast and the Furious movies was killed after the Porsche Carrera GT he was in spun out of control. It was later found that the vehicle was on nine-year-old tires, and the California Highway Patrol noted that “the tires' age might have compromised their drivability and handling characteristics”.

An easy way to check the age of your tires is to look for the Department of Transportation (DOT) Tire Identification Number on the sidewall. Tires manufactured since 2000 use the Week-Year format, for example:

Tire date code DOT vehicle car truck safety 2

To the right of the DOT stamp on the tire, we see a four-digit number, 4014. This means that the tire was manufactured in the 40th week of '14, or the first week of October 2014. Here's another example:

Tire date code DOT vehicle car truck safety 1

This tire reads 3014, so it was manufactured in the 30th week of 2014. Simple enough, but with all the numbers and letters scattered around the sidewall, you could easily overlook this code if you weren't searching for it. Most manufacturers recommend replacing tires every 6 to 10 years, regardless of wear, though the lifespan can be diminished in hot and dry conditions. This also applies to your spare tire, so don't forget to check it as well.

Tire date code DOT vehicle car truck safety 3

Of course, there are many other warning signs to watch for, including tread depth, cracks in the sidewall, bubbles, air leaks, flat spots, or abnormal wear patterns. But the DOT tire code can give you an idea of how long a tire has been on your vehicle — or how new the “new” tires you just bought really are. For more information on tire wear and age, check out this helpful article from Edmunds.com.


Video: Choosing a High-Security Lock

A lock is the last line of defense to protect unattended valuables, so it should be taken seriously. It's easy to believe the saying that “locks keep honest people honest” by creating a high barrier of entry and discouraging opportunistic criminals. While there's truth to that statement, the physical security of the lock you buy does matter.

When your key looks like this, it's a safe bet nobody is going to be picking your lock with a paperclip.

Not all locks are created equal — there's a reason Fort Knox isn't securing its gold with $10 locks from Walmart. We've previously addressed this subject when we showed that a MasterLock padlock can be opened by simply tapping it with a hard object. This goes to show that buying quality locks is important, since it can mean the difference between a skilled criminal bypassing it in seconds or risking capture as he struggles with its complex mechanism.

Lock security lockpicking BosnianBill padlock key 1

Even inexpensive locks can be secure, if you know what features to look for.

YouTube lock expert BosnianBill summarizes how to choose a high-security lock in the video below. Here are some of the key factors he recommends considering:

  • Number of pins — a 7-pin lock is much harder to pick than a 4-pin lock.
  • Pin style — Serrated or dimple pins can throw off criminals who are unfamiliar with these less common mechanisms.
  • Body — Solid steel is preferable to the stacked-washer style or brass bodies used on cheaper locks.
  • Shackle — Thick shackle, preferably with rounded ball bearing detent and shielding around the base.
  • Replaceable cores — If one of your keys is lost or stolen, you can easily swap the lock core for a different key without replacing the entire lock.
  • Uncommon features — Rotating discs and reactive keys can make even the most advanced criminals give up on picking your lock.
  • Price — Consider the value of the item you're securing. A more valuable item may necessitate a more expensive lock.

Note: the video starts with a satirical portion to demonstrate the weakness of MasterLock padlocks. Watch the whole video before you jump to conclusions.


Review: Hinderer XM-18 Bowie, MP-1, and Investigator Pen

Behind the scenes here at RECOIL OFFGRID, we're always hustling to find new and interesting gear for our various product reviews and buyer's guides. This usually involves copious email chains, back-and-forth phone calls, spreadsheets, scribbled notes, and checklists on the office whiteboard. While the product request process can be tedious at times, it's all worth it when a box shows up with some cool new items to test and write about.

In a handful of rare cases, we cut open these boxes to find that a company generously sent us even more gear than we requested. This was the case with Hinderer Knives. We got in touch with the company to request one knife for an upcoming article in our print magazine (more on that later) — a week afterward, a package arrived with three knives, four tactical pens, and a machined stainless double shot glass. Christmas came reeeeal early this year.

Hinderer folding knife XM18 MP1 investigator tactical pen 14

We were excited to see this array of EDC goodies, and decided to thoroughly evaluate each item here on OFFGRIDweb. While we appreciate Hinderer giving us free reign to test these pricey products, don't think that we'll be pulling punches with our feedback. As always, you can expect our honest thoughts on what we liked and disliked about this gear.

Hinderer XM-18 3.5-inch Bowie

After setting aside the knife we'll be evaluating in our upcoming print article — check Issue 20, on sale 6/2/17 — we moved on to the next blade in the box.

Hinderer folding knife XM18 MP1 investigator tactical pen 06

This is Hinderer's illustrious XM-18, a folding knife practically idolized by many in the every-day carry (EDC) gear community. The XM series is available in three blade sizes: 3-inch, 3.5-inch , and 4-inch (a.k.a. the XM-24). This knife occupies the popular middle bracket, with an 8.25-inch overall length, 4.75-inch handle, and 5.6-ounce weight.

The MSRP for a standard XM-18 is $425. That price point may immediately deter many people from ever considering these knives, but as we'll discuss, Hinderer creates a premium product at a premium price. To make an analogy, a Toyota Camry will get you from point A to B, yet this doesn't phase a customer who's considering an Aston Martin. While both vehicles serve the same core purpose, they're worlds apart in terms of performance, polish, and visual appeal. Hinderer isn't trying to compete with affordable entry-level knife brands — it's going after a much smaller and more demanding customer base.

Hinderer folding knife XM18 MP1 investigator tactical pen 02

Part of the allure of Hinderer knives is the fact that few knives produced by the company will look identical. There's an immense variety of colors, finishes, and blade styles to choose from, and that's before you consider all the customization parts offered by Hinderer and other aftermarket vendors. You can keep your XM exactly as it came from the factory, or swap hardware, clips, and scales to your heart's content.

Hinderer folding knife XM18 MP1 investigator tactical pen 03

The XM-18 seen here features a bright blue G10 scale and tumbled (a.k.a. stonewashed) metal finish — pretty standard for an XM model. The blade shape is a bit out of the ordinary, however. Rather than the more common Spearpoint or Spanto (modified spearpoint / tanto hybrid) grinds, this XM-18 uses a Bowie-style blade.

The Hinderer Bowie blade features a flat belly and upswept tip, with sculpted curves cut into the spine. The leading curve tapers the business end of the blade down to a strong piercing point, while a second curve contours the spine to the user's thumb. This is helpful for added leverage and control during downward cuts. Our 3.5-inch model feels just right in the hand; if you're on the fence between 3- and 3.5-inch blades, we'd recommend going with the 3.5. It's more controllable.

Hinderer folding knife XM18 MP1 investigator tactical pen 04

The frame is machined from lightweight titanium, and the blade is formed from S35VN, an excellent steel that's consistently one of our favorites during long-term testing. It stays razor-sharp and has proven to be even tougher than its more common sibling, S30V.

The blade strength and construction get full marks from us, but we're not so sure about the Bowie's appearance. Its distinctive look may appeal to some users, but from a purely subjective standpoint, we feel that it doesn't look as elegant as a Spearpoint. The Bowie shape makes us think of a big fixed blade in the hands of Crocodile Dundee; it seems a little weird on a modern titanium folder. Perhaps it'll grow on us.

Hinderer folding knife XM18 MP1 investigator tactical pen 01

From a mechanical standpoint, the XM-18 is a beautifully-crafted knife. Feel the buttery-smooth pivot and solid yet easily-to-release lock bar, and you'll begin to see why this knife is priced the way it is. There's no wiggle whatsoever in the blade, and the thumb studs nestle into a notch on the handle for added reinforcement. Flipping the knife does require a small amount of wrist action.

Hinderer folding knife XM18 MP1 investigator tactical pen 05

One minor quirk we noticed: every Hinderer we've seen ships with the pocket clip in tip-down orientation. In our experience, the vast majority of knife users (including this writer) prefer tip-up for faster deployment — it's easier than drawing and reversing your grip before flipping the knife open. Reversing the clip is obviously easy, so this is mostly nitpicking, but we wonder just how many Hinderer owners actually prefer it in the factory tip-down position.

The XM-18 is a terrific knife, and deserving of the reputation it has earned. Whether the price point is justifiable remains up to the buyer — but we will note that there's a thriving resale market for these knives, so if you ever tire of it, you shouldn't have a problem getting a good chunk of change in return.

Hinderer MP-1

Hinderer folding knife XM18 MP1 investigator tactical pen 07

The Hinderer MP-1 is a newer addition to the company's lineup, debuting at the 2016 Tactical Knives Invitational event. MP stands for Modular Platform, in reference to the knife's Hinderer Modular Backspacer System (HMBS). The HMBS is a solid titanium piece sandwiched between the handles, and it can be swapped out for lanyard-loop or non-lanyard versions in various finishes, all without disassembling the knife. It's one more point of customization for those who hot-rod their knives, but the forthcoming glass breaker HMBS attachment is definitely something we'd be interested in picking up.

Hinderer folding knife XM18 MP1 investigator tactical pen 12

The MP-1 is $25 more than an XM-18, with an MSRP of $450, but the design is substantially different. Instead of using the thumb studs as a reinforcement point against the handle, the MP-1 has a floating stop pin that rides in a groove cut into the handle around the pivot. When the MP-1 is flipped open, the stop pin hits the end of its track, adding rigidity to the blade.

While this stop pin functions effectively, we question the need to press another piece of steel into the blade, rather than using the larger and sturdier thumb stud as a dual-purpose opener and reinforcement point. Again, there's nothing wrong with the stop pin design, but it seems to add complexity with no obvious benefit. The thumb stud placement is very slightly (about 1/16-inch) further forward on the blade, but this makes no functional difference in ease of opening.

Hinderer folding knife XM18 MP1 investigator tactical pen 11

Our MP-1 features Hinderer's Full Working Finish, which is similar to the standard tumbled finish, but with a duller satin appearance and slightly darker shade. We really like this well-worn industrial look — and it seems to hide scratches better, too. The handle scale on our sample is layered green, black, and brown G10, with a crosshatched cutaway for added grip. This texture is mirrored by another crosshatched section on the titanium frame.

Workmanship on the MP-1 is superb, and the action feels even smoother than the XM-18. No wrist movement is needed to flip it open consistently. Combined with the subdued appearance and high functionality of its S35VN sheepsfoot blade, this is an appealing package. Weight is the same as the midsize XM-18, but the MP-1's dimensions are slightly more compact (3.25 inch blade, 4.5 inch handle, 8 inches overall).

Hinderer folding knife XM18 MP1 investigator tactical pen 09

Aside from the questionable necessity of the redesigned blade stop, our only gripe with the MP-1 is the limited number of customization parts at the present time. Bronze or blue anodized hardware and five different backspacers can be purchased directly from Hinderer, but replacement scales aren't out yet. It's a relatively new knife, so we understand that parts are less plentiful than the longstanding XM line, but it's worth considering. If having a totally unique modded knife is a major priority, an XM will have many more options to choose from, at least for now.

Pitting the MP-1 against the XM-18 Bowie, we'd take the MP-1 without a second thought. Functionally, we'd give it a slight edge in smoothness, since flipping it open is a bit easier than the XM, but both are very good. If the XM had a Spearpoint or Skinner blade, it would be a tougher decision, but we'd still lean towards the MP's sheepsfoot for its practical slicing ability. We also appreciate the textured handle cutaways and HMBS customization. Considering the $25 price difference compared to the XM, the MP-1 is the knife we'd choose for EDC.

The Hinderer XM-18 is a very good knife, but once customization part availability equalizes, we'd say it'll be an easy decision to take an MP-1 over an XM-18.

Hinderer Investigator Pens & Double Shot Glass

Hinderer folding knife XM18 MP1 investigator tactical pen 13

The package we received from Hinderer also included four Investigator pens — two in polished aluminum, two in aluminum hardcoat. The blue and red hardcoat models feature a matte finish, while the green and purple polished models are… well, polished. Hinderer also offers these in stainless steel, brass, copper, or titanium, with a variety of different colors and finishes. Pricing is set as follows:

  • $55 for hardcoat aluminum
  • $60 for polished aluminum, stainless, or brass
  • $80 for copper
  • $200 for titanium

Hinderer folding knife XM18 MP1 investigator tactical pen 16

These pens are smaller than we expected from pictures, just 4.5 inches long, 0.375 inches in diameter, and 1.4 ounces. The compact size can be a plus, since they're very light and perfect for carrying in a shirt pocket. The screw-on cap is reversible to reveal either the Fisher Space Pen tip or pointed Bullet tip. The Bullet tip is removable, and can be replaced with a flat end or conical Warhead tip (sold separately).

Hinderer folding knife XM18 MP1 investigator tactical pen 15

We found the Investigator easy to write with, and its ridged body provides a secure grip. It's a bit on the small side for defensive use as a kubaton, but just big enough to work in a pinch. For around $60, they're pretty affordable, and there are more than enough colors to match the rest of your favorite EDC gear.

Hinderer folding knife XM18 MP1 investigator tactical pen 14

Finally, there's the stainless shot glass. At first we thought it was a diminutive pen cup designed for the Investigator — it actually fits that role well. But after some research, we found it listed online as a Hinderer Double Shot Glass, a limited-production item from the 2016 holiday season. Filled to the brim, it holds 3.5 ounces of your favorite spirit, and measures 2.6 inches tall by 2 inches in diameter.

Hinderer folding knife XM18 MP1 investigator tactical pen 17

The shot glass is quite heavy at 7.2 ounces, and weighted at the base, so you won't have to worry about tipping it over once you've had a few. The exterior is textured with the same pattern you'll find on XM knife handle scales. Hinderer logos are laser-etched along the base, as well as on the bottom of the cup. This stainless version will set you back $100; copper and brass versions are available for $125.

Hinderer folding knife XM18 MP1 investigator tactical pen 14

While the Hinderer Shot Glass is a cool piece of machining, and it feels great in the hand, you'd have to be a pretty hardcore fan of the brand to shell out $100+ for one. It's about as serious as a pair of Hinderer toenail clippers, so we couldn't see ourselves spending that much money one of these. For now, it's mostly useful for showing off on Instagram and storing our Investigator pens.

Rick Hinderer has been making knives since the mid-1980s, and based on what we've seen of his latest designs, he's still got it. While it's not true that everything bearing the Hinderer insignia is pure gold as some internet fanboys might claim, the company produces some very solid American-made blades with numerous customization options — you just need to be willing to pay for that level of quality and prestige.

For more info on the latest Hinderer knives and other products, go to RickHindererKnives.com.


Short Film: Making Viking-Era Lime Bast Rope

In this era of mechanization and mass-production, we tend to take a lot of things for granted. We're not just referring to modern technology like personal computers and automobiles — even items which would be considered primitive today were once incredibly laborious to produce. Our ancestors would no doubt be dumbfounded by how plentiful our resources are these days.

paracord

Take rope, for example. If you need some cordage right now, you can open a new tab on your web browser, tap a few keys and click a few buttons, and have 100 feet of mil-spec paracord delivered to your house by this time tomorrow. Its synthetic fibers are woven flawlessly by a machine, and it's no thicker than a pencil, yet has been tested to withstand 500 pounds of weight. No big deal.

Lime bast rope viking cordage bushcraft cord 6

Production of lime bast rope starts by peeling strips of bark from a lime (linden) tree.

A thousand years ago, there was no Amazon.com with overnight shipping. In most cases, there wasn't even any pre-made rope to buy. Want some cordage? You'd be harvesting the materials and making it yourself. And you'd better have a good teacher to literally show you the ropes, because there'd be no internet to Google it on. Even if there was, it'd be useless because you'd almost certainly be illiterate.

Lime bast rope viking cordage bushcraft cord 5

Bast fiber layers are separated from outer bark by soaking in seawater for several months.

Archaeological records show that ancient ropes were often constructed from bast. This material is a tough fiber found in the inner bark layer of certain plants. Jute, hemp, and flax are examples of bast fiber which are still used for rope-making today. Since at least AD 800, vikings in Norway were known to use bast from the lime tree to make rope. We know what you're thinking — this tree is unrelated to the green citrus fruit, and is also known as linden or basswood.

Lime bast rope viking cordage bushcraft cord 2

Lime bast rope is still made today in Norway using the same traditional methods: stripping bark from lime (linden) trees, soaking the strips in seawater to separate the layers, twisting the bast fibers into strands, and braiding the strands into a three-ply rope. The following 5-minute short film by Silje Ensby documents the process in an artistic manner:

Obviously, the vikings didn't have chainsaws or pressurized hoses, but other than these time-saving measures, the 1,000-year-old technique remains the same. If it still took us 4 months of waiting and countless hours of finger-numbing weaving to craft a rope, we'd be a whole lot more careful about cutting it.


Infographic: States with the Worst Traffic Congestion

If you live in a major metropolitan area and own a car, you're already familiar with the frustration of sitting in traffic jams. It's incredibly aggravating to inch along on the highway, stuck in a sea of brake lights with no end in sight. It's especially bad around rush hour, which unfortunately is the time most of us need to travel between home and work — a real catch-22. In many cases, traffic eventually clears up, only to reveal that the slowdown was caused by rubberneckers looking at someone changing a flat tire on the shoulder.

broken-down-car

For all these reasons, it's worth doing your best to avoid traffic during your everyday commute. However, during an emergency bug-out situation, the degree of traffic will increase exponentially as cars flood the roads trying to get out of Dodge. As we always say, the time to prepare for this is now — when there's an emergency and you're trying to evacuate in your vehicle, it may be too late to find an alternate route.

While traffic can be a problem in most cities, some states have it much worse than others. This can be measured by the congestion index, a ratio of the number of registered vehicles to the number of miles of public roadway within a state. The math is simple: more vehicles on less asphalt equals higher traffic. Some states (like Texas) have lots of vehicles, but also a huge network of roads, so their congestion index is just slightly above average.

The following infographic from TitleMax shows the data for all 50 states, plus Washington D.C., so you can check the statistics on how your home state fares. This info can come in handy when you're planning a bug-out strategy, but be sure to compare it with what you've observed in your local area during rush hour. Click here to download a full-size version of the graphic.

Infographic worst congestion traffic car truck road 1


10 Lessons From an Urban Escape and Evasion Class

Photos by Mark Saint

Our feature “Bound & Determined” in the Summer 2014 Issue of RECOIL OFFGRID dealt with methods for escaping different restraints if you've been kidnapped. When we set out to research how to survive unlawful incarcerations, we discovered that there are very few subject-matter experts — at least known outside of covert circles. However, we lucked out when we interviewed Kevin Reeve.

Prior to founding onPoint Tactical, he studied under renowned survivalist Tom Brown, and much of his other skills came from what he calls “a misspent youth.” Reeve's resume includes training military, law enforcement, and organizations at every imaginable level. You know, like three-letter governmental agencies.

Naturally, we jumped at a chance to learn directly from Reeve. In late 2016, RECOIL OFFGRID participated in his Urban Escape and Evasion Class and walked away with a renewed appreciation for those who've made it out of real life-threatening situations. Although nothing beats taking the program yourself, here we're going to distill some of the top lessons that could mean the difference between life and death if you have to flee a dangerous area and avoid capture.

Think tourists who may have been in Turkey during the recent coup. Picture commuters on their daily route home when a riot erupts. Imagine a natural disaster in which emergency services are too overwhelmed to help you. It can happen. It does happen.

The Setup

One sentence in Reeve's course outline is an attention-grabber: “Please be advised that upon entering the training facility, you will be entering a ‘safe-house in a foreign country,' and the enemy will have surveillance in effect at all times.” The tension begins as soon as you arrive. You start looking at everyone (and the way they look at you) differently.

The course takes place over three days. The first two are primarily classroom lectures with homework that carries over into the evenings. The last day is the big test: You're “kidnapped” and must escape from custody and remain undetected while fulfilling certain tasks at various checkpoints along the way to your rendezvous point. You spend a good 10, if not 15 miles, on foot — all while Kevin's minions try to hunt you down and return you to the very beginning to start over.

Lesson 1: Know Your Surroundings

“L.A. County has 10-million people, about 180,000 known gang members, and about 22,000 active police officers,” Reeve posits to the class. “There are roughly 92,000 hospital beds, with usually 70 percent of those filled at any given time. Imagine what would happen if an earthquake along the lines of Hurricane Katrina-level damage happened here. People are always nine meals away from anarchy.”

Being reminded of these facts reaffirmed our belief that those who criticize our devotion to prepping (as well as people who insist that tougher gun legislation will reduce crime) aren't living in the real world.

“Roughly half the deaths during Katrina were victims of gun violence,” Kevin continues. “The police went home. They had families of their own to take care of. Those left behind were preyed upon mercilessly. Don't assume the government will protect you. You have to rely on yourself.”

10-lessons-from-an-urban-escape-and-evasion-class-city

So what should you do? First, be proactive.

Gather intel on a location you might be visiting, such as demographics, safe and dangerous areas, road infrastructure, emergency response times, and transportation systems. Consider places that offer government services and the quality thereof. Is a police station in the foreign country you're visiting as legit as they are in the USA? Are there nearby locations that offer free Internet, like a library? How many hospitals are in your vicinity? The more you research this info ahead of time, the better off you'll be.

When you're traveling, the enemy already has home-field advantage, you don't.

Lesson 2: Use Social Engineering

The notion of using social engineering to manipulate people into giving you something you need in a desperate situation was another important part of the coursework. One of our practice assignments was to use social engineering tricks on a random person. I stayed at the hotel where the class was held and hustled the staff to finagle a new room. I won't tell you the angle I used, but no matter what the situation, you have nothing to lose by asking. What's the worst that can happen? People say no and you try again.

This concept is put to the test on the last day when you'll be required to talk to strangers into giving you things in an area known for its homeless population, so people are understandably suspicious. Learn to get out of your comfort zone and shake the guilt of asking for something for free. Start practicing now. Pretend you're one of those people trying to sign shoppers up for Direct TV. It might save your life.

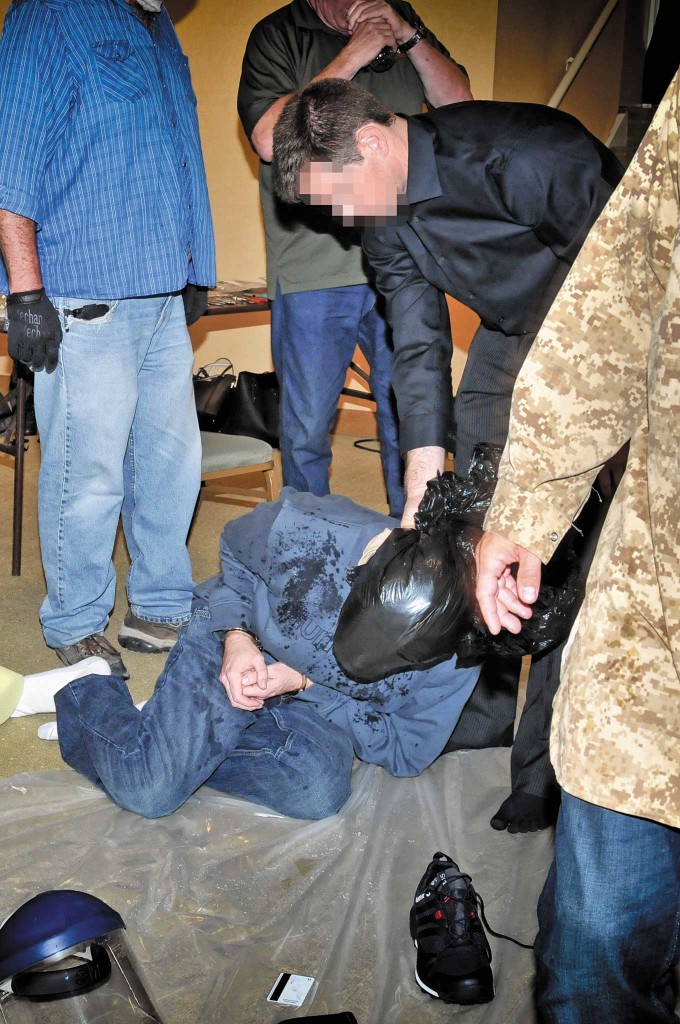
Lesson 3: Get Your Stress Inoculation

By now you've read many articles in this magazine explaining how people don't rise to the occasion, but rather sink to the level of their training. One of the biggest things that gets people killed is panic. If you haven't trained realistically, you'll act the same way under stress. An escape-and-evasion scenario is one of the most stressful situations you can encounter. The higher your heart rate gets, the more your cognitive and fine-motor skills deteriorate.

10-lessons-from-an-urban-escape-and-evasion-class-mock-kidnapping

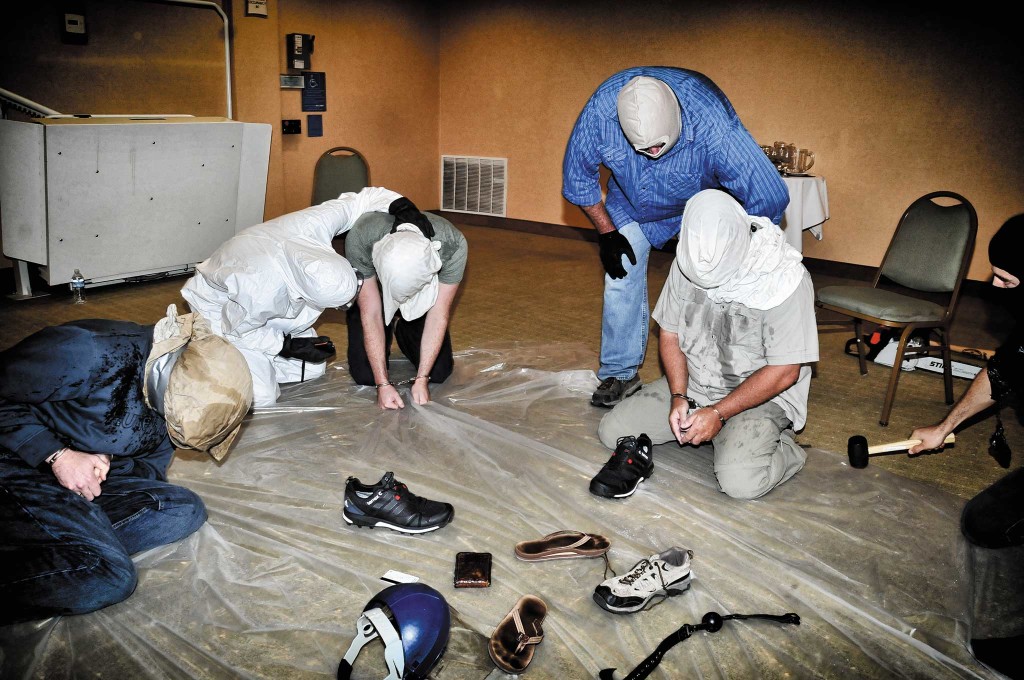
The mock kidnapping we experienced began when we entered a room with a group of hooded individuals in one corner, lots of torture devices on display, and plastic sheeting on the floor where the students are told to sit. If that weren't enough, our heads were covered with pillowcases, we were bound with restraints, and interrogated aggressively. We got shocked (and listening to others being shocked), heard chainsaws being turned on, were sprayed with water, and had a trash bag put over our head. Trust us, this experience was not fun.

In a kidnapping situation you have to assume you're going to die and compliance won't save you. The only things you should be thinking about are how to stay calm and what you can do to escape. Don't fall victim to Stockholm Syndrome. Stay focused, practice drills, and try to keep your breathing deep, slow, and consistent.

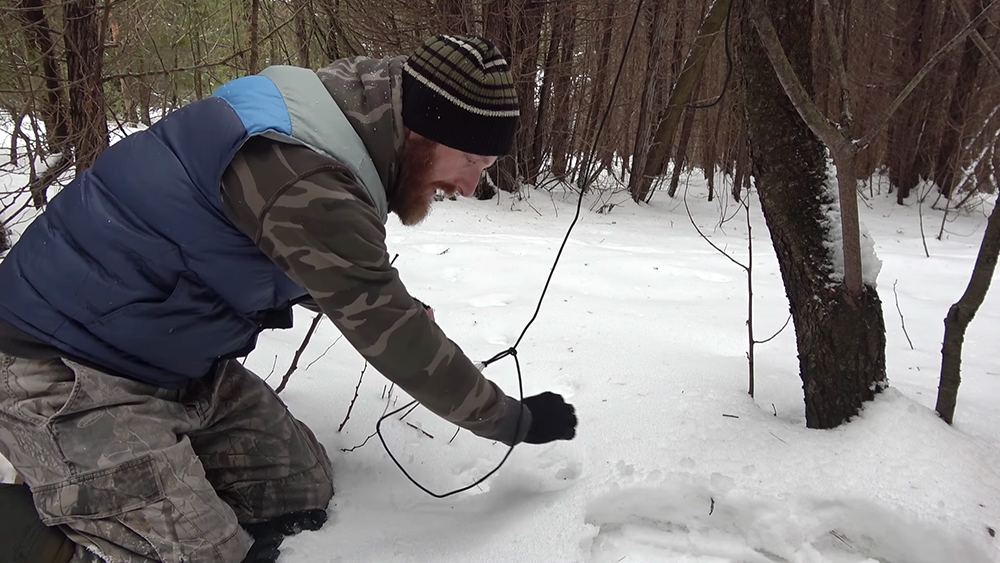
Lesson 4: Create a Cache

Building and hiding a cache is key and plays into how well you can get to know your surroundings. The contents are up to you, but it's all about what you'd need in a desperate situation: food, money, weapons, water, a medical kit, etc. Use leak- and corrosion-resistant vessels to house the contents: Ziploc bags, ammo cans, PVC pipe with capped ends, or 5-gallon buckets.
Create more than one and stash them where they won't be discovered by others but in a location you'll be able to relocate easily. You think this should be easy, right? We thought so, too. We were wrong.

Our class was given a practice assignment. We were each provided a box with a set of handcuffs inside. Reeve asked us to hide the empty box somewhere nearby.

During our lunch break on the first day, we found a restaurant down the street where I hid the box at the base of a billboard near the parking lot and covered it with dirt. It seemed inconspicuous enough. When we returned the next day, lo and behold, the box was gone. Our photographer informed us that when we got out of the truck, he noticed a guy in the parking lot had taken a particular interest in our actions. Apparently, we didn't look or act as discrete as we had thought.

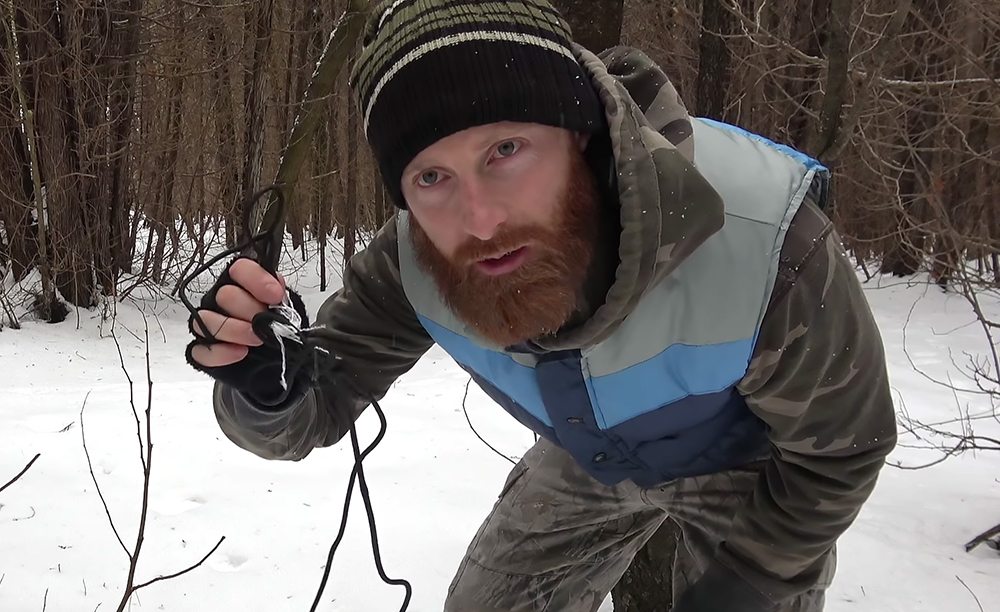
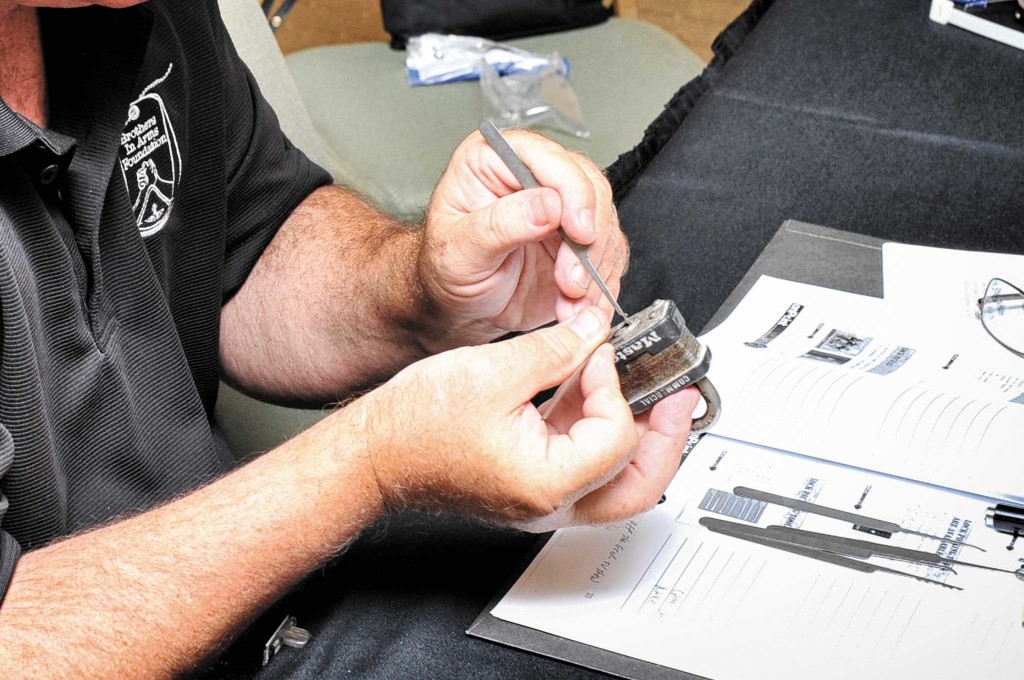
Lesson 5: Learn How Restraints Work

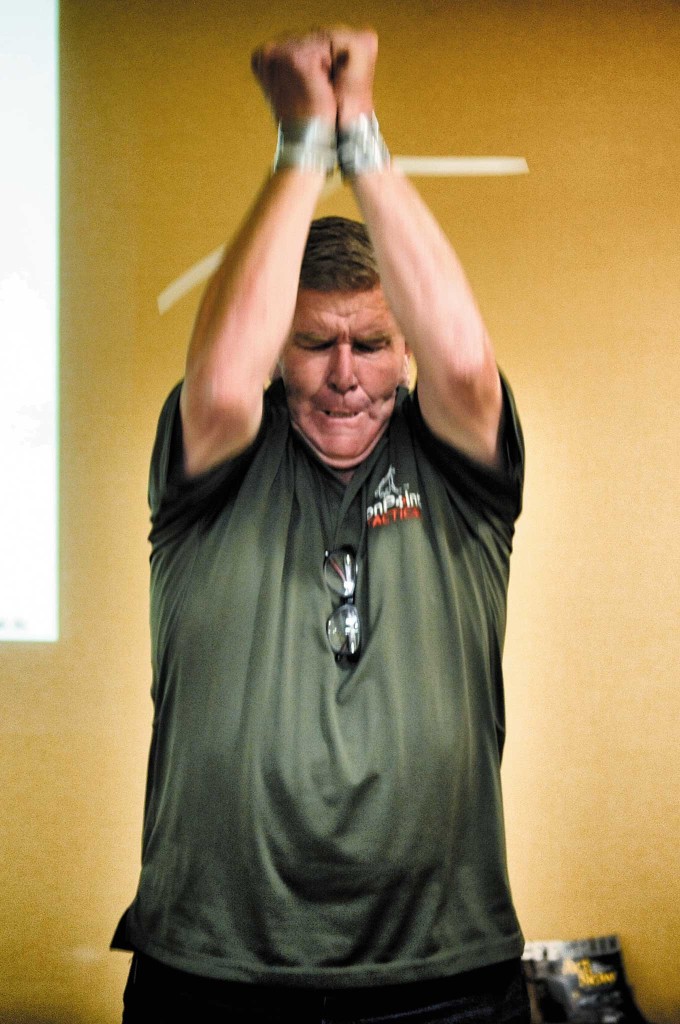
We spent a good portion of the course discussing techniques to remove handcuffs, how to break out of flexi-cuffs, and how to free yourself if you've been bound by duct tape or rope. Research shows these are the most common forms of restraint used by kidnappers, but there are plenty of ways to escape using what's at your disposal. Again, it takes practice.

10-lessons-from-an-urban-escape-and-evasion-class-restraint-escape

10-lessons-from-an-urban-escape-and-evasion-class-handcuff-lock-picking

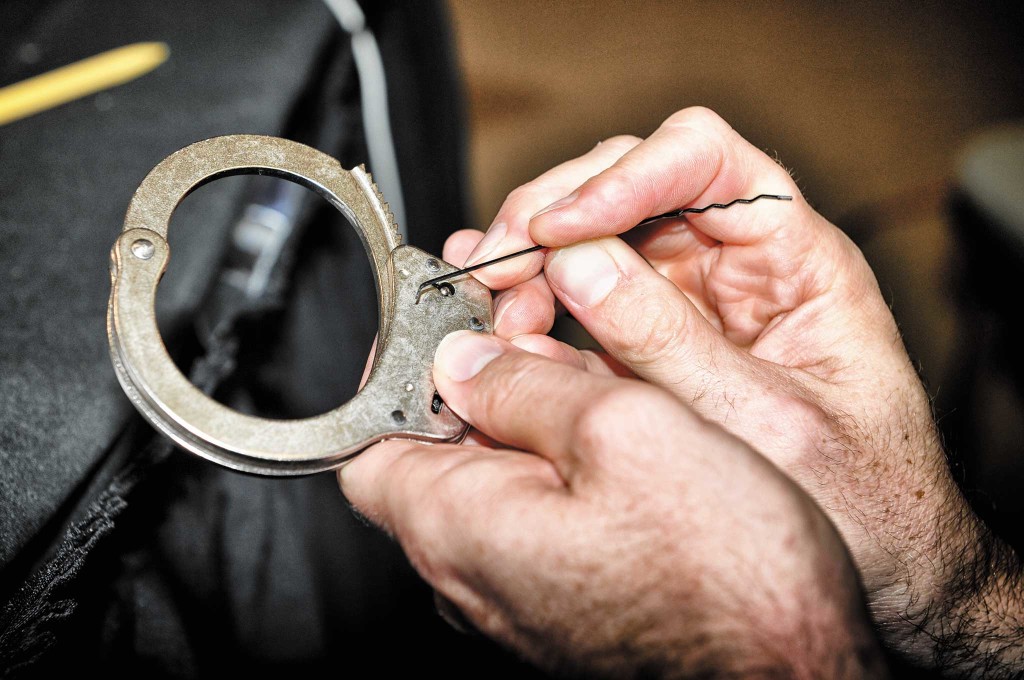
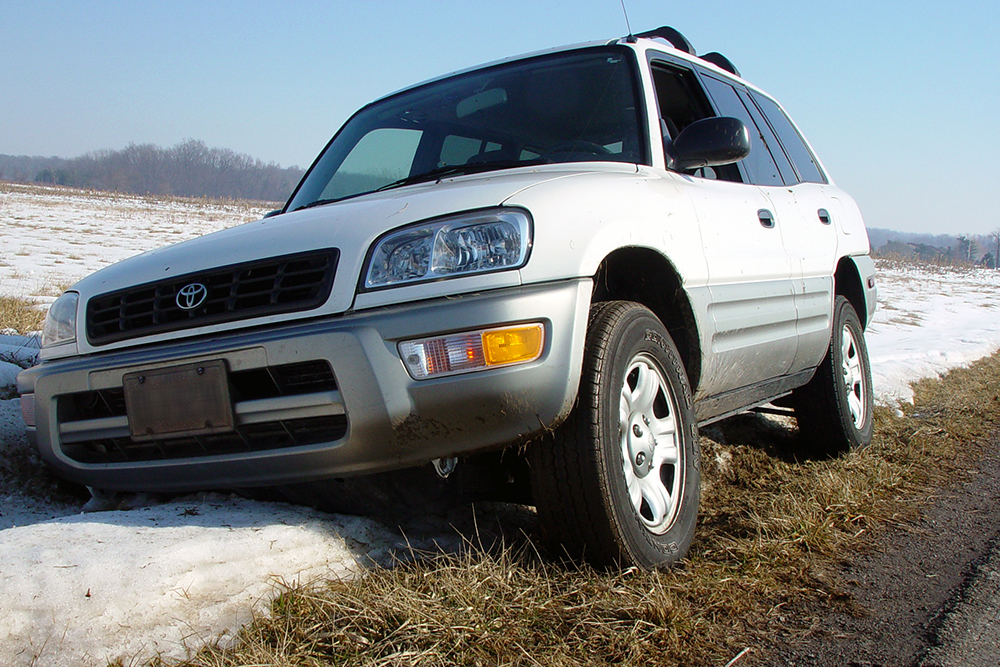
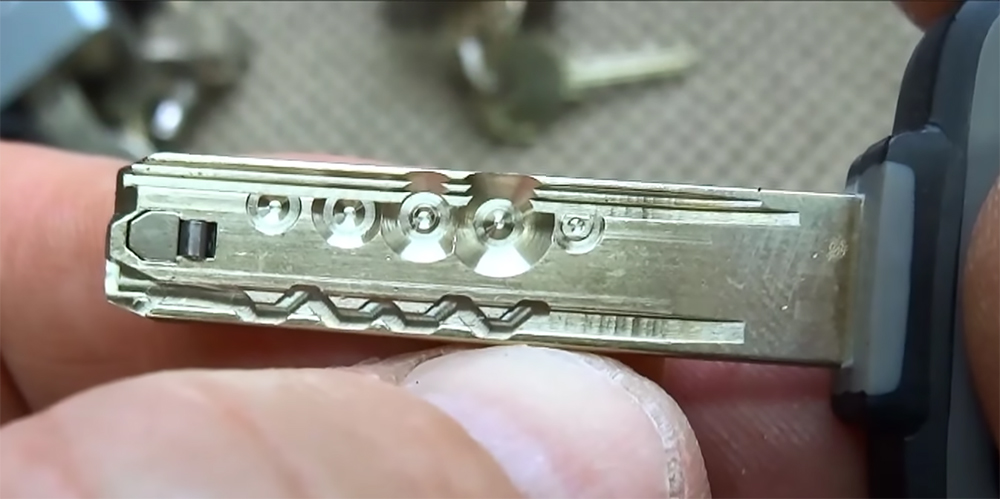
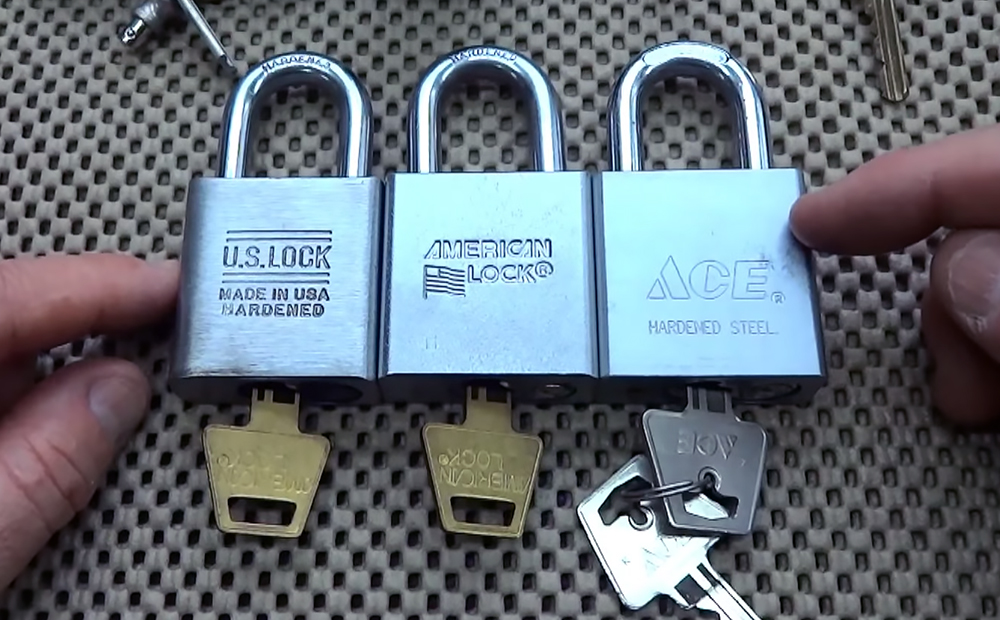
We also delved into techniques on how to pick locks. I'll never look at a Master Lock or basic door lock the same way again. It's amazing how much of a false sense of security these items create for those who don't know how easy they are to defeat. With just a few simple tools or everyday items that you could easily fashion into a lock pick, bypassing the average door or car lock is not terribly difficult.

10-lessons-from-an-urban-escape-and-evasion-class-lockpicking

While you might think a deadbolt on your front door is all that's needed to protect you, those who commit home invasions know how many seconds it'd take to get through one and be inside.
Have redundancies for your home security measures.

Lesson 6: Blend into the Baseline

Just like every song has a tempo, every environment has a unique vibe or “baseline” to it. Paying close attention to the way people dress, walk, talk, and act is critical if you want to blend in with the local populous.

What are the movement patterns like? Does your gait and appearance assimilate easily into a city or country you're unfamiliar with?

10-lessons-from-an-urban-escape-and-evasion-class-urban-environment

Reeve says that one of the top reasons students are spotted by his trackers during the final test is that they're out of baseline — the normal pace and appearance of the general public in a particular area. If you're rushing through a crowd and constantly looking behind you, guess what? You look suspicious and won't probably don't blend into your surroundings. Spend some time observing the public when you're in a new location. If you need to blend in, start by identifying the patterns you see.

Lesson 7: Use Disguises

Reeve talked about people who usually go “unseen.” Hookers and street people are noticeable, however, you tend not to stare at them, lest you provoke a nasty response. Service people, such as mailmen or construction workers, are usually written off as part of the environment.

How often do you give the aforementioned types of people a second look? Something to think about if you're trying to become “invisible.”

Another facet of changing your appearance is creating a fake ID or having something that acts as a “scepter of authority.” There are actually apps that can help you do this. If you look the part and act the part, people are often gullible enough to believe what you say and not question you, particularly if you have some official-looking symbol.

Most of us are all too anxious to avoid confrontations with those who we think “outrank” us. You should exploit the hell out of this situation if it means saving your life. Having confidence in your role is also part of your disguise. Try practicing this on friends. You might be surprised how much little nuances, such as acting like an authority figure, altering your voice, and minor appearance changes can fool people who know you.

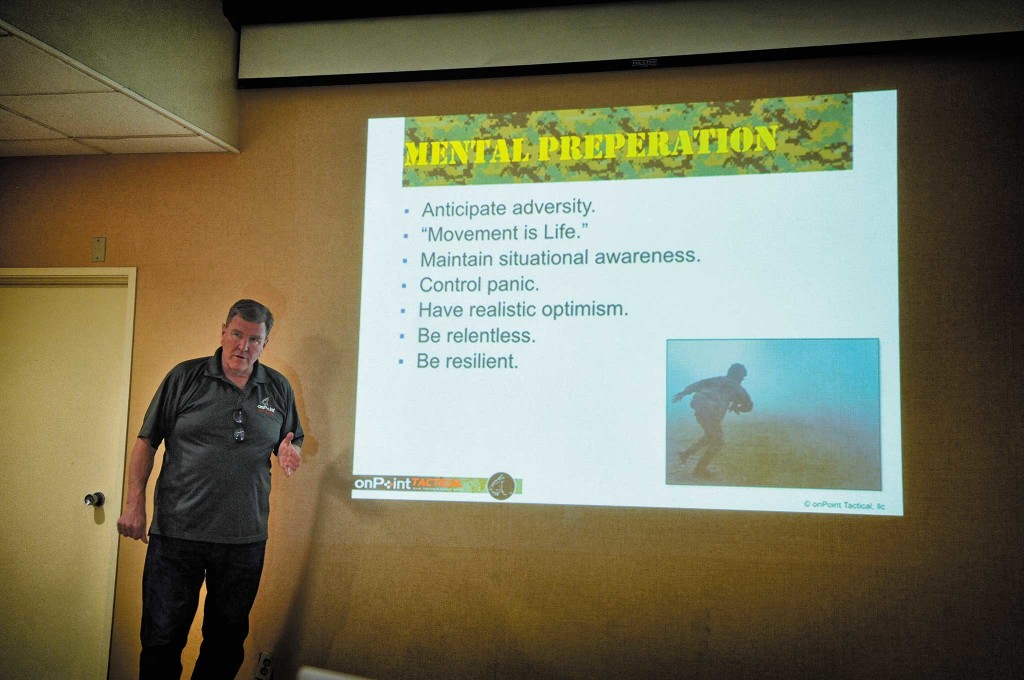
Lesson 8: Keep Walking (While Looking for Shelter)

One thing Kevin said that really stuck was “movement is life” during a catastrophe. Also, people tend to take the easiest route to get where they're going, he added. So, during the final test, assuming the kidnappers were combing the main thoroughfares, we took a lot of side streets to get to the class's required checkpoints.

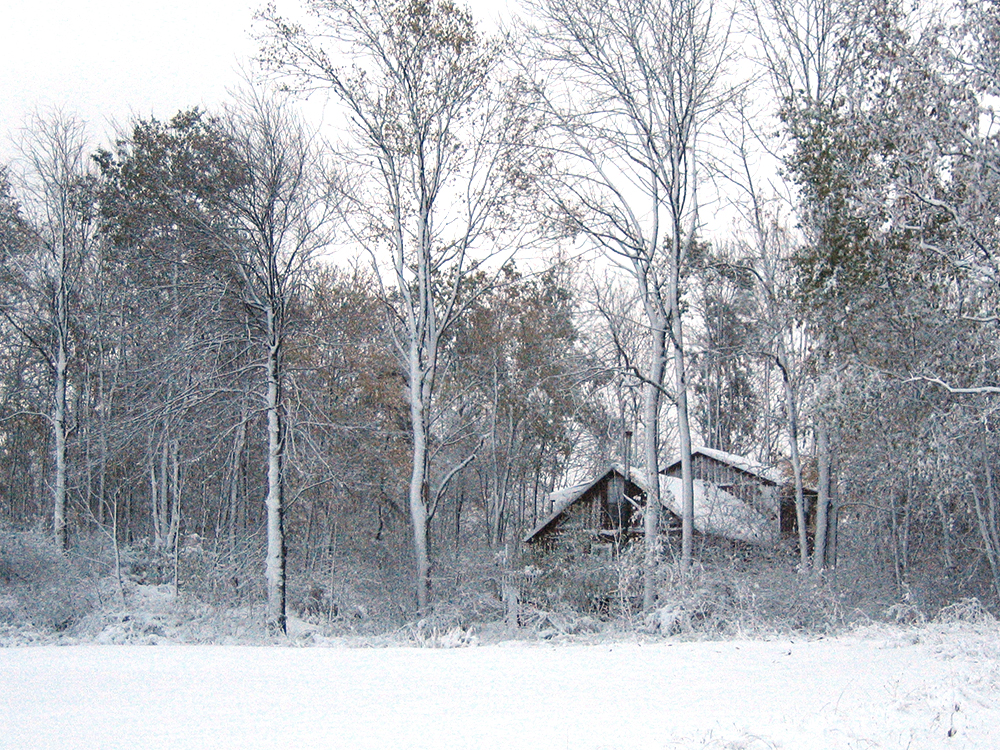
Don't stay stagnant in an escape-and-evasion situation. Keep moving. You may have to find a location to hold up for a night, so keep an eye on places that'd serve this purpose. Even if it's nothing more than a public restroom that doesn't get much traffic, it's better than nothing. Keep an eye on structures that appear abandoned or under construction that'd work as temporary shelter if you're traveling abroad.

Assuming you've studied daytime movement patterns enough, as long as you match the baseline, you'll remain invisible.

Your escape-and-evasion priorities should be immediate security, medical attention, protection, physical needs, communications, and transit to safety. Whatever you can do on the move, do it. A dogcatcher can only catch a dog if it's cornered or immobile.

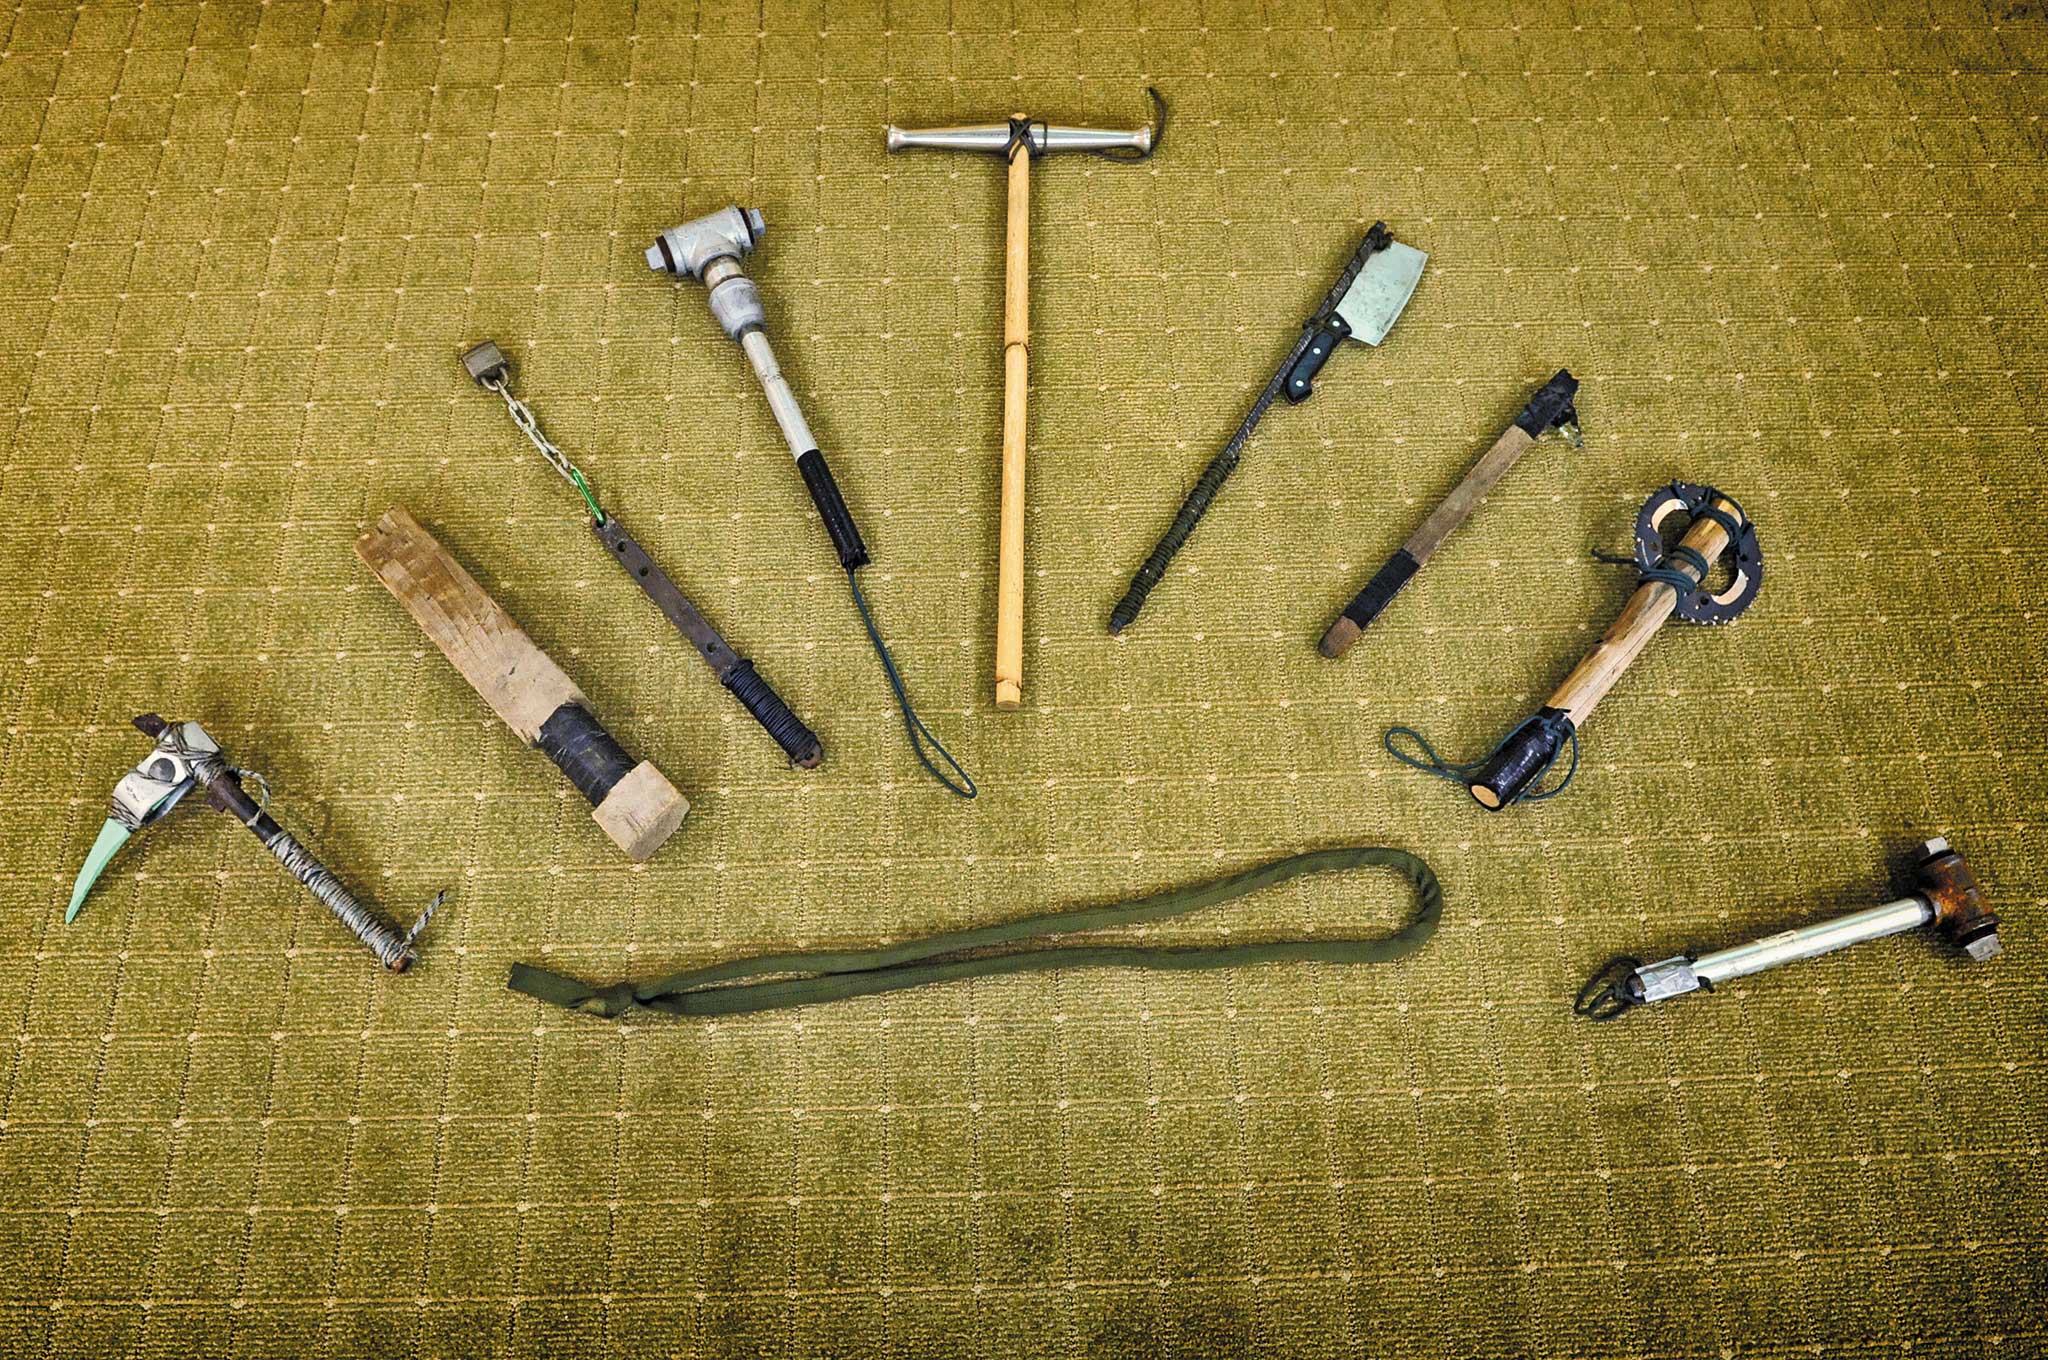
Lesson 9: Improvise Your Weaponry

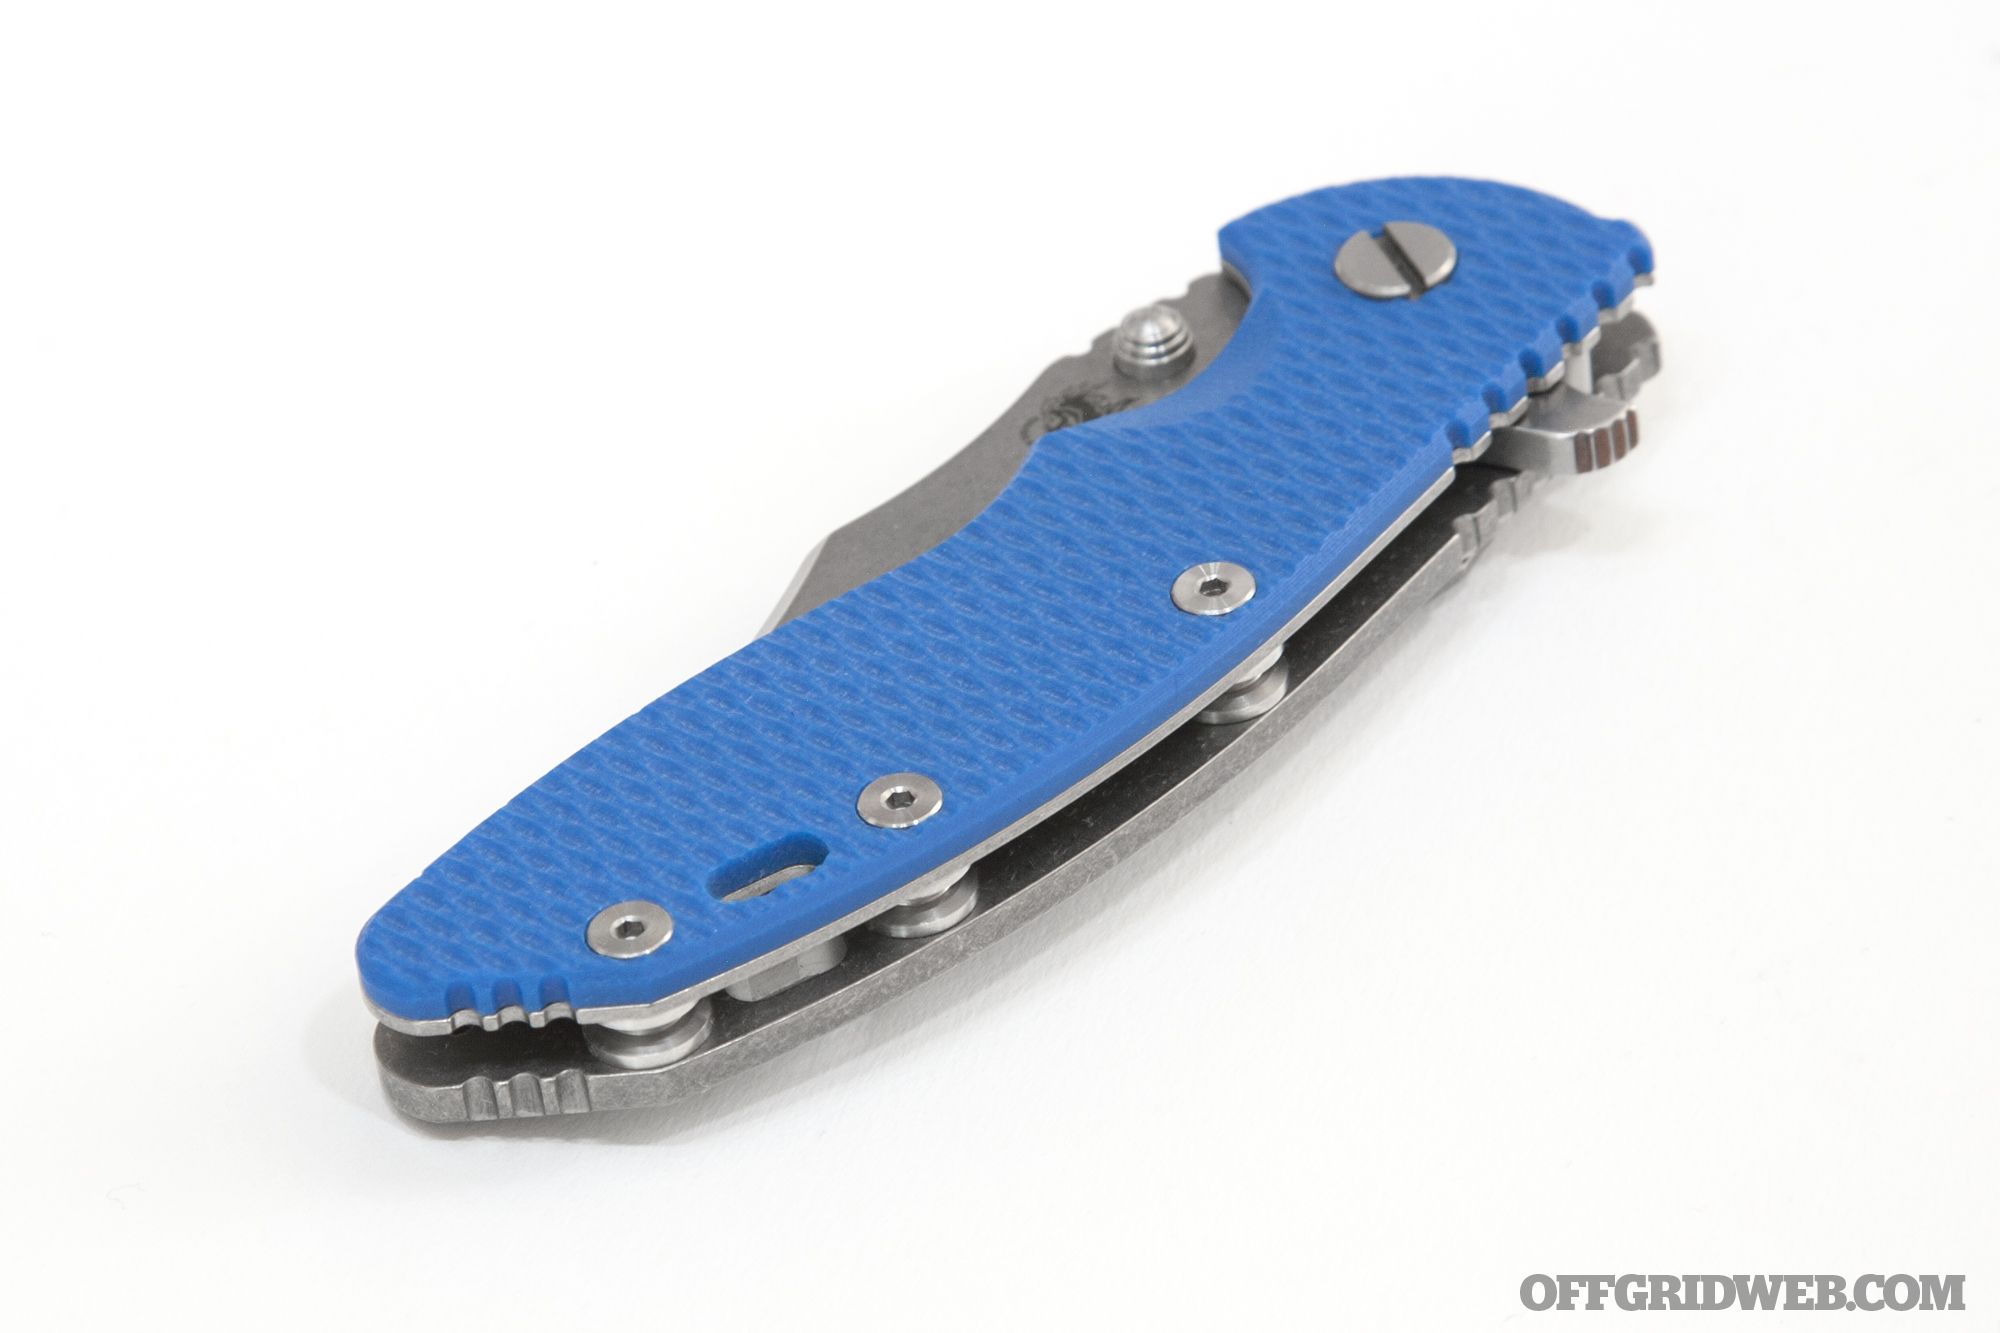
How to select and prioritize your gear, as well as improvising with what you have, was another point of discussion. You'd be surprised how much junk is lying around in a major city and can be converted into a striking or stabbing implement. Just take a walk around the parking lot of a restaurant and you'll see what we mean.

10-lessons-from-an-urban-escape-and-evasion-class-improvised-weapons

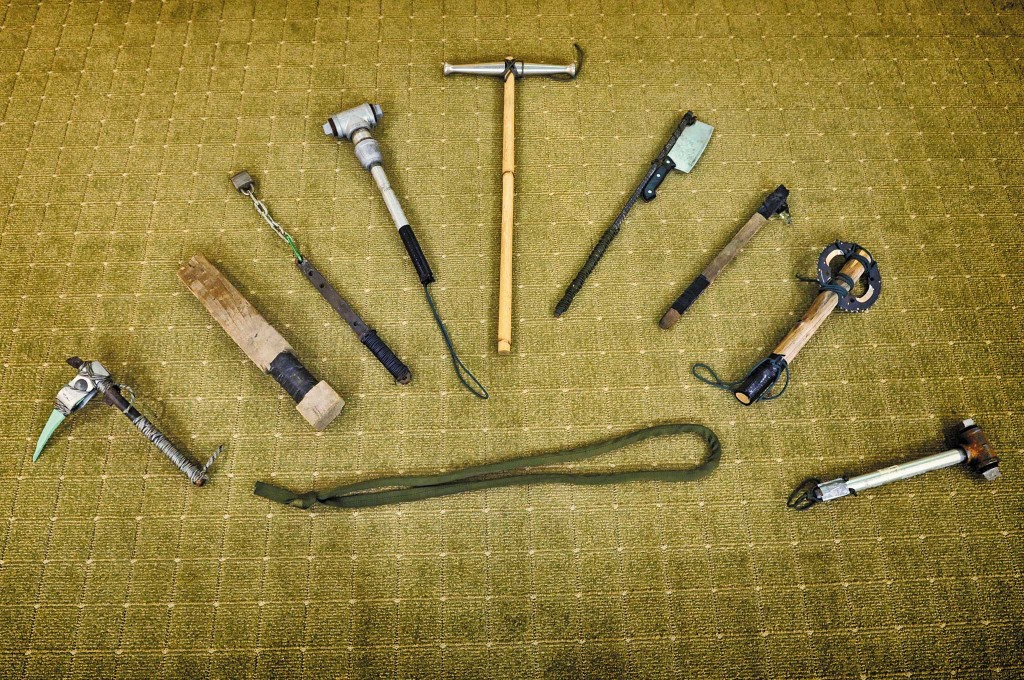
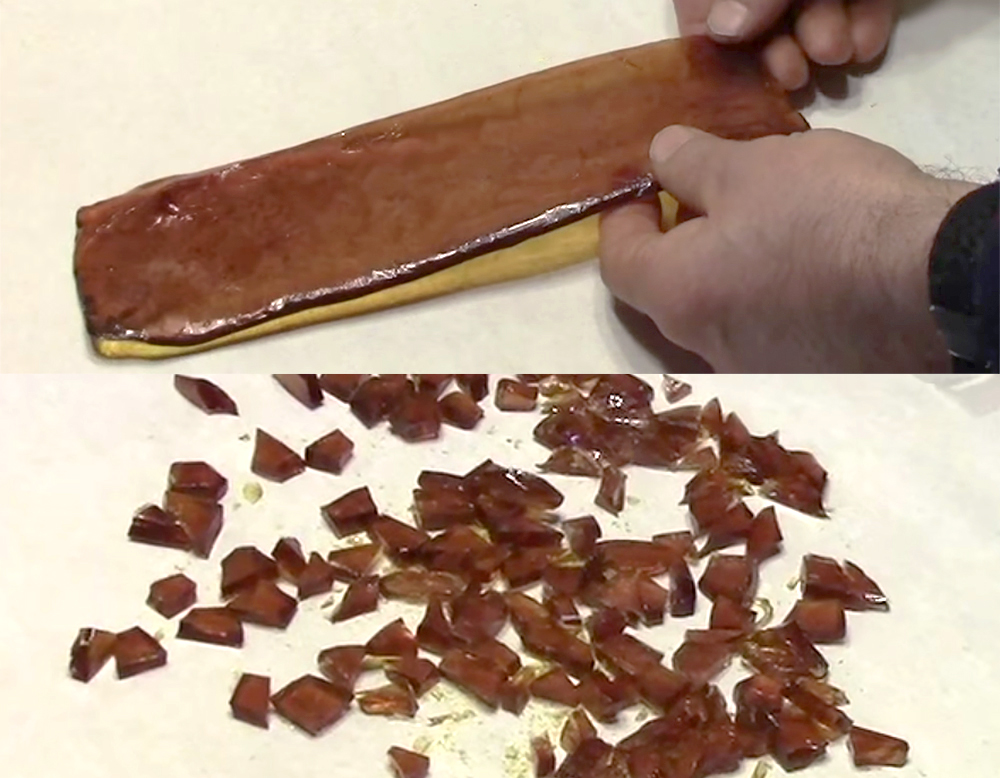
Look near trash enclosures and construction sites for the really good stuff. Other small items may not be suitable as weapons, but can help you break out of restraints. Finding a bobby pin, paperclip, or empty soda can goes a long way when you need to cut through something or pick locks.

Lesson 10: Use Counter Surveillance

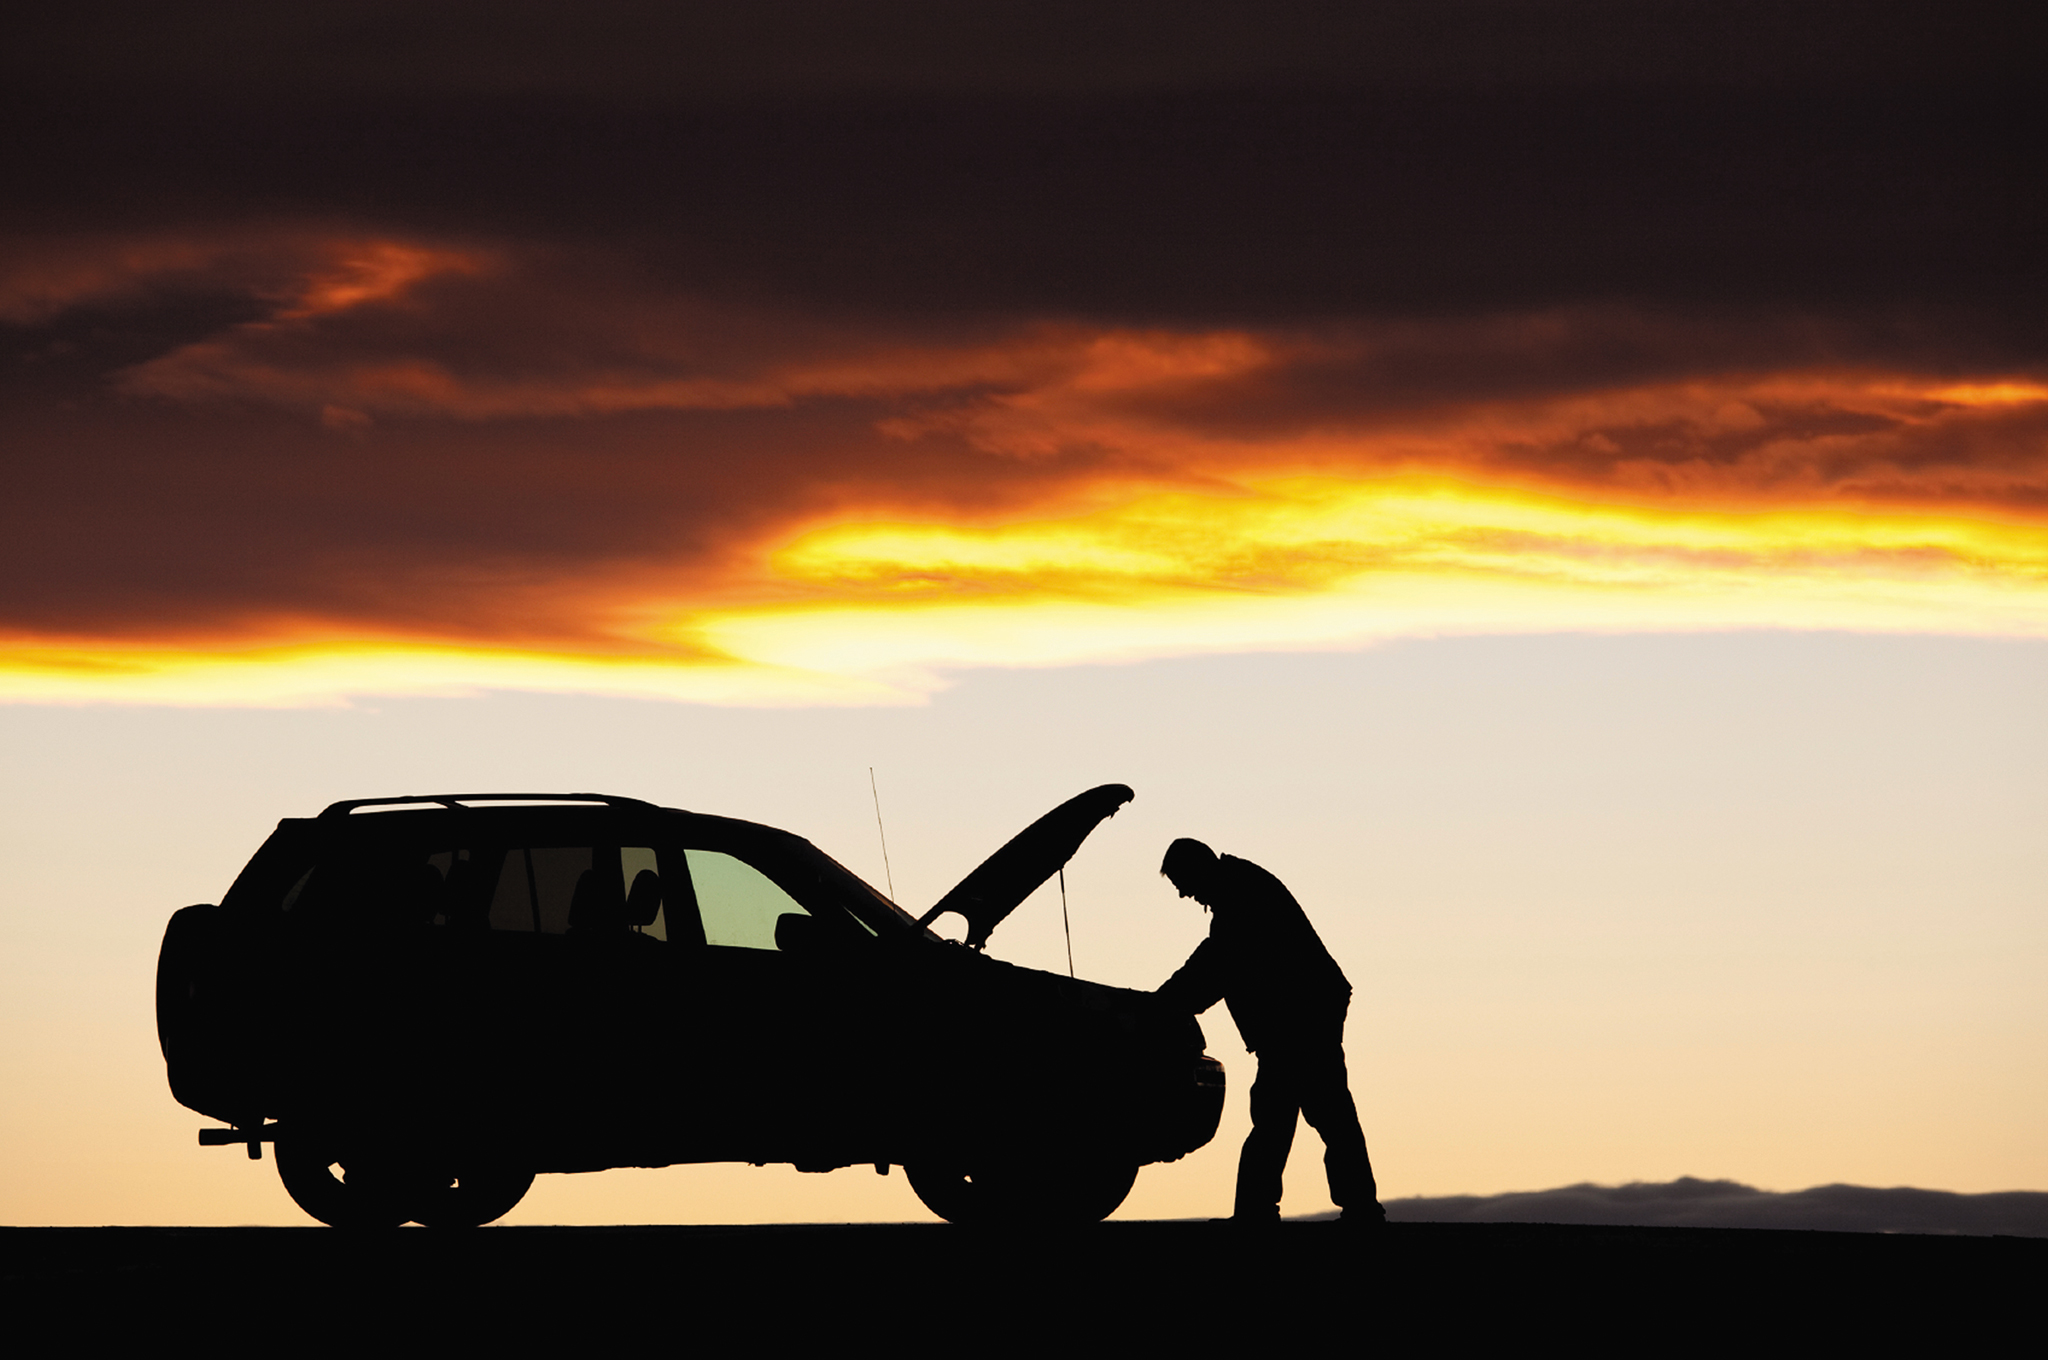
Learning to spot suspicious behavior and people following you can help you devise “disinformers” to throw them off. Look for suspicious vehicles cruising the area repeatedly. Trust your gut if something about them appears unusual. Broken down and parked vehicles with people gathered around or sitting inside, or individuals loitering nearby, might be an indication that you're being watched, particularly if you're in a foreign country.

Check the rearview mirror often when you're driving. Do not take the same path to and from your destination each day.

Are cars following you for more than a few miles? Make multiple stops and direction changes to eliminate the possibility of coincidence. Be aware of this, even in your own hometown. Home invasions often begin with the enemy picking soft targets who are oblivious to anyone following them and gathering intel on their living situation.

If you think someone is following you, drive to the nearest police station and pay attention to the license plate number. Leave enough space between your vehicle to see where the tires of cars in front of and behind you touch the ground. This will enable you to switch lanes easily if someone tries to box you in. Never get out of your vehicle, unless you're the victim of a carjacking and can run. You're sitting in a 3,000-pound weapon and can use it as such if a mob tries to attack you. Look into evasive driving courses as a way of enhancing this skillset.

Conclusion

Reeve and onPoint Tactical travels the country holding a variety of courses. Our particular class was an amazing experience and provided us a wealth of potentially life-saving knowledge. As Reeve would say, “The only way out is through.” A real-life survival situation is not the place to practice — courses like these are.

10-lessons-from-an-urban-escape-and-evasion-class-classroom-instruction

The more you rehearse skills like these, the better your odds are if you're in an area where the rule of law disappears or you're kidnapped. You can live in denial about the likelihood you'll ever be in a dangerous situation, but those who choose to do so become statistics. This would be a great way to introduce friends or family to the importance of prepping/survival and do it in an informative and exhilarating way.

10-lessons-from-an-urban-escape-and-evasion-class-onpoint-tactical-class

Oh, and for those keeping score, we did indeed pass the final test by escaping our restraints, hitting every checkpoint, and making it to the rendezvous site without being detected. It gave us renewed confidence in what we did know, but also reminded us how much we still need to learn.

Hidden in Plain Sight

10-lessons-from-an-urban-escape-and-evasion-class-wazoo-survival-gear-cache-belt

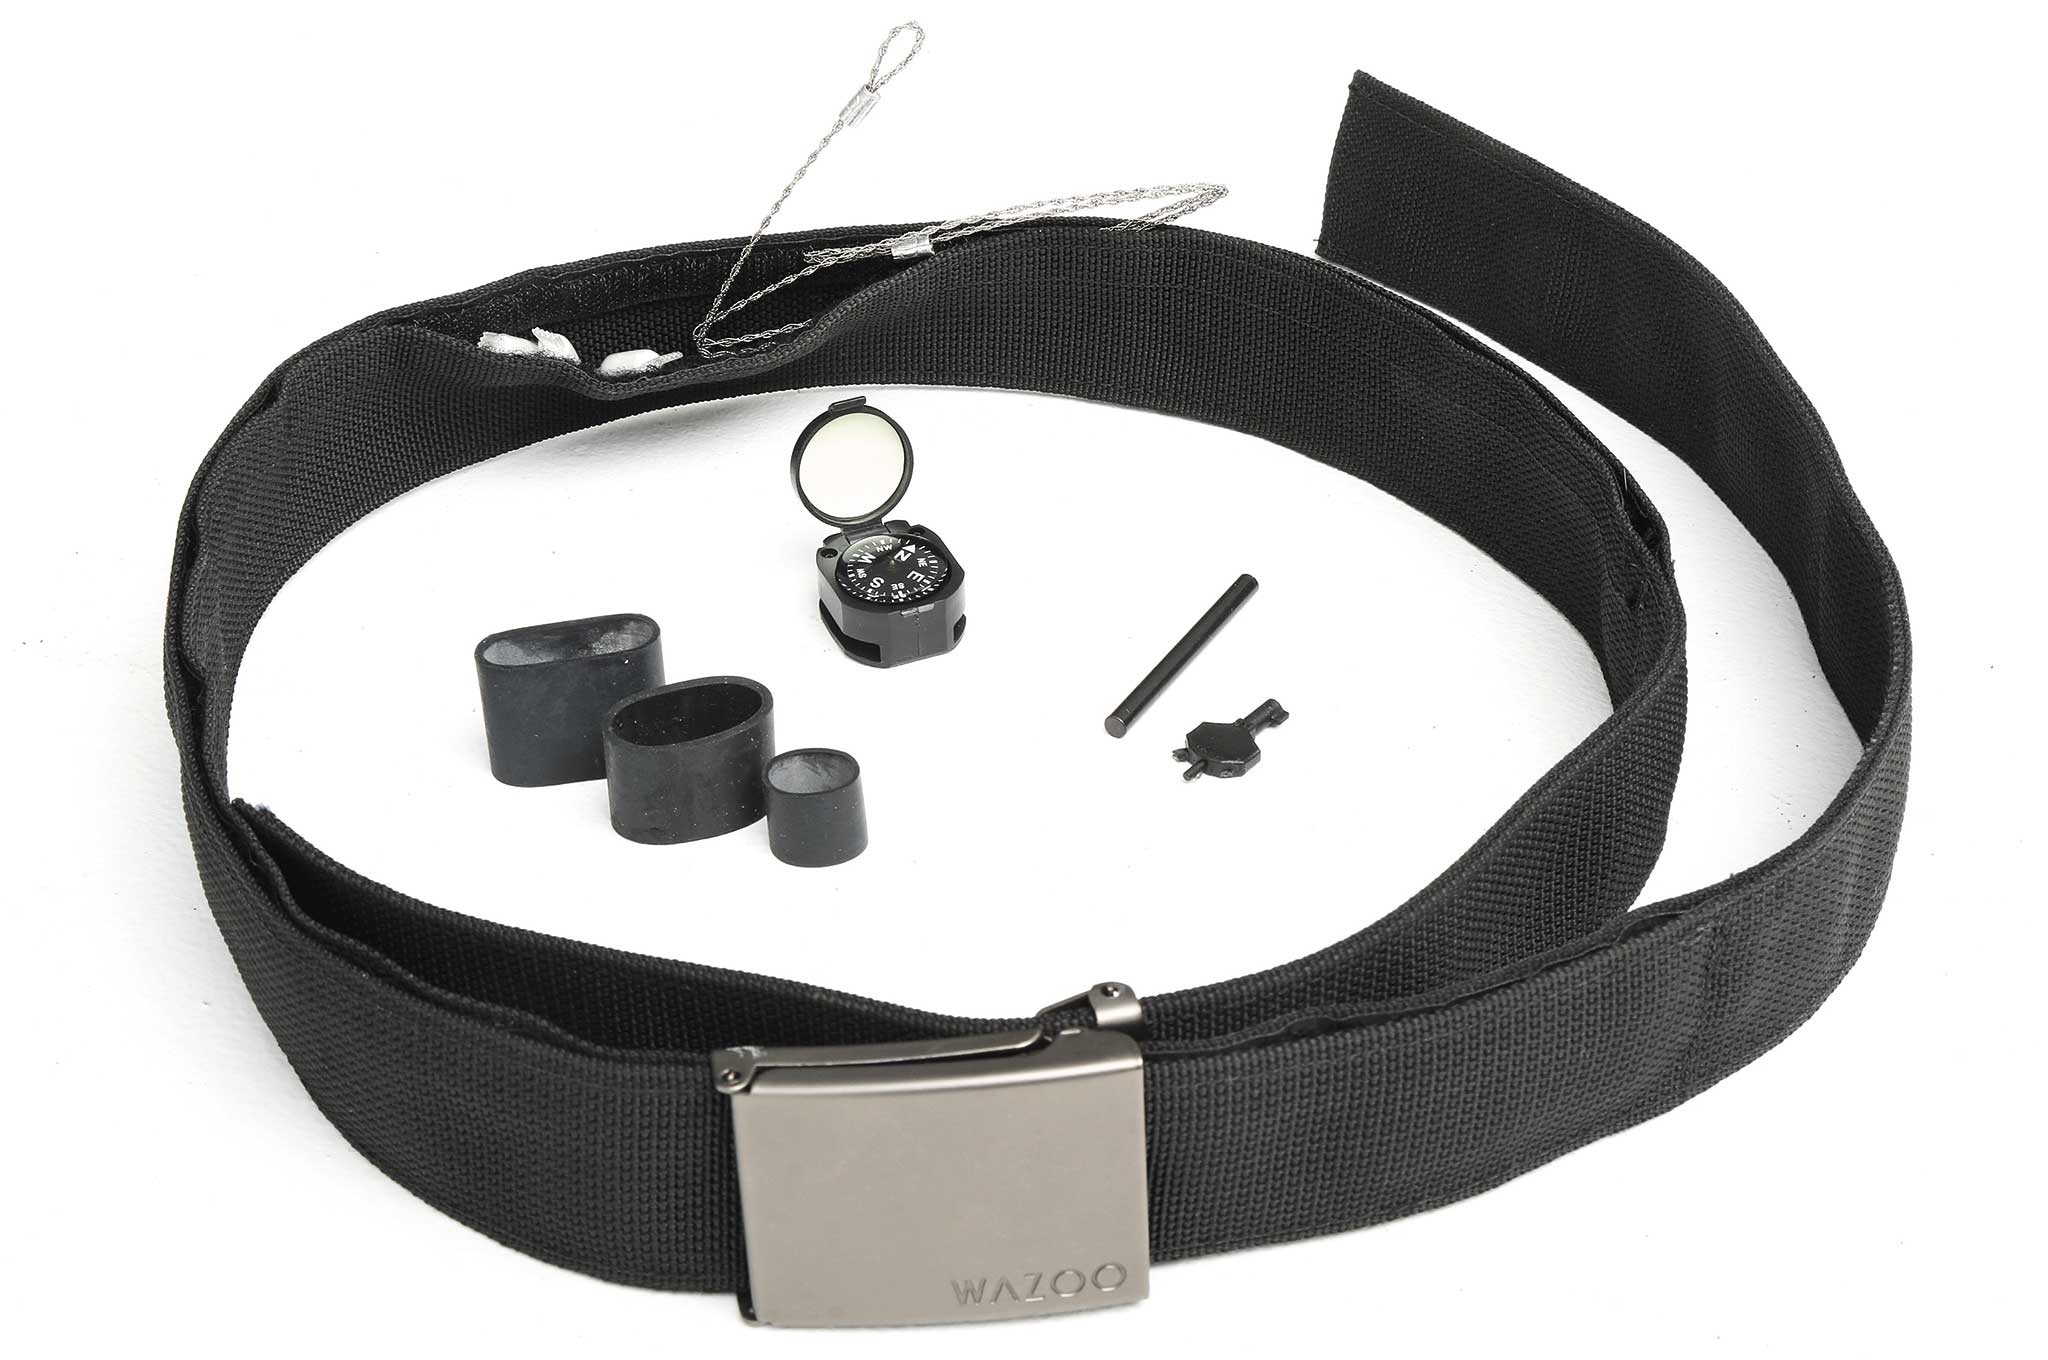
No one plans to be kidnapped, but at least your apparel can give you an edge if you're ever put in that situation. Wazoo Survival Gear let us borrow one of its Cache Belts for onPoint Tactical's Urban Escape and Evasion Class. Not only does it look innocuous, but the hidden pocket contains lots of tools that'll help you escape. A plastic handcuff key, wire saw, compass, ceramic knife, Ferro rod, and bandages are just a few of the items it comes with. We ran the course wearing this, and it wasn't cumbersome at all. Something to think about, especially if you'll be traveling into potentially hostile territory.
www.wazoosurvivalgear.com

Source:

onPoint Tactical
www.onpointtactical.com

More From Issue 19

Don’t miss essential survival insights—sign up for Recoil Offgrid's free newsletter today!

Read articles from the next issue of Recoil Offgrid: Issue 20

Read articles from the previous issue of Recoil Offgrid: Issue 18

Check out our other publications on the web: Recoil | Gun Digest | Blade | RecoilTV | RECOILtv (YouTube)

Editor's Note: This article has been modified from its original version for the web.


Frostbite Treatment Drug Being Studied in Canada

Frostbite is an insidious threat. While it can cause the same level of tissue damage as a severe burn, it doesn't create the reflexive pain response that intense heat produces — instead, it slowly numbs your peripheral nerves. By the time you feel pain or notice visual symptoms, the damage may have already been done.

In the past, we wrote a comprehensive guide to frostbite diagnosis, treatment, and prevention. Since then, a new method of frostbite treatment has undergone testing in Canada's frigid Yukon territory, and the results are promising. This research was spearheaded by Josianne Gauthier, a pharmacist at Whitehorse General Hospital, and her colleague Dr. Alex Poole.

Frostbite treatment iloprost medical cold winter snow 1

Josianne Gauthier (pictured) worked with Dr. Alex Poole to test Iloprost for frostbite treatment. Photo: Whitehorse...

The pair were inspired by European doctors who have used a drug called Iloprost to treat frostbite. Iloprost is a vasodilator used to treat pulmonary arterial hypertension — in simple terms, it opens up blood vessels to alleviate conditions which cause high blood pressure. Frostbite constricts blood vessels near the skin to consolidate warm blood at the core, so it appears that Iloprost counteracts this by restoring blood flow to the extremities.

Frostbite snow cold winter medical health skin 13

Illustrations of the three stages of frostbite. Source: The Mayo Clinic

Poole said, “At the time, this approach was not well-known [in Canada], and the drug was not available for use in North America.” Gauthier and Poole worked with Health Canada to receive special permission for limited testing of Iloprost in the Yukon. Initial tests produced encouraging results — so far, two patients with severe frostbite have been treated with a combination of rapid rewarming and Iloprost, and both patients were able to avoid amputation and serious long-term damage.

Survival scenarios winter log cabin house snow

This study has encouraged other hospitals in Canada to apply for permission to use the drug. If results continue to produce positive results, it may lead to widespread adoption of Iloprost for frostbite treatment in Canada and potentially even the United States. However, Poole reiterated in an interview that quick access to professional medical attention is the key to recovery from frostbite:

“It is critically important to seek care for frostbite within the first 24 hours of exposure. Unfortunately, many cases of the injury still go unchecked, or people wait too long to seek medical assistance.”

For more information on frostbite diagnosis, treatment, and prevention, read our article titled “Frostbite 411”.


New: Steel Will Gekko 1555 Folding Knife

First and foremost, a knife is a cutting tool, but there's more to it than that. A good knife needs to cut smoothly, but also to be durable and comfortable. And, while we're not about to bedazzle our blades with rhinestones and glitter, aesthetics also come into play. If all else is equal, most of us tend to gravitate towards knives that look cool and fit our taste.

Steel Will Gekko 1555 folding knife 5

Most knives play it safe in the looks department, sticking to varying quantities of silver and black. Of course, there's nothing wrong with this — most of my own EDC folders stick to these finishes — but it's also good to see more colorful options becoming available.

Steel Will Gekko 1555 folding knife 3

The new Steel Will Gekko 1555 uses an interesting shade of maroon micarta on its handle, paired with a black PVD-coated 3.5-inch blade and satin silver hardware. Steel Will says that this “may not be a typical color combination for folding knives, but it emphasizes the individuality of its owner.” Whether you love it or hate it, it's not a color you see very often on a knife.

Steel Will Gekko 1555 folding knife 4

The Gekko 1555 is made in Italy with a D2 steel blade hardened to 59-60 HRC and a sturdy lockback mechanism. This knife is part of the Gekko Mini family, though its 7.87-inch total length isn't really what we'd consider small. This knife tips the scales at 4.75 ounces, and includes a reversible pocket clip (tip-up only) and lanyard hole.

Steel Will Gekko 1555 folding knife 2

This knife is currently available for pre-order, but we're told it will be available soon. MSRP for the Gekko 1555 is $220. For more information, visit SteelWillKnives.com.


Spruce Pitch Chewing Gum for Oral Hygiene

Maintaining a positive mental attitude can be difficult during survival situations. So, when things aren't going your way, it's important to have some go-to methods of boosting your morale. You might take some down time to read a favorite book, play cards, draw or write, or enjoy a tasty snack. These activities help you stay productive, and take your mind off the harsh realities of your situation.

Spruce pitch chewing gum teeth candy sugar 6

Chewing gum also falls into this morale-boosting category. It provides a burst of flavor, and keeps your mind and jaw muscles occupied. Scientific studies have even shown that chewing gum can significantly reduce anxiety and fatigue and improve your mood. On top of all this, many varieties of chewing gum can improve oral hygiene and keep your breath smelling fresh.

Spruce pitch chewing gum teeth hygiene bacteria 2

It may not look appetizing, but this spruce pitch can be turned into tasty chewing gum.

Unfortunately, during a survival scenario, you probably won't be able to stroll into the local grocery store and pick up a package of your favorite minty gum. Outdoorsmen in the past couldn't either, so they learned to make their own chewing gum from the sap of coniferous trees, such as pine, spruce, and fir. This natural gum has a refreshing flavor, and its antiseptic properties can also help keep your mouth healthy.

Spruce pitch chewing gum teeth hygiene bacteria 1

After cleaning, melting, and straining the pitch, it can be poured into a container to harden.

In the video below, Lonnie of Far North Bushcraft and Survival shows a step-by-step process for making spruce pitch chewing gum. It's a relatively easy process, but you will need some basic tools: two metal cans, a metal strainer, an oven or heat source, foil or parchment paper, and some corn starch (to prevent sticking).

Spruce pitch chewing gum teeth hygiene bacteria 3

The solidified gum is broken into bite-size pieces, which will be coated with corn starch.

Lonnie also makes an important note: be careful how you chew this gum, as it may stick to your teeth. The last thing you want in a survival situation is to lose a filling or break a crown when no dentist is available. However, with a little caution and an active jaw, this gum can spruce up your breath and keep your spirits high.