Ignik FireCan: Bringing The Heat

Ammo cans are the Tupperware of the emergency preparedness world. Although they were originally intended to carry loose ammunition or machine gun belts, we’ve seen these rugged, inexpensive stamped steel boxes repurposed to contain everything from tools and camp cooking utensils to fishing tackle, portable radios, and medical gear. Some DIYers even outfit them with batteries and USB ports to function as a portable charging station, or with speakers to serve as a boombox. Washington-based gear company Ignik Outdoors came up with their own ammo can contraption — a portable propane fire pit called the Ignik FireCan — and has continued to develop and upgrade it with some clever features.
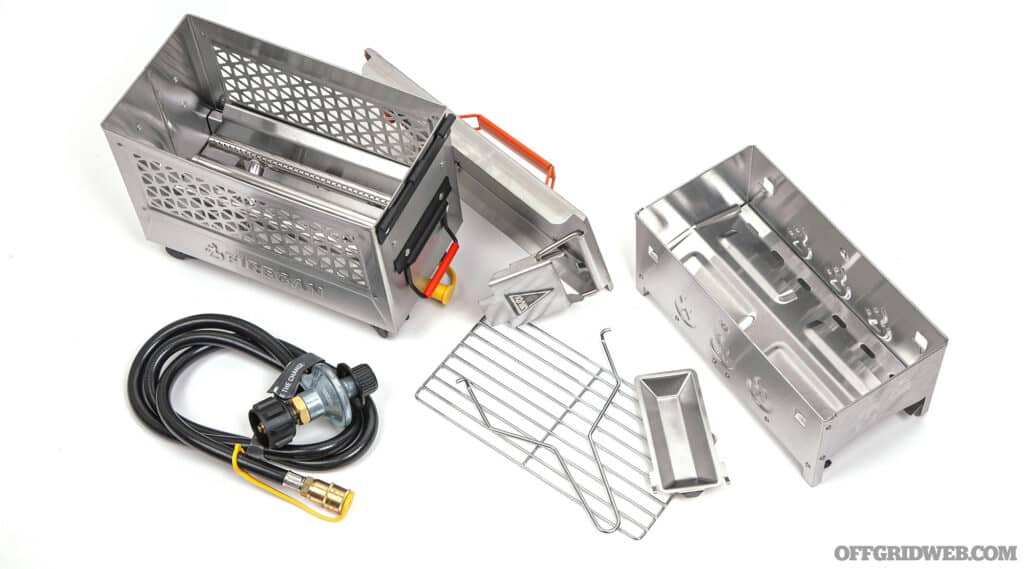
The FireCan Deluxe includes a grill insert with removable spring-loaded handle, a drip tray, and a 5-foot quick-release hose with an adjustable regulator. If you pack everything carefully, it all fits inside the FireCan for easy transport.

Above: The FireCan Deluxe includes a grill insert with removable spring-loaded handle, a drip tray, and a 5-foot quick-release hose with an adjustable regulator. If you pack everything carefully, it all fits inside the FireCan for easy transport.

Buy or DIY?

The concept of converting an ammo can into a mini propane fire pit is nothing new. If you’re handy, you can make one by drilling a hole in the side of an ammo can, inserting a capped piece of pipe with some smaller holes drilled in it, and adding a fitting on the end to attach a propane tank. You can buy these cans in the form of DIY kits or complete units from a variety of vendors. You can also make a shotgun with some pipe, a roofing nail, and a 2×4 from the hardware store … but a Beretta 1301 it ain’t.

The moral of the story is that DIY projects are fun and can save you some money, but sometimes it’s worth paying more to have a thoughtfully engineered product with added features and quality-of-life improvements. Such is the case for the Ignik FireCan, especially its Deluxe package.
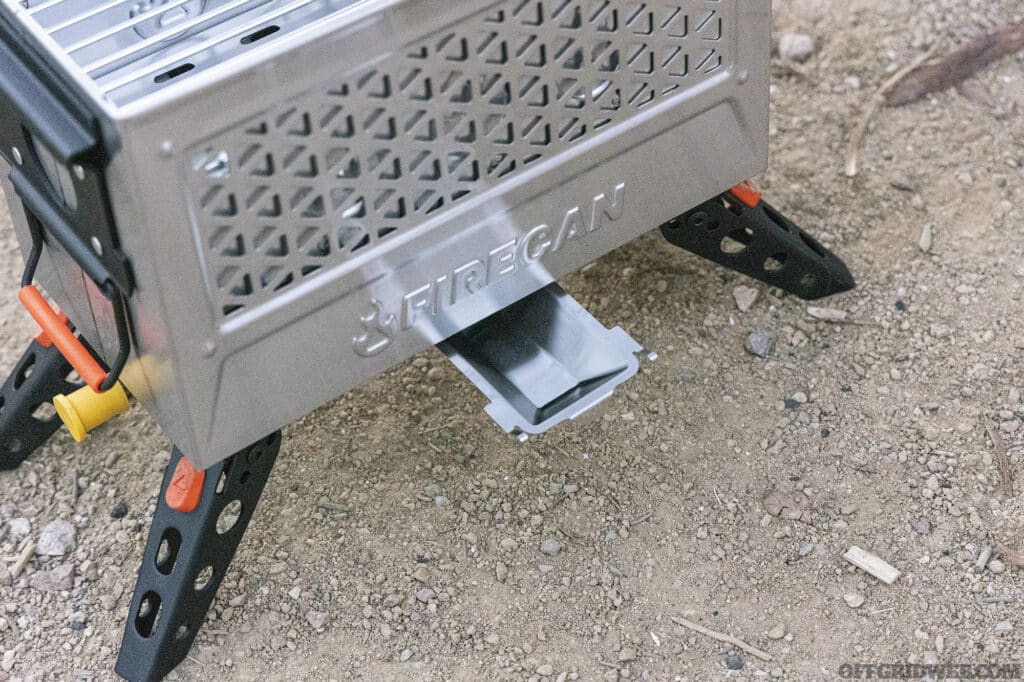
The removable drip tray gathers any residual grease from your food, making cleaning easier and keeping mess to a minimum.

Above: The removable drip tray gathers any residual grease from your food, making cleaning easier and keeping mess to a minimum.

The standard edition of Ignik’s FireCan ($200 MSRP) is a powdercoated steel can with mesh grates cut into each side to increase airflow, heat transmission, and visibility of the flames. It also has heat-resistant silicone carry handles and four folding legs that lift the can off the ground, reducing the risk of your fire scorching the ground or spreading out of control. Rather than a basic screw-on propane connector, it has a locking quick-release fitting and includes a matching 5-foot hose with adjustable regulator. After removing the can’s lid and unfolding its legs, just connect the regulator to any standard 20-pound/4.6-gallon propane tank, or to one of Ignik’s convenient 5-pound/1.2-gallon Gas Growlers, as seen in this article. Then, click the other end of the hose onto your FireCan, light it through the included access hole, and enjoy your portable heat source.

For more radiant heat, you can fill the can with some fire rocks to increase its thermal mass. Ignik offers tumbled lava rocks which weigh 5 pounds, as well as ultra-lightweight 1-pound ceramic “Moon Rocks” that can be used to fill your FireCan. Each of these also varies the flame pattern to create a more natural fire pit experience, as opposed to the propane burner’s symmetrical jets.
The Deluxe Gas Growler comes with a black padded carrying case as well as the standard adapter hose. With this setup, we won’t be buying any more of those short-lived green propane bottles for our camp stove.

Above: The Deluxe Gas Growler comes with a black padded carrying case as well as the standard adapter hose. With this setup, we won’t be buying any more of those short-lived green propane bottles for our camp stove.

FireCan Deluxe

Recently, Ignik introduced the FireCan Deluxe ($300 MSRP), which improves upon the regular FireCan in several areas. The first thing you’ll notice is its brushed silver finish, which indicates stainless steel construction. This will be more corrosion-resistant than the black powdercoated carbon steel, even if it gets a little scratched and banged up over time. It also discolors naturally into bronze and gunmetal hues with use, developing a unique patina. But its biggest difference is revealed when you open the lid.

Beneath its lid, the FireCan Deluxe features a removable grill insert that’s constructed from more stamped stainless steel. Its inner surface is ramped and slotted to funnel drippings down gutters and into a removable drip tray that sits in a slot at the base of the unit. Four hooks in the corners of the grill insert hold a 5×10-inch rectangular wire grill — the perfect size for hotdogs, hamburgers, chicken breasts, veggies, and other small items. Granted, you won’t be making a feast for the whole family on this setup, but it’s perfect for cooking a quick meal for one or two people.
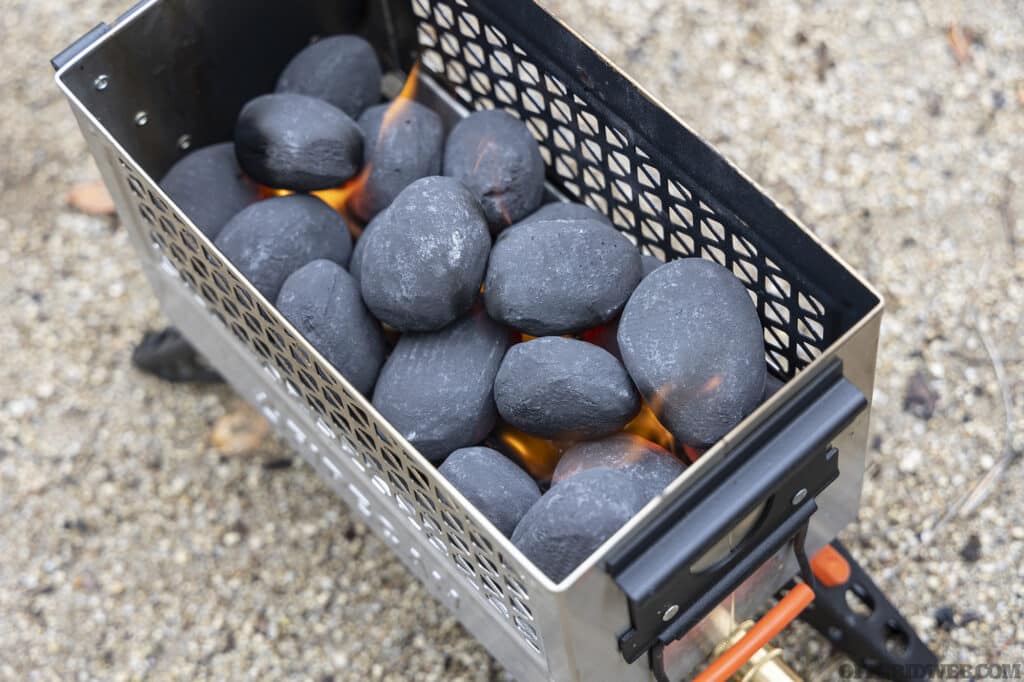
These ultra-light Moon Rocks resemble charcoal briquettes, but they’re actually made from blown ceramic. Placed atop the burners, they make the flames dance and help your FireCan give off more radiant heat.

Above: These ultra-light Moon Rocks resemble charcoal briquettes, but they’re actually made from blown ceramic. Placed atop the burners, they make the flames dance and help your FireCan give off more radiant heat.

Initiating Grill Mode, as Ignik calls it, requires a slightly different setup than Fire Pit Mode. The FireCan Deluxe contains three burner pipes, rather than two on the original FireCan. The two outside burners are connected to a propane inlet port on one end of the can, and have holes that are angled upward, producing tall yellow-orange flames for Fire Pit Mode. With its propane inlet on the other side of the can, the center Grill Mode burner has its holes arranged horizontally, creating a low blue flame similar to what you’d see on a kitchen stove or propane barbecue. The end result is precise, even heat that cooks food quickly without engulfing it in yellow flames and leaving it tasting like propane.

Remembering which end of the FireCan to connect your propane tank to would be tricky, so Ignik etched helpful pictograms onto each end of the stainless steel box. Next to the Grill Mode inlet, there’s an image of the grill insert and a hot dog on a skewer; the Fire Pit Mode inlet shows the can with tall flames coming out of it.
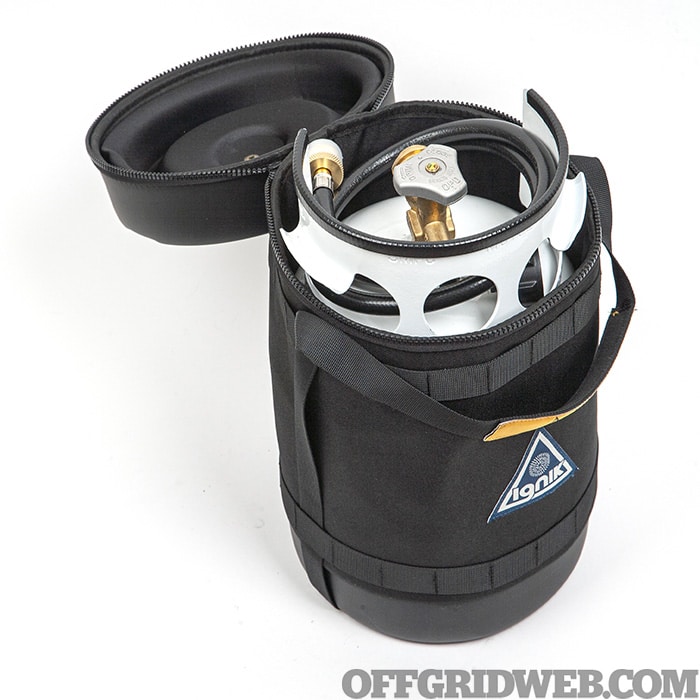
Photo of the ignik firecan propane gas growler deluxe.

Gas Growler Deluxe

Although the FireCan can be connected to any run-of-the-mill 20-pound propane tank, such as those found under most barbecue grills, lugging one of those around with such a small fire pit seems impractical. The FireCan’s compact and portable design had us wanting a more portable fuel source. Unsurprisingly, Ignik has a solution: the Gas Growler.

The most basic version of the Gas Growler ($110) is essentially a standard 5-pound propane tank with an Ignik logo and a few extras. It has rubberized strips applied to the sharp edges on the top and bottom of the tank, preventing it from digging into your palm as you carry it or sliding around on smooth surfaces. It also includes a 4-foot adapter hose that allows this larger tank to be used with 1-inch 20UNEF propane devices — the kind that normally require disposable 16-ounce green propane bottles. So, in addition to fueling the FireCan, we can use this tank with our Camp Chef stove and other propane-powered camping gear.
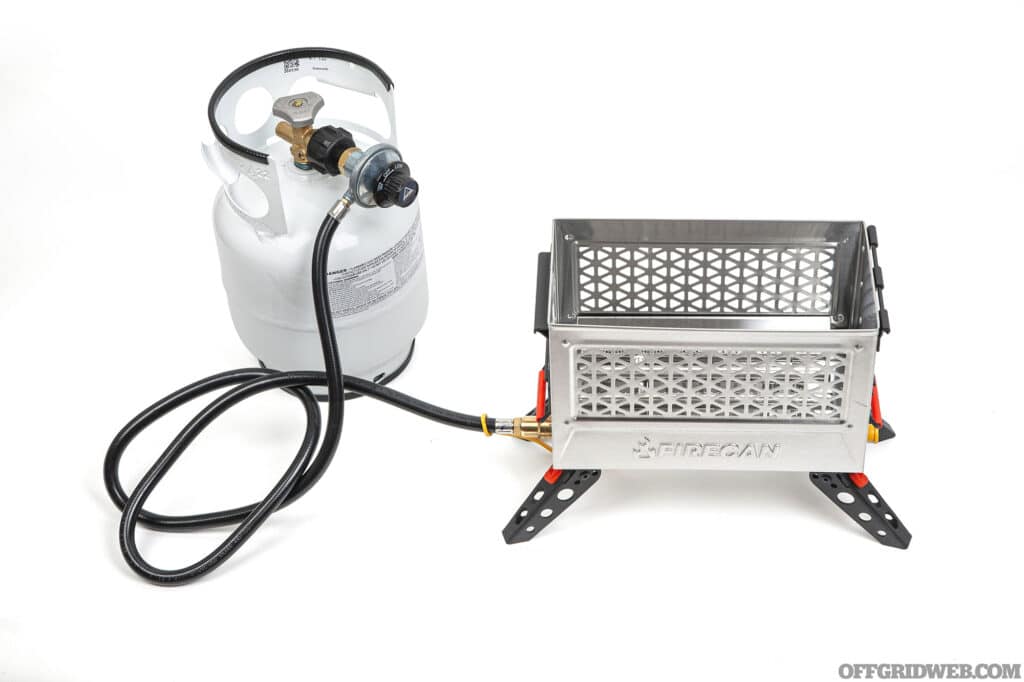
Studio photo of ignik firecan fully assembled.

Speaking of green propane bottles, they’re a hassle to carry and swap out, and they’re also not environmentally friendly due to their single-use, disposable design. A full Gas Growler lasts as long as five green bottles, but refilling it costs about the same as one ($5) and you won’t be packing out a bunch of empty and partially used bottles at the end of each trip. It’s less wasteful and more cost-effective — that’s a win-win.

The Gas Growler Deluxe edition ($150) adds a high-quality fitted carrying case in either a retro-style white/orange/brown color scheme or plain satin black (an easy choice for us). The case adds cushioning to protect the tank, makes it easier to carry, and has enough room for the hose, a wrench, and other small items under its zippered lid. The outside of the case is lined with two rows of nylon MOLLE webbing that could be used to strap the tank down or retain tools.

Granted, if you don’t care about the hose, edge protectors, and carrying case, you can save some money and buy a generic 5-pound propane tank at Home Depot for about $50. The FireCan works just fine with one of those.
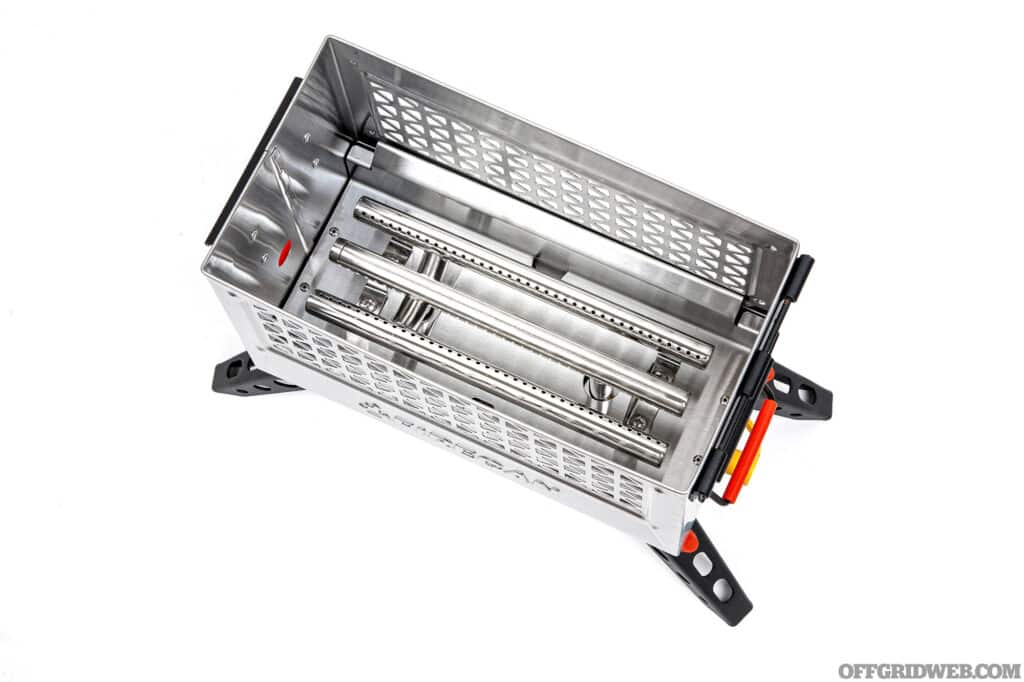
At the base of the FireCan, two of the burners are angled upward to give off tall, warm flames in Fire Pit Mode. The third burner produces a row of smaller blue flames down the middle for Grill Mode.

Above: At the base of the FireCan, two of the burners are angled upward to give off tall, warm flames in Fire Pit Mode. The third burner produces a row of smaller blue flames down the middle for Grill Mode.

In the Field

We spent several months testing our FireCan and Gas Growler, both for fire pit duties and for cooking meals. It’s pretty much perfect for overlanding adventures where space inside the vehicle is already occupied by lots of other gear. A full-size fire pit would normally be considered a luxury item for those trips — nice to have, but not really worth packing and unpacking at every stop. The FireCan and Gas Growler, however, are small and light enough that they’re easy to justify bringing along. The multi-functional nature of having a 5-pound propane tank to power a Camp Chef stove makes it an even easier decision.

Admittedly, the heat from the FireCan isn’t nearly as powerful as a full-blown campfire, but on a chilly evening, two to four people can sit close to the FireCan and still remain comfortable. Unlike a campfire, it’s extremely fast to set up and tear down. In less than 30 seconds, you can get a roaring fire going, and (once it’s cooled down for a few minutes) you can pack it up in a similar time frame. In situations where you may only want a fire for an hour or two before bed, that’s really convenient. The FireCan also doesn’t require gathering enough firewood to sustain a campfire, which usually ends up being a lot more wood than you think you’ll need.

As for grilling, the FireCan Deluxe worked great for hamburgers and hot dogs. The adjustable regulator included with the FireCan made it easy to fine-tune the heat source as our food cooked. Grease collected nicely in the drip tray, and while cleaning wasn’t as easy as a flat-top grill, it wasn’t too difficult. We’d recommend cleaning the grill thoroughly before packing or transporting it — if there’s any grease left on it when you pack up the FireCan, it’ll act as a grease-scented air freshener inside your vehicle until you disassemble and wash it.
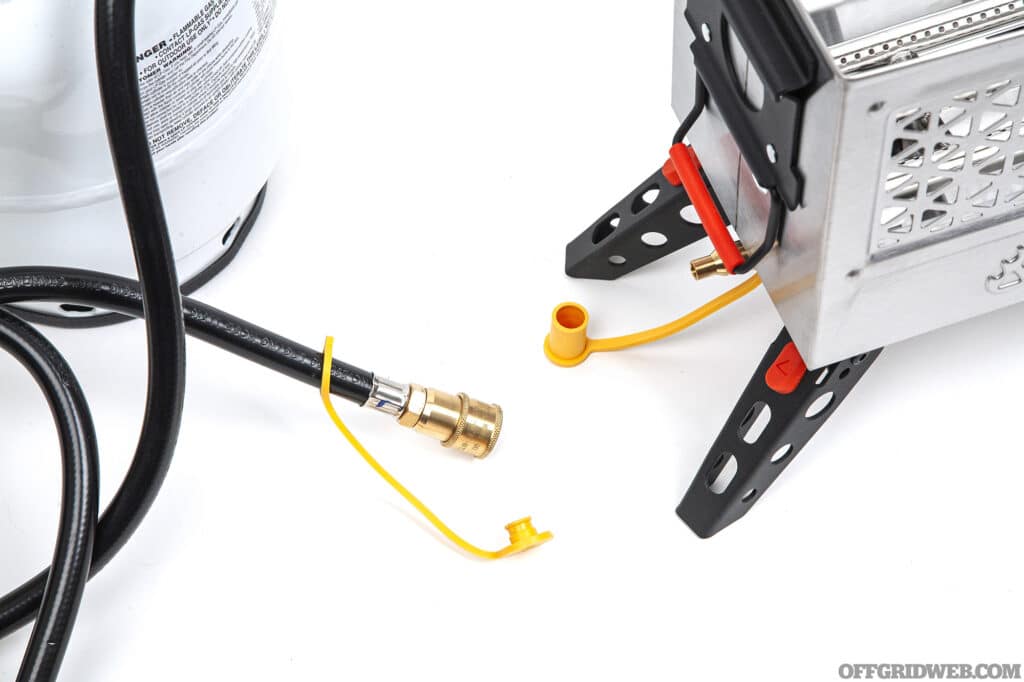
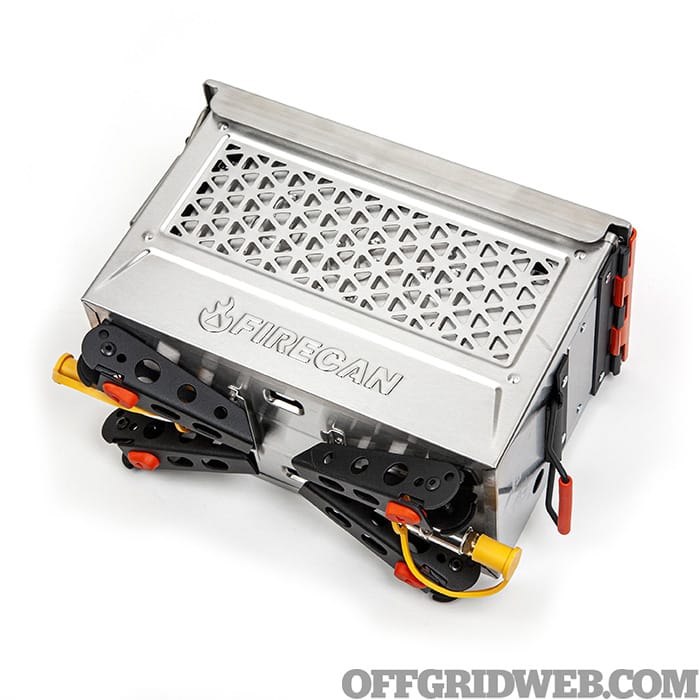
A quick-detach collar makes it simple to attach the FireCan to a propane source without leaks or threading on connectors.

Above: A quick-detach collar makes it simple to attach the FireCan to a propane source without leaks or threading on connectors.

A Note About Fire Restrictions

In wildfire country, it’s normal for the local forestry service to issue bans on open campfires during the dry months. This is a major bummer for anyone who’s planning a camping trip, because sitting around an LED lantern doesn’t have the same appeal as sitting around a warm fire. Thankfully, there are usually exemptions for propane-fueled fire pits and stoves — this means that the FireCan is one of the few ways to safely and legally have a fire at the campsite during wildfire season. Check your local laws to see if this is also true in your area, but if it is, it’s a major selling point for the FireCan and other propane fire pits.
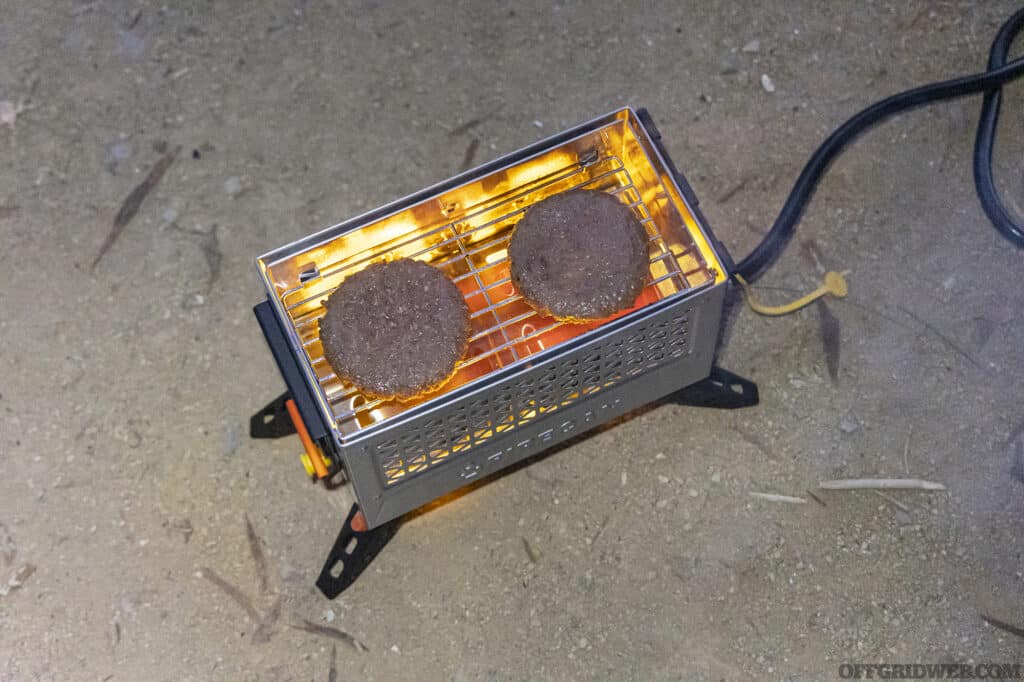
The size of this grill is ideal for two burger patties. If you’re making cheeseburgers, drop the FireCan’s lid back on to trap the heat and melt the cheese slices faster.

Above: The size of this grill is ideal for two burger patties. If you’re making cheeseburgers, drop the FireCan’s lid back on to trap the heat and melt the cheese slices faster.

Closing Thoughts

The Ignik FireCan Deluxe is a versatile tool for camping, overlanding, family outings, and even for use on the back patio at home. Everyone enjoys watching the “Ranger TV” — an old Army Ranger nickname for the hypnotizing allure of a fire — and basking in the warmth it gives off. Although we mostly found ourselves using the FireCan in Fire Pit Mode, the Deluxe edition’s Grill Mode is a nice added feature, and it allowed us to quickly whip up a few burgers or brats at campsites that didn’t have other cooking amenities. The Gas Growler also pairs nicely with the FireCan to create a portable system, so we can bring an instant heat source wherever we go.

Sources

Read More

Subscribe to Recoil Offgrid's free newsletter for more content like this.

Editor's Note: This article has been modified from its original print version for the web.


Survival Rifles: Positional Rifle Shooting

In the book, How to Survive in the Woods by Bradford Angier released in 1969, the author asserts the following about a survival firearm: “The best survival weapon, it follows, is a flat and hard shooting rifle. There is no need to append that it should be rugged, accurate, and durable.” Angier, considered to be one of the foremost voices in the survival community prior to the explosion of internet survival stars, formulated a very logical argument for carrying a rifle as a tool to put meat over the fire. In 1969, the leading .22 rifles on the market were the Armalite AR-7, Marlin model 60, Ruger 10/22, and Remington Model 66.

Even today, despite a couple of them being out of production, these firearms are among the best available, and countless used gun racks have excellent working examples of these durable wilderness tools. Angier was a prolific writer and had dozens of titles to his name. In an even earlier book, he advocated for a centerfire rifle, shotgun, and .22 for long-term living away from society. This practical combination will work just as well today as it did in his era, though the cost of feeding them has made practice with the centerfires much more expensive. Angier’s survival firearm recommendations also added fuel to the “if you only had one gun” campfire debate. Would it be better to have a .22 for taking small game to fill the pot once and also allowing you to carry more ammo, or would it be better to have a larger centerfire rifle to take one animal that you could preserve the meat to create days of rations? The appropriate solution is still a popular philosophical debate.

Photo of a man standing with a firearm.

Above: Standing is the quickest position to get into but also the most unstable. It is most suitable for shorter distance shots or when less time is available for a firing solution.

Since Angier’s time, survival rifles have taken off in popularity with many companies offering take-down models, synthetic furniture, and accoutrements like M-LOK handguards, adjustable stocks, and removable muzzle devices. Firearm ownership has skyrocketed, and the meat shortage of the COVID pandemic left gun store racks empty with folks accepting the idea of hunting their own if supermarkets couldn’t provide. “Survival” became more broadly defined as not just wilderness, but urban and suburban as well. 

Since the first publication of this book, there have been great advancements in how marksmanship is taught, not only for the woods but for the concrete jungle many of us live in. What remains the same are the fundamentals of marksmanship no matter how you use your rifle. Plinking is casual shooting, where it’s easy to blow through 100 rounds in a fun session, but survival shooting is anything but laid back. Each round matters, and how you train should set you up for success when your reality goes sideways. Events of the past few years means it’s worthwhile revisiting the survival rifle concept and, more importantly, the training that mimics reality. We selected a basic .22LR rifle, much like the type Angier recommended, and have highlighted some of the important positions to train and develop like your life depended on them — as someday it might.

Photo of a man aiming with a firearm from the kneeling position.

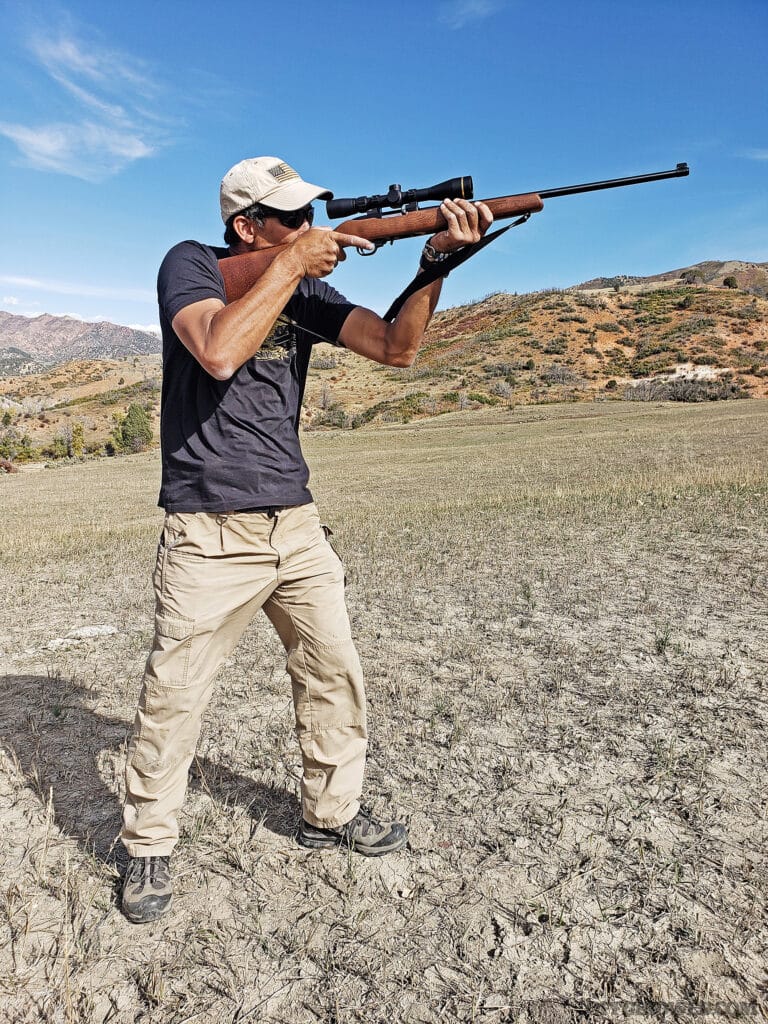
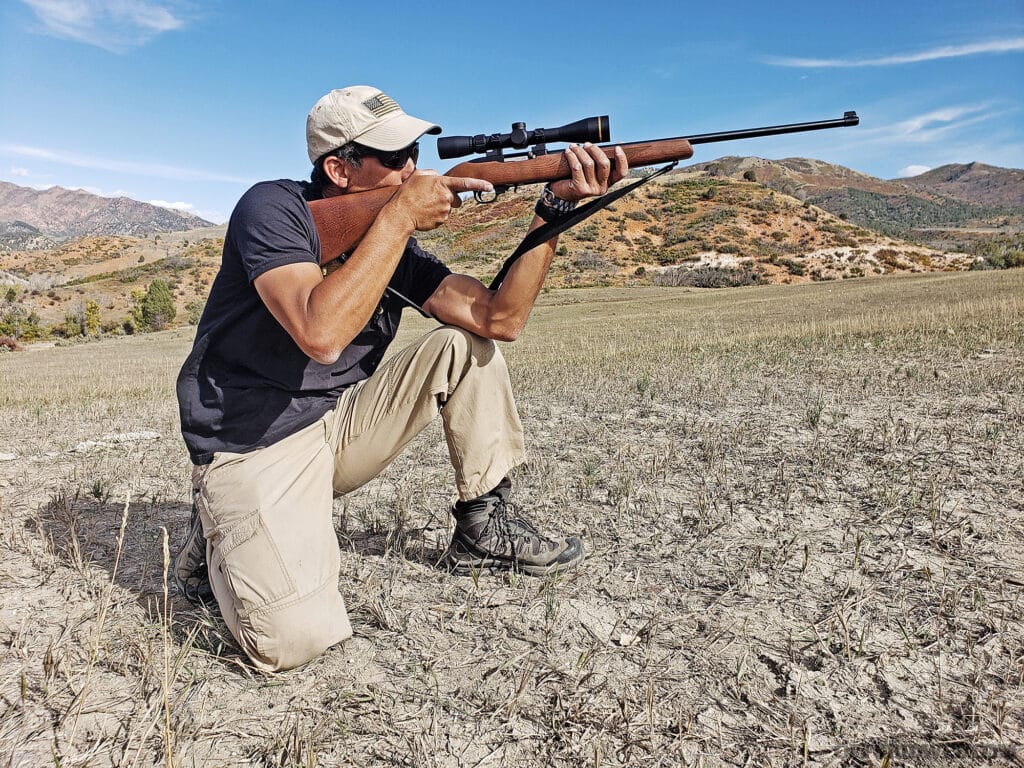
Above: A quick kneel (high or low) can greatly increase stability. The shooter should avoid bone-on-bone contact with the elbow and the knee.

The How and Why

In the early 20th century, the big three shooting positions were standing, kneeling, and prone. Shooting from the prone position offers great stability, but in the field this ideal is seldom presented as a reasonable option. More likely, shots will be taken by hasty kneeling, sitting, or standing with your rifle supported against a tree. You can practice with any firearm, getting into position and dry-firing, but running drills cold doesn’t provide any proof on paper. The jarring recoil of larger centerfire rifles may dissuade shooters from sustained practice from these unconventional shooting positions. The much friendlier .22 rifle helps the shooter make adjustments to their structure, determining if it holds up to pressure and if it results in hits on target.

Photo of a man bracing a firearm against a wooden pole.

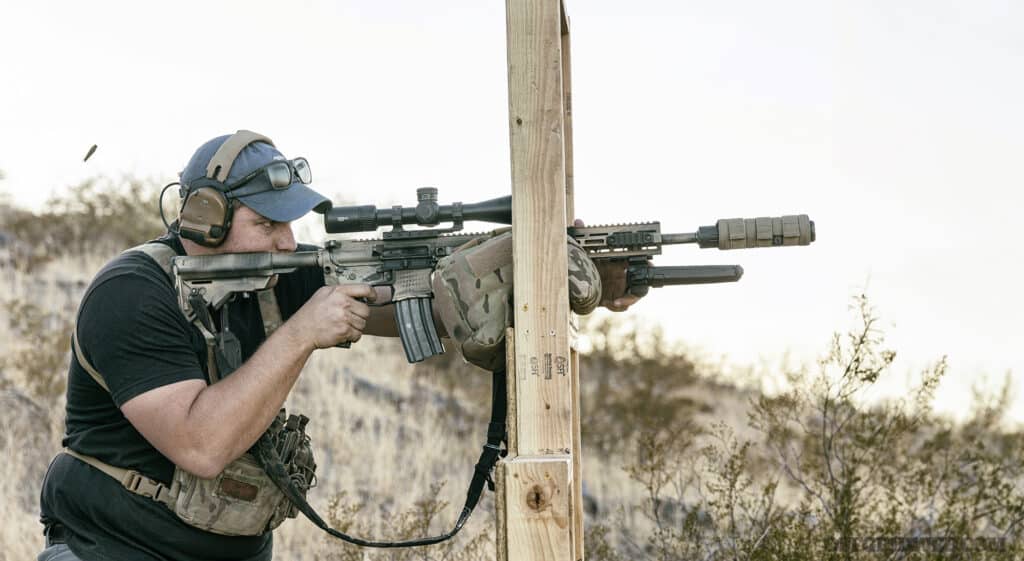
Above: Whether you're using an AR-15, bolt gun, or a .22LR varmint rifle, learning to work from a variety of positions can make you a more well-rounded shooter. This is especially important in a survival setting where every round counts.

Every shooting position presents a trade-off. Prone is stable but takes the greatest time to settle into. Standing is dynamic and allows easier reloading but is less stable. In a survival situation, variations of prone, seated, kneeling, standing, and support side shooting may be needed. Using available objects for increased stability, such as firing off of a backpack or resting the rifle forend on a tree branch, is a real possibility. Training should mimic these scenarios. Additionally, as you move from the most stable to the least stable positions, the size of the target should change to reflect the difficulty of the shot.   

Photo of a man aiming with a rifle from the prone.

Above: Prone is the most stable position but it can be rendered useless in tall grass. Note the shooter’s flat heels and bone structure supporting the rifle

In this economy, perhaps the most compelling argument for training with a .22 is to save money. Material cost has skyrocketed, and the cost of ammunition has steadily risen in turn. The fundamentals of marksmanship can be learned with a rimfire rifle and then later applied to centerfire ammunition. While the diminutive .22 isn’t as capable as .223/5.56 or .30-caliber counterparts, the building blocks of good marksmanship can be applied to either round at closer distances and tracked on paper targets without the need to compare rimfire and centerfire ballistically.

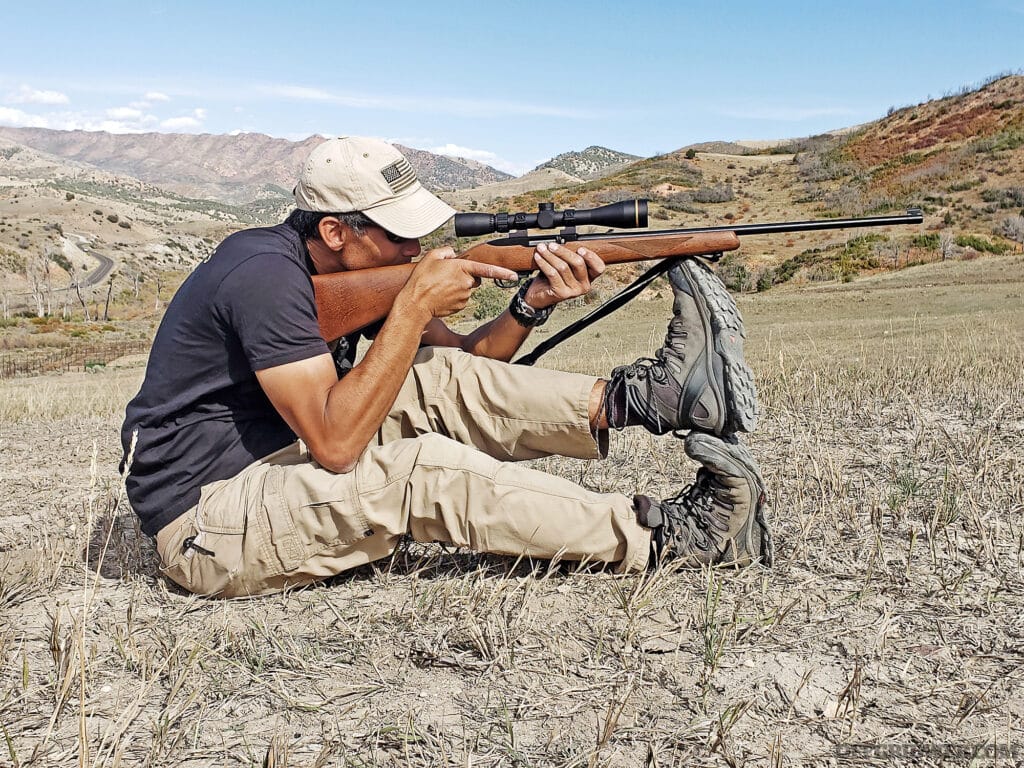
Photo of a man sitting cross legged, aiming with a firearm.

Above: Seated shots are accomplished with legs crossed or extended based on flexibility and comfort. Legs can also be extended if the terrain is not level.

8 Positions to Train

Standing: The standing position, sometimes called “offhand,” offers the fastest solution from a low-ready or high-ready posture. For instance, you may have to take a snapshot at an animal you come across while hiking along a trail. For a quick standing shot, find a repeatable touch point on the chest with the toe of the buttstock, and hold the rifle in position with the optic or sights coming in line with your eye. Standing is quick, but it lacks stability. It’s best used when there’s little time to set up or when your target is close enough. As the range increases, so should your ability to seek a better position for a more stable shot. Standing is optimized with the use of a sling wrapped around the upper arm. One of the benefits of standing is the ability to start walking or running to another location quickly.

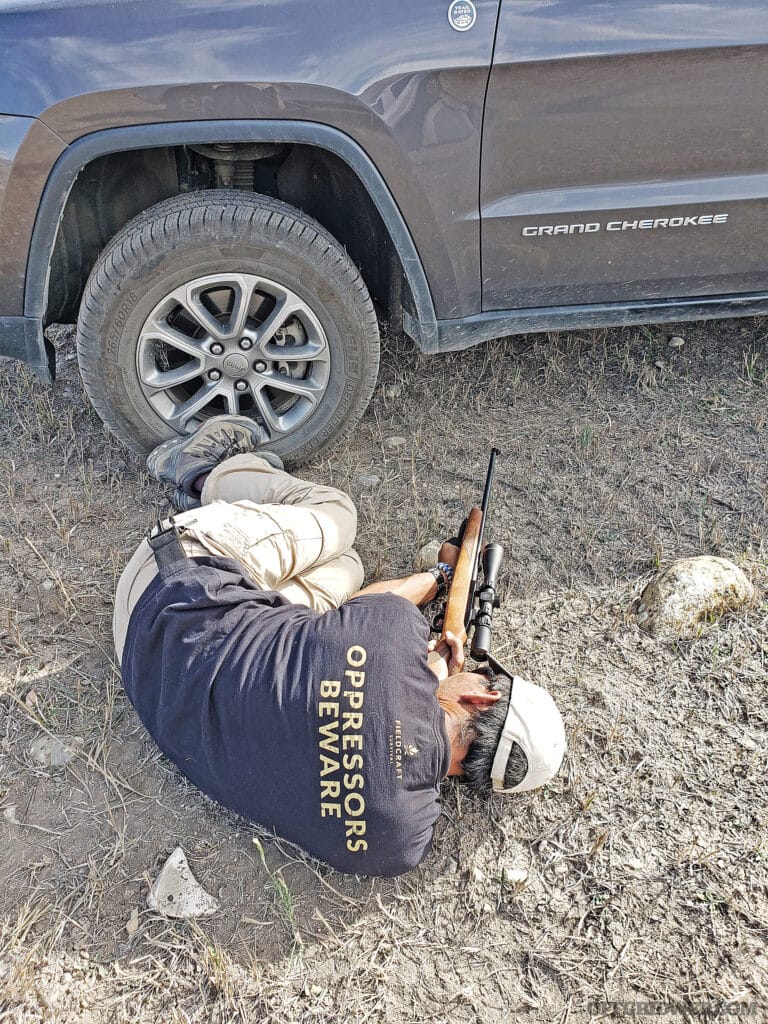
Photo of a man aiming under a vehicle.

Above: Urban Prone (as pictured) uses the cover provided by a vehicle’s axle. The shooter can maintain stability by pushing off of the vehicle’s tire.

Kneeling: If there’s an opportunity to take a knee before a shot, it’ll increase your stability and reduce your profile. Kneeling can be done hastily with an upright posture, or compressed where you sit back on your heel. You can rest more of your shin flat against the ground for additional comfort. Kneeling is an excellent option to lower your level and silhouette. From a compressed kneeling position, place the outside of your support arm on the inside of your upright leg. Avoid bone-on-bone support between your elbow and kneecap. The duration a shooter can maintain a kneeling position will be determined by the substrate on the ground and fitness factors.

Prone: The prone position is the most stable of all the shooting positions, but it takes more time to establish. Prone uses the structure of your arm bones to support the weight of the rifle against the ground. The trade-off for greater stability is the time it takes to reposition if your sights need to move outside of the range of motion prone provides. Prone can also become uncomfortable in colder weather, as it places the body’s core against the ground where rapid conduction cooling takes place. If possible, a sleeping pad can be used as insulation if time permits to set up for a shot. Prone requires more time to work in and out of than kneeling or standing, but the level of accuracy improves dramatically with more points of contact against an immovable object that you’re resting on.

Photo of a man with a survival rifle resting on his stacked feet while he aims.

Above: Stacked feet looks ridiculous to some until they achieve hits with it. Much like barricade shooting, rest the forend and not the barrel to avoid point of impact shifts.

Squat/Crouch: Both squatting and crouching are quick to work into position and reduce your profile. Depending on your own flexibility, you’ll either be able to squat (range of motion will vary, with the greatest being able to sit on their feet) or crouch (similar to kneeling with one leg in front of the other without the knee touching the ground) to various lower levels. Squatting and crouching for some will be limited to bending over slightly at the waistline. Bending at the waistline requires core muscle input and creates muscle fatigue. As lactic acid builds up, your sight picture will become more unstable. Consider this option if you’re hunting in thick brush and dropping your level moves the muzzle below branches that obstruct your shot. A shot from the squat/crouch should be taken quickly before your body fights you. From the squat or the crouch, it’s easy to transition back to standing or lower yourself further into a kneeling or seated position.

Seated: The seated position takes time to establish but is second to prone in terms of stability. Seated can be with ankles crossed, legs crossed, or legs extended based on your comfort level and flexibility. Much like the kneeling position with the elbow of the support arm on the inside of the thigh, the strong side elbow is placed on the inside of the strong side high, creating a base. This reduces the amount of muscular input needed to hold the position, providing more durability. Just like the prone position, you place a large portion of your body on the potentially cold or wet ground, and a good sleeping pad or even a stadium seat can help improve your comfort for a long sit. The seated position can be used in tall grass that would otherwise obstruct the view from the prone position. Seated is moderately durable with repeated shots possible, but you must adjust your natural point of aim if working with a moving target outside the range of motion your seat provides.

Urban Prone: Think of urban prone (also called “Rollover prone”) like a modified sideways prone position. It’s accomplished from either side of the body based on your position relative to the cover and opening available. Urban prone can be done with knees and a shoulder on the ground or tucked to one side with legs compressed in to minimize your profile. While this position takes its name from the tactical world, where shots underneath vehicles, from behind the limited cover of a curbside, and through small firing ports are the only options, it could also be applied in a woodland environment where stacked downed trees provide concealment from your prey and limited options for a more traditional shooting posture. Urban prone is typically taught with AR-style rifles, but it can be used with traditional bolt guns as long as you have the same understanding of sight/bore offset and holds. In both urban and woodland settings, make sure to provide enough offset for your firearm’s moving parts if using a semi-auto weapon so the ground doesn’t cause malfunctions.

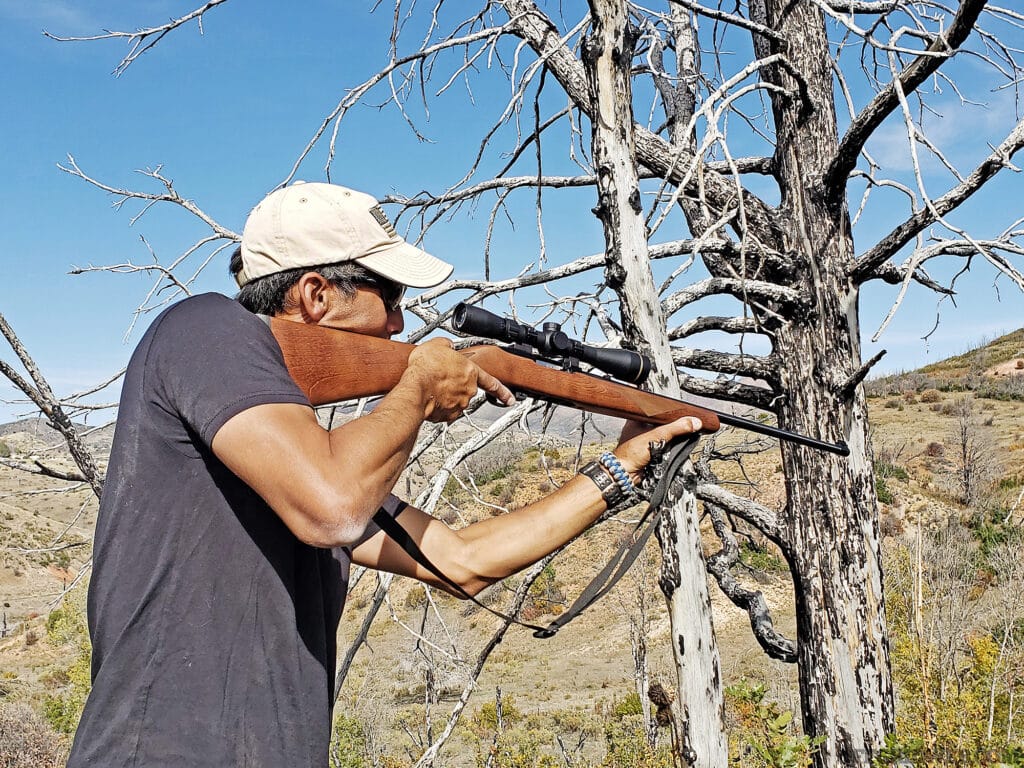
Photo of a man using a tree to aim.

Above: A tree can be used to assist with an incredibly stable shot. If time allows, the sling can be undone and used as an additional support wrapped around the pole.

Tree/Post/Wall Assist: Bipods and tripods are excellent supports for your rifle, but they’re not always practical to install or carry. You can utilize rooted trees, posts, or walls as an alternative shooting aide. Use the support hand to brace against the tree, post, or wall, and hold the rifle in position with your thumb under the forend. You can also hold the front of the sling like a vertical foregrip to keep the rifle steady. This assist can be utilized standing, crouched, kneeling, or seated as well. Even a walking stick can be used as a makeshift monopod using this technique. It’s absolutely vital not to rest the barrel of the rifle against anything in the process of using a tree, post, or wall as an assist or in any of the other positions mentioned. Your barrel has unique harmonics that will be disrupted if it comes in contact with an object, and accuracy will suffer.

Stacked Feet: While this position looks awkward, results downrange justify its use. With legs extended and feet stacked on top of one another, you can bring the height of your muzzle above other conventional seated positions by placing the forend of the rifle on the top of your boot. This position works well for heavy barreled rifles that tax the body more than slimmer profiled barrels. Stacking your feet requires some balance but once you get the hang of it, it works well for longer distance shots. The trade-off is mobility and limited range of movement. Since the position requires flexibility and balance, it’s also not a good position for sustained use. If you happen to have the assistance of a training partner, they can place their knee/shin against your back to allow you to lean back against it and achieve greater stability. If no partner is available, you can lean your back against a rock, tree, or hillside.

Modifiers

With all of these positions, there are ways to modify your training to adjust the difficulty level and performance expectations. Just like the flat range doesn’t always translate over to real life self-defense events, you must go beyond the basics to fall back on in a survival scenario. Keep in mind that you won’t rise to the occasion, you’ll fall back on your level of training. It’s better to train with increased difficulty to make a difficult situation you actually face later less imposing. It’s easy to incorporate some training modifiers that provide a greater difficulty level for newbie to experienced shooters.

Time is universal in all shooting positions. There’s an amount of time needed to get into position, an interval of time between shots, and a total amount of time from start to finish. You can track your time with a shot timer, or a training partner can use their smartphone to record you. If you have the space and backstops are plentiful, you can do a woods walk with a training partner with targets staged in various places. You don’t have to let your training partner know when to be prepared to take a shot; just tell them to locate and engage the target hidden in the woods, much like an animal would be. After all, the animals you’re training to hunt in an emergency don’t live their lives tacked to a target backer at a set distance down range.

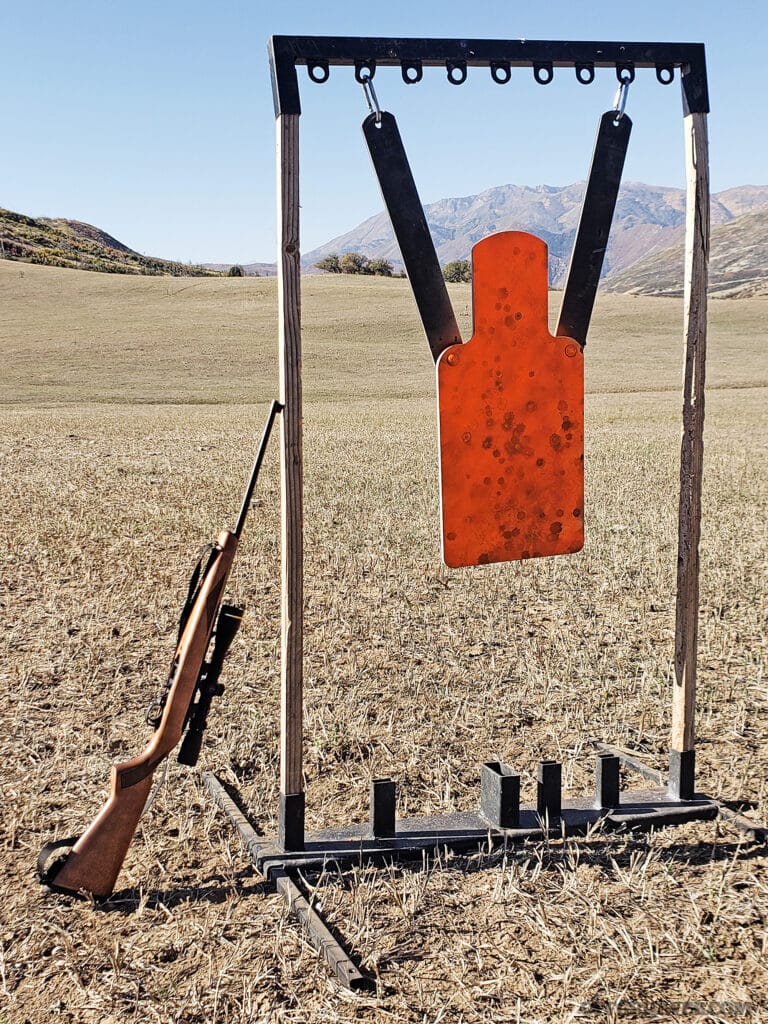
Photo of a steel silhouette target, with a survival rifle propped next to i.

Above: The author’s Ruger 10/22 with Leupold 3-9 Rimfire optic in Talley Rings used for this article in the mountains of Spanish Fork, Utah.

Another element that can be modified is the distance to your target. The vital area of the game you’re hunting won’t change in size, but the way it appears to your naked eye (unless you adjust a scope) will change as the range increases. You must understand how your round travels once it leaves the barrel, compared to your line of sight. Many animals that are easy to hunt may travel in groups, so follow-up shots may be needed once the first animal is dropped. You can pair training far shots with near shots in your training evolution, or you can test yourself with far and farther shots too.

Yet another modifier is a strict standard for accuracy. You can use coins, bottle caps, or any other metric as a maximum allowed group all of your rounds must fall inside of for a particular shooting position. Eventually, you can jump to heavier calibers, which is the whole point of using your rimfire. The increased recoil, more pronounced muzzle report, and disturbance to your natural point of aim will affect your performance. However, if you adhere to the fundamentals and spend enough time working with a rimfire, the transition to centerfire shouldn’t be too much of a leap. The hard part is learning the macro aspects of positional shooting, which you can accomplish with a micro-caliber rifle.

Bilateral rifle shooting may also be needed in a survival scenario. You may be pursuing a particularly spookish animal and shooting from your strong side would expose you and cause the animal to flee. Working your support side may be the only option. Additionally, if you’re in a survival scenario, you may have sustained injuries including your eyes. Learning to use your non-dominant eye and side will help you prepare for that scenario. If nothing else, bilateral shooting helps you work through the fundamentals, as you may have to relearn the basics to put rounds on target down range.

Read More

Subscribe to Recoil Offgrid's free newsletter for more content like this.

Editor's Note: This article has been modified from its original print version for the web.

Let It Snow: Cold Weather Tips

When you’re out camping or hiking and old man winter strikes with an unexpected fury, it can be challenging to stay safe, much less comfortable. Sudden temperature and weather shifts can transform a chilly day outside into a harrowing or even deadly incident, especially for those who are caught underprepared. But don’t worry — even if you’re not acclimated to harsh winter weather, there are a few easy cold weather tips to make any outdoor experience more enjoyable. In this article, we’ll explore them together.

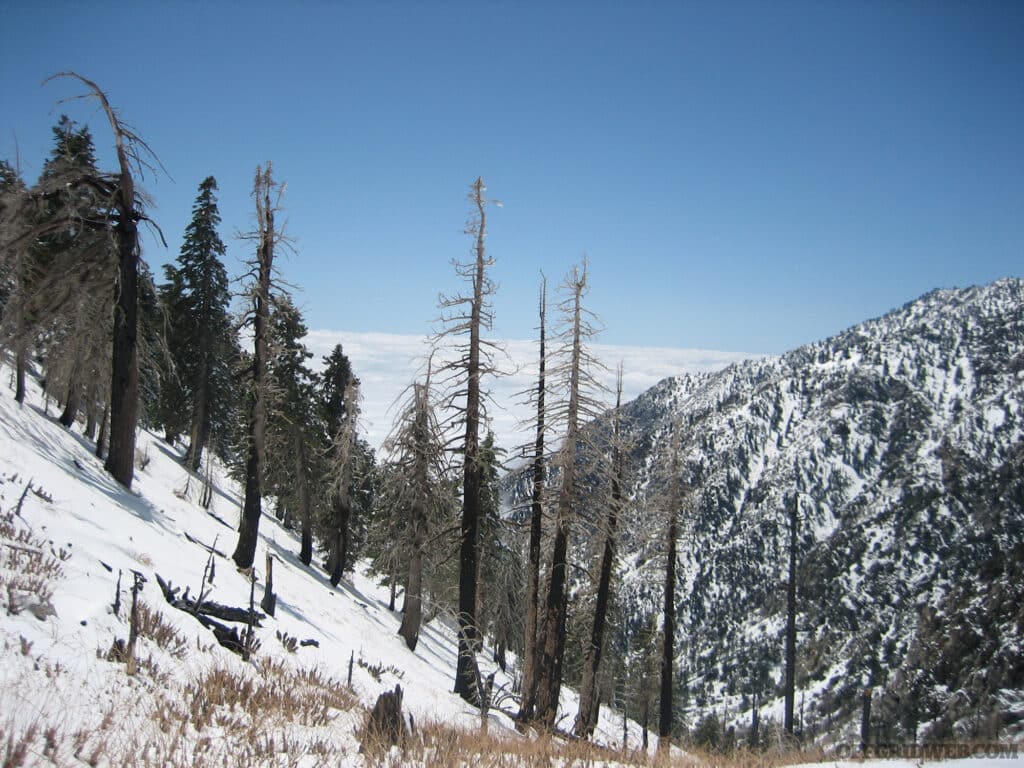
Photo of a snowy alpine landscape.

Remember the Basics

There’s no denying the incredible experiences and unforgettable moments that can be had in the great outdoors during the winter months, despite the cold temperatures. And while some of the basic rules may seem like common sense, they’re absolutely essential to ensure a safe and enjoyable trip. So, let’s briefly cover the basics and equip ourselves to tackle any cold-weather adventure.

Layer Up

You’ll enjoy any trip a whole lot more if you keep yourself warm. However, that doesn’t mean you should just throw a heavy coat over your everyday T-shirt and call it good enough. It’s best to wear multiple layers of clothing that trap air and insulate your body. Start with a base layer of wool or synthetic material that wicks moisture away from your skin; avoid cotton, as it absorbs sweat and loses its insulative properties. Next, wear a mid-layer of fleece or wool for added warmth. Finally, wear an outer layer of waterproof and windproof material that shields you from the elements. Remember to cover your head, hands, and feet with hats, gloves, and socks made of materials other than cotton.

Photo of a man walking across a snowy field with hiking poles.

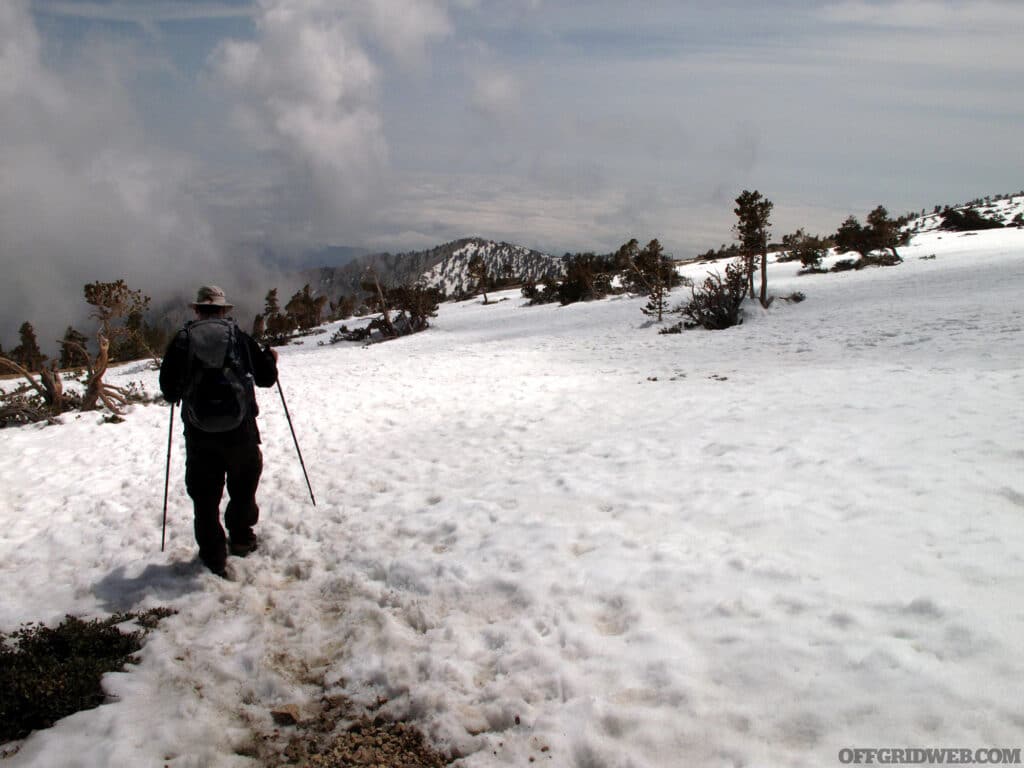
Above: After finding his way out of a freak blizzard overnight, the author reflects on his winter experience in California’s Angeles National Forest.

Stay Dry

This point goes hand-in-hand with the last one. Getting wet can lower your body temperature and increase your risk of hypothermia. Avoid sweating by removing layers if you begin to overheat and reduce your level of physical exertion if necessary. If you get wet from rain, snow, or sweat, change into dry clothes as soon as possible. Keep your sleeping bag (or camper’s quilt, blanket, etc.) and gear dry by storing them in waterproof pack liners or bags. Bring extra socks and dry the wet pairs out by the campfire, because there are few things more miserable than cold, wet feet.

Eat and Drink Well

Your body needs more calories to stay warm in cold weather. Eat high-energy foods rich in carbohydrates, fats, and proteins, such as nuts, dried fruits, chocolate, cheese, and granola bars. When going on a winter camping trip or day hike, it is recommended to consume high-calorie foods with fats as they can help keep your body warm. As you hike, your body will metabolize the food and generate heat.

It’s also essential to pay attention to the importance of staying hydrated during cold weather. Though people might not associate winter with being thirsty, it’s crucial to drink water to keep your body functioning correctly. Avoid eating snow as a replacement for water, as it’ll cool you down instead of warming you up. Instead, melt it in a kettle or metal water bottle and drink it. Keep drinking water close enough to your body to prevent it from freezing or keep it near a campfire.

It’s also advisable to take advantage of cooking hot meals and drinking warm beverages before sleeping. They can help you stay warmer than uncooked food and dehydrated snacks. Make pine needle, spruce, or hemlock tea for a hot vitamin C-infused drink. However, it’s wise to avoid consuming alcoholic beverages like beer and hard cider as they can cause multiple trips to the bathroom, leading to a loss of the warm microclimate you’ve been painstakingly creating.

Photo of a winter hiker standing next to a field as the sun sets.

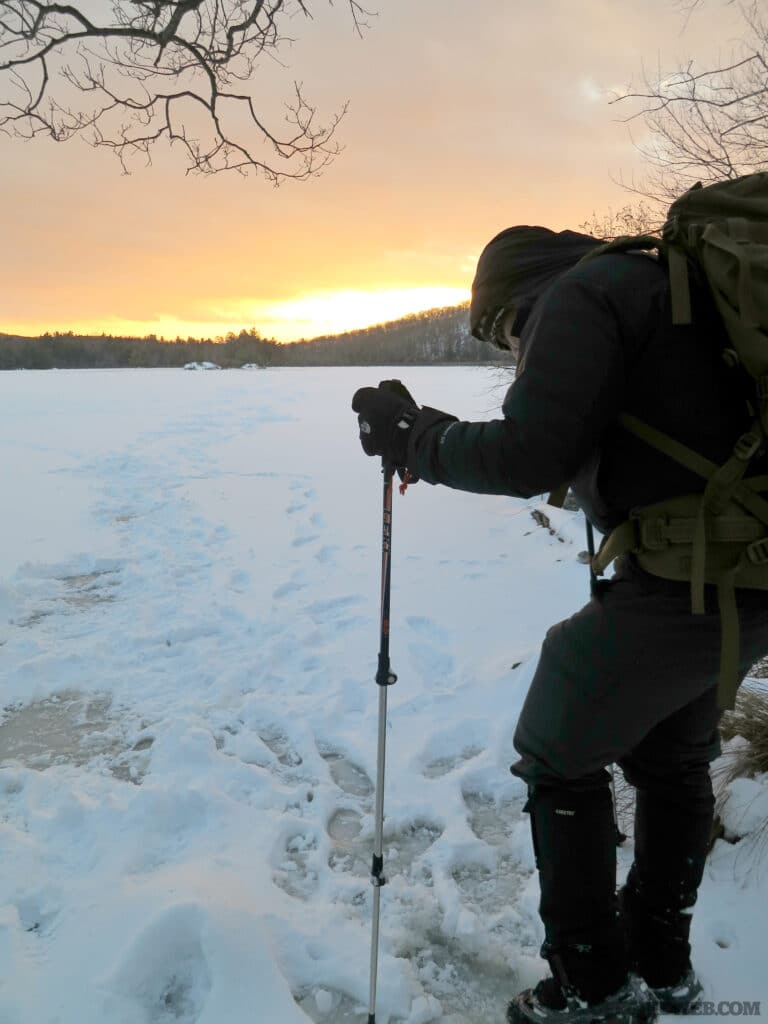
Above: Cold weather winter outings must be taken seriously. Equip yourself physically and mentally for when Mother Nature gets pissed.

Be Ready for the Unexpected

Let’s say you’ve done your best and followed as many pre-planning tips as possible, yet the weather changes. It happens. Several years ago, I went on a backpacking trip in the Angeles National Forest in California. Back then, the snowline was about 6,500 feet — we were at only 4,000 feet. This was early November in a state that’s not known for rain or snow, in general. We hiked in with sunglasses and the sun on our faces. Later that night, we heard the sound of a light pitter-patter on our tarps as we hung in our hammocks enjoying the late autumn night. Eventually, the light tapping turned into a tin roof cat dance, and it was coming down hard. I told my cousin to pull the tarp over tight as it started to sprinkle before it was a full-on rain — or so we thought.

After about 40 minutes of it, nature called, as it often abruptly does in the worst of times. I pulled the tarp back and turned in the sitting position to grab my shoes. To my surprise, I saw a sea of white powder. It wasn’t sprinkling, nor was it ever raining — we had snow. It was 1 a.m., and the thought of “What will we do tomorrow?” hit hard. Expected lows of 50 degrees F became 20 degrees. It was time to act. What would you do in this situation?

Photo of a hasty winter tarp shelter.

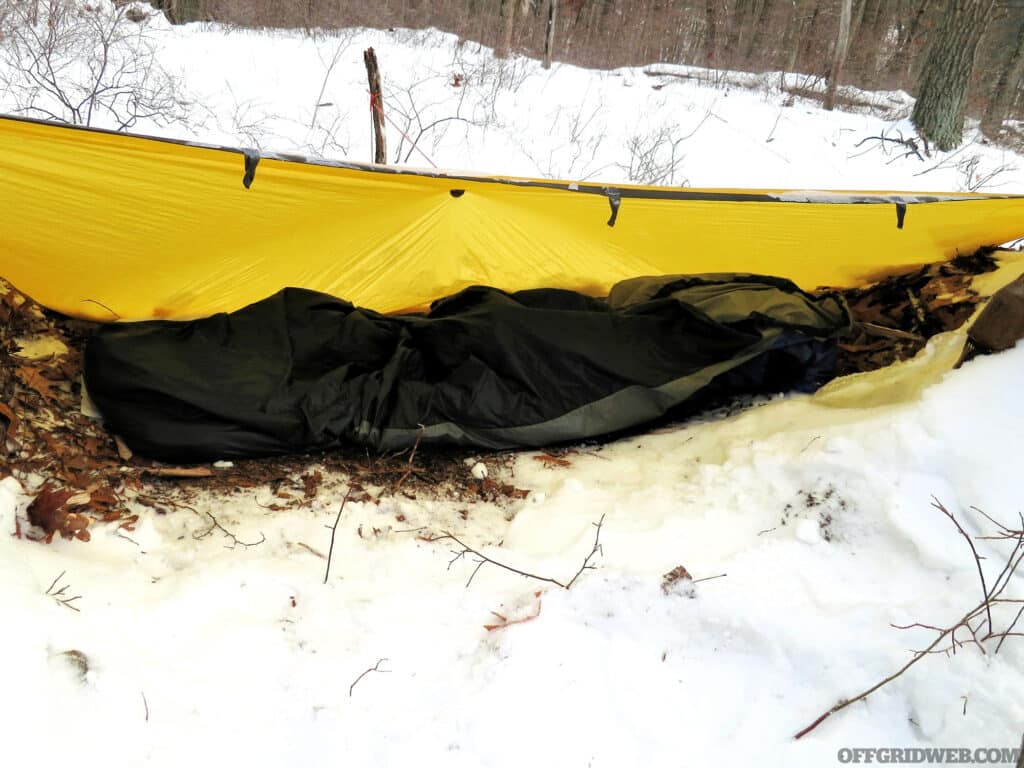
Above: Throughout the night, the author remained comfortable while sheltered under a tarp (with bivy) that effectively prevented heat loss. Despite the temperature dropping to 8 degrees F and the continuous onslaught of wind-blown rain and snow, he stayed warm and dry.

Stay Active

Waking up cold sucks. Waking up freezing in a blizzard is serious business. It’s common to wake up in the middle of the night while camping, especially if you need to pee. Remember that your body stays warm naturally through movement and digestion, so it may be helpful to get up and start moving around. Make sure you have a saw and a large piece of wood to saw and help create heat before you attempt to go back to sleep. Building a campfire can also be a great way to warm yourself up. Take advantage of the opportunity to warm up water for your water bottle or hydration bag. Once you’re feeling warm and cozy, you can try to get back to sleep.

Moving around can help you generate heat and improve your blood flow. Do simple exercises, such as jumping jacks, squats, or push-ups to warm up your muscles and joints. However, keep yourself from overheating and sweating profusely.

An old-timer’s trick used by experienced campers is to carry a candle in a pocket. When taking a break from hiking or setting up camp, they would light the candle and sit upright while draping a coat or blanket over themselves. This helps trap the heat from the candle and keep warm, making it a great way to thaw out and recharge quickly before continuing the hike.

Photo of a man standing in front of a quonset hut.

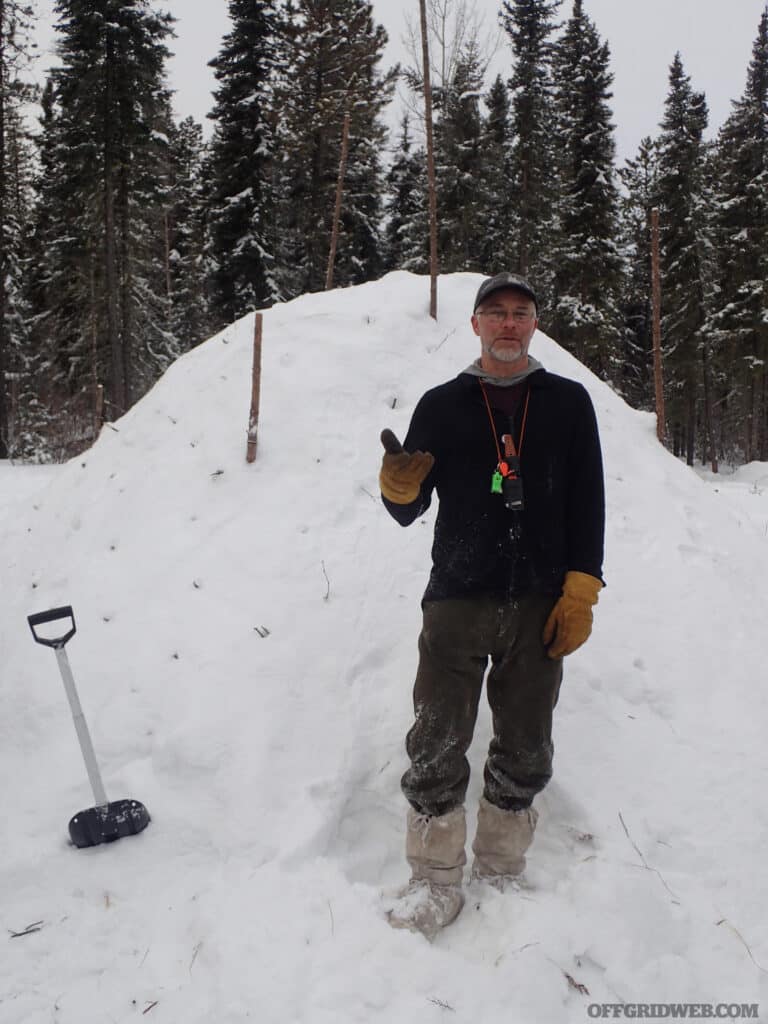
Above: Dale Kiselyk of Karamat Wilderness Ways in Canada stands outside a completed snow cave.

Seek Shelter

When you’re hiking and you get hit with an unexpected storm, it’s essential to find a sheltered spot. This can help you stay warm by blocking the wind and retaining heat. Good spots to consider include areas under trees, behind rocks, or in caves. However, it’s important to know about potential hazards, such as falling branches, rockslides, or wild animals.

If you have a tent, make sure to set it up on a flat and dry spot that’s away from water sources or low-lying areas. It’s also a good idea to use a ground cloth and pad to insulate yourself from the cold ground. This is more crucial than most people give proper attention to. Don’t neglect it! Before getting into your sleeping system, fluff it up and zip it to keep warm. Additionally, you can use a blanket, bivy sack, or emergency mylar blanket for extra warmth.

Photo of a man standing in a snowy forest with a snow crusted scarf across his face.

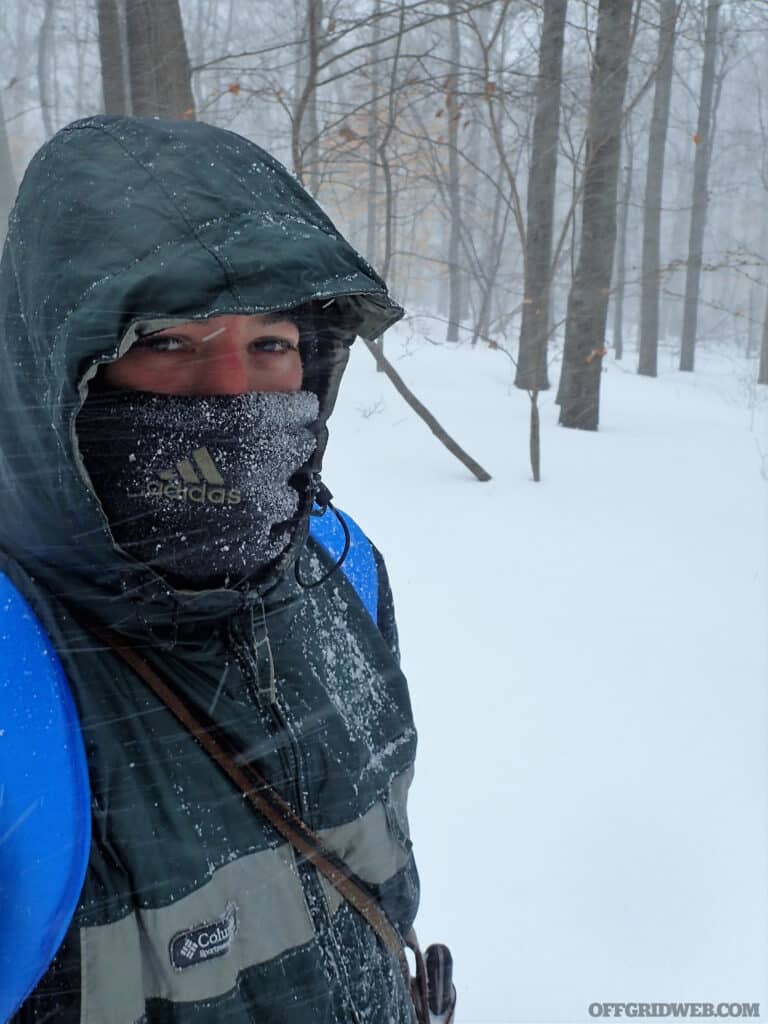
Above: After getting caught in a blizzard in the Northeast Woodlands, the author was properly equipped with warm clothing. To avoid frostbite and hypothermia, the author covers up completely to preserve body heat.

Hard Lessons Learned

One winter, I was fresh back from assisting a tracking/survival class in Louisiana on an Army base where the low was 50 degrees F. Afterward, I was flown to the East Coast with trail runners and deerskin bottom moccasins as my only footwear — in December. News said there would be a monumental blizzard closing in. Soon after, my phone lit up with a buddy saying, “Terrible storm closing in, I’ll pick you up at 7 a.m. to camp.” This was the first time I got frostbite.

We hiked in the cold, crisp air of the early East Coast winter, observing black bear and deer tracks. By the way, I chose the trail runners. Suddenly, the sky opened up, and icy rain and snow fell. Time to act.

In no time, the best of the worst campsites was selected, and we went to work establishing what would be our cozy impromptu camp. After clearing the ground of as much snow as we could, kicking it aside, it was time to bulk up on the ground insulation. Leaves and debris were covered with snow, but we had birch bark from nature’s store. The birch bark served double duty as a fire accelerant and ground padding. Large pieces of bark were used as insulation with my pack liner (a tall kitchen garbage bag), filled with frozen leaves harvested from under the snow. On top of all that, I placed my torso-sized closed-cell foam pad. It was enough to fight conduction from the cold ground. Tarps were set, and we quickly got a fire going to stave off the chill.

Photo of camp food on a stick being wrapped in bacon.

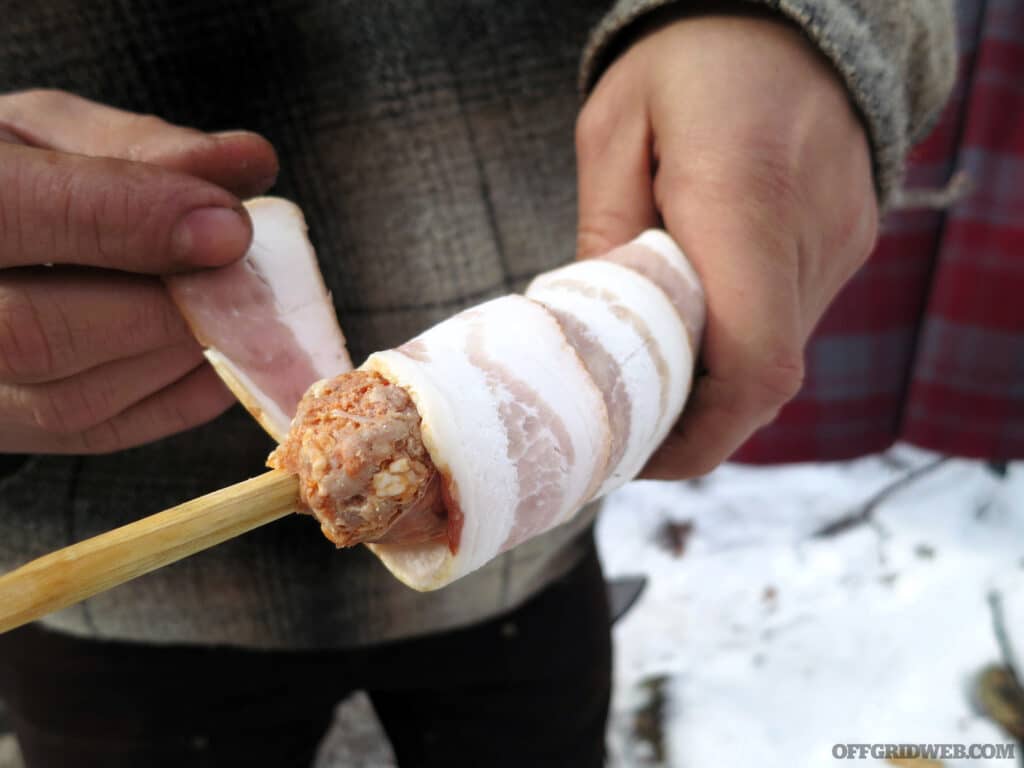
Above: Calorie-up for a winter trip and take advantage of high-caloric foods to help generate heat while asleep.

Hone Your Fire-Building Skills

When camping or surviving alone, fire can be a great companion. Not only does it boost morale, but fire preparation also provides us with a task that keeps us warm. Fire is one of the few things that can keep us entertained for long periods without speaking a single word. In fact, fire serves several vital purposes, such as warming us up, drying clothes, boiling water, and cooking food — especially during the winter.

It’s always a good idea to keep at least three ways of starting a fire on hand, especially in colder weather when a fire can be a lifesaver. A ferrocerium (ferro) rod, stormproof matches, and a lighter are all examples of items that can help with ignition. However, building and maintaining a fire must be practiced to ensure you can successfully get one going when it matters most.

When camping in cold weather, it’s vital to lay down a wooden platform first to serve as a base for the fire. This is especially true if there’s ice, snow, or moisture from rain on the ground. The forest floor is the coldest thing around, and it can quickly drain the heat from our fire. By laying down wood, we can create a barrier between the fire and the cold ground. The wooden platform will eventually become part of the coal bed, so it’s best to choose hardwood if possible.

Practicing fire-building skills in places like a family car campsite, beach bonfire pit, or backyard can be a great way to prepare ourselves for camping in colder weather. These skills can come in handy in case of an emergency or if we want to impress our fellow cold-weather campers.

Photo of fir needles being steeped in boiling water for tea.

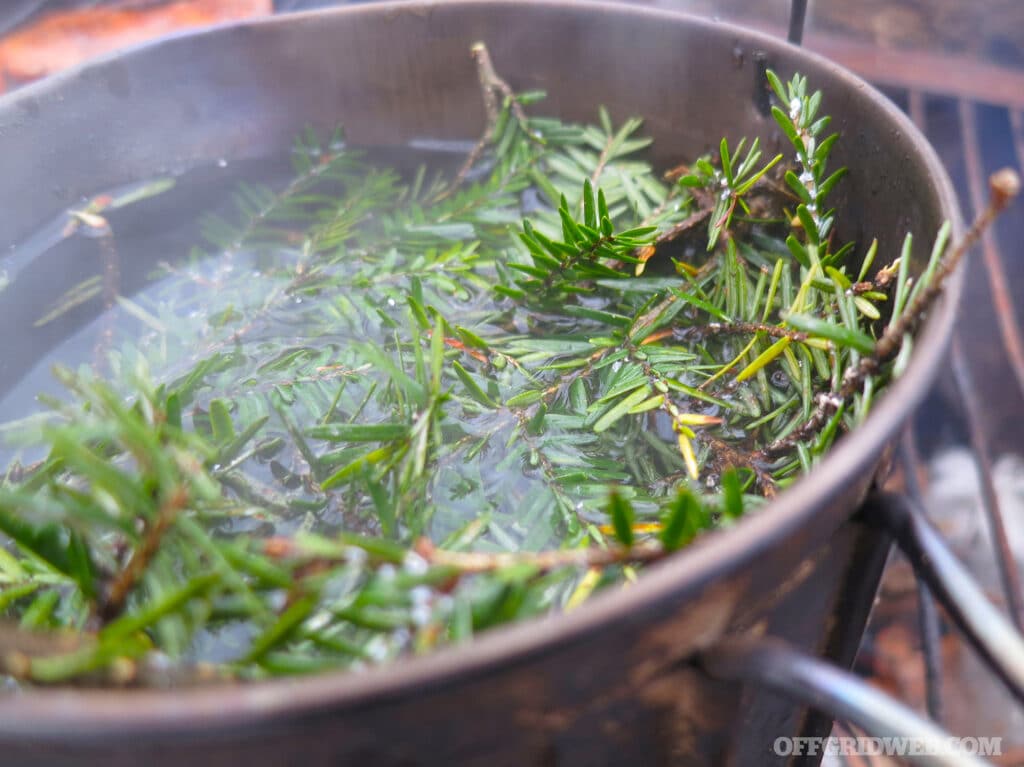
Above: Fire is used to melt snow and make Hemlock needle tea while providing warmth, hydration, and a healthy state of mind.

Six Ways to Improve Your Winter Sleep

  1. Urinate: As you prepare to settle down in your sleep system, it’s crucial to ensure that your body is warm enough to promote a good night’s sleep. One of the ways to achieve this is by emptying your bladder before you hit the sack. The reason behind this is that the body uses up a significant amount of heat to warm urine, which can be better used to keep the rest of your body warm and comfortable. So, urinate as much as possible to avoid any unnecessary heat loss that could lead to discomfort during the night. 
  2. Hot Water Bottle: During cold winter nights, you can keep warm by filling a water bottle or hydration bladder with hot water. Place it at your feet, between your thighs, or near your torso to keep these areas cozy. If you have two water bottles, add another to increase the warmth. The best part is that you don’t have to get out of bed to drink water when you wake up. 
  3. Change Socks: If you have a second pair of socks, changing them before bed is one of the best tips I can give. Feet can become damp due to rain, melted snow, or sweat. Therefore, it’s important to keep them dry and warm by changing into fresh socks. I always carry a pair of Arctic Carhartt socks in the winter, which feel incredibly warm and cozy to slip on at night. 
  4. Bivy: Using a bivy bag while camping can benefit cold sleepers. It captures and retains body heat effectively, adding 5 to 10 degrees of warmth to your sleep system. However, it’s important to note that condensation may be an issue in colder weather if you don’t use a breathable bivy. Additionally, some people may feel confined in a bivy bag, so it’s worth trying a larger size to see if it suits your needs better. 
  5. Beanie: Even a light beanie can do wonders in the cold. In fact, a Buff-style neck gaiter can double as an emergency beanie and help retain heat. I prefer Alpaca wool or fleece beanies and will never camp without one. Since essential body heat escapes through the neck and head, it can also be a reason why people get cold feet. The late survival guru Ron Hood used to say, “If you have cold feet, cover your head.” 
  6. Ground Pad: A good ground pad is often overlooked in cold-weather gear. Heat loss to the ground can be a real issue. Even if you spend $300 or more on a high-quality sleeping bag, you may still end up freezing all night because you didn’t get a good sleeping pad or didn’t use one at all. I recommend using a closed-cell foam pad, which is lightweight, inexpensive, and nearly indestructible during regular use.

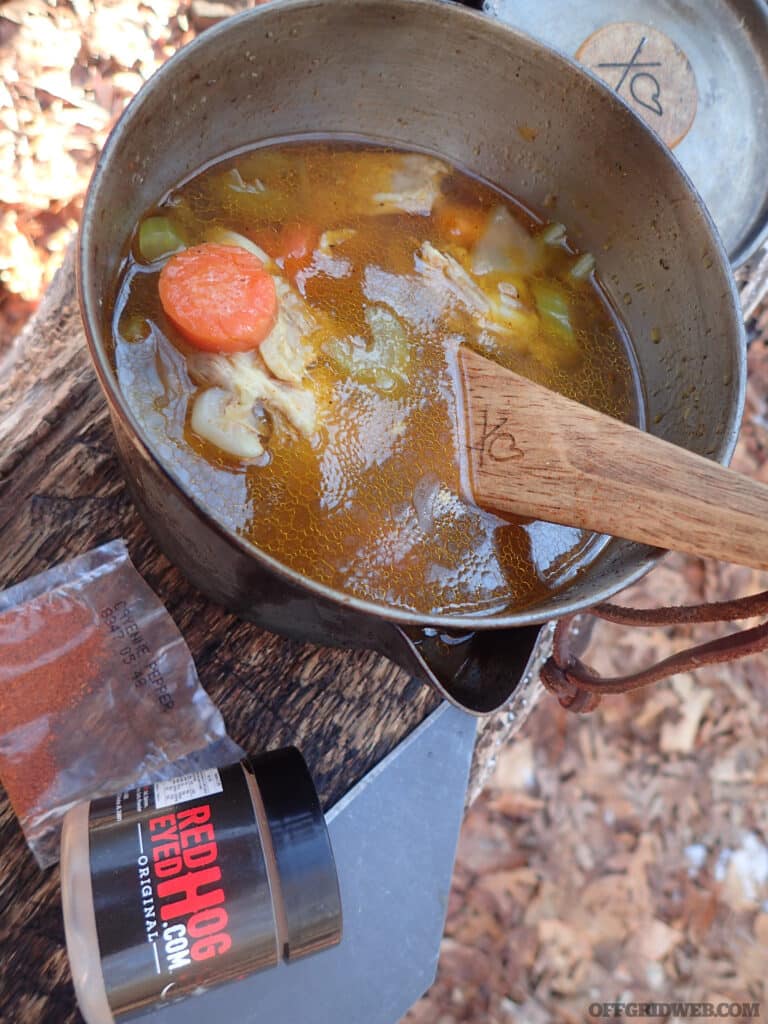
Photo of camp food stewing in a pot.

Above: Winter meals like stews and soups are not only comforting and warming but also packed with nutrients. Chicken soup and lentil stew are great options to try.

Five Heat Loss Mechanisms

It’s one thing to be cold and another to know why you’re cold. Understanding these five mechanisms will help you get one step closer to avoiding or preventing them.

  1. Conduction is felt by losing body heat when contacting colder surfaces, such as the ground. 
  2. Convection is another way of saying wind; it saps the heat out of your body almost as fast as water. 
  3. Radiation is heat loss through the skin into the air, especially your head and neck. 
  4. Respiration is experienced when we exhale warm body heat. 
  5. Perspiration/moisture is any water (such as sweat) that draws heat away from your body. The evaporation of this moisture also amplifies the effect of convection to further chill us.

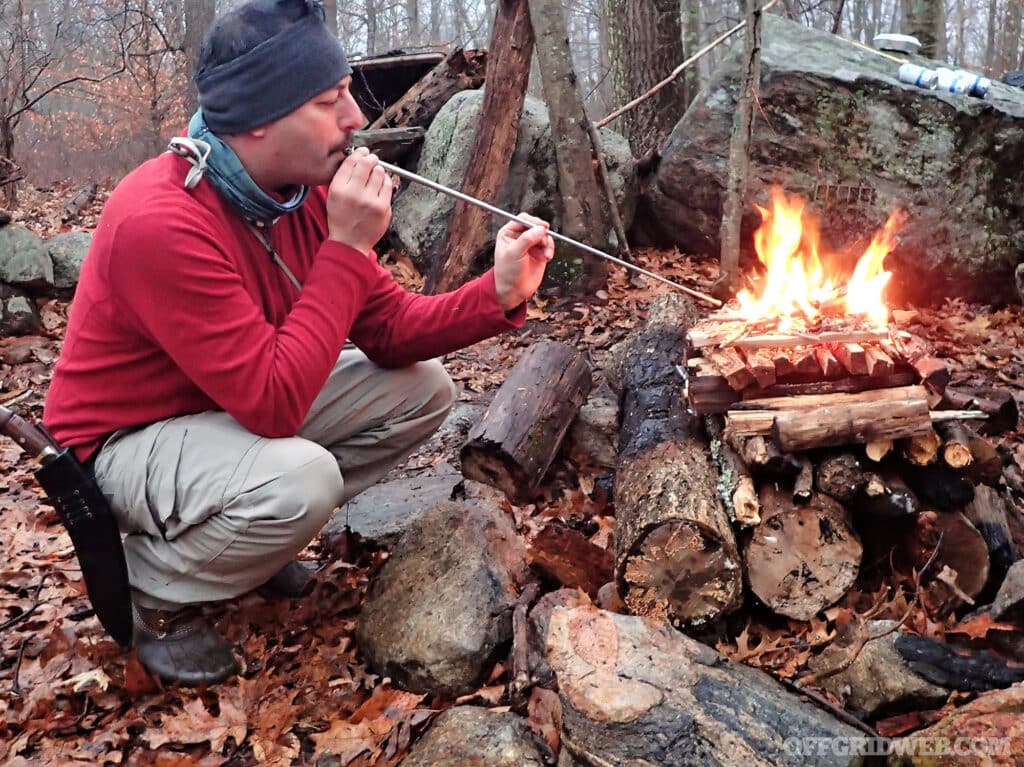
Photo of a man blowing into a fire to stoke the flames.

Above: When it comes to winter fires, make them big. The author starts a winter fire and maintains it throughout the night for warmth and cook coals.

Be Ready to Become a Cave-Dweller

If you actually get caught in the snow, be it a snowstorm or a place with deep snow, you may have to make a snow cave. This is grueling work and runs a high risk of overheating, but it could save your life if you don’t have another adequate shelter. Thick snow walls offer an insulated shelter and can keep you warm and safe from the elements. Digging a snow cave requires a shovel or sturdy metal cook pot to assist in the scooping of snow.

To make a snow cave, find an area with deep, compacted snow. Dig a hole in the snow that’s big enough to crawl into but not so big that it’ll be challenging to keep warm. Use a shovel or other tool to make the cave walls thick and sturdy. Once you have dug out the inside of the cave, smooth the walls and ceiling with a flat tool such as a snow saw or ski. After that, let the snow walls settle and harden for a few hours before you start using the cave. Finally, cover the entrance with a tarp or other material to keep the wind and snow out. Remember to practice safe snow cave-building techniques and avoid creating a cave in areas with avalanche risks.

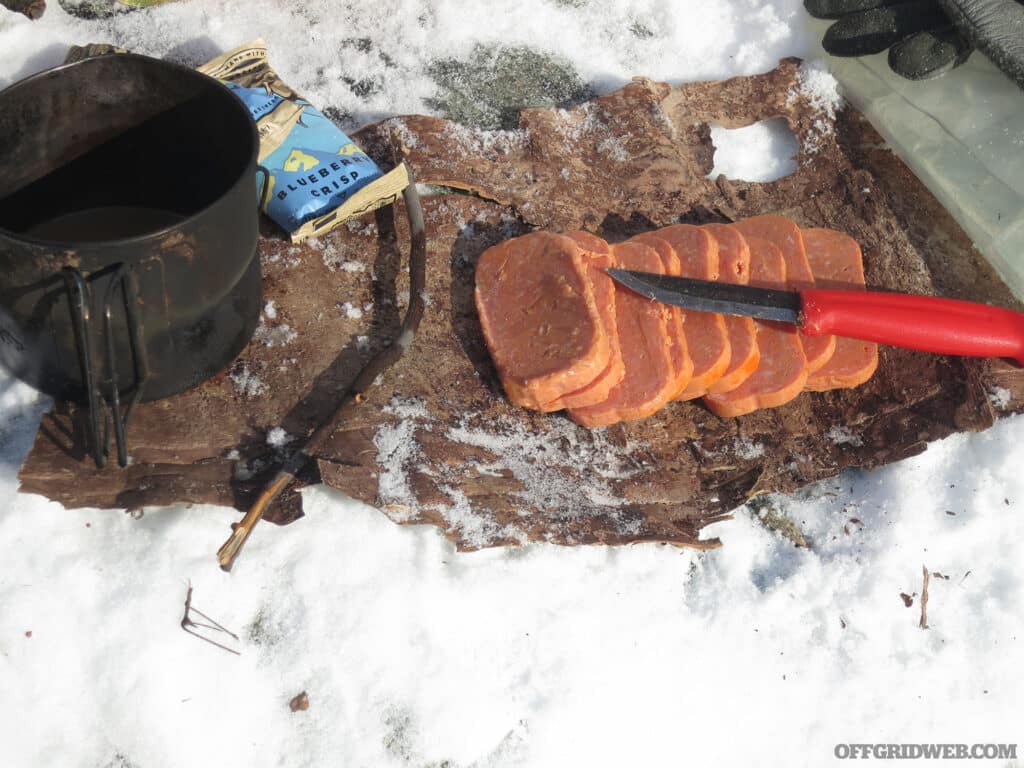
Photo of sliced span on a piece of frozen bark.

Above: Birchbark is versatile in the woods as a cutting board, serving platter, sitting pad, and ground insulation.

Closing Thoughts

Camping in winter is a lot of fun, but weather can change quickly, and you’ll end up in serious trouble if you’re not prepared. It’s crucial to take proper measures to stay safe and comfortable. First, ensure you have warm and waterproof clothing, including layers to keep you insulated. Next, keep your body temperature up by staying active and eating high-calorie foods. If you’re in an emergency, it’s essential to have the right gear, such as a sturdy shelter and a reliable heat source. Finally, be prepared to improvise, such as building a shelter from natural materials or digging into the snow for added insulation.

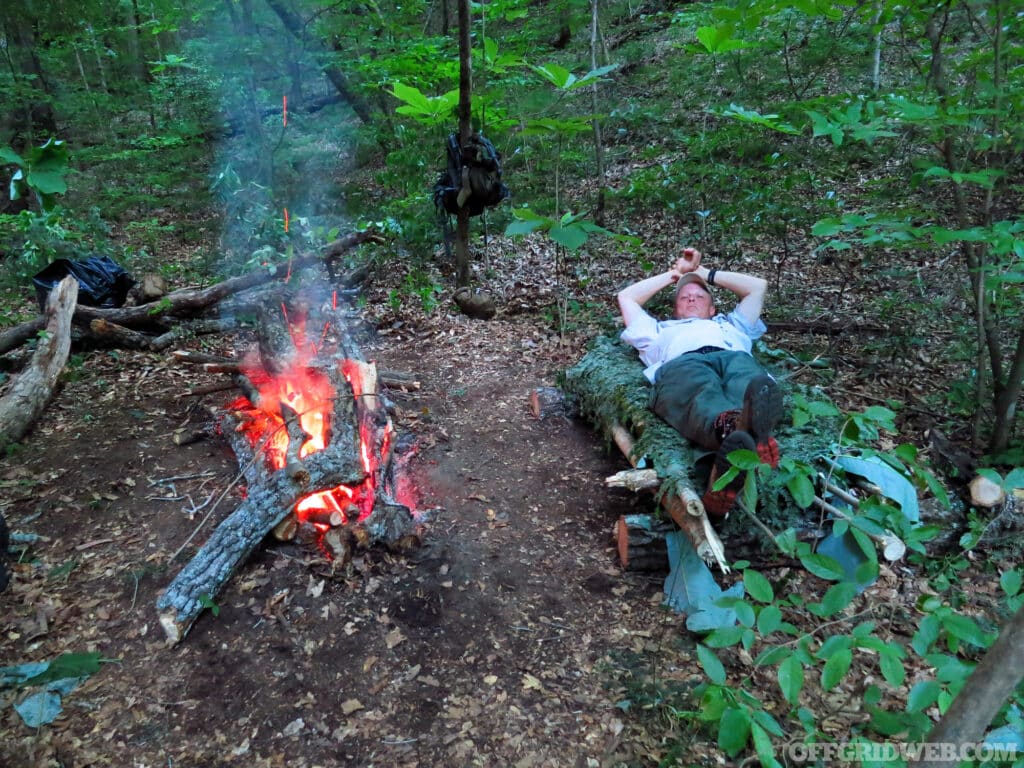
A man sleeping next to a fire on the forest floor.

Above: A long-fire is an excellent way to stay warm and cook in cold weather, especially if you need to sleep next to it.

About the Author

Adventurer, writer, photographer, and survival instructor for Randall’s Adventure & Training, Reuben Bolieu has spent most of his life hiking and backpacking through the wildernesses of the world. He has traveled abroad in extreme environments and seeks out primitive survival techniques, construction, and uses of knives and edged tools. Bolieu has published many articles on survival, knife and tool use, and woodcraft. He remains a lifetime student of survival.

A view of a yellow birch trunk in the winter.

Above: Yellow Birch bark is an excellent resource in the wilderness. The bark is flammable, and larger pieces can be used for insulation and mats.

Read More

Subscribe to Recoil Offgrid's free newsletter for more content like this.

Editor's Note: This article has been modified from its original print version for the web.

The Final Weapon: Gamut Resolutions

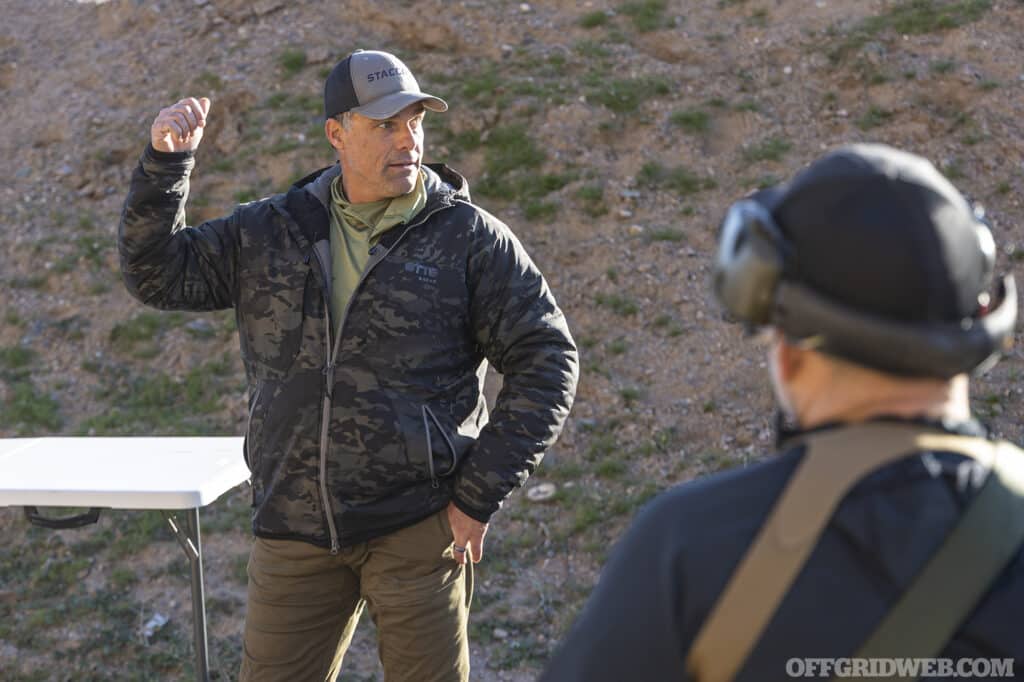
Pop quiz: What’s one thing that happens in every rifle gunfight? The answer is simple. At least one of the shooters raises the gun from some sort of ready position, aims it at the target, deactivates the safety, and fires the first round. There are many things that can happen after that, but the beginning is always the same. In training circles, this is often called a ready-up drill, and many advanced shooters see it as being excessively basic — perhaps even boring. Those same shooters might prefer to show off their lightning-fast reloads or ability to shoot from difficult positions, since this looks cool on social media. But for Bob Keller (owner of Gamut Resolutions), a U.S. Army Special Operations veteran who spent more than 10 years in 1st Special Forces Operational Detachment – Delta (also known as Delta Force, Combat Applications Group (CAG), or simply The Unit), the basic ready-up drill is the foundation all other training must be built upon. “The boring stuff is critical,” he explained. “Ready-up is a 100-percent guarantee in every fight. Everything else is a maybe.”

When Bob Keller talks about what wins gunfights, you listen. Over the course of more than two decades in special operations, he has participated in more than 1,000 real-world direct-action hits and had more than 400 engagements — a professional way of saying shooting an enemy combatant and/or getting shot at, often in extremely close quarters. These days, Keller trains American citizens how to survive real gunfights through classes from his company, Gamut Resolutions. We attended his Introduction to Tactical Carbine and Pistol course in Phoenix, Arizona, to improve our skills with these weapons.

Bob Keller has more than a decade of experience winning fights as a member of what many consider to be America’s most elite special operations unit. As a result, he doesn’t hesitate to draw clear lines between important skills and useless range theatrics.

Above: Bob Keller has more than a decade of experience winning fights as a member of what many consider to be America’s most elite special operations unit. As a result, he doesn’t hesitate to draw clear lines between important skills and useless range theatrics.

Always Practice the Basics

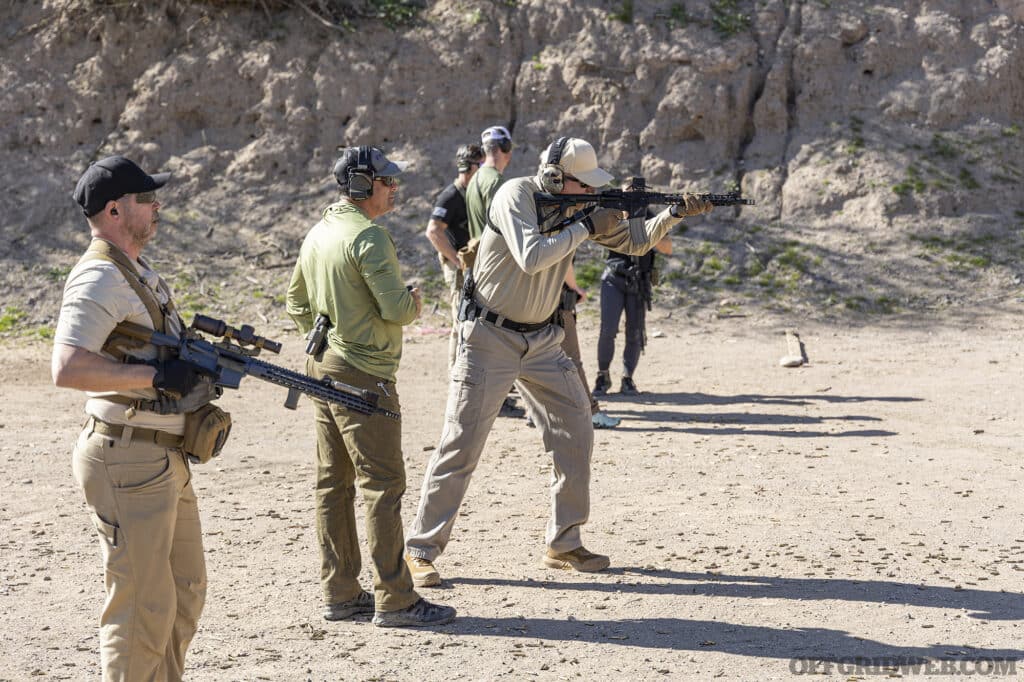
At the start of the class, as you might guess, we began with simple ready-up drills with our carbines. We were reminded that accuracy is more important than speed. However, the goal time was anything but slow: 0.5 seconds to a hit on a 3-inch circle at 10 yards. We were also reminded that the drill doesn’t end when the shot breaks; always reset the trigger and be prepared to shoot again. Don’t reactivate the safety too soon! If the gun goes empty, your reflex should be to reload immediately and get back on target.

Speaking of reloads, this was another subject where Keller’s experience shed some light on the reality of gunfights. “I’ve gone to bolt lock one time in combat. I only remember two other dudes I saw do it in a fight,” he said. As a result, he told students to treat emergency reloads as something that shouldn’t happen, like a malfunction. Instead, get into the habit of performing a combat reload (i.e., replacing a partially empty mag with a full one) whenever it’s possible. Keller also encourages tugging the mag downward during each reload, and periodically while carrying a carbine, ensuring it’s fully seated at all times. You may have seen someone shoulder a gun, only for the mag to fall out — in combat, that could be a fatal error.

Photo of Tom Marshall practicing pistol drills at Gamut Resolutions.

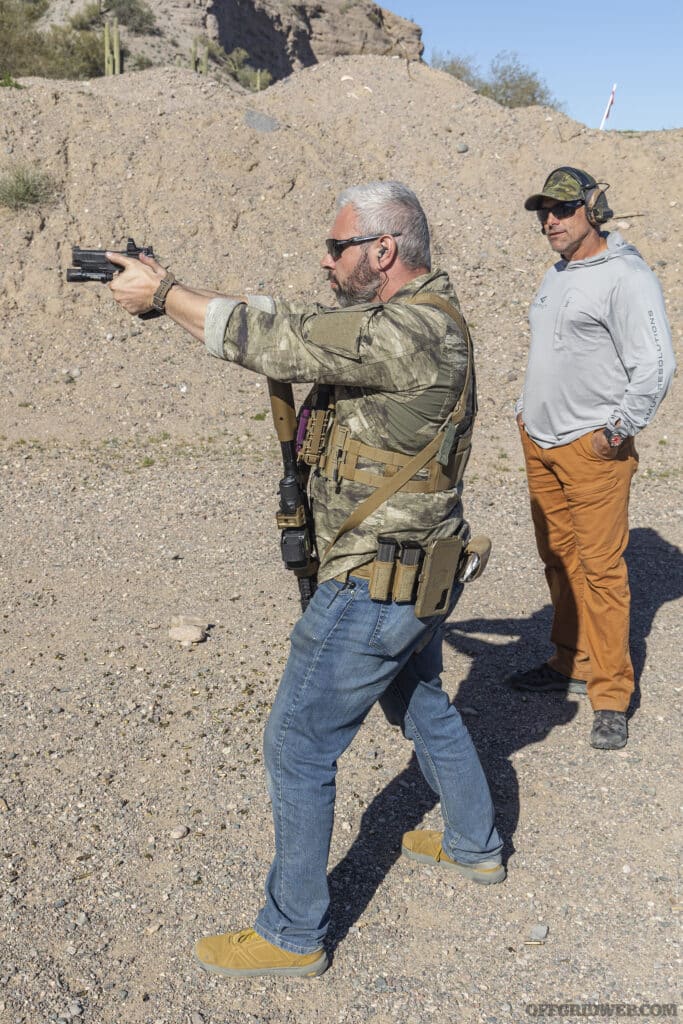
Next, we practiced shooting our carbines from our support side. Keller explained this is essential for working around cover, and a skill you should practice until you have no doubt about using it when your life is on the line. Left-handed reloads were tricky; for those of us without ambidextrous rifles, we slid our support hand back to the receiver to press the mag release, then hit the bolt release with the firing hand. After getting more comfortable shooting from the support side, we began working transitions from shoulder to shoulder. This begins with the dominant hand releasing the pistol grip and moving forward to the magwell. Then, the support hand takes its place on the pistol grip, and the stock moves to the other shoulder. Don’t forget to switch feet with each transition for improved stability.

As for positional shooting, Keller didn’t spend any time teaching prone or kneeling techniques, which he says are rarely useful in his experience. Why? Consider how many of the obstacles around you in urban environments — buildings, walls, vehicles, etc. — will at least partly obscure your view of a human-sized target from a prone or kneeling stance. While standing, you can see targets clearly and keep moving as you return fire.

Students line up at Gamut Resolutions training course.

Sidearm Skills

On day two, we started with a skill assessment with pistols at 25 yards. As Keller explained, there’s no warmup before a gunfight, so there was no warmup for us either. Each student was graded on a scale of 500 points based on accurate hits with slow and fast fire using both hands, dominant hand only, and support hand only. Keller said the test results should scare you — at 25 yards with a pistol, you have to do everything perfect, and if you miss, it can kill someone. To be on Keller’s team in The Unit, each member had to score above 400 points on demand, every single time. I only managed a 342.

Much like shooting a carbine, we were reminded to always be ready to continue firing after breaking the first shot; stay ready on the trigger as long as you’re on target. As for the draw, it’s just as important as a ready-up with a carbine, so practice it until it’s fast and consistent. Keller said, “There is no multi-step draw process in a gunfight. It’s one smooth motion.” We also practiced immediate action (i.e., malfunction) drills, reloads, and shooting one-handed from either side — the latter is challenging but necessary, due to the high likelihood you’ll be fighting through some form of injury.

Lastly, we brought it all together with carbine-to-pistol transitions. If you’re forced to draw your sidearm in combat, it’s typically the result of a malfunction with your primary weapon (carbine), but don’t make that decision lightly. Ideally, you should try an immediate action tap-rack to clear the malfunction first — maybe even try it twice. Don’t build the bad habit of switching to your pistol if you don’t absolutely have to.

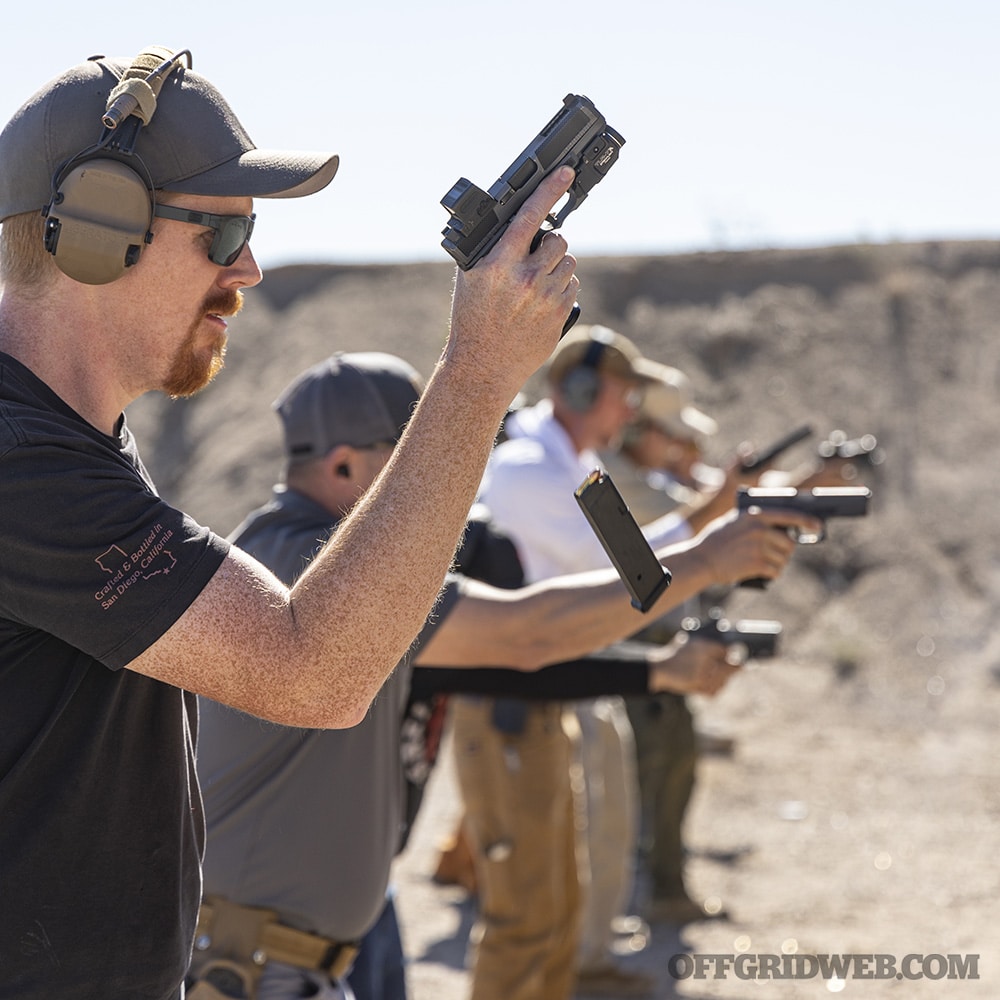
Above: Don’t wait until your gun is empty to reload. Keep it topped off at all times, even if that means dropping a mag with a few rounds left.

Closing Thoughts

The Gamut Resolutions pistol and carbine class was unrelentingly challenging, and served as a stark reminder that surviving a real gunfight requires an extremely high level of practice and proficiency. As Keller explained, if you’re able to pull off a drill with a target full of center-mass hits, you’re not pushing yourself hard enough — go faster, do it with your support side, or do it one-handed. Then, get to the point where you can do it cold every time. This practice builds confidence, and confidence wins fights — Keller says, “You must know you’re the most badass motherf*cker out there.”

Keller is based in Florida but offers classes throughout the United States. He also created The Gamut Challenge, a two-day event consisting of 16 different shooting scenarios plus over 20 miles of running or rucking. Check gamutresolutions.com for upcoming dates and locations.

Read More

Subscribe to Recoil Offgrid's free newsletter for more content like this.

Editor's Note: This article has been modified from its original print version for the web.

Book Review: “The Survival Medicine Handbook”

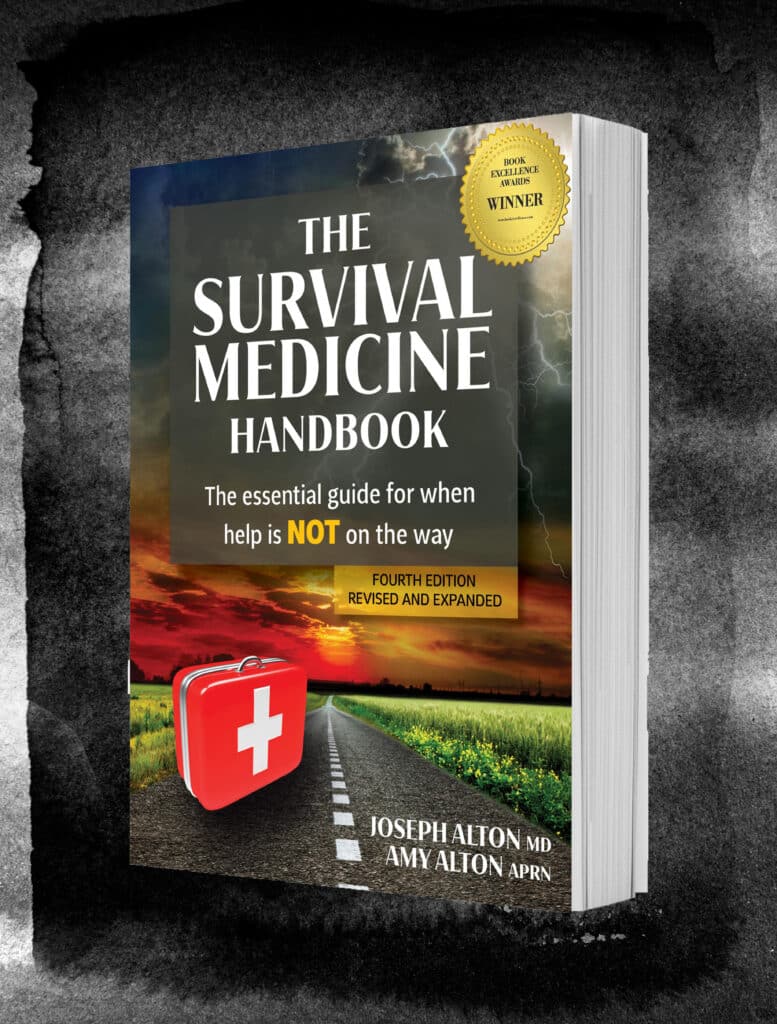
In an austere setting, it may be up to you to save yourself and perhaps those around you. An often-overlooked part of our training is medical preparedness. Dr. Joseph Alton and Nurse Amy Alton have spent years educating the average person on various medical issues. The Survival Medicine Handbook serves as an extensive reference for the average person looking to improve their medical knowledge. Each section within the book is specific to a medical topic, making it easy to use as a reference. The fourth edition contains many updated revisions compared to the third edition. The authors of this book intend it to be “a plainly written guide understandable by all” (p.3). It succeeds in this task.

The 411

This comprehensive book was the first of its kind, to my knowledge. I was glad to see the fourth edition improving upon the layout of the third edition, and it makes the book much more accessible. Each of the 35 sections in the fourth edition covers a specific topic, making it easy to reference for the “family medic.” I broke these sections into groups: the basics (Sections 1 to 6), medical issues (Sections 7 to 20), first aid (Sections 21 to 28), and other issues (Sections 29 to 35).

The first group, the basics, discusses topics like becoming a medical asset and medical supplies. Included are extensive lists of supplies to consider stockpiling. The second group, medical issues, discusses different medical problems like dental, respiratory, and skin issues. These sections will give you a general overview of each condition and how to treat it. The third group, first aid, discusses major and minor trauma as well as wound care. The last group, other issues, discusses topics such as mass casualties, nursing off the grid, and medications/antibiotics. These sections cover what to expect in the aftermath of an off-grid medical emergency.

Often throughout these sections, there are numerous lists that help to emphasize a point in the body of text. There’s also an extensive glossary list at the back of the book. Dr. Alton includes over 20 references for further reading on key topics.

Photo of the book, The survival medicine handbook by Joe and Amy Alton.

The Verdict

This is a lengthy and comprehensive book that serves as a medicine primer for the average person in an austere environment. The handbook covers some sections extensively (e.g., Section 35 Antibiotics). Very few sections (e.g., Section 13 Heart Issues) are lacking in depth. Admittedly, there may not be much to do with heart issues in an austere setting; however, I felt this section could include more content.

Additionally, at the risk of making the book longer, I would like to see more pictures to emphasize some of the points in the book (e.g., Section 18 Skin Issues). Where this book really shines is the alternative treatments using natural products. Section 4, Natural Medicine, is an excellent narrative on using herbal remedies when modern medicine is no longer available.

There are 21 essential oils and 24 different natural products mentioned in Section 4. Each of these examples covers procurement, recipes, and applications of the herbal remedy. Nearly every section throughout the book includes an example of natural treatment and a recipe for use. I found this to have added value to each topic covered.

The book is certainly worth having in your home library, but not in your bug-out bag due to its length (672 pages). I would use it as a reference for the non-medical person looking to survive a medical encounter in an austere setting. It would be difficult to cover such an expansive topic in fewer pages. The authors do an excellent job of speaking to the layman who has little to no medical knowledge. They have done a good job keeping the book as up-to-date as possible.

About the Book

  • Book & Author: “The Survival Medicine Handbook: The Essential Guide For When Help Is NOT on the Way”, Fourth Edition By Joseph Alton, MD, and Amy Alton, APRN
  • Publisher: Doom and Bloom, LLC
  • MSRP: $34
  • URL: doomandbloom.net
  • Pages: 672
  • Rating: Thrive | Survive | Die

More From Issue 32

Don’t miss essential survival insights—sign up for Recoil Offgrid's free newsletter today!

Read articles from the next issue of Recoil Offgrid: Issue 33

Read articles from the previous issue of Recoil Offgrid: Issue 31

Check out our other publications on the web: Recoil | Gun Digest | Blade | RecoilTV | RECOILtv (YouTube)

Editor's Note: This article has been modified from its original version for the web.


Hydroponic Gardening: Indoor Survival Food

Growing your own food will increase your self-sufficiency and food security. Unfortunately, not everyone has the time, weather, resources, land, or even the necessary knowledge and skills to achieve a successful outdoor garden. This is especially true for people who live in confined urban areas with little to no outside space, who reside in regions of the country with short growing seasons, who don’t have the ability to maintain outdoor garden, or who may live in communities with homeowner’s associations that don’t allow residents to have an outside vegetable garden.

Faced with these challenges, many people give up on growing their own food — it seems like there are just too many obstacles to overcome. However, there are now viable alternatives to traditional outdoor gardening. Enter the indoor hydroponic garden.

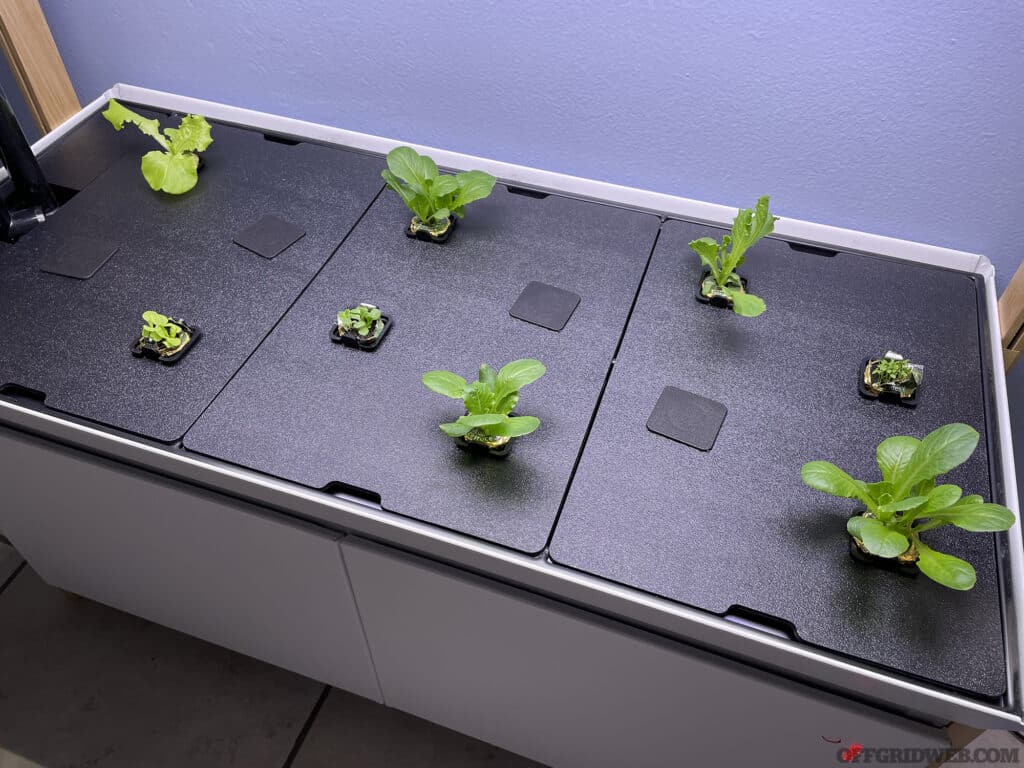
At this stage of development, it’s difficult to imagine, but within 30 days these tiny seedlings will grow into mature plants large enough to harvest and begin feeding your family.

Above: At this stage of development, it’s difficult to imagine, but within 30 days these tiny seedlings will grow into mature plants large enough to harvest and begin feeding your family.

In this article, we’ll look at the Rise Family Garden, and explore some of the many benefits of using an indoor hydroponic garden to efficiently grow your own food, in a safe and secure environment, unaffected by inclement weather, insects, pests, soil conditions, or prying eyes.

Disclaimer: The materials provided are for illustration and/or informational purposes only. Any use of the information contained in this article shall be solely at the reader’s risk.

Sustainable Survival Food

Many people understand the importance of storing at least a three-month supply of emergency food. With the recent supply chain disruptions, food shortages, and skyrocketing prices, many more folks are now starting to realize that relying solely on grocery stores and online retailers may be a very risky strategy. The importance of emergency food stores has never been greater, but storing non-perishable foods may not be enough. Growing some of your own food is an excellent way to supplement your emergency supplies, and to add variety and freshness to any food plan, while also mitigating your risk and increasing your options.

Five weeks into the grow cycle and all the plants are ready to start feeding you and your family. The three-level Family Garden is compact, but has enough capacity to grow dozens of plants, and provide your family with a substantial amount of fresh produce over an extended period of time.

Above: Five weeks into the grow cycle and all the plants are ready to start feeding you and your family. The three-level Family Garden is compact, but has enough capacity to grow dozens of plants, and provide your family with a substantial amount of fresh produce over an extended period of time.

Hydroponics 101

Hydroponics is a technique of growing plants (usually greens, vegetables, and herbs) in a controlled environment. “Hydro” (meaning water) and “ponics” (meaning work) are combined to describe a method of growing plants with water, nutrients and sunlight, or appropriate color spectrum LED lights, but without soil. The LED lights, used by indoor hydroponic gardens, are specially designed to mimic sunlight and maximize growth.

Despite their small size, microgreens pack a concentrated nutritional punch that makes them an excellent choice for any survival garden. Rich in flavor and easy to grow, microgreens contain more nutrition than much larger vegetable greens. Microgreens also provide high levels of vitamins, minerals, and antioxidants. Rise solutions contain all the essential nutrients plants need for healthy growth.

Above: Despite their small size, microgreens pack a concentrated nutritional punch that makes them an excellent choice for any survival garden. Rich in flavor and easy to grow, microgreens contain more nutrition than much larger vegetable greens. Microgreens also provide high levels of vitamins, minerals, and antioxidants. Rise solutions contain all the essential nutrients plants need for healthy growth.

Although this all sounds very high-tech, what we call “hydroponics” today is actually based on some very ancient farming techniques that date back thousands of years; some say as far back as the ancient Egyptians, Romans, and Greeks. It wasn’t until the mid 1800s and early 1900s, however, that the first modern hydroponic systems began to take shape, and scientists developed the concepts that’d eventually become the basis for the systems we use today.

Modern hydroponic systems provide complete control over the growing environment, and with the simplicity of self-watering and self-fertilizing, the results are larger yields and healthier, more nutrient-rich produce. Modern indoor hydroponic systems are also much more efficient than traditional outdoor gardening, since they use much less water and aren’t dependent on favorable weather.

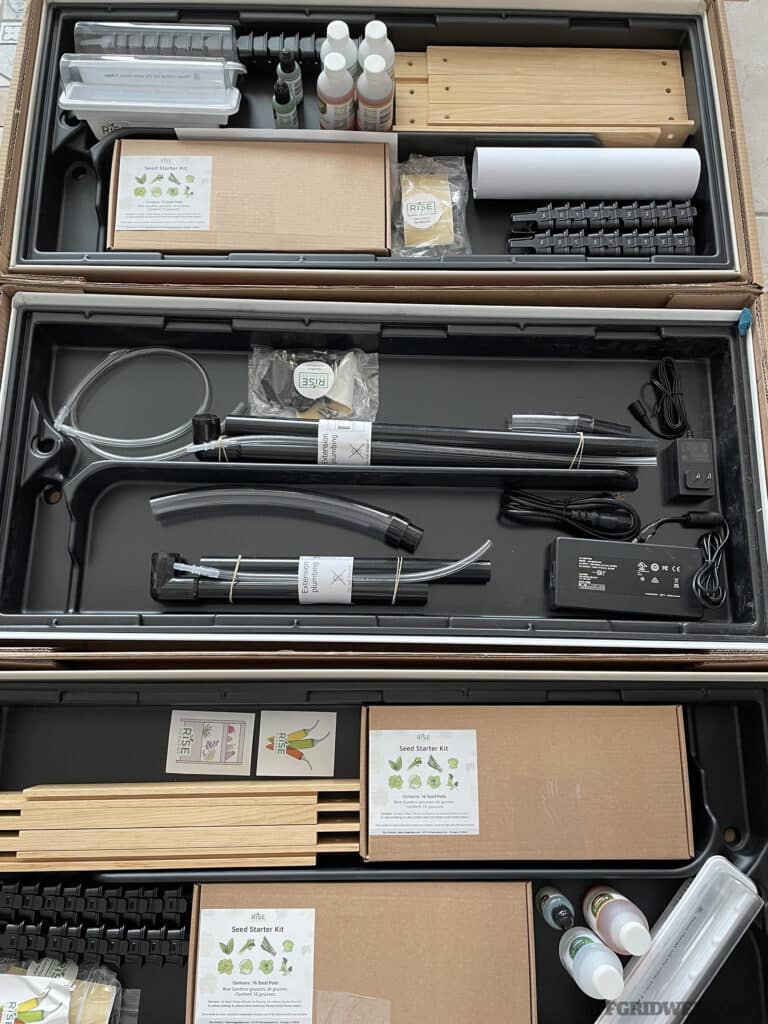
The Rise Family Garden comes with everything you need to get started. All the necessary components are clearly labeled, organized, and ready for assembly. An instruction booklet is included, or you can watch the assembly videos on the Rise website.

Above: The Rise Family Garden comes with everything you need to get started. All the necessary components are clearly labeled, organized, and ready for assembly. An instruction booklet is included, or you can watch the assembly videos on the Rise website.

Advantages of Hydroponics

  • Hydroponic systems are closed and recycle water. This can represent an up to 90 percent more efficient use of water, and is a superior way to deliver a precise amount of micro-nutrients to the plants.
  • By controlling temperature, lighting, water, and nutrient flow, hydroponic gardening can increase produce production by 3 to 10 times over the same amount of space in a traditional garden.
  • By moving the farm indoors, produce can be grown year-round, and in places where weather conditions may not be favorable.
  • Indoor hydroponic systems don’t require chemical weed, pest, or critter control products.
  • Hydroponic systems are designed to make the most of the available growing area by using vertical space instead of horizontal space.
  • Hydroponic systems can be positioned closer to the end user, shrinking the amount of time from harvest to consumption, and dramatically increasing the nutritional content of hydroponically grown produce.
  • Plants grown hydroponically can grow up to 50% faster than similar plants in soil.

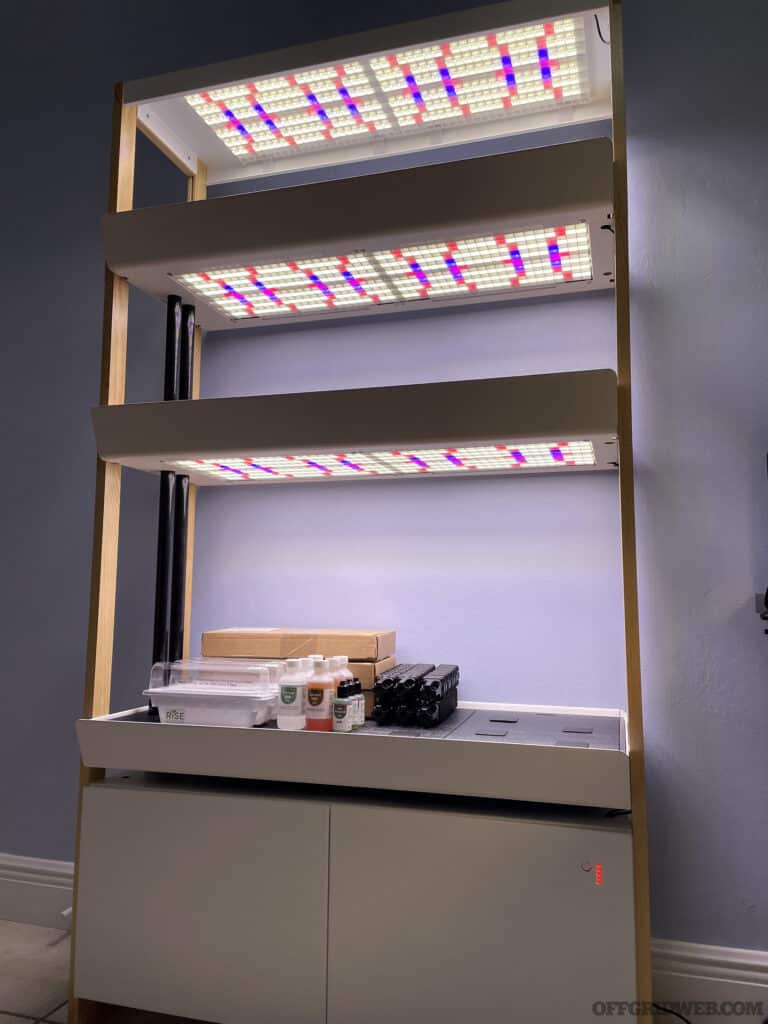
The fully assembled Family Garden has three growing levels (lowest level is the tallest). Each level has its own water supply and grow lights. The Garden comes with a one-year warranty.

Above: The fully assembled Family Garden has three growing levels (lowest level is the tallest). Each level has its own water supply and grow lights. The Garden comes with a one-year warranty.

Rise Hydroponic Gardens

For this article, we reviewed the Rise Triple Family Garden, a three-level indoor unit with a sleek design that resembles a modern Scandinavian bookcase. Since the garden looks very much like a piece of nice furniture, it’ll fit right in with just about any home décor. The unit measures 36 inches long by 16 inches deep by 66.25 inches high and is fully self-contained.

We chose the Three Level Garden for its increased capacity and technological advancements/features that automate and simplify the growing process. We’ve summarized some of these key features below:

  • App-Enabled – The Rise Gardens App monitors the garden’s systems, and tells you when it needs water, nutrients, etc. It also provides reminders, tips, and suggestions. Using what the folks at Rise call SmartCare technology, the App walks you through every step of the process, from seedlings to harvest. You can control and monitor your garden with the App, or you can even sync with Alexa.
  • Full Spectrum – LED Lights. The cutting-edge, full-spectrum lighting system is specially designed to mimic sunlight and maximize plant growth. The on-board controller ensures your garden gets the right amount of light, usually 16 hours a day. The system even simulates sunrise and sunset with a gradual dimming/brightening feature.
  • Smart Watering – The self-watering system is designed to deliver the precise amount of water, and nutrients, to maximize growth. The App will alert you when the water levels run low or get too high. When it’s time to add nutrients, the App will tell you precisely what nutrients to add, and in what amounts.
  • Modular Design – The modular system allows you to expand your garden. You can start with a single level and expand up to three levels. Each level will have its own water supply and LED lighting system.
  • Advanced Seed Pods – All plants start life as seeds in pods made from coconut coir and peat moss. The Rise Nursery is designed to create just the right environment for the seedlings to grow until they’re ready to transition to the garden, usually within five to seven days.

The Rise Garden comes with everything you’ll need to start growing right away — just put it together, plug it in, and add water.

The Rise Garden comes with a selection of seed pods, nutrients, PH balance solution, a nursery, and instructions. The three level gardens come with enough supplies to start growing on all three levels.

Above: The Rise Garden comes with a selection of seed pods, nutrients, PH balance solution, a nursery, and instructions. The three level gardens come with enough supplies to start growing on all three levels.

Self-Sufficiency and Privacy

For people who want to become more self-sufficient and increase their food security, an indoor hydroponic garden offers many benefits, one of the most significant being privacy. You can grow a substantial amount of fresh food right inside your own home 365 days a year — this is huge. Traditional outdoor gardens aren’t only vulnerable to critters, but in a dire food shortage, they might also get raided by two-legged critters.

The high visibility of an outdoor garden lets the world know your yard is rich in resources and makes your house a target. Growing indoors vastly reduces your visibility and allows you to grow a good amount of food without displaying any of the obvious signs of a traditional garden. During turbulent times, an indoor garden also reduces the amount of time you must spend outdoors tending to a garden. Security and self-defense are a top priority in any survival situation; the less time you spend outdoors, and the less people know about your preparations, the safer you’ll be.

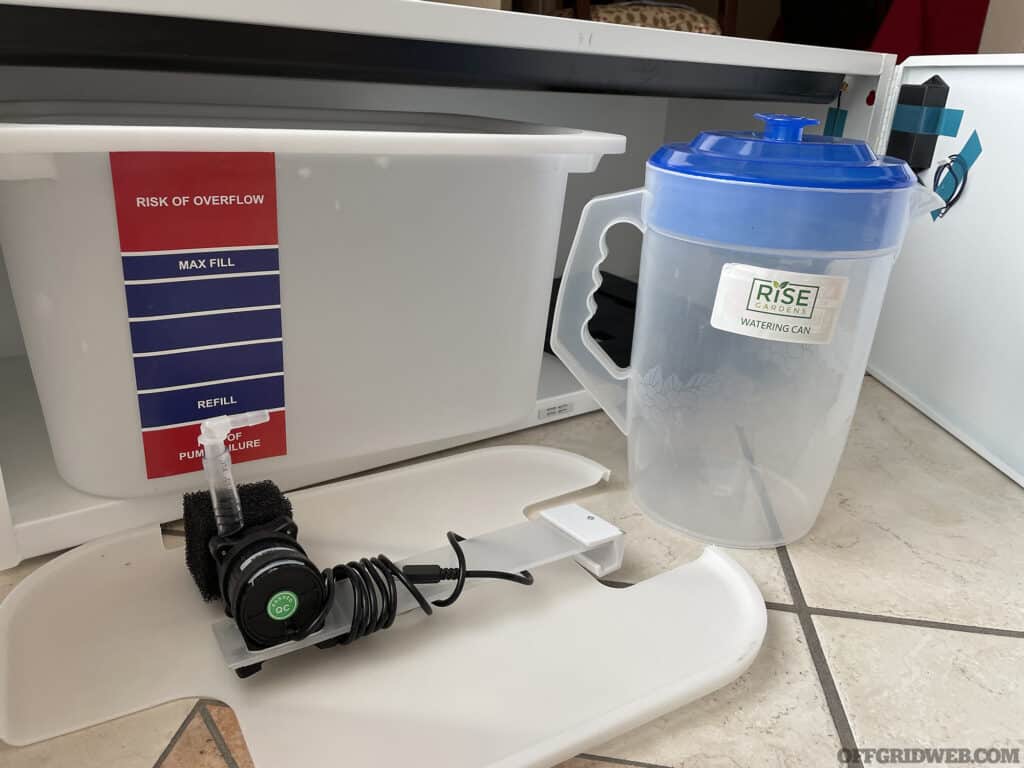
Contained within the lower cabinet is the water tank and pump assembly that continually circulates the nutrient-rich, oxygenated water throughout the various levels of the garden. The watering can allows you to easily add water to maintain the proper levels.

Above: Contained within the lower cabinet is the water tank and pump assembly that continually circulates the nutrient-rich, oxygenated water throughout the various levels of the garden. The watering can allows you to easily add water to maintain the proper levels.

Growing with Less Water

In a traditional outside garden, it’s estimated that as much as 50 percent of the water used for irrigation is lost due to evaporation, wind, or runoff. These estimates may vary according to a variety of factors, but an outdoor garden will always require far more water, and a good deal of that water will be lost. This can be a big problem for your outdoor garden if water is in short supply.

The water requirements for an indoor hydroponic garden will depend on the size of your unit and how many plants you’re growing. But, since the water is constantly circulating and being reused, your hydroponic garden will require far less water than a traditional outdoor garden. For example, a fully planted three-level Family Garden will consume about four gallons of water per week.

This represents a substantial water savings over traditional growing methods that would typically require much more water over the same period of time for a similar amount of produce. Whether you’re facing a water shortage or simply tired of paying increasing irrigation bills, this is a major advantage.

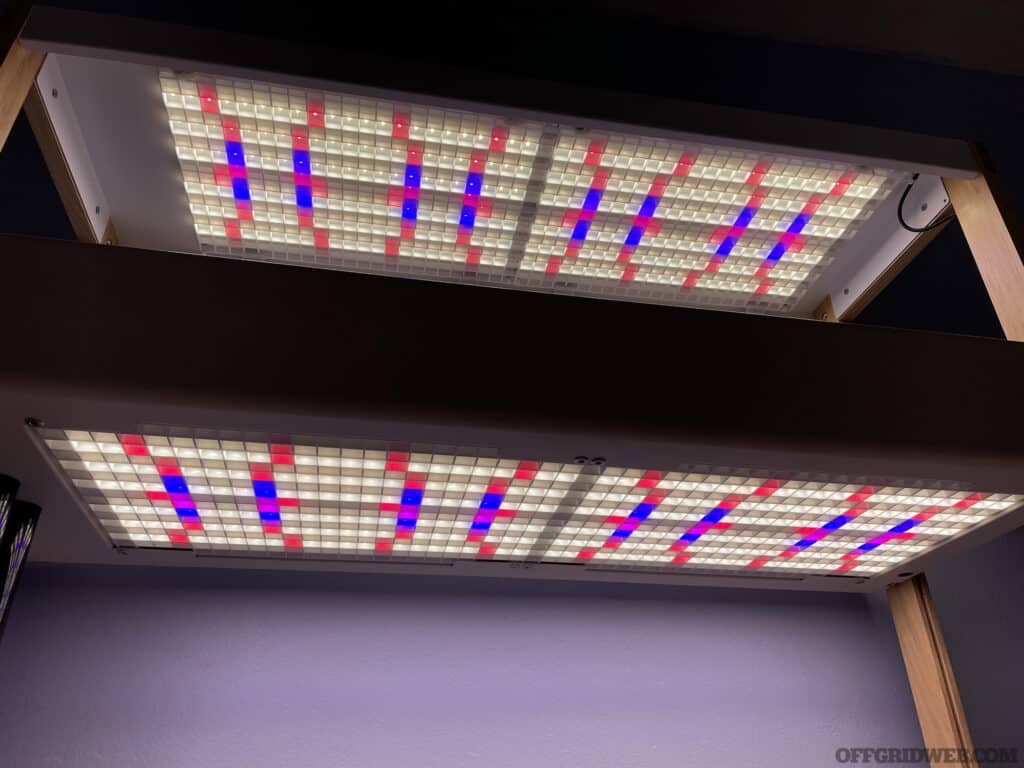
Designed to maximize plant growth, the innovative, full-spectrum lights mimic the natural light of the sun, and even simulate sunrise and sunset.

Above: Designed to maximize plant growth, the innovative, full-spectrum lights mimic the natural light of the sun, and even simulate sunrise and sunset.

Fresh, Nutrient-Rich Produce at Home

Homegrown veggies offer far more nutrients than the produce we normally buy at the local supermarket. Deterioration in the nutritional content of veggies starts as soon as these crops are harvested. The further away you are from the source, and the more time the produce spends in transit or storage, the more nutrients are lost. Store-bought produce has usually spent at least one week in transit, storage, and in warehouses before it ever reaches your local market; all these factors contribute to nutrient loss. According to the folks at Rise, the fresh produce you get from your garden is not only more flavorful but contains as much as 70 times more nutrients than produce you buy from your local grocery store.

You can take this one step further — to maximize the nutritional value of your homegrown produce, focus on plants with high nutrient density like microgreens, kale, Swiss chard, and beets. Not only are these plants very high in essential nutrients, but they only have to travel the distance from your garden to your table. Microgreens also grow very quickly and are usually ready to harvest in 2-3 weeks. There are many other options to choose from, or you can use the seed-less pods and grow your own varieties. The Rise Family Garden can easily be used to grow even larger plants like eggplants, tomatoes, and cucumbers.

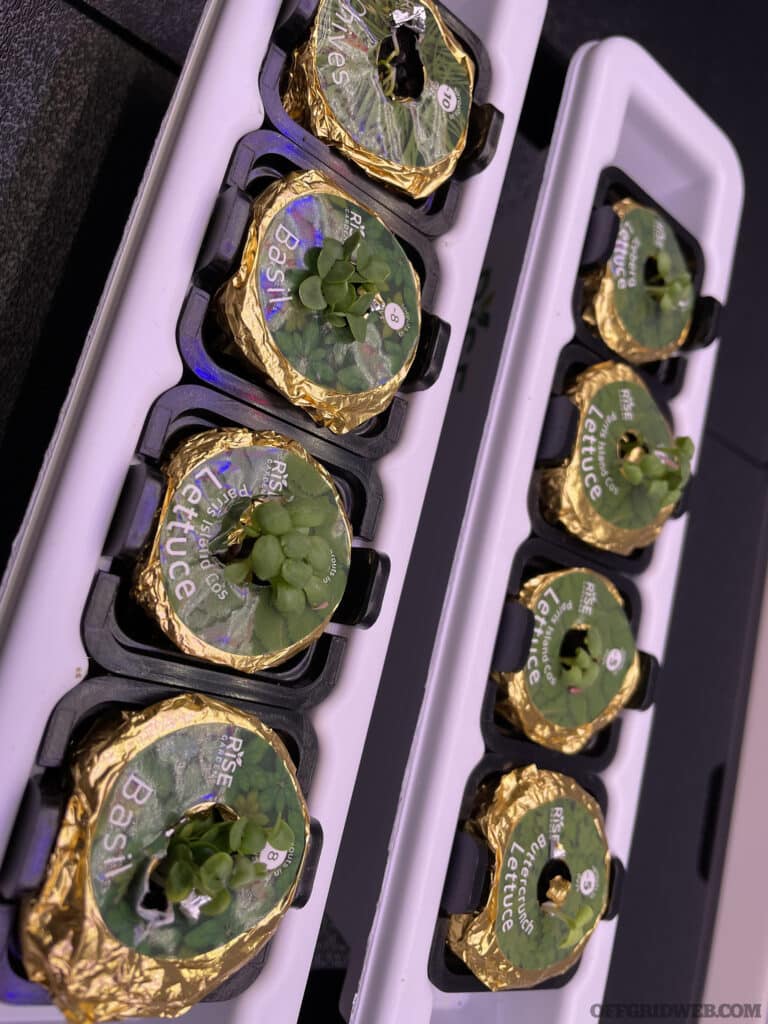
All plants start life as seeds in seed pod cups made of coconut coir and peat moss. Rise offers dozens of seed varieties, depending on your needs and the size of your garden. To start, carefully poke a hole in the center of the seed pod, place in the nursery, provide an initial watering, and cover.

Above: All plants start life as seeds in seed pod cups made of coconut coir and peat moss. Rise offers dozens of seed varieties, depending on your needs and the size of your garden. To start, carefully poke a hole in the center of the seed pod, place in the nursery, provide an initial watering, and cover.

Keeping Your Garden Secure

Stockpile Supplies. Stockpile sufficient nutrients, seed pods, and other necessary supplies to keep growing food even if there is a supply chain interruption, or some other serious problem that prevents the free-flow of commerce. Keep your seed pods in a cool, dry environment. Rise seed pods have a one-year shelf-life. Make sure to stock up on seedless pods in case you decide to grow your own seeds.

  • Have a Water Plan. Have a secondary source of water for use in your garden. If there is an event that affects your primary source of fresh water, makes sure you have a back-up plan and a reliable water supply for your garden. A three-level Family Garden will consume about four gallons of water per week. Plan ahead, store extra water, and have multiple ways of filtering water.
  • Maintenance. The Rise Garden needs a good cleaning every four to six months. You can recycle the water from the Garden to your outdoor plants so nothing goes to waste. Periodic maintenance keeps all the components functioning well and supporting optimum plant growth.
  • Backup Power Supply. To ensure you have uninterrupted growing cycles, have a back-up power supply to run the water pump and the LED lights in the event of a power outage. Consider a solar generator or an inverter generator.
  • Avoid Prying Eyes. Position the Rise Garden in a location away from exterior windows, and out of sight by casual visitors to your home. Run the light cycle during the day so that you reduce the possibility that someone will see the grow lights and recognize that you have a hydroponic garden. Knowledge of your preparations, including your garden, should be on a need-to-know basis.

Seedlings are protected, nourished, and kept at proper temperature within the nursery which provides the perfect growing environment. Once the seedlings develop their second set of leaves, they’re ready to be moved to one of the levels of the garden.

Above: Seedlings are protected, nourished, and kept at proper temperature within the nursery which provides the perfect growing environment. Once the seedlings develop their second set of leaves, they’re ready to be moved to one of the levels of the garden.

Supper’s On

There are many reasons to consider a hydroponic garden. You can grow impressive amounts of healthy and nutritious food in a controlled environment, use far less water and other consumable resources than traditional outdoor farming, and keep your valuable food far away from unpredictable weather, pests, weeds, diseases, and, of course, prying eyes.

Indoor hydroponic gardens have many benefits. From small table-top models with which you can grow a few herbs, to full-sized family units that will supplement your food stores, these gardens will consistently bring fresh produce to your table when you need it most.

Once the seedlings are moved to the garden, they quickly develop roots that extend into the water circulating throughout the system. Eventually these roots will mature and provide your growing plants with the necessary water and nutrients.

Above: Once the seedlings are moved to the garden, they quickly develop roots that extend into the water circulating throughout the system. Eventually these roots will mature and provide your growing plants with the necessary water and nutrients.

About the Author

Richard Duarte is a practicing attorney, an urban survival consultant, writer, firearms enthusiast, and freedom-loving American patriot. He’s the author of Surviving Doomsday: A Guide for Surviving an Urban Disaster, and The Quick Start Guide for Urban Preparedness. Duarte’s books are available at Amazon and other fine retailers. You can connect with Richard on Twitter @SurvivingDoomsd

Read More

Subscribe to Recoil Offgrid's free newsletter for more content like this.

Editor's Note: This article has been modified from its original printed version for the web.


Affordable AK: The WASR-10

Much like bringing up a bitter team rivalry in a crowded sports bar, bringing up the subject of AK variants among gun enthusiasts is an easy way to stir up a heated discussion. Everyone who’s ever owned or fired an AK, despite hundreds of imported and domestically produced types in the wild, seems to have an opinion on which one is the best. And in almost every one of these debates, you’ll hear someone shout, “just get a WASR!” The Romanian-built WASR series has become a mainstay of the U.S. imported firearms category, and it’s regarded by many as the gold standard of affordable AKs available stateside. For decades, Century Arms has been one of the biggest importers of firearms into the United States, and some of this success can be attributed to what the company still calls a “massive demand” for the WASR.

So, does the WASR live up to its legendary reputation? Is it still the AK variant to buy if you’re not looking to break the bank? To shed some light on these questions, we’ll be discussing a rack-grade WASR-10 in 7.62×39 and our experiences from firing, handling, and thorough inspection by a qualified AK gunsmith.

As seen on the cover of this issue, we temporarily dressed up our WASR with some beautiful surplus Russian wood and a Bakelite grip borrowed from Copperhead USA.

Above: As seen on the cover of this issue, we temporarily dressed up our WASR with some beautiful surplus Russian wood and a Bakelite grip borrowed from Copperhead USA.

About the WASR

Much like anything worth knowing, the history behind the topic is relevant. Century Arms is the importer of the WASR, but these rifles are built by Cugir Arms Factory in Cugir, Romania. Cugir Arms developed out of an iron-processing facility founded in 1799 in the hills of the Transylvania region and has been producing weapons ever since.

The WASR-10 comes standard with light wood furniture, a black polymer grip, and a US PALM 30-round magazine. What about a Picatinny rail and red dot? Nyet, rifle is fine — we stuck with iron sights.

Above: The WASR-10 comes standard with light wood furniture, a black polymer grip, and a US PALM 30-round magazine. What about a Picatinny rail and red dot? Nyet, rifle is fine — we stuck with iron sights.

The name WASR is short for Wassenaar Arrangement Semi-automatic Rifle, a reference to a post-Cold War international arrangement that helped many former Warsaw Pact nations export weapons — everything from tanks and artillery to small arms — to other nations in Europe and North America. The WASR-10 is essentially a semi-automatic version of the Pistol Mitralieră model 1963 (PM md. 63), which in turn was a licensed version of the Soviet AKM. Utilizing a well-known design and simple wood furniture, these Romanian rifles are a no-frills variant of the AKM.

We tested our WASR with four magazines. From left to right: US PALM, Magpul, Bulgarian steel, and XTech.

Above: We tested our WASR with four magazines. From left to right: US PALM, Magpul, Bulgarian steel, and XTech.

The current WASR is a product of years of improvements. One of the most notable is eliminating “trigger slap” in current offerings via an aftermarket trigger. This is when the bolt slaps back into the hammer as it travels, which impacts the disconnector/trigger, snapping it back into the shooter’s trigger finger. This has to do with clearances inside the receiver and, thankfully, is pretty uncommon on modern AKs, such as the current WASR-10 offerings from Century.

A Closer Inspection

The WASR-10 we received looked fine when we removed it from its box, as we’d expect from a basic imported AK. However, unlike an AR-15, many parts of the AK must be pressed and/or riveted together — if this is done improperly, an AK can be in for serious problems down the road. To check the baseline condition of our WASR, we had local AK expert Josh at Copperhead USA in Tempe, Arizona, look it over before we commenced testing.

Something that cannot be overstated is that AKs often require real gunsmithing, as opposed to other platforms where you can swap internal components using simple hand tools. AK tolerances are all over the map and vary from country to country and even from the same factories at different times. Several companies offer build classes on AKs where you can dive deep into these differences and the things you need to be aware of, and Copperhead does a great job of these classes. If you’re considering getting into the weeds of the platform, it’s worth the time and money to invest in learning to be competent rather than simply enthusiastic.

The rifle failed to feed the last round from an XTech mag near the start of our break-in. This was an isolated incident.

Above: The rifle failed to feed the last round from an XTech mag near the start of our break-in. This was an isolated incident.

Right off the bat, Josh checked headspace, as it’s possible for an AK to fire out of battery — meaning when the bolt isn’t fully seated to the chamber — which can cause serious issues. This WASR was found to have good headspace after having been appropriately gauged. Josh noted it had a tight chamber, which will come up later. It’s not uncommon to find a canted (i.e. tilted) front iron sight post on an imported AK, but thankfully, our WASR’s sights were just fine.

After a few magazines of rapid fire, wisps of smoke began to appear around the barrel and gas tube.

Above: After a few magazines of rapid fire, wisps of smoke began to appear around the barrel and gas tube.

The rest of the problems were purely cosmetic, but it should be noted that having some knowledge of the platform to make those distinctions is vital. The gas block was canted slightly, and the slant brake muzzle device doesn’t sit flush on the muzzle due to the detent retaining it being slightly too long (this could easily be fixed with a file). It looks like the bolt carrier had been dropped at some point before us getting a hold of it, since there was a small ding on the top of the carrier just forward of the recoil spring assembly. The safety was also remarkably tight even after bending it out, which is another common issue with many AKs. Any of those things could’ve looked worrisome to the untrained eye, so we’re glad Copperhead USA could take a look at it. Aside from the tight chamber, which Josh said would improve with time, our rifle was in great functional condition.

The wood furniture was nothing to write home about; in testing, it even manifested some unexpected issues we’ll discuss later. The trigger was a common spongy AK trigger with a tactile reset and a curved bow. Based on everything we saw, this wasn’t a cherry-picked rifle and is a good measure of what you can expect from a WASR-10.

At the Range

Testing was simple — the best thing you can do to test a new rifle is fire it. That shouldn’t be a controversial concept, yet to some, that might be the case. In particular, firing an AK with a tight chamber will help fit the bolt to the chamber, reducing that issue.

To prepare for our break-in range day, we loaded 500 rounds of Red Army Standard steel case 7.62×39 ammo into four different types of mags. These included US PALM AK30R magazines, XTech MAG47 polymer magazines with steel locking lugs, Magpul MOE magazines, and Bulgarian steel 30-round mags from GunMag Warehouse. We began by running one of each magazine through the rifle to ensure there weren’t any significant issues with that type. Again, with the wide range of specs and tolerances, not all AKs will like all magazines. Often, tuning magazines for a particular rifle may be required.

Once the barrel and handguard retainer got hot enough, they began to burn the wood handguard, leaving blackened areas and small blisters in the finish.

Above: Once the barrel and handguard retainer got hot enough, they began to burn the wood handguard, leaving blackened areas and small blisters in the finish.

The first mags of all four types presented no issues. However, the second XTech mag failed to feed on the last round, which also set the bullet back in the casing far enough to make us throw that round away. Other than that, the only magazine issue we experienced was difficulty seating them, which is a combination of needing to break in the mag release lever and the mags themselves. We’d rather mag lockup be too tight than too loose, anyway.

For those who’ve ever run an AK hard, you’ll know that the forward sling loop is a dicey place to find your fingers, as it transmits heat quickly. Our experience was no exception; after less than 200 rounds in rapid succession, the sling loop was painful to the touch. It’s also where heat started radiating into the handguard and melting the finish on the wood. Strangely, as the finish bubbled and melted near this contact point, it gave off a slight audible hiss and the distinct smell of pancakes. Once the finish melted off, it started puffing white smoke and smelling of burnt wood, as expected.

Photo of the foregrip of an affordable ak.

Around 250 rounds in, we experienced that tight chamber observation come to fruition. We had a round fire, and the steel case expand as usual; however, the extractor ripped the edge off the case, causing a failure to extract. This isn’t the fault of the bolt or extractor, it’s likely the tight chamber causing an issue. We grabbed a paint can opener — a surprisingly useful tool for prying out stuck cases — in an attempt to snag the edge of the stuck casing, but had no luck, meaning it was tightly expanded. It took a cleaning rod down the bore to punch out the damaged steel. We should note that the WASR doesn’t come with a cleaning rod, but we added one to our rifle from a spare parts bin.

Handling the Heat

As the rifle got hotter and hotter after several hundred rounds, it handled the wear remarkably well, with the finish experiencing minimal discoloration. In fact, the WASR-10 took everything we threw at it remarkably well. After dumping mag after mag into targets without more than a few seconds’ pause, the rifle’s entire barrel and handguard were rippling with heat and smoke, but it kept chugging away.

The second malfunction occurred roughly halfway through our test. A case got stuck in the chamber, causing the extractor to rip off the case’s edge. Tapping it a few times with a cleaning rod knocked it out, and we went right back to shooting.

Above: The second malfunction occurred roughly halfway through our test. A case got stuck in the chamber, causing the extractor to rip off the case’s edge. Tapping it a few times with a cleaning rod knocked it out, and we went right back to shooting.

Towards the end of our 500-round test, we also noticed a ½-inch crack developing in the wood stock on the shooter’s side close to where it meets the rear trunnion. Considering the quality of the wood, it’s not unexpected to find defects, and this had no impact on the firing schedule. We were planning to replace the wood with a nicer laminate furniture set anyway, so the charred handguard and cracked stock only give us more reasons to do so.

At the end of the range session, we noticed one edge of the wood stock was starting to crack. The stock isn’t loose at all, so it’s solely cosmetic.

Above: At the end of the range session, we noticed one edge of the wood stock was starting to crack. The stock isn’t loose at all, so it’s solely cosmetic.

Except for the one misfeed, all the mags ran solidly and fed reliably. Consider this as a crucial consideration for buyers, as few will be willing to experiment with various magazines to find what your particular rifle likes best. Despite firing 500 rounds of steel-case ammo in less than 30 minutes during our aggressive break-in test, the WASR-10 held up remarkably well. Sure, it had a few minor issues out of the box, but most are purely cosmetic, and none would be insurmountable without a minor repair or continued use to break in the components.

Closing Thoughts

With an MSRP of $1,070, the WASR-10 from Century Arms isn’t the cheapest AK you can buy, but it still remains one of the best bang-for-your-buck options on the market. If you’re shopping for your first AK or simply want a do-all rifle that focuses on reliability and durability above all else, it’s worthy of your consideration.

We had no intention of giving our AK the white-glove treatment — we wanted to run it hard, just as Mikhail Kalashnikov intended. Our 500-round test is only the start of its service life, and we’d say it performed admirably so far.

Above: We had no intention of giving our AK the white-glove treatment — we wanted to run it hard, just as Mikhail Kalashnikov intended. Our 500-round test is only the start of its service life, and we’d say it performed admirably so far.

If, on the other hand, you expect an immaculate finish, 1 MOA accuracy, and the ability to add a modern sighting system without purchasing an aftermarket mount, you should look not only at a different AK but also at a different platform entirely. That being said, you’d be surprised what you can squeeze out of the platform, especially with the help of a gunsmith specializing in AKs.

AKs continue to be a staple of the American firearms market even as prices climb on what might be a boutique firearm in the not-too-distant future. If you’re looking for an affordable, reliable, and fun-to-shoot AK, you’d be hard-pressed to do better than the WASR-10 from Century. As it turns out, its reputation is well-deserved.

Sources

Read More

Subscribe to Recoil Offgrid's free newsletter for more content like this.

Editor's Note: This article has been modified from its original print version for the web.
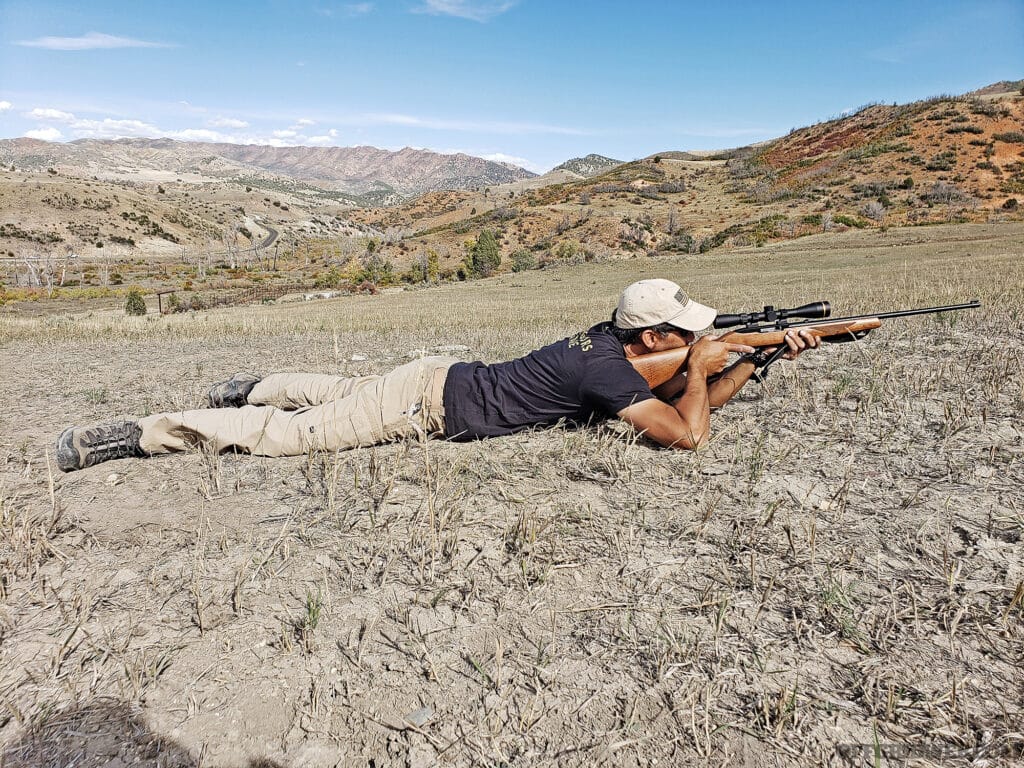

70-Series Toyota Land Cruiser: Forbidden Fruit

As Americans, we take great pride in our unique national treasures. The Bill of Rights, National Parks, baseball, barbecue, rock and roll — the list goes on. In addition, our cultural melting pot has given us access to a huge variety of iconic creations from foreign shores; we didn’t invent pizza or tacos, but we’ve certainly embraced them. So, it’s always surprising to come across an item that’s essentially unobtainable in America. Such has been the case for the 70-Series Toyota Land Cruiser.

Photo of a Toyota in the middle of a muddy water crossing.

Produced from 1984 through the present (yes, it’s still in production), the 70-Series is an immensely popular vehicle for militaries, government organizations, and off-road adventurers around the world. However, it was never sold in the United States — we got the rounder and more luxurious 80-Series, sold here from 1990 to 1997. Although it’s possible to bring over some foreign-market 70-Series Land Cruisers under the 25-year-old vehicle import law, making one street-legal comes with a long list of additional headaches and costs, especially if you live in a state with strict emissions regulations.

Photo of a 70-Series Toyota Land Cruiser driving through the desert.

Above: The truck also includes a deployable awning and shower enclosure with hot and cold running water.

70-Series Toyota Land Cruiser

Tim McGrath, founder and lead designer for overland apparel company Sackwear, fell in love with the 70-Series Land Cruiser, especially its 79-Series pickup truck submodel. “The people that know about the 79 wish they sold them here in the States,” he says. Knowing the difficulties of legalizing an imported 79-Series, he began looking for alternative ways to achieve the appearance and rugged functionality of one of these trucks. This led him to Maltec, a company in Germany that builds custom Land Cruisers that — despite their appearance — are actually based on the easily importable 80-Series chassis. They agreed to build him a North American-spec truck that features a modified 70-Series cab and carbon-fiber camper on top of an 80-Series frame.

Photo of a Toyota with the canopy of a bed camper extended.

Above: It only takes a few seconds to deploy the pop-up roof and set up camp.

The build began with a 1993 80-Series Land Cruiser. After removing the original body, its frame was stretched to match the desired wheelbase for the camper conversion. A four-door cab from a 79-Series donor vehicle was mounted onto the 80-Series frame, and the back of that cab was cut out to create a pass-through into the carbon-fiber camper shell that was added next. Normally, having a custom vehicle built halfway across the globe would be rather nerve-wracking, but Tim says the builders listened to his needs and were extremely communicative. “Maltec did a great job keeping me connected with the progress, and sent me lots of emails with photos. I trusted their expertise and craftsmanship since they build really awesome rigs.”

Photo of a 70-Series Toyota Land Cruiser driving through the fog.

Above: The Front Runner roof rack holds two Alu-Boxes and a large dry bag for gear storage. Additional rails atop the camper can be used to retain a kayak or paddleboards.

Modifications and Upgrades

In addition to the body modifications, Maltec installed a 4.2-liter 1HD-T turbo-diesel engine and five-speed manual transmission, a configuration that was also unavailable in U.S.-spec Land Cruisers. The truck’s underbody is armored with a variety of Maltec skid plates to fend off rocks on the trail; it rides on OME 3-inch-lift springs and OME shocks, 17-inch Braid beadlock wheels, and 37-inch Cooper tires.

Photo of a Toyota driving down a forested road.

Above: Despite its many creature comforts, this Land Cruiser is no pavement princess. It can still go just about anywhere and take Tim’s whole family with it.

Tim says this combination balances a spacious interior and compact exterior, with “enough room to travel and sleep four while still remaining small and capable.” He explains, “There’s not a lot of room, but it’s doable — I guess that’s the trade-off. I can wheel this thing to places where most campers can’t go. I love that we can set up someplace crazy and stay comfortable, warm, and dry at night. We can even cook inside and watch a movie.” It wasn’t an easy or inexpensive process, taking a year to complete and costing north of $200,000, but he doesn’t regret it for a second.

Photo of a 70-Series Toyota Land Cruiser driving next to an alpine lake.

Over the course of the last year, Tim has taken his Land Cruiser out on family expeditions at least once a month. In one of his most memorable experiences, he and his daughter drove to Colorado, arriving late in the evening to a dark and narrow trailhead. They continued onward, winding up a steep mountain road to a lake just above the tree line at 12,000 feet. He recalls, “The truck tackled the obstacles without any issues and delivered us safely. We were the only ones there under a star-filled sky, and had paddle boards to keep us entertained the next day.”

Photo of the interior of a Toyota Overlanding rig.

1993 Toyota Land Cruiser

  • Drive Train: 4.2L 1HD-T turbo-diesel inline-6, 5-speed manual transmission, 4×4 with 2-speed transfer case
  • Suspension: Old Man Emu springs and shocks
  • Wheels & Tires: 17-inch Braid Dakar Beadlock A wheels, 37×12.5R17 Cooper Discoverer STT Pro tires
  • Body Modifications: 79-Series Land Cruiser cab with rear cutout; Maltec aluminum front bumper, skid plates, fender flares, and carbon-fiber camper; Front Runner roof rack, awning, and camper roof rails; Alu-Cab exterior hot/cold shower, two 42L Alu-Boxes and Halite dry bags for storage
  • Interior Modifications: Maltec cabinets, gray and black leather door panels, suede headliner, and teak wood camper flooring; four Recaro Sportster CS leather seats, Webasto heater, 15-gallon fresh filtered water tank, water boiler, hot/cold sink, three-burner stove, espresso machine, upper and lower beds (sleeps four)
  • Lighting & Electronics: Dual AGM house batteries, two 100W SunWare solar panels, Victron Energy 2,000W power inverter, Alpine Halo 11-inch head unit/navigation, Simarine PICO touchscreen information panel, two Dometic refrigerators, LED camper lighting with charge ports, Warn Zeon 10-S Platinum winch with Factor 55 fairlead and FlatLink E, Baja Designs S1 bumper lights and LP9 Pro driving lights, KC Hilites Cyclone rock lights
  • Built By: Maltec – Menden, Germany – www.maltec.org

Photo of the kitchen in a 70-Series Toyota Land Cruiser.

Above: A triple-burner stove and espresso machine allow Tim and his family to enjoy a hot breakfast without leaving the comfort of the camper.

Read More

Subscribe to Recoil Offgrid's free newsletter for more content like this.

Editors Note: This article has been modified from its original print version for the web.
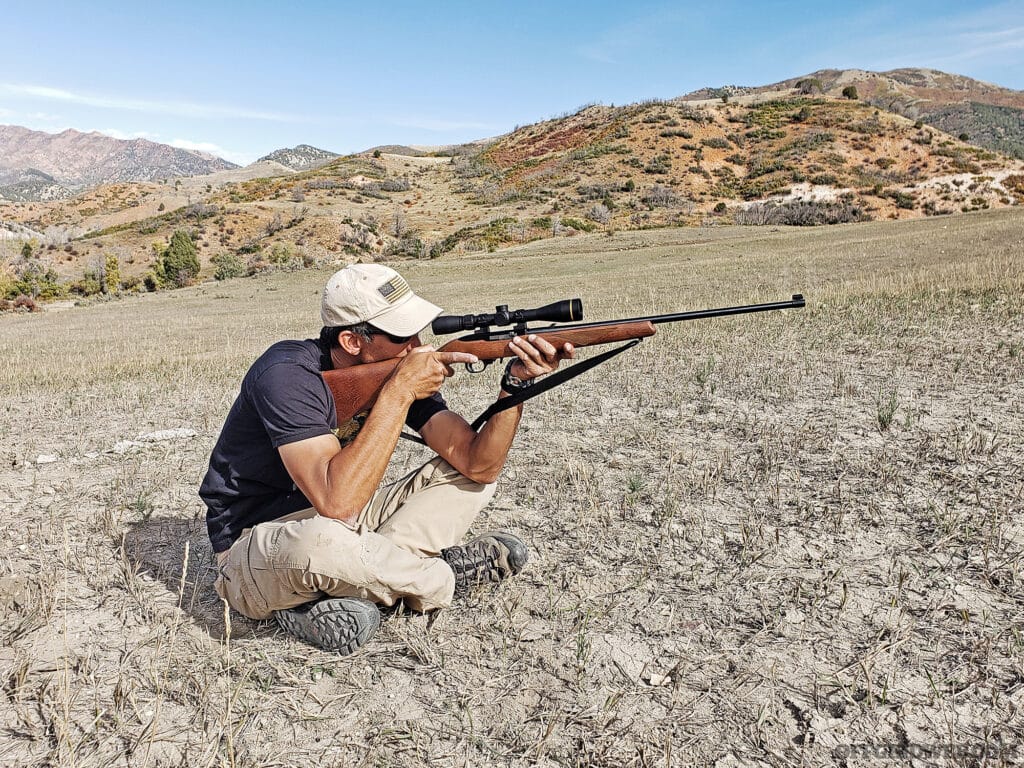

Resilience During Crisis: Managing Mental Health

Below is an event that actually happened to me. At the time of this incident, I’d been a mental health therapist for a few years, and after graduating and obtaining my license, had studied under Dr. Sal Minuchin for six months, one of the premier therapists of our lifetime. I was quite familiar with the fight-flight-freeze response that is hard-wired into our survival instincts. It is my hope that, as I walk through my thoughts and feelings as events unfolded, that you will be able to recognize what is going on and be able to find resilience during crisis.
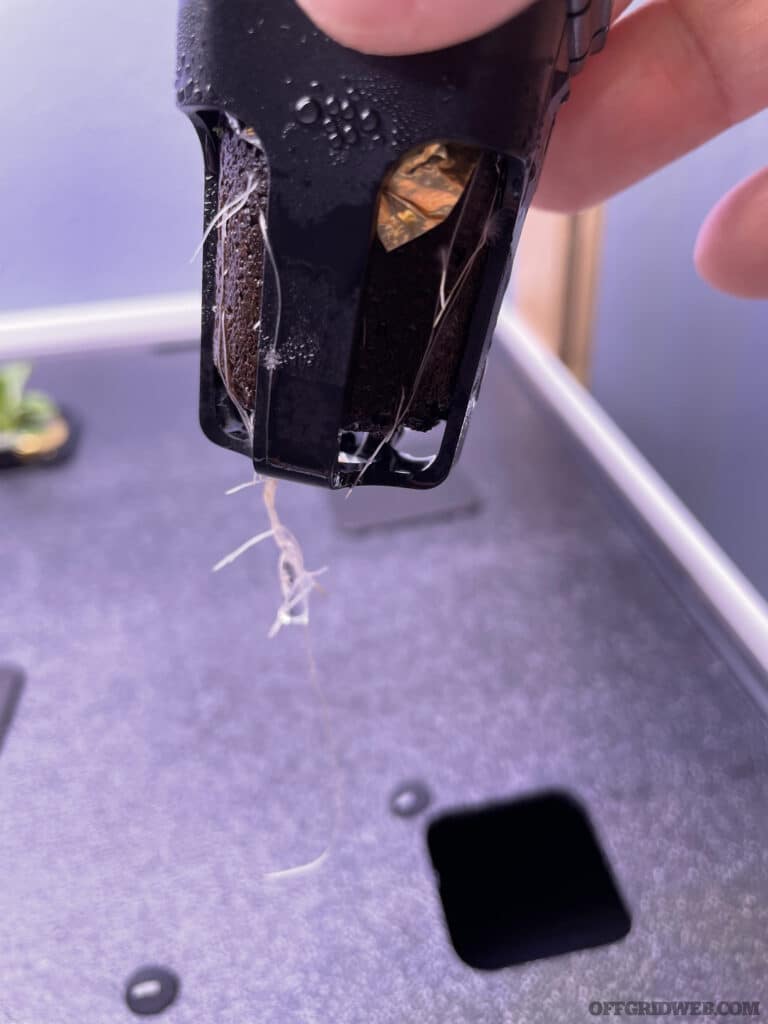
The Scenario

I had eagerly anticipated this hike for months. It was to be my first exploration of Red Rock Canyon, and the scenery surpassed even the breathtaking images I had seen online. The vastness of the landscape had a way of humbling you, making you realize just how small we are in the grand scheme of things. The plan was straightforward – a couple of miles through one of the smaller foothill trails, then back.

Since I was unfamiliar with the area, I intended to stick to an intermediate trail. I set out early, well-prepared with a gallon of water and my survival kit. Another gallon waited in my vehicle for rehydration upon my return. The desert's reputation for quick dehydration isn't exaggerated; I found myself swatting away flies attracted to the moisture near my eyes.

Photo of the terrain in an arid desert.

Above: Becoming disoriented on a trail is a common way hikers become lost.

While soaking in the stunning views, I must have missed a turn in the trail. Suddenly, I found myself on a wild game trail. Lost in the moment, I had lapsed in judgment and strayed off the intended path without realizing it. The passage through the underbrush narrowed, signaling that I was clearly not on the trail meant for humans.

“Okay, no big deal,” I reassured myself. “I'll just retrace my steps.”

Despite my attempt at reassurance, panic lurked at the edges of my mind. Nearly half my water was already gone, and the thick brush hinted at hidden rattlesnakes. This was in the days before everyone owned smartphones, and even if I had one, it likely wouldn't have had a signal that far out.

Resilience Matters

As a Licensed Mental Health Therapist, the tables had turned. I now needed not only my survival training but also my mental health training to navigate this unexpected challenge. As I boy, I grew up raised by an 82nd Airborne Paratrooper who taught me wilderness survival, learned more survival skills in Boy Scouts, and was no stranger to hiking and camping.

“If anyone can figure this out, I can.” I thought. Or rather, tried to convince myself….

When we are faced with perceived danger, a part of the brain that is called the Amygdala gets activated, it sends signals to the Hypothalamus to activate the Sympathetic Nervous System. In Layman’s terms, this is your fight-flight-freeze response. When it is active, several things happen, your heart rate increases, your pupils dilate, your blood pressure increases, and your breathing becomes more rapid. If you are facing down a bear that decided that you look like a tasty snack, this would be helpful, because it makes your stronger, faster, and more resilient to pain.

Photo of first responders tending to a patient.

Above: First Responders and Military personnel often deliberately place themselves into situations where they must conquer their fight-flight-freeze response.

But it also has some negative effects, the brain processing speed gets overclocked, your fine motor skills deteriorate, you can get tunnel vision, and the physiological responses in your body feel quite similar to a panic attack. Panic attacks can cause us to freeze or want to take flight, neither of which is good in a “lost in the wilderness scenario.”

In the same way that Soldiers and First Responders can train to manage that fight-flight-freeze response, so too can civilians learn to apply training, including Hikers who get lost in a desert filled with rattlesnakes.

Understanding a little bit of mental health first aid can be life-saving skill for those who may encounter a personal emergency or who are trying to help calm someone who has just experienced a life-threatening scenario.

“Okay…” I thought, “let’s just backtrack a little. See if I can’t find the main trail.”

So, I walked about 10 minutes back down the game trail, and found several forks, most of which looked like more game trails, not hiking trails. Panic tried to creep in again.

“Sit down. Just sit down Sarge. Stop.” I thought.

S.T.O.P.

In all wilderness survival classes, they tell you that when you are lost, to remember the acronym S.T.O.P., an mnemonic acronym that stands for: Sit, Think, Observe, Plan.

YES, that’s it! What had I learned about being lost in the wilderness. STOP. Hug a tree. In this case, a desert boulder.

So as I sat there, I realized that my mind was racing, as was my heart, and that I had been dangerously close to panic-walking myself further into danger. I didn’t want to be one of those guys who panic walks in circles or further into the wilderness. That’s the thing with mental health first aid. Panic attacks can be mitigated, shortened, and in some cases eliminated with just a few skills.

As I sat on the boulder, I focused on my breathing, knowing that I needed to get my sympathetic nervous system under control first so I could make clear-headed decisions. Panic can be like an altered State of Consciousness. Some people get tunnel vision, most people get racing thoughts, and a few people get a de-realization/out-of-body feeling. None of the above is pleasant.

“Breathe.” I thought. “In through the nose, slow. SLOW. Hold it for a few seconds. Now release through the mouth even slower. Pause. Repeat.”

I did this for a few minutes until I started to feel a little calmer. Then I started working on my cognitions. The worst thing one can do is to think thoughts like “I’m gonna die” or “I’m really screwed.” These thoughts, and any catastrophic thinking really, such as “What if a rattlesnake bites me?” could trigger me right back into panic mode, because every thought we have. EVERY thought, has a biochemical response in the brain that causes a feeling/emotion, and this emotion, whether we all want to accept it or not, largely determines our behaviors and choices. This is the essence of cognitive behavioral therapy. Learning to control your thoughts, will improve your feelings, and this will help you make good decisions and choices. But it always starts with a thought, even a subtle one.

Photo of Tom Sarge peering into the distance.

Above: Taking the time to think about your situation will help override the body's initial biochemical response to an emergency situation.

“Okay, what do we know?” I thought. “I know I can’t be too far off-course, no more than a couple miles. I know a few people knew generally where I was going (but not the specific trailhead) and that I expected to be back by nightfall. I know I have survival training and some kit with me that would help me make it through the night if needed. I can do this.”

My panic started to fade some more.

“Observe.” That was the next step right? Standing up from my boulder I looked around. The brush was too high in some areas to see far. That was a problem. I climbed a bit further up the foothill to find a spot that had a bit of an overlook. Looking down in the distance I could see what I thought was a road. Hard to tell in the desert because the sand and dust covers the pavement in some spots, but it looked right, and my instincts told me that was the general right direction I came from.

“Observe.” I thought again.

I started pulling things out of my pocket to see what I had with me. A pocket knife, a lighter, a small flashlight, a few bandaids, a small hank of cordage, a bit of jerky (trail snack), and about half a gallon of water left. I was wearing light, loose clothing, but my shirt was a shade of blue that was not normal for the desert landscape. It stood out. I also observed that I thought I had at least a couple hours of sunlight left based on the stacked fingers method against the horizon.

“Plan.” I thought finally. “Okay, if I head in that general direction, travelling down the foothills and to the South East, it should bring me to the road. From there, I might even see my vehicle, but if not, I can at least wait till the next car goes by and ask for a ride to the trailhead. If I find a large broken branch I can use it to tap the ground in front of me on these game trail, with a little luck I might not encounter any rattlers. But if I do, they may strike the stick first and I could use it to flick them away… maybe.”

Photo of a rattlesnake coiled up.

Above: Thinking of, and preparing for potential dangers, such as aggressive wildlife, is an important step when trying to return to safety.

Supporting Others In A Crisis

It's likely that each of us will encounter emergencies in our lifetime, or maybe you will be the first responder for your family and neighbors in the aftermath of a tornado, or worse. People will be in panic mode. Anyone can learn to use some of these Mental Health First Aid skills to help others in these situations.

  • First, determine that the scene is safe. If it is not, that must be your first priority, getting everyone to safety. Then, assess the group, find helpers, other people who do not seem to be in panic mode. Ask them to go check on other members of your group. Triage the situation, determine who needs your help first, then address that person by name. Assure them that they are safe now. Ask them to look around the area and tell you five things they see, four things they hear, three things they physically feel, two things they smell, and one thing they taste. It isn’t important that they get four things or three things, what you are doing is forcing them to input sensory information into their brain. This has a grounding effect.
  • Next tell them to breathe slowly, in through their nose, out through their mouth. Really slow. Repeat for several minutes.
  • Then ask them if they are okay, ask them to describe what they witnessed and how it made them feel. This will help mitigate longer term effects such as nightmares or flashbacks to some extent. It’s not perfect, but this is Mental Health First Aid, not therapy.
  • Validate their experiences, don’t argue with them, even if they saw something different than you. “You’re right, that was really scary.” Validation also will help mitigate the chances that the experience becomes something worse over time.

Photo of burned ruins with a firefighter trying to put out the flames.

Above: In the midst of destruction, are people who need help mitigating their emotional trauma.

After The Crisis

The next step would be to prepare them for what is to happen next. “Ok, we’re going to try to get you to a hospital (or home if that’s appropriate.)”

You may tell them it is normal to be shaken up about the incident, and that they may even have bad dreams about it. If the dreams, or panic, or flashbacks (dissociative episodes) start happening and persist for more than a week, it might be a good idea to talk to a therapist for further help. But in many cases, the initial symptoms will fade over a week or so. The long term response depends on a lot of factors.

As a therapist who works with First Responders and Veterans, most of my patients have had a lot of experience with having to use that fight-flight-freeze response to survive dangerous encounters and to help others in danger.

While the training these individuals get for how to overcome the freeze-flight part of the response is excellent, many are not prepared for the long term after-effects of repeated activation of the Amygdala’s survival mechanism. Some people can be prone to long term panic attacks (or worse, nightmares, flashback dissociations, and more).

Any civilian can learn Mental Health First Aid. Search for classes on this in your area, it is often free and sponsored by trained professionals in the mental health community.

And if you are prone to panic attacks, (or worse symptoms) and find that some of the techniques described here are not helping to manage them, it may be a good idea to seek help from a licensed therapist.

Who will be prone to long term panic attacks is difficult to predict. There seems to be a genetic component, but it also has a lot to do with how we were raised, and that does not necessarily mean that being raised in a good environment or bad environment makes one more prone, but rather how we learned to think, how we believe the world “should work,” how we learned to problem solve, and what other life events we have already been exposed to. It’s not a matter of being weak or strong. In fact, some of the strongest soldiers, bravest fire fighters, most resilient officers, and most dedicated paramedics have come to see me in therapy for their symptoms. If anything, it takes great strength and bravery to ask someone else for help. It is not a weakness or character flaw.

Photo of someone being comforted in a waiting room. Above: Knowing how to help guide someone through the stresses of a crisis can help mitigate some of the negative effects of traumatic events.

Conclusion

So what happened to Old Sarge? Well I made it down the foothill, mostly by sticking to my wits, and using the mental health skills that I had developed. Fortunately I didn’t need to spend the night in the desert, but if I had, I think I would have been ok too.

A few times on my descent the game trails got very narrow, and the brush so think that I could barely see my feet. I got pricked by more than a few cacti, but fortunately, no rattlesnakes!

Once I made it to the road, I could see my vehicle about 1/10th of a mile to the South of where I came out. Not too shabby, considering that I could not see above the brush for most of my descent. I was thirsty though… if you ever go hiking in the desert, bring much more water than you think you will need.

I now teach mental health first aid and mental health awareness as part of my content on my YouTube channel, Prepping With Sarge, in hopes that it helps people manage their mind and emotions for the emergencies they will face.

I’ve not returned to Red Rock Canyon since that hike, but I hope to one day. I hope I can find the same trail, walk it again, and figure out where I went off course.

I do hike frequently still, but now I approach it differently. I always carry a survival kit of course, but now I make sure I tell someone EXACTLY where I am starting my hike, and when I expect to be back. I carry more water, and several ways to purify water. And most of all, I try not to get so overcome with the scenery that I lose track of the trail!

About Tom Sarge

Portrait photo of mental health expert Tom Sarge

Tom Sarge is a content creator for YouTube and Instagram under the channel name Prepping With Sarge, where he focuses on preparedness topics such as Mental Health First Aid, Wilderness Foraging, and Food Self Sufficiency.  He also manages a Mental Health Channel on YouTube where he teaches people how to manage the effects of trauma, anxiety, panic disorder, and insomnia called The Official Mental Health Matters Channel.  Currently he works as full time therapist for First Responders.


Read More

Subscribe to Recoil Offgrid's free newsletter for more content like this.


The Dawn of AI Warfare: Scientists Explore The Implications

With rapid advancements in artificial intelligence, the idea of AI-driven conflict has transitioned from science fiction to a tangible reality. A recent study titled “Escalation Risks from Language Models in Military and Diplomatic Decision-Making” takes a close look at AI in warfare and the potential for a radical shift in how conflicts are waged. From autonomous drones to AI strategy simulations, we stand on the brink of a new era. But what does this mean for global security, ethical governance, and the future of humanity?

The implications of artificial intelligence in warfare are profound and far-reaching, affecting everything from military strategy to international law and ethics. As AI technology continues to advance, the potential for its application in military operations raises both opportunities and concerns. Here are some of the key subjects the study brings to light:

AI Warfare

The ethical considerations surrounding AI in warfare delve into profound moral dilemmas and responsibilities. As we introduce autonomous systems capable of making lethal decisions, the traditional tenets of warfare, including human judgment and accountability, come into question.

One central ethical issue is the delegation of life-and-death decisions to machines. This raises significant concerns about the reliability of AI systems in distinguishing combatants from non-combatants, adhering to international humanitarian laws, and ensuring decisions are made within ethical frameworks. The potential for AI to act on flawed data or algorithms poses a risk of unintended civilian casualties or escalatory actions that could spiral conflicts out of control.

Accountability in the use of AI-driven weaponry is paramount. In scenarios where autonomous systems fail or make bad decisions leading to unlawful acts, determining responsibility becomes complex. This challenges existing legal and ethical frameworks, necessitating new guidelines that address the unique characteristics of AI in combat roles.

AI generated photo of an underwater drone swarm.

Another ethical concern is the risk of an arms race in AI military technologies, leading to increased militarization and potentially destabilizing global security. The rapid development and deployment of AI systems without international agreements could exacerbate tensions and lead to conflicts that might have been avoidable.

Using AI in warfare could desensitize decision-makers to the human costs of war. Remote operations and the impersonal nature of AI-driven decisions might lower the perceived threshold for engaging in conflict, potentially leading to more frequent and less justified wars.

Addressing these ethical considerations requires a concerted effort from the global community to establish norms, regulations, and oversight mechanisms. This includes ensuring transparency in AI development, implementing rigorous testing standards to verify compliance with international law, and fostering international collaboration to prevent an AI arms race. The goal is to harness the benefits of AI in enhancing national defense capabilities while safeguarding human dignity, accountability, and global security.

Strategic Implications

Technological advancements in AI offer the potential to enhance decision-making, reconnaissance, and efficiency in warfare. AI-driven simulations, such as those explored in studies on AI behavior in simulated wargames, highlight the capability of AI to strategize and react to complex scenarios with a speed and depth beyond human capability. However, this also introduces the risk of an arms race in AI technology, with states competing to develop increasingly advanced military AI systems.

Advancements in AI technology are reshaping military strategies and capabilities, leading to the development of autonomous systems and sophisticated simulation tools for warfare planning. This technological evolution prompts a global arms race in AI military applications, heightening geopolitical tensions. Automating combat operations reduces human casualties in immediate terms but raises concerns about lowering the threshold for initiating conflict. Ensuring ethical deployment and establishing international norms for AI in military use are critical to mitigating these strategic implications and maintaining global stability.

The use of AI in warfare could signify a shift in the nature of conflict, potentially leading to wars that are more strategic yet impersonal, with an increased emphasis on cyber warfare and remote operations. This shift raises questions about the future of warfare, including the potential for AI to make war more likely due to lower human costs, and the implications for global security and stability.

AI generated photo of a military planning facility.

Navigating the Future

The international community faces the challenge of regulating AI in warfare to ensure ethical use and prevent escalation. This includes establishing international norms and agreements on the development, deployment, and use of military AI, as well as mechanisms for accountability and oversight.

As we venture into this new era of AI warfare, the need for ethical consideration, international cooperation, and robust regulatory frameworks has never been more critical. The potential of AI to transform warfare presents both opportunities for enhanced security and significant risks that must be managed with foresight and responsibility. The future of AI in warfare is not predetermined, it will be shaped by the decisions of today, requiring a balanced approach that considers both the technological potential and the ethical imperatives.

If you want to read the research paper yourself, you can find it here: https://arxiv.org/abs/2401.03408

Read More

Subscribe to Recoil Offgrid's free newsletter for more content like this.