Build a WWII-Style Bunker Snow Shelter

Think fast — where are the hardest places to survive a winter? The odds are good that Russia is near the top of your list. Russian winters are known to be bitterly cold, especially in northern regions. In fact, the inhospitable conditions there are often seen as one of the deciding factors of World War II. Hilter's Wehrmacht was caught unprepared during their winter invasion of Russia, and many historians agree that the cold had a dramatic effect on their eastward progress.

A YouTuber known as Survival Russia often travels into the cold northern region of the country to practice his survival skills. He also has a stated interest in WWII — specifically, how soldiers managed to survive the extreme winter conditions back then despite limited supplies. In the video below, this Danish-born survivalist uses his knowledge of history to build what he calls a “WWII bunker snow shelter”. It appears to have been inspired by the various types of dugout shelters constructed during that time.

This design is low-profile and blends into a snow bank, while providing substantial protection from the elements. It's based around a frame of logs or saplings, notched and stacked log-cabin style. Blocks of snow are cut from underneath the center of the frame with a large snow shovel, and arranged on the top and sides of the frame. This creates a dugout snow shelter that's wide enough for several adults.

It's worth noting that this structure will only work in specific circumstances. First, you'll need a deep layer of hard-packed snow, as this will form the blocks around your shelter. You'll also need a saw or an ax to gather large logs, and a wide snow shovel to dig out blocks. However, if all these requirements are met, and you're patient enough to build this bunker snow shelter, you should have an extremely strong and spacious structure that can last you all winter.


Trayvax Wallet Review: 3 Minimalist Wallets for EDC

Think about the most essential items you carry in your pockets every day — the items you'd never leave home without. This answer likely won't be exactly the same for any two readers, but there is some common ground. For most of us, those the cornerstones of every-day carry (EDC) include a cell phone, keys, and a wallet. It's generally wise to carry some sort of knife, and many of us also use items like a flashlight, multi tool, or pen. But the absolute essentials are almost always the same three items.

Despite this information, we sometimes feel that EDC loadouts overlook the importance of these cornerstone elements, especially the wallet. We've seen way too many people carry $300 folding knives and fancy titanium tools one pocket away from a fat wallet that has “back problems” written all over it. A beat-up old billfold looks neglected next to other high-end gear, but more importantly, it's not a very efficient use of pocket space.

Trayvax wallets money card EDC pocket tool 07

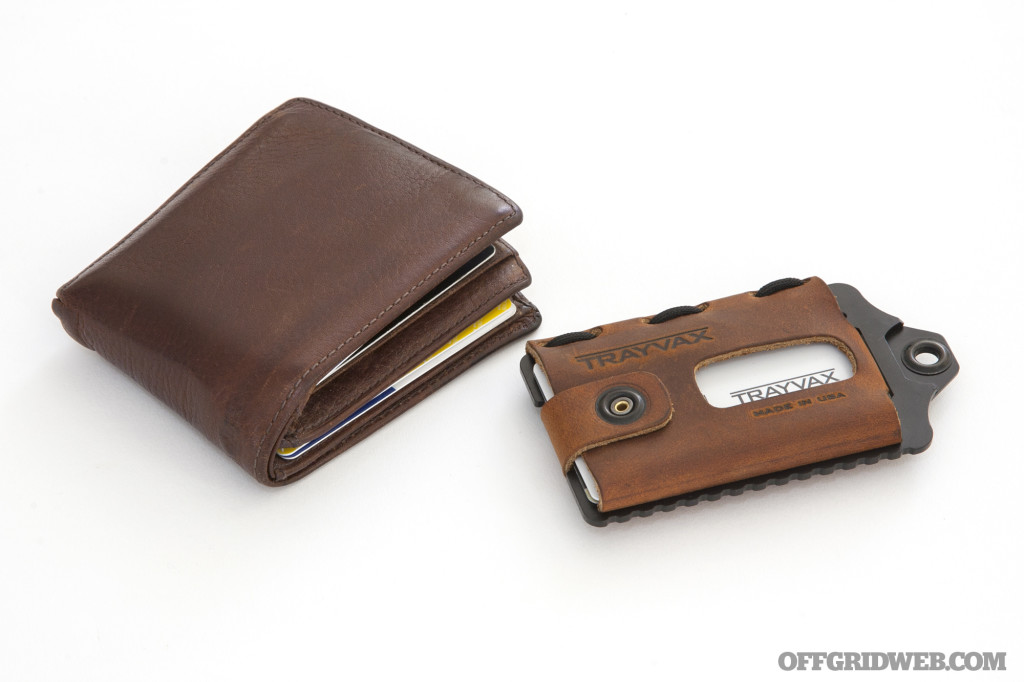
The slim Trayvax Element wallet is dwarfed by a normal leather wallet.

EDC fans may want to think outside the box when it comes to their wallets, and Washington-state-based company Trayvax claims to have developed a solution that improves upon the traditional billfold formula. Actually, they claim to have developed several solutions. The Trayvax wallet line consists of five different models, each offering an innovative approach to storing cash and cards.

About Trayvax Wallets

Trayvax wallets money card EDC pocket tool 30

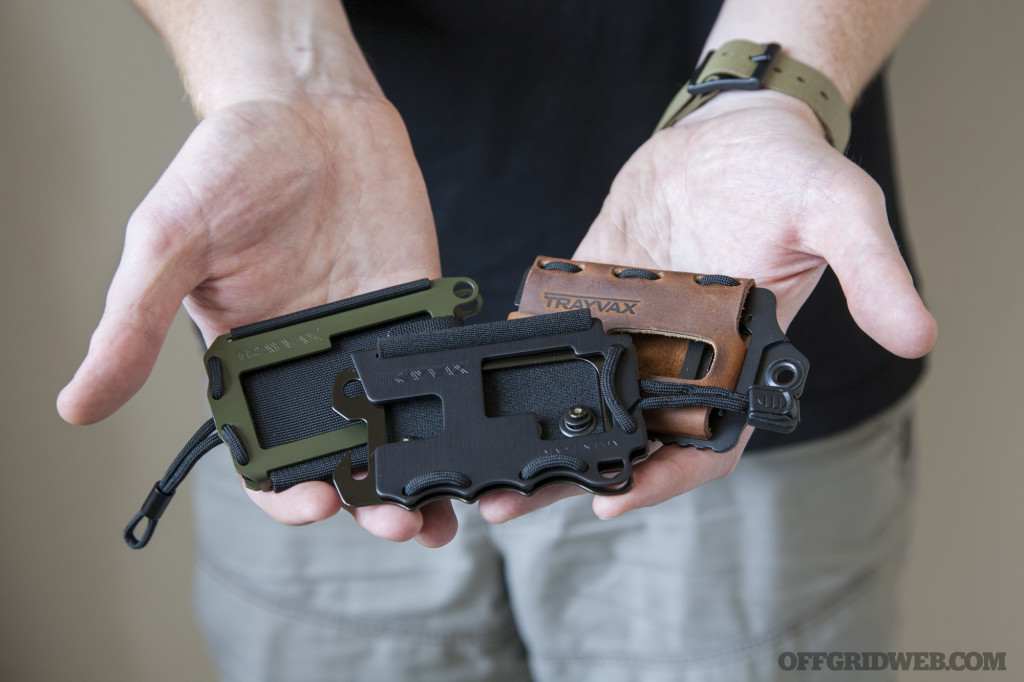
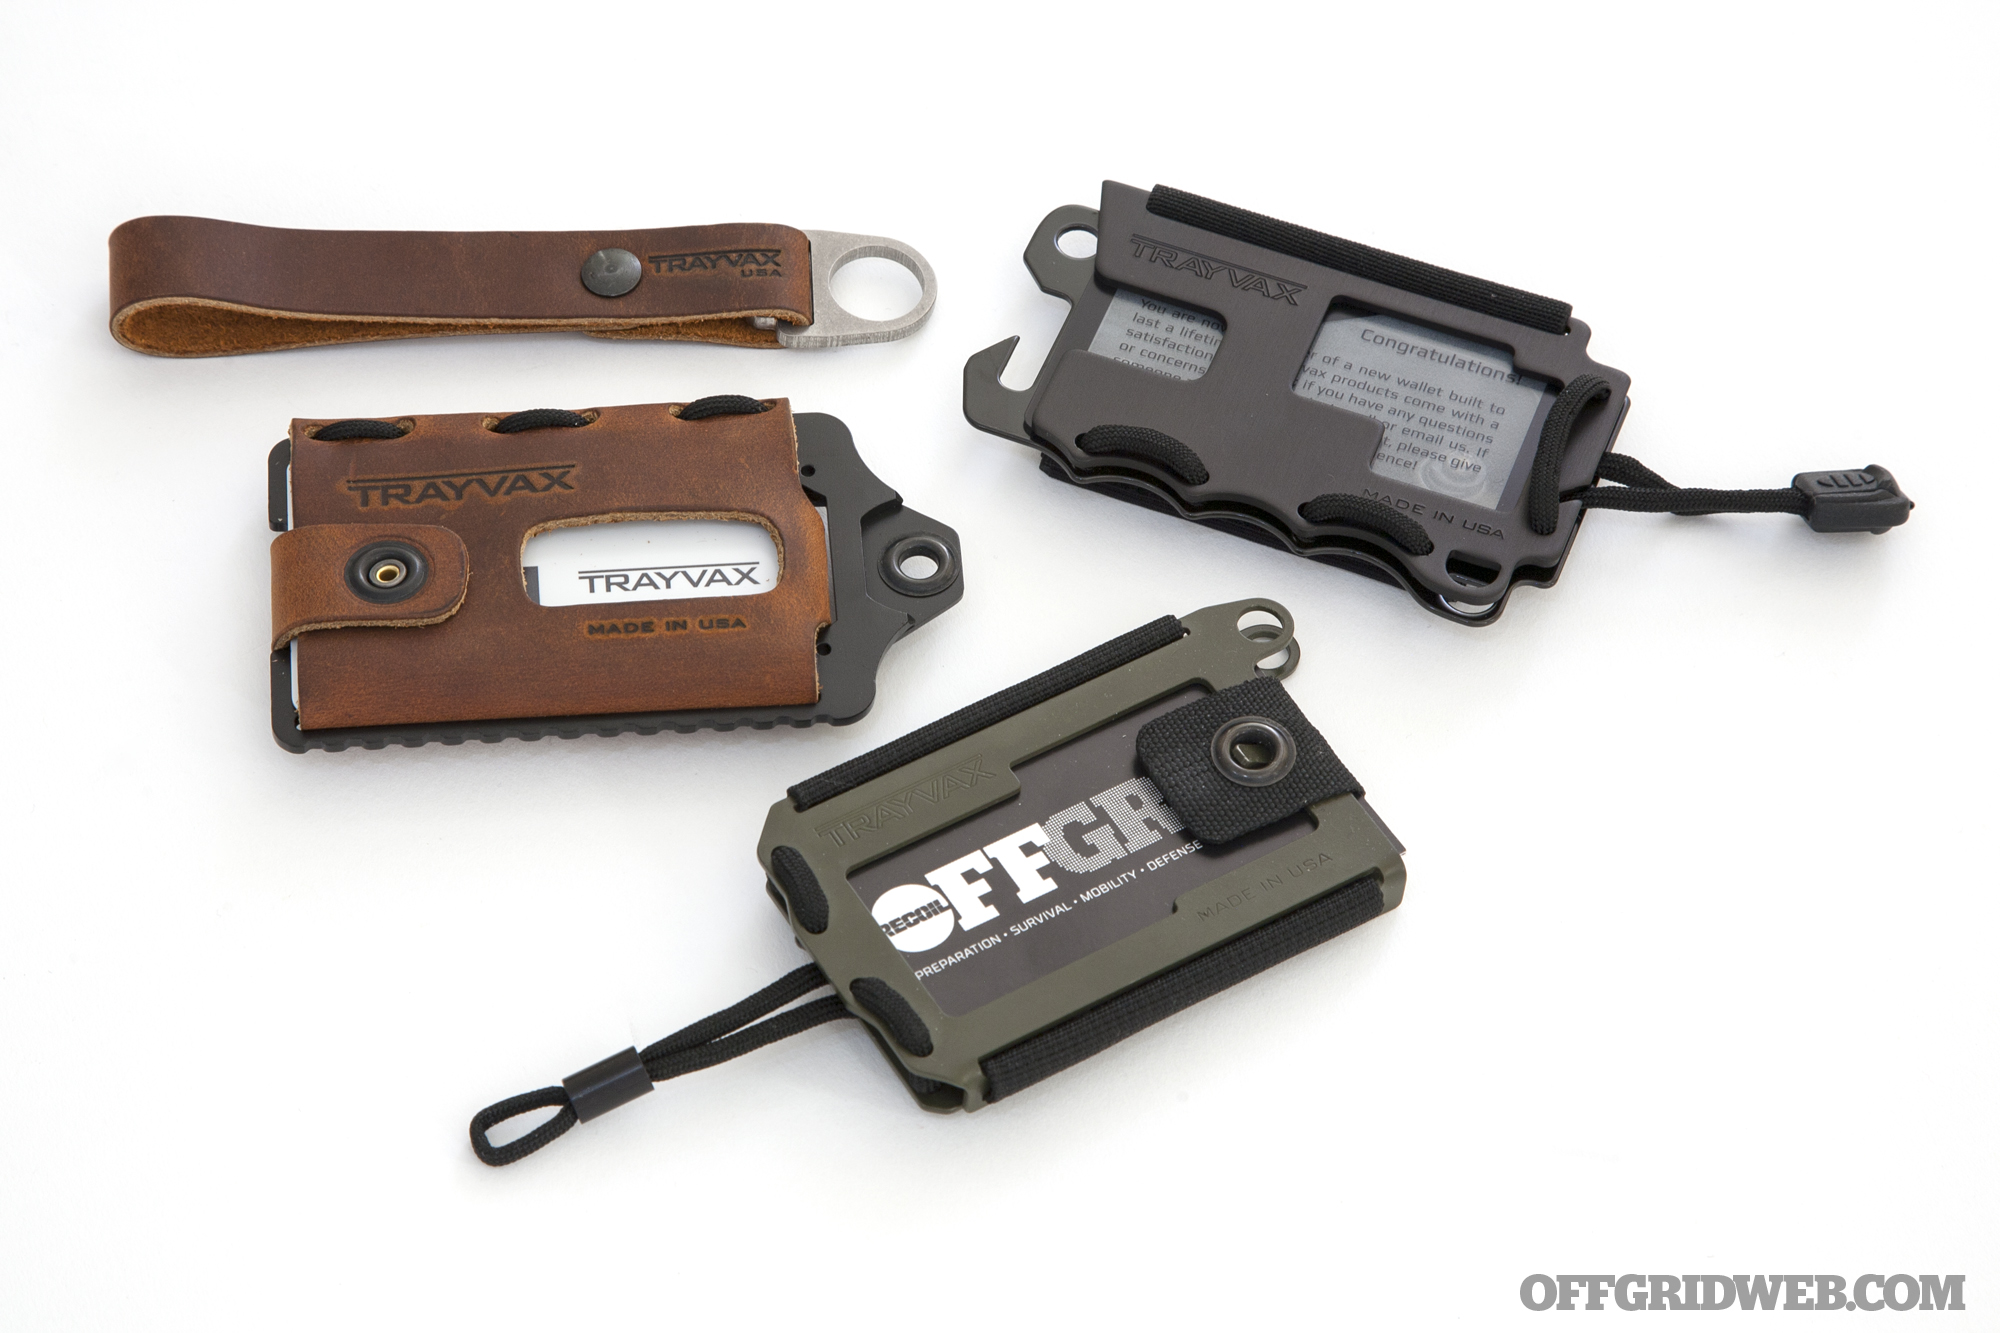
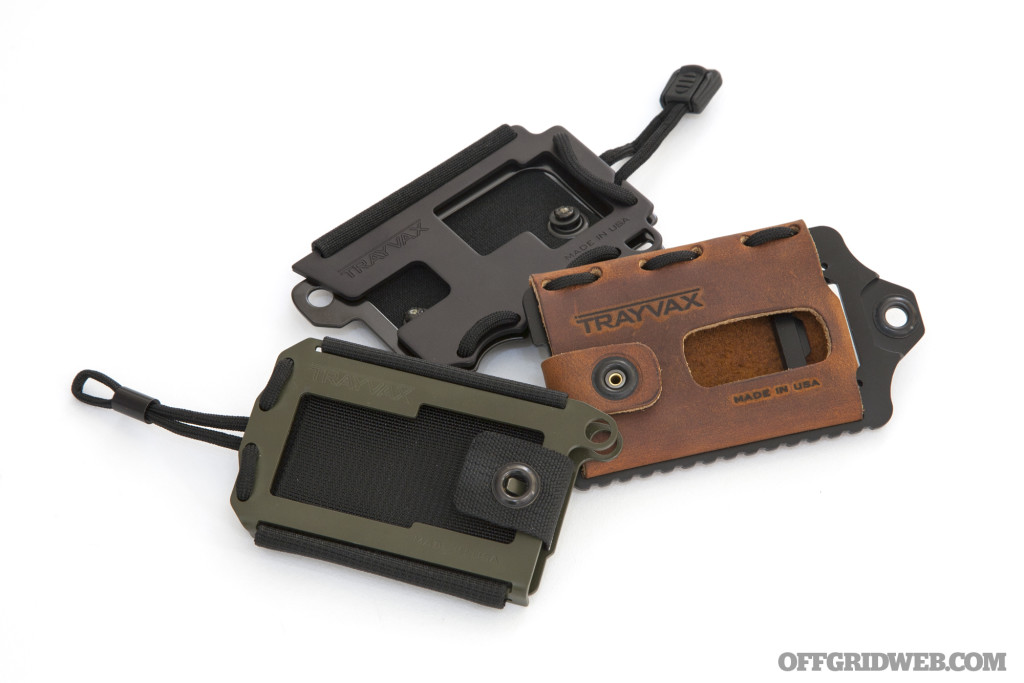
From left to right: the Trayvax Axis, Original, and Element.

The concept for the Trayvax wallet began in 2013, when founder and inventor Mark King was attempting to create — strangely enough — a “reusable plastic bag carrier”. This plastic bag device didn't work out as planned, but the machined aluminum shape gave Mark a new idea: a tough metal-framed wallet. After many protoypes and revisions, the Trayvax Original wallet was born, consisting of steel and aluminum plates, some elastic, hook-and-loop fabric, grommets, and paracord.

Since 2013, Mark has grown his business to include four more wallet designs and a variety of parts and accessories. The very first wallets were made in the USA, and the company has stayed true to this ethos — all of Trayvax's products are still American-made to this day.

Trayvax wallets money card EDC pocket tool 03

After hearing about the success of this company and its wallets, we recently requested a sample to test out, in order to see if it's all hype or if it's truly EDC-worthy. Trayvax was kind enough to send us three of its most popular wallets, the Axis, Element, and Original. They even threw in a Keyton bottle opener keychain. Read on for our opinions on each of these items.

The Trayvax Original

Trayvax wallets money card EDC pocket tool 11

In order to get a good feel for these wallets, we started at the beginning. The Original wallet is available in five colors: black, grey, blue, orange, and bare sandblasted aluminum. Each Trayvax Original wallet is available for a very reasonable MSRP of $30, and is composed of a sheet of anodized aluminum sandwiched atop another sheet of cold-rolled steel.

Trayvax wallets money card EDC pocket tool 25

The two pieces are loosely joined by woven paracord on two edges, and by a piece of elastic fabric with hook-and-loop/Velcro material on the third edge. To open the wallet, peel away the hook-and-loop section. This releases tension on the elastic, thereby releasing tension on the two metal plates. Cards slide into the center of the wallet, and cash can be inserted underneath the elastic strap on the back side. Listed capacity is up to 14 (yes, fourteen) cards and 5 bills, or you can expand it further with a Trayvax High Roller extended strap (but that seems to defeat the purpose, in our opinion).

Trayvax wallets money card EDC pocket tool 16

Like all Trayvax wallets, the Original has some hidden tricks up its sleeve. First of all, its metal construction is RFID-blocking, so it can prevent wireless identity theft and credit card skimming. The leading edge has a built-in bottle opener, as well as an attachment hole for a lanyard or small carabiner, such as the Trayvax titanium carabiner.

Trayvax wallets money card EDC pocket tool 26

Our experience with the Trayvax Original was positive for the most part. It looks cool, it's made in the USA, and it's very affordable. We liked the stretchy elastic since it allows the user to cinch the wallet together, but we found that this design works better with thicker contents. With the rated minimum of 3 cards and some cash, there wasn't enough tension in the elastic to keep our cards from slipping out. Even with six credit/gift cards in the wallet, the retention is far from 100% secure. The cards are easy to access quickly, but may also begin to slip out when jostled.

Trayvax wallets money card EDC pocket tool 19

We would've preferred some sort of clasp or strap at the open end for peace of mind — especially because the elastic's tension will surely loosen over time. Fortunately, the next two wallets deliver on this request.
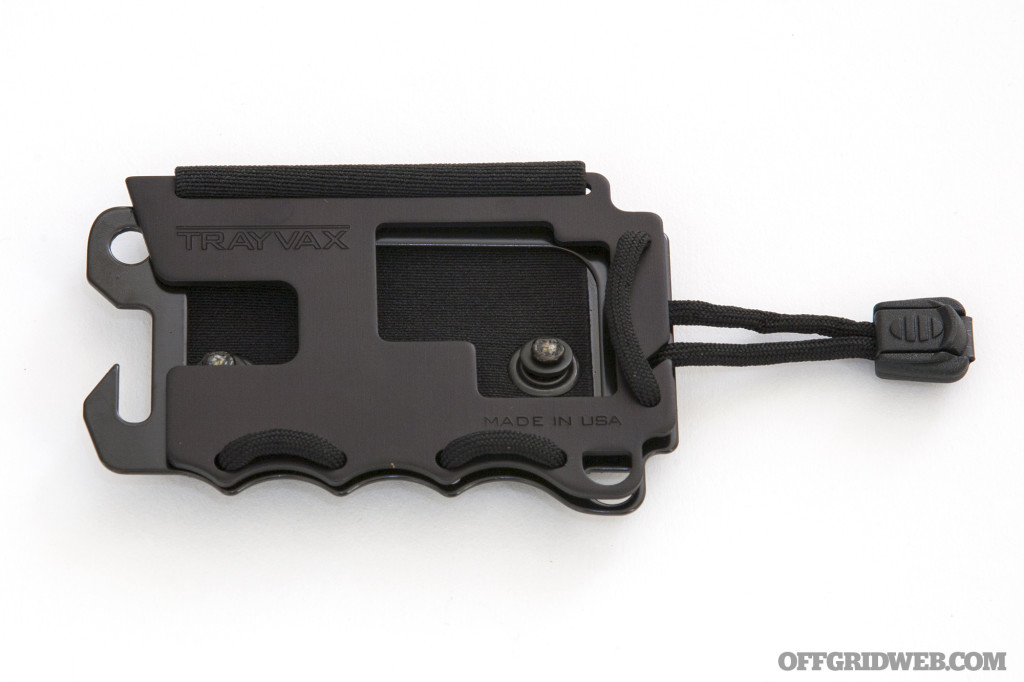
The Trayvax Axis

Trayvax wallets money card EDC pocket tool 10
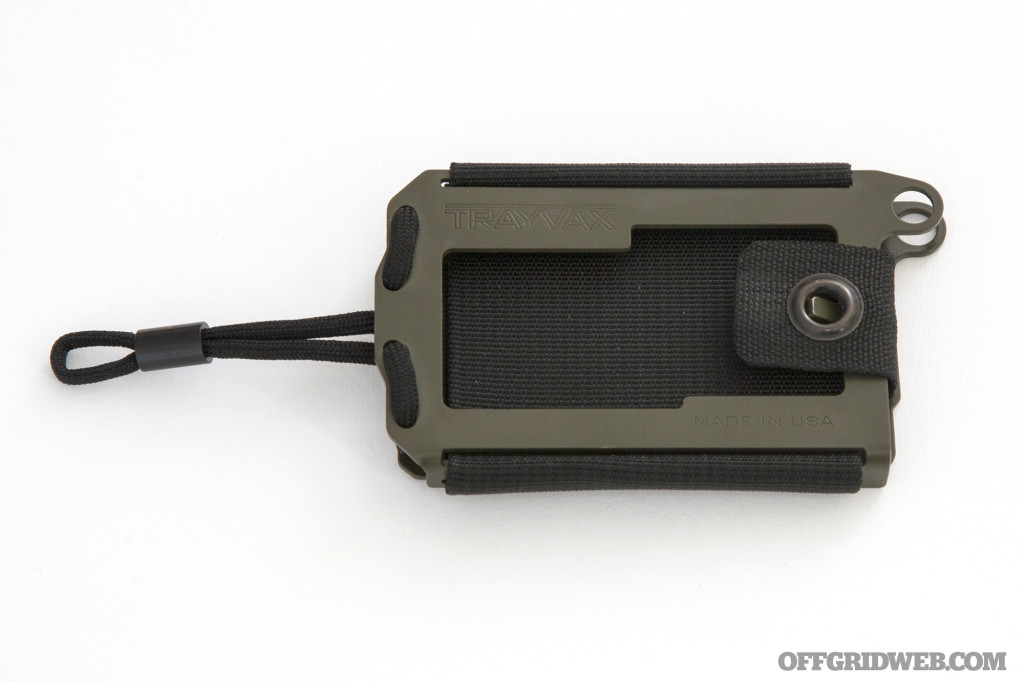
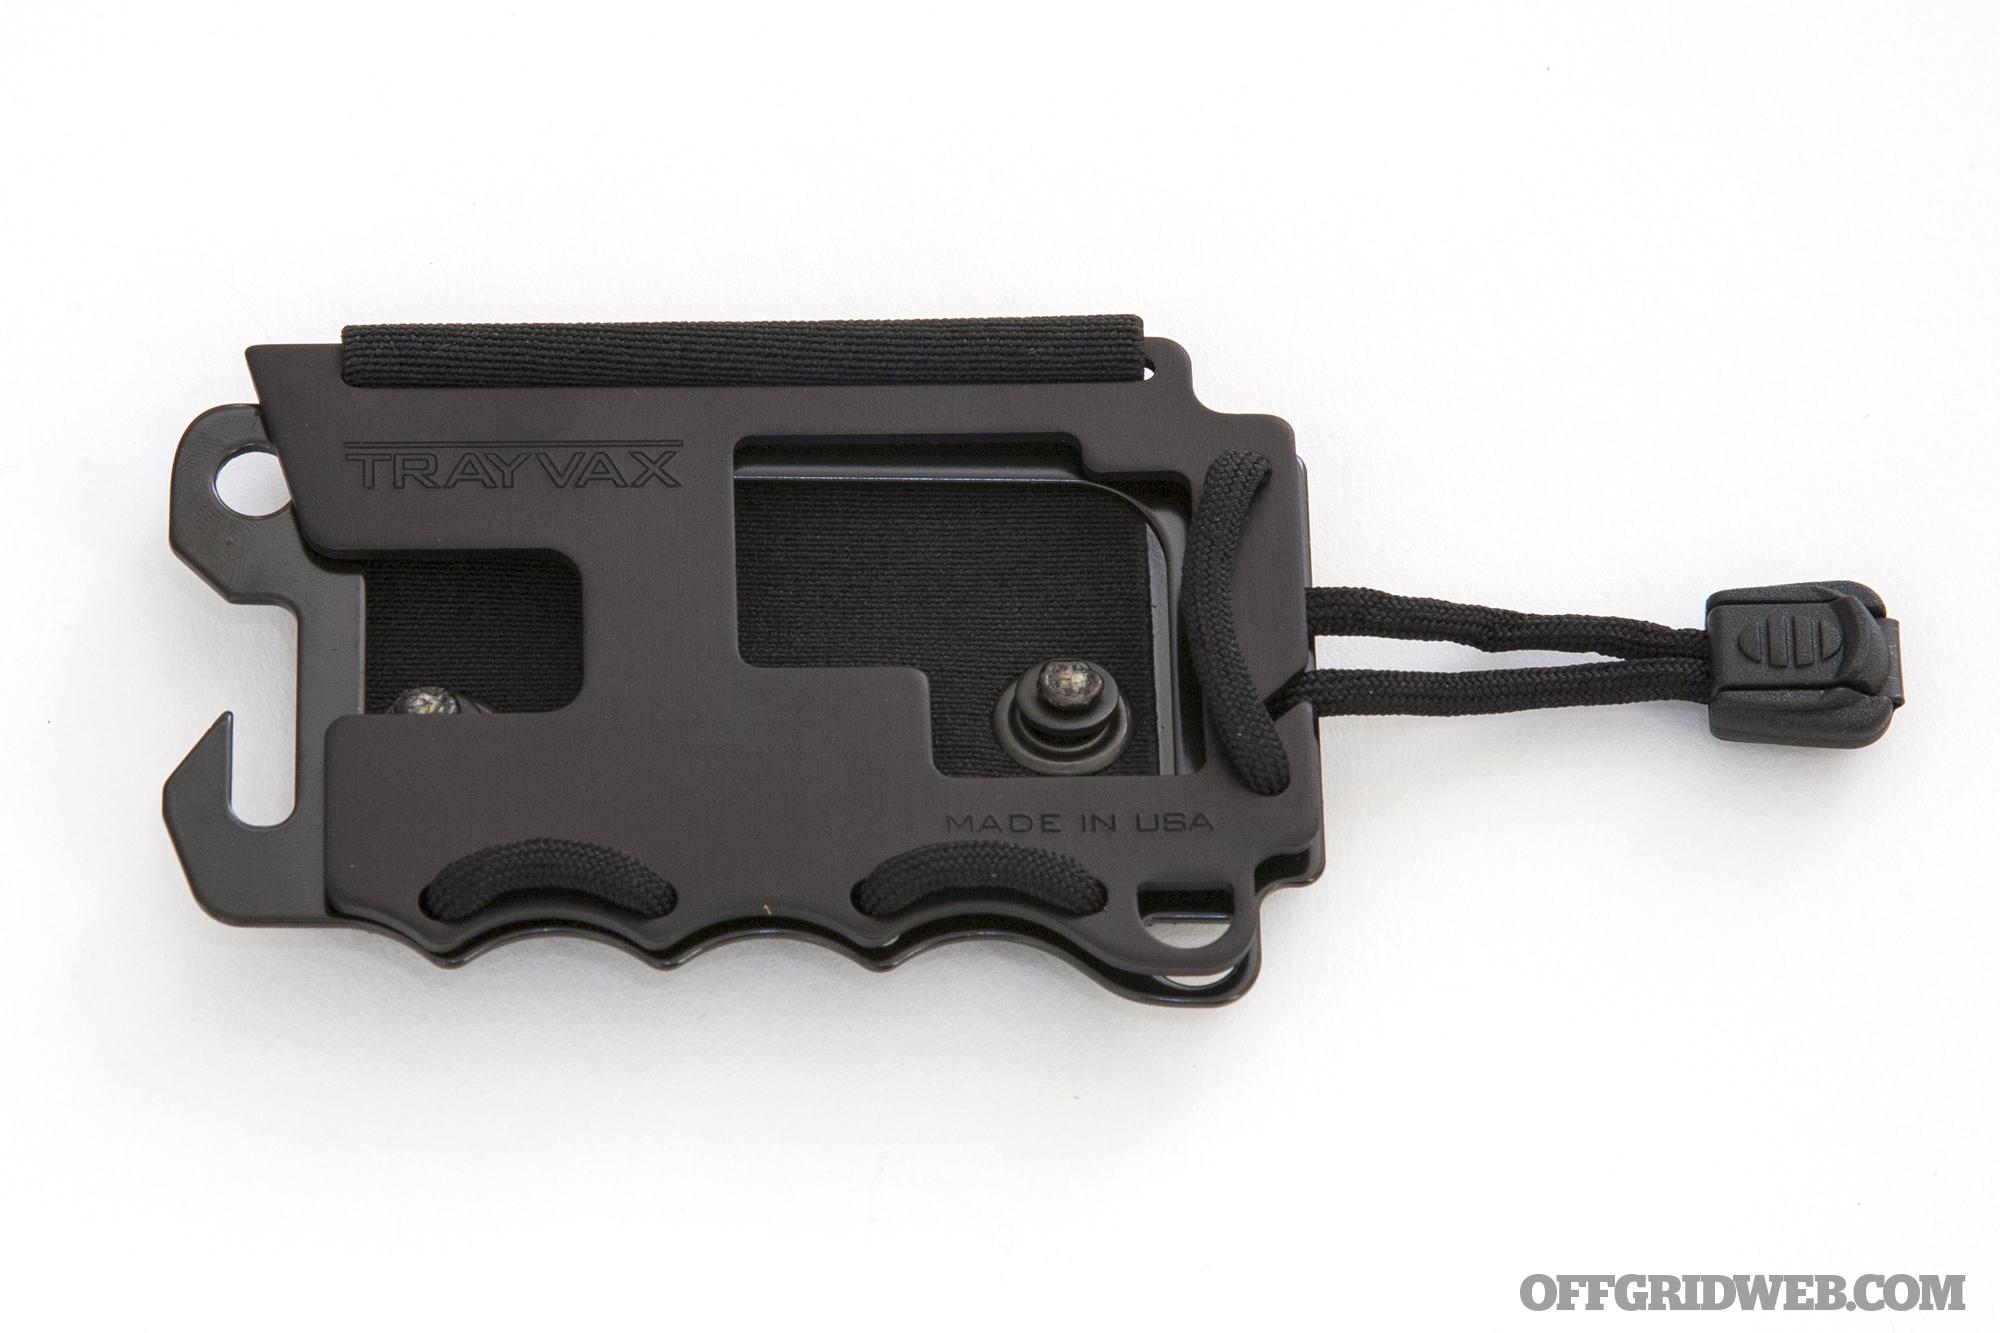
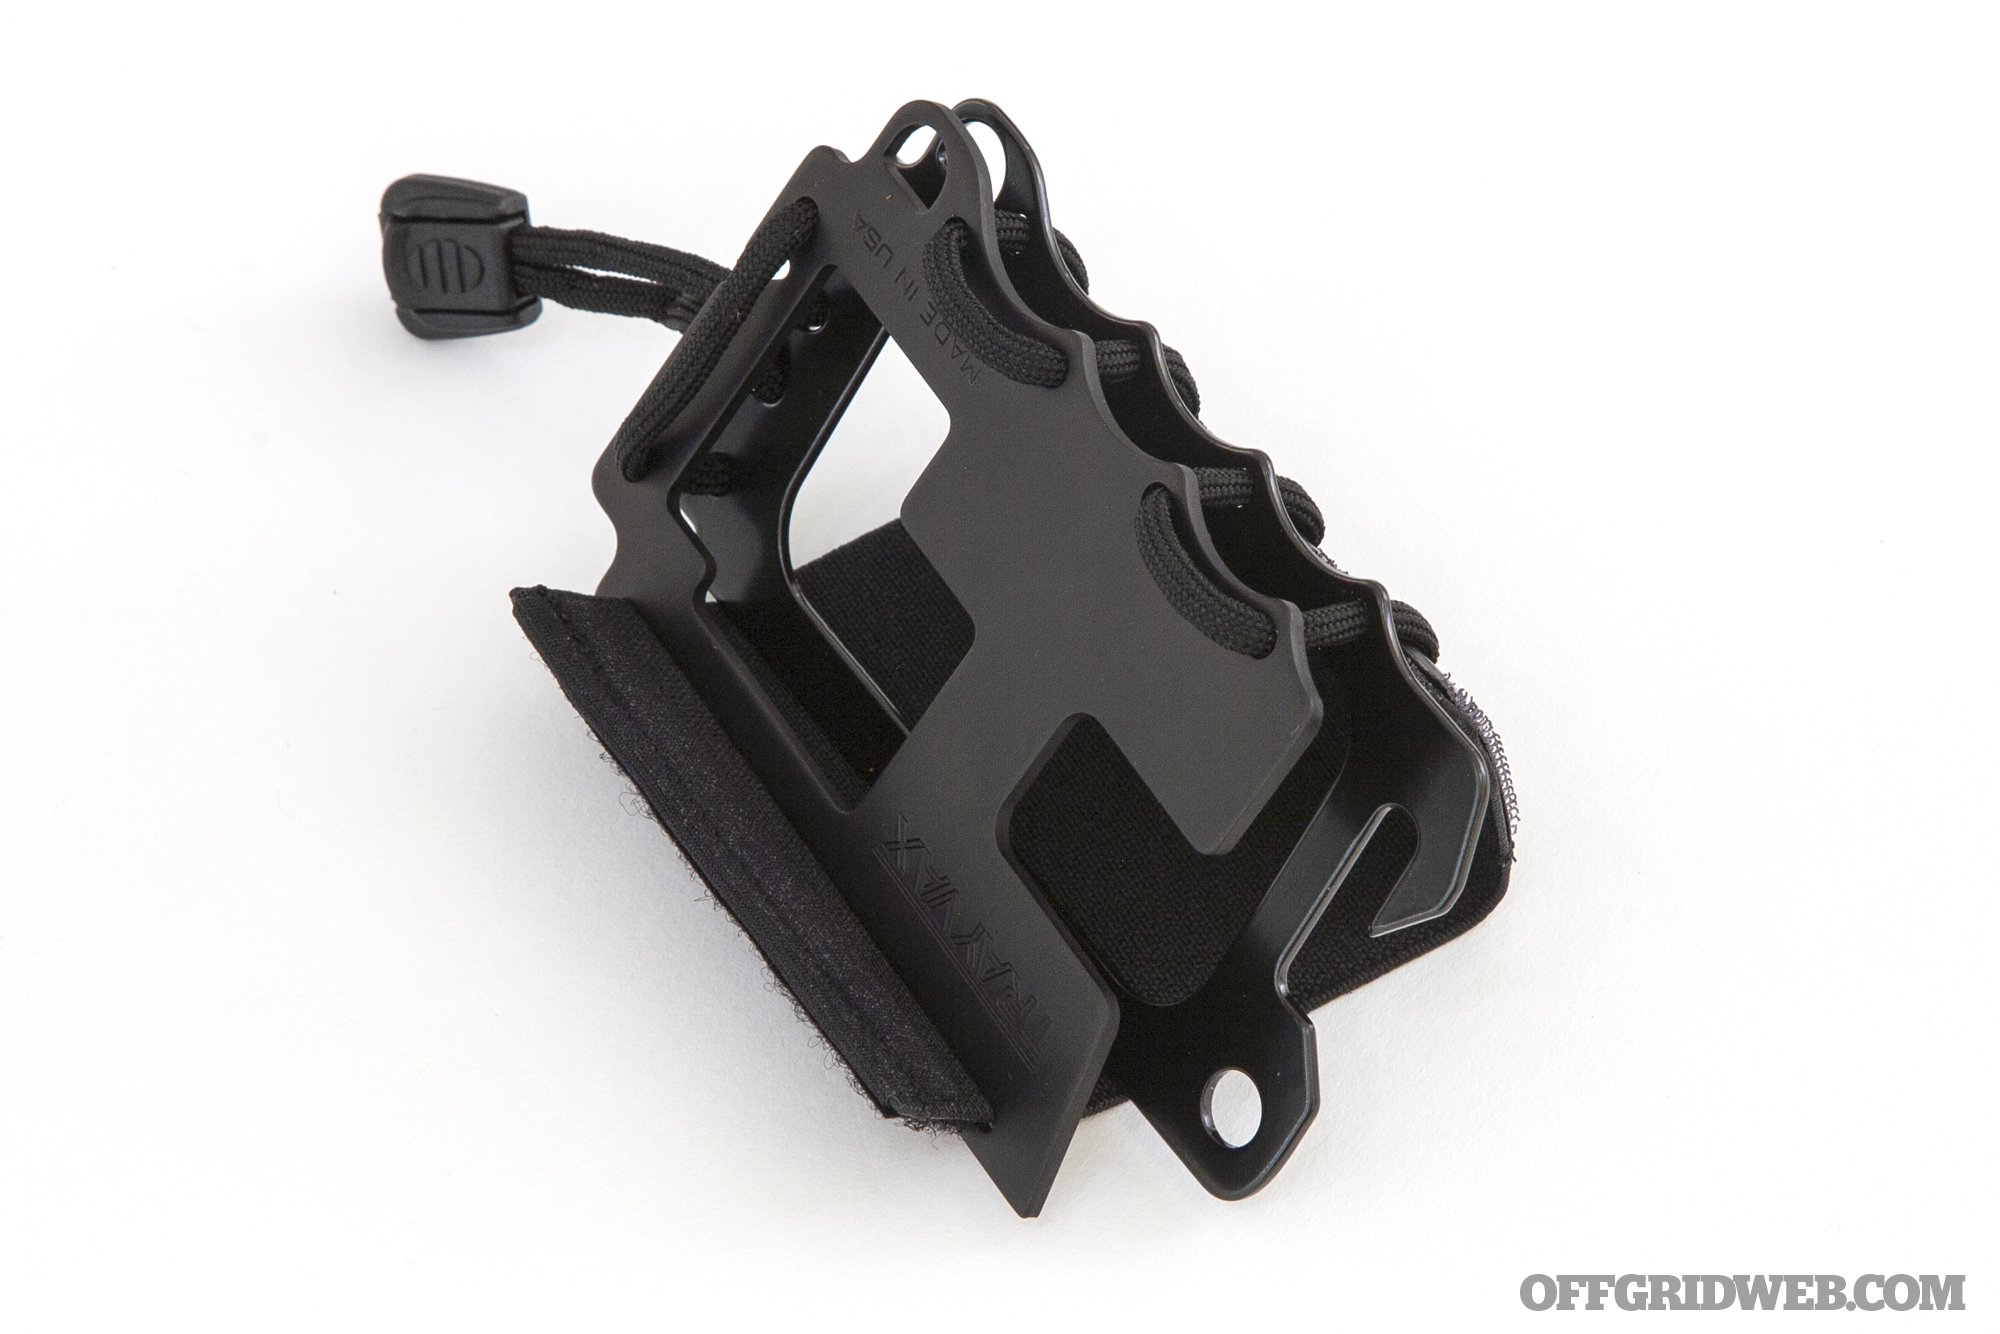
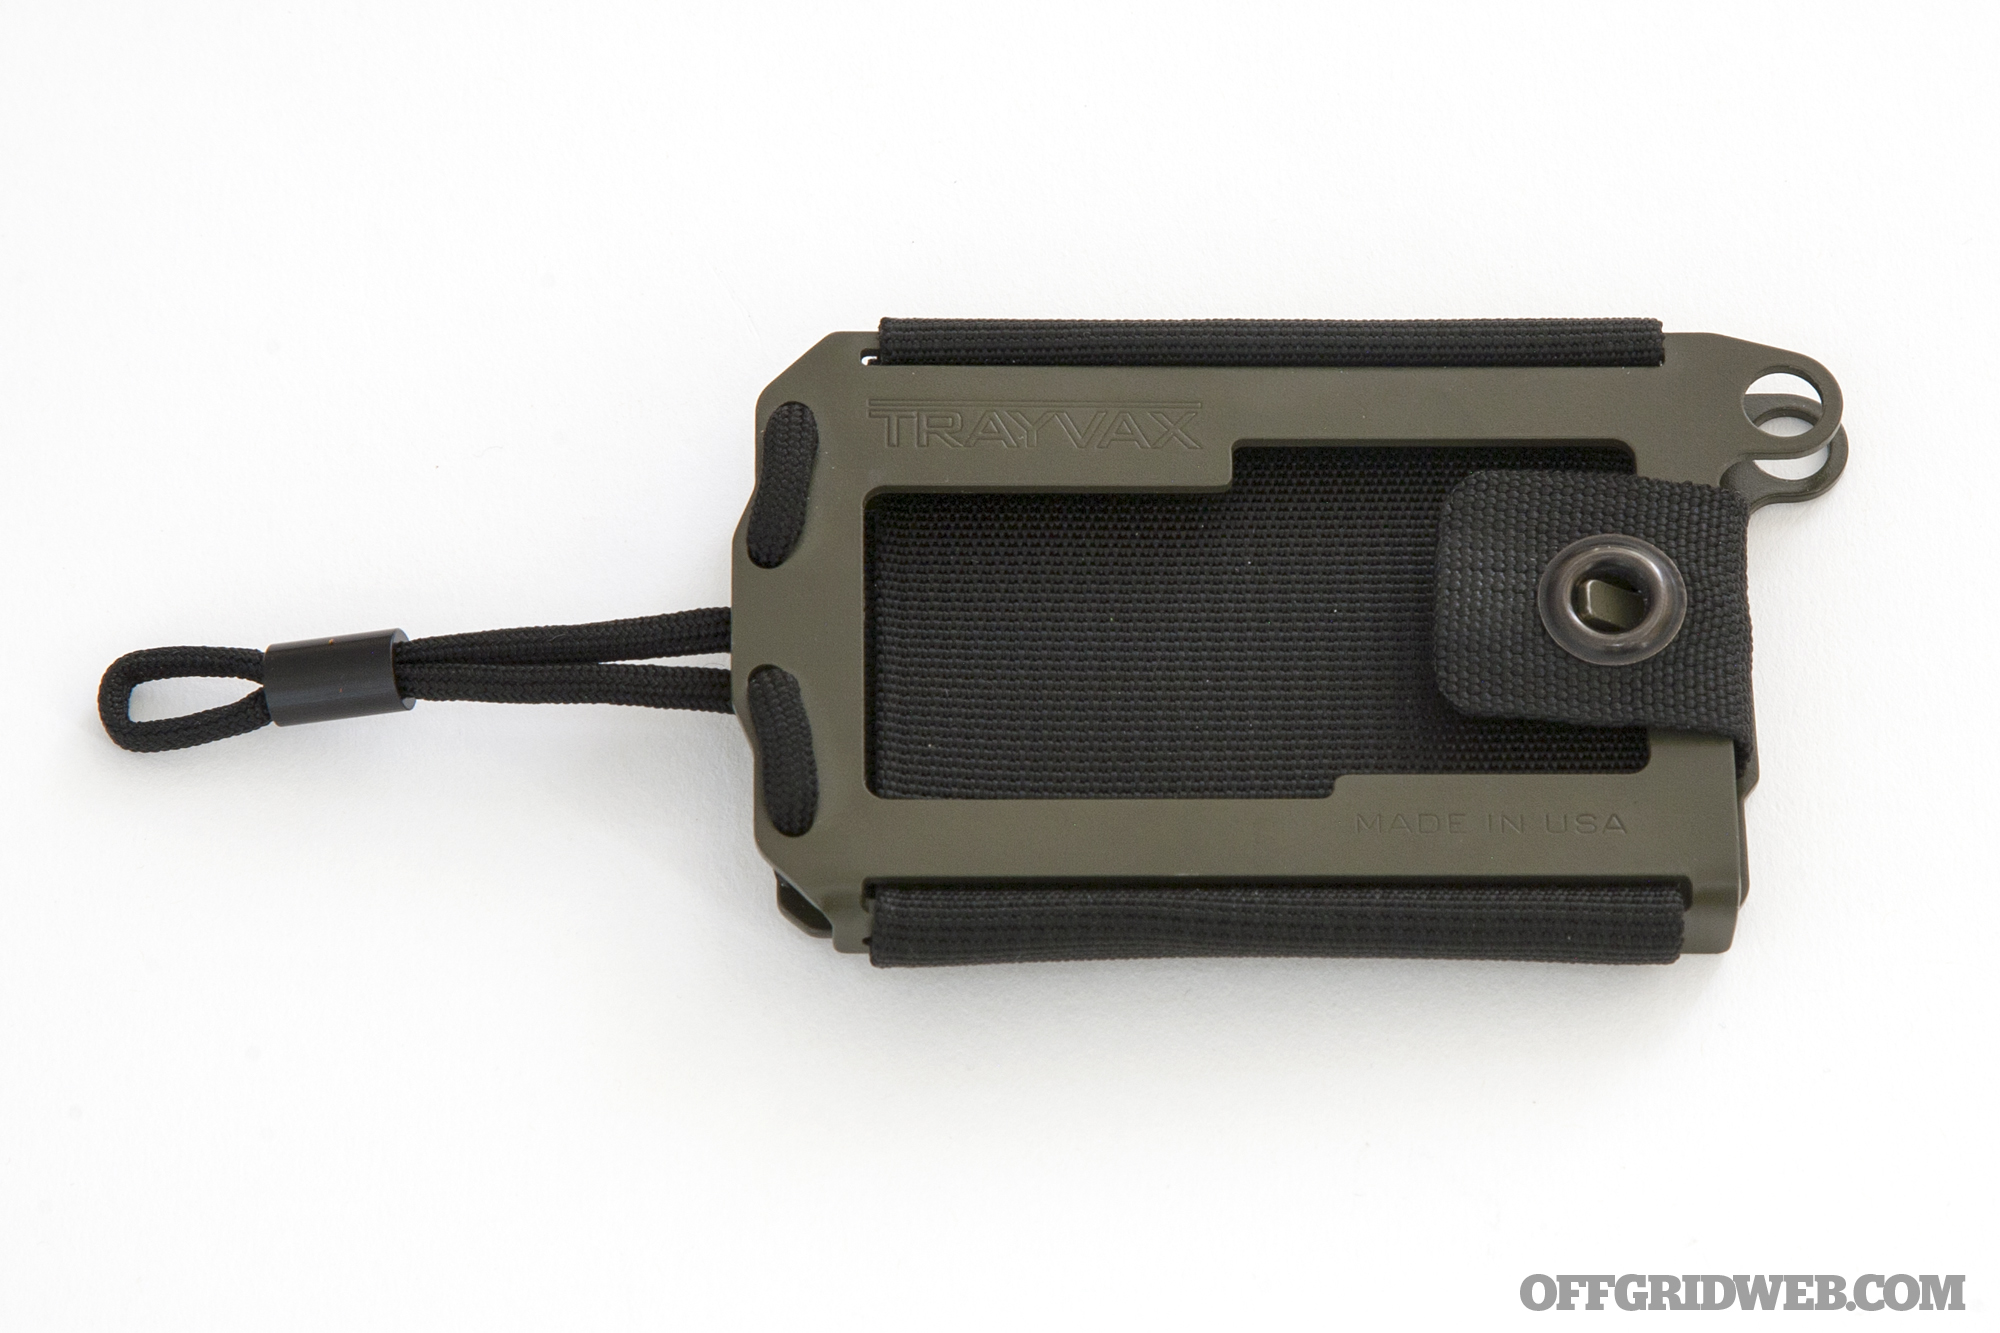
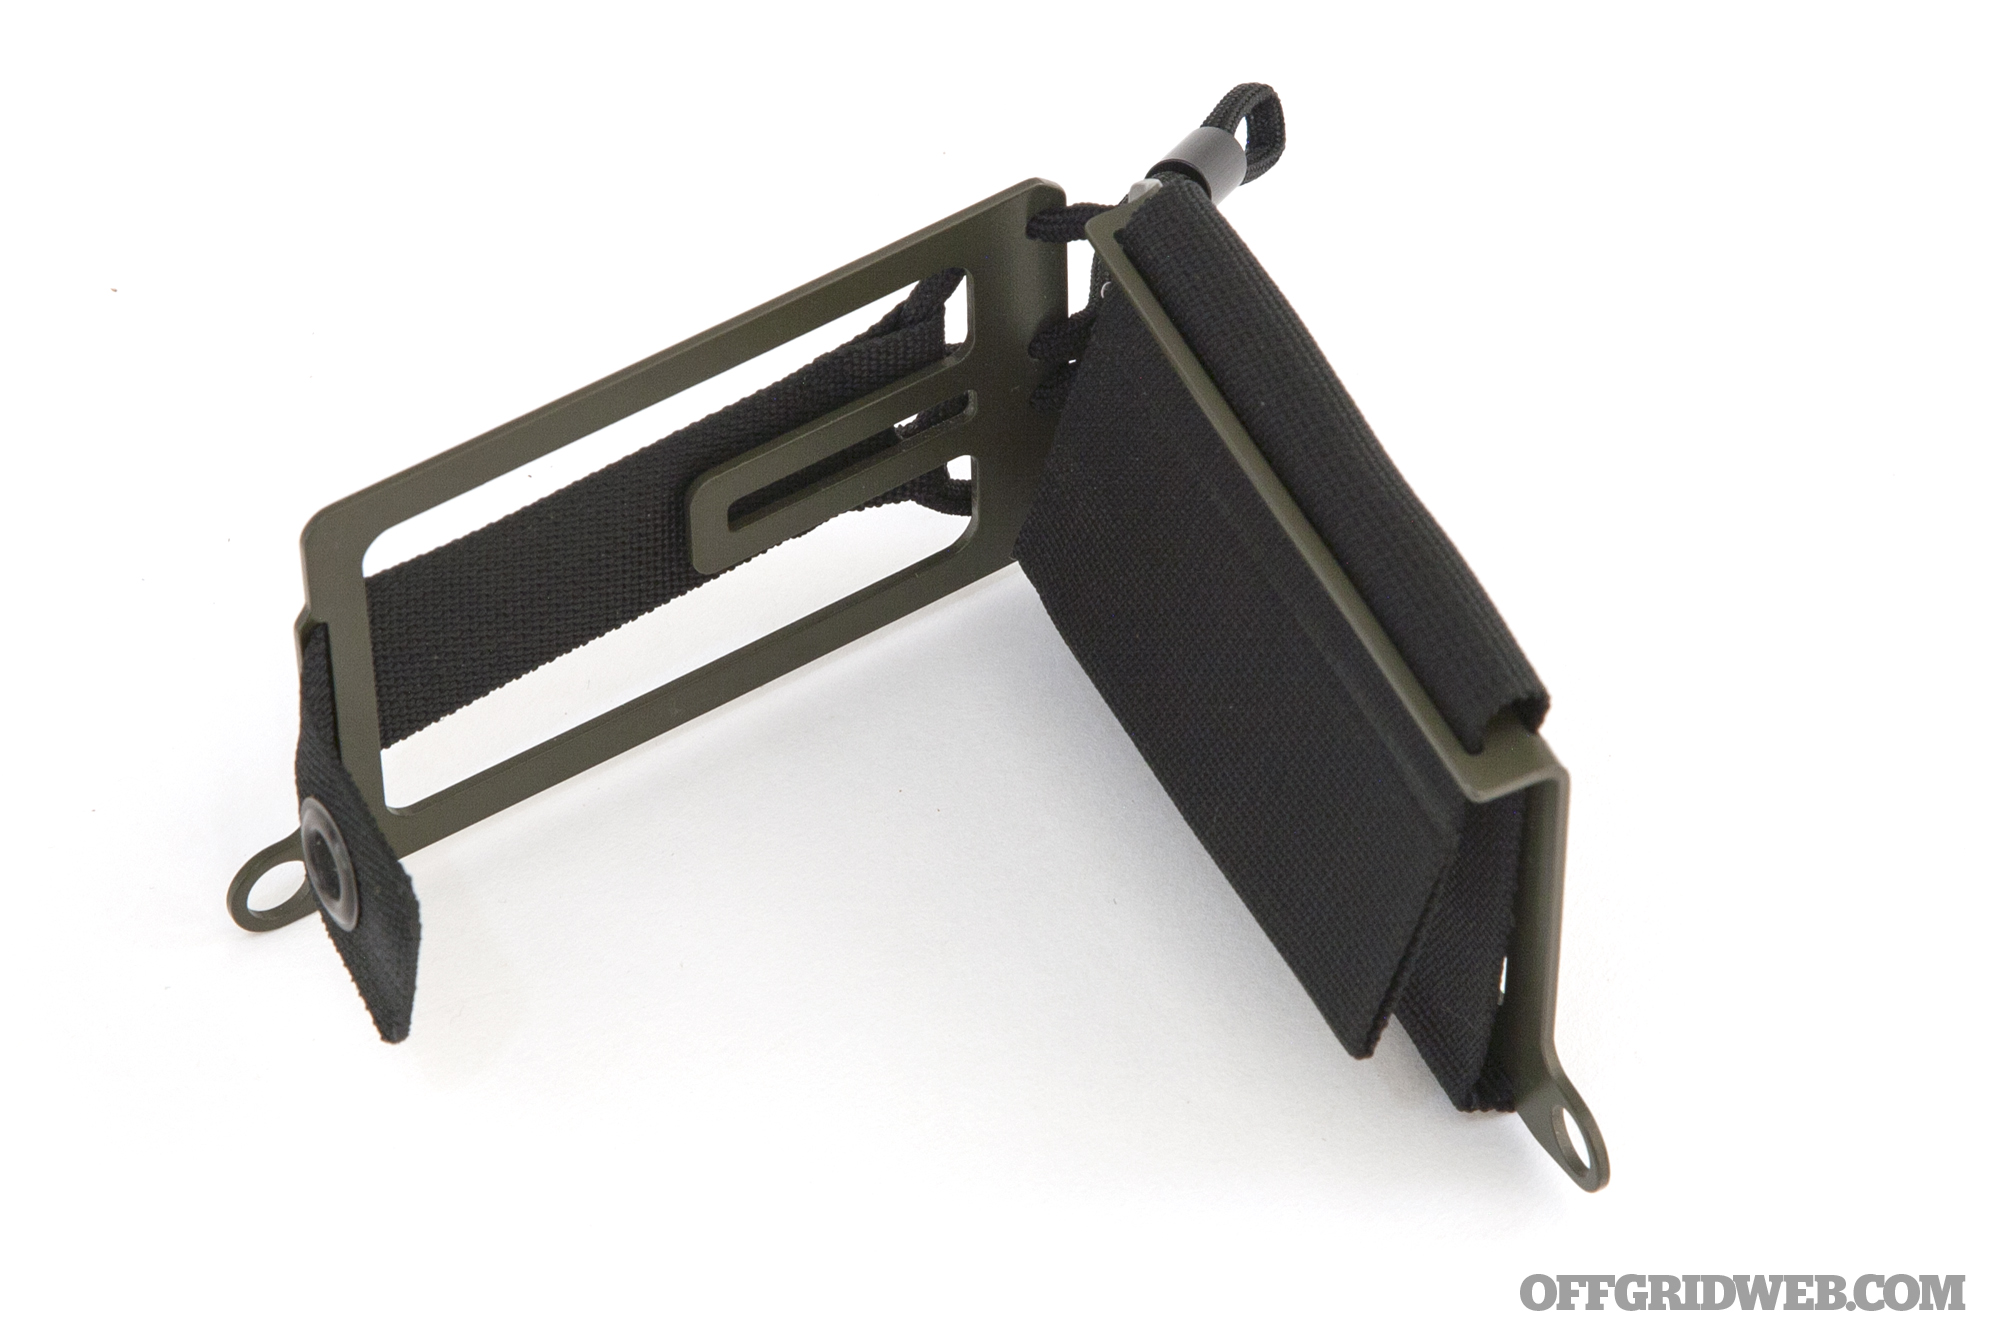
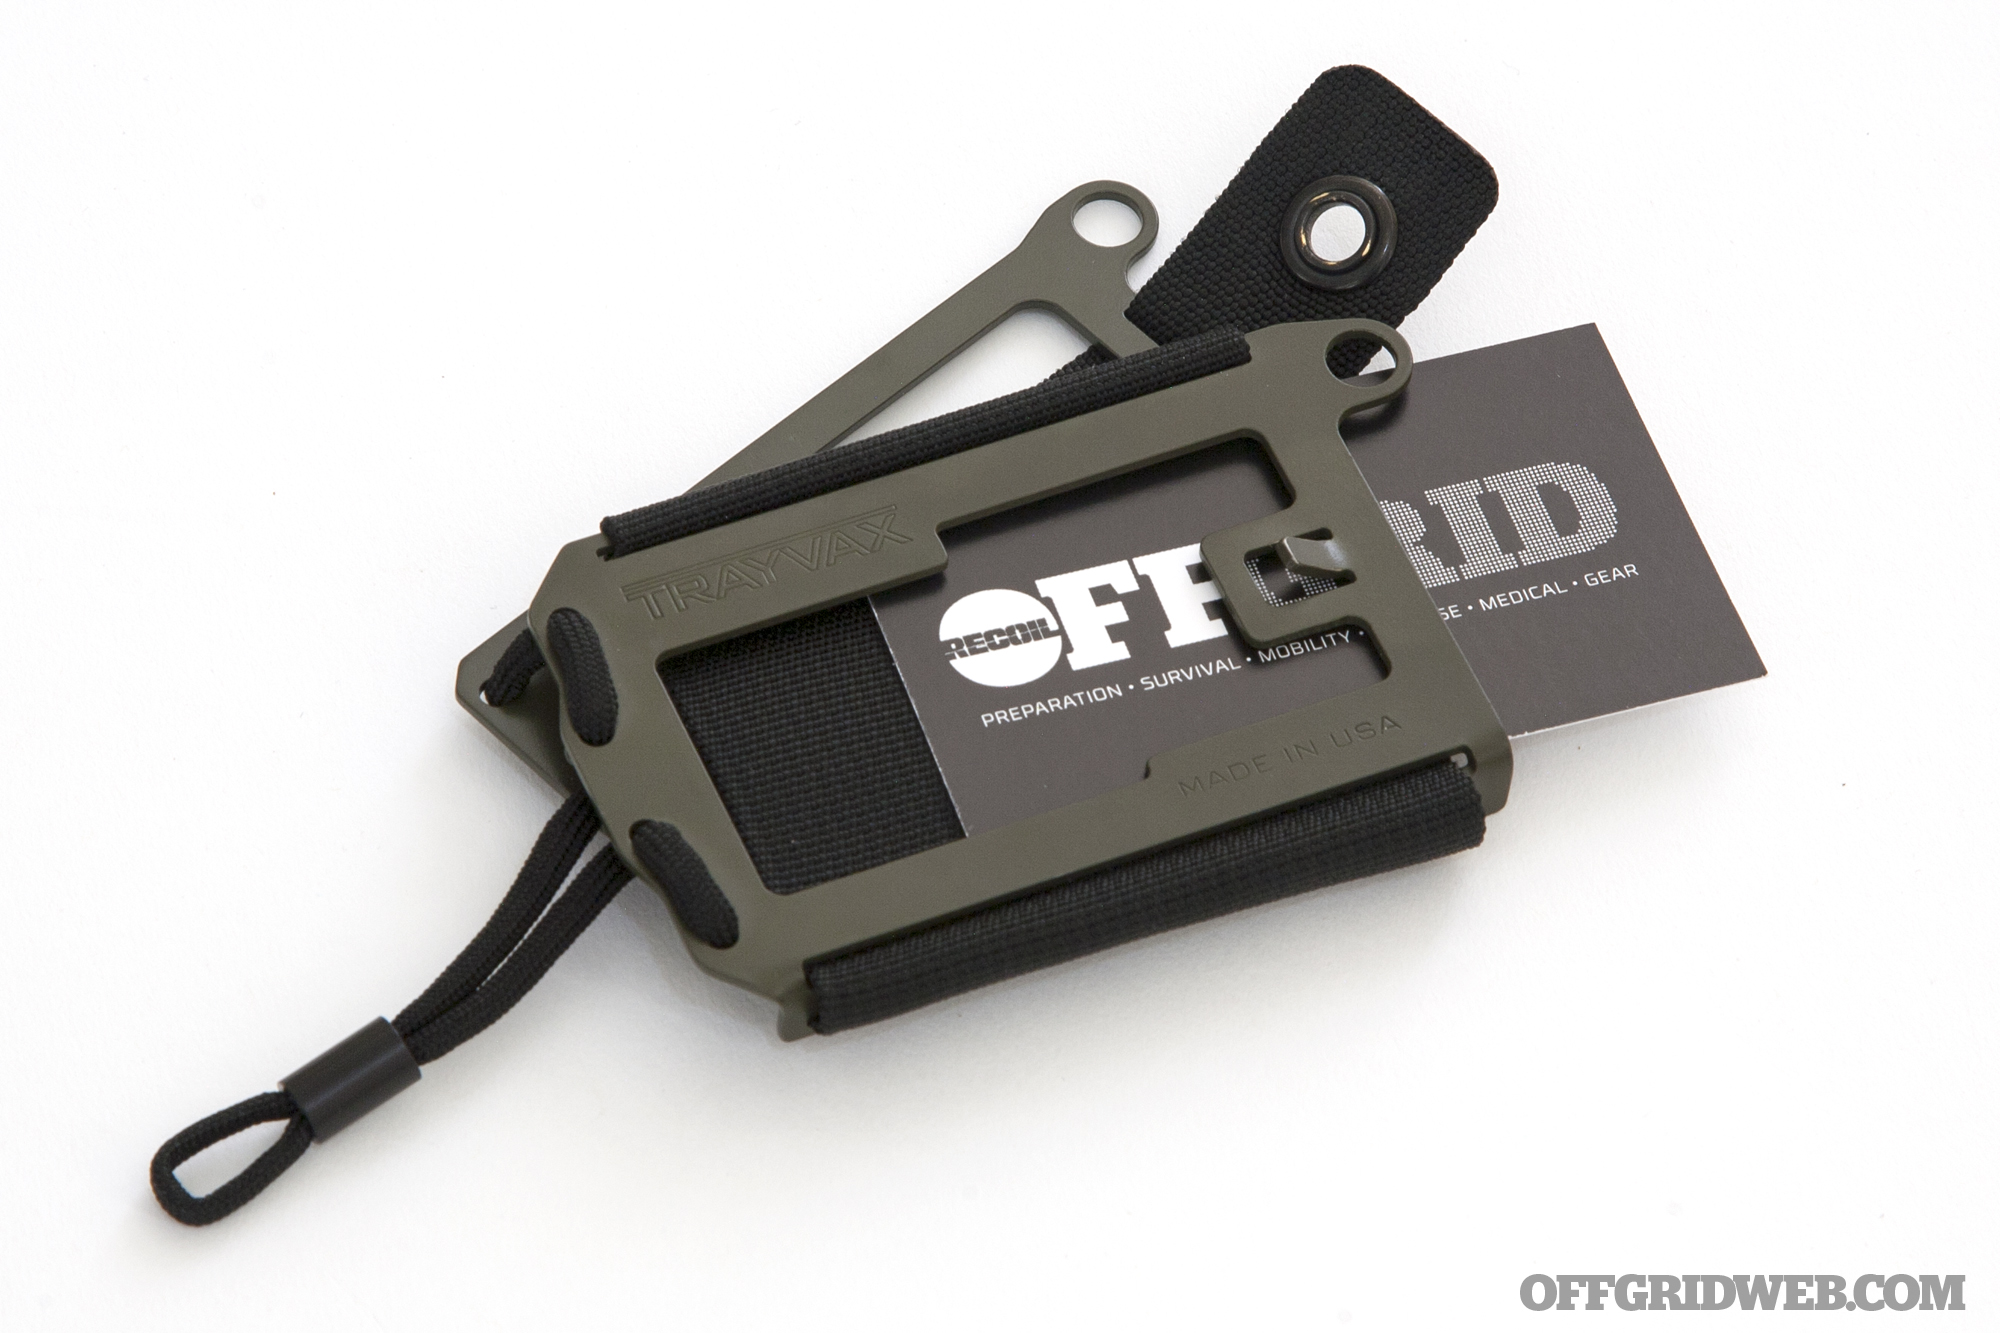
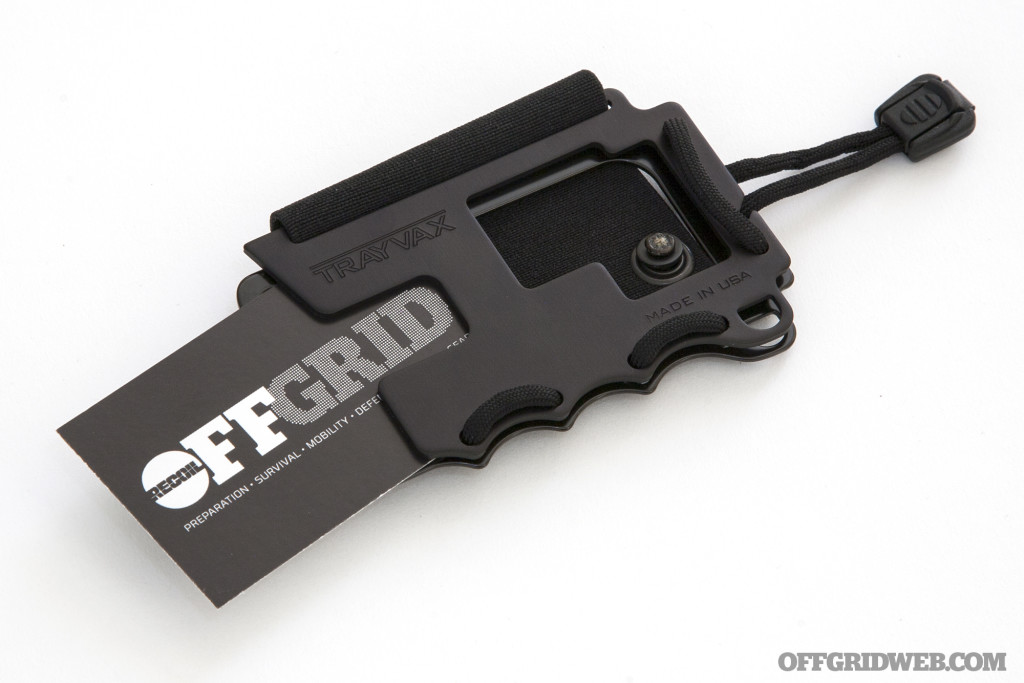
As indicated by its name, the Trayvax Axis is a hinged bifold design, with two stainless steel plates. These plates are available in six different colors of corrosion-resistant Cerakote, as well as plain black and bare-metal tumbled finish.

Trayvax wallets money card EDC pocket tool 24

Instead of stretchy elastic and hook-and-loop closure, the Axis relies on a black nylon strap with a grommet that hooks onto a prong on the wallet's front edge. This clasp provides much better card retention than the Original wallet, and the strap can be tightened further by cinching down the paracord.

Trayvax wallets money card EDC pocket tool 13

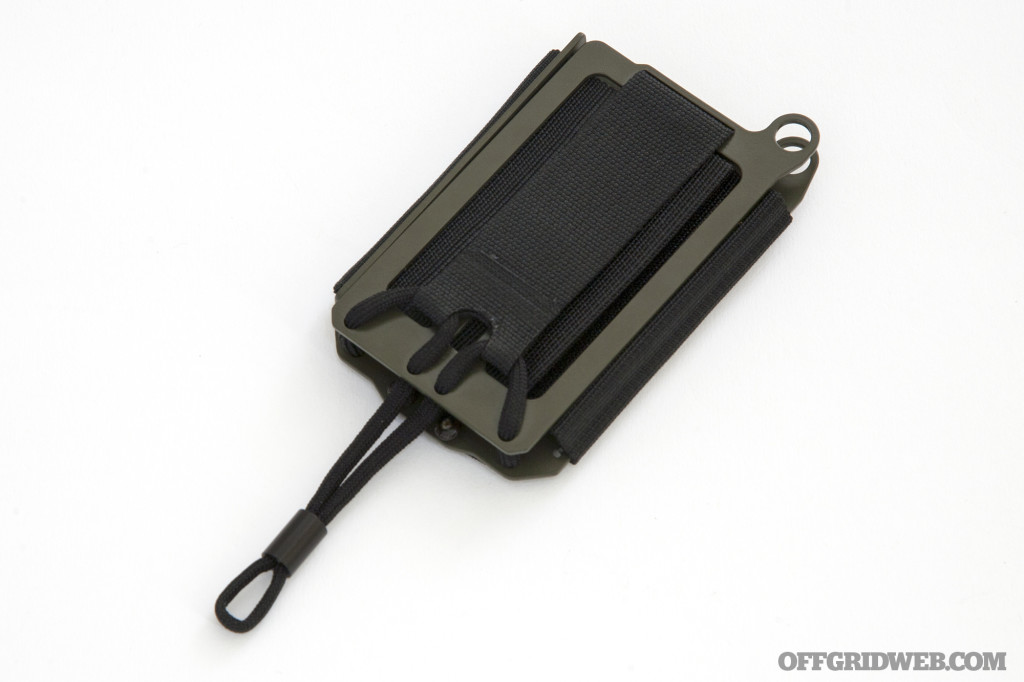
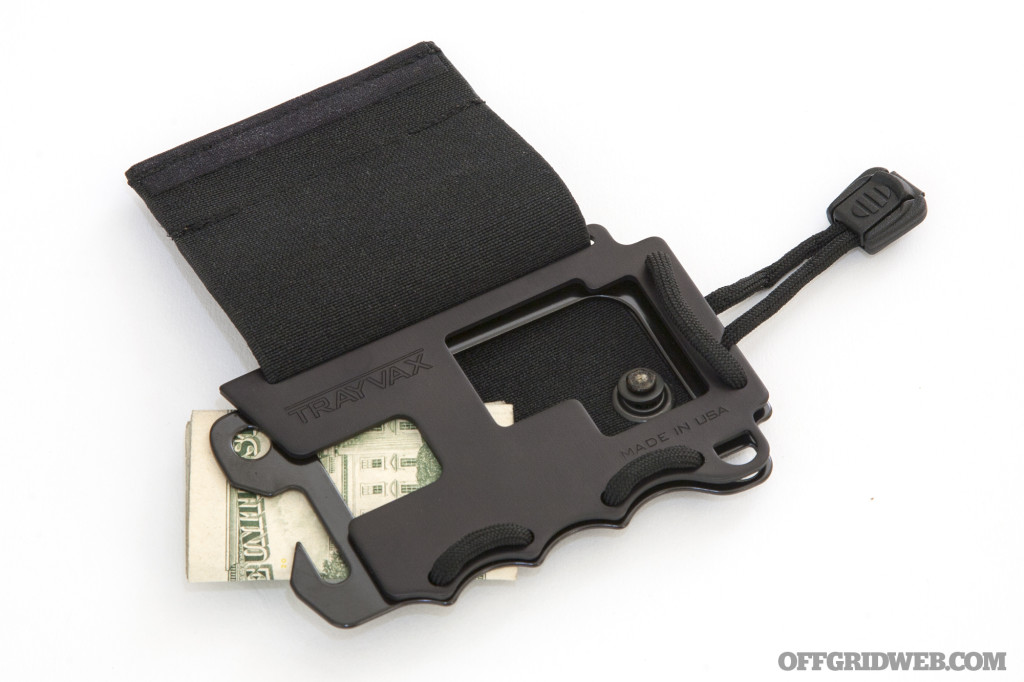
The Axis is available at an MSRP of $50. It doesn't offer a bottle opener like the Original, but it does have similar RFID-blocking properties. It also offers a slightly larger capacity range of 1-14 cards and 1-8 bills. We liked the addition of a cash clip on the back plate, as well as the nylon webbing that divides the contents into four organized sections.

Trayvax wallets money card EDC pocket tool 18

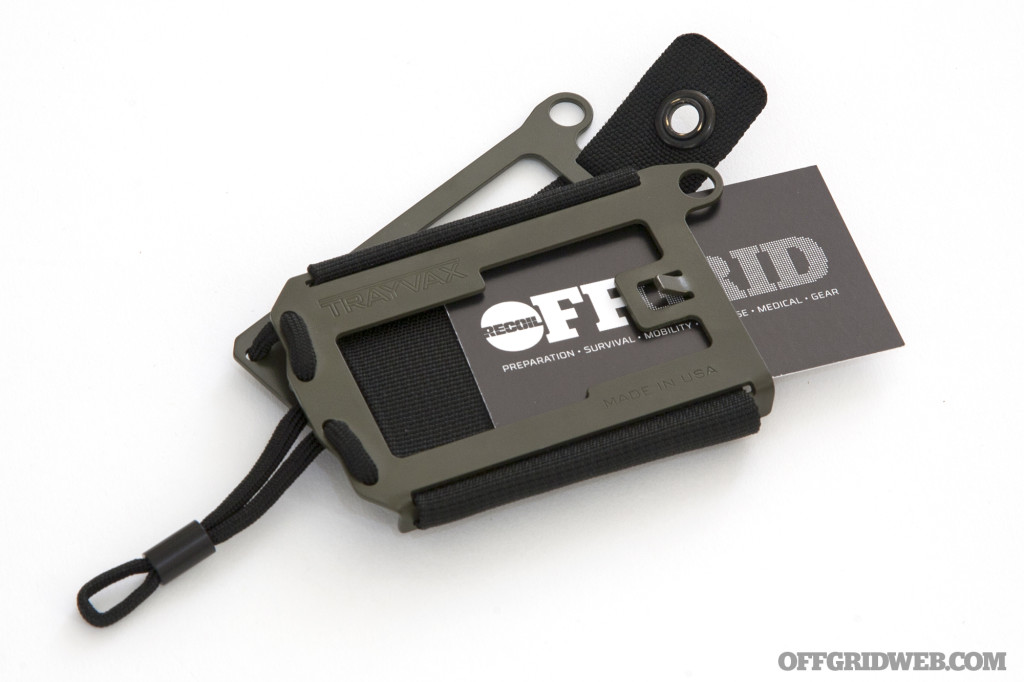
Due to the clasp closure and quick-access bifold design, we liked the Axis better than the Original. We missed the lack of a bottle opener, but other than that, we'd feel more secure carrying this wallet on a daily basis. If you're still concerned about the clasp coming un-done, you can even clip a carabiner or keyring through the attachment loops in the top right corner, locking the metal plates together.

The Trayvax Element

Trayvax wallets money card EDC pocket tool 09

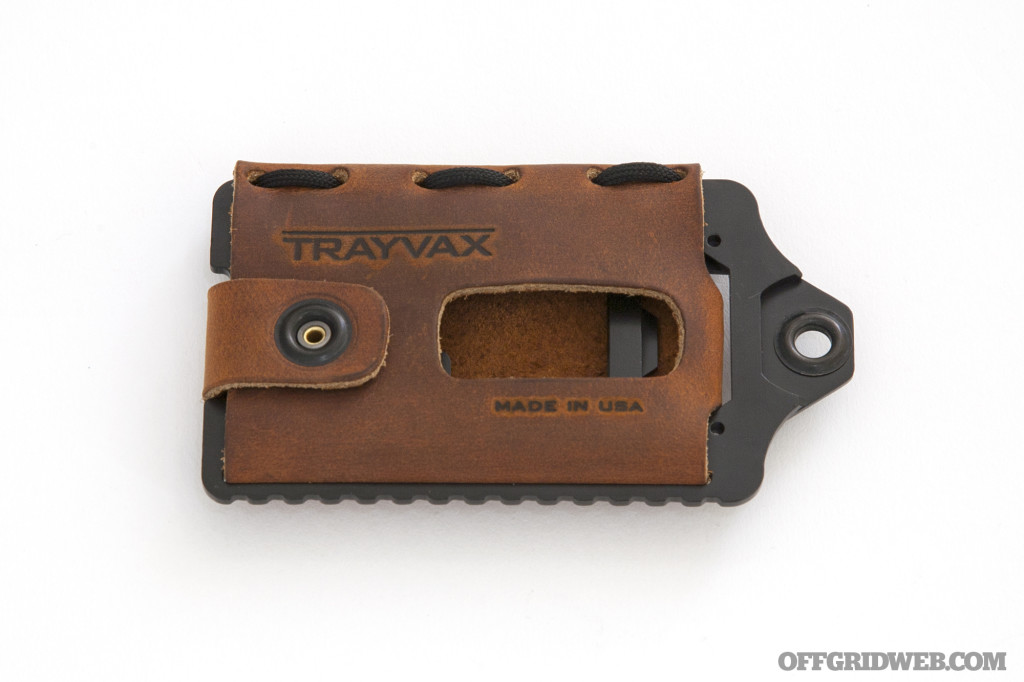
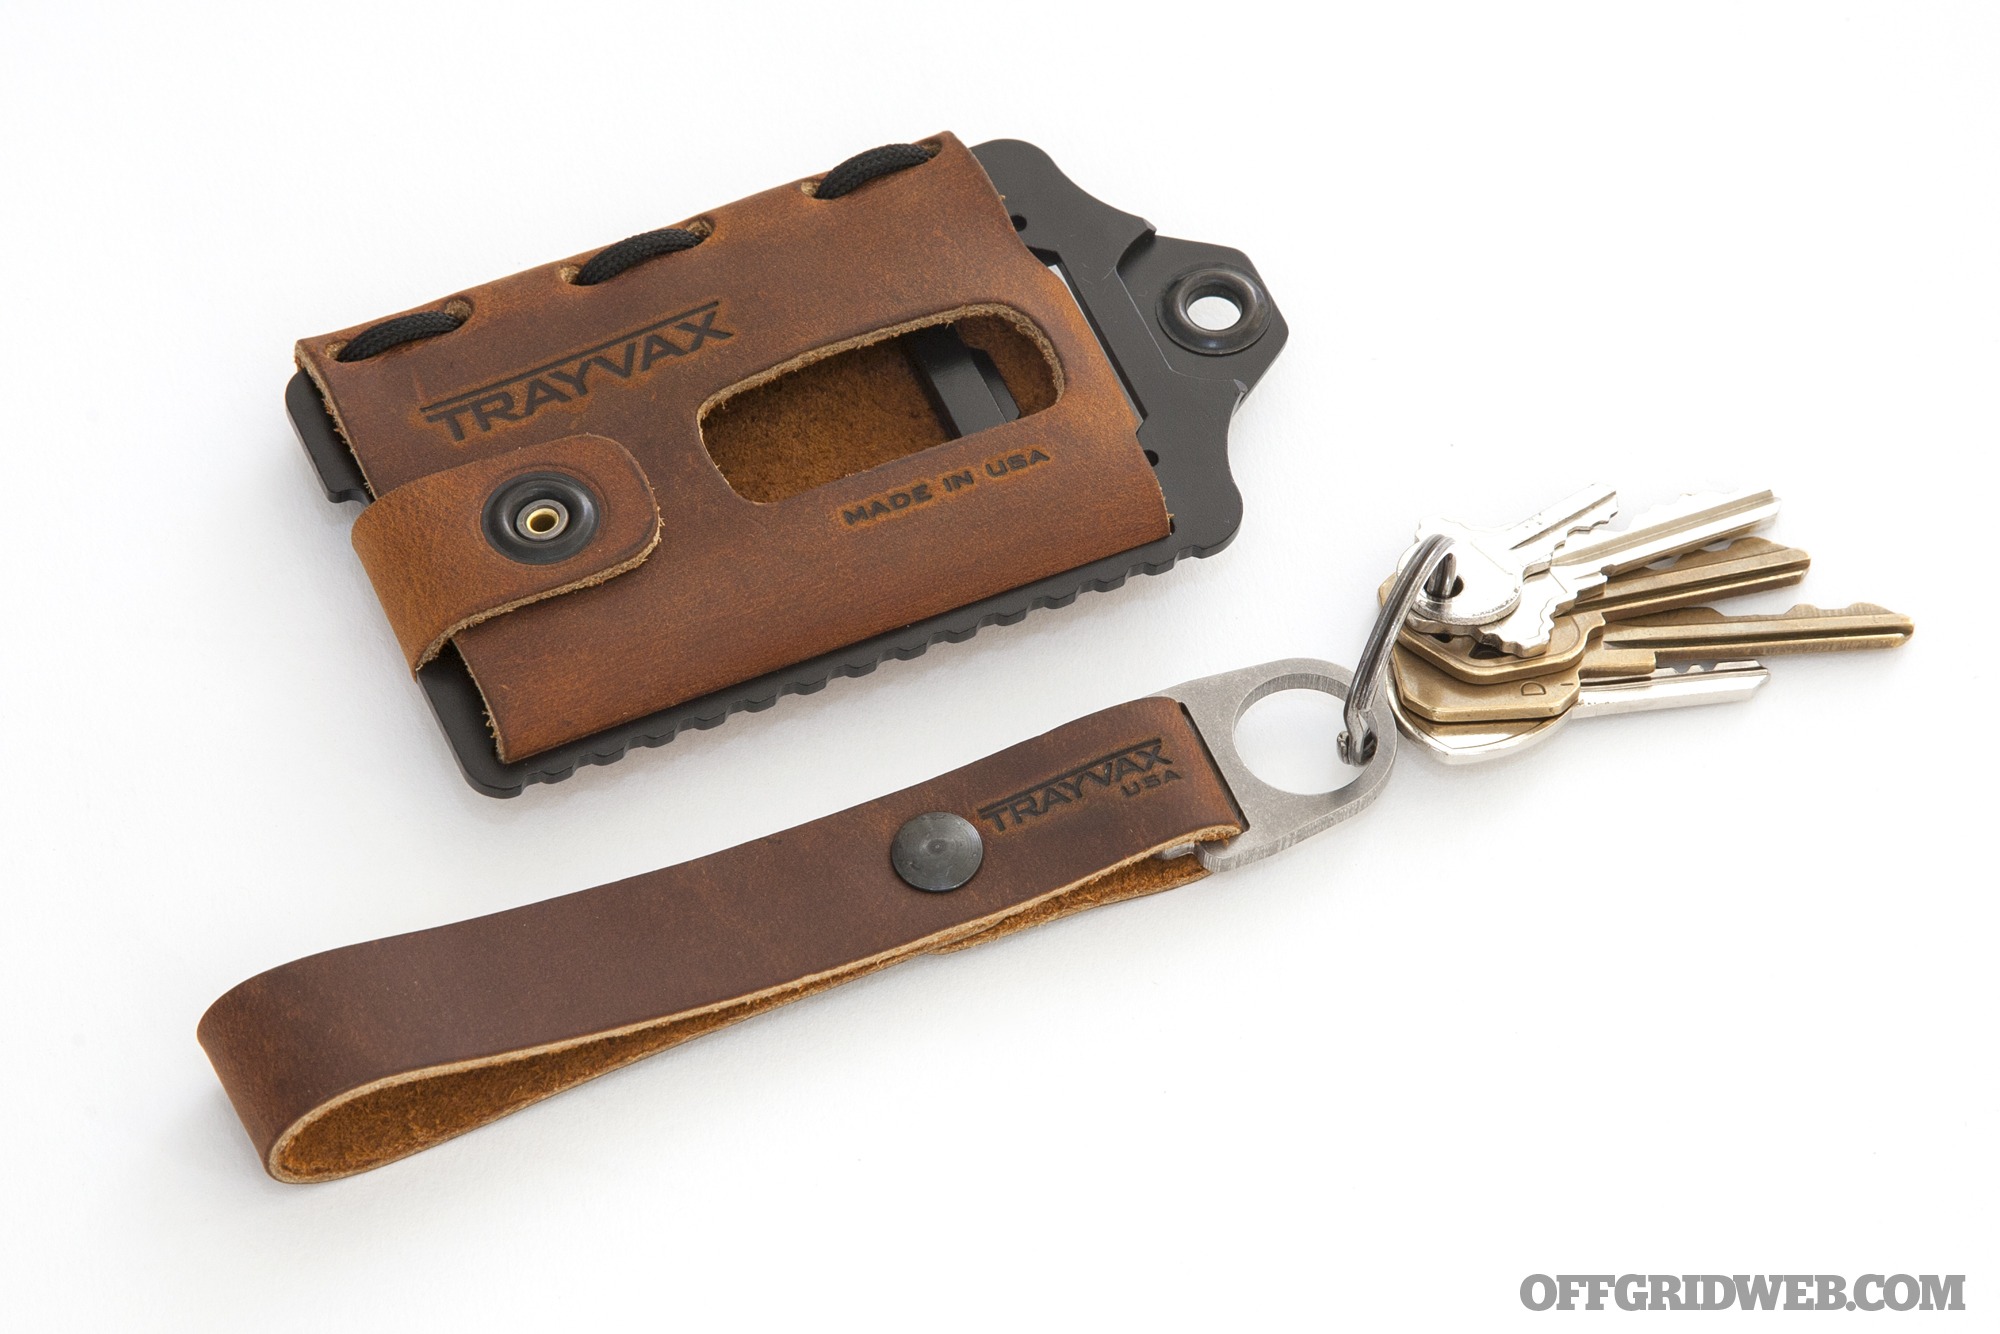
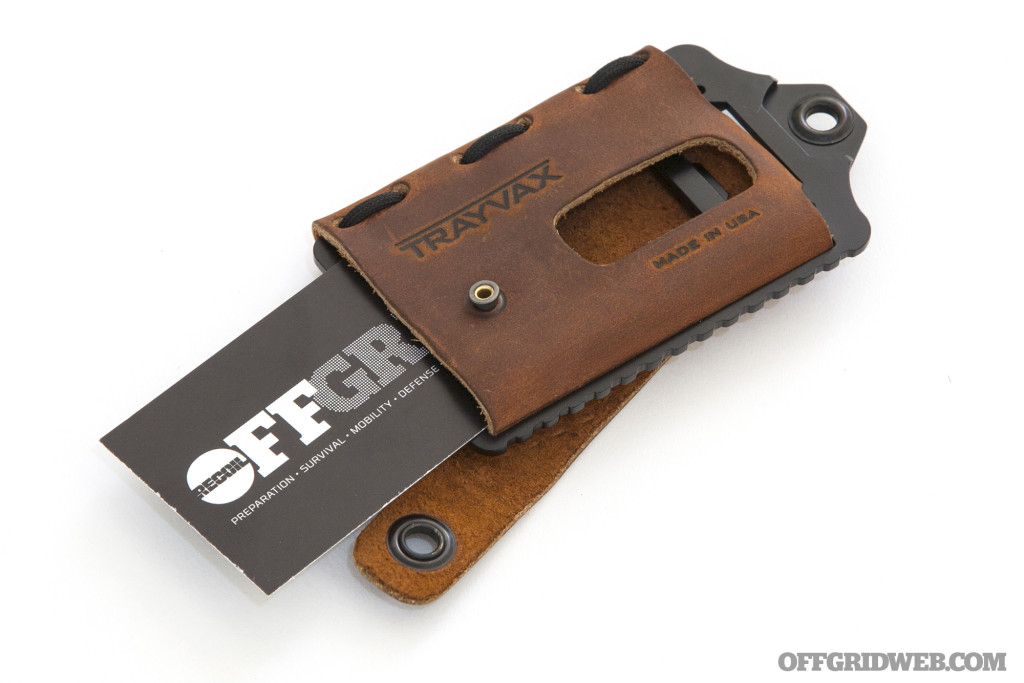
The Element wallet is Trayvax's flagship design, and the company says it's intended to look “tough enough for the job site, but stylish enough for date night”. Thanks to the use of natural American-sourced, oil-tanned leather, the Element exhibits a style that's less tactical and more classy. The leather is available in four colors — Stealth Black, Tobacco Brown (pictured here), Mississippi Mud, and Canyon Red. This leather is wrapped around a one-piece RFID-blocking stainless steel frame, finished in either raw tumbled steel or satin black coating.

Update: Trayvax recently let us know that the Element's steel frame has been updated as of November 2016, improving functionality of the bottle opener and other features. The model we tested is an older Element, so your mileage may vary with the latest version.

Trayvax wallets money card EDC pocket tool 15

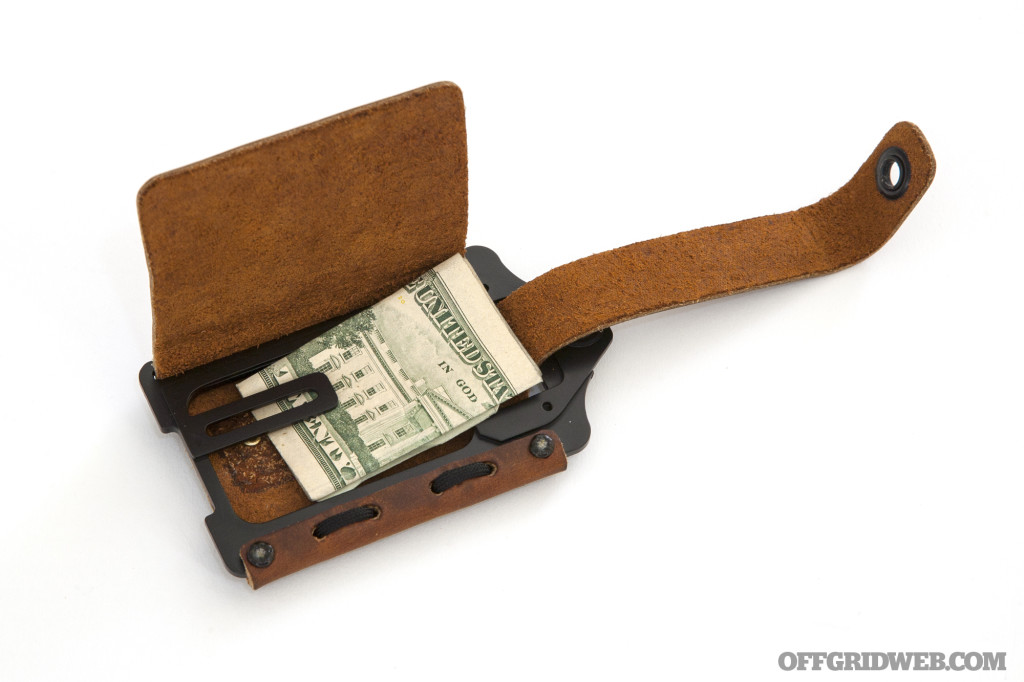
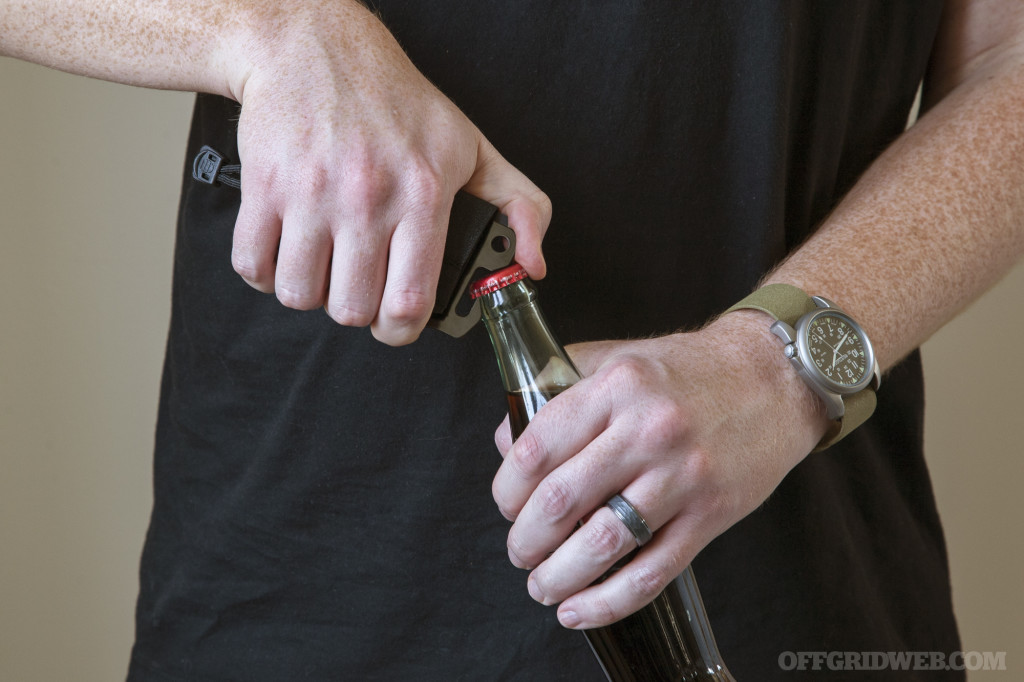
To open the Element, pull the leather closure strap off its peg, and flip open the flap underneath. This reveals an integrated money clip, as well as a space for card storage on the opposite side of the frame. The strap also passes through an integrated bottle opener, near the end of the frame with the lanyard attachment hole. Overall listed capacity for the Element is 3-10 cards and 1-5 bills, and the MSRP is either $80 for raw stainless or $85 for black finish.

Trayvax wallets money card EDC pocket tool 20

While the bottle opener is nice to have, its placement makes it tricky to use without displacing the contents of your wallet. That may be for the best, since you might not want to risk spraying your beverage of choice all over your cash and cards.

Trayvax wallets money card EDC pocket tool 27

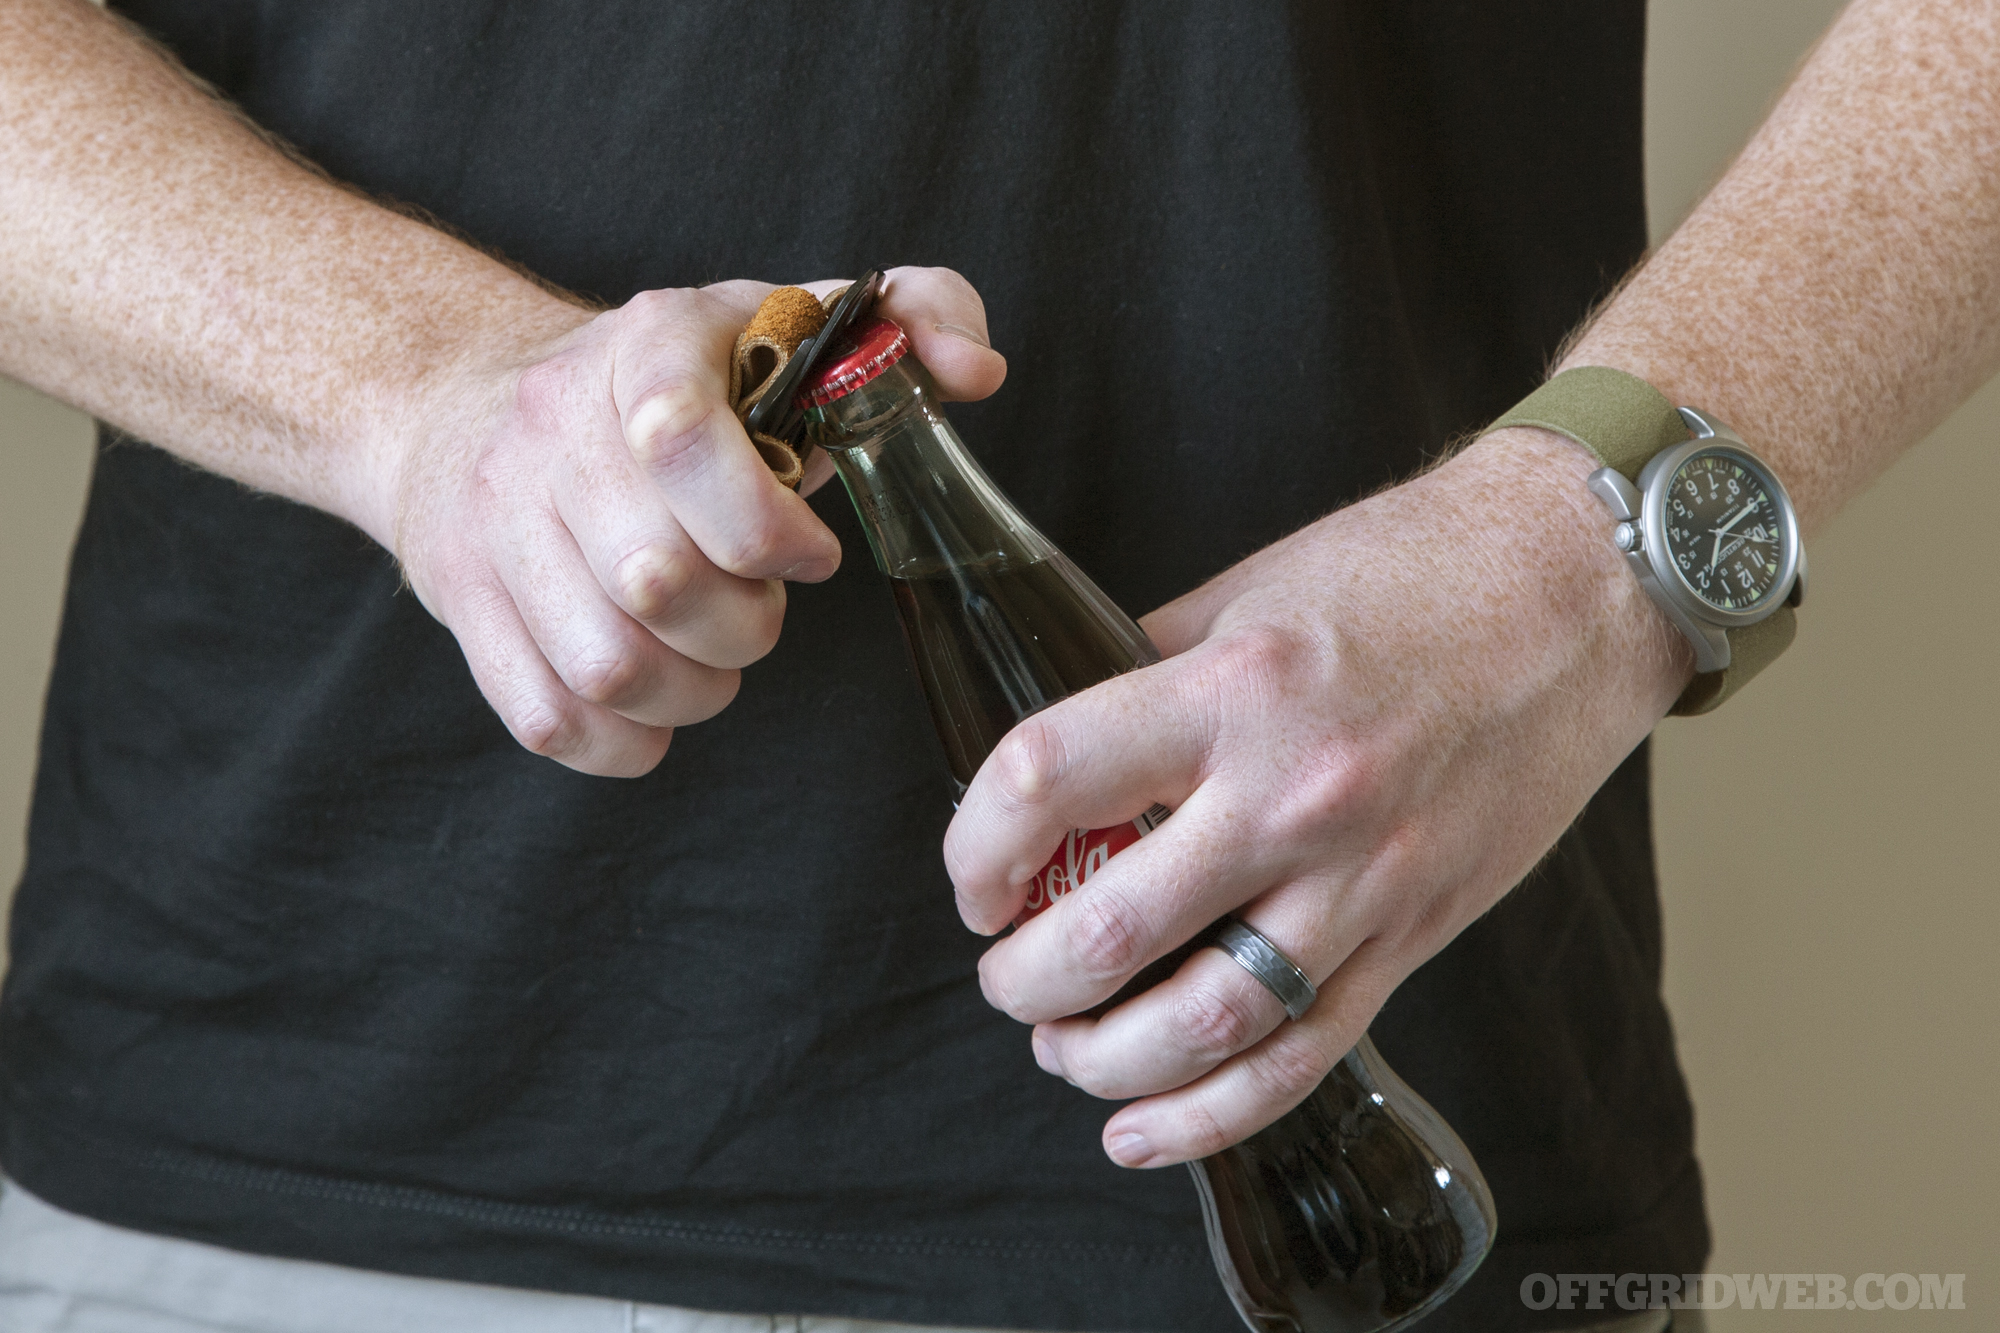
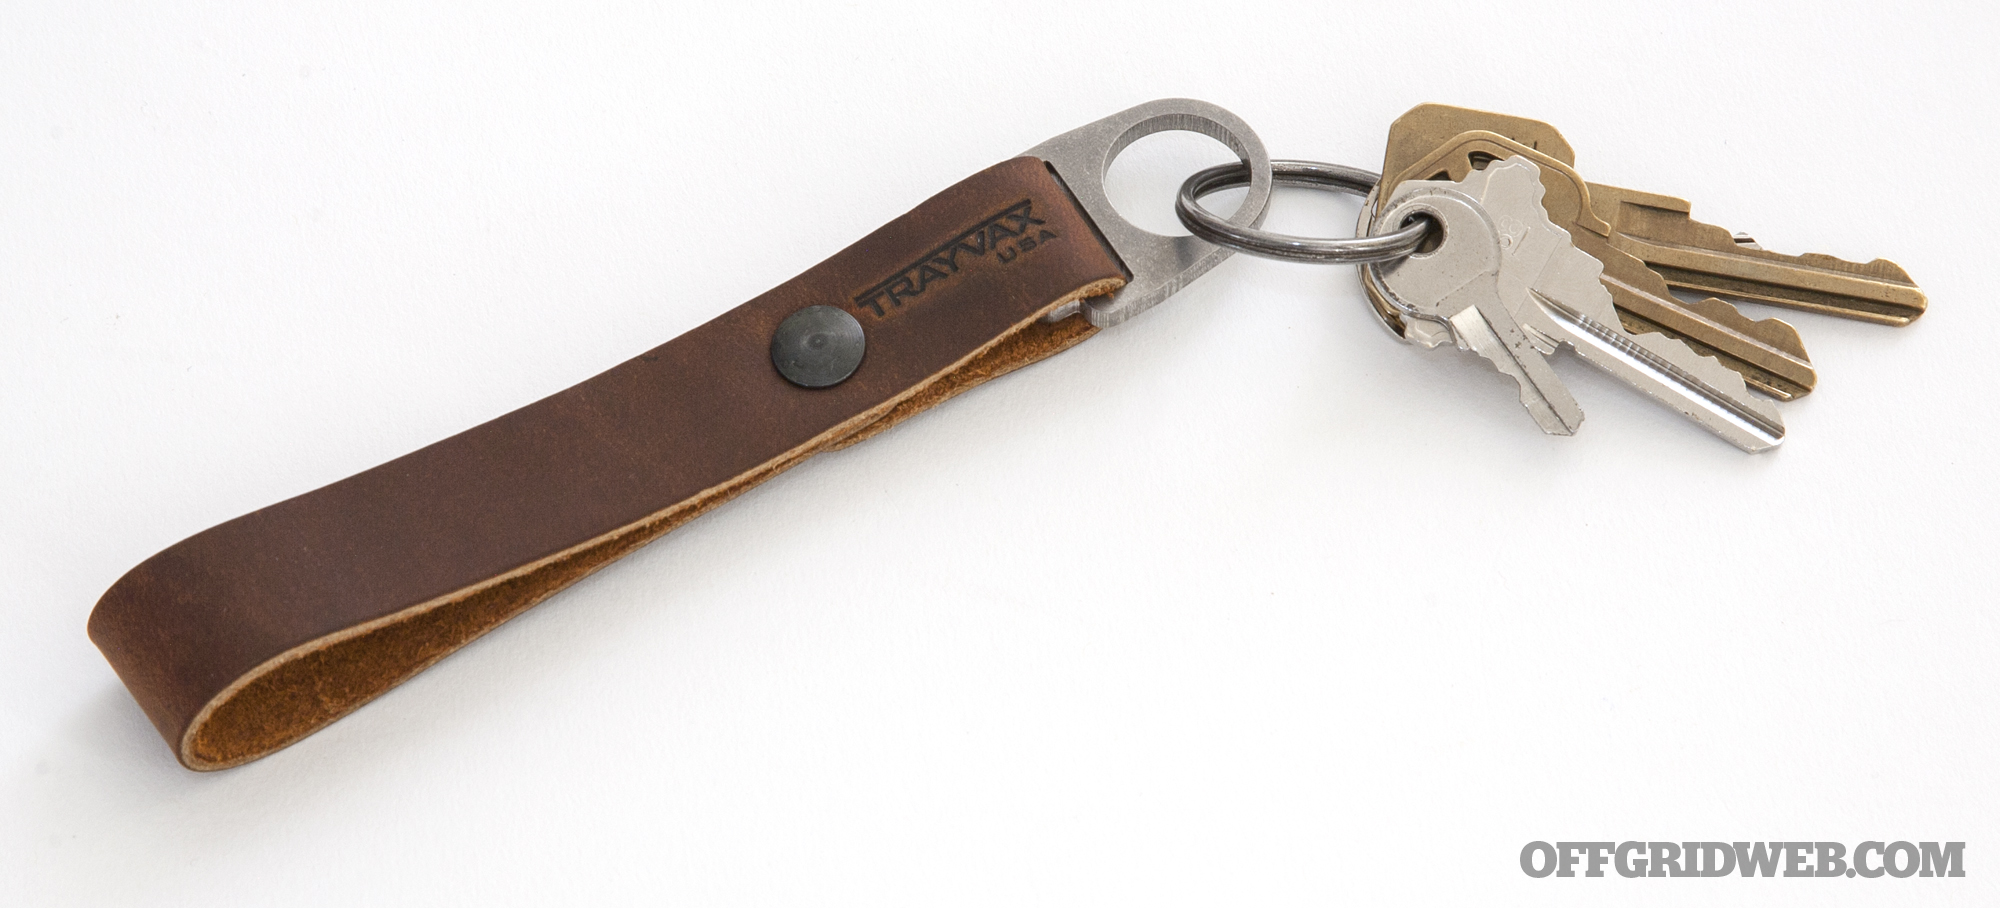
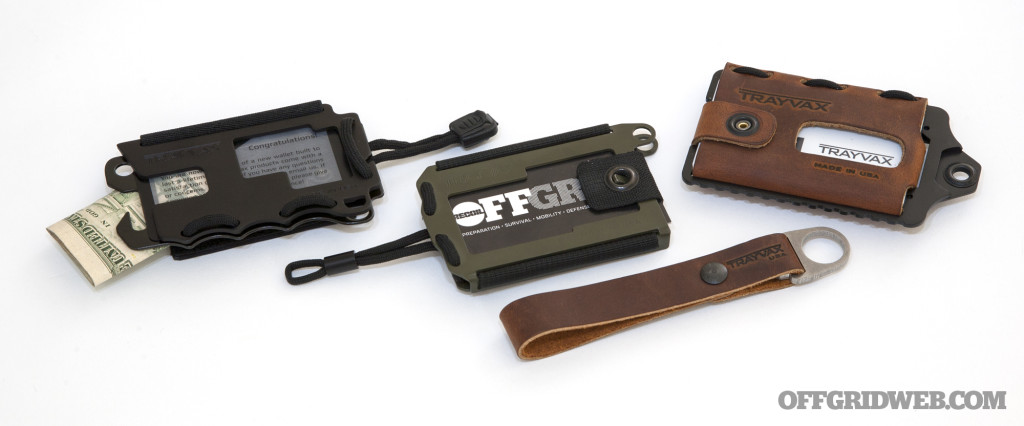
Fortunately, Trayvax made a bottle-opening accessory to complement the Element: the Keyton bottle opener keychain.

Trayvax wallets money card EDC pocket tool 21

The Keyton is available in the same leather and steel finishes as the wallet, and can be used as a matching key fob. When you need to open a cold one, there's a bottle opener hidden inside the strap.

Trayvax wallets money card EDC pocket tool 28

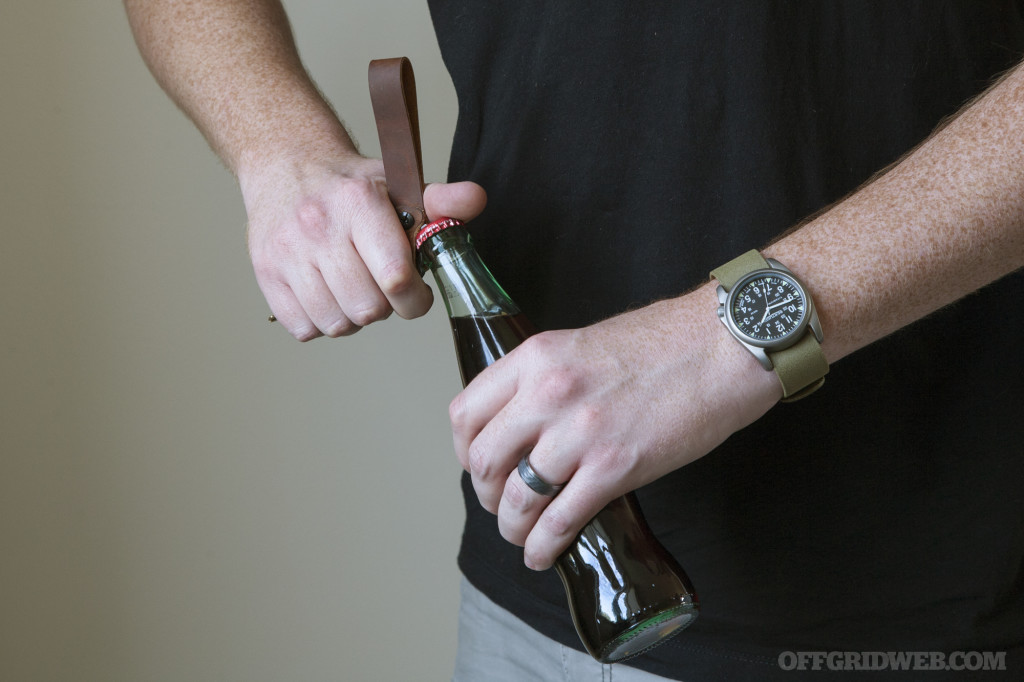
MSRP for the leather Keyton is $15, or you can get a mil-spec nylon version for $13.

Of all the Trayvax wallets we tested, we liked the Element the best. Its American-sourced leather is soft and smooth to the touch, and it offers a secure closure strap to keep your wallet contents in place. While the built-in bottle opener placement isn't ideal for frequent use, the Keyton keychain complements this nicely. Our only critiques of the Element are its slightly smaller capacity compared to other Trayvax models — you'll need to keep contents to a minimum with this wallet — and its substantially higher price tag.

Conclusions

Trayvax wallets money card EDC pocket tool 05

If you're looking to break away from the bulky billfold paradigm and simplify your EDC gear, Trayvax wallets provide an appealing solution. They're built in the USA from high-quality materials, and they're designed around tough metal frames that protect your cash and cards from impacts and RFID skimming.

Trayvax wallets money card EDC pocket tool 02

Trayvax also stands behind all of its wallets with a lifetime warranty against hardware failure during normal use. That includes broken straps, loose grommets, snapped paracord, and worn out Velcro. So, you shouldn't need to worry about damaging your wallet, no matter where you take it. These wallets are built to last.

For more information on Trayvax wallets and EDC accessories, visit Trayvax.com.


Skivvy Roll Technique for Efficient Packing

Whether you're packing a suitcase for a weekend trip or prepping your bug out bag for an emergency, using pack space efficiently is a must. It's common sense not to haul around a bulky pack full of disorganized gear. Also, it's important to make the most of the space you have, and consolidate related items into grab-and-go kits. This way, when you need a certain set of gear quickly, you won't end up rummaging for loose items.

511 Rush backpack action 1

Pack organization is crucial. Without it, you'll waste valuable time hunting for gear during an emergency.

Packing a first-aid kit or cooking kit is easy enough, but what about clothing? The traditional packing method is to fold apparel flat, but this doesn't provide much organization, and leaves individual items loose. Grabbing an entire change of clothes requires hunting for a separate shirt, underwear, and two socks.

Over the years, members of the military have devised a more efficient method for packing clothing. It's called the skivvy roll or grunt roll, and it combines a shirt, underwear, and socks into a single compact bundle. If you learn this method, you can compress these items and save space in your backpack or suitcase. It's also easy to grab when you need a fresh set of clothes. Here's how to make a skivvy roll, step by step:

Start with a T-shirt, a pair of underwear or PT shorts, and a pair of socks.

Start with a T-shirt, a pair of underwear or PT shorts, and a pair of socks.

Lay the shirt flat. Fold the shorts or underwear in half, and place them in the center.

Lay the shirt flat. Fold the shorts or underwear in half, and place them in the center.

Fold the edges of the shirt over the center. Fold carefully to avoid wrinkles.

Fold the edges of the shirt over the center. Fold carefully to avoid wrinkles.

Fold the other side of the shirt across the center.

Fold the other side of the shirt across the center.

Place a pair of socks as shown, with the open ends facing left and right.

Place a pair of socks as shown, with the open ends facing left and right.

Tightly roll the shirt around the socks, starting at the neck.

Tightly roll the shirt around the socks, starting at the neck.

Here's how the rolled shirt should end up looking.

Here's how the rolled shirt should end up looking.

Invert the socks, and stretch them tightly over the rolled shirt.

Invert the socks, and stretch them tightly over the rolled shirt.

The finished product resembles a clothing burrito.

The finished product resembles a clothing burrito.

The skivvy roll technique is great for camping, backpacking, or bug-out bag preparation. Next time you're packing fresh clothes, remember this method. P.S. – We'd like to give a shout-out to Duckworth for providing the excellent Lightweight Crew socks seen in these photos. They're made in the USA from Montana-grown merino wool, and they're super comfy.
Skivvy roll grunt clothing pack shirt socks 10


On Sale Now: RECOIL OFFGRID Issue 17

There’s no feeling like it. Whether inside my local supermarket or at one of those endangered species called a brick-and-mortar bookstore, I get a case of the feels whenever I see a stack of RECOIL OFFGRID magazines on the newsstand. I’m proud of every issue we produce, but my smile might beam a little wider when I spot Issue 17.

Why? Because aside from the really cool (pun intended) cover looking fantastically frigid, it’s layered and insulated with plenty of practical cold weather survival knowledge courtesy of our talented editorial staff and the subject-matter experts who contribute. As the Game of Thrones memes forewarned us, winter has come. Survivalism is hard enough as it is during other times of the year, but throw in freezing temps, heavy snowfall, and bone-numbing wind-chill factor and conditions can be downright fatal. Fortunately, we've got your back.

RECOIL OFFGRID magazine Issue 17 preview announcement

In our popular What If? feature, we ask survival instructor Tim MacWelch and others to walk in the shoes of someone who’s injured and stranded in a white expanse, then tell us how they’d get out of that jam. On a related topic, Ryan Houtekamer provides seven survival concepts if you ever need to bug out on foot in a frosty landscape. This outdoors adventurer has more than enough experience in this regard, being part yeti and a Canadian Army veteran who did more than his fair share of military exercises in snow. And our features editor, Rob Curtis, dipped his feet into the world of wool, nylon, and other fun fabrics to bring us a comprehensive buyer’s guide on cold-weather socks.

On that same path, RECOIL OFFGRID sets itself apart from the competition by providing in-depth and honest product reviews. So, in addition to the socks feature, web editor Patrick McCarthy presents buyer’s guides of both collapsible water bottles and miniature flashlights in Issue 17. And, because, you know, he doesn’t have enough work being in charge of this website, I tasked him with reviewing the Shadrach neck knife from DGT and Master Proven for our Hands On column.

This issue is packed with other great features, from the four curious survival uses of an Altoid tin to the top 10 most neglected (but important) preps. We also have an exclusive behind-the-scenes look at SOG Special Knives’ 30th anniversary and a no-B.S. paramedic’s guide to traumatic injuries.

I think this issue is loaded with good stuff. But don’t take my word for it. Look for RECOIL OFFGRID Issue 17 on newsstands or subscribe here. Maybe you’ll get the feels, too.


Skull Crush Tactical Touring Harley Davidson Saddle Bags

In the past, we've mentioned that a motorcycle can make an excellent bug-out vehicle in certain circumstances. On a bike, you can out-accelerate and out-maneuver other vehicles, or simply weave through small gaps in traffic to escape gridlock in an emergency scenario. Motorcycles are also usually more affordable and fuel-efficient than their automotive counterparts — we could go on, but you get the idea. A bike isn't always preferable to a car or truck, since you wouldn't want to ride through a blizzard, but there are many cases when it's a viable option.

Skull crush motorcyle saddle bag 7

Skull Crush Tactical Touring Saddle Bags are designed to fit Harley Davidson Touring motorcycles. Photo Credit: Harley...

However, when it comes to bug-out bikes, there's one key issue: carrying all your gear. You can strap on a backpack, but that's a small amount of gear compared to what would fit in a car trunk or truck bed. If you want more storage capacity on your bike, you'll need some saddle bags — unfortunately, many standard saddle bags don't provide adequate organization, or the ability to grab all your gear at once.

Skull crush motorcyle saddle bag 6

Skull Crush has made better use of the saddle bags found on Harley Davidson Touring motorcycles, with its new Skull Crush Tactical Touring Saddle Bags. These soft bags are made of 1000-denier Cordura nylon, and fit neatly inside your Harley's hard-sided saddle bags. They're available in six colors: black, tan, ranger green, urban gray, digital desert sand, and MultiCam.

Each Skull Crush Tactical Touring Saddle Bag is constructed with two zippered compartments, and a padded flooring to protect your gear. One inner wall is lined with hook-and-loop material, so you can stick on other gear, such as pouches and holsters. Both outer side panels include PALS webbing, allowing the addition of  a near-endless variety of MOLLE-compatible gear.

Skull crush motorcyle saddle bag 1

A heavy-duty handle allows you to grab the entire contents of a saddle bag in one hand, and carry it with you. This makes these a good choice for luggage duffel bags, range bags, LE duty bags, go-bags, or medical kits.

Skull crush motorcyle saddle bag 2

All Tactical Touring Saddle Bags are made in the USA, and they include a lifetime warranty. These bags are sold individually for $130, or in pairs for $225. For more information, visit SkullCrush.com.


Threat Identification Infographic: Handgun Concealment “Tells”

One of the most important aspects of any self-defense system is situational awareness. By paying close attention to your surroundings, and knowing which warning signs to look for, you can see a potential attacker coming and prepare yourself for quick action. Without situational awareness (SA) you might end up oblivious to threats right in front of your nose, and be blindsided by a sudden attack. Even if you're a trained martial artist or shooter with years of combat training, you're automatically at a disadvantage when your attacker has the element of surprise.

Carrying a concealed weapon is an excellent tool for self-defense. However, concealed weapons are also sometimes carried by dangerous criminals, muggers, and thugs. So, in order to avoid being taken by surprise when a malicious individual draws a handgun, it's helpful to be aware of anyone in your vicinity who might be carrying. Even if that individual ends up not being a threat, it's wise to keep an eye out at all times.

handgun-in-holster

In poker, a “tell” is an unconscious action that may reveal an opponent's true intentions. Similarly, there are many identifiable “tells” that might give away someone attempting to conceal a weapon. Keep in mind that many of these tells are far more subtle if the individual is equipped with adequate training, a high-quality holster, and appropriate clothing. Fortunately for us, most bad guys won't bother with those formalities, so their tells may be much easier to spot.

The following threat identification infographic was created by Megan Jaegerman with input from former NYPD detective Robert T. Gallagher. It shows a few common mistakes made by individuals attempting to conceal a handgun. Law enforcement officers are often trained to spot these behaviors, and with a little practice, you can learn to identify them too. (Click here for a full-size version of this infographic.)

Concealed handgun infographic firearm pistol 1

We should also mention that this guide works both ways: if you carry a concealed weapon, you should be careful not to exhibit these behaviors. Otherwise, an attacker might notice you're carrying a weapon when you're trying to remain discreet. Also, even with a proper holster, printing through clothing can be a giveaway. Click here to read more about the importance of printing from our friends at RECOILweb.com.


Survival Tip: A Better Way to Strike a Ferro Rod

Some tools seem so intuitive that we never really think about the way we use them. For example, when was the last time you contemplated alternate ways to use a flashlight or a pair of scissors? They're pretty straightforward tools, and we've all seen them used a certain way a thousand times, so we usually go into auto-pilot mode when we pick up these items.

Ferro rod fire steel 01

For survivalists, a ferrocerium or ferro rod fire starter is another ubiquitous implement. You can pick it up in one hand, grab a sharp-edged striker in the other hand, and swipe the striker along the rod, showering your tinder bundle with sparks. Simple enough — we've seen dozens of people do it this way over the years, and it tends to be at least reasonably effective. However, there may be a better way to strike a ferro rod.

Ferro rod fire tinder trick 2

Striking downward against the top of the rod scatters sparks inconsistently.

The first key to improving your rod's effectiveness is to move the ferro rod, not the striker. This prevents pushing the striker into your tinder, and disturbing or scattering the pile. Manufacturers of ferro rods will typically give you this information in their instructional guides, such as this guide from Coghlan's. However, there's another useful tip you should learn, seen in the video below:

Outdoorsman and YouTube video creator Clay Hayes posted this short video, and it shows a second modification to the striking technique. By holding the striker underneath the ferro rod and pulling the rod backwards, sparks are directed into the center of the tinder bundle. When using the top side of the rod, these sparks tend to scatter, making it harder to light the fire.

So, next time you whip out your ferro rod, think twice about how you're striking it. It might save you some time and energy as you light your campfire.


Making a Paracord Ball Keychain

Have you ever seen paracord woven into a ball, and wondered how it's done? Making a simple knot lanyard is easy enough, but creating a sphere from a single strand of paracord is much less intuitive. These spherical paracord formations are often called monkey fist or monkey paw knots, and they can be created using cord alone or with a round stone, marble, ball bearing at the center.

Here's one traditional method for tying a monkey's fist knot.

Here's one traditional method for tying a monkey's fist knot. Other decorative methods are also available.

These ball knots have a variety of potential uses:

  • Making the end of a rope easier to throw across gaps, such as those between a ship and dock. This is called a heaving line, and often contains an added weight at the center of the knot.
  • Anchoring a line during rock climbing by jamming the knot in a crack. Rarely used by modern climbers due to safety concerns.

Paracord ball keychain weave knot 6

  • Serving as a button closure for a bracelet, by passing the knot through a loop. See this guide from Paracord Forum for more details.
  • Easy-to-grab zipper pulls or keychains.
  • Decoration or ornamentation on the end of a line.
  • With a heavy metal weight at the center, for swinging use as a self-defense weapon.
Paracord ball keychain weave knot 2

The loose formation of a paracord ball knot. See video below.

There are a number of variations on the monkey fist knot. In the below video from Paracord Knots on YouTube, the host shows a silent demonstration of how to tie a small paracord ball keychain. This version contains no weight or marble at the center, but it would be possible to add one before tightening the knot.


Trench Foot Treatment & Prevention

If you're planning to spend time outdoors this winter, you'll need to be cautious of frostbite and hypothermia due to the cold conditions. However, there's another more insidious medical problem to be watchful for: trench foot. Also known as immersion foot syndrome, trench foot is a harmful condition caused by prolonged exposure to damp, cold, and/or unsanitary conditions. If left untreated, it may cause loss of blood flow, numbness, open sores, fungal infection, and tissue decay (necrosis) which may force amputation of the foot or leg.

Photo of logs burning in a campfire.

You might be thinking, “trench foot only happens to soldiers living in cold muddy trenches, right?” While the name of the condition originated in World War I as a result of those conditions, it's not restricted to winter. The related condition of tropical immersion foot (or “paddy foot”) afflicted many soldiers during the Vietnam war, despite temperatures of 70°F and up. Trench foot is also not restricted to wartime environments, and frequently affects hikers, mountain climbers, and backpackers. It has even affected attendees of a particularly rainy music festival.

Here's an interesting 5-minute documentary segment from the BBC, which briefly addresses the initial causes of and solutions to trench foot during World War I:

British physician and bacteriologist Almroth Wright made tremendous progress in trench foot treatment by cleaning the wounds thoroughly, then leaving them open to the air to heal naturally. This contradicted the older practice of pouring antiseptic into the infected wound, and immediately closing or covering it. The key cause of trench foot is excessive moisture, so allowing the feet to breathe and dry out was a game-changer at that time.

Black and white photo of Almroth Wright. Wright advanced treatment of trench foot by allowing patients' feet to breathe and dry.

Almroth Wright advanced treatment of trench foot by allowing patients' feet to breathe and dry.

In modern times, we have a better understanding of trench foot. Since it begins as a result of prolonged exposure to moisture, and is accelerated by cold temperatures and bacteria/fungi, the best preventative measure is to keep feet dry, warm, and clean. In heavy rain or snow, this can be difficult, but regular foot inspection is essential to watch for initial symptoms — numbness, tingling, swelling, and pain. Even waterproof boots aren't a sure fire fix — while they can keep out external moisture, they may also trap in sweat, leading to maceration and softening of the skin.

Trench foot boot immersion medical water 2

The introduction of wooden “duckboards” helped keep soldiers' feet out of the mud and moisture during...

If these initial symptoms are spotted, the Centers for Disease Control and Prevention (CDC) recommends trench foot treatment via applying warm packs or soaking in warm water (102° to 110° F) for approximately 5 minutes. Medical attention should be sought if symptoms continue to worsen.

Trench foot boot immersion medical mud 3

The effects of trench foot on an unidentified soldier during WWI. Source: Library and Archives Canada, PA-149311 /...

Even if no symptoms are present, the following preventative measures should always be taken if you're spending time in a wet environment:

  • Thoroughly clean and dry feet at least once per day, or multiple times throughout the day if possible.
  • Put on clean, dry socks daily. If no fresh socks are available, air-dry your existing socks or place them near a fire to dry.
  • Do not wear socks when sleeping or resting. Allow your feet to breathe and dry out. However, keep them warm and be cautious of frostbite.

For more information on trench foot treatment and prevention, read the CDC Disaster Recovery Fact Sheet on trench foot or immersion foot.

Related Posts


Zombie Tools Limited-Edition Bushlicker Knife

With a name like Zombie Tools, you might expect this Montana-based team of bladesmiths crafts weapons that look cool but are impractical for survival use. Fortunately, that's not the case — Zombie Tools blades may look good, but they can also take a beating in the real world. The company has continued to prove this point by unveiling knives that emphasize practicality, while retaining the unique battle-worn ZT aesthetic.

The Zombie Tools elves are hard at work finishing a backlog of blade orders before Christmas.

The Zombie Tools elves are hard at work finishing a backlog of blade orders before Christmas.

A few weeks ago, we wrote about the redesigned Zombie Tools Para Bellum, a slight twist on the traditional Filipino bolo knife. More recently, ZT has announced the release of another practical blade, known as the Bushlicker. The innuendo-laced name fits right in alongside other creatively-dubbed ZT blades like the Traumahawk and D'Capitan. However, the Bushlicker is substantially different from most previous ZT blades in a number of key areas.

Zombie tools bushlicker bushcraft knife 1

The Bushlicker is ZT's very first bushcraft knife, designed with a simple and useful blade size and profile. The short, upswept belly is ideal for carving wood and skinning game, while the hard-edged spine serves as a ferro rod striker. Rather than ZT's typical leather-wrapped aluminum handle scales, this knife uses black G10 laminated onto a red Kydex liner on each side of the full-tang handle.

Zombie tools bushlicker bushcraft knife 2

Speaking of materials, there's another first for ZT: a departure from 5160/6150 spring steel. All previous ZT blades have been made of these forms of steel, but the Bushlicker is different. This little blade uses German 80CRV2, which in ZT's words is “tough as f**k” and “will outlive you”. The blade can be carried into the wilderness in its included black leather sheath, which is embossed with the ZT logo. Here are the rest of the key specs:

  • Total Length: 8.5 inches
  • Blade Length: 4.25 inches
  • Handle Length: 4.25 inches
  • Steel Width: 0.165 inches
  • Weight: 8 ounces
  • MSRP: $275

Zombie tools bushlicker bushcraft knife 3

Finally, the ZT Bushlicker knife is the company's first limited-edition blade. Only a few dozen have been produced for release this holiday season, and the knife will only be available for purchase while this supply lasts. Once they're gone, the Bushlicker will be no more. The upside is that unlike standard-production ZT blades, these are not being made-to-order, and are therefore ready to ship immediately. So, you can still pick one up before Christmas.

For more info on the Zombie Tools Bushlicker bushcraft knife, go to ZombieTools.net.