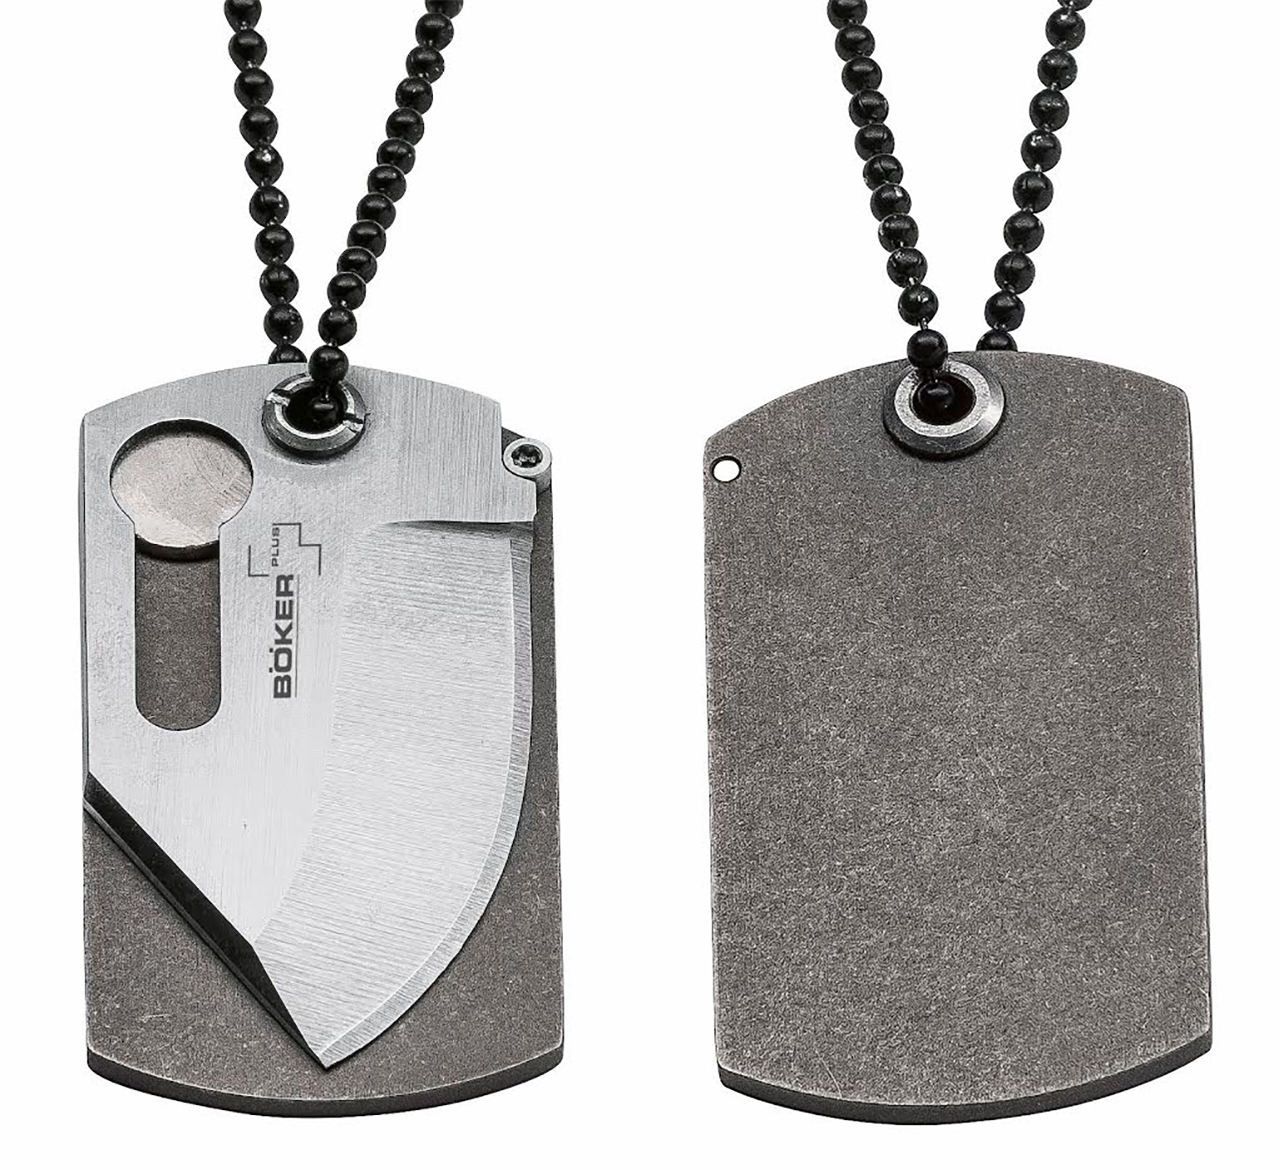
Boker USA has recently unveiled a new compact folding knife, known as the Kubasek Tag Knife or KTK. John Kubasek is a knife designer who worked with Boker on successful projects like the Boker Plus Credit Card Knife. The credit card blade was extremely slim, but this time around, Kubasek came up with an even smaller and lighter blade—a dog tag knife.
This new Boker Plus KTK knife is composed of a 1-3/4-inch 440C stainless blade, paired with a lightweight 2-inch titanium handle scale. The blade folds out to a total length of 2-3/4 inches, and has a magnetic safety button to prevent accidental opening. This safety means that the knife locks in both the open and closed positions.
The KTK dog tag knife has a central pivot that also serves as a lanyard hole, and it comes complete with a black beaded neck chain with shackle. This allows the knife to be worn as a discreet neck knife, or as a compact backup blade for delicate tasks. Thanks to the use of lightweight materials, the entire knife weighs only 1 ounce.
Here's a summary of the key specs of the Boker KTK neck knife:
Overall Length: 3-3/4 inches
Blade Length: 1-3/4 inches
Blade Material: 440C stainless steel
Handle Material: Titanium
Weight: 1.0 oz
MSRP: $40
For more information on the KTK and other Boker knives, visit Boker.de/us.
We've discussed many fire-starting methods here in the past—everything from matches to bow drills to fire pistons. However, thanks to the endless creativity of the human race, there are plenty of other methods for improvised ignition that we have yet to cover. One such device is the Fresnel lens.
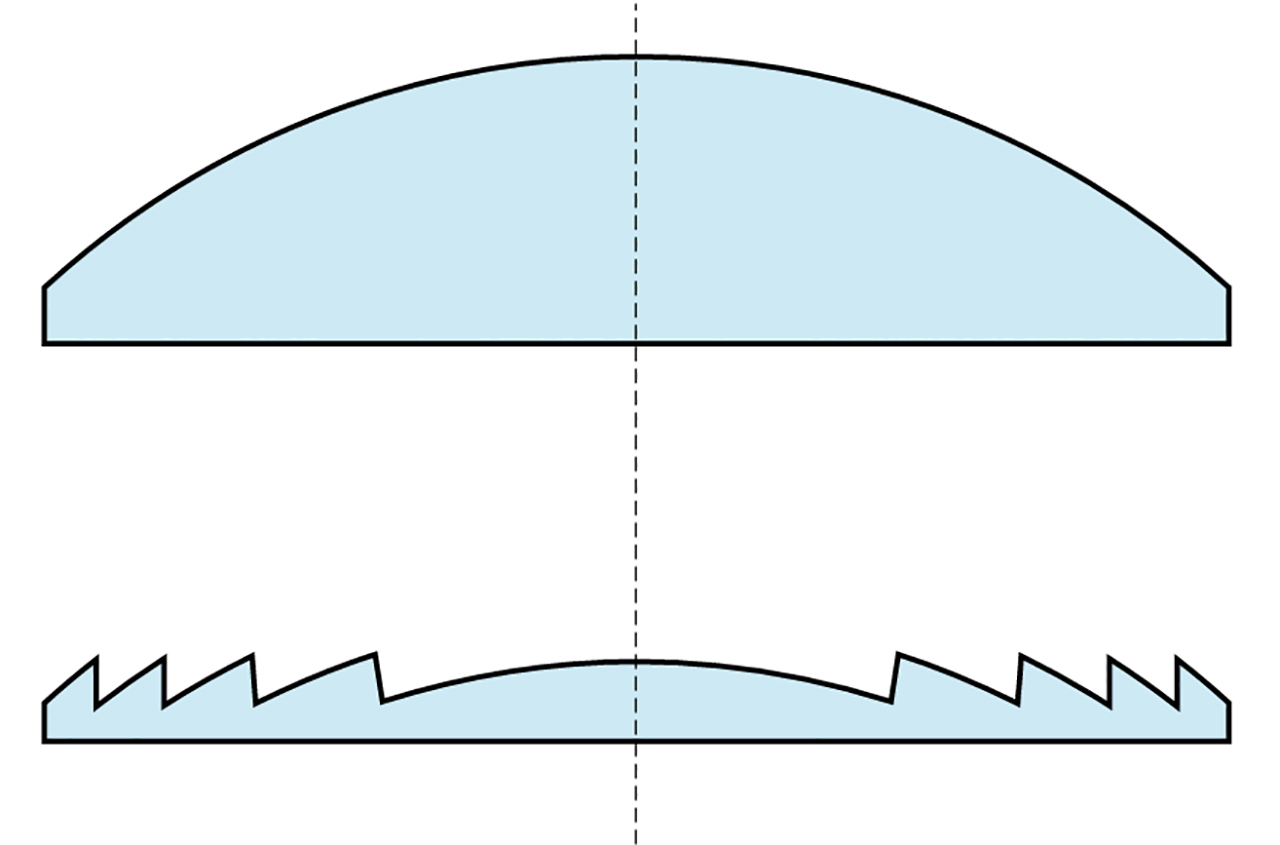
You're probably familiar with the concept of starting a fire with eyeglasses or a magnifying glass. The general idea is to focus the sun's rays into a single point of light and heat atop your tinder bundle, and then wait for an ember to appear (if all goes according to plan). A Fresnel lens achieves the same result, but the design is quite different from an ordinary lens. This is because a Fresnel lens is composed of many angled segments, rather than a single large arc.
Top: cross-section of traditional lens. Bottom: cross-section of Fresnel lens of equivalent power. Source: Wikipedia /...
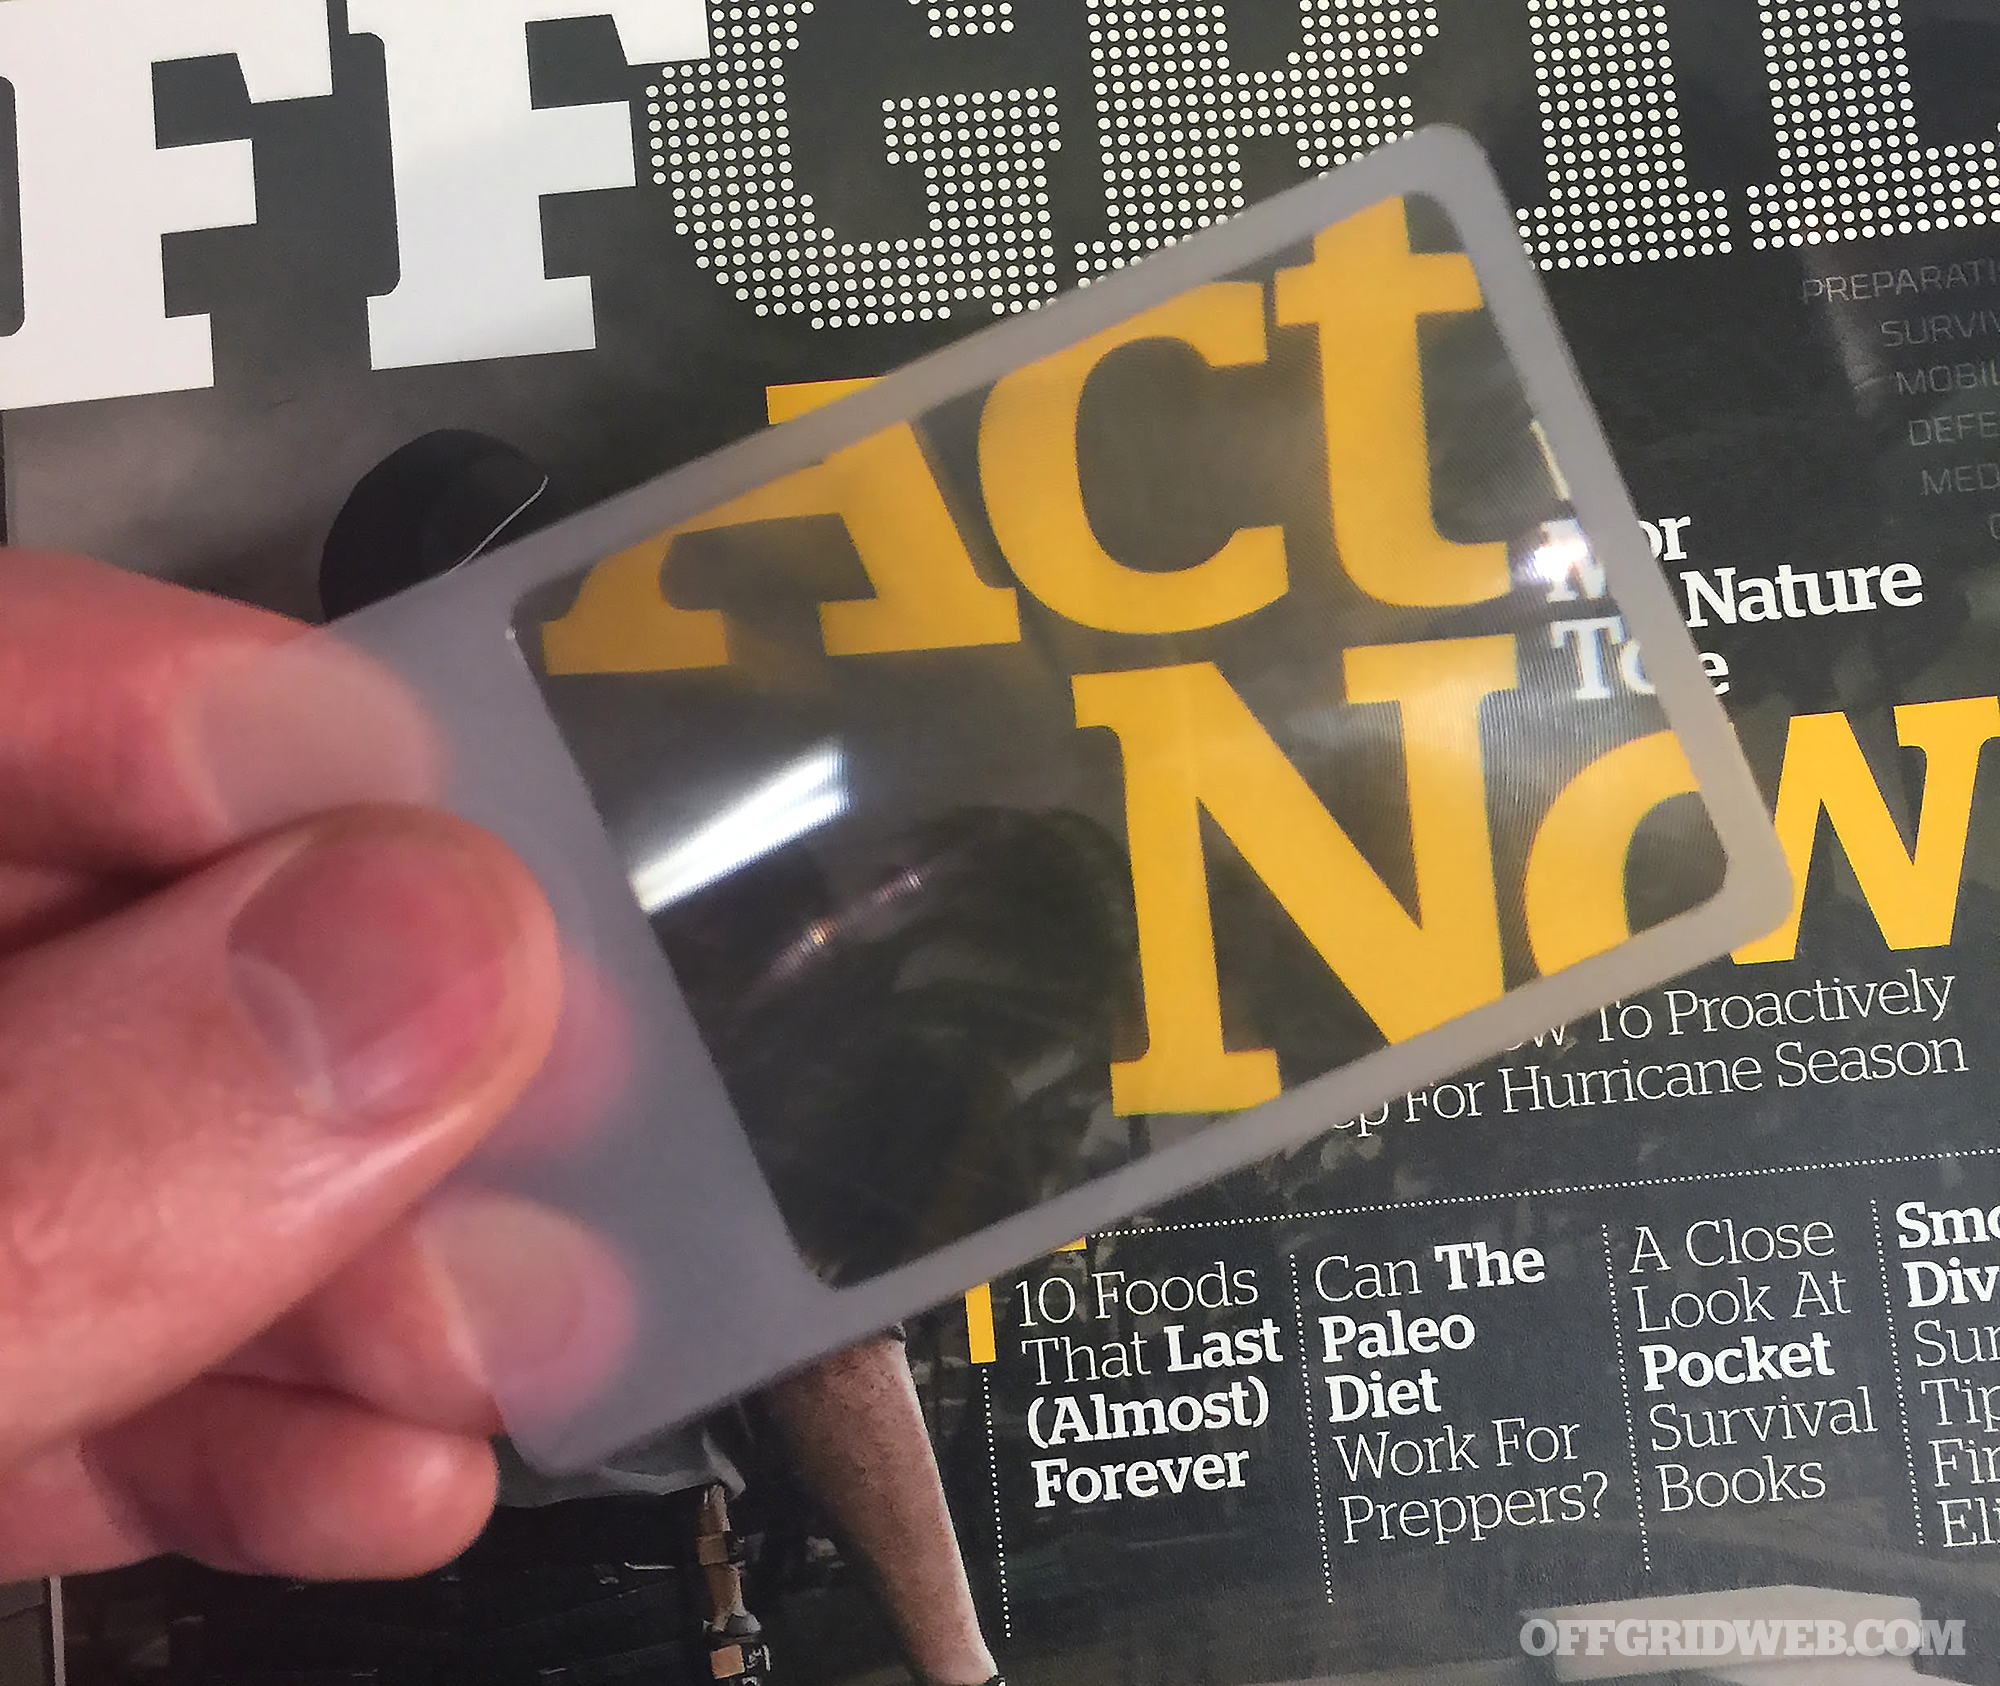
Without getting too much into the scientific content behind how a Fresnel lens works, we'll tell you why you should care. A Fresnel lens can be paper-thin. You can carry one of these lenses in your wallet in place of a business card, and have a means of starting a fire as long as bright sunlight and dry tinder are also available.
Emberlit gave us the business card fire lens seen above at the Outdoor Retailer show. It's the size and thickness of a standard business card, and it's even flexible. If you want one, they're included in the Emberlit fire starting kit, or you can buy value-packs of these lenses from various online retailers. They weigh almost nothing, so you can easily store them in your wallet, bug-out bag, glove box, and various other key locations.
So, now you know what a Fresnel lens is, but how easily can it start a fire? See for yourself:
Pretty effective, but it's also possible to take this concept to the extreme. One YouTuber removed the Fresnel lens from the surface of an old flat-screen TV, and turned it into a monstrous 2000-degree solar torch. Less portable, but a whole lot more powerful:
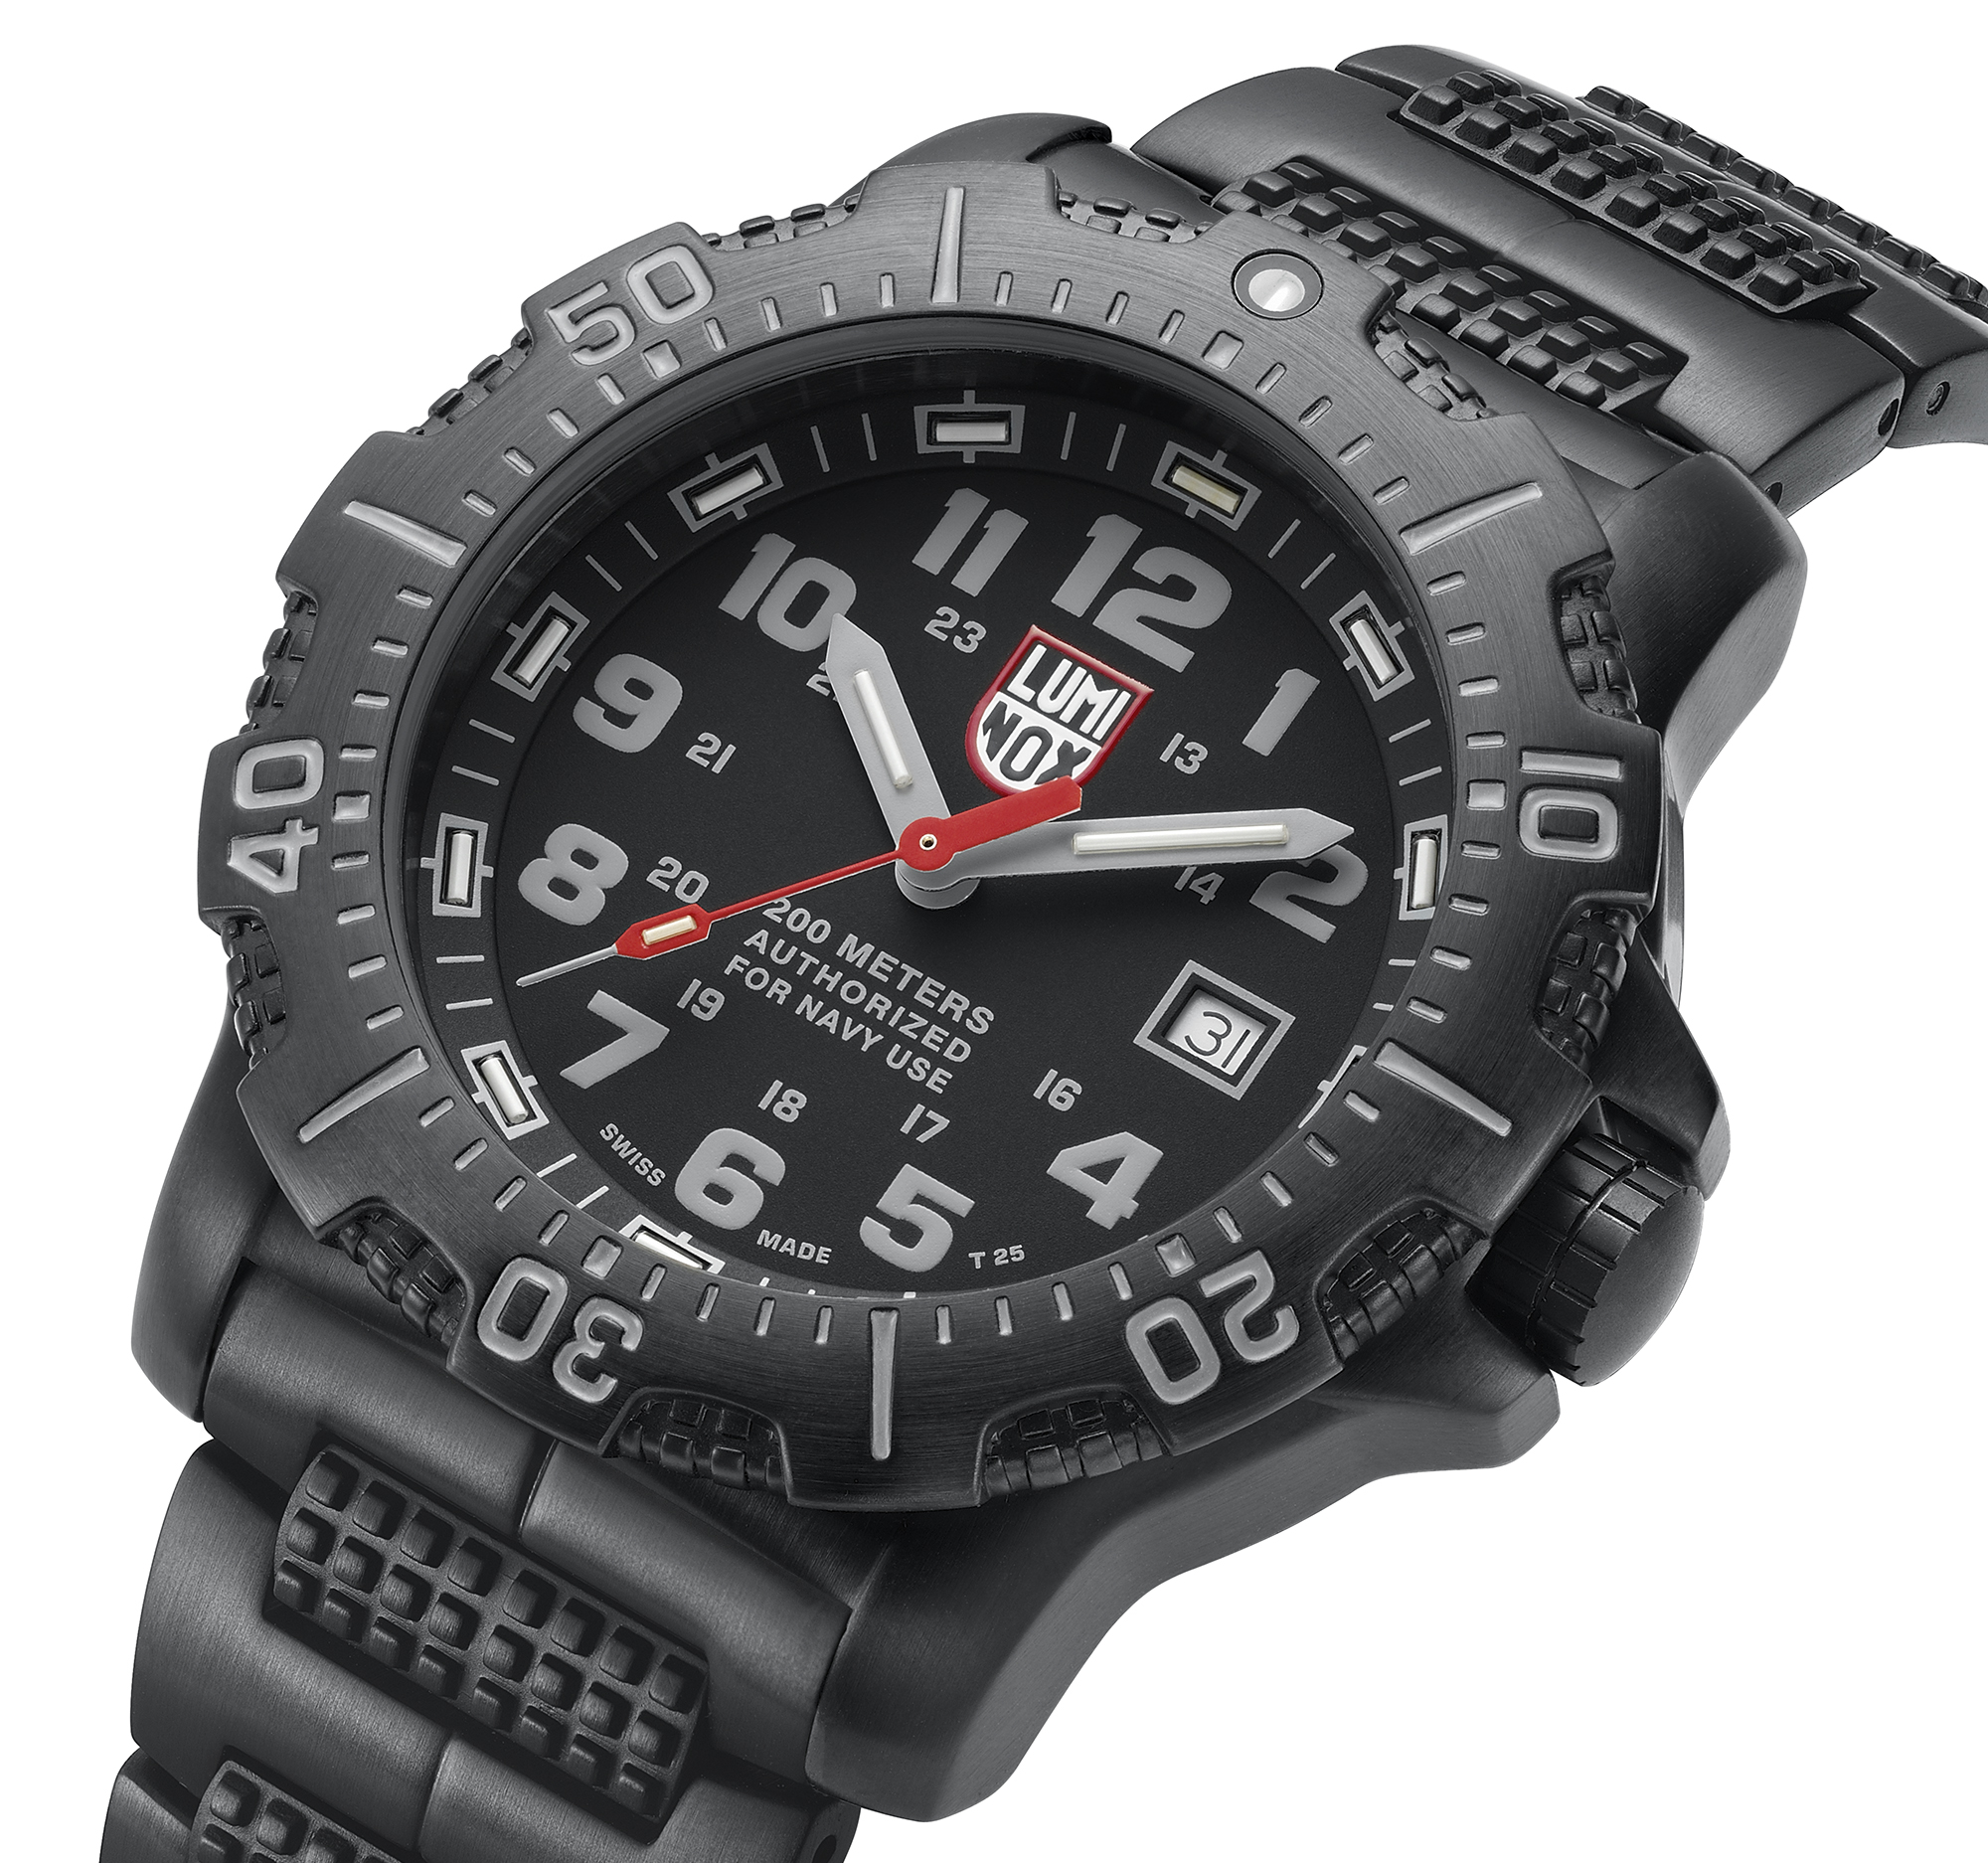
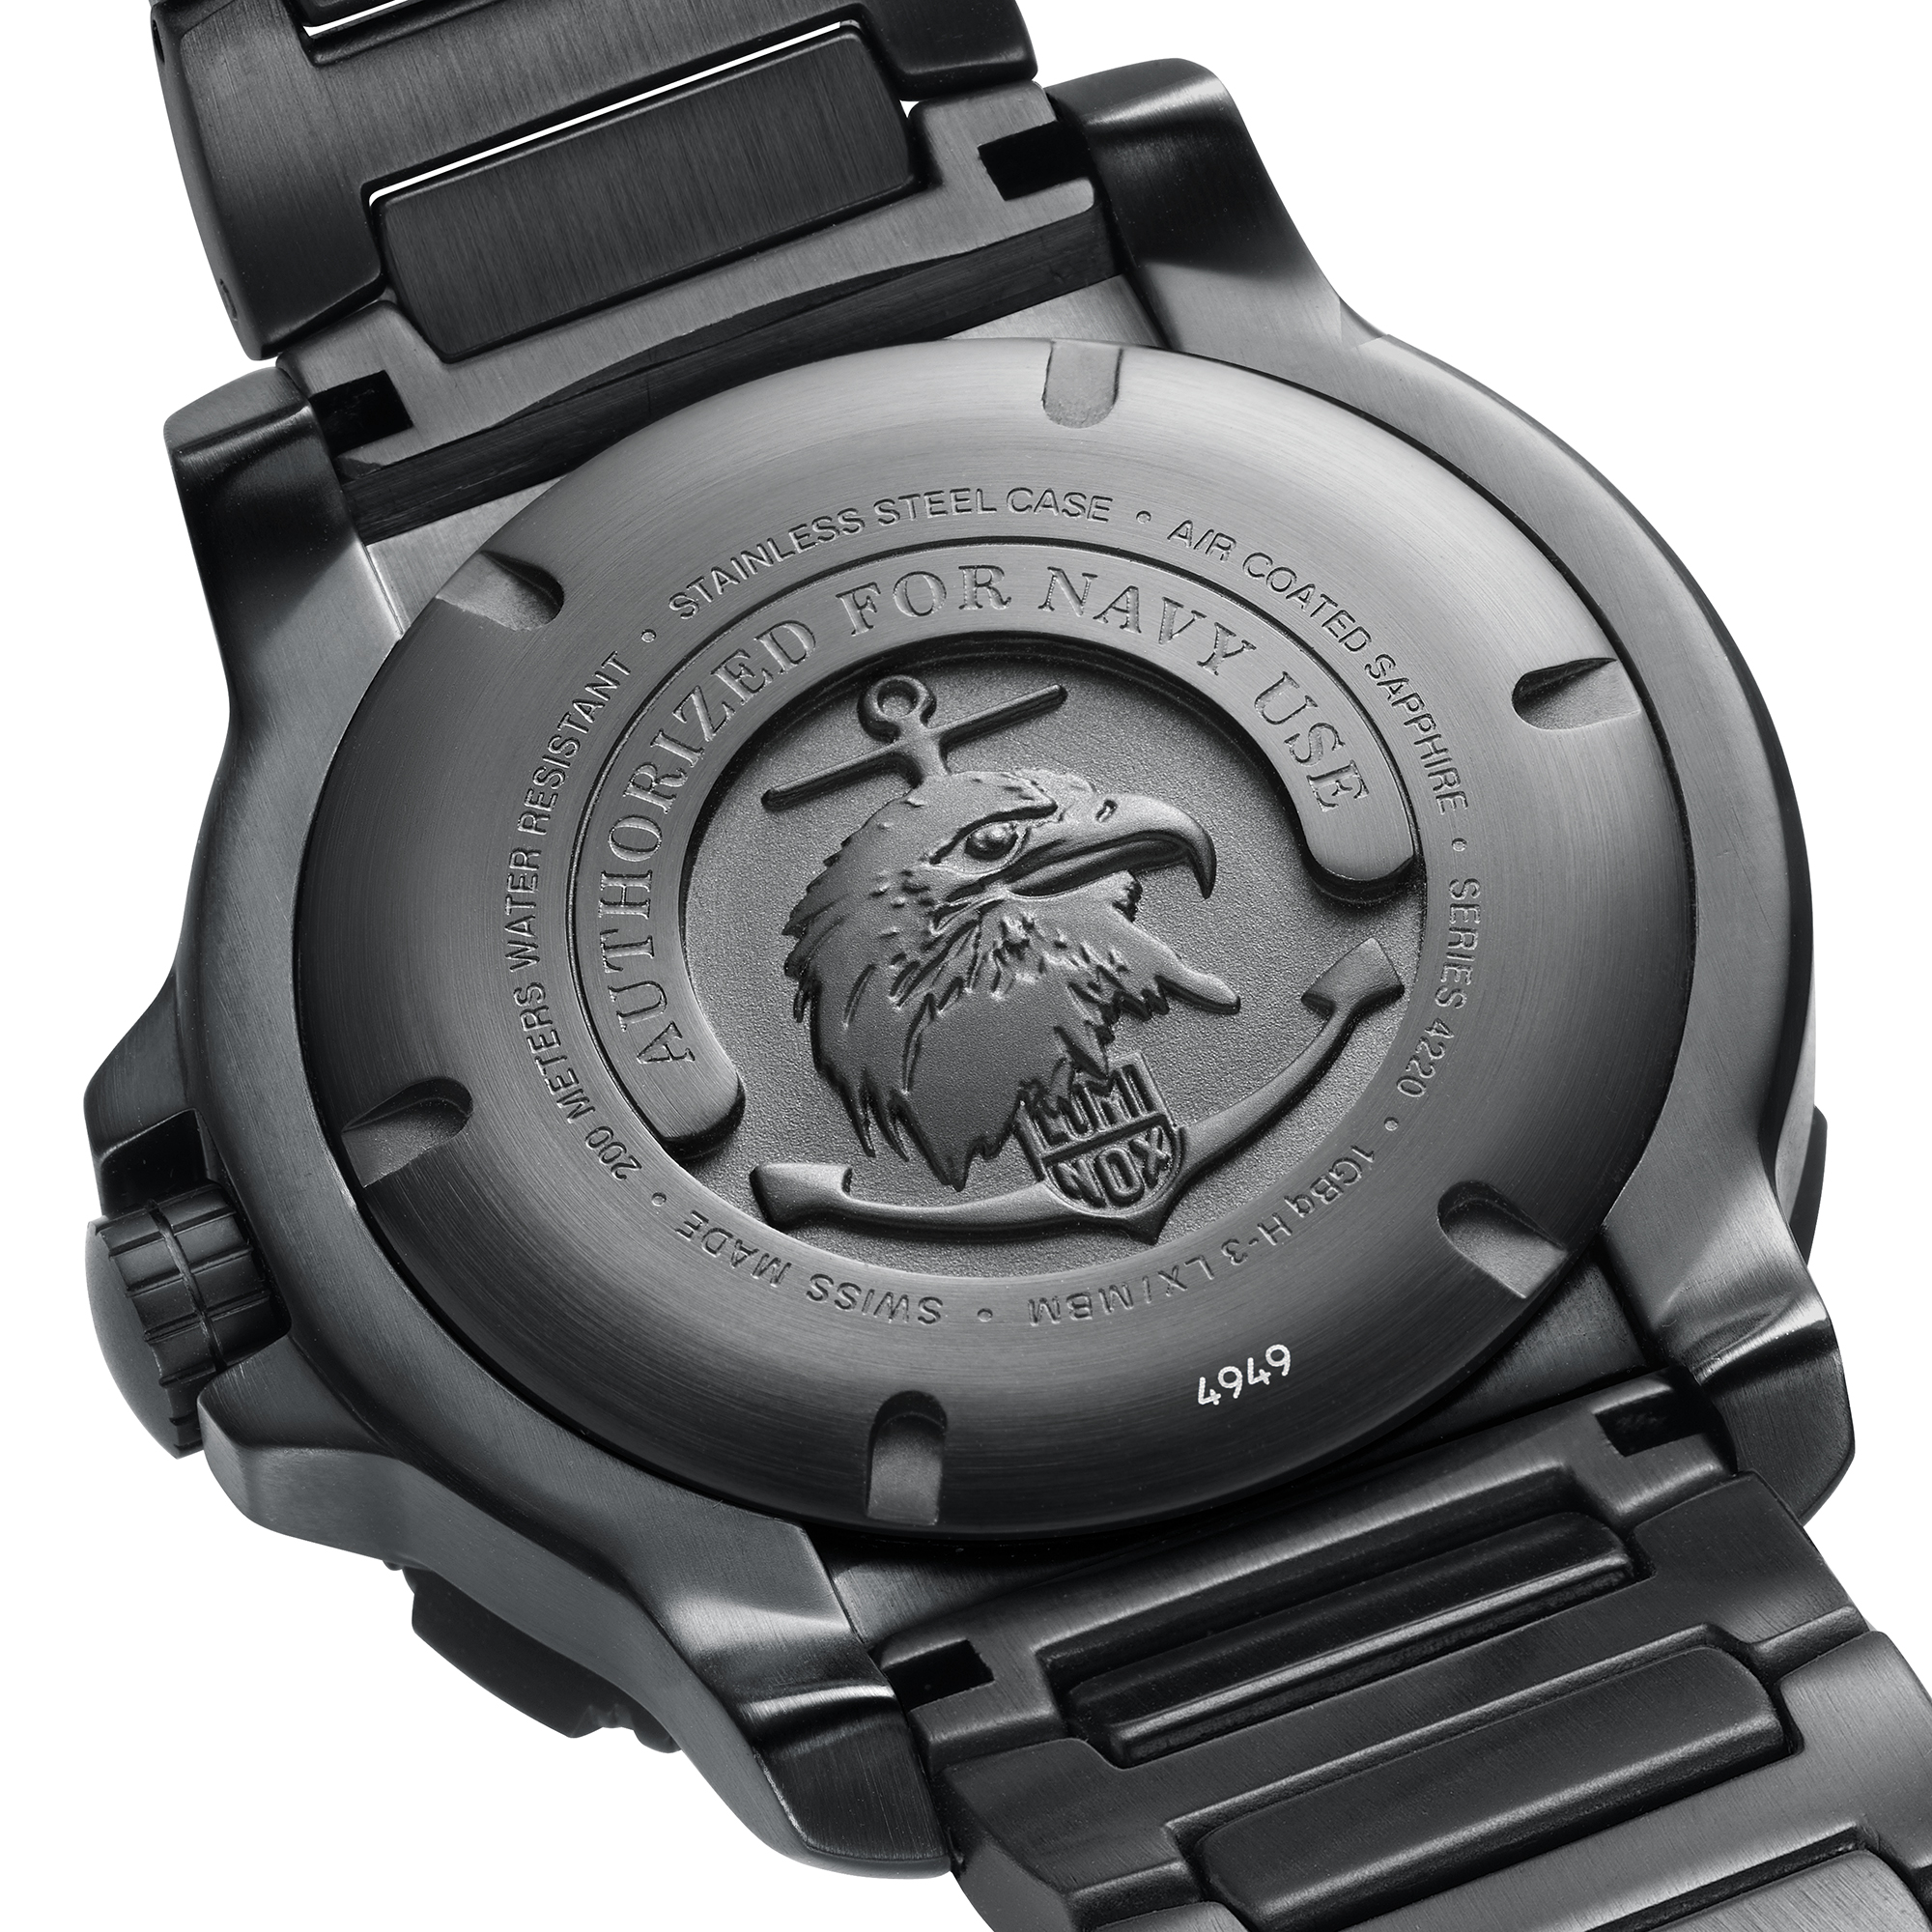
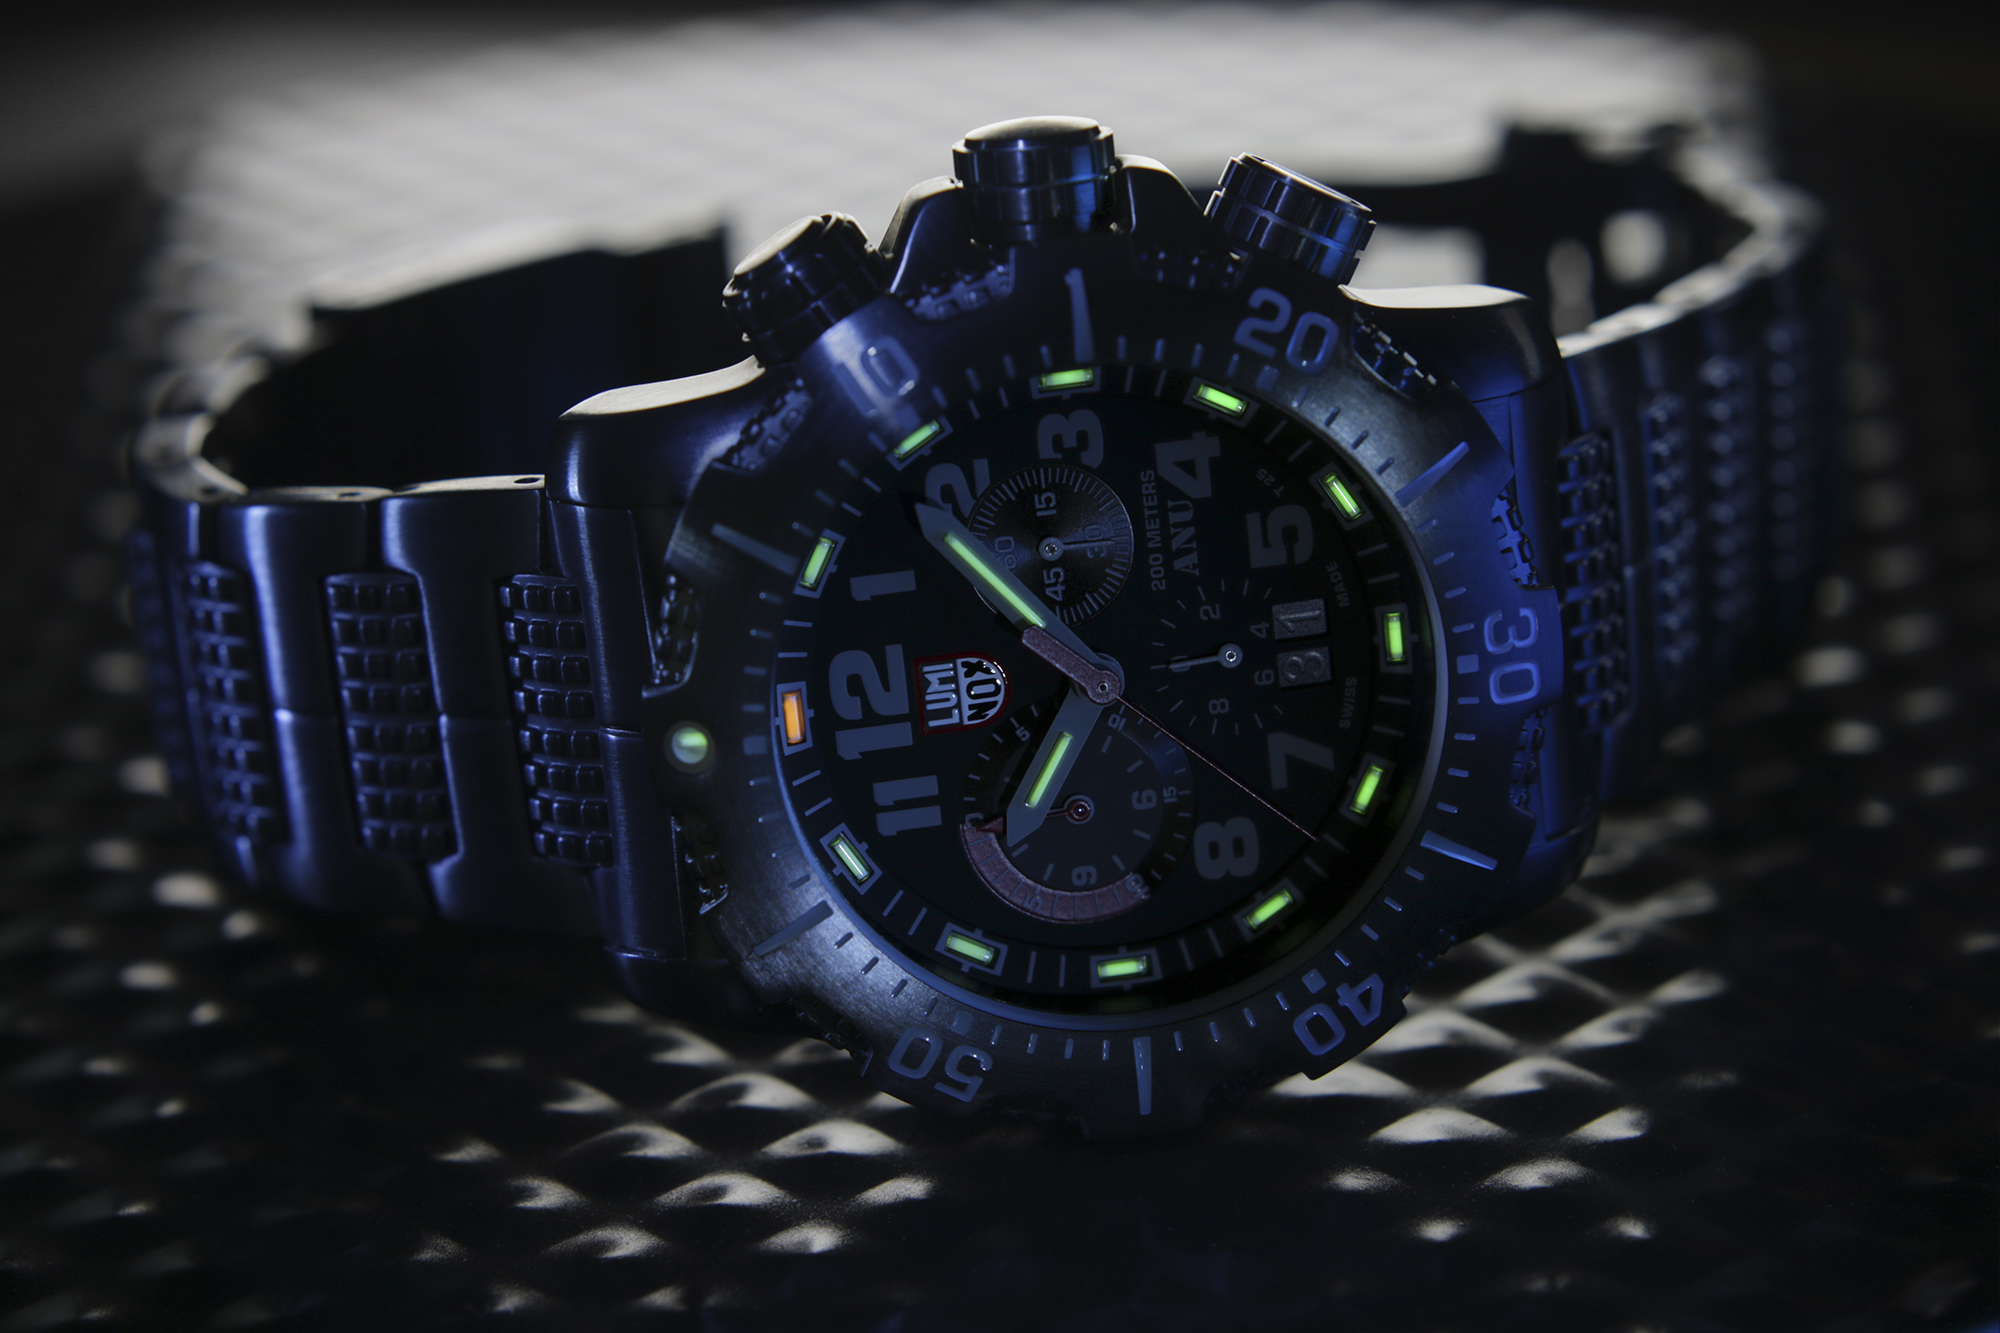
Luminox has announced the launch of several new watch models for Fall 2016. We'll show a few of our favorite designs here, so you can take a look at some of the latest Swiss-made timepieces from this renowned watch manufacturer. As with other Luminox watches, these models are intended for rigorous use by military personnel, including pilots and Navy SEALs.
First in the list of new models are the Authorized for Navy Use or ANU 4222 (top) and 4242 (bottom right) watches. Both are 45mm designs with quartz movement, and fall into Luminox's Sea Series. These watches offer 200-meter water resistance and a new stainless steel strap design. Existing models offer rubber and nylon straps. The 4222 features time and date functionality, and retails for $795. The 4242 offers full chronograph/date function, and retails for $1,100.
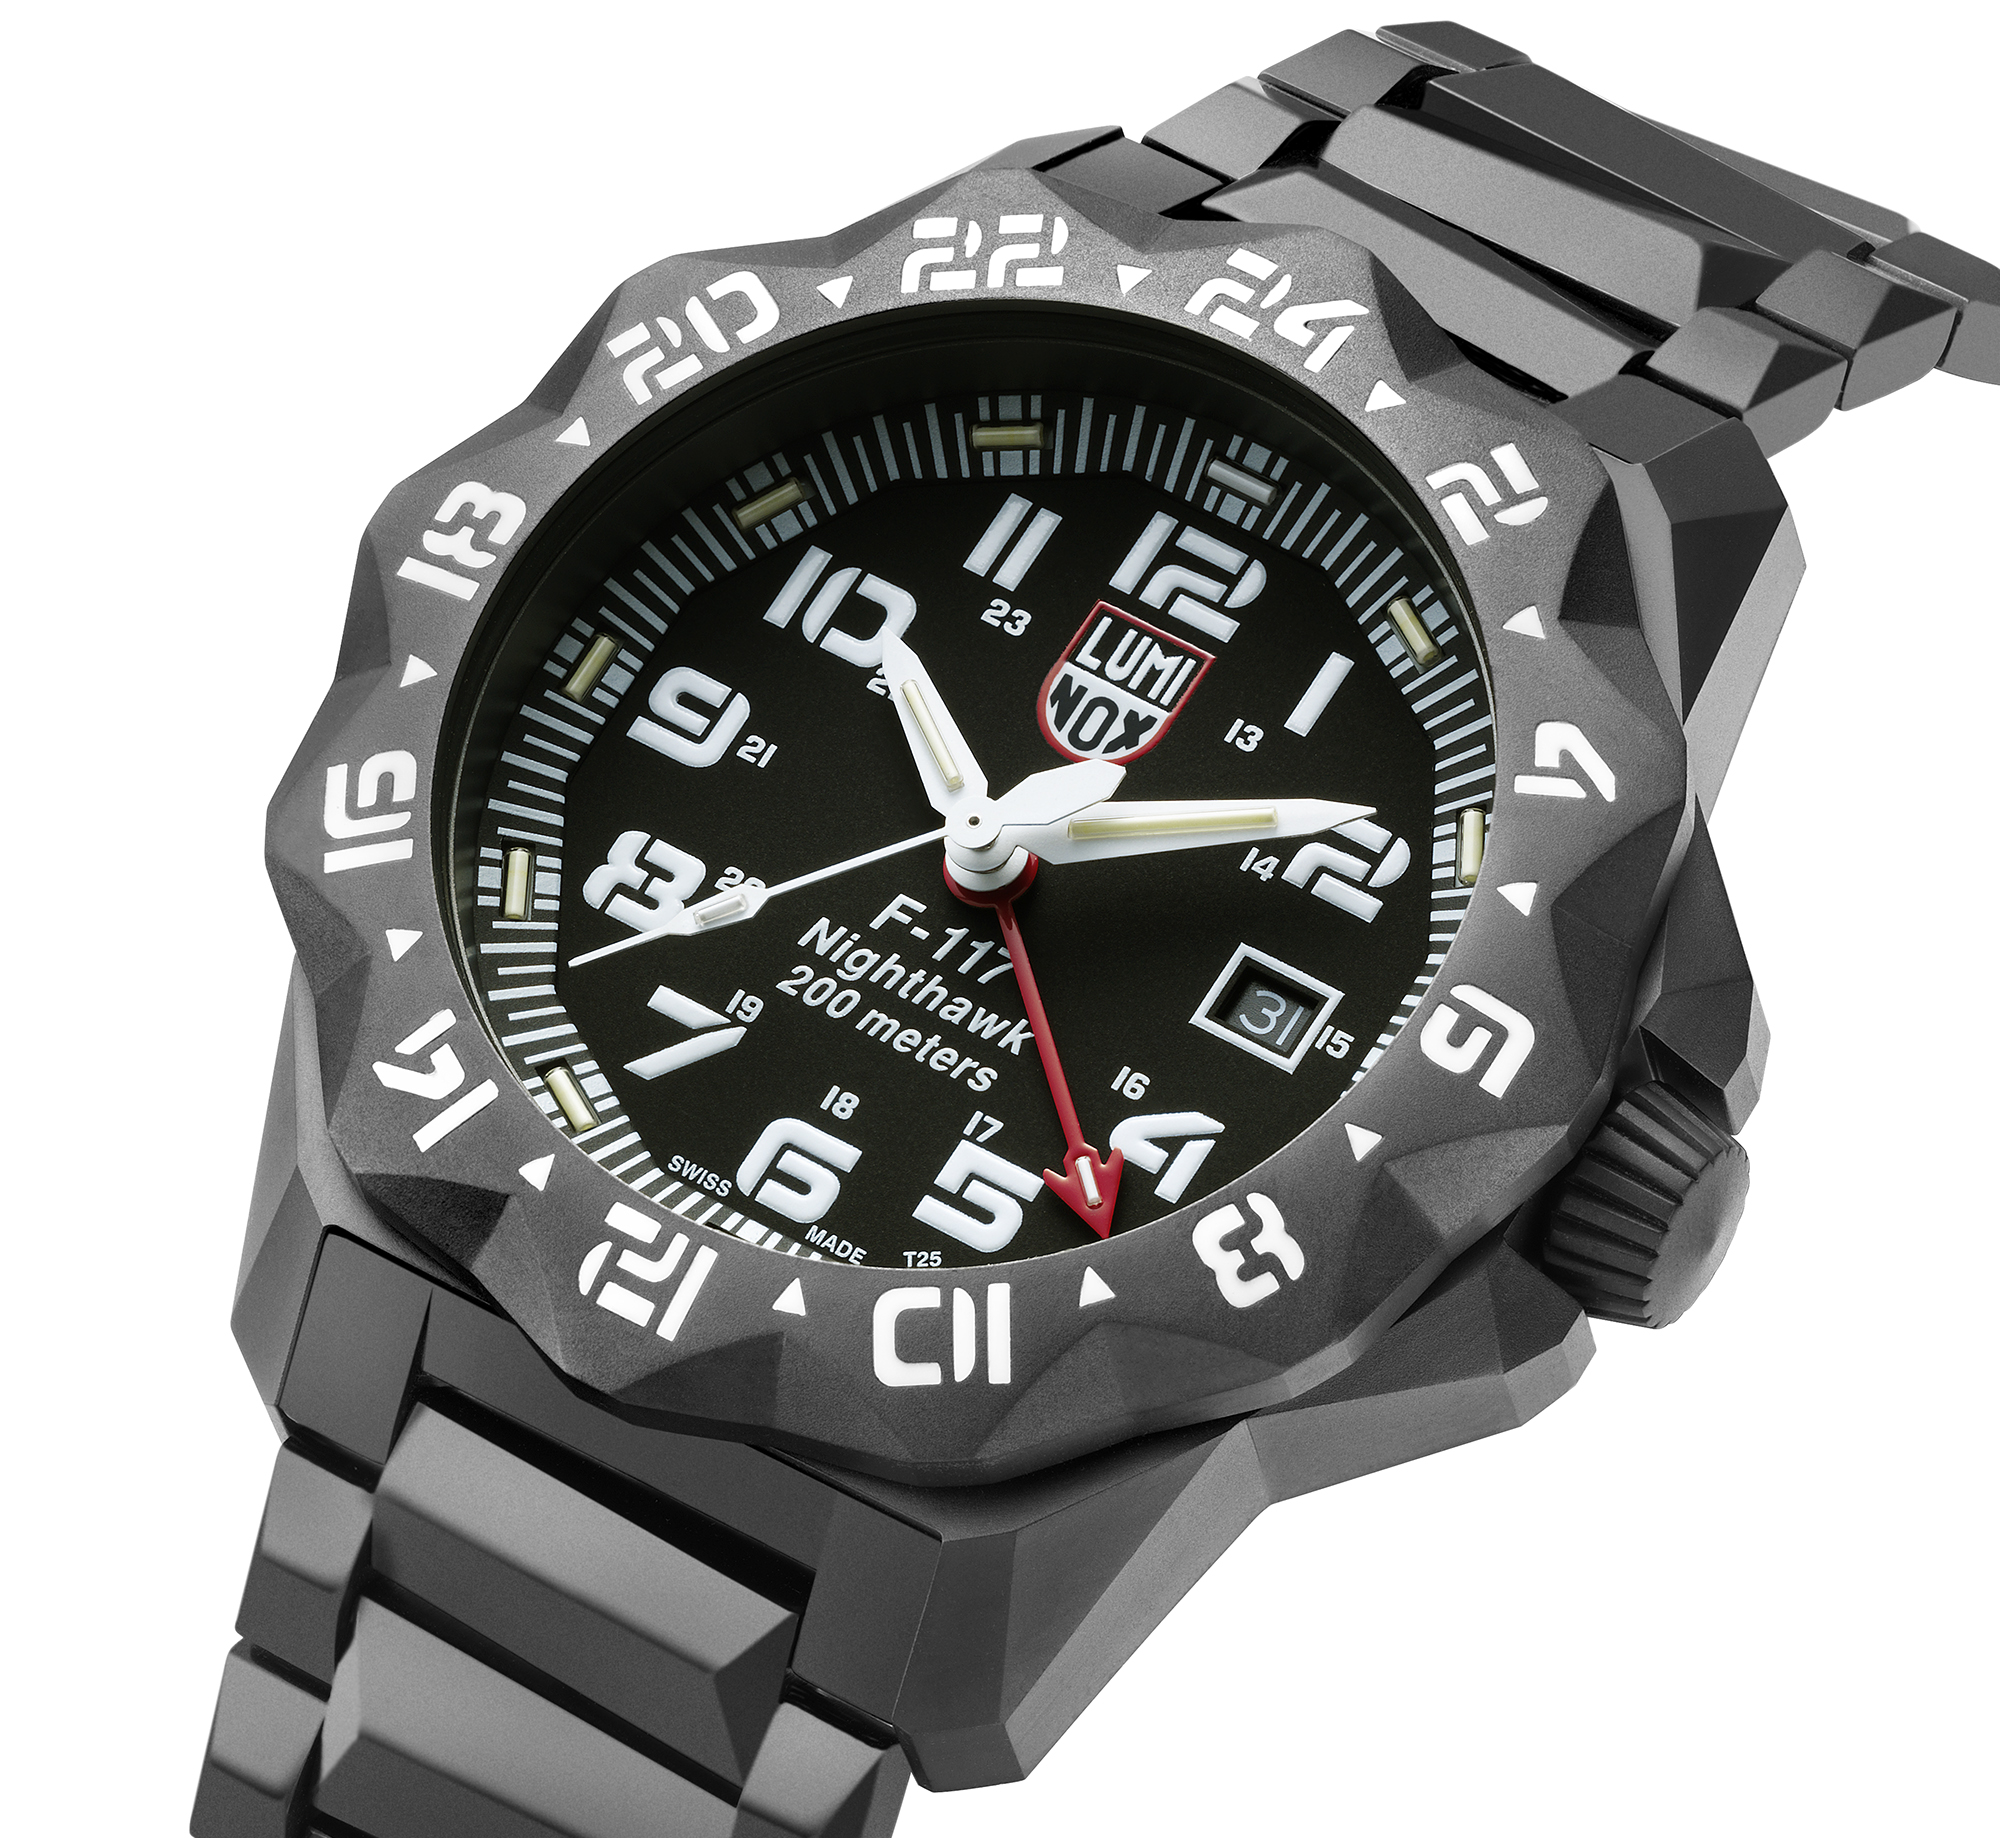
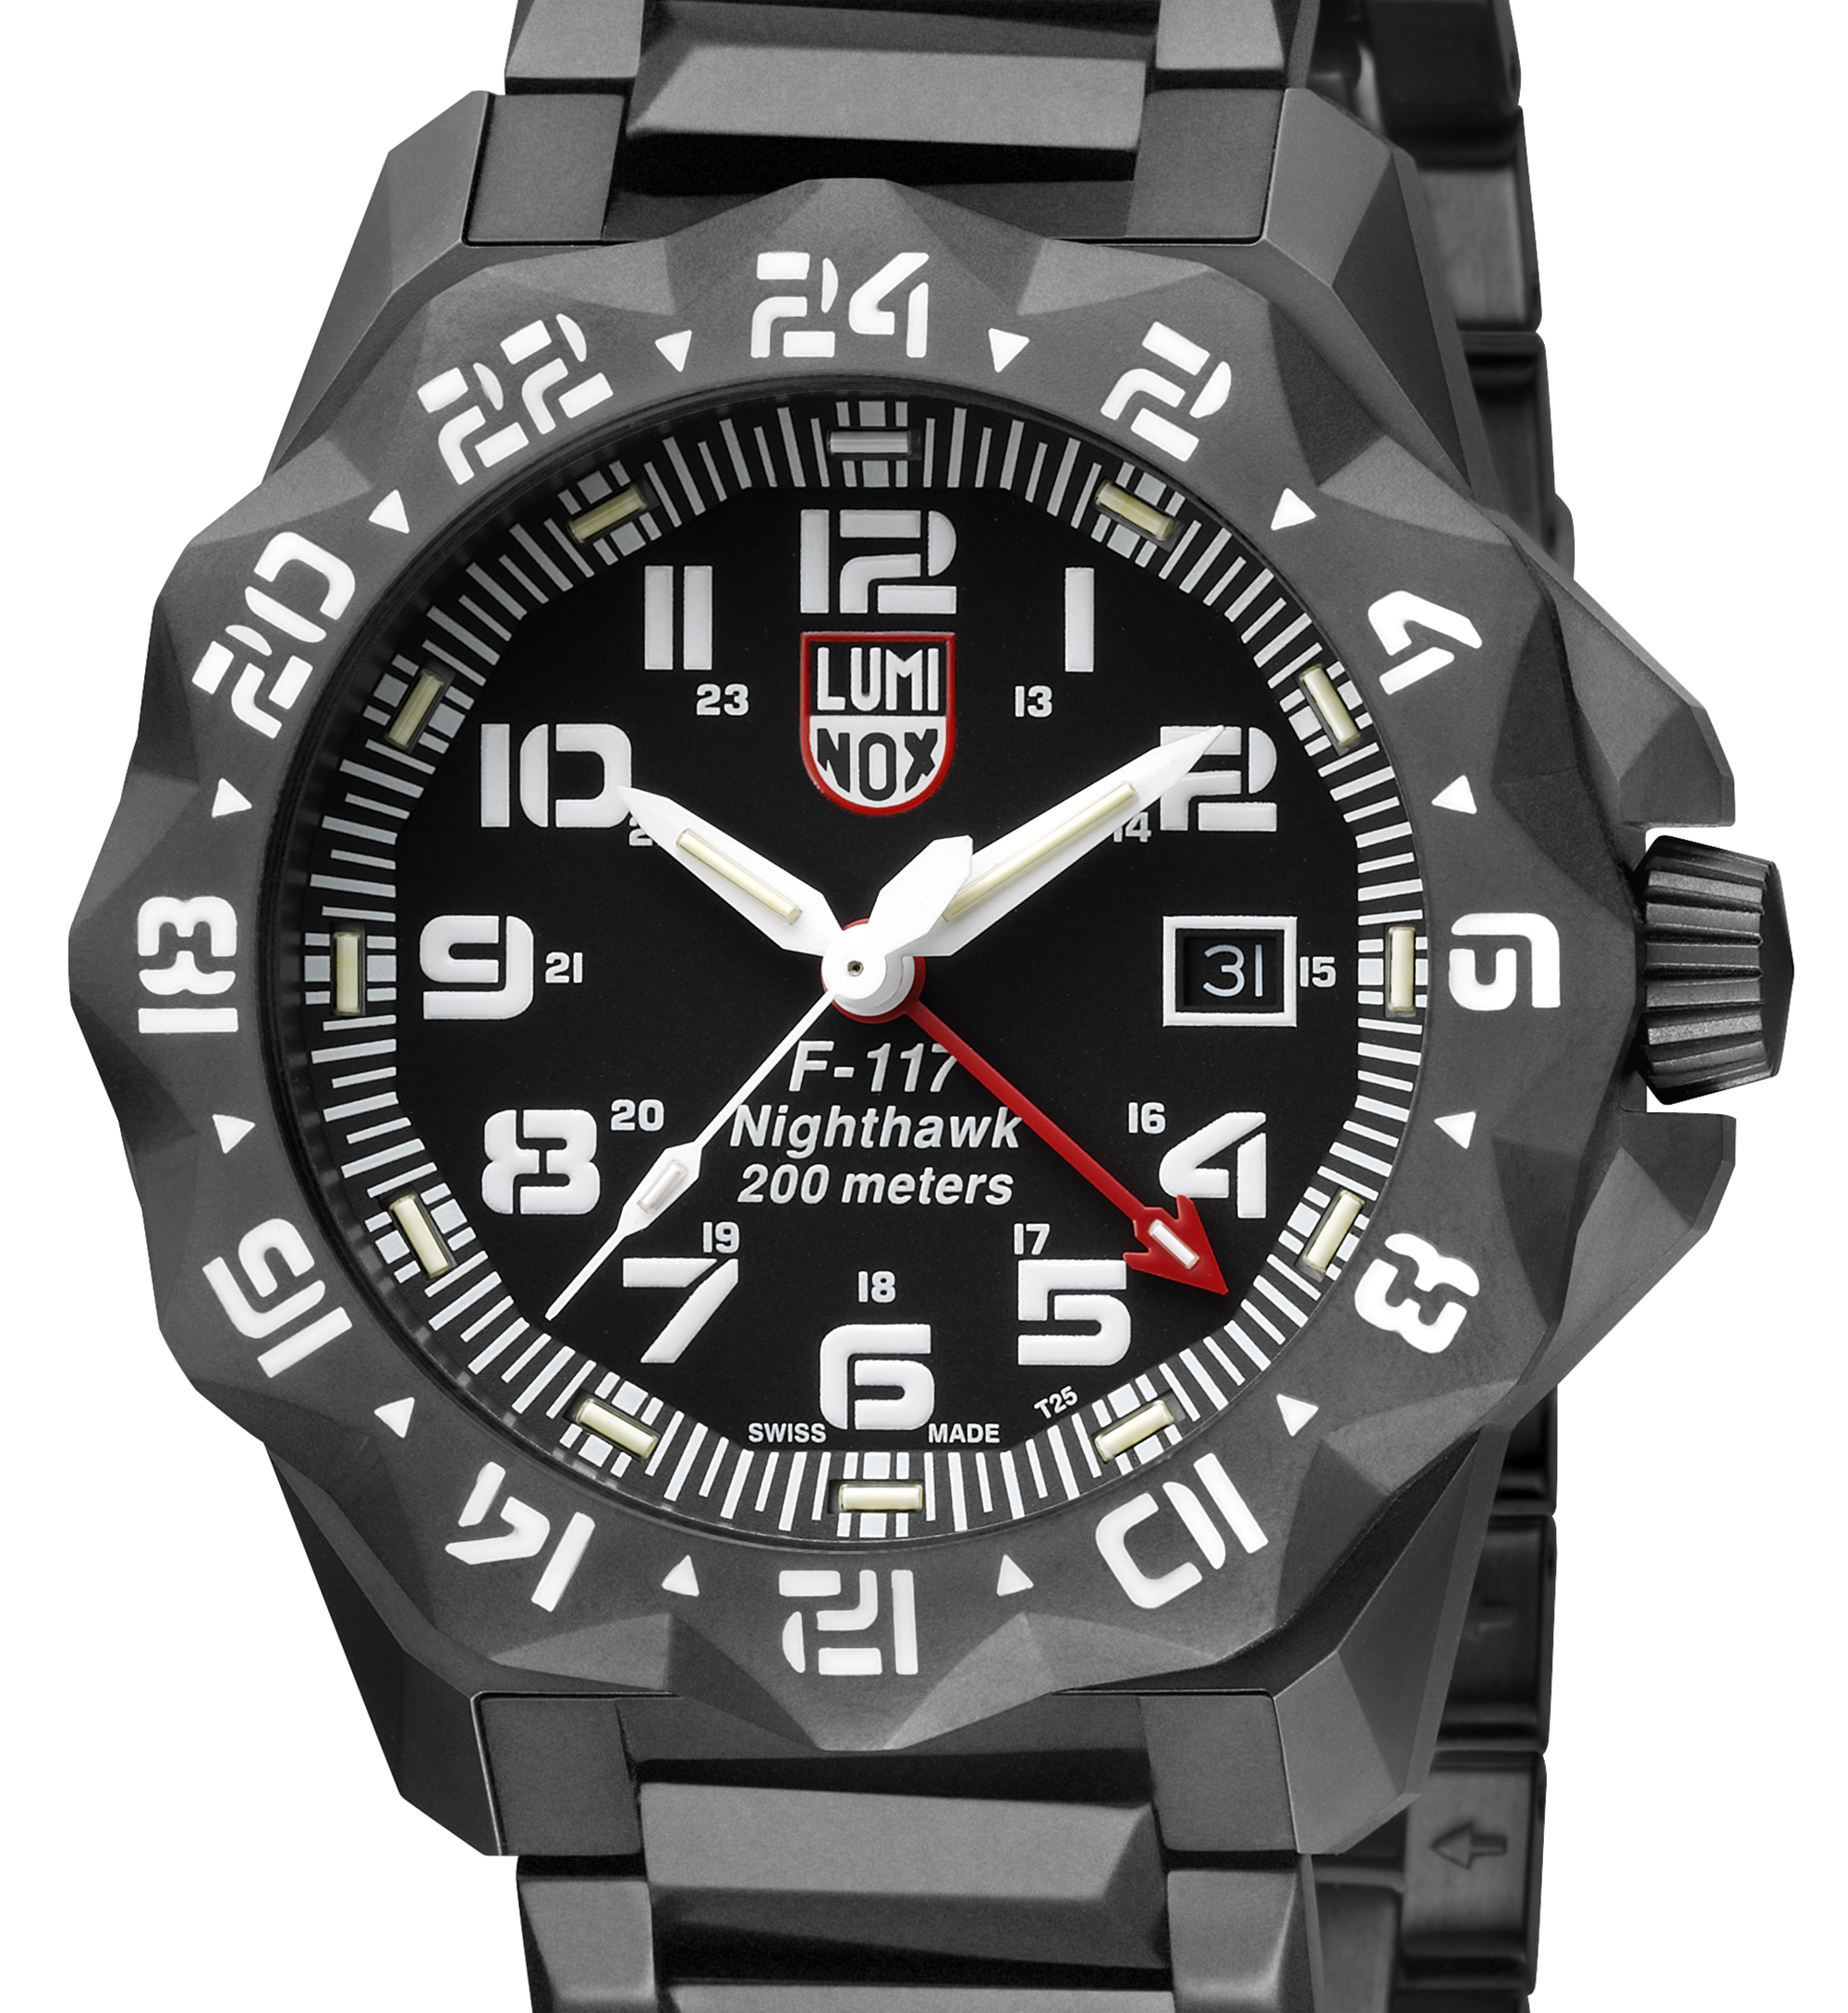
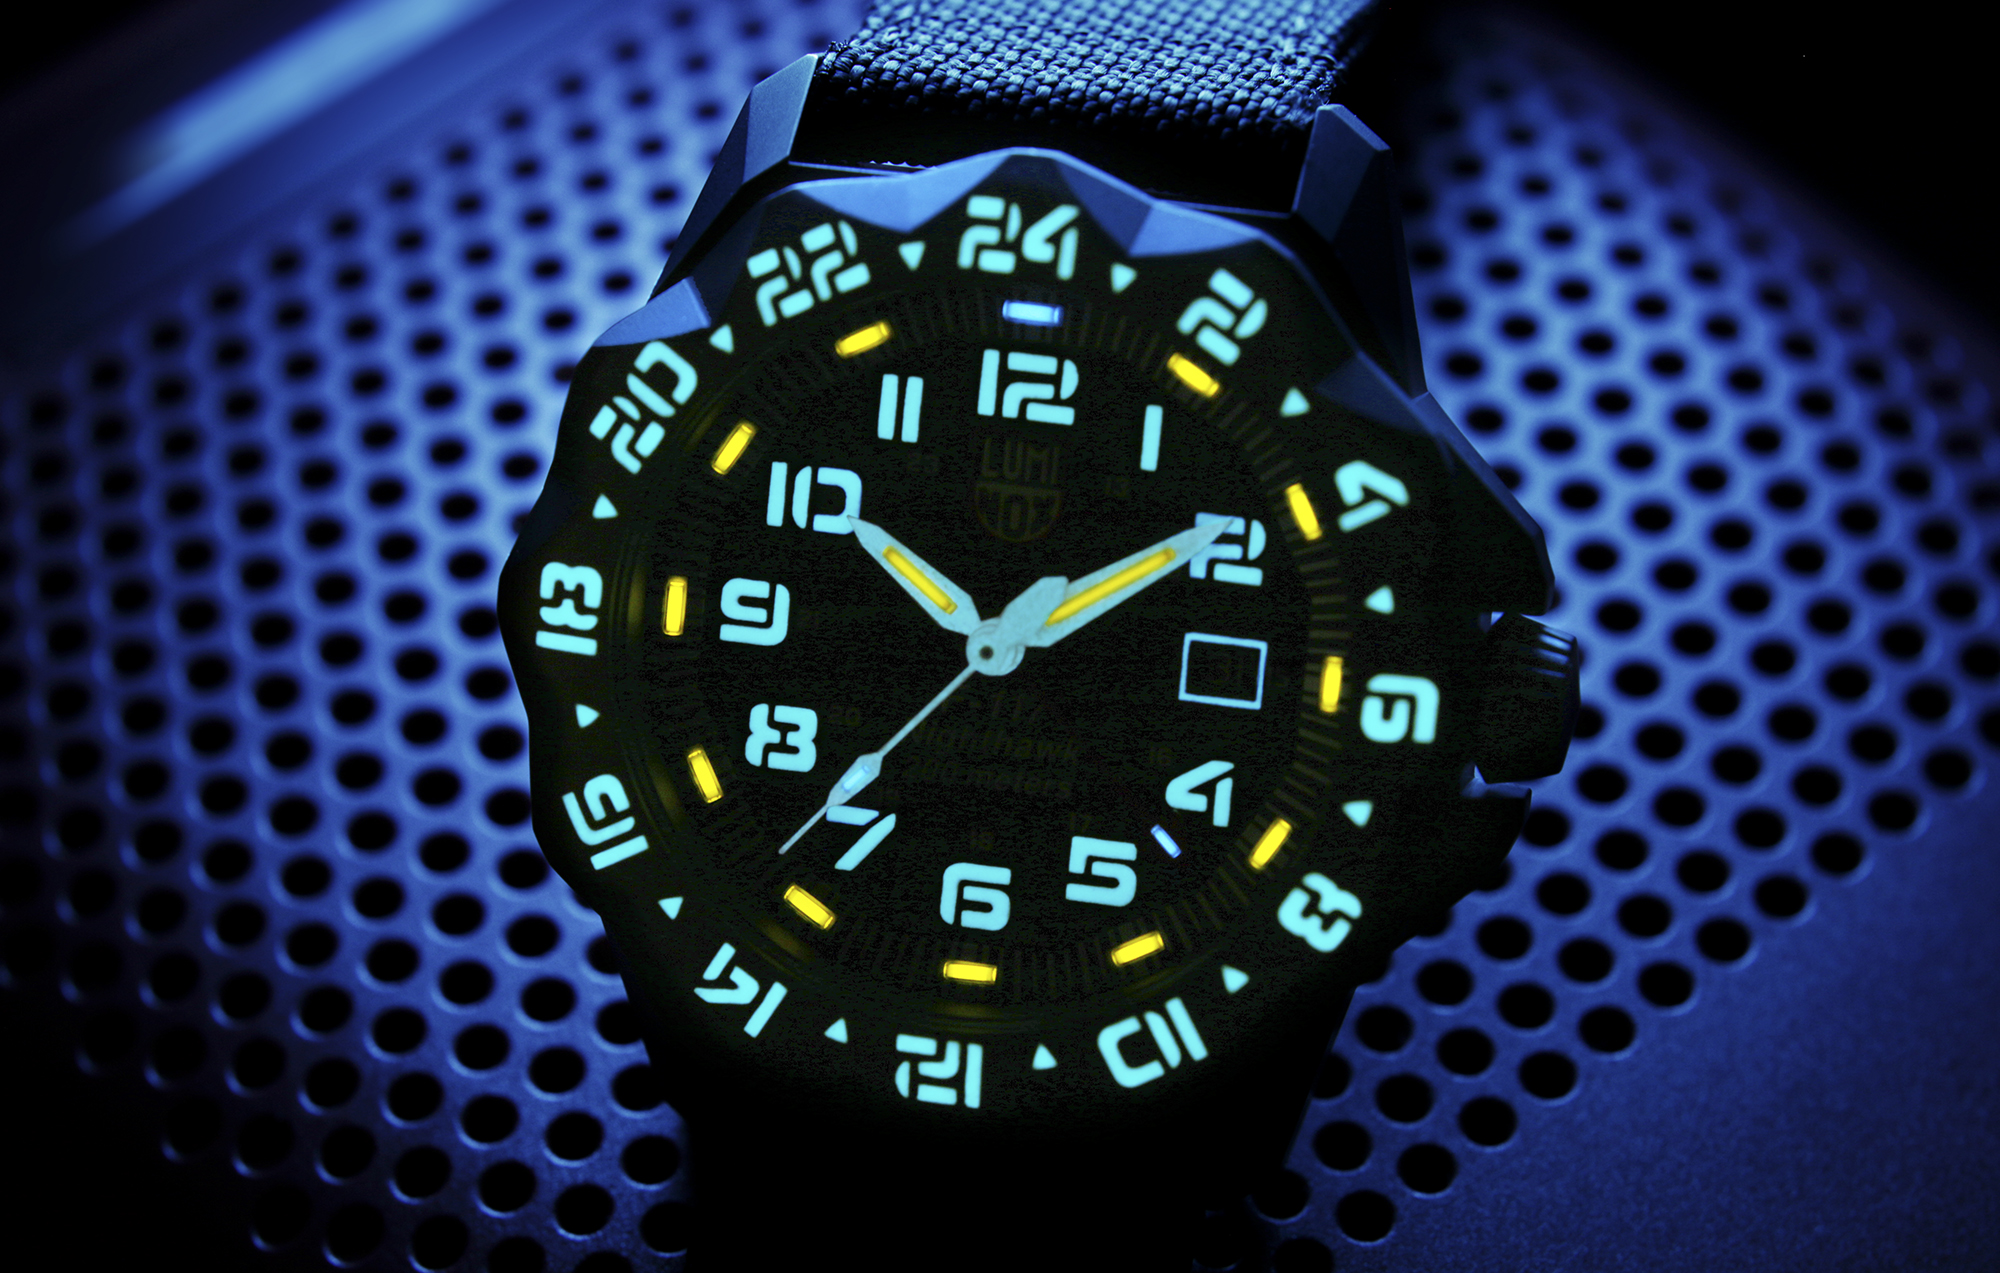
Next up in the line of new Luminox watches is the F117 Nighthawk series. These watches are offered in two models, the 6421 with a nylon band (above right), or the 6422 with a stainless steel bracelet (above left). Both are 45mm with quartz movement and offer a secondary time zone function for frequent flyers. The 6421 retails for $1,000, and the 6422 retails for $1,400.
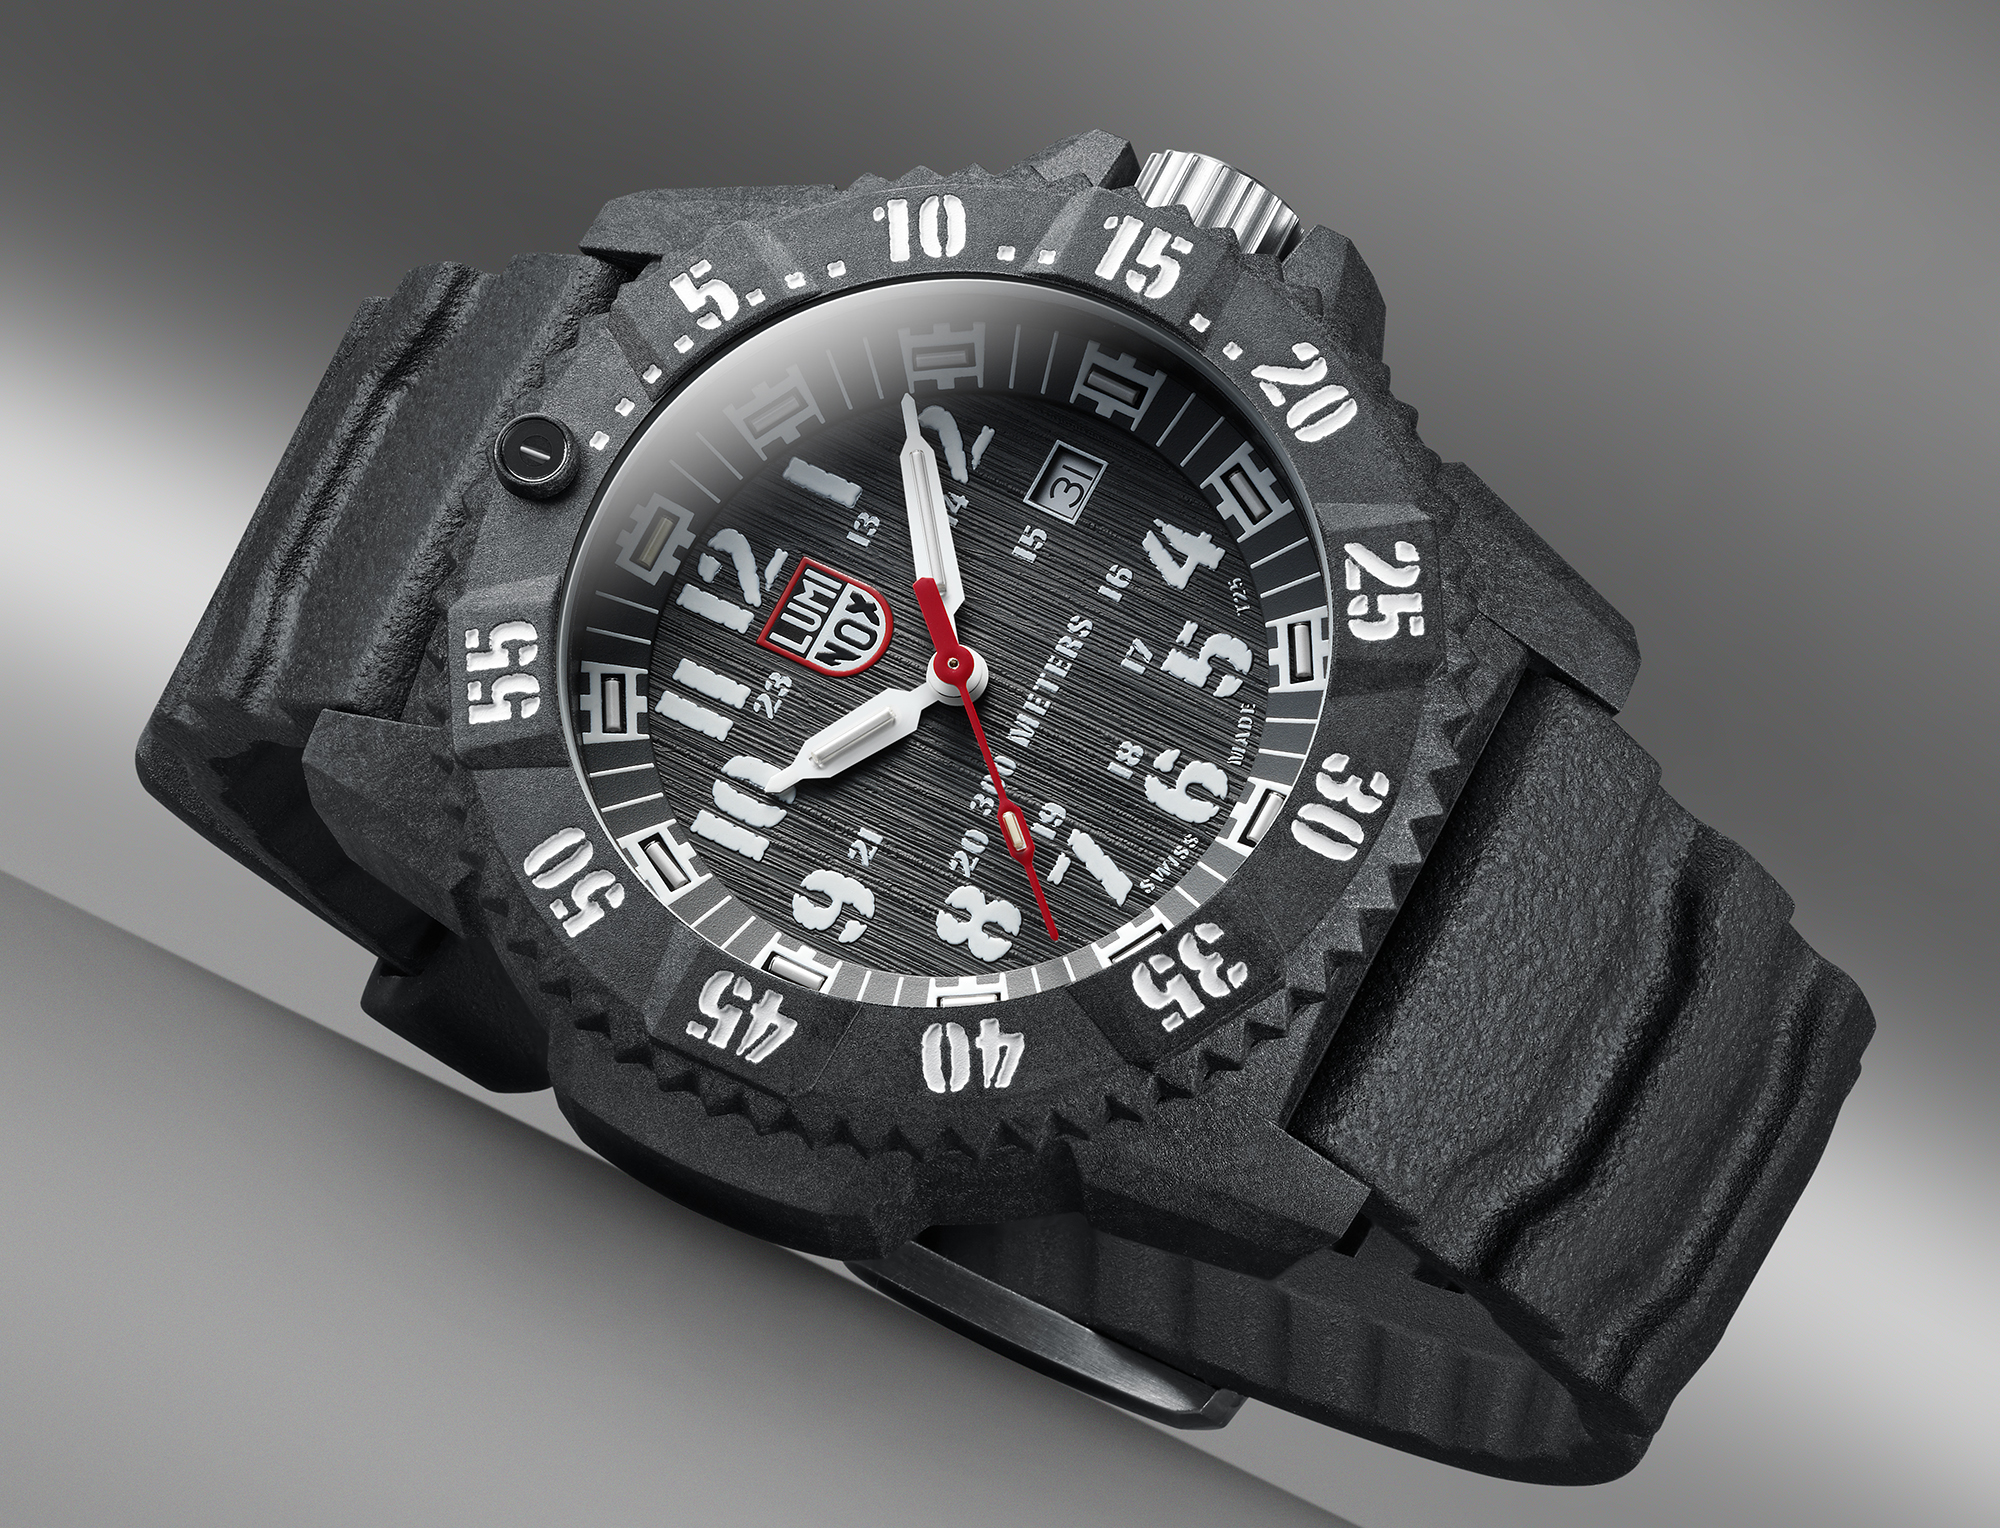
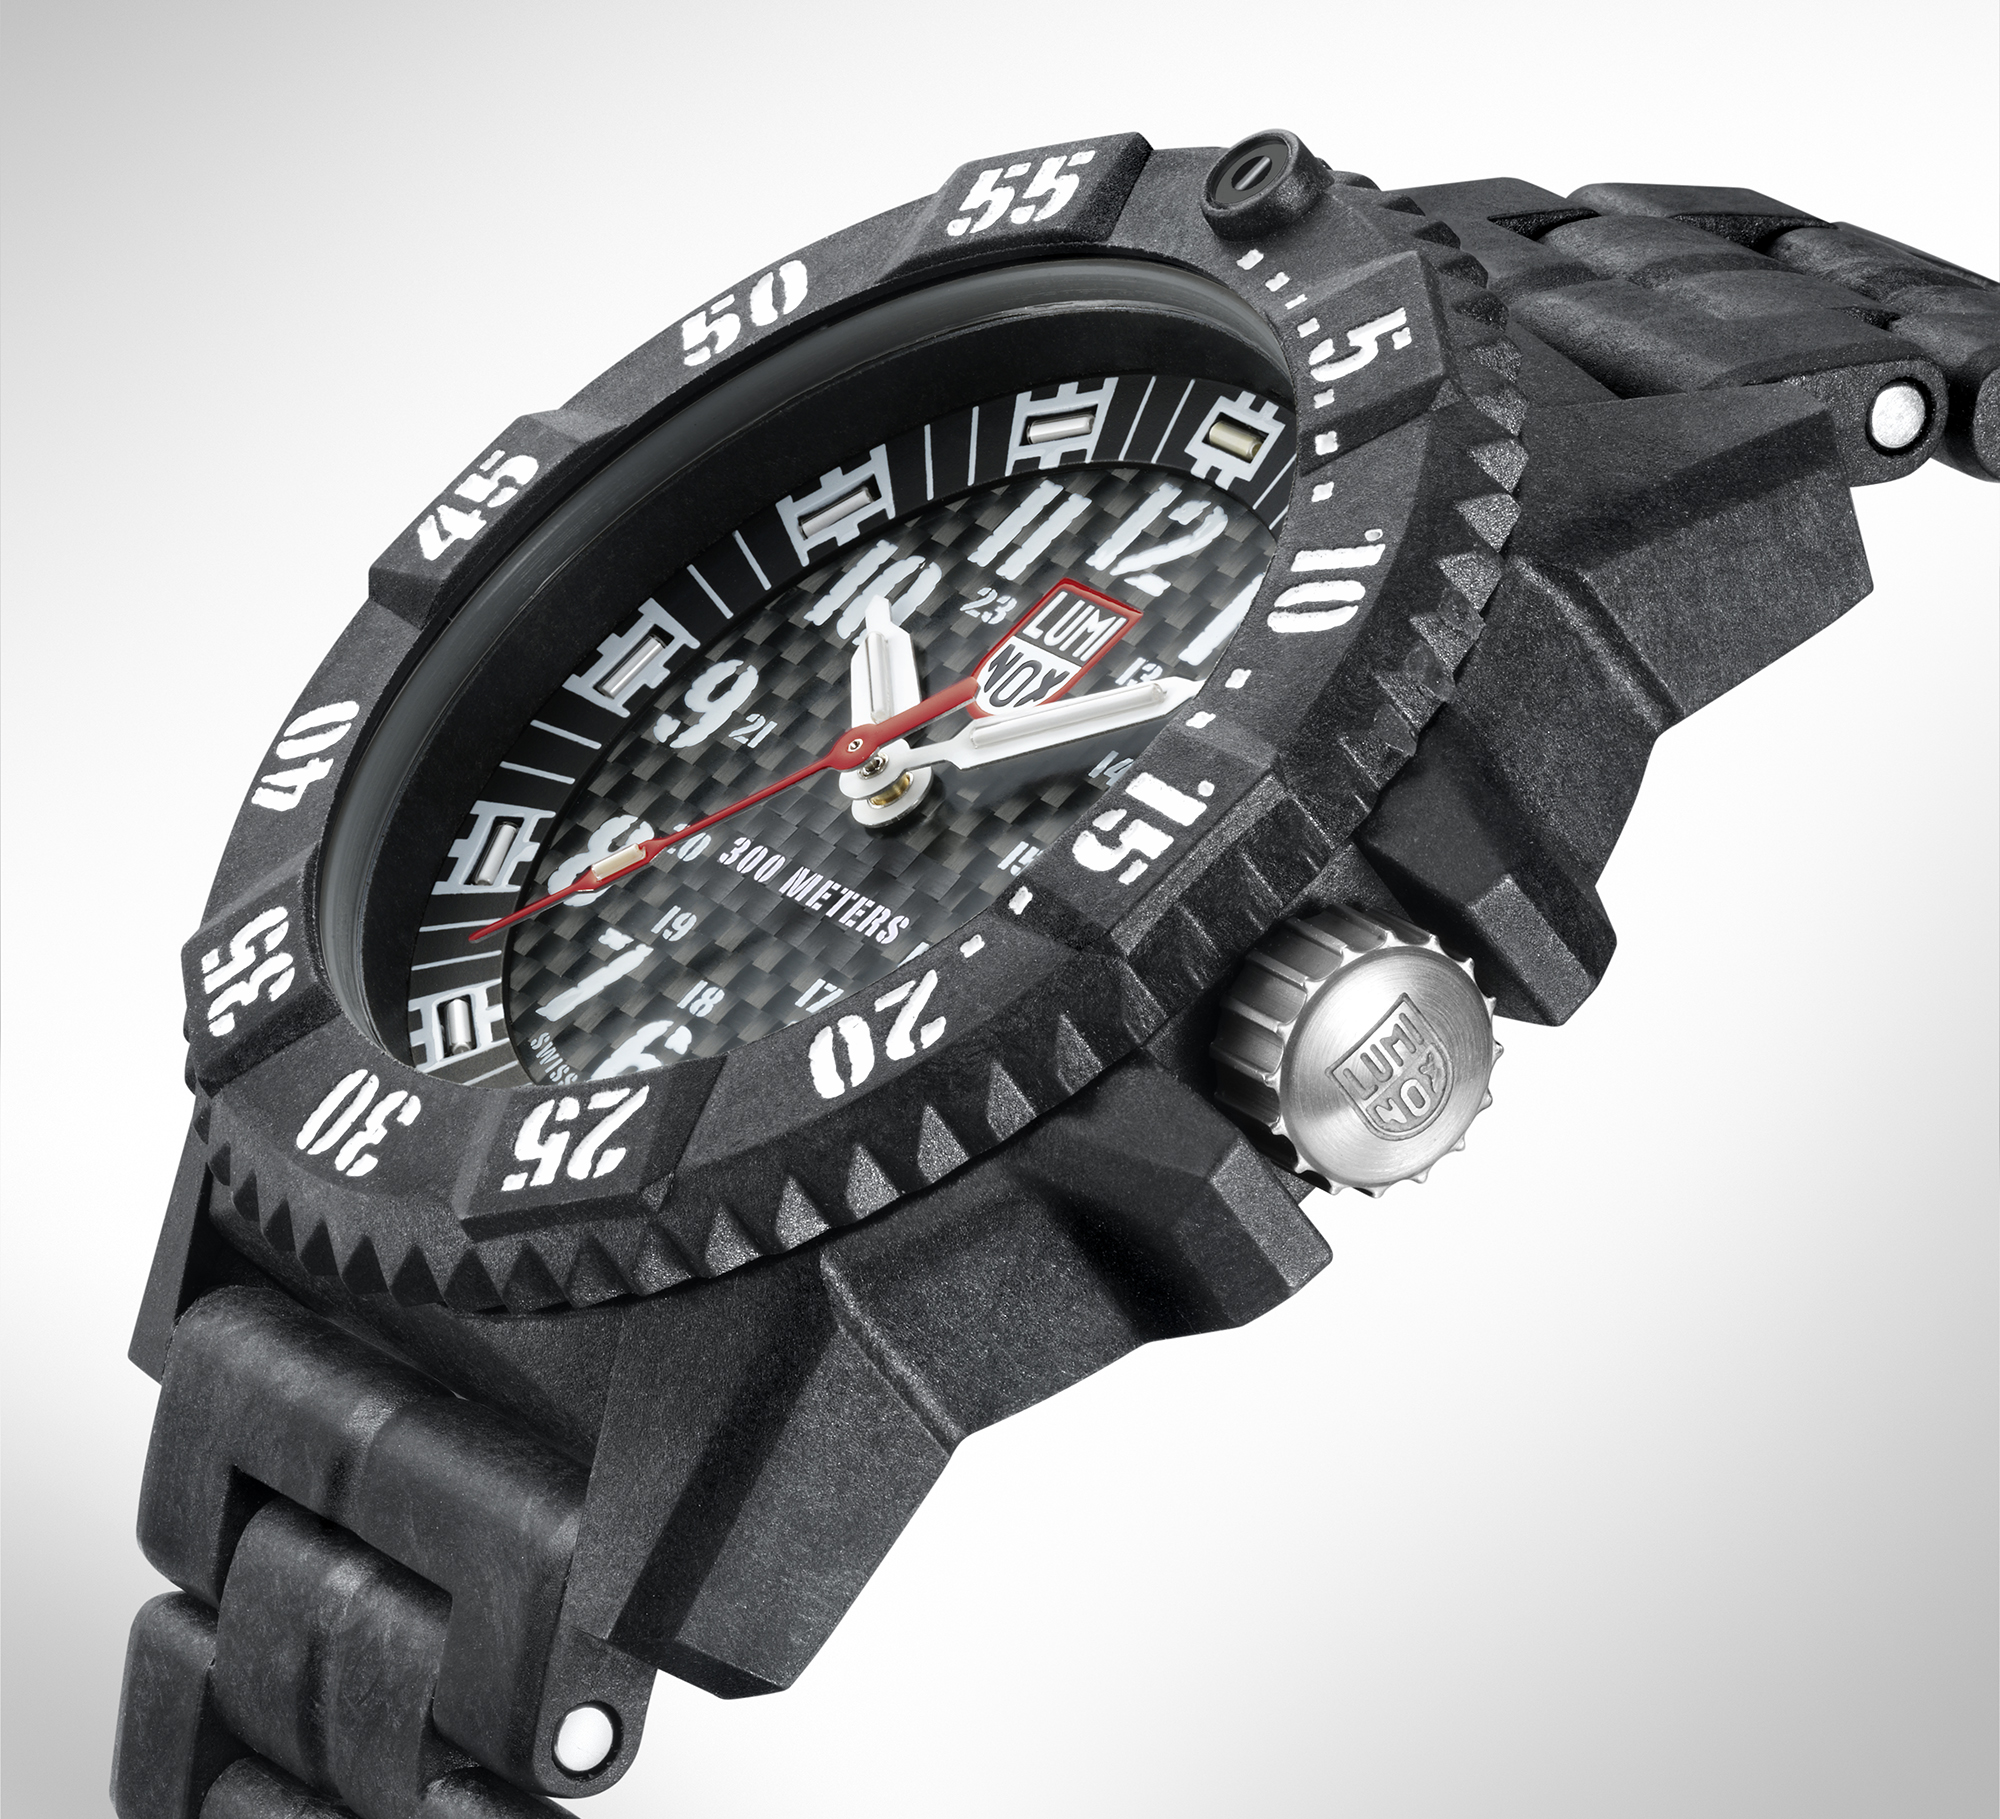
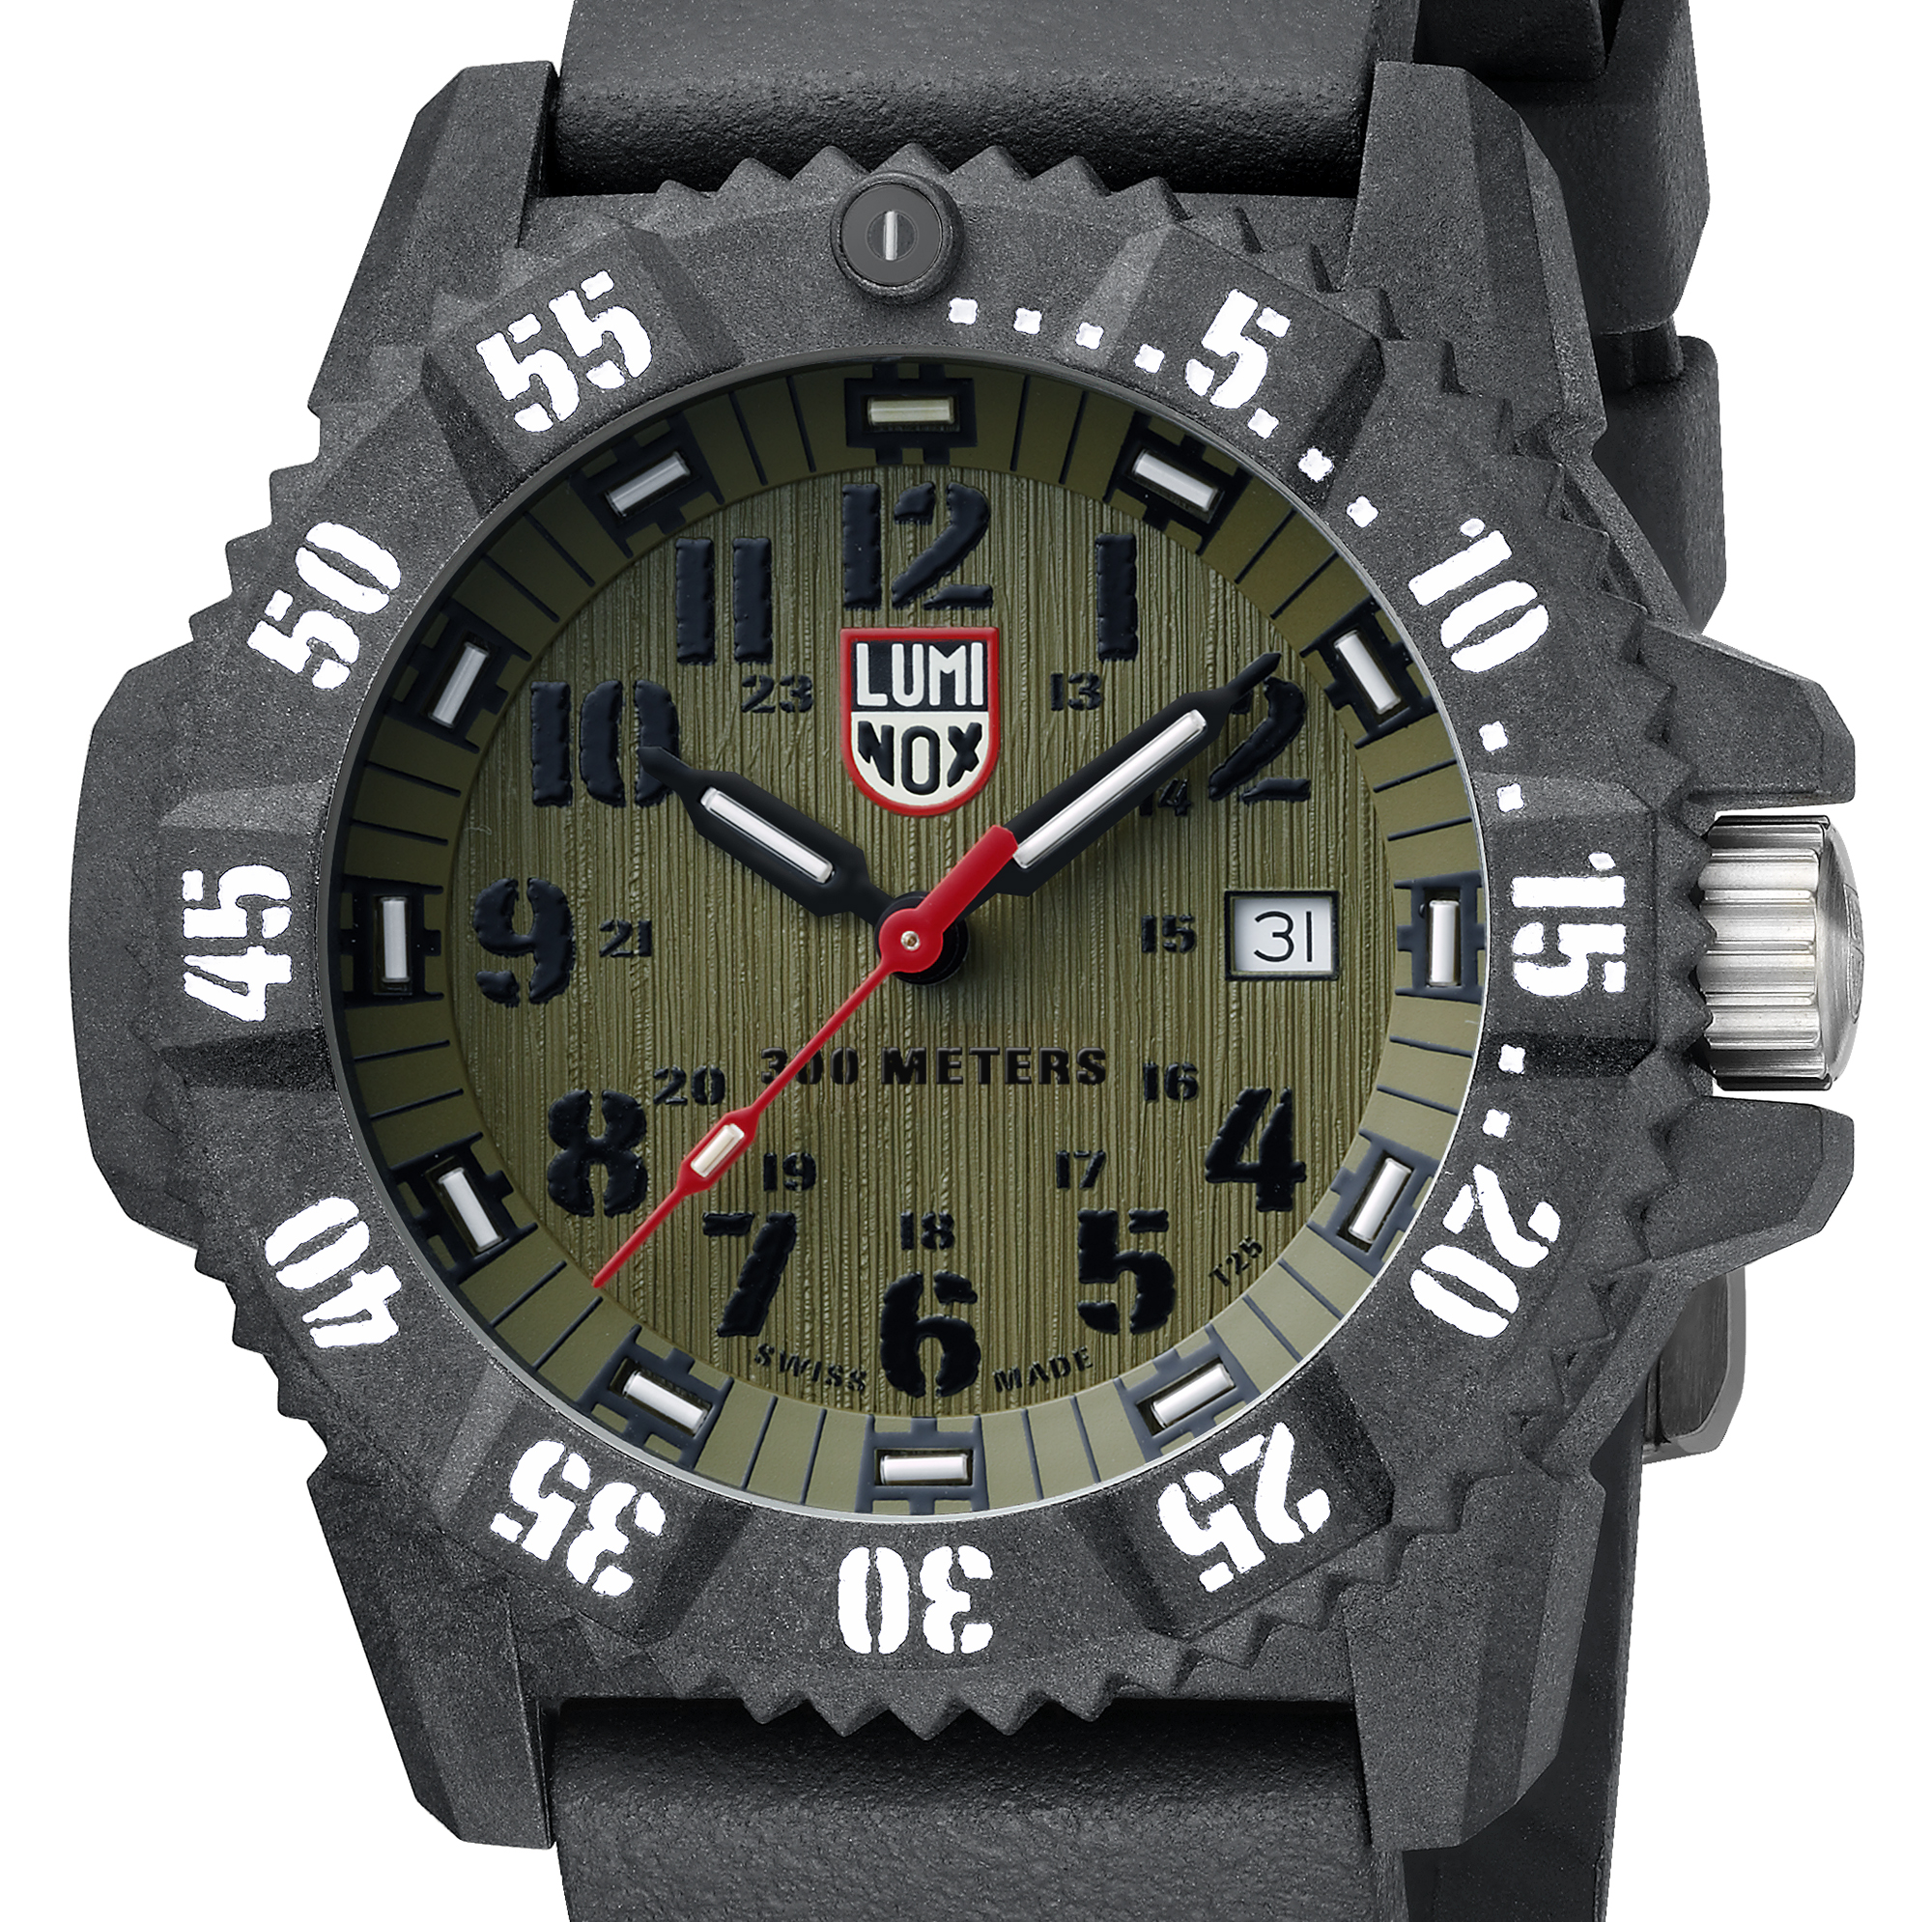
Finally, there's the Carbon Seal 3800 series, with three new watch models. The case on these watches is made of a new composite material that uses 40% carbon in bar form, making the case ultra-light—about one third the weight of titanium. It's also more durable, scratch-, chemical-, and heat-resistant than most other materials on the market. The 3801 (above left) retails for $675, the 3802 (above center) retails for $750, and the 3813 (above right) retails for $675. Each sub-model offers a different face pattern and/or coloration.
For more information on what's new at Luminox, and to see the other models that we couldn't fit here, go to Luminox.com.
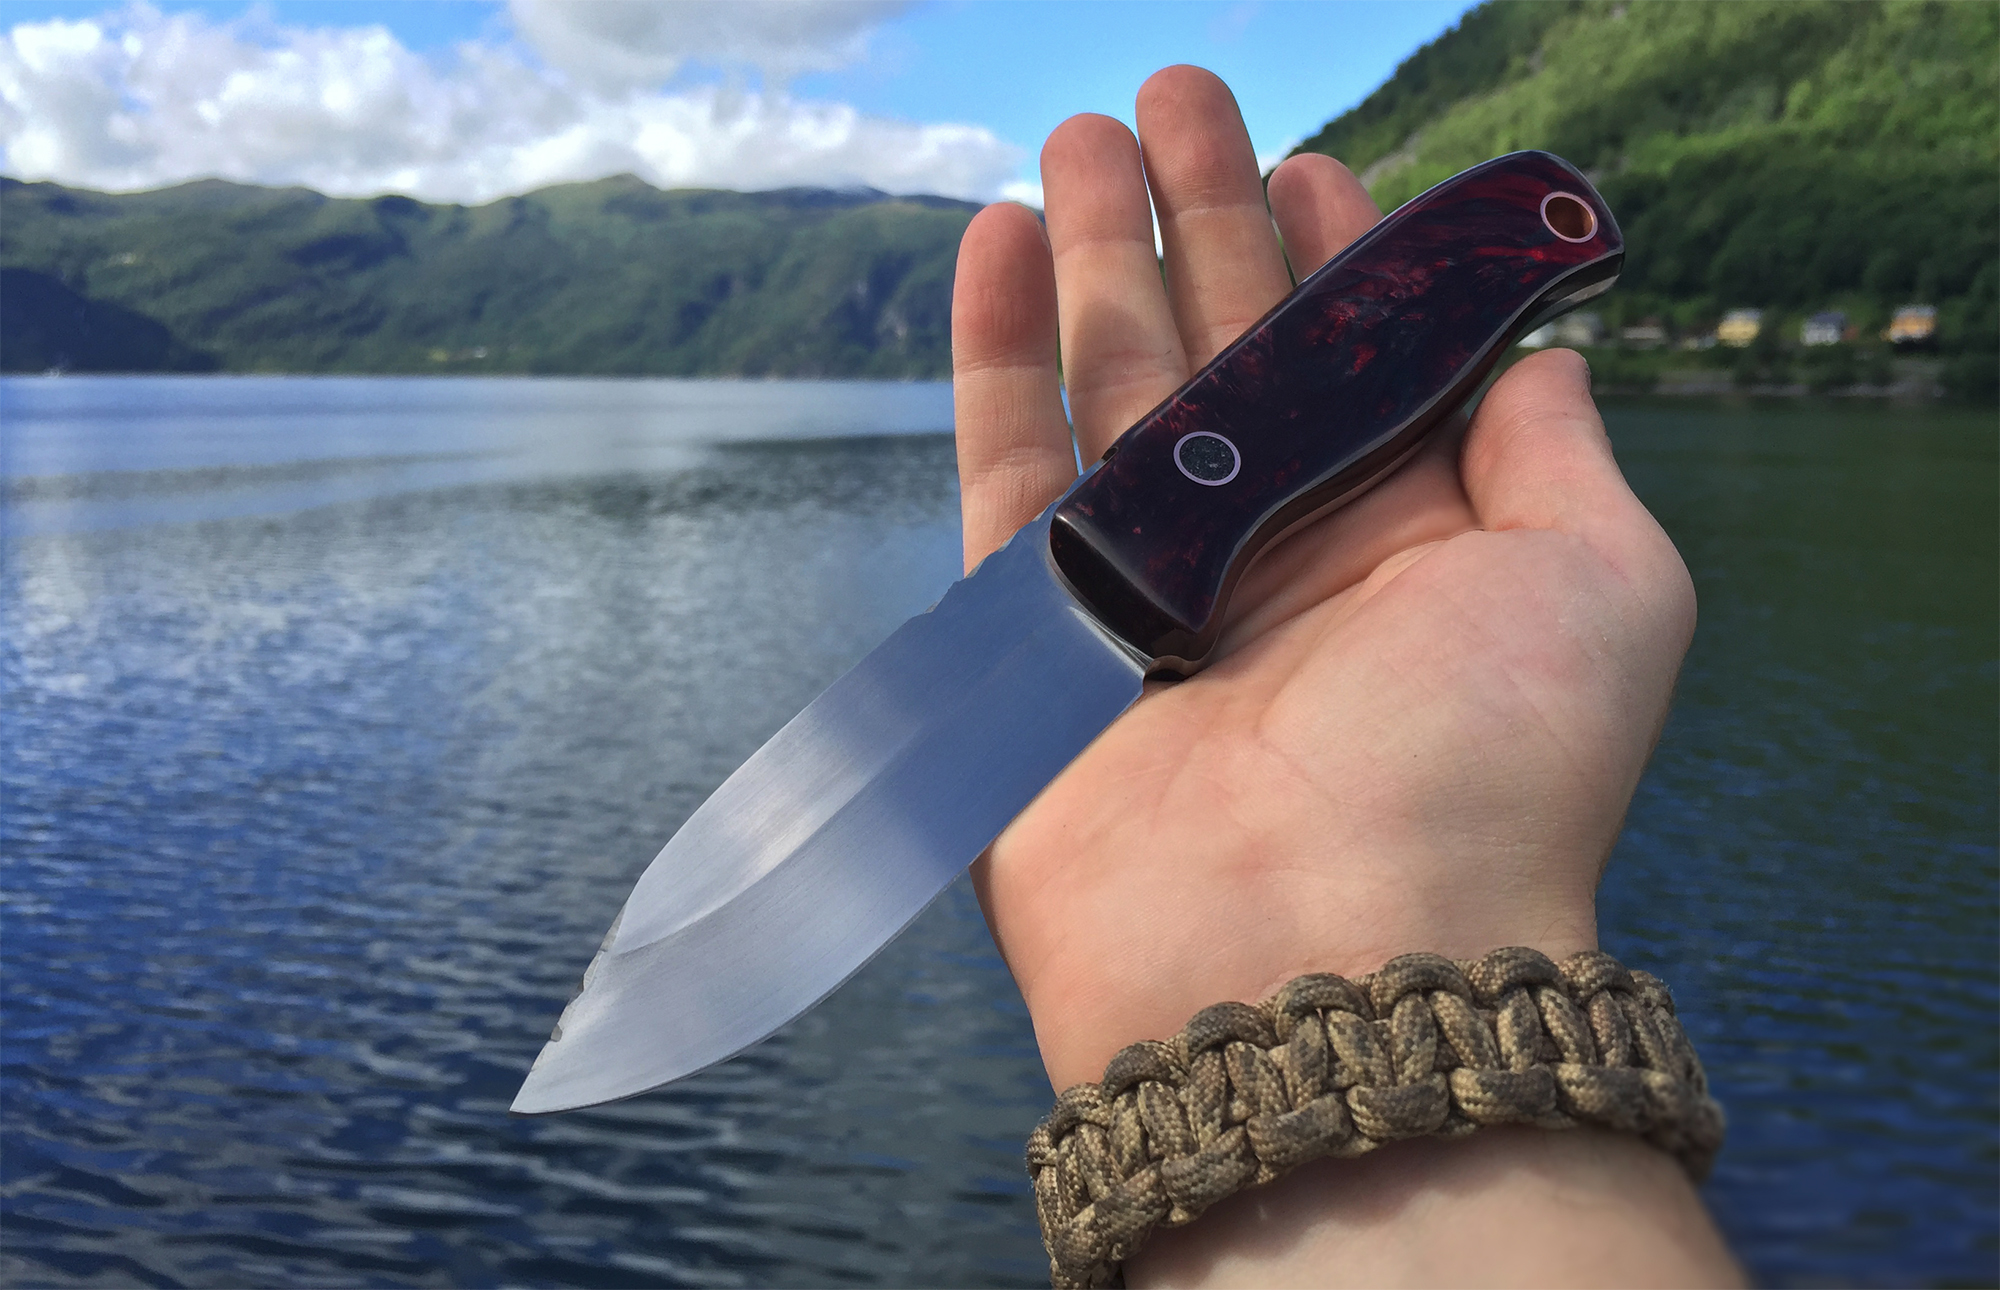
We've always had an appreciation for real craftsmanship, especially bladesmithing. There's something powerful about carefully cutting, grinding, and refining a plain piece of steel into a razor-sharp knife. The knife is also a quintessential survival tool, so being able to make your own custom knife can be a fun and valuable skill. We've previously posted about making improvised knives from a wrench or a metal file, but the following project is in a different league.
The creation of this Bushcrafter's Dream blade was filmed from start to finish. Check out the videos below to...
While browsing the wilderness survival subreddit, we recently came across a post where a user showed off a custom knife he made. According to his post, he had initially asked some members of the bushcraft community on Reddit about design features they'd like to see on a fixed blade knife. He received suggestions on the following design considerations:
Length of blade
Size and shape of handle
Steel choice, carbon steel
The placement of the point of the knife (center of axis)
Jimping on the tip, as well as on the handle/blade transition
Recessed handle for batoning without handle damage
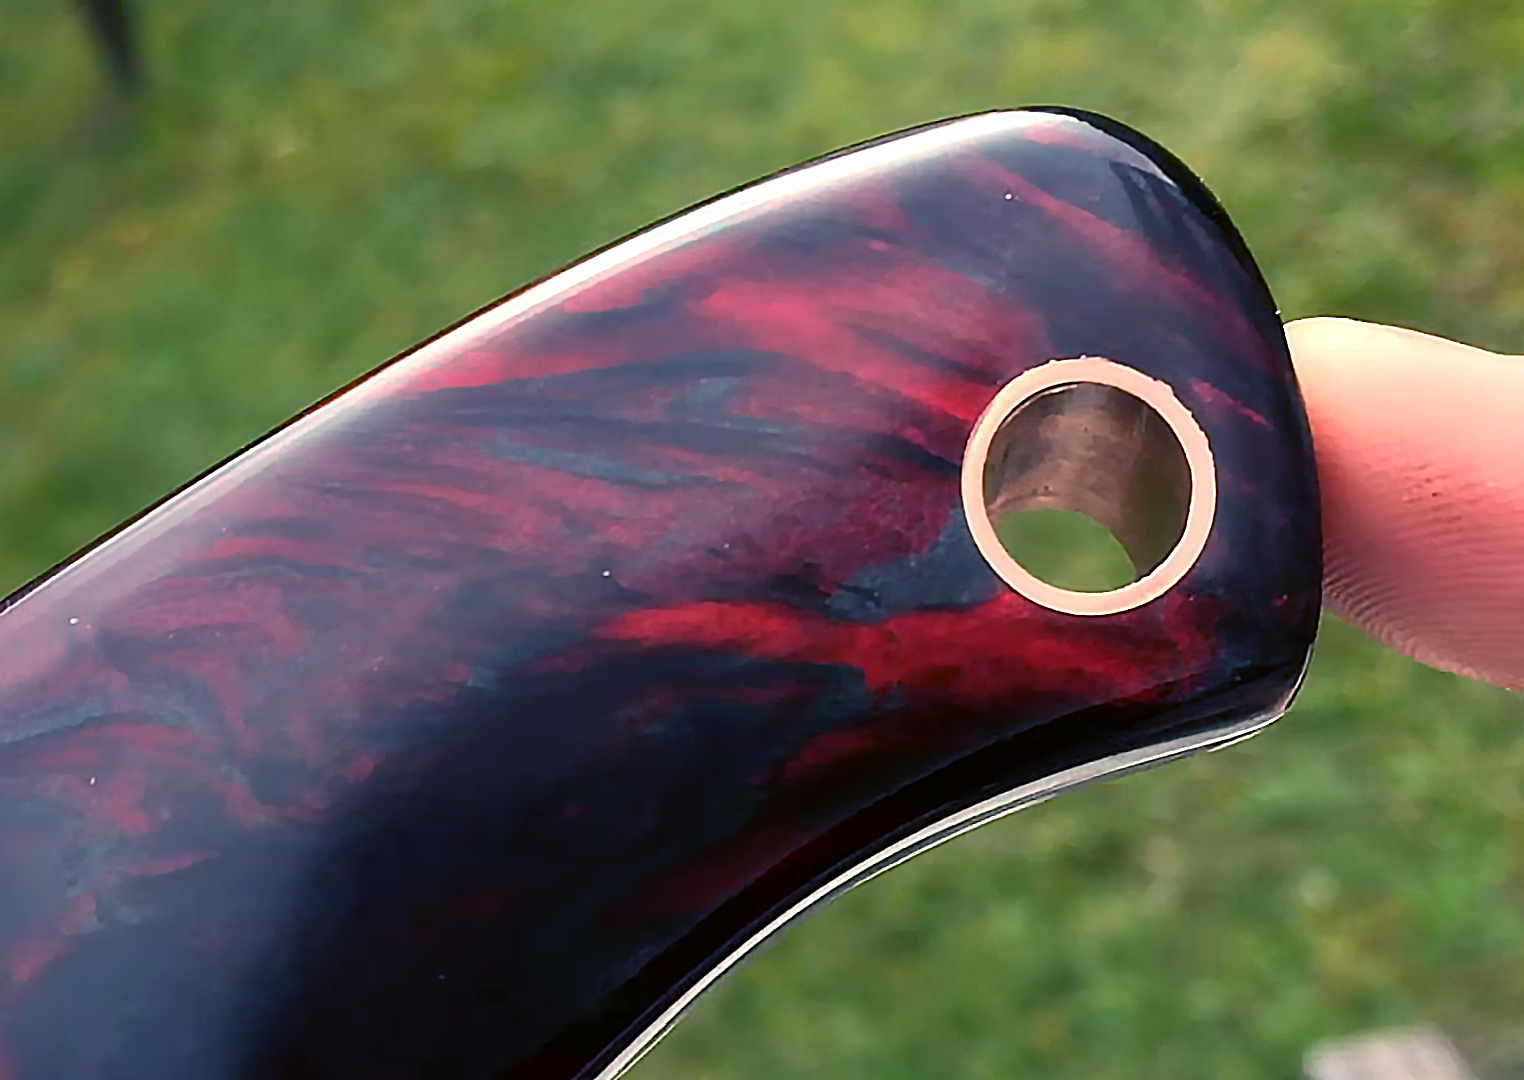
Simple yet interesting handle material/execution
Lanyard hole/tube
Based on the feedback he received, he sketched the knife on paper, and used it as a template to create the blade from scratch. The entire process was filmed and edited into a two-part video series on his YouTube channel, Eternal Improvement. The videos are definitely worth watching if you're interested in learning to make a knife, or if you just like watching a skillful craftsman in action.
Here's part one, where the host completes the blade of the knife:
Here's part two, where the handle is sculpted and added to the knife:
Finally, if you're curious about the cost and materials used, here's a rundown from the video description:
Steel: 80CRV2 carbon steel tempered to 60 HRC
Handle: Alumilite handle scale material by 5th Arrow
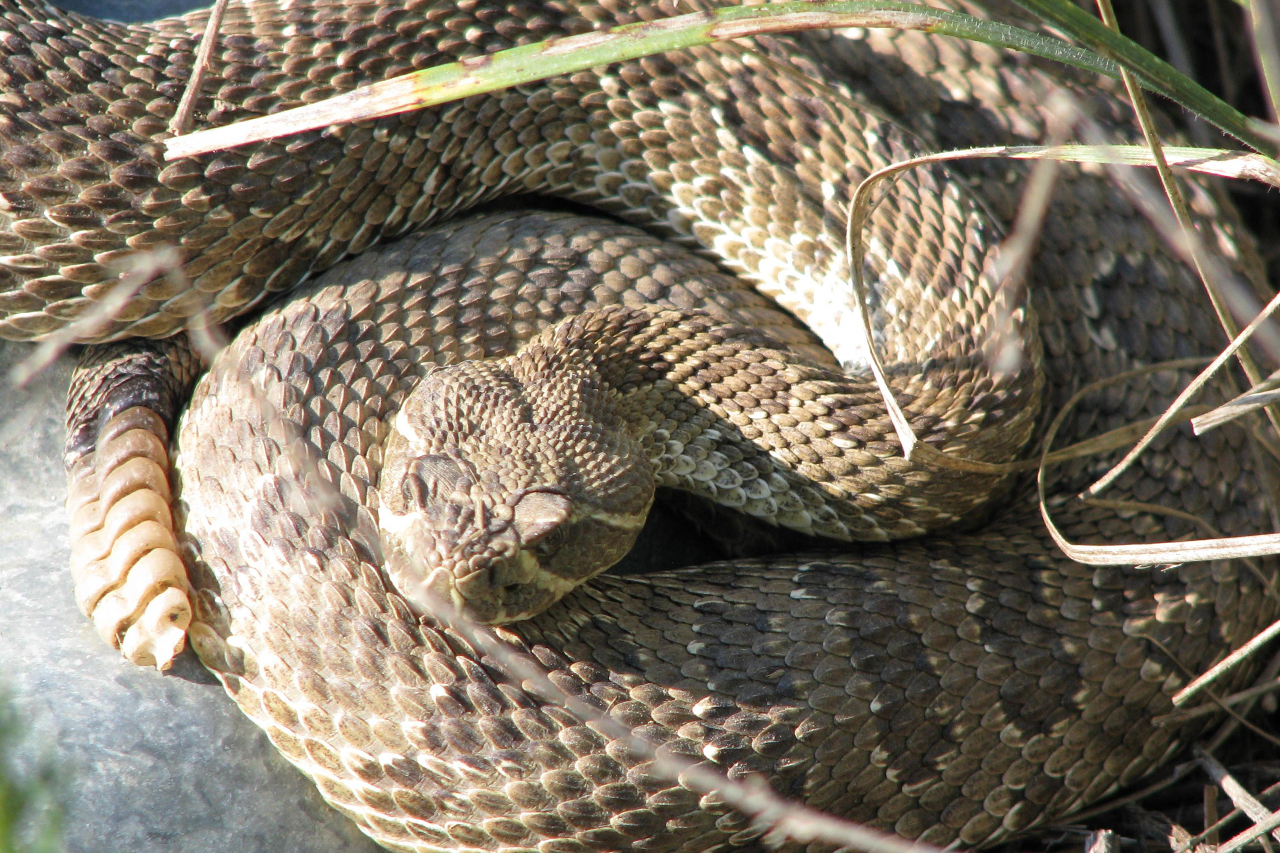
Venomous snakes are found throughout the United States, and the CDC estimates that between 7,000 and 8,000 individuals are bitten by venomous snakes each year. Most snakes will only bite humans if they feel threatened, but hikers, backpackers, and those who spend considerable time outdoors may unknowingly enter a snake's path. If this interaction results in a bite, it's important to know what to do immediately. Otherwise, the venom of several common American snakes (such as rattlesnakes, cottonmouths, and copperheads) can cause serious injury, limb loss, or even death.
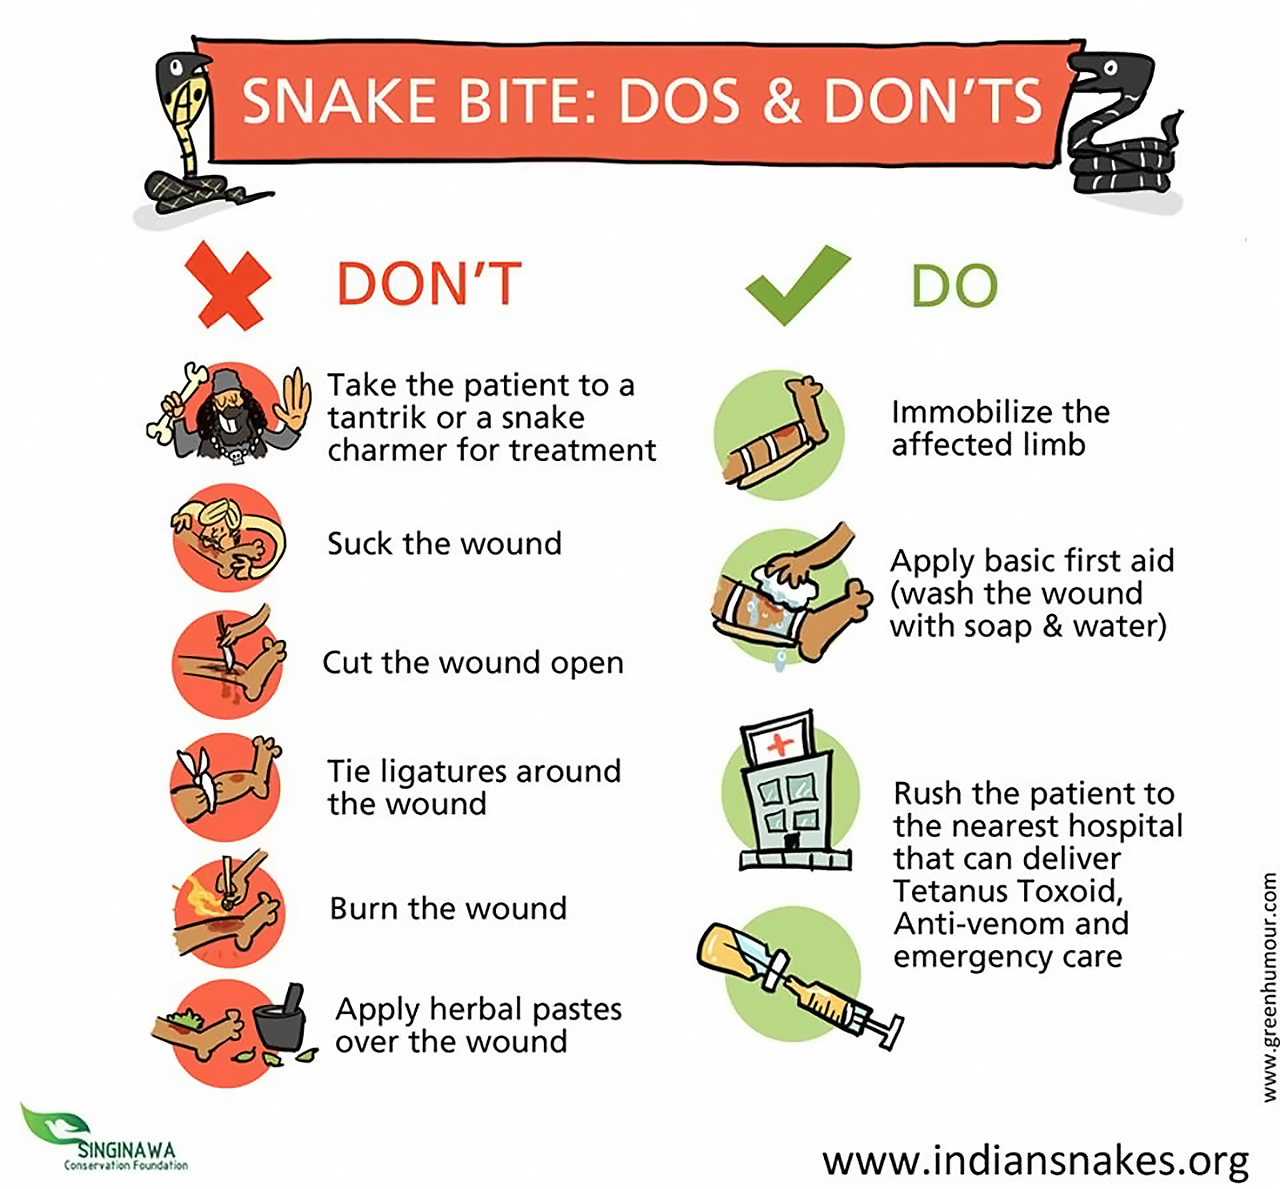
Unfortunately, many misconceptions about snake bites still exist. Possibly the most pervasive is that the venom should be sucked out of the wound immediately by mouth, to prevent it from entering the bloodstream. Other myths state that applying a tourniquet will slow the spread of venom, or even that cutting away the affected tissue will save the victim. None of these claims are true—in fact, they'll generally make things worse.
The infographic below summarizes the basics of snake bite first aid:
Seems simple enough, right? That's because it is. If you can conceivably get the victim of a snakebite to a hospital, immobilizing the affected limb and doing so should be the first priority. Again, go immediately to a hospital. This is the only effective option for venomous snake bites.
Now, you may be thinking: what if there isn't a hospital nearby? When professional medical care is absolutely not a possibility, the situation gets grim. There really isn't much you can do to fix a snakebite without antivenom, but you can at least slow the spread of the toxin.
Here's what you can do if hospital care is not available:
Immobilize the wound, and wash with soap and water as seen above.
Keep the victim calm and stationary—minimize heart rate and stop all physical activity.
If possible, call the National Poison Control Center at 1-800-222-1222. It is open 24/7 and an adviser can provide help over the phone.
Do not apply ice or a tourniquet. Do not give the victim alcohol, caffeine, or painkillers.
Do NOT elevate the wound—in fact, do the opposite. Have the victim sit or lie down with the bite site BELOW the level of the heart.
Apply a clean bandage to the wound, and hope for the best. Some snake bites are “dry bites” with no venom injection, so they may be survivable without professional treatment.
If neurotoxic venom has been injected, and you are certain no medical care or antivenom is available, there is very little that can be done. Get comfortable and try to signal for rescue.
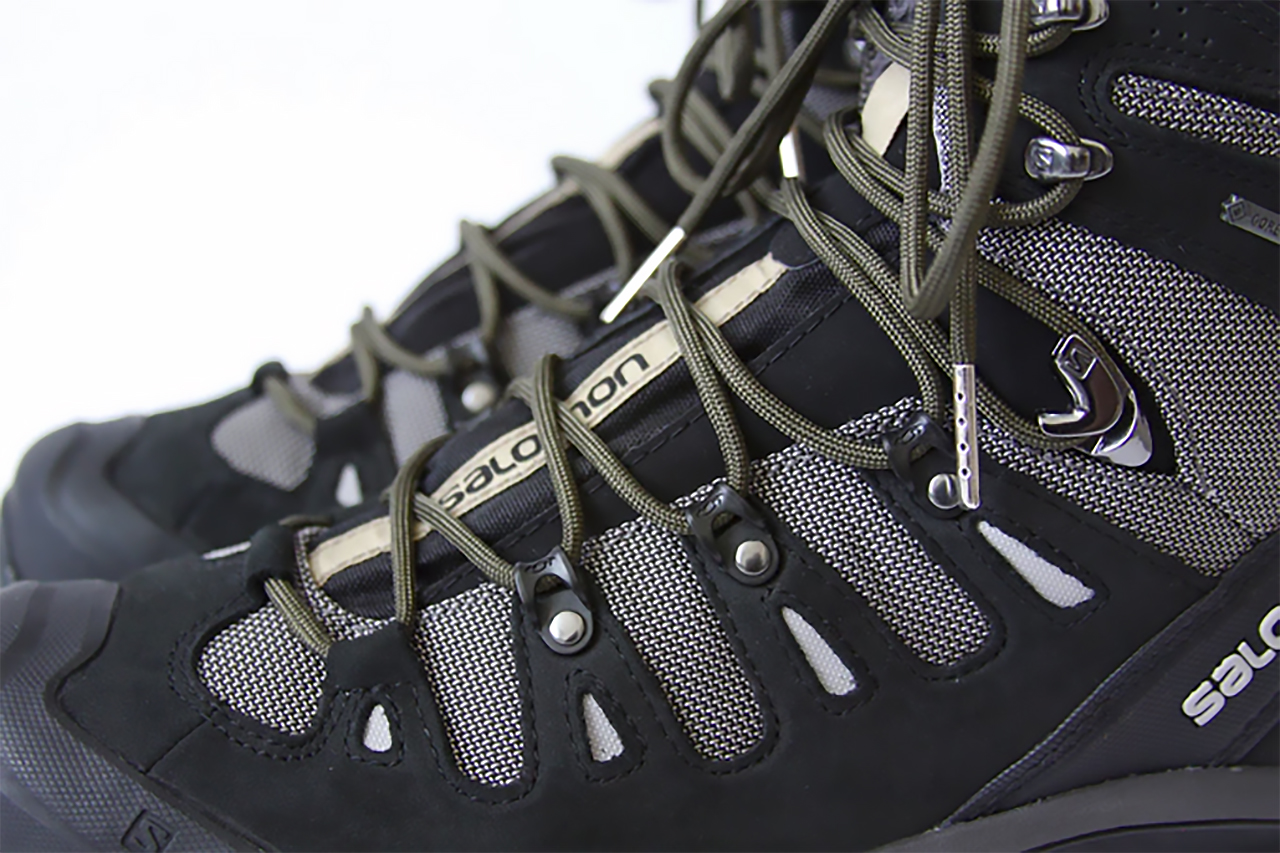
Shoelaces are an often-overlooked component of any outdoor gear loadout. Virtually all shoes and boots already come with laces, and for many of us, they get the job done. As long as they stay tied and don't fray or snap, we tend to forget they're even there.
Some experienced survivalists replace their boot laces with 550 paracord, as it provides an accessible source of emergency cordage. Others will take it a step further, and use flammable Fire Cord as laces—this special paracord contains a waxed internal wick that can easily be ignited with a ferrocerium rod or flint and steel. However, Wasatch Outdoors has combined all of these concepts into a single purpose-built pair of survival laces.
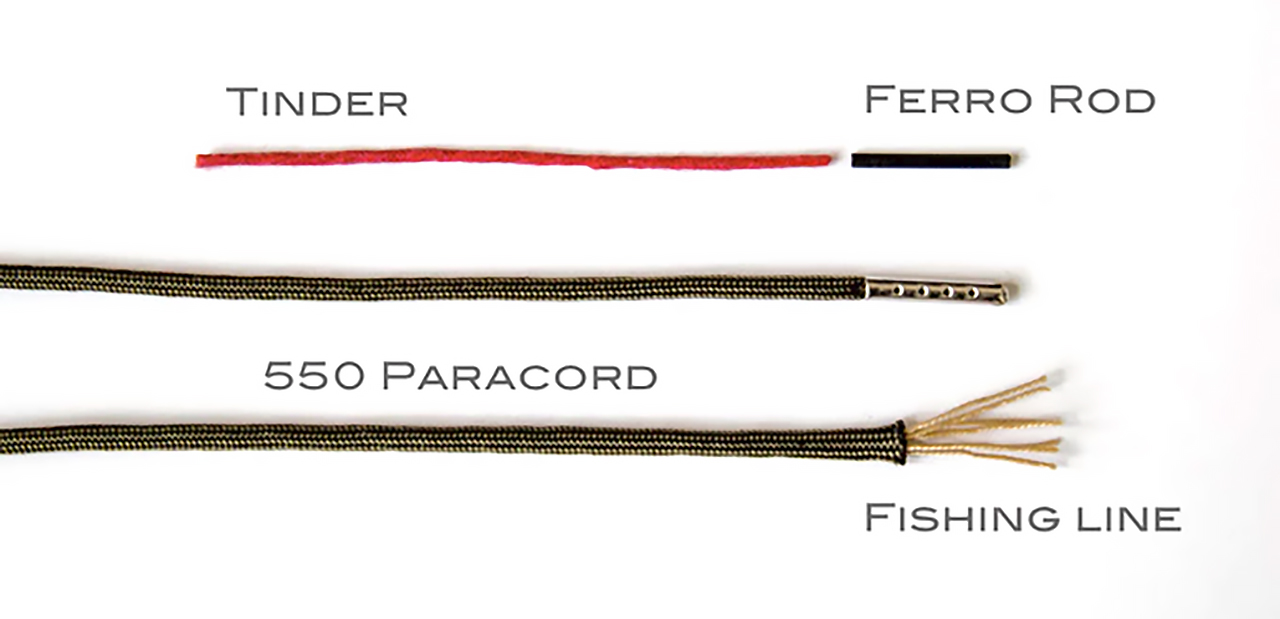
Inside one lace: fishing line running the entire length
Inside the other lace: red waxed tinder strand running the entire length, plus a 1-inch ferro rod
The survival laces can be ordered in sizes from 48 inches to 84 inches, and in your choice of black or olive drab coloration. Wasatch Outdoors also offers a survival lace for hoodie sweatshirts, so you can replace the rarely-used hood pull cord with something much more useful. The MSRP of the boot laces is currently $18, and the hoodie lace is available for $12.
Our only concern about the design of these laces is the glaring omission of a striker for the ferro rod. Sure, most users will already have a knife on hand to generate sparks, but if you ended up stranded with only the clothes on your back, you'd have a hard time finding a suitable striker in the wild. A sharp rock fragment or piece of glass or ceramic would get the job done, but you'd still have to search for it. A hard edge on one of the metal aglets would work well, but the current design appears to lack this element.
Aside from this one potential issue, we could see these survival laces serving as a useful backup tool in your loadout. They take traditional paracord or Fire Cord laces to the next level. To learn more about these laces, visit WasatchOutdoors.com.
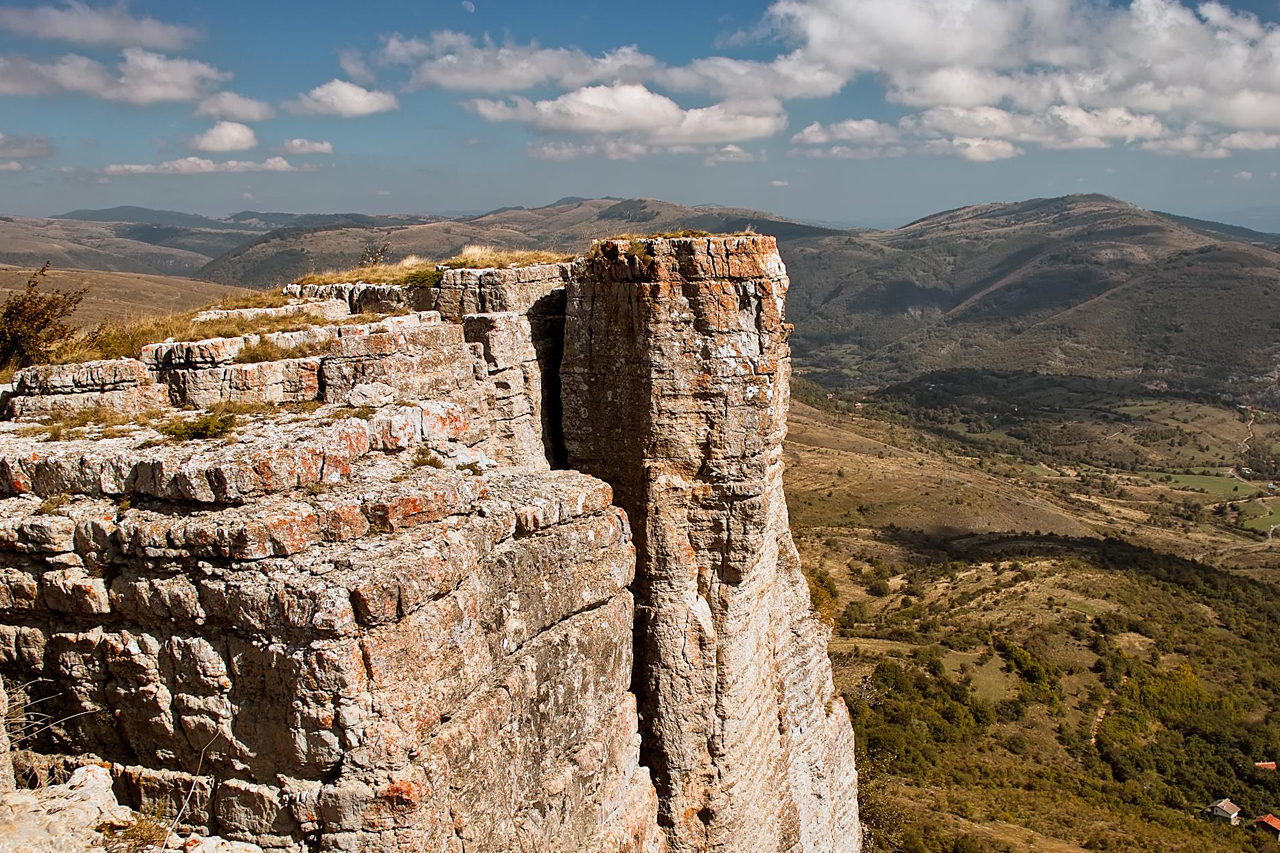
Ever look down from the balcony or roof of a tall building and feel uncomfortable? Your palms might sweat, and your stomach might churn, but from a logical standpoint you remain perfectly safe. In order to get back to terra firma, you need only walk down some stairs or push an elevator button. Nevertheless, acrophobia (the fear of heights) remains one of the most common personal anxieties of Americans.
However, what if taking the stairs or elevator was not an option? What if a structure fire, earthquake, or other dangerous event made it impossible to escape a building by normal means?
This sort of scenario may be unlikely, but it would be ideal to know how to descend to safety from that aforementioned balcony or roof. Unless you have some form of emergency rappelling device already prepared, you'll need to improvise with simpler materials. As with any other emergency survival technique, you'll want to be prepared and know what to do ahead of time.
Note: The techniques listed here are intended for emergency scenarios only, and should not be taken lightly. Climbing and rappelling are inherently dangerous, and if you think you may need to do either, you should consult with experienced climbers beforehand. Proper training and professional-grade gear is always your best option. We are not responsible if you fall and hurt yourself.
The Best-Case Scenario
Looks easy, right? It is …as long as you're on a rock wall and supported by a guy off-camera holding the...
In an ideal world, you'll be 100-percent prepared when disaster strikes. If you need to escape a tall building via the window, you'd whip out your complete climbing rig (you know, the one you stashed for this exact scenario), strap on protective gear, and effortlessly descend the exterior of the building like a scene from Mission Impossible. Onlookers on the street below will applaud, and a beautiful woman in a red dress will be so impressed she'll hand you her phone number. Cue upbeat music, roll credits.
Outside of Hollywood fantasy land, you're likely not going to be an experienced mountaineer, and you won't have a complete climbing rig in your closet. If you're trapped on the third floor of an office complex, and some form of disaster has made the lower floors inaccessible, you'll need to find another way out.
If you're willing to spend several hundred dollars, you can look into a pre-made personal escape system, such as the Petzl EXO seen in the video above. These systems are specifically-designed as a compact and quick way to escape from a burning building. However, they still require mandatory training from an authorized source, and are generally designed specifically for firefighters. We're discussing emergency rappelling techniques, so we'll move on to some improvised methods instead.
Swiss Seat Harness
A good climbing rig starts with a good harness. The harness makes sure your body stays attached to the rope, rather than plummeting to the ground.
The Swiss Seat is a DIY rappelling harness that can be assembled from about 12 feet of rope. Source: ITS Tactical
Speaking of rope, it is the only resource you absolutely cannot do without in an emergency rappelling scenario (aside from a strong anchor point, obviously). As you'll see later, you can even get away without a harness or carabiner in a pinch, but having a surplus of strong climbing rope on hand is mandatory. If you think there's any chance you might have to use these emergency techniques in your apartment or office, stow a substantial length of climbing rope in these locations.
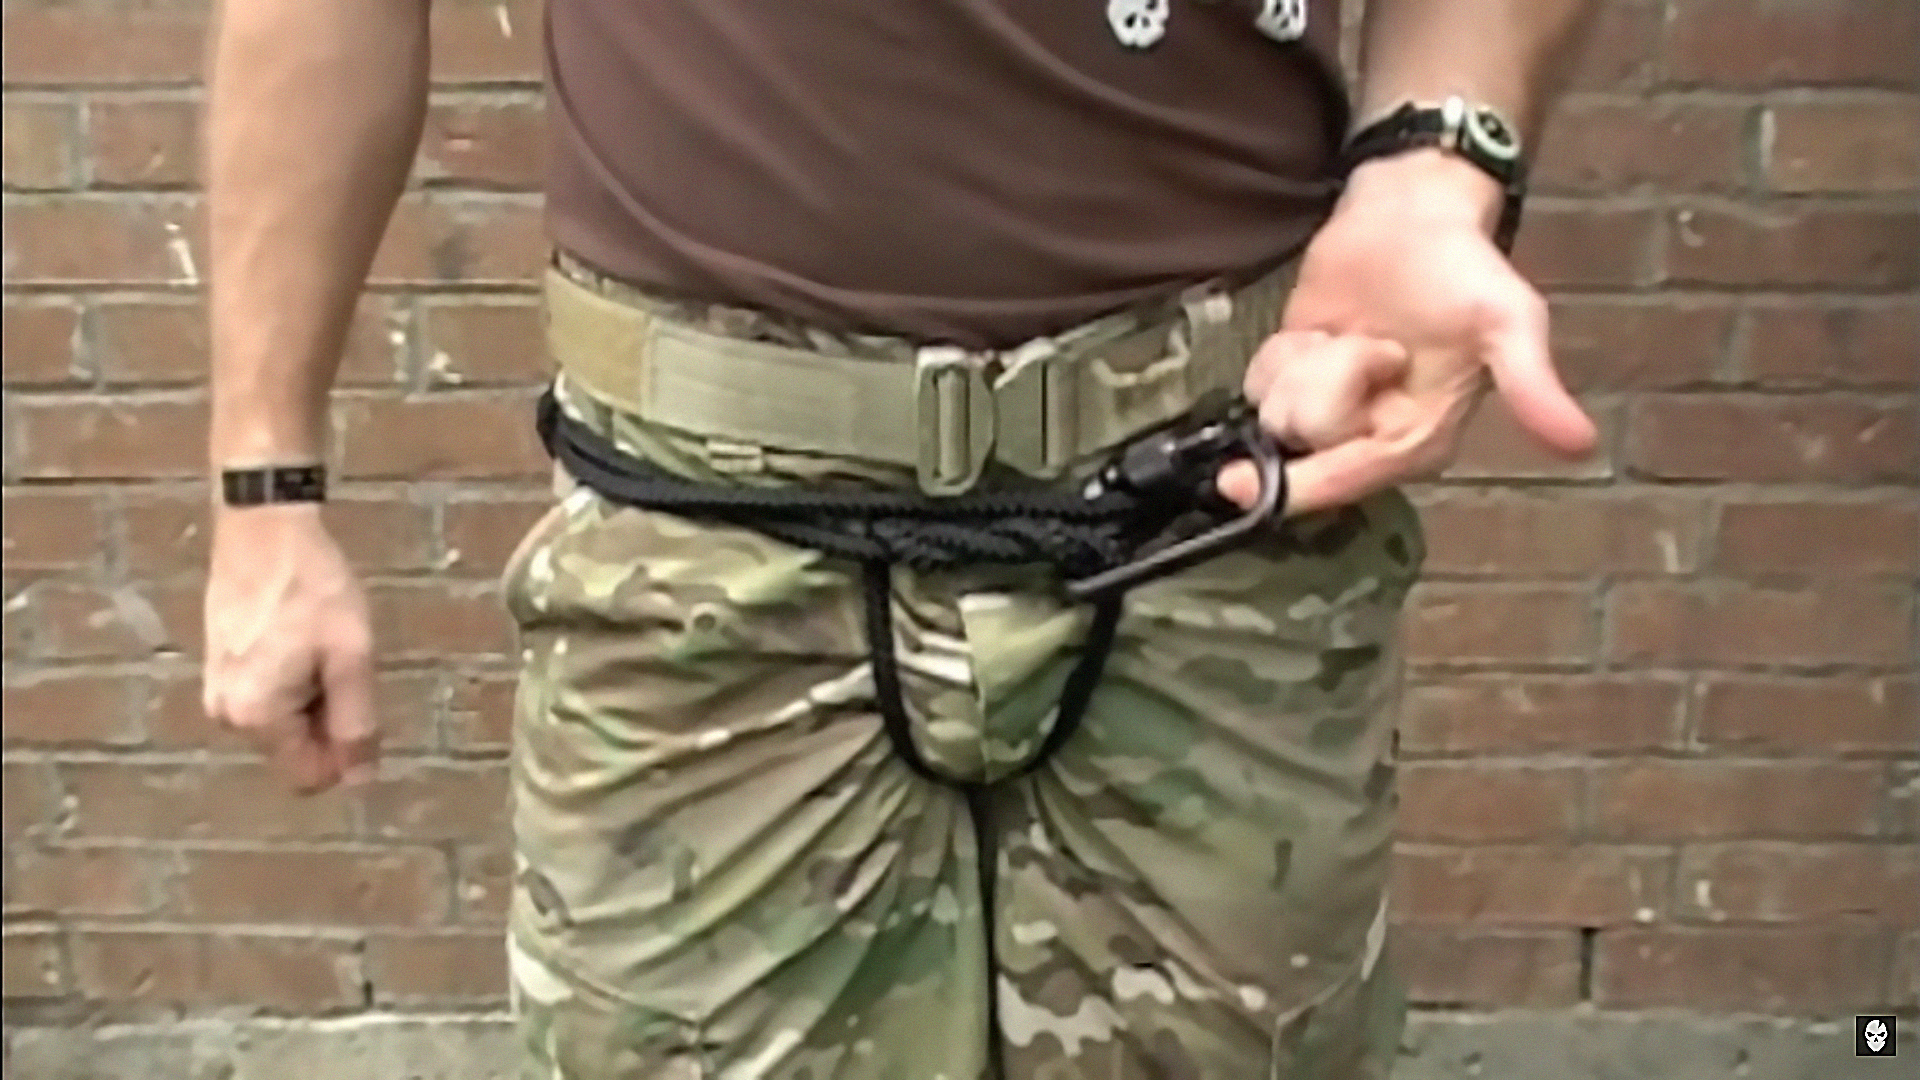
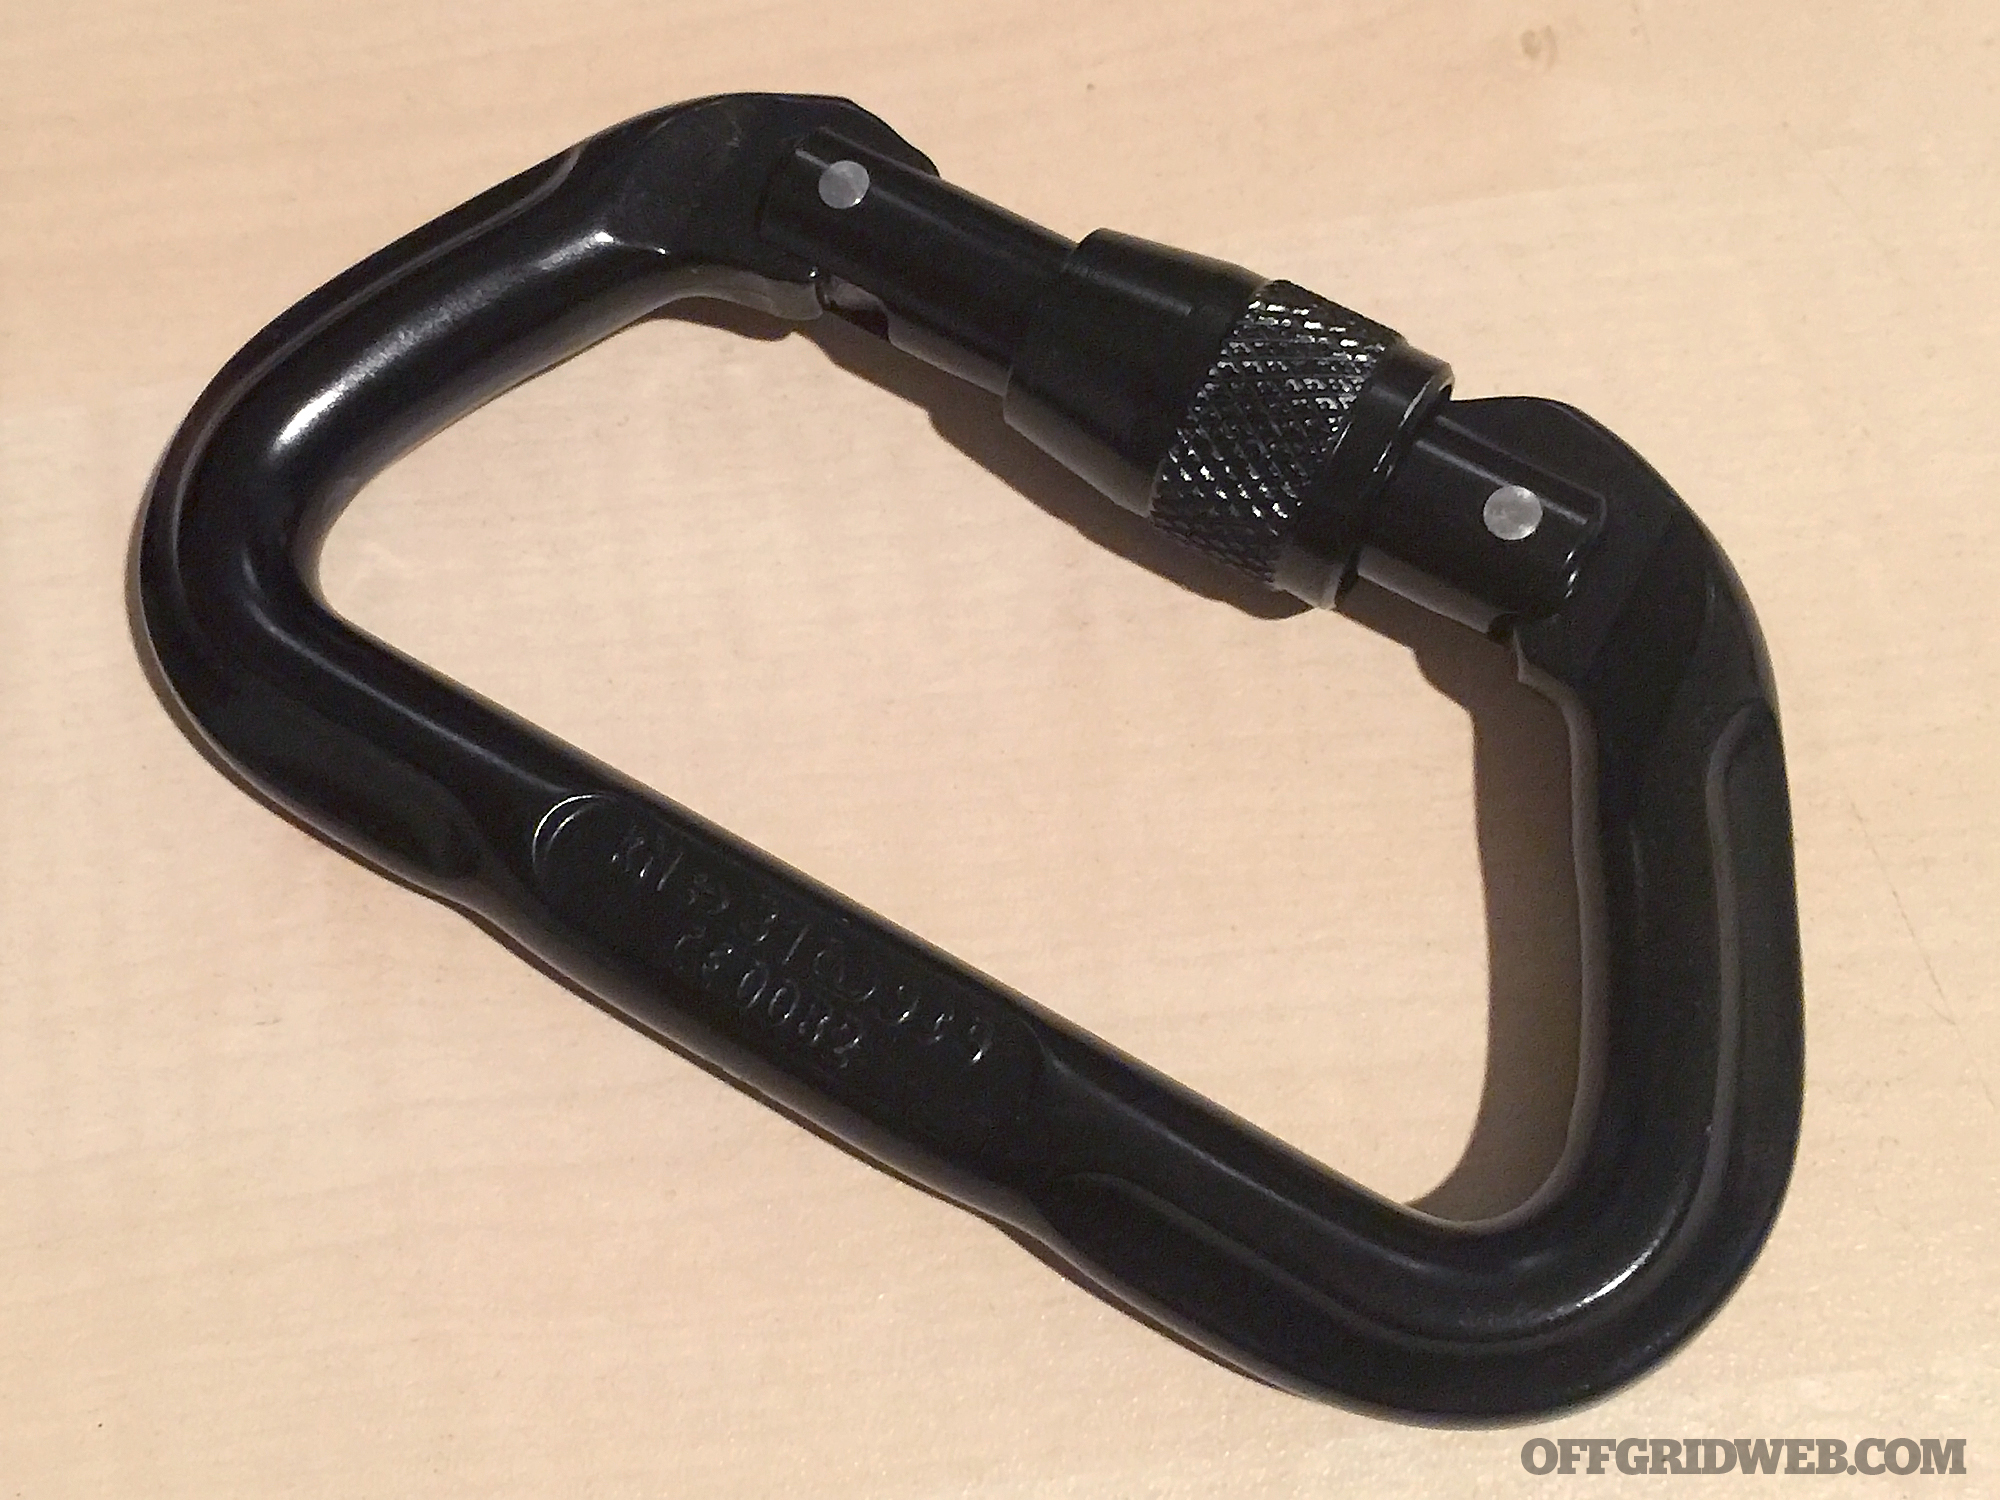
Additionally, it's not unreasonable to stash a few carabiners with this rope. Get the real weight-rated kind, not the flimsy keychain kind. Unlike a climbing harness, both rope and carabiners can be used for other day-to-day purposes, so they won't just sit collecting dust in case of a specific scenario. In fact, we generally recommend including at least one large carabiner in a go-bag or bug-out bag—it has many uses, from self-defense to simply retaining your keys.
With only your rope and a few climbing carabiners, it is possible to rappel (aka abseil) and descend from a high place. One common method begins with tying a Swiss Seat rappelling harness. It's simple enough—all you'll need is a section of approximately 12 feet of climbing rope, and one large locking carabiner.
This video from ITS Tactical shows how to tie a Swiss Seat harness:
Improvised Braking
Now you have the harness, but you'll still need a way to descend in a controlled manner. Wrapping your rope haphazardly around a carabiner or your waist will result in one of two things:
Too much friction – You won't budge, and will be stuck dangling in the air helplessly.
Not enough friction – The rope will slip through your grasp, give you a rope burn, and you'll fall.
If you can stash a real rappelling brake (aka belay), that's ideal. It will improve safety, and be much easier to use than any improvised system. However, here's what to do if you don't have a proper brake:
This “biner brake” just requires four more climbing-rated non-locking carabiners. This system allows you to slow your descent to a safe rate, even if you don't have a purpose-built brake on hand. Add two of these carabiners to your Swiss Seat rig or harness, slot two more around the first two, and work your rope through all four. If you're interested in learning more on how the carabiner rappelling brake works, check out this article on Climbing.com.
So, with the Swiss Seat, carabiner brake, and plenty of practice in a safe environment, you could rappel to safety. You'd need only the following items:
Climbing rope (for both the harness and actual descent)
One locking carabiner
Four identical non-locking carabiners
Last Resort: Dülfersitz Method
Remember how we said it's possible to rappel with only a rope? Here's what to do if you don't even have carabiners.
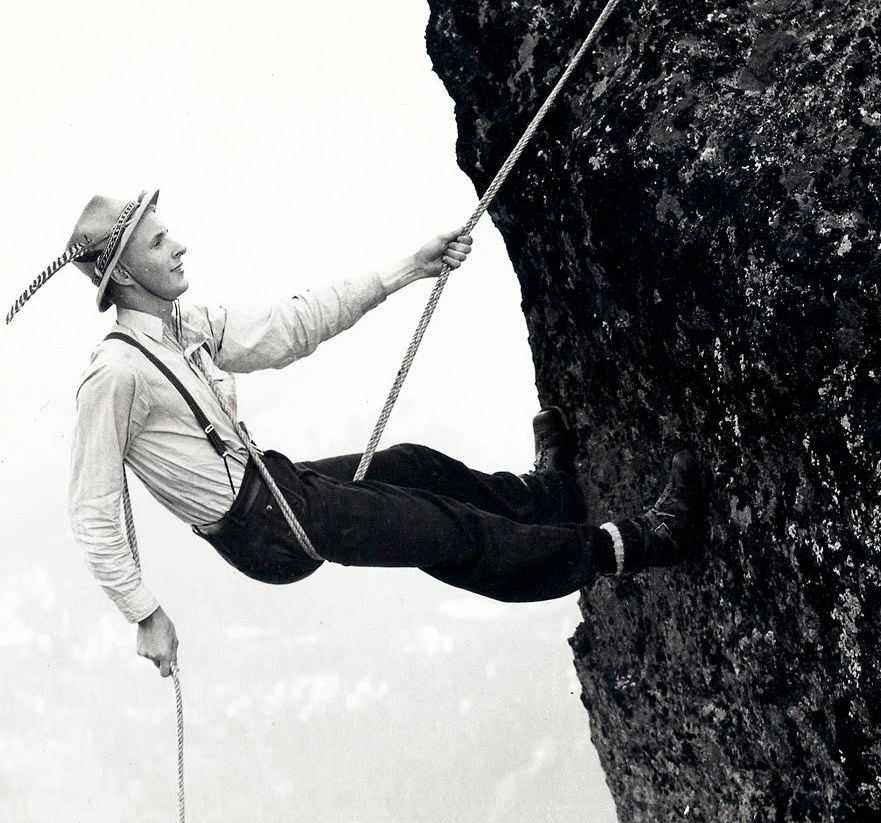
A vintage photo shows a climber using the Dülfersitz method.
The Dülfersitz technique, named after German mountain climber Hans Dülfer, can serve as a last resort. It's pretty much guaranteed to cause some pain, but it can get you to safety in a pinch. It uses doubled-up rope wrapped in a “Z” along your groin, around your thigh, and over your shoulder.
Wrap the midpoint of the rope around a sturdy anchor, then feed the rope through your hands as you rappel to the ground. Your dominant hand grip and non-dominant arm positioning can regulate your speed. Once you're on the ground, you can pull on one end of the rope to recover it.
Note that you'll definitely want to wear gloves if possible, as the heat and friction can quickly blister your skin otherwise. Long sleeves and padding stuffed around your groin and collarbone can also help reduce the discomfort. Also note that this method can be quite dangerous—if your hand releases for any reason, you'll inevitably fall.
Final Thoughts
Whether you're using a complete rappelling rig, improvised Swiss Seat with carabiner brake, or the Dülfersitz technique with no gear whatsoever, you'll have some options for escaping an elevated location. Learning these emergency rappelling techniques may not eliminate the fear of heights, but it can greatly increase your chances of survival in a structure fire or other dangerous scenario.
What are you afraid of? In a very general sense, many of us might say “death” or “pain”. However, the true nature of fear comes down to something more esoteric. We're often afraid of things that pose little risk of harm, or things that pose no physical threat whatsoever. You might be terrified of public speaking, but it's not going to kill you—unless you somehow manage to literally die of embarrassment.
Many people are afraid of spiders, despite the fact that most arachnids are timid and harmless.
Regardless of actual danger, fear is a powerful motivator, so understanding it provides valuable insight into the human psyche. This is helpful from a survivalist standpoint, both for conquering your own fears and for dealing with (or even exploiting) the fears of others.
Last year, Chapman University took a random sample of 1,541 adults throughout the United States, and asked them to rank their level of fear about various topics. These topics from the Survey of American Fears fell into 10 categories, which Chapman researchers called the Domains of Fear. Here's how they separated them:
Then, the researchers established which of these categories was most terrifying on average. The results indicated the following Average Fear Scores for each domain, on a scale of 1 (not afraid) to 4 (very afraid):
Man-Made Disasters – 2.15
Technology – 2.07
Government – 2.06
Environment – 1.97
Personal Future – 1.95
Natural Disasters – 1.95
Crime – 1.72
Personal Anxieties – 1.63
Daily Life – 1.51
Judgment of Others – 1.31
Beyond these categorized results, the survey showed specific fears that were most common, regardless of domain. According to this survey, here are America's top fears:
These are only the top 10, but a complete list is available on the Chapman University survey page. Interestingly, the individuals surveyed were more afraid of reptiles and public speaking than of actually dying. Also, those surveyed were on a whole far more afraid of financial crimes like identity theft than of physical crimes (murder, rape, theft, break-ins, etc.).
For comparison purposes, here are the ten least common fears, followed by percentage of individuals who were “afraid” or “very afraid” of them.
Fire-starting is just like any other survival skill—if you don't have multiple methods to fall back on, you probably won't be able to make it happen reliably. Your lighter could break or run out of fuel, your matches could get soaking wet, and you could lose your ferrocerium rod. Given the essential nature of fire in survival situations, it's wise to have at least two or three fire-starting methods prepared ahead of time.
A modern 6061-T6 aluminum fire piston manufactured by Sims Tactical Solutions. Photo: Dangerang / Wikipedia
One simple fire-starter that is often overlooked is the fire piston. This device uses a piston in a cylinder to compress air rapidly, creating heat as a byproduct. The tip of the piston is packed with a small amount of tinder material, such as char cloth, which ignites easily under pressure. The process works much like one of the cylinders in an engine, using the piston to quickly squeeze air into a tight space, creating the optimal conditions for combustion.
The materials used in a DIY fire piston. Check the video below to see how it goes together.
You can purchase pre-made fire pistons from various retailers, or you can make your own with simple tools for only a few bucks. Here's a list of what you'll need, as well as how each item is used:
Wooden rod or dowel – This will form your piston. The video uses a 12mm-diameter rod.
Wooden knob and wood glue – Provides a handle for your piston.
Copper tube – This will form your cylinder, and should be slightly larger than the piston. The video uses a 15mm tube.
Copper tube end cap, soldering flux and tin, and blowtorch – To seal one end of your cylinder tube.
Small hacksaw – For cutting the tube and rod, as well as adding O-ring notches to the rod.
2 rubber O-rings and petroleum jelly – These form the air-tight seal in your cylinder.
Tinder material – Stuffed into the end of your piston. Char cloth (aka carbonized cotton) works especially well.
Once you have the necessary materials, here's how it all goes together:
Should you carry a fire piston as your only source of ignition? Of course not. However, it does serve as an inexpensive tool to add to your survival tool kit or bug-out bag, and it can provide a much-needed fallback plan in case other fire-starting methods fail.
If you haven't read it yet, you might be scoffing at the scenario we posed in this issue's What If? feature. “Deadly volcanoes?” you ask. “How can anyone die by lava when it moves so slowly?” Well, outrunning flowing magma from active volcanoes might be the least of your worries.
In 1985, Colombia's Nevado del Ruiz erupted, melting summit glaciers and causing mudflows to blanket nearby towns. More than 25,000 people died. Closer to home, Mount St. Helens blew her lid in 1980, killing more than 50 people — most died due to asphyxiation from ash and toxic gas. Volcanoes have been fatal in other ways, from ejecting lethal debris to causing devastating tsunamis and even famine.
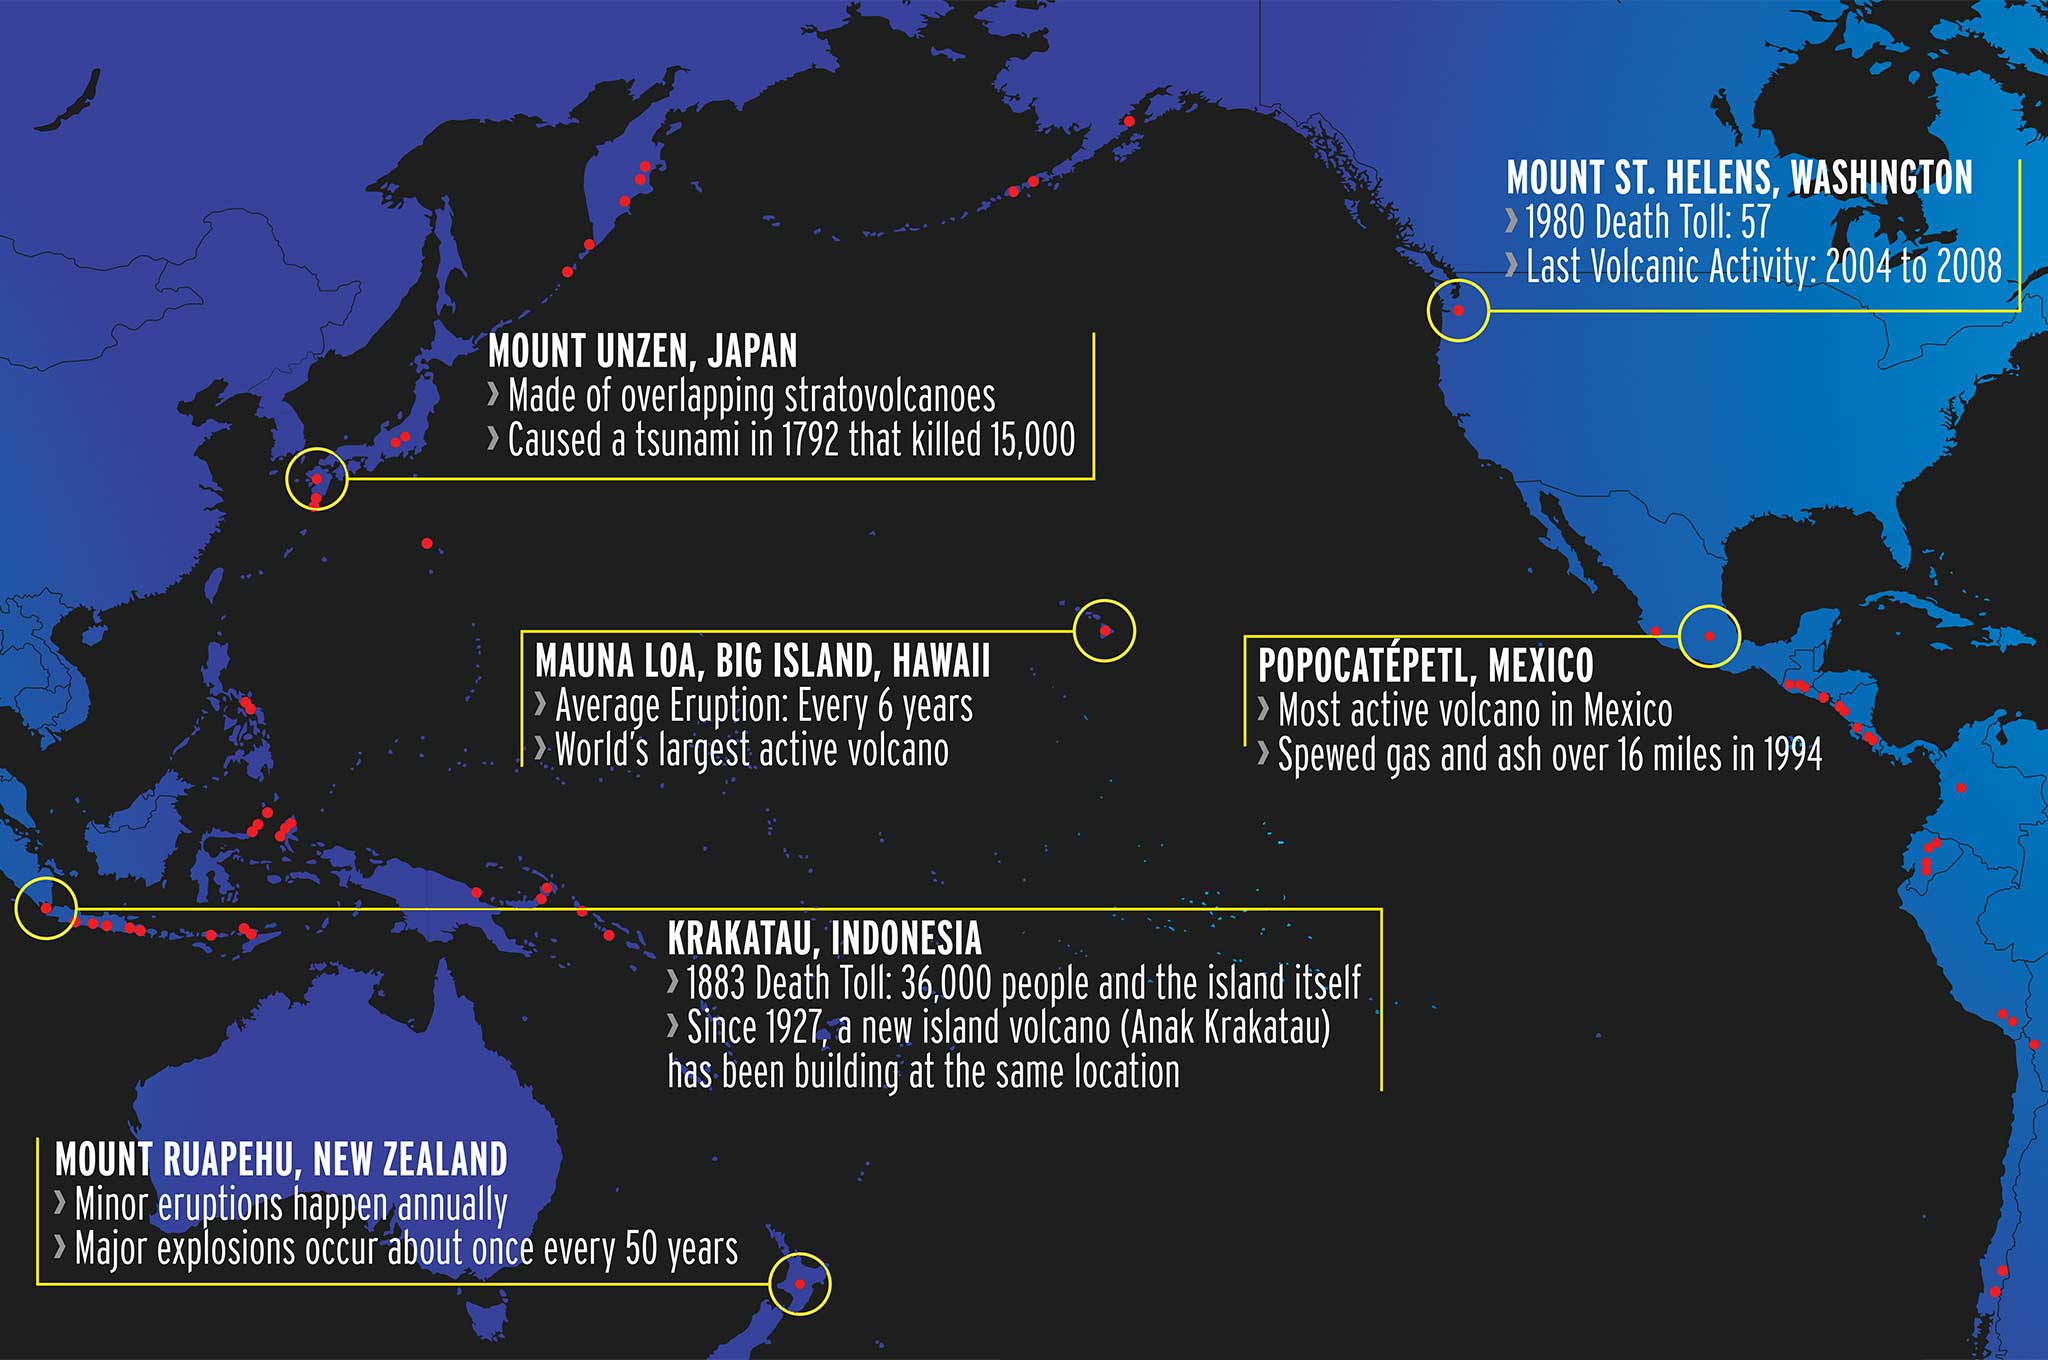
So, pay attention to any news reports about active volcanoes. Even if you don't live next to them, you could be vacationing nearby when one of these blows. Or, at the very least, you could spew fun facts the next time your wife decides to watch Joe Versus the Volcano for the umpteenth time. Below is a just a handful of the many active volcanoes on this molten rock we call Earth.
Mount St. Helens, Washington
1980 Death Toll: 57
Last Volcanic Activity: 2004 to 2008
Mount Unzen, Japan
Made of overlapping stratovolcanoes
Caused a tsunami in 1792 that killed 15,000
Mauna Loa, Big Island, Hawaii
Average Eruption: Every 6 years
World's largest active volcano
Popocatépetl, Mexico
Most active volcano in Mexico
Spewed gas and ash over 16 miles in 1994
Krakatau, Indonesia
1883 Death Toll: 36,000 people and the island itself
Since 1927, a new island volcano (Anak Krakatau) has been building at the same location