Tactical Awareness Kit (TAK): Ultimate Guide

Howling winds and bone-shattering waves crash against the moonlit shore. Trees bend and uproot from the earth. Power lines snap, and the city plunges into darkness. This narrative is a reality for those who have lived through a hurricane or a similar natural disaster where devastating storms wipe out entire sections of the power grid. With critical infrastructure such as cell towers and internet service provider nodes gone, how can first responders or prepared citizens stay connected to assist rescue operations and inform others about what’s happening in the area?

Enter the Tactical Assault/Awareness Kit (TAK). Over the past decade, you've probably seen photos online of Samsung Galaxy phones used by our military. Usually, you'll see them encased and mounted on their body armor. The app loaded on those devices is known as ATAK, short for Android Tactical Assault Kit.
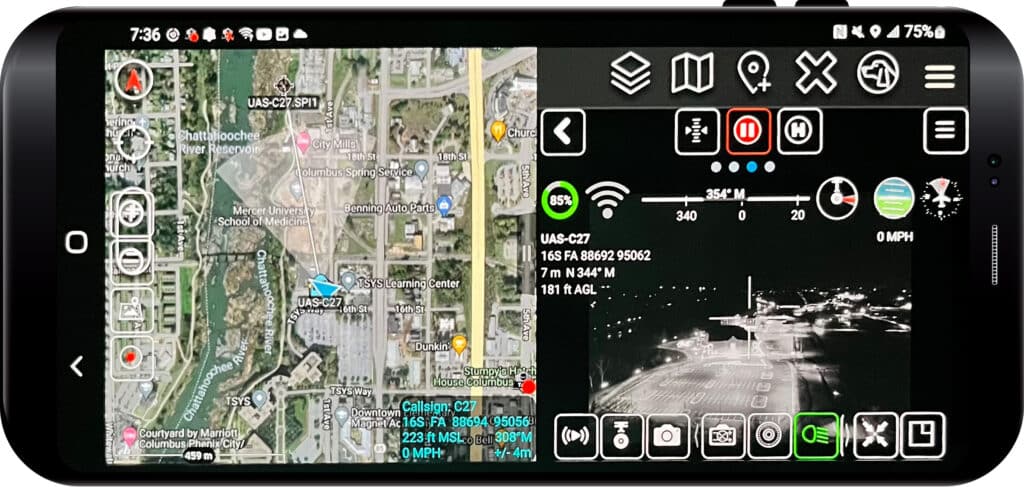
Screenshot of the Tactical Awareness Kit.

Above: The UAS plug-in offers seamless integration of unmanned aerial surveillance devices — in other words, drones. The drone’s map position, field of view, and live video feed are visible to users within the TAK app.

ATAK allows a military member to view and share geospatial information, such as friendly and enemy positions, danger areas, and casualty reports. The Cursor on Target (CoT) protocol is at the center of TAK, and this feature is used to share information between users. This can include specific target information such as team member locations, route information, sensor data (video feeds from a drone), text messages, or medevac information.

The TAK ecosystem includes ATAK for Android, iTAK for Apple iOS, and WinTAK for Microsoft Windows; the latter two systems are oriented primarily toward civilian first responders and may lack some of the features of the original ATAK. In addition, the TAK ecosystem has an extensive list of available plug-ins and tools to extend functionality.

With TAK, your team can get oriented quickly, make better-informed decisions, and respond rapidly to a situation. Rather than radioing a teammate to ask how close they are to your position, which direction they’re traveling, or where they last saw a person of interest, you can simply look down at a screen that overlays this information on a map in real time. Some of the other capabilities of TAK are:

  • Map rendering/imagery support
  • Route navigation
  • Range and bearing tools
  • Personnel location and tracking
  • Direct messaging and team chat
  • Intelligence, surveillance, and reconnaissance (ISR) tools
  • Video and ISR feeds (e.g., live drone footage)
  • Jumpmaster tools (e.g., planning parachute insertions)
  • Fire tools (e.g., artillery targeting; disabled in the public release)
  • Tactical survey tools

TAK was initially developed in 2010 by the Air Force Research Laboratory (AFRL) for use by U.S. Special Forces. It has been tested through years of real-world usage in combat by thousands of active warfighters. After its success in various military operations, it was modified and adapted to fit the mission of other federal, state, and local agencies, as well as the prepared citizen.

Situational awareness, or the lack of it, rears its ugly head when forced to deal with a particularly stressful situation such as a natural disaster. Not being able to see the whole picture sinks us deeper into a spiral of real and imagined dangers, which can make us respond in a maladaptive way. TAK can be that beacon of light on dark days, making it easier to work together with our loved ones and our community. This article will highlight what you need to run TAK and tips to get you and your team up to speed with this powerful tool.

Photo of an adult male sitting at a bar looking at his computer.

Above: The WinTAK application allows PC users to access most of the same information as mobile device users. This can help admin personnel at a nearby command post keep an eye on each team member’s position and movements.

Hardware Considerations

For users to run ATAK, each member will need a Samsung Galaxy S5 phone or better. Samsung Galaxy devices work best with ATAK, as they have the necessary processing speeds to run ATAK efficiently. Another viable option is the Blackview BV6600. This phone is built for rugged use and runs on Android OS. Finally, for iTAK, use any iPhone that supports iOS 14.1 or later.   

Small Single Board Computers (SBCs) such as the Raspberry Pi allow you to create a small TAK environment for communication-denied environments with minimal equipment needed for situational awareness. If configured correctly, this setup will be able to federate to a larger TAK Server environment. A federated network is a set of linked networks that have the ability to transfer data and messages between members. An excellent example of a federated network is the mobile phone network. You place a call on your Verizon phone to your friend who has an AT&T phone. These are two separate networks, but they have the ability to link with each other. If using a Pi as a server, you'll need:

  • Raspberry Pi 3 Model B+ or later
  • 32GB+ SD card
  • Keyboard and HDMI monitor
  • Raspbian (Buster Lite) operating system
  • Etcher for MAC or Win32DiskImager for Windows (all GUI)
  • Wireless router (or internet access for initial setup)
  • WinSCP, Filezilla, or some sort of SCP/FTP application
  • TAKServer Version 1.4 or later
  • USB GPS dongle that has GPS/GLONASS functionality

Network Connectivity

The easiest way to operate TAK is over the existing cellular network, since coverage is nationwide, there’s plenty of bandwidth for high-definition video feeds, and your smartphone is already set up with a cellular plan. However, if you’re using this device for emergencies such as natural disasters, you can’t rely fully on the cellular network, since it may be disabled or overloaded.

When cellular networks are non-existent, or if you’re using a device that doesn’t have an active cellular plan, off-grid mesh communication devices such as Meshtastic or goTenna can be used to provide mesh networking options for the team. These devices are vital for any scenario where cellular connectivity isn’t guaranteed, but remember that their range is much shorter than you’d get with a cellular network.

Much like a handheld radio, mesh networks may only reach a few miles under optimal conditions. A second option when operating in critical communication infrastructure-denied environments is employing a wireless ad hoc network (WANET) or a mobile ad hoc network (MANET). These networks are a decentralized type of wireless network. These networks are ad hoc because they don’t rely on outside networks.

Military MANETs are used by members of the military who need to establish a network with an emphasis on an all-wireless network that is robust and secure. Common radio waveforms that the military uses are Silvus Technologies’ MN-MIMO Waveform Streamcaster Radios, and Persistent Systems’ WaveRelay MPU5 Tactical Network Radios. There are civilian options for creating a MANET — one great example is the Human MANET Portable Radio (HaMPR).

This is a human-carried portable Amateur Radio Emergency Digital Network (AREDN) wireless Mobile Ad-hoc Network (MANET) access device that encompasses both a MANET radio and an End User Device (EUD; the device you’re using to interact with the TAK app). The HaMPR was developed by Greg Albrecht for the San Francisco Bay Area Emergency Mesh Network.

One final option for teams to connect members on a local TAK server to a larger TAK server environment is employing Starlink. Starlink is a satellite internet constellation operated by SpaceX, providing satellite Internet access coverage to 40 countries. Employing satellite-based communications and connectivity is a viable option in cellular denied environments.
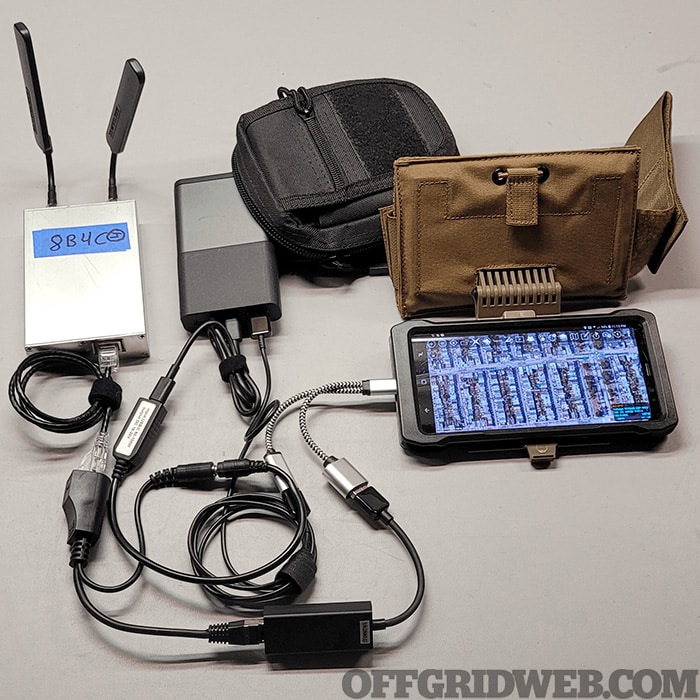
Photo of additional equipment used to set up the Tactical Awareness Kit.

Above: An example of a HaMPR setup from the system’s developer, Greg Albrecht. It includes a Samsung Galaxy in a Juggernaut case connected to a Ubiquiti Rocket M5 MANET radio with two 5GHz antennas. The entire system is powered by a portable USB-C power bank.

Protecting Your Device

Although it’s possible to just shove your phone in your pocket, it’s beneficial to carry it in a manner that’s protected against damage and able to be monitored hands-free. You'll want an End-User Device (EUD) case for your phone, with the best options coming from Juggernaut Case and Kägwerks.

Though the market does have some excellent 3D-printed options at a fraction of the price, I would advise that if you work in austere environments, you should go with one of the former highly durable cases. Both Juggernaut and Kägwerks offer a variety of mounts for attaching your phone to gear and vehicles; Tom Marshall discussed some of the mounts offered by Juggernaut Case in RECOIL OFFGRID Issue 53.
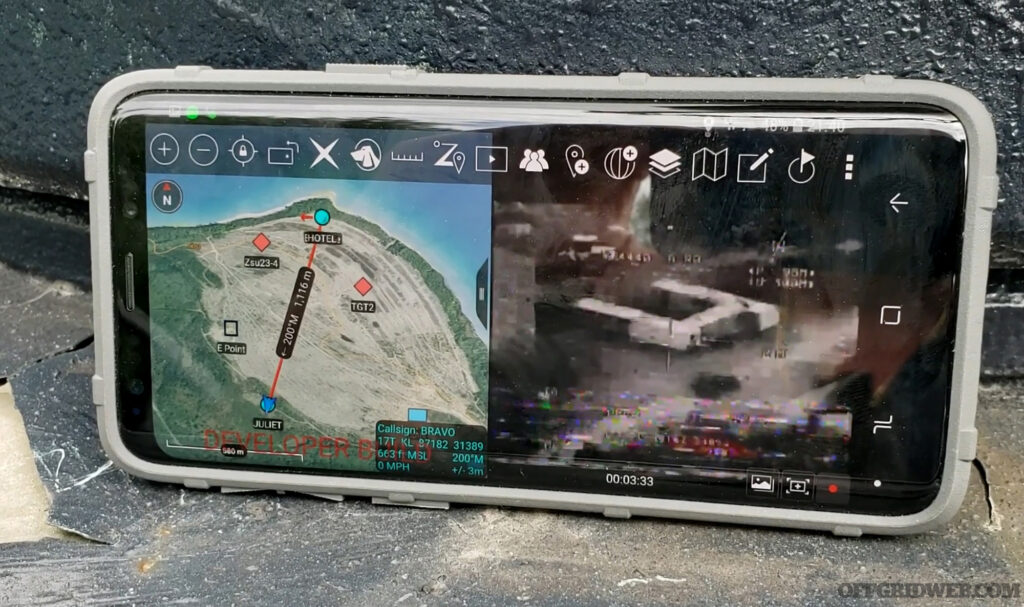
An Android Tactical Awareness Kit shows location data and an image feed during Northern Strike 20, at Rogers City, Mich. Joint Terminal Attack Controllers regularly use the ATAKs to see location of forces and coordinate close air support.(Courtesy Photo)

Above: A device loaded with ATAK shows map data and a drone video feed. (Public domain photo courtesy of Michigan National Guard).

Server Options

A TAK Server connects a small team of people using internet connectivity (or a mesh network) to provide essential situational awareness, chat, and streaming services. The connection can be encrypted for security and provides user control. To allow networking between teammates, you'll need to set up a multicast network or a central server that all team members can connect to.

One multicast communication consideration is setting up a free Zero Tier VPN (www.zerotier.com). For client-server topologies, several open-source TAK servers are available on GitHub that can be installed on a Raspberry Pi or similar device.

FreeTakServer can be extended with its built-in API and optional Node-RED server and includes an easy-to-use “zero-touch” installer (github.com/FreeTAKTeam/FreeTakServer). Taky is another Python-based server (github.com/tkuester/taky). These servers also have data package servers for distributing larger information packs to team members. 

Additionally, the app enables multiple types of encrypted data communications, such as text and file sharing. These communications can be set for user to user, user to select teams, user to command posts, or user to entire force. TAK can be configured to encrypt all mesh communication using AES-256 (see our article on encrypted radios in Issue 53 for more info on this encryption standard). When mesh encryption is enabled, TAK will no longer send or receive unencrypted traffic on the local network. You’ll only be able to communicate with other devices on the local network if they’ve also been configured with the same encryption key.   

Generating an Encryption Key

1. Launch ATAK.
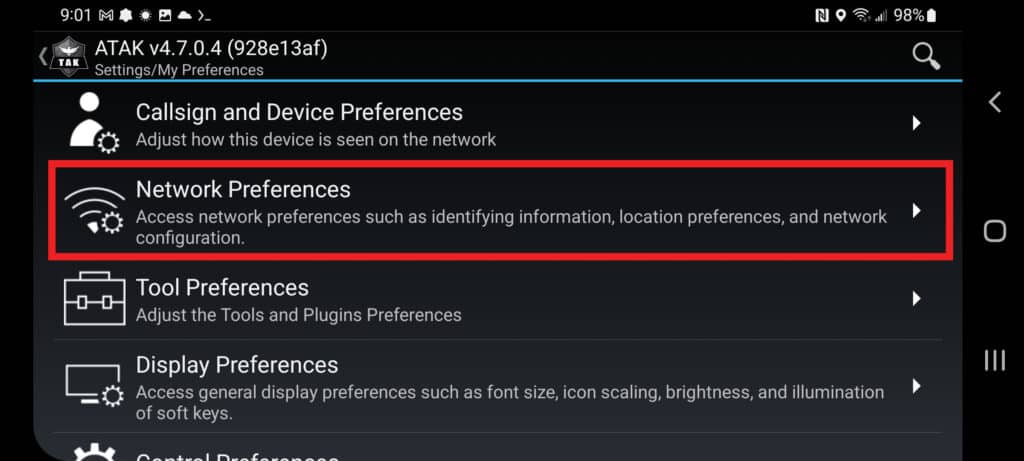
Screenshot of the Tactical Awareness Kit.

2. Select Additional Tools (3 lines) > View all tools & plug-ins > Settings > Show All Preferences > Network Preferences.

Screenshot of the Tactical Awareness Kit.

3. Select Network Connection Preferences.
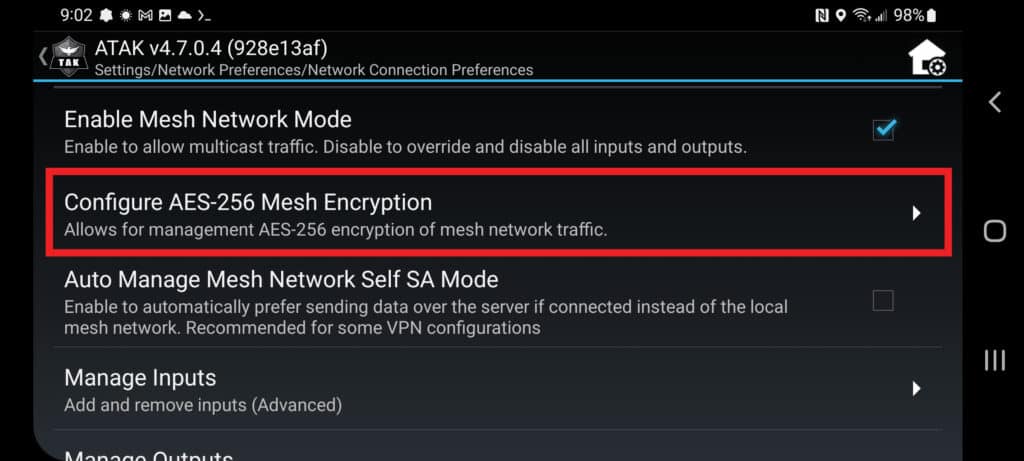
TAK screenshot.

4. Select Configure AES-256 Mesh Encryption.

TAK Screenshot.

5. Generate Key.

TAK screenshot.

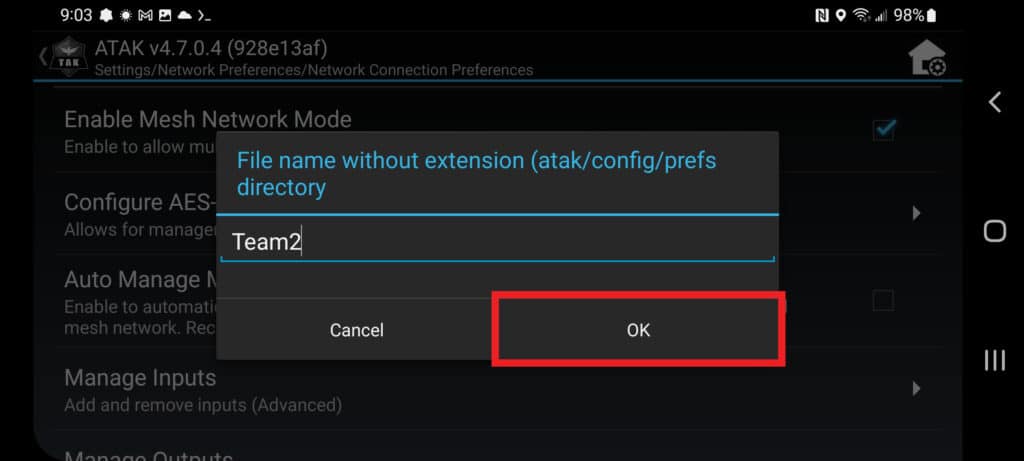
6. Enter a file name for the generated key.
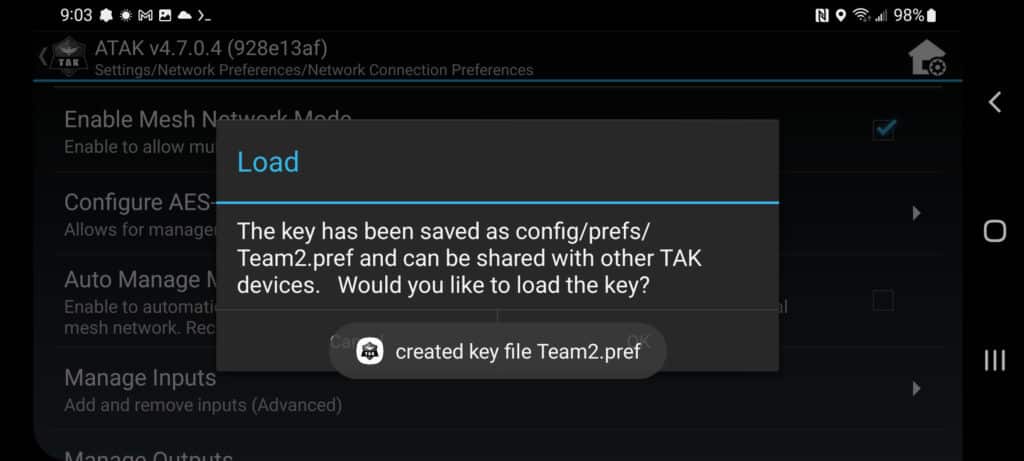
TAK Screenshot.

7. Select OK. The key will be saved on the ATAK device's local storage in the atak/config/prefs directory, with the file name entered in the previous step.

Loading an Encryption Key

After a key file is generated, it must be loaded onto every ATAK device on the local mesh network for all the devices to successfully communicate in mesh mode.

1. Copy the generated key file to the ATAK device's local storage.

2. Launch ATAK.
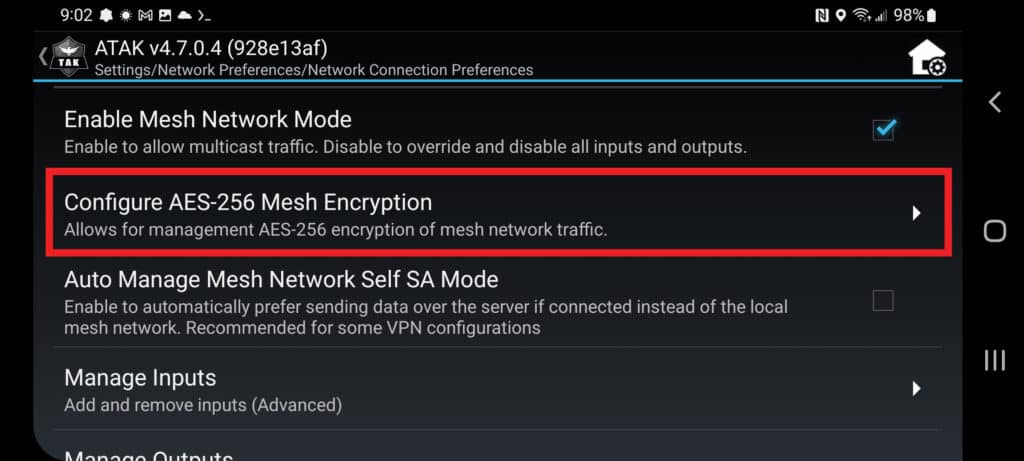
Screenshot of the Tactical Awareness Kit.

3. Select Additional Tools (3 dots) > Settings > Show All Preferences > Network Preferences > Network Connection Preferences > Configure AES-256 Mesh Encryption.

Screenshot of the Tactical Awareness Kit.

4. Select Load Key and browse to the location of the key file.
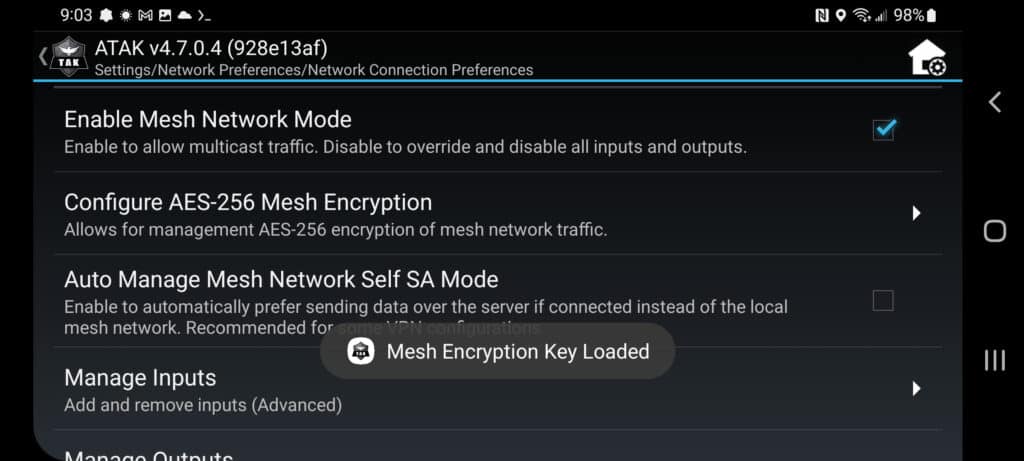
TAK Screenshot.

5. After selecting the key file, a message should appear saying, “Mesh Encryption Key Loaded.”

Expanding Functionality with Plug-Ins

TAK starts to truly shine when you add plug-ins to extend its features. Even the most basic TAK functionality is offline and unusable in communication-denied environments (e.g., a natural disaster that has wiped out infrastructure, or a war against an enemy that’s implementing electronic warfare tools). However, with plug-ins like the goTenna Pro X, team members in the operating area can share information, text, and locations even when terrestrial networks are unavailable.

Another off-grid networking plug-in is HAMMER, which acts as an audio modem to end CoT data using commercial off-the-shelf “walkie-talkie” radios (github.com/raytheonbbn/hammer). ATAK-forwarder (github.com/paulmandal/atak-forwarder) works with LoRa-based Meshtastic radios, or you can use APRS-TAK with ham radios (github.com/pinztrek/aprstak). Finally, the UAS plug-in available on TAK.gov can pull data from a commercial off-the-shelf drone (aka Unmanned Aircraft System or UAS) like a DJI Mavic Pro or an Autel Evo II. 

From left, U.S. Marine Corps Sgt. Christopher N. Lupyak, Lance Cpl. Joseph Burns, and Lance Cpl. Nolan Jaros, all combat engineers with the Littoral Engineer Reconnaissance Team, 9th Engineer Support Battalion, 3d Marine Logistics Group, utilize the Android Tactical Assault System to aid in a reconnaissance patrol during a littoral mobility and detection exercise on Camp Pendleton, California, Nov. 18, 2021. The ATAK is a tool that allows Marines to rapidly report critical geospatial information to support intelligence requirements for a given objective. During this exercise, 7th and 9th ESB are refining their skills with emerging Marine Corps technologies in order to facilitate follow-on forces’ littoral mobility from shallow water to the objective. (U.S. Marine Corps photo by Sgt. Hailey D. Clay)

Above: A group of Marines checking ATAK as part of a littoral mobility and detection exercise at Camp Pendleton. (U.S. Marine Corps photo by Sgt. Hailey D. Clay)

How to Download & Install ATAK

The Team Awareness Kit for Android (ATAK) application, some auxiliary/plug-in applications, and supporting documentation are available for download at TAK.gov. First, download the .apk installer(s) to a PC, transfer them via USB cable to an Android device, and launch the installer. The other option is downloading the Civ-Tak version at CivTak.org from your mobile device. You can access other Civilian TAK-related resources on this site.

Launching the Installer

Use the Android file manager to locate the folder containing the ATAK apk. Select the ATAK apk and respond to installation prompts. Once ATAK has been installed, select the apk for any desired plug-in to initiate the installation. ATAK requires that the release numbers of any plug-ins match the release number of ATAK.

When ATAK is launched for the first time, a passphrase prompt may appear if it detects encrypted data from a previous ATAK installation. To continue using this data with the new ATAK installation, enter the passphrase and select OK. Otherwise, choose Remove and Quit to discard the old data, and then relaunch ATAK. To quit ATAK while leaving the existing data intact, select Quit. Note that the prompt will reappear on the next launch unless the encrypted data is removed, or the correct passphrase is supplied.
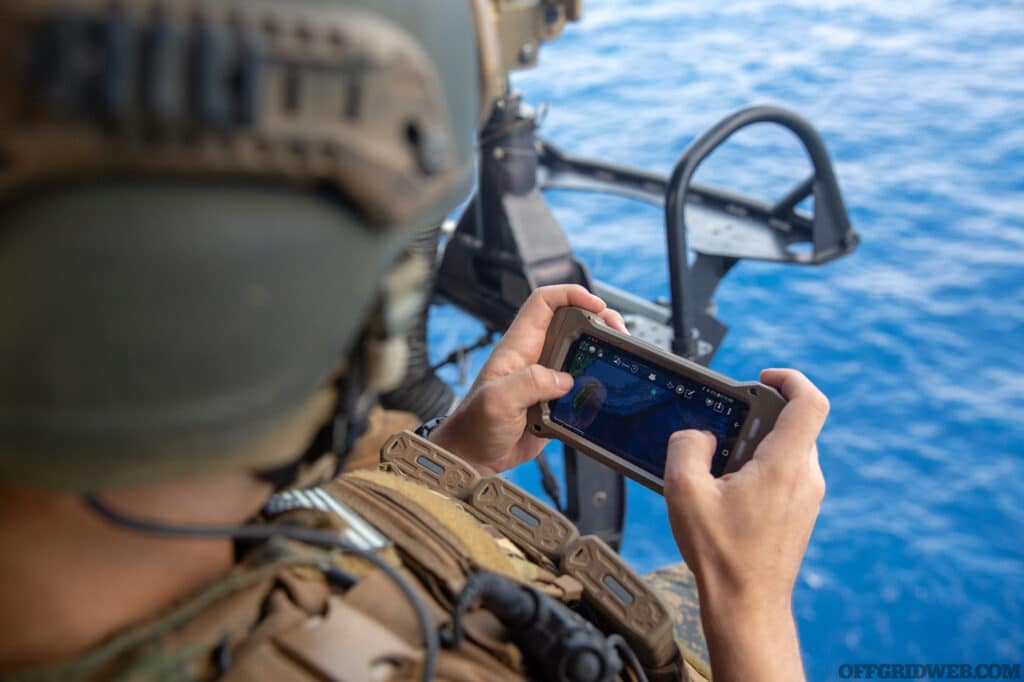
SOUTH CHINA SEA (Sept. 6, 2020) Lance Cpl. Quentin Kachelmeier, a radio operator with the Maritime Raid Force (MRF), 31st Marine Expeditionary Unit (MEU), uses an Android Tactical Assault Kit (ATAK) during a Visit Board Search and Seizure (VBSS) mission on a UH-1Y Venom helicopter with Marine Medium Tiltrotor Squadron 262 (Reinforced), 31st MEU, after taking off from amphibious assault ship USS America (LHA 6). VBSS is part of Maritime Interception Operations that aim to delay, disrupt, or destroy enemy forces or supplies in the maritime domain. America, flagship of the America Expeditionary Strike Group, 31st Marine Expeditionary Unit team, is operating in the 7th fleet area of operations to enhance interoperability with allies and partners and serve as a ready response force to defend peace and stability in the Indo-Pacific region. (U.S. Marine Corps photo by Cpl. Brandon Salas)

Above: A radio operator with the USMC Maritime Raid Force uses ATAK during a Visit Board Search and Seizure (VBSS) mission in the South China Sea. (U.S. Marine Corps photo by Cpl. Brandon Salas)

Installed plug-ins and bundled support applications must be loaded into ATAK via TAK Package Mgmt. Once ATAK is launched, select Additional Tools (3 lines) > View all tools & plug-ins > Settings > TAK Package Mgmt. Installed plug-ins and bundled support applications that match the current release will appear in the list with the current availability status. The user can filter the current view by using the Search (magnifying glass icon). Tap on the plug-in or bundled support application name to initiate loading or installation.

Maps aren’t included in TAK by default, so you'll have to download and import ATAK-Maps packages found on GitHub or CivTak.org. Some familiar map sources will be Google Maps and OpenStreetMap. TAK can also cache maps and imagery for offline use. ATAK only has low-resolution elevation data included by default. Still, you can download and import more detailed elevation data from the USGS website. 
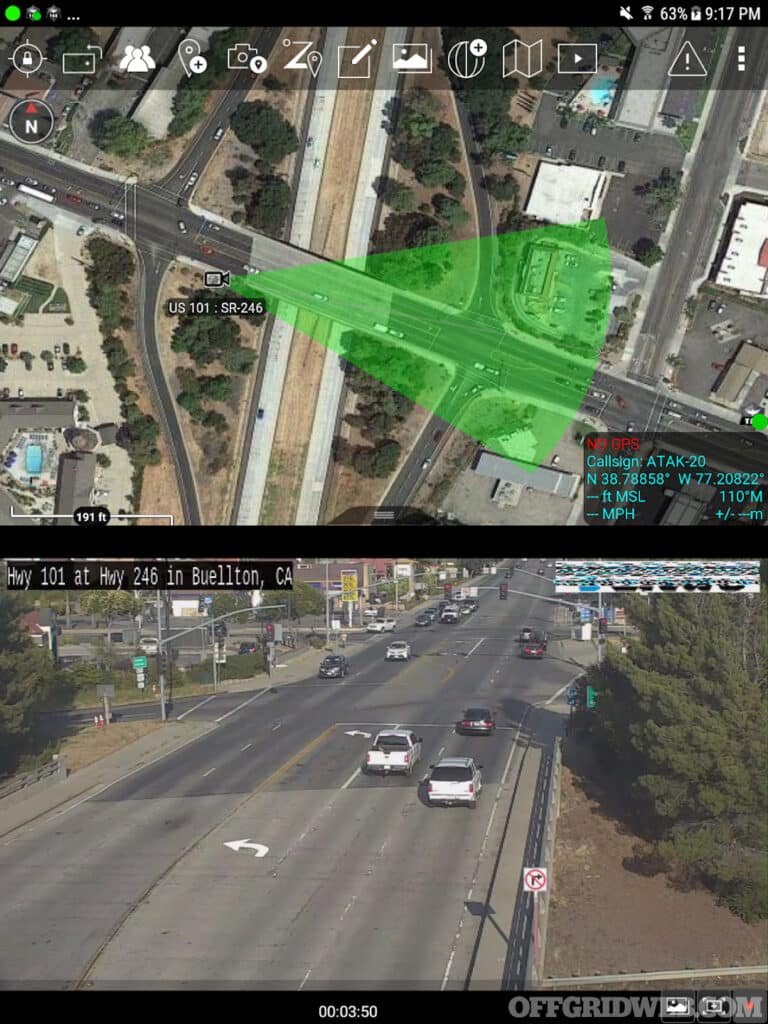
Screenshot of publicly available IP cameras.

Above: Publicly accessible IP cameras, such as traffic cams and wildfire monitoring cams, can be integrated into ATAK by pasting in the video feed URL.

TAK Server Considerations

Before you begin to operate TAK within your team, some serious thought has to be given to how you’re going to deploy your TAK server. You have a few options that you can use.

1. Cloud A Digital Ocean (DO) or other virtually hosted servers. This option will allow your team the fastest means to deploy a TAK server without any serious headache.

2. VPN An RPi (Raspberry Pi) server running as a ZeroTier client will allow any TAK client on the ZeroTier network to access the RPi server regardless of internet connection method.

3. Hybrid Off-Grid A Digital Ocean server or RPi with one or more of the TAK clients connected as a “bridge” to an off-grid mesh network such as Meshtastic LoRa. This configuration allows any off-grid Meshtastic clients to have their communications reach all “internet-connected” TAK clients via a TAK client who is simultaneously connected to both the internet and mesh sides of the network. This is where you could have a Starlink Device act as that bridge from the off-grid network to a Digital Ocean Cloud-hosted server.
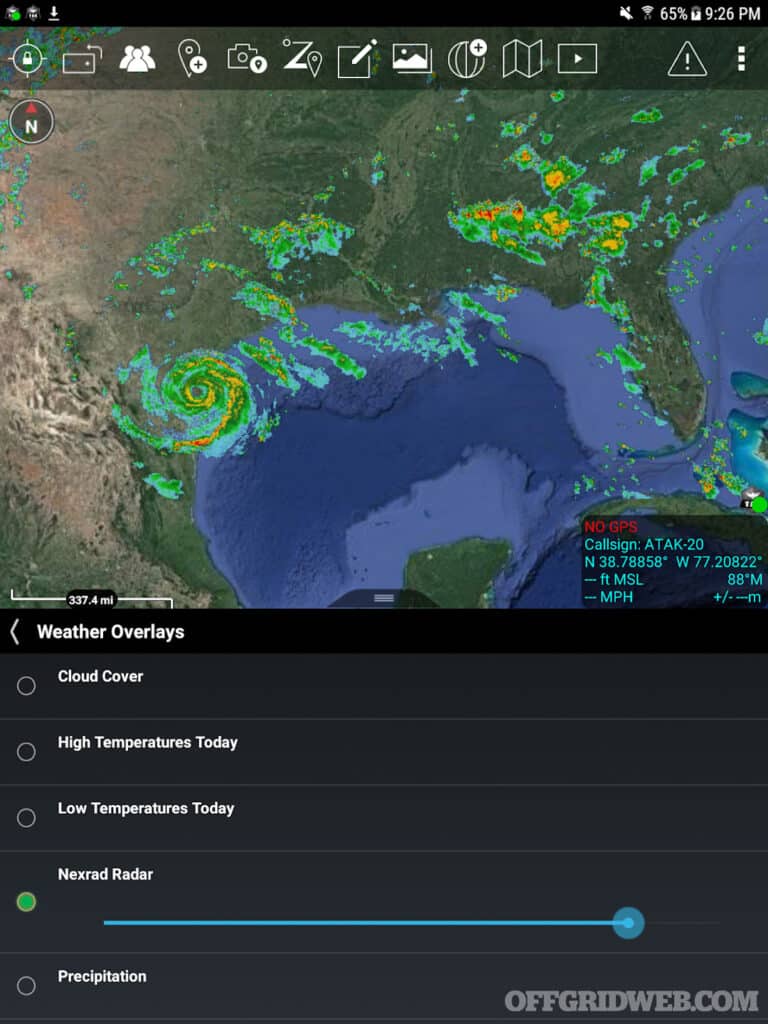
Screenshot of a weather overlay.

Above: Optional weather overlays can help you track a storm’s progress while you coordinate with your team.

Closing Thoughts

TAK is a game-changer, as it transforms the team’s understanding of the situation in any given area. Multiple organizations have used TAK to coordinate searches and rescues, respond to criminal activity, and establish perimeters in combat zones. Having TAK on your team is like having the connectivity of a command center at your fingertips.

Additional Resources

There are many different paths to setting up TAK for your group. The following sites provide helpful resources and information:

About the Author

Christopher Rance has 19 years of professional experience in the realm of precision shooting and field communications, having served in a variety of sniper positions within the U.S. Army. During his tenure as an Army Sniper Instructor, he trained hundreds of soldiers, including elements of Air Force Combat Controllers, Air Force Special Reconnaissance Airmen, the 75th Ranger Regiment, law enforcement, and foreign allies. He's also the creator of The Light Fighter Manifesto zine. The zine focuses on emergent warfare topics including drones, off-grid communications, and small unit tactics. lightfightermanifesto.org

Read more

Subscribe to Recoil Offgrid's free newsletter for more content like this.

Editors Note: This article has been modified from its print version for the web.


Review: Slip-Joint Knives

If you’re a Boomer or Gen-Xer, you may have a fond memory of your father or other relative giving you a pocket knife at a young age. It may have been a lock-back or a fixed blade, but for most of us it was a simple slip-joint folding pocket knife with no locking mechanism. The blade was held open under simple spring pressure. Sometimes it was a single blade Barlow style or Jack knife. In other cases, it may have been a Trapper with a drop-point knife blade and a Spey blade. If you were really lucky, it could’ve been a multi-blade Congress knife or a Swiss Army Knife.

Many of us who were more serious about knives may have graduated on to something with a Walker liner lock, frame lock, or Axis lock-type mechanism. That was the goal from the 1980s onward, to have a folding knife that locked up like a fixed blade. Still, many of us look back on fond memories of that first knife type. Custom knife makers often offer a few slip joints in this category as a testament to modern craftsmanship and materials or for customers with a bit of nostalgia.

These knives are still very capable in our modern age and will still perform over 90 percent of common daily tasks. They tend to be on the smaller side and are easily stowed in a pocket, so you always have a knife. Additionally, if you travel outside of the U.S., you’ll find that they’re usually the only knife that won’t land you in prison in most of Europe.

Because slip-joint knives are typically carried loose in a pocket, a lanyard of some type makes more sense as a means of being able to locate and retrieve the knife. Unfortunately, this is a small detail that is often overlooked to keep with tradition. In the past, slip joints were cheaper knives sold in hardware stores, gun shops and department stores. Modern slip joints are a little bit more expensive in many cases, but still more affordable on average than typical tactical folding knives.

Spyderco

Studio photo of a spyderco knife.

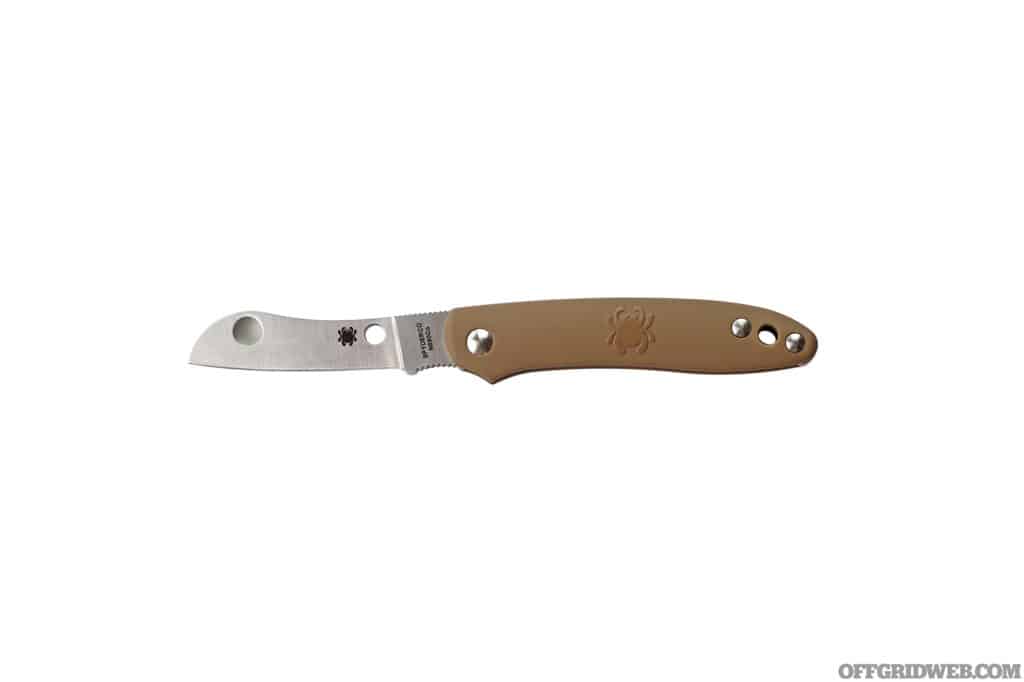
Roadie

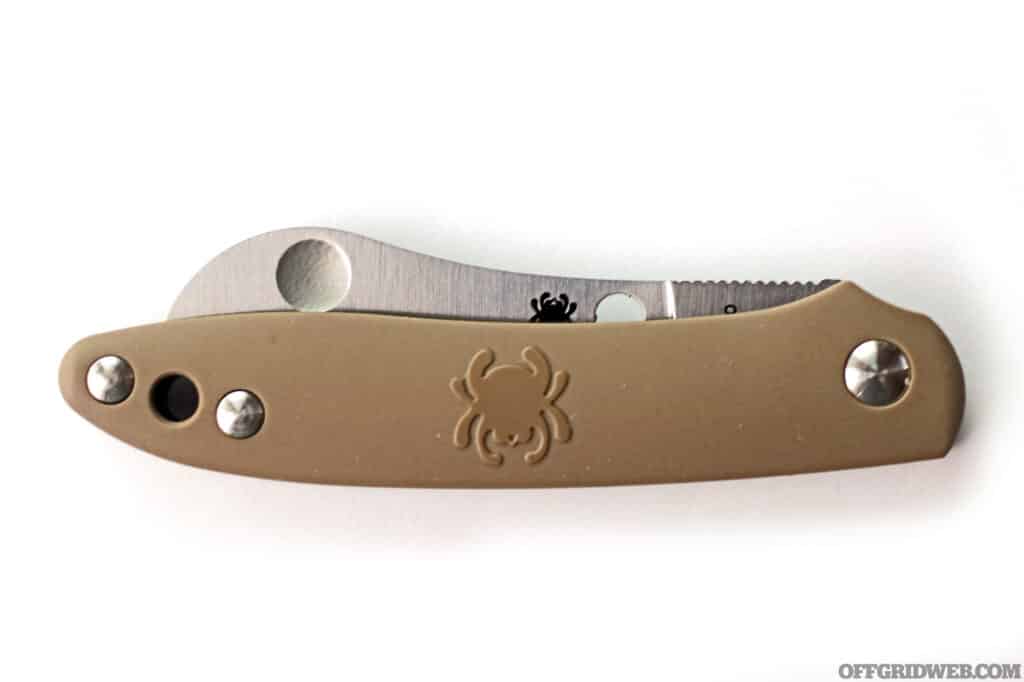
After 9/11, carrying any type of knife aboard an airplane was prohibited. In early 2013, the Transportation Security Administration (TSA) announced a plan to allow certain knives on airplanes again. Although the plan was later withdrawn, Spyderco had already designed a non-locking pocketknife that would conform with proposed guidelines. The Roadie is an evolved penknife that is more practical than typical slip joints. It relies on a pair of symmetrical dimples in the blade that allow a fingernail-free two-handed opening. Far superior to a traditional nail nick, they also don’t collect dirt or debris. The Roadie also features a subtle index-finger choil that acts as a safeguard against unintentional closure.

  • Overall length: 5.1 inches
  • Blade Length: 2.1 inches
  • Weight: 1 ounce
  • Blade Material: N690Co

Studio photo of a spyderco knife folded closed.

Pros:

  • The blade slices like a surgical scalpel.
  • Its handle scales are extremely comfortable.
  • Lanyard hole makes it easily accessible

Cons:

  • This knife would be better with a pocket clip.
  • The sheepsfoot blade worked well for its original design, but a clip-point or drop-point variant would be welcome.

Price: $84

URL: spyderco.com

Mikov

Studio photo of a mikov slip joint knife.

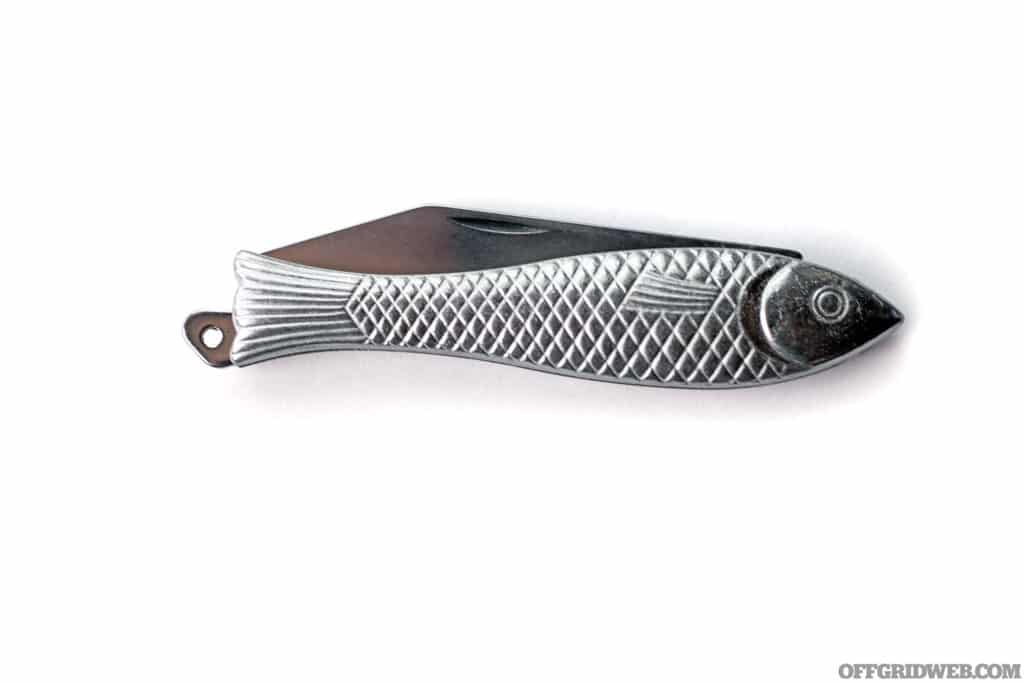
Rybicka

Mikov is a classic European knife manufacturer that has been making knives in the Czech Republic since 1794. The Rybicka or “Little Fish Knife” has been in their catalog for over 100 years and is a traditional slip joint design that is often passed down from father to son. Original knives of this type sported carbon steel blades and often had carved wooden handles. Mikov began offering these knives with a 420 steel blade and Zinc alloy handles a few decades ago. This makes them more durable and actually quite a bit cheaper.

  • Overall length: 5.5 inches
  • Blade Length: 2.2 inches
  • Weight: 1.5 ounces
  • Blade Material: 420

Studio photo of a mikov slip joint knife folded closed.

Pros:

  • This is a small and unobtrusive knife that can attach to a key ring or be worn around the neck for ease of access.
  • This is a classic Czech design of a very distinct model.
  • Properly sharpened, it’s a very capable little slicer.

Cons:

  • The handles are a cast zinc alloy, which means it’ll corrode and degrade over time.
  • The knife was very dull out of the box.

Price: $14

URL: mikov.cz

Heretic Knives

Studio photo of a Heretic knife.

Jinn

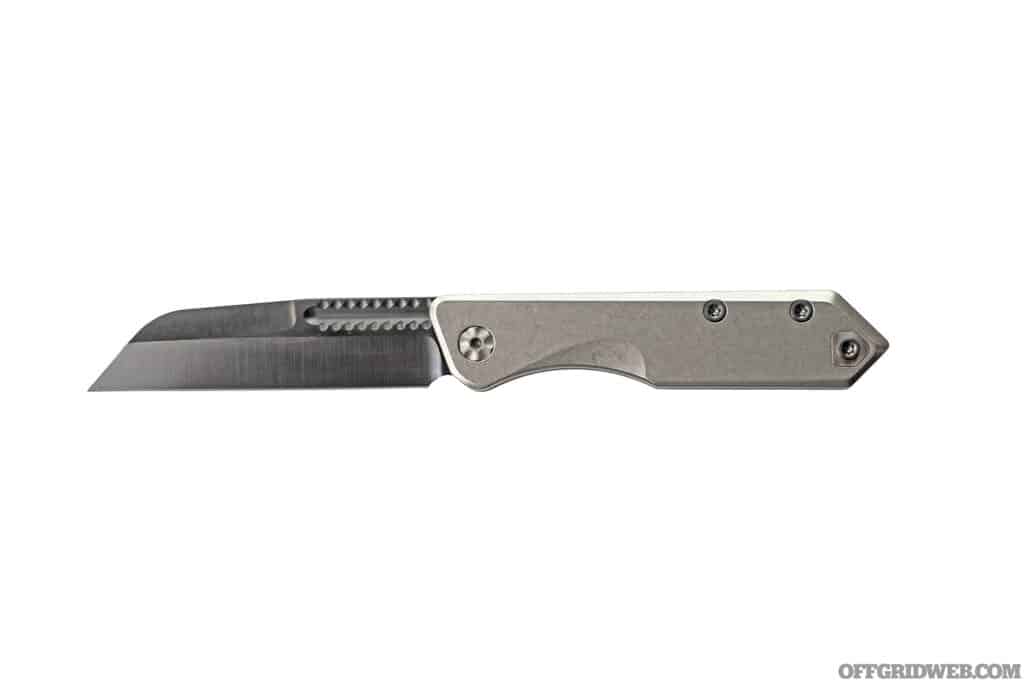
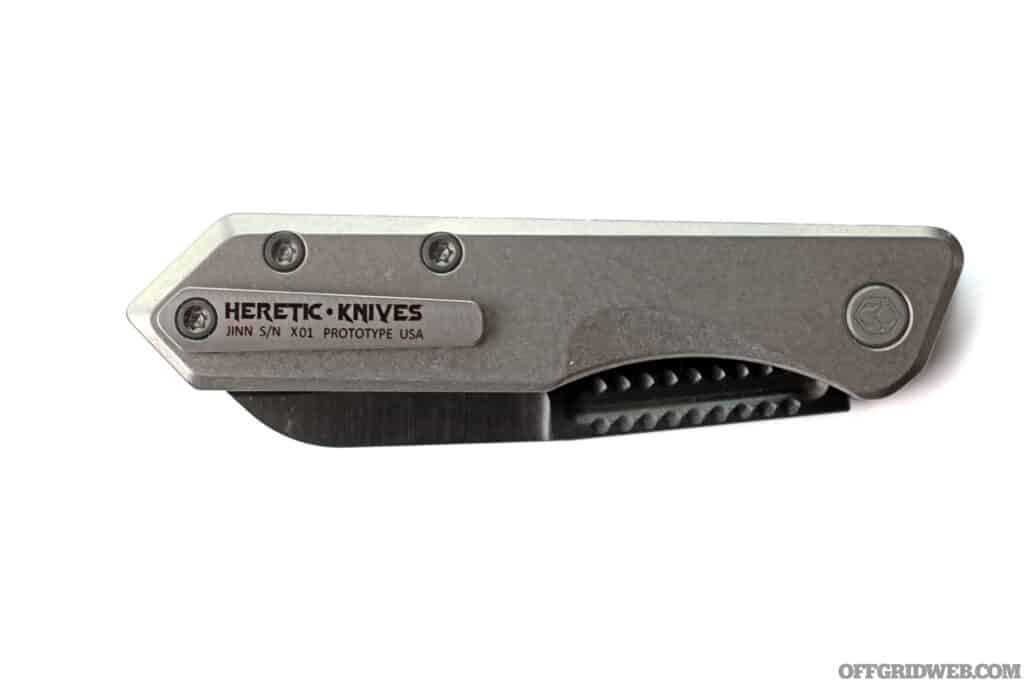
Heretic Knives has a long and consistent history in the realm of tactical automatic knives. So, to see a slippie in their lineup made us sit up and take notice. As can be expected, Heretic doesn’t screw around when it comes to materials. The CPM Magnacut for the blade is the star in this show, along with titanium handles and a pocket clip. This is definitely not grandpa’s Barlow knife. The blade is a sheepsfoot design and if you’re in a locale that restricts you based on the locking mechanism of your knife, this is the one you want. This is a slip-joint knife for a new generation.

  • Overall length: 6.8 inches
  • Blade Length: 3.1 inches
  • Weight: 2.4 ounces
  • Blade Material: CPM Magnacut

Studio photo of a heretic knife folded.

Pros:

  • It’s made from CPM Magnacut, which may be the future super steel for the next decade or two.
  • Razor sharp out of the box, the way all knives should ship
  • Titanium handles with amazing texture really blows the doors off everything else in this category

Cons:

  • These knives are handmade one at a time to order or in small batches, so availability may be an issue.
  • Like most slip joints, there’s no lanyard hole.

Price: $800+

URL: hereticknives.com

Benchmade

Studio photo of a benchmade knife.

Weekender

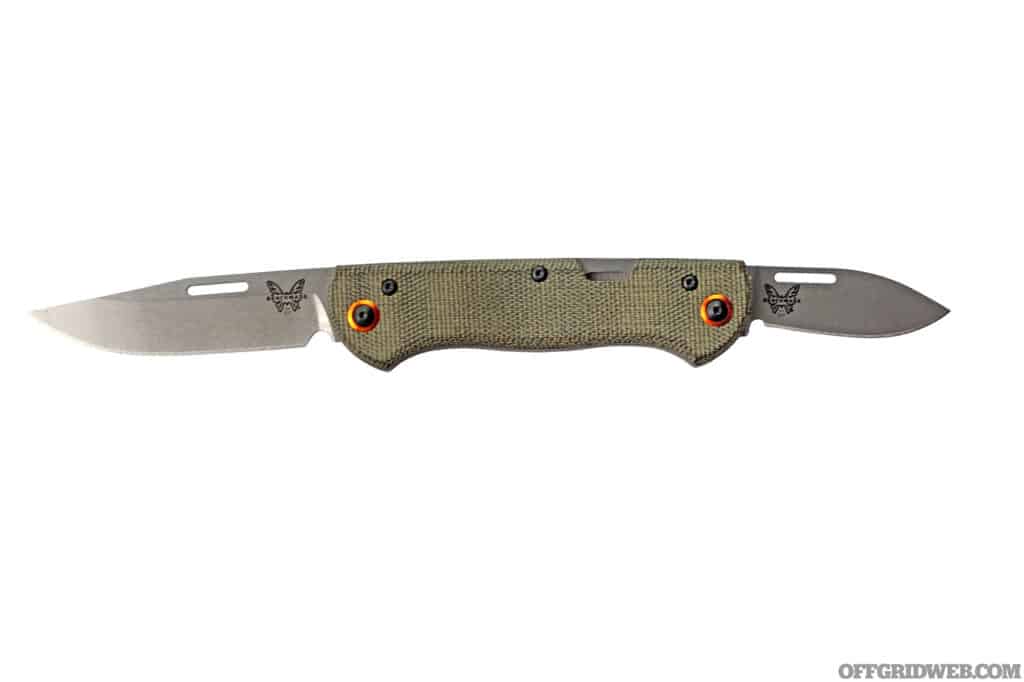
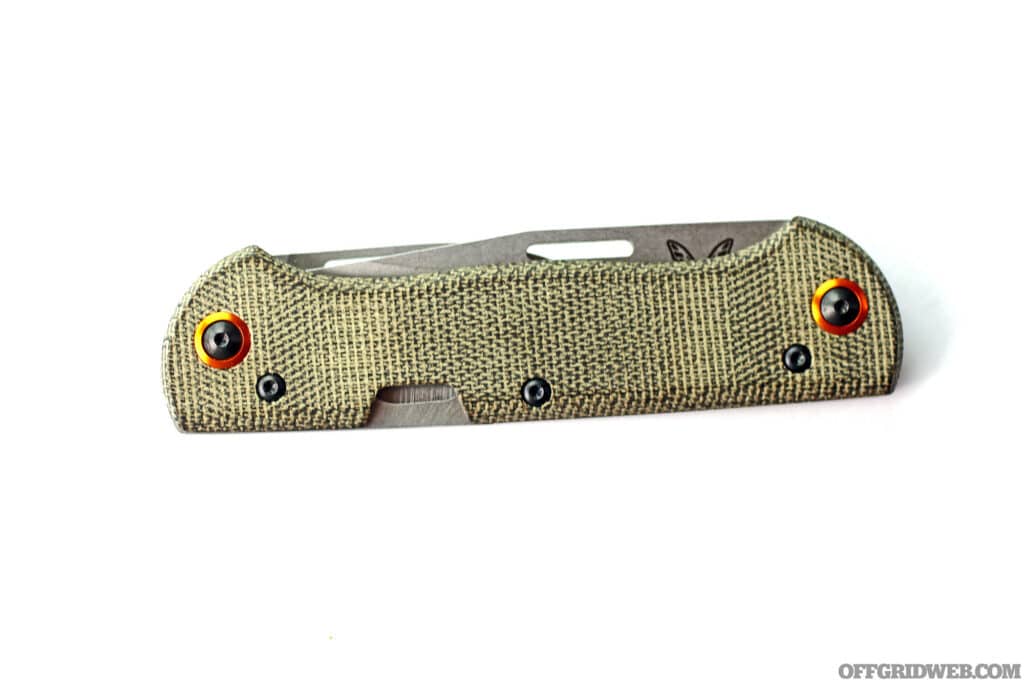
The Weekender is a multi-bladed pocketknife equipped with tools to improve your weekend — or any day. It features a 3-inch clip-point blade for your EDC cutting needs, and a 2-inch drop-point blade for smaller cutting jobs; the bottle opener ensures all your favorite beverages can be opened with ease. The Weekender is a USA-made folder to enhance your life. The blades are made of CPM-S30V steel, ensuring that they stay sharp when you need them. The Micarta handle offers a great gripping surface and will last virtually forever. There are other versions of this model in the works with different blade options and colors of Micarta.

  • Overall length: 7.1 inches
  • Blade Lengths: 3 inches, 2 inches
  • Weight: 3.5 ounces
  • Blade Material: CPM-S30V

Studio photo of a benchmade knife folded closed.

Pros:

  • Very sharp out of the box with nice thin edges for slicing
  • CPM-S30V is a premium knife steel with superb edge retention.
  • The bottle opener comes in handy when you need it.

Cons:

  • As good a steel as S30V is, it can be difficult to sharpen.
  • There’s no lanyard hole on this to help you secure the knife.

Price: $250

URL: benchmade.com

CRKT

Studio photo of a crkt knife.

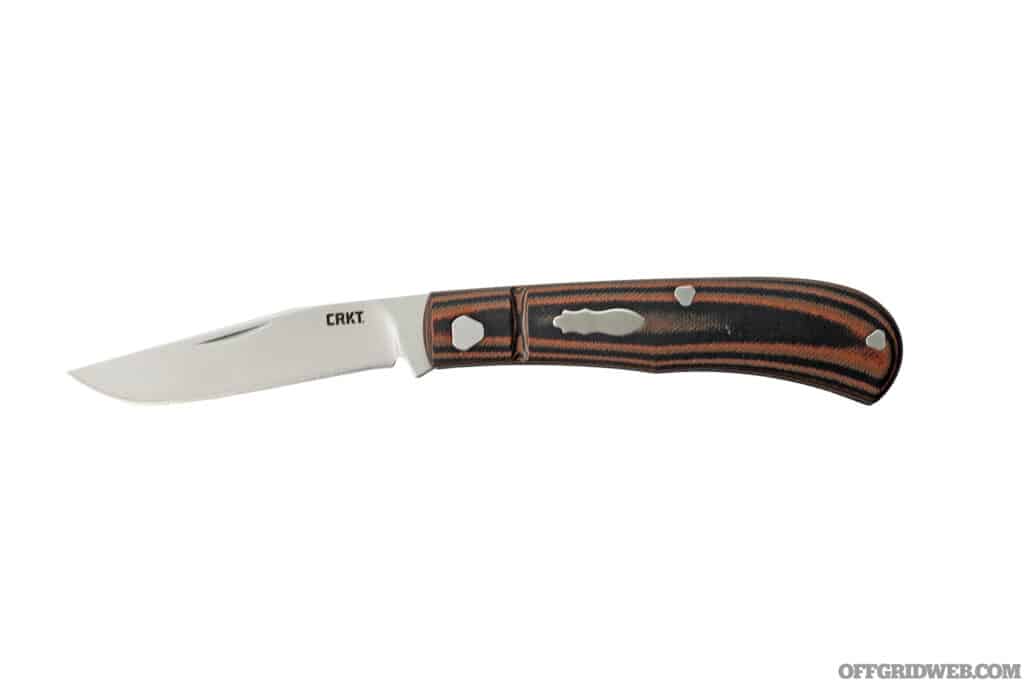
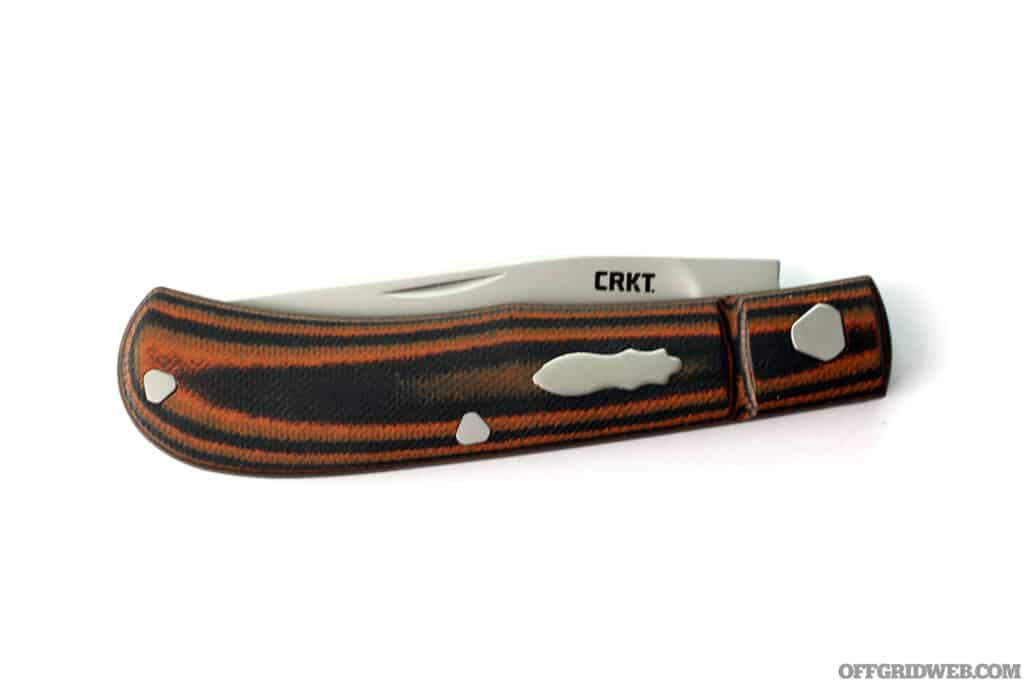
Venandi

The name Venandi comes from a Latin word meaning “hunter,” and this design is a collaboration between custom knife maker Richard Rogers and Columbia River Knife and Tool. Rugged G10 handle scales mean that the handles will probably outlast the rest of the knife. Its 3.1-inch clip-point blade is made from 8Cr13MoV stainless steel. The steel is good, but it’s not exactly Magnacut. This is a great first knife for someone who is just getting into knives. It’s an ultra-modern take on a classic and timeless design.

  • Overall length: 7.2 inches
  • Blade Length: 3.1 inches
  • Weight: 1.8 ounces
  • Blade Material: 8Cr13MoV

Studio photo of a crkt slip joint knife.

Pros:

  • The blade is sharp out of the box and ready to tackle virtually any cutting chore.
  • The knife excels at cutting and slicing with its clip-point blade.
  • You almost never think of G10 handles with a slip joint, but it works well on this model.

Cons:

  • Like most slip joints, there’s no lanyard hole.
  • A pocket clip could have worked well on this model, even though that’s not a common slip-joint feature.

Price: $40

URL: crkt.com

Cold Steel

Studio photo of a cold steel slip joint knife.

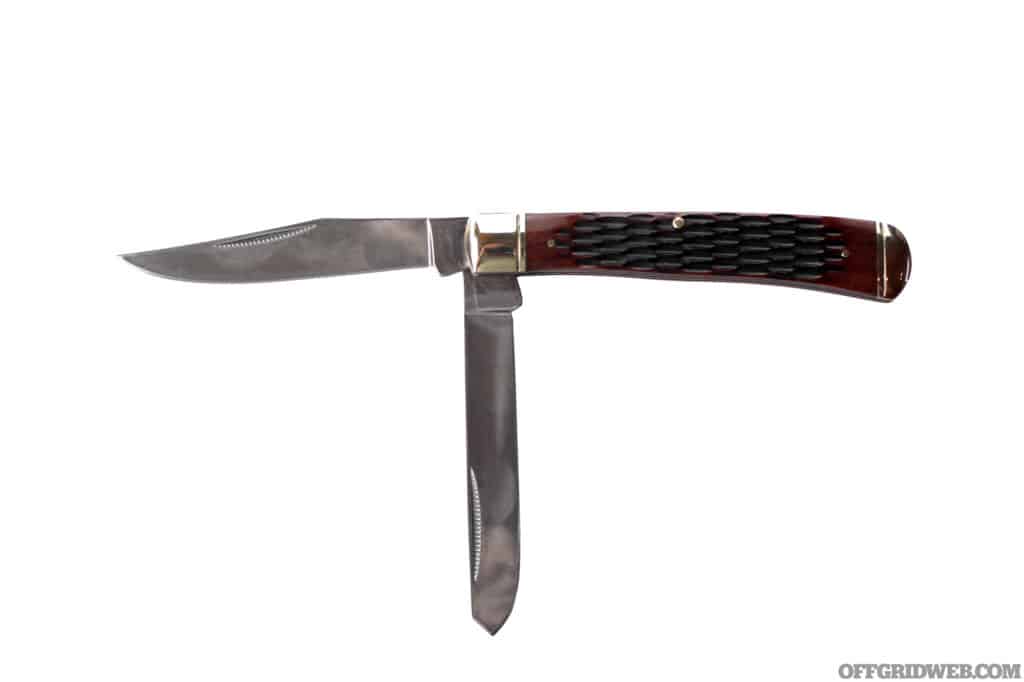
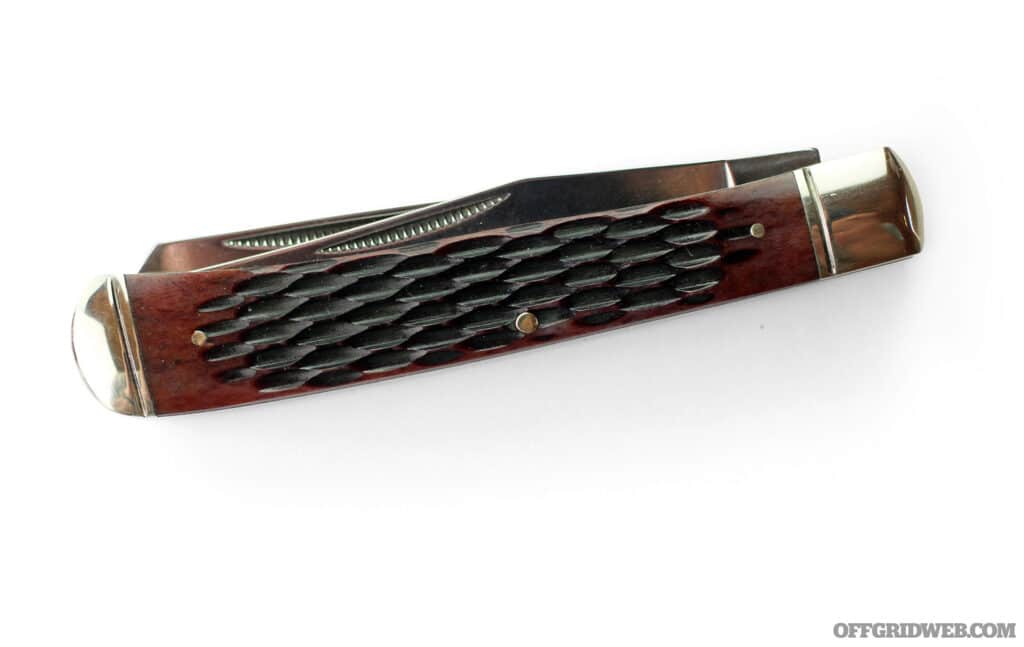
Trapper

This is Cold Steel’s take on the classic slip-joint Trapper knife. It features handles with authentic jigged bone, highlighted with polished metal bolsters. The rugged handles are substantially sized for hard work, even with gloved hands. It’s constructed in a traditional Jack Knife pattern, with two polished blades: a clip-point for piercing and cutting, and a Spey for skinning and gutting, both folding out of the same end. Popular folklore has placed the Trapper as the preferred choice of rugged outdoorsmen and frontier hunters, but its practicality makes it useful for all sorts of chores.

  • Overall length: 7.4 inches
  • Blade Length: 3.3 inches
  • Weight: 4 ounces
  • Blade Material: 8Cr13MoV

Studio photo of a cold steel slip joint knife in the folded position.

Pros:

  • This knife reminds me of one of the Trappers I used from the age of 7 until my early 20s as a hiker, hunter, Marine, and ranch hand.
  • The blades slice like razors and open easier than a traditional nail nick due to scalloping.
  • Compact, many options for daily carry.

Cons:

  • Like most slip joints, there’s no lanyard hole.
  • The handle material may degrade over time with a lot of use. Bone isn’t Micarta.

Price: $40

URL: coldsteel.com

Kershaw

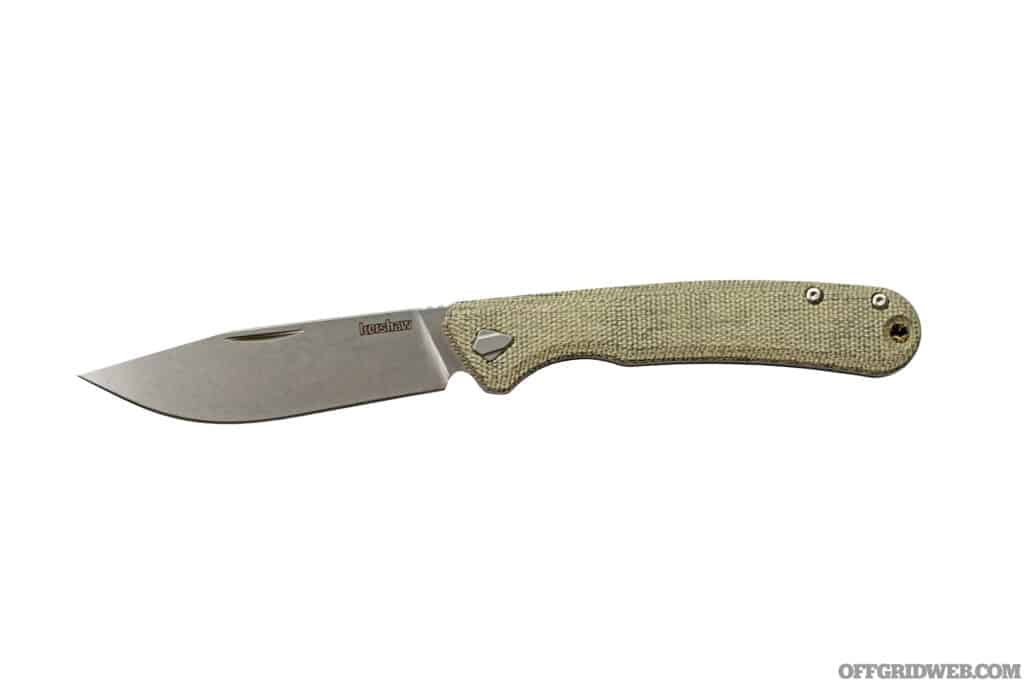
Studio photo of a kershaw slip joint knife.

Federalist

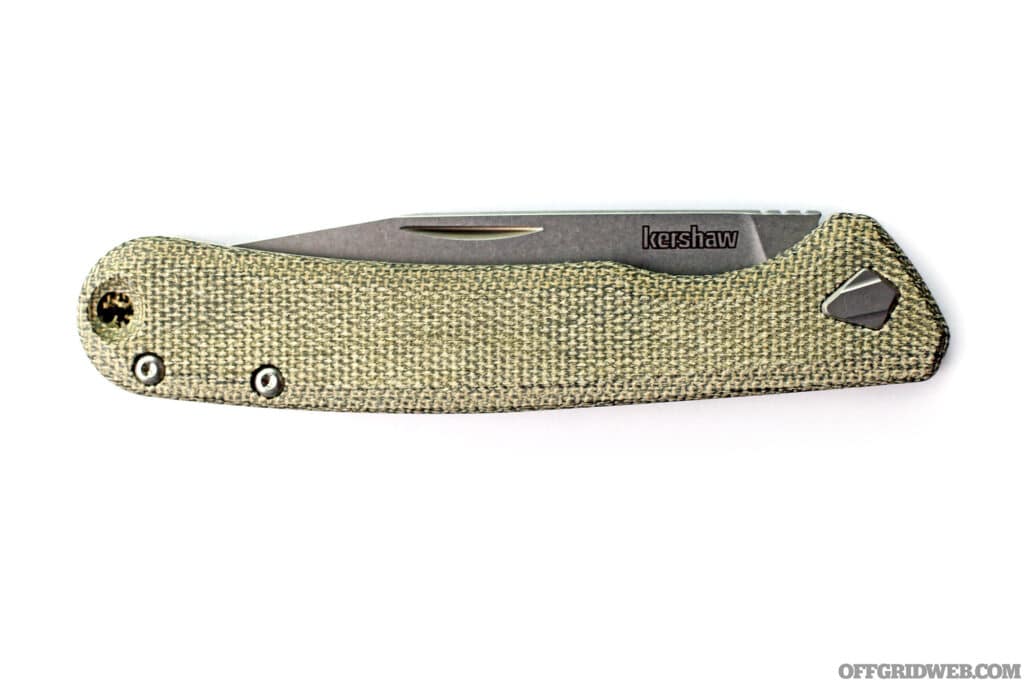
Kershaw’s Federalist is a U.S.-made non-locking slip joint. It relies on a double-detent system to hold the blade in place while closed, and the half-stop offers controlled opening and closing action. The green canvas Micarta handle feels good in the hand, and it’ll prove to be extremely durable. The blade is made from CPM 154 steel and has an impressive edge when first taken out of the box. The custom pivot forms a shield detail to complete the distinct look of a slip joint knife. In spite of that, the Federalist moves the design several steps forward by blending characteristics of a tactical folder with that of the old-school Jack knife.

  • Overall length: 7. 5 inches
  • Blade Length: 3.3 inches
  • Weight: 2.1 ounces
  • Blade Material: CPM 154

Studio photo of a kershaw slip joint knife in the folded position.

Pros:

  • This slip joint has lanyard hole, which makes it easily accessible or locatable in the pocket with a lanyard.
  • The handle is extremely comfortable and ergonomic.
  • The blade is made from 154 CM; it’s tough, razor sharp, rust resistant, and sports an easily maintainable edge.

Cons:

  • The blade could have been a hair sharper out of the box.

Price: $155

URL: kershaw.kaiusa.com

Read More

Subscribe to Recoil Offgrid's free newsletter for more content like this.


Hazard 4: Jeep Molded Storage Headliners

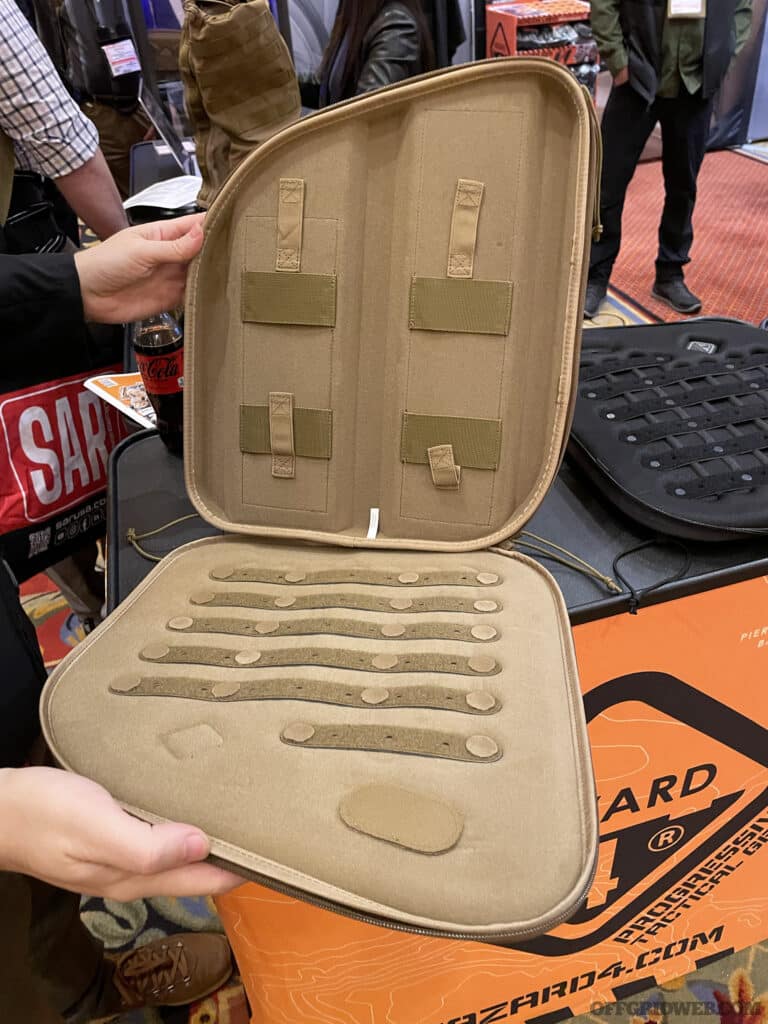
Today, we're taking a look at a handy piece of kit for all Jeep enthusiasts: the Hazard 4 Headliner. We found this at the Hazard 4 booth during SHOT Show 2024, and although it was designed for Jeep JL/Gladiator models (with new models on the way for the Ford Bronco and Hummer EV), it may also fit it other vehicles depending on whether or not there is enough room on the ceiling.

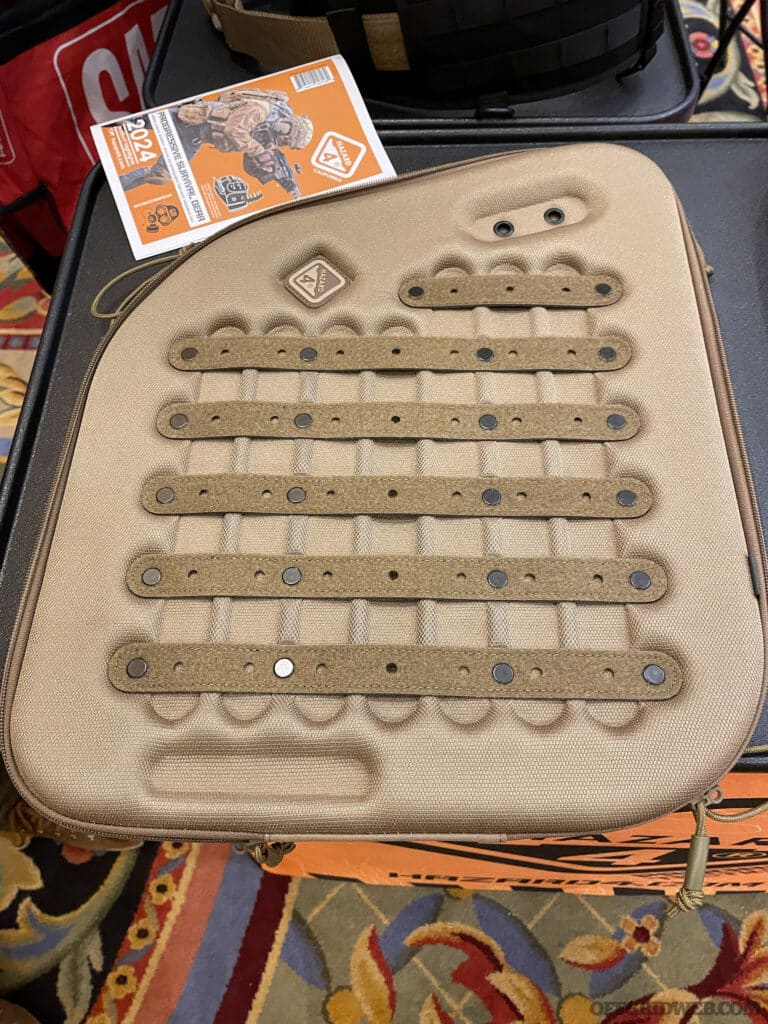
Top veiw of the Hazard 4 Jeep molded headliner.

Design and Construction

The Hazard 4 Headliner is crafted with a dual-foam construction – a feature not commonly seen in standard headliners. This design aims to provide enhanced insulation, both in terms of temperature control and sound dampening. There are other features built into the design, including HardPoint ports (those two holes you see in the top corner of the picture above), which allow you to mout things like Hazard 4's LED Beacon lights or other accessories.

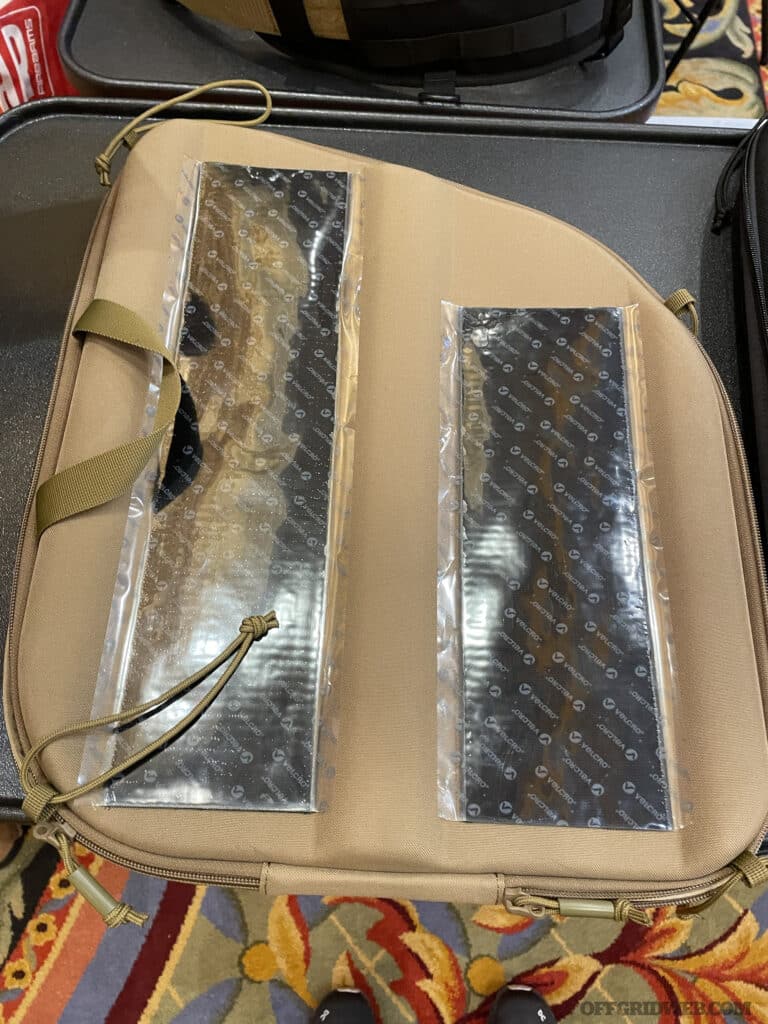
Additional loops on the corner can be used to secure the Headliner to the Jeep's existing tie downs for an even more secure attachment, but the heavy duty velcro on the back will hold a reasonable amount of weight. YKK zippers along the side provide secure access, and the zipper ends can be tucked into the front.

View of the velcro on the back of the Hazard 4 Headliner.

Storage and Utility

A key feature of the Hazard 4 Headliner is its storage capability. Designed with hard-molle modular channels, it allows for customization and additional storage options. This could be useful for those who need extra space for gear, especially when off-roading, overlanding, or camping.

View of the inside of the Headliner.

Hazard 4 Headliner Specs

  • Overall Dimensions: 18.8″ L x 16″ W x 2″ D (47.6 x 40.6 x 5.1 cm)
  • Product Weight: 2.2 lbs. (35.2 oz)
  • Available Colors: Black, Coyote
  • MSRP: $225
  • URL: Hazard4.com

Read More

Subscribe to Recoil Offgrid's free newsletter for more content like this.


First Look: Aero Precision Lever Action Rifle

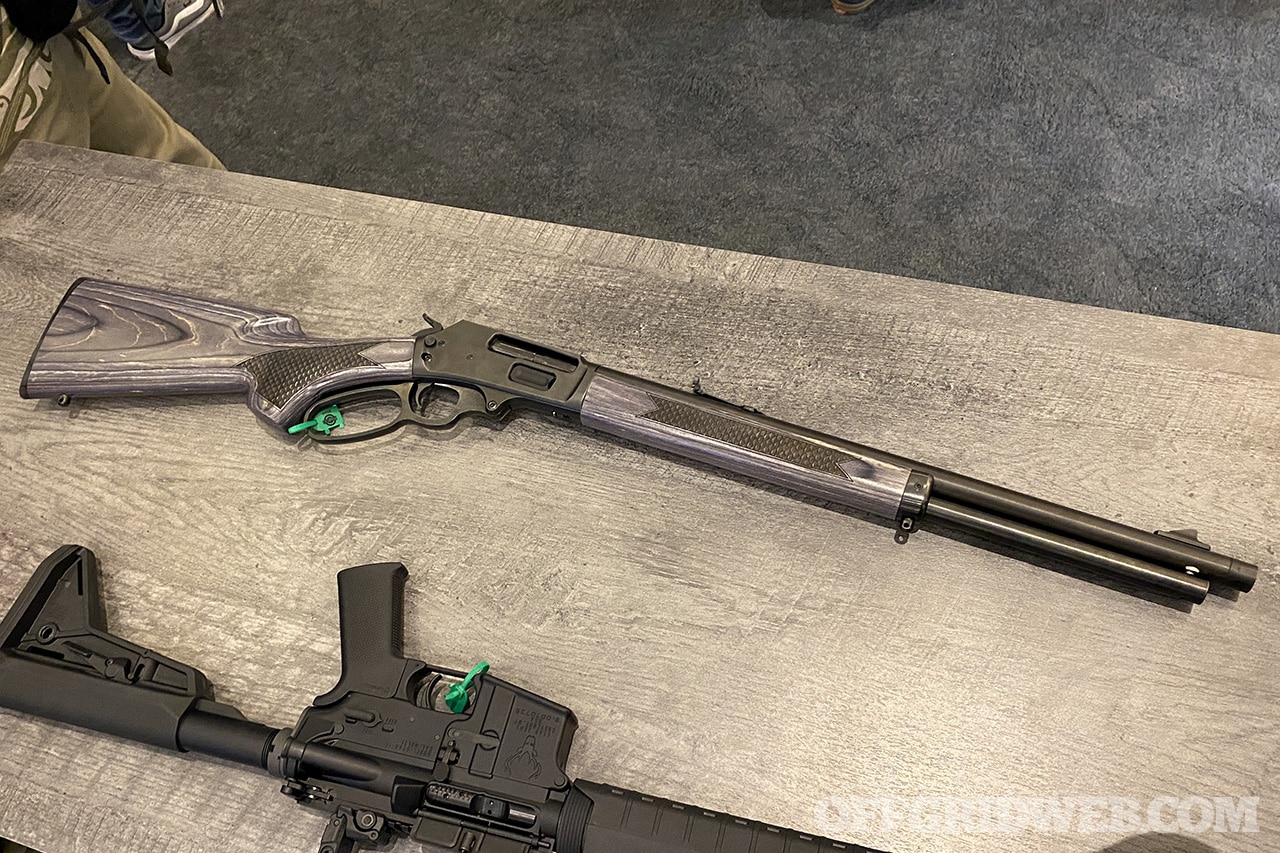
Big news for lever gun enthusiasts: Aero Precision is breaking into the modernized lever action rifle market. Aero is well known for its AR-15s, AR-10s, pistol caliber carbines, and most recently the Solus bolt gun, but this was a surprising turn. Although the new Aero Precision lever action rifle is still very much in its prototype phase — it doesn't even have an official name yet — we were able to get a first look and some key details about it from company representatives at SHOT Show.

Aero Lever Gun Prototype Features & Specs

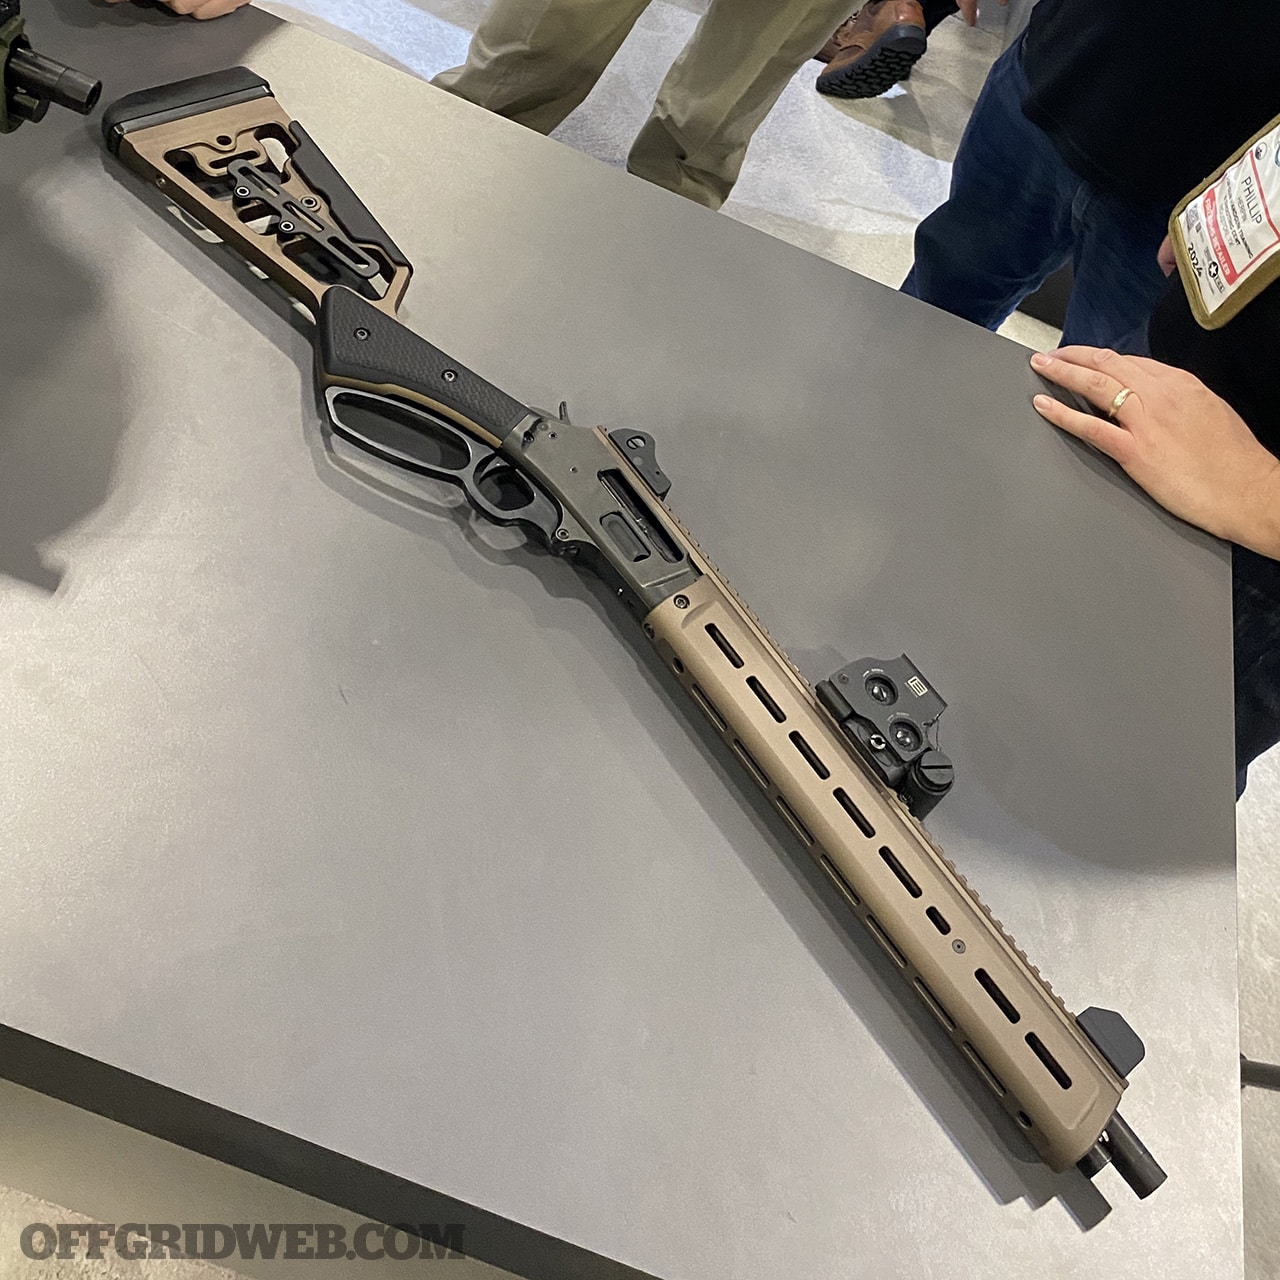
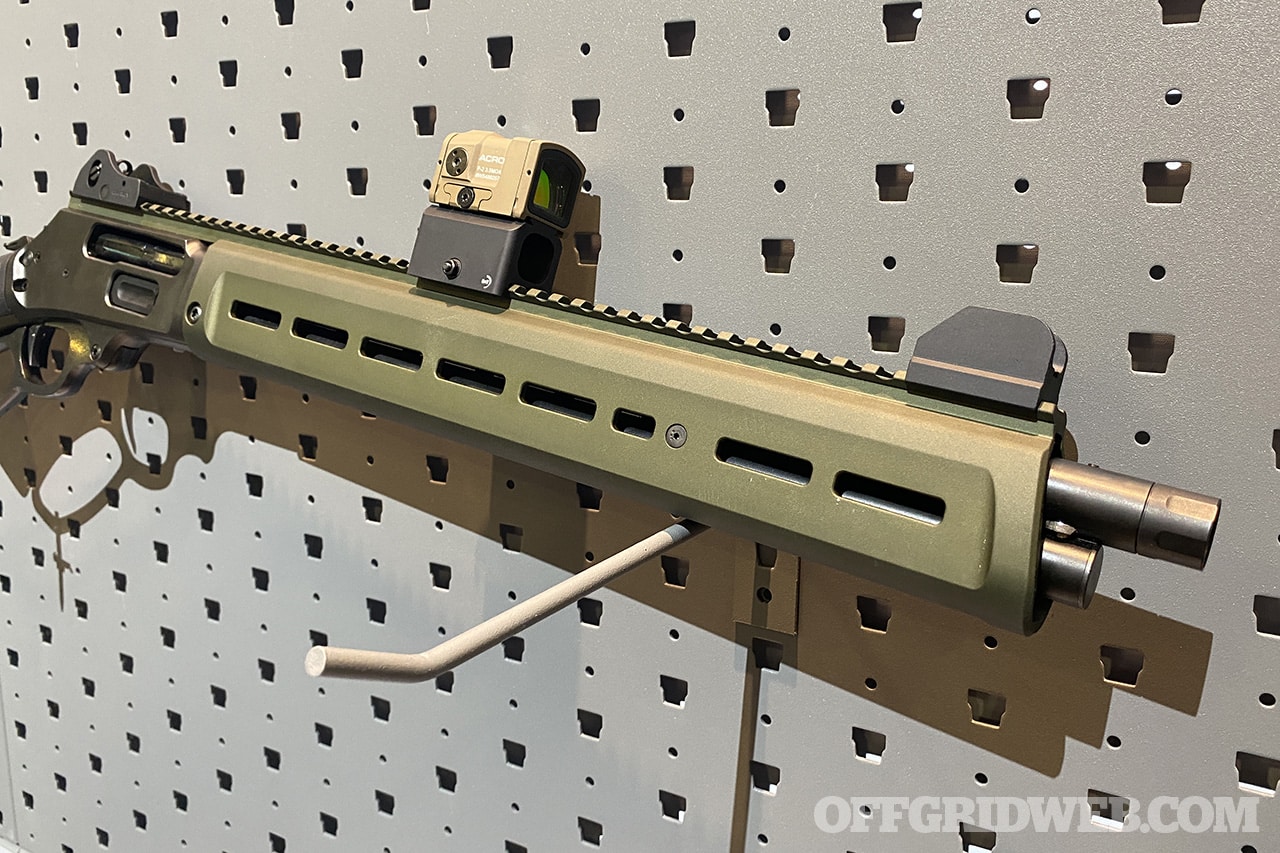
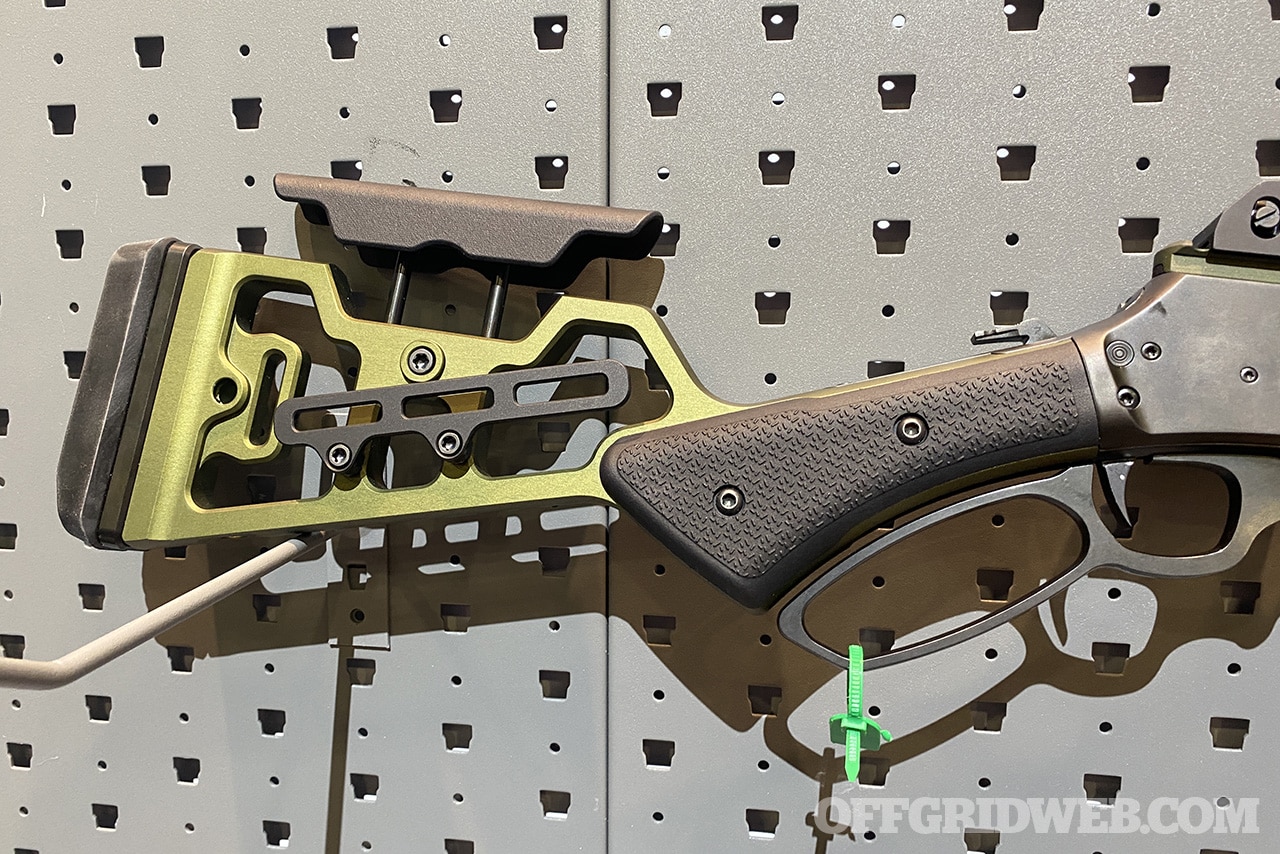
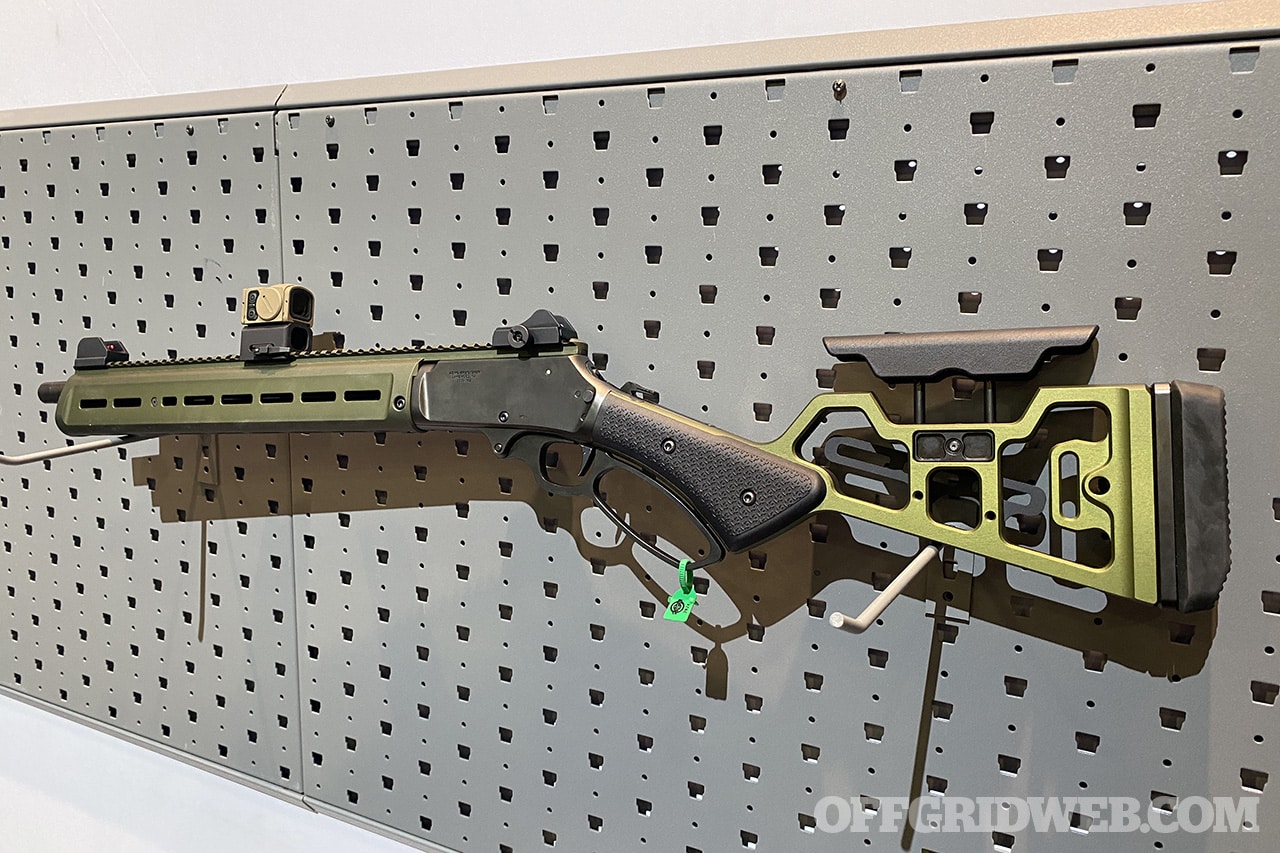
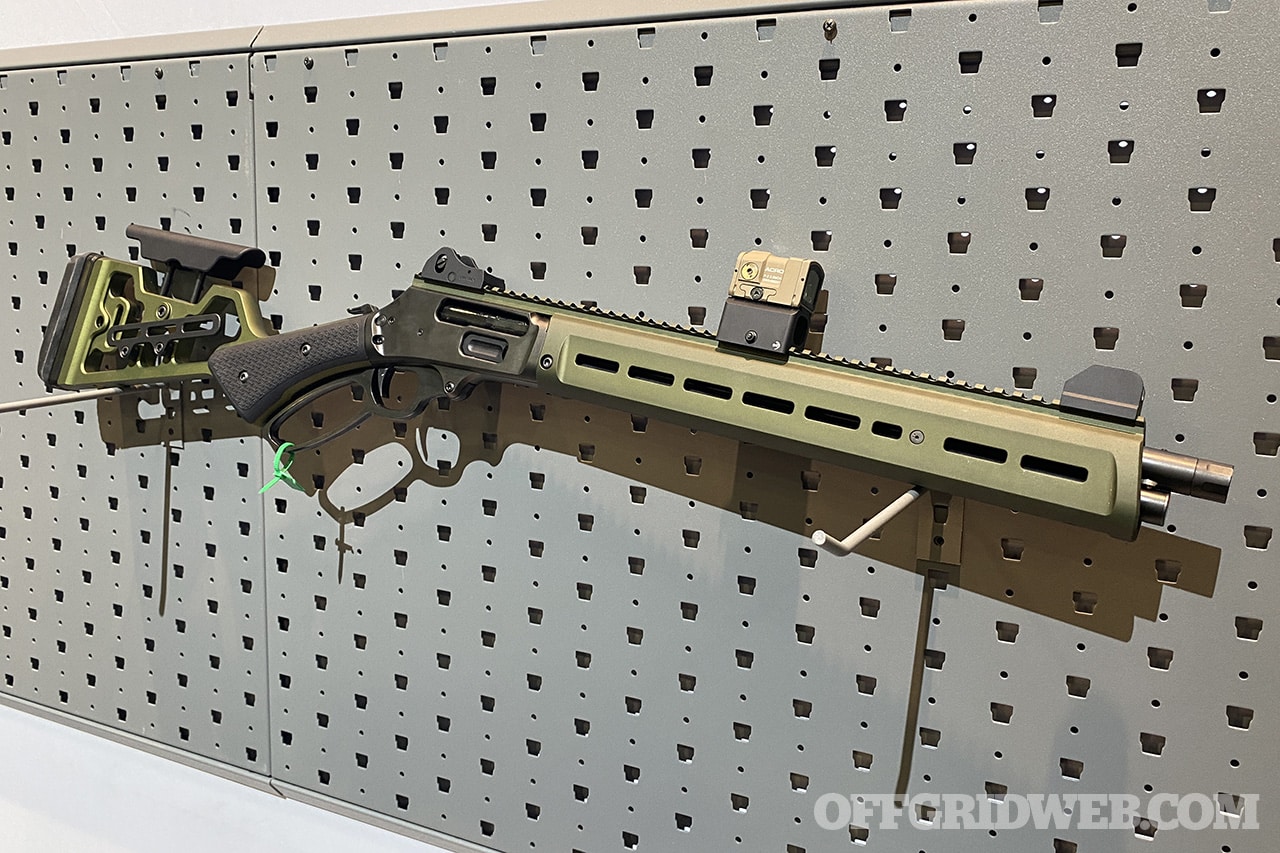
Right out of the box, the Aero lever gun will come with some of the most common upgrades that would typically be added to a tactical lever gun. It has a 16-inch threaded barrel to allow installation of muzzle brakes and suppressors, as well as a machined aluminum handguard with M-LOK slots and QD sockets for a sling.

The handguard extends into a full-length Picatinny top rail with a ghost ring rear sight and fiber optic front sight. The handguard, top rail, and stock will be available in a few different finishes, including OD green and FDE.

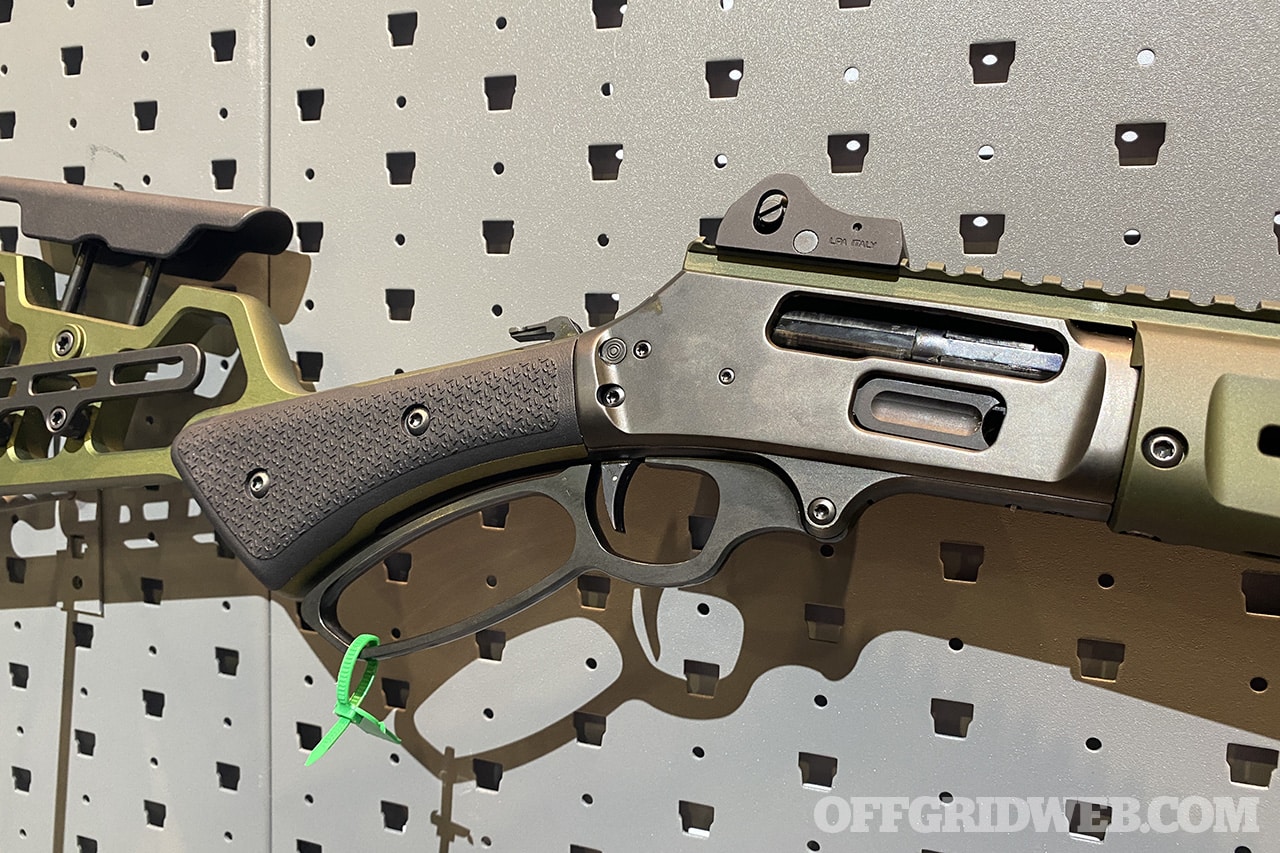
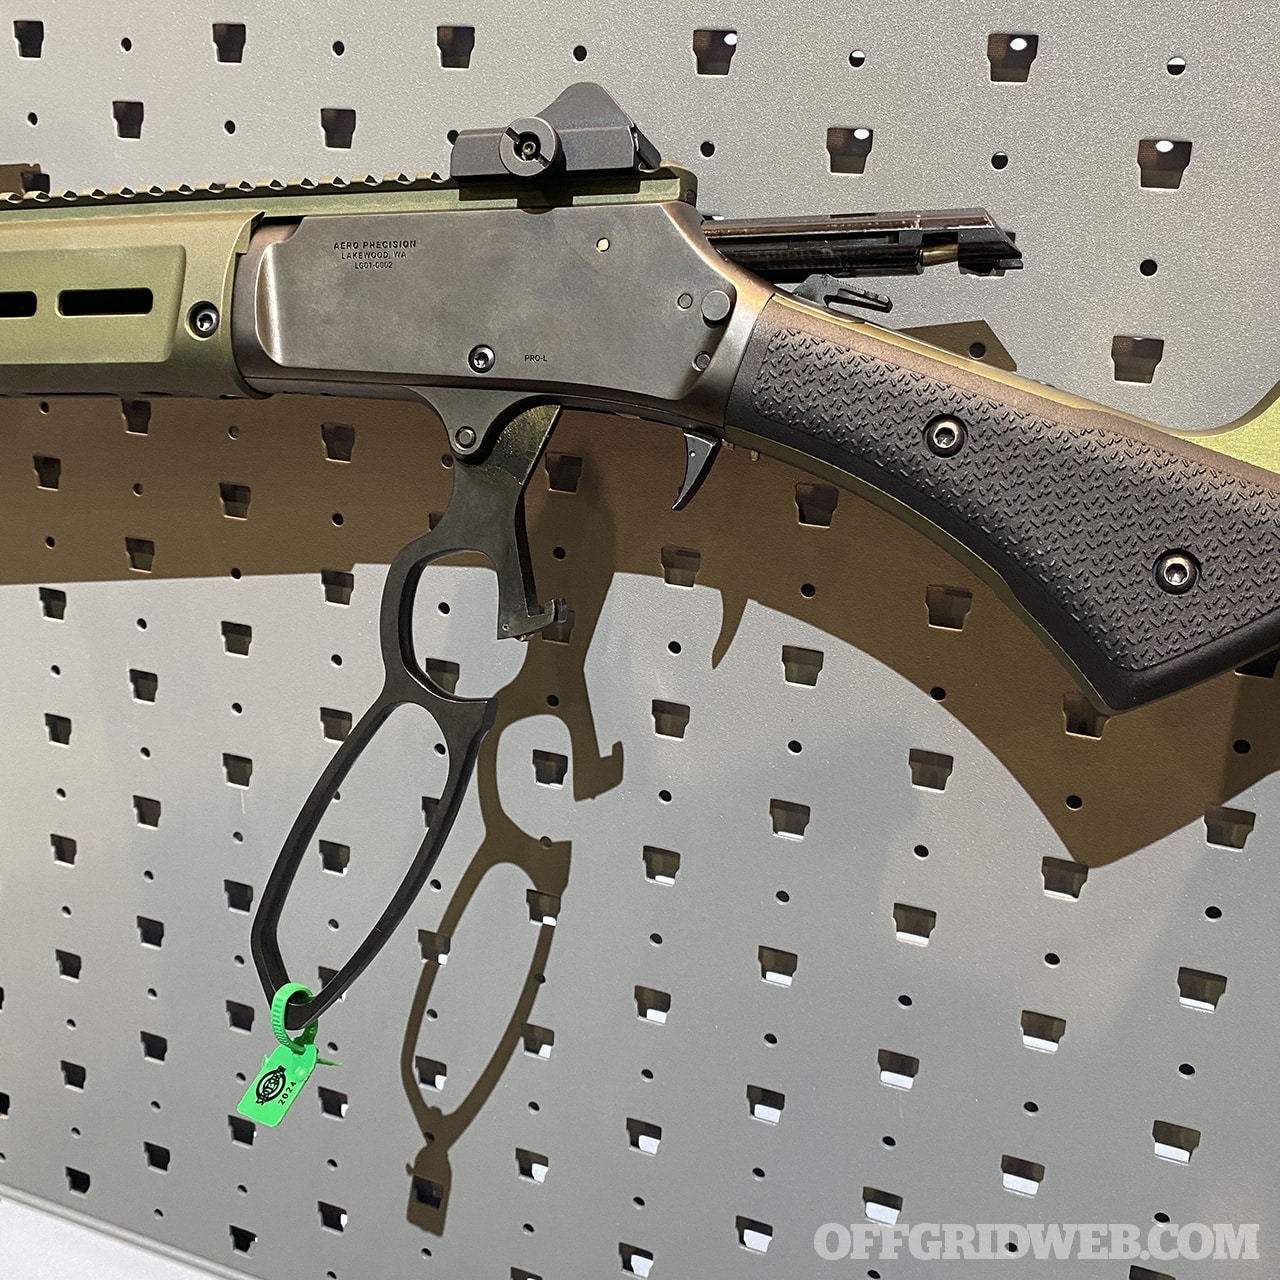
The receiver is finished with an upgraded loading gate, aftermarket trigger, and a unique lever that matches the contour of the rifle's grip. The grip also features polymer panels on either side with texture reminiscent of an AR pistol grip.

The Aero Precision lever action stock is a skeletonized aluminum design, very similar to existing aftermarket options. It features an adjustable cheek riser, attachment points for sidesaddle ammo carriers, and QD sling sockets. The end is finished with a cushy rubber buttpad and what appears to be a spacer for length of pull adjustment.

Above: Aero's lever design is slightly more angular than a traditional lever loop, and lines up with the shape of the grip.

As you might expect, the Aero lever action will be offered in two of the most popular rifle calibers immediately at launch: 30-30 and 45-70. The company tells us there will be more caliber choices coming after that, including some especially interesting ones (that's all we're allowed to say right now).

Keep in mind this is a very early prototype, so some of the smaller details and finishing touches may change before it hits production. However, after handling the gun and running the action, it feels impressively smooth for this stage of development.

When and How Much?

Aero Precision staff told us the release of this lever gun is tentatively slated for the fourth quarter of 2024. Pricing is estimated at $1,700 to $1,800, but that may also change as the design and features are finalized.

Stag Arms Lever Action

Stag Arms, Aero's sister company, is also releasing its own variant of the same lever gun. In line with Stag's hunting-oriented rifles, the Stag lever action will be a more traditional lever gun with iron sights, wood furniture, and a classic lever loop. It should be a solid choice for fans of the traditional lever gun, comparable to existing Marlin, Henry, and Winchester offerings.

For more information on the new Aero Precision lever action rifles, keep an eye on aeroprecisionusa.com later this year.


First Look: Hammerli Force B1 .22LR Bolt Action

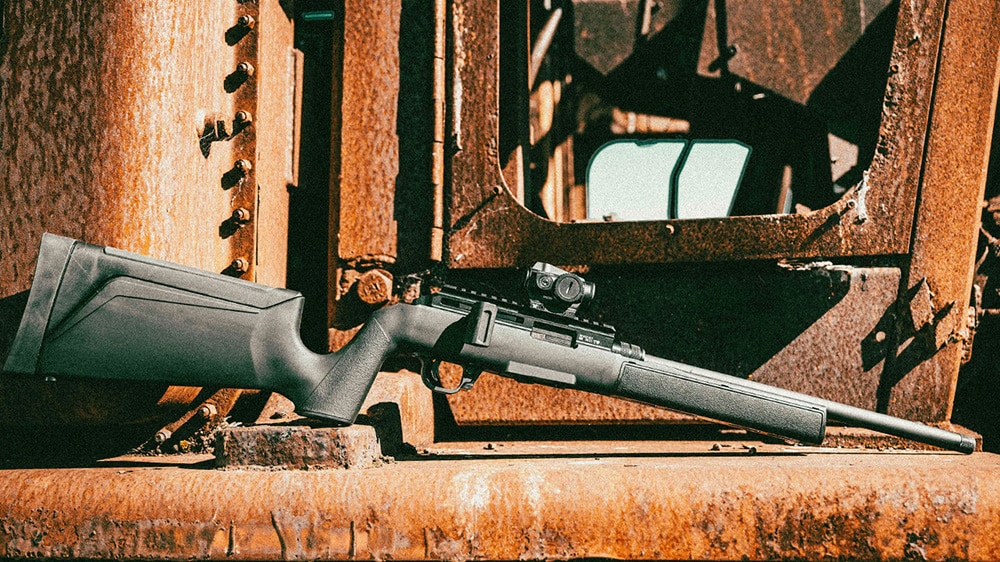
Established in Switzerland in 1863, Hammerli Arms is best known today for its high-end target pistols and rifles, many of which have appeared in the hands of Olympic shooters. However, at SHOT Show 2024, the company showed off its newest release: the Hammerli Force B1. This .22LR rifle uses a toggle-style straight pull bolt action inspired by the mechanism used in competition rifles, but combines it with a quick-change barrel system, rugged polymer stock, and Ruger 10/22 trigger and magazine compatibility.

Hammerli Force B1 Rimfire Rifle

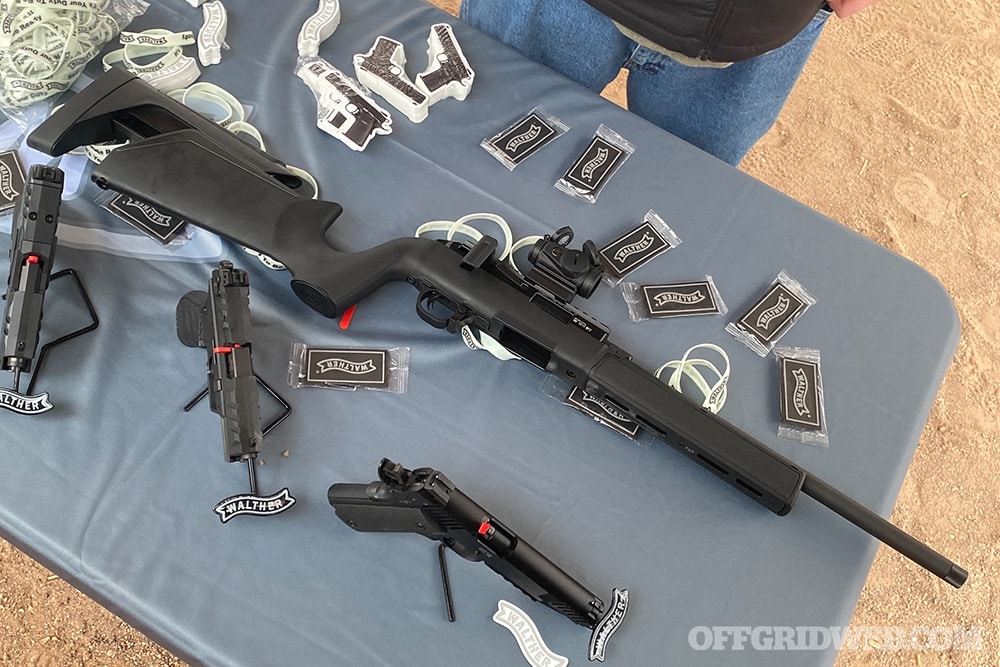
Above: The Hammerli Force B1 was on display in the Walther booth at SHOT Show Range Day, since Hammerli is part of the Walther family of brands.

The short-throw toggle action (as seen in this video) makes the Force B1's bolt easy to actuate quickly and without disturbing the rifle's sight picture. The locked bolt also makes this an excellent suppressor host, so we're glad to see it comes with a 1/2×28 TPI threaded barrel.

Speaking of the barrel, it detaches without any tools and can be swapped to accept different calibers (.22LR, .22 WMR, and more options to come later) or changed for a different barrel length. A Hammerli representative told us the company is also working on an integrally suppressed barrel for it.

Any time the subject of rimfire rifles comes up, so does the Ruger 10/22. Thankfully, Hammerli noticed the widespread support for that platform, and made the Force B1 compatible with 10/22 triggers and magazines. If you already have a 10/22 or some spare parts laying around, this is a great way to get into an even quieter bolt-action rifle with cross-compatible parts.

For caliber changes, the Adaptable Magwell can be used to convert the rifle to accept the appropriate Ruger magazine once the barrel has been swapped out.

The Hammerli Force B1's stock also features toolless adjustments for length of pull and comb height. The underside of the forend also has integrated MLOK slots for bipods and other accessories. Total weight is only 5.75 pounds, optic and accessories not included.

MSRP for the Hammerli Force B1 is $649. We hope to get our hands on one of these rifles in the near future for a full review, but until then, you can find more information on the Force B1 at HammerliArms.com.


Hot On The Trail: Testing Armasight’s Thermal Optics

Humans are apex predators, but you’d never know it by looking at us. In comparison to other predatory species, we’re feeble, slow-moving, and physically defenseless. We don’t have the strength and resilience of a bear, the flesh-ripping claws and teeth of a tiger, or the speed and agility of a hawk. Most importantly, our senses are extremely limited. Our sense of smell pales in comparison to nearly all apex predators, as does our hearing. Even our eyesight, which is quite sharp compared to other mammals, becomes nearly useless in dark conditions. But our true superpower — intelligence — has allowed us to overcome every one of these weaknesses through technological advancements.

In previous articles, we’ve discussed a variety of magnified optics that help us see further, and night vision devices that allow us to see in darkness. Both of these amplify and augment the natural capabilities of our eyes. In this article, we’re looking at a third category of optics that offer the ability to see something our eyes can’t detect at all: heat. Thermal optics give us a view of the world that other predators would surely envy, instantly highlighting the body heat (infrared radiation) of our prey.

Studio photo of an Ulfhednar tripod.

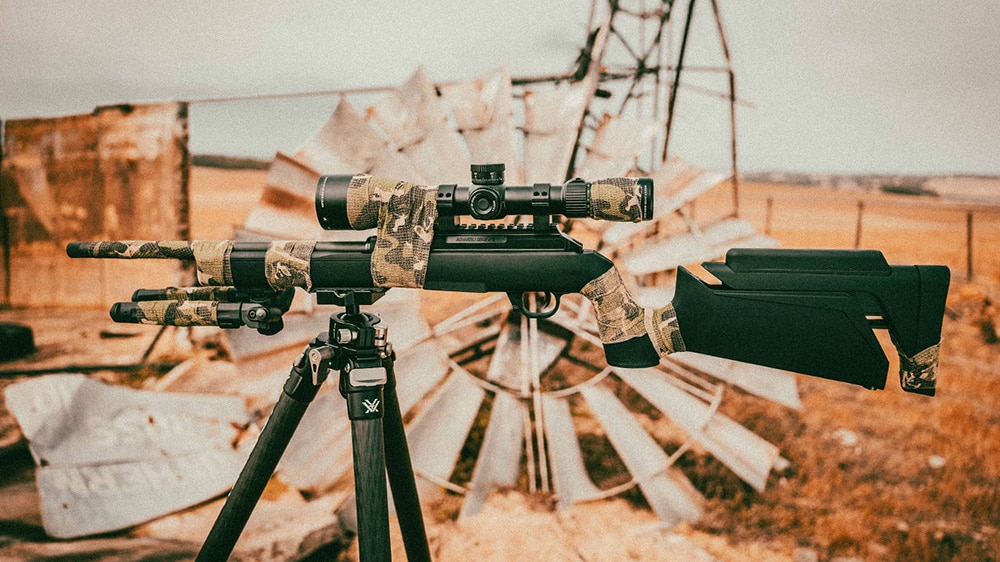
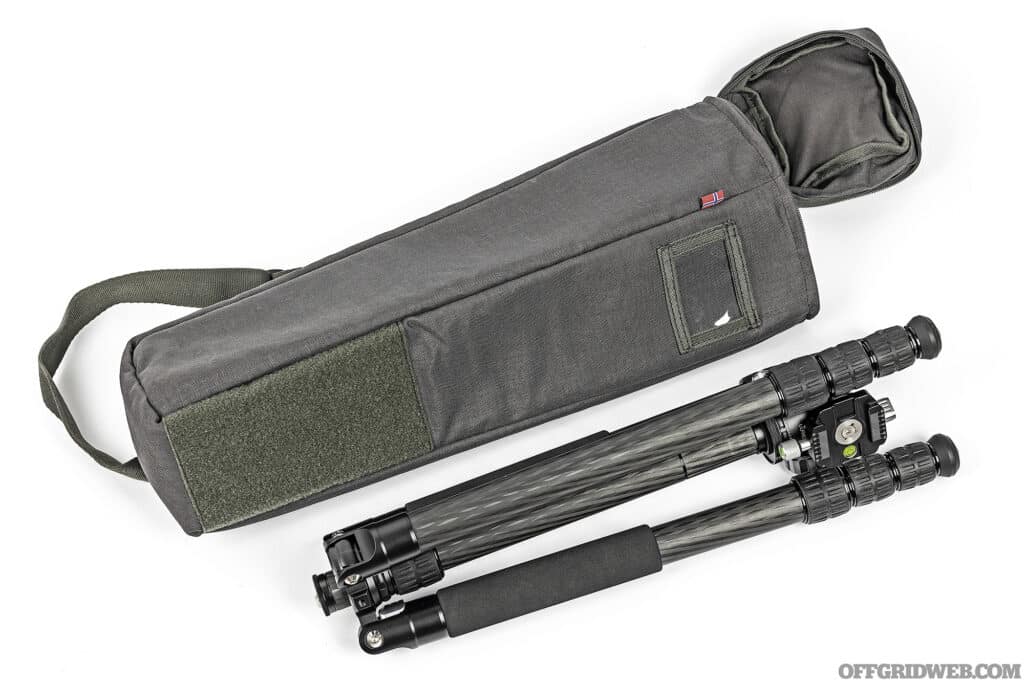
Above: Norwegian precision rifle shooters at Ulfhednar designed the lightweight carbon-fiber tripod we used with our thermal-equipped rifle, as well as a padded rifle bag to protect all our expensive hardware.

Thermal Optic Advantages

The ability to see heat, or the lack thereof, has many valuable applications. It’s an incredibly powerful tool for search-and-rescue operations, whether it’s being used to track a criminal from a police helicopter, locate a missing hiker in the wilderness, or even find a lost pet. Thermal optics aren’t only capable of identifying body heat — they can also be used to determine if a vehicle was driven recently based on the heat of the engine block, or to detect water leaks inside the walls of a home. For these purposes, a handheld thermal camera or monocular may be most convenient (and most cost-effective).

However, for the average end user, hunting is arguably the most rewarding application of thermal devices. The majority of prey animals have developed camouflage to blend into their environments, but that camouflage won’t matter in the slightest when you’re using a weapon-mounted thermal optic. Even if your view is partially obscured by foliage, the telltale body heat shines clearly through, and any movement of that heat signature is immediately visible. It’s so effective that several states have made it illegal to possess thermal optics while hunting (be sure to check your local laws).

Unsurprisingly, this also makes thermal optics a powerful tool for warfare. We’ve seen an increasing number of photos and videos from places like Ukraine that depict the brutal effectiveness of thermal optics on the battlefield. Enemy combatants may be visually concealed and motionless within a treeline — completely invisible to the naked eye or night vision devices — but a thermal optic can make their position crystal clear. While it’s possible to conceal a human body’s thermal signature with Mylar foil, a heat-resistant cloak, or even a wet blanket, it’s much more difficult to do so while moving and/or shooting.

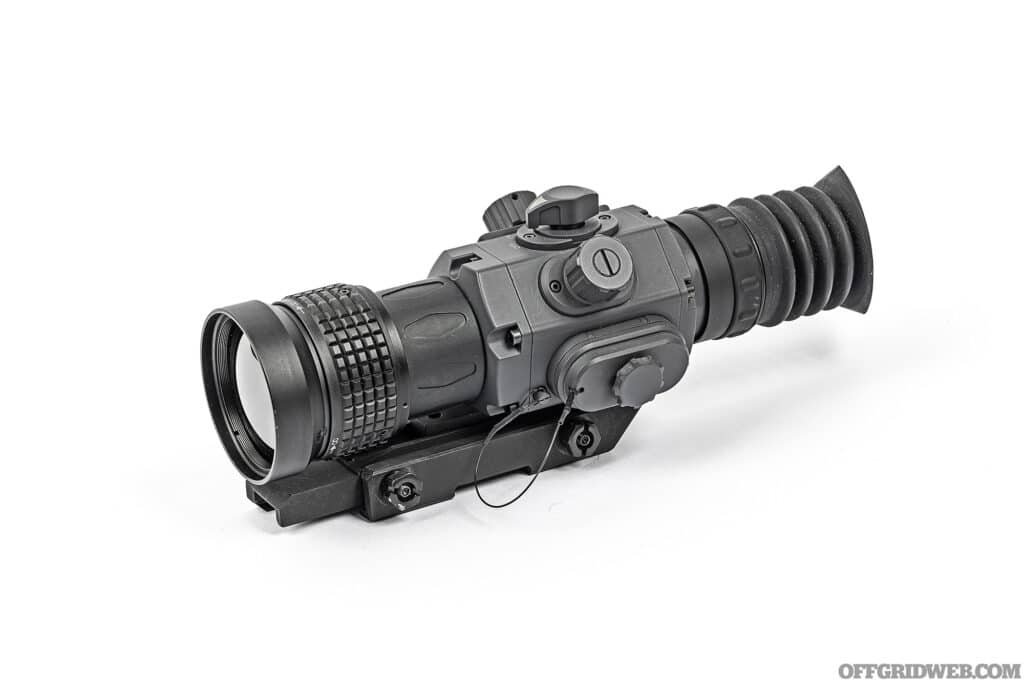
Studio photo of two Armasight thermal optics sitting side by side.

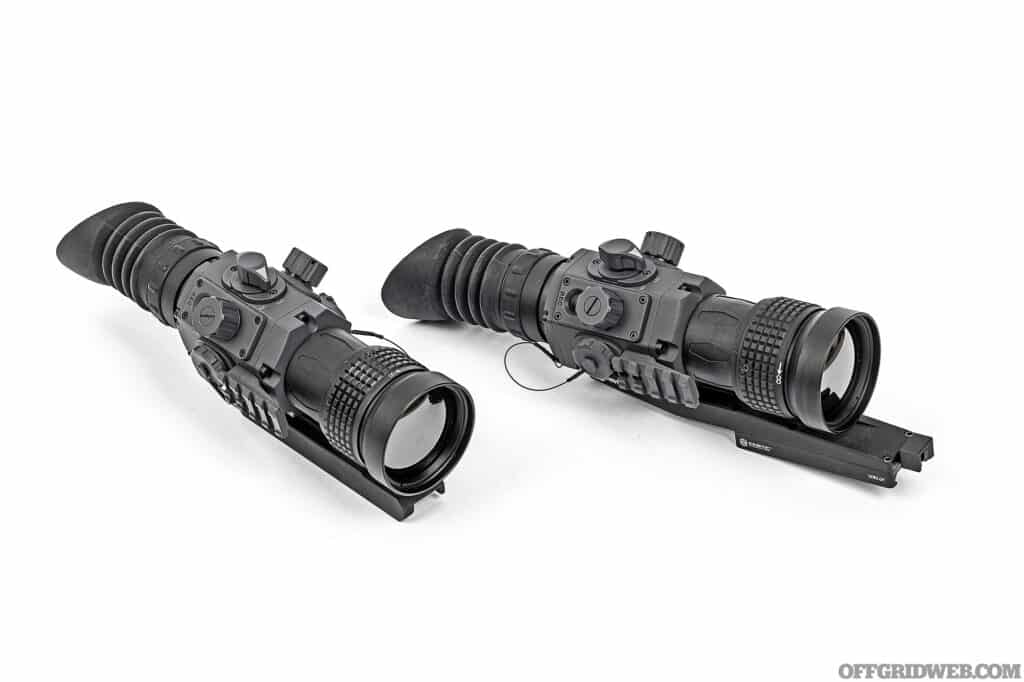
Above: The Contractor 320 (left) and 640 (right) look nearly identical, with the exception of the 640’s KDG Sidelok quick-detach mount.

Types of Thermal Optics

  • Handheld: These include pocket-sized monoculars, binoculars, and various types of thermal cameras. They’re used for general-purpose applications such as search and rescue, tracking, and home inspection. 
  • Helmet-Mounted: Looking for the functionality of a handheld thermal optic plus hands-free convenience? If so, consider one of these. They can be used on their own, or on a “bridge” alongside a night vision monocular. However, unlike analog night vision tubes, most thermal optics have a noticeable latency effect that some users may find disorienting or uncomfortable for prolonged use, especially while walking or tracking moving objects.
  • Clip-On Weapon Sights: If you have a rifle that’s primarily set up for daytime use but would like to add thermal capabilities for certain occasions, consider a clip-on. This optic attaches directly in front of your weapon’s existing optic, showing a thermal image behind your rifle’s existing scope reticle. This also allows you to retain your weapon’s zero setting. Be sure to confirm that the thermal you purchase is compatible with the mount height/position and base magnification (typically 6x or less) of your daytime optic. 
  • Stand-Alone Weapon Sights: These are dedicated thermal optics that can be used without a traditional scope. Since there’s no additional glass between your eye and the display, they offer the clearest and brightest image, plus a wide field of view that’s less sensitive to the shooter’s head position. They’re also usually lighter and more cost-effective than setups with a clip-on thermal and a traditional rifle scope.

Studio photo of the Stag Pursuit buttstock.

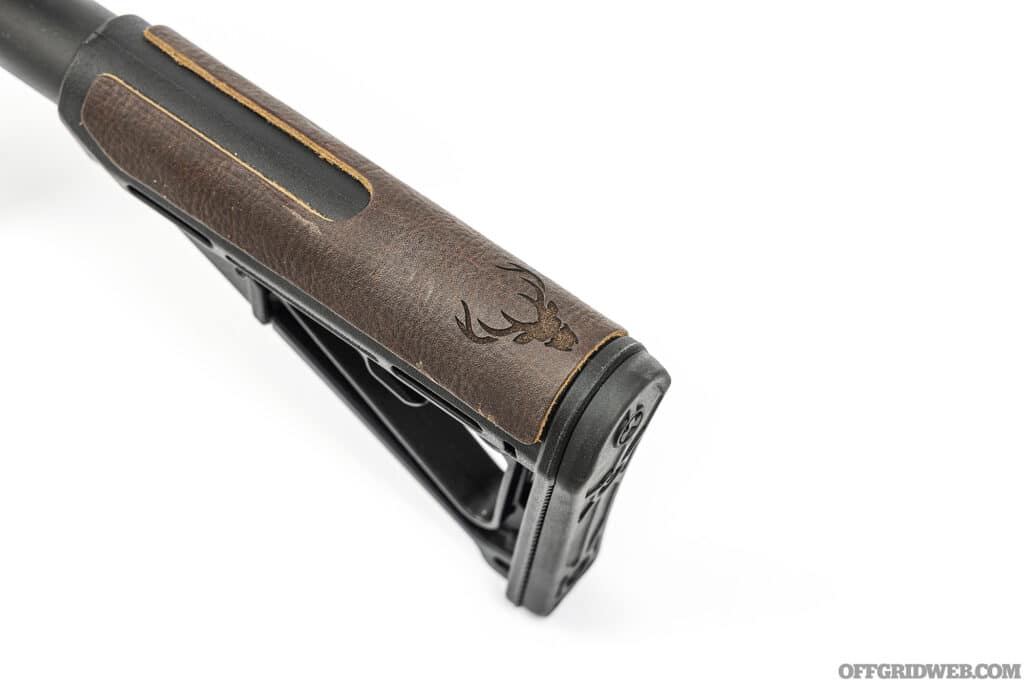
Above: The Stag Pursuit includes a Magpul stock with unique leather cheek pad.

Drawbacks & Considerations

All technology comes at a price, both literally and figuratively. Thermal optics are extremely potent tools, but they also have some drawbacks and challenges you should consider:

  • Cost. While basic handheld thermals can be found for less than $1,000, if you want a high-quality weapon-mounted thermal optic, expect to pay at least a few thousand for it. And if you want the latest and greatest high-resolution sensor, expect to spend a lot more — some high-end models exceed $15,000. 
  • Battery life. It takes a lot of energy to run a thermal sensor, the computer that controls it, and the screen that displays its output. Newer thermal optics have become more efficient, but they still go through batteries fast enough that you should always be carrying multiple spares. 
  • Latency. Like any digital camera or display, thermal optics have a slight delay between gathering thermal data from the sensor and rendering it on the screen. High-end models have faster processors and better screens that reduce this delay, but it’s always present, even if it’s only a few milliseconds. 
  • NUC. All thermal sensors need to periodically conduct a Non-Uniformity Correction (NUC, pronounced “nuke”). When a thermal sensor runs continuously, visual noise and imperfections will start to build up within the image; NUCing resets the sensor to a neutral temperature reading, wiping away that noise temporarily. Some thermal optics require the user to manually close the lens cap to NUC, but most use an automatic internal shutter. From the user’s perspective, this appears as an audible click and a sudden freeze of the display.Weapon-mounted thermals typically have a countdown leading up to the NUC, so it doesn’t surprise the shooter and lead to a missed shot. For the first few minutes after the thermal sensor turns on, it’ll need to NUC frequently until it reaches normal operating temperature. After that, the NUC cycle will become less frequent. So, it’s a good idea to let your thermal optic run for a couple minutes and “warm up” before you use it.


  • Size & weight. This amalgamation of glass, sensors, electronics, and batteries isn’t as compact as a traditional rifle optic. And once you enclose those fragile components inside a housing that’s durable enough to be mounted on a rifle, it can also be quite heavy. 
  • Thermal barriers. Heat, much like light, can be blocked or reflected by certain materials. Some materials, like layers of clothing, will simply take time to soak up heat, appearing cool at first and slowly warming up. Others, especially highly reflective materials such as Mylar and glass, will act as an opaque barrier at best or a mirror at worst, reflecting ambient heat back at the viewer. 
  • Environmental conditions. Since thermal optics display the difference in temperature between a target and its environment, there are some situations where the difference may be so small that the image looks washed-out. For example, if you’re scanning a 100-degree desert landscape for a human’s 98-degree body temperature, it’s going to be much more difficult to see than if that human were standing in front of a snowbank. Granted, thermal optics are sensitive enough to detect minuscule differences in temperature, but a larger temperature difference will produce a clearer, higher-contrast image.

Studio photo of an armasight thermal optic mounted to a stag arms rifle.

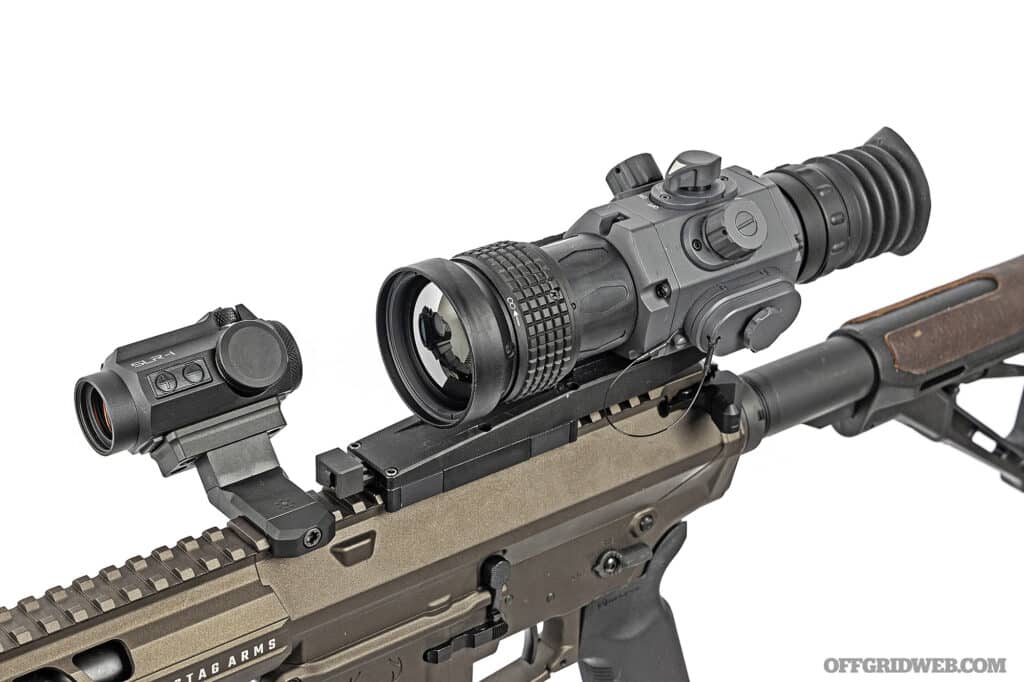
Above: All thermal optics go through batteries quickly, so it’s wise to have a backup sight of some kind. We used an Atibal SLR-1 red dot on a 45-degree Arisaka Defense mount.

Heavy rain and thick fog can also negatively impact thermal optic performance at longer ranges, since the dense water particles in the air absorb and scatter infrared energy before it reaches the sensor. On the other hand, thermal optics can see through some airborne particles that obscure visible light, such as smoke and dust, as long as the particles aren’t large or dense enough to disrupt the infrared radiation. This is why they’re often used by firefighters and rescue personnel in low-visibility environments.

Now that you know some of the advantages, disadvantages, and applications of thermal optics, we’ll share our real-world impressions with two thermal optic models from Armasight.

Armasight Contractor Thermal Optics

In early 2022, Armasight unveiled a new series of weapon-mounted thermals known as the Contractor series. These launched with two models, a 3-12x25mm and 6-24x50mm. Much like traditional rifle optics, the first numbers indicate magnification range — in this case, magnification levels above the base value are digitally magnified, meaning the image becomes less clear (lower resolution) as you zoom in. The millimeter measurement denotes the objective lens size; just as a larger objective lens on a rifle scope allows it to gather more light, a larger thermal lens allows the sensor to take in more infrared radiation for a clearer picture at longer range.

Both of the initial Contractor models used an ArmaCORE 12-micron 320×240 sensor — this is known as the optic’s resolution. We’ll discuss that in more detail later.

Front view of an armasight thermal optic.

Above: Unlike the quick-detach mount on the 640 models, the Contractor 320 includes a basic Picatinny rail mount that must be installed onto your rifle with a wrench.

Contractor 320 6-24x50mm

We began by testing the higher-magnification Contractor 320 thermal sight, which has a 6x base magnification and an MSRP of $4,399. This optic is built into a rugged, IP67 water- and dust-proof metal housing with large, tactile controls that can be operated easily with gloved hands. Focus and diopter adjustment are both manually controlled via textured rings on the housing, ensuring the user can get a crisp image at all times. The 1024×768 AMOLED display is colorful and bright, with a responsive 60Hz refresh rate. It's powered by two CR123 batteries, with an approximate run time of 4 hours at 68 degrees F. Like we said, thermals eat batteries quickly, and this is actually a respectable run time compared to some of its competitors.

The Contractor also has a sophisticated suite of color palettes, image enhancement modes, and extra features. These include:

  • Five palettes: white hot, black hot, target, rainbow, and sepia
  • Detail enhancement/sharpening settings: default, forest, detect, indoors, and sky/sea
  • Eight reticle types with adjustable colors and 1/2 MOA elevation/windage adjustments
  • On-screen compass, level, inclinometer, angle cosine indicator, and optional stadiametric rangefinder
  • Picture-in-picture mode
  • Video streaming and data transfer via USB or Wi-Fi
  • Bluetooth connectivity with iOS and Android apps
  • Manual or shot-activated video recording and image capture

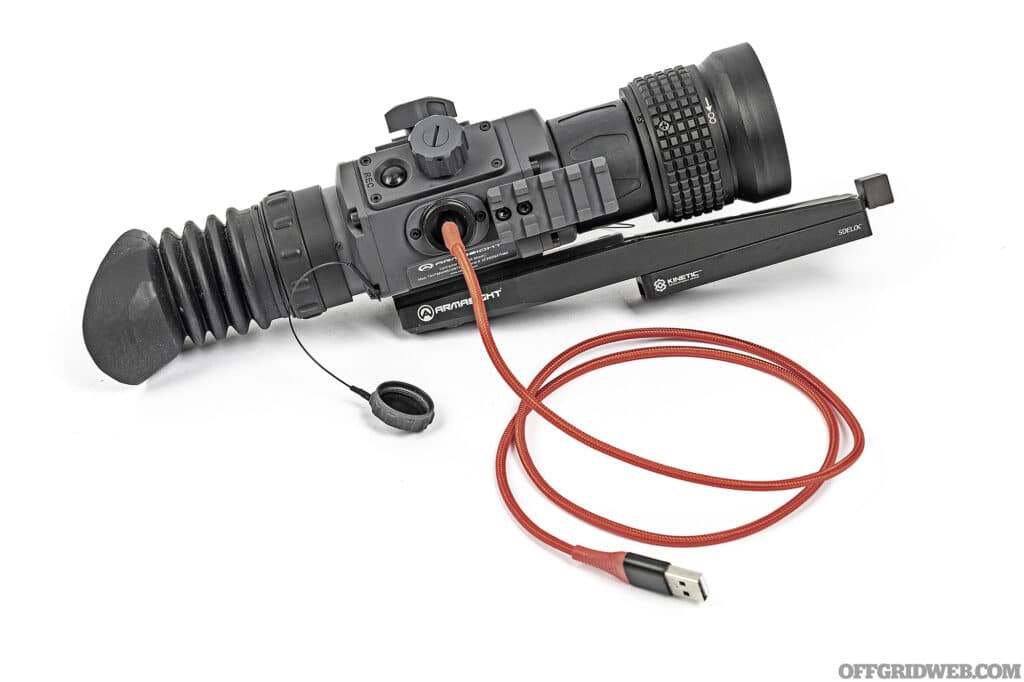
Studio photo of a thermal optic with a usb charging cable plugged in to the side.

Above: A weatherproof cap covers the USB-C port used for streaming or data transfer from the onboard storage.

Contractor 640 3-12x50mm

About a year after the release of the Contractor 320, Armasight unveiled its big brother: the Contractor 640 family. These optics use the company’s proprietary ArmaCORE 12-micron sensor, but now with 640×480 sensor resolution — double that of the 320 series. Three Contractor 640 models are available, ranging from a compact 2.3-9.2x35mm model to a 4.8-19.2x75mm monster. We decided to test the Contractor 640 3-12x50mm, which has the same objective lens size and housing size as the 320 model we’re comparing it to.

The Armasight Contractor 640 3-12x50mm has an MSRP of $5,799, which is $1,400 more than the Contractor 320 6-24x50mm. Its features are nearly identical to the 320, with the same display, run time, color palettes, and so on. Aside from the sensor itself, the most notable difference is the mount. Unlike the 320, which features a standard Picatinny rail mount, the 640 series comes with a much more convenient Kinetic Development Group Sidelok quick-detach mount.

So, is the 640 sensor resolution and QD mount worth the price increase? More importantly, is either optic worth thousands of dollars of your hard-earned money? These are questions we aimed to answer, no pun intended.

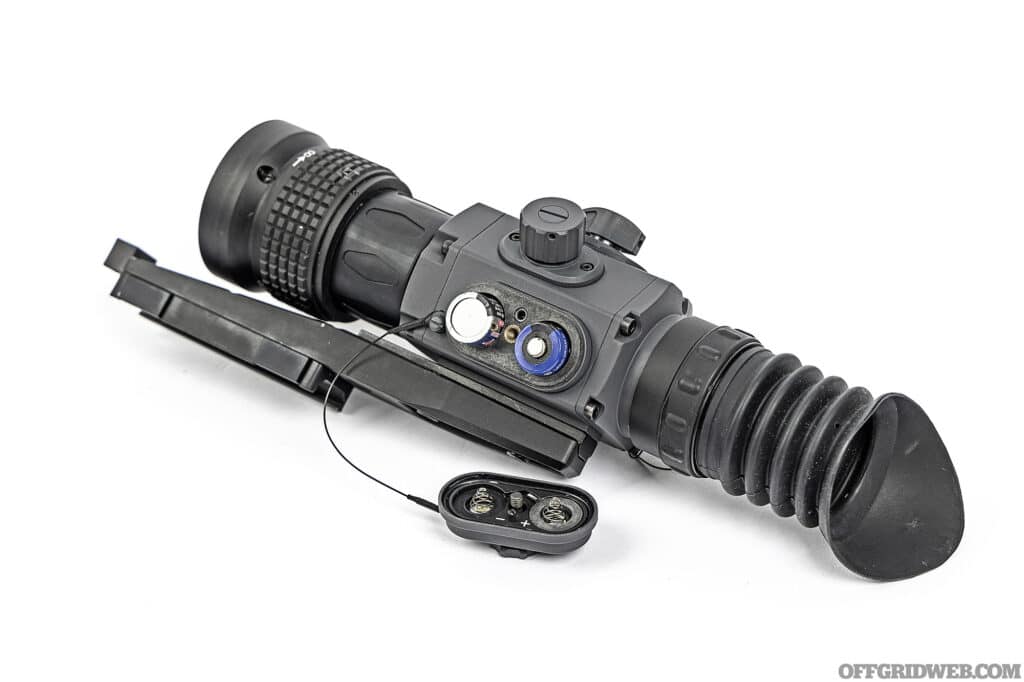
Studio photo of an armasight thermal optic with two batteries in the side.

Above: A weatherproof cap protects the battery compartment and its two CR123 batteries.

Armasight Contractor Color Palettes

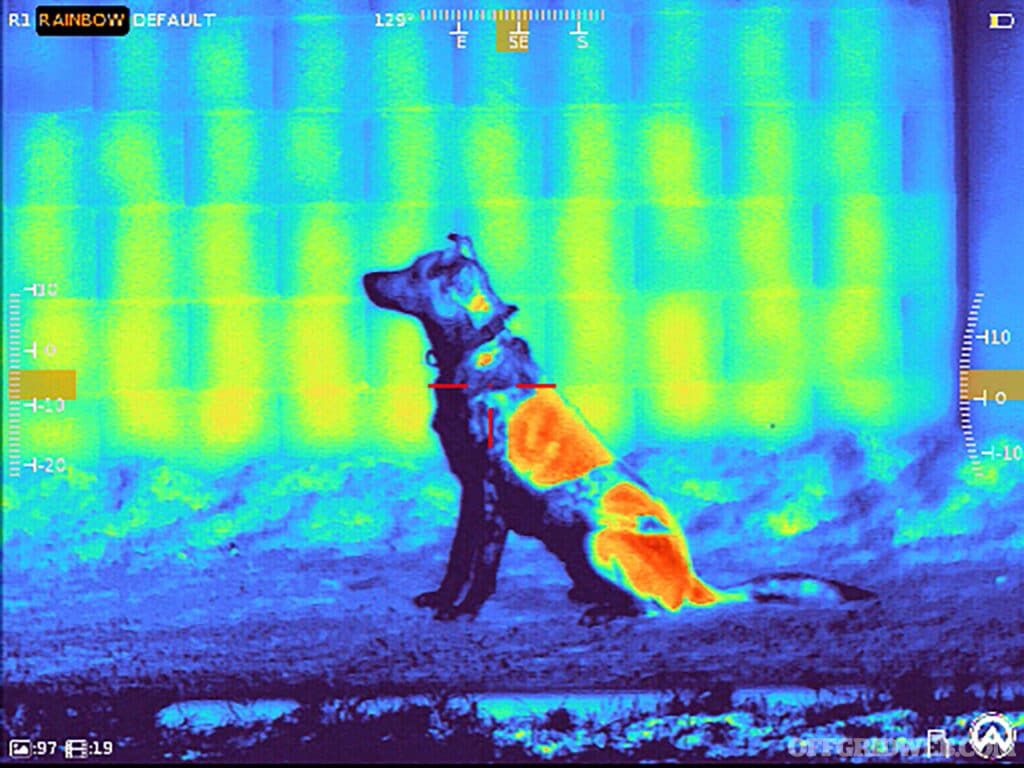
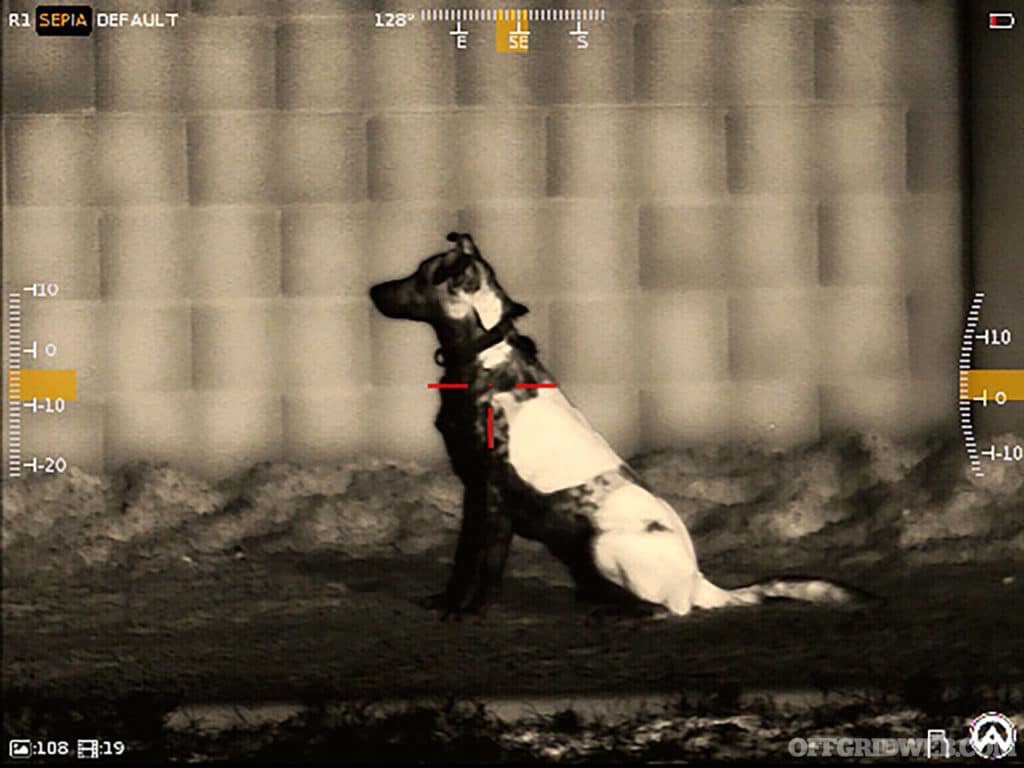
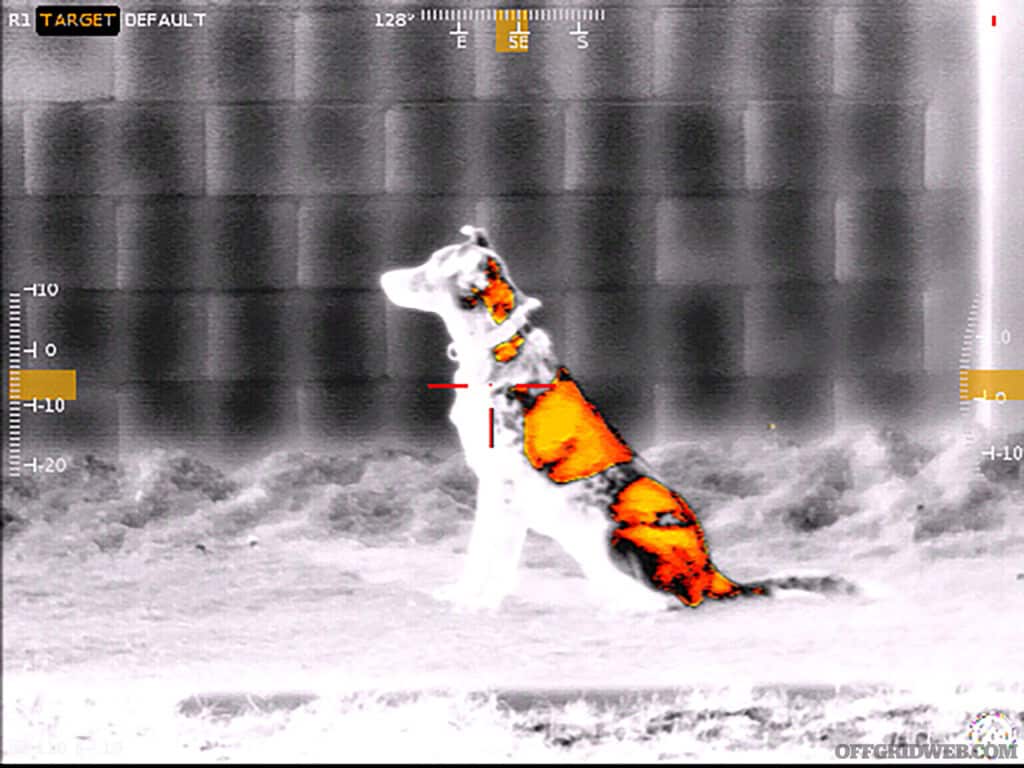
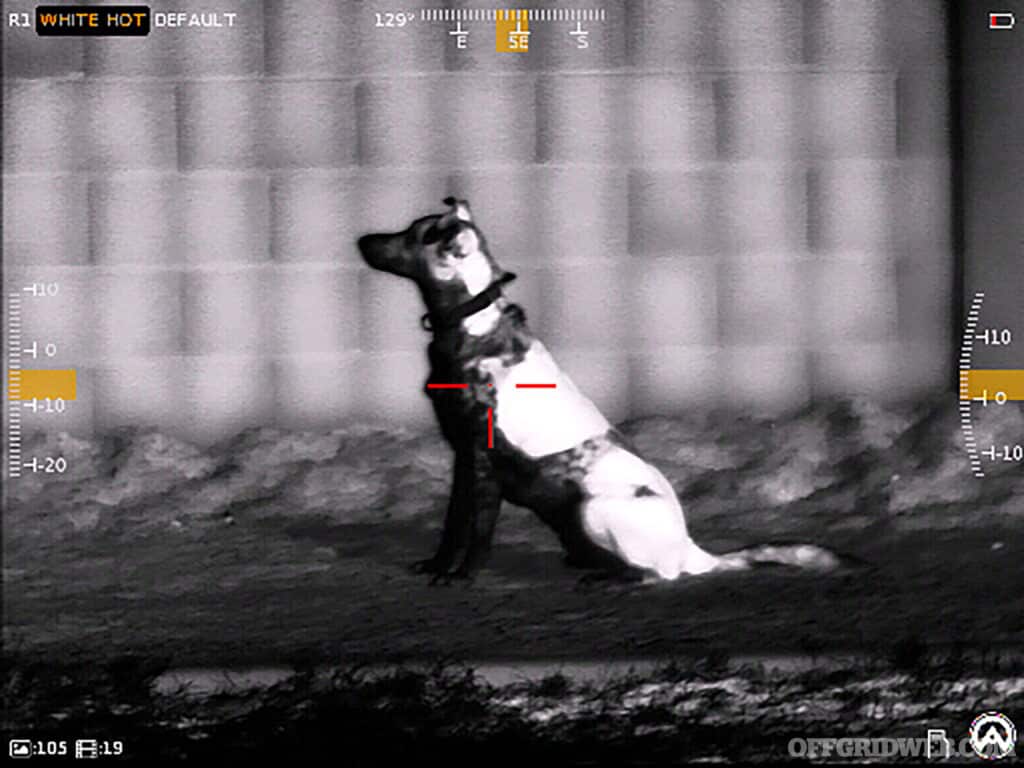
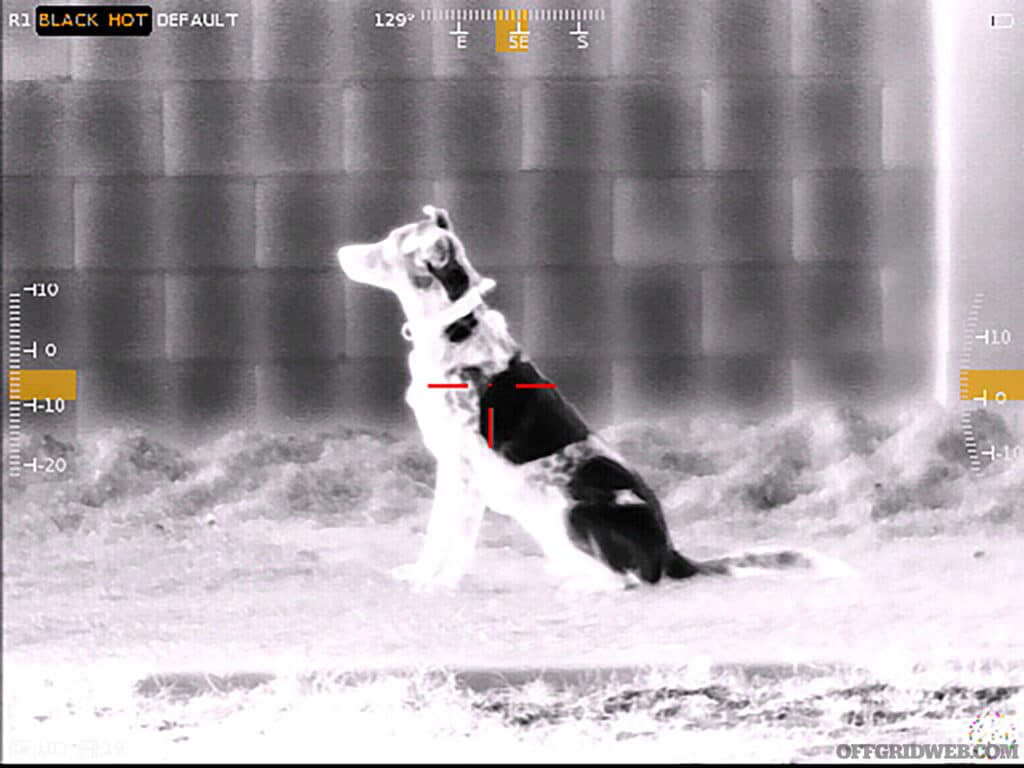
Here’s a quick comparison between the Contractor 640’s color palettes. Notice how black patches on the dog’s fur appear warmer than light patches. This is a result of absorbing more heat from the sun. (Don’t worry, no dogs were harmed in the making of this article.)

Thermal black hot view of a dog. Thermal rainbow view of a dog. Thermal sepia view of a dog. Thermal target view of a dog. Thermal white hot view of a dog.

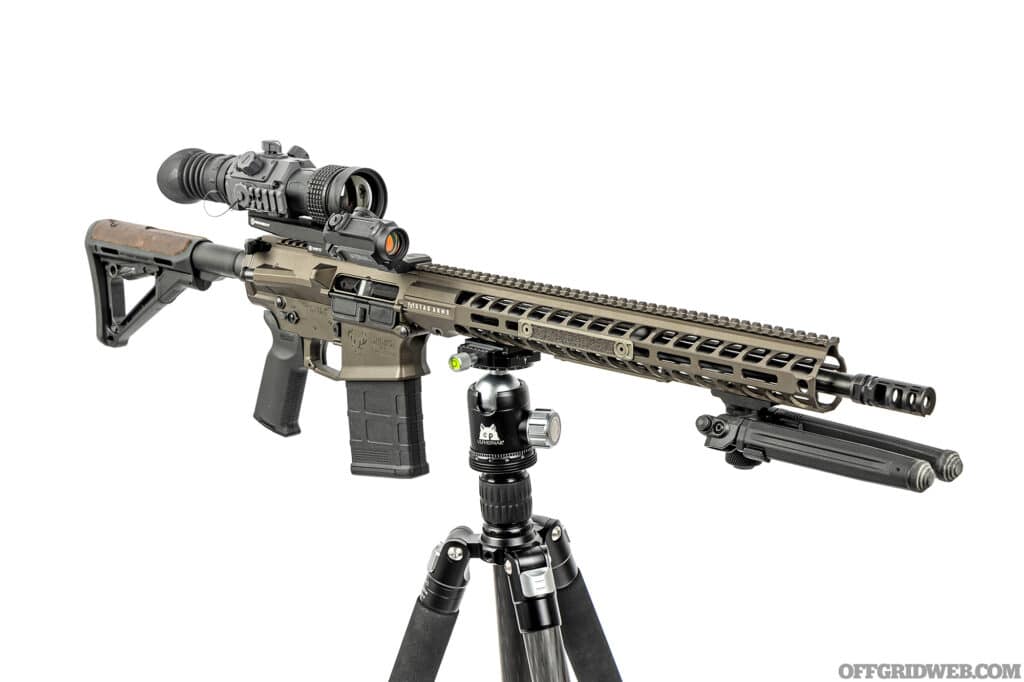
The Test Platform: Stag Pursuit 6.5 Creedmoor AR-10

To put these thermal optics through their paces, we chose a suitable test rifle from Stag Arms. The Stag 10 Pursuit is the company’s first product line designed specifically for hunting and is available in 16-inch .308 or 18-inch 6.5mm Creedmoor variants. We chose the latter, since we already had a healthy stockpile of Norma 6.5 ammo from the long-range rifle class we wrote about in Issue 55.

The Stag 10 Pursuit comes in an elegant Midnight Bronze Cerakote finish with several upgrades out of the box: a two-stage Timney trigger, Magpul K2+ increased-angle grip, ambi 90/45-degree safety selector, ambi Breach charging handle, and Magpul CTR stock with a Stag-branded leather cheek pad.

Studio photo of an armasight thermal optic mounted on a stag arms rifle mounted on a tripod.

We can rarely leave a rifle unmodified, so we installed a few accessories. A stable shooting platform is critical for any long-range or hunting rifle, so we added a Magpul bipod and an M-LOK to ARCA rail adapter from Ulfhednar. The former accommodates traditional prone shooting; the latter makes it possible to quickly mount the rifle in Ulfhednar’s excellent carbon-fiber tripod for rock-solid shots in a standing or seated position. Walker Defense Research provided a set of FDE-colored NILE silicon carbide grip panels, which offer a more secure grip on the forend, even in wet conditions.

Lastly, every serious rifle needs a backup sighting system — especially when the primary optic depletes its batteries every 4 hours — so we attached an Atibal SLR-1 solar red dot on an Arisaka Defense 45-degree offset optic mount. Although it’s possible to mount a red dot on the Contractor’s side accessory rail, that mounting point is better suited to a laser rangefinder. Plus, this way our backup red dot stays zeroed even if we remove the thermal.

Ulfhednar also provided a padded, dual-purpose gun cover/shooting mat that allows us to keep our rifle protected on the way to the range and shoot comfortably from the prone position once we arrive.

Zoomed out view of a piece of foil tape on a target as viewed through a thermal optic.

Zoomed in photo of a piece of foil tape on a target as viewed through a thermal optic.

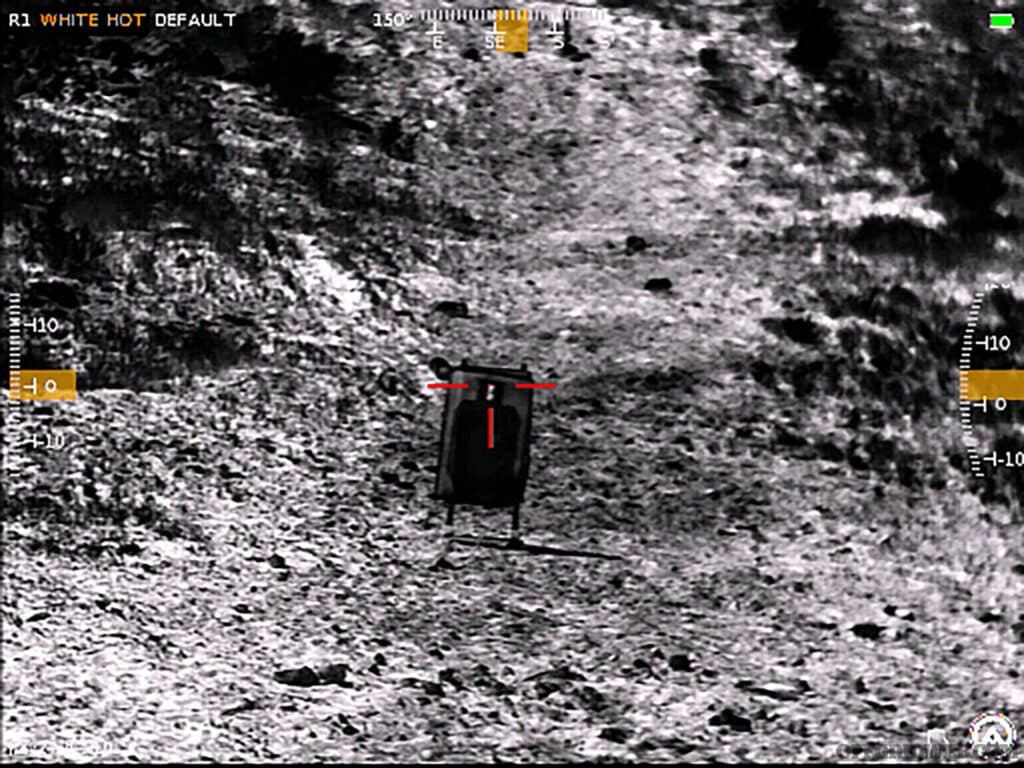
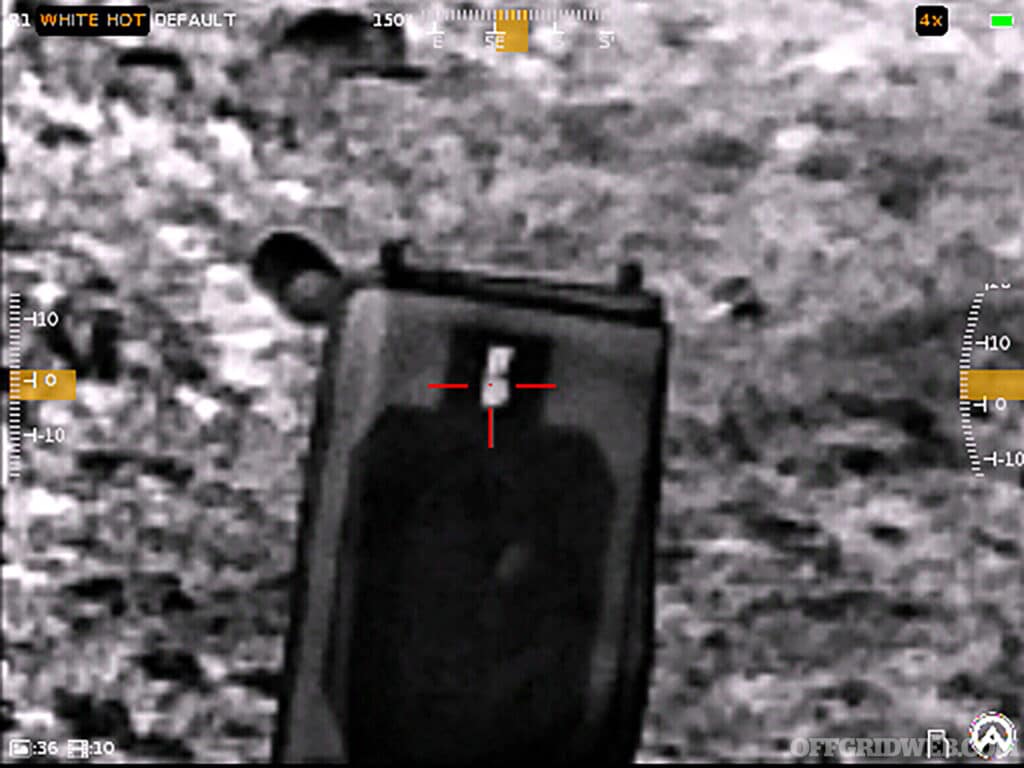
Above: A 2-inch-wide strip of foil tape was clearly visible at 50 yards through the Contractor 640 at base 3x magnification. After dialing up to 12x digital zoom, a dark spot is visible where bullets impacted the foil.

In the Field

Before testing each of the Armasight thermal optics, we needed to zero them — if you’ve never done this with a thermal before, it’s not as hard as you may think. Armasight provides a foil-backed zeroing target with each optic, but the DIY method is to buy a roll of aluminum foil tape at your local hardware store; either way, just attach the thermally reflective target to some cardboard and set it at the desired distance. Heat from the sun will cause it to appear as a light (or dark) spot in the optic’s display. Then, open the Contractor’s boresight menu to adjust the crosshair to match the bullet’s point of impact.

We used the Contractor 320 and Contractor 640 optics in the hot desert at midday, on cool evenings, and even indoors. Once we dialed in the focus to the appropriate setting, each produced a crisp image that clearly displayed the heat signature of field mice, birds, dogs, and humans, as well as inanimate objects like cars — obviously, we removed the optic from our rifle before aiming it at anything we weren’t planning to shoot.

Motion appears smooth and fluid through these optics, and although there’s a slight perceptible delay — as with all digital optics — it’s only noticeable if you’re looking for it. Unlike some lower-end thermal optics or digital night vision devices, the Contractor didn’t leave us feeling seasick and disoriented after tracking moving objects. The 60Hz AMOLED display does a great job of rendering the data from the sensor, and it’s easily bright enough to be comfortable during the day.

The controls are also straightforward: the right knob controls digital zoom, and the left knob controls color palettes and enhancement modes. A large locking power switch on top of the housing turns the optic on and off, and a recessed button behind the right knob captures photos (long press) and videos (short press). Thousands of photos or up to 4 hours of video can be saved to the onboard storage. Once you’re back home, you can upload them to your computer via a USB-C port that’s hidden under a screw-down cap on the right side of the housing.

Although these thermal optics are undeniably bulkier than a traditional rifle scope, they’re not much heavier. Each Contractor optic, including batteries, weighed between 2 and 3 ounces more than a Leupold Mk8 CQBSS 1-8x24mm optic in a Badger Ordnance mount. That’s a negligible amount of weight for such a huge difference in capabilities.

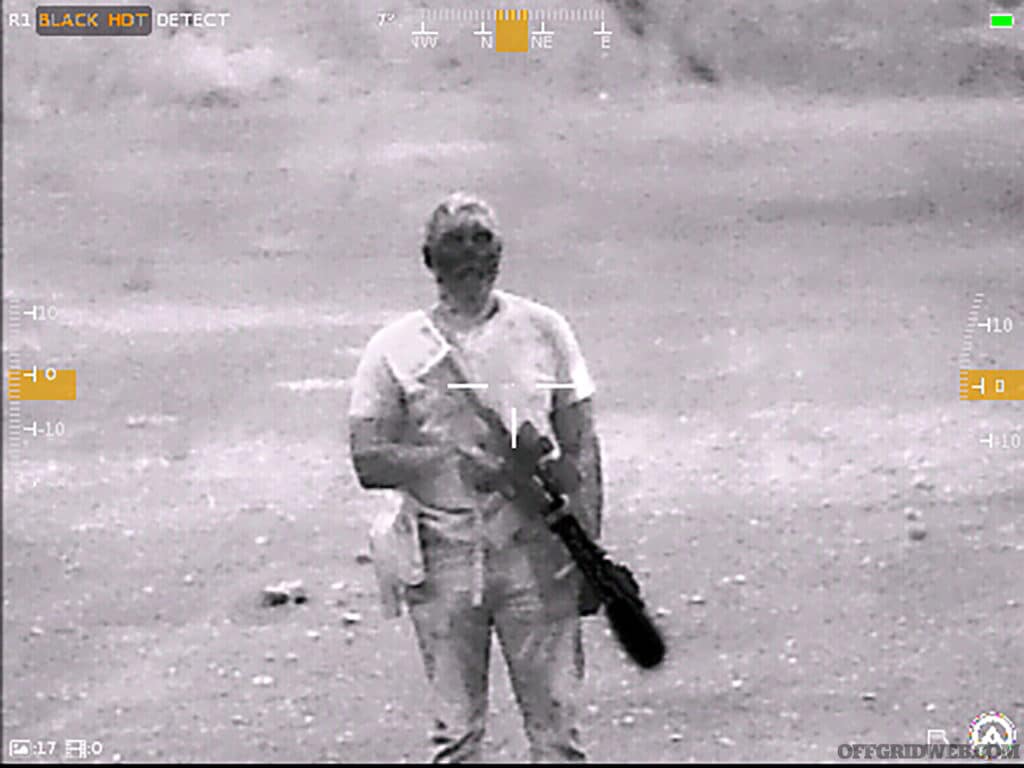
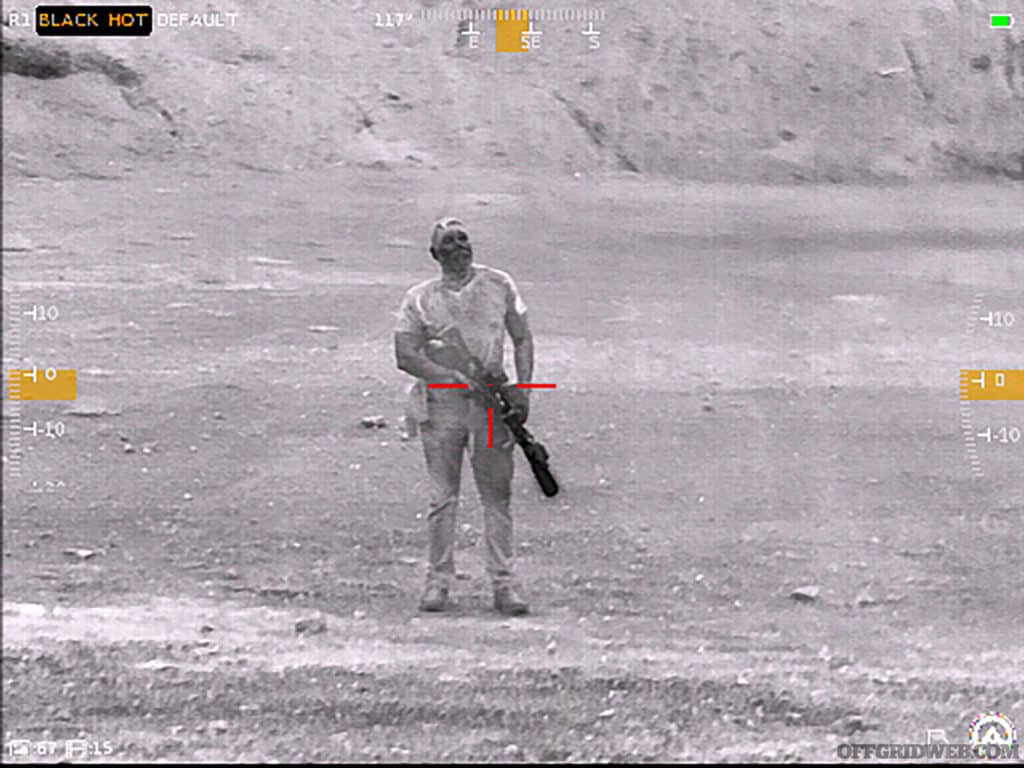
Thermal optic image of a man holding a cold suppressed rifle.

Thermal optic photo of a hot suppressed rifle.

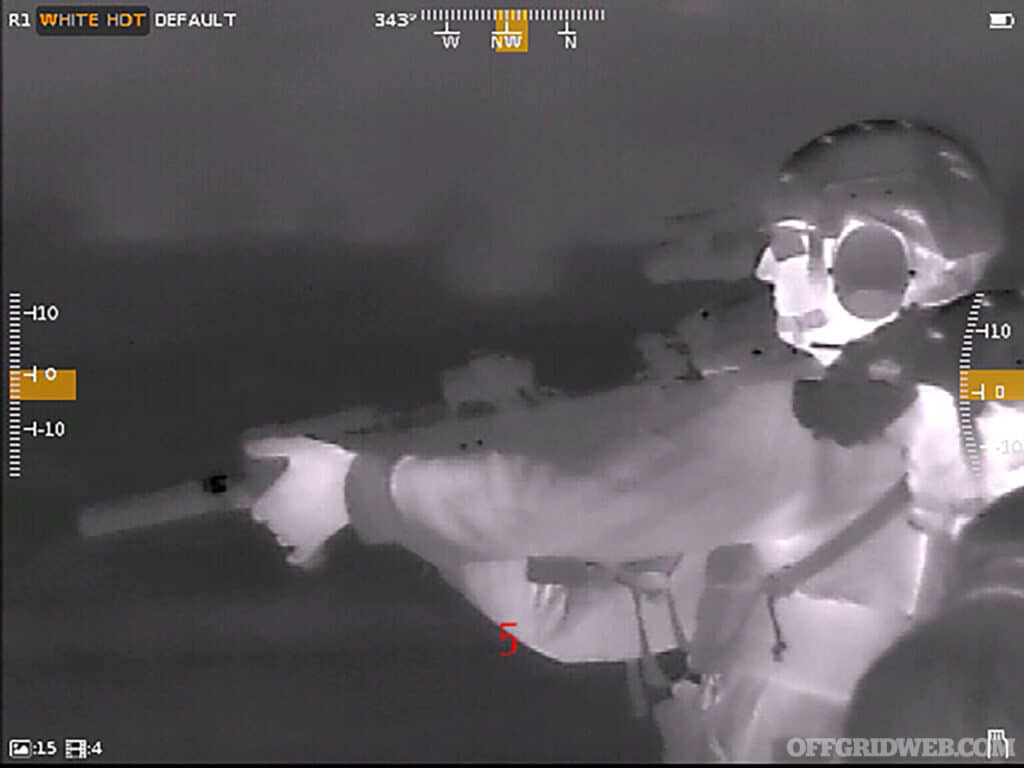
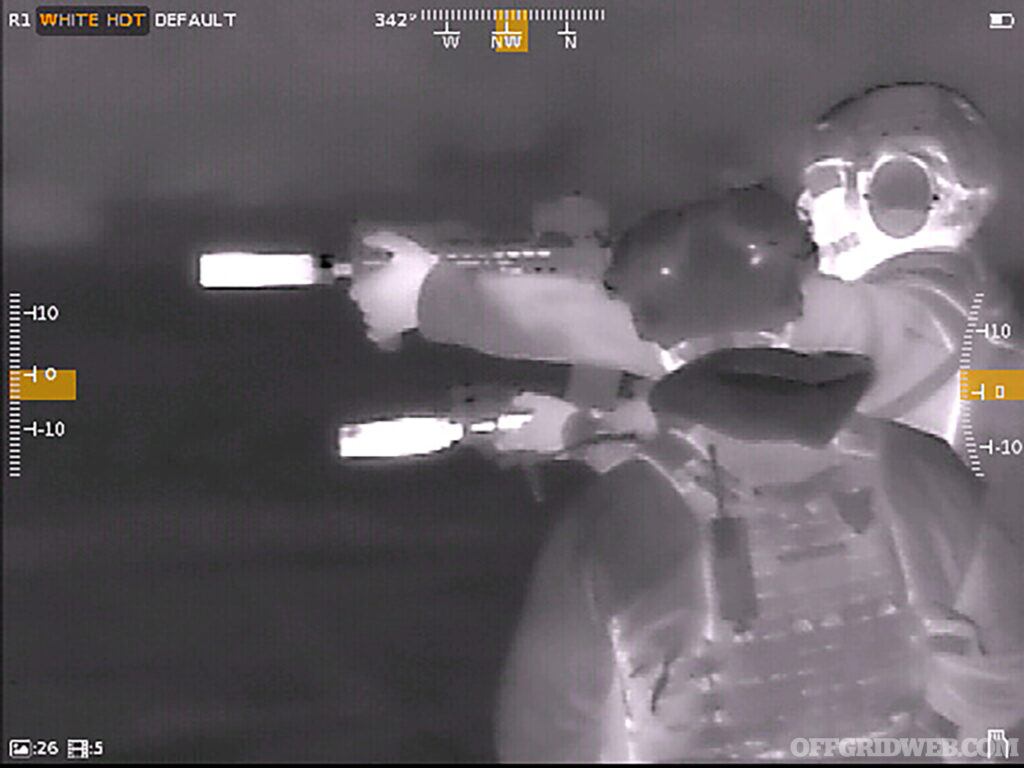
Above: Can you tell the difference before and after shooting? The rifle’s suppressor and barrel glow brightly as they heat up. (Contractor 320)

A Note About NUC

As mentioned earlier, you’ll definitely want to let these optics warm up before attempting to shoot. After a cold start, the NUC feature kicks in about every 10 seconds, displaying a 5-4-3-2-1 countdown on the screen before freezing momentarily to wipe the sensor. It’s possible to shoot during this warm-up cycle, but you need to time your shots carefully within those 10-second windows.

The NUC can also be delayed by pressing the right control knob during the countdown, but that only delays it for one cycle and results in a continued degradation of image quality. Thankfully, once the Contractor optics have run for about 15 minutes, image quality stabilizes and NUCs become rare enough that you’ll hardly notice them anymore.

320 or 640?

So, how much of a difference is there between the Contractor 320 and Contractor 640? Placing them side by side, the image difference is obvious. The 640×480 resolution is significantly more detailed, picking up more texture on objects and sharper edges. The less expensive 320×240 sensor produces an image that still makes it easy to identify heat signatures — you’d have no problem at all using it to spot the outline of a hog or coyote — but details often appear fuzzy or blotchy.

Granted, the two optics we tested have different base optical magnification levels (3x and 6x) so it’s difficult to rule out all other variables for a perfect one-to-one comparison. We did notice that using the Contractor 640 (3x base power) at its 2x digital zoom setting puts it at the same working resolution as the Contractor 320 at base 6x magnification. In this way, the 640 sensor has a much greater usable range than the 320 — at base magnification, it’s incredibly clear, and even when it’s zoomed in to 2x, the image is still quite good.

With the 320, on the other hand, targets become much less defined at the 2x zoom setting. And when you crank it up to 4x zoom — the equivalent of 24x total magnification — you’re effectively working with a data source that’s only 80×60 pixels. It’s still usable, but it’s not ideal.

If you’re planning to use digital zoom frequently or spend hours looking through your thermal optic, we’d say the Contractor 640 is well worth the extra cost. It’s easier to make out fine detail and has more “zoom headroom” than a lower-res sensor, but maintains the same housing size, weight, and run time as the 320. The quick-detach mount is also a valuable upgrade. That said, the Contractor 320 is a solid choice that will easily meet the needs of most hunters. Also, MSRP for the 320 has dropped $400 since its release in 2022, so there’s a good chance it will continue to become a more affordable choice in the future.

View of a man with a rifle through the Contractor 320.

View of a man standing with a rifle through the Contractor 640.

Above: Here’s a direct comparison of the Contractor 320 (top) versus the 640 (bottom). Both show the subject clearly, but we preferred the less fuzzy image produced by the 640 as well as the wider field of view from its base 3x magnification.

Closing Thoughts

There’s a reason the otherworldly hunter in the classic movie Predator was shown using advanced thermal vision to find his prey — nothing makes it easier to stealthily track a warm-blooded target. Every animal and human hunter understands the importance of visual camouflage, and it’s a skill that’s been honed through thousands of years of natural selection. However, very few species are capable of concealing their heat signature. Even if you stand perfectly still in total darkness, you’ll light up like a Christmas tree through a thermal optic, and you won’t know you’re being watched until it’s already too late.

Armasight’s Contractor series offers impressive capabilities and a wide range of features that’ll make you feel like a supernatural hunter, spotting every living thing that crosses your path from 1,000 yards or more. Whether you choose a 320 or 640 sensor with high or low base magnification, thermal optics give you the ability to see what would otherwise be invisible — that’s about as close to a superpower as you can get for a few thousand dollars.

Pair one of these optics with a nice rifle like our Stag 10 Pursuit and a stable tripod, and your prey won’t know what hit ’em. Better yet, pair all that with a helmet-mounted night vision setup like the one we reviewed in Issue 58, and you’ll be able to stalk your prey in total darkness before switching to your thermal to take the shot.

Sources

Read More

Subscribe to Recoil Offgrid's free newsletter for more content like this.

Editor's Note: This article has been modified for the web.

Readers’ Survival Tip: Bamboo Water Fountain

In the ever-evolving world of survival and preparedness, the wisdom of experience often provides the most valuable insights. For this reason, we've tapped into our community of avid readers as a resource for survival knowledge, and are sharing tips that stand out for their simplicity and effectiveness.  This Readers' Survival Tip comes all the way from Southeast Asia, and is a great reminder of how many resources are out there during emergency situations.

Readers Bio

  • Name/Alias: Thaiger_Wa
  • Location: Thailand
  • Age: 53

Thaiger_Wa's Survival Tip

When you are lost in the jungle in a tropical area, finding a place to shelter is a priority. But more importantly, water. If you can't find an open water source, a plant that can help you is the bamboo tree. Bamboo trees are very useful. It can give water from its joints. Its shoots can be cooked and eaten. Its stem can be made into many useful things such as weapons, traps, shelter, and fuel. Moreover, that the worms that live in the joints of bamboo plants are a good source of protein. Do some research on the internet and you will find much more on how bamboo keeps you alive!


Submit Your Survival Tip

Want to see your own  survival tip featured in our publications? Simply fill out the form here: Share Your Survival Tips

We are looking for your best tips, tactics and techniques to share with our audience! You do not need to be a survival expert to share with us, simply share any tip you find handy, useful or interesting.

Read More

Subscribe to Recoil Offgrid's free newsletter for updates, offers, and more.


Concealed Carbine Pack: Full-Sized Firepower In a Compact Carrier

Concealing a handgun in a backpack is relatively straightforward, since a pistol, holster, and spare mags can fit in even the smallest packs with ease. However, if you’re looking for a way to carry a concealed carbine, choosing your pack carefully becomes a much higher priority. Large backpacks can hold a rifle easily, but they practically scream there’s a gun in here — that may not be the message you want to send when you’re walking through a hotel lobby, parking lot, or other public location.

Smaller packs may not fit your rifle or may look awkward and bulky once they’re loaded with a weapon. The setup seen here was designed as a happy medium between these extremes, with priority placed on carrying a fully concealed, multi-role folding carbine.

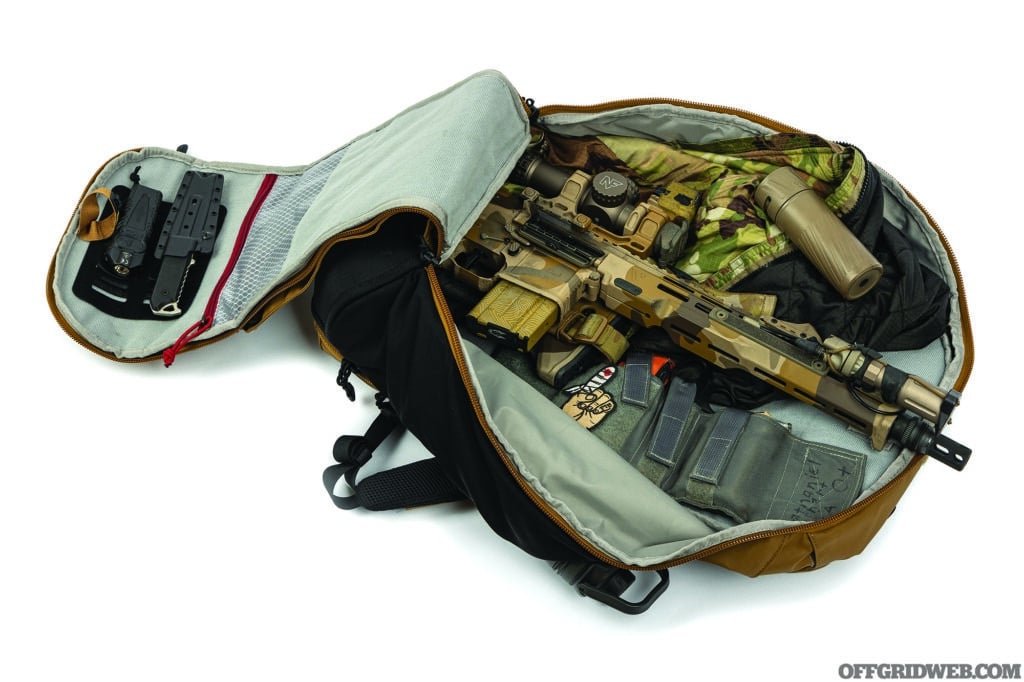
Studio photo of a carbine in a bugout bag.

Vertx has been a key name in the everyday carry backpack space for years with its Gamut series. As a happy owner of several of these bags, the larger Vertx Basecamp seemed like a natural choice for this application. I made sure to carefully compare its measurements to those of my carbine in advance, and I wasn’t disappointed when it arrived.

The Carbine Setup

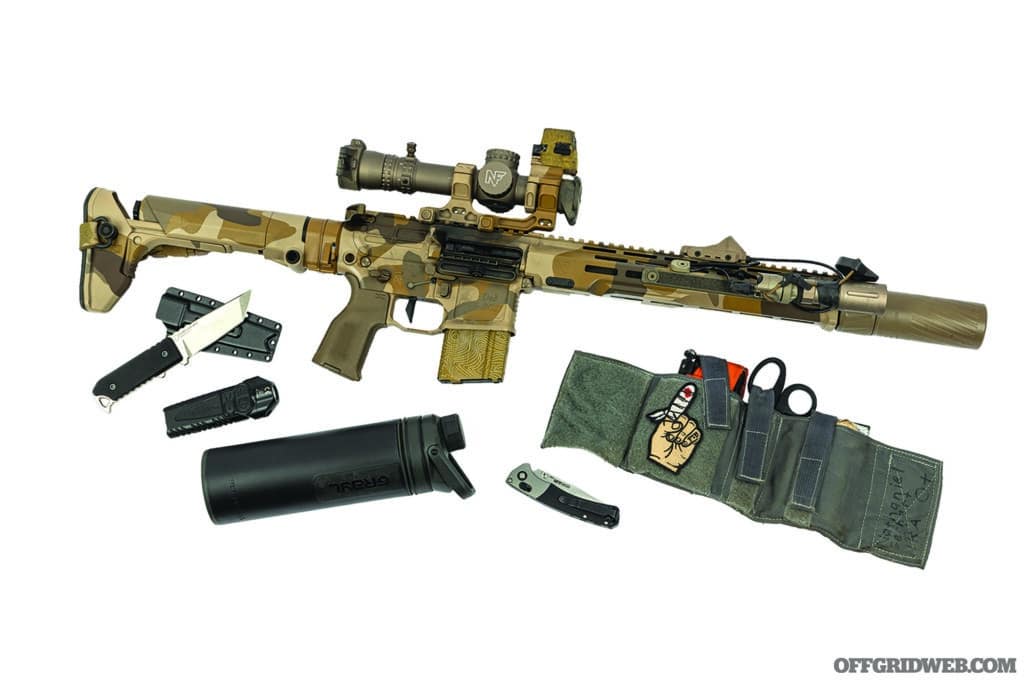
The bag is a snug but functional fit for my 12.5-inch AR with a LAW Tactical folding stock adapter and 20-round magazine. This rifle is equipped with a Nightforce NX8 1-8x optic in a Badger Ordnance Condition One 1.7-inch-height mount, as well as a Holosun 509T red dot on the slimming KOENG.CO 12 o’clock mount.

The carbine was built to serve as the most effective general-purpose rifle I could fit in the bag, allowing easy access in a pinch. I wanted to ensure it could be fired immediately without pausing to unfold the stock or put on ear protection; this is accomplished by the addition of a LAW Tactical ARIC bolt carrier and a Thunder Beast Dominus-K suppressor. The base of the AR build is a San Tan Tactical Pillar matching receiver set and a VLTOR Freedom Handguard with a built-in hand stop and ARCA rail section (for quickly mounting on a tripod). It also needed to be day and night capable.

Studio photo of a carbine set up.

To this end, it’s equipped with a Modlite PLHv2 light on an Arisaka mount activated using a UNITY Tactical AXON switch. Utilizing a 12 o’clock mounted red dot also means I can passively aim the rifle through night vision, if necessary. The 12.5-inch Criterion barrel is excellently gassed, making suppressed usage downright pleasant. Equipping the carbine with a PRI M84 Gas Buster charging handle also helped reduce gas blowback to the face.

The choice to utilize a 20-round magazine wasn’t due to any regional restrictions, but rather to allow easier access to the carbine through the top of the bag without stripping the entire face open. A 30-round magazine will fit tightly, but it means having to rip the backpack wide open, which is less than ideal if you’re in a hurry to access the weapon.

Additional Features

The Basecamp is feature-rich with a removable laptop sleeve on the interior and zippered pouches for storing small items. The Dark Earth color was chosen for function as much as aesthetics. It fits the carbine with the custom M81 Arid paint job from Pro2Customs and makes it easy to conceal in an arid desert environment. To facilitate this setup, removing the laptop sleeve was absolutely necessary. This pack’s removable laptop sleeve wasn’t present in earlier versions of the Gamut series, which is another selling point of Vertx’s newer bags.

I prefer keeping things like batteries outside of direct sun and heat in the desert, so having those small storage options positioned away from the top of the pack is beneficial. I store paper goods or items less susceptible to heat in the large, zippered storage pocket on the top of the opening flap. Speaking of that top flap, I appreciate that Vertx includes a Hot-Pull Tab at its leading edge, which can be staged between the two zippers and pulled to quickly open the main compartment. This makes it faster to open without hunting for zippers that might have otherwise ended up in a different place every time.

The generous internal storage allows the effective concealment of not just the carbine but also a Dauntless Manufacturing Hiker Tanto fixed blade with its sheath mounted to the included TactiGami panel, a fully stocked Ryker Nylon ankle IFAK utilizing the hook of the kit itself to attach to the internal loop, and a SureFire Stiletto light stored beside the Dauntless fixed blade. I also keep a reversible MultiCam/black A3 Alpha Lochi jacket from Beyond Clothing inside the main compartment, offering concealment as well as warmth.

Photo of the outside top of the Basecamp bugout bag.

Lastly, there’s a GRAYL GeoPress water purifier bottle. In the metropolitan center of the desert city where I live, I can fill it with 24 ounces of clean water from any tap, or purify water scavenged from ponds and drainage ditches in a pinch. The external stretch pockets allow me to carry the GeoPress as well as a 32-ounce bottle on the opposite side.

Eventually, my buildout of the bag will be improved to utilize more TactiGami panels on the interior for better spare magazine storage. I also plan to use the external PALS webbing hidden under the flap on the outside of the pack. I’ve used this outer storage space effectively in the past by mounting specific pouches for sundry items that might require access without exposing the main compartment’s contents. Ideas that come to mind are basic toiletries, pen and paper, a book, a multi-tool, and, naturally, some snacks.

In my opinion, you’ll be hard-pressed to find a more well-rounded and durable backpack at this price point. The Gamut family has proven to be well-built and reliable over the years, and the Basecamp looks to be no different. If you’re in the market for a multi-role backpack that offers concealment for anything from a subcompact pistol to a carbine, medkit, and spare magazines, you should give this bag a closer look.

Vertx Basecamp Pack Info

  • Make and Model: Vertx – Basecamp
  • Capacity: 30 Liters
  • MSRP: $280
  • URL: vertx.com

Read More

Subscribe to Recoil Offgrid's free newsletter for more content like this.

Editor's Note: The original contents of this article have been modified for the web.


Book Review: Scary Smart by Mo Gawdat

Scary Smart Premise

Scary Smart by Mo Gawdat isn’t your typical guide to bracing for life’s curveballs. Instead, it dives deep into the realm of artificial intelligence (AI) and its potential impact on humanity. Gawdat, a former Google executive, warns us about the rise of AI, which he argues could be both a blessing and a curse. The book serves as a wake-up call, urging us to prepare for a future where AI could either be our greatest ally or a formidable adversary. 
The 411

Gawdat starts the book with a thought exercise. Imagine it’s the year 2050, and you’re sitting around a campfire with the author. You’re either living in a dystopia where AI turned against humanity, or a utopia where AI ushered in a new age of prosperity. Looking back at the current time, what words of wisdom would future you say to present you? Gawdat does just this, exploring how we could reach a worst-case conclusion or a best-case future.

The book explores the “dual use” of AI. For example, when Oppenheimer discovered how to recreate nuclear fission, he invented a paradigm-shifting technology that could be used to annihilate civilization or provide it with an abundance of energy. AI is similar in scope with this double-edged sword characteristic, and Scary Smart explores how humanity can prepare and approach AI’s development in an ethical way. The book emphasizes that AI has the potential to solve some of the world’s most pressing issues but also poses risks if not managed responsibly. Gawdat stresses the importance of programming ethics into AI, which is crucial for ensuring that these systems act in the best interests of humanity. The book argues we need to be mentally and emotionally prepared for a future where AI plays a significant role. This involves understanding the technology, its limitations, and how to co-exist with it.

While Scary Smart doesn’t directly address traditional notions of readiness for unforeseen events, it does offer a unique perspective on preparing for a future shaped by AI. It’s about adaptability, mental fortitude, and ethical considerations — qualities that are essential for any kind of readiness strategy. The book encourages us to think critically about the technology we’re creating and how it could affect us, a vital skill when planning for the unknown.

The book has faced criticism for its somewhat alarmist tone, with some readers arguing it paints an overly grim picture of AI’s potential impact. But Gawdat balances the potential for dystopia with an equal amount of how astonishingly well AI can solve some of the world’s most dire problems. Additionally, Gawdat’s focus on embedding ethics into AI has been met with skepticism, as defining “ethics” in a universally acceptable way is a complex task. Much like any tool humanity invents, often the only way to stop a bad guy who uses the technology in a nefarious way is a good guy using the tech to prevent the bad from happening.

The Verdict

Scary Smart is a thought-provoking read that challenges us to consider the ethical and practical implications of rapidly advancing AI technology. While it may not be a traditional guide on how to prepare for life’s uncertainties, it offers valuable insights into adapting and thriving in a world increasingly influenced by AI. If you’re someone who’s keen on understanding the broader landscape of threats and opportunities that lie ahead, this book is definitely worth your time.

About the Book

  • Book & Author
    Scary Smart: The future of Artificial Intelligence and How You Can Save Our World
    By Mo Gawdat
  • Publisher: Bluebird
  • MSRP: $15
  • URL: mogawdat.com
  • Pages: 326
  • Rating: Thrive | Survive | Die

Read More

Subscribe to Recoil Offgrid's free newsletter for more content like this.


Exploring Simpleshot’s Slingshots: Review and Class Experience

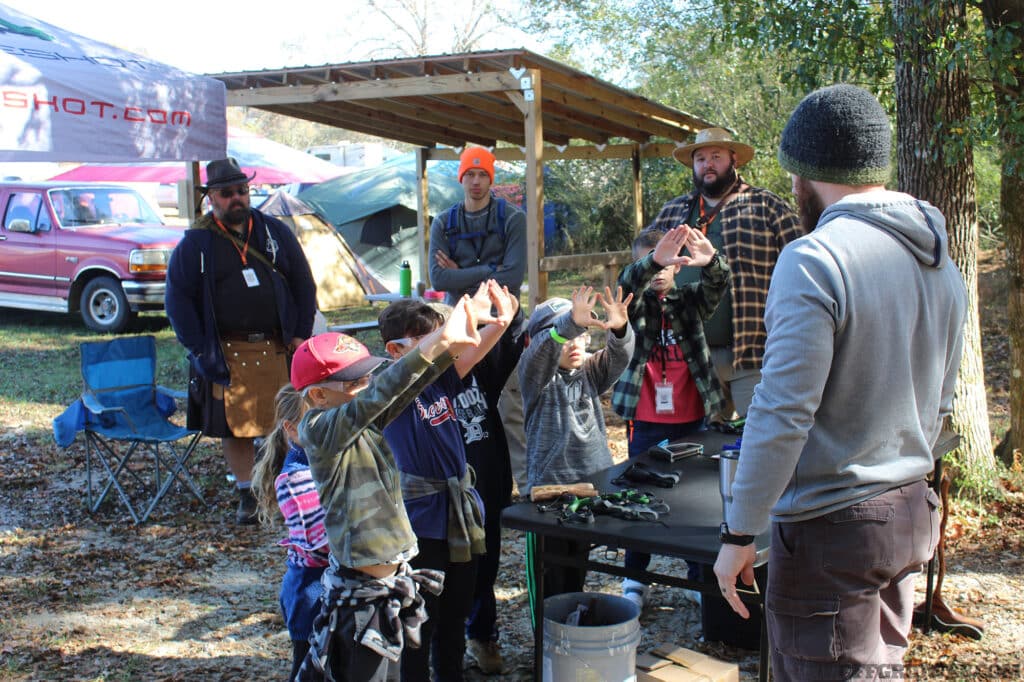
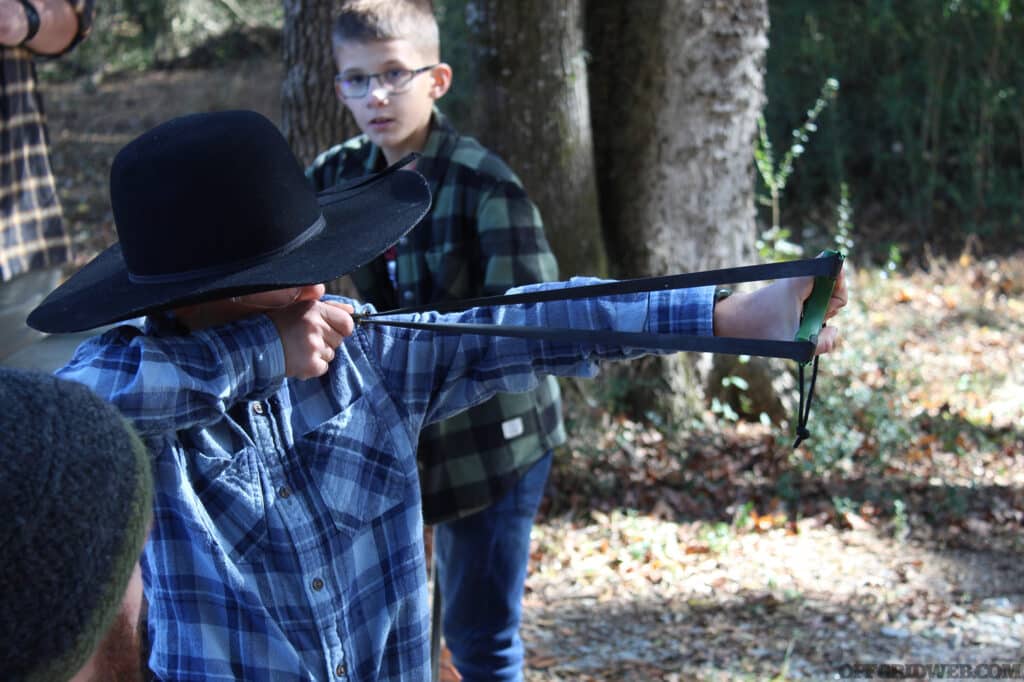
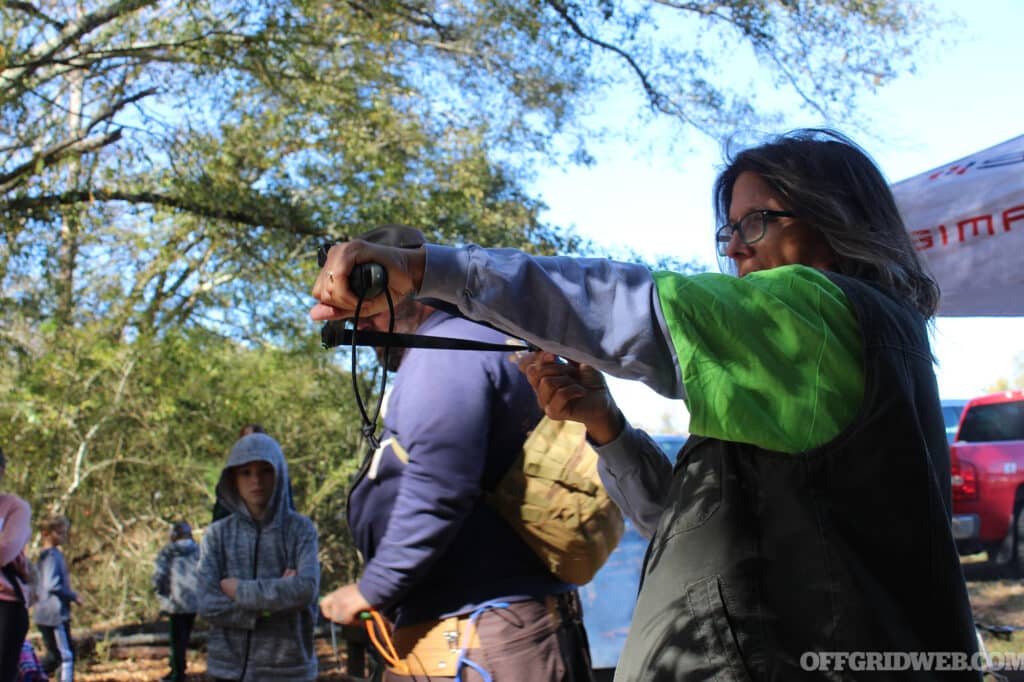
When you think of a slingshot, what comes to mind? Maybe a nostalgic memory of childhood shenanigans comes to mind, or perhaps you envision a TV character like Bart Simpson or Dennis the Menace. You might be surprised to learn that slingshot technology has not only kept pace with modern advancements, they are an effective tool for hunting, recreation, and even defense. Enter into the world of Simpleshot, a name that's ubiquitous in the slingshot community. We'll take a look at several of their products, including the Scout X, Hammer XT, Torque, and Axiom X slingshots. Plus, I'll share my firsthand experience from a slingshot class held at the Georgia Bushcraft event.

Simpleshot Slingshots: An Overview

Simpleshot is not just another slingshot brand. They've carved a niche for themselves with innovative designs and a focus on quality. But how do these slingshots really stack up? Let's break it down by looking at a few of their models.

  • The Scout X Slingshot The Scout X is a versatile beast. It's designed for both beginners and pros, offering an ergonomic handle and a sturdy frame. What makes it stand out is its simplicity and adaptability. You can switch bands easily, and it's suitable for various shooting styles. However, it's not just about comfort; the accuracy this slingshot offers is impressive.

Studio photo of the Simpleshot Scout X slingshot.


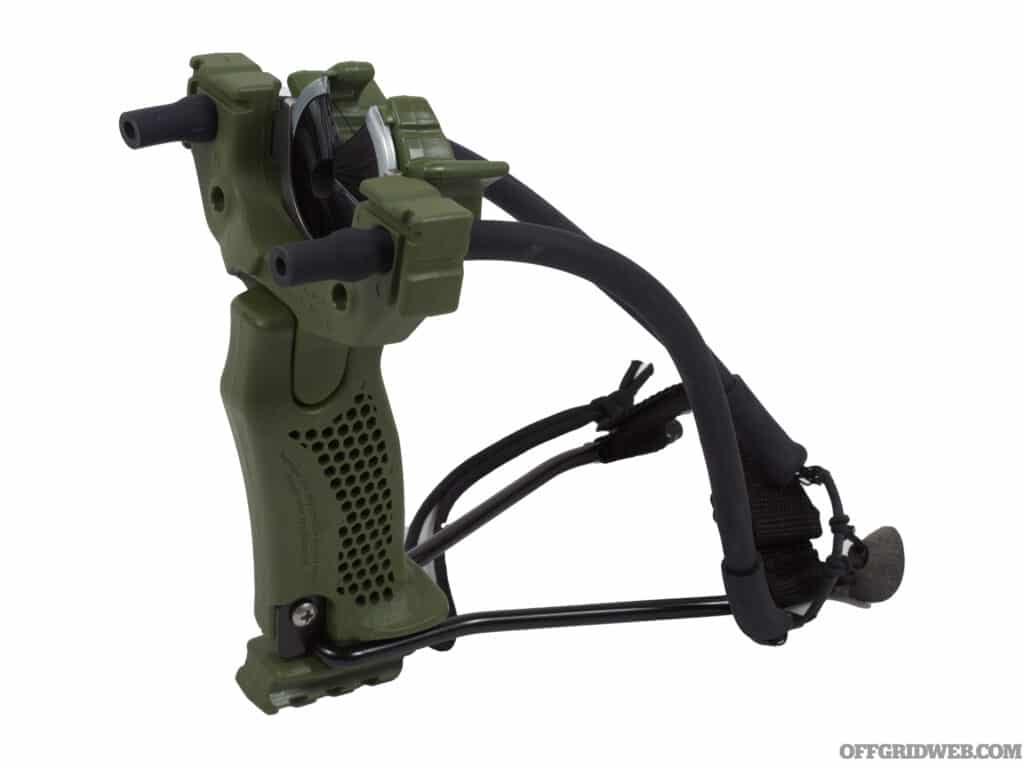
  • The Hammer XT Slingshot The Hammer XT is a powerhouse. It's built for heavy-duty use, and you can feel it. Its weight and construction make it a great choice for hunting or long-range shooting. The wrist brace adds stability, which is crucial for powerful shots. The forks can also be swapped out for an archery biscuit to shoot arrows.

Studio photo of the Simpleshot Hammer slingshot.

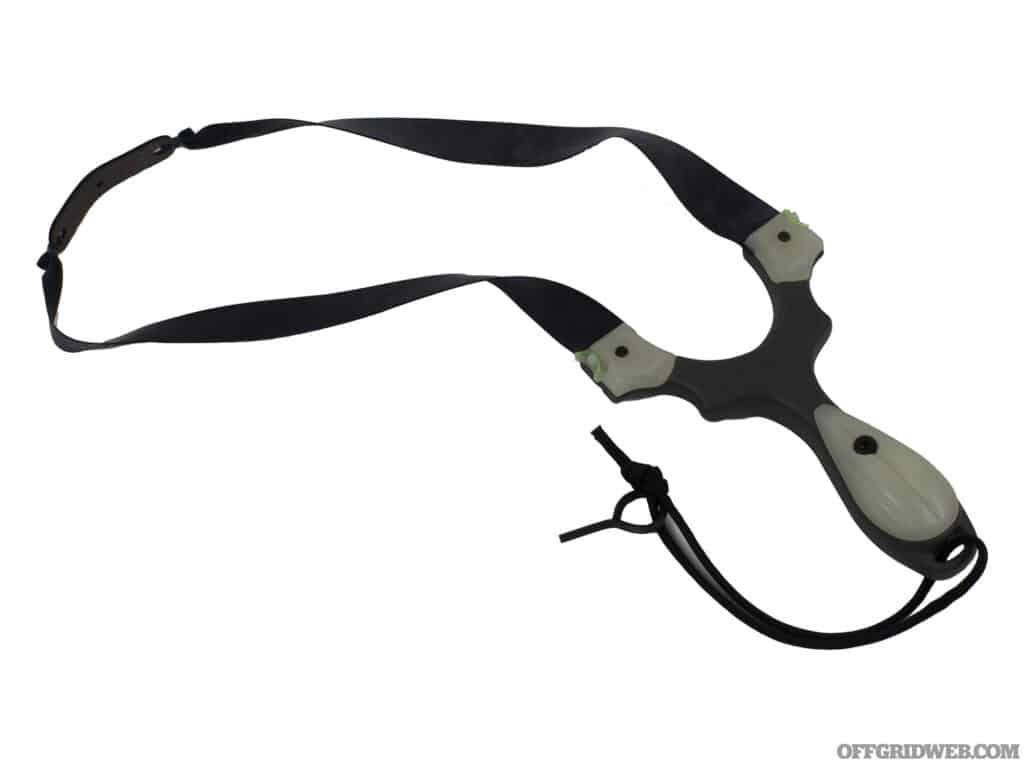
  • The Torque Slingshot The Torque is a compact wonder. Its unique, angular design is not just for looks – it aids in grip and alignment. It's incredibly lightweight, making it a great travel companion. However, its small size might be a challenge for those with larger hands.

Studio photo of the Simpleshot Torque slingshot.

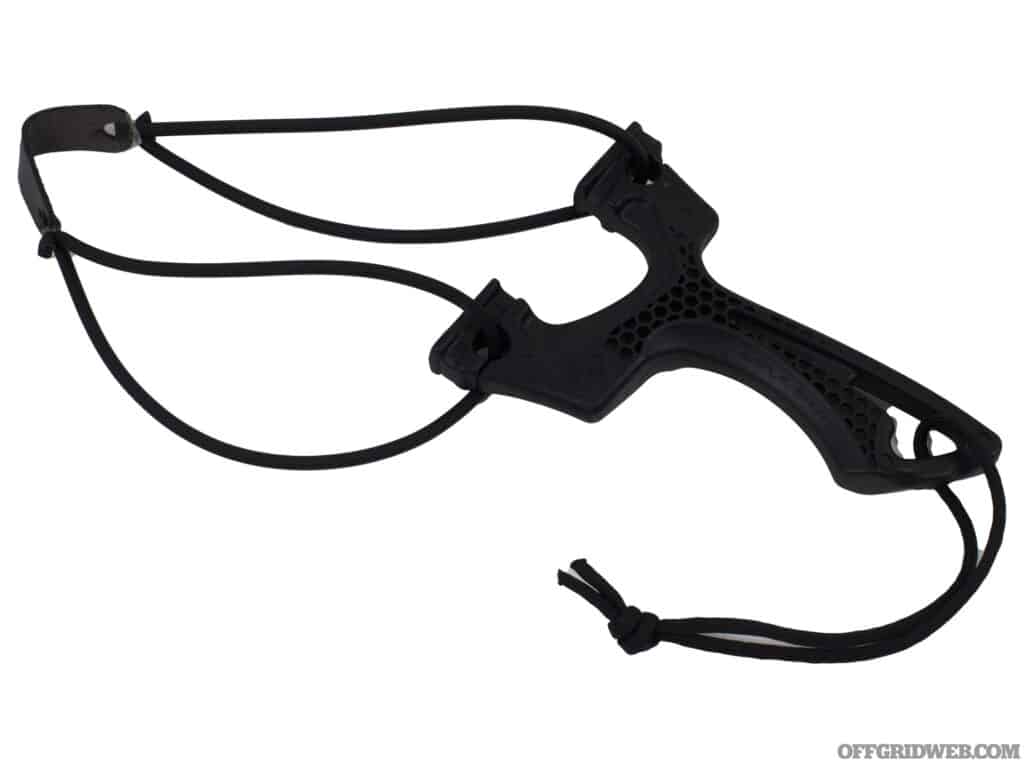
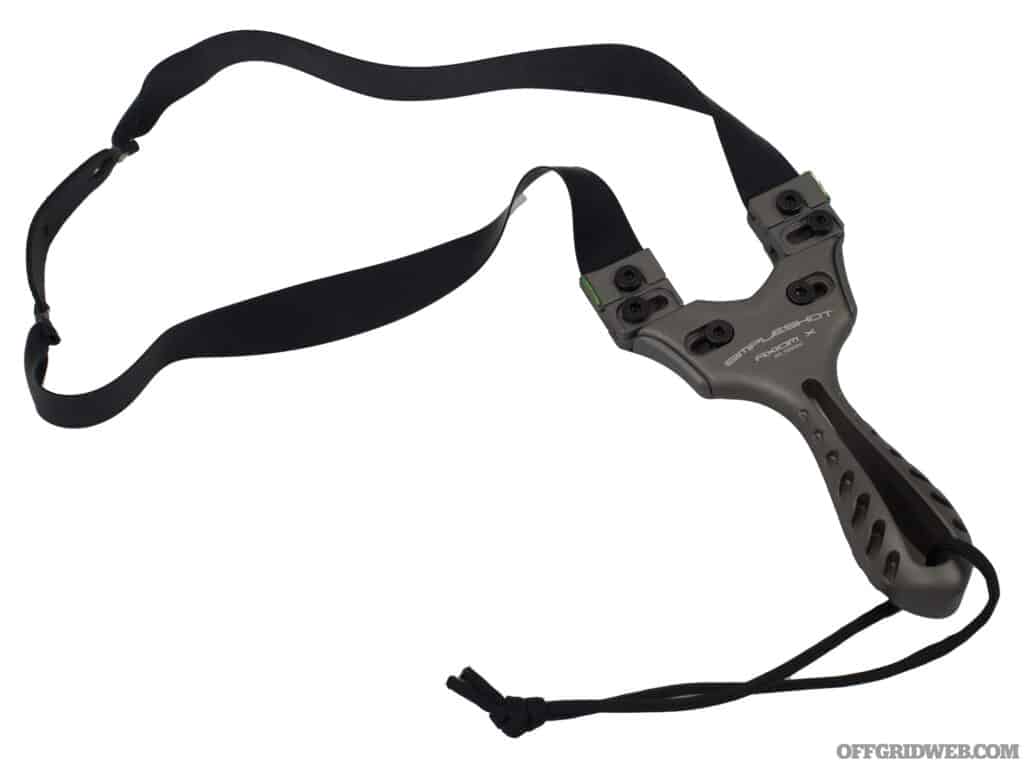
  • The Axiom X Slingshot Lastly, the Axiom X is a well-rounded option. It's designed for comfort and accuracy, with a frame that accommodates various grips. It's a solid choice for both recreational shooting and more serious endeavors.

Studio photo of the Simpleshot Axiom X Slingshot.

Slingshot Accessories

When it comes to accessorizing your slingshot, Simpleshot has an array of options. For starters, their Clay Shooting Flat Bands are tailor-made for clay ammo enthusiasts, ensuring precision and durability​​. If you're aiming to improve your accuracy, the Bell Target is a fantastic choice with its high-visibility and ultra-durable design​​.

Simpleshot offers many ways to customize your slingshot rig. Their Scout LT Scales come in a 5-pack bundle, allowing you to personalize your slingshot's handle to your liking​​. And for those who love a bit of target practice, the Self-Resetting Knockdown Target and its accompanying replacement discs are a good option. These targets are not just fun but also aid in skill improvement​​​​. For the more competitive shooters, the Competition Training 5-Pack of Self-Resetting Knockdown Targets is designed to simulate a real-world shooting experience, perfect for upping your game​​. And for those late-night practice sessions, the Glow-In-The-Dark Golf Ball Target is a useful accessory​​. Simpleshot also caters to the digital age with their Foundations Online Course, a great resource for mastering slingshot techniques​​.

Finally, the brand offers various handle weights, scales, and clips specifically designed for their Scout X model, enhancing the overall shooting experience with added stability and grip customization​​​​​​. Plus, the quick-release keychains and hex screws are handy tools for making quick adjustments on the go​​​​​​.

Slingshot Fundamentals

At Georgia Bushcraft‘s Fall Gathering event, I had the opportunity to learn slingshot fundamentals from the Simpleshot experts themselves. The class focused on four key areas:

  1. Finding Your Dominant Eye: This is crucial for accuracy. The instructors helped students identify their dominant eye, which is essential for proper aiming.

Slingshot students learn how to find their dominant eye.

  1. Proper Grip Techniques: A correct grip is the foundation of a good shot. We learned the proper grip for the slingshot shooting style. Rather than holding on to the handle exclusively, the grip also included the forks of the slingshot to prevent it from leaning backwards when pulling back on the band.

Student takes aim with a Simpleshot slingshot.

  1. Preventing Band Twists: Twisted bands can affect accuracy and the lifespan of the bands. The instructors showed us how to attach and maintain the bands properly.

Simpleshot student ensures the bands aren't twisted.

  1. Archery Elbow Technique: Just like in archery, the elbow technique in slingshot shooting is vital for stability and precision. We practiced this to improve our shooting form.

Slingshot shooter takes aim with proper technique.

The class included people of all ages and backgrounds participating, proving that slingshots continue to stand the test of time. It was a fantastic experience that not only improved my skills but also deepened my appreciation for the sport.

Final Thoughts

Simpleshot is leading a renaissance in the slingshot world. Their range of products caters to a wide spectrum of users, from beginners to experts. Each model has its unique strengths, and there's something for every preference.

Read More

Subscribe to Recoil Offgrid's free newsletter for more content like this.