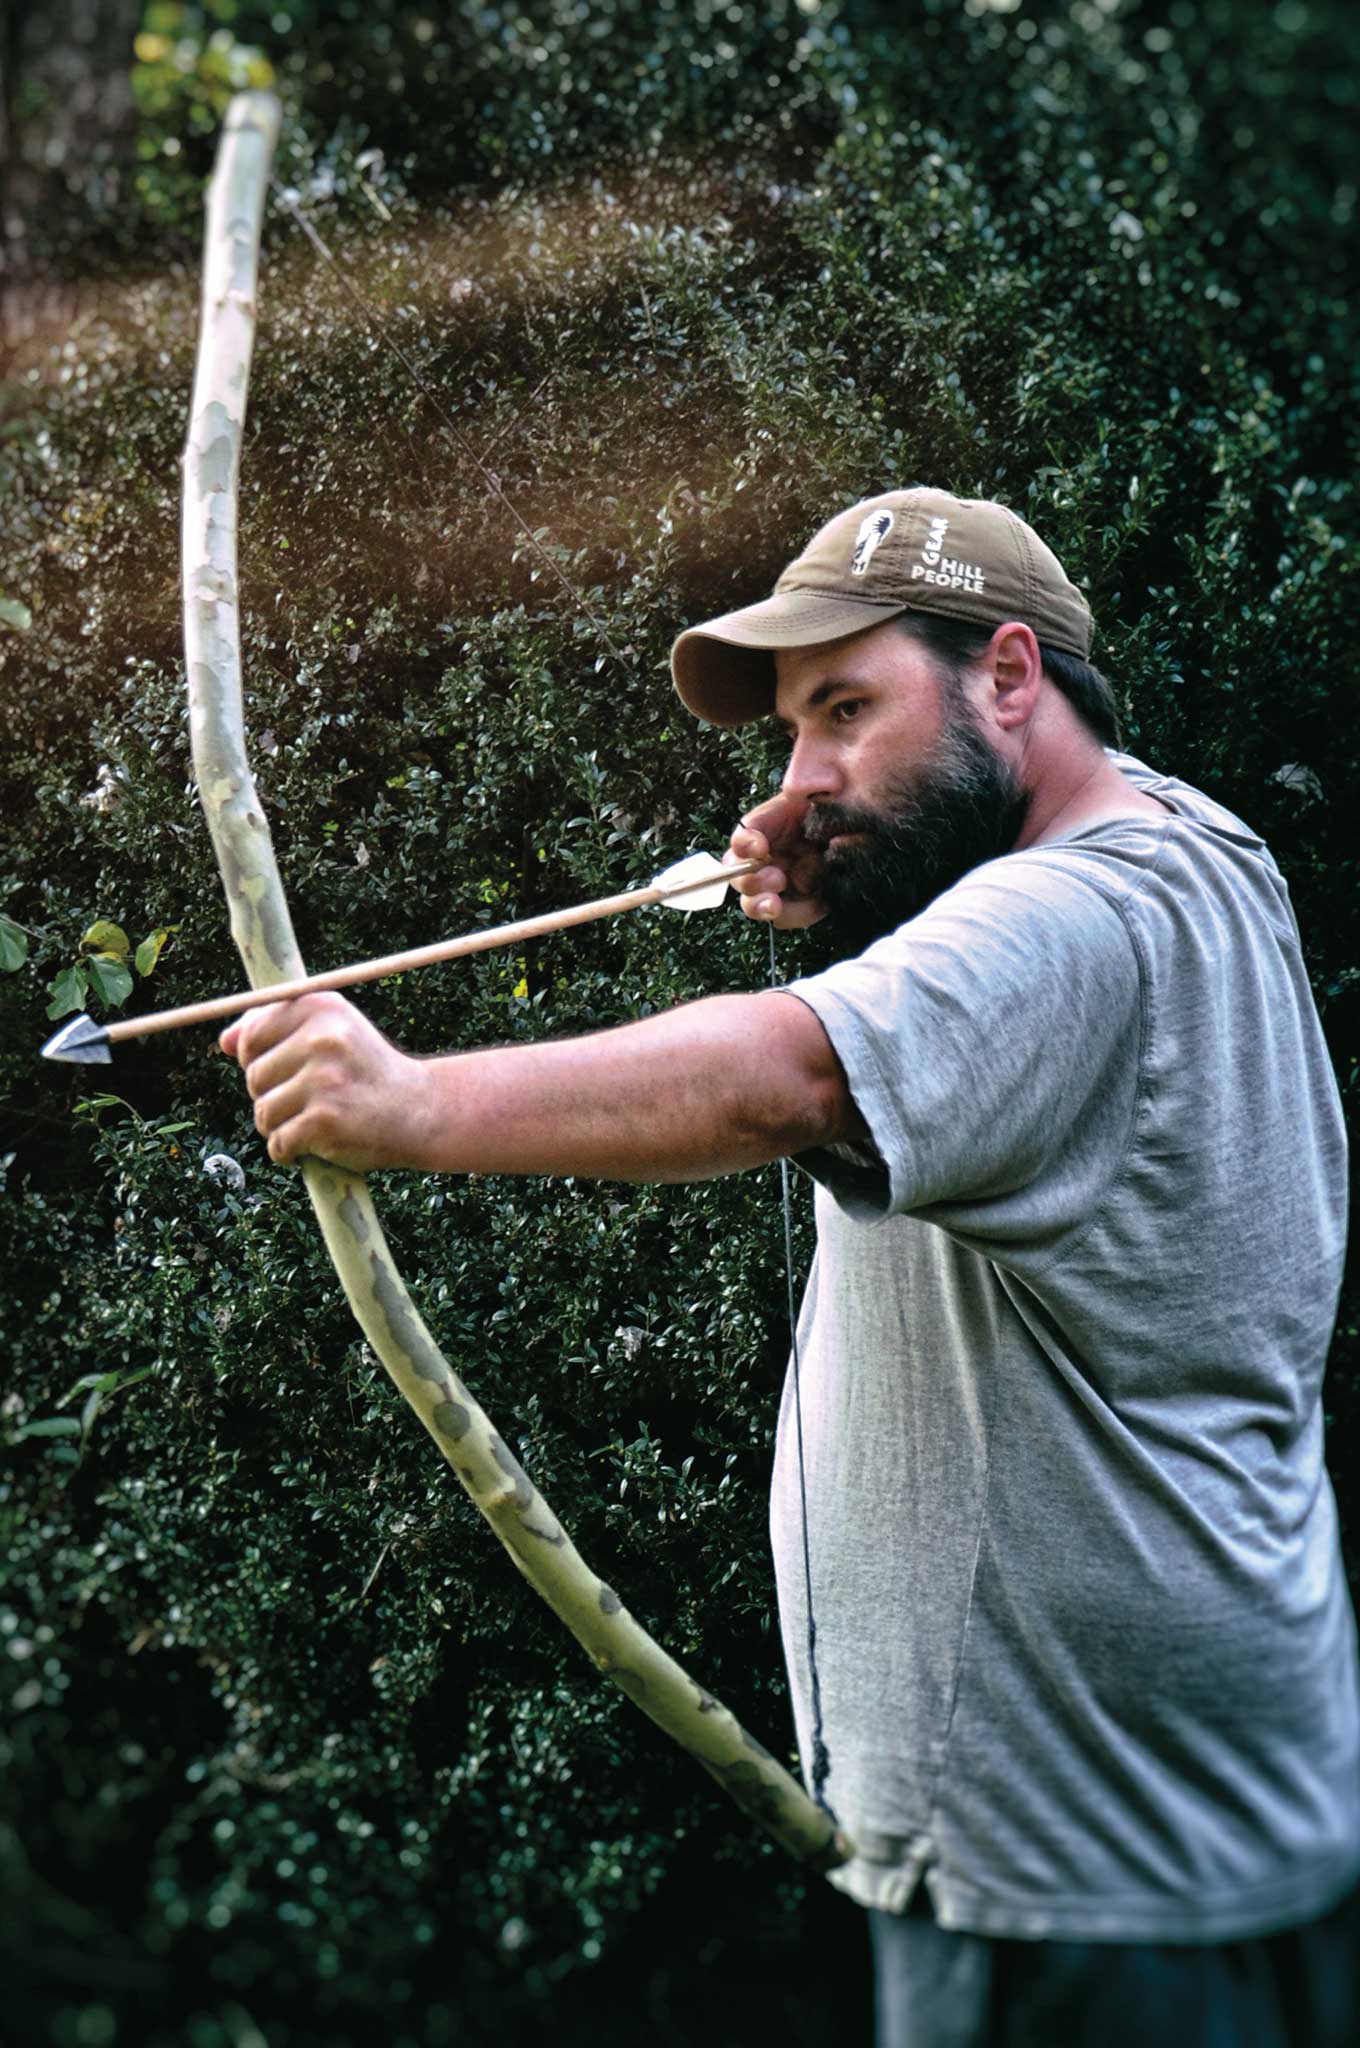
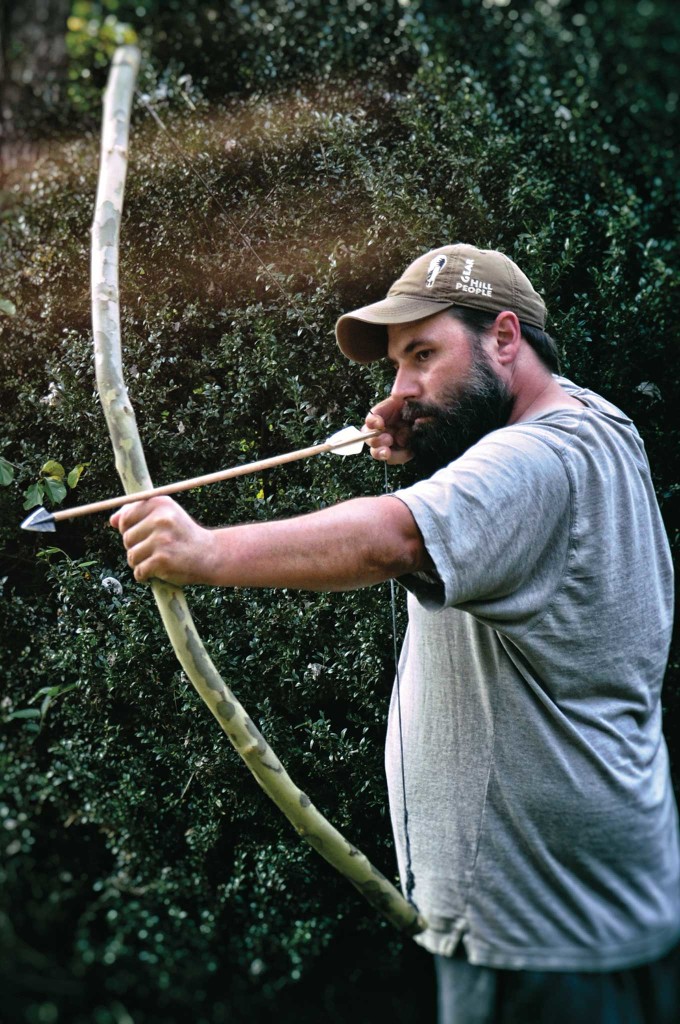
Cool leaves of yellow and red pelted my face and hands in the autumn breeze. The wind was in my face, blowing from my quarry toward me. Good, I thought, one more advantage. He wouldn't be able to smell me. I waited for my prey to move clear of the vegetation, as one stray vine or branch could send my arrow careening off target. The shot was lining up perfectly. It was as if I were watching this happen to someone else. I was detached, emotionless, and simply allowing things to happen.
Age-old instincts took hold, and I began to draw the bow. My camouflage was perfect, right down to the bark still clinging to the back of my field-built bow. I drew the nock of the arrow to the right corner of my mouth. Then, to my dismay, the wooden bow made a sound like the “tick” of some large clock. My prey, a fat gray squirrel, looked right at me and bolted faster than my arrow could follow. I muttered a curse under my breath, and then fixed myself on the same thought that my ancestors must have thought on 10,000 failed hunts before me: next time…
It's entirely true that a field-built bow has a lot of quirks, ticks, and actual ticking sounds as you break-in the wood fibers (or actually break them). But if you don't have access to a bow after wolfing down the last of your emergency food supplies and firing your last round, it's nice to know that you can build your own bow just as our forebears once did. The natural materials for the archery tackle haven't changed at all in 10 millennia — all you need is wood, fiber, glue, feathers, and a sharp point for each arrow.
So maybe you're a hunter, looking to take things to the next level by building your own equipment. Or perhaps you're a serious prepper, interested in yet another backup method of food procurement. Or maybe you just watched the movie Predator one too many times as a kid and want to build an alien-slaying primitive bow, worthy of Arnold himself. Whatever the motivation, we're glad you're here. Bow making is an ancestral art form dating back thousands of years and appears in almost every traditional culture on earth. It's a means of hunting for food and fighting back against predatory animals and similarly motivated humans.
Making your own bows, arrows, and archery tackle are also a confidence builder and quite a bit of fun. Read along, and we'll give you the beginner's guide to the tools, materials, and techniques for survival bow making.
The Setup
You may imagine that you'd need an entire woodworking shop to build a wooden bow, and certainly, that wouldn't hurt. But you can also do all of the important work with a fixed-blade knife, a multitool, and a billet to strike the spine of the fixed-blade knife that will baton your way through the wood (see “Firewood Fundamentals” in Issue 10 of OG). The knife and multitool could be part of your normal everyday carry gear, and to finish off your bow-making toolkit, carry a few bow strings, some thread, a few fletchings, and some arrowheads.
Modern “glue-on” broad heads or “trade blank” points can be bought from specialty catalogs and websites, and are similar to the ones that were once traded to native cultures by Europeans. If you're particularly handy, you could chip arrowheads from stone or glass. You could also improvise your own bow strings from 550 cord, but a word of caution: 550 cord is a bit too elastic for the job of bowstring, even after stretching and twisting.
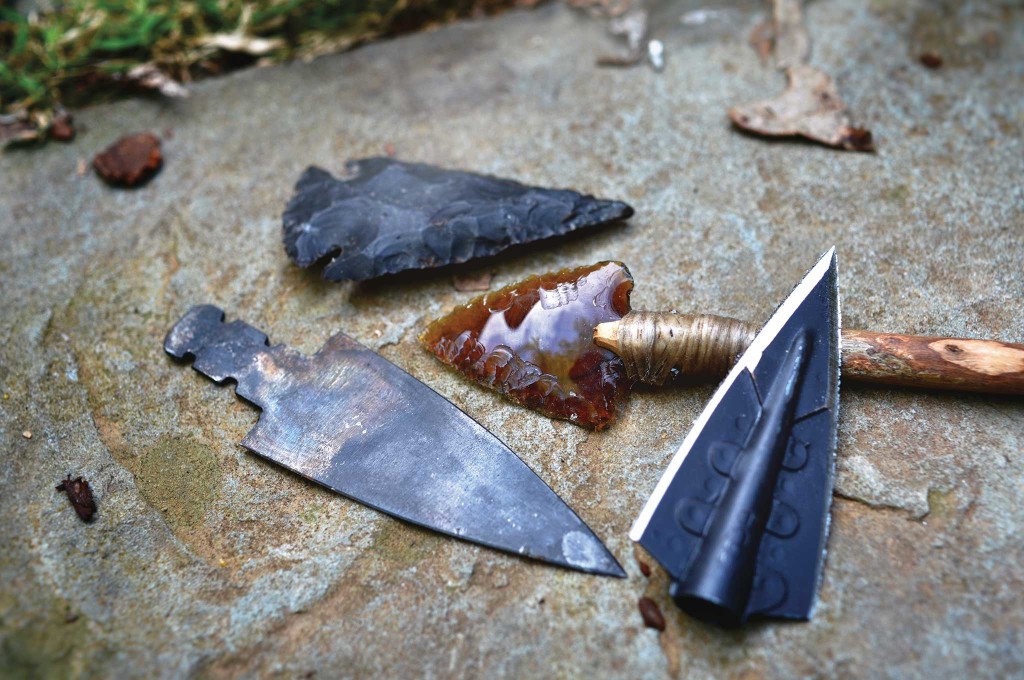
Arrowheads are modern glue-on broad-head, trade blank metal point, a stone point, and a beer bottle point.
Finally, you'll need the bow stick (also called a stave or billet, respectively). This can be a recently deceased sapling or branch from a larger tree. You'll want it dead and dry (but not rotten) for same-day use. If you can wait a few weeks, you could also cut a live sapling and allow it to dry in the shade, ideally with any cut ends sealed with paint or glue to prevent cracking. Do a bit of research to find out about the favored bow woods used by the native peoples of your area. Chances are good that those are your top choices.
In the East, I go out of my way to get hickory and black locust. I've also used ash, oak, maple, and other local hardwoods with good results. For those in the Midwest, look for osage orange, which is excellent. Midwesterners can also try more flexible species of juniper. And for the West Coast, try your hand with yew and cedar.
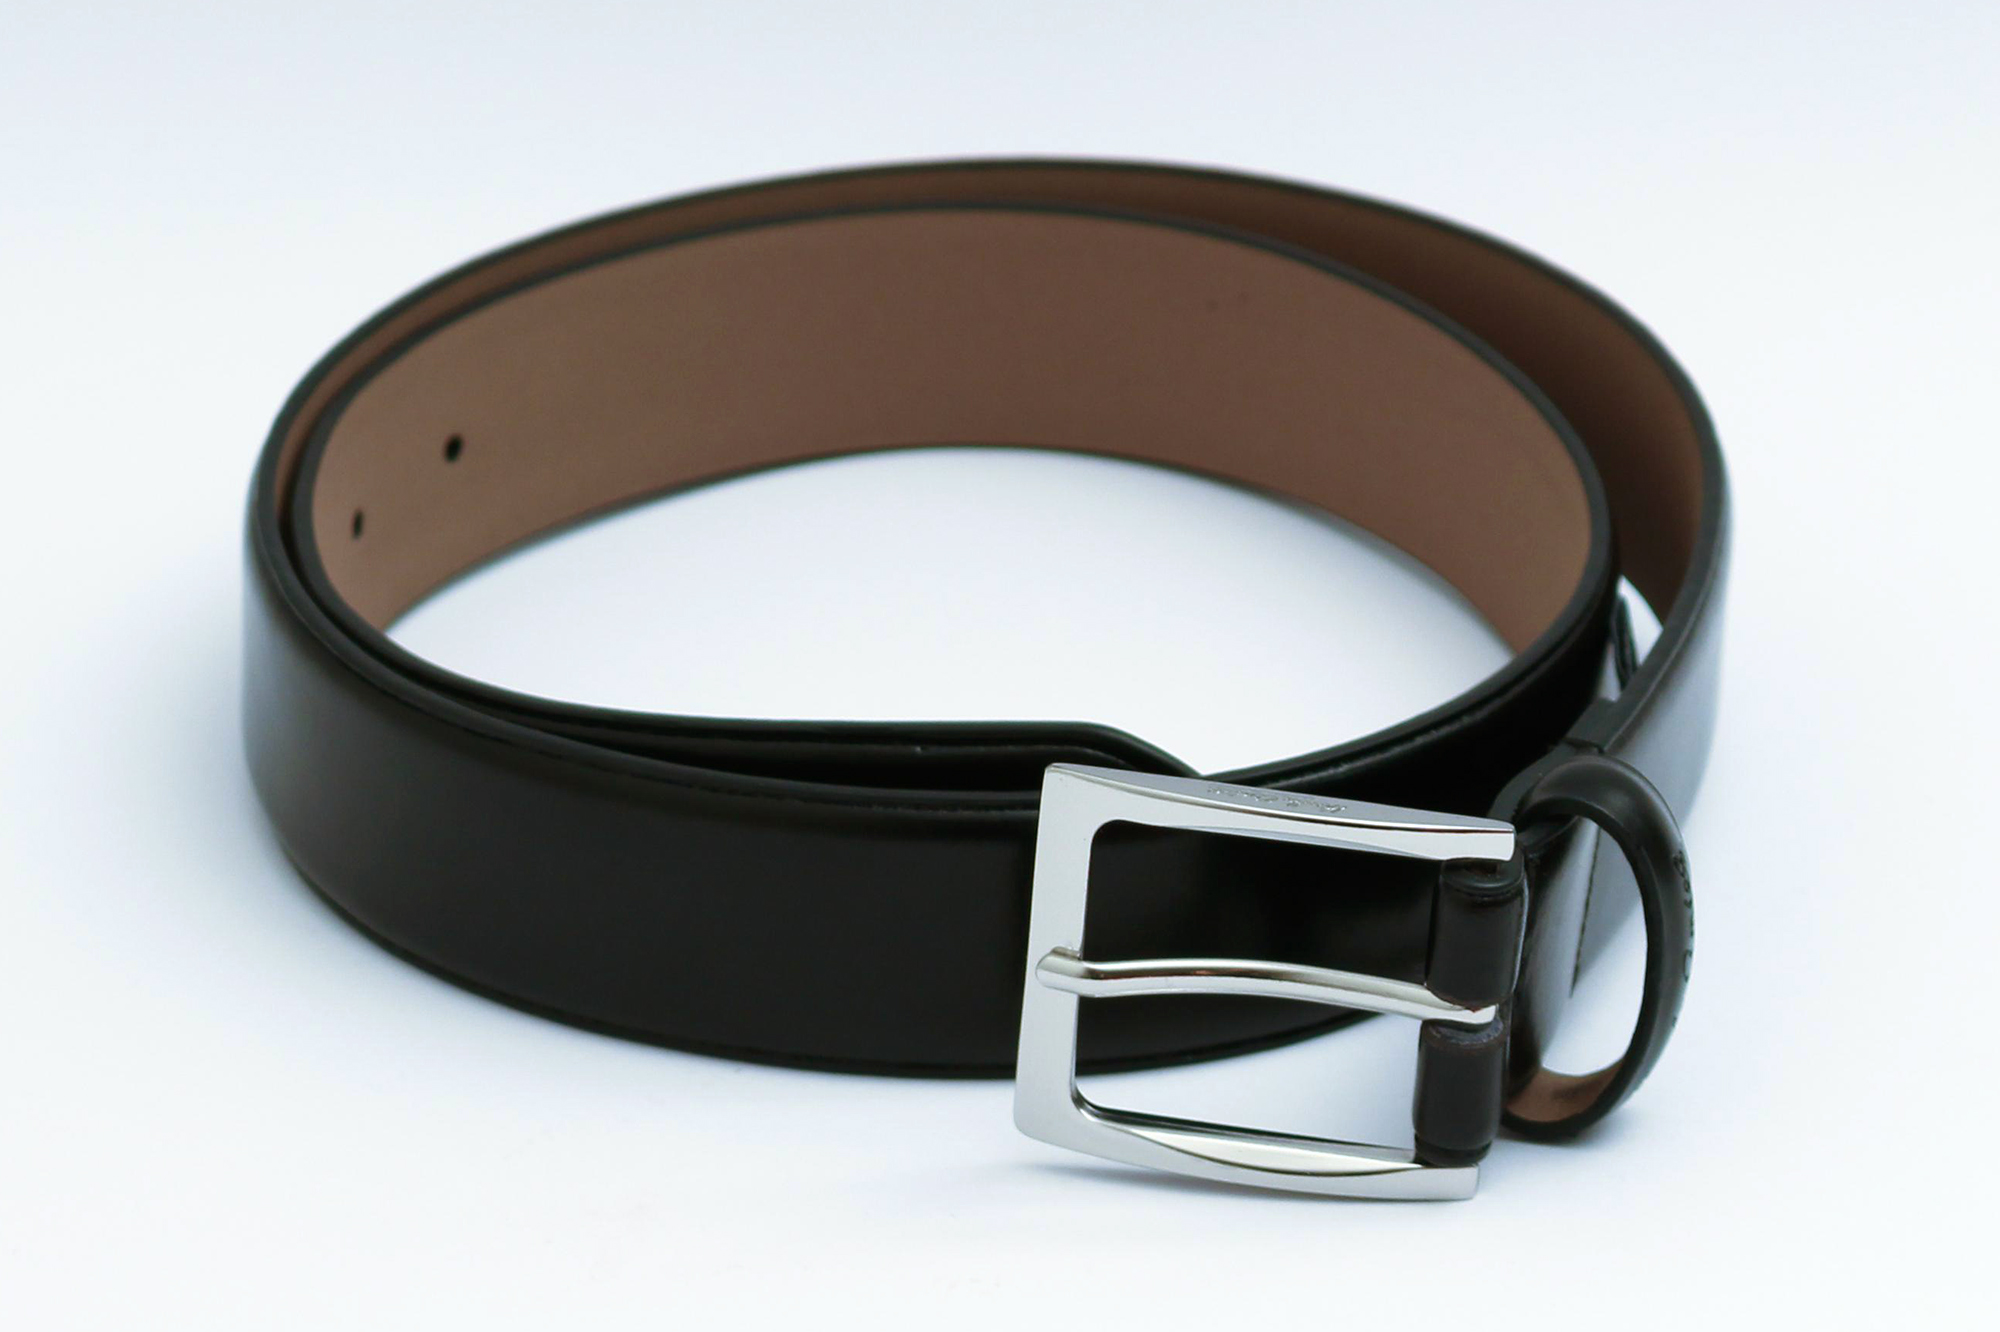
And while you're assembling your supplies, treat yourself to a strip of leather for an armguard. This may save you from a nasty bruise or large blister if you are shooting with bare forearms. A pencil is handy too, though a chunk of charcoal will suffice. A piece of 100-grit sandpaper and a tape measure will finish out your supplies for your first bow.
The How-To:
Step 1: Pick your Stave
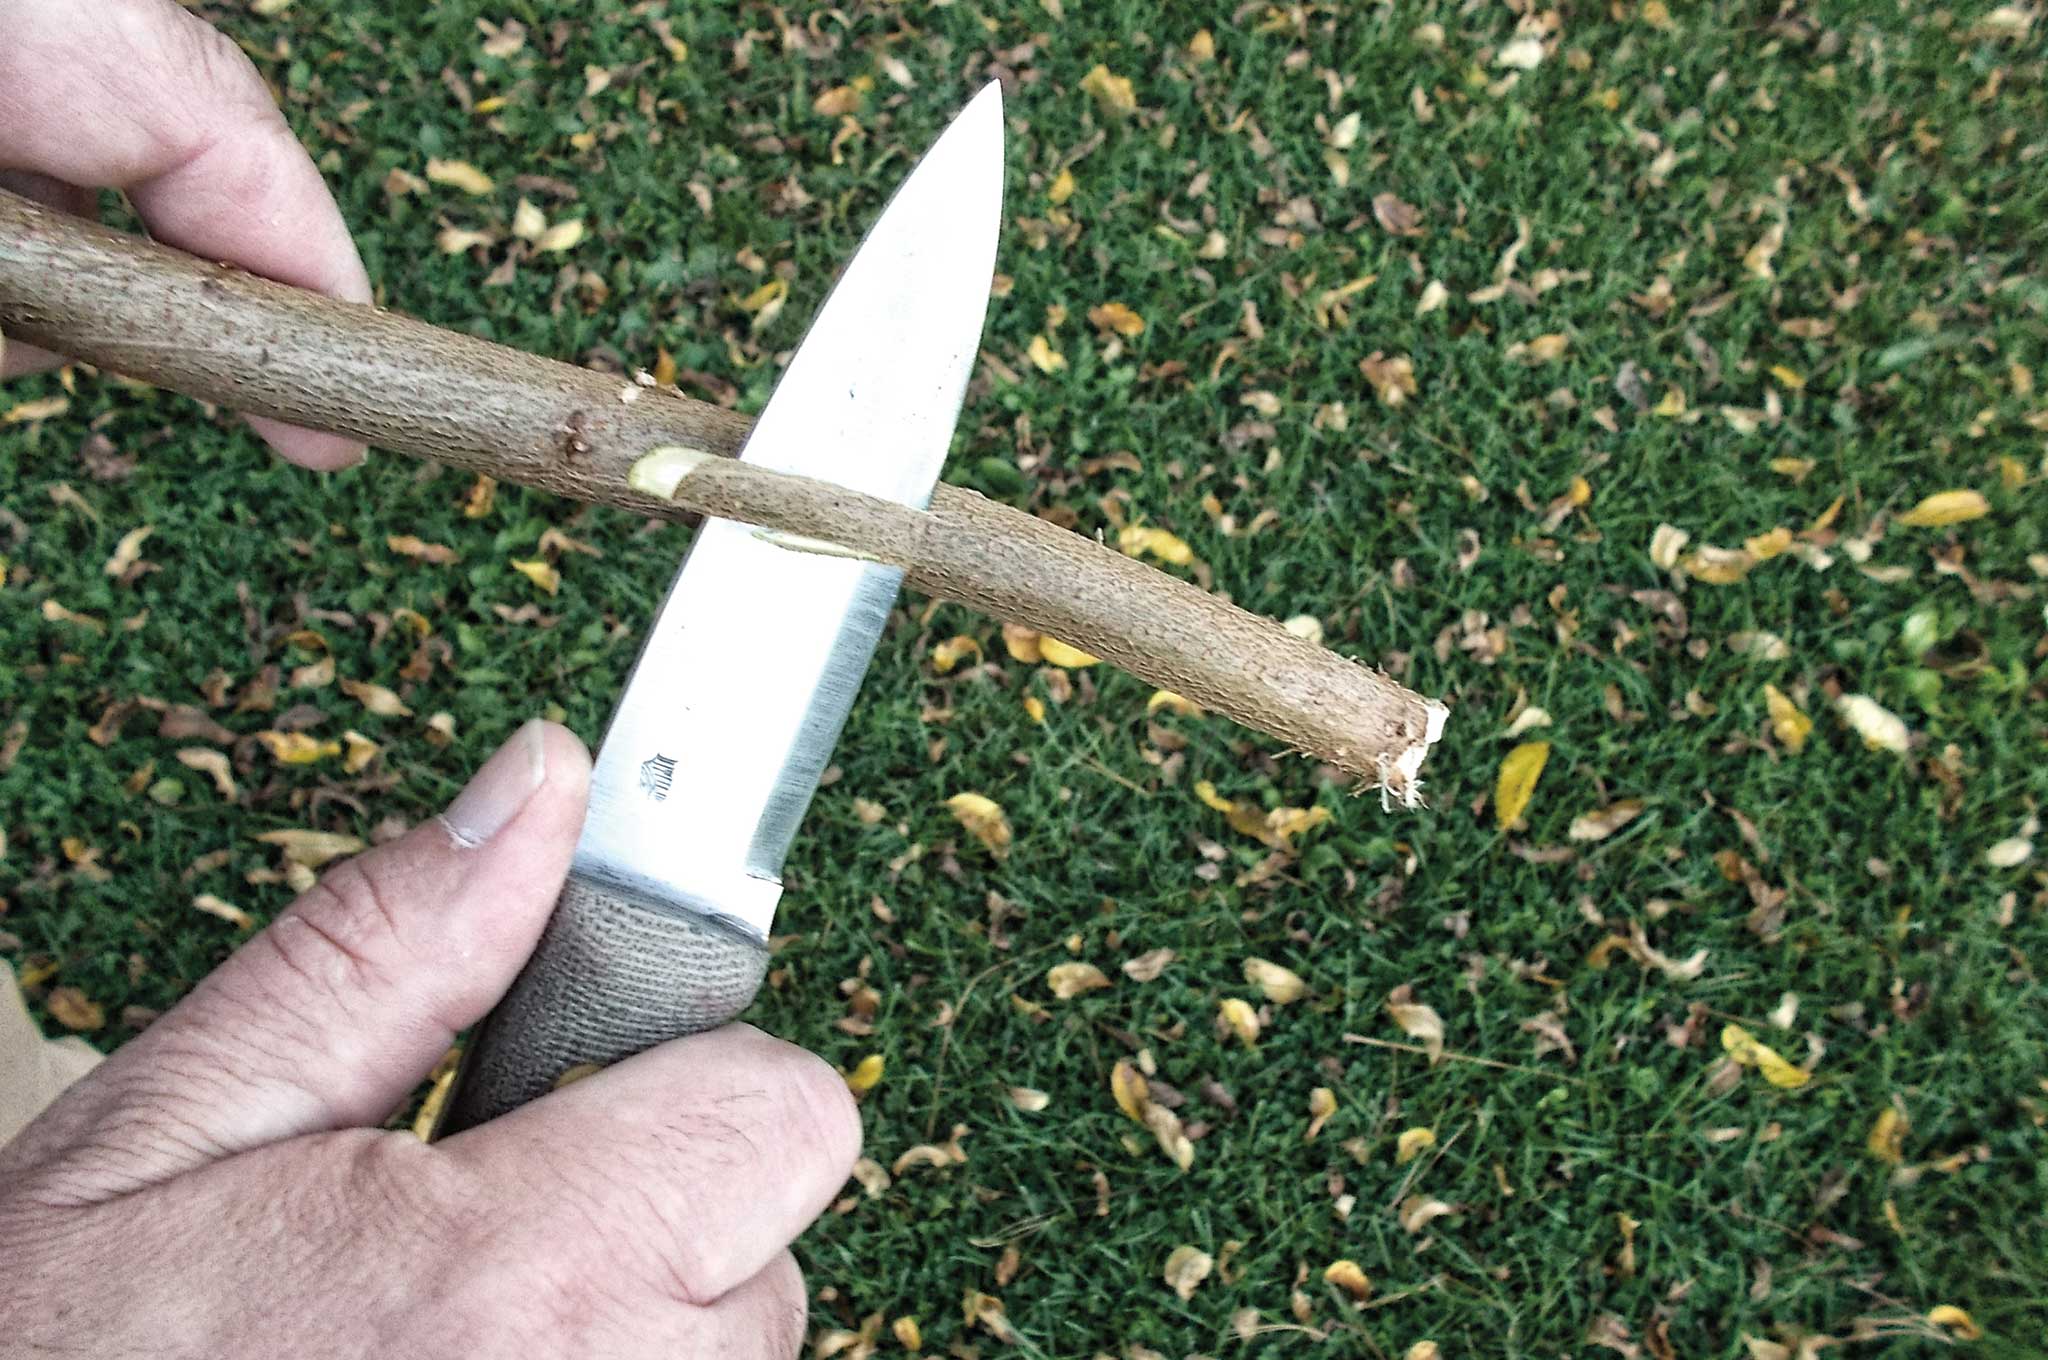
This is where you begin striding down the golden path to glory, or the nature trail to hell. You need to select a suitable bow wood species, and it needs to be a good specimen. Start with one of the woods listed above, such as hickory or black locust. Osage orange is a little finicky for beginners. The bow we are creating here is a “quickie” stick bow. It will be more forgiving if the finished bow is longer, rather than shorter.
Start with a dead branch or sapling that shows no sign of rotting (no fungus, and the bark is tightly attached). It could be 6 or 7 feet long when cut in the field, and worked down to 5 or 6 feet long for the finished bow. Pick a stave that's relatively straight and free of knots, side branches, and twists. It should also be about 2 inches in diameter at the thicker end.
Again, if you plan to work the wood later, cut a live sapling and dry it for a few weeks, preferably a few months.
Step 2: Plan Your Bow's Shape
This means that you'll need to find the bow's belly, back, grip, and lay out the limbs. Start by figuring out which way the stick “wants” to bend. Hold the bow stave upright, with one end on the ground. Generally, this is the thicker end on the ground, in the orientation that the sapling once grew. Grab the top of the stave loosely with one hand and push on the middle of the stave. The stick should naturally swivel to indicate its tendency to bend. The outside of the bend is known as the “back” of the bow, and it is the side of the bow that faces your target. The inside of the curve is called the “belly,” and it faces the archer.
Be careful not to mix up these terms (or sides) as you work. Since the back receives the tension when the bow is drawn, damage to the outer growth ring on the back can cause the bow to break. Don't carve, hack, or saw into the back of the bow.
Finally, figure out where your grip will be. Find the middle point of the stave and mark out a 6-inch grip area in the middle. The belly area of the grip will remain unworked (for now). The wood above the grip is called the upper limb, the wood below is the lower limb.
Step 3: Shape the Belly
Bend your prospective bow again, pushing on the grip area from the belly side of the bow. Do this repeatedly and study the way that the upper and lower limbs bend. Generally speaking, the thicker limbs don't bend as much and will require more carving than the thinner limb. Look for areas that bend and spots that don't. Mark the areas that don't bend. Rest the bow stave against a tree, ideally in the fork of a tree. Use your fixed-blade knife and a baton to begin removing wood from the belly of the bow where you have marked them as stiff. Thin down the areas that don't bend, and for now, leave alone the sections that do bend.
Your goal for this rough shaping process is to leave the back of the bow untouched, and to get the limbs to bend equally by thinning down the belly of the bow. Go slowly and bend the bow often to check your progress. The grip and limb tips (ears) shouldn't bend at this point. Once the stave is bending equally and looking a bit like a bow, you're ready to put a string on it to more accurately see its action. Remember that thick staves require a significant amount of carving, but they typically yield stronger bows. And conversely, slender staves may only need a little belly shaping, but they're often weak bows.

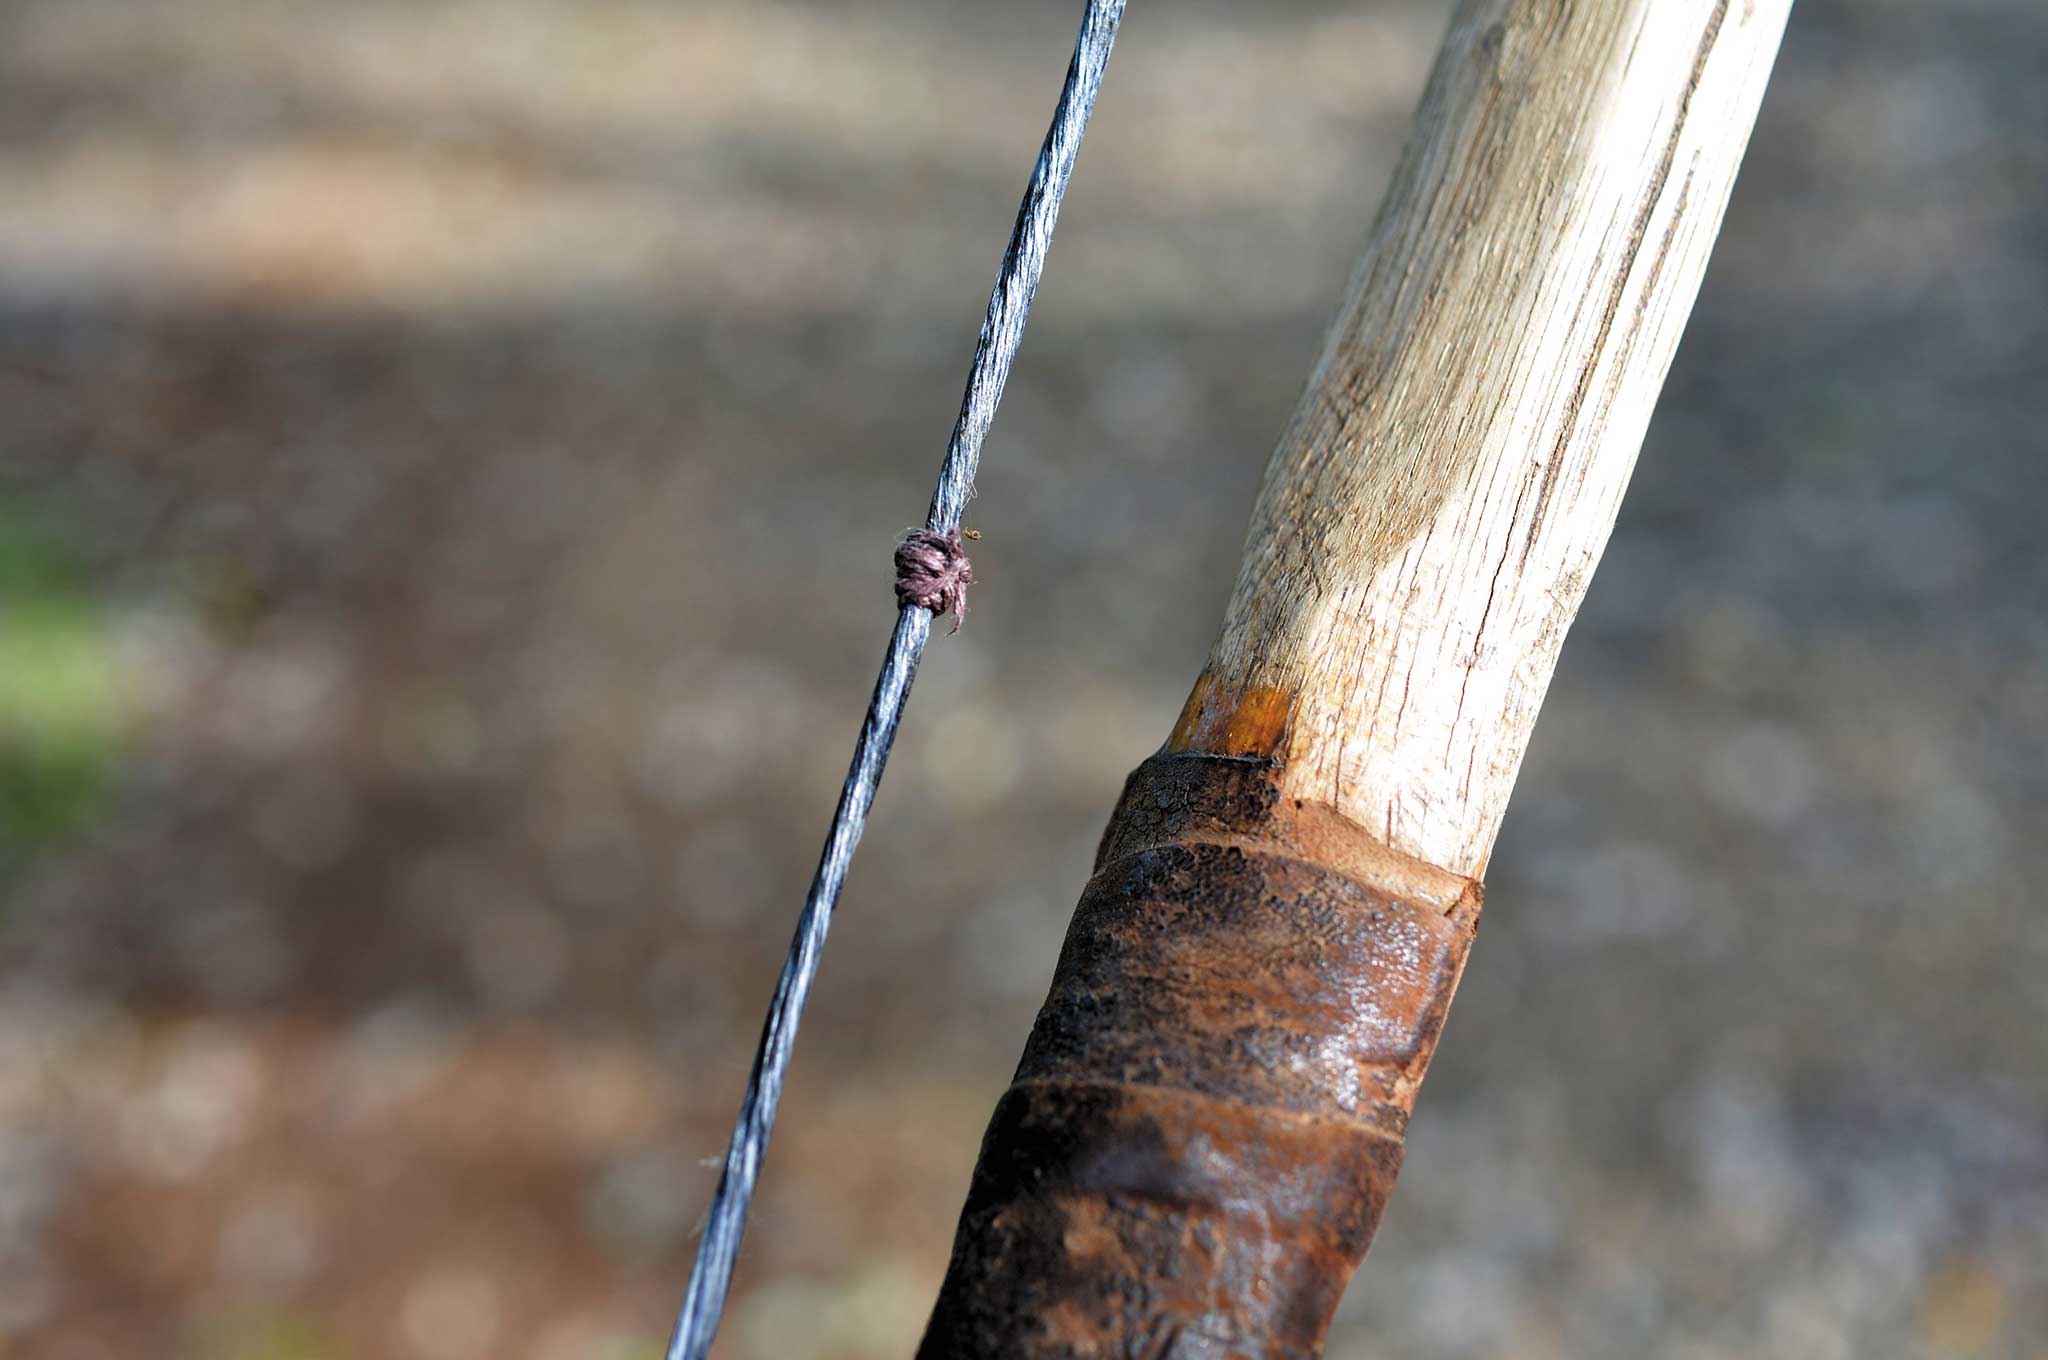
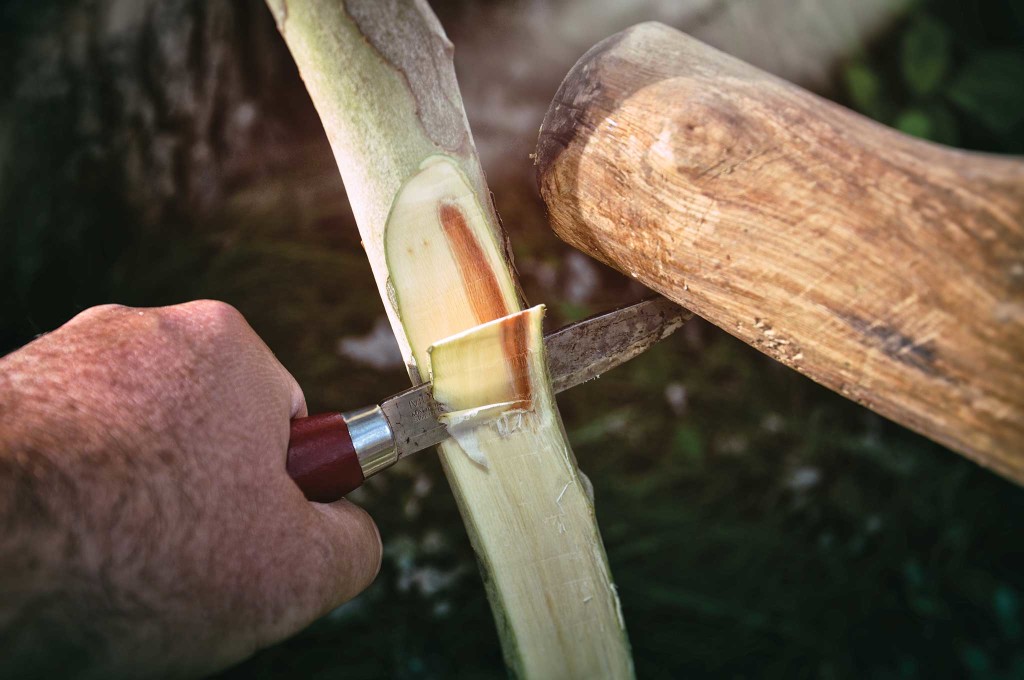
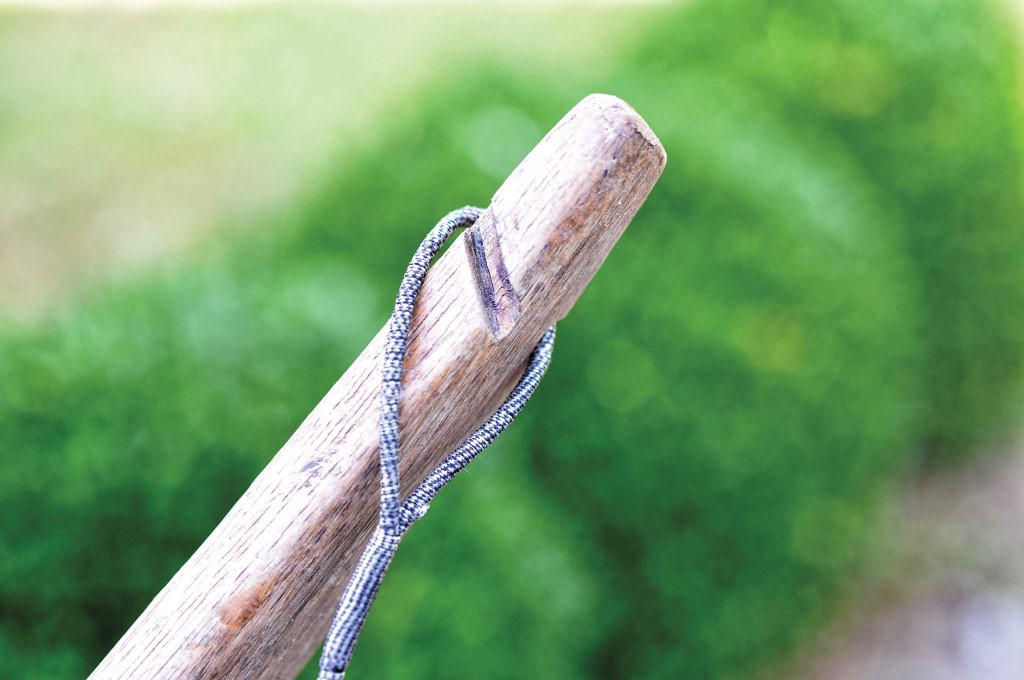
Step 4: Cut Your Notches (Carefully!)
This can be the part were neophyte bowyers destroy all of their hard work. Notch cutting on the bow ears must be done carefully. Use the saw on your multitool to cut small matching notches on the both sides of each bow ear. Cut them on an angle, thinking about the direction the string will pull from each ear toward the grip. Do NOT saw into the back of the bow, just cut into the sides. These cuts should be shallow, just enough to seat the bow string. Attach your string to both ears. It doesn't need to be tight yet; this is simply for testing. Don't be tempted to do your best Hunger Games pose yet either, drawing a rough-shaped bow is a great way to shatter it!
Step 5: What the Hell Is Tillering?
Chances are good that you've never heard the word “tillering” before. It's simply a word that means thinning and shaping, usually in the context of woodworking. And that's what we are doing next.
Cut off a nearby tree branch, about head height, leaving a stub. You could also use some similar way to affix the bow grip. Pull downward on the bow string, gently at first. Carefully study how the limbs bend. You want to see each limb bending equally across its full length. You also want to make sure that the limbs bend equally — compared to each other. The two limbs should look like a mirror image of each other when bent. Use your pencil again to mark areas that are not bending enough. I like to shade them in aggressively, then carve away the marks completely, yet cautiously. It's best to take your string off when carving, so you don't accidentally nick it or cut it.
Tillering may take a while, perhaps hours, but this is how you make a bow. Recheck your strung bow frequently, and continue tillering until you feel you are pulling the string nearly to your draw length. Draw length is measured by holding a bow and pull the string back as if to fire and arrow. Measure the length between the grip and your jaw. Most draw lengths are around 28 to 30 inches for adults. Shorter folks and kids have shorter draw lengths, taller folks have longer ones.
Step 6: Finishing
Continue tillering, checking your limb bend and checking your draw length until you are feeling confident that your bow feels like a real bow. Sand down or carefully carve the belly of the bow to smooth it and remove any “chop marks” from your baton work. This is critical to eliminate weak points. Chop marks tend to create hinge points in the belly, which lead to breaks in the bow back. If you're curious about the poundage of the bow, you can test it now by getting a 5-foot piece of 2×4 lumber.
Use a tape measure and pencil to mark the inches on the lumber, up to 30 inches. Stand the lumber vertically on a standard bathroom scale. Set the bow grip on top of the lumber and pull the string down across the numbers you've marked. When you've pulled down on the string to a full draw length, check the scale reading for a good estimate of your draw weight. You can use a 25- to 35-pound draw weight bow for small-game hunting and target practice. You'll need a 40- to 60-pound draw weight for bigger game animals.
Conclusion
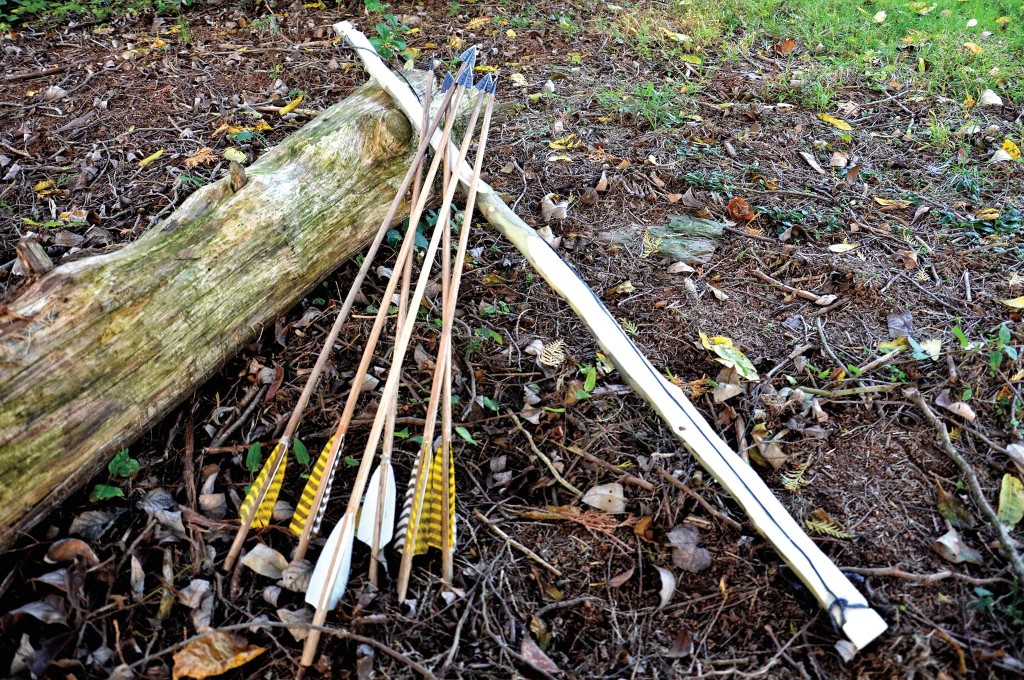
Bow-making and arrow-making are some of the most challenging feats of craftsmanship you can take on during a survival situation, but they are also proven and vetted game changers. The skills of bow and arrow making, and archery itself, could make you an invaluable member of your team or group. With a serviceable bow and a few well-built arrows, it's possible to take down a variety of game animals (some of which are almost impossible to take without projectile weapons).
After taking small game like rabbits, opossums, and raccoons, you can feed yourself for a day. By taking deer and large game, you can feed yourself for a month or provide for a whole camp of people for many days. In darker times, archery could even be used as a means of self-defense, but let's all hope it doesn't come to that.
Archery and bow-making, like many skills, carry a big learning curve, so it's best to start working on them now, rather than later. And despite all the blisters, splinters, and tears, this can be an immensely rewarding pursuit and quite possibly — your new favorite hobby!
Build Your Own Arrows
As you've seen, there's quite a bit of detail involved in the construction of seemingly simple survival stick bows. You'll have to pay close attention to craftsmanship if you're planning to build bows for the next Katniss Everdeen or some kind of dystopian Robin Hood. But now it's time for a bombshell. The bow isn't the hardest thing to make. At the end of the day (or the end of civilization), the bow is just a bendy stick with a string on it. That's all it is, a stick and a string.
The part that really takes some skill to create is the projectile, better known as the arrow. A great bow won't help us to survive without a proper set of arrows to fire from it. And if you thought bow making was hard, try crafting aerodynamic arrows from scratch — out in the woods. Arrow-making is where your biggest challenge lies. But don't let me scare you off. I'm just adjusting your expectations. Our ancestors built fine arrows from raw materials in the wild, and so can we. Here are the basic steps:
- Step 1: Find slender and straight saplings, reeds, cane, or bamboo that are already arrow shaft diameter (5/16 inch underneath the bark for hardwood, a little thicker for hollow things like cane). Let nature do the work growing the perfect materials. Don't waste your time trying to whittle a log into an arrow shaft.
- Step 2: Trim and straighten the arrow shafts. You'll need to trim, carve, or sand off anything that is not contributing to the perfect dowel shape. Cut the shafts a little longer than you think you'll need. Finished arrows should span from the nock to about 2 inches past your knuckles at full draw. The material should be dead, but not rotten. Straighten any curved or crooked spots by warming the spot over a fire, bending it a little beyond straight, and holding the spot in that position until cool. This heating (holding) cooling process helps the woody materials to retain a new shape, which could be “straight” if you do it right.
- Step 3: Saw the notch and add the fletching. Carefully saw a notch (aka nock) about 1/2-inch deep into the end of the shaft (a multitool saw blade is usually the right size for this). It should match the width of your bow string. If using a hollow material, use a wooden plug and an insert and cut the notch in the solid wood — not the hollow shaft (unless you want to see the string cut the arrow in half). Then plan where your feathers will go in relation to the notch. Two feathers will need to line up with the notch, parallel to it.
With three feathers, the feathers will need to be equidistant from each other, with one feather perpendicular to the notch cut. These fletchings can be hard to accomplish without glue, even harder if you don't have a dead bird to provide a good assortment of feathers. Your feathers should match on each arrow. Use all right-wing feathers on one arrow, for example. Keep left wing and tail feathers together as well. Trim the fletching, apply glue if you have any, and tie them tightly in place with whatever string you can scrounge. Make sure the front edge of the fletching (toward the arrowhead) is smooth and well secured, or else it may scratch your hand as it glides across when fired. - Step 4: Attach your point. Small flat metal arrowheads would be a wonderful thing to add to your bug-out bag, along with a few proper bow strings. Saw a notch in the front of your arrow, then carve a slight tapering to the end of the shaft for better penetration. Glue the arrowhead in place, and bind it tightly with string. If you don't have metal points, try to make some or use stone or glass points you have chipped into a triangle shape. Failing all that, simply carve a point on the wooden shaft or leave it blunt to strike small game.
Anatomy of a Bow
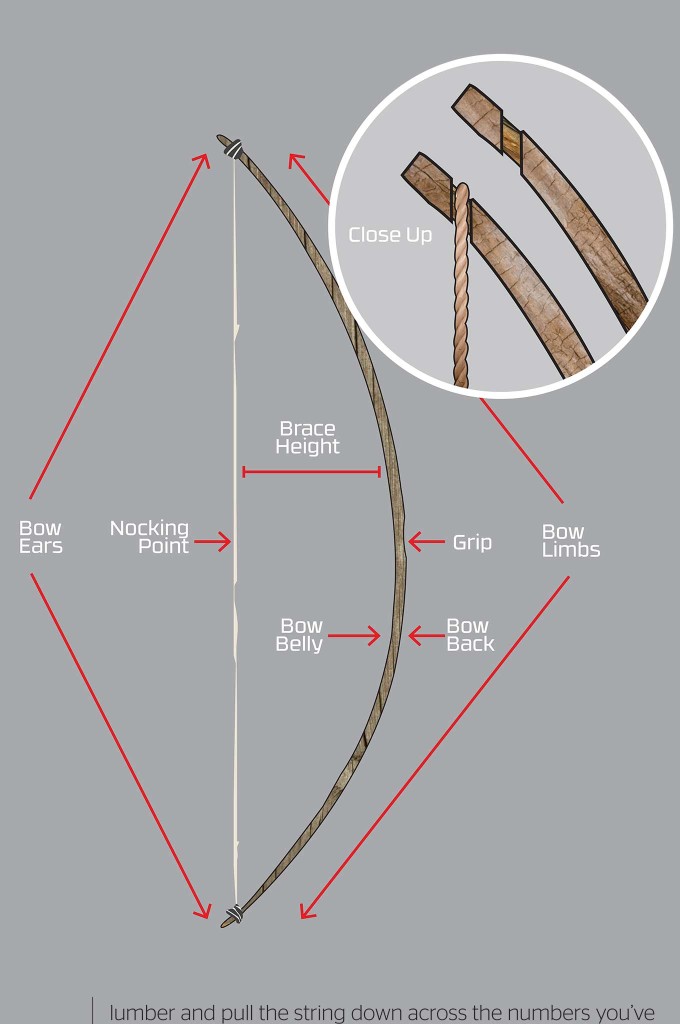
Back: This is the side of the bow that faces away from you as you pull on the bow string. The back of the bow is toward the target. If a bow breaks, the back will often produce splinters of wood, as the back is under tension due to the wood fibers pulling away from each other.
Belly: The belly of the bow is on the inside of the bow, facing you as you pull the bow string. If a bow breaks, the belly may hinge or fold while breaking due to the fibers being compacted in the belly. In modern archery, the belly is now called the “face.”
Bowyer: A person who makes bows.
Brace height: The distance from the grip to the string when the bow is strung. The Old English term is “Fistmele,” which is the length of your hand when giving a “thumb's up.”
Ears: Each end of each limb is referred to as an ear, basically the last couple of inches on each end of the bow.
Grip: The grip is the middle of the bow where you actually grip it.
Limb: Each end of the bow is considered a limb, so every bow has two limbs, even though it may be made from one limb of a tree.
Stave: A solid stick of wood that will be made into a bow, also referred to as a “bow stave.”
Take Aim and Fire!
We could write a whole book on traditional bow marksmanship and aiming … and still not cover it all. But if you can stay alive long enough to get in lots of practice, you can learn a lot through observation and experience. So, to keep you alive that long (hopefully), here are the bare-bones basics.
First, you'll need to figure out your dominant eye. You can use the same trick that many early shooters use. Outstretch your arms, make a triangle or circle with both hands, and pick a distant object to look at through your hand opening (both eyes open). Take turns closing your right eye and left eye, to see which one is still looking at the distant object. The eye that's still on target (or sort-of on target) is your dominant eye. If you are right-eye dominant, hold the bow grip in your left fist and shoot across your left knuckles. If you are left-eye dominant, hold the bow grip in your right hand and shoot across your right knuckles. This puts your dominant eye looking right down the shaft. I'm right handled, but left-eye dominant. As such, I've been working on my “southpaw” shooting. Let me tell you without hesitation, eye dominance matters more than hand dominance.
Next, eliminate the variables. Make a mark on your bow grip so your hand always grasps the exact same spot. Then tie a wad of thread around your bow string to create a nocking point that matches the top of your grip. Don't tie your bowstring itself into a knot to create this lump in the string. That's too much stress on the bow string. Use a separate string tied in place.
Then start shooting the bow at a soft target, like a decaying stump. See whether you are more accurate with your arrow nock over or under the nocking point on the string, and try different finger placements. And for safety, wear a glove on the hand that is holding the bow, so that rough fletchings don't scratch up your hand.
Finally — practice, practice, and practice. Make certain that you draw the bow to the same spot for each shot. Try to keep your back “flat” when you are at full draw, and parallel to the target and arrow's path. And then practice some more.
Making Bows = Breaking Bows
It's been said by wiser bowyers than me, that a fully drawn bow is a stick that's almost broken. This is an unpleasant thing to imagine, especially when you have to invest so much time and labor into the process of bow-making. Yes, the lovely bow that you have carefully crafted could break at any time. It could be a hidden flaw in the wood, or more likely, an error in craftsmanship. But there are a few ways to prevent untimely breaks and cracks in your finished stick bow:
- Never over-draw your bow (bending it farther than it was meant to bend).
- Don't cut through the growth rings on the back of the bow.
- Taper the belly of the bow smoothly. Abrupt changes in the bow's thickness create “hinges.” These are spots where the bow limb literally folds and creases, leading to breakage.
- Protect the finished bow from dings, cuts, scrapes, and scratches. Don't use the bow as a tool, pry bar, walking stick, digging stick, etc. Damage to the bow's surface creates weak points, and weak points lead to breakage.
Oil the bow with grease from your first kill. Wipe some warm animal fat into the bow limbs to keep them supple, prevent cracking and prevent moisture from soaking into the bow. A dry bow is a snappier bow, while a damp bow is more sluggish.
Sources
Hunting & Gathering Survival Manual
www.amazon.com
Three Rivers Achery Supply
www.3RiversArchery.com
Traditional Bowyer's Bibles
www.boisdarcpress.com
More From Issue 11
Don’t miss essential survival insights—sign up for Recoil Offgrid's free newsletter today.
Read articles from the next issue of Recoil Offgrid: Issue 12
Editor's Note: This article has been modified from its original print version for the web.