Our SHTF nightmare goes a little something like this: Outnumbered and nearly overrun, we hit the mag release on our AR-15 and let the empty magazine fall to the soft ground below. Ripping our final magazine from our chest rig, we slam her into the magwell and drop the bolt. “Last one,” we whisper to ourselves. The last 30 rounds to fend off these blood-thirsty marauders, save our family, and protect the precious few provisions we have left.
But in reality, it'll probably go a bit more like this: Out of supplies and no signs of rescue coming, we drop our empty MRE packet and bury it in the soft ground below. Pulling the final protein bar from our chest pocket, we rip open its wrapper and scarf it down. “Last one,” we say with a hint of desperation.
While the first scenario is what some preppers plan for (and maybe even fantasize about), the second one is much more likely. Imagine an injured hiker who didn't pack anything but water. Or picture a suburban family stranded in a broken-down camper with no mobile phone reception, having already eaten through their cache of ham sandwiches. If they think the only way to stave off starvation would be to hunt small game, they'd be overlooking a vast source of sustenance. If you can find a stream, lake, or river, you'll find not only potential drinking water, but quite possibly a source of abundant food.
In past issues of OFFGRID, we've explored traditional angling techniques and introduced the concept of a bug-out kayak from which to catch fish. But not every outdoor adventurer is going to have the inclination or the knowledge to pack a fishing rod, just as not every prepper will have the room to jam a tackle box in their bug-out bag. So, here we're going to delve into improvised means of catching fish, covering all sorts of methods — from the unconventional to the ancient.
Warning!
This is not meant to be an exhaustive guide to improvised angling. Fishing in some regions under certain conditions can be extremely dangerous. Seek a professional guide or a reputable instructor for more information.
Fish for Knowledge
If you read “Teach a Man to Fish…” in OFFGRID Issue 4, you know that a mini fishing kit can fit into an Altoid box. But the low-cost nature of fishing gear allows for greatly expanded kits to be assembled and stored in multiple locations, from your home and your office to your daily driver and your kayak. This will enable you to take advantage of multiple environments, species, seasons, and waters, from ponds and upland freshwater to salty bays and coastal tidal creeks.
For anything longer than one night in the woods, less is not more when packing fishing kits. Yet, judging from a quick look at fishing gear on the market, the manufacturers' main objective seems to be to make them as small as possible with almost no line and few hooks or lures. But why settle for 30 feet of line when, for $7, you can grab a readymade spool of more than 3,000 yards of light monofilament? Add in a box of hooks and you're halfway to a good meal.

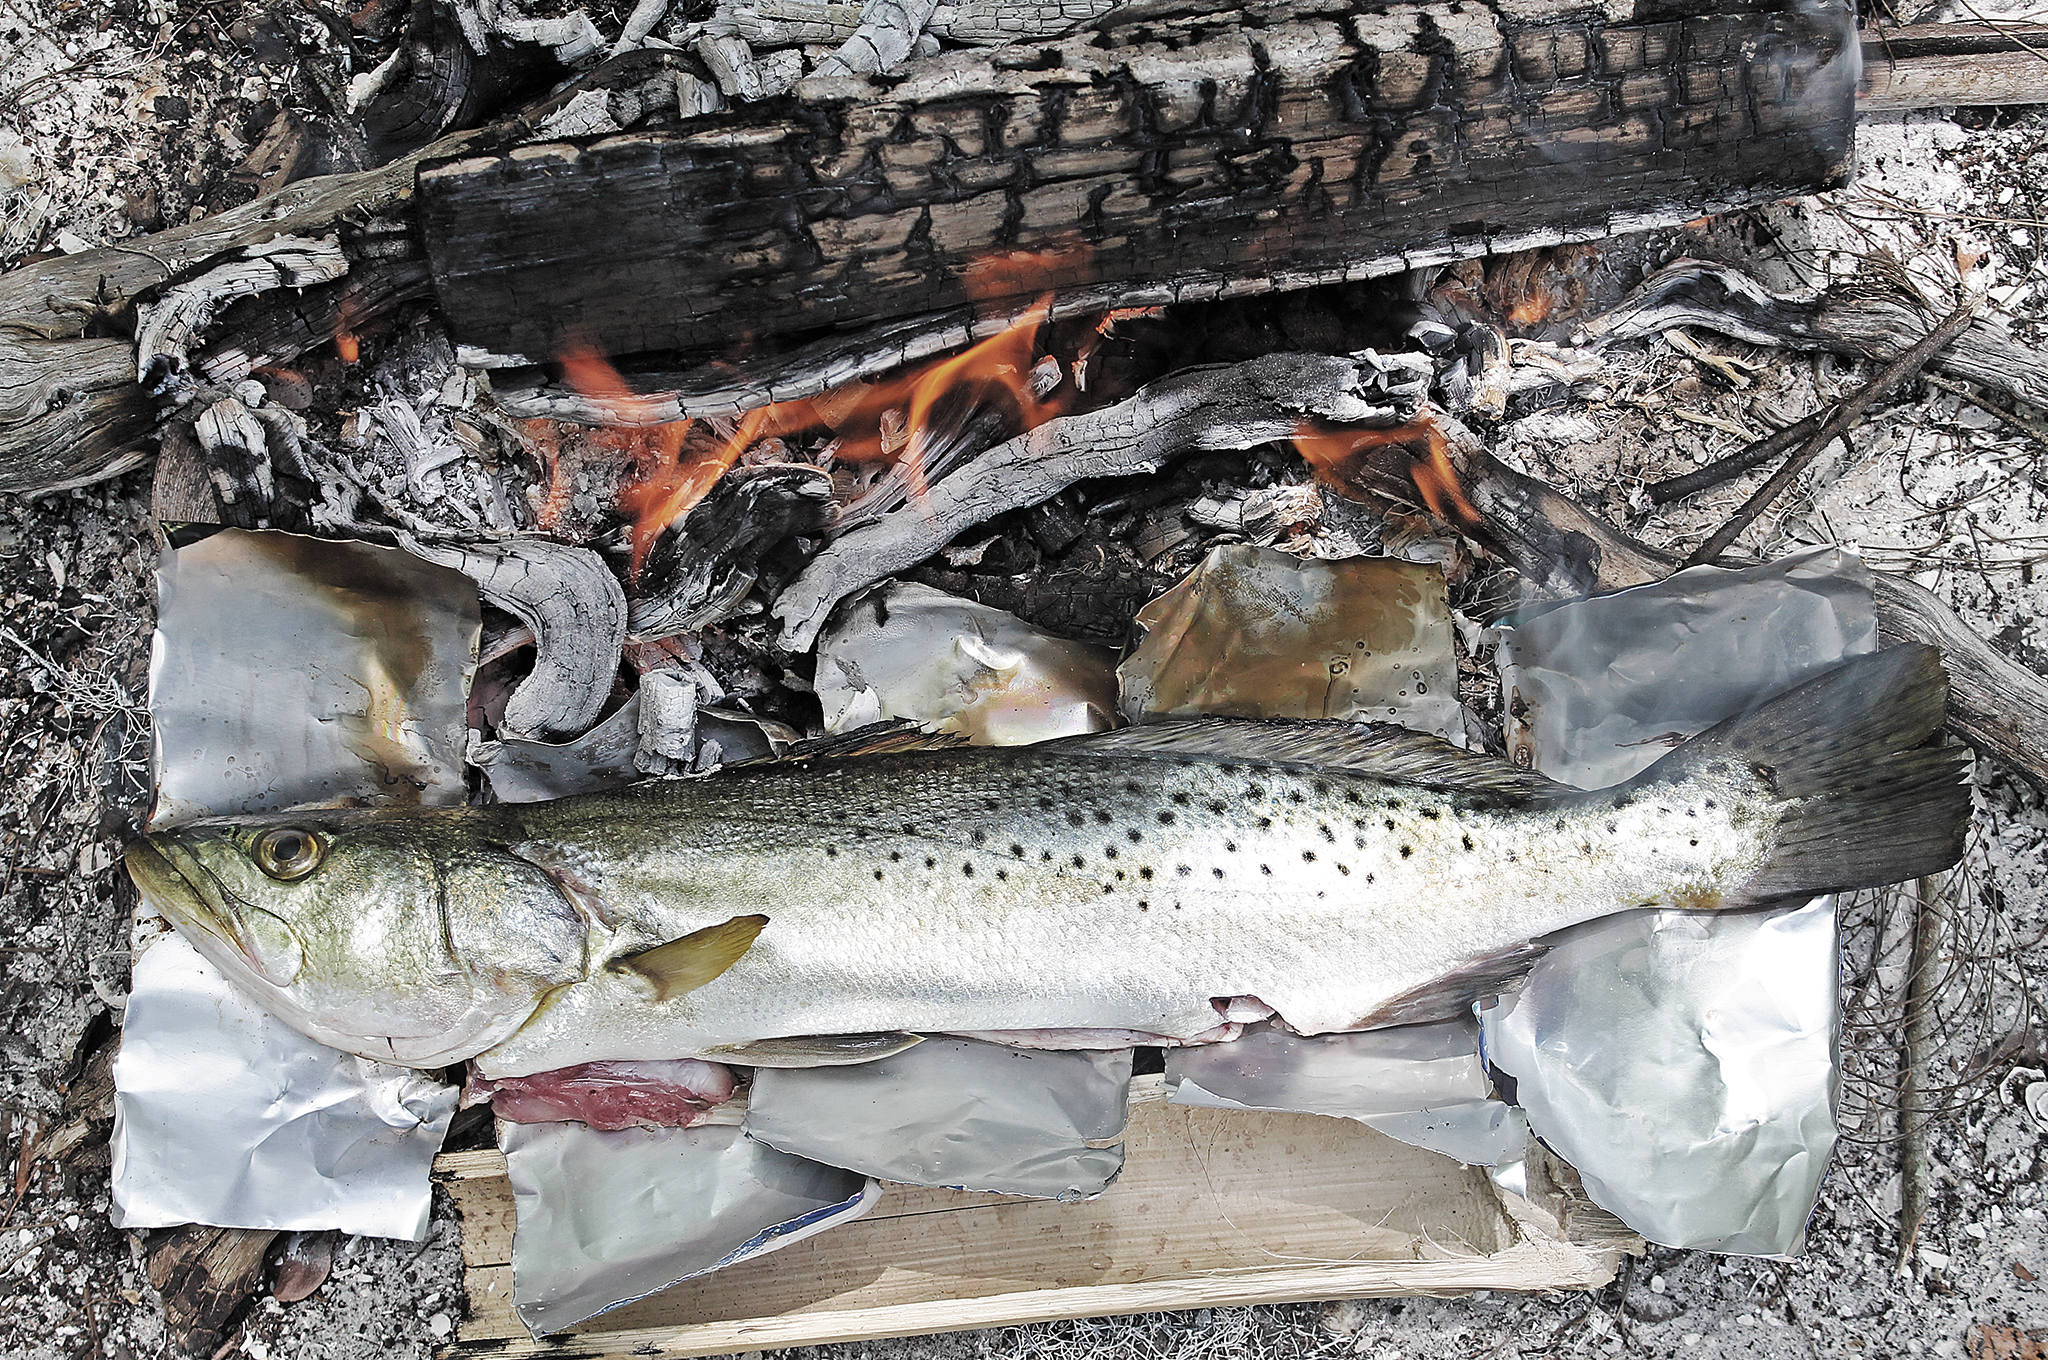
Survival fishing might require some improvised cooking. Soda cans can be splayed out and re-purposed as a grill
The key to it all? Understanding your target species and settling in for the long haul, to keep moving and harvesting fish as you go.
Learn your home species, and adjust your kit according to destinations. Ask yourself, “If I crossed the state line, would I be able to work my way home living on only fish I caught along the way?” Stepping off the grid should increase, not decrease, your confidence. And the best way to do that is to gain knowledge and develop skill through practice. Next time your wife complains that you go fishing with the boys too often, tell her you're doing vital research.
If 10 percent of the fishermen catch 90 percent of the fish, and 20 percent of the water holds 80 percent of the fish, the first thing you need is a decision matrix to eliminate the less productive waters and focus on more productive waters that you can still safely access. A decision matrix would look like this:
Freshwater vs. Saltwater
Shallow Water vs. Deep/Moving Water
Live Bait vs. Artificial Bait
Your target species and time window dictate your choice of tackle, and the tackle determines your movement and timing. Additionally, consider adding any of the following where it's legal and it makes sense: seines, cast nets, fish traps, bush lines, spears, or ancient techniques still practiced from bayou to backwater — everything short of dynamite.
Trust your instincts or you'll reduce your options. Stop reading the instructions and start reading the water, looking for those natural ambush points: bottle necks, choke points, sandbars, structural covers, or current lines that draw and concentrate bait flow, leading to small and large fish activity. Forget the trophy fish and focus on that small percentage of water that you can access safely and that holds the fish you need to survive. The key is to assemble a kit that enables you to work various levels of the water column, regardless of water body, for the target species, or make the tools you need.
Freshwater Techniques
Freshwater remains the common denominator. It can be a treatable source of hydration, a pathway to safe refuge, a barrier against potential hostiles, and an ambush point for life-sustaining fauna. Approach a pond, lake, river, marsh, or inland swamp almost anywhere throughout the USA, and you can count on a number of reliable “pan fish” species. There's bluegill, sunfish, bream or crappie, catfish, and regional fish — from trout to small-mouth bass. Look for spawning beds in the shallows during the spring, and keep your eye on cover vegetation holding ambush predators.
Improvised Fishing Pole
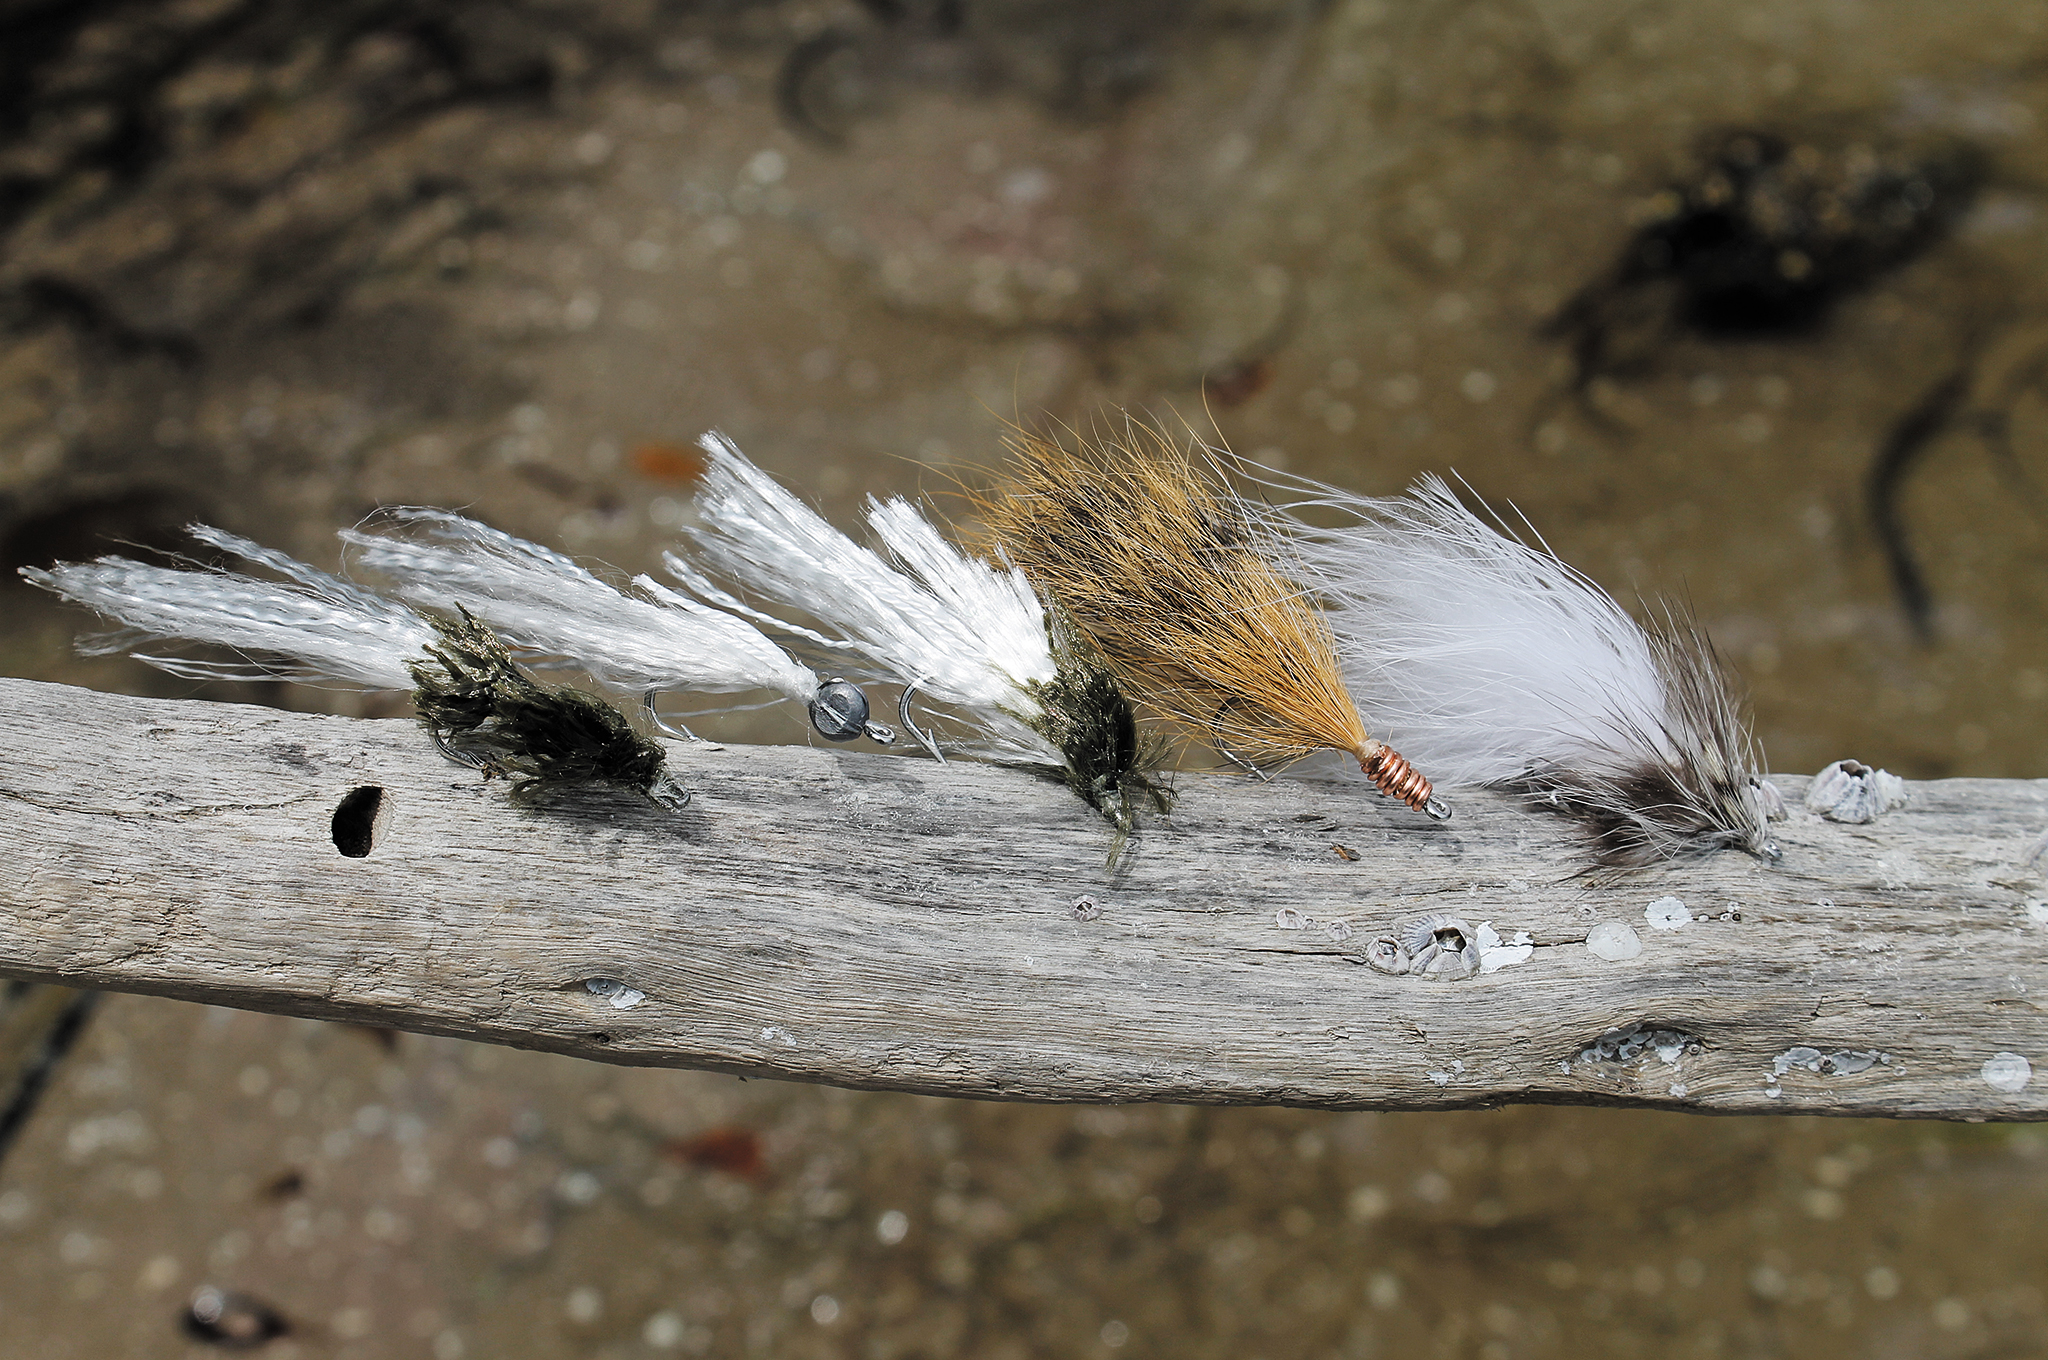
Freshwater species readily hit ultra-light artificial lures like micro-jigs, spoons, and flies. So connect a synthetic lure to a hook and paracord and voilà. These species also like live bait — from worms and crickets to frogs and crayfish. Catch some little critters and suspend them from hooks that are tied to ultra-light monofilament or micro-braid lines. To rig these baits, just follow these easy steps:
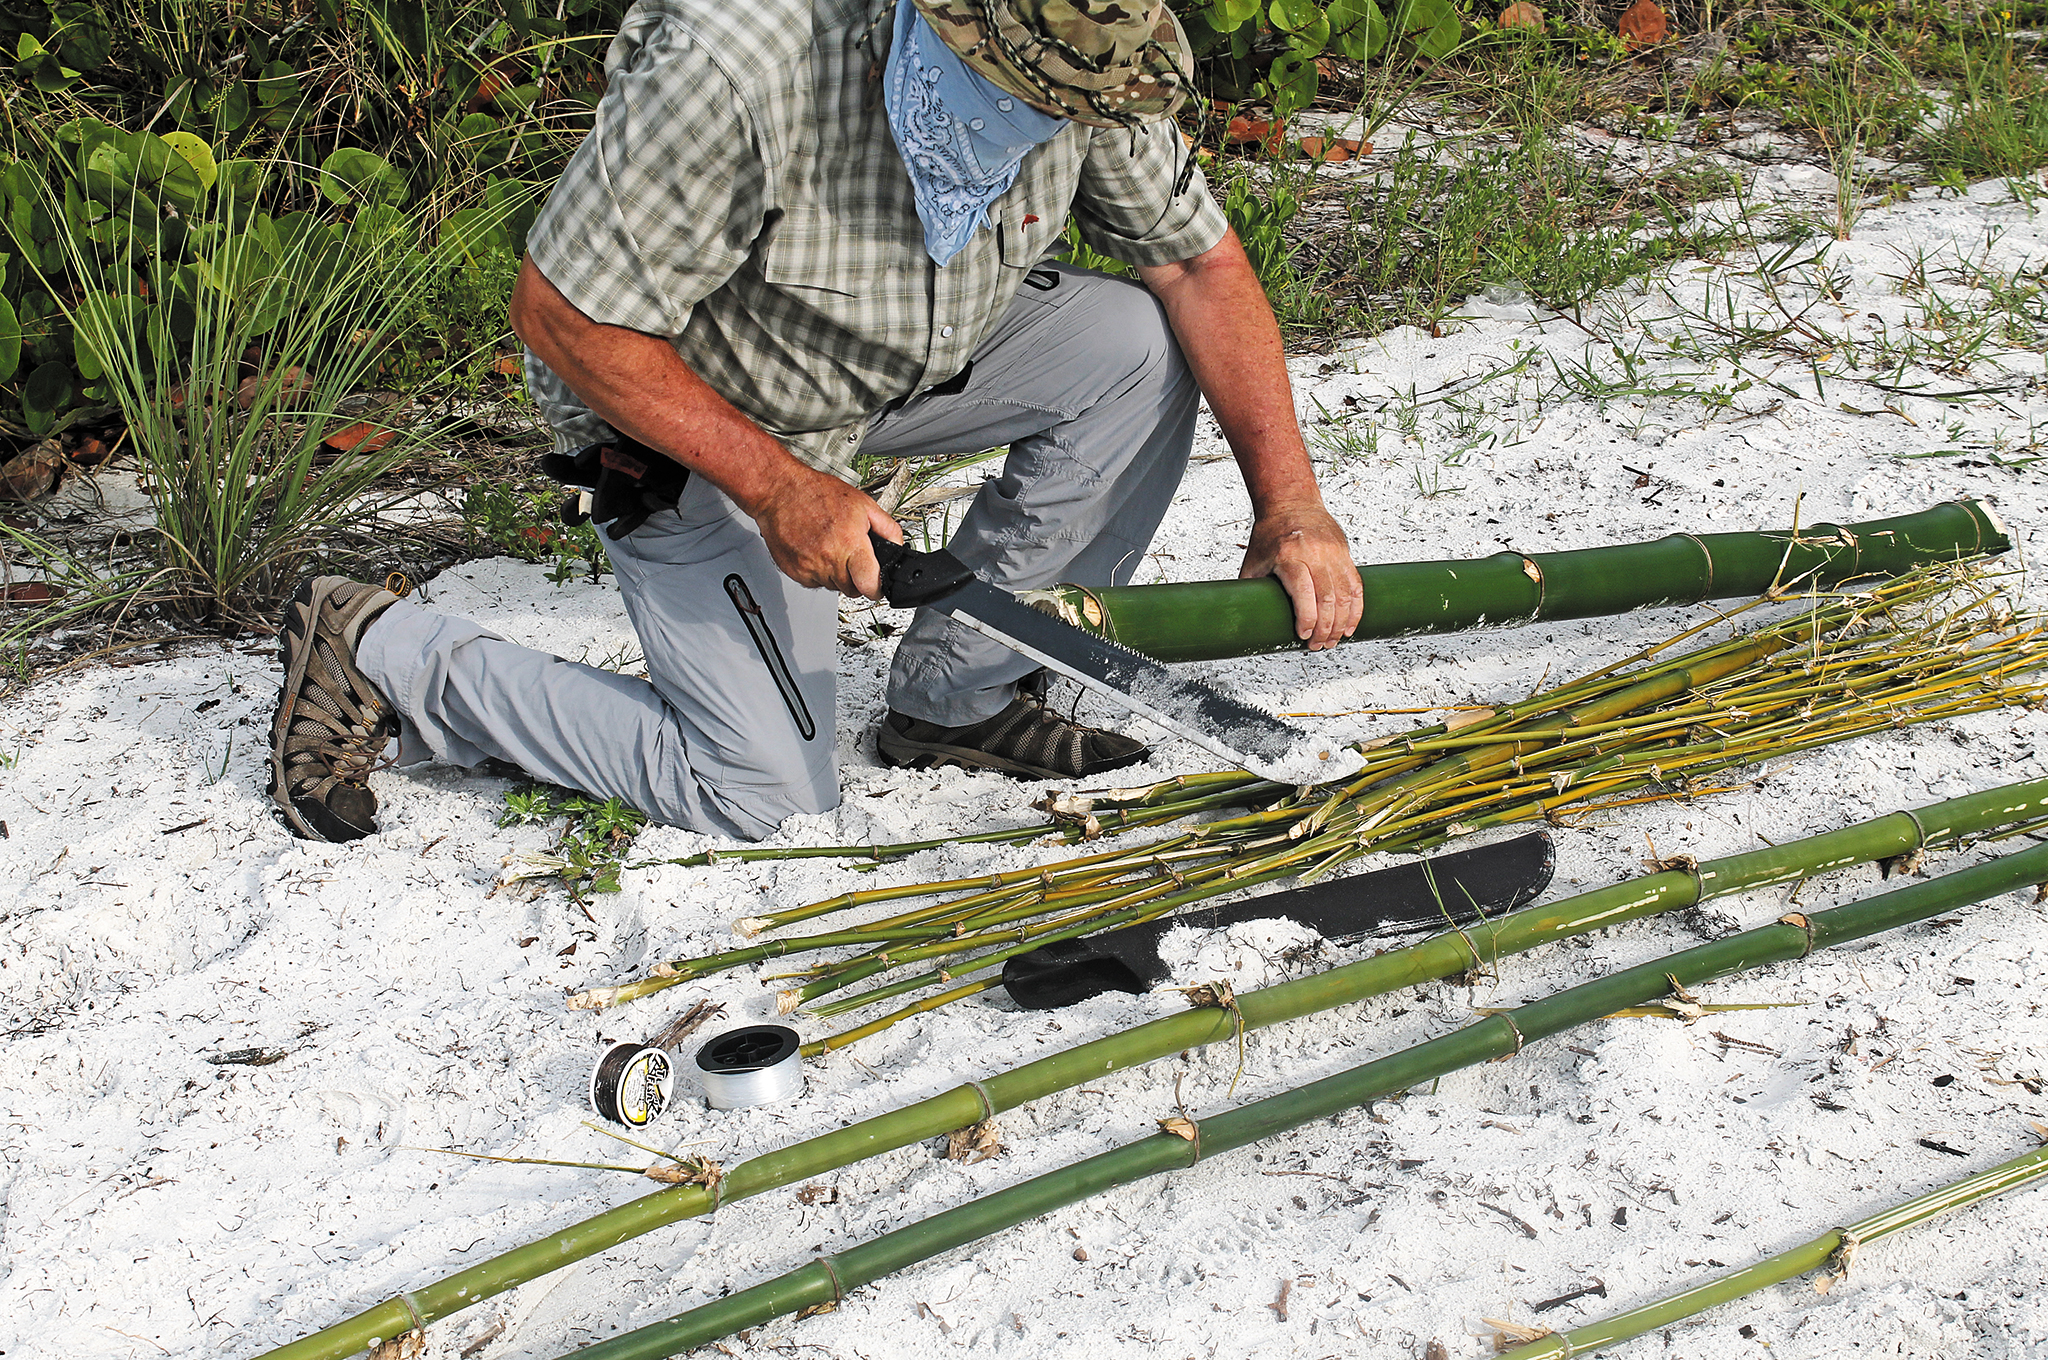
1. Look for a light sapling, a length of cane, some bamboo, or a long, lean tree limb.
2. Cut and trim the selected branch, then harden it over campfire coals.
3. Tie in your ultra-light mono or micro-braid line about halfway up the pole, wrapping it in long spirals until you reach the tip.
4. Tie off the line and leave as much as you can flip out, about 12 to 20 feet. This way, if a large catfish or bass breaks your cane pole tip, you'll still be connected to your dinner.
5. Complete this classic rig by attaching a small No. 8 hook, split shot, and cork.
At night, standing on an overhanging river or creek bank, you can use your heavy cane pole, tipped with a heavy length of line to artificial surface plugs, to draw fish by the lost art of “jigger-poling.” Swishing in tight figure-eight patterns and loops can sometimes trigger an explosive bass strike. Night fishing can be productive during the warmer months when you're on foot and fishing the shallows near shore.
Floating Bait
No cane poles or bamboo in your bug-out locale? No problem. It's just a matter of observation and adaptation:
1. Check the shoreline for any floating vessel, like an old soda bottle or bleach jug.
2. Rig your floatable device with bait on 3 to 4 feet of line.
3. Attach a length of paracord or twine to your bottle and let it float across the lake, pond, or river, where you can pick up strikes away from the shore.
Hanging Bait
Similar rigs can be suspended from tree limbs that hang over lakes or slow-moving rivers, especially when you have live or cut bait. Be careful not to offer your entire line and hook set in a trotline arrangement unless you can afford to lose it all at once to a gator or an alligator snapping turtle.
Nets And Traps
Rivers offer the advantage of allowing you to turn the current to your advantage. Send out worms, live or cut bait, or almost anything with scent to attract catfish. In moving water, creeks, and streams, don't rule out ancient techniques. Nets and traps are great for ensnaring bait, crayfish, or freshwater turtles. They're effective forms of passive fishing, allowing you to focus on other important tasks like filtering water or even sleeping overnight while prey get caught up in them.
For example, seine nets have been used all over the globe for millennia to capture seafood. Some resemble volleyball nets that are held down by weights on the bottom, but buoyed by floats at the top. Also, funnel-shaped traps can be crafted with nothing more than bait, a knife, some twine/cord, and tree branches that can be wrapped. Bamboo is best, but any light sticks that are flexible can be used.
Saltwater Techniques
Tools, tactics, and techniques vary more widely once you reach coastal waters based on species inhabiting estuaries, brackish rivers, mangrove islands, coastal beaches, shallow tidal bays, and barrier islands.
Reel in the Bait
Saltwater is where live bait rules. Netted, trapped, or hooked bait is used to attract larger predators. Common coastal species range from schools of small snapper, mullet, or pelagic species that cruise sandbars, oyster bars, and beach troughs looking to munch on something smaller while avoiding something toothier. Start by working through the shallows to procure scented live bait, from clams and barnacles to minnows and sand fleas (AKA mole crabs). You can catch them using a seine, a wire screen, or a handmade bait trap. Also, hooking even smaller baitfish on tiny hooks and mono line can do the trick.
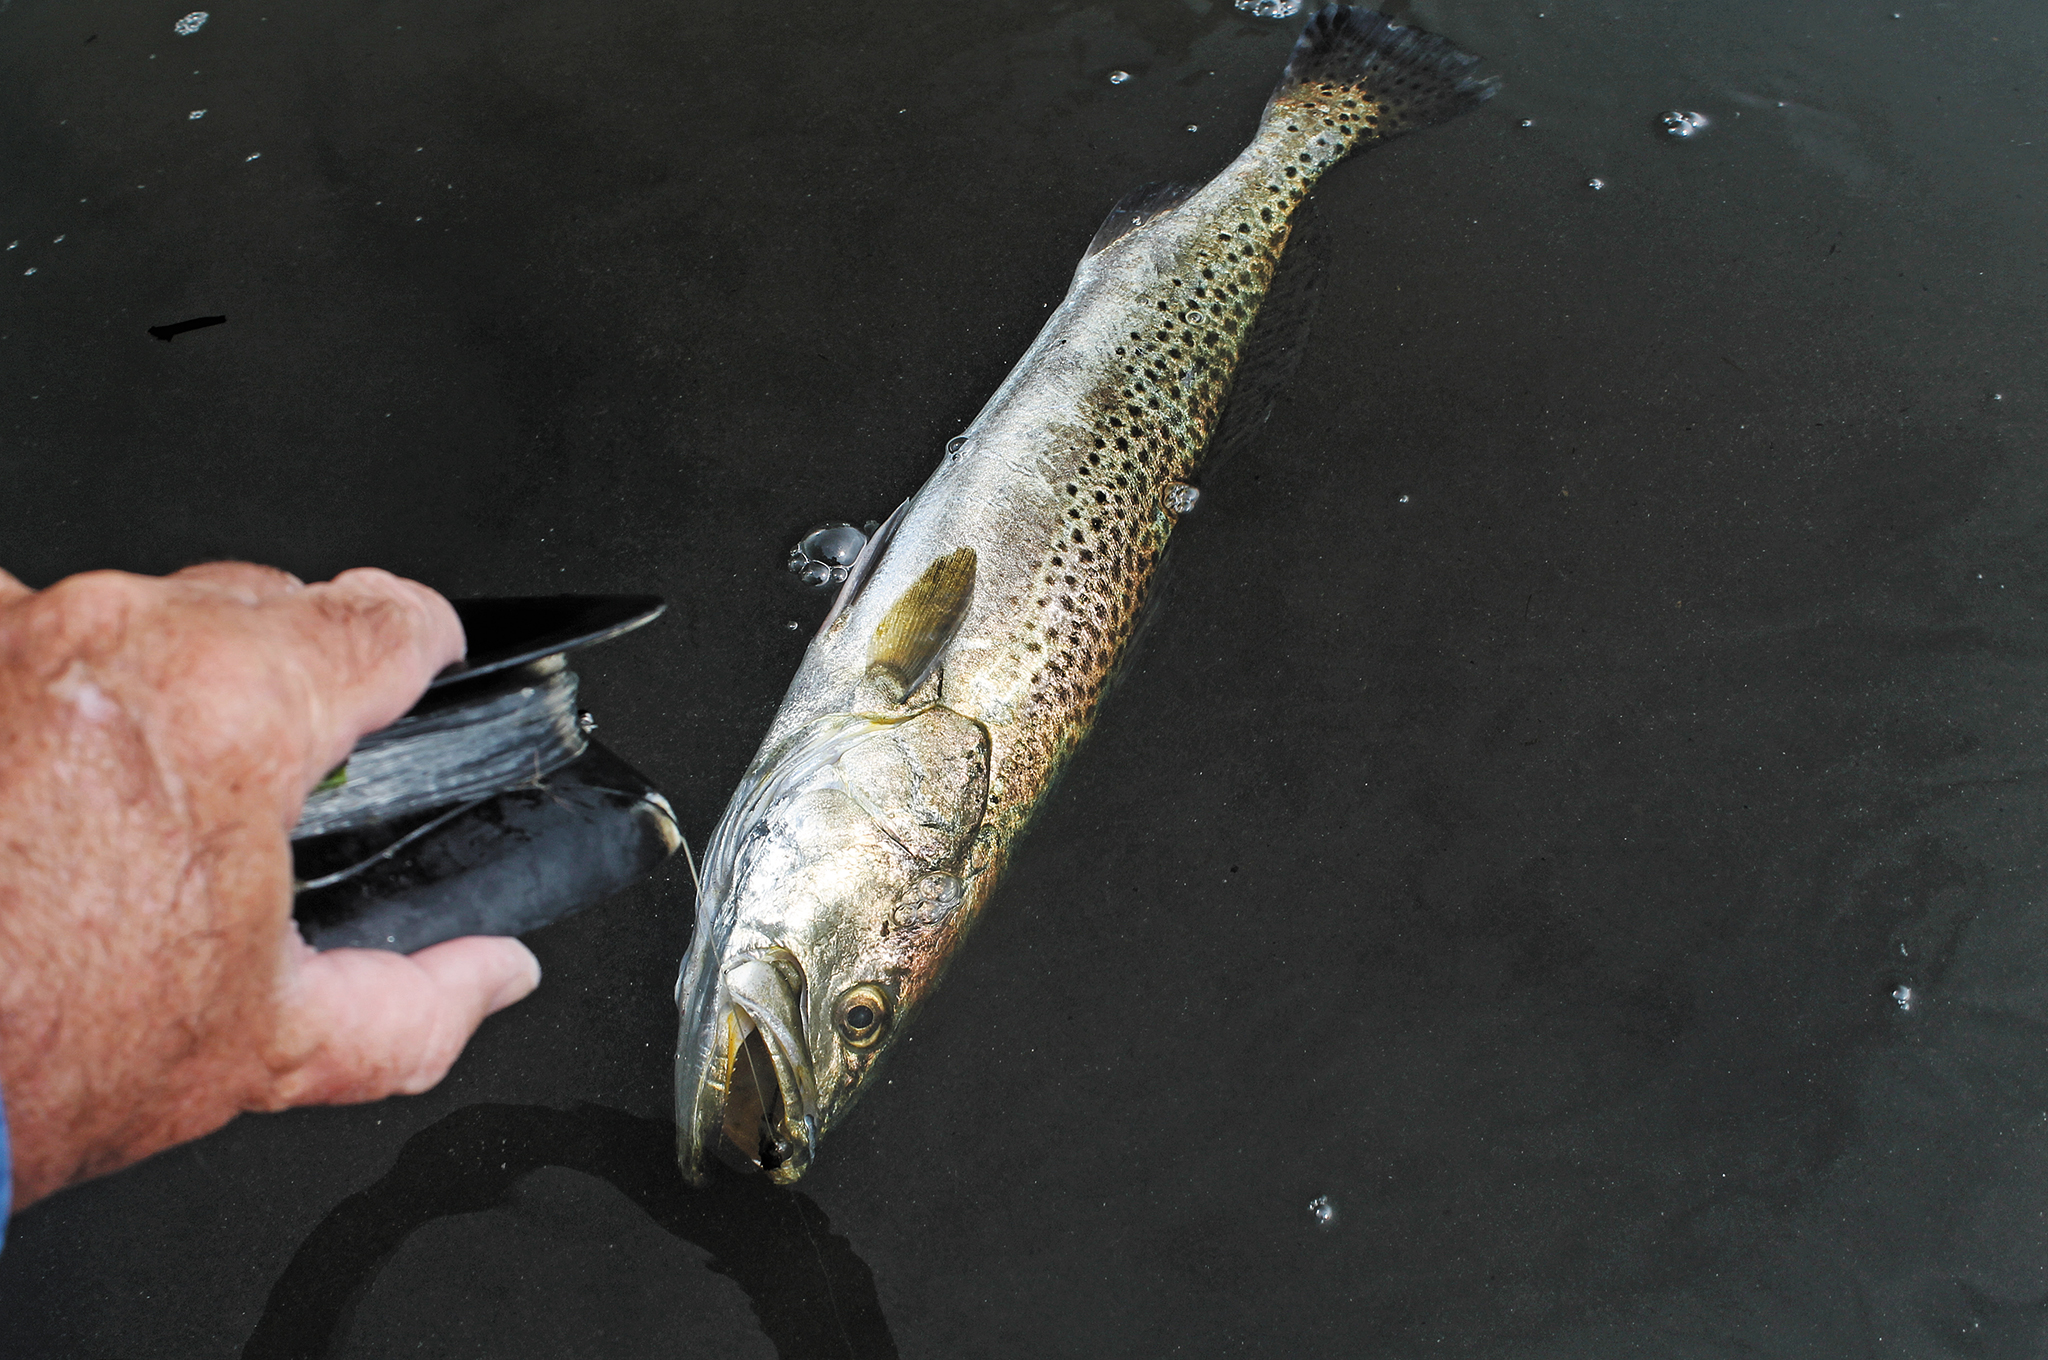
Cuban Yo-Yo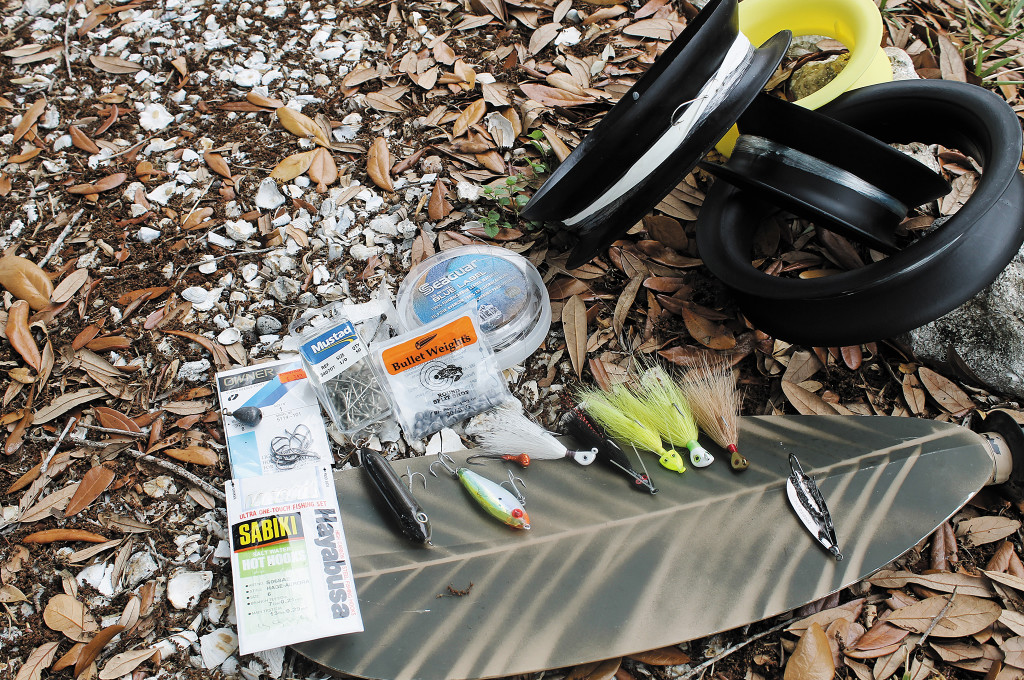
No, this isn't the latest popular kid's toys; it's one of the simplest fishing systems one can use from a shore, jetty, or pier. This time-tested fishing device is a simple plastic spool with a concave channel capable of holding hundreds of feet of light or heavy line in various sizes. In coastal waters from Alaska to Florida, yo-yos are capable of taking trout, flounder, redfish, mangrove snapper — even small shark if you include some wire leader.
To use it, first quietly wade or stand in the shade of the mangroves, or at a low-profile spot where water movement shows signs of baitfish and feeding fish. To cast using the yo-yo, pay out several feet of line with the hand spool. Then swing the hook, leader, and sinker or lure around your head like a lariat, and let her fly, allowing the spool to spin in your opposite hand, your reeling hand. A 30-foot cast is plenty.
Terminal tackle can consist simply of a line connected by small sliding sinker, swivel, a length of leader, possible cork bobber, and a baited hook.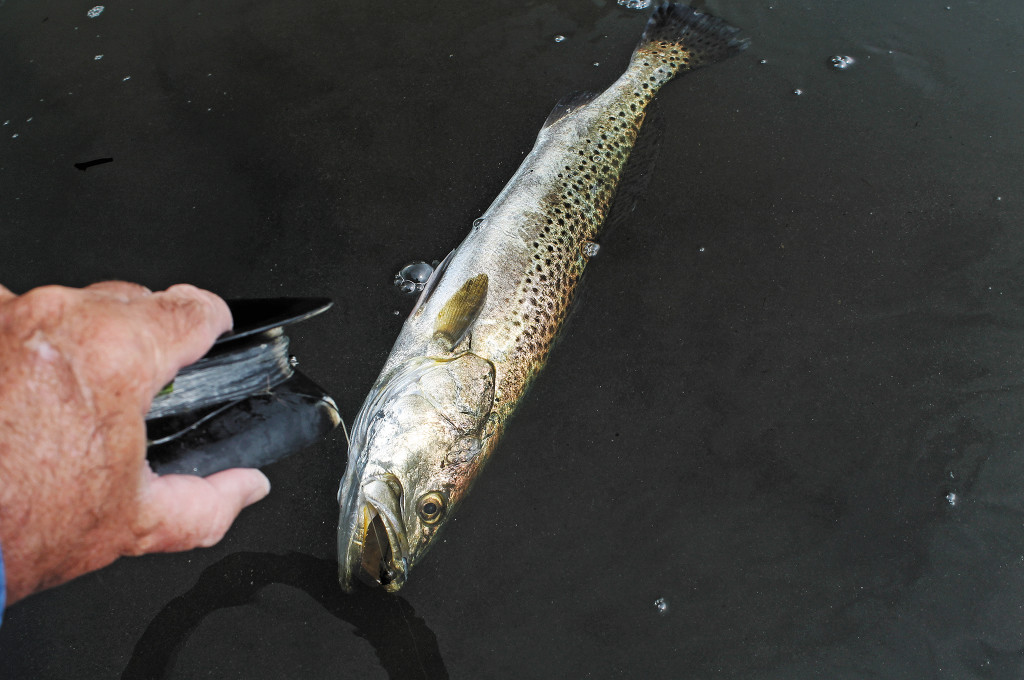
To manage large and small fish, practice rolling your wrist one handed and fishing by feel with your opposite hand. Take care not to allow the line to cut you when using microfiber lines. When that large fish hits, a braided line can cut you to the bone. Never wrap your bare hand with any fishing line lest you risk a deep cut; use the spool. A glove helps prevent skin loss when the fish hits. (If you receive a line cut or a hook stab, treat it immediately by flushing, disinfecting, and bandaging, then keeping as dry as possible.) Prepare to loosen your grip and allow the fish to exhaust itself by playing it carefully. Too many fish are lost by attempting to winch them in, tearing the hook or lure from their lips.
If you're able to procure, by hook or crook, a small seaworthy row boat or jon boat for fishing offshore, the yo-yo will allow you to drop weighted baits or lures into the deeper channel edges, where reef fish or even grouper may dwell (along with passing pelagic species during fall or spring seasons). Be prepared to play the fish and if need be, stab it at boat side with a handmade spear. Given time, you may even rig a small landing net by steaming and bending branches into a loop, and cross connecting with paracord fiber strands, square knotted into a small mesh screen.
Hawaiian Sling
Depending on the currents, the season, or the water temperatures, you may even be able to dive for crabs or to spearfish using a pole spear or Hawaiian sling. “A what?” you might be asking. A Hawaiian sling is a poor man's spear gun and works like a combination of a slingshot and a bow and arrow, but instead of flexing a wooden or fiberglass bow to build up energy you pull back on rubber tubing. While they're commercially available, you can fashion one yourself, MacGyver style:
1. Obtain a sturdy shaft for a pole spear and sharpen one end (i.e. wooden dowel).
2. Tie bungee cord or surgical tubing in a 12-inch loop at the base of your spear.
3. Slip your hand up the pole, tightening the loop across the webbing between your thumb and trigger finger until you can grip the pole under tension.
4. Then point and release.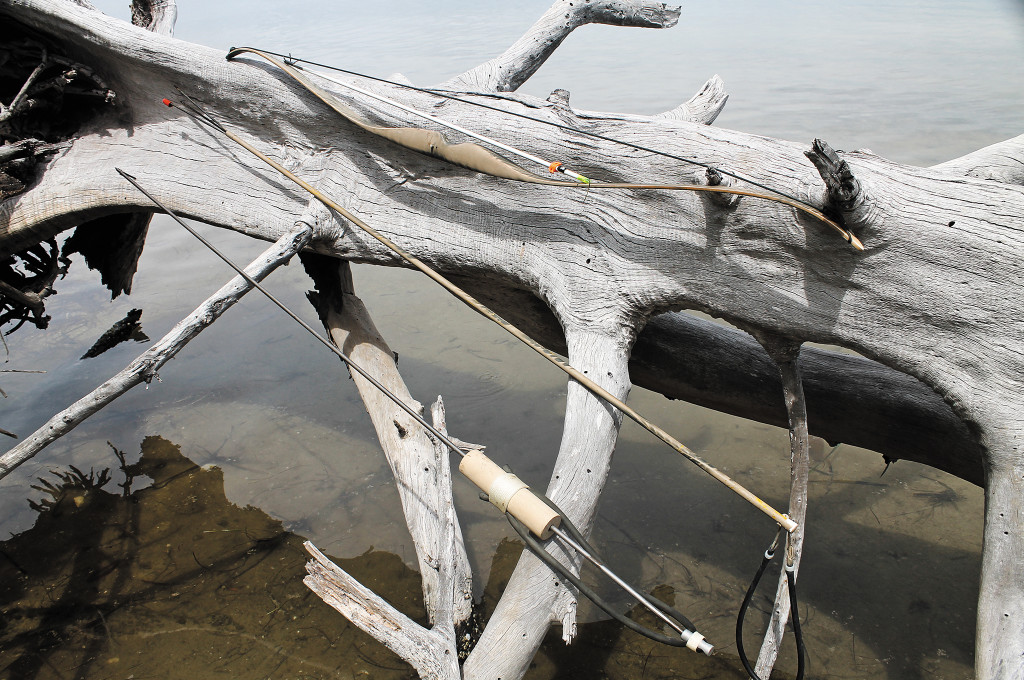
Nets and Traps
These devices work just as well in saltwater as they do in freshwater. Premade or crafted from paracord, a simple cast net or seine can gather both bait and larger keeper fish. If you have the capacity to carry a premade bait or cast net, this can reward you with one simple toss after mastering the ancient technique. Set nets framed by fish traps to funnel both bait and larger fish. If you're able to rip some screen or chicken wire from a fence or window, roll and form a cylinder to use as a bait or crab trap, then weigh it down, and bait with fish heads to keep the food chain going.
However, these require a large time commitment to make in the field, so consider staging a premade net in your boat, vehicle, or bug-out location.
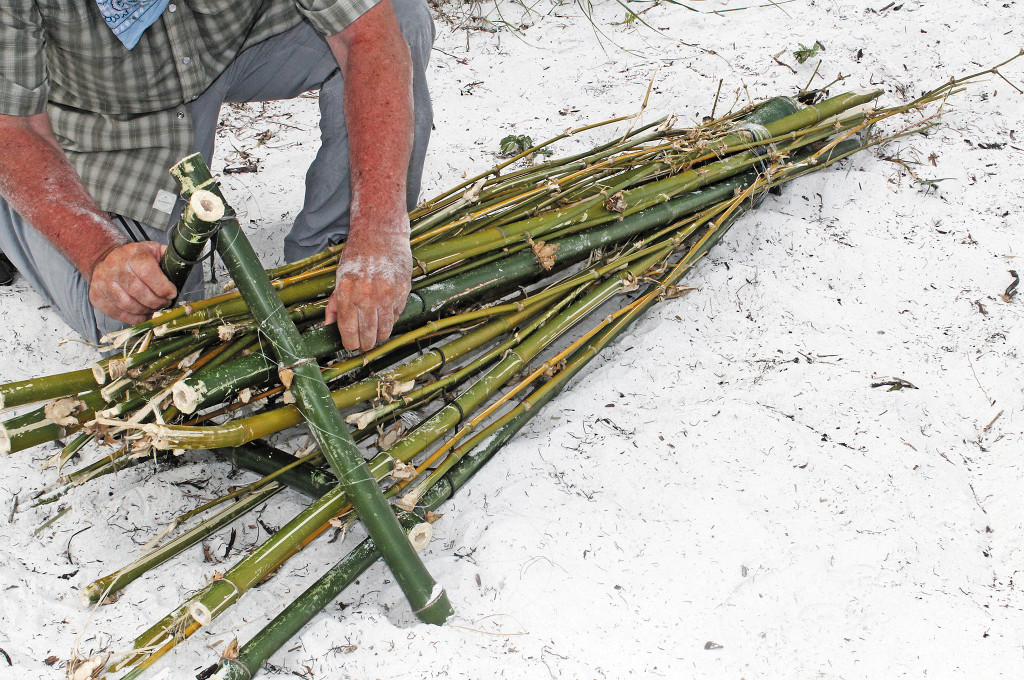
The author fashions a fish trap out of bamboo. As a passive form of fishing, the trap funnels both bait fish and larger...
Fish-Gone Conclusion
For long-term survival, the most well thought-out bug-out bags consist of core essentials surrounded by modular sub-component packs that may be added or deleted based on need, travel, and season. This holds true with angling supplies, too.
With each component, it's essential to know every element and how it works in the given environment you're in. Perhaps more importantly, it's vital to practice with it before it's needed. Just as you wouldn't wait until you're bleeding out from a gunshot wound before you try a tourniquet for the first time, you shouldn't add a single lure or tool to your kit without considering its cost, weight, safety concerns, and usefulness in the water. Instead of going entirely with the mini-fishing-kit-in-a-mint-box approach, consider how your off-grid adaptability and effectiveness will be greatly increased at very little cost by incrementally increasing the carrying capacity of your basic setup.
There are survival schools that will teach you how to survive by eating a worm. Or, if you go off the grid with grit and some knowledge, you can use that worm to catch an almost limitless abundance of fish. So save the Altoids, hero. You'll need them for kissing the girl once you've fed your clan long after the last MRE was devoured.
About the Author:
Native Texan David H. Martin is a conservation-driven kayak fishing guide and firearms instructor based in Sarasota, Florida, where he charters coastal waters, mangrove islands, and remote rivers. Competing with sharks and alligators for his next meal, he hones and teaches survival skills needed for transitioning from potential urban threats to remote backcountry camps.
10 Worst Angling Mistakes to Avoid
1 Don't Pack a Knife: A knifeless man is a lifeless man, goes the Nordic saying, and this is never truer than when working the water's edge. You don't want to connect with anything you can't disconnect from in a hurry — think getting tangled up with a fishing line, weighted fish trap, or even an anchor line. A fixed blade or a safety cutter like the Benchmade 9 CB will give you control over thrashing fish and save a trip to the emergency room when that unseen hook comes through the web of our hand.
2 Forget Edge Discipline: Almost any fisherman can show you the scar he got when his hand slipped on slime while cleaning a slick fish or when the blade ricocheted off a fish spine. Clean fish the way you'd sharpening your spear: cut away from your body.
3 Overlook Small Cuts: A knife is not the only thing that can cut you. The new micro-braid fishing line can cut to the bone when burning through your hand, leading to impairment and blood loss. Small hand cuts might seem insignificant, but can result in a red streak up the wrist, an early warning sign of an infection.
4 Go Deep: When wading, remember to keep it “shin deep, not chin deep.” The idea is to be predator, not the bait. Don't go for the trophy fish in deep waters without a boat, and just take what you need; small fish count, too.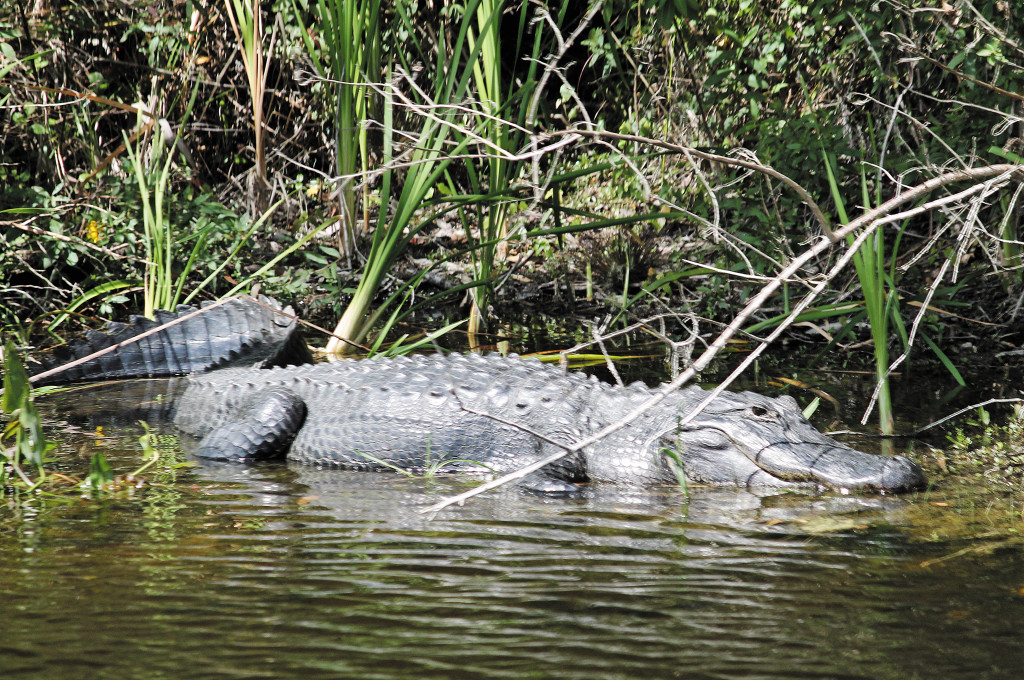
5 Stay Unaware: Never turn your back on the water, especially at low light or nightfall. The water moccasin remains the most belligerent and malingering serpent at the water's edge, and the reason the .410 Snake Charmer shotgun was invented. And no one need be reminded about the dangers of crocs and gators.
6 Just Dive In: Your hiking stick works when wet. Don't attempt a crossing through moving water, even a seemingly smooth-flowing creek or channel, without probing the bottom. A safety line (i.e. a heavy rope) can provide a measure of security when crossing waters or maneuvering, scouting, or portaging river country. Recreational fishermen disappear every year, pulled down in their waders when stepping into a hole or slipping on a green mossy rock.
7 Ignore the Temperatures: Once you're wet, weather conditions can drastically affect you for the worst. It's easy to get so caught up in survival fishing that you forget to pay attention to your shivering body. When you're cold, you make bad decisions. Get a fire started at your basecamp before you realize that you have no dry spare clothing and your tinder is wet.
8 Clean Where You Eat: Clean your fish away from camp. If you can't use the entrails or head for cooking or baiting traps, don't bring it back to your bug-out base. Otherwise, you'll be sending out an aromatic invitation for raiders, from nuisances like raccoons to serious threats like bears.
9 Eat the Weirdos: Pass on any fish that acts disoriented or appears unnatural. Favor the firm, lively, and clear-eyed fighter. Prepare carefully and cook thoroughly. The fish will fall apart when done so plan on using a pan if you have one, or spreading out the fish on skewers or a grill. Even crushed beer cans make a good improvised oven or grill. A classic cooking technique is to wrap the fish in foil, coat in mud, then bury in campfire coals for about 30 minutes.
10 Pack Just One Line and Hook: Compared to ammo, whiskey, and cigars, the cost for ample line and hooks are low and their weight and bulk are minimal. Stock up well in advance, building in a variety of lines for any possible condition and having various kits set up for your different emergency packs.