In This Article
For those of us who are interested in learning to survive adverse conditions, one of the best sources of of knowledge is history. Previously, we have shared the stories of real-world survivors like Poon Lim, who lived for a record-setting 133 days alone on a life raft in the ocean. Today, we'll be sharing another real-life story of solitary survival—one which would go on to inspire the most famous castaway novel of all time, Robinson Crusoe.
Alexander Selkirk
Back in the 17th century, the world was more sparsely populated, and lacked the technology for instant communication across vast distances. Violent crime, war, civil unrest, incurable diseases, and thousands of other everyday dangers meant living past the age of 50 was unlikely during the 1600s. There's no question that it was a much more difficult time to be alive than the present.
During this period, a boy named Alexander Selkirk was born as the 7th son of a humble cobbler. In 1676, the family lived in Lower Largo, Fife, Scotland. At the time, Scotland was independent from England, and a “Glorious Revolution” was about to occur in 1688, involving rioting and a coup that would depose the king.
This tumultuous environment was a difficult place to be a child, and Selkirk grew up with a rebellious nature and “a quarrelsome and unruly disposition”. To escape legal troubles in Scotland, he struck out to sea at age 17 and became a buccaneer, which essentially amounted to being an English-government-sanctioned pirate.
While living at sea, Selkirk and his fellow crewmen fought against the French and the Spanish during the War of the Spanish Succession in the early 1700s. Some historians call this the first true world war in human history, and it hardened Selkirk into an experienced sailor.
Selkirk's Fateful Voyage
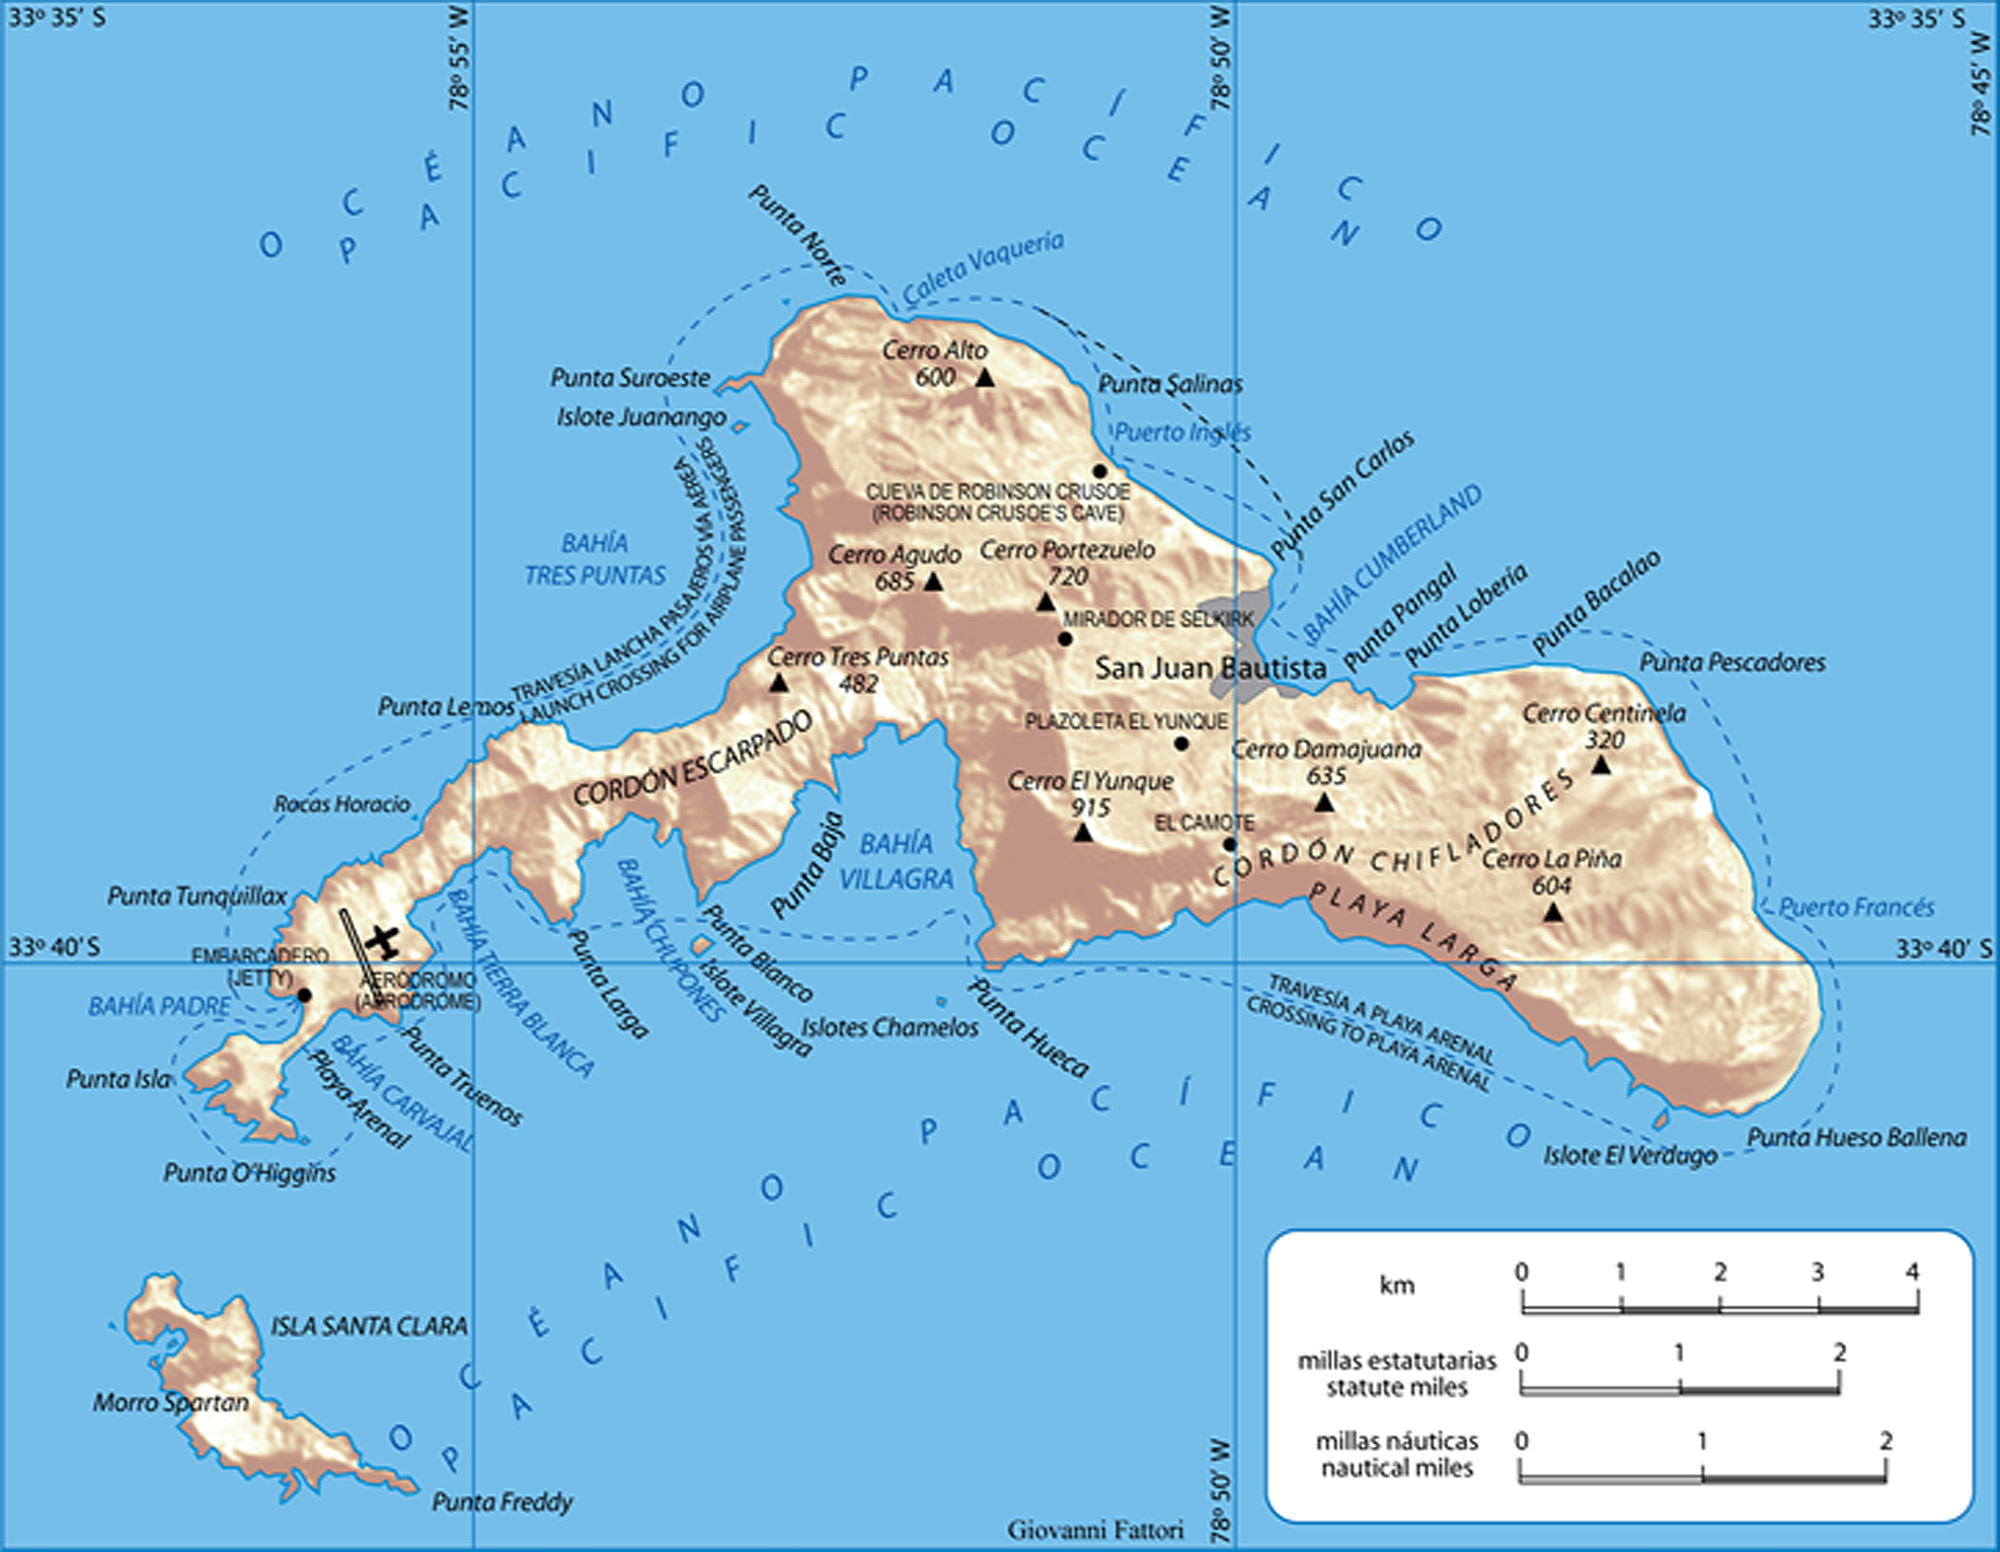
Isla Más a Tierra, the island where Selkirk was marooned in 1704. Source: Wikipedia
After narrowly surviving hard battles against Spanish galleons, Selkirk soon became the sailing master of a ship called the Cinque Ports, serving under a 21-year-old Captain Thomas Stradling. In September 1704, the ship needed to resupply fresh water and other resources. So, Stradling stopped the Cinque Ports at an island in the Juan Fernandez Archipelago, 416 miles off the coast of Chile. The 18.5-square-mile volcanic island was known as Isla Más a Tierra, and was completely devoid of human life.
While resupplying the ship, Selkirk (true to form) got into an argument with Captain Stradling about the seaworthiness of their ship. Its wood had sustained damage due to a worm infestation, and Selkirk was worried it would sink before they could return home, spelling a likely death sentence for all on board. However, the captain angrily rejected this notion, and said the ship would be just fine.
Selkirk was so frustrated with the Captain, he said he would rather be marooned on Isla Más a Tierra than set foot on the leaky ship again. Stradling took this declaration literally, handed Selkirk a few supplies, and granted his wish to stay on the island. Selkirk realized his mistake and tried desperately to get back on board, but Stradling refused to allow it, sailing away without him.
Life as a Castaway
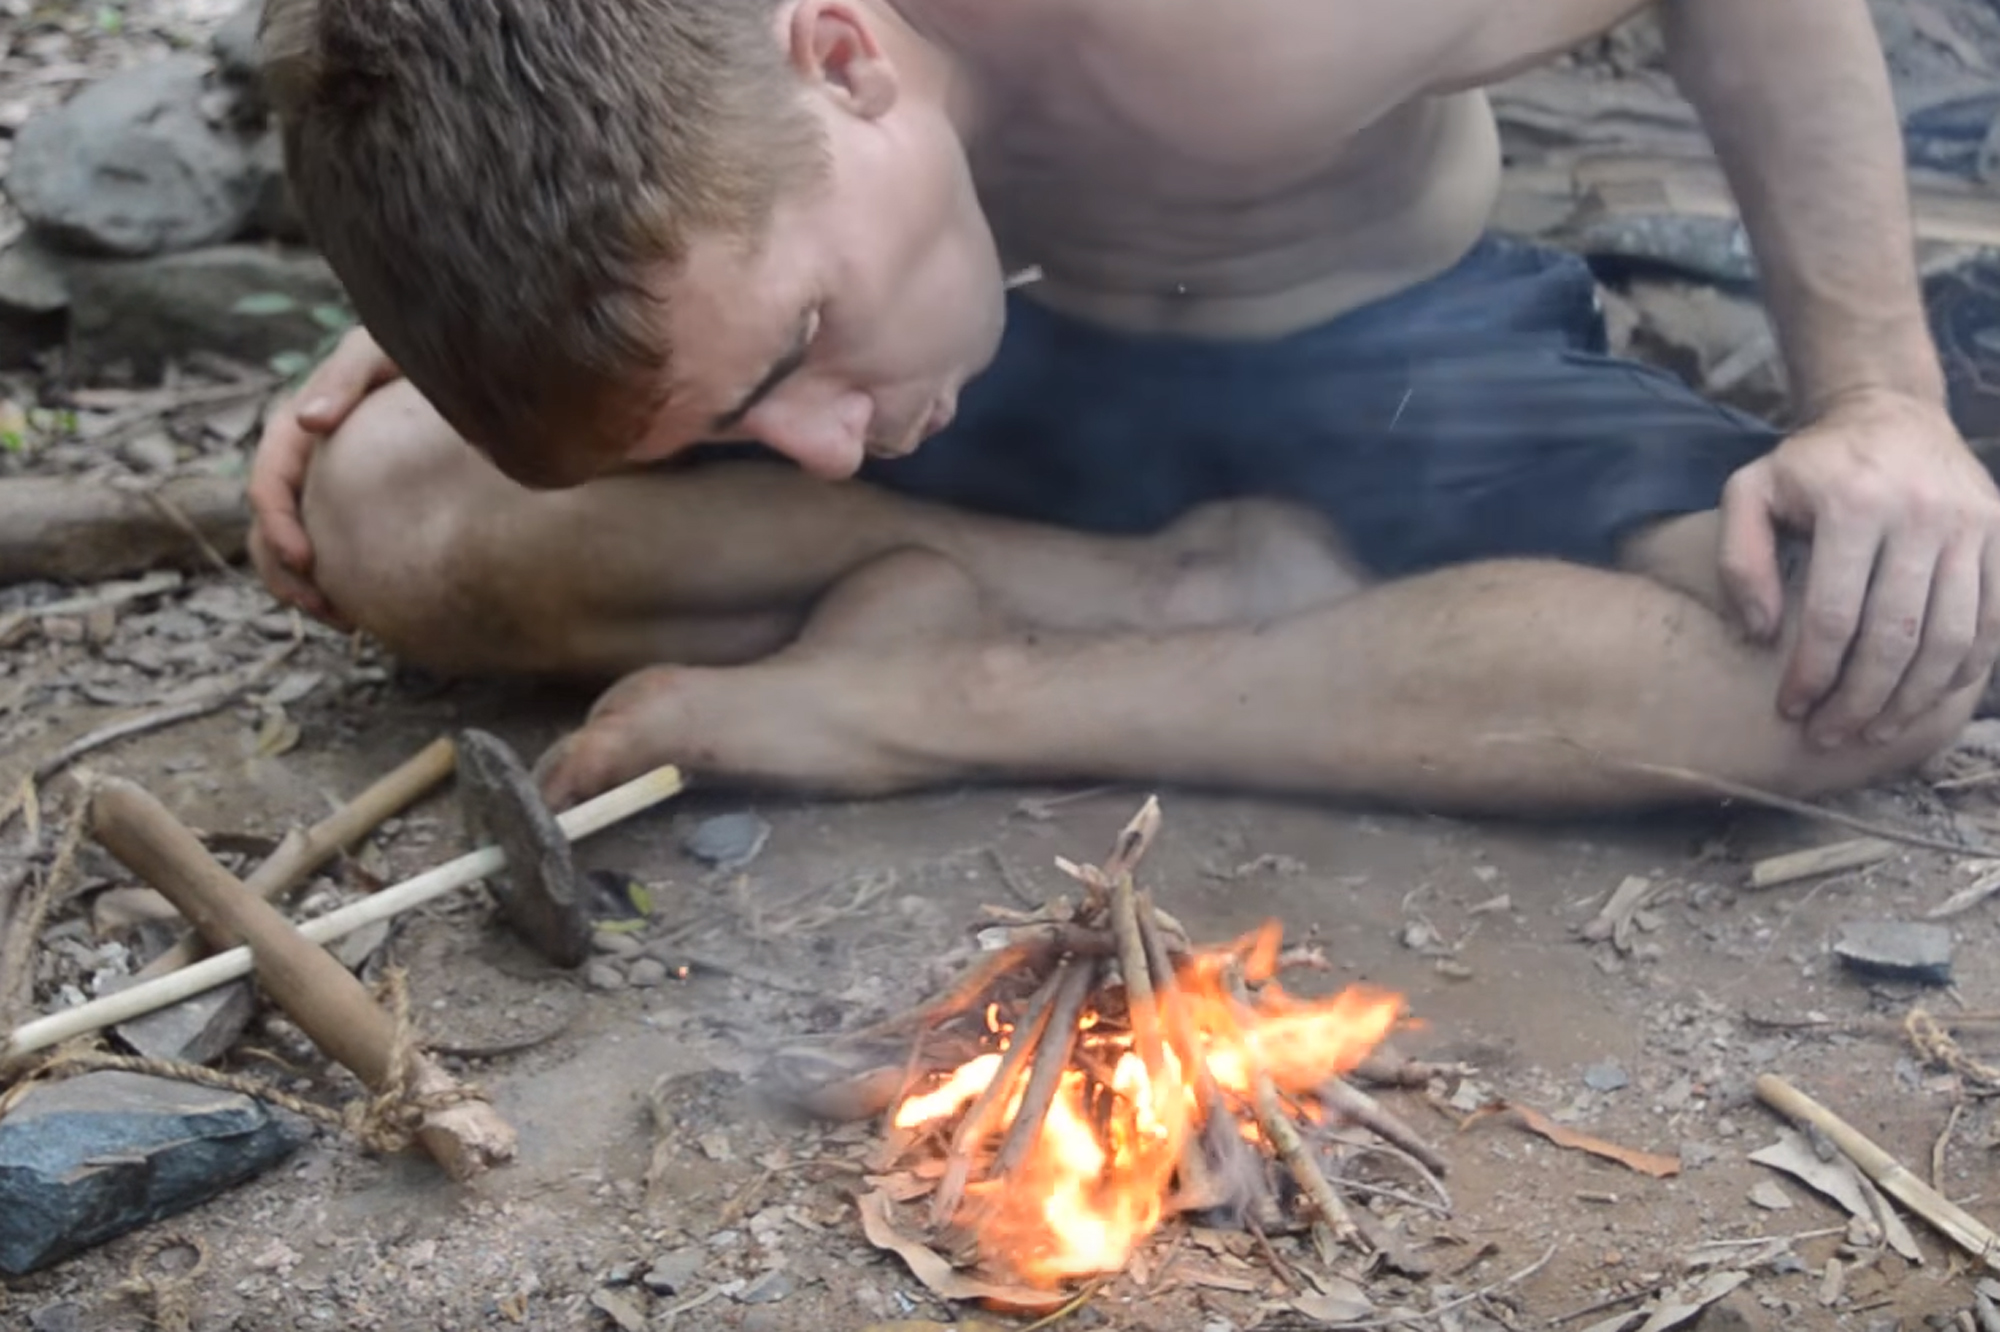
As Selkirk watched the Cinque Ports disappear on the horizon, he was left with only his personal belongings: a flintlock pistol, a knife, a hatchet, some oats, a little tobacco, a Bible, a few navigational instruments from the ship, and the clothes on his back. He would be stranded here alone for over four years.
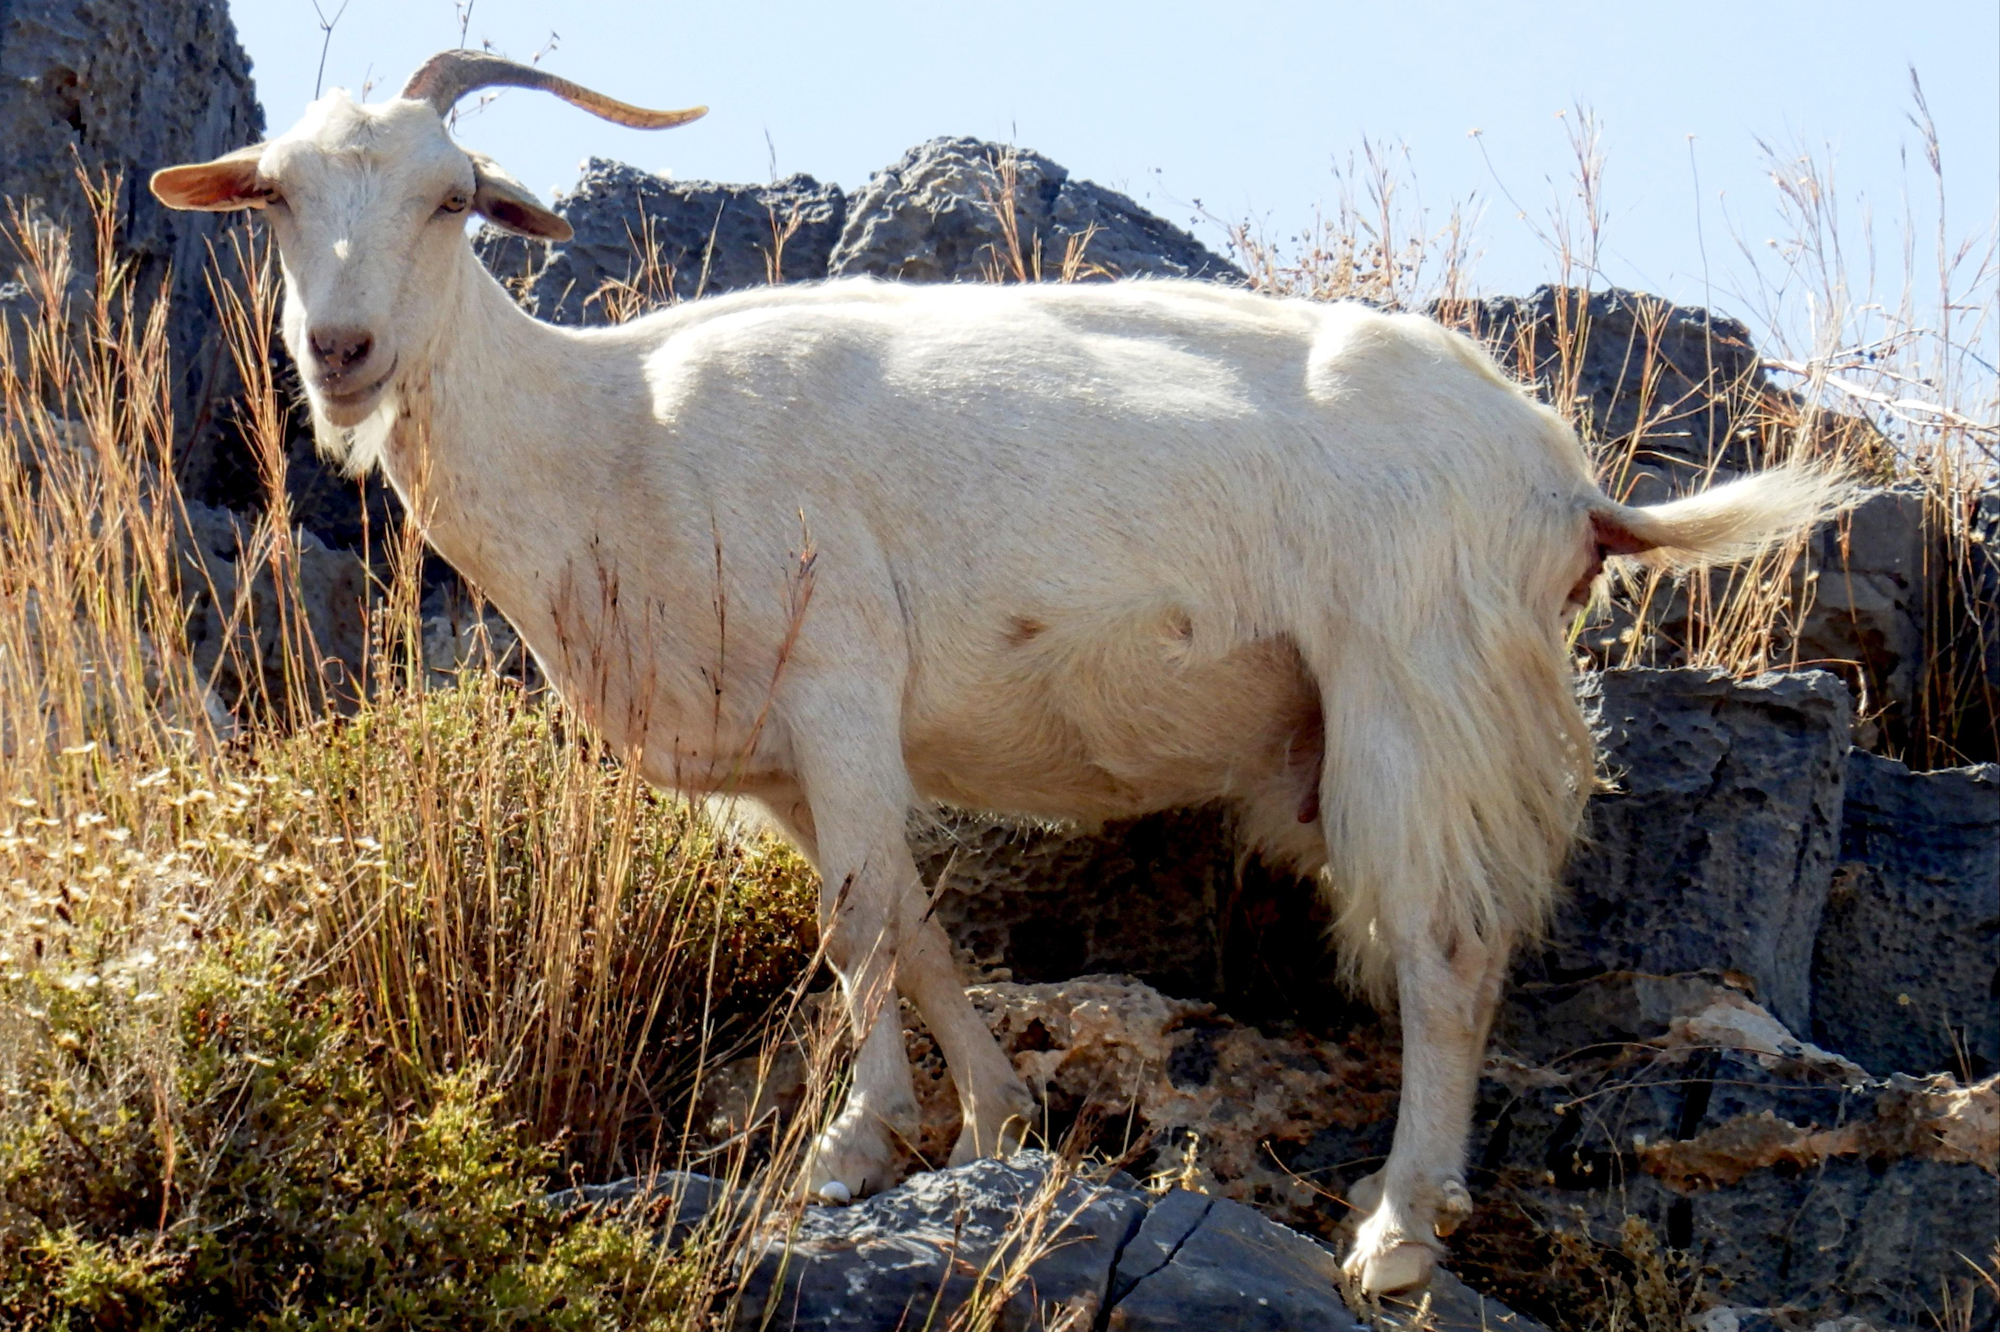
Selkirk was able to sustain himself by hunting and milking wild goats on the island.
Luckily for Selkirk, Más a Tierra hadn't always been uninhabited, and previous Spanish sailors had left rats, feral cats, and a handful of wild goats on the island. The goats served as food sources for Selkirk—he hunted them at first with his pistol, and once the gunpowder ran out, on foot with his knife. The vicious ship-rats would attack him in his sleep, but he eventually befriended some feral cats for protection.
Selkirk also used every bit of the island's resources to their fullest. He fished, caught spiny lobsters, milked goats, and foraged for wild turnips, cabbage, and pepper berries. He even crafted a new knife out of barrel hoops he found on the beach after his original blade dulled and broke.
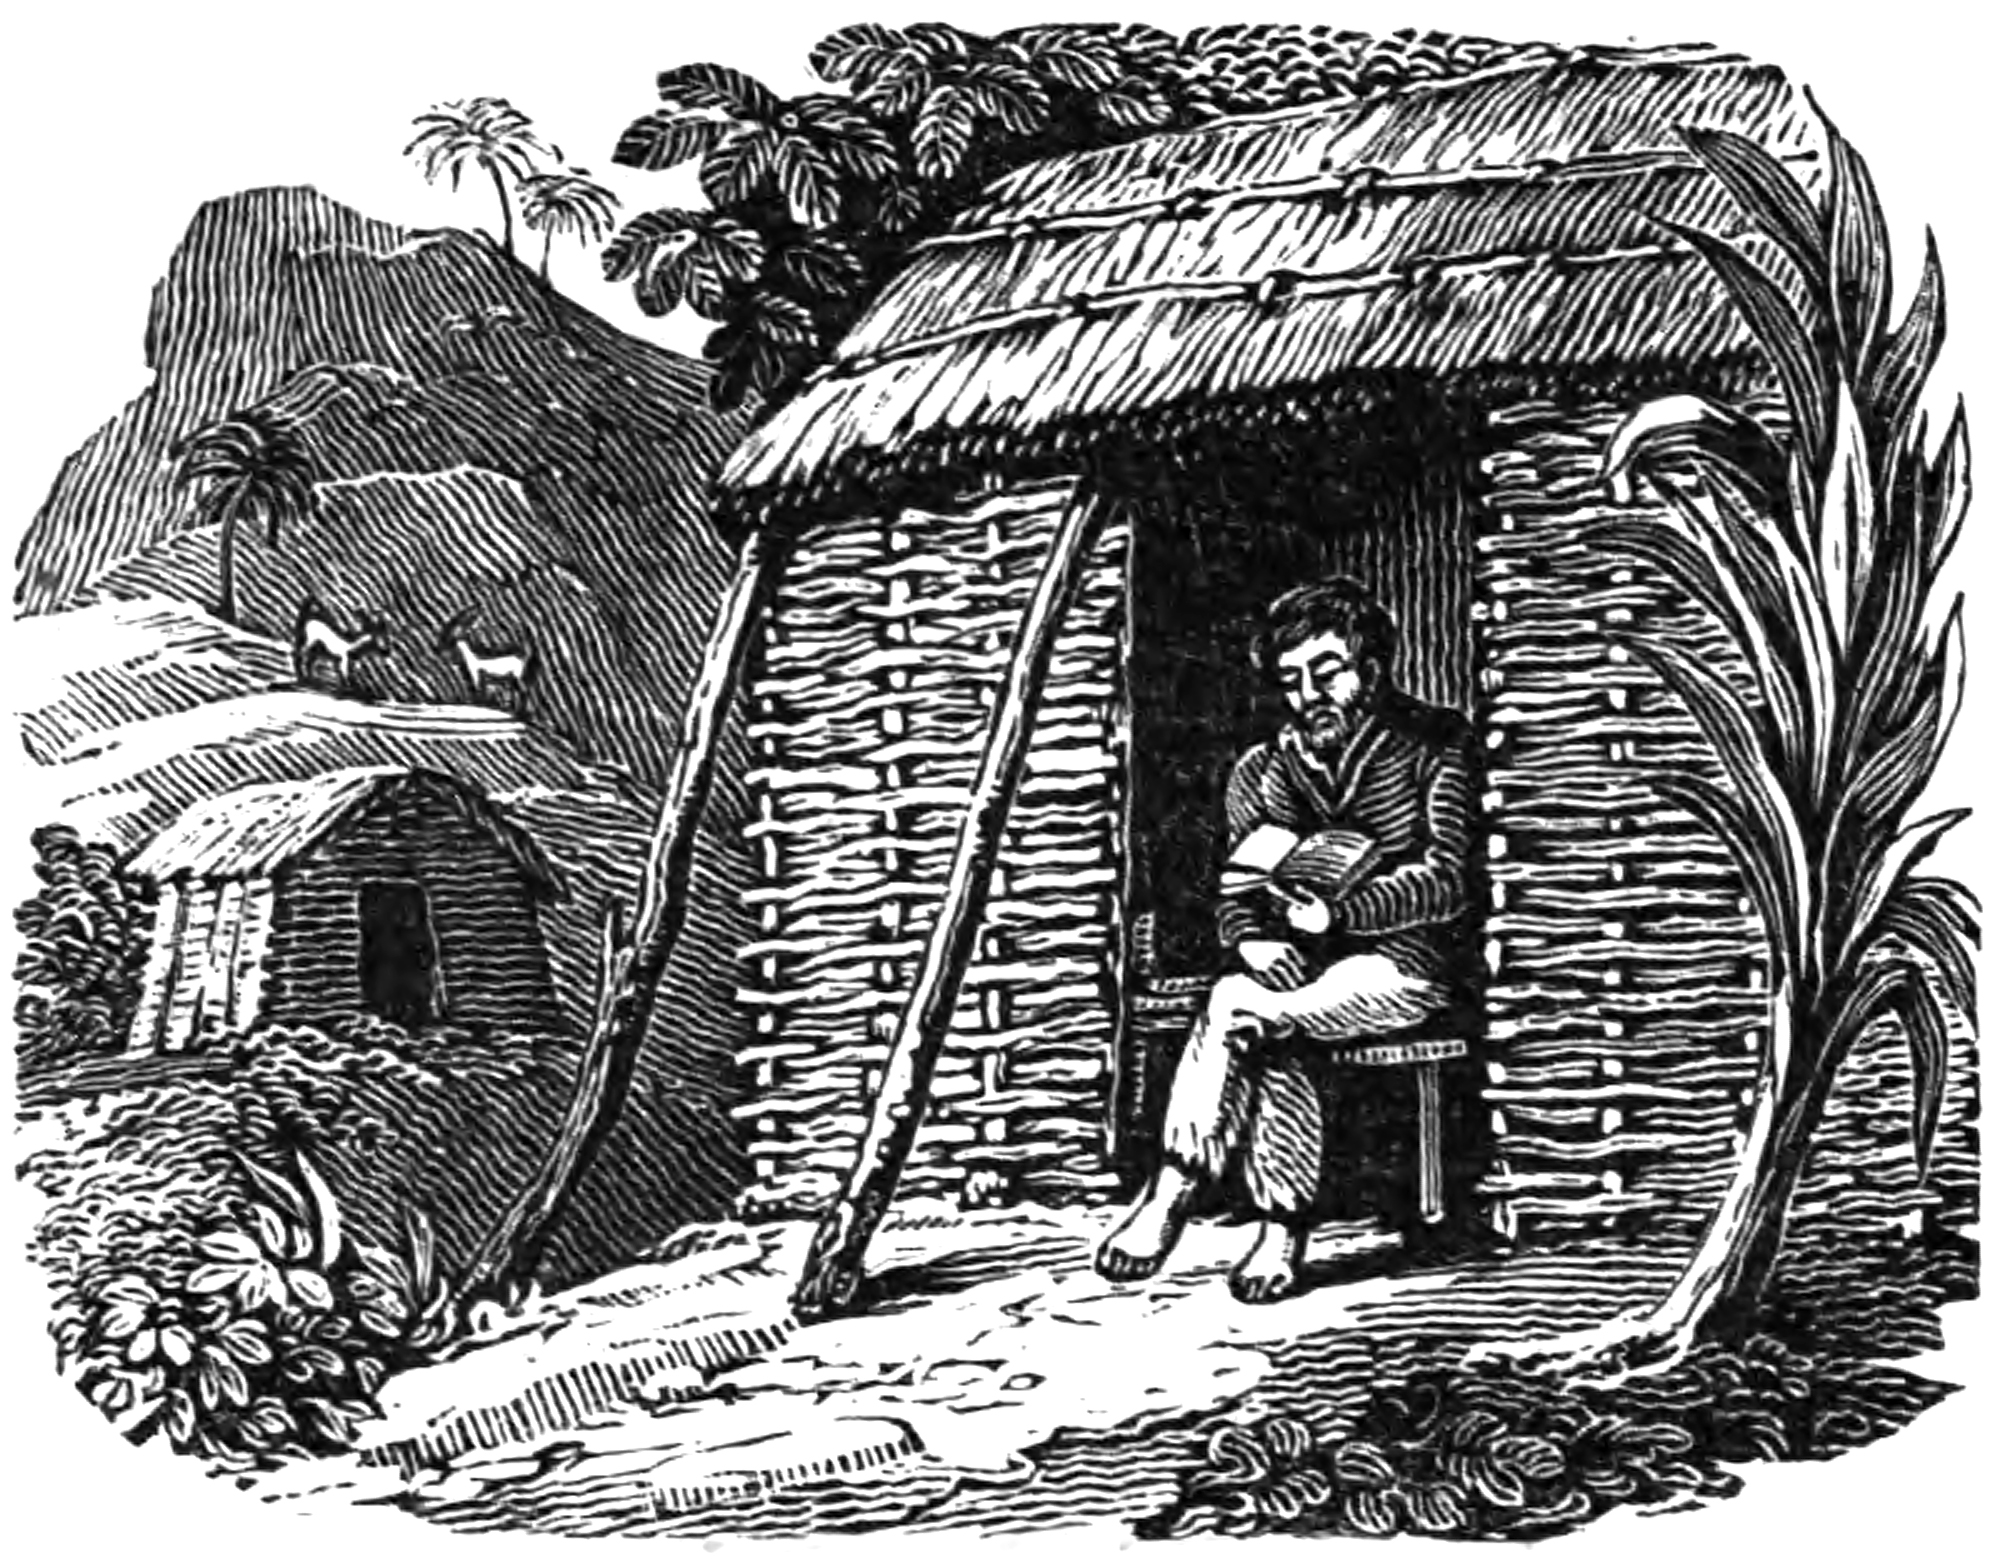
An 1837 illustration of Selkirk reading in one of the two huts he built. Source: Wikipedia
Although the island's weather was relatively mild, Selkirk still needed shelter from the rain and colder nighttime temperatures. So, he chopped down pepper trees and built two huts, one for sleeping and one for cooking or food storage.
His clothes wore out after a few years, so he skinned goats and sewed the skins into new clothing using a nail and some thread. His shoes wore out also, but he eventually developed callouses and decided to remain barefoot. Selkirk also kept his mental acuity by reading the Bible he was left with, and singing Psalms.
During the four years and four months Selkirk lived on the island, two ships came ashore. However, there was a problem: both ships were occupied by Spanish soldiers, and Selkirk knew he would be captured, imprisoned, or even killed if they found him. One of the two ships spotted him, but his knowledge of the island's terrain helped him narrowly escape, until the Spaniards gave up and sailed away.
Finally Rescued
After years of solitude and self-reliance, the incredible survival story of Alexander Selkirk finally came to an end. On February 2nd, 1709, an English privateering ship called the Duke landed on the island. Selkirk was described as “incoherent with joy” at the sight of friendly humans, and helped the Duke's crew recover from scurvy by providing food and water for them.
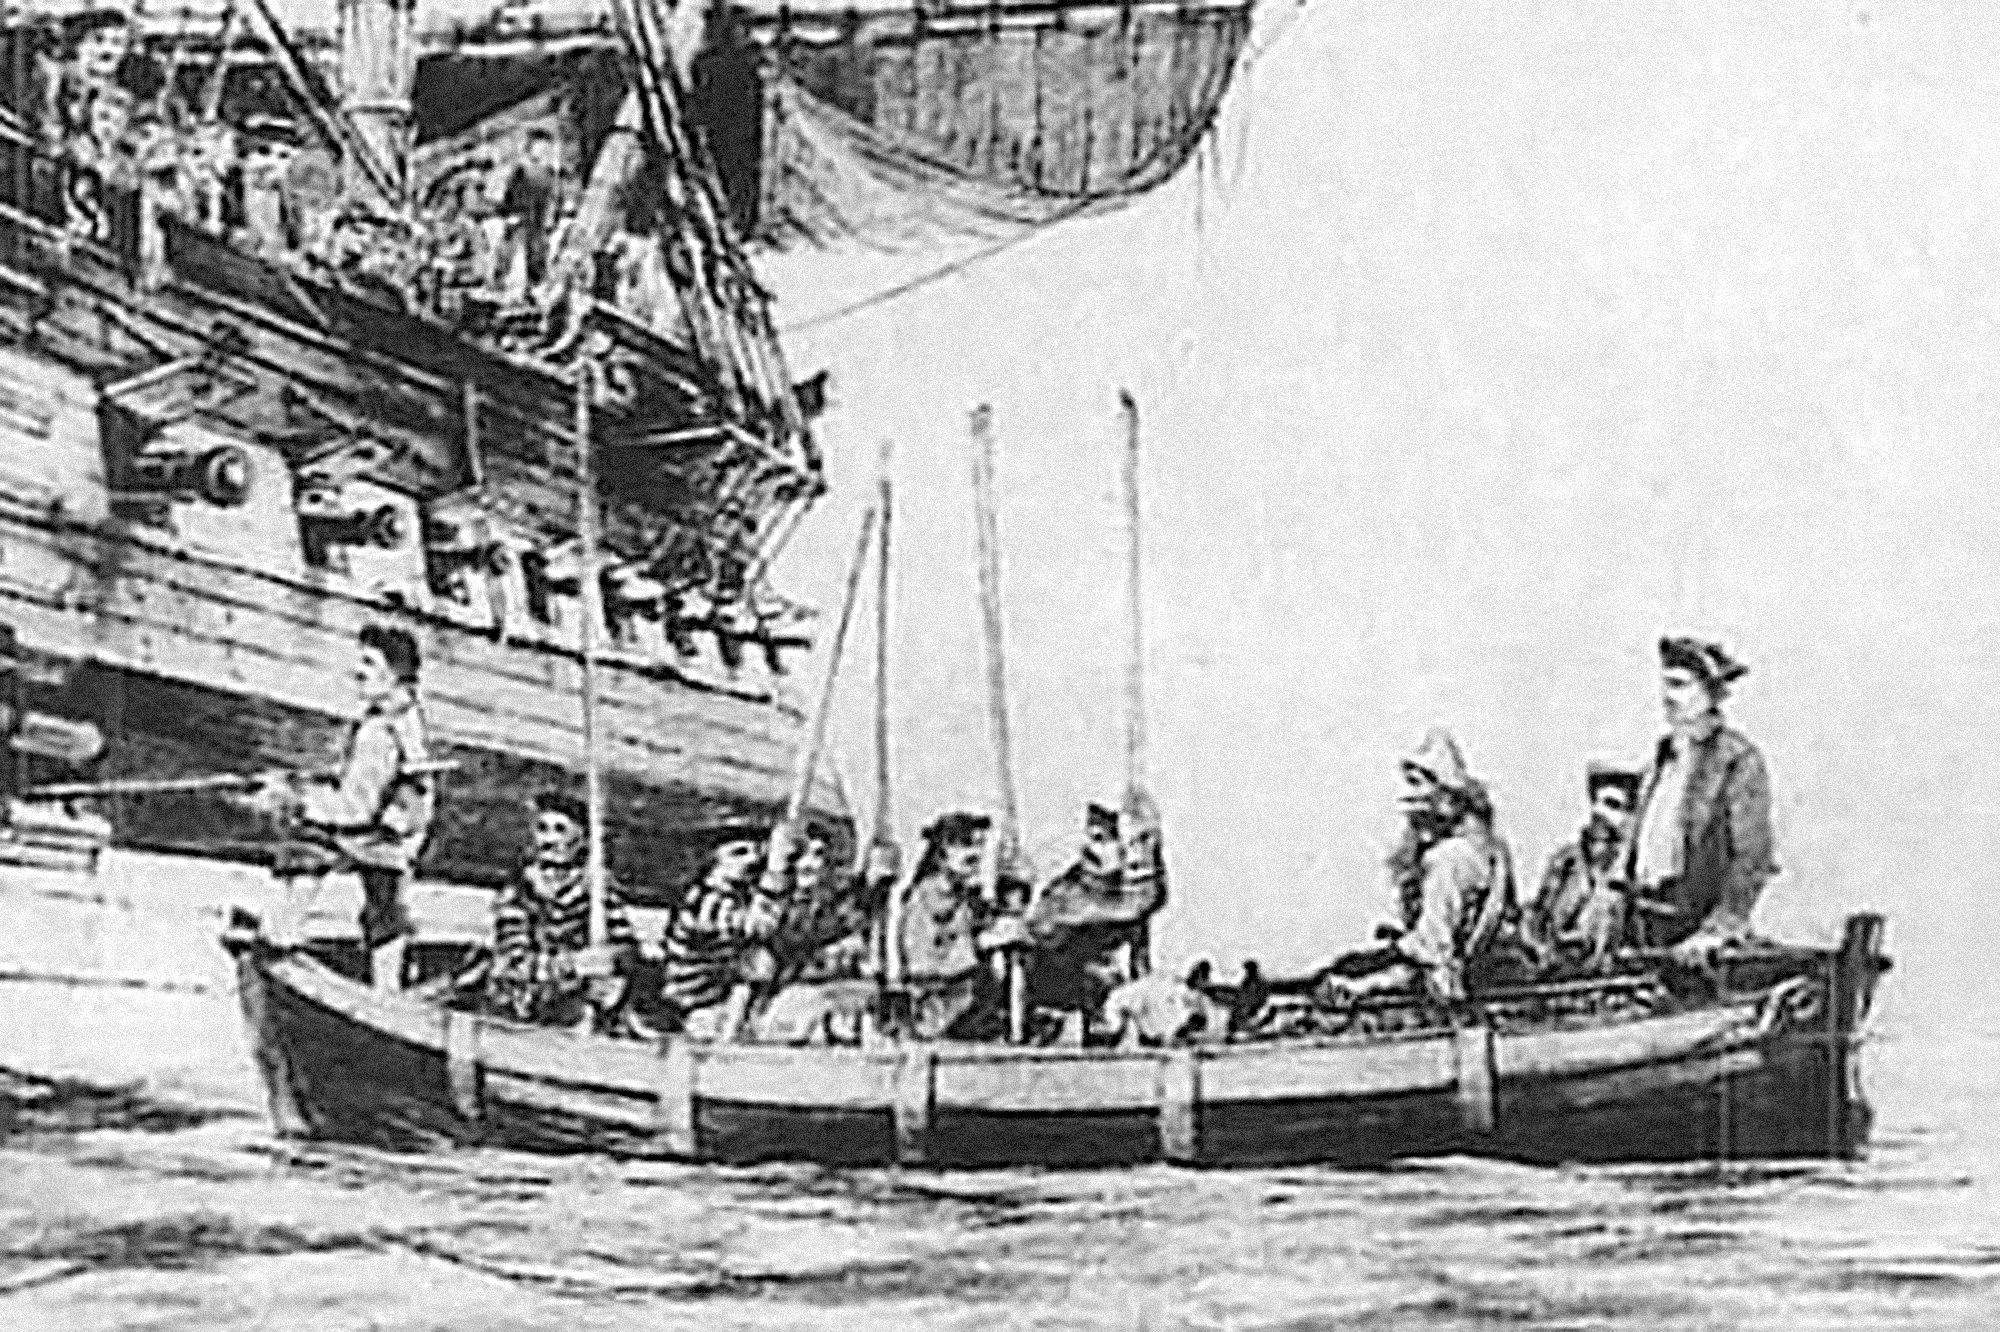
An 1859 illustration of Selkirk being taken aboard the Duke. Source: Wikipedia
Woodes Rogers, the captain of the Duke, was impressed by Selkirk's survival skills. He wrote, “One may see that solitude and retirement from the world is not such an insufferable state of life as most men imagine, especially when people are fairly called or thrown into it unavoidably, as this man was.” Rogers made Selkirk the second mate of the Duke, and eventually gave him a ship of his own.
Rather than immediately return home to Scotland, Selkirk remained at sea, plundering jewels from Spanish ships and hunting for gold galleons off the coast of Mexico. After spending several years sailing around the world, he finally headed back to England, and enjoyed life as a local celebrity for the next decade.
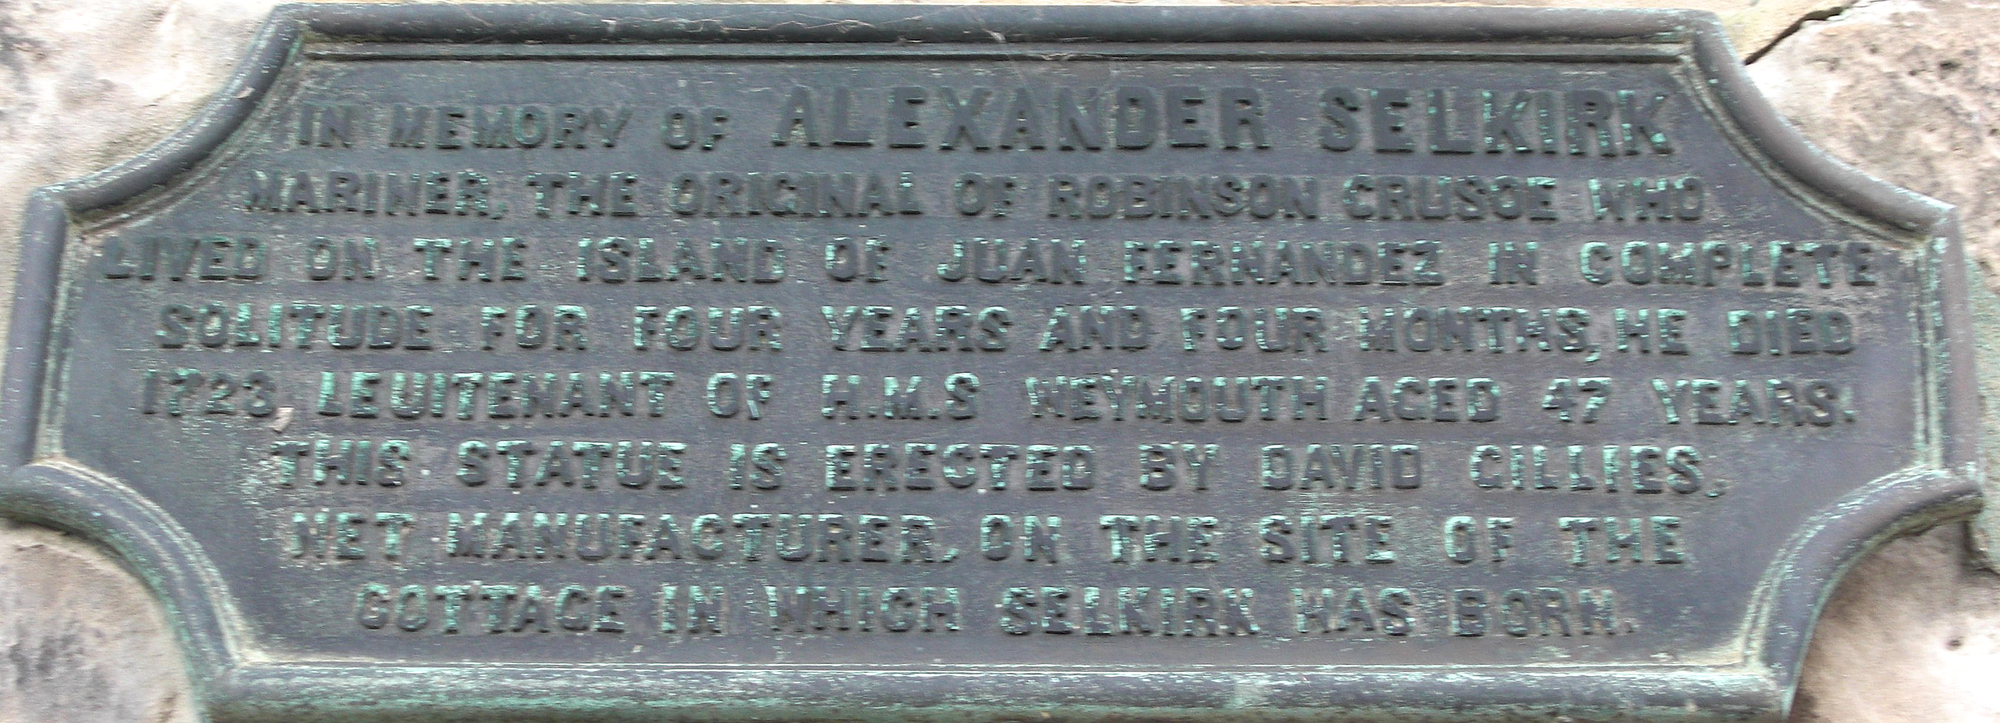
A plaque in Lower Largo, Scotland, which commemorates Selkirk. Source: Wikipedia / SylviaStanley
Selkirk eventually sailed away from England yet again in 1721, but contracted Yellow Fever near the coast of Africa, and died on the ship in 1723. He was buried at sea.
Selkirk's amazing story would go on to inspire author Daniel Defoe to write Robinson Crusoe, a novel that has remained popular for nearly 300 years. Many aspects of Selkirk's ingenuity, such as the use of goat skin for clothing, were incorporated into the book.
The Fate of Those Who Abandoned Selkirk
Ironically, the fate of the Cinque Ports ship was exactly as Selkirk had predicted. The vessel took on water rapidly after leaving Isla Más a Tierra, and sank near a much smaller island off the coast of Colombia, forcing Stradling and the entire crew to surrender to the Spanish in order to avoid starvation. The Spanish soldiers then took the men to be tortured and imprisoned in Lima, Peru. Only 18 of the original 63 men were said to survive the ordeal.

The island of Malpelo, where the Cinque Ports crew was stranded before surrendering to the Spanish. Source: Wikipedia