This Ain’t Your Daddy’s BB Gun?

Picture the worst-case scenario. Our biggest threat (ISIS, Iran, al-Qaeda, North Korea — take your pick) has launched a coordinated series of suicide-bomb attacks in multiple metropolitan areas, hoping to spread fear and make the nation vulnerable to conventional attacks. Fortunately, you saw the writing on the wall and quickly bugged out in your off-road rig to the backcountry. You've lived off your emergency supplies, but weeks have now passed and you're barely surviving off the land.

You packed an AR-15 rifle, but are low on ammo; plus, using it to hunt could draw unwanted attention from other desperate souls. However, all your preparation for this type of scenario led you to bring along a fitting SHTF tool — an air rifle.

Many airguns available today are more than adequate for taking small- to medium-sized game. In the United States, they're even more attractive because they aren't heavily regulated. So, those of you who like to plan for any inevitability might consider keeping one in your rig or bug-out vehicle, as they can be more than useful in all sorts of emergencies — from being lost in the backcountry to facing long-term survival situations in no man's land.

Compressed Defense

First things first: what is an airgun? Think of it as a blowgun on steroids. Basically, it's like any firearm with a lock, stock, and barrel, except it uses compressed gas to propel the projectile. The breech has a close tolerance to the pellet, forming a seal to trap the air behind it. The trigger system either strikes a valve to release the compressed gas, or releases a spring/gas ram to push a piston that forces the air to compress and drive the pellet at the time of firing.

Airguns have been around for centuries, with fine examples being displayed in arms museums around the world. Even the Lewis and Clark Expedition carried a multi-shot air rifle on their famed trek west of the Mississippi in the early part of the 19th century. When they hear the term airgun, most folks immediately think of “BB gun.” While BB guns qualify as a type of airgun, the variants we're referring to are on a very different end of the spectrum. BB guns use .177-caliber steel shot and feature a smooth bore. While you could down a sparrow with a well-placed shot at close range, a shot from a BB gun is fairly anemic in most circumstances.

Quality air rifles utilize rifled barrels, with higher-end models sometimes sporting barrels made by top firearm barrel manufacturers such as Lothar Walther. Most fire .177- or .22-caliber pellets, and many come equipped with permanently attached sound moderators so their firing signature is less likely to announce your presence every time you go hunting. Would you believe that there are air rifles available today that are capable of taking out a buffalo at 150 yards? Don't believe it? Do a Google search to see for yourself. As astounding as that may seem, that's not even the extreme. In fact, back at the beginning of the 20th century, the U.S. Navy experimented with compressed air deck guns on a warship.

In a true SHTF scenario, could a modern air rifle be used for self-defense? Certainly, it is a possibility. However, there are caveats with that theory. First of all, a number of the air rifles discussed here are single-shot arms. While they may not be as slow to load as a muzzle-loader, they aren't rapid fire either. Another caveat is range. Unless you have a custom big-bore, your effective range will typically be less than 100 yards. Additionally, pellet mass is usually only between 7 and 15 grains, so there's not a lot of terminal ft-lb of energy hitting a target. The conclusion would have to be, yes, self-defense is a possibility in a pinch. But a better option would be to use your airgun for hunting, while saving your centerfire rounds for when you might really need them.

Affordable and abundant, airgun ammunition are pellets usually made from copper or lead. They come in various calibers, most commonly .177, .22, and .25.

Affordable and abundant, airgun ammunition are pellets usually made from copper or lead. They come in various calibers,...

Airgun Types

You've seen pellet rifles at the big-box stores, and most look like “starter” guns used to introduce kids to shooting. The low-end guns are excellent for that purpose, yet you wouldn't want to bet your life on them. If you're going to stake your survival on one, be sure to do your research. Let's look at the power plants providing the air or compressed gas to different types of airguns.

air-rifles-gamo-whisper-silent-cat

The Gamo Whisper Silent Cat is a spring-piston airgun of the break-barrel variety, meaning that the barrel also serves as the cocking lever. This single-shot breech-loader can fire .177-caliber pellets at up to 1,200 feet per second.

The Gamo Whisper Silent Cat is a spring-piston airgun of the break-barrel variety, meaning that the barrel also serves...

Spring-Powered: Spring-piston or gas-ram airguns are commonly referred to as “springers.” Break-barrel types are charged by forcing the barrel downward though the cocking arc, sometimes requiring up to 35 or 40 pounds of pressure. Then you load a pellet into the breech and return the barrel to its original position. Other versions of springers are charged by a side-lever or lever below the barrel.

air-rifles-crosman-benjamin

This Crosman Benjamin is a multi-pump air rifle, meaning its internal reservoir is charged by pumping a lever — which, in this case, is integrated in the fore-end. Multi-pumps are solid off-grid tools because they're

This Crosman Benjamin is a multi-pump air rifle, meaning its internal reservoir is charged by pumping a lever —...

Multi-Pump: These rely on an internal reservoir that is charged by pumping a lever, typically part of the fore-end of the rifle. When the rifle is fired, all of the air in the reservoir is released. This type allows the user to control the power and velocity of the shot to some extent by varying the number of pumps. Multi-pumps and powerful springers can be a real workout during long shooting/practice sessions, especially multi-pumps because each stroke is harder than the last.

This Daystate Wolverine B can retail up to almost two G's. Your daddy's BB gun it is not — unless his last name is Trump. This pre-charged pneumatic rifle features a 500cc air bottle, allowing for about 85 shots of .177- or .22-caliber pellets per fill.

This Daystate Wolverine B can retail up to almost two G's. Your daddy's BB gun it is not — unless his...

Pre-Charged Pneumatic (PCP): These types hold high-pressure gas (air, CO2, or nitrogen), up to 3,000 psi, in a reservoir attached to the gun. PCPs can be good for many high-powered shots before needing recharging and can be stored under pressure for long periods of time (except in hot vehicles!). These might be considered a little less “self-contained” as they require either a specialized pump or some type of pressurized cylinder (i.e. scuba tank) to refill them. But, if your bug-out truck is already rigged with an air compressor, you won't have to worry about recharging when you're in the middle of nowhere.

Carbon Dioxide (CO2): CO2 airguns strictly run on pressurized carbon dioxide via throwaway cartridges or tanks. Newer models can take larger refillable 88-gram tanks as opposed to the little 12-gram cylinders commonly used in BB guns and with portable bicycle tire pumps. But note that those that accept the larger tanks are not going to be more powerful than the other types of airguns. A disadvantage to cylinder-fed guns is that carrying spare cartridges can get heavy really quickly. There are some PCP models that operate with either CO2 or high-pressure air that can be viable choices, only because you could revert back to air after exhausting your supply of CO2. Other drawbacks: pellet velocities are impacted by ambient temperature fluctuations that affect the gas cartridges, and they should not be stored pressurized.

air-rifles-crosman-benjamin-discovery

The Benjamin Discovery from Crosman is a pre-charged pneumatic rifle with a filling port just below the muzzle.

The Benjamin Discovery from Crosman is a pre-charged pneumatic rifle with a filling port just below the muzzle.

Off-Grid Options

Let's get down to the nitty-gritty. Which type is the perfect survival airgun? It depends on your finances and circumstances.

If you can stretch your budget, a PCP would be a good bet. They are good for many high-powered shots, have low to no recoil, and are available from some manufacturers in large calibers (i.e. .25 and .30). Several models are adjustable for the power of the shot, which helps conserve air if full-power shots are not needed. Some models are fed by rotary magazines. As a bonus, suppressed models tend to have a mild sound signature, essential if you're trying to stay low-key. One manufacturer even makes a model with an interchangeable arrow-firing barrel. Some variants are carbine length, which adds to the appeal for some shooters.

The drawback? PCP versions can be pricey. For example, the Hatsan BT65 (featured in Issue 14 of our sister publication RECOIL) can fire 30 accurate shots at 30 yards before any noticeable drop in muzzle velocity — but it retails for about $700. Ouch! Other models, such as the Daystate Wolverine B, have a heart-attack-inducing MSRP of almost $2,000. Yes, two grand. Double ouch! Plus, if your bug-out truck doesn't already have an air compressor or you're forced to go on foot, you'll have a hard time justifying packing an air pump in your go-bag over, say, water and rations.

This special high-pressure air pump is designed to recharge pre-charged pneumatic (PCP) airguns. In a bug-out scenario, packing this piece of equipment makes PCP air rifles a little less attractive. But if you have the cargo capacity to spare, a PCP and its accessories are good additions to your survival kit.

This special high-pressure air pump is designed to recharge pre-charged pneumatic (PCP) airguns. In a bug-out scenario,...

Another good choice for an off-grid airgun could be a multi-pump. These types truly are self-contained because the method to charge the gun is built right into the weapon itself. In .20- or .22-caliber, they are quite capable of taking small critters at reasonable distances. They tend to have light recoil and are relatively quiet. One manufacturer produces a bullpup configuration in .30-caliber and claims the pumping force doesn't increase with each pump. But there are downsides. They shouldn't be left pressurized for long periods. Plus, they must be pumped for each shot. So, if you're faced with more than one marauder or predator, you better make that first shot count and have a backup weapon at the ready.

For the budget-conscious, a break-barrel springer could be more than adequate as a survival gun. There are many models readily available in a myriad of calibers, stocks, and finishes. Some are very powerful, can be had in calibers as big as .25, and are accurate with practice. Models equipped with sound moderators reduce the sharp crack as the pellet leaves the barrel, and, of course, some work better than others.

The Hatsan MOD 125 Sniper is available in .177, .22, and .25, the former of which can shoot up to 1,250 feet per second. This single-shot, break-barrel rifle comes in three colors, including this Mossy Oak Break-Up camo version.

The Hatsan MOD 125 Sniper is available in .177, .22, and .25, the former of which can shoot up to 1,250 feet per...

What's their biggest hindrance as a SHTF tool? Springers are typically heavy due to the metal used in the receiver housing, its powerful spring, and a substantial stock to handle its internal stresses. If you're already carrying a large three-day pack, this type of airgun will only add to your cargo load. Also, they're rather loud unless fitted with a good suppressor. Its cocking force can be a bit much for smaller shooters, too. While not the same as a medium-caliber rifle, recoil from a springer can be surprisingly stout for shooters fondly remembering their old BB guns; plus, its recoil occurs in both forward and backward directions. For this reason, you do not want to use your favorite riflescope on your springer air rifle because it could eventually damage the scope.

Should you find yourself in a Red Dawn-like situation, your firearms will obviously be essential survival tools. But they're not always the best choice when you're forced to go on a stealth hunt after all the grocery stores have been boarded up, burned down, or taken over by unsavory types. Archery bows are great tools, but let's face it, they take a lot of practice to master and aren't necessarily the best choice with small game. Spears, slingshots, or blowguns might be an option at close range, but again, only with enough practice. For the area in between these options, the airgun makes sense for filling the void. There are a myriad of choices out there, so you are bound to find the right option for you. Do your research and test some out if you're able. It could mean the difference between facing starvation or putting meat in the pot.

Warning!

Airguns aren't toys. Handle them like firearms, and obey the four cardinal safety rules: 1. Treat every gun as if it were loaded; 2. Always point the gun in a safe direction; 3. Keep your finger off the trigger until you're ready to fire; and 4. Be aware of your target's surroundings.

Airgun Maintenance

Keeping your weapons, even airguns, in top form is essential to your survival. For springer-type air rifles, besides cleaning and lubing the inside of the barrel occasionally, you'll want to oil its joints and any friction points. Any type of airgun you decide on will also need new O-rings or seals eventually. The seals will last a whole lot longer if you avoid using any products derived from petroleum distillates, so get yourself some quality silicone lubricant. Replacing seals on an airgun is a topic for another article, but educating yourself on some simple maintenance via the user manual, YouTube, or friends and acquiring a supply of seals and parts will go a long way in keeping that air rifle a viable piece of your survival kit.

Air Force Education

Are you new to airguns? Never fired an air rifle before? Much like any other valuable survival tool, there is a bit of a learning curve. The best thing to do before purchasing a model is to do as much research as possible and test a few if you have the opportunity, then determine if any of them fit in your off-grid plans. Below is a brief list of companies and resources in the world of airguns.

Airforce Airguns: This U.S. manufacturer of pre-charge pneumatics (PCP) produces the Ton Jones signature survival air rifle.
www.airforceairguns.com

Airgun Hobbyist: A publication devoted to airguns and its related accessories.
www.airgunhobbyist.com

Airguns of Arizona: This importer and purveyor of fine airguns is also a certified repair facility for many brands.
www.airgunsofarizona.com

Crosman: Founded in 1923, this U.S. corporation makes all types of airguns, ammo, and accessories.
www.crosman.com

Daystate: An English company that constructs high-end PCP rifles.
www.daystate.com

FX Airguns: A Swedish maker of fine PCP and multi-pump air rifles, as well as the arrow-firing Verminator Extreme.
www.fxairguns.com

Gamo USA: This is the American arm of the longtime Spanish airgun manufacturer.
www.gamousa.com

Hatsan USA: The U.S. branch of a line of high-quality Turkish airguns, many in .25-caliber.
www.hatsanusa.com

Umarex USA: The American division of this German corporation designs impressive airguns.
www.umarexusa.com


The Art of Building Effective Makeshift Weapons

Sharp rocks. Arrows. Catapults. Blunderbuss. SCAR-17 rifle. Intercontinental ballistic missiles. Since the dawn of time, man has been crafting weapons. Much like our need for food and shelter, it seems the desire to defend ourselves from harm is ingrained in our DNA — and most of the time our fists and feet just aren't good enough. Take a look at even the most primitive, isolated cultures on earth, and you'll see a plethora of different weapon designs, from simple spears and clubs to more advanced contraptions. It's easy to understand why: In many cultures, to have no weapon is to face an immediate, painful death.

Today, weaponry has evolved considerably beyond the humble spear. In fact, many of us own firearms that are more powerful, durable, and compact than our ancestors could have possibly dreamed. Still, it's easy to become overly reliant on our modern technology, and we rarely consider what might happen if these high-tech weapons malfunction. Or, worse yet, if we found ourselves in a life-and-death situation completely empty handed.

What if you were thrown into a hostile scenario with nothing but your ingenuity and the clothes on your back? Would you have what it takes to create your own weapon and survive?

The mention of improvised weapons may evoke images of wilderness survival TV personalities building overly complex snares or poison darts, but the reality is much simpler. In fact, makeshift weapons have a long history of real-world effectiveness — for example, just look at the prison system. Even in the most Spartan environment imaginable, with limited resources and under near 24/7 observation, convicts have managed to create deadly weapons from combs, toothbrushes, and even toilet paper. It's all about setting one's mind to the task at hand and taking stock of one's resources. Once that happens, weapons will become readily apparent.

Here’s a small sample of a few improvised weapons created by untrained survivalists over the course of a few hours. The diversity seen here is truly impressive. Now imagine what could be done with a little study and practice.

Here’s a small sample of a few improvised weapons created by untrained survivalists over the course of a few hours....

Types of Improvised Weapons

Stuck between a rock and a hard place, with all manner of predators (either the two-legged and four-legged variety)? The first step is to take in your surroundings and note what objects are available. Then consider whether those items can be crafted into three classes of improvised weapons: blunt-force, piercing, and projectile. Each category has its advantages and disadvantages:

Blunt-Force Weapons: They're exactly what they sound like — simple, no-nonsense, and absolutely devastating when used correctly. Channel your inner caveman, because the club is one of the most well-known weapons in this category. Maces, staves, batons, and knuckledusters would also fall into this class, as do kali sticks (for those of you familiar with Filipino martial arts). In a wilderness setting, a solid tree branch would make an excellent blunt-force weapon, while an urban environment might furnish a pipe, 2×4, or even an actual hammer.

Piercing Weapons: These are much more versatile for survival situations, but also more difficult to create. These weapons are designed to slash or stab, and include shivs, spears, pikes, knives, and swords. If you're in an urban setting, you'll be likely to find any manner of cutlery, scissors, or even a letter opener to use or modify into a spear. In the wilderness, a simple sharpened stick of any length is a tried-and-true implement of defense.

These tools have better range, but are the most risky to use. Once you've used your weapon, you're left defenseless while you reload, draw another weapon, or make your escape. However, with proper training, these weapons can be deadly. Included in this category are slings, bows, javelins, throwing knives, and bolas.

Keep in mind that any of these categories may be combined for added effectiveness. For example, a shovel, pickaxe, or hatchet would serve as an excellent hybrid of blunt-force and piercing. A tomahawk can be used for hacking and slashing, or thrown for added range. The more weapons you make, the more options you have. The possibilities are as limitless as your ingenuity.

Building a Weapon

Now that you're aware of the differing weapon classes, on to the harder part: how to actually build one. These techniques, and your available resources, will vary greatly between urban and rural environments, so we will address both settings.
Urban environments (whether metropolises or small towns) are rife with all sorts of useful manmade materials. Building a weapon from scratch probably won't be necessary here, seeing as how there are many preexisting weapons available — and we're not even talking about guns and machetes. Crowbars, chef's knives, baseball bats, and the like would be relatively easy to obtain. If you find yourself in a place devoid of any effective impromptu weapons and forced to create a more effective tool, plenty of building materials can be found in homes and businesses — duct tape, cable ties, baling wire, and even broken glass.

One key point to remember: In urban settings during a chaotic event, you'll be more likely to run into other people carrying more formidable weapons or guns, making stealth a key to self-defense.

Rural or wilderness environments make it much more difficult to build improvised weapons, primarily due to the lack of manmade materials. Even finding something as simple as cordage to lash a club together can be a struggle. Your primary materials will be stone and wood, so think primitive. Clubs can be formed by lashing a rock to a branch with fibrous vines or bark strips. You can also use twine, paracord, or fabric from your own clothing — whatever is available will (have to) do.

Barbed-wire fences can be a real asset, since the sharp wire can serve as both a binding agent and part of the weapon itself. Additionally, the thin stamped steel fence posts found in some areas can serve as a lightweight, strong weapon handle. Other materials to keep an eye out for include nails, bone, shells, and garbage. Something as innocuous as a discarded plastic bag can be repurposed into a sling pouch or cordage.

Many other weapons can be constructed quickly without complex tools. A spear can be formed by working the tip of a branch against a rock, or using a small knife if you happen to have one. If you've got a larger fixed-blade knife, just lash it to the end of a pole for added range. Even if you're not in a wooded area, palm fronds or yucca stalks can be used in place of branches.

The Moment of Truth: Using Your Weapon

It may still seem unlikely that an improvised weapon would ever be used in modern combat, and we certainly hope that's the case. However, it can and does happen in desperate situations. That's why law enforcement groups worldwide study and document improvised weaponry. Criminals on the run sometimes resort to these tactics, and the fact that armed police officers take these weapons seriously shows their effectiveness.

Just as with any other type of weapon, the element of surprise can yield a major tactical advantage. If you feel threatened enough to use your improvised weapon, and can get the jump on your attacker, do so when possible. The last thing you want is to end up facing an armed aggressor head-on, or to end up outnumbered. Another factor to keep in mind is having a backup plan.

Remember, if your primary weapon breaks, you don't want to be left defenseless. Most importantly, know when to back down and when to stay hidden.

An improvised weapon will always be a last-ditch measure — one that you don't want to test out unless you absolutely have to. The moral of this story is not to become a luddite and abandon modern weaponry. In fact, it's wise to embrace the finest weapons the 21st century has to offer. Just don't become overly reliant on this modern technology — you never know when you might be reduced to fighting with sticks and stones.

In addition to its obvious use as a binding agent, cordage can be used on weapon handles to provide additional grip and avoid cuts or splinters.

In addition to its obvious use as a binding agent, cordage can be used on weapon handles to provide additional grip and...

Learning from the Past

Learning about ancient weaponry is crucial to creating effective implements of your own. Thousands of years of trial and error went into the designs of many so-called primitive weapons, and it would be foolish to disregard this knowledge.

Online encyclopedias have huge indexes of edged, blunt-force, and projectile weapon designs to study — or you could go old-school and visit your local library. Start with a simple design, and practice building it from materials commonly available in your area. Don’t go expecting to build yourself a crossbow under pressure.

Most importantly, learn how to use your weapon of choice as its originators intended. If you study the warfare of the past, you’ll be better prepared for anything that comes your way in the future.

The Filipino Connection – By Patrick Vuong

If you're a fan of The Bourne Identity, you've probably never looked at a ballpoint pen the same way after watching the first installment of the movie franchise. In the 2002 original, the titular amnesiac spy (played by Matt Damon) dispatches various assassins with the help of all sorts of ordinary objects, including said pen.

Much of the innovative action came courtesy of fight choreographer Jeff Imada, a stuntman and martial artist who borrowed heavily from his background in both Jeet Kune Do (the system founded by Bruce Lee) and eskrima (a Filipino martial art). These systems emphasize adapting to your environment — and your opponent — using any and all means available to you. While eskrima is often considered a blade-and-stick art, its students can apply its combat principles using almost anything they can grasp. Pencils, umbrellas, and even this very magazine rolled up into a tube are potentially lethal improvised weapons in the hands of a skilled eskrima practitioner.

Your name doesn't have to be Jason Bourne for you to develop competency in using everyday objects as self-defense tools. From handheld flashlights to scissors, ordinary items can make the difference between going bare-knuckled and having a distinct tactical advantage in an unexpected emergency.

3 Unusual Prison Weapons – By John Teator

When you're caged almost 24/7 for years on end, you have lots of time to ponder both your existence and your death. Therefore, prisoners often get quite creative when it comes to fashioning weapons. Here are three surprising types:

  1. Powdered Non-Dairy Creamer Flamethrower: Yes, you read that right. Sodium aluminosilicate is an ingredient added to powdered creamer to keep it from caking. It also can become highly flammable when it is blown into an open flame. Place some creamer in a toilet paper tube, blow on one end with a lit lighter on the other. Voilà, flame on!
  2. Chocolate Napalm: Melted chocolate sticks to the skin and is nearly impossible to get off before it scalds — causing serious burns, a lot of pain, and possible disfigurement or worse. Boil a Snickers bar for extra sticky caramel gooeyness.
  3. Razor Blade Whip: Tie a shoelace to the end of a stick and, on the other end of the shoelace, string up several razor blades. There you go, a razor blade whip.

Should I Stay or Should I Go

Imagine yourself on a day hike, a pastime that millions of Americans enjoy each year. You've gone camping for the weekend, and set out from the campsite to explore the terrain and observe the natural beauty that surrounds you. You've got your backpack with a hydration bladder, snack food, knife, cell phone, and even a map and compass — plenty of supplies to get you through the day. You have it all planned out and know you can be back well before sunset, so you hit the trail with a smile on your face.

As the hours pass, you decide you've had enough hiking for one day, turning around to follow your tracks back to camp. The sun sinks closer and closer to the horizon, and suddenly it hits you — at this rate, you should have been back by now. Your surroundings seem familiar enough, but out here, everything does. Fighting back the onset of panic, you pull off your backpack and check your supplies. Barely any water left. No food. A smartphone that reads “no signal.” Damn it. Sure, you've got the map and compass, but it's been years since you've actually tried to use them. Your heart drops into your stomach as you come to grips with the fact that you're lost. Decision time — what are you going to do?

This scenario might seem like fiction, and let's face it, nobody really expects it will happen to them.  However, even in the age of cell phones, GPS, and ever-expanding urban sprawl, it continues to happen. And, tragically, it continues to take the lives of those who are unprepared. We think you see where this is going — knowledge is power, and if you know how to handle being lost, your odds of survival increase dramatically. With this in mind, there's one question that must be answered before all others when you're lost: Do you stay where you are and wait for rescue, or do you get going and attempt to find your own way to safety?

Making the Critical Decision

So, how do you know whether to stay or go? It's a difficult question — one that will become even harder when it can mean the difference between life and death.

It's important to note that almost all wilderness survival guides recommend that you stay put unless circumstances prevent doing so (we'll go into those circumstances shortly). Hunkering down and making yourself as visible as possible for search-and-rescue teams should always be your default option. This makes it much easier for you to be tracked down from the ground and/or located by aircraft. Also, inexperienced hikers who try to find their own way out often get themselves even more lost, exhaust themselves physically, or injure themselves. That said, there are some factors to consider before deciding to stay put.

stay-or-go-going

The first item to consider is your physical condition. Do you have any injuries or medical problems that could potentially become life-threatening within the next few days? Low on insulin? Need your asthma inhaler? Attempting to move may accelerate your injuries, but also has the potential to get you to safety faster if you're not far from civilization. Secondly, consider whether anyone knows your approximate location, and how long you've been gone. If so, there's a strong possibility that they will send for help once they realize you're missing. Finally, consider your supplies and knowledge. If you're not physically or mentally prepared to navigate to safety, trying to do so may get you into more trouble.

As you can see, deciding whether to stay put or keep moving is far from a cut-and-dry choice. Every situation is different, and all the variables must be carefully examined before making a final decision. However, once you have decided what's best, you'll need to know what to do next. OFFGRID got a hands-on tutorial on how to handle both survival strategies at Krav vs. Wild III, a wilderness survival camp hosted by the Krav Maga Worldwide Force Training Division. Instructors were made up of current and former law enforcement and military special operations forces members who have extensive survival experience. Read on to find out how to tackle each survival option.

Staying Put to Survive

If you choose to stay where you are, priority No. 1 is to find shelter. Building a good shelter is not easy, but even a shoddy one can offer protection from the elements and also provide a significant morale boost while you wait for help to arrive.

First, you'll need to find an optimal location for your shelter. For the sake of this demonstration, we chose a clearing near a tree line and found a fallen log that would provide a natural starting point for our frame. The location makes us visible to aircraft and its partial shade prevents excessive sweating while building the shelter.

Constructing the basic framework for an A-frame shelter.

Constructing the basic framework for an A-frame shelter.

One of the simplest and sturdiest improvised shelter designs is known as an A-frame. It consists of a single roof beam, with two crossed upright supports at each end. In this case, we opted to rest one end of the roof beam on the fallen log, simplifying the design and giving it enough elevation to cover our feet.

Adding additional upright branches along the sides of the A-frame.

Adding additional upright branches along the sides of the A-frame.

Next, additional branches were added along each side, forming supports for our roofing material. Then, brush was gathered and layered on each side of the A-frame from bottom to top, ensuring water would be diverted off the shelter if it rained. Large leaves, such as palm fronds, are ideal for this purpose.

Layering foliage, such as eucalyptus and palm leaves, along the upright supports to protect against the elements.

Layering foliage, such as eucalyptus and palm leaves, along the upright supports to protect against the elements.

Placing heather and dry grass inside the shelter for insulation.

Placing heather and dry grass inside the shelter for insulation.

Finally, soft plant material was placed inside the shelter to serve as bedding. A good rule of thumb for this step is to gather as much as you think you'll need — and then double it, since the bedding will compress considerably once you lie on top of it. This will make the shelter more comfortable and prevent loss of body heat caused by the cold ground.

After crawling inside the shelter, a large palm frond can be used to cover the entrance.

After crawling inside the shelter, a large palm frond can be used to cover the entrance.

Once you have completed your shelter, you can focus your attention on finding a viable water source, starting a fire, and searching for food. It could be days before rescue arrives, so it's best to plan ahead and keep yourself occupied.

Navigating to Safety

So, what if you choose to find your own way to safety? This option carries a greater risk of worsening your situation, but also a greater reward — after all, in this scenario, you know your original campsite is less than a day's hike away. Also, the fact that you have a compass and map makes navigating to safety more appealing. Although it's more difficult to navigate successfully without these items, it can be done. (See the sidebar for more information on finding north without a compass.)

A lensatic compass, similar to those used by the U.S. military. Note the folding rear sight with lens and slotted sight in the front cover.

A lensatic compass, similar to those used by the U.S. military. Note the folding rear sight with lens and slotted sight...

First, you'll want to pull out your compass. There are several different compass styles, but we recommend using a lensatic type, which features folding front and rear sights. They enable you to easily set a precise course to a visual landmark, such as a distinctive tree or a rock formation on the horizon.

Examining a topographical map. Changes in elevation are indicated by shading and/or contour lines.

Examining a topographical map. Changes in elevation are indicated by shading and/or contour lines.

Next, take a look at your map. In this case, we have a topographical map that indicates changes in elevation — certainly helpful, but not mandatory. Place your compass on the map and align north on your compass with north on the map. Assuming your declination is set correctly for your geographic location, you are now oriented correctly with true north. You can typically find your area's declination printed on the map itself — our Southern California location required a 14-degree declination correction on the compass. (Keep in mind, the declination can change every year due to the constant change in Earth's magnetic field.)

All compasses indicate magnetic north, which can differ greatly from True North (the geographical point) depending on your location. Setting correct declination by turning the outer ring on most compasses compensates for this difference.

All compasses indicate magnetic north, which can differ greatly from True North (the geographical point) depending on...

Now that you know True North, you need to triangulate your location to determine where you are on the map. Choose a visible terrain feature (such as a hilltop or saddle), identify it on your topo map, and use your compass to find an azimuth on the map toward that feature. Draw a straight line on the map along that azimuth, then repeat this process with another landmark at least 60 degrees from the first. The intersection of the two lines will indicate your approximate location.

stay-or-go-going

Once you know True North and your location on the map, set an azimuth to where you want to go. A lensatic compass can be held up to your cheek, and an azimuth can easily be set toward any landmark in its sights. Simply aim the sights at the target, then check the degree reading through the rear sight lens. This 0- to 360-degree reading is known as an azimuth. Once you have the azimuth in degrees, place the compass back on your map and draw a line in that direction. Now you know where you need to go and can move toward it safely.

Transferring the azimuth onto the topographical map with a pen.

Transferring the azimuth onto the topographical map with a pen.

Even if you don't know where your original camp was on the map and can't return there, these techniques can help you find a nearby roadway, body of water, or move to higher ground for visibility. However, they can be confusing to a first-timer, so it's wise to practice these land navigation techniques as much as possible. That way, if your life someday depends on it, you'll be ready.

Human Compass

If you've ever been camping or earned your orienteering merit badge as a kid, you've probably used a compass. Maybe you can even use one properly and know the difference between True North and magnetic north. Or perhaps you just learned how to use a map and compass by reading OFFGRID. Whatever your experience, navigation of the non-GPS kind is an important survival skill. But what happens when you don't have a compass or the one you packed is broken? Here's a brief look at how you can find north using nothing but a stick, a rock, and some sunlight. Note: This applies if you're in the northern hemisphere. If you're in the southern hemisphere, you'll be facing south more or less.

stay-or-go-human-compass-stick

1. Place a stick upright in level ground and observe the stick's shadow.

stay-or-go-human-compass-marker

2. Place a marker, such as a stone, at the tip of the stick's shadow.

stay-or-go-human-compass-marker

3. Wait 10 to 15 minutes then place another marker at the shadow tip's new location.

stay-or-go-human-compass

4. Stand with your left toe to the first marker and your right toe to the second marker. You are now facing north approximately.

Dangerous Hiking Mistakes

stay-or-go-water-supply

Lacking sufficient hydration:
Miscalculating how much water to bring is an all too common occurrence. Water is life, and you want to live — always bring more than you need.

stay-or-go-trail-hiking

Underestimating trail difficulty:
Beginners especially tend to overrate their hiking abilities. Honestly evaluate your fitness level, research the trail before you hike, and start out on easier trails until you can work your way up to more difficult ones.

stay-or-go-survival-supplies

Failing to prepare is preparing to fail:
Put some forethought into what you might need if things go awry. Sure, it's warm at the trailhead, but up near the peak the temperature might drop by 20 or more degrees. What if you twist your ankle? Do you have extra water or other provisions?

stay-or-go-hiking-solo

Having a lone wolf attitude:
If you hike solo, be sure to notify someone of where you're going and how long you expect to be gone. Personal locater beacons are also a smart choice to carry.

stay-or-go-marked-trail

Wandering off-trail:
Staying on marked trails is the safest way to go. Conversely, going off-trail can be a quick way to get lost or injured. If you do choose to go off the beaten path, be sure you are prepared for the added dangers and unexpected consequences.

Source
Krav Maga Worldwide Force Training Division > www.kravmaga.com


What If You Get Lost in the Backcountry?

My ankle felt like it was on fire. I was on my back. Points of pain competed for attention across my entire body. Through the clearing dust, I could see the spot where the screaming originated. The screams came from her. I looked up at my girlfriend's face, normally beautiful, now twisted into a red and unfamiliar mask of fear and surprise. I had fallen. And I was hurt. Then the full scope of the situation dawned on me. We were in a remote and unforgiving area. We were also lost. Lost, hurt, alone, and darkness would be upon us soon. The nauseating dread that was growing in my belly was the complete opposite of the excitement I had felt just hours before driving to the trail head to “test our skills.” Playtime's over, kids, I thought to myself grimly; this just went from pretend to real.

The latest edition of “What If?” poses this question: What do you do if your easy, daylong hike has turned into a life-threatening survival situation after you've gotten lost on the trail? While this scenario might not seem as thrilling as a kidnapping (see OFFGRID's Summer 2014 issue), it's certainly far more likely and just as fatal. So, for answers, OFFGRID asked me and two other outdoor enthusiasts for our approach to handling the aforementioned scenario.

With us is our “average Joe,” Ryan Lee Price, a freelance journalist and self-taught survivalist who has contributed to the “SHTF” column in our sister publication, RECOIL. Next is our military vet, Len Waldron, a former U.S. Army infantry officer who grew up hunting in the hills and fishing along the Mississippi River. He has a wealth of hard-earned outdoor experience. As for myself, I have been a survival instructor for the past 18 years and am the author of a new book on survival and emergency preparedness, Prepare for Anything. Read on to find out how each of us would handle this “What if?” situation.

The Scenario

Survival Situation
Lost in the backcountry

Your Crew
2 adults

Location
Mount San Antonio Loop Trail, California

Elevation Gain
4,000 feet to the summit, which is at 10,000-plus feet

Season
Autumn

Weather
Partly sunny, highs in the mid 60s F and lows in the 30s F

You're a fit 30-something who enjoys living in Los Angeles. But, you realize the need to be prepared for any emergency, be it natural or manmade. You understand the concept of “bugging out” and want to practice by loading up a one-day bug-out bag and going on a hike. You enlist your longtime girlfriend to do the same. Though she's of only average athletic ability and not a prepper, she's willing and able.

Things go well as you ascend Mount San Antonio Loop Trail, known locally as Mount Baldy, until you reach the Devil's Backbone, the final portion before the summit; it tests your endurance and athleticism. You chug more water than expected, going through two-thirds of your water supply already. Your girlfriend has downed half of her water supply. After four hours, you finally reach the summit, and it's an amazing view. You're literally above the clouds.

what-if-get-lost-in-the-backcountry-fall

After resting, taking photos, and eating sandwiches, you descend. About an hour into it, you noticed the trail looking less and less traveled. Another hour goes by and you see no clear paths, zero signage, or any clues to the base of the trail. Suddenly, you roll your ankle on some loose gravel. The momentum of being on the steep decline sends you tumbling down in a violent heap 10 yards below. Once the screaming and shock subside, your girlfriend helps you assess the damage: you've suffered many bruises, several cuts, a banged-up knee, a sore wrist, and a severely sprained ankle.

You know you can't continue the descent on one leg, but your girlfriend can't carry you down either. Nor does she have the experience to go on solo to call for help. With the sun getting closer to the horizon, the alternative frightens you: being lost and stranded on the mountain overnight. It can be extremely dangerous, especially with the temperatures dipping close to freezing. So, what do you do?

Average Joe: Ryan Lee Price's Approach

Now I had done it. I was pretty banged up after slipping on that rock, but nothing too serious that would require a trip to the hospital. The rolled ankle was the worst of it, though. But there's no way I was walking out of here on my own, and Kelly isn't strong enough to carry me. We were stuck, at least for a while. We talked a little about her heading down alone to get help, but she was hesitant to do so. There was no longer a trail to be seen. It just vanished into the brush. No question about it: We were lost. And with the sun dipping toward the horizon, it was about to not only get dark, but also get really cold quick.

We weighed our options: Make a splint for my ankle and hobble back up toward where we think the trail is, or stay here, build a fire, and endure the night. Since it would be nearly impossible to find the trail again in the dark, even with flashlights, we decided on the latter. Plus, maybe by morning, my ankle might improve enough to walk on it.

Hiking in the mountains during autumn is like a double-edged sword. On one hand, it's beautiful, but on the other, it's very dry. All of the creek beds we had passed that day were dry as a bone. With just a little water left between us, we have a significantly short deadline to either be rescued or hike out. There was no finding water, no hunting for food, and no crafting of intricate survival shelters.

What was especially unnerving as we said farewell to the sun, however, was that we could see the city lights in the distance, knowing that the ski lift parking lot at the base of the trail had to be only some miles away…

I left my boot on my rolled ankle to help contain the swelling; plus, if I took it off, I would never be able to put it back on again if I had to. Kelly gathered some loose twigs, leaves, and small branches, and clearing a space at the base of a large boulder nearby. I broke out the mag rod fire-starter, and the dry kindling ignited after only a few slashes. The fire felt good, and the light reflecting off of the boulder kept up our spirits — especially considering we were starving. The sandwiches we ate for lunch were our only real meals. Not thinking that we'd actually be in a life-and-death situation, we had only energy bars left in our go-bags. We felt it was best to save those for morning, when we would need them most. For now, I was hoping the smoke from the fire would alert someone — brushfires in Southern California are always a serious concern, so there are people whose jobs it is to watch for fire. Perhaps they're watching.

Darkness settled around us quickly and the cold soon followed. We had long pants and jackets, which staved off some of the chill. But as my watch clicked past midnight, we decided to stoke the fire with another armful of sticks Kelly gathered, put on the ponchos to keep off any morning moisture, and get as close together as possible, conserving body heat until morning.

Neither of us slept much, what with the sounds of nature crashing around us and the possible impending doom looming on the horizon. The fire was warm, but we must have slept just long enough for it to die out about an hour before the sun came up. Man, it was cold! Fortunately, neither of us succumbed to hypothermia.

what-if-get-lost-in-the-backcountry-injured-ankle

My ankle wasn't any better, though, but we couldn't sit around any longer waiting for someone to come along. Let's face it, we had to get back to the main trail, and I had to do it on my own power, as much as possible. And that meant splinting my ankle with two long sticks, both of our belts, and my jacket as padding. The point was to transfer the weight from my foot to the base of my knee, and with the help of a longer branch to act as a crutch (padded with Kelly's jacket), I was able to move, albeit slowly and excruciatingly.

We ate the energy bars and began the long, arduous hike back up the hill toward where we thought the trail should be, or at least in that direction. The plan was to walk northwest toward the summit again, where we'd hope to find the Baldy Bowl trail or run into another hiker, whichever came first. The sun was warmer than the previous day, and we drank what was left of our water sparingly. Kelly was a big help, guiding me over some of the more difficult terrain, but the largest hurdle to overcome was the lack of water. We drank so freely coming up the mountain that we didn't leave much if trouble found us. Kelly had about two or three sips left and I was down to nothing. The fear of dehydration crept into my mind. Was the headache creeping across my braincase brought on by sleeping awkwardly on a pile of rocks or from not enough water (which could lead to debilitating side effects and, eventually, death)? I decided to keep that question to myself. No need to worry Kelly while she was focusing her strength on helping me down the trail.

We kept our eyes open for the Sierra Club Ski Hut. It was built in the 1930s and has water piped right into it from a local spring. Odds would be good that someone would be there, but it isn't directly on the trail. As we came out of a stand of pine, we were overlooking the Baldy Bowl itself, about a mile from the summit. We had at least found our bearings, as just below us was the trail, We were elated to see several small colored dots, hats, and backpacks of fellow hikers.

Overall, it was a close call. Had the weather turned for the worse or if I had severely broken a bone or was knocked unconscious, we would have been in a terrible fix. We were prepared for what came at us, but we could have done a better job of packing more useful items. Luckily, we stayed calm, treated the situation as just a problem that needed patience, clear headedness, and a solution, and found the way down by going up. The hikers we met had some water for us and a phone with a signal. A couple hours later, I was helped down to the trailhead by forest personnel.
Kelly broke up with me soon thereafter. Oh well, I'll survive that too, I guess.

Military Veteran: Len Waldron's Approach

After this weekend, I may have to put a ring on it. Sophie, my girlfriend of six years, saved both our lives. The Mount Baldy/San Antonio trails broke my body, but strengthened our relationship. Nothing like immobility, uncontrollable swelling, and potential hypothermia to tease intimacy out of man.

Sophie is a soft-hearted hard-body who is prone to bringing random foster kittens and incontinent Chihuahuas to stay at our house for weeks at a time. In her day job, she's a graphic design artist for an advertising firm in L.A. When she's not trail-running or finding yet another stray to rehabilitate, she works on keeping me from reverting to my Teutonic, linear self. She's a good balance for me, but our differences sometimes blow things up, just like any good couple.

Both embarrassed at my fall and the situation it put us in, I was in no mood for Sophie the two-legged gazelle to ask me “why” I fell, but I just marked it down to her female need to understand. I was more concerned about the setting sun and dropping temperatures. Absent the radiant heat of the sun, the altitude and arid atmosphere will suck the heat right out of a moist body. My lack of mobility made a slow hike down the darkening mountain out of the question. Sophie and I quickly reached the conclusion that we were in hunker-down mode.

The first consideration was finding a location that gave us some protection from the prevailing winds that were ripping across the rock faces. We had very little water — but hypothermia would kill us before dehydration, so shelter and a fire was the priority. If it provided visibility from the air or the ground, so much the better, but we were in real danger from the falling temperature. I managed to fall on one of the steeper sections of the hike, so there was nothing useful I could just hop over to.

Sophie used the ace bandage in our first-aid kit to wrap my ankle. I had already re-tightened my 3/4-length boot for added support, but it did little to help. It was a severe sprain, and my foot was useless. I stealthily broke into the snivel packs of ibuprofen in the first-aid kit after Sophie walked down the slope to scout for a shelter site. I managed to scratch around on the ground for dried grass, pine needles, pine cones, and small sticks to start a fire. I was about as mobile as a sea lion on a yacht dock, but managed to stuff a plastic grocery bag I brought with me full of tinder and a few sticks of kindling. I also managed to whittle a spruce limb to use as a walking stick. It would have been smarter to have started out with one of those.

what-if-get-lost-in-the-backcountry-campfire

Sophie returned smiling and appraised my bag full of scrapings.

“I found a village,” she said.

“I'm sorry. What?”

“I found a village. It's right down there. I think we should stay there tonight.”

“Are there people in this village?”

“No, they've been gone for awhile, but there is still some stuff there.”

I was in no position to argue, so we loaded up our packs, and with a walking stick in my right hand and Sophie under my left arm, I hopped and dragged my sorry ass down to the “village.”

Sophie's village was actually an old mining camp and what we would later learn was the ruins of the Gold Dollar Mine. Rusted mining detritus lay strewn about, but there were two key features, an old iron stove and a wind break built into a cut in the rocks. What seemed like a good idea at first proved to be less useful. The stove would be a great way to create and control heat, but it was atop a flat platform made from old lumber slabs and rough cut planks exposed to the wind. We opted for getting a fire started within the windbreak.

Though I had brought a magnesium fire-starter, I used the “matches” from the bandage box. Cardboard containers make great fire-starting material along with collected tinder. (Note: Save toilet paper for its intended purpose. You may be tempted to burn it, but there are more substitutes for tinder than for TP, so choose wisely.) Sophie scouted around for larger pieces of wood we could use to fuel our fire. I encouraged her to get much more than we would need. This of course involved a debate about what constituted good firewood and how much was enough, but we managed to find a workable supply.

As the sun descended, so did the temperature and our sweat-soaked clothing was getting cold. Sophie wandered off, collecting firewood as I worked up the fire. After several runs to collect large hunks of wood, she returned with two armfuls of long, thin limbs.

“Sophie, we don't need those anymore; the fire is going,” I told her. “We need bigger fuel logs.”

“These aren't for the fire,” she remarked.

“Ok, I'll play, my dear, what are they for.”

“Laundry”

“Laundry?”

“Yes. Laundry.”

In the fading light of day, Sophie used her belt to lash together a makeshift tripod, stripped down naked except for her hiking boots, and proceeded to dry her clothes over the fire. So here I was with a bum ankle, yucca cuts, swelling bruises, and no water — but a girlfriend who despite of our circumstances found a way to behave like a resourceful pagan wildling. Things were looking up.

Staying close to the flames, she twirled around, keeping her parts warm while her clothes dried out. She then peeled my shirt and pants off as well. After our clothes dried, we bundled back up in our clothes and wrapped up together in the poncho, using our shared body heat to augment the fire. I ate the “ham slice in natural juices” MRE that I couldn't bring myself to open earlier during lunch. Sophie ate one of the two power bars we still carried.

The night was very cold and uncomfortable. The increased pain and swelling kept me awake, but it also prevented me from letting the fire get too low. We found some rusted steel scraps that we placed opposite us next to the fire, to help direct the heat toward us. Though Sophie was completely inside the poncho, I kept my head and one arm out so I could tend the fire. She slept most of the night and only kicked my ankle a few times.

The morning arrived, and we had decisions to make. We only had enough water to keep our mouths wet, and that was worrisome. We debated various courses of action, but thankfully shuttered the plans when a California Search and Rescue pair appeared. My OCD habits had helped us after all. Before departing, I had taped a 3×5-inch notecard with our names and route to the National Park Activity Pass hanging from the rear view mirror of my Land Cruiser. Sophie's sister had called the Park Service when she didn't return, and our navigation issues were pathetically predictable. More water and a functioning GPS would have been nice, but ultimately, a decisive decision to get heat and shelter along with communicating our travel plans saved us.
I was charged with a misdemeanor and fined $1,000 for having an unauthorized campfire in the park during the dry time of the year. Evidently nudity in the park is also against the law and carries the same fine…but that's our little secret.

Survival Expert: Tim MacWelch's Approach

Ask and ye shall receive, I thought to myself. I didn't want to actually say it in front of my frightened girlfriend and make things worse by saying something stupid. But I also couldn't ignore the irony of our predicament: We had gone out to test our gear and self-reliance skills, and now we have no choice but to rely upon them. We could die up here without them. Or maybe even with them.

As my ankle, wrist, and knee ached, I sat there realizing that this was the most basic emergency situation that outdoor enthusiasts encounter. We were lost, I was hurt, and evening was falling — this was survival 101. We had to avoid panic and get to work if we were going to make it through the night.

I told my girlfriend in a matter-of-fact way about the priorities of survival, and that these priorities are like a checklist, helping us to handle the worst problem first. Shelter was top priority then came water. We also needed a fire, which could warm us and act as a signal for help. Food was a low priority, but I was relieved to remember that we had packed some. We laid out our gear and took inventory. The ponchos and our jackets were the only shelter that we brought with us. I couldn't walk or crawl to help her build any kind of shelter, and there wasn't much to work with anyway. Dirt, sand, rocks, and a few bushes were all we had for company out there.

The first big hole in our bug-out plan was now obvious. We should have had sleeping bags, space blankets, or some other source of warmth. Ponchos would keep the rain off, but they would do little to keep us warm.

The next (and almost laughable) weak point was the lack of water. We each had two empty bottles in that dry climate. There should have been factory-filled bottles of water in those BOBs. They would have lasted for months and still been safe to drink. It was very demoralizing to find these mistakes the hard way. But there was no time or reason to dwell on it. We needed warmth quickly. I knew that hypothermia could kill within hours, and we both knew that we were in a place that became very cold at night.

With our signal-less and virtually useless phones, there was no way to call for help. We even tried texting, but the messages wouldn't go through. There was no way to reach out to the world, except perhaps for a signal fire. We did have fire-starting gear in our bags, and right then, it seemed like the most valuable commodity we had.

With the sun touching the horizon, we started to work on our fire. My girlfriend began gathering sticks, dead grass, and bigger pieces of wood from the rocky and desolate landscape, while I used my knife to shave magnesium off the fire-starter block. As I worked, I found myself wishing for a lighter. There was no real benefit to the magnesium block, and at that moment, I would have traded anything for a simple butane lighter. In the light of the setting sun, I tried several times to get the magnesium shavings lit. In my haste, with my throbbing wrist and the stress of the situation, I kept knocking the magnesium shavings out of the tinder. Finally, I tried throwing sparks directly into the grass tinder. Once a spark hit the fluffy seed down at the top of a grass stalk, the fire erupted. The grass burned so fast that I was afraid it would be consumed before the small sticks began to light. Thankfully, the dry conditions worked in our favor and the twigs began to burn. The fire was soon established. Our makeshift campsite on the mountainside had good visibility, and I hoped that if we could see out, then others could see us.

The fire was a game-changer. We both knew that much. And naturally, we hunkered close to it. But as soon as the sun disappeared, the air temperature started to drop. We got out our flashlights. Mine wasn't working. Frustrated, I hurled my torch as hard as I could into the darkness. “It's OK,” my girlfriend said, trying to console me. “We have one that works.”

This cooled my blood and set me thinking again. I knew how dangerous panic could be in an emergency, but I never realized how valuable morale was. And it hit me: nothing boosts morale like food. Normally, we would have eaten dinner hours ago. I knew that we'd need all of our strength to make it through the night, so I suggested we share one of our two energy bars even though they were our only food rations left.

As we had a “picnic” of peanut and chocolate, the reality of the situation was settling. Our fake bug-out simulation was now a real life-or-death survival scenario. We finished the bar and drained the last of the water. My girlfriend milled around in the dwindling twilight to find a few more dead sticks from the sparse brush of the surroundings, and then we snuggled in by the fire. Tomorrow, we would improvise a crutch to get me moving again and use the compass to find our way out of there. If we could just hold on until morning.

The hours passed and the stars brightened over our heads. Our breath was steaming and we were both shivering, despite sitting next to a fire and being wrapped in our ponchos. Our firewood pile ran low, and night hadn't reached its coldest point yet. We periodically used the flashlight as a beacon, my girlfriend standing and rotating it slowly like the beam of a lighthouse. From our high vantage point, we could see the lights of distant scattered homes or buildings, but they were all very far away. We huddled together and prayed that someone could see us.

My head was nodding, which scared me. I couldn't tell if it was the late hour or the hypothermia that was making me want to go to sleep so badly. Maybe it was both. I knew that hypothermia made you sleepy…toward the end. And as my head sank again, it seemed like a vivid dream was taking hold. I heard someone yell “Hey!” It was a man's voice, a stranger's voice. “Hey!” the voice called again. I looked up and saw the beam of a flashlight bobbing up and down, coming toward us. “You're not supposed to have fires up here,” the man said.

I tried to stand, but the pain from my injuries shot through my joints. “Are you two alright?” the man asked. I could see him better now, a man in a tan uniform — a park ranger! “Thank God,” I replied.
The ranger told us that his truck was just 50 yards away on a fire road, and he left it running with the heat on. We walked slowly, huddled together. I leaned hard on the ranger's shoulder, not caring if he minded. It was the only way I could walk. Soon we saw the headlights of the truck. The bumpy ride back to the station seemed like a strange dream, but a good one. I had thought we were going to die, but we didn't. We were not as prepared or as invulnerable as we thought. But through a little good luck scattered among the bad, our signal fire in a high place, and a fortuitous ranger patrol, we had made it.
Conclusion

This scenario was a tricky one to navigate, especially with minimal supplies. In bleak environments, survival is tough, even for the pros. Beginners would need every advantage possible when entering these types of terrain. You shouldn't ever expect to find what you need out there, especially things like shelter and water. You need to bring it with you.

Our characters could have easily died in the first night of this proposed scenario, without bringing more substantial shelter.  From a bug-out standpoint, the gear was painfully inadequate, and this test was an epic failure. Just because you label a backpack with the term “BOB” doesn't mean that it can save you. To build a decent BOB, you'll want to mirror the supplies you'd need for a backpacking trip, and then adjust them to fit the climate. Add more water for arid conditions. Add more items for warmth in cold climates. You need a self-contained and self-reliant system to be able to bug out effectively, even for a short period of time.

Hopefully, this story will serve as a cautionary tale for those who are overconfident and underprepared. You need to have the right tools for any job. And when that job is survival, you'd better have plenty of those tools and know exactly how to use them.


What If A Riot Threatens To Destroy Your Business?

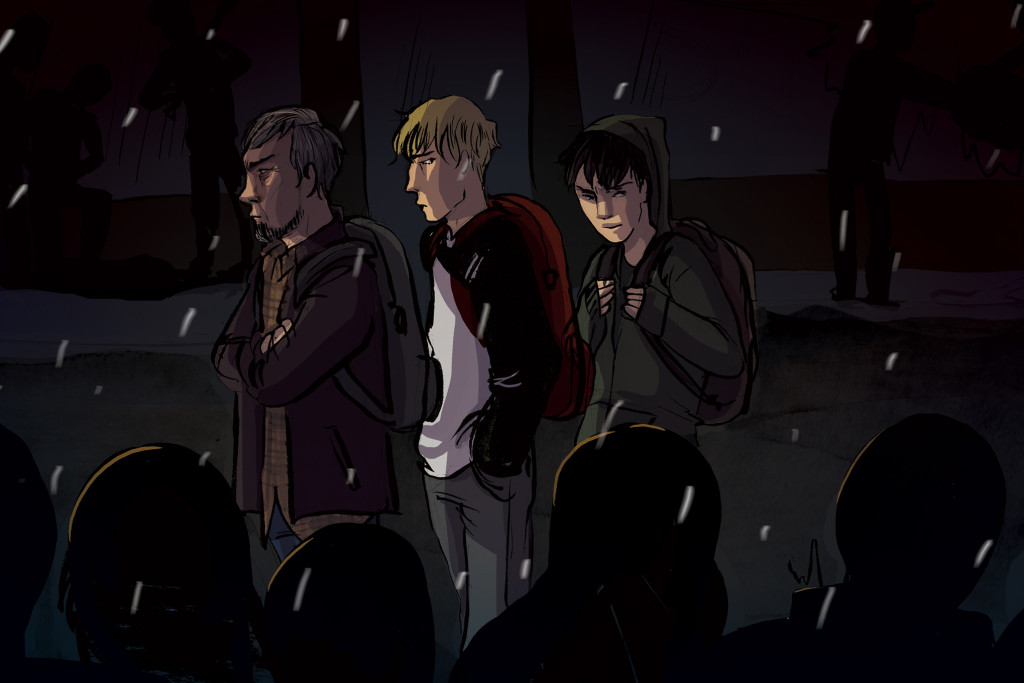
I was working hard in the store, counting products and taking inventory, but little things kept gnawing at the edges of my attention. My two employees, normally industrious kids, just wouldn't stop texting the moment they started their shifts. Then, there were t sounds of helicopters flying overhead. And a lot of foot traffic passed by the storefront, yet it seemed odd that no one was coming inside. Sure, it was snowing a little, but not enough to slow sales to a grind.

Suddenly, there was a loud slapping sound. Someone had thrown a cup of soda at the store window. Beyond the cola-soaked glass, people ran down the sidewalks and street, all in the same direction. My youngest worker said his friends were texting him about a riot. “Riot? What riot?” I asked, rushing to the back office. Turning on the TV, I watched in horror as the local news station explained the event: Chaos had indeed erupted…and the epicenter was very close to the shop.

In this edition of OFFGRID's “What If?” feature, we pose the question, what do you do if you're a small-business owner caught in the middle of a growing riot?

For answers, OFFGRID asked three different writers for their approach to handling this frightening and unpredictable situation. With us is Patrick McCarthy, a freelance journalist, lifelong outdoor enthusiast, and OFFGRID contributor. Erik Lund is a federal law enforcement agent with a vast array of tactical and survival expertise. And myself, I have been a survival instructor for the past 18 years and am the author of a new book on survival and emergency preparedness, Prepare for Anything.

With our varied backgrounds, we each provide different ways to solve the same dire situation. Read on to find out if our methods would work in your SHTF preparations.

The Scenario

Survival SituationInner city riot
Your Crew3 adults (you and two co-workers)
LocationDowntown Detroit, Michigan
Time of day4 p.m.
Level of DifficultyAdvanced
Length10 miles
SeasonWinter
WeatherSnowing, highs in the mid 30s F and lows in the 10s F

The Set-Up: You're a convenience storeowner in your mid 50s. Today, you have two of your best employees working, both college kids in their early 20s. You hear on the news that a riot has broken out due to the announcement of an unpopular trial verdict. The epicenter of the riot is no more than six blocks from your business and expanding in a swirl of pandemonium. The news report says that the police presence is being withdrawn from the area and reorganized for riot preparation. Dark is approaching and although you know the area well, there's a gauntlet of looting, random acts of violence, and general panic for a 10-mile radius. You call 911, but the lines are all busy. You lock up your store with the collapsible metal curtains across the glass storefront and shut off the lights. You've pulled all the money (just over $1,000 in cash) out of the register and safe and stuffed it onto your person.

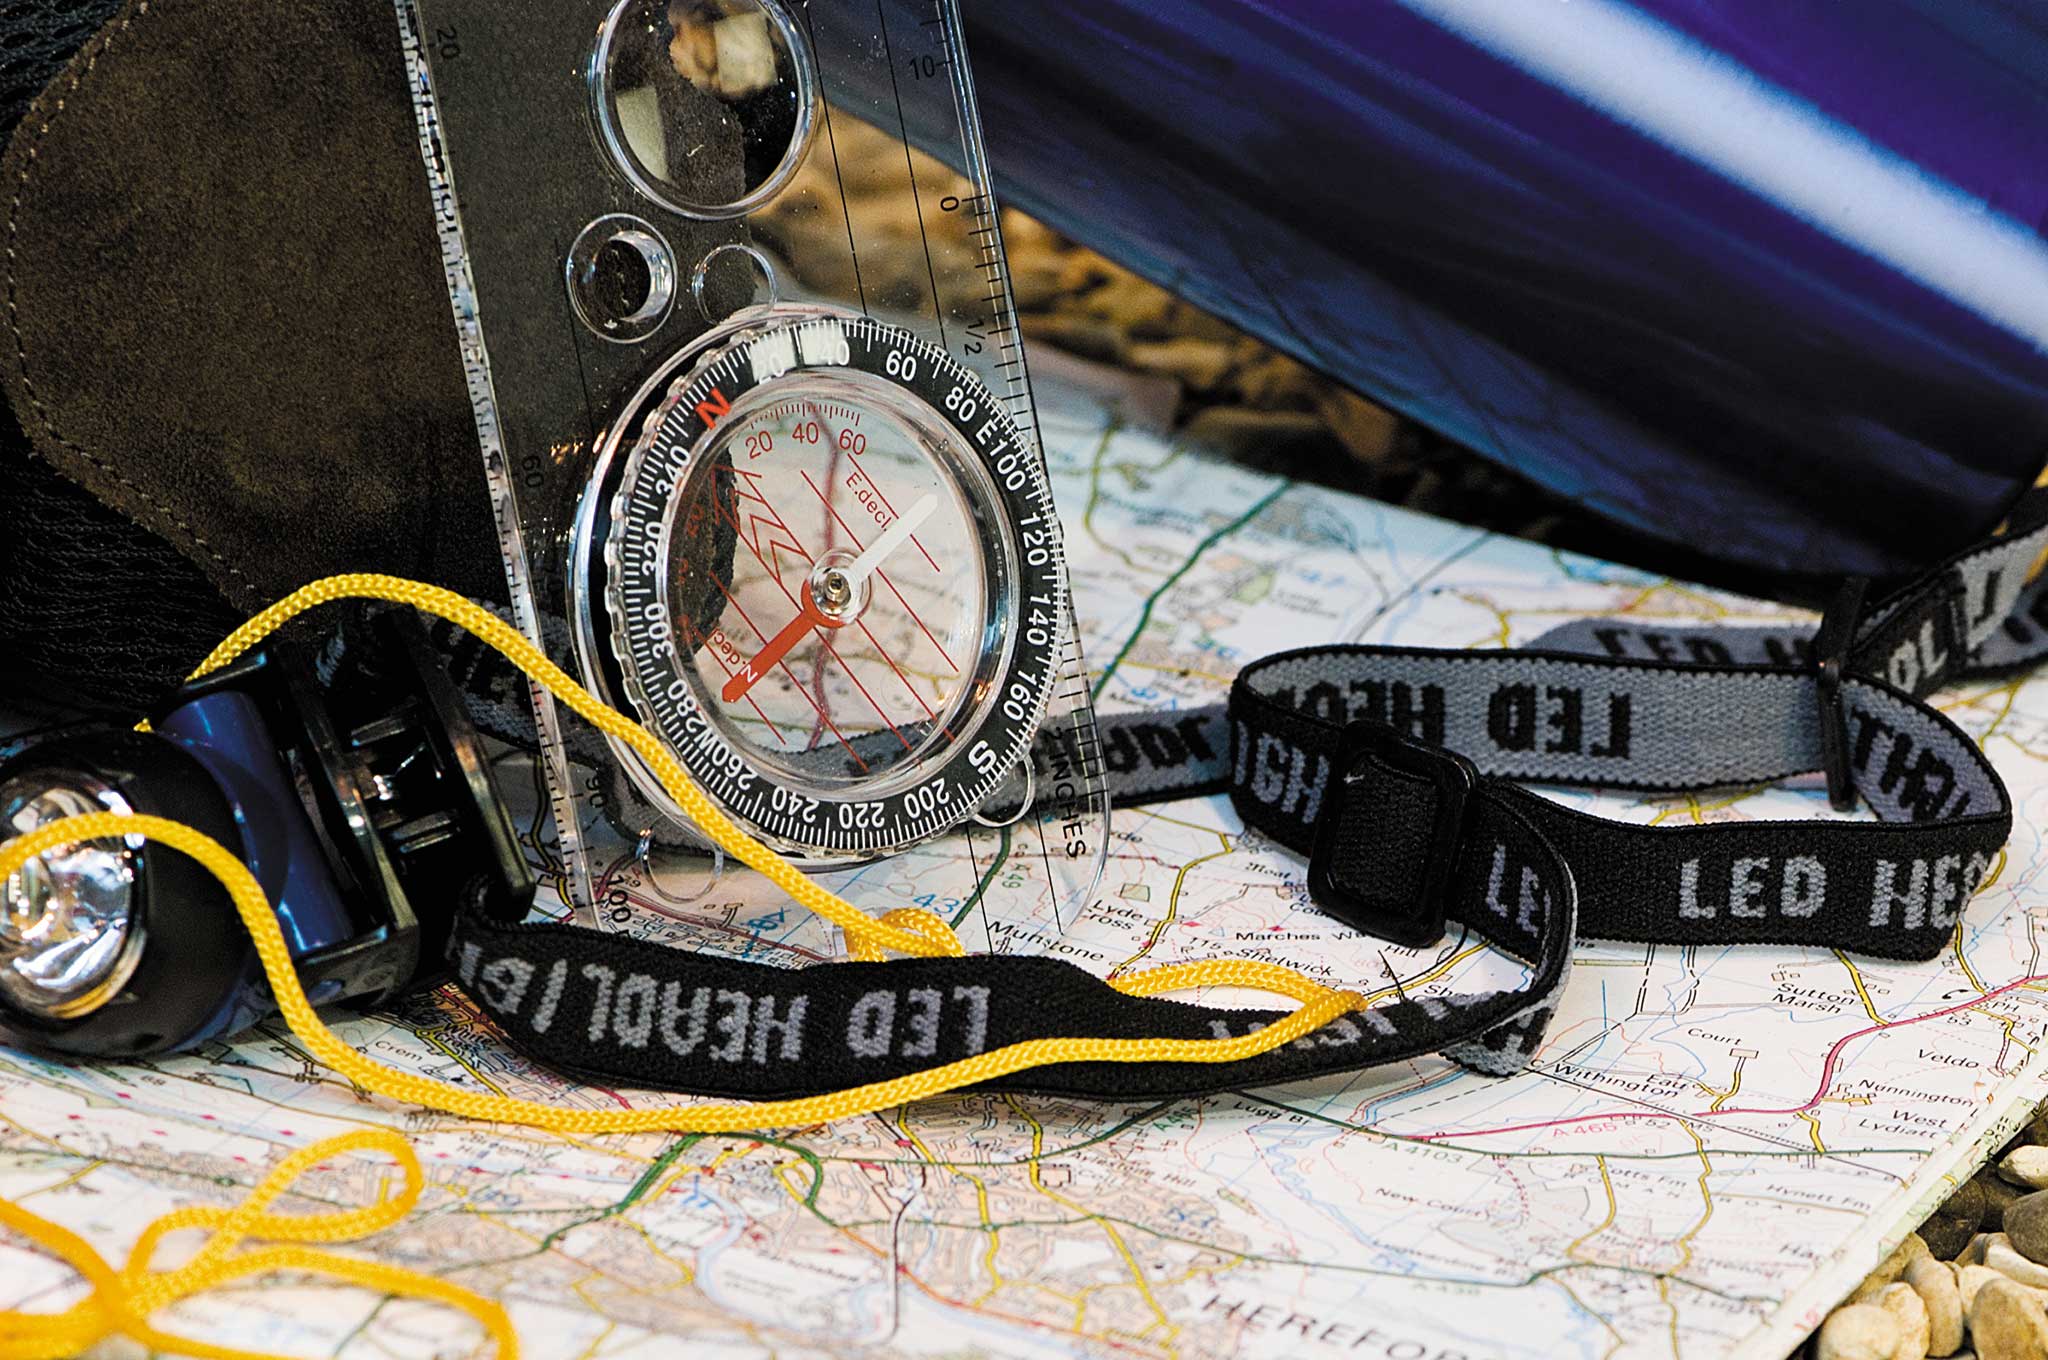
Your Gear: Plenty of packaged food, bottled drinks, a cellphone, a landline, a box cutter, a backpack, and the clothes on your back.

The Complication: While watching TV for more info on the situation, crowds of people suddenly begin trying to break in the front windows. Do you try to calm the mob, perhaps attempting to pay them off with the petty cash and pray they leave your store alone? Do you lock your back office, hoping they don't get through the metal security curtains and kill the three of you? Do you attempt to run out the back door and brave the elements alone? Do you bring your young co-workers with you for protection upon fleeing? What would you do?

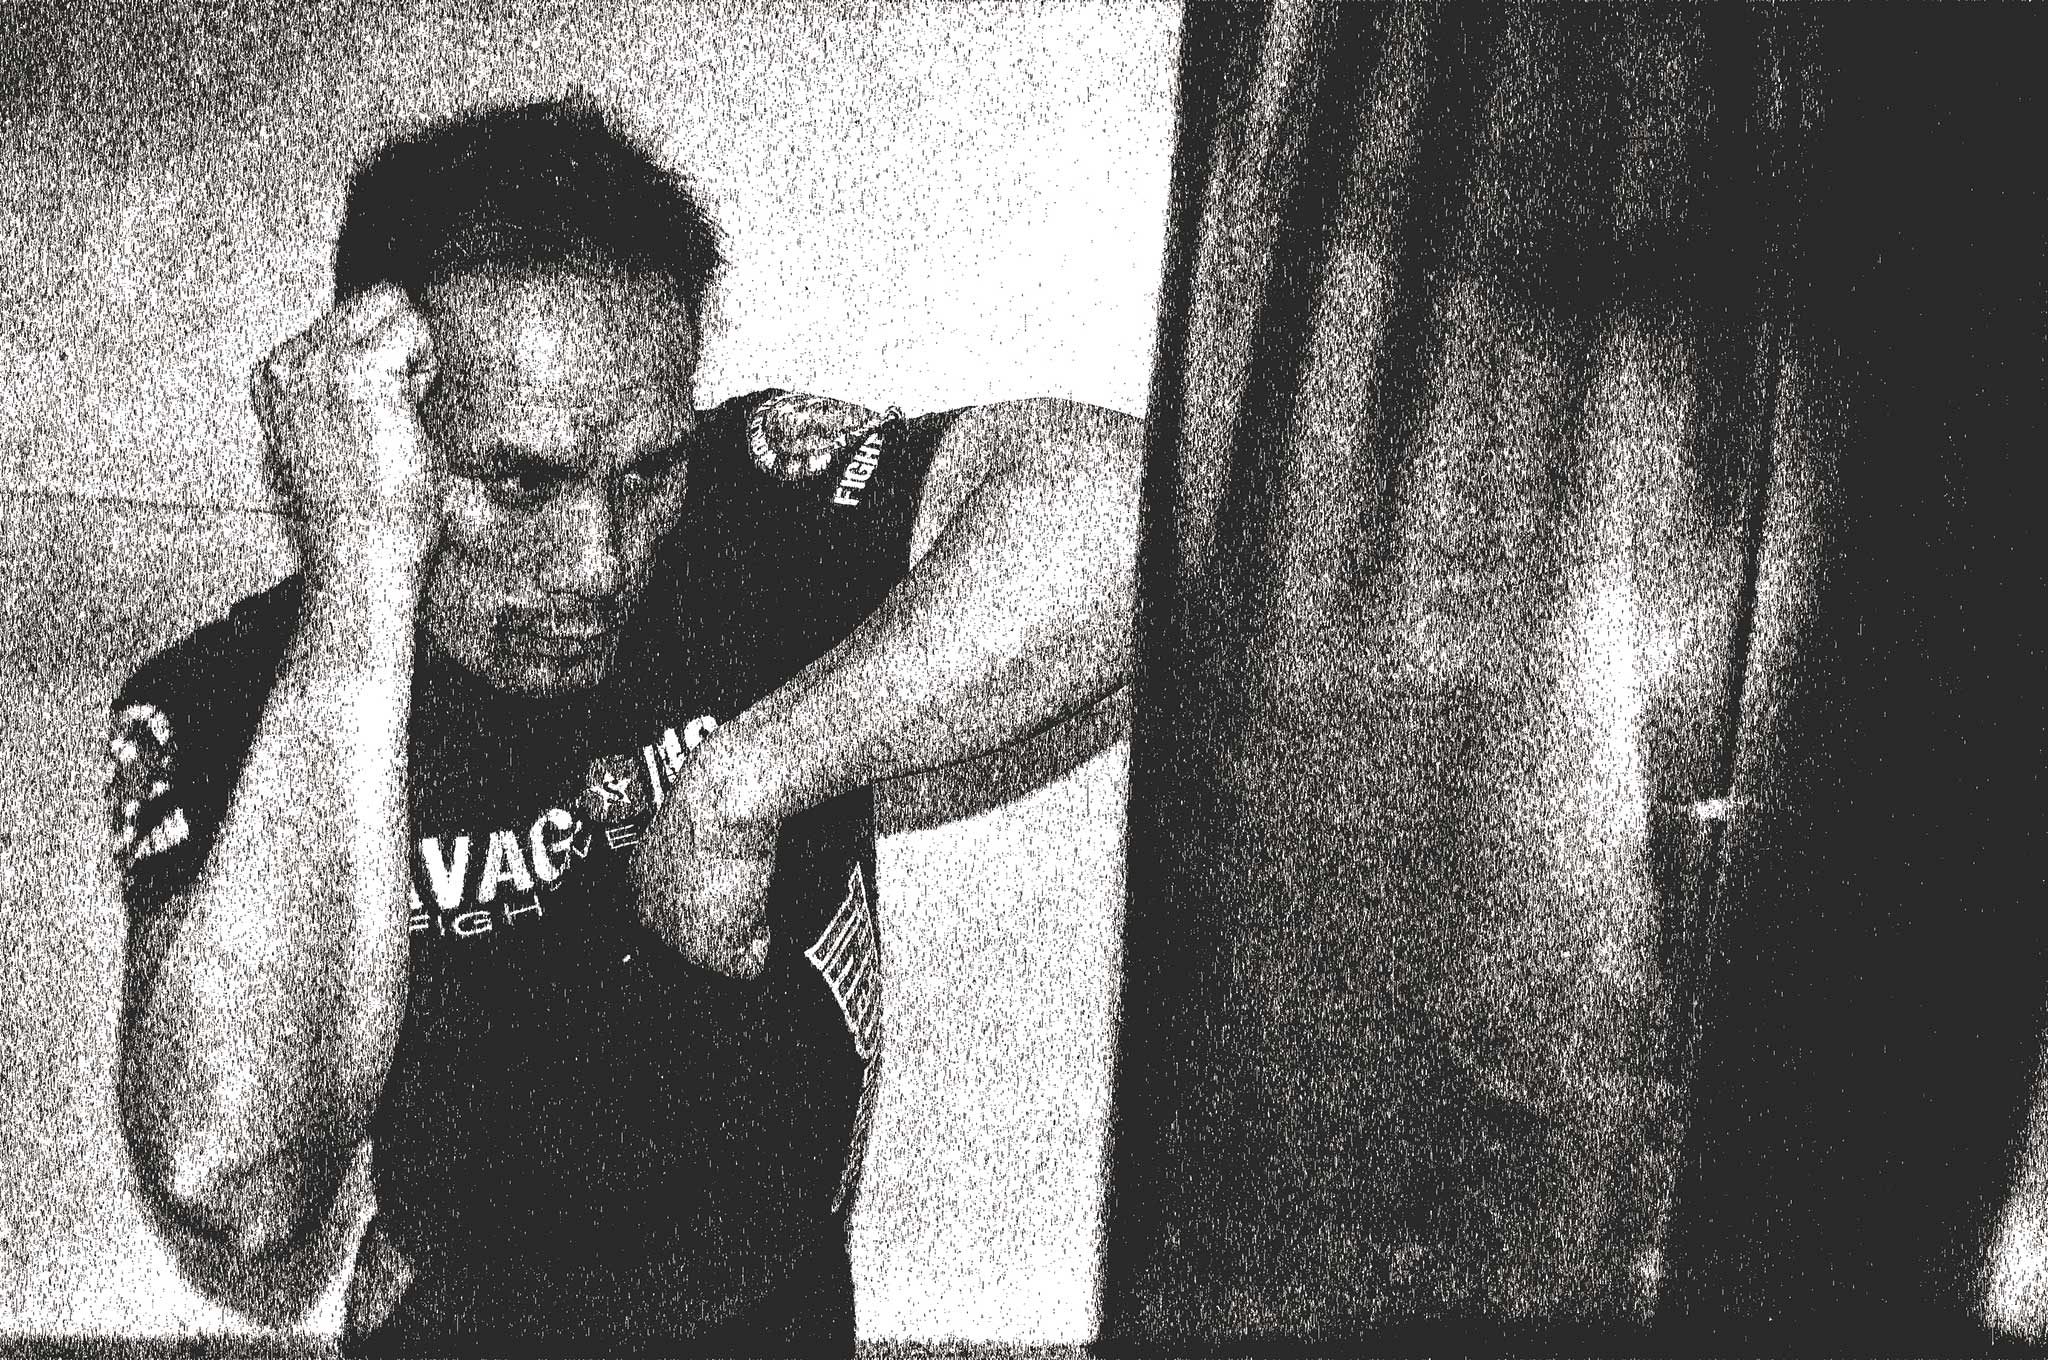
Average Joe: Patrick McCarthy's Approach

Even on a good day, downtown Detroit can be a rough place to call home, but we were about to find out how bad it really gets. We had been hearing rumors of unrest in the city for days now, but halfway into my shift, the televised news reports were beginning to get increasingly ominous. The rioters had tired of simple breaking and entering, and were now turning to mob violence. Destruction for the sake of destruction — torching buildings, flipping cars, and viciously beating anyone who stood in their way.

Earlier in the morning, we had seen police cars screaming down the street, sirens blaring. Hours later, I spotted one headed the opposite direction. No sirens this time. Around 2 or 3 p.m., we heard the first gunshots — not an uncommon occurrence in this part of town, but never with this frequency. Then, the sounds started getting closer. I made the decision to close the doors early. It's not like we had seen any customers for hours, anyway. Snow was beginning to fall as we pulled the security gates closed.

Then reality set in — none of us were going to make it home that night. The sounds felt like they were closing in from all sides. Smashing glass down the block, cars blasting by the shop at full throttle, more staccato pops of gunfire in the distance.

Before cashing out the register, I told my two employees, Damon and Rick, to close up shop and kill the lights. It would draw too much attention to simply walk out to my truck and drive away, and it was much too cold to make it far on foot. Besides, a middle-aged man and two scrawny college kids would make for an easy target on the streets, especially in our work uniforms. We'd have to hunker down for the night in the back office, and head out just before dawn once the violence subsided.

The evening hours ticked by as we huddled around the tiny security camera monitor, watching the footage of shadows running by underneath the streetlights outside. TV news was no help — after the chief of police made a statement that the situation was under control and a perimeter had been set up, the newscast cut away to other stories, and eventually to late-night infomercials. How can no one care what's going on here?

Not long after midnight, someone spotted the security camera out front, and smashed it with a brick. Then the sounds outside descended upon us, with disembodied voices shouting and unseen objects shattering the storefront windows. The assault seemed relentless, but miraculously, the security gates held. Thank God I spent extra for those reinforcements. I could hear through the wall that the pawn shop next door hadn't fared so well. Knowing that the security gate wouldn't withstand another barrage, Damon, Rick, and I agreed on a plan. We would take some supplies and the cash from the register, head for my truck outside at 4:30 a.m. (hopefully when most of the looters would grow tired and head home), and drive like hell.

In the early morning hours, once the noise outside had died down, I grabbed my backpack and silently loaded it up. Bottles of water, protein bars, beef jerky, and the limited contents of our medical end-cap. Each of us pocketed a box cutter from the storeroom — not that it would do much, but it felt better than nothing. I held onto the old D-cell flashlight from under the counter, more for use as a blunt instrument than a source of light. I was shaking as morning approached. Was this really the right choice?

what-if-riot-destroys-business-illustration-2

I opened the back door at exactly 4:30 to find our parking lot looking like a war zone. There was trash and broken glass everywhere, and the choking smell of ash filled my nostrils. My truck was on the far side of the lot, or at least what was left of it. Someone had smashed the windows and gutted the steering column. The tires were slashed. My heart sank as I realized it wouldn't be taking us anywhere. Rick looked terrified, but Damon said he thought we could make it to his apartment about a mile away. It was starting to get light, and there was no turning back now — the apartment would have to do.

We walked quickly as dawn approached, feeling as if we'd find another mob around every street corner. Fortunately, only a few stragglers were out at this hour, and we were ignored. I think I may have seen a body slumped over in an intersection, but I definitely wasn't going to go get a closer look. After what felt like an eternity, we made it to Damon's complex, where the wrought-iron security gate out front appeared scarred but intact. Inside the building it was eerily quiet. We made it to his apartment, bolted the door, and practically collapsed. It's amazing how much covering a mile in fight-or-flight mode takes out of you.

The three of us holed up in the one-room apartment for most of the day, finally able to eat something and watch the news. It was pretty clear that Damon intended to stay here until the riots were contained, and I couldn't fault him. But Rick and I just wanted to get home to our families. I knew Laura and the kids would be worried sick by now, despite the text messages I sent before my battery died. I tried to call them using Damon's landline, but I couldn't get through. All the lines must be jammed. So, the two of us decided to stay the night and head out again first thing in the morning.

Despite the exhaustion, I found myself barely able to sleep that night. Maybe it was adrenaline wearing off, or just plain fear at what the day would hold. In the early morning hours, we talked with Damon to hash out our travel plans. Although he couldn't afford a car, Damon mentioned that his roommate had an old hatchback in the parking garage. The roommate was out of town for the week, and Damon figured that he wouldn't mind if we borrowed the car — getting it out of the city would probably save it from the same fate as my truck, anyway.

After topping off our supplies, grabbing the car keys, and picking up an aluminum baseball bat from the apartment's closet, Rick and I made our way to the building's attached parking structure. Eyes adjusting to the twilight, we found the hatchback where Damon said it'd be. We were in luck — due to its ratty appearance, it had been overlooked by the mob. We hopped in, and it sputtered to life as I turned the key.

Pulling out onto the street, the engine noise seemed deafening against the early morning's silence. We drove block after block, tension slowly fading as we navigated through the abandoned cars and rubble. A few miles later, the roads cleared, and we eventually rounded a corner to find a handful of linked metal barricades blocking the street. A small army of police officers stepped out from behind the barricade, shotguns and AR-15s in hand. They weren't messing around. This must be the “containment plan” we heard about on the news. After a few minutes of interrogation about where we got the car (and why we had a baseball bat) and showing them our IDs and my business card, we were allowed to pass through. As we headed out of the city into the gray sunrise, my anger at the police's complacency turned into a stark realization: I would never be so unprepared again.

Federal Agent: Erik Lund's Approach

The sound was as clear as an emergency dive klaxon on a submarine. The metal security curtains at the front of the store were being kicked. Jumping to my feet, I left the back office to see how well the curtains were bearing the attack. “Stay here,” I told Damon and Rick, my two young employees.

I mentally cursed myself for allowing the news coverage of the escalating riots to distract me. I should have left when I had the chance — when the angry protesters were gathering, before the mob mentality broke loose. I could have simply driven home, but now that was no longer an option. The falling snow meant the roads were likely to quickly become slushy and clogged with vehicles trying to leave the danger zone…or with those trying to get into the area to participate in the riots. There's nothing like a good riot to bring out the party animals. Groups of marauders were roaming around, making their way toward the excitement of the riots. The thought of being stranded or carjacked in the middle of a Detroit winter snowstorm had the sex appeal of Nancy Pelosi. The idea of packing up and sacking up for a bug-out hike back home at night with temperatures hovering in the teens had even less. This meant I would make my stand here, at my store. I had food, shelter from the elements, good communications, a reasonably defensible structure, and a firm location should emergency services be needed, regardless of their response time. This would be my Alamo.

Walking to the front of the store, I quickly retrieved my Glock 17 9mm pistol from its secure place behind the laminated security glass enclosure that protected my counter. I slid two additional magazines into my pants pocket. Several unsuccessful robbery attempts motivated my increased security protocols, but I never wanted it. I never wanted to work inside a bullet-resistant box, but what I wanted and what I needed were two entirely different things. Along with the protective enclosure, security cameras provided me a full 360-degree view outside the building. And what I saw was not good.

A group of marauders, 20 to 30 strong, had descended upon my store and several of the “leaders” were kicking and hitting the front security screen in an attempt to breach the building. I yelled to Damon and Rick, “Grab the hose and hook it up to the spigot! Now! Get up here when you're done!” I grabbed my cellphone and made a quick call to my son to inform him what was happening, with instructions to call the Michigan State Police. If anything did happen to me, I wanted someone other than the locals to know what caused my demise. I asked him to be ready to come pick me up at the store if needed. While I did have my own vehicle in the back parking lot, I had no way of protecting or securing it. And I had no way to know if it would be in drivable condition when I finally got to it. My son acknowledged that he'd be ready for my call and could reach the store in about 30 minutes.

My two employees came running to the counter. “All set boss,” Damon said, looking a bit nervous, but trying to sound brave. “Now what?” I told them the plan was for them to stay inside the security counter and to call my cellphone. I was going to the roof with the hose. I wanted them to watch the cameras and tell me where the mob was moving around the store. They understood the plan and locked the security door as I left for the back of the store.

After getting dressed as warmly as possible given the circumstances, I dragged the hose up the access ladder in the store to the roof. The roof was flat with a small knee wall that ran around the circumference of the building. It afforded me a little protection and allowed me to move around with a small degree of concealment. From the roof I could hear the chanting, laughing, and cheering even clearer now. Lying prone, I peeked over the knee wall. I could see a large part of the group through the falling snow. Even on the roof I could feel the vibrations of the blows to the security curtains shaking the building. Those curtains had done a good job so far, but I didn't know how much longer they would hold. I held the nozzle of the hose just over the knee wall and squeezed the handle. A flood of freezing water rained down on several subjects attacking the security screens. Several seconds passed before the thugs realized exactly what was happening. They were thoroughly soaked in sub-zero temperatures, trying to run out of range of my hose amid yells and curses. Those thugs will be hypothermic in 10 minutes if they don't leave and get out of those wet clothes, I thought to myself. The first wave had been repelled.

what-if-riot-destroys-business-illustration-3

Through the hoots and jeers of the crowd laughing at the drenched rats running around, my initial success quickly faded. Some of the crowd accepted my defense as a challenge and began throwing everything that wasn't tied down at me and the building. They wisely kept their distance from my hose; rushing up to throw some object and quickly retreating. I was willing to play this game as long as I could but after a couple of hours the cold was quickly affecting me, too. Everything was numb. Peering over the wall, I observed one particularly defiant soul push through the crowd and walk right up to the front of the building. Rising up to drench the bold rat, I was greeted with a steady cadence of pops ringing out from his pistol. “F#*k me!” I screamed, as I dove behind the knee wall. I wasn't about to randomly shoot back into a crowd, and the roof was no longer a safe option. Checkmate. I needed to get inside and work my way back to the security counter.

Climbing down the access ladder I could hear more shots zipping through the security screen. Reaching the counter, my two wide-eyed employees opened the door and let me in.

“Damn, dude! They're shooting at us!” Damon screamed.

“Thank you, Captain Obvious!” I shouted back. “Call the police again. Let them know were getting shot at!”

Looking up, I immediately saw my investment in the security counter had paid off. Two shots had randomly hit the security glass, and one would have injured someone had the glass not stopped it. Meanwhile, Damon had miraculously reached a live voice and was conveying our situation. Then, he shook his head as he put his phone away: “I got through, but the operator said everyone was getting shot at and they would send someone as soon as they could.”

“Well, as long as we stay in this box,” I said, “we'll be OK.” At that exact moment, Rick pointed to the camera covering the back of the store and yelled, “Who the hell is that?!”

Four men with rifles jumped out of the SUV and moved toward the back door. I pulled my Glock from its holster. “They are not getting inside this store,” I said. “Damon, call the cops again, tell them there's about to be a gunfight!” I moved to the back of the store and took up a position to engage anyone who forced their way through the back door. Suddenly, the back door erupted with banging sounds. I raised the Glock ready to shoot should the door break loose. Over the sound of the banging I heard voices arguing, but then I recognized one. “Dad!! It's Jacob! Open the door!” My son and some of his friends had arrived.

I had never been so happy to see my son (well, except maybe on the day he was born). We all piled into the SUV and left the store. The four-wheel drive handled the snowy roads just as easily as the four rifles would have handled any predators looking for an easy meal. Thanks to the quick thinking of my son, we all made it home safe. Several days later, the riots finally ended and relative calm returned to the area. The store had been ransacked and set on fire — it was a total loss. Insurance covered most of my losses, but I choose not to rebuild. Retiring to the country seemed a more appealing option.

Survival Expert: Tim MacWelch's Approach

As the looters tore and kicked at the metal security screen, yelling like animals, the real danger of the event began to sink into my mind. If those people broke through the barricade, they would destroy my livelihood — and they might beat me to death just for kicks. And if I tried to slip out the back, I'd be out there in the midst of them.

And I wasn't just worried about myself. My two employees are young enough to be my sons. Their safety was my responsibility, too. Staying off the streets would be the smartest thing to do, if only I weren't sitting in a prime target for looting. Watching the news broadcasts didn't help. They described the mayhem on the streets — my streets, my hometown. Aerial footage from news helicopters showed thousands of people in the streets. Vehicles and buildings had been lit on fire. One piece of footage showed a man being beaten by a group.

Another attempt to use my cellphone and the landline proved fruitless. All of the phone lines were jammed. The news said that buses, taxis, and the Detroit People Mover light rail system had been suspended. We had no way out of the neighborhood, except on foot.

My home in the suburbs would be unreachable, but I had a rough idea of where my employees lived. Both lived on the outskirts of downtown. After a quick discussion, I found out that the youngest man, Rick, lived closest to the store, about 15 blocks away — but on the other side of the riot's epicenter. There was no way I'd risk our lives on that trek. The other worker, Damon, lived 22 blocks away from the store, but away from the main rioting. We agreed that we'd head there, or at least try to.

After stuffing the store's cash into my wallet and jacket pockets, I loaded up our only backpack with snacks, drinks, and a box cutter. Then I faced the back door. Scared of what might be on the other side, I pressed my ear against the door and listened for a few moments. As quietly as possible, I unlocked the door and opened it a crack. The alley was dark already, even though sunset had not quite come. I saw some movement by the alley opening, so I ducked back inside to wait. The air was cold and raw with the snow flurries falling. None of us were dressed for a long walk in the open.

After another peek down the alley showed that the way was clear, we exited and locked the two deadbolts on the dirty metal door. The young men agreed to stick with me, as they seemed almost as frightened as I was. Nearing the first open street, I took a deep breath and plunged into the stream of foot traffic. Some people had bandanas and scarves covering their faces. These, I suspected, were up to no good. Other people were laughing and joking, reveling as if this were a tailgate party at a Red Wings game. Then a few other people scurried by with frightened expressions and quick movements. And no sooner than I began to think that they should probably play it cool, a terrified woman got socked in the face by a girl and her boyfriend. The couple kicked off a “boot party” on the poor woman before running away with her purse.

Should we help her? I asked myself. Not with a grand in cash stuffed in my pockets and two scared guys expecting me to get them out alive, my conscience shouted back.

I pulled my boys close and whispered, “Don't look afraid. We have to blend in.” Damon nodded and pulled the front of his undershirt up to his nose, covering his face. Rick followed suit, popping his jacket's collar and zipping it up all the way past his mouth. In that moment, I had hope that this charade might just work.

The wind began to pick up and the snow fell a little harder, though this didn't dampen the rioter's parade. As we threaded the crowds, block by block, I witnessed trashcans hurled through windows, small cars being flipped over, and fires being lit everywhere. My nerves were beginning to wear down, and I needed this to be over. As our trio turned a corner, halfway to the safe haven of Damon's apartment, I walked right into a huge muscular man who was stinking of liquor. Startled, we all stopped. He was lightly dressed, despite the cold and his knuckles were dripping blood.

what-if-riot-destroys-business-illustration-4

“What do think about that verdict, man?” he asked. Realizing there was only one right answer, I shouted, “It's bullshit! Those courts are out to get everybody! I can't even believe it. I just can't believe it.” The big man simply grunted and headed off with a slight stagger. Another test barely passed.

Another block passed, and soon the crowds started to thin. But we weren't out of danger yet. Thugs still roamed the streets, looking for easy targets and potential victims. And all three of us were bitterly cold. Frostbite was a serious concern now. But eight blocks more, and we'd be at Damon's apartment. As I plodded forward, we drew near to something I hadn't thought of before — a hotel. It'd be the perfect place to hide out until the looting subsided. There were two hotels between my shop and the apartment. Since the lobby of the first one was on fire, the second would have to be our refuge. This hotel was undamaged, and I had plenty of cash to pay for a room.

“This might just be your lucky day after all,” I said to my boys as I pulled the hotel's door handle. But it didn't budge. I grabbed it with both hands and yanked hard. It wasn't frozen shut, it was locked. My hope began to dissolve. I knocked on the large glass window, but there was no one inside. I banged on the glass harder, and suddenly a squad of buff men in nice suits entered the lobby from a side office. Each one with a coiled radio earpiece in his ear and a pistol in his hand. They must be hotel security. Then I realized how it all looked: Three men were at the door during a riot, two with their faces covered, banging on the front entrance. I wouldn't have let them in either. So much for the hotel idea.

We resumed our tense trek, passing burning cars and drug-idled looters. It seemed like our frozen odyssey would never end. For morale, I handed out some of the snacks and drinks. Though the drinks were now basically slushies or outright ice, the rock-hard granola bars were edible and did seem to give my boys some energy. “Only three blocks left,” Damon said.

The snowfall started to diminish when I turned the corner and saw the most beautiful sight that entire day: an immense line of police officers, dozens deep. In fact, hundreds of officers in riot gear. Some were on horseback, in vehicles, on motorcycles, but most were on foot and preparing to march.

A queasy feeling gripped my stomach. We'd already been mistaken for looters and slipped past a whole army of them for a better part of the evening. Would the police think that of us also? Would they even let us pass? Our trio continued up the sidewalk, as if the police were not even there. But as we drew near to them, several officers stopped us. They asked for ID and to look in my backpack. I explained our ordeal and our destination. I silently thanked God that Damon had his driver's license with his address, legitimizing our nearby destination. Fortunately, the orders were given for the officers to advance, and they decided to let us pass, mainly because they had more important things to do. I nodded, thanking them, and let out a huge sigh of relief as we slipped past the officers.

After two more blocks, we'd finally made it to Damon's apartment. He practically sprinted to the thermostat and turned up the heater. The warm air felt like fire against our frostbitten faces. Damon offered me and Rick a couple of beers from the fridge. Sure, my drink was cold, but I needed it. After hours of raw nerves, frigid temperatures, and braving the horde of looters, I finally felt that we were safe.

Conclusion

A riot is a scary, yet survivable, event. The first and most important step is to stay informed of the situation as early as possible. The TV, radio, and Internet can provide some news, but they'll be biased and not necessarily up to date. Social media can sometimes provide local info, but they're even less reliable for accuracy. Try to discover where the disturbance is located and why it's happening.

Then communicate your situation frequently with your loved ones while the grid's still up. Tell them where you are and what you plan to do. That way, if you lose contact, they'll have a general sense of where to look for you when it's safe.

Once critical mass has been reached for a riot to form, one way to stay safe from a roaming mob is to hunker down and avoid the streets — unless you're in a position like our story's shopkeeper, trapped in a looter's paradise. While firearms, surveillance cameras, security curtains, and bullet-resistant glass can provide added safety, they can't be relied upon as the only solution against a legion of marauders.

This brings us to the other method to survive civil unrest: blend into the crowd. Whatever topic sparked the rioters, yell what they yell, chant what they chant, and say what they want to hear. One thing always holds true: the bigger the crowd, the lower the IQ of the mob mentality. If you find yourself in the middle of a riot, try to make your way to the edges and away from the crowd. But as you make your escape, be very careful not to get pushed up against a wall or fence. You could be crushed by the press of people. Seek a safe haven to hole up until the crowd disbands, and if you hear nearby breaking glass or smell smoke, move to a new hiding spot.

How would you react to the same scenario as played out by our panel?  Share your plan with us on our Facebook page: www.facebook.com/OFFGRIDmag.


Bug-Out Bike

As a father, he had it all planned out. Food, water, security…well, almost everything. Jayson Ross felt good about his preparations in the Mountain West region, but when his daughter chose to attend a college on the East Coast, her safety was suddenly out of his control. “If something bad happens really fast, I would never see her again,” Jayson Ross says. “And I wasn't cool with that.”

Ross has been a survivalist since childhood. He's spent most of his life training in hunting, fieldcraft, camping, firearms, scuba diving, athletics, and more. It's culminated in his cofounding ReadyMan.com, an online company that's made up largely of special-operation veterans and offers a wide range of survival training services through online videos and live courses. Yet, no amount of his equipment and skills could get his daughter home if a major disaster or social breakdown occurred. Not willing to accept that sort of loss, he began breaking down the challenges she might face in a 2,100-mile cross-country trek. Ultimately, Ross couldn't get past the near certainty that after a major event, roadways would be snarled with traffic and gasoline would be at a premium.

The only alternative was to build a well-equipped, lightweight, and maneuverable vehicle to carry his daughter forward when an automobile couldn't. In other words, he would have to build her a dual-sport motorbike.

Why a Motorcycle?

Ross's plan was to augment his daughter's Subaru Outback with a small trailer that carried two Suzuki DR200SE motorcycles and a specifically chosen load-out of complementary gear. The strategy he fashioned was for his daughter and a family friend in the area to, at the first sign of major trouble, hitch the motorcycle trailer and start heading west. If the catastrophe subsided quickly – no problem – return to school, but err on the side of getting out of Dodge.

Motorcycles aren't a perfect solution, but they do provide a number of significant advantages. First, they're efficient, particularly the small ones. Ross found that a 200cc engine got nearly 70 miles to the gallon. The combination of the long distance his daughter would have to cover and a likely shortage of gas made choosing a smaller engine a smart choice. In most cases, the next larger size of bike managed considerably fewer miles per gallon and required a larger fuel tank to achieve an equivalent range. Additionally, the lighter overall weight made it a better fit for her smaller frame.

bug-out-bikes-supplies

He chose the Suzuki DR200SE because it's a simple, versatile platform capable of both highway and off-road travel. The most likely scenario Ross envisioned was an interstate snarl with vehicles jamming the roads, stranding their operators in place, and putting them at risk of assaults and robbery. The motorcycles could be rolled off the trailer and ridden down the median or shoulders, around the traffic, and out of the danger area. While leaving the safety of the automobile would be a major decision, doing so on a bike would be an excellent alternative, with gear staged and packed for just such a contingency.

In any case, the bike beats walking by a long shot. But switching to the motorcycle changes just about every element of travel.

The riders would now be exposed to the elements, more vulnerable to external attack, and unable to rotate sleeping and driving duties. Travel post-crisis would now be as much physical as emotional. The simple act of balancing and steering the motorcycle over time would fatigue them, and interpersonal communication would be a challenge. With these obstacles in mind, Ross began adapting the Suzukis to maximize the range and survivability of their riders.

Motorcycle Outfitters

The first element to be enhanced was range and carrying capacity. That year's model of Suzuki came with a 2.5-gallon tank, which under ideal conditions puts the range at 175 miles. Ross wanted a minimum of 250 miles with a buffer to compensate for the added weight of equipment and fuel.

bug-out-bikes-kriega-bag

To increase the carrying capacity of the Suzukis, Ross installed the Kriega Overlander 60 system. The Overlander 60 is a frame-mounted rack that attaches without welding or cutting. Flexible and modular, the system allows for both pannier packs and fuel. The rack mounts above and behind the rear wheel, but clears both the frame and the exhaust. At 15 liters each, the Kriega packs ride forward of the fuel cans and just above the rear passenger pegs. Because they're below the seat and the rider's center of gravity, they don't significantly impact the handling characteristics of the motorcycle.

bug-out-bikes-gas-can

Behind the Kriega panniers, Ross added four 1-gallon RotoPax fuel tanks on either side of the rear wheels. Made of high-impact plastic, these tanks have a modular design that allows them to be mounted individually or stacked on a central mounting peg. The auxiliary tanks add an additional 275 miles of range to the fuel tank, providing nearly one-third of the fuel necessary for the trip – and this is after the automobile is abandoned. Refueling would be a necessity, but it wouldn't be immediate.

As functional add-ons, Ross added hand windshields on the grips and a small windshield. Short of the additional cargo and fuel, the motorcycle is largely stock.

bug-out-bikes-tie-down-point

Kitting the Bike

Deciding on how to divide gear between the rider and the motorcycle was a deliberate process. Ross decided on some redundancy with the kit carried on the rider (see the sidebar), but in the panniers he largely stuck to hard goods, bike support equipment, and items to deal with the changing external environment. For example, in addition to a helmet he staged riding leathers, gloves, hand and toe warmers, as well as dust and gas masks. For quick fixes he added a small tool kit, a knife, multitool, headlamp, and flashlight.

In a small backpack on the back of the bike above the rear fender, he staged field gear such as batteries, a medical kit with manual, a shortwave radio, a solar charger, a JetBoil stove with fuel canisters and a small cook kit, extra cold-weather clothing, and MREs. The intent was to have essential items ready-to-grab and non-essential items ready-to-dump if the motorcycles had to be ditched.

Kitting the Rider

Deciding what kit to carry on the actual rider is a more serious and complicated question. Changing the weight of a rider changes not just the performance of the engine, but also the handling characteristics of the motorcycle. Because the engine is small and chosen for efficiency over power, weight is always a consideration. Ross also reckoned that on-foot bug-out equipment should not require sorting and packing. As such, the rider's backpack load-out closely resembles a hiker going on a backcountry trek.

bug-out-bikes-readyman-team

While testing options for a personal backpack, it became clear the best option is a full frame backpack with a bombproof waistband. This helps to both secure the pack while operating the motorcycle, but also requires no changes or modifications if the bike has to be ditched and the rider has to continue on foot.

His daughter chose the REI XT 85 because it had the capacity to accommodate the required gear, and most importantly, it fit her. Ross chose an ultralight tent, fly, and footprint along with a compression sack-reduced sleeping bag and ground pad. To this he also added personal hygiene items, a Platypus water filter, a GPS, more batteries, light binoculars with a chest rig, cash, a pre-charged cell phone, passport or ID, Mechanix gloves, and a compass. The backpack was configured for his daughter and her companion. His daughter is an experienced backpacker and that definitely dictated some gear choices. So the backpacking gear was more customized than the more universal on-bike gear.

bug-out-bikes-readyman

Armed With a Plan

Ross harbored no illusions about the necessity of carrying a firearm in a situation serious enough to warrant a cross-country bug out. But what to choose and how to stage it required some thought. He concluded an accessible, but semi-concealed waist holster was a must. For his daughter he chose a Glock 19 as she was trained to use it, and it was more likely than most other models to function under all conditions. He settled on 200 rounds of ammo divided between six magazines and a spare box stored on the bike.

Ross wasn't convinced having only a handgun was the answer, so he added a folding stock AK. Though the AK's reliability is well known, Ross had additional reasons for choosing it. Traveling through potentially hostile territory on a motorcycle is no one's first choice, particularly because the rider has very little protection. Gone are the luxuries of body metal, steel frames, and the deflection of interior glass – and only mobility remains. The saddle of a motorcycle is not the place to initiate offensive action. Rather, Ross's strategy for travel and survival was to stay low profile, and avoid populated areas, danger, and conflict. While there are many short-barreled AR's out there, the buffer spring limits the degree to which they can be shortened. The AK can be folded and carried discreetly in the backpack, but drawn only during times of prolonged danger or for pulling security during bivouacs. Ross settled on 300 rounds with two pre-loaded magazines.

bug-out-bikes-tent

But the best arms and gear in the world mean very little without a well-contemplated and clearly understood plan for travel. Ross approached the route planning in a deductive and rational manner. His first step was to simply pull a Google map of the quickest route between his daughter's college and his home. His second step was to overlay population centers along the route. Ross planned routes around the densest counties and tried to avoid the major population centers by 250 miles whenever possible. This is much tougher in the East where cities and towns are both larger and more tightly clustered.

“It's tricky,” says Ross. “There are small slots between populated areas and sometimes you have to go near or though places you wouldn't want to. Things get better west of the Mississippi, and particularly once you get past Des Moines.” He then acquired detailed state maps of the route and planned primary, secondary, and alternate routes.

The plan for his daughter and her friend was to travel mostly at night. Their mindset would be one of escape and evasion. As two young people in unfamiliar territory, there is nothing to be gained from being spotted by anyone at any time. Though they could travel by headlamp or the motorcycle's headlight at night, they also were equipped with PVS-7 night vision goggles. Roadblocks would be avoided at all costs and stops in the open or during daylight would only be for critical items like fuel, water, and food.

Are motorcycles a great plan for a young family of five? Probably not. But if you have family, friends, or college students who could get caught hundreds or thousands of miles from hearth and home, this layered strategy of bugging out could be the difference between life or death. And, using some of the strategies Ross employed, motorcycles can be an excellent fallback when automobile travel becomes unworkable.

bug-out-bikes-suzuki-bikes

Bug-Out Bike Gear List

The gear you select is essential in any preparedness situation, but it's especially true when you're trying to bug out on a motorcycle that's traveling at 75 mph or faster without a large windshield or steel doors. If your GTFO vehicle is a dual-sport bike, consider the following setup that Jayson Ross has established for his daughter's motorcycle.

On the Rider
– Backpacking backpack
– Tent with rain fly and footprint
– Rip-stop ponch (camouflage color)
– Sleeping bag (in compression sack)
– Small sleeping pad
– Light binoculars with harness
– Passport and/or ID
– $400 in cash
– Cellphone
– 1 Nalgene Water Bottle (full)
– Platypus Gravity Water Purifier
– Gortex Rain Parka
– Sunglasses
– Wind-up watch
– Toothbrush and toothpaste
– Tampons (if necessary)
– Single Kleenex pack (doubles as toilet paper)
– ChapStick
– Mechanix Gloves
– GPS and fresh batteries
– Maps
– Compass
– Fire-starter(s) and Bic lighters
– Sidearm
– Sidearm holster with magazine pouches
– 6 sidearm magazines
– 200 rounds of sidearm ammunition
– Folding AK-47
– 2 AK-47 magazines (loaded)
– 300 rounds of 7.62x39mm ammunition
– Fixed-blade knife
– Knife sharpener
– Leatherman multitool
– Petzel headlamp
– Tactical flashlight
– PVS-7 night vision google

In a Pack on the Bike
– Trauma medical kit with manual
– 2 Motorola two-way radios with batteries
– 8 extra AA Batteries
– 8 extra AAA Batteries
– Bath wipes
– 100-percent DEET insect repellant
– Travel Bible, playing cards
– 8 Kleenex packs
– Shortwave radio with line amplifier (if possible)
– Solar charger for shortwave and other devices
– JetBoil Stove and 2 canisters (one unopened)
– Compact cooking kit
– 1 Wool sweater
– 2 Pair of warm wool socks
– 1 Set of Polartec thermal underwear (top and bottom)
– 1 Long-sleeve shirt
– 1 Fleece jacket
– 1 Wool pants
– Thin beanie
– Neoprene facemask
– Hiking boots
– 8 MREs

On the Bike
– Suzuki 2013 DR200SE
– 4 RotoPax fuel cans and mounting hardware
– Kriega Overlander 60 Pannier Sets
– Happy Trails SU Side Rack (modified)
– Small windshields
– Hand windshields
– 2 Nalgene bottles
– Siphon
– Israeli gas mask
– Gas mask cartridges
– Leathers
– Helmet
– Motorcycle gloves
– N95 dust masks
– Battery trickle charger (to keep bike battery topped off/storage)
– 10 pairs of hand warmers/toe warmers
– Tool Kit (ratchet and screwdriver set)

Gas Sippers

A variety of options exist for nimble, efficient, and generally affordable alternatives when a single track is the only option. Here are some dual-sport motorcycles that could fit the bill.

bug-out-bikes-suzuki-dr200se

Suzuki DR200SE
Engine 199cc, four-stroke
Fuel Tank 3.4 gallons
Miles Per Gallon 68
Range 231 miles
Weight 278 pounds
MSRP $4,199

bug-out-bikes-yamaha-tw-200

Yamaha TW-200
Engine 196cc, four-stroke
Fuel Tank 1.8 gallons
Miles Per Gallon 78
Range 140 miles
Weight 278 pounds
MSRP $4,590

bug-out-bikes-kawasaki-klx-250s

Kawasaki KLX-250s
Engine 249cc, four-stroke
Fuel Tank 2 gallons
Miles Per Gallon 70
Range 140 miles
Weight 298 pounds
MSRP $5,099

bug-out-bikes-honda-crf250l

Honda CRF250L
Engine 249cc, four-stroke
Fuel Tank 2 gallons
Miles Per Gallon 73
Range 146 miles
Weight 320 pounds
MSRP $4,999


Straight to the Point

You've spent lots of time and plenty of greenbacks planning and preparing for TEOTWAWKI. You have your evacuation route planned. Your bug-out vehicle is a well-oiled machine. And your go-bag is full of all the good stuff only a survival Santa could bring. But Murphy and his damn law can pop up at anytime, anywhere — if anything can go wrong, it will, and that includes your self-defense plans.

Every prepper probably has a knife, hatchet, or a firearm at the ready — or perhaps all three simultaneously. But what if you're caught bugging out empty-handed? Say a fire tore through your neighborhood, and you had to bail with nothing but the pajamas you were wearing. Or maybe the first part of your bug-out plan went as you expected, but you stopped to take a leak by a tree and a band of marauders ambush you? Perhaps it doesn't have to be a catastrophic situation. It could just be you walking to the corner store and getting jumped by a couple of hoodlums. As the old saying goes, “No plan survives first contact with the enemy.” At that point, you'll have to survive using nothing but your skills and the tools you were born with.

No worries. Just put a little (warning, puns ahead!) elbow grease into it. With a little knowhow, that knobby little joint in the middle of your arm can save your hide when used as a defensive shield, a devastating hammer, and a leveraging tool. Read on and learn how three different masters, representing three different fighting arts, reveal all you need to know about making a little “elbow room” when SHTF.

Elbow Striking 101

To learn how to throw a proper elbow strike, OFFGRID went straight to the elbow-striking expert, Sam Phimsoutham of World Team USA in San Francisco, California. Even though he's knocked out and pummeled many opponents with his fists and feet as an ajarn (or master) of Muay Thai (AKA Thai boxing), Phimsoutham doesn't suggest using either as your primary empty-hand weapon. “On the street, you want to use palm and elbow strikes so you don't break your hand,” says Phimsoutham, who has trained more than 40 Muay Thai and MMA champions. Indeed, when the grid goes down, getting medical attention for a fracture may prove difficult.

Using your elbow as a weapon is not rocket science, nor should it be. Phimsoutham shows us two effective elbow strikes to be used when your life is on the line.

Vertical Elbow

How: This strike is thrown upward like an uppercut, but with your arm bent all the way so that you connect with your elbow instead of your fist:

elbow-strikes-vertical-elbow

– Start in a good stance. Your feet should be shoulder-width apart with your dominant leg slightly behind you (if you're right-handed, step back with your right leg). Place your hands up with your palms out to protect your head.

elbow-strikes-vertical-elbow

elbow-strikes-vertical-elbow

– Raise your elbow straight up with your palm traveling along the side of your head, like you're combing your hair. Keep your other hand up by your temple to protect your head.

– Elbows are lonely creatures, so practice throwing multiple strikes on both sides.

Why: The vertical elbow strike is an instinctive motion. Plus, it doubles in protecting your cranium because it blends well with the natural flinch response. From a distance, you can use your elbow as a shield.

If you're close enough, your elbow will cause damage to your opponent's face, head, or neck. “This strike works best when a fighter comes at you aggressively,” Phimsouthamsays. The harder they come charging in, the more damage they will do to themselves — talk about karma at work.

Horizontal Elbow

How: Think of this strike as if you're throwing a hook punch, or pretending to be Dracula pulling on his cape:

– Just like with the vertical elbow, you want to start in a good stance: feet shoulder-width apart and hands up.

elbow-strikes-horizontal-elbow

– Bring your elbow up to your shoulder, keeping your forearm level to the ground. Bring your elbow across your chest, like throwing a hook punch in boxing. (Your right elbow makes a straight line from your right shoulder to your left and your left elbow goes from left to right.)

elbow-strikes-horizontal-elbow

– Keep your other hand up by your temple to protect your head.

– For extra power tighten your abs, rotate your hips, and pivot your same-side foot (if you're using your right elbow, pivot with your right foot with the heel off the ground like you're grinding a cigarette butt).

– Practice throwing multiple elbow strikes.

Why: When thrown correctly and utilizing your core, the horizontal elbow strike can knock someone out or cut them open. “One of my champions opened a cut on his opponent that took 20 stitches to close,” Phimsoutham says. “During a disaster, you want to end the fight fast so, for maximum trauma, use your entire body weight.”

Target Anatomy

For both vertical and horizontal elbow strikes, you want to use the pointy part of your elbow (the olecranon process of the ulna for you studious types) and up to 2 inches of bone below that. This will allow you to create more pressure (and damage) per square inch.

-elbow-strikes-chest-strike

elbow-strikes-chest-strike

In fact, your elbow is the strongest area of your arm and one of the strongest parts of your anatomy. This makes it a durable blunt instrument against all manner of targets. “Aim for the chin, bridge of the nose, neck, temple, behind the neck,” Phimsoutham says. “Or anywhere on the spine.” Attacking the back of the neck and the spine can be fatal blows, but desperate times may call for desperate measures — particularly if you have loved ones depending on you for their safety.

However, your elbow, like all tools, has limitations. “You must be in the correct range,” says Phimsoutham, who has been teaching Muay Thai for over 20 years. “Use your elbow when you can grab the guy. If you cannot grab, don't throw the elbow — you're too far. You use your elbow in close quarters only.”

“A good time to throw the elbow strike is when they can't see it coming. For example, after you off balance them in the clinch,” Phimsoutham says. “It works even better when you set it up with a low technique, like a knee to the groin.”

Firing your elbow, like firing a gun, requires training to become proficient. Training will help develop technique, coordination, power, and proper distancing.

Fine Arts

As a prepared individual, you'll want to be proficient with at least one empty-hand self-defense system. But where to start? There are thousands of methods, from military combatives and reality-based programs to traditional Asian fighting styles and modern mixed martial arts (MMA). Below is a brief overview of the three we've highlighted in this article.

Muay Thai: The Art of Eight Limbs

Muay Thai (or Thai boxing) is often referred to as the art and science of eight limbs because competitors use their fists, feet, knees, and — yes, you guessed it — elbows to beat each other into a bloody pulp. Originally from Thailand, MMA competitors have known for many years that this “science” is a must learn for effective stand-up fighting in the cage. The elbow techniques of Muay Thai are perfect for preppers because they are simple to learn, easy to implement, and traumatic in their usage.

Krav Maga: Pressure Tested

It used to be that everyone was kung-fu fighting. Now everyone is doing Krav Maga, from German police officers to Jennifer Lopez in the film Enough. And for good reason: Krav Maga has been battle tested, over and over again, by the Israeli Defense Forces in the war-torn Middle East. Created in the 1940s by Imi Lichtenfeld, this system incorporates elements of boxing, Muay Thai, Combat Sambo, and wrestling. Translated as “contact combat,” Krav Maga is known for its instinctive body movements, simple principles, and devastating techniques.

Pentjak Silat: Minimum Movement, Maximum Devastation

Pentjak Silat, or the study of movement and combat, is one of the most effective styles you have never heard of. Because of silat's effectiveness, many gurus (teachers) aren't open to teaching this system to the public — hence silat's lack of popularity in the USA. Pentjak Silat is a general term for hundreds of different styles from Indonesia. These deadly styles are a unique blend of Chinese, Indian, and Indonesian martial arts forged from centuries of jungle warfare. Represented in this article is Pentjak Silat Anak Serak, identified by its bladed weapons, close-range fighting, sophisticated angles, extreme leveraging, and effortless sweeps.

What If…?

“Using the elbow is one of the most underrated weapons out there,” says Edgar Gabriel, a certified Krav Maga instructor who co-founded the Academy of Combative Defense and Fitness in San Jose, California. “Elbow strikes are instinctive movements and are used to induce blunt trauma and break or cut open the skin. These weapons are fight-enders.”

Because of this, Gabriel often teaches how to respond with elbows in these three specific situations:

Baseball Bat Swing: Found in nearly every garage in North America, a baseball bat is another nasty weapon you may encounter when facing looters and troublemakers. This technique can also be applied against any object of similar length, such as a stick, 2×4, or pipe.

elbow-strikes-baseball-bat-counter

– If you see someone holding a big green, zombie-busting baseball bat, get your hands up to protect your noggin like Gabriel does here.

elbow-strikes-baseball-bat-counter

– The attacker isn't raising that bat to stretch, he's trying to hit a homer with your head. Immediately step inside the arc of the bat. Block at their arm with your left arm, keeping your right hand high, just in case. With any luck, your attacker may hyperextend their elbow and drop the bat right there.

elbow-strikes-baseball-bat-counter

– No, such luck? Use your left arm to cup their elbow (controlling the bat wielding arm) and unleash all the nasty elbow strikes you've been drilling.

Rear Bear Hug: This attack is often used by multiple thugs to hold you in place so their buddies can finish you off. It's also a common move used by rapists and kidnappers to move you to another location before inflicting further pain and other evil acts.

elbow-strikes-rear-bear-hug-counter

– Bend your knees and settle your weight so the attacker cannot lift you and throw you around like a rag doll.

elbow-strikes-rear-bear-hug-counter

– Strike with a rear, upward elbow strike to the attacker's neck, face, or jaw.

elbow-strikes-rear-bear-hug-counter

elbow-strikes-rear-bear-hug-counter

– Repeat your rear, upward elbow strikes on both sides (right and left) as often as necessary until you make enough space to turn, facing your attacker for more horizontal elbow strikes to their chin.

Knife Threat: It doesn't take society to be ripped apart at the seams for a thug to be armed. Blades are often the weapon of choice for the unprepared and the desperate because they're cheap, commonplace, and concealable.

elbow-strikes-knife-counter

– In this instance, the attacker is using the knife to intimidate you from behind, but this technique will work just as well for a stab to the gut.

elbow-strikes-knife-counter

– Turn to face your attacker using your forearm to deflect the knife off line and away from your body.

elbow-strikes-knife-counter

– Using the same arm, tightly cup the attacker's elbow for control.

elbow-strikes-knife-counter

– Violently smash your elbow into the attackers chin. Don't be a Scrooge; deliver as many horizontal elbow strikes as necessary to stun your attacker until you can get away.

Getting Tooled

All preppers look at their tools as multifunctional items. For example, your knife can be used for self-defense, to skin an animal, for batoning tree limbs, and for a hundred other things. Your elbow, too, has multiple uses and can function as a shield, a wrecking ball, or a lever, depending on the situation.

One expert on the versatility of the elbow is Dr. Andre KnustGraichen, a master of the Indonesian martial art called Pentjak Silat.

“The elbow is conditioned and trained for striking already,” says KnustGraichen, who serves as CEO of Pentjak Silat USA, the American chapter of the International Pencak Silat Federation. “You will also notice your elbow has very little nerve endings.” That means your elbow can be used as a destructive barrier, because it is solid compared to the small bones in the hand. By guiding the opponent's punch into your elbow, it's like making them punch a brick wall.

Wrecking Ball and Lever Versus a Punch: After breaking the attacker's hand, you can immediately turn your elbow into a leveraging tool. Your elbows can produce a large amount of force and leverage because they are closer to your core than your hands. Also, you can use your elbow as a lever to break an attacker's elbow or redirect a strike in a pinch.

elbow-strikes-wrecking-ball-and-lever-versus-a-punch

– The good doctor shows how to guide a left punch right into a left horizontal elbow. Because the elbow is larger than the carpals of the hand, the elbow will win out every time. The result is a broken hand for the bad guy. The harder they strike, the worse their injury — karma strikes again.

elbow-strikes-wrecking-ball-and-lever-versus-a-punch

– KnustGraichen quickly follows up with a left-handed wrist grab and a right vertical elbow motion as a lever, to hyperextend his assailant's elbow, ending the confrontation.

Wrecking Ball and Lever Versus Machete Attack: The brilliance of Pentjak Silat is using one principle for many applications. Here, KnustGraichen, who has mastered multiple systems of silat, demonstrates the same principles of the wrecking ball and lever against a back-hand machete attack.

elbow-strikes-wrecking-ball-and-lever-versus-a-machete

– This time Dr. KnustGraichen guides the back-hand machete slash into his right vertical elbow strike. This strike may fracture the small, delicate bones in his assailant's hand and end the fight right there.

elbow-strikes-wrecking-ball-and-lever-versus-a-machete

– If the enemy still has the machete, Andre performs a right-handed wrist grab and simultaneously executes a left vertical elbow motion to dislocate the elbow. With his attacker injured, KnustGraichen can choose to disarm his attacker or end the fight with more blows.

Conclusion

By definition, a prepper is always preparing. Preparing to protect yourself and your family with or without weapons is all part of the plan. It's not unlike making a fire. While a lighter and fuel is ideal, any Boy Scout will also know how to spark a flame using nothing but his skills and his ability to adapt to his surroundings.

And just like making fire out of two branches and some brush, the time to practice is not during a crisis. With proper training, your elbows can be used as effective self-defense weapons when you have no other choice. Practice your elbow strikes, and eventually learn to use every part of your body as a weapon. This way if your primary, secondary, and tertiary weapons go off-line or aren't immediately available, it won't be the “end of the world” because you can simply roll up your sleeves and use your elbows.

Drill It to Kill It

Bruce Lee once said, “When you're talking about fighting, as it is, with no rules, well then, baby, you'd better train every part of your body!” Although elbows are just a small part of your body, they can be deadly weapons if trained properly. Like making shelter, creating fire, or shooting a gun, forging your elbows into effective weapons takes practice. Here are some simple drills to train your new tool.

Shadowbox

What: Go through the motions to develop proper form

Required Equipment: Mirror

How: Standing in front of the mirror, practice your upward elbow and horizontal elbows trying to keep proper form

Key Points:

– Practice both right and left sides.
– Keep your guard up.
– Tighten your abs and use your core to increase power.
– Start slow to maintain proper form and eventually speed up.
– Set a timer and do one round of two or three minutes.

Heavy Bag Work

elbow-strikes-heavy-bag-work

What: Hit the heavy bag to develop your power and distancing

Required Equipment: Heavy bag

How: Stand in front of the heavy bag and unleash the fury that is the apocalypse

Key Points:

– Maintain form. Just because we're hitting something doesn't mean we can get sloppy.
– Start slow and increase speed as you warm up and get comfortable, eventually striking with full speed and power.
– Set a timer and do one round of two or three minutes.

Situational Training

elbow-strikes-situational-training

What: Practice applying techniques in common scenarios

Required Equipment: Partner, training tools

How: Have your partner slowly attack you and practice your stuff. In a SHTF scenario, you will most likely be attacked by a gun, empty hands (a punch or grab, most likely), a blade (knife, machete, or axe), a stick of some sort (like a bat). Train for all four scenarios.

Key Points:

– Partner training is a must for proper distancing and realistic responses.
– Safety first: Make sure to use training weapons. Start slow and increase speed as you become more familiar with the techniques.
– Do sets of three and switch roles.
– The techniques in this article are a good place to start, but ultimately there is no substitute for proper instruction from a qualified, reputable teacher.

Sources
Edgar Gabriel, Academy of Combative Defense and Fitness
www.academydefensefitness.com
Andre KnustGraichen, Pentjak Silat USA
www.pukulanpentjaksilatserak.com
Sam Phimsoutham, World Team USA
www.worldteamusa.com


Scavenger Chop Shop

In a long-term survival scenario, scavenging is essential. Sure, many of us have go-bags, or even stockpiles of emergency supplies, for when SHTF. However, sooner or later, those supplies will be used up, lost, or stolen, even for the most prepared among us. It's inevitable. So, where do you turn when your supplies are dwindling? You could spend valuable time scavenging buildings that have already been picked clean of resources, or you could look for something that literally surrounds us in everyday life – the automobile.

Why Vehicles?

There are over 250 million cars and trucks in the United States alone, and each one is packed with useful survival items that are easily overlooked. From obvious resources, like gasoline, to more obscure parts, every abandoned vehicle you see is a veritable treasure trove of resources. You certainly don't have to be a mechanic to find them, and oftentimes, you don't even need any tools – you just need to know where to look. And that's where this guide comes in.

General Guidelines

Before we get started, let's go over some general guidelines:

  • Choosing the Right Vehicle: Almost every make and model will have something you can scavenge, but everyday economy cars will generally be easier to work with and disassemble. Expensive luxury or sports cars may be less user-friendly and require specialized tools, making life difficult if all you've got is a multitool. However, keep an eye out for commercial vehicles, such as vans and work trucks, as they may contain items a passenger car wouldn't.
  • Check for Operable Condition: Look for keys, and see if the car is in operable condition. There's no sense in tearing apart a car you could easily use for transportation.

Note: For demonstration purposes, we'll be scavenging from a common 2008 model four-cylinder Japanese sedan. However, virtually any type of passenger car or truck will do.

Warning: The techniques described in this article are for illustrative purposes only. We need not remind you that it's illegal to scavenge from cars and junkyards you don't own.

For more useful survival hacks and tips, check out our book OFFGRID Presents: DIY Survival, on sale now.

Gasoline

  • Scavenger Level: Moderate
  • Tools Required: Small-diameter rubber hose or a strong piercing instrument
  • Uses:
    • Replenishing fuel supply for functional vehicles
    • Starting fires
    • Solvent to remove grease and grime
    • Barter good

Car with gas cap open.
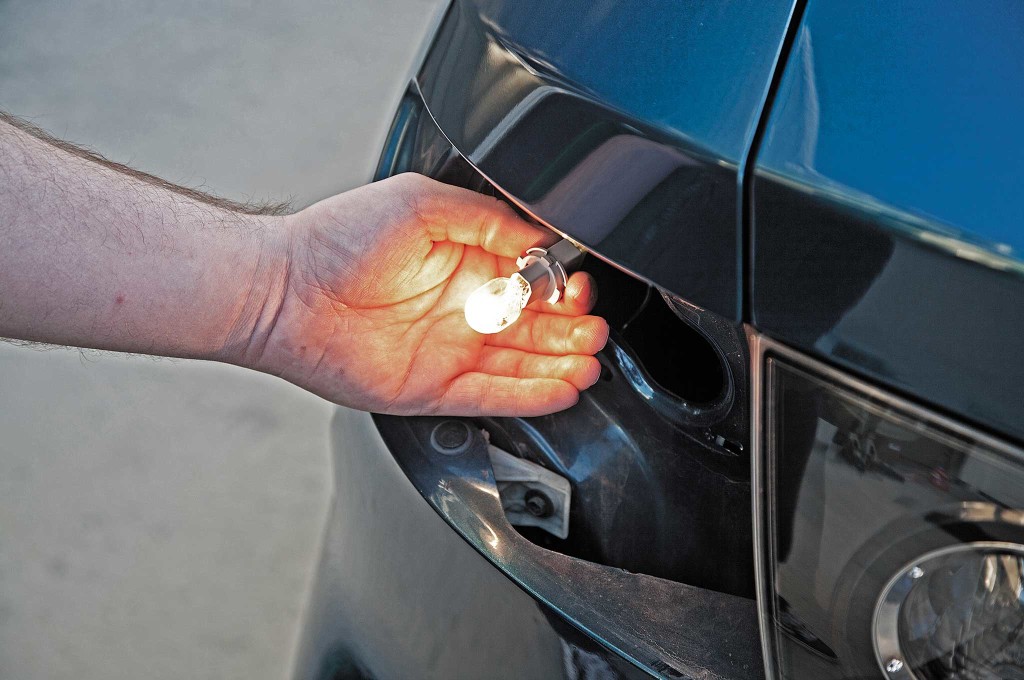
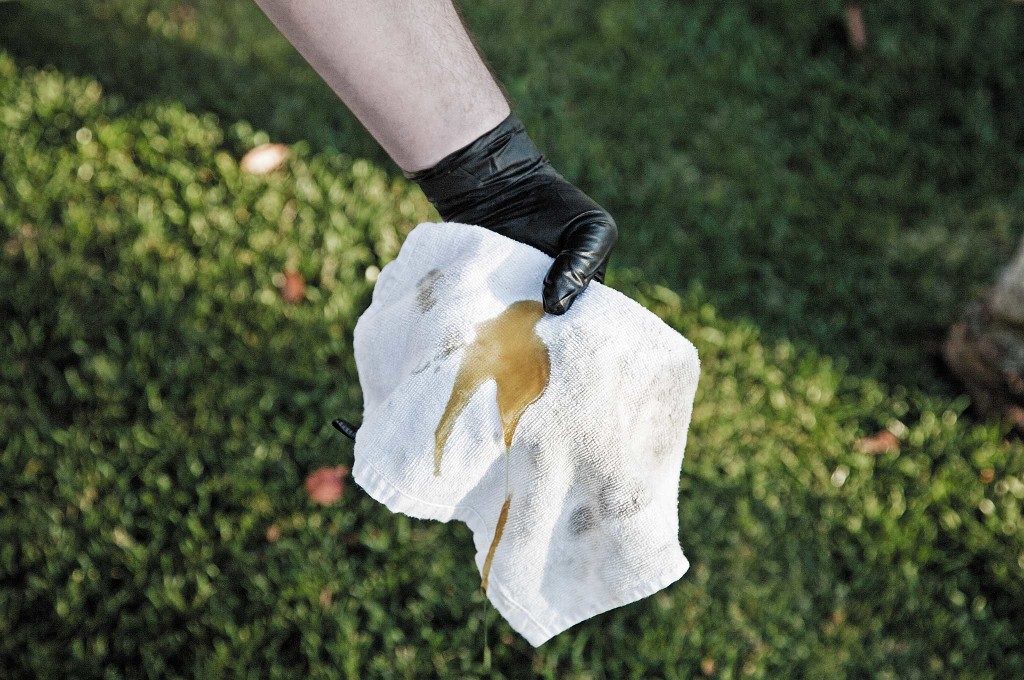
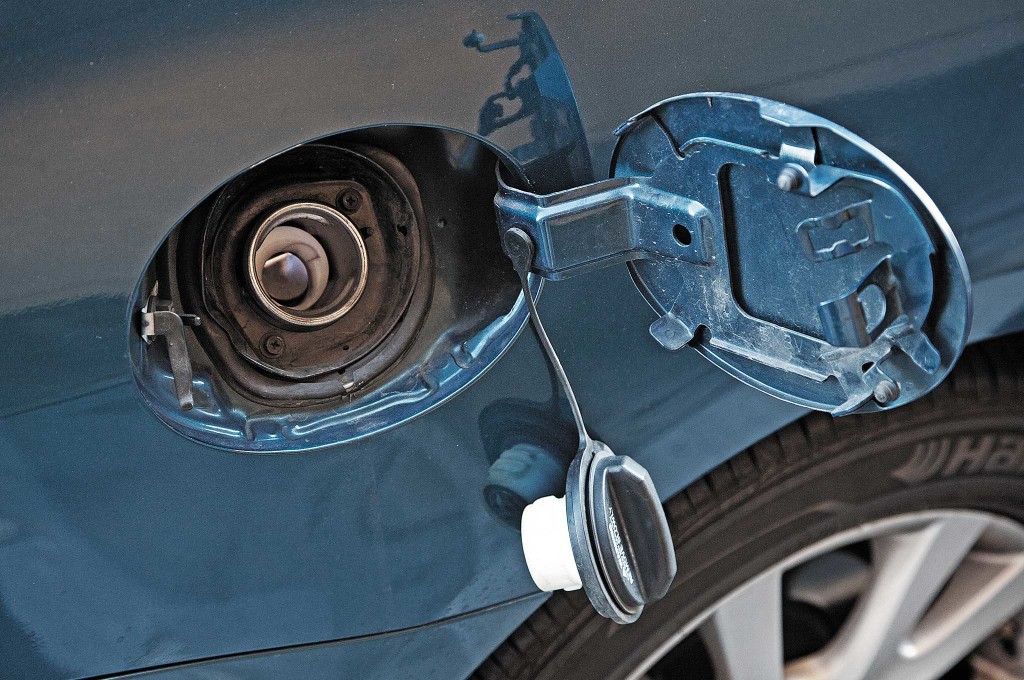
Above: The gas cap is easily found on most vehicles, but may be easier to access on older models.


If you don't already know why gasoline would be like mana from heaven in a doomsday situation, you're better off putting down this magazine and going to www.darwinawards.com. If you have a functional vehicle, you'll want to replenish its fuel supply. Also, gasoline burns, and it does so very efficiently. Naturally, it can be used for starting fires, as an excellent solvent to remove grease and grime, and as a highly sought-after barter good.

Illustration of a rubber hose and and hand awl for piercing.

Above: Rubber hose and something to pierce with, such as an awl, can be easily sourced from a hardware store.

How to Scavenge:

Due to its obvious value, gasoline is often surprisingly difficult to scavenge. Most new vehicles have a screen or valve that prevents the use of a hose to siphon from the gas tank filler neck. If you can find a vehicle from the mid-1990s or earlier, it may lack this security feature – but you'll need to pry the metal flapper near the opening out of the way with a screwdriver or stick before inserting the hose. If siphoning using your mouth, you also run the risk of serious injury from gasoline inhalation.

Assuming you don't care about damaging the vehicle, a much better option is to look underneath the car, find the fuel tank, and bore or punch a hole using a knife, awl, cordless drill, or other sharp instrument. Modern cars with plastic fuel tanks are ideal for this purpose, although it still can be done on older metal fuel tanks. Work with care, as you don't want to cause a spark. Note that you might need to punch a second air hole to help the gas flow more easily – a la those 2.5-gallon water jugs you get at the grocery store.

Jack and Tools

  • Scavenger Level: Easy
  • Tools Required: None
  • Uses:
    • Removing the car's wheels and tires
    • Steel lug wrench as a blunt instrument, weapon, or pry bar

Someone showing where to find recovery tools in the trunk of a vehicle.
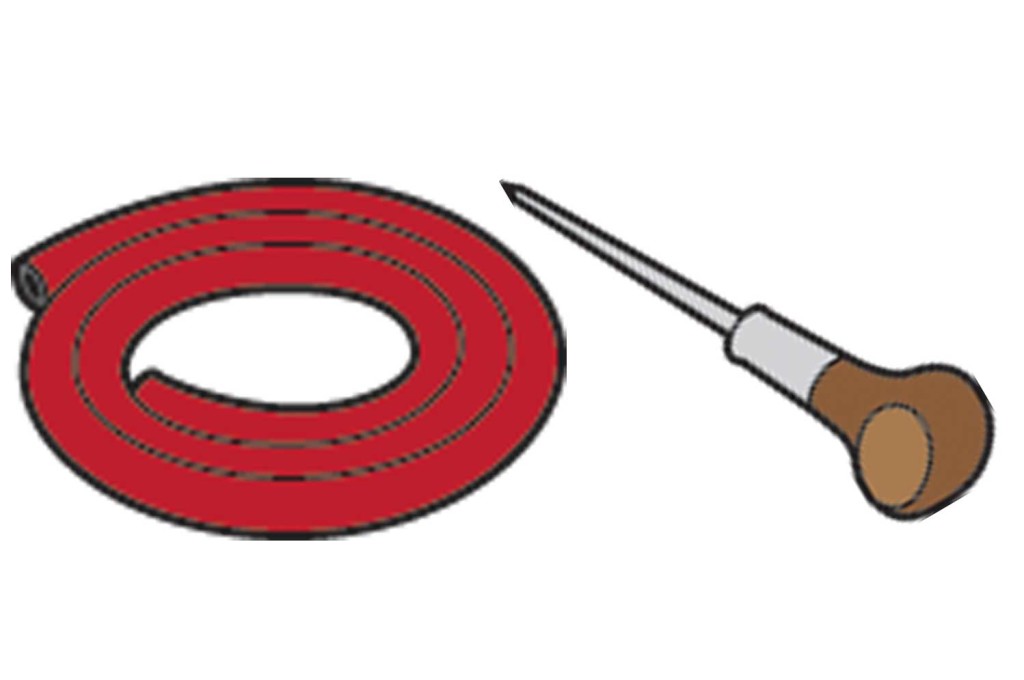
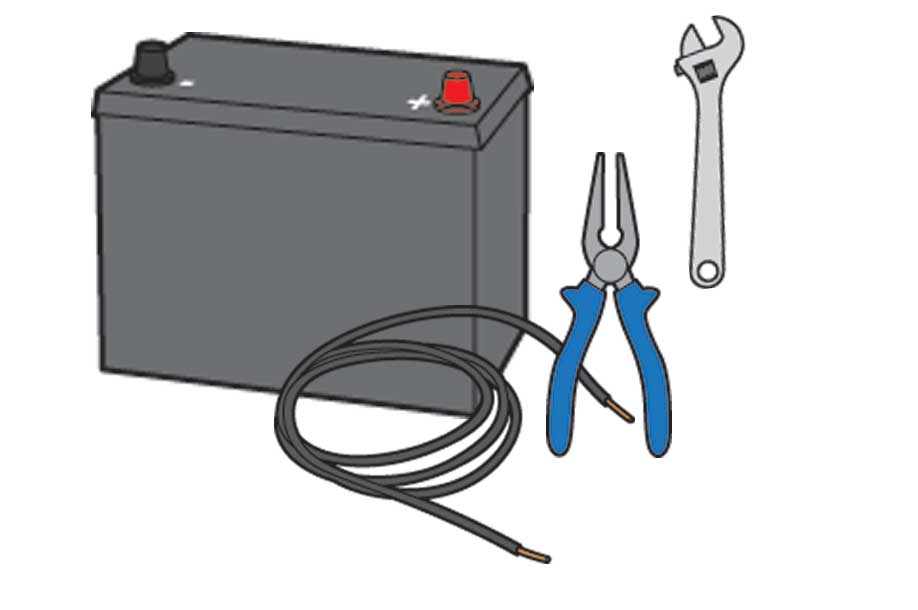
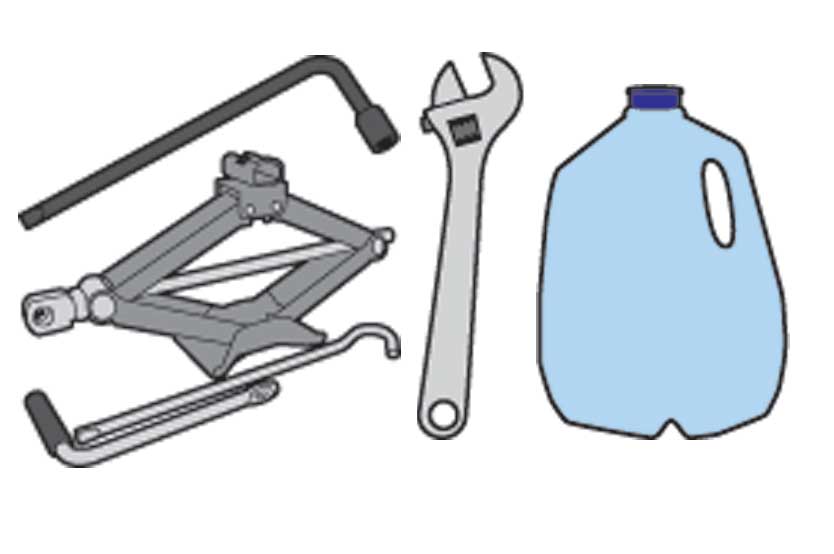
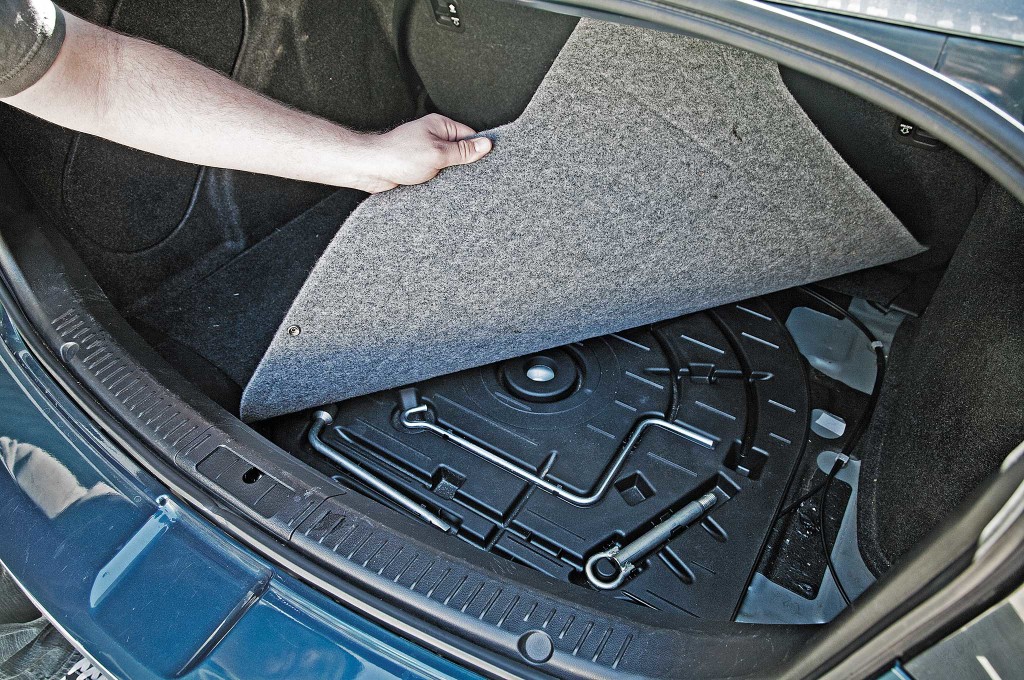
Above: Many vehicle models store their recovery tools under the carpet in the trunk.

Almost every passenger car includes a jack and tools for changing a flat tire. Primarily, they can be used to remove the car's wheels and tires – we'll get into why that's useful in the next step. Secondly, the steel lug wrench found in most cars functions as an excellent blunt instrument, weapon, or prybar. It's definitely worth holding on to.

Someone showing where to find the lug wrench in the back of a vehcle.
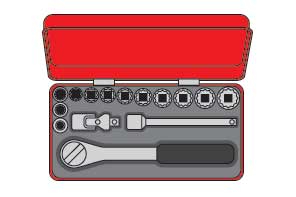
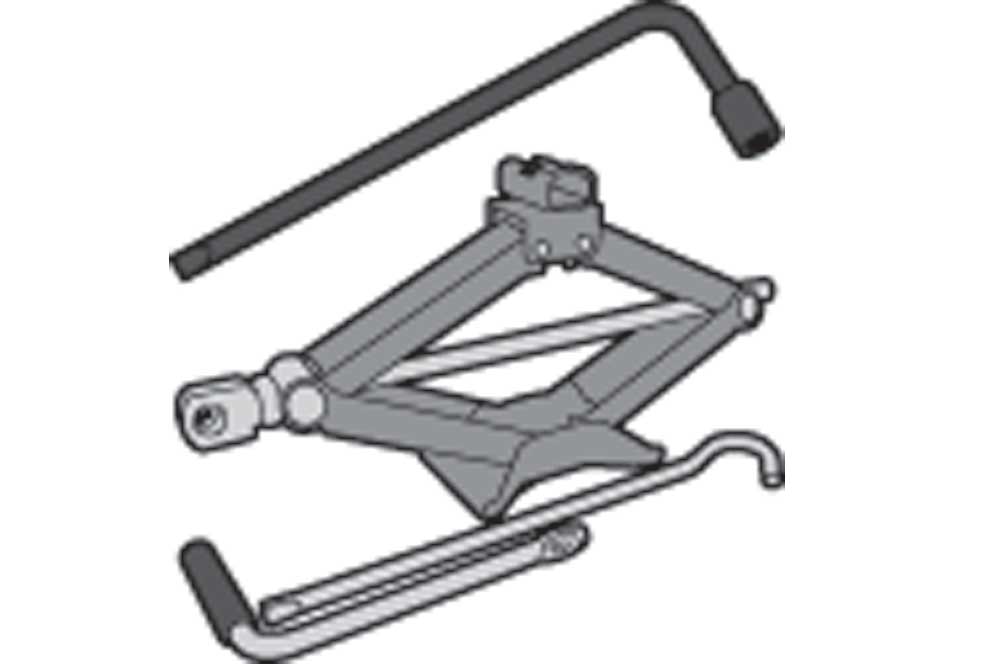
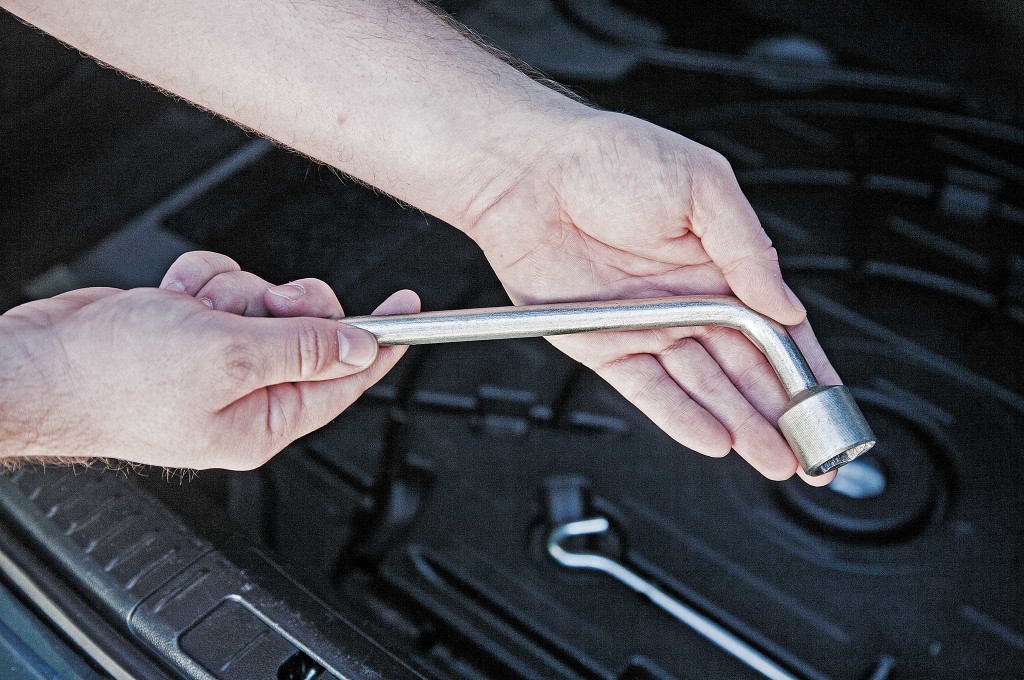
Above: Vehicle recovery kits typically include everything you'd need to remove a tire.

How to Scavenge:

Most cars store these tools underneath the trunk floor panel, although they may also be found underneath or behind the seats in some vehicles. The jack is typically also located near the tools. If you don't spot it immediately, check for storage compartments or removable panels in the trunk.

Tires

  • Scavenger Level: Easy
  • Tools Required: None for spare tire; jack and tools for other four
  • Uses:
    • Burning for signaling rescue with acrid black smoke

Someone scavenging a spare tire from the trunk of a vehicle.

Above: A spare tire has many uses beyond replacing a flat.

Ever see a tire burn? It creates acrid black smoke that's visible for miles. If you're in a survival scenario where rescue is possible, burning car tires is a great way to alert rescuers of your position.

Note: Always remember to let the air out of tires before burning, or they may burst and scatter or put out your fire.

Illustration of a jack stand and recovery tools.
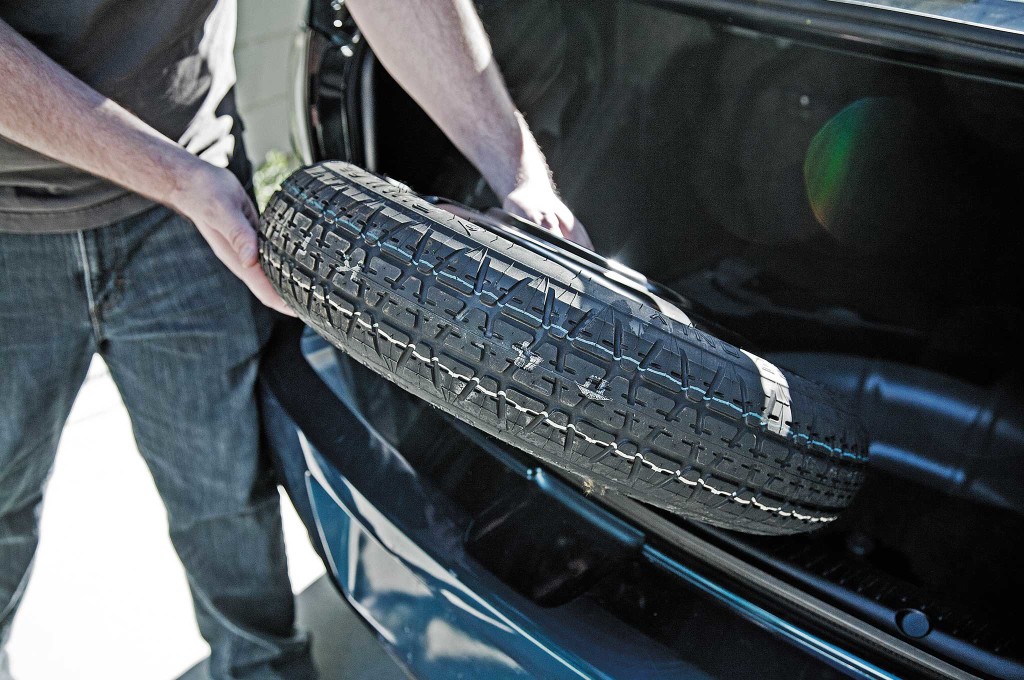
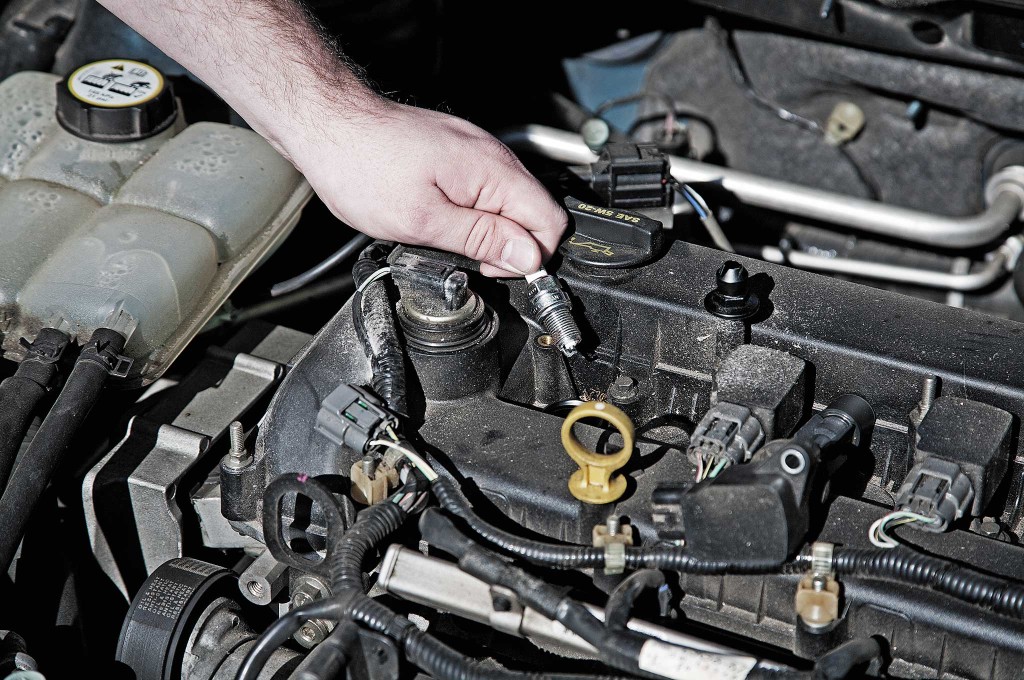
Above: With the use of a jack stand, a tire can be removed even if a spare is unavailable.

How to Scavenge:

Start by looking for a spare tire, as most vehicles have one inside or underneath the trunk. If the vehicle is missing the spare tire, or you need more tires for a larger fire, you can use the jack and tools (see No. 2) to remove the other four wheels and tires. One caveat: Removing a tire from its wheel is quite a chore with handtools, so hopefully you needn't roll them too far to where you plan to use them.

Carpet and Upholstery

  • Scavenger Level: Easy
  • Tools Required: Knife
  • Uses:
    • Warm bedding, blankets, or shelter against the elements

Photo of scavenged upholstery mats from a vehicle.

Above: Carpet, even in small amounts, has several uses.

Thick, soft, insulated fabric is always handy to have in a survival scenario. It can be used for warm bedding, blankets, or shelter against the elements.

Illustration of a box cutter.
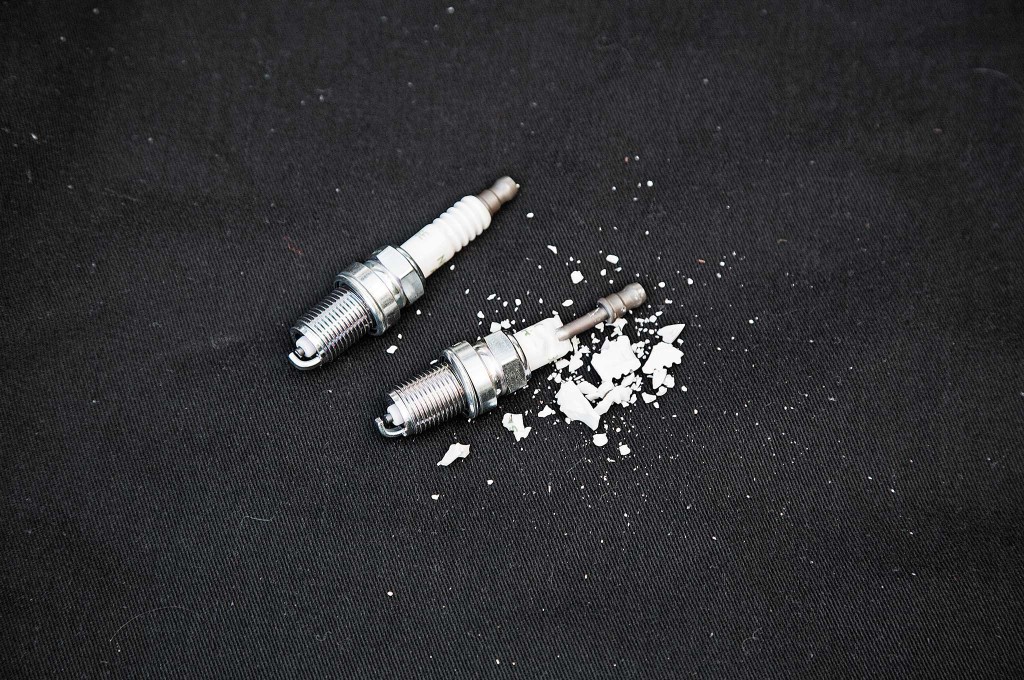
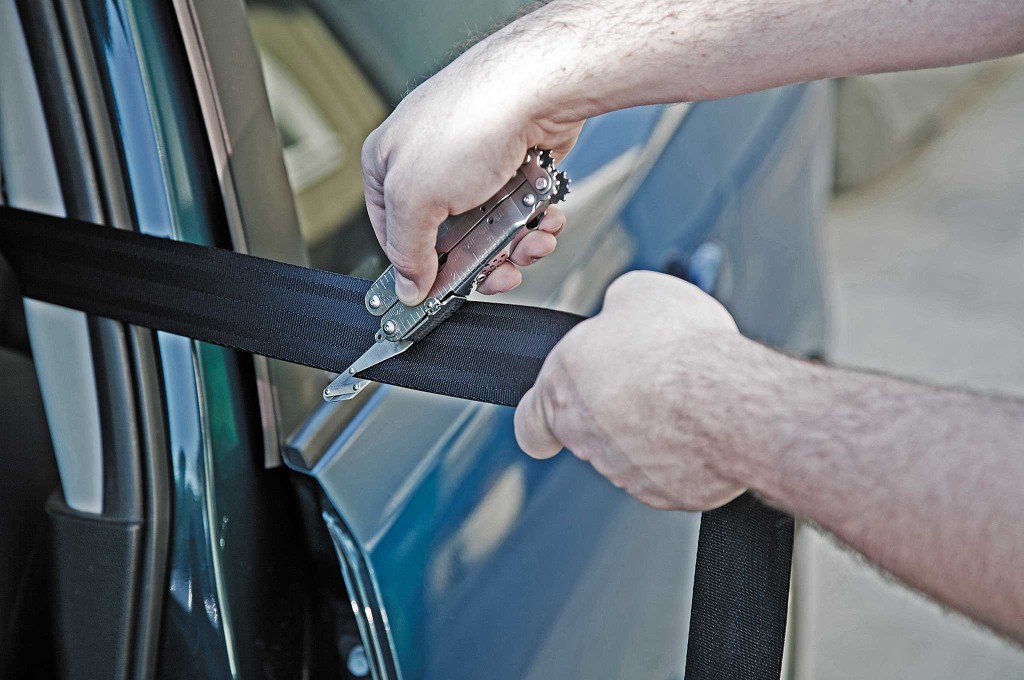
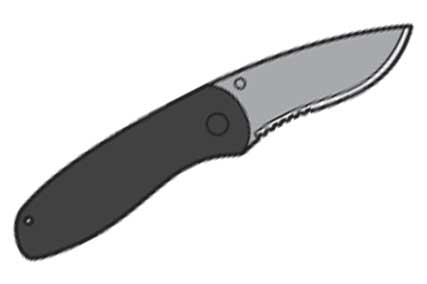
Above: You may need the help of a blade to completely remove upholstery from a vehicle.

How to Scavenge:

Look for trunk liners, floor mats, and seat covers that are easily removable. If these aren't available, you may have to cut away the upholstery. The headliner is a great place to start, as it's usually one large piece of fabric.

Warning: If you're stranded in a cold-weather environment, you might be tempted to use the upholstery as kindling for a fire. Be cautious. They usually contain chemicals that turn into toxic fumes once burned.

Mirrors

  • Scavenger Level: Easy
  • Tools Required: Screwdriver or prying instrument
  • Uses:
    • Rescue signaling at long distances
    • Starting fires
    • Assisting with personal hygiene

A scavenged review mirror.

Above: The reflective properties of a scavenged mirror can be used for signalling and self-care.

Automotive mirrors are large and high-quality, perfect for rescue signaling at long distances. They can also be used to start fires or to assist with personal hygiene (e.g. check for ticks, inspect an injury, or examine debris in your eye).

Illustration of a flathead screwdriver.

Above: Most mirrors will require a prying tool or screwdriver to remove.

How to Scavenge:

Exterior mirrors can be carefully pried out of their housings with a knife or flat screwdriver. Interior mirrors can be unscrewed from the roof, or unclipped from their windshield mounts with relative ease.

Battery

  • Scavenger Level: Easy
  • Tools Required: Wrench or pliers, jumper cables (optional)
  • Uses:
    • Jump-starting other cars
    • Starting fires
    • Powering lights or AC electronics with a power inverter

Photo of jumper cables being held above a car battery.

Above: Jumper cables aren't just for getting your car moving again.

Car batteries provide strong, long-lasting 12-volt electrical power. When combined with jumper cables or two lengths of large-gauge wire, they can be used to jump-start other cars, start fires, or even directly power lights (we'll cover that part later). If you're able to find a power inverter elsewhere, you can also use a car battery to power a myriad of AC electronics, such as mobile phones or radios.

car-scavanging-jumper-cables

Above: The voltage of a car battery can create sparks, but care must be taken to the risk of electric shock.

car-scavanging-jumper-cable-wrench

Above: These common recovery tools can usually be found somewhere in the vehicle.

Car batteries provide strong, long-lasting 12-volt electrical power. When combined with jumper cables or two lengths of large-gauge wire, they can be used to jump-start other cars, start fires, or even directly power lights (we'll cover that part later). If you're able to find a power inverter elsewhere, you can also use a car battery to power a myriad of AC electronics, such as mobile phones or radios.

How to Scavenge:

Pop the hood and take a look. Most of the time, the battery location will be obvious. Some cars hide the battery under a removable plastic cover, and a few luxury cars and sports cars relocate the battery to the trunk (where they may be hidden underneath trim pieces). If you've got jumper cables, you can connect them directly to the battery and touch them together for instant fire-starting sparks. If you want to take the battery with you, you'll need to disconnect the tie-down bar and terminal wires, usually with a small wrench or pliers. They are heavy, though.

Lights

  • Scavenger Level: Moderate
  • Tools Required: Car battery, wire, wrench, or pliers (if removing entire light assembly)
  • Uses:
    • Providing instant, bright light

Photo of an exposed headlight bulb.

Above: Bulbs can be accessed either through an open hood, or by removing the headlight casing.

Automotive lights can be wired directly to a 12-volt battery for instant, bright light. An entire headlight assembly can be removed for focused light, or the bulbs themselves can be used to illuminate a wide area.

Illustration of a car battery, wire, needle nose pliers and adjustable crescent wrench.

Above: Removing a headlight requires a little more effort, and possibly some extra tools.

How to Scavenge:

If you have a set of wrenches or needle-nose pliers, it may be possible to unbolt and remove an entire headlight with bulbs, but it'll take some time. If not, you can reach behind most car headlights and unclip or twist the bulbs to pull them out of the housings. Then cut two pieces of wire from the engine bay, and connect the positive and negative battery terminals to the corresponding bulb terminals for instant light.

Spark Plugs

  • Scavenger Level: Hard
  • Tools Required: Tool kit with ratcheting wrench, sockets, and extensions
  • Uses:
    • Glass-breaking tool

Photo of spark plug being removed from an engine block.

Above: Spark plugs are much easier to access on older vehicle models.

If you've got spark plugs, you've got a quick and easy glass-breaking tool. Just smash the white ceramic section on the plug with a blunt instrument, collect the larger chunks of ceramic, and you've got projectiles that can shatter glass panels instantly from a distance. It's much more effective and safe than trying to kick in a window or smashing a glass partition with a valuable tool (you wouldn't want to use, say, your flashlight as a hammer and risk damaging it, especially in a SHTF scenario).

Photo of two spark plugs side by side, one of them with broken ceramic.

Above: The ceramic insulator of spark plugs can be broken and used as shrapnel.

Photo of broken chunks of spark plug ceramic.

Above: Larger pieces of ceramic will be the most useful.

Illustration of a socket wrench and socket set.

Above: Spark plugs can be removed with deep sockets and a socket wrench.

How to Scavenge:

The downside to spark plugs is that they're quite difficult to remove, even with basic tools. However, if you've got a standard hardware store tool kit with a ratcheting wrench, sockets, and extensions, it's doable. Our example car is a four-cylinder with coil-on-plug ignition, the most common style for cars newer than the mid-1990s. On top of the engine, one 8mm bolt is removed to take out a coil pack, and a 5/8-inch deep socket is used to remove the spark plug itself. Then just wrap the plug in a cloth and smash it to collect the ceramic pieces.

Seatbelts

  • Scavenger Level: Easy
  • Tools Required: Knife or cord-cutting tool
  • Uses:
    • Excellent cordage

Photo of someone using a seatbelt cutter to remove a section of seat belt.

Above: A knife, scissors or dedicated seatbelt cutter can be used to remove a section of belt.

Seatbelts are constructed of extremely strong, durable nylon, making for excellent cordage. If you need to tie something down, look no further.

Illustration of a folding knife.

Above: Sharp cutting tools are necessary to get through the nylon of a seat belt.

How to Scavenge:

Simply pull to unravel the seatbelt from its reel, then cut. You can always use a knife, but we jumped at the chance to finally use the nifty seatbelt cutter on our multitool.

Motor Oil

  • Scavenger Level: Moderate
  • Tools Required: Jack and tools, wrench, empty bottle or rag
  • Uses:
    • Lubricant for mechanical items
    • Providing heat in an oil-burning furnace

Photo of a man holding a rag with engine oil displayed on it.

Above: Oil is a petroleum product, which means it has both protective and flammable properties.

Motor oil is an excellent lubricant for mechanical items – including your firearms – hence its use inside car engines. It can also be used in an oil-burning furnace to provide heat (there are plenty of guides available online).

Illustration of recovery tools, and a gallon jug.

Above: Since it's in the engine, getting to the oil will require tools and a basic understanding of where to access it.

How to Scavenge:

For most passenger cars, you'll need to jack up the vehicle, although some pickups have enough ground clearance for you to crawl underneath. Remove the oil drain bolt with a wrench and drain some oil onto a rag or into a bottle.

Scavenge it Clean

When scavenging from a vehicle, always check the glovebox, center console, and other storage compartments for miscellaneous items. You might be surprised by what you'll find – bottled water, medications, first-aid kits, hand sanitizer, flashlights, lighters, pens and paper, tools, and more. In addition, vehicles have a lot of glass, wiring, and rubber hoses to be salvaged. You might even be able to use the vehicle itself as a temporary shelter – or disconnect and use the hood and trunk lids as roofing or sleds. Car parts and accessories have many uses beyond what they were built for, so your adaptation will be limited only by your creativity and ingenuity.

Read More

Subscribe to Recoil Offgrid's free newsletter for regular updates on more content like this.

Editor's Note: This article has been modified from its original print version for the web.


OFFGRID 411 – Weather Fatalities

There are certain forces of nature we have no control over, such as the pull of gravity or the excruciatingly long lines at the DMV. Another uncontrollable factor that affects our lives is the weather and the potential for weather fatalities. When Mother Nature's in a foul mood, conditions can get downright deadly.

With rain and harsh weather being one of the prevalent themes this issue, we decided to take a closer look at the U.S. Natural Hazard Statistics. The National Weather Service collects this data by tracking fatalities in the United States caused by weather in nine different categories, including tornadoes and hurricanes. It also records fatalities, injuries, and other damage caused by weather-related hazards.

Making plans and preparations on how best to deal with the weather can keep you and your loved ones safe. Looking at how many people have lost their lives due to meteorological conditions serves as a reminder to take the forecasts seriously.

weather-fatalities

Just by taking a quick glance at the graph above, you can see which types of weather can play a role in meeting your maker. The top three contenders over nine years (2004-2013) racking up the highest mortality rate are heat tornados, hurricanes, and heat related weather fatalities. Of course, succumbing to the weather depends on your present location, but it helps to highlight that the forces of nature are not to be ignored.

There are plenty of ways you can prepare for the inevitable harsh weather event, from extreme heat inducing blackouts to frigid blizzard conditions, and anywhere in between. Whichever strategy you decide to use to prepare, it pays to look up the data available in your area. By looking into what you will be most affected by, the safety and well being of you and your loved ones can be better protected.

Sources
National Weather Service – www.weather.gov
National Oceanic and Atmospheric Administration – www.noaa.gov


Urban Foraging: Food is Everywhere

Warning! This article is meant to be a quick overview and not a detailed guide on urban foraging. Eating certain plans could lead to serious illness and even death. To learn more, consult with a reputable instructor or trained botanist

Tough times call for tough measures — sometimes, they may even call for a weed — and this is where urban foraging comes in. No we don’t mean the “medicinal” kind. We’re talking about the ones that grow annoyingly al over your lawn. Should the nation fall into an economic collapse and your month-long emergency supply of food becomes depleted, there’s no doubt that you and your family would be in real trouble. In a scenario like that, grocery stores would have long been emptied, and hitting your favorite drive-through would be a thing of the past. Without stores and restaurants, you’d be thrown back to hand-to-mouth subsistence, back to hunting and gathering. But there are few animals you’d want (or be able) to hunt in the city, and do you even know how to forage for plant foods?

Urban Foraging Basics

At first look, foraging can seem scary, mysterious, or even nauseating. Yes, we’re suggesting that you eat the “weeds” from the gutter. Some of those weeds are edible, and some are actually tasty. With some patience, practice, and careful observation, you’ll begin to see wild food along the city streets, in your neighborhood, and especially in the park. Positively ID these plants, prepare them correctly, and you might even like them.

This is a quick list of wild edible plants that can be found almost anywhere, and it can form the foundation of your urban foraging skill set.

acorns

Acorns

What is it: Acorns are the nuts from oak trees (the genus Quercus). All species of oaks produce acorns that are edible to humans, though a few are exceptionally bitter. Look for symmetrical, egg-shaped nuts with a two-part shell. One part is the shell covering the entire nut. The other part is the acorn cap, which only covers part of the inner shell.

Where to find it: Oaks are commonly planted throughout cities and suburbs, as they are strong and resilient shade trees. Native to the Northern Hemisphere, they can be found coast to coast in the USA. Luckily for the forager, oaks also produce a hailstorm of nuts in early autumn.

How to get it: Wait for them to fall, then scoop them up when they’ve piled up in a low spot. You’ll often find them on sidewalks and road surfaces directly beneath oak trees. A broom and dust pan makes quick work of collecting them; so can a square shovel and a bucket.

How to process, prepare, and store it: Acorns do require some processing to eat. Crack them, remove their shells, soak the nut pieces in water, and change the water several times a day. When the nut pieces are no longer bitter, they can be eaten as is, dried and ground into flour, or prepared in many other ways. Store the processed nuts by drying or freezing them. Acorns can still be harvested several months after falling, if the nut meat still looks good and solid. One pound of acorns (depending on the species) can provide almost 2,000 calories.

Possible dangers: Make sure you’ve actually found acorns. Buckeye nuts (genus Aesculus) look similar and are poisonous. Buckeye nuts have an asymmetrical shape, and their outer nutshell covers the entire inner nutshell. Another trick to identify a bad nut is that buckeye trees have opposite branching (most leaves and twigs have a “twin”), while oaks have alternate branching (leaves and twigs grow in a zigzag pattern, like most plants).

chickweed

Chickweed

What is it: Chickweed (Stellaria spp.) is a small herbaceous plant with leaves in opposite pairs and little white flowers that appear to have 10 petals (but it’s just five, each deeply split). Chickweed is a great salad plant.

Where to find it: Widespread in Europe and North America, this plant can be found at the edges of pavement, parks, yards, planters, and almost anywhere. It can be found in full sun or in the shade. It’s surprisingly tough for such a small, tender, and juicy plant.

How to get it: Collect the tender stems (and the leaves along with them) by picking them as you would any other salad plants. They’re tender enough to pinch off what you need.

How to process, prepare, and store it: Wash the plants thoroughly, and eat them as salad or cook them as cooked greens. Fresh chickweed can be stored in the fridge for a few days, but doesn’t keep long. Let it stay alive and unharmed until you’re ready to pick it and use it. Being a salad item, chickweed is low in calories, but it does provide vitamins A and C.

Possible cons: Chickweed can have a mild laxative effect. Also, be cautious of where you go foraging. Cities and counties often spray herbicides and pesticides along roadways, and any chickweed not killed in the process could be contaminated with toxic chemicals.

hanging-pine

Pine

What is it: Pine trees (the genus Pinus) are easily identified by having needles in clusters of two to five — and mature trees can also bear the tell-tale pine cones. Fresh green pine needles, the innermost layer of bark, and the seeds of large-cone species can be used as food.

Where to find it: Pines can be found in a wide range of soils and climates, largely in the Northern Hemisphere. Hit your nearest city park to find them, or a Christmas tree lot in December.

How to get it: Pine needles are the easiest pine part to forage, and they make a surprisingly tasty tea. Just tear them off the live branches. Pine nuts can also be peeled out of larger pine cones. Inner bark (the cambium layer) can be shaved from live wood, though it’s very damaging to the tree.

How to process, prepare, and store it: Use the needles fresh or dried for tea. Rip up a small handful of needles and drop them into a cup of scalding hot water. Let them sit for five minutes, strain, sweeten, and sip. This cup of tea should provide about 500 milligrams of Vitamin C. Don’t boil your tea, or it’ll become bitter and destroy the vitamins. The inner bark from the tree can be scraped from branches and tree trunks, dried, and ground into powder for a flour additive. The pine cones can sometimes be opened near a fire by the heat. These can be eaten as is, or stored in jars until used. One cup of pine nuts has over 900 calories.

Possible dangers: Pine needle tea (consumed regularly) is not recommended for pregnant women — some of the compounds may be abortive. Loblolly pine (Pinus taeda) and ponderosa pine (Pinus ponderosa) may also have some additional toxins, so these are no longer recommended for tea (for anyone).

dandelion-plant

Dandelion

What is it: Dandelion (Taraxacum officinale) is a lawn-loving weed native to Europe, but it’s also found coast to coast in the USA. They provide edible flowers, leaves, and roots.

Where to find it: This plant can be found anyplace sunny. Dandelion is one of the most common plants to actually grow out of cracks in the sidewalk. It’s widespread in parks and abandoned lots.

How to get it: Use a small shovel to pop the entire plant out of the ground. Cut the sections apart so that you can take advantage of the different uses of its various parts.

How to process, prepare, and store it: Wash the leaves thoroughly, and eat them as a salad or sauté them in oil for a nice cooked green. Fresh flowers only last one day in the fridge, but can be battered and deep fried for amazing fritters. The roots can be washed, dried, roasted, and brewed into a caffeine-free coffee substitute. The roasted roots will last indefinitely in a jar or paper bag. Leaves and other parts are low in calories, but packed with Vitamin A.

Possible cons: None that are inherent. However, because dandelions are so prevalent, be wary of possible contamination from herbicides and pesticides used in certain parts of your city.

maple-extraction

Maple

What is it: Maples are beautiful trees that produce edible seeds in late spring and safe drinking water and sweet syrup in midwinter. Sugar maples and black maples offer the highest sugar levels, but any native maples can be used for sap and syrup.

Where to find it: Used similarly to oaks as shade trees, maples can be found growing along streets, in landscaping, and in yards and parks. Maples are commonly found in the eastern half of the United States and Canada, though they can be grown almost anywhere as a landscaping species.

How to get it: The “helicopter” seeds can be picked up or swept up beneath the trees in late spring. The sap can be tapped in February by drilling a hole into the tree and attaching a container. If you’re picking up seeds in an urban setting, no one usually cares. But if you’re drilling holes in trees and hanging jugs on them, make sure you have permission and that your neighbors understand what you’re doing. “Syruping” doesn’t harm the trees, but it’s very conspicuous and occasionally alarming — what with all the odd containers lying around and the propane tanks to run the outdoor burner for sap cooking. In Illinois, one family of syrup-makers had a SWAT team at their door after neighbors called in about the suspicious “meth lab” activity.

How to process, prepare, and store it: The seeds can be peeled of their helicopter housing, rinsed, and then boiled for 30 minutes to create a unique cooked vegetable. Sap can be collected in buckets or bottles and drunk immediately as a water source. The xylem tissue of the trees provides excellent filtration of ground water. The sap can be boiled and reduced dramatically to yield the familiar maple syrup. You’ll need to boil off roughly 40 gallons of sap to produce just 1 gallon of syrup, but it’s worth it. Real maple syrup is 825 calories per cup — and delicious.

Possible dangers: Don’t use the sap from a maple if it’s milky white in color. This comes from the invasive Norway maple (Acer platanoides), which is toxic.

plantain-plant

Plantain

What is it: This plant is often the sidekick to the ubiquitous dandelion. Plantain (Plantago spp.) is a low-growing herbaceous plant with leaves that bear several heavy parallel veins. There’s no relation to the banana-like fruit in the grocery store, just the same common name. The leaves and seeds are edible.

Where to find it: Lawns, sidewalks, parks, or any other sunny place where dandelions would normally be present.

How to get it: Pick the leaves and strip off the seeds by pulling the stalk through your hand — easy!

How to process, prepare, and store it: The fresh leaves can be chopped up and added to salad or cooked as a cooked vegetable. The cooked leaves also freeze well, and can be dried and rehydrated. The seeds can be dried and stored in a jar or bag. They can be used fresh or dried by grinding them up and stewing as porridge, or by boiling them alongside other grains (like rice). Fresh plantain leaves can also be mashed and applied to cuts, scrapes, rashes, and burns to speed healing. This mashed leaf poultice is even better at relieving the pain of bee stings and venomous insect bites.

Possible dangers: Like the dandelion, the plantain has none in its natural state, but could be affected by herbicides and pesticides.

The Conclusion

Having taught people the art of foraging wild food plants for almost 20 years, I’m still surprised myself at the bounty of wild edibles within city and suburban limits. Flimsy concrete and sticky asphalt can’t hold back the eruptive force of the weeds trying to break free into the sunlight. In urban environments and in the wild, there’s food literally everywhere. You just have to be able to spot it, make sure it really is the right plant, and prepare it properly.

If times ever get so tough that you’re wondering if you can eat the weeds in the sidewalk cracks, we hope you had the foresight to hang onto every copy of OFFGRID. And please pick up one of the edible plant books mentioned in the sidebar. We might not find our favorite dishes out in a post-apocalyptic world, but there’ll still be plenty of food out around.

Common Foraging Mistakes to Avoid

Not every plant wants to be your friend. Poison ivy should be a good enough example of the dangers of the plant kingdom. Just brushing against the plant can cause a severe rash (for those who are allergic to its oils). But this dreaded itch is a mere inconvenience compared to the real harm from ingesting the wrong plant.

Making assumptions: We all know what happens when you assume something. But with foraging, you’re not just making an “ass” out of “u” and “me,” you could kill us both. Assumptions about plant identity can lead to hospital trips — or even a trip to the morgue. If it doesn’t look exactly as it should, don’t assume you know what it is. And don’t eat it.

Eating multiple new plants: In your excitement to try new things, it’s easy to load up a plate with many new plants that you’ve never tried before. Don’t do that. If you’re allergic to one of them or have some other negative reaction, you won’t know which one is the culprit. Rather than play vomit-roulette, try only one new plant per day until you see how your body handles it.

Leading without experience: If you’re in a legit survival situation (or any other situation), don’t let the amateurs pick the wild food. Make certain that experienced foragers are leading the hunt for edibles and inspecting everything that their helpers collect. Of course, people can learn to identify plants fairly quickly, but hunger can make us less keen observers. Just as you wouldn’t send someone out hunting who’s never fired a shot before, make sure someone who knows what they’re doing is running the foraging foray.

Reading Material

Peterson’s Field Guide to Edible Wild Plants by Lee Allen Peterson.  Over 400 plants with detailed drawings, as well as thorough descriptions and usage information.

Edible Wild Plants, A North American Field Guide by Elias and Dykeman.  Over 200 plants, arranged by season with beautiful color photos and solid usage information.

Edible Wild Plants, Wild Foods From Dirt To Plate by John Kallas.  Great book on wild food preparation with excellent pictures of plant parts and growth stages.

Additional Sources

Related Posts