Build the Perfect Post-Apocalypse Micro Cleaning Kit for Your Gat

The enormous ship appeared first in the atmosphere, like a giant cumulonimbus cloud made of alloy. Then when the large transport crafts disengaged from the mother ship and slowly lumbered down toward the surface, nobody quite knew what to think. When the smaller carrier ships launched from the transport ships and landed on the surface, nobody quite knew what to say. When the three-legged aliens with electro-discharge plasma weapons started exiting the ships, nobody knew who to call. And when those weapons started shooting humans and causing them to explode like water balloons, nobody quite knew what to do — except for your friend, Bubba.

Bubba raised his Remington 870 shotgun and fired back with some 00 buckshot, kinda exploding one of them in return. He sent the first clear message to our new visitors: Exploding humans would not be tolerated. From that point on, interstellar diplomacy emanated from the barrel of a gun.

Since that time, the war had settled into a stalemate. The visitors mostly controlled the population centers while the humans surrounded and controlled the backwoods and countryside. While the alien technology was truly awesome, their tactics sucked. The humans were slowly forcing them into tighter and tighter security zones around their ships. Quick hit-and-run attacks, ambushes, and sniping missions were taking a toll on the invaders, but they were also taking a toll on our weapons. Firearms maintenance was difficult at best; there were very little supplies.

Funny thing — when the end of humanity is approaching, everybody remembers to bring guns, magazines, and ammunition. But cleaning supplies? Not so much.

Prepped Cleaning Kit

Regardless if you’re preparing for an alien invasion or a disaster of more terrestrial origins, it’s always ideal to have at least one firearms kit with tools, spare parts, and much-needed cleaner and lubrication. Let’s take a look at putting together a bare-bones cleaning kit that is small and easy to pack.
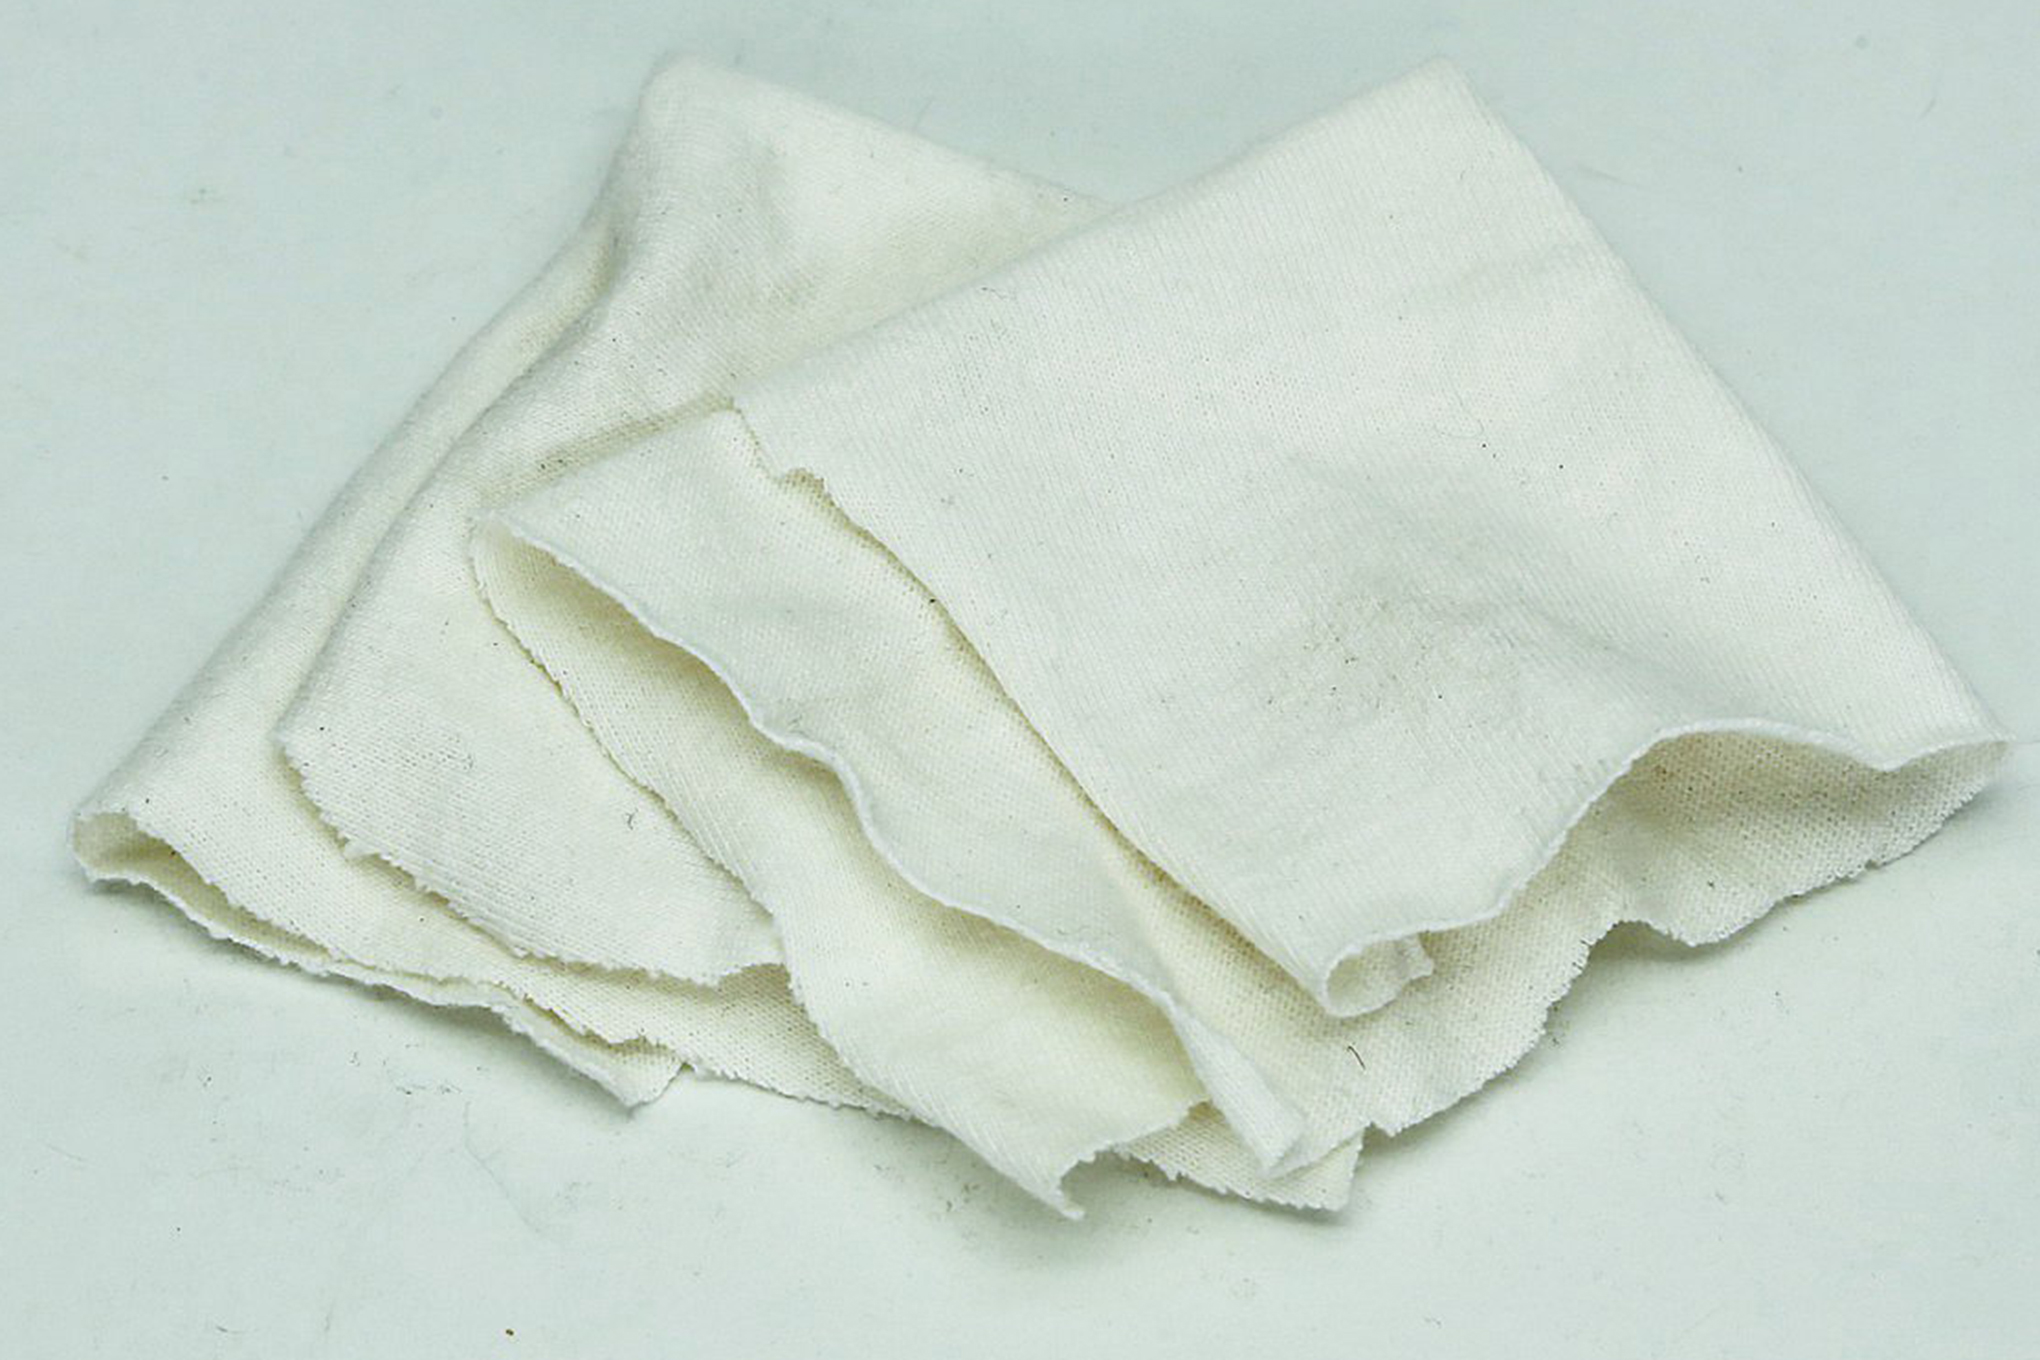
cleaning-cloth

Cleaning Cloth

Some type of cloth is needed for wiping away dirt, carbon, and debris from your firearm. While just about any piece of cloth will work, standard-colored handkerchiefs work well. They are thin, absorb fluids, and easily fold into flat compact sections. Cut a standard-sized handkerchief in half, wrap it around your BoreSnake, and pack it away. Another option is using custom cut sections of cloth from men’s white undershirts. When selecting cleaning cloths look for materials made from 100-percent cotton. They tend to absorb fluids better than other blends.

clp-cleaners

CLP

Proper firearms maintenance involves the use of several different types of task-specific cleaning solutions, which are generally broken down in three categories: cleaners, lubricants, and preservatives.

Cleaners are solutions specifically designed to dissolve carbon and copper fouling. They are used to clean all surfaces of the firearms and the bore of the barrel. Lubricants are various types of oils that are used to coat the surfaces of metals that contact each other. Lubricants reduce friction and drag between metal components and suspend dirt and fouling in the fluid to reduce its accumulation over long periods of use. Preservatives are liquids that coat the metal parts of the firearms with a thin film of liquid that prevents rust and corrosion from forming due to exposure to the environment. All three are needed to effectively maintain your firearm over long periods of time, but carrying three different bottles of cleaning accessories compromises the idea of a small cleaning kit.

Fortunately, there are products available specifically for multiple cleaning tasks called CLP, named so after the three categories. CLP products such as Break-Free and FIREClean perform all three cleaning functions with only one solution. While the individual solutions most likely offer better performance in their respective categories, CLPs offer good performance across the board. When building a micro cleaning kit, a CLP solution is really the only choice for effectively performing all of your cleaning requirements without weighing down your bug-out bag. An easily packed ½-ounce bottle of CLP, when judiciously used, will last several cleaning sessions.
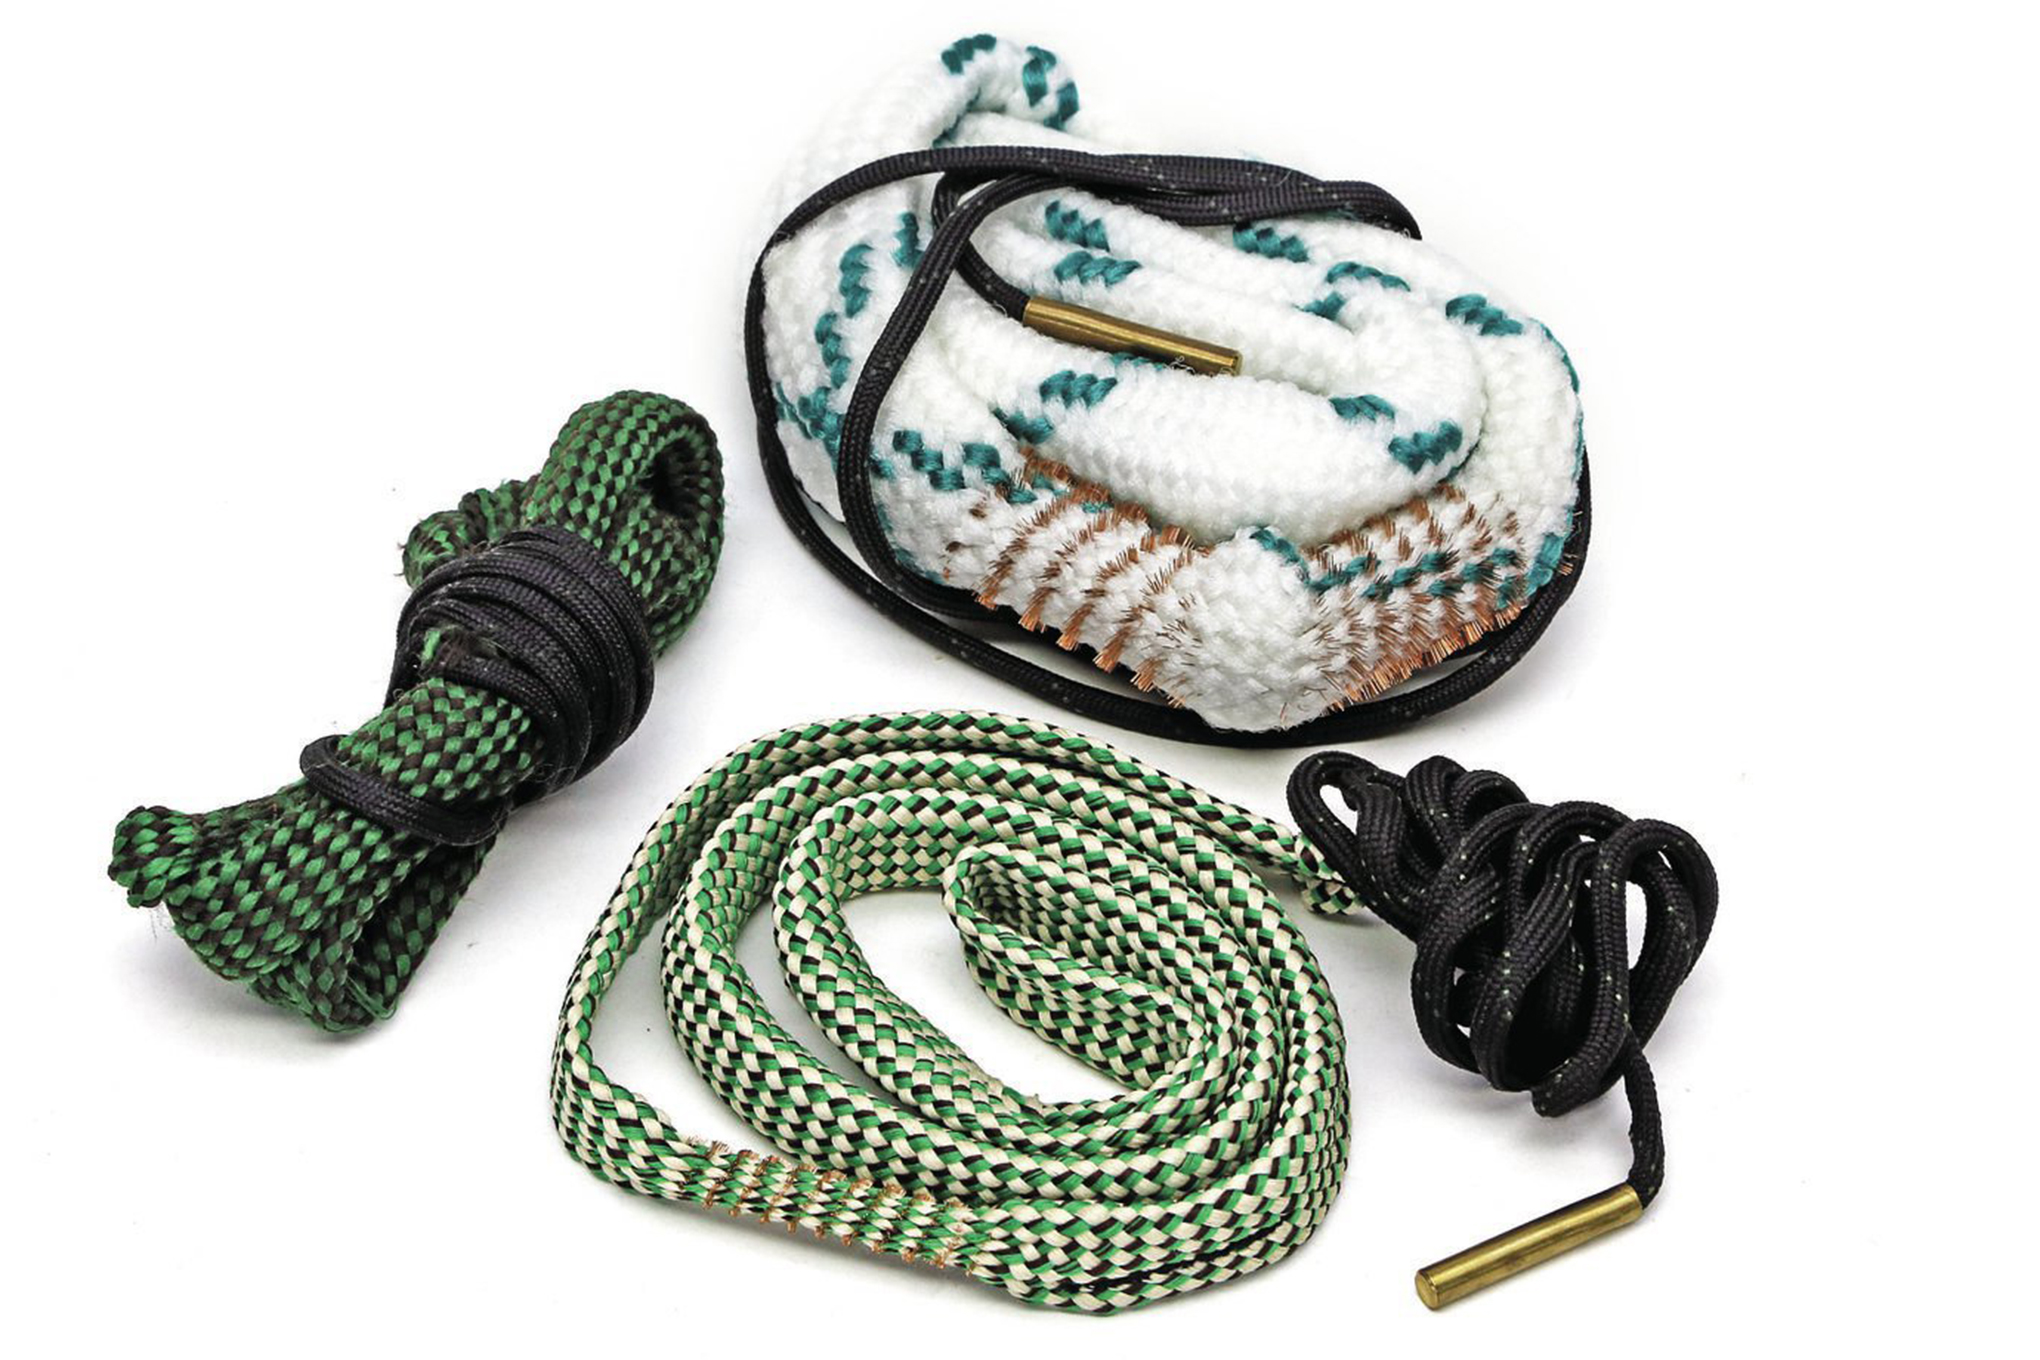
gun-barrel-cleaning-rod

Cleaning Rod

Conventional bore cleaning tools use a metal rod, either in sections or as a one-piece unit. The end of the rod is threaded for the use of multiple cleaning accessories such as a wire brush for scrubbing the barrel and different diameter barrel jags. Patches are wrapped around the jag to create a seal for pushing fouling out of the bore and for coating the inside of the bore with protective oils. Unfortunately, cleaning rods are bulky to store (even the sectional ones) and are prone to bending and breaking. They also require the use of at least two different detachable accessories, the wire cleaning brush and the bore jag.

A much better option that combines all of these features into one small package is a product by Hoppes called the BoreSnake. It’s a braided nylon cord with small sections of wire bristles implanted in the weave of the cord. There’s a small section of nylon prior to the bristles for the application of cleaning solution and a large section of braided nylon behind the bristles to pull out any debris loosened by the bristles. The BoreSnake effectively replaces the cleaning rod, the wire brush, and the jags in a single braided cord that can be folded very tightly for storage. It’s the centerpiece of any micro cleaning kit.

super-fine-steel-wool-and-toothbrush

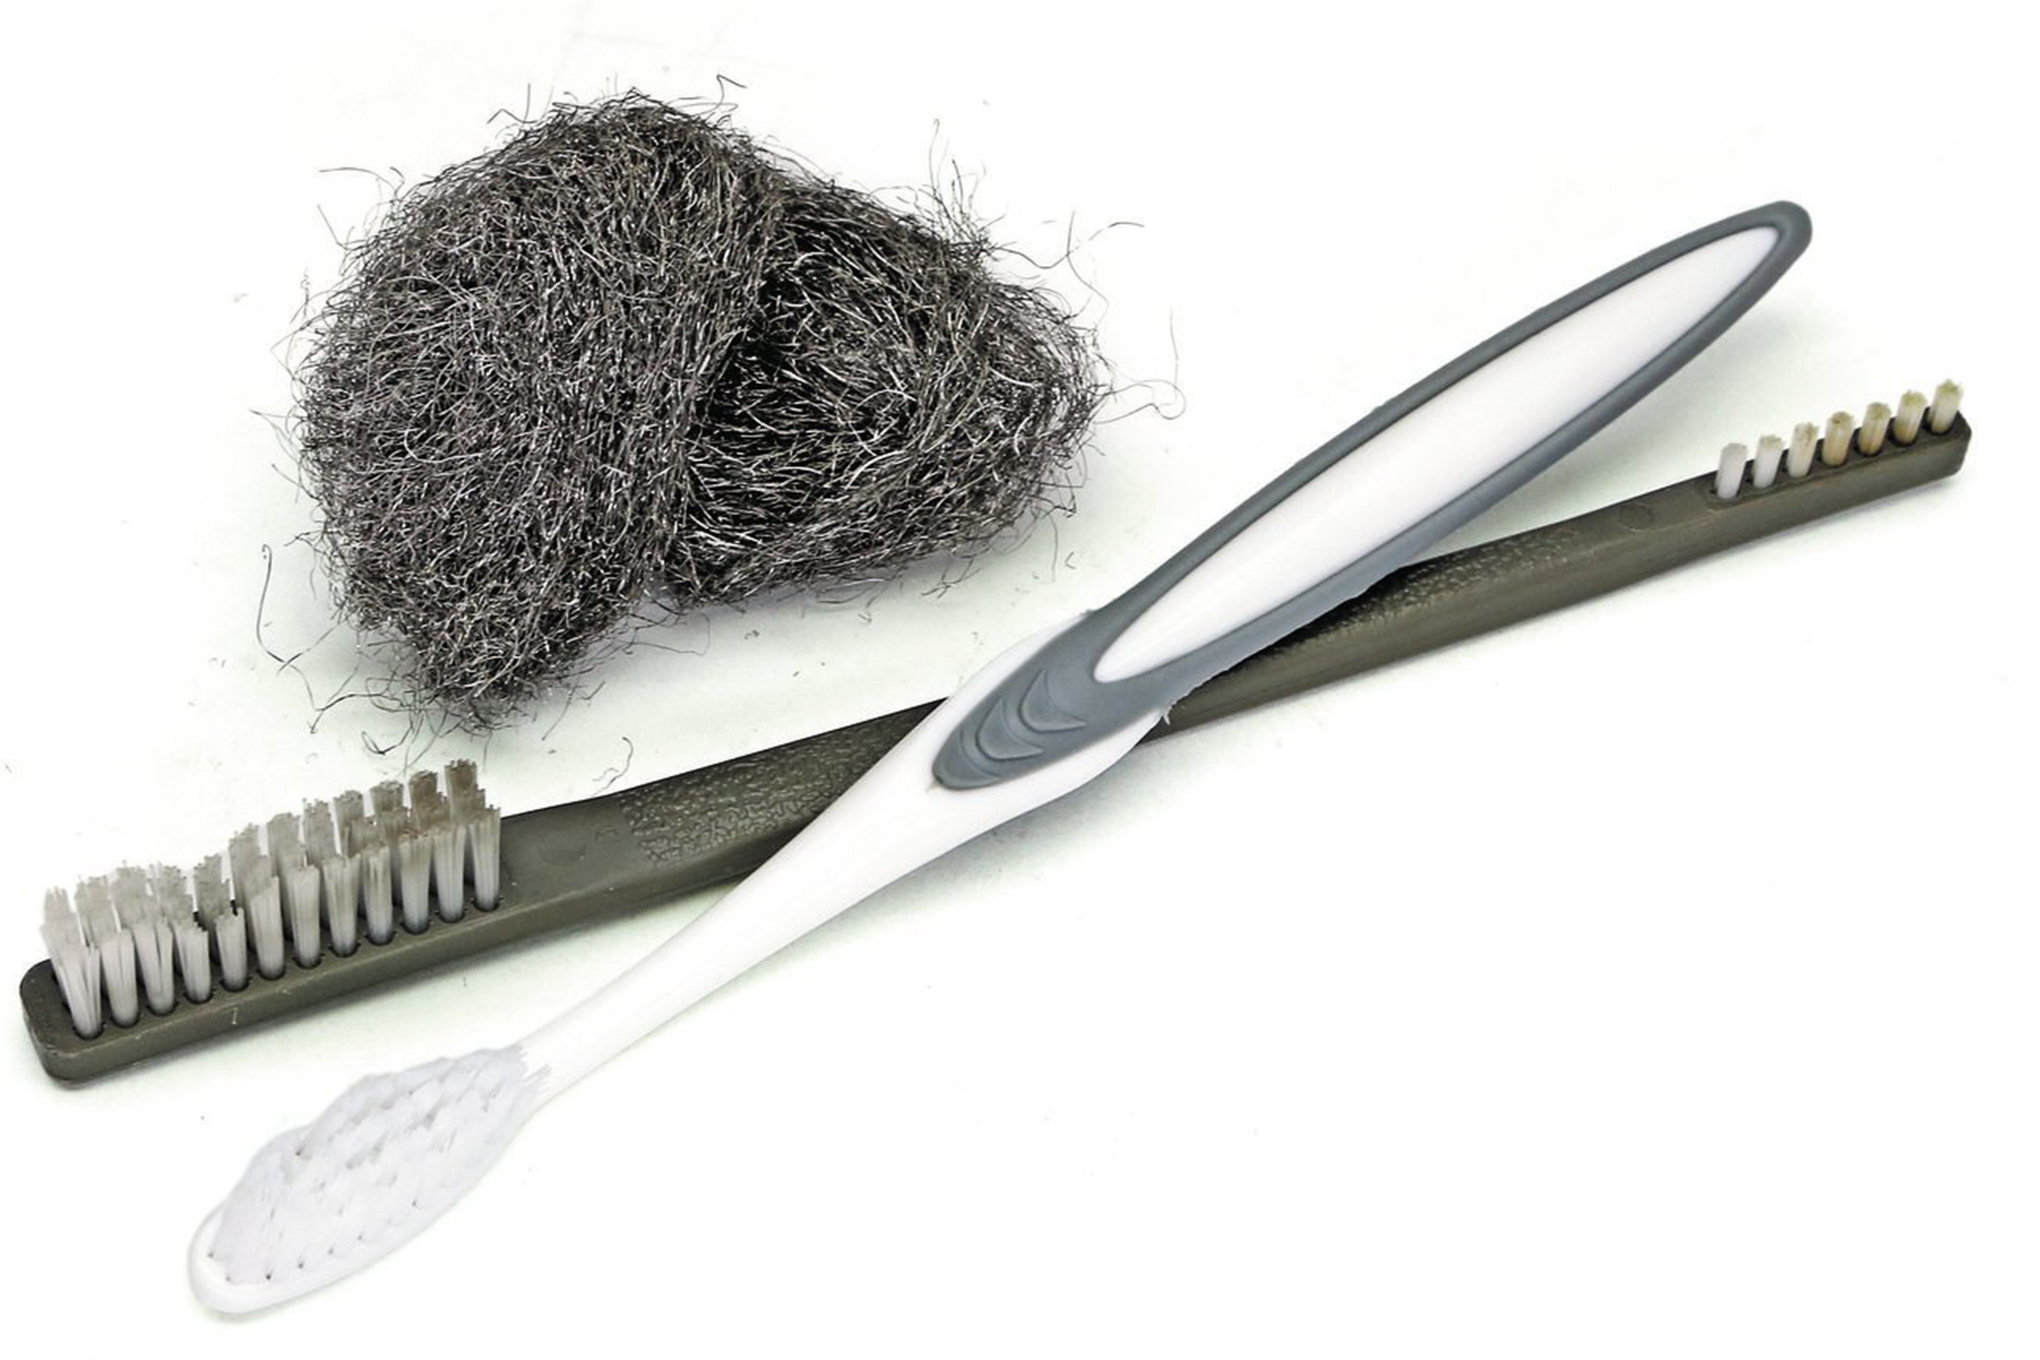
The Nice-to-Have Options

While our micro cleaning kit is complete, there are few additional accessories that make our cleaning tasks a bit easier with just a small trade-off in additional packing space. The first is a small section of grade #0000 steel wool (the super-fine grade). It makes the task of scrubbing off hardened carbon fouling (especially on the AR-15 bolt) a much easier chore. The second accessory is a small brush. An old toothbrush with the handle cut down to size is perfect for this task.

Improvised Cleaning Kit

Though small, the aforementioned micro cleaning kit will take you and your firearm far. But what do you do if you didn’t have the wherewithal to build one ahead of time? Let’s look at some options for cleaning our firearms when nothing is available except for our wits.

rope

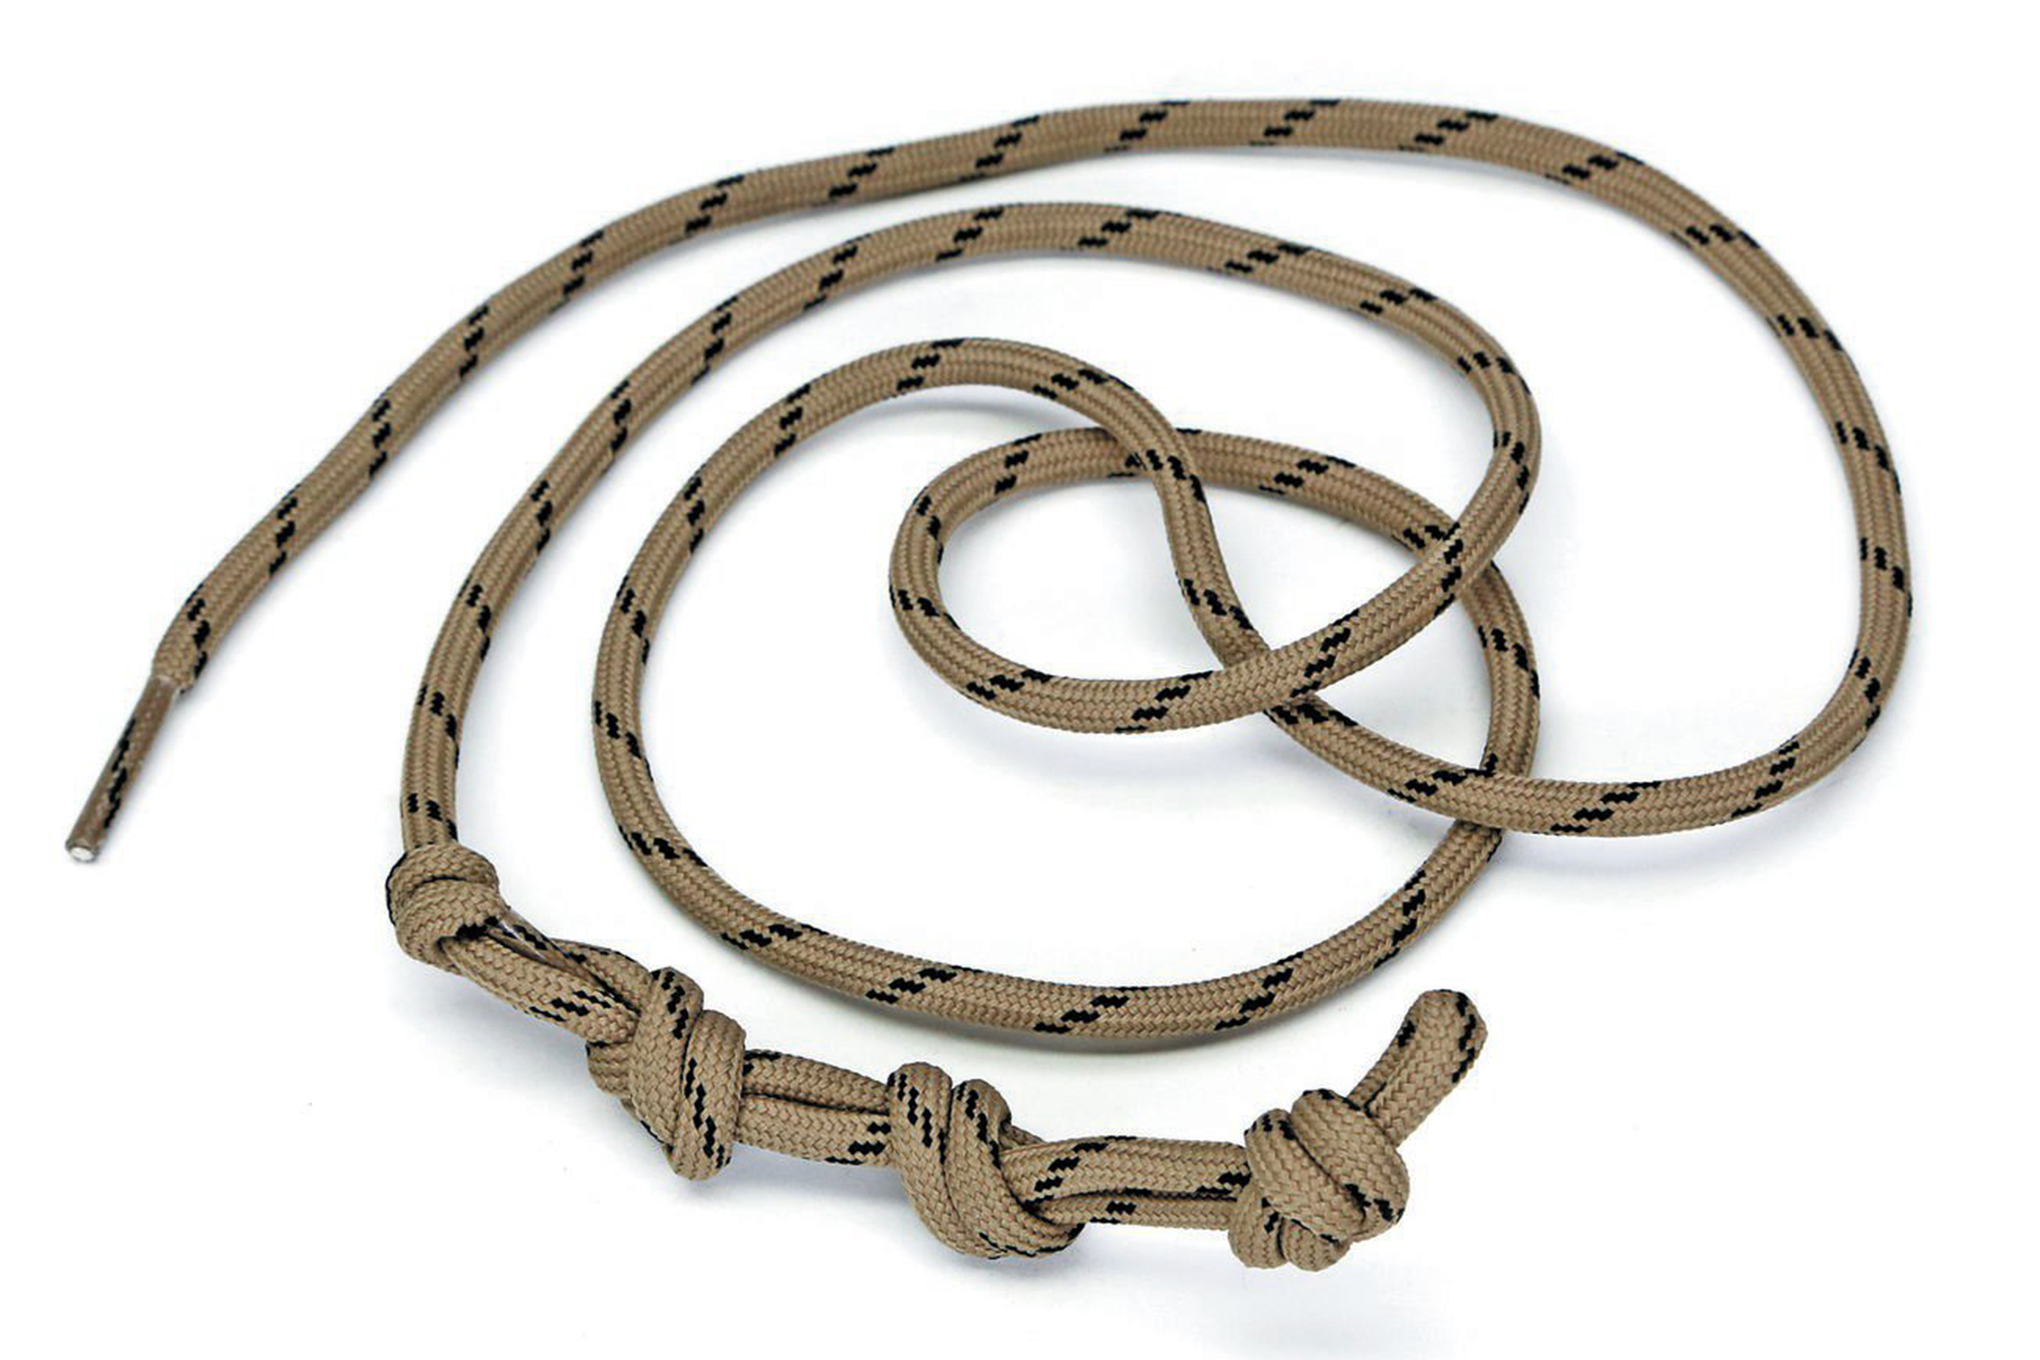
Bore-Cleaning Alternates

With the proven design of the BoreSnake as our guide, we can creatively build a clone using a length of 550 paracord. Tie several knots into the paracord to match the diameter of the bore. When completed, pull the cord through the chamber and bore to remove any fouling.

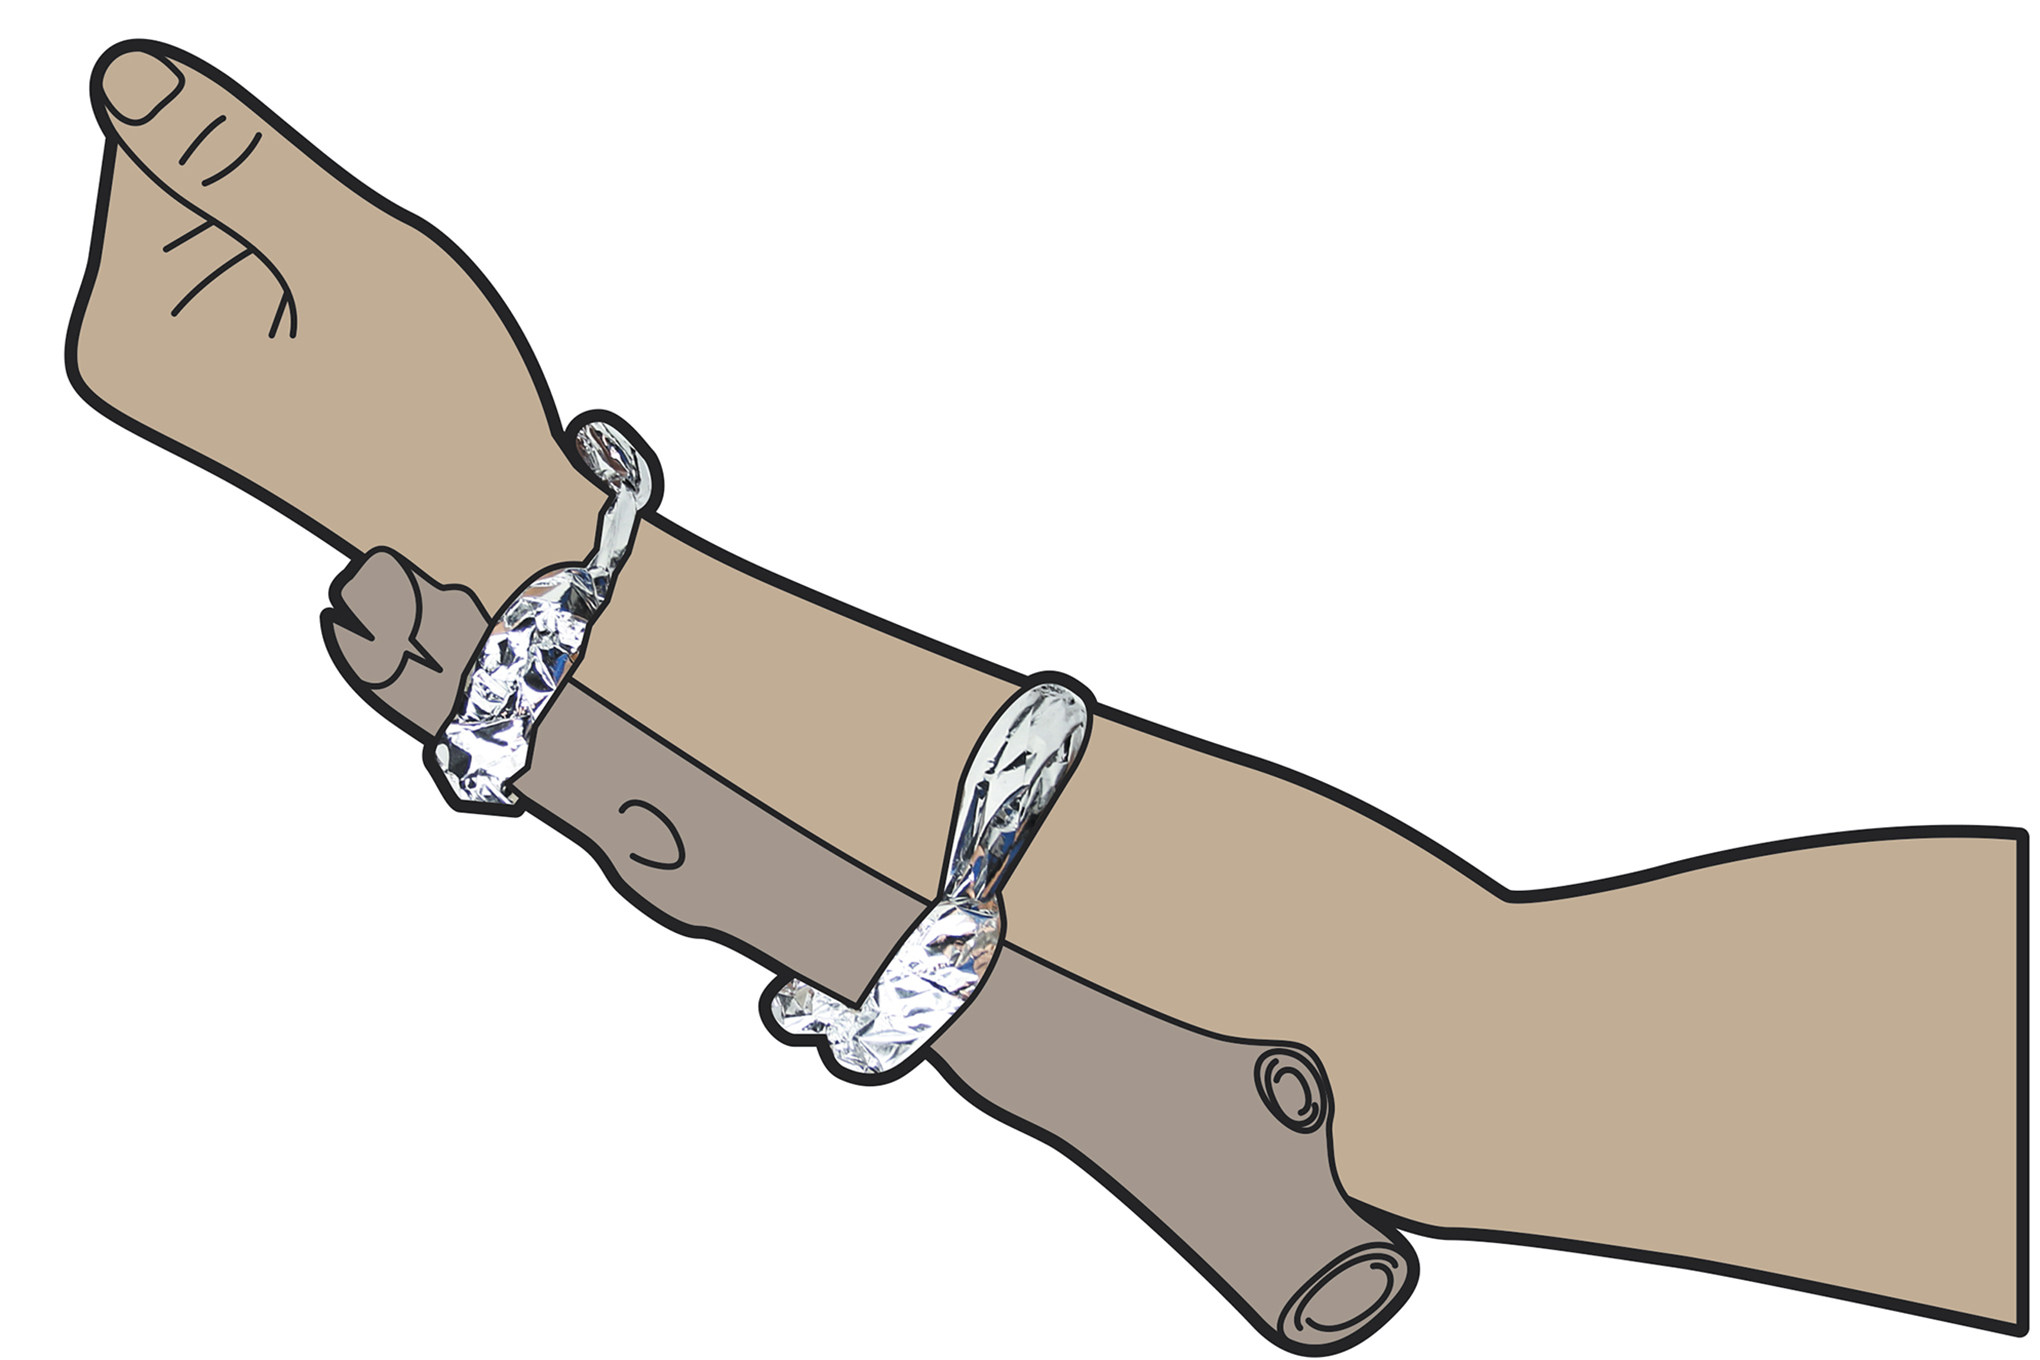
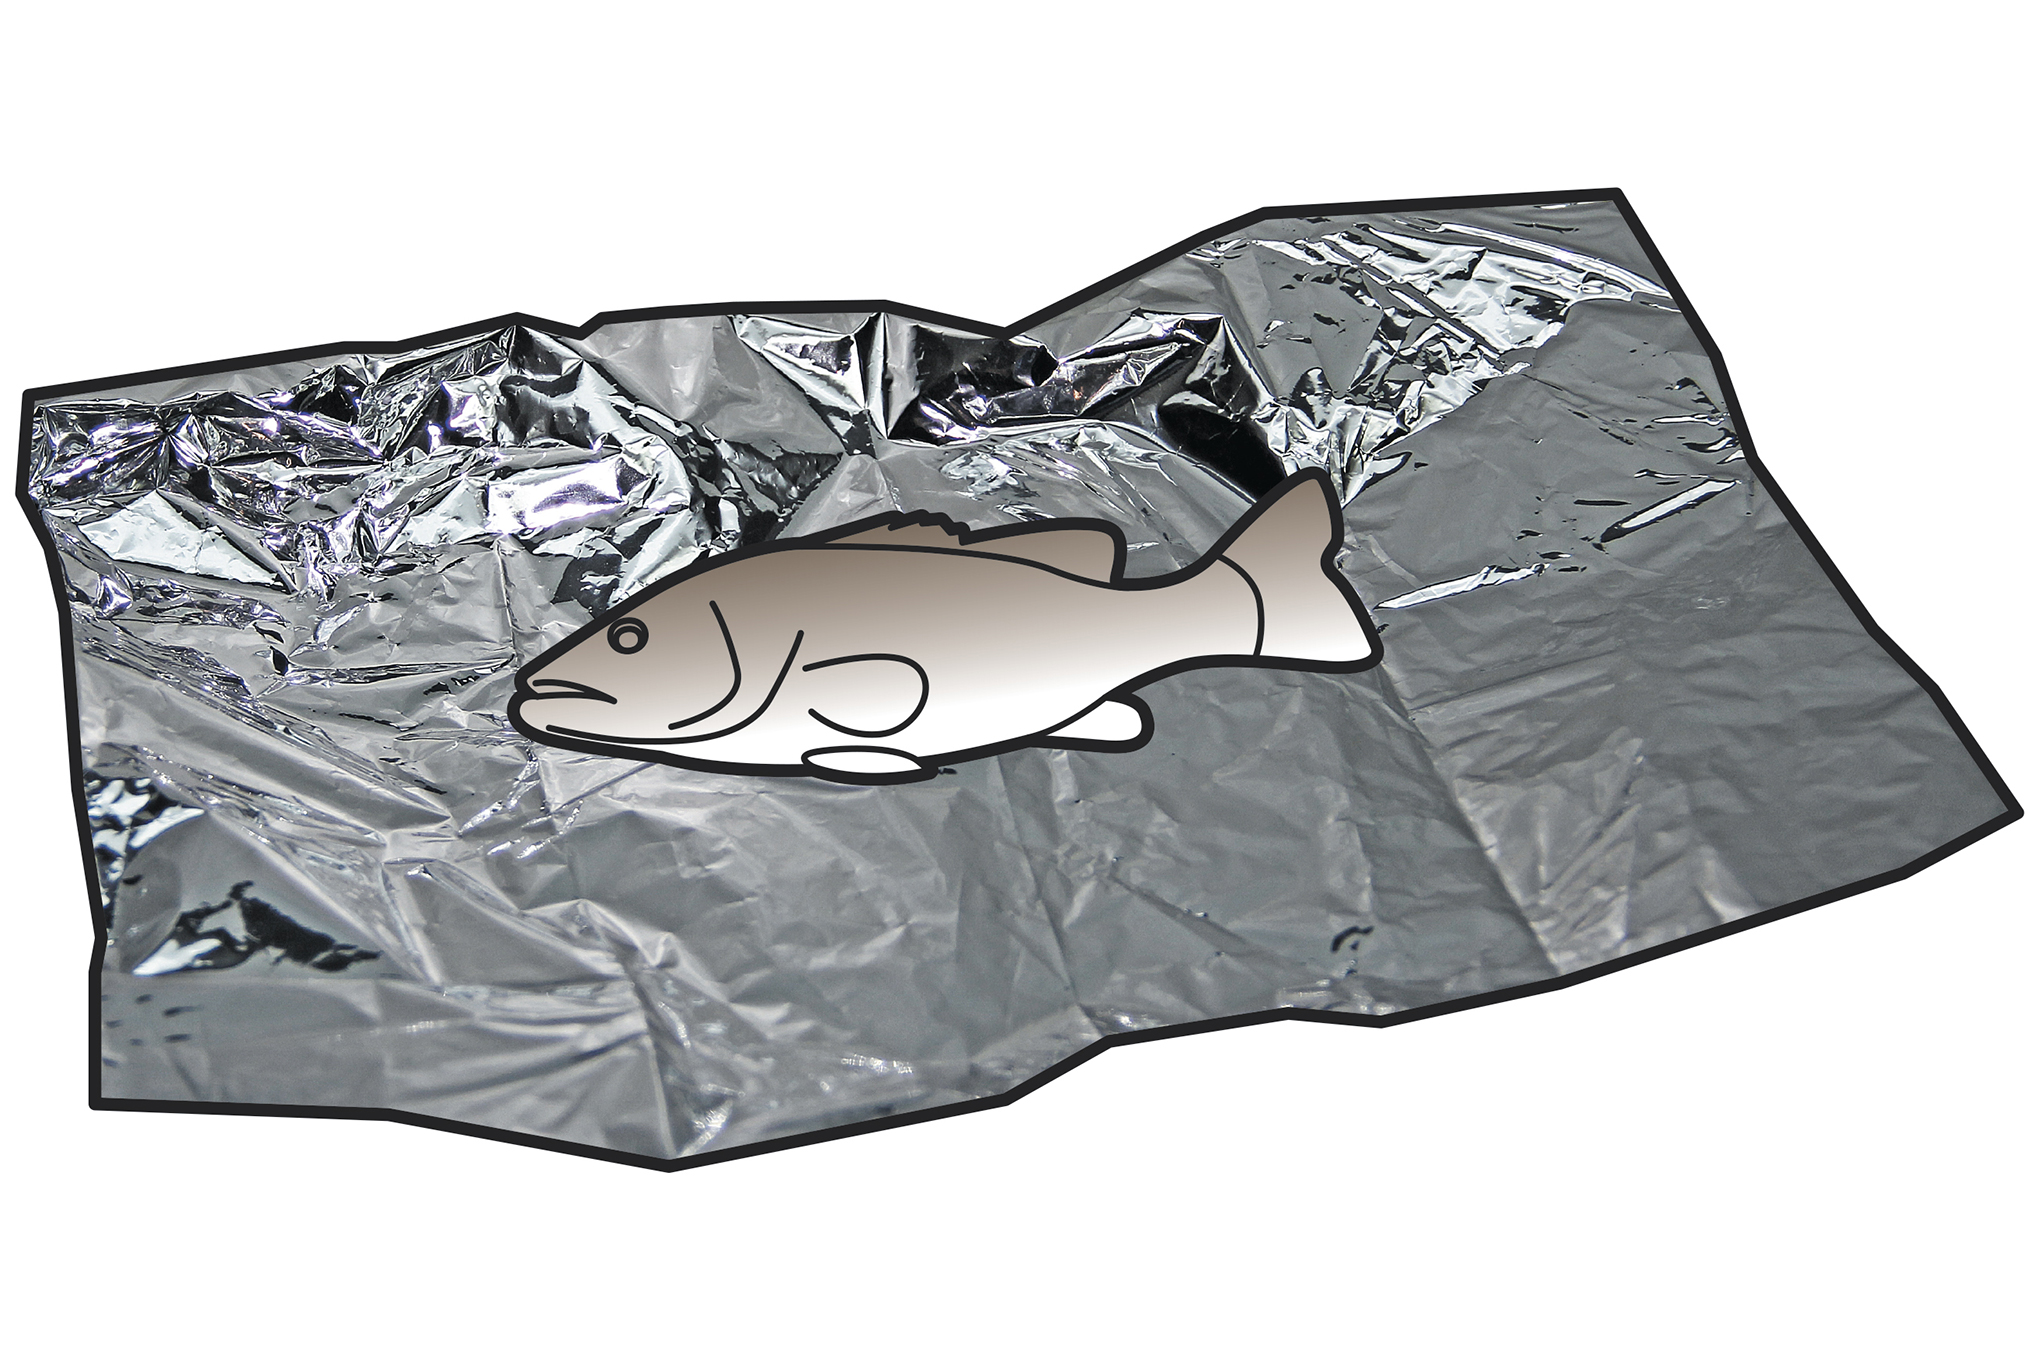
Should paracord be unavailable, bootlaces or bungee cords make adequate substitutes. A more creative solution could involve fishing string with a hook small enough to fit through the bore of the firearm. Fold several sections of cloth over the hook and pull this setup through the bore.

substitute-cleaners

Substitute Cleaners

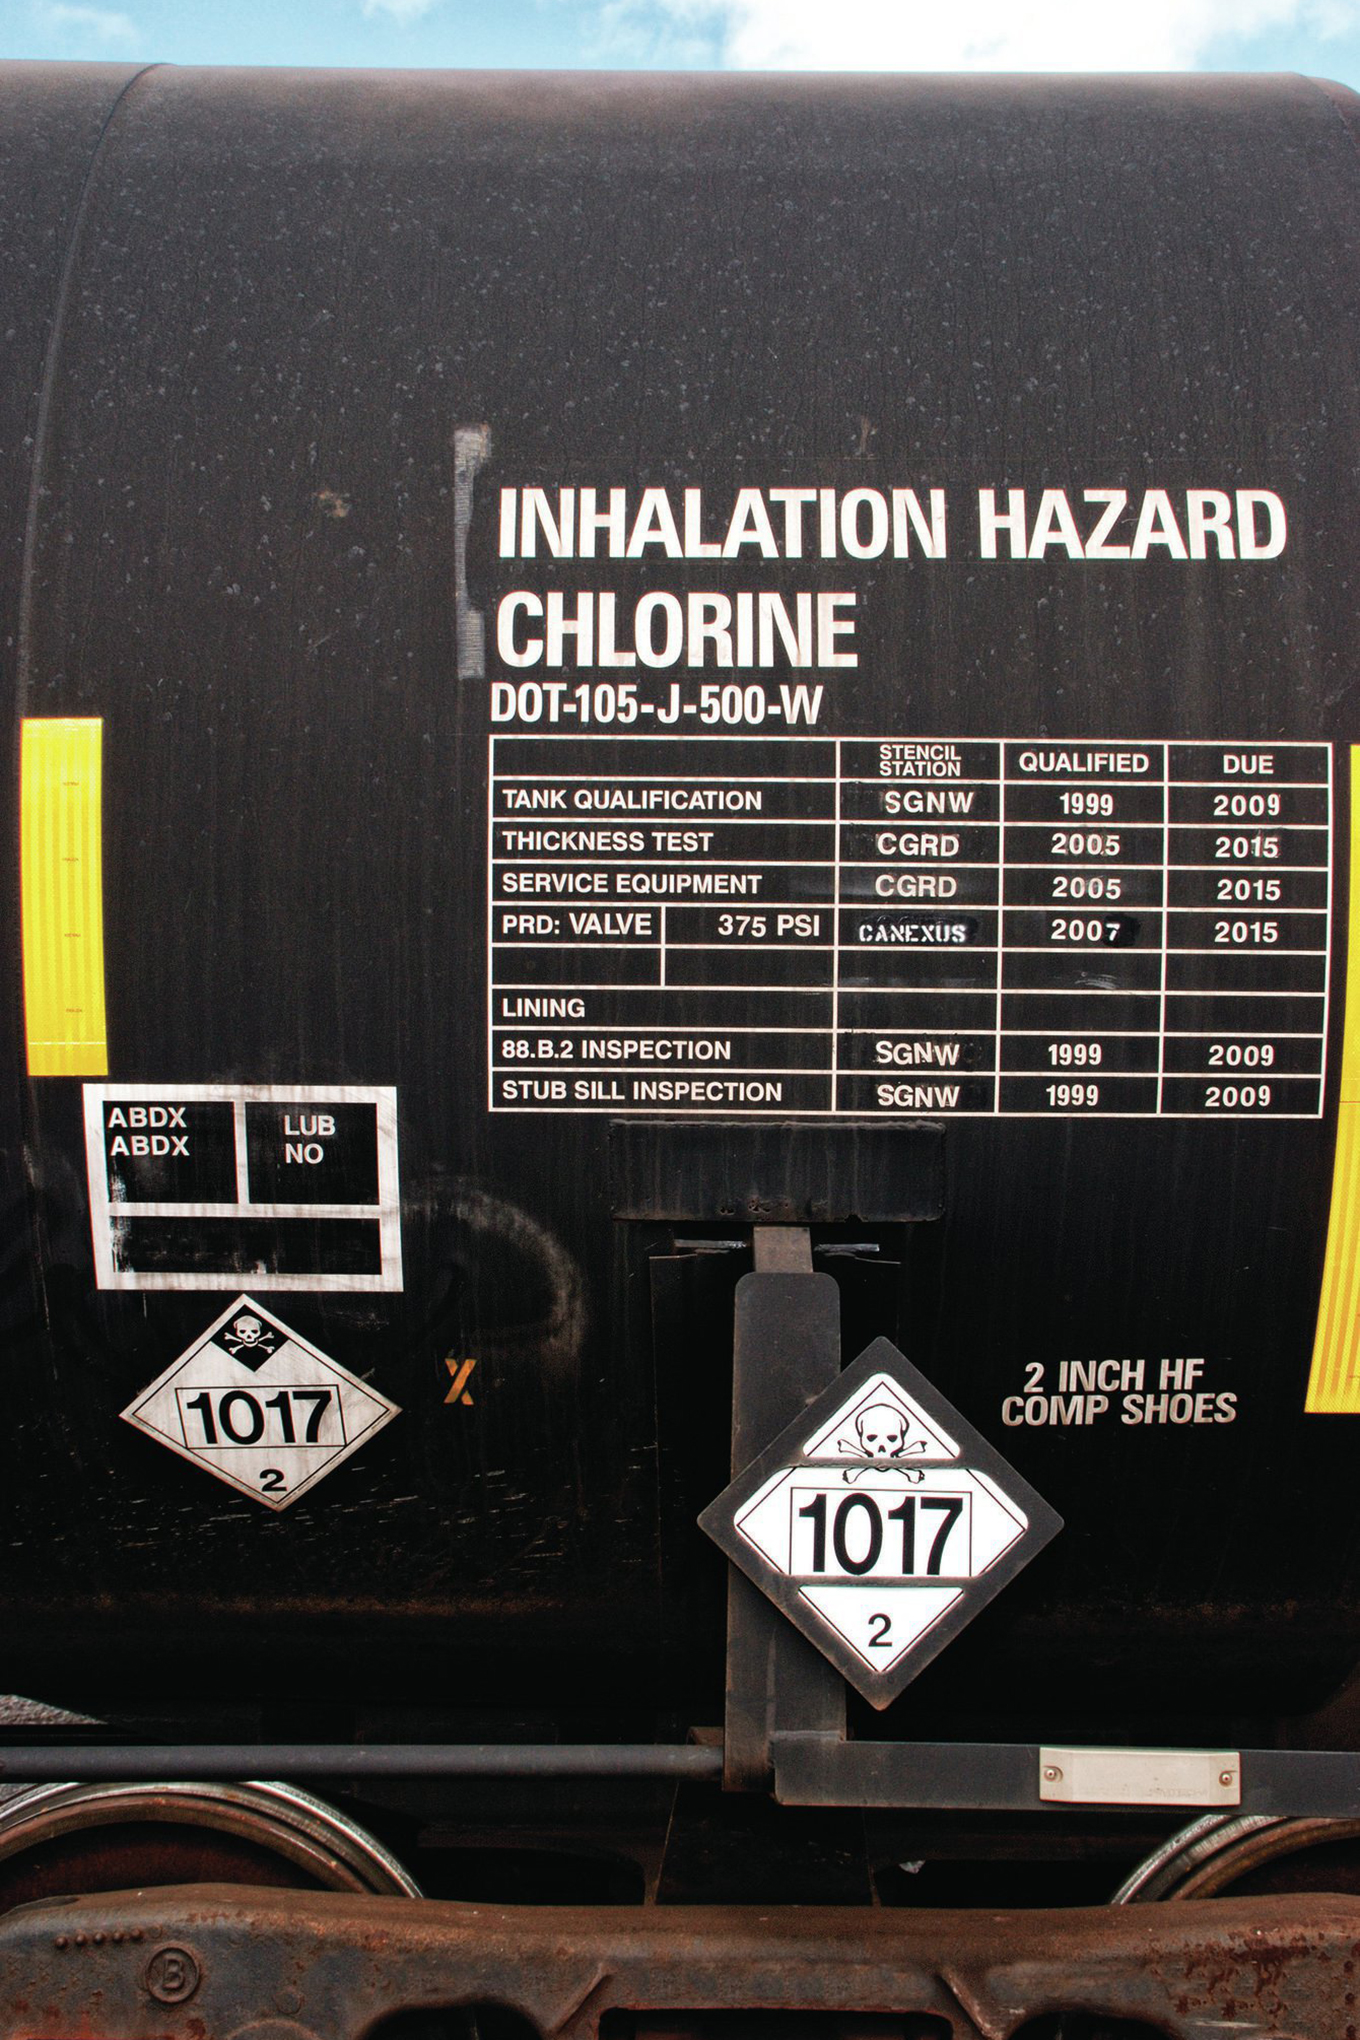
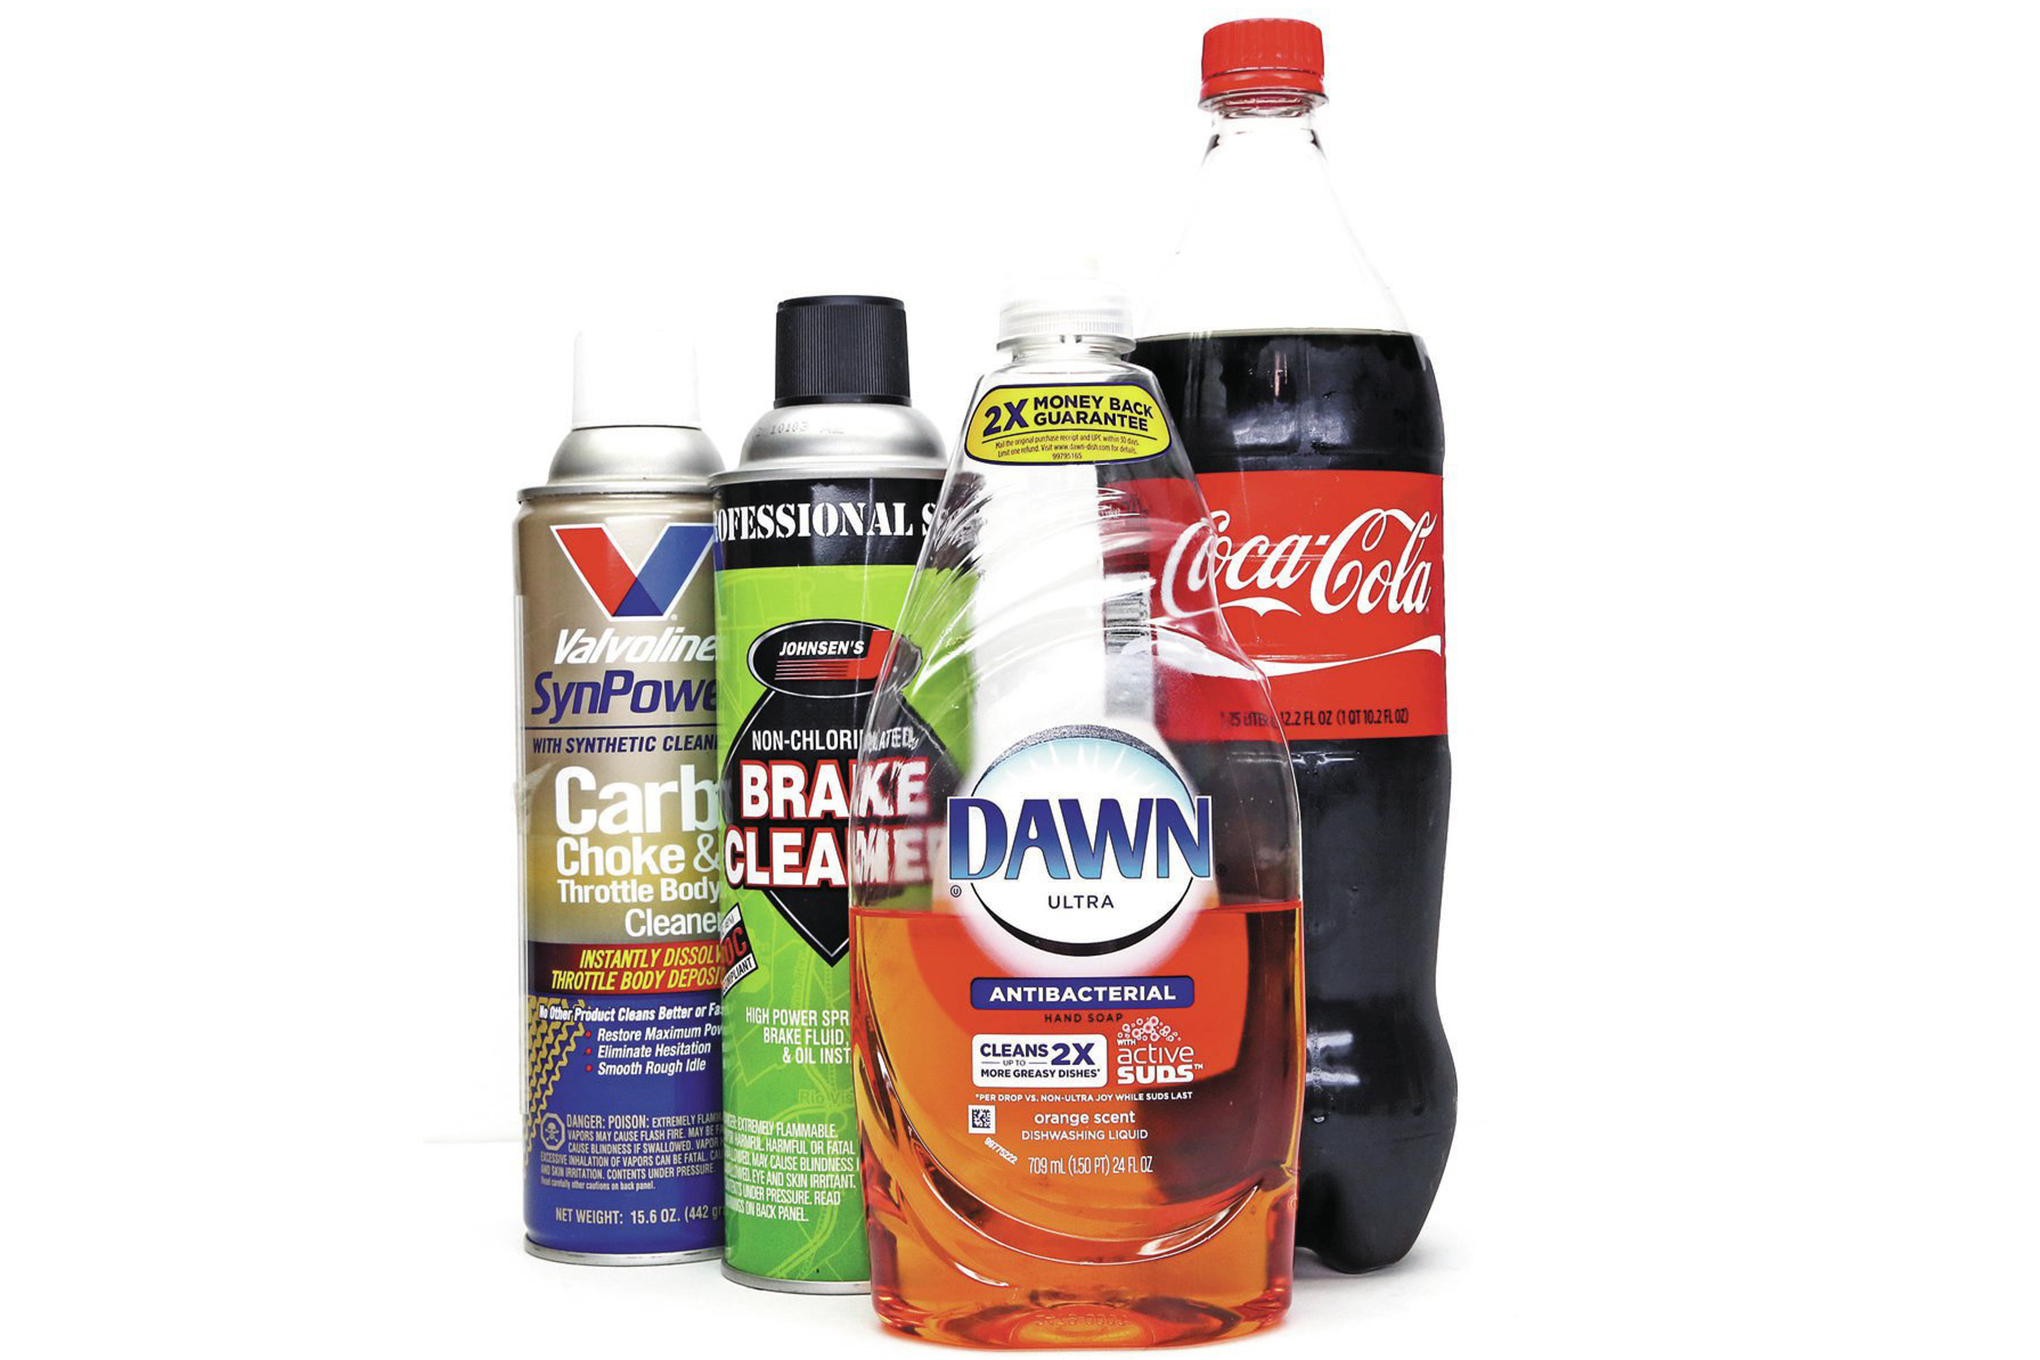
These are really only limited by your imagination. Just about any cleaner that is used on machinery can be used to clean your firearms. A few options would be automotive brake and drum spray cleaners and heavy-duty marine degreasers. If no automotive or machine cleaning solutions are available, you can use fuel from abandoned cars. Gasoline, diesel, aviation fuel, or even kerosene will work.

A few home-cleaning solutions could work, too, such as mineral spirits, paint thinner, Simple Green, or even Formula 409 cleaner. Don’t overlook dishwashing soaps like Dawn or any other detergent that specializes in removing grease. There is also the old Coca-Cola trick. Being highly acidic, Coke will also clean off dirty firearms parts as well. Regardless of what cleaner you choose to use, ensure all parts are thoroughly rinsed and dried before reassembly.

lubes-and-preservatives

SHTF Lube and Preservatives

Substitute lubricants and preservatives can basically serve the same purpose. Usually any lube can act as a preservative. Wipe a thin coating of lubricant on any exposed metal and it should offer some level of corrosion protection. You should use enough liquid to put a slight shine on the metal, but not so much that it looks or feels wet to the touch.

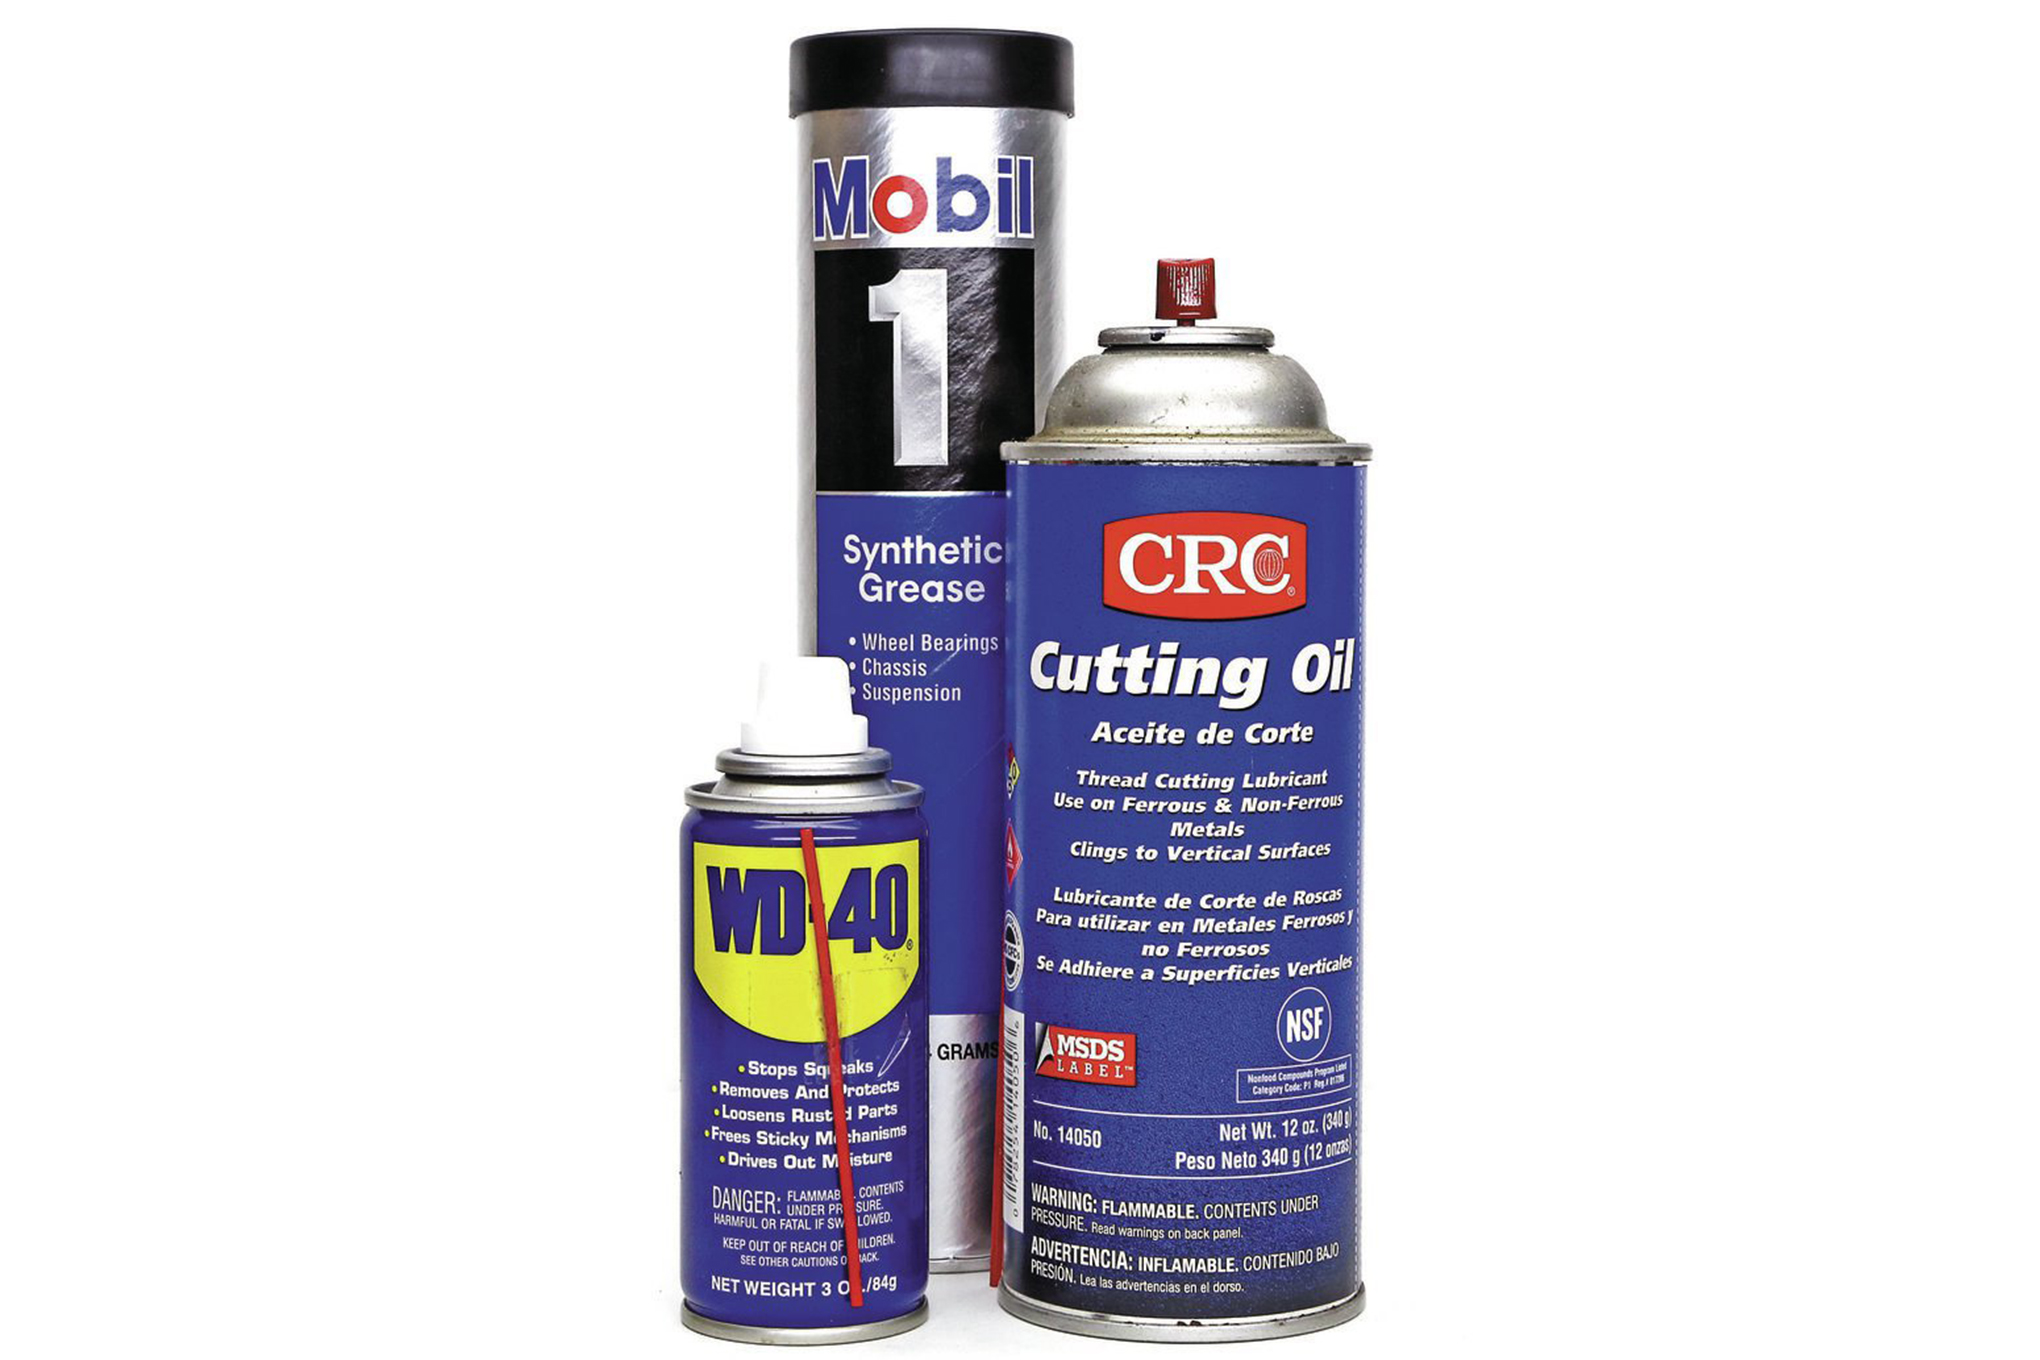
Finding a substitute lubricant is actually pretty easy. Any type of machinery that requires an engine will require lubricant. Vehicle fluids such as motor oil, transmission fluid, or even hydraulic fluid will all suffice as a lubricant. Home and gardening tools such as lawnmowers, chainsaws, gas-powered weed wackers, or even generators will all require some manner of lubricant that can also be used on firearms.

Another type of lubricant to consider is grease. All vehicles have grease points on the chassis and suspension. A finger swipe of grease will also work as a lubricant. Even common petroleum jelly (i.e. Vaseline) will offer some level of lubrication. Again, be creative in your search and look at anything with an engine as a good source for lubrication.

Get Cleaning

It shouldn’t take the fear of an alien invasion to spur you into action. Set aside some time to gather the right supplies to make a lightweight yet efficient micro cleaning kit and pack it alongside your firearm and bug-out gear. If you’re like us and have multiple go-bags in various locations for different emergencies, you’ll want to make sure you have one cleaning kit per pack.

And, should you ever have the misfortune of being separated from your cleaning supplies, know now that you have the knowledge and skills to craft your own kit in the field. Like with any survival skill, all it takes is some awareness and creativity to adapt to what life’s given you.


10 Uses for Emergency Blankets

It’s easy to bundle up in a scarf and jacket when the temperature drops. And packing a sleeping bag when you go camping is a no-brainer. But what if you end up stranded while on a day hike or have to flee unexpected danger after SHTF? Enter the emergency blanket. This thin piece of Mylar film doesn’t look like much more than a reflective sheet of flexible plastic, but it can retain life-saving heat if you’re caught outdoors without shelter. Plus, it has a myriad of other improvised functions.

The amazing emergency blanket, also known as a space blanket, was developed by NASA back in 1964 and has since become a mainstay in many emergency and first-aid kits — and for good reason. Emergency blankets take up little room, are very lightweight, and can keep you warm by efficiently preventing heat loss. Stash one in your backpack or vehicle’s glove compartment and wrap yourself in it if you ever need a way to stay warm in a jiffy. Its powerful heat-retention properties are why marathon runners are draped in them after running their 26.2 miles and the reason its Mylar material was used to line the spacesuits that went to the moon.

Offgrid Tip!
How to Properly Use an Emergency Blanket: To be fully effective, an emergency blanket should be placed with the shiny side facing your body or any surface you want to keep toasty. This shiny side reflects about 90 percent of your body heat, while the dull side, which is not as efficient, only reflects about 65 percent of radiated heat.

Aside from making you feel like a toasty Pop Tart when wrapped in them, what else are they practical for? Let’s examine 10 alternative uses for the blanket from space.

1. Insulation

emergency-blanket-shoe-insulation

An emergency blanket makes a great insulator from the cold. Use it to help fortify your sleeping bag, if you’re fortunate to have one, or cut a blanket up and stuff it into your shoes and gloves to help keep your tootsies warm.

2. Signaling

emergency-blanket-signaling

Emergency blankets usually come in a silver or gold chrome-like finish. Their mirrored reflective surface is great to bounce light off of to signal for help. When strung up on a tall object such as a tree, wind may cause it to move, creating a fluttering light reflection that may improve your chances of being detected.

3. Water Gathering

emergency-blanket-water-gathering

Because it’s a large sheet of non-porous material, a space blanket is great for catching and collecting water. If it rains, you can dig a hole in the ground and line it like a mini-swimming pool to collect water. Make sure its edges are raised to avoid any dirty runoff. Or if you want to keep your water off the ground, you can tie up four corners onto a tree and use a rock to weigh down the middle. Water will collect at the bottom of this makeshift funnel.

Another alternative is to create a funnel or slide that can divert rainwater into a container. If you’re contending with snow, you can shape the blanket into a cone and place snow into it. Then align your “snow cone” to catch sunlight so that the light generates heat to melt the snow.

4. Shelter

emergency-blanket-shelter

In conjunction with some paracord, duct tape, or even strips of itself (see Use #10), you can make a “lean-to” shelter by tying up two corners of the blanket up on trees and the other two corners lower to the ground to create a shelter from rain or the sun.

5. Heat Reflection

emergency-blanket-fire-heat-reflection

Mylar has a melting temperature of 500 degrees Fahrenheit so it is relatively safe in close proximity to open fire. Use a blanket to reflect heat from a campfire back into your aforementioned emergency-blanket shelter.

6. Medical

emergency-blanket-medical-makeshift-sling

You can use an emergency blanket to fashion a makeshift sling to help better immobilize a broken or sprained arm or use it as a tourniquet in an extreme emergency. Use strips of it to tie sticks to a leg or arm create a splint for injured limbs. It can also act as an impromptu compression bandage if needed as well.

7. Waterproofing

emergency-blanket-backpack-waterproofing

Since the sheet is completely waterproof, anything you sufficiently wrap or shield from falling water should be able to stay dry. Use it to help keep the contents of your backpack dry by placing everything on the blanket then wrapping it prior to placing it in the pack. Keep yourself and your stuff dry by using a blanket as a tent footprint or groundsheet.

8. Catching and Cleaning Meat

emergency-blanket-cooking-fish

Fish like shiny things, so strips of a blanket used as lures should better attract them than just a hook. Also, an emergency blanket makes for a clean and large enough surface on which to clean fish or field dress game. Keep the dirt off your meat!

9. Cooking

emergency-blanket-cooking-next-to-fire

Fashion a blanket into a bowl shape and face it into the sun. Place very thinly sliced meat into it and allow nature to take its course. This works best when there is a blazing sun in the sky. Or if you opt to cook by flame, use pieces of a blanket to wrap up food for cooking near the fire. Not on the fire mind you, but place your wrapped food near the fire and it should get hot enough to cook what’s inside.

10. Cordage

emergency-blanket-strips

Strips of blanket can be braided together to help form improvised cordage. Large braided pieces can even serve as makeshift rope in some circumstances. Though, probably not safe enough to climb with, emergency cordage is good for helping you build a shelter or secure your gear.

Read More

Subscribe to Recoil Offgrid's free newsletter for more content like this.


Bug-Out by Air?

Warning!

This article is meant to be a quick overview and is not a detailed guide on aviation, nor should it be construed as an endorsement to operate an aircraft without proper training and licenses. To learn more, consult with a reputable training school or instructor.

The TV reporter said all you needed to know in one sentence: “The governor is declaring a state of emergency and evacuation plans will be announced in the next five minutes. ” Strong winds from the Northwest are driving the flames toward a derailed train of tanker cars filled with volatile chlorine. A solid wall of flames stretches across the television screen and roiling clouds of thick brown smoke climb thousands of feet into the sky. Fire departments from all over the state have been unable to slow the fire's path toward the overturned tankers.

Your wife and two young children enter the room and stand next to you. Their survival will depend on your skills and decision-making over the next hour. You know what to do. You need to bug out now, and it's got to be by plane.

Without being told, each member of the family grabs their go-bags, and 10 minutes later you're entering the code that allows you into Sky Ranch Airport and to your bug-out aircraft: a 22-year-old Cessna 172. The preflight complete, you reach for the ignition key. Your wife puts her hand over yours and squeezes gently as the engine coughs to life, settling into the familiar rhythm. After a few heart-pounding minutes, you're in the air and cruising through 2,100 feet. You share a relieved look with your wife as you gently bank northeast toward your first destination, the mountain top airport 150 nautical miles north.

The preceding story, although fiction, has its basis in the stark reality of compromised land and water egress. Take this story's hypothetical opener: a chlorine tanker accident.

inhalation-chart

Chlorine is used in industrial and commercial products and is therefore commonplace. Depending on the concentration and the exposure time, this chemical can cause severe health problems and even death. At room temperature, chlorine is a gas that's heavier than air, which means it'll linger in low-lying areas unless the wind picks up. The safest means of escaping its potentially fatal and widespread mist could very well be via an aircraft.

At this point, some of you might be asking, “What if I don't know how to fly?” or “Having a bug-out plane is stupid because it isn't realistic. ” Remember: If disaster has already struck, it's too late to develop a bug-out plane strategy. Having an aircraft is an option that may take years to fully develop. But once you have it, it could mean the difference between saving your family and being stuck on the highway with thousands of other panicked drivers wishing you could grow a pair of wings. As they always say, “You can never have too many options when the SHTF. ”

Winged Transport

If you're a regular reader, you know that OFFGRID delves into all manner of bug-out vehicles, from kayaks and snowmobiles to off-road rigs and mountain bikes. So, in this edition we shine the spotlight at aircraft as a survival option. Here's a look at the benefits and disadvantages of being a prepper pilot.

Pros:

  • Best answer when getting distance between you and the event quickly is a priority
  • Reduce limiting variables, such as traffic, road closures, unpredictable crowd behaviors (survival mob mentality), etc
  • Fly over disasters, hostiles, blocked roads, destroyed bridges, etc.
  • Not stranded if the infrastructure can't handle the automotive traffic
  • Ability to do fly-over reconnaissance prior to landing
  • Access multiple destinations

Cons:

  • Dependent on fuel
  • Possibility of public airport closures (the best reason to keep your aircraft at a private airport)
  • Governmental flight restrictions (e. g. Sept. 11 terrorist attack)
  • Most small private aircraft are vulnerable to theft or vandalism due to poorly constructed locks
  • Aircraft not parked in hangers are susceptible to weather events
  • Cost of buying and maintaining an aircraft, and need for maintaining flight skills (whereas you drive your car or truck every day)
  • The variable of flying in poor weather
  • Limits of gross weight (baggage, supplies, etc. ), depending on aircraft

usa-pilots-license

Step One: Pilot's License

Let's say you've weighed the pros and cons, and you're game. Where do you start? Obtain a valid pilot's license (private, sport, or recreational) if you don't already have one. According to Federal Aviation Administration (FAA) guidelines, you can begin training at any age. However, you must be at least 16 to obtain a sport pilot certificate and 17 for a recreational pilot or private pilot certificate.

Here's a look at the main types of pilot's licenses and what it takes to obtain them.

1. Private

Privileges:

  • More than one passenger may be carried
  • Flight outside U. S. airspace allowed
  • Night flight allowed

Training Requirements:

  • 40 hours minimum
  • Pass FAA written exam
  • Pass flight exam with an FAA examiner
  • Requires FAA medical exam
  • Average cost: $9,900

2. Recreational (Airplane and Rotorcraft)

Privilege:

  • Only one passenger may be carried
  • Night flight allowed, but only under the supervision of a certified flight instructor

Training:

  • 30 hours minimum
  • Pass the FAA written exam
  • Pass flight exam with an FAA examiner
  • Requires FAA medical exam
  • Average cost: $7,700

3. Sport (Airplane, Gyro, Weight-Shift-Control, Airships)

Privileges:

  • Only one passenger may be carried

Training:

  • 20 hours minimum
  • Pass the FAA written exam
  • Pass flight exam with an FAA examiner
  • Requires FAA medical exam or a U. S. driver's license and self-certification
  • Average cost $4,400

Step Two: Obtain a Plane

Once you've acquired your pilot's license, it's time to get an airplane that has the basic characteristics needed for a bug-out vehicle. Avoid a rental or club aircraft. Instead, consider a seaplane. It's quite possibly the most versatile bug-out aircraft available to the general public. The seaplane allows you access to runways, grass and dirt landing strips, lakes, ocean, and all manner of waterways.

Due to the inherent ruggedness and reliability of the Husky, Skyhawk, Caravan, and Beaver, all four models are ideal for bugging out to and from land, snow, or water. They also have several rather significant benefits not found in the newer aircraft: long production runs and availability of parts. These planes can be found used in greater quantities and at a lower cost. Here's a closer look at each one. See if one of them meets your needs.

De Havilland Beaver
This single-engine, high-wing Canadian bush plane has been used by military all over the world, from the U. S. Army to the Ghana Air Force.

Capacity:One pilot, six passengers
Cargo:2, 100 pounds of useful load
Length:30 feet, 3 inches
Wingspan:48 feet
Height:9 feet
Empty Weight:3, 000 pounds
Gross Weight:5, 100 pounds
Power Plant:450 hp Pratt and Whitney Wasp Jr. radial engine
Maximum Speed:158 mph
Cruise Speed:143 mph
Range:455 miles
Service Ceiling:18, 000 feet
Rate of Climb:1,020 feet per minute

Aviat Husky
In production since 1987, this rugged and dependable two-seater is one of the best-selling light aircraft designs of the past two decades. This high-wing utility plane is used
for all sorts of functions, from pipeline inspection and glider towing to border patrol and anti-poaching missions.

Capacity:1 pilot, 1 passenger
Cargo:925 pounds of useful load
Length:30 feet, 6 inches
Wingspan:35 feet
Height:9 feet
Empty Weight:, 275 pounds
Gross Weight:2, 250 pounds
Power Plant:180 hp Lycoming O-360
Maximum Speed:145 mph
Cruise Speed:140 mph
Range:800 miles
Service Ceiling:20, 000 feet
Rate of Climb:1, 500 feet per minute

Cessna Caravan Amphibian
This rugged and proven aircraft can operate from terra firma or water— you can land on and take off from almost anywhere. The passenger capacity and ability to transport extensive supplies put this bug-out aircraft at the top of the list. Manufactured since 1998, it's the largest seaplane with a single engine.

Capacity:Eight, 10, or 14
Cargo:3, 230 pounds
Length:38 feet, 1 inches
Wingspan:52 feet, 1 inches
Height:17 feet, 7 inches
Empty Weight:5, 555 pounds
Gross Weight:8, 750 pounds
Power Plant:675 hp Pratt & Whitney Model PT6A-114 A
Maximum Speed:175 kias
Cruise Speed:159 knots
Range:820 nautical miles
Service Ceiling:20, 000 feet
Rate of Climb:939 feet per minute

Cessna 172 Skyhawk
The Cessna 172 Skyhawk is a four-seat, single-engine, high-wing aircraft that first flew in 1955 and has been in production since 1956. More 172 s have been manufactured than any other airplane in history. The availability of used aircraft in good condition is extensive.

Capacity:Two to three passengers(including the pilot)
Length:27 feet
Wingspan:36 feet
Cargo:446 pounds of useful load
Empty Weight:1, 275 pounds
Gross Weight:2, 300 pounds
Power Plant:Lycoming O-360
Maximum Speed:188 mph
Cruise Speed:143 mph
Range:800 miles
Service Ceiling:20, 000 feet
Rate of Climb:1, 500 feet per minute

Step Three: Practice

Much like any other survival skill, flying a bug-out plane proficiently takes repetition. So once you have your license and your plane, practice, practice, and practice. And when you think that you have practiced enough, practice some more. Obviously, you can't learn how to fly from reading a magazine article. So we'
ll give you a brief overview of the basics.

normal-plane-takeoff

Takeoff and Climbing
Complete your pre-take off checklist.  Typically use one degree of flap and the elevator trim is adjusted to neutral. Now slowly advance the throttle, using the rudder pedals to steer the aircraft to the active runway and point the nose into the wind.  Wait for the tower to say, “Skyhawk 6 Charlie Lima, clear for takeoff. ”  The throttle is opened fully to start the takeoff roll. During this takeoff roll, the control wheel, or stick, is usually held in the neutral position, and the rudder pedals are used to keep the airplane on the runway's centerline.

As takeoff airspeed is approached, gently apply backpressure on the control wheel or stick and the plane's nose will begin to lift off the runway. Use the rudder pedals to keep the nose point straight.

When the airplane is clear of the runway, gently relax the control slightly, letting the nose drop slightly as you gain speed. As your airspeed increases, remember the best rate of climb
for your aircraft(found in the aircraft operating manual).

normal-landing-approach-illustration

Landing
First, find the airport— sometimes that's more difficult than it sounds. Check the wind direction at the airport by asking the tower controller the wind direction or look at the windsock on the airfield. At a controlled airport you must comply with the directions of the tower, and a controller will give you the runway information and tell you when to land.

At an uncontrolled airport, there is no tower. You announce your intentions, look for other planes, and when clear, land. Whether you are told which runway to land on or you make the choice, align yourself into the wind and control your airspeed so that the needle in the airspeed indicator is in the white arc. This is a time to be careful and maintain the appropriate airspeed since the bottom of the white arc usually represents the planes stalling speed.

Run a “before landing” checklist, found in the aircraft manufacturer's operating handbook, prior to the final leg of your pattern. Maintain your glide slope angle by using the VASI (Visual Approach Slope Indicator) system installed along the runway. If you see a set of red lights over a set of white lights on the VASI system, you are on the proper glide slope. If the runway you are landing on doesn't have approach lights, you should be 300 feet above the ground 1 mile from the end of the runway and as you cross the runway threshold, smoothly bring the power to idle and smoothly pull back on the controls and flare(slightly nose up) and allow the plane to settle to the runway.

Once you've become proficient at the fundamentals, take it a step further and begin practicing for a potential bug out. Try these four exercises:

Checklist It: Keep a checklist in the office, house, and car. Discovering that you forgot an essential item after you're already strapped into the plane is of little use.

Preplan It: Find the best and fastest route to the airport from your home, work, and any other location were you go at least three times per week on a regular basis.

Drill It: Do a complete run-through at least once every three months with whomever is in your family or survival group.

Old-School It: Once in there air, pick an objective location and see
if you can get there without a GPS and other advanced navigational aids. Hint: At times it may be as simple as following the highway and making the appropriate turn off— it's just that you'
re 4, 000 feet above the ground.

Aviation Adaptation

Whatever the cause, any disaster of significance will adversely affect the power and communications grids. That means your entire wiz bang— state-of-the-art communications and navigational devices will be useless, at least
for a time. The world of convenience will be transported back to the 19 th century.

Right now you are probably saying, “Yeah, but my glass panel and GPS have backup batteries. Wrong, all the backup batteries in the world will not be of any help if society's infrastructure begins to collapse. Tuning to your favorite radio station will be a waste of time if the station can't broadcast a signal. An electromagnetic pulse (EMP) burst will fry everything electrical and whatever survives will be worthless because satellites will be non-functional, ground-based NDBs (non-directional beacons), VORs (VHF omnidirectional range beacons), and TACAN (Tactical Air Navigation Beacons) will cease to function.

Within a matter of seconds you will be transported back to the days of the biplanes, when traveling from point A to point B involved following geographical landmarks such as roads, bridges, mountains, and lakes. Times when one's most important assets were common sense and self-reliance.

How about while you're flying? Are there specific altitudes you need to fly? Visual Flight Rules (VFR) will most likely be used if a crisis hits. The designated altitudes to fly at are 7,500 feet and 8,500 feet since the VFR state that traffic flying easterly should be at odd altitudes plus 500 feet (e. g. 7,500 feet). Westerly traffic utilizing VFR should be at even attitudes plus 500 feet (e. g. 8,500 feet).

Not every catastrophic event will be a chlorine tanker explosion fueled by a wildfire. And not every bug-out vehicle will(or should be) an aircraft. But if you're already a pilot, or have the means to become one, consider a plane as another card in your survival deck.

Aerial Go-Bag

The bug-out bag(BOB) may be as essential to your survival as the fuel in the aircraft's tanks. The first thing to remember is that although you are flying, nothing has to be TSA compliant. Each passenger should have his or her own BOB. There should be one bag for the aircraft that remains in the plane.

The BOB is a very important yet personalized necessity. Unlike on a motor vehicle or a boat, weight is of paramount consideration in an airplane. Weigh each bag and calculate into the total passenger and carry-on weight. This is extremely important as it relates to the plane's performance. You should inspect everyone's bags on a monthly basis using a checklist. Your family's BOBs should be stored in the same place and stored together. Some have used a hall closet or cabinet in the garage. Here's a closer explanation of what your bug-out gear should be.

On Your Person

Whether you're flying commercial or private, make sure you're wearing cotton or wool(no nylon) and leather sole shoes or hiking boots. Pack a light jacket, a hat, and medication. Ask your doctor if you can get a prescription for a wide-spectrum antibiotic and an anti-diarrhea medication.

Captain's BOB

For sake of clarity, the pilot's bag will be called the “Captain's BOB ” and it's the responsibility of the pilot to verify that each passenger has their BOB.  The Captain's BOB should contain:

  • Sectional Charts
  • Sectional Plotter
  • Multiple forms of identification(passport, pilot ‘s license, driver's license etc.)
  • Carbon Monoxide Detector
  • Aviation Transceiver with NOAA weather channel
  • Handheld radio transceivers
  • Pilot's tool kit
  • Compass with mirror
  • Poncho
  • Hat
  • Notepad with pen and pencil(preferably a pad that is designed to be used in rain or foul conditions)
  • Spare prescription eyewear and sunglasses
  • Fire piston(sparks for fires)
  • Paracord 550 (50 feet)
  • Headlamp plus spare batteries
  • Long – sleeve shirt
  • Socks and undergarments
  • Leather work gloves
  • Medical kit
  • Life-Straw for water treatment
  • Mylar blankets (one for each person on board)
  • Vaseline – soaked cotton balls in container (starting / maintaining fires)
  • Large Ziploc bag with toothpaste, medications, deodorant, dental floss Travel Kleenex Packets
  • Sunscreen
  • Tube of Vaseline Lip Therapy
  • Hand sanitizer or wet wipes
  • Extra batteries
  • Assorted plastic bags(trash plus gallon and quart Ziploc bags
  • At least $500 in cash and old / well used silver coins
  • Two knives: one folding, one fixed blade
  • Duct tape
  • Leatherman type tool
  • Aircraft Navigational Maps(Sectionals)
  • Red marking pen or pencil for drawing route and adding changes
  • Handgun and ammunition

bug-out-bag-items

Family BOB:

The list here is a sample.  Build your own go-bag based on your location, the age and health of passengers, and the potential weather.

  • Quart Ziploc bag with toiletries
  • Undergarments
  • Two changes of clothes
  • Hat
  • Sunglasses
  • Small flashlight
  • Compass with mirror
  • Three pairs of socks
  • Gloves
  • Compact water purifier
  • Mini first – aid kit
  • Wet wipes packets
  • Ferrocerium rod fire starter
  • Folding knife
  • Mylar blanket
  • Two large trash bags

ultralight-aircraft

Worst Bug – Out Aircraft

Given the parameters of a bug – out aircraft, there are certain aircraft that would not be appropriate for this type of mission.They ‘re too small, too slow, have little to no cargo capacity, or have limited pilot and passenger protection, among other concerns.

  • Avoid these types of craft when bugging out:
  • Single seat self – launch gliders
  • Hang gliders
  • Paragliders
  • Ultralight aircraft
  • Hot air balloons
  • Speed Parachutes

Air Glossary

  • ADF: Automatic Direction Finder: Radio compass giving a relative bearing
  • ADT: Approved Departure Time
  • AGL: Above Ground Level
  • AIRMET: A type of weather advisory regarding turbulence, icing, and low visibility
  • AME: Aviation Medical Examiner
  • APP: Approach control
  • ARTCC: Air Route Traffic Control Centre
  • ASI: Airspeed Indicator
  • ATA: Actual Time of Arrival
  • ATIS: Automatic Terminal Information Service. Automatically recorded message transmitted on a particular frequency, containing current weather conditions, altimeter setting, active runways, etc., provided at airports with a tower (controlled).
  • AVGAS: Aviation Gasoline. Usually followed by the octane rating. Used by piston-engine aircraft.
  • Call sign: Phrase used in radio transmissions aircraft to identify an aircraft, before proceeding to actual instructions. An example would be “Motorglider 351 Hotel” or “Cessna 13 Whiskey.”
  • Ceiling: Height above ground or water level of the base of the lowest layer of cloud.
  • Clearance: Authorization given by ATC (the tower, Air Traffic Control) to proceed as requested or instructed (for example: “Cleared for takeoff,” “Cleared to land”).
  • Crosswind: Wind perpendicular to the motion of the aircraft. The crosswind leg is also one of the many words describing the approach segments.
  • Density altitude: Pressure altitude (as indicated by the altimeter) corrected for air temperature.
  • DI: Direction Indicator. A gyro instrument, which indicates the magnetic heading of an aircraft.
  • Downwind: When flying parallel to the runway.
  • ELT or ELB: Emergency Locator Transmitter/Beacon
  • ETA: Estimated Time of Arrival
  • FAA: Federal Aviation Administration
  • FBO: Fixed-Base Operator. Supplier of fuel, maintenance, aircraft rental or sale, flight training, etc. at the airport.
  • FINAL: Final Approach is the part of a landing sequence in which the aircraft has made its final turn and is flying directly to the runway.
  • GND: Ground
  • Go-around: When an aircraft on final terminates its plans to land, gains altitude and begins the landing pattern again.
  • GPS: Global Positioning System (Navstar). Navigational system using orbiting satellites to determine the aircraft’s position on the Earth.
  • IDENT: SQUAWK function of a transponder. When the “Ident” button is activated, an aircraft will briefly appear more distinctly on a radarscope and this may be used for identification or acknowledgment purposes.
  • IFR: Instrument Flight Rules for the operation of aircraft in instrument meteorological conditions.
  • ILS: Instrument Landing System provides horizontal and vertical guidance for the approach.
  • Knot (kt): Standard unit of speed in aviation were 1 knot equals 1.1515 mph
  • LAT: Latitude
  • Magnetic course: Intended horizontal direction, measured in degrees clockwise from magnetic north.
  • Mayday: The international radio distress call.
  • MSL: Mean Sea Level
  • NM: Nautical Miles
  • NTSB: National Transportation Safety Board
  • OAT: Outside Air Temperature
  • Payload: The combined weight of passengers and/or cargo.
  • POH: Pilot’s Operating Handbook (aircraft’s owners manual)
  • RPM: Revolutions Per Minute
  • RWY: Runway
  • SIGMET: Significant Meteorological Information. A type of weather advisory regarding severe weather conditions (thunderstorms, turbulence, icing, volcanic ash, etc.).
  • Squawk: To transmit an assigned code via a transponder.
  • STOL: Short Take-Off and Landing.
  • TAS: True Airspeed. Airspeed corrected for altitude and outside air temperature.
  • TCA: Terminal Control Area
  • Tailwind: Strong wind in the same direction as the motion of the aircraft.
  • Touchdown: Synonym for landing.
  • Transponder: A transponder is a wireless communications, monitoring, or control device that picks up and automatically responds to an incoming signal.
  • UNICOM: Privately operated radio service at uncontrolled airfields.
  • UTC: Co-ordinated Universal Time, formerly Greenwich Mean Time
  • VHF: Very high frequency. Radio frequencies in the 30-300 MHz band, used for most civil air-to-ground communication.
  • VOR: Very high frequency Omnidirectional Range.
  • Wake turbulence: Wingtip vortices generated behind a wing producing lift.
  • Waypoint: Reference point used for navigation indicated by latitude and longitude.
  • Wind shear: Refers to a rapid change in winds over a short horizontal distance that can cause a rapid change in lift, and thus the altitude of aircraft.
  • Zulu: Used worldwide for times of flight operations.

About the Author:

Dr. Neal H.Olshan is a consulting psychologist, a pilot, a writer, and a fine art photographer, as well as the chief combat psychologist for LMS Defense.He is the developer of the Evolution of Mindset Training Program.  Olshan is the author of six non-fiction books and wrote the novel The Panama Escape with his wife, Mary.

>> www.drolshan.com


How Do You Measure Its Worth?

“Hello, my precioussssss.” Due to their scarcity and, for some, their beauty, precious metals have been highly desirable and considered quite valuable by many cultures for millennia. Those of us who enjoy living a prepared lifestyle may opt to keep precious metals because these commodities traditionally hold their value and are trusted after financial institutions fail. After an economic collapse, a nation's currency might be worthless, but a metal such as gold will still be sought after.

The truth is the value of precious metals isn't fixed — it fluctuates according to the mood of the economy as well as other outside factors. Everything from a weak economy, conflicts between countries, and even natural disasters can affect their worth. Let's take a look at the values of two prominent precious metals — silver and gold — during economic crises of the past four decades. We're not economics professors, but the correlation would be evident even to Gollum.

Sources
Info Mine www.infomine.com
National Mining Association www.nma.org
U.S. Geological Survey www.usgs.gov

*Note: Prices not adjusted for inflation.

price-of-gold-and-silver


A Guide to Knife Sharpeners and Sharpening

On a recent visit to a major sporting goods store that had a counter dedicated to blade sharpeners, a woman took out a folding knife from her pocket, turned on a sample grinder, and just stuck the blade directly into it. This author noticed and said, “You might not want to do that.” She pulled her knife out of the machine and the blade tip was rounded, plus the edges were beat to hell. Her husband said, “I’m glad you said something or I would have just stuck my Benchmade in there just like she did.”

Since the dawn of mankind, the most basic survival tool has been the blade. Its basic requirement is a sharp cutting edge. Surprisingly, maintaining that edge seems to be a lost art.

One of this author’s shooting mentors, Rob Virkus, was fond of saying, “There are two completely useless things in the world: an unloaded handgun and a dull knife.” When knife blades go dull there are three options: dispose of the knife, return the knife to the manufacturer for sharpening, or sharpen the blade yourself.

The first choice is typically used for only the cheapest knives or by people who don’t appreciate the value of a decent blade. The second is the mark of a user who lacks the skill, confidence, or tools to undertake the task of sharpening on their own or maybe someone who has a somewhat valuable piece with a particular edge that lost its factory grind and it needs to be restored by the maker. As a rule, if a knife must be returned to the manufacturer for something as basic as sharpening, it’s probably not intended to be a working knife to begin with.

Readers of OFFGRID tend to be a self-reliant group. We like to do things for ourselves, on our own whenever possible. In some circumstances it may be our only option. When that happens, we want to be able to keep our tools sharp — both proverbially and literally.

Repetition Equals Skill

Sharpening with any device requires a basic understanding of how the sharpener is meant to be used. Before using any sharpener, you must read the manual and understand the instructions. If you don’t know the angle of your blade grind, contact the manufacturer and find out. Sharpening at an incorrect angle will result in changing the profile of the blade.

Always start slowly and use precise, deliberate strokes. The key to a proper edge is in being consistent. Forcing the blade can damage the sharpener or the knife, and it can create a thick burr on the edge that will be difficult to remove.

Whether you are restoring a completely dull piece of steel or using the finest stone available to touch up an edge, always remember that you’re removing metal. There is a learning curve. It’s best to start out with the cheapest knives in your house, like the set of steak knives that your uncle gave you as a Christmas present 10 years ago.

Sharpening Stones

sharpening-stone

The stone is the most basic type of sharpener available. It is quite literally a stone, just available in various degrees of coarseness or grit (from extra coarse to extra fine). These are most commonly produced from natural silicates found in Arkansas or India. Manmade versions are produced by companies such as DMT, which rely on the same principle of a flat abrasive sharpener, but use microscopic diamonds bonded to a metal surface.

Stones can be used dry or with water as a lubricant. Some manufacturers recommend water-based honing oils instead. These products work as advertised, but once oil is used on a stone or aluminum-oxide sharpener, it cannot use water again.

The major downside to natural stones is that they wear down and are prone to breakage. Their relatively low cost may mitigate this somewhat, but if you’re on the move and have one in a sheath pouch or in a pack, it may not be usable when you need it.

Secondly, most stones have no guide and the user needs to know how to gauge the angle by eyesight. As basic as they may be, stones are not ideal for a complete beginner.

Manual Sharpeners

chefs-choice-sports-diamond-hone-sharpener

These are the most basic sharpeners on the market and include the previously mentioned stones, but in this case some of the guesswork has been taken out with regard to angles. The easiest ones to use are the “pull through” types offered by companies like Chef’s Choice. The sharpener is either mounted to a counter or held down in place with one hand and the blade is pulled through from the choil to the tip. The sharpener uses integral stones or sticks of varying degrees of grit and set at predetermined angles. A few strokes on the coarse stone will tune the edge and expose more carbide. The finer stones will refine these and result in a basic and durable sharpening job. They are rugged, lightweight, and portable.

Another variant on the manual sharpener is known as “the sticks.” The sticks form a V-shape and the knife is sharpened by bringing the blade down and rearward in one smooth and continuous motion.

By far the best one we have found has been the Spyderco Tri-Angle Sharpener. Spyderco is mostly known for its innovative and cutting-edge knife designs, but it was this sharpener that gave the Colorado-based company its start.

spyderco-tri-angle-sharpener

The Tri-Angle breaks down for easy storage and portability. What makes this sharpener different from all the others, in this author’s opinion, is the choice of using a plastic base. Many lesser designs use wood and the uncoated rods wear away at this much quicker than they do on a knife blade. The result is an inconsistent angle that will give you an inconsistent grind. In this day and age, people try to save money where they can, but that extra $10 or $20 savings can potentially ruin a much more expensive blade.

Dynamic Sharpeners

Up to now, all of the sharpeners we have discussed are of the static type. This makes sense because we want consistency and stability in our sharpening. A dynamic sharpener is different in that the knife blade is stabilized and it’s the stone that comes into contact with it on the part of the user. In essence it’s how the majority of manufacturers put the factory edge on their knives.

The best sharpener of this type in our experience has been the Lansky system. There is a bit more of a learning curve than with the others, but it’s not very steep. The knife blade is secured in a padded clamp that has various holes indicating different angles. A stone or hone is fastened to a rod and then the rod is inserted into the hole. The hone makes contact with the blade at this angle and is moved back and forth from choil to tip on each side. It is a series of very coarse to very fine stones allowing everything from a quick touch up to a complete restoration.

lansky-knife-sharpener

Aside from the brief learning curve, we have found this system doesn’t work well with particularly long or thick blades. If the majority of your blades are shorter than 8 inches and less than a ¼-inch thick, it might be one of the better systems out there for you.

Mechanized Sharpeners

There are a lot of myths about using a powered sharpener. Unfortunately, many of these types, such as the rotating stone included on many electric can openers for maintaining kitchen knives are essentially worthless and the hazards associated with these and common stone grinding wheels have contributed to a huge amount of misinformation.

We found one sharpener that stands out from the rest. It is made by Work Sharp and this particular model was designed by none other than famed knife-maker Ken Onion.

Using a mechanical Worksharp knife sharpener.

The Work Sharp Ken Onion Edition is a scaled-down belt grinder. There are guides on either side of the belts and the angle is completely adjustable. The belts are available in a variety of grits, and a leather belt for buffing or stropping an edge is included to really make that final result pop.

Like the pull-through model by Chef’s Choice, set the choil of the blade in the guide and slowly squeeze the trigger on the beltdrive. Pull the knife rearward and stop before you get to the tip or else it will round. Do this as many times as you need to while counting to 10, and then grind the other side.

The biggest myth about a system like this is that you will ruin the temper or heat-treatment of your blade as if you had used a motor-driven grinding wheel. This is most often espoused by folks who have no knowledge of steel, chemistry, or physics — the same types who wear belts with suspenders. There is simply no way to get this device’s motor-driven belt system that fast and hot to cause the damage that they fear. That damage can occur with a faster motor-driven grinding wheel, but not with the Work Sharp.

For even more versatility, Work Sharp offers a knife and tool grinding attachment. This replaces the belts and will let you do an expert job on chisel grinds, lawnmower blades, axe blades, and can act as an introduction to grinding a blade from bar stock.

Portable Systems for the Prepared

Every sharpener we have touched on to this point is portable, including the Ken Onion Work Sharp model (it needs power, but it is by no means heavy). They would all require a minor degree of setup to work in the field and are fine for hunters. But if you’re bugging out and don’t have the time or facilities to set up a sharpener, or are tallying every item down to the ounce or cubic-inch, there are a few options beyond the basic whetstones. Here’s a look at a few:

Photo of a knife with a Worksharp knife sharpener.

Guided Field Sharpener: Made by Work Sharp, it’s roughly the weight and dimensions of an unloaded pistol magazine. The guide is a 20-degree angle with coarse and fine diamond abrasive stones. A three directional ceramic rod is located on the spine for coarse or fine work and even has a fishhook setting and a rod for sharpening serrations. The opposing side has a practical leather strop treated with a polishing compound.

Blademedic Knife Sharpener: This Lansky model comes in an even smaller package and can handle serrations with a swing-out diamond hone rod. The tool may not work on large knives or machetes due to the smaller dimensions, but for maintaining pocketknives, fishing knives, or hunting knives, it makes for a very handy piece of kit for your bug-out bag.

Golden Stone: Spyderco’s portable tool makes for a much more portable version of their Tri-Angle sharpening system. This oblong sharpener is made from alumina bonded ceramic covered in micron-sized sapphires and comes in a suede pouch that doubles as a base. Position one of the legs on the base for the proper angle to sharpen one side, and then rock it over to the other leg to sharpen the reverse. Unlike a stone, this one will never wear out and requires no water or honing oil.

Whichever sharpener you choose will require some study and research to get the most out of it in order to be able to properly maintain your knives. Most sporting goods stores and hardware stores have in-house samples to let you try them out before you buy them.

Luckily for the couple in the opening paragraph, we were able to restore the edge on the cheap pocketknife the wife tried to destroy by using a demo unit of one of the very sharpeners mentioned in this article. The knife still looked beat-up, but based on the model, it definitely had a better edge than when it left the factory.

3 Tips From the Master

Ken Onion is a master knife-maker and was kind enough to give us a few tips for the sharpener he developed with Work Sharp:

Slow Your Roll: “I realize it was easy to round the tips with the old Work Sharp. We addressed this with my version. The belts are wider and the variable speed makes it much easier to dial down the speed to where you are comfortable. Start slow and work it up.”

Sponge It Up: “If the dust becomes bothersome, try putting a damp sponge on your table and place it right across the face of the wheel so it just barely touches it, but do not get the belts wet. The sponge will collect the dust.”

Get Attached: “If you are having trouble getting the hang of things or wish to sharpen zero grinds or just want to take your knife sharpening to a whole new level, I recommend getting the knife and tool grinding attachment. I feel it’s much easier to use and does a much more precise job of sharpening. You’re much less likely to scratch the finish of your knife, as you’re not pulling your blade through a guide.”

Sharpening the Emerson Way

emerson-production-chisel-grind

Ernest Emerson helped popularize the chisel-grind edge on folding knives and revolutionized the concept of the tactical knife in the 1990s. As simple and efficient as the grind may be, it still mystifies some users. He was kind enough to share some of his wisdom with us:

Why the Chisel Grind Edge? “When designing a knife for use by SEAL Team Six back in the 1980s, we chose the chisel-grind edge because it is the easiest to sharpen (you only have to sharpen one side of the knife) and it holds its edge for a long time.”

When is it Sharp Enough? “Use whichever device you are most comfortable with and sharpen the primary edge. When you feel a burr with the back of your fingernail off the edge, you have sharpened the front edge enough.”

What About the Back Side? “Turning the knife over, you lightly stroke the flat side just to break the burr free. This only takes a couple of light passes. Incline the sharpener slightly so you don’t scratch the surface of the blade and are only touching the very edge. Next you take the cardboard back of a yellow legal pad and strop the knife back and forth on the cardboard. You have to use some pressure, so be sure that your fingers are clear of the blade if it were to accidentally close. Do this repeatedly for 10 to 20 strokes on each side.”

Strops and Steels

Perhaps the best way to maintain any blade is to strop it on a regular basis. A few passes on a strop or razor strap will keep a keen edge on most blades. For certain blades, it may be the only failsafe method of maintaining the edge, such as on a zero-bevel knife or “Scandi-grind.”

Another touted method is the “Butcher’s Steel.” These steel sharpening rods used to be a standard feature in most kitchen knife blocks, and they do a great job of cleaning blood, gristle, and skin from knives that have been processing meat because they are made from the same steel with the same hardness. For that reason it is not a good idea to “touch up the edge” on your EDC knife with S30V, ATS-34, D2, or any other steel that the Butcher’s Steel was not made for.

Improvised Sharpeners

Using the bottom of a mug as a ceramic knife sharpener.

Sometimes the best plans fail, and maybe you bugged out without a decent sharpener. Abrasive stones found in the wild that are flat will mostly work the same as a sharpening stone. The rough inside of a quality leather belt can function as an effective strop as can denim, cardboard (see the Ernest Emerson sidebar), and most rugged material of a similar nature. Coffee cups, bowls, and other items made of ceramic are sufficiently hard enough to stand in for a field expedient sharpener if necessary. Other abrasives, such as files and sandpaper, can be used as well.

Read More

Subscribe to Recoil Offgrid's free newsletter for more content like this.


Two-Wheel Torque

With one twist of its throttle, the stout Rokon motorcycle can transform from a rubber-burning all-terrain vehicle to a gravity-defying projectile that can down an incoming enemy helicopter, sacrificing its own life to heroically save your entire team from a deadly strafing run. Naturally, this can only be done if you're Sylvester Stallone, your team includes Jason Statham, and the helo is a prop in Expendables 2.

Artistic license aside, its movie-star turn serves to illustrate what its loyalists have believed for nearly 50 years: the Rokon is not only America's best kept secret weapon, but also the ultimate transporter that can practically roll on, over, and through almost everything.

The modern-day Rokon stakes its claim as the second-oldest U.S. motorcycle in constant production. Remaining true to its heritage, today's Rokon closely resembles the simple schematics that inventor Charles Henry Fehn first submitted with his patent applications in 1958 when he called it the Trail-Breaker. The patent was granted in 1966, and even today's models are instantly recognizable as offshoots of the original version, what with the MIG-welded steel frames and tractor-like 8x12x25 Titan tire treads over hollow aluminum drum wheels. In fact, the sealable drum wheels hold 2.6 gallons each of water or fuel, so you could almost triple the amount of fuel available on board from the standard 2.69-gallon fuel tank. Its four-stroke, fan-cooled 7hp Kohler 208cc engine is mated to a three-speed automatic torque-converter transmission.

With a burn rate of 1/4 gallon per hour, and with a running speed of, say, 30 mph, your bug-out-route range will approach 330 miles on one 2.69-gallon tank before you tap into the wheel reservoirs for two additional fill-ups for a total range of over 900 miles. And if things get to Mad Max: Fury Roadlevels of desperation, you can always sling another tank on the back.

And, OK, the Rokon does not fly. But when each wheel drum is left empty, the 218-pound Rokon may be laid on its side and floated across open water, carburetor up. “What good is a floating bike?” you might ask. What if your bug-out route brings you to a deep creek or river and a roadblock is set up at the only bridge crossing for 200 miles? Try wading chest deep with your dual-sport bike or ATV.

A pair of Rokons relied upon by the U.S. Forest Service to hit the trails inaccessible to ATVs and quads.

A pair of Rokons relied upon by the U.S. Forest Service to hit the trails inaccessible to ATVs and quads.

“Rock and Row”

From his 1915 birth in San Bernardino to his passing in 1972, Fehn lived in Southern California with a penchant for invention and seeking investors, demo-ing the Trail-Breaker in steep sand dunes or by driving over the dropped tailgate and into the bed of his El Camino. Through development of an innovative clutch, front and rear chain-driven wheels, and gearing system, Fehn's ideas enabled the rider to maneuver in tight turns without grounding — a system that has since undergone considerable refinement.

Early bikes were sold in kit form or from various distributors, the most successful being Orla Larsen. Larsen named his distributorship company Rokon, after his Vermont ski lodge that he called “On The Rocks.” While some die-hards still pronounce the motorcycle name “Rock-on,” the universal pronunciation is “Row-con.”

Today the company is enjoying a resurgence as Rokon International, Inc., based in Rochester, New Hampshire, with 29 dealers in the U.S. and eight overseas. Factory-direct custom order sales are strong with Rokons arriving at dealers and doorsteps around the country, said President Tom Blais.

If the Internet's latest “ultimate” bug-out jeep, truck, or tank is beyond your financial reach or free space in your garage, consider adding a Rokon as your bug-out vehicle. For those who have the scratch, it could also serve as a secondary ride mounted on your truck bed or on a trailer hitch. It's available in street legal or strictly off-road versions and is highly customizable from dealer options. Dual-sport bikes fit the higher speed, on-road/on-trail route scenario very well (see RECOIL Issue 10, and OFFGRID Issue 7 or turn to “(No) Easy Rider, our feature on motorbike techniques, elsewhere in this issue). Still, when SHTF, Rokon riders say the low and stable two-wheel-drive difference is unbelievable if you have to leave the urban landscape and go beyond established trails, all the while towing a trailer or dragging big-game behind you.

In-The-Dirt Testing

rokon

In a series of real-world tests, we were able to validate the Rokon's billy-goat-meets-Big-Foot qualities by joining a small group of hardcore riders on a 200-mile journey deep within the Ocala National Forest. There the U.S. Forest Service Rangers receive training on the usage of the Rokon for taking chainsaws and other gear deep within trails that are too narrow for ATVs. Rangers favor the low-pressure Rokon tires (3.5 pounds psi) and spark arrestor mufflers in the deep sugar sand, inclines, and muddy crossings. The tubeless tires are said to leave less pressure than a human footprint, passing easily between narrow trees on handlebar-width trails. The bikes also can perform search-and-recovery efforts, even towing out other vehicles with a ball hitch if needed.

“These Rokons are not about speed,” said one of the riders, a retired U.S. Army brigadier general who once demo'd the Rokons for the Pentagon. “These are about torque. These are about getting from Point A to Point B when there is little or no path before you and you must absolutely arrive. They are unstoppable. They will go where a dirt bike, quad, or ATV will not pass.”

Rokons feel very different from traditional dirt and street bikes or ATVs and require a shift in thinking. All Rokon controls are accomplished by the hands. The unsprung, folding front or rear foot pegs serve only to support the rider and passenger's sturdy boots while riding, allowing the riders to place one or both feet on the ground to steady the bike on slow maneuvers and obstacles.

The tractor-like tires and high (14-inch) ground clearance allowed seesaw, teeter-totter log crossings by shifting weight fore and aft. Compared to high-riding dirt bikes, the Rokon's low-seat position inspired confidence while traversing slopes.

Although one novice rider laid his bike down about three times in deep shifting sands, the rider was never thrown and was faulted more than the bike. These were not bunny slopes, and the fact that a beginner could negotiate these hills is a tribute to the bike's low center of gravity and pure torque.

Orientation commences with powerful front and rear hydraulic disc brake levers, with the left hand braking the rear and the throttle hand controlling the front. Both brakes are mounted high to keep them free from mud and water. The left hand also controls a black engine emergency “kill” button that shuts off the engine if the bike goes down, plus headlight switch. Above all, we insist on opting for the “Brush Buster” optional handguards to protect the grips and hands from impacts with trees, rocks, or any other obstacles.

Getting Hands On

On the lower right-hand side, fuel management is controlled by the fuel tank shutoff valve, for storing or transporting the Rokon. Close by and beneath the choke, an engine fuel valve is opened for riding and closed for storing the motorcycle. The fuel tank cap air valve may be closed to air intake in the event the Rokon is floated sideways — during our test, this was followed by an immediate and sure start. Some early model bikes attending were equipped with snorkels for exceeding the recommended maximum operating depth of 24 inches.

With the engine in neutral, and using the three-position (anti-theft) ignition key switched to on, the Rokon is started either from a steady pull on the right-side starter rope or from an optional key electrical starter.

Testing the Rokon's flotation at lakeside. With carb side up, the Rokon creates a splash, but comes up and starts.

Testing the Rokon's flotation at lakeside. With carb side up, the Rokon creates a splash, but comes up and starts.

What sets the Rokon apart from other motorcycles is the sealed three-range transmission that appears as a straight shaft inline horizontal plunger on the lower right side of the bike, with a black ball end. Shifting is not done on the move, but from a dead stop and only then at idle speed or when the engine is off. Grasping the plunger ball and pulling outward all the way brings the bike into first gear. If needed, gently rock the bike until the gears synch. The shift pattern from the inside to the outside is as follows: third, neutral, second, neutral, first. There's no reverse. To turn the bike in tight quarters, it may be pivoted 180 degrees on its kickstand.

The Rokon may be started in gear, with one hand lightly on the brake lever and without revving the engine. From any gear, the Rokon may be run from a dead standstill to the top speed range of its gear. When coupled with the automatic torque converter, it has extremely broad capabilities from steep grade climbing to routine routes. The torque converter provides a large overlap of speed and torque between gears, making frequent gear changes unnecessary and eliminating the need to shift on the move. In the event a dangerous encounter occurs, the Rokon may be brought to an abrupt stop, still in gear at idle speed, and hands switched to sidearm or long-gun without downshifting or going to neutral. Even in third, one twist of the throttle later, and you are gone.

Auto-Grab suspension has 8 inches of travel, and the aluminum wheel holds 2.6 gallons of water or fuel.

Auto-Grab suspension has 8 inches of travel, and the aluminum wheel holds 2.6 gallons of water or fuel.

The torque converter is designed especially for Rokon and provides smooth automatic clutching and ratio changing in response to throttle control and terrain requirements, all without loss of engine revs or power, as the front and rear-driven pulleys transfer power through the gears to the front or rear chain drives.

We crawled and drove up tree trunks and ditches in first, floated through sand in second, and hauled down logging roads in third, although some expert riders never left third and managed the responsive throttle beautifully.

 With the front wheel chain guards removed, proper chain tensioning and lubrication is accomplished with simple wrenches.

With the front wheel chain guards removed, proper chain tensioning and lubrication is accomplished with simple wrenches.

For many years, riders had only an adjustable seat spring for one or two riders and low-pressure tires to absorb vibrations while covering terrain. More recently Rokon offers a new Auto-Grab front suspension, allowing for 8 inches of shock travel via a swing-arm pivoted at the bottom of the front fork. In order to maintain proper chain tension as the suspension moves, a second chain was added up front on a dual idler sprocket, adding a slight amount of weight and improving traction. Rokon's Geoff Richardson said the front spring was developed at the insistence of the Jordanian military for ease of negotiating asphalt that's pockmarked with mortar rounds. Jordan now imports its own Rokons and assembles them in a plant, where the King of Jordan maintains a Rokon museum.

Maintenance on most items is accomplished with a simple set of wrenches and lube, with many parts available from local hardware stores. Checking for front and rear chain tension and lubrication is standard operating procedure.

Front suspension soaks up the drop

Front suspension soaks up the drop

Kit Up

A cult-like following of Rokon rebuilders is constantly searching for Rokons to restore and to rally with in remote locations the nation over, while squeezing out an additional 5 to 10 mph. During our ride, accessories were basic, ranging from tomahawks and handheld GPS units to ammo cans that went unopened. To equip and customize a modern Rokon, the company makes it simple for new owners by providing an itemized accessory menu, with a rumored Prepper Edition in all black arriving some day.

Meanwhile, for bugging out and keeping a low profile, we highly recommend accessories, including:

– Trail Maintenance Kit, (fuel filter, air filter, spark plug and wrench, two connecting chain links, two half links and chain, chain breaker, low-pressure gauge, pump, tubeless repair kit, and drive belt in leather pouch
– Camouflage Upgrade
– Carrier ramp plus ratchet straps to secure Rokon to trailer hitch or truck
– Gun boot, saddle style; keeps the width of the bike down and is safer than carrying a rifle across the handlebars on narrow, wooded trails.
– Tow bar kit chain, trailer hitch, and hard bar
– Brush Busters (handguards)
– Tachometer/hour meter
– Game Carrier, which replaces the rear seat to transport backpacks, cargo, rigging saddle bags, and large objects
– Single Track Trailer, a long linear carrier that increases carrying capacity
– GPS/cell phone holders
– Fuel siphon pump
– Waterproof 12-volt plug for recharging cellular phones, lap tops, and powering low-pressure air pump for tires
– Tactical carry system (two ammo cans) on saddle bag position
– Stihl chainsaw, machete, axe, rope, spare fuel, trail maps, tent, pack

The Rokon Trail-Breaker has come a long way from its origins in 1958, one year after some young Americans first carried the M-14 into Vietnam. Just as a new generation of fighters has rediscovered the worth and staying power of the old battle rifle, so too are new generations of “urban bug-out planners” realizing the potential of the Rokon ride.

Our deep wilderness ride ended with one broken mirror, but we're not courting bad luck. As this author tells his firearms students, “Leave luck to the unprepared.” Rock on, Rokon.

Offgrid Tip

Company president Tom Blais pounded the Chilean Andes with his. The U.S. Special Forces covered sands with it in Desert Storm. And U.S. Border Patrol agents use theirs to pursue narrow foot paths. Rokon motorcycles are relied upon by the military and law enforcement agencies all over the world, from Fort Bragg to Brunei.

So, we were thrilled at the chance to join the ranks of those who've tested these all-terrain vehicles. Here are some lessons learned from a recent hardcore training session:

– Starting in neutral is best.
– Carry maps, a GPS unit or two, plus plenty of fuel in reserve.
– Keep a few basic tools with you to tighten up any loose fittings, and always keep your chain properly tensioned and lubricated.
– Practice your bug-out skills by creeping through the woods or your given landscape, walking the bike if necessary. Work less on speed and more on negotiating obstacles.
– If you're unable to avoid traveling on or across roads, keep your head on a swivel, scanning and assessing 360 degrees when traveling and stopping, watching first from the woods and listening before crossing.

Rokon Lineup

Rokon offers three similar models with slight variations in color, available suspension, wheel, and motor-gearing options. Each model is available with 50 factory accessories, from a one-bolt add-on sidecar to a 2,000-watt generator.
Rokon

rokon-trail-breaker

Trail-Breaker
The flagship bike is the complete package with Auto-Grab front wheel suspension, 12-inch aluminum drums, and the high-output 208cc 7hp Kohler engine.
Drive System Full-time all-wheel drive
Engine 7hp Kohler, one-cylinder, four-stroke
Piston Displacement 208cc Kohler
Power Transmission Auto torque converter into a three-gear range selector
Fuel Tank 2.69 gallon
Grade Capability 60-percent
Wheels 12-inch aluminum sealed drum
Tires 8x12x25 tubeless
Wheelbase 51 inches
Ground Clearance 14 inches
Height Over Seat 32 inches
Height Over Handlebars 41 inches
Width 30 inches
Length 79 inches
Weight 218 pounds (dry weight)
Fordable Water Depth 24 inches
Base Price $7,350

rokon-ranger

Ranger
The middle-of-the-pack model, appealing to those wanting the 160cc 5hp Honda engine and solid non-drum heavy-spoke wheels.
Drive System Full-time all-wheel drive
Engine 5hp Honda, one-cylinder, four-stroke
Piston Displacement 160cc Honda
Power Transmission Auto torque converter into a three-gear range selector
Fuel Tank 2.69 gallon
Grade Capability 60-percent
Wheels 12-inch steel spoke
Tires 8x12x25 tubeless
Wheelbase 51 inches
Ground Clearance 14 inches
Height Over Seat 32 inches
Height Over Handlebars 41 inches
Width 30 inches
Length 79 inches
Weight 218 pounds (dry weight)
Fordable Water Depth 24 inches
Base Price $6,975

rokon-scout

Scout
Basically the same as the Trail-Breaker, only without the drum wheels and the front suspension for a lighter or more traditional feel.
Drive System Full-time all-wheel drive
Engine 7hp Kohler, one-cylinder, four-stroke
Piston Displacement 208cc Kohler
Power Transmission Auto torque converter into a three-gear range selector
Fuel Tank 2.69 gallon
Grade Capability 60-percent
Wheels 12-inch steel spoke
Tires 8x12x25 tubeless
Wheelbase 51 inches
Ground Clearance 14 inches
Height Over Seat 31 inches
Height Over Handlebars 41 inches
Width 30 inches
Length 79 inches
Weight 218 pounds (dry weight)
Fordable Water Depth
24 inches
Base Price $6,500

Rokon
www.rokon.com


Giving the Ruger 10/22 Takedown a Survival Makeover

While prepping for when the “Fit Hits the Shan,” the conversation will inevitably turn to proper firearms for hunting and self-defense. But be careful where you elicit advice from. Gun shop “experts” will tell you how useless a shotgun is and how you need a .338 Lapua to take out threats from a mile away. Meanwhile, Internet commandos will espouse the need for a double-stack 10mm pistol to deal with grizzly bears in downtown Cleveland. And tactical mall ninjas will suggest affixing as many lights, lasers, blades, and Tasers to your AR-15 for when the zombie outbreak hits.

Most will dismiss what is probably one of the more useful firearms to have in a crisis situation: a reliable, lightweight semiautomatic rifle that can be suppressed. For these characteristics and a few more, we looked to Ruger’s 10/22 Takedown to see if it was the answer to our survival-firearm question.

For reliability, accuracy, and a plethora of aftermarket accessories, no other manufacturer can beat the 10/22 in the .22-caliber realm. With more than 5 million units sold, it’s a proven performer that takes its lines from the M1 Carbine and has the distinction of being the first modern rimfire rifle designed specifically for adults as opposed to being a youth training firearm. The Takedown models have been out for nearly three years, and while definitely not the only 10/22 in the safe, this one makes for the best we could find in a SHTF rimfire carbine.

Of course, this being an OFFGRID story, we didn’t just buy a 10/22 Takedown and leave it, well, alone. As our loyal readers know, it’s best to personalize all our survival tools and supplies based on you and your family’s needs, your home and general region, and the types of calamities you might encounter. So read on to find out how we made this .22 LR firearm SHTF ready.

Survival Makeover

The Stock

There isn’t a whole lot to the 10/22’s synthetic factory stock, and this Takedown version is no exception, apart from where it is cut into two sections. The aftermarket options are a little sparse at the moment, but this should change in time.

We made two basic modifications besides ditching the flash suppressor: removal of the barrel band and the addition of a single-point sling.

Removing the barrel band is a holdover from the days of using non-takedown 10/22s. All they really added was more of the look of an M1 Carbine. There are versions now that allow the shooter to add a Picatinny rail or a laser, but as an old-school rifle shooter, this author came of age when you didn’t want anything touching your barrel that would affect harmonics and performance. It’s moot on the Takedown, as the fore-end itself is attached to the barrel, but if anything on a firearm serves no real purpose, we prefer to remove it.

The single-point sling was tricky, as the lightweight stock didn’t seem to be a good candidate for installing sling swivel studs; a two-point sling on a takedown rifle seemed impractical. We used the Single-Point Sling Adapter by BLACKHAWK! to give a mounting point for a DeSantis Outback Bungee Sling.

This is one of the better single-point slings we have come across and we chose this design because it is longer than most, and the extra material can be used to jury-rig a two-point sling by wrapping it around the barrel. It stays put and can be undone in a matter of seconds when used in this manner.

The Coating

ruger-10-22-lr-strap

At this point we had a blued receiver, a bare metal scope mount, an aluminum ring, and a Realtree buttstock. It was effective, but not the classiest-looking setup. And the author’s forays into the Sierra Nevada Mountains and the wilds of Alaska sparked doubts about whether a stainless version would have been a better choice to resist the elements.

We contacted Russ Bacon and Nevada Cerakote (a division of High Desert Guns in Gardnerville, Nevada) for a custom Cerakote job. We went with the tried-and-true “High Desert Web” pattern that incorporates the green, browns, and tans of our local and immediate bug-out area. This was a major improvement over the blued steel of the barrel and receiver, bare aluminum of the scope rail and barrel lock, and, of course, the Elmer Fudd-ish Realtree camo that the stock was originally colored in, by way of a hot dip.

The Optics

If this platform has one shortcoming, it’s the sights. Iron sights are great, and by and large that is how this author performs 90 percent of his own shooting, including with a long-gun. However, for this particular rifle to work as we envisioned it, we wanted something more accurate than Ruger’s factory irons, and going with the Tactical Solutions barrel meant giving up the sights completely.

The dilemma with optics and takedown rifles is that it will cause a shift in zero every time the firearms are taken apart and reassembled. One solution would be a cantilever type of mount on the barrel, but until that becomes an option for the Takedown, we decided on a rugged red-dot sight mounted farther back on the scope mount. We chose the Lucid M7, a solid little workhorse.

The Barrel

We purchased the version you see in these pages not so much for the Realtree camouflage pattern, but for the threaded barrel. Unfortunately, the factory 16.25-inch barrel turns into a 22-incher with an attached suppressor. Not a deal-breaker by any means, but when being compact is the order of the day, we wanted something shorter.

Enter Tactical Solutions, one of the companies that’s reinvented the Ruger 10/22. The Idaho-based company supplied us with an SB-X barrel that is made specifically for the Ruger 10/22 Takedown. Tactical Solutions builds a lightweight 12.5-inch barrel with a permanently attached ventilated shroud that brings the barrel length back to 16.25 inches. The shroud allows the installation of most rimfire suppressors and can be used with the included dummy suppressor or fired without it. Some velocity is lost with this setup due to the shorter length, but it does make the rifle quieter with the suppressor.

Our only real complaint with the factory barrel was the inclusion of an AR-15-style flash suppressor that serves no purpose beyond looks. Like being on a bad date, we ditched it as soon as we could, replacing it with a Gemtech ½x28 thread protector. The only shortcoming to the Tactical Solutions SB-X barrel is that you’ll have to kiss goodbye to your iron sights. (We’ll get to the workaround later in this story.)

ruger-10-22-lr-barrel

The Suppressor

In the world of NFA (National Firearms Act, which defines various categories of firearms and devices, including suppressors), there are a number of choices for a .22-caliber rimfire can. We went with the Gemtech Outback IID. This rugged little suppressor is dependable, user-serviceable, and quiet enough for our purposes. The price is very competitive, and Gemtech is currently offering an upgrade to the older models that makes it easier to clean and maintain while having a mono core.

ruger-10-22-lr-side-profile

But it’s Still a .22?
We’re sure the thought has crossed your mind as you read this story: Isn’t a .22-caliber gun just a peashooter? True enough, the .22 LR is not a service-rifle caliber. The round is a laughable choice for a self-defense handgun and not at all recommended by tactical trainers. But, we’re not talking about handgun performance here. We’re looking specifically at a rifle. The following is a closer examination of why the 10/22 Takedown could very well be your go-to survival firearm.

Ballistics

One of the many myths about suppressors is that they slow down the speed of the bullet and therefore make ammunition less effective. This may be old “gun shop wisdom” parroted on the Internet forums. In all our years of shooting handguns and rifles with suppressors, we have never noticed it and can still ring steel and knock down bowling pins with the best of them.

We put this myth to the test by rolling out our F1 Chrony with the Ruger 10/22 Takedown at the range. Using Remington Subsonic 38-grain hollow points and the 16-inch barrel, we averaged between 909 and 962 feet per second (fps) without the can. Screwing on the Outback IID, we averaged between 905 and 953 fps. The same ammunition with the shorter Tactical Solutions barrel resulted in 819 to 834 fps without the suppressor and 810 to 825 with it. This actually means the shorter barrel makes the rifle quieter as those extra few inches taken away means that the rifling will not push the bullet toward supersonic levels.

When shot with Federal Premium Target loads with a 40-grain bullet, we averaged 1,053 to 1,072 fps on the factory barrel without the can, 1,050 to 1,060 with it, and 880 to 900 with the Tactical Solutions barrel and no suppressor. Adding the suppressor to the Tactical Solutions barrel with the Federal Premium gave us an average of 871 to 887 fps.

The velocity loss is somewhere between 5 and 15 fps when using the Outback IID. It’s certainly nothing we want to be shot with.

ruger-10-22-lr-chart

Self-Defense

Yes, you read that correctly. Self-defense. The .22 LR may not be the round of choice for a defensive handgun, but when chambered in a reliable rifle like the Ruger 10/22 Takedown, it’s positively deadly against two-legged predators. Just reread the aforementioned ballistics stats. One reason is the increased velocity when fired from a longer barrel and the increased accuracy from using modern optics coupled with no recoil. Also, if called into action, the 10/22 Takedown is light enough to be shot accurately with one hand — a huge plus if you’re carrying your child, protecting your spouse, or hauling vital life-saving medicine or supplies.

Pest Control

Disasters often have secondary consequences. Earthquakes, gas leaks, fire, or floods that devastate or otherwise evacuate structures not only drive out people, but send the vermin looking for other shelter and food sources, too. Whether it’s a plague of rats, feral dogs, possums, or other nuisance wildlife, the .22 LR excels at reducing their numbers humanely and quietly. Plus, it lets you save your larger caliber — 9mm, 12-gauge, .308, etc. — for more dangerous creatures.

Hunting

In most parts of the USA, hunting big game with a rimfire round is outlawed. This is partially based on the notion that the .22 LR lacks power to make a humane kill, but also because a “miss” is subject to over-travel and can easily hit and injure another person a great distance away.

The fact remains that the .22 LR is effective on large game when the shot is placed properly. Poachers have effectively used this round for decades, and most farmers take down their cows for butchering with a single .22 shot to the head. Unless you’re hand cycling .22 CB Caps or .22 Shorts, don’t underestimate the power of this little cartridge. In all reality, a true SHTF scenario could decimate the entire local deer population within a year. Stockpiled .223, .308, and other full-sized rifle calibers will be overkill for the smaller animals that are left, such as squirrels, raccoons, foxes, marmots, groundhogs, and muskrats, etc.

Portability

This is another benefit of the 10/22 Takedown model. In a true TEOTWAWKI situation when you may find yourself having to elude a larger armed group, this smaller rifle will give you that ability to escape and evade. Always remember legendary lawman Wyatt Earp’s famous answer with regard to surviving a gunfight: “Don’t show up for it.” That little rifle broken down in its compact pack will be much less obvious from a distance than a black rifle slung over your shoulder or inside a long gun case. Furthermore, because the .22 LR is so much smaller than, say, 5.56mm, you can pack and carry a lot more rounds than you would if you were running with an AR-15.

Price

While a basic AR-15 rifle can easily cost you more than a grand, a stock 10/22 Takedown can be found for less than a handgun. The MSRP is $409, but street prices are much cheaper. And unlike .50 BMG or .338 Lapua rounds, the Takedown’s .22 LR ammo is quite affordable and generally more readily available. Yes, we’re well aware of the current ammo shortfalls in some areas of the country, but this, too, shall pass. When a disaster strikes, it’ll be reassuring to know that your chosen caliber will be commonplace to purchase or scavenge.

Conclusion

When preparing for worst-case scenarios, realism is the name of the game. Forget the fanboy fantasies of zombies, cannibals, jack-booted thugs in blue helmets, or a Sharknado-like phenomenon. The reality is that a well-made .22-caliber rifle such as the Ruger 10/22 Takedown model will cover many of the real-world situations that a prepper might come up against in either a SHTF incident or simply living off the grid for an extended period of time. Be armed with both the tool and the knowledge to survive and thrive.

Ruger 10/22 Takedown Specifications

Caliber: .22LR
Overall Length: 34.5 inches (20 inches broken down)
Magazine Capacity: 10 or 25 rounds
Weight (Unloaded): 4.75 pounds
MSRP: $409
URL: www.ruger.com

Accessories
Barrel:
Tactical Solutions SB-X $295 – www.tacticalsol.com
Suppressor: Gemtech Outback IID $325 – www.gem-tech.com
Optic: Lucid M7 $229 – www.mylucidgear.com
Sling Adapter: BLACKHAWK! Single-Point Sling Adapter $7 – www.blackhawk.com
Sling: DeSantis Outback Bungee Sling $56 – www.desantisholster.com
Coating: “High Desert Web” Cerakote $350 –www.nevadacerakote.com


Headlamp Faceoff

We're ashamed to admit that we used to snicker at the sight of a headlamp. We'd see joggers wearing them while hitting the pavement and say snide things under our breath like, “Heigh-ho, heigh-ho, it's off to work we go.” But when we got old enough to turn wrenches in the garage, we realized head-mounted lights weren't just for miners.

In fact, headlamps aren't just for recreational activities, but are essential for emergencies. Picture an earthquake that topples your apartment complex, and you have to dig through crumbled walls to find your missing daughter. Imagine a chemical spill spews toxic fumes for miles, forcing you to bug out far away from city lights. Or perhaps you're in the less dramatic, but more likely, scenario of having to fix a flat tire after sundown — it's pretty hard to unscrew lug nuts with a flashlight in one hand.

So, in this edition of Hands On, we're pitting two moderately priced models head to head (pun completely intended): The Coast Products HL27 and the Fenix HP12.

Coast Products HL27

headlamp-face-off-coast-products-hl27

Make & Model: Coast Products HL27
Max. Runtime: 330 lumens
Max. Runtime: 8 hour, 45 minutes
Weight: 6.8 ounces (including batteries)
MSRP: $75
URL: www.coastportland.com

Fenix HP12

headlamp-face-off-fenix-hp12

Make & Model: Fenix HP12
Max. Runtime: 900 lumens
Max. Runtime: 145 hours
Weight: 5.9 ounces (including batteries)
MSRP: $65
URL: www.fenixlight.com

Illumination

On paper, it might seem like Fenix's LED outshines Coast's. Its max output of 400 lumens edges out the Coast's 330 lumens. Plus, with a maximum output of 900 lumens in the 30-second burst mode, the Fenix offers a retina-searing amount of light with an impressive throw of 124 meters (a little longer than a football field). Many light snobs will love the ability to wield almost 1,000 lumens…but when is a lot just too much? It depends on your application.

We tested both models in various situations: indoors, performing car maintenance and practicing household emergency drills; outdoors, hiking in low light and using the lights while practicing our survival skills on a camping trip. Like giddy Boy Scouts, we found that the Fenix's 900-lumen burst mode was fun to play with while outdoors, but it wasn't really necessary. In the woods, our immediate survival concerns at night never extended beyond 40 meters at any given moment, and indoors the burst mode was more a detriment than an asset, as it often caused light to bounce off walls and nearby objects into our eyes. We suspect that, unless you're in an outdoor search-and-rescue situation (either signaling to be rescued or searching as a rescuer) or your job puts you in a vast and unlit workspace, the burst mode won't be vital to your general operations.

Rest assured the Coast's 330 lumens come close enough to Fenix's 400-lumen output for all practical purposes. Both provide superior illumination at night and offer different levels of brightness. The Fenix HP12 can also emit 150 lumens on mid mode, 50 on low, and 10 on eco. Meanwhile, the HL27 doesn't have different modes, but rather features Coast's Light Output Control Wheel, which you twist like a dimmer dial to get the exact brightness you want.

Functionality

While the Fenix might have the Coast beat in the maximum brightness category, the Coast is much more intuitive to use. Coast's Light Output Control Wheel is pure genius. Just spin it counterclockwise to get a dim light then rotate it clockwise for gradual brightness or all the way for full blast. Located at the top of the lamp just behind the on/off switch, the wheel is easy to find by feel, responsive to the touch, and a simple yet brilliant solution to the Goldilocks problem of needing a brightness level that's not offered by the preset modes.

Meanwhile, the Fenix has a push-button switch that's easy to find on the side of the lamp. To access each mode, just push the switch. However, because it has multiple modes, you'll have to push it four times to get to high mode. While not a big deal if you're on a casual hike, it could be tough to find the right mode under any sort of stress. On more than one occasion, we found ourselves hammering on the switch, running through the modes and initiating a manual strobe of sorts as we tried to find the right brightness. In a desperate doomsday scenario, we can foresee potential problems with this, such as accidentally signaling your location to strangers when you were just trying to shut it off.

To turn the Fenix on or off, simply hold the button down for a moment. Just don't hold it down for too long or you'll kick on the blinding burst mode.

The Coast's on/off switch is an ergonomic button just above the light that's a cinch to operate. Another highlight for the HL27 is its twist focusing ring on the lamp that lets you adjust the beam from flood to spot, just by rotating the ring. When turned to spot beam, the Coast lamp can shine up to 129 meters, slightly more than the Fenix. This makes the HL27 exceptionally versatile.

The HL27's lamp also has a hinge, so you can shine the light downward in various positions rather than having to bend your neck to illuminate what's at your feet. Likewise, the Fenix HP12 can pivot downward, but has the added advantage of also turning upward. Shining your lamp skyward wouldn't make sense in the backcountry, but indoors this can reflect light off ceilings and provide greater overall illumination in a confined space.

Comfort and Durability

With its mostly plastic construction, Coast's HL27 doesn't look particularly rugged — but it held up admirably during our testing period. Of course, we didn't go spelunking or attempt to summit K2, but we didn't baby it, either. Backed by a lifetime warranty against defects in materials and workmanship, the HL27 is impact and water resistant.

On our heads, it felt comfortable thanks to adjustable elastic straps. Plus, the two main contact points are made of flexible synthetic rubber. Oh, and the cord that connects the battery pack to the LED is integrated into the headband to prevent snagging.

On the flipside, the Fenix's power cord hangs outside of its elastic headband. While we didn't get caught up in the cord during use, we can see how much better the Coast's integrated cord is at avoiding snags (and any resulting damage).

Fortunately, the Fenix is quite durable — and certainly looks like it. Made of aluminum alloy and stainless steel, the headlamp and its battery housing have a hard-anodized finish to fend off abrasions. Even the lens is made of tough glass with an anti-reflective coating. These features allow the HP12 to be shockproof and waterproof up to 2 meters — and even freeze-proof from -40 degrees.

Though only long-term testing will truly determine how long the headlamps last, it's a safe bet that both should perform diligently for years to come.

Conclusion

If backed into a corner and forced to pick just one, we might bypass the Fenix HP12's superior illumination capabilities and give the slight edge to the Coast HL27 because of its versatility and ease of use. Not only does its Light Output Control Wheel provide precious brightness levels quickly and easily, it's powered by three AA batteries, which are far more common than the two CR123 batteries that the Fenix feeds on.

However, there's no loser in this headlamp faceoff. Both models performed admirably in the field and are solidly constructed with quality parts. Either one would be worthy additions to any prepper's go-bag. With stellar performance and quality construction, both of these headlamps will cut through darkness; whether you're in the woods or on the trail … or in a mine filled with singing dwarves.


OFFGRID 411: U.S. Transportation Safety Statistics on Planes, Trains, Boats, and Automobiles

We all dread being involved in some sort of crash. While mainstream media often dwells on the worst situations and gives many the impression that a certain method of transportation is more unsafe than another, have you ever stopped and looked at the U.S. Transportation Safety Statistics? What really is the safest way to travel?

To show you what your “odds” are relating to the U.S. transportation system, we compiled statistics involving travel by air, by rail, by boat, and by highway for the first year of five different decades to see how these measurements stack up against each other.

These numbers reflect quite a few variables, but at least you get an overall sense of the level of danger involving these transportation modes. Aside from a few upticks, there is an unexpected downward trend in the overall injuries and fatalities involving these various methods of transportation. While this may be due to improvements in technology, regulations, and public awareness, among many other things, we were surprised to see this decrease given the likely ever-growing amounts of vehicles and owners.

Understanding U.S. Transportation Safety Statistics

The U.S. Transportation Safety Statistics reveal a complex picture of travel safety across different modes of transportation. The unexpected downward trend in injuries and fatalities is a positive sign, but it's essential to continue monitoring these numbers and understanding the underlying factors.

Whether you're a frequent traveler or just curious about the safest way to travel in the U.S., OFFGRID 411 provides the insights you need. Stay tuned for more in-depth analyses and travel safety tips, and always make informed decisions based on the latest U.S. Transportation Safety Statistics.

U.S. Transportation Safety Statistics

transportaion-injuries

Related Posts


Optimizing Movement for Survival: A Comprehensive Guide

Disclaimer: The exercises and content about optimizing movement for survival shared in this article are for illustrative purposes. Always consult a medical professional before attempting any physical activity or adopting a nutritional plan.

Movement is the essence of life. Top fitness experts emphasize the significance of optimal movement for a healthy, long life. Yet, many of us, due to sedentary lifestyles, overlook its importance. This guide aims to reintroduce the importance of movement, especially in survival situations, and offers tests and strategies to optimize it.

From infancy, movement plays a pivotal role in our development. However, modern lifestyles, characterized by prolonged sitting and minimal physical activity, have diminished our natural movement patterns. This not only affects our health but also our ability to respond effectively in life-threatening situations

Any physical fitness expert worth a dime will tell you that the ability to move well and be active are key components to a long and healthy life. As babies, we develop through movement. At some point in our lives, however, most people lose sight of that. Maybe it's a result of our stuck-in-a-cubicle jobs and sedentary lifestyles. Sitting at a desk all day followed by lying in front of the TV all night just makes things worse.

What we need to discuss are some ways to test how well you move. Even better, we need ways to fix the issues that arise to prevent unnecessary injuries when you're in a life-and-death situation — like evading roaming bandits.

So, how do you know if you're moving well?

It can't be overstated that staying healthy is key to survival. That doesn't just refer to being disease-free — that also means keeping your body structurally healthy. Today, when all is well in the world, you could easily visit the doctor if your back hurts or your joints flare up. But what if tomorrow there's a massive wildfire that obliterates your community and forces you to bug out on foot through miles of woodlands? Suddenly, a quick trip to the knee specialist doesn't seem so likely.

Self-assessment and care are crucial. A hamstring pull will slow down your entire survival group, which will make traveling much more costly, possibly turning a short hike into a death march. Lengthy travel means more supplies, more time, and more terrain challenges. Plus, how will everyone feel when you're slowing them down? Things may get heated, and anger certainly clouds judgment and causes in-fighting. Morale can plummet from this as well. Everything will seem a lot bleaker once injuries start popping up and travel becomes more grueling.

To make sure you don't fall victim to a preventable injury, let's take a look at five movements that will determine how likely you are to end up broken. They'll test how well you move — and, if need be, we'll outline a corrective strategy to fix you before you get wrecked.

The Toe Touch

Seems pretty basic, right? If you can't touch your toes, you're at risk for some pretty rough back issues. You need mobility in your hips, and if there's not enough, you'll get that extra motion through your lower back. So, let's take a look at your toe touch, and if need be, correct it.

Test: Stand with your feet together. Keeping your knees slightly bent, touch your toes. If you didn't reach your toes, we'll go through a simple progression to fix it.
Progression 1: Toes-Elevated Toe Touch. Stand with your toes elevated on a 2- to 3-inch surface, feet together, and a rolled up towel between your knees. Reach toward the sky, then bend forward.  Once you reach the bottom position, crush the towel between your knees. Complete two sets of 10 repetitions. Once you can reach your toes comfortably with your toes elevated, we'll move on to the next progression.
Progression 2: Heels-Elevated Toe Touch. Repeat the same three steps described previously, only elevate your heels this time. Complete two sets of 10 repetitions.

The Seated Trunk Twist

Slouching forward at your desk or while watching TV keeps you in a chronically slumped position. Over time, this causes you to lose motion in the mobile part of your spine. Since your shoulder blades sit on your ribcage, which is attached to your spine, is it any wonder that this posture yields lack of mobility, and, over time, can cause pain? A simple self-assessment is the seated trunk twist.

Test: Sit Indian-style facing a doorframe with your arms crossed, while holding a dowel on the front of your shoulders. Keeping your torso tall, rotate as far as you can while keeping the dowel on your shoulders. If you can't tap the dowel to the doorframe while rotating in both directions, you're going to need some help fixing that. Luckily, this progression will do just the trick.

Progression 1: Rib Roll. Begin lying on your right side, with your top knee bent at 90 degrees and your bottom leg straight. Prop your top knee on something 4 to 6 inches high, such as a small ball. Grab your top knee with your right arm and the right side of your ribs with your left arm. Breathe in through your nose, thinking about expanding from your stomach. As you exhale through your mouth, push your left knee into the object, and drop your left shoulder toward the floor while gently pulling your ribs as you rotate. Complete two sets of six to eight repetitions on each side. Do twice the amount of sets on the weak side if an asymmetry is found.

Progression 2: Side-Lying Windmill. Once you've completed the first progression, and movement is nearly symmetrical on each side, we'll move to a more challenging position. Begin in the same position as described in progression 1, but with your hands held together out in front of you. Breathe in through your nose, thinking about expanding from your stomach. As you exhale through your mouth, push your left knee into the object, and trace a big half-circle with your left arm as you rotate through your upper back to move your left shoulder toward the ground. Be sure to follow your hand with your eyes as you move. Complete two sets of six to eight repetitions on each side. Do twice the amount of sets on the weak side if an asymmetry is still present.

The Push-Up

The push-up is a great test of how stable you are through your core. When you transfer force through your body (think punching, throwing, or heavy squatting), you'll need core stability to allow the maximum amount of energy to move between your upper and lower body. Here's how we'll test it.

Test: Begin lying face down with your hands under your shoulders, your legs straight and your toes pulled to your shins. Press yourself up to the top of the push-up position. Do not allow any movement in your body except for your arms and shoulders.

If you weren't able to do the push-up, or you did, but your chest rose before your hips, we have some correctives for you to follow.

Progression 1: Hand Walk. Begin standing with your feet together. Bend forward and walk out to a push-up position, only using your arms. Return to the starting position, again only using your arms. Complete three sets of six repetitions.

Progression 2: Elevated Push-Up. Begin in a push-up position with your upper body elevated on a 6-inch to 2-foot-high sturdy object, such as a bench. With your elbows at a 45-degree angle to your body, slowly lower yourself to about 6 inches away from the bench. Push into the bench and think about reaching as you come to the top of the movement. Complete two sets of 10 repetitions. Once that is no longer challenging, lower the height by 6 to 12 inches and repeat.

The Straight-Leg Raise

This is a deceptively complex movement that can reveal how well your legs function separately and how stable your core remains during that motion. If you can't pass this test, any movement that resembles walking, running, or climbing is going to put unnecessary stress on your back and hips.

Test: Begin lying on your back with your feet together and toes up, with your arms out to your sides with palms up. Position your left mid-thigh next to a doorframe or stable vertical object. Keeping both knees straight, slowly raise your left leg as high as you can.

If you aren't able to reach the object or doorframe with your ankle bone, you're going to need some work to make this possible.

Progression 1: Supported Single-Leg Lower. Lie on your back with both legs straight and raised up in front of you. Wrap a towel or strap around your left foot and gently pull it toward you. You should feel a light stretch in your left hamstring. Slowly lower your right leg toward the ground, stopping when you are no longer able to keep your back flat against the ground and both knees straight.

Complete two sets of eight repetitions on each side. Do twice the amount of sets on the weak side if an asymmetry is present.

Once the first progression is fairly easy, we'll move to a more challenging variation.

Progression 2: Unsupported Single-Leg Lower. Begin in the same position as the first exercise, this time without using anything to hold your leg up. Place your arms at your sides, with your palms pressed firmly into the floor. Keeping the left leg straight, slowly lower your right leg toward the floor, stopping when you are no longer able to keep your back flat against the ground and both knees straight.

Complete two sets of eight repetitions on each side. Do twice the amount of sets on the weak side if an asymmetry is present.

Single-Leg Stance

About 40 percent of a normal walking gait takes place on one leg. Every time we go up stairs, we're on one leg. It's safe to say single-leg stability is important to normal functioning. It's no wonder, then, that we should take a look at how well you are able to stabilize yourself on one leg.

Test: To test this, simply stand with your feet together and raise one knee above your hip for 10 seconds. It's best to do this in front of a mirror to make sure your hips remain level. If you weren't able to hold each knee up for 10 seconds, or your hips weren't level, here are two exercises to help.

Progression 1: Single-Leg Glute Bridge. Begin lying on your back with your knees bent to 90 degrees. Pull one knee up toward your chest. Drive your planted foot through the floor and push your hips to the ceiling.

Complete two sets of 10 repetitions per side. Do twice the amount of sets on the weak side if an asymmetry is present.

Progression 2: Balance Beam. The next progression is simply walking on a balance beam. The beam can be anything from a few 2x4s to a fallen tree. Find something that is wide enough to plant a foot, and ideally, not very high off the ground. Shoot for three sets of about 30 seconds to a minute of balance time.

Conclusion

Don't beat yourself up if these movement tests gave you some difficulty. The point is to be proactive and test yourself regularly — by identifying areas that need improvement, you can proactively work on the progressions we've outlined above. A little prevention will go a long way to catch these issues before you're traversing mountainous terrain to find shelter or climbing through rubble after a building collapse.

Sources

About the Author

Ryne Gioviano, a regular OFFGRID contributor, co-owns Welligee Personal Training & Lifestyle in Naperville, Illinois. With a master's in exercise physiology and NSCA certification, he's an authority in fitness. Visit www.welligee.com for more.

Related Posts