What If You’re Stranded On A Flooded Jeep Trail?

Do not enter when flooded.” It’s a bright yellow road sign you’ve probably seen next to drainage areas and bridges, but have you given it any real thought? Unfortunately, most motorists simply tune out these warnings. When severe weather does occur, far too many drivers venture into areas where their vehicles simply cannot go — such as becoming stranded on a flooded jeep trail — leading to precarious rescues or even preventable fatalities. According to the National Weather Service, an average of 95 people die each year from flash flooding, and nearly two-thirds of those deaths occur in vehicles. A study published by the University of Arizona also concluded that most motorists who crossed flooded areas did so due to a calculated decision, not an impulsive one — “they tended to cross if it appeared that weather conditions were getting worse, if they could not find another route, and if they saw that vehicles had successfully crossed.”
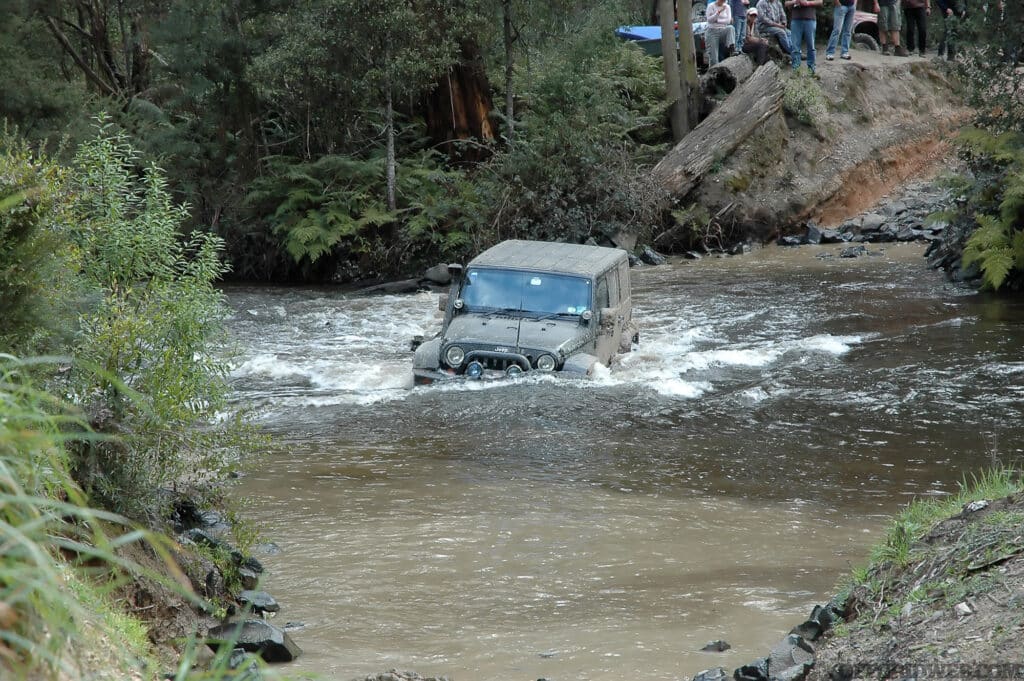
Photo of a modified Jeep Wrangler crossing a river during a flash flood.

If you found yourself stranded in worsening storm conditions with a flooded road ahead, how would you gauge your ability to escape the situation? Should you stay put and risk worse flooding at your current location, or attempt to drive out carefully to reach safety? We asked survival instructor Kevin Estela and overlanding expert Rick Stowe how they’d deal with this dangerous predicament.

The Scenario

Situation Type

Flash flood evacuation

Your Crew

Yourself and your 8-year-old daughter

Location

Southern United States

Season

Summer

Weather

Looming storm clouds; high 92 degrees F, low 74 degrees F

The Setup: As a father, you’re a big believer in spending quality time with your kids in the great outdoors. You’ve gone on countless father-daughter adventures with your first-born — camping, fishing, hiking, and plenty of weekends off-roading together in your Jeep Wrangler. For her eighth birthday, you decide to load up the Jeep with supplies and drive from your home in the Midwest down to visit a family member who lives on the Gulf Coast. Along the way, you hit a few off-road trails and camp out overnight. For most of the trip, the weather has been overcast with scattered showers, but as you get closer to the coast, you notice the forecast predicts heavier rain from an incoming tropical storm. Still, it looks manageable, and none of the locals you’ve met seem especially concerned. You’ve only got one more night of camping before you reach your relative’s home, so you head out on the trail to find a campsite one last time.

The Complication: You awake in the middle of the night to the sound of rain hammering your tent. Rolling out of your cot, the floor undulates like a waterbed beneath your feet. Outside the tent, water is already ankle-deep and it’s only getting worse. You wake your daughter and tell her you’ll both need to take shelter in the Jeep, since the tent isn’t going to be able to keep out the rising water for long. As you fire up the engine and turn on the headlights, you realize that the situation is even worse than you thought. The trail back to the main road is clearly flooded — some areas are just muddy, while others are submerged in flowing water. You recall crossing creek beds on your way into the site that may be a foot deep by now, given this amount of rainfall. The weather only seems to be getting more intense, and this whole area may be submerged soon. There’s no cell service, and you’re a few miles from the nearest paved road or occupied structure.

What can you do in this rapidly escalating situation? Should you wait for a break in the weather before attempting to drive on the partially flooded trail? Or should you attempt to drive out of the danger zone immediately before the flood gets deeper? How would you gauge if a water crossing is passable or too dangerous? What can you do to prevent your Jeep’s engine from sucking up water and stalling? If your vehicle gets stuck, would you abandon it to seek higher ground?
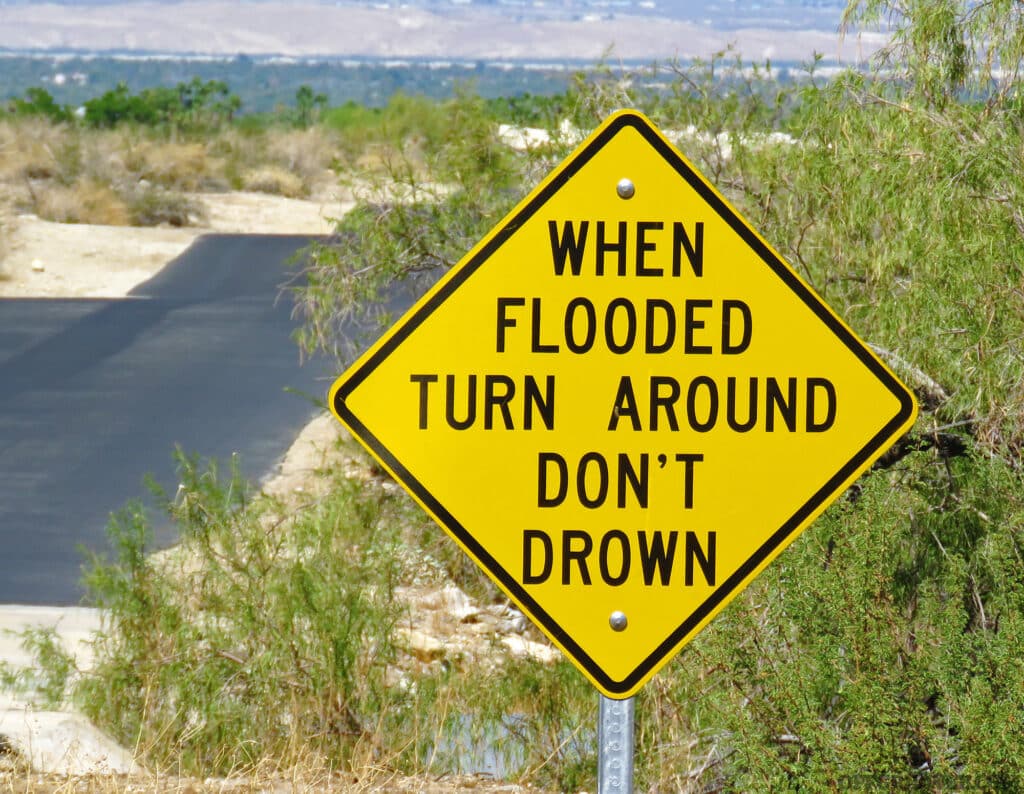
Photo of a flash flood warning sign. telling travelers to turn around when the road is flooded.

Survival Instructor Kevin Estela’s Approach

“Jesus Christ!” I blurted only to be corrected by my daughter, “That’s a sin, dad. Don’t swear.” My profanity was more of a surprised prayer for help than an expletive. How could we be caught off guard by this water? I grew up in New England and lived in Utah for two years, but I never experienced flooding like this. In my travels to and from Arizona for work, I dealt with monsoons, but I was never put into a situation where that collective rainwater turned into a threat. Then again, those times were not like this one and I should have known better setting up camp so late at night. That’s what I get for driving until I need to sleep instead of stopping when I want to sleep. The backcountry is open for adventure but there’s always a trade-off. We’re on our own to get out of this one.

Noticing the flood waters rising and the rain increasing, I assume this flood is much like the flash floods we heard about at the visitor center. In the Southwest, rain pouring miles away can travel underground and resurface as flooding above ground. I know there’s no way to predict how high the water will get, and we have to assume the worst. Who knows how long this storm band is? Even though I think we’ve seen the worst of the storm, there could be a lot more rain coming, and the water may rise even more.

You can experience cold even in the summer and in the desert. Add in wet clothing and sleeping bags, and you can die from the cold overnight. Our greatest lifeline was our sleeping bags, and we knew we had to keep them as dry as possible. We didn’t plan on camping in wet weather, and we didn’t pack dry bags. Looking over what we had left in our camp, we had to improvise. Since it was the tail end of our camping weekend, we used the garbage bag that lined our Trasharoo rear-tire garbage holder to protect our sleeping kit. We dumped out the contents and inverted the bag to use the clean outside to hold our bags inside. The rain was coming down strong, and we had to fight the wind to close the Jeep doors, which did a mediocre job of preventing the horizontal rain from coming in.

When the water started to rise around us, the question “could this flood” was replaced with “how bad will this flood be?” We didn’t have time to sacrifice waiting around for that answer. Unfortunately for us, where we set up was in a ravine we didn’t notice in the dark. We arrived at camp late at night and couldn’t see the nearby terrain features. We disregarded the general rules for setting up a camp and our haphazard selection cost us. Fortunately for us, we know we can quickly gain elevation climbing to the top of the draw by running to the top of the spur that leads to the ridgeline. Between us and the spur is fast moving water that I can’t determine the depth of. The only other option is heading back the way we came through what appears now to be a creek bed rushing with water.
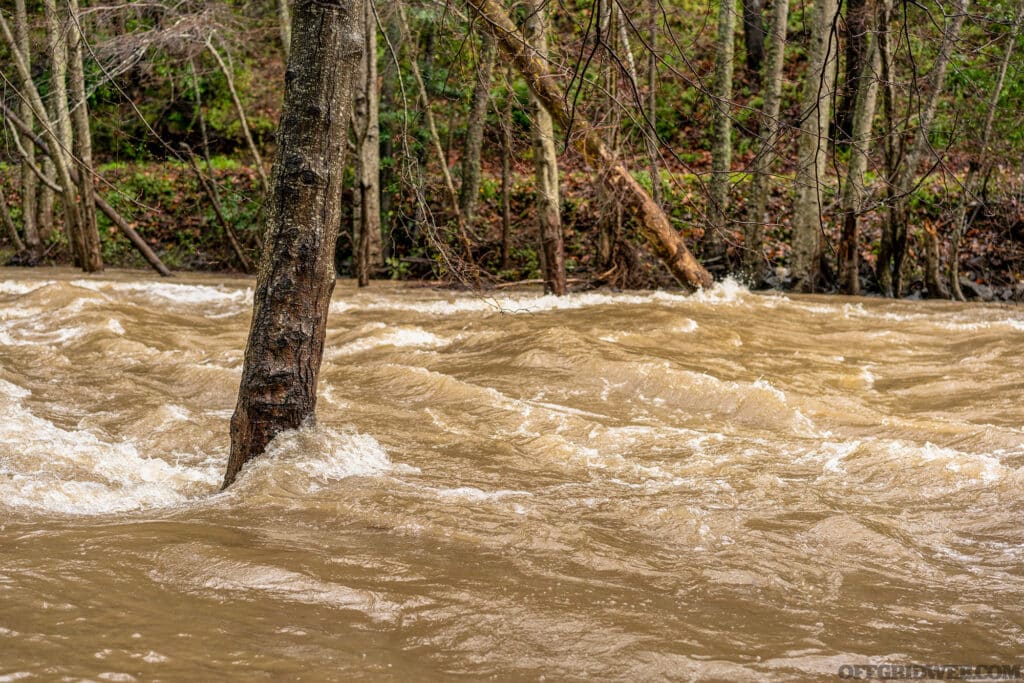
Photo of flash flooding taking place in California early 2023.

We tune the radio to AM frequencies and start scanning for any updates. This is brand new for my daughter as she grew up in an age when terrestrial radio was falling out of favor, and everything became a playlist plugged into the vehicle. She’s small, and I task her with listening for “the weatherman” who is giving an update on what we’re experiencing. We know storms don’t last forever and perhaps if we can get an idea how long this storm will last, we can decide if we should hunker down or attempt an escape.

This ordeal provided an excellent opportunity for me to speak to my daughter about life. While some parents believe in sheltering their kids, I’d rather educate them than keep them ignorant and naive longer. She may be disappointed with the decision to end our camping trip, but she’ll be alive, and she’ll forgive me eventually. There’s no chance for reconciliation after death. She was nervous when we woke to the water in our tent, and she didn’t fully comprehend the urgency in my voice. In a time like this, she needs to listen to me as a parent and not as the fun dad or friend.

The problem with flood water is not just the water. Our skin is pretty tolerant to that in the short term. Water can be forceful, and it does have the power to bend canoes and kayaks when they’re pinned up against rocks. Water can also float a vehicle pretty easily and just a few inches of water can give a vehicle buoyancy. What also worries me in flood water is what the flood water is carrying with it. Broken off branches, basketball-sized rocks, sharp debris like bottles and trash discarded along the riverbanks and now in the mainstream. Murky water shouldn’t be viewed as just water. I can’t believe I’m seriously thinking about crossing that water, but my daughter got drenched by the rain, and her condition has started to deteriorate.

I never would recommend crossing water of unknown depth if there is a safe alternative to self-rescue. It goes against all logic and the advice of every industry expert I’ve heard. In this circumstance, the choice became very clear even if it was incredibly desperate. In my daughter’s attempts to help me, her clothes became soaking wet. Everything in our camp became soaking wet, including our lifesaving sleeping bags, and not even the vehicle’s heater seems to be warming her fast enough. She was shivering uncontrollably and has now become disoriented and lethargic. In my desperation to fight off hypothermia, I had to come to the realization that she might die if we don’t get her body heat up, and we could both die if we cross the river in an attempt to drive to safety. I’ll be called foolish and careless for letting this scenario get to this point, but I would rather deal with insults than a funeral. No parent wants to bury a child, and the outcome will weigh on me if I don’t act now.

Recovery boards are standard in my vehicles, and they’re used more than my winch. To avoid losing them in mud, I always attach a length of cordage tied to my bumper to drag them from the mud after I drive out of it. In these conditions, prep like that means not losing a lifesaving tool. Traction boards work great in dry conditions, but they become almost impossible to hold onto when water is rushing over them. If I used them in these conditions, I would have to risk losing them, testing the tensile strength of the leashes that hold them to my rear bumper. Even attempting to get them under the tires in moving water could put my life at risk, so we’ll have to rely on keeping up momentum.
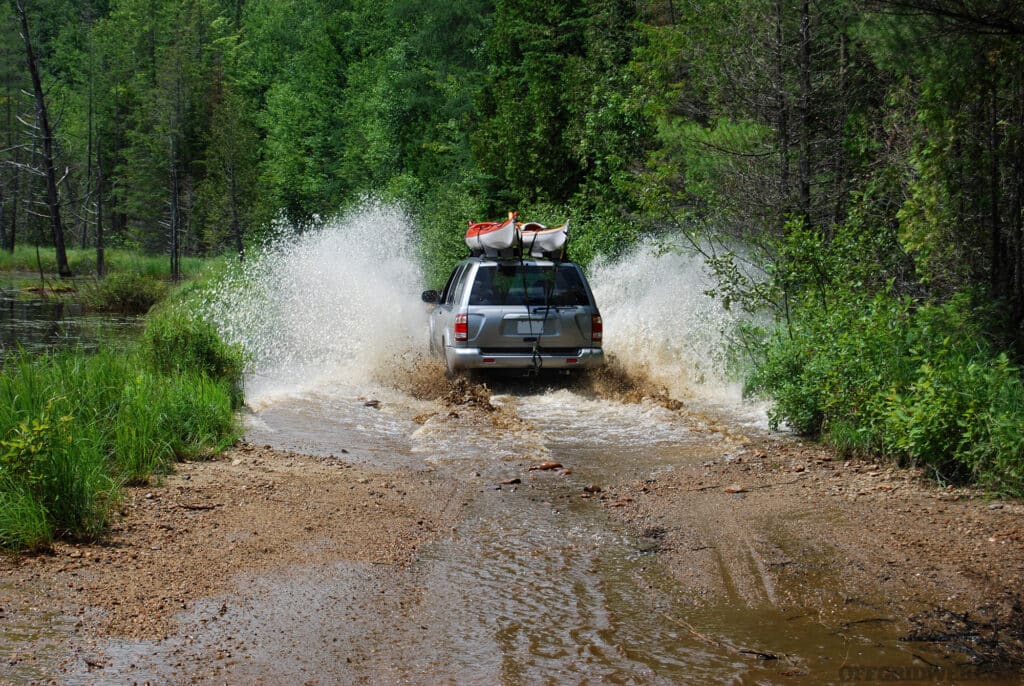
Photo of an SUV driving down a water logged forest trail.

I take inventory of the gear in camp. A tarp and some bungee cords can be used to create an improvised grille cover to reduce the risk of water flowing into the engine bay. I recall reading that ARB, a well-known off-road gear company, offers a “water crossing cover” that attaches to the front of a vehicle for this purpose. It’s almost like one of the old vinyl car bras that became popular in the 1980s, but without openings for airflow (or in this case, water flow). We aren’t looking for a waterproof seal, but rather a boat-style bow wave that’ll redirect the water to the sides of the vehicle, rather than up into the engine compartment. I quickly cut out an appropriate-sized section of tarp and lash it across the Jeep’s hood and bumper with the bungee cords.

My normal vehicle loadout consists of a battery pack for jump-starting self-recovery, traction boards, and a shovel to unstick myself, as well as some basic stay-alive gear like camp stove, sleeping pads/bags, water, and fire-starting equipment. Whenever I travel to the desert, I always pack more water than I need with at least 2 to 3 gallons per person per day. In off-road conditions, light is an asset, and we pack plenty of high output handhelds to support the lights on our vehicle. Now, as I prepare to abandon camp, I ditch any gear that’ll weigh down the Jeep and get it stuck during our bugout.

After prepping the Jeep, we pull up to the water’s edge. I turn on the vehicle’s roof-mounted light bar to illuminate the riverbank on the far side, and I use my handheld light to examine the bank to the driver’s side of my rig. I’m looking for signs of the high-water mark. The spotlight reveals displaced foliage and folded-over branches a few feet above the surface of the water on the far side. Behind my vehicle, candy wrappers and a single water shoe can be seen tucked in the undercut and exposed root system of the riverbank trees. This water isn’t as high as it has been. There’s a chance we can make it if we cross now.

It’s easy to assume slow-moving water is safe to cross, but we can only see the surface and not how it’s flowing underneath. Years as a kayaking/canoeing instructor and guide taught me the laminar flow found under the surface of the water can move much faster and poses a much greater risk. This swift water is often the reason why even experienced swimmers drown in rivers that look to be barely moving. Who knows how the current will affect the Jeep as it crosses? All that’s left is to say a prayer, hope my earlier cursing isn’t held against me by the man upstairs, and send my rig into the water at a steady pace.

The tires lurch forward, and the water gurgles as it rises against the undercarriage of the vehicle. I don’t let up on the gas and avoid spinning my wheels. Momentum is key. I feel the current pushing my vehicle laterally, and I watch the road on the far side of the river appear to move across my dashboard. Steady, steady, keep the wheels straight. Don’t fight the steering wheel. Don’t be surprised by the water coming into the cab. Keep going, come on, come on, more gas … come on, gas, gas, gas! I stare over at my shivering daughter only long enough to make sure she is still with me, and my glance is interrupted by the feeling of the front wheels grabbing the far riverbank and the sound of water draining out of my bumper, wheel wells, and through the seams in the doors. Thank you, God. When I’m clear of the river, I remove the tarp from the front end to allow airflow to the radiator and stow it in case I need it again further down the road. It isn’t long before we make it to a roadblock manned by a highway patrolman who helps my daughter dry off, wraps an emergency blanket around her, and lets her sit in his cruiser to warm up.

Moving forward, part of my EDC will be a set of electronic tools that go hand-in-hand. A Garmin InReach and Garmin Foretrex 601 will allow me to know my exact location and relay it from one device through another to two of my most trusted friends. This trip was not without risk, and since there will be more, these items will be carried without fail on a daily basis. I will also be much more diligent about checking weather forecasts in the future and will choose campsites with flooding potential in mind. I can’t rely on luck or prayer like I did this time. If I make the same mistakes again, shame on me.

Overlanding Expert Rick Stowe’s Approach

I’ve faced a situation similar to this one. It’s a terrible feeling staring at a water crossing that you’re not 100-percent sure you can make it through, especially when it’s your only way out of the area. And while thankfully I wasn’t behind the wheel, I’ve seen a well-equipped off-road rig rendered inoperable by 3 feet of relatively calm flowing water. It’s easy to romanticize crossing rivers with a wake breaking behind the truck, but in reality, combustion engines and electronics don’t mesh well with submersion.

That being said, just because you don’t expect high water during your backcountry trips doesn’t mean you won’t encounter it. Before I even consider modifications and additional equipment, I’d take a look at the factory features and capability of the rig. Personally, I prefer at least a rear locker, close to 10 inches of ground clearance, 2 feet of fording depth, all-terrain tires, and some underbody protection for low-hanging components.

I’m also a big proponent of receiving quality training from a reputable source. I want to know what a rig is capable of before it’s in a dire situation. The Overland Expo event series includes a great team of off-road trainers, and they can show you how your vehicle stacks up against the types of obstacles you’re most likely to encounter in the backcountry. Beyond training behind the wheel, you can also learn the ins and outs of winching, trailside repairs, and other situations that can quickly become dangerous when handled incorrectly.

In this scenario, I’d consider a Jeep Wrangler with decent tires plenty capable of tackling trails with some mud and flowing water less than a foot deep. Given the ankle-deep water in camp, I wouldn’t expect to encounter more than 2 feet of water at the crossings at this point. Of course, this is all speculation, and you never know when you’ll encounter the unexpected, but that’s why we prepare for the worst.

Most of the gear that I’d consider a must-have for the possibility of flooded trails and water crossings isn’t specific to that situation, but regardless, it’d be helpful. We live in a day and age when satellite communication, GMRS, and HAM radio capabilities can all fit on your dash in small, easily accessible devices. With those tools, or a combination thereof, not only can I stay in communication with family back home to keep them updated about my location and changes to my plans, but I can also reach out to seek information about weather and road conditions. In this scenario, I might be tempted to leave the camping area, and by using NOAA weather radio, I could decide which direction to travel to avoid backtracking or areas with more severe flooding. It’s also worth noting that having all of your comms hardwired to your rig is a bad call. I like to keep at least one handheld radio and a satellite communication device that I can grab and go if I’m away from the truck.
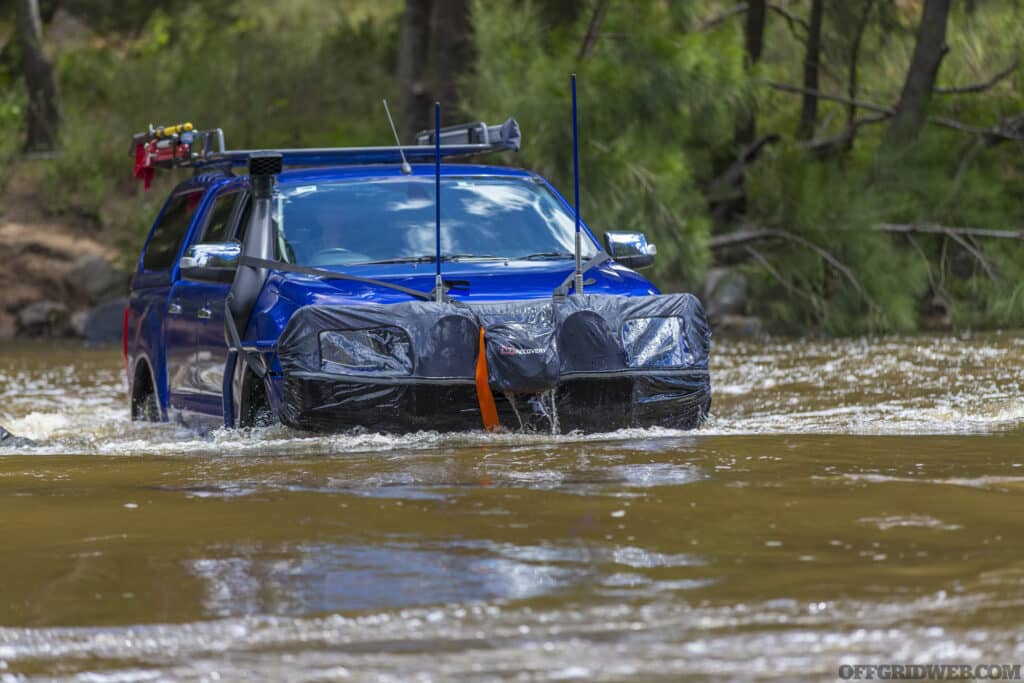
Photo of a customized overlanding SUV driving through a water crossing.

Above: Adding a snorkel to the intake and covering the front end with waterproof material can decrease the likelihood of the engine sucking up water during a tricky water crossing. (Photo courtesy of ARB)

In addition to communication equipment, primary and secondary navigation tools are a must-have. The vast majority of my route planning is done with the onX maps smartphone app. It allows me to save maps offline and review trail photos, difficulty ratings, closure dates, and descriptions of popular tracks. I also keep a number of Delorme Gazetteer paper maps and some region-specific 4×4-focused maps in my truck at all times. You can’t predict when a phone or tablet will be damaged or lost, so secondary navigation tools are required kit.

Recovery equipment and tools are also necessary for venturing into the backcountry via 4×4, especially when traveling without a companion vehicle. I always have traction platforms stored in an easily accessible location. They’re a great first step in recovery situations that are both fast and safe. Full-sized hand tools — at the bare minimum, a sturdy shovel and a saw — are a must. Chain saws or large folding saws both work. The decision comes down to available storage and how fast you want to clear fallen trees. The final component of the trio, a properly rated winch, gains significant capability when you add extension straps, snatch blocks, and tree savers. A winch is also a tool that requires some training to operate safely and effectively.

If I have to ditch my truck because it’s inoperable or hopelessly stuck, I always keep a go-bag packed with shelter, water, and food as the top priorities. Going overboard with a go-bag is tempting, but keeping it small and accessible means I’m less likely to leave it at home. An emergency bivy bag, a quality poncho, a water filter, some shelf-stable food, and the cutting, fire starting, and illumination tools I carry every day will get me through the night.

Obviously, I can’t discuss water crossings in a 4×4 without mentioning a snorkel, but it’s important to remember that this modification doesn’t necessarily give you magical river-fording powers. There are still plenty of electronics and other parts that can fail due to submersion. Specifically, extended differential breathers will eliminate a potential failure.

There’s a bit of an art and plenty of science to driving even a well-built overland rig through water crossings over 18 inches. Ideally, you want to enter the water and maintain a speed that’ll push the bow wake ahead of your front bumper. If you go in too fast or too slow, the water can enter the engine compartment. It’s honestly something you have to get a feel for.

In all reality, this Gulf Coast rainstorm scenario has a lot of moving parts that could greatly affect how I would react. The location comes with its own unique challenges. For one, water crossings where the bottom is sand as opposed to bedrock or gravel can be particularly tricky because they’re more prone to washouts and shifting depths. That’s why I’m certainly not opposed to walking a water crossing before I attempt it. With just my daughter as a companion, I’d rig up a safety line to pivot me back to shore just in case I encountered strong currents. I’d also cut a long sapling or branch to test the bottom as I made my way across each crossing. The one upside to water crossings in areas with less drastic elevation changes is that they’re less likely to rise into flash floods due to draining areas far away. That’s a possibility near large mountains or canyon lands.
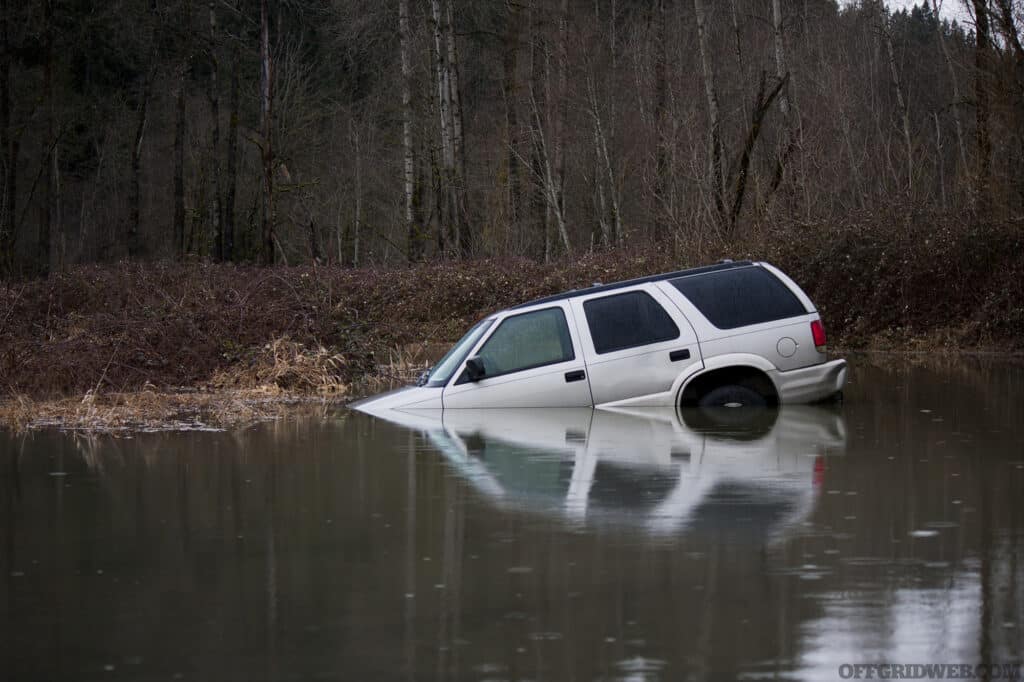
Photo of a flooded SUV with the front end sunk into the water.

Ideally, before I ever got into this situation, I’d reconsider the low-lying flood-prone areas with the rainy forecast in mind. Obviously, I don’t want to disappoint my daughter; quality time isn’t always easy to carve out, but at the same time, rerouting a couple of hours could save us a lot of trouble. Plus, I could use it as an opportunity to allow her to take part in the planning process as we researched a new area to camp for the night. This is exactly the type of situation where it pays off to be flexible and to have some points of interest and waypoints in mind for future trips.

The biggest factor in this scenario is whether we stay or go. After waking up to standing water in the tent and seeking shelter in the Jeep, I would use my NOAA Weather Radio, satellite comms, and even HAM to gather as much info as I could to make a decision. Driving out of the area to get back to a road might mean encountering an impassable obstacle, whether that be an unsafe water crossing or downed trees. I’ve seen too many situations where you spend time cutting a tree blocking the trail just to find a tangled mess of timber a quarter mile away. Unless the expected rainfall was going to produce significant flooding, I’d be tempted to wait it out, sleeping in the back of the Jeep. That’d keep us dry and out of the water unless it was going to rise over 3 feet. Since the scenario doesn’t take place right on the coast, storm surge isn’t an issue, and if more than 36 inches of rain is forecasted, I’d definitely change the plan.

Heading to the high ground would also be an option, but unless it was close and definitely drivable, I’d keep an open mind about setting out on foot. With the equipment in the go-bag, the night would be passable, and the temperatures wouldn’t necessarily be dangerous.

Obviously, having an 8-year-old as your only travel companion takes some special consideration. The biggest being that this whole situation will be a lot easier if she’s calm and comfortable throughout the ordeal. Personally, I think a lot of that depends on exposing kids to adverse situations at a young age with proper preparations and encouragement. In short, teach them to deal with “the suck.” Kids are malleable, and their comfort range isn’t as narrow as some might think. Making sure my daughter knew how to use the radio so I could stay in touch while scouting crossings or pulling the winch line is at the top of the list. Even if we had to head out on foot, her poncho and bivy would keep her warm and dry, and as long as that wasn’t the first time she had been out in stormy conditions, she would be fine.

Just like an off-camber trail, getting a truck high-centered, or a whole host of other situations you can encounter overlanding, high water can be nerve-wracking. At the end of the day, we explore to push ourselves, and technical driving is just another skill set to add to your mental toolbox. As long as you’re honest about the conditions, your ability, and your rig, you’ll probably be OK, but that’s still no guarantee. Where’s the fun in that?

Conclusion

These days, our vehicles are safer and more technologically advanced than ever before, and that tends to make us feel insulated from danger behind the wheel. But danger is ever-present, especially once inclement weather and reduced visibility are added to the mix. Even on paved roads, it’s not uncommon to see motorists stranded after losing control in the rain or attempting to drive through flooded areas. In an off-road setting, heavy rain can quickly turn smooth dirt roads into slippery mud, and swell trickling creeks into impassable rivers. And if you get stuck in a remote location, tow trucks and traditional roadside assistance services won’t be able to help you, assuming you have enough cell signal to reach them at all.

As always, preparation is key. Plan your route carefully and use services such as onX maps that provide recent photos and user-submitted updates regarding trail difficulty. When you’re heading out on a trail for the first time, consider bringing an experienced friend with a second vehicle — if you get stuck, they might be able to pull you out or go find help. Check weather frequently and don’t hesitate to turn back if conditions deteriorate. If you’re serious about off-roading and overlanding, invest in quality tools, recovery equipment, and off-grid communications gear. Above all, don’t fall into the trap of overestimating your driving prowess or your vehicle’s capabilities. That’s an easy way to end up in deep trouble — literally.

Meet Our Panel
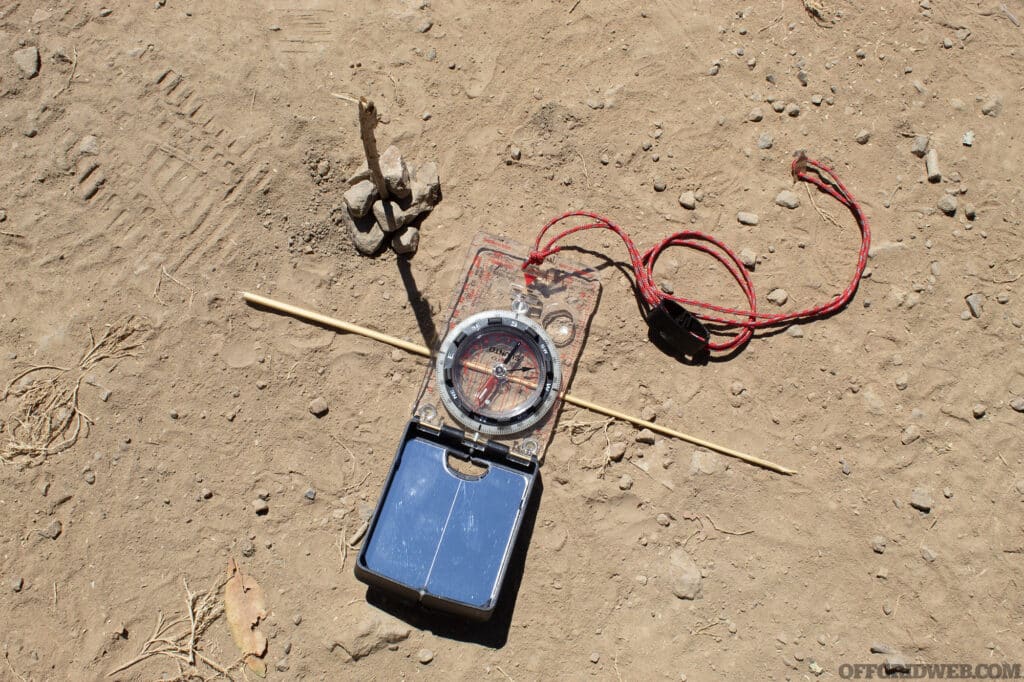
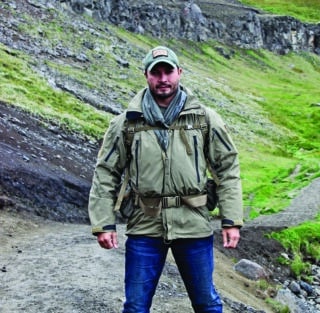
Photo of survival expert Kevin Estela. Kevin Estela

Kevin Estela is the director of training for Fieldcraft Survival in Aberdeen, North Carolina. He’s the best-selling author of 101 Skills You Need to Survive in the Woods and an accomplished magazine writer. He’s the host of the Fieldcraft Survival Podcast and a regular guest on others. Estela has been a professional bushcraft and survival instructor since 2007 and has tested his skills in a wide range of environments. Highly sought after for product testing, designs, and feedback, he’s regarded as a subject matter expert and authority in outdoor skills who conducts regular courses around the country. You can follow him on Instagram at @estelawilded

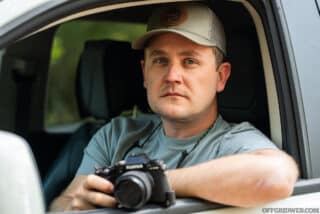
Portrait photo of author and overlanding expert, Rick Stowe. Rick Stowe

Rick Stowe, associate editor for Overland Expo, is a fan of exploration regardless if it’s by foot, 4x4, or bike. Even though most of his professional work is based around lifted trucks and rooftop tents, he still appreciates the opportunity to head out with a pack, a tarp, a cook kit, and a knife to practice primitive skills. If there’s a solid trout stream nearby, even better. He believes that when everything goes wrong, the most valuable thing you can carry is a solid knowledge base and practical experience. Remember, skills weigh nothing, and an emergency is a terrible time to get your gear dirty for the very first time. overlandexpo.com

Related Posts


FROG.PRO’s Custom Mantracking Kit

As chief mantracking instructor at Hull's Tracking School, I am constantly traveling, moving from one country to another about once a week. This involves taking airplanes, buses, trains, and lots of traveling on foot. And of course, it means utilizing various pieces of kit to carry essential supplies. Over the years I’ve lost count of how many pieces of equipment I’ve used, from modern tactical solutions to vintage style gear without being entirely satisfied, which is why FROG.PRO caught my attention.

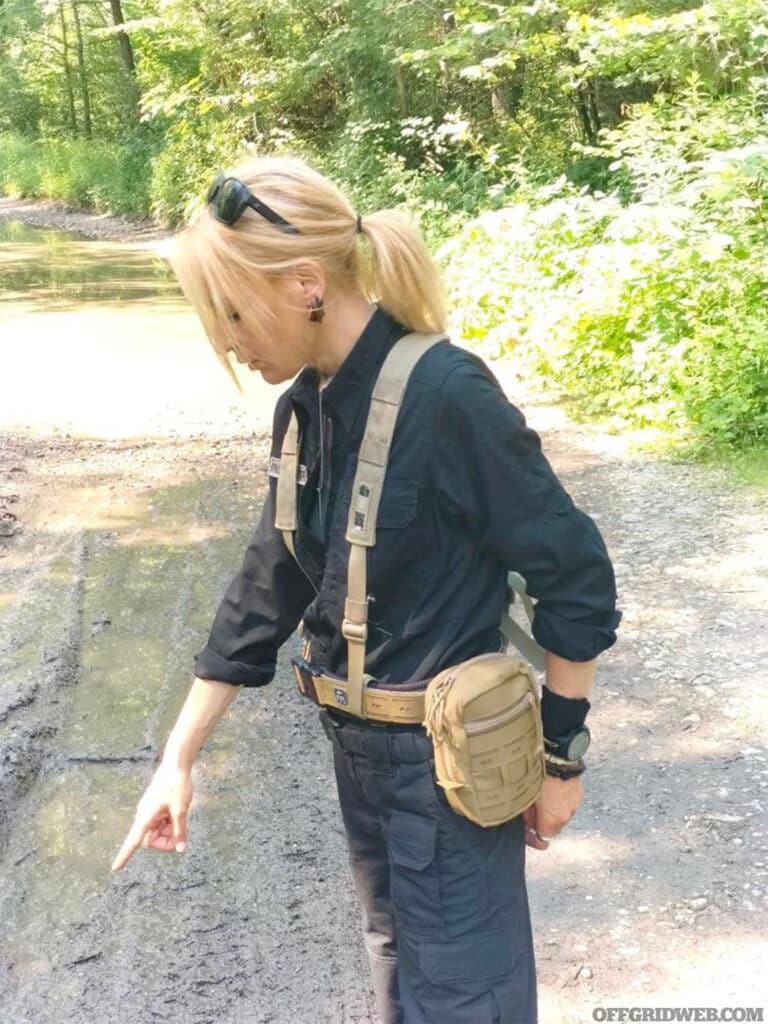
Kyt Lyn Walken is wearing her customized FROG.PRO mantracking rig while navigating an obstacle.

Mantracking Rig Criteria

My idea of the perfect gear system which can cater to all of my needs must meet the following criteria: 

  • Easy to carry
  • Versatile
  • Durable
  • Usable in different seasons and with various weather conditions
  • Suitable to be paired with different backpacks

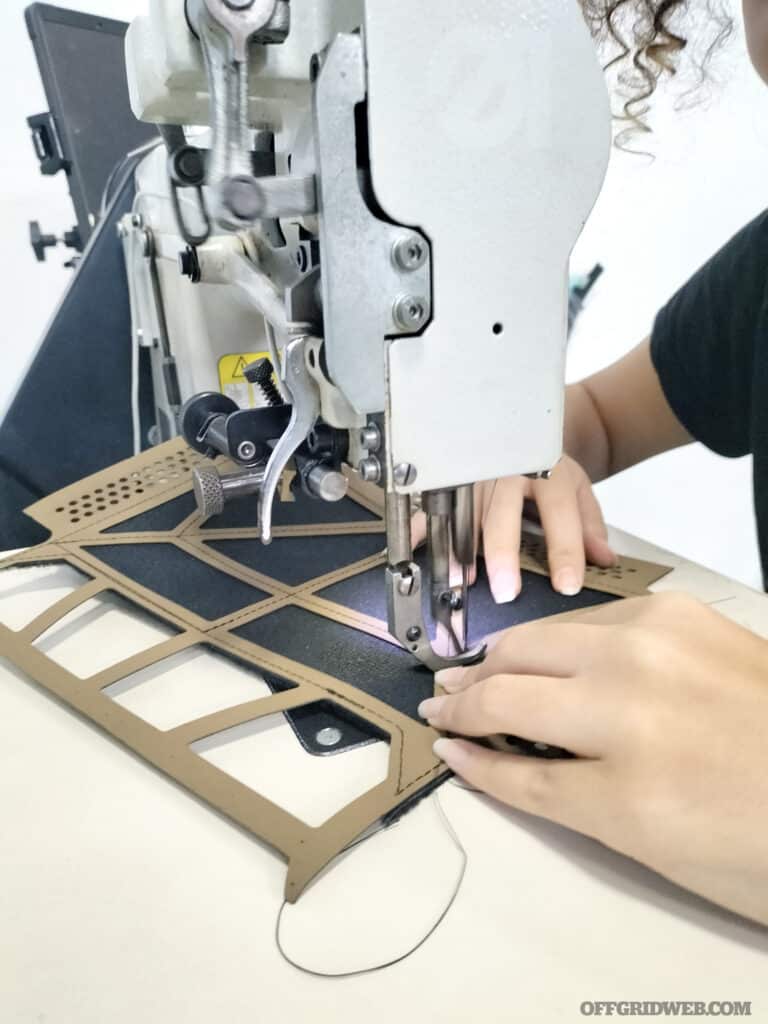
A worker at the FROG.PRO production facility sewing components for their gear.

Above: Many of FROG.PRO's components are handcrafted, making it easier to produce one-off custom orders.

Not asking for too much, right? I was actually looking for something I had in mind, a variation from what I saw the SAS use in Malaysia and Borneo while I was writing my book “Jungle Trackers.” Basically, I wanted to replicate that kind of equipment by employing modern materials and more innovative concepts.

After much research, trial and error, and countless hours of field testing, I ran into FROG.PRO. FROG.PRO is a company founded by Italian tactical craftsmen. They make tailored gear suitable for anything from outdoor activities and recreation to tactical operations and private security. The materials they use are some of the best on the market, including Cordura fabric, ITW Nexus fastenings, YKK zippers, Hi-Tech laminated fabrics, Velcro brand hook & loop fasteners, and mil-spec webbing. And rather than outsourcing to a factory overseas, the production process is handled and executed within the company itself.

Since this was a product I desperately needed, I placed a call and asked them if I could pay a visit to discuss my needs in the field.

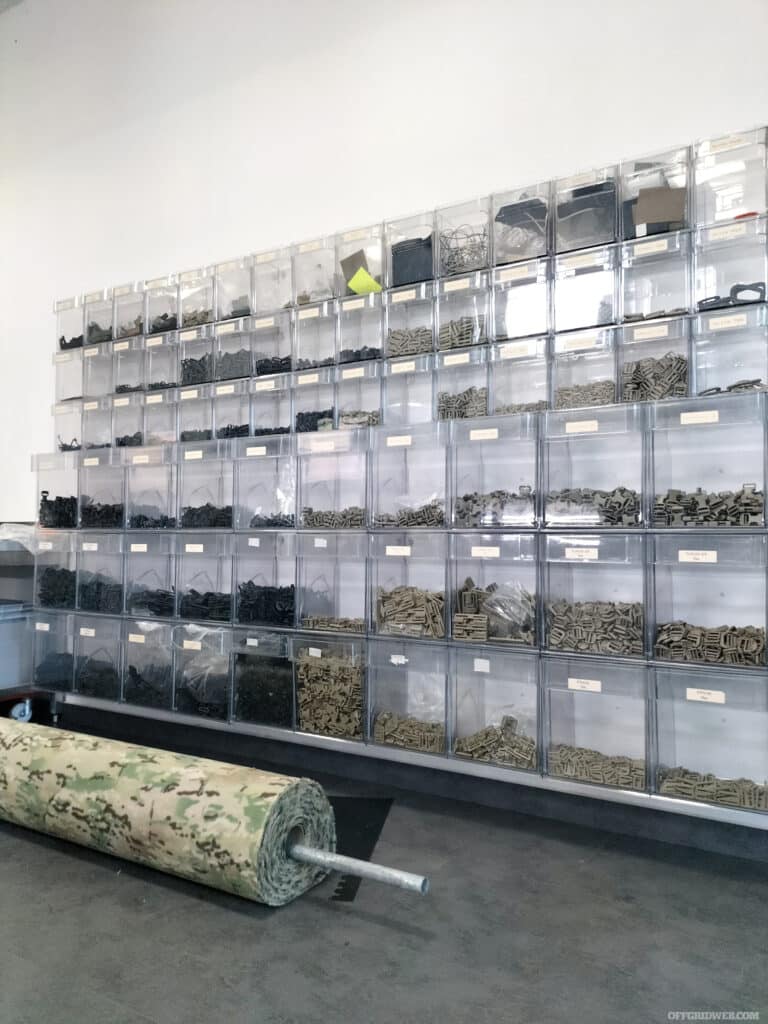
Material storage bins at the FROG.PRO production facility in Italy.

Above: At FROG.PRO's production facility in central Italy, components are prepared and organized.

About FROG.PRO

Fabio Casali, former Italian Army Soldier, and the owner and founder of FROG.PRO, welcomed me directly and invited me to tour their facility. The company's manufacturing facility occupies the ground floor of an elegant building not far from Parma, in the central area of Italy. Totally renovated by Fabio, the facility hosts all the company's production phases, from design, to product realization, to sale. Founded in May 2013 – and solely operated by Fabio at the time – FROG.PRO now employs 13 people; 9 in production, and 4 between administrative offices and marketing. 

In 2015 FROG.PRO brought laser cut gear to Europe for the first time. This makes their products less webbing-dependent, but also extremely lightweight.

FROG.PRO's reputation for quality has allowed them to partner up with different units, like 17° Stormo Incursori (their very first cooperation), then with all the Italian Special Forces units (G.I.S., N.O.C.S., 9º RGT “Col Moschin”, G.O.I, 185° RGT RRAO, etc.). They've collaborated with foreign countries as well, including a Belgian government agency.

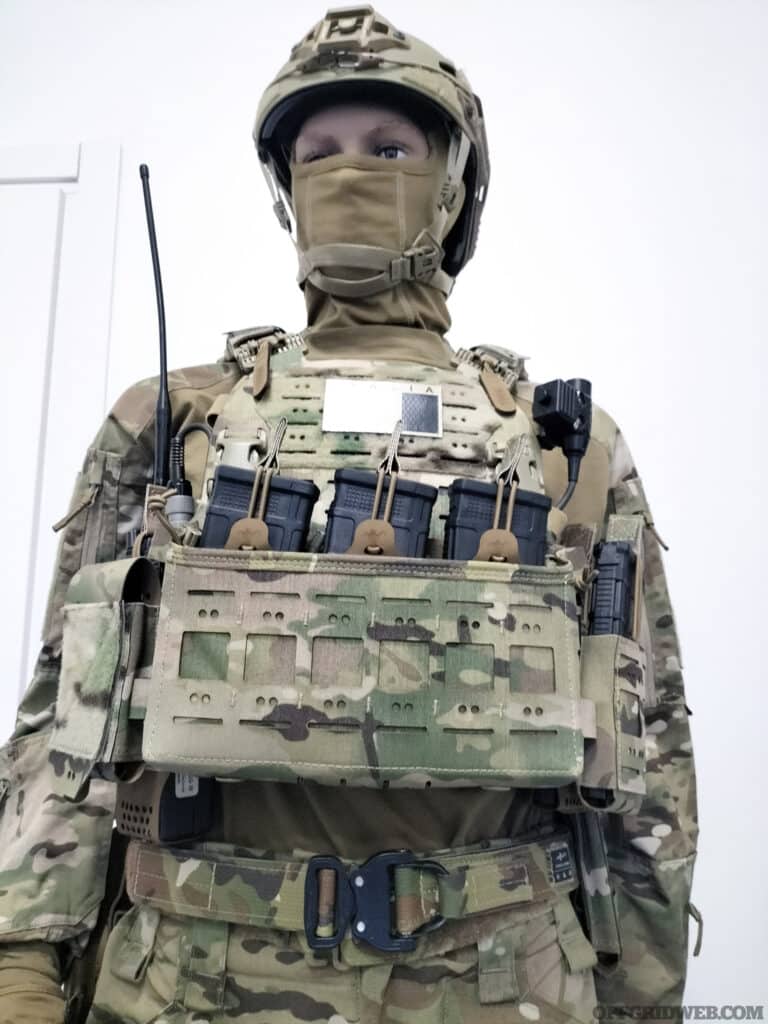
FROG.PRO tactical gear displayed on a mannequin.

Above: The HAWK Plate Carrier with several modular pouch systems on display.

Customized For The Field

Fabio kindly asked me to show him the contents of my Tracking Kit and to explain my needs. After discussing and evaluating different solutions, we ended with a set up that included:

  • A tactical belt
  • Suspenders
  • A utility pouch with two multipurpose panels inside
  • A flashlight pouch
  • Enough space for modular expansion in the future

Kyt Lyn Walken wearing her customized FROG.PRO mantracking rig.

Above: Kyt Lyn Walken using her custom tracking rig in the field during a tracking exercise.

The whole system was designed and tailored for my needs, according to my body size. Since receiving the custom made Tracking Kit, I have been impressed by the quality, performance, and how well it fits my needs throughout my field training and classes that I lead. 

Custom work aside, some of FROG.PRO's most iconic products include the Sniper CORE (released in September 2022), the HAWK Plate Carrier, the Chiron Mini IFAK, the SFD-Responder 2.0, and the already mentioned Multi Purpose Organizers. Many of these items have proven ideal for tasks we perform at Hull's Tracking School, and for the rigors of the field.

Related Posts


Shedding Light on Safety: The Benefits of LED Vehicle Lighting

For the average vehicle owner, there's one element that often goes unnoticed yet plays a pivotal role in our safety: vehicle lighting. Vehicle lighting is not only used to show us the way through the dark, but they are also used as an important form of communication to other drivers. Many of us have experienced a vehicle from another lane turning into our own without the warning of a signal light, or have had the high beams flashed in our direction to warn us of a danger ahead. Those are dangerous situations that could be easily avoided. We often look at upgrading to the latest headlamp, hand torch or mounted gun light, but we rarely discuss the benefits of LED lighting being added to your average, everyday vehicle. Improving your visibility, and means of communicating with other vehicles on the road is simple and easy to do.

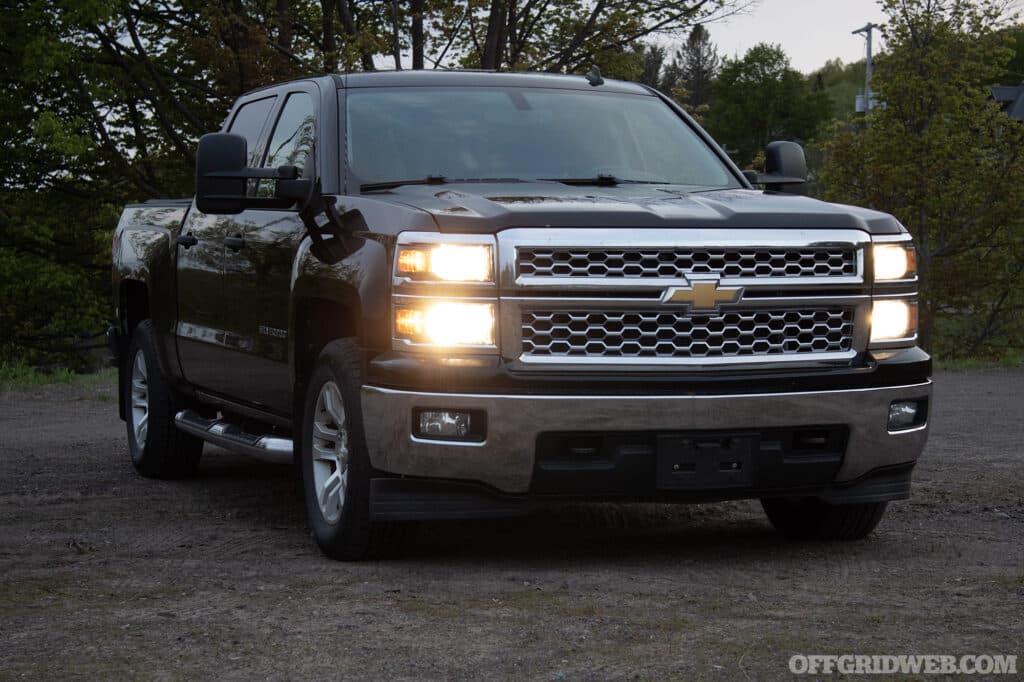
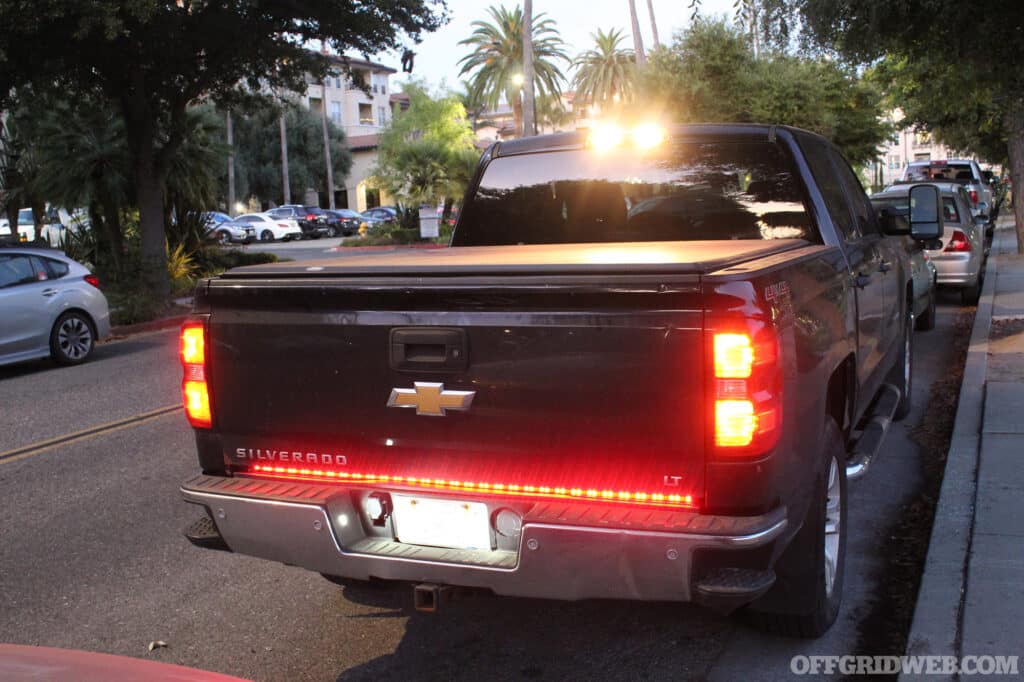
Photo of a chevy silverado 1500 without the benefits of LED vehicle lighting.

Above: Halogen headlights have been used for decades, but their warm light is sub-optimal compared to modern LEDs.

Tracing the Path of Automotive Illumination

Before the age of electricity, vehicles, primarily horse-drawn carriages, relied on lanterns fueled by oil or kerosene. These lanterns, though rudimentary, served the dual purpose of illuminating the path and signaling the vehicle's presence to others. However, their limited brightness and the need for constant refueling made them less than ideal for the burgeoning world of motor vehicles. The late 19th and early 20th centuries marked a significant shift in vehicle lighting. With the advent of the electric bulb, cars began to feature electric headlights. The 1912 Cadillac was one of the first cars to incorporate an electrical system, which included electric lights. This not only improved visibility but also eliminated the need for drivers to step outside to light or adjust their lamps.

Photo of a refurbished 1912 Ford Model T.

Above: Notice the kerosine tail light on this Model T? This method was used to signal and illuminate on everything from horse-drawn carriages to steam locomotives.

Introduced in the 1960s, halogen bulbs became the standard for vehicle lighting for several decades. They offered a brighter, whiter light compared to their predecessors and had a longer lifespan. The tungsten filaments in these bulbs, encased in halogen gas, ensured that the filament didn't degrade quickly, leading to a more extended period of illumination. The 1990s saw the rise of HID (high-intensity discharge) or Xenon lights. These lights, known for their distinctive blue-white glow, provided even better illumination than halogen bulbs. Instead of a filament, they used an arc of electricity between two electrodes, housed in a chamber filled with xenon gas. This technology resulted in brighter light output and increased efficiency.

The 21st century ushered in the era of Light Emitting Diodes (LEDs). LEDs transformed the automotive lighting landscape with their superior brightness, efficiency, and longevity. Their compact size also allowed for more innovative and stylish headlight designs. Moreover, with the ability to turn on and off instantly, LEDs found applications in brake lights, enhancing safety by reducing the reaction time for drivers following behind. With advancements in technology, vehicle lighting has become more than just about illumination. Modern cars come equipped with adaptive lighting systems that adjust the beam direction based on steering input, ensuring optimal illumination on curves. Additionally, smart lighting systems can automatically adjust the light intensity based on external conditions, ensuring maximum visibility without blinding oncoming drivers.

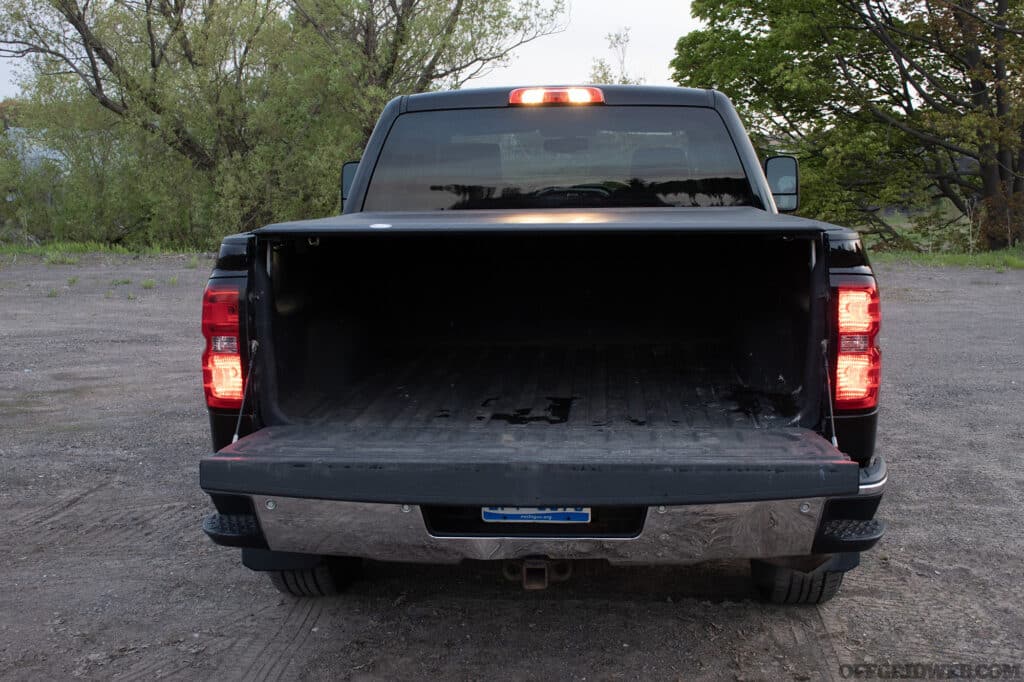
Photo of the tailgate of a chevy silverado before the benefits of LED vehicle lighting.

Above: A major drawback of vehicle lights that use filaments is that they burn out much quicker than modern LED's.

Advantages of Modern Lighting Systems

Superior Visibility: Modern lighting systems, especially LEDs, emit a brighter and more intense light compared to traditional halogen bulbs. This increased brightness ensures that drivers can see farther and more clearly, especially during nighttime or adverse weather conditions. LEDs often produce a cooler, whiter light that closely resembles daylight. This natural color improves contrast, helping drivers recognize obstacles, pedestrians, and road signs more quickly and accurately.

Energy Efficiency: LEDs are known for their low power consumption. They can produce the same amount of light as halogen bulbs while using a fraction of the energy. This efficiency translates to less strain on a vehicle's electrical system and potential fuel savings. With increased energy efficiency comes a reduction in CO2 emissions. As vehicles consume less power for lighting, they indirectly contribute to a decrease in environmental pollution.

Dramatic photo of two sports cars that have been upgraded with Oracle Lighting LEDs.

Above: LEDs can dramatically ramp up the cool factor by outlining grills, undercarriages and hood ornaments. But it also makes the vehicle easier to spot in the dark, increasing safety.

Durability and Longevity: Modern lighting technologies have a significantly longer lifespan than traditional bulbs. While a halogen bulb might last around 1,000 hours, an LED can last up to 50,000 hours, reducing the need for frequent replacements. Modern lights are devoid of fragile filaments, and are more resistant to vibrations and shocks, making them less prone to damage during bumpy rides or minor accidents.

Design Flexibility: The small size of LEDs has given automotive designers more freedom to experiment with headlight designs, leading to more aerodynamic and aesthetically pleasing vehicles. Modern lighting systems can incorporate adaptive features, such as cornering lights that turn with the steering wheel, ensuring optimal illumination in all driving scenarios.

Photo of an overlanding vehicle upgraded with several extra LED lights.

Above: Adding lights can help campers and overlanders spot safety concerns on in rough terrain after the sun goes down.

Safety Enhancements: LEDs light up instantaneously, which is especially beneficial for brake lights. The immediate illumination can give the driver behind a few extra milliseconds to react, potentially preventing accidents. Advanced lighting systems are designed to reduce glare for oncoming drivers, ensuring that brighter lights don't compromise the safety of others on the road.

Cost Savings: Given their extended lifespan, modern lights, though more expensive initially, can lead to cost savings over time as they don't need frequent replacements. With their enhanced durability, modern lighting systems often require less maintenance, saving vehicle owners both time and money.

Potential Pitfalls of Upgrading Lights

Initial Investment: Many LED options can be more expensive than traditional halogen bulbs. This initial investment can deter some vehicle owners, especially if they're unaware of the long-term benefits. Upgrading to a more advanced lighting system might require professional installation, adding to the overall cost.

Compatibility and Integration Issues: Not all modern lights are plug-and-play solutions for older vehicle models. Some vehicles might require modifications or additional components to accommodate the new lights. Advanced lighting systems might have different power requirements, potentially necessitating upgrades to the vehicle's electrical system or wiring. For example, older vehicles come with removable relays that help control certain features like blinker speed. Newer vehicles on the other hand, have replaced relays digitally. Which means fixing issues like hyper-blinking after installing LEDs might be impossible without a dealership to reprogram digital components.

Photo of a vehicles wiring being modified.

Above: Trying to make wiring modifications can cause serious problems without the proper technical expertise.

Potential for Glare and Disturbance: If not properly aligned or installed, modern lights, especially those with higher brightness, can produce glare that blinds or distracts other drivers. Some regions have regulations regarding the brightness or color temperature of vehicle lights, and upgrading without considering these regulations can lead to legal issues or fines.

Maintenance and Repairs: While modern lights tend to be more durable, when they do need repairs, it might require specialized knowledge or tools, making DIY fixes more challenging. In some advanced lighting systems, a single malfunctioning component might necessitate the replacement of the entire unit, leading to higher repair costs.

Installing Vehicle LEDs

For those who are not accustomed to working on their own vehicles, making modifications can be a daunting proposition. It is easy to imagine worst case scenarios of causing serious damage, or wrecking the vehicle in some way. A good rule-of-thumb to follow with any DIY project where high value items are involved is: if it makes you too uncomfortable, don't do it. When it comes to vehicles in particular, some modification projects are easier than others, and taking it to a professional could save time and money in the long run. So proceed at your own discretion. Companies like Oracle Lighting have a mix of products ranging from easy to install, swappable headlights, to more advanced strip lights that require a little technical knowledge, which makes it easy to pick and plan exactly how you would like to to upgrade your vehicles lighting.

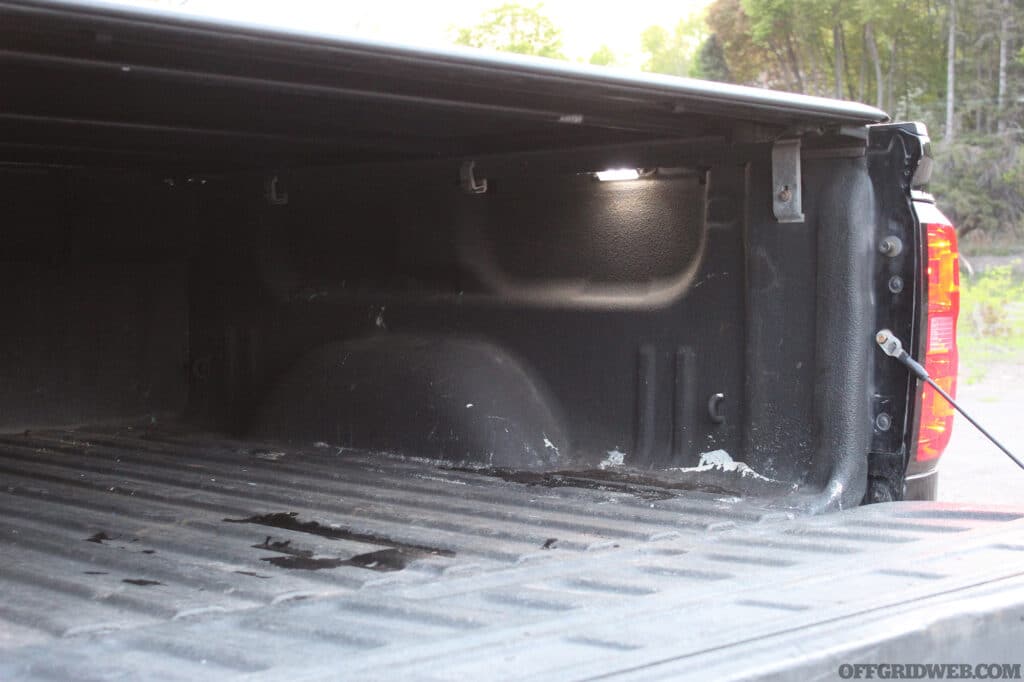
Photo of the bed of a chevy silverado 1500 before the benefits of LED vehicle lighting.

Above: Stock bed lights offer some illumination at night, but it is not ideal.

Fortunately, you do not have to bolt an entire array of bar and strip lights over every square inch of your vehicles body panels to benefit from upgraded lighting. One of the least problematic and easiest upgrades is simply swapping out the headlights. Newer vehicles can make even this project more challenging than it needs to be, but the concept is pretty straight forward, and most headlights simply plug and twist into place. Auto parts stores will be able to tell you the exact LED you need for your vehicles make and model, and in less than an hour, you'll be seeing things in the dark that were previously obscured. Headlights may be all that you need to improve safety and illumination on the road, but there are LED versions of every light from blinkers to license plate lights that could improve the quality of your drive.

Then there are the more advanced lighting projects where personal experience will dictate whether or not you have LEDs professionally installed. This includes specialized lights for camping, overlanding, and trailers, and typically involves tying into the vehicles wiring. Online tutorials for these projects exist in many flavors from highly detailed, to uncomfortably vague, and you should avoid following along with any that don't make you feel confident about completing the installation successfully. Splicing into the wrong wire, or making an improper connection can have cascading detrimental effects to the rest of your vehicle.

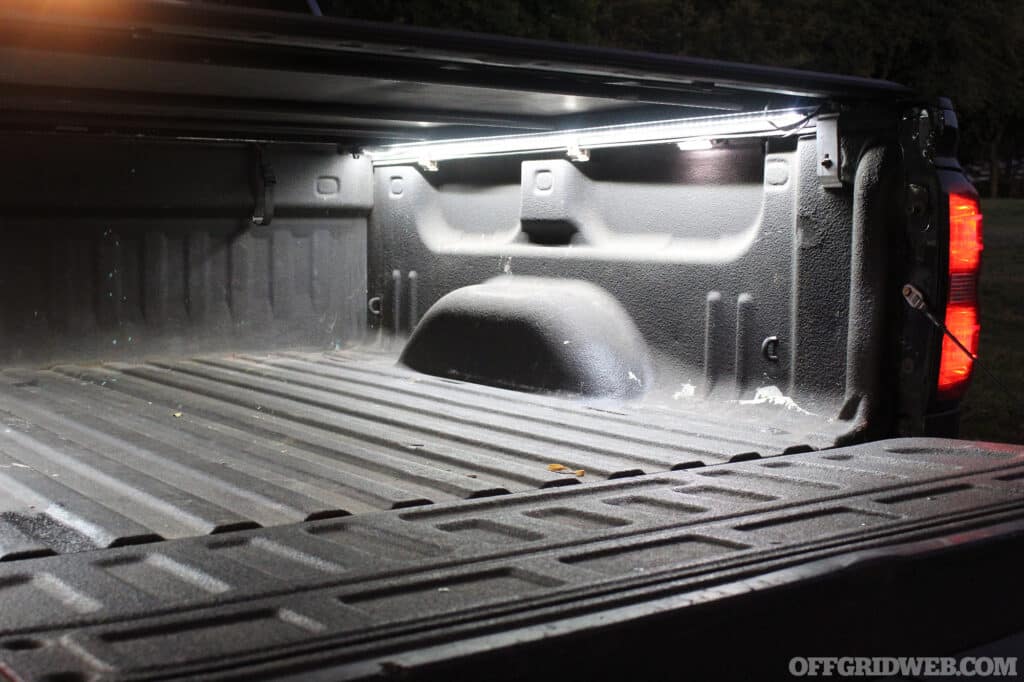
Photo of the bed of a chevy silverado 1500 after the benefits of LED vehicle lighting.

Above: Oracle Lighting LED light strips enhance the effectiveness by illuminating the truck bed in its entirety.

Practical Implications of Advanced Vehicle Illumination

Imagine navigating a serpentine mountain road on a foggy evening. With traditional halogen bulbs, the dense fog scatters the light, severely limiting visibility and making every twist and turn a potential hazard. Now, contrast this with powerful LED lights equipped with adaptive fog lighting technology. These advanced systems pierce through the fog, revealing potential obstacles like fallen branches, wildlife, or sharp bends, ensuring a safer and more confident drive.

Driving on a highway during a torrential downpour can be another daunting situation. The reflection of water on the road, combined with the spray from other vehicles, can significantly reduce visibility. Modern lighting systems, with their enhanced brightness and color temperature, can cut through the rain, reducing glare and improving the driver's ability to judge distances and spot potential hazards.

Photo of the tailgate of a chevy silverado 1500 after the benefits of LED vehicle lighting.

Above: Tail lights communicate to other drivers when you are stopping, turning or going in reverse. Oracle LEDs are brighter than common stock lights, making the vehicle more visible to those who may be following behind.

Venturing on a remote countryside road devoid of streetlights presents more hazards not typically encountered in well-lit cities. In such scenarios, the vehicle's lighting becomes the sole source of illumination. Advanced lighting systems, with their broader and more extended beam patterns, illuminate not just the road but also the peripheries, helping drivers spot animals, pedestrians, or other obstacles that might suddenly come into the path.

In a bustling city intersection, a myriad of activities occurs simultaneously – pedestrians crossing, cyclists weaving through traffic, and vehicles from multiple directions. Here, proper lighting plays a dual role. Bright and responsive brake lights and indicators ensure clear communication of the driver's intentions to others, reducing the risk of collisions. Simultaneously, headlights with adaptive urban lighting can adjust their intensity to prevent blinding other drivers or pedestrians.

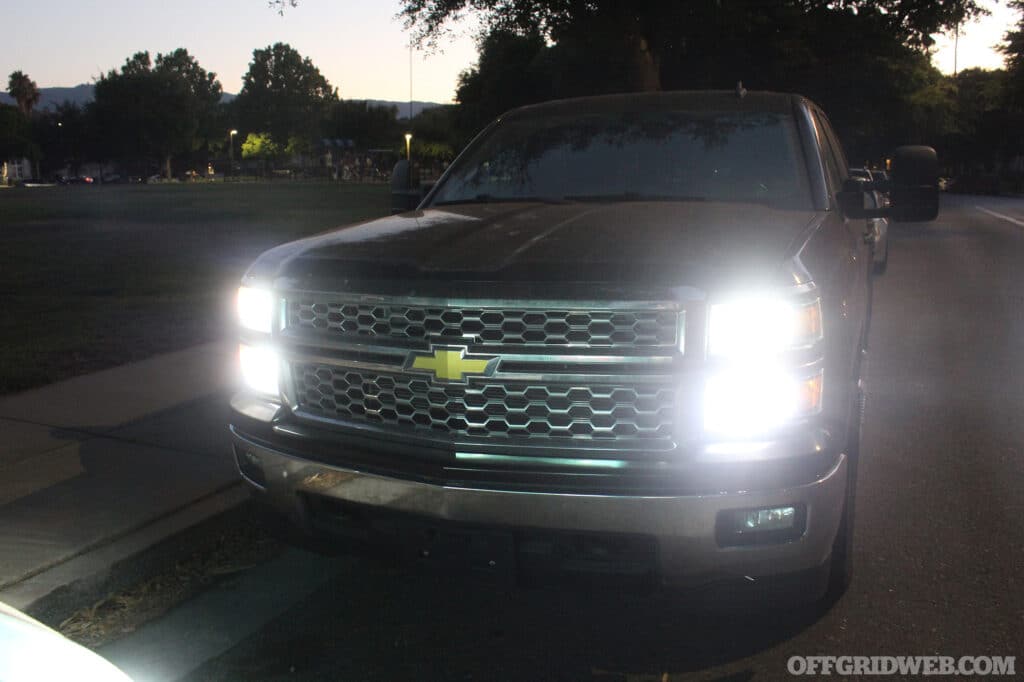
Photo of the headlights of a chevy silverado 1500 after the benefits of LED vehicle lighting.

Above: Oracle headlights provide bright white light as opposed to the warm light of halogen bulbs. This makes everything in front of you easier to see for a greater distance.

Parking in tight spaces or multi-story parking lots with poor lighting is a recipe for fender benders. Newer vehicles equipped with perimeter lighting or puddle lamps illuminate the area around the vehicle. This not only aids in parking but also ensures drivers and passengers can safely enter or exit the vehicle, avoiding pot holes or tripping hazards.

Beyond Just Illumination

Vehicle lighting, often taken for granted, is more than just about seeing the road. While advancements in technology will continue to enhance our driving experience, it's crucial to remember the foundational purpose of vehicle lights: safety. Wearing a powerful headlamp will boost your visibility and keep you from getting injured during a power outage, or while out on the trail. So why not take the time to upgrade your visibility while operating thousands of pounds of fast moving steel?

Related Posts


Raw Wilderness Navigation: Navigating Without Tools

Hiking on a marked trail can seem like an easy task at first. There are innumerable trailheads to start from across the country, and each one typically has a map of the area as a guide. Even if you come ill prepared, most people can take a photo of the trailhead map with their phones or make a sketch with whatever they happen to have with them. In some places where trails are more popular, there are dedicated navigation apps to help ensure you get the most enjoyment out of your adventure. But even with all this redundancy available, outdoor enthusiasts can still find themselves navigating without tools to guide them.

One of the most common ways that people find themselves lost in the wilderness without any tools to guide them, is by stepping off the beaten path to relieve themselves. Often these soon-to-be lost people will ground their gear on the trail so they can get out of sight in a more agile way. Then they travel far enough away from the trail so that no other passers-by can see observe them doing their business. Upon completion, they confidently head back to where they assume the trail and their gear is located, and this is where things go awry.

Photo of a hikers foot turning to leave the trail.

Above: Stepping off the trail briefly may seem harmless at first, but can quickly lead to a disorienting event.

Walking back to the trail, the now lost individual may not feel immediately disoriented until they realize the walk back is taking much longer than they expected. But once they realize the trail isn’t where they thought it was, they are hit with an overwhelming feeling of dread. Maybe panic sets in as they frantically search for the trail, which is deceptively more difficult than they assumed it would be. This situation can escalate quickly into a life-threatening situation if the lost person doesn’t quickly get a grip on the situation or take the appropriate actions. What should someone do in this situation? Let’s learn some easy ways to prevent becoming lost, even if you are left with nothing but the clothes on your back.

Planning Ahead

An ounce of prevention is worth a pound of cure, so before you venture into the wild, planning is essential. This sort of planning can prevent a worst case scenario such as having to navigate the wilderness without any tools. It’s much like setting out on a road trip – you wouldn't start without knowing your destination, right? Similarly, it's imperative to familiarize yourself with your route, identify key features, potential hazards, and have a few contingency plans for those hazards before heading out. A good map reconnaissance will equip you with valuable information about the terrain, water sources, and distinguishing landmarks. Knowing how to read and interpret a map is an invaluable skill, and thankfully, there are many sources out there to learn map reading from.

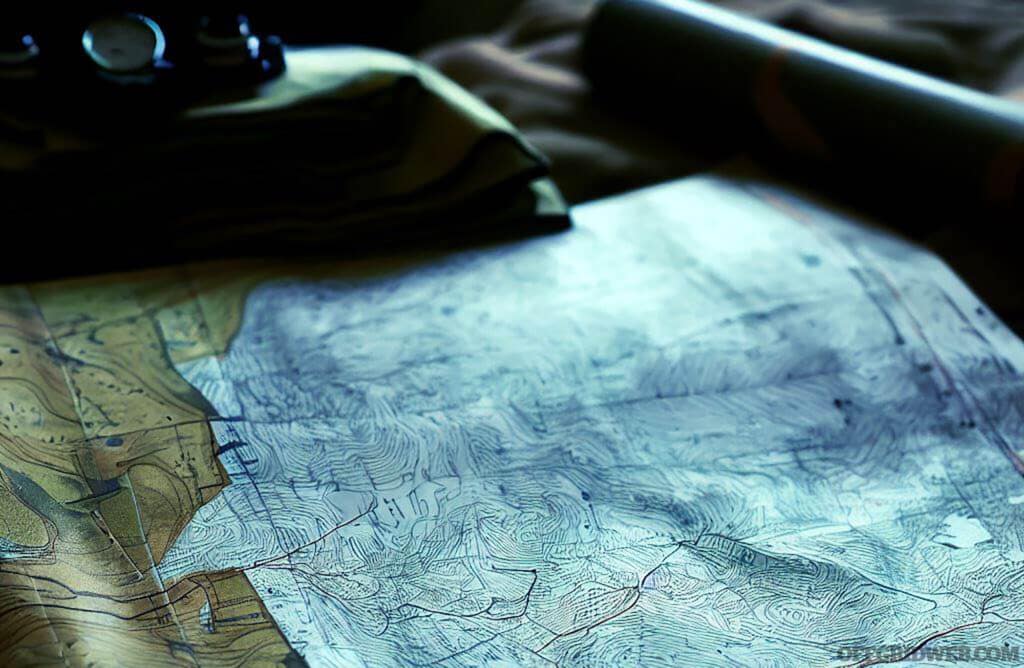
Photo of a topographic map being analyzed for wilderness navigation.

Above: Looking at a map, even if it is the crude park map posted at the trailhead, can give you a better idea of where you are going, and maybe even prevent becoming lost. A good rule of thumb is to have a paper back up, and a photo on your phone.

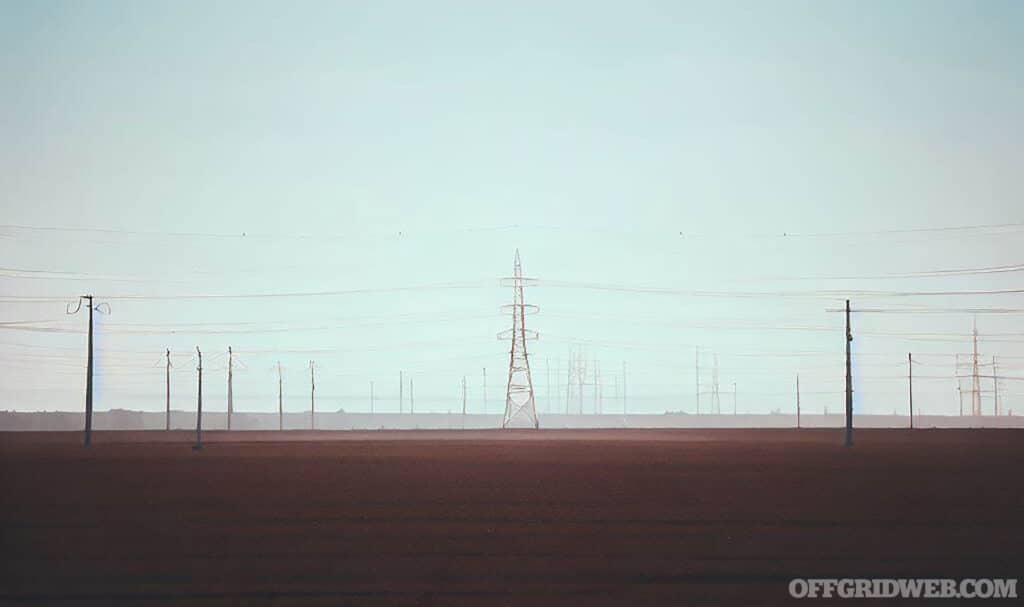
The wilderness doesn't offer printed road signs, but it does make certain geographical features more obvious than others. Establishing an emergency bearing – a direction leading to a large, noticeable feature or civilization – before you head out is key. It could last resort when all else fails, and it is a very simple thing to do. For example, while looking on your map, you may notice a town or city nearby your intended destination, or a river, or a powerline. Any of these features could help you find help or lifesaving resources. Simply note what the direction is, so if you become lost, you can head in that general direction knowing that you will eventually run into the feature.

Photo of high-voltage power lines.

Above: Power-lines, highways, and major waterways are easy to identify landmarks that can be used to find your way back to safety, but they must be identified before you head out.

Packing wisely should be a no brainer, pre-trip task. Along with your basic necessities, always bring signaling equipment like mirrors, whistles, or flares. Knowing how to use those tools is just as important as brining them along. For example, blowing whistle three times in a row, may sound like the call of bird to someone searching for you in the distance, whereas one long continuous whistle will capture their attention quickly. There are a bunch of other emergency signaling techniques to choose from, just ensure you know a few of the most effective for the area you’ll be in. Think of them as your lifeline, connecting you to the outside world.

Preparing for the elements will keep you alive the longest. Most people who die while they are lost in the wilderness succumb to what is known as exposure. This means that their body could no longer regulate its own temperature, and is caused by becoming either too hot or too cold for too long. The wilderness can be as kind as it is harsh, and knowing what weather to expect helps you to dress appropriately, manage your energy, and overall, make your journey safer.

Feeling Lost

Understanding what happens when you realize you are lost could help you make smarter decisions. When you look around and notice that you are not where you should be or start feeling uncertain about where you may be heading, your body reacts instantly. Catecholamines – like adrenaline and epinephrine – kick in, triggering the fight, flight, or freeze response. You might feel disoriented, panicked, or anxious. This is where the STOP method comes into play: Stop, Think, Observe, and Plan. The act of consciously thinking about your situation, what your options are, and what resources you have at your disposal can slow or halt the flow of catecholamines. It's a powerful tool to regain control of your emotional response and make rational decisions.

Photo of a rabbit staying very still underneath vegetation to avoid notice from predators.

Above: The human is just as prone to fear as other animals. Being able to recognize and acknowledge what you're feeling will help keep those emotions under control in a stressful situation.

One useful technique to control those heart-pumping hormones is to sit down and dump your pockets. Take inventory of what you have – anything could be a potential survival tool, and this where you should get the most creative about improvising your way out of the situation. Evaluate whether it's best to stay put and make yourself visible, or to start moving to a location with a higher likelihood of discovery. As a rule of thumb, if you're close to a well-traveled route, it's often wise to stay put and signal for help. But perhaps finding higher ground would get you to a place where you get better cellphone coverage, or a better vantage point to reorient yourself. It’s situationally dependent, but more often than not, staying put leads to the highest chance of being discovered by a rescuer.

Navigating by Day

The sun is your daytime guiding star. In the northern hemisphere, it’s due south when at its highest, and due north in the southern hemisphere. This simple information can be used to keep your bearings. You can take this a step further by creating a makeshift compass using a stick and some stones. Place a stick vertically in the ground and mark the end of its shadow with a stone. Wait for a while and mark the new position of the shadow. The first mark indicates west, and the second one, east. However, this method only works when the sun is visible. On a cloudy day, you can still figure out your bearings by using a thin, straight object and a flat surface like your fingernail. The sun’s position, even when not directly visible, will cast a shadow, indicating its direction.

Photo of a single straight stick stuck into the dusty ground in full sunlight. The stick is casting a shadow and will be used as the starting point for an improvised sundial. Its a useful way of navigating without tools.

Above: In full sun, just placing a stick in the ground and waiting a few minutes for the shadow to move will help reestablish your sense of direction. In the northern hemisphere, the shadow points generally north, but its accuracy depends on the time of day. 


Photo of an improvised sundial with a row of rocks marking the initial point of the shadow cast by the sun.

Above: Once you place a straight stick in the ground, mark the initial point of where the shadow lies. It may be helpful to mark it with something that will be easy to identify later so you don't lose track.


Photo of a sundial with a second row of rocks marking the second shadow measurement.

Above: After about 10-15 minutes, you can mark where the shadow has moved. By making a straight line across the two points where the shadow was marked, you are effectively identifying the east-west cardinal directions.


Photo of the east-west line marked with an improvised sundial. A compass is being used to prove the accuracy of this method.

Above: A compass was used to demonstrate how accurate the improvised sundial is. In the photo above, it is pretty spot on.

When humans navigate, be it vegetated wilderness or urban jungle, we create maps in our minds and move relative to the features we recognize. If it’s a trail in the Ozarks, we might use a particularly tall hill to associate where we are in relation to the land around us. In downtown Chicago, we may look for a familiar skyscraper. Navigating in this way is known as terrain association and it is another beneficial way to get around without having to look at a map or shoot an azimuth with a compass. Identify landforms and compare them with your earlier map reconnaissance. Keep your eyes open for watercourses, as they often lead to human settlements.

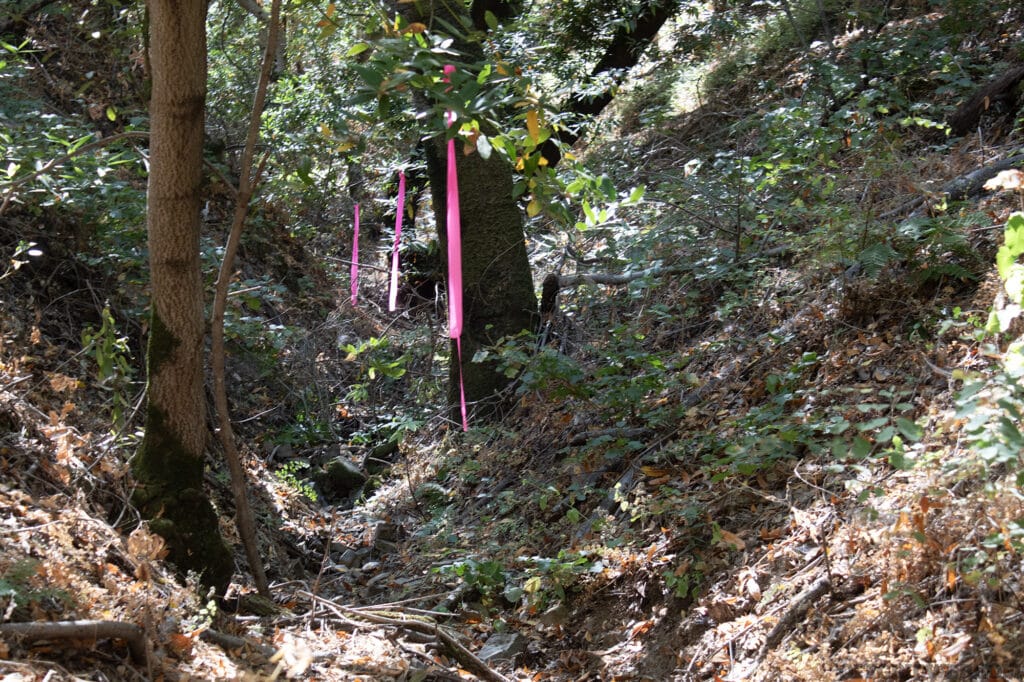
In our earlier example of walking off the trail for a bathroom break, we can create our own trail markers to find our way back. This method could come in in many forms and are limited only be the imagination. For example, stacking stones or sticks in a particular way periodically would be useful landmarks to find your way back. Brightly colored paracord or marking ribbon, sometimes called flagging, tied at eye-level as you make your way into the vegetation would easily help you return to the trail.

Photo of marking ribbon used to mark a trail through the woods. It's a useful way of navigating without tools.

Above: Use long tails and tie off at eye level when marking a trail with flagging, this will make it easier to identify in thick vegetation. If you can line up three in a row, a relatively straight line can be made, which is helpful for maintaining an accurate direction of travel.

Be careful if you use the flagging method to establish a long-term route, such as an off-trail camping location. Inquisitive animals like deer and raccoons will sometimes unintentionally remove these trail markers out of curiosity. To prevent this from happening, make tight knots and leave long tails, about arms-length, to maximize your chances of picking up the route you created. If creating artificial trail markings is impractical, we can look for our way back to safety by using something that all living creatures leave behind: Tracks.

Tracking Skills for Self-Recovery

Navigation mastery typically involves the employment of maps and other devices. Nonetheless, running out of batteries or finding yourself stranded somewhere and with no connection is far from being a remote possibility. This is when your tracking/backtracking skills can be put into use. Tracking yourself in unknown places requires a high level of expertise, along with commitment, dedication, focus and bravery. To many, the skill of tracking can seem primordial, however, it is an art which has been successfully handed down through various means over time to the present. Since the principles of tracking are as old as humanity itself, the skill has maintained itself as a powerful survival tool.

Tracking can be defined as the ability of locating, reading, interpreting, and following animals and/or men by the tracks they left. Simply put, the ground and the entire environment you are in, can provide us all the information we need to get out from a tough situation.

Photo of crushed vegetation where either a human or large animal has walked through.

Above: Running through the center of this photo is a path where someone has walked through previously. Identifying disturbed vegetation can help you find your way back to a trail or previous starting point.

Trackers are not a special breed of person. They don't tap into fantastical magic, and they are not guided by any supernatural force when they inspect the ground to gain important information. They just rely on simple facts, and on science. Their task is to read the ground, interpret what they see and follow the tracks which are of their interest. They collect clues, which is precious data for them, and put all the pieces together. By reading tracks in this manner, they can disclose how many persons passed on a specific trail, how old the tracks are, if they were carrying gear, if they were man or woman, what was happening at the time, and so on. There is an unbelievable amount of information in each track.

Getting lost in the woods can be handled through the application of the art of tracking and requires no tools beyond your own physical senses,  observational skills and intuition. Because of this, it can be employed in any situation, in any weather condition, at any time of day. Reading the tracks of your own, and other people’s footsteps on the ground, for example, can potentially lead you to a safe place, such as a parking area, the next road, and so on.

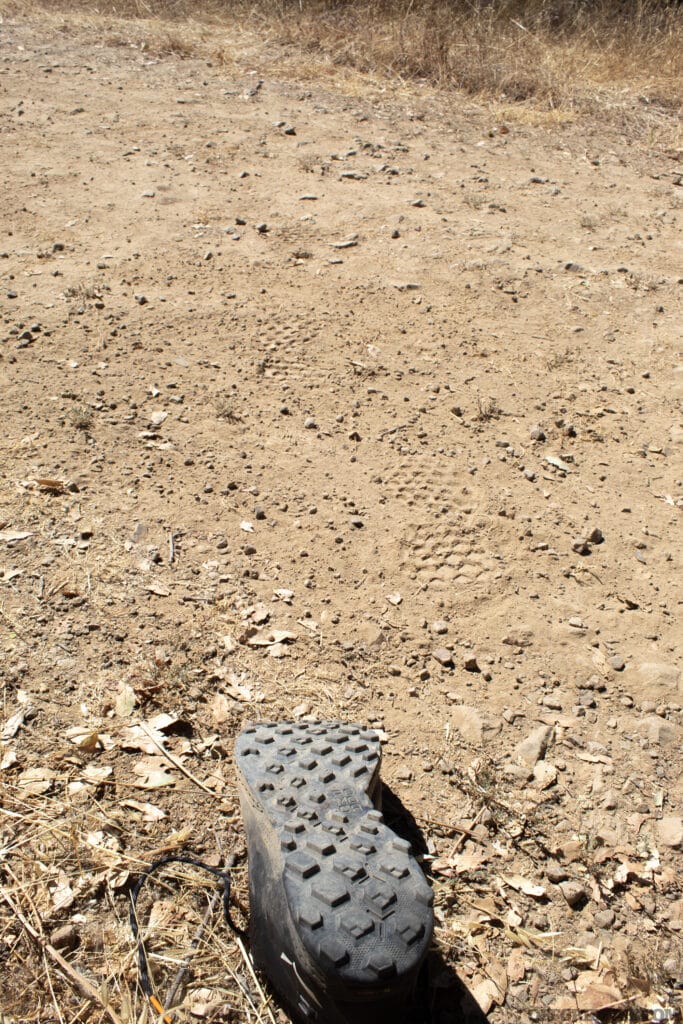
Photo of the bottom tread of a hiking shoe next to the prints it has left behind. Tracking is one method of navigating without tools.

Above: Knowing the tread pattern of your footwear can help you track your own footsteps back to where you came from.

Being able to read a track easily depends on both the land being traveled, and the individual skill of the tracker. A beginner may only be able to detect their footsteps on ground that is easily disturbed, such as mud or wet sand. An experienced tracker may be able to follow footsteps across exposed bedrock. Using tracking as a self-recovery tool will only be as effective as the tracker, and this skill can only be developed by getting out there and observing the signs you leave behind.

If you find yourself on a soft or humid terrain, you might be able to backtrack yourself by checking the design of the soles of your shoes. This must be done in a very accurate way, as a miss-interpretation could easily lead you into following the tracks of those who passed before you. Running into mistakes can turn into increased distress, especially when you feel physical and mental fatigue.

Observations In the Field

Feeling lost is a harrowing experience, but it can be mitigated, and even resolved with the power of observation. Situational awareness isn’t just looking for immediate threats, its also understanding your position on the globe, and how surrounding features could help or hinder you recover efforts. Observation can allow us to collect data on several details of utter importance connected to safety, such as:

  • distance to our destination
  • the type of environment we are in
  • the area we are crossing
  • evolving weather conditions
  • probability of finding a safe place to spend the night

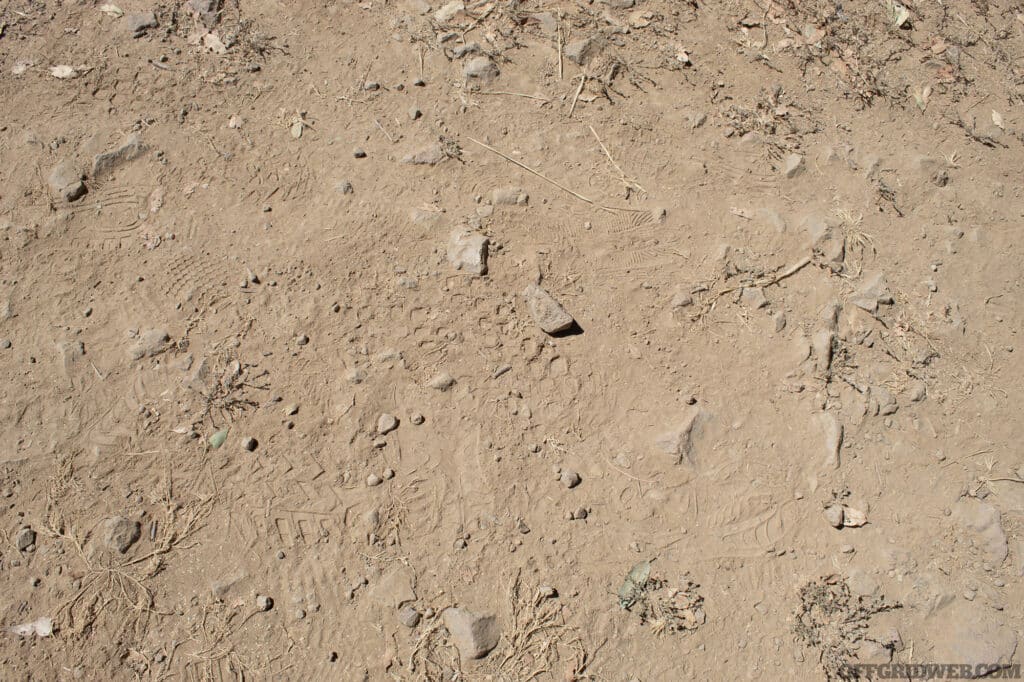
Photo of a mix of foot prints left behind in the dust by numerous people with different types of shoes.

Above: There are multiple tread patterns in this photo, but knowing which one is yours will help you follow the right trail. Tracking in the dust like this can be more difficult than tracking in a medium that is moist.

In terms of tracking, we do not have to look explicitly for footprints, but there are many signs that could leave “bread-crumbs” helping us find our way back. Every detail counts when it comes to understanding our location. Additionally, observed and analyzed information can play an important role in determining our safety if we find ourselves stranded:

  • signs of urbanization
  • presences of roads
  • presence of vehicles
  • flora and fauna
  • detection of any sound we can immediately recognize as man-made
  • any trace of recent or old passage of people and/or animals

Navigating by Night

Night navigation is generally risky due to limited visibility, increased activity of predatory animals, and should be avoided if possible. But the darkness of night is an opportunity to increase your chances of being rescued. At night, it's easier to signal for help due to the contrast of light and darkness. Rescuers will be able to spot signal fires or blinking distress signals from a much greater distance than they would normally be able to during the day. That being said, if stopping for the night is not an option, the moon and stars can be helpful orienteering tools. The moon rises in the east and sets in the west, just like the sun. As for stars, the Big Dipper constellation in the northern hemisphere and Southern Cross constellation in the southern hemisphere can give you another indication of where north and south are located.

Photo of the big dipper in the northern hemisphere. Stars can be a method of navigating without tools.

Above: There are several signs on the landscape in this photo that can be used to navigate. City lights in the distance, light pollution over the horizon, and the big dipper in the sky.

Light and noise pollution can indicate nearby human presence but be cautious as these could also be misleading. The roar of ocean surf, or water tumbling over a fall might sound like a busy highway or airport. Light reflecting off the clouds in the sky from a large city may be hundreds of miles away. But, since the darkness will hide any terrain associating reference points, lost persons will almost always wander in circles without something to guide them.

Navigation Myths

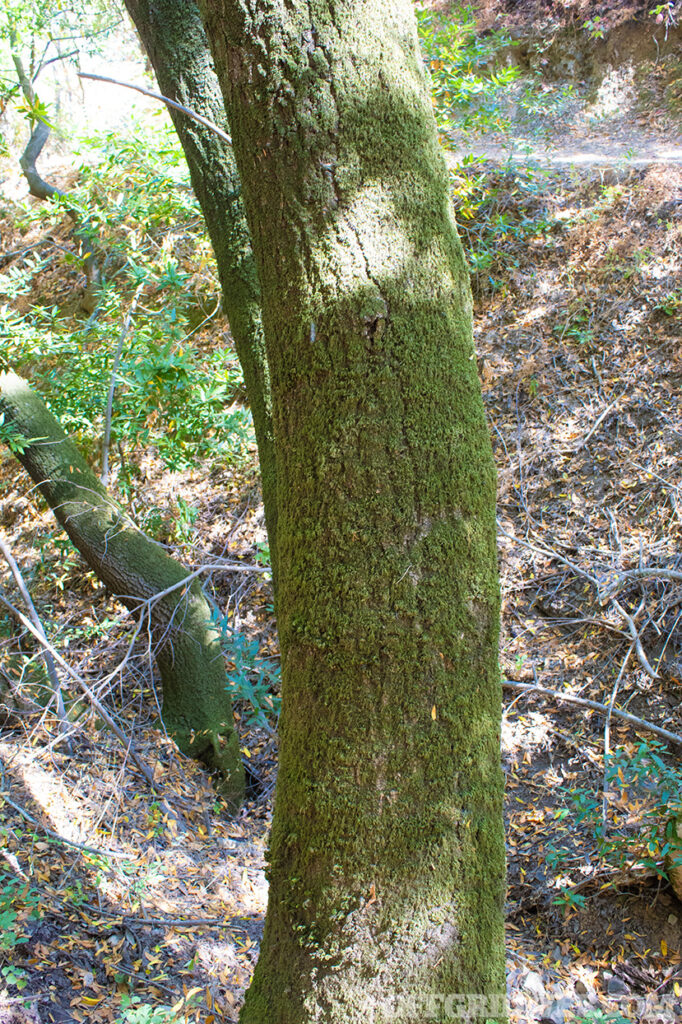
As with any subject, wilderness navigation isn't free from myths. You might've heard that moss grows on the north side of trees, which isn't universally true. Similarly, relying solely on celestial bodies isn't wise, as weather conditions can make them invisible.

A common myth is that pace count will tell you the exact distance traveled. However, different terrains and individual strides make this a rough estimation at best. Unless you know your pace count perfectly in every weather condition or terrain type you encounter, it will only give you a rough estimate at best. It is much more effective to travel in a straight line towards an emergency bearing.

Photo of moss growing on a tree.

Finally, there's a belief that lost people move in circles or favor their dominant side. This isn't universally applicable and greatly depends on the individual's state of mind and physical condition, topography, and time of day.

Mastering navigation in the wilderness without relying on tools is an invaluable survival skill. By planning ahead, understanding your body's response to stress, using nature as your guide, and avoiding the traps navigation myths might try to spring, you'll be better prepared to face any wilderness adventure that comes your way.

Related Posts


Gear Up: New Survival Gear For August 2023

Tuff Possum: The Entry Kit

NOTES

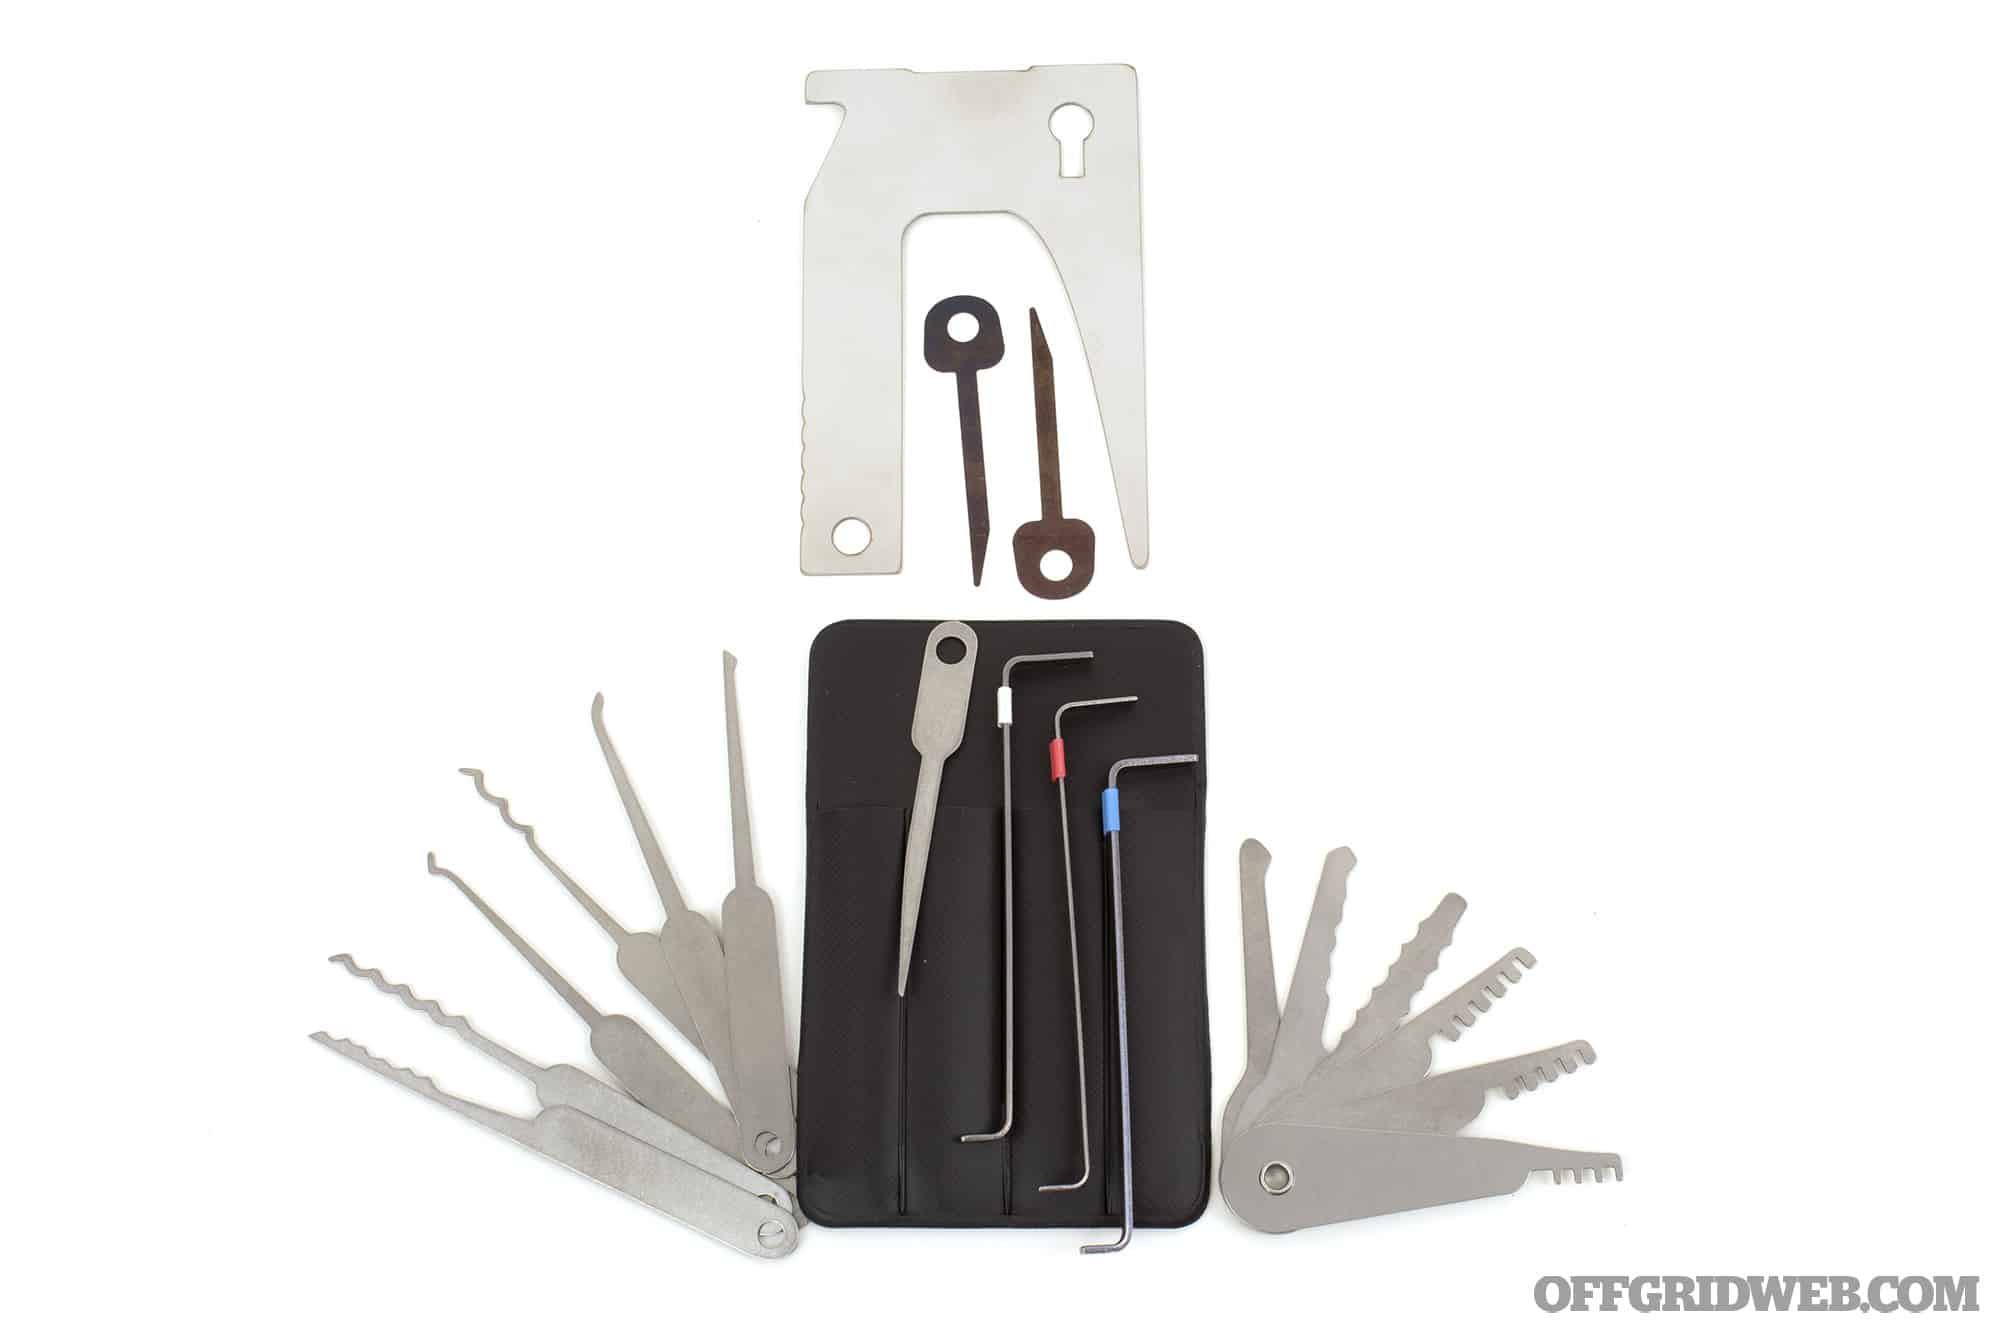
Imagine something as simple as small, interlocking metal bits keeping you or your loved ones from food, medical supplies, or shelter during a disaster. Tuff Possum has considered this, and put together a compact solution. The Entry Kit has a tool for many of the most common locks that may be encountered in an emergency situation. The EZ Card is used like a credit card to bypass latches. Also provided in the credit-card sized Entry Kit holder is the Covert Bypass Multi-Tool, an array of jigglers and comb-picks, Quick Stick Pro for cheaper foreign locks or filing cabinets, and two EZ Decoders for locks with a row of spinning numbers or letters. To tackle the more complex picking tasks, The Entry Kit includes a 6-piece Lockpick Set that features a Short Hook, Half Diamond, City Rake, Hollow Half-Diamond, Triple Peak Large Wave, and Five Peak Small wave. To top it all off, three Longhorn Tension Wrenches of varying thicknesses complete the whole package. Stowed conveniently in a custom leather pouch, it could be easily accessible whenever you need it most.

Studio photo of the Tuff Possum Entry Kit.

WEIGHT

2.1 oz

MSRP

$106

URL

tuffpossumgear.com

Backpacker's Pantry: Emergency Meal Kit

NOTES

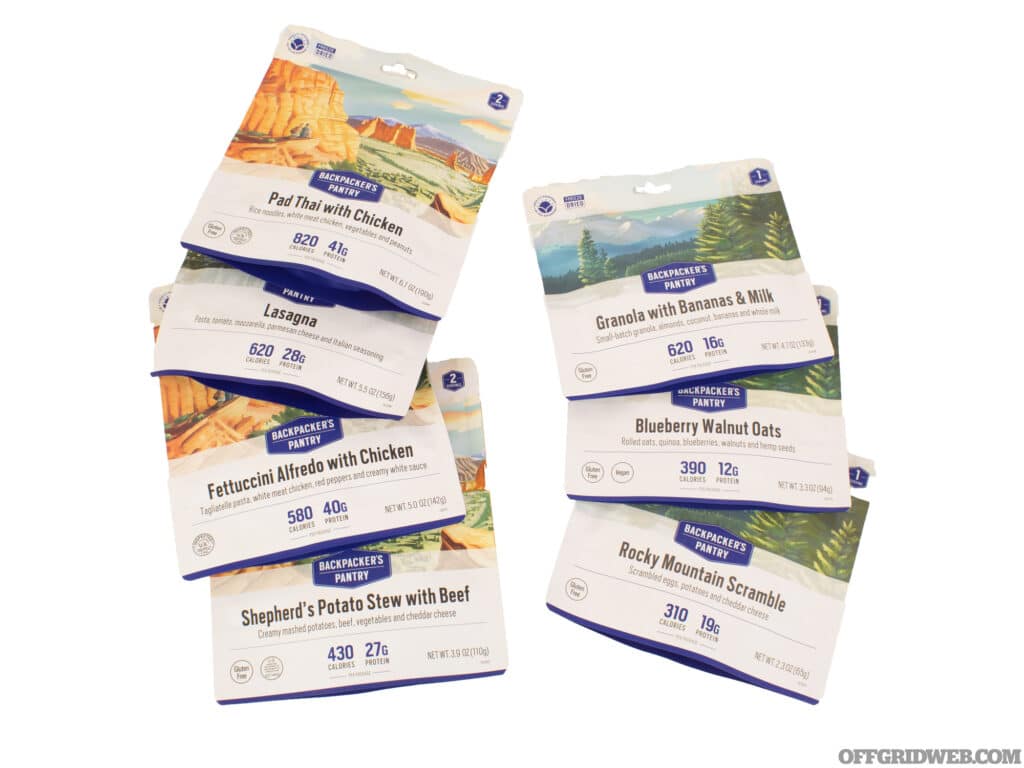
Making it through a natural disaster or food shortage comfortably means having enough calories to see you through strenuous activity levels. Fortunately the days of having to meticulously grow and preserve your own food are behind us for the time being. Backpacker's Pantry has put together a FEMA recommended three day meal kit with enough options and variety to keep your palate happy. Six breakfasts and twelve entrees are packed into a conveniently sized box, perfect for long-term emergency storage, or for your next camping trip. Included in the Emergency Meal Kit are two Granola with Bananas, Almonds & Milk, two Blueberry Walnut Oats, two Rocky Mountain Scramble, two Pad Thai with Chicken, two Fettuccini Alfredo with Chicken, one Shepherd's Potato Stew with Beef, and one Lasagna. There is also a Vegetarian Emergency Meal Kit available as an alternative. Each meal has a potential shelf-life of up to ten years, making this an easy way to stay ready for anything.

Studio photo of the meal options in Backpackers Pantry Meal Variety Kit.

MEALS

18

MSRP

$110

URL

backpackerspantry.com

SureFire: EDC1-DFT

NOTES

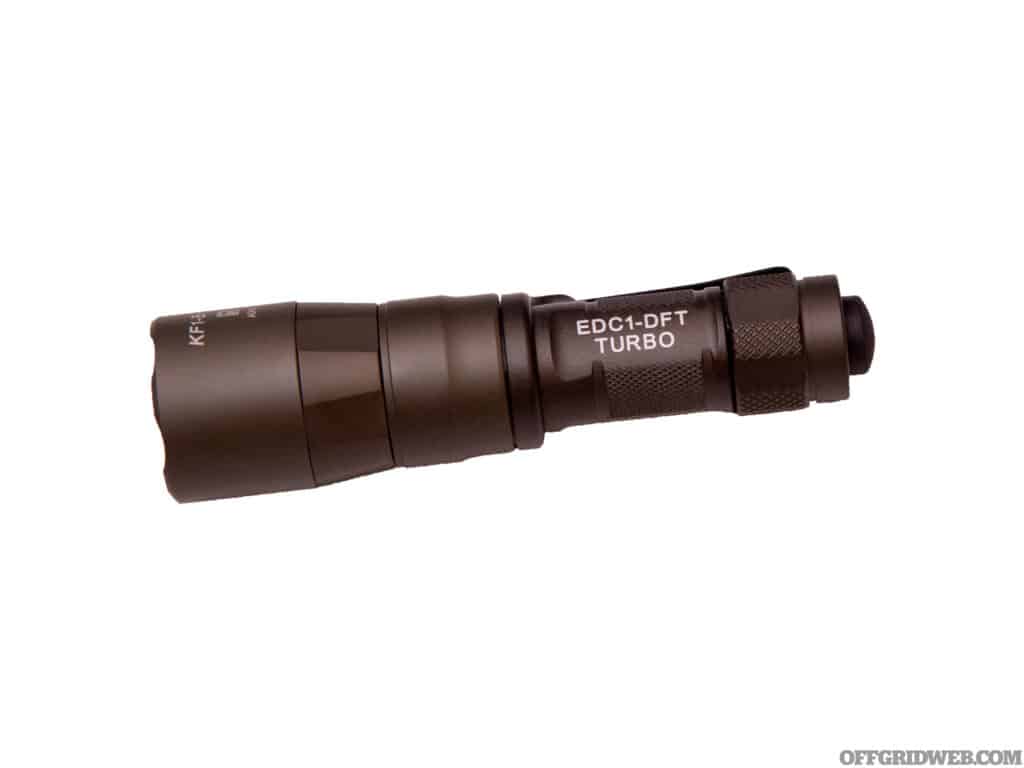
SureFire has brought back their legacy Turbo line, which focuses on high-candela lights that have lately become all the rage. The first re-launches in the Turbo line were updated versions of their classic weapon lights, the Scout and the X300. Now they are putting this same power in your pocket with the EDC1-DFT. The name says it all, it’s an everyday carry light that runs on a single power cell. Featuring SureFire’s dual-fuel technology, this light can accept either one rechargeable 18350 or one single-use CR123. Peak output with an 18350 cell is 650 lumens and 95,000 candela, which is impressive for a light that measures less than 5 inches and weighs under 5 ounces. As is proper with a well-rounded EDC light, there is also a 25-lumen low mode ideal for administrative tasks. The clicky tail cap is refreshingly simple: half-hold for momentary, full-press to click into constant on. A second half-tap will get you to low mode. The high-then-low program is fixed, so you always have full power on tap for emergencies. 

Studio photo of the Surfire EDC1-DFT.

COLORS

Black, Tan

MSRP

$259

URL

surefire.com

ETA: Water Filter Bottle

NOTES

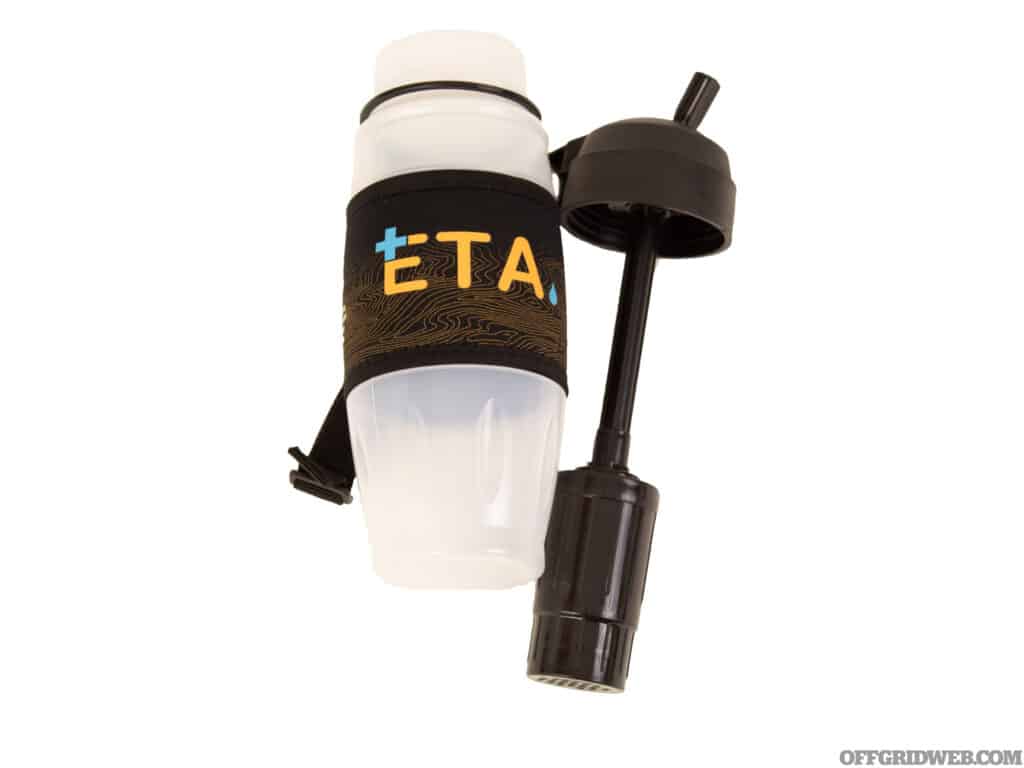
Water, or rather clean potable water, and its importance to the human body cannot be over emphasized. Every year, a large swath of the entire population of Earth struggles with finding a clean source of water. In North America in particular, powerful storms and failing infrastructure regularly leave thousands wondering if their drinking water is safe to drink. To help mitigate this recurring problem, the company ETA offers an American-made, reusable water bottle that houses a filtration system. It has been independently tested and shown to remove visual, chemical, dissolved particulate, and even radiological contaminants from water. The Water Filter bottle can be used to improve the quality of drinking water and remove unpleasant taste and odor. The bottle itself has 28 ounces of capacity, and the filter has a lifespan of up to 100 gallons. The cap has a large, built in lanyard loop to clip easily with a carabiner or rope and the bottle is made from BPA free materials that do not leach into the water being filtered.

Studio photo of the ETA water bottle filter.

COLORS

Orange, White

MSRP

$69

URL

etaliving.com

Bear & Son Cutlery: Bear Edge 61125

NOTES

Cutting tools are arguably one of the most important pieces of gear one can carry. From utility to defense, they fill in many gaps that our own two hands cannot. Fixed blades are versatile and fun to have around, but they tend to draw unwanted attention in many populated areas and are potentially illegal to carry in other places. Shorter folding blades are a potential work around to this problem, and can be carried or clipped into a lot more unassuming positions. Bear & Son Cutlery has a ton of fixed and folding blade options, but recently introduced the Bear Edge 61125, or BE125. The BE125 has a 3.25-inch 440 stainless steel reverse tanto blade, and a 4.25-inch stainless steel handle. It's light, weighing in at mere 4.5 ounces and has been created with a contemporary design. The integrated ball-bearing opens the blade in a smooth motion, and the reversible clip further increases its versatility.

Studio photo of the Bear & Son Cutlery Edge BE125.

BLADE LENGTH

4.25in

MSRP

$70

URL

bearandsoncutlery.com

Litefighter: Fido 2 AI

NOTES

Exposure is a leading cause of fatalities when people venture into the Great Outdoors. This is due in part to underestimating the weather, and being unprepared to withstand its shifting changes. Having a reliable shelter system can mean the difference between life and death, and LiteFighter is keeping outdoorsmen and women alive with their Fido range of sleeping systems. The Fido 2 AI (All In), sleeps two people with their gear comfortably, and can squeeze a 90 by 54-inch tent (with all the stakes, poles and rain flys) into a 19 x 8-inch MOLLE pack. If the Fido 2 is packed with everything included in the kit, it weighs approximately 9.5 pounds, but can be scaled down depending on the expected climate conditions to weigh only 5.9 pounds. The base color of the tent, and the Multi-cam rain fly blends in to wide range of environments which is great if the Fido is being used for a bugout situations, and it is relatively quick to pitch and disassemble. Its cold weather kit includes four parachute stakes to anchor the tent in snow or sand, and it has plenty of zippers and exposed netting to get that perfect thermoregulation and moisture control on the inside.

Studio photo of the Litefighter FIDO tent.

SEASONS

3/4

MSRP

$586

URL

litefighter.com

MPOWERD: Luci Beam 2-in-1 Solar Headlamp and Flashlight

NOTES

Going on a camping trip, late evening hike, or enduring a power outage does not have to mean roughing it like a primitive Neanderthal. Modern life and all of its high-tech gear can be a huge advantage in just about every outdoor or emergency preparedness situation. MPOWERD is keeping all of that techno wizardry up and running with a slew of solar powered charging and lighting devices, including one of their latest, the 2-in-1 Solar Headlamp. The base of the 2-in-1 is has a solar panel for daylight charging, and has an integrated micro-USB port. This makes the base both chargeable from an outlet before you need it, and can be used as a portable power bank when the outlet fails or is unavailable. The base is magnetically clipped to an adjustable headband, and a multi-function light is magnetically clipped to the base. All three pieces can be detached and interchanged depending on how the light needs to be used. When fully charged and set to the high mode, its full 300 lumens will last about 2 hours, but when it is set to the low mode (10 lumens), it can last as long as 24 hours. It has both white and red LED lights, can flex 90 degrees, and the magnetic clips makes it attachable to anything a magnet will stick to.
Studio photo of the MPOWERD Luci 2-in-1 headlamp flashlight.

LUMENS

300

MSRP

$65

URL

mpowerd.com

Maven: CRF.1 – 6×22

NOTES

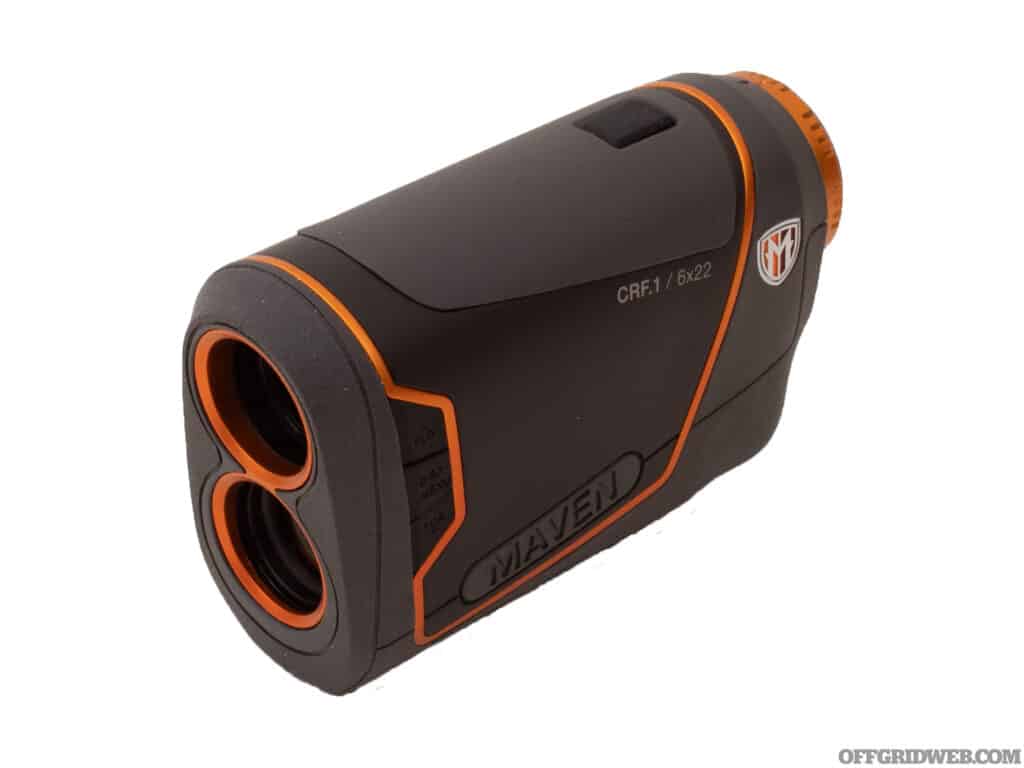
In the field, distance can be deceiving, which is problematic when trying to estimate how far one needs to travel or shoot. Being able to take the guess work out of determining how far away something is a game changing capability. The Maven CRF.1 -6×22 is a lightweight, compact, laser range-finding monocular that has the potential to make that next outdoor excursion a more successful one. Its dimensions are 4.3 by 2.9 by 1.9 inches, about the same size as an average adult hand, and weighs 8 ounces. The laser can find the range of objects between 5 and 2400 yards away, has line-of-sight and angle compensation, and has a built-in forest mode for readings in heavier vegetation. If a more stable platform is needed, there is a fitting that will attach the CRF.1 to a bipod or tripod, and it is water resistant so a little precipitation won't get in the way of getting things done. There are three reticle options, one that resembles a cross-hair, an open box, and a single dot, depending on what the targeting needs are, and the display can be in either auto black or red.

Studio photo of the Maven laser range finder.

RANGE

5-2400 yd

MSRP

$295

URL

mavenbuilt.com

Woods Monkey: Medium Monkey Board

NOTES

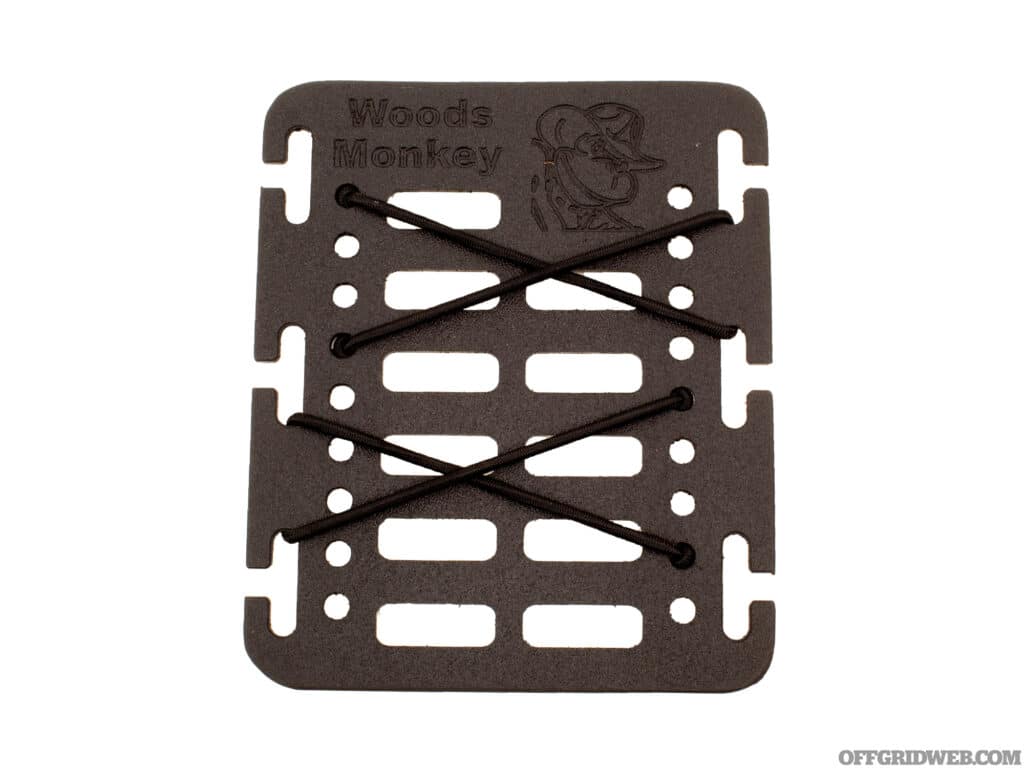
EDC should be easily accessible, but placing things in your pockets every day can make it confusing, especially if you don't wear the exact same clothes day in and day out. Woods Monkey, a company that believes in tactical organization, came up with a solution that is elegant in its simplicity, the Monkey Board. Monkey Boards are made from light-weight and durable Kydex, and are easily integrated with both MOLLE and Tek-Lok systems. They come in three sizes, large, medium and small, and can be fixed in place to a piece of gear, or used to hold EDC items reliably in a pocket. Elastic cords can be used to strap things like a tourniquet, flashlight, or wallet, and the variety and placement of mounting systems makes each Monkey Board endlessly customizable. Instead of fumbling for that loose pocket or backpacking gear, now you can just grab a Monkey Board and everything is readily accessible on your own customized Kydex pallet.

Studio photo of the Woods Monkey medium monkey board.

DIMENSIONS

5in x 6in

MSRP

$25

URL

woodsmonkey.com

Outdoor Element: Contour Feather Adventure Survival Knife

NOTES

There are a few key items that can be carried into the wilderness that will keep you alive. These can include something to cut with, a way to start a fire, and a signaling device to communicate with loved ones or rescue workers. But why carry three different things when you could simply carry one? Outdoor enthusiast and mastermind behind Outdoor Element, Michael Mojica, has designed a knife that does just that. Tucked within this 6.3-inch, 3.2 ounce knife is a 115 dB survival whistle, a custom hex ferro rod, and a 1/4-inch hex driver. To get a stronger spark, the ferro rod can be screwed into a forward facing position, and the Kydex sheath has an integrated ceramic sharpener to keep a keen edge on the 2-inch VG10 steel blade. Each Contour Feather sheath has a heavy duty clip, and plenty of grommets to tie into place, or allow the blade to be worn as a neck knife. The Contour's price is also nothing to sneeze at considering the versatility it brings to the table.

Studio photo of the Outdoor Element Contour Feather knife.

WEIGHT

3.2oz

MSRP

$45

URL

outdoorelement.com

Plano: Field Locker Element Tactical Gun Case

NOTES

Moving firearms from one destination to another is sometimes easier said than done. With a multitude of government agencies issuing demands about how a firearm should be carried in any given situation, having a robust case that checks all the boxes is a must. Designed with modern firearms in mind, the Field Locker Element Tactical Gun Case is a heavy duty firearms transportation solution that can protect your platform from a barrage of elements. Interior dimensions are 44 by 15 by 6.4-inches, and two durable wheels are built into the exterior for ease of transportation. This TSA-approved case has a sealed exterior, protecting up to two firearms from harmful dust and moisture. On the inside, double density, customizable foam keeps your firearms immobilized, and the built in pressure equalizer prevents potential damage from dramatic atmospheric changes. Reinforced padlock gates keep the case secured and further protected from the elements when you're on the go.

Studio photo of the Plano field case.

COLOR

Black

MSRP

$300

URL

planooutdoors.com

Salewa: Pedroc Powertex

NOTES

Proper footwear is something that is neglected far too often. And since most ambulatory people spend most of their time moving around on them, finding the right shoe for the right occasion is an important endeavor. However, not all shoes are created equal, and wearing something inappropriate for where you may be traveling on foot could lead to some serious injuries. If you're feeling adventurous, Salewa's Pedroc Powertex may be the shoe you need. This was designed specifically for fast hiking, and was built to keep your feet cool and protected for less technical speed-hiking and climbing applications. The rip-stop mesh upper is durable and resistant to scratching and tearing when moving over rocks or tough brush, and a Powertex membrane protects your feet from moisture while allowing them to breath. The Pedroc Powertex also integrates Salewa's 3F system that connects the instep to the sole and heal, which provides extra stability when moving over uneven terrain.


Studio photo of the Saleway Pedroc PTX shoe.

COLORS

Black/Black, Blue/Java Blue, Brown/Golden Brown

MSRP

$180

URL

salewa.com

Related Posts


“HOW NOT TO DIE”: Laura Zerra’s Guide to Wilderness Survival

In a world increasingly dominated by technology and predictable outcomes, the idea of getting back in touch with our primal roots, or being thrust into a life-or-death scenario, is both fascinating and terrifying. CarbonTV‘s show “DECIVILIZED” explores these concepts, and the inaugural episode “HOW NOT TO DIE” is an eye-opening introduction to the intense world of survival.

Laura Zerra: A Survivalist Like No Other

How Not To Die's host is Laura Zerra, a world-renowned primitive survivalist who has spent an immense amount of time surviving in the wild. The episode's title, “HOW NOT TO DIE,” is a bold statement that immediately captures attention. It's not just about surviving in the wild; it's about thriving and taking control of one's life. Laura's teachings are not limited to extreme survival scenarios but are applicable to any outdoor activity, encouraging viewers to think outside the box when the unexpected occurs. Her unique knowledge, self-education, and close-call experiences in the wild make her an authoritative figure in the field of survival. From building shelters and making fire to finding food and water, the episode covers essential survival skills that can be life-saving in emergency situations. Watch the video below to level up your own survival know-how:

Survival in a Technological World

Episode 1 takes the viewer on a journey into the wild, where predictable outcomes are replaced by raw instinct and adaptability. It's a unique perspective in a world where technology often overshadows our connection to nature. Laura's approach to survival is both educational and insightful. She doesn't just demonstrate survival techniques, but explains the reasoning behind them, making the content easily understandable to both novices and seasoned outdoor enthusiasts.

More than just a survival guide, this episode is a call to action, challenging the viewer to take charge of their life, to embrace uncertainty, and to find strength in their primal instincts. It's a message that resonates in a world where many feel disconnected from nature and their true selves.

Fresh Perspective on Survival

“HOW NOT TO DIE” is more than just a survival guide; it's an important reminder that an outdoor experience can turn on a dime, and that it's important to be ready for anything. Laura Zerra's engaging teaching style and the episode's blend of education, inspiration, and visual appeal, makes it a compelling watch. CarbonTV is the site to visit if you are interested in learning from more of Laura Zerra's insights. You can also follow Laura on Instagram and Twitter (a.k.a. “X”).

Related Posts


Top Countries to Survive the Apocalypse

Which country would you move to in order to avoid brutal hardship? Surviving an apocalyptic scenario is a subject that has fascinated and terrified humanity for centuries. Whether it's the breakdown of society, war, killer AI robots, or any other dystopian scenario, people have always wondered where the best place to survive would be. Back in 2021, Insider published a list of the five best countries to survive an “apocalypse”, but are they really the best choices? Let's take a look at their reasoning.

Insider's Countries to Survive the Apocalypse

  1. New Zealand: Known for its isolation and renewable energy sources, New Zealand tops the list. With 40% of its energy supply coming from renewable sources and 75% produced domestically, it seems like a safe haven.
  2. Iceland: With an abundance of natural and renewable resources, Iceland's isolation and cooler climate make it a strong contender.
  3. United Kingdom: Surprisingly, the UK's available farmland, temperate climate, and low risk of natural disasters place it on the list.
  4. Australia: Its location, climate, and massive land make Australia a prime spot to ride out the apocalypse.
  5. Ireland: With fertile soil, low population, and lower energy demand, Ireland rounds out the top five.

However, these choices may not be as ideal as they seem. In rebuttal to this list Andrew Henderson of NomadCapitalist.com draws on his experience helping others move around the globe to explain why you should reconsider. If you're not from these countries, moving there could be difficult. Ireland might be the easiest to move to, but the UK, Australia, and New Zealand are expensive and challenging for immigration. Iceland isn't very open to immigration either. So, where should you go instead?

Nomad Capitalist's Countries to Survive the Apocalypse

  • Latin America: Countries like Mexico, Guatemala, Costa Rica, Panama, and Ecuador offer relatively straightforward residence options. Ecuador, with its cheap agricultural land and tax-friendly policies, could be an interesting choice.
  • Europe: Ireland still stands out, but Malta and Cyprus could be potential options. Switzerland's history and stability make it appealing, but it's expensive and centrally located on the European land mass.
  • Asia: Malaysia, with its foreigner-friendly land ownership and nice people, could be a place to consider.
  • Africa and the Pacific: Mauritius in Africa and Vanuatu in the Pacific offer residence for real estate buyers and are also tax-friendly.

While the top five countries listed by Insider may seem appealing at first glance, and for legitimate reasons, they might not be the best choices for everyone. Considering alternative options and understanding each countries immigration process is essential. Whether it's Latin America's affordability, Europe's stability, Asia's friendliness, or the unique offerings of Africa and the Pacific, the best place to survive the apocalypse may be more personal and nuanced than a simple list can capture. Watch Andrew's video below for a deeper dive, and hopefully a better understanding. Who knows, the best place to survive the apocalypse might be exactly where you're at right now.

Related Posts


Toughest AR-15 Upper: Apocalypse-proofing Your Bugout Carbine

What do nails, woodpecker lips, and wild west hombres have in common? They’re all tough. Which is exactly the quality you want from the special rifle you’ve designated to defend your family, home, and resources in the case of a severe, violent crisis. This doesn’t have to be the lawless wasteland portrayed by Hollywood. During the widespread civil unrest of 2020, there were plenty of places in the American heartland—places that didn’t even lose cell service or electricity—that remained functionally lawless for weeks at a time. Police chiefs told their officers not to respond to certain calls or enter certain neighborhoods. Mayors and city council members gave speeches about giving people “room to riot”. While the likelihood of needing to use a firearm in anger during a disaster is very low, it’s not zero. If you do find yourself face-to-face with that statistical anomaly, you’re going to want a rifle, maybe even a bugout carbine, that’s tough.

Photo of Tom Marshall firing the toughest AR.

But what exactly does that mean? We’re not talking about accurate and reliable. We’re not talking about “runs fine, even if it’s a little dirty”. Webster’s Online defines tough, among other things, as: capable of enduring strain, hardship, or severe labor, characterized by severity or uncompromising determination. Some of this language is surely intangible and subjective. So how do we translate that into assessing a mechanical device? If you spend enough time on social media, someone will try and convince you that a rifle is tough by burying it in a shallow grave, dragging it behind their truck for 100 yards, or dropping it off the roof of their house onto concrete. While these types of “tests” (we use the term loosely) might make for good entertainment, they give you no empirical information about the weapon’s ability to endure hardship over time.

We tried our best to take a more analytical approach. Instead of resorting to gimmicky torture tests, we took a hard look at the individual stages of the AR’s operating cycle and identified as many mechanical failure points as possible. From there, we scoured the aftermarket to find products that would mitigate, reduce, or eliminate the potential for failure at that point. We’re not sure if the resulting upper receiver group is the most accurate, flattest shooting, or will run the most number of rounds before failing. What we can say with some confidence is that every phase of the operating cycle has been mechanically or structurally reinforced to endure environmental and operating conditions well above average.

NOTES

This article will be specific to the AR-15, as it’s one of the most ubiquitous rifles in America, both in terms of sales volume and cultural recognition. They are accurate, reliable, inexpensive, with a wide selection of ammunition and plentiful supply of spare parts. This dearth of replacement and aftermarket components is, in part, what has made this story possible. The amount of research, over-engineering, and sweat equity some of these companies have invested into making the strongest and most durable version of their individual products is commendable, and we’re happy to unite them all in this franken-build exercise. We also want to address the possibility of piston-driven AR’s. There’s absolutely nothing wrong with them. In fact, we’re big fans of several well-known piston rifles out there.

Studio photo of an AR handguard.

While they do introduce less fouling into the receiver, we disagree with the notion that they “run cleaner”. Instead, we’d argue they simply deposit their fouling elsewhere in the operating system. Furthermore, because there are no dimensional standards for AR pistons, adopting one will inevitably introduce proprietary parts into your rifle which will be inherently harder to come by if replacement is ever needed. While this is by no means meant to condemn them from preparedness applications, it’s food for thought. Since the direct impingement system is more prolific, and more financially accessible to a larger number of consumers, we focused on that. Some of the aftermarket upgrades seen here are not inexpensive. However, these upgrades can be made piecemeal to distribute the financial burden, or even cherry picked from this list based on your preferences and perceived needs. We also focused entirely on the upper receiver group because this is where the “work” takes place, meaning its where all of the carbon fouling and mechanical parts wear takes place.

RECEIVER

Our build started with VLTOR’s new MLOK VIS Lightweight MLOK Polylithic Upper receiver. These uppers have been out in KeyMod for some time, and now the line is being expanded to include MLOK versions in 10-, 12-, and 15-inch handguard lengths. Our sample upper is a pre-production prototype, but VLTOR says they expect them to hit market between 3rd and 4th quarter of 2023. The VIS Polylithic system is composed of an upper receiver and handguard which are manufactured separately before being mounted into fixtures and welded together to create a single unit. In order to make this work, the upper receiver is forged from 6013 aluminum instead of VLTOR’s normal 7075. The handguard is extruded from 6061, both hardened to T6 specifications. Ours also came with VLTOR’s new titanium graphite ejection port door. The VIS Polylithic features a unique port door in the bottom of the handguard at the receiver end. This is how the barrel nut is secured to the receiver with a special one-time-use barrel nut intended to be consumed in the installation process.

Studio photo of an AR upper receiver.

GAS SYSTEM

It’s been said that the heart of a rifle is its barrel. For this build, we chose a unique barrel offering from HM Defense. This barrel is incredibly unique in that the gas block is integrally machined into the barrel itself. Instead of fitting a collared gas block over the port, HM’s Monobloc barrel cuts the block directly into the barrel blank, eliminating any possibility for mis-alignment, slipping, leakage, or corrosion at the gas block. These 4150CMV barrels are button-rifled, triple-honed, chrome-lined, phosphate finished and listed as match grade by the manufacturer. They are chambered in 5.56mm NATO with a 1:8 twist rate. There are several lengths available, but our test barrel is of the 12.5-inch variety and features a mid-length gas system. Historically, 12.5 barrels with true mid-length gas systems can be a little finicky in terms of reliability, sometimes require particular gas system tuning or limitations on compatible ammo for consistent cycling. HM Defense claims the integrated gas block increases reliability by maximizing gas flow directly into the gas tube, thus eliminating the reliability problem sometimes found in this barrel configuration.

Studio photo of an AR gas tube.

Speaking of gas tubes, we installed a V Seven Weapon Systems’ Extreme Environments Gas Tube into the monobloc. This tube is made from heat treated Inconel with a black DLC finish. Inconel is the same material often used for suppressor baffles because of its incredibly high resistance to high-temperature thermal cycling. Its ability to withstand repeated exposure to incredibly high temperatures without melting or becoming brittle makes it an ideal choice for parts that regularly come into direct contact with the super-heated expanding gasses caused by firing a weapon.
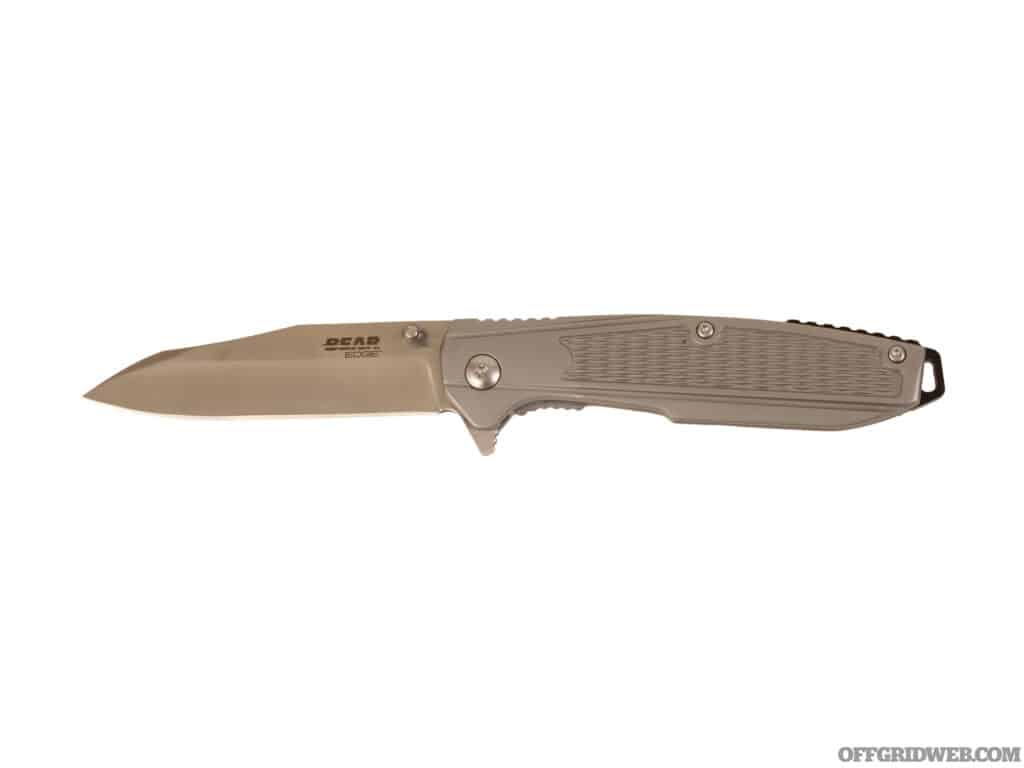
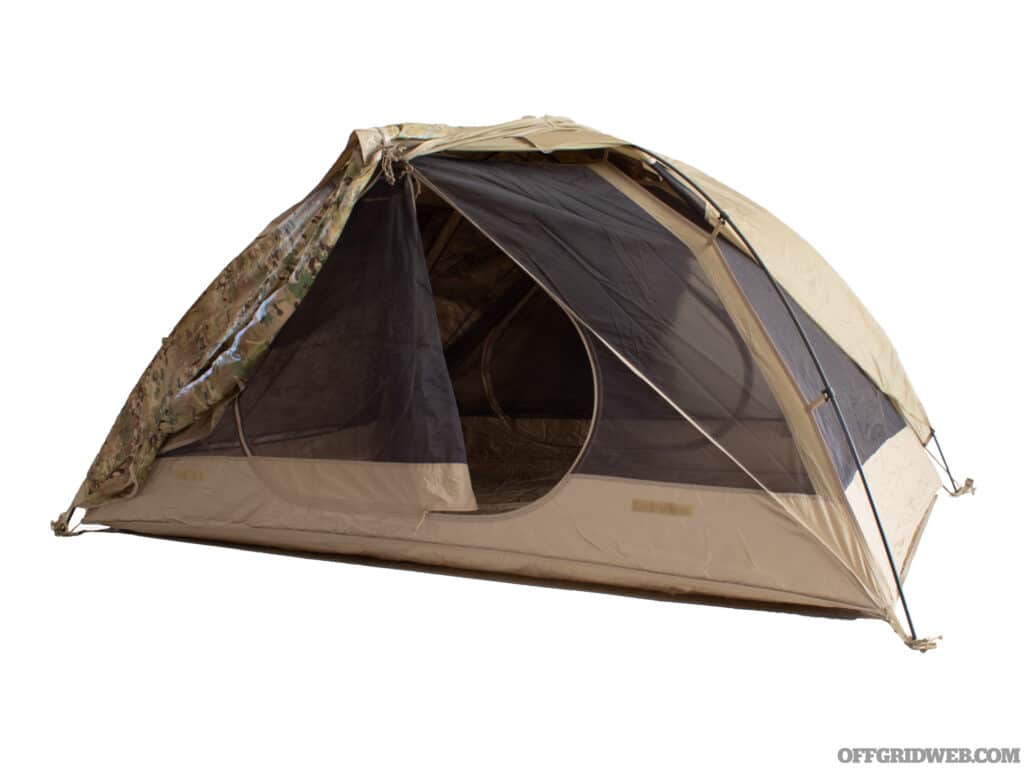
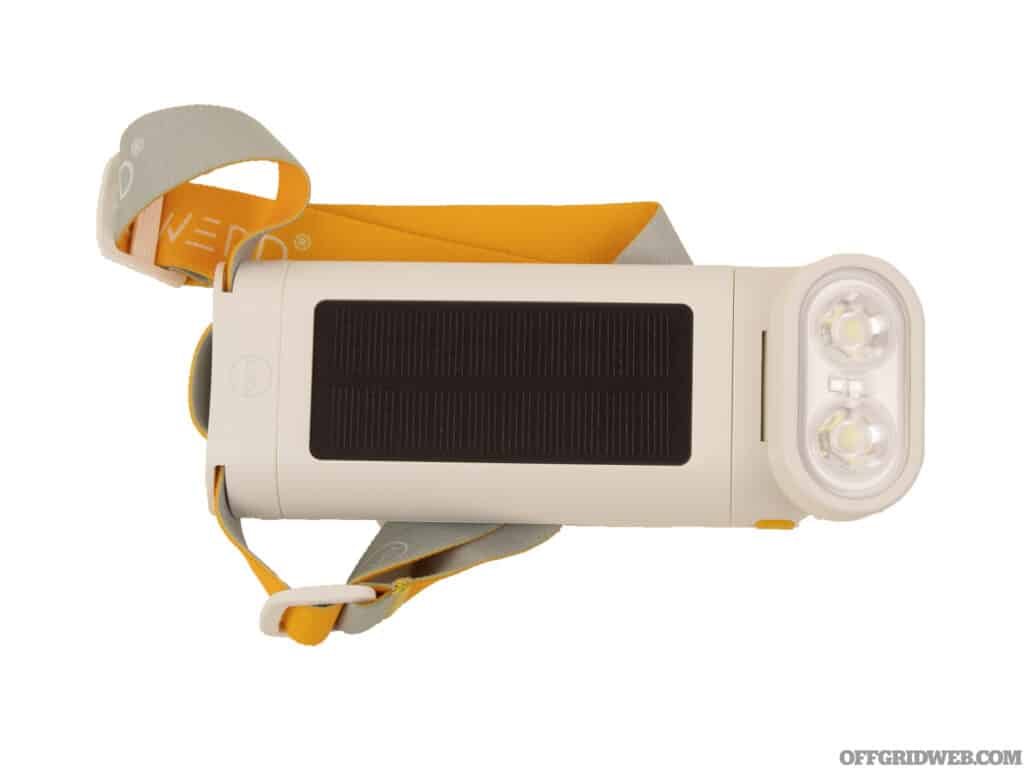
BOLT CARRIER GROUP

In researching optimized, enhanced, or reinforced bolt carrier groups, we came across a surprisingly wide array of options, each one purporting to address a specific weak point in the bolt or carrier. While we were not able to sample them all, we did get our hands on a couple of options for your consideration.

HM Defense makes more than Monobloc barrels. One of their other products is the HMB Bolt. This bolt is specifically designed to counter one of the better-known issues with the AR-15 bolt: cam pin hole shearing. Traditional AR bolt designs feature a cam pin hole that goes all the way through the bolt itself. Because of the size of the cam pin, this leaves relatively thin walls on either side of the cam pin hole. Sometimes these walls can snap, literally breaking your bolt in half and dead-lining your gun until you can find a replacement. The HMB bolt uses a proprietary bolt and cam pin design that leaves one side of the bolt completely intact to add extra structural strength. The bolt is 9310 steel while the cam pin is hardened 4340 steel. Both parts are black nitride finished.

Studio photo of an HMB bolt carrier.

Another option is the Sharps Rifle Company Relia-Bolt and Xtreme Performance BCG. The Relia-Bolt is made of heat-treated S7 tool steel, which Sharps describes as having higher tensile strength and resistance to softening at temperatures up to 1,000 degrees. The Relia-Bolt also features a unique tapered and rounded lug design meant to reduce the possibility of a malfunction caused by improper locking or unlocking of the bolt when the barrel extension becomes heavily fouled or impeded by debris. The front edges of the locking lugs are re-shaped to increase performance under harsh conditions, while the rear lug faces remain fully squared to achieve full lock-up when the bolt goes into battery. The Relia-Bolt can be purchased on its own, as part of the Sharps Xtreme Performance BCG. These sets include a “balanced bolt carrier” that is also made of  heat-treated S7, with conservative lightening cuts on the back of the carrier. There are multiple finish options including black DLC, NiB-X, and FDE Zirconium Nitride. There is also a low-mass carrier available, in addition to BCGs features the Sharps Adjustable Gas Recoil System which includes a set screw in the back of the gas key to moderate gas flow into the carrier, allowing you to adjust gas flow based for suppressed use.

Studio photo of an AR bolt carrier.

Finally, we have a bolt carrier from Walker Defense Research. This carrier is made from 8620 tool steel and finished in FDE DLC coating. The Walker carrier comes with Optimized Carrier Key Screws designed by Ned Christiansen. These screws have a beveled top edge that also has a shallow serration pattern cut into it so that, when staking the gas key screws, the staked material has an increased surface area to bite into. While sub-par factory AR’s have been known to have shallow staking, or skip it entirely, the Christiansen OCKS keys essentially lock themselves in. While we sourced our Sample OCKS from Forward Control Designs, and had the team at Walker Defense Research install them on our carrier—along with a Sharps Relia-Bolt—Drew Walker, the owner of WDR, was so impressed with the OCKS design that by the time you read this they will be standard on all Walker Defense BCGs. We love to see the owner of a company embrace innovation and include other small businesses in ways that make their own products even better.

Studio photo of an AR bolt carrier.

ACCESSORIES

Finally, it came time to finish and accessorize our upper. We paired our BCG with a Gesissele Automatics Airborne charging handle. Geissele parts are well-known for their widespread adoption across the DoD, in particular within elements of Special Operations Command. If that isn’t a testament to their ability to endure prolonged hard use, we’re not sure what is. These handles are machined from a solid block of 7075-T6 aircraft aluminum, Type 3 hard coat anodized and feature a raised lip on the rear to mitigate gas blowback during suppressed use. The Airborne features lower-profile levers to reduce the amount of snagging on chest-mounted gear.

Studio photo of a charging handle.

We also went back to Walker Defense Research NILE grip panels. The Non-slip InLaid Element panels snap directly into MLOK rail slots to enhance grip and insulate your hands from heat build-up. They are inexpensive, simple, lightweight, and durable. They offer a greatly-enhanced grip surface with no perceptible added weight.

We tipped the Monobloc barrel with a DeadAir KeyMicro flash hider. The KeyMicro mount is a smaller version of their ubiquitous KeyMo mounting system, and the KeyMo HUB mounts we have on hand are all compatible with KeyMicro muzzle devices. Their flash hider is compact and heavily built, with a rugged and widely available mounting interface for suppressors.

Finally, we added a pair of Vortex optics on an American Defense Manufacturing mount. Specifically, we used a Razor Gen II 1-6x paired with their SPARC Solar red dot, in an ADM Delta-C mount. Like the Geissele charging handles, Razor LPVOs have found an unlikely home with US Army Special Operations Command. The Delta-C mount places the scope at a 1.5-inch height-over-bore and their newly released line of direct-mount top rings, places the piggy-backed red dot at approximately 3 inches over bore.

Vertircal grips and hand stops are an intensely personal choice, but we strongly prefer short vertical grips on rifles for the added control we get, as well as for ideally positioning our thumbs over the top of the bore to actuate light control buttons for lights and lasers – which can be found on nearly all of our personal setups. In this case, we experimented with two: first we tried a Stubby MLOK Vertical Grip from Onyx Arms. This grip appears to be inspired by the old Knights Armament “broom handle” vertical grip – the first well-known example of this type of grip in military use. They were, in fact, standard issue as part of the original SOPMOD accessory package handed out to Special Operators to customize their new (at the time) modular quad-rail handguards. These grips are especially useful on shorter guns where a full traditional “palm grip” on along the underside of the handguard is not permitted due to lack of space or may be uncomfortable when using railed fore ends. The Onyx Arm grip updates the older designs by doing away with the rail clamp in favor of a pair of MLOK T-nuts for today’s sleeker handguards. The polymer they use is dense and stiff enough to prevent perceivable flexing even when driving the gun hard across a field of dispersed targets. Then we tried the Unity Tactical VFG – a more modern aesthetic with an oblong shape, flared at the bottom and textured on the front and back edges. Both were comfortable and functioned well with the VLTOR polylithic receiver.

Studio photo of the toughest AR build.

Speaking of lights, we added a Cloud Defensive REIN 3.0 weapon light to this build. The REIN has staked its claim as perhaps the toughest and brightest rifle light on the market, with the 3rd generation putting out 100,000 candella and 1250 lumens with a 95-minute run time. The 3.0 also introduces dual-fuel capability, running on either a single rechargeable 18650 battery, or a pair of CR123s. While the former will always provide peak output and runtime, the latter allows fast swapping in the field when charging stations or power outlets may not be available. The REIN’s heavy-duty switching setup features a pressure pad with separate buttons for momentary and constant-on activation as well as a clicky tailcap button which will operate completely independently of the remote switch. While the two are hard-wired together as a single unit, you can literally cut the wire to the remote switch without losing tail-cap activation. The bezel diameter is only 1.3 inches, meaning it will play will with lasers or IR illuminators and, at just over 6-inches long, it won’t take up a ton of real estate on the handguard. To that end, the REIN is specifically designed and tested to run with the head running alongside the muzzle device. Even if you have a multi-chamber brake with high gas output, the REIN will function just fine for the entirety of its service life. Just don’t forget to clean the lens as needed. The REIN is IPX8 rated for waterproofing and has been function tested to run even after 24 hours submerged in 100 feet of water. It also sports a front lens that’s 3mm thick and meant to withstand direct hits from force-on-force marking rounds, so there’s no need to cover or baby this light if you train hard with your carbine. If something does fail, Cloud’s lifetime warranty will cover just about any failure case you can think of.

ROUNDS DOWNRANGE

Of course, all of this leads us back to the question most of you have already asked yourselves while reading this: “Is all this really necessary?”

You will have to answer that question for yourself. Our goal here was not to give you an exact blueprint that needs to be replicated to have a worthwhile SHTF rifle, but to present a buffet of what’s available in terms of mechanical upgrades. The cost, in both money and man-hours, required to build this exact rifle is substantial and perhaps prohibitive for many. But maybe there are a couple of individual components here that pique your interest or that you deem worth the expense to augment an AR you’ve already got in your safe. As always, the existence of the OFFGRID brand is driven by the mission to provide you with the maximum amount of information to help you make the most educated decisions possible when budgeting for emergency gear.

Related Posts


Journey Back in Time: Embracing Ancient Hunting Techniques

Have you ever wondered how our ancestors survived in the harsh landscapes of the North American Southwest? How they utilized ancient hunting techniques and thrived using primitive tools and techniques? We recently stumbled upon a captivating video titled “Journey Back In Time: Ancient Ram Hunt” that takes us on a fascinating journey into the past, exploring the hunting techniques of the ancestral Puebloan culture.

You may recognize the video's host, Phillip Liebel, a contestant on the History Channel's Alone: The Beast, instructor at Primitive Wilderness Survival, and an expert in primitive technology. Phillip delves deep into the history of the ancestral Puebloans, a nomadic culture that thrived in the Southwest's arid climate. He discusses their lifestyle, their movement patterns, and their ingenious use of resources. But the truly exciting content is his exploration of the Puebloan's hunting tools and techniques.

Phillip also displays his replica ‘sand dune knife' and discusses the dynamics of an ‘atlatl', or spear-throwing lever, both items based on artifacts and rock art left behind by the Puebloans. He also crafts a dart from river cane, similar to the reeds used by the Puebloans. The highlight of the video is when he puts these tools to the test, successfully hunting a ram using the self-made atlatl and dart.

This video is a testament to the ingenuity and resilience of our ancestors, and it's a thrilling watch for anyone interested in history, survival techniques, or hunting. We've embedded the video below for you to enjoy.

After watching, we'd love to hear your thoughts. What did you find most fascinating about the ancestral Puebloan culture? Have you ever tried replicating primitive tools or techniques? Share your experiences in the comments section below!

Don't forget to share this post with your friends and followers. Let's take them on this exciting journey back in time!

Related Posts


New: Rossi R95 Lever Action Rifle

Whether it's a 1969 Camaro, a Led Zeppelin album, or a nice bottle of whiskey, some things don't lose their appeal with age. The lever action rifle also falls into this category — it's been around for well over 100 years with only minor changes, and has remained popular. As a testament to this fact, Rossi has announced the expansion of its lever gun lineup with a new model, the Rossi R95. It's chambered in the popular .30-30 Winchester caliber and available in 16.5 and 20-inch models.

Rossi R95 Specs and Features

Each variant of the new Rossi R95 includes hardwood walnut finished furniture, a cushioned rubber recoil pad, and adjustable iron sights. However, if your tastes are a bit more modern, it's compatible with commonly-available aftermarket rails and handguards designed for “another major manufacturer’s lever action” (we're guessing that means Marlin). The receiver is also drilled and tapped for optic mounts.

R95 barrels are hammer-forged, and metal components are finished in a black oxide coating. For those who aren't used to running lever guns in the traditional half-cocked position, there's a push-button safety at the rear of the receiver. Capacity of the tube magazine is 5 rounds plus one in the chamber. MSRP for the new Rossi R95 is $949.

For more information on the Rossi R95 lever action rifle, go to RossiUSA.com.