How to Plan and Pack Your Go Bag

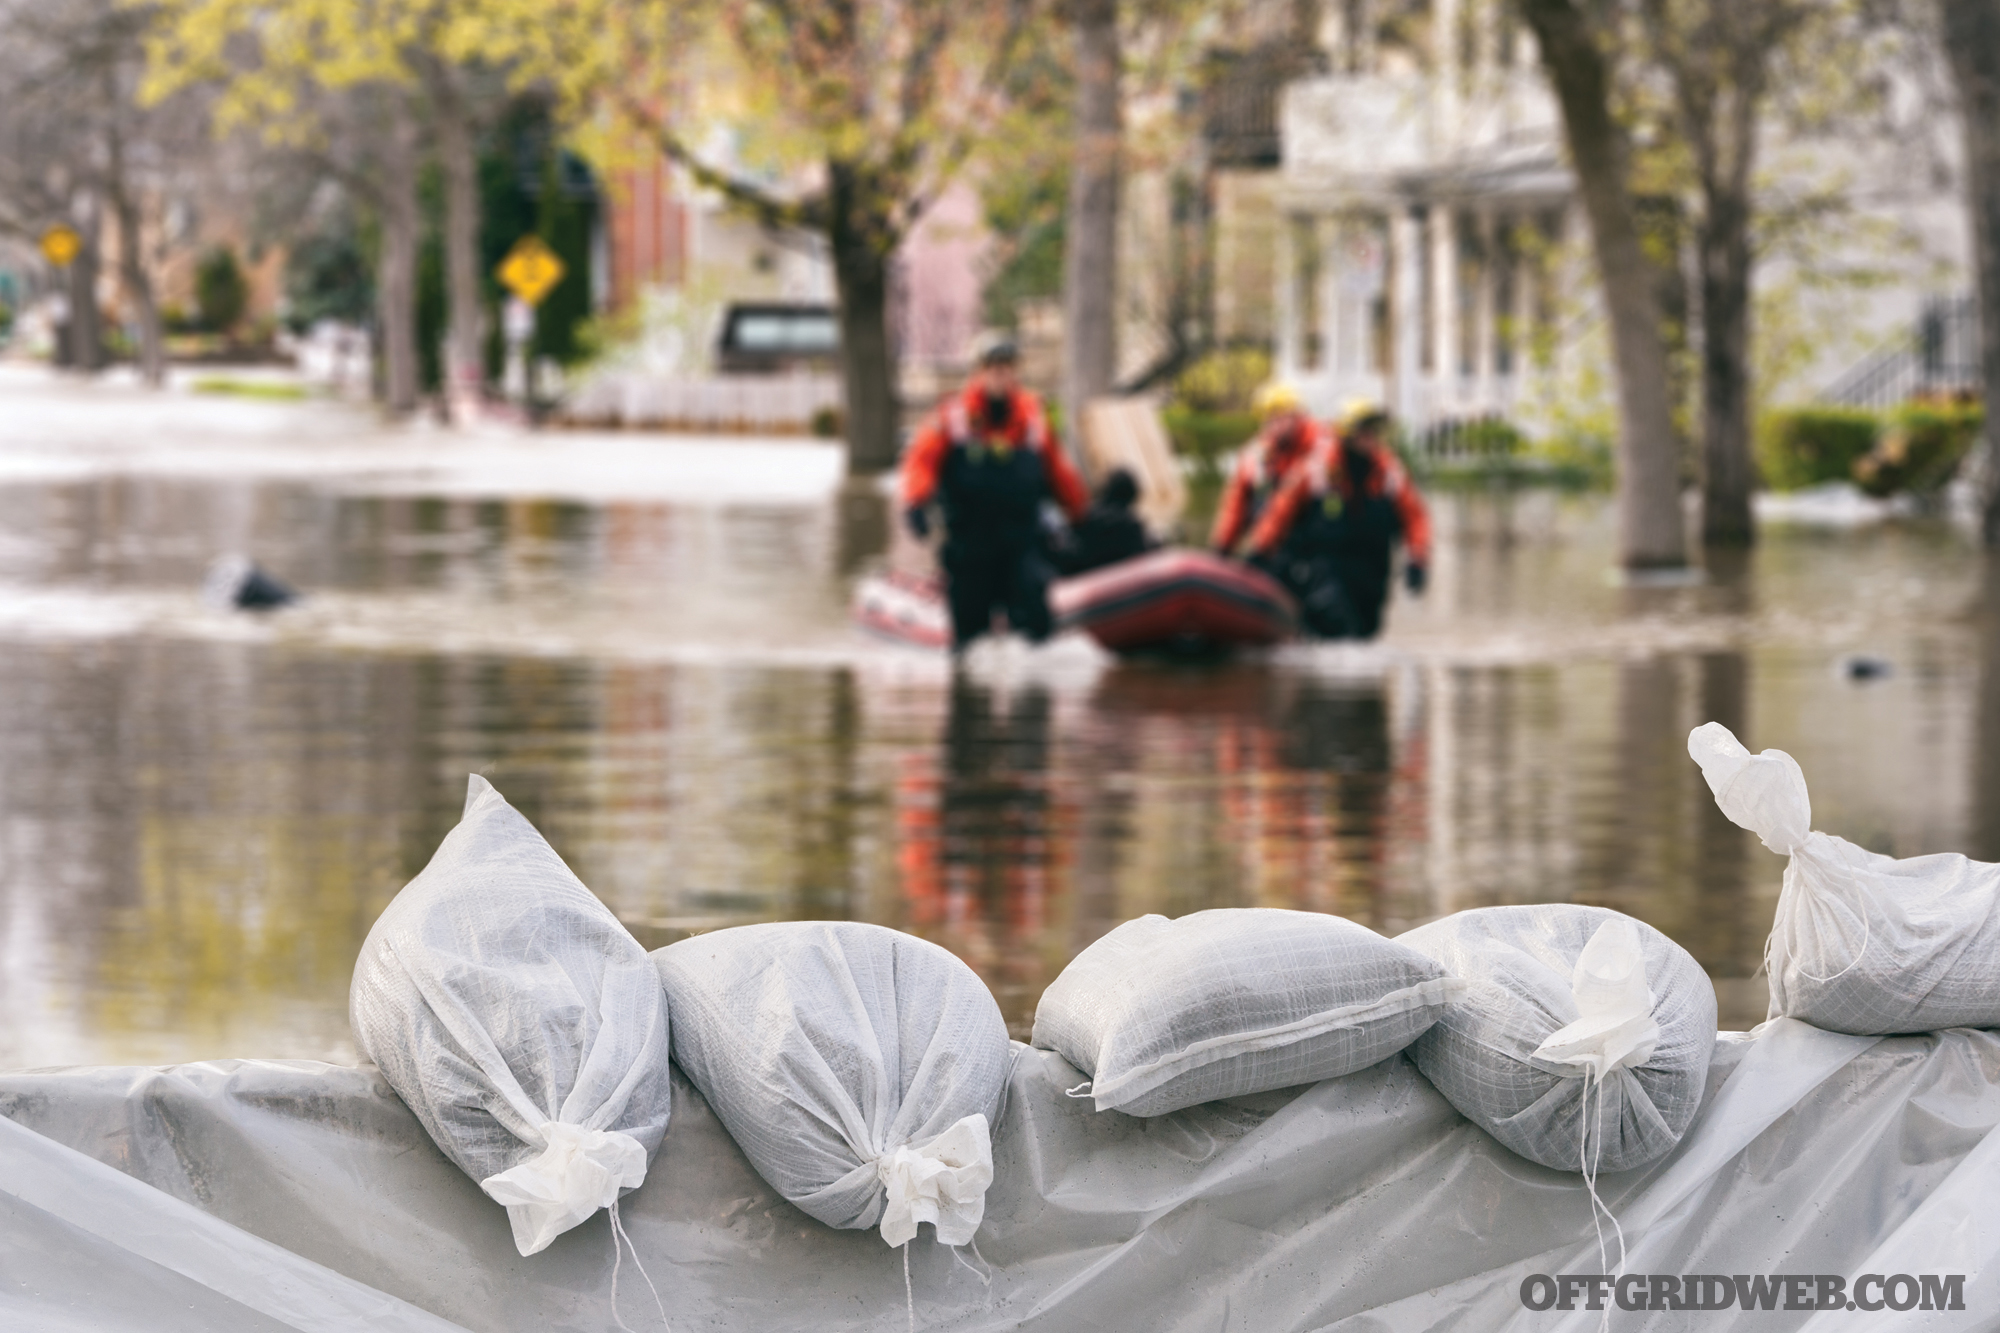
You want to be prepared for hardships, but also realize not everything is a cataclysmic event. There may be serious trouble on the horizon like a grid disruption or natural disaster, or your trouble could be something as simple as a vehicle breakdown. Contrary to many preparedness guides, not everything needs to be based on the fall of civilization. You may find you need to leave your residence based on unsafe human conditions like civil unrest or an ignored personal protection order. Fortunately, with a little forethought, you get to decide what action you’ll take. A tool people often opt for what is sometimes called a sustainment kit, emergency preparedness kit, or bug out bag. We use sustainment kits daily. Have you seen a mother with a diaper bag, a contractor with a lunch box, or a student with a backpack? These are all versions of a sustainment kit. Having a bag prepared for serious or emergent scenarios is a wise action to take before the trouble occurs.

Photo of tools like a compass and rope that could be packed into a go bag.

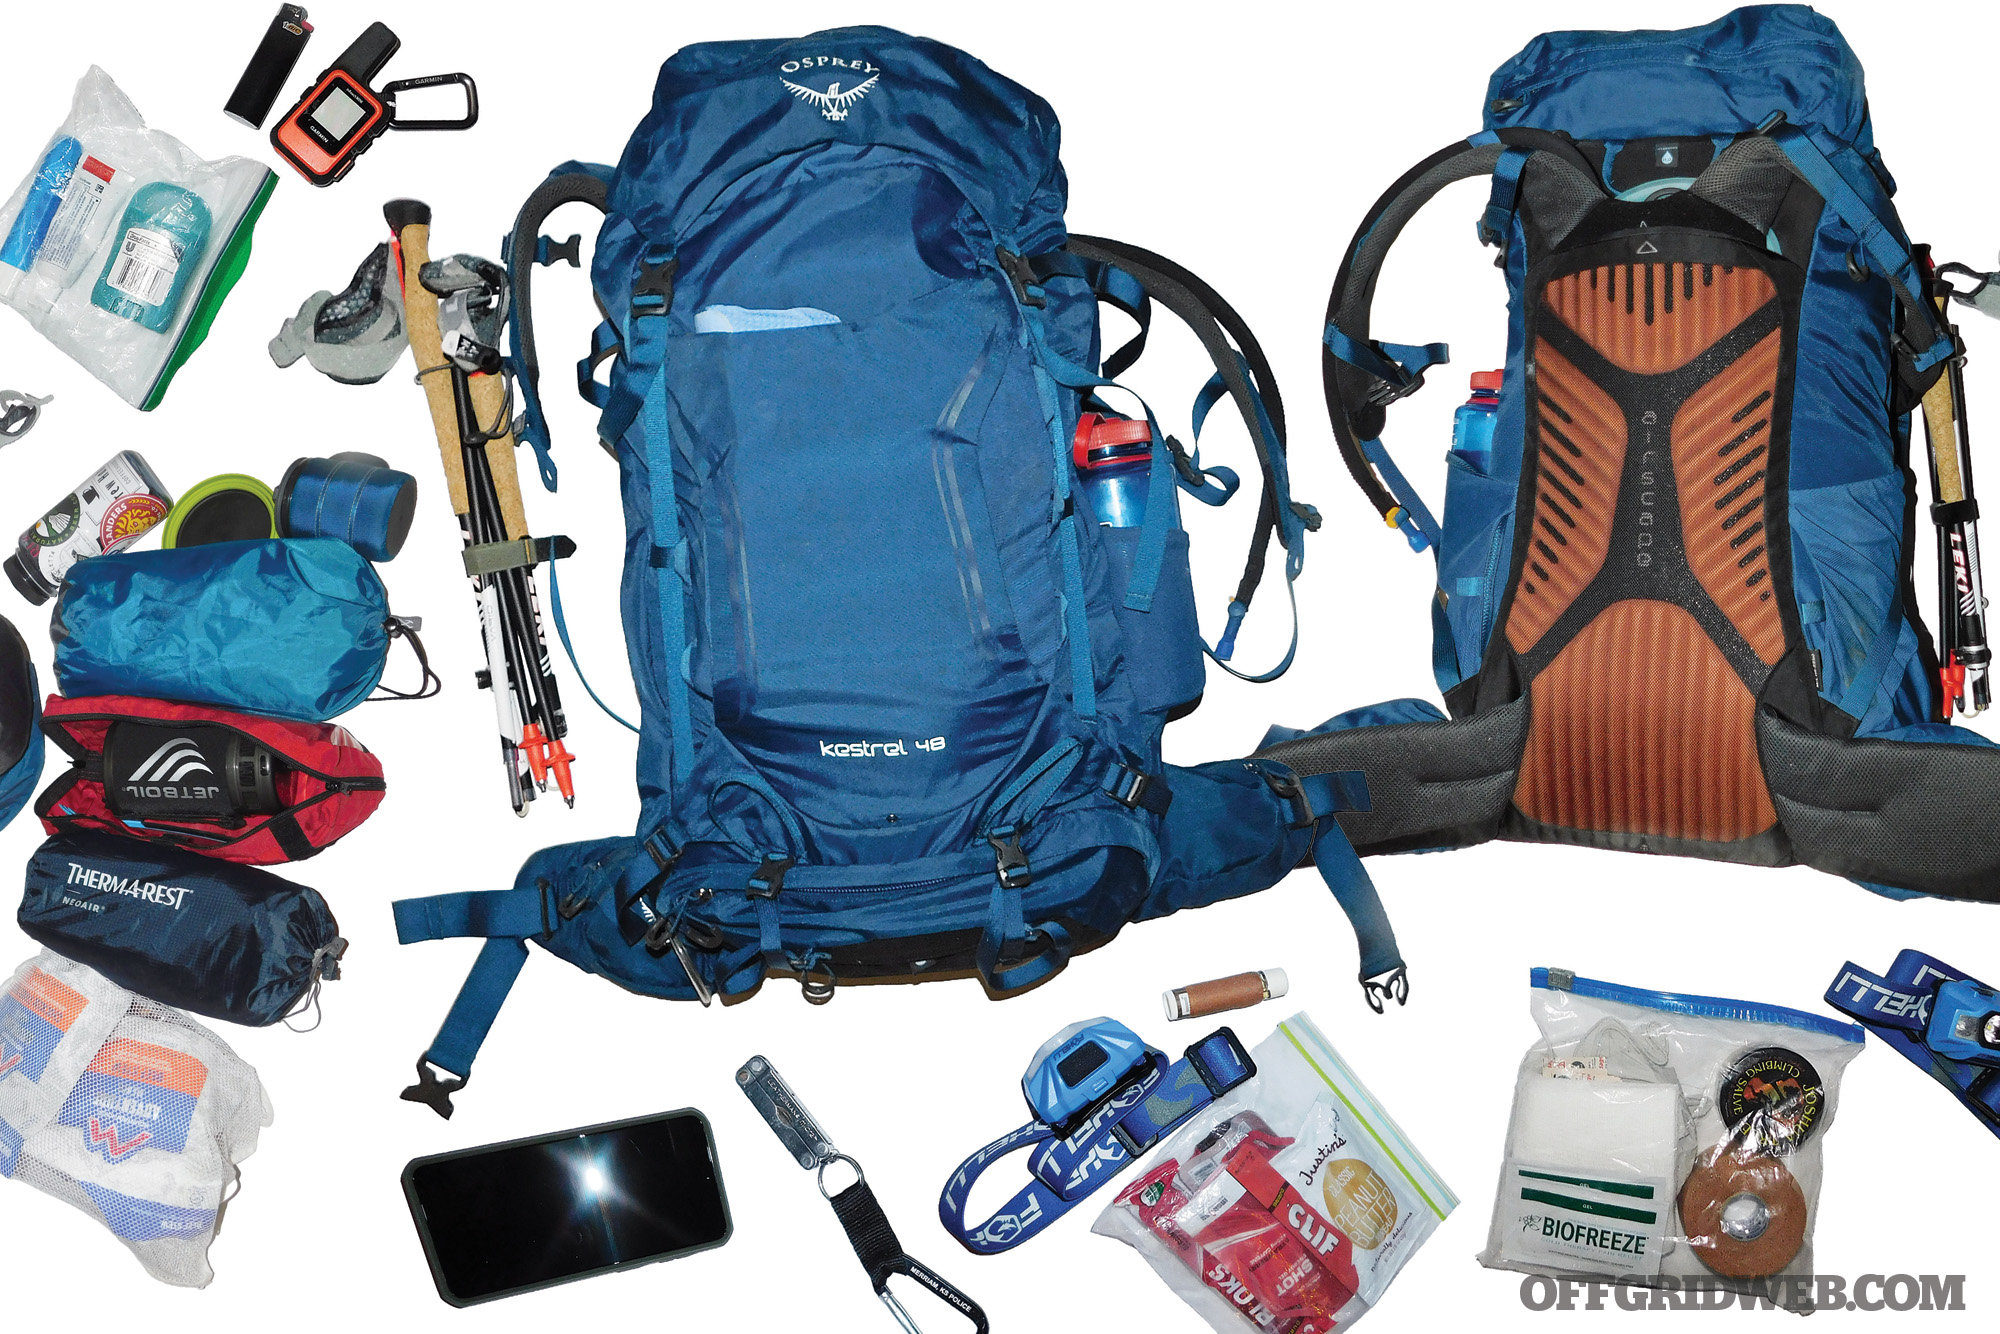
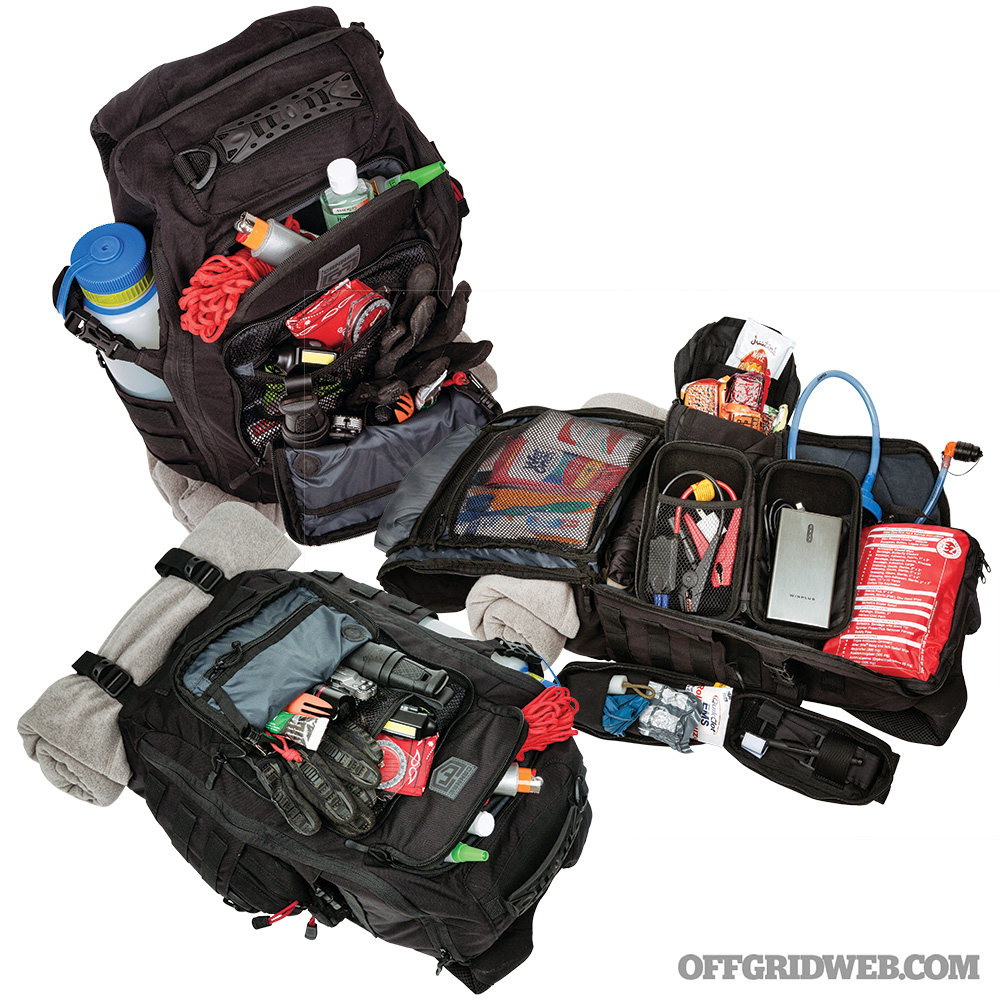
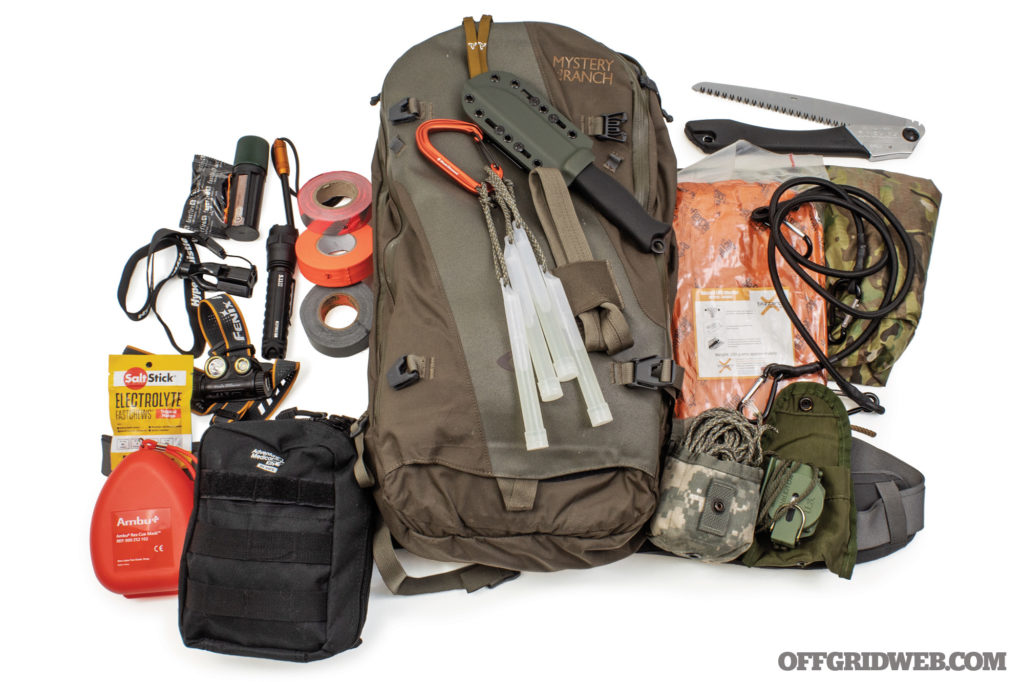
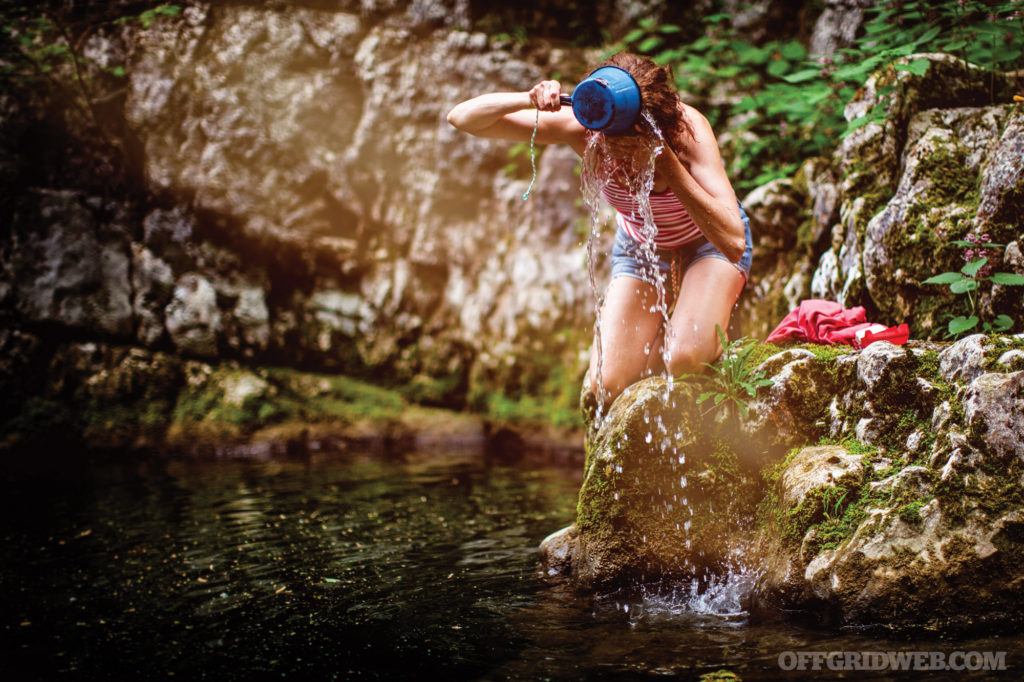
Above: Emergency preparedness kits are highly customized, but some items like cordage and navigation tools are universal.

Types of Go Bags   

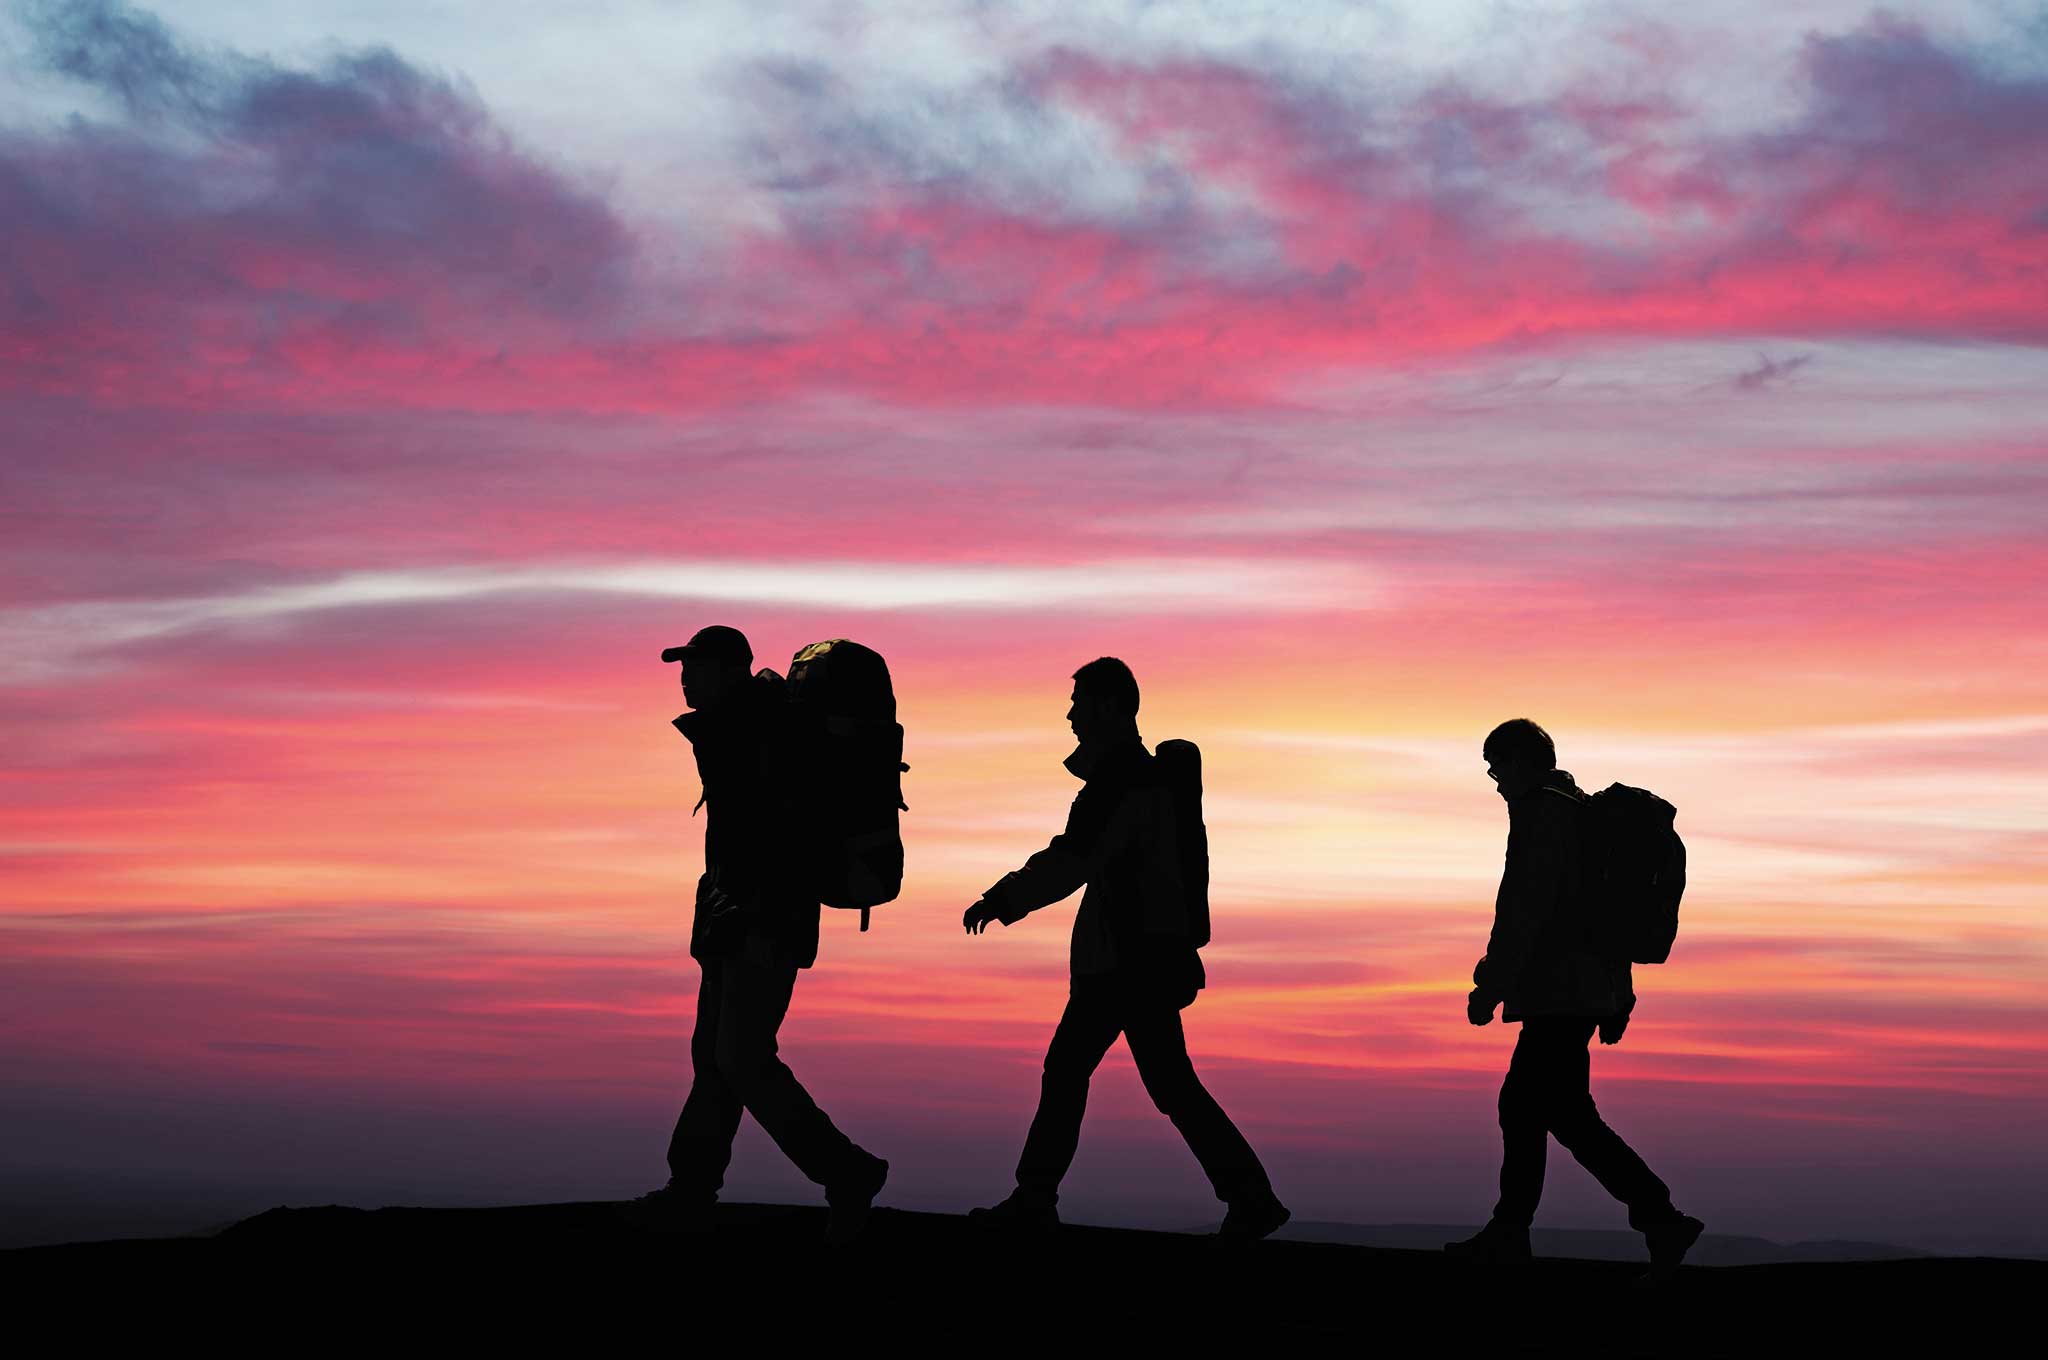
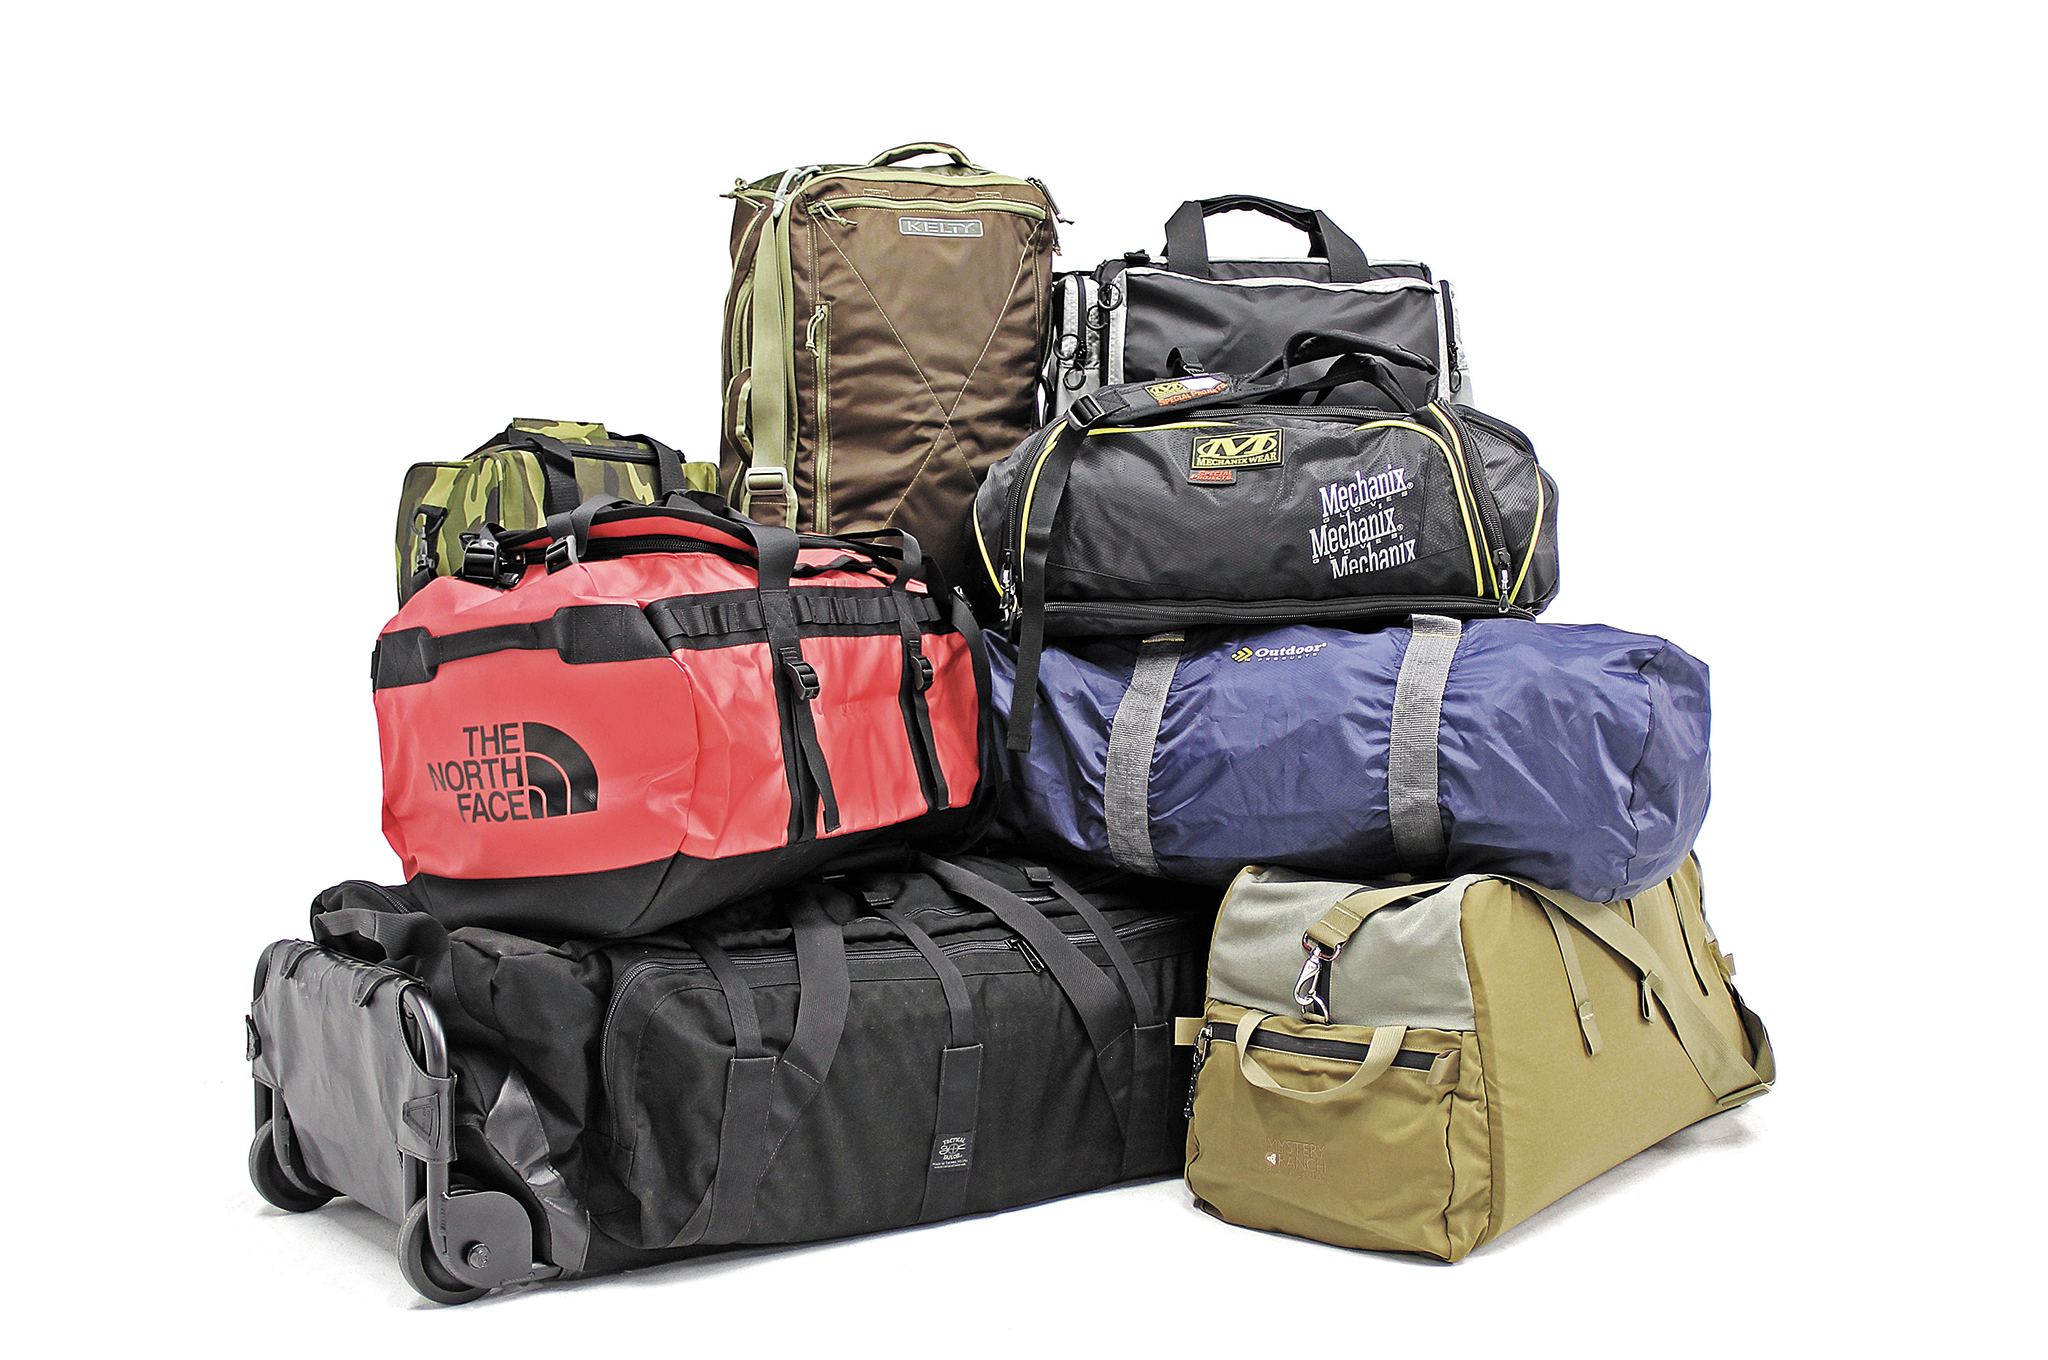
There are many names associated with this type of preparedness kit. The Bug Out Bag (BOB), Go Bag, or if you want to take the excitement and anxiety level down a few notches, a Departure Kit, are a few of them. Putting one together is most easily distilled down for one reason: there may come a time when it's no longer safe to stay at your residence and you must leave. This doesn't have to be a forever scenario, however that's how the situation is often envisioned. The BOB will spend most of its time at your residence and will likely be larger than a day pack. Depending on the scenario your BOB will have food, water, and the appropriate gear to keep you going for multiple days. 

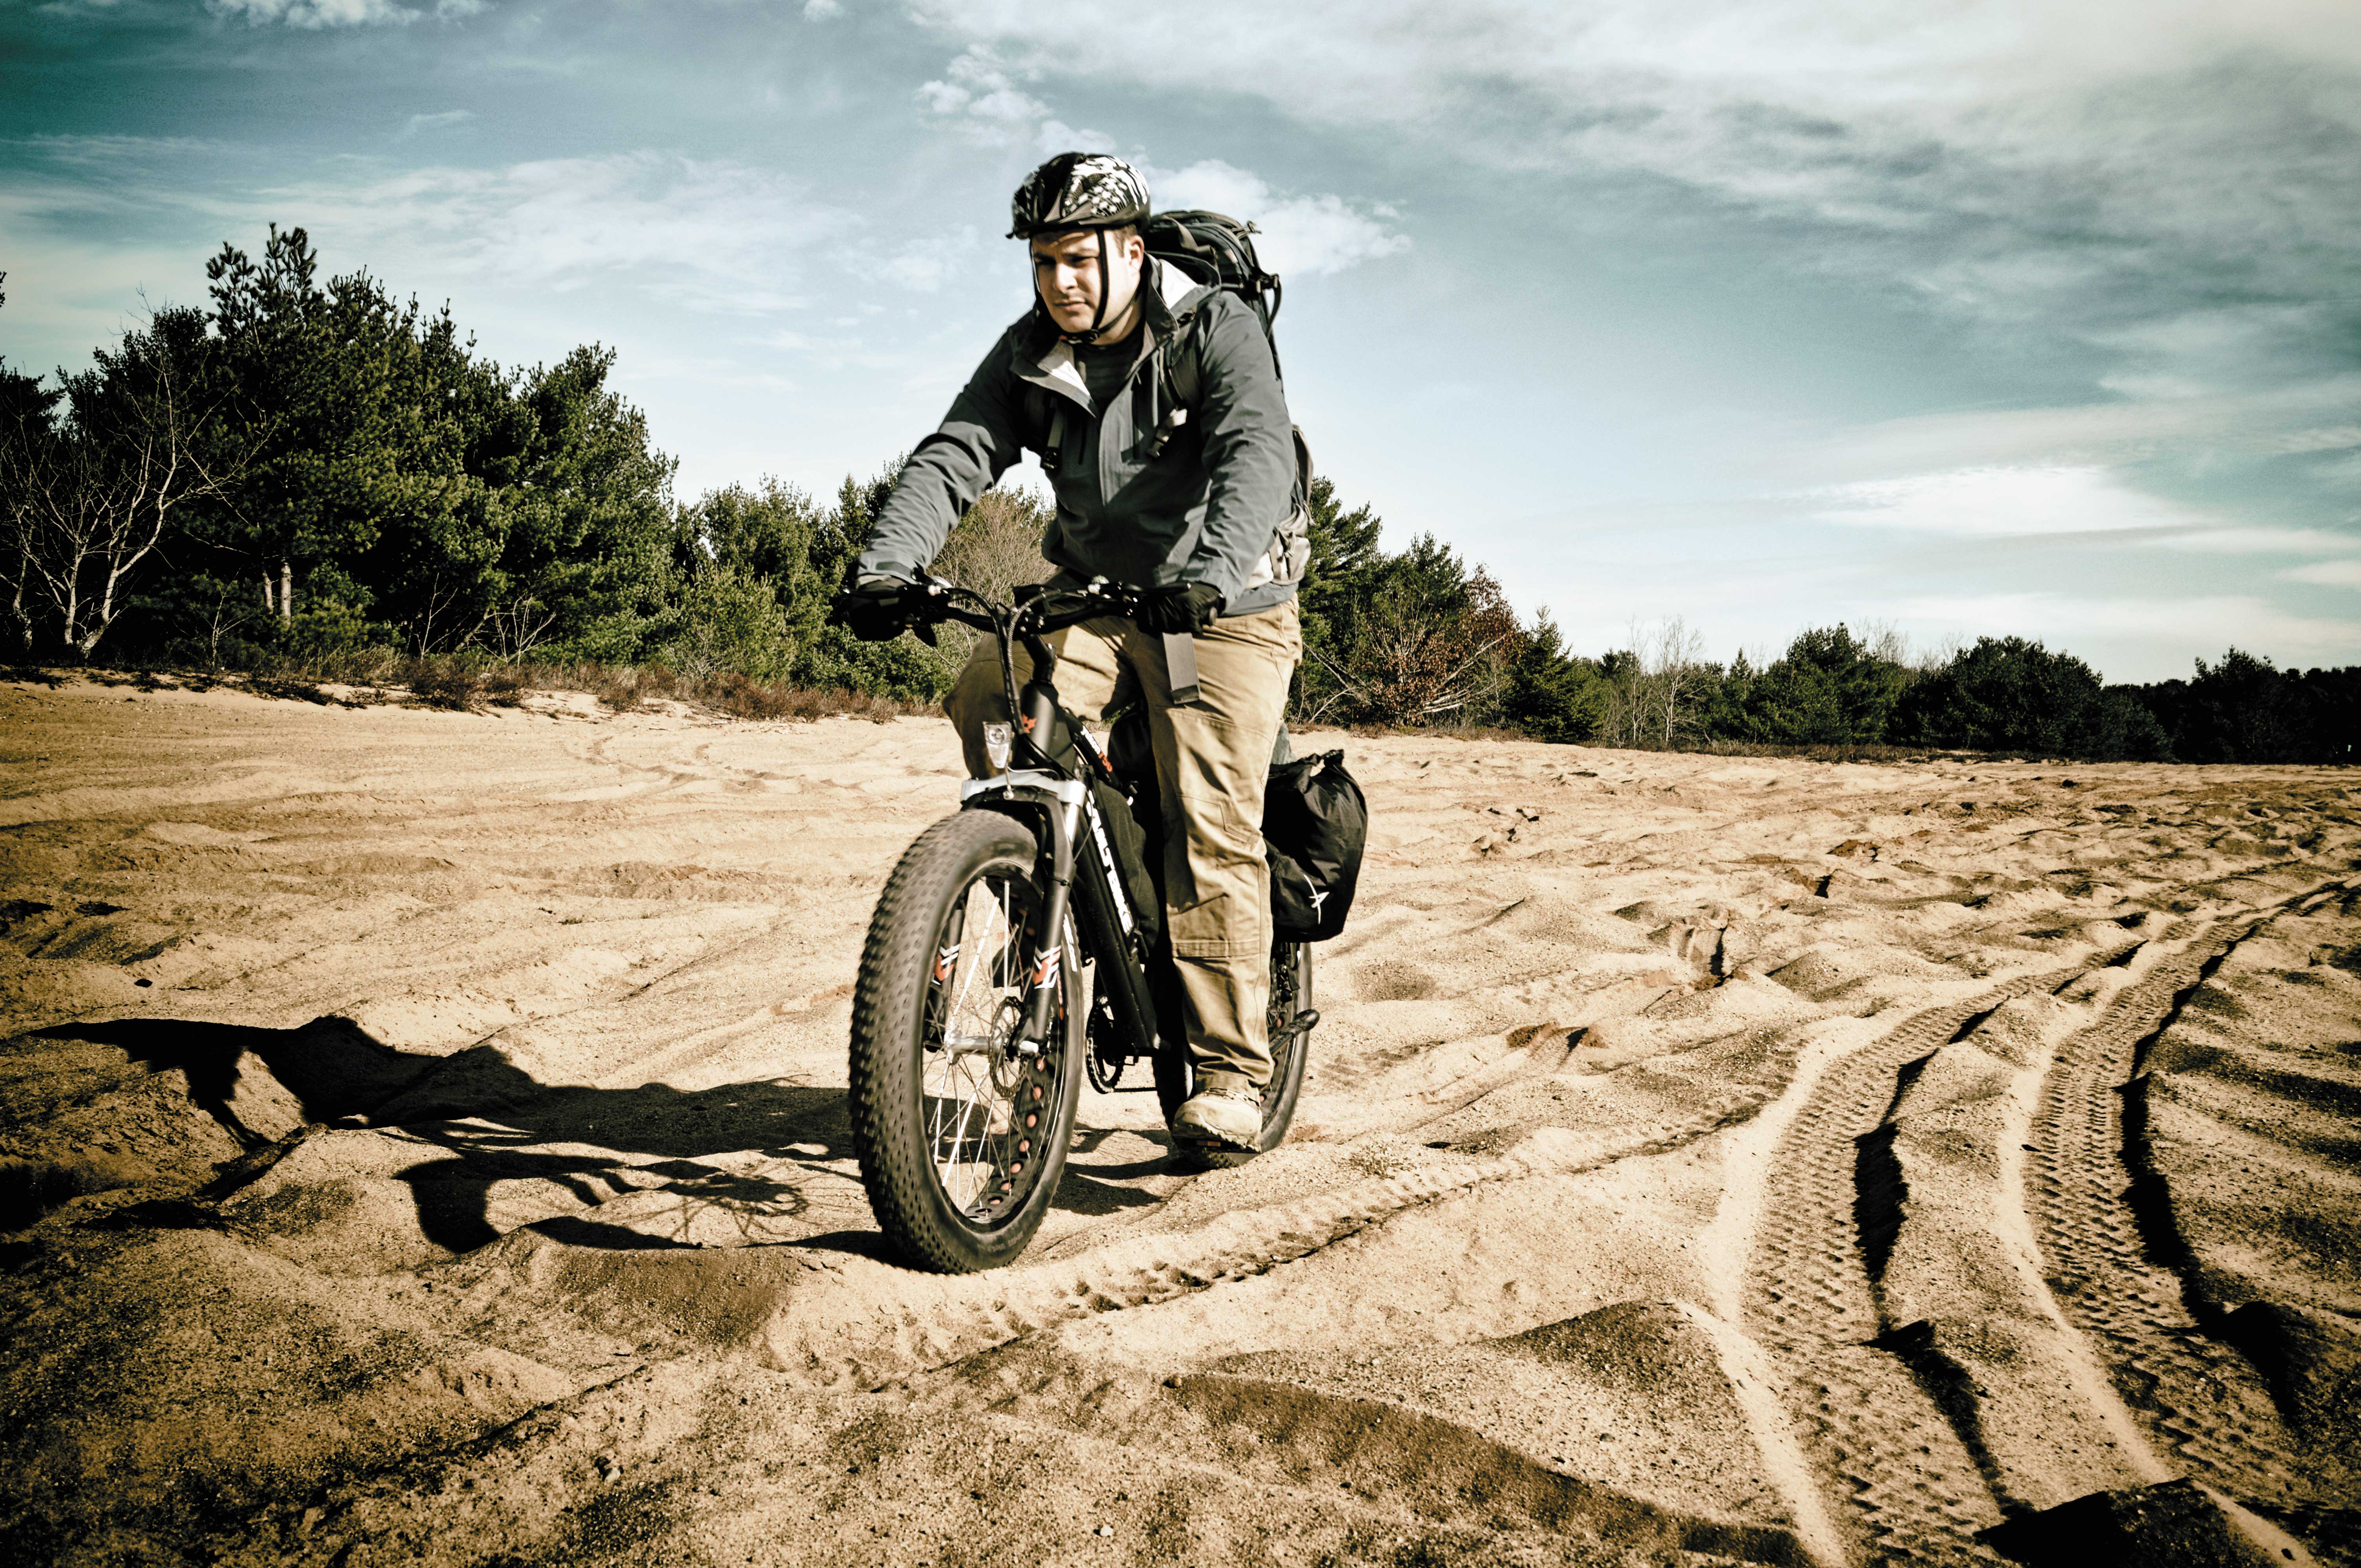
Above: A go bag is packed according the anticipated duration of needing to be gone and away from reliable resources.

Alternatively, you may have an incident that requires you to walk home from your current location with only what you have available. This is what the Get Home Bag (GHB) is for. The GHB is a short-term sustainment kit and is the more succinct of the types of bags mentioned earlier. The nature of the GHB limits the size of the bag you’ll need and the equipment that you’ll likely have in it. Having the purpose clearly defined is what makes this bag such an attractive and accepted option. In contrast to the Bug Out Bag, they're usually lightweight, don't look out of place while walking a trail or in a shopping center, and only have the essentials for about 24 hours in them. There may not be a sleeping bag or days of food. You're on your way home with the bare minimum, but not empty-handed.

Planning Your Go Bag

Having an idea of where you’re heading, who is coming with you, and if you’re driving or walking will give you a more clear vision of what you need to include in these two different kits. Asking yourself these few simple questions will significantly cut down on hauling around unnecessary weight. To do this we want to have a plan ahead of time. P.A.C.E. is a useful acronym to use as a planning tool for packing a go bag that stands for Primary, Alternate, Contingency, and Emergency. 

  • Primary: What is the main tool, gear or skill you are planning to use to solve a particular problem?
  • Alternate: Do you have a second method as a backup incase your primary method fails?
  • Contingency: If none of your tools or skills are functioning, how will you improvise or work around it?
  • Emergency: This is the last line of defense to keep you alive regardless of the situation.

Photo of a SAR 24-hour pack.

Above: Where you are planning on going, and who you are going with makes a large impact on go bag contents. More people traveling together could mean fewer items to carry.

It’s important to have a plan, and to have predetermined backup plans if and when your primary plan fails. Often times, a Go Bag is a perfect place to see P.A.C.E. tossed completely to the wind since people like to skip Primary and jump straight to Emergency. An example of this is fire starting, and deciding to rely on a bow drill/friction fire as a primary ignition source. However, friction is one of the most difficult ways for the average person to start a fire. Bow drills are nostalgic and traditional, but even Jeremiah Johnson used flint and steel. 

Who's Coming With You? Is this a solo venture or are you going to have your spouse and kids in tow? Unless you live alone, there is a high likelihood you’ll be leaving with a family or group. Considerations need to be made to accommodate emergency travel with babies, toddlers, and younger children. They’ll need formula, diapers, wipes, snacks, small toys, and extra changes of clothes. If you have kids old enough to carry a backpack to school you can have them carry essentials for themselves, even if it's only a small amount. 

U.S. Marines with Combat Logistics Battalion 26, 2nd Marine Logistics Group, eat their cold weather Meals Ready to Eat, used to sustain an individual during operations occurring under arctic conditions, at the U.S. Marine Corps Mountain Warfare Training Center (MWTC) Bridgeport, Calif., Jan. 24, 2015. MWTC trains Marines across the warfighting functions for operations in mountainous, high altitude, and cold weather environments in order to enhance a unit's ability to shoot, move, communicate, sustain, and survive in mountainous regions of the world. (U.S. Marine Corps photo by Sgt. Anthony L. Ortiz/Released)

Above: What skills do you and your companions have that could affect the kind of gear you need pack?

Where Are You? Is the terrain flat like Chicago or is it full of hills like San Francisco? Are you in an urban or rural area? What is the average temperature for the next 30 days? Temperature, weather conditions, social surroundings, and the topography of your area are essential to consider for planning what to pack and what to wear.

Skills Drive Gear

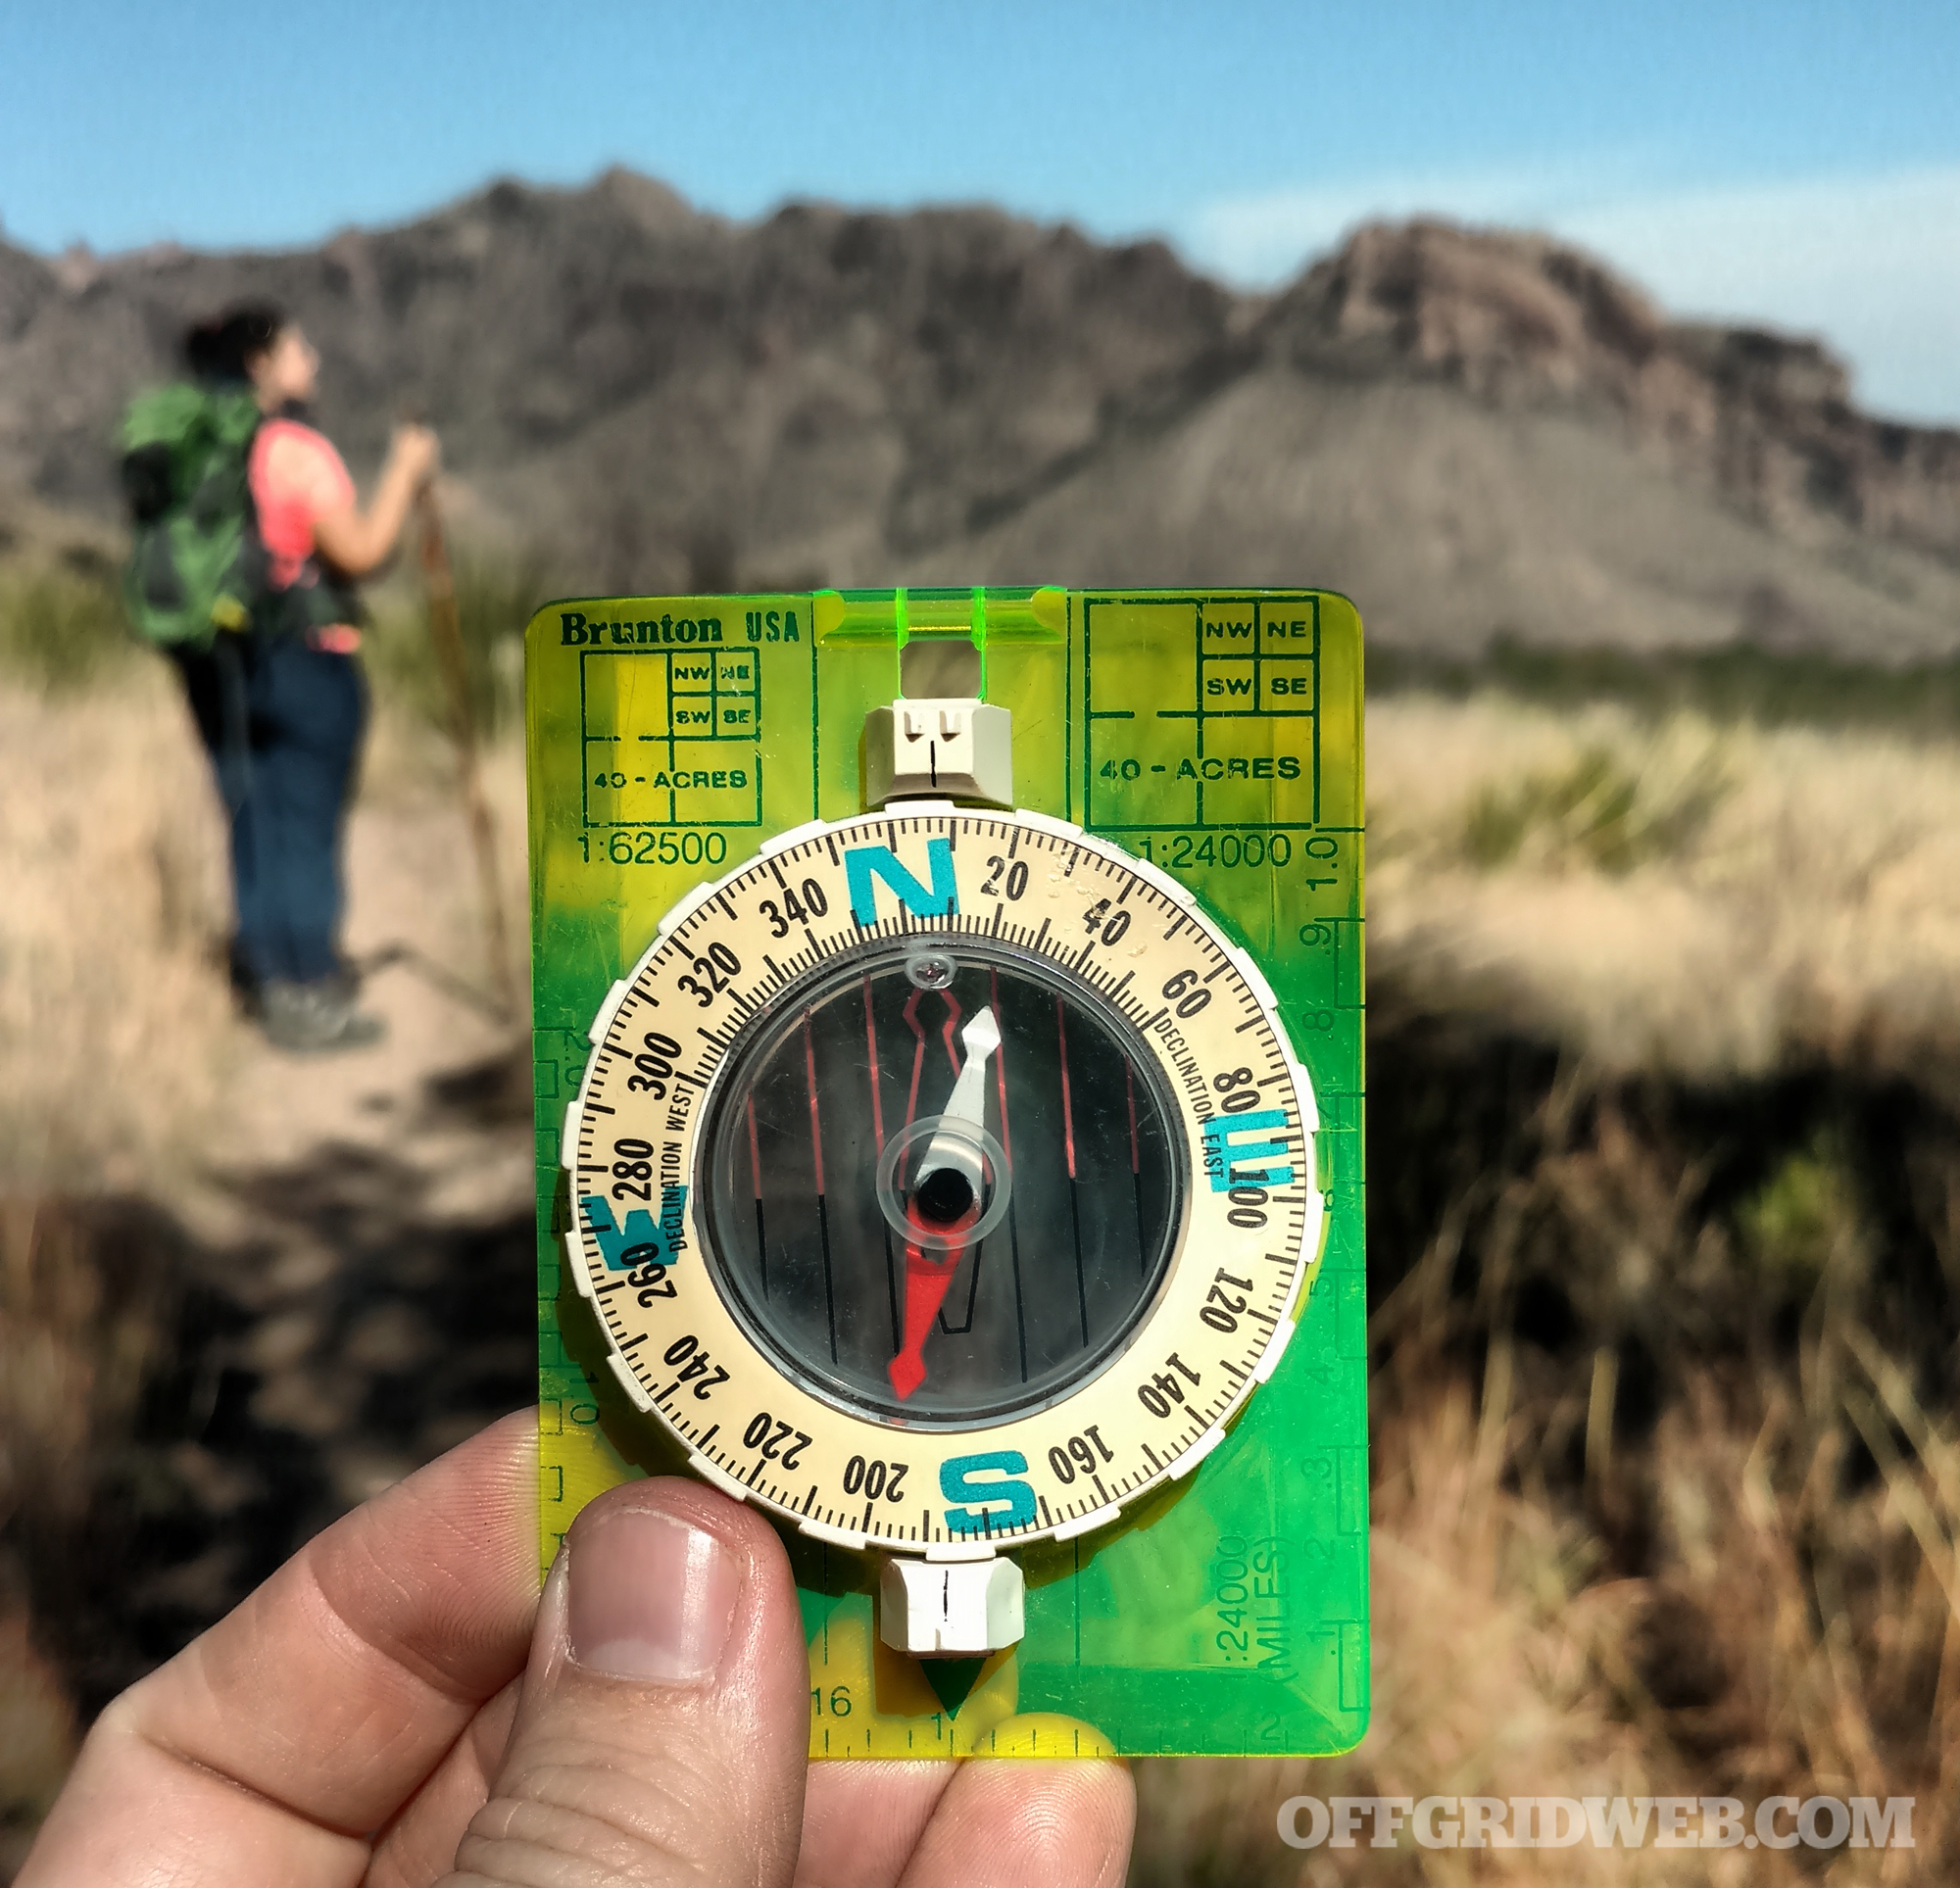
Before we dive into what to equip your bags with, it’s important to understand what skills you possess. It is vital that you’re honest with yourself here. We need to know our capabilities, but more importantly we need to be aware of our limitations. Only bring items and tools with you that you're proficient in using. Not only will you cut down on unnecessary weight this way, but you'll also prevent possible injuries or mishaps. For example, if you’ve never learned how to use a compass other than to find a cardinal direction, betting on “figuring it out” is a recipe for disaster when you need to be confidently covering ground.

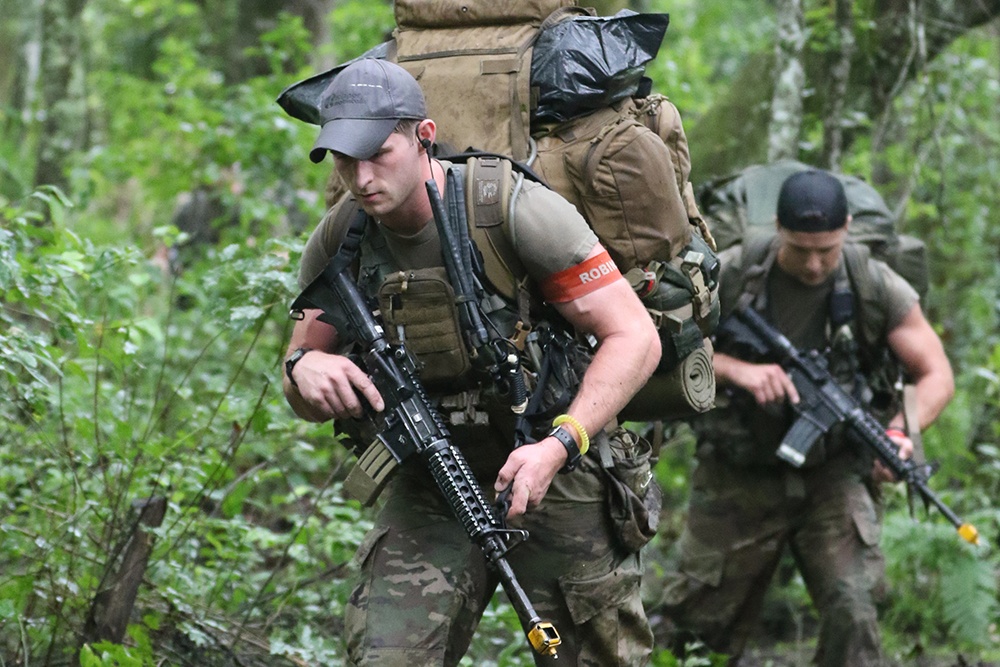
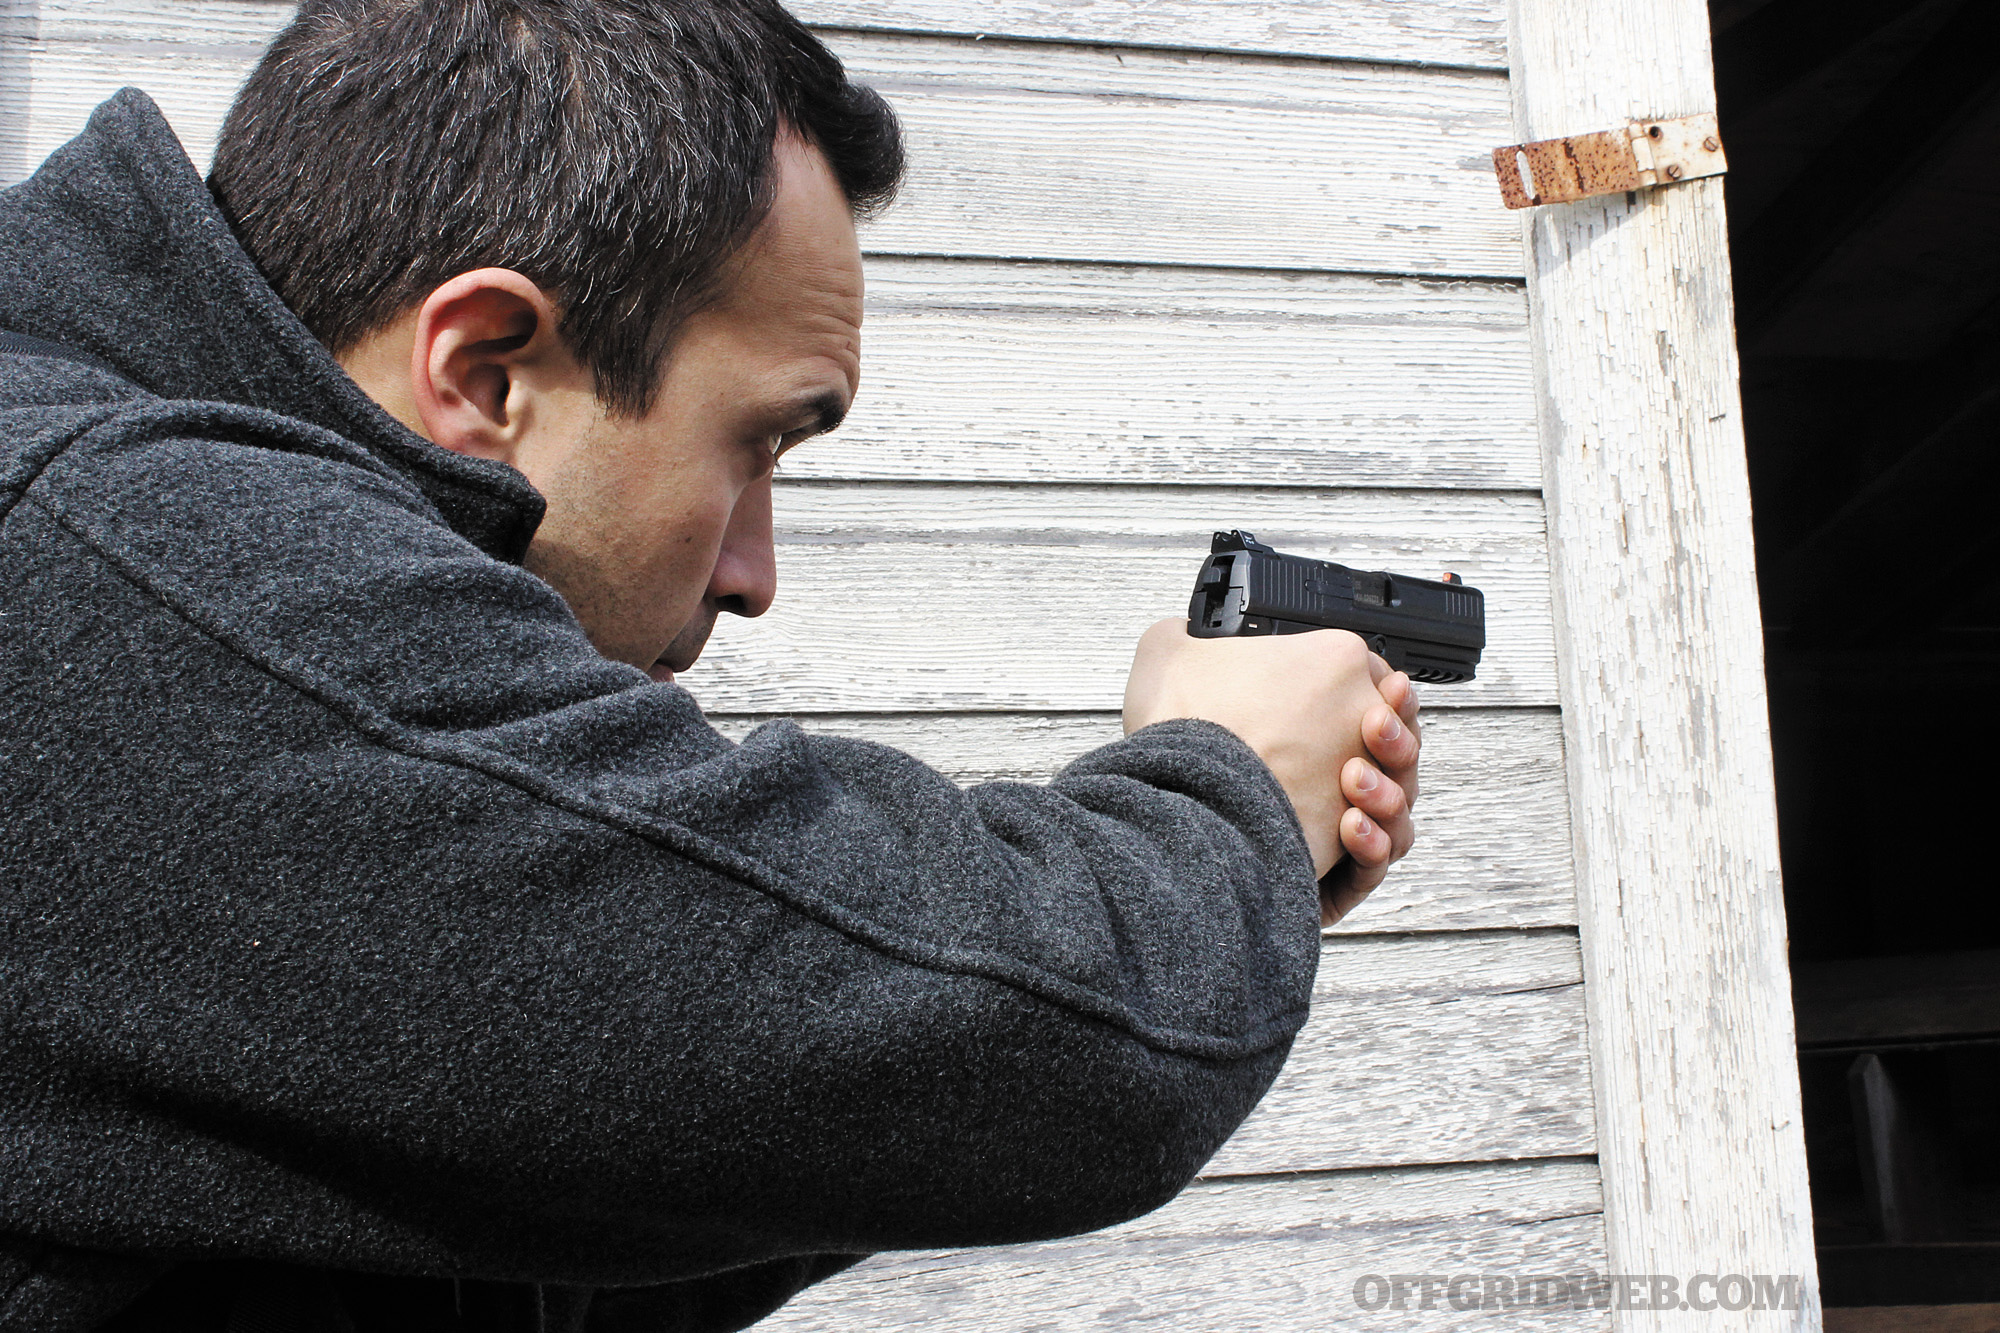
Above: If you have no firearms training, or haven't developed knife skills, don't expect to suddenly transform into John Wick during an emergency scenario. Seek training before relying on tools alone.

Honestly assessing your skillsets gives you the opportunity to improve your weaknesses before an emergency situation. For example, if land navigation is something you've never trained in, there are great classes out there to take. Once such class, offered by the Nature Reliance School with Tracey Tremble and Craig Caudill is top notch and will teach you a ton of useful navigation skills. No matter what skills need improving, there is a high probability of being able to find a reputable instructor that can help. 

What's In The Bag

Now for the fun part of these kits: the gear. Finding new survival gadgets and cool-guy gear is exciting, and gives you a chance to test them out before they are needed in a real world scenario. Before you feverishly hit ‘submit order’ on hand-held radios, compasses, and ferro rods ask yourself WIN, another useful planning acronym for “what’s important now?” There are four pillars to survival and they are food, water, shelter, and fire. Anything you add to your kit in addition to those should be based on the results of your initial planning. 

  • Water: “But you can go three days without water.” That may be true when you're sedentary. What is not accounted for in that statement is that you’ll have to be physically active in most of these situations. It is also life threatening to eat if you're dehydrated. If you're not able to urinate every 90 minutes or so, it's time to get water in you. Staying hydrated helps you think more clearly, keeps your muscles from cramping, fights fatigue, and reduces irritability and dizziness. Photo of contents of a bug out bag that pertain to drinking water. Above: There are many ways to purify water for drinking, including filters, chemicals, and old fashioned boiling.

Sanitation and hygiene are both important when collecting water. No matter if you’re getting it from a pond, lake, stream, or the sky itself, sanitizing the water is important. Even when water looks clean and clear there can be dangerous bacteria, parasites, or viruses that can lead to waterborne diseases. Steven Rinella from The Meat Eater once recounted one of his experiences with beaver fever, also known as Giardiasis, a parasite commonly found in contaminated water. Symptoms of Giardiasis are excessive gas, stomach cramps, dehydration, and nausea. Most of all was the symptom Steve described as “uncontrollable pants messing.” We avoid severe diarrhea at the best of times. Be especially careful when there's limited toilet paper around. 

Studio photo of Sawyer's One Gallon Gravity Water Filtration System.

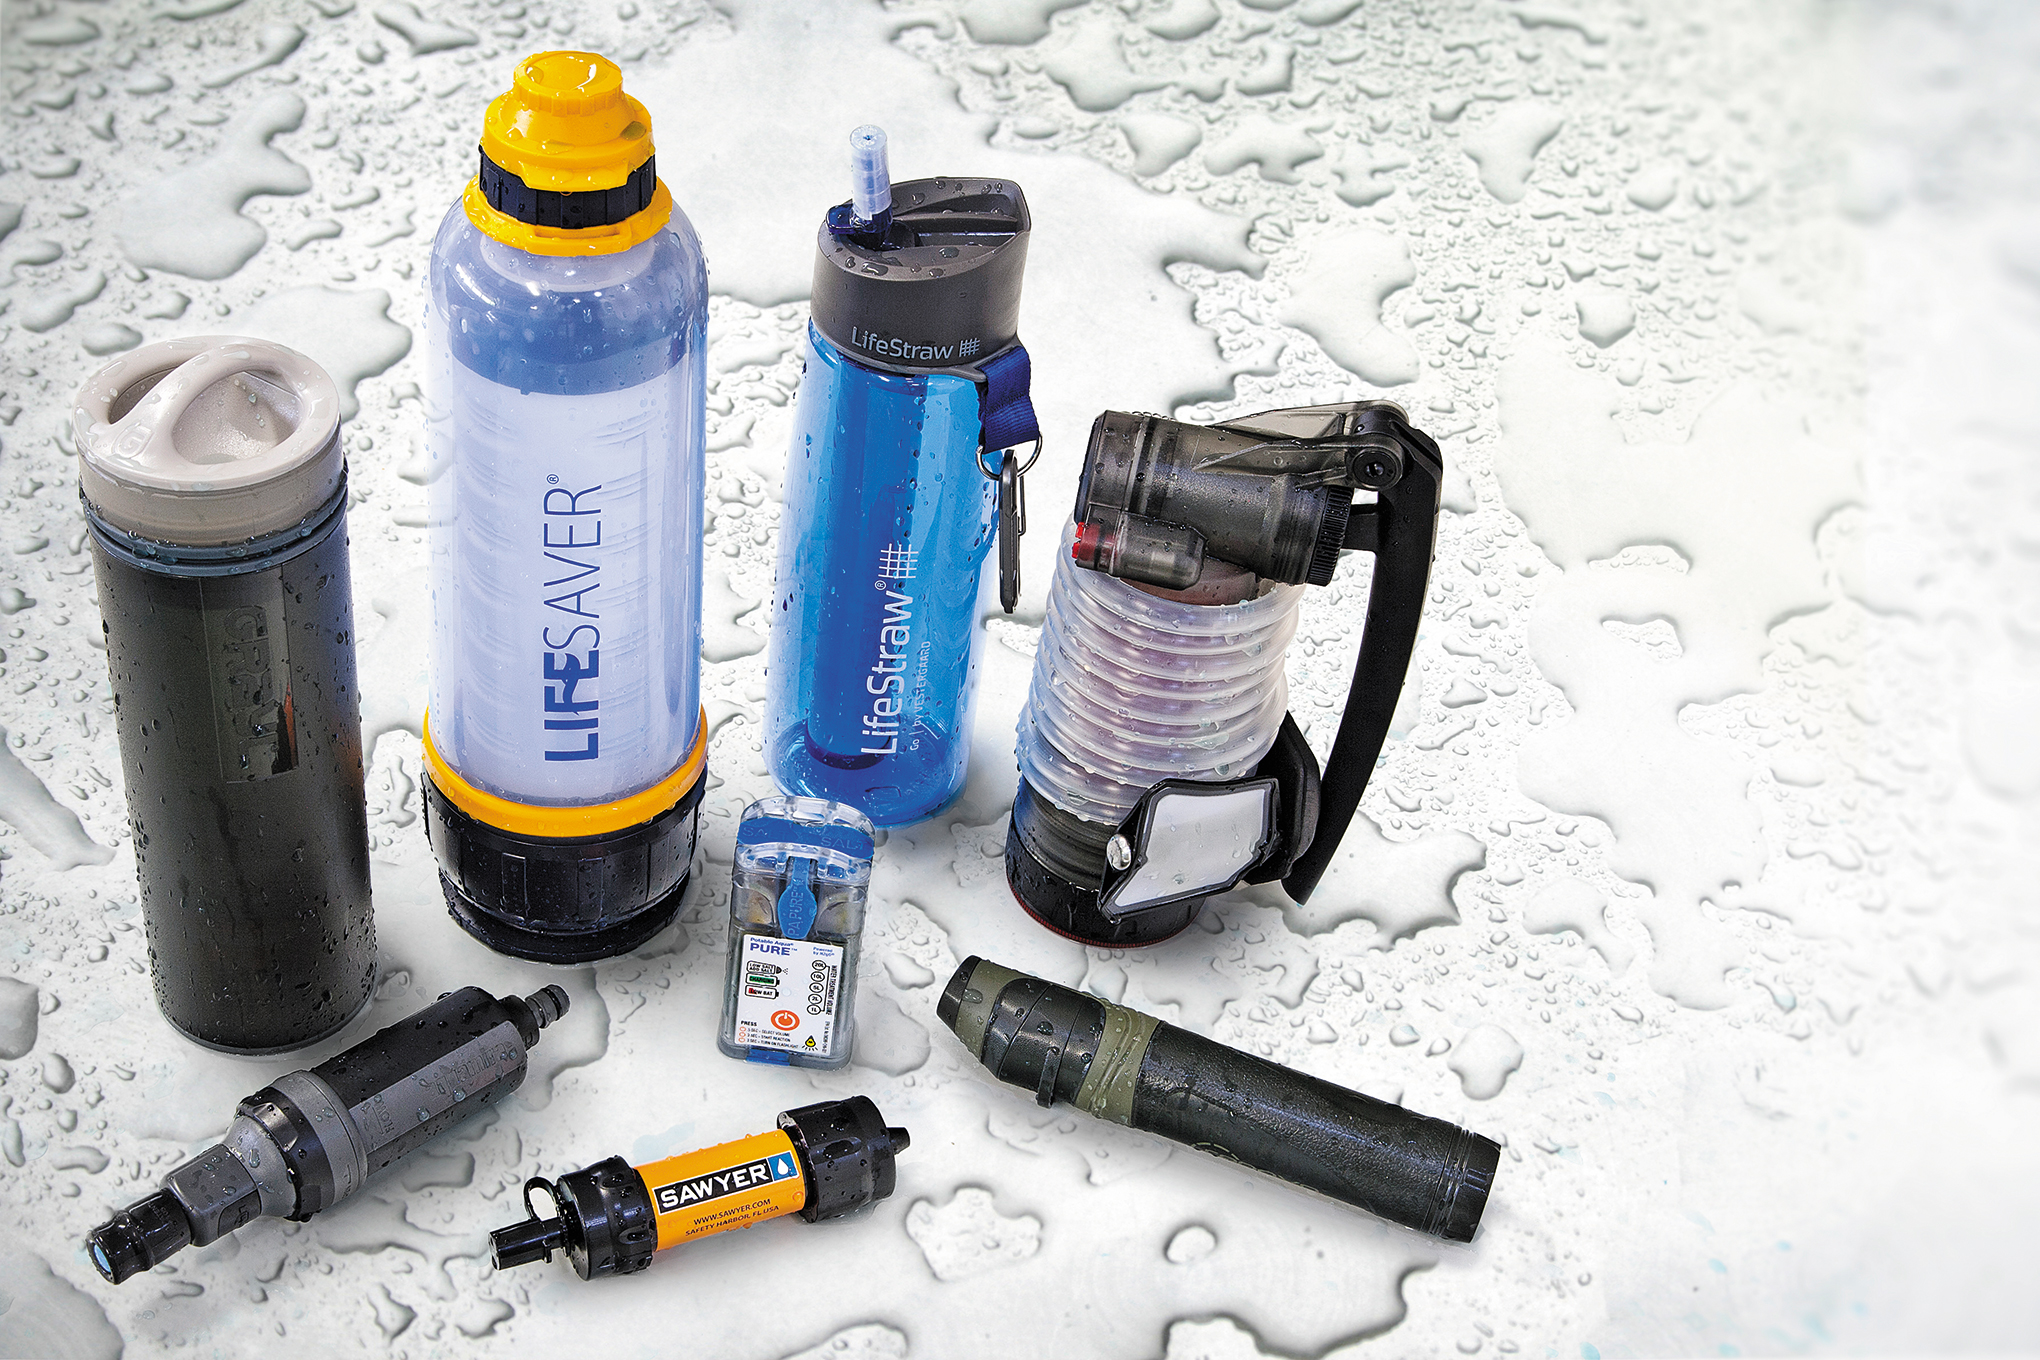
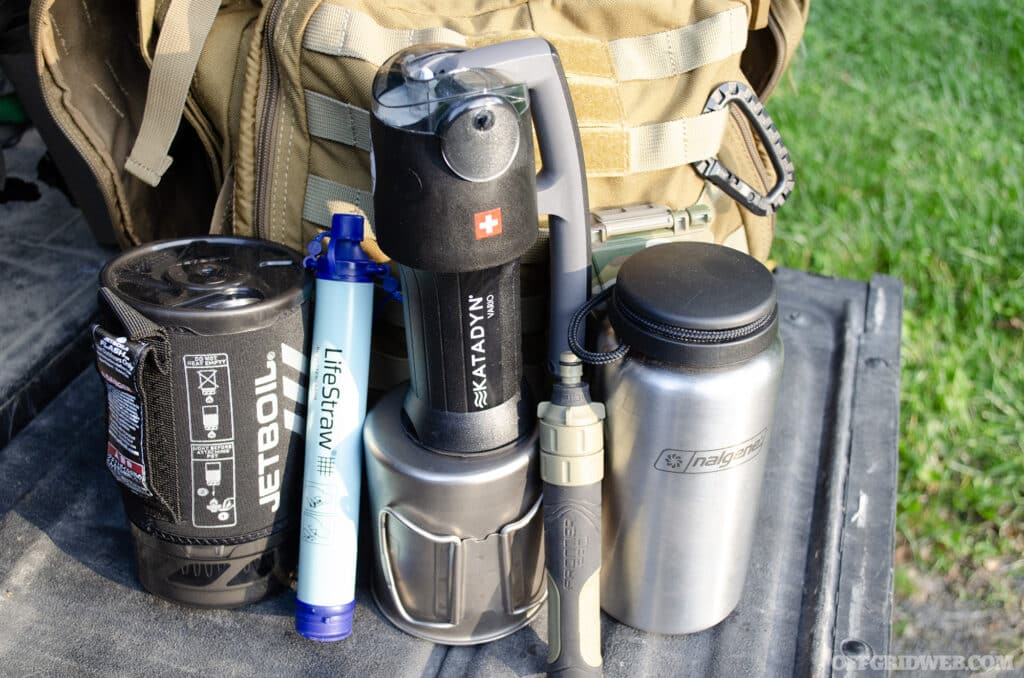
Above: Filter systems are a convenient way to obtain potable water from questionable sources.

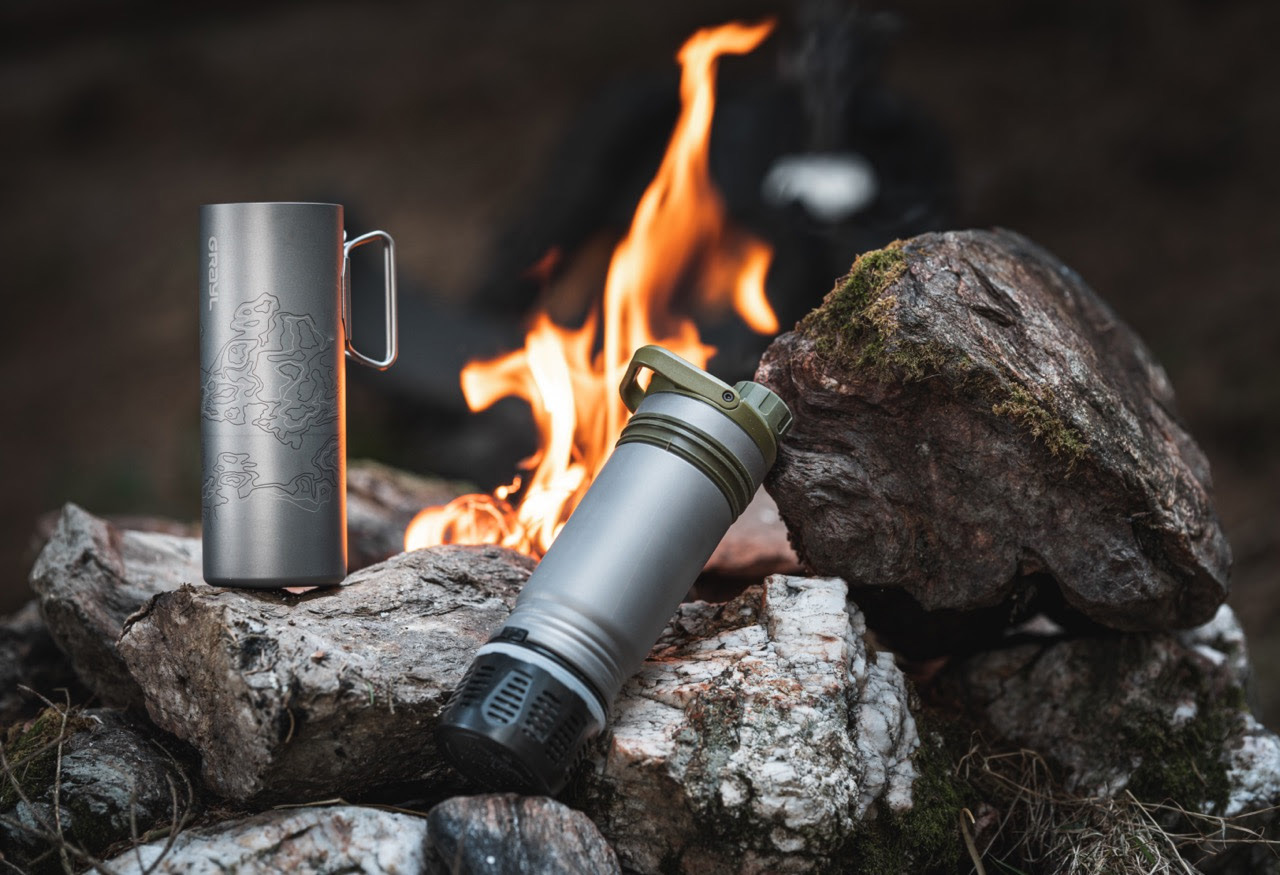
Filtration systems are amazing today. My bug out bag has a Sawyer hand pump filter that will clean 500 gallons before changing out the filters, but could be a bit too large for a get home bag. For smaller packs, a better option may be a LifeStraw. They’re compact, lightweight, and some models will screw to a water or pop bottle. Add a sillcock key to each of your bags if it applies to your area. These are used on the outside of public buildings, where there is a water spigot, but there's no hand valve to turn it on. If you use one of these, make sure you let the water run for a while. Water typically sits in those pipes for quite some time without circulation and you may end up filling up your water bottle with dirty, stinky water if you're not careful. Iodine tablets work well, but they usually need about 30 mins to take effect, the taste is terrible, and prolonged use can be tough on your stomach. Read the instructions on the bottle and give the tablets a try at home before relying on them in the field. The taste of purification tablets may motivate you to get a filter system of some type.

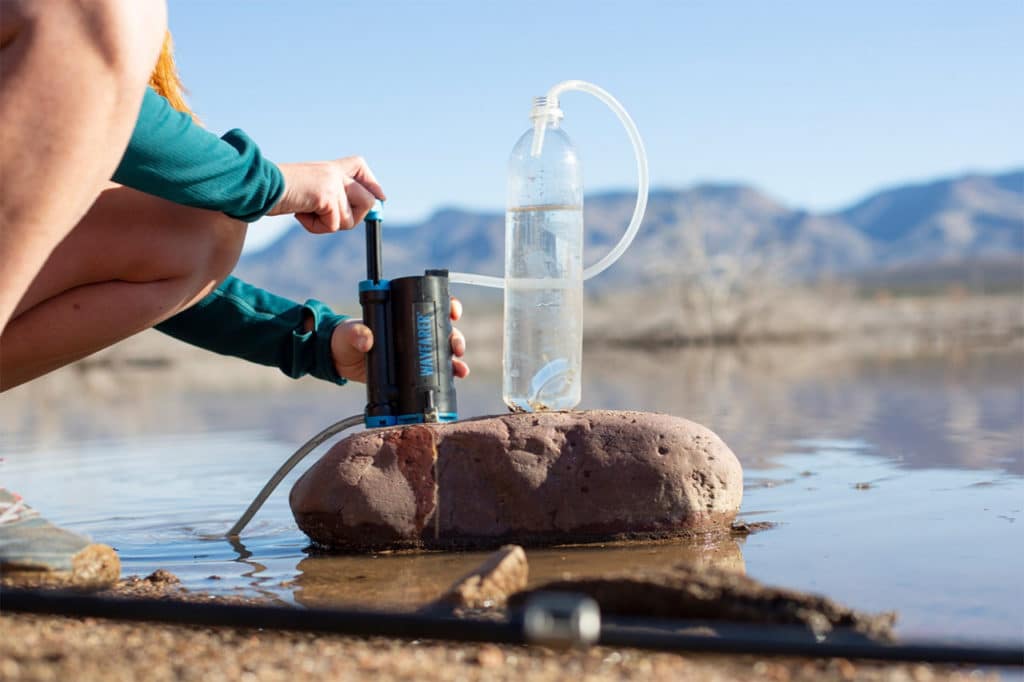
Above: When purifying water, try to choose a water source that appears to be the least contaminated.

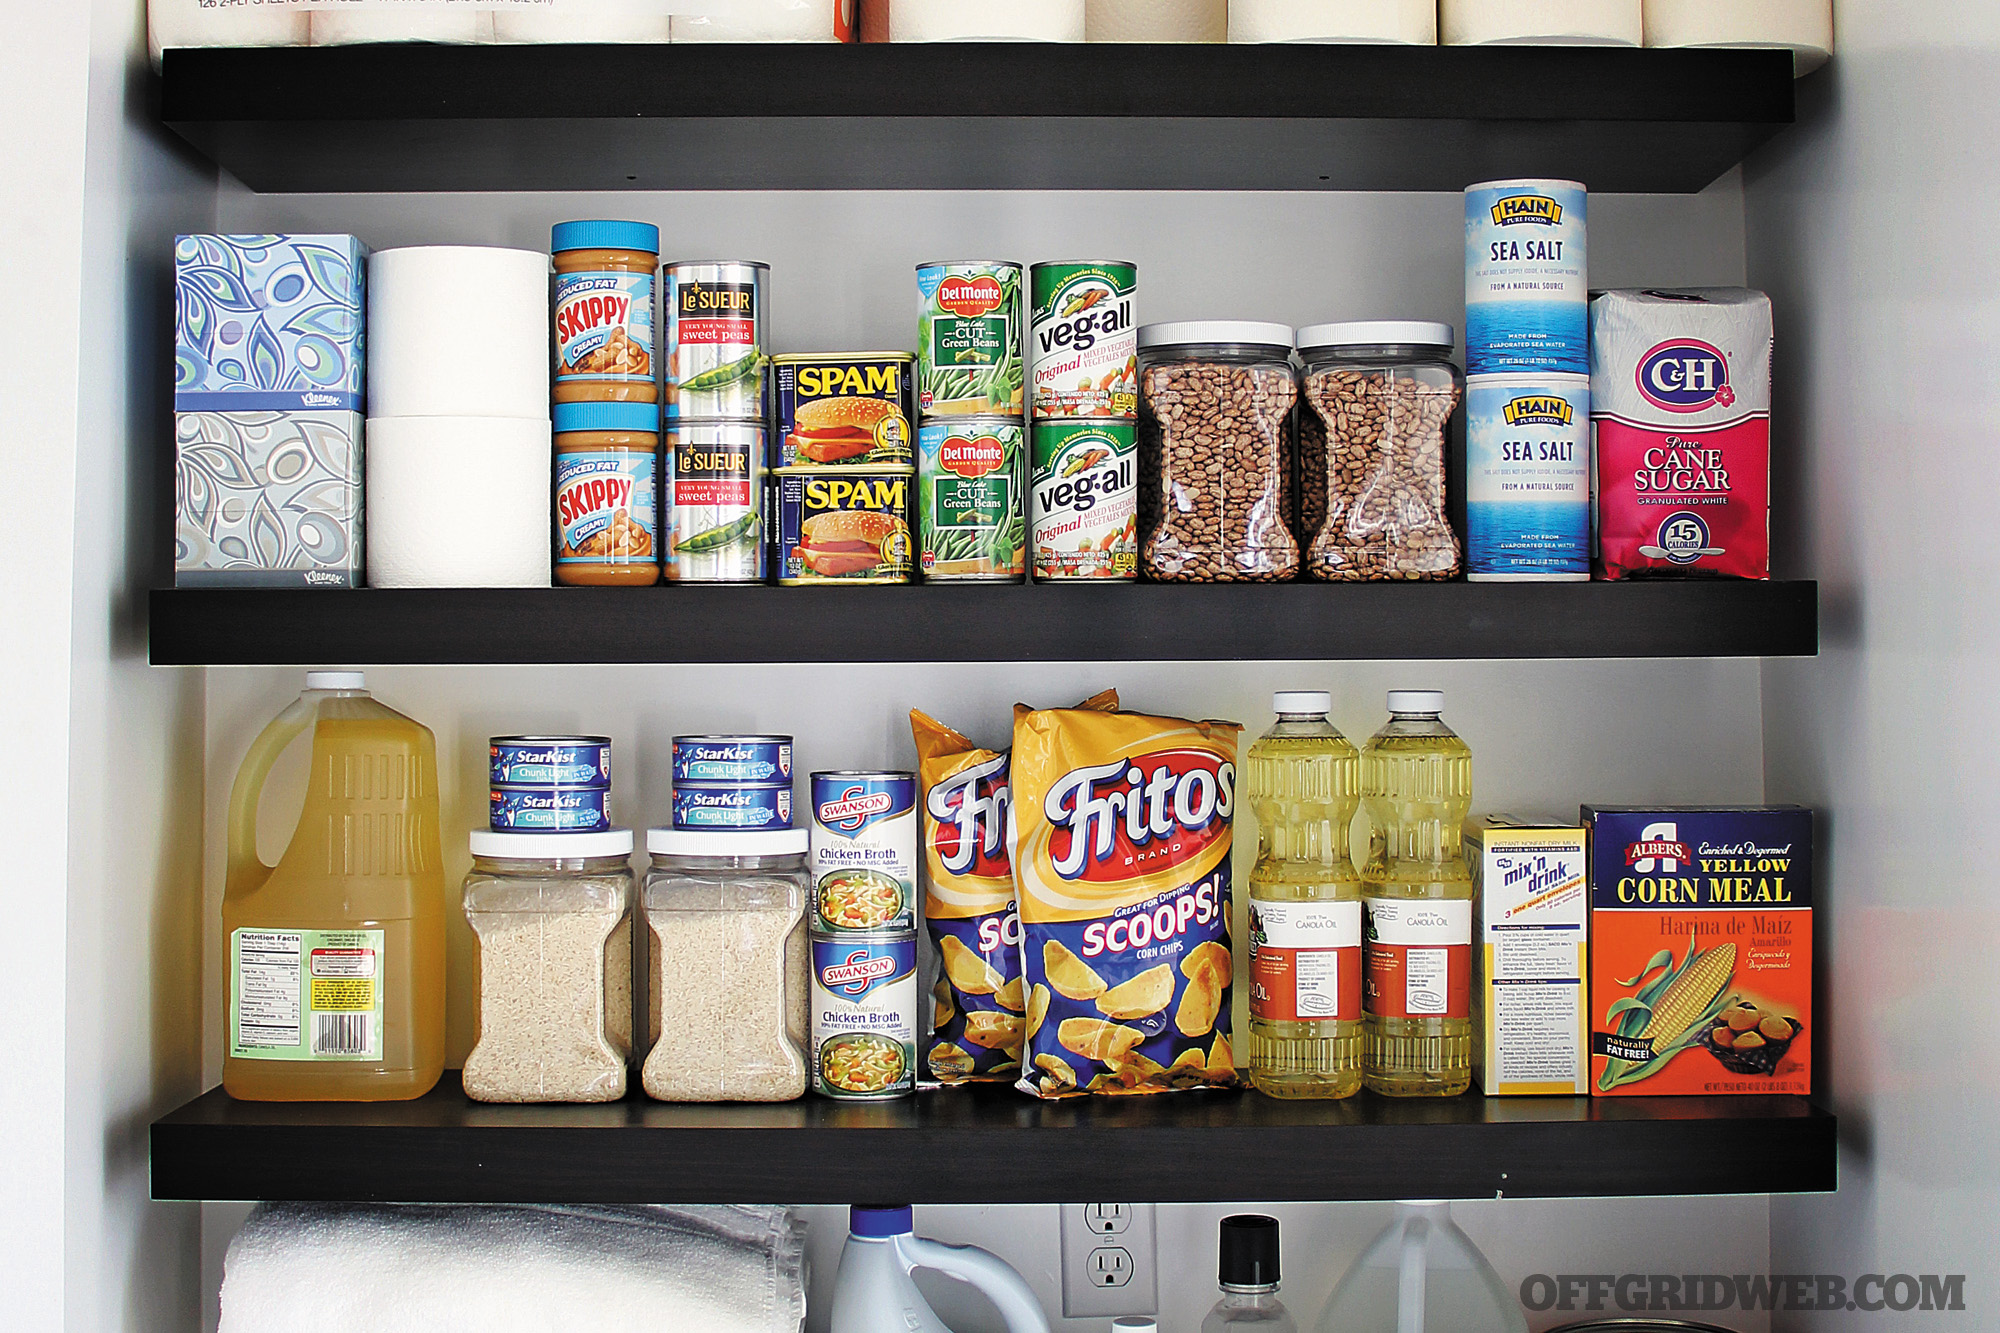
  •  Food: Food is important for nutrients, carbohydrates, proteins and fats. You can go longer without food than you can go without water, however, there are some important things to keep in mind. Emotional control is the first thing to go when we're hungry. That's why those Snickers commercials are funny. We can relate to the feeling. This can be dangerous under stress where the ability to make good decisions is important. Once you burn up all the stored glycogen or carbohydrates in your blood, you'll have a compromised state of mind, lose strength, and have decreased endurance.With this in mind, when it comes to packing food, lighter is better. Cans are heavy and you're not getting a lot of bang for your buck with most canned food. Dehydrated and freeze-dried foods are great options.

    Studio photo of a pack of Nutrient Survival food.
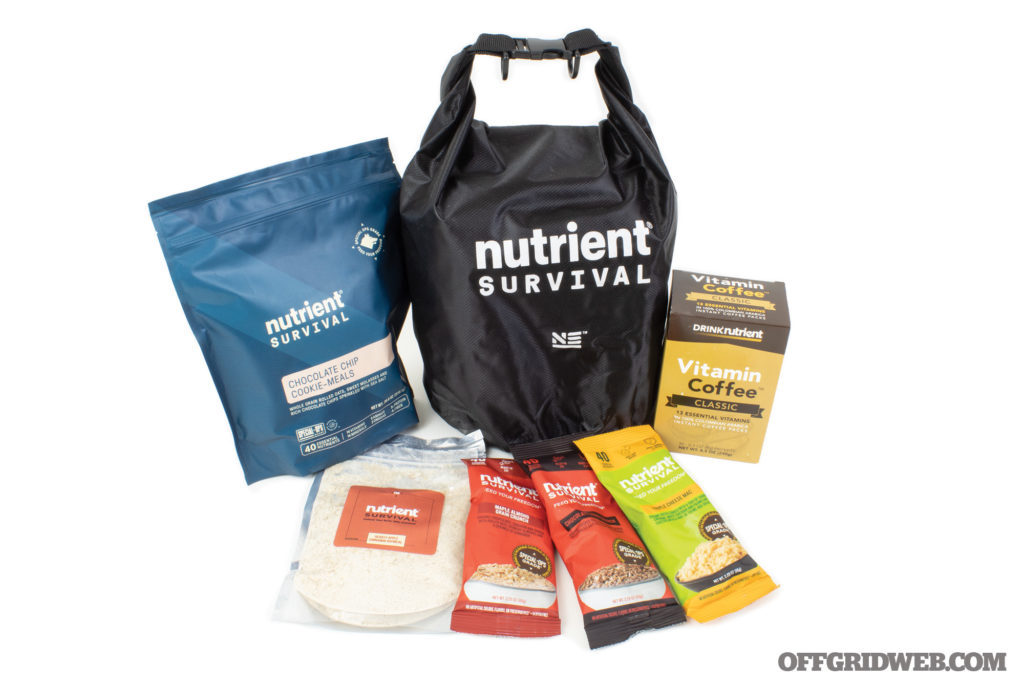
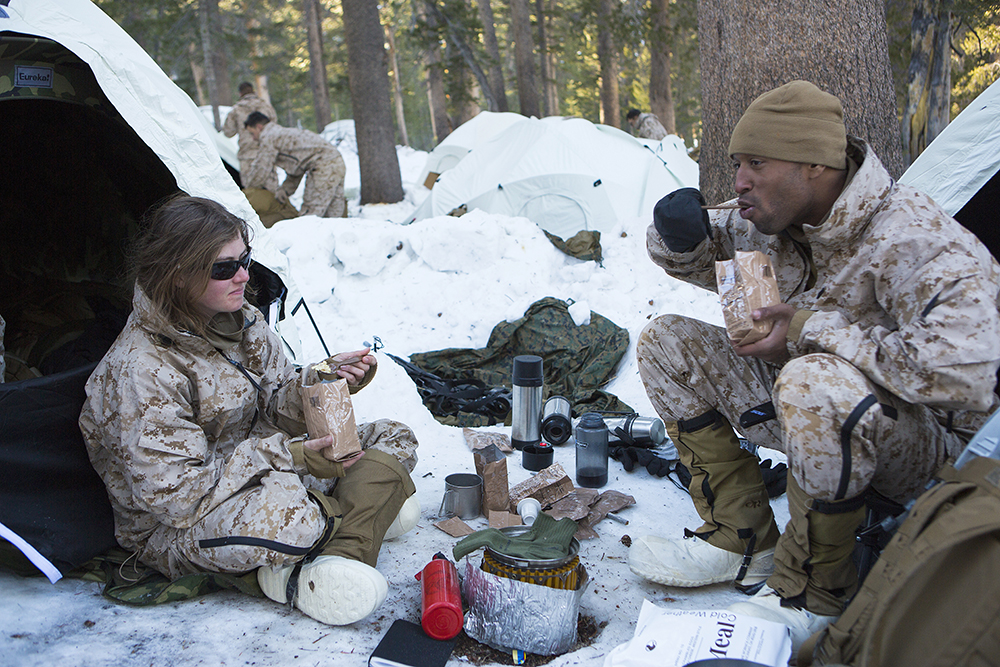
    Above: Dehydrated, or freeze dried food is a space saver and come with enough calories to keep you going for a while.

    There are several companies selling freeze-dried food that are great for either your bug out bag or get home bag. Don’t discount the value of a case of Meals Ready to Eat (aka, MRE). They do require additional water to be warmed up, but if possible you’ll probably want to heat them as they tend to taste better warm than cold. You’ll want to strip them down to the essentials before they go into either of your kits as there is a lot of extra plastic bulk associated with a single MRE. It's never been cheaper to buy a food dehydrator or even your own freeze dryer if you're into that ‘Prepping 2.0’ life. You may even want to take a page out of Mike Jones’ (Garand Thumb) playbook. Mike goes with a jar of peanut butter, a pack of tortillas, and some green vegetable powder. You can go a long way on the calories, salt, and oil in this simple meal. Offgrid contributor Ed Calderon has his own inexpensive survival food recipe: peanut butter, honey, granola, and instant coffee granules. Pour everything into a Ziploc bag, mix thoroughly, and eat gradually throughout the day.

    Photo of the contents of an MRE, meal ready to eat.

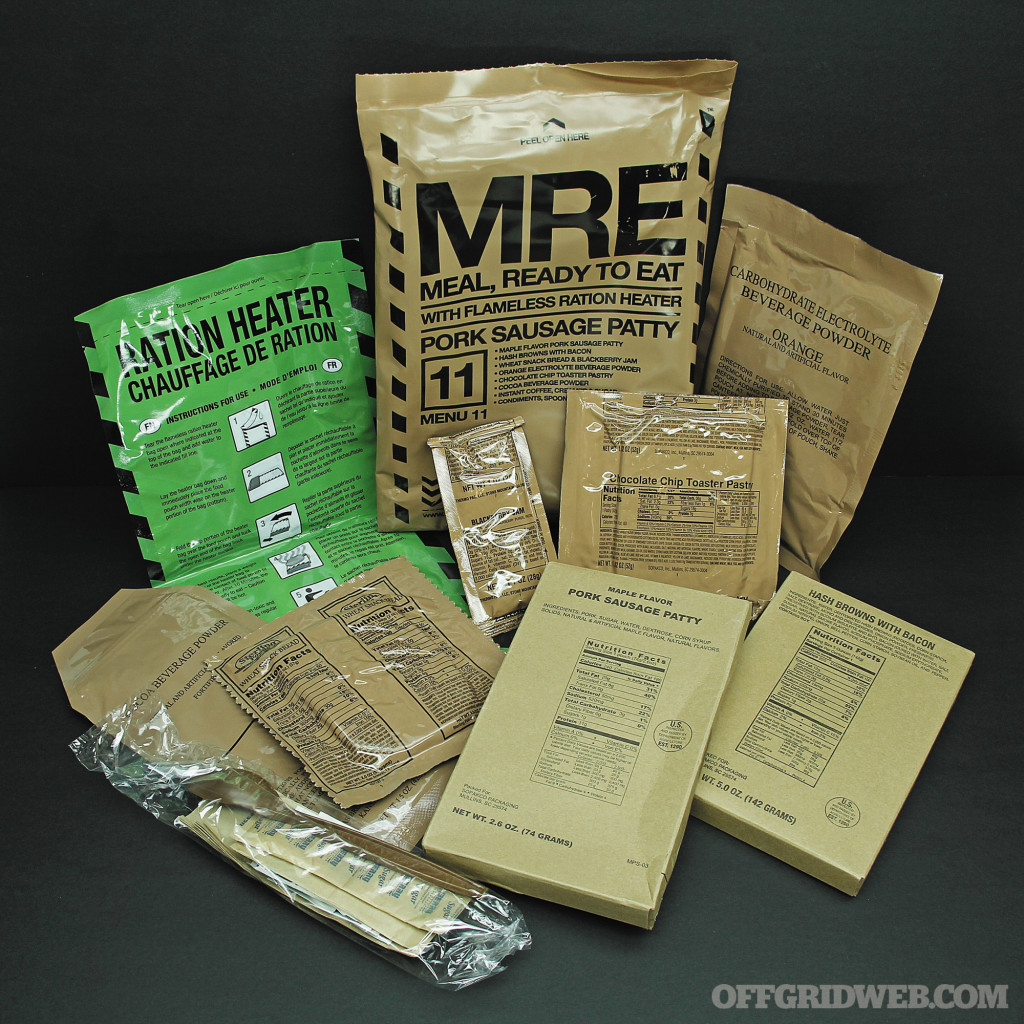
    Above: MRE's have been used by the military for several decades and come in many varieties. Pro Tip: Mix the cheese with the chili mac!

  • Fire: Fire is important for so many reasons. You use it to get  warm, cook your meals, sanitize your water, help you see around camp, and keep away animals and pesky bugs. Fire also does a lot for the well-being of your mental state. My PACE plan for fire is a BIC lighter, ferro rod with prepared fire plug tinder, bow drill, and finally my “I need fire right away!” Pull Start Fire Starter.

Recalling that skills drive gear, not only is it critical to know how to start a fire, but it’s equally important to know how to maintain one. This may be a little challenging to work on if you're in an urban area. Consider going to a place with a community charcoal grill to practice this skill, or even better, plan a camping trip at a campground. The consequence of failure is low and you'll have all the time you need to work on it. Odds are there will be plenty of people around who would love to help you too.

Photo of a fero rod and fire starter plugs.

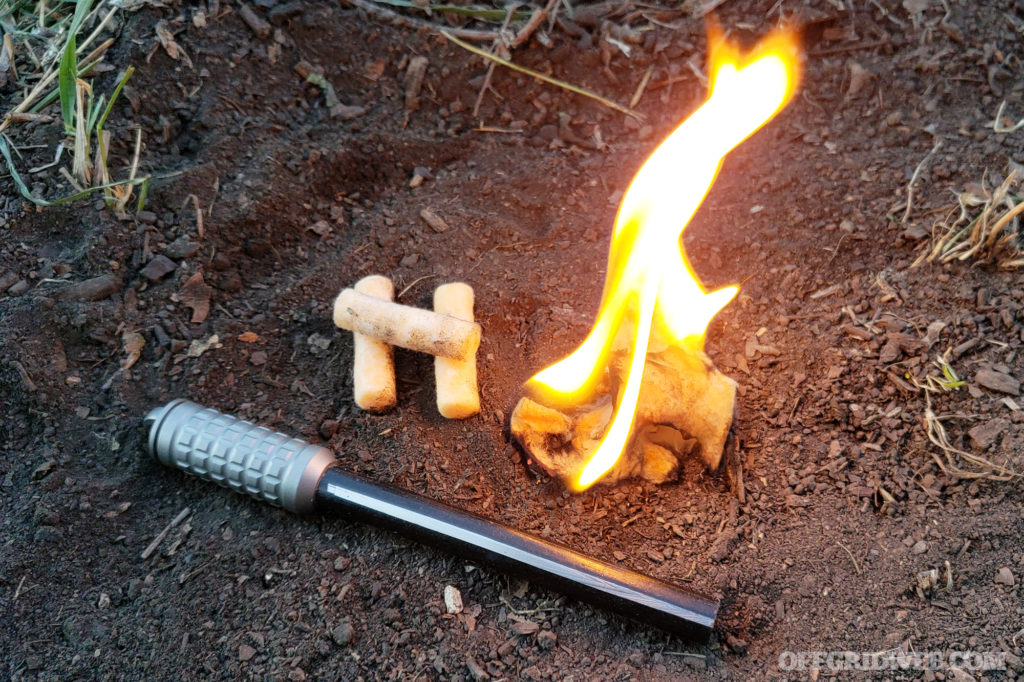
Above: Sparks from a ferro rod will are hot enough to ignite dry tinder.

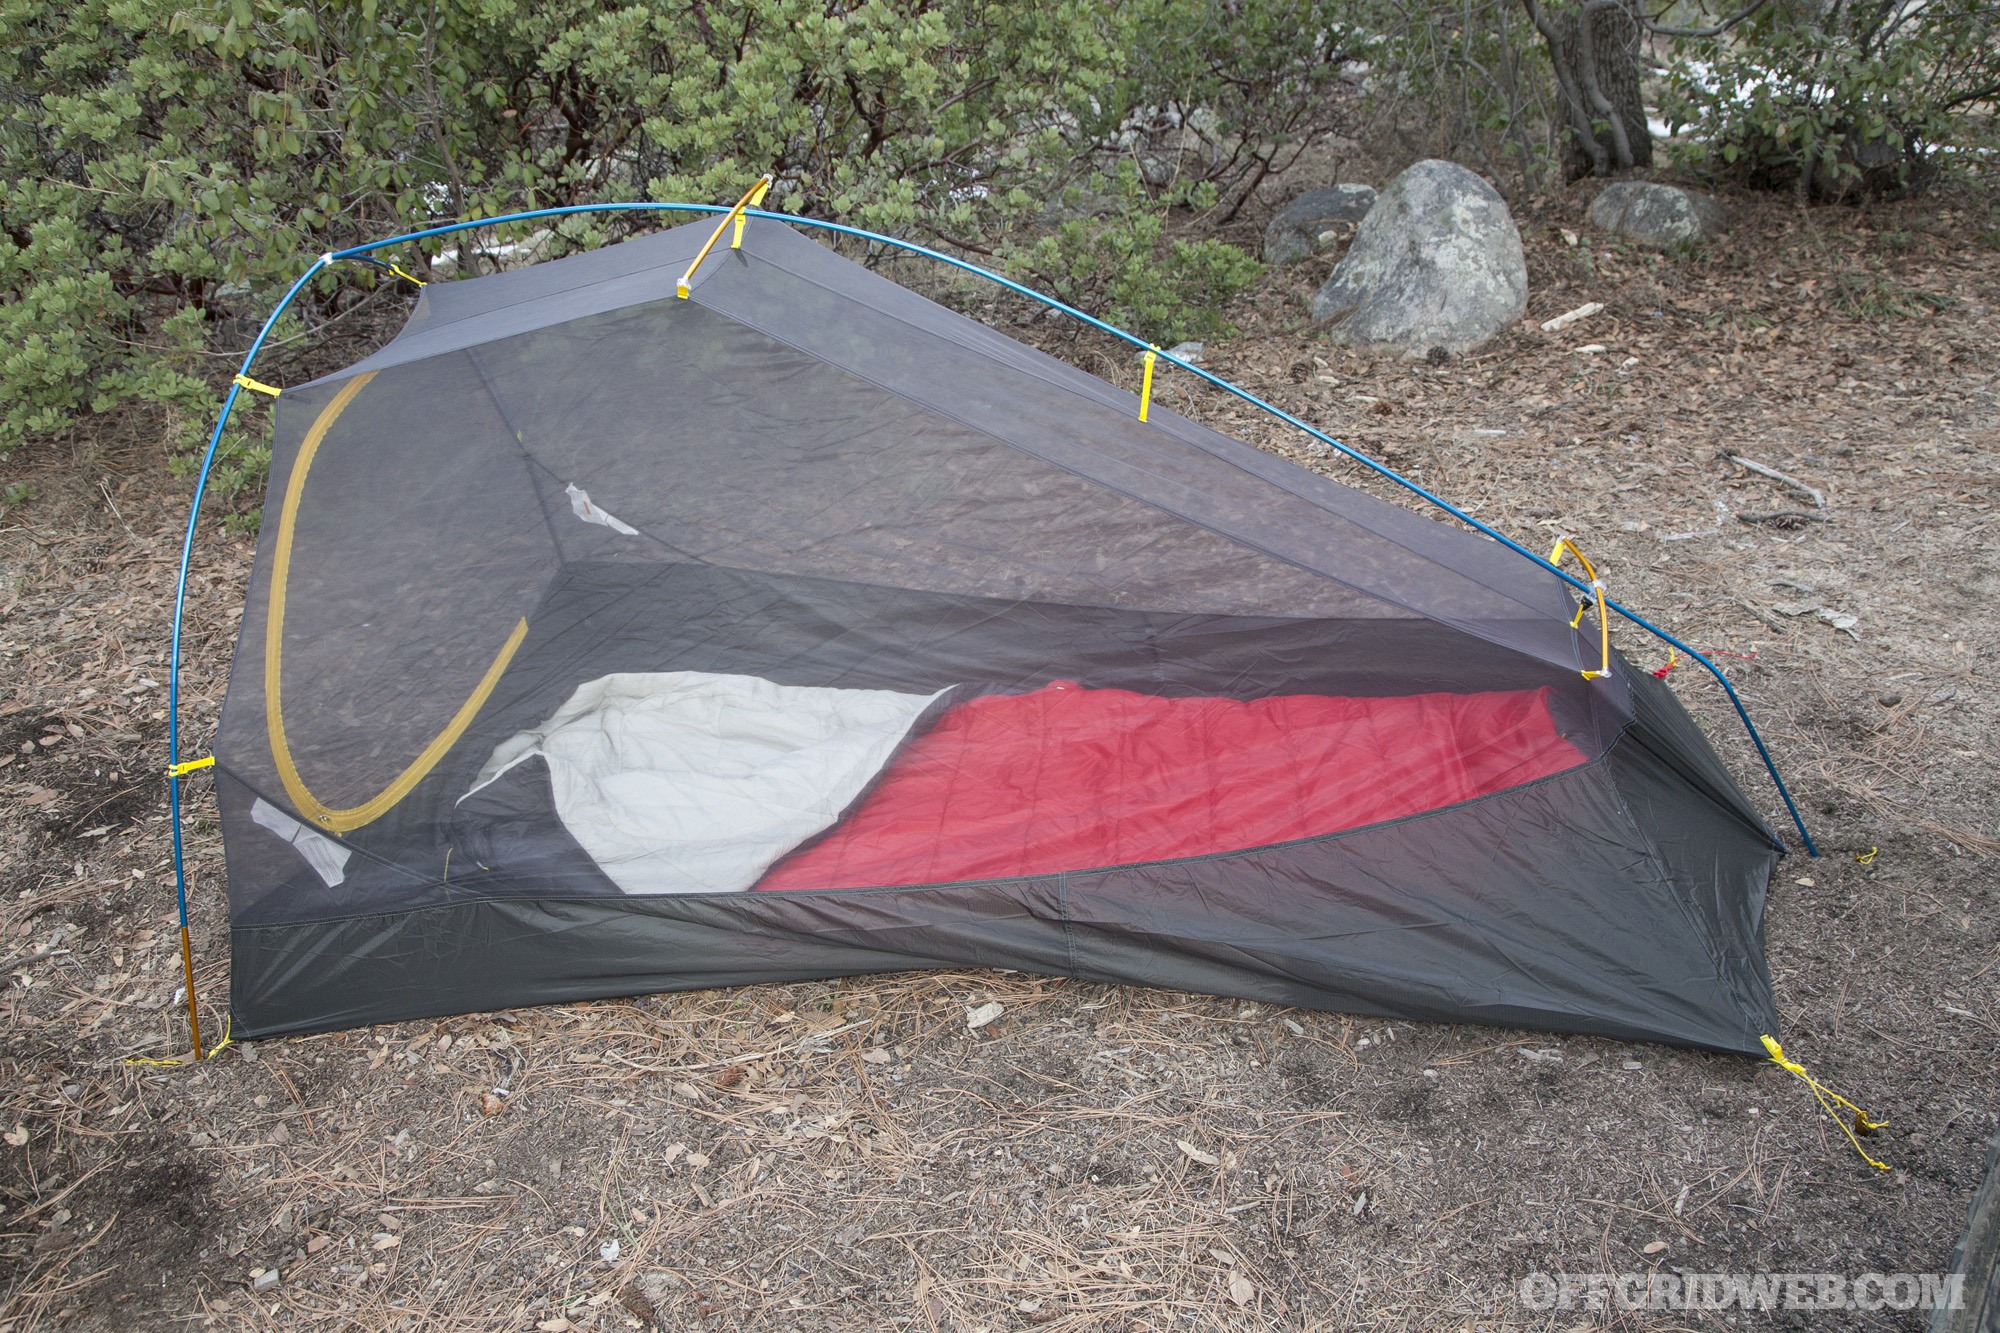
  • Shelter: What you’ll require for shelter is going to depend on what season you are in. Regardless of high or low temperatures you’ll need a shelter to keep the elements at bay. When you sit to take a break or lay down to sleep for a few hours, insulating yourself from the ground to prevent thermal conductivity can be vital. Pairing a sleeping pad, a good synthetic-filled sleeping bag, and a wind and waterproof bivy for your go bag are all factors to take into consideration. A mylar bivy or blanket might be the best options for a smaller packs or get home bags.Photo of a Sierra Designs Studio 2 Tent.

Above: Shelter can be improvised, but having a tarp or small tent will make life easier.

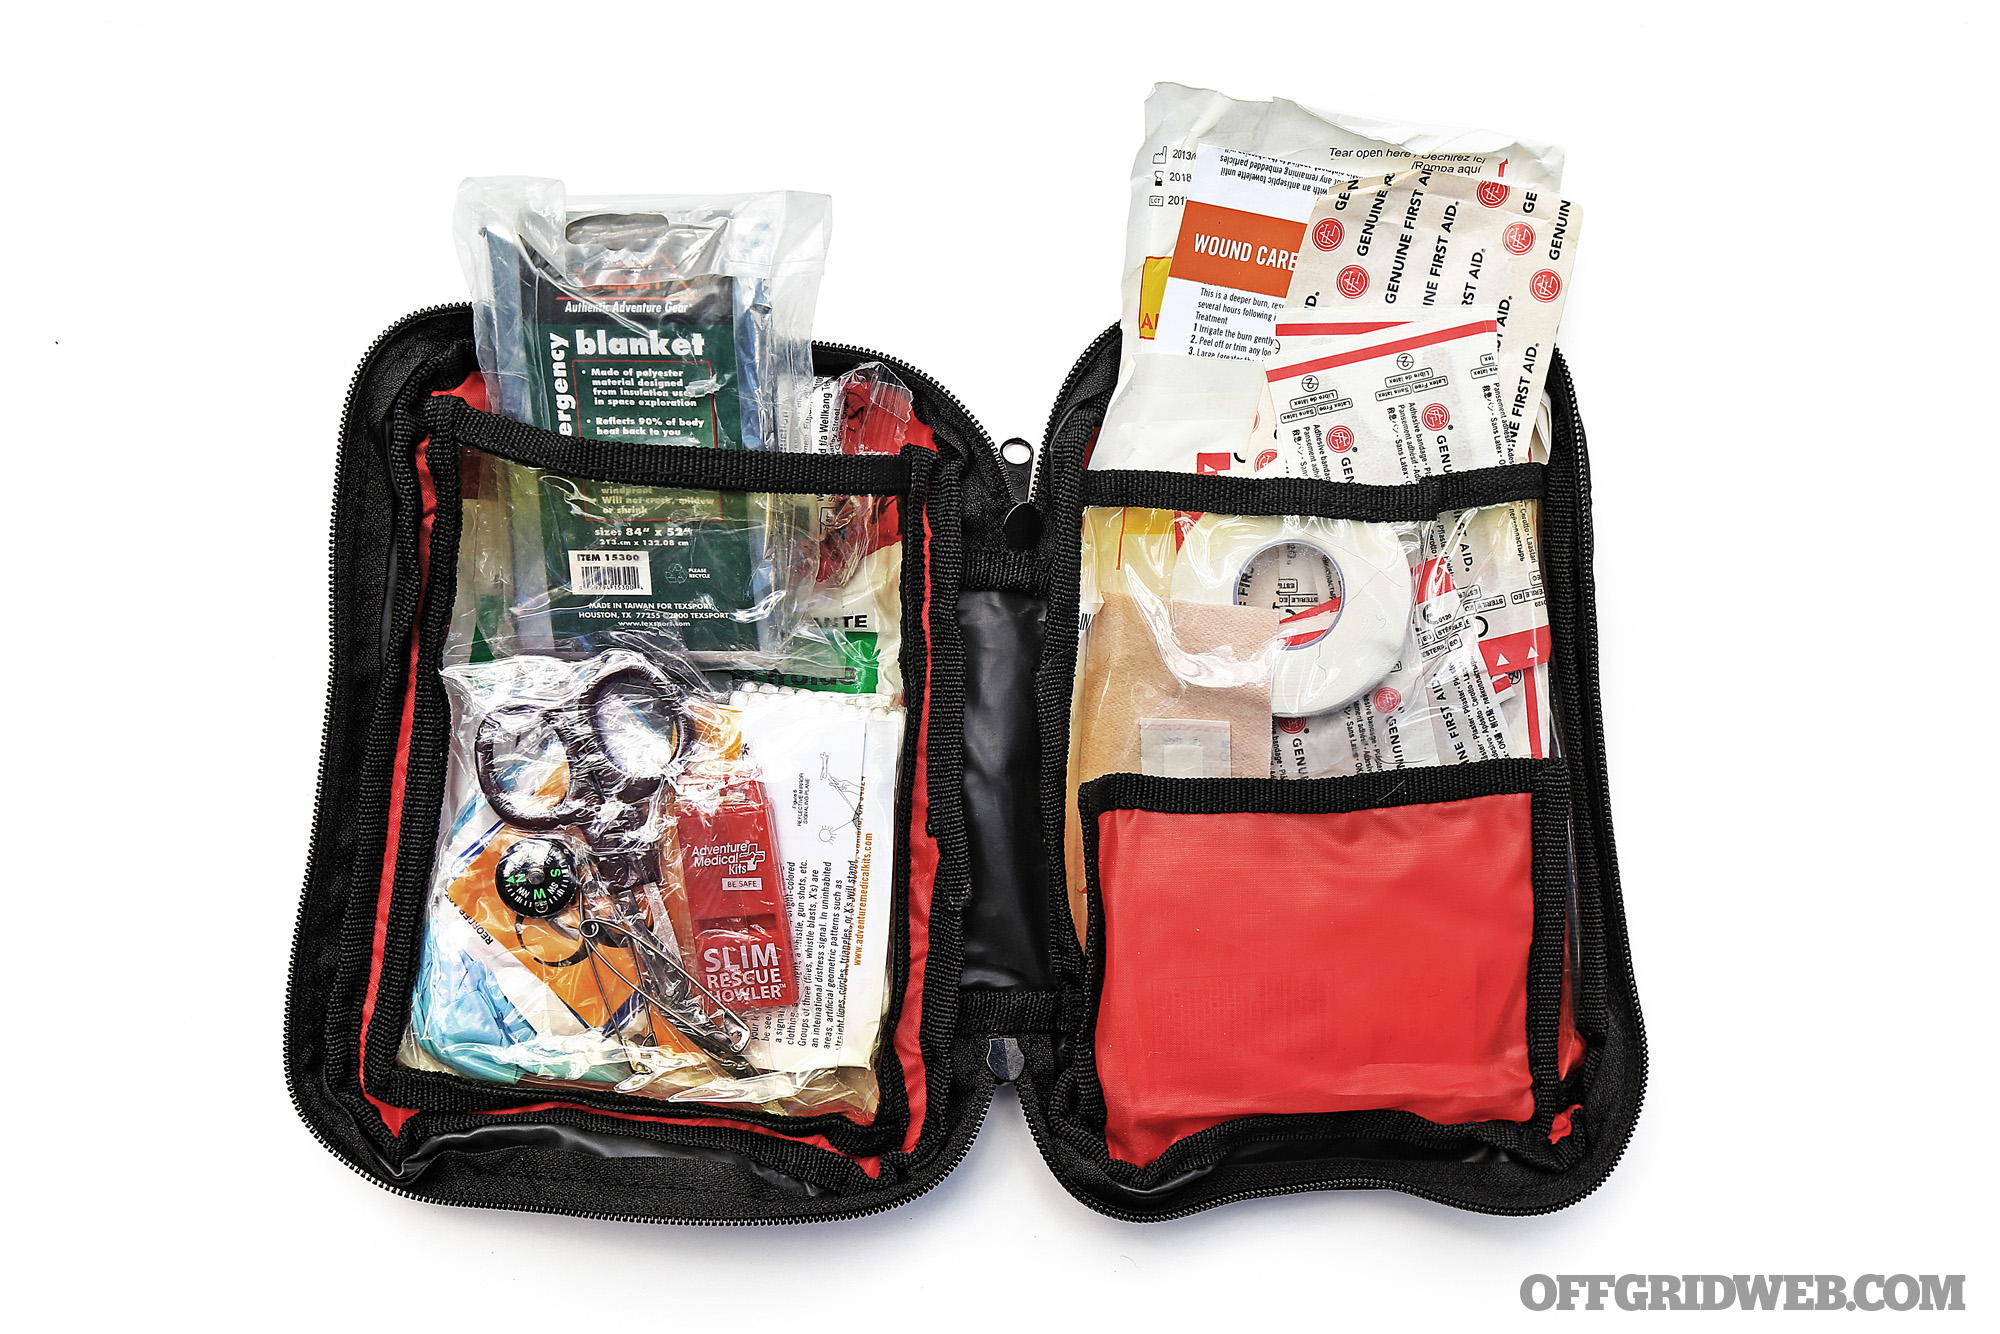
  • Medical: There are med kits and there are trauma kits and the distinction is important. Medical kits are for headaches, stomach aches, cuts, and abrasions. Trauma kits are for treating emergency wounds like massive hemorrhaging, compound fractures, and puncture wounds. Do not minimize the importance of the med kit. It might be that a bottle of Imodium is what saves your life from protracted dehydration. A trauma kit is used for what is able to kill you in minutes. You’ll want to stage your IFAK (individual first aid kit) on the outside of your bag or even looped on a belt if possible.

    Photo of the contents of medical supplies for a bug out bag. Above: When packing a med kit, only bring what you are comfortable using.

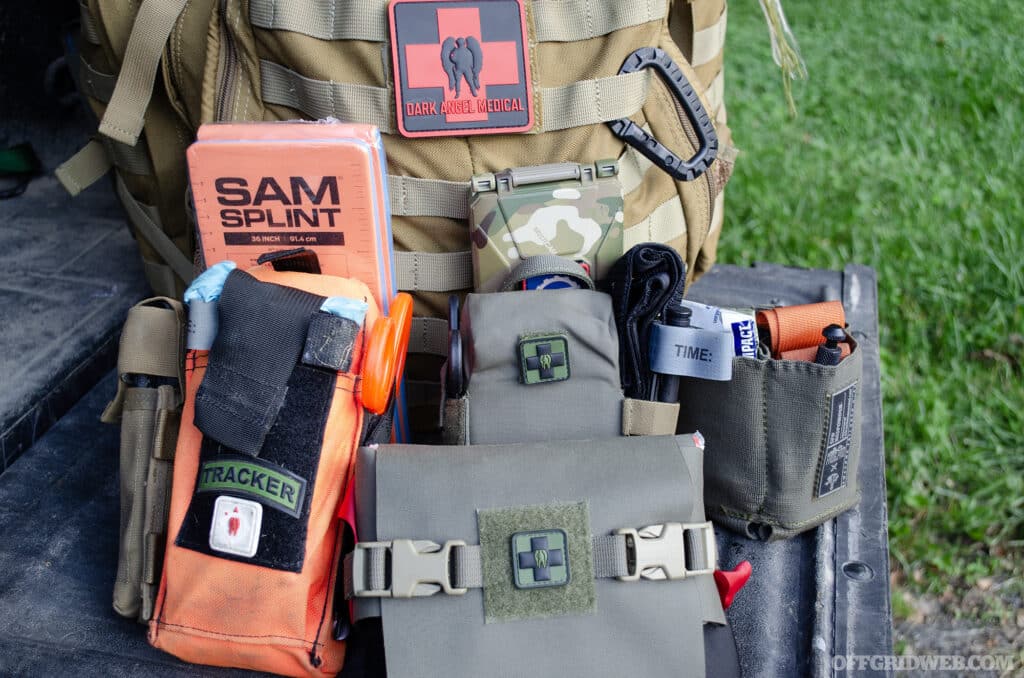
Premade med and trauma kits are easy to come by these days. Make sure you look at the inventory list and add what you’ll need. I buy pre-packaged trauma kits from Dark Angel Medical. I like to add at least one extra tourniquet, hemostatic gauze, and a couple extra sets of exam gloves rolled up into my prepackaged kits. Make sure your tourniquets are being sourced from a reputable source like North American Rescue. Sometimes the cheaply made knock-offs fail on the first application. Find a trauma med class to get in and learn how everything works. You don't want an emergency to be the first time using a life saving device like a tourniquet or chest seal.  

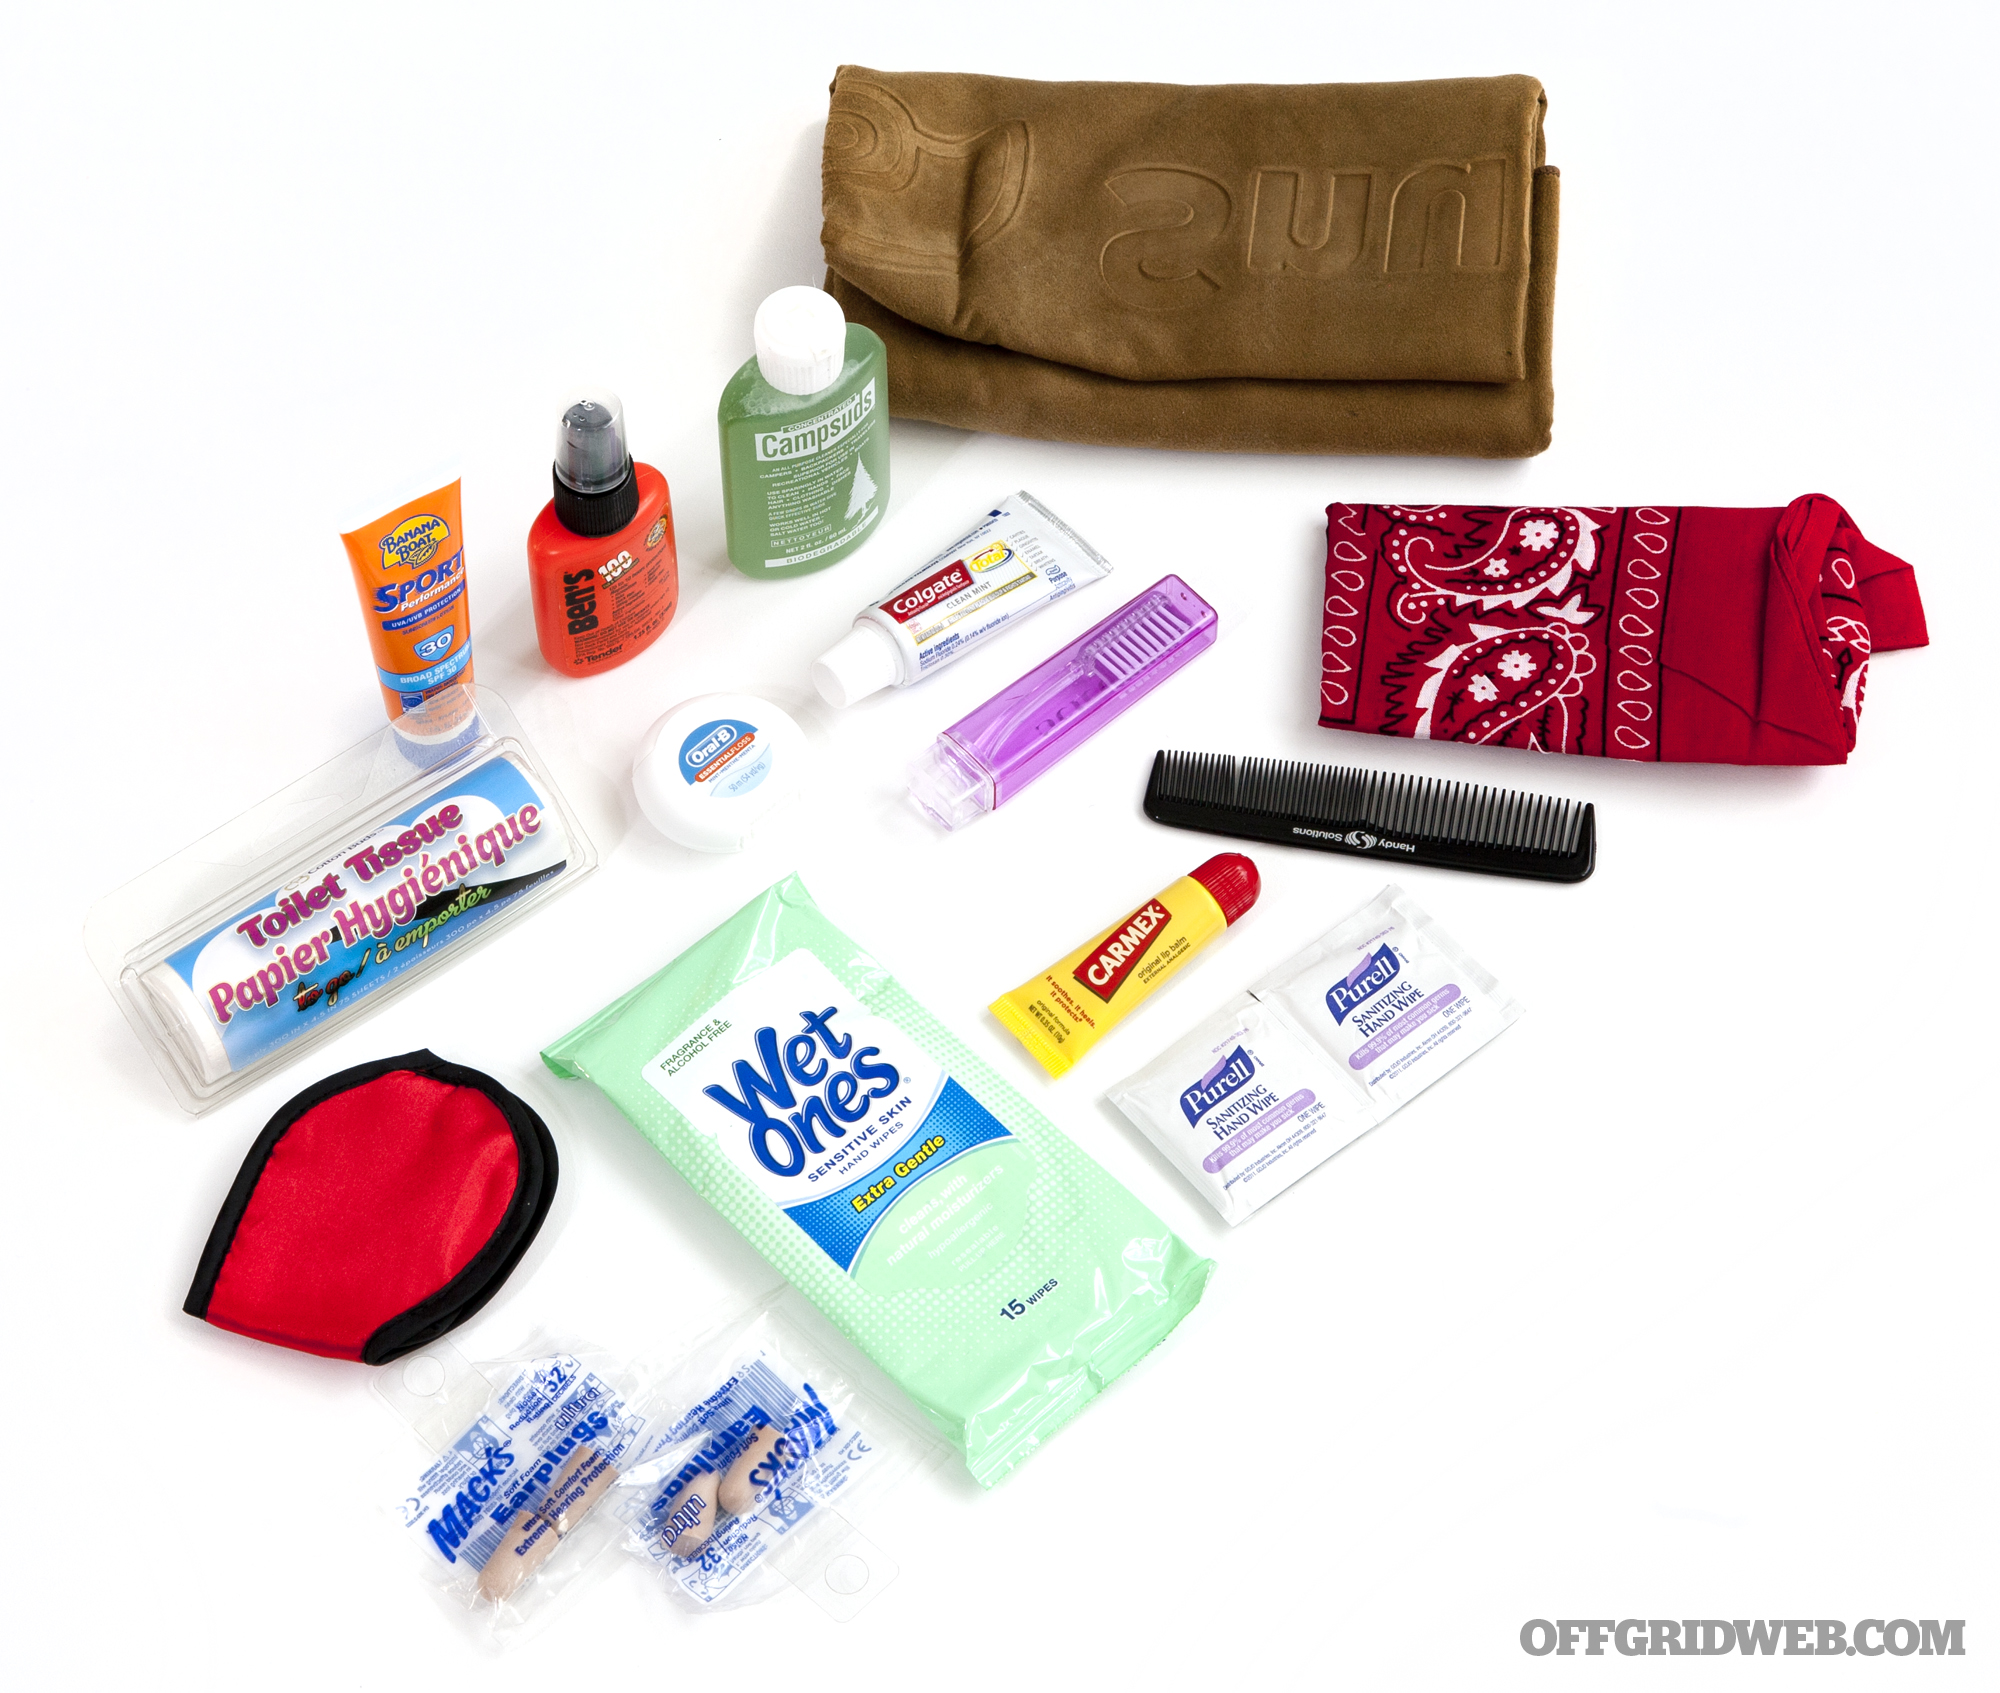
  • Hygiene: More than 800,000 people die each year worldwide due to inadequate sanitation of water and bad hygiene. Toss a small bottle of hand sanitizer in each pocket of your pack and maybe a bar of soap or two in Ziploc bags. Wet wipes are great, but they take up a fair amount of space. There are also several companies that make a dry compressed tablet-like product you can use the same way as wet wipes. Add a bottle cap full of water to it and it opens up. Prevent getting sick by washing your hands before you eat, and sanitizing your cooking and water carrying vessels. Dental hygiene is also important, and everyone should have a toothbrush, toothpaste and dental floss in their kits.Photo of an adult woman washing her hair in a river.Above: Even water that looks clear can be contaminated. Be very careful when practicing field hygiene.
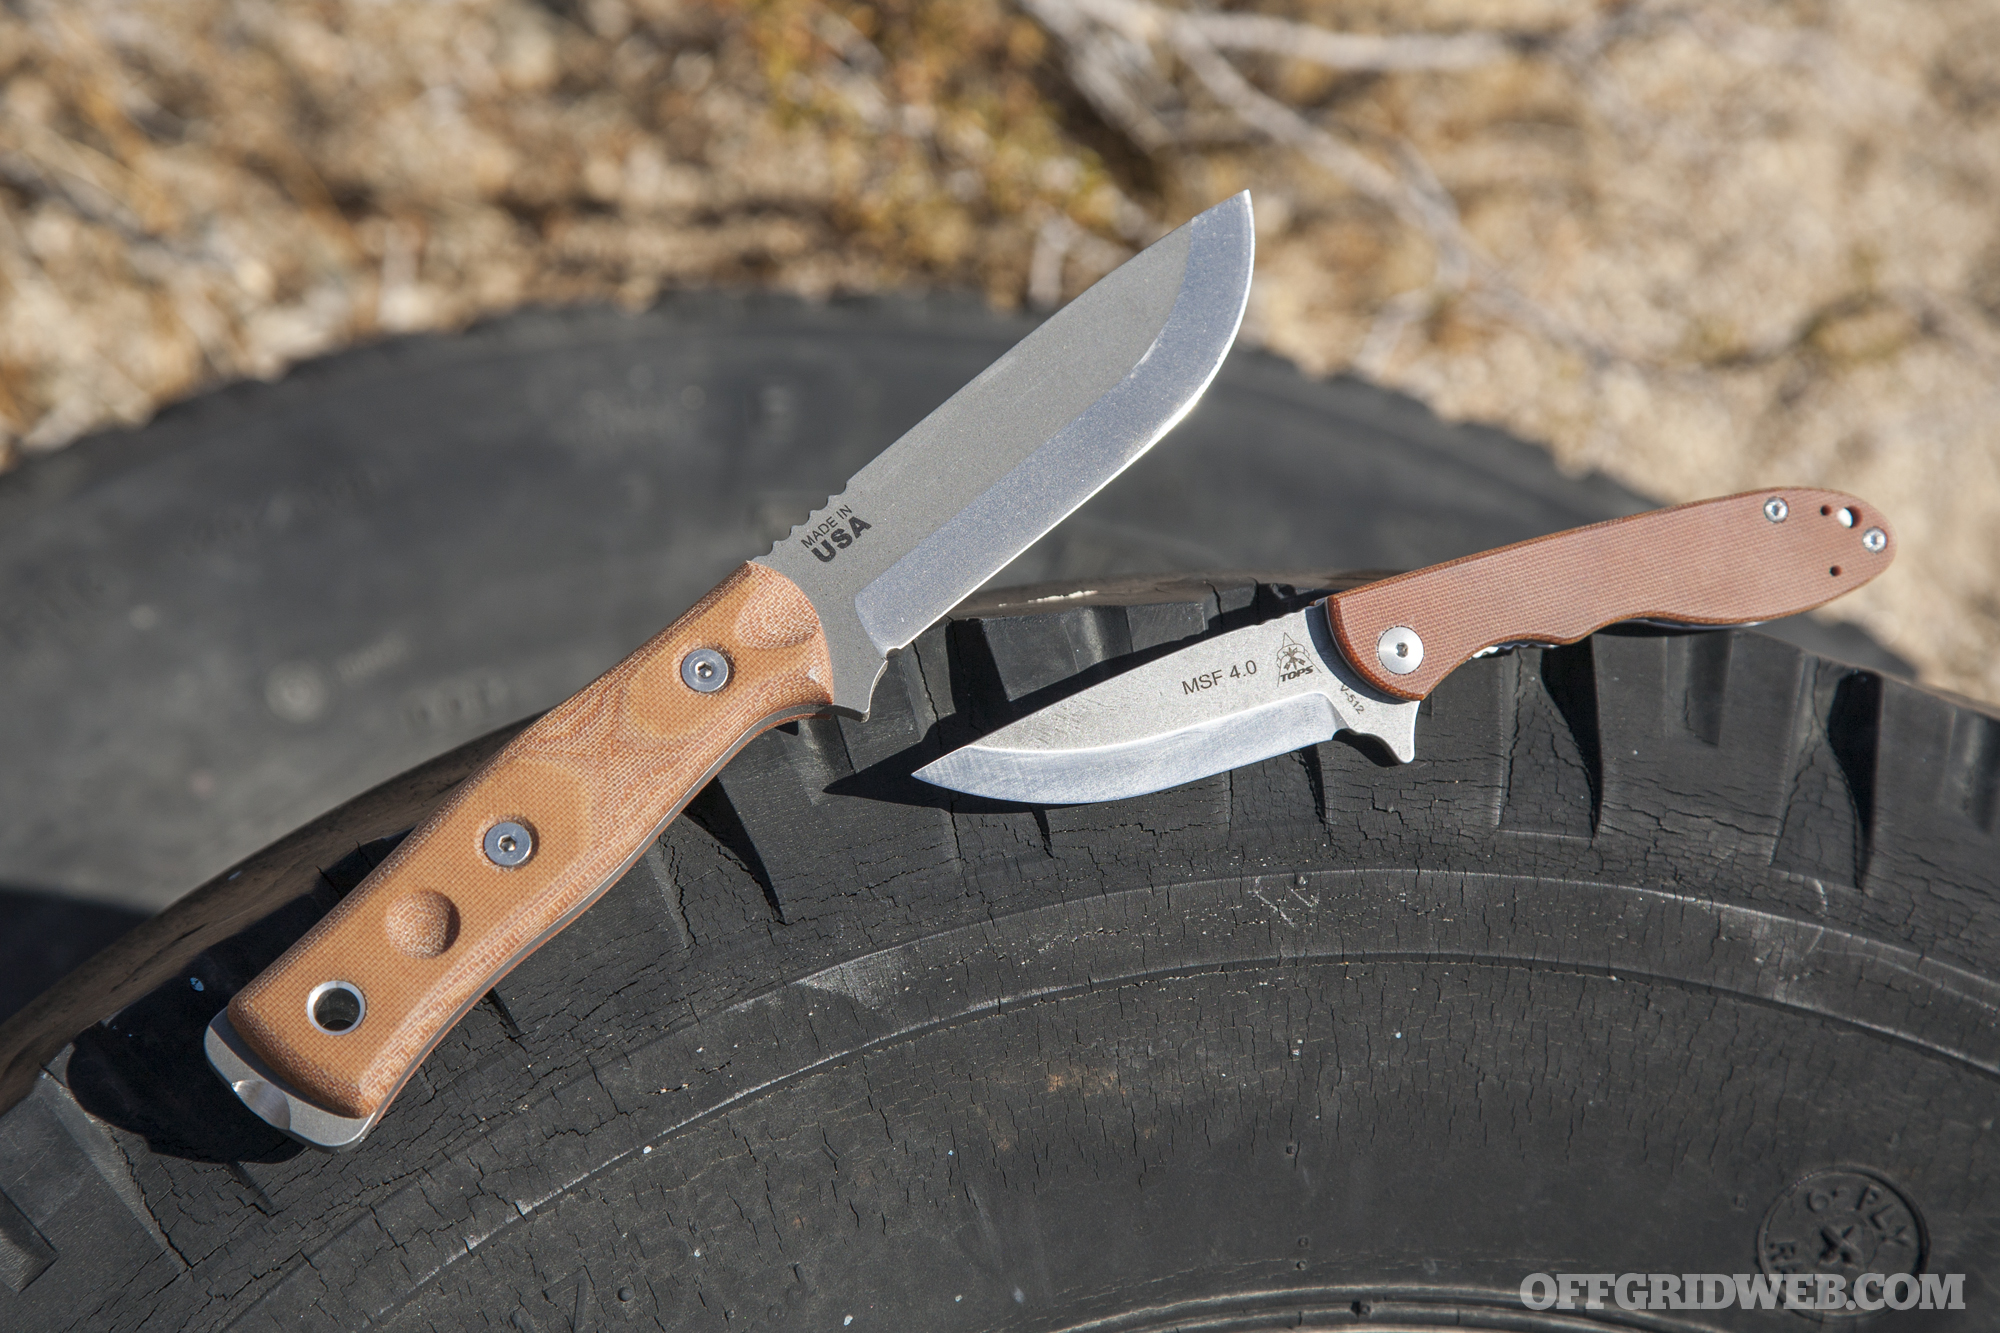
  • Cutting Tools: Carrying a pocket knife is a great start, but you cannot beat a good fixed blade knife. There are many schools of thought on this, but it is good to keep it simple. Most of the time you will need a sharp knife, not necessarily a huge knife. Ideally, fixed blades need to be easily maintained and be able to produce sparks for fire when using a ferro rod. I’ve had great luck with small knife making companies like Bradshaw Knives and Corvus Knife and Tool. If you’d rather get something a little cheaper but still capable, Mora makes a respectable blade. Neck knife, belt knife, or backpack knife, they style doesn't matter as long as it's easy to access and keeps the knife secure. Photo of the Carrion, a knife made by Corvus Knife and Tool. Above: The Carrion from Corvus KT is a handy fixed blade knife for everyday tasks.

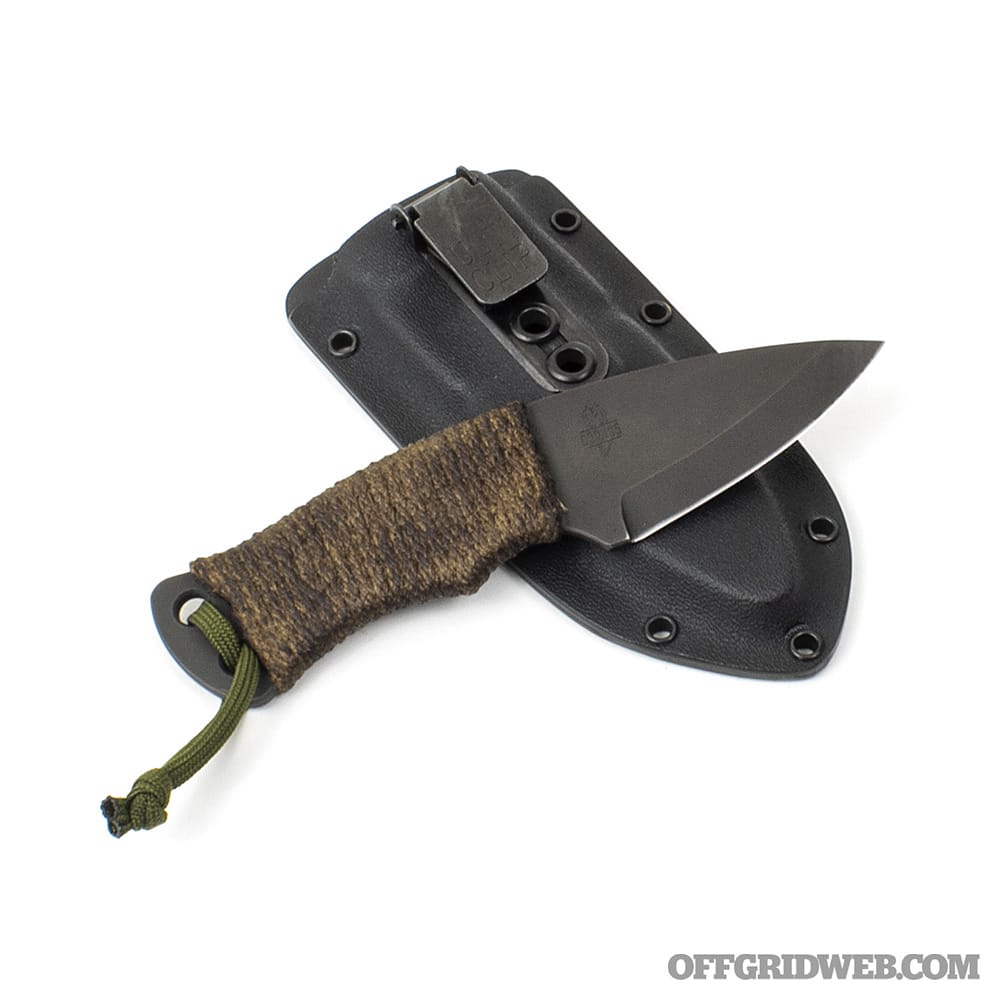
A pocket knife is used for lighter tasks than your fixed blade. Something with a thin spine and straight blade that's roughly 3 inches long can serve many needs, although you may have to look into your local regulations to determine what blade length is legal to carry. One daily carry to consider is a MicroTech UltraTech which will get the blade out quick; however, the Benchmade BugOut is a great option if you’re unable to carry an automatic knife. 

Silky folding saws are a great tool when hunting or camping. They're efficient, lightweight cutters. If space and weight are at a premium, or cutting firewood is not your highest priority, check out the Lester River Bushcraft Folding Saw. They've got a minimalist saw that utilizes a reciprocating saw blade. The blades have the ability to cut metal or wood and are extremely tough. They can make short work of nails and those hard to reach screws without wearing out.

Photo of numerous types of fixed and folding field saws.
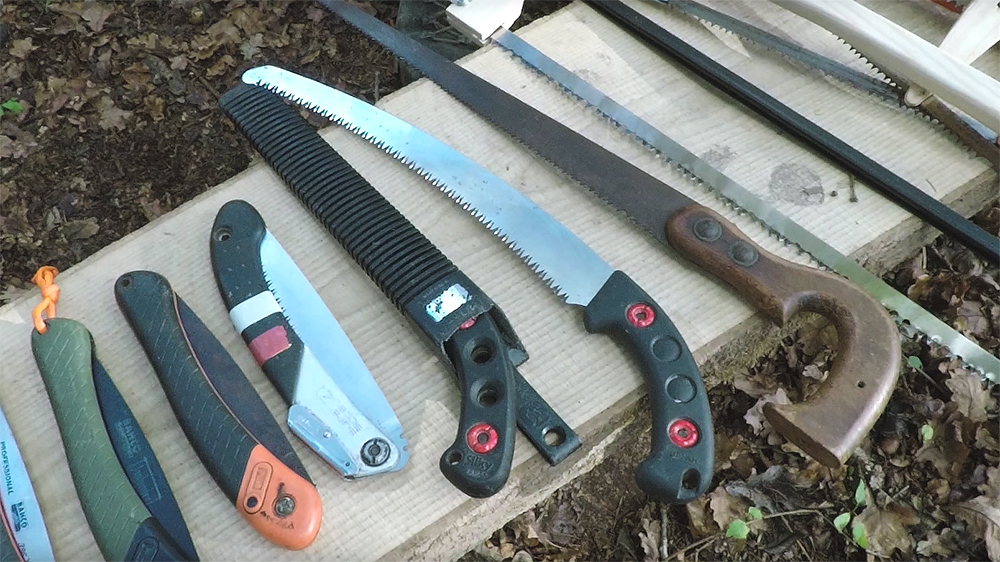
Above: Processing firewood for cooking and warmth is made much easier with a saw.

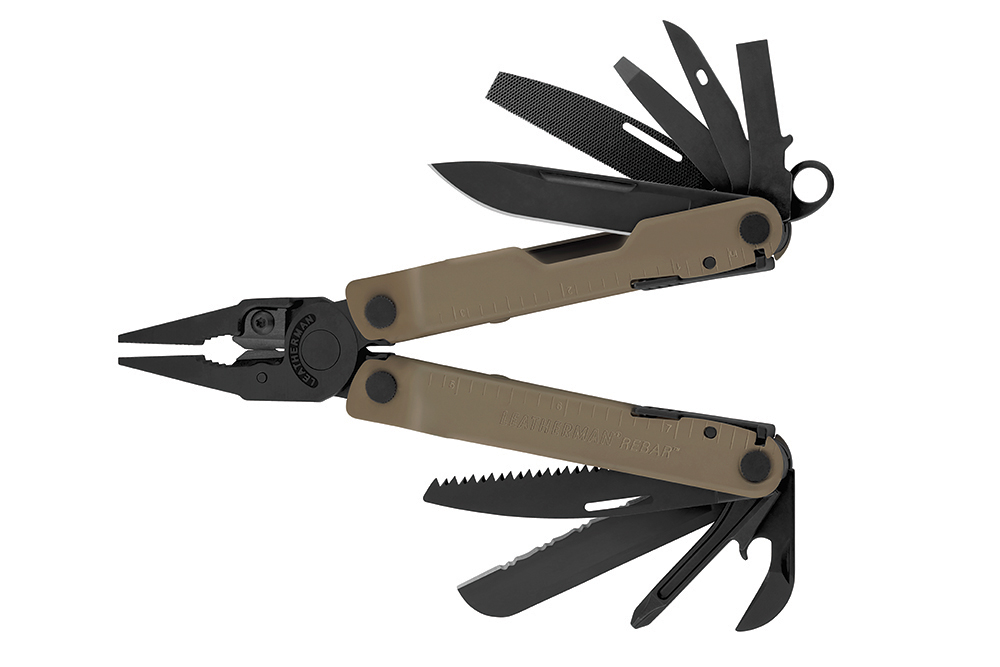
Remember, these are tools for backpacks where space and weight are at a premium. The more uses each item has the less you'll need to improvise. You may find you’re  better off with a multitool instead of a pocket knife. While specialized cutting tools are nice, their extra weight can add up fast and slow you down. 

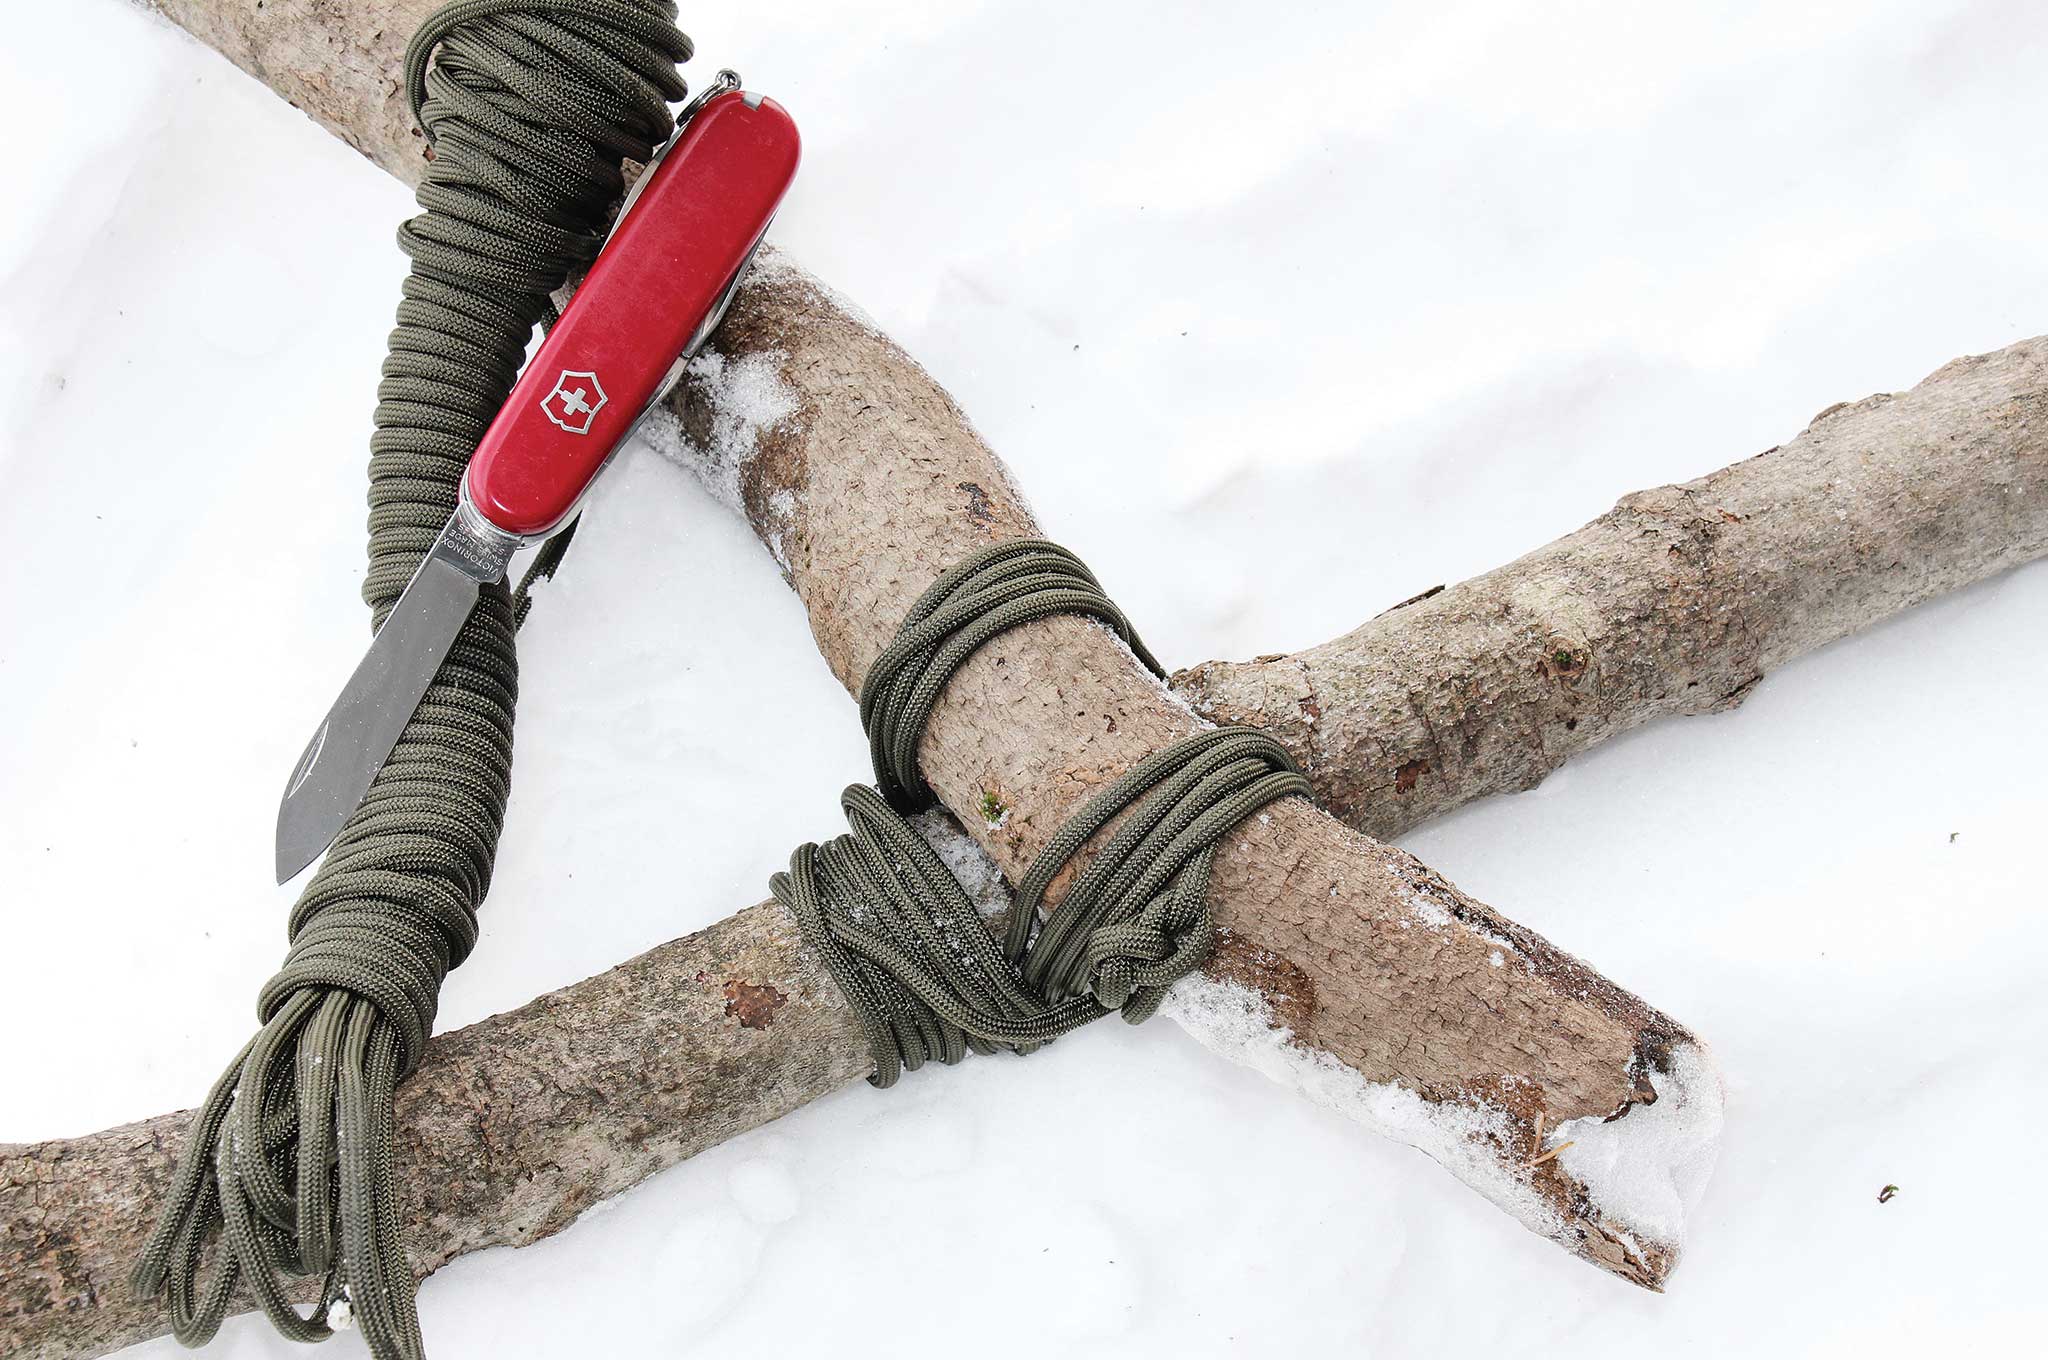
  • Shore Things Up: Eventually the time will come when you need to tie down a tarp tent, carry useful items you find along the way, or attach something to your pack. Things like paracord or 550 cord, zip ties, carabiners, S hooks, and tubular nylon can be used for securing items or making a temporary shelter, hoisting, dragging, and lifting.Photo of cordage that might be packed in a go bag.
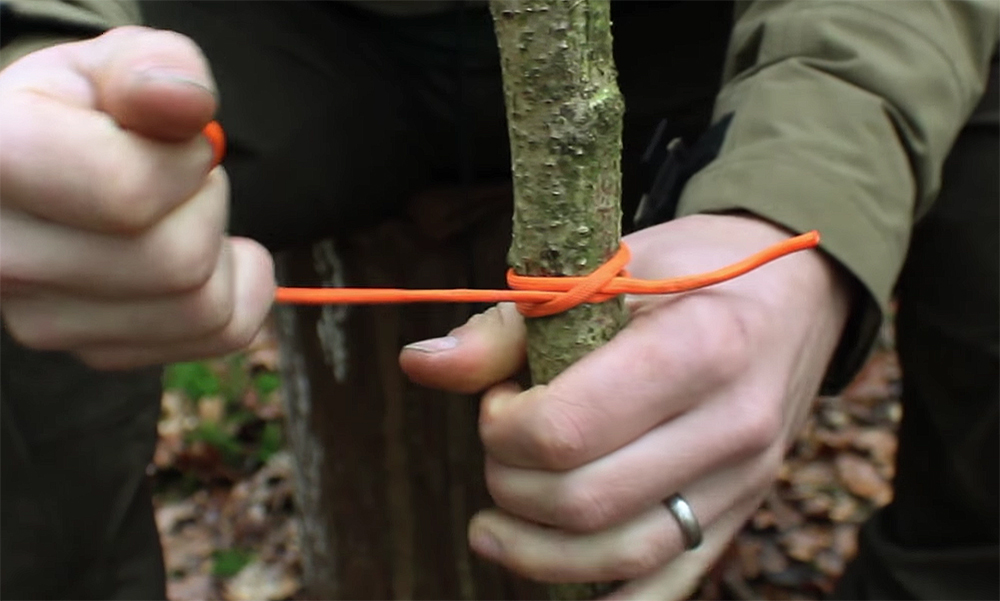
Above: Having a bit of rope is a game changer, opening the doors to everything from fishing to furniture.
  • Door Opener: A lock pick set can come in very handy in life-and-death situations. Sometimes you don't have a key to something you need to gain access to without damaging the lock. They can be used to open cabinets, lockers, file cabinets, doors and drawers, granting access to things like medicine, food, or other supplies. Always use these tools responsibly, and be prepared to explain your actions to authorities after an incident and pay for anything you had to use.Photo of a lock picking set that may go into a go bag.

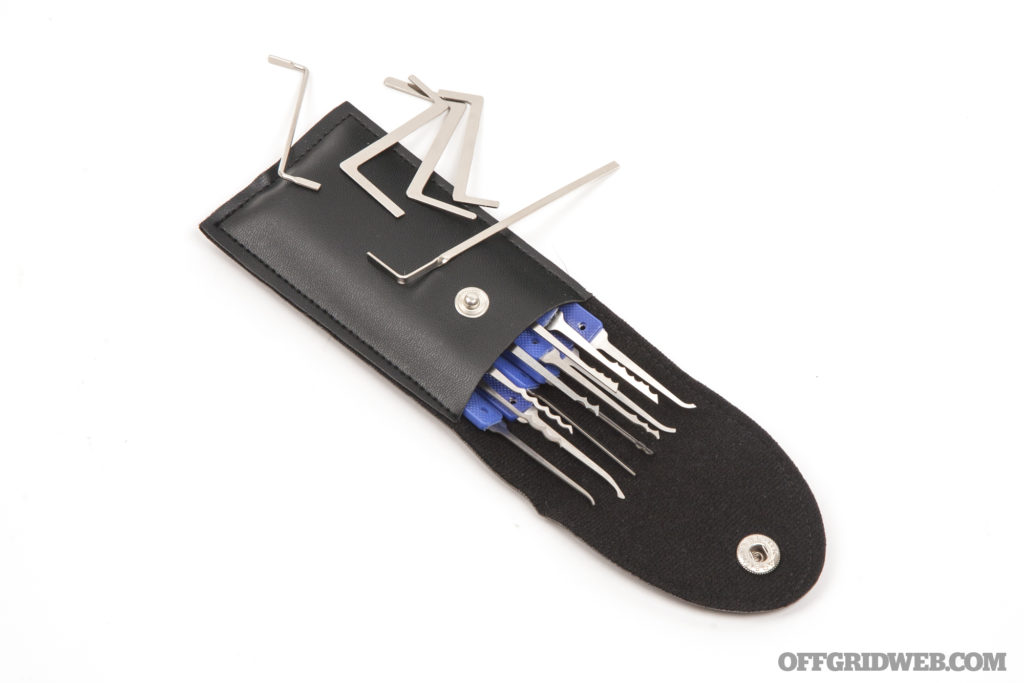
    Above: Need something from that medicine cabinet, or shelter from the snow, but a lock bars your way? There are tools to help overcome that obstacle.

  • Clothing: Your go bag might have a full change of clothing for an additional layer of warmth or something more light weight to keep you cool. The smaller get home bag should have a change of socks and underwear. Clean socks and underwear can do a lot for your physical and mental health.Photo of a variety of cold weather socks that could be packed into a go bag.

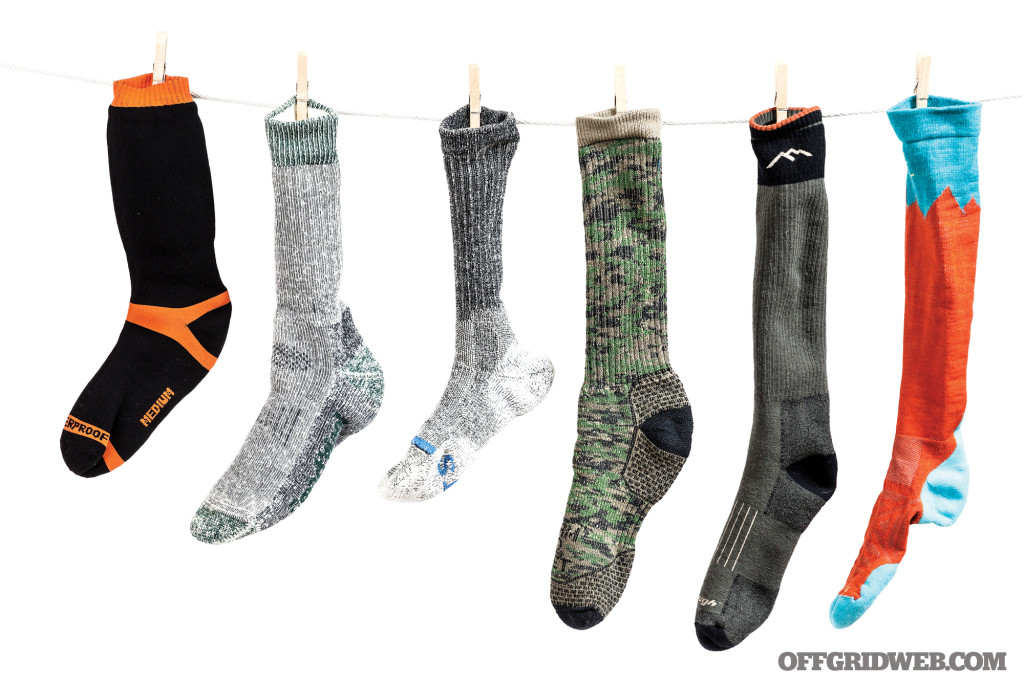
Above: Nothing beats a clean pair of socks, and changing them frequently will prevent common foot injuries.

  • Batteries: It seems like everything we use today takes batteries. Thyrm makes a great product called the Cell Vault to keep your batteries safe, dry, and organized. If you can find rechargeable batteries for your gear you’ll have an easier time keeping things running if you can pair them with a small solar charger. Photo of a Thyrm battery case used to store specialized batteries in a bug out bag.

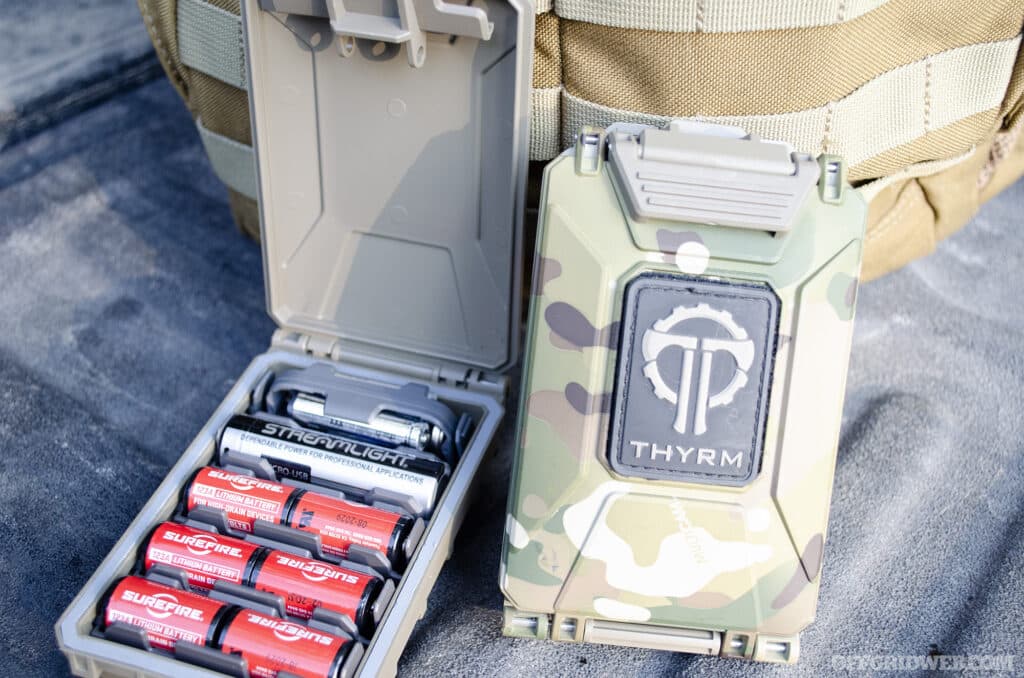
    Above: With today's prolific technology, keeping devices powered can be a necessity.

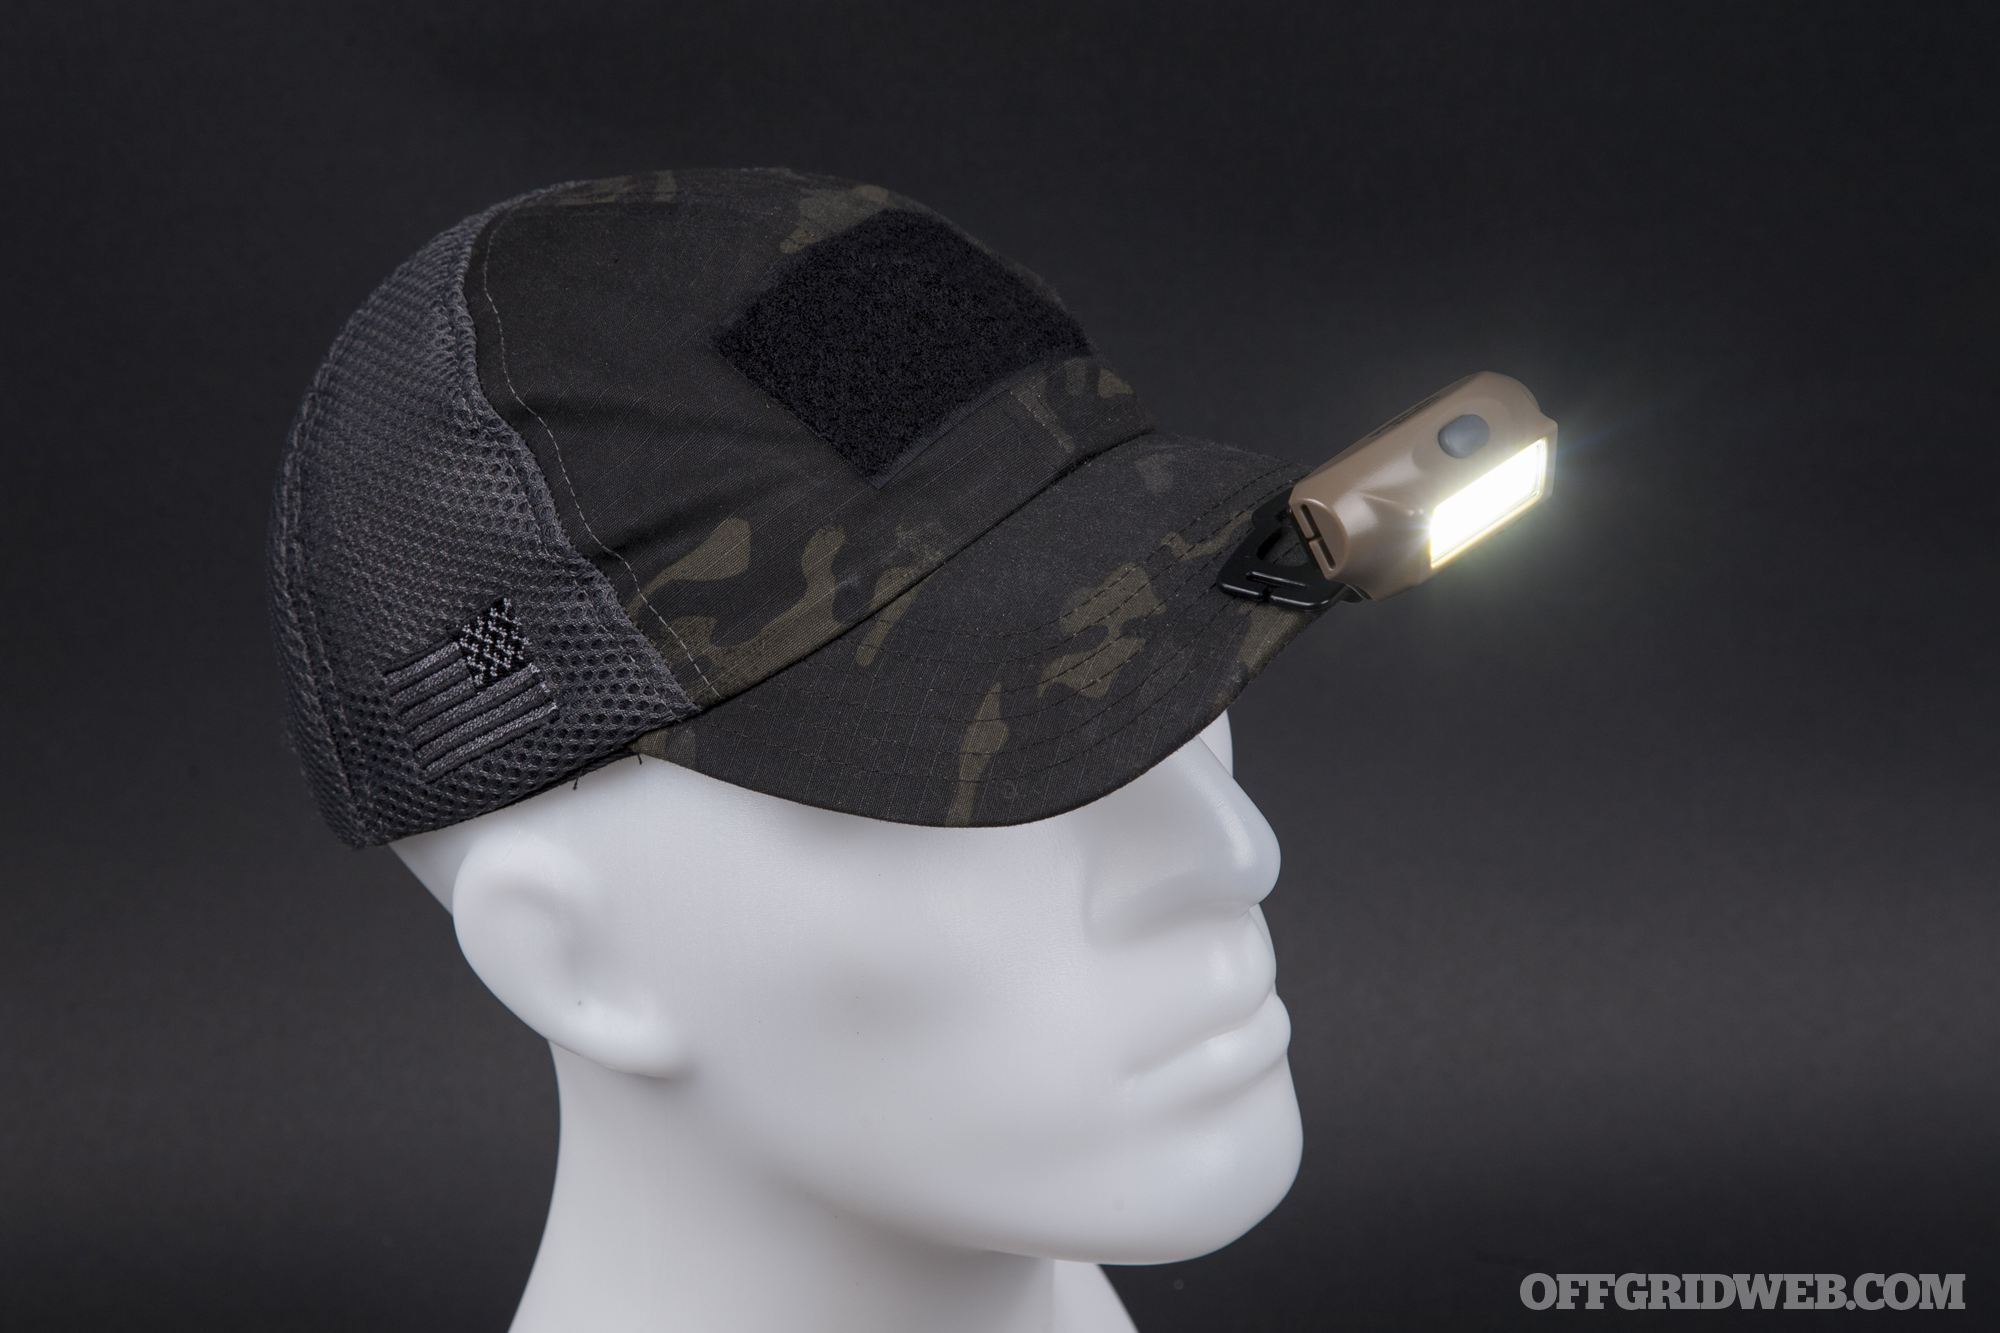
  • Lights: I’ve got it on good authority that at some point today it's going to get dark. Never leave home without a pocket flashlight. Light gives us information when it's dark, and information allows us to make informed decisions. Something tough and dependable, like the Streamlight ProTac 2L-X is a solid choice, and runs on a rechargeable 18650 battery. Studio photo of the Streamlight Protac 2.0 tactical flashlight.

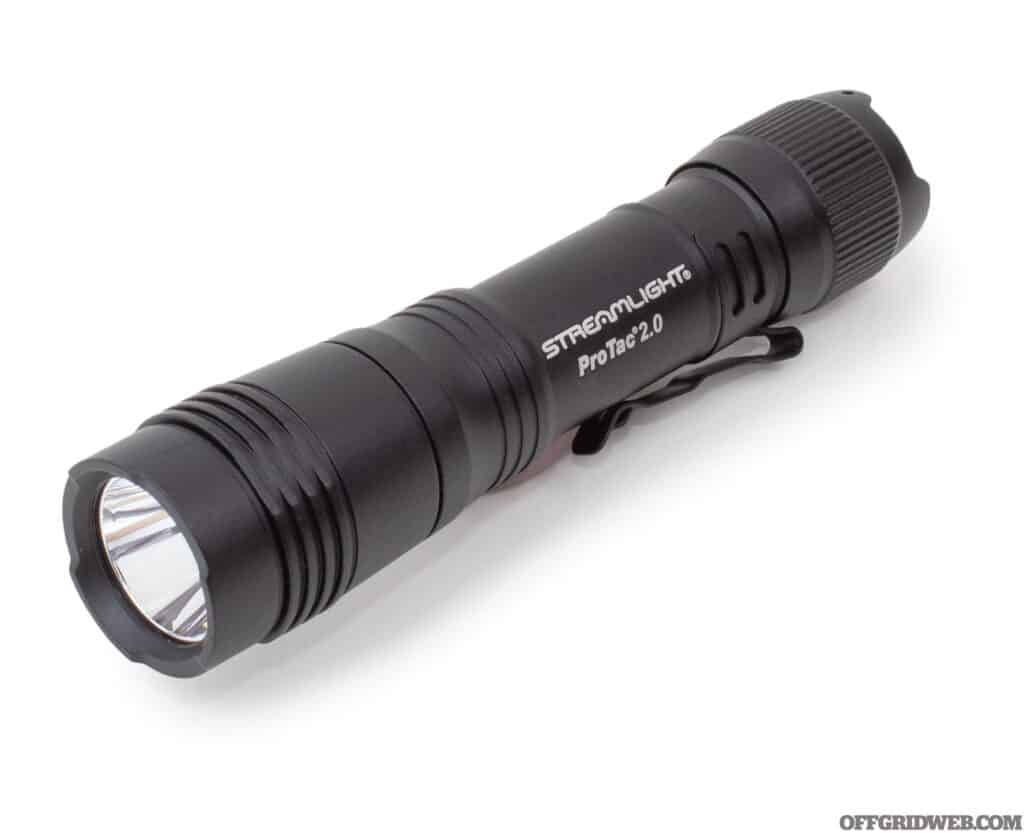
    Above: Illumination can ward off predators and keep you safe from injuries in the dark.

  • Radios & Communication: You need to be able to communicate in the event cell towers go down or are jammed due to extreme use during emergencies. The Baofeng UV-5R is probably the easiest and least expensive way to get into handheld radios. Yes, you do need to take a test to get a HAM license, but the entry level licenses are relatively easy. General Mobile Radio Service (GMRS) licenses are another great option and there is no test. Simply fork over the dough to Uncle Sam for the license and be good to go. Keep in mind these radios are not as intuitive as your smartphone, and take a little effort to learn on your part.Photo of handheld radios for communication.

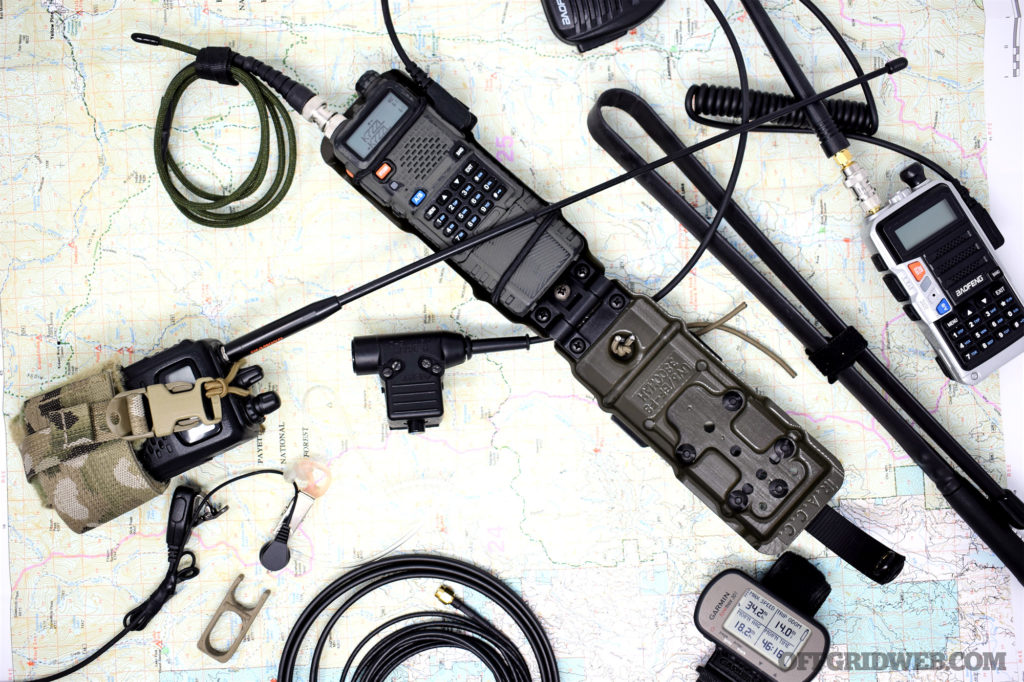
Above: Communicating for help can save lives, and being able to talk to loved ones provides peace of mind.

  • Cash: Having an assortment of cash on hand can be a game changer. If a credit card machine was down, or your card gets lost or damaged, or the power goes out and kiosks aren't working, having cash on hand will allow you to barter, or make a purchase to get you out of a jam. Having $100-$200 stashed in a get home bag or go bag will take care of most emergencies. Another good idea is to slide a spare $20 in your phone case.  

Final Thoughts

When you get the urge to lace up your boots and grab your pack, perform a quick gear check, and inspect the inventory to make any adjustments for seasonal or weather changes. Maybe it's the addition or subtraction of a wool hat, a parka, or a sleeping bag. The most important aspect is figuring out What’s Important Now (WIN). At a bare minimum you need a tool to cut with, cover to protect yourself from the elements, cordage to tie things down, and something to hold food and water in. This may helped you narrow down your choices for what goes in a bug out bag or a get home bag. Don't pack anything in the kits that you haven't used or tested on your own. Testing  gear can take place in the woods behind your house, a living room or patio, in class settings under the watchful eye of a mentor, and even throughout daily life. You don't need to head to the mountains to know whether your sleeping bag sucks or not. It's much more preferable to spend a few uncomfortable or hungry nights near home now than than to discover your go bag set up doesn't work during an emergency.

Remember to WIN and PACE yourself. Add in a healthy dose of critical thinking and you’ll go far.

About the Author

Matt Williams is the lead instructor and owner of Foundation Defense, a Michigan based firearms training school. As an avid student of all things, you might see Matt attending a class in your area.

Related Posts


Tiga Tactics Knife Defense Seminar: Alertness and Survival in San Francisco

What would you do if you were forced to face off against an aggressive stranger bent on attacking you with a knife? Depending on your level of experience, that terrifying scenario could induce one of the three most common reactions to a life threatening situation: fight, flight or freeze. Locking up with fear is clearly the worst reaction. Not being in that situation to begin with is ultimately the best option, with getting away as fast as possible a close second. But if you had no choice but to fight, is there a way to do so without getting sliced to ribbons? Tiga Tactics, a self-defense and consulting company with over 60 years of combined martial arts experience has several effective answers to knife defense, and we attended their Knife Defense Seminar in San Francisco to learn more.

Photo of Patrick Vuong an Conrad Bui, instructors for Tiga Tactics, demonstrating knife defense skills.

Above: Instructors Dr. Conrad Bui and Patrick Vuong demonstrate knife defense techniques.

Day One: The Learning Begins

Our adventure into the world of  knife defense kicked off with some easy to learn fighting stances and simple strikes. We jumped headfirst into the basics, the nitty-gritty details that form the groundwork of practical self-defense techniques that could be your lifeline in sticky situations. These techniques were derived after studying over a thousand hours of real-world knife attacks and picking out the most common patterns that emerged. In the murky world of street fights, even through the chaos and adrenaline, they often encompass four primal types of attacks: knife attacks, hooks, bludgeoning weapons, or even firearms. Recognizing these is like acquiring a secret decoder to untangle the mess in real-time. When it comes to knife attacks, the two most common movements the aggressors make are the underhand thrust, also known as the “sewing machine,” and the overhand swing, fondly known as the “psycho stab.”

Photo of an attacker using the

Above: Assistant instructor Sherman Chin demonstrates how to break free from a simulated aggressor trying to halt his offensive strike.

Since the focus of the seminar is on knife attacks, we quickly learn some of the most efficient defensive and offensive physical reactions to this type of assault.

Hand stance: It all begins with the hand stance. Imagine something is being thrown at your head, your first reaction will most likely be to cover your face to prevent your eyes, nose and ears from being damaged. This is a natural instinct ingrained into all of us to protect our biological sensory inputs. We can also use this initial reaction to get ourselves in an optimized position to both defend and counter attack an aggressor. Hands held high, not to cower in fear, but to set up a defensive fortress close to your head. This isn't just defense—it's a poised tiger, ready to strike when the moment demands.

Photo of two students of the Tiga Tactics Knife Defense seminar in San Fransisco.

Above: One-by-one, each seminar attendee faces off against everyone in their group, pushing their newly learned skills to the limit.

Strikes: We then switched gears, throwing ourselves into the whirlwind of strikes. Our repertoire expanded with palm strikes, loose-fingered finger washes that target our attackers eyes, precise elbow strikes—taking care not to overextend our reach, throwing off our balance—and powerhouse knee strikes. The heel of the palm is used instead of punching with a closed fist to prevent damage to your knuckles. When in the midst of a knife defense situation, the last thing you want is to be crippled with pain because your counter attack broke a finger or shattered a bone.

Photo of two knife defense students are practicing offensive palm strikes.

Above: The palm strike prevents broken hand bones and bruised knuckles.

Situational Awareness: The Secret Ingredient

Surviving a sudden showdown isn't just about how hard you can hit—it's often about your tiger-like situational awareness. Using environmental cues, such as a random car honk or a bing from your phone, you can pull up your mental drawbridge, steady your breathing, and crank up your surroundings' observance. Often when potential assailants look for targets, they are looking for people who are clearly not paying attention to their surroundings. This could be someone who's head never leaves the screen of their phones, people who are lost in a podcast being played through ear buds, or even someone standing with bad posture. Simply standing up straight and giving the appearance that you are aware of your surroundings can be enough to stop a bad actor from selecting you as a target. Our instructors also made a point to remind us that this isn't just about feeding your inner paranoia. It's also about spotting the beautiful details life splashes around us.

Photo of a woman on her phone sitting on a curb. She is looking around suspiciously.

Above: These days, people spend a lot of time looking at phones. This makes them ideal targets for potential assailants.

Mastering Knife Defense

Diving into the realm of knife attacks, remember: most folks with a knife are scared, confused, often with little to zero training. Even though they are the ones with the intent to harm another with a blade, their biological systems are probably surging with catecholamines like adrenaline, making it hard to think rationally. This is why they resort to one of the two easiest to carry out attack motions, the sewing machine, or the psycho stab. To effectively defend against these moves we are taught the secret sauce acronym, PRO (Protect. Reposition. Offense).

Protection: Safety first. Before you can launch into your own counter attack, you need to make sure that the sharp end of a knife isn't free to harm you. To do this, we practice an easy to learn blocking technique that once again, draws on your natural instinct to shield yourself. Imagine what your first physical reaction would be if someone with a knife is coming at you, and they swing. Chances are likely you will try to block the swing with your closest forearm. But you can take this a step further by using your second arm to create an “X” shape, temporarily trapping your assailants knife wielding hand in the top of the “X”.

Photo of two knife defense students sparing. One is using the low X-block against the other.

Above: The X-block is a quick and effective way to halt an initial knife stab.

From here it becomes a matter of locking the blade of the knife into a safe position by grabbing the wrist of the wielder and holding it in such a way that they have a difficult time getting loose. Mastering the X-block technique, we learned to neutralize both high and low knife thrusts.

Reposition: After the knife is in a position that will prevent you from getting severely cut, you'll need to move your own body into a place where you can strike your opponent. Ensuring there is no space between you and the attacker will prevent them from breaking loose or using a gap to strike through your defense. Secure the wrist, straighten those elbows, and keep the attacker beneath your center of gravity. If this procedure sounds intense, you are correct. Even practicing in a safe environment, it was shocking to experience first hand how quickly a situation can escalate.

Photo of Tiga Tactics instructor Patrick Vuong, and assistant instructor Sherman Chin demonstrating repositioning.

Above: By holding on tightly to the wrist, the knife cannot reach it's intended target.

Offense: Only after seizing control, did we switch into offense mode. Using the strikes from earlier, we attacked in a way meant to disable the attacker long enough to get away, or destroy their intent to harm.

Knife defense instructor Patrick Vuong demonstrates an eyewash offensive strike.

Above: Once the blade is secure, more energy can be spend on offensive strikes.

Day Two: From Defense to Offense

Having traversed the wild landscape of self-defense on day one, we were ready to delve deeper into the realm of knife defense and offense on day two. For the purposes of the Knife Defense Seminar, it means knowing how to deploy your own EDC knife to defend yourself from an aggravated assault.

Like detectives at a crime scene, we started with forensically analyzing videos of real-world attacks. Watching the videos left most of us unnerved, since the attackers seemed mentally ill and random, and it was easy to empathize with the plight of the victims. However, there was a silver lining. Each of the attackers had an obvious tell that would have given them away to the situationally aware observer. The hands, and the demeanor of the attackers in the videos leaked clues of an impending attack. This learning point was used as a segue to drive home how important mindset is, not just in self-defense, but as an everyday habit.

Above: People who attack with a knife typically use a few common methods, such as the overhand “psycho stab” demonstrated here.

Staying alert, using those environmental cues as reminders to calm your breathing and look around, has to be something practiced and developed. Not being a victim, or selected as a target, can be partially influenced by the choices we make. Hopefully, increasing this situational awareness gives you the upper hand when you do have to defend yourself, or go on the offensive. For those situations where a defender is not free to escape, such as when they find themselves in in a building or enclosed space, we bolstered our mental toolkit with the Four E's – Entry, Enemies, Escape, and Extinguishers.

Entry: Be aware of entry points, and the demeanor of those who pass through them.

Enemies: Keep a closer eye on people nearby who exhibit unstable mannerisms, who seem out of place, or clearly look like they are up to no good. Listen to your instincts.

Escape: Just as important as entry points, is to be aware of potential escape routes. This could be windows or utility doors. Avoid placing yourself in positions where you are boxed in to an unescapable corner.

Extinguishers: If the worst case scenario happens, being aware of where the fire extinguishers are can give you a surprising advantage. Extinguishers can be sprayed to obscure an attackers vision, or even used as a bludgeon.

Black and white photo of an underground subway tunnel.

Above: When entering a building or vehicle, try not to place yourself in a location with no escape routes.

The Knife Defense Exam

Then came the crescendo—a gripping knife defense exam. We broke into two groups and launched into a mock battle, defending against each group member's knife attacks. Attacks were randomly left to fellow attendees to decide, either the low, underhand sewing machine attack, or the high, overhand psycho stab. It was as close to a real knife attack as we could simulate—a terrifying, yet eye-opening experience. Each person in the seminar practiced the PRO concepts against at least 10 other attendees under the sharp eyes of our instructors, testing  our reactions and physical endurance. By the end of this exercise, a little sore and fatigued, we realized that every knife defense situation is different, and the only way to truly be ready for one is to maintain awareness, and continue training for the scenario in the future.

Photo of two students facing off during a knife defense sparring match.

Above: Trying to draw a knife while being attacked requires a cool head and the proper technique.

Afternoon Session: Knife Laws, Perception, and Carry Positions

Post-lunch, we moved into the complex maze of knife carrying laws. Whether or not we like to think about the legality of the situation, the truth of the matter is, if you have to defend yourself with or against a knife, you'll probably have to defend yourself in court. Following local knife laws could make or break the situation. Most places have laws regarding how you can carry a folding blade or fixed blade, how long your blade can be, and what style of blade you can carry. Being ignorant of these laws is not an excuse to disregard them, and can get you into trouble.

There was also the perception aspect of carrying a knife. Most people will have different emotional reactions depending on what style of blade they are looking at. For example, someone looking at the knife on a Leatherman Multi-Tool will react in a much different way to looking at a karambit. This emotional response will play a role in court. If you decide to carry a knife with a design that looks different from the generic “steak knife” look, be prepared to deal how people feel and potentially react to it.

Studio photo of Bastinelli's Grumpy hawkbill blade unsheathed.

Above: Regardless of their real-world functionality, knives with unique designs can be perceived by the general public as more deadly than others with traditional designs.

We navigated through different carry positions—in the pocket, waistband, pocket clip, dangle sheath, or on the ankle. Each carry method has pros and cons related to ease of accessibility, as well as concealability. Legal restrictions aside, there is no right or wrong way to carry a knife, as long as it is carried consistently. Getting used to where the knife is located and how to access it will make the motions second nature. Consistent practice is the key here—you don't want to fumble when the moment arrives. One technique is to practice drawing the knife once per day whenever the knife is worn for the first time.

Drawing and Using the Knife

Drawing the knife isn't just an act—it's an art. From the ‘Stealth Draw' that keeps your knife hidden like a ninja, to the ‘Combat Draw', where your non-dominant hand plays defense while you unsheath your knife, we learned to adjust to the situation at hand.

Photo of two students seeing how fast they can draw their knives.

Above: How fast can you draw your knife? Facing off against another trying to do the same thing gives you an idea of how quickly a situation can escalate.

Stealth Draw: This is done by facing your opponent in such away that your blade is concealed the entire time you draw it. Motions are subtle. It should not be obvious to your aggressor that you are drawing a knife. The idea behind this is leveraging the element of surprise. If someone looks like they are intent on assaulting you, and all of a sudden a knife pops up out of nowhere, there is a strong chance they will change their mind.

Combat Draw: Using this technique is reserved for when the situation has already escalated into a full blown assault. You keep your attacker at bay with your non-dominant hand long enough to deploy your knife.

Photo of a students practicing the combat draw during the knife defense seminar.

Above: Utilizing the Combat Draw will keep your attacker at bay while your own knife is being deployed.

In both situations, once the knife is deployed, you must make a choice as to how you will wield you blade. We discuss keeping movements simple. Hammer grip and diagonal slashes from shoulder to opposite hip, and combining with quick short thrusts, will effectively cut anything in front of you while minimizing the chances your knife will be knocked from your hand. These techniques should only be used long enough to convince your attacker that they made the wrong choice, or until you have a long enough window to escape.

Final Thoughts: Embrace Your Inner Warrior

Our two-day journey concluded with a profound revelation: you, yes, you are the weapon. The knife? That's just your sidekick, a tool that you can use as a force multiplier that increases your effectiveness as a weapon. With regular training, you ensure that the sidekick never upstages the hero—you.

Students in the Tiga Tactics Knife Defense Seminar facing off against each other.

Above: Training should be effective, intense and fun. Tiga Tactics checked all of these blocks at the Knife Defense Seminar in San Francisco.

Are you ready to take a stand? To defend your life, or someone else's, if the situation demands? Can you choose to live, no matter what? That's the question we left with—a question that continues to echo in our minds as we step confidently into the world, armed with the knowledge that could one day save our lives.

Related Posts


Crucial Steps to Survive Catastrophic Flooding

Recent years have been marked by a significant increase in what most would consider extreme weather events. 2023 has been particularly brutal with record setting temperatures, wild fire smoke, and warming ocean surface waters. A warming atmosphere holds more moisture, and this has lead to a global rise in catastrophic flooding. Catastrophic flooding can test our resilience like nothing else. While no one can control Mother Nature's fury, we can equip ourselves with the knowledge to outsmart her wrath. Here's a comprehensive guide to help you prepare and survive catastrophic flooding.

Photo of catastrophic flooding within an urban center.

Above: Much of the urban infrastructure in the United States is not sufficient to deal with the massive increase in precipitation we are now coping with.

Floods can be truly devastating, wiping out homes, damaging infrastructure, and sadly claiming lives. This makes it essential to know what to do when you suspect a major flood is imminent. From making early preparations to ensuring your safety during the event, and the following survival tips can help you navigate such a disaster. Watch the video below and continue on to learn even more lifesaving tips.

Preparation is crucial. Start by gathering essential supplies and keep them in an emergency preparedness kit. Items like, like water, non-perishable food, first-aid kit, flashlights, and a battery-operated radio could be the difference between life and death. Keep these items in an easily accessible location, ideally in a waterproof container. You may also want to prepare a go bag with important documents, cash, and medication, in case an evacuation becomes necessary. Another great prep to make is having a dedicated early warning system like a Midland NOAA Weather Radio that will alert you to danger before you become irreversibly caught in it.

Studio photo of a Midland NOAA weather radio.

Above: This is a low-cost early warning system that could potentially save your life and lives of your loved ones.

Next, assess your home. If it’s possible, consider installing flood barriers or flood shields to protect your property from water damage. Always keep gutters and drains clean to ensure proper water flow. It's also wise to safeguard your home by elevating critical utilities, such as the electrical panel, water heater, and major appliances. Taking these steps can be expensive, so if constructing or installing preventative measures is not an option, at least knowing where the weaknesses are will make you more situationally aware in an emergency.

Above: Survival legend Les Stroud shares important survival tips for a flooded home.

Understanding the local flood risk is paramount. Keep a close eye on weather reports and stay informed about the situation in your area. Consider signing up for community alert systems for real-time updates. If you live in a high-risk flood zone, consider having a safe evacuation plan. Remember, it's safer to evacuate early than to wait until the last minute. Once a flood warning is issued, focus on ensuring your safety. Turn off utilities at the main switches and unplug electrical items to prevent potential electrical shock. Don’t forget to move valuable items to higher levels of your home, but only if you have enough time available to do so.

Photo of an urban area receiving catastrophic flooding.

Above: Flood waters can rise rapidly, get to an elevated area from which you can escape from. Avoid becoming trapped in an attic or other restricted space.

During the flood, prioritize personal safety over possessions. If the water starts to rise inside your home, move to the highest level but avoid enclosed attics to prevent becoming trapped by rising floodwater. Always avoid walking or driving through floodwaters. It takes just 6 inches of moving water to knock an adult off their feet, and 12 inches to move most vehicles. After the floodwaters recede, be cautious while returning home. Fast moving water can make buildings and roadways unstable, or expose things like high voltage lines or gas and sewage pipes. Check for structural damage before entering any building and be mindful of potential electrical hazards.

Above: One of the most dangerous situations during a flood is getting stranded in a vehicle.

Being prepared for catastrophic floods involves careful planning, maintaining a keen eye on the weather, securing your home, and knowing when and how to evacuate. Having some simple items in place, and knowing what to do in the event of a flood event may help keep you level headed long enough to survive the worst.

Related Posts


Review: Valhalla Tactical Baldr SOL and HRT AWLS Weapon Lights

Light is an essential aspect of self defense and home defense. Many violent crimes occur under cover of darkness, and if you can't see what's in front of you, you won't be able to defend yourself against it effectively. This is why every defense-oriented firearm we own — rifle, shotgun, or pistol — is equipped with a weapon light. We've tested and reviewed countless different weapon lights over the years, but recently had an opportunity to get our hands on two variants of a new light design: the Valhalla Tactical Baldr SOL and the HRT Advanced Weapon Light System (AWLS). The two companies collaborated to produce a family of weapon lights with Valhalla's clever omni-directional activation switch. Read on for our review and impressions of the Baldr SOL and HRT AWLS.

HRT & Valhalla Tactical Collab

The photo above shows a HRT AWLS prototype we received for testing. Shortly after we received it, we also received Valhalla Tactical's final production version of the light design, known as the Valhalla Tactical Baldr SOL. Both lights are clearly based on the same architecture, and each offers a full-size 18650/2x CR123 version as well as a compact 18350/1x CR123 version. Both lights use the same Valhalla Tactical ODA tailcap with an innovative omni-directional activation switch. Much like a joystick on a video game controller, it can be pushed in any direction to activate the light in momentary mode, or clicked inward for constant-on mode. ODA sensitivity inserts are also included to fine-tune how much pressure is required to activate the light.

If you prefer a standard push-button tailcap, the “joystick” portion unscrews to reveal a rubber button that works like any traditional flashlight tailcap.

Both the HRT AWLS and Valhalla Tactical Baldr light bodies feature integrated MLOK mounts which allow the light to be installed directly onto most rifle, carbine, and shotgun handguards without a need for additional components. This solid aluminum, monolithic design is strong and simple, with only two mounting screws as opposed to four or more. Here's a photo that shows the AWLS installed directly on the handguard of a Primary Weapon Systems MK116 carbine alongside Walker Defense Research NILE grip panels and a BCM vertical grip:

After a close examination, the Valhalla Tactical and HRT tailcaps and bodies appear identical, aside from the laser-engraved logo near the mounting surface. The head is where the two lights begin to differ noticeably. Both heads use industry standard SureFire M600DF thread pattern, so they can be installed onto Dual Fuel SureFire light bodies.

In the photo above, the head on the left is Valhalla Tactical's version, known as the PDG DF Mod 1. It produces a maximum of 1,600 lumens and 58,000 candela. HRT's head, pictured on the right, is known as the PSF-Mk6. It produces 1,700 lumens and 90,000 candela.

For those who aren't up to speed on flashlight terminology, this means that the total light output of these heads is similar, but the beam pattern is quite different. The Valhalla head creates a softer and wider beam that's preferable for close to intermediate range, while the HRT head produces a focused spotlight pattern that's better-suited to long-distance engagements. The version you prefer will depend on the environment where you plan to use the light.

One more noticeable difference is that the HRT head's output color is rated at 5,500K, a neutral “daylight” white. The Valhalla/PDG head's output color is slightly cooler — we'd estimate it's about 6,500K. Both are within the color range we'd consider acceptable for weapon lights.

Testing the Baldr SOL & HRT AWLS

The 18650-size HRT AWLS fit nicely on our 16-inch PWS carbine, and seems well-suited to this application. Activating the light is as simple as reaching a thumb over the bore and pushing down on the ODA “joystick.” Constant activation is also easy to access with a quick press forward.

It's also worth noting that this light body is reversible, so you can swap the head and tailcap if you want to use the light on the left side of a weapon. Along with inverting the body on either side, this allows for four different mounting positions.

Granted, the HRT AWLS we have is a prototype, but we did notice a strange activation delay with this version of the light. When we press the switch, there's about a 1/2-second pause before the light turns on. This is not the case with the production-ready Valhalla Tactical Baldr SOL variant, which activates instantly as you'd expect. It's also not the case if we swap the Valhalla DF Mod 1 head onto the HRT body, so it appears to be isolated to the HRT PSF-Mk6 prototype head.

We can't say for sure if this issue carries over to the production HRT head, since we haven't used one yet.

As for the Valhalla Tactical Baldr SOL, we attached it to a Magpul forend on our custom Vang Comp Systems Remington 870 shotgun. Since this gun doesn't have much room for a remote tape switch, the all-in-one design is a great fit. The Valhalla head also creates a wide beam pattern that's suitable to close-range shotgun uses.

Above: The Valhalla Tactical Baldr SOL with ODA tailcap and DF Mod 1 head attached to a Magpul MOE 870 shotgun forend.

Final Thoughts

The HRT AWLS and its sibling the Valhalla Tactical Baldr SOL are refreshing additions to the list of weapon lights currently on the market. The ODA tailcap is one of our favorite new products to hit the market in recent years, winning Recoil's Best Accessory of SHOT Show award in 2022. We love that it offers all the functionality of a regular clicky tailcap with the added versatility of a removable, omni-directional joystick option. The light body, whether you choose HRT's or Valhalla's version, is sturdy and easy to install on any MLOK rail without a need for additional mounts or adapters.

As for the HRT PSF and Valhalla DF heads, each offers pros and cons for differing environments. The wider beam and lower candela of the Valhalla head offer better visibility in enclosed spaces, while the HRT's higher candela and better throw would be preferable for punching through obstructions such as car window tint or for use in outdoor engagements beyond 100 yards. The activation delay we noted with the HRT head is an annoyance, but that may be a prototype-exclusive issue.

Lastly, we should discuss pricing. A complete Valhalla Tactical light setup (head, body, and ODA tailcap) costs $190, while a complete HRT AWLS setup costs $295. This $105 price difference is hard to stomach, since (as far as we can tell from testing and hands-on examination) the only functional difference between the two lights is candela and color temperature. The tailcaps are identical, and the bodies are identical aside from the logo. But HRT's standalone head costs $200, only $9 less than a Modlite OKW or PLHV2. For this reason, the Valhalla variant seems more appealing unless high candela is absolutely mandatory for your application.

For more information on the HRT AWLS, go to HRTtacticalgear.com. For more information on the Valhalla Tactical Baldr SOL and ODA tailcap, go to Valhallatactical.com.


“Survivalist” Manhunt: Craig Caudill’s Insights Of a Fugitive on the Run

In the heart of a suspenseful escape incident in Pennsylvania, we are given a glimpse into the intricate world of survival, evasion, and difficulties law enforcement must overcome to catch a fugitive on the loose. Our guide is none other than recently interviewed Craig Caudill, the Director and Instructor at the Nature Reliance School in Kentucky, renowned for his expertise in wilderness and survival training. Amid the ongoing search for Michael Burham, an escaped inmate with some self-taught survival skills and military training, FOX news asked for Craig Caudill's insights. This interview unveils the harsh realities and complex dynamics of survival in the wilderness, as well as the strategies for evading capture, all drawn from this unfolding, real-life scenario. Watch Craig's interview, and read more about the situation below.

Photo of a roadside sign for the Allegheny National Park, which Craig Caudill's insights suggest holds numerous survival challenges.

Above: The Allegheny National forest is vast, spanning a little over 800 square miles.

Background

The search for escaped inmate Michael C. Burham continues into its seventh day as of July 13th, 2023 in northwestern Pennsylvania. Burham is suspected of escaping by climbing on a pull-up exercise machine in the prison recreation yard, getting onto a roof, and sliding off the prison roof using a rope made of bedsheets which were tied together. He is wanted in connection with the fatal shooting of Kala Hodgkin, 34, and also accused of kidnapping an elderly couple, stealing their SUV, and fleeing to South Carolina.

Burham is described as a “self-taught survivalist with military training.” This includes 12 years as a Water Treatment Specialist (92W) and Utilities Equipment Repairer (91C) in the Army Reserve from February 2008 to December 2020. He had no deployments, and held the rank of Sergeant at the end of service. Col. George Bivens, deputy commissioner of operations for the Pennsylvania State Police, warns that Burham should be considered armed and dangerous.

The search for Burham has extended into the Allegheny National Forest, with authorities finding potential stockpiles and campsites believed to be connected to him. Rewards totaling $19,500 are offered for information leading to his capture. Multiple agencies are involved in the search, including the Pennsylvania State Police, U.S. Marshals Service, U.S. Forest Service, U.S. Border Patrol, and others.

Wanted poster for escaped fugitive Michael Burham.

Situation Analysis

Pennsylvania's Allegheny Forest, where the fugitive is presumed to be hiding, is a challenging environment. This mixed hardwood forest is a hotspot for insects and wildlife, presenting constant threats to safety and comfort. Craig explains that despite the forest having resources for survival, the rugged terrain, limited resources in some areas, and the need to evade law enforcement make this a daunting survival situation for the inmate.

Survival challenges that Burham faces are numerous, extending beyond evading law enforcement. Craig Caudill highlights that everybody, regardless of their situation, has core needs: safety, security, and maintaining a stable body temperature. These needs become more acute when trying to survive outdoors, where factors such as hydration and mental stress come into play. Craig points out the critical role of mindset in survival situations, and suggests that Burham's mental resilience and survival skills might be tested in the face of the physical, psychological, and environmental pressures he is dealing with.

Craig Caudill's insights go on to suggest that the constant mental strain of being hunted, dealing with harsh environmental factors, and possibly even encountering wildlife could be wearing Burham down. Without training and experience in handling stress in similar scenarios, the fugitive could find himself using up more of his energy reserves, both physically and mentally. This heightens his need for sustenance and water, simultaneously increasing his risks as he needs to source these from the environment. All of these factors cumulatively increase the likelihood of his capture, as they push him further into making potentially critical mistakes.

Photo of a dam located in the heavily forested valley of the Allegheny wilderness.

Above: Twisting water-ways and steep topography present numerous challenges to both law enforcement and fugitive alike.

Public Safety

In the face of a manhunt like this, it's essential to recognize the importance of community vigilance and collaboration with law enforcement. Craig Caudill's insights are an invaluable resource, however, it is important to remember that searching for a fugitive on your own is dangerous, should not be attempted, and is best left to the authorities. Meanwhile, it's crucial for the public to remain alert and maintain situational awareness, particularly those living in or around the Allegheny Forest. If anyone spots anything suspicious or has any information regarding the whereabouts of Michael Burham, they should immediately report it to the local law enforcement authorities. Public safety is paramount, and every bit of information, no matter how small it might seem, could be a vital piece in resolving this tense situation.

Update: The Hunt is Over

On July 15th, Burham was caught in the backyard of a Pennsylvania couple, Ron and Cindy Ecklund. The couple heard their dog barking and went to investigate, only to come face-to-face with Burham, who told them he was camping. The Ecklunds contacted the police, who arrested Burham and paid them a $2,000 cash reward. They may also receive additional rewards of $10,000 from Pennsylvania Crime Stoppers and $7,500 from the U.S. Marshals Service.

As for Burham, he was reportedly found with two bags of supplies including food and ammunition in “several different calibers,” although he did not appear to have a firearm at the time of his arrest. He was wearing a t-shirt and prison pants turned inside-out. In addition to his new escape charge, he will return to prison to face his previous charges of carjacking and kidnapping. He is also reportedly a suspect in homicide and rape cases in Jamestown, New York.

Related Posts


HRT LBAC Plate Carrier: The Evolution of Body Armor

Ever since humans have decided to use pointy objects as a persuasive tool, they have been attempting to figure out ways to counter the tactic. Compared to its ancient ancestors, the HRT LBAC plate carrier is a modern marvel. Early protective garments were made of leather, fur and other lightweight materials, and usually only covered the torso and arms. Primitive armor offered some protection against slashing and blunt force impacts, as well as some degree of warmth and protection from the elements. As warfare and metallurgy advanced, so did armor design. Bronze, iron and steel were forged into plates and segments that could be arranged to maximize protection against a variety of weapons. Suits of armor such as these offered increased protection but were expensive to make, worn only by the wealthy elite.

Photo of tanned hide next to an steel helmet and sword.

Above: Using things found in nature, like animal leather and raw metals, ancient humans invented ways to toughen their fleshy exteriors.

Fast forward a few thousand years, and the advent of black powder largely negated the effectiveness of steel plate. If a soldier couldn't hunker down in a tank, or behind reinforced concrete, firearms would easily pierce through historic steel plate armor. So instead of trying to run around with the weight of steel thick enough to stop a bullet, ancient armor was ditched in favor of being able to treat a wound quicker. Although this worked for a while, simply getting shot was still not the ideal way to engage in combat. Eventually chemistry and industry improved to a point where the ceramic plate was invented, and humanity has been using it to this day. Ceramic is lighter, and disperses energy better than steel, making it ideal for body armor.

Photo of a civil war reenactment.

Above: For a time, armor for the average soldier didn't really exist, instead relying on easy access to treat wounds quickly.

Having an advanced style of body armor also necessitates finding an effective way to wear it. Generals on the battlefield no longer assemble soldiers in rank and file formations which move methodically in an open area. These days, speed and mobility is the name of the game. To maintain a high level of agility, and stay armored at the same time, ceramic plates are used mainly to cover the body’s vital organs, leaving the arms, legs and lower half of the torso to move freely. Of course, this doesn’t offer perfect protection, but since all of the vital organs in a human body are in the center of its mass–the easiest place to aim at with a firearm–it is an effective way to stay alive in a firefight.

Photo of soldiers standing together.

Above: Combining quick access to wounded extremities with armor protecting vital organs, modern soldiers receive the benefits of both protective measures.

Many systems have been tried in an attempt to keep that ceramic plate covering the most necessary bits. Flak jackets in the 60’s were fitted to have a plate slide into the front and back, but these were awkward, and still felt cumbersome. During the early 2000’s, advances were made in the form of the Outer Tactical Vest (OTV), and later the Improved Outer Tactical Vest (IOTV). Although they offered better mobility, it was still a bit bulky and exceedingly heavy. Moving in and out of vehicles and buildings wearing an IOTV could be difficult on its own. Start carrying any extra gear, ammo, or equipment and the extra weight added up quickly. Then along came the Adaptive Vest System, what is now colloquially known simply as a Plate Carrier. Plate carriers are minimalistic, ditching the extra Kevlar jacket bulk of an IOTV, and once soldiers began to take note of how great they functioned in combat, the body armor industry has never looked back.

High Risk Training (HRT)

HRT is a company that has been working with modern tactical body armor since the early 2000’s. They originally began as a company that focused solely on tactical training before evolving into one that produces tactical gear. During the training phase, HRT noticed how traditional plate carrier systems could be improved, and they used this insight to develop a product reflecting what ideal gear should look like. They pride themselves on making a product that can be used reliably in real-world, worst-case scenarios, including the Load Bearing Adaptive Carrier, otherwise known as the LBAC. By combining the HRT experience with a plethora of customer feedback, they designed the LBAC from the ground up to exceed expectations. The results are nothing short of impressive.

Photo of the HRT LBAC plate carrier and its numerous accessories.

Above: The LBAC is modular and highly customizable.

HRT LBAC Plate Carrier

Following the minimalist approach, the base LBAC, without any plates, pouches or accessories weighs a mere 2 pounds. Add two 10” x 12” ceramic plates and the LBAC can weigh between 10 and 14 pounds. That is less than half the weight of its predecessor, the IOTV. The cummerbund, back and shoulders are made with a stiffened material to evenly distribute weight around the body and avoid producing hot spots. Plates are held securely in place with a wide Velcro panel accessible from the bottom. The front and back panels are nearly form-fitting to the plates, so they do not slide around once they are inserted into the carrier.

Studio photo of the front of the HRT LBAC plate carrier.

Above: A tough internal support system ensures the weight of the armor plates and any attached accessories is evenly distributed.

There are a few ways to adorn the LBAC depending on the user's preference. At each end of the cummerbund, and in the front ends of the shoulder harness, are quick release buckles. One quick tug down or to the sides, and the carrier comes free. Reattaching the buckles is easy as well. Just line up the pegs and they click back into place. Manipulating these buckles is as easy with bare hands as it is with thick winter gloves, which could be lifesaving if the wearer found themselves trapped underwater, or with the need to quickly get clear of whatever they became snagged on. Releasing the top buckles while leaving the cummerbund connected, or vice versa, gives access for medical or thermoregulating purposes while still offering a level of protection. In addition to the buckles on the cummerbund, Velcro panels hold the sides securely to the front panel of the LBAC, and can be torn free should the need arise.

Studio photo of the back of the HRT LBAC plate carrier.

Above: The back and waist supports of the LBAC are fitted with Velcro and MOLLE to support a variety of attachments and gear.

Besides the advanced load bearing capabilities, one of the stand-out features of the LBAC is its customizability.  HRT has designed a truly versatile system of interchangeable and compatible pouches and placards. No matter what an operator's role is within a stack, or what the tactical needs may be, there is a way to customize it to perfection. Having seen products fail during training exercises, special attention is made to ensure the LBAC and its accessories are constructed to a high standard. All the material is made with 500 denier Cordura and double stitched, so even if this carrier were being dragged through a gravel pit, it would come out the other side intact. Studio photo of a magazine pouch that can hold three 30-round mags.

Above: Quick release bungie cords keep magazines in place while offering a hasty means of grabbing one.

Placards, the accessories that attach to the front of the LBAC, focus primarily on what is most important in a fire fight: having enough ammo. There are AR and pistol mag options, as well as a shotgun placard. Most of these are one magazine thick, keeping the front profile slim and allowing the wearer to move their weapon platform around easily without a huge stack of magazines getting in the way. However, with the MOLLE placard, magazine pouches with greater capacity could be added, and the HRT Maximus Placard includes two admin pouches with plenty of room for other supplies. To cover every possible base, there are “hanger” accessories that attach below the front plate, like the Tactical Hand Warmer for cold weather scenarios. All of these placards can be quickly swapped via buckle and Velcro, depending on what the mission dictates.

Studio photo of a hand warming placard that can be attached to body armor via Velco.

Above: For cold environments, a hand warming pouch can be utilized to keep trigger fingers at the ready without the bulk of gloves getting in the way.

What often goes overlooked by many people who watch movies with military operators, is how often back panels are used by other members of the team, and not necessarily the person who wears it. Often they are used as tactical supply depots, filled with extra ammo, batteries, food, medical gear, and even equipment used to breach doors and windows. Instead of worrying about how to keep all this extra stuff easily accessible on oneself, an operator can simply use the person in front of them. In this regard, HRT Back Panels further increase the versatility of the LBAC. Rather than increasing the size of the wearer's profile with an assault pack, the LBAC has customizable packs that can be swapped out or rearranged. A combination of dual YKK zipper sections, MOLLE, and Velcro keep each back panel fixed firmly in place. One of the largest panels, the HRT Zip-On Hydro Max is only 10” by 10” by 4” and can hold a 1.5L hydration bladder and a ton of extra gear. Other options like the General Purpose, or Dual Removable GP pouches can minimize the bulk while still adding plenty of storage, and a dedicated MOLLE panel can hold anything with MOLLE attachments. Just like with the placards, back panels can be interchanged and swapped for any situation.

Studio photo of an HRT LBAC back admin pouch.

Above: A robust back panel for the plate carrier can hold supplies and gear easily accessible by teammates.

Non-Military Plate Carrier Uses

If there is anything the past few years has taught us, it is that danger can manifest any time, anywhere. Being on the business end of an angry person with a firearm is not restricted to the battlefield. Just ask the business owners whose shops were looted and set on fire throughout the United States, or the innumerable refugees from broken and war-torn countries. There are literally tens of millions of people, even now, who have been forcibly displaced due to violence. How many lives could be saved with the help of some modern day body armor?

Photo of a refugee camp at night with city lights illuminating the sky in the background.

Above: Civil unrest, refugees seeking help, and people living in dangerous places could potentially prevent serious injury or death by wearing armor.

Having armor is no longer just for elite warriors or military personnel. It has become affordable, lightweight, and easy to use on a daily basis. It’s a sobering reality, but as law enforcement agencies face budget cuts, and crime rates rise, the need for self protection also increases. Even if it can’t be loaded down with ammo, an HRT LBAC could be donned and filled with everything needed to move to a safer location quickly. For those who train with firearms regularly, wearing body armor while doing so could add a new level of challenge to the training regimen, or increase survivability in a real-world scenario.

Photo of paramedic first responders unloading a spine board from an ambulance at night.

Above: EMTs rushing to the scene of a dangerous emergency to help people could be at risk from bullets and shrapnel.

Outside of the civilian realm, other first responders could make great use of body armor. EMTs responding to triage during a dangerous situation like an active shooter, or bombing with the potential for a secondary device, could be armored and protected. An HRT back panel or placard filled with medical supplies would be easy to get to and use once on scene. Search and Rescue operators attempting to locate a despondent and potentially armed missing subject could use body armor to mitigate the risk of having a firearm pointed in their direction. Basically anyone who has the chance of being shot or hit with shrapnel could save their lives by having a plate carrier at the ready. And with a company like HRT making a versatile product like the LBAC, anyone with the resources could have a greater chance of making it through the worst of times.

For more information on HRT Tactical Gear and the LBAC plate carrier, go to hrttacticalgear.com.

Related Posts


Unsolicited Smartwatches: Potential Threats and How to Respond

Service members across the military have recently become targets of a concerning trend involving unsolicited smartwatches being delivered to their mailing addresses. The DABENXIANG D18 watches in question seem to be imitations of more expensive models, the primary function of which is as a personal fitness tracker. When the watches are turned on, the unsuspecting recipients discover that the devices automatically connect to Wi-Fi and establish unauthorized connections with their smartphones. This alarming breach of privacy grants unknown individuals access to a wide range of personal user data.

Photo of a smartwatch being worn by someone in a camouflage military uniform.

Above: In recent years, smartwatches have become popular among civilians and military personnel alike. However, like any electronic device, they are vulnerable to malware and cyberattacks.

Potential Risks and Malware

Although receiving a free piece of hardware seems like a sweet deal at first glance, unsolicited smartwatches pose severe risks as they may come with pre-installed malware designed to exploit the recipients' personal information. In the event that these malicious software programs are present, the sender gains unauthorized access to an array sensitive data, including banking information, contact details, and account credentials such as usernames and passwords. The phones may also transmit other data such as tracking the service members location via GPS. What initially may seem like a pleasant surprise ends up compromising the individual's digital security, their financial stability, and potentially their personal safety.

Photo of someone in the military checking their smart phone.

Above: We carry these smart devices with us everywhere, most of the time oblivious to the fact that they are listening through the built in microphone, and transmitting personal data.

Privacy Invasion through Voice and Cameras

In addition to data theft and unwarranted tracking, the smartwatches in question may also contain malware that grants unauthorized access to the built-in voice and camera functionalities. This allows nefarious actors to eavesdrop on conversations and access accounts associated with the smartwatches. Given the sensitive nature of what some people in the military work with, wearing an electronic device received through the mail in this manner is akin to being accompanied by a foreign intelligence agent. This invasion of privacy further emphasizes the need to exercise caution with unsolicited equipment, and be increasingly vigilant for those who may not be aware that this occurring.

Photo of someone in the military checking sensitive electronic equipment.

Above: Tracking where military personnel may be located and listening to what they are saying, could have disastrous implications to national security.

Brushing Scam Alert

One does not have to work in the military to be a target of a deceptive practice known as “Brushing.” This tactic involves the mailing of products, often counterfeit, to random individuals with the aim of generating positive reviews under the recipients' names. By doing so, the sender intends to gain a competitive edge against established products. Recognizing this scam highlights the potential motives behind the unsolicited delivery and underscores the importance of taking appropriate measures. However, smartwatches being sent specifically to military men and women potentially indicates a more sinister motive. Recent data breaches within the government compound the danger of people privy to secret or compartmentalized being the target of a brushing scam.

Photo of a nefarious cyber criminal checking the internet in a dark room, the glow of the computer reflecting in their glasses.

Above: As data harvested from smart devices is becoming more prolific, so too is the rise in cyber crime.

What to Do If You Receive an Unsolicited Smartwatch

If you happen to receive one of these suspicious devices, it is crucial that you refrain from turning it on. Government employees, private contractors, or anyone working on or near sensitive subjects should promptly report the incident to their local counterintelligence or security manager. Alternatively, service members can utilize the Submit a Tip – Report a Crime portal, which serves as an official channel for reporting such occurrences. Civilians can utilize their local law enforcements non-emergency contact information to report the receipt of an unsolicited electronic device. By taking immediate action, you contribute to safeguarding your personal privacy and protecting others from falling victim to this concerning trend.

Photo of a group of military personnel happy to be receiving mail.

Above: Most people enjoy receiving free things in the mail, but sometimes it pays to question the intent behind the gift.

Parting Thoughts

The emergence of unsolicited smartwatches being sent to military service members raises significant security concerns, and highlights the rapidly evolving world of big-data. With auto-connectivity to Wi-Fi and unauthorized access to smartphones, these devices expose users and the security of the nation to many potential dangers, known and unknown. The presence of malware further exacerbates these risks by compromising personal information and enabling unauthorized access to voice and camera functionalities. Recognizing the potential involvement of a brushing scam underscores the need to remain vigilant and take necessary precautions. By promptly reporting any such incidents and refraining from activating these smartwatches, individuals can play a crucial role in combating this growing threat to digital security.

Related Posts


Bug Out Bag List of Essentials

Spend enough time wandering the web looking up topics regarding disaster or emergency preparedness, and eventually you’ll run into terms like “bug out,” “bugging out,” or “bug out bag.” To the uninitiated, the concept of bugging out, or building a bug out bag might be a little overwhelming, since these terms can mean many different things to different people. Although some people perceive bugging out as only necessary for an end-of-the-world apocalyptic situation, this is absolutely not the case — a well-stocked bug out bag is a practical tool that can help you and your family through a variety of real situations. So, we've created a bug out bag list of the most essential gear you'll need for a wide range of emergencies.

But before we dive into some of the nuances, let’s explore what is meant by bugging out.

What Does Bug Out Mean?

bug-out-bag-list-essentials-civil-unrest

Imagine a devastating natural disaster is on its way to your home, and evacuation orders have been issued. Or perhaps your city is being rocked by waves of civil unrest, and you fear for your safety. Either way, it seems like the security of four walls and a roof is not going to last. In the chaotic times we live in, it probably doesn’t take much of an imagination to picture this happening to you and your family or loved ones. For many in this situation, leaving as quickly as possible, or bugging out, is the best solution to avoid impending catastrophe.

There are countless situations in which evacuating to a safer location may be necessary. Here are some examples of situations where bug out plans might be viable, ranging from ordinary to extreme. To delve deeper into preparedness measures for any one of those topics, you can click one of the links.

Bug out is simply the informal term used by people who develop an evacuation plan for when things get dicey, and safety is no longer guaranteed.

bug-out-bag-list-essentials-flood

Some examples of bug out plans you can see in your everyday life can be found in fire evacuation routes posted on the back of apartment or hotel doors, or the tsunami evacuation signs along roads leading to higher elevations. For most commercial and government organizations, having a plan to bug out is mandatory, and there are many free guides to help decision makers put one together.

Planning for disaster is not restricted to businesses and emergency responders, but the Federal Emergency Management Agency (FEMA) strongly recommends everyone be prepared as well. And one of the most important preparations you can make if you must bug out, is having a bug out bag list including all the essentials you’ll need to weather a deteriorating situation on the move.

Bug Out vs. Bug In

home-emergency-supply-stockpile

Above: Don't be overly eager to leave home in an emergency. Your home offers large stockpiles of food, water, medicine, and other resources you won't be able to fit in a bug out bag. It also provides a defensible position, especially if you've taken steps to enhance your home security.

Granted, leaving the safety of your home is not always the best solution — in many cases, sheltering in place can be a safer and much more comfortable way to ride out an emergency. Some call this “bugging in.” In these cases, a well-stocked bug out bag will still include many of the tools and resources you’ll need to stay safe at home. And, should the situation worsen, your bag will already be packed so you can hit the road quickly.

For more information on deciding whether to bug out or stay put, check out our previous article: Should I Stay or Should I Go?

How to Choose a Bug Out Bag

Having an emergency preparedness kit, a.k.a. bug out bag, is one of the single most important things you can do to be ready for a multitude of situations.

vertx-gamut

Above: The Vertx Gamut series of packs is popular for every-day carry as well as emergency preparedness. The subdued exterior conceals a multitude of useful features.

The exact situation you’re preparing for depends heavily on geographic location and your needs. For example, a bug out bag for someone living in the south side of Chicago will be dramatically different from someone living in a remote cabin in the Rocky Mountains. But your bug out bag list does not have to be overwhelming, simply start with a list of considerations and needs. Make notes about each of the points below, and feel free to write about your own concerns that arise while you do so. Thinking about what your present situation will heavily influence what gear you decide to bring, or not, when putting your bug out bag list together.

Variables to Consider

  • Location – Is your location urban, suburban, or rural? Will a dense population clog travel routes and present chaotic danger, or will a remote location necessitate a higher degree of long-distance mobility? Are there safe places to hunker down nearby, or will you be on the move for a long time?
  • Weather & Environment – Is it hot, cold, wet, or dry? Does the weather have a tendency to turn on a dime? Do you live in a place with a predicable climate, or will there be transitioning seasons taking place? It may be necessary to build a seasonal expansion kit with extra gear for incidents during cold or rainy months.

weather-dehydration

  • Bug Out Duration – This can be a bit tricky to forecast due to the chaotic nature of emergency situations. Bugging out from the path of a Category 5 hurricane, which could mean being away for months, is much different from getting way from civil unrest for a few days. It is also possible to prepare for both, but if you’re just starting out, try to prepare for what you think is the most likely situation. You’ll also find that there are some items that you can add to your bug out bag list that will cover a multitude of emergency situations.
  • Travel Distance – The adage, “one pound on your feet is five pounds on your back” quickly proves true when you start carrying a ton of gear in a backpack. If part of your bug out plan includes taking a vehicle to your next location, consider yourself lucky. But if you need to sling your bug out bag over your shoulders and make your way on foot, you’re going to want to think carefully about how far you’ll be able to travel with the extra weight. You can probably get away with a much heavier bug out bag if you’re only going a short distance (think 5 miles or less). For longer distances, the lighter the pack, the less energy you’ll need to spend exerting yourself, and the more likely you’ll prevent an injury.
  • Group Size – Going it alone is romanticized in movies, but it is not practical. Not only is there safety in numbers, but if everyone has a bug out bag, there are more supplies to draw from, and more of the weight can be distributed among the group. Are there children, elderly or pets bugging out with you? These factors will also influence what you decide to bring with, or how you decide to bug out.
    >See also: Safety in Numbers: How to Form a Preparedness Group

bug-out-group

  • Access to Resupply Points – Will you be able to restock and replenish perishable items along the way, or will you have to make do with what you have the entire way? A resupply point doesn’t have to be a department store, gas station, or another friendly household, it could also be a predetermined cache that was set up in advance. In any case, predetermined supply points can reduce the number of items you need to include in your bug out bag list.
    >See also: Buried Treasure: How to Build a Survival Cache
  • Secondary Threat Assessment – Life doesn’t occur in a vacuum, if there is a disaster, or emergency that warrants bugging out, then in all likelihood, you are not going to be the only person looking to escape the ordeal. It’s human nature to not think about danger until it presents an immediate threat, so in the process of bugging out, you may come across people who are desperately looking for supplies or a means to save their own existence. Someone who is looking to prevent their own demise is a potentially dangerous person, and it could save your life to prepare for this encounter. That could mean training in some form of self-defense, but it could also mean choosing a bug out route that reduces the amount you’re exposed to other people.Humans are not the only danger, bugging out from a natural disaster, like a wildfire, flood, or blizzard, presents an entirely different spectrum of dangers that mush be planned for. How would you bug out from an area being stricken with a contagious disease? There is also the possibility that you are someone you are bugging out with is not in the greatest of physical shape or may become injured along the way to your bug out location. Do you are someone you are bugging out with require medicine on a regular basis? Does that medicine require refrigeration? As you can see, after having only considered seven major points, bugging out is not as simple as packing a bag with granola bars and water bottles and sneaking to a clandestine camping site.

Bug Out Bag Size

Choosing the right bug out bag is a highly personal choice, and you’ll only find the perfect one by wearing it fully loaded under the circumstances you predict might happen. The bug out bag doesn’t even have to be a backpack necessarily. It could be a duffel bag, load bearing vest, chest rig, hip-pack, satchel, briefcase, or even a purse. Bags at the smaller end of the spectrum are often called day packs, 24-hour bags, or “get home bags,” and are designed to sustain you for shorter emergencies.

duffel-bag

Above: Duffel bags and roller bags can be viable for some bug-out scenarios. They're harder to carry on your body, but can easily be tossed into a vehicle.

Traditionally, most bug-out bags fall into a category referred to as 72-hour bags and are large enough to contain everything you need to be self-sufficient for three days. However, emergencies don’t magically end after 72 hours, so that should only be seen as a general rule of thumb. For this reason, we’re not going to recommend a specific size or carrying capacity — 30 to 50 liters is usually a good ballpark, but much smaller or larger packs may be necessary in certain situations.

Bug Out Bag Features

Some packs (such as modern hiking packs) have rigid internal support structures to help reduce the stress on your back, and packs with external frames (such as the classic military surplus ALICE pack) make it easy to lash other items or gear to the outside when needed. If you’re carrying a substantial amount of weight, a pack with an internal or external frame is highly recommended.

If you expect to be traveling long distances on foot with a heavy load, packs with shoulder load-lifting straps, lumbar support, and a padded hip belt will be crucial. Some packs will even adjust to the length of your spine. To wear a heavy pack properly, it is important to cinch the hip belt so the weight of the pack is resting on your hips before tightening the shoulder straps. Hips are load-bearing joints, and wearing a pack this way will prevent a lot of injuries. If you’re ignoring your hip belt, you’re going to get hurt.

military-pack

Above: A large pack offers more room for supplies, but also slows your movement and can lead to injuries if you're not physically fit. If you need to carry a lot of gear, look for a pack with comfortable shoulder straps, a sturdy frame, and a supportive hip belt. (U.S. Army photo by K. Kassens)

To recap, here’s what we’d recommend for a traditional bug-out bag:

  • Durable materials, but not excessively heavy
  • Large enough to carry all the gear you need, plus a little room to spare for supplies collected in the field
  • Internal or external frame
  • Padded shoulder straps with load lifters
  • Adjustable chest strap
  • Lumbar support pad
  • Wide, comfortable hip belt

Bug Out Bag List: The Basics

hiking-pack

Above: Commercial hiking packs such as this Osprey Kestrel 48 can be outstanding bug out bags, and may not draw as much attention as a “tactical” or military backpack in suburban areas.

Hopefully you spent some serious time contemplating the factors in the previous section and have started thinking about what you could bring with you. Packing a bug out bag doesn’t have to be terribly extensive. At a minimum, it just has to have enough gear and goods to keep you alive from one point to another. At most, the gear you bring with could help you establish yourself for a longer period at your bug out location.

There is a popular method of thinking about the most fundamental survival gear called the “5-C’s of Survival.” This includes:

  • Cutting tools
  • Combustion materials (for starting fires)
  • Cordage
  • Containers (for carrying water)
  • Cover (protection from the elements)

These are items which will provide for your basic necessities and buy you enough time to get (or make) the other resources you need in a survival situation. It’s not the end-all be-all to thinking about what to bring, but it’s a pretty good place to start your bug out bag list.

bug-out-bag-list-essentials-knife

Above: Your cutting tools may include a fixed blade camp knife, a folding pocket knife, or both. This photo shows a B.O.B. Fieldcraft fixed blade and MSF 4.0 folder, both from TOPS Knives.

Cutting Tools – As the term implies, cutting tools are things like knives, axes, and saws. It is easiest to bring an inexpensive stainless-steel fixed blade knife, such as the ever-popular Mora, but a folding pocket knife is better than nothing. In a worst-case scenario, you can improvise cutting tools with things like broken glass or by knapping flint. But using these skills is time consuming, and the midst of an emergency is not the time for slowly crafting a sharp (and fragile) edge. Examples:

bug-out-bag-list-essentials-fire

Above: You should always have multiple methods of starting a fire. A Prometheus Design Werx ferro rod, struck against the spine of a knife, threw enough sparks to quickly ignite this tinder.

Combustion Materials – For bug out bag purposes, a combustion tool should be quick and reliable. Many tout the great effectiveness of a simple Bic lighter, but if it’s too cold, the fuel won’t vaporize, and if you’re wearing gloves, you may not be able to manipulate the striker. Fuel can also leak out if the button is inadvertently pressed inside your pack. Other items to consider are weatherproof matches, commercially made tinder with a longer burn time, candles, and of course ferro rods. Learning to identify, collect and process combustible materials is also just as important as bringing along an item that will set them alight. Ultra-light backpackers also bring collapsible camp stoves and fuel that are more portable and convenient than a small wood fire. Examples:

bug-out-bag-list-essentials-paracord

Above: Paracord can be used for a wide variety of tasks, from lashing together branches for a shelter to creating a ridgeline for a tarp. The venerable Swiss Army Knife is always a good addition to your pack as well.

Cordage – If you are unable to walk outside and identify a material that you could make a rope with, you should probably bring your own. Technical rope, like the kind climbers use to traverse vertical rock faces, can be used in a similar manner to haul heavy things or raise and lower people or supplies where ladders are unavailable. There’s also everyone’s favorite, 550 paracord. This was originally used to rig parachutes but became popular among military and survival circles because the length of cord is actually a nylon tube filled with smaller strands of nylon cords that can be used for anything you can think of. Some companies went further, as in the case of Survivor Cord, by stuffing the cord with things like fire cord, snare wire, and fishing line. Other things that fall under the same category as cordage include duct tape, zip ties, carabiners, or anything that you can use to tie something down or secure something to something else. Examples:

  • 550 paracord
  • Specialty cord such as FireCord or TITAN SurvivorCord
  • Climbing rope and carabiners
  • Jute twine (doubles as tinder)
  • Duct tape
  • Zip ties
  • Snare wire
  • Fishing line

Containers – Cupping your hands will only go so far. Apart from the bug out bag itself, having a water-tight way to carry and transport liquids, especially water, is a must. Nalgene is a flexible polymer that makes for a lightweight water bottle that’s perfect for freezing temperatures, but it can’t hold up to direct heat for boiling water. A non-insulated metal canteen can be used to boil water for sanitary reasons, but a canteen with a narrow opening makes it difficult to mix and eat some types of backpacking food. A happy medium is the combination of a plastic bottle for liquids, and a metal canteen cup to heat water and food over a fire. Wide-mouth metal bottles such as Klean Kanteen are also popular.

bug-out-bag-list-essentials-water-container

Above: A water container is certainly one of the bug out bag essentials. If you choose a metal container, you'll also be able to boil water inside, and some bottles even have built in water filters. This GRAYL Ultrapress Titanium features all three features rolled into one useful container.

The most important container is a vessel for water, but other types of containers that are useful are plastic bags of various sizes, Altoid tins, or small Pelican cases. There are also a ton of useful zippered pouches and pockets from various gear suppliers to fit any bug out bag, so it really boils down to what and where you need to store it. Don’t forget to fill your containers with clean water ahead of time, and to include a survival water filter or other tools to purify water you collect in the field. Examples:

  • Nalgene bottle
  • Metal camp cup
  • Metal canteen or bottle
  • Camelbak or other hydration bladder
  • Cookware such as a pot or frying pan
  • Plastic bags
  • Waterproof Pelican cases for fragile items
  • Zippered pouches or roll-up dry bags for gear

Cover – Humans were made to thermoregulate body temperature to a constant 98.7 degrees F, but only if we are living in a climate that doesn’t veer too far from that temperature to begin with. If it the ambient temperature gets too hot, or too cold, that could spell trouble in the form of hyperthermia (heat stroke) or hypothermia, and there are not too many locations on the planet that accommodate the goldilocks zone we need to survive naturally. So, we need things like appropriate clothing, such as rain or cold weather gear, and shelters to stave off night-time lows and day-time highs. It’s not always easy to pack these types of things in a bug out bag due to their bulk and weight, but there are light-weight emergency thermal blankets and rain ponchos that will work in a pinch.

bug-out-bag-list-essentials-tent

Above: A lightweight tent, air pad, and sleeping bag will allow you to get a much-needed rest away from wind, rain, and insects. This photo shows a Sierra Designs Studio 2 tent (without rain fly installed) and Synthesis sleeping bag.

Depending on the season, it might be a good idea to bring a change of socks, or a pair of sunglasses. And if you need to stay at a clandestine camping site for a few days, using backpacker’s hammock with an ultralight sleeping bag could be a good way to rack out while staying off the ground and away from critters and pooling water. In cold climates, you’ll need to think about insulating yourself against the ground. Most sleeping mats for camping have a R-rating, just like the insulation in your home. The higher the R-rating, the colder the ground you can sleep on comfortably. For minimalist warm-weather cover, consider a lightweight tarp strung up on a ridgeline, plus a sleeping bag and protective bivy bag. Examples:

  • Tent or hammock
  • Waterproof tarp
  • Sleeping bag and/or waterproof bivy bag
  • Sleeping mat or pad
  • Mylar emergency blanket
  • Seasonally-appropriate clothes
  • Rain gear
  • Extra socks and underwear
  • Comfortable boots or trail shoes
  • Sunglasses
  • Wide-brim hat

Refining Your Bug Out Bag Loadout

So, you’ve got an emergency preparedness kit that covers the 5 C’s and is loaded in a properly fitted and tested bug out bag. That’s a great start! It will even cover a lot of basic needs in many disaster or survival scenarios, but it is also just the tip of the iceberg. The more the bug out bag is tweaked and refined, the more you might realize it’s missing something important. We’ll address these below.

Water & Purification Gear – This is something we all need to live, and it is especially important when exerting yourself, like in a bug out scenario. In a survival situation, eating is discouraged if there is not enough water available to aid in the body’s digestive processes. If you’re following the 5 C’s we mentioned, you should have at least one bottle of clean water in your pack, but that’s usually not enough.

bug-out-bag-list-essentials-water-filter

Above: Even if a lake or river looks clean where you are, it may be loaded with harmful bacteria, viruses, or other waterborne contaminants you can't see with the naked eye. It's always wise to filter, purify, or boil water you've collected before drinking it in order to avoid illness.

A rule of thumb is to carry 1 liter of water for every two hours of traveling on foot. On average, a human can travel one mile, on foot, in 30 minutes. However, this can change dramatically if there is steep elevation, thick vegetation, hot weather, or any number of challenging obstacles that may present themselves. In its most simplistic form, if your bug out location was 4 miles away, at 30 minutes per mile, it would take you two hours to get there. In other words, you would need 1 liter per 4 miles per person under perfect conditions, more if conditions are less than perfect.More distance means more water. Unless you plan a long bug out route that passes sources of clean water, or water that can be treated with filters or bleach, be ready load up with as much water as is necessary. Just remember that water is also heavy — each liter will add 2.2 pounds to your bug out bag.

bug-out-bag-list-essentials-food

Above: Bug out food doesn't have to be miserable and tasteless. With the addition of some boiling water, freeze-dried backpacking meals can provide a warm, nutritious morale boost. This Mountain House Chili Mac with Beef is one of our favorites.

Food & Cooking Supplies – These should be lightweight, energy-dense foods (i.e., trail mix, jerky, backpacking meals) that can be prepared quickly or eaten on the go. There is lightweight trail cookware that would make food prep easier, but choosing to bring these depends on the expected duration of the bug out. If bugging out is expected to last only a few hours to a few days, then maybe a few heatless snacks or MRE’s would do the trick. But if you’re facing a longer duration event or may need to hunt and cook meat, a lightweight cooking set with utensils may not be a bad idea. Packing hydration mixes or electrolyte tabs could also be a potential life saver, especially in hot weather. Morale boosters like instant coffee, tea, cooking spices or candy can also be a great pick-me-up during a bug out scenario. Examples:

  • Energy-dense trail food (nuts, trail mix, jerky, energy chews, etc.)
  • Dehydrated food and freeze-dried backpacking meals
  • Military MREs
  • Shelf-stable foods (rice, beans, pemmican, etc.)
  • Cooking resources (oil, seasonings, etc.)
  • Morale-boosters (coffee, tea bags, chocolate, hot sauce, etc.)
  • Utensils for cooking and eating

bug-out-bag-list-essentials-first-aid-kit

Above: An off-the-shelf first aid kit like this Adventure Medical Kits Adventure First Aid 2.0 kit can help with many common illnesses and injuries. A separate trauma kit, also called an individual first aid kit (IFAK) in military parlance, may be necessary for life-threatening injuries such as severely broken bones, puncture wounds, or gunshot wounds.

Medical & First Aid – Having a few bandages, gauze, and sterile wipes will help prevent infections. And a handful of over-the-counter medicines like Tylenol, allergy pills, and antacids should cover the most common of ailments. Depending on where you live and your clothing choices, it may be a good idea to think about sunscreen. Taking care of your feet is also crucial when you are traveling long distances on them, so having some moleskin or using duct tape to cover hotspots will help prevent blisters. Biting insects or poisonous plants may be worth preparing for with bug spray, anti-itch/rash cream, or even a mesh mosquito hood. When it comes to more serious medical supplies like tourniquets, suture kits, or anything trauma related, pack what you know how to use safely and proficiently. Examples:

  • Survival medicine and medications (painkillers, anti-diarrheal, antihistamines, etc.)
  • Adhesive bandages
  • Gauze, tape, and self-adherent compression wrap
  • Moleskine for blisters
  • Sunscreen
  • Insect repellent, sting/bite ointment
  • Trauma kit or IFAK with tourniquet(s), hemostatic gauze, pressure dressing, and chest seals

bug-out-bag-list-essentials-hygiene

Personal Hygiene – Nobody enjoys feeling dirty for too long, and wet wipes or a washcloth can be used for a refreshing wipe down. Dental hygiene is often ignored in a survival situation (watch the movie Cast Away to find out how this turns out), so it may be a good idea to bring floss or a toothbrush. Hand sanitizer or soap can help prevent many diseases, and deodorant or body/foot powder can help you stay dry and prevent skin problems like dermatitis. Bugging out females need to consider feminine hygiene. There are products on the market that are rinsible and reusable, and many women who go ultralight camping simply dedicate a water bottle for use as a bidet. A water bottle bidet is also a great alternative to carrying a ton of wet-wipes or toilet paper. Examples:

  • Wet wipes
  • Hand sanitizer and/or camp soap
  • Bandana, shemagh, or squeezable chamois towel
  • Toothbrush and toothpaste
  • Deodorant
  • Baby powder for friction reduction and dry showers
  • Feminine hygiene items
  • Trash bags

bug-out-bag-list-essentials-multitool

Above: A multi-tool such as this Leatherman Rebar provides many useful tools in one convenient package. If you're not already carrying one in your pocket, you should certainly have one included in your bug out bag list.

Tools – A small bolt cutter, lock pick set, or any other form of entry tool could come in very useful, especially if you have a desperate need to get out of the elements. Obviously, you should use these items responsibly and expect to justify their use to authorities after the fact. Many people carry a multi-tool for their compact versatility, but having a small, dedicated tool kit like Fix It Sticks can aid in repairs or assembly/disassembly of your other bug out bag essentials. Examples:

  • Multi-tool (e.g. Leatherman or Gerber)
  • Compact tool kit (e.g. Fix It Sticks)
  • Silcock key for sourcing water in urban areas
  • Lockpicking tools for emergency entry/escape (use them responsibly!)
  • Cash and other desirable items (e.g. cigarettes, coffee, alcohol, or possibly even weed) that can be used for bartering

bug-out-bag-list-essentials-compass

Navigation – A fully charged personal GPS unit will make life easy when navigating to your bug out location. A compass and map of your bug out plan should almost be a necessity, but only if you know how to use them. Pencil and paper can be handy to take notes or jot down a sketch for communication, or for recording your travel route. Bringing a pair of binos or a monocular could be useful for identifying potential hazards or threatening situations before you find yourself in the midst of them. Examples:

bug-out-bag-list-essentials-headlamp

Above: A headlamp provides hands-free light for tasks after sunset. This Streamlight Bandit Pro headlamp is lightweight, USB-rechargeable, and can be worn on a headband or clipped onto the brim of a hat.

Personal Electronics – This could include a headlamp or flashlight for illumination, two-way radio for communication, cell phone or burner phone, and any of the necessary charging cables/power adapters. Keep in mind though, unless it has a solar panel or a hand crank, eventually the charge will run out (and it will run out very fast if it’s cold). There are disposable batteries and USB power banks, but these are also extra weight and have a limited supply of energy. Depending on the environment and how much you’re moving, a small solar panel may be helpful for keeping essential devices powered. Examples:

bug-out-bag-list-essentials-handgun

Above: As much as we'd like to trust everyone we meet and work together during emergencies, there will always be dangerous individuals who are willing to victimize others to get what they need (or want). It's advisable to factor some form of self-defense tool into your bug out bag list, if you're not already carrying a concealed weapon on a daily basis.

Self Defense – Even if you’re a professional ninja whose hands are considered lethal weapons, having an extra form of self-defense will help keep you and your loved ones safe during a bug out scenario. When circumstances are dire, it’s an unfortunate fact that there are some individuals who may be willing to attempt taking your gear by force. A self-defense tool and the appropriate training can prevent this and may also be able to be used for hunting or protection from wildlife.There are many possible configurations you could use to carry a handgun or longer rifle/shotgun in your bug out set up. Unless a vehicle is part of your bug out plan, a gun and its ammo should be light enough to comfortably carry a spare magazine or two. If firearms are not possible, a defensive knife or OC spray are great, short-range alternatives, and even trekking poles or a walking stick can be used in self-defense. Examples:

  • Pistol, holster, and belt
  • Rifle/shotgun and sling
  • Spare magazines, ammunition, and pouches/bandoliers/chest rig
  • Defensive knife and sheath
  • Pepper spray
  • Trekking poles or walking stick (can be used as an impact weapon)

Testing, Training, and Mental Preparedness

bug-out-bag-list-essentials-pistol-caliber-carbine

There’s a lot more to preparing for an emergency than simply buying gear and storing it in a closet. The late survival expert Mors Kochanski famously said, “The more you know, the less you carry.” Training doesn’t have to be from an expert in the field (although that does help immensely), simply spending time with your gear will help.

Put your bug out bag essentials together and wear it around the house while you’re doing chores. Go for a walk or hike a local trail. Take it on a camping trip and rely solely on its contents. Take notes about what you used, what you didn’t, and how easily accessible each item was. Frivolous things can be removed, important things can be added, and after a few short hikes, you’ll feel more confident that what you packed in your bug out bag.

bug-out-bag-list-essentials-bike

Every emergency is different, and there’s no universal solution for what to bring or how to bring it. Not every item mentioned in the lists above are mandatory, and there are items you may require that have been left out. Don't forget, the real Best Bug Out Bag Checklist isn't one you find online. It's the custom one you make for yourself based on a careful analysis of your exact survival needs and risks. We hope this article helps you create a bug out gear list that can help you and your family make it through a real-life emergency someday.

More Bug Out Bag Articles from OFFGRID


Gunfighter Design: Hard Use Tools for Serious People

Rob Ziarnick, founder and owner of Gunfighter Design, has been designing and making blades for over five years and decided it was time to test the limits of his product. He reached out and asked if I could take a beautifully crafted, handmade knife and, “put it through an insane amount of abuse and write about it”. When Rob offered to send me a sample of his POPS (Professional Outdoorsman Precision Skinner) MK2 and submit it to some gnarly testing, how could I refuse?

Studio photo of the Gunfighter Designs POPS MK2 knife.

Gunfighter Design has an interesting story that started back in 2018. With the goal of making a great knife, the original design was a living room collaboration with Rob's friend and colleague Michael Baccellierli (aka Buck). Both Buck and Rob spent time addressing the shortcomings they encountered with knives in the past. Both were Marines and Snipers who broke knives while on combat deployments. Strength, ergonomics, functionality, and usefulness in more than one task  lead to their prototype design, the Ravens Head. The double thumb relief or DTR was born, as well as the idea to incorporate a glass breaker. After making the first Ravens Head in a small propane forge with a piece of 80CrV2, it sent Rob on a journey of making knives as a business. Just as he was getting started, he was struck by a drunk driver, and was unsure if he could ever bladesmith again. But Rob is as tough as the knives he makes, and was back in the bladesmithing saddle in no time. Partnering with Eric Moser, a retired Green Beret Sniper, machinist, and someone who also had experience with knives breaking in combat, they began production with a new and improved design.

 Videos of all kinds of blade destruction tests exist, but I didn’t want to wreck a perfectly good knife just for the sake of seeing it broken. At least not at first. I decided that I wanted to push its limits in a functional sense, before seeing what it might actually take to physically damage it beyond repair. Most knives are typically capable of performing three basic functions, piercing, chopping and slicing. The POPS MK2 was going to be evaluated on its ability to retain its edge and original design specs, while performing those functions during testing.

The  Blade

 POPS MK2 is an absolute beast of a blade, not because it's the longest fixed blade out there, but because of its design and composition. Made from CPM 3V, it's forged from powdered, high carbon steel with a high amount of vanadium. Crucible Particle Metallurgy, designated by the CPM has a much finer grain pattern, and a more even dispersion of alloy elements. 3V indicates that the steel has around 3 percent vanadium, which is specifically used to increase hardness and edge retention. CPM 3V is specialized steel that is normally used in industrial shear blades, or commercial forging punches, but Gunfighter Design is using it in the form of a skinning knife!

Photo of the Gunfighter Design POPS MK2 along with all of the materials the blade will be tested against. This includes hard seasoned maple batons, a brass rod, and copper tubing.

Above: Several materials were selected to test the blades hardness, sharpness and durability. These include seasoned maple batons, a brass rod, and a copper tube.

The blade itself is 3.5 inches, and 8 inches over all, with a girthy width of 5mm. A functional glass breaker is ground into the end of the butt, and titanium eyelets hold G10 handle slabs in place. For a fixed blade on the short end of the spectrum, it has enough mass to let weight and gravity do most of the cutting work. It's a thick, wide blade, and the bevel skirts the border between meat cleaver and hatchet. One of the most unique features is its Double Thumb Relief on the spine of the blade. Placing your thumb on the spine when holding a knife is sometimes called the “saber grip”, and it is used to extend your reach. Adding a relief notch affords more control, and the second relief notch lets you work the blade with more dexterity in tight places.

 Basic Tests

 Before getting into the serious performance tests, I wanted to establish a relatively simple baseline of its cutting capabilities. One of the best ways to do this is simply letting the edge slice through a piece of standard printer paper. The edge of the POPS does this easily enough, although the width of the blade slows down its momentum. This is perfectly fine as the blade is made for breaking bone and cutting through ligaments and sinew. Since it’s a brand new knife, there are no chips or rolls along the edge. Now that I know that it's sharp and will slice easily, it's time to test its piercing and chopping performance.

Photo of the POPS MK2 being tested for sharpness by slicing a piece of printer paper.

Above: Being able to smoothly slice a piece of printer paper is an easy way to test a blades' sharpness.

For chopping, I have three items of varying densities: wood, copper and brass. First up is a seasoned hard maple baton. Summoning my inner Jay Nielson, I swing the POPS into the wood with as much force as I can muster. The blade chews through the baton like a hungry beaver, leaving the edge perfectly intact. To add extra force behind it, I use a second baton and hit the spine of the blade to drive the edge into the wood deeper. To remove it from the wood, I pry the blade as far as I can back and forth. The steel remains straight, and the edge remains true. Turning it on its point, I baton the blade tip-first into the wood as far as I can go, prying it back and forth to remove it. POPS stares back at me unphased.

Photo of the POPS MK2 being batoned into a hard chunk of seasoned sugar maple.

Above: Seasoned sugar maple is a hardwood that will give an axe a run for its money, but its just a walk in the park for the POPS MK2.

 Okay, great, it can handle wood, nothing supernatural about that, so lets try it against some soft metals. POPS is batoned into copper pipe, and then into a brass rod. The copper pipe is cut and bent, and the brass rod is cut through as well. Still the edge of the POPS remains in pristine condition. No rolls, no chipping. Maybe some of the anodized finish is blemished, but beyond that, it's like nothing ever happened. I do a follow up slice test on the paper and notice a slight decrease in sharpness. But after a few passes on an 800 and 1000 grit stone, and a little stroping, it's slicing better than ever. 

Photo of the Gunfighter Design POPS MK2 being batoned into a copper tube.

Above: Copper has a hardness between 45 and 50 on the Rockwell Hardness Scale (HRC).

At this point, I feel the POPS MK2 has held up to more than would ever be asked of it, even in the most difficult settings. It can be pried without losing its straightness. If it can cut through brass, it can surely cut through bone unphased. Obviously the heat treatment–a knife making process that affects the quality of steel hardness–was done expertly. The edge sharpened easily, and over all, I would rank this as a top notch hunting knife. Unfortunately for the POPS, I was asked to punish the blade, and needed to crank things up a notch to push it to its limits.

Photo of the Gunfighter Design POPS MK2 being batonned into a brass rod to test its hardness.

Above: Brass, a composite of zinc and copper, has a hardness of around 30 HRC.

 The Punishment

 I want to preface this by stating, on the record, that I love handmade knives, and I cringe every time I see destruction testing taken to the extreme. Someone’s hard work, skill and time goes into every blade, and to purposefully destroy one seems disrespectful to me. So just know, that what I’m about to do may have been harder on me than it was on the knife.

 On a knife, the tip is one of the weakest, if not the weakest point. Any inconsistencies in the heat treatment can cause the tip to bend or break. I already know the tip of the POPS can hold up to hardwood and soft metal, but what about chipping its way through ice? For this punishment, I’m not using your normal, clear, run-of-the-mill ice. Instead I chip my way through four inches of stamp sand and gravel that's been frozen solid and compacted by a county snow plow over the course of several months. After several minutes of continuous chipping, POPS survives! The tip did not break, bend or roll, and it did not lose much of its sharpness. In fact, I would go so far as to say a hole could be augered for ice fishing using this blade if you were in a pinch.

Photo of the POPS MK2 sticking tip first out of a concrete mix of ice and gravel.

Above: Chipping through a concrete mixture of ice and gravel proved to be a boring challenge for the POPS MK2.

Punishment number two is a test of its overall integrity. So far I've been focusing mainly on the edge and its functionality, and overall it seems bullet proof. But what about the handle and the rest of its construction? To find out what this thing is made of, I place the knife flat on the gravel strewn ice pack, and jump in my truck. Each truck tire exerts roughly 1,400lbs of contact pressure with the ground, and because I'm moving, that pressure is rolling along the width of the blade at different points at different times. Any problems with the heat treatment or handle construction will cause a critical failure of the blades integrity. First I back over the POPS with the rear tire, then the front tire, then drive forward and get it with the front, then again with the rear tire. POPS has been driven over four times. Then I repeat this process four more times for good measure for a total of 20 times. At one point I became nervous about the blade going through the tread of my tires, but I risk it all for the sake of science!

Photo of the POPS MK2 about to be run over by a truck tire.

Above: The POPS MK2 awaits being run over, repeatedly, by a full size pickup truck.

Getting out of my truck, I walk around to see what happened to my beloved tanky POPS, and… it survives! Not only did it survive, but it seems completely indestructible at this point. The spine of the blade is still straight, the G10 handle slabs haven’t come loose, and if there is any damage at all, it's only to the anodized finish. Even the G10 appears unscathed after cleaning it up a bit.

At this point I'm facing a bit of a conundrum. I was asked to brutalize this thing, and aside from throwing it in the fires of Mount Doom, or dragon's breath, I’m not exactly sure what else to do to test it. My mind wanders to taking the blade to the range and throwing some lead at it, but lead is much softer than brass, no matter how hard you toss it at something. In fact, given the velocity, mass, and acceleration of your common 9mm, you’d only be exerting about 1,600lbs of pressure on the blade. Granted, at much faster speeds, but still, that's only a few more pounds than truck tires. And we just did that twenty times in a row. I wander through my garage looking for inspiration, and find it in the form of a 10lb sledge hammer. Believe it or not, depending on how fast and hard the swing is, a steel sledge hammer can produce astronomical amounts of pressure. We’re talking in the double digit tons of pressure.

 Picking up the sledge, and placing the POPS down reverently on the compacted ice, I put on some safety glasses, and say some final words to one stubbornly durable knife. Aiming for the flat of the blade, I swing the sledgehammer overhead as hard and fast as I can. Ice and gravel spray violently in all directions. Wiping clear the debris from my safety glasses to assess the damage, I find, to my astonishment… POPS survives! Just to be sure, I swing again. POPS survives! And again. POPS survives! It isn’t until the sixth swing of the sledge that POPS suffers a catastrophic failure.

Photo of the Gunfighter Design POPS MK2 broken in half, and the sledge hammer that broke it.

Above: It took an insane amount of punishment to finally inflict enough damage to cause the blade to break.

Failure occurred at where the handle meets the ricasso of the blade, which is a common place for a break to happen. Near the break, there is a titanium eyelet, and my best guess is that there was just not enough steel in that location to absorb the ferocious impact of multiple sledgehammer blows. Other than the break, the G10 seems a little roughed up but nothing major considering what it just went through. The blade itself is unbent, and when pieced back together, makes a perfectly straight line.

 Conclusion

 Iron is a magical element in the hands of someone who knows how to manipulate it. Mix it with the right additives and it becomes an alloy steel that takes on otherworldly properties. In the case of the POPS MK2, it is a steel blade that could outlast humanity if taken care of properly. Barring industrial cutting tools, or temperatures that exceed 2,000 oF, Rob, Eric and Gunfighter Design has brought a knife to market that you could depend on with your life. Although the blade is now broken, it will be kept as a reminder of what dedication to quality and attention to detail can achieve.

Related Posts


Run to the Hills: What to Consider Before Moving to the Country

Ask ten people what their initial reaction to the recent COVID-19 pandemic was, and you’ll likely receive ten unique answers. For some, it was simply to abide by local municipal guidance. Others took a more laissez-faire approach and went about their daily lives as though nothing was out of the ordinary. But for many others, a disease that has quickly covered the entire world and brought the global economy to a standstill was their cue to escape the pandemonium of a densely populated city and find their new niche in life closer to nature. The same holds true for the skyrocketing cost of living in dense urban areas. Home prices on the rise and inflation with no end in sight, has many people considering the idea of moving to the country.

Photo of the side of a red barn and silo out in the countryside.

Above: Moving to the country comes with a lot of freedom, and a lot of work. Simply maintaining buildings without the assistance of a landlord can be more than a lot of people can handle.

Its an appealing proposition to be sure. Fewer people, wide open spaces, the beautiful scenery  the list of benefits goes on. Another important aspect of rural life is that its more difficult to control. Recent events have shown that a city under quarantine can be more easily policed. Higher population density means restrictions can be more efficiently implemented with less effort on behalf of the enforcers. No one is going to closely monitor someone living on a hobby farm, miles away from the nearest neighbors, unless they are breaking bad out in the barn. So then, why are people not fleeing en masse to the hills and abandoning the circumstances George Orwell envisioned in his nightmares? Whether youre looking for land to feed your family or to escape the tedium of the rat race, theres no shortage of considerations that must be made. So, let’s dive right in and take a look at some of those issues.

Photo of a moving box and several suitcases lying on an unmade bed in preparation for a move.

Above: Packing up all of your worldly possessions can be stressful. But it can also be liberating to get rid of things you don't really need.

The Good, The Bad, and the Ugly

There are two sides to every coin and living in a remote area is no exception — it has pros and cons. The same can be said for living in an urban setting. One of the biggest issues is access to goods and services. Some folks living in rural areas have to make doing any kind of shopping, beyond basic necessities, a near vacation event. Instead of going to the same local convenience store every day, people in rural communities will often take a day off and travel for an hour or more just to get to the nearest Target or Walgreens. Almost everyone living in remote areas must make do with what they have for longer periods of time and forgo the convenience of having many nearby options to visit on a whim.

This is also true for services such as healthcare, dentistry or auto repair. In a big city, it is easy to scope out a few online reviews and find the right practitioner to fit your needs. In the country, you may not even have a clinic or repair shop anywhere near your location. If you are fortunate to have the service you require nearby, it’s the same one everyone else uses, regardless of how great or poor their performance is. Because of an abundance of competition in urban areas, if someone is providing a mediocre service, they will not last long as their potential customers wise up and find someone better. But in a rural location, if someone has to choose between mediocrity or spending $100 in gas and food traveling to the next nearest option, mediocrity will probably win.

Photo of a collection of 1800's style apothecary flasks, and medicines.

Above: It takes a while for modernization to trickle out to the more remote regions of the country. Available tools and medicines may seem like ancient technology compared to what you may be used to in the city.

Children are another matter entirely. Rural areas do not have an abundance of choices when it comes to schooling, and many children have to be bussed to more populated areas just to attend. These bus rides can be long, and some young ones spend hours each day just riding the bus back and forth. Don’t like their teachers or the curriculum? Too bad! Your child is stuck with it unless you want to fork out the money and time transporting them somewhere else on your own. However, the reverse is also true, as smaller communities mean smaller class sizes, and the quality of education can be phenomenal. It all depends on the standards the local education system holds themselves to. If you're a parent, it is worth your time researching what school is best for you child.

Most of us are aware that there are some neighborhoods you just shouldn’t find yourself in. Maybe there are issues with illegal substances, human trafficking, or any number of nefarious activities detrimental to a quality life. Don’t think that moving to a remote location will completely eliminate this. One of the most notorious bootleggers of his era, Al Capone traveled from Chicago to Northern Michigan to lie low when the police where hot on his trail. The fact that he smuggled Canadian whiskey through the North American wilderness, sometimes with the help of his connections in the Coast Guard, is well known. Ted Kaczynski isolated himself by living in the most isolated area he could find. If you are up to something illegal, there is no better place to conduct operations than a remote wilderness area. Even a place several miles out of town in Midwest farmland affords more privacy than any urban or suburban location.

Climate can play a big role in the decision-making process and it would be in your best interests to determine if the weather patterns where you want to move suit your style. An area with lush, green summers could be inundated with insurmountable snow in the winters. The perfect spot for a ranch location could be smack dab in the middle of Tornado Alley. Prone to depressive moods? Maybe you should avoid the rainy season in the Northwest, or areas with longer winter seasons. Then again, maybe you are up to the adventure of something new! One man’s shovelinduced hernia is another man’s Nordic Skiing paradise.

Photo of a pile of logs outside of a wooden cabin with mountains and alpine forests in the background.

Above: Perhaps utilities is something you take for granted. Some rural areas heat their homes with processed firewood, or wood pellets and coal. Many homes in the countryside pump their water directly out of the ground via well-pumps.

A great idea is to make a list of pros and cons, just to get the ol’ noodle thinking about what you may be getting into. Realize that when you jot down a list like this, it will never be allinclusive, and things will come up along the way that you didn’t expect. But having an understanding of what youre getting yourself into will prevent any catastrophic failures. Its also important to sit down with everyone who would be affected by this important decision and have them weigh in with their thoughts and feelings. That way, when you look over your list, you can make the most logical decision.

Deciding to Move

So, let’s say you have made your decision, and after weighing all the pros and cons, the scales tip in favor of moving. What next? Make sure you know exactly why youre moving and do some serious research. Many excitedly move to their aesthetically appealing “dream location” and quickly discover that they cannot easily provide for their families. Does moving mean a cut in pay? Are you willing to give up the occupation you are currently working in and possibly settle for something less sophisticated? Can you give up easily accessible high-speed internet for an area that can only support DSL and spotty cell service? And if so, is it worth it?

Photo of a truck parked outside of a cabin with mountains in the background.

Above: It's calm, quiet and peaceful, but the farther the location from an urban center, the more difficult it is to use amenities that make life easier.

One of the best ways to determine if a move to someplace more rural is financially viable is to apply for jobs in the area and see if you can obtain one. Often, businesses in remote settings hire people they know and grew up with nearby, just to help their neighbors stay gainfully employed. And in some instances, they may even pass over someone more qualified just to do this. In cases like this, those who cannot find work and refuse to give up the country setting, must commute to their jobs sometimes for hours each way. If you are moving to escape the crowds and the air pollution, maybe having extra travel time is worth it. Lots of people have to do this if they live in the suburbs. Then again, putting extra wear and tear on a vehicle may cancel out any benefits. It can be confusing to think about all of the aspects involved, but the more time you dedicate to focusing on the issues, the more you can be certain that the decision you are making is the right one for you and your family.

Those who want a peaceful retirement, or a quieter way of life for their family, will find that rural life is a no-brainer. In rural communities, most neighbors look out for each other and lend a helping hand whenever they are able to. In our experience, people living in the country can be some of the most generous and kindhearted you will ever have the pleasure to meet. But evil exists everywhere, even in the most isolated of places.

Photo of an adult male in a blue and white flannel shirt tipping his stetson with smile, presumable greeting someone off camera.

Above: Neighbors look out for each other in rural communities, and most are willing to lend a helping hand without asking for anything in return.

Settling In

Let’s say you determine that moving is the right option. You pack up your things and head out for a taste of the quiet life. What you do when you first arrive could make our break the entire experience. A key thing to remember is that with far fewer people, you have more physical privacy, but social privacy is almost non-existent unless you decide to turn in to a complete hermit (and even then, that may not work). The tricky thing about first impressions is that you only get one.

Sometimes your closest neighbors could be miles away, but even so, they may be used to a tightly knit community helping each other out. If they ever need a helping hand with a chore, or someone to watch over their pets on a vacation, they will be used to their neighbors being there for each other. Its usually more expedient to ask a neighbor for help than to waste time and energy driving to town looking for a handy man or dog sitter. The good people living nearby aren't just humans occupying a residence, they are friends and family. Neighbors share struggles, lament each other’s losses, and celebrate good times together. And if someone has to move, they are sad to see them go. That being said, put yourself in the position of someone watching another individual or family move into the vacated home. If they were fond of that neighbor, they might resent the idea that you took their place. You will only cement those feelings if you show up and act in an ungracious manner.

Photo of a sparsely developed countryside.

Above: The distance between homes may give the initial impression that nobody interacts with each other, but typically the opposite is true.

There is a common misconception, largely due to the entertainment industry, that people in rural areas are degenerate in some capacity. And if you hold this belief, do yourself a favor and purge it from your mind right now. It takes intelligence, independence and strength, both physical and emotional, to thrive in a place far from easy access to commodities. Owning a large property or a homestead takes a lot of hard work. As a newcomer to a rural community, being kind when you first arrive, and maybe even showing a pinch of humility, will go a long way.

Try to “read the room” for a while before getting comfortable with everyone in your new community. As mentioned earlier about privacy, everyone talks to each other and will know a lot about what is going on. It is possible that before you get a chance to meet someone for the first time, they may already know a little about you. You can use this to your advantage to hear what people think about others in the community and why. Then you can start to develop a better sense about who might be a good friend, or who you should keep your wife and kids away from. This may feel uncomfortable at first, especially if you are moving from a community where everyone largely ignores the densely packed humans around them. But discomfort will quickly fade, and you will find profound comfort in knowing who can be counted on in your community. Just be cautious not to perpetuate baseless gossip and rumors, since these behaviors often cause more harm than good.

Photo of a young horse standing in a pasture.

Above: Raising large animals takes much more dedication and hard work compared to walking a dog, or changing a litter box.

Closing Thoughts

Most importantly, trust your instincts. In the digital age, its easy to forget that we were once very social creatures. Talking to someone face-to-face is much different than sending them a text or interacting in the comments section. Our social skills are still there beneath the surface and will return quickly with repeated use. You've probably experienced that feeling that creeps up when someone approaches, and you can just tell if they are friendly, or if they do not have your best interests in mind. The reaction to either relax, or quickly get away from the situation is just one example of your latent social skills at work. When moving to the country, once getting settled in, you will be able to tell very quickly if the community you are living in is accepting of new members, or will be a tougher nut to crack.

Before moving to the country, putting as much thought into as many scenarios as you can will make a move exponentially more successful. Do your research, have a solid plan, and if moving to a rural area is the best option for you, dedicate yourself to being a great neighbor. Moving because of a knee-jerk response to a difficult time will only lead to a disastrous outcome. Being close to nature is known to be therapeutic, managing land of your own can be very rewarding, and anyone willing to put forth the effort may find a better quality of life.

Related Posts