Run to the Hills: What to Consider Before Moving to the Country

Ask ten people what their initial reaction to the recent COVID-19 pandemic was, and you’ll likely receive ten unique answers. For some, it was simply to abide by local municipal guidance. Others took a more laissez-faire approach and went about their daily lives as though nothing was out of the ordinary. But for many others, a disease that has quickly covered the entire world and brought the global economy to a standstill was their cue to escape the pandemonium of a densely populated city and find their new niche in life closer to nature. The same holds true for the skyrocketing cost of living in dense urban areas. Home prices on the rise and inflation with no end in sight, has many people considering the idea of moving to the country.
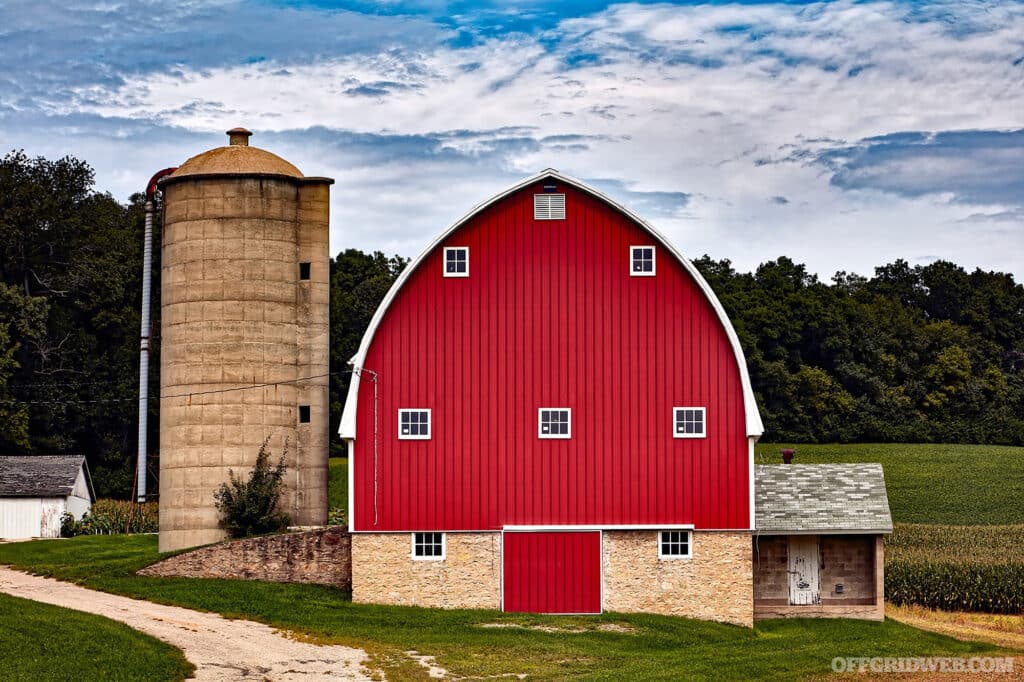
Photo of the side of a red barn and silo out in the countryside.

Above: Moving to the country comes with a lot of freedom, and a lot of work. Simply maintaining buildings without the assistance of a landlord can be more than a lot of people can handle.

Its an appealing proposition to be sure. Fewer people, wide open spaces, the beautiful scenery  the list of benefits goes on. Another important aspect of rural life is that its more difficult to control. Recent events have shown that a city under quarantine can be more easily policed. Higher population density means restrictions can be more efficiently implemented with less effort on behalf of the enforcers. No one is going to closely monitor someone living on a hobby farm, miles away from the nearest neighbors, unless they are breaking bad out in the barn. So then, why are people not fleeing en masse to the hills and abandoning the circumstances George Orwell envisioned in his nightmares? Whether youre looking for land to feed your family or to escape the tedium of the rat race, theres no shortage of considerations that must be made. So, let’s dive right in and take a look at some of those issues.

Photo of a moving box and several suitcases lying on an unmade bed in preparation for a move.

Above: Packing up all of your worldly possessions can be stressful. But it can also be liberating to get rid of things you don't really need.

The Good, The Bad, and the Ugly

There are two sides to every coin and living in a remote area is no exception — it has pros and cons. The same can be said for living in an urban setting. One of the biggest issues is access to goods and services. Some folks living in rural areas have to make doing any kind of shopping, beyond basic necessities, a near vacation event. Instead of going to the same local convenience store every day, people in rural communities will often take a day off and travel for an hour or more just to get to the nearest Target or Walgreens. Almost everyone living in remote areas must make do with what they have for longer periods of time and forgo the convenience of having many nearby options to visit on a whim.

This is also true for services such as healthcare, dentistry or auto repair. In a big city, it is easy to scope out a few online reviews and find the right practitioner to fit your needs. In the country, you may not even have a clinic or repair shop anywhere near your location. If you are fortunate to have the service you require nearby, it’s the same one everyone else uses, regardless of how great or poor their performance is. Because of an abundance of competition in urban areas, if someone is providing a mediocre service, they will not last long as their potential customers wise up and find someone better. But in a rural location, if someone has to choose between mediocrity or spending $100 in gas and food traveling to the next nearest option, mediocrity will probably win.

Photo of a collection of 1800's style apothecary flasks, and medicines.

Above: It takes a while for modernization to trickle out to the more remote regions of the country. Available tools and medicines may seem like ancient technology compared to what you may be used to in the city.

Children are another matter entirely. Rural areas do not have an abundance of choices when it comes to schooling, and many children have to be bussed to more populated areas just to attend. These bus rides can be long, and some young ones spend hours each day just riding the bus back and forth. Don’t like their teachers or the curriculum? Too bad! Your child is stuck with it unless you want to fork out the money and time transporting them somewhere else on your own. However, the reverse is also true, as smaller communities mean smaller class sizes, and the quality of education can be phenomenal. It all depends on the standards the local education system holds themselves to. If you're a parent, it is worth your time researching what school is best for you child.

Most of us are aware that there are some neighborhoods you just shouldn’t find yourself in. Maybe there are issues with illegal substances, human trafficking, or any number of nefarious activities detrimental to a quality life. Don’t think that moving to a remote location will completely eliminate this. One of the most notorious bootleggers of his era, Al Capone traveled from Chicago to Northern Michigan to lie low when the police where hot on his trail. The fact that he smuggled Canadian whiskey through the North American wilderness, sometimes with the help of his connections in the Coast Guard, is well known. Ted Kaczynski isolated himself by living in the most isolated area he could find. If you are up to something illegal, there is no better place to conduct operations than a remote wilderness area. Even a place several miles out of town in Midwest farmland affords more privacy than any urban or suburban location.

Climate can play a big role in the decision-making process and it would be in your best interests to determine if the weather patterns where you want to move suit your style. An area with lush, green summers could be inundated with insurmountable snow in the winters. The perfect spot for a ranch location could be smack dab in the middle of Tornado Alley. Prone to depressive moods? Maybe you should avoid the rainy season in the Northwest, or areas with longer winter seasons. Then again, maybe you are up to the adventure of something new! One man’s shovelinduced hernia is another man’s Nordic Skiing paradise.

Photo of a pile of logs outside of a wooden cabin with mountains and alpine forests in the background.

Above: Perhaps utilities is something you take for granted. Some rural areas heat their homes with processed firewood, or wood pellets and coal. Many homes in the countryside pump their water directly out of the ground via well-pumps.

A great idea is to make a list of pros and cons, just to get the ol’ noodle thinking about what you may be getting into. Realize that when you jot down a list like this, it will never be allinclusive, and things will come up along the way that you didn’t expect. But having an understanding of what youre getting yourself into will prevent any catastrophic failures. Its also important to sit down with everyone who would be affected by this important decision and have them weigh in with their thoughts and feelings. That way, when you look over your list, you can make the most logical decision.

Deciding to Move

So, let’s say you have made your decision, and after weighing all the pros and cons, the scales tip in favor of moving. What next? Make sure you know exactly why youre moving and do some serious research. Many excitedly move to their aesthetically appealing “dream location” and quickly discover that they cannot easily provide for their families. Does moving mean a cut in pay? Are you willing to give up the occupation you are currently working in and possibly settle for something less sophisticated? Can you give up easily accessible high-speed internet for an area that can only support DSL and spotty cell service? And if so, is it worth it?
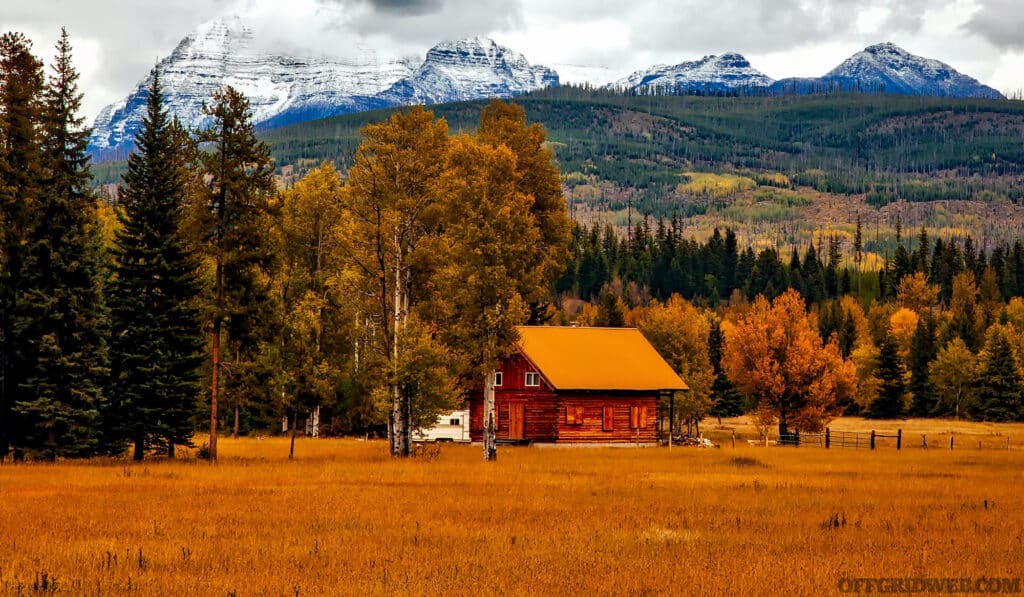
Photo of a truck parked outside of a cabin with mountains in the background.

Above: It's calm, quiet and peaceful, but the farther the location from an urban center, the more difficult it is to use amenities that make life easier.

One of the best ways to determine if a move to someplace more rural is financially viable is to apply for jobs in the area and see if you can obtain one. Often, businesses in remote settings hire people they know and grew up with nearby, just to help their neighbors stay gainfully employed. And in some instances, they may even pass over someone more qualified just to do this. In cases like this, those who cannot find work and refuse to give up the country setting, must commute to their jobs sometimes for hours each way. If you are moving to escape the crowds and the air pollution, maybe having extra travel time is worth it. Lots of people have to do this if they live in the suburbs. Then again, putting extra wear and tear on a vehicle may cancel out any benefits. It can be confusing to think about all of the aspects involved, but the more time you dedicate to focusing on the issues, the more you can be certain that the decision you are making is the right one for you and your family.

Those who want a peaceful retirement, or a quieter way of life for their family, will find that rural life is a no-brainer. In rural communities, most neighbors look out for each other and lend a helping hand whenever they are able to. In our experience, people living in the country can be some of the most generous and kindhearted you will ever have the pleasure to meet. But evil exists everywhere, even in the most isolated of places.
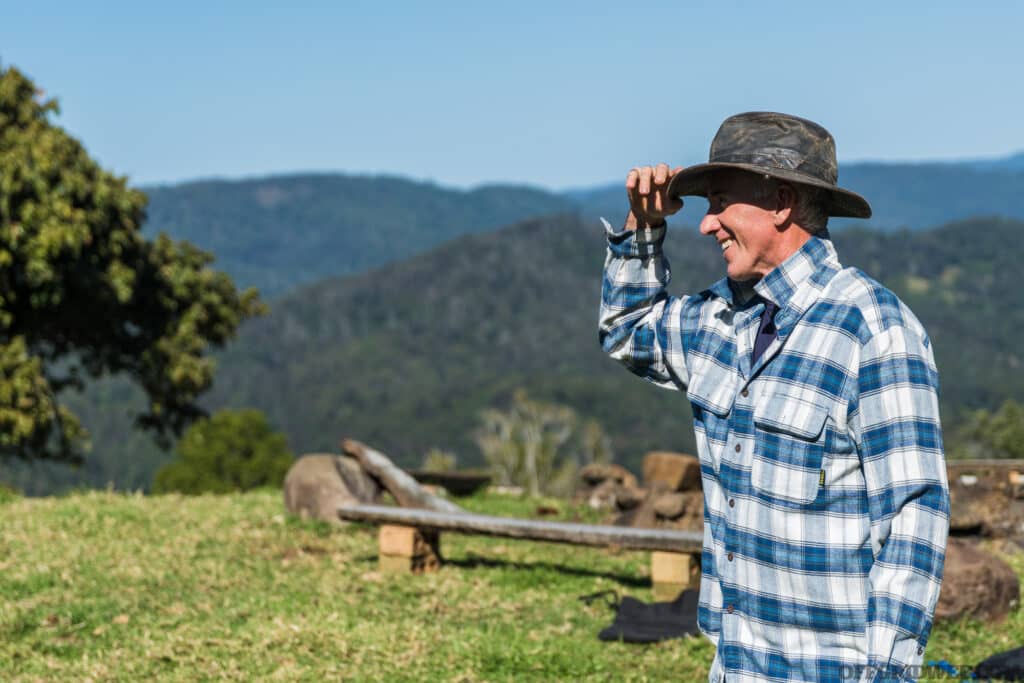
Photo of an adult male in a blue and white flannel shirt tipping his stetson with smile, presumable greeting someone off camera.

Above: Neighbors look out for each other in rural communities, and most are willing to lend a helping hand without asking for anything in return.

Settling In

Let’s say you determine that moving is the right option. You pack up your things and head out for a taste of the quiet life. What you do when you first arrive could make our break the entire experience. A key thing to remember is that with far fewer people, you have more physical privacy, but social privacy is almost non-existent unless you decide to turn in to a complete hermit (and even then, that may not work). The tricky thing about first impressions is that you only get one.

Sometimes your closest neighbors could be miles away, but even so, they may be used to a tightly knit community helping each other out. If they ever need a helping hand with a chore, or someone to watch over their pets on a vacation, they will be used to their neighbors being there for each other. Its usually more expedient to ask a neighbor for help than to waste time and energy driving to town looking for a handy man or dog sitter. The good people living nearby aren't just humans occupying a residence, they are friends and family. Neighbors share struggles, lament each other’s losses, and celebrate good times together. And if someone has to move, they are sad to see them go. That being said, put yourself in the position of someone watching another individual or family move into the vacated home. If they were fond of that neighbor, they might resent the idea that you took their place. You will only cement those feelings if you show up and act in an ungracious manner.

Photo of a sparsely developed countryside.

Above: The distance between homes may give the initial impression that nobody interacts with each other, but typically the opposite is true.

There is a common misconception, largely due to the entertainment industry, that people in rural areas are degenerate in some capacity. And if you hold this belief, do yourself a favor and purge it from your mind right now. It takes intelligence, independence and strength, both physical and emotional, to thrive in a place far from easy access to commodities. Owning a large property or a homestead takes a lot of hard work. As a newcomer to a rural community, being kind when you first arrive, and maybe even showing a pinch of humility, will go a long way.

Try to “read the room” for a while before getting comfortable with everyone in your new community. As mentioned earlier about privacy, everyone talks to each other and will know a lot about what is going on. It is possible that before you get a chance to meet someone for the first time, they may already know a little about you. You can use this to your advantage to hear what people think about others in the community and why. Then you can start to develop a better sense about who might be a good friend, or who you should keep your wife and kids away from. This may feel uncomfortable at first, especially if you are moving from a community where everyone largely ignores the densely packed humans around them. But discomfort will quickly fade, and you will find profound comfort in knowing who can be counted on in your community. Just be cautious not to perpetuate baseless gossip and rumors, since these behaviors often cause more harm than good.
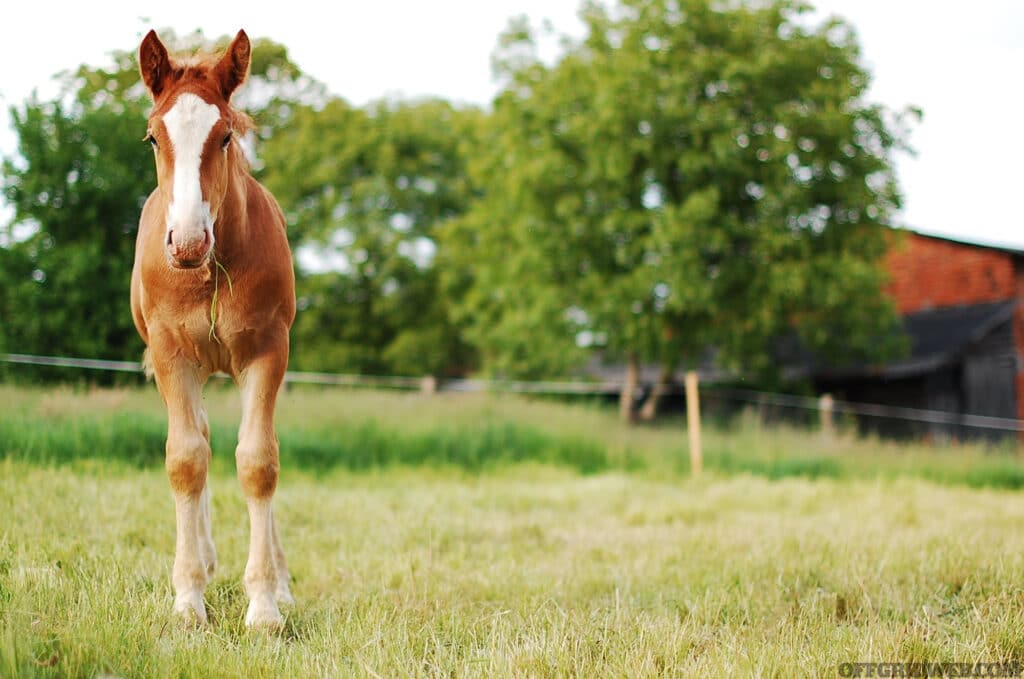
Photo of a young horse standing in a pasture.

Above: Raising large animals takes much more dedication and hard work compared to walking a dog, or changing a litter box.

Closing Thoughts

Most importantly, trust your instincts. In the digital age, its easy to forget that we were once very social creatures. Talking to someone face-to-face is much different than sending them a text or interacting in the comments section. Our social skills are still there beneath the surface and will return quickly with repeated use. You've probably experienced that feeling that creeps up when someone approaches, and you can just tell if they are friendly, or if they do not have your best interests in mind. The reaction to either relax, or quickly get away from the situation is just one example of your latent social skills at work. When moving to the country, once getting settled in, you will be able to tell very quickly if the community you are living in is accepting of new members, or will be a tougher nut to crack.

Before moving to the country, putting as much thought into as many scenarios as you can will make a move exponentially more successful. Do your research, have a solid plan, and if moving to a rural area is the best option for you, dedicate yourself to being a great neighbor. Moving because of a knee-jerk response to a difficult time will only lead to a disastrous outcome. Being close to nature is known to be therapeutic, managing land of your own can be very rewarding, and anyone willing to put forth the effort may find a better quality of life.

Related Posts


Survival Botany: Six Lifesaving Plant Species

Three days have passed while you scuttled unseen from one abandoned apartment to the next. Every cupboard and pantry have long since been ransacked by those who came before you. As the country devolved into chaos and opposing gangs vied for control of portions of your city, you boarded up your dwelling and bugged-in, content with your weeks of prepared food and ammunition reserves. Then the food ran out, electricity turned off, sewers backed up, and fresh water ceased its flow from the tap. Only a brief rainstorm miraculously afforded you the chance to stave off dehydration for a little while longer. You feel cold and so exhausted that you struggle to summon the motivation to continue your search. If only you could find some source of nutrition to give you the energy needed to make it out of the concrete jungle and into an area where food sources might be more abundant. Digging through what's left of the books you haven't burned for fuel and warmth, you come across a resource about foraging for wild edibles, in other words, survival botany.

Photo of an adult male searching through abandoned ruins.

Above: Running out of food can make people desperate. Don't become one of the dangerous marauders hunting for their next meal, and learn what the land can provide. Photo by Craig Adderley

Survival and prepping resources are rife with articles about sources of food that can be found in the wild, but few, if any, outline sources that can be easily identified in both urban and rural areas, and in every region of the United States. Many wild edibles have similar species look-alikes which are poisonous, and it takes a little experience and practice to avoid poisoning yourself. But there are edible plants that are so easily recognizable, there is little chance of mistaking them for something else. Before you test your ability to forage from the land, take a moment to equip yourself with some knowledge that could spare you from potential digestive discomfort, starvation, or even death.

An Ounce of Prevention

As the old saying goes, “an ounce of prevention is worth a pound of cure.” This couldn’t be truer when it comes to foraging for wild edibles. When getting ready to forage, take the time to look up what species of wild plants are edible in the location specific to where you plan on going. Do a little research, take copies of the images of the plants with you, or find a published field guide to reference when you want to know what something is. No guessing allowed!

In North America, there are plants that can cause serious skin damage just by touching, and even some that a single bite could induce grand mal seizures and potentially death (I’m looking at you Water Hemlock). It’s vital to your existence that you take proper identification extremely seriously. A good rule of thumb is when in doubt, leave it alone. You might find that there are a few methods out there for testing toxicity orally, but I do not recommend using these methods under any circumstances, so practice these at your own peril.

Photo of poison ivy growing on the forest floor.

Above: Plants, including the poisonous ones, can look different depend on where they are growing. This means learning to identify plants every time you move to a new area. Even areas that are close geographically.

Consider the location of the plant you are foraging. Is it growing along your backyard fence, or next to a stagnant pool of parking lot rainwater runoff? We have been told since we were young that we are what we eat and the same holds true for every organism. Plants not only absorb nutrients from the soil that they grow in, but they also absorb other chemicals which are present near their root structures. Steer clear of plants growing in potentially toxic environments or which may have been sprayed with herbicides or pesticides. If it looks unhealthy, it most likely is.
If, for any reason, you ingest or touch something poisonous, spit out what you can or wash the skin with soapy water, take a few sips of water and contact medical personnel immediately. Trying to induce vomiting can make matters worse because the acid in your stomach could expose the delicate tissue in your esophagus to the poison. Trying to experiment with foraging in a location where help is not easily reached could make for a dire situation if you become poisoned. No matter how hungry you may be, you must find the discipline to take your time and ensure you are not eating something potentially fatal.

Illustration of a woman feeling sick and overing over a toilet bowl.

Above: Nobody likes feeling sick, and foraging can lead to even worse end results. It's best to learn from someone who is experienced in harvesting the wild edibles in the area you are interested in.

All this talk about danger and poisoning may have cast a dark cloud on the idea of foraging, so let’s clear it up a bit. Being able to forage for food is like donning an armor of confidence. Whether your car breaks down somewhere remote, you get lost on a hike or you must bug out to somewhere safe, you won’t feel distraught about how much food you packed or where your next meal will come from. Not to mention, there are some delicious wild foods out there just waiting for you to enjoy. Some wild foods are even highly sought after by Michelin Star chefs!

What follows is a list of some of the wild edible plants that can be found in every state of the continental United States, as well as many other places in the northern hemisphere. Take some time to review the facts, and you will see how valuable a skill plant identification could be in a survival situation.

Dandelion

Photo of a dandelion growing in a grassy patch.

Above: Often thought of as a weed, a dandelion is incredibly versatile as a wild edible.

If you have looked up edible plants before, you have probably seen this on every list, and it is for good reason. Dandelion is one of the most abundant and easily recognizable wild edible plants on planet Earth and can be found on almost every continent. A single cup of their raw, distinctive green leaves is packed with nutrients, fiber, carbohydrates, and even a gram or two of protein. Every piece of this plant is useful in some way. Tea from the roots is similarly high in vitamins and antioxidants and is used as an anti-inflammatory. The flowers, while they are yellow are edible and used in tea, and even in making wine. You can find them growing in almost every lawn or crack in the pavement with moist soil below.

Acorns

This wild edible requires the most preparation out of all the others in this list, but it’s worth mentioning because there are hundreds of oak trees in the world, and all their seeds (acorns) are edible. Granted, some are more palatable than others, but if survival is the name of the game, knowing that acorns can be a source of nutrition could make all the difference. Preparing acorns is a little more involved than crushing them in your palm with the bottom of your revolver’s grip a la Rick Grimes in “The Walking Dead”.

Photo of a pile of acorns lying on the forest floor.

Above: Many animals rely on acorns for food, so finding an oak tree may also lead to more hunting or trapping opportunities.

For starters, an easy way to check if they are suitable for consumption is to soak them in a container of water. Those that sink are good to go, while the ones that float may be insect infested or have gone bad and should be discarded. Once you have all the good acorns, you can crack them open with a rock or hammer exposing the inner seed. The next step is the most important. Every raw acorn has bitter tannins that can cause intestinal pain and should not be consumed raw. They need to be boiled until all the tannins have been removed. This may sound like a lot of work at first glance but, considering that the dried seeds can be ground in to flour for baking, its cooking applications make it worth the effort.

As the nuts are boiled, the water will darken as the tannins are leached from the seed. Keep replacing the water until the boiling acorn water remains clear. Some species, such as the Northern Red Oak, will remain bitter no matter how much you boil them, and others will be ready to eat after their first hot water bath. Acorns are high in nutrients and are packed with carbs, more so than the other wild edibles on this list.

Clover

Photo of a purple clover flower with a a small moth feeding from the necter.

Above: Clovers are easy to identify, and grow in many regions of North America.

Purple flowers, honeybees and St. Patrick’s Day are all iconic of this well-known plant. What is little known by those outside of agriculture is that it is a great source of protein and vitamins, can be eaten raw or cooked and is found nearly anywhere there’s an open patch of grass. Once the plant flowers, the leaves tend to be slightly bitter, but are still edible. The easily recognizable purple flowers have a honey-like sweetness and are sometimes used in salads, cooking recipes or just eaten raw.

Photo of green clover leaves.

Above: Thanks to popular holidays, the distinguishing features of a clover leaf are almost universally recognized.

Thistle

It’s difficult to mistake this species, and you may have even encountered the spiky fortifications of the thistle. This wild edible almost did not make the list because of its prickly defense; however, it’s so abundant and surprisingly edible, that it makes the perfect survival food candidate. Its ability to grow prolifically in harsh conditions is another reason to remember this plant in an emergency. There are many species, they all look similar, and they are all edible. The best time to harvest them is during early summer or early fall when the nutrients are concentrated more in the base of the stem or roots, but it will remain edible throughout the entire growing season.

Photo of a a cluster of thistle flowers growing in a grassy field. Thistle is a versatile wild edible and worth adding to the survival botany list of plants to learn.

Above: The flowers of this petal are a little too small to create a meaningful meal, but the roots and leaves will provide a good source of nutrition.

If you come prepared with thick gloves or something to wrap your hands with, and a sharp knife, harvesting a thistle will reward you with a meal that is higher in fiber, protein, and other nutrients. The stems and thick midribs of the leaves can be stripped of their thorns, exposing the pale stalks underneath, and eaten raw or cooked. Since they are a cousin of the artichoke, the unopened petals of particularly large thistle flowers can be prepared and eaten in a similar manner.

Photo of a single thistle leaf.

Above: Notice the thick midrib of this leaf. Carefully separating the meatiest part from the rest of the leaf will provide a great source of food.

Cattail

Since cattail grows near the edges of fresh water sources, it’s not only a potential food source, but is also an indicator of where potable water might be found. Cattails make the list because it’s so easy to recognize and have been used as a food source for at least 30,000 years. The young shoots are edible, the pollen can be used a flour substitute and the roots are high in carbohydrates.

Photo of a cluster of cattails growing near the edge of a pond.

Above: The brown colored cattails are older, and useful as a source of tinder. The cattails that look yellow are fresh, and the pollen can be used in several forms of wild edible cuisine.

These plants are also just as functional as they are edible. Cordage can be woven from strips of their long leaves, and the leaves themselves can be woven into vessels for carrying things or even made in to mats or furniture. There are a few downsides to this useful plant. They grow exclusively in low-lying wet areas, so if you find yourself in an arid region, you will have to find something else to eat. And a word of caution: cattails are natural filters, and if the water source they are growing next to is polluted, consuming them could make your survival situation worse.

Purslane

Photo of the succulent purslane growing in a garden.

Above: Purslane is also drought resistant, making it a great source of nutrition during long dry spells.

Bane to backyard gardeners everywhere, purslane is a succulent that creeps across the soil and threatens to over grow newly planted seeds. Unbeknownst to many is that this plant is not only edible, its delicious raw and has a taste similar to sweet peas. It’s a good source of vitamin A, C, and slew of other nutrients. As it ages and flowers, the taste can become more bitter, but is still edible. It’s a good idea to rinse them off before eating because rainwater can splash soil particles on to the leaves that grow so close to the ground.

Harvesting

Every species on the list, with the exception of thistle, can be harvested with your bare hands. Having a dedicated root knife will your make harvesting efforts less strenuous and will spare your pocketknife from being dulled if you are trying to dig up a stubborn plant. Bringing along a breathable container to keep them in as you harvest would be beneficial, but you can always improvise a vessel should you need one. Your individual scenario will dictate how you collect and consume wild edibles. As with most plants, boiling or blanching them will give you the most nutritional content. If you are wanting to save them for later and you have the ability, drying the plants, either with a dedicated dehydrator or in the sun will preserve your find for months, if not longer.

Photo of a hand holding freshly picked wild berries.

Above: Not every wild edible plant will be easy to pick like berries or other fruits. Come prepared to deal with thorns and prickles.P hoto by Marlene Leppänen.

Stacking the Odds In Your Favor

Three days have passed while you scuttled unseen from one abandoned apartment to the next. Every cupboard and pantry have long since been ransacked by those who came before you. But despite the potentially bleak circumstances and the occasional stomach growls, you feel like you have enough energy to continue on your journey. The edible plants you forage as you make your way out of the city have enough water content to keep you hydrated, carbohydrates to keep you energized and vitamins and minerals to keep you healthy. While others grow desperate or give up, you and your loved ones confidently make your way to your destination, all thanks to a little foraging knowledge.

Photo of an adult male foraging for wild edibles in a thickly vegetated forest.

Above: Learning about what wild foods can be harvested for sustenance before a disaster strike will boost confidence and keep morale up for you and your loved ones. Photo by Michael Burrows.

Related Posts


Learn How To Build Your Own Forge

When you watch a blacksmith performing their work, what thoughts or emotions cross your mind? I’ll never forget when I first witnessed a blacksmith at a trade show creating a single iron link for a chain. Outside the sun shone brightly, but beneath the roof of his forge, it was dark enough to see the soft orange glow of the searing hot metal being pounded into shape. There was something mesmerizing about the smiths' focus as each hammer strike guided the link into its final form, and something oddly satisfying about the hiss of steam as the quench cooled the piece into permanence. I spent a long time after that wondering how I might try my hand the craft and considered the challenges I might face if I ever decided to build my own forge. These days it is a hobby only relatively few get invested it, as forging has become replaced by CAD, 3D printing and CNC machines that can pump out products in a fraction of the time of what a single human could possibly hope to produce manually.

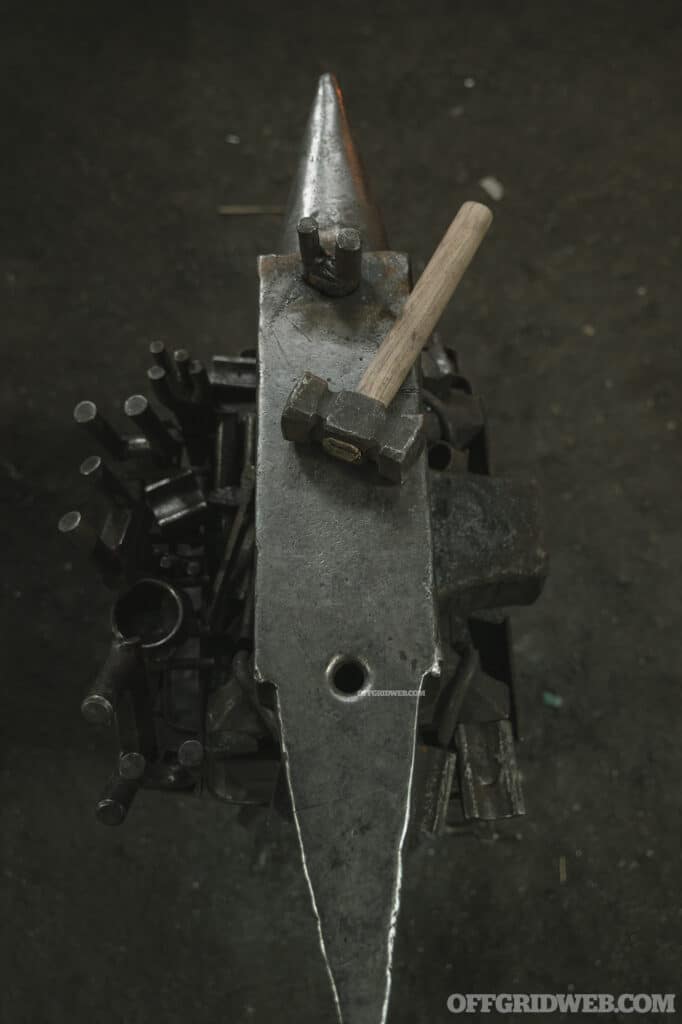
Photo of a hammer resting on the face of a large blacksmithing anvil.

Above: An anvil an a hammer are two important blacksmithing tools. But you don't have to break the bank to find them.

Shows on various television networks have rekindled an interest in hobby forging, and thanks to the internet, there are no shortage of tutorials and demonstrations. There are plenty of opinions on how to get started and what tools to have available, so for someone new to the idea of becoming a hobby blacksmith, starting can be detrimentally overwhelming. That need not be the case, as you will see further on. It is a particularly useful skill to learn and well worth the effort, especially in the times we are living in now. Knowing how to shape metal could not only be a matter of survival, but it could be a source of potential income, a skill to barter with and a practice that can bring family, friends and neighbors together. After much trial and error, I have condensed my experience into easy to follow steps that will not break the bank.

Choosing the Right Location

Creating fire is one of mankind’s greatest inventions and without it we would have never hardened spear tips, baked bread or created engines to drive cars. Unfortunately, its ability to create is only equaled by its capacity to destroy and any time fire is being used, it needs to be treated with the utmost respect. Therefore, the first thing you must consider before trying to heat your first piece of iron is where you can do it safely. Even the most simplistic forge designs can reach temperatures in excess of 2,800F and anything combustible that gets anywhere near will go up in flames. If having a metal ventilation hood is out of the question, realize that anything directly above the forge may melt or become singed. When I made my first forge, I had located it at the entrance of my garage. It wasn’t until I was well in to my first blacksmithing experiment that I noticed the rubber seal at the bottom of my raised garage door was hanging limply and had melted in several places.

Locations outside and well away from any residence are preferred. The middle of a driveway, or even a designated backyard fire pit—away from your neighbors’ fence or any low hanging tree limbs—are good places for starting out. Keep in mind, the set up I am describing is just to whet your appetite for blacksmithing and see if it is something you want to invest in further, not for creating custom swords or elaborate works of art. That being said, it would be excellent neighborly etiquette to tell the people next door or across the street what you are getting involved with. This way you can avoid having the fire department called on you, or receiving a visit from the police for making too much noise. At a minimum, any forging activities should be done at a time when most people will not be disturbed from the pounding of a hammer. I would strongly recommend avoiding placing a forge on a balcony, the risk of a forge tipping and spilling hot coals on an unsuspecting pedestrian below is too great.

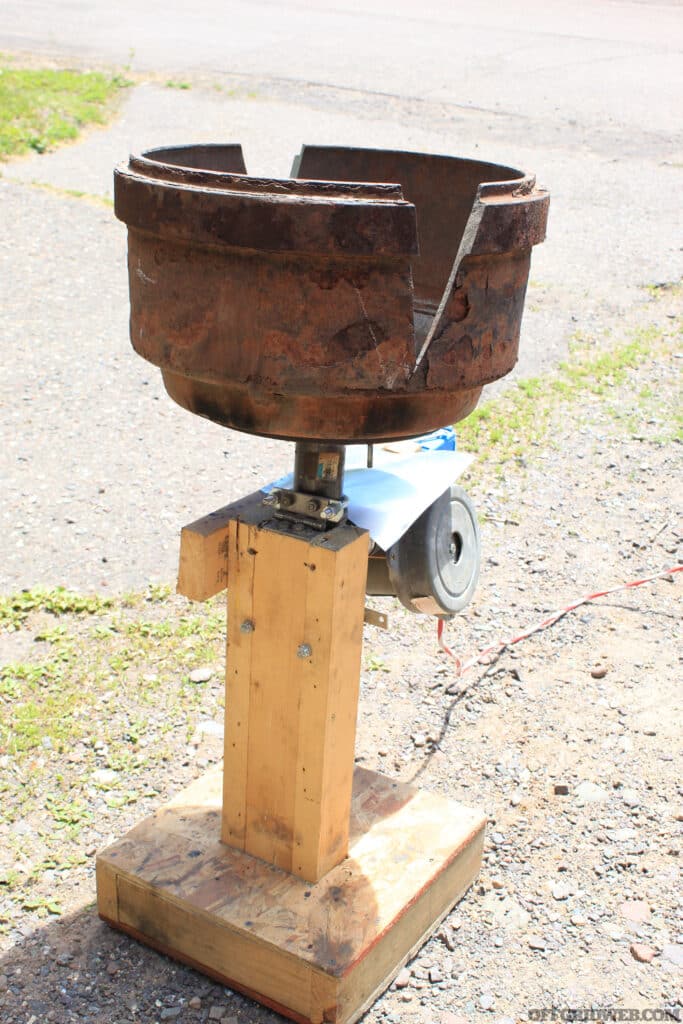
Photo of a home built brake-drum forge sitting safely in a driveway and a way from flammable objects.

Above: Keeping the forge based on a substance that can't burn, at least twice the distance in its height away from structures or flammable objects, and out in the open if it cannot be ventilated, may keep your house from burning down.

Building the Forge

Just to review the very basics of survival knowledge, every fire needs three elements: oxygen, a source of fuel and a spark. A forge is simply a vessel to contain and manipulate these elements to your will. Some people have used a very simple technique that involves stacking two rows of bricks side-by-side, filling the gap in-between with their fuel source. But even stacking some fist-sized rocks in a similar fashion would do the trick. Avoid using something like a small charcoal grill or a raised metal fire pit. You will be surprised how hot the flames will become and if you are not careful, they could even burn a hole through thin steel! In ancient times, the walls of some forges were made with clay, a very porous substance that disperses heat surprisingly well. The point here is that you do not need to invest in a professional forge created by a company to get started. And the beauty of starting small and simple is that if you decide it’s not the skill for you, you haven’t invested a small fortune in supplies.
Like any craft or hobby, the amount you can spend is limitless, but I found an efficient way to create a forge that should cost less than $30. If you have access to a scrap yard, then you have access to the cliché novice blacksmiths beginner forge: the brake drum. The gentleman whose scrap yard I perused let me have a rusty pickup truck brake drum free of charge when I told him what I wanted one for, and it was more than enough for several years of tinkering. But having a vessel to set coals on fire is only the first step. Next you need away to feed those hot coals oxygen, and the faster and harder you can feed it, better.

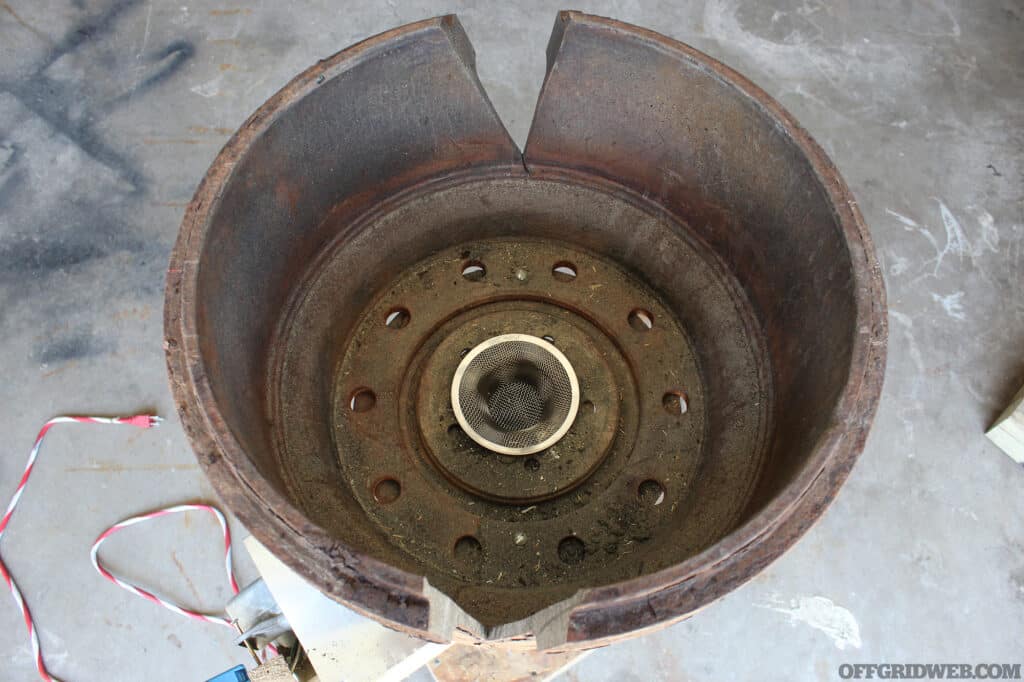
View of the inside of a large brake drum that has been modified to act as a makeshift forge.

Above: This tractor-trailer brake drum has been modified with angular grooves to allow longer metal stock to be heated along its length, and has a simple sink strainer to keep coals from falling into the tuyere.

If you have ever been next to a campfire on a gusty night, or fanned the briquettes in your grill, then you have witnessed the effects of forcing oxygen into flame. For a moment the flames become stronger and the temperature rises. You need to devise a way to sustain that airflow to get the coals to forging temperatures. Old time blacksmiths used canvas, leather or wood-valve bellows to pump air manually. They would carefully observe the coals color and flames, and regulated the heat, while simultaneously working on the piece they were crafting. It was a skill that was passed on from master to apprentice and the technique took years to perfect. Now you can pick up a used hair drier from your local thrift store and pump air in with a flick of a button. Some hardline blacksmithing enthusiasts may scoff at the idea of using old appliances, but it is a perfect way to get the job done on the cheap. Even when schools were still teaching blacksmithing, they traded their manual bellows for industrial blowers. I have even seen people use leave blowers for their homespun forge. There is more than one way to set up a forge, so be creative if you do not have access to any of these suggestions.

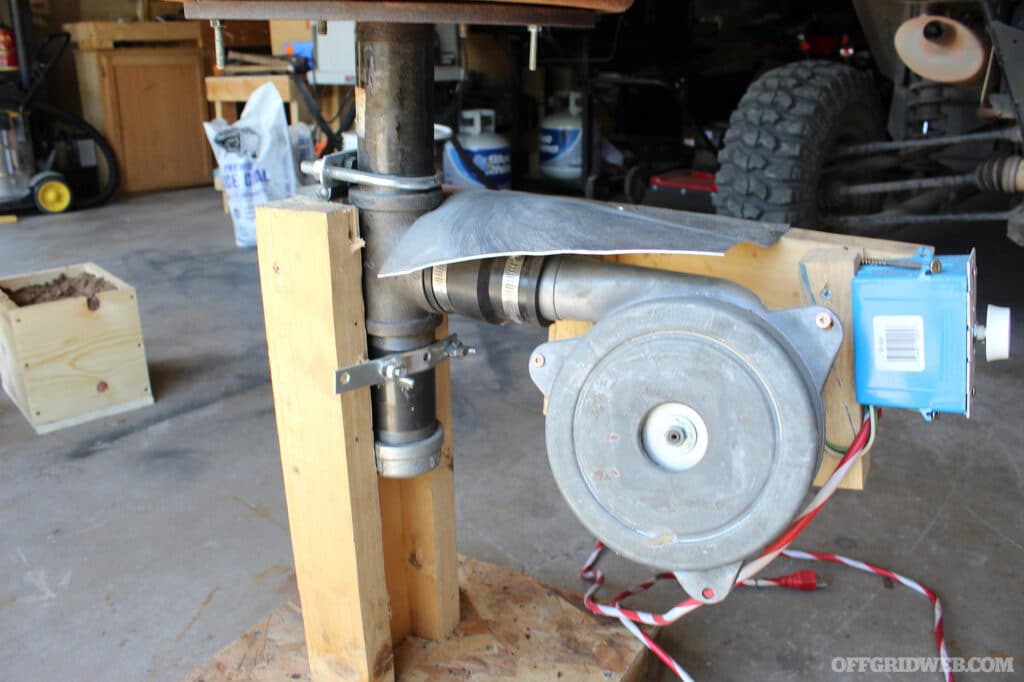
Photo of the blower assembly for a home made forge.

Above: Due to the heat, and sometimes the occasional falling coal or spark, a thin piece of sheet metal was used to protect the rubber pipe connections and the blower motor.

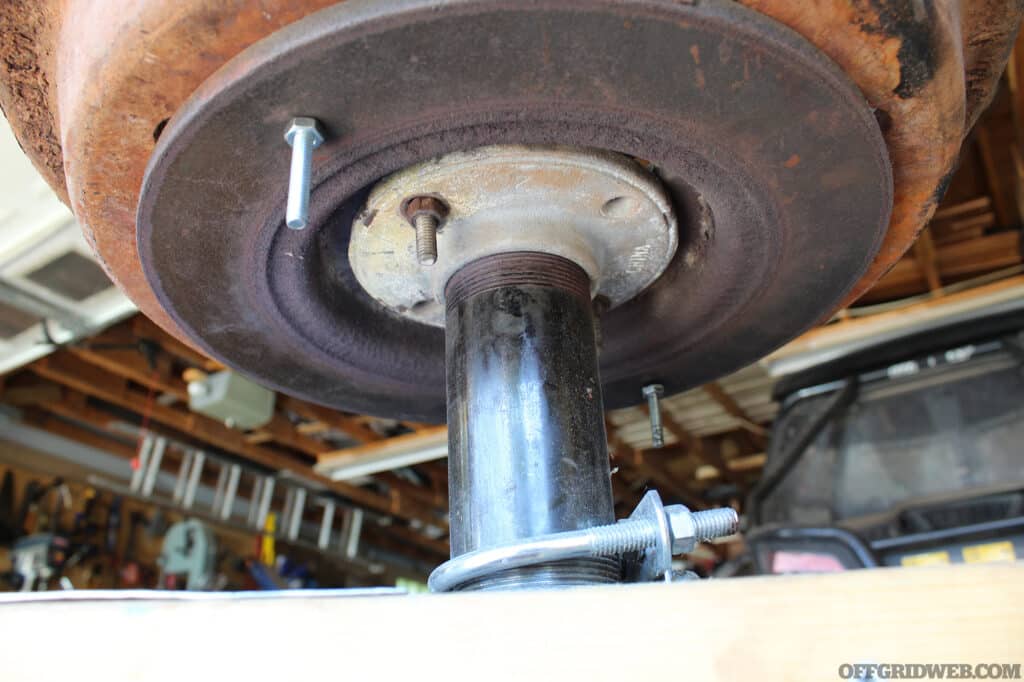
The next thing to do is get the air into the coals in a controlled way. A brake drum forge does this with a series of pipes connected to the bottom of the brake drum. If you are using this method, make sure that any pieces are not galvanized or stainless steel because the high temperatures will release toxic chemicals. Black steel pipe is the safest way to go if you decide to use this method. The setup is simple: brake drum, pipe flange, a section of straight pipe, a T-Pipe, a section of straight pipe and an end cap. You may have to drill some holes and use some bolts to connect the flange to the brake drum, and a titanium, or more preferably a cobalt drill bit will take care of that in a cinch. The T-Pipe is where you will connect the hair dryer with a piece of stretchy bicycle tubing or a specialized rubber pipe connector. Once you turn on the hair dryer, air is forced through the pipe and up into the brake drum. I used some scrap wood to build a stand for the forge and used some old disk brake rotors to counter the weight on the bottom and make it less tippy, but you can achieve similar results by making the base as wide as it needs in order to stabilize. One final touch is to put a wire screen over the hole in the brake drum, so your coal keeps from tumbling down the pipe. I used a strainer you can buy for your kitchen sink and was surprised to find out that it would not melt, even after multiple uses. You can decide the height, but you should keep it at a comfortable level, so you prevent overextending your reach as you move metal pieces in and out of it.

Photo of a flange connecting the blower to the bottom of a brake drum, all components of a hand made forge.
Above: This flange is bolted to the bottom of a brake drum and connected to the straight pipe that directs airflow to the coals.

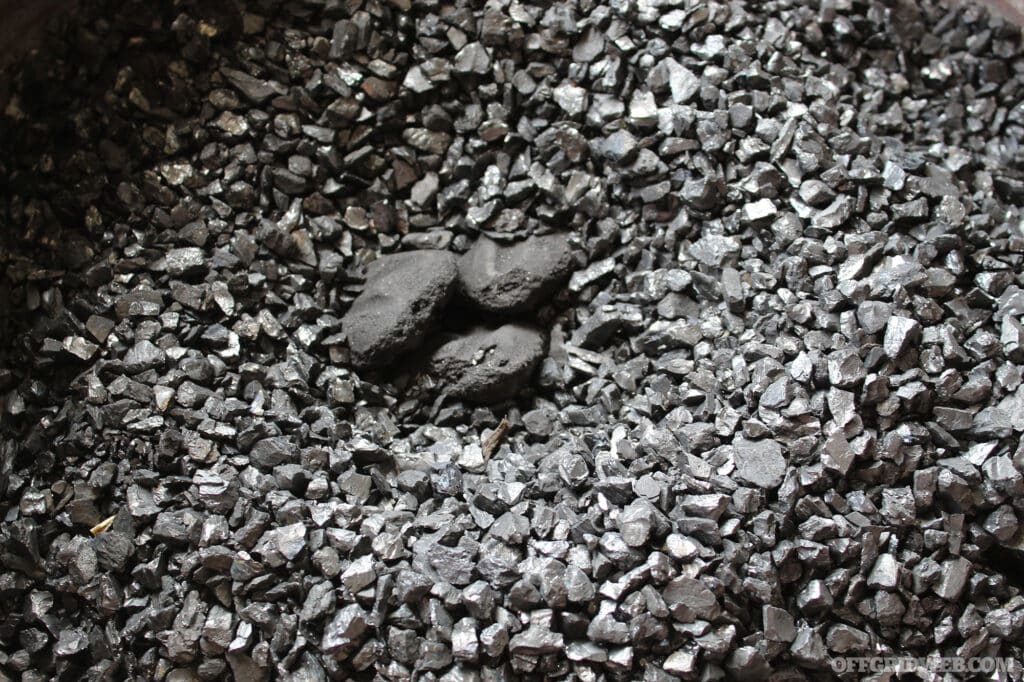
There are several options for fuel, and it is even possible to make your own if you have the desire. For now, we are dealing exclusively with coal as setting up a propane forge is much different, more expensive and potentially more dangerous if you make a mistake. Coal comes in two flavors, wood coal or mineral coal. Mineral coal—sometimes labeled “bituminous coal”—is mined from the ground and can be bought from stores that offer stoves as a home heating source. It burns with little to no smoke and burns for a longer period of time. Wood coal is made by super-heating chunks of wood without oxygen, carbonizing them into those easily recognizable chunks we sometimes grill our food over. If you cannot find pure wood coal, charcoal briquettes will work. Either options are completely fine, although mineral coal is somewhat trickier to get started and wood coal is smokier, so you may have to choose what you are using based on your individual circumstances. Because I still like to work from my garage, I use mineral coal to keep from getting smoked out. I light my mineral coal by burning a small pile of charcoal briquettes in the middle just to get the sustained heat needed to get it going, and turning on the blower to expedite the process.

Photo of a small pile of charcoal briquettes lying on a bed of mineral coal.

Above: Using charcoal briquettes (seen lying in the middle) are an easy way to get the mineral coal started.

The Anvil

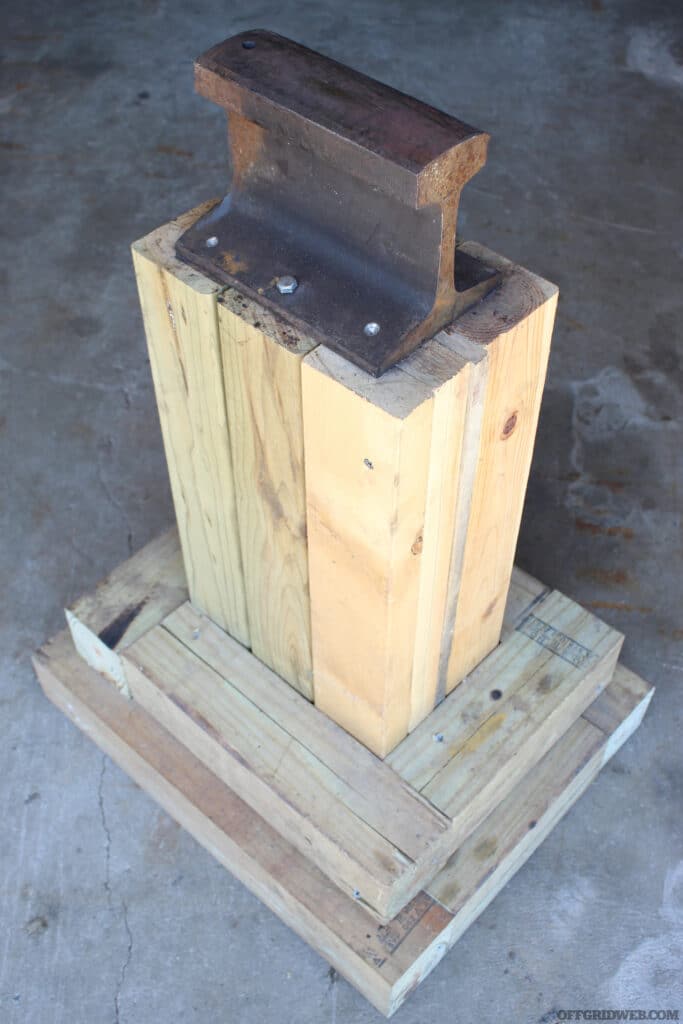
An anvil is more than just the heavy thing mischievous coyotes drop on quick witted birds, it is a critical tool that is vital to shaping metal. Professional anvils are quite pricey, so many beginner blacksmiths find a chunk of railroad tie useful. These are not always easy to acquire, as railroad ties are tightly controlled and restricted. The perfect scenario is to find a piece of railroad tie 8 to 12 inches long from a scrap yard, but as hobby blacksmithing becomes more popular, so too does the scarcity of discarded railroad tie. If it is impossible to come by and you just need something to beat metal against, a dense brick or rock will do the trick, but you will find yourself replacing it frequently as high heat and the impact of hammering will eventually break it. For a more permanent set up, you will want an anvil stand to hold the top of your anvil at approximately the same height as your arm resting at your side. I used random scrap wood to build mine and had to widen the base several times when I discovered hammer blows caused the stand to wobble precariously.

Photo of a small chunk of railroad track being used as a makeshift anvil.

Above: This small chunk of railroad tie makes for a convenient anvil, but any block of solid metal will do the trick in a pinch.

Blacksmithing Tools and Materials

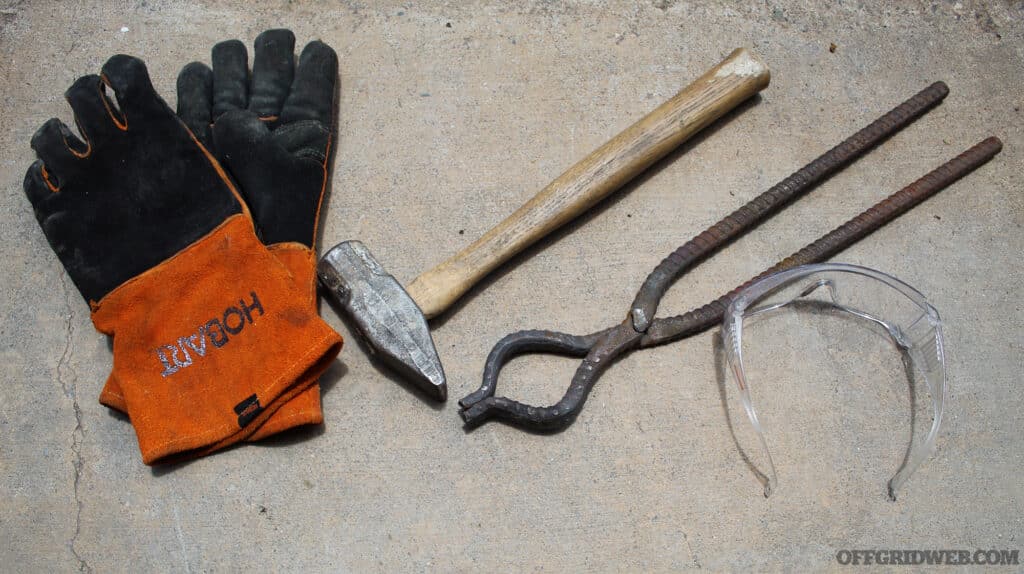
After getting the forge and anvil together, you are going to be eager to get started but there are a few tool necessities that cannot be overlooked. Before you can start pulling hot metal out of your forge you will want some kind of tongs to grab it with. I started with a pair of channel locks to grab the iron, and in my personal experience, the longer the handle, the better. For small pieces, even a pair of pliers will work, but the need to work with higher temperatures is the reason one of my first blacksmithing endeavors was to forge some blacksmithing tongs. You will also need something to shape the metal against the anvil with. Any hammer will be useful, but something that weighs between 2 to 4 pounds is the best way to go. The heavier the hammer, the less force you will have to put into your blows. Swinging a hammer down hard will quickly wear you out and the shock of the blow may even cause joint distress in your elbow and wrist. For this reason, most blacksmiths let gravity pull the weight of the hammer down to do the work for them, putting most of their effort into raising the hammer. There are many tutorials of basic blacksmithing techniques on the internet that are well worth the effort of practicing.

Photo of essential blacksmithing tools. From left to right: leather gloves, hammer, tongs and safety glasses.

Above: The bare minimum safety equipment. It is also a great idea to find a leather apron, steel-toed boots or shoes, and to wear non-synthetic clothing. The high temperatures will melt synthetic fabric to your skin.

Lastly, you will need something to heat up and work into something useful, like a knife or a tool. For starting out, I recommend finding some iron rebar, which you can also find at a scrap yard or even waste from a local construction project. Don’t worry if its rusty, it will all get pounded off as you work the metal. Any rebar from ¼ to ½ inch is best, and if the pieces are too long, you can cut them to more manageable sizes with a hack saw or angle grinder. If blacksmithing is something you want to get more serious about, there is plenty of information about different types of metal and their properties, as well as what techniques are best for working with them. Do not worry about any of that for now, just get your forge fired up, put the metal piece in the coals and when its glowing hot, pick it out with the tongs and start hammering away!

Safety and Learning Resources

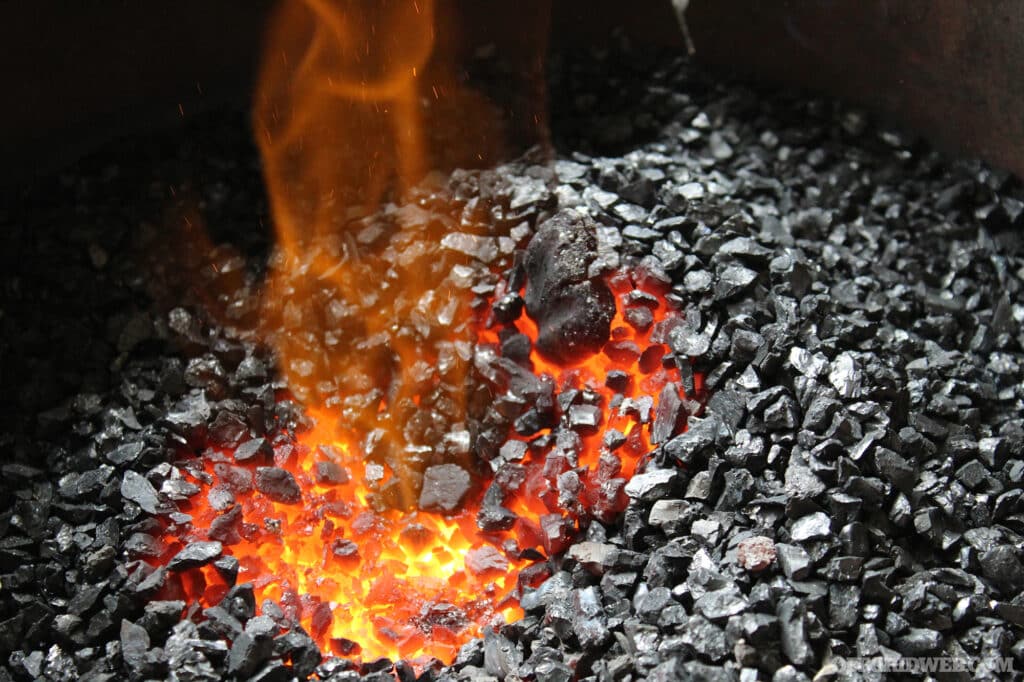
Like I mentioned earlier, working with fire and hot metal is inherently dangerous. Keep children away and always be mindful of the heat. Metal can reach temperatures of 900F before it even begins to glow a faint dark red, which is several times hotter than the self-clean mode on your oven! A good rule of thumb is to always assume metal is hot and treat it as such. When metal increases in temperature, hitting it can cause sparks to fly, and for this reason, a pair of safety glasses is highly recommended. Avoid wearing clothing that is made out of synthetic fibers that will melt to your skin when something hot touches them. Most blacksmiths wear exclusively cotton clothing and most wear a leather apron or even steel toed boots. Having a bucket of sand to smother the coals should a flare up occur and a fire extinguisher nearby are both recommended precautions. Blacksmithing is a fun and rewarding skill to learn but taking safety seriously cannot be understated.

Photo of lit mineral coals, glowing with heat and flame.

Above: If not carefully monitored, these coals can easily become hot enough to melt steel.

As you progress on your blacksmithing journey, you will want to learn how to do more than just heat metal and pound on it. Thankfully there is an almost unlimited supply of lessons and tutorials available for free online. Because blacksmithing is an ancient skill, doing an online search in the Library of Congress will yield fun and interesting results. There are also many phenomenal vloggers to inspire you and show you techniques. Ultimately, the best way to learn is by finding a practicing blacksmith in person to learn from and mentor you as you progress. One of the challenges of teaching yourself is that you will develop bad habits that a master blacksmith can show you how to avoid.

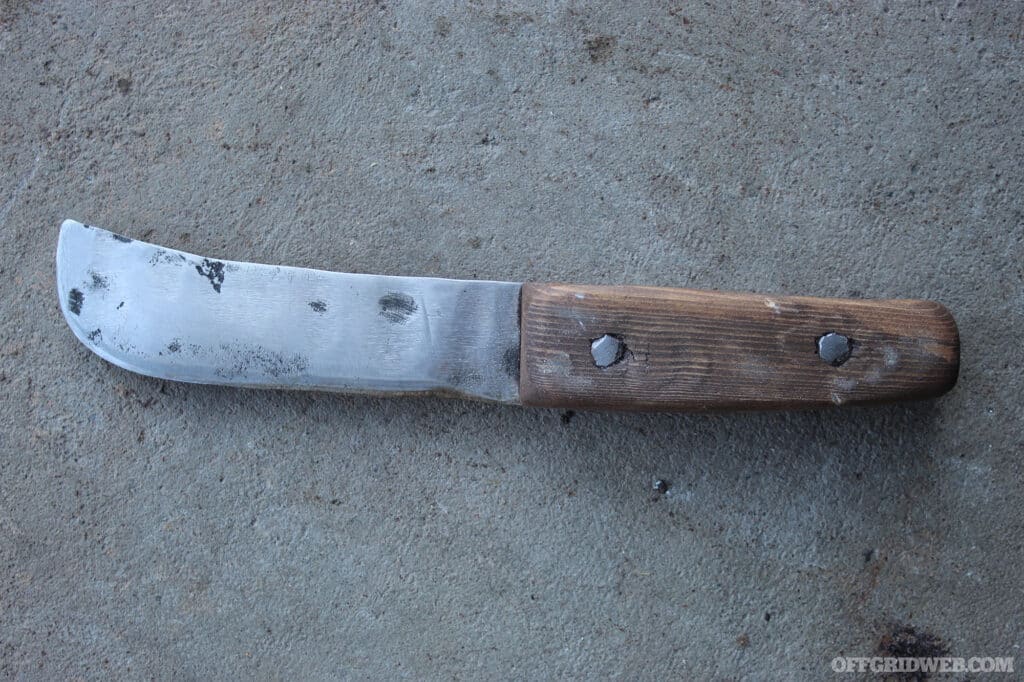
Photo of a crude knife forged from a chunk of iron rebar.

Above: This knife was forged from a chunk of rebar using the brake drum forge and train track anvil.

Most importantly, do not be overwhelmed with the amount of ideas and opinions of how to get started, and just start. You will learn as you go and improve as you learn. My oldest daughter and I created a simple knife just by messing around with some rebar one evening. Granted, it’s not perfect, but it will spread butter, and we were both able to learn knew skills in the process. As your proficiency increases, you will find comfort in knowing that if you needed something forged from metal, be it weapon, tool or hardware, you would have the skill set to do so. There is always something both satisfying and rewarding about working with your hands, to step away from the digital noise that often drowns our lives and focus our attention on something we are creating. Blacksmithing may be one of humanities greatest achievements, and practicing the craft is demonstrative of how we were able to control every element—water, wind, earth and fire—to improve every aspect of our lives.

Related Posts


eMergency Transportation: eBikes Are For More Than Just Going Green

Scenario 1: It’s 6:10 in the AM. The city you live in, which happens to be below sea level, is assailed by torrential rain and sustained winds of up to 140 mph. Sea surge of nearly 30 feet quickly overwhelms the levies and entire neighborhoods are swallowed by water. Whether you moved to safety beforehand, or decided to stay, it will take at least two more weeks before utilities are fully restored.

Photo of a flooded suburban community, taken by photographerSyed Qaarif Andrabi.

Above: Water can rise alarmingly quick during heavy precipitation, especially in low lying areas. Photo taken by Syed Qaarif Andrabi.

 Scenario 2: It’s 1:25 in the AM. Awoken by the sudden absence of the electric hum that pervades everyday life, you look around the darkness confused. Temperatures have dropped over 40 degrees below normal for this time of year, and an overtaxed energy grid has forced rolling brownouts. Unpredictable winter weather is on the rise, and getting worse. On top of the life-threatening risk of cold exposure, it will be another nine days before all roads are fully passable.

Photo of an urban area almost completely obscured by heavy snowfall. Photo taken byMaria Orlova.

Above: Heavy snowfall can block roads, take down power lines, and cause people to take risks they may not have otherwise. Photo by Maria Orlova.

 Scenario 3: It’s 4:17 in the AM. Without warning, normal everyday life is violently upended as seismic upheaval destroys entire cities and kills tens of thousands in a matter of minutes. Maybe you were fortunate enough to be in a building constructed to code, or maybe you were far enough away from the epicenter to be spared the worst. Either way, it is going to be a long time for life to resemble what it once did.

Photo of urban infrastructure heavily damaged by an earthquake. Photo taken by Aksel Anıl.

Above: Infrastructure not built to withstand the energy of a powerful earthquake can crumble, killing and injuring any who are inside or nearby. Photo take by Aksel Anıl.

All of the scenarios above have something in common, other than the fact each occurred uncomfortable early in the morning. When disasters strike, the things we most commonly rely on disappear, sometimes indefinitely. Having a reliable source of fuel and a method of transportation is a fairly recent amenity that is often overlooked until we reach for it… and it's not there. For most, storing large quantities of gasoline, or having a partially submersible overlanding vehicle is an impractical prep, but there are alternatives. One such alternative is the eBike.

eBike History

eBikes have been around a lot longer than most people realize. The first patents for hand-cranked, three-wheeled bikes without any pedals were seen in France way back in the 1880’s. But due to the financial influence of big players in the oil market, battery powered bikes remained in obscurity until over 100 years later. Which may be for the best. Old models were obscenely bulky, and lead-acid batteries large enough to move an adult were cumbersome behemoths.

 As lithium-ion technology hit the market and improved the use of hand held electronics, the eBike’s practicality also received a much needed boost. Smart batteries and decreasing costs of computer components spurred more innovative eBike designs. These days, an affordable eBike can travel at ranges up to 200 miles on a single charge. Throw in pedal assist, and eBike can go as far as the endurance of the human who rides it. All this without the expense, weight or emissions of cars or trucks powered by fossil fuels.

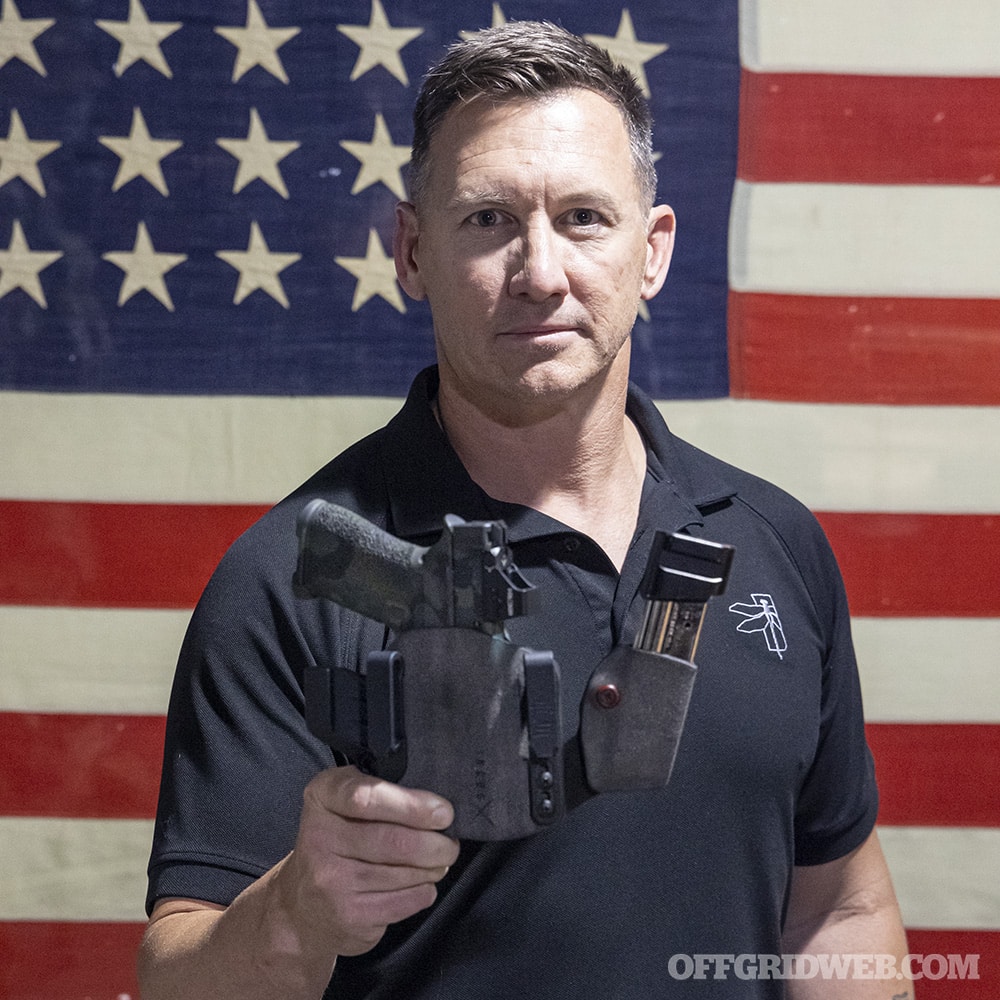
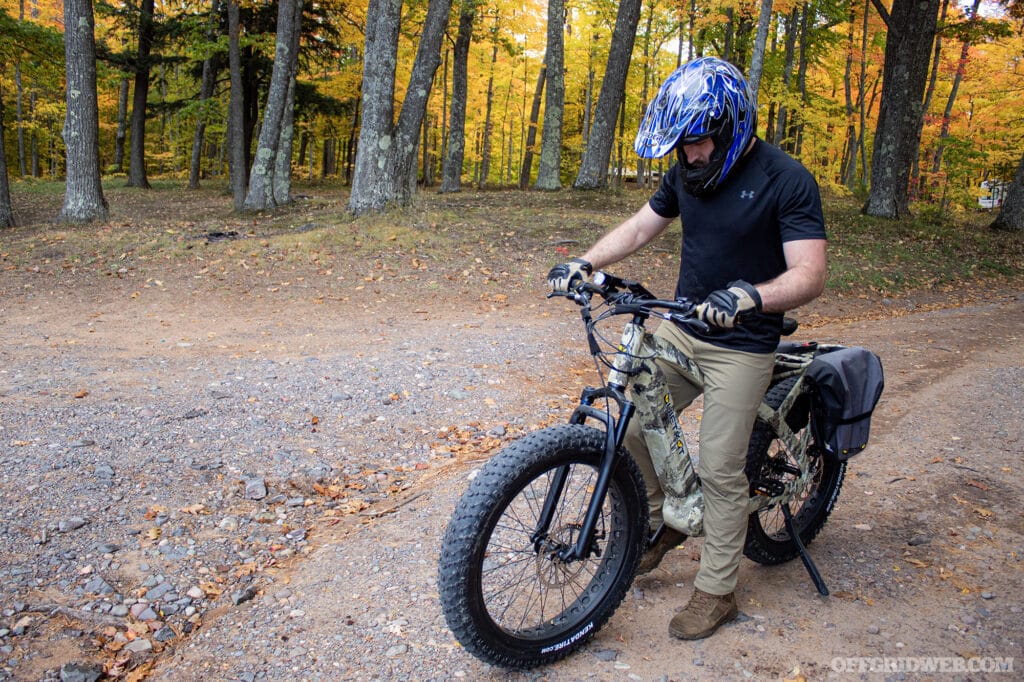
Photo of an adult male wearing a motorcross helmet getting ready to ride an eBike.

Above: Before riding a motorized vehicle, such as eBike, it is important to wear appropriate personal protective equipment and make sure the functions of the bike are working properly.

 Many people use ebikes to make inner-city commutes easier and less costly. For someone in a fair weather climate, using an ebike eliminates fuel expenses, reduces insurance premiums, and where gridlock occurs, it drastically cuts down on commute times. Many newer models are even powerful enough to tow small payloads, nudging into the realm of cargo transportation with the right accessories, such as pull behind trailers and cargo racks.

Not everyone is fit enough to spend the day biking around on trails. This includes the elderly, and the physically disabled. With an eBike, the effort needed to enjoy a leisurely excursion is limited only by being able to maintain balance, and battery life. Using an ebike to get around scenic and tourist locals eliminates the need to pay for more expensive options and reduces physical exhaustion. Someone suffering from joint pain, or a leg injury can still enjoy getting around in the open air without having to torment themselves. Lightly pedaling, but letting the electric motor do most of the work, could be a great starting point for someone out of shape to build themselves up without risking injury or cardiovascular complications.

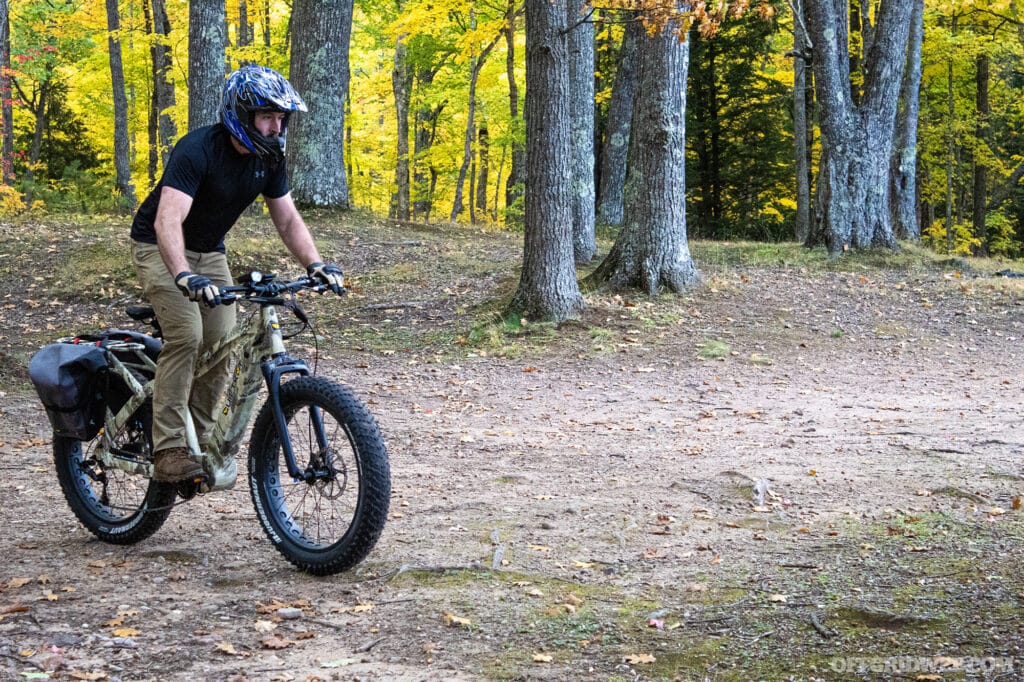
Photo of an adult male riding an eBike on a forested, unpaved trail.

Above: Going for a ride on a smoother trail or road before taking on more challenging terrain is a great way to test the brakes and make sure the electronic motor is operating the way it should.

Many upsides to eBikes exist, but what about in an emergency situation or survival scenario? Being able to move quickly while quietly, and with little effort would be a boon when heading to a bugout location. It attracts less attention than a vehicle and is much more expedient than traveling on foot. An ebike fits into tighter spaces, making narrow alley’s and pedestrian walkways that a car or truck would never fit into, easily accessible routes. Some models are capable of off road travel, furthering versatility, especially when making the urban/rural transition. To find out if an eBike is truly up to the worst calamities Mother Nature–or human nature–can throw our way, I got my hands on one of the most rugged models out there.

QuietKat – Warrior Specs

QuietKat is a company that leads the way for offroading eBikes. Right out of the box, the Warrior model is an impressive specimen. Weighing in at 70lbs, 10 of which are the battery, it is readily apparent that it was built to take a beating. 26” x 4.5” All-Terrain fat tires, an adjustable coil suspension fork, and Tektro mechanical disk brakes are designed to get off the streets and do some major offroading. Several different modes allow the user to adjust the efficiency of the 5-speed motor, and it can easily reach speeds over 20 mph depending on which battery type is included. The Warrior has a load capacity of 325 lbs, a cargo shelf that can carry up to 100lbs, and is capable of towing.

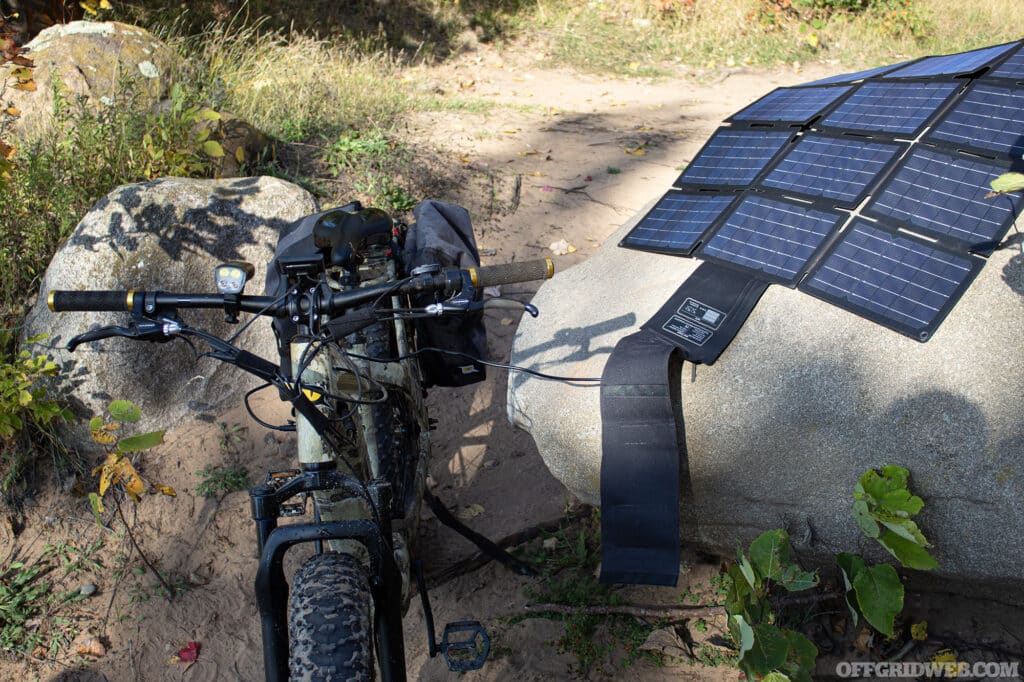
Photo of the QuietKat Warrior eBike parked next to a boulder plugged into its portable solar charger.

Above: The portable solar charger is weather resistant and folds into a compact size, making it easier to store in a pack.

 In addition to all the techno wizardry and performance design, there are a ton of accessories that make this brand stand out from the crowd, specifically the Comfort, Overlander’s, Angler’s and Hunter’s Kits. These include numerous cargo options, seat enhancements and even an all-terrain cargo trailer for pulling game out of the woods, or supplies into it. The model I’m using is a combination of the Comfort and Overlander kits, and includes a portable solar charging station. Eager to push it to its limits and see what it’s capable of, I fully charged the warrior via its conventional 110v AC charging cable, and identified a few unique locations to run it through its paces.

Terrain Performance

 Before I started throwing the eBike into challenging situations, I wanted to warm up with it on the paved roads near my house, and I’m glad that I did. If you’re like me, you might be thinking, “I know how to ride a bike, how different can it be?” Well let me tell you, there is a dramatic difference. Almost as soon as you begin pedaling, the electric motor kicks in, giving an instant speed boost. Depending on what setting you pre-programmed, this automatic motor engagement will launch you forward without much effort. If you’ve ever driven a dirt bike, or motorcycle, then you know how intertwined balance and momentum can be. 70 lbs might not sound like a lot, but it makes a huge difference when compared to a traditional 12-speed mountain bike. Fortunately the bike-riding fundamentals are largely the same, and before long I was zipping down the roads, already impressed by how much of a boost I could get with the motor. After familiarizing myself with the mechanics and the digital settings, I was comfortable ramping things up to the next level.

Photo of an adult male riding the Quietkat Warrior through colorful fallen sugar maple leaves on an autumn day.

Above: The motor assisted pedaling is surprisingly effective, and it makes traversing town roads practically effortless.

 On well established gravel or paved roads, an eBike seems more moped than bike. Pedals are useful, and using them will significantly boost your speed and your mileage, but you’re not putting much effort into it once the motor engages. On both gravel and pavement, I was able to max out my speed in the 25 to 30 mph range. The bike could easily keep up with in-town traffic. Going up inclines is also surprisingly easy. When the motor kicks in, minimal effort is required, even on inclines as steep as 20 degrees.

Photo of an adult male riding an eBike up a steep hill.

Above: Even steep roads are easily driven with an eBike's motor helping the rider.

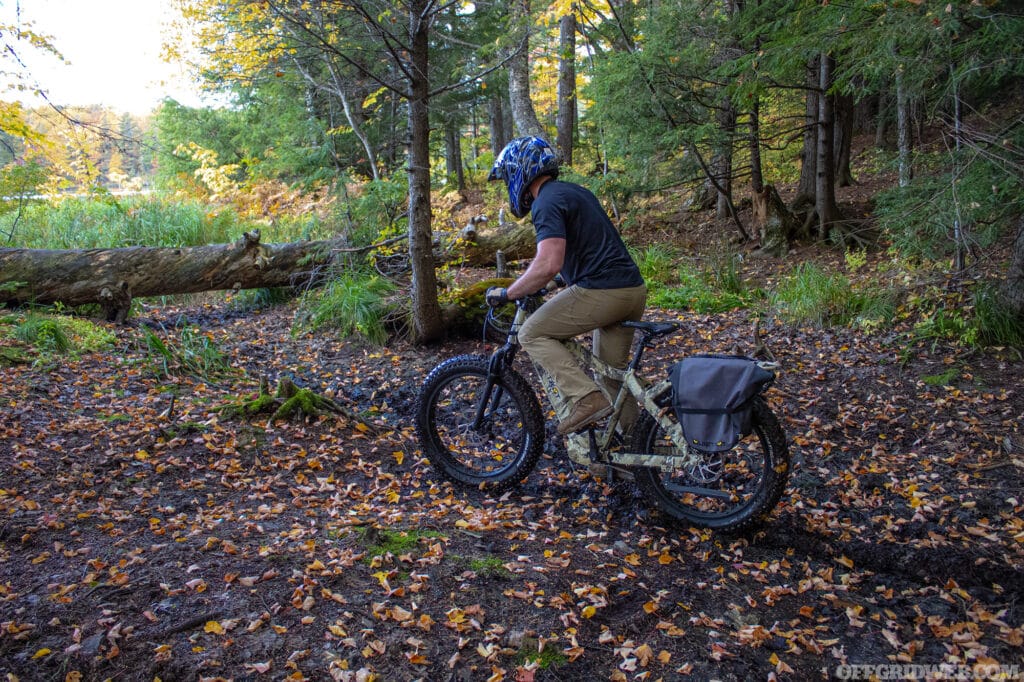
 My first offroad location was a remote camping site with rooted and rutted trails surrounding a boreal lake. To compensate for the unpredictable terrain, I loosened the suspension, and soon I was floating over downed tree branches and larger holes. This was actually surprising to me, since my only off road biking experience told me that I would be in for a bumpier ride. I was pleasantly surprised how easily I could get around, both on the trails, and even through undeveloped forest floor. Although I will warn that deciding to go off the trail means taking it slow. Being loaded down with gear adds a lot of extra weight, and the eBike the size of the Warrior is not as nimble as its non-motorized cousins. This makes tipping over easy if a corner is cut too sharply, or balance is lost trying to make it over a larger obstacle.

Photo of an adult male riding an eBike off the trail near a remote campsite in Michigan's Upper Peninsula.

Above: Off the trail, the right eBike makes traveling through open wilderness an easy task.

 Which leads me to what I consider one of its more challenging tests: deep mud. The land surrounding the lake is filled with swamps and bogs. With the ground so saturated, it is easy to step up to find knee-high mud, or deeper in some places. In this scenario, fat tires make all the difference in the world, especially when the air is let out a little ways. What I found was that by determining where the mud meets dry land, and traversing the mud in a straight line to that point, I could make it to the other side 9 times out of 10. The deeper the mud, the more speed and momentum is needed to get across. Trying to make gradual turns typically lead to wiping out, so good balance and maintaining straight-line momentum is crucial in this situation. Even so, with the combined weight of myself, my gear, and the bike, I was able to get across large mud patches without worrying too much about falling over into the goop.

Photo of an adult male riding a fat-tire eBike through thick mud.

Above: Sharp turns should be avoided when traveling through deep mud. Turning too quickly causes the tires to brake in the same way a hockey player turns sideways on ice to skid to a stop.

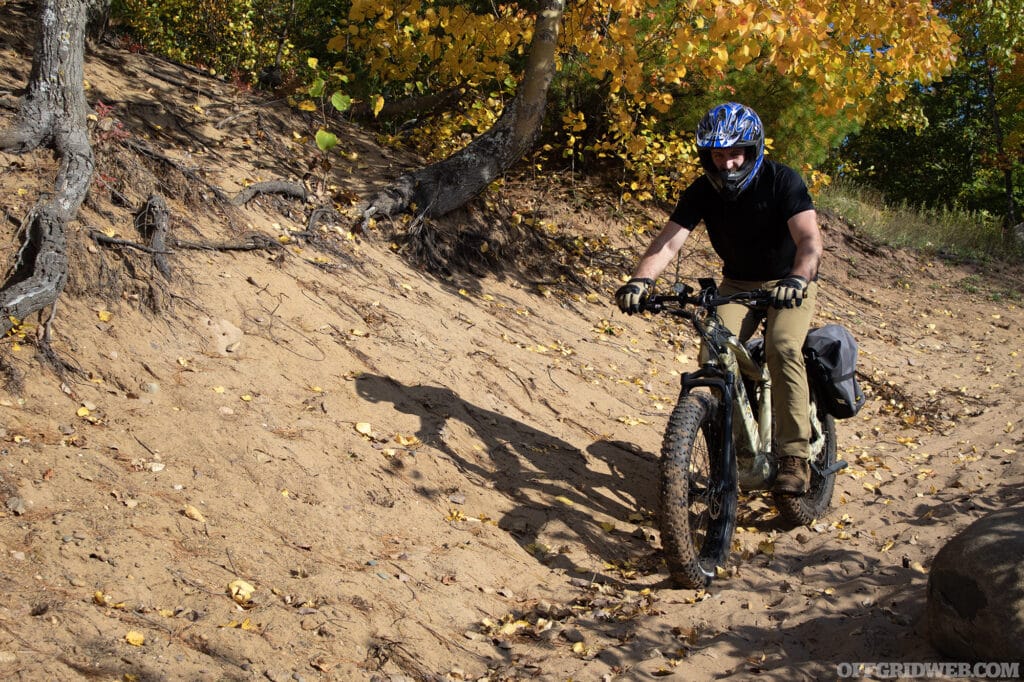
 If mud is wet and goopy, the opposite condition has got to be what people often refer to as “sugar sand”. Maybe you’ve had the unfortunate experience of trying to drive your vehicle near a beach, or through sand dunes, only to discover that loose sand has next to non-existent traction. Well that's just the terrain type for the next location. Generally, the 70lb Warrior does very well over this type of terrain. Like driving through deep mud, the best results require letting some air out of the tires. After doing so this bike was zipping down a sandy Lake Superior beach with minimal effort. Balance and momentum were easier to maintain compared to wet mud and the bike was able to make sharper turns more easily as well. The only task it could not perform was going up a steep dune with a rider on the bike. Once the bike was moving up the sandy terrain at a steep angle, the tire dug into the sand and stalled. Regardless of whether it was a weight issue, or the riders-skill, if I wanted to get to the top of the dune, I needed to get off, and engage the motor for assistance as I walked it the rest of the way.

Photo of an adult male riding over sand dunes on a fat-tire eBike.

Above: The combined weight of rider and eBike proved too much to make it over steep dunes. Traveling over sugar sand was similar to deep mud.

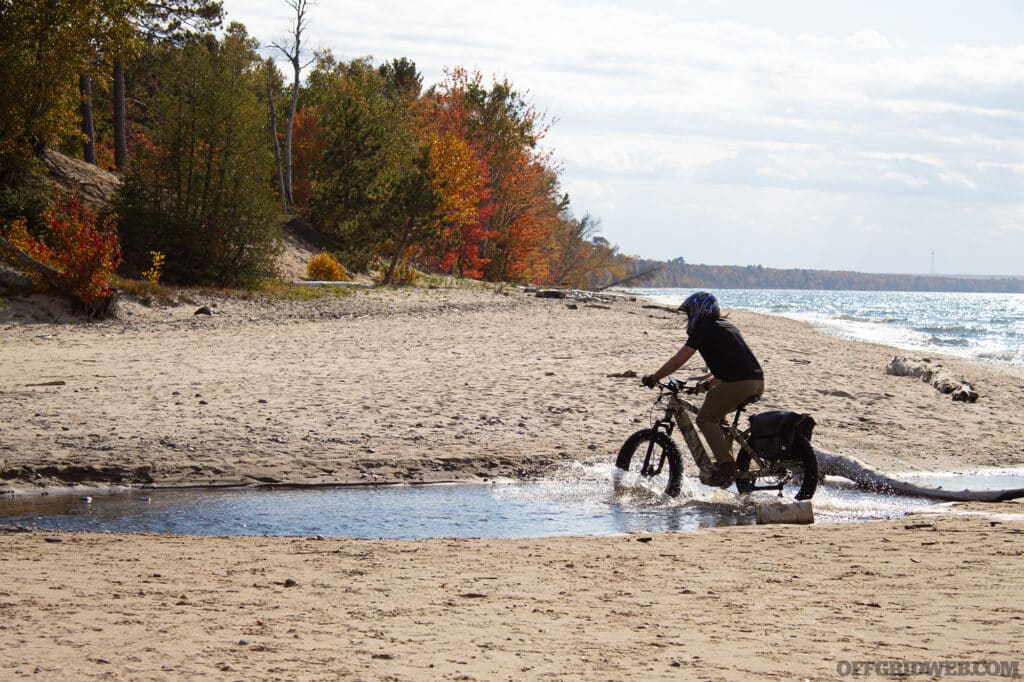
 Shallow water crossings were a breeze and did not negatively affect the performance. Water at the crossing site I tested was flowing steadily from an inland river to the lake. The bottom was lined with muddy silt, and various sizes of rocks. The weight of the bike helped keep it upright against the force of the moving water, and once again those fat tires proved their worth in this situation with much needed traction. This wouldn’t be the ideal way to cross water deeper than the tires are high, or in  areas with a more forceful flow rate, but the Warrior would work great at sites that have been assessed as relatively safe. It was great to see how waterproof the components of the bike were, and being submerged did not cause the motor or the battery to malfunction.

Photo of an adult male crossing a shallow river outlet on a fat-tire eBike.

Above: Doing a quick reconnaissance is important before attempting to cross moving water to avoid falling over any underwater ledges, hitting any large rocks, or getting stopped by underwater logs.

 Snow and ice have similar properties to mud and sand, and the eBike traverses them as such. Going through deep fresh powder is more challenging than dense snow pack or ice, but it will make it through. Moving in straight lines is more important in powder and on ice, but a dense snowpack is almost like moving over asphalt. Traveling fast through cold air requires additional layers to prevent cold weather injuries, but the added bulk didn’t get in the way of the pedals or chain. I did notice a slight decrease in battery longevity in colder weather, but the rate the battery drained was not alarmingly fast. Recharging times seemed pretty close in both cold and warmer conditions, with the solar panels and with the AC adapter. It took about 6 hours, give or take, to get the battery from completely drained back to fully charged.

Observed Pros and Cons

 Being much lighter and smaller than a vehicle makes an eBike a great option for travel and mobility. However, eBikes are heavier than motorless bikes, and not everyone is capable of swinging 40 to 70 pounds around when needed. Moving 70lbs of anything can be challenging if you’re out of shape, or by yourself. That being said, the bike would be relatively easy to deploy from an apartment, a garage or from the rack of a vehicle. An eBike does not emit loud engine noises or exhaust fumes, which attracts less attention, and allows the rider to have better situational awareness. Not having to rely on fossil fuels, and being able to charge with solar panels would be a huge advantage in a situation where utilities and gas stations are shut down.

Photo of an adult riding an eBike next to a lake in autumn with the leaves changing color in the background.

Above: While not as light an agile as a non-motorized mountain bike, eBikes take significantly less effort and can go many places mountain bikes cannot.

 Sure, they are not as large as a sedan, but eBikes instantly stand out to anyone paying attention because they have features not seen on their motorless counterparts.. A model like the QuietKat Warrior looks more bulky and aggressive, and tends to draw even more eyes. The flip side of this is that a bike has a lower profile and less bulk than a car or truck, making it a smaller target, and increasing agility.

 Mechanical problems could be problematic in an emergency situation. If the motor malfunctions, it is not as easy to repair as a motorless bike would be, and finding or ordering parts may not be an option. We have all experienced the effects of a disrupted supply chain, and those issues would be exacerbated in a disaster area. Other than keeping the bike maintained, having a fully charged battery could prove difficult as well. After the battery runs out of energy, the rider must pedal the extra weight until they are able to charge it again. Without working utilities, solar panels, or enough sunlight, long periods of time could pass between being able to recharge it again.

Photo of an adult male getting standing next to a fat-tire eBike on the sandy shores of Lake Superior.

Above: Embarking off the beaten path on a bike that can go where others can't is great way to discover new areas with minimal effort.

 As far as usefulness in an emergency or survival situation goes, eBikes capable of offroading would be invaluable. Before running the Warrior through various terrain, I was skeptical it would perform as well as it did. But modern eBikes are more powerful and versatile than ever before, and well worth considering as a transportation or mobility alternative, in addition to other preps. Practicing with it, knowing how to repair or maintain it, and having some back up parts could make the eBike a tool that can outlast an extended crisis period. Having a reliable method of grid-down mobility would absolutely help in each of the scenarios we considered in the beginning.

Final Thoughts

Will an eBike be a help or a hindrance? The answer to almost every survival question is, “It depends.” An ebike in a survival scenario becomes a tool for the user to prolong life and the lives of others. Like any other tool, it comes down to personal familiarity and practice using it. Scissors are a hazard in the hands of the careless, but when wielded deftly by a practiced user, can turn a hedge into a dolphin. Being able to expertly maneuver an eBike over difficult terrain in an emergency is no different.

In a situation where cars and trucks are inoperable, or incapable of being used, eBikes may be the next best thing. A friend or family member may need medicine or supplies quickly. Someone may need to be transported to a medical treatment facility. Or you may need to get out of dodge as quickly and quietly as possible. Having a bike’s power amplified by a silent electric motor could make all the difference in the world.

Related Posts


New: Haley Strategic and Safariland Release the INCOG X Holster

If you've ever carried a firearm in an outside-the-waistband holster, especially on a law enforcement duty belt, Safariland is undoubtedly a name you're familiar with. The company, established in 1964, has become the industry standard for retention holsters. However, their options for concealed carry holsters have been somewhat lacking — a fact they'll openly admit. Safariland's Product Manager David Higginbotham said bluntly that taking a Safariland outside-the-waistband duty holster and making it into an inside-the-waistband design is “a garbage idea,” since OWB retention holsters do not translate to IWB everyday carry. The company needed a different approach. So, in order to capture a bigger segment of the civilian concealed carry holster market, Safariland partnered with someone who has considerable experience in that field: Travis Haley of Haley Strategic Partners (HSP). Together, HSP and Safariland developed the new INCOG X holster, which will begin shipping on July 14th.

Ten Years in the Making

The original HSP INCOG was conceptualized in 2011. At that time, Travis Haley wanted an appendix inside-the-waistband (AIWB) holster with an attached magazine caddy — a format that has become commonplace today, but was substantially less so back then. He began experimenting with some sheets of Kydex, foam, and a toaster oven. The resulting design became the original HSP INCOG holster, which was manufactured by G-Code for roughly 10 years. In 2022, Haley began thinking about updating the holster design, and after a conversation with acquaintances at Safariland, decided to partner with them for this tenth-anniversary redesign. It's aptly called the INCOG X after the Roman numeral.

INCOG X Features & Options

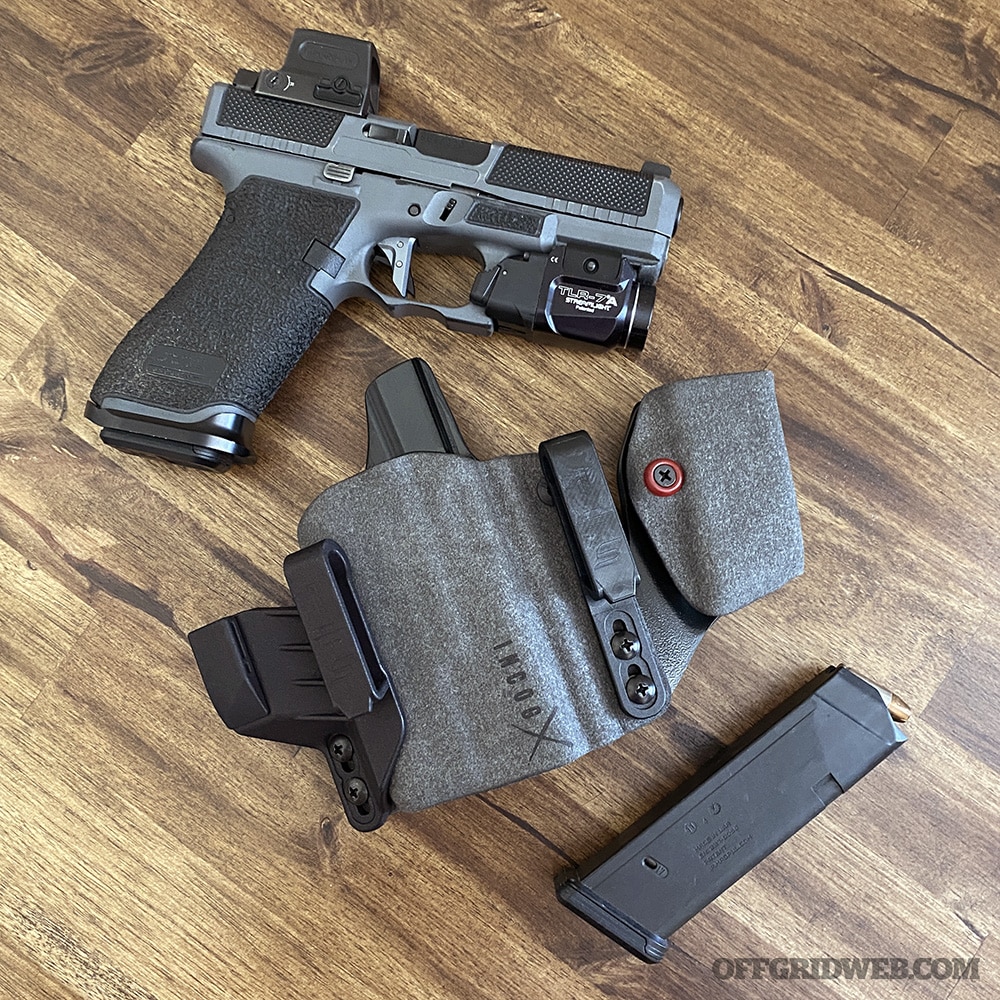
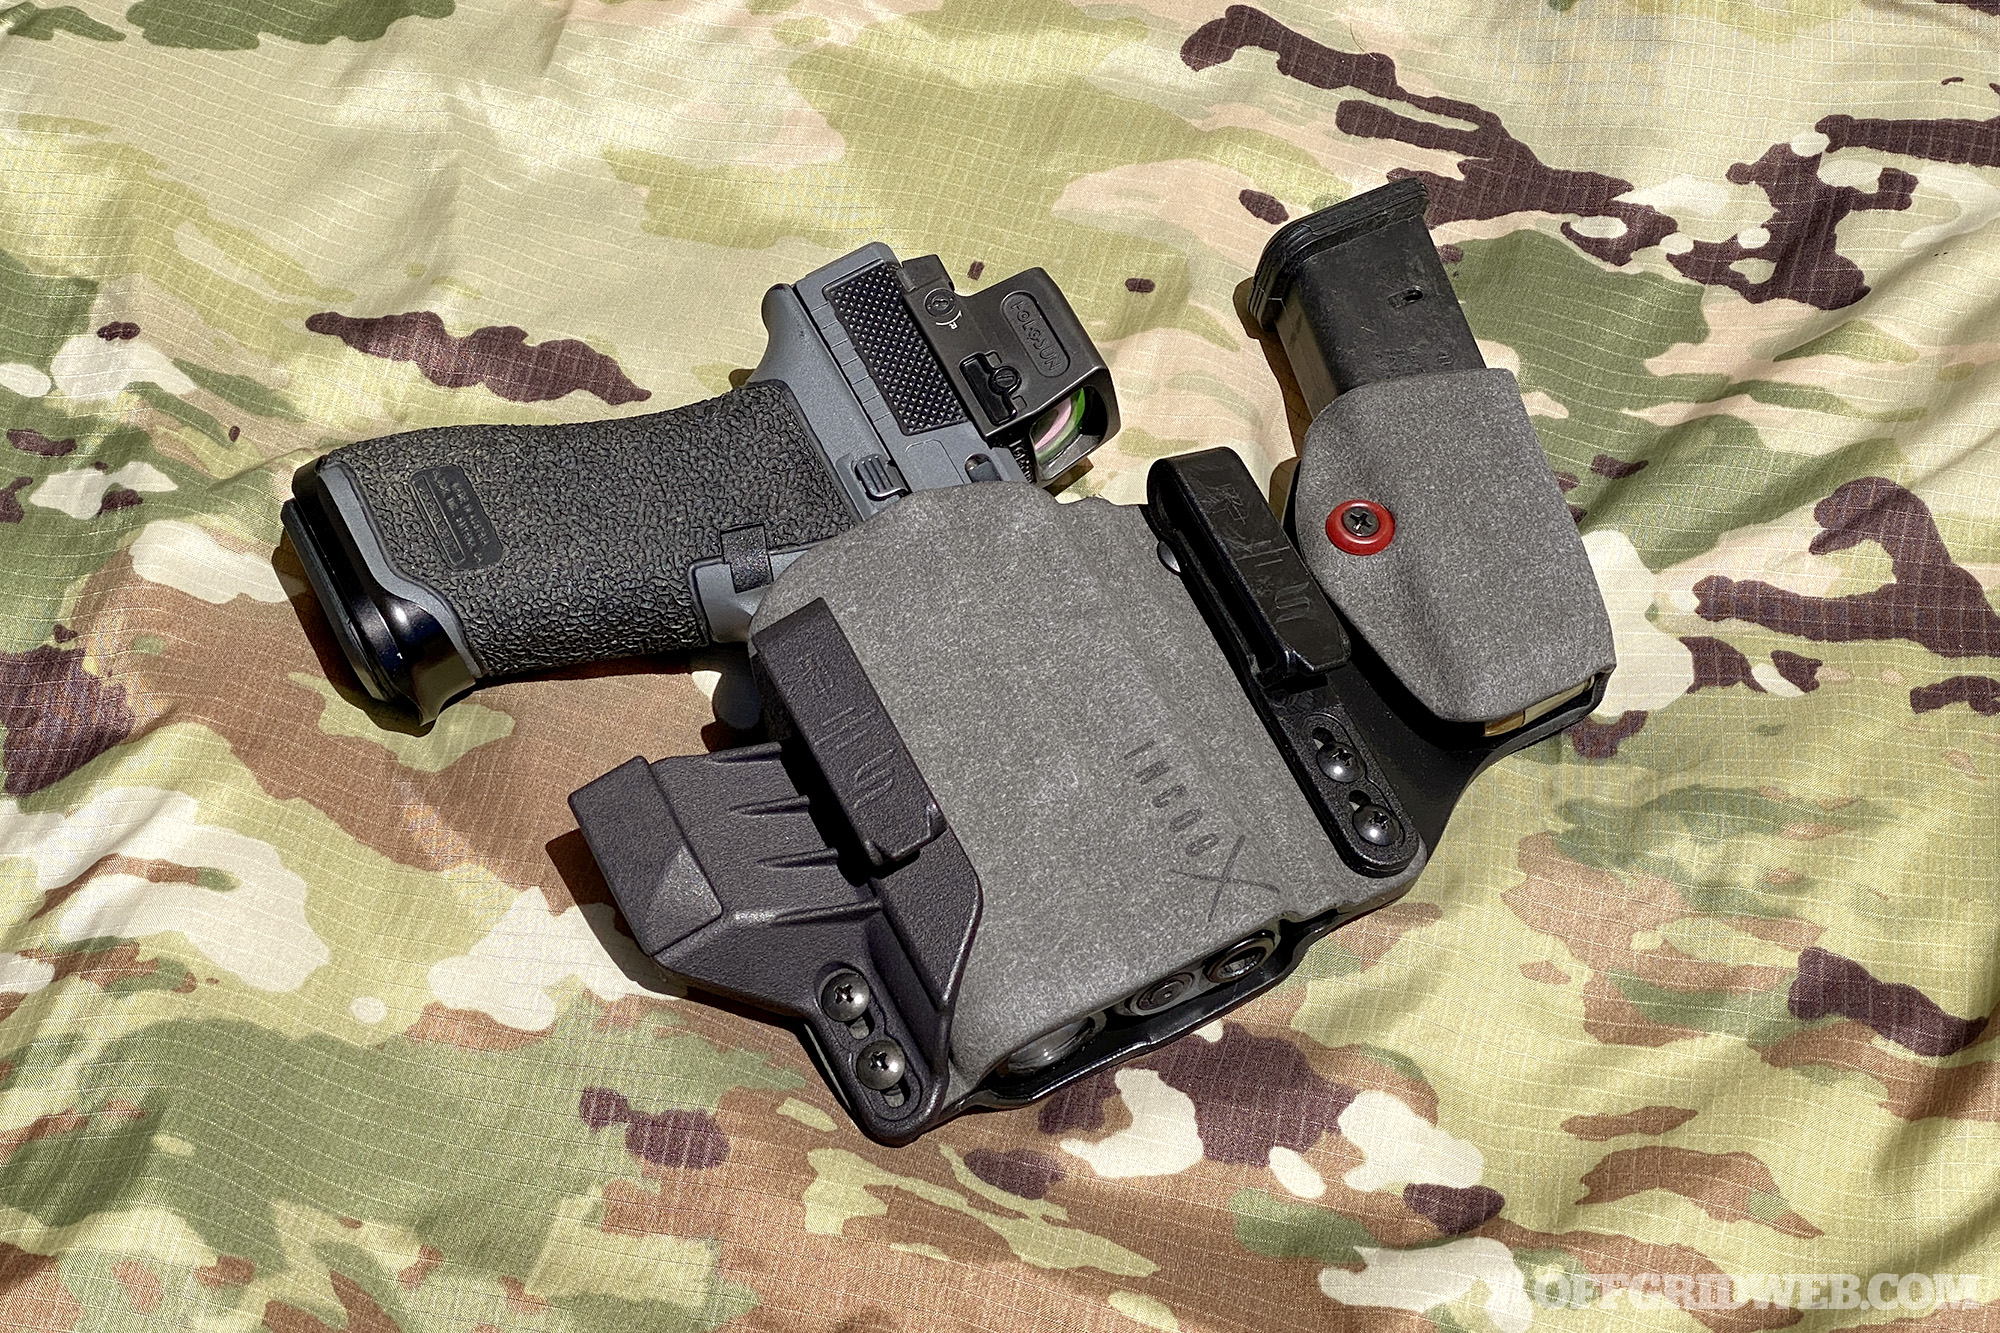
The new HSP / Safariland INCOG X is constructed from thermoformed Boltaron polymer, finished with an outer layer of microfiber suede for added comfort. It features re-engineered clips, one of which includes an integrated concealment strut. The strut comes with three modular, snap-in spacers to fine-tune the angle of the gun's grip against the user's body and reduce printing. The optional mag caddy is designed to flex slightly with the user's belt, but it does so based on the stiffness of the Boltaron material, not an additional hinge or elastic. This, along with the use of minimal hardware (4 clip screws plus 2 for tension adjustment), is designed to eliminate as many points of failure as possible. Many of us have had holster screws work their way loose over time, so Haley's logic is the fewer to check, the better.

For users who prefer different clips, Safariland noted that the clip screw spacing allows for installation of various aftermarket options.

Knowing that many users carry pistols with red dot sights and compensators, the INCOG X comes standard with breathing room for these accessories. Light-bearing and non-light-bearing options will be available, with the former intended for compact, EDC-friendly lights such as the Streamlight TLR-7. The holster comes in HSP's signature grey with black and red accents. At launch, 16 models will be available to cover the following platforms:

  • Glock 17/19
  • Glock 43/48
  • SIG P320
  • SIG P365

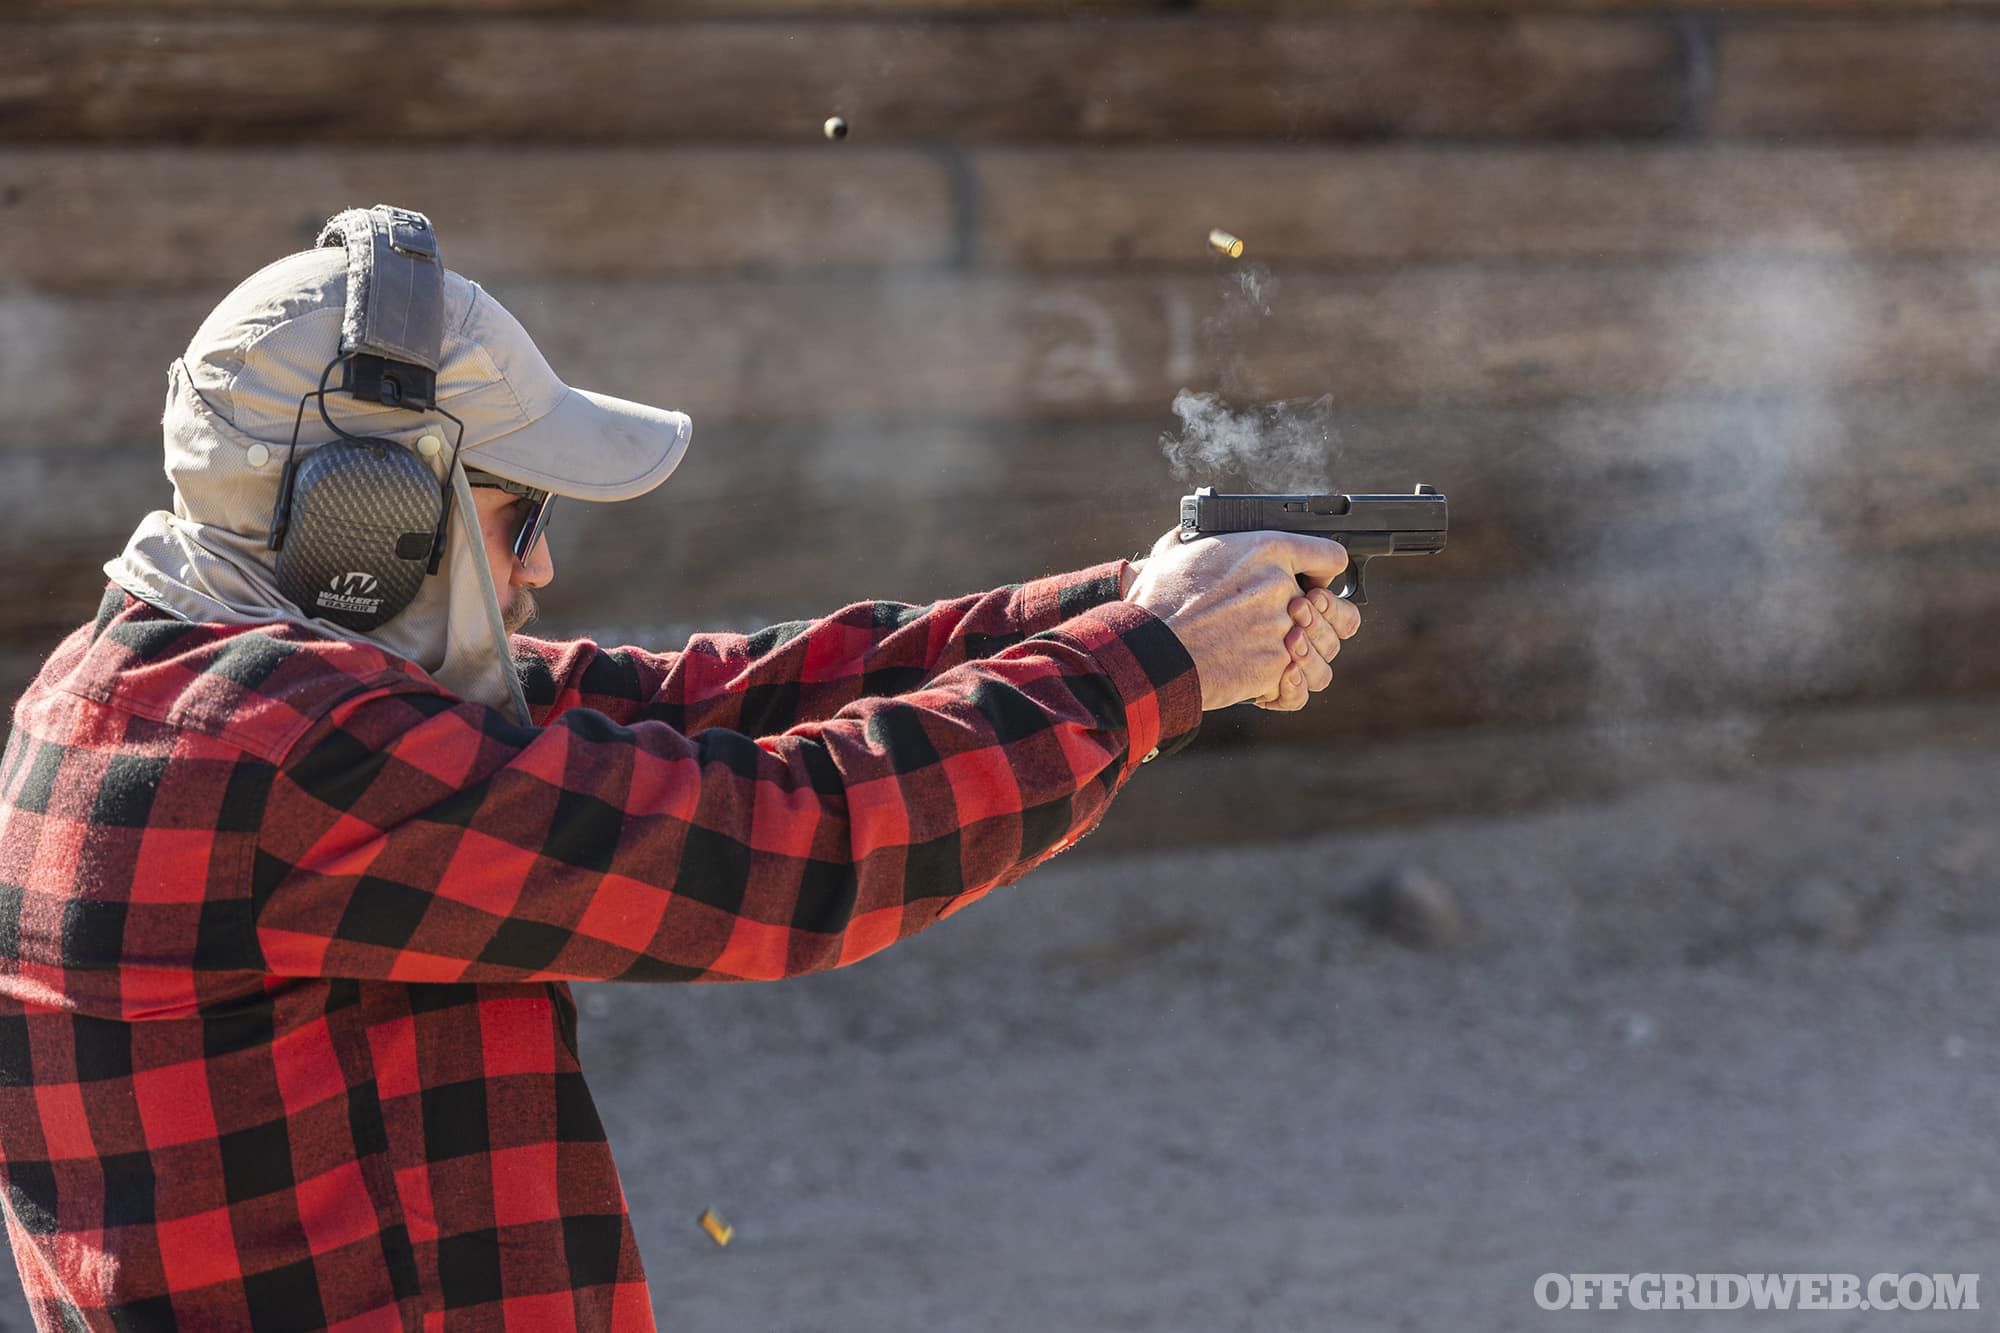
Above: My custom Glock 45 fit the INCOG X like a glove, along with its TLR-7A light and Holosun 509T optic. In this photo, it's also equipped with a new Nelson Precision trigger shoe.

Each holster will be available with or without space for a weapon light, and with or without an attached mag caddy. A Safariland rep mentioned that other pistol applications are being considered for the future, including Walther, H&K, and Staccato, but those may not be available until 2024. MSRP will be $120 with the mag caddy or $90 for variants without it.

Hands on with the INCOG X

Above: Paige of Some Chick Who Shoots and Josh of Juliet Tango Customs practice timed drills in front of a simulator screen.

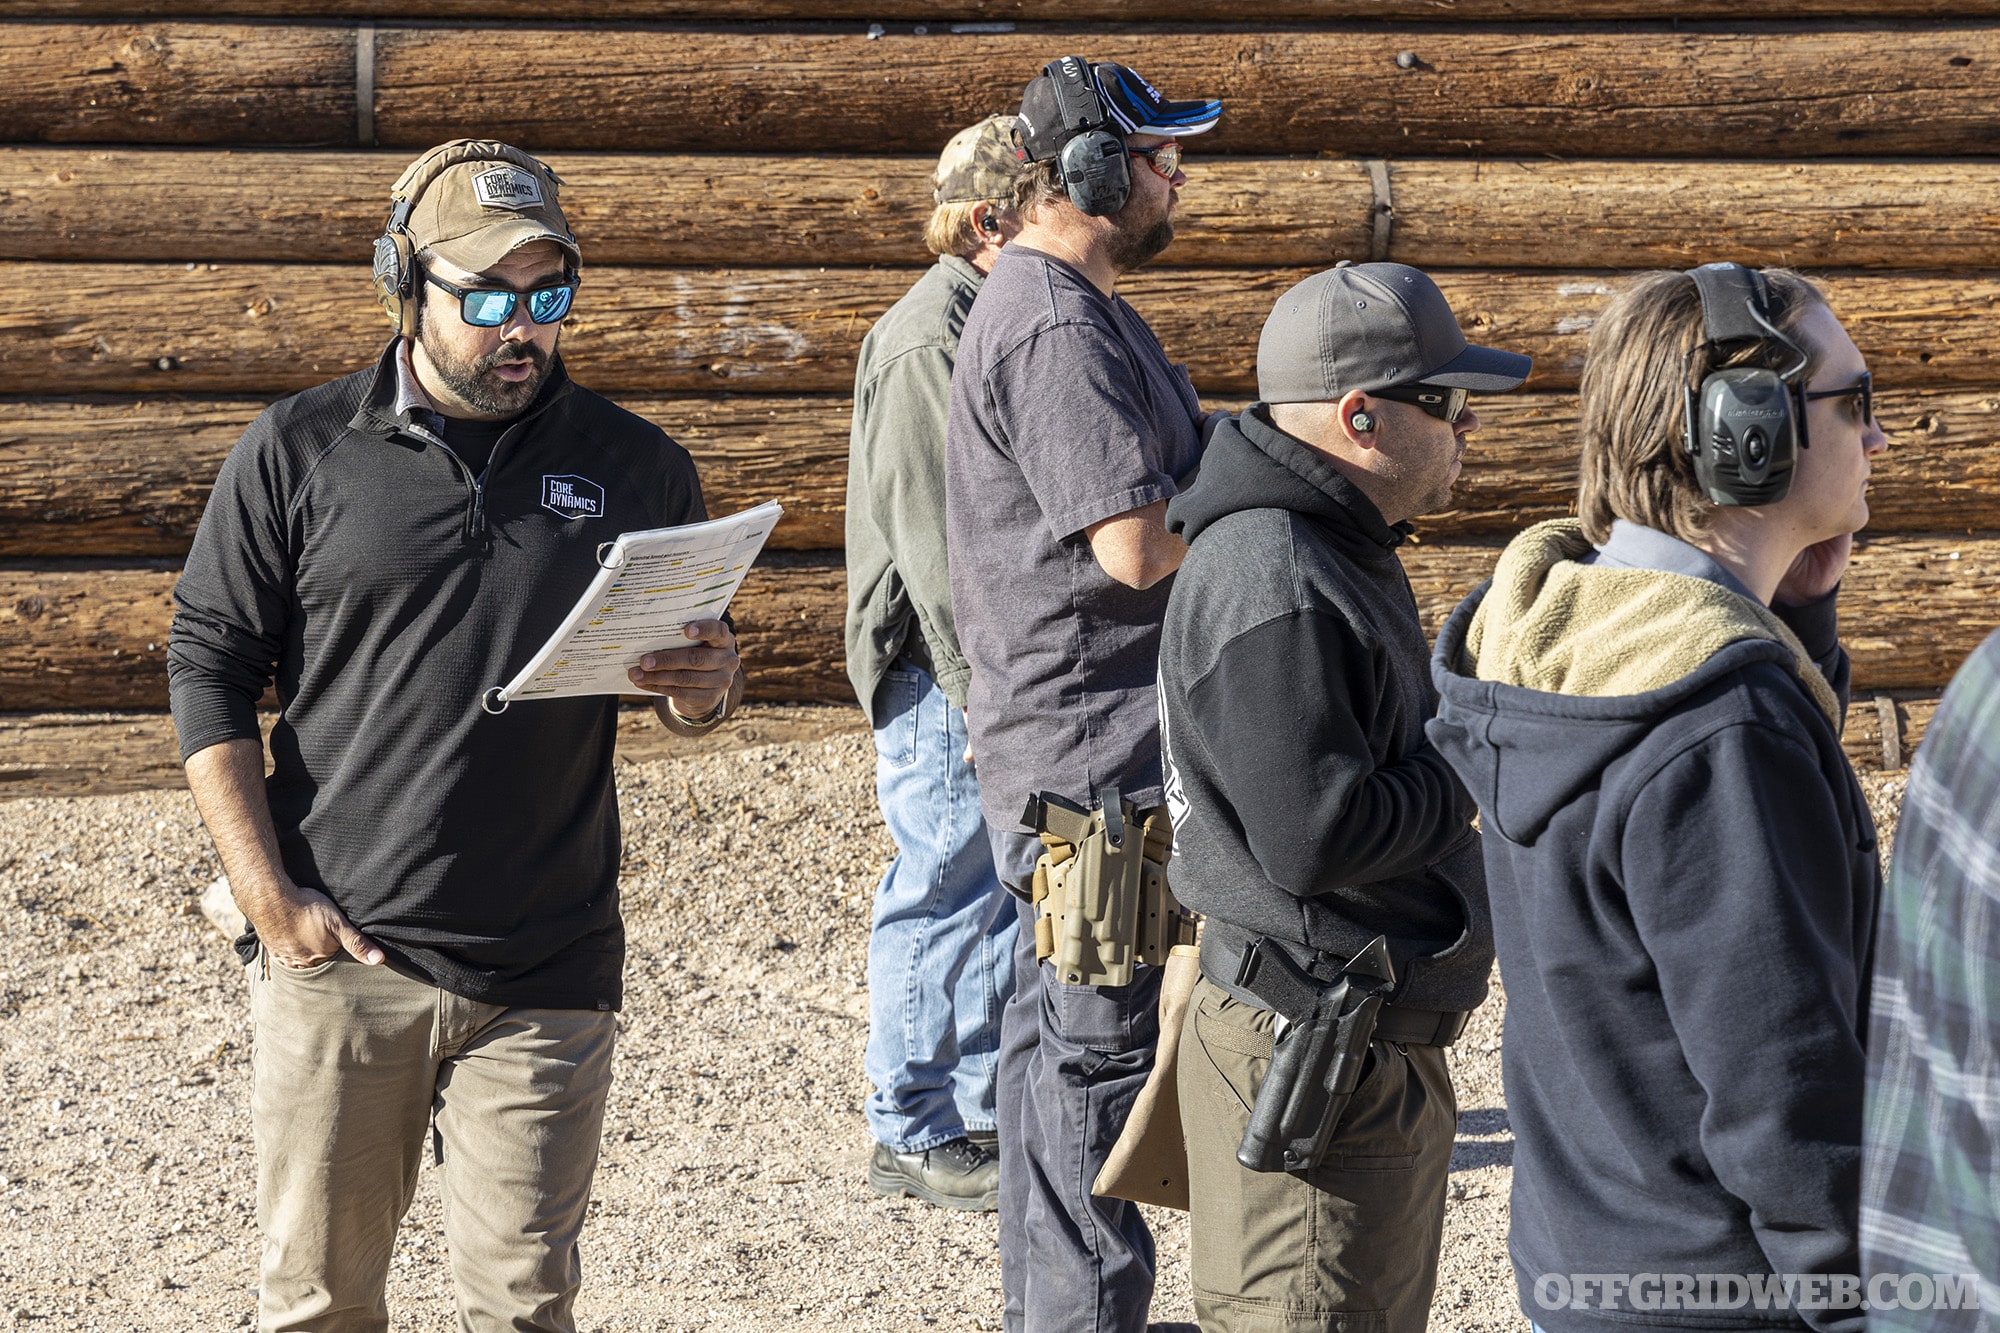
For the launch of the INCOG X, Travis Haley invited a small group of media members to his training facility in Scottsdale, AZ. As mentioned in our previous article about the Haley Strategic D7 course, this facility has a multi-million-dollar VirTra shooting simulator that can be used with gas-blowback training guns. After taking a look at the INCOG X holsters, we put them on and stepped in front of the projector screen to warm up on some virtual paper and steel plates.

After spending the morning doing concealment drills in front of the single-screen VirTra sim, we moved on to the wraparound VirTra 300. Inside this immersive environment, we experienced a variety of scenarios, starting with our CO2-powered Glocks concealed in our INCOG X holsters. The VirTra system isn't just pre-programmed for one outcome, it's operated by an instructor who can send you on branching paths and cause armed assailants to react differently each time, so we had to put ourselves in Haley's “thinkers before shooters” mindset and react dynamically to threats.

Since I've spent time in the sim before, I was given a challenging scenario involving a gunfight with two shooters who both had AR-15s and body armor. Other attendees faced scenarios ranging from an ATM mugging to a home invasion to a shooting inside a crowded movie theater.

I'm looking forward to spending more time wearing and training with the new INCOG X to see how it compares to my other favorite EDC holsters. For more information on this holster, keep an eye on HaleyStrategic.com and Safariland.com as we approach the June 14th official launch date.


Indigenous Knowledge: How Four Children Survived the Amazon for 40 Days

Deep in the heart of the Colombian rainforest, danger abounds, and it may seem impossible that four children survived the Amazon in those treacherous conditions. Poisonous creatures roam beneath the thick canopy, lethal jaguars silently stalk their prey, and mosquito born illnesses sicken the healthiest who are bit. Humans who tour this vibrant but deadly ecosystem face peril, even when they are part of an organized expedition. That's why we need to learn from the children who survived a plane crash into a remote region of the Amazon, and continued to hold their own for 40 days afterward.

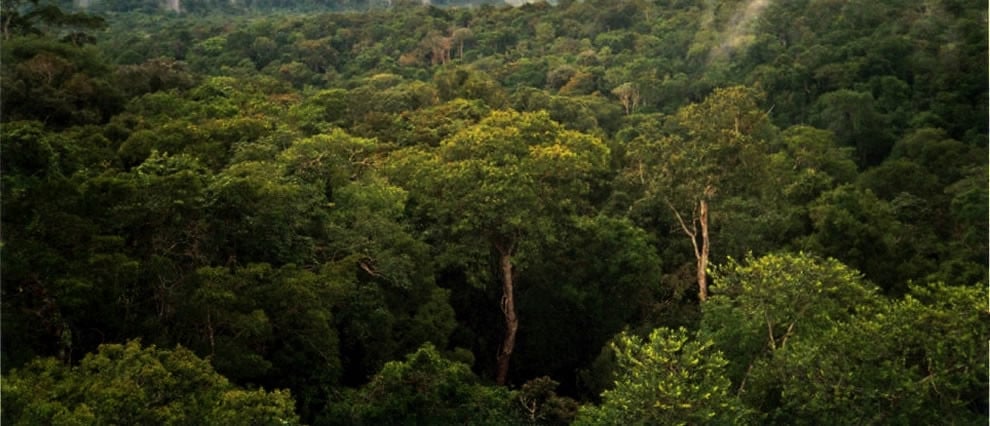
Aerial photo of the upper canopy of the Colombian rainforest.

The Crisis

On May 1st, 2023, a Colombian family — three  adults and four children, ages 13, 9, 4 and 1 — traveling from Araracuara to San Jose del Guaviare in a single-engine Cessna, crashed into a remote region of the Amazon rainforest after their plane suffered a catastrophic failure. At the time of this post, it is suspected that two of the adults perished immediately upon impact except for the mother of the children. It was initially reported that she stayed alive for about four days, before insisting that her children go on without her. The four children spent those first four days living off the supplies they had brought on the plane, but after those ran out, they had only the indigenous knowledge passed on by their tribe and whatever resources the jungle could provide. Only after 16 days did the search and rescue operation first locate the crash site, and by then, the children were gone.

Indigenous Knowledge

As fate would have it, the four children were a part of the Huitoto tribe, a group that resides in some of the most remote regions of the Amazon. Part of their tribal tradition is passing down the indigenous knowledge of their forebears to the next generation, and the stranded children used this to great effect. This included shelter-building to stay warm and prevent exposure, something extremely important, since at the time of the crash, it rained for more than half of every day. They also used this knowledge to stay safe from predatory animals, poisonous amphibians, biting insects, and arachnids. Huitoto upbringing taught them how to live off the land, what to eat, and how to drink water without getting sick. The silver lining to the situation was that the jungle was presently going through a productive growing season, and fresh fruit was in abundance. But without the knowledge of what was a safe to eat, what was potentially toxic, or how to stay dry and thermoregulate, these children may not have lasted as long as they did.

Rescue – Four Children Survive the Amazon

Colombian Army soldiers and skilled Huitoto trackers with an intimate knowledge of the jungle, combined their efforts to find the missing children. To maximize the chances of keeping the missing children alive, food was dropped by aircraft into areas where they believed the kids might be, and signal flares were fired to try attracting their attention. As it happens in many search and rescue operations in remote wilderness, it is thought that the searchers passed near the children on a few occasions, but the dense jungle prevented their detection. However, after 40 days of continuously searching a 1,600 mile region, they were all found — dehydrated and undernourished, but relatively okay — 3 miles from the crash site.

The Takeaways

How would you fare in the scenario above? Surviving a plane crash is a miraculous thing in and of itself, but facing weeks of isolation in a hostile jungle is another beast entirely. Granted, as adults, many of us know that staying at the site of a crash can make it easier for search and rescue teams to find us. But in the thick jungle with no overhead visibility, that's not as certain as it would be in open terrain; it might be necessary to find a nearby location with better visibility for a distress signal. It's also extremely easy to become disoriented and lost in the vegetation while searching for food and resources. And we must remember that these were children whose loved ones' bodies were still at the crash site, so staying put would have been undeniably traumatic.

One of the most important things to recognize here, is how relevant indigenous knowledge is, even in our modern world. Once we strip away all the things which make us comfortable — climate controlled buildings, just-in-time logistics, internet connectivity, gear, etc. — all that we are left with is what is between our ears. Let's take a second to ponder that implication, what those four Huitoto children survived, and consider whether or not we are equipped to face nature raw and unfiltered as they were able to.

Related Posts


ProTek Watches: Mil-Spec Watchmaker Barry Cohen’s Latest Project

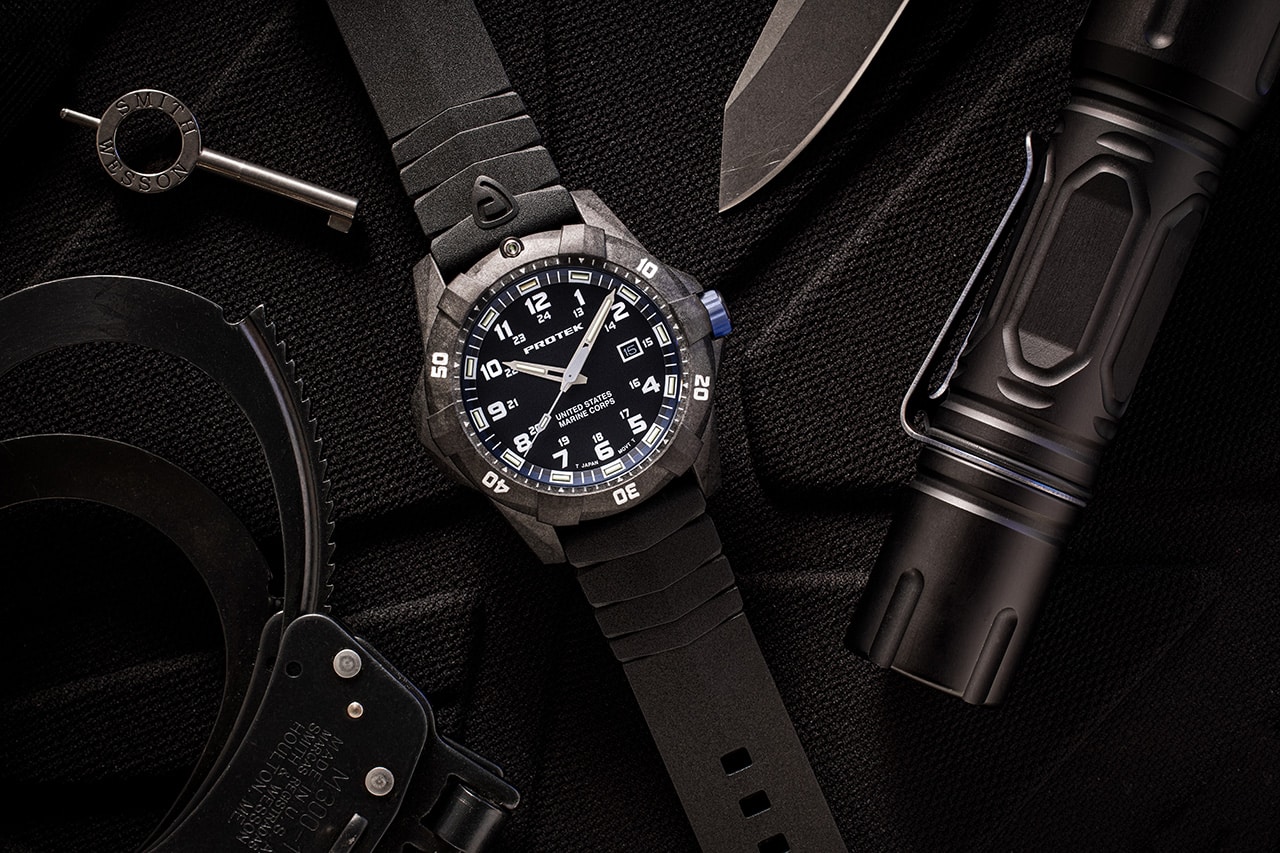
Barry Cohen may not be a name you're familiar with, but you've almost certainly heard of the watch company he created in 1989, Luminox. Recently, after several decades of producing illuminated watches for the U.S. military with Luminox, Cohen set out on his own to launch his latest creation: the ProTek watch series. ProTek was designed for hard use by those who need a rugged, dependable, and easy-to-read timepiece, such as members of the military, law enforcement, and first responders. Cohen appears to have accomplished exactly that, since the ProTek collection has been designated an Official Watch of the U.S. Marine Corps. These watches feature tritium built into the face and hands for illumination that lasts consistently for 25 years.

Above: The ProTek Official USMC Dive watch is available in a variety of colorways, each with the company's signature tritium illumination (as seen in this article's lead photo).

Series 1000 Carbon Composite Dive

As the name suggests, this model was made for underwater operations. Water resistant down to 300 meters, the 42mm carbon composite case has a 60-click timing bezel and a sapphire crystal with an anti-reflective coating. Japanese quartz keeps the time, the illumination system is many times brighter than other watches of a similar vein, and the rubber strap is reinforced with light-weight steel tubing.

Studio photo of four ProTek watches with different strap colors.

An additional line of products in the Carbon Composite Dive series features ProTek watches with the USMC logo engraved in the back of the case.

Series 2000 Stainless Steel Dive

This watch is rated down to 200 meters of water resistance, and is entirely stainless steel. For timing, the Gents Steel Dive features a 120-click unidirectional bezel, and the strap is genuine Italian leather. Japanese quartz keeps the hand and date movement, and its battery will keep it ticking for about 10 years. As with all ProTek watches, these feature self-powered tritium illumination.

Studio photo of four ProTek Watches, the Gents Steel Dive 2000 series.

Series 3000 Titanium Field

Last but not least is the Titanium Field 3000. As the name suggests, the 40mm case, caseback, and push crowns are made from marine grade titanium. It is water resistant down to 100 meters, and features the same sapphire anti-reflective crystal and Japanese quartz as the other watches. The Titanium Field also comes with an Italian leather strap, and uses the largest tritium tubes available for the indices in three different colors.

Studio photo of four ProTek watches, the Titanium Field 3000 series.

Modifications and Accessories

In addition to the different series of ProTek watches, they can can be further customized to one's personal style. Replacement straps are available in both rubber and water-resistant leather in a wide range of colors. Rubber watch straps can come in: charcoal gray, red, blue, green, orange, USMC red, USMC blue, USMC green, and USMC desert sand. Leather watch straps can come in black, dark tan, and dark brown with stainless steel buckle, black with gun metal buckle, black with black titanium buckle, and tan or dark brown with a titanium buckle.

MSRP: Starting at $450

URL: protekwatch.com


Home on the North Springs Shooting Range

Much like cookies and cream or chocolate and peanut butter, some products like firearms, optics, suppressors, and ear-pro were made for each other. Utah is home to several companies — Desert Tech, HUXWRX, Armasight, and AXIL — all within close proximity to each other, who decided to combine forces to show off some of their newest products to members of the media. With the help of the North Springs Shooting Range, and a pit stop at the Black Rifle Coffee Company HQ for a quick caffeine fix, we were invited to take a closer look at what these companies had going on, and to take their many of their products for a day and night test drive.

Desert Tech

To kick things off, we headed to the Desert Tech facility. Desert Tech (DT) is a firearms company that specializes in weapons based on the bullpup design. For those who might be unfamiliar, this is where the firing grip is located in front of the breech instead of behind it, making the firearm more compact for its barrel length. Not only does this make a rifle look futuristic, it can also help it remain lighter and more maneuverable than a traditional counterpart. DT has several firearm platforms: the Hard Target Interdiction (HTI), the Stealth Recon Scout (SRS), the Micro Dynamic Rifle (MDRX), all of which can swap barrels depending on which caliber is being used. Additionally, they offer a .22 long rifle bullpup called the Trek-22, and have designed a unique AR-15 lower called the Quattro-15 which houses a custom 53-round, quad-stack magazine.

Desert Tech fabricators hard at work assembling parts for Desert Tech rifles.

Above: Desert Tech Gunsmiths assemble parts of Desert Tech Rifles.

With a focus on precision shooting, DT has their own line of ammunition to pair with their rifle barrel selections, including .308 Win, 6.5 Creedmoor, .338 Lapua Magnum, .375, .408 and .50 BMG. To further dial in that shot group, they include a ballistic data chart with each caliber and have even developed a firing solutions iPhone app called TRASOL 2.0. The app can be wirelessly connected to other devices, such as external cameras, optics, and can even tie in to local doppler radar information.

No less than fifteen DT rifle platforms with every variety of their ammo was loaded up and brought to the North Springs Shooting Range. Not stopping there, they also provided several Ulfhednar tripods and shooting mats so that their rifles could be fired from a wide range of angles and positions.

Photo of the inside of the Desert Tech production facility.

Above: A birds eye view of the Desert Tech production facility.

HUXWRX Safety Co.

Next, we walked through the HUXWRX facility to learn more about some recent changes. Previously known as Operators Suppressor Systems (OSS) and recently rebranded to Human Exposure Workshop (HUXWRX Safety Co.), this suppressor fabrication company focuses on a type of design called “flow-through.” Flow-through simply refers to how the gas from a fired round moves through the baffles of a suppressor. Traditional suppressors trap the gas inside an internal baffle system, while gas travels through and is vented out of the front of a flow-through suppressor. This is meant to keep the operator from potentially inhaling harmful gasses that are normally trapped within the firearm during the use of traditional suppressors.

Photo of a HUXWRX calibration tool.

Above: HUXWRX uses precision tools to ensure exact specifications.

HUXWRX utilizes the latest in 3D metal printing, a process that fuses powdered metals with a laser into detailed and precisely layered structures. This is the same process used to make custom parts for companies like Space X. With this method, they can design an intricate system of internal baffles without needing to worry about whether a stock-removal system, such as CNC machining, can reach the inner nooks and crannies. It also eliminates the need to weld pieces together.

By using the latest in manufacturing processes and flow-through design, HUXWRX is focused on mitigating exposure to toxic gas, and improving the health and well-being of military, law enforcement, and firearm enthusiasts. To show off the versatility of their product range, HUXWRX suppressors were mounted to every DT rifle, and several handguns that were brought to the range.

Armasight

To this day, many people think of night vision as a grainy-green video, or thermal imaging as something out of a 1980’s action movie. But modern-day technology paints a much clearer picture than the old school NVGs. Armasight brings the latest in night vision tech to a variety of products, ranging from wearable monoculars and goggles to clip-on rifle optics. Most of the products are available in both green and white phosphor and have clarity that's light years above and beyond what is shown in older movies.

Photo of the Armasight NVG kit.

Above: A Team Wendy Bump Helmet with Armasight Pinnacle Night Vision Goggles.

Recently they put together an entire package that includes everything you need to attach an NVG system to a Team Wendy bump helmet, taking out all of the mounting guess work. This kit was brought to the North Springs Shooting Range, along with several of their rifle mounted clip-ons and infrared lights for a night shoot at the range’s cowboy town.

AXIL

Photo of Patrick Diedrich discussing firing solutions with Jeff Wood.

Above: Traditional earplugs work fine to block loud noise, but active ear pro (such as the AXIL XCOR earbuds the author is wearing in this photo) make it much easier to have conversations on the range.

Spending an entire day and most of the night at the range, even with suppressors attached, can use a little extra hearing protection. To enhance the range experience, we also met with AXIL to learn more about their background and try out some of their ear protection.

Inspired by a family business over 50 years in the making, with its roots in designing hearing aids, the company has evolved into designing premium ear buds, muffs, and plugs. AXIL prides itself as a company that does not take any short cuts when sourcing materials for their products, or releasing a product until they are sure it is completely ready for their customers. Most recently, they released a product call the XCOR, which is an earbud with Bluetooth connectivity. It can enhance ambient sound and dynamically reduces overly loud decibel levels in real time. Meaning, between sending rounds down range, in-person conversations are possible without removing them, and the built in mic allows one to answer calls from a Bluetooth connected phone. AXIL’s new XCOR ear buds were the icing on the shooters cake.

Range Performance

Spending the majority of an entire day at the range can be a blast, pun intended, but the North Springs Shooting Range enhanced the entire experience with the stunning backdrop of the Utah high desert spanning as far as the eye could see. Close range targets as close as a few yards to as far as two miles were available to try out the HUXWRX suppressed DT rifles, and a cowboy town was available for the night shoot. All of the rifles were set up, ammo was readily available, and with our XCOR’s fully charged and put in place, we got to shooting some targets.

Photo of Patrick Diedrich firing a Desert Tech rifle.

Above: Patrick Diedrich fires a Desert Tech SRS-M2 equipped with a HUXWRX suppressor.

Personally, as someone with minimal experience firing bullpups, I was surprised by how versatile of a platform they could be. The smaller caliber platforms were light and compact, but it did take a few mag changes to get used to the location of the magazine well behind the firing grip. And for someone with large hands, finding a comfortable hand position took a little experimenting. On the bolt action rifles, there were occasional misfeeds, but this always turned out to be operator error by not sliding the bolt back far enough between rounds. It takes some practice to get used to cycling a bolt that's mounted further back on the rifle.

Larger caliber DT rifles were heavier, but their precision was undeniable, and before long we were consistently hitting targets as far out as 1000 yards. To showcase the versatility of their rifles, a DT barrel and bolt were rapidly exchanged in the field. Without any further adjustments to the rifle or the optic, I was hitting 600 yard targets as if nothing had happened.

Photo of Patrick Diedrich firing a Desert Tech rifle.

Above: After changing the barrel and the bolt, the SRS can still hit targets out to 1000 yards and beyond without any zero adjustments.

HUXWRX flow-through suppressors kept the decibels of larger calibers to a minimum, all while avoiding gas build up. Since we were firing these rifles for hours, not having to deal with a cloud of acrid smoke pouring back down the barrel, through the ejection port, and into our faces was refreshing. Smaller calibers made even less noise, and the first time the suppressed .22 LR platforms were fired, nearby shooters couldn’t even tell the shot was fired until they heard the plink on the steel targets. While firing a fully automatic Quattro-15, the suppressor was held to feel how fast it would heat up, and the temperature never reached a point where holding on became unbearable.

After the sun had set, we headed to the cowboy town to don our Armasight night vision and take out a few steel bank robbers and buffalo silhouettes. People who wear NVGs typically experience serious problems with depth perception, but the ghost white phosphor Pinnacle night vision goggles were astonishingly clear. There was a little loss of depth perception, but nothing even close to those old military PVS-7s or 14s. Their rifle mounted night vision and thermal optics were equally clear, and target identification was further enhanced with IR flashlights.

Photo of a Desert Tech rifle equiped with Armasight night vision optics.

Above: A Desert Tech Rifle equipped with an Armasight Vulcan Gen 3 night vision rifle scope and HUXWRX suppressor.

Final Thoughts

Sending hundreds of rounds of varying calibers downrange all day seems like it would inevitably lead to some sort of breakdown or malfunction, but this never occurred. Overall, our impression of these companies and their products was positive, and the time spent at the range was enjoyable. It was apparent that each one that contributed to this day at the range was passionate about what they do, and cared deeply about the function of their products. This passion was also evident in their staff — after taking a peek behind the curtain of their production facilities, even their line workers were enthusiastic about the role they played. It will be exciting to see how these companies move forward, and we hope to get our hands on some of their newest gear for in-depth reviews in the near future.


CCW Fundamentals: Core Dynamics Core Pistol Class Review

Shooting and gunfighting are not the same thing — this is a statement we’ve made countless times on this site and in our magazine, and it’s always worth reiterating. A strong grasp of technical shooting skills is essential if you expect to defend yourself with a firearm, but that alone doesn’t make you a gunfighter any more than owning a plane and knowing how to perform a basic takeoff makes you a fighter pilot. Preparing for a gunfight involves maintaining situational awareness, developing a defensive mindset, a smooth and consistent draw, balancing speed and accuracy, footwork, transitioning between multiple targets, and the ability to manage stress. It may also involve skills that are rarely practiced in a typical “flat range” setting, such as one-handed shooting, shooting from retention (i.e. before the gun is fully extended with sights on target), and clearing malfunctions. Each of these important skills were addressed at a Core Pistol class I recently attended, taught by lead instructor Chris Vermeer of Core Dynamics Firearms Training.

Core Dynamics Core Pistol Class

The Core Pistol class began with a discussion of defensive mindset principles. In addition to reminders of Murphy’s Law (if it can happen, it will happen) and the OODA loop (observe, orient, decide, act), Vermeer mentioned the less commonly known Hick’s Law (the more choices you have, the longer it’ll take to make a decision).

From these three principles, students learned the importance of preparing for worst-case scenarios, continuously observing our surroundings, and “pre-gaming” situations mentally in order to streamline our heat-of-the-moment defensive decisions. We were also reminded that violent criminals don’t think the same way we do; they may be desperate addicts, mentally unstable, or ruthlessly determined enough that the presence of a gun won’t phase them in the slightest. In those cases, lethal force may be the only way to stop an attack.

Above: Vermeer demonstrates steps two through five of the traditional five-step draw.

Stepping out onto the range, we practiced the classic five-step draw process from concealment: clear cover garment and establish a secure grip, draw the gun up out of the holster, rotate muzzle towards target, join with the support hand at sternum level, and finally extend to acquire the sights. Next, we worked from three ready positions: low ready (looking over the sights), temple index, and compressed. As we checked our targets, Vermeer reminded us that line breaks don’t count in this class, because accuracy in a real defensive situation must be held to the highest standard. Shooting drills started with slow and precise single shots to test our fundamentals, but quickly moved on to multi-shot strings with varying cadences based on target difficulty. We tested ourselves at distances from 5 to 25 yards, and even practiced no-shoot situations to simulate an opponent who surrendered before a shot was fired.

Above: Many of us have heard of the “tap-rack” malfunction clearance technique, but when was the last time you actually practiced it? Frequent tap-rack reps are important to speed up your reaction time if a real malfunction occurs.

Malfunctions — which should be rare but are never impossible — were an important component of the class due to the aforementioned Murphy’s Law. The classic tap-rack (smacking the magazine to ensure it’s seated, then racking the slide) is a technique Vermeer says most shooters don’t practice frequently enough. In order to make it a reflexive action, he recommended students integrate it into our daily dry fire practice routine.

Above: One-handed shooting is another skill that's often overlooked, but it could be critical if one hand is injured or if you're using it to push a loved one out of the line of fire.

As drills continued, students began sidestepping left or right while drawing, issuing verbal commands to the hypothetical assailant, and scanning a full 360-degree radius after firing. Obviously, we kept our weapons pointed downrange, but turned to look over each shoulder past the usual 180-degree “scan and assess” range. To ensure the latter task wasn’t simply range theatrics, Vermeer quizzed us about what we observed once we had scanned our surroundings. For example, “what color shirt was the person over your right shoulder wearing,” or “how many people were standing behind you?”

Above: Many “scan and assess” drills involve quickly pivoting the head 180 degrees left and right as if you're crossing a street. However, in the real world, it's wise to carefully scan a 360-degree radius and observe important details.

In our final exercise, students paired up in front of two steel plates for a simulated fight. On the buzzer, each student quickly drew and shot the steel three times; whoever got three hits the fastest was the winner, and advanced to the next round. This induced stress, since each of us was aware of the consequences a fumbled draw or missed shots might have in a real gunfight.

Closing Thoughts

I enjoyed my time at the Core Pistol class, and felt it was a nice refresher for critical skills related to self-defense with a concealed handgun. For more information on upcoming Core Dynamics pistol, carbine, and medical classes in Arizona, go to coredynamicsaz.com.


Pocket Preps: Recurve Blades

The recurve blade is a design that has been around forever in some form, but in the past 25 years or so, it has really taken off and become a popular EDC profile. At one time, the design was made to facilitate chopping and hacking, but as knives and blade steels have evolved, so has the application of the recurve blade. Depending on which historian you believe, the design originated in the ancient world. The kukri, kopis, falcatta, golok, dao, scimitar, and other similar designs exhibit recurve styles with a larger curve and more weight toward the front of the blade. They were all almost undoubtedly choppers — whether meant to hack through thick vegetation or a warrior’s leather, metal, or wicker armor.

The geometry of the recurve potentially allowed for efficient slicing, and this pattern was popular on butcher knives and skinning knives in more recent centuries. We still see them on various choppers like machetes or kukris, but on the full range of EDC blades they offer another advantage: They pack more usable blade length into a smaller package. If you compare blades with even a slight recurve, you’ll find that you’re gaining the cutting power of a blade from 25- to 75-percent longer than the straight length measurement of the recurve blade. To simplify this, think of your 4-inch-bladed recurve
having the cutting power of a 5- to 6-inch blade.

If there’s a drawback to the recurve, it may be maintaining the edge. Much like the hawksbill — but not as bad — you’ll find that most whetstones and straight sharpening devices won’t work well with a more dramatic recurve. You can either send them back to the maker or manufacturer, visit or send to a professional knife sharpener, or invest in a round-shaped sharpening stone or rod.

The recurve was born out of basic geometry and has really improved over the centuries we’ve seen it in use. Whether you need something for slicing, chopping, or just a good self-defense blade, the recurve has a little bit more to it than meets the eye.

CSSD/SC

Studio photo of the CSSD/SC Mini My So in the open position.

Mini My So

Bram Frank is a Grandmaster of Arnis and has developed a series of self-defense-oriented knives based on his teaching. The Mini My So is a small concealable folder featuring a recurve blade fit for an ancient warrior with respect to its design. Available in a variety of colors (pink, black/pink, black/tan) and three sizes (mini, medium, and large), this is a knife designed to be carried comfortably but ready to deploy instantly. This is a somewhat specialized design, and it’s advised that you seek training with Bram Frank or one of his instructors in order to fully understand the intricacies of its design.

Studio photo of the CSSD/SC Mini My So in the folded position.

Pros:

  •   Like all of Bram Frank’s designs, this includes the BRAMP that allows you to open it against an attacker’s body if needed.
  •   The blade slices like a razor, a testament to the grind more than the steel used.
  •   Its smallish size leads to a lot of concealment options for daily carry.

Cons:

  •   There’s currently no training variant for this model.
  •   While the basics are simple, these knives really need the user to work with Frank or one of his instructors.

Overall length: 6.8 inches

Blade Length: 2.8 inches

Weight: 4 ounces

Blade Material: 8Cr13MoV stainless steel

Price: $100

URL: cssd-sc.com

Benchmade

Studio photo of the Benchmade North Fork in the open position.

North Fork

The North Fork has a dressy look to it with its stabilized Dymandwood scales, and the blade has one of the slightest recurves compared to the rest on our list. Benchmade offers this as a potential pocket skinning blade for processing game, but it makes for a very effective EDC knife. The Axis lock mechanism makes it easy to open or close the blade with one hand and a flick of the wrist.

Studio photo of the Benchmade North Fork in the closed position.

Pros:

  •  Very sharp out of the box with a nice thin edge for slicing
  • The North Fork relies on Benchmade’s ever popular Axis lock for a safe and robust locking mechanism.
  •  CPM S30V is a premium knife steel with superb edge retention.
  • The clip can be positioned tip-up and either left- or right-handed.

Cons:

  •   As good a steel as S30V is, it can be difficult to sharpen.
  •   The handles can get slick under wet conditions. Be mindful if you’re using it to dress game. A retention lanyard should be used if possible.

Overall length: 7 inches

Blade Length: 3 inches

Weight: 3.2 ounces

Blade Material: S30V

Price: $220

URL: benchmade.com

Zero Tolerance

Studio photo of the Zero Tolerance ZT 0350 in the open position.

ZT 0350

Zero Tolerance is a division of KAI/Kershaw Knives, and this company prides itself on their designs coming from the demands of military professionals. The ZT 0350 is a good-sized recurve blade that deploys by means of the speed-assist mechanism. This is a scaled-down version of the ZT 0300, making it lighter and more pocket friendly. The G10 feels great in the hand with its natural texture.

Studio photo of the Zero Tolerance ZT 0350 in the closed position.

Pros:

  •  The blade is made from CPM S30V; it’s tough, razor sharp, rust resistant, and sports excellent edge retention.
  • This knife performed well as a cutter, and the factory grind was just about perfect.
  •  Fires like a rocket every time, like all assisted or flipper knives should function.

Cons:

  •   The pocket clip is a bit too tight from the factory and seems prone to damage.
  •   S30V may keep its edge for a long time but it’s not the easiest steel to sharpen.

Overall length: 7.6 inches

Blade Length: 3.3 inches

Weight: 6.2 ounces

Blade Material: S30V

Price: $235

URL: zt.kaiusa.com

Mercworx Knives

Studio photo of the Mercworx Knives Golgotha unsheathed.

Golgotha

Mercworx Knives has a long and consistent history in the realm of tactical fixed blades. Made by professionals for professionals, these knives have seen serious use with elite troops all over the globe. The Golgotha sports a chili-pepper-shaped handle that locks into your hand in either the forward or reverse grip and is extremely comfortable. The blade is a bold-styled recurve that brings to mind a Kopis or Falcatta, albeit a scaled-down one.

Studio photo of the Mercworx Knives Golgotha sheathed.

Pros:

  •  It’s made from either 154CM or S30V. This version is 154CM and has been an absolute performer.
  • Razor sharp out of the box, the way all knives should ship
  •  The rubber belt loop carry attachment works well for keeping the blade in an upright and ready-to-go position while remaining secure.

Cons:

  • These blades are handmade one at a time to order, so availability may be an issue in some cases.
  • Some users don’t care for a mirror-polished blade; it’s very reflective unless you bead-blast it.

Overall length: 8.5 inches

Blade Length: 4.5 inches

Weight: 8 ounces

Blade Material: 154CM

Price: $375

URL: mercworxknives.com

SOG Knives

Studio photo of SOG Knives Kiku FX Fixed Blade unsheathed.

Kiku FX Fixed Blade

SOG Knives has been partnered with custom knifemaker Kiku Matsuda for a number of years. He brings quite a few fixed blade and folding designs to the table with his compound recurve designs. The FX Fixed blade features a variety of different handle materials and colors, from natural linen Micarta in this one to orange G10. The handle material and texturing give this knife great ergonomics.

Studio photo of the SOG Knives Kiku FX Fixed Blade sheathed.

Pros:

  • The blade is generously sized and can tackle just about any task you have in store for it.
  • The handle is extremely comfortable and ergonomic.
  • The blade is made from S35VN; it’s tough, razor sharp, rust resistant, and sports an easily maintainable edge.

Cons:

  • Although the sheath is well-made, the Tek Lok makes it sit a bit farther out than most other designs.
  • The blade could’ve been a hair sharper, but it was easily touched up due to the compound edge and approaching it from two different angles.

Overall length: 8.7 inches

Blade Length: 4.1 inches

Weight: 7.4 ounces

Blade Material: S35VN

Price: $150

URL: sogknives.com

Emerson Knives

Studio photo of Emerson Knives Commander in the open position.

Commander

Emerson was asked to design a folding knife for use by the SEAL Teams, and the original submission was deemed too scary by the Navy brass, despite the fact the SEALs loved it. Emerson changed the blade design to a more utilitarian shape in the form of a recurve. He was asked to incorporate a blade catcher on the top of the blade for knife fighting. As silly as this may sound, the device, now known as the Emerson Wave Shaped Opening Device, opened the knife as it was drawn from the pocket, which soon propelled Emerson into an even higher demand from knife users.

Studio photo of the Emerson Knives Commander in the closed postion.

Pros:

  • The blade, made of 154CM, is tough, razor sharp, rust resistant, and sports an easily maintainable edge.
  • The knife excels at cutting and slicing.
  • The Emerson Wave Shaped Opening Device allows this one to deploy as it’s drawn from the pocket.

Cons:

  • The Emerson Wave Shaped Opening Device can shred your pocket corners up with regular deployment.
  • It’s only tapped for clip use for right-handed users. Emerson Knives can tap the other scale for an upcharge.

Overall length: 8.8 inches

Blade Length: 3.8 inches

Weight: 5.5 ounces

Blade Material: 154CM

Price: $269

URL: emersonknives.com

V Nives

Studio photo of the V Nives Deplorable Titanium in the open position.

Deplorable Titanium

V Nives is one of the fastest-growing knife companies in the U.S., producing collaborative designs with custom knifemakers. The Deplorable Titanium is based on a design by custom maker Jerry Hossom. There’s an economical version of this model about $300 cheaper, but they sent us the version with the sculpted titanium frame lock handle. The sculpted handle offers a nice grip and imparts the look and feel of a custom knife. Whether you go with this one or the economy version, the Hossom-designed blade makes for an amazing recurve style even if it’s more of a strike point than a curve.

Studio photo of the V Nives Deplorable Titanium in the closed position.

Pros:

  • This one is very comfortable in the hand, V Nives did an outstanding job here.
  • The blade is made from S35VN; it’s tough, razor sharp, rust resistant, and sports an easily maintainable edge.
  • Flipper action is buttery smooth and opens perfectly every time.

Cons:

  • The polished titanium handles could be susceptible to scratching with everyday use.
  • It could’ve been a little sharper out of the box.

Overall length: 9.3 inches

Blade Length: 3.9 inches

Weight: 6.5 ounces

Blade Material: S35VN

Price: $370

URL: vnives.com