New: Midland MXPW Portable Radio Base Stations

If you've ever shopped for a two-way radio, you'll know that handheld and mobile are two of the most common categories. Handheld radios are — you guessed it — battery-powered devices small enough to hold in your hand or wear on a belt. Mobile radios, on the other hand, are generally larger and heavier units used in vehicles, drawing power from the vehicle's battery. Mobile radios in the GMRS category can transmit at up to 50 watts, while handhelds are limited to 5 watts. (You may recall our previous article showing how we installed a 50W mobile radio in our 4Runner.) Today, Midland announced a new MXPW radio base station series that offers more portability for these powerful mobile radios.

The new Midland MXPW series takes existing Midland mobile GMRS radios and integrates them into portable metal ammo cans. Each can includes a mounting slot for the radio, a built-in battery pack, volt and amp meters, a fan to keep the unit cool, and storage for the hand mic, magnetic antenna, and cables. The removable can lid is waterproof and acts as a metal ground plane for the antenna, maximizing its range.

We were also pleased to learn that both of these units are made in the USA.

Two models will be available initially:

  • MXPW115 — surplus 7.62mm ammo can with 4Ah LiFePo4 battery, compatible with the MXT115 (15W), $425 MSRP
  • MXPW500 — surplus 5.56mm ammo can with 10Ah LiFePo4 battery, compatible with Midland's MXT500 (50W), $600 MSRP

Above: The MXPW115 (top) is designed for the MXT115 radio, and the MXPW500 is designed for the MXT500. Radios are not included with these units, so you'll need to purchase those separately.

As you can see in the images above, the laser-engraved panels inside these portable base stations provide useful reference info, including menu flowcharts, channel and repeater frequencies, and a quick-reference guide for the NATO phonetic alphabet.

Both of these MXPW units include rechargeable LiFePo4 batteries, which are said to only lose 2% charge per month when not in use. This makes them well-suited to long-term storage for emergencies. For off-grid charging, Midland will also offer the MXPW01 40-Watt Foldable Solar Panel for an additional $150 MSRP.

For more information about the new Midland MXPW series, go to MidlandUSA.com.


Review: Viktos Taculus Chest Rig

Viktos has made an unapologetic name for themselves in the world of tactical/EDC/adventure apparel and packs. Not satisfied to stop there, they recently announced their entry into the load-bearing gear market with the launch of two chest rigs: the Low Key and the Taculus. We’ve been testing out advance samples of both for the last couple of weeks, but this review will focus on the Taculus. The Taculus is meant to function as a range day and training rig, but also has great potential as a SHTF/emergency reaction rig, or as an active shooter response rig for law enforcement.

Viktos Taculus Chest Rig Features

The overall design of the Viktos Taculus is incredibly straightforward but sports some well-thought-out features. The pocket configuration is fixed – three rifle mag pockets with a hard-sewn “dangler” or “drop down” pouch. The mag pockets do have rows of laser-cut PALS webbing for MOLLE accessories, which means the rig can be expanded upon. But the base configuration is not in itself modular.

The harness is a lean four-point design. The shoulder straps attach to the top of the rig via G-hooks, while the waist straps use small magnetic buckles that can be opened with a sharp tug. All four straps lead back to a padded rear yoke which is completely slick (no MOLLE or Velcro) keeping with the Taculus’ minimalist design. Two nylon “tails” are sewn into the top of the rig for the G-hooks to attach to. Each tail has several loops so the rig may be adjusted for ride height.

There’s a point to make here regarding the harness system. Neither G-hooks nor quick-pull magnetic buckles offer an especially bulletproof level of retention. Furthermore, the four-point system with its small, triangular side wings is going to be less secure than a traditional six-point harness with X- or H-configured shoulder straps and a dedicated waist strap, all with independent adjustment and buckle closure. The folks at Viktos are aware of the trade-offs and chose the slimmer setup for a couple of reasons.

The Taculus was not intended to be a “deployment ready” chest rig. While we believe it could absolutely function in short-duration urban engagements (like the aforementioned Patrol Officer responding to an active shooter) it’s intended purpose is for civilians to have a little bit of lightweight ammo carriage for a weekend class, action carbine match, or day at the range running drills. The other byproduct of this is the low cost. At $75 MSRP, this may be the least expensive chest rig we would actually recommend to you. We’re sure a simplified harness design contributes to that.

The back of the rig features a rectangular piece of grippy, rubberized material that’s held in place by Velcro. Peel it off and you’ll see two rows of hook-side Velcro, allowing the Taculus to be attached directly to plate carriers with Velcro face on the front plate bag.

The mag pouches are sized for 30-round AR mags, and we’re not sure you could really get anything else into them. Mag retention is achieved by the same rubberized material, which lines each mag pouch. While retention is not adjustable, we did notice varying results with different mags. The thick, textured polymer of PMAGs created the most amount of drag against the pouch lining. Metal DuraMags slid in and out the easiest (though they did not flop or bounce around in the pouches) – everything else was somewhere in between.

Below the mag pouches is the sewn-on dangler pouch. This is a slender pouch the width of the entire mag shingle, large enough to hold the contents of a Supplemental IFAK Resupply Kit (SIRK) by North American Rescue. These are trauma kits without the kits – contents only, vacuum sealed in a thick plastic bag. They are great for uses like this, where you already have a pouch and only need med supplies. The dangler pouch on the Taculus has two shock-cord loops sticking out of the bottom that are perfect for holding a tourniquet.

Completing the Chest Rig Loadout

We mentioned earlier that the Taculus featured laser-cut loops on the mag pouches. We decided to put those to use by adding a few additional MOLLE pouches to our test sample. Namely, we added three Soft Shell Scorpion mag pouches from G-Code, in a two-tone colorway: Multicam Black pouch body with OD Green frame. We added one rifle mag pouch and two pistol mag pouches, loading the latter with Staccato C2 magazines. Finally, we used a drug store hair tie to secure an IWA International M13 thermobaric canister. While there is not a ton of MOLLE-estate on the Taculus, radios, small fixed-blade knives, smart phone trays, handcuff pouches, flashlights, multi-tools, and smaller general-purpose pouches can all be made to fit.

For a down-and-dirty load-out on the go in SHTF situations, we wanted to see how well the Taculus would play with a slick plate carrier. So, we broke out our First Spear Deceptor, cinched it down, and tossed the Taculus on over top of it. We ended up liking the way the Taculus fit over armor even more than when wearing it by itself. It’s likely a little bit of tinkering with strap length would change out minds on that, but it goes to prove that this rig can absolutely be worn over plates or soft armor and still be both secure and comfortable.

All in all, for a sub-$100 price tag from a well-established brand, we think the Viktos Taculus offers a straightforward product at an extremely accessible price that is a great display of elegance through simplicity. This rig should just be hitting the Viktos website as you read this, so head over there and check one out for yourself.


Letter from the Editor: Terror Turns 21

As you read this, babies born on or immediately after Sept. 11 will be old enough to have their first beer. Like most of you, I can still remember exactly where I was and what I was doing that day — and it certainly doesn’t feel like 21 years ago. In a bitterly ironic twist of timing, we’re also passing the one-year anniversary of the fall of the Afghan capital of Kabul to Taliban forces. Watching a decades-long campaign that cost close to 3,000 American lives crumble on live TV in a matter of days was a tough pill for many people to swallow — particularly those of us who spent a significant amount of time there, or who had loved ones killed or wounded. In the aftermath of such a shocking turn of events, the self-reflection that our politicians and mainstream media outlets are trying to avoid led us back to a singular question: Are we safer from terrorism now than we were on September 10, 2001?

The answer is going to be personal for each of us, but I cannot in good conscience say “yes.” When you combine this with the stark reality that many law enforcement agencies around the country have been gutted by attrition and restricted by policies resulting from the events of the last two years, we face an equally severe but more immediate question: Where does that leave you and your loved ones? It is this question on which our brand is built.

So, we decided to take this solemn anniversary time to focus on preparedness information regarding terror-related threats. While we hesitate to whip the dead horse of “no one is coming to help you,” police forces are now openly telling their citizenry that … well … no one is coming to help them. In the face of a violent radical threat (pick your flavor of perverse ideology) such as an active shooter, improvised explosive, or vehicle attack, you may be left to your own devices. Even with a best-case police response time of only a few minutes, it’s the first few minutes that often shape how you weather the rest of the event. This is part of why we feature not one, but two separate articles in this issue dedicated to behavioral profiling and its development. If you can see the behavioral cues of a malicious actor before they initiate their attack, you can be significantly ahead of the reaction curve.

Our Bag Drop column focuses on loading out a medical response bag. We’ve seen time and time again that, in any kind of mass casualty scenario, medical training and equipment is equally important to, if not more important than, firearms. But that’s not to say that the value of firearms should be ignored. In that vein, I’ve contributed an article based on my experiences at the Haley Strategic D5 Kalashnikov carbine course. Even if you don’t regularly shoot AK-pattern rifles, they’re prolific throughout the Global War on Terror, including among extremist elements here at home. It may behoove you to be familiar with their operation.

There are also two stories directly from the frontlines. First, Robert Young Pelton discusses the time he spent in post-Ghaddafi Libya and how drone warfare has shaped modern counterinsurgency practices. Another war correspondent and RECOIL OFFGRID alum, Hollie McKay found herself trapped in the middle of Afghanistan as the country disintegrated around her. Not only is this story a first-hand account of total collapse, but a testament to her resourcefulness and quick-thinking to not only escape unharmed but return several times after the U.S. government’s complete withdrawal.

We hope that none of you ever wind up face-to-face with the consequences of terrorism. At the same time, we’d be foolish and reckless to not acknowledge its legitimacy as a potential threat to our everyday lives. Train regularly. Train seriously. Stay “Left of Bang” on the disaster time line.

Keep an eye on our Recoil Offgrid Issue 51 page for an up-to-date list of articles from this issue as they appear online.


Infographic: The Most Common Causes of Death

For those of us who take emergency preparedness seriously, it's important to keep our preps grounded in reality. Granted, it's always valuable to consider a wide variety of hypothetical “What If?” situations, even some that might be relatively rare. But we should still spend most of our time and energy preparing for the dangers that are most likely to impact us and our families. In other words, think less about alien invasions and more about common illnesses and injuries. The following infographic from Visual Capitalist shows how many people die each day around the world from a variety of causes — communicable diseases, chronic illnesses, accidental injuries, suicide, homicide, and many others.

Here's another interesting graphic from the same Visual Capitalist article:

The total death counts above are skewed by population, but it's mentioned that Russia has the highest death rate proportional to its population (34.7 daily deaths per million people).

So, what can we learn from all this? Unsurprisingly, heart disease is by far the most common cause of death. Cancer and respiratory diseases/infections are also serious threats. This should serve as motivation to take physical fitness seriously. Exercise and a healthy diet are perhaps some of the most overlooked steps towards preparedness — not only will you reduce your likelihood of death, but you'll also enhance your quality of life.

Above: Physical fitness isn't usually categorized as a “survival skill” but it's certainly one of the most important.

Avoiding drug and alcohol abuse also reduces your risk factors for several of the primary causes of death, as well as liver disease and overdose. Secondary effects of drug and alcohol abuse are linked to other major causes of death such as road injuries (e.g. drunk driving) and homicide (e.g. gang activity and drug deals gone wrong).

Above: Car crashes and other road injuries are the most common injury-related cause of death.

Aside from living a healthy and active lifestyle, the injury category is especially interesting to examine. You probably already know that driving a car is the most dangerous activity most of us do on a daily basis, but you might be surprised to see that the statistics for suicide aren't too far behind. Take your mental health seriously and check in on your friends and family members who might be struggling.

Drowning is another risk that's frequently overlooked, whether it's kids falling into swimming pools or adults getting carried out to sea by rip currents. Make sure your family members are comfortable around water from an early age, and be extremely cautious of flash floods if you're hiking or off-roading.


Smooth Moves: The Full Spectrum Warrior Combat Mobility System

A lot of time is spent, in various forums and professional social settings, discussing when one should move with a firearm. But it seems not a ton of time is spent on discussing how to move with one. Sure, you hear things like “explosive movement off the X,” which roughly translates into “go fast in any direction.” This is one thing we feel the martial arts community does better than the firearms community — good martial arts instructors will explain everything in terms of leverage, force application, and body mechanics. Much of what we accept as conventional wisdom in the shooting world is anecdotal, or at least passed down anecdotally and accepted based on the pedigree of the source.

About Full Spectrum Warrior

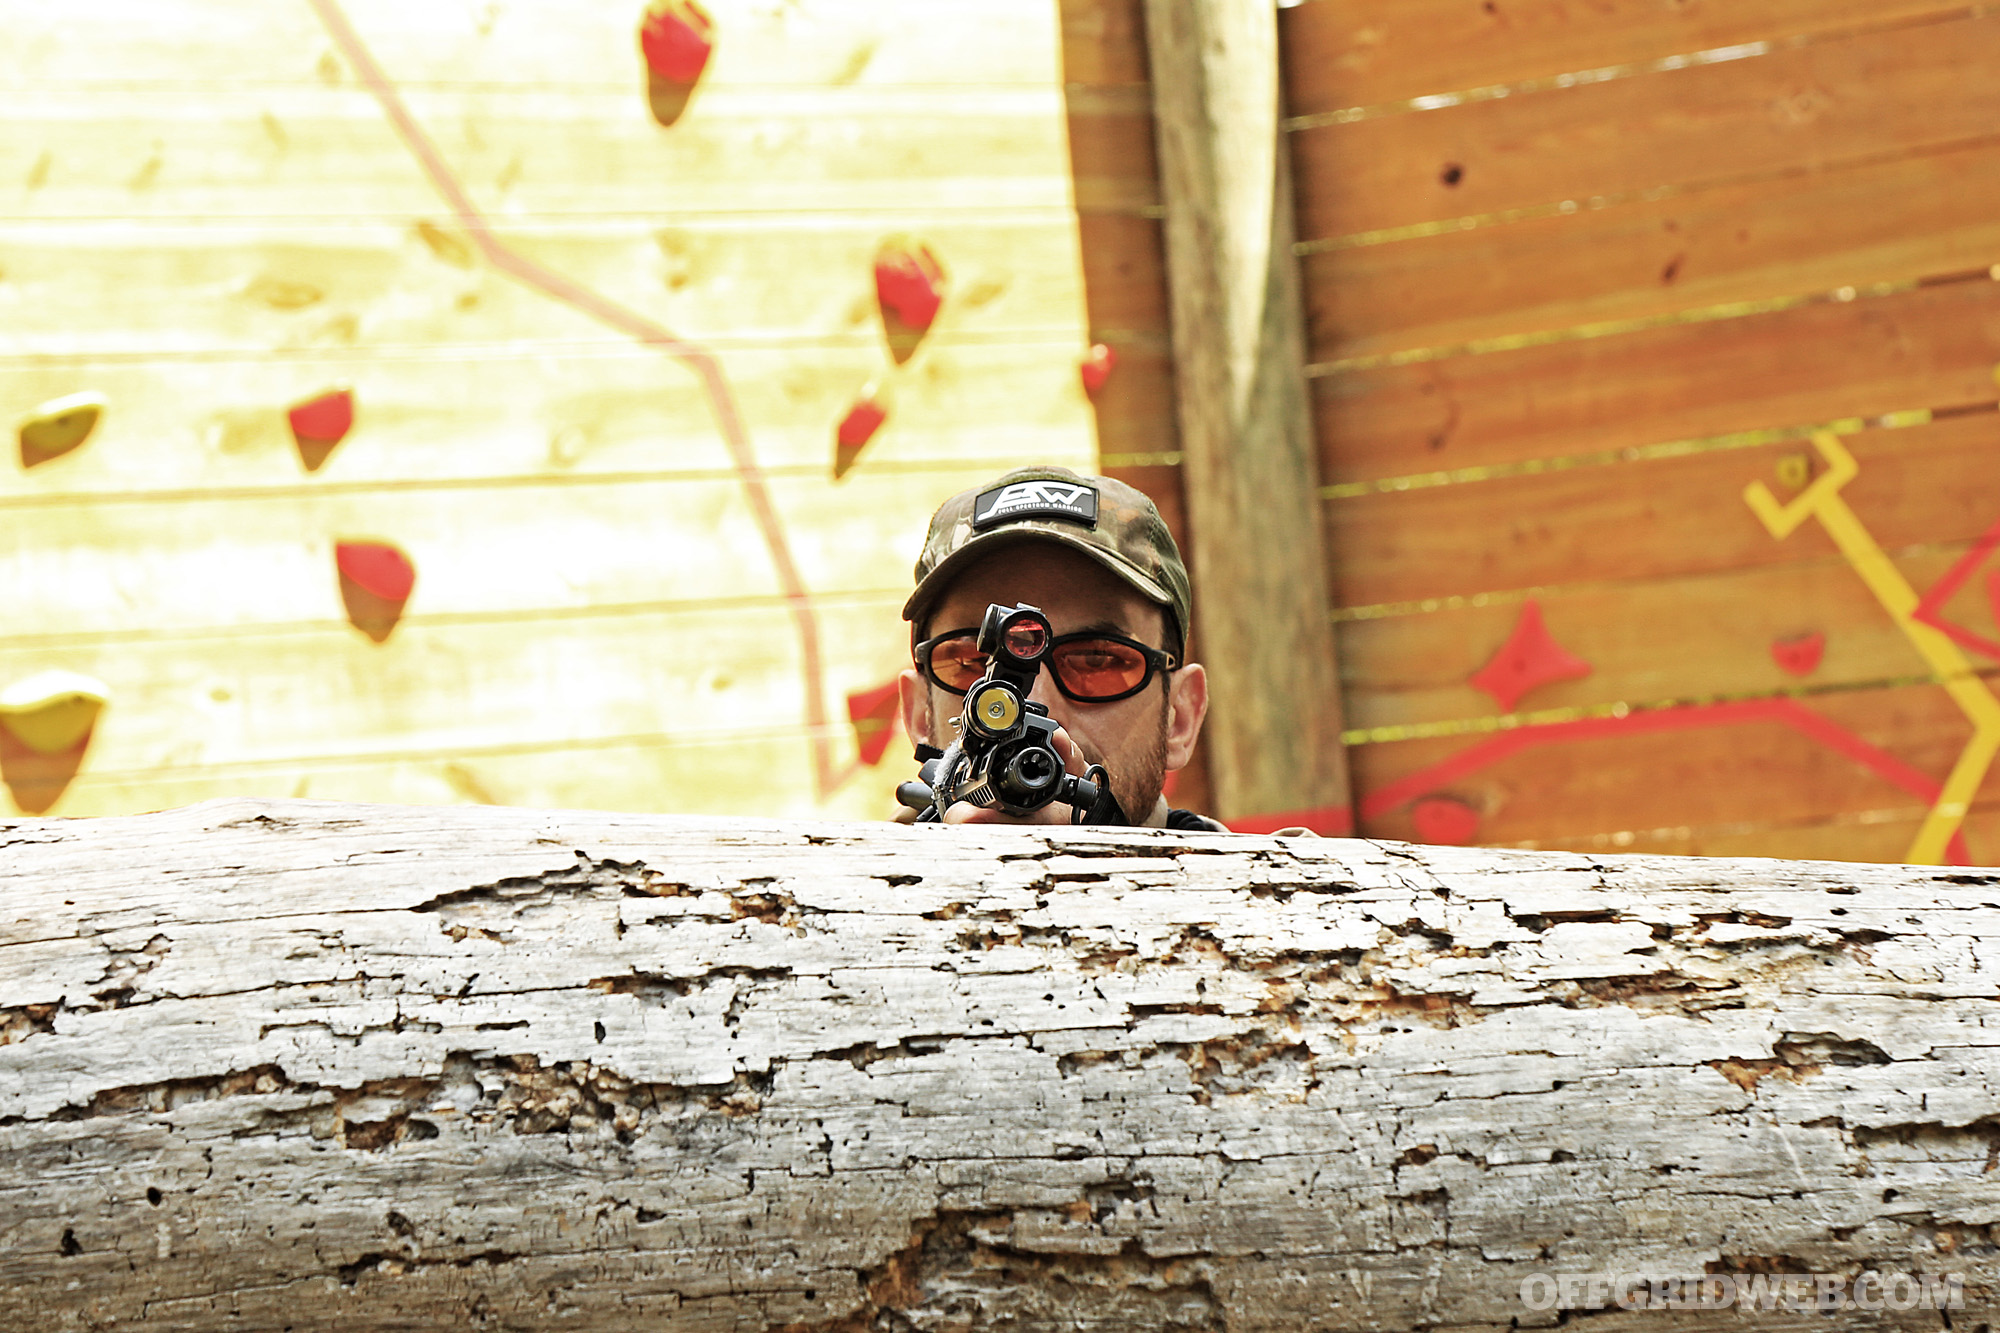
Occasionally, you’ll come across trainers who are both skilled in firearms and possess a deep background in martial arts and/or strength training. Enter Full Spectrum Warrior, founded by former Navy SEAL Rich Graham. He offers a number of training courses in both firearms and combatives topics, but one of his flagship curricula is the Combat Mobility System. Coauthored with strength coach and martial arts trainer Greg Mihovich (read more about his unique story in RECOIL OFFGRID Issue 49), the Combat Mobility System approaches movement and body positioning from a kinesiological perspective, offering some unique methods of movement and positioning.

Last year, I had the chance to visit Full Spectrum Warrior and spend several days with both Rich and Greg reviewing the Combat Mobility methodology. It’d be impossible to capture the entirety of their three-day program in a single article, but I wanted to highlight a couple of the lessons I learned while working with FSW to learn the details of their Combat Mobility System.

Body Positioning

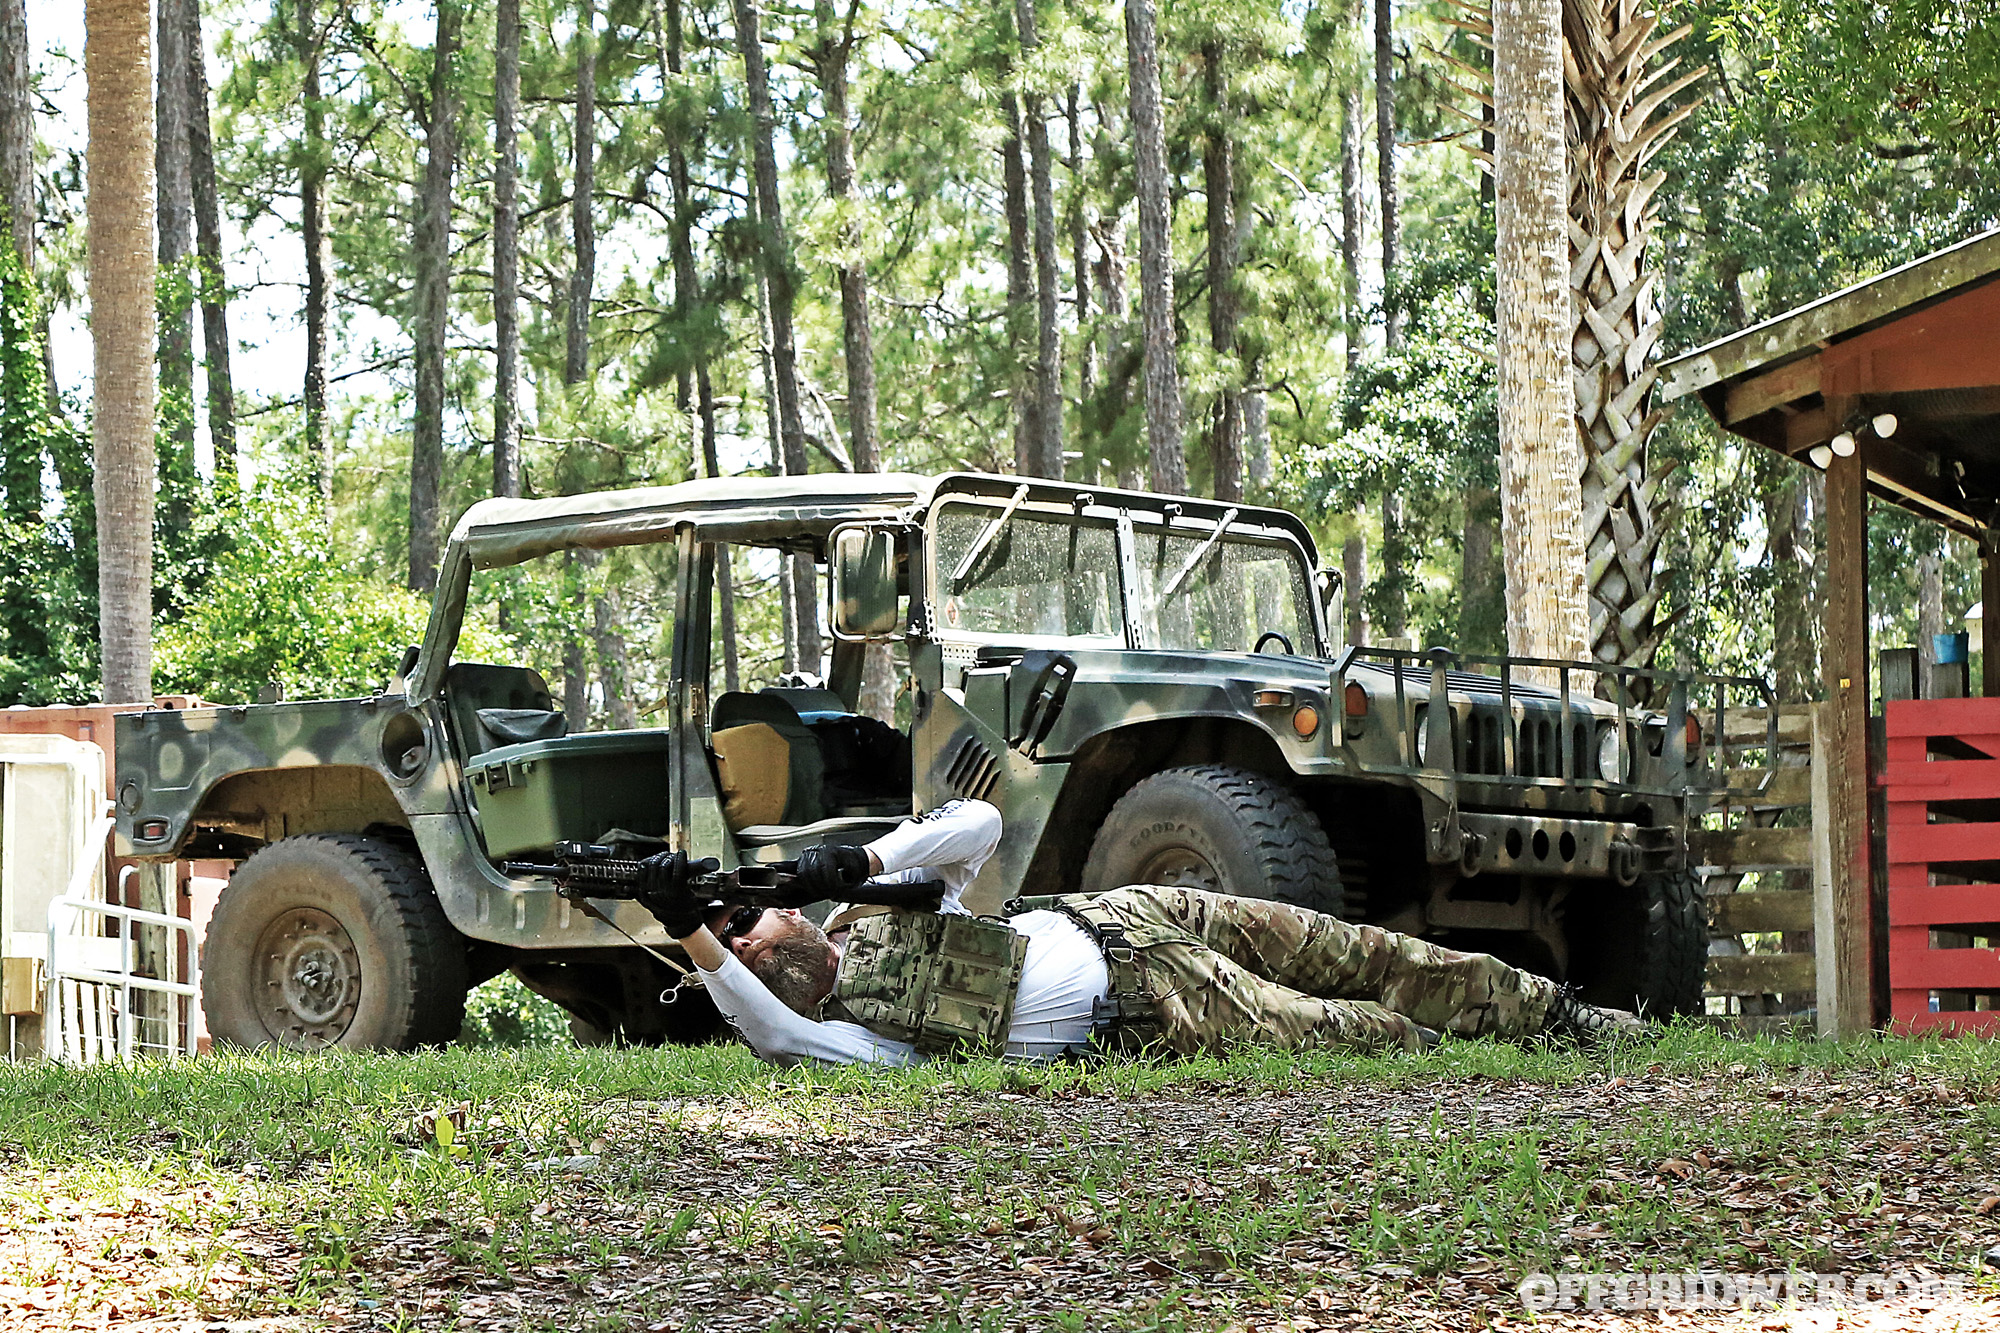
Above: Stability is key to shooting quickly and accurately in awkward positions. Actively engaging the feet and knees in “urban prone” with a pistol creates additional control for more effective shooting. 

Our review of the Combat Mobility System started with an in-depth discussion on various body positions. “Stance” is one of the seven fundamentals of marksmanship as taught by the military, and for good reason. If you think of your body as a platform or chassis that the gun is dropped into, having a mechanically sound body position is part of what enables you to make consistent hits and effectively manage recoil. Regardless of whether you’re standing, crouching, kneeling, or prone/supine, building a body position that’s stable and sustainable — in other words, you’re not fighting your own body to hold the position — is important for successful marksmanship.

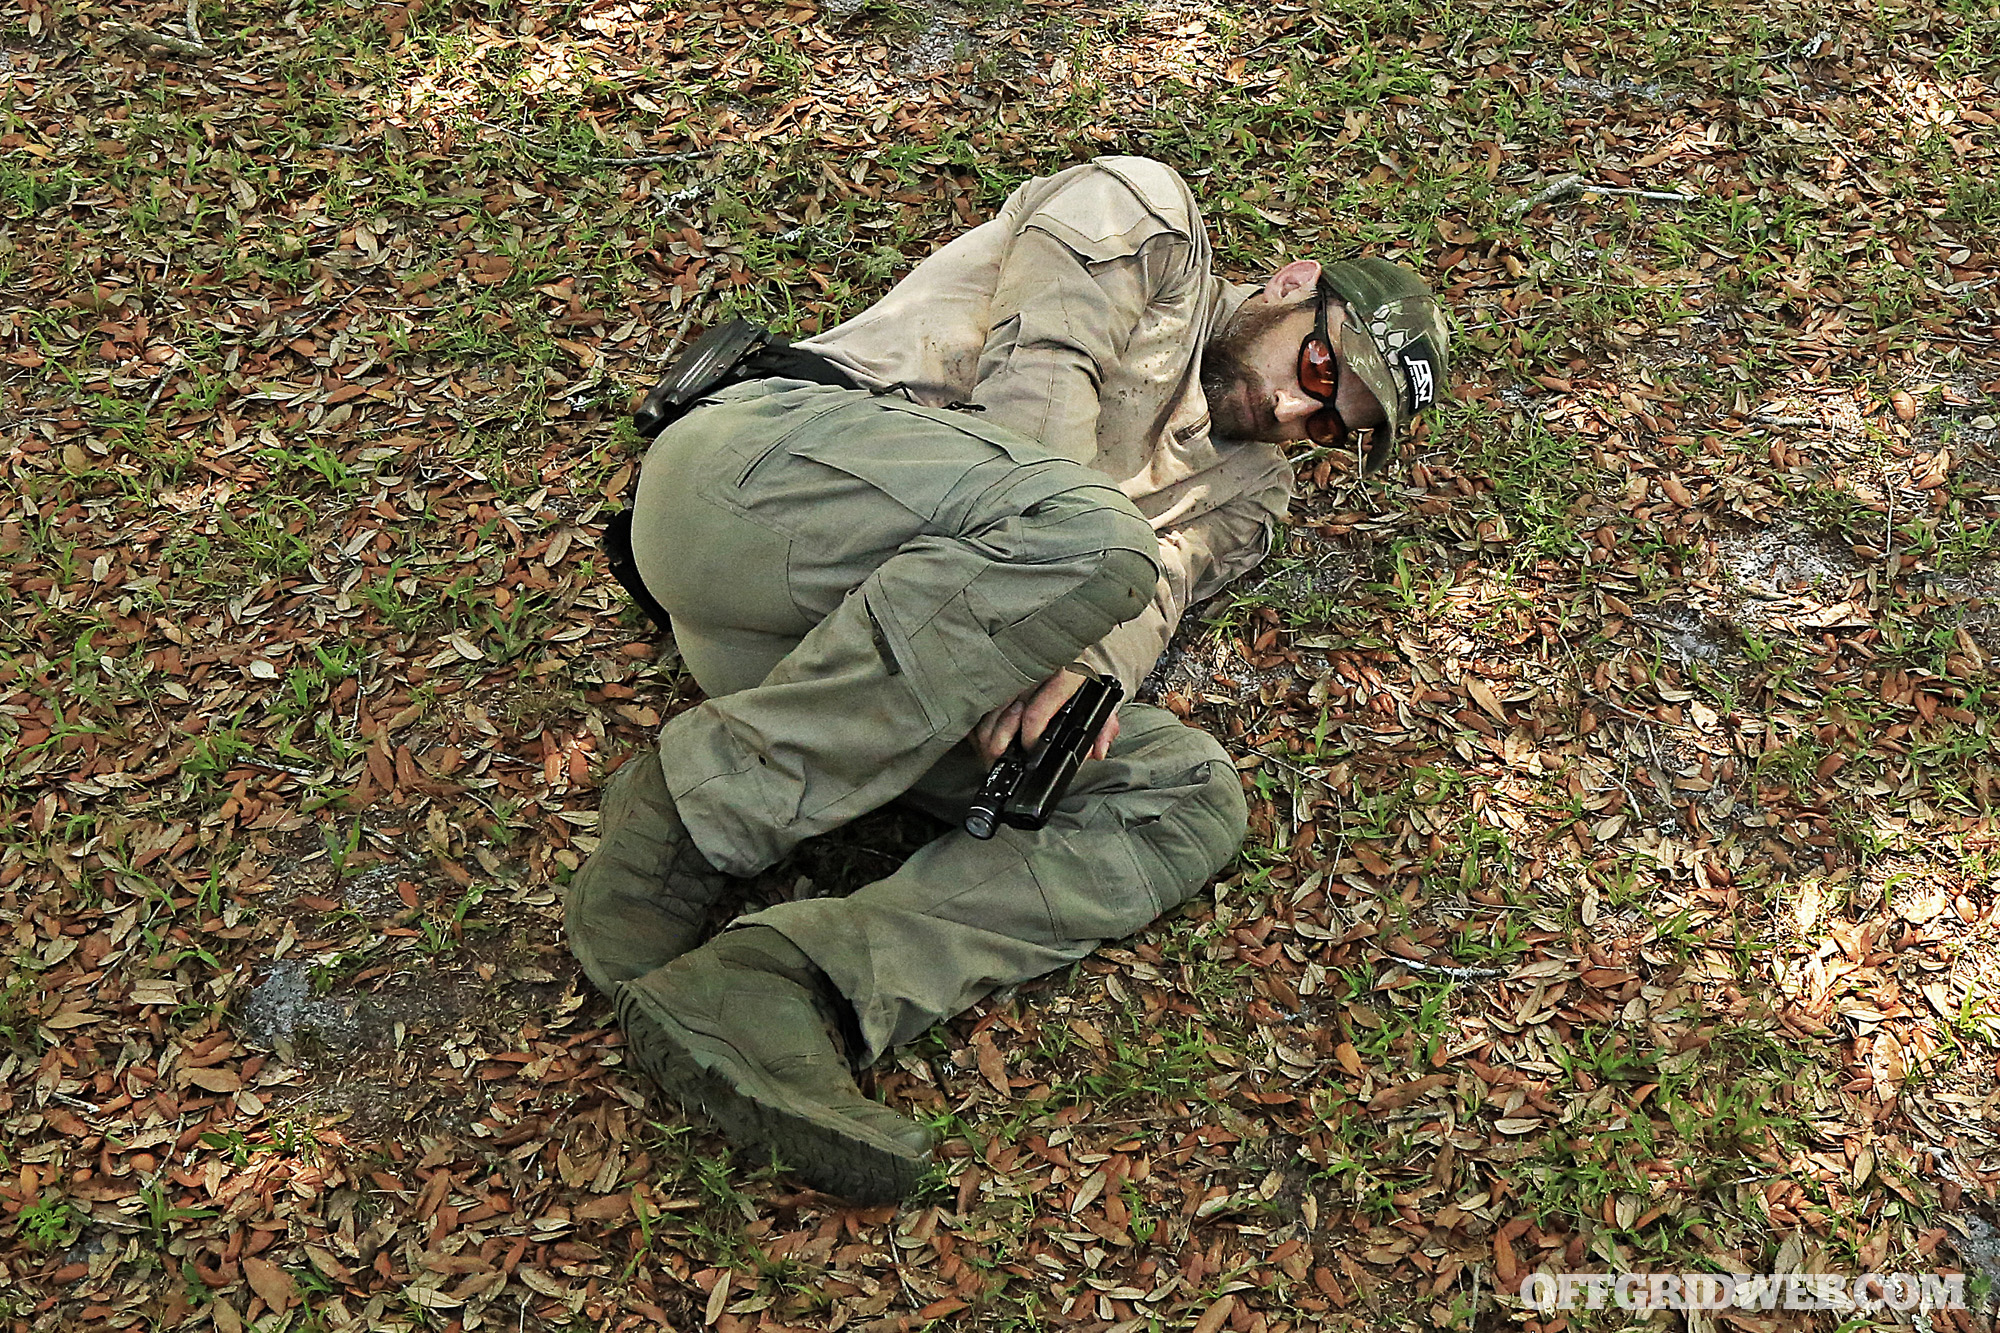
We reviewed everything from baseline upright stance to sitting, kneeling, crouching, prone, urban prone, and supine, with an examination and discussion of how to engage your body in the shooting process. When shooting a pistol from the urban prone, Mihovich demonstrates bracing your forearms or elbows against the inside of your legs and hooking your feet together. This method, as opposed to simply laying on your side and extending your arms out, creates three additional points of contact (each arm against each leg, and feet locked) and allows you to engage your larger leg and pelvic muscles to help stabilize the pistol.

Above: Bracing off cover also contributes to stability while shooting and can provide a physical index for properly mounting barriers or obstacles.

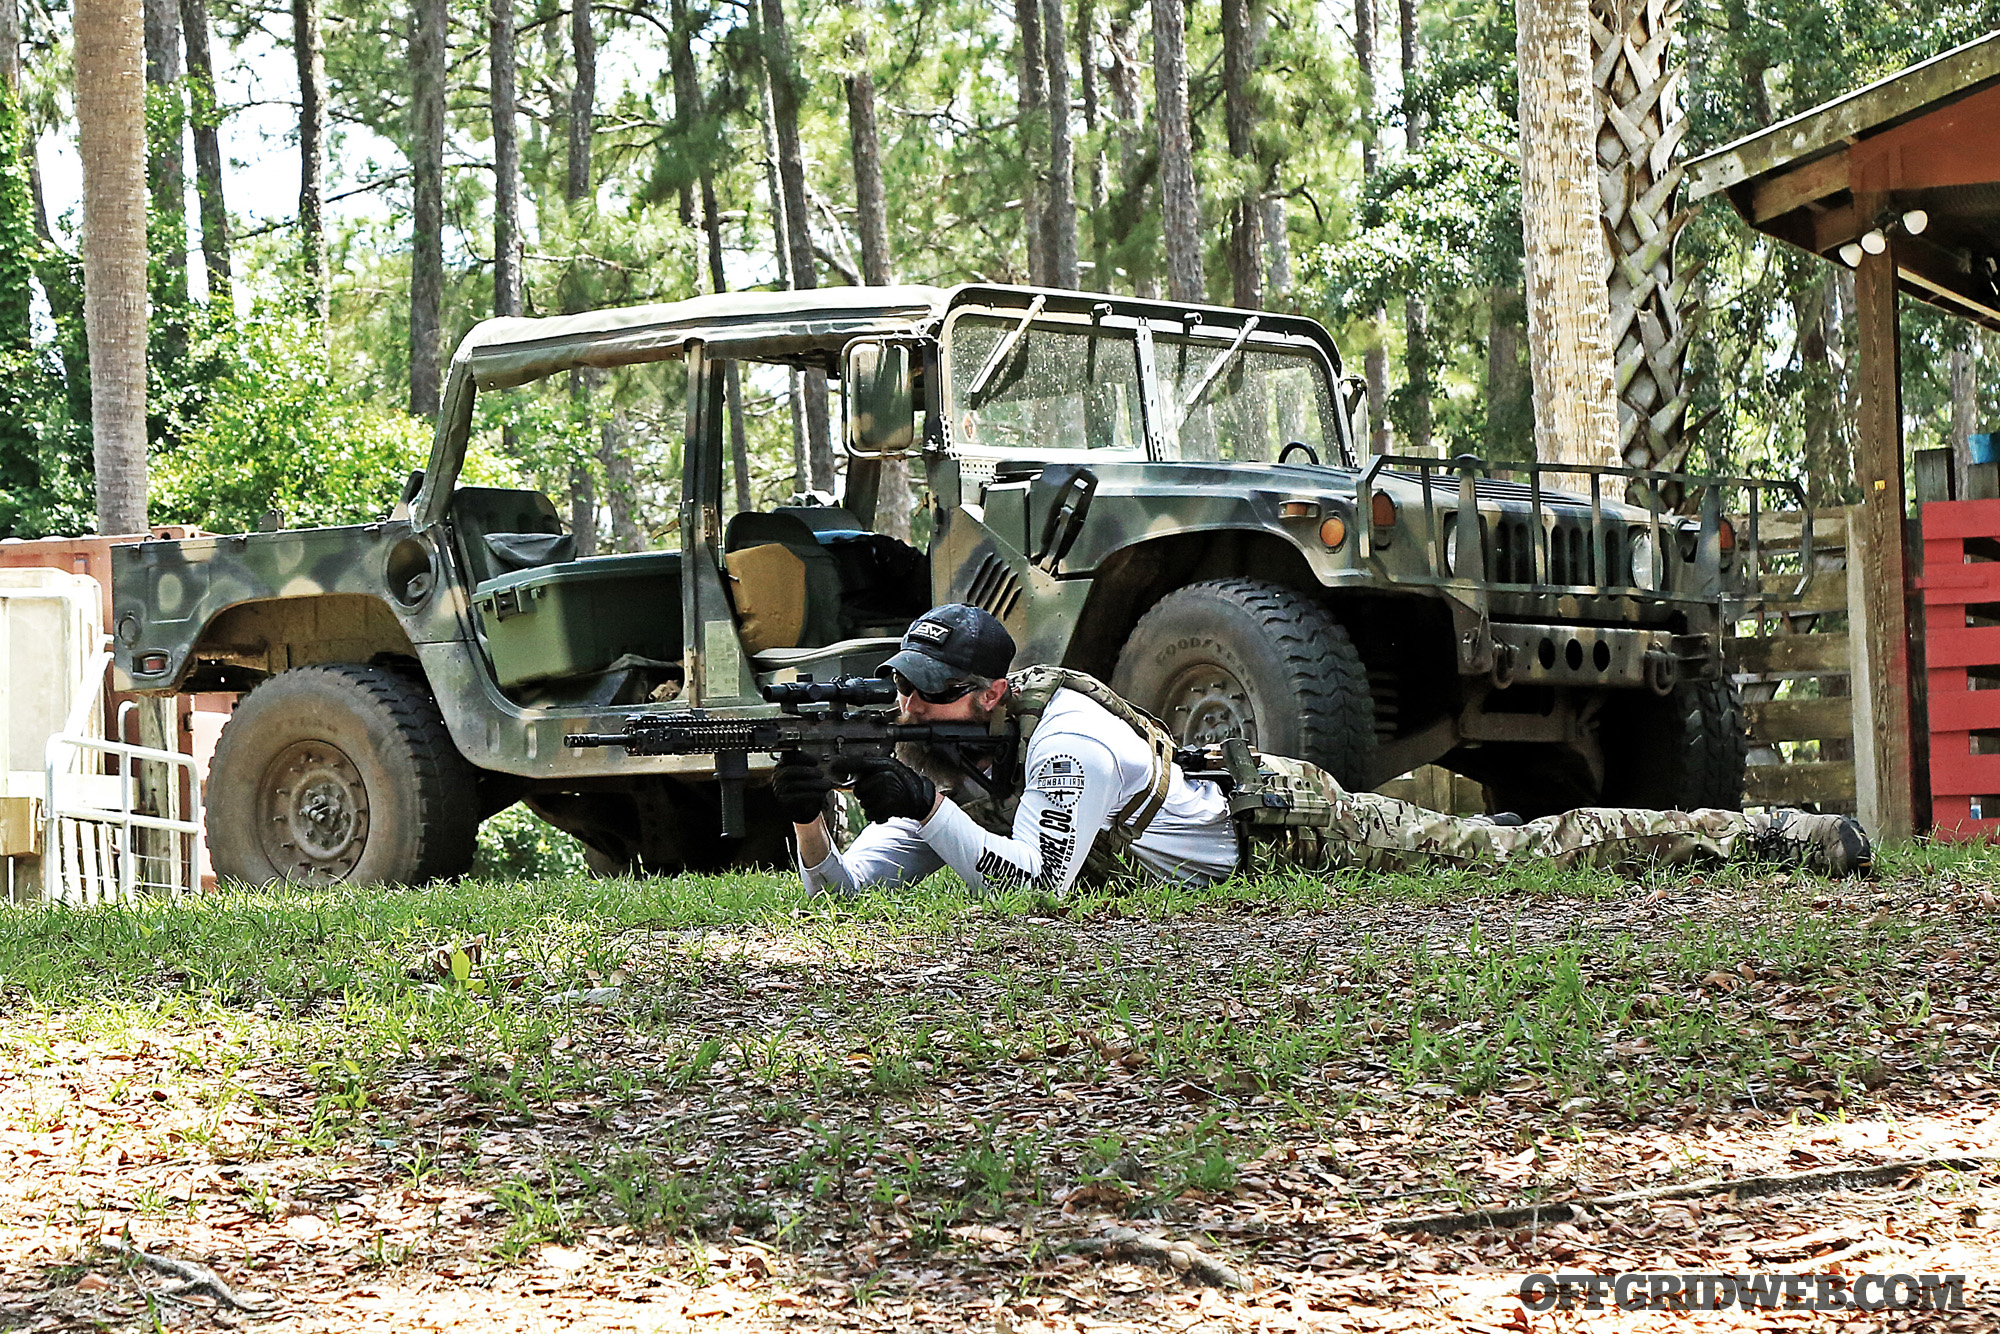
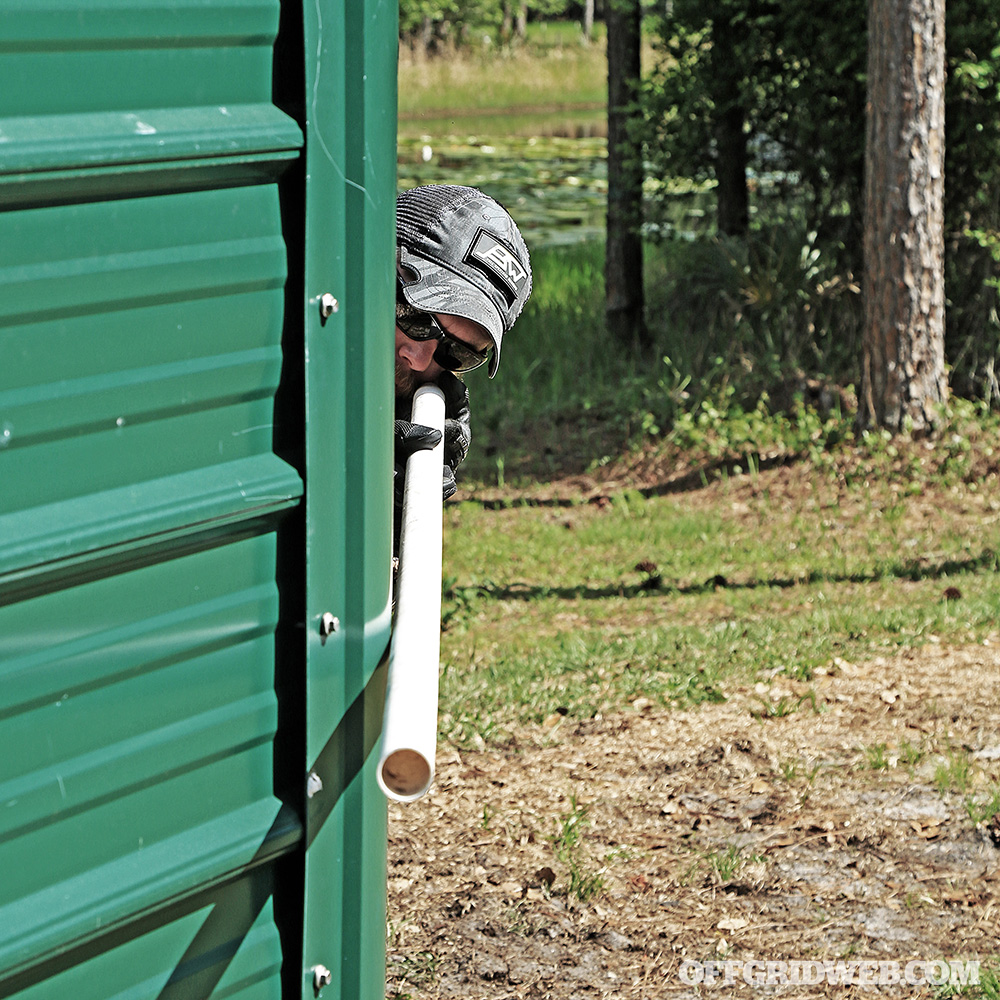
Above: This image shows the shooter's minimal exposure to target in the position shown in the previous image. 

In the context of combative or defensive shooting, it’s also important to give yourself the most stable platform possible while minimizing how much of your own body you expose to potential incoming or return fire. If possible, use cover or concealment barriers to create additional points of contact, and keep your body compact to minimize exposure. If it’s not possible to use a stable object or barrier, maximize the number of body-to-ground and body-to-body contact points to create stability.

This point also factors heavily into how you change positions. The best example I saw in class was moving from standing to prone. When I was still on active duty, I was instructed that the best way to transition from standing to prone was to “get as low as you can and kick your back legs out behind you to drop into the prone.” Like much misguided military instruction, this lesson was punctuated with the tough-guy cop-out “if it hurts, you’re doing it right!”

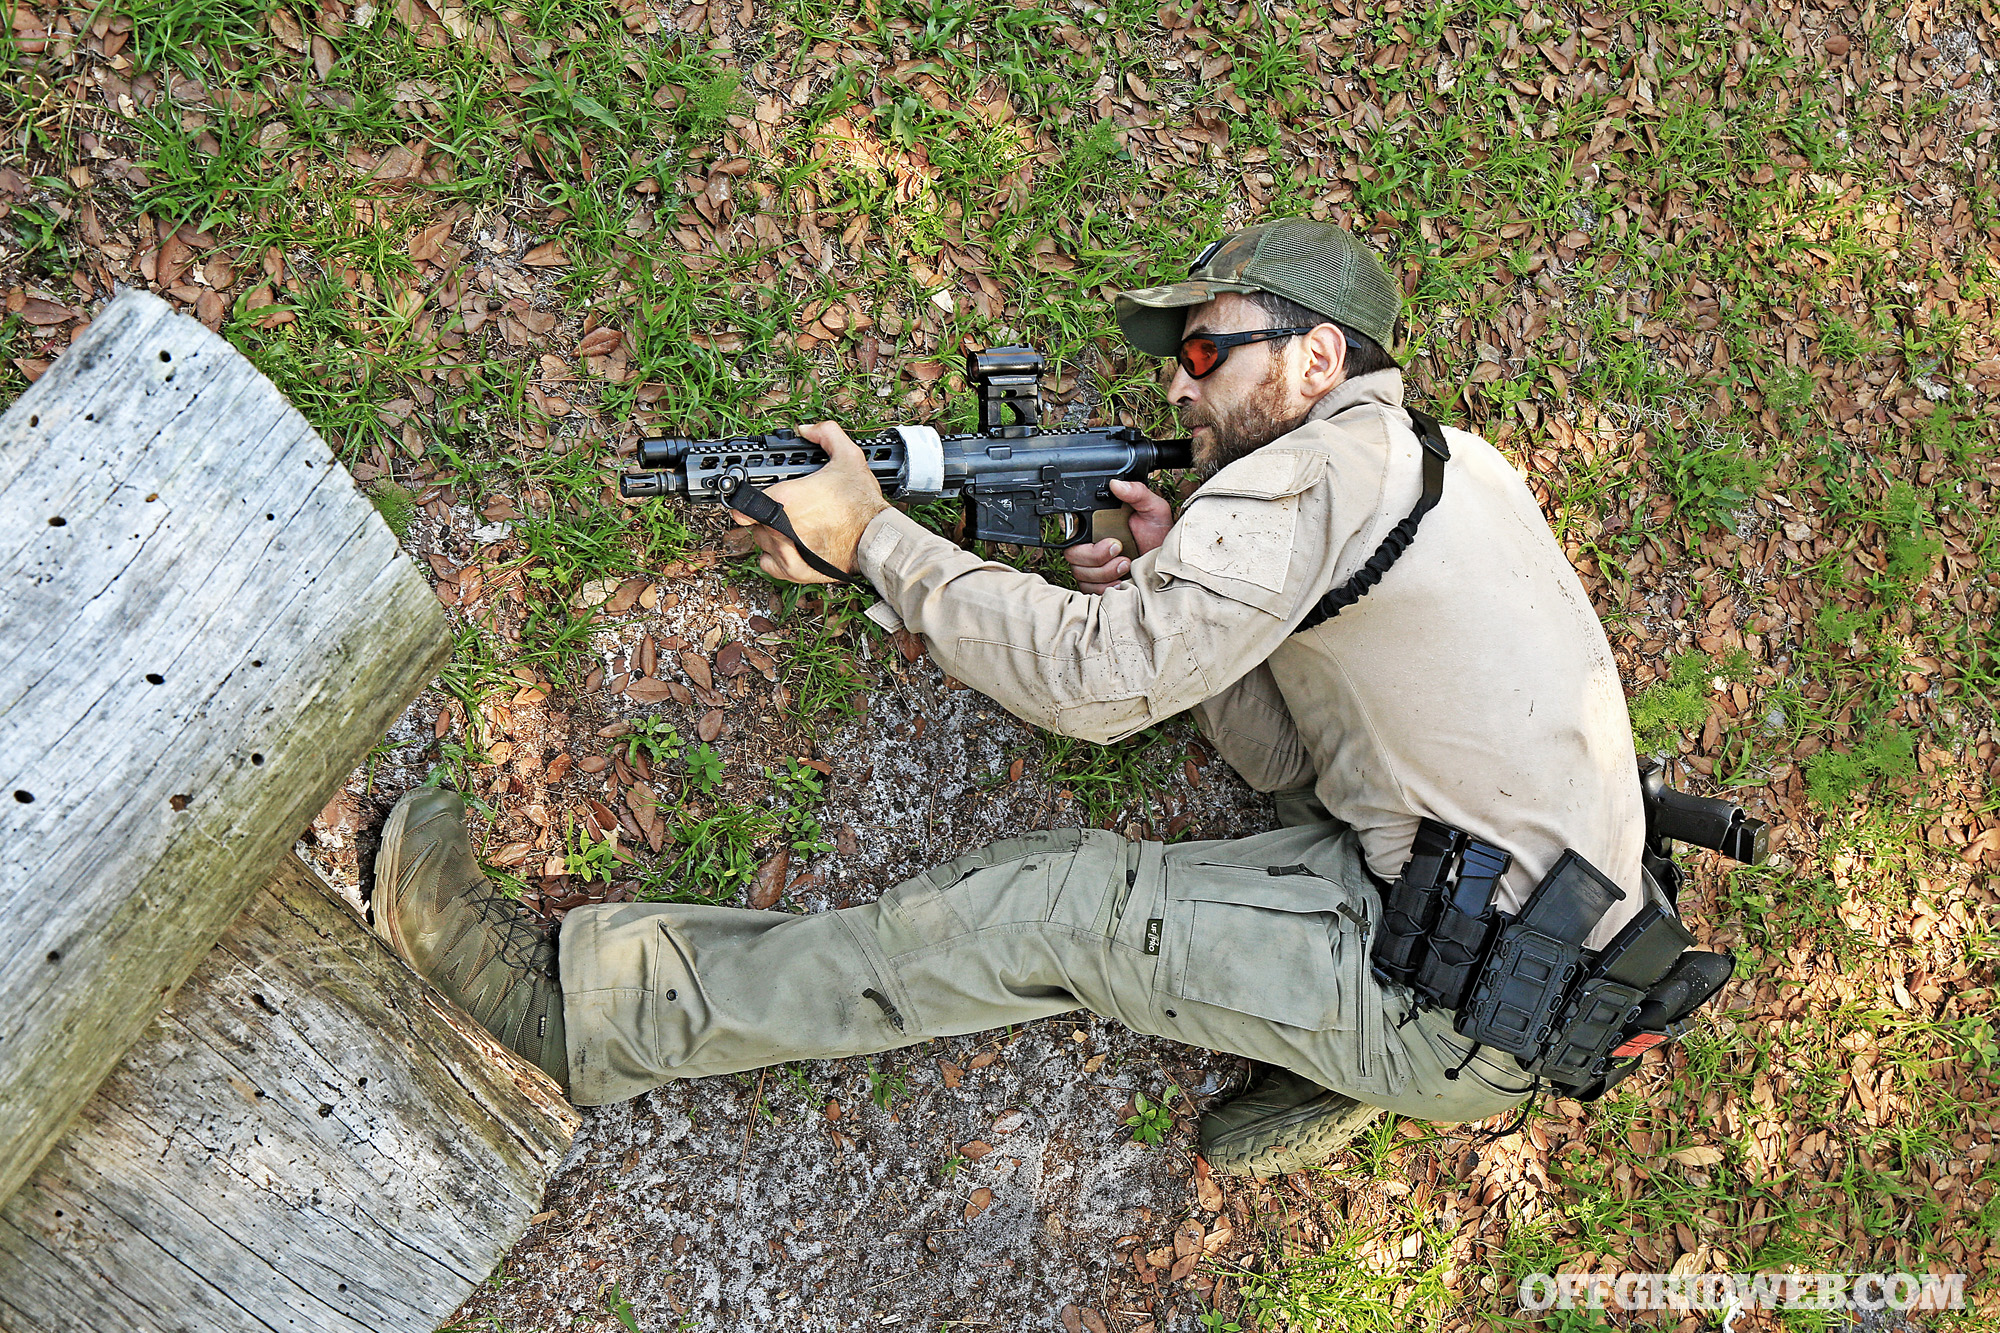
Above: Seated positions are inherently stable and can be adjusted to minimize how much of a target you present.

Fortunately, Full Spectrum Warrior has developed a more methodical approach. Instead of dropping all your mass down in the dirt in one uncomfortable, unsmooth, painful burst of motion, simply collapse your body’s natural anchor points into the ground from the feet up. First a knee, then a hip, then torso and upper triceps, then simply roll onto your elbows. Not only is this a safer, less injurious way to switch positions but if the situation changes rapidly, you could, theoretically, “pause” on any of those major anchor points (knee, hip, abdomen, triceps) to return fire or even just reassess the situation.

In the following sequence, Graham demonstrates his method for transition to prone, meant to reduce impact on the joints from dropping straight down:

Scanning

Alternately labeled as vital to maintaining situational awareness and absurd range theatrics, post-shoot scanning has been a long-time staple of defensive shooting instruction. I’ll leave the discussion about its viability for another time, but the Combat Mobility System does include it, and includes it in a way I’d not seen before. Most of the scans I’ve seen in the past focused on either simply turning your head to look left and right or, at most, twisting at the waist (with or without moving the gun, depending on who you talk to you) in order to turn your upper body 180 degrees to see behind you.

The CMS version goes, literally, a step further and focuses on moving the entire body from the feet up in a series of 90-degree facing movements. This solves a disconnect between the oft-touted maxim of “360-degree battlespace” and then simply pivoting your head left-right to scan your environment. Moving the entire body a quarter-turn at a time means that you always land in a full fighting/shooting stance, more able to react to unknown sudden-presentation threats.

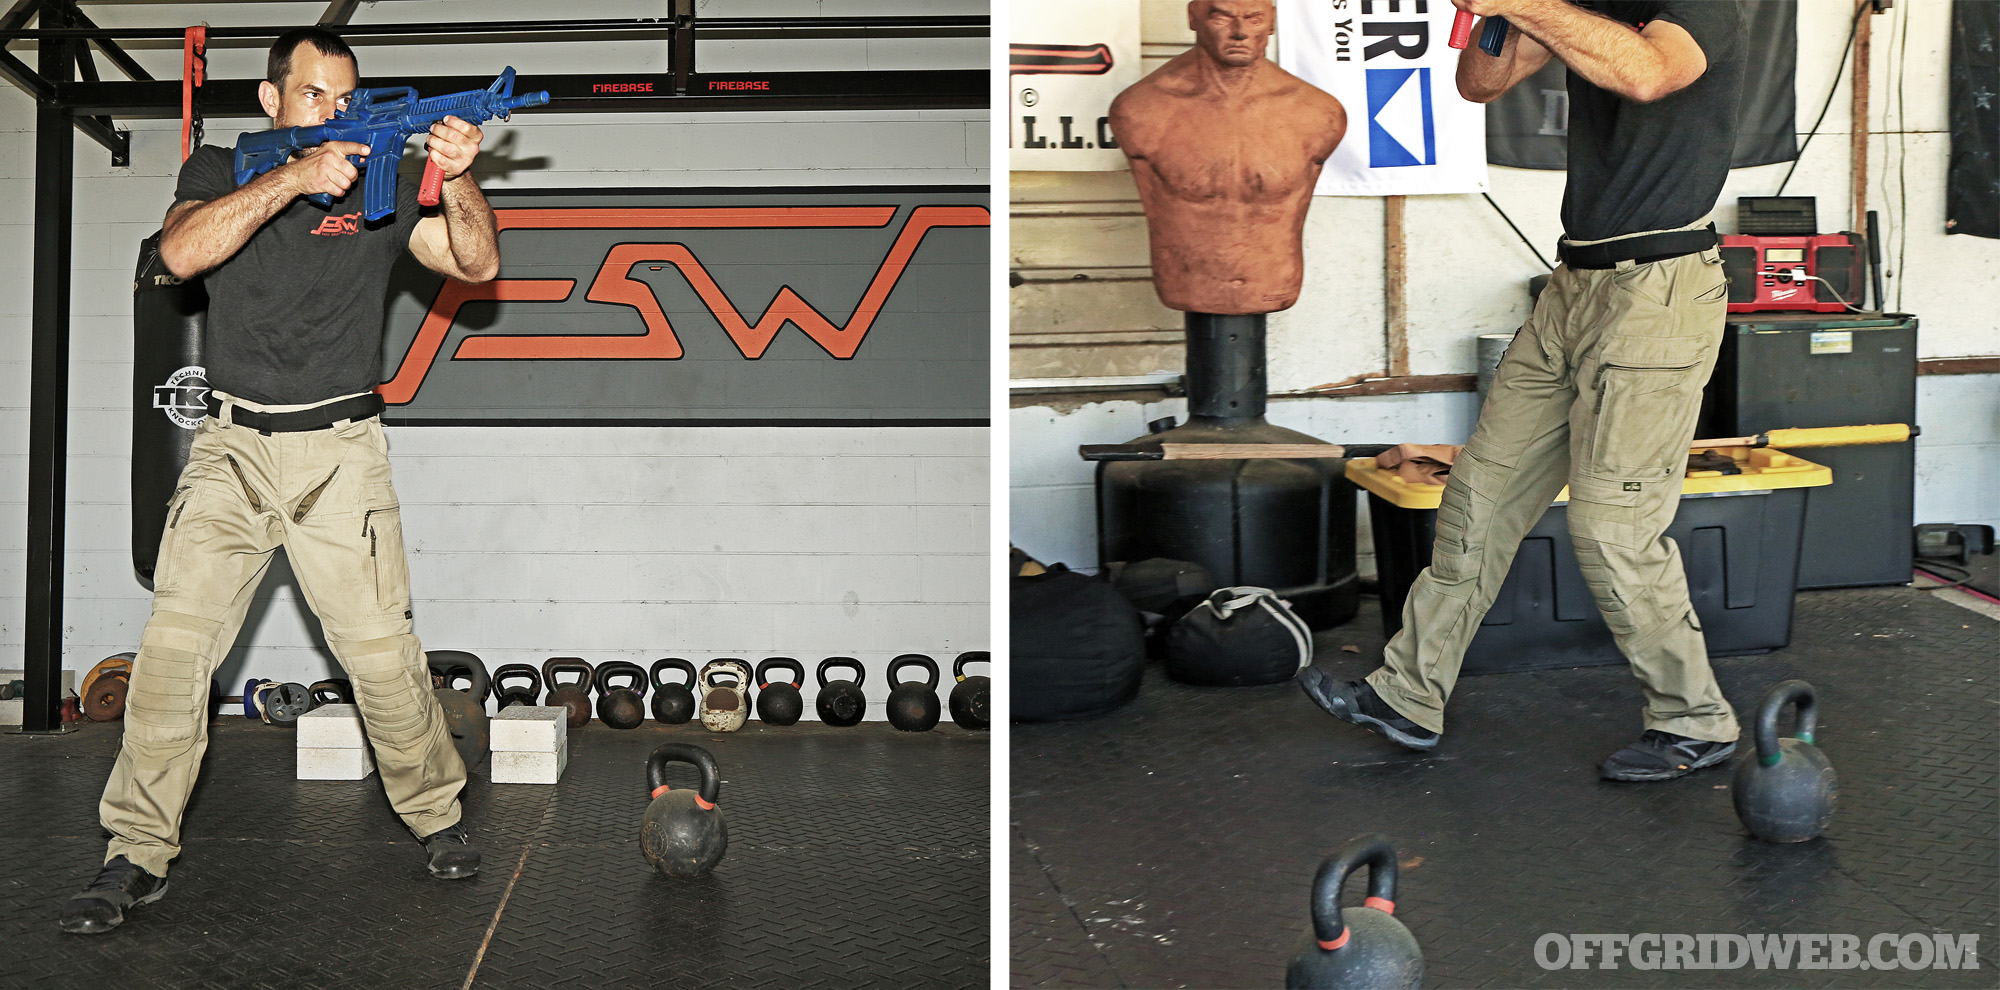
The following sequence demonstrates the FSW strike-through drill, which drills using the pistol as an impact weapon to create space before shooting:

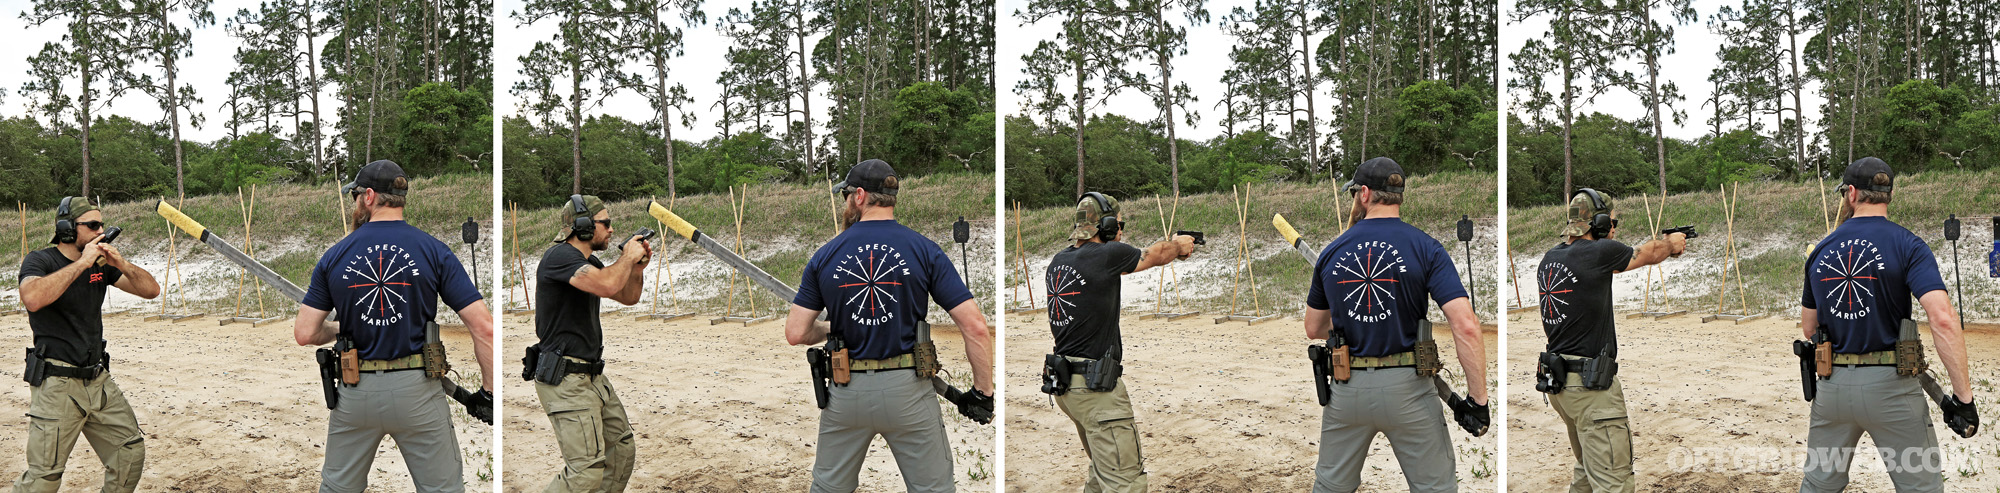
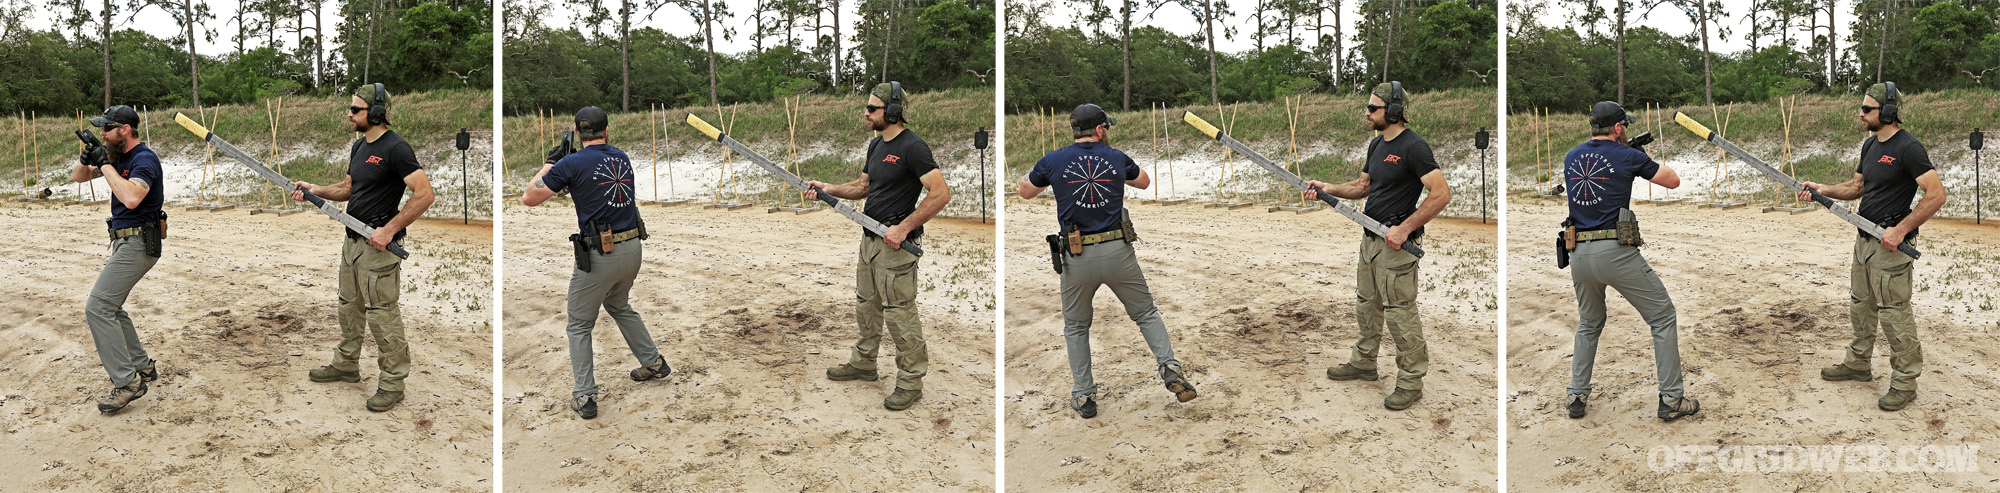
Graham and Mihovich encapsulated this concept in a drill involving a pivot-based scan that put you face-to-face with a wooden beam held at striking distance. The full-body step-pivot scan turns you into the beam, albeit in a full flush-to-target fighting stance. From this position, you can muzzle strike the beam out of your line-of-sight to engage a target further down range. In the photo sequences here, you see Mihovich demonstrate the drill from a 90-degree scan/pivot, while Graham does it at the end of a complete 180-degree turn. In the latter, you can see he faces each direction in a fully grounded combative stance.

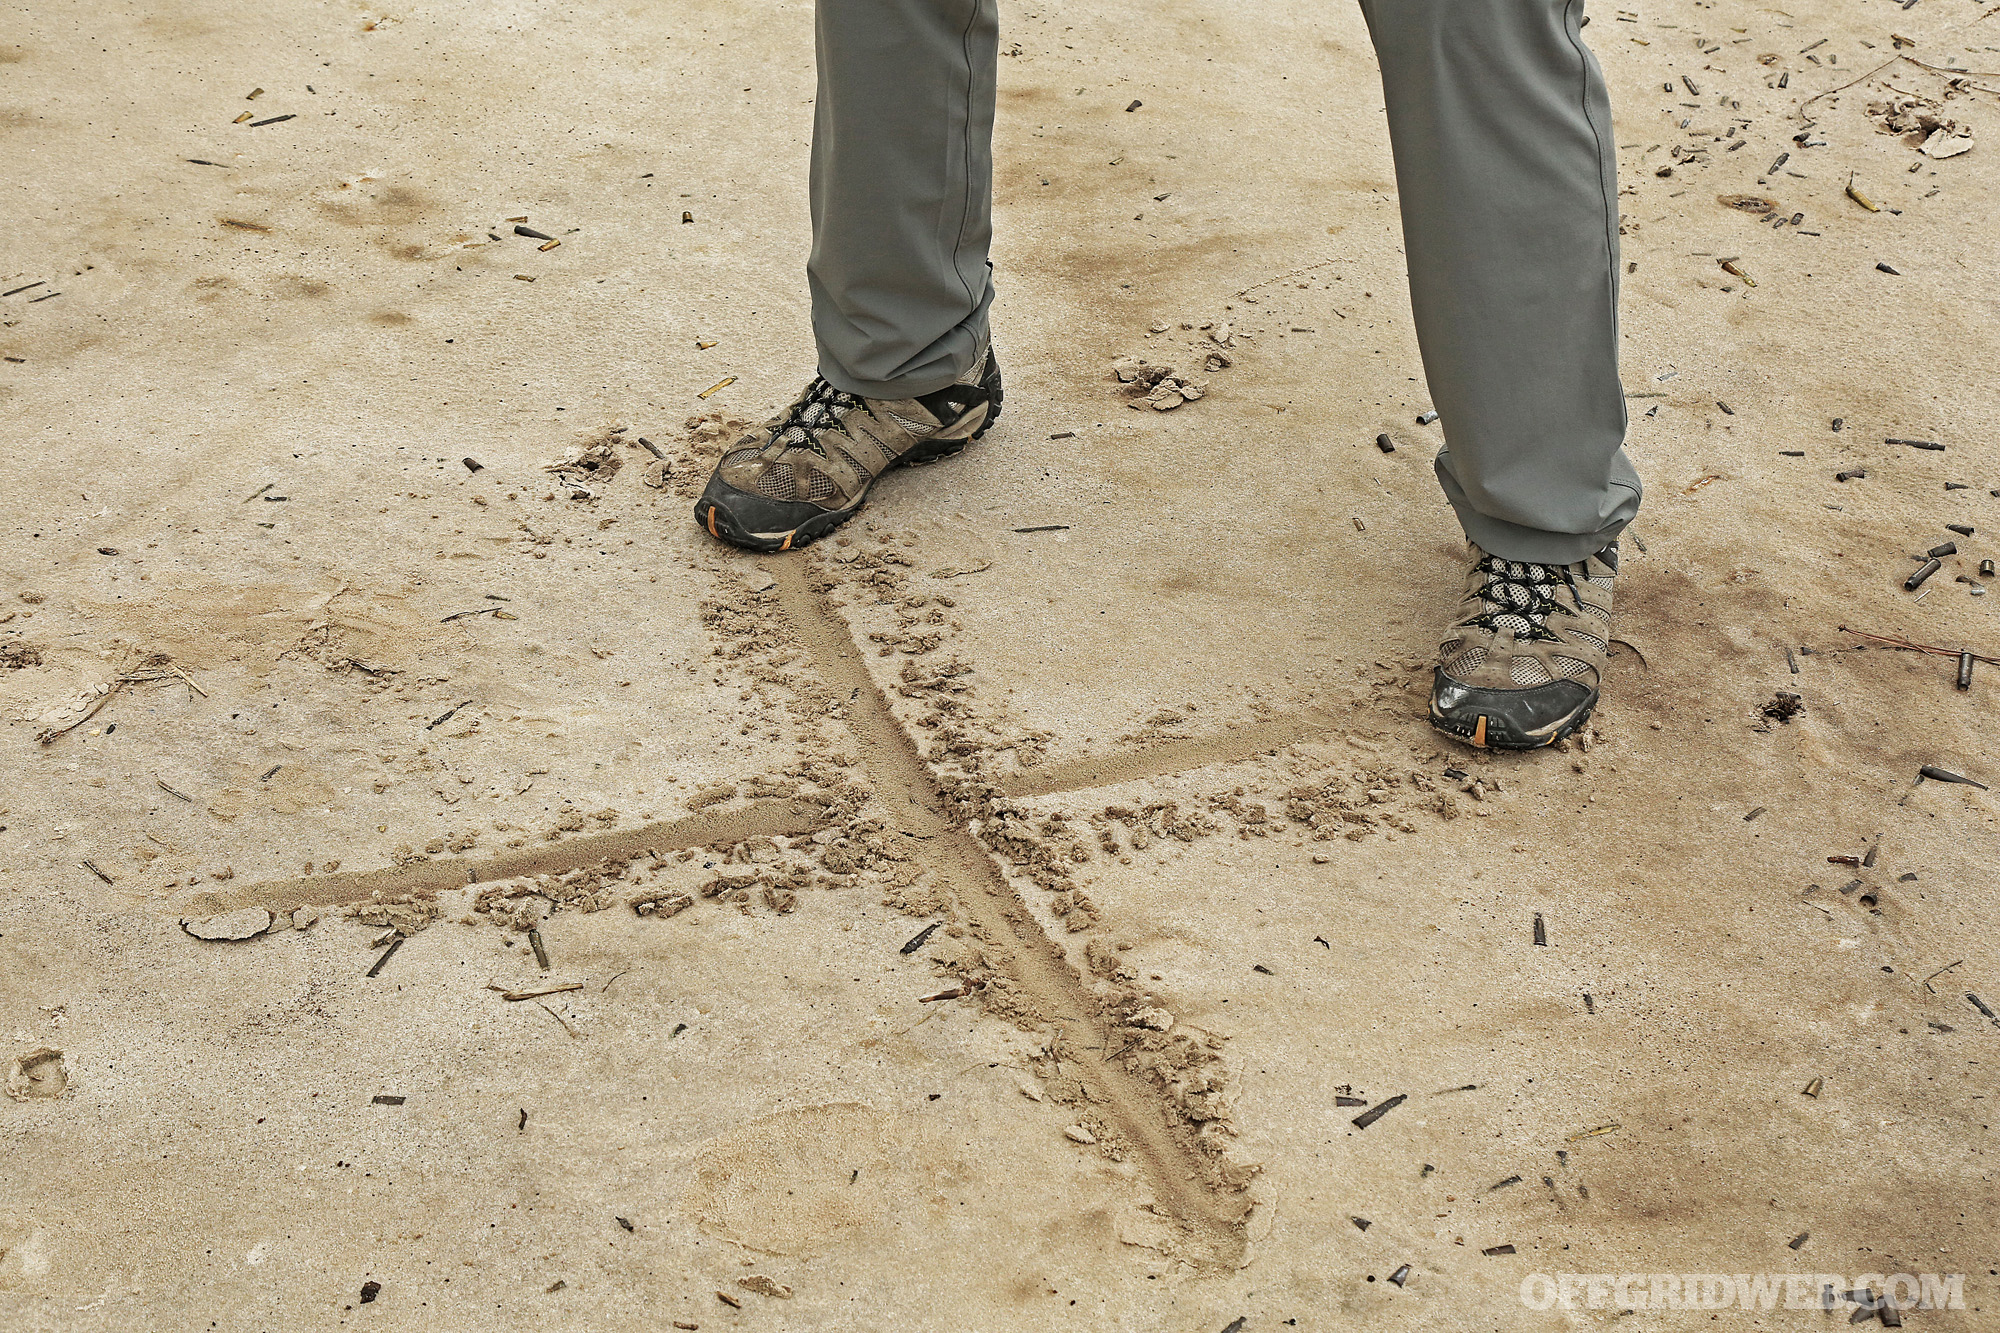
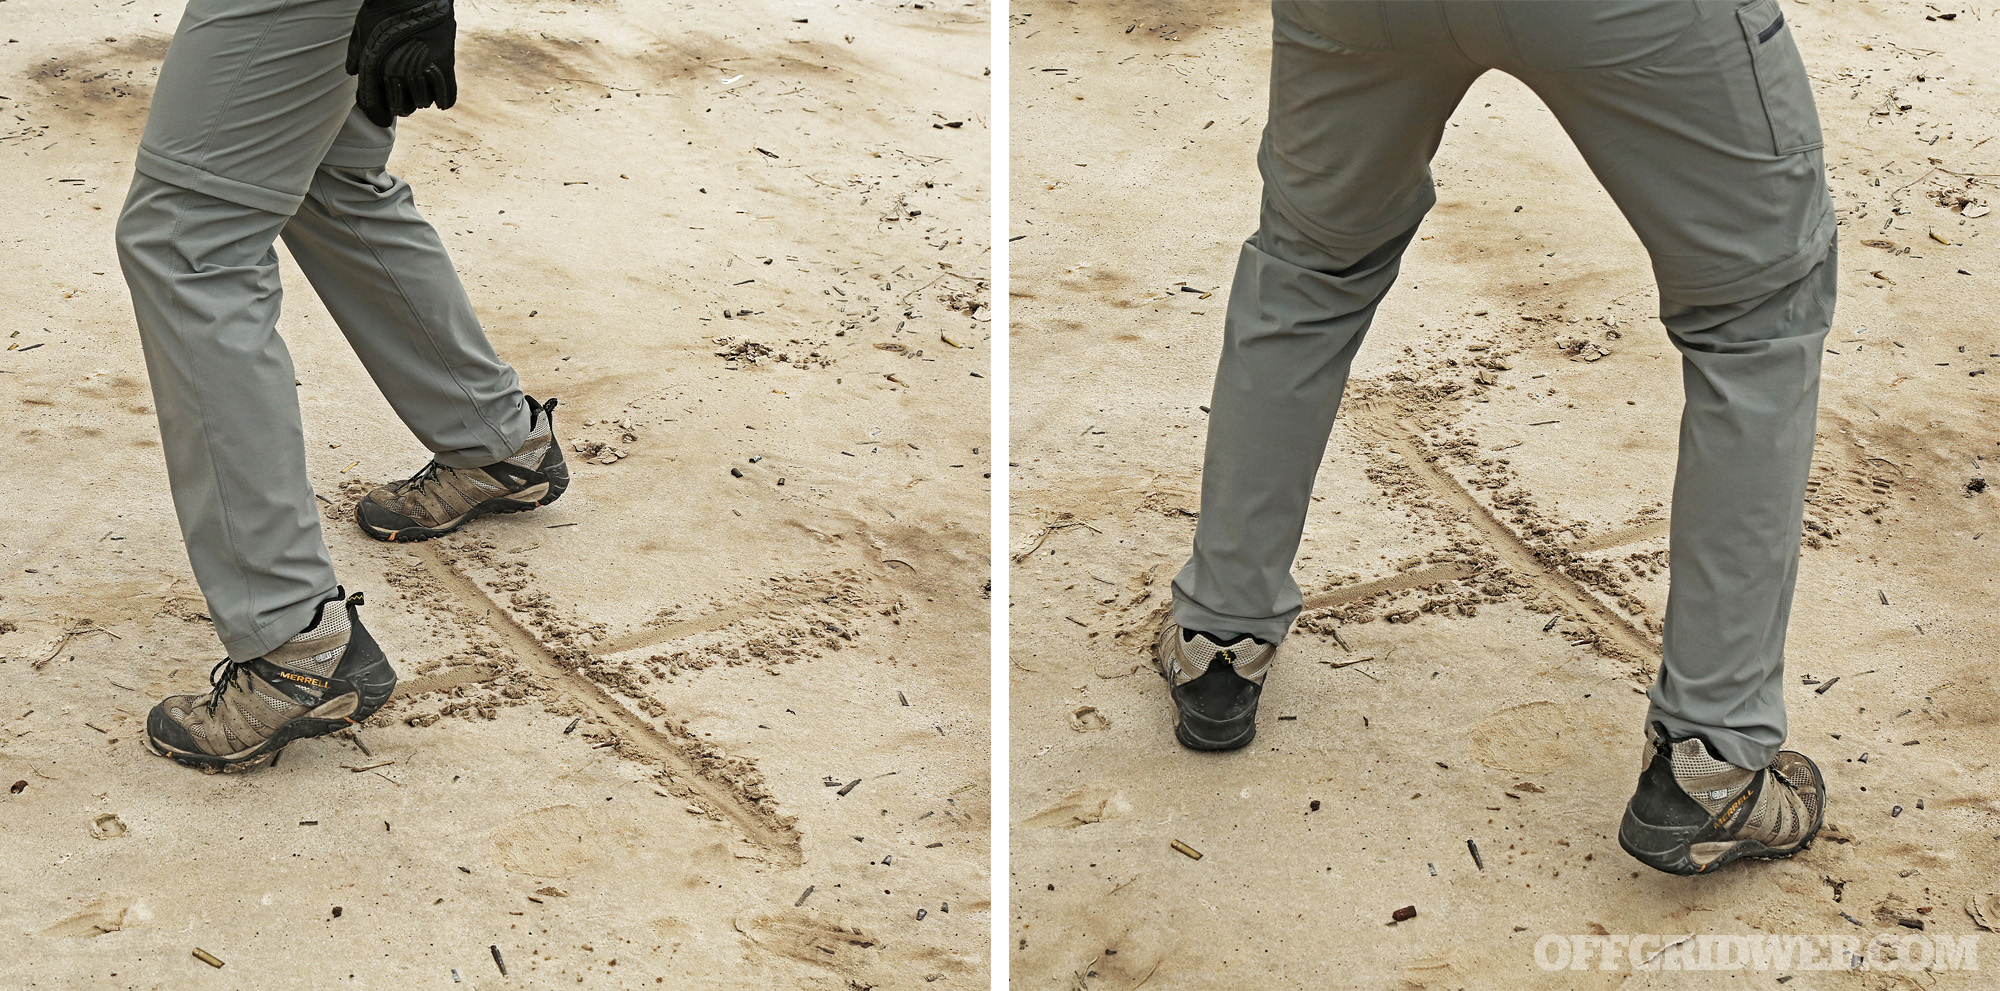
The footwork took me a few reps to pick up, without just spinning around in a circle — a testament to my lack of athletic grace, more than anything else. But Graham broke the footwork down step-by-step after drawing an X in the sand and demonstrating the individual contact points for each foot. It’s laid out here for a 180-degree turn but can be followed through for a complete 360 scan.

The method pictured below breaks a 180-degree turn down into two 90-degree turns, meant to preserve the fighting/shooting stance throughout the turn in the event of unanticipated threats:

Here's a footwork demonstration of the 180-degree turn technique:

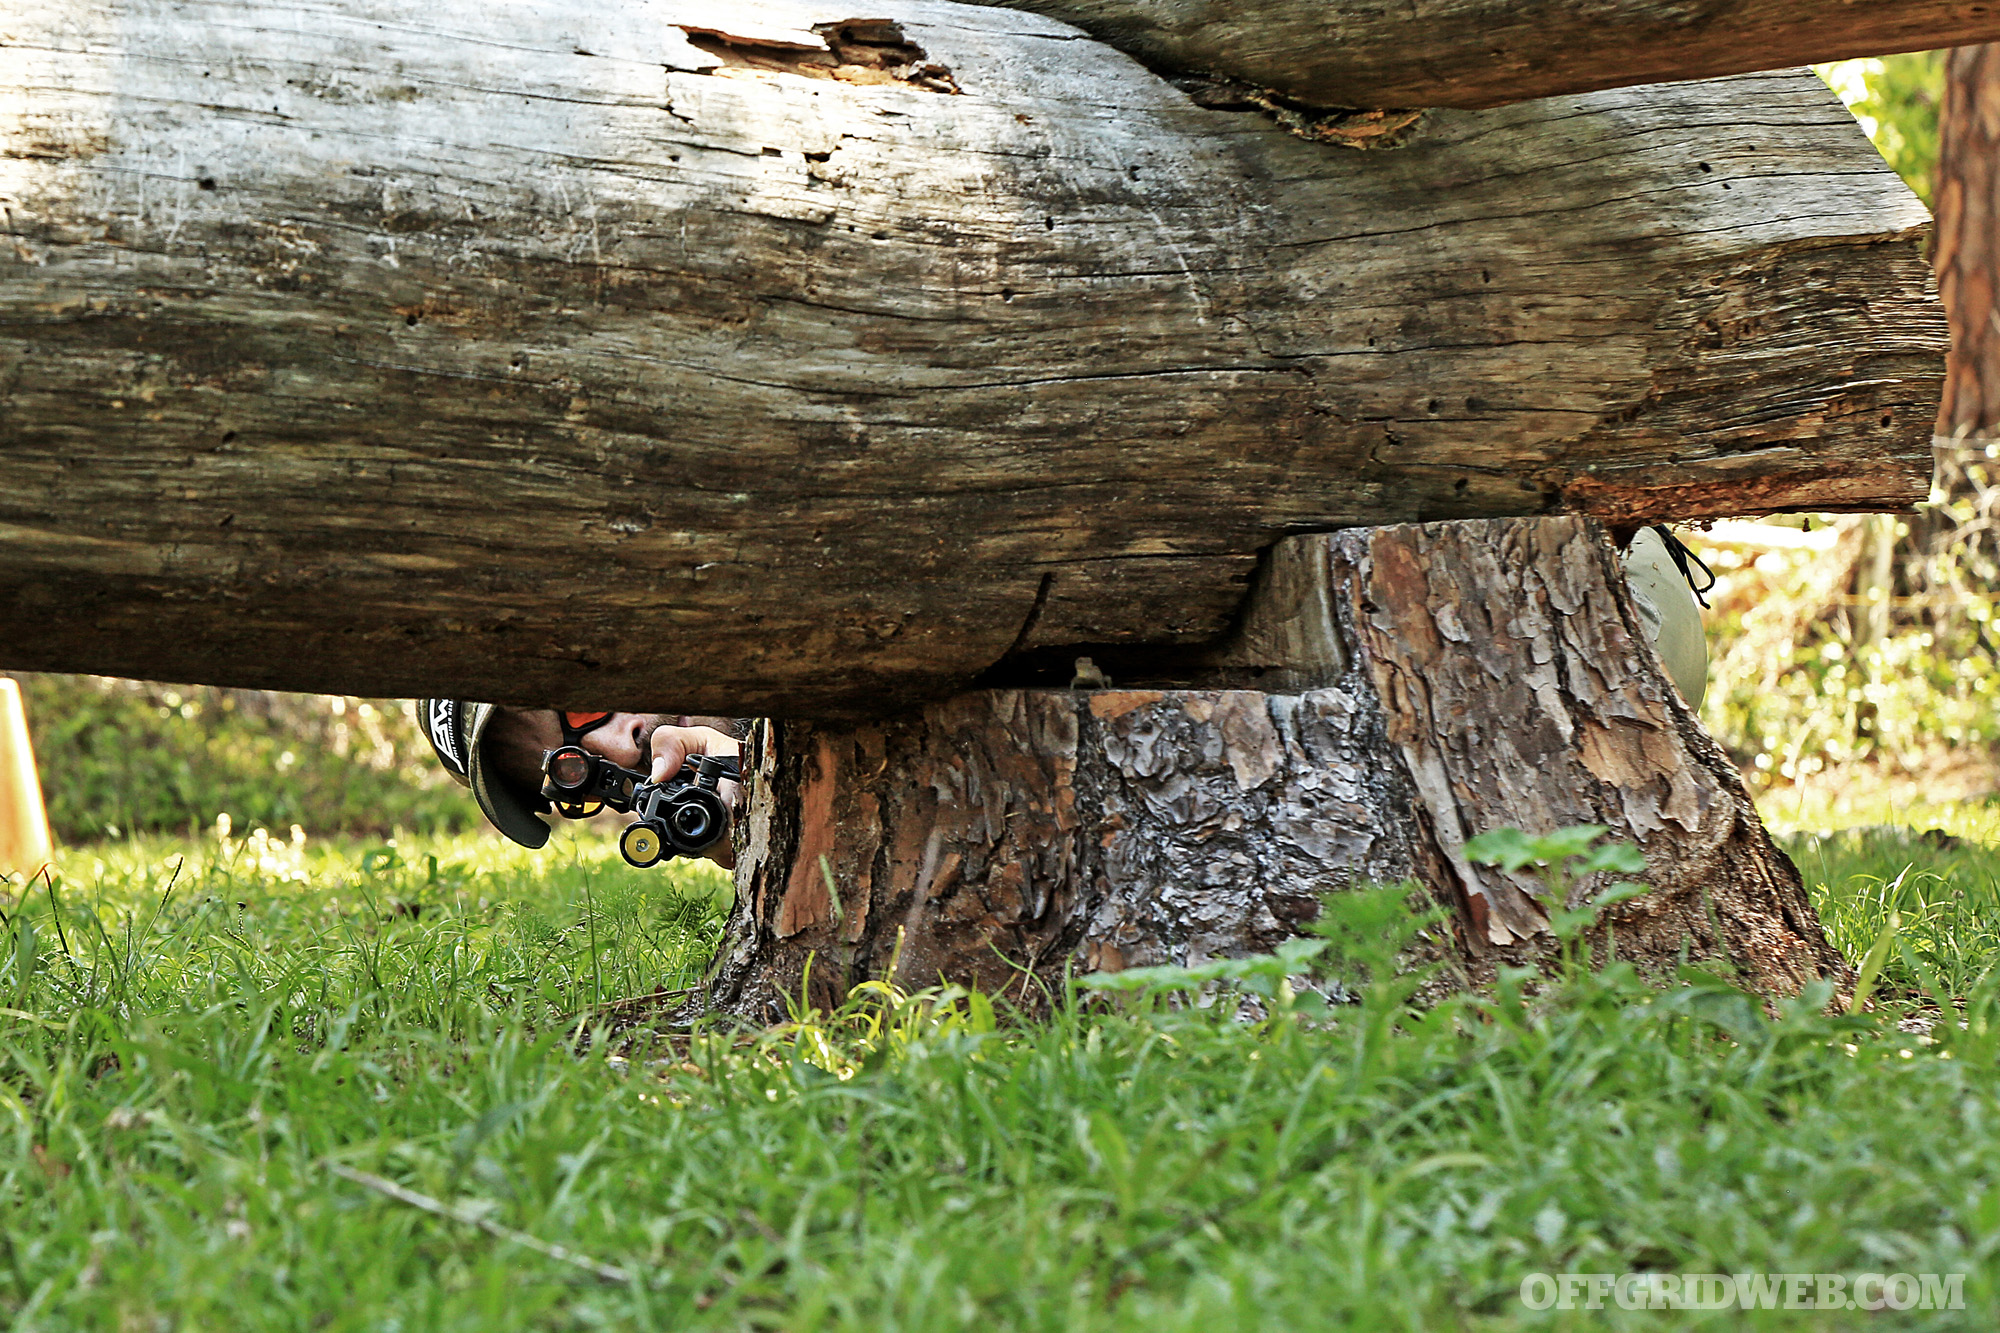
Movement and Corners

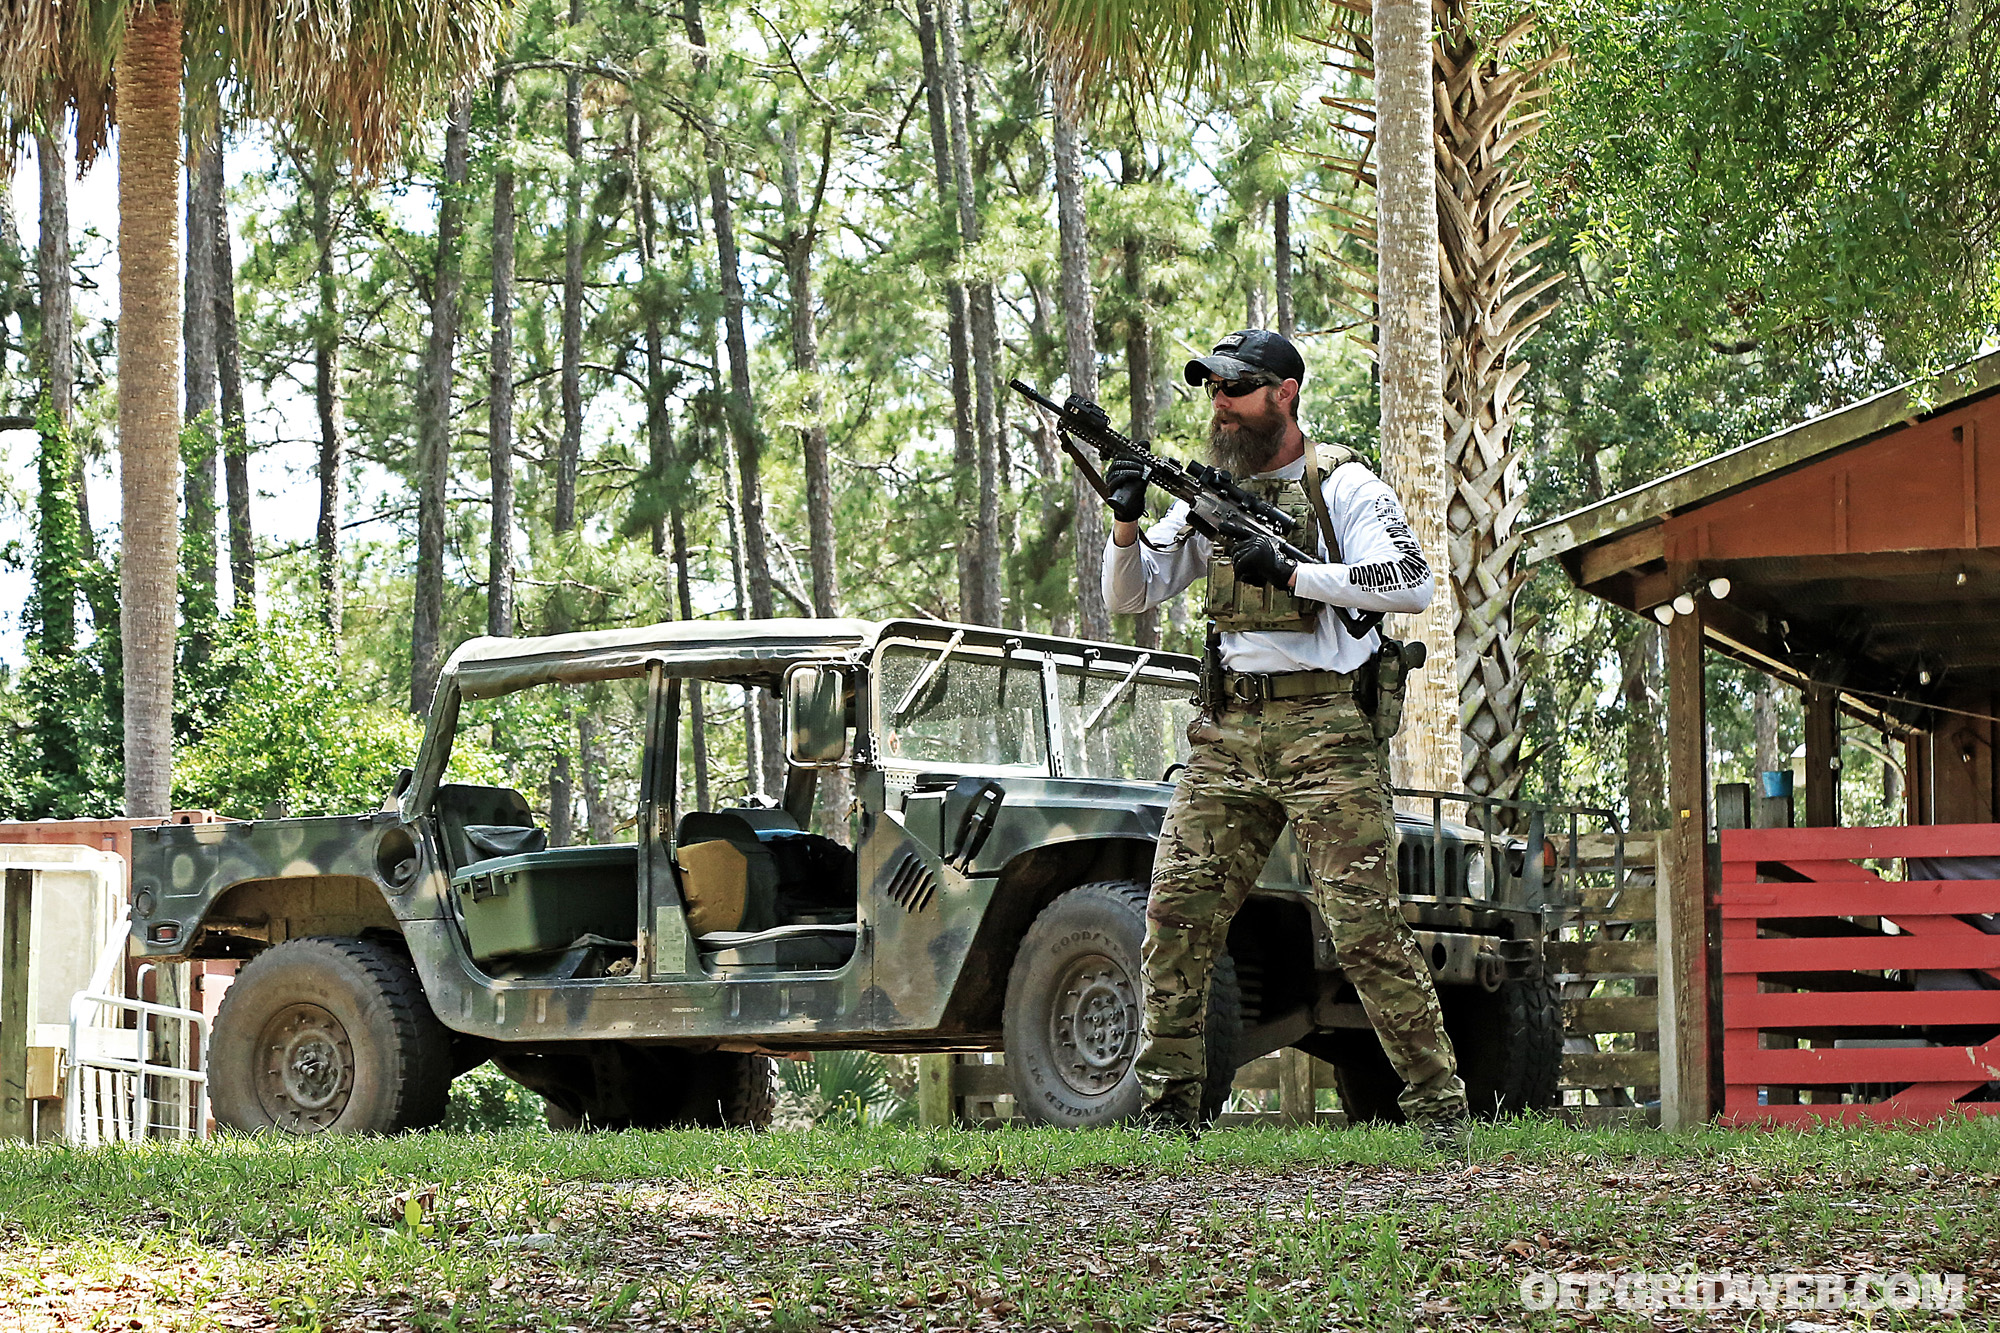
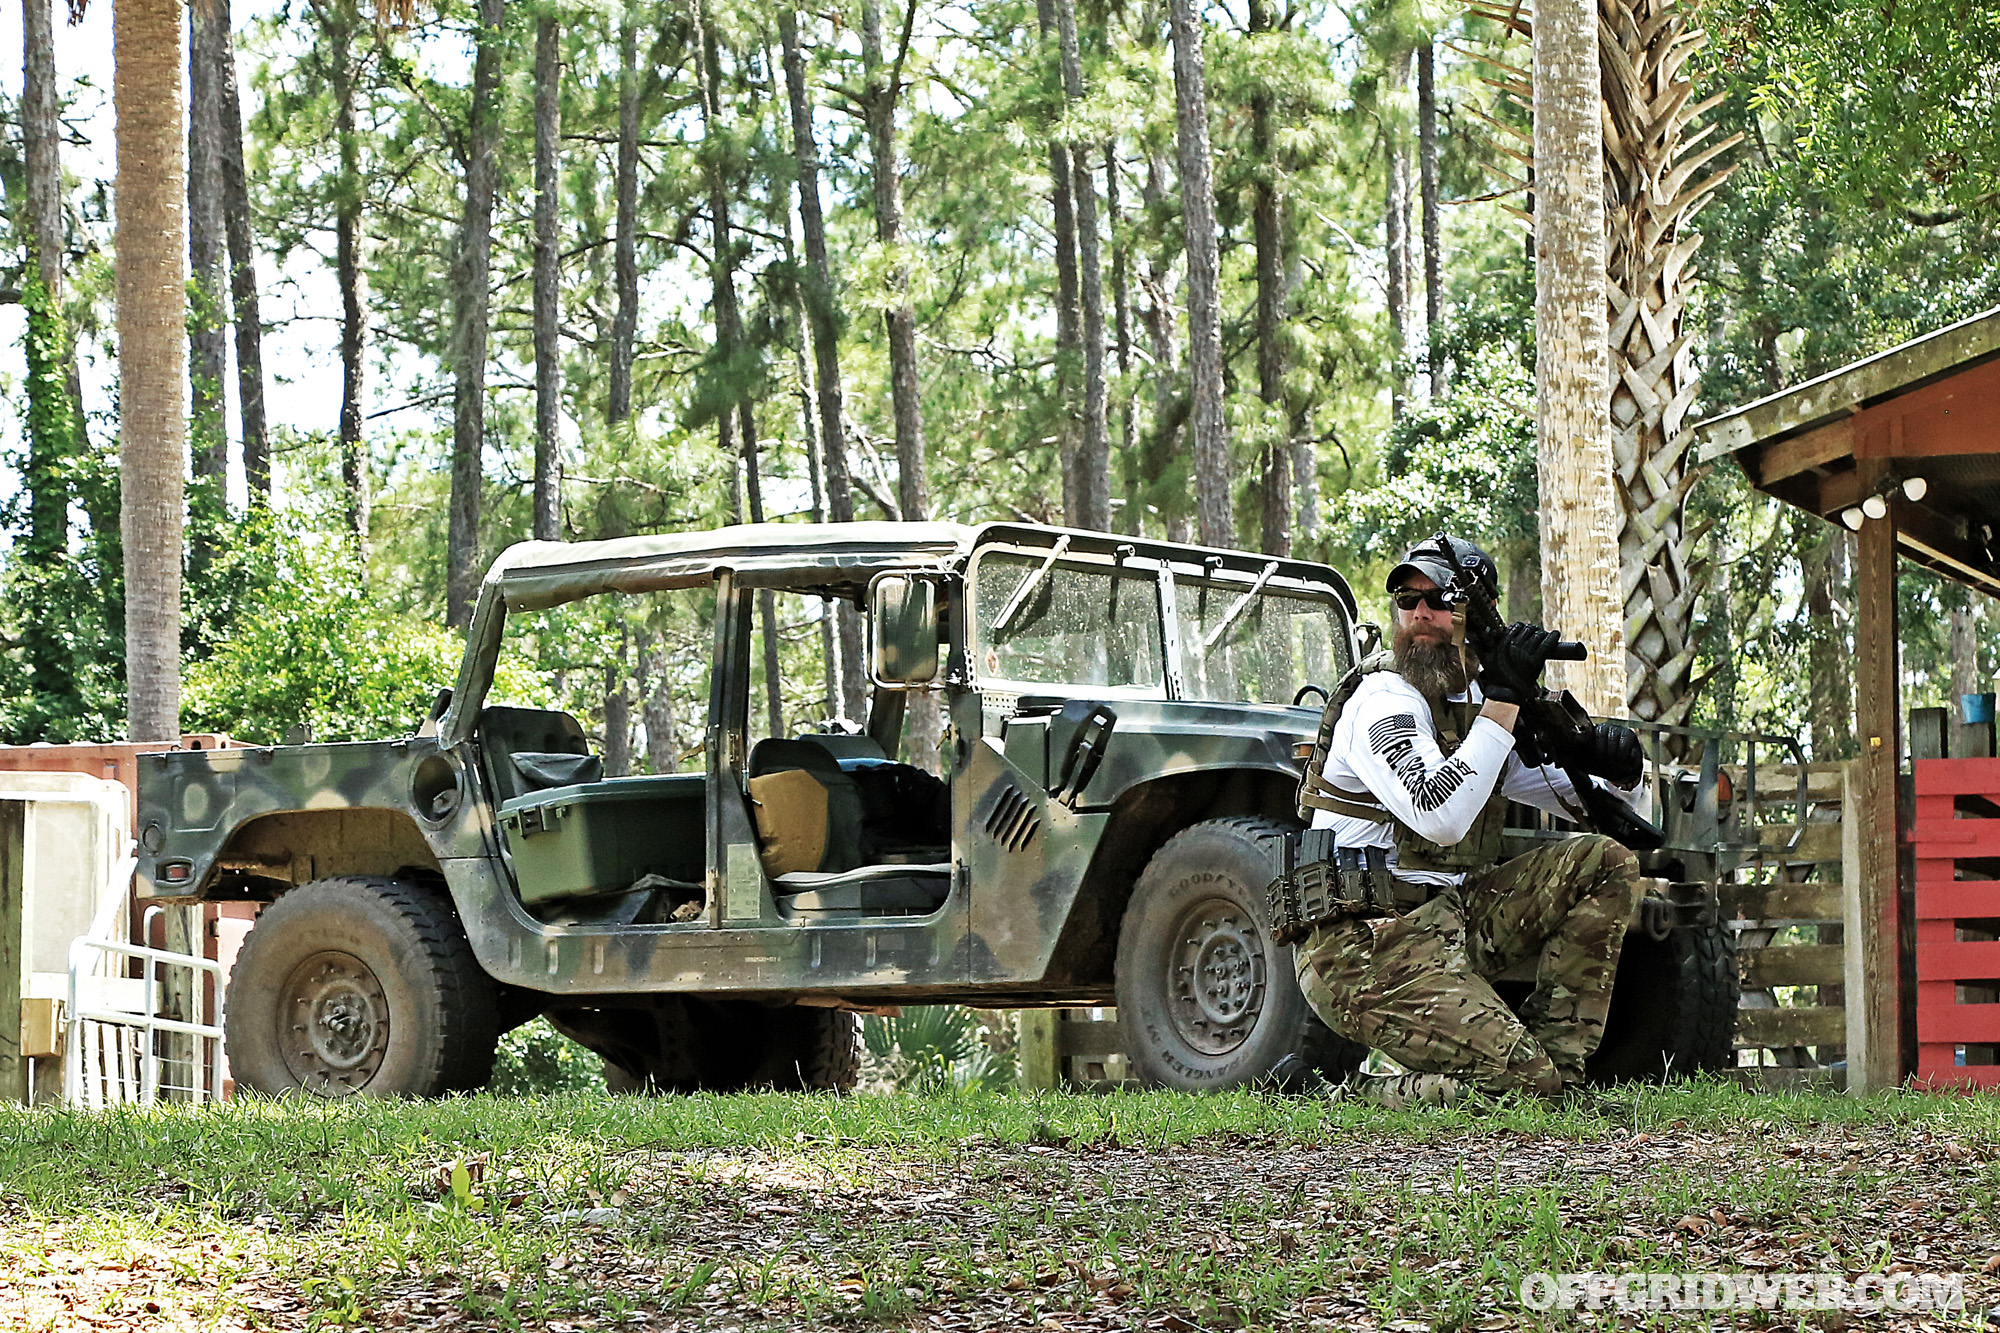
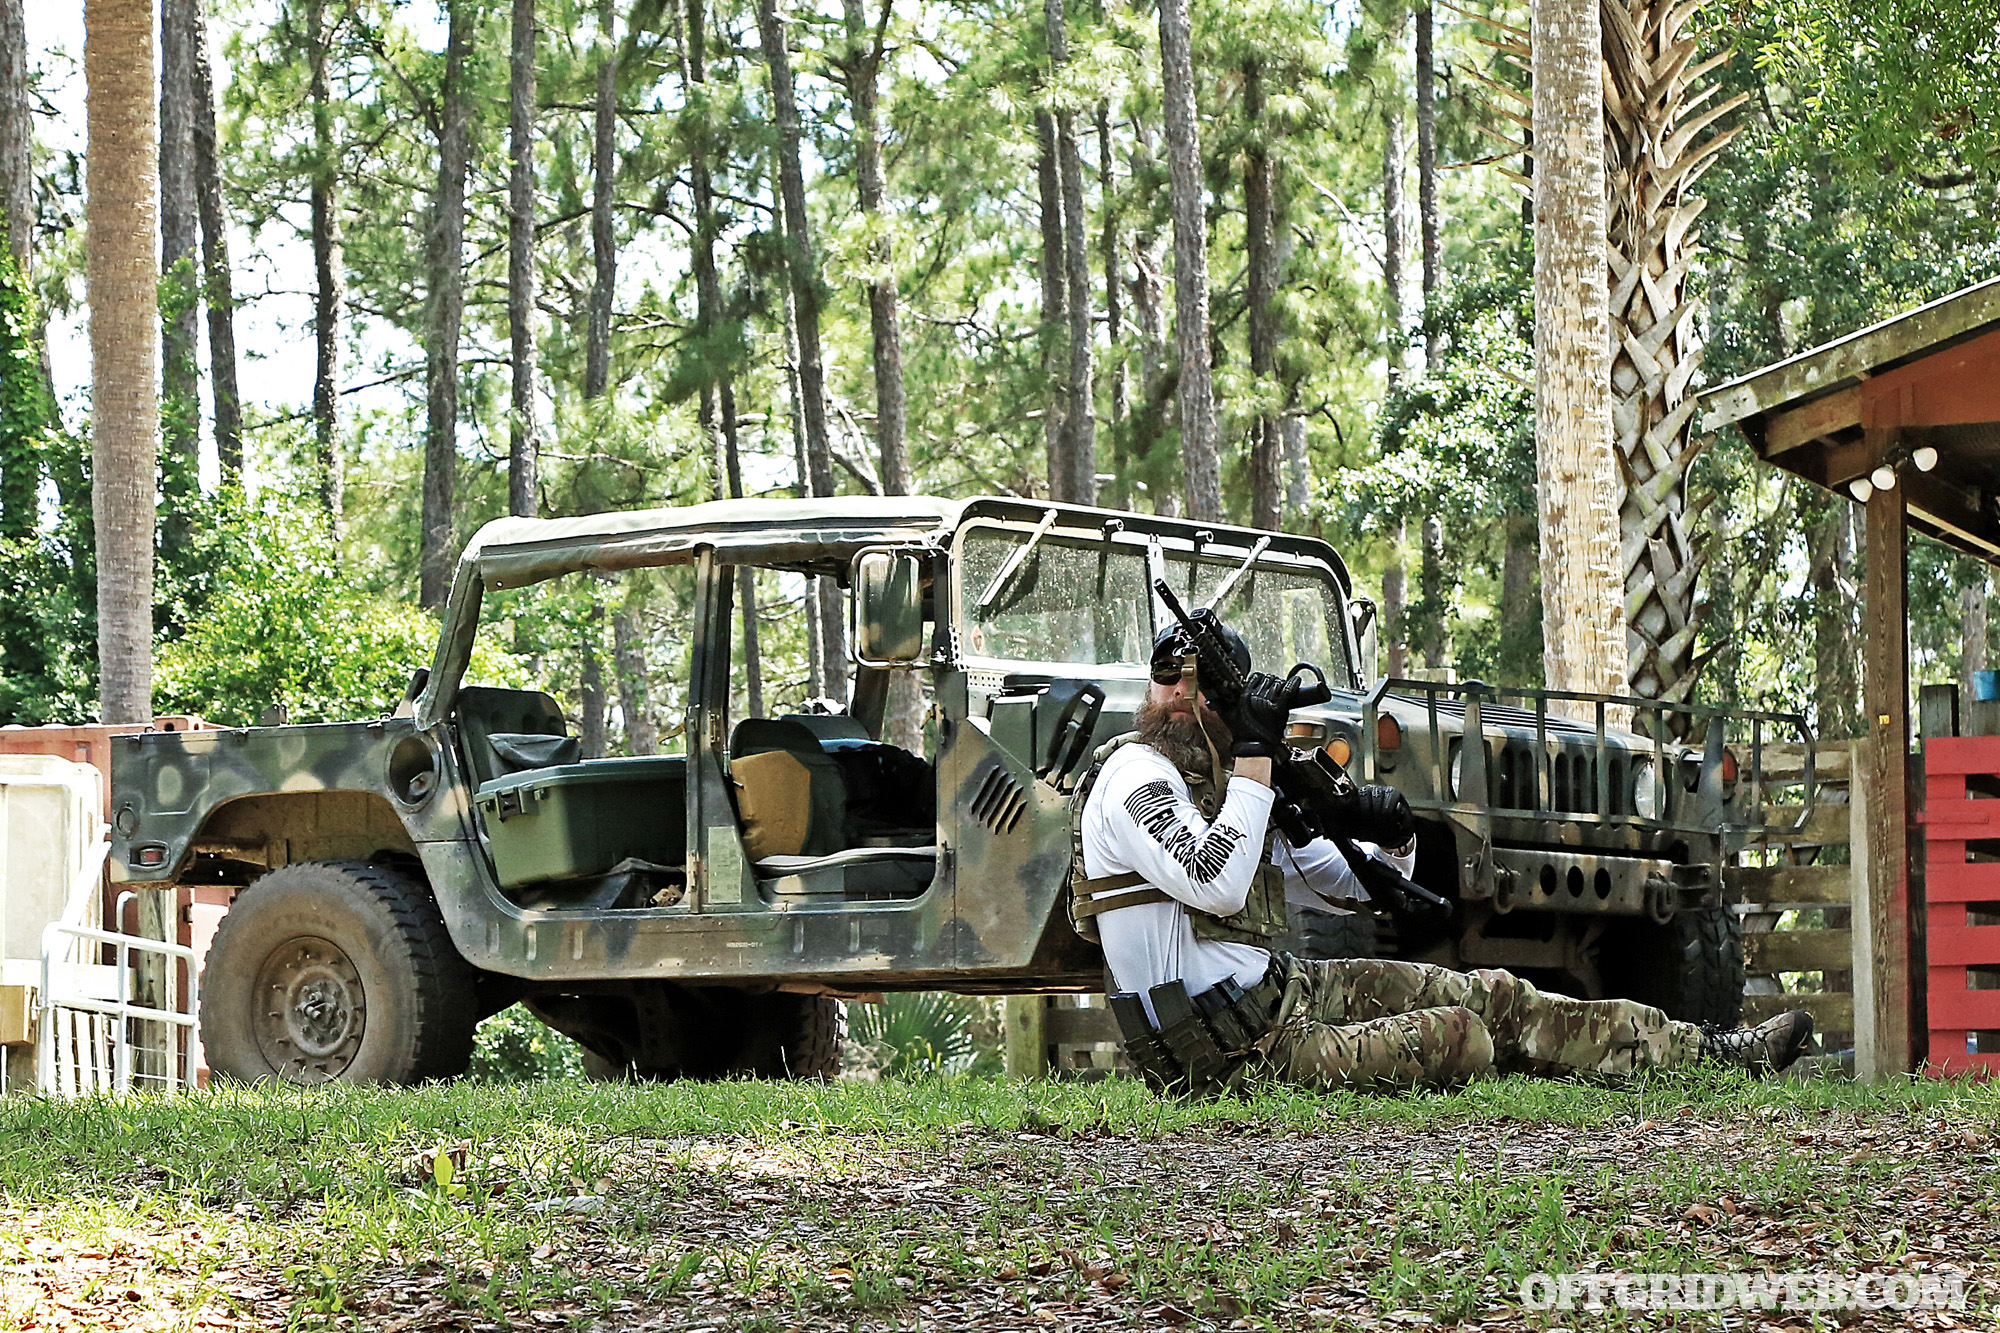
With more and more conflict occurring in heavily urbanized areas, and structure clearance becoming more accepted as a part of citizen self-defense, movement and cornering have grown in popularity as topics of interest not just for armed professionals but for prepared citizens as well.

Movement drills in large pistol or carbine classes are typically restricted by a combination of range facility limitations (physical or administrative) and student safety in a group environment. What I see most often is isolation of either forward/rearward movement (walking straight up-range or down-range) and lateral movement, which typically focuses on a sideways shuffle step that brings the ankles together, then spreads them apart. Regardless, the principles of shooting while moving, and moving before or after shooting, are valuable ones to understand.

Above: In this demonstration, the upper body traverses toward a target while the hips and legs remain oriented in the direction of travel.

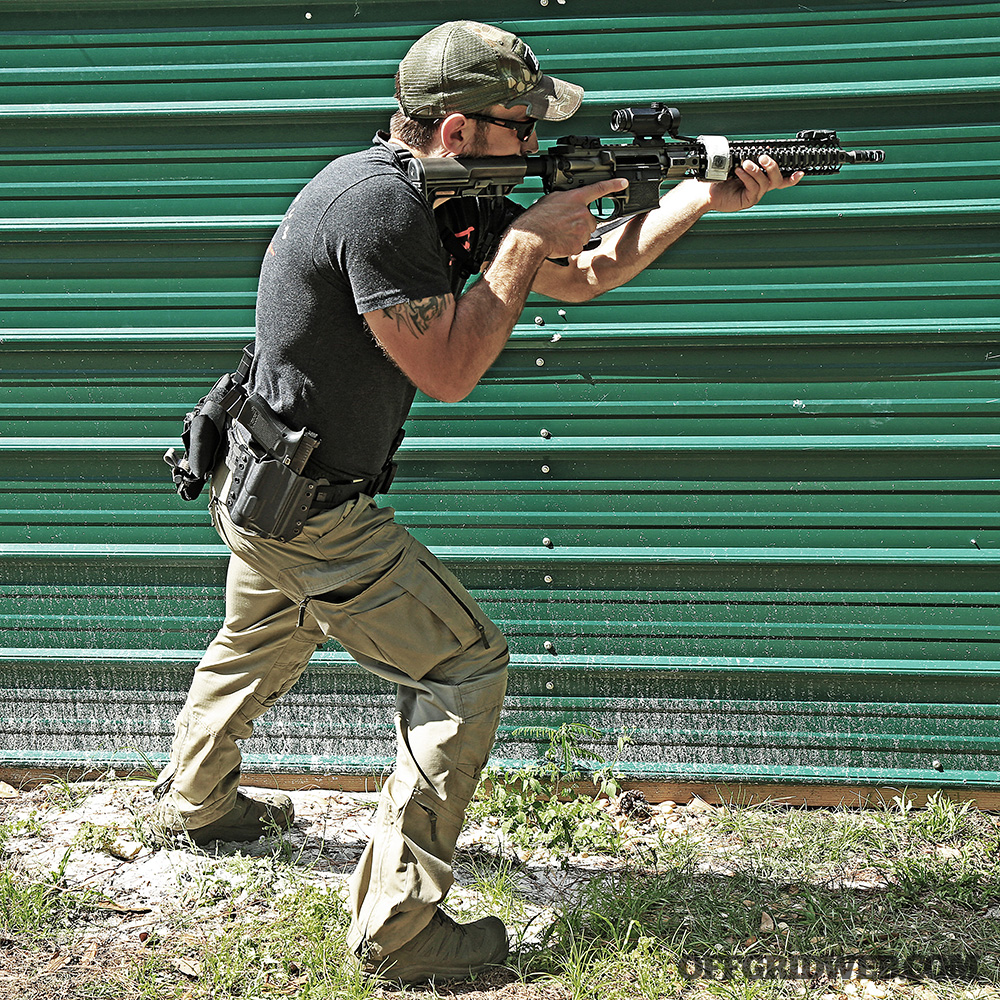
The Combat Mobility System doesn’t isolate movement drills based on direction. In fact, it uses drills that incorporate all directions of motion, including diagonal and even weaving around obstacles, while maintaining weapon orientation toward the target. This is preceded by a block of instruction on muzzle awareness and ready positions to ensure the student can move safely through mixed environments that include friendlies or bystanders. However, I’m going to focus on the mechanics of movement itself.

The previously discussed legacy techniques to teach movement all focus on keeping the entire body oriented toward the target. The CMS method stresses turning the lower body in the direction of motion, pivoting at the hips to change direction as naturally happens when moving unarmed, while independently turning the upper body toward the target. This creates steady, fluid movement and allows smooth flow around obstacles.

Above: Pieing or panning a corner by shifting weight on the legs or stretching the torso.

Once you introduce movement, in the context of moving through or around structures, you’re almost immediately presented the challenge of corners. Problem-solving corners is, arguably, the fundamental building block of CQB. One of the primary concerns about getting around a corner is balancing the need to get your muzzle and eyeball past the corner without over-exposing the rest of your body and presenting an easy target for potential threats. Because of this, body positioning and movement technique is incredibly important. The most common way I’ve seen this done is by planting the feet and then leaning out by extending the legs or torso just enough to get that muzzle/eyeball line past the corner.

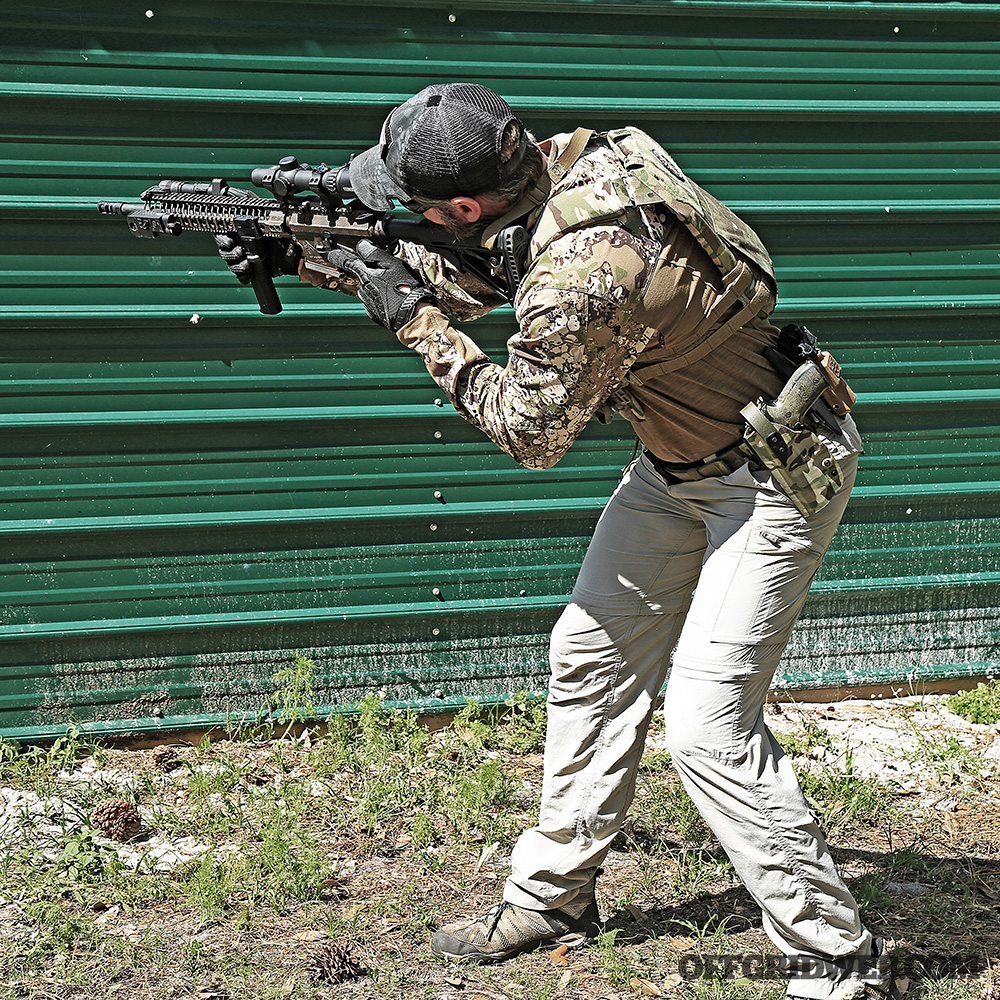
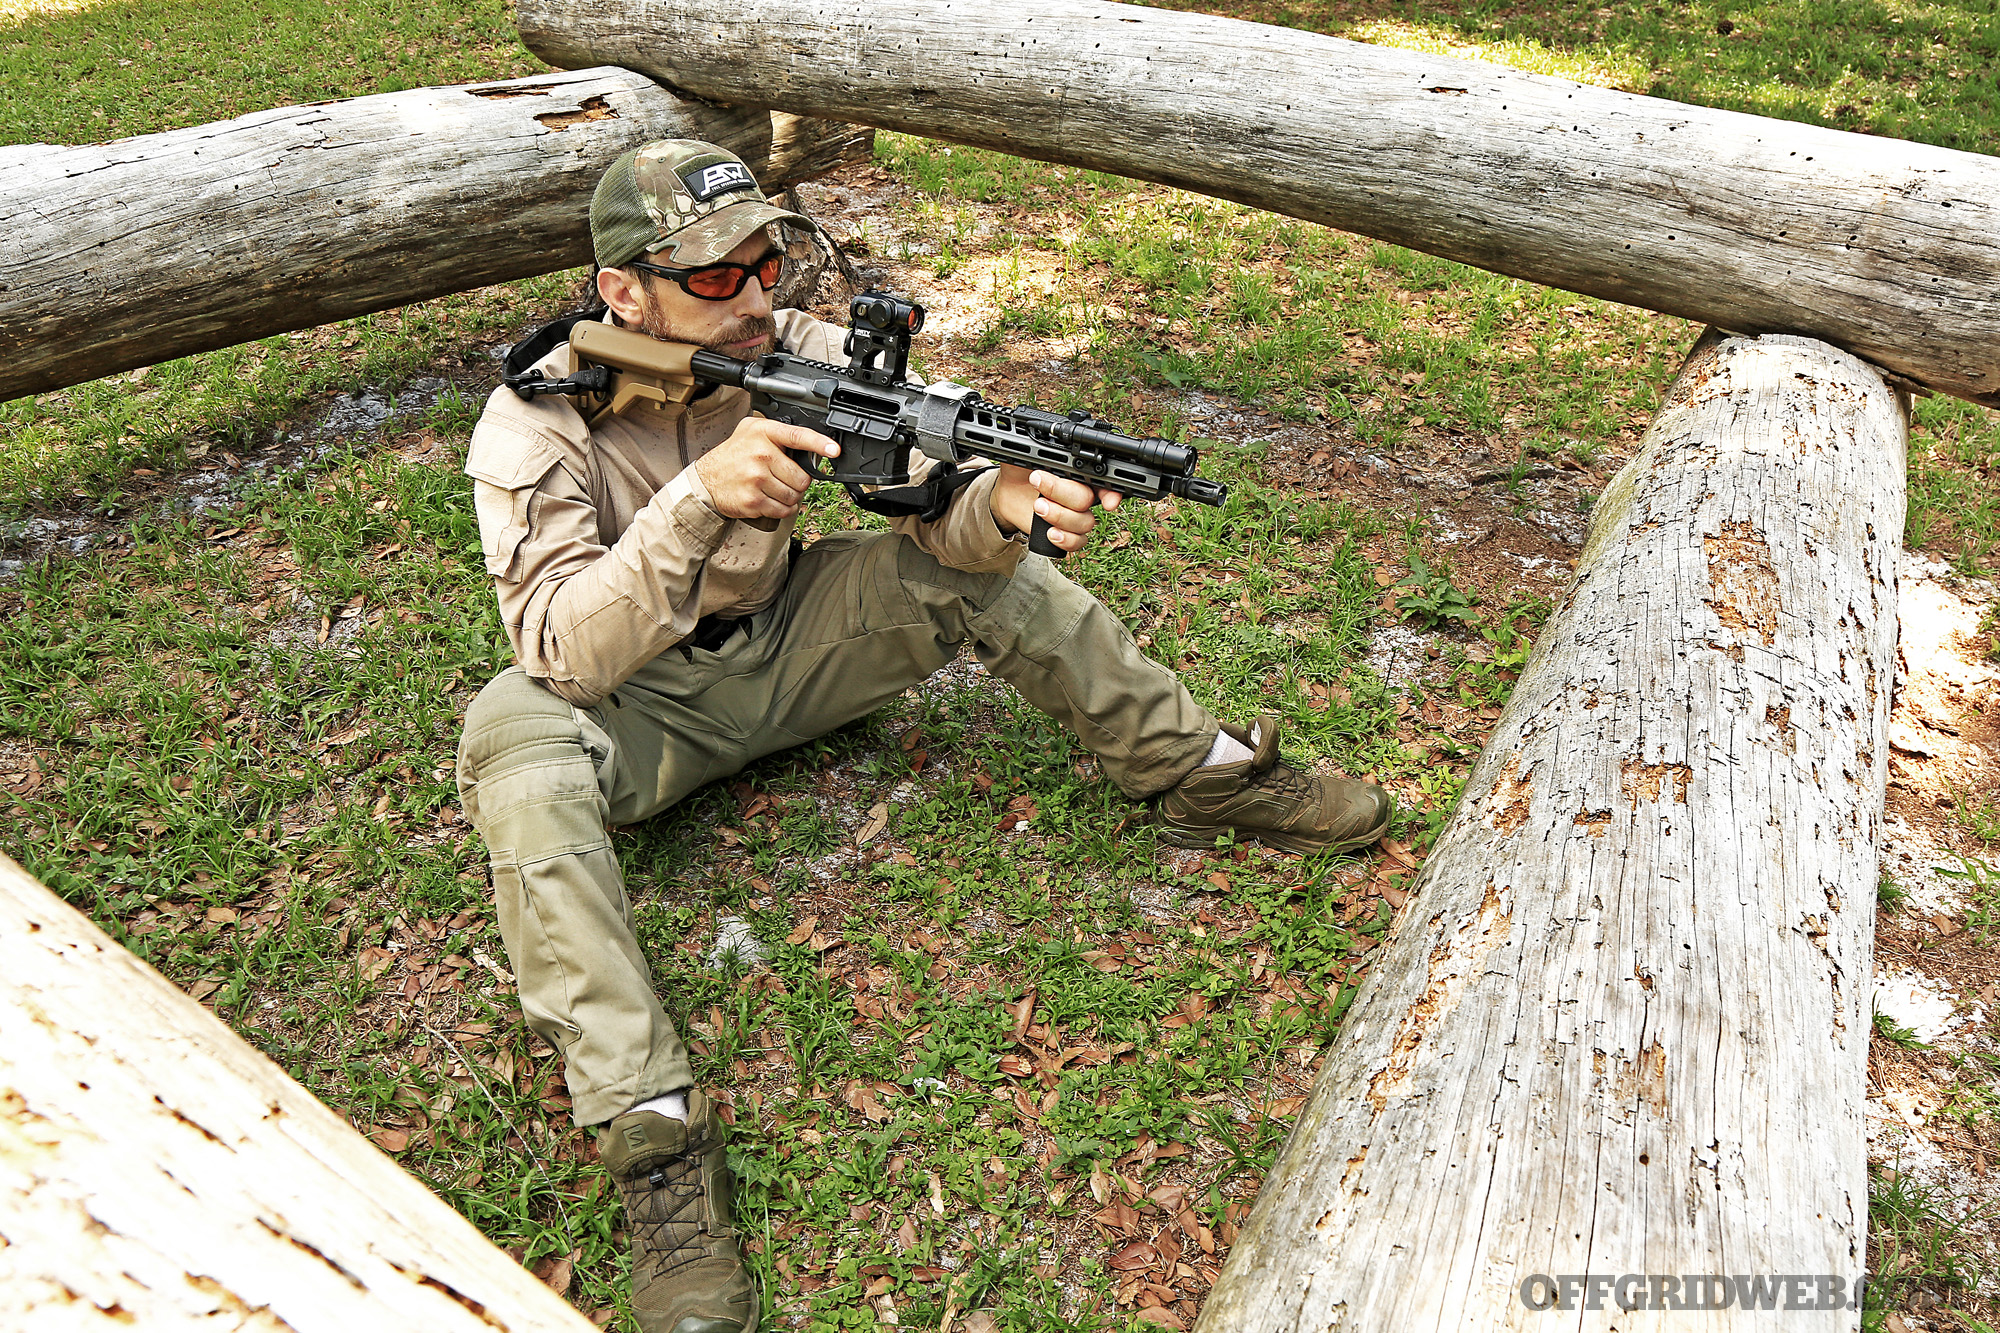
Above: Hinging around a corner by compressing the stance and bending at the hips.

While this method is taught in the Combat Mobility System, Graham and Mihovich also propose an alternate method for getting your body past a corner, which they refer to as hinging. Instead of lengthening the legs or torso to move your body, hinging uses a bending motion with the hips and core. Graham explains that, executed properly, the movement should mimic that of a dead lift. Just as in a dead lift, hinging engages some of the strongest muscle groups in the hips and core to support the weight of the gun and supporting gear — armor, load-bearing equipment, etc.

Using a long plank or PVC pipe gives a visual representation of your bore line in relation to a corner or obstacle:

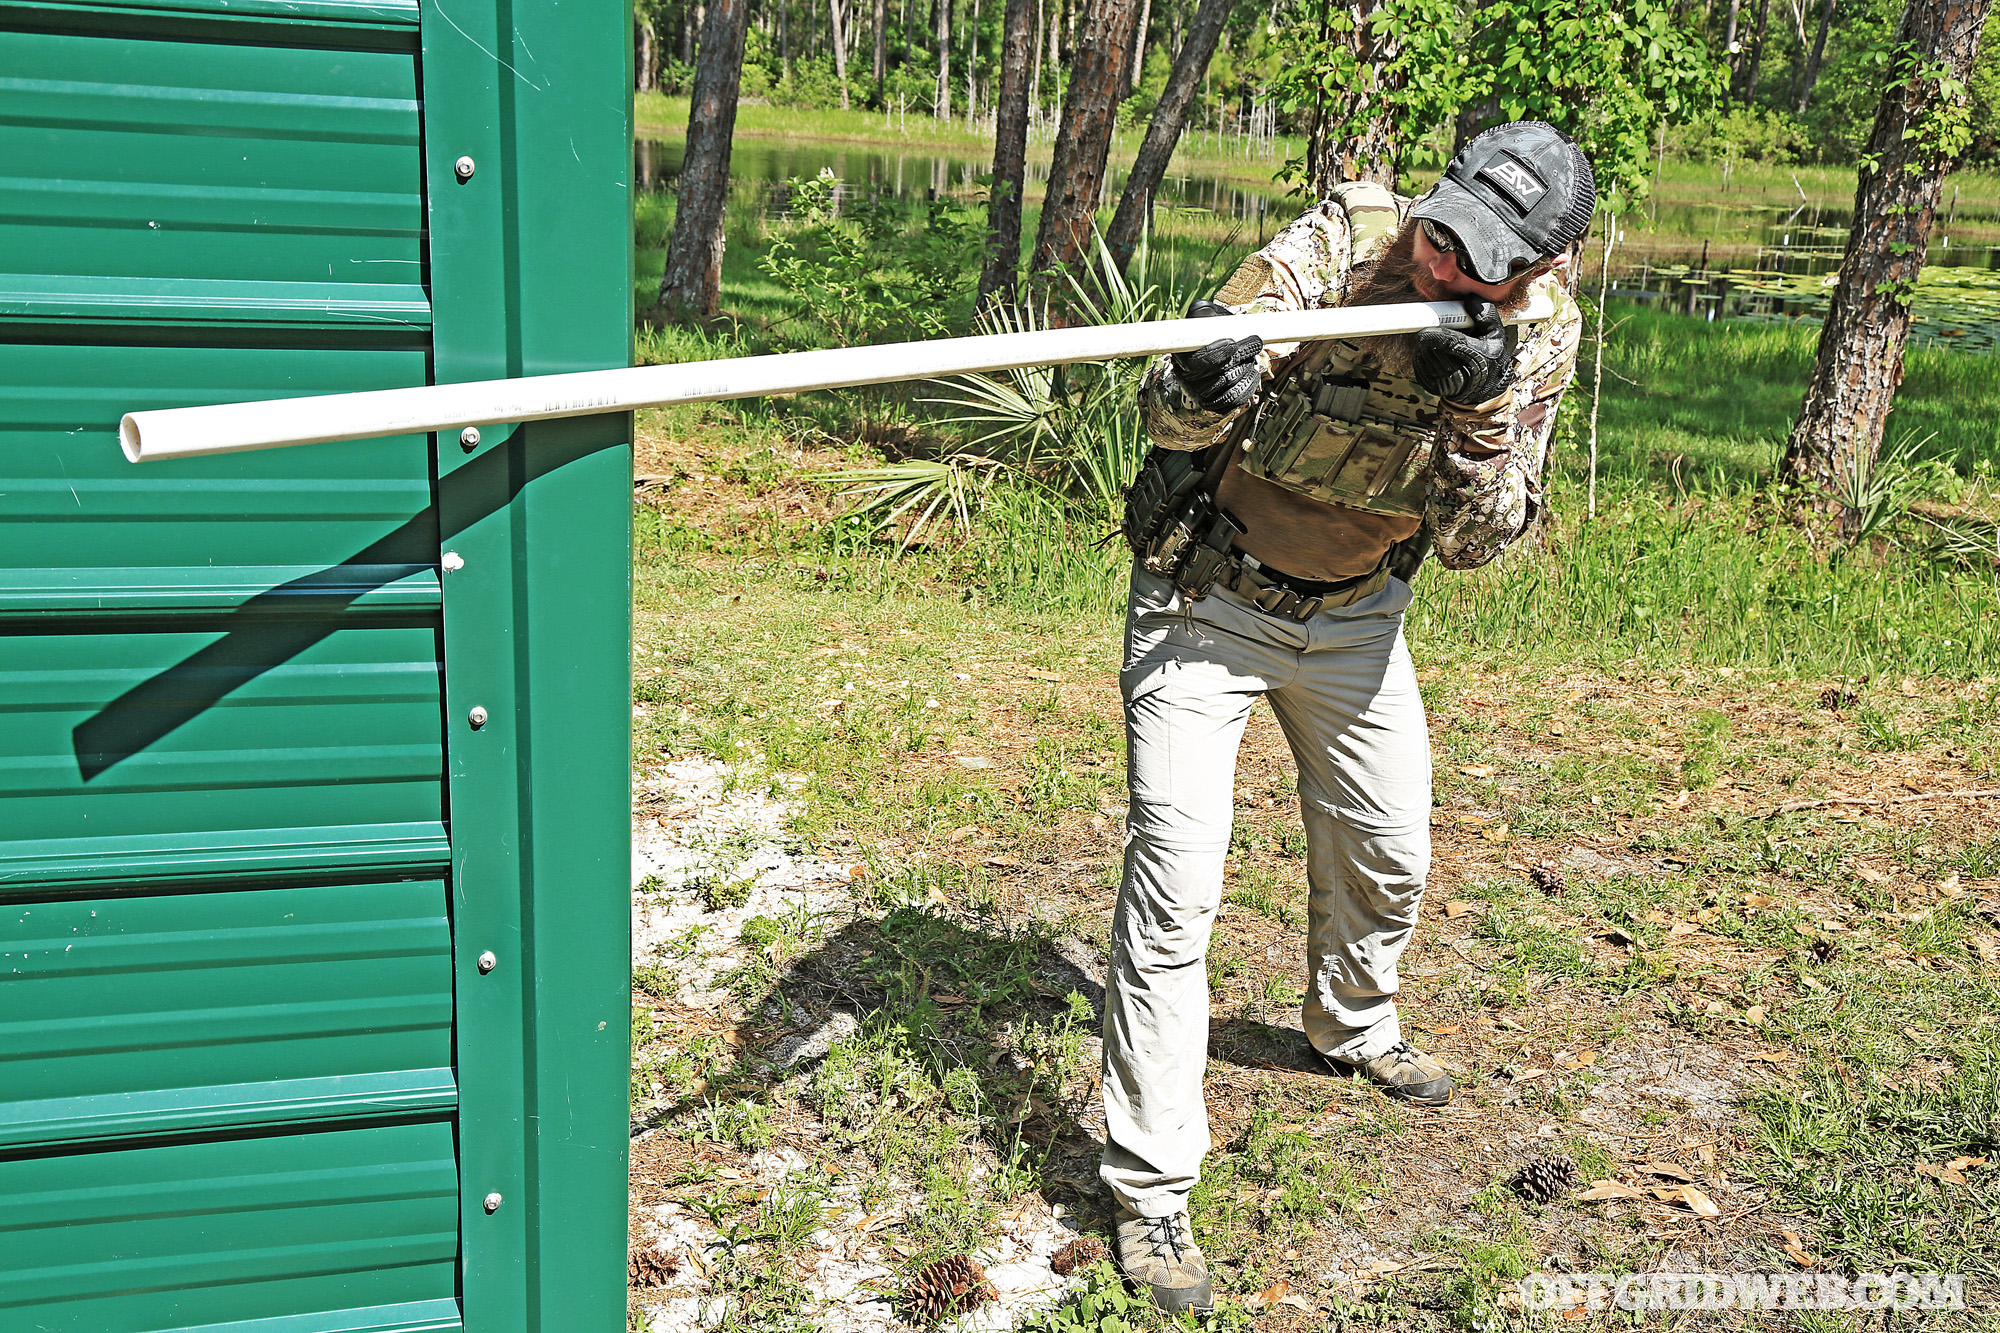
The instructors drove the importance of fine-tuning body position with a drill that uses a length of PVC pipe (thin wood beams, planks, or dowels are acceptable substitutes). The idea is to hold the pipe as you would hold a gun, thus offering an extended “line of sight” for your barrel and eye. Bracing the middle of the pipe on the corner itself allows you to fine-tune your movement — whether you lean or hinge — to get your muzzle past the corner without over-exposing the rest of your body. We found this drill particularly useful for creating a tangible, visual representation of your body position and sight line in relation to the corner itself.

Conclusion

At the end of my time with Full Spectrum Warrior, I came away with a better appreciation for how the human body moves and some new variations on shooting techniques I thought I’d figured out years ago. If you’re unable to make the trip to central Florida to train with FSW in person, they also offer the entire Combat Mobility curriculum as an “online university” you can subscribe to. Their extensive series of videos breaks the whole system down by individual topic, allowing you to study and rehearse the movements at your own pace in the comfort of your own home.
Either way, we suggest checking out Full Spectrum Warrior in person or online and opening your mind to new possibilities of armed movement with their Combat Mobility System.

Full Spectrum Warrior > www.fullspectrumwarriors.com


Pocket Preps: Brass Knuckles / Knucks

Call them what you want — brass knuckles, knucks, knuckle dusters, brass paper weights, and so on. You know what they are when you see them. They make for a small, easily concealable close-quarters impact weapon, particularly the ones we’re going to look at. Commonly and incorrectly, they’re often portrayed as the weapons of thugs or bad guys or someone who doesn’t fight fair. At one time, knuckles were commonly found in general stores and department stores. Buying a set and carrying them was about as commonplace as a pocket knife.

Abraham Lincoln’s bodyguard was known to carry a set. Many more went off to war with our soldiers, sailors, and Marines well into the 20th century. Yet, that’s when we saw a change. During the moral panic concerning switchblade knives in the 1960s, knuckles were thrown into this category, too. You’ll see no news reports from that time about people going on rampages with a set of knuckles, pummeling anyone who got in their way, yet they were unjustly lumped into a category of deadly weapons.

As a result, most collectors and manufacturers went underground. All you need to do is leaf through a copy of David Grant’s History of Knuckle Dusters, published in 2007, and see most of the manufacturers and collectors listed as “anonymous.” Fortunately, many states have gradually reworked their weapon laws to decriminalize switchblades and other knives. Brass knuckles are often removed from the statutes, too, so they aren’t as illegal in the United States as they used to be.

They make fine paperweights, some have additional tools built into them, and they can act as a discreet force multiplier if you need to defend yourself. As with anything else, check your state and local laws before you start carrying a set.

Bawidamann Dough Boy DB-1 Brass Knuckles

OAL:
2.5 inches

Width:
1.5 inches

Material:
Brass

Weight:
4 ounces

MSRP
$85

URL
bawidamann.com

Notes:
The Bawidamann Dough Boy DB-1 resembles a single knuckle cut from the handle of an M1918 Mk1 Trench Knife. It’s small enough to stow in a pocket for unobtrusive everyday carry yet adds plenty of punching power if you feel you need it. This knuckle is investment cast in pure brass and sandblasted for an antique kind of old-world finish. The tip has a nice point to aid in punching, and there’s a lanyard hole, should you wish to attach a lanyard.

Pros:

  • Investment cast in solid brass
  • Plenty of room for even the biggest finger in this one
  • The sand-blasted finish imparts a good feel in the fist.

Cons:

  • A bit too spacious around the finger. This might be an issue for folks with smaller fingers.
  • For a single knuckle, it’s a bit on the heavier side. That’s not a bad thing for its intended usage but definitely something to keep in mind for EDC use.

BT Customs The Tool

OAL:
1.75 inches

Width:
2.25 inches

Material:
Aluminum

Weight:
0.75 ounce

MSRP
$90

URL
everythingbtcustoms.com

Notes:
The BT Customs Rook is a lightweight and attractive two-knuckle set that includes a lanyard and bead. Two bottle openers are incorporated into the base making it a sort of combat multi-tool. Crafted from aluminum, this set is on the lighter side without being too light. The anodized finish is reminiscent of Timascus or Damascus steel. Bennet Tool makes a lot of unique products for the vaping industry and firearms industry, so you’re not skimping on quality with a set like this.

Pros:

  • The lanyard and bead make it easy to retrieve from the pocket in a hurry.
  • Finger holes seem perfectly sized for even the largest of fingers.
  • The bottle openers work well. You’ll be a hit at the next party if there’s a case of cold ones involved.

Cons:

  • Although it’s got stunning looks, the anodized finish could wear off after a time.
  • The interior edge at the base seemed a little sharp at times.

Hooligan Handcrafts KC Copper Heart

OAL:
2 inches

Width:
1.75 inches

Material:
Copper

Weight:
2 ounces

MSRP
$250

URL
@jeyrhooligan (Instagram)

Notes:
When you’re looking for a solid set of knuckles, sometimes you have to hit up custom makers who may only have a social media presence in lieu of a website. That’s the case with Hooligan Handcrafts by Jeyr Lindsey. You can find him on Instagram or at one of the major national knife shows like the Usual Suspects Gathering or the Blade Show. When you do find a set, they’re well worth it. The KC Copper Heart comes on a QD Strega chain so it can be worn as jewelry but quickly broken away and in your fist for up close and personal self-defense.

Pros:

  • Being heart-shaped, the base of the heart makes for an optimal striking tool.
  • The Strega chain makes for a great “hide in plain sight” self-defense option.
  • The entire piece is machined out of copper for a classy look and has just enough weight and density to be effective.

Cons:

  • The Strega chain works well but was a little tight for my 19-inch neck, especially when orienting the knuckles properly on the draw.
  • Designed for women, some men will find the knuckle holes a bit too small

KE Arms Aluminum Goblin

OAL:
2.75 inches

Width:
2.5 inches

Material:
Aluminum

Weight:
0.75 ounce

MSRP
$40

URL
www.kearms.com

Notes:
If you’re a shooter, you may be familiar with KE Arms. They offer a variety of firearms and related accessories for the AR-platform, among others. The Aluminum Goblin may be made from the exact same material that the very rail on your AR is made from. A true EDC tool, lanyard holes and a bottle opener are incorporated inside the base. This set features a striking point right at the crest of the tip of the knuckles. A pricier titanium version is available, too.

Pros:

  • This set is light and dense, perfect for everyday pocket carry.
  • I’ve had this particular set for about four years, and the finish seems to hold up fairly well.
  • The bottle opener hidden in the base is probably one of the more ingenious ways I’ve seen this incorporated into a set of knucks.

Cons:

  • The finger holes might be a bit too tight for those with larger hands.
  • They seem to be made in small batches so they can be subject to availability.

RMJ Tactical Snuckles Aluminum

OAL:
5.1 inches

Width:
3.1 inches

Material:
Aluminum

Weight:
4.5 ounces

MSRP
$149

URL
rmjtactical.com

Notes:
Ryan M. Johnson of RMJ Tactical made his bones building tomahawks for the U.S. military and historical collectors but has branched out into other realms with products as diverse as tetsubos, saps, a myriad of knives, and knuckles. In the case of the knuckles, he brands them as Uncle Stumpy’s Snuckles, and they make for one hell of an EDC item. Johnson is a stickler for authenticity and making products that work. He spent a lot of time interviewing police officers and others who carried traditional knuckles and used them with great effect. This design is the result of countless hours of input and testing. This set is crafted in aluminum and is the only full-size version we profiled in this article because they’re as lightweight and handy as any of the smaller single and double sets we have profiled.

Pros:

  • The face of the Snuckles is richly textured and could be used for tenderizing meat if you need to do so.
  • Having spent decades examining various types of knuckles, these are among the best I’ve seen and handled.
  • Big enough for full scale usage, yet light enough to carry all day without realizing that they are in your pocket.

Cons:

  • As impressive as the machining and engraving is on these, the finish is a little plain. However, a Cerakote option is available as well.
  • This is another small-batch item that’s subject to availability.

Toor Knives Copper Thumper

OAL:
1.6 inches

Width:
1.2 inches

Material:
Copper

Weight:
1.65 ounces

MSRP
$35

URL
toorknives.com

Notes:
Toor Knives is an innovative knife manufacturer based in Southern California. Occasionally, they step outside the box to create an interesting piece of gear without a blade. In this case, it’s the Thumper. Small enough to hide in the watch pocket of your jeans, dangle from a keychain or wear as a necklace, the Thumper makes for a great little piece of self-defense kit. Available in copper, brass, or titanium; this one is solid copper and is so handy and portable that at less than 2 ounces, you won’t realize it’s in your pocket.

Pros:

  • Possibly the smallest knuckle I have seen, this one pretty much goes with you wherever you want, so long as it’s not a non-permissive environment like an airport terminal.
  • The hump for the bale makes for a very good strike point when punching.
  • One of the more affordable and readily available options out there.

Cons:

  • The finger hole is generously sized, but this might be a little too small overall for most users.
  • This one is pretty thin. A slightly thicker option might be nice.

A Dying Breed: Tim Seargeant’s Manual-Transmission FJ Cruiser

Like it or not, the manual transmission is going the way of the dodo, at least when it comes to new vehicles. According to a study by CarMax, only 2 percent of the vehicles sold by the company in 2020 had manual transmissions, a number that has plummeted from 27 percent in 1995. For most drivers, it’s less hassle to simply press the gas pedal and let a computer do the shifting, but for those who enjoy modulating the clutch and smoothly changing gears, this extinction feels tragic. Tim Seargeant, a lifelong sports car enthusiast who has never owned a vehicle with anything but a manual transmission, is firmly in the latter category. When Tim decided to purchase a truck, he knew it had to have a six-speed, but he also wanted something relatively new and reliable enough for long road trips with the family.

Above: These forged 17-inch Titan7 wheels are significantly lighter than the FJ’s factory wheels, so it retains most of its acceleration and braking performance, even with larger 34-inch all-terrain tires. (Photos by Tim Seargeant and Evan Ohl)

After plugging in the requisite filters on AutoTrader, Tim soon learned that the Toyota FJ Cruiser fit the bill and found roughly 40 manual-equipped FJs that fit his criteria in the United States. Luckily, one of them was only a short drive from his home in Southern California. Five hours later, he drove away with a new truck, already thinking about modifications to make it more capable on- and off-road. The next week, the build began.

Tim's FJ Cruiser Project

The first phone call was made to Tim’s friend, the founder of Titan7 wheels. Although the company primarily makes lightweight forged wheels for motorsport applications, they offer one model for off-roaders. Tim wrapped the 17-inch Titan7 T-AK1 wheels in 34-inch Nitto Terra Grappler G2 tires. These were paired with Bilstein coilovers and upper control arms in front, as well as Bilstein shocks and leaf springs in the rear.

Above: This FJ Cruiser came with Bilstein shocks from the factory, so when it was time to upgrade, Tim decided to swap them for some aftermarket Bilstein suspension parts.

At this point, Tim wanted a more distinctive look, so he decided to enlist the help of a friend and cover the original silver paint with MultiCam Alpine vinyl. Next, a Front Runner roof rack was installed, along with a retractable awning, mount for the Smittybilt jack, stowable folding table, and even a rack-mounted bottle opener. To protect the FJ from damage on the trails, the front bumper was replaced with a Smittybilt M1 metal bumper, and a set of DeMello Offroad rock sliders were installed.

Above: A BOSS StrongBox drawer, Tactical Walls VMod door panel, and Refined Cycle window MOLLE panels offer plenty of storage for guns, recovery gear, and camping supplies.

According to Tim, he knew he wanted to upgrade the truck’s light output, but he intentionally put this off. He wrote, “Wiring, electronics, splicing, and soldering intimidates me … it was the most challenging part of the build.” After talking with more experienced friends and putting himself through “YouTube University,” he was able to successfully install an array of Baja Designs lights, including LP6 Pro driving lights on the front bumper, Squadron fog lights and ditch lights, and S2 auxiliary lights around the perimeter of the roof rack. Everything is wired to CH4x4 push switches that match the amber interior lighting. A Pioneer touchscreen stereo with Apple CarPlay, speakers, and a secondary backup camera were also added to modernize the truck.

Above: Although Tim was intimidated by the prospect of learning how to wire these Baja Designs lights, the results were well worth the effort.

Since he works in the gun industry, Tim wanted a secure way to carry guns and gear, so he ordered a 40x22x10-inch locking drawer system from BOSS StrongBox and bolted it to the floor. Additional storage options come by way of a pair of Refined Cycle rear window MOLLE panels and a Tactical Walls VMod rear panel. These hold an Urban Medical Gear trauma kit, recovery tools, and other accessories, many of which are attached to Vanquest Gear hook-and-loop panels for quick tear-away access.

Above: The Pioneer NEX stereo head unit offers wireless Apple CarPlay and Android Auto compatibility, which make it more convenient to navigate on long road trips.

Tim says he has had many memorable experiences with this FJ Cruiser, including a recent trip with his wife and sons to Utah. During that trip, they hauled all their guns and gear to a Fieldcraft Survival course, tackled some challenging rock crawls in “Little Moab,” and even fired up the Baja Designs lights to drive through an abandoned train tunnel carved into the mountains. Knowing that the days of new manual transmission vehicles — not to mention fossil-fuel-powered vehicles in general — are likely numbered, Tim takes every opportunity to row through the gears and enjoy the old-school ruggedness of his truck. He'd like to thank his friends Gene Y., Randall T., Don N., Josh E., Kento K., Michael E., Mark H., and Chris F. for donating their time and expertise to help him complete the build.

Build Specifications

Drivetrain: 4.0L V-6 with 6-speed manual transmission

Suspension: Bilstein B8 8112 front coilover shocks, upper control arms, 8100 rear shocks, and B12 1.5-inch lift rear leaf springs

Wheels & Tires: 17×8.5 Titan7 T-AK1 wheels (-8 offset) and 305/70R17 Nitto Terra Grappler G2 tires

Body Modifications: Front Runner Outfitters Slimline roof rack, 2m awning, jack mount, and stainless steel folding table with under-rack mount; Smittybilt M1 front bumper and Trail Jack, DeMello Offroad rock sliders, MultiCam Alpine vinyl wrap

Electronics & Lighting: Pioneer NEX 7600 stereo head unit, 6×9 speakers, and backup camera; Baja Designs LP6 driving lights, Squadron SAE fog lights, Squadron Pro ditch lights, and S2 Pro side and rear auxiliary lights; CH4x4 push-button switches, Blue Sea 12-circuit fuse block

Interior Modifications: BOSS StrongBox 7126-7611 gun safe drawer, Tactical Walls VMod rear door panel, Refined Cycle RM3 and RM4 rear window MOLLE panels, Vanquest Gear MOHL-AIR tear-away panels with Urban Medical Gear TRK-1 IFAK and other MOLLE accessories


The New OFFGRID “What If?” Book is Now Available

Whether you just started reading our magazine or you've been a die-hard supporter since Issue 1, you should know that our “What If?” column is an important staple of every issue of OFFGRID. We know that forethought is an important aspect of preparedness, so each entry presents a hypothetical survival scenario in order to get you thinking about how you'd overcome it. But it's not just a playful choose-your-own-adventure exercise — it's meant to help you become better prepared. Members from our pool of contributing writers use their real-life expertise to explain how they'd prepare for these challenges, and their input can steer you in the right direction. Until recently, these articles were only available separately, but we've released a new OFFGRID “What If?” book that compiles them into a single convenient format (your choice of paperback or digital).

What's Inside the OFFGRID “What If?” Book?

This book covers dozens of scenarios — from short-term natural disasters to long-term grid-down catastrophes — and draws on the experience of more than 40 contributors from a wide variety of fields. These writers aren't just keyboard warriors, they're professionals and subject matter experts who have made a living honing their skills and teaching students how to stay alive.

Check out the table of contents below for a complete list of the scenarios in our “What If?” book:

NATURAL DISASTERS
Advice on how to prepare for Mother Nature’s worst and the collateral damage that can be both unpredictable and indefinite.

  • What if You’re Forced to Endure a Blizzard With No Utilities? P. 6
  • What if You’re Attacked by a Wild Animal? P. 16
  • What if a House Fire Breaks Out During an Ice Storm? P. 24
  • What if You’re Caught in a Tornado? P. 32
  • What if You’re Trapped in a Major Flood? P. 39
  • What if You’re Caught in an Earthquake? P. 48

CRIME
Learn to thwart some of the most common methods criminals use to target victims and carry out their crimes.

  • What if Your Privacy is Compromised by Internet Doxing? P. 58
  • What if Your Neighborhood is Attacked by an Angry Mob? P. 68
  • What if You Become a Target of Road Rage? P. 77
  • What if You’re Confronted by Someone Impersonating a Law Enforcement Officer? P. 85
  • What if You’re Assaulted in a Parking Structure? P. 94
  • What if You Stumble Upon a Home Burglary? P. 104
  • What if You’re Lured into a Roadside Abduction? P. 112
  • What if You’re Threatened by a Stalker? P. 122
  • What if You Awaken to a Kidnapping, Abduction, or Worse? P. 132
  • What if Your Vehicle is Attacked by an Angry Mob? P. 141

TERRORISM
We take a look at tactics historically used by terrorists and mass murderers to wreak havoc on society.

  • What if You’re in a Hostage Situation? P. 149
  • What if Your Flight is Hijacked? P. 158
  • What if Your Subway is Attacked With Chemical Weapons? P. 167
  • What if Your Cruise Ship is Hijacked? P. 176
  • What if You’re on a Train With a Suspected Suicide Bomber? P. 185
  • What if You’re Caught in a Mass Shooting? P. 195
  • What if a Dirty Bomb Goes off in Your City? P. 205
  • What if Hackers Take Down the Power Grid? P. 214

TRAVEL
From traveling domestically to internationally, check out how you can survive threatening situations away from home.

  • What if You’re Stranded on a Remote Backroad? P. 225
  • What if You’re Trapped in a Country Consumed by Political Turmoil? P. 235
  • What if You’re Locked up Abroad? P. 245
  • What if You’re Lost at Sea? P. 255
  • What if Your Child is Abducted While Traveling? P. 265
  • What if You’re Stranded in the Desert? P. 274
  • What if You’re Trapped in a Country Under Siege? P. 283

GRID DOWN
Take precautionary measures to sustain yourself when the resources we take for granted become unavailable.

  • What if Critical Supply Lines are Indefinitely Interrupted? P. 294
  • What if We’re Hit With Another Pandemic? P. 304
  • What if Basic Utilities are Indefinitely Interrupted? P. 315
  • What if the U.S. Plunges into Economic Collapse? P. 324
  • What If You’re Captured by Marauders Intent on Taking Your Supplies? P. 334

Where to Buy a Copy

The OFFGRID “What If?” book is now in stock and shipping. Head over to the Gun Digest Store to order a copy in either traditional paperback ($25) or digital download format ($23).


New: GiantMouse ACE Nibbler Folding Knife

As much as we enjoy full-sized folding knives with 3.5-inch blades, they occasionally feel like overkill for many daily tasks. Sometimes, all we really need is a small utility blade for slicing open a letter or package. This is especially true in warmer months when we're wearing lighter clothing. GiantMouse Knives, founded by well-known Danish knifemakers/designers Jens Ansø and Jesper Voxnaes (a.k.a. Vox), has released a new compact folder called the ACE Nibbler that looks great for summer every-day carry.

The GiantMouse ACE Nibbler — named after the character Nibbles from Tom and Jerry — is available in a few different varieties and price points. Each shares the same core elements:

  • 2-inch blade length
  • 4.7-inch overall length
  • Ball bearing pivot
  • Liner lock
  • Left-to-right reversible wire pocket clip

The entry-level ACE Nibbler ($95 MSRP) features aluminum handle scales in your choice of red, blue, or green. The blade is made from Bohler N690 steel with a satin finish, and the backspacer is made from aluminum.

The next step up ($155 MSRP, pictured above) features a green canvas Micarta handle, brass backspacer, and satin-finished 20CV steel blade. Finally, there's a titanium model ($185 MSRP) that pairs the same satin 20CV blade and brass backspacer with machined titanium handle scales. Custom knives made by Ansø and Vox themselves can easily exceed the $1,000 mark, so these production ACE Nibbler knives are manufactured overseas by Reate Knives to keep prices lower — we appreciate that GiantMouse is transparent about this fact.

For more information on the new GiantMouse ACE Nibbler, go to GiantMouse.com.


Preps of the Pros: Contributing Writer Patrick Diedrich’s EDC Gear & Go Bag

Patrick Diedrich

Residence: Hancock, Upper Michigan

Occupation: Writer and amateur blade/blacksmith

Patrick's EDC Gear

What is your general approach/philosophy for everyday carry tools? What do you see as the most likely threats/issues you might deal with in your daily routine, and what items are necessary to address these issues?

If I were to sum up my approach to EDC, it would be “versatile redundancy.” Every item carried should have more than one function and should complement each other. Since I live in a remote area, finding myself stranded due to unforeseen circumstances is a very real possibility. So, being able to signal for help, create a fire for warmth, or improvise my way to safety governs what I leave the house with.

Above: The Walther PDP is simple, reliable, affordable, and offers 18+1 rounds on tap in the full-size frame seen here.

In my region, crime is low, so I usually do not feel the need to carry a firearm. The exception is when I purposefully head into the wilderness to recreate or hunt, where there are large predatory mammals that do pose a potential danger. A Walther PDP accompanies me in a G-Code Optimal Drop RTI rig via a Kydex holster from T-Rex Arms. The PDP is fitted with a Leupold DeltaPoint Pro and a Streamlight TLR-7 light.

Please outline the gear you carry on a daily basis. Include specific brands/models, and why you chose each.

Having a well-made knife is a crucial part of my EDC. If I am out and about in town, I like to bring the WESN Micro Blade. If I am spending time in the great outdoors, I like to have a multi-tool as well as a fixed blade like the Corvus Survival Carrion. My key ring has become part of my EDC kit, and includes a Griffin pocket tool, as well as a CPR face shield in case I find myself needing to give life-saving support to someone.

I almost never leave without a Wazoo Cache belt. The belt is packed with the Wazoo Adventure Kit, which provides 23 tools including several tools for fire-starting and water purification, a button compass, high-quality cordage and wire, a fishing kit, a whistle, and a signal mirror. If I’m on the road for a few days, I’ll put some extra cash in the belt. The Tasmanian Tiger wallet shields the chips in my debit card, driver’s license, and passport from being scanned and exploited remotely.

What is one underrated piece of EDC gear that more people should strongly consider carrying, if they don’t already?

There are two things that I think are always overlooked. One is a dedicated light source. Having a light has been useful on so many occasions. The Wazoo button light doesn’t have the bulk or awkwardness of larger lights and can be stored in the cache belt or put on a key ring. It comes in handy when rummaging through bags when it’s dark out, looking for items that were dropped in between seats, and can be used to attract attention as an emergency signal or as a light source for night tracking. The other thing that’s overlooked, and should be a part of everyone’s EDC, is physical fitness. All the gear in the world is never going to help if you do not have the physical strength or endurance to make it through a tough situation.

What was the most recent change you made to your EDC kit?

Last year, I had the pleasure of meeting survival expert Jerry Saunders of Corvus Survival. When we were talking about his EDC, it turns out that he also uses a Wazoo cache belt as well, and he mentioned lock picks. I had a lightbulb moment when I heard this, because if I lost my keys, needed to get into a building for shelter, or needed to open a medicine cabinet in an emergency, a set of lock picks would be extremely helpful. This led me to a company called Serepick. They have an array of picks to choose from, and even a see-through tumbler lock that you can practice with. At present, I am only mildly proficient, but my skills are improving. The set of picks I have fits easily in the cache belt along with everything else.

Patrick's Go Bag

Which make/model of bag did you choose, and why?

Mystery Ranch makes a line of bags designed for cold weather environments in various volumes, but I use the Saddle Peak. Where I live, it seems like nine months of the year is nothing but cold temperatures and snow, and the Saddle Peak was designed to keep zippers from icing shut and the material from degrading due to frozen temperatures. The front pouch was specifically designed to house an avalanche kit. It also has straps on the outside for snow mobility tools like skis, snowboards, and snowshoes. Initially, I used it as a cold weather emergency bag, but it has evolved into my search and rescue (SAR) 24-hour Ready Pack, and I always have it prepped and handy.

Where is this bag staged (or carried) and what specific purpose does it fulfill in your daily preparedness plan?

The bag is always ready to go and sitting close to my front door. Normally, if I am called to a SAR operation, the only additional item I add is a freshly filled 3L CamelBak. When I return, I make it a priority to clean and restock what was used so that everything is ready again. Besides being a really useful SAR pack, it also makes a great bug-out bag, because it has everything I would need to sustain a small group for a few days. Also, if I know I’ll be driving in inclement weather, I can toss it in the back of the truck in case of an emergency on the road.

Please outline some of the most important items you have in this bag, to include brands/models where possible. Discuss why you chose these items and how they complement and expand upon your EDC gear.

I usually adapt it based on the season and how long I expect to be wearing it. For example, if I think I’ll be responding to a SAR operation that could last days, I will pack a camp stove, mess kit, and extra food. I may even bring a second bag with extra clothing to change and restock during the event. But, typically, it’s just this one pack with as little as I can get away with. There are some who claim that a 24-hour pack should be at least 35 to 45 liters, but by keeping it around 25L, I force myself to pack only what’s necessary and useful. Even so, when this pack is filled to the max, it can still weigh a little over 30 pounds.

During the winter months, the front pouch contains a Black Diamond avalanche kit with a collapsible snow shovel and probe. In the main compartment, I have:

There is a smaller compartment on top where I keep a Fenix Raptor headlamp, a 5.11 Response flashlight, and extra high-visibility marking tape. In winter months, I also keep Oakley ski goggles and a neck gaiter in this pouch. On the hip straps, I keep an extra compass, a MOLLE pouch with 50 feet of 550 cord, an IFAK, and a Survivor Filter Nalgene bottle if the windchill threatens to freeze the tube on my CamelBak. Lastly, on the shoulder straps, I hook several chemlights for trail marking or signaling, and a Varusteleka Terava Jaakaripuukko 110 knife.

What is one extra item you’ve considered including in this bag? Briefly explain why you haven’t added it yet (space, weight, cost, likelihood it’ll be needed, etc.).

Since this bag is quite minimalistic for what it’s used for, all the gear prevents me from effectively storing a change of clothes, a more robust shelter, or room for extra layers if working in the cold starts generating too much sweat. I can strap extras to the outside, but there’s the risk that nature will claim whatever isn’t fastened securely enough. My hesitation to change to a pack with more volume comes from not wanting to fill that space with more stuff — which almost inevitably happens — and creating a pack that weighs more. I like to stay light on my feet so as not expend valuable calories as a pack-mule and being able to burn the energy when it matters.