How to Choose a Homestead Property

We’ve all heard the saying, “location, location, location.” Real estate professionals commonly employ this phrase to emphasize how the value of similar properties can differ substantially, depending on where those properties are located. In other words, with all else being equal, location can (and usually will) dictate the appeal and value of a structure or a parcel of land. To many people, desirable homestead locations often have certain traditional characteristics, including scenic views, stable neighborhoods, top-rated schools, proximity to quality healthcare, public transportation, entertainment, and shopping. Others might consider more practical things, such as safety, economic development, jobs, population density, taxes, personal freedoms, elevation, and maybe even the ability to live a sustainable, self-sufficient life.

When it comes to surviving a natural or man-made crisis, however, homestead location becomes even more significant, and there are many more factors to consider. Some of these elements can help you gauge if a particular location is desirable, and whether moving there can actually help you tip the scales of survivability in your favor.

In this article, we review some of the factors to consider when assessing homestead locations for livability and survivability. We also review some of the ways to you manage a process that can at times seem completely unmanageable and overwhelming: evaluating all the variables for relocating to a safer and more “survivable” location.

How a Homestead Improves Your Odds

When it comes to survival, where you choose to live, work, and play can make a huge difference. A preferred location can tip the odds heavily in your favor. A poor location, on the other hand, will most certainly have the opposite effect. The truth is, all locations come with some level of risk, and all will require some degree of adjustment and compromise.

Life holds absolutely no guarantees for any of us. The very best any of us can hope for is to take steps that afford us every possible advantage. We are, in effect, playing the odds and hoping that those odds come out in our favor as much as possible. This isn’t rolling the dice; it’s more like “loading the dice.” While there are many things that you’ll never be able to control, there are also many other areas where you actually have options; and here’s where you should focus the majority of your attention.

Choosing a Property with Due Diligence

All important decisions should begin with thorough research, and an accurate assessment of the facts. In order to make solid, well-reasoned decisions, you’ll need not only information, but accurate, well-researched information. This process will help you gather, study, weigh, and consider as many of the variables as possible.

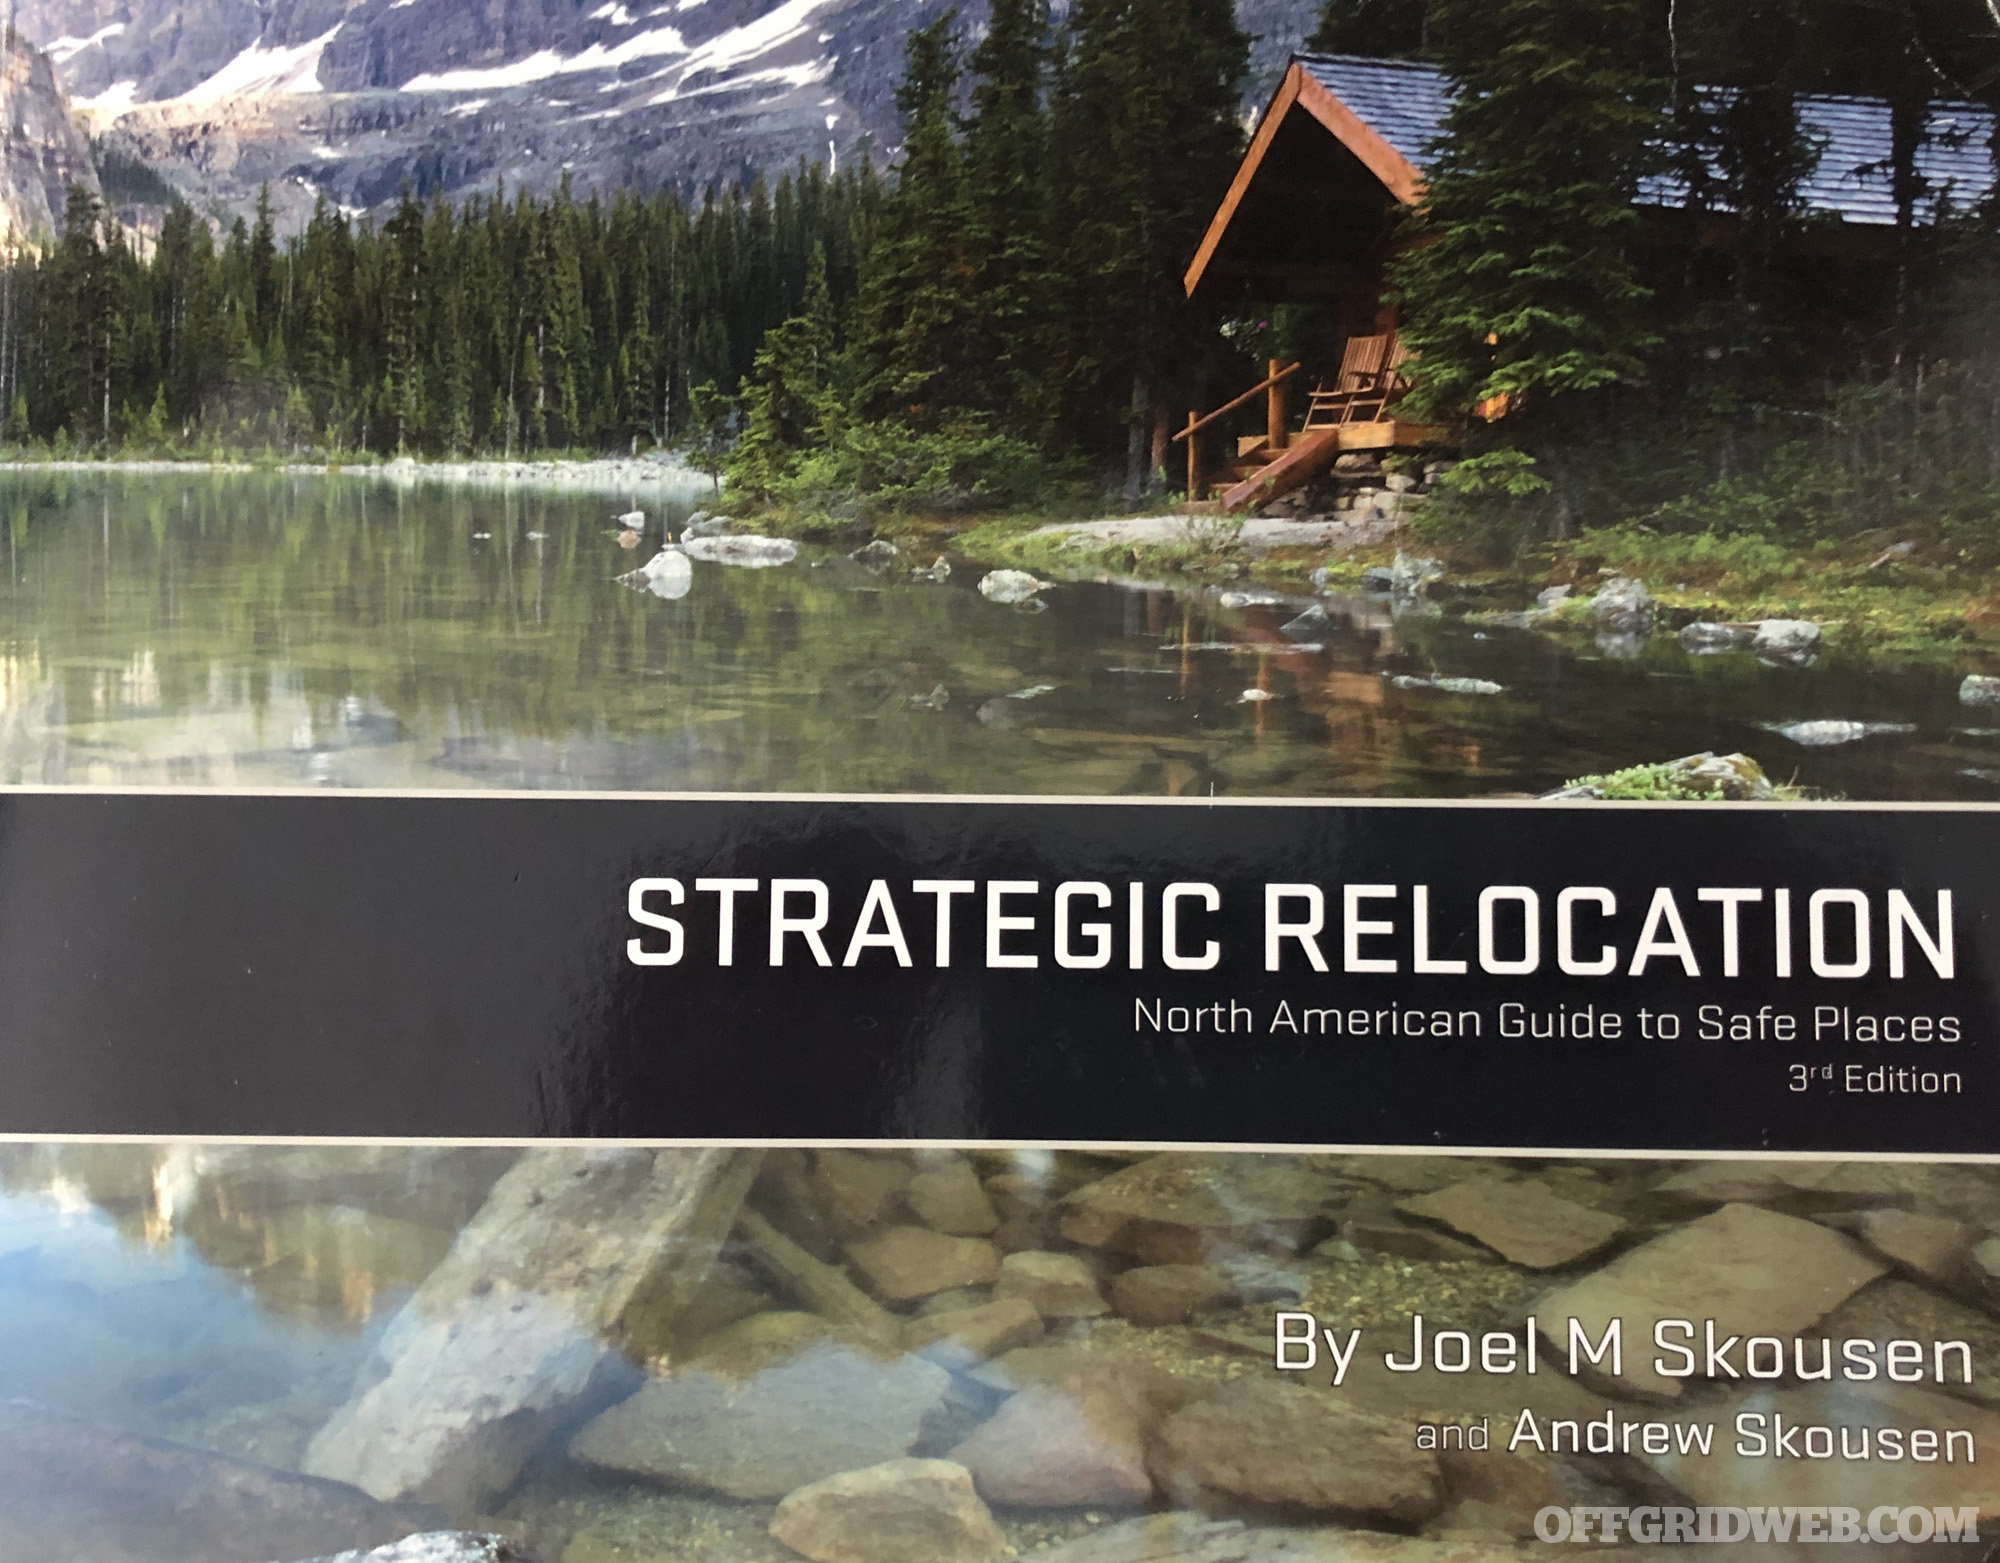
Above: Strategic Relocation, North American Guide to Safe Places, 4th Edition by Joel M. Skousen and Andrew Skousen has long been a go-to resource for relocation research. In the 4th Edition, the authors have updated the state-by-state reviews to reflect demographics and other significant changes.

For purposes of this article, here are some factors to consider:

Patience: Give yourself sufficient time to do solid research on a location, and to digest and analyze your findings. There will be lots of unknowns that gradually reveal themselves as you conduct your research. This is probably the most significant part of the process. If you rush it, you’ll short-change yourself.

Objectives and priorities: If you don’t clearly define what you’re looking for, you’re not likely to get it. Outline your objectives/priorities and keep that list front and center.

Keep an open mind: Never begin your research with bias, or preconceived notions of what you think, or hearsay. Look at everything with a “fresh set of eyes” and with absolutely no prejudgment.

Test your information: Throughout the course of your research, you may run across conflicting and contradictory information. Treat all this data, regardless of its source, with a healthy dose of skepticism.

Document your findings and keep good records: Start a file for each state or area that you’re considering, and organize your findings in an easy-to-access spreadsheet/folder. You’ll likely go back to the same information many times. It’ll be far more effective and efficient if you organized your findings from the very start.

Homestead Considerations

What’s the best location for increasing your chances of surviving a natural or man-made crisis? The simple truth is that there’s no “best” location. Every place, no matter how attractive it may seem at first, will have its pros and cons. What you choose will depend largely on your particular needs and circumstances. A location that might be ideal for one person, could end up being the worst possible choice for someone else.

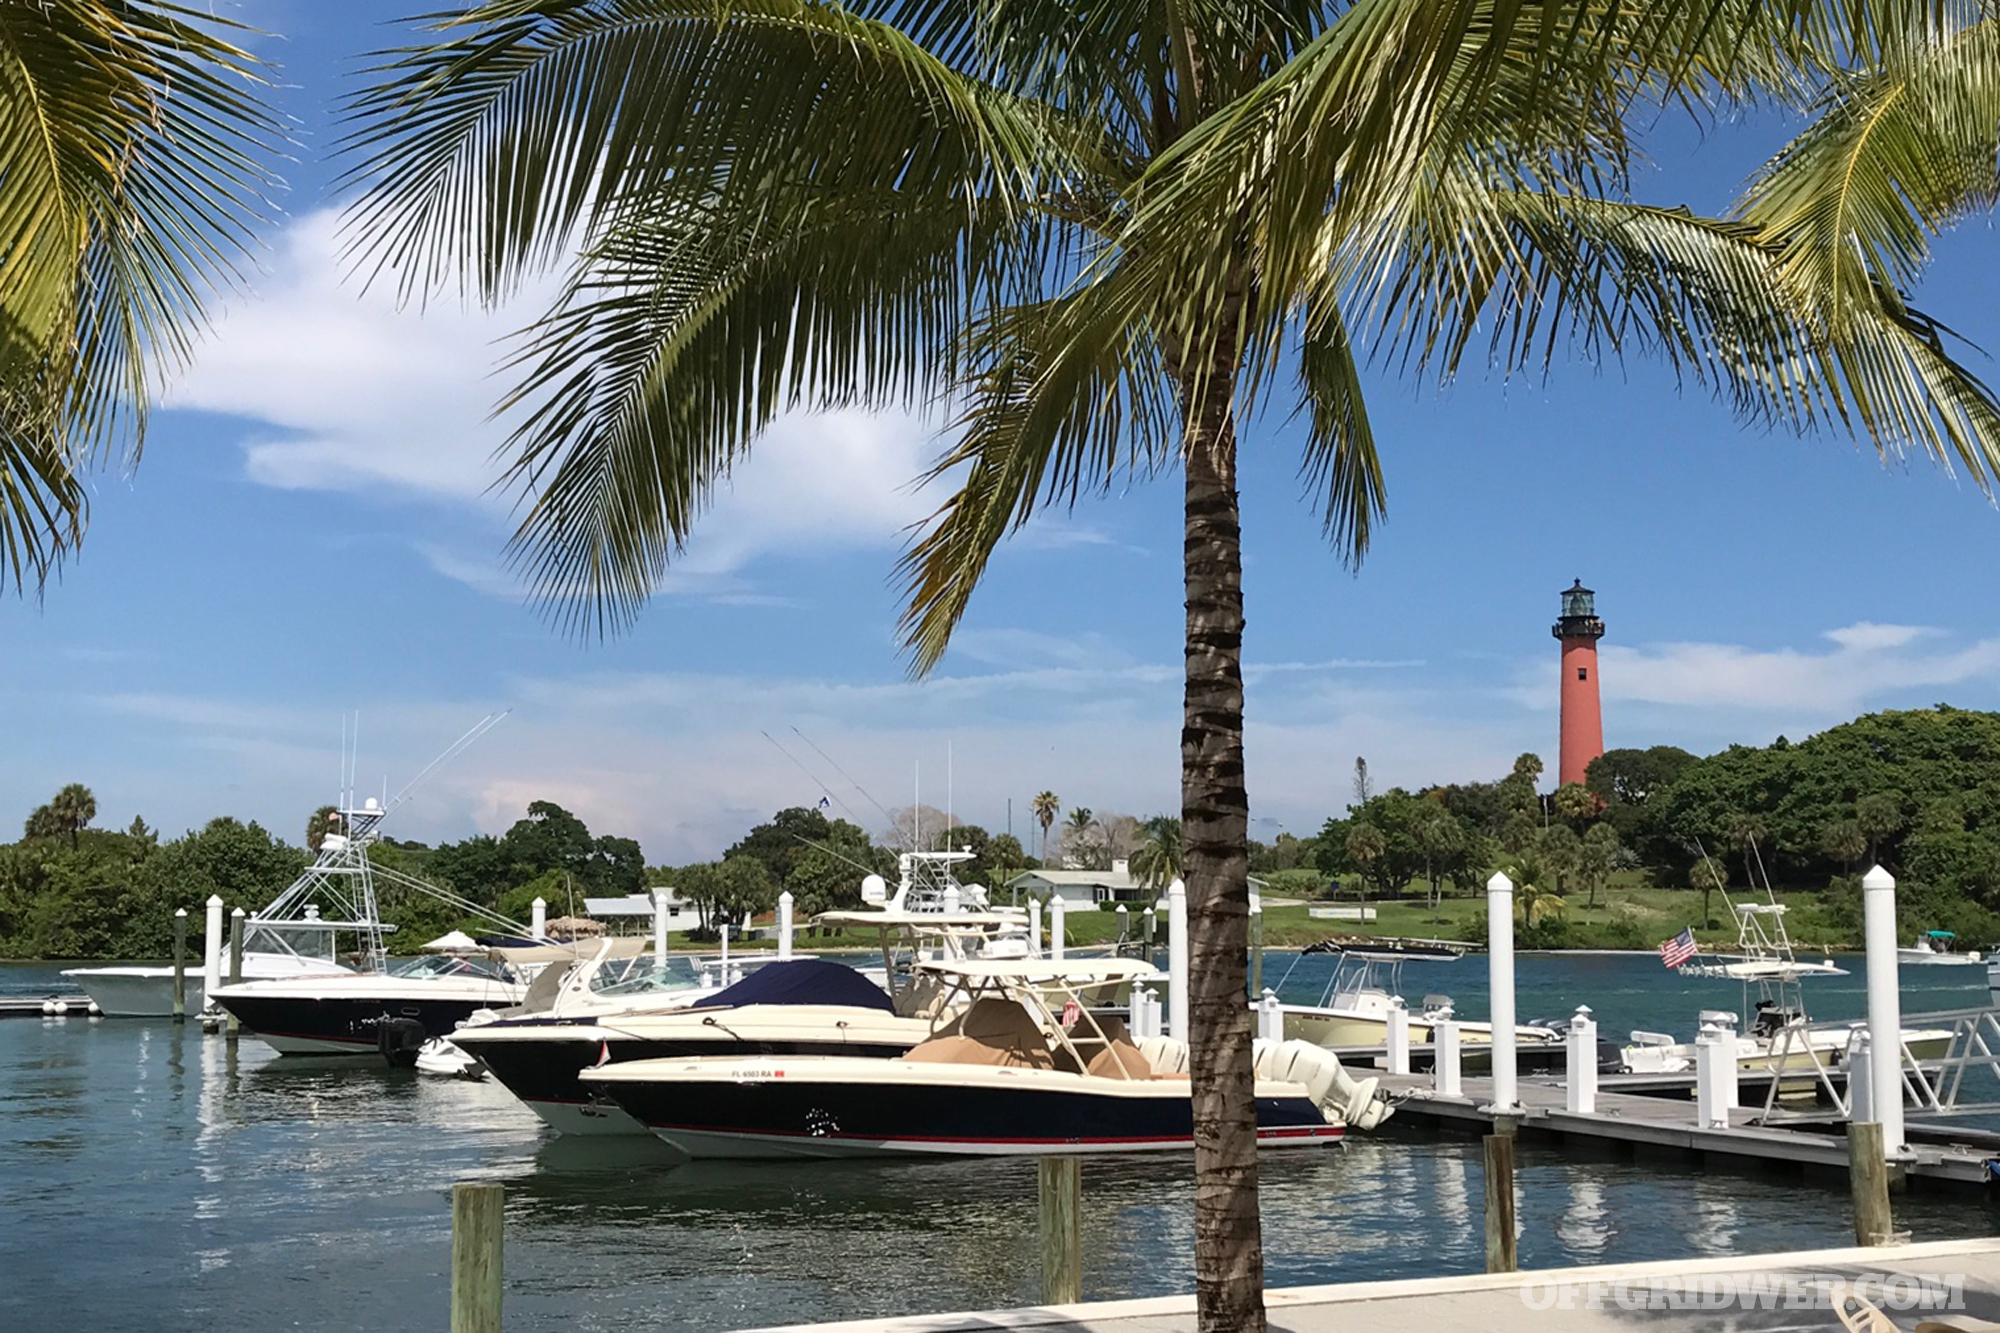
Above: Coastal regions offer beaches, boating, and fishing. Access to a boat may also provide options for leaving an area quickly and without having to deal with the usual traffic. However, these regions may also be prone to storms and flooding.

Below are some of the more important categories that you should consider in your overall search parameters:

Population density: This is very significant. No matter the crisis, being close to a largely populated city center has the potential to make things much worse. The larger the population, the larger the chance of man-made problems arriving at your doorstep. (See “The Big Three” sidebar.)

Weather/climate: Cold or hot, humid or dry, windy or calm, quality air or pollution. All of these things matter, and oftentimes may even affect your overall health. Look for areas with mild to moderate climate, and try to avoid extremes. Also consider the length of the growing season, rainfall, flooding, and overall weather patterns, especially if you plan on growing your own food.

Jobs: No matter how self-sufficient you may be, you’ll most likely still need some income. Traditional jobs are the most common source of income, but also consider working from home, or operating your own business — maybe even a home business. Research local regulations before you dive head-first into a business venture, since some states require all sorts of licenses and permits.

Economy: A thriving, growing and diverse economy offers the best chances for financial success no matter your particular circumstances. But a thriving economy will also attract people from far and wide, and can usually result in higher real estate prices, traffic, congestion, and an overall higher cost of living.

Hospitals and healthcare: Access to quality hospitals, physicians, specialists, dentists, and other medical facilities is often overlooked. Depending on your age and overall medical condition, this may or may not be high on your list of priorities, but remember, emergencies happen whether you plan for them or not.

Shopping: We’re all consumers, and no matter how self-sufficient and independent we may be, we all need to shop. Do you mind driving long distances to pick up groceries, or do you need more convenient options? Also, the further goods have to travel to get to you, the more expensive they will be. Consider visiting some of the nearby shopping centers. It’s amazing what you can learn by looking around and interacting with locals.

Public services: Having a wide array of public services can be a convenience to some and a burden to others. Remember, everything comes at a cost. The more services you get, the more taxes you’ll pay. Finding a balance is key. In some rural areas you’ll need to plow your own roads, pay monthly subscription fees for fire department and EMS services, and you can forget about public transportation. Also, find out how reliable the grid power is, how often it’s down, and if there are any alternatives.

Environment: Usually this refers to the natural environment and its overall health. Lots of areas in the U.S. have suffered tremendous damage at the hands of irresponsible corporate entities who have disposed of toxic waste into public waterways or landfills that eventually leak and contaminate the land. Also consider soil quality and study the type of crops that thrive in the area.

Education: Unless you plan to homeschool your kids, or grandchildren, the quality of the local schools is most likely very important, especially to young families. Research the local school districts, class sizes, technology use, percentage of certified teachers, grades, and rankings.

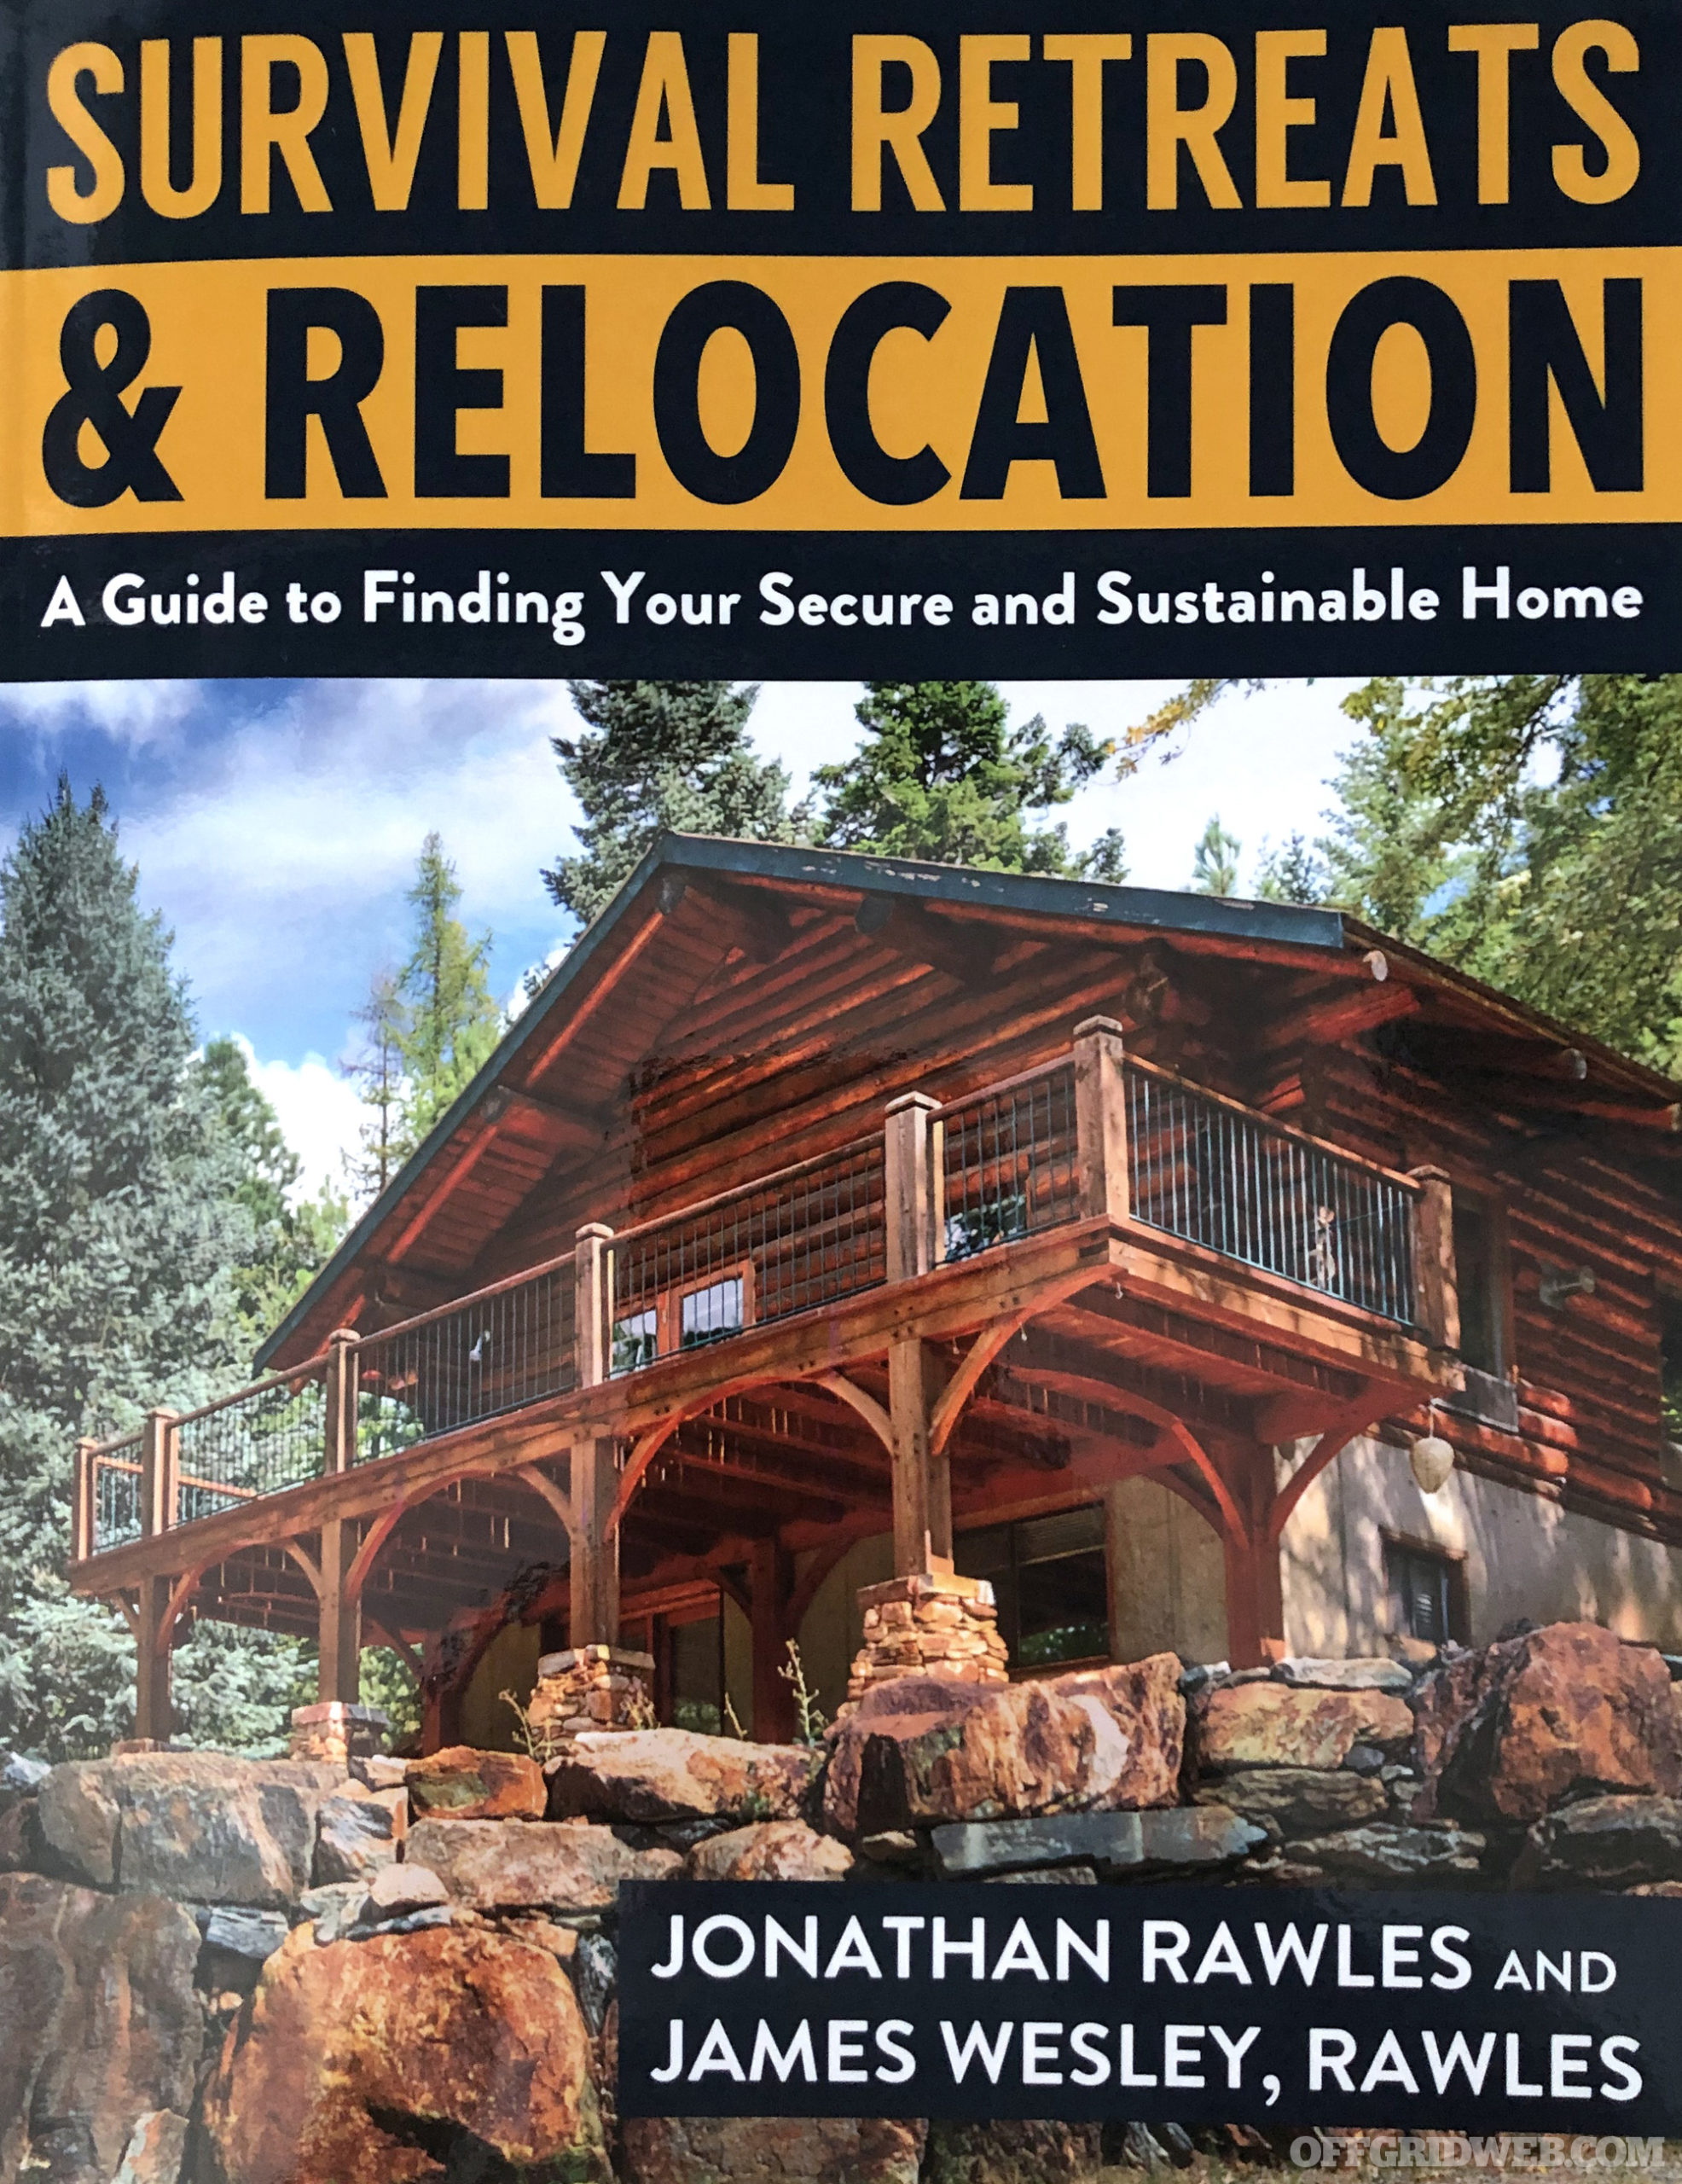
Above: Survival Retreats & Relocation – A Guide to Finding Your Secure and Sustainable Home by Jonathan Rawles and James Wesley Rawles is an excellent resource for starting your research. It’s also good for fine-tuning your search parameters using in-depth analysis and data specifically targeted for folks interested in the preparedness lifestyle, freedom, and self-sufficiency. 

Cost of living: The overall cost of living will vary widely from one area to another. This should never be overlooked. If you expect your income to remain the same, or even decline, factoring in the anticipated cost of living is critical. Look at how your target location compares to neighboring states, and other comparable locations in similar cities or states. Fuel, heating, cooling, taxes, food, insurance, utilities, education, etc. — all these things add up. Start a spreadsheet and compare to other locations you might be considering. Do a cost benefit analysis; one area may have higher taxes, but may offer better schools, more public services, etc.

Taxes: Taxes represent a large chunk of most family budgets. Considering that just about everything we do is taxed, you’ll want to determine the overall tax burden. For example, some states like Florida, Wyoming, and Texas, have no state income tax, while others like New York, New Jersey, and California impose substantial state income taxes on top of the federal income taxes. Make sure to also consider sales tax, property taxes, and local taxes. (Tip: Research bordering states when considering a location. This will sometimes yield unexpected benefits, such as tax-free shopping a short drive across the state border.)

Homestead exemptions: Some states offer homeowners homestead exemptions on their primary residence. This represents a major advantage in two ways: (1) it may save you on property taxes; (2) it protects and shields your primary residence from some creditors. Certain states provide an exemption for the full value of the home, while others provide little to nothing.

Debtor rights: While all U.S. consumers have somewhat equal rights under federal law regarding debt collection, most states also have their own laws. Some states actually provide stronger protections. These protections are important and can often shield you, and your family, against overzealous collection efforts. Some states make it very easy for a potential creditor to levy against all your assets, including your home. Other states have laws that protect you and your assets, especially your primary residence.

Sustainability and self-reliance: Living a life of sustainability and self-reliance requires knowledge, skills, and having access to the proper resources. Geography, climate, and natural resources all play a role. Look for locations that provide an abundance of natural resources, including wood, water, and game.

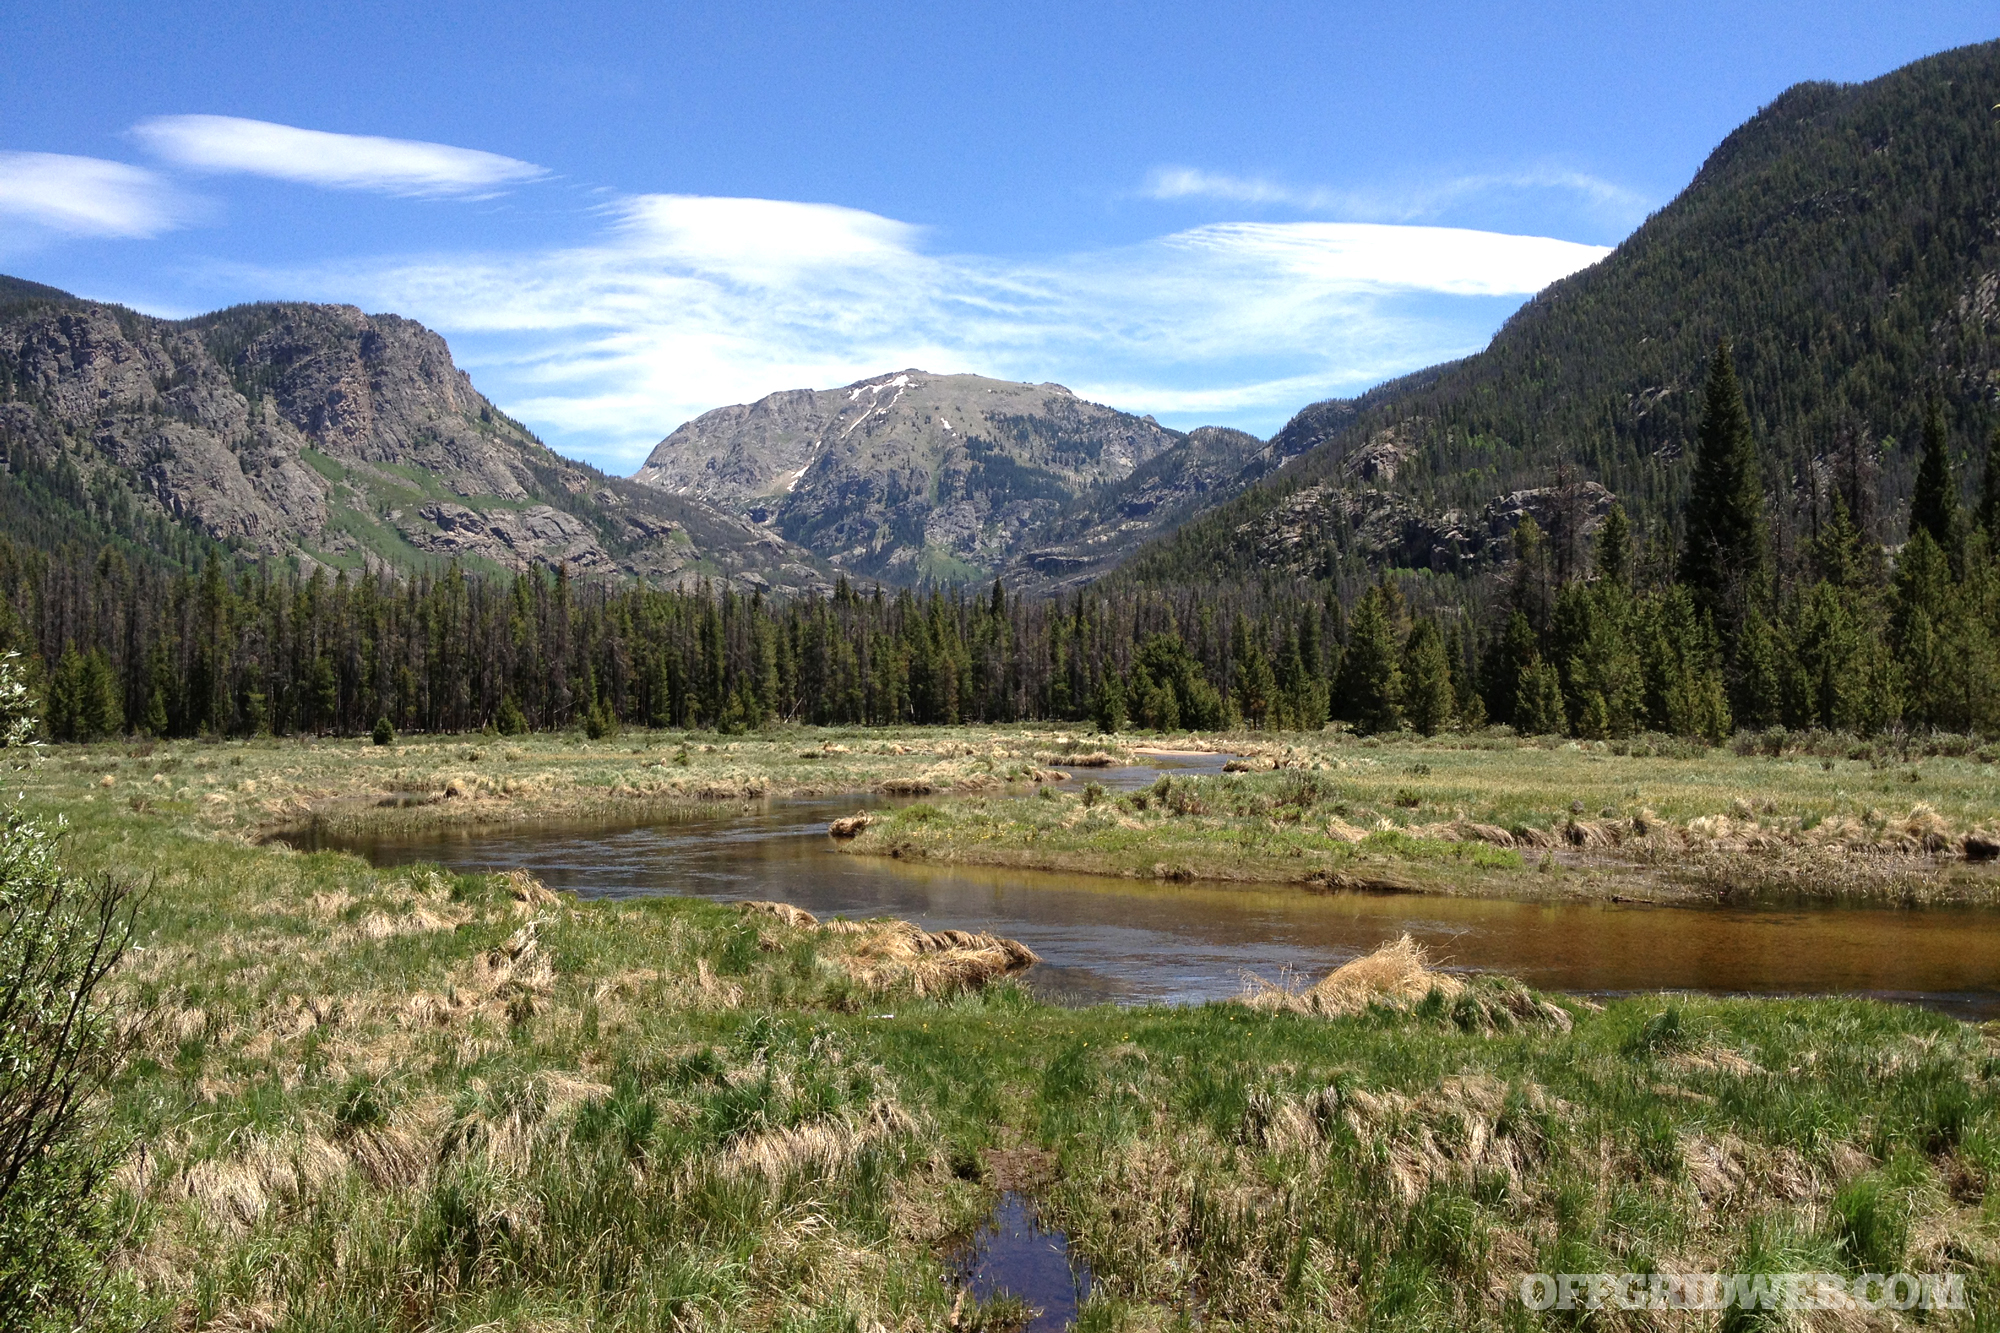
Above: Many areas around the country offer mountain views and the possibility for remote living. But mountains also offer protection, security, and opportunities for harvesting natural resources like wood and game. 

Crime, security, and safety: Crime imposes an extremely high cost on society and its individual citizens. Few factors affect the quality of life in a community more than crime. Think increased police presence, increased security expenses, higher home and auto insurance rates, but also the physiological and emotional toll of living in fear. Note: True crime sometimes hides in the shadows. At first glance, a community may look nice, but the well-manicured lawns and picturesque downtown may not tell the full story. Research actual crime statistics, and look for specifics like the percentage of violent and property crimes, crimes per square mile, and how these measure up against national statistics. You can also call the non-emergency police number and request recent police call logs and crimes in a given area.

Self-defense and gun laws: Your ability to protect and defend yourself and your family is, and should always be, a top priority. Avoid, at all costs, states that restrict your ability to protect yourself and your loved ones. Also consider the laws that dictate when and where you may deploy a firearm in self-defense, and what your legal duties may be when using that firearm.

Water: Will you be relying on the public water system, your own private well, a river or stream, or rainwater collection? Where does public water come from? Are those sources safe and reliable? If the public water system fails, or is somehow compromised, would there be a reasonable alternative? It’s important to know that some states have laws strictly regulating rainwater harvesting, while other states encourage and incentivize it.

Traffic: Look beyond commute times, and also research roads and road conditions, traffic patterns, traffic enforcement, and how drivers in the area are rated. Some states/cities are notorious for bad drivers, horrific accidents, and to no one’s surprise – exorbitant auto insurance rates.

Insurance costs: Auto insurance, homeowner’s insurance, even life and health insurance can vary depending on where you live. In areas with high likelihood of natural disasters (think hurricanes in Florida), you’ll pay a premium for homeowner’s coverage.

Air travel/airports: Being close to an airport can bring enormous advantages, but it comes at a cost — noise, traffic, congestion, pollution, and even potential aviation accidents. But if you’re forced to travel often, this may be a trade-off you’re willing to consider.

Overall wellbeing and livability: Certain locations feed the soul. For some, the mountains provide a deep calming connection to nature; others prefer being close to the ocean or a lake. The practical aspects of survival are very important, but so is being happy.

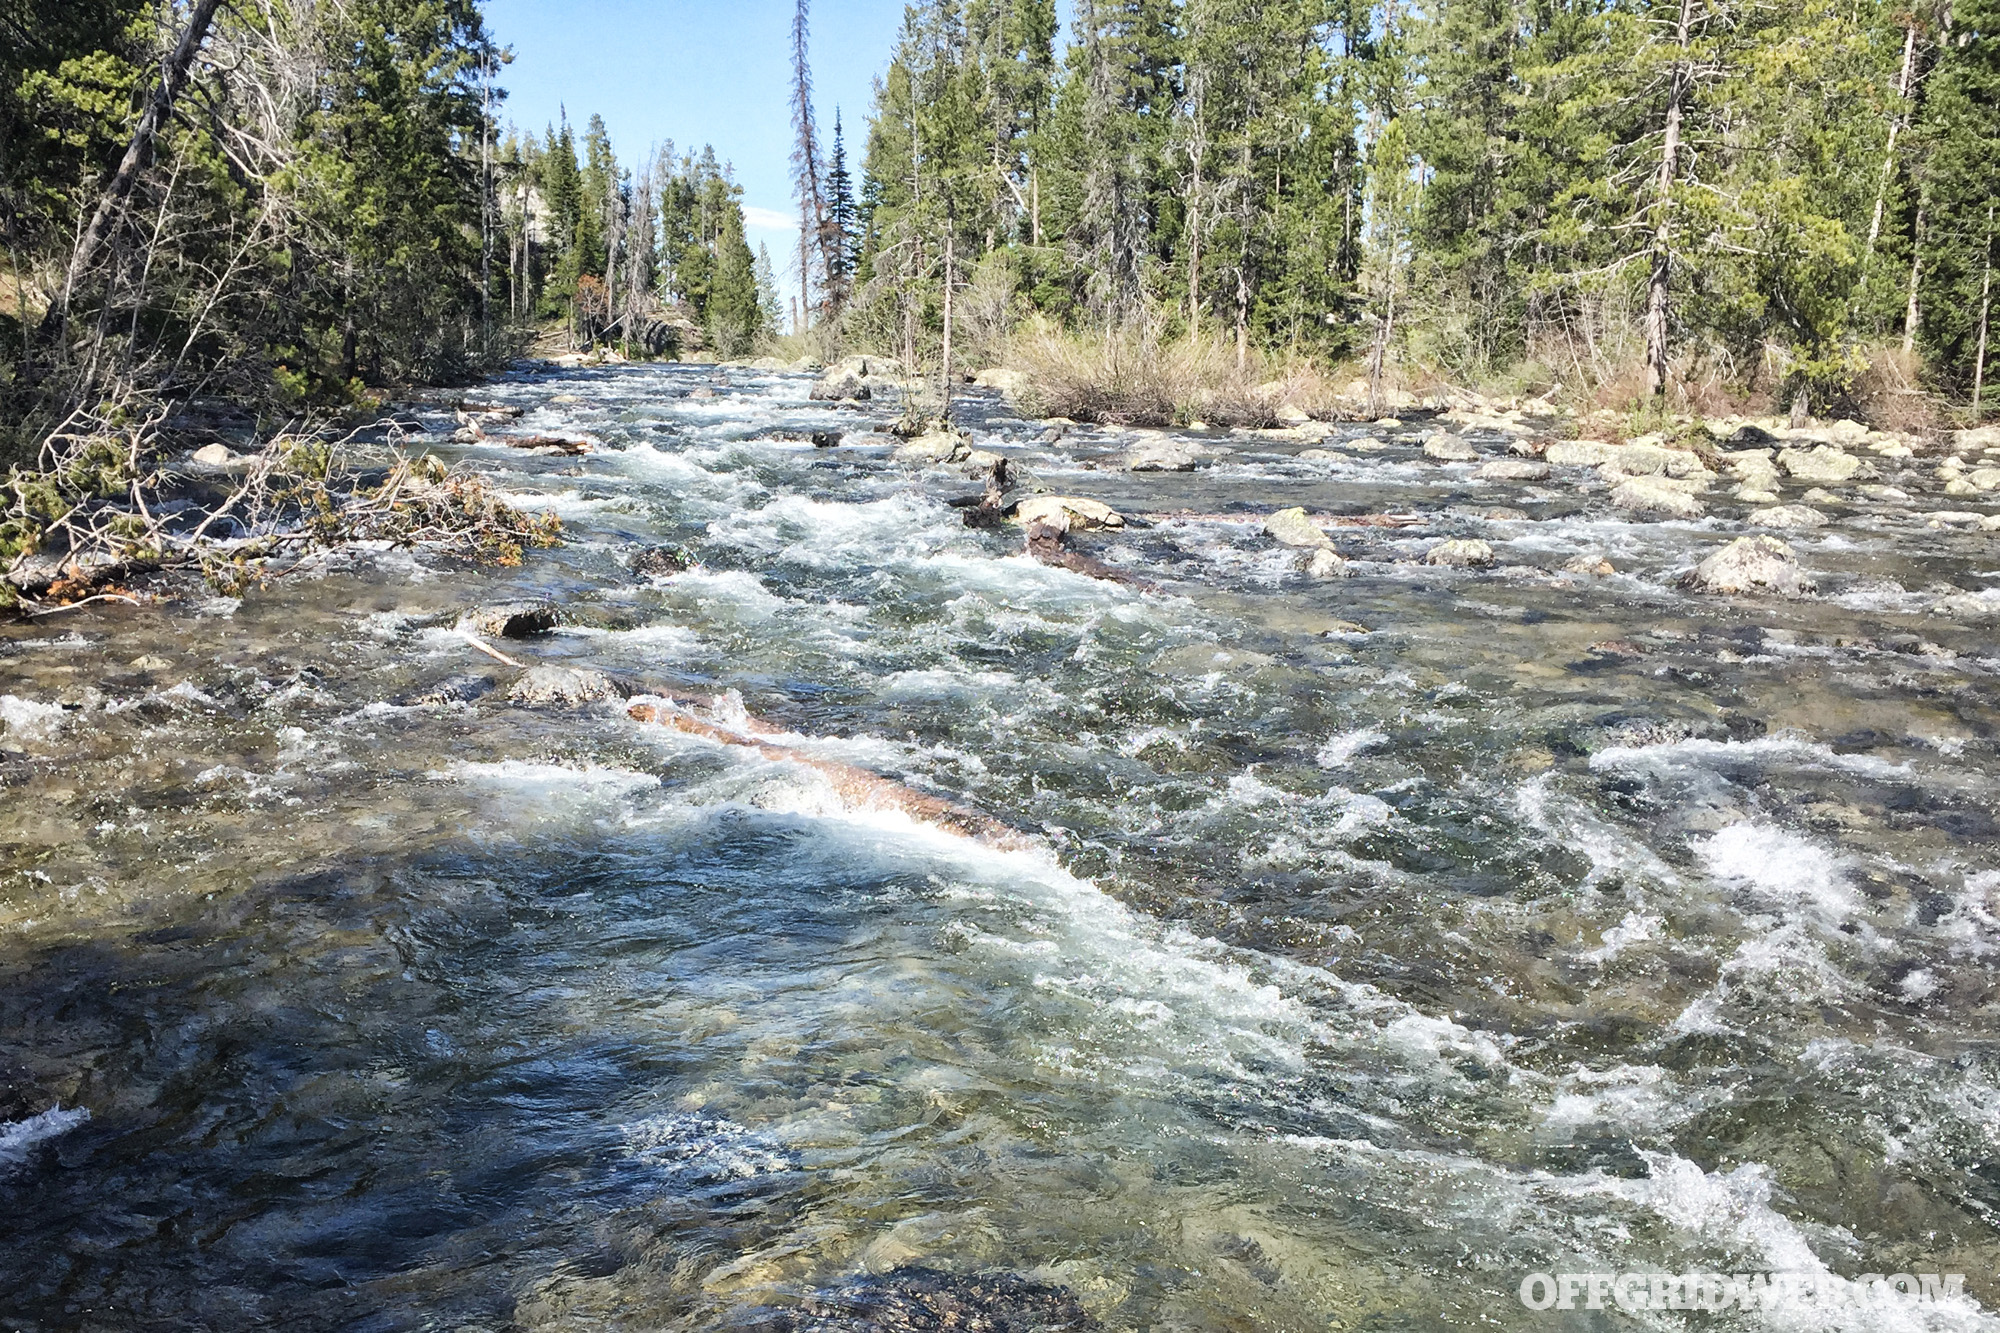
Above: A free-flowing river or stream can often provide many options including a reliable water supply, and opportunities for fishing and hunting, since water usually attracts game.

There are, of course, many other factors to consider. Entire books have been written on this topic, and we recommend that you read some of these books. Two of the most popular are Survival Retreats & Relocation – A Guide to Finding Your Secure and Sustainable Home by Jonathan Rawles and James Wesley Rawles, and Strategic Relocation – North American Guide to Safe Places, 4th Edition by Joel M. Skousen and Andrew Skousen. Both of these are excellent choices and will provide you with a wealth of material to consider, as well as insights, ideas, and suggestions on how to expand your research.

The Big Three: Common Homesteading Problems

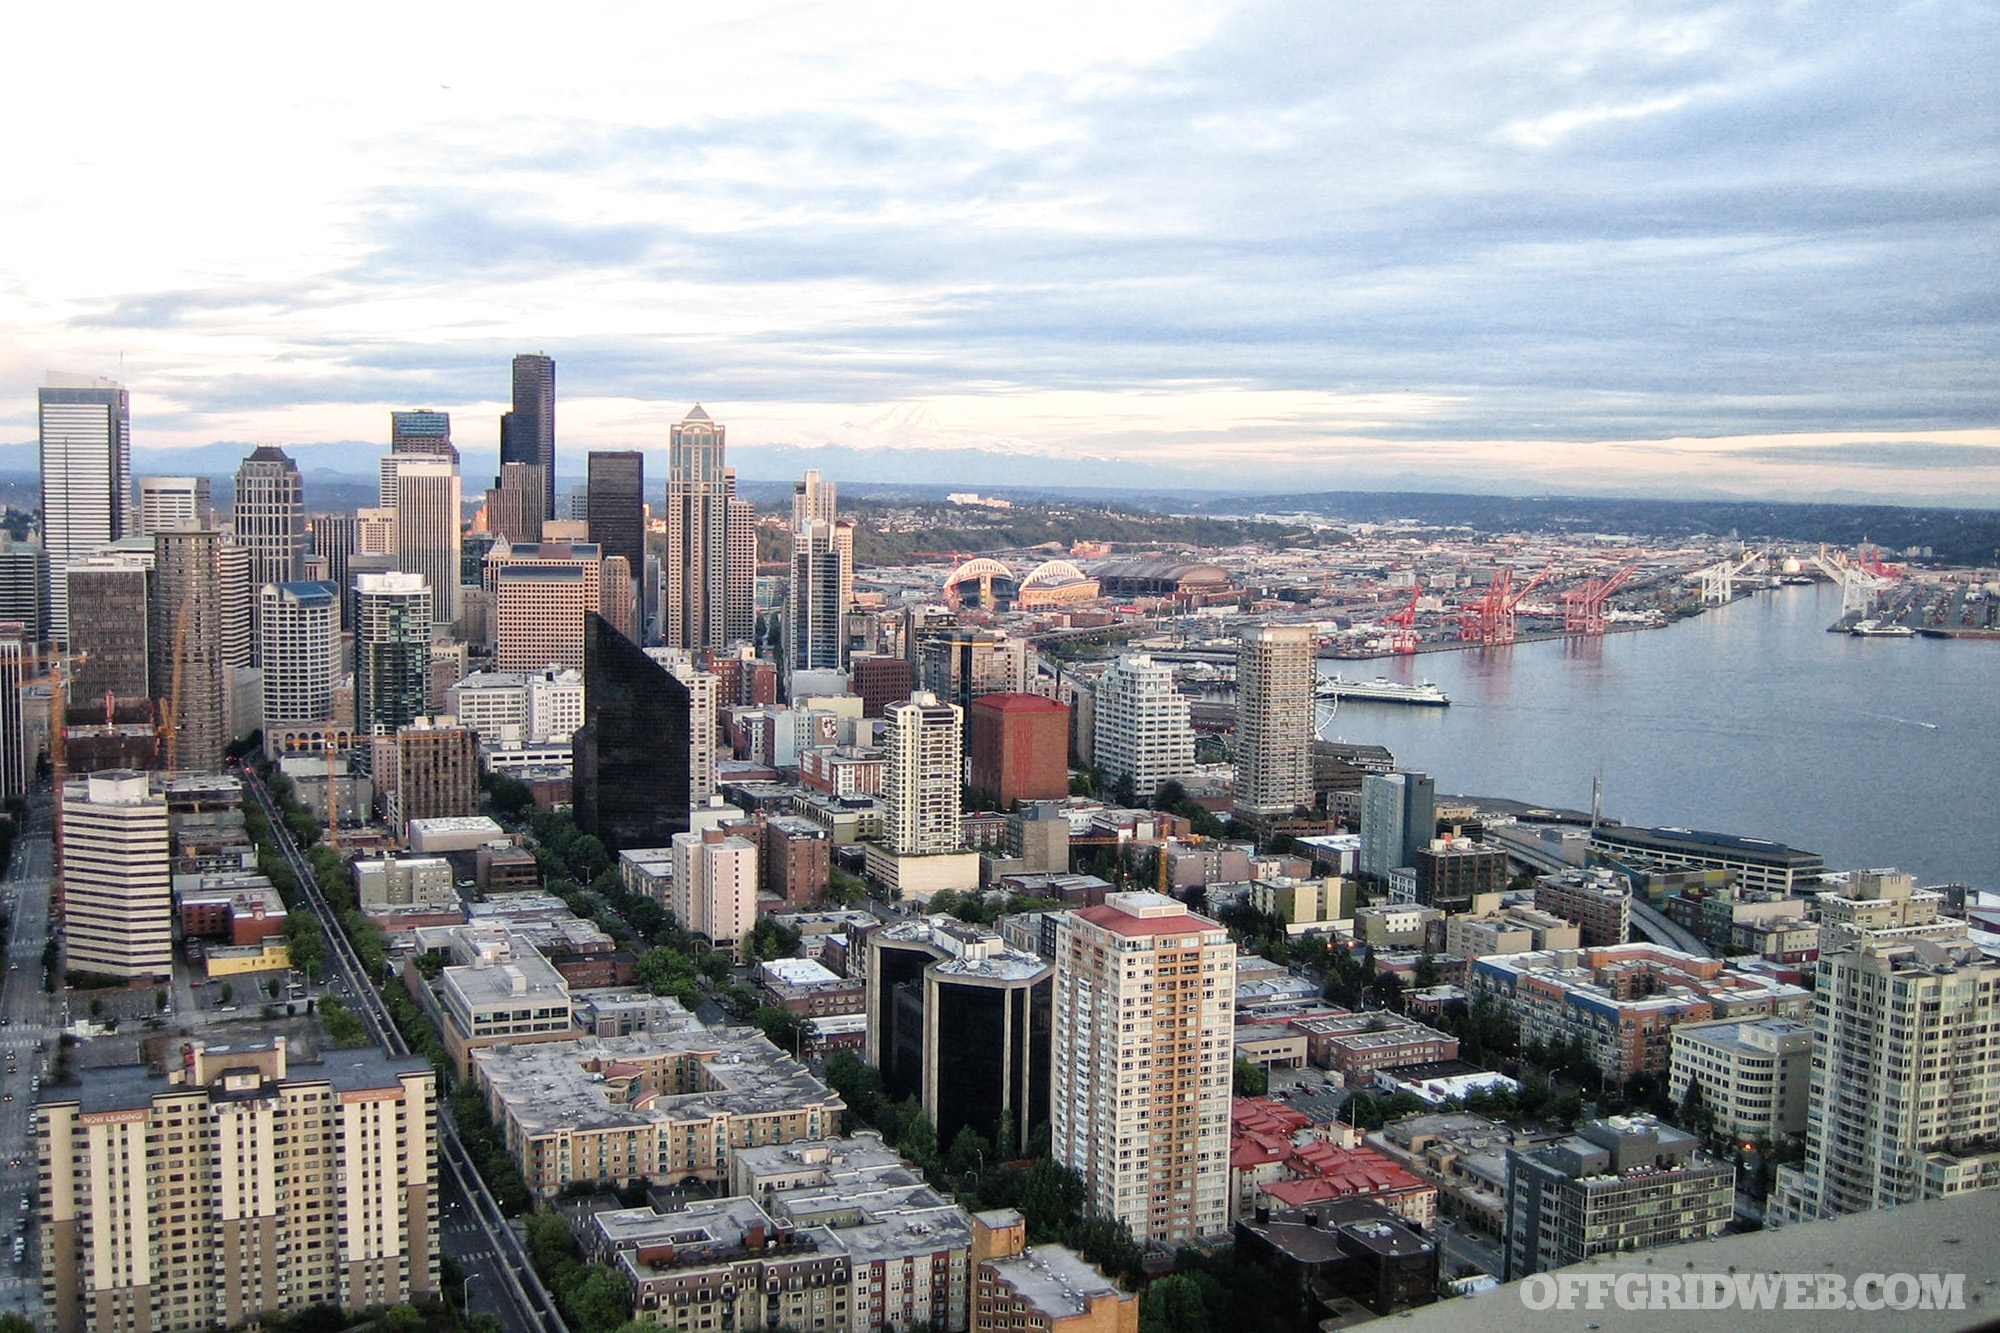
Above: Large urban areas are heavily congested, and have an extraordinarily high cost of living. Because of the population density, many of these urban areas have become very dangerous, especially during or after a natural or manmade crisis. 

The People Problem
Population density can become one of the biggest dangers to your safety and wellbeing, before, during, and in the aftermath of a crisis or public emergency. There’s a very simple reason for this — during a crisis, these areas are likely to experience the most severe and extensive eruptions of violence, looting, rioting, and overall civil unrest. This isn’t mere speculation; history has confirmed this sad reality time and again — when the SHTF, many people will be at their worst. Add to this a finely tuned infrastructure and supply chain that may be unable to keep pace with sudden changes to demand for food, water, sanitation, and public services. The more people there are in a given geographical area, the more precarious the situation will be. And as a disaster accelerates, trying to escape a high-density population center will become extremely difficult, if not impossible, unless you were able to get a jump on everybody else.

Personal Freedom
Where you choose to live can make a tremendous difference in how you live your life. Government regulations, limits on how you can use your property, how you can teach and educate your children, how you can make a living, and how you can feed yourself — all these things matter.

Some states seem to regulate even the smallest activities, while others tend to leave citizens alone to make their own choices and live their own lives. An intrusive government will always have a tendency to desire more power over you, and often even abuse its power. When considering your options, focus on locations with local and state governments that put a high value on personal responsibility, self-sufficiency, and freedom.

Risks – Natural and Man-Made
When considering the potential risks, people often focus on natural disasters, while ignoring or downplaying man-made disasters. Yet both are dangerous, and both can kill. Consider that no state is free from natural disasters, and that you’ll usually trade one set of dangers for another. While the coastal states can suffer flooding, hurricanes, and other offshore hazards, many interior states are affected by tornadoes, wildfires, earthquakes, mudslides, or even volcanoes. No matter where you live, there’ll always be risks. Avoid power plants, superfund sites, and areas affected by toxic contamination. Hazardous waste sites are scattered throughout the country. There are more than 1,300 of these “Superfund Sites” where toxic chemicals and other contaminants were dumped for years, polluting soil, water, and air.

The Great Migration

While there have always been patterns of migration throughout the United States, according to a U.S. Migration Report from North American Moving Services, 2020 saw Americans moving in record numbers. While some moves may have been influenced by COVID-19 and the fallout from lockdowns, job losses, and failing businesses, Americans continue actively leaving big cities for more rural locations as they’ve done in previous years.

This annual study tracked nearly all interstate and cross-border household relocations from January 1, 2020, to December 11, 2020. Here’s a breakdown of the top states that Americans were moving to and leaving in 2020.

Top Inbound States:

  • Idaho (70%)
  • Arizona (64%)
  • South Carolina (63%)
  • Tennessee (63%)
  • North Carolina (61%)

Top Outbound States:

  • Illinois (69%)
  • New York (65%)
  • California (64%)
  • New Jersey (64%)
  • Maryland (61%)

In general, Americans are leaving the Northeast and Midwest in favor of the warmer climates, and the lower cost of living typically found in the Southeast and Southwest. Florida, Texas, and Colorado round out the top eight states for inbound moves. The full report, including an interactive map of the U.S, and a downloadable version of the report is available at www.northamerican.com/migration-map.

Wrap-Up

While there’s no such thing as a “perfect” homestead location, there are many safer locations to consider. Doing your research and taking advantage of existing resources can not only save you time and money, but can substantially increase your chances of success in finding a location that not only addresses your needs, but also provides an increased level of safety, security, and protection from both natural and man-made hazards.

Sources
> www.survivalrealty.com
> www.joelskousen.com
> www.census.gov
> www.northamerican.com (2020 Migration Report)

Books
Survival Retreats & Relocation by Jonathan Rawles & James Wesley Rawles
Strategic Relocation, North America by Joel Skousen

About the Author

Richard Duarte is an urban survival consultant, writer, and firearms enthusiast. He’s the author of Surviving Doomsday: A Guide for Surviving an Urban Disaster and The Quick Start Guide for Urban Preparedness.


First Look: Trailblazer Pivot 9mm Rifle

At SHOT Show 2022, we ventured into the basement in search of hidden gems. If you've ever attended the show in Las Vegas, you'll know that this level of the convention center is typically filled with smaller companies and startups, so it often breeds some of the most interesting (and bizarre) new products. One firearm that we found there might fall into either category, depending on your personal opinion: the new Pivot 9mm rifle from Trailblazer Firearms.

How the Trailblazer Pivot Works

Unlike most folding rifles, the Trailblazer Pivot does not fold in half via a hinge in the midsection. Instead, the upper and lower halves of the rifle unlock and rotate 360 degrees in either direction. The locking mechanism is controlled by a button at the front of the lower receiver, and it includes a safety feature that prevents the Trailblazer Pivot from folding if the bolt is forward or if a magazine is inserted. There is also a manual thumb safety lever.

Click here for a video of the Pivot we recorded on the show floor.

Overall length in folded configuration is 20.9 inches. Unfolded, it measures a maximum of 29.7 inches. Width is just over an inch, and unloaded weight is 5 pounds.

Pivot Additional Features

The Trailblazer Pivot has a full 16-inch barrel, so it's classified as a rifle and can use an adjustable buttstock without requiring an NFA tax stamp. The barrel is threaded for addition of a suppressor or muzzle device. Most of you will be pleased to learn it takes Glock 9mm magazines, which are plentiful and relatively inexpensive (if you don't already have a bag full of them).

A cavity in the stock accepts another Glock mag, so you can carry an extended magazine (such as the Magpul 21-rounder seen here) when it's time to pack the rifle. Since the early prototype we handled wasn't quite ready for mass-production, the mags felt somewhat loose in the stock, but we're told this retention will be corrected for the final version.

Both the upper and lower receivers of the Trailblazer Pivot feature M-LOK slots for accessories such as flashlights and foregrips. The upper also features two sections of Picatinny rail for optics and backup iron sights.

As a result of its slick folding mechanism and outside-the-box design, our colleagues at RECOIL awarded the Trailblazer Pivot “Best of the Basement” for SHOT Show 2022. That might sound like a backhanded compliment, but as we mentioned earlier, we love to see unusual and creative products like this one in the lower level of the show. We hope to give the Pivot a full review once test samples are available later this year.

For more information on the Trailblazer Pivot 9mm rifle, go to TrailblazerFirearms.com/pivot-rifle.


First Look: Valhalla Tactical ODA Weapon Light Switch

Valhalla Tactical is a company that doesn't have the same brand recognition as big players in the flashlight market like SureFire, Streamlight, Modlite, and Cloud Defensive. However, they've introduced some innovative machined aluminum products that may have flown under your radar. First came the Baldr weapon light, with an extremely compact body and offset mounting plates that allowed users to mount it close to any rifle's handguard. Next came the Rukh optic mount, which features adjustable angle and a clever removable RMR battery compartment. At SHOT Show 2022, the owner showed us a new weapon light switch called the Valhalla Tactical ODA. Think of it as a joystick control for your flashlight — it sounds weird, but after trying it, we want one.

The Valhalla Tactical ODA Light Switch

If you've ever picked up an XBOX or Playstation controller, you'll be familiar with how the ODA works. It can be pressed in any direction to activate the light momentarily, or can be pushed inward to click the light into constant-on mode. This is especially useful for setups where rail space is limited and attaching a tape switch may not be an option. It's not an overly-sensitive hair trigger, nor is it a switch you have to manhandle to activate — it feels just right.

To be blunt, we thought we'd dislike this design when we first saw photos on Valhalla's social media pages. But handling it at SHOT Show quickly won us over. The large polymer joystick is easy to use from any angle, and you can even wrap your whole hand around it and simply tighten your grip to activate the light with your palm. No longer are you limited to turning on the light with the tip of your thumb.

Better yet, the Valhalla Tactical ODA allows you to return to a standard tail cap at a moment's notice. Just grip the ring around the joystick and unscrew it to reveal a rubber clicky button.

Valhalla Light Body & HRT Tactical Head

The ODA was developed in-house at Valhalla Tactical, and the prototype version seen here was machined to match a new multi-fuel light body design that can accept 18650, 18350, and CR123A batteries. Thanks to the standard thread pitch, this body will accept SureFire Scout and Modlite heads, but in these photos it is paired with an AWLS (adaptive weapon light system) head created by HRT Tactical. That's why you'll notice Valhalla and HRT's logos in these photos. We're told the HRT Tactical AWLS head can produce 1,700 lumens and 90,000 candela.

If all you want is to add an ODA switch to your existing weapon light, we're also told that there are plans to produce switches for other common light bodies in the near future. The SureFire Scout tail cap is coming first, and the Cloud Defensive REIN tail cap may be released later. At the moment, you'll need to get the ODA and light body together.

SHOT Show 2022 Award

Our sister publication RECOIL magazine gave out four “Best of SHOT Show 2022” awards, and our editorial team decided to give the Best Accessory award to Valhalla Tactical for the new ODA. One after another, our editors tried the switch and decided it was deserving of recognition.

Post-Prototype ODA Changes

Since the Valhalla Tactical ODA seen here is a pre-production prototype, there will still be some fine-tuning before it's released to the public. This will include additional texture around the circumference of the joystick to provide better grip in wet conditions. The Valhalla Tactical team also let us know that the joystick can be replaced by removing a single screw on the underside, so they're considering creating a few different shapes and sizes (for example, a shorter rounded nub). This also opens up the possibility of adjusting sensitivity by adding or removing spacers between the ODA and the tail cap.

For more updates on the Valhalla Tactical ODA, go to ValhallaTactical.com or follow @valhalla.tactical on Instagram.


First Look: Holosun PID Weapon Light

Although SHOT Show 2022 officially begins tomorrow, today at Industry Day at the Range we got our hands on something brand-new for the first time. Holosun showed us their unreleased weapon light, known as the Holosun PID. The example in these photos is serial number 001, and we're told we were the first media outlet to see it. Read on for the initial specs and details.

The New Holosun PID Weapon Light

You may notice this light's name is a not-so-subtle reference to the term positive identification (PID). A weapon light allows you to positively identify your target before you decide to fire, so this name makes a lot of sense.

We don't have all the specs yet, but we'll share what we've been told so far. It offers a maximum output of 1,000 lumens in high mode, as well as a 500-lumen low mode. It uses a rechargeable battery, and features a USB-C charging port on the underside of the light, shielded by a protective rubber flap. The battery can be charged without removing the PID from the gun, or removing the battery from the housing.

Beam pattern is said to be intermediate, with enough throw for medium-range outdoor use and enough spill for close-quarters indoor use.

The Holosun PID is controlled by ambidextrous paddles that allow for momentary (press and hold) and constant-on activation of the light.

As for holster compatibility, we're told it fits nicely into common duty-style holsters that accept the SureFire X300 or Streamlight TLR-1, such as those from Safariland. That's a good start, but it's likely that molded Kydex holster manufacturers will still need to create new molds for full compatibility the new Holosun PID.

One especially interesting piece of news is the price point. We're told the Holosun PID will be priced substantially below other 1,000-lumen WML competitors, with an MSRP of around $120. That means street prices are likely to be under $100 once the PID becomes widely-available.

For more information on the new Holosun PID weapon light, keep an eye on Holosun.com in the near future.


Distress Signal Device Buyer’s Guide

There are few situations as despair-inducing as those that leave you removed from other people and unable to help yourself. Bad weather or a blown tire sends you careening off the road, your boat motor craps out and you’re adrift without power, or you’re lost or injured in the wilderness and in need of help — these are all very realistic scenarios that occur every day. The easy, go-to distress signal method is your cell phone, and that works great right up until the moment that it doesn’t. Assuming your phone isn’t broken and the battery has some life, signal strength can be sketchy, particularly in the wilderness or offshore. If you subscribe to movie clichés, don’t forget that technology always fails at the most critical moment. It can be an incredible tool, but overreliance on technology can be fatal.

Whether you’re preparing for an excursion in the great outdoors or conducting your due diligence by stocking your boat or automobile with a small cache of safety equipment, having the ability to signal when you’re in a predicament shouldn’t be considered optional. Packing a small first-aid kit is more than most accomplish, but even that’s often the extent of an average person’s contingency planning. Somewhere between doing nothing and investing in a personal locator beacon (PLB), lie some small and lightweight distress signal options that are universally recognized for locating someone in need of help. The term “flare” often conjures an image of what looks like a stick of dynamite with a bright-red flaming end that resembles a firework. While classic flares are still widely used and generally accepted as roadside and maritime signaling/warning devices, there are alternatives that can be just as effective and may be better suited to meet your space and weight requirements as well as your overall expectations.

Above: Orange smoke is one of the most effective daytime distress signals, particularly when seen from above.

Purists will tout the capabilities and ease of carry of a good old-fashioned mirror and whistle or the effectiveness of the white smoke from a pine-needle fire. While those are certainly time-tested and situationally effective options, most would prefer a little further reach for their distress signals. There are multiple types of distress signal devices that can be used in a variety of situations. Flares and signaling devices are separated, although not exclusively, into three general categories. Individually they can be placed into one or two of the general categories, but most can be utilized in many different scenarios.

Distress Signal Applications

Roadside: Roadside distress signal devices are used to warn oncoming traffic that you’re stopped or stuck, and they need to reduce speed and check for needed assistance. The devices can also be used to alert passersby that you’ve gone off-road and need aid. Common devices: traditional road flares (also called highway flares or ground flares) and LED flares/strobes.

Marine: The United States Coast Guard (USCG) regulates the quantity, types, and disposal of required signaling devices needed for boats over 16 feet in length. Three day and night signals are required when there’s more than a 2-mile passage to the sea. Pyrotechnic flares are required by USCG to be replaced 42 months after their manufacture date. For smaller vessels, warning devices are recommended, although not required. Common devices: floating beacons, smoke, and aerial flares.

Wilderness: For those who enjoy going off-road and into the wild, whether it’s in the mountains, canyons, waterways, or trails, an emergency signaling device should always be within reach. Ask anyone with a stickered Nalgene bottle, and they can give you an earful of examples, regaling near-misses and lore of wilderness tragedies. Common devices: smoke signals and handheld flares.

Above: Flares come in a variety of sizes and uses. Packing the right one and knowing how to use it should be an essential part of your planning.

Distress Signal Comparison Test

The potential list of warning devices is vast. This article features six options that were put to the test and provide different and sometimes unique methods for alerting others of your need for assistance. Your particular comfort level, storage requirements, and environment will dictate which style you pursue. The evaluation of these flares wasn’t conducted in a controlled environment using scientific methodology. They were evaluated based on their manufacturer provided and published data and field tests on a mild Midwestern fall day.

The daytime distress signal tests were conducted at approximately 3:30 p.m. on a mostly clear day with little to no wind. The night tests were administered at 7:30 p.m. in the same conditions. Evaluators were placed at a distance of 2 miles and 5 miles with a direct line of sight to where the signals were activated.

Orion Signal Flare / Fire Starter 2-Pack

Category:
Roadside, Marine, Wilderness

Day/Night:
Both

Effective Range:
1 mile

Duration:
5 minutes

Shelf Life:
No expiration

Cost:
$5 (2 pack)

URL:
orionsignals.com

Above: Lighting the flare with the self-contained igniter.

Notes: If there’s one thing that preppers and outdoor enthusiasts love, it’s multi-use items. Orion leveraged their position as the long-standing most recognized name in flares and re-engineered their bread-and-butter road flare to also be employed for an obvious secondary use: a fire-starter. They wrap it up in a small, lightweight, and inexpensive package effectively checking the “multi-use” box as an emergency fire-starter and signaling device.

As you’d expect, this small flare isn’t a heavy hitter, but certainly has its place on the spectrum of alerting devices. Its size and dual application characteristics make it a practical tool for a backpack or bug-out bag. This flare was simple to ignite and sparked easily the first time, even for the evaluator, who had never used one before. The bright, ambient sunlight drowned out the small flame and greatly limited its ability to be seen during the daytime test. The evaluator at the 2-mile post, though, could see it when using binoculars.

At night it stood out far better and could even be seen (barely) at the 2-mile post exceeding the 1-mile range given to it by the manufacturer. It couldn’t be seen at the 5-mile post. The only drawbacks for the Camp Fire Starter / Signal Flare are the limited daytime visibility and the molten drippings that weep from the end of the flare that’s burning at over 2,000 degrees F. The flare itself isn’t too hot to hold with a bare hand, but the drippings will remind you to hold it away from your body and not above anything that might melt or burn.

Recommendation: These little flares are a great addition to your backpack as a small alerting device and/or an effective fire-starter if you have wet or precarious natural fuel.

Greatland Laser Green Rescue Laser Flare / Rescue Laser Flare Magnum

Category:
Roadside, Marine, Wilderness

Day/Night:
Both

Effective Range:
Night: 30 miles, day: 1-5 miles (green) / night: 20 miles, day: 1-3 miles (red)

Duration:
Battery life is 5 hours continuous use

Shelf Life:
No expiration

Cost:
$125 (red laser) / $225 (green laser)

URL:
greatlandlaser.com

Notes: Nearly all signaling devices are a pyrotechnic of some sort that present some obvious risks, most notably the heat they create and the inherent potential for flame-related destruction. The fix? Remove the fire from the distress signal. Greatland Laser has created a trio of “laser flares” that pack quite a punch in a small package and range in price from $100 to $225.

We evaluated the Rescue Laser Flare Magnum (red) and the Green Rescue Laser Flare. These types of signaling devices are unique in that they’re not traditionally recognized as a call for help. Most often they are viewed as antics by someone just trying to get a reaction. That perception and the requirement for a direct line of sight are certainly limiting factors, but these tools have benefits that tip the scale.

The advantages of the laser flares are that they’re compact, lightweight, and won’t fail in the rain, create secondary damage, or start a fire. A key advantage may lie when used in conjunction with another signaling device. Pyrotechnic flares are limited in their duration, therefore activating one to garner attention and then utilizing the laser to help concerned parties zero in on your location may be the perfect one-two punch to be rescued. Additionally, their prime benefit is getting the attention of aircraft. Although it’s illegal to point lasers at aircraft, federal law makes an exception when it’s used as a distress signal. The Green Rescue Laser Flare is slightly smaller and lighter than the red lasers and carries a bigger price tag but was noticed much easier at the 2- and 5-mile posts. The evaluators did note they didn’t see the lasers during the day unless they were specifically looking for them, and at night, they may not perceive the laser as a call for help. So, the person in peril may need to focus on their target and annoy them into calling law enforcement.

Recommendation: If reliability is at the top of your priority list for equipment, you can’t beat a Greatland Laser. It may be most effective when used in conjunction with another, more prominent notification device.

Orion Alerter Basic 4 Flare Gun

Category:
Marine, Wilderness

Day/Night:
Night

Effective Range:
27 miles (factoring in curvature of the earth)

Duration:
7 seconds at up to 500 feet high

Shelf Life:
No expiration (42-month Coast Guard mandate)

Cost:
$60

URL:
orionsignals.com

Notes: In another offering from the Orion family, the Alerter Basic 4 is a classic aerial signaling device. There’s a familiarity and comfort in the pistol-shaped 12-gauge launcher. From it, a red rocket fires and illuminates the sky. It can be seen for miles. Because the projectile is airborne and burns out before it hits the ground, it’s considered safer than some other pyrotechnic devices when used correctly. Usually found on watercraft, the Alerter Basic 4 has frequently been used by hikers as well, proving its versatility.

During the assessment, when the red fireball shot from the pistol, there was no question from evaluators at the 2- and 5-mile posts that a distress signal had been activated. Unless you happen to be in distress in the middle of a fireworks show, this signal is universally acknowledged as an alert to anyone in the area that someone is in need of help. The evaluator who fired the Alerter Basic 4 had never done so before, and with zero instruction, was able to load and fire the flare. He noted there was no kick and no heat, but recommended hearing protection because of the loud, gun-like bang.

Recommendation: This flare would be a great addition to any watercraft, as it’s USCG approved and could be included in backcountry vehicle kits for contingency planning.

Sirius C-1002 Two Color Distress Light Flag & Whistle

Category:
Marine

Day/Night:
Both

Effective Range:
6 miles / 20 miles from aircraft at 3,000 feet

Duration:
6-hour run time (2 hours required + bonus 4 hours)

Shelf Life:
10-year batteries

Cost:
$300

URL:
siriussignal.com

Notes: Sirius Signals has taken the classic water distress beacon and injected a healthy dose of the latest technology. While it comes at a hefty price tag, it’d be tough to argue that you could do better for a maritime distress signal device. It even comes with an accompanying app that provides the platform to enter as much of your personal and watercraft identification information as you’d like, the ability to send out a customized text, a concise first-aid tab, and a request for tow service. Also included is a “check me” button that can send your float plan and a text to up to five contacts, and a “SOS” button that can alert first responders with a customized message via text and phone call.

The beacon itself is about as basic as it gets, with a prominent and simple on/off switch. Be warned, though — when you switch it on, the beacon illuminates immediately and is extremely bright. The 2-mile post reported it to be “plain as day” and “very visible.” The 5-mile post had a little more difficulty seeing it, but once it was picked up out of the water and pointed, it became more easily recognized. This reinforced that, from an elevated vantage point such as the deck of a ship or an aircraft, this beacon can be seen from a great distance. Sirius touts that its 13 LEDs are five times brighter than any other approved device on the market.

Recommendation: Adding this beacon to your watercraft will satisfy Coast Guard requirements as well as provide the ability to issue a salvo of requests for aid.

Pocket Flare Mixed Signal Kit with Case

(Includes “Bear Bangers” plus flares)

Category:
Wilderness

Day/Night:
Night

Effective Range:
3 miles

Duration:
5 seconds

Shelf Life:
No expiration (if stored properly)

Cost:
$65 CAD (approx. $53 USD)

URL:
frankensled.com

Notes: Flares come in a variety of shapes and sizes. One of the most compact options is the “pocket” or “pen” flare. A variety of manufacturers sell versions of this tiny giant, but we evaluated the one included in the Mixed Signal Kit sold by Frankensled. The kit, which also includes bear bangers, contains three signal flares and a pen-style launcher, all contained in a waterproof case fitted with a belt clip and small carabiner. These flares are reasonably priced in comparison to their larger brethren. The shipping fees to the United States, if you buy from a Canadian manufacturer, can sting a bit, but these are in a class of their own for size, weight, and effectiveness.

The red, fiery projectile burns at more than 15,000 candlepower at a height of over 150 feet. The flare itself simply screws into the end of the pen launcher. Then, you point it up in the air at a 45- to 60-degree angle, pull back the slide trigger, and let it spring forward which fires the device. It’s possible to operate this with one hand, but it’s a smoother process with two. Hearing protection is recommended and, as with all projectile-type flares, you should utilize eye protection or turn your head and look away when firing. After a sharp “bang,” your flare is airborne and a glowing red ball burns across the sky for about 7 seconds. This flare was easily seen and recognized from both the 2- and 5-mile posts.

Recommendation: Backpackers, ATV enthusiasts, and even boaters could find these flares extremely beneficial. Moderate in price, low in weight and space, and high in effectiveness, this flare is appealing to just about all genres of the prepper and outdoor communities.

Orion Orange Smoke Handheld Signal

Category:
Marine, Wilderness

Day/Night:
Day

Effective Range:
3 miles

Duration:
1 minute

Shelf Life:
No expiration (42-month Coast Guard mandate)

Cost:
$30

URL:
orionsignals.com

Notes: Like red aerial flares at night, orange smoke is a universally recognized signal for help. It’s the standard for maritime distress during the day. Orange is used because of its high visibility, and it lies on the opposite side of the color wheel as blue, which provides the greatest contrast against water. In the open, and in an area of high contrast, it has a proven record of effectiveness. There are, though, some limitations. Ambient light, wind, and cover can render orange smoke useless. Night will eliminate the visibility of the smoke. A moderate to high wind will dissipate the smoke readily, which reduces visibility, particularly from a distance. And if you’re in a dense forest or among very high trees, the orange smoke isn’t easily identified.

Orion manufactures several versions of their orange smoke distress signals. The handheld version is lightweight, relatively inexpensive, and packs away nicely. It strikes easily on the first attempt and after a belch of white smoke, an impressive volume of orange smoke discharges that continues for a full minute. A potential rescuer should be within sight because of the brief duration of the orange smoke signal. The 2-mile post reported the smoke could be seen, but was unsure if he would acknowledge that it was a signal for help if he wasn’t pre-informed. It couldn’t be seen from the 5-mile post.

Recommendation: Within certain parameters, orange smoke is a proven distress signal. It should be used during the day, in an open area, preferably with high contrast, and a rescuer in sight.

Summary

Best practices dictate that you don’t activate a signal flare unless you’ve identified a person, people, or vehicle/aircraft/watercraft whose attention you’re attempting to grab. It’s also recommended that you locate yourself, if possible, in an open area, ideally that would provide high contrast to your signaling device. Depending on your respective scenario, there are a variety of options that can bring attention to you when you require aid. Don’t let the first time you need one be the first time you think about or use one. Consider which might be the best fit for you and learn about them, practice using them, and then take them with you. Flares can be life-saving tools when used correctly and should be given thorough consideration before venturing out on your next outing.


New: Bushnell Vault Binocular Chest Rig

The front and center of your torso is an ideal place to store critical gear, whether that consists of spare magazines and an IFAK in a combat situation or a radio and navigational tools while adventuring in the wilderness. Positioning these items on the front of your chest ensures you'll be able to access them easily with either hand, even in alternate stances such as sitting or kneeling. Hunters need quick and quiet access to tools such as binoculars, a laser rangefinder, and game calls, because fumbling around in search of these items is likely to spook the intended target. With this in mind, the new Bushnell Vault binocular chest rig was developed with pockets for each of these items, plus silent magnetic closures that won't click or rattle.

Above: Binoculars are valuable for hunting, shooting, and all sorts of other outdoor activities. A good set doesn't come cheap, so it makes sense to protect them.

Bushnell Vault Harness & Rangefinder Pouch

The new Bushnell Vault binocular chest rig was announced earlier this month as a new product for 2022. It features a compact design with an ultralight X-harness that attaches via four built-in buckles. The binocular compartment is lined with soft, water-resistant material, and can accommodate 12×50 roof prism binoculars from most manufacturers. For binos with smaller optics, there's a removable riser pad that fills in empty space and keeps the binos from bouncing around inside.

The main compartment opens with a forward-facing flap that's attached with a quiet magnetic closure. It contains a mesh pocket for cleaning cloths and other small items. Additional mesh pockets on either side of the chest rig offer storage for game calls, weather meters, multitools, and other items. One more zippered pocket on the back of the binocular carrier serves as a good place to put hunting tags, maps, or a smartphone.

The optional rangefinder pouch (attached in the picture above) is sold separately, and features another quiet magnetic closure. There's also an integrated tether so you won't end up losing your rangefinder in the field if you drop it.

Bushnell says the Vault binocular chest rig will be available soon at an MSRP of $70. The rangefinder pouch will cost an additional $30. For more info, keep an eye on Bushnell.com.


Plate Carrier Workouts with the 5.11 Tactical TacTec Weighted Vest

Exercising with minimal equipment has certainly become more prevalent over the last year and a half. Amidst a pandemic, more and more people have chosen to stay home and workout. This has given rise to many home-training options like video products, streaming fitness classes, home gyms, and easy-to-use equipment. Among the companies entering this arena is 5.11. While 5.11 products are becoming associated with CrossFit, they’re also a solid home gym investment for anyone looking to get in better shape, regardless of the type of training you do. Given that these products are from 5.11, a company whose products many of us have likely used in the past, there’s certainly a level of durability and functionality we can expect. So, let’s take a closer look at some plate carrier workouts with their TacTec Plate Carrier, Weight Vest Plates, and PT-R Weight Kits.

Above: The full arsenal of 5.11 fitness gear makes it easy to get a good workout in anywhere.

Plate Carrier Workouts with the 5.11 Tactical TacTec

Out of the box, this plate carrier looks cool — and who doesn’t want to look their best when working out? Originally meant to carry armor plates and tactical gear, its design is similar to that of many plate carriers used by military and law enforcement units, which is a differentiating factor among other weight vests. In the author’s humble opinion, it’s hands down the best-looking weight vest on the market. Also, if you happen to use a plate carrier for your day job or intend to use one as part of your preparedness plan, the fit, finish, and feel of the TacTec will likely be similar to whatever plate carrier you have for personal protection. Outside of that, it appears durable and well-made. Based on the initial feel, it seems like it’ll last a while. Other weight vests we’ve used have broken down over the course of one to two years of consistent use, but this vest feels different. Meant for frontline service, it’s a little overbuilt by home gym standards, which hopefully translates to an extended lifespan of hard training use and helps to justify the higher price tag at $210.

In terms of first-time wear impressions, the TacTec feels more stable and more comfortable than other commercial weight vests due to the large degree of fit adjustment that’s possible with this design, as well as the padded shoulder straps. These are similar to the straps they have on their backpacks. Using a weight vest for long periods of time certainly can be a strain on the shoulders and neck, so the extra padding is a nice touch. It’s a little larger than others on the market today, but it doesn’t feel very bulky. Overall, it fits well and doesn’t move very much during use once adjusted properly. Based on the out-of-the-box adjustments, it’ll likely fit most adult males well.

Above: Bodyweight movements can easily be made more challenging with a weight vest like the TacTec Plate Carrier.

The plate carrier has some other nice features like perforated mesh padding on the inside as well as vents to increase airflow and cushion it while resting on your chest and back. Even though this vest is a little bigger than many others on the market, it doesn’t get too hot, and range of motion is good. This makes the TacTec Plate Carrier an excellent choice for anyone looking to use a vest looking for more comfort in general, endurance training of any kind, or individuals looking to use a weight vest for a prolonged period of time. No matter how long you wear it, it doesn’t really get to a point where it’s uncomfortable or very hot, unlike other commercial weight vests.

Above: Using both the TacTec Plate Carrier and the PT-R Weight Kit gives you numerous different training options to keep training interesting.


One unique feature of the TacTec Plate Carrier not found in other vests is the quick-release cable escape system. This allows the user to pull on a Velcro-enclosed cable and quickly disassemble the vest. Putting it back together is a bit of a process, but it’s not difficult. This feature was originally meant for the TacTec’s primary role as an armor carrier for first responders, who may need to ditch the vest in a hurry — for example, if their vehicle rolls over, they wind up in water, or are wounded and need to quickly remove the vest for medical treatment. But as a weight training vest, the cutaway feature is a unique feature to have in the case of an injury or medical emergency while training.

Weight Vest Plates

Above: The metal plates are likely the best option for most people as they’re the easiest to use with the least amount of setup.

The 5.11 TacTec Plate Carrier offers two different options to add weight for plate carrier workouts — the Metal Weight Vest Plate and the Weight Plate Sandbag. The Metal Weight Vest Plates are easier to use compared to the Weight Plate Sandbags, as they don’t require any filling of sand. They slid in easily and fastened well in the compartment. These plates come in a pair and are offered in both 5.75- and 8.75-pound options, at the additional expense of $70 or $75, respectively. If you don’t have the actual armor plates to train with, or don’t want to train with said plates for fear of damaging them during a workout, these plates are a great way to add weight that integrates seamlessly with the TacTec. The plates measure 12.5 inches high and 9.5 inches wide, which means they may also be able to integrate with other plate carriers, if you happen to have one on hand already.

Above: These durable sand-filled plates were very easy to fill and are a very suitable alternative to the metal weight plates.

As far as the Weight Plate Sandbags, they don’t require much sand to fill to the requisite weight, and they Velcro easily with both a regular closure and a rolled closure. Once filled, just slide them into the TacTec carrier. These are very well-designed with two individual compartments to fill with sand and a break in the center to better fit the contours of the body. There was no issue at all with sand leaking out during use, which is always a concern when using any sand-filled training product since some can create a real mess. Once filled, they fit snugly in the vest and attach to the inside of the weight vest via Velcro to keep them secure. These were about 8.5 pounds each when fully filled, and they run $50 for a pair.

PT-R Weight Kits

Above: Each PT-R Weight Kit is composed of two liner bags inside of the weight bag. Just unzip the weight bag and take out the liner bags for other exercise options.

Sandbag training may be new to much of the public but has been around in the fitness community for a little while now. Using sandbags as a weight training implement is a nice option; it gives people the ability to easily get a resistance training workout with numerous different exercises and very little equipment necessary. On top of that, sandbags allow the user to do work in multiple planes of motion easily, and they also allow some movements that are generally more coaching intensive, such as the hang clean, to be done without as much difficulty compared to a barbell version.

The 5.11 PT-R Weight Kit feels well-made, although some of the other similar products on the market do feel a bit more durable due to different materials. They use 1050D nylon, which will increase durability over extended-use periods. There are a few different options in terms of handle placement, giving some freedom as to what feels most comfortable and to accommodate an array of different movements.

One very useful feature of the PT-R Weight Kit that competitors don’t have is the ability to use the internal liner bags on their own. 5.11 thought to put handles on each liner bag. Individually, they function similar to a kettlebell with a handle at the top with the weight below. This is very useful to be able to do exercises like swings and Turkish Get-Ups, but you can certainly use them for much more than that.

Above: The different handle placements can change an exercise quite a bit.

The PT-R Weight Kit comes in both 50- and 100-pound sizes, which should have your bases covered for most exercises. These two sandbags will run you $140 for the 50-pound bag and $160 for the 100-pound bag.

Above: Feel free to experiment with the best way to use these liner bags in your workout. They easily slide back into the weight bag.

Conclusion

Overall, these products were durable, reliable, and reflect the high-quality standard that 5.11 has set for most of its products. The TacTec Plate Carrier fit well, didn’t move very much during our plate carrier workouts, was cool and comfortable. The larger size may be a turn-off for some, but it does add more comfort and stability not found in other vests. If you don’t mind the price tag, it’ll likely be the most comfortable weight vest you ever use.

Above: The Velcro cummerbund Velcro closure does a great job keeping the vest firmly in place.

The PT-R Weight Kits function very well and allow for a wide range of different exercises making them a very useful part of a home gym, or even as the sole piece of workout equipment. Their durability should result in a lot of use without issues. If you’re someone who wants to keep most of your training at home, or you’d like some new equipment to broaden your catalog of exercises, consider these products as they’re a great addition to your plate carrier workout arsenal, and you can take them on the road with you to exercise on the go.

About the Author

Ryne Gioviano is the owner of Achieve Sports Performance & Personal Training located in Aurora, Illinois. He earned his master’s degree in exercise physiology and is a Certified Strength and Conditioning Specialist through the National Strength and Conditioning Association. You can find more information at www.Achieve-SportsPerformance.com or reach him on Twitter and Instagram at @rgioviano.


Reviewing the Internet’s Dumbest Survival Tips

Bushcraft is a term that was largely popularized by legendary Canadian outdoorsman Mors Kochanski, who summed up his survival philosophy with a memorable quote: “The more you know, the less you carry.” This emphasizes the importance of developing a well-rounded set of knowledge and skills that can help you survive in the wilderness. It also encourages the use of natural resources, rather than overreliance on manmade gear and tools. Unfortunately, the term bushcraft is often misused to refer to any outdoorsy DIY “life hack,” most of which are actually the exact opposite of what bushcraft should be. The following viral video from the Facebook page 5-Minute Crafts Men claims to contain “serious bushcraft ideas” that can help you “survive in any conditions,” but it actually feels like a 15-minute compilation of some of the internet's dumbest survival tips.

Above: If you think this is what survival looks like, please save the search-and-rescue teams some trouble and don't venture off the beaten path.

The Original Survival Tips Video

You can watch the full 15-minute “serious bushcraft ideas” video in the embedded video player below, or by clicking this link.

There's a lot to take in here, so read on as we evaluate some of the most impractical survival tips seen in this video.

Survival Tip #1: “Protected from Wild Animals”

The very first segment in this compilation sets a low bar for the remainder of the survival tips. We'd love to know which wild animals this woman is seeking protection from, because a waist-high string net isn't going to be stopping any of them. Small critters like field mice and racoons will pass right under it. Larger animals like bears will be completely unfazed by it, assuming something inside the campsite caught their attention in the first place (they're smart enough to open car doors). The only thing this tip might be useful for is improvising an emergency beach volleyball net.

It's almost as bad as another piece of infamous internet survival advice, the WikiHow entry for “How to Escape Dangerous Forest Animals.”

If you want to avoid creepy-crawlies at ground level, consider building an elevated sleeping platform or set up a hammock. As for bears and larger animals, keep all food and other scented items away from your camp, ideally in an elevated bear bag. Refer to this article from the Alaska Department of Fish and Game for more info.

Survival Tip #2: Pitiful Plastic Tipis

We hope you're stocked up on plastic wrap, because it seems to be the video creators' favorite material. Would it be useful if you found a roll in a dumpster or washed up on a beach? Sure. Is it an essential material you should carry in your backpack specifically for shelter-building? No way. Here's a better survival tip: bring a tarp. They're lighter, more compact, easier to work with, opaque, and they're even reusable! What a concept. Ironically, the very next clip shows a rudimentary tarp setup on a ridgeline, so we know they had access to one.

On top of that, this tipi design is barely big enough to huddle inside in the fetal position. Spend a night like that in the forest, and you certainly won't be smiling as much as this lady. Instead, use your handy-dandy tarp to make a shelter, or use real bushcraft skills to construct one from naturally-occurring materials.

Later in the video, another clip shows how to make a tipi out of rolls of clear packing tape, which manages to be even more inefficient than the plastic wrap method. As Ron Burgundy would say, we're not even mad — that's amazing.

Survival Tip #3: Did We Mention the Plastic Wrap?

This clip gave us a glimmer of hope at first — it starts with a rudimentary wood A-frame that's at least long enough to sleep inside. But then our hopes were dashed as the plastic wrap returned. Yes, applying enough of it can create a water-resistant barrier over the shelter, but so would a tarp… or a few layers of the nearby grass and evergreen boughs. We won't even bother discussing the goofy, pointless plastic wrap fence around the shelter.

Additionally, this shelter is built on a tiny sand bar that's surrounded by water, and it's raining. Does she want her shelter to get flooded? Because it sure seems like the perfect location for that.

Survival Tip #4: Bring the Entire Kitchen!

The video would lead us to believe that this woman's backpack contains:

  • A whole raw chicken
  • One eggplant
  • One bell pepper
  • A full-size cutting board
  • A wood mortar and pestle
  • Aluminum foil
  • Multiple jars of spices
  • A grocery store bottle of olive oil

At this point, she might as well just bring a portable barbecue grill and basting brush rather than making them out of twigs and dirty grass from the riverbank. The latter item is a great way to smear waterborne pathogens all over the food. She also apparently forgot to pack a fork, since she's seen stabbing her food with a camp knife to eat it. Next morning, she splashes dirty river water in her face before cutting the plastic wrap off her shelter and traipsing off through the creek.

For an overview of the numerous alternative cooking methods that could've been used here, check out our previous article Grid-Down Chef: 6 Outdoor Cooking Methods.

Survival Tip #5: Give Yourself Hypothermia

More plastic wrap. This time, it's used to enclose a DIY fire pit made from an old car wheel and some fire bricks — we assume she stopped by a junkyard and Home Depot on the way to bushcraft practice. She surrounds the fire on all sides, makes sure to seal the bottom edge with snow, and then cuts a large entry flap that's seen blowing in the breeze. After setting up a wall thermometer (also from Home Depot, no doubt) she dons a bikini and jumps into the icy water nearby, then returns to the plastic sauna to attempt to warm back up. How refreshing!

Seriously though, if you're in a cold-weather survival situation, we shouldn't have to explain why it'd be stupid to wear a bikini or jump into an icy lake. And if you have enough time to build a sauna, you should probably pick a different recreational activity that doesn't put you in immediate danger of hypothermia and frostbite (maybe even carbon monoxide poisoning). Or just build one out of wood like a normal person.

Survival Tip #6: Make a PVC Geodesic Dome

The final segment is truly incredible.

You'll need a few friends to help you create this expert-level survival shelter. Make a clearing in the woods, lay down some blankets, and remove a few dozen segments of PVC pipe from your backpack. Then take the propane torch and C-clamp you also carry in your backpack, and flatten the ends of each pipe. Next, for some reason, use a pair of scissors to bore bolt holes through each pipe (your cordless power drill must be out of batteries). Use bolts and wingnuts to assemble the PVC pipes into a geodesic dome — everybody knows that's the most efficient survival shelter shape.

Cover the shelter in transparent mesh so it won't block the breeze, and decorate it with placemats, throw pillows, scented candles, and cute dreamcatchers. It's the perfect place to relax and read Isaac Asimov novels until someone can come rescue you. Pair this with a zigzagged string animal barrier for extra safety.

Closing Thoughts

Even a broken clock is right twice a day, and this insane video still includes a few tips that might be marginally useful. The hammock clip shows how to add toggles to tie down a tarp. The igloo clip builds about 20% of a functional snow shelter, but it does contain a few smaller tips with some validity:

  • Using a pencil sharpener to quickly generate tinder shavings
  • Using crumpled paper as extra insulation between clothing layers (a practice often used by homeless people in cold climates)
  • Making pine needle tea

At the time of publication, this video has 928,000 views. We sincerely hope that, like us, most of those viewers were only watching to point and laugh.


Hands On: Micro Chest Rigs vs. Heavy Chest Rigs

We’ve spent a lot of time recently talking about body armor and plate carriers. It’s a topic we think is especially relevant as we continue to see pockets of aggressive unrest that include property damage and crimes against persons. Your equipment should be a reflection of your environment, and you should always take steps to prepare for the worst-case scenarios. Current trends in kit configuration have led to many viewing the chest rig as an accessory or add-on to an armor carriage platform. We agree that this is definitely an excellent use for a chest rig. But the beauty of chest rigs is that they can also be used independent of armor as a stand-alone load-bearing platform. Whether you want to carry spare magazines, radios, shelter-building equipment, medical supplies, or just food and water, chest rigs offer a flexible, ergonomic option to keep your survival gear easily accessible. To illustrate this point, and to examine the primary schools of thought in chest rig design, we’re looking at two specific products to represent two major categories: micro chest rigs and heavy chest rigs.

MICRO CHEST RIGS

Redwire Gear Emergency Management Rack (EMR)

We’ve had our Redwire Gear EMR chest rig for years, and despite the absolute deluge of compact, minimalist, low-vis, and micro chest rigs to hit the market over the last couple years, we still haven’t found one we like better than the EMR. It’s a simple panel with a 6-row-by-6-column grid of laser-cut slots in lieu of traditional MOLLE-compatible webbing. It comes complete with an H-harness constructed from 1-inch nylon straps and is assembled using six Fastex-style buckles.

The back of the panel is covered in hook tape from edge to edge, with a removable loop-side panel if you don’t need the stick-on capability. The combination of hook tape and buckles makes the EMR usable as a stand-alone chest rig, clip-on front panel for QASM-equipped plate carriers, or even to attach onto some assault packs with loop tape panels (the 5.11 AMP12 pack, for example). With the H-harness, it can also be slung over a vehicle headrest, and the waist strap connected around the seat to create an ad-hoc seatback load carriage setup. When configured lean enough, this micro chest rig completely disappears underneath a windbreaker or hoodie.

We’ve reconfigured ours a number of times over the years, but believe we’ve found the goldilocks setup for it (for now):

Above: The HSGI Bleeder/Blowout Pouch holds just enough trauma gear to cover likely battlefield wounds.

The G-Code Scorpion pouches allow us to use a variety of rifle mags from AR-15 to AR-10/SR-25 to AK pattern. The High Speed Gear Bleeder/Blowout pouch has been around for years and is a prime example of the “if it ain’t broke …” axiom. It’s a compact, low-profile design that has just enough room for a basic blowout kit including chest seals, combat gauze, compact pressure dressing, and a set of nitrile gloves. The only thing that doesn’t fit inside the kit is a tourniquet, which we’re able to fix by threading a bungee-based STRAP band to the small laser-cut MOLLE panel on the side of the pouch. There’s also a slot in the back of the Bleeder/Blowout pouch for trauma shears, with positive snap-close retention.

The Demo pouch, Redwire’s answer to the growing trend in drop-down or sub-abdominal style pouches, is augmented with a Mk1 chem light panel from Explosive Ops Gear. We originally had the panel stocked with 10 4-inch miniature chem lights, but found these had a habit of falling out during rigorous movement. So, we went with the larger 12-inch “hand flare” chem lights that feed through both sets of loops. They’re a little bulky but provide more light than the minis and are held rock-solid secure on the panel.

Inside the Demo pouch, we have a small IR “firefly” beacon for marking/identification under night vision as well as a compact Sport Smoke smoke grenade and smaller elastic-loop panel for miniature IR chem lights. We also have a 50-foot length of 4-in-1 FireCord. This looks just like standard 550 parachute cord, but the outer nylon sheath can be split open to reveal a strand of Dyneema that can be used as fishing line or a friction saw, a strand of waxed linen tinder cord, and a strand of cotton sewing string that can be used to repair gear or for wound suturing in austere conditions.

The Demo pouch is highly versatile and can be loaded with anything from medical gear to snacks to survival tools or demolition equipment, if you’re cool enough to use that for your job. It attaches via a large hook-and-loop panel that just presses onto the back of the EMR. If that’s too much bulk, or you don’t need the extra load carriage, simply tear it off and run the EMR in stand-alone configuration.

Why Choose a Micro Chest Rig?

What is a micro chest rig good for? It is, admittedly, not a whole lot of load-carriage, relatively speaking. But there are some specific applications that this sort of setup is ideal for.

To those working in law enforcement or low-profile protective roles, a micro chest rig is a great way to up your ammo or gear capacity while maintaining maximum concealability. Whether you’re conducting surveillance, working an active shooter response role, or supporting a VIP escort/protection team that doesn’t require large amounts of ancillary gear, micro rigs are an excellent way to feed a carbine or rifle that may be a secondary or worst-case weapon, or to carry other equipment like a radio, large flashlight, or medical gear. Small chest rigs are lightweight, low-bulk, and keep your critical items close at hand and easily accessible with either hand from a variety of positions. If you spend most of your time behind a steering wheel, these rigs can also be more comfortable than adding equipment to a duty belt while being faster than digging through a go-bag or assault pack.

Above: The Redwire Gear Emergency Management Rack is an excellent example of a modular micro rig that can carry a no-frills fighting load for emergency response, while still being concealable under a large hoodie or windbreaker.

For prepared citizens, micro chest rigs allow you to scale your level of response. They can be thrown over a slick plate carrier and just as easily removed when not needed. They’re also a great way to supplement your EDC if/when the situation requires a more aggressive posture. Even if you appendix carry a pistol or other weapon in your daily routine, micro chest rigs will not inhibit your access to pockets or beltline, especially if you forego the Demo pouch add-on.

The author keeps his EMR packed in a go-bag with a First Spear Slick plate carrier. These two pieces of kit paired up allow a fully scalable response for an array of situations that may require just armor, just additional gear, or both. As stated, the Slick and the EMR micro chest rig, even when worn together, still allow normal draw from an AIWB holster, access to an AIWB fixed blade, and full use of all pant pockets for smaller EDC items like flashlight or folding knife.

Above: The EMR’s load carriage can be expanded with Redwire Gear’s Demo Pouch, which hangs down under the EMR.

HEAVY CHEST RIGS

Barrel & Hatchet Ghost

On the other end of the spectrum from the high-speed-low-drag micro rigs are larger, purpose-built chest rigs. Sometimes referred to as general-purpose or patrolling rigs, these offer a substantial increase in load carriage, trading off concealability. They typically have a set of pouches that are hard sewn to the harness. Not intended to be clipped onto a plate carrier, patrolling rigs date back to earlier generations of chest rigs used in places like Vietnam and Rhodesia — for a long time, these setups were referred to as “Rhodesian rigs” due to their popularity in a number of African Bush wars.

They date back to a time before body armor was prevalent on the battlefield, and were worn simply for more ergonomic load carriage. Nowadays, some military units that work in tough terrain or specialize in long-range reconnaissance patrols still use them when direct contact with the enemy isn’t in the mission profile. Some units will wear patrolling rigs while keeping slick plate carriers in their rucksacks. The patrol will stop short of their objective to don armor before striking but have all their immediate-use equipment on them in the meantime.

Our example patrolling rig comes from a new company called Barrel & Hatchet Trade Company. Their rig, which they call the Ghost, was designed by Air Force JTACs (Joint Terminal Air Controllers) who often work attached to special operations units charged with long-range patrols. The JTAC’s job is to call in airstrikes on identified enemy positions. This mission set is clearly translated into the Ghost’s design, which features pouches for up to six AR-style magazines, two radios (one to talk to their teammates, one to talk to attack aircraft), and two general-purpose pouches for medical or sustainment supplies.

Fortunately, if you’re not directing F-16s dropping bombs on ISIS fighters, the radio pouches can be repurposed to hold all kinds of things from water bottles to power bars to sunglasses. They are open-topped with bungee retention cords that can be adjusted for tightness via pinch clip. When adjusted properly, these pouches can even accommodate a full-sized service pistol with weapon light. Even the mag pouches will hold other sundries, thanks to the Ghost’s unique design that features reinforced openings.

Above: The GP pouches on the Ghost rig are great for these Nutrient Survival single-serve rations.

We’re not huge fans of the flap-top mag pouches, but since these pouches are meant to be multipurpose, we understand the benefit of additional closure/retention. Said flaps buckle closed, with no hook-and-loop to make noise or get mudded up. The general-purpose end pouches are straightforward. There are no elastic loops, pile tape, or anything inside the pouches.

Those who like to meticulously organize every item in every pouch might be triggered by the lack of sub-compartmentalization, but the unadorned GP pouches on the Ghost can be pressed into service to hold odds and ends, or even left empty to pick up scavenged items on the fly. Our sample came with an H-harness, by our request, but an X-harness is the current production standard. Generally speaking, the X-harness is more comfortable for long-term wear, but the H-harness is easier to use when throwing a chest rig on over body armor.

Speaking of armor integration, we attempted to integrate our Ghost with our Defense Mechanisms plate carrier. The top-mounted clips on the Ghost click right into the QASM-style female buckles. The Ghost also features a square of hook-side tape on the back side of the main panel, which is placed perfectly if your plate carrier features loop-side tape on the front plate bag.

The Ghost is substantially larger than a micro chest rig or load-bearing placard, with the radio and GP pouches extending well past the edges of a plate carrier. We attempted to use our AXL advanced chest rig retention kit to secure the ends of the Ghost to our cummerbund but ran into a hiccup. The side buckles on the Ghost are all male-end buckles, which defies the trend of male buckles up top, female buckles on the side. The AXL retention kit also uses all male-end buckles. So this was a no-go in terms of using the AXL kit to secure the Ghost to our plate carrier.

We loaded one GP pouch with Nutrient Survival single-serve rations and the other with a combination of 4-in-1 survival cord, an AR multi-tool, and a Sport Smoke smoke grenade. The radio pouches handily accepted an insulated water bottle and a Leupold spotting scope.

Why Choose a Heavy Chest Rig?

If concealment isn’t an issue for you, a larger patrolling-style heavy chest rig like the B&H Ghost offers advantages in both the amount and array of equipment you can carry. Likewise, if using a chest rig for general outdoor activities like hunting or hiking where armor integration isn’t a concern then a stand-alone rig is likely the way to go. While you may not need 6 … or 9 … or 12 magazines as part of your family preparedness plan, there are a multitude of general-use rigs available, and large flap-style mag pouches can be repurposed to hold all kinds of other things.

Of course, there are also all-MOLLE versions of these kinds of larger heavy chest rigs that can be customized ad infinitum to your specific needs. Especially if you’re the pack mule for young children or other family members, the extra storage capacity will be a boon. Using a heavy chest rig in conjunction with a small daypack or belt-mounted load carriage will also help distribute the weight of survival equipment over several different areas of the body, reducing fatigue on a specific point.

Conclusion

These are just two specific products showcasing two entire weight classes of chest rig. We’re not going to declare a winner or tell you that you should pick a micro chest rig over a heavy chest rig (or vice versa). On the contrary, we urge you to take a hard look at what your realistic needs are and make the best choice from there. Regardless of what size, style, type, or pattern of chest rig you think you need, there are at least two options on the market today that fit your parameters.

SOURCES:

More Articles on Chest Rigs and Plate Carriers

To learn more about tactical load-bearing equipment such as chest rigs and plate carriers, check out some of our previous articles below:


Bag Drop: Personal Security Detachment Backpack

Personal Security Detachment (PSD) work isn’t as glamorous as it sounds. The idea that you’re always wearing a black suit with a curly earpiece hanging out of your ear like the Secret Service in the movies isn’t accurate in most cases. The point is to offer close protection of a client or high-value individual. You don’t want to look like a gang of heavily armed goons surrounding someone very important like the rings of the archery target encircling the bull’s-eye. The more attention you bring to yourself, the riskier you make your unprotected movement in public areas.

During my time doing PSD work overseas, we had to protect quite a few high-value personnel. While armor plates and a pistol aren’t necessarily hard to conceal, a carbine and a chest rig will make you stick out. In those situations where we were trying to be less conspicuous, we’d put an MP5 or similar PDW/SBR (Personal Defense Weapon/Short Barreled Rifle) in a backpack with a Rhodesian or similar LBE (Load Bearing Equipment) kit. This was an option we could deploy quickly if needed, but it let us blend in with any group of tourists simply walking around viewing the sights. These backpacks would be civilian in nature as to not draw attention with excessive MOLLE attachments and camouflage nylon.

Above: It's essential to carry a pack that looks discreet and can easily blend in with the local population and/or tourist groups.

Many of these events required us to sit and observe during a dinner or meeting that may last most of a day. If we were already carrying a backpack, why not use it to expand our ability to respond to violent threats, medical emergencies, or various daily inconveniences? While loading the backpack with required tactical gear took a lot of space, it could be loaded efficiently to minimize bulk. When I had to do this work years ago, we simply didn’t have access to the enormous number of options we do today for backpacks and low-vis equipment.

Personal Security Detachment Bag

For my more modern take on this requirement, I started with a Vertx Gamut 2.0 backpack. I’ve had this specific bag for a couple years, and I use it every day. Its contents are typically set up in this specific configuration, but the PDW and chest rig are removed when necessary. The bag itself is 20.5 H by 11.5 W by 7.5 D inches and has an internal capacity of 25 liters. This bag is designed specifically for the carrying of a PDW and accessories while maintaining a very discreet external signature. The Gamut is built with a quick-access rear weapons compartment with a large pull tab. The bag can also utilize ballistic panels and complement any body armor you may already be wearing.

Make & Model
Vertx Gamut 2.0

MSRP
$220

URL
www.vertx.com

Backpack Contents

The purpose of this bag is to bring a bigger gun than a pistol into the fight if needed. I chose to use a B&T APC9 Pro Pistol with brace, which fits perfectly with stock collapsed and a 30-round magazine inserted in the back compartment. I’d imagine similar guns like the MP5 or its clones, or a SIG Rattler or MPX, could also fit in a very similar fashion. The main compartment has a specific laptop (or armor plate) sleeve and multiple zippered pockets to keep all required equipment organized.

I loaded my internal main pocket with a beanie, light jacket, notebook, three pens, a Multitasker Twist, and a Haley Strategic DC3RM Micro with four additional 30-round magazines and assorted smaller items. The design of the bag allows rapid access to the weapons compartment, and only takes slightly more time to get the chest rig out. The idea is to deploy the bag’s contents after using your sidearm to handle any immediate threats. Going from a pistol with 15+/- round magazines to a PDW with multiple 30-round magazines increases the defense capabilities of any protection detail in a high-threat environment.

I used the external pockets to stow quick-access items, so I won’t need to open the main compartment. The Gamut features an external flap that can be opened and attached with two hooks to hold a jacket or helmet if needed, but I left it zipped up and used it for medical gear instead. I was able to insert a Dark Angel Medical kit and a SOF-T tourniquet with room to spare for easy access. In the two external side pockets, I have another SOF-T, trauma shears, a Leatherman multi-tool, knife sharpener, two cigars, a torch, and a cutter. Those last items are for my positive mental attitude more than any tactical “need,” obviously. I developed my love of cigars overseas, so it only seems fitting.

Finally, in the top smaller pocket, I keep mosquito repellent, sunscreen, a couple pens, all of my required chargers for cell phone and comms equipment, extra batteries, a small headlamp, and a handheld SureFire flashlight. Slide a Nalgene bottle on the outside and a couple Clif bars, and you’re set for a full day of sitting around and ensuring someone stays alive. When fully loaded, the bag isn’t light, but for what you’re bringing to the fight — especially without causing mass panic in a public environment — this is a very capable option.

Closing Thoughts

Looking back at what we used in the past and what we’re able to purchase, configure, and carry today is astounding. This bag and setup would’ve worked great for what I was doing in my past life, and hopefully the men and women currently serving in that capacity are able to use the best equipment for their given environment. There’s something to be said about making do with what you have to accomplish a task, but if given the opportunity, always take the time to acquire the best tools for the job.