Verification Code Scams: Circumventing 2-Factor Authentication

How difficult is it to find your phone number online? For most of us, the answer is “not very,” despite our best efforts. There are countless places where your phone number might be shared, whether it's due to your own actions or those of a third party. Maybe you posted your number alongside a for-sale ad in an online marketplace, your spouse shared it in a community group on social media, or your boss emailed it to someone without your knowledge. Perhaps you signed up for a customer loyalty program at a store, and that store sold your name and number to make a quick buck. Maybe it was leaked in one of the countless data breaches that we hear about almost every day now. No matter the reason, phone numbers have become a key target for cybercriminals who carry out verification code scams.

What is a Verification Code Scam?

Two-factor authentication, or 2FA, has become an increasingly popular method of adding security to online accounts. The most common form of two-factor authentication involves sending a text message to your phone number with a verification code that must be used to take an action (e.g. reset a password, create an account, or allow a new device to log into an existing account). Everyone knows not to give out their passwords to strangers, but not all are as conscious of how 2FA codes work. Verification code scams involve convincing users to share those codes so criminals can take malicious actions, sometimes without requiring an additional password.

Now, you might be thinking, “That's ridiculous! I would never give a verification code to a stranger.” That may be true — if you're even a little security-conscious, you'll know never to give out a verification code that you receive. Many verification code text messages also include a message that says “Don't share this code with anyone.” But all of this can be overcome by a smooth-talking criminal who understands social engineering. (If that's not a term you're familiar with, read our article Social Engineering: 5 Manipulation Techniques.)

Even if you wouldn't fall for this trap, your family members and friends might. That's why it's essential to share this knowledge with those who are less tech-savvy and more easily victimized.

How Do Verification Code Scams Work?

There are many ways cybercriminals convince victims to hand over their verification codes. For context, let's look at a real-life example that has been circulating lately: the Google Voice scam.

Imagine you've listed an old iPad for sale online. As most people do, you enter your phone number so potential buyers can contact you. You receive the following message: “Hi, I'm interested in the iPad you're selling. If it's still available, I can send you the money through PayPal, but first I want to make sure you're not a scammer. I've had too many close calls and I don't want to get ripped off.” The message continues, “I'm going to use Google verification to prove that you're a real person. You'll get a text with a six-digit code from Google, so just let me know the verification code so I can prove you're not a bot. Thanks!”

You then receive a code from Google that looks like this:

Example via support.google.com

If you're even a little skeptical, alarm bells should be going off in your head by now. Unfortunately, many people — often children or the elderly — don't know better.

If the victim hands over the code to the criminal in this example, it's used to set up a new Google Voice account with the victim's phone number. That allows the scammer, who is usually overseas, to use the new Google Voice number to scam other victims (or to sell the number to other malicious groups). If authorities investigate, they'll find the victim's number linked to the scammer's Google Voice account.

Here's a guide explaining how to reclaim your number if you fall victim to the Google Voice scam.

Above: Security consultant and former Army Cyber Warfare Officer Rich Malewicz shared this example of a verification code scam in action. Even if it seems obvious to you, many people still fall for these brazen attacks.

Other possible verification code scams might be seeking access to accounts whose username and password data have previously been leaked. When a criminal already has access to the username and password, a 2FA code is usually the final key to taking over an account.

steganography embarrassed woman

Now, maybe you're not falling for the nice guy approach — that's good. But there are other ways attackers convince victims to give up these codes. Fear is another common tool to convince victims to share a verification code. For example, a criminal might send an official-looking text that says, “ALERT: a new device has accessed your Amazon account near Shenzhen, China. A six-digit emergency verification code has been sent to this number. Reply immediately with the code to recover your account.” Uninformed users might panic and comply without realizing that this fraudulent message isn't protecting their account from an attack — it IS the attack.

Methods to Avoid Verification Code Scams

The obvious answer is to do what most verification messages say: treat every verification code like a password, and never tell them to anyone. But there's more to it than that.

Since SMS/text-message-based authentication is the most common method, it's also the most common target for criminals. It's a good idea to set up one of the other 2FA verification methods, either as a backup or your primary method. Authenticator-app-based (a.k.a. Time-Based One Time Password, or TOTP) verification tends to be more secure since its codes expire in as little as 30 seconds — probably not enough time for an attacker to use it, even if you were foolish enough to share it. Google Authenticator is a good example of this type of app.

Titan Security Keys in USB-A and USB-C format. (Photo via store.google.com)

For the extremely security-conscious, Google even offers an option to create a physical security key for 2-factor authentication. This requires you to insert a pre-programmed key, such as the Titan Security Key pictured above, into the USB port on your device to serve as your 2FA verification code. Unless someone steals the key, they won't be able to access your account.

We also highly recommend creating one-time-use backup verification codes, which can be printed out or written down and saved in a secure location (e.g. inside a safe). If your primary 2FA method becomes inaccessible — for example, you lose or break your phone — these backup codes allow you to verify your identity.

If you suddenly receive an unexpected verification code that appears legitimate, it's probably a good idea to go change your password immediately for that site, since it may be a sign that someone already has your username and password. Here are some tips on how to create a secure password.


How to Carry Your Handheld Emergency Radio

Every successful relationship starts with communication. This mantra is important for us as prepared individuals, because no matter the circumstances, we need to communicate with our loved ones and those who rely on us. In a grid-down disaster or even just a back-country emergency, being able to talk to another human being can bring on a sense of calm and also get you out of a sticky situation. History has shown us that cell phones can be very unreliable, either as a result of overloaded cell towers or poor signal strength. Ham radio, on the other hand, doesn’t get overwhelmed and has proven extremely useful during crises. This is why it's wise to carry a handheld emergency radio, either as a primary or secondary communication tool.

Getting on the Air with a Handheld Emergency Radio

We should get this disclaimer out of the way first: it’s essential to understand your radio’s capabilities as well as local and federal laws before you begin transmitting. The ever-popular Baofeng UV-5R or BF-8 are great radios for the price, and a wonderful place to get started on your ham journey, but they can also help you inadvertently break the law if you don’t know what you’re doing. For a more in-depth article on handhelds, check out “Can Anyone Hear Me?” in Issue 38 of RECOIL OFFGRID. Patrick McCarthy gives a nice breakdown of the bands used within the VHF and UHF range, which we’ve included below.

Family Radio Service (FRS): If you’ve ever used the walkie-talkies sold in blister packs at retail stores, you’ve probably used this service. FRS radios require no license but are limited to 2 watts of output power and can’t use a detachable antenna, so you’ll rarely see range beyond a mile.

Multi-Use Radio Service (MURS): Like FRS, this service doesn’t require a license. It’s slightly better due to the ability to use external antennas, but the FCC’s guidelines for MURS prohibit the use of repeaters to extend range.

General Mobile Radio Service (GMRS): This service is one step better for emergency communication purposes, since it can be used with repeaters. It requires a $70 license, but there’s no test required, the license lasts for 10 years, and it automatically applies to all members of your immediate family. However, power restrictions limit its range in comparison to ham radio.

Ham/Amateur Radio: Ham radio offers the most versatile capabilities and the most robust community of operators to communicate with. However, in order to legally use a ham radio, you’ll need to pass a test and get a license. There are three license categories: Technician, General, and Extra. The first is the most practical for general emergency preparedness; the associated 35-question multiple-choice test costs about $15 and can be passed easily after studying for about a week. The other two categories offer increasing levels of access to HF for intercontinental communication.

When you take a ham radio license test, you can find out immediately if you passed or failed. If you failed the test by only a few questions, you can often retake a slightly different version of it on the same day (you’ll need to get approval from the Volunteer Examiner who is proctoring the test and pay the fee again). After passing the test and waiting a week or two for processing, you’ll be assigned a six-character call sign. At that point, you’re cleared to begin transmitting.

Bringing Your Handheld Radio with You

Once you understand the different ways to use the radio, now comes the time to make sure you have it when you need it, and keep it accessible and secure.

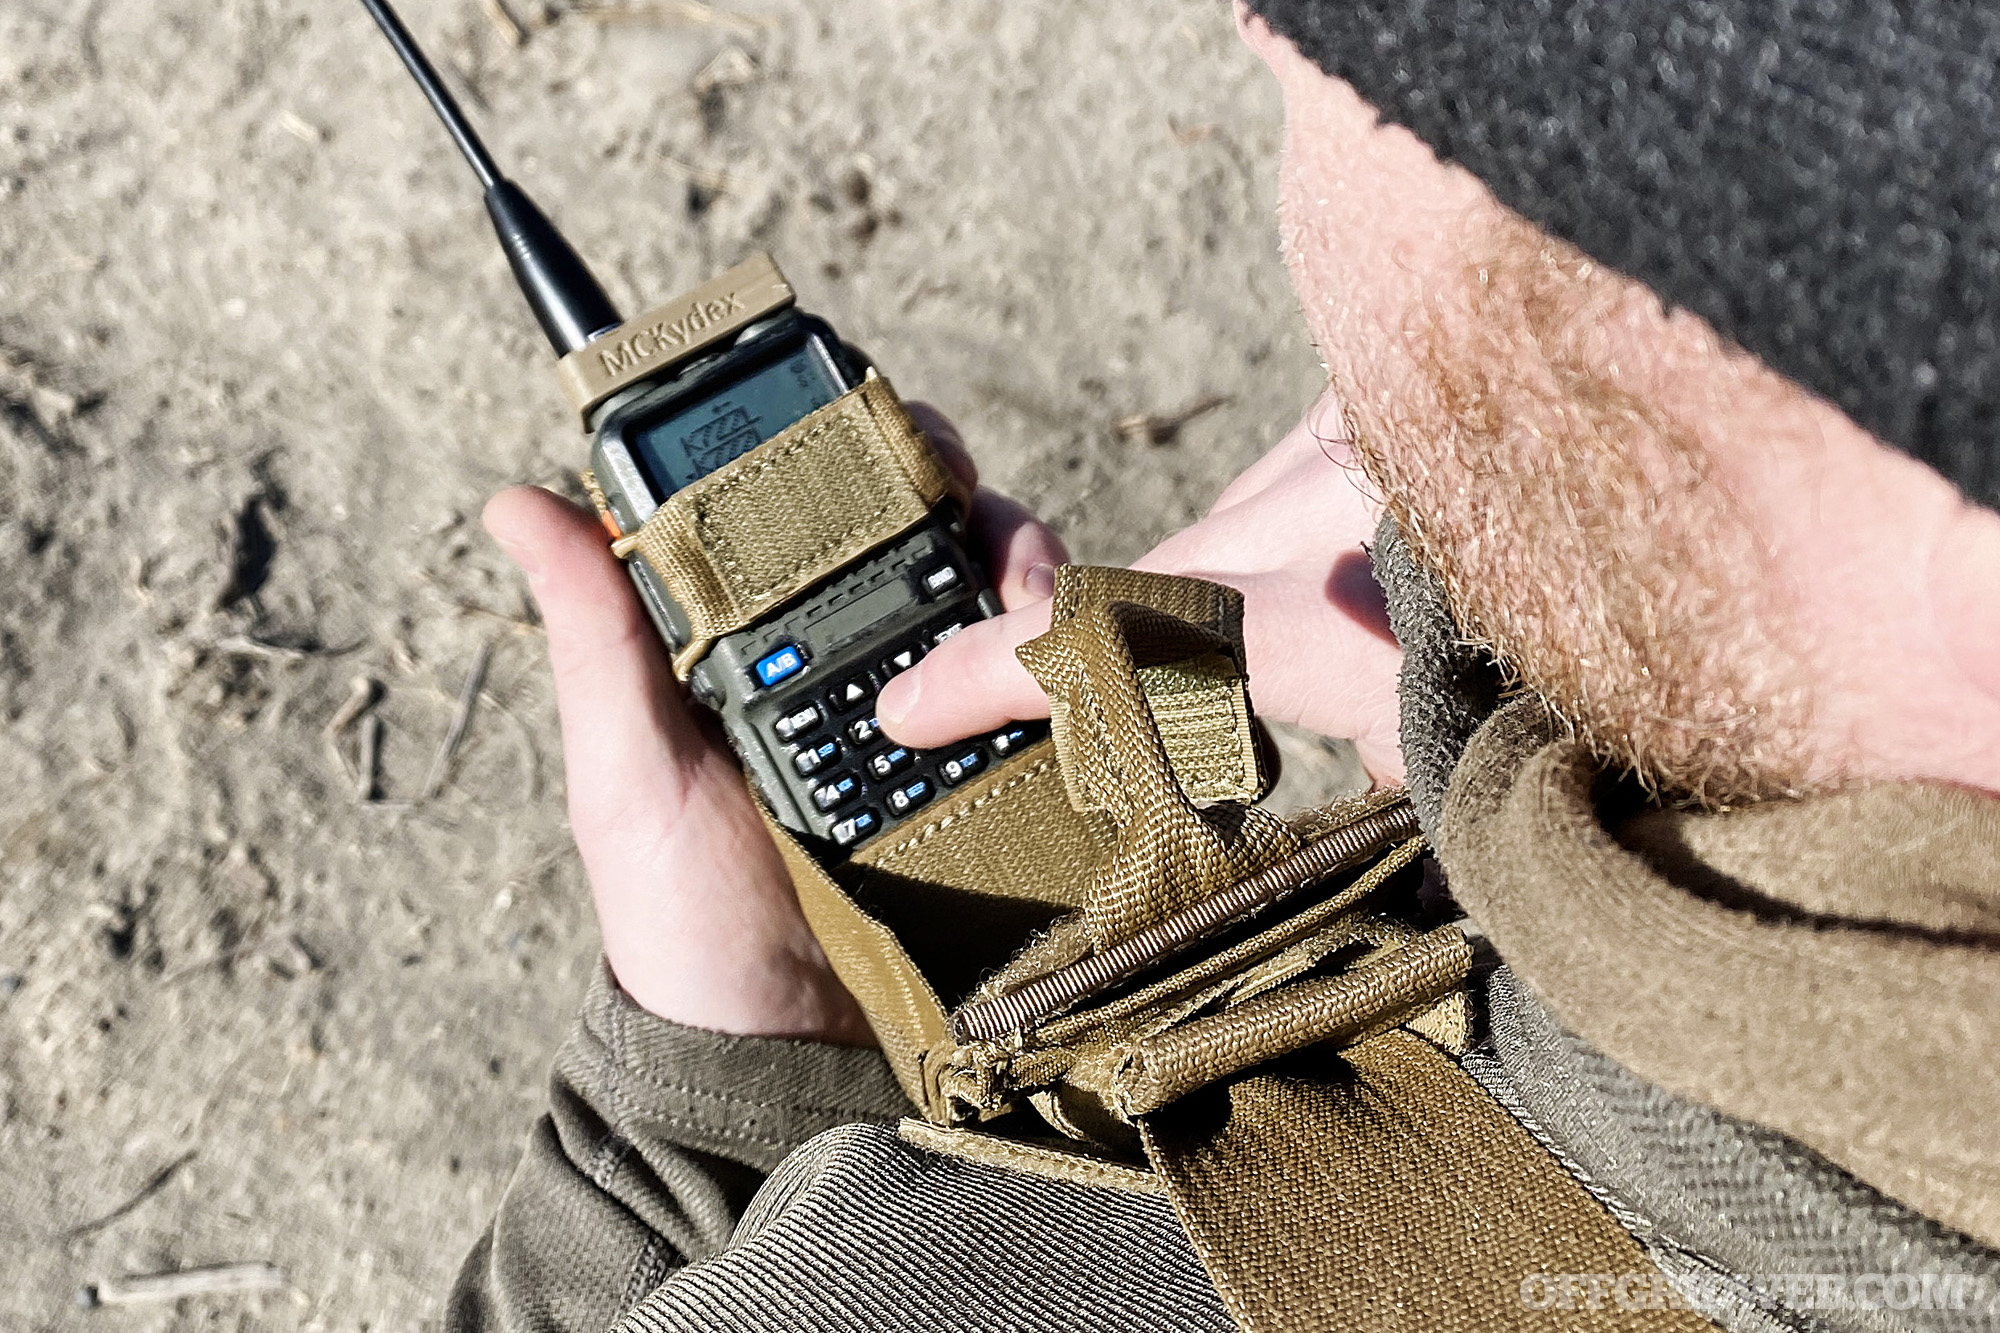
Above: This ITS Tactical 10-4 pouch offers access to the radio’s buttons without removing it from the pouch. It’s mounted on the shoulder strap of a Hill People Gear Kit Bag, and also has an MC Kydex knob protector.

There are numerous radio carriers on the market, and some offer more than others. The Tactical Tailor Small Radio pouch allows great adjustability for handheld (HT)radios and is MOLLE or belt compatible. Mounting on a belt with an earpiece keeps the radio out of the way; keeping the pouch on a backpack strap near the head can assist in hearing the built-in speaker and allowing the user to speak directly into the radio. Another option is the ITS Tactical 10-4 Radio Pouch. This pouch has several different mounting methods, places for a retractable tie down or spare battery, and you can “deploy” the radio forward to see the screen without having to remove it from the pouch. The downside to pouches like this is the knobs are exposed, which can lead to unwanted adjustments.

If you wish to incorporate the radio into a chest rig or plate carrier, besides the previously mentioned pouches, you can consider a wing system like the Ferro Concepts Wingman. These are large elastic pockets that hold your radio while velcroing to the back of many common chest rigs. The benefit to these is they are very tight and limit the chance of a radio falling out while also holding in any headset or PTT (push to talk) buttons. They also cover the faceplate, which can light up at night while receiving or transmitting. The downside is the lack of ability to make any changes to the radio without removing it from the pouch. Also, if other gear is mounted too close to these soft pouches, it can accidentally press buttons.

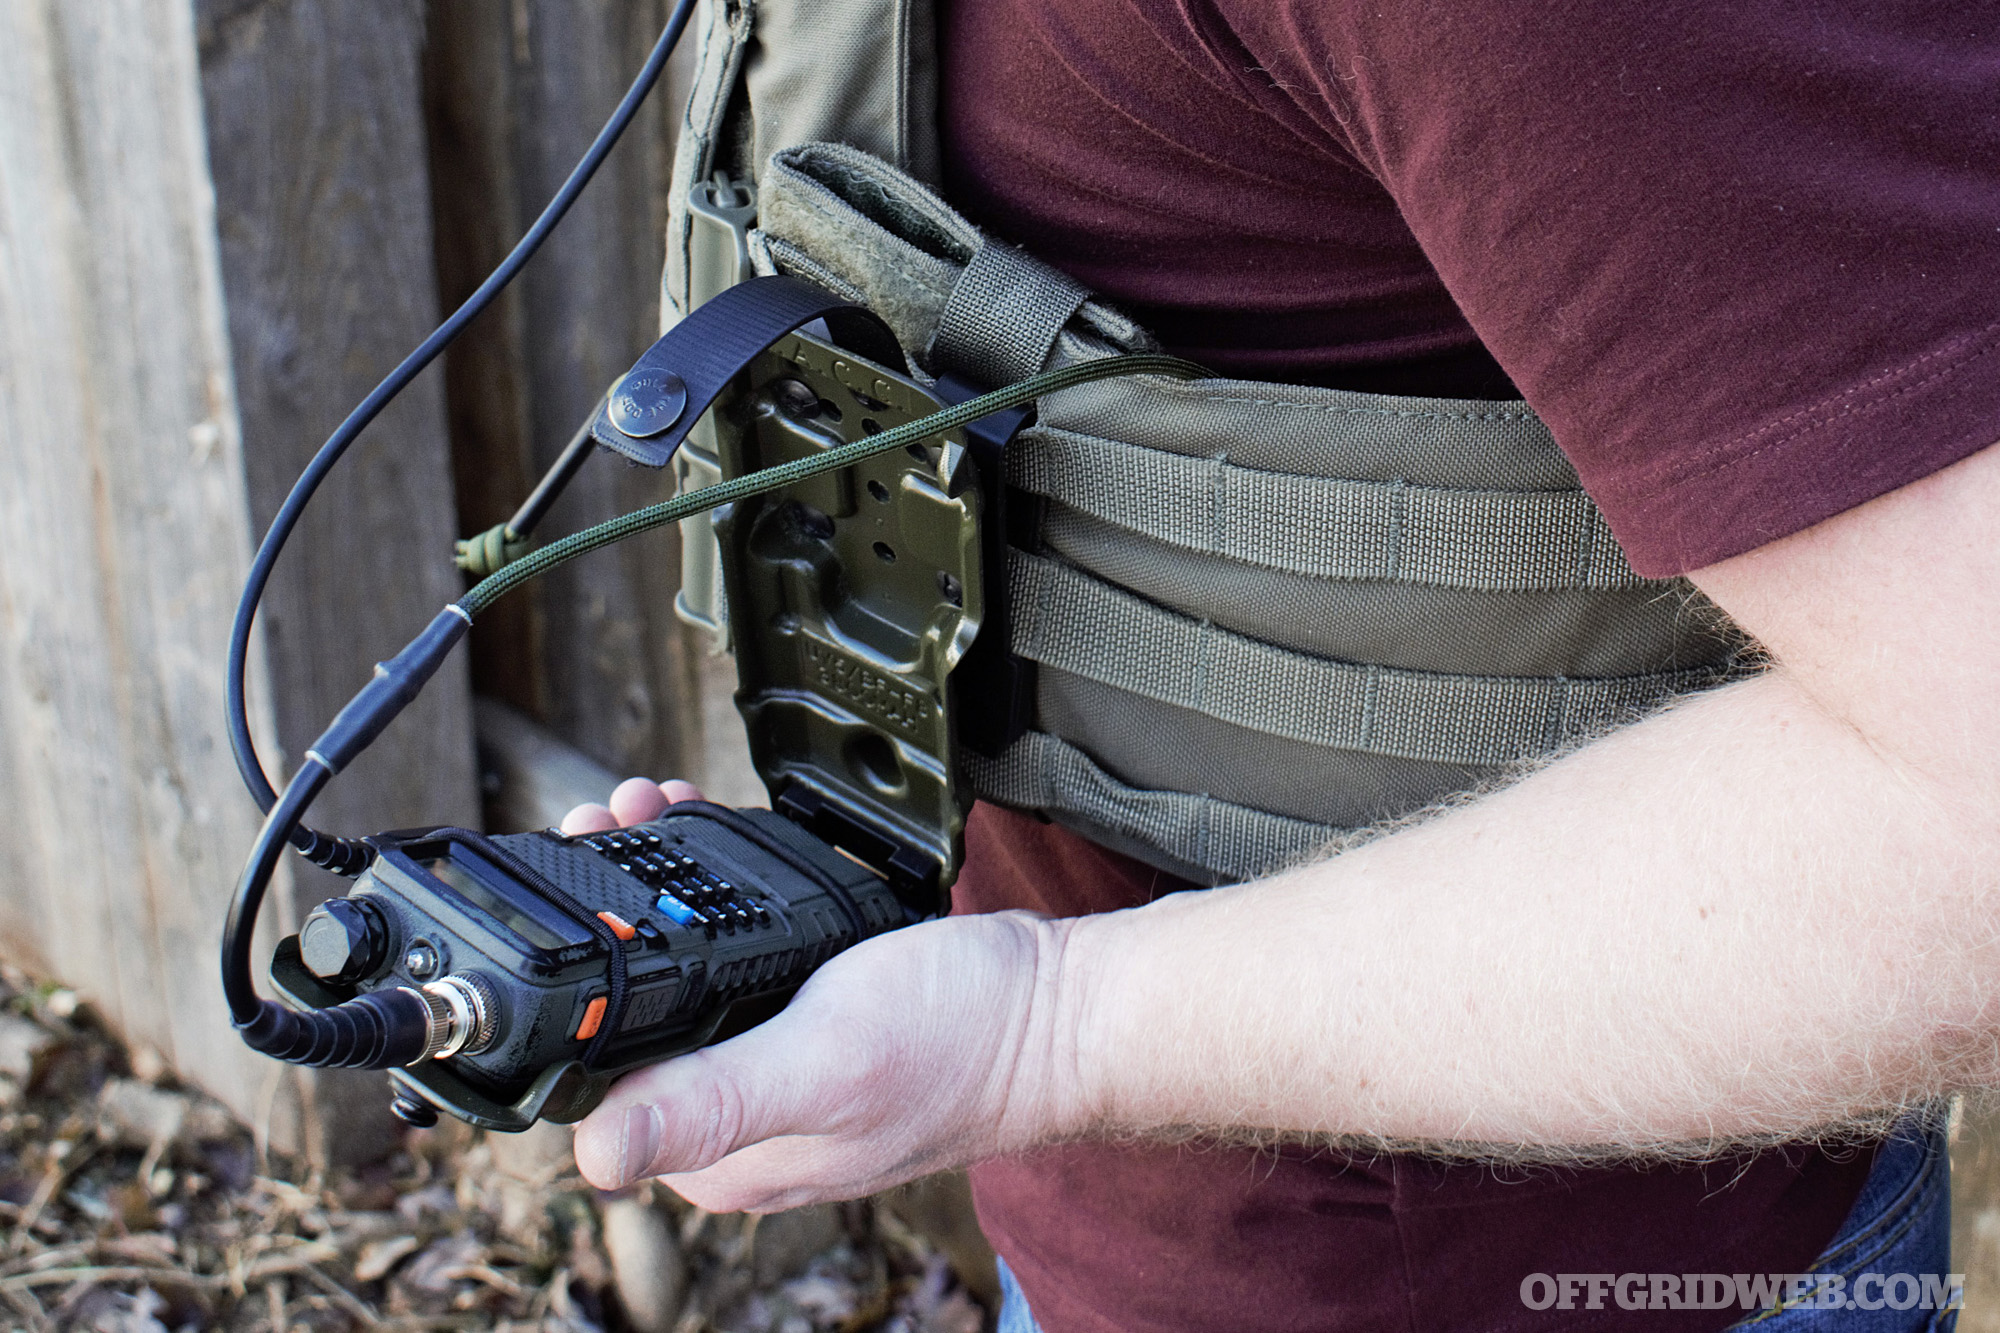
The other option covered for carrying your radio is a hard Kydex carrier. These offer a variety of mounting options as well as protection for the radio. Many incorporate knob protections also. The author’s favorite option is from MC Kydex, known as the Rapid Access Comms Carrier or RACC. This carrier is specific to the Baofeng UV-5R with extended battery and offers protection of the radio, access to the necessary attachment points, and a hinge that allows the user to access the front panel of the radio when needed, using a pull-the-dot button. The radio is secured with two elastic shock cords. However, further considerations are necessary for this type of carrier.

Above: The MC Kydex R.A.C.C. attached to a plate carrier. The CAATail antenna is routed along the cummerbund and up the back; the PTT is mounted to the chest and connected to a headset. 

One final note on pouches — knob protection is important because the knobs on top of the Baofeng (or other radios) can get bumped and turned. At best, the volume goes up; at worst, it switches the channel or turns off the radio, and now you can’t hear or talk to anybody. Baofeng knob protectors can be 3D printed or purchased. Some are large and bulky; others are small and fit very tight. Some individuals add a small rubber O-ring to the knob to make it more secure, which is a cheap option and isn’t radio dependent. If your pouch doesn’t lend to keeping the radio inside it at all times, consider a dummy cord or some kind of retractable lanyard. Dropping your radio and breaking it or losing it would be a major bummer.

Handheld Radio Antennas

Antennas are hugely important for the capability of your radio. The market has provided the consumer with an incredible number of options to tailor to specific needs. Whip- or duck-style antennas are skinny, usually flexible, and vary in length. They’re a great option when wearing the radio on a belt or on a chest rig, and they can be tailored to fit within the given spaces. The foldable whips, like those from Abbree, offer the user a chance to extend the antenna as needed — some models are as long as 48 inches. Ham Radio Crash Course on YouTube did a great break down of these types of antennas and their effectiveness.

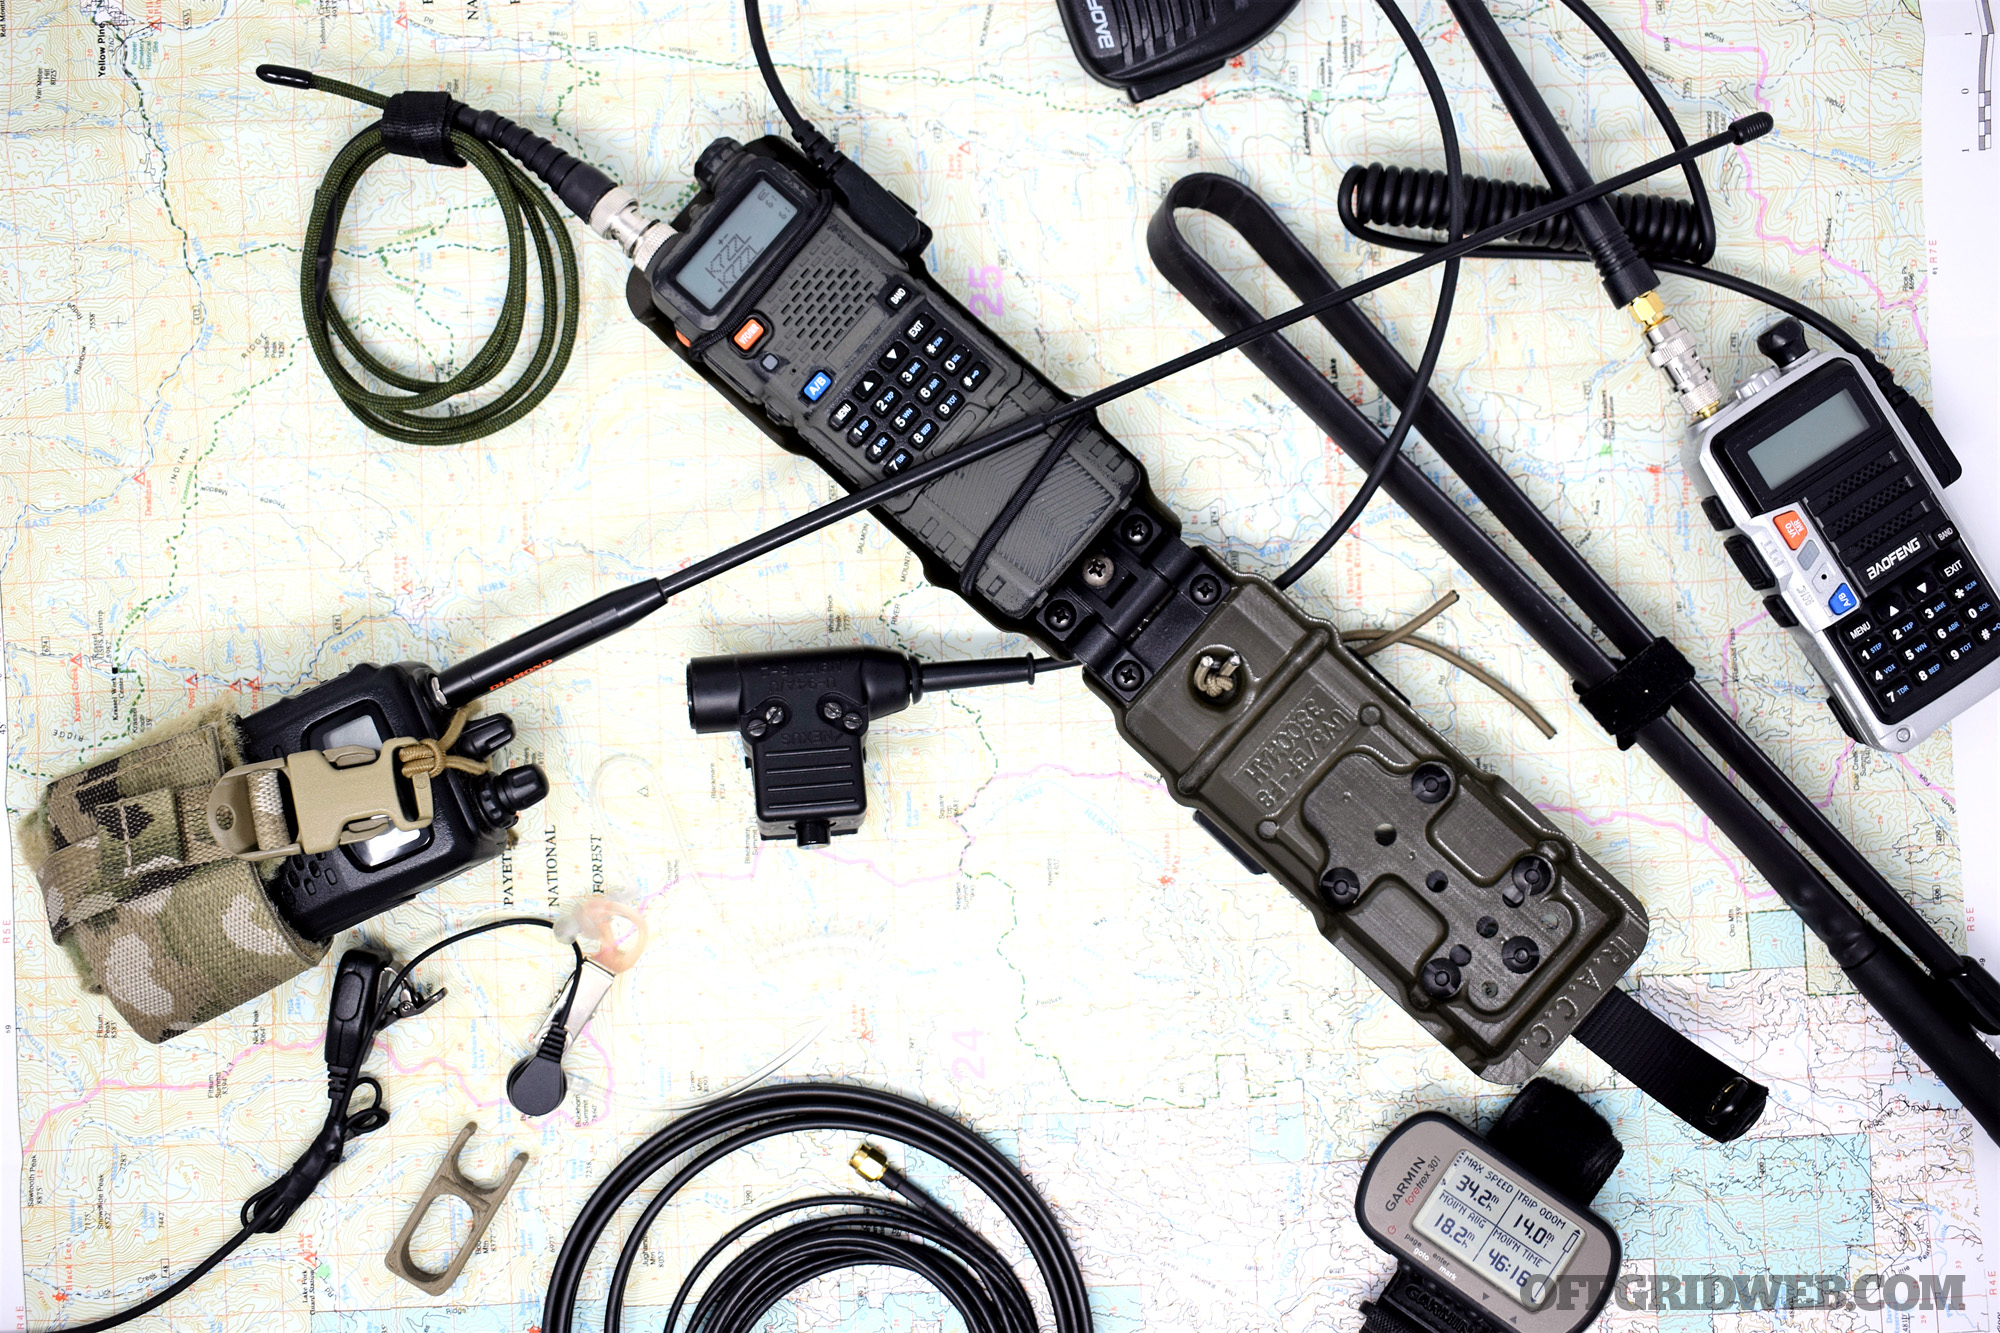
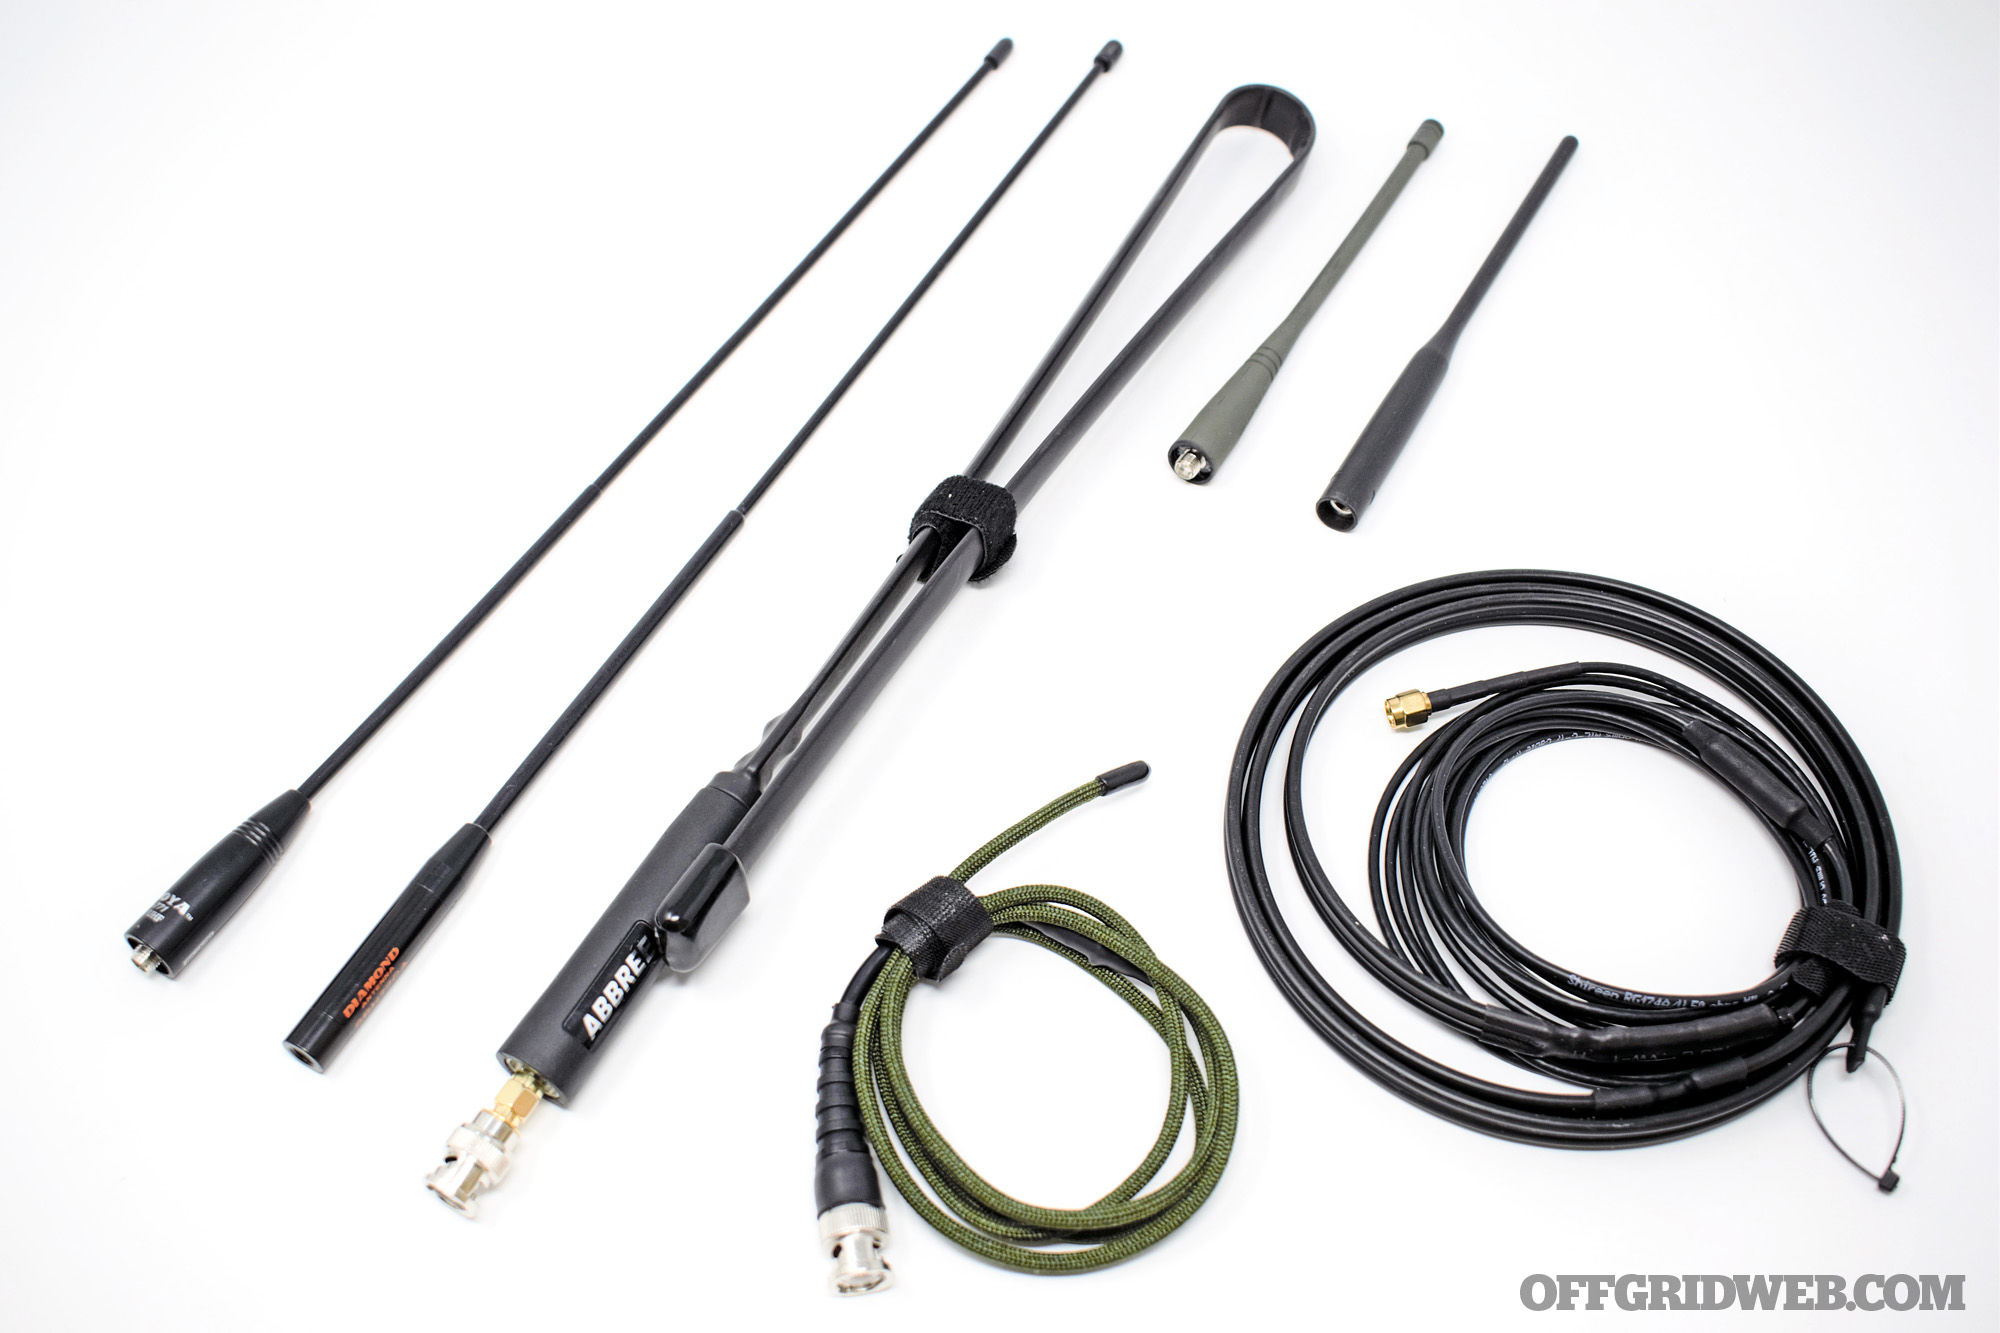
Above: Having multiple antennas helps tailor the radio to your needs. Pictured from left to right: Nagoya NA-771, Diamond SRH77CA, Abbree Whip, CAATail Antenna Baofeng Package, Nelson Antenna J-Pole. Top row: Factory Baofeng, Factory Yaesu.

Wearable antennas are very helpful when using a radio on a plate carrier. These are flexible antennas, usually with a sheath similar to 550 cord. They can be woven into PALS webbing, keeping them very low profile and out of the way when in full kit. CAATail Antennas offers several different colors and connections to best suit your radio. They have a Baofeng-specific kit for simplicity. These types can also be used to conceal the antenna when in a stationary place like a campsite or observation post. Remember that simply attaching a long antenna won’t automatically improve performance. To maximize performance, you’ll need to run it straight up in an area with clear line of sight to the target receiver.

The J Pole antenna isn’t intended to be wearable, although you could have it attached to the radio and mounted on a kit. It’s nice to have if you’re planning to spend an extended period of time somewhere that may be obscured, since you can suspend this antenna to help with radio performance. They’re lightweight and compact and will increase capability.

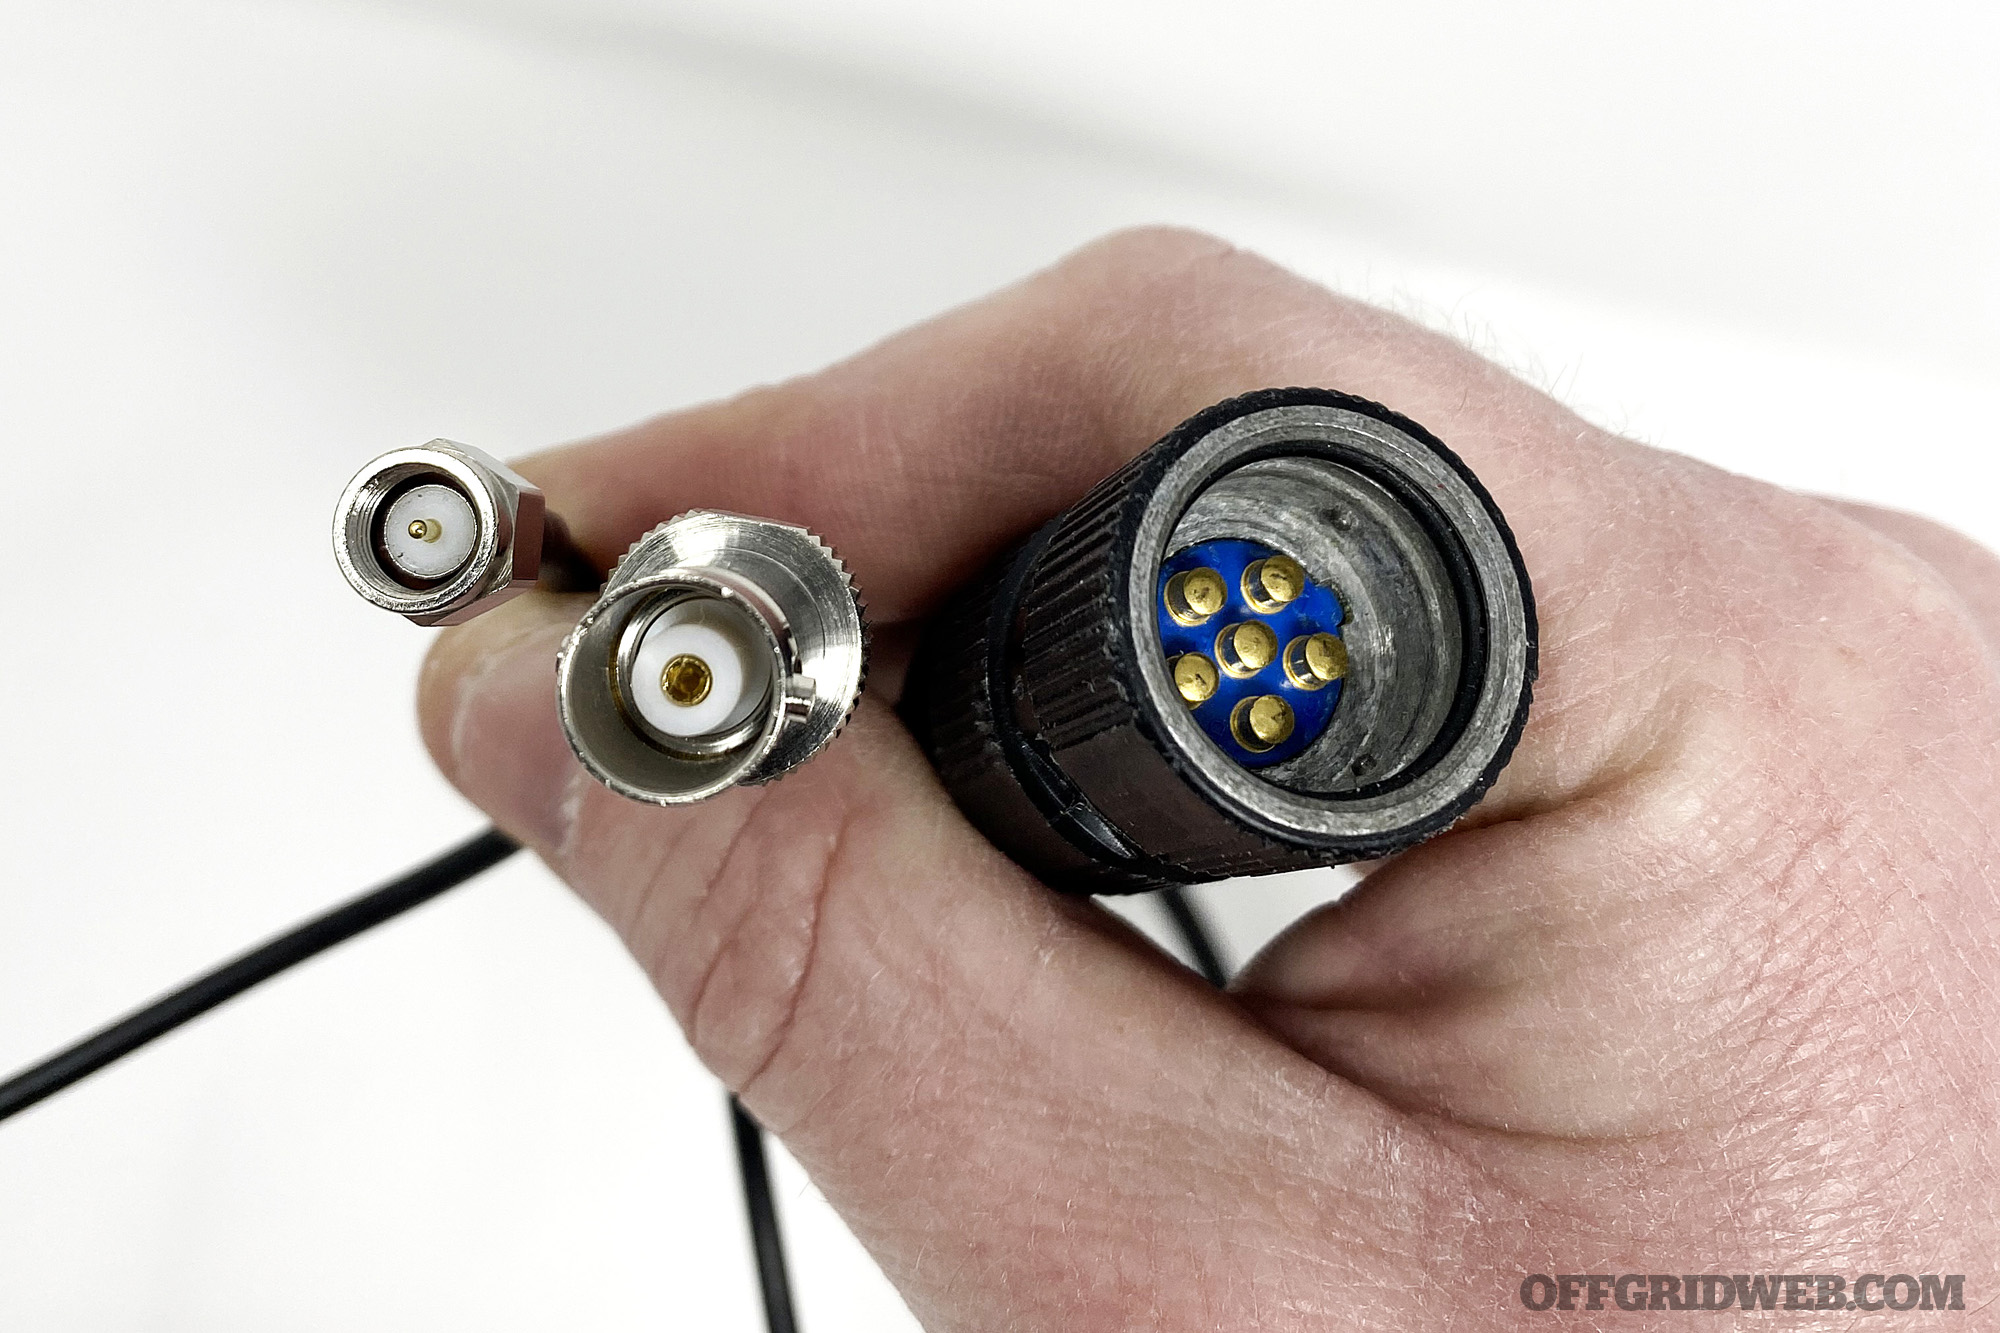
Above: Example of SMA, BNC, military six-pin connections.

A final note on antennas, outfitting your antenna and radios with BNC (Bayonet Neill-Concelman) connectors can help with using one radio in different applications. The connection becomes a simple push and twist instead of threading antenna on, saving time. Adapters are widely available.

PTTs, Mics, and Headsets

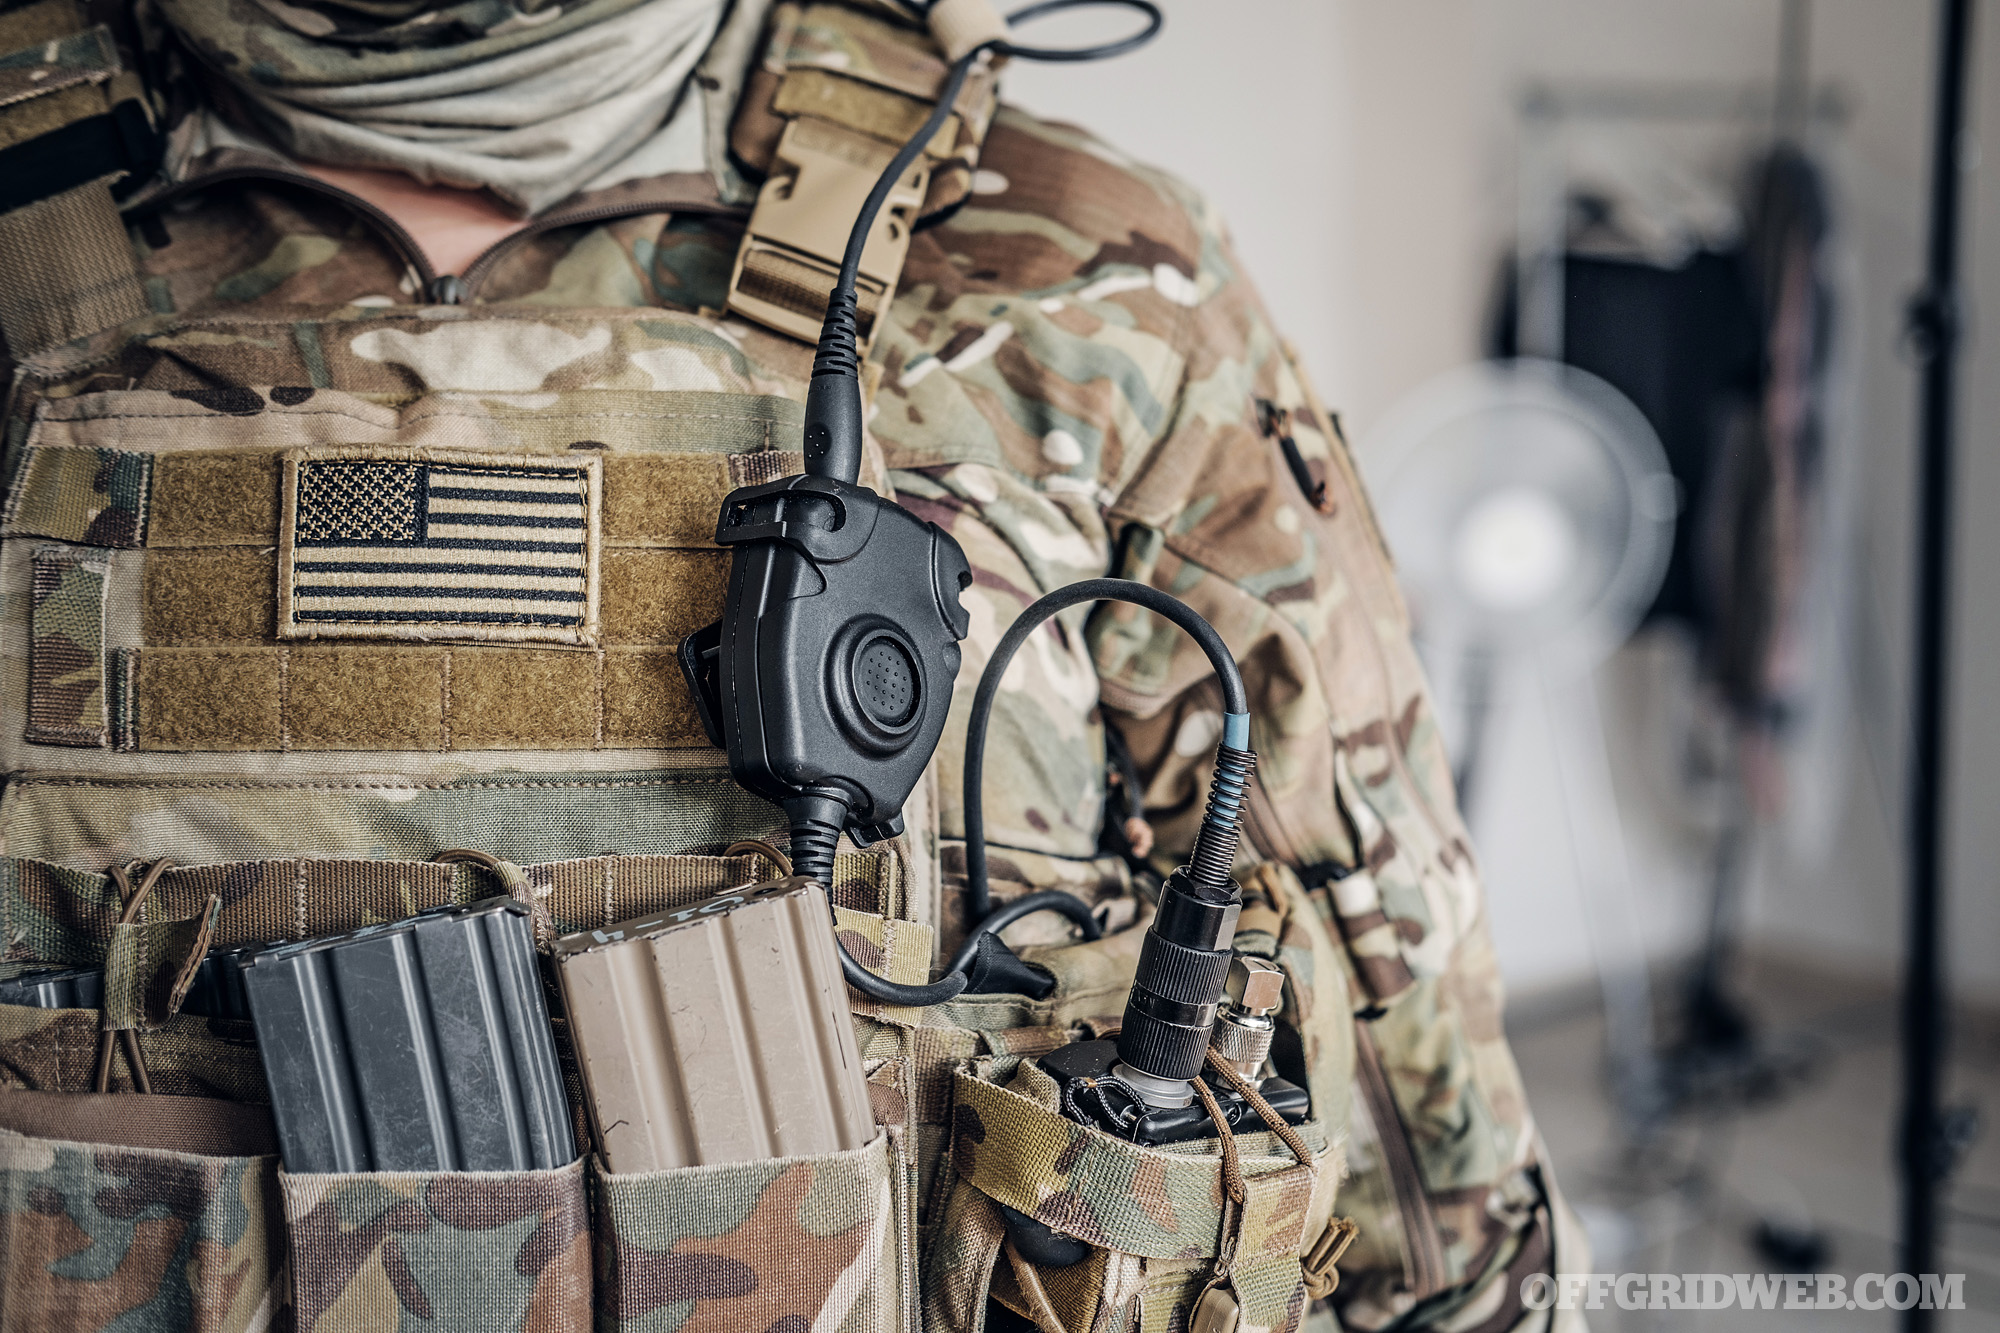
Headsets, earpieces, and push to talk (PTT) buttons are all great additions when putting a radio onto a loadout.

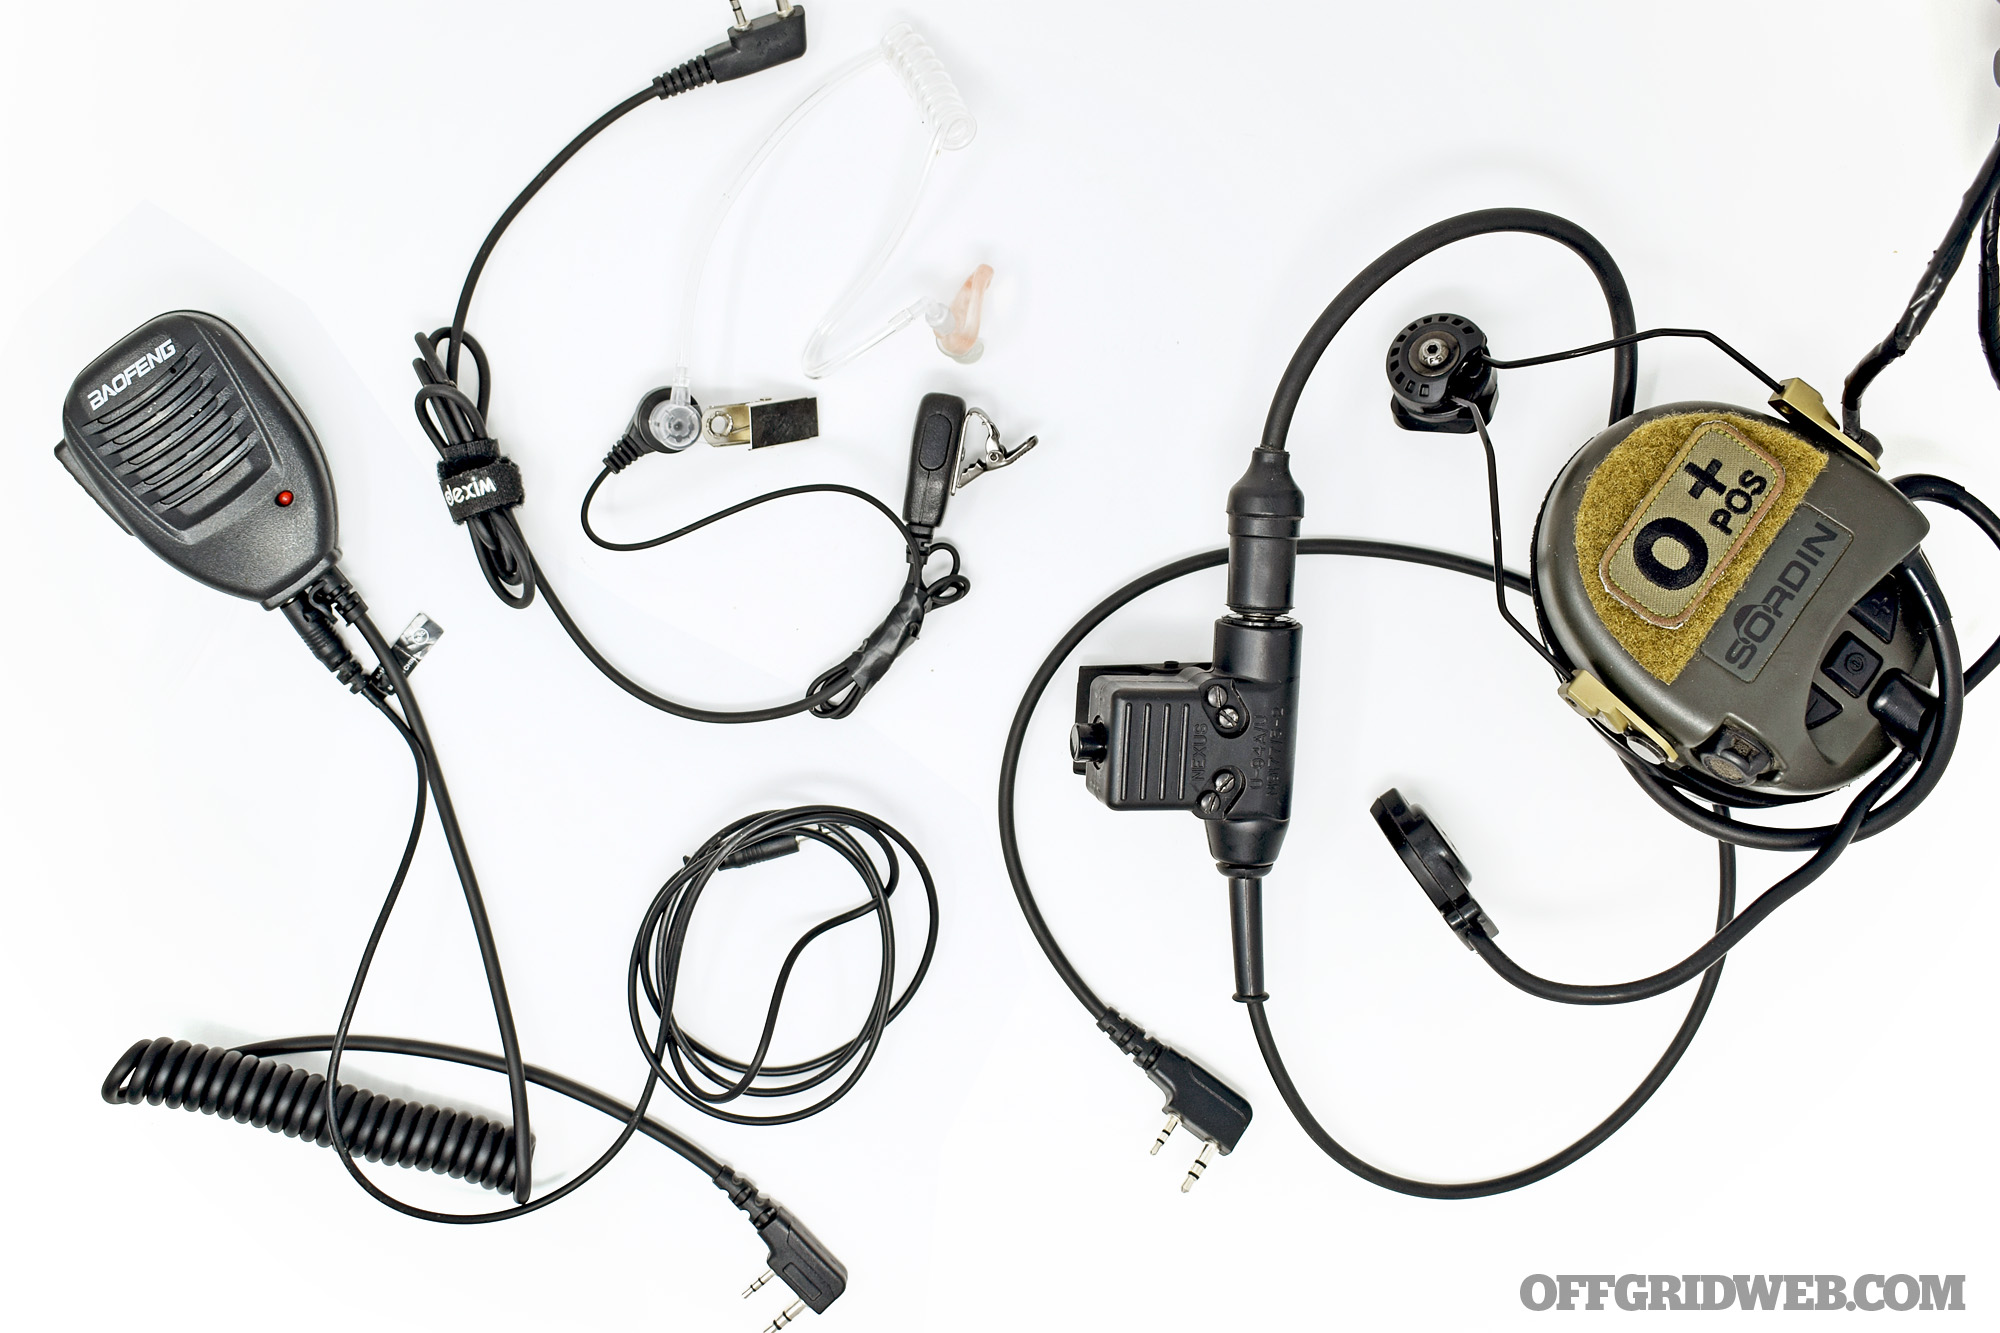
Above: Using your radio without taking it out of your kit is handy. Clockwise from left: Baofeng hand mic with 3.5mm output cord, cheap clear earpiece and PTT, Disco 32 U-94/A PTT connected to MSA Sordin ear protection.

The Baofeng in some cases comes with a cheap earpiece that also incorporates a PTT. These can be useful when trying to keep a lower profile than a hand mic because they can look like regular ear buds. The clear earpiece/PTTs, which you’ve probably seen in use by executive protection and security personnel, are available online as well. Many of these are low quality with poor sound, but they can be worn under ear protection as a budget-friendly option.

For using a radio while wearing hearing protection, the use of an amplified PTT is recommended. The Disco 32 U-94/A is an amplified PTT with a solid button depress that is compatible with the most common tactical communication headsets like Peltor, Ops Core, and MSA Sordin, among others. These don’t come cheap, and might be considered overkill with a $30 radio, but the sound clarity and simple plug and play makes it a worthy investment.

Other radios have Bluetooth features and can connect wirelessly, making them ideal for low-profile operations where the radio is out of sight and you’re wearing a common earpiece that brings little attention.

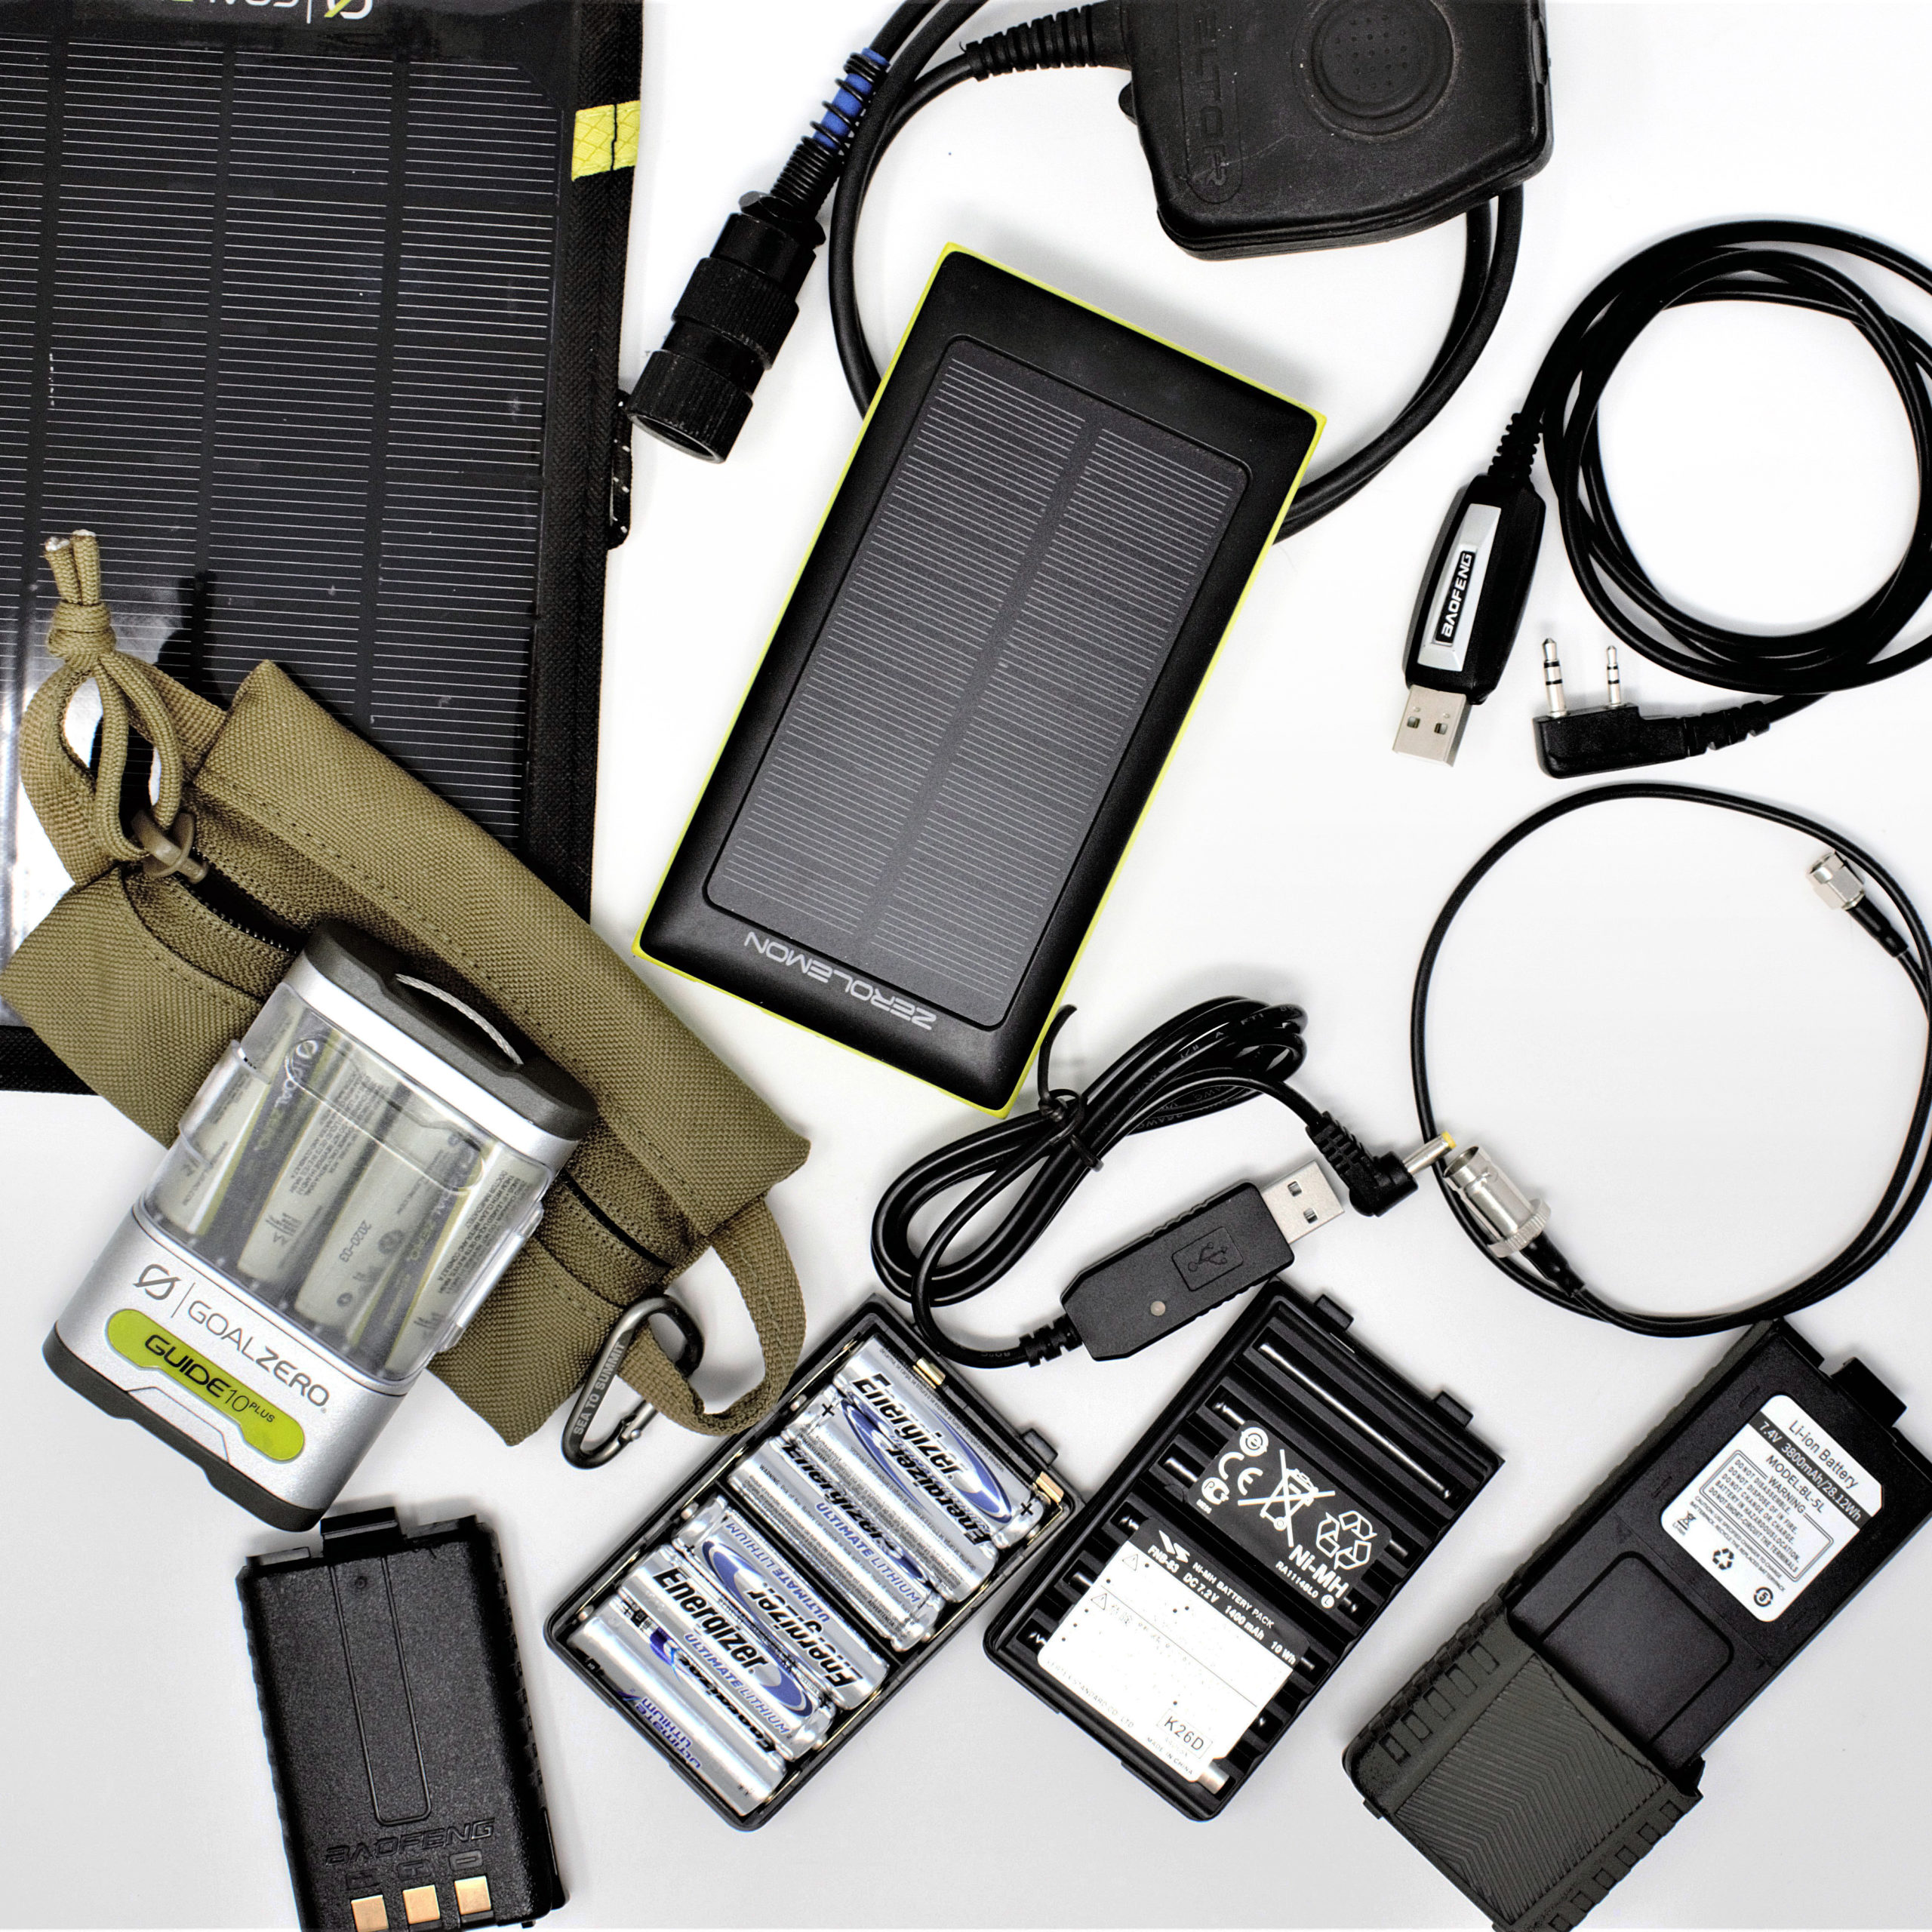
Above: Radios need power, extra batteries, and ways to charge that should be included in your EDC or kit.

Like all electronics, radios require power, so be sure that you have enough spare batteries or a way to charge the radio battery. Extra batteries can be inexpensive (at least for the Baofeng) and can maintain a charge for a considerable amount of time. Most radios charge from USB so an external battery pack can fit the bill with the proper wall charger. Make sure you have the correct cable, too. Some radios also offer a battery pack that can run off AA batteries. This is useful if you’re carrying other gear that uses these batteries, like flashlights or night vision devices.
Understanding radio connections will help you in the long run. Yaesu radios have a different connector than a Baofeng, which is the same as a Kenwood. This is important for things like microphones and headsets. Headsets like Sordins or Peltors may have a 6-pin connector or a TP120 (a gigantic headphone jack). The folks at SRS Tactical are knowledgeable and will be able to help you with connection questions.

Programming cables, while not usually included in your EDC or kit, are an important part of the radio. The Baofeng can be programmed using a PC and a free program known as CHIRP, but higher-end radios may require separate software. It’s usually best to buy the factory-made programming cable, since there are many unreliable bootleg cables on the market.

Copy My Last?

Communication is key, and events of the past have shown us on more than several occasions that your cell phone shouldn’t be your only tool. Factoring ham radios into your comms plan is smart, inexpensive (at first), and relatively easy (assuming you can study for a test for a few days). Be patient and take your time to learn — ham is a big subject. Much like upgrading your rifle to make it more efficient, upgrading your radios will make them better and give you capabilities you previously lacked. Ham radios come in all shapes and sizes and can be tailored to your needs. It’s easy to create a neighborhood watch and stay in touch within a 2-mile radius. Do you need to talk to your family across town? Hit a repeater, and you can make that happen with little effort. Lastly, when you go out shooting with your friends, it’s convenient to be able to stay in touch and call hits without shouting. You can also talk smack about your friends who don’t have a radio without them knowing.

For more information on ham radios and how to use them, check out these folks:
Ham Radio Crash Course on YouTube
@Aganz__ on Instagram
www.arrl.org
HAMSTUDY app

More Articles on Emergency Comms & Ham Radio


Budget Bolt Action Rifle: Pennies and MILs

Having a dedicated precision rifle in the safe can be an invaluable addition to a well-rounded preparedness plan. The ability to project firepower to 500 yards and beyond is a capability that can be directed to both game-getting and property protection. For those who are interested in building a skillset, the proliferation of the Precision Rifle Series (PRS) has made competing at these ranges more accessible than ever. The flipside of that coin is that the popularity of precision shooting and the purpose-built rifles that go with it has driven a market expansion that, on the surface, seems to have significantly raised the cost of entry. It’s frighteningly easy to spend five figures on a long-range rifle, quality scope, and ancillary equipment. While this may be a worthwhile investment for dedicated competition shooters (or those who are professionally sponsored), prepared citizens who are simply interested in expanding their long-range firepower capabilities with a budget bolt action rifle may be left in the dust. The temptation to dismiss a long-range rifle as simply too expensive to consider is great.
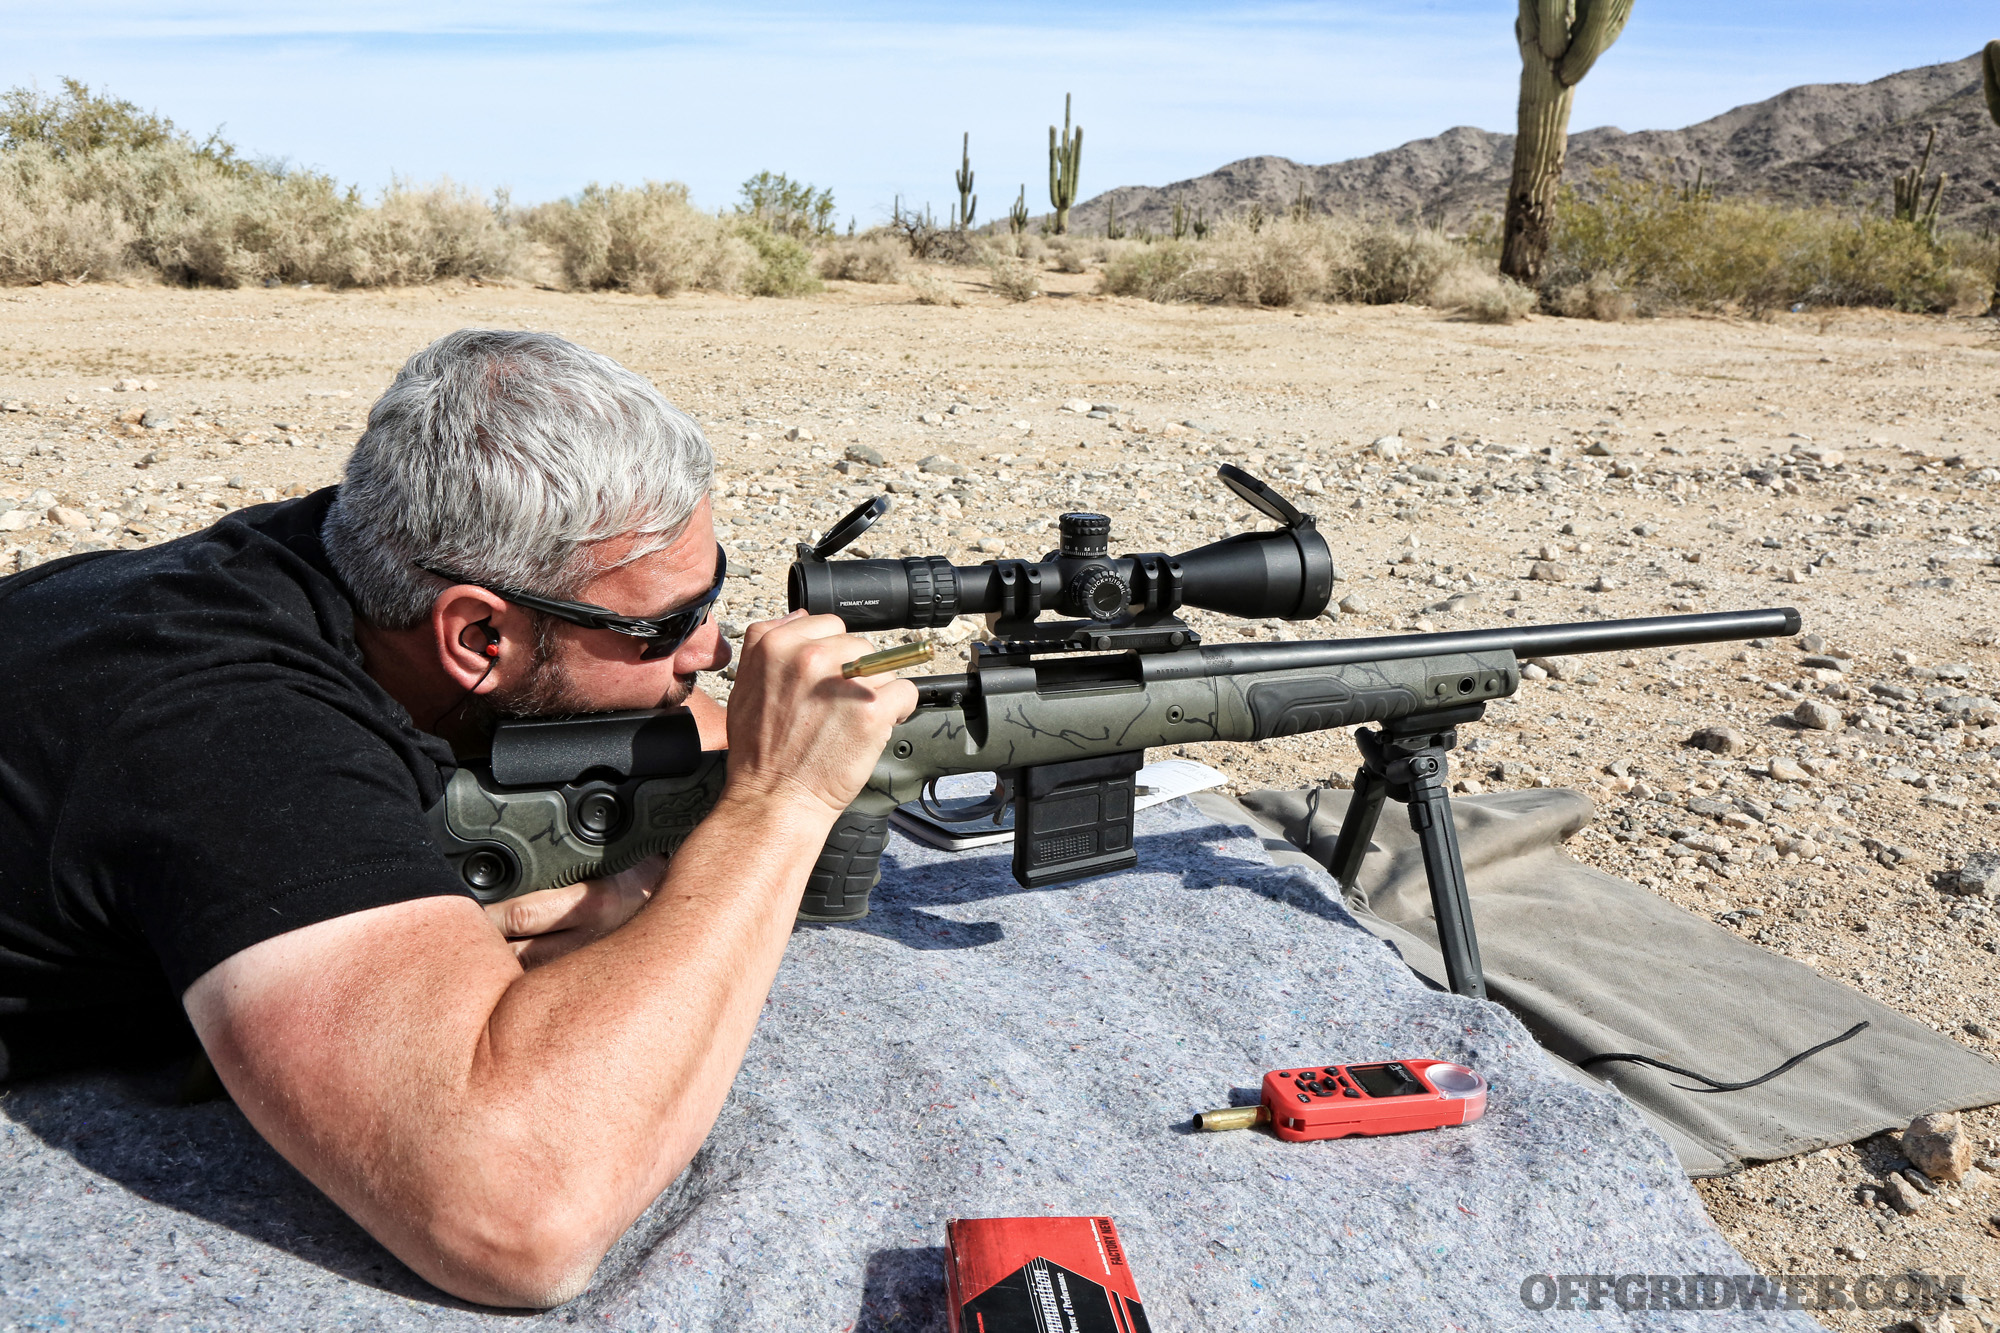
Above: Author fires his last round on a multi-range target drill. This build was able to deliver rounds on targets of varying sizes out to 880 yards. (Photos by Niccole Elizabeth and Patrick McCarthy)

So, we wanted to see exactly what kind of performance we could get for a fraction of that price. Notice we didn’t say “cheap” or even “inexpensive.” We set an all-inclusive project budget of $2,000, and came in pretty much right on the money, with some optional go-fast parts that could be sacrificed to pinch pennies if needed. That’s still a lot of money for most of us. But because we built our test rifle part by part, it’s easy to spread the cost over a period of months — or even a year or two — and make a project like this more attainable. The payoff for us was a dedicated long-gun capable of nearly 900 yards on a regular basis, and 800 yards consistently with just a little bit of training and practice.

Building Our Budget Bolt Action Rifle
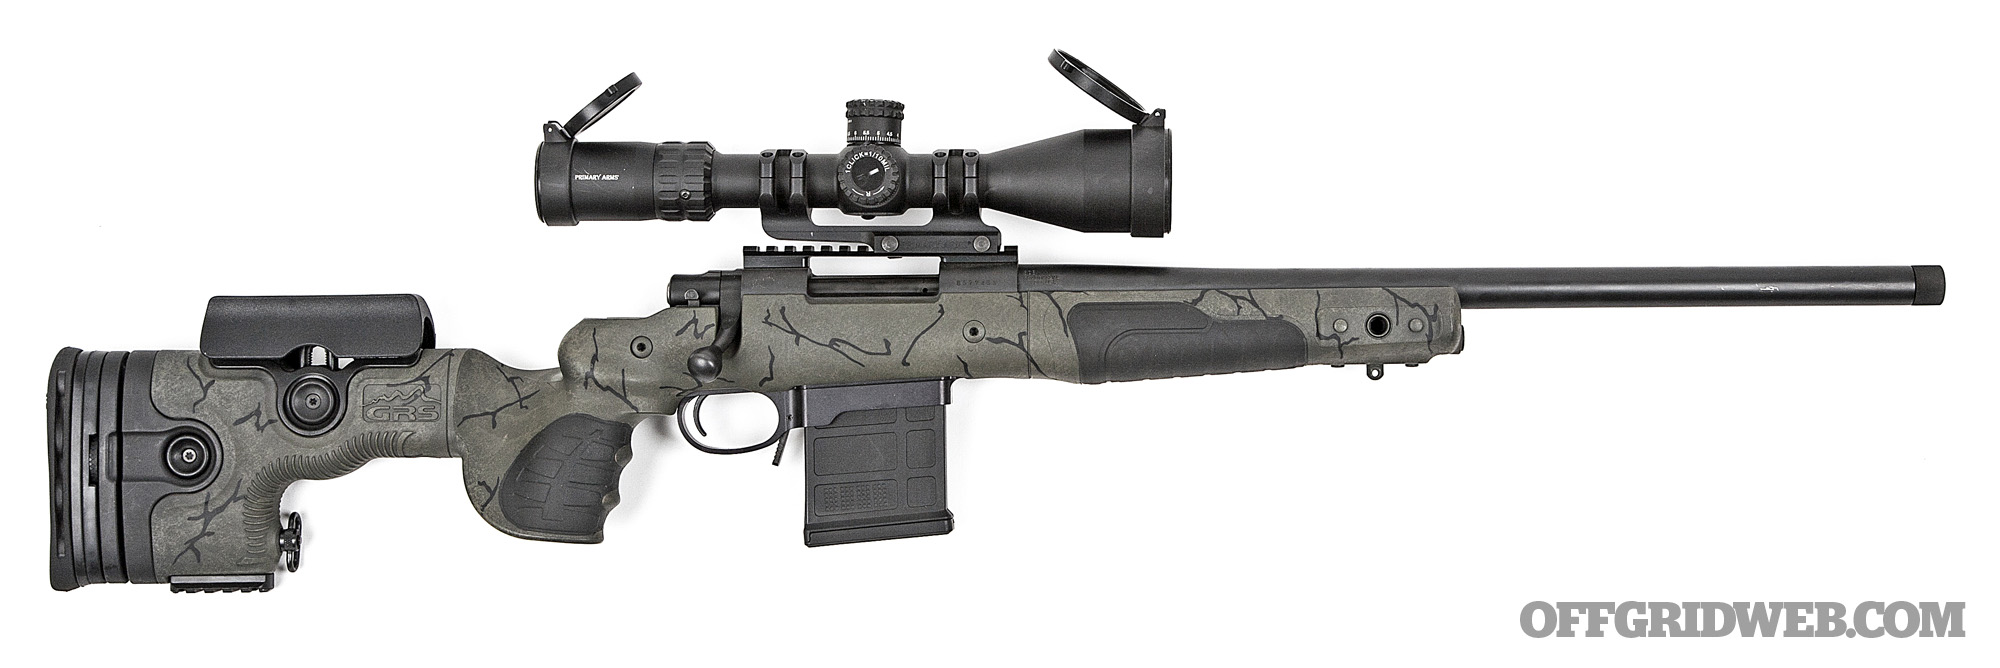
ACTION: The heart of any precision bolt gun is the barrel and action. While it’s possible to purchase an action and barrel separately, we wanted to reduce time, effort, and cost by using a barreled action with a good reputation. We settled on the Howa 1500 for this purpose. While not quite as popular as Remington 700 actions, the Howa is a diamond in the rough, capable of great results for its price point. It’s manufactured in Japan, imported by Legacy Sports International, and distributed through Brownells in a number of barrel lengths and calibers. We chose a .308 action, for availability and variety of ammunition, in a 20-inch heavy-barreled configuration. This barrel length is reasonably compact without sacrificing too much velocity. The barrel is rifled to a 1-in-10 twist, which is a solid middle ground to accommodate a variety of .308 bullet weights.

The biggest shortcoming we perceived with the Howa action is that, out of the box, it’s configured with a five-round internal box magazine. That means to reload the rifle, the breech must be open, and then the five rounds fed in by hand one at a time. Legacy Sports does have versions that are fed from detachable mags, but they use a proprietary pattern. So, instead, we picked up a detachable bottom metal conversion from Pacific Tool & Gauge. This unit converts the Howa’s feeding chute to run off Accuracy International Chassis System (AICS) short-action magazines. While factory metal mags from AICS can run three-digits apiece, Magpul produces a PMAG in this form that costs less than $40, so we got a few of them, courtesy of GunMag Warehouse.
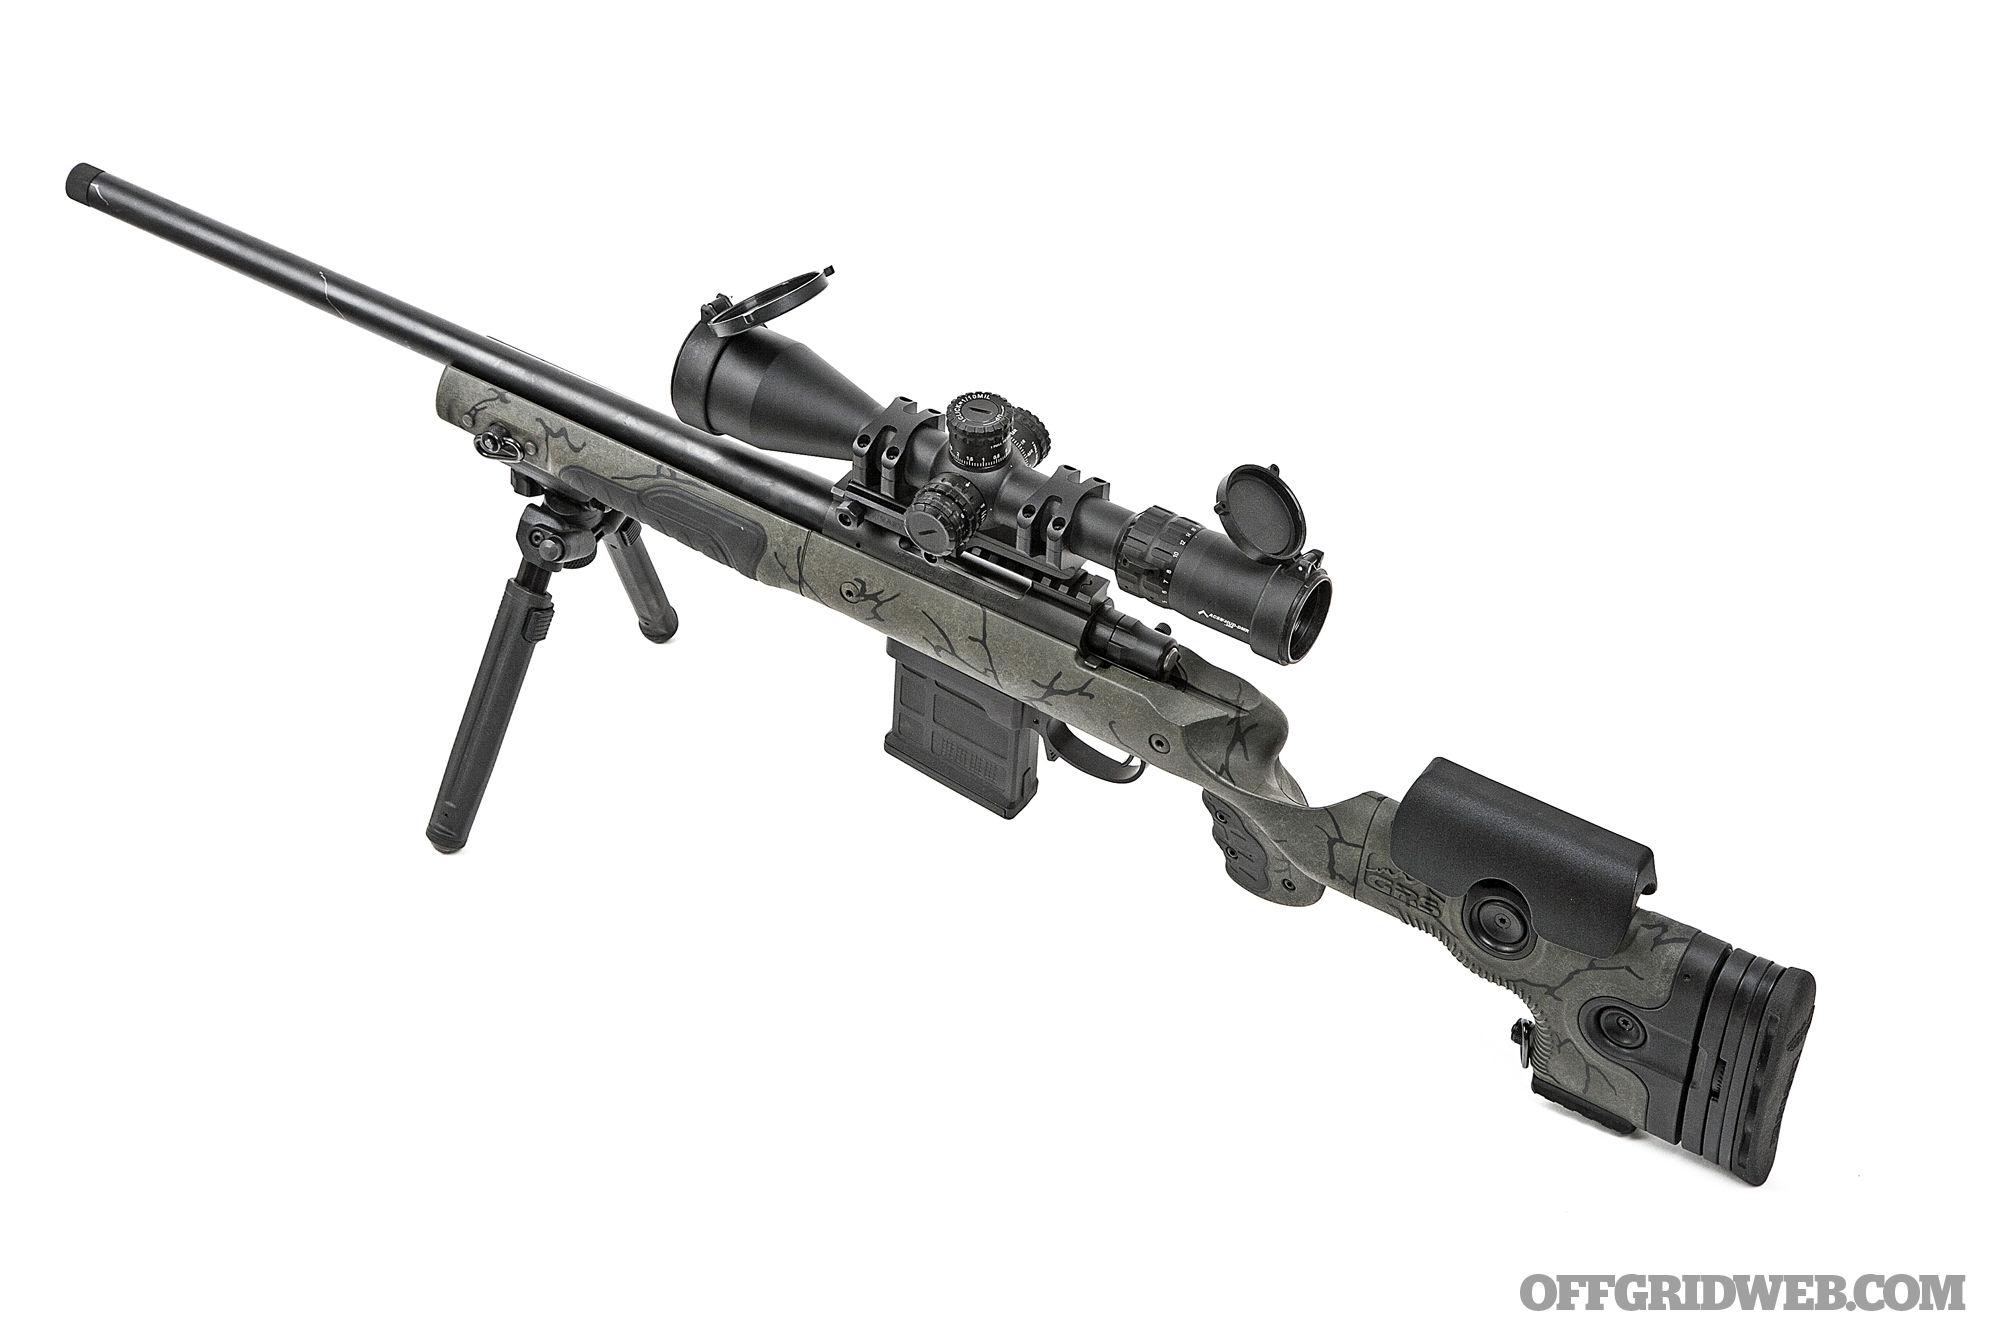
The other change we made to the action was a trigger swap. To give all parties fair credit, the OEM trigger on the Howa 1500 action we received was absolutely up to the task. But since we had some room in our assigned budget, we wanted to push this build a little further and went with a Timney Triggers replacement unit. For less than $150, the Timney unit is available in black or nickel-plated finish in a variety of pull weights ranging from 1 1/2 pounds up to 4 pounds. We selected the 3-pound option in black.

Finally, we topped the receiver with a Warne Mounts 20MOA Picatinny rail scope base. The Pic rail option gave us a much wider variety of scope rings and mounts to choose from, with more flexibility in front-to-back placement to fine-tune eye relief. The 20-MOA bias is built in to give the scope a little extra elevation for extended-range shooting. Final fitting of all action upgrades as well as overall assembly was handled by Wright Armory in Mesa, Arizona.

STOCK: Once we had all of the action parts assembled, we looked far and wide for a suitably priced stock that was sturdy and packed full of options. In fact, we looked even farther than normal and wound up finding GRS – a Norwegian company specializing in stocks for precision rifles and hunting rifles. What you see here is their Bifrost stock, which falls squarely mid-spectrum for available precision stock options. It offers far more adjustability than a traditional hunting or field stock, but falls short of the skeletonized modularity of a full-blown chassis system. The Bifrost offers a conventional forearm mated to a nearly vertical pistol grip (six-degree grip angle) that’s incredibly comfortable … if you’re right-handed. There’s no southpaw version of this that we know of, unfortunately.
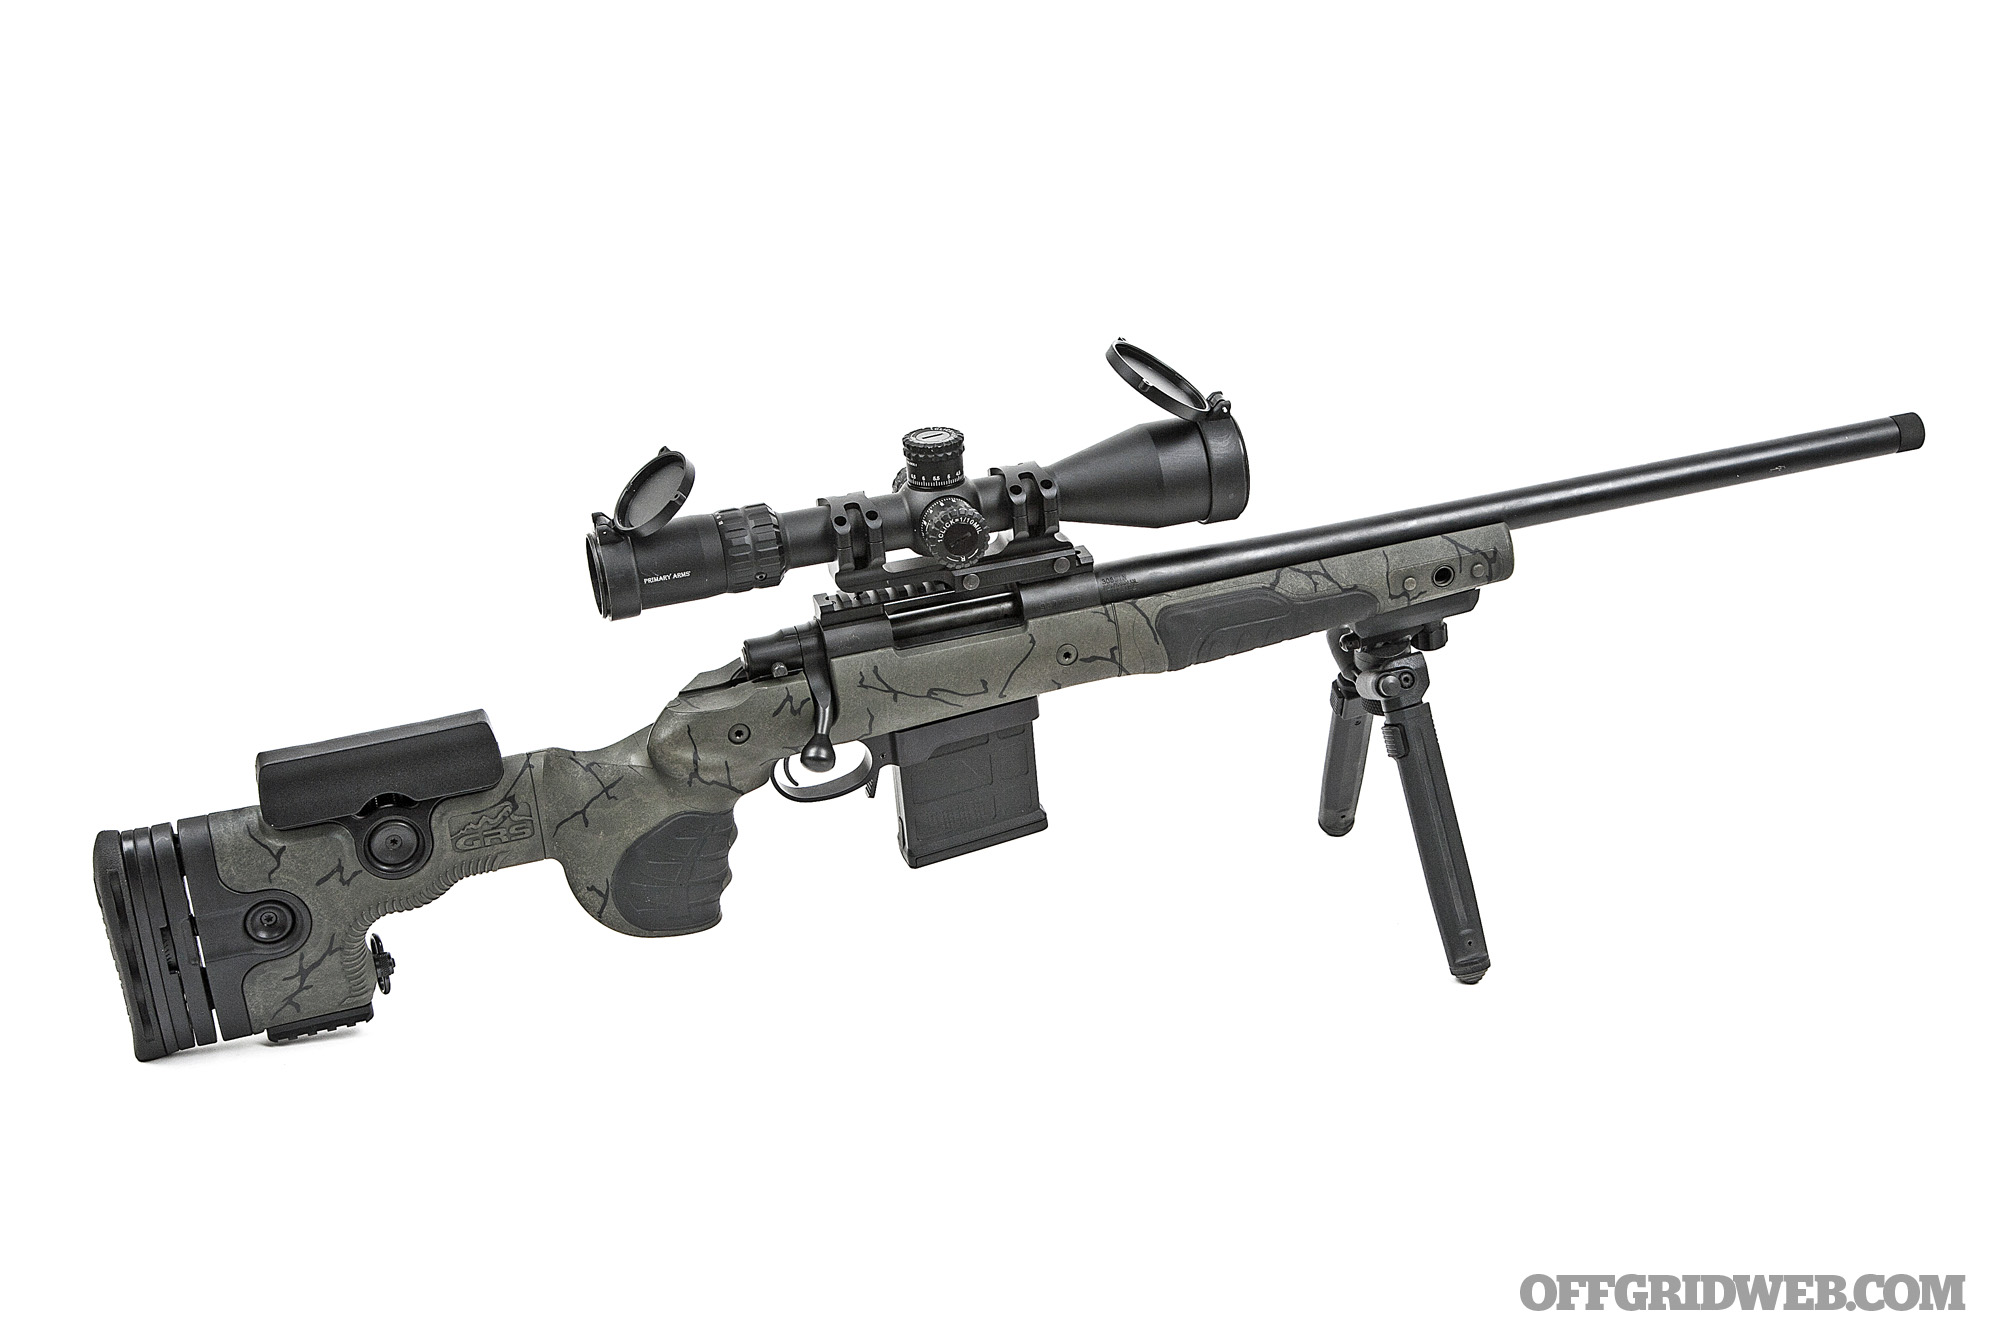
Above: The GRS Bifrost stock is both lightweight and comfortable to shoot.

Behind the pistol grip, the stock itself is immensely adjustable. Cheek-piece height, length-of-pull, height of butt pad, and left/right cant of the butt pad can all be adjusted on the fly without tools using a clever push-button locking mechanism. The Bifrost also comes out of the box with a forearm stud for our Magpul bipod as well as QD sockets at both ends for a sling. The pistol grip area and forearm area are both rubber-armor-coated for extra comfort. All of this comes standard in a package that weighs less than 3 pounds and costs just over $500.

SCOPE: Keeping in mind budgetary constraints, as well as the utilitarian purpose of this rifle, we chose a Primary Arms SLx 3-18x50mm First Focal Plane scope. The SLx is Primary Arms’ flagship line. The specific 3-18x we chose came equipped with their ACSS-HUD-DMR-308 reticle. That’s a hearty bowl of alphabet soup just to describe what the crosshairs look like, so let’s break it down some:

ACSS stands for Advanced Combined Sighting System, a term that Primary Arms has come up with to describe a series of different reticle designs featured in multiple types of optics. The ACSS reticles are designed in-house by Primary Arms engineers, each one for a specific purpose or caliber, but they all share a common parameter. In Primary Arms’ own words, the ACSS system of reticles “utilizes bullet drop compensation correlated with a range estimation, wind, and leads in one simple-to-use system.”
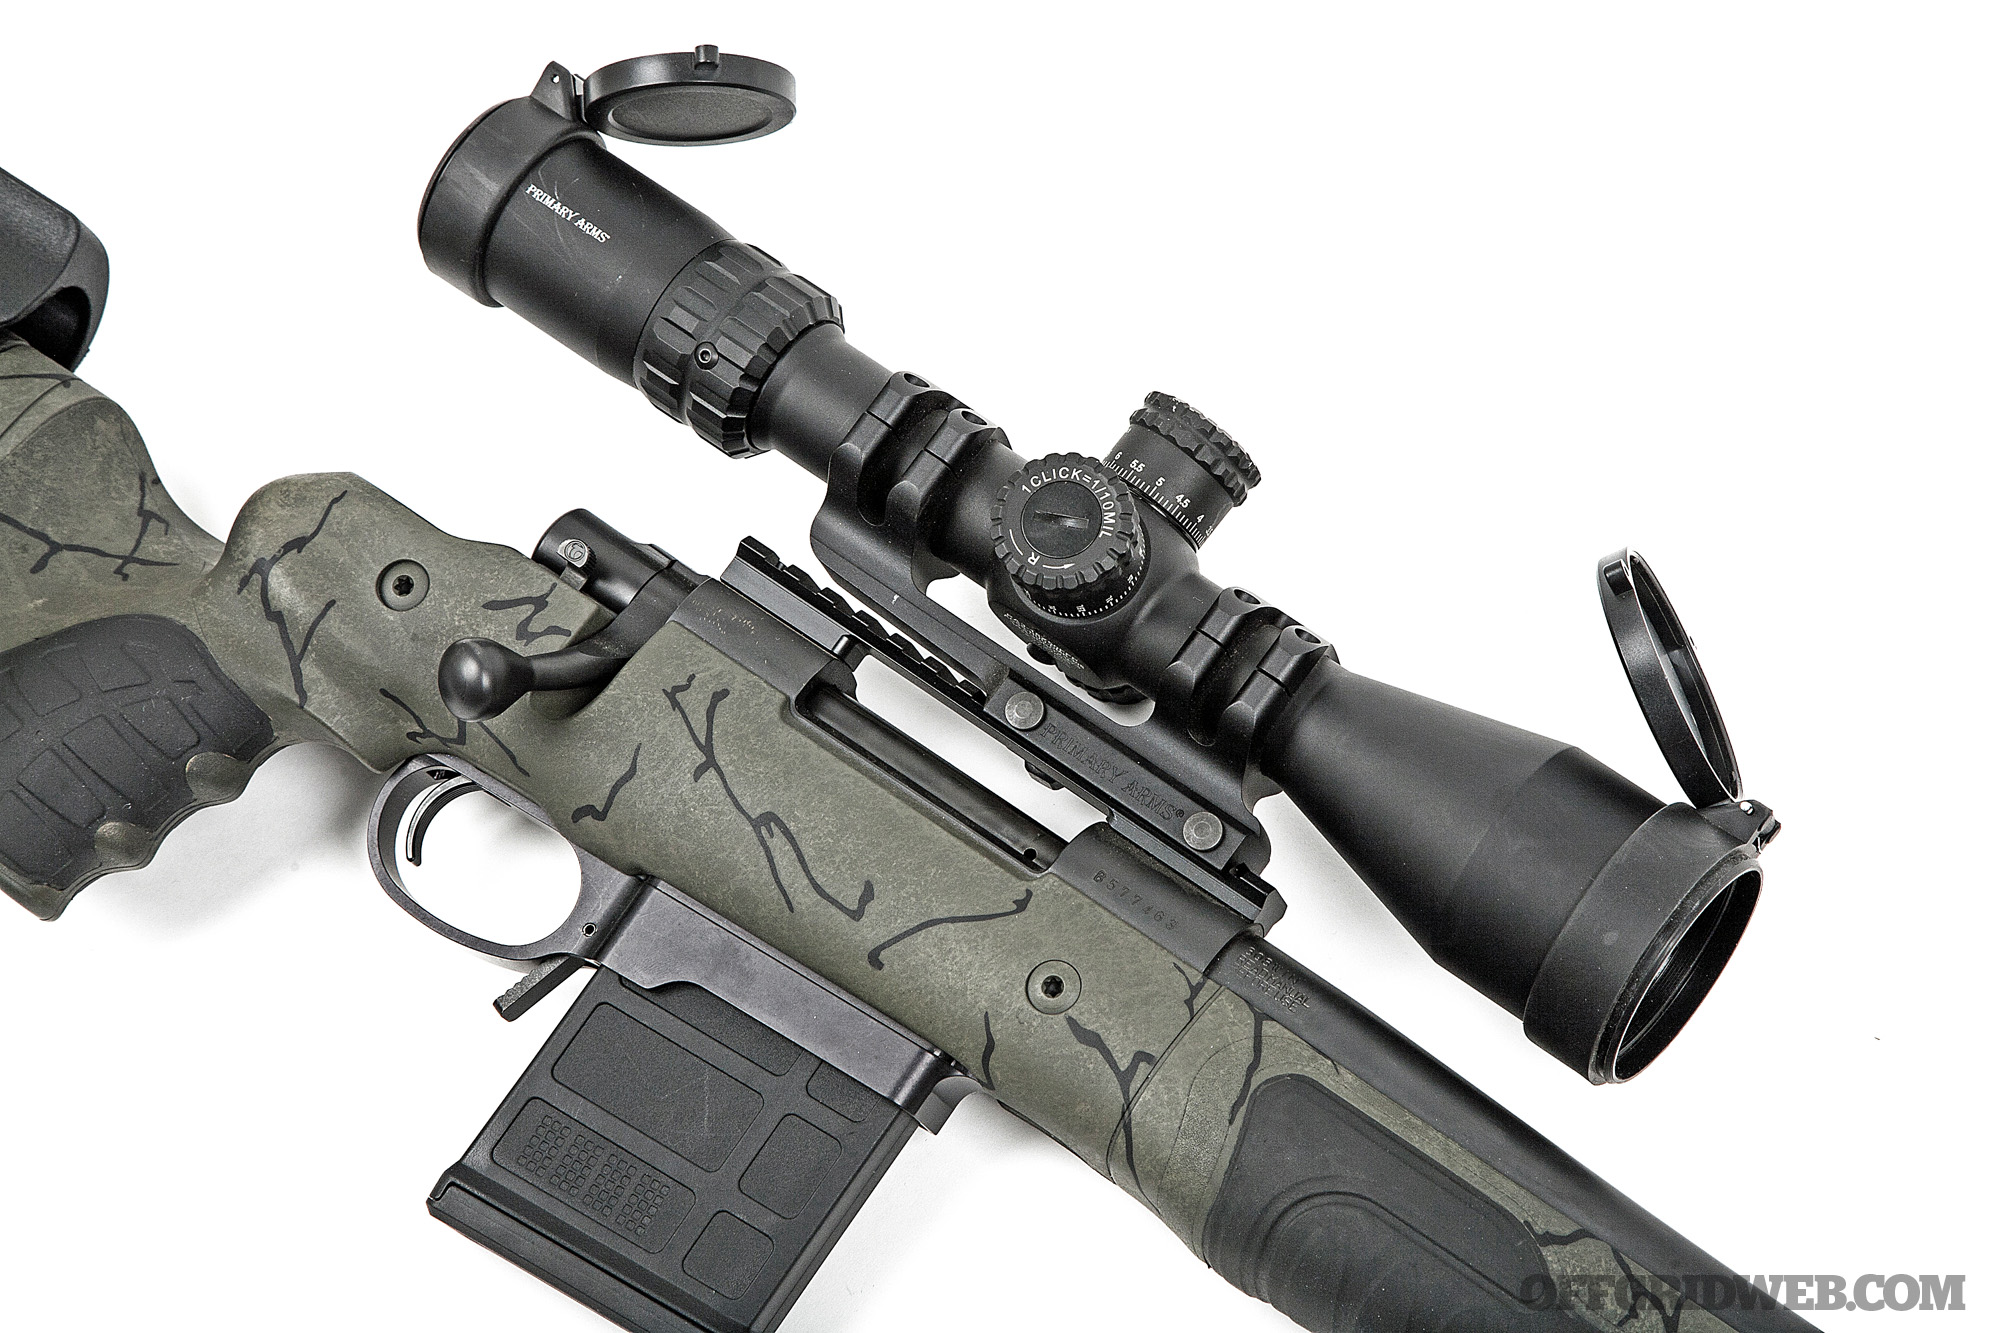
In lay terms, an ACSS reticle allows you to determine the range of an unknown target and offers a built-in elevation holdover for that range as well as pre-calibrated windage holds based on caliber. It also has markings that offer built-in leads for hitting a moving target. The various holds on an individual ACSS reticle are caliber-specific and, if paired properly, remove 90 percent of the manual calculations required to make a hit at distance. The system isn’t as precise as using a reticle with fine mil hash marks or an intricate “Christmas tree” style layout (such as Horus reticles) but for nonprofessional long-gunners needing down-and-dirty quick hits on meaty targets, the system is easy to learn and offers some serious tangible benefits.

As for the rest of the name, HUD stands for Heads-Up Display, DMR for Designated Marksman Rifle (meaning this reticle was designed with tactical or defensive use in mind), and 308 indicates the caliber to which this particular ACSS reticle is calibrated.

Detailed Specifications

PARTMAKEMODELPRICEURL
Barreled ActionHowa1500 Barreled Action$532brownells.com
StockGRSBifrost$521brownells.com
TriggerTimneyHowa 1500 Trigger$140timneytriggers.com
Scope railWarneHowa 1500 20 MOA Rail$75warnescopemounts.com
ScopePrimary ArmsSLx 3-18×50 FFP .308 DMR HUD$480primaryarms.com
BipodMagpulQD Stud Bipod$130magpul.com
Detachable Bottom MetalPacific Tool & GaugeHowa 1500 DBM$120pacifictoolandgauge.com
MagsMagpulAICS Short Action PMAG$40magpul.com
Spotting scopeLeupoldGold Ring 10-20x$499leupold.com
TripodLeupoldCompact Aluminum Tripod Kit$199Discontinued
Rear bagArmageddon GearN/AN/Aarmageddongear.com
Soft caseSavior EquipmentUrban Warfare 42-inch$205saviorequipment.com

How It Shot

In order to put our home-brewed bolt gun to the test, we spent a couple days with Josh Reeves. Reeves is a former special operations sniper and current long-range competition shooter and firearms instructor. We were introduced to him through Independence Training in Phoenix, Arizona, and after explaining our end goal for this article, he agreed to spend a couple of days on the range putting us — and our test gun — through the proper paces.
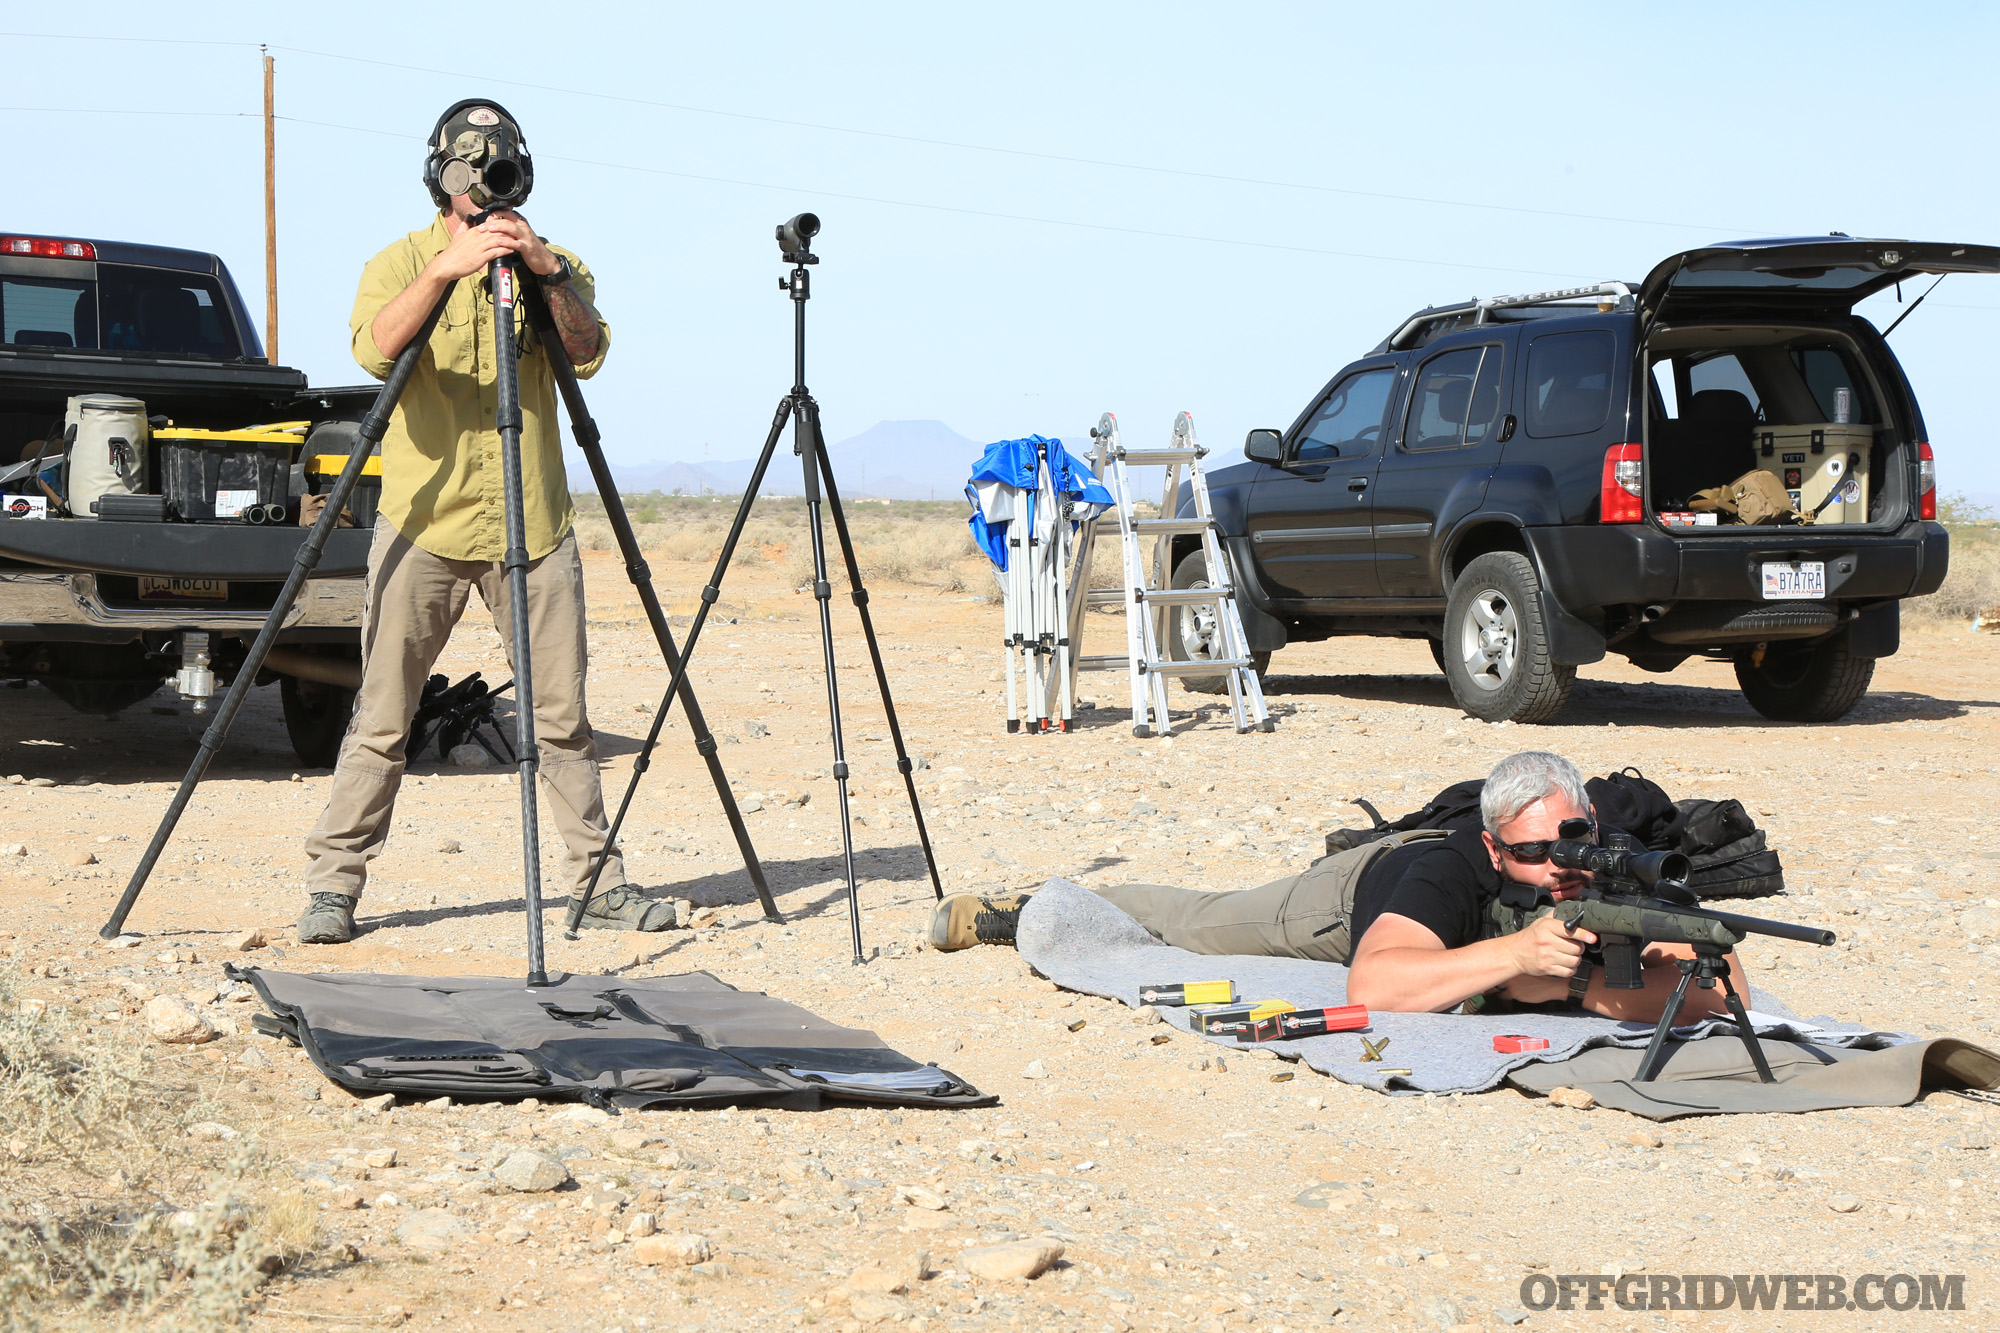
Above: Instructor Josh Reeves spotting for the author.

We started with a 100-yard zero. There are all kinds of theories and methods for zeroing your rifle at different distances, which fall outside the scope of this article, but we chose 100 yards to make use of the bullet-drop compensator built into the ACSS reticle in our scope. We zeroed the rifle, and did most of our shooting, with Black Hills 175-grain Boat-Tail Hollow Point. Black Hills has long held a top-notch reputation for accuracy and would wring maximum performance out of our rifle. Our initial groups with this load were consistently just over 1 inch end-to-end.

We tested three other Black Hills loads, using 168-grain Boat-Tail Hollow Points, 155 grain Tipped Match King, and 155-grain ELD-M bullets respectively, as well as one Federal Gold Medal load using 175-grain Sierra Match King Bullets. Our best results were with the two 175-grain loads, with our Howa barrel preferring the Federal SMK by a couple of tenths — it was the only load that gave us a sub-1-inch group, if just barely. As stated, the Black Hills 175 was just over 1 inch. As bullet weights dropped, groups opened up with the 168-grain bullets running about an inch and a quarter, and both 155 grain loads turning in groups of an inch and a half or larger.

Above: This target shows the build’s performance with three different loads. The circled corner of each square was point of aim. We got the best performance with 168-grain SMK. The upper left square shows the error introduced by resting the barrel directly on a bag or barricade, instead of the stock.

The bottom-line data point to come out of this grouping exercise is that our combination of parts produced a 1- to 1.5-MOA rifle. This hardly qualifies as laser-beam level accuracy. But for a budget-minded, utilitarian rifle to use in a last-ditch defensive or game-getting capacity, 1.5 MOA is absolutely acceptable.

Once we established the baseline accuracy of the rifle, Reeves took us through a number of precision tradecraft exercises including target ranging, shooter-spotter communication, wind calls, and unconventional shooting positions. There were steel targets of varying shapes and sizes laid out as far as 1,100 yards. The farthest we were able to make hits with our test gun was 880 yards, but the farthest we were able to make consistent hits was 800 yards even — that’s repeated first-round hits, as well as multiple hits in a row, for multiple shooters.

Supporting Equipment
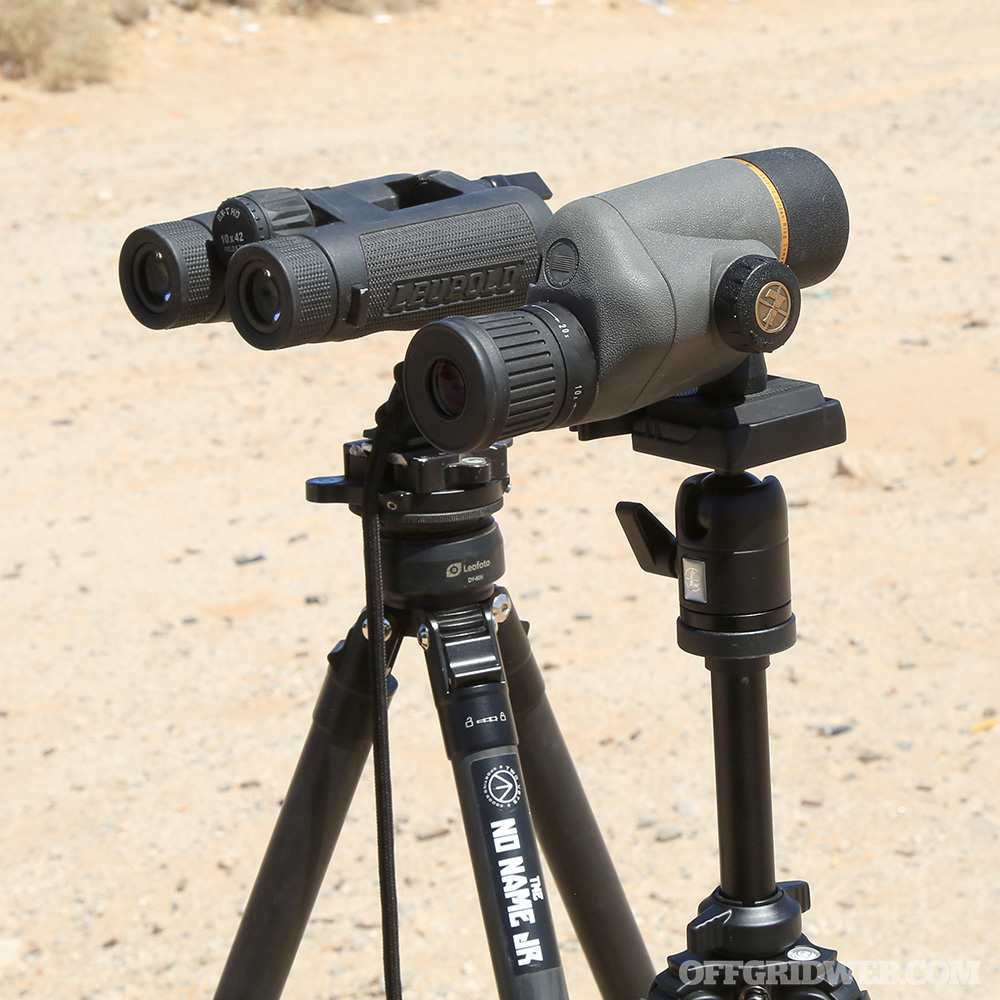
Part of what makes long-range shooting so expensive isn’t just the rifles and optics, but the ancillary equipment needed to support it. During our time training with Josh Reeves, we used a Leupold Gold Ring 10-20x spotting scope and a compact aluminum tripod. For $500, the GR 10-20x makes an earnest attempt to balance price point and optical capability. This model doesn’t have a reticle, which makes ranging and shot corrections a little more difficult. But having a reticle different than what’s in your rifle scope can also introduce confusion between spotter and shooter. The compact aluminum tripod is, sadly, discontinued but for sub-$200 offered a lightweight, packable solution for spotting.
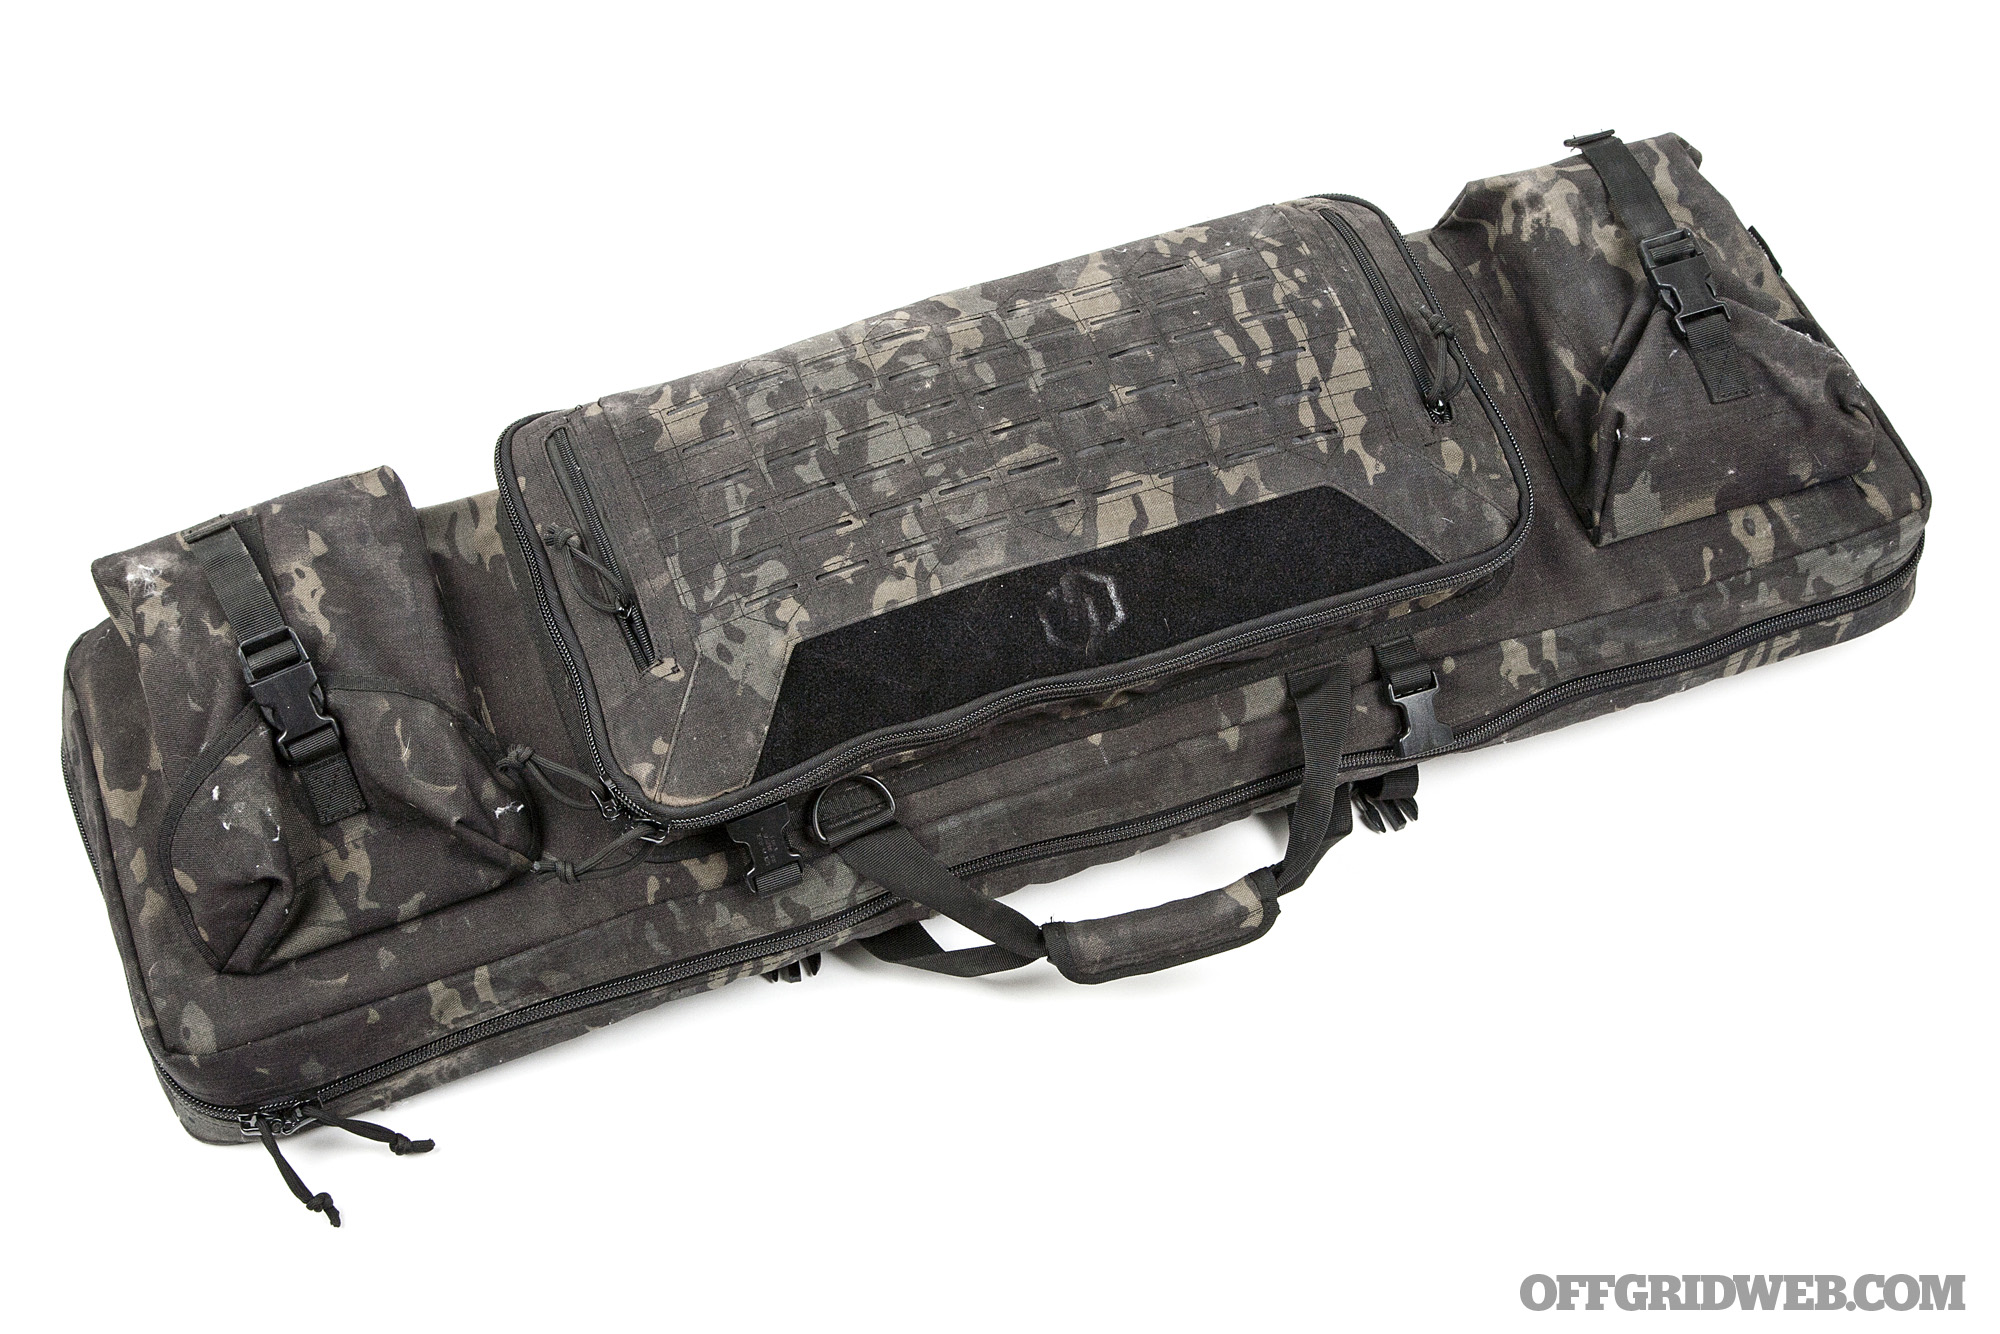
Above: The Savior Equipment Urban Warfare Case held our rifle, spotting scope, tripod, Kestrel weather meter, rear bag and several boxes of ammo with ease. This gave us a complete grab-and-go ready bag for precision rifle work. 

Instructor Bio: Josh Reeves with Independence Training

Josh Reeves served in the 2/75 Ranger Regiment as a sniper and team leader with multiple combat deployment in support of both OIF and OEF. After his military service, he again deployed as a contractor multiple times and continued to train while attending an array of firearm courses. In 2011, he returned to the states full time and became a guest instructor for multiple training facility across the U.S. with Independence Training becoming his home institute in Arizona. He has taught courses to everyone from military special operations and conventional forces to law enforcement and the civilian hobbyists. He currently competes in multiple shooting competitions such as NRL, PRS, and USPSA 3/2 gun matches.

Lessons Learned From This Bolt Action Build

We only experienced one mechanical issue during our T&E period. Every time we’d fire the rifle, the magazine would fall out. Even though we ensured the release latch clicked into place every time (we could hear and feel it) and tugged repeatedly on the mag to ensure it was seated, it’d fall out every time we fired.

After much internet sleuthing and asking around within our circle of SMEs, we reached out to Scott Van Dorsten of Van Dorsten Custom Firearms. He specializes in custom bolt-action rifles and scout rifles in particular. He explained to us that sometimes, when using polymer PMAGs in conjunction with the Pacific Tool & Gauge detachable mag conversion, an extra power mag release spring is required to hold the magazine in under recoil. He sent us several springs cut to the task; we passed the springs on to the folks at Wright Armory, who installed them for us. Since then, we haven’t had any issues with mags dropped free — other than when we want them to.

All told, we were very happy with how this build turned out. We hit our $2,000 budget right on the nose, and that included some upgrades like a trigger and a detachable mag conversion. (Excluding just those two items shaves $300 off the build cost.) We also spent $200 on a nice soft case from Savior Equipment; if you already have a spare case, that’s another area where money can be saved. While we’ve personally shot and reviewed precision rifle setups costing north of $15,000, that kind of expenditure is not required to put long-range capability into your survival toolbox. Spending just 10 percent of that’ll give you a handy, accurate rifle that can reach ranges well beyond what most of us would ever need in a survival situation. There are a nearly infinite number of combinations of parts that can be assembled with just a little market research, but hopefully this sample build gave you some ideas on how to get started on the road to long-range.


Weaponized Drones: The Spread of Commercial-Grade Flying IEDs

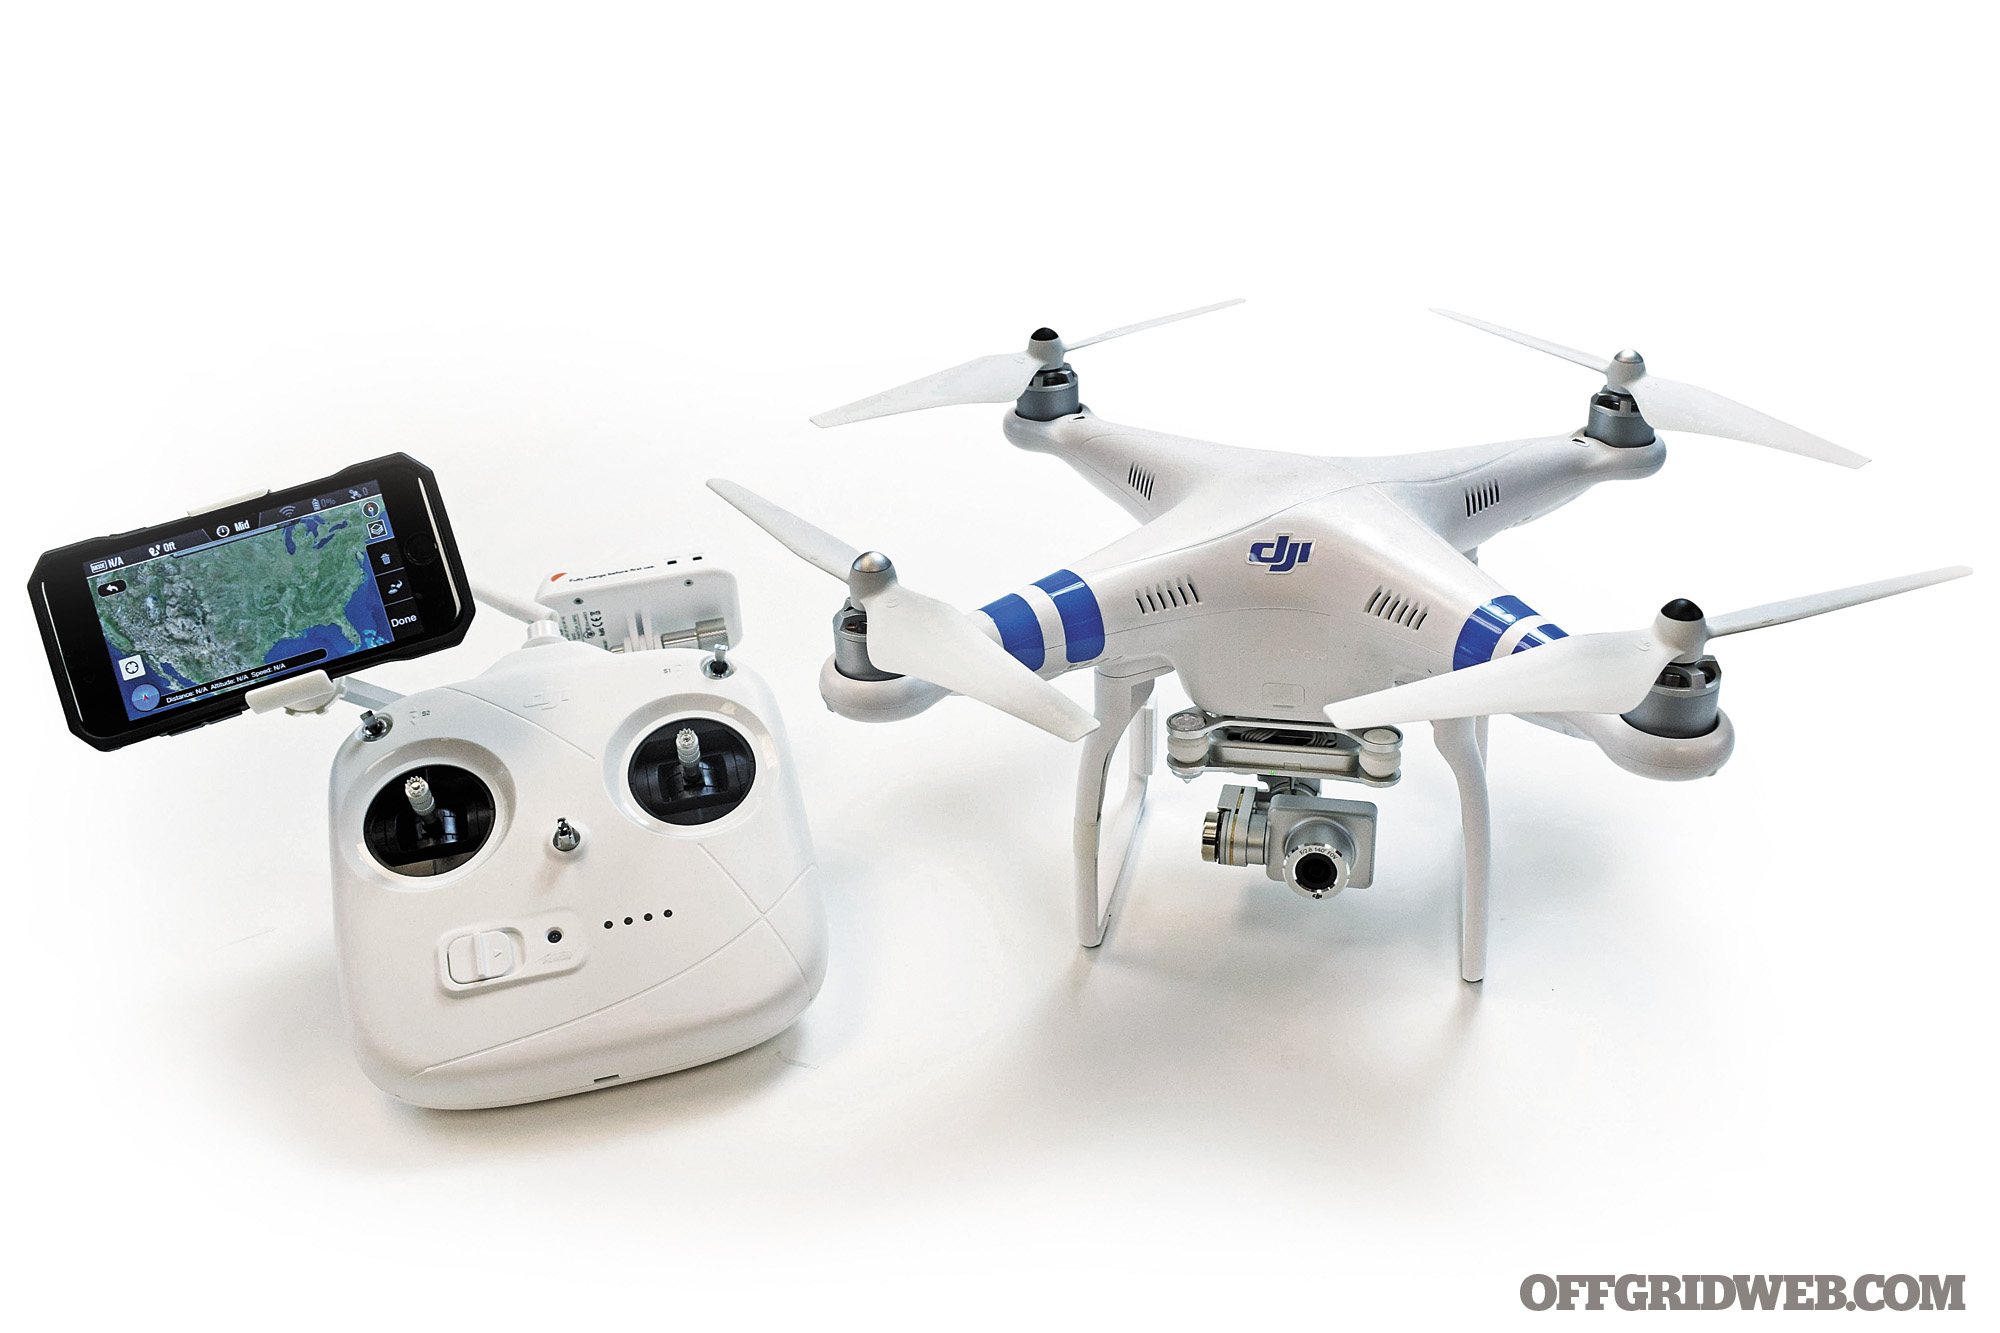
It's not uncommon for military technology to eventually make its way into civilian hands — after all, the Internet you're using right now was born from ARPANET, a U.S.-Department-of-Defense-funded research project. From GPS navigation and microwaves to hemostatic bandages and duct tape, many items we now rely on are based on tech that was developed for military applications. Aerial drones are yet another example of this trend. Remote-controlled quadcopters are becoming more popular and affordable with each passing year, and are widely used by filmmakers, hobbyists, and even children. But there's a dark side to these commercial-grade flying devices: they're being turned into inexpensive, remote-controlled weapons by a variety of malicious groups. Read on as we take a look at some recent examples of weaponized drones.

The Military Origin of Weaponized Drones

Above: When you think of weaponized drones, you might picture something like this MQ-1 Predator UAV, which can carry camera equipment as well as Hellfire missiles. (U.S. Air Force Photo by by Lt. Col. Leslie Pratt)

Flying drones have been around longer than you might think. Various designs have come and gone since World War II, including gyroscope-driven “aerial torpedoes” and jet-powered German V-1 flying bombs. Camera-equipped reconnaissance drones rose to popularity during the Vietnam War, and eventually the two drone categories were combined to create aircraft that carried observational equipment (cameras) and weapons (bombs, missiles, or onboard explosive payloads). UAVs such as the Predator have played a pivotal role in countless 21st-century conflicts.

Loitering munition is another term associated with military drones, indicating a category of drone that flies in to destroy a target on a suicidal kamikaze mission. Some are directly operated by humans, while others have a degree of built-in autonomy. This term is also relevant to many of the crude “flying IED” drones we'll discuss later in this article.

Commercial and Hobbyist Applications

Photo courtesy of Walmart Press Center

In 2013, Amazon announced plans to begin delivering packages via commercial drones. In 2015, Flirtey (now known as SkyDrop) began delivering medical devices with the approval of the Federal Aviation Administration (FAA). The list of commercial adopters of drones has grown exponentially since then. In late 2020, Walmart announced drone-based delivery of “select grocery and household essential items” in trial markets.

As corporate adoption of drone tech grew, so did its popularity among civilians and hobbyists. As of December 2021, the FAA says there are more than 863,000 registered unmanned aircraft systems (UAS) in the United States. However, this number fell from 1.74 million in December 2020 — a result of a huge number of drone registrations that expired at the end of that year. This means the actual number of drones (including those that are currently unregistered) in the United States is likely to be well over 2 million.

Globally, Business Insider predicted annual sales of drones to exceed 2.4 million units in 2023. That's a 67% compound annual growth rate.

Pandora's Box is Open

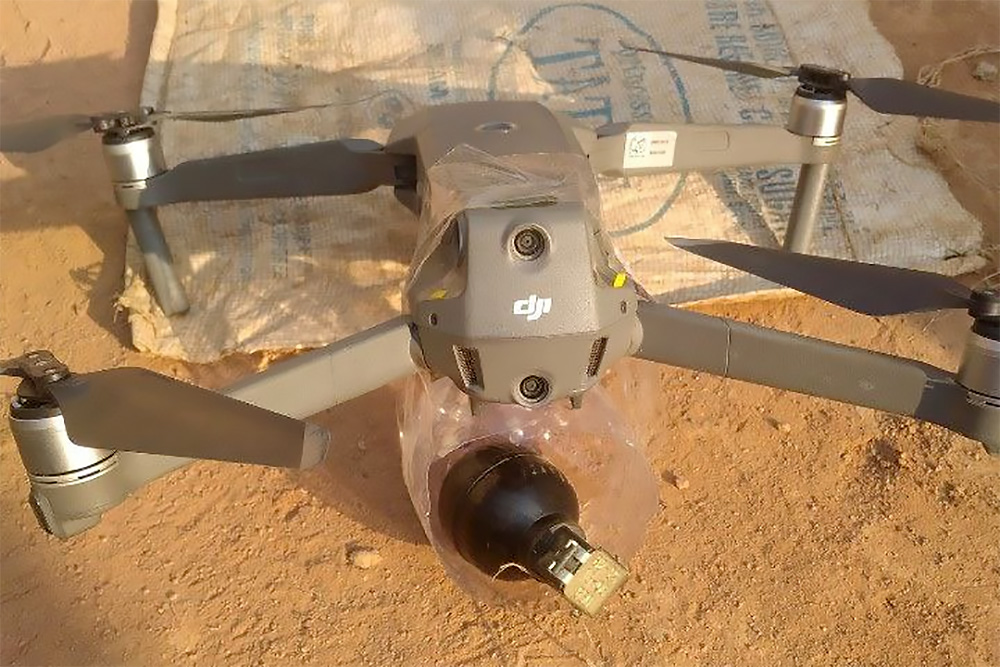
Above: On December 21st, 2021, authorities in the Central African Republic seized this weaponized drone. It appears to be a DJI drone with a plastic jug that carries a Chinese Type 82-2 hand grenade with its pin tethered to the aircraft by a string. While obviously crude, its lethality shouldn't be underestimated. (Photo via @Jack_Mrgln on Twitter.)

Aerial drones moved from the military to corporations, and eventually into the hands of ordinary people around the world. What once cost billions can now be purchased off eBay for a few hundred bucks (or less). Unfortunately, this inevitably got the attention of violent individuals who saw an opportunity to build remote-controlled improvised explosive devices (IEDs). Now, rather than attempting to ambush their enemies with stationary weapons or conduct vehicle-ramming attacks, they can fly weapons through open windows or stealthily drop them from several stories overhead.

Paramilitaries and terrorist organizations can't afford Predator drones, but they can certainly afford to strap some explosives onto cheap quadcopters.

ISIS/ISIL began using this tactic as early as 2015 in Syria, and continued it in Iraq with devastating effects. War on the Rocks explains, “Terrorist groups have weaponized commercial drones for high-profile attacks around the world from Venezuela to Yemen, but ISIL’s drone program stood out for its large scale and impact on major combat operations. In its heyday in 2017, ISIL launched 60 to 100 drone attacks per month across Syria and northern Iraq.”

Videos of ISIS drone attacks have been widely distributed by the terrorist group for propaganda purposes.

Above: An image posted in December 2021 by a social media account linked to the Russian paramilitary organization Wagner Group. The group has been accused of “serious human rights abuses in Ukraine, Syria, Libya, the Central African Republic, Sudan and Mozambique,” according to a recent statement by the European Union. The inset text translates to “civilian copters at war.”

Outright terrorists are not the only ones using weaponized drones; paramilitary groups are also recognizing their effectiveness. Self-described mercenaries from the Russian-backed Wagner Group frequently post images alluding to the use of commercial drones on the battlefield. On December 15th, a statement from the U.S. State Department explained, “Countries that experience Wagner group deployments within their borders soon find themselves poorer, weaker, and less secure. … Wagner forces [have] stoked conflict and increased insecurity and instability, causing the deaths of local soldiers and civilians and undermining national sovereignty.”

Above: An illustration posted by a Wagner-Group-affiliated social media account shows a commercial quadcopter flying above armed mercenaries.

Drug cartels are also using drones more than ever, and not just for drug smuggling. In June 2021, Business Insider reported, “The bee-like sound of flying drones has become a new symbol for terror in small Mexican towns like Aguililla in the southwestern Mexican state of Michoacan. Families in Aguililla have been reporting bomb-strapped drones flying over their homes since early this year, in a new tactic used by cartels to fight for their turf.”

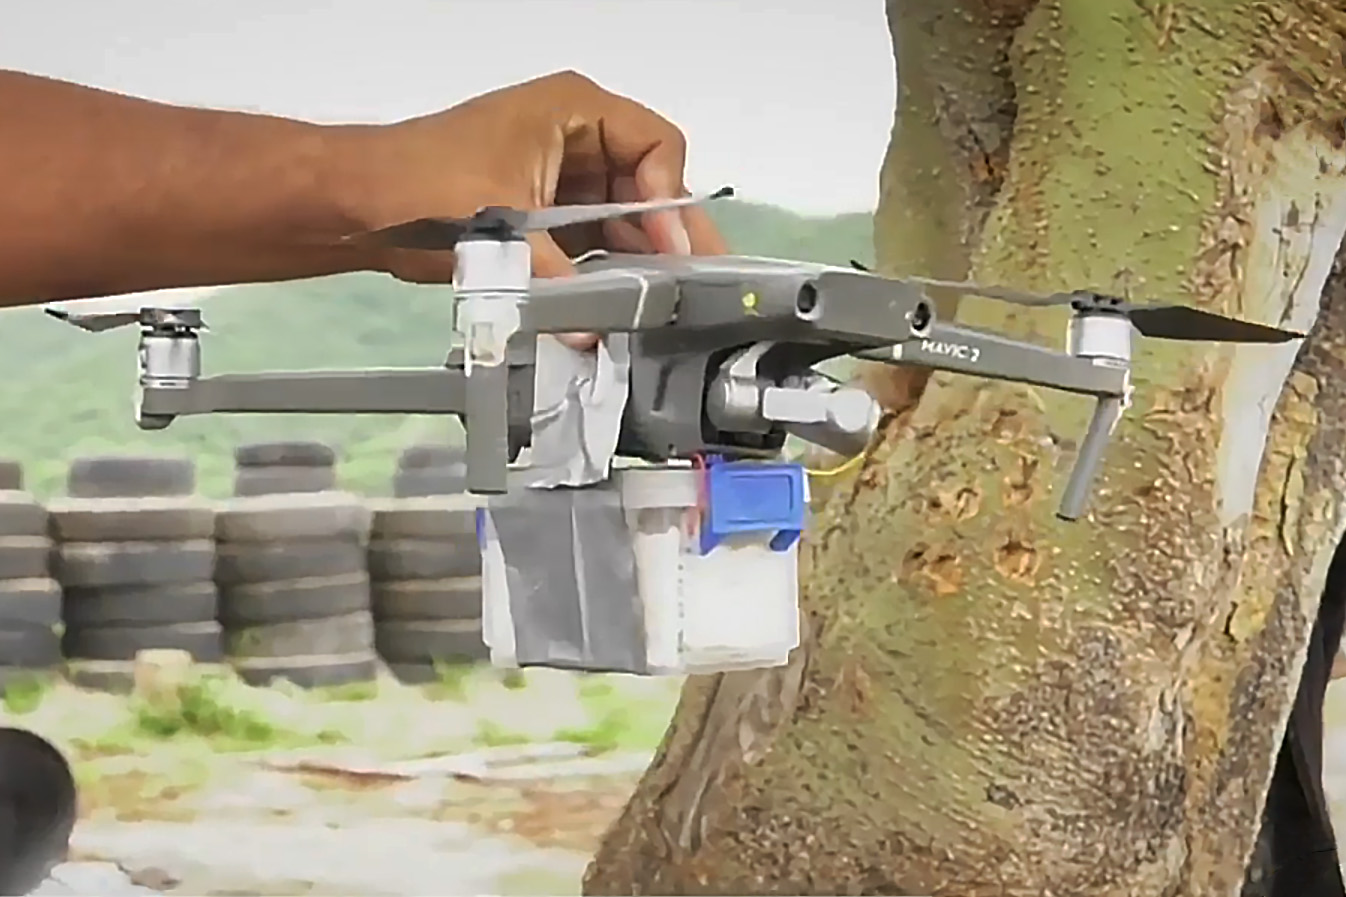
The following Spanish-language video from Noticieros Televisa features cartel personnel showing off weaponized DJI drones. Each drone carries a plastic container filled with C4 and steel ball bearings, linked to an electronic detonator that can be remotely triggered by the drone operator.

There have also been reports of the infamous CJNG cartel incorporating chemical weapons into its weaponized drone arsenal. Demoler reported, “In early October, one soldier was injured after the CJNG reportedly used explosives laced with insecticide on its drones in Tepalcatepec, Michoacan. … [Carbofuran] pesticide is one of the most toxic pesticides still in use and exhibits toxicity similar to that of V-series nerve agents. It is classified as an extremely hazardous substance in the United States and banned in Canada and the European Union.”

Anti-Drone Countermeasures

All this begs the question: what can be done to stop weaponized drones?

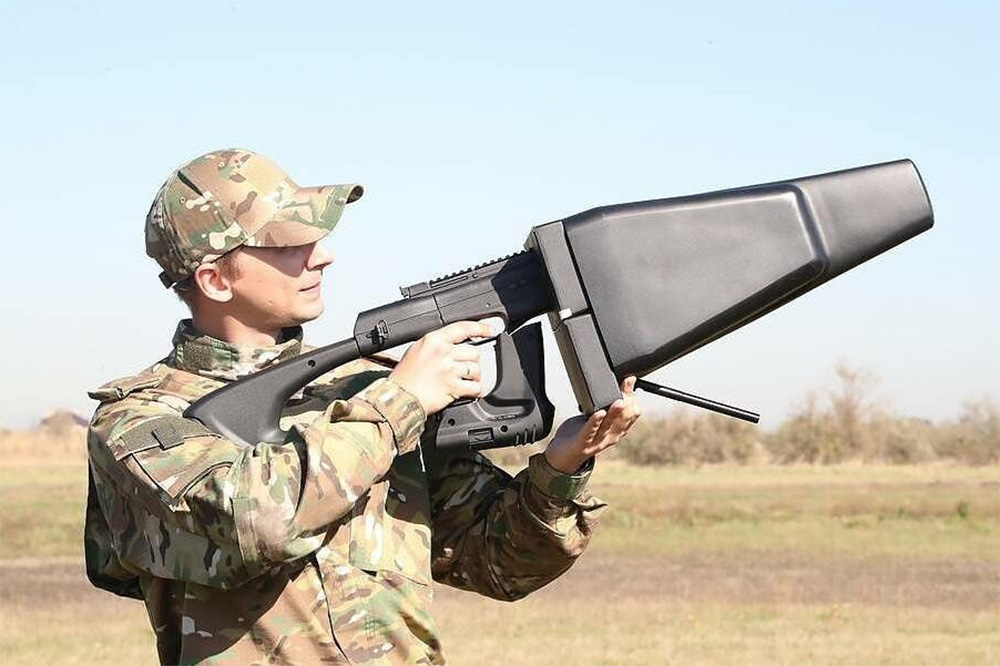
Above: A Russian anti-drone weapon said to be “capable of repelling attacks not only by single drones but also their massive use from different directions and altitudes within a radius of at least 3 km.” (Photo via Rosoboronexport)

During the Syrian Civil War, ISIS drone attacks became so common that Russian and Syrian opposition forces began using electromagnetic jammers and anti-drone “guns” to interfere with them. Beyond high-tech electronic warfare systems, Mexican drug cartel members have been seen wearing portable signal jammers to defeat rival factions' drones — check out our article on signal jammers for more details.

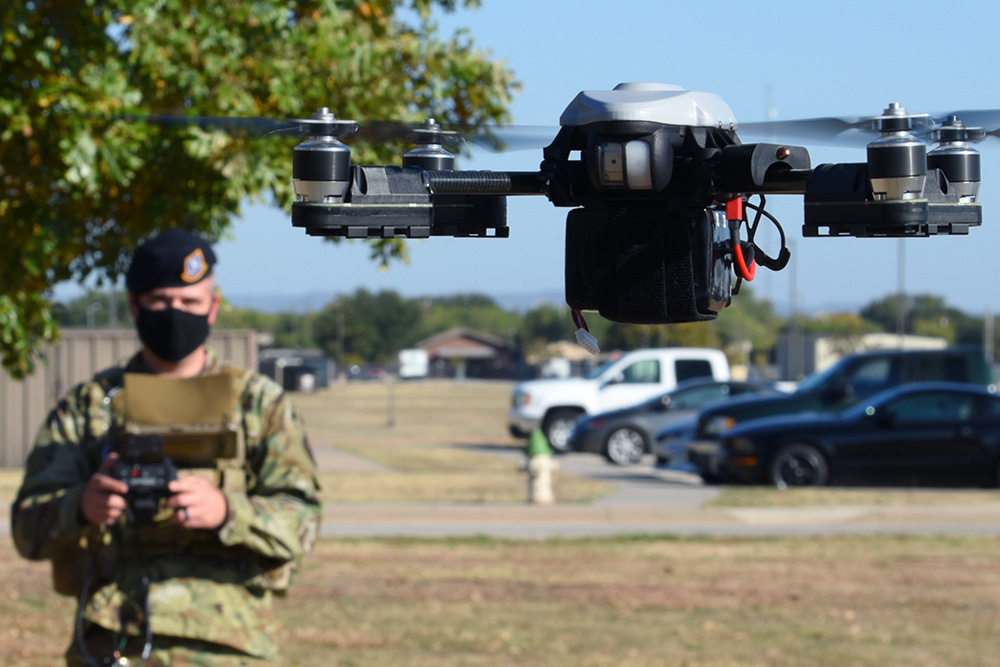
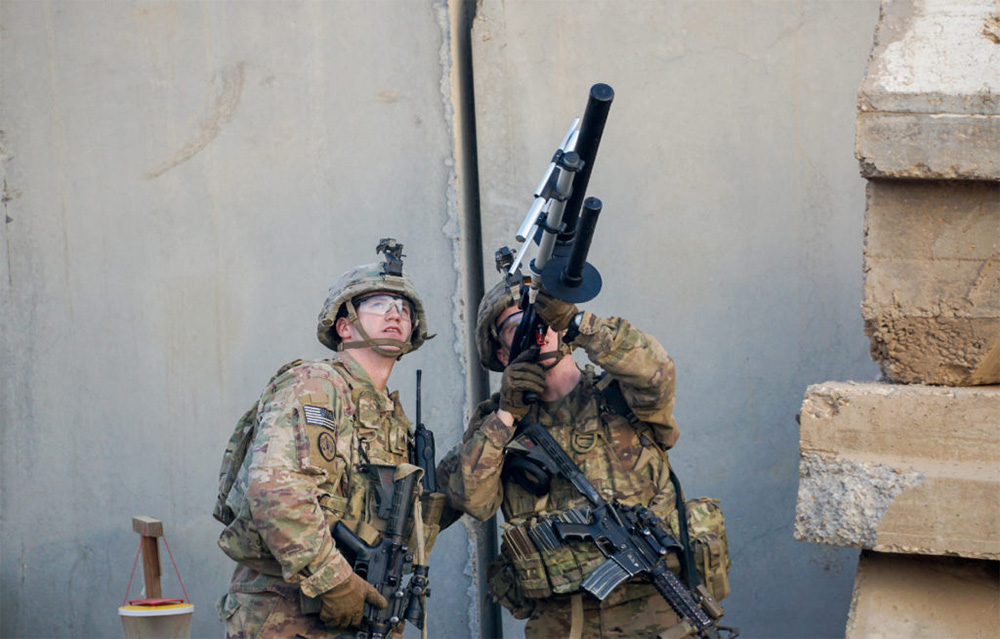
Above: Two U.S. Army troopers operate a Drone Defender device in Iraq during an October 2018 counter-unmanned aerial system drill. (U.S. Army photo by Capt. Jason Welch)

Although the FAA has placed increasingly tight regulations on drone ownership and use in the United States, we know that motivated individuals won't be deterred by these laws. Drones are still widely-available and easy for novices to operate. Since civilians don't have access to military anti-drone tech and can't legally use signal jammers, our best option may be simple situational awareness. Keep an eye on the sky, and if you see a suspicious-looking drone in the area, it might be time to investigate further or seek shelter.

Closing Thoughts

A December 2021 NBC News article stated, “Some experts believe the spread of the semi-autonomous weapons will change ground warfare as profoundly as the machine gun did.

U.S. Air Force photo by Airman 1st Class Ethan Sherwood

The point of this article is not to demonize drones, or to imply that they have no legitimate peaceful applications. Drones, like most forms of technology, have the potential to be used to improve our lives or to inflict harm. But as prepared civilians, we should recognize the possibility — whether slim or substantial — of weaponized drones being used to attack soft targets within our own borders.


New: Cloud Defensive MCH Handheld Flashlight

Cloud Defensive is one of the leading names in weapon-mounted lights, with the exceptionally-durable OWL and versatile REIN receiving praise across the industry. Several members of our staff, myself included, own these lights and have had great experiences with them. However, there are a few lighting categories that Cloud hasn't entered yet. The first is pistol lights — they've been teasing the EPL series, and we're looking forward to its release in the future. The second is handheld lights, and that's why we're glad to report that the wait is almost over. The Cloud Defensive MCH handheld flashlight design, specs, and approximate release date have been revealed.

The New Cloud Defensive MCH

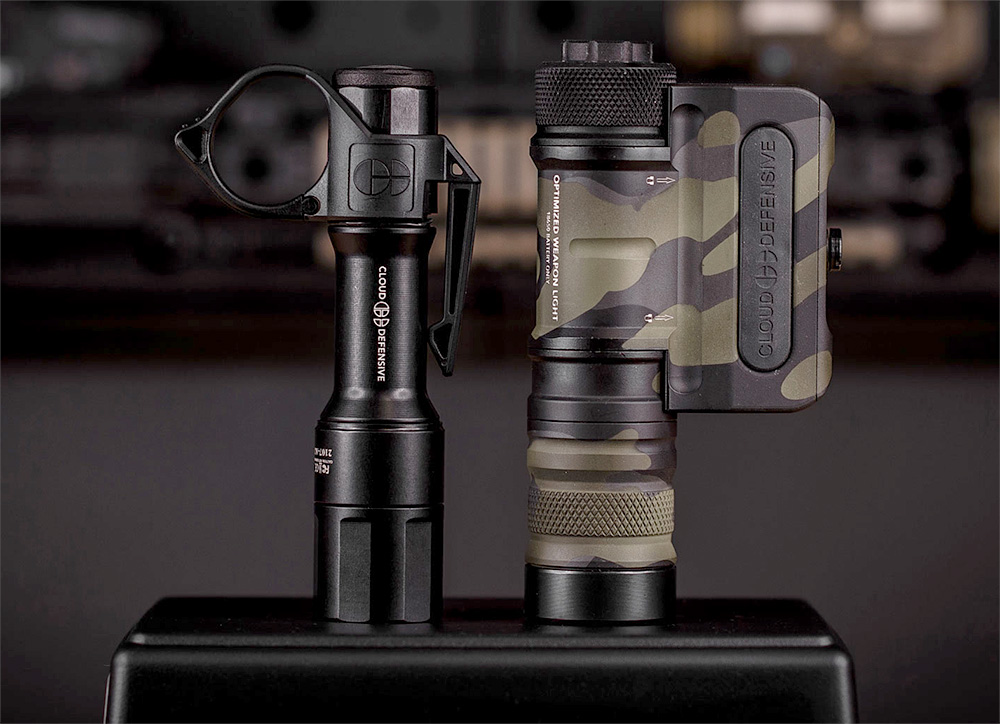
The MCH (left) next to a Cloud Defensive OWL (right)

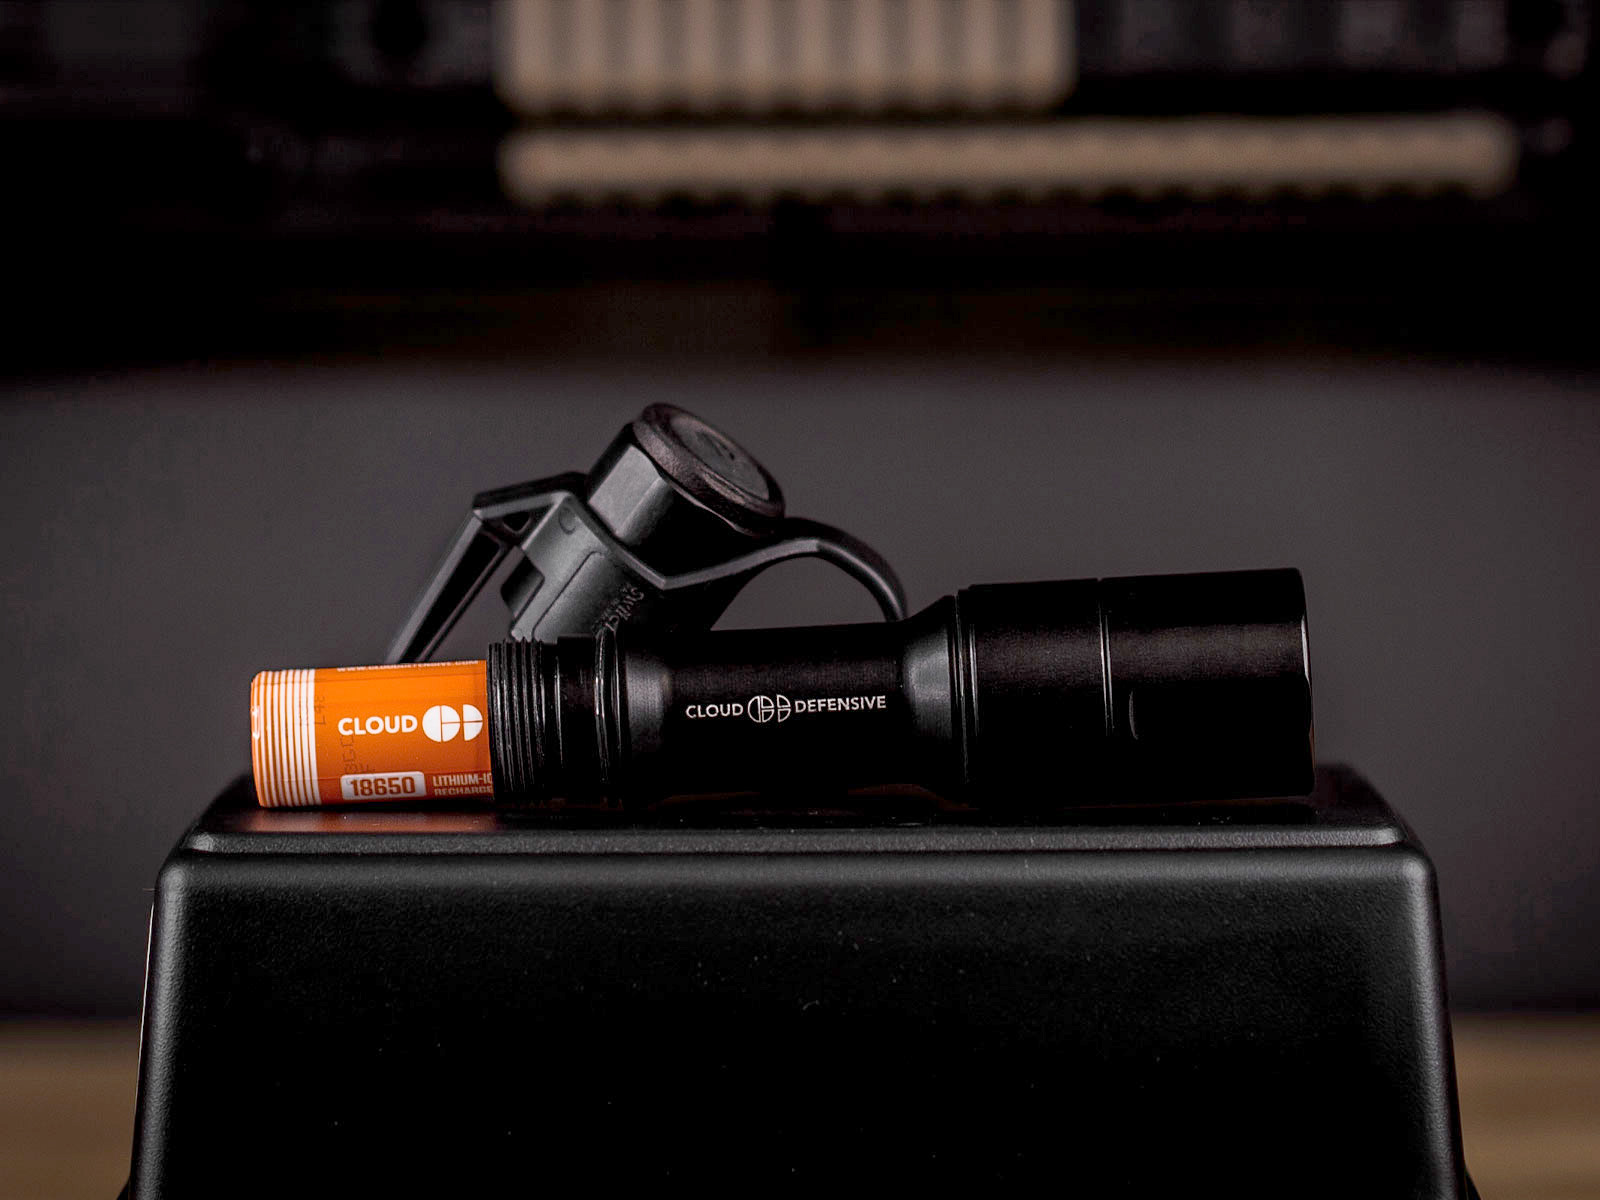
MCH, which stands for Mission Configurable Handheld, is a modular flashlight that will offer various body, head, tailcap, and pocket clip options. This configurable design will allow each user to set up the MCH with his or her desired color temperature, candela, battery life, tailcap feel, and so on. The MCH will be covered by a transferable lifetime warranty and 30-day money-back guarantee.

Read on as we go over some of the options that have been announced already.

Body Choices: Full-Size 18650 or Micro 18350

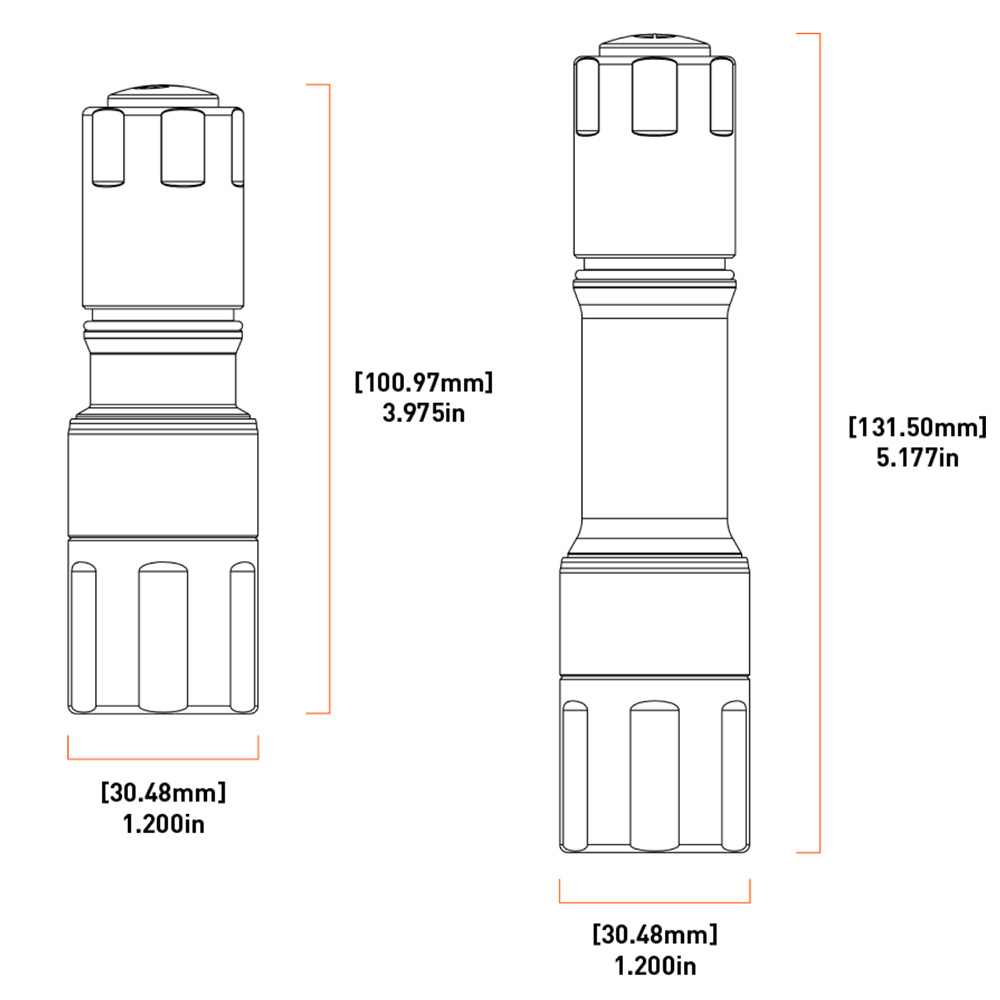
The MCH will be available in two body sizes. The Micro (above left) takes an 18350 battery; the Full-Size (above right) takes an 18650. These are approximately the size of a single CR123 or double CR123 battery configuration, but these lights don't use those old-style disposable batteries. Instead, each light includes an 18350 or 18650 Lithium-Ion rechargeable cell, much like Cloud Defensive's weapon lights.

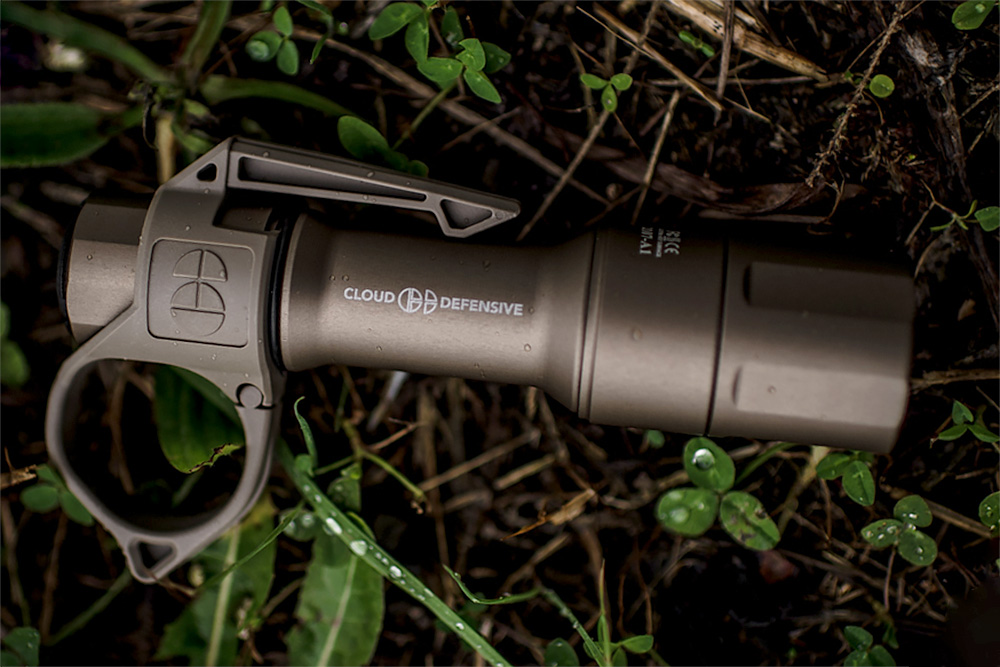
Each light is machined from 6061-T6 aluminum with a Type III “hard coat” anodized finish. Black and FDE lights have already been shown, but it seems likely that Cloud Defensive will eventually offer other color options such as OD green, clear anodized, camo, and even “moonshine” as previously offered on the OWL and REIN.

Head Choices: EDC, High Candela, and More

At time of launch, two heads will be available for the Cloud Defensive MCH. These will be designated MCH-EDC and MCH-HC. The EDC model is the standard model, designed for every-day carry and general-purpose use. It offers a balance between strong candela for long range and spill for close range.
MCH-EDC Pending Specs:

  • Estimated 30,000 Candela.
  • Estimated 1,400 Lumens.
  • At at a confirmed 4000-5000K light temperature, it is a phenomenal Every Day Carry option that displays coloration similar to the older incandescent bulbs.
  • Estimated 18650 run-time is 90 minutes.
  • Estimated 18350 run-time is 35 minutes.

The HC model stands for high candela, which is ideal for long-range use as well as cutting through photonic barriers such as window tint. Some might refer to the HC as a “tactical” light, since its specs indicate it would be well-suited to law-enforcement and other duty applications. Cloud Defensive says it may be “too intense” for use in enclosed spaces or for admin tasks such as map-reading.

MCH-HC Pending Specs:

  • Estimated 70,000 Candela.
  • Estimated 1,100 Lumens it performs in a way nobody else can.
  • Uses a proprietary and customized Mil-Std coating on our Low-Iron AR glass that moves the light temperature from 6000K down to 5200k. This creates a penetrating white light that is warm enough to defeat photonics barriers and cool enough to be highly disruptive on target.
  • Estimated 18650 run-time is 80 minutes.
  • Estimated 18350 run-time is 30 minutes.

Other Heads Coming Soon

You may have noticed that the MCH-EDC and MCH-HC both offer fixed lumen output (1,400 and 1,100, respectively). Many users prefer high and low modes for close-range admin tasks and longer battery life. Thankfully, Cloud Defensive has mentioned plans to offer another head with this functionality.

In a comment on the official Instagram page, a representative explained that it's uncertain if the high/low mode head will be available at launch. “We will have that available as soon as possible, but we are still trying to get all the timelines figured out,” the comment explained.

Cloud Defensive MCH heads are fully interchangeable with both body sizes, and will be sold individually on the company's web site.

Pocket Clip Choices: Deep-Carry Steel or Thyrm SwitchBack

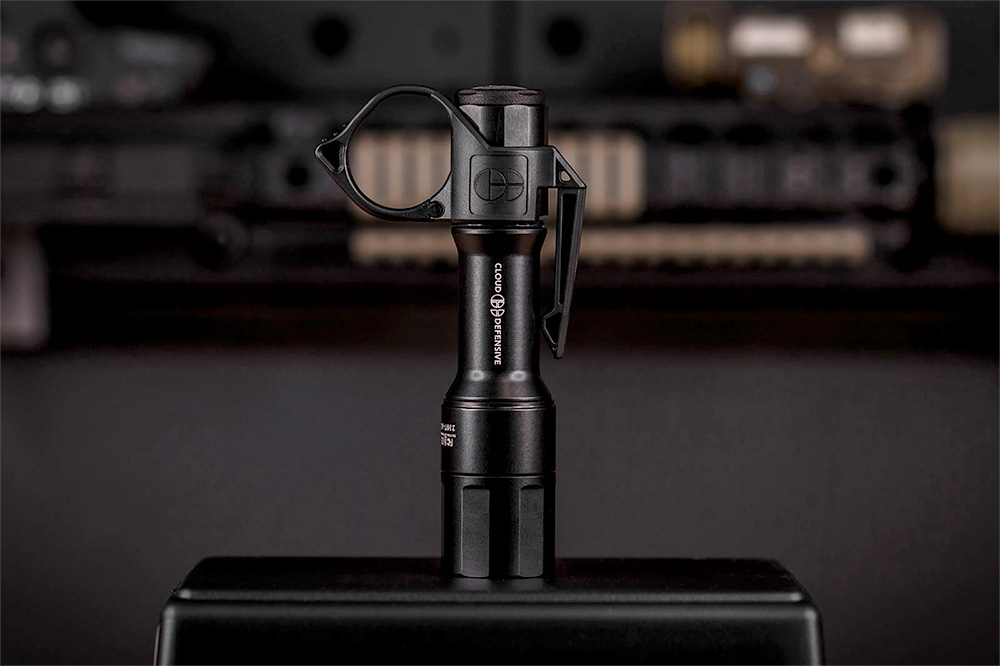
Cloud Defensive MCH with optional Thyrm SwitchBack clip/finger ring

The MCH will ship with a standard deep-carry spring steel pocket clip with a black nitride finish. At time of publication, we haven't seen photos of this clip yet, but several photos have been published of the other option: a Cloud-Defensive-branded Thyrm SwitchBack. The Switchback features a polymer pocket clip plus a finger ring that helps retain the light during one-handed use (especially alongside a firearm).

Tailcap Choices: Three Included ND Protectors

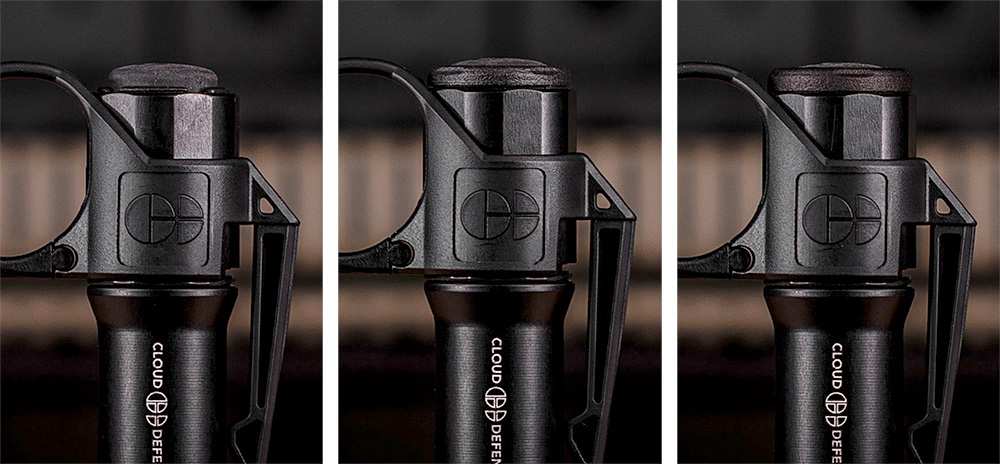
There's no worse feeling than reaching for a flashlight when you really need it, only to find the battery is dead. For any light with a raised tailcap button, there's a chance of a negligent discharge (ND) if an object presses that button while it's in a pocket or on a belt. Cloud Defensive has worked around this by including three “ND protectors” with each MCH flashlight.

The low-profile protector (pictured above left) is intended to offer maximum access to the button, and is well-suited to use with a Thyrm SwitchBack. The other two create medium and tall barriers to protect the button from unintended activation. Cloud Defensive says they're user-serviceable and take about 10 seconds to swap out.

Cloud Defensive MCH MSRP and Availability

Cloud Defensive says the MCH will be offered at an MSRP of $220, but early birds will be able to snag the first batch of MCHs at a one-day launch price of $200.

At time of publication, the exact launch date hasn't been announced, but Cloud Defensive has confirmed it will be released in Q1 of 2022. So, we hope to have one of these lights in our hands for a full review by the end of March.

For more details, go to CloudDefensive.com.


Letter from the Editor: No Man is an Island

We’ve always said that survival is a team sport. Whether it’s your family, neighbors, coworkers, or the fated group of strangers you wind up alongside, humans are pack animals and there’s indeed strength in numbers. But modern life, particularly in a post-COVID world, has many of us working remotely and socially distanced. While there’s certainly something nice about a little bit of privacy, the complications of survival are compounded without anyone else to rely on for assistance. If a crisis shows up on your doorstep when you’re home (or away from home) alone, what you have in your bag and in your brain will be all you have to rely on. Combine that with increased risk of exposure that is part-and-parcel of the colder holiday weather, and the severity of an isolated survival scenario grows exponentially — whether you’re a lifelong resident of blizzard country or have to add a layer or two against the cooler nighttime temps of the southern sunbelt.

So, we’re looking at how to cope with the perils of finding yourself stranded, either alone or in a small group. Our What If feature examines how to make the most of limited supplies and no communication in the context of a hunting trip or cabin vacation gone wrong. Scott Finazzo gives us the lowdown on flares and signaling devices. Just because help isn’t there when you get in trouble doesn’t mean that you can’t get help to come to you. Our Pocket Preps column examines a variety of tinder and fire-starting tools that can be stashed in a pocket or pack. Patrick Diedrich interviews survival instructor Jerry Saunders, whose new home in Michigan’s Upper Peninsula puts him on the frontlines of both rural separation and cold weather.

We also look at two different survival rifle projects: a sub-$2,000 economy bolt-action rifle for precision shooting and game-getting, as well as a pair of modified and customized AK-pattern rifles tricked out for emergency use. Finally, we pay tribute to the passing of staple RECOIL OFFGRID contributor Chad McBroom. Any of you who are regular readers have surely come across one or two of his articles, which were always engaging and informative.

Regardless of your location, lifestyle, or likely risk factors, there’s always a possibility of facing the odds with nobody there to back you up. This is why we so strongly stress thorough research, informed gear choices, and a broad skillset to call on in the face of danger. Survival is hard. Work harder now and stack your deck.


In Memoriam: RECOIL Remembers Chad McBroom

It’s with heavy hearts that the RECOIL editorial team found out about the recent passing of one of our own. Chad McBroom was a U.S. Border Patrol tactical officer who wrote frequently for the entire RECOIL family of publications. He was a prolific contributor not just to this magazine, but also to our sister titles CONCEALMENT and RECOIL, as well as RECOILweb. We were deeply saddened to learn of his untimely departure from our lives at the end of August, and we felt compelled to share some thoughts with those of you who may have crossed paths with him or known his work.

I personally recruited Chad as a contributor in 2015, after taking his collapsible baton tactics seminar. It was a one-on-one training session conducted in a local park. I was impressed not only with his level of knowledge in a particularly niche self-defense subject, but also with his highly approachable demeanor and the ease with which he conveyed techniques and principles. I immediately began working with him, and he went on to have a rich career as a truly beloved member of our team, both as a writer and a photographer.

But Chad was so much more than his articles. He was a devout family man, and a consummate professional in both his law enforcement career and as an educator of our audience. Every member of the RECOIL OFFGRID team will tell you that the thing we recall most fondly was his passion to convey knowledge to those who sought it and his absolutely unshakable positive attitude. It’s easy to get jaded in this industry — the politics, the constant stream of product launches and media events, the re-hashing and de-bunking of tired old survival stereotypes — but that wasn’t the case for Chad. Every opportunity to evaluate a new tool or learn a new skill was a joy for him. He seemed to quickly find the best parts of every product — and every person — he encountered. Every class or range trip was a chance to teach and to learn. He was a life-long student of all forms of self-defense, from shooting to tactics to martial arts. He never got tired of seeing new things and sharing these discoveries with us and with you. We can’t think of a single person who dealt with him personally who ever had a negative thing to say about him — an unfortunately rare report to give in today’s day and age.
It was an honor to watch him continually grow and develop. Not only as a passionate subject matter expert, but as a writer and photographer. Over the last several years, he honed his skill behind a camera as he would have behind a knife or gun, and his photography prowess soon grew beyond magazine content to include real-estate, portraiture, and street art. As was his style, he shared these endeavors through multiple social media streams, most notably the legacy Instagram accounts @cmcbroomphoto and @cmp_street. At time of writing, these accounts are still available to view and, if you knew him or his work in the shooting community, we encourage you to look at them and share his enduring passion for visual art.

Chad McBroom truly embodied the warrior spirit, both in his passion and his compassion. His depth of knowledge and unwavering enthusiasm for anything he deemed worthy of his time will be fondly remembered and sorely missed. We are, beyond any doubt, diminished without his continued presence in our lives and wish only the best for his family, children, and grandchildren.


Raven Rock Book Review: A Little Bird Told Me

The Premise: Since the 1950s, the United States has had a plan on how the government could survive a nuclear attack. In August 1949, the Soviet Union detonated their first atomic bomb, sparking the nuclear arms race and the Cold War. In the early days, the nuclear threat was small, but it gradually escalated to earth-shattering superweapons such as the Russian Tsar Bomba. At 50 megatons, that hydrogen bomb was over 1,500 times more powerful than the bombs dropped on Hiroshima and Nagasaki combined. What started as a few hardened facilities able to withstand a near miss snowballed into a multibillion-dollar, multitiered plan to save the government in hopes of rebuilding the United States of America after a catastrophic event. Underground facilities such as the Raven Rock complex exemplify this plan.

Our Review of Raven Rock by Garrett M. Graff

The 411: In writing Raven Rock, author Garrett M. Graff delves deeply into the history of how the U.S. Government plans morphed from some basic protection to very comprehensive Continuity of Government (COG), Continuity of Operations (COOP), and Enduring Constitutional Government (ECG) programs that continue to this day. The author writes, “What began in the 1950s as a nationwide push to ready every household and workplace for a Soviet attack shrank decade by decade, until by 9/11, there was just one aspect of the grand plans left in operation: the evacuation of the nation’s leaders to bunkers hidden under mountains … The terrorist attacks of September 11, 2001, and the subsequent anthrax attack on the U.S. Congress restarted a focus on COG and COOP planning that continues to this day. Today, this secret world still exists, just beneath the surface of our country. In many ways, it’s actually more expansive, powerful, and capable today than it ever was during the 20th century.”

The book further explains the size, rough capability, and government function of several unclassified facilities. Also of note are the civilian-owned facilities, such as the AT&T bunkers, “Atomic Storage” contractors that housed records for companies like IBM and General Electric, and yet others built by Fortune 500 companies like Standard Oil and Shell Oil. These private bunkers far outpaced what the U.S. Government was building, in terms of sheer size and quantity. But in terms of importance to the United States Government, Raven Rock stands out. “The Raven Rock Mountain Complex (RRMC) is a unique hardened, survivable, deep underground command center and relocation site with rigorous redundancy, reliability, and security standards charged with a mission to support the Secretary of Defense, the Chairman of the Joint Chiefs of Staff, select DoD components, and as appropriate, non-DoD agencies of the Federal Government. The installation encompasses at least 35 distinct tenant activities with specialized infrastructure and buildings spread out over a 700-acre campus and several distinct remote sites.”

There are a lot of interesting tidbits contained within the read. For example, the now-infamous Greenbrier facility reveal by the Washington Post in 1992, the suggestion to use Mammoth Cave in Kentucky as a government relocation facility, and the symbolism of the “Fallout Shelter” signs. Was there ever a foreign nuclear device stored in the United States? Would any private-sector personnel have priority to be saved ahead of other doomsday planners? How did the Cuban Missile Crisis affect the civil defense effort? How did Hurricane Katrina affect Continuity of Government plans?

The Verdict: This book is a must-read for anybody who has an interest in knowing how the U.S. Government plans to withstand a national catastrophe — whether it be a nuclear exchange with a foreign power or a rogue asteroid capable of killing millions of people in seconds. The author has successfully managed to peel away the layers of the unclassified aspects of these programs and presents them in an engrossing manner. The book is heavily researched and annotated, with an extensive bibliography of more than 400 references.

About Raven Rock

Book & Author
Raven Rock: The Story of the U.S. Government’s Secret Plan to Save Itself – While the Rest of Us Die
By Garrett M. Graff

Publisher
Simon & Schuster

MSRP
$20

URL
simonandschuster.com

Pages
560

Rating:
>Thrive
Survive
Die

OFFGRID LIBRARY OF RECOMMENDED READING


AKs Two Ways – Part Two: Custom Lee Armory AK

If you haven't already read Part One of our AKs Two Ways series, we recommend you go do so now. It sets the context of this comparison between two approaches to building customized AK-47s. For our full custom build, we teamed up with the AK experts at Lee Armory in Phoenix, Arizona. With their help, we learned how to convert a bare Lee Armory AK receiver and a pile of parts into a fully functional custom rifle, pressing in every rivet and polishing every surface for the best possible results.

Photos by Patrick McCarthy

The Blank Slate Lee Armory AK Build

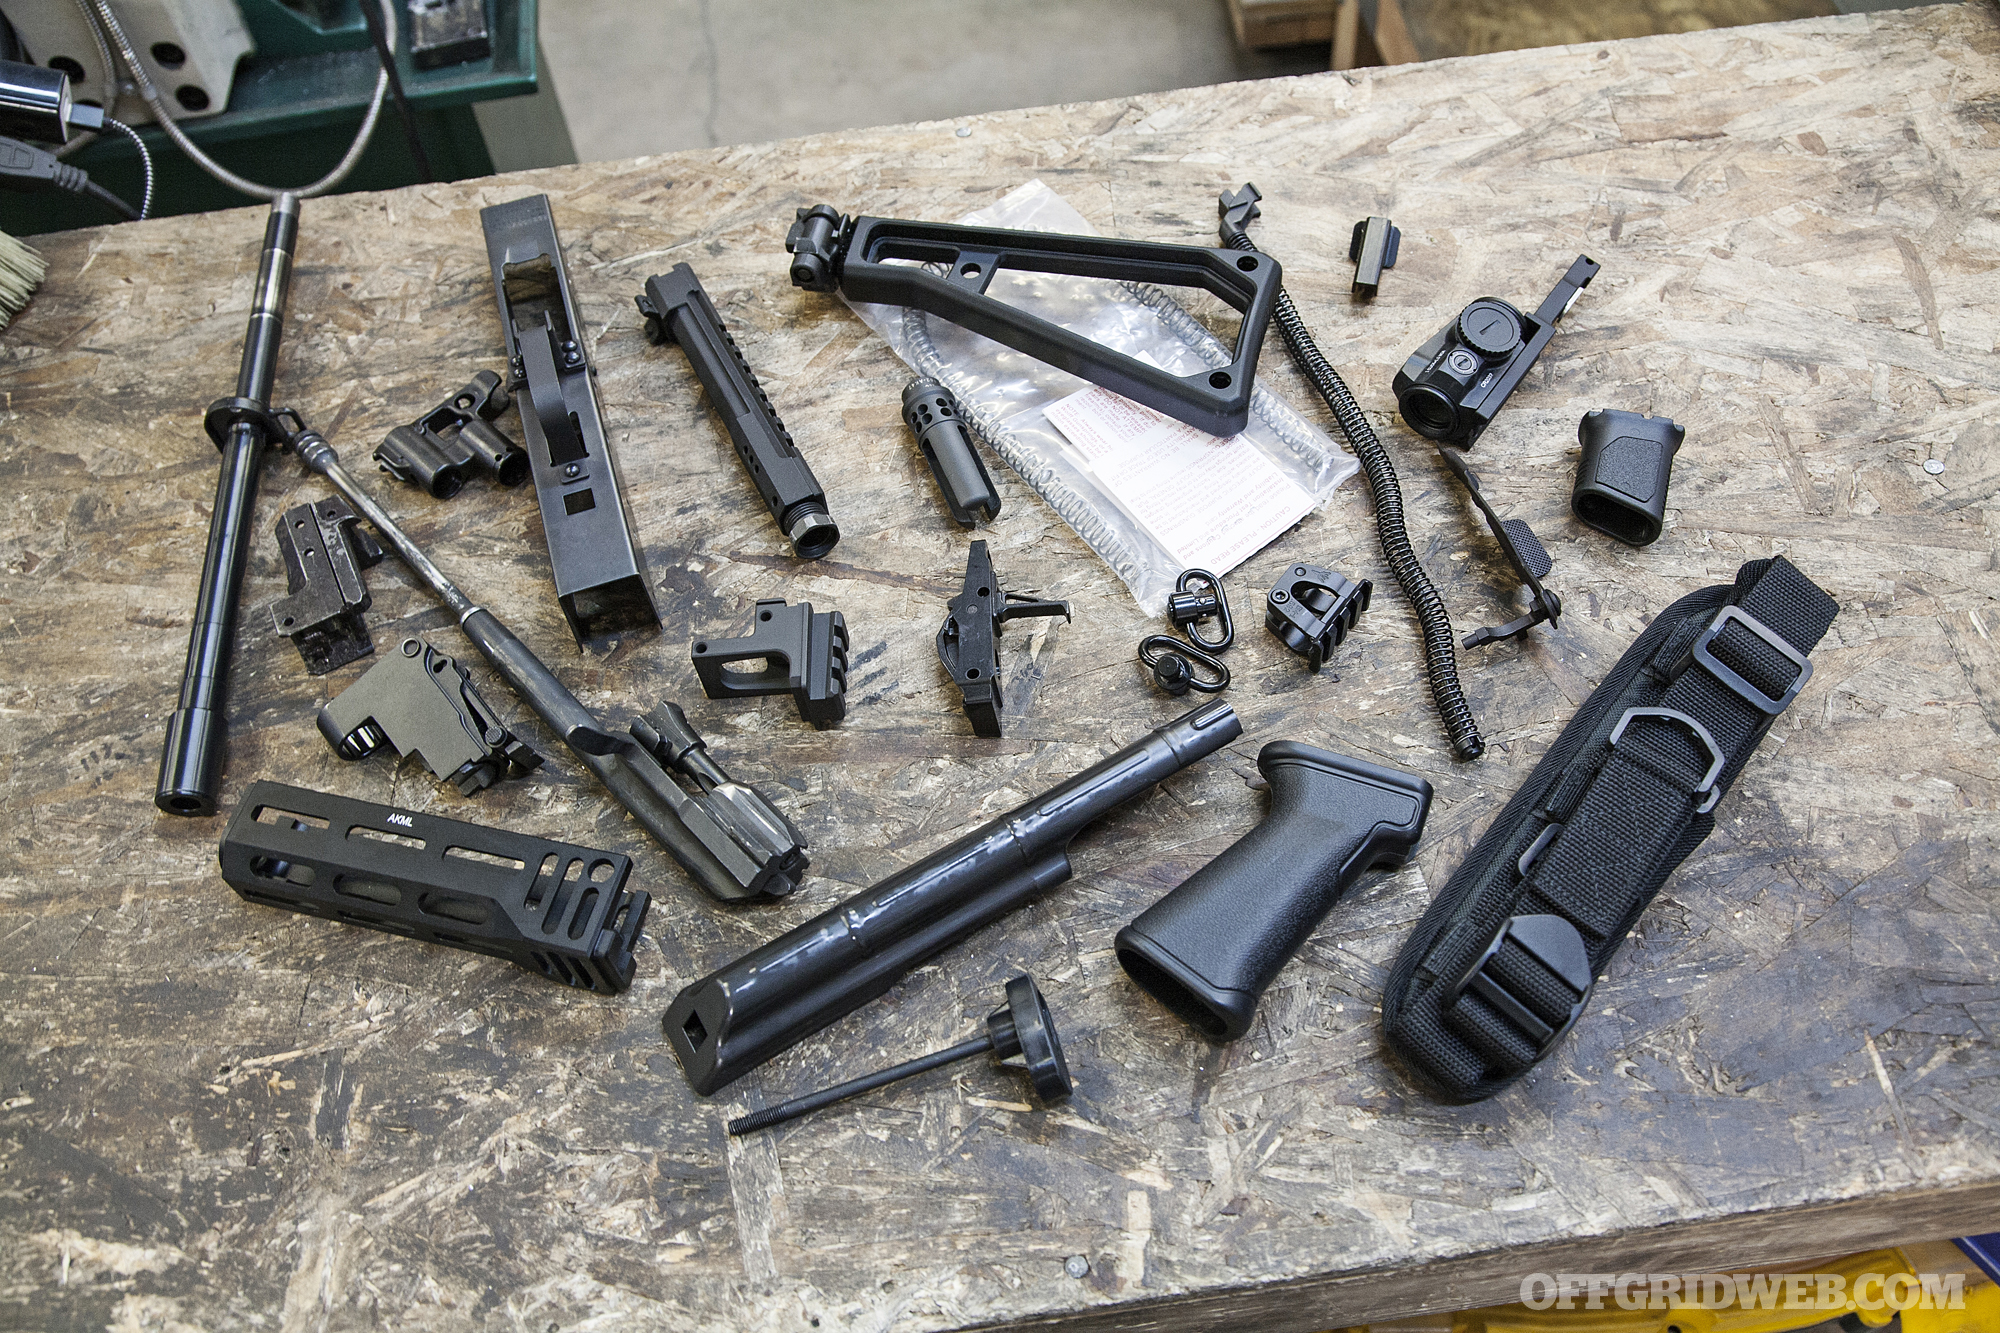
Above: The “pile-o-parts” in raw form, before the builders at Lee Armory worked their magic with them.

Our full-house custom build is based on a Lee Armory AK stripped receiver and parts kit. As previously mentioned, the days of extremely cheap, reliable AKs are probably fully in our rearview mirror. While modding an off-the-shelf rifle does allow the advantages of immediate gratification and financial burden spread out over time, the amount of money you save total may not be a significant incentive for some.
By contrast, a true custom-built AK is the long-game solution to those looking for a single AK-for-every-occasion. We know that there are true Kalashnikov aficionados who’d rather (and do) rely on this Soviet-era workhorse instead of an AR. For them, we suspect there are both practical and existential advantages to having an AK platform built not just for them, but to them.
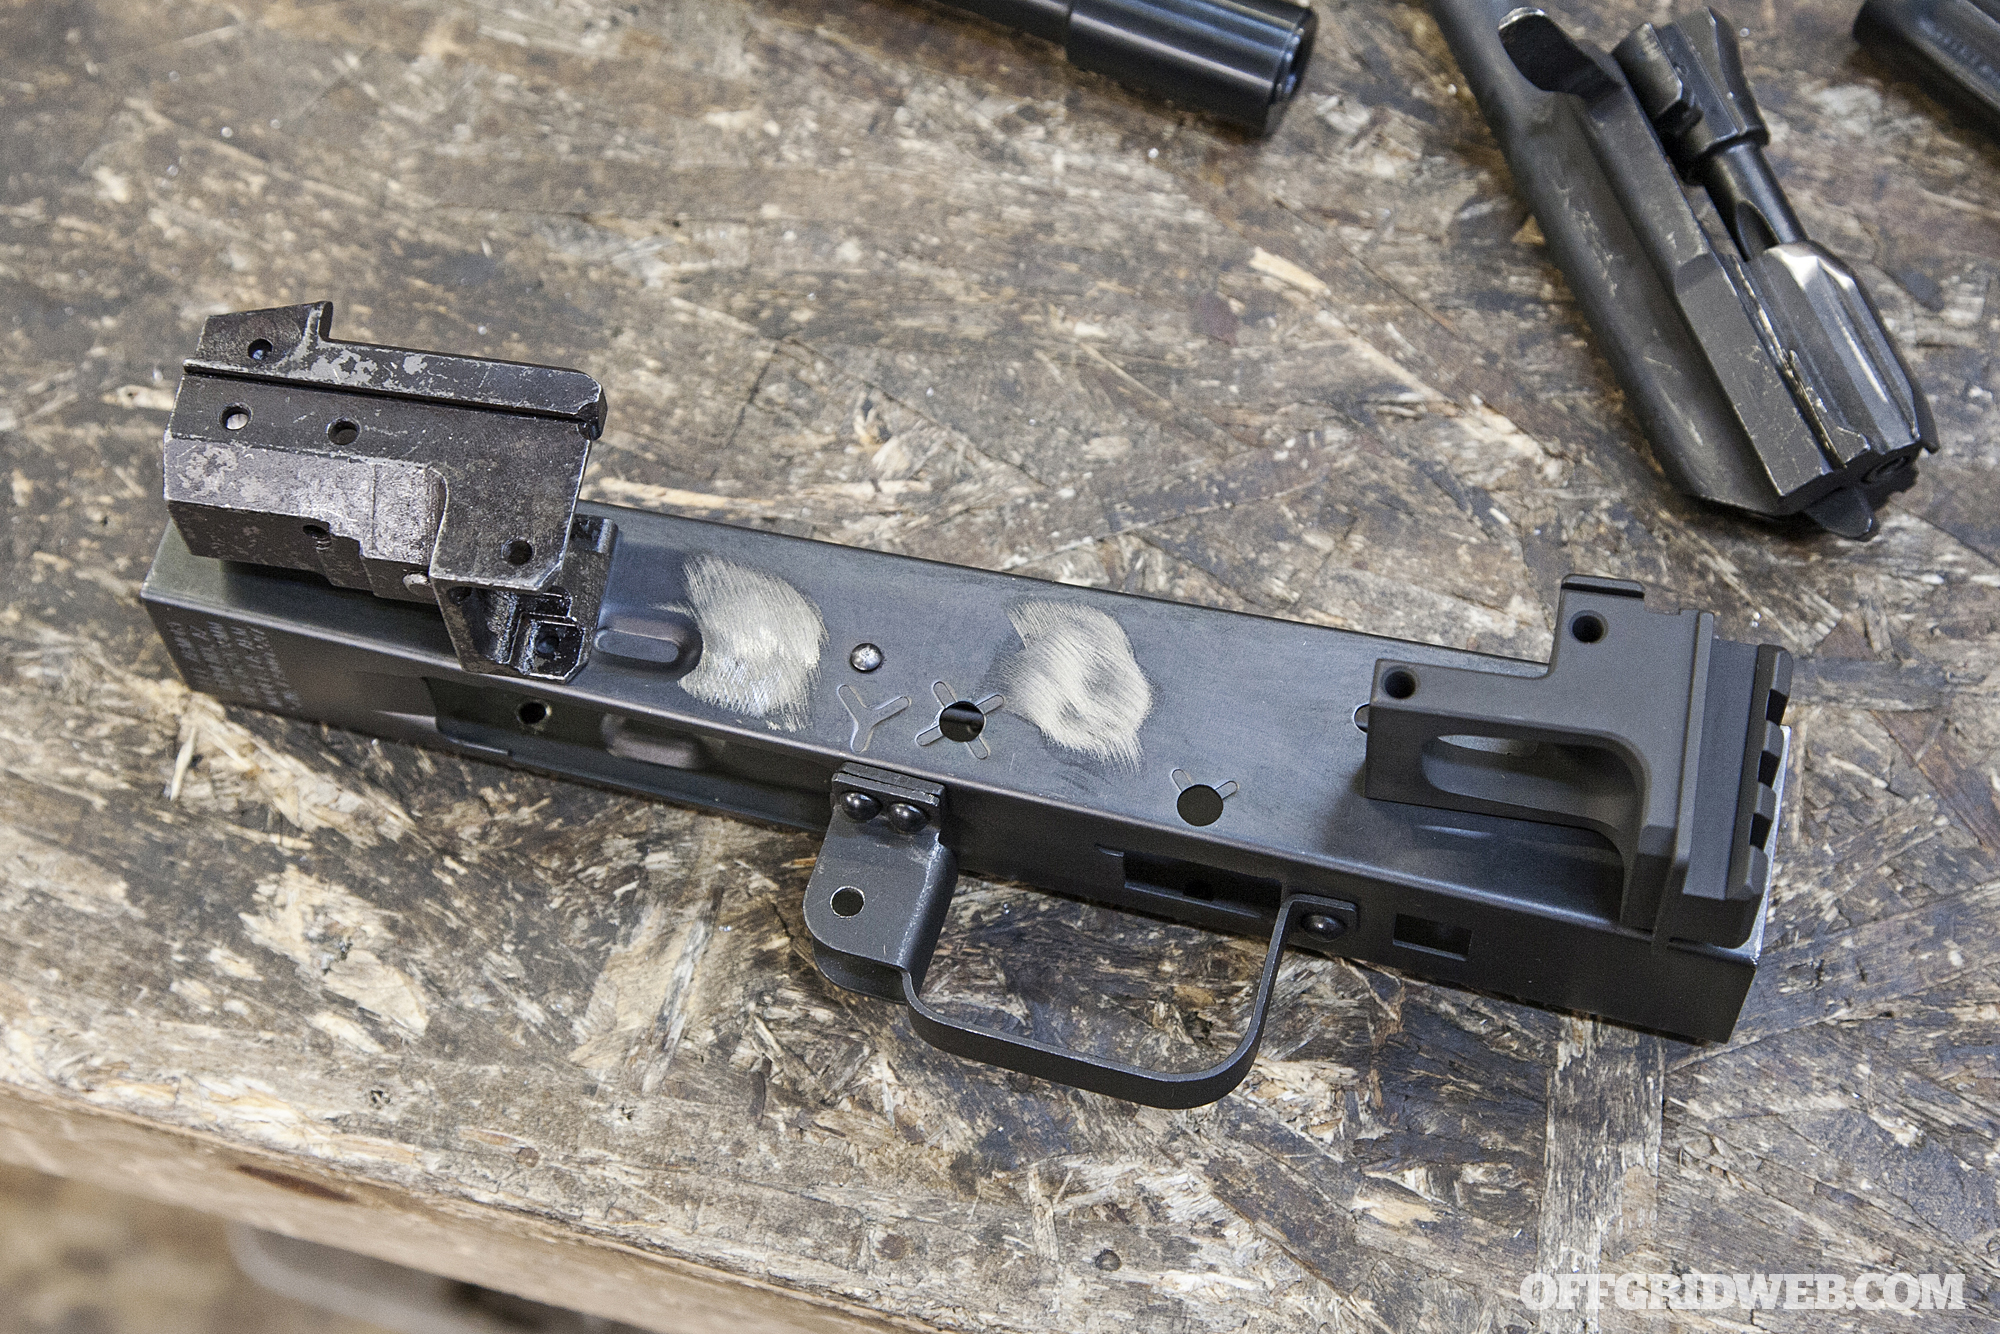
Above: Unlike an AR parts kit, which can be assembled while watching TV on your couch with hand tools, AKs require a more artisan approach to put together properly.

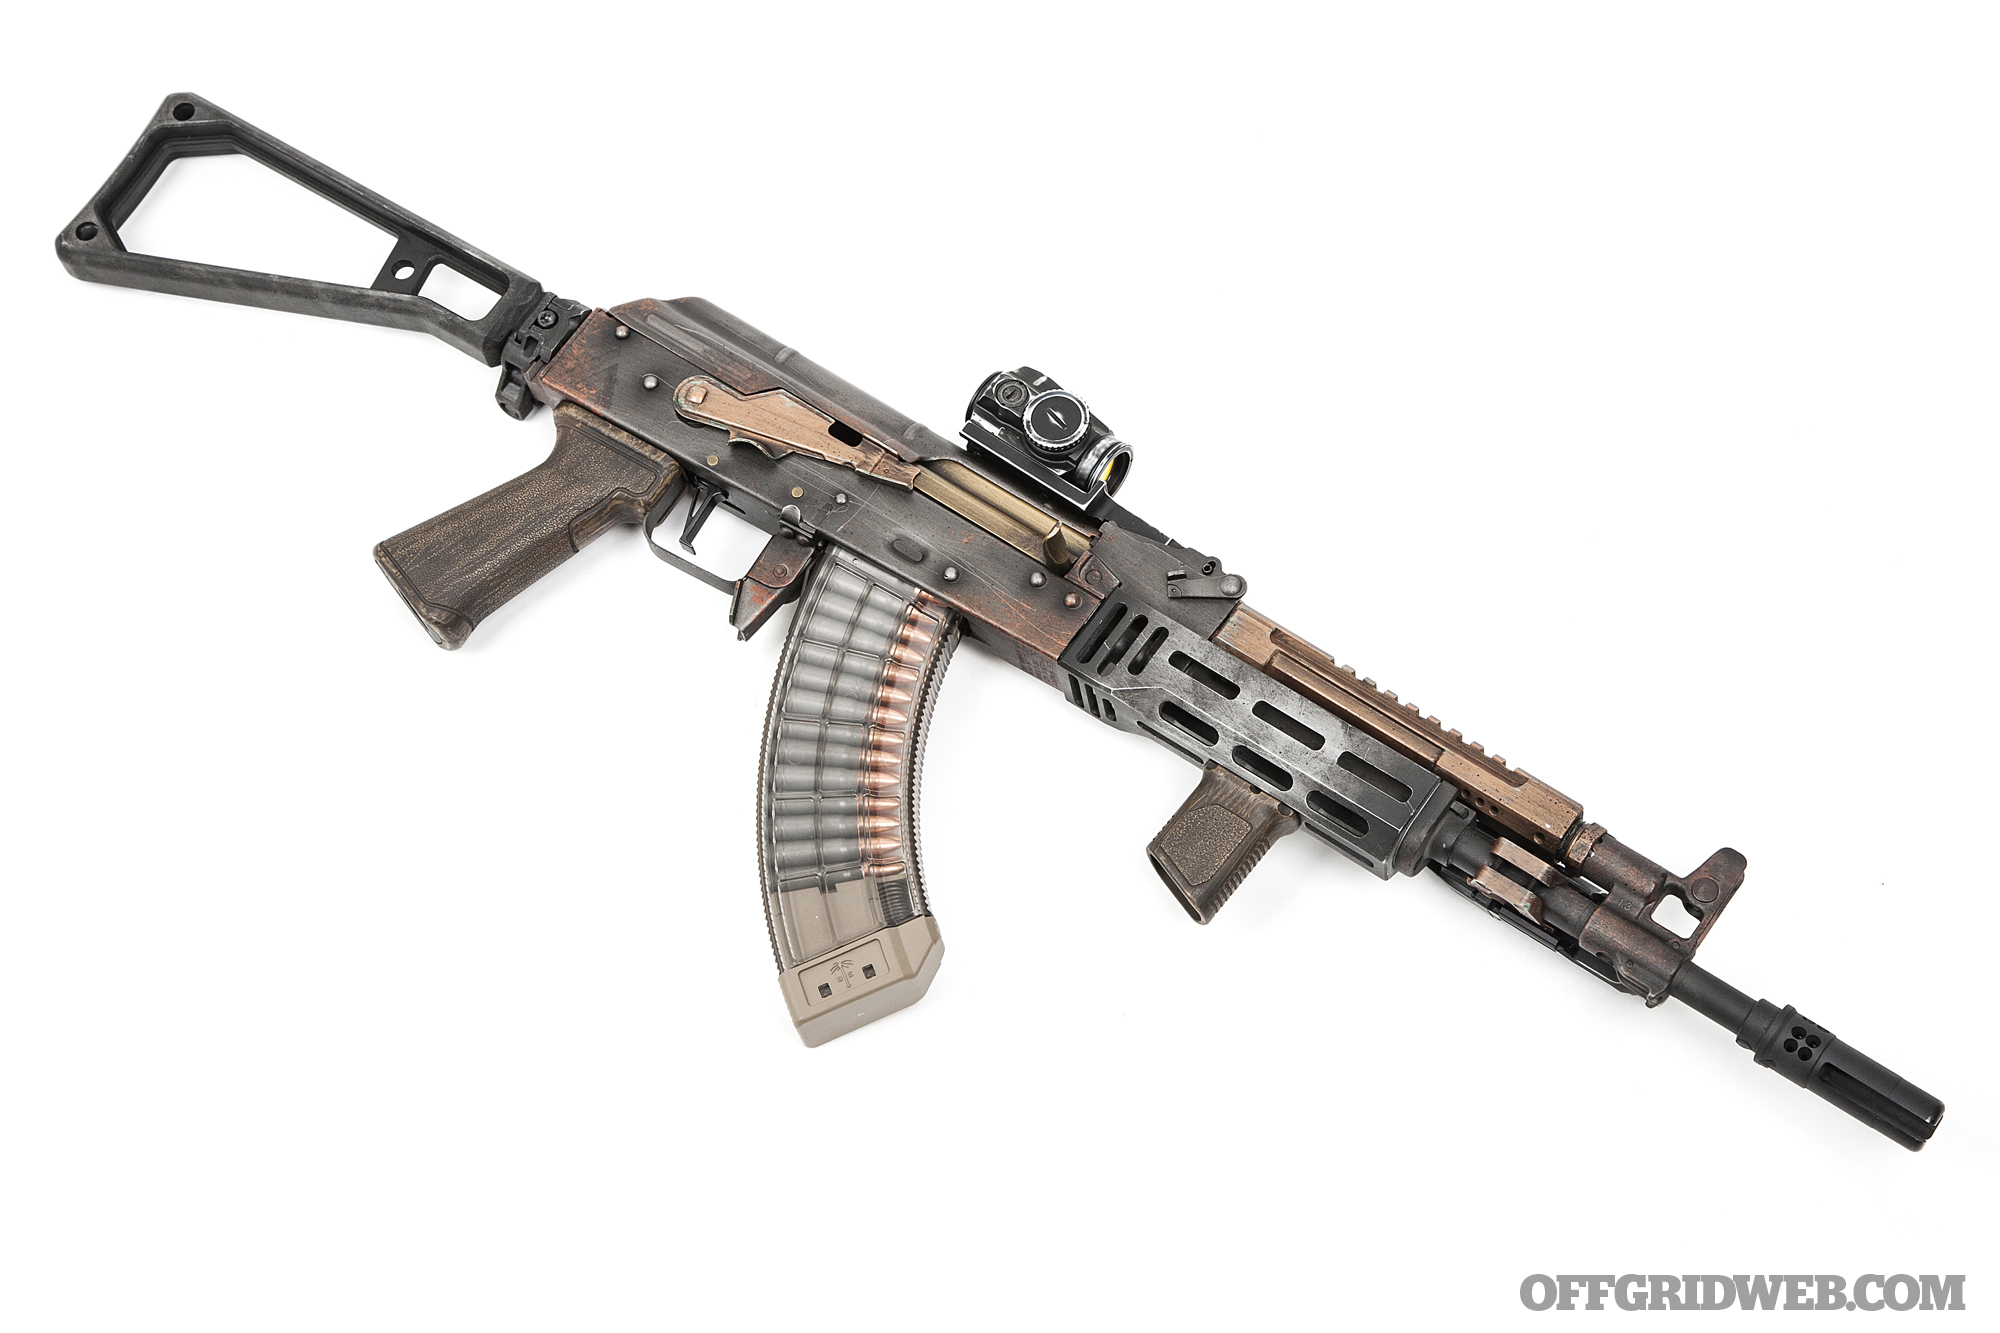
We decided on a fixed-stock pattern, stamped receiver to maintain maximum access to aftermarket accessories. On that note, we’ll start by pointing out that “fixed-style rear trunnion” no longer means the same thing as “fixed stock.” To that end, we capped the back end with a 1913 Picatinny rear trunnion from Occam Defense. We then clamped their Hex 2.0 folding stock onto it. The beauty of the 1913 rear trunnion is it allows you to convert from fixed to folding stock, and swap stock styles, ad infinitum per personal preference.

For internals, we used a standard bolt and bolt carrier, beefed up with the same ALG Defense enhanced recoil spring used in off-the-shelf conversion. But instead of the ALG trigger, we chose the cassette-style counterpart from CMC Triggers. CMC has been in the AR trigger game for a long time with a well-established track record for performance. Admittedly, we’ve had their AK trigger in our parts bin for longer than we care to remember, just waiting for a Kalash to drop it into. The wait was worth it. The crisp, single-stage 3.5-pound trigger is almost frighteningly good when compared to legacy AK service triggers. There’s an audible click during reset, but the reset is so immediate you might miss it under recoil. It makes running this trigger at speed too easy, given the skyrocketing prices of 7.62x39mm ammo.

We finished off the fire control suite with a Krebs Custom safety — another enduring staple in the AK aftermarket — and a RAM Tactical extended magazine release. It took us a fair amount of digging to find RAM Tactical, but this is the second AK build we’ve used this magazine catch on and we’re very happy with the result. It’s extended and easier to actuate without being intrusive or ungainly.

Above: We elected to delete the side scope rail from our receiver to better accommodate the Occam folding stock.

Our Lee Armory AK omits the standard side rail optics mount to allow the Occam Hex folding stock to sit tighter against the receiver. In its place, Lee Armory installed an Attero Arms Bravo Mount. This mount replaces the rear iron sight with a low-profile, footprint-specific tail for direct-attaching optics. The Bravo version will accept any optic with an Aimpoint Micro-style footprint. In this case, we used a Vortex SPARC Solar. The SPARC has gone well above-and-beyond to prove its reliability — one of our contributors literally smashed one against a tree and threw it in a fire, and it still worked — and, last year, Vortex upped the SPARC’s capability by adding a solar backup. We figured, on a survival AK, an optic that can be supplemented with solar power was a good thing to have on hand. It should be noted that the Attero line of mounts also feature a built-in backup iron sight in the form of a pistol-style rear notch. While this doesn’t offer the adjustability for range found on a standard AK-style rear sight, for quick shots up close in the event of an optic failure, it’s a good repeatable option to have.

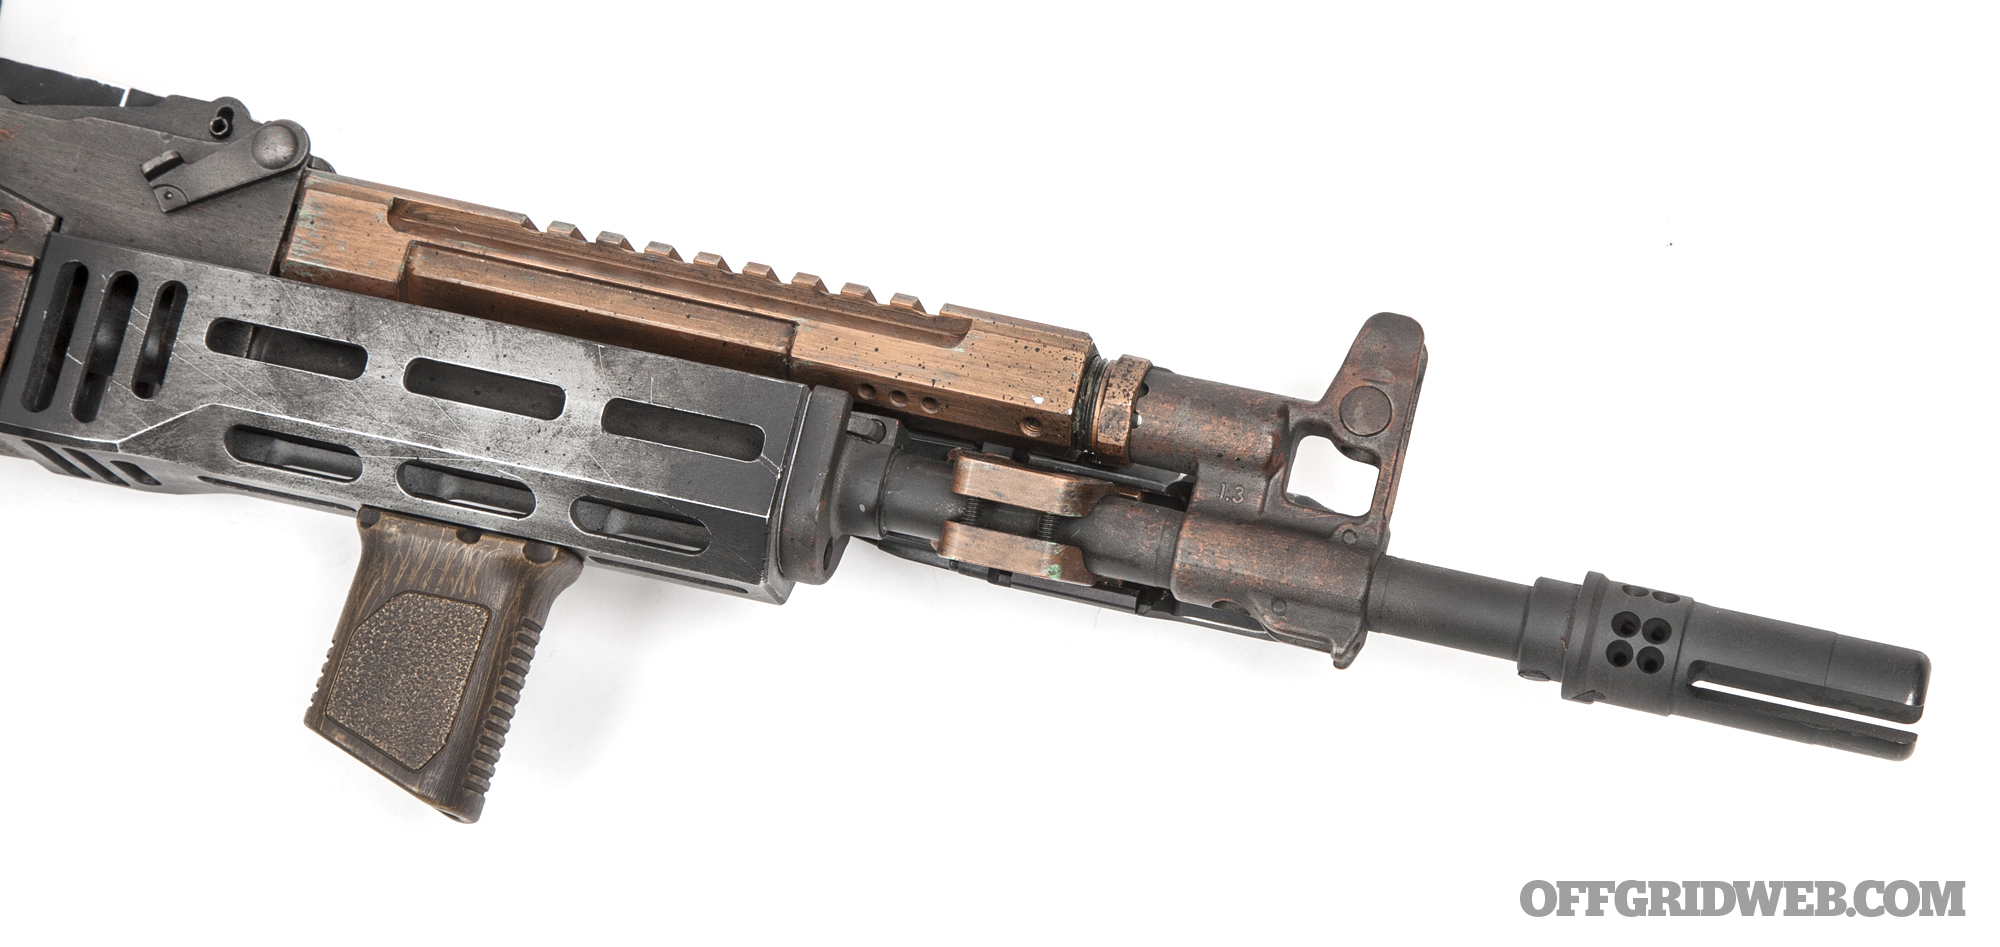
Our handguard setup took some serious thought. There are an ever-increasing number of modern handguard options for AKs. Many are extended to the gas block or muzzle to give you more room for both hand position and accessory mounting. Some of those require you to grind off either the sling loop or the entire handguard retainer. That’s not the worst thing in the world if you’re confident in your choice of handguard, or at least handguard style. We decided to play conservative and go with a setup that wouldn’t require any permanent removal of the lower handguard retainer. TDI Arms specializes in AK accessories and theirs have seen both law enforcement and military service in a couple of locations around the globe. We also used their Enhanced Russian Grip for our pistol grip.

TDI’s lower handguard is a light, rugged, effective way to incorporate a few M-LOK slots into your AK setup. It also features a left-side QD socket for direct attachment of a sling. We didn’t feel there was enough room to comfortably mount a weapon light on the handguard — we’ll get to our solution for that shortly — but we did want to attach a forward grip or stop to increase controllability under rapid fire.

When people first attempted to mount early gen vertical grips to AKs, problems were encountered during reloads. AR mags drop straight down, so you can mount a forward grip anywhere you want. But the longer, curved AK mags have to be “rocked” out and a long vertical grip too far back could make reloads literally impossible. We still wanted a way to maximize control on the front end of the gun without road-blocking our own reloads. Our goldilocks fit came from Strike Industries. Their short angled vertical grip measures a demure 2.3 inches tall and weighs less than 2 ounces. Even on the shorter TDI Arms lower handguard, there’s no interference with reloads and no substantial mass added to the front of the gun. These grips also feature a channel through the bottom to manage excess cable from lights and laser switches. We wound up not needing this feature, since we decided to equip our build with a Streamlight RM-2 weapon light.

The RM-2 is a 1,000-lumen rifle light that can be activated with either an included tape switch or a pressure pad built into the rear tail cap. We chose the latter option and mounted it directly to the barrel via an RS Regulate BM-1 light mount. The BM-1 is essentially a short section of Picatinny rail with a hinged clamp for attachment directly to the barrel. We were able to get the BM-1 attached between the handguard and gas block, which put the light close enough to our hand to make the tape switch unnecessary.

We did still decide to install a railed gas tube on this build. Even though it remains unused at time of writing, “rail estate” on the AK is in short supply as-is, so we wanted to build in some additional mounting space on the off chance it’d be needed in the future — whether we add more accessories or just change the configuration of the existing ones. There are a couple of different options out there, and we went with Midwest Industries. The folks at MI have a well-established track record for durable, ergonomic meat-and-potatoes accessories at reasonable prices, and their railed AK gas tube was an easy drop-in addition to add to the adaptability of this rifle.

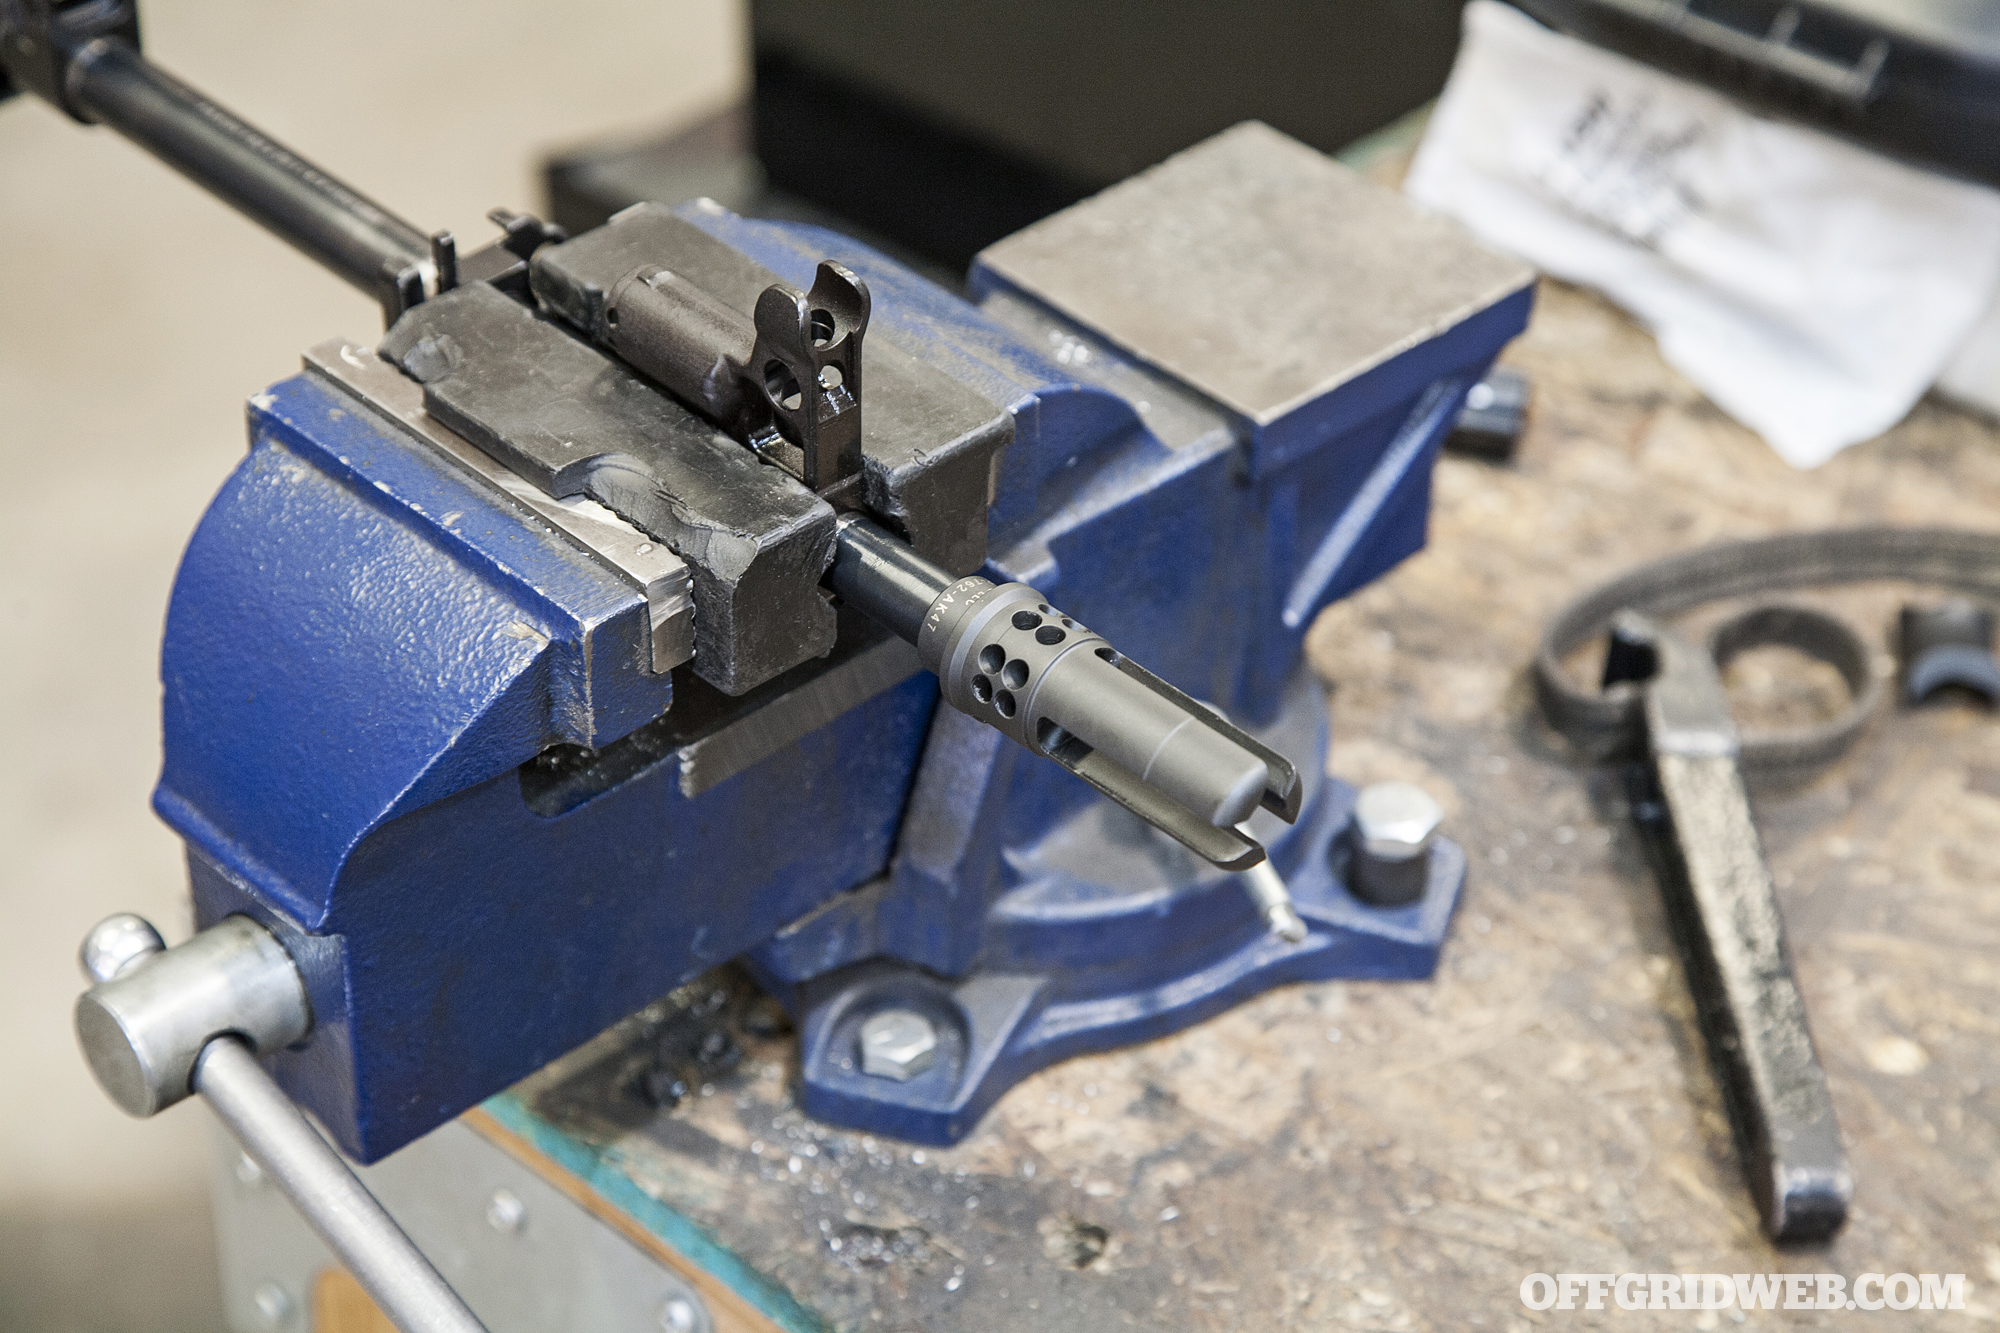
The gas block is a combination gas block/front sight base from JMac Customs. While gas block setup is largely a function of personal preference, we prefer the combo gas block because it’s fewer parts and a little less weight on the front of the gun. It also allows you to shorten up the front end if you choose to pin and weld your muzzle device, which we did. In this case, we used a SureFire Warcomp in 7.62mm, threaded for the AK’s 14×1 LH threads, perched on the end of a Faxon Firearms AK barrel. This allowed the folks at Lee Armory to trim the barrel down to just over 13 inches and permanently attach it for an overall barrel length of 16 inches. This gave us the “shortest” 16-inch barrel setup we could get away with while providing compensation, flash suppression, and the ability to run a SureFire can in the future if we so choose.

Above: We chose to have our Faxon barrel cut to minimum legal length for the SureFire Warcomp, which was then pinned and welded into place.

The Faxon Firearms AK barrel is U.S.-made from 4150 CMV that’s finished inside and out with a salt bath nitride finish. The barrels are magnetic particle inspected and individually gauged for headspace. The button rifling is a 1:8 twist that finishes at an 11-degree target crown. Weighing in at a deft 1.21 pounds, we felt the use of a high-quality U.S.-made barrel, combined with the streamlined combo gas block, would produce a highly nimble carbine that feels more like an SBR than standard AK configurations, while still avoiding the $200 permission slip.

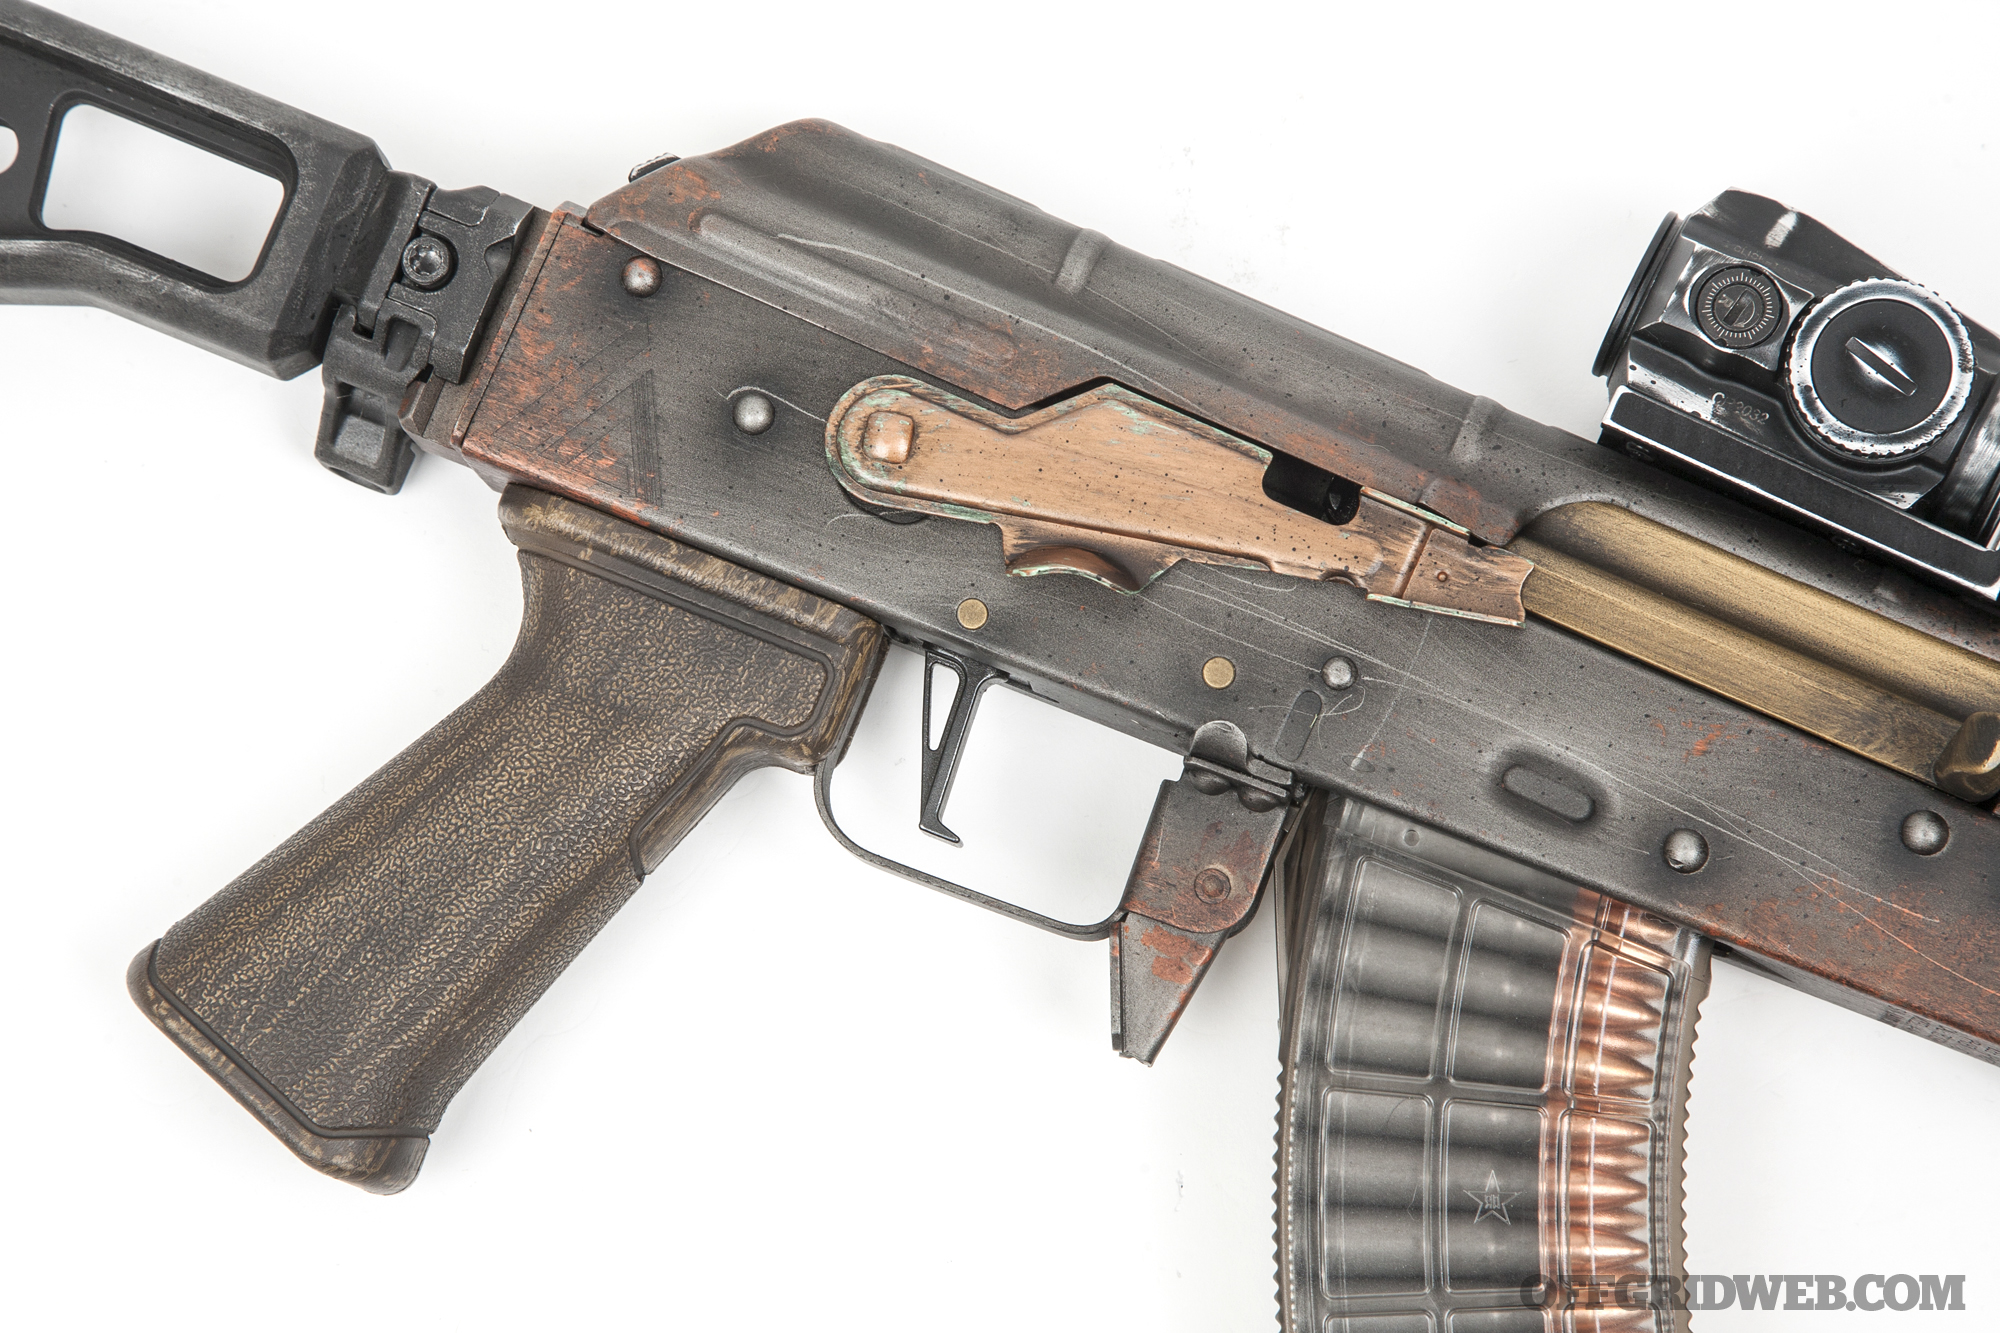
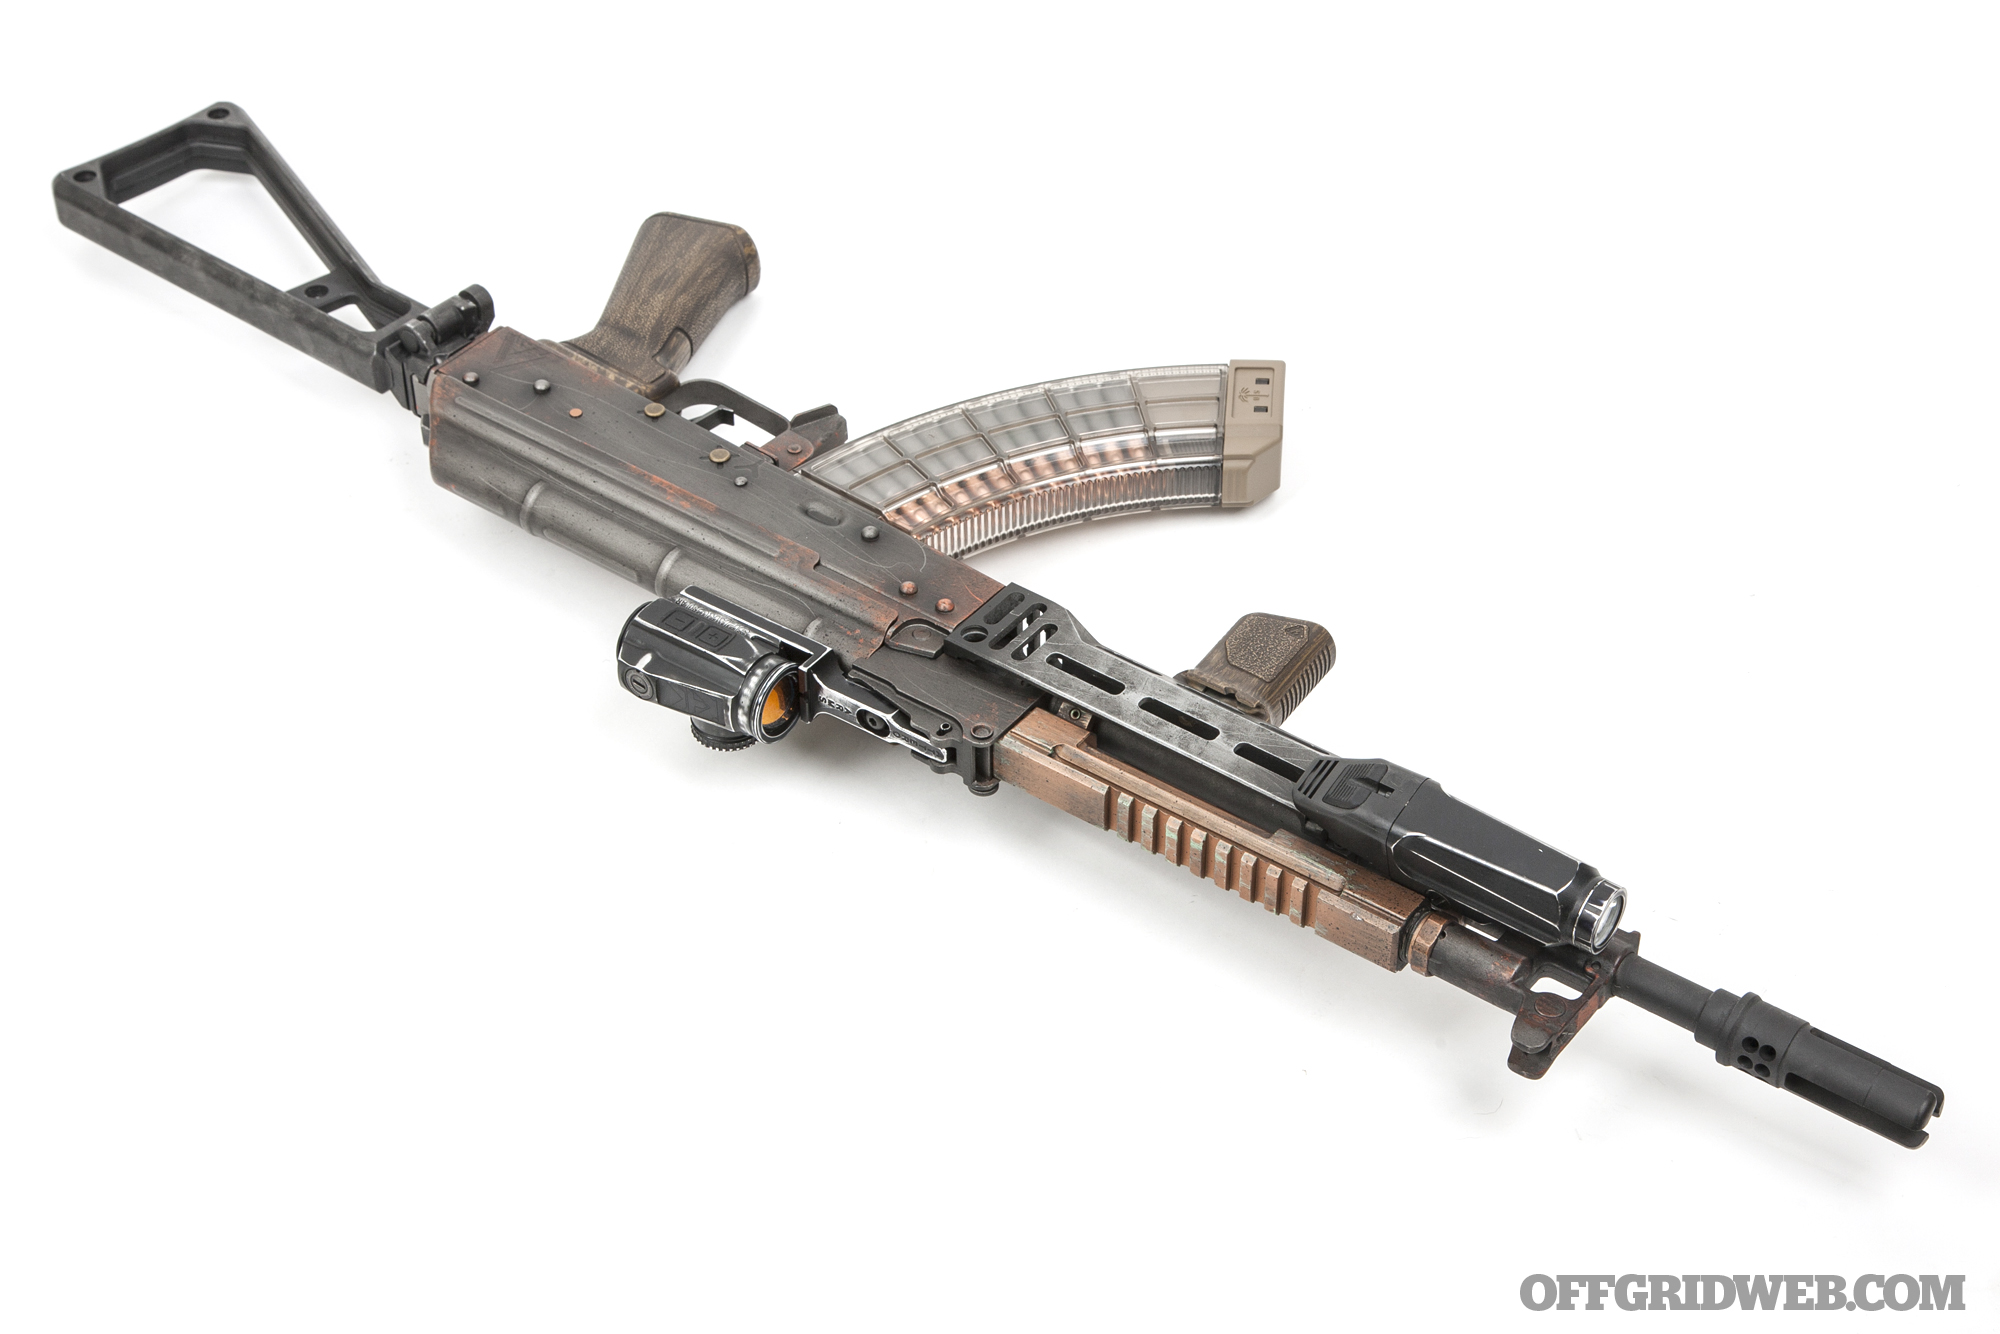
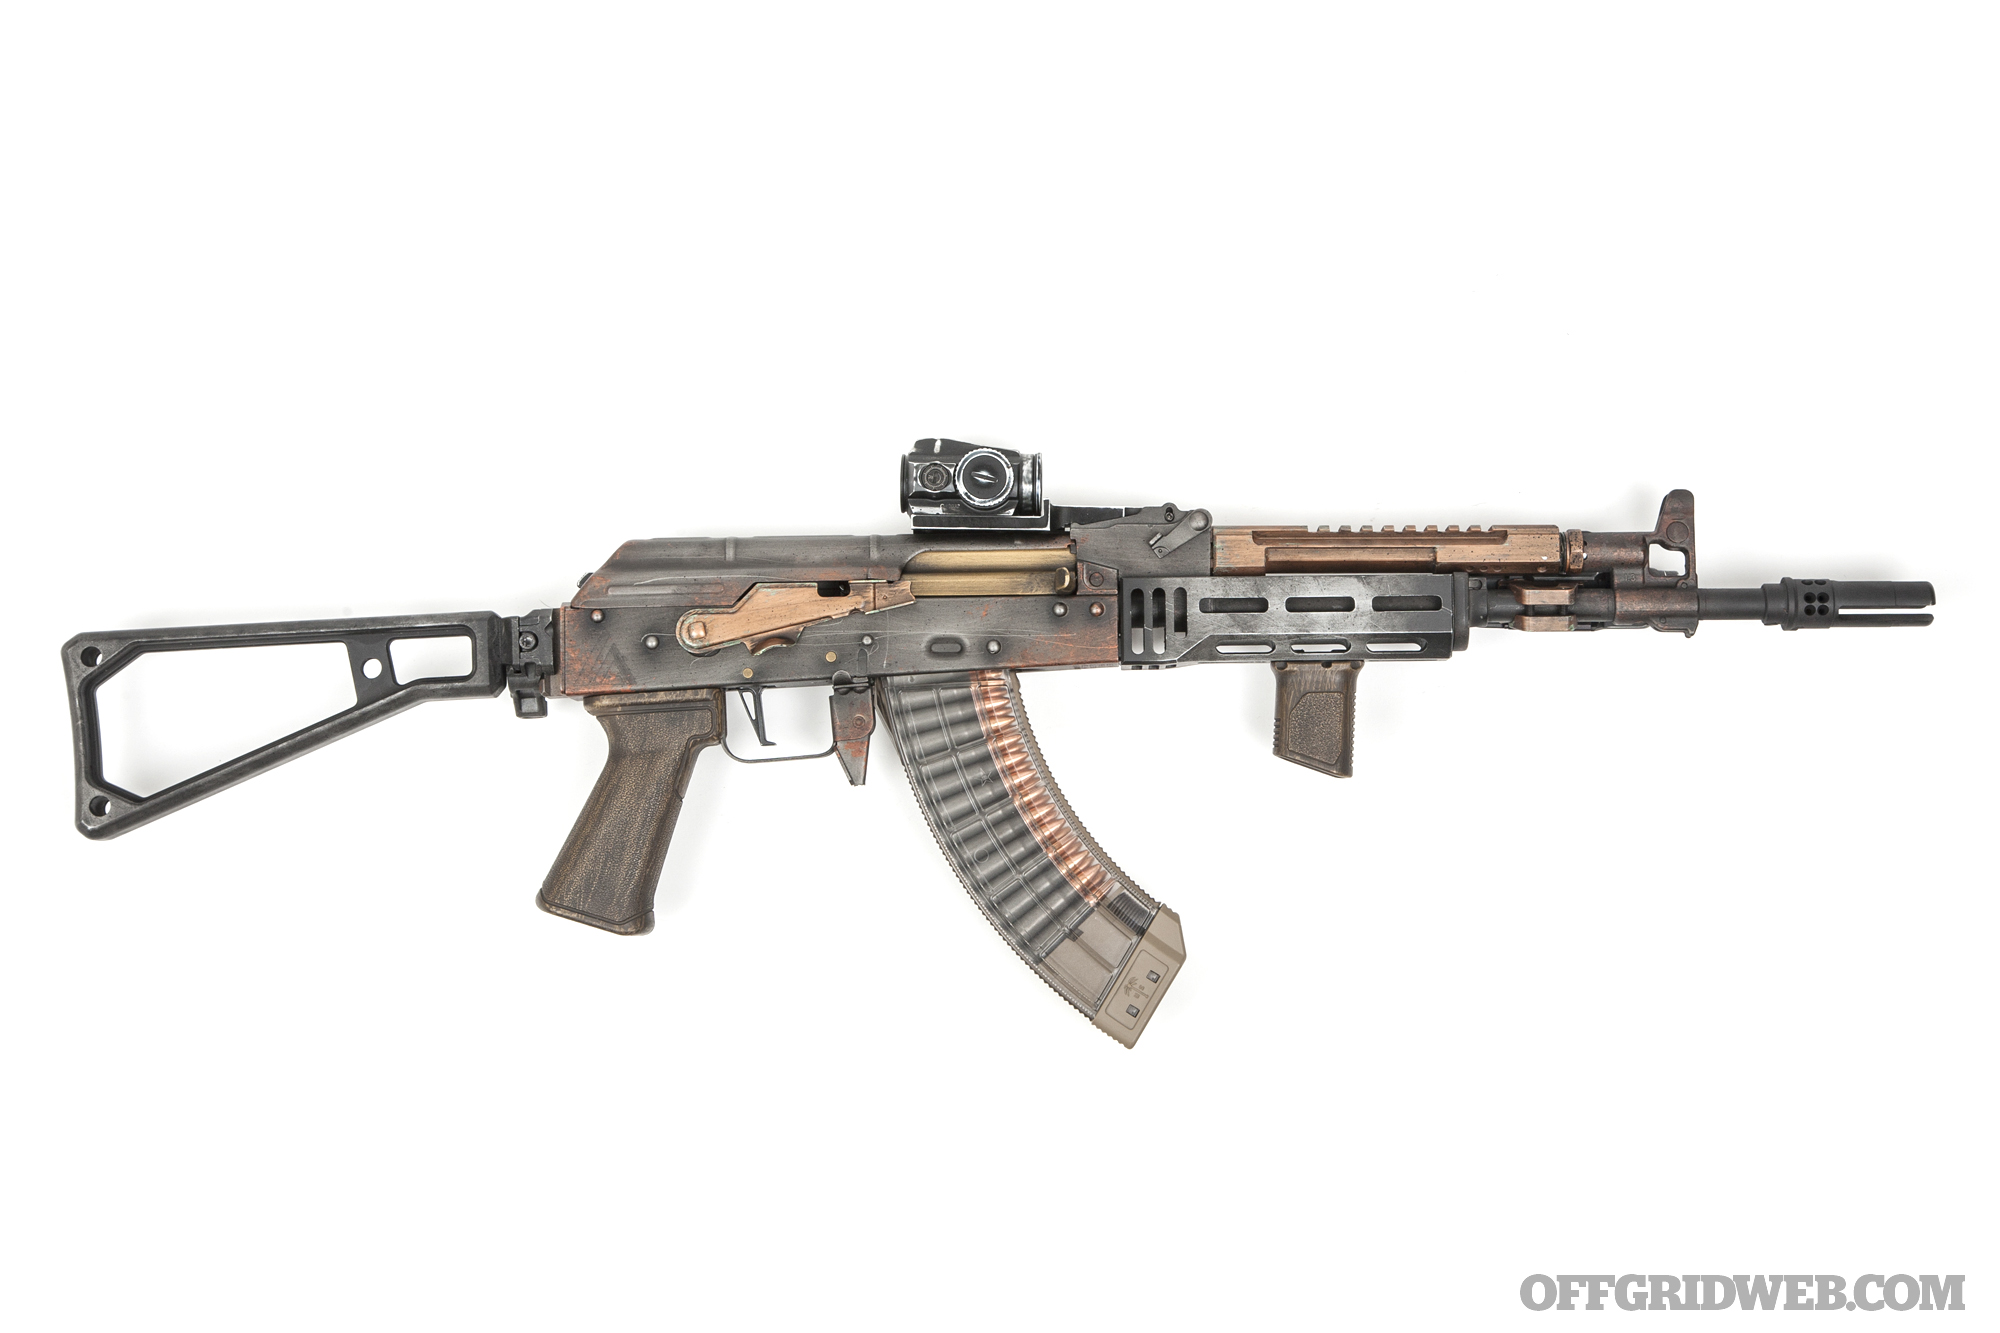
Finally, in the spirit of a truly custom Lee Armory AK befitting a RECOIL OFFGRID feature, we sent the rifle to Pro 2 Customs (formerly known as We Plead the 2nd) for a unique Cerakote job. We asked them to give us their take on a “post-urban-collapse” Kalashnikov. Something that looked beat up, worn down, cobbled together, and maintained with whatever parts could be scavenged. Beyond that guidance, we left everything up to the artistic talents at Pro2Customs, and we were proven right to have done so. The level of detail in this finish is not done true justice by the photos included here — although we did try. In an effort to keep with the industrialized look of the Cerakote work, we loaded this rifle with a US PALM AK-30R magazine, produced by Century Arms. The clear body gives you a fast visual index of available ammo and, when loaded with steel case, looks downright dapper against the copper-and-rust tones of the finish work.

What Did We Learn About AK Builds?

The bottom line is that no matter how you slice it, a bespoke AK-platform rifle is no longer the cheaper, easier alternative to a similarly outfitted AR. The progression in manufacturing quality and the growth of the AK accessories market has put the Iron Curtain arch enemies on equal financial footing. While we have no desire to turn this into an AK-vs.-AR discussion, suffice it to say that a well-appointed defensive rifle takes both time and money, regardless of what specific type of rifle you choose.

Modding an off-the-shelf rifle comes with immediate gratification as well as the benefit of having a rifle that is still usable right now, even as you take the time to perfect its configuration. The full custom option takes longer, but lets you walk away with a no-compromises workhorse that looks, feels, and performs exactly as you want it to in one fell swoop.

At the end of the day, the choice is yours. It must be decided based on personal preference, performance requirements, and budgetary constraints. Neither of these builds is a universal answer, but instead should serve as a healthy dose of inspiration for what could be possible when outfitting your survival AK with knowledge, research, and TLC.

Lee Armory AK Parts List

RECEIVER AND PARTS KITMSRP
Lee Armory AK$1,939
COMPONENTSMSRP
Occam Defense 1913 Rear Trunnion$150
Occam Defense Hex 2.0 Stock$200
TDI Arms Enhanced Russian Grip$19
Krebs Custom Safety Selector$50
Attero Arms Bravo Mount$75
Midwest Industries Railed Gas Tube$110
TDI Arms AKML Lower Handguard$99
Faxon Firearms AK-47 Barrel$155
JMac Customs GBC-13 Front Sight/Gas Block$110
SureFire Warcomp$150
CMC AK Trigger$160
Century Arms US PALM AK-30R Magazine$16
ACCESSORIESMSRP
Vortex SPARC Solar$400
Streamlight RM-2 Light$142
RS Regulate BM-1 Light Mount$70
Strike Industries Short Angled Vertical Grip$25
TOTAL:$3,870

Sources

Lee Armory > leearmory.com
Pro 2 Customs (formerly We Plead the 2nd) > wepleadthe2nd.com
Occam Defense > occamdefense.com
Krebs Custom > krebscustom.com
Attero Arms > atteroarms.com
RS Regulate > rsregulate.com
Midwest Industries > midwestindustriesinc.com
Strike Industries > strikeindustries.com
Vortex Optics > vortexoptics.com
Faxon Firearms > faxonfirearms.com
SureFire > surefire.com
Streamlight > streamlight.com
CMC Triggers > cmctriggers.com
TDI Arms > tdi-arms.com
US PALM > centuryarms.com


AKs Two Ways – Part One: Blue-Collar Palmetto State AK

Seventy-five years is a long time. Most of the tools that were commonly used in 1947 have long since become obsolete — we no longer drive carbureted vehicles with leaded gas and bias-ply tires, or get the latest news via black-and-white TVs and vacuum-tube radios. But there’s one iconic invention of the postwar period that has remained relevant, even after three quarters of a century: the AK-47. It offers rugged durability, mechanical simplicity, and excellent barrier penetration with 7.62x39mm ammunition. It has proven its effectiveness countless times on battlefields around the globe, from Vietnam to the Middle East.

Photos by Patrick McCarthy

Background on Custom AKs: Some Assembly Required

Decades of widespread popularity have led to a healthy selection of aftermarket parts and accessories for this platform. However, before starting your first AK project, it’s essential that you know what you’re getting into. Building an AR-15 is a bit like assembling IKEA furniture — as long as you take your time and put the all the pegs in the correct holes, you’ll be OK. Building an AK-47 is more like building custom cabinets. It involves precise measurements, hand-fitted surfaces, and many specialized tools and jigs a novice is unlikely to own. You can always pay a professional to do it for you, but where’s the fun in that?

With this caveat in mind, we set out to examine two approaches to building customized AK-47s. First, we took an off-the-shelf Palmetto State Armory AK with a blue-collar price tag and replaced a handful of components to fine-tune it. Only one part of this build required professional gunsmithing; the rest was done at home on a workbench. Next, we teamed up with the AK experts at Lee Armory in Phoenix, Arizona. With their help, we learned how to convert a bare receiver and a pile of parts into a fully functional custom rifle, pressing in every rivet and polishing every surface for the best possible results.

Read on as we analyze each of these AK-47 projects and consider which one might fit your budget and experience level.

Off-the-Shelf Palmetto State AK Build

Among devout AK fans, the phrase “mass-produced American AK-47” will usually result in more grimaces than a string of expletives in church. We specify mass-produced because there are plenty of reputable shops in the U.S. that build custom AKs — Lee Armory is one noteworthy example. However, those custom builds can involve substantial hand-fitting, cost, and lead time (as you’ll see in Part Two of this article). If you’re looking for an off-the-shelf AK with a sub-$1,000 price tag, the typical recommendation used to be an imported Eastern Bloc gun such as the WASR-10. Unfortunately, prices for those rifles have climbed rapidly over the last few years, so the idea of an inexpensive, domestically produced AK has become more appealing.

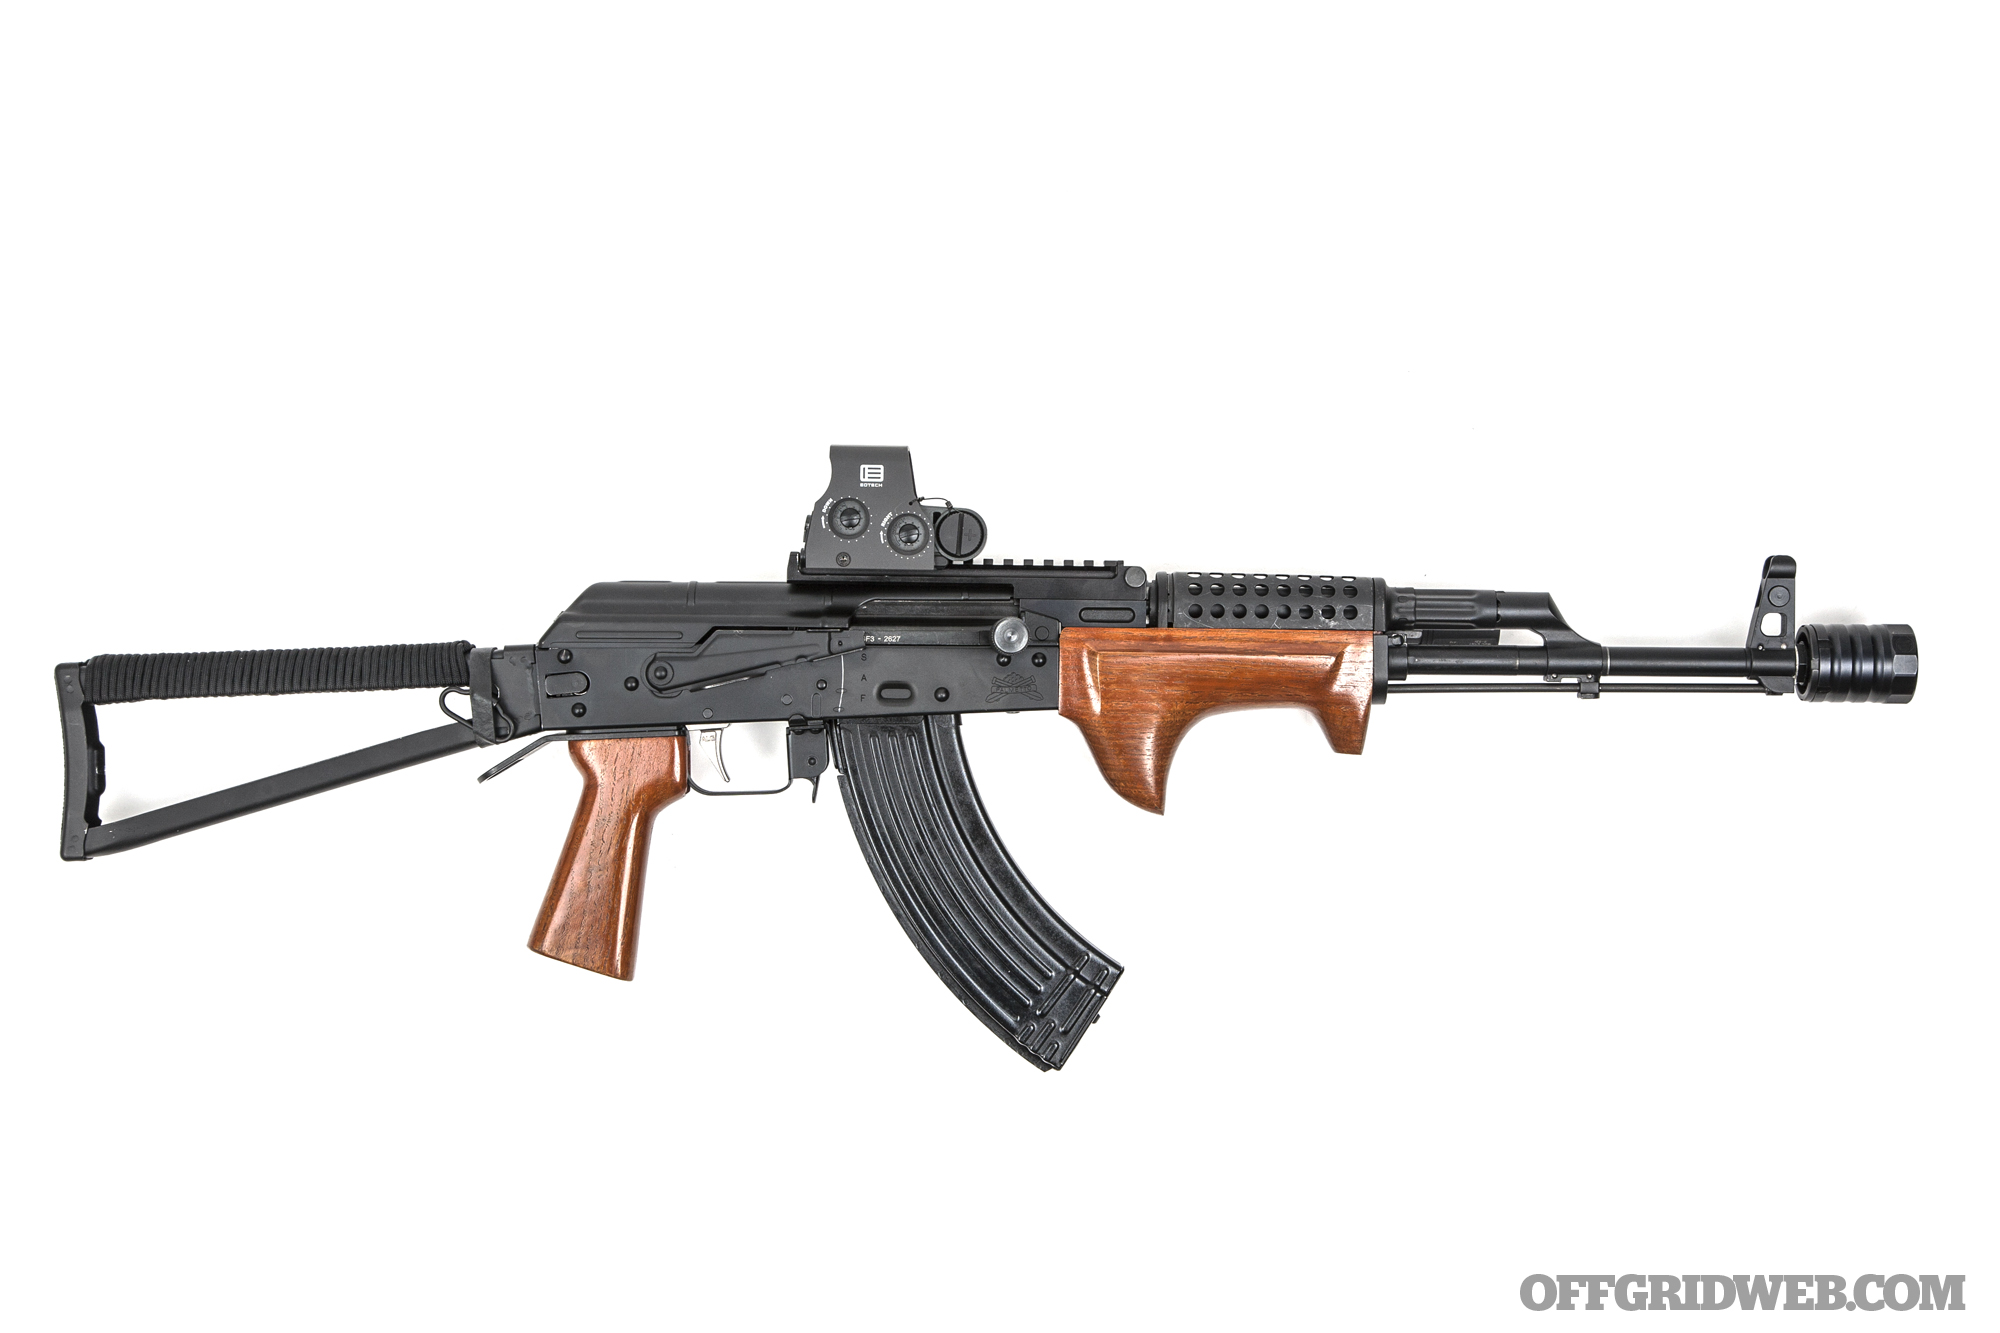
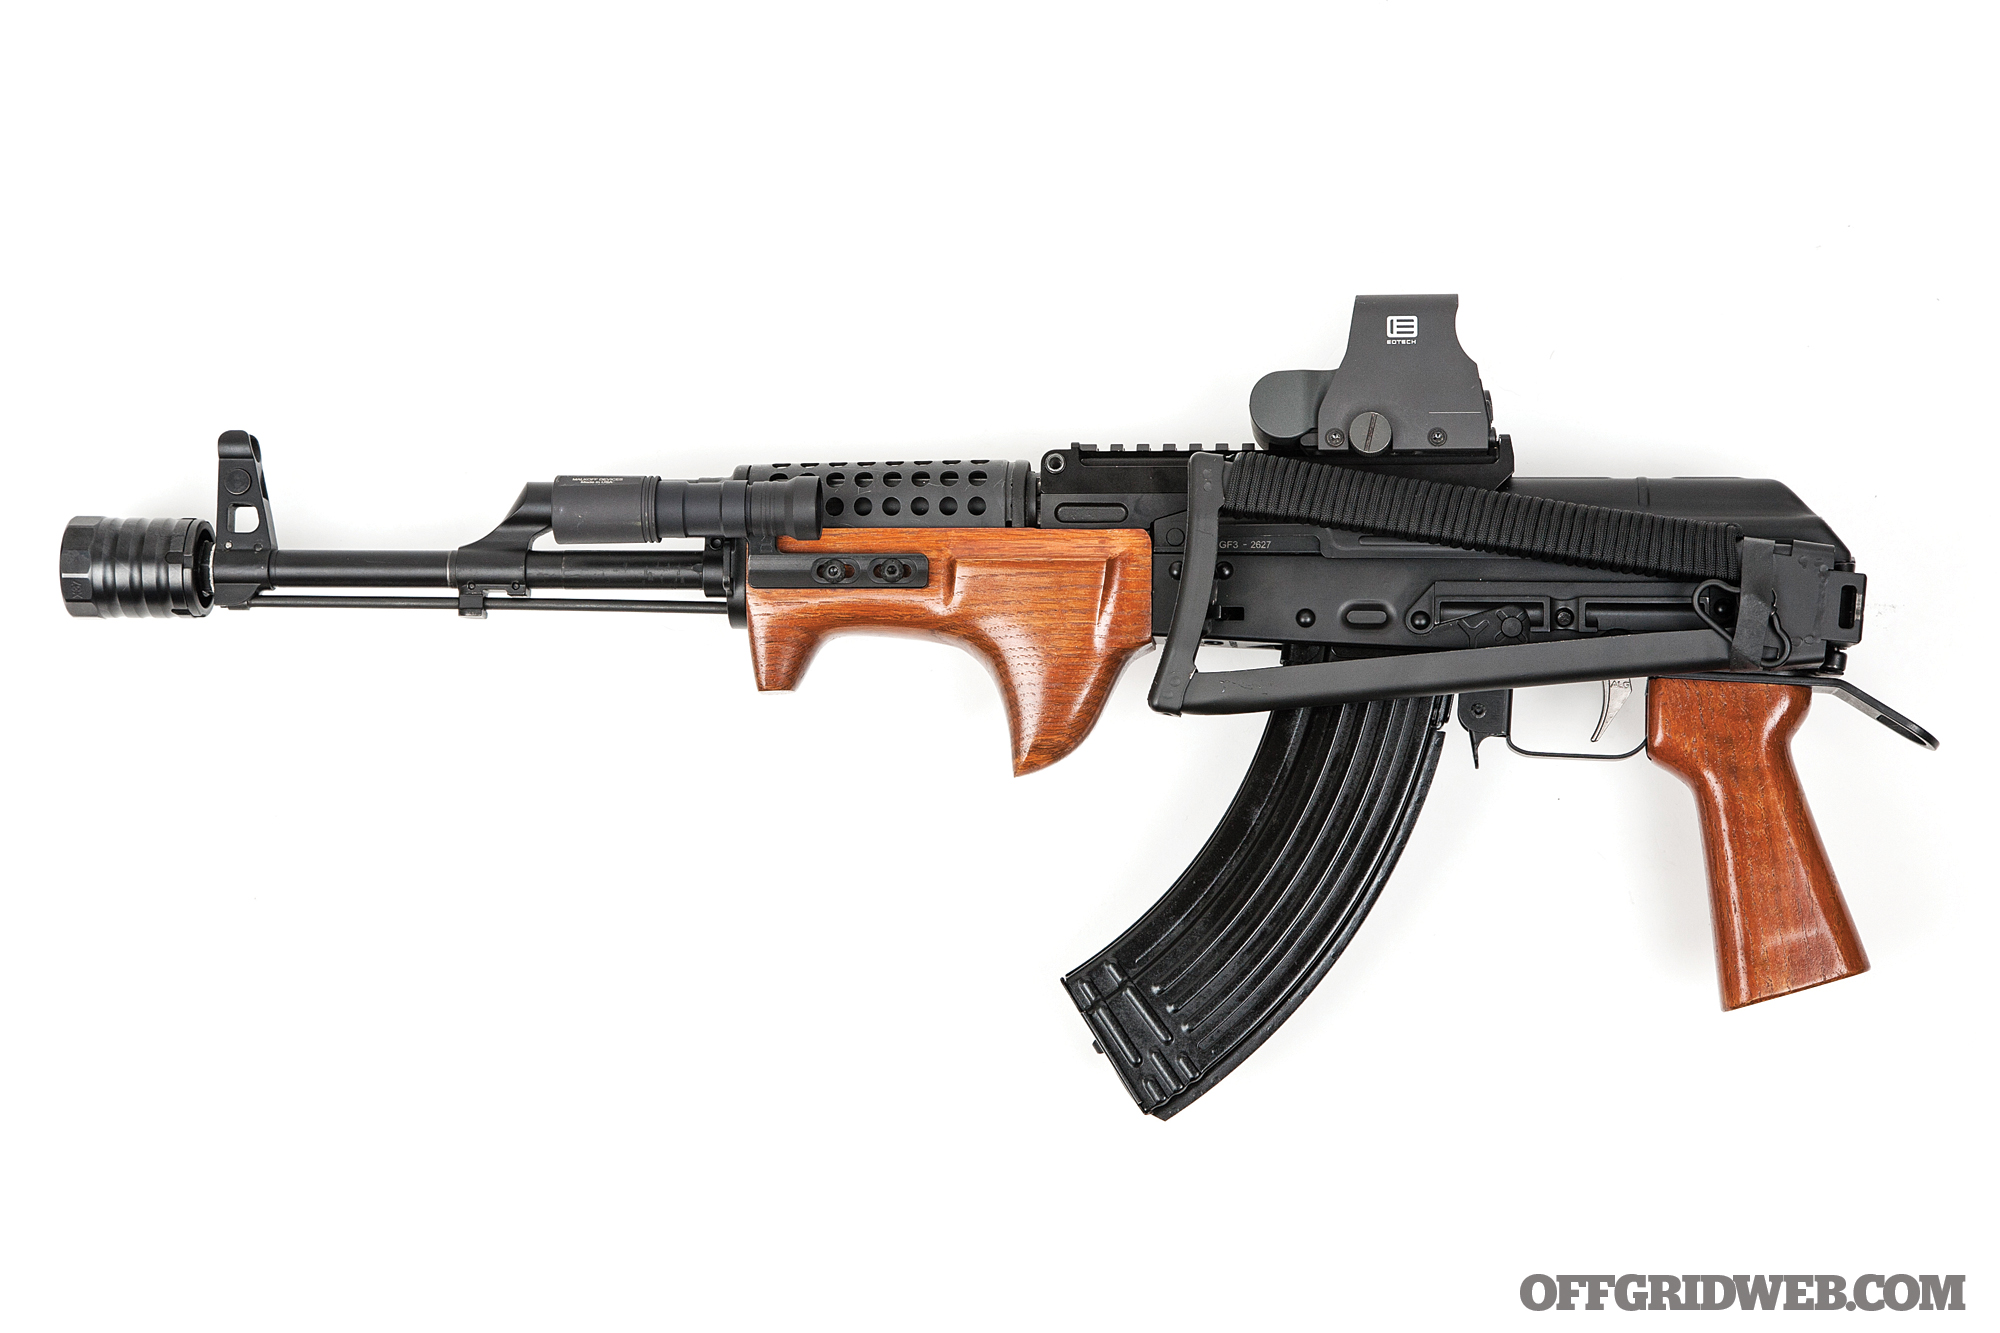
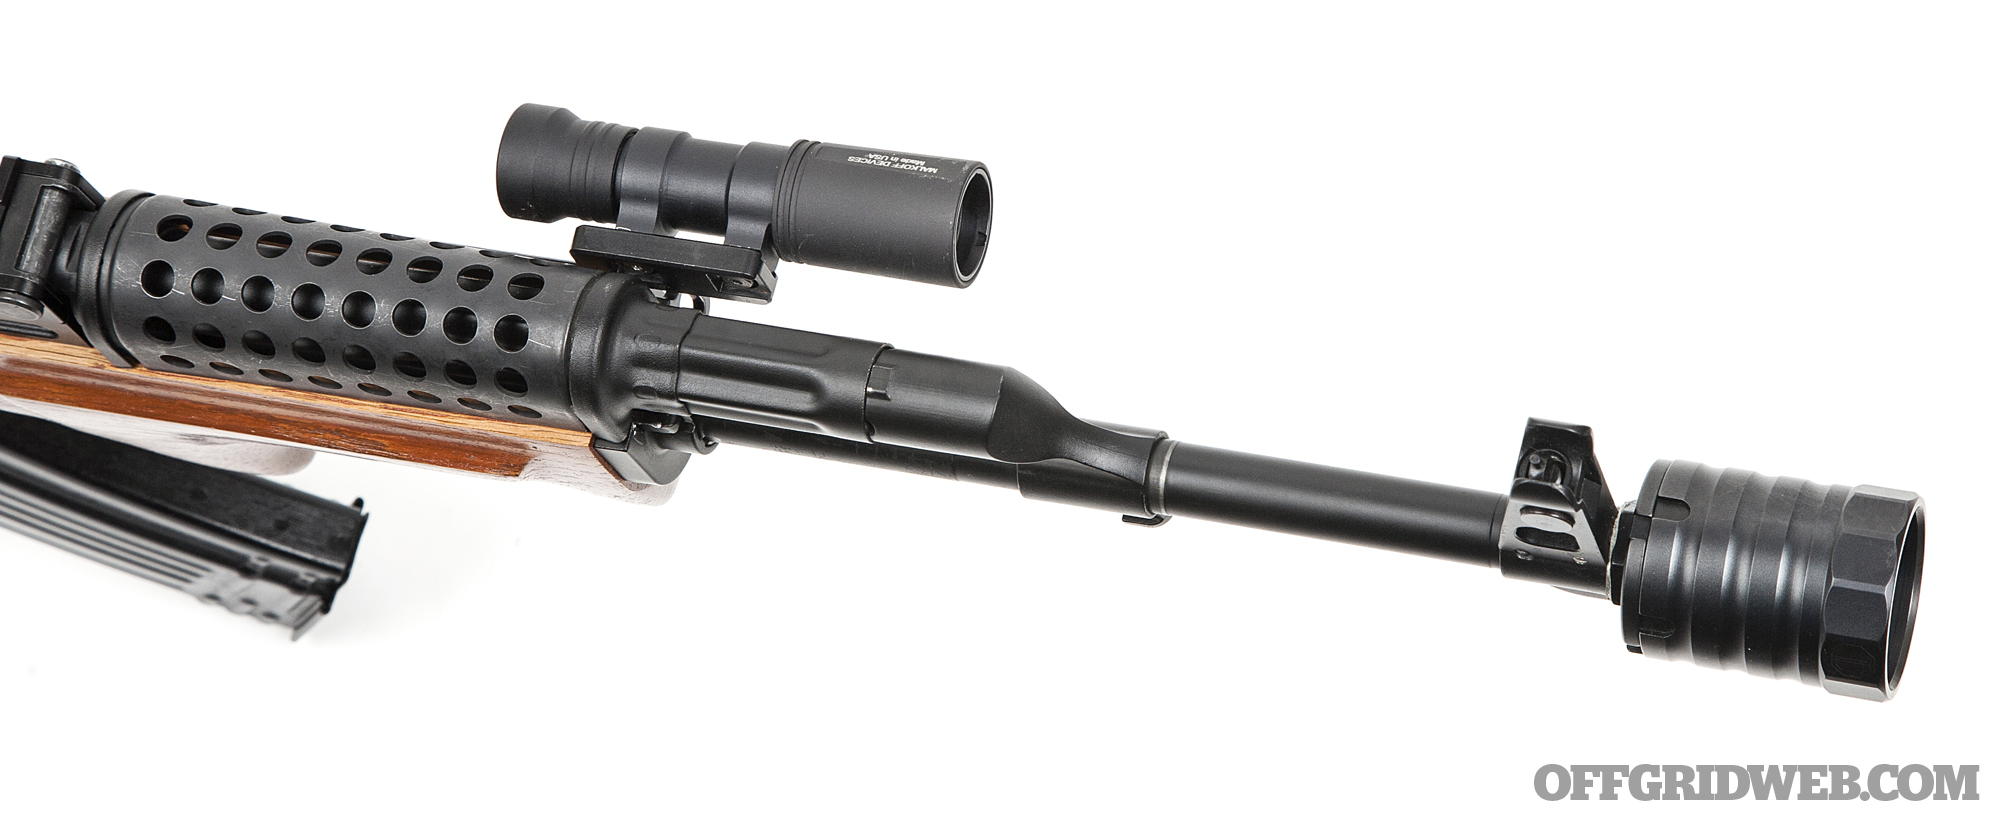
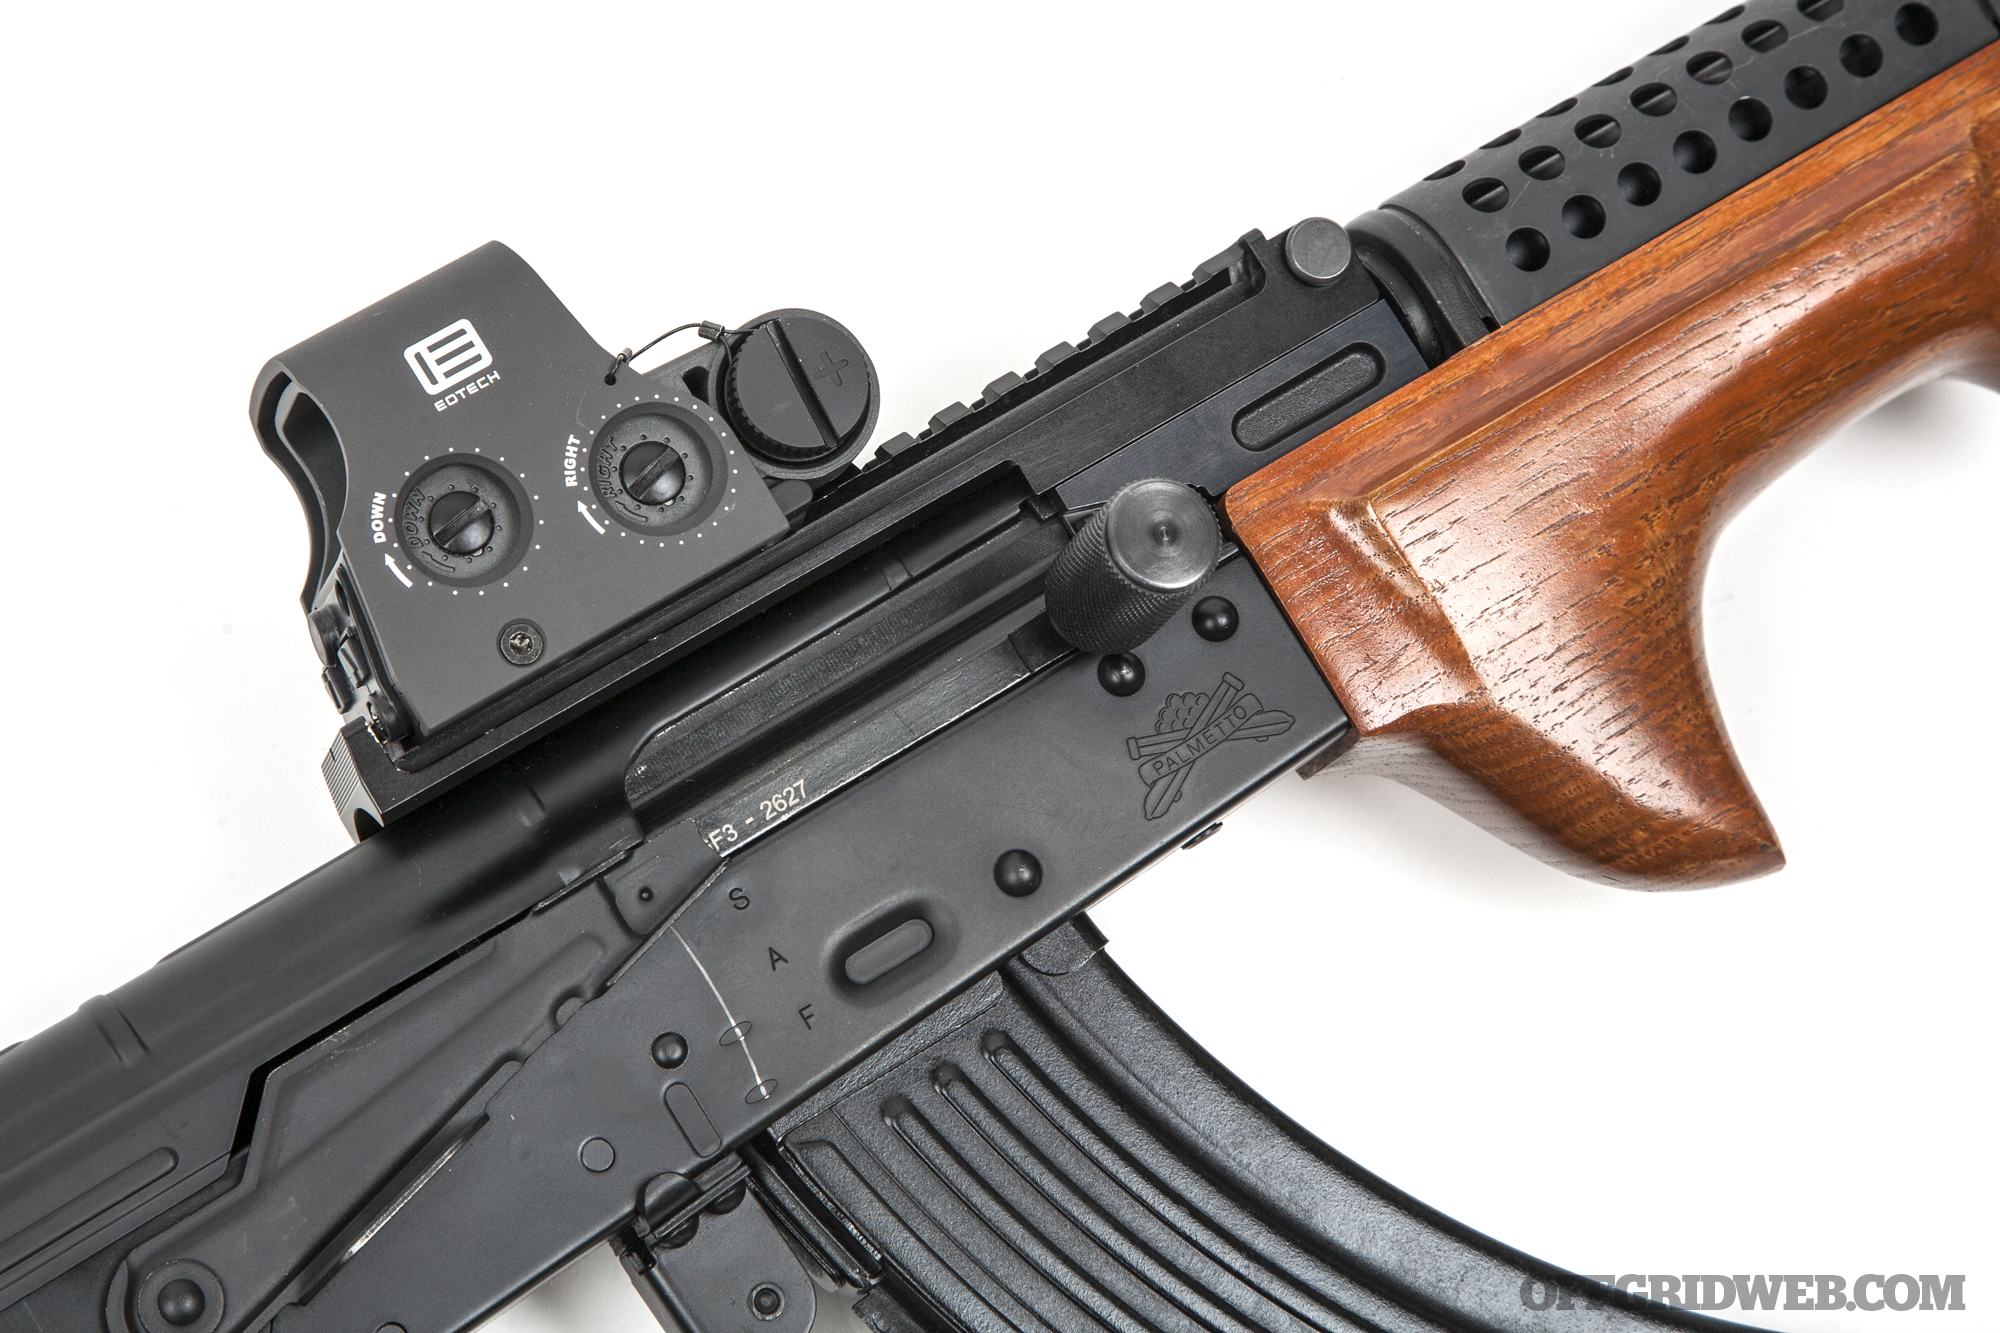
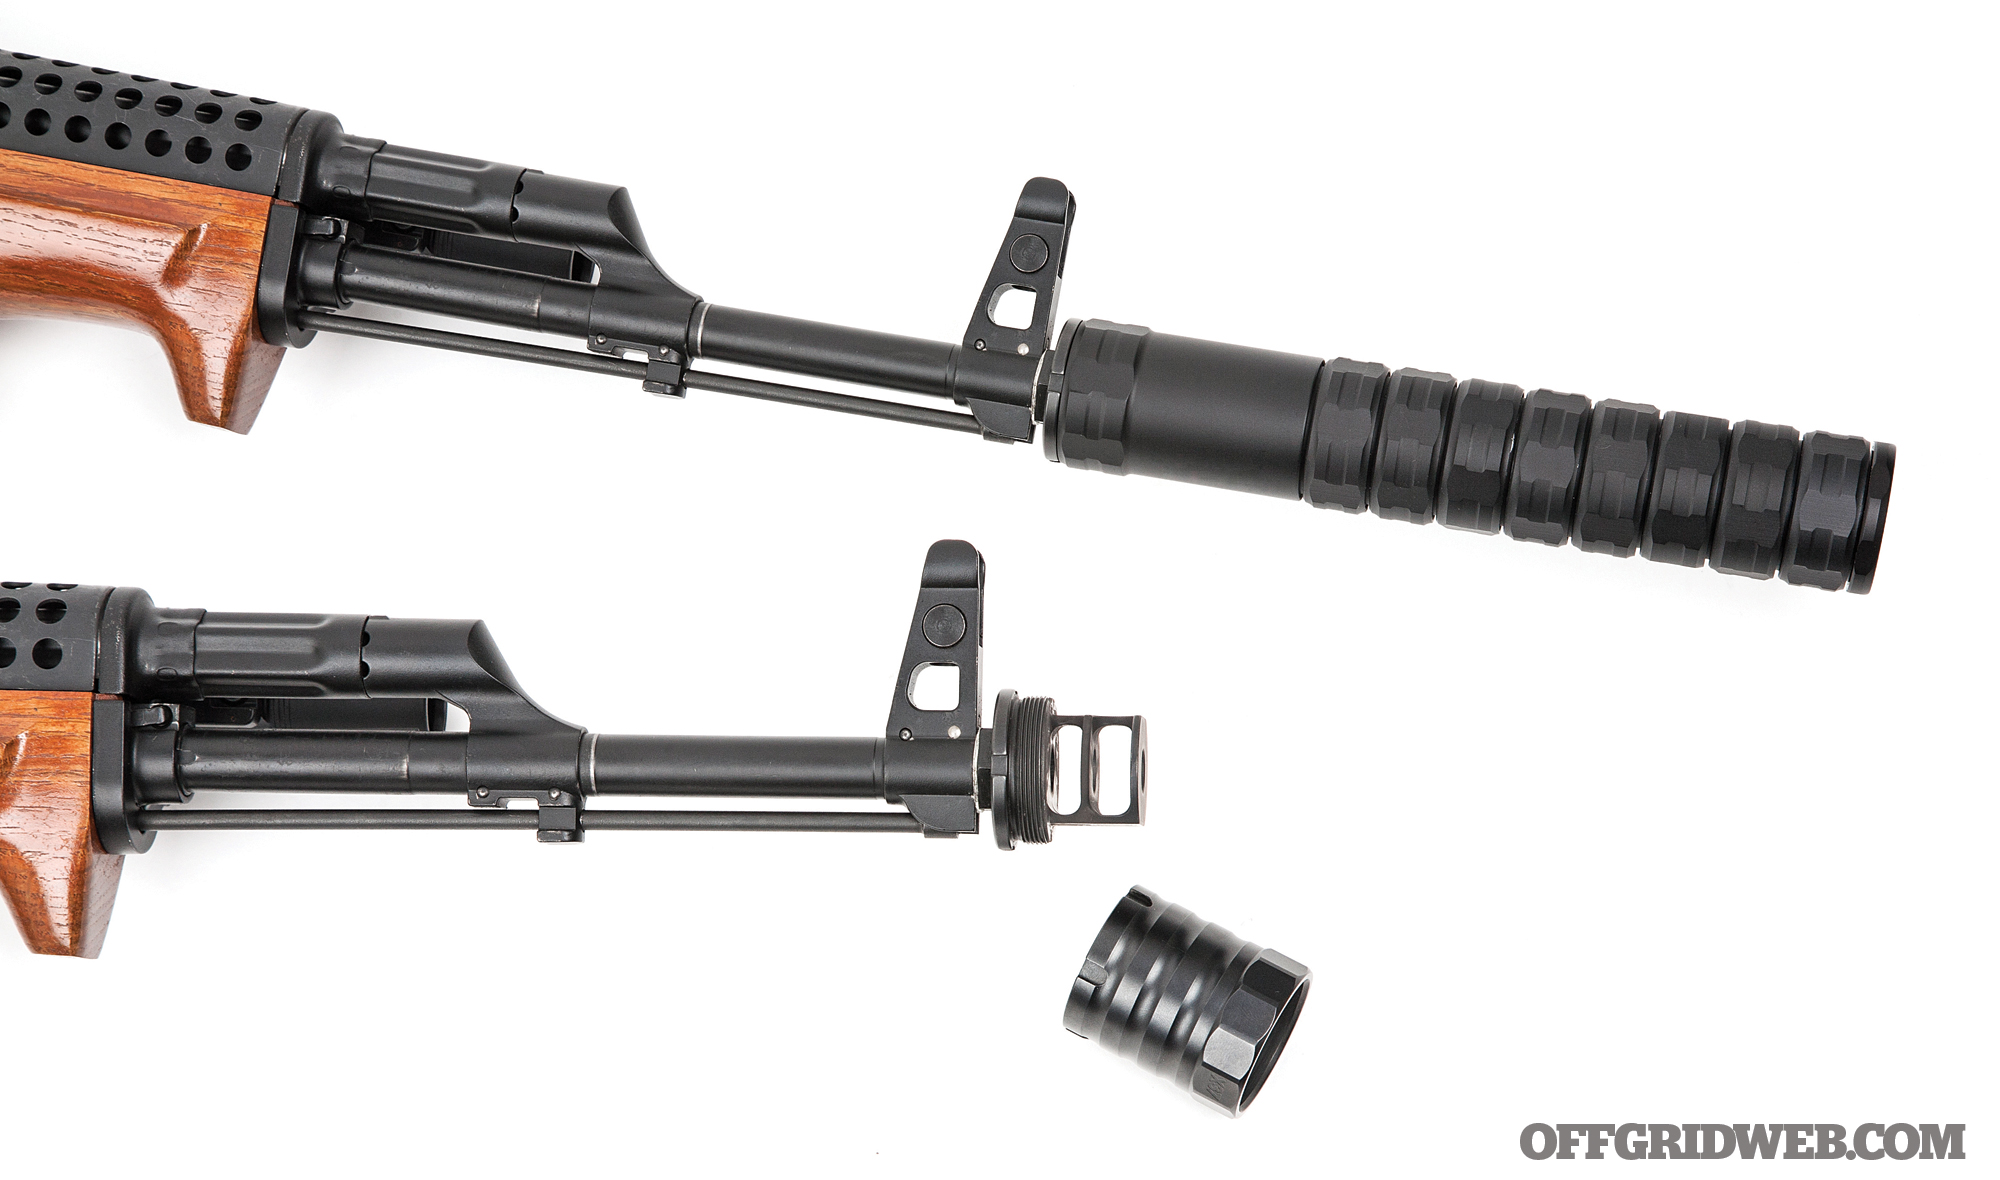
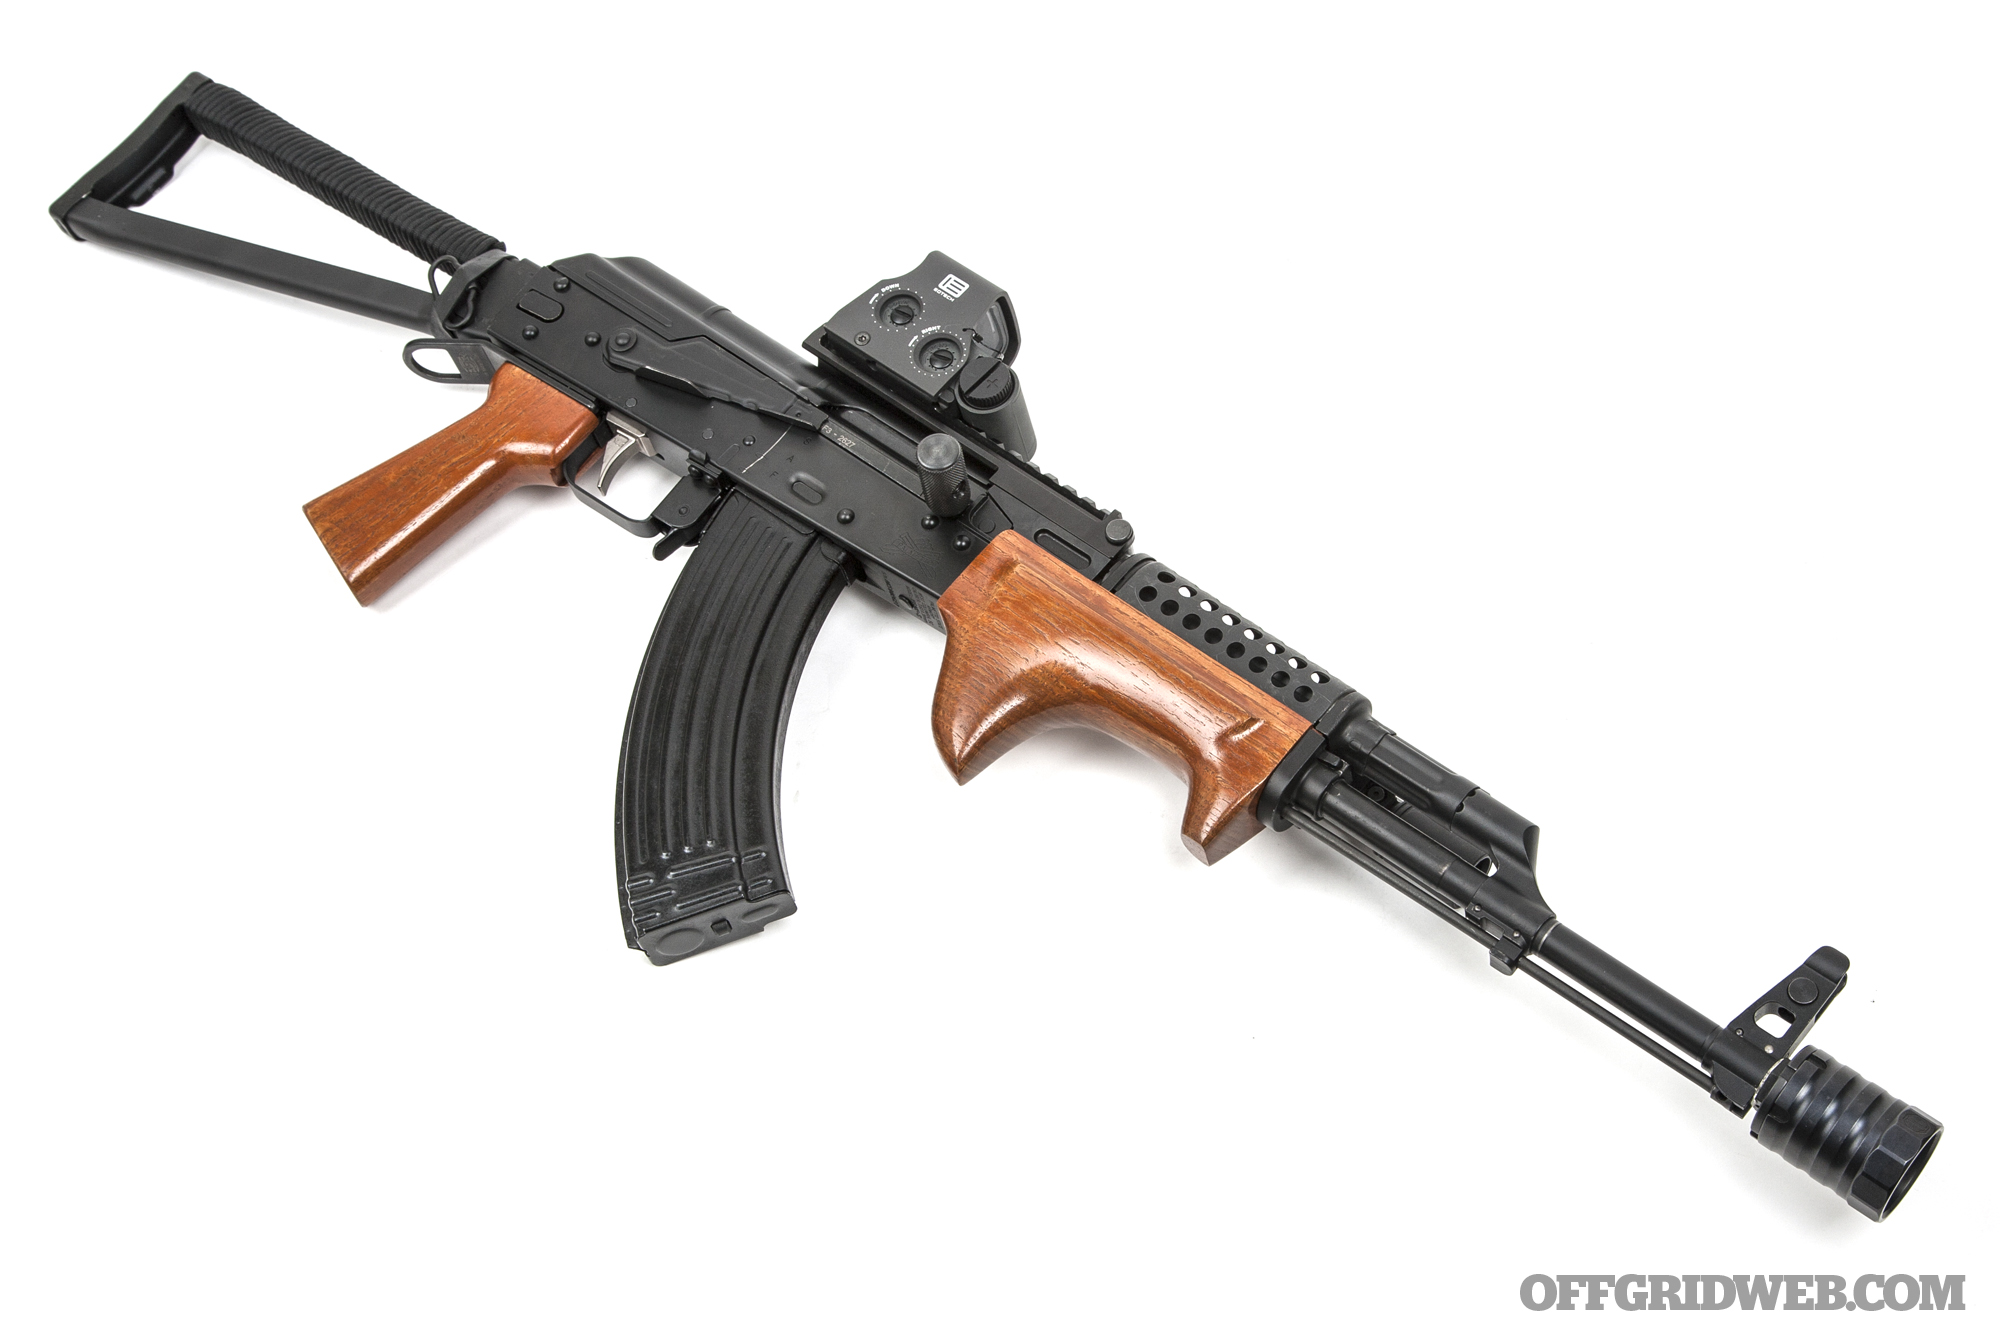
The Palmetto State AK-47 GF3 variant is offered in various configurations, some of which are priced under $800. Each has a hammer-forged bolt, carrier, and front trunnion, as well as a 4150 barrel with nitride finish. The model we selected also included a triangle side folder stock, “cheese grater” upper handguard, and dark red wood furniture. A Magpul 30-round mag comes with the rifle, but we switched that with a Bulgarian steel mag from GunMag Warehouse for a more traditional look.

We encountered two problems with the base rifle. First, the pin through the mag release wasn’t sufficiently peened on one side, causing it to feel loose. The second issue was more substantial — the top bar of the stock wasn’t properly welded to the folding mechanism, so it wiggled up and down when we shouldered it. We reached out to Palmetto State Armory about the problems and were immediately issued a 2nd Day Air return label to send it back for repair. Less than a week later, we received our AK with a brand-new folding stock and mag release. Although we never want to encounter defects, we appreciate that PSA fixed them under warranty with no hassle and a surprisingly fast turnaround time.

Our first modification to the Palmetto State AK was to replace its burgundy-stained lower handguard and pistol grip. We contacted Kalashnicarver, a craftsman in Missouri who specializes in custom AK furniture. After discussing options, we settled on a “Bandito” lower handguard and nearly vertical pistol grip, both sculpted from curly white oak and finished with an orange stain. Kalashnicarver also attached the Sabrewerks ALM light mount directly to the handguard. It positions a SureFire Scout or similar light — such as the Arisaka Defense 300 Series we used — in line with the shooter’s thumb for easy activation.

The GF3 includes a side rail that’s compatible with aftermarket optic mounts, but we decided to go a sleeker route. The Sabrewerks KOP is a two-part modular optic mount system. Its base replaces the rear sight tower, and features slots and a locking pin to secure a variety of interchangeable mounts and rail sections. This is the only part of our build that required gunsmithing, since the base must be pressed and pinned onto the barrel. Lee Armory handled that task with ease. We tried two KOP optic setups: a 30mm cowitness mount with a Vortex Strikefire II red dot and a Picatinny rail section with an EOTech XPS2. Although the latter configuration doesn’t allow iron sight cowitness, we preferred the taller placement and large window of the EOTech for this rifle. If we change our minds, the KOP system makes it simple to switch back and forth.

We also wrapped the metal buttstock’s cheek-piece with paracord — a common mod to prevent burns on hot summer days — and stuck a strip of Talon Grips textured material to the end for improved traction against the shoulder.

We’ve grown used to crisp aftermarket AR triggers, so the original trigger on this AK had to go. An ALG Defense Ultimate trigger reduces weight and shortens pull, and its flattened Lightning Bow shape feels more modern. We also installed an ALG main spring to maintain reliability with a variety of ammo and a recoil spring for softer shooting.

An Echo Nine Three rear sling mount offers an attachment point that doesn’t move based on folding stock position, and a Circle 10 knurled charging handle provides more grip during quick reloads. The GF3 is finished off with a JMac Customs two-chamber muzzle brake. The brake’s external 1.375×24 threads make it possible to add various suppressors or blast diversion shields. We threaded-on a JMac BDS-37 blast shield and a Form 1 home-built JK Armament suppressor; both were very effective in taming the powerful concussion that the brake produces.

Since we intend to run the AK in classes in the future, we needed a way to carry some spare mags. The Parashooter Gear VOLK chest rig pays homage to old-school Chinese rigs that have been widely used since the Vietnam War but integrates modern Swift clips to attach to the Minimalist H-Harness (pictured) or your plate carrier of choice. We increased its capability with a prototype wraparound expansion kit from a local nylon gear maker known as @D3_Supplies on Instagram. This combination offers just enough room for three 30-round mags, a flashlight, two pistol mags, and a few other small items.

Some of you may look at the finished price of this Palmetto State AK build — roughly $1,900 without accessories, or $2,700 with — and say that it doesn’t seem blue-collar. However, keep in mind that AK prices aren’t what they once were, and the days of sub-$500, new-in-box WASRs are long gone. As for hand-built American AKs like our Lee Armory project, the difference in refinement is undeniable, but many of those rifles start in this price range before modifications. That said, there’s good value to be had with the PSA GF3, and our upgrades made it a lot more enjoyable to shoot. It’d be easy to tighten the budget further by starting with a fixed-stock model, using the original slant brake, and/or sticking with iron sights as Mr. Kalashnikov intended.

Stay tuned for Part Two of our AKs Two Ways article series, which will be published soon.

Palmetto State AK Parts List

BASE RIFLEMSRP
PSA GF3 AK-47 Triangle Side Folder$1,050
COMPONENTSMSRP
Sabrewerks KOP Platform #1 with long rail mount$251
Kalashnicarver custom curly white oak handguard and pistol grip$160
ALG Defense AK Trigger Ultimate with Lightning Bow$140
ALG Defense High Energy Main Spring and Recoil Spring$22
Circle 10 AK Extended Charging Handle$25
Echo Nine Three V1 Sling Adapter$24
JMac Customs RRD-2C 14F X37 brake and BDS-37 blast shield$198
GunMag Warehouse Bulgarian steel magazine$20
ACCESSORIESMSRP
EOTech XPS2 Grey holographic sight$589
Sabrewerks ALM light mount$50
Arisaka Defense 300 Series flashlight$200
TOTAL:$2,729

Sources

Palmetto State Armory > palmettostatearmory.com
ALG Defense > algdefense.com
Arisaka Defense > arisakadefense.com
D3 Supplies > instagram.com/d3_supplies
Echo Nine Three > echo93.com
EOTech > eotechinc.com
GunMag Warehouse > gunmagwarehouse.com
JK Armament > jkarmament.com
JMac Customs > jmac-customs.com
Kalashnicarver > kalashnicarver.com
Lee Armory > leearmory.com
Parashooter Gear > parashootergear.com
Sabrewerks > sabrewerks.com