OTTE Gear LVZ OVT Plate Carrier

In a world of ever-growing uncertainty, both civilians and armed professionals alike are seeking low-cost, high-value options for both armor and load carriage. We recently had a chance to review the OTTE Gear LVZ OVT (Low Viz/Overt) plate carrier. This kit was designed from the outset for the needs of both consumer types, effectively bridging the gap between slick armor carriers and full-blown, direct-action-oriented plate carriers. (More on the differences between the two here.) 

OTTE Gear is most well-known for their technical apparel but has made recent strides to flesh out their product line with a series of bags and are now making their first foray into nylon gear with the LVZ OVT. In an age where modularity is king among plate carriers, many manufacturers have gone to an a la carte method of purchase where plate bags, cummerbunds, shoulder straps and placards must all be bought separately. While this does offer a high degree of out-of-the-box modularity, it often drives the final price up and can overwhelm less-savvy buyers who may not know exactly what they need (or know they need a fully scalable setup with multiple components). We appreciate the value that OTTE brings to the consumer by selling the LVZ OVT as a complete kit – the base plate carrier, cummerbund, three-mag shingle and padded shoulder straps all come included for a base price of just $160. For that price, you get a complete carrier that allows you to load for bear. As it arrives, the LVZ OVT has space for a whopping 11 AR-style magazines: four on each arm of the cummerbund, plus three more on the included front panel. Those slots can, of course, be used to stow anything else that will fit in them such as medical supplies, E&E kits or personal radios. On the latter note, the included shoulder pads come with Velcro-adjustable loops for cable routing. There are also laser-cut slots in the front plate bag for attaching QASM buckles so that chest rigs or clip-on placards can be attached or detached quickly. The only thing this carrier lacks in terms of attachment is loops or laser cuts for MOLLE attachment, which precludes the use of a direct-attach assault pack or hydration carrier. But these things fall outside the carrier’s intent of being a low-visibility carrier intended for concealed use or short-duration emergency response (or other low-signature tasks like plainclothes surveillance). For these types of applications, hook-and-loop pouches for everything from ammo to handcuffs are now widely available and can be attached via the liberal amounts of loop-side pile tape sewn into the LVZ OVT. 

OTTE Gear LVZ OVT Plate Carrier

This feature is part of what we really like about the OTTE carrier – because Velcro-style attachment of pouches and cummerbunds is so prolific in the marketplace, the LVZ OVT plays nice with components from other companies as well. So if you purchase the complete OTTE kit and find that the included components just don’t fit your needs quite right, the combination of Velcro and QASM compatibility means you can plug and play a host of other parts from other manufacturers. To test this capability, we made a point to integrate some other products onto our LVZ OVT setup. First, we wanted to maximize the plug-and-play capability of the hook-and-loop tape all throughout the system. We especially appreciate that the included triple-mag placard has hook on the rear and loop on the front. This means you can wrap the cummerbund over top the placard to lock it in place and keep the profile low, or you can fold the cummerbund behind the placard and use the loop-tape front for patches and pouches. We added a couple of patches as well as a Tactical Tailor low viz Pistol Mag Pouch.

OTTE Gear LVZ OVT Plate Carrier

We also wanted to see how the LVZ OVT did with “sandwich in” ancillary pouches. So we stacked on a Swift Clip MOLLE Panel and Multi-mount Tourniquet Pouch from jtactical solutions and a Nairobi Knife Dangler from Parashooter Gear. The Swift Clip MOLLE Panel is a single-column thermoplastic MOLLE rack attached to a hook-and-loop covered “wing” that lets you sandwich it behind a placard or chest rig to get one extra column worth of attachment for small items like a knife, single pistol mag or tourniquet. We chose the latter, which is where the Multi-mount Tourniquet Pouch comes it. It’s a closed-flap TQ pouch that can mount via MOLLE or belt loops. 

Parashooter Gear is a small company specializing primarily in tactical nylon specific to those who run AK-pattern rifles, but their Nairobi Knife Dangler is a clever and low-footprint way to get a fixed-blade knife onto your kit without taking up space on the primary front panel. It too, consists of a hook-and-loop “wing” design with an elastic sleeve on the end that is also lined with loop tape. It can accommodate a variety of fixed-blade knives, so long as you can get hook-side tape around its sheath and fit it inside the sleeve. We filled it with a Half Face Blades Disaster Jr.

OTTE Gear LVZ OVT Plate Carrier

Adding all these pouches, while conveniently scalable, does start to add ever-thickening layers of fabric sandwiched upon fabric. While the LVZ OVT took it like a champ, without a significant increase in overall bulk, we also wanted to configure it separately using the quick-detach feature. So we added a set of female QASM buckles and hooked in a Redwire Gear Emergency Management Rack, a laser-cut micro panel capable of being used as a placard or a standalone chest rig. We fitted our EMR with two G-Code Softshell Scorpion mag pouches and an HSGI Bleeder/Blowout Pouch. This rack can be clipped on when overt load carriage is needed and removed just as quickly to return the LVZ OVT to its slick armor-only configuration. Likewise, the OTTE shoulder straps can be removed to minimize bulk and printing under cover garments if that outweighs the need for all-day comfort. 

While the included cummerbund arms sit perfectly flat when not used, we really like ability to don/doff the carrier without tearing on a bunch of hook-and-loop. So we swapped the OEM cummerbund for the hybrid QD version from Defensive Mechanisms. These offer a combination of elastic and mesh MOLLE, as well as two fast-pull QD latches that and be locked and unlocked without any crunchy tearing.

OTTE Gear LVZ OVT Plate Carrier

The LVZ OVT is sized for “standard” 10×12-inch armor plates in an earnest attempt to create a one-size-fits-most solution, with the adjustability of cummerbund placement able to account for most of the variance in torso sizes. The plate bags are shaped somewhere in between the old SAPI cut and the newer “shooter’s cut” plate shapes. We used a set of lightweight Level III+ composite plates from Spartan Armor Systems which fit just fine, with no sliding or flopping inside the carrier. For reference, the Spartan Plates are 9.5×12.5 inches and 1.1 inches thick. The shoulder straps themselves, underneath the pads equipped with cable loops and MOLLE slits, are also adjustable for ride height. 

OTTE Gear LVZ OVT Plate Carrier

We’ll continue to test the OTTE Gear LVZ OVT plate carrier in both training and daily “grab-and-go” use as able but, overall, we think this carrier offers a whole lot of bang-for-buck value, especially if you’re in the market for a first-time buy or want to pare your collection of carriers down to a single, modular setup that fills both concealed and overt needs. Stay tuned here and at OTTE Gear as they continue to expand their in-house line of plug-and-play accessories for the LVT OVT line. 


OTTE Gear LVZ OVT Plate Carrier

Colors: Coyote, Tactical Grey, Ranger Green, Multicam, Multicam Black, Poppies of War
Fits: Medium SAPI, ESAPI, Swimmer Cut, 10″x12″ up to 10”x12.25“x1”
MSRP: $160 (Solids), $200 (Camo)
URL: www.ottegear.com


MORE ON NIGHT VISION, TACTICAL GEAR, AND FIREARMS


New Survival Gear in OFFGRID #45

DECKED Tool Box

Compatibility: Select truck model years, including the Ford F-150 and Toyota Tundra
MSRP: Starting at $700
URL: decked.com

DECKED Tool BoxDECKED made a name for itself thanks to its innovative drawer systems, allowing drivers to securely stow tools, firearms, and valuables in their truck beds. Now the company’s revolutionizing vehicle storage once again with a fresh toolbox design that (for an additional $175) can include a telescoping ladder so you can easily reach inside. But even if you don’t get that upgrade, this 73.4-gallon tool box has several brilliant design features. Its seamless construction and EPDM lid gasket ensures waterproof storage. Torsion springs deliver smooth lid opening and closing — no accidentally crushing your fingers. A steel armored locking mechanism is virtually pry bar proof. Plus, a DECKED Blue D-Box comes standard to keep things organized at no extra cost.


Vertx Move to Contact Glove

Colors: Ranger Green, Urban Grey
MSRP: $65
URL: vertx.com

Wearing gloves in the summer? A reliable pair of paw protection is good to have on hand (pun intended!) all year round. Whether it’s to prevent your fingers from getting shredded while working with rope, tools, or firewood or wearing it on your support hand during a weekend-long carbine shooting course, gloves can make the difference between dexterous digits and blistered booger hooks. The Move to Contact Glove provides protection without taking away mobility, thanks to 100-percent goatskin leather, flexible D3O padding that doesn’t constrict, and a mechanical stretch knit back-of-the-hand fabric that’s abrasion resistant. It also features YKK zipper and hook-and-loop wrist closure. Plus, the trigger finger, middle finger, and thumb are touchscreen compatible for added convenience.


Ninja Wilderness Survival Guide by Hakim Isler

Pages: 266
MSRP: $17
URL: tuttlepublishing.com

Ninja Wilderness Survival Guide by Hakim Isler

Before Hakim Isler ever appeared on TV shows like Naked & Afraid and First Man Out, he was an expert in ninjutsu (among other systems) and a U.S. Army psychological operations sergeant who served in the Middle East. Combining breadth of knowledge and real-world experience, Isler writes a thoroughly entertaining and insightful wilderness survival guide that isn’t just based on concepts from the ancient ninja, but also on his adventures enduring some of earth’s harshest conditions. This softcover manual delves into everything from primal methods (the fire plow) to modern adaptations (turning a discarded soda bottle into a fish trap). And through it all, Isler provides a cerebral, almost spiritual, insight that only a ninja/combat vet/survival expert/TV star could.


Teton Waters Ranch Dinner Sausages

Flavors: Various, including Cheddar Bratwurst, Italian-Style, and Polish
MSRP: $55 for 24
URL: tetonwatersranch.com

Teton Waters Ranch Dinner Sausages

As much as we fancy ourselves survivalists, not all of us are going to take down a buck, field dress it, and haul it back to home base during a weekend camping trip with the family. Sometimes we just like to chill and make s’mores. For low-key outings, easy-to-prepare packaged food will probably be your go-to meals. Enter the dinner sausages from Teton Waters Ranch. They’re made from 100-percent grass-fed beef and are free of hormones and antibiotics. While they’re perishable and need to be kept on ice, the wieners are free of added sugars, nitrites, and nitrates … but full of deliciousness. Teton also offers classic bun-length hot dogs, smoked cocktail sausages, and burger patties if you need more variety for your campfire grill. 


Quake Kare 4 Person Ultimate Go Bag – Extended Edition

Dimensions: 20 by 16 by 5.5 inches
MSRP: $159
URL: quakekare.com

Quake Kare 4 Person Ultimate Go Bag – Extended Edition

Designed as a vehicle emergency kit for drivers who have to evacuate or might get suddenly stranded, the 4 Person Ultimate Go Bag – Extended Edition contains the essentials for you and a small group to sustain for up to three days: thermal blankets, a tube tent, 2,400-calorie food bars, water pouches, water filtration tablets, a first aid kit, and a NOAA weather-band AM/FM radio. Also included are supplemental items like a multi-tool, a five-in-one survival whistle, and a pocket survival guide. If you’re a seasoned survivalist, you might not give this package a second glance. But this kit is a good entry point if you’re new to the preparedness lifestyle or looking to gift to a friend who needs a kickstart.


Rambo Electric Bikes Rebel 1000 XPC Camo

Weight: 69 pounds
MSRP: $5,500
URL: rambobikes.com

Rambo Electric Bikes Rebel 1000 XPC Camo

In a postapocalyptic situation, a dual sport bike might seem like ideal transportation. But how readily available will gasoline be? And how will you evade bandits when your engine can be heard half a mile away? Suddenly, electric bikes like the Rebel seem like a smart alternative, especially when combined with a solar generator. Its Bafang 1,000-watt high-torque mid-drive motor and 11-gear derailleur can give the rider a powerful boost whenever pedal power doesn’t cut it. Meanwhile, the GT860 air forks and Maxxis fat tires deliver both the suspension and the traction needed to negotiate everything from mountainous plateaus to sandy beaches. Decked out in TrueTimber Viper Western Camo, the Rebel has a max distance of 48 miles — nothing to scoff at in a TEOTWAWKI scenario.


PNW Bushcraft Waxed Canvas Ground Cloth/Hammock Chair

Dimensions: 4 by 2.5 feet
MSRP: $98
URL: pnwbushcraft.com

PNW Bushcraft Waxed Canvas Ground Cloth/Hammock Chair

While this looks like an old-school tarp, it’s actually a pretty handy multi-tool of sorts. As the name denotes, the Waxed Canvas Ground Cloth/Hammock Chair works as a dry spot to sit, kneel, lie, or place your gear on. Made of super durable 10.1-ounce waxed canvas with a 4-inch hem on one end, a 2.5-inch hem on the other, and four grommet holes on each corner, it can be attached to logs to serve as a chair, a table, a shelter, or a tinder gather. If you have cordage, you can transform it into a foraging bag or a haversack. And you can even turn it into a pillow by stuffing it with soft foliage. One smartly designed cloth, many uses. Made in the USA.


Danner Jungle 917 Rock Ridge

Height: 4.5 inches
MSRP: $170
URL: danner.com

Danner Jungle 917 Rock Ridge

It’s almost as if Danner made these boots specifically for RECOIL OFFGRID editors. The Jungle 917 Rock Ridge was designed for urban use but was based on Danner’s legendary hiking boots, providing extra support and traction if you need to venture into rocky terrain. The Vibram outsole offers solid grip in wet conditions, the Vibram midsole provides cushioning and stability, the OrthoLite footbed delivers comfort and heat dissipation, and the suede-and-nylon upper creates a durable yet snug hold around your foot. Part sneaker, part hiking boot, the comfortable Rock Ridge doesn’t cast unwanted attention on you in casual environments yet allows you to bug out to the backcountry at a moment’s notice without having to change into more rugged footwear.


Liemke Thermal Optics Keiler-35 Pro

Weight: 14.8 ounces
MSRP: $3,332
URL: liemke.com/en/

Liemke Thermal Optics Keiler-35 Pro

After the sticker shock fades and you delve into the features of this high-definition monocular, it becomes apparent why you get what you pay for. The Liemke Keiler-35 Pro is a thermal spotter, allowing you to see heat signatures in all light conditions — from daytime to pitch-black zero dark 30. This handheld device has detection capability up to 1,350 yards. Plus, it has a 13mm objective lens, a digital zoom of up to 4x, a rechargeable battery with a seven-hour runtime, and integrated Wi-Fi to transfer live image data to a smartphone 54 yards away. So, whether you’re a hunter looking for big game or a prepper surveilling your bug-out property, this investment could mean the difference between feast or famine.


Superesse ICERS

Format: Digital template
MSRP: $12
URL: superessestraps.com

Superesse ICERS

Standing for “In Case of Emergency Response System,” this digital product is a template that you download, modify to your needs, and distribute to your loved ones. It contains sections to fill in blood type, allergies, and emergency contact information, as well as rally points and guidelines for your most likely catastrophic scenarios. That way, if SHTF, everyone in your family can independently determine how to communicate with each other and when to shelter in place or bug out. ICERS also contains categorizations of disasters, tips for action plans, and guidelines for creating a personalized method of communication using tap code and Morse code. Like a modern playbook for preppers, ICERS provides a smartly organized template that anyone can adapt to their disaster planning.


Ontario Knife Co. Camp Plus Hatchet

OAL: 12 inches
MSRP: $90
URL: ontarioknife.com

Ontario Knife Co. Camp Plus Hatchet

Not everyone has the cargo space or the inclination to haul around a two-handed, two-bit ax. That’s why the Camp Plus Hatchet is a solid choice for a camping trip or your vehicle emergency kit. Clocking in at just 1 pound, 6 ounces and a foot long, this model is the ideal size for portability without sacrificing performance. Made out of high-carbon steel, it has a sharp 2.9-inch cutting edge and a flat poll that’s perfect for batoning wood. Note: Avoid holding the shaft, which has 90-degree corners — great for striking ferro rods, but abrasive on your hands if you’re not careful. Fortunately, the Micarta handle itself is comfy and ergonomic. Overall, the U.S.-made Camp Plus Hatchet is an affordable, reliable ax.


Step 22 Tortoise Toiletry Bag

Dimensions: 10 by 7 by 4.75 inches
MSRP: $65
URL: step22gear.com

Step 22 Tortoise Toiletry Bag

It’s pretty crazy to think that we have space-age backpacks, but when it comes to stowing our hygiene products, we’re forced to throw all of our toiletries into a Dopp kit — many of which have just one compartment and one zipper to hold things together. How … antiquated. Fortunately, the Tortoise brings the toiletry-bag genre into the 21st century with a futuristic “lunchbox” design, 12 pockets and pouches to help organize your items, and padded exterior panels to protect your travel-sized containers. Moreover, it comes packed with clever features: a hanging hook (for when there’s no sink or counter), a removable zippered hygiene pouch (for more sensitive items), and a detachable mirror (which can double as a signaling device in a SHTF situation). 


Spy Week with Jason Hanson: Survival Lessons from a Former CIA Officer

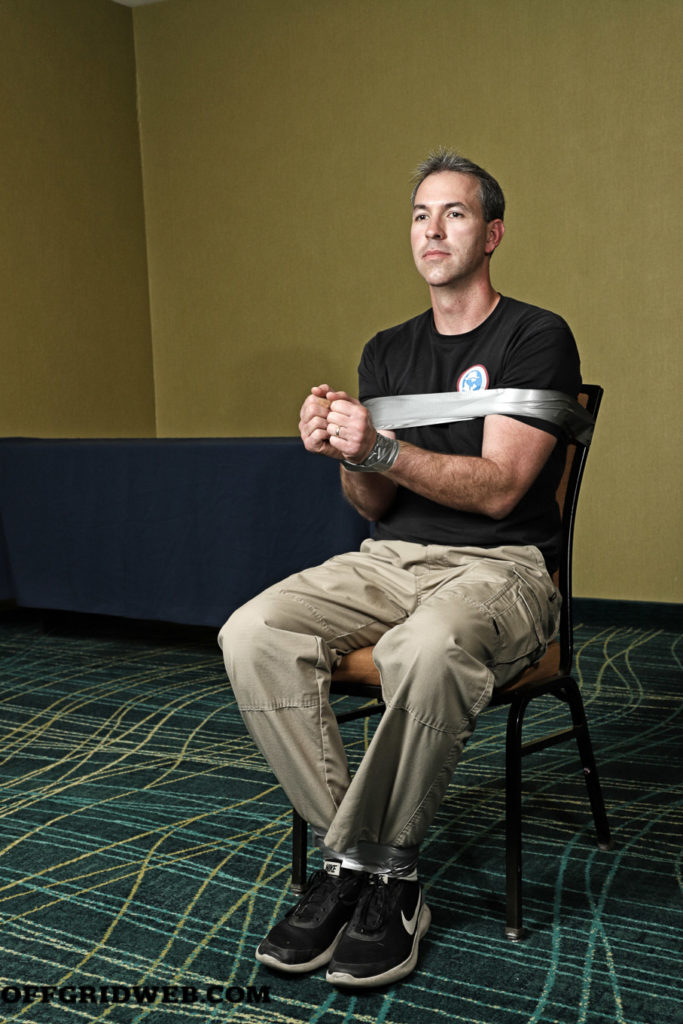
You’re standing in line at a crowded consulate in a foreign country when you get a sinking sensation that you’ve been flagged to be detained. As you begin to slink away toward the lobby, an agent calls out to you. You calmly and deliberately take stock of your situation, noting several Marines posting security and another agent readying handcuffs. You stop and raise your hands to a surrender position, which appears submissive while also being an effective fighting position.

Your eyes continue to scan as you’re surrounded by three men — a Marine and two in suits. As the Marine places his hand on your shoulder, you control him with a wrist lock, strike one of the others in the throat, elbow the Marine, and kick the other one again. You block an attack by the Marine and shove him back into the third man, who has drawn his service pistol. You quickly disarm him and throw him to the ground. As horrified and petrified onlookers scream and scatter, you’re off to the races.

If this is your idea of what being a spy is like, then you probably already recognize this piece of fiction as the U.S. Embassy scene from the action movie The Bourne Identity. In reality, the life of an intelligence officer can be quite mundane at times and thrilling at others, but the stakes are no less critical. In the interests of national security, a CIA officer may perform counterintelligence, conduct surveillance, recruit agents, or protect personnel and assets. They operate in dangerous and nonpermissive environments, persuade and cajole, evade capture, and are ready for anything.

Jason Hanson

While the likelihood you’ll need to do dead drops or fight assassins is pretty low, many skills and tactics from the world of espionage are directly applicable to everyday life. We attended a weeklong course, dubbed “Spy Week,” taught by former CIA officer Jason Hanson. After a stint as a police officer in Virginia, Hanson joined the CIA and served for seven years, mostly overseas, before leaving to focus on his family. He then did training and corporate work, reaching wider acclaim after appearing on the TV show Shark Tank in 2014 and securing a deal with celebrity investor Daymond John. Since then, he’s published several books, appeared on numerous TV shows, and expanded his training offerings.

Titillating title aside, Hanson’s Spy Week course was chock full of practical and useful skills. Read on for five key lessons we took away from this experience.

Situational Awareness

The best way to survive a life-threatening, dangerous situation is to avoid it in the first place. At Spy Week, Hanson stresses that situational awareness — paying close attention to what’s going on around you — is the most important skill for you to practice on a daily basis. This is preached over and over again, including in this very magazine, yet you need only look around any public place to see scores of people obliviously hunched over their smartphones rather than observing the world around them.

If you have good situational awareness, you’ll have a better chance at noticing pre-incident indicators (known in layman’s terms as “clues”) of a potential threat. Someone staring at you unnaturally may have picked you out as a possible target. If someone is pacing you — matching your speed, whether on foot or in a car — this is very unusual as well. Criminals might also work together as a team, with one attempting to distract you while another sneaks up on you. A pair might attempt to funnel you between them to trap you; two people walking together don’t usually open up to let someone between them.

spy week tools for escape

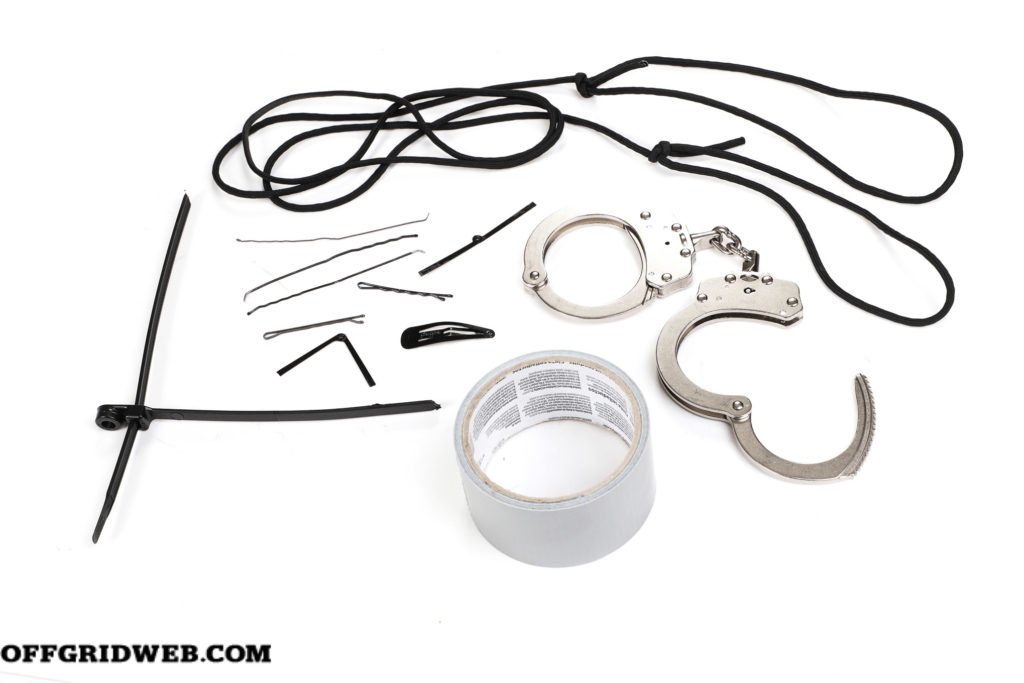
Above: Paracord, handcuff picks and shims, zip tie (cut by paracord), duct tape, and handcuffs.

Pay attention to baselines — what’s typical and normal for people and places. This will help you identify when something seems unusual. For a place, you might return home and notice some items moved or doors ajar that you know you always close — someone may have been or might still be in your home. For people, someone might be acting strangely, wearing inappropriate clothes for the weather, or paying too much attention to you.

Perhaps you suspect that someone’s following you. You can conduct what’s called a surveillance detection route, an oft-used skill in the intelligence business, to recognize if you’re being followed or targeted. For example, let’s say you’re a young woman in a department store and notice a man sneaking furtive glances at you, making you uneasy. To make sure you’re not just feeling paranoid, you could walk to another section, such as women’s handbags, and see if he eventually shows up. Then, go to another one on the opposite corner of the building or on another floor, perhaps women’s shoes. If he appears again, he’s probably following you, and you should contact store security. Similar concepts apply when you’re driving your car.

Escaping Restraints

If you find yourself in the unfortunate circumstance of being abducted, first of all, fight like hell immediately. If criminals successfully snatch and relocate you, your odds of a good outcome drop significantly. The first 24 hours are critical; you’ll quickly lose energy, strength, and spirit as time passes and as you likely get sparse helpings of food and water. At Spy Week, Hanson advises that any chance you get, leave as much DNA behind as you can, particularly in spots that aren’t normally cleaned. For example, bite your lip and spit blood out behind some furniture or leave a bloody fingerprint under a table.

spy week restraints duct tape

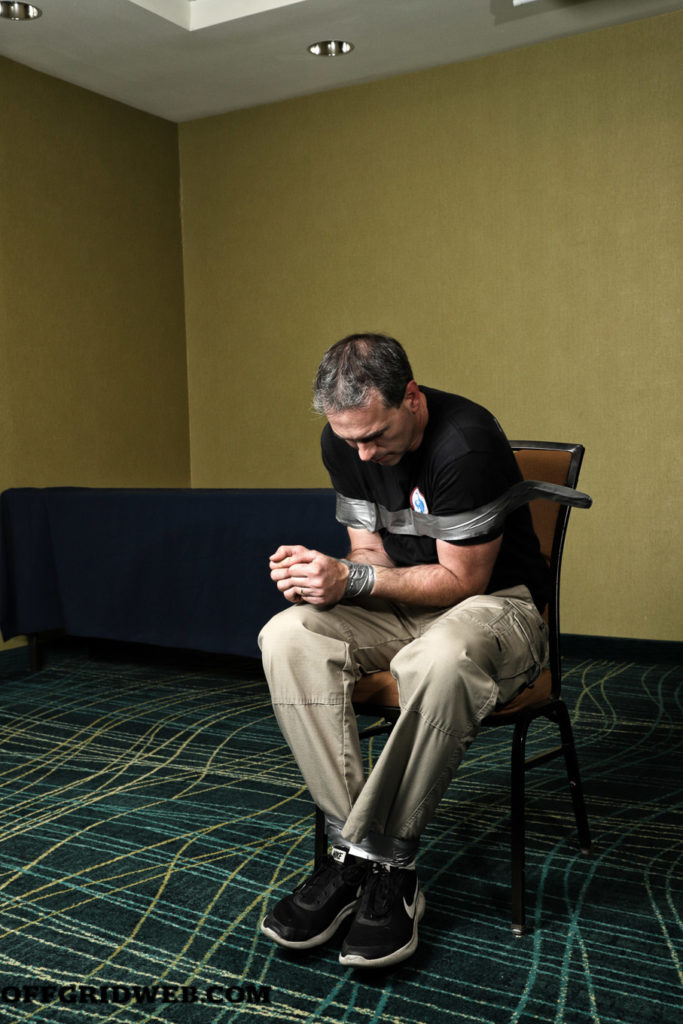
If you’re duct taped to a chair, jolt forward quickly, like you’re trying to put your head between your legs. If only one side of the tape around your chest breaks, spin your way out.

spy week restraints duct tape

If you get an opportunity to escape, you may need to defeat restraints. Many victims feel psychologically crushed once they’re restrained; don’t despair, you can escape from many commonly used restraints.

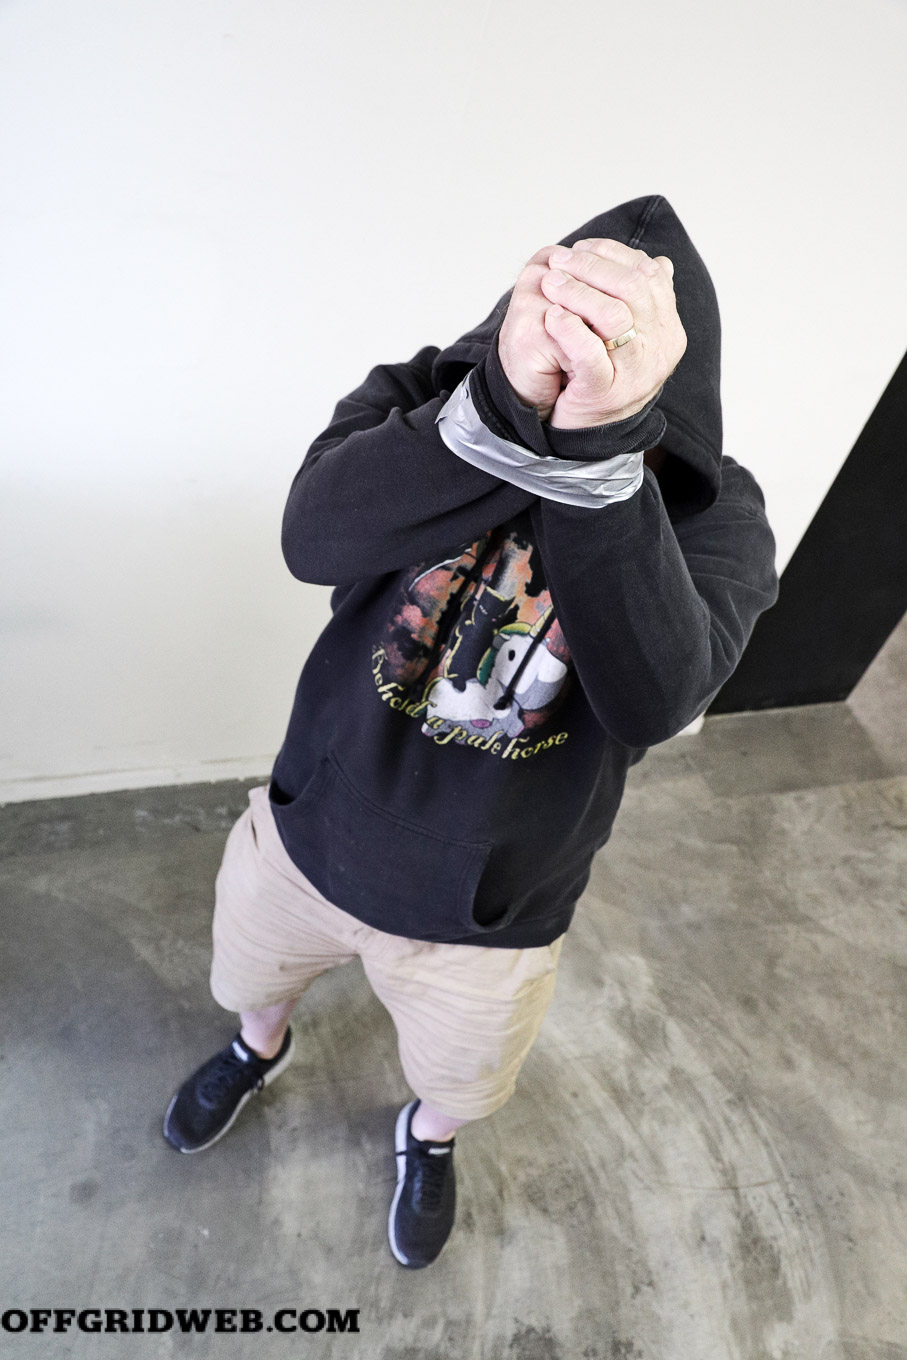
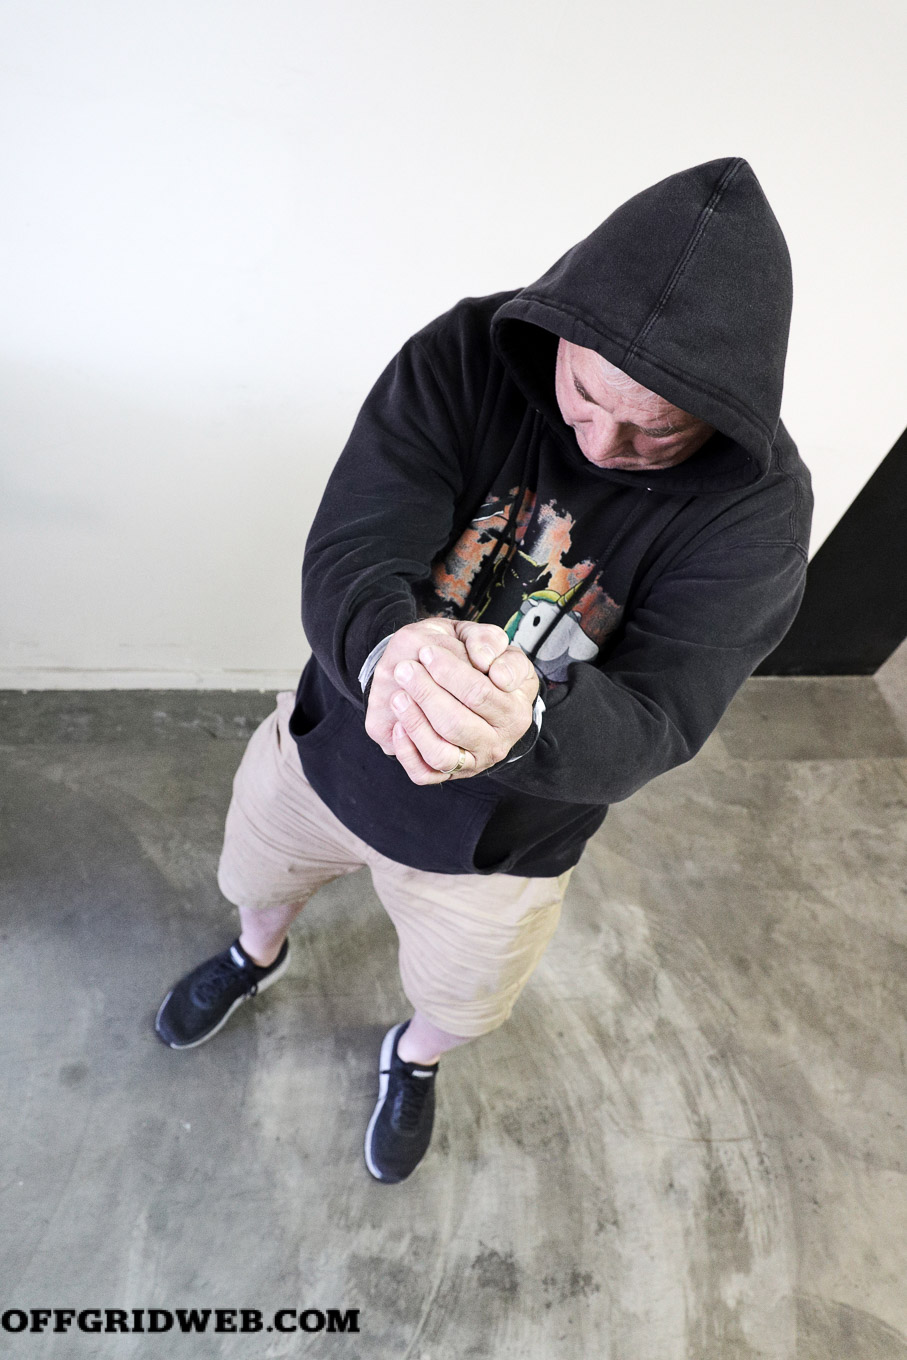
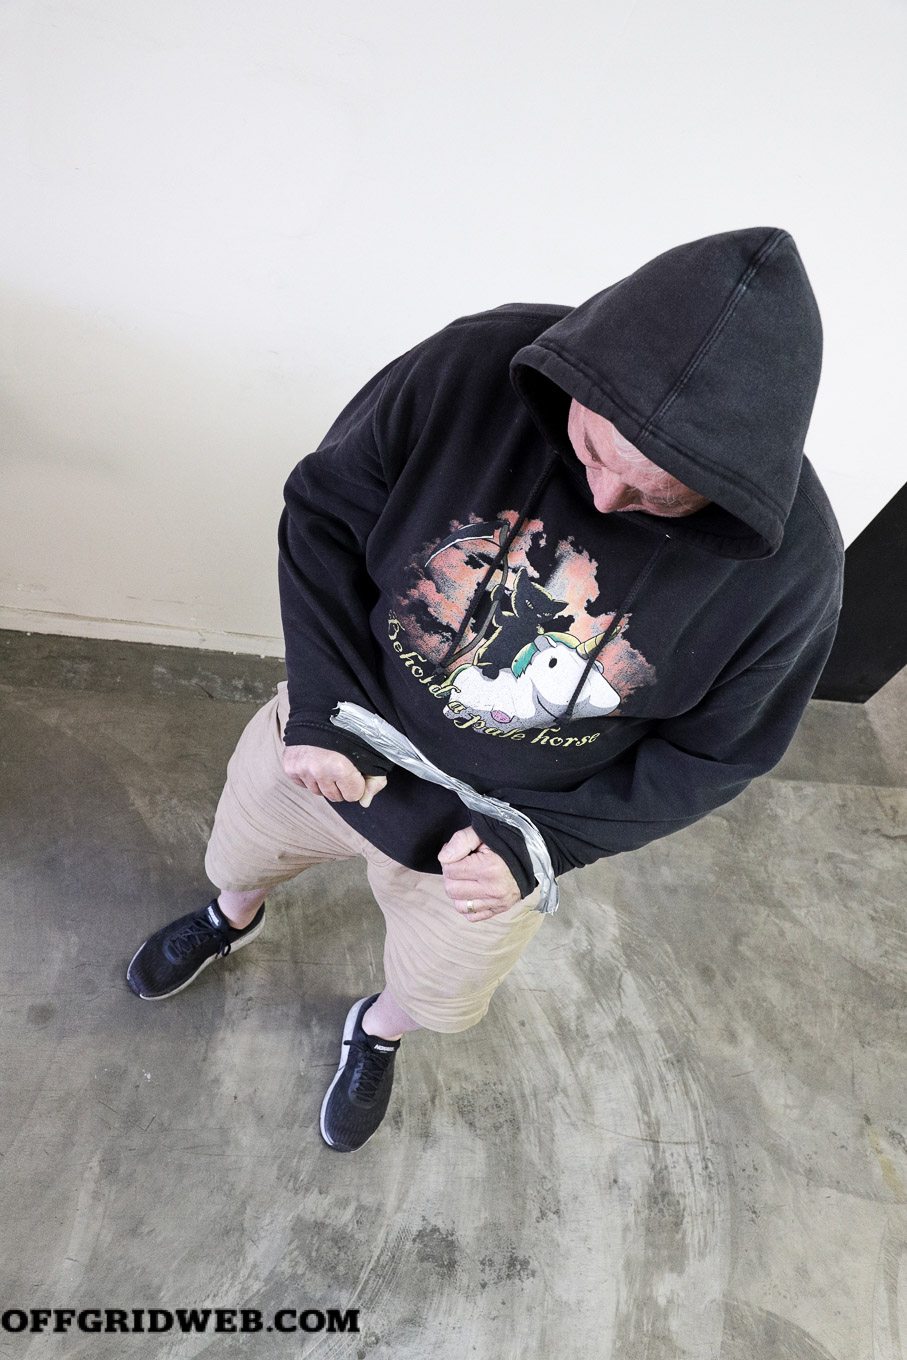
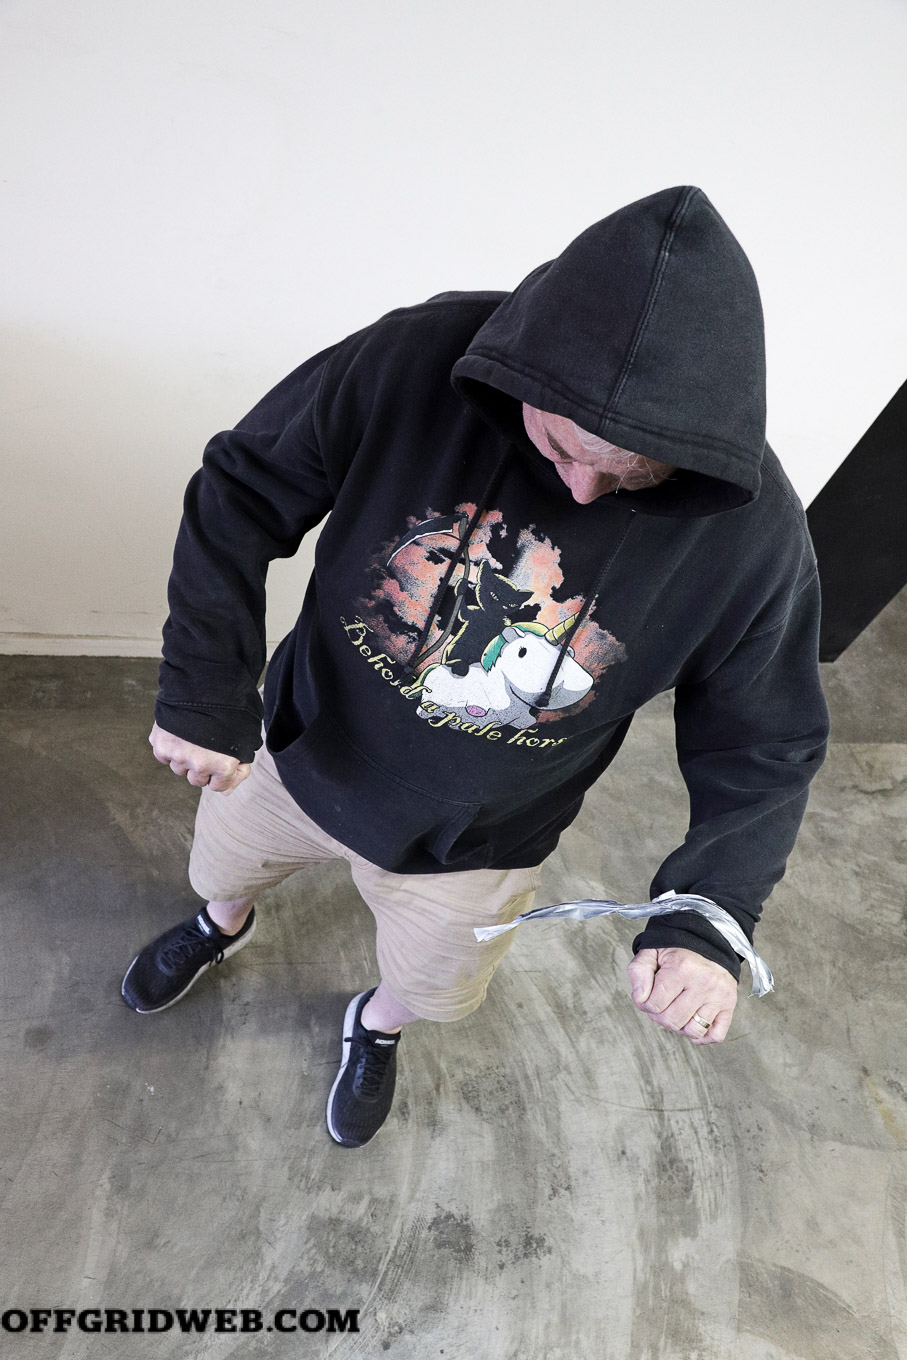
Duct tape: This is one of the most prevalent restraints, as it’s cheap, easy, and readily available. Wrapping duct tape around someone’s wrists is quick and makes it easy to lead them around. Fortunately, duct tape is also easy to defeat; think of how effortlessly you can tear duct tape at a 90-degree angle. The key is to learn how to exert force on the tape to make it rip open. If your hands are in front of your body while you’re being taped, lean forward and press your forearms together; you’ll appear more compliant, and it’ll be easier to escape later. When your captors aren’t around, raise your arms above your head, like a church steeple. Then quickly pull your arms down and out to the sides past your hips, like you’re elbowing someone behind you. Alternately, you can also rub the tape on a sharp edge, like the corner of a door or furniture. If large amounts of tape are used, it’s applied in a figure-eight pattern, or your hands are taped behind your back, you may need to cut it with the cord saw method described below.  

The tighter the tape and your wrists, the easier it’ll be to escape. While practicing these techniques repeatedly, wearing long sleeves will save your skin from getting thrashed. Raise your arms above your head, like a church steeple. Quickly pull your arms down and out to the sides past your hips, like you’re elbowing someone behind you.

Zip ties: These are also frequently used and are harder to defeat than duct tape. For positioning and breaking free, follow the same steps as for duct tape; however, be sure to rotate the zip tie so that its lock is centered between your hands. You’ll need to exert a lot more force, get the angle just right, and it’ll hurt, so not everyone will be successful with this technique. There’s an alternative method, if you’ve stashed paracord, Kevlar thread, or other strong cordage somewhere accessible. Thread the cord through the zip tie, then tie loops on each end for your feet. Lean on your back and act like you’re bicycling. This will saw the cord clean through the zip tie. A similar kicking technique can be used if your hands are behind your back, but it requires more flexibility and patience.

spy week zip tie paracord escape


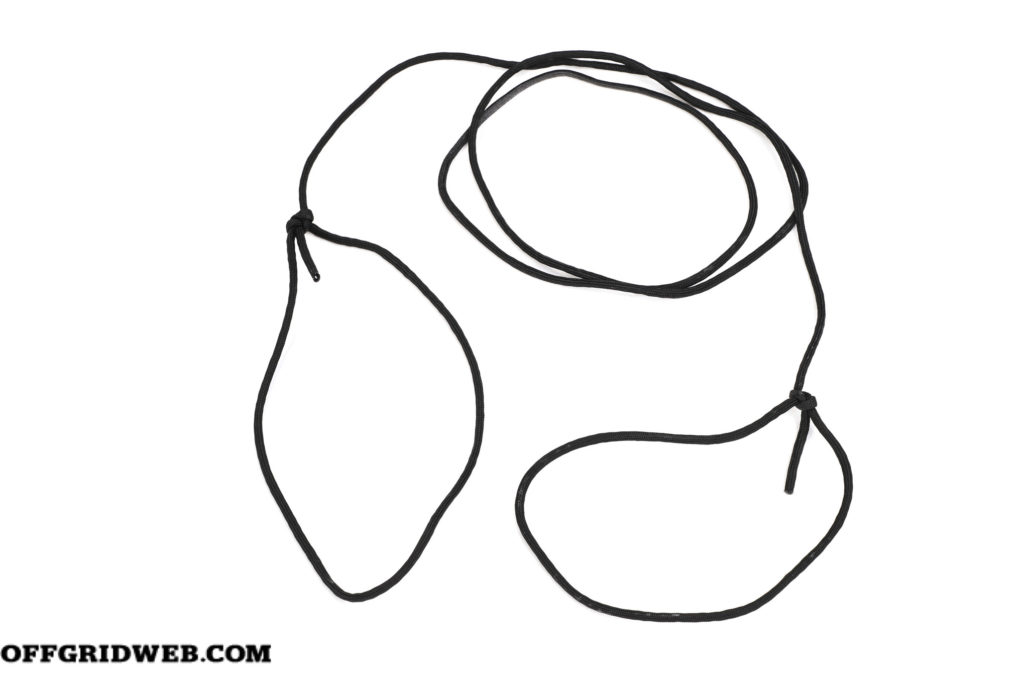
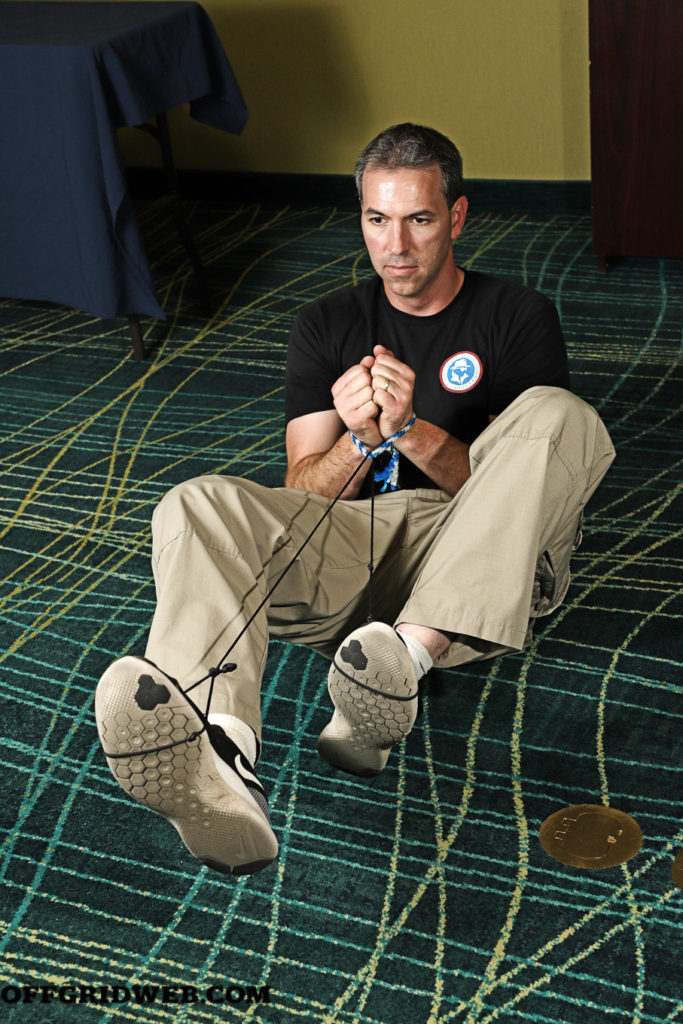
You can use paracord or other strong cordage with two loops for your feet to saw through restraints. 

spy week zip ties

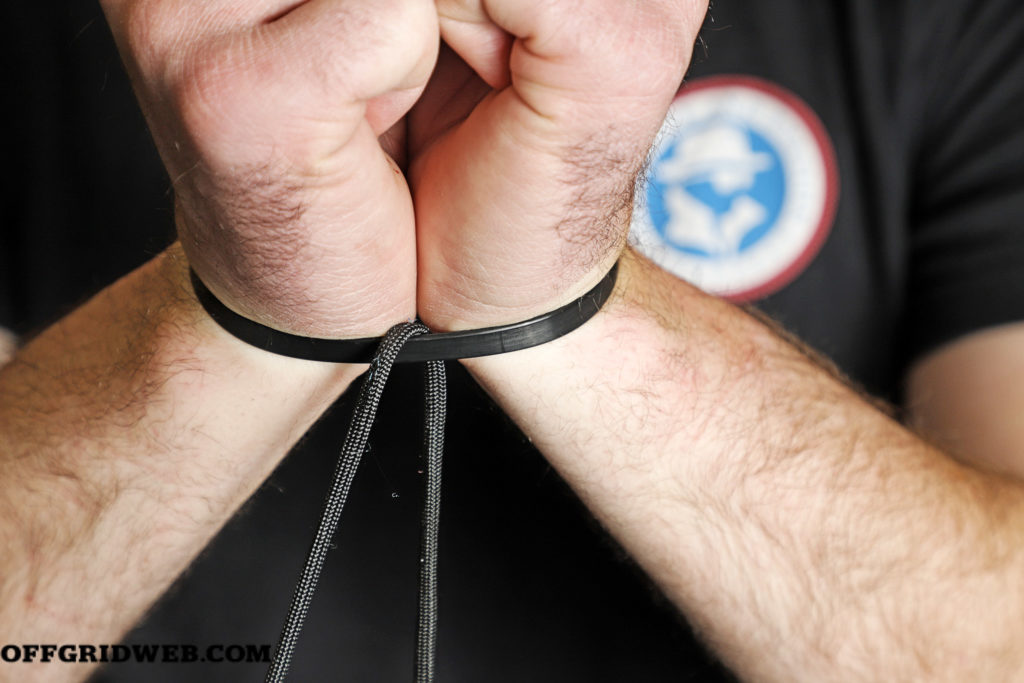
Thread the cord through the bottom of the restraints. Secure the loops on your feet and move in a bicycling motion to saw through the restraints.

spy week zip ties escape

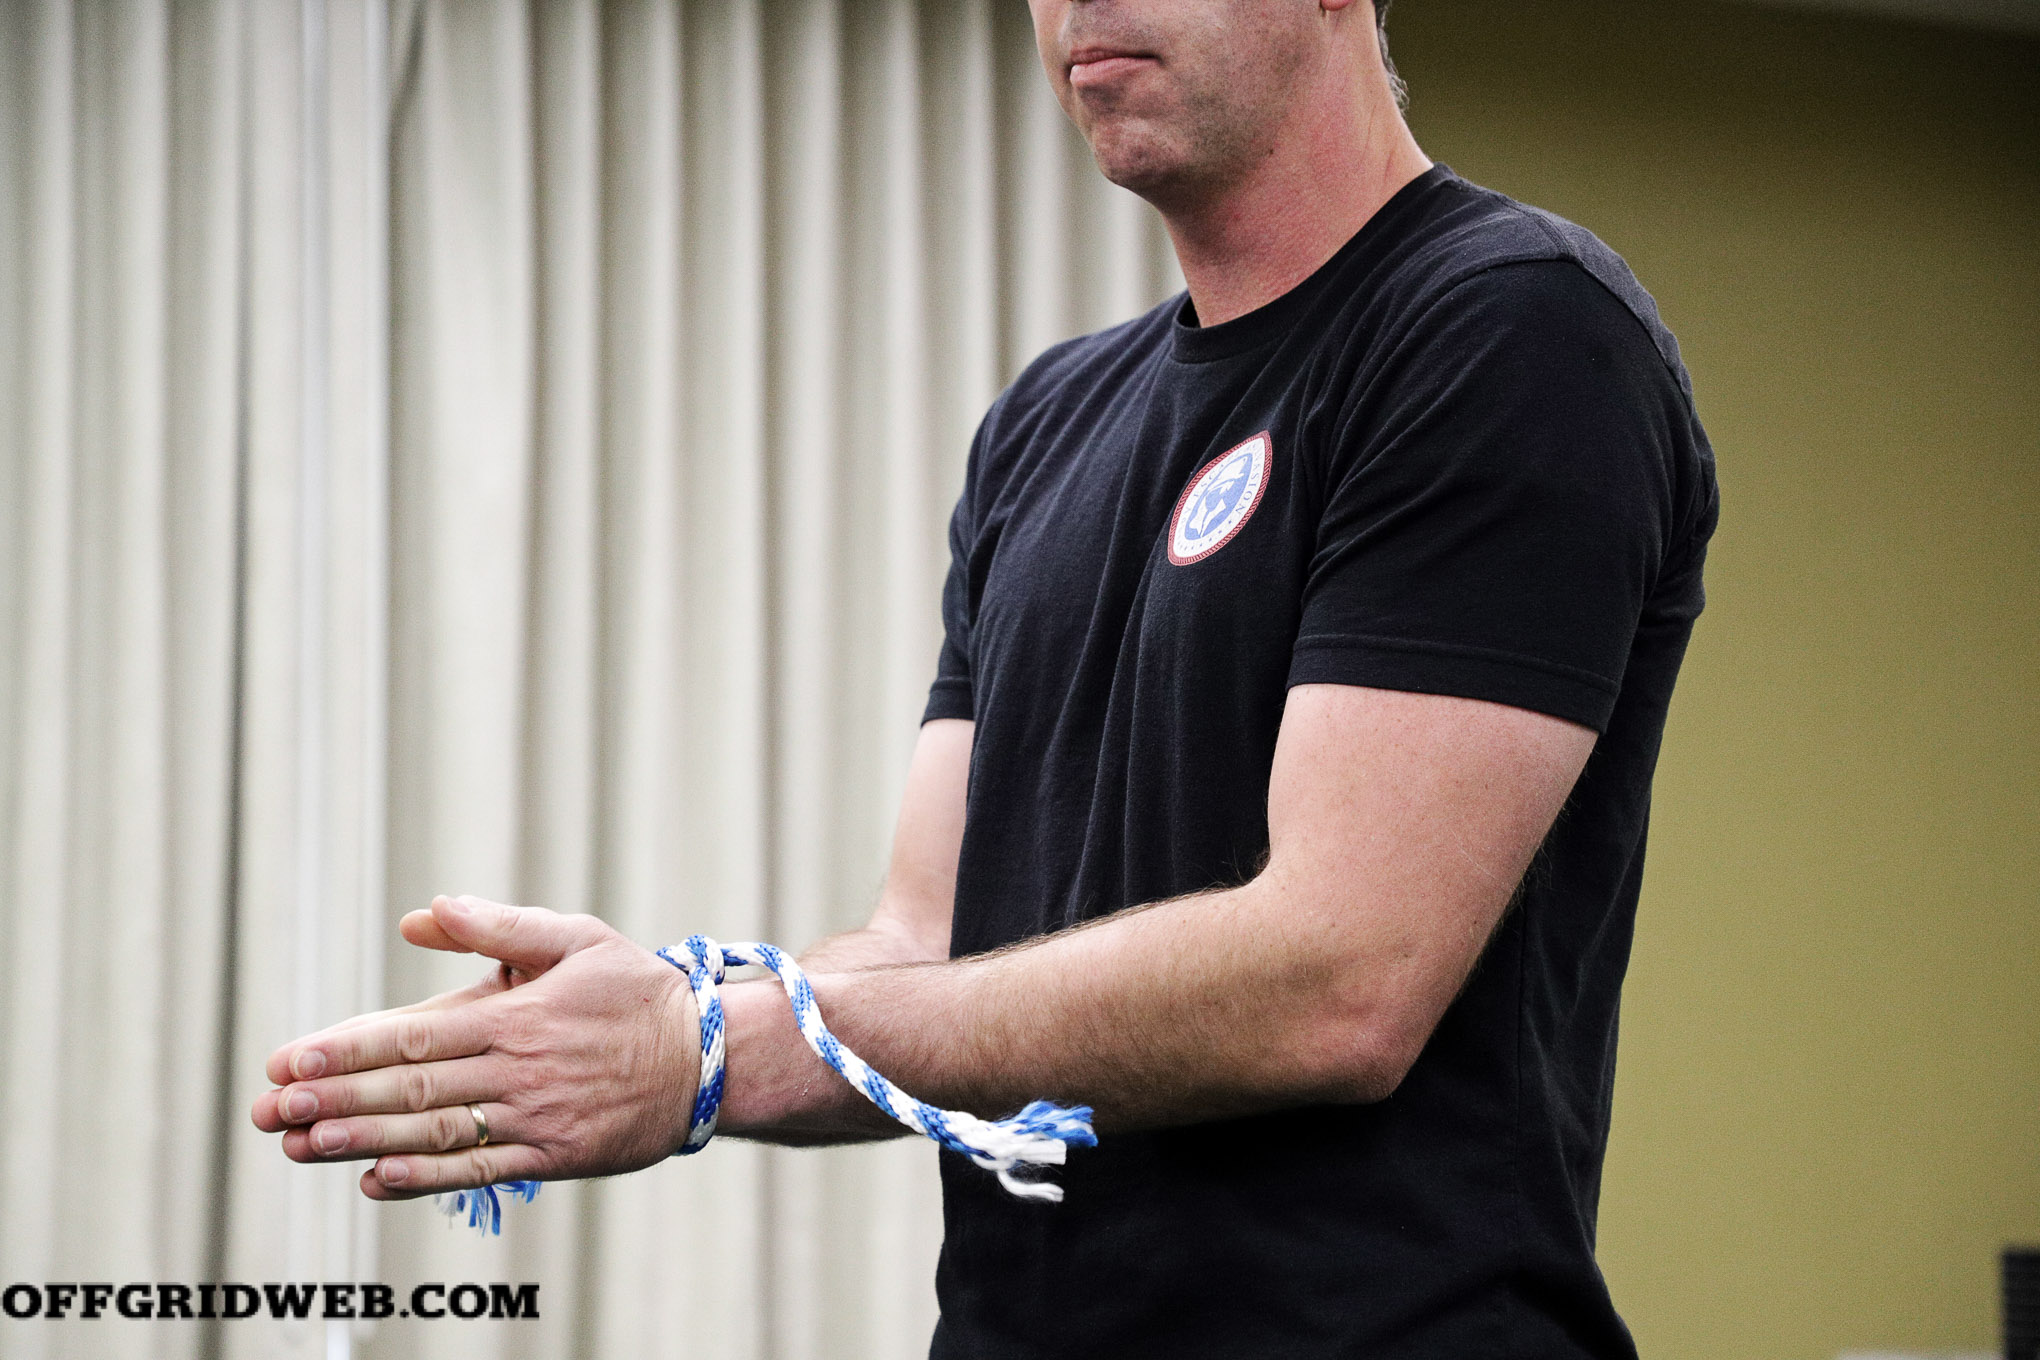
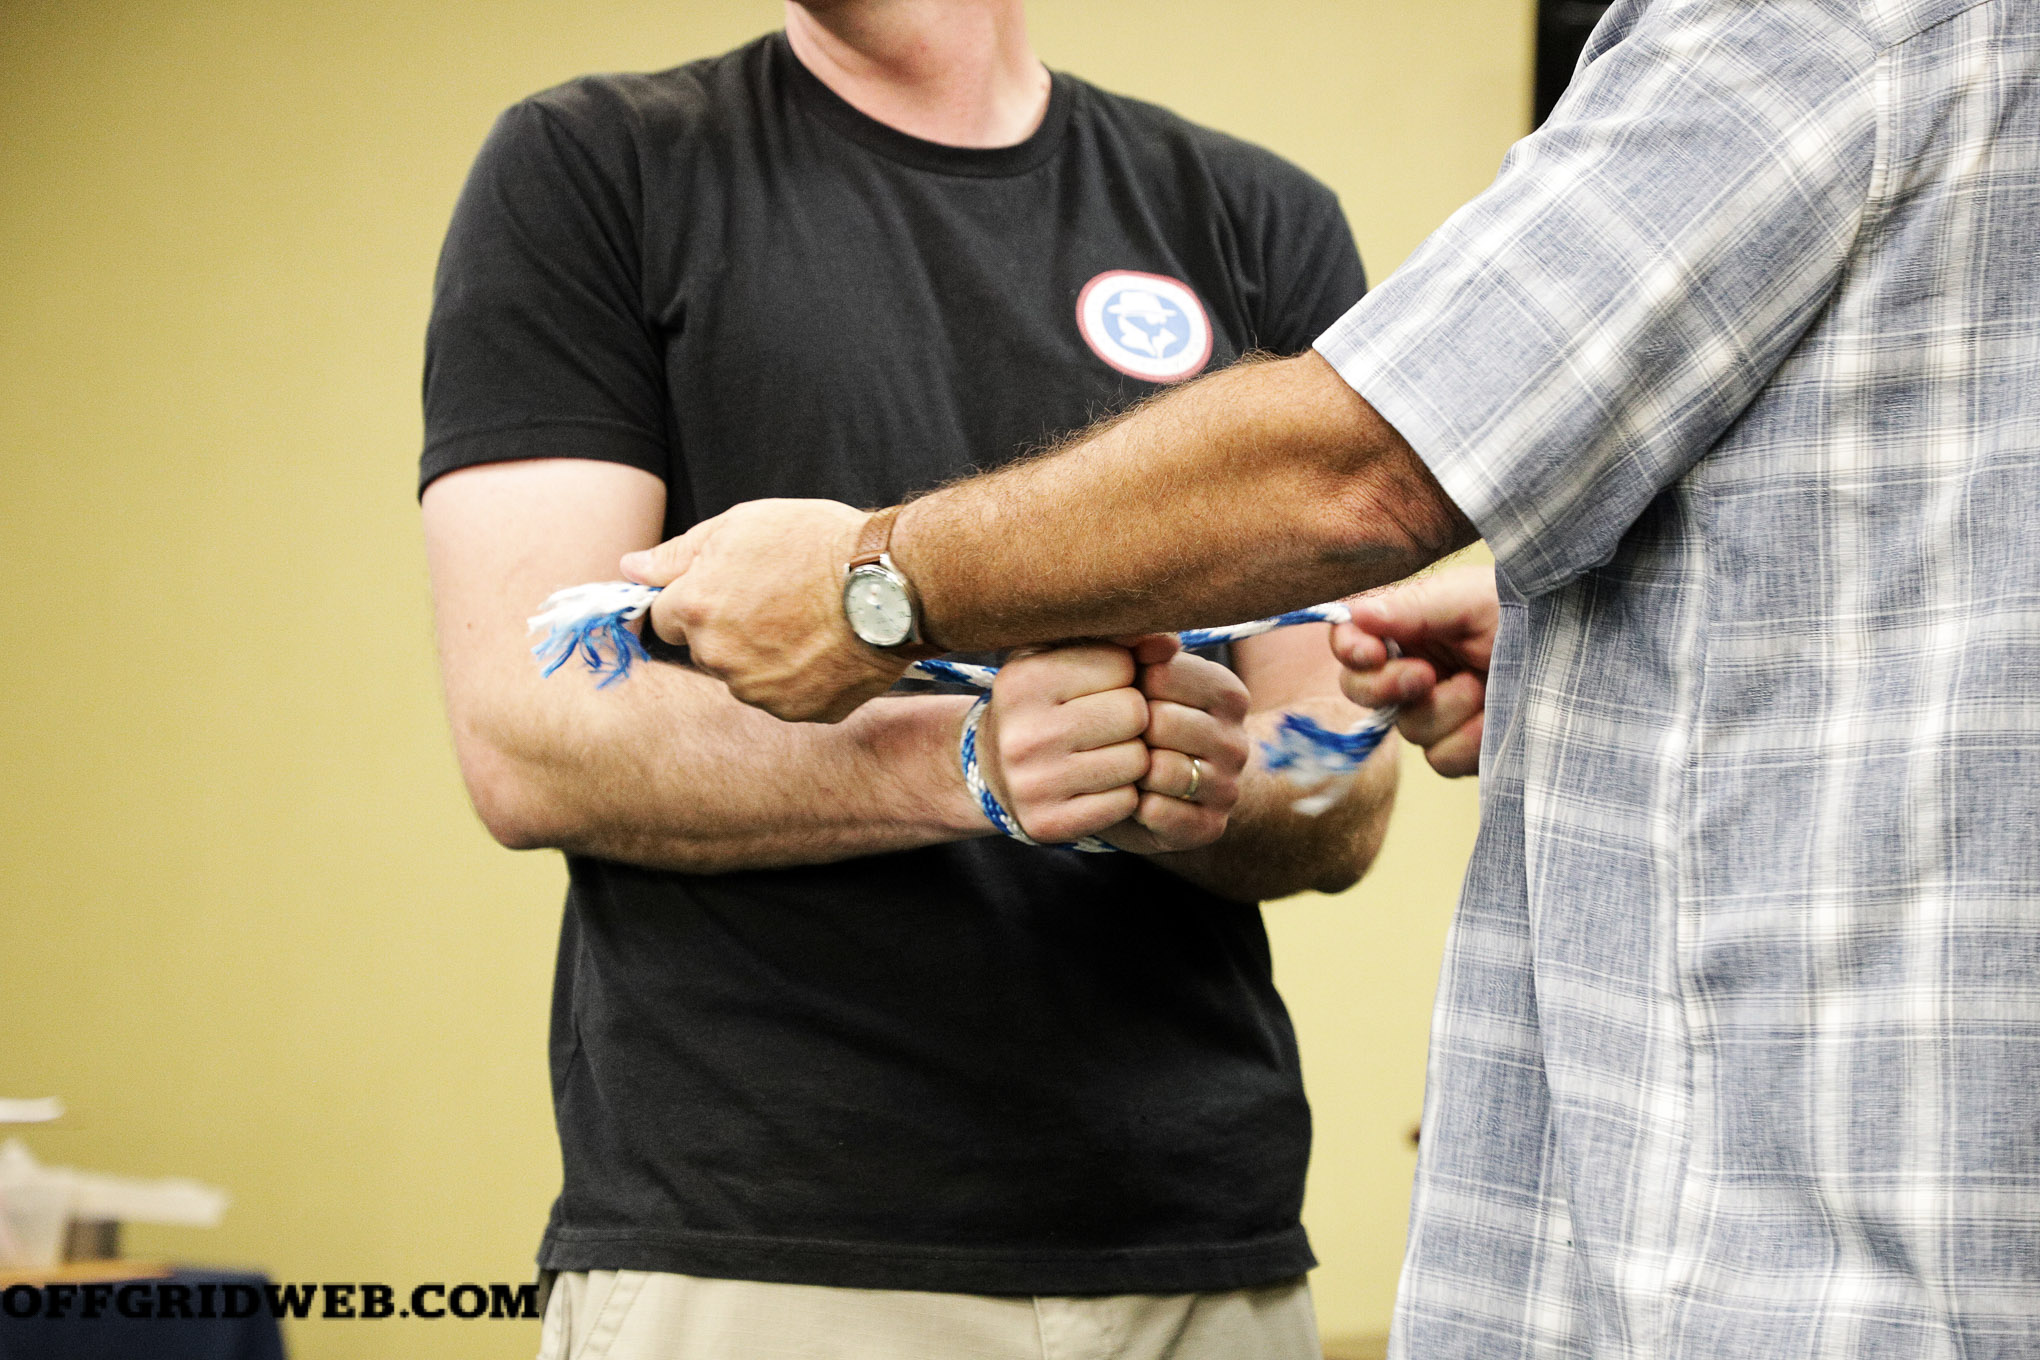
Rope: If you’re being tied up with rope, do the opposite as with tape or zip ties — pull your elbows against your body to keep them far apart, press your palms or fists flat together, and push your wrists apart. If you can do this, you’ll buy yourself more room to work with the rope. To get out, push your arms forward and straight, press your hands together, make knife hands, and shimmy your hands back and forth. After suffering through rope burn and scraped skin, you may eventually be able to pull your hands free. Alternatively, you can use paracord to saw through the rope, as with zip ties.

Above: While being tied up with rope, pull your elbows against your body, press your hands flat, and push your wrists apart. This will give you more room. Then, push your arms forward and straight, make knife hands together, and shimmy your hands back and forth to work them out of the rope.

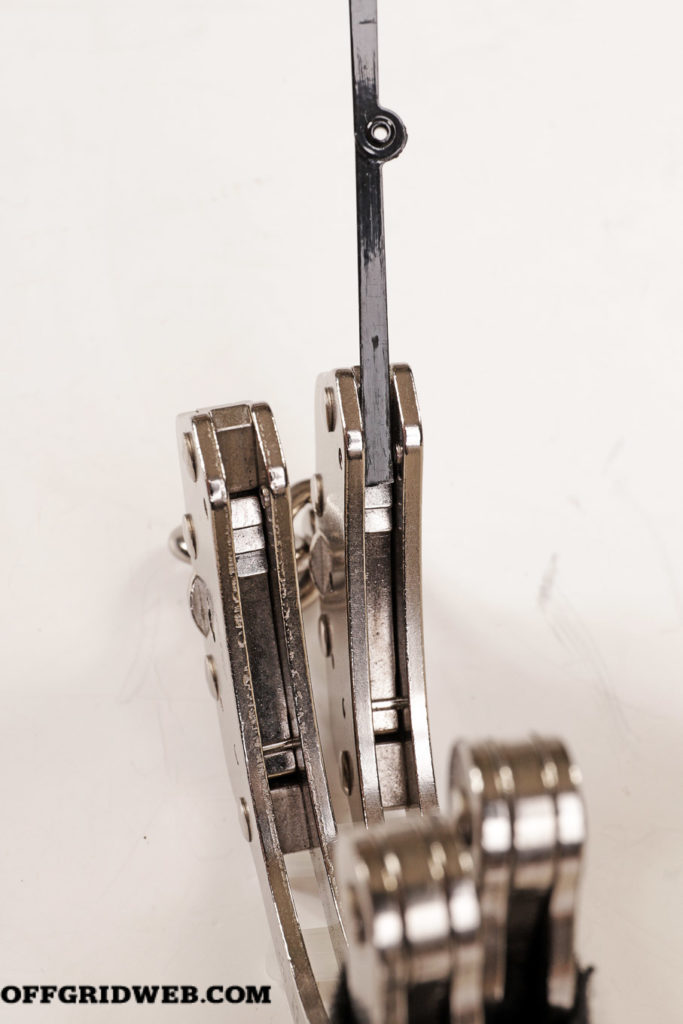
Handcuffs: These are less common among criminals, but it’s good to know how to deal with handcuffs. It requires prior preparation — you can make your own pick or shim. Picking is harder; straighten a bobby pin and bend a quarter inch at a 45-degree angle at the end. Insert the leg into the keyhole with the bend pointing toward the center line of the handcuff and the scoop pointing up. Pull down and to the side to disengage the ratchet. Alternately, make a shim out of a hair barrette. Remove the middle part of the barrette, then bend and break off the fat end, leaving a V shape. Smooth out the cut edges and open the hinge, making it into a long shim. Insert the shim into the handcuffs where the ratchet’s teeth go into the cuff. Push the cuff further closed a bit while you push the shim in as well; be gentle so you don’t over-tighten the cuff on your wrist. This will allow the shim to block the teeth on the cuffs, and you can open them. Note that shimming is only possible if the cuffs aren’t double-locked, which prevents the cuff from closing over the shim.

spy week handcuff shim

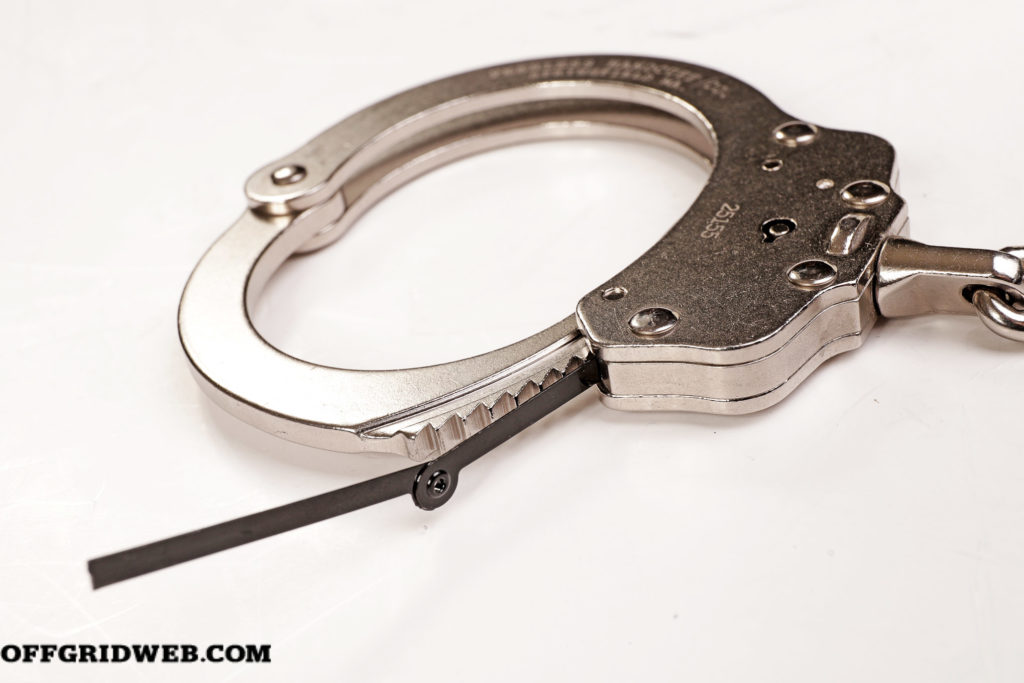
Above: Insert the shim into the handcuffs where the ratchet’s teeth go into the cuff. Handcuffs have teeth on a pawl that secures the ratchet as it closes over your wrist. Use a thin shim to prevent the pawl’s teeth from engaging the ratchet.

spy week handcuff shim

Social Engineering

The skill of getting others to do what you want is as old as the hills; social engineering is a fancy way of describing that psychological manipulation. Even if this evokes a negative connotation for you, it’s a crucial life skill. Whether being a parent or child, a boss or worker, or simply getting things done in the world, you influence the behavior of other people all the time. You’re also influenced by others. Therefore, developing a keener understanding of cognitive biases and how emotions affect decision-making can help you persuade others when needed. It can also help you recognize and mitigate when others are trying to take advantage of you.

Gaining a sense of whether people are fibbing or telling the truth is an immensely valuable skill, which Jason Hanson calls being a human lie detector. Most people aren’t very good at lying, so there are a number of indicators that you can watch for; you need to have a baseline, to give you an understanding of their basic, normal mannerisms to compare against. If you notice several indicators, that’s a clue to be wary. Here are several examples:

First 3 to 5 seconds: Someone who’s formulating a lie will often pause, stammer, get nervous, or stumble over their words after you ask the question. 

Indirect answer: A guilty party may not answer your question directly, instead referring to wonderful things they’ve done to imply they’re an honest person.

Pointy feet: Our feet tend to point in the direction we want to go. If the person you’re talking to has their feet turned away from you, they may be lying, have something to hide, or at least want to get away from you.

Over-staring: Someone who’s lying may stare too hard at you, looking intently and unnaturally at you, hoping to convince you to believe them.

Overreaction: If you confront someone who’s lying, they can overreact to an extreme degree. This is often seen with infidelity; when a cheating spouse is accused of having an affair, they can become outlandishly enraged and flip out at the perceived lack of trust.

Head shake: Head movement that’s mismatched with what’s being said is a well-known tell, such as Lance Armstrong famously saying “yes” while shaking his head “no” during video-taped testimony on his drug use. Additionally, head movement usually comes before the words, so someone who says “yes” before their head starts nodding may be lying.

Survival Driving

We spend a lot of time in our vehicles. A study in 2019 estimated that Americans spend an average of almost 8.5 hours per week driving. With all the potentially dangerous situations that you might encounter while driving, honing your survival driving skills is important. During Spy Week, we learned and practiced several key techniques: 

spy week defensive driving

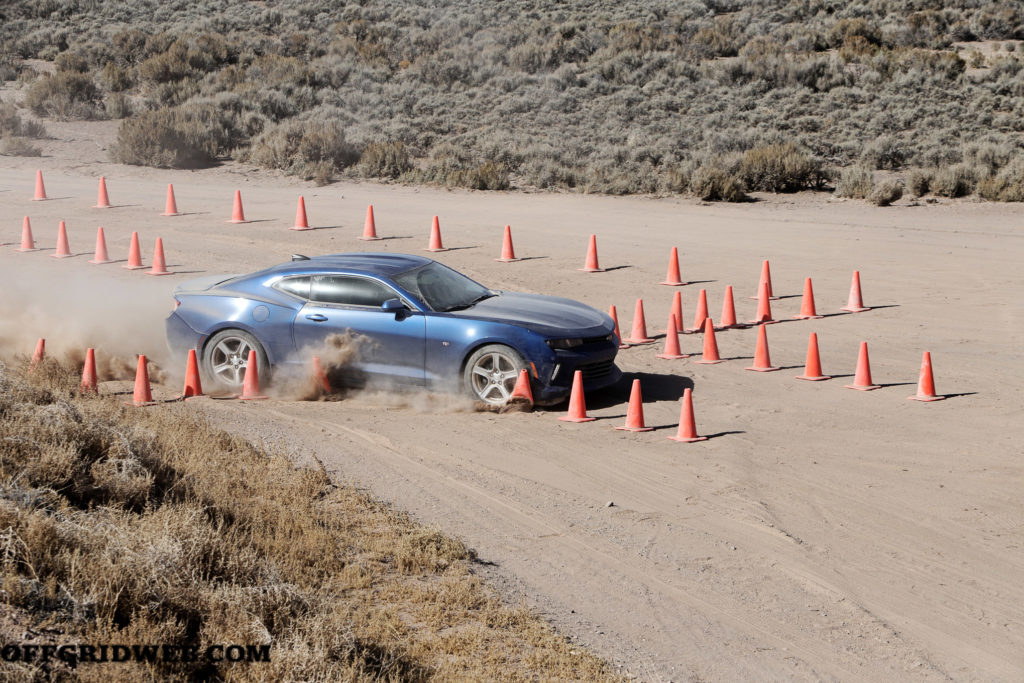
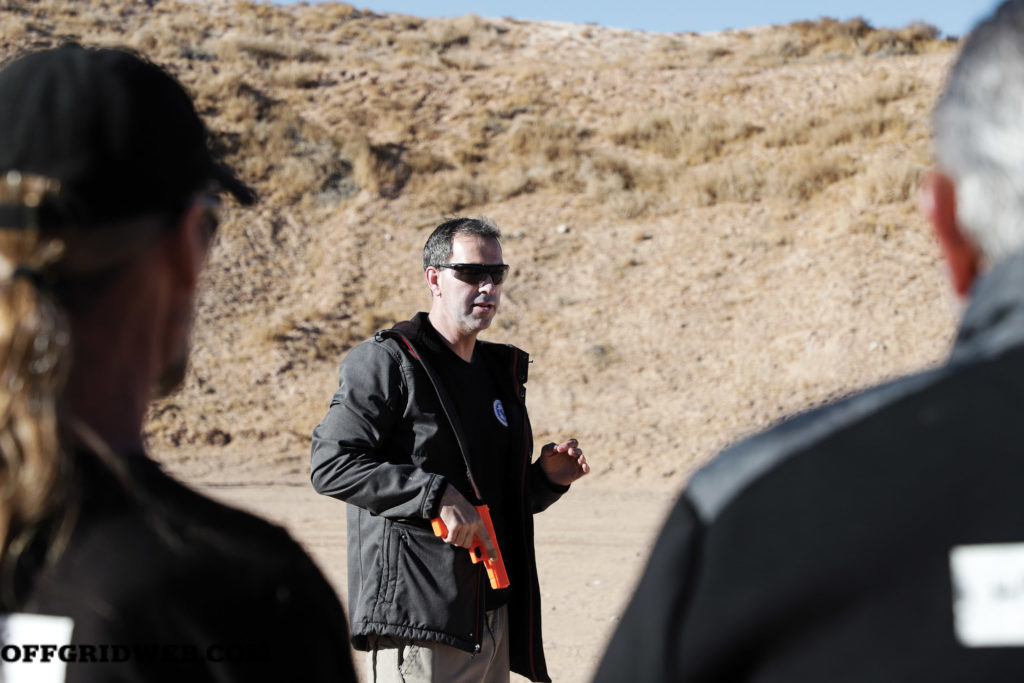
Above: In one exercise, Hanson would throw a cone in your way at the last minute, forcing you to quickly change directions.

Secure your car: This is an obvious one, but always make sure to lock your doors and keep your windows up for maximum security.

Leave enough space: Ensure you can always see the tires of the vehicle in front of you, so you have enough space to get around them if necessary.

Evasive maneuvers: Learning effective car control will help you be able to flee from threats. We learned about managing weight transfer and braking in a straight line before adding steering input — any grip you’re using to stop is grip that can’t be used to turn. We did exercises to crystallize these principles, with cones set up in a slalom course as well as a roadblock drill, both forward and in reverse. 

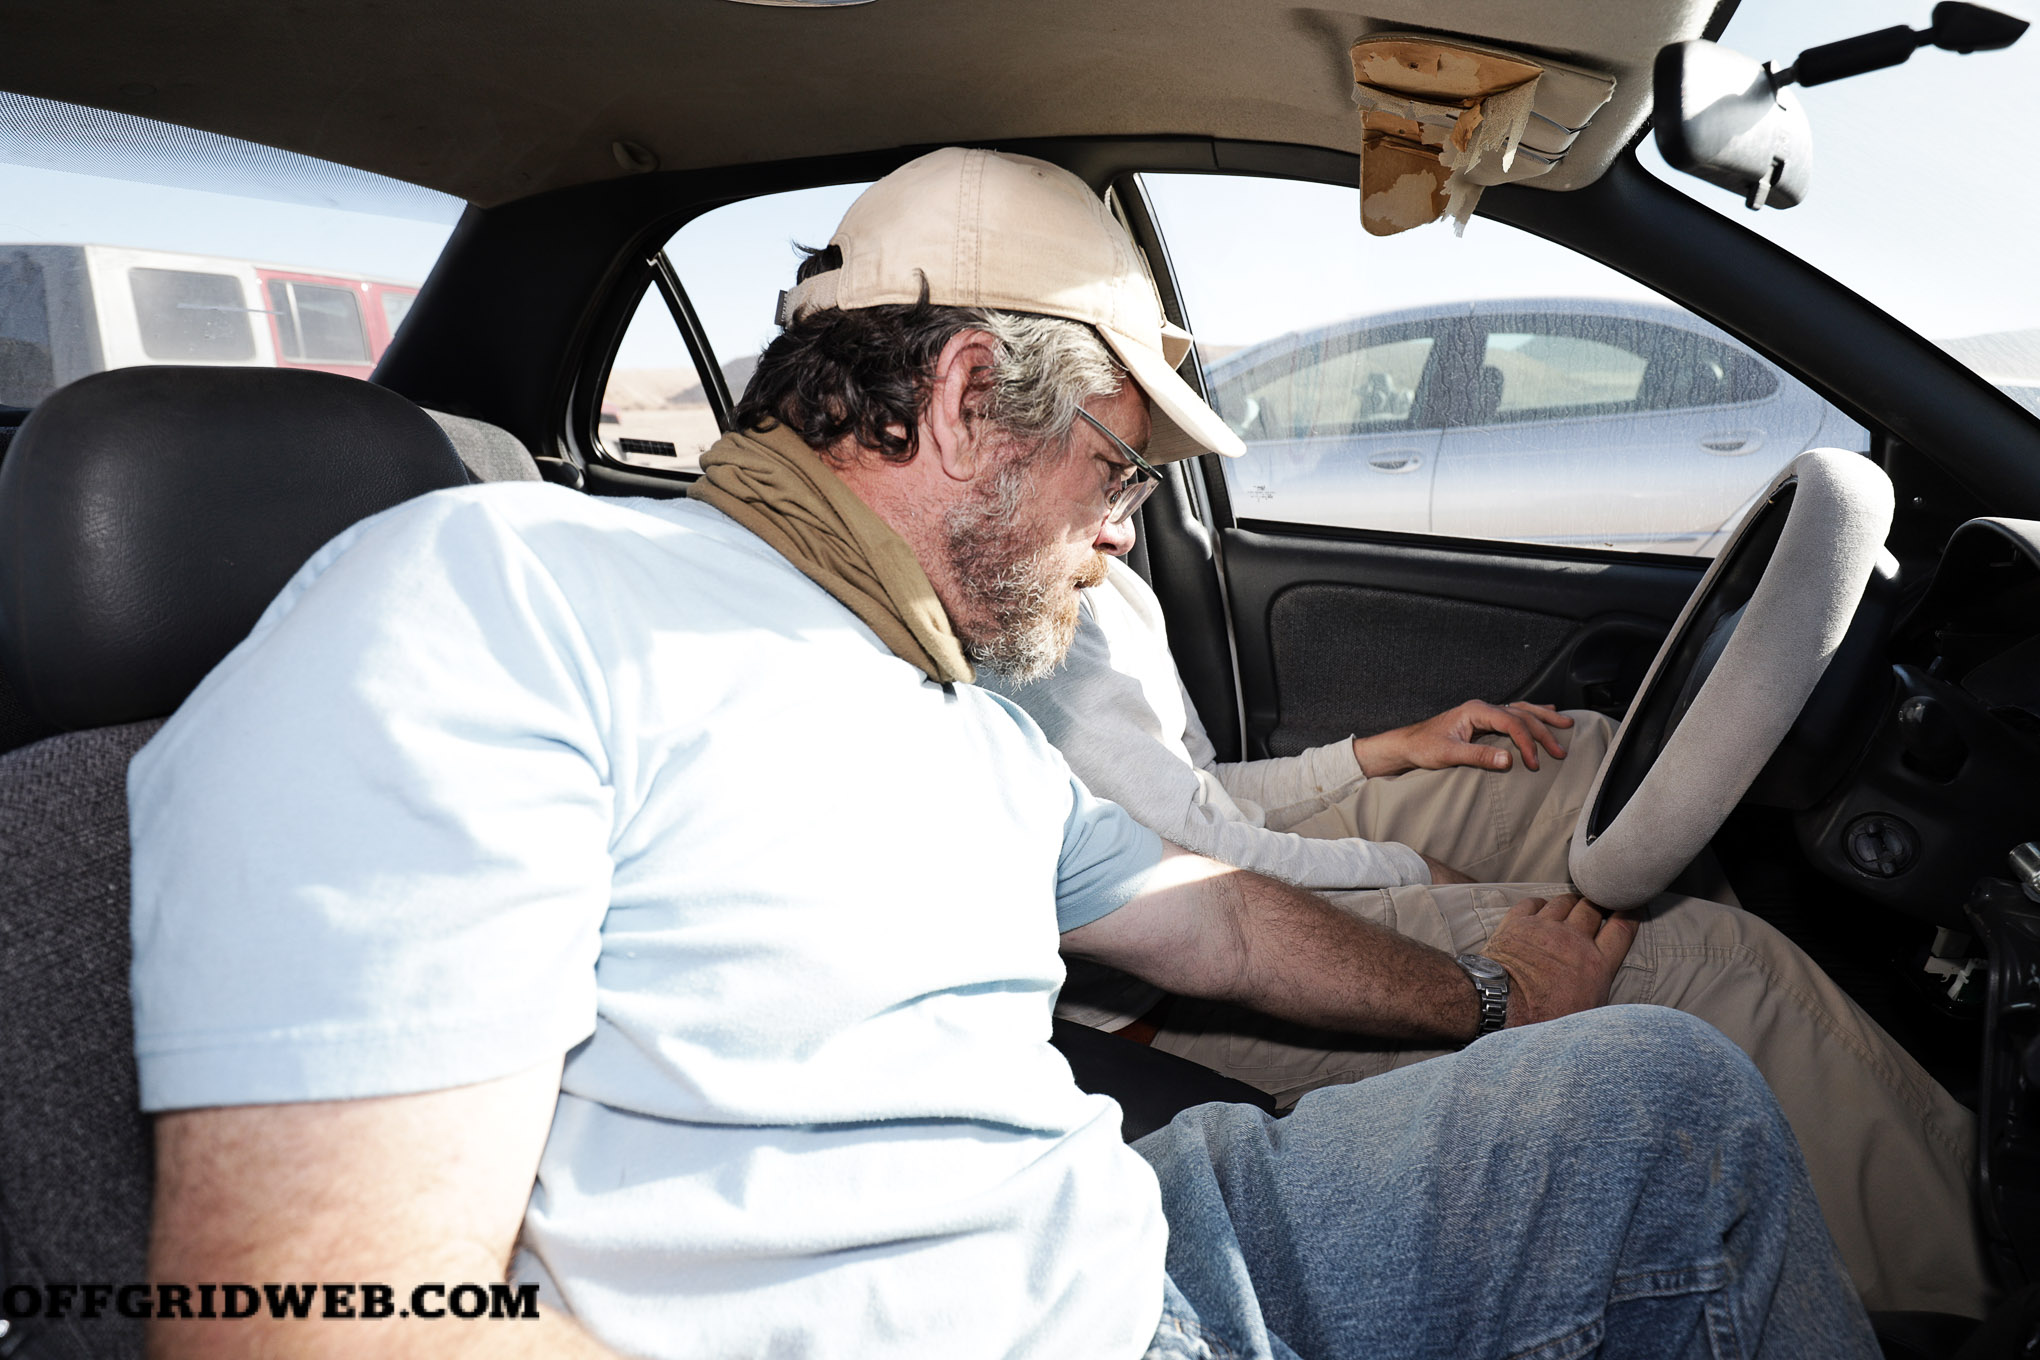
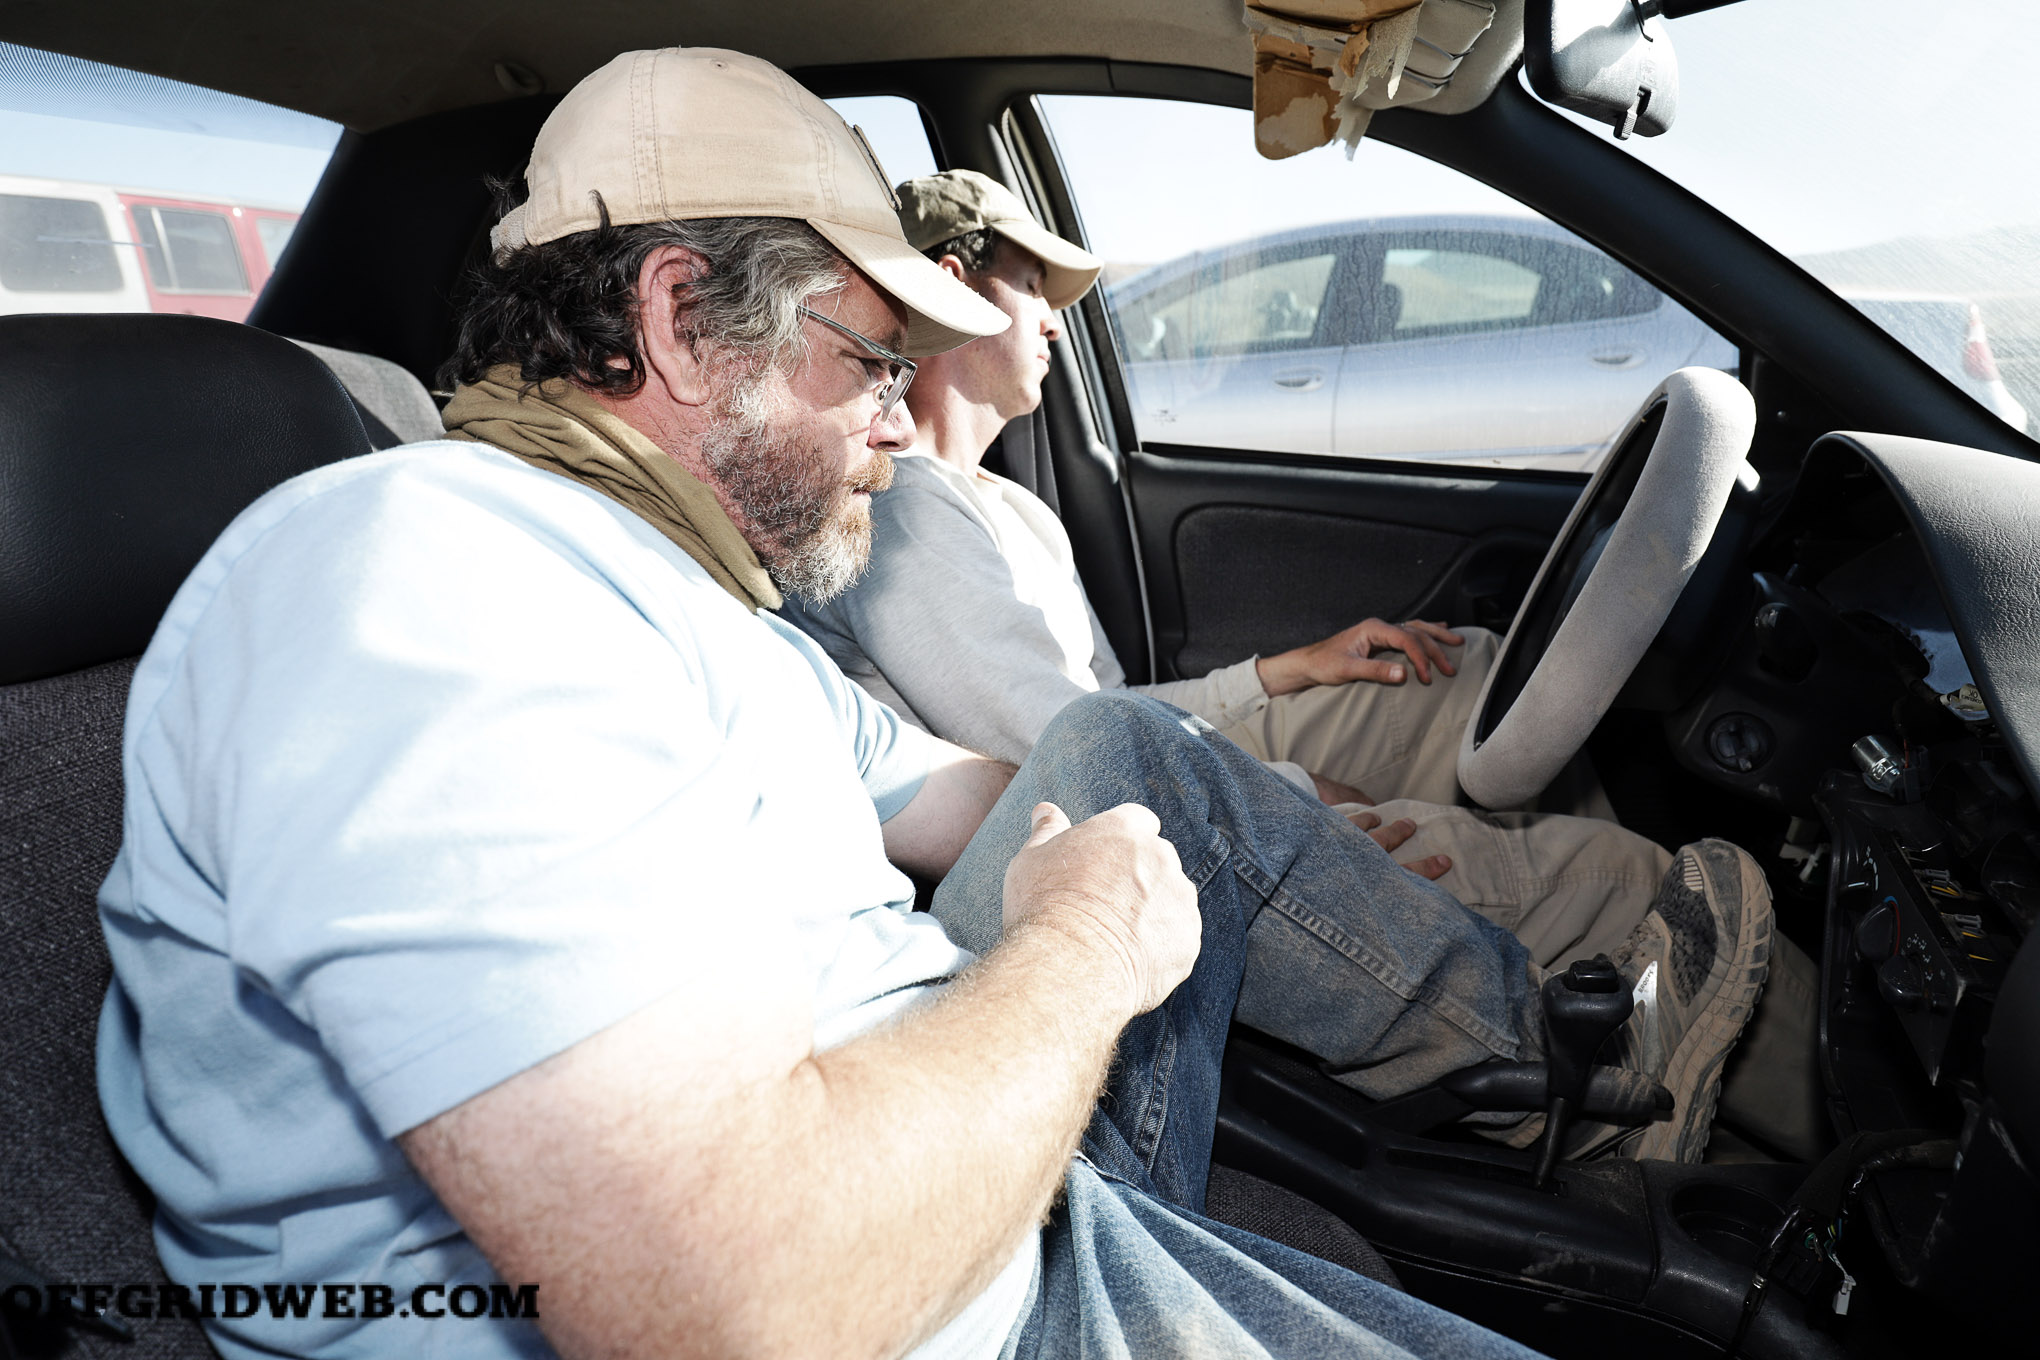
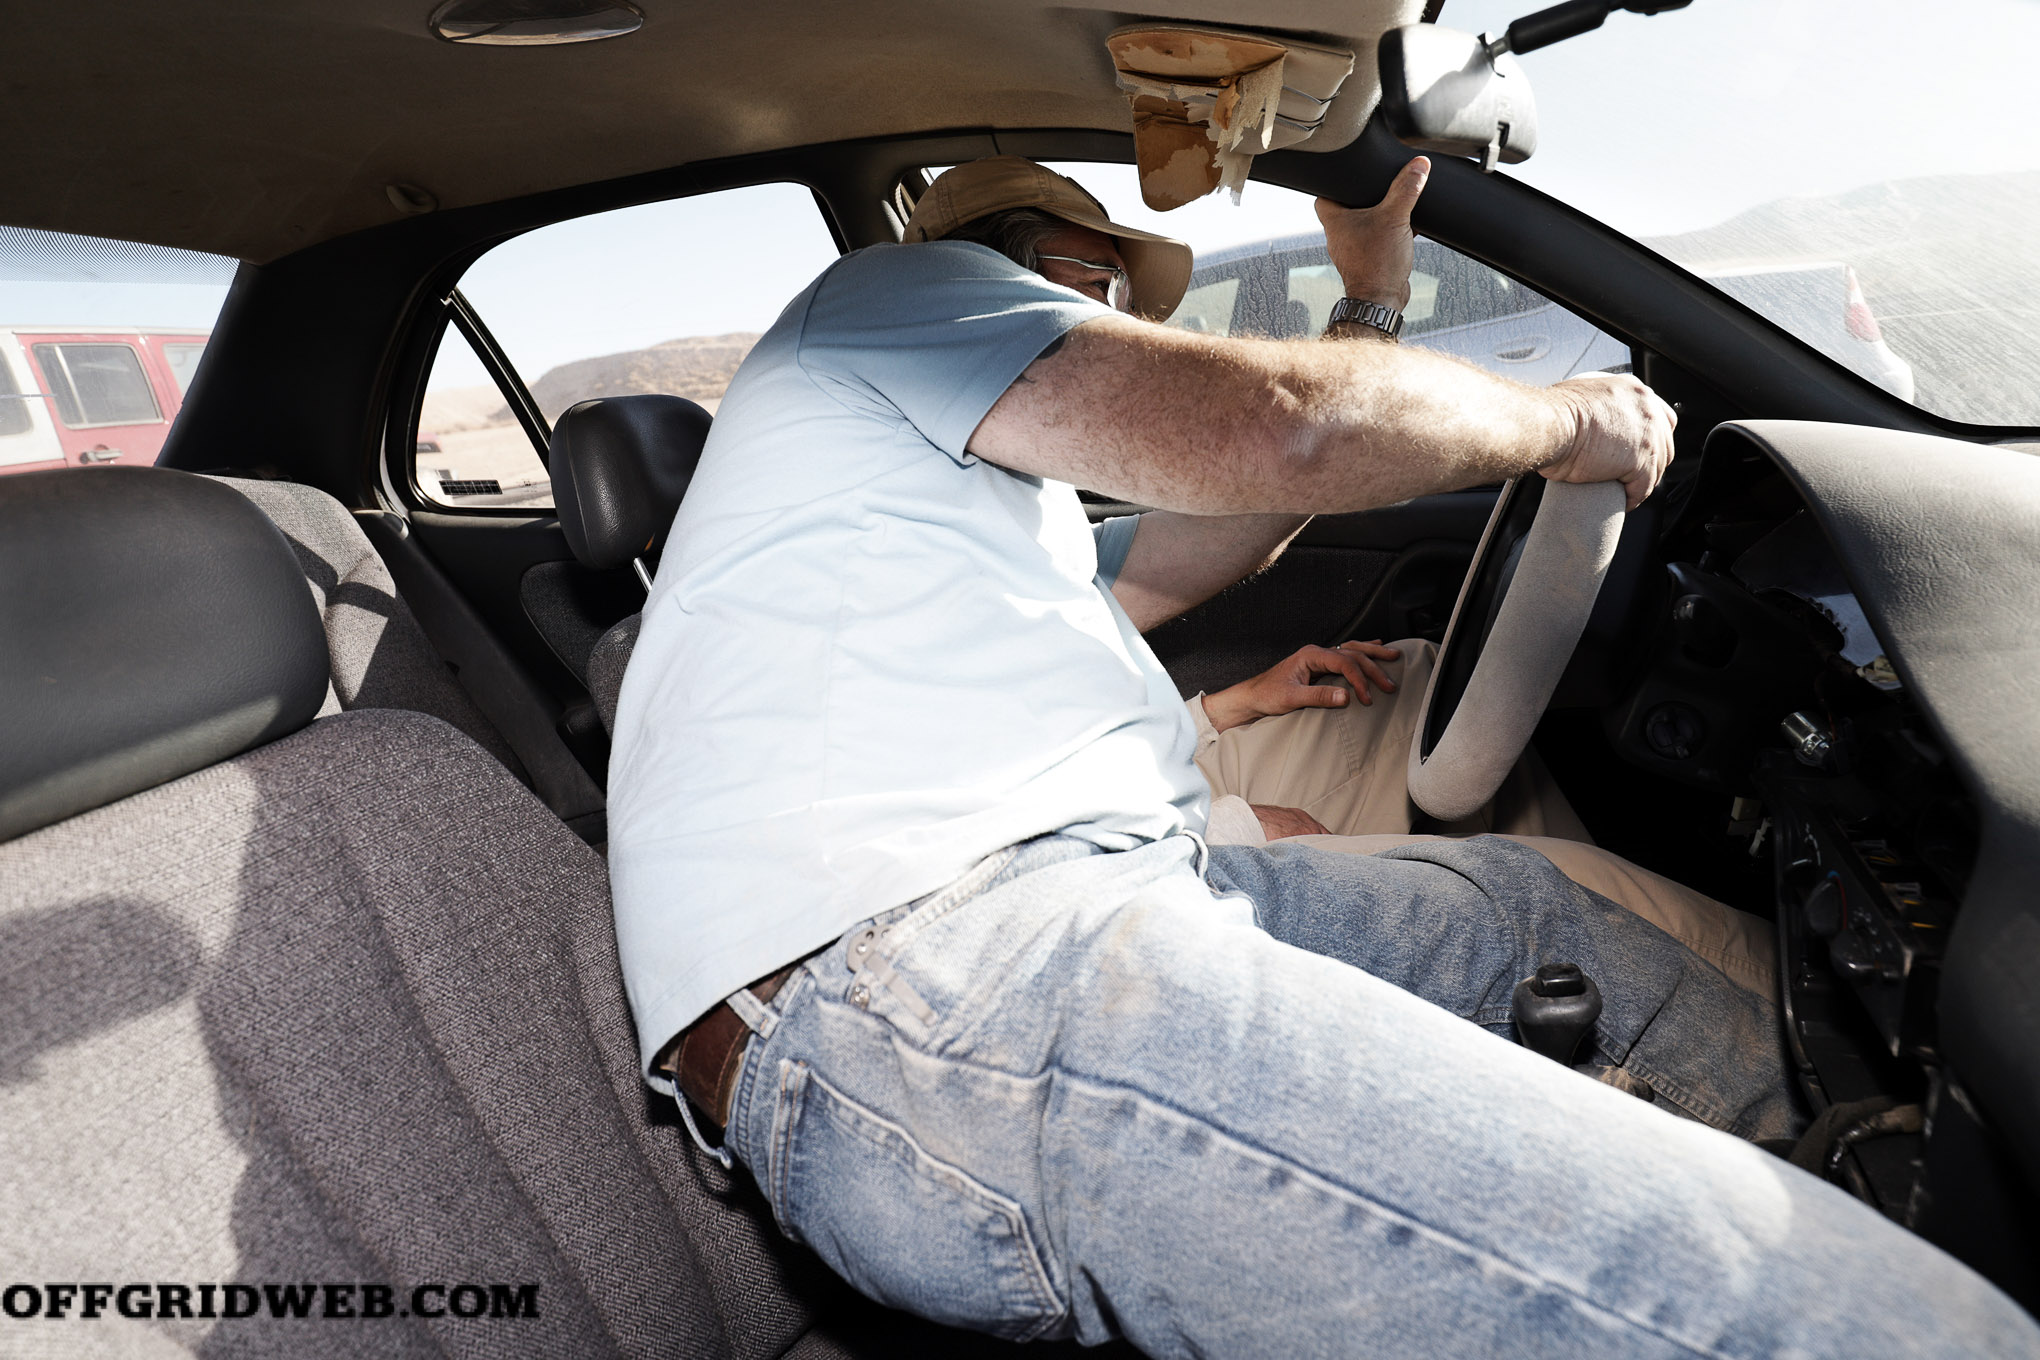
Downed driver: If the driver in your vehicle has been incapacitated, you can take over from the passenger seat. Firmly push their right leg out of the way and step over the center console, but be careful about hitting the gear shift. Shove your left leg into the driver’s footwell to work the gas and brake pedals. With your left hand, grab a handle or the back of the seat to stabilize yourself, and steer with your right hand.

Above: To take over for a downed driver, firmly push aside their right leg. Shove your left leg into the driver’s footwell to work the pedals. Stabilize yourself with your left hand and steer with your right.

J-turn: In that rare situation when you’re blocked and need to quickly escape backward, you can execute a reverse 180. Place your left hand at 9 o’clock on the steering wheel. Put the car in reverse and accelerate backward to at least 20 mph. When you want to do the J-turn, snap the wheel with your left hand around to the 3 o’clock position while taking your foot off the gas. The car’s nose will quickly spin around. Shift into drive and rock on.

Ramming a car: In the even more unlikely chance that you need to break through a blockade, you can ram a car. Aim for the rear of the vehicle near the gas tank, which is lighter than the front. Approach at roughly 20 mph, don’t lift off the gas and don’t hit the brakes as you make contact and push your way through. This technique shouldn’t be undertaken lightly, as modern unibody cars can sustain quite a bit of damage and your airbags may deploy.

spy week defensive driving ramming vehicles

Above: To break through a blockade, aim for the rear of the vehicle near the gas tank, approach at about 20 mph, and push your way through.

Fight For Your Life

In RECOIL OFFGRID, we’ve frequently covered topics related to fighting with and without a weapon, and employing knives and guns. Hanson stresses competency with hand-to-hand, knives, and firearms as important components of self-defense, and a couple days during Spy Week are devoted to them. His curriculum covers similar frameworks to other excellent courses that we’ve written about before, with solid and modern firearms principles, practical self-defense concepts, and knife work grounded in the Filipino martial art of Kali. So, with limited space in this article, we won’t go too deep into specific techniques here.

jason hanson shooting course spy week

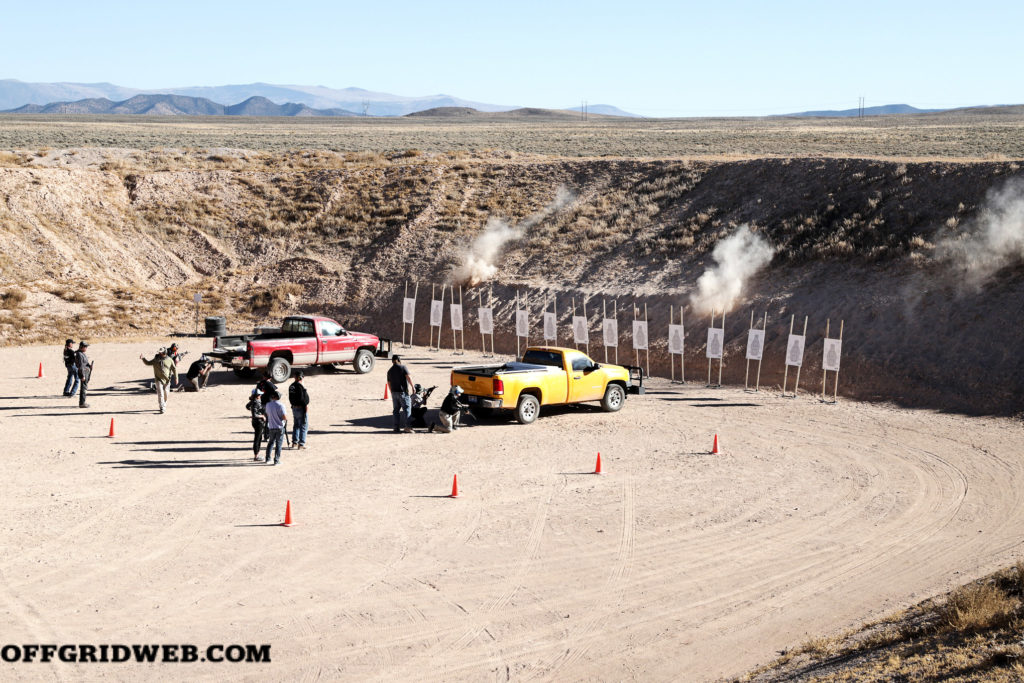
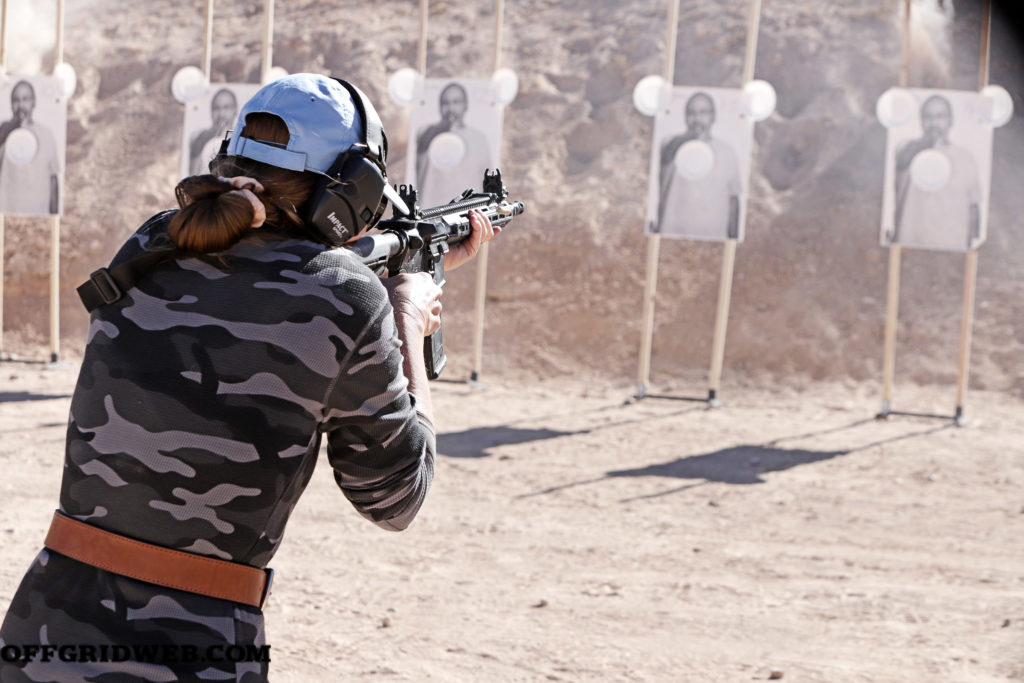
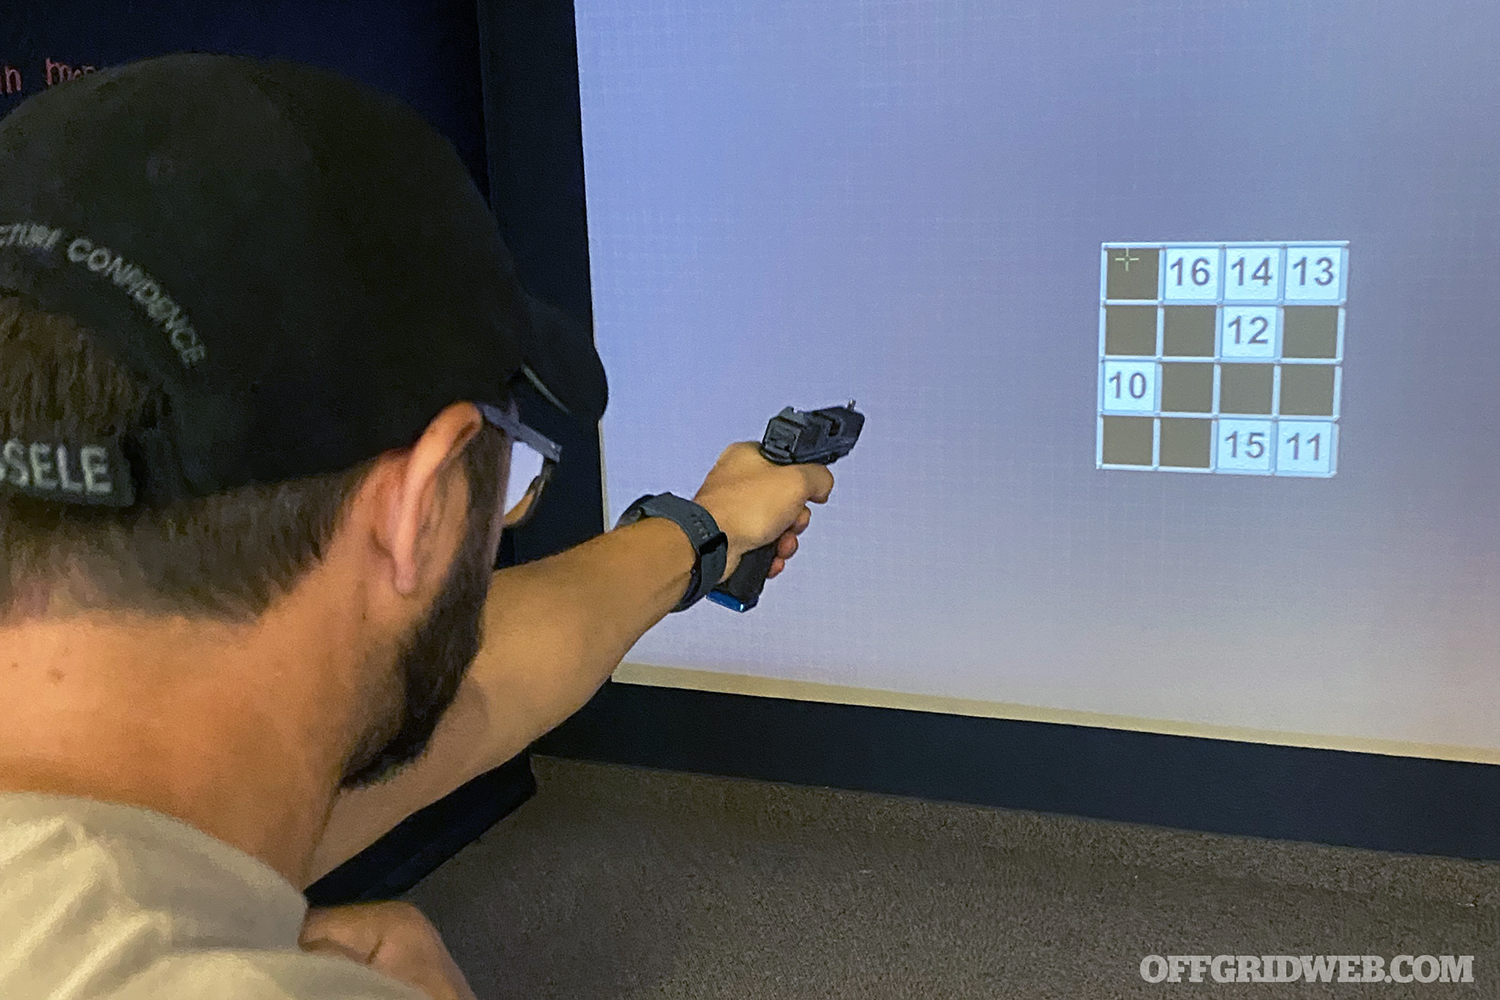
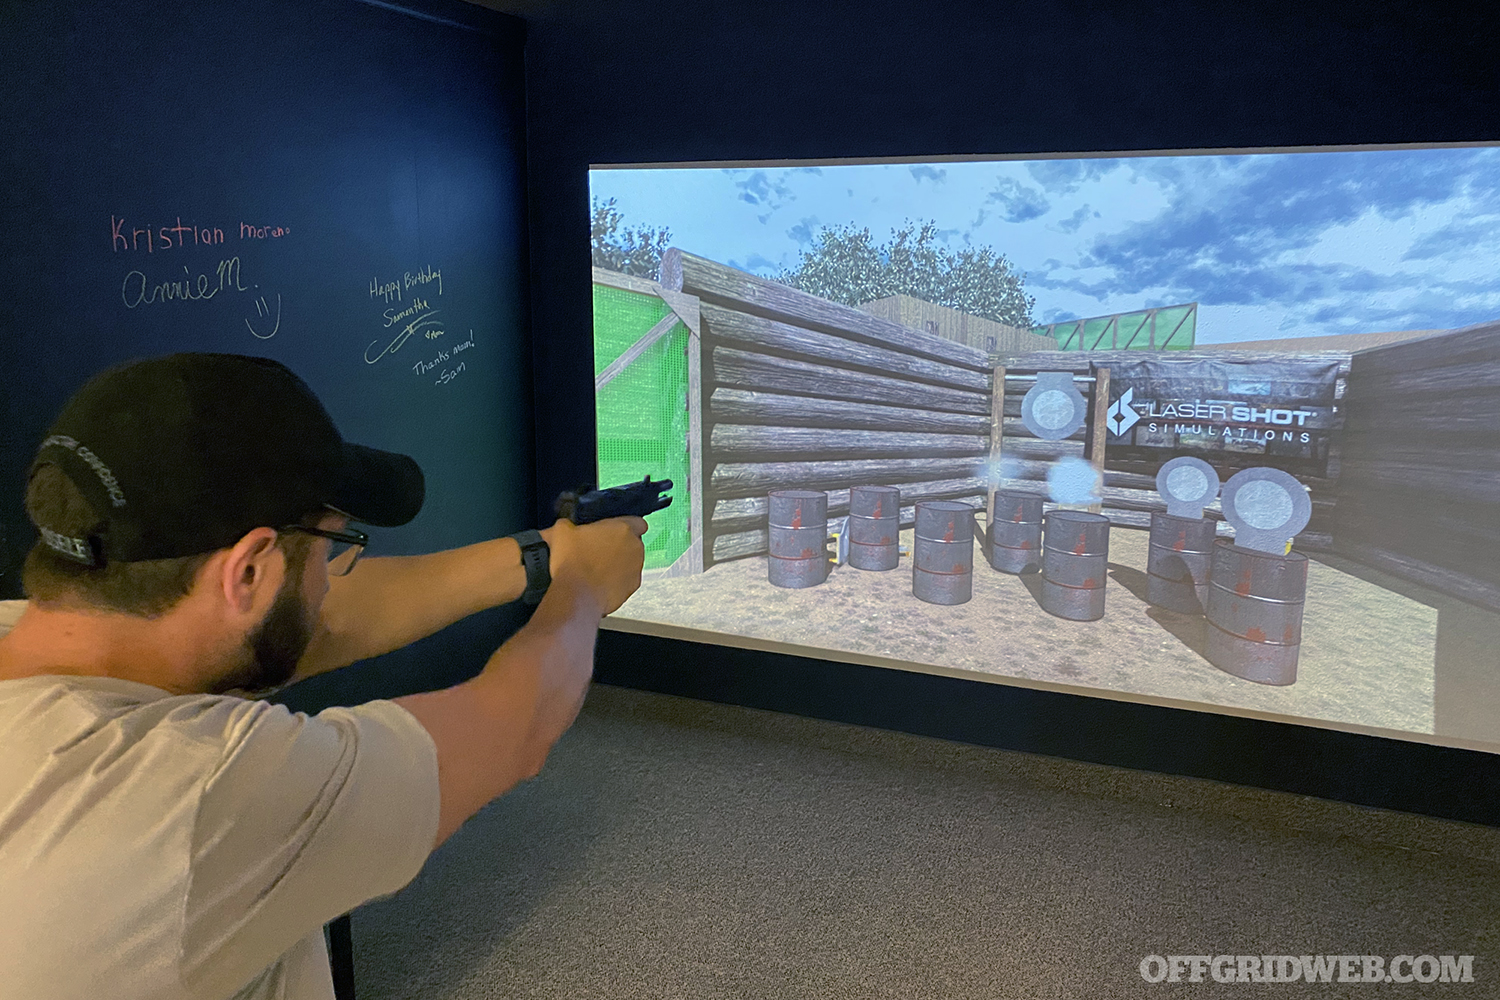
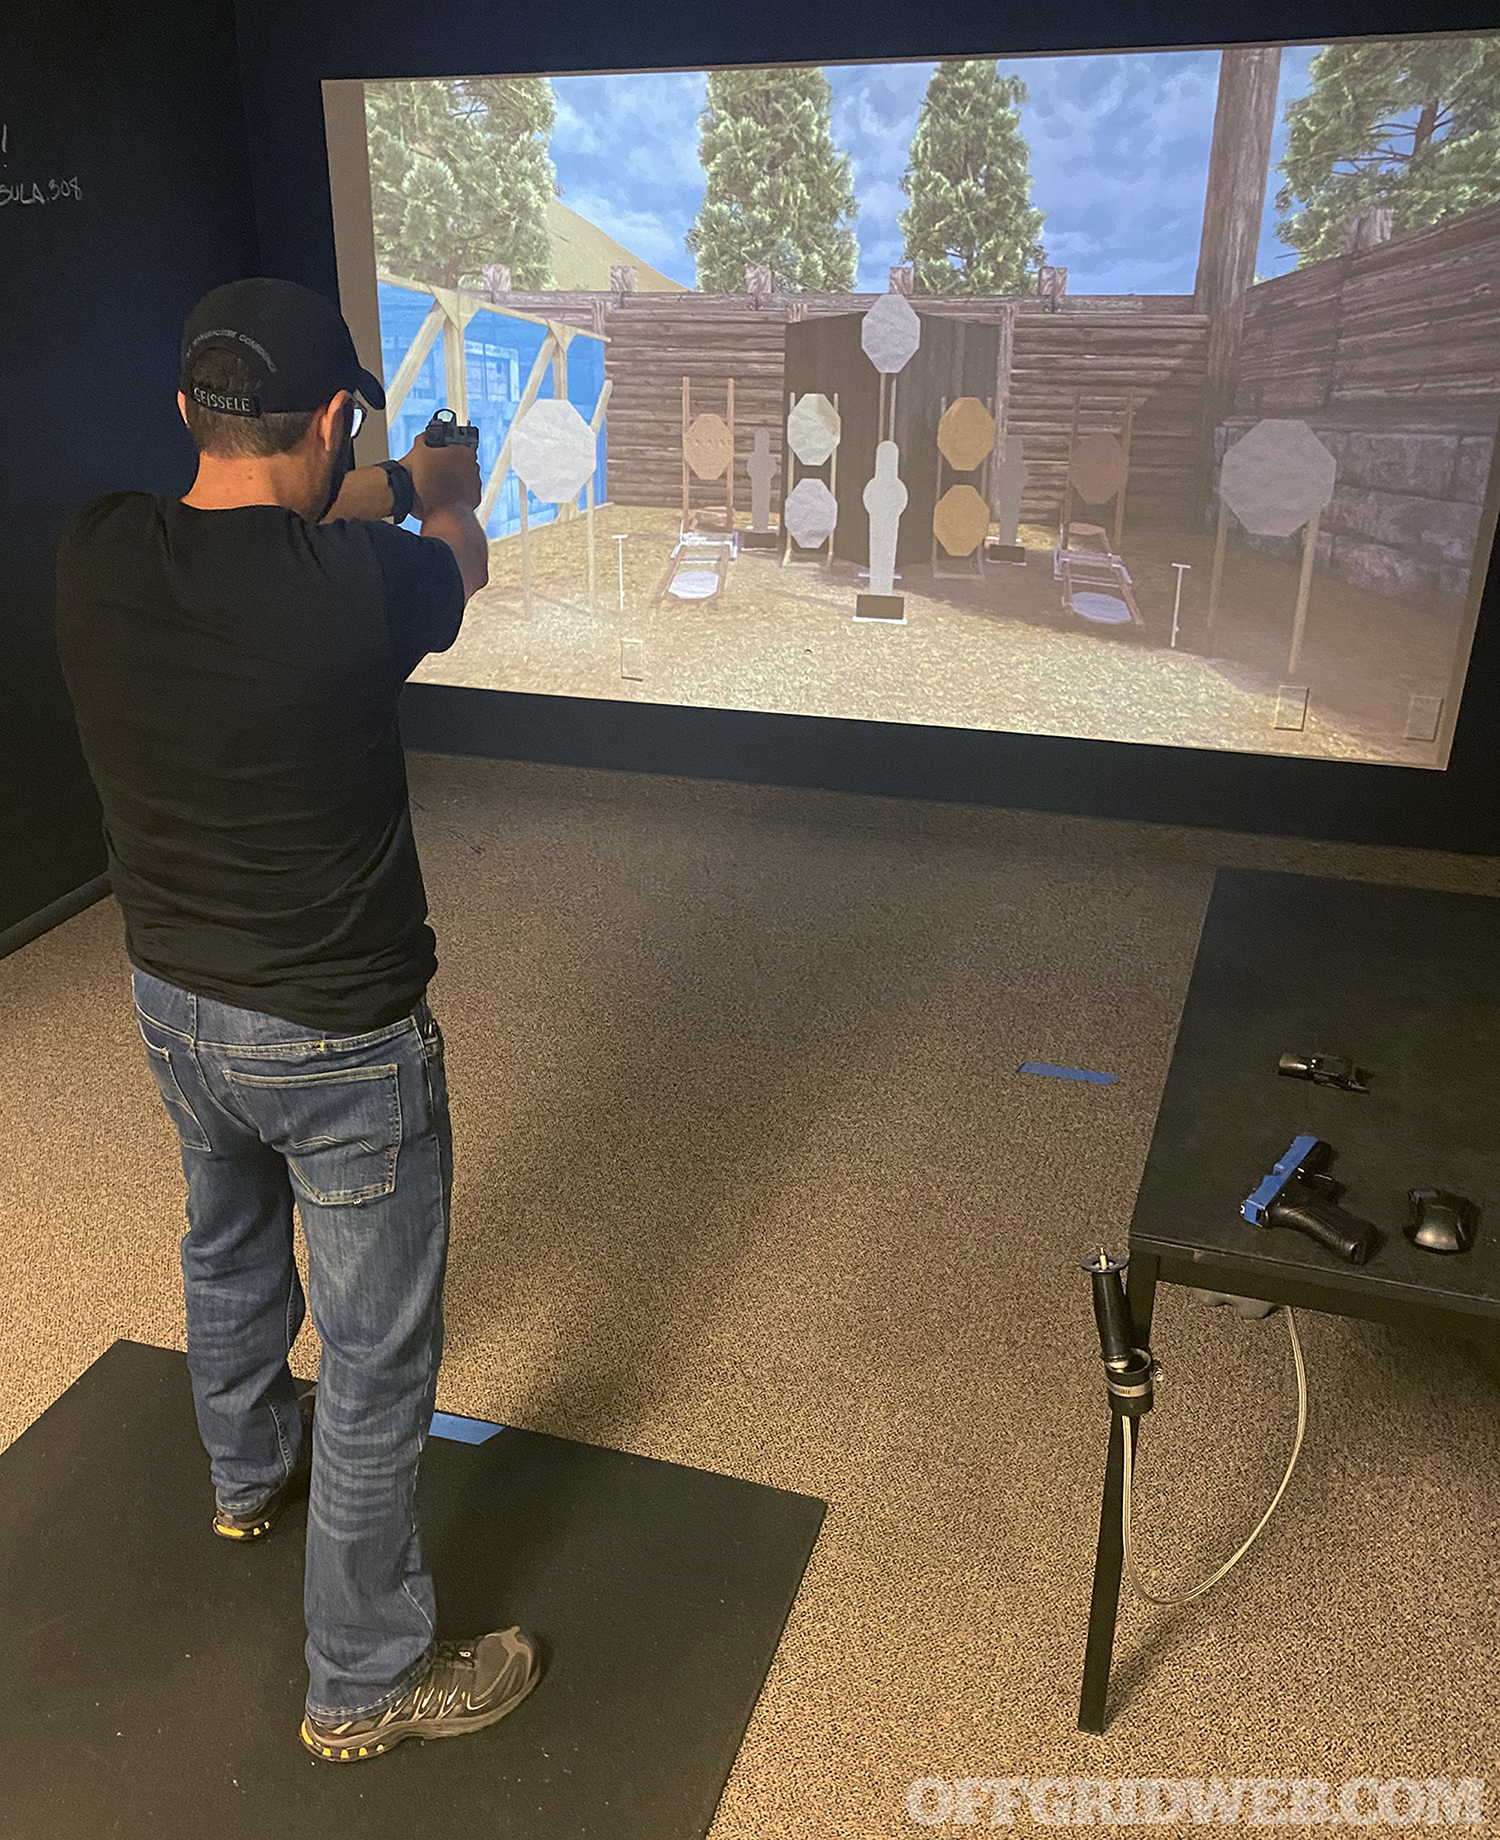
With both rifle and handgun, Hanson covers the fundamentals of marksmanship, including grip, stance, sight picture, trigger control, and follow-through. We ran drills on shooting from various positions, recoil management, transitions, multiple targets, movement, reloading, and more. We worked in and around vehicles, then shot one with various weapon systems and observed how little protection the body of the car provides.

spy week shooting at cars

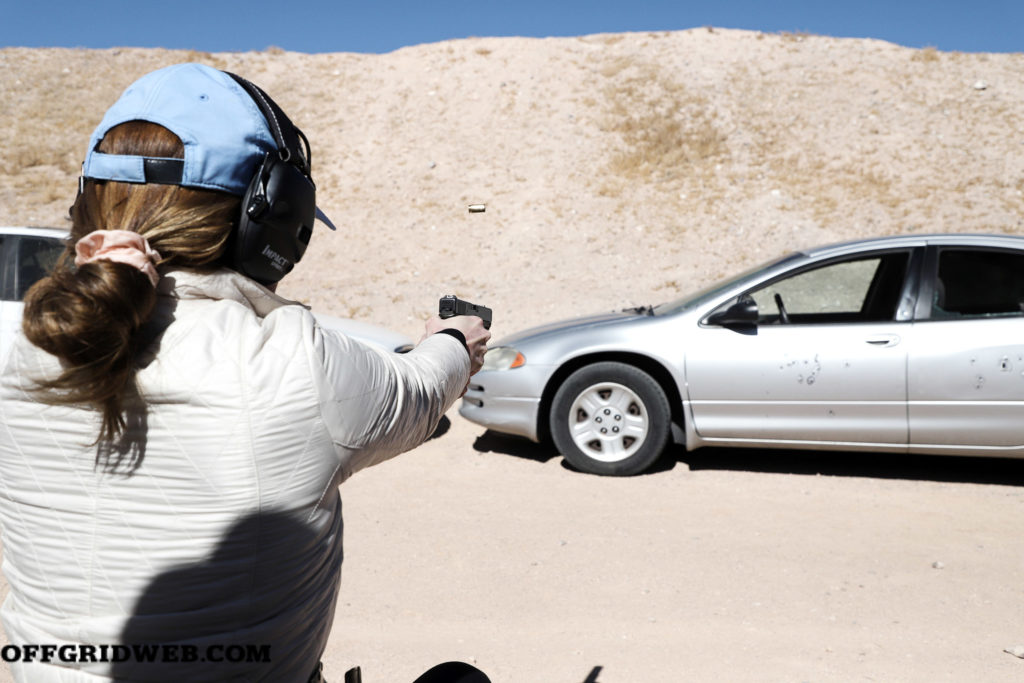
Above: Car doors are easily perforated by gunfire.

We trained defenses against typical abduction techniques like wrist grabs, choke holds, and bear hugs, or if you’ve been taken to the ground and mounted. Then, we layered in knives. We looked at key knife targets, including arteries such as the brachial, carotid, and femoral, the heart, intestines, mandible, abdominal aorta, and perineal area. Angles of attack can be horizontal, vertical, thrusting, or diagonal in various directions. We did flow drills with partners to practice motions, attacks, and defenses, in particular; redirection. Unfortunately, if you ever need to defend yourself against a knife, the likelihood of getting cut is very high. We all took a swipe at a piece of pork with a small knife to see how much damage it can cause.

spy week range time

As always, avoiding confrontations and breaking contact as soon as possible are far preferable to getting drawn into a fight of any kind. But you need to be prepared; carry a gun and a knife whenever possible, or a tactical pen otherwise. Building and maintaining proficiency in these areas requires training, practice, and dedication. Hanson urges that you make it a continuing priority.

Hard-Won Wisdom

None of the topics we covered at Spy Week are rocket science. But like many things in life, effective application of proper fundamentals is the cornerstone of excellence. The CIA understands this better than just about anyone, with hard-won, bloody wisdom gained from experience in the trenches, metropolises, and back alleys all around the world. Thus, it trains its operatives accordingly with best practices from a variety of disciplines.

spy week kidnapping stuffed into a trunk

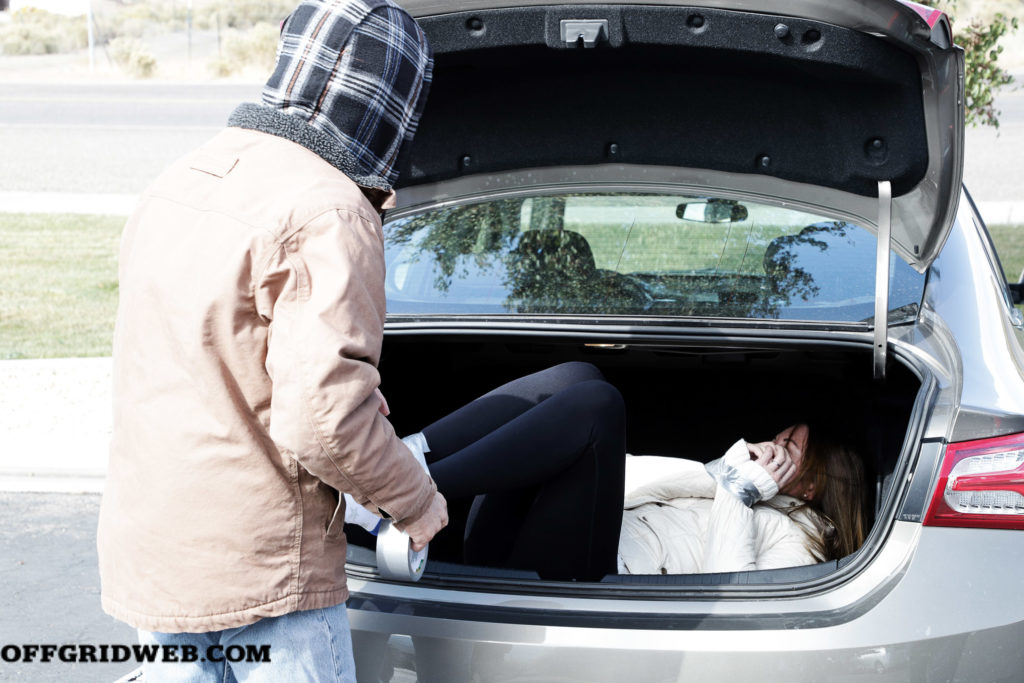
Above: During Spy Week’s Trunk Challenge, you’re handcuffed or duct taped and stuffed in the trunk of a car. Disoriented and in the dark, you have to free yourself.

Hanson’s Spy Week course isn’t cheap, but his clientele tends to be affluent, and he provides integrated one-stop shop training for all these important topics across a weeklong experience. He also provides all necessary gear for those who need it. You can also select one of his shorter, more narrowly focused courses. Our Spy Week class was attended by several business owners and contractors, a longshoreman, a private investigator, a bail bondsman, a Master-class competitive shooter, and a former Blackhawk crew chief from the 160th Special Operations Aviation Regiment, among others. Many came as married couples, another as a father-son combination, which is great to get the whole family synced up.

Take a page from the CIA’s book — cultivate these skills and qualities, and unleash your inner spy. 

Find Out More at: spyweek.com


MORE FROM OFFGRID ON TRAINING AND PREPAREDNESS


Range Time Review: Simulated Shooting, Real Results

Developing any skill takes continuous practice. It’s only natural that someone who runs a mile daily will get in shape far faster than someone who does it a few times a month. Shooting is no different. However, due to ammo cost, weather, and other factors, many of us aren’t able to do as much live-fire practice as we’d like. Dry fire at home is beneficial, but it doesn’t come close to the experience of shooting live rounds. A simulator — such as Range Time in Phoenix, Arizona — can offer a much better analogue at a fraction of the cost.

We’ve tested indoor shooting simulators in the past, such as the multi-million-dollar VirTra system at Haley Strategic (see Issue 43). That panoramic setup can recreate lifelike self-defense scenarios, from active shooters to muggings to home invasions, but sessions in that sim aren’t easy to come by — classes are booked weeks in advance, limited to five students, and cost $900 for a two-day course.

Above: In addition to four simulator bays for on-site training, Range Time's Arizona facility contains an FFL storefront with guns, ammo, parts, and gunsmithing services.

Range Time, in Phoenix, Arizona, has taken a different approach with its indoor shooting simulator. Rather than cater to a hardcore, deep-pocketed subset of the gun community, they set out to make simulator training accessible and affordable to all. An hour in the simulator costs $30, and you can shoot as much as you’d like without spending a dime on ammo. Walk-ins and reservations are both accepted. Various common pistols and rifles are available to rent; each is a real firearm retrofitted with CO2 blowback internals and an infrared laser in place of the barrel.

After learning about the Range Time facility, I was interested to give it a try. If you’ve been following this column, you’ll know I’m an intermediate shooter who trains regularly under well-known instructors. So, would this affordable simulator be nothing more than a novelty, or would I be able to use it to improve my live-fire performance?

After visiting Range Time, I quickly established a rapport with in-house instructor Nate Gerhart. He provided pointers and recommended various drills, such as my ongoing benchmark, “Lateral Thinking.” This consists of 16 numbered squares laid out randomly in a grid; the goal is to shoot them in ascending order as quickly as possible. Click here for a video demonstration.

Above: Difficulty for each drill can be adjusted within the simulator by changing target size and sequence (ascending, descending, even, odd, etc.), or by randomly adding no-shoot targets that must be skipped. If that's not enough, try shooting one-handed or while holding up a 50-pound kettlebell.

A 20-second time is reasonable for a beginner, 10 seconds is good for an intermediate skill level, and 7 seconds or less is considered competitive. Starting out, I my best time was 11.1 seconds, but I decided to make a Range Time session part of my weekly routine and chip away at that time.

Over the course of the following three months, I continued one-on-one training for an hour each week. Inside the simulator, I worked on fundamentals, target transitions, tracking movement, strong-side and weak-side one-handed shooting, reloads, and footwork. I shot pistols with iron sights and red dots as well as carbines. I started from various positions and from behind cover. I practiced drawing from concealment and from my range belt. At times, this felt like drinking from a fire hose, but Nate’s patient instruction kept me determined to push onward.

Above: My results for the Lateral Thinking drill served as an indicator of steady improvement as the weeks and months passed. This drill places strong emphasis on a shooter's ability to quickly assess a scene and transition between targets.

These weekly Range Time simulator sessions soon produced the results I had hoped for. My best time in the Lateral Thinking benchmark dropped to 6.7 seconds, with average times comfortably in the 7-to-8-second range. More importantly, the improvements went beyond the simulator. I recently started competing in local pistol matches, and have seen noticeable increases in my live-fire precision and consistency. When these matches throw a curveball, such as one-handed shooting or a table start, I’m ready for it.

Although some shooters will always write off simulator training as gamer nonsense, I have gradually become a believer in its effectiveness. Of course, this type of training is what you make it — you can learn nothing by dumping mags at the screen like you’re playing The House of the Dead, or you can take it seriously and reap the benefits. In my case, the results speak for themselves, and Range Time sessions will continue to be a regular part of my training routine.

For more information on the Range Time shooting simulator, go to rangetimellc.com or follow @rangetime2020 on Instagram.


A Poor Man’s Guide to Knife Making

There’s no doubt that every RECOIL OFFGRID reader understands the importance of a well-constructed knife. It’s arguably the most valuable tool in any survival kit. Whether out of love of the blade or an innate desire for self-sufficiency, many have considered putting their own hands to the forge only to be dissuaded by the expensive equipment and technical skills employed by modern-day bladesmiths.

In this step-by-step instructional article, we’ll guide you through the knife-making process from start to finish, using a stock removal method and basic hand tools. 

STEP 1: Select A Steel

The foundation of the knifemaking process is steel, so consider your options carefully. Choosing a steel that has the right balance between hardness, durability (toughness), and corrosion resistance can be challenging, especially when you’re working with limited resources and technology. Many of the steels you might find at the local salvage yard or hardware store are mild steels unsuitable for anything more than a prison shank, while the many “super steels” used in high-end cutlery must undergo hardening processes that require specialized equipment and extreme precision. It’s best to stick with basic, high-carbon steels like 1095 or 1075. Some tool steels like O1 are also relatively easy to work with. 

Knife Making steel

Whenever possible, you should purchase your steel from a reputable dealer that specializes in cutlery steels. This is the best way to make sure you’re getting correct and uniform materials. Plus, you can purchase the steel in the width and thickness you wish to work with, which will save you a lot of time and effort.

Mystery steel (any steel with unknown properties) should always be a last resort. In the event of a global meltdown or zombie apocalypse, a car leaf spring would be a fair gamble, especially in older models where 5160 or similar spring steels were commonly used, but with modern cars it’s still a crapshoot. Plus, repurposed steel, if not already flat, will require additional cutting, bending, twisting, and/or grinding to make it flat and usable.

STEP 2: Lay Out The Design

Once you’ve acquired your steel, the next step is to decide on the blade and handle design and then transfer that design onto the metal. 

Knife Making
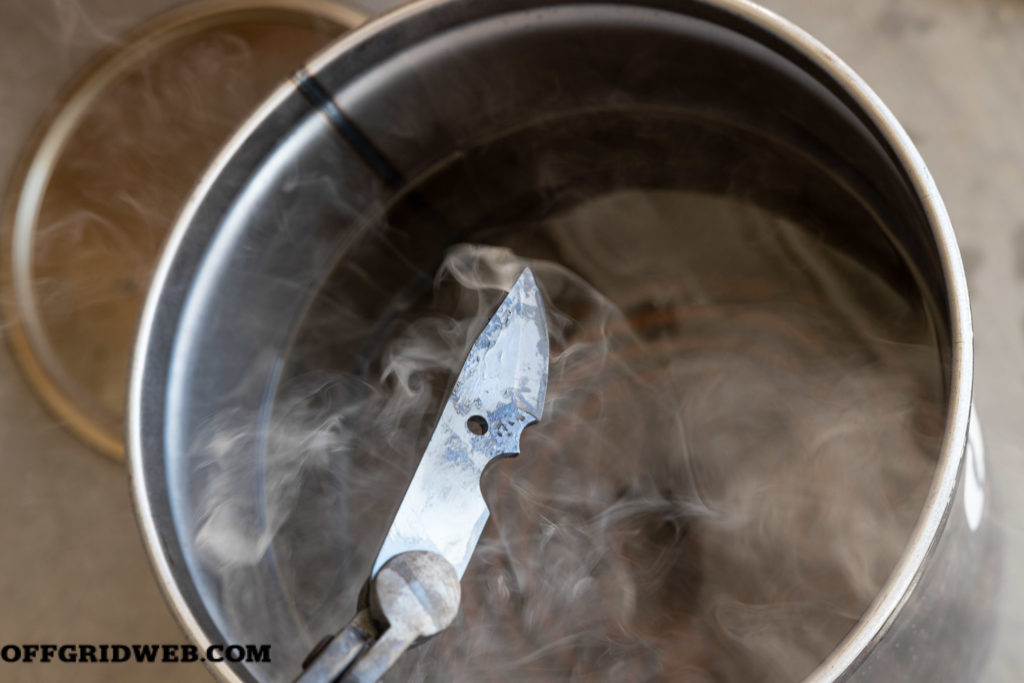
Above: An angle grinder is an inexpensive power tool that can help you make quick work of shaping your knife blank. Use a file to smooth and straighten your cut lines. Different sizes and shapes of files to fit different areas will make this process much easier.

The easiest way to do this is to sketch your design on a piece of cardstock or cardboard with a pencil. Once you’re happy with your design, cut out the design and then trace it onto your steel. You can use a steel layout fluid such as Dykem to coat the surface and trace around the template with a metal scribe, or you can simply use a black marker on the bare steel surface.

STEP 3: Shape Your Blank

Shaping the knife blank with minimal tools will be the most tedious step in the process. This can be done with nothing more than a hacksaw and a file, but it’ll take time and patience. If you can introduce an angle grinder or metal bandsaw into the mix, it’ll be much faster with less tendonitis. 

The process is the same regardless of the tools you’re able to work with. Use a saw or grinder to cut along the lines of your design. Once you get to tight spots like the finger grooves, make a V-shaped cut to remove as much material as possible. 

Once you’ve removed as much excess metal as possible, use a file to straighten your lines, round your corners, and remove everything else that isn’t a knife. It’s helpful to have a few different shapes and sizes of files so you can fit into those smaller grooves and odd-shaped crevices. 

Don’t forget to drill holes for your handle pins or cord wrap during this step of the process. It’s much easier to drill your holes prior to hardening the steel. 

STEP 4: Smooth & Surface 

Once you’ve finished shaping your knife blank, you’ll need to smooth everything out and make sure the surface of the knife is even. This can be done using anything from a power sander to a homemade sanding block. The objective here is to make everything nice and even so you can grind your bevels. 

Assuming you’re working with minimal tools, a sanding block made out of mild steel with a piece of leather glued to the bottom works very well. Simply cut a sheet of sandpaper a little wider than your knife and fold it over the leather side of the block near the end of the strip. Pinch the sandpaper between you thumbs and index fingers to hold it in place. As the grit wears down, you can slide a fresh portion of sandpaper into place and continue until the entire strip is worn out.

It’s recommended to start with 80-grit sandpaper for this step. Adding some WD-40 onto the sandpaper helps extend the paper’s life and makes hand-sanding much easier and cleaner. You can use a bench vise to hold the knife while working on the outer edges. Once you begin working on the flat surfaces, you can place a long, flat board inside your vise so it extends out from the workbench, then clamp the knife onto the board to hold it in place. The back side of the jig we’ll be discussing in the next section makes a great working surface.

STEP 5: Grind Your Bevels

Grinding the bevels into a knife is the most difficult task every knifemaker faces, whether they’re using a $4,000 knifemaking grinder or the most primitive tools. This author discovered a highly effective way to grind perfectly uniform bevels using a simple homemade jig. 

Jig Construction

To build the jig, you’ll need three 2-foot-long ¾-inch by 3½-inch boards, wood glue, four or five eye bolts of different lengths, two nuts for the eye bolts, and a long screw with tight threading to use as a stop screw. You’ll also need a table vise or other method to hold the jig in place when you start using it.

Knife Making

Using one of the boards as a base, glue and clamp the other two boards on top to form a “T” shape. Drill holes the size of your eye bolts down the center of the jig and holes the size of your stop screw down the center of the cross board. Use 1-inch spacing between the holes on both sections.

Knife Making jig

Using the Jig

To use the jig, begin by attaching a 2-foot metal rod to the back of a file with hose clamps. Insert a stop screw into one of the pre-drilled holes on the cross portion of the jig. The purpose of this screw is to create a consistent stopping point as you file your primary bevel. 

Next, determine where you want to set your plunge line (where the grind stops) and orient the knife so the desired plunge line lines up with the stop screw. Once you have the proper alignment, clamp the knife to the board.

Knife Making

Screw an eye bolt into one of the pre-drilled holes on the jig to set your grinding angle and use the two nuts to lock the bolt in place. The angle should be set steep enough to achieve about a 30-degree bevel. The longer the bolt and the closer it is to the knife, the greater the angle. 

Using the eye bolt to guide the file rod, grind down the bevel until you reach the midline of the edge, then repeat the process on the other side. Switch back to the original side and decrease the grind angle. File until the bevel reaches the desired height and blends with the original bevel, then repeat on the other side. You may have to make slight adjustments to your angle along the way until you reach the desired effect.

STEP 6: Heat Treating

This is a multistep process used to change the molecular alignment of steel particles to create a hardened edge that isn’t too brittle. The first step in this process is to heat the steel to a point where it temporarily loses its magnetic properties. The heating process can take place in a coal or gas forge, if available, but you can also make do with a propane or butane torch.

Knife Making

Heat the blade from the cutting edge up to at least the midline of the primary bevel. The heat should be applied until the steel reaches a cherry red color that’s even throughout. The heating point can be confirmed by touching a magnet against the heated portion to check for magnetism. If the heated portion of the steel doesn’t pull toward the magnet, then the critical temperature has been reached and the blade is ready to be cooled using a quenching solution. After performing a magnet check, be sure to apply additional heat to regain the temperature you just lost prior to quenching.

Knife Making

Dip the blade into the quench as rapidly as possible after removing the heat source. Be sure to move the blade back and forth so it cools evenly. Remove the blade and check the hardness with a file to make sure the quench was effective. The file should skate off the edge if the steel is hard.

Knife Making

The purpose of the quench is to cool the steel rapidly and force the rearrangement of atomic positions to produce martensite, which is an exceptionally hard phase of steel. Martensite is very brittle, so it’s necessary to modify the mechanical properties by heat treating at a lower temperature range for an extended period of time, a process known as tempering. 

Once the metal cools to the touch, place it in the oven for one hour at 400 degrees F (temperature can vary depending on the steel). Remove the knife and allow it to cool, then repeat the process for one additional cycle. 

STEP 7: Resurface

After heat treating the blade, you’ll need to remove the fire scale and carbon deposits from the surface. This is basically a repeat of Step 4, so there’s no need to describe the process in detail. The amount of resurfacing you do is based on personal preference and how rough or polished you want the final product to be. 

Knife Making

STEP 8: Add Handles/Wrap

Since handle-making and wrapping can itself be an art form, we won’t go into detail here. A simple paracord wrap is the easiest method to start with. Wrap the cord around the top of the handle once, then cross and twist the cord each time the ends meet until the entire tang is covered. When you reach the end, feed the cord through the lanyard hole on the bottom and tie a knot on the other side. Cut and melt the ends of the cord to secure the knot.

Knife Making

STEP 9: Sharpen

The final step is to sharpen your blade. Depending on the thickness of your primary bevel, it may take some time to form a secondary bevel resulting in a cutting edge. Sharpening can be done using stones or mechanical sharpeners. The more consistent the angle, the finer the edge will be. For a polished, razor-sharp edge, work in stages and finish by running the edge backward along a leather strop. It’s possible to improvise a strop from an old leather belt — look for one with a natural, suede-like inner surface — treated with automotive polishing compound or toothpaste.

Knife Making

Conclusion

The art and science of metalworking can take a lifetime to master, but it doesn’t have to be a difficult arena to enter. No matter if you’re motivated by the survivalist’s code of self-reliance or a desire for artistic expression, the information presented here — though it only scratches the surface — is enough to get you started without breaking the bank. 


Check Out the book DIY Guns: RECOIL's Guide to Homebuilt Suppressors, 80 Percent Lowers, Rifle Mods, and More.


MORE DIY ARTICLES ON RECOIL AND OFFGRID


IFAK vs Portable Medical Kit: Scaling Medical Gear

Battlefield medicine has made leaps and bounds through improved infrastructure and a near-universal deployment of the IFAK or Individual First Aid Kit.  As a result some lessons can be taken when considering both the rising civil unrest in cities like Minneapolis, as well as remaining prepared during more peaceful times. By taking an approach similar to our article on Layering Your EDC Survival Gear, we can divide our Medical Gear into four layers: Personal EDC, Kit-Mounted, Vehicle-borne, and Home base.

Foundational Considerations

Considering that most of us don't have the same medical infrastructure as the military or a hospital's resources at our disposal, we must take elements of what they have taught us, and apply it in the context of our daily lives. Similar to our article on the Tactical and Survival Application of Body Armor, we began by recognizing that Plate Carriers are for a world with Hospitals. Access to a medical facility will have an influence on how we set up each layer of medical preparedness.

old IFAK 
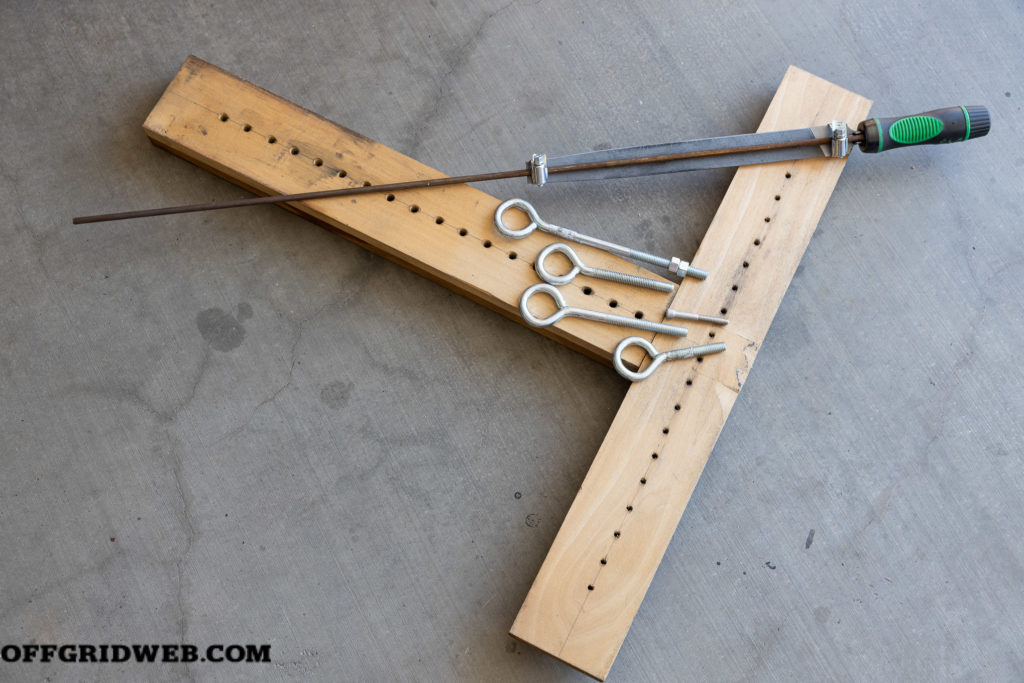
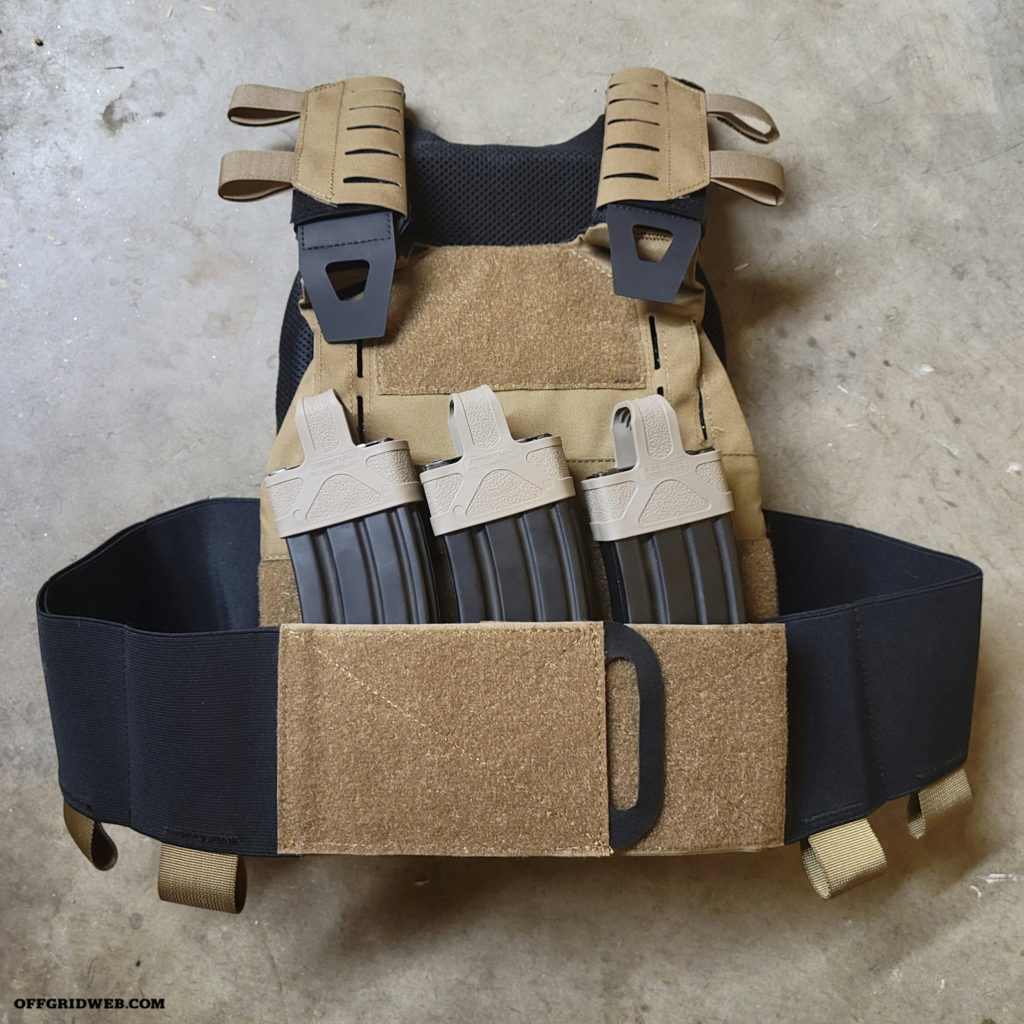
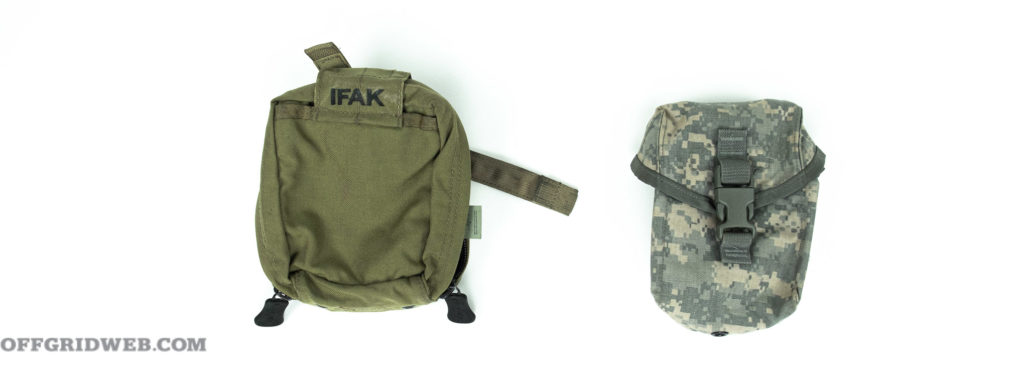
Above: These older IFAKs come from a time before a smaller, slimmer kit was in vogue.

In our modern environment, what separates an emergency kit from long-term sustainment is access to professional medical treatment. We may be able to prevent a gunshot wound from becoming fatal, but our objective will still be to get the wounded to a hospital. If there is no access to medical facilities, the situation is much more dire. However, we can begin from the known and expand further.

In a past life, Ranger First Responder training taught the acronym M.A.R.C.H. Each letter stood for a different type of injury, and established a hierarchy of greatest immediate threat, descending to long-term care. Broken down, M.A.R.C.H. stood for:

M: Massive Hemoraging/Bleeding
A: Airway
R: Respiratory
C: Circulation
H: Head Trauma/Heat Injury

This acronym is one of many used for emergency medical responses, and the importance of training cannot be overstated. Without spending time with these tools in your hands, their value is greatly diminished, and in the brief moments when an emergency medical response is needed, the additional confidence and skill impact more than the possibilities of life and death, but the emotional aftermath.

Esstac DST Medical Pouch
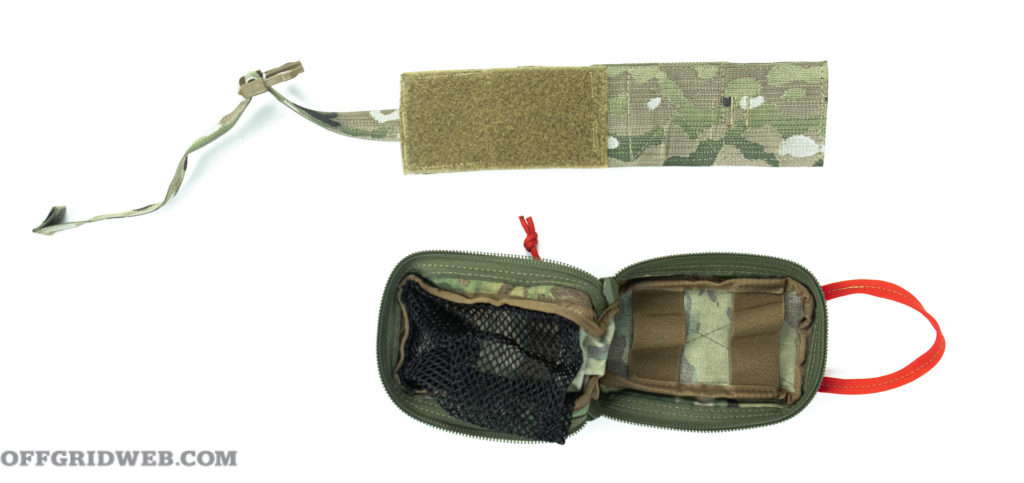
The EssTac DST Medical Pouch features a tear-away main storage container, so the wearer doesn't have to remove their belt to get at their IFAK. 

The important element to take away from M.A.R.C.H. today is that they represent different types of life-threatening injuries where time is of the essence. While we can leave the order of treatment to another time, we can address what different levels of an IFAK should, and could contain.

Personal, Kit, Vehicle, Home

The four categories we've chosen: Personal EDC, Kit-Mounted, Vehicle-borne, and Home can integrate into one another, are best thought of as a physical representation of a Venn Diagram: their contents overlap often, with each tailored toward a situationally specific direction.

Personal EDC

Two elements dictate what and someone's Personal EDC will contain: what they need, and what they're comfortable carrying. Needs are a given and typically prescribed by a doctor. Comfort, however, is where one must seriously pick and choose, as the primary limitation of EDC gear is space.

With all the attention paid to defensive tools such as knives and handguns, it's natural that we turn to medical gear as a close second. A tourniquet handy can quickly save a life, from witnessing a motorcycle wreck to an active shooter, to improvising a splint in the wilderness, it has more uses than simply stopping major bleeding.

A TQ can be easily kept in a bag, carried in a pocket, or stored in a holder. However as not all wardrobes will facilitate these options, a serious consideration of fitting into one's environment comes into play. Dressing for galas is rarely a daily occurrence, and the homeless look works in some urban environments, but little stands out more than a person trying too hard to conceal something that they should have kept off-body.

Various EDC medical kits have tried to remedy this: from self-contained wallet-sized packages, to ankle kits, and a few more. Ultimately it is up to the individual to make the choice about what they carry and pay the consequences for it.

Kit-Mounted

Inspired by the Military, adding an Individual First Aid Kit to one's plate carrier or shooting belt separates itself from their personal EDC in both tone and focus. Since it is connected to firearm-related gear, whether for practice or for protection, the focus of this IFAK is for conflict-induced injuries. This is the place to focus on gunshot wounds and lacerations.

GBRS Group Belt with Blue Force Gear Micro Trauma Kit NOW IFAK

Massive Hemoraging: Tourniquets, Pressure Dressings, Gauze Bandages, and Clotting Agent.
Airway: Nasopharyngeal Airway
Respiratory: Chest Seals of some type. Only carry a Decompression Needle if trained in its use.
Circulation: While Combat Medics will likely be concerned with maintaining enough blood pressure to keep the blood flowing during an emergency, this is the opportunity to cover smaller wounds. Consider the value of carrying an IV starter kit without maintaining access to IV solution.
Head Trauma and Heat Injury: For those in cold climates, a micro space blanket will go a long way in the event of injury.

Additional Considerations: Non-Latex Gloves, a CPR Mask, combat shears, additional tourniquets, disinfectant, over-the-counter pain killers, sharpie and laminated card to write details on.

Ferro concepts forward Observations Roll 1 Pouch IFAK S&S Precision PlateFrame-Modular
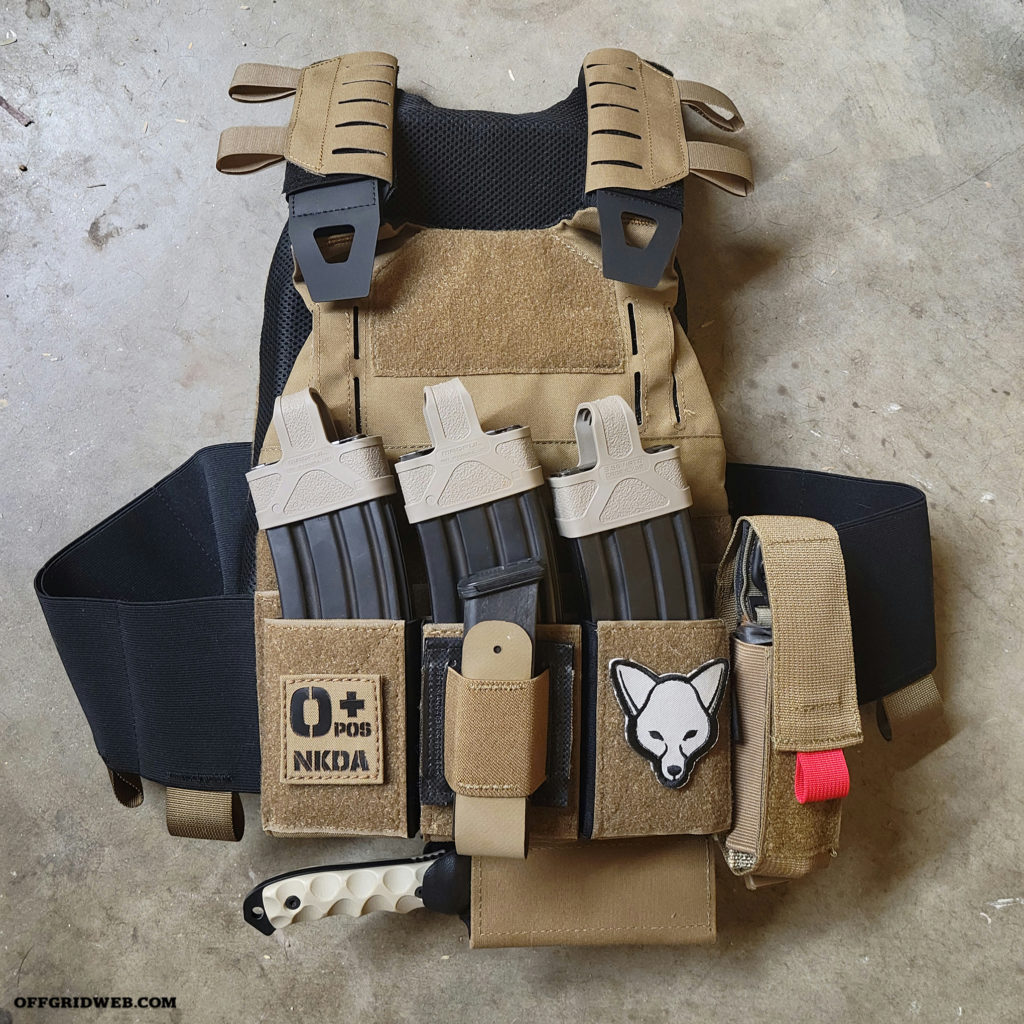
Above: The Ferro Concepts x Forward Observations Roll 1 trauma pouch can replace a belt-mounted IFAK, or be used as supplemental storage. Utilizing the space between the plate carrier and the belt line, it also provides additional lumbar support, especially when riding in a vehicle. 

A little goes a long way when it comes to kit-mounted medical gear. The primary focus of an IFAK is to meet the needs of the wearer. Whether for self-care or to treat another person, the objective is in the title: Individual First Aid Kit.

At least annual maintenance should be performed on a belt-mounted IFAK. Whether it rarely sees use, or if the range is a frequent occasion, the contents will degrade over time. Set a date, and stick to it.

Vehicle-borne

A vehicle-borne portable medical kit is built primarily for a mass casualty situation, where multiple people might need treatment, with the possibility that some might need transportation to a hospital. According to military terms, mass-casualty typically refers to when at least 10% of the force is killed or wounded, but for survival and private citizen considerations, it informs a vehicle kit to focus on treating more than one person.

vehicle portable medical kit tactical tailor 
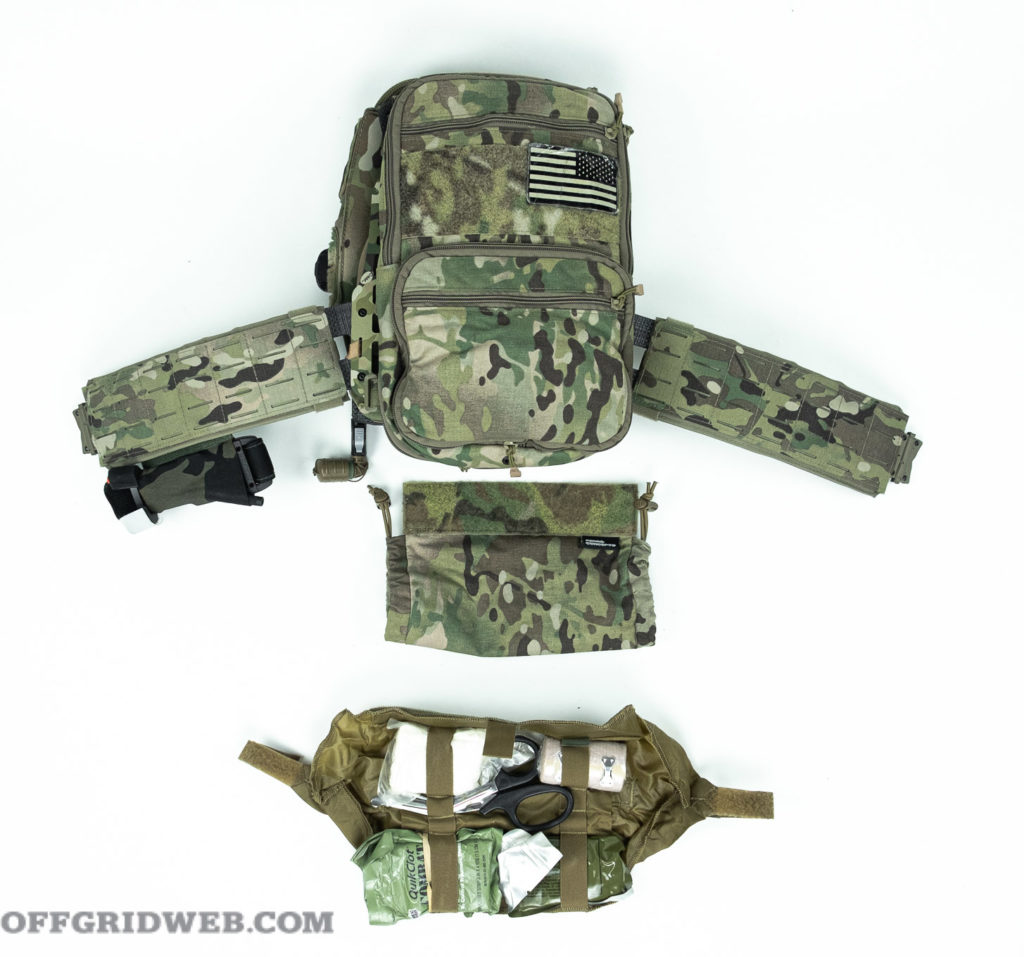
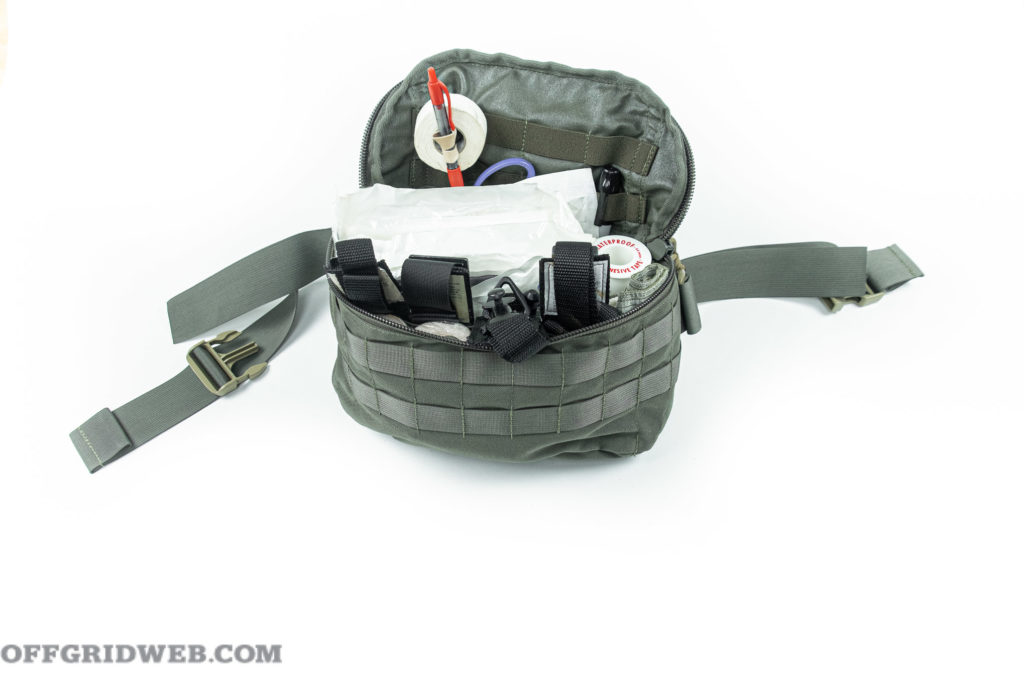
Above: The Tactical Tailor First Responder Bag fits into a wheelwell, and can be quickly strapped on as a Fanny Pack or a sling-bag. 

With special considerations for things like car accidents, a vehicle-portable medical kit will contain many of the same things as an IFAK. However, it should be understood as more than just a larger version of a personal medical kit. Seasonal appropriate inclusions, like winter clothes, or regional necessities, such as additional water define the focus of this kind of kit.

Larger fanny-pack or sling bag style bags such as the Tactical Tailor First Responder Bag easily store in a vehicle, taking up little enough space to have a dedicated location.

Home Base

If this type of portable medical kit could have another name, it would call itself family emergency first aid. Heavily dependent on the number of people in your household, the political and natural environment, and the emergency plans one has in place, the largest of options doesn't need to be as portable, so long as it's purpose is pre-determined. Is your family planning on bugging out in the event of an emergency? Do you live in a condo or a single-family home?

5.11 tactical rush12 home medical kit
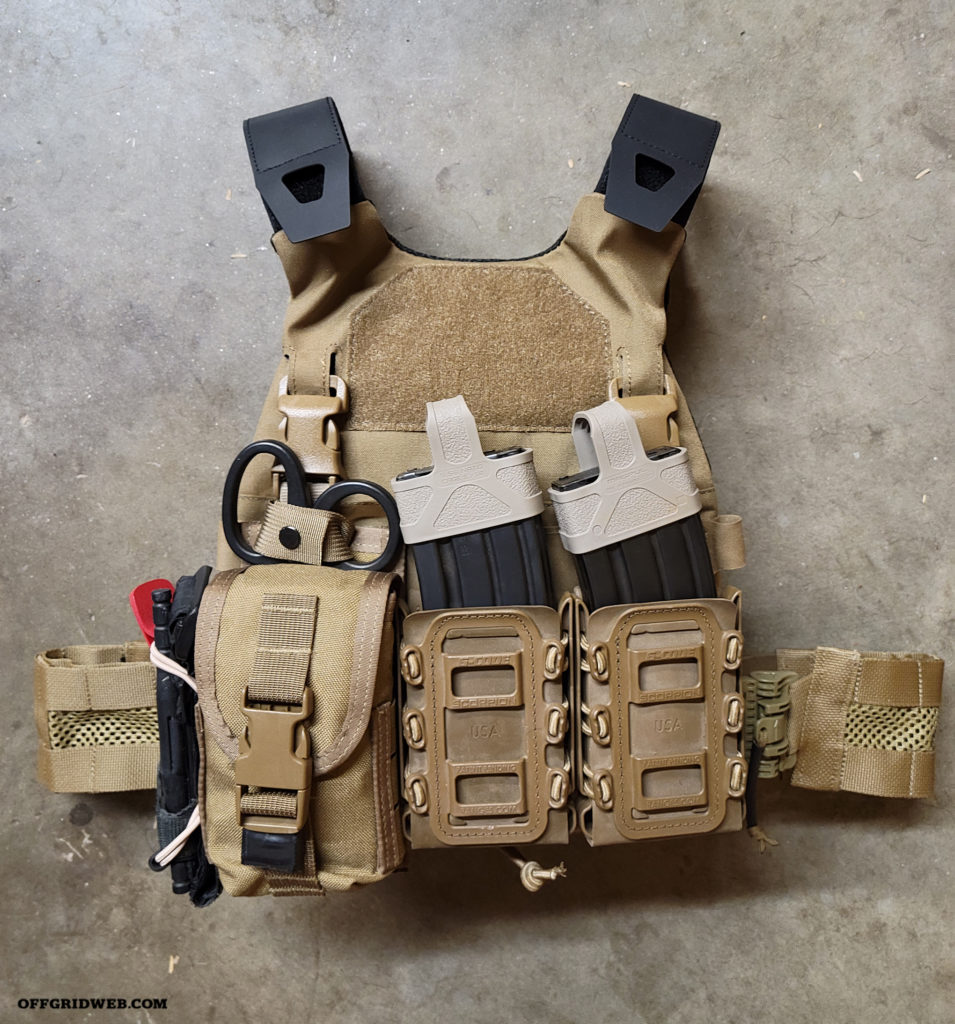
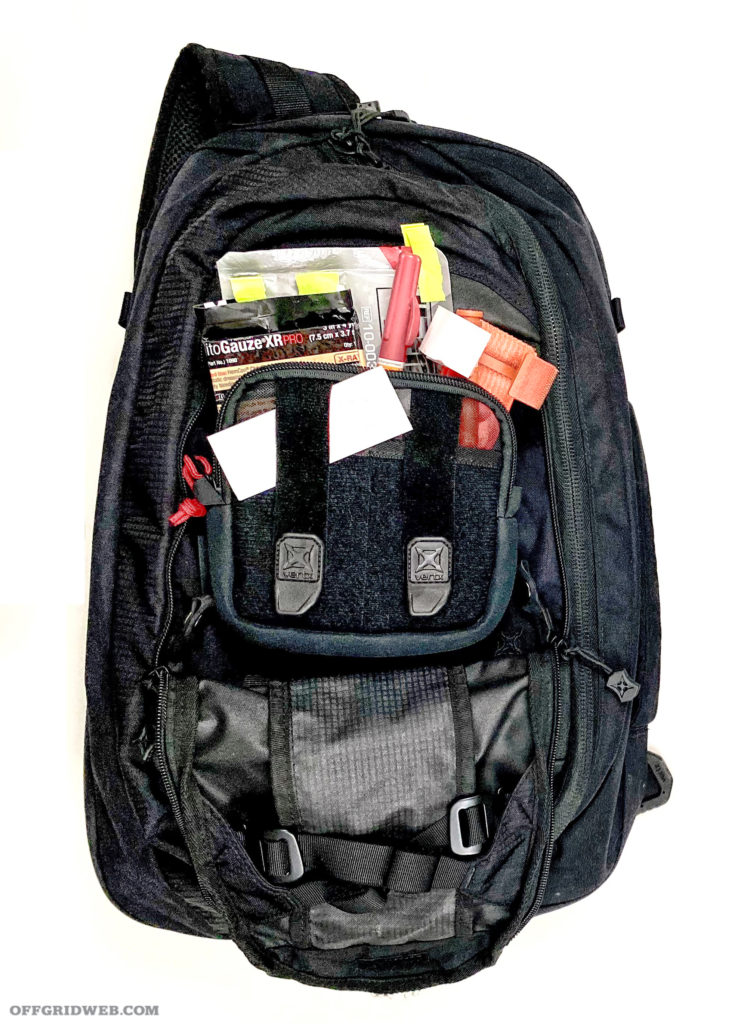
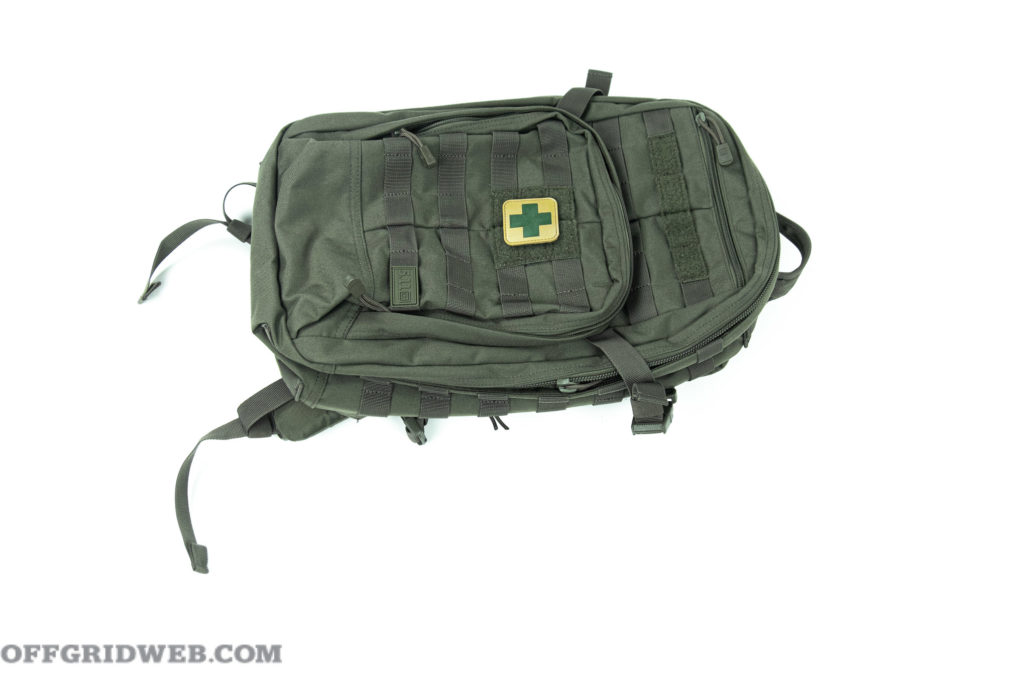
Above: While it's capable of being used as an EDC pack, the 5.11 Tactical Rush12 backpack can carry a comprehensive medical kit, without getting too specialized, and is easily marked with patches. However, don't get trapped into thinking that emergency gear is equivalent with tactical equipment.

For those who live alone, the home kit should be the place where backup supplies are stored. That way, what doesn't make it into the IFAK can be kept in a centralized location, and serve as a resupply opportunity if something gets damaged or used. As its purpose is to treat emergencies, not everyday cuts and bruises, it should be kept separate than a household first-aid kit. There's nothing against keeping bandages in both the bathroom and the bug-out kit, but it would be a tragedy if the emergency supplies were raided and not replenished before an unexpected tragedy.

A spare backpack can easily accomplish the needs of family kit. The items in this kit prioritize long-term storage, and should have a dedicated storage location in the house: a coat closet by the front door, or hanging from a door to the basement.

The size of the bag comes down to personal preference and what training family members have received.

Putting It All Together

We began this article on portable medical kits with the understanding that we will not have the infrastructure and supply line capabilities of a hospital or military unit. That spirit continues in not only how one layers their IFAK with other medical gear, but also how they go about acquiring it. With companies like North American Rescue, Guerilla Tactical, and Live the Creed providing full medical kits for what might go on your battle belt, plate carrier, or chest rig, the best approach to the next layers: vehicle-borne, and home base supply, is to remain methodical.

For example, a single pack can serve as both the vehicle portable medical kit and home base supply, doubling duties by having a designated storage location in a vehicle that is typically parked, unlocked, in an attached garage. Folded Gauze, pressure dressings, and tourniquets are often sold in packs, ready to be distributed across a growing system.

The primary objective of layering emergency medical quipment is to be able to scale one's response to a changing scenario. Since it is impossible to create a single kit that works for every situation, each step up: from IFAK to Vehicle Kit, recognizes the known and likely hazards that one could face. By tailoring each layer to the known and likely scenarios one could face, they improve their position at each level.


Gear Shown

Blue Force Gear Micro Trauma Kit NOW!
Colors: Black, Coyote Brown, OD Green, Wolf Grey, Multicam
Option To Come Stocked? Yes
MSRP: $73 Empty, $110 with Essentials Kit, $140 with Pro Kit, $200 with Advanced Kit
URL: www.blueforcegear.com

Esstac DST Medical Pouch
Colors: Black, Ranger Green, Coyote Brown, Wolf Grey, Tan 499, OD Green, Kryptek Typhoon, Kryptek Highlander, Multicam, Multicam Black, Multicam Tropic, Multicam Arid, M81 Woodland, Woodland Marshal, Desert Marshal
Option To Come Stocked? No
MSRP: $50
URL: esstac.com

Tactical Tailor First Responder Bag
Colors: Black, OD Green, Ranger Green, Coyote Brown, Multicam
Option To Come Stocked? No
MSRP: $110
URL: tacticaltailor.com

5.11 Tactical Rush12 2.0 Backpack
Colors: Black, Grey, Tan, Ranger Green
MSRP: $100
URL: 511tactical.com

Ferro Concepts x Forward Observations Roll 1
Colors: Multicam, Ragnar Green, Black, Tan, Wolf Grey
MSRP: $85
URL: www.forwardobservations.com


More on Emergency Life Saving Gear


Bag Loadout: Urban Communications Kit

As an electrical contractor with an interest in emergency preparedness, I’ve realized that there are a variety of events that could interfere with our normal communications infrastructure — if the internet and cell service go down, things can get chaotic quickly. If there’s total loss of power, it’s only going to get worse. As a result, I carry a kit that allows me to bypass these mainstream systems, and still stay in touch with those I care about. 

The Backpack

Make and Model: Vertx Communter Sling 2.0
MSRP: $199
URL: www.vertx.com

Bag Drop vertx commuter sling 2 communications rig

I’ve carried $400 GoRucks, $100 REI bags, and a variety of CamelBaks on various adventures. You really have to try them all to get a sense of what feels good on your back. There seem to be two schools of thought regarding backpack choice — one group will remove their pack to go through the contents; the other will leave it attached to the shoulder while rummaging through it. The messenger-style backpack has some tactical advantages, since it leaves a smaller window of opportunity for a bag-snatcher and can give you better access to important items on the move.

This Vertx Commuter Sling 2.0 works exactly as designed. It has a rather large “Rapid Access” main storage compartment for a variety of tools. Whether it’s a foldable rifle that requires a sling attachment point or your favorite handgun, the attachment possibilities are endless with the mounting systems Vertx offers. It also comes with retention G-hooks to prevent the bag from flopping open completely while surveying your environment. Its ballistic panel pocket easily accepts lightweight plates to give you a valuable layer of protection from projectiles and shrapnel flying in your direction.

This bag doesn’t scream “tactical,” so if you’re trying to stay under the radar, it could be a great choice over some of the military-style bags out there. 

Communication Equipment

GoTenna is a mesh network that can allow multiple devices to connect and chat offline. It offers a means of communicating silently within a small geographical area if there’s no cellular or Wi-Fi service available (range will depend on the number of wireless devices in your vicinity).

Another alternative using the same LoRa Mesh technology is a stand-alone homebuilt communicator. This requires technical knowledge and soldering skills, but it’s a stand-alone unit that doesn’t require an Android/iPhone for communication. If placed in a familiar location, multiple devices can be linked to a repeater. A well-placed single repeater could potentially give you 10 miles of range. Buildings and trees obviously diminish these results. A “post office box” setting in this unit can save messages for when your device is in range. 

bag drop communications kit radios and dfndr plate

A Baofeng ham radio is an excellent affordable device that’s capable of communicating with other licensed ham radio operators within a decent range. They’re also limited by terrain, and only travel from one to 10 miles under normal conditions. Maxing out at around 30 miles under ideal conditions would require a longer antenna and clear line of sight. It’d be a great portable way to communicate with someone in the event cell service wasn’t an option — better yet, they’re cheap enough that you can buy several for your family members and friends. If you need to extend that range to hundreds of miles, you need a high-powered, high-frequency (HF) radio and a general license. 

The HackRF Portapack has a ton of features ranging from listening to/broadcasting a radio station, remote-starting your neighbor’s car on a chilly morning for him, replacing a lost garage door opener, or chatting with a freight ship captain as he’s coming into port. Although some features can be considered “nefarious” in nature, the all-in-one package is a very robust tool that can potentially reprogram traffic lights in your neighborhood or enable the restaurant buzzer to skip the long wait at your favorite diner. Use your powers responsibly and don’t blame us if you get in trouble.

A Pirate Box is a small device that can broadcast your own LAN (Local Area Network). This can be a source to host a localized off-grid chat, share files, act as a “dead-drop” for digital information, or even provide an easy solution for an off-grid wireless camera setup. If you’re tech-savvy, you can make one at home with less than $100 in materials, or you can purchase them pre-built.

Portable Power

Portable battery packs are vital to both power and recharge all the electronics discussed above. Mophie Powerstations have a track record of holding up to abuse. Extreme changes in climate and multiple charge/recharge events naturally wear out battery cells. Cheaper alternatives don’t handle the wear and tear as well as some of the better brands, so do your research and get the most dependable unit you can afford. 

18650 or Lithium-ion (Li-on) batteries pack a greater punch for some sensitive electronics, however, they have been known to spontaneously combust and can get you unwanted attention at TSA checkpoints. Keeping them safe and understanding their dangers is essential if you'll be using them for your equipment. 

bag drop communications kit batteries

The CR123 batteries used in SureFire flashlights fall under the same category. Regular alkaline or nickel-metal hydride AA batteries just can’t produce the power needed, and most rechargeable options tend to fizzle out rather quickly. Having a spare set of each type of disposable batteries in your bag is a requirement.

Solar chargers can be bulky and often don’t perform as needed, but if you’re in a pinch and all your resources are empty, an affordable foldup can serve as a last-ditch option for emergency power. Always keep a USB wall charger in your kit to borrow power from coffee shops and other local watering holes.

Having plenty of spare cables, both USB-C and Micro USB, can lead to tangles and clutter. Keeping them individually tied will help keep you organized and better prepared. 

Medical

Being prepared for a fight is an automatic ticket to the “prepare to seal wounds” after-party. Tourniquets, chest seals, chito gauze, decompression needles, and Hello Kitty Band-Aids will take up very little room and invaluable space for any “What If” scenarios you may encounter. With the items contained in this pack and the everyday-carry gear in my pockets, I feel confident that I can weather any storm without being dependent on the power grid or established comms infrastructure.

Bag drop communications kit medical gear

For more info on the items in my kit, you can follow me on Instagram: @socal_offgrid. 


More Bag Loadouts on OFFGRID


NFC Tag: A Close Look at Near Field Communication Technology

Sticky notes provide a quick and easy way to write down snippets of important information — phone numbers, addresses, appointments, website URLs, and so on. But these colorful scraps of paper are low-tech tools in a high-tech world. With an NFC Tag Reader, storing vital information discreteley goes digital. 

If you could design a modernized Version 2.0 of a sticky note, what characteristics would it have? It might be more durable, and water-resistant so it won’t become illegible if it gets wet. Maybe it’d be smaller, but with the capacity to store more text. Most importantly, the data it contains — letters and numbers are a form of data, after all — should be easy to access at a moment’s notice. These “advanced sticky notes” might incorporate some technology, but they shouldn’t rely on access to the internet or the power grid. And for the security-conscious user, these notes should be concealable in discreet locations and should offer optional password-protection to deter prying eyes.

nfc tag 
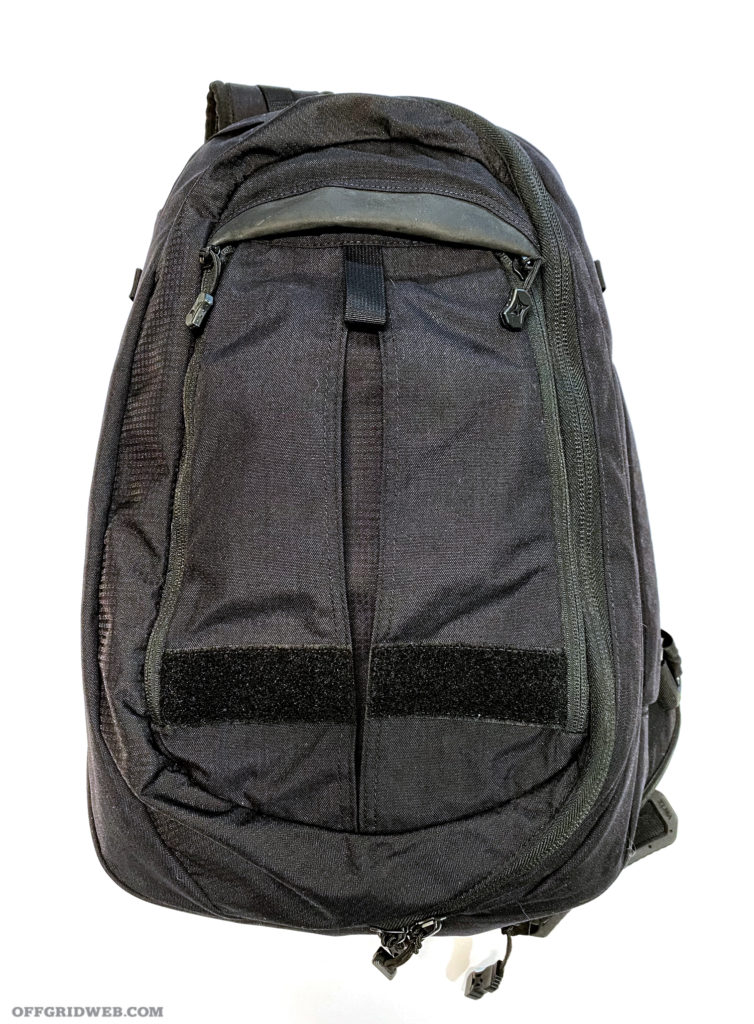
Above: NFC tags are available in many forms, including paper-thin, flexible, weatherproof stickers.
They can remain readable for more than a decade.

Near Field Communication or NFC tags serve as a compact, concealable, and versatile means of storing small amounts of data. Think of them as digital sticky notes — they can be bought by the dozen for a few bucks, programmed instantly with a smartphone app, and placed almost anywhere.

What is NFC?

Near Field Communication is a radio communication standard similar to Wi-Fi, Bluetooth, or RFID, but as its name indicates, it’s intended for extremely short range. NFC devices transmit on the 13.56 MHz frequency over a maximum distance of about 4 inches. NFC’s most common use is for contactless payment systems, which allow a chip in your credit card or smartphone to wirelessly transmit payment information to a nearby point-of-sale terminal. NFC tech can be used for countless other purposes, which we’ll discuss more below.

What is an NFC Tag?

An NFC tag is a tiny wireless device that contains a small amount of memory, a radio chip, and an antenna. NFC tags don’t contain a battery; they draw the minuscule amount of power they need from the reader (e.g., your smartphone) via magnetic induction. They’re typically about the diameter of a quarter and can be fully encased in waterproof polymer or attached to a paper-thin, flexible sticker. Many colors and designs are available, and users can write on plain tags with a permanent marker. Most modern NFC tags are rewriteable, so they can be used over and over for decades. It’s also possible to lock tags in “read only” mode so they can no longer be edited. Some NFC tags support optional passwords and/or encryption to enhance security.

nfc tag stackAbove: We purchased a pack of 20 NFC tag stickers online for $15 shipped.
Buy from a reputable seller to ensure you’re getting current-generation, reliable tags.

There are myriad NFC tag variants, each with different storage capacities, transfer speeds, features, and price points. For the purposes of this article, we bought a small pack of 20 NFC tag stickers from Amazon for $15 including overnight shipping. They’re based on the NTAG216 chip and offer 888 bytes of usable memory. This chip is rated for 10 years of data retention and 100,000 read/write cycles.

How Do I Read and Write Tags?

Thanks to the prevalence of contactless payment systems like Google Pay and Apple Pay, most modern smartphones contain NFC hardware. To check if your phone is NFC-compatible, refer to the running list on Wikipedia.

nfc tag quarters on a computer

If your phone supports NFC, you’ll just need to confirm that the appropriate setting is enabled and download an NFC reader app. For this article, we used an iPhone 11 and installed a free app called NFC Tools. The app makes it simple to read, write, erase, password-protect, and lock tags.

In addition to manually programming tags with text or other data, you can use automation apps to link your NFC tags to specific actions — set an alarm, send a text message, navigate to a destination, etc. On iPhones this is included in the built-in Shortcuts app; for Android phones, you can download a third-party automation app such as Tasker. See this sidebar for more details on NFC tag automation:


Automating Tasks with NFC Tags

As we mentioned earlier, NFC tags can be used in conjunction with automation apps to trigger complex sequences of actions. For example, let’s say an emergency has occurred and you need to send text messages to each member of your family, start the navigation app on your phone to check traffic conditions, dim the screen to conserve battery, and turn on do-not-disturb mode for any incoming calls outside your inner circle. These tasks could be completed by swiping your phone over a “SHTF” tag that does it all instantly.

nfc tag reader automation

If you’ve already integrated “smart home” features into your house, you could tie these into your NFC tag automation sequence. Remotely turn on the lights, crank up the volume on the TV, and activate your security system to convince potential intruders to pick a different house. Lock your computer or go full scorched-earth and wipe the hard drives. Activate a string of Wi-Fi-enabled Christmas lights that could hypothetically be wired into various booby traps (for legal reasons, that’s a joke). The sky’s the limit.

On a more practical note, NFC tags are great for saving time on simple daily tasks. Slap one on your washing machine to start a timer that alerts you when clothes are done. Put one in the phone cradle in your car that pairs the Bluetooth and starts a music playlist. Place one in a medication bottle that tracks each time you take a pill and activates a reminder if you forget to do so.

The catch is that the instructions for these automation sequences are stored on your phone, not on the tag. That means it won’t work with someone else’s device unless you apply the same settings in advance.


Uses for NFC Tags

Now that we’ve got the technical details out of the way, we can move on to the fun stuff.

As we mentioned above, NFC tags have only a small amount of memory. Our NTAG216 chip can store 852 characters of plain text. It’s possible to find non-standard NFC tags that can store several times that amount, but these will be much more costly and potentially unreliable with certain readers. Thankfully, there’s still a lot we can do with this limited space. Read on for a few noteworthy examples.

nfc tag storage blackAbove: We chose discreet black stickers, but tags can be found in a variety of colors and designs.
You can even mark tags with a Sharpie to denote their functions.

Store Emergency Information
Here’s a straightforward one that harkens back to our sticky note analogy. A tag can be programmed with emergency contact phone numbers, addresses, or coordinates for a bug-out location. In the event that you lose your wallet, you might store your driver’s license number and insurance info on a tag in your vehicle. If you need to stash some money discreetly, you could put funds on a prepaid debit card, save the info on your NFC tag, and shred the physical card. The same technique could be used for an emergency prepaid phone card. Of course, take precautions to ensure this information doesn’t fall into the wrong hands — conceal the tag, add a password, or both.

Show Proof of Ownership
If you’re looking to prove you own a piece of valuable property, you could attach a label with your name and address, but that’s easy to remove and poses some privacy concerns if it falls into the wrong hands. A hidden NFC tag containing the same information will be just as effective but much harder for thieves to notice.

Link to a File or Website
Although NFC tags don’t have much local storage capacity, they can certainly provide a link to data that’s hosted elsewhere. This can be used to save someone the trouble of typing in a website URL, or it can provide a private link to download files. Those files could be encrypted, turning the NFC tag into a digital key that unlocks a huge archive of sensitive documents cached online.

nfc tag storing a password

Store a Password
When you go on vacation, you might hide a key in a secure spot in case a trusted friend or neighbor needs to enter the house in an emergency. NFC tags can be used in a similar fashion to store passwords in an innocuous place. This way, you can tell the house-sitter to hold their phone up to a specific picture frame in the hall to instantly retrieve a gun safe code or security system override code.

In less dire circumstances, it’s a good way to share your Wi-Fi password with visitors without repeatedly explaining the spelling and capitalization.

Dead Drops
In Issue 37, Tom Marshall explained the Cold War spycraft technique known as a dead drop. This involves two parties covertly exchanging information without making direct contact. For example, one agent would leave a note in a hidden location and give a predetermined sign that a drop was ready — a chalk mark on a mailbox or a piece of tape in the corner of a window. A second agent would see the sign and retrieve the drop.

Large amounts of digital information might require a USB drive loaded with files, but this can be risky, since anyone who sees it will know it contains data. On the other hand, most people would never guess that an NFC tag contains data, much less consider how to retrieve it. It’d be easy to write a few sentences onto a tag and stick it inside a book jacket, onto the underside of a bench, behind a car’s fuel door, or in thousands of other creative locations. The recipient would only need to scan the tag from a few inches away and could rewrite a response without leaving so much as a fingerprint.

For added security, apply a password, encrypt the tag, or encode the message itself with a cipher.

nfc tag reader and writer tool
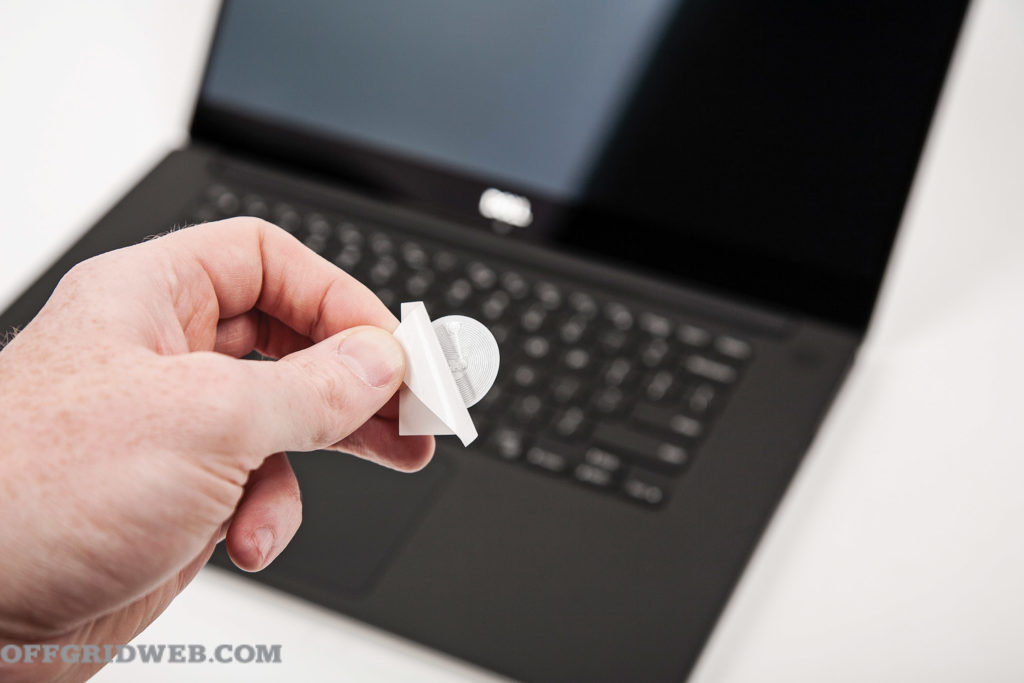
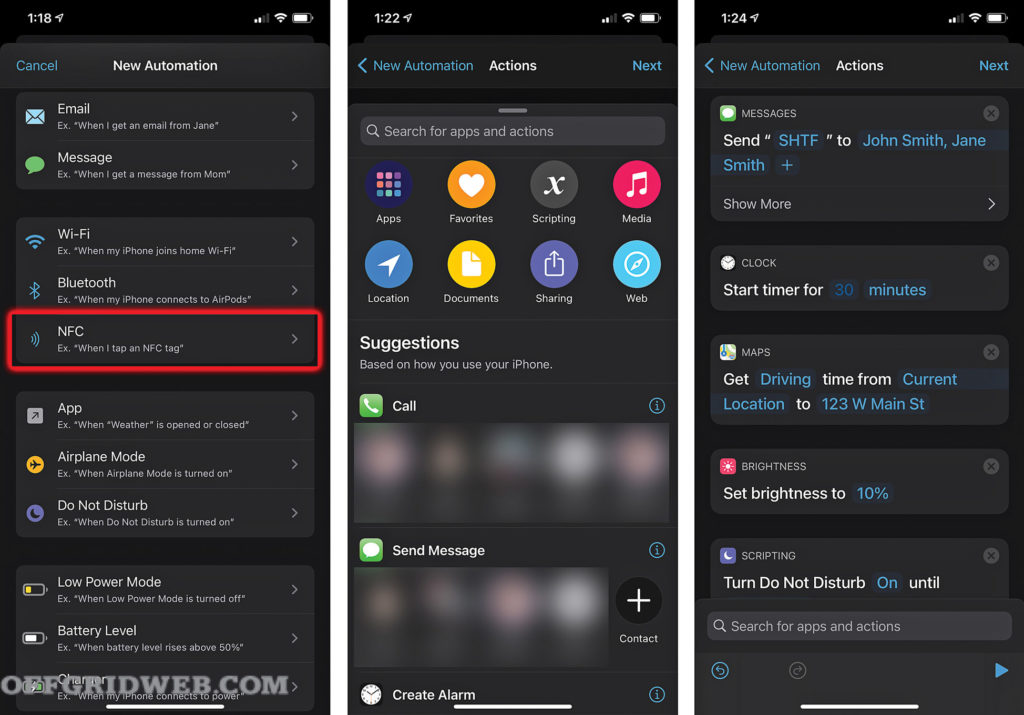
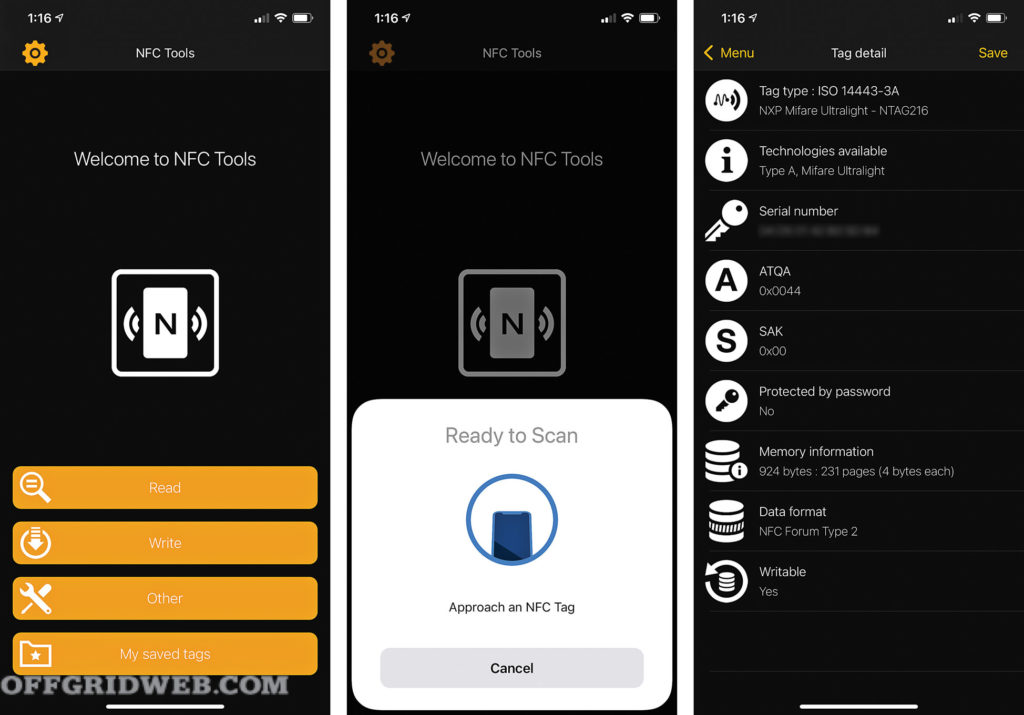
Above: We used this free NFC Tools app on an iPhone to read, write, and modify our tags. It also showed us the tag’s type, capacity, and features.

Nearly Infinite Possibilities

Much like the ubiquitous sticky note, NFC tags are nothing more than repositories for small amounts of information. You can write anything you wish onto them, from a simple phone number to an encryption key that unlocks every one of your digital assets. Despite their relatively small capacity and short range, they’re incredibly versatile, especially when they’re paired with automation apps that can control your smartphone or home appliances. Pick up a few and start experimenting — you’ll be surprised by all you can accomplish with a single swipe. 


More on CyberSecurity and Discreet Communication


Book Review: A Burglar’s Guide to the City, by Geoff Manaugh

The Premise: How do burglars look at a city and decide what their next target should be? How do burglars manage to pull off large heists of bank vaults and seemingly get away unnoticed? Geoff Manaugh takes the approach that burglary is highly influenced by urban planning and architecture. As he puts it: “How humans can take advantage of the built environment’s spatial opportunities for crime.” Through countless interviews with people involved in burglary, on both sides of the law, and some obvious painstaking research, Manaugh lays bare the tales of some notorious burglaries as he paints a picture of how weak spots are often exploited.

The 411: The book starts off with reference to one of New York City’s most successful burglars, George Leonidas Leslie, in 1869. If you’ve ever watched Ocean’s Eleven, The Inside Man, The Italian Job, or The Thomas Crown Affair, and thought that there’s no way some gang of crooks would go to the effort of constructing a replica of the place they were going to steal from, tunneling into a bank vault, or having an elaborate ruse to misdirect the onlookers, think again. Snippets of real-life heists have been interwoven into numerous popular movies. Shimmying through a pet door? Check. Climbing through a dumbwaiter chute? Check. Crawling through the air ducts? Check. Long lost secret tunnels that are rediscovered? Check.

Burglars of this sort are able to think spatially. That is, they understand that a location can be navigated in unconventional ways, whether it’s coming in through the ceiling, breaking through some sheetrock of an inexpensively manufactured business, or working their way up through water tunnels on ATVs and chipping through a few feet of concrete to get into a bank vault, they can see the not-so-obvious way into their target to purloin whatever valuables they desire.

Manaugh even delves into the “good burglars,” such as in the secret world of legal burglary done by the CIA, FBI, and local police to plant eavesdropping equipment in an attempt to catch a spy, terrorist, or organized crime suspect. And then there’s groups, such as the lockpicking enthusiasts trying to save the Locks of Love left on bridges around the world. Manaugh talks about how he accompanied a group of well-meaning people onto the Brooklyn Bridge, for a kind of anti-graffiti gesture, to remove illicitly placed locks and help slow the corrosion they cause to this landmark. 

Of course, this research isn’t complete without a discussion about the specific tools and techniques burglars use. Sections discuss lockpicking in its many varied forms, then the specifics about lockpicking tools and the materials they’re made from, whether it’s a commercially manufactured tool set, a homemade tool from just the right kind of springy steel, or perhaps that shiny metal bristle left behind by the street sweeper. “Street-cleaning bristles, broomsticks, electrical tape, liquid polystyrene: in the right hands, everyday items have an unexpected secondary function, able to become something like skeleton keys with which we can gain entrance to any building or thwart the world’s most sophisticated security systems. The dark promise here is that if only you can assemble the right tools in the right combination, you’ll find yourself holding keys to everything around you.” (Chapter 4, Page 161).

A burlgar's guide to the city by geoff Manaugh 

As the author explains, the very makeup of a city, the layout of its streets and infrastructure, play a role in crime. Does easy-on and easy-off access to a major highway indicate that burglary is more likely in that part of a city? What about a darkened alleyway? Will closed-circuit TV cameras stop or even deter a thief? Or are these cameras easily manipulated and overcome by professional burglars intent on getting access to somebody else’s valuables?

The Verdict: Manaugh has really done his research. The book includes 16 pages of small font text with his references. There are many stories in his book that I’m familiar with, even without checking his references. My days as a NYC detective taught me many burglary skills and techniques from skilled veterans, on both sides of the law, and Manaugh not only touched on many of those, but several others I had only heard about in passing. There are many movie heists mentioned in this book, which brings an extra air of familiarity to the tales, and the first-person stories relayed by the author kept me engaged. If you’re looking for a disquisition on burglary in its many forms, this book is a good read. 


The Burglar's Guide to the City by Geoff Manaugh

Publisher: Farrarr Straus and Giroux
MSRP: $17
URL: www.burglarsguide.com
Pages: 296
Rating:
   Thrive
   Survive
   Die


OFFGRID LIBRARY OF RECOMMENDED READING


Scaly Supper: An Overview to Hunting Reptiles

Maybe you’re a survivalist who fantasizes about retreating into nature and living off the land after civilization collapses, or perhaps you’re a hard-core camper who prefers to exist in the outdoors even before doomsday has come. Maybe you’ve stumbled across this article, and now your curiosity has been piqued as to how to survive in the wild. This guide will teach you the dos (and importantly, the donts) of hunting reptiles in the wild — which reptiles to hunt, which to avoid, how to identify and catch them, and finally, how to cook them. For anyone who sees lunches of lizards or suppers of snakes in their future, this article is essential.


Warning!

This article is meant to be a general overview and not a detailed guide on eating reptiles and amphibians. Always check all local game regulations before attempting to hunt reptiles or amphibians and work with an experienced herpetologist before attempting to prepare any for consumption. 


Which Reptiles Should You Hunt?

Lizards: If you’re traveling in the Southern Hemisphere, you’ll need to steer clear from certain venomous species of lizard; in the United States, the only one to be aware of is the Gila monster. All other lizards native to the U.S., in theory, are safe to eat. Certainly, there’s a risk of bacteria and parasites, which we’ll discuss in more detail in the section on how to cook reptiles.

Most lizards you’ll encounter are relatively small and won’t offer a great deal of meat. You’ll need to hunt for many of them in order to get your fill. This isn’t the most efficient strategy, since lizards tend to be quick and agile, making them difficult to trap or spear. Beggars certainly can’t be choosers for those living off the land, but if you have the option, you’re likely to have better luck with other species. 

cooking reptiles
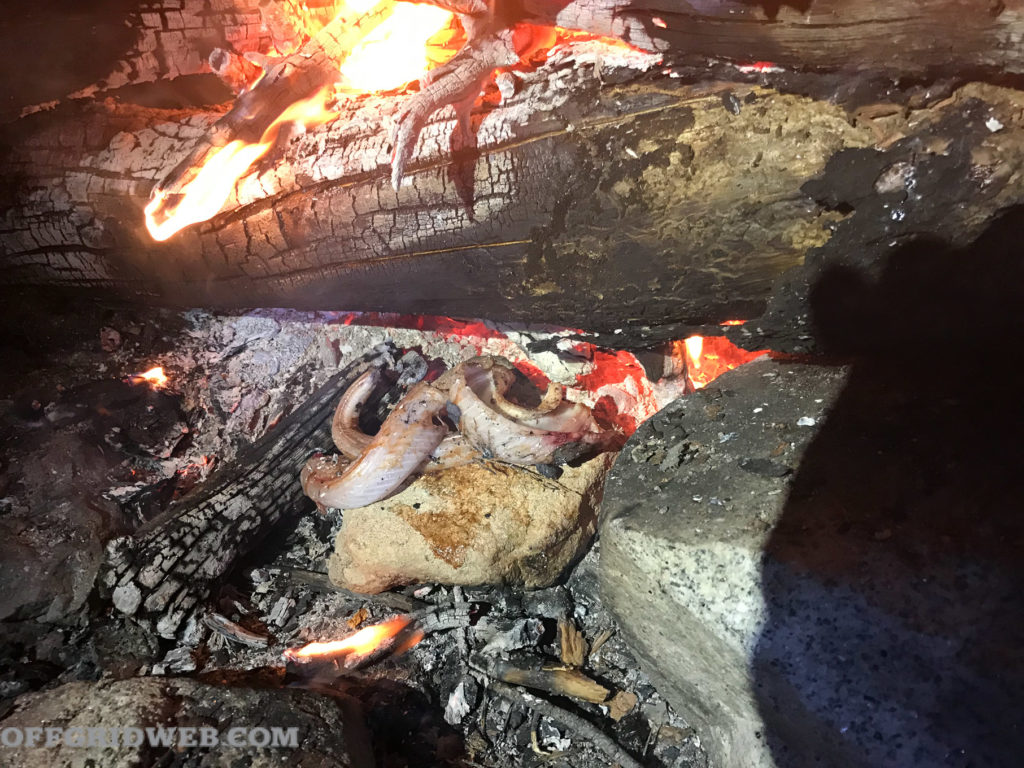
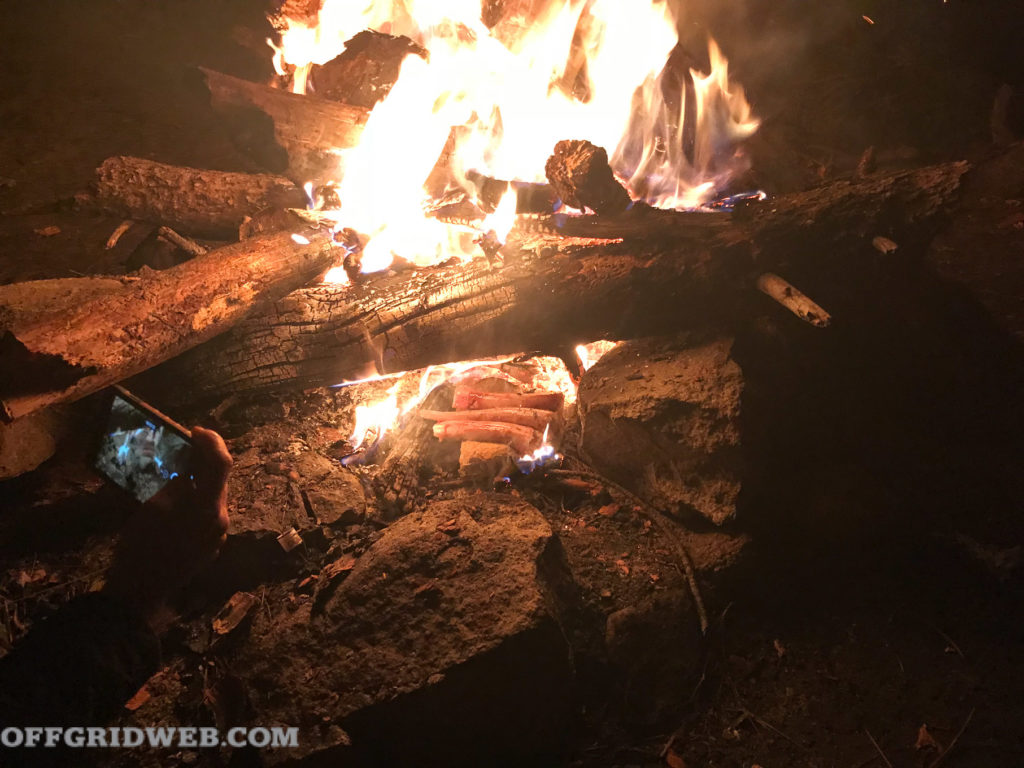
Above: Be sure to cook wild reptile meat thoroughly to avoid the misery induced by diseases such as salmonella.

Snakes: So long as you cut off the head, you won’t be at risk for ingesting snake venom. However, it’s best to stay away from the venomous species (cottonmouths, copperheads, coral snakes, and rattlesnakes, in the U.S.), because of the risks of getting bit while trying to hunt them. 

If you’re a reptile-lover, you may find it difficult to kill a snake that looks like one you’ve had as a pet. Many pet snakes aren’t native to the U.S., and you won’t encounter them in the wild, but if you keep snakes at home, think about whether you’d be willing to hunt an animal that slithers around like your beloved pet!

Turtles: Turtles are some of the easiest reptiles to hunt because they’re so slow-moving and can’t easily dart away from you like a lizard. Certain species of turtles, notably box turtles, subsist on diets of mushrooms, which may include fungi that are poisonous to humans. When you eat the turtle, you also are ingesting whatever they’ve eaten, which could be harmful to your health. 

One of the most common turtles you’ll find in North America that you can safely eat is the snapping turtle. The risks come with catching it — be sure to handle from behind the neck and the tail, where your hands will be out of reach of its sharp teeth.

Which Reptiles Should You Not Hunt?

Crocodiles and alligators: In some parts of the country, alligator meat is considered a delicacy and even a superfood, with its high protein content and relatively low fat. However, this doesn’t mean you should attempt to hunt down one of these beasts in the wild for your dinner. 

Commercial alligator meat is legally sourced from alligator farms, and hunting these reptiles is only legal in a handful of states, including Florida and Texas, in which you may need a special license or permit (wlf.louisiana.gov/page/alligator-hunting). In the United States, it’s illegal to hunt crocodiles, and you can face serious fines if caught.

Both alligators and crocodiles can be aggressive, and if you’re not certain of how to deal with them and are without the right weapons, you can find yourself in serious trouble. If you value your limbs and don’t have prior experience, steer clear of hunting these reptiles. 

What About Frogs?

Although frogs are often thought of as similar creatures to snakes, lizards, and turtles, frogs and toads actually belong to the amphibian class. In the United States, most species of frogs are safe to eat, but as a general rule, stay away from any with brightly colored skin — this coloring serves as a warning that they’re poisonous. 

You may have heard of people eating frog legs as a cultural delicacy, but you’d be better off hunting reptiles in the wild, for a simple reason: You’d have to catch a whole lot of wild frogs to get enough protein for your meal.

How to Identify Reptiles

There’s no way we can detail how to identify every type of reptile you could encounter in the wild. You’ll want to do your own research outside of this article if you’re preparing to rough it in the wild. So, for the sake of space, we’ll only cover how to identify dangerous reptiles that you should stay away from. 

If you see a pit viper (ufwildlife.ifas.ufl.edu/venomous_snake_identification.shtml), you’re better off not trying to hunt it. These include cottonmouths, copperheads, and rattlesnakes. They can all be identified by their blocky triangular heads with clearly defined necks, cat-like eyes, and thick, large bodies. These species of snake are venomous, and while they can be eaten in a pinch, the risks of hunting them often outweigh the reward of snake meat. 

tasty meal cooking reptilesAbove: Fire-roasted snake made for a tasty meal, especially with the addition of a little habanero barbecue sauce.

We also mentioned that you should steer clear of box
turtles, because of their tendency to eat poisonous mushrooms. These terrapins (ufwildlife.ifas.ufl.edu/venomous_
snake_identification.shtml) can be identified by their high-domed, ridged carapaces that flare out at the edges, as well as distinctive brownish, yellow, and orange skin patterns. 

How to Hunt

The methods you’ll use to hunt will vary depending on what equipment you have available, but they largely will fall into two categories: hunting and trapping. 

The number-one thing to remember when hunting is to always be aware of your surroundings. Don’t be so focused on your prey that you don’t notice you’ve followed them to the edge of a precipice.

For hunting, there are many possibilities — you can use a firearm, bow, spear, slingshot, knife, or even a rock to bludgeon the reptile. 

To trap a reptile — this method works best with turtles and some snakes — you’ll dig a hole with steep sides that they won’t be able to climb out of. For bait, you can use any combination of vegetation, fungi, or insects, depending on the preferences of your prey. 

snakeskin saved hunting reptiles
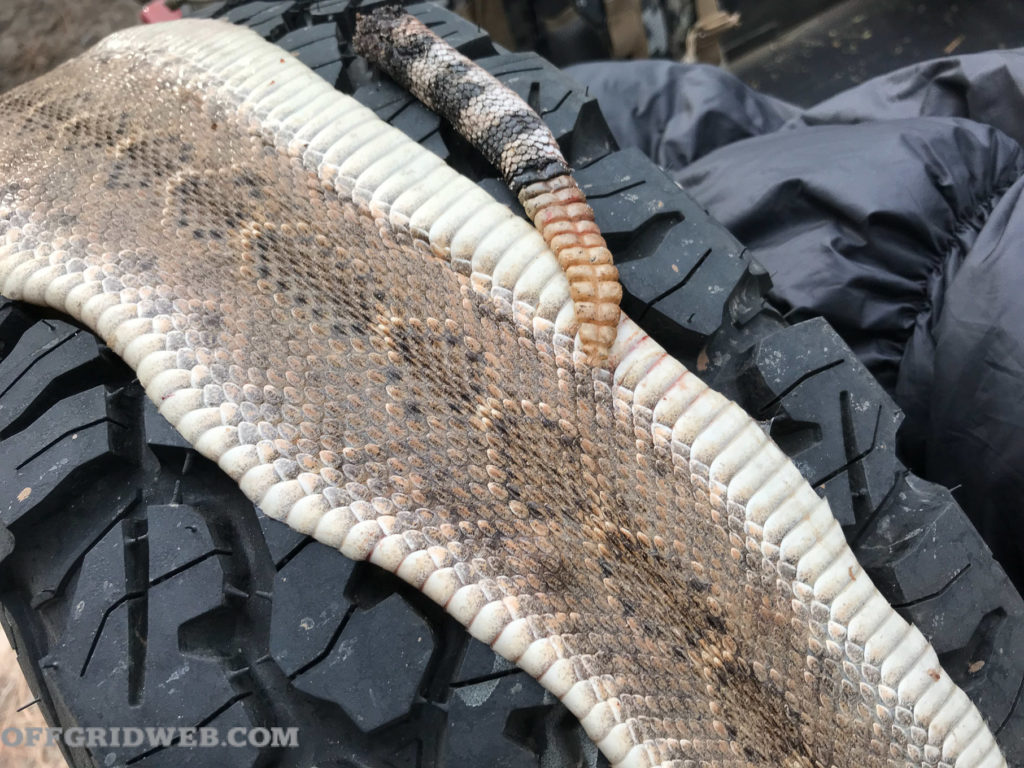
Above: The snake’s skin and rattle were saved for future projects. Waste not, want not.

Here are five reptiles that are ideal for hunting in the wild:

Iguana: Green iguanas are an invasive species in Florida, and the state encourages residents to hunt them. In the Caribbean, they’re often referred to as “pollo de los árboles,” which translates to “chicken of the trees.” To see an iguana hunt in action, check out this RECOILtv episode where some of our staff hunted these large reptiles in Puerto Rico: https://videos.recoilweb.com/watch/channel/carnivore/tcZx22L0mHQ0-recoiltv-road-trips-iguana-hunting?q=iguana

Black rat snake: The black rat snake, also known as the Western rat snake or simply “black snake” is a great choice if you’re a novice at hunting reptiles. They’re harmless to humans and their long, thick bodies mean that you’ll get plenty of meat per animal.

Snapping turtle: Snapping turtles are large terrapins that can be found across the Eastern United States. Harvested professionally for food in some areas, these turtles make a hearty and protein-packed meal. Just watch your fingers and toes.

Argentine Black and White Tegu: Native to South America, these lizards are an invasive species in Georgia. They are the largest of the tegu lizards, growing to about 2 feet in length. 

Garter snake: Although garter snakes are relatively slender and won’t offer as much meat as their thicker counterparts, their advantage is that they’ve proliferated across the United States as one of the most common species of snakes in the country.

Red-eared slider: Red-eared sliders are the most popular species of turtle in the American pet trade; however, the nature of being widely held as pets means they’re frequently abandoned and have been classified as an invasive species in many states.

How to Eat

One of the big takeaways from this article should be the following: Always thoroughly cook any reptile meat that you’re going to eat.

Even if you’ve picked a nonvenomous and nonpoisonous species, any wild animal carries bacteria and parasites that can cause infection and illness if ingested. Reptiles especially are notorious for being carriers of salmonella bacteria. 

Salmonella lives in their digestive tracts, and you won’t be able to tell if they’re carrying the bacteria until it’s too late. Symptoms of salmonella include diarrhea, vomiting, and stomach cramps. However, there’s a simple step to take that will all but eliminate your risk of contracting salmonella from a reptile. 

hunting and cooking reptiles

Above: After cutting off the head, the meat was roasted by the campfire.

Cooking the reptile will kill these bacteria (pubmed.ncbi.nlm.nih.gov/19679367/) and leave you with a safer (and tastier) piece of meat. Additionally, be sure to wash your hands, cooking surface, and tools that have come in contact with raw reptile meat. 

If you’re in the wilderness eating reptiles, you probably don’t have access to your George Foreman grill. However, you don’t need any fancy equipment to safely cook your fresh meat. Boil the reptile in water to sanitize it, then roast over a fire to get the best sear. 

If you have a choice of ingredients available to make a more complete dish, you can’t go wrong with snake tacos or iguana stew. After you’ve finished your meal, be sure to dispose of any remnants (bones, skin, etc.) far away from your campsite. Leaving the discards from your dinner laying around can put you at risk of other scavengers coming by to feast on the scraps. By the same token, unwanted pieces of meat and organs can also be used as bait for fishing and trapping, turning your first meal into a second.

Summary

If you find yourself in the wilderness having to fend for yourself, you may want to start by seeking out more popular animals to eat, such as mammals and fish. However, if it comes down to it, many kinds of reptiles can also fill out a diet. 

Stick to the reptiles that are safe to hunt and eat, and make sure that you cook them properly before chowing down. Bon appétit! 

[Editor's Note: Photos by Patrick McCarthy.]


About the Author

Johnathan David is a fourth-generation reptile keeper and wildlife biologist. Learn more about him at www.everythingreptiles.com.


More on Cooking and Survival Food