In This Article
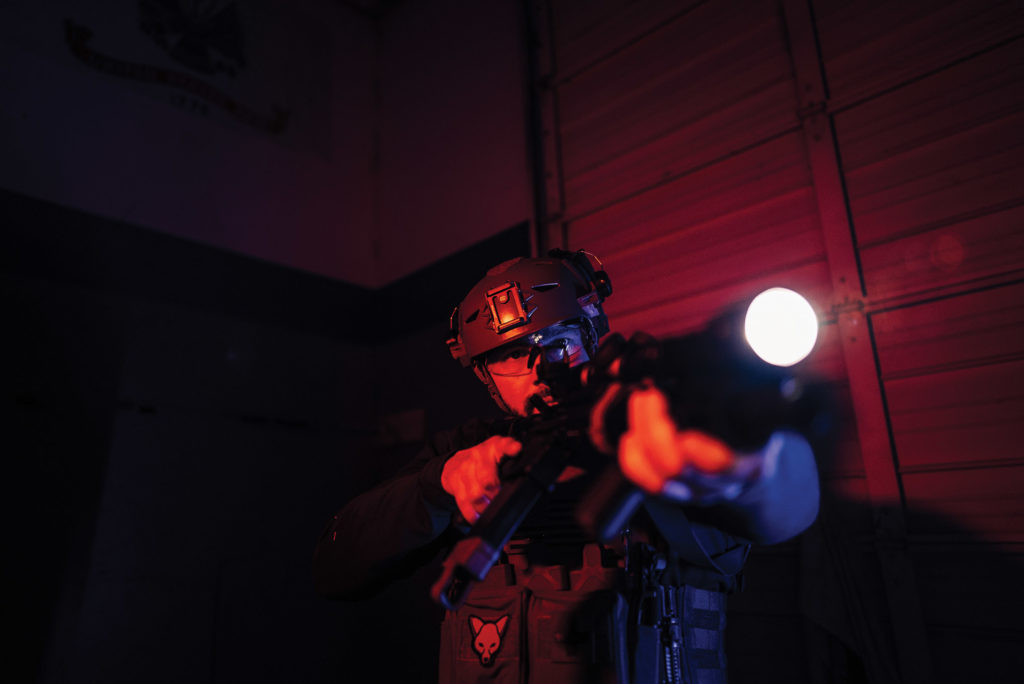
Night Vision evokes a sense of the near future, and as it becomes more and more available to those not in the military's special operations units, we are fortunate to live in a country that occasionally believes that its citizens should not be left in the dark. In OFFGRID 43 we looked at how a set of Night Vision tubes are judged for quality, and were discovered, at least on the inside, the technology can sometimes look like one part science, one part magic. But it's not just what's on the inside that counts. Two of the most popular models of night vision goggles, the RNVG and DTNVG are getting a specific look for what they bring to the table and where one might be chosen over the other.
Night vision goggles can only be represented so well by film and video games, and apart from using them, it can be difficult to get a picture of what are the advantages and drawbacks of a dual tube system. The history of night vision is a tangled path of experimentation, but over the course of the Global War on Terror, the military's use and development of the equipment has illuminated their application, at least in a tactical environment. As more and more night vision ends up in the public's hands, new uses pop up.
Night Vision Goggles Terminology
The term Night Vision Goggles (NVG) has been used to identify a variety of types of night vision, from misused general reference, to AN/PVS-7's with a single objective lens, but two eyepieces, to what is accurately described as goggles: housing with two independent tubes. The term NVD (Night Vision Device) has held more wide-spread standing, along with NOD (Night Observation Device) have leaked into common use, and for the sake of this article, we are restraining the use of the term Night Vision Goggles to those with two independent pods, each with their own objective lense, “tube” or internals, and ocular lense.
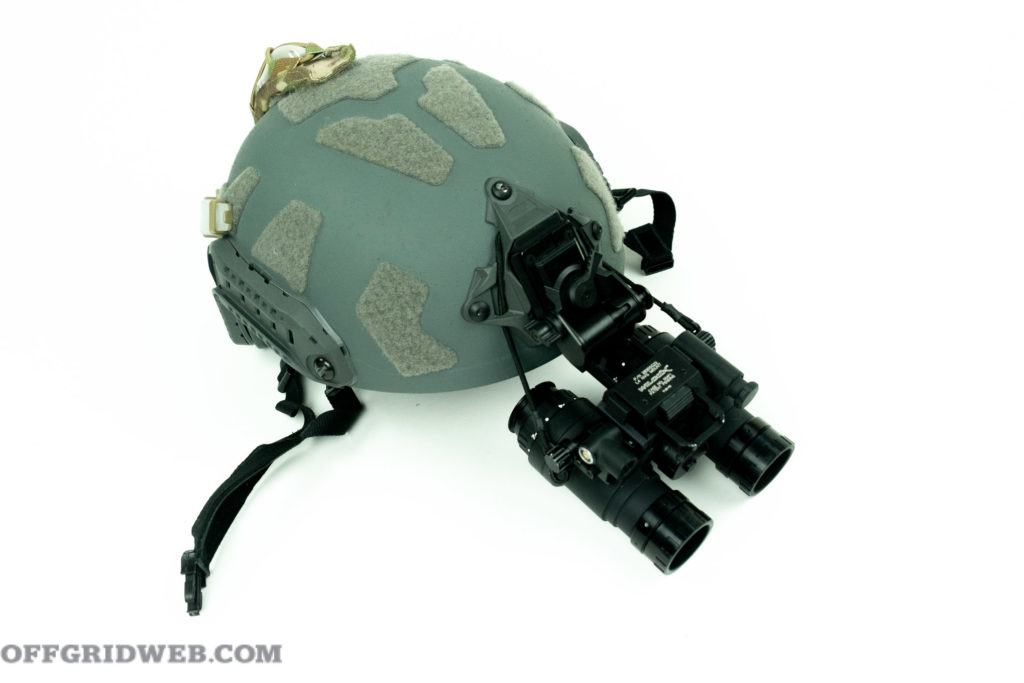
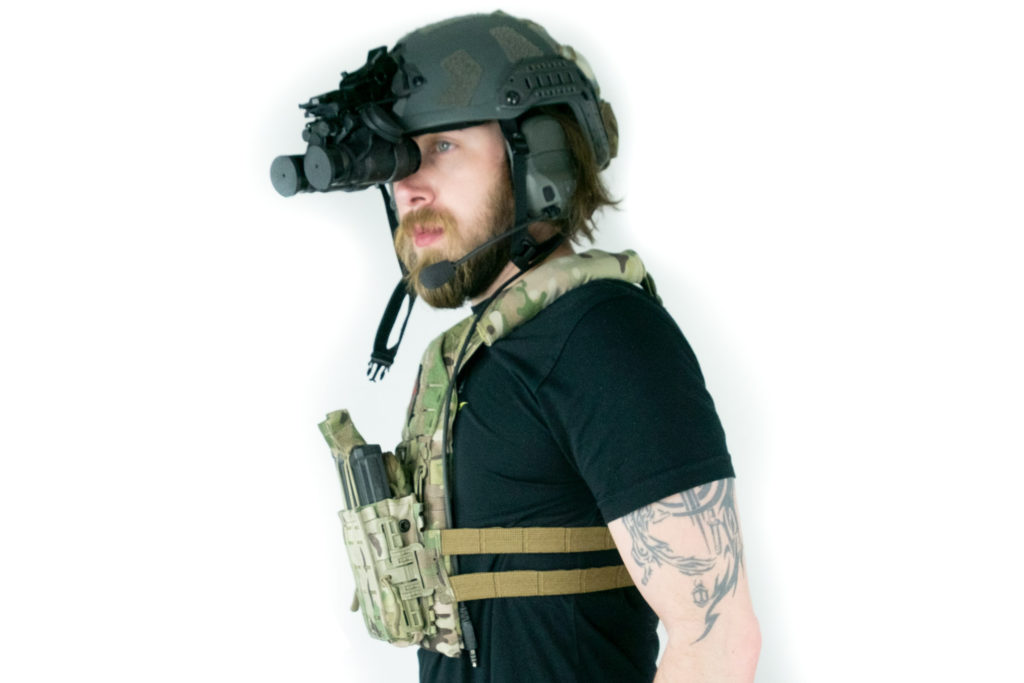
Above: Opscore FAST SF Super High Cut Ballistic Helmet with Illumination and Strobe by S&S Precision. Wilcox mount and TNVC Ruggedized Night Vision Goggles.
Military men and women involved in night operations during the last 20 years of war have likely undergone various iterations of night vision development. From the clunky AN/PVS-7 (Army/Navy Portable Visual Search – 7) to the comparatively sleek monocular AN/PVS-14, to NVG's, and for a special few, the quad-tube GPNVG's. Within the military, a distinction was made between land-centric, and aviation-focused night vision devices, where a few generalities could distinguish the design intent between one and the other. Aviation NVG's were typically lighter, and more fragile, and prioritized optical clarity, while the mission set of those using ground-based night vision required something that could withstand a broad variety of adverse environments.
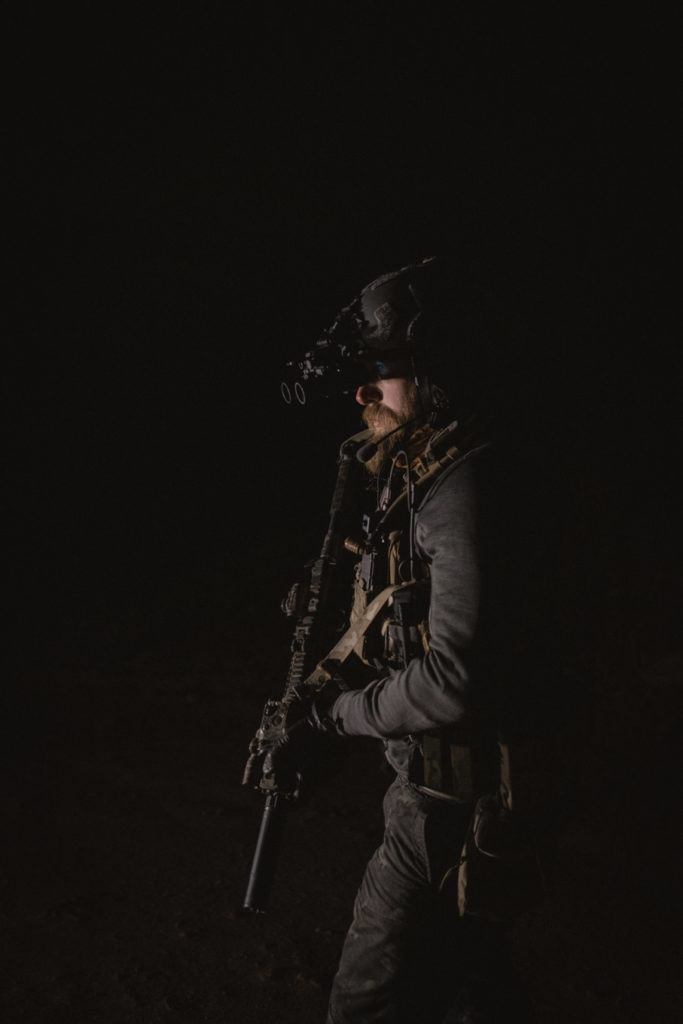
Above: Photo by Samantha Lauraina
Outside of the military, however, this distinction loses purchase, partially because the availability of night vision is such a recent development for civilians. As a result, while some things are still behind a government/civilian partition, the buyer is opened up to an expanding plethora of options when it comes to night vision. From green or white phosphor tubes, to new options in lenses, to a growing list of different housings, each with its quirks and qualities.
Why Binos/Goggles?
Unlike video games, night vision devices affect what you can see more than washing it in one color scale. One of the first things noticed when wearing NODs for the first time is how it affects one's depth perception. Albeit oversimplified, in the daylight, both eyes and one's neurology work together to achieve stereopsis: a “solid vision” including an understanding of distance in reference to one's self. A monocle NOD, such as the AN/PVS-14 grants the user the ability to see in the dark, but their depth perception is fairly hampered. Although there is still some distortion, night vision goggles handle this phenomenon drastically better.
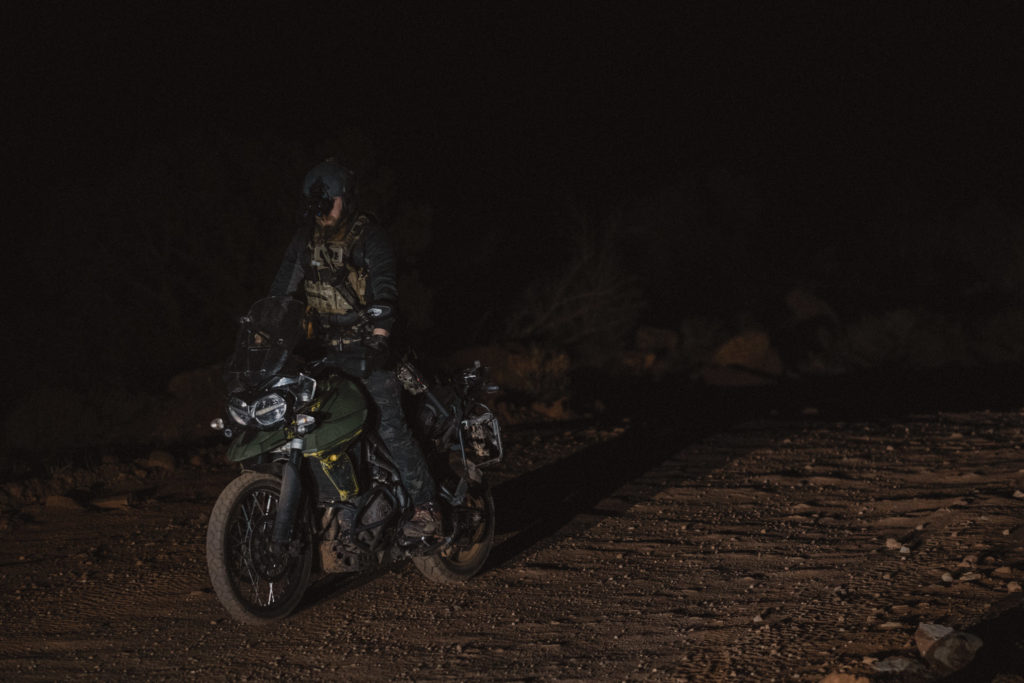
The field of view changes everything. Single tube night vision isn’t part of the conversation because of the total lack of situational awareness. Typical dual tubes have 40 degrees, where 4-tube night vision has 97 degrees. That means less tunnel vision. When you’re looking through night vision, if an object is even slightly outside of that field of view, you don’t see it at all. Adding that extra field of view increases both reaction time, and situational awareness. It gets really dangerous when do- ing things like breaching or skydiving, or riding a dirt bike under night vision. – GBRS Group from our interview with them in OFFGRID 43.
Components
In the article on evaluating Night Vision tubes, most of the focus was on the guts of the devices. FOM, or figure of merit considers the image intensifier, which for some reason have been colloquially referred to as “tubes.” So when we say “tube” we mean what's inside the tube, but when we say “pod” it's the actual cylinder holding the guts in place.
Above: Photo by Samantha Lauraina
Commercially, AN/PVS-14 lenses rule the market. As a result, most night vision goggle bodies/housings are designed to take AN/PVS-14 glass. Some military models stray from this, and are trickling down into the civilian world, such as the L3 Harris BNVD AN/PVS-31a with its fixed diopter.
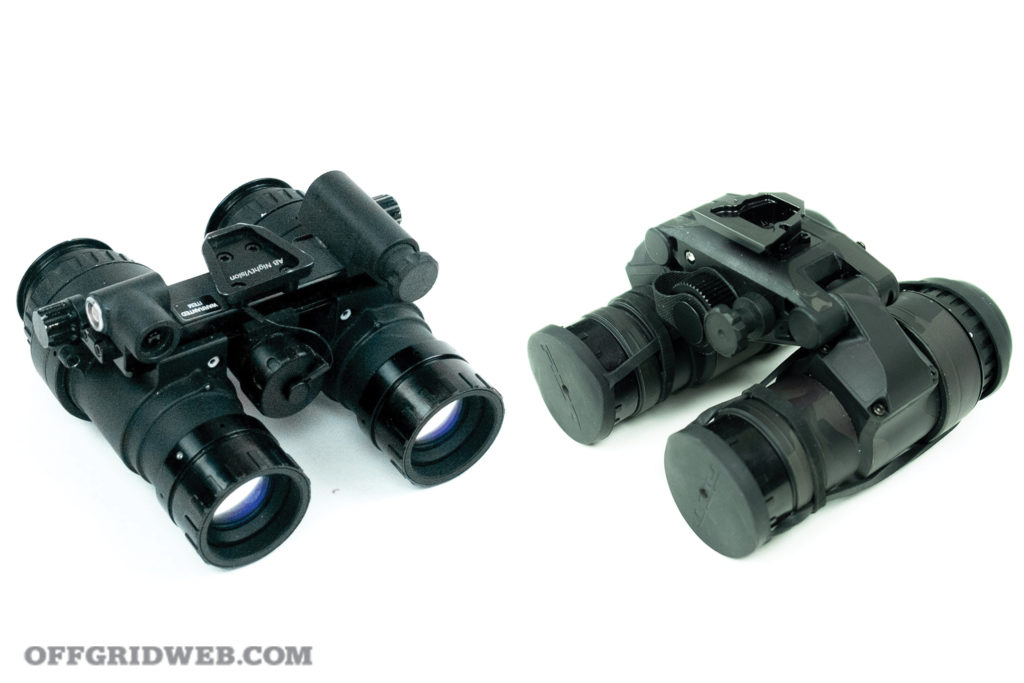
A Tale of Two Housings
With nearly identical tubes and lenses, two different housings show what each brings to the table. The RNVG or Ruggedized Night Vision Goggle came from TNVC to take a look at what is likely the most rugged housing on the market. Ideal for doing unorthodox activities like trying to Offroad a motorcycle under NODs, where you hope to avoid testing the integrity of night vision goggles. The RNVG's are constructed out of 7075 aluminum by AB Night Vision, giving it considerable rigidity to protect the expensive tubes inside.
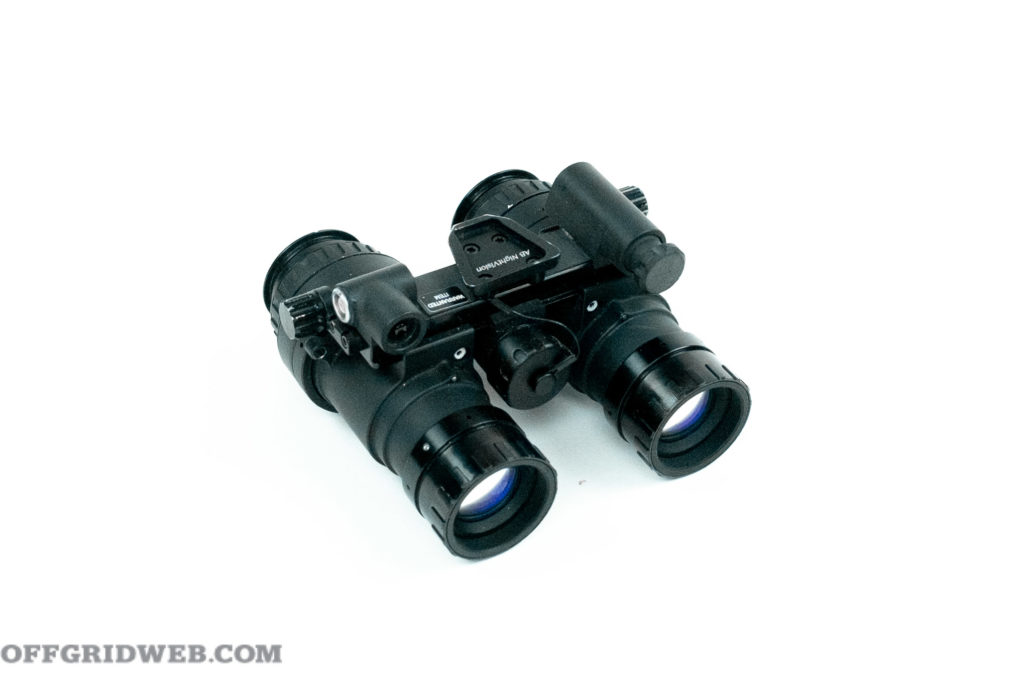
Each of the pods effectively run on a track and the inter-pupillary adjustment of the RNVG's is accomplished by turning a knob at each end. Due to the shape, they do not stow as close to the helmet/forehead as the individually articulating pods on other housings. There are better candidates out there for “day noodles,” but nothing beats the RNVG for protection against bumps and falls: something anyone who has spent time under night vision is very familiar with. For those who do not personally have a fully-functioning supply chain to replace broken or tweaked equipment, the RNVG by TNVC deserves a second look.
Built into TNVC's RNVGs, a small Infrared light comes standard, and although the adjustments can make the NODs feel stiff, such is the tradeoff for its rigidity. The housing is heavier than other night vision goggle bodies, but we're talking about the weight of two CR123 batteries, so nothing extreme.
RNVG
Built by TNVC
Optional Image Intensifiers: L3 Unfilmed White, L3 Thin Filmed Green
Weight: 570 grams, 20.1 ounces
Battery: CR123, or External Battery Pack
MSRP with L3 Unfilmed (White): $8,700
URL: tnvc.com
At the time of writing, Night Vision Incorporated still has DTNVG housings by ACTinBlack in stock. While they have been mostly replaced by the DTNVS housings by the same manufacturer, the genetic code remains consistent between the two generations. With individually articulating pods, the wearer can choose baetween left-eye, right-eye, or both with quick, easy adjustments. When transitioning from the dark outside to a lit room, a quick push of the pods moves them out of the way, where they automatically shut off to protect the internals.
DTNVGs represent a well-rounded housing, with more than adequately rugged fiber reinforced polycarbonate body, reasonable water resistance, and very straightforward manipulation. With L3 White Phosphor tubes at their core, they hold up well against all but the most aggressive builds, which typically demand a considerably higher pricetag. Some drawbacks, such as the lack of a port for an external battery pack, are partially solved by things like the ACTinBlack DICC. So, no high-altitude skydiving immediately out of the box, at least not where you'd need a cold-weather pack.
Above: The Multicam Black pattern is not original to the DTNVGs, but instead is a Nocorium Wrap sold by Steele Industries.
DTNVGs are on the heavier side for night vision goggles, but once again, we are dealing in grams and fractions of ounces for the most part. Night Vision Incorporated also offers to build DTNVGs with Ether Eyepieces, which drop the overall weight of the unit by 40 grams. When a premium set of BNVDs comes in at <450 grams, the difference isn't vast, making DTNVGs a general-use set of night vision goggles.
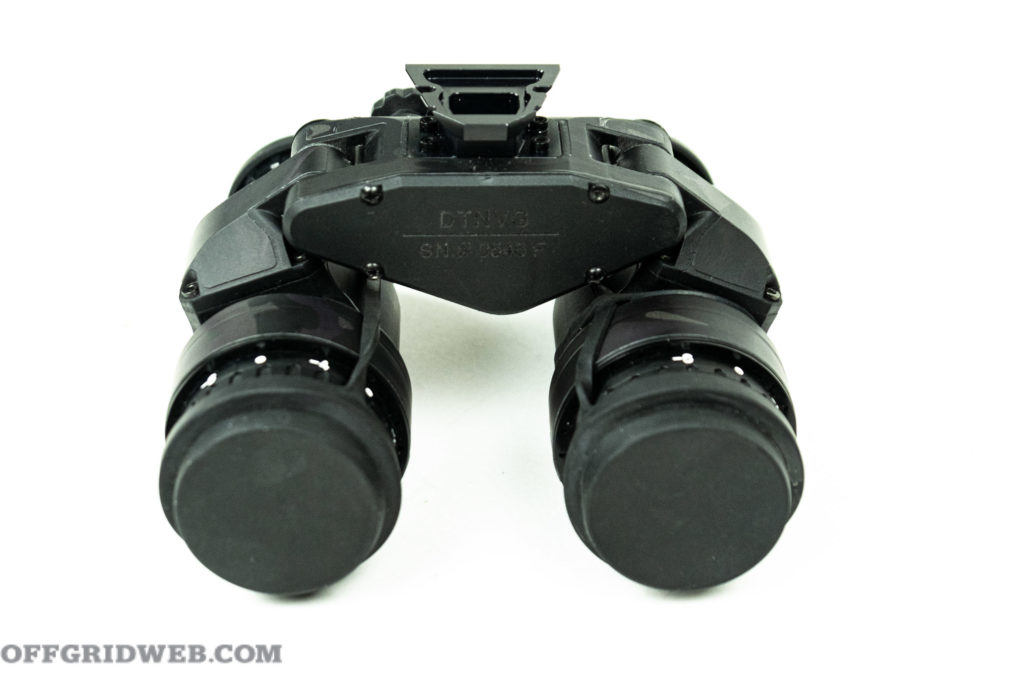
ACTinBlack DTNVG
Built by Night Vision Incorporated
Optional Image Intensifiers: L3 Harris 24 UA Gen3 Unfilmed White, Photonis 4G Hybrid White
Weight: 528 grams, 18.6 ounces
Battery: CR123
MSRP with L3 Unfilmed: $11,500
URL: nvincorporated.com
Closing Considerations on Night Vision Goggles
While the AN/PVS-14 may be referred to as the new Glock Gen 3 of night vision, as the “everyman's NODs,” night vision goggles will continue to proceed as the world standard for above-recreational equipment. The cost of entry for night vision definitely requires some time, consideration, and planning for most civilian buyers, and it doesn't stop at what you're looking through. Along with NVGs, one will have to consider helmet, mount, and if there's a weapon involved, IR laser/illuminator.
Still, for the long-term, night vision goggles are the staple for all but top tier special operations units. Maybe a breakthrough will occur that will force us to eat our words on the matter of NVG cost of entry, but if that comes to pass, we certainly won't be complaining.
More on Night Vision
- How to set up your Rifle for Low-Light/No-Light Conditions.
- Night Vision 101.
- GBRS Group: Shadows that Bite.
- Night Vision Helmet Setup Guide.
- Sionyx Aurora Pro: Color Night Vision Review.
- S&S Precision: PlateFrames, Chest Rigs, and Illumination: More than Maritime Excellence.
- Unobtainium Gear Active Night Vision Recording System: Taping what you see.