Money Clip: Pocket Preps

When we asked survivalist Les Stroud (see Issue 21) what his most important everyday-carry (EDC) item was, we were shocked to learn it wasn’t something sexy like a folding knife, but rather it was cash and credit cards. His reasoning is that you’re more likely to use what’s in your wallet or money clip — not your go-bag — to either evade a crisis or to recover from one.

Picture buying fuel for your vehicle before a hurricane evacuation, or having the liquid funds to pay for a replacement part in the event of an unforeseen breakdown. In the worst-case scenario, you might have to bribe your way through a situation. Money solves a lot of problems, and can usually help prevent the rest.

That’s why we’re taking a closer look at a convenient way to carry these items: money clips. 

Before minimalist wallets were invented, the money clip existed in various forms for centuries, but the modern version was patented in the early 20th century. It’s usually made of rectangular metal that’s folded in half so that cash and/or cards can be wedged between the two ends. Some have hinged clamps, while others feature a timepiece or are decked out with diamonds.

The money clips we review here aren’t quite that Gucci. Some are simple but functional, others have integrated tools, and one is even ubiquitous office stationery you probably never even thought of using. All are worth a look-see. 


511 Utility Money Clip_

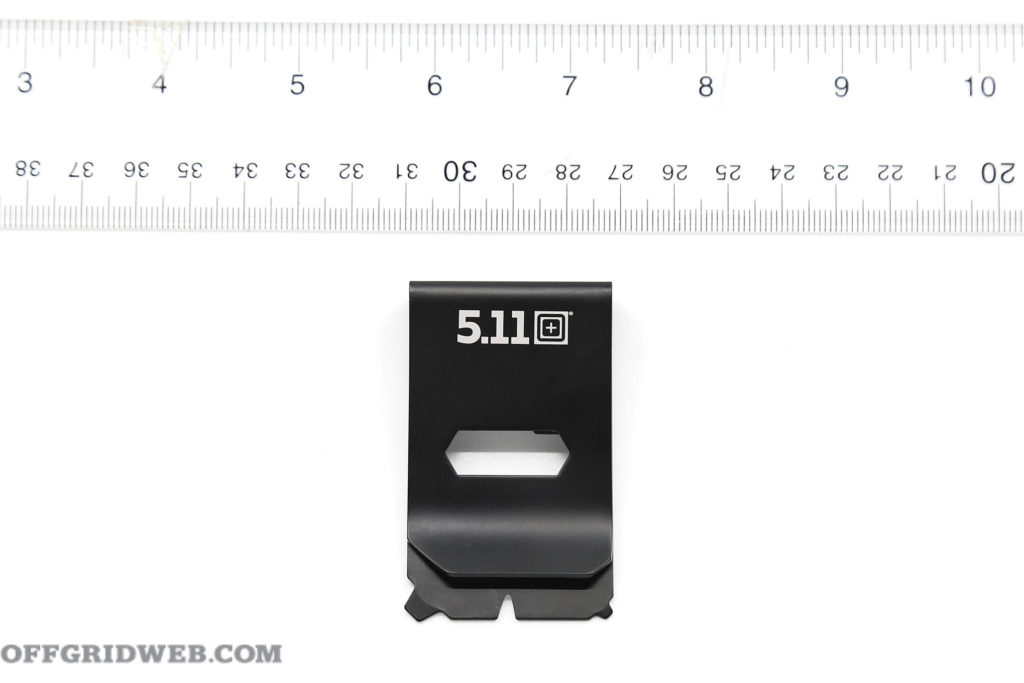
5.11 Tactical Utility Money Clip Multitool

Material: Spring Steel
Dimensions: 2.5 by 1 inches
Weight: 1 ounce
MSRP: $20
URL: 511tactical.com

pocket clip 511 Utility Money Clip_

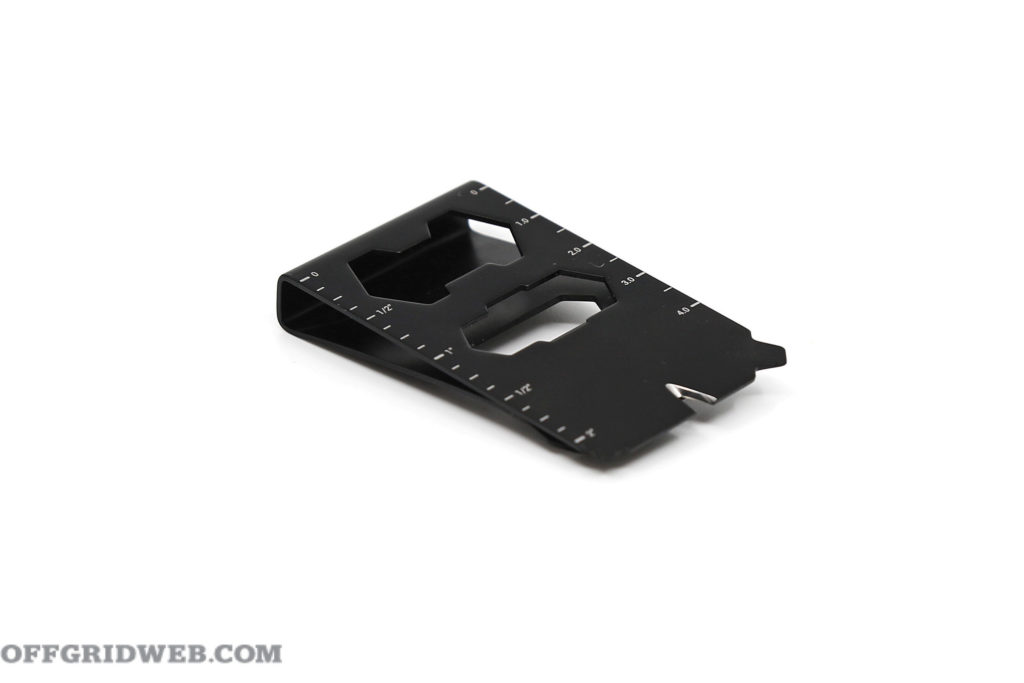
At first glance, this clip looks like your average modern money clip. But on closer inspection, you’ll realize it actually has some built-in tools that give it more functionality than just holding your paper and plastic. There’s a wire stripper, bottle opener, multi-size bolt wrench, flathead screwdrivers, and both metric and imperial rulers. Overall, it’s a robust money clip with a smart, functional design.

Money Clip 511 Utility Money Clip_

Pros:

  • Integrated tools add greater utility 
  • Goldilocks size: not too small, not too bulky
  • It’s made of 1.2mm spring steel, providing good strength to keep your valuables in place, but it’s flexible so it won’t crack.

Cons:

  • It’ll be a tight fit if you want to carry more than just one or two credit cards and a wad of cash.
  • The screwdrivers are too stubby to reach recessed screws.

clip filson tug boat

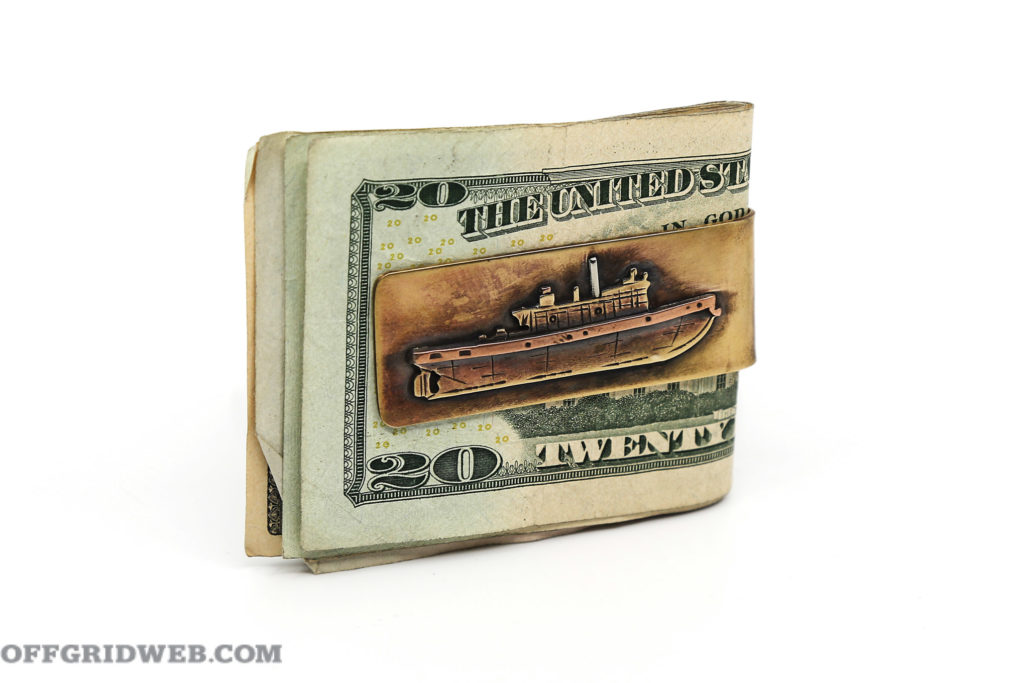
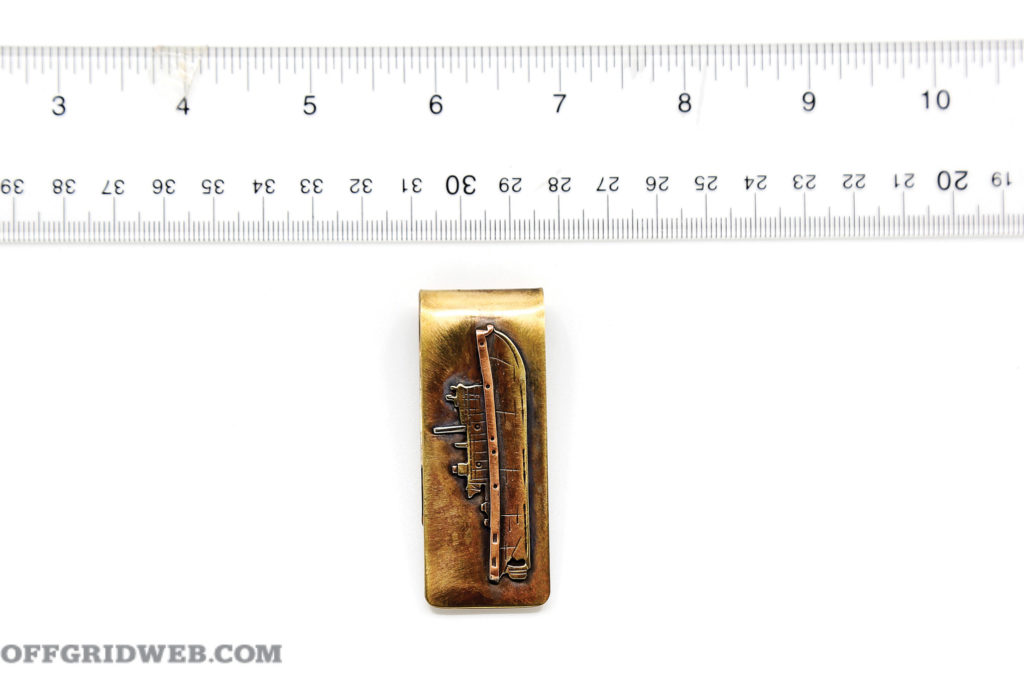
Filson Tug Boat Money Clip

Material: Brass, Copper
Dimensions: 2.6 by 1 inches
Weight: 1 ounce
MSRP: $78
URL: filson.com

clip filson tug boat

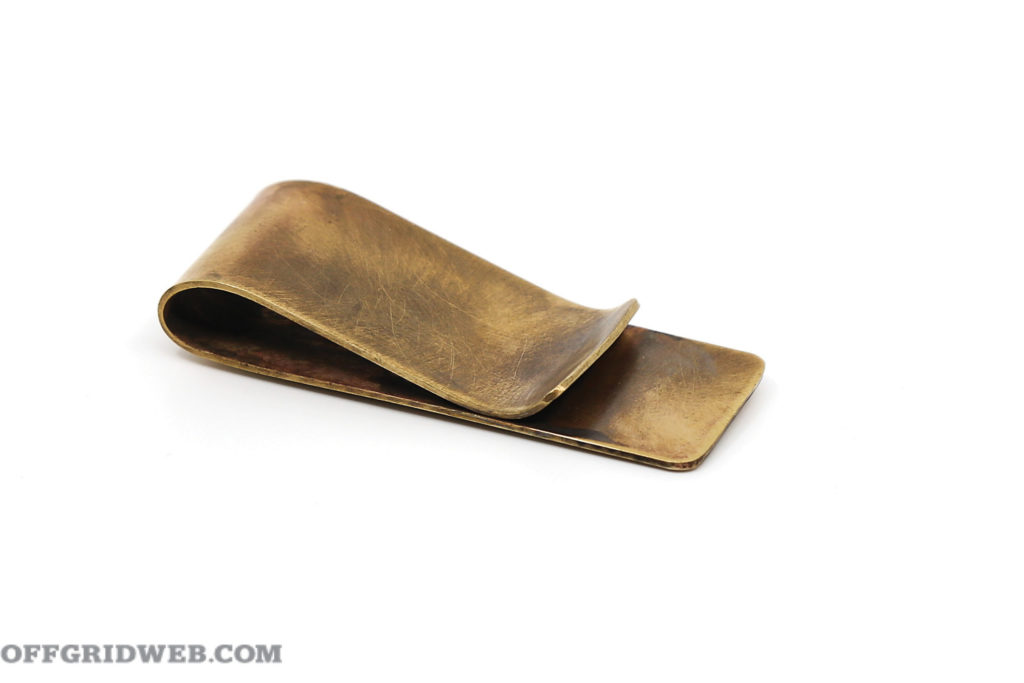
This is something your granddaddy probably could’ve carried — and that’s a compliment. Handmade in Ohio from brass and copper, this Filson accessory features a tugboat that’s handcut using a jeweler’s saw then soldered into place. This limited-
edition piece has the look, feel, and weight of an old-school money clip and harkens back to an era when craftsmanship mattered and products lasted longer. A classy, made-in-the-USA money clip for EDC.

clip filson tug boat

Pros:

  • Intricate artwork and vintage appeal
  • Solid heft without being heavy
  • Tight clip ensures your moolah won’t go missing

Cons:

  • Unlike some of the other clips reviewed here, this one doesn’t have any secondary functions despite being the priciest option at $78.

money clip halfbreed blades CCC-1

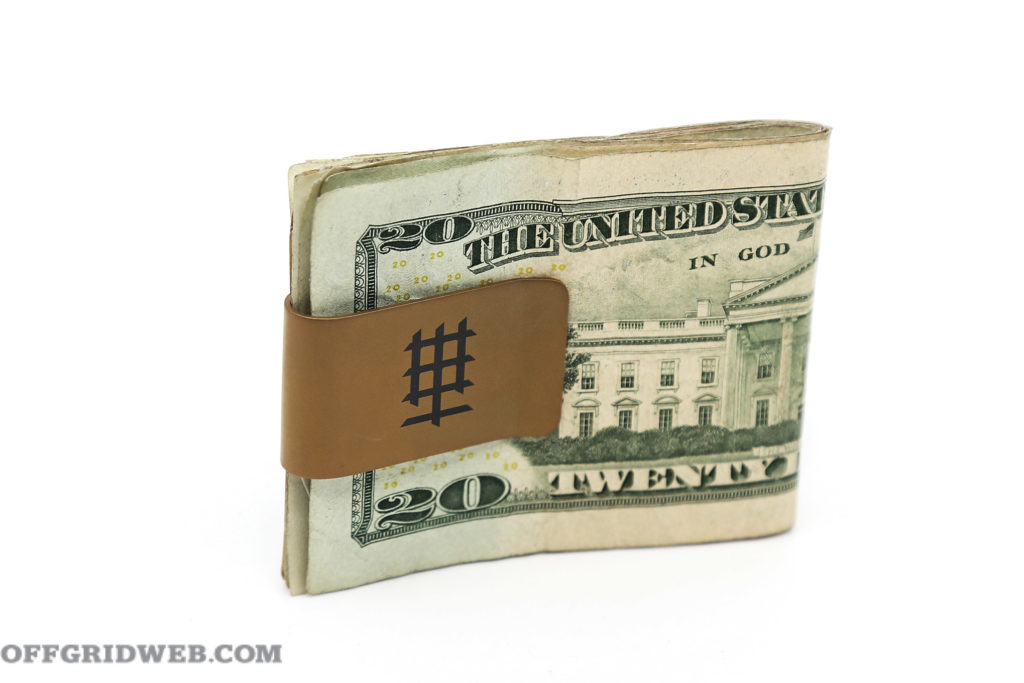
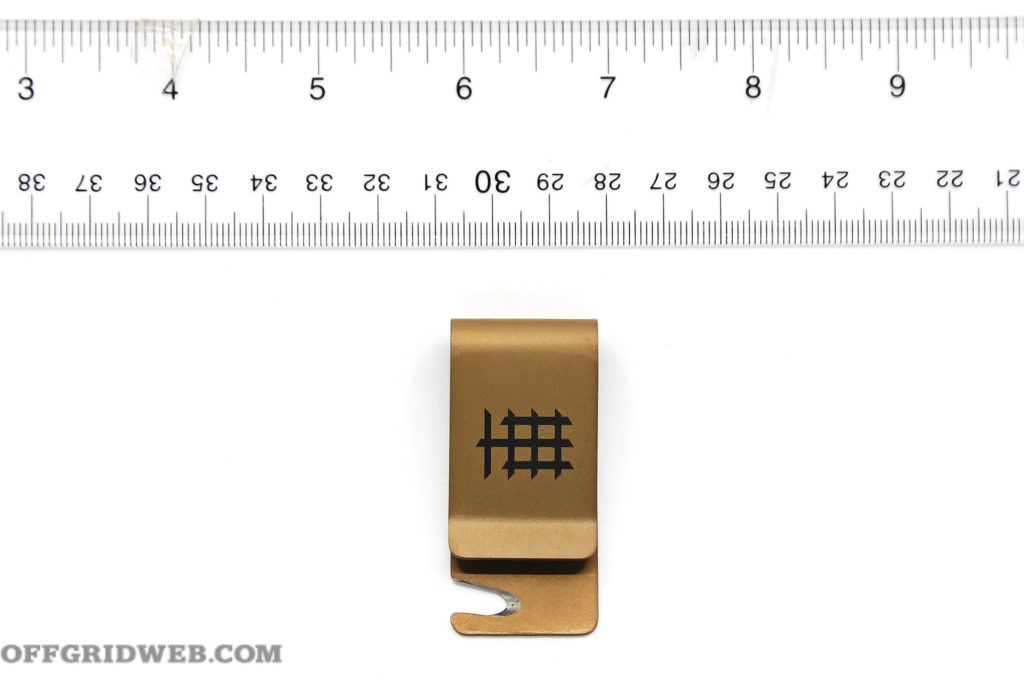
Halfbreed Blades CCC-01

Material: Titanium
Dimensions: 2.1 by 1 inches
Weight: 0.4 ounces
MSRP: $55
URL: halfbreedblades.com

money clip halfbreed blades CCC-1

The CCC-01, or Cash & Card Clip, earns our Top Pick Award because it can do more than just hold your dough and plastic. Made from titanium, it has a built-in belt cutter (for slicing seatbelts in emergencies or more mundane tasks like opening packages) and a multi-size hex wrench (for your torquing needs). It’s a badass blend of good looks, smart design, durability, and EDC functionality. Available in Black, Dark Earth, and Ranger Green.

money clip halfbreed blades CCC-1

Pros:

  • It’s as tough and functional as it is handsome.
  • Titanium is flexible yet incredibly strong and lightweight.
  • Anti-reflective PVD coating increases wear resistance
  • Comes in a classy foam-lined box with logo sticker, warranty card, specifications card, and certificate of authenticity

Cons:

  • There’s a roughly 1/8-inch gap where the clip’s two ends meet, which makes it easier to slide a thick fold of greenbacks … but is too loose if you want to carry only a couple of bills.

mgear gadget wallet

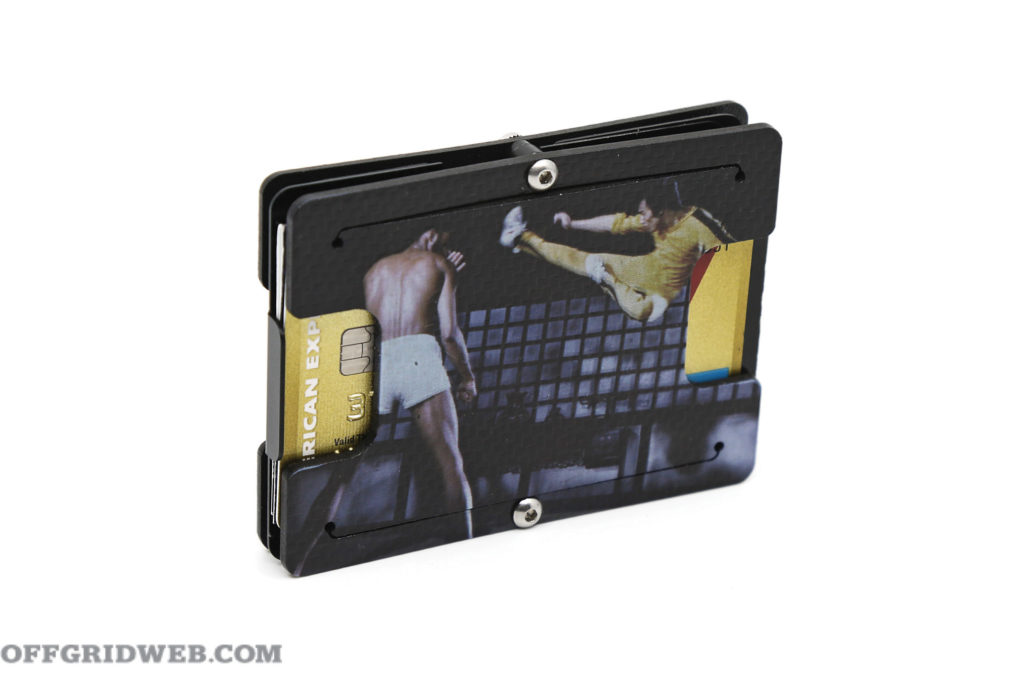
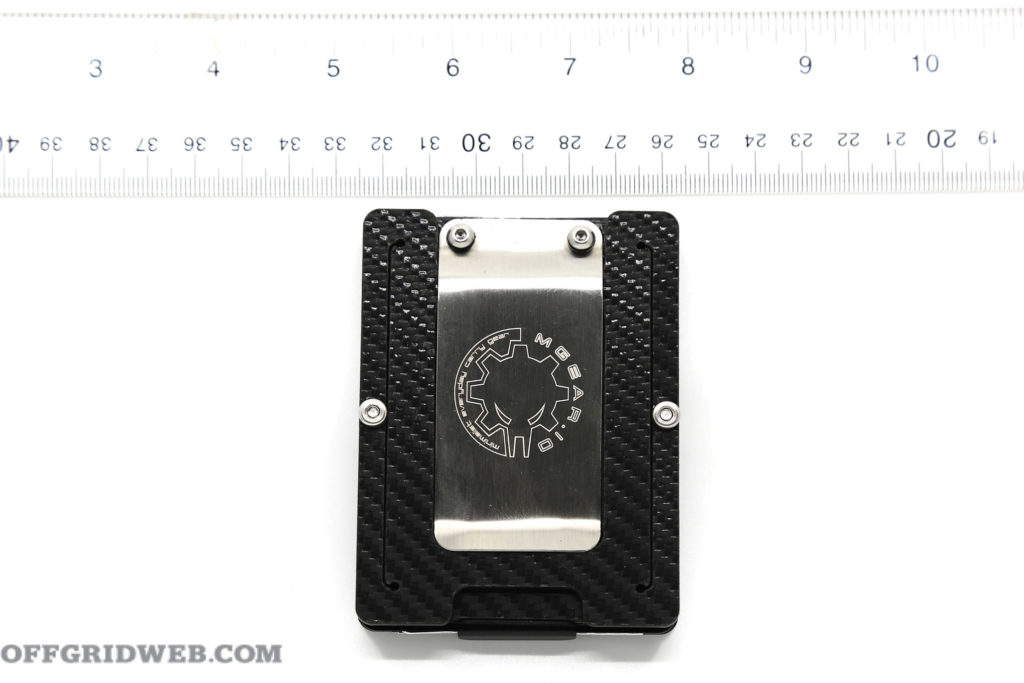
MGear Gadget Wallet 2.0 – Hero Edition

Material: Various, including polymer and stainless steel
Dimensions: 3.6 by 2.6 inches (entire wallet + money clip)
Weight: 3.7 ounces (entire wallet + money clip)
MSRP: Starting at $50
URL: mgear.io

mgear gadget wallet

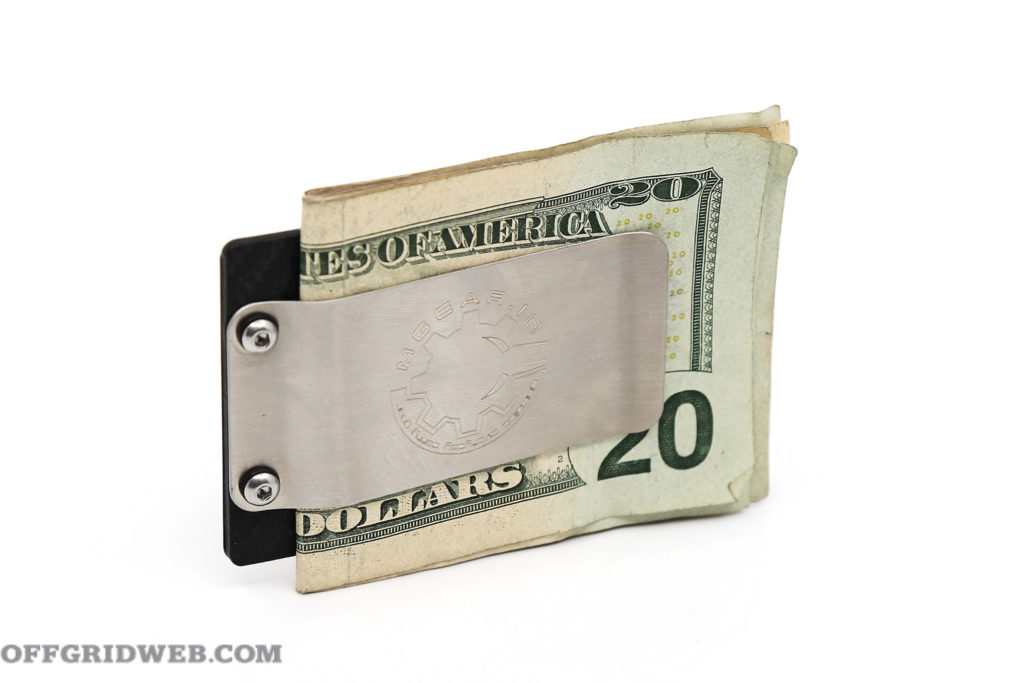
This is actually a multi-tool wallet, but we’ve included it because it comes with a substantial money clip that’s removable. What’s cool about the Gadget Wallet is that it’s customizable à la carte style; you can pay extra for a custom printed image, an engraved steel clip, or a variety of survival tools. Our upgraded review sample — which came with the money clip, a 10-in-1 mutli-tool, and a Bruce Lee print on the backside — priced out at $59.

mgear gadget wallet

Pros:

  • If you’re looking for more than just a money clip, the Gadget Wallet 2.0 offers greater cargo capacity in a slim package.
  • Highly customizable for a reasonable price
  • Base model wallet comes with Fresnel lens, RFID-blocking ruler/survival guide card, and more.

Cons:

  • The stainless steel clip is large and strong, which is nice, but it’s screwed to a plastic frame with faux carbon fiber, which isn’t so strong and flexes too much.
  • It might lean too close to the “tacticool” aesthetic for some.

money clip nite ize

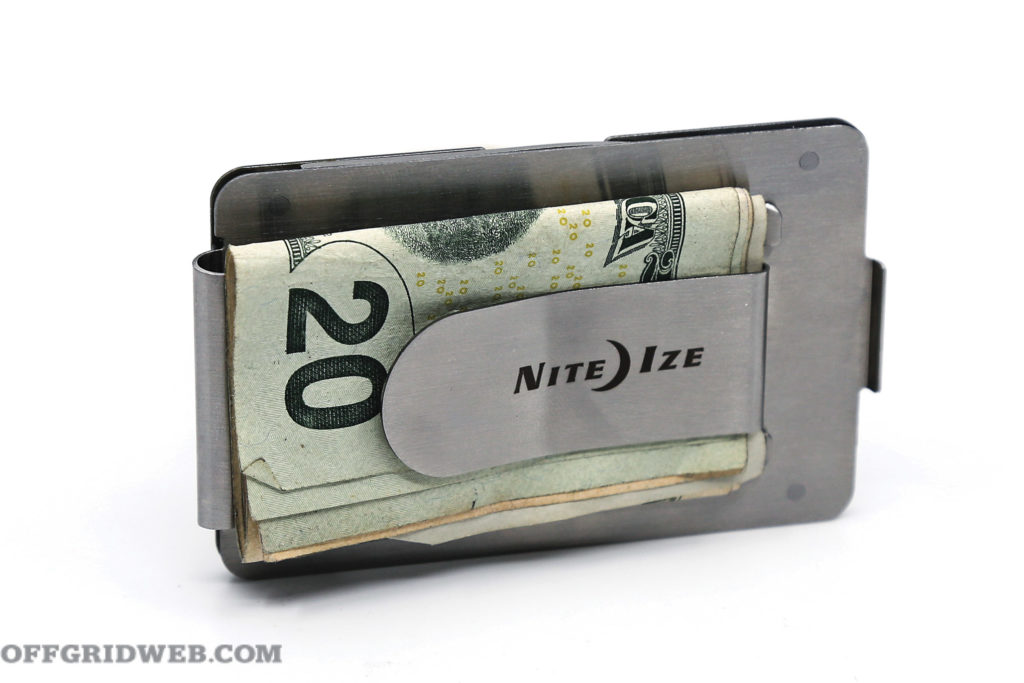
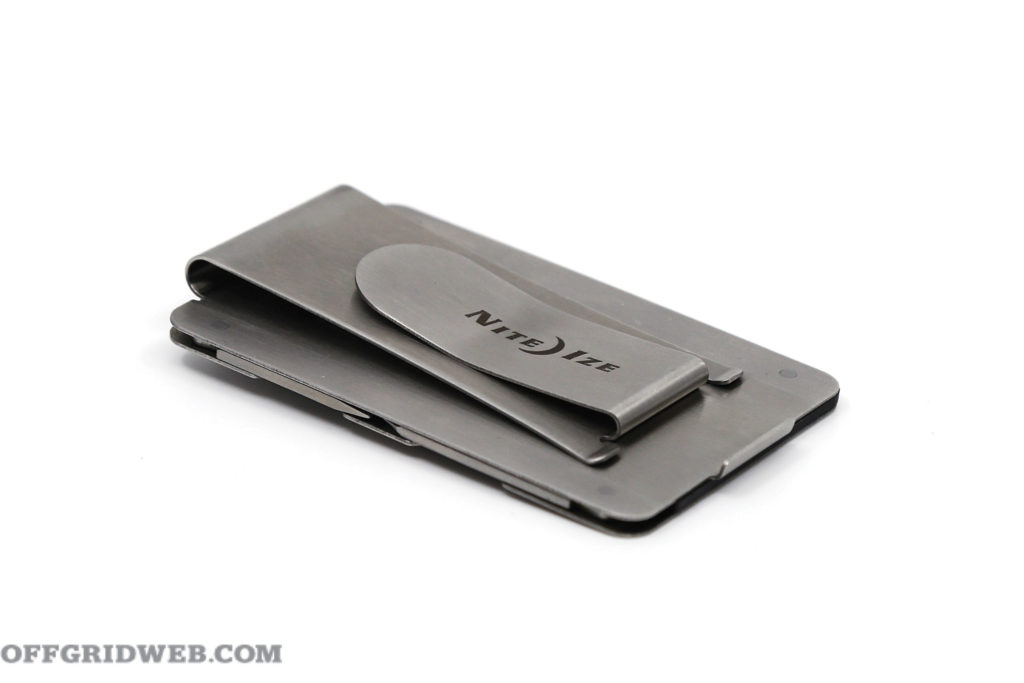
Nite Ize Financial Tool Money Clip + Pocket Tools

Material: Stainless Steel
Dimensions: 3.5 by 2.2 inches
Weight: 3.3 ounces
MSRP: $20
URL: niteize.com

money clip nite ize

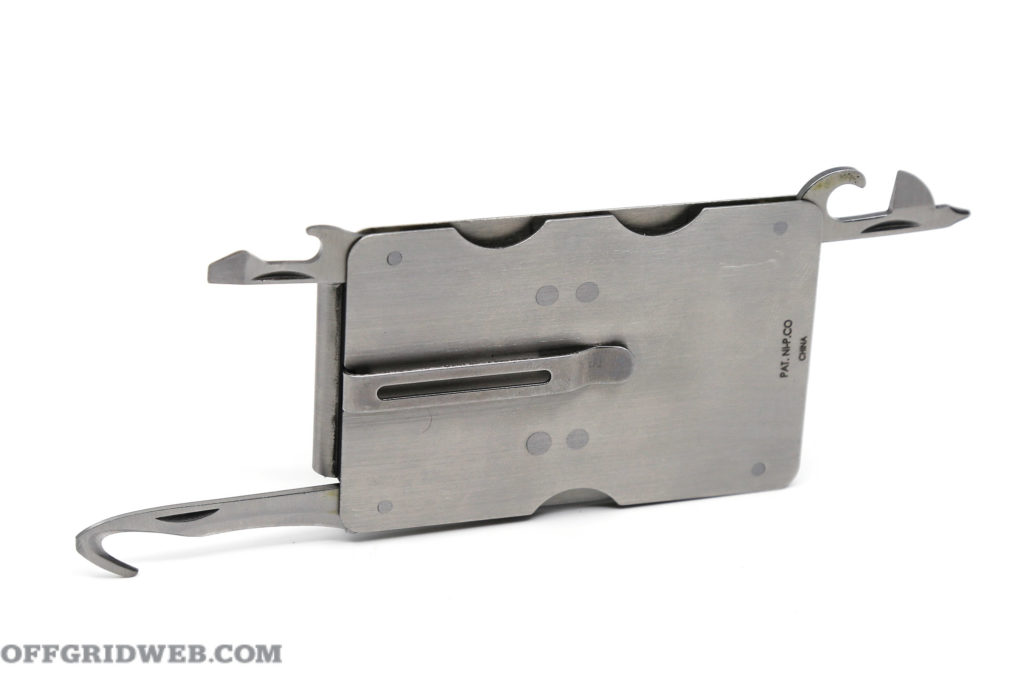
Unlike the conventional design, the Financial Tool Money Clip is folded twice, with the bigger fold for holding a couple of charge cards and the smaller fold for cash. Plus, it’s an extension of a larger rectangular body that houses a fold-out hook knife, can opener, bottle opener, and screwdrivers. The Financial Tool Money Clip is a brilliant outside-the-box design packed with utility for an affordable price, which is why it earns our Best Value Award.

money clip nite ize

Pros:

  • With a 6-in-1 multi-tool design, it’s more than a money clip.
  • Durable stainless steel construction
  • Comes with a retractable pocket clip for deep carry
  • Great bang for the buck

Cons:

  • The short screwdrivers won’t be able to reach recessed screws.
  • Not ideal for holding more than a few plastic cards

binder clip and cash

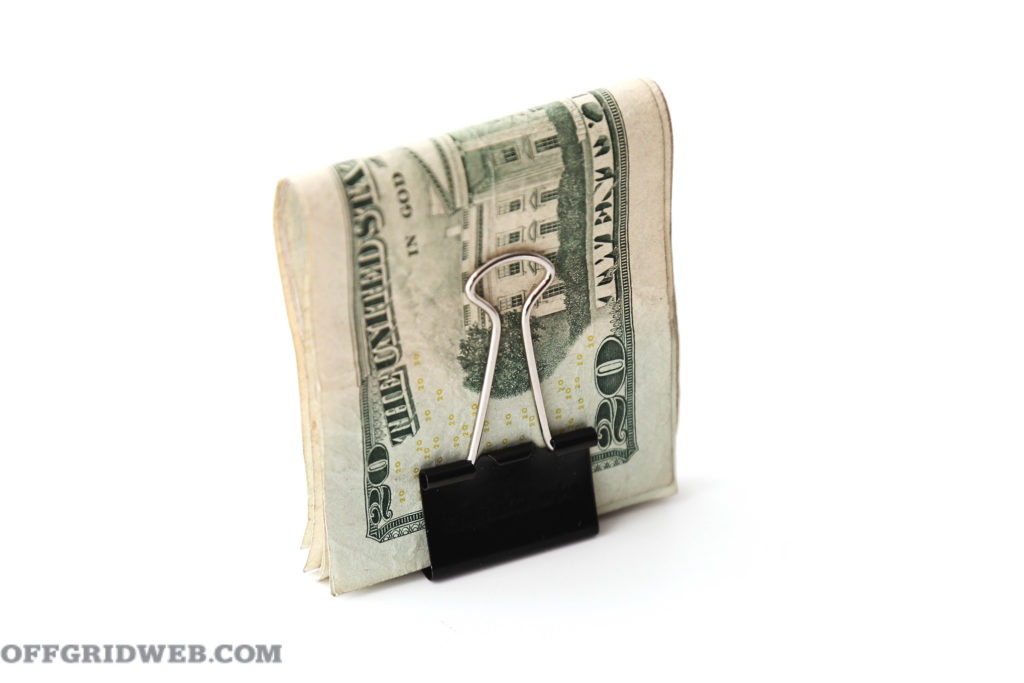
Office Depot Binder Clip

Material: Stainless Steel
Dimensions: 2.2 by 1.3 inches
Weight: 0.1 ounces
MSRP: $4 for a 24-pack
URL: officedepot.com

binder clip

All too often, newbie survivalists want the flashy toys instead of investing in learning skills. That’s why we’ve included this super low-budget option: the binder clip. Anyone who’s ever attended high school or works an office job has a ton of these stashed in their desk drawer. Pull one out, because it doesn’t just work as a strong money clip, but also can be improvised for a variety of post-SHTF scenarios — you’re limited only by your skills and imagination.

Pros:

  • Super cheap option at about 16 cents a piece
  • Lightweight and durable
  • Can hold several credit cards and a decent-sized wad of cash
  • Has many improvised survival functions when used in conjunction with other items, e.g. set up a rain catcher, secure tarp for shelter, etc.

Cons:

  You won’t win any style points.


money clip vargo money clip

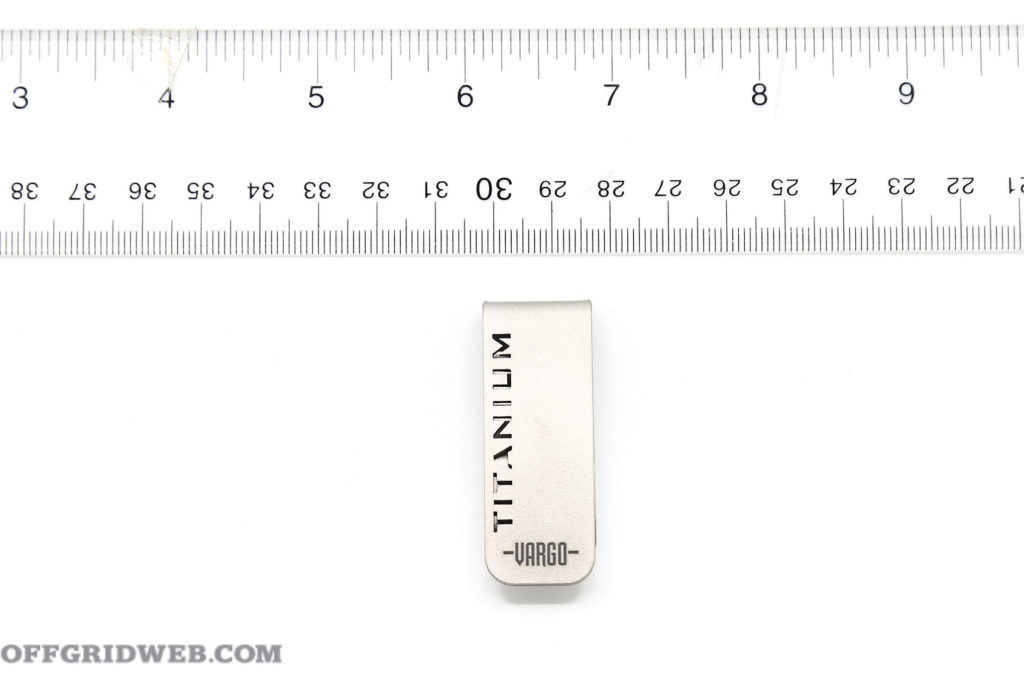
Vargo Titanium Money Clip

Material: Titanium
Dimensions: 2 by 0.8 ounces
Weight: 0.3 ounces
MSRP: $20
URL: vargooutdoors.com

money clip vargo money clip

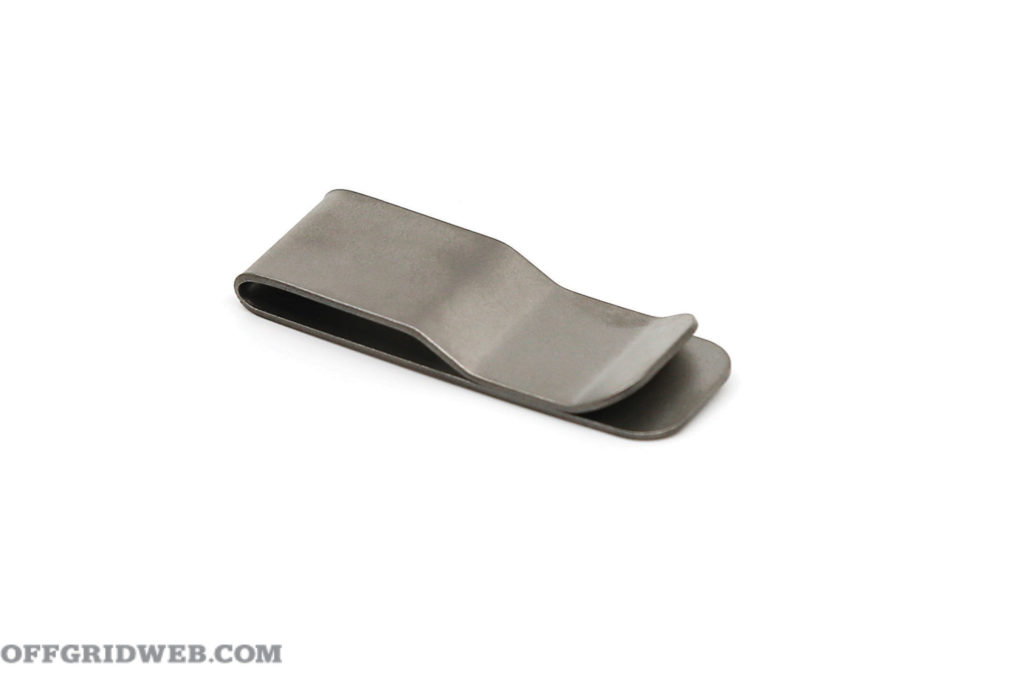
This little puppy is for ultra minimalists. It’s 2 inches long, flatter than a pancake, about the width of a finger, and just a third of an ounce (seven grams) — making it a barely there holder of your hard-earned bucks. Plus, it’s made of titanium, which has one of the best strength-to-weight ratios of any metal. This is most ideal for those who need to save weight while out on the trail or just on a quick convenience store run.

money clip vargo money clip

Pros:

  • Slim, light, and classy
  • Titanium is crazy strong, so this clip will hold tight to your stash.
  • Sophisticated and aesthetically pleasing in its simplicity

Cons:

  • Nitpicking here — because it does its job beautifully — but, aside from holding your bread, it doesn’t have any other function.

More Pocket Preps


The Fenris Chest Rig – Moving Beyond Average

If you don't look at the Fenris and see the 2021 version of the rig used in the film Heat, you lack imagination.

Chest rigs come in all shapes and sizes, well, almost. Until now, most chest rigs oriented your magazines vertically across your chest. The Fenris from Nightfighter does things differently. Instead of running them across your chest with the magazines oriented vertically, the Fenris holds them horizontally, positioning them under the shooter's arms. brn-180 fenrish chest rig

Minimalism describes the Fenris perfectly. It gives you nothing more than magazine slots. No fancy MOLLE webbing, zero room for admin pockets, and no, you don't get a map pocket. Users get six AR 15 sized magazine pouches and a series of straps to make it fit. That's it.

Breaking Down The Fenrir

Six magazine pouches break down to three on each side. Are they strictly designed for AR 15 magazines? No, as elastic magazine pouches, they can fit a surprising variety of magazines into the pouches from the Mini 14 to the Steyr AUG; you get room for everything.

Admittedly shooters can fit a variety of gear into an elastic pouch designed for 5.56 sized magazines. Feel free to pop in a CAT tourniquet, a radio, a smoke grenade, or whatever else your mission may dictate. The pouches cling tight to whatever you squeeze in, and they won't let your gear go without a fight. The magazines are held tighter than a KAC castle nut. fenris chest rig

Nightfighter produces a 308 variant for FAL/G3/AR 10 shooters and a PCC variant perfectly paired with an MP5 or CZ Scorpion.

The setup provides a supportive series of straps with one that goes around the neck, one in front of the stomach, and two crisscrossed back straps that provide a minimalist setup that secures the magazines under your arms with ease.

What's the purpose of packing that much lead under your arms instead of across your chest? Well, concealment mostly. Users can strap 180 rounds of 5.56 under their arms, toss on a windbreaker or a good flannel, and they disappear. brn-180

An open jacket or overshirt will show the stomach strap, but most people won't pay enough attention to ever see it. You add some bulk to your frame and may feel like you suffer from invisible lat syndrome, but again, it takes a dedicated eye to notice such things. Pop in 20 round magazines to reduce bulk if you feel it's too much.

Getting Fitted With The Fenrir

Anything secured by good elastic takes some force to remove, and due to this, the fit must be tight. The Fenris offers plenty of room for adjustment, but a buckle extender for the stomach strap was necessary to accommodate my six-foot-five-inch, 270-pound frame.

Once fitted properly and loaded down, you'll feel the weight in your neck. A combination of the weight and thin neck strap delivers a pressure point on your upper neck. Minimalist designs rarely excel in the comfort department, but that being said, the pinch never got unbearable.

Even when worn for hours at a time, the discomfort never moved beyond a feeling of pressure. A pad could help, and modifying gear for comfort is a time-honored tradition.

Fitted properly means the magazines are pushed up and underarms. When the magazine sits under the arms high and tight, you maximize your ability to conceal the magazines.

The rig will rub your arms a bit, but long sleeves quickly take care of that. It's one of the tradeoffs of using minimalist, concealable gear. They don't have the room to stretch and build for comfort. Rigs like the Fenris fulfill a specific niche, and that does create a challenge to balance concealment and comfort.

Getting Frisky With the Fenrir

Experimentation guided magazine orientation. On the dominant side, the projectiles face downwards; on the nondominant side, projectiles face upwards. When speed is of the essence, this orientation allows for rapid and intuitive reloads. It's easier to grip magazines on the nondominant side with a thumbs-up grip and on the dominant side a thumbs-down grip. Shooting gloves helped grip the magazines, but barehanded wasn't difficult either. fenris chest rig

Regardless of how a chest rig orients the magazine, it must be accessible at all times and in all positions. A proper test included magazine changes in the prone, the kneeling, standing, behind cover, moving, and even in a vehicle. The majority of the testing utilized a BRN 180 rifle with a rifle-length barrel. Inside the vehicle called for a shorter AR pistol for maneuverability's sake.

Putting the Fenris through a wide variety of situations will show any weaknesses or flaws we might not have imagined when stuck on a square range. A shot timer provides objective data for the testing. Time without context means nothing, so to provide context, the Fenris faced off with a normal chest rig. Specifically a Blue Force Gear Ten-Speed M4 chest rig. chest rig

The Square Range

On the square range, in the standing, rifle reloads could be accomplished in under 3.5 seconds, with the fastest being 3.10 and the slowest being 3.43 seconds. Reloads required an accurate shot fired on a 25% IPSC target to end the drill. Times with the Blue Force Gear Ten-Speed M4 Chest Rig were close to identical. The fastest reload with the BFG chest rig occurred in 3.17 seconds, and the slowest was 3.38 seconds. side by side chest rigs

Faster and more talented shooters will drive that number down. Nothing in the Fenrir's design makes drawing a magazine and reloading your rifle difficult. brn-180 reload

Switching to a kneeling position showed a similar result, with all reloads taking less than 3.5 seconds with both rigs. brn-180 reload kneeling

The prone position resulted in a slightly more dramatic difference. Reloads in the prone were more intuitive with the Fenris rig and allowed more efficient movements to retrieve the magazines. Since they sit on the side of the body, they do not require the user to rise slightly to retrieve magazines. brn-180 reload prone

A greater gap in time appeared between the two chest rigs with an average time of 3.23 seconds with the Fenris and 3.45 with the Blue Force Gear rig.

All in all, none of the standard square range shooting positions compromised access to magazines in the Fenris chest rig.

Beyond the Square Range

Moving into more dynamic shooting showed the Fenris remained capable. A PTS Barricade challenged the Fenris to dynamic shooting positions at awkward angles, and it never tapped out. Reloading on the fly in such awkward angles remained intuitive and ergonomic.

Again when pressed against a traditional chest rig, the times were nearly identical with reload times well below 3.5 seconds, and the Fenris broke the 3 second par time with the traditional chest rig lagging behind by fractions of a second. On average, both the Fenris and Blue Force Gear rigs averaged around 3.2 seconds on the reload. fenris chest rig reload cover

When moving quickly, the Fenris will move if it's not appropriately tightened down. The Fenris needs to be tight to ensure there is no rocking motion. Beyond that, there was no major difference between the chest rig and the Fenris rig. The Blue Force Gear Ten-Speed M4 rig proved to be the slightly faster option on the move.

Presenting the magazines up front meant arm movement never got in the way of retrieving magazines. The Blue Force Gear rig averaged right around 3.46 seconds, and the Fenris lagged behind at an average of 3.54 seconds.

Inside, a vehicle challenged the Fenrir. Retrieving the magazines requires you to drive your arm rearward. Driving your arm rearward against the chair created a challenge and required less efficient movements. The Ten-Speed chest rig forces your arms to move forward, resulting in no additional challenges. brn-180

The Fenrir's average reload time was 3.48 seconds, and the Blue Force Gear M4 chest rig offered an average reload time of 3.32 seconds.

The End of All

The times between the two chest rigs were minimal outside of reloads in the prone position. The Fenris isn't a revolution of providing more accessible and faster reloads. Instead, the Fenris allows you to reload just as fast as a traditional chest rig with the ability to conceal the rig on demand.

Additionally, the ability to carry a larger fighting load than most chest rigs should not be underestimated. Most chest rigs offer four to five magazine pouches, and most minimalist designs offer even less. The Fenris gives you six slots for magazines and additional gear. fenris chest rig front

Concealment comes at the cost of comfort. A traditional chest rig provides you more comfort but is a good bit harder to conceal. The Fenris offers you concealment and access. The rig remains concealed even when your jacket or shirt remains opened. Mission drives gear selection, and the Fenris chest rig fits a niche use.

Where to Find The Fenrir

One man shops pop up every now and then, making outstanding gear. Nightfighter is no different. If the Fenris fits your mission needs or your want for a modern Heat style rig, you can find Nightfighter on Instagram at Nightfighter848. Send a direct message to order your own Fenris rig and let us know below what you think about the Fenris rig, minimalist chest rigs, and concealable load-bearing gear.


How to Set Up Your Rifle for Low-Light (or No-Light) Conditions

Every day, most of us have approximately 12 to 16 hours of sunlight to work with. That means we also have approximately 8 to 12 hours of darkness. If your rifle, handgun, or shotgun aren’t setup for working in the dark, you potentially have a limited-use item — a 12- to 16-hour gun for a 24-hour world. If you’re one of these folks, we’re going to help you out. I personally strive to have a 24-hour gun. So, no matter the occasion, I have a working firearm that can do more than just shoot in well-lit, controlled environments. I want a reliable, dependable system with the equipment that’s better than just “good enough.” The phrase “good enough” tells me that you know there’s better, and you’re not willing to achieve it — don’t fall for that trap.

jon dufresne main rifle

Above: Battle Arms Development Workhorse Rail with a Rosco MFG Bloodline barrel and a SureFire RC2. On the rail is a Cloud Defensive REIN and B.E. Meyers MAWL.

Let us start our journey with a base rifle. Like I stated above, I want something reliable and dependable. There are plenty of fantastic manufacturers out there, but I personally choose Battle Arms Development for my base rifle. At the heart of the rifle is a Rosco Manufacturing barrel — I’ve tested it in so many conditions in the last few years that I don’t want to use anything else at this point. Once you make your choice, or if you already have a base ready to go, we need to pick the appropriate accessories to add. Options are almost endless, so we’ll touch on some of the most important. 

Optic Choices (Red Dot vs. Holographic vs. LPVO) 

Optics are going to be the primary way we aim our rifles, so choose wisely. We have some things to figure out if we want to fight in the dark. Red dots are standard nowadays, and they’re usually the easiest to learn with and use night or day. Red dots come in two distinct offerings: diode or holographic. 

Scalarworks leap mounts for vortex razor and aimpoint t1 night vision height mounts

Above: Scalar-works LEAP 1.93 mounts for the Vortex Gen 2 Razor 1-6 (Left) and Aimpoint T-1 (Right).

Diode-based optics project light from an LED, which the front lens reflects it back toward your eye. Very simple and robust. The downside is that this projected light can appear distorted for those of us with imperfect vision (especially astigmatism). If that’s not an issue, then the hard part comes in with choosing a specific optic. This is one of the more personal choices that you’ll have to make. I use the Aimpoint Micro series most of the time, unless I’m testing something for another company, because they have a long battery life, low weight, small size, and a sturdy housing with easy adjustments. No frills, they just work. If you plan to use night vision, make sure to get a model that features low-brightness settings designed for this purpose.

Battle Arms Development Aimpoint T-1 Unity Tactical Fast Mount

Above: Battle Arms Development Workhorse with an Aimpoint T-1 on a Unity Tactical Fast mount.

Another option you have is a holographic sight like one of the EOTech models or the Vortex UH-1. These have much shorter battery life than red dots, but work well with magnifiers and night vision. Depending on your eyes, you may see a sparkly reticle or a solid one. I’ve been told by a significant amount of people that their astigmatism is lessened by holographic sights, as well. When it comes to holographic sights, I’ve been gravitating toward the Vortex UH-1 Gen 2, but that is once again a personal choice. You must make your own.

Vortex Razor Gen 3 low light rifle setup

Above: The Vortex Razor Gen 3 1-10 in a Geissele 1.5 height mount with a Holosun 508T on a Reptilia Corp ROF-90 mount.

The third option for optic selection is a Low Power Variable Optic (LPVO), typically with magnification range around 1-6x. LPVOs have an advantage over the other two types of optic: an etched reticle. Depending on the brand and optic you choose, there are some awesome choices out there from Vortex, Leupold, and Nightforce. These optics have magnification when you want it, and models with an illuminated reticle can be used like a red dot with practice. The main downsides are that they’re significantly heavier and more expensive than red dots. Illuminated LPVOs have similar battery life to a holographic sight. When it comes to LPVOs, you’re now working with a more precise optic that you can use to dive deeper into the pool of precision. 

Mount Height 

With optic selection comes mount selection. Mounts typically range from 1.3 inches all the way to 2.33. So, let’s go through them to see what may fit your needs.

t-1 micro mount heights

Above: From left to right, an ADM 1/3 co-witness mount, Scalar-works LEAP 1.93, and Unity Tactical Fast 2.26.

1.3 to 1.5 are great for magnified scopes, or for when you need a consistent cheekweld for precision shooting. Just be aware some scopes won’t fit in a 1.3 depending on the objective lens size. I also don’t recommend the 1.3 and 1.5 (absolute co-witness) for red dots on most weapons. It’s unnecessarily low for the needs that a red dot fits, but like everything, it’s your choice.

The next step up is a 1.7, also known as a 1/3 (or “lower third”) co-witness height. This is a popular place to mount LVPOs and red dots for iron sight co-witness, if you still use iron sights. It’s still a little low for those of you trying to use it for night vision, and depending on head size, you may end up craning your neck.

Unity Tactical Fast Mount T-1 Micro night vision rifle setup night vision optics

1.93 is the next height — this is at the limits of comfort for any prone shooting with night vision, but it’s a great height for those who plan to be upright or standing more than prone. I enjoy the 1.93 or 2.05 for my LPVOs that I’ll be using as a primary optic. This height also works well for red dots.

Next up are the 2.26 and 2.33 heights. I don’t suggest these for an LPVO. It ends up being difficult to consistently avoid parallax — not that it cannot be trained, but it’ll take more work and is very straining on the neck for anything prone. My suggestion for any mount that you choose is to figure out the purpose of the rifle and the optic you’re using to make a choice. 

two carbines night vision optics low-light no-light carbine setups

Above Top: Battle Arms Development Workhorse — my main jam. Below: Rosco MFG 12.5 URG — my do-it-all rifle.

Another style of mount selection is blending the traditional mounts above with an offset mount. There are a lot of combination mounts that you can put micro red dots on the top or side (45-degree) of your scope. This adds a level of redundancy and options to enhance your capabilities. Top-mounted red dots on scopes are one of my favorite styles, as it gives me ambidextrous use of my rifle in a scope or red dot capacity. I still enjoy using side-mounted dots when I use a higher magnified optic or am trying to keep the height profile of my rifle down. Either one needs some personal consideration depending on your setup and needs.

Weapon-Mounted Lights (White vs. IR) 

Weapon-mounted lights are an absolute must for a rifle. The only exception is something used exclusively for daytime competitions. As for a dedicated low-light rifle, you’ll need a good light. By good light, I’m not just talking about any light that says “tactical” and comes with a rail mount. I’m talking about the output on multiple levels. Your light should have high candela, lumen, and lux stats. Candela is the intensity of the beam emitted from the light. Lumens is the overall brightness rating of the light. Lux is the intensity of the light in a given area or distance. Personally, I stick to two companies that I believe have surpassed the others in performance capability. Modlite and Cloud Defensive have made lights that are modular and offer outstanding performance in these key areas. Modlite offers lights that are compatible with industry-standard mounts, tailcaps, switches, and other components. Cloud has attacked the market in another way, starting from the ground up to develop two different-style lights, the OWL and REIN. Both companies make great products that someone can adapt to their needs. 

weapon mounted lights cloud defensive rain, modlite okw, surefire m600v

Above: From left to right, the Cloud Defensive REIN, Modlite OKW, and SureFire M600V.

If you’re operating under night vision, you may want either a dedicated infrared (IR) or dual-output white/IR light. These are very specific use items. Depending on your laser setup, you can supplement it with a dual spectrum light like the SureFire M300V/M600V “Vampire” series. Just remember most dual-spectrum lights provide both IR and white light, but usually do both jobs sub-optimally. Most use these lights to add more IR illumination to the area they’re targeting for passive night vision use, or as a searching tool. The only dual-spectrum light I use is on my helmet. More on that in the future.

Top down B.E. Meyers MAWL Cloud rein surefire suppressor

Above: A top view of button controls for the Cloud Defensive REIN and B.E. Meyers MAWL.

Muzzle Devices (Muzzle Brakes, Flash Hiders, and Suppressors)

Muzzle devices vary in many ways, and each will have pros and cons. The most common muzzle devices are muzzle brakes and flash hiders. Beyond those, there are also suppressors, which are my favorite option. I can be seen in the wild most of the time using one. Let’s get into some of the details.

Surefire Warcomp, Dead Air KeyMo, Surefire Warcome closed Tine muzzle devices for low light carbine
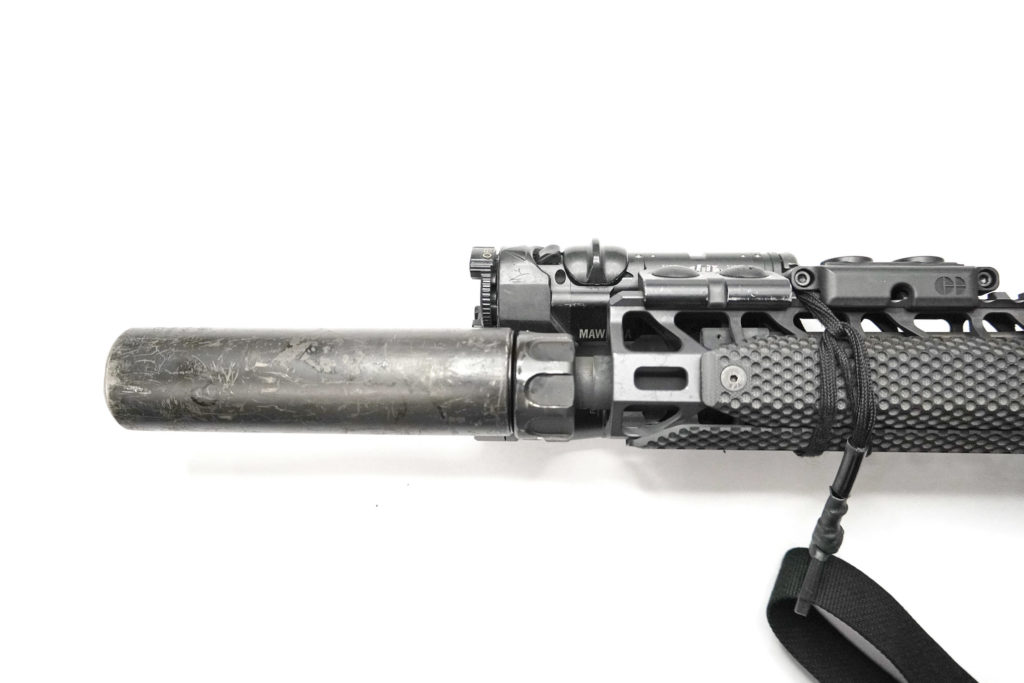
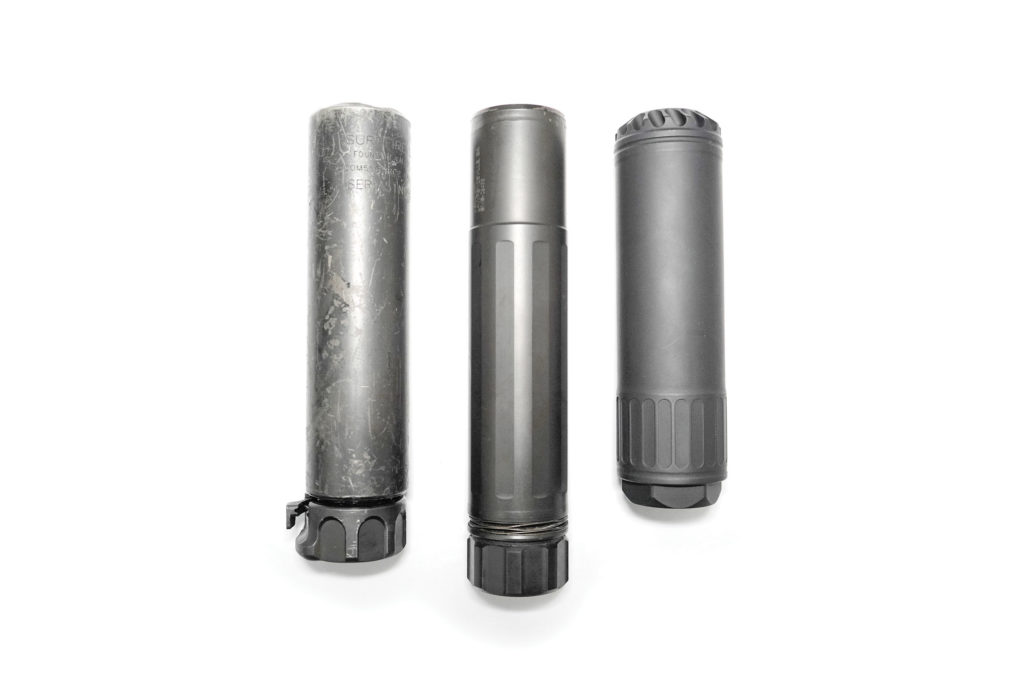
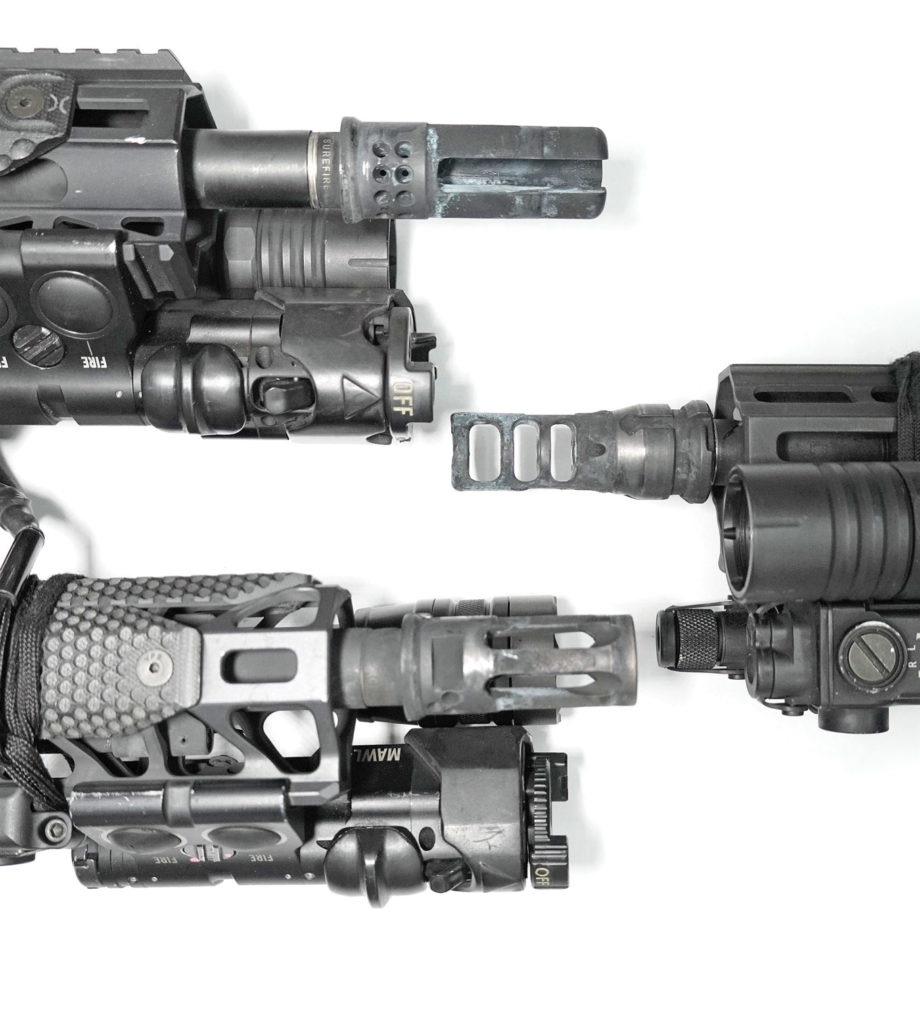
Above: From top to bottom, a SureFire Warcomp flash hider, Dead Air Keymount brake, SureFire Warcomp closed-tine flash hider. 

Muzzle brakes, also known as compensators, are usually the best at recoil mitigation because of the way they redirect gases to force the muzzle lower or reduce muzzle climb. That benefit also has some downsides. I’ve found that if I shoot with a brake/compensator for long enough, I start to relax my shooting position. I relax so much to the point that shooting with anything else is harder to manage. Also, if you’re shooting next to others — teammates and/or classmates — you’ll be hated by all. That redirection of gases and concussive force is very harsh to your neighbors. I suggest that you don’t shoot a muzzle brake indoors, since it’ll be unpleasant even with the best ear protection.

night vision carbine muzzle setup

Above: Battle Arms Development Rail with a Rosco MFG Bloodline barrel, SureFire RC2, and Rail­-scales EXO panels.

Flash hiders conceal the muzzle flash by using slots or holes in the muzzle device. Flash hiders are also misinterpreted: They don’t hide all the muzzle flash; they mitigate or minimize it. Flash hiders were originally meant to help the shooter’s eyesight by not overwhelming the photo receptors in their eyes. Some flash hiders also help with recoil, giving you a blend of a brake and hider. Just remember, most devices that do both usually aren’t ideal at either one. 

SureFire RC2, Dead Air Sandman S, and OSS 556K

Above: Left to right is a SureFire RC2, Dead Air Sandman S, and OSS 556K.

Both kinds of muzzle devices can also include a mount for a suppressor. Suppressors, also known as silencers, use a series of baffles or chambers to limit the expansion of gases. This limits the noise coming from the rifle and can also potentially limit the amount of flash, depending on the length of rifle and suppressor. Suppressors add weight to the front of the rifle, and that takes some getting used to if you don’t do enough pushups. For some, a suppressor is cost-prohibitive, but I highly recommend you save your pennies for one. Suppressors are the ultimate muzzle device for a low-light rifle and can also help protect your hearing. The only other downside is that they get extremely hot with use, so don’t burn yourself.

Laser Devices

Laser devices come in a lot of shapes and sizes. Lasers are also very specific tools and must be cared for, so they take a dedicated user. They’re not plug-and-play like some believe them to be. They must be carefully positioned and zeroed, much like an optic. I don’t recommend just grabbing any laser off the internet. Choose the laser that’ll fit your needs. Visible lasers are great for certain uses, like gas mask work and practicing for IR laser use. Be aware that they have limitations due to lighting in the environment you’re working in. IR laser devices are meant for use under night vision, so they won’t be visible to the naked eye. As a result, IR lasers are often paired with a visible laser, so that if one is zeroed you know the other should be, too. Since I use a lot of night vision and teach it, I use a B.E. Meyers MAWL, which has a visible laser, IR laser, and an IR illuminator. I suggest those going into night vision get something with all three tools. 

night vision optics lasers

Above: Both my setups have some similarities. To the left is a B.E. Meyers MAWL and a Modlite OKW. On the right is B.E. Meyers MAWL and a Cloud Defensive REIN.

Conclusion

Setting up a rifle is very dependent on your needs and wants. I don’t like to skimp on my equipment and don’t suggest it to anyone. Save up and buy the good stuff, instead of buying inexpensive gear that you may have to replace when it breaks or malfunctions. With the myriad of accessories and tools on the market, setting up a low-light rifle can be overwhelming, but I hope that this article helps guide you. Build a list, save your money, and get practicing.

low-light no-light rifle carbine setup

To see Jon Dufresne's Training Calender or to Check out Kinetic Consulting: kinetic-consulting.net
Follow him on Instagram: @mochabear_actual

[Editor's note: Photography by Jon Dufresne and Real Dirty Media.]


MORE ON NIGHT VISION


Book Review: Violence of Mind by Varg Freeborn

One part criticism, one part methodology, Violence of Mind pokes at the soft tissue of how we think of self-defense in order to build a foundation that combines the irreverence of a street fight, with the analytical benefit of systematizing one’s mindset. In this, the book offers two benefits: first and foremost as a cheque to one’s own ego, and second, as an attempt to build not only a roadmap of training progression, but heuristics to protect one’s self from the self-sabotage of misguided intentions. Varg Freeborn announces from the beginning that this work is written to construct the mental foundation needed to support and inform one’s survival, by evaluating one’s actual versus perceived goals, and holding rigorously to them.

In essence, then, this book functions as philosophical, in its true form. In a world of “gotcha” criticisms heavily driven by ego, Violence of Mind begins with asking what is the goal of self-defense, and allows no wiggle room for weak answers. Jabbing at trendy phrases like “I’d rather be judged by twelve, than carried by six” and injecting the physical, mental, legal, and moral aspects of something like self-defense, he balances the criticism with constructive experience and direction.

Varg Freeborn then brings a violent breath of fresh air on how we think about situational awareness, and offers some perspective from the mind of a predator. A recognizable shift from the oft-quoted and long-sterile examples bad SA, he ushers in a different paradigm of broadening one’s range of perception: a sharp contrast to the hyper-vigilance model.  In a world of pseudo-intellectuals who attempt to look smart by noticing a single feature, or simply reverting to the criticize-people-for-being-in-their-phones approach, he addresses how we oscillate between attention to detail and wide-band observation intentionally and how to train it in.

violence of mind toor jank shank

Above: Varg Freeborn is strongly opinionated about the use of knives, from what type of knife is carried, to appearances, to legalities, to what the court might think. The Toor Knives Jank Shank may fit well, but it's you're choice. 

Some of the most valuable aspects of Violence of Mind are diving into Marc MacYoung's hierarchy of escalation, and the author’s structured ideal training pathway. By identifying the distinction between “advanced” and “specialized” training, he draws a line that separates CQB from advanced self-defense. In this, he argues that certain forms of training, while having been marketed as advanced, are really only specializations, and need to be recognized as such, especially by the student.

This book belongs on the shelf of both those who are pursuing their own capacity for self-reliance through self-defense, and is a must-read for any who wishes to instruct. As the book cuts apart the poor arguments we have used to justify bad habits or mental laziness in the past, a path to redemption is paved in within the pages that balance the critique of current and past trends, with the methodological approach to how we think of training itself. Instead of asking what to train or why we train, this work addresses how we think about training and self-defense, and in doing so, represents academic rigor without the ivory tower.

Criticisms

The title is correct in describing the objective of the book. While the term Mindset is certainly trending at the time of writing, the opening chapters of the book are instrumental in self-reflection. That being the case, as the chapters carry on, some arguments fall into the pattern that has been seen before with the elite special operator types, sounding something like “you don't know because you're not a hardened criminal like me.” It can be offputting, but we're talking about violence here.

This, however, works to the advantage of the reader, for just as the Varg identifies, ego can quickly become self-destructive when violence occurs. His argument from authority challenges the reader's ego, and highlights the value of the book as a tool of self-evaluation. For those who take seriously the reality of violence, their disagreements with the author will also be taken into consideration knowing they have skin in the game, rather than responding emotionally. Violence of Mind is ultimately a tool of introspection with deadly consequences.


Violence of Mind and Its Author

Author: Varg Freeborn
Pages: 223 pages
MSRP: $17 on Amazon (Buy Here)
URL: violenceofmind.com


OFFGRID LIBRARY OF RECOMMENDED BOOKS


VirTra Training: Total Immersion Gun Simulation

Summer 2020 in Arizona wasn’t conducive to live-fire training, given the perfect storm of 115-degree temperatures, wildfire-related shooting restrictions on public land, COVID-induced range closures, and extremely high ammo prices. Rather than rely solely on dry-fire practice at home, I decided this was the ideal time to try out the state-of-the-art VirTra firearms simulator at the Haley Strategic headquarters in Scottsdale, Arizona. Haley’s D7 Disruptive Performance course is a two-day program that’s limited to just five students, and it takes place without a single live round fired. I attended a D7 Carbine class, but Handgun and Handgun Lowlight versions are also available.

The VirTra system is no oversized arcade game — it’s a sophisticated simulator with an impressive degree of realism. Students use real BCM AR-15s retrofitted with VirTra internals that produce CO2-powered recoil and a laser flash with each trigger press. An array of sensors detect where the laser impacts on a projector screen, a computer calculates ballistic trajectory in the virtual environment, and the shooter receives real-time audio and visual feedback.

The D7 Carbine course began with a classroom portion that introduced Haley’s “thinkers before shooters” ethos, thoroughly analyzing the mental and physical aspects involved in firearms training. After discussing zeros and hold-overs for various distances, we stepped up to the VirTra 100 single-screen simulator, firing our ARs from a prone position at virtual targets from 50 to 500 yards. Our instructors, Josh and Robert, were able to instantly enlarge our targets and provide guidance based on our shot groups.

virtra carbine

Next was a detailed discussion of shooting fundamentals, such as stance, trigger control, sight picture, and eye movement — the latter becomes especially important when dealing with multiple targets in a dynamic setting. Back on the single-screen sim, we ran various drills from low ready and high ready, maintaining an even cadence between shots and receiving one-on-one evaluation from instructors. We finished our first day in the flagship VirTra 300 simulator, testing our ability to pivot and transition between simulated clay targets across the 300-degree screen. On day two, we warmed up with the same transition drill, then returned to the single-screen sim for box drills that tested our footwork and ability to move forward, backward, and laterally between shots. The final classroom portion of the D7 class was taught by Travis Haley. It covered the powerful effects of a life-and-death scenario, such as the body alarm response (BAR) that dumps hormones such as adrenaline and cortisol into the bloodstream. Rather than attempt to resist this inevitable process, we must learn to anticipate and manage it.

Since firsthand experience is a powerful teacher, the D7 class culminated by testing each student’s performance inside the panoramic simulator. One by one, students were called into the darkroom and fitted with a belt-mounted Threat-Fire pack, which delivered a 10,000-volt shock any time we were hit by a virtual incoming round. The consequences of failure would be painful, and this elevated the sense of tension. Haley’s VirTra system includes dozens of scenarios, and each features branching paths and outcomes that can be controlled by the instructor in real-time. This made it feel like interacting with live opponents, rather than pre-programmed AI.

We experienced two scenarios, a mugging at an outdoor ATM and an active shooter situation inside a courthouse. These scenarios included multiple assailants, innocent bystanders, and ally first responders, as well as complications such as armored foes and hostage-takers — in the latter case, I was able to negotiate a surrender after an agonizing 90-second standoff. However, I didn’t walk away unscathed from the ATM mugging. Seconds after stopping the first threat, I was blindsided by an accomplice I had failed to notice. I returned fire, but got zapped and received a wake-up call about the dangers of tunnel vision.

This Haley Strategic D7 Carbine class was an incredible experience, and a powerful reminder that real defensive scenarios are far more complex than drills on a 180-degree shooting range.

For more information on future Haley Strategic classes, visit haleystrategic.com/train.
For more information on VirTra: virtra.com


MORE FROM OFFGRID ON TRAINING AND PREPAREDNESS


A Competitive Advantage with Secret Weapon Training

I recently participated in my very first two-gun match alongside Iain Harrison, RECOIL’s editor-in-chief, and Nick Saiti, a frequent contributor to the magazine. Both of them made the stages I struggled with look easy. I soon learned that Saiti, who I had just met that morning, is a Grand Master in all eight USPSA divisions. He was kind enough to offer me some pointers and encouragement, and at the end of the match, he invited me to join him at an upcoming Competition Pistol Clinic hosted by his training company, Secret Weapon Training. After watching him shoot, there was no way I was going to pass that up.

Unlike prior classes I’ve written about, this class was specifically designed to help competition shooters. Before you dismiss this as impractical, remember that it’s a different approach to the same end result: fast, consistent hits on targets. There are differences, of course, but if you’re a good competition shooter, it’s not hard to apply those same skills to self-defense.

Saiti explained that he breaks down shooting skills into six manageable chunks, which must be mastered individually and then layered. The first subject of the day was stance. Feet should be shoulder-width apart, hips square to the target, and knees and elbows slightly bent to absorb recoil. Saiti recommended shifting more weight onto the balls of my feet until I almost toppled forward. I felt my toes digging into the ground and shin muscles tightening — this greatly improved my stability.

The second topic of the clinic was grip. Some instructors recommend 60/40 or 70/30 pressure from your support and dominant hands; Saiti recommends 100/100. Grip the gun as tightly as possible with both hands, as long as trigger finger dexterity isn’t diminished. Choke up high on the grip, make sure there are no voids between the hands and the gun, and push the support thumb forward on the frame.

nick saiti secret weapon training instruction

Third, Saiti discussed draw technique. Both hands should be moved in unison to the level of the holster; this symmetrical movement prevents favoring one side. Establish a consistent, strong grip, and bring hands together in the workspace where you’d naturally clap your hands. Keep the barrel flat as you drive the gun up and out to eye level, fast at first, then slower to acquire a sight picture. To test your draw, start with a good stance, close your eyes, draw normally, and open your eyes. If your mechanics are perfect, you should see a clear sight picture every time. Saiti says, “Technique will take you most of the way. Your eyes just confirm it.”

These three topics are the most fundamental layers — if you can nail them, you’re off to a great start. Reloading was the fourth topic. Focus on getting the mag up to the gun and aligned quickly, then guide it in and re-establish grip. Too many students try to save time by slamming the magazine in quickly; this is only a tiny fraction of the reload time. Topics five and six, efficient transitions and movement, offered more “meat on the bone” to shave time that can be spent taking shots.

Saiti closed the Competition Pistol Clinic with an analogy. If you spill nails on the floor, what’s the fastest way to clean them up? You could go get a vacuum, rig up a magnet on a string, or Google a solution, but the real answer is to simply bend down and pick them up immediately. Learning to become a Grand Master is much the same — it’s a matter of time and hard work. At the end of this class, I noticed measurable improvement in my speed and consistency, and felt renewed determination to keep working on my fundamentals. 

For more information on Secret Weapon Training, go to www.secretweapontraining.com or check @secretweapontraining on Instagram. 


More from OFFGRID on Training and Preparedness


PTSD

Somewhere between 3 to 8 percent of the population will deal with Post Traumatic Stress Disorder, or PTSD, in their lifetime. In the past 30 years, progress has been made in identifying therapies to aid in the recovery of individuals afflicted by PTSD. Several treatment modalities have shown benefit. The purpose of this article is to review some of those treatment modalities. We hear more about PTSD today due in part to its fairly recent recognition by several organizations as a “real” psychiatric disorder as well as increased public service announcements. 

A lengthy and specific definition of PTSD can be found in the Diagnostic and Statistical Manual of Mental Disorders, Fifth Edition (DSM-5). To summarize, people who have PTSD are often those who have undergone a traumatic experience related to near death or perhaps a trauma related to sexual abuse. They often have flashbacks, distressing dreams, or memories of the traumatic event. Because of these symptoms, patients may avoid anything that reminds them of the event. 

These experiences cause a variety of symptoms, including anxiety, irritability, disruptive behavior, depression, isolation, and even suicidal thoughts. We now have a common screening assessment for PTSD, called the PTSD Checklist (PCL). There’s a version for civilians (PCL-C) and one for military (PCL-M). If you score above 44 on the PCL-C, or 50 on the PCL-M, you may have PTSD, and need to see a doctor for further recommendations. A shorter version is the PCL-6, where a score of 14 or greater suggests that PTSD is likely.

ptsd chart

A physician may prescribe medication, psychotherapy, or both to assist in treatment. Studies have shown that these are about 50-percent effective in helping those with symptoms of PTSD — not perfect, but every bit helps. Medication stabilizes the mood and lessens some of the symptoms that are disrupting the individual’s life. Therapy is an essential adjunct to help the person overcome the negative associations and psychological pain attributed to the event. 

Medication

Drugs like Selective Seratonin Reuptake Inhibitors (SSRIs) and Seratonin-Norepinephrine Reuptake Inhibitors (SNRIs) are the standard of care for PTSD. SSRIs include drugs like Sertraline (Zoloft), Fluoxetine (Prozac), and Paroxitine (Paxil); Venlefaxine (Effexor) is a recommended SNRI. These drugs work on chemical components of the brain that help the patient deal with anxiety and depression that’s often experienced with PTSD. 

Another drug that has been helpful in some patients with PTSD is Prazosin. This drug is commonly used to treat enlarged prostate in men; however, it has been shown in some people to reduce the number of nightmares and improve quality of sleep. Study conclusions have been mixed as to Prazosin’s general effectiveness; however, it’s typically recommended to see if there’s a benefit in each individual patient. 

Lastly, medical marijuana has gained a lot of popularity for treating just about everything under the sun; however, it hasn’t been shown to provide a benefit in PTSD patients. 

Mindfulness

Jon Kabat-Zinn wrote his treatise on mindfulness back in 1990, detailing what mindfulness is and how to go about being mindful. In short, he proposed that we become mindful of the moment. Savor the food we chew. Feel the sun on our face and the grass beneath our feet. In doing so, we can gain an appreciation of our current moment and live a better, more in touch, life. 

Often with PTSD, the trauma keeps rearing its ugly head, and we forget about the moment we are living, and step back into a horrible time in our lives. Mindfulness offers an escape from the past as we focus on the now. There’s an excellent app called Mindfulness Coach that I recommend. Also check out www.mindful.org to learn more about mindfulness.

stock praying

Above: Mindfulness and meditation are essential components of PTSD treatment.  

EMDR

Eye Movement Desensitization and Reprocessing (EMDR) was developed by Dr. Francine Shapiro in 1990. It’s a complex form of therapy that combines modalities from other therapies to have its beneficial effects. Basically, in EMDR, the traumatic event is recalled while a repetitive act is performed (tapping fingers, roving eyes). This interrupts the old thoughts associated with the memory and creates a new pathway for the brain to associate with the event. The process can take a while to prime the patient for successful treatment. It has a lot of research showing its benefit, as supported by the World Health Organization, the American Psychiatric Association, and the Veterans Administration. I have seen this work in several patients with amazing success. See www.emdr.com for more information.

stock nurse or doctor

Above: Physicians should take a multi-disciplinary approach to treat PTSD.

Stellate Ganglion Block

The idea of using medication injected into the stellate ganglion on the right side of the neck was first proposed in the 1940s. It wasn’t until 2010 that the first study was done to see if stellate ganglion block could help with PTSD. Although the exact mechanism of how it works is unknown, the idea is that it “calms down” sympathetic stimulation of the nerves during anxious times. It’s still being used, but there’s mixed evidence that it’s helpful. The Veterans Administration suggests that more study needs to be done on this modality. 

Cognitive Behavioral Therapy

This popular and effective therapy focuses on the symptoms of trauma and its effects on thoughts, feelings, and behaviors. There are two modalities commonly used in CBT: exposure therapy and cognitive restructuring. In exposure therapy, the person might be asked to relive the trauma in a safe environment. The exposure can be written, verbal, or even virtual reality-based. In cognitive restructuring, the person is asked to recall the trauma in a more logical way, as they often only remember pieces of the trauma and sew together what they may have missed. The goal is to have the patient re-evaluate their negative associations with the trauma and to develop more effective patterns of thought. There are typically 12 to 16 sessions involved. 

cognitive behavioral therapy

Above: Cognitive Behavioral Therapy has been proven to be effective in treating PTSD.

Cognitive Processing Therapy

This was developed in the 1980s and is a specific subset of Cognitive Behavioral Therapy aimed at treating those who have succumbed to a sexually traumatic experience. Often, patients blame themselves after such an incident. Patients are asked to think about their trauma and how it has affected them. In order to overcome their trauma, they must develop an understanding of how they feel in relation to the trauma. They must develop new patterns of behavior associated with the event (e.g. “I survived the trauma because I fought the SOB,” rather than “How did I let this happen?”). CPT is typically 12 sessions long. 

Post-Traumatic Stress Disorder affects millions of people in the U.S. Our understanding of screening, diagnosis, and treatment has improved over the past 30 years. PTSD is now recognized by the American Psychiatric Association and the World Health Organization as a disease. Medications and relatively newer therapies, such as Eye Movement Desensitization and Reprocessing, as well as older therapies, such as Cognitive Behavioral Therapies, can provide benefits to people afflicted with PTSD. Treatment is lifelong, and there are no shortcuts. There is help, and there is hope, for those suffering with PTSD. 


About the Author

David L. Miller, DO, FACOI, is an internist in private practice for 20 years. His experiences away from the office have included time as a fight doctor in regional MMA events and as a team physician for 10 years at a mid-major university in the Midwest. Currently, he serves as the lead medical instructor for the Civilian Crisis Response team based out of Indianapolis.


MORE ON HEALTH AND FITNESS FROM OFFGRID


Book Review: The Meateater Guide to Wilderness Skills and Survival by Steven Rinella

The Premise: This book is a 21st-century outdoorsman’s manual. It’s meant to be a practical guide to the thoughtful process of gear selection, food and water, dangers to be aware of, shelter and warmth, navigation and travel planning, and medical safety. It’s a team effort from a group of professionals. To date, it has sold over 100,000 copies. While it’s aimed primarily at the active outdoorsman, the information in the book also serves as a detailed manual for disaster preparedness.

The 411: The pages of this book are densely packed with practical info, with no extraneous filler. 

I spoke with author Steve Rinella as part of my review process for this book, and think he can best describe the aim of this book in his own words:

Steven Rinella: “I’ve always gone into the outdoors, out in the wilderness, with something I wanted to accomplish. Whether it’s working as a journalist in very remote corners of the world, or filming a TV show, or hunting, or taking my kids out to teach them about nature, I’m going out because I want to get something done. I view wilderness survival skills as a way to facilitate accomplishing my goal.

“It’s not like I do a lot of camping just for the sake of camping. There’s a level of determination to go into places, enjoy them, and be effective. To do that, there are a lot of practical skills one needs to develop. There are also skills that you need to accumulate over the years. I think that once you get pared down to the things you need, and you know how to maintain them, then you know their applications. You keep them in your home, and they become a part of your home. We wrote a lot about building a basic kit. And then we say, it’s not a survival kit. It’s not a medical kit. It’s all those and more.

“When we go on a family vacation, I packed these things with me because it’s the stuff I know I need. It expands my ability to do things and feel comfortable. It’s got flashlights, batteries, med equipment, zip ties, all these things. Am I going into a wilderness setting? No. We’re going down to stay at a rental house, but I have it with me because it makes me feel prepared.

“I have a system in my truck. I keep my truck very well-stocked with first aid, medicine, food, insulated rain gear, tire chains, tire repair stuff. I have it all. When I’m going ice fishing or going hunting, I’ve got to be ready. But it makes it so I don’t care when I get in that truck. That thing is ready. I’m ready to go. If, somehow, I drove away from my house and my house vaporized, I would be good for a few days. I like to have that feeling.

“That does not mean I sit around rooting for the end of society. I quite like society. But I don’t live in fear of something bad happening and feeling like I’m not ready.

“I call myself an ‘accidental prepper’ because I have an enormous amount of freeze-dried food. I have firearms, ammunition, cooking fuel, everything. The only thing I needed to add, I realized, is in my crawl space. I keep treated water. That’s the only ingredient I needed to reduce my vulnerability because I already have the remaining gear as an outdoorsman, and I know how to use it.

“There’s a general preparedness that goes into life. When you get prepared, when you’re equipped, and have the knowledge, skill set, and the tool kit to get by in the winter up in the mountains, I would have to assume you should be pretty damn OK in town. 

“That’s my view on it. I harvest preparedness as a sort of side benefit. A perk to the lifestyle that I have is that, at all times, I feel prepped for whatever might come my way.”

The Verdict:

The book is a true cover-to-cover read. It’s one you will reread as a reference manual as you dive into each chapter to adjust your gear. Like me, you may make changes based on what you learn. I updated my water treatment kit to include both a high-capacity MSR water filter and an ultraviolet light Steripen. I expanded the types of food I’m stocking and testing. I now carry both Tylenol and Ibuprofen. I installed and learned to use new apps, and carry multiple ways to keep devices charged. And I bought electronic arc lighters, including one long enough to stick into and light a Coleman stove without toasting my fingertips. The bottom line is that if you want to thrive while surviving, absorbing this book is worth your time. 


the meateater guide to wilderness skills and survival

Book and Author

The Meateater Guide to Wilderness Skills and Survival
By Steven Rinella

Pages: 464
Publisher: Random House
MSRP: $20 Paperback ($15 on Amazon with this Link)
URL: www.themeateater.com

Rating:
 THRIVE
SURVIVE
     DIE


OFFGRID LIBRARY OF RECOMMENDED BOOKS


Gear Up: New Survival Gear for May 2021

Tyrant Designs | S&W Shield Extended Magazine Release

COLORS: Various, including Blue, Gold, and Red
MSRP: Starting at $25
URL: tyrantcnc.com

Tyrant Designs | S&W Shield Extended Magazine Release

In a life-and-death situation, having a second magazine full of ammo won’t do you any good if you can’t eject the first empty magazine efficiently from your firearm. That’s why Tyrant Designs has come out with this extended magazine release for the popular Smith & Wesson M&P Shield. By extending the length and increasing traction with a crosshair pattern, this sturdy component increases purchase and adds control to your relo.comads so you can press the release quickly without having to grope for it. Not just for show, this upgrade can boost both your gun’s aesthetics and performance. It can be installed in seconds without any tools. Designed and made in the USA, this mag release fits both the 9mm and .40-caliber versions of the M&P Shield, as well as the newer Shield 2.0.


5.11 Tactical | Field Watch 2.0

COLORS: Black, Kangaroo
MSRP: $170
URL: 511tactical.com

5.11 Tactical | Field Watch 2.0

Loyal readers will know that an analog wristwatch can offer many improvised survival functions — way more than we have room here to describe. But rest assured, the Field Watch 2.0 will perform admirably both in the backcountry and big city. It retains the best elements from the original Field Watch but adds two important features: a clear date window and phosphorescent Super-LumiNova hands (to see in dark conditions). They’re well protected thanks to a chip- and scratch-resistant mineral crystal display, a 44mm stainless steel case with a matte ion-plated finish, and a stainless steel screw-in backing. While the 22mm-wide nylon NATO band is a tad long for our liking, it’s sturdy and flexible. Plus, the watch is water-resistant up to 100 meters. 


SOG Specialty Knives & Tools | Pentagon XR

OAL: 8.38 inches
MSRP: $175
URL: sogknives.com

SOG Specialty Knives & Tools | Pentagon XR

SOG isn’t exactly what it used to be … and that’s a good thing! The Pentagon XR is a prime example of how the company has remade itself in the past year by refocusing on functionality over flash, and quality of products over quantity of sales. This folder’s spear-point blade is made of CTS-XHP, a premium stainless steel that has great corrosion resistance, toughness, and edge retention. These attributes make it effective for daily carry, professional use, or hard field use. Plus, the knife features SOG’s XR Lock, dual thumb-studs, a flipper tab, and a reversible pocket clip — all of which allow for ambidextrous, one-handed operation. Add in the ergonomic G10 handle, and the Pentagon XR is a top-performing, versatile folding knife that helps elevate SOG’s folding-blade lineup beyond many of its production-knife peers.


Maven Outdoor Equipment Company | CM.1

DIMENSIONS: 5.1 by 2 by 1.75 inches
MSRP: $150
URL: mavenbuilt.com

Maven Outdoor Equipment Company | CM.1

Whether it’s finding an injured hiker during a search-and-rescue mission or more mundane tasks like checking out what’s going on in your neighborhood, the ability to see at a distance can sometimes be vital. But when you want something more compact than binoculars or a riflescope (especially if it’s a non-shooting scenario), then a monocular is the way to go. Maven’s CM.1 offers you a mid-level optic solution that fits into your jacket pocket while giving you ample magnification with its 8×32 configuration. With its compact polymer frame and multi-coated ED glass, the CM.1 provides a clear, high-contrast image, strong color fidelity, and a substantial field of view. It’s also waterproof and fog-resistant, and comes with lens caps and a microfiber storage bag.


Mystery Ranch | Tech Holster

COLORS: Black, Coyote, Foliage
MSRP: $29
URL: mysteryranch.com

Mystery Ranch | Tech Holster

The Mystery Ranch Tech Holster is a convenient and portable place to stow your expensive smartphone or GPS unit outside of your pants pocket, helping you avoid the fear of it getting wet or cracked. Made of 500-denier Cordura fabric and a water-resistant YKK zipper, this padded pouch can be attached to your belt, PALS webbing, a pack’s shoulder strap, a binocular harness, or any MOLLE-compatible gear. The main compartment also has a separate section for cable storage, while an external front pocket can be accessed one-handed via an adjustable elastic closure with pull tab. One caveat: If you’re rocking a massive phablet (e.g. iPhone 12 Pro Max, Samsung Galaxy S21 Ultra, etc.), it might not fit in this holster, which has external dimensions of 7 by 4.5 by 2 inches. 


Gear Aid | Fire Strand 550 Paracord

WEIGHT: 4.58 ounces
MSRP: $12
URL: gearaid.com

Gear Aid | Fire Strand 550 Paracord

Cordage is an underrated piece of kit. When people prep their bug-out gear, most of the attention tends to go to water, food, fire-starting, and weapons. But rope or a strong string can make all the difference in certain situations, e.g. tying down your gear to your off-road rig. That’s why the Fire Strand 550 Paracord could come in handy. This seven-strand nylon cord is strong enough for all sorts of tasks, from tensioning tarps to making an improvised boot lace. But it has a hidden bonus: It can be unraveled to reveal a wax-coated fire strand for sparking campfires. The fire strand can also double as a fishing line or thread. Plus, it comes with a non-climbing plastic carabiner.


Outdoor Research | Merino Work Gloves

COLORS: Black, Tan/Grizzly Brown
MSRP: $110
URL: outdoorresearch.com

Outdoor Research Merino Work Gloves

While the snow has melted in most places in North America, there’s still no reason you shouldn’t have a sturdy and warm pair of work gloves for chilly springtime nights or heavy-duty tasks that require a bit more paw protection. As the name denotes, the Merino Work Gloves are made partly of Outdoor Research’s Alpen-Wool — a blend of wool, nylon, and polyester that provides warmth, moisture-wicking, and odor-resistance. This is paired up with deerskin, which gets softer with use but maintains long-term durability. Moreover, the gloves have a pre-curved construction and elasticized wrist for a better fit, as well as touchscreen compatibility so you don’t have to remove the gloves to use your mobile device.


MyMedic | Auto Medic – Stormproof First Aid Kit

COLORS: Black, Red
MSRP: $150
URL: mymedic.com

MyMedic | Auto Medic – Stormproof First Aid Kit

Stormproof is a recently released line of portable first aid kits that are meant to be stowed in various types of vehicles. The Auto Medic edition of Stormproof is (naturally) ideal for those driving four-wheeled transportation. It has key items for almost any emergency you might encounter while on the road, including a window-breaker, seatbelt cutter, EMT shears, and a pen light. If your ride breaks down in the middle of nowhere, there’s a survival blanket and hand warmers. For cuts and scrapes, there’s a microMend Cut Kit and various bandages. The whole package fits inside a weatherproof bag, which features MOLLE loops for easy attachment and modular mesh pockets on the inside for customization.


Real Avid | Gun-Max Gun Oil

NET WEIGHT: 12 ounces
MSRP: $13
URL: realavid.com

Real Avid | Gun-Max Gun Oil

The last thing you want to happen to your firearm in a life-and-death situation is to press the trigger and not hear a bang. Like anything else worth maintaining (e.g. your health, your relationships), this kind of failure can certainly happen if you neglect your guns. Cleaning and lubing them regularly is an essential part of extending their life spans and having them be ready when they’re most needed. Gun-Max Gun Oil helps make that easier, thanks to its powerful inhibitors (which displace moisture to prevent corrosion) and anti-friction additives (which bond to metal surfaces for extended lubrication). Unlike other CLPs or gun oils, this comes in a smartly designed can. Its flip-up nozzle has two positions: “up” for precise applications and “down” for a wider spray.


Lioncrest Publishing | 100 Deadly Skills: Combat Edition

PAGES: 330 pages
MSRP: $25
URL: 100deadlyskills.com

Lioncrest Publishing | 100 Deadly Skills- Combat Edition

Clint Emerson knows a thing or two about being violent when needed. He retired as a Navy SEAL with more than 20 years of service and founded Escape the Wolf, a company that focuses on crisis management for global companies. His best-selling 2015 book, 100 Deadly Skills, taught readers how to escape and evade dangers while at home or abroad. Now he’s back with 100 Deadly Skills: Combat Edition, a self-defense manual that includes everything from empty-hand combatives and surviving a multi-threat ambush to knife-throwing and drawing and shooting a handgun. Each skill isn’t just explained and illustrated; there are also QR codes that take you to a video for each concept.


Nutrient Survival | Chocolate Chip Cookie-Meals

SERVINGS PER CONTAINER: 15
MSRP: $25
URL: nutrientsurvival.com

Nutrient Survival | Chocolate Chip Cookie-Meals

Long gone are the days when survival food had to look like gray oatmeal and taste like old cardboard. Forget hardtack or MREs (aka Meals Refusing to Exit). Nowadays food prep technology has become so advanced that you can have chow that doesn’t just last a long time but also tastes delicious. The Chocolate Chip Cookie-Meals from Nutrient Survival are proof. These morsels have no artificial colors, flavors, or preservatives yet come packed with 14 vitamins, 14 minerals, Omega-3, Omega-6, fiber, and protein. One serving (two cookies) gives you 220 calories, 10 grams of fat, and 8 grams of protein. Plus, they have a shelf life of 18 months. They’re great morale boosters in a post-SHTF scenario or just as a satisfying everyday snack.


Gregory Mountain Products | Supply Duffel 90

COLORS: Brick Red, Obsidian Black
MSRP: $110
URL: gregorypacks.com

Gregory Mountain Products | Supply Duffel 90

This bag is so rugged and roomy that it could play double duty as a bug-out bag. But the Supply Duffel 90 is better suited as a camp/travel pack, a large gym/training bag, or as a vehicle emergency kit because of its rectangular shape, 420-denier nylon body, and flat Kevlar bottom panel for hard-core durability. Its main, lockable #10 YKK zipper can be opened or closed via a jumbo T-Grip zipper pull, while its side zippered pocket can transform into a storage pouch for the entire duffel when not in use. If you do need it to haul gear while on the move, there are grab handles on either end, padded handle wrap for suitcase carry, and an adjustable and removable strap for cross-body carry.


Find More Gear and Reviews on OFFGRID


NODs and Night Vision Tubes: Evaluating what Counts

Throughout human history, our species has always looked for advantages in both technology and tactics. The rock became the club, which became the spear, which became the arrow, and finally the firearm. The sword was always more important than the shield, and offensive technology was always forward-thinking and progressive. Regardless of time, culture, race, or creed, humans have always looked at our resources and thought, how can we weaponize this? One of the biggest hindrances to warfare has always been darkness — sure, fighting happened at night, but up until recently, it wasn’t conducted the way we do business in this century. And today, what is more evocative of a “Tip-of-the-Spear Operator” than a NODs wearing warfighter. 

Enter image intensification, more commonly known as night vision (NV). It’s light amplification on a large scale, turning very small amounts of light photons (be they visible or infrared) into multiplied electrons, then back to photons in a wavelength that our feeble human eyes can see. It’s been around since the 1940s in its infant form, but I’ll spare you that boring lecture. First and foremost, NV was designed for offensive operations — moving to and from a point of origin to close with and destroy the enemy. This is the advantage image intensification has over other technologies that can see into and through the darkness.

green phosphor night vision tubes

Above: Many will say the “green vs. white” argument boils down to personal preference, but physiological principles indicate that the human eye can perceive greater detail through WP tubes.

This article isn’t about the tactics, techniques, and procedures (TTPs) of NV usage in a survival situation or combat zone. That’s for another night, and best left to others to explain. Here and now, I’ll delve into some of the ins and outs of NV technology and night observation devices (NODs) so that, should you decide to add this amazing technology to your kit, you can be better informed. Much like researching the materials used and the specifications on an AR-15 before you invest in a high-end gun, this will pull back the curtain and explain several things in layman’s terms. 

whitt phosphor nods tube

Green or White?

One of the most readily apparent factors of NV is phosphor screen color. A much-debated topic as of the last several years, emotions can and do run deep surrounding this subject. To understand the argument, we must first understand how the human eye works.

The retinas of our eyes have two types of photoreceptors: rods for night and cones for day. Rods are sensitive enough to perceive trace amounts of light, such as silhouettes on a moonlit night, but cannot detect color and offer low visual acuity (sharpness). Cones are far less sensitive to light, but can interpret millions of colors with much greater detail. There are three kinds of cones: red, green, and blue sensitive. Cones also give you spatial acuity, which is why you’re much less likely to stumble or stub your toe in broad daylight than you would be in a dark room. The rod and cone cells are distributed evenly throughout the retina, except in a small central area called the fovea, where there are only cone cells. The fovea is the part used for detailed vision, like reading. This is why your peripheral vision feels less precise than your direct gaze.

It takes about a thousand times more light to activate the color cone cells than it does the monochrome rods, which is why detail and depth perception are much better when using both cones and rods, instead of just rods. Rods don’t provide much detail. The goal of NODs is to take light that might only be detectable to your rods, and intensify the image enough to allow your cone cells to detect it clearly.

NODs night vision

When using green phosphor (GP) NV we use our green cone cells, which make up only about one-third of our day vision. Humans generally don’t use rod cells with green phosphor NV systems or NODs.

With white phosphor (WP) NV (white light being the sum of all colors) we engage all three types of our day vision cones. So, WP is fully engaging our day vision mechanisms (cones) and even some of our NV mechanisms (rods). WP also has a strong blue component in the 400-nanometer wavelength range, where we engage a more substantial portion of our rod cells.

Using a WP NODs is akin to being able to use more of your brain processing power to think through and solve problems. You can certainly accomplish similar tasks with GP, but you’ll probably do so faster with WP due to the physiology involved. It delivers more light data to your brain. This leads to reduced fatigue because you’re not working as hard to gather the same amount of information. Contrast is higher and the data feed is broader.

You might be about to retort, “But Sam, the human eye can detect more shades of green than any other color in the visible spectrum!” Yeah, I’ve heard that a time or two. Here’s what you need to know about that — the dark-adapted human eye is capable of detecting more shades of green than any other color. What happens when you power up a bright phosphor screen in front of your eye? Bingo, no longer dark-adapted, so that factoid goes right out the window. In scientific terms, there’s a chemical compound in your eye called rhodopsin that’s produced at night. Once exposed to bright light, it photo bleaches.

operators wearing nods

Colorblindness is generally a genetic mutation of one of (or a combination of) the red, green, or blue cone photoreceptor cells in your eyes. True color blindness genes are carried on the X-chromosome, which is why it’s spread from grandfather to grandson. Very rarely is it expressed in women. If you’re truly colorblind, then that can affect your choice a bit, but WP probably still comes out on top for the reasons I outlined above. If you can’t see green, then WP is even more clearly the choice. If you can’t see red and blue, then maybe GP is the better choice for you.

That said, much of this argument still comes down to personal preference for many people. Nothing compares to trying both GP and WP in-person over an extended period of time to literally see which phosphor color one prefers. The physio/neurological basis for the detail, contrast, and fatigue advantages of WP are true regardless, but remember this as well: Some people are born with more of one type of photoreceptors than other folks. The same can be said about rods, as some people’s natural unaided NV is better than others, so genetics can come into play a little. Finally, individual tube and NODs specs and NV generation are important variables to consider. As we’ll explain momentarily, these issues need to be taken into account independently of phosphor choice for a truly useful comparison of WP versus GP. 

Next, we must get into the nitty-gritty of the tubes’ actual performance. Think of tube specs as what a dyno readout says about an engine’s horsepower and torque. In my opinion, the following are the five most important tube data points. It should be noted that there are others, such as luminance gain and high light resolution, that aren’t included due to their secondary nature as NV tube spec data points. This is a reference for U.S. Gen 3 systems and data sheets.

wearing nods at night

Photocathode Sensitivity: Photocathode Sensitivity is the PC’s ability to convert Photons to electrons. A higher PR usually corresponds to good SNR numbers. The minimum is 1,800 for the OMNI 8 contract. 1,800 is good, anything above 2,000 is very good. It matters a great deal to have properly matched photocathode numbers for a dual-tube system, +/- 100 is generally the range I adhere to when building/assembling dual-tube systems. This will prevent one tube from appearing noticeably brighter than another while in operation.

EBI or Equivalent Background Illumination: This is the amount of light you see through NODs when an image tube is turned on, but no light is on the photocathode. EBI is affected by temperature; the warmer the NV device, the brighter the background illumination. EBI is measured in lumens per square centimeter (lm/cm2). The lower the value the better. The EBI level determines the lowest light level at which an image can be detected. Below this light level, objects will be masked by the EBI. The lower the better. For example, this will determine the contrast of a ridgeline against the sky behind it. EBI is an often-overlooked data point, but is a very important one — many times the most important in terms of detecting and/or differentiating objects.

SNR or Signal to Noise Ratio: Plays a key role in NV performance. The role of the micro-channel plate, SNR is the unit’s ability to transfer a strong signal from input to output and is usually referenced as a ratio (19:1, for example). This measures the light signal reaching the eye divided by the perceived noise as seen by the eye. The higher the difference between the two numbers, the better. As the light level drops, scintillation (visual noise or graininess) will be noted sooner on a tube with lower SNR versus one with higher SNR.

nods close up

Center Resolution: Screen resolution measured in line pairs per millimeter (LP/mm). The higher the better. Usually listed in line pair increments of 57, 64, 72, 81, and so on. When a center resolution is listed, the line pair measurement could in fact be higher, but not high enough to cross the threshold of the next listed LP resolution. For example, a 64-line pair listed tube could in fact be as high as 71-line pairs, but because it doesn’t meet or exceed the 72 limit it cannot be listed as such.

Line pair resolution is generally not as important as many people make it out to be. For example, the human eye cannot tell the difference between a 64- and a 72-line pair when viewed through a 1x system such as a PVS-14. However, when used or viewed in clip-on NODs alongside a magnified rifle optic, a higher center resolution is preferred and often noticeable for better resolution/image quality.

Halo: Bloom or halo when looking at light source, or the ability to control the bloom when viewed. The lower the value the better. Objects can be masked or hidden behind bright blooms of light in tubes that have higher halo values. Lasers can also have more apparent bloom off certain objects in some tubes as opposed to others due to this attribute. A high halo value can contribute to a lowering of tube resolution (high light res) thus affecting what can be seen/detected by the user.

nods bloom

Above: Halo comes into play when looking at a light source that has the potential to overload receptors in your NV tubes. High-quality tubes will be able to better modulate incoming light from secondary sources like lights and illuminators.

FOM or Figure of Merit: This is simply center resolution multiplied by signal to noise ratio. The higher the value the better. It’s a quick, down-and-dirty way to determine the performance of a tube, mostly for export purposes set forth by the U.S. State Department. Because FOM measures only two data points, it’s not the be-all and end-all of a tube’s performance. In other words, you could have a low to average FOM tube that can, in certain lighting conditions, outperform a tube with a higher FOM, or at least match its real-world performance. EBI, photocathode sensitivity, and halo are three very important data points to take note of when looking at a tube. 

Are Tube Specs Important?

This is an often-asked question and the short answer is maybe, maybe not. If you’re using a NODs as a stand-alone unit without supplemental infrared (IR) laser/light energy, such as for astronomy purposes, then a tube with high data points overall is going to do more for you than a lower performing system. Notice I didn’t say FOM — as I stated previously, FOM is not the be-all and end-all in a system, though it should be noted. 

Now, can a human tell the difference between a 30 SNR tube and a 37 SNR tube? Not in all but the darkest of lighting conditions. Even then maybe not, depending on the viewer’s eyesight. You can chase NODs tube specs until you're blue in the face, and in reality gain nothing but wasted time and energy. Go with what I list below as a template for tube specs, and try not to get too wrapped around the axle about them.

For a thin-filmed Gen 3 system some good numbers to go off of as of the writing of this paper would be as follows:

  • Photocathode: 1,900 or higher
  • EBI: 1.5 or lower
  • SNR: 26.0 or higher
  • Center Resolution: 64 LP/mm
  • Halo: 1.0 or lower
  • FOM: 1728 or higher

Moving onto an unfilmed system, good numbers to go off of are as follows:

  • Photocathode: 2,000 or higher
  • EBI: 1.0 or lower
  • SNR: 30.0 or higher
  • Center Resolution: 64 LP/mm 
  • Halo: 0.8 or lower
  • FOM: 1920 or higher

If you have NODs that exhibits most or all of these numbers, you possess a very solid performing system.

Green Phosphor Nods image

If you’re using supplemental IR lighting in conjunction with NODs for detection and targeting, then that’s going to boost the capability of a lower performing system significantly to the point where tube specs are going to matter less and less. This is especially true at close ranges under 100 meters. Put simply, a powerful laser/illuminator is going to do more for you than tube specs will almost every time. 

Ultimately though, it comes down to training with your gear and training your eyes how to observe your environment. As you spend more time using NODs and acclimating your eyes to them, you’ll be able to see things with a lower performance system than folks who are untrained and unaccustomed to using a higher performance system. If I was behind the wheel of a high-performance Formula 1 car, a skilled racecar driver could still beat me around a track in a street car simply because I don’t have the experience to make the most of that highly tuned vehicle.

The opinions expressed in this writing are mine and mine alone. Technology advances as time goes on, so in the future some (or much) of what’s said is sure to change and/or be updated. If you’re seeking further info, I welcome you to watch some of the informative videos I have on my SilentSolutions YouTube channel or attend a Greenline Tactical class taught by me and Don Edwards. 


About the Author

Sam Houston is a 10-year Veteran of the U.S. Navy, where he flew onboard P-3C Orion surveillance aircraft as a flight tech and sensor operator supporting combat operations in multiple theaters. Transitioning to the civilian sector, he became a qualified UAV operator/maintainer on RQ-27’s, logging over 2,000 hours supporting conventional and Special Operations Forces in Iraq and Afghanistan, both on the battlefield and remotely, as well as a thermal and electronic surveillance sensor operator on RC-12 aircraft supporting U.S. interests overseas. He’s currently in the Florida National Guard as a forward observer. 

Sam owned and operated a NV hog hunting outfitting guide service, taking clients into the Florida swamps and forests to search, locate, and harvest feral pigs with the aid of NV and thermal optics. In 2015, he was hired by TNVC and ran the NV Goggle build and repair programs and continues at TNVC as the special programs manager and a night vision technical advisor. Additionally, Sam helps run the Night Fighter NV Training Program with Don Edwards at Greenline Tactical, and works for John Lovell at the Warrior Poet Society as an assistant instructor.


MORE ON NIGHT VISION