Covert Carry versus Concealed Carry

What do you think of when you hear the term “concealed carry?” Your first thought might be the legal definition of carrying a concealed gun or knife, and the accompanying guidelines in your home state and city. Perhaps you think of skills you’ve practiced in self-defense classes, or you think of the equipment you’ve accumulated for the purpose of concealment — there are a nearly infinite number of handguns and holsters you can keep hidden on your person. No matter which subtopic crossed your mind first, there are many variables to carefully consider and research. This is compounded by the amount of information available through internet forums, gun-store counter jockeys, and local “gun guys,” which is both immense and rife with inaccuracies.


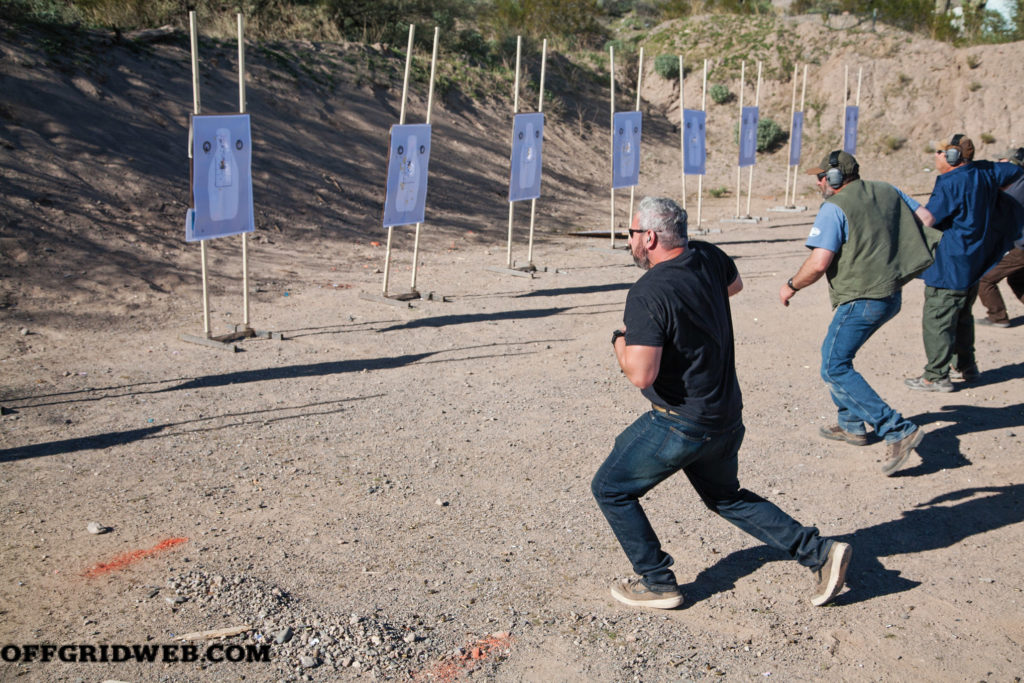
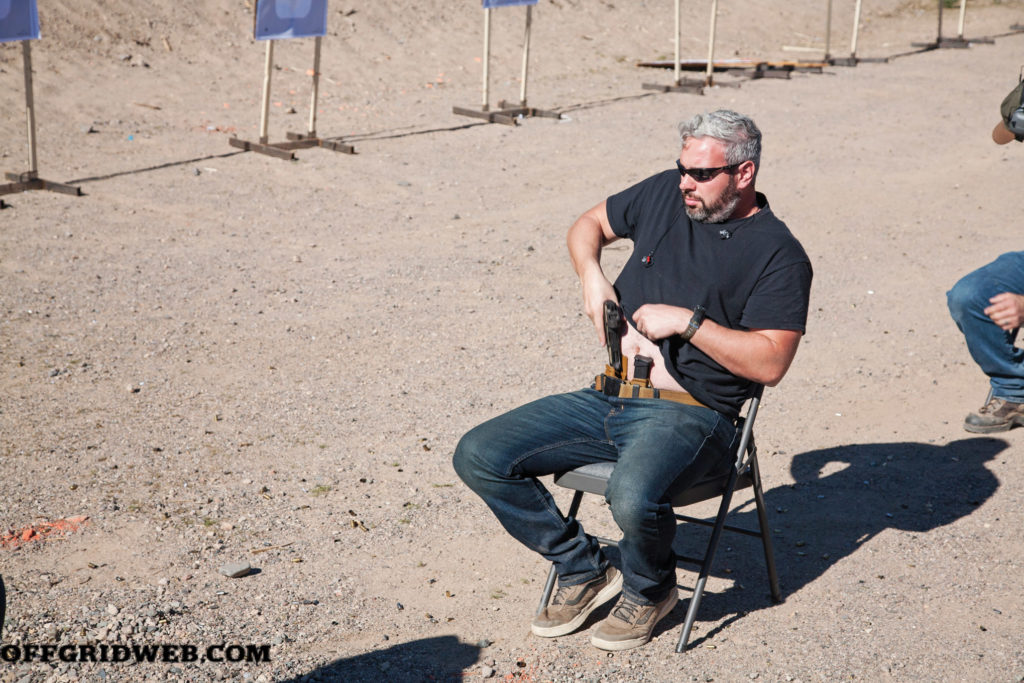
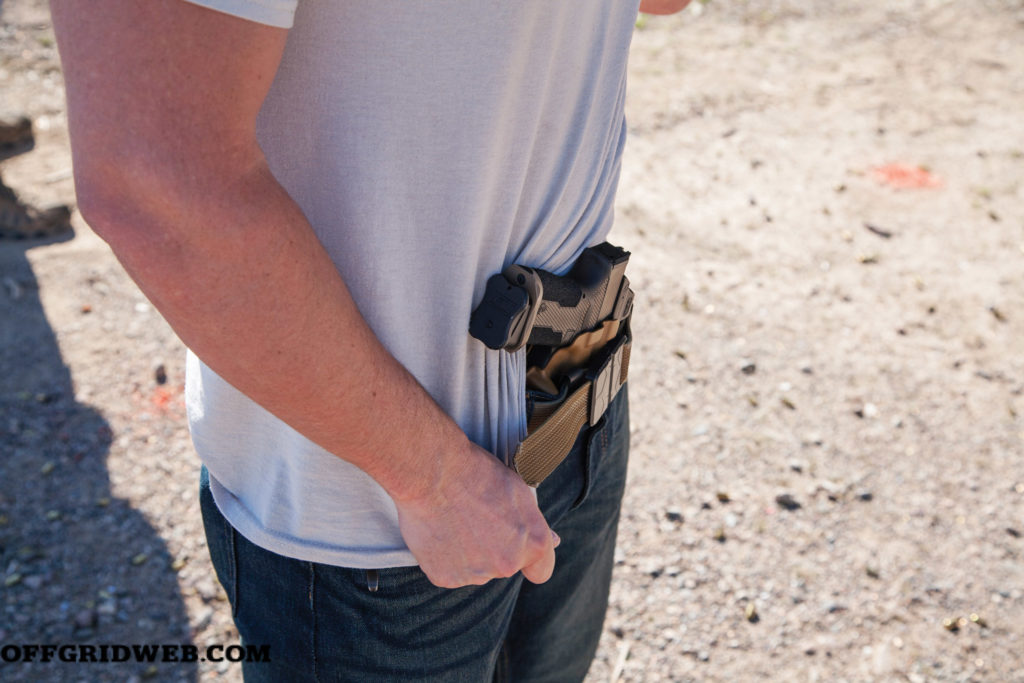
Above: Drawing from concealment while moving or changing position is a vital skill to responding with a covertly carried weapon.

In order to clear the air and find firm ground to start from, we sought out some of the best instructors we could find to teach us how to properly and responsibly carry concealed. We quickly learned that what we wanted to learn about was better defined as covert carry. What’s the difference? Merriam-Webster defines the two terms as such:

Concealed: kept out of sight or hidden from view

Covert: not openly shown, engaged in, or avowed

It may seem like semantics on the surface, but just because something is out of direct view doesn’t mean it’s truly hidden. If you live in an area where concealed carry is prominent, you may have seen someone else’s gun “printing,” or creating a noticeable silhouette through their T-shirt or jacket. Is the gun out of sight? Yes. Is it actually not showing? Different story.

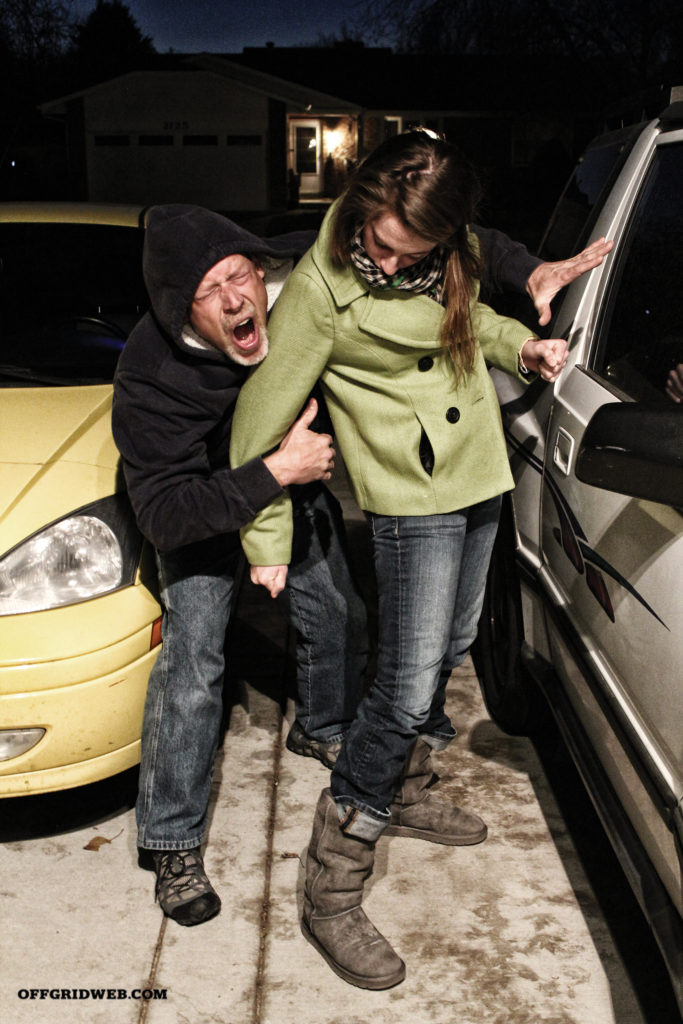
The theory of covert carry comes primarily from the military and law enforcement community where appearing truly unarmed could be advantageous or required based on circumstances. For example, police officers in high-risk undercover roles or military personnel working in plainclothes special operations or intelligence-gathering operations. For private citizens, there are numerous reasons to want your pistol completely undetectable until needed. Having your weapon hidden provides certain tactical advantages. Having your gun exposed or readily visible may actually make you a target in some cases. For example, let’s say you’re standing in line at a convenience store, idly waiting to purchase a soda and some scratch-off lottery tickets, when someone enters the store to rob the register. If you’re open-carrying or your gun isn’t truly invisible, the robber may decide you need to be dealt with first. If you’re being targeted for a mugging, an exposed weapon may increase the level of violence used in an initial surprise attack, eliminating the option of simply handing over your wallet or watch, which, frankly, are probably not worth killing or dying for. Or you may be targeted specifically so that the bad guy can get themselves a nice new gun.

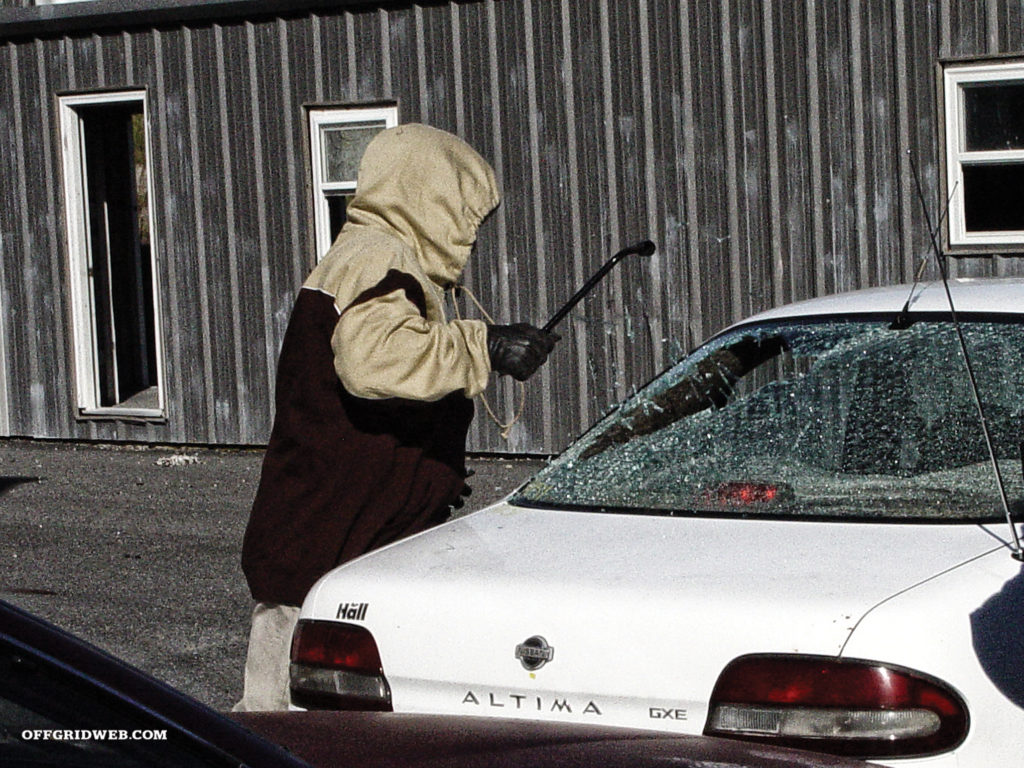
There are also potential legal pitfalls to incorrect concealment. In some jurisdictions, concealed carry of a weapon is legal, but open carry is not. Some of these laws are so stringent that if your gun is “printing” or pokes out of your cover garment when you bend over to pick something up, this can be legally defined as brandishing — an offense that can be prosecuted as a felony in some jurisdictions (especially those with prosecutors who aren’t fans of Second Amendment rights).

We strongly advocate that, if you choose to carry a handgun, you carry it covertly when you’re able to do so. The idea of your gun being a visual deterrent is a weak possibility at best. At worst, it’s an invitation to be harassed or attacked solely for having it on you. In order to enhance our knowledge and skills related to covert carry, RECOIL OFFGRID staff attended two courses focused on this topic and came away with a number of lessons that go well beyond what holster to use or where to put it.

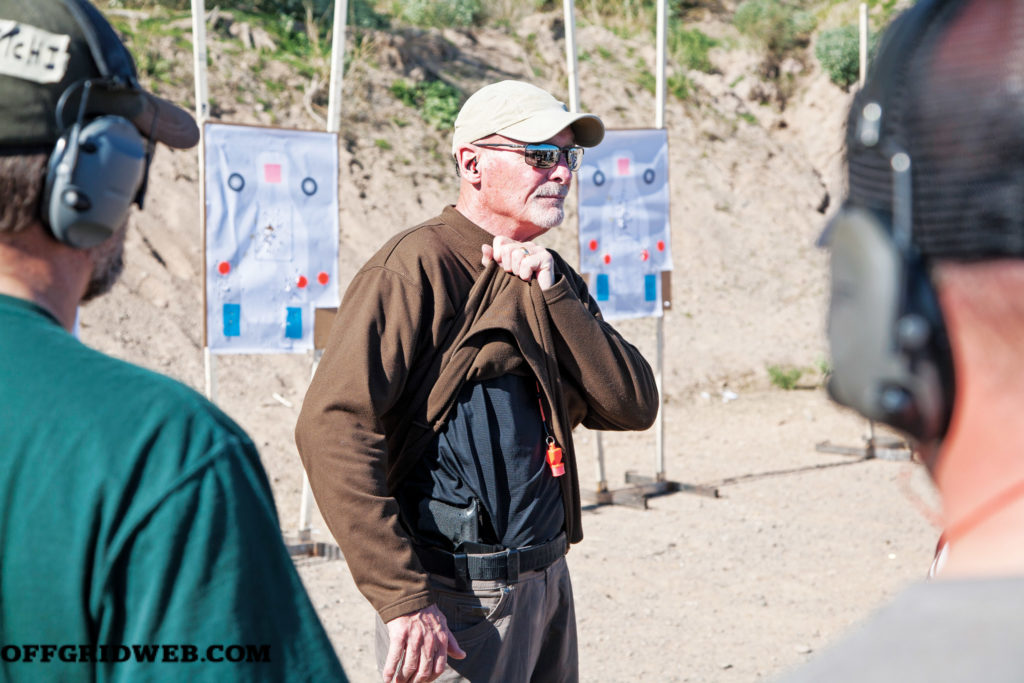
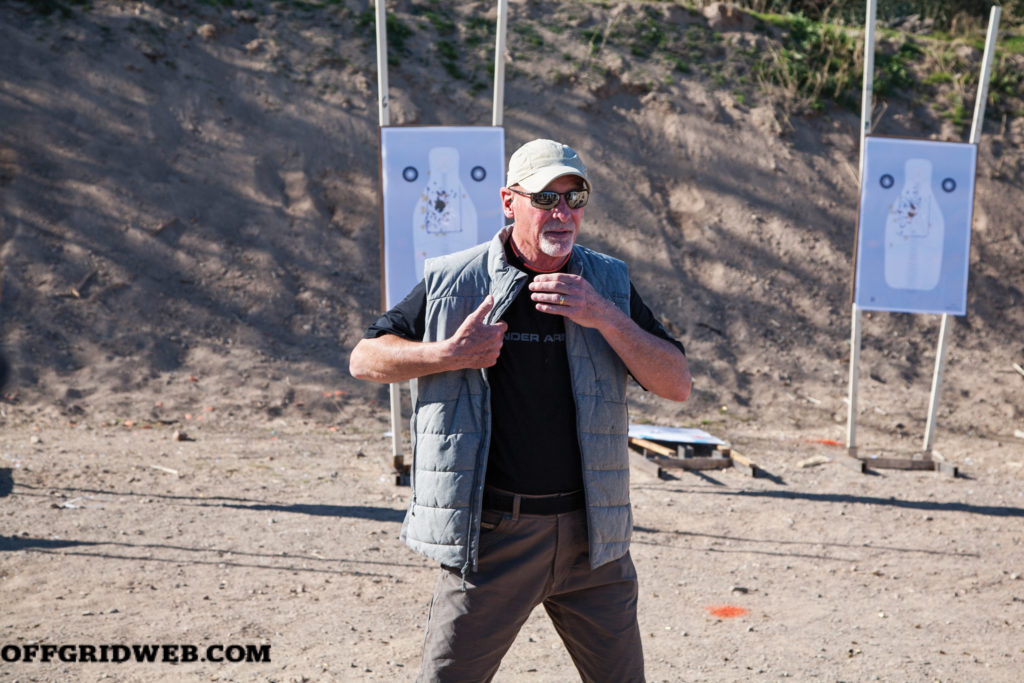
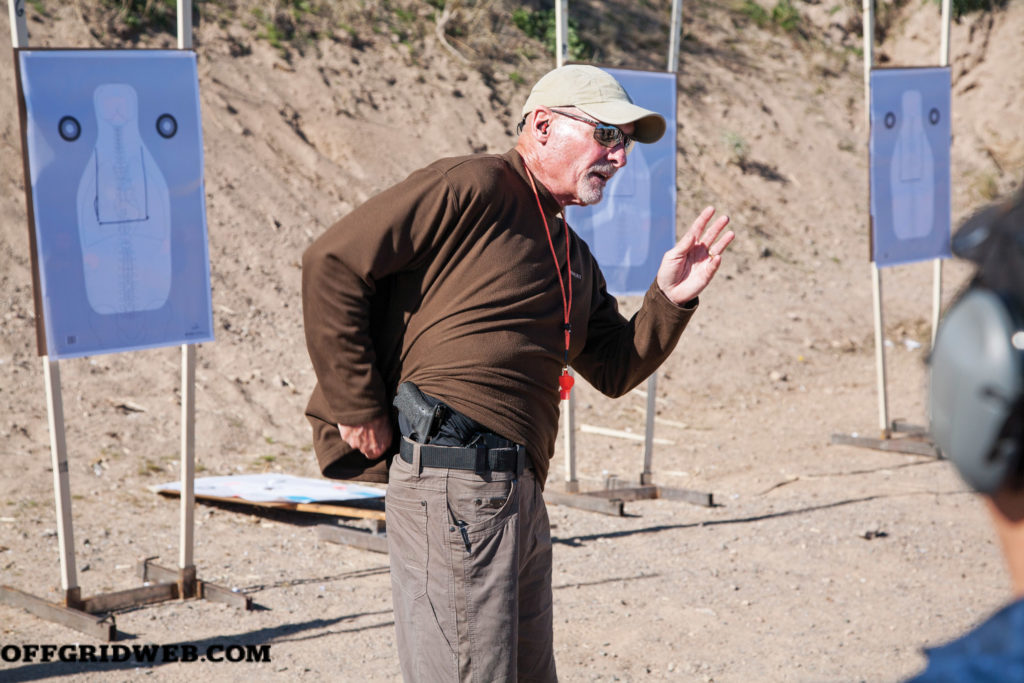
Above: Dave Spaulding demonstrates a closed-front garment sweep.

All The Puzzle Pieces:

Handgun Combatives’ Advanced Covert Handgun Course

Dave Spaulding has been teaching duty and defensive handgun use longer than most of our staff has been alive. His company, Handgun Combatives, offers a dedicated Advanced Covert Handgun class that focuses heavily on the theory and practical lessons of covert handgun carry. He does an excellent job of presenting a literal lifetime of lessons and “carry hacks” that went a long way toward helping us make informed decisions about how and what to carry.

dracula draw 1

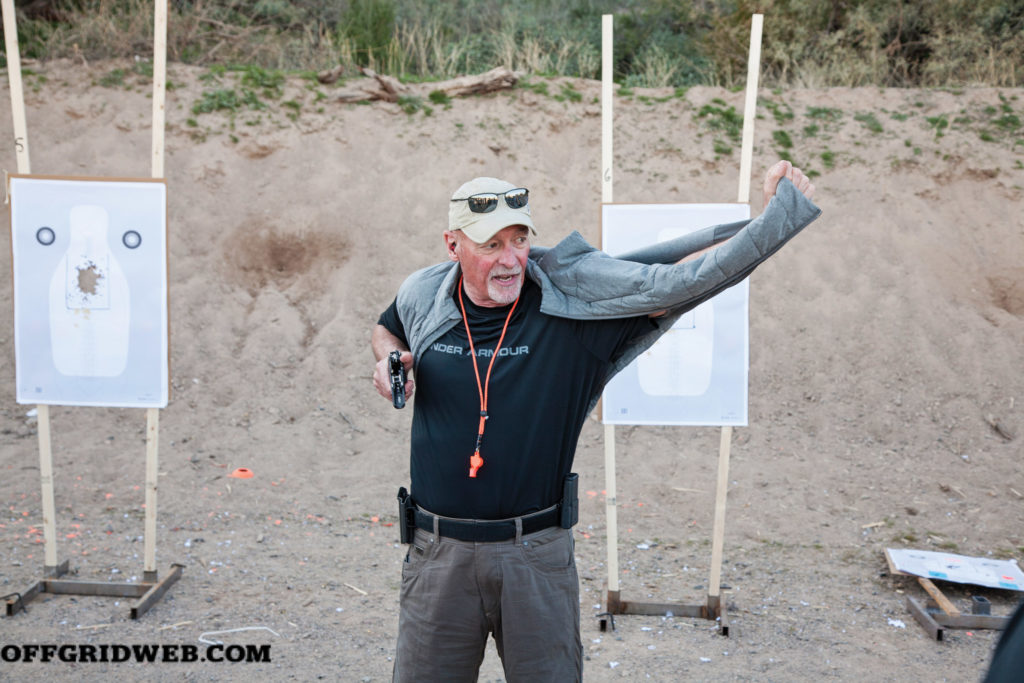
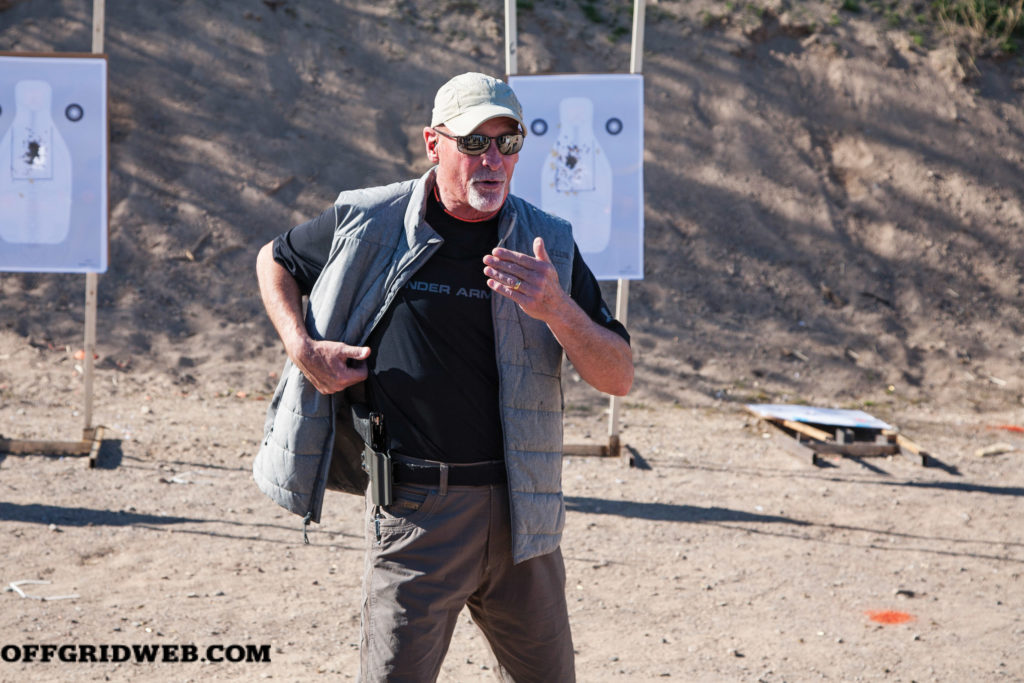
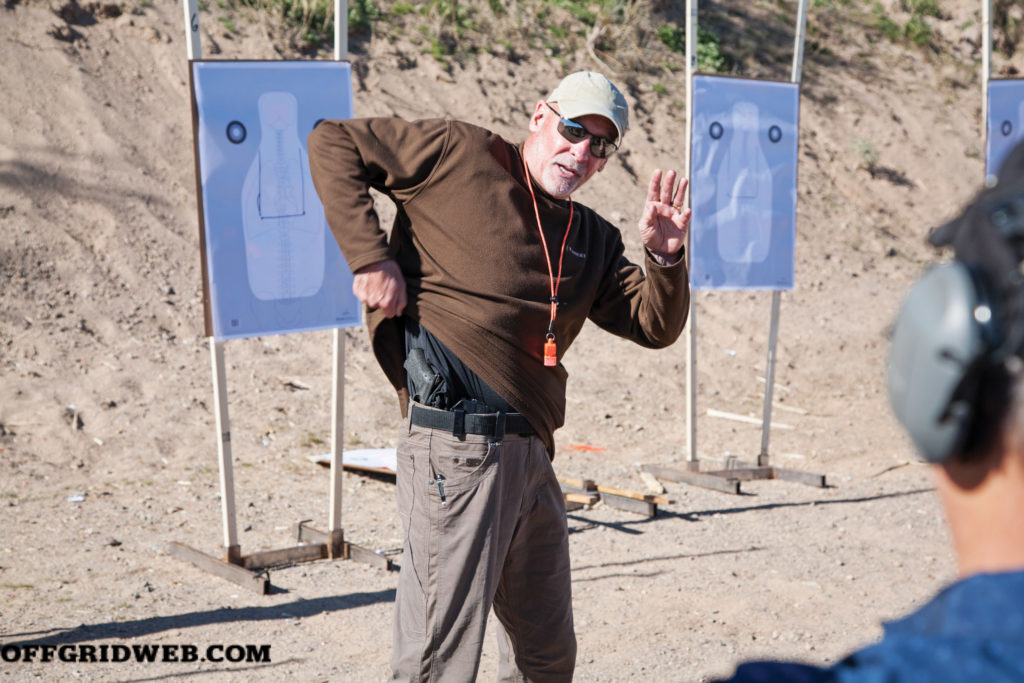
Above: It may look melodramatic in photos (hence the name), but it provides a way to move the cover garment with your support hand while drawing with your strong hand.

Carry Gear

First off, it must be understood that the handgun you choose to carry is one part of a concealed carry system that encompasses your pistol, holster, belt, and cover garment. Let’s take a look at each of these and establish some selection criteria before we look at how to harmonize them:

Pistol: The size, shape, caliber, and capacity of the pistol you carry is a deeply personal choice. Spaulding doesn’t make any hard recommendations in this area, and neither do we. What we will say is that, in our opinion, you should carry the largest pistol you can comfortably conceal. If you choose to carry a super-slim, ultra-light, micro-machine of a pistol, do so with the knowledge that you will have fewer bullets, smaller sights, and (in most cases) stiffer recoil, with stiffer recoil springs that can make the slide harder to manipulate.

If you’ve made your peace with this, you’re restricted to this type of pistol based on local laws, or you’re absolutely certain there’s no other way to avoid printing, so be it. Guns that are uncomfortable to shoot or manipulate will simply be shot less often, resulting in a less-proficient shooter. So, whatever you pick, make sure you can get through a 100-round range session with it and not feel relieved to be finished. Our personal preferences as a team lean toward having the best-performing pistol we can make covert.

Red-dot optics, lights, effective ballistics, and substantial capacity are all advantages we want in a life-or-death encounter. Don’t choose a more “convenient” handgun that short-changes you on performance potential. If you need the gun, you’ll want every bit of help it can give you — in Spaulding’s words, you’ll be better off in any gunfight with a fistful of gun.

Above: A well-concealed pistol is no good if you can't access it. Rehearse your concealed draw from a variety of body positions.

Holster: There are a couple of simple factors to consider when selecting a holster. First, make sure your holster fits your gun. It sounds silly, but even in 2020, there are still generic holsters sized “small, medium, or large,” and big-box sporting goods stores sell way too many of them. Choose a carry gun based on your assessed needs and personal preferences. Then, choose a holster for that gun and only that gun.

The holster is your gun’s better half. It’s the place your gun returns home to after doing hard work. Choose accordingly. That includes proper level of retention (i.e. the ability of the holster to keep the gun securely in place). There’s nothing wrong with open-top holsters that use friction retention rather than a secondary lock or release mechanism. However, there should be enough friction that your pistol doesn’t fall out if the holster is turned upside down and jostled. On the flip side, the level of friction shouldn’t inhibit your draw stroke.

We don’t care if you prefer leather or Kydex, but conventional wisdom says avoid fabric and other soft materials at all costs. This plays to a point that Spaulding emphasizes in his class: Your holster should not collapse when you take the gun out of it. If you draw your gun, the “mouth” of your holster should not close or change shape at all. This issue is non-existent with Kydex or injection-molded polymer holsters due to the nature of the material.

While this used to be a risk with some softer leather holsters, most modern carry designs have overcome the problem by reinforcing the top edge of the holster with an extra layer of leather, additional rows of stitching or thin metal or plastic inserts underneath the leather layers, which provide rigidity and shape. Lastly, make sure your holster fits your belt. If you wear a 1.5-inch-wide carry belt, don’t settle for a holster with 1.75- or 2-inch belt loops. This will create sliding and tilting that’ll never be under control, and there’s a high chance your holster — and the gun in it — will not be where you want it when you need it.


We don’t care if you prefer leather or Kydex, but conventional wisdom says avoid fabric and other soft materials at all costs.


The Belt: The belt itself really only has to pass three tests: Does it support your carry load? Does it fit securely? Does it fit your wardrobe? Regardless of whether you prefer leather or nylon, the carry belt should be rigid enough to hold the weight of your pistol and spare ammo, but flexible enough to be comfortable. Spaulding warns that stiffer isn’t always better. There are some carry belts out there made from double-layer SCUBA strap webbing. Once you wear these belts a couple times, they’ll take a set so stiff that you can remove the belt and hold it out in front of you, and it’ll remain a nearly perfect hoop. While the load-bearing capacity of these belts is substantial, they can dig or cut uncomfortably into the hips and back while seated or during extended wear. Some leather carry belts feature a plastic strip sandwiched between two layers of cowhide, and these can produce the same problem.

Of course, all the carriage capacity in the world is useless if your belt doesn’t have an adequate closure system. Some modern belts feature a friction slide or open-bottom G-hook. These are convenient and quick but offer little assurance of holding their own if you wind up running, climbing, shimmying, or grappling. Some have buckles that snap positively into place but also have release buttons or levers that can be tripped just by bending over or sitting down. Finally, your belt has to make sense with your wardrobe. This is less about fashion and more about maintaining covert status by ensuring that your wardrobe portrays a consistent narrative. Pairing your navy blue pinstripe suit with a double-layer MultiCam nylon belt with AustriAlpin Cobra buckle is going to raise eyebrows to even the most pedestrian observer.

Cover Garment: Much like the belt, your cover garment must match your narrative — that is, the story you tell onlookers with your appearance. For many years, concealed-carry vogue was to wear your pistol outside the waistband and cover it with a vest. These vests could be found at any outdoors or sporting goods store and were typically marketed to photojournalists or fly fishermen. Usually, they’re black, khaki, or dark green. They zip up, but are always worn open, and adorned with beaucoup cargo pockets. These vests, paired with heavy denim jeans and hiking boots, essentially make you a walking advertisement for your gun. While these “shoot me” vests may indeed conceal your pistol, they’re not even remotely covert in today’s carry-savvy circles. Another common problem is cover garments that are either too tight or too short. The former creates the telltale “carry bulge,” and the latter lets your gun play peek-a-boo any time you bend over or reach up high. If you choose to wear your gun outside the waistband and use a flannel or dress shirt to cover it, make sure your shirt isn’t so thin that it’ll flutter open on a breezy day, turning you from a concealed carrier to open carrier in a single gust.

Carry Positions

Now that we’ve got all the individual components outlined, we can combine these to create a couple of different carry styles. We’re only going to go in-depth on the carry positions we recommend. Then, we’ll touch briefly on some others, and why neither the RECOIL OFFGRID team nor the instructors cited recommend them.

Strong-Side Hip Carry: This is probably the most convenient carry position and stems directly from the duty-carry positions still used by military and law enforcement shooters today. While you can stick a holster anywhere on your waistline, a 3-o’clock hip position is most recommended (make it 9 o’clock for lefties). This position lends itself to a smooth, efficient uncover and draw. Since your arms naturally hang directly at your sides, and swing just fore and aft of your hips while walking, your hand is in natural close proximity to the gun through most normal daily body movements. If you’re a uniformed professional pistol carrier, chances are this is where your pistol sits on duty. Keeping your handgun in this spot while concealed reinforces consistency between on- and off-duty carry.

Even if this is not the case, inside the waistband (IWB) carry may not be comfortable or even realistic depending on your body type. If you carry outside the waistband (OWB), ensure that routine tasks like taking out your keys or wallet don’t inadvertently sweep back your cover garment. OWB carry is generally very comfortable when standing or walking around for a wide array of physiques. But if you spend a lot of time sitting, you’ll likely have to lean or bend to draw your gun. Also, if you spend all day behind the wheel of a car, and you’re a right-handed shooter, your seatbelt buckle is going to sit right over top of your gun. OWB hip carry permits a wide variety of cover garments from windbreakers and rain jackets to goose down vests, sport coats, and pearl-snap shirts.

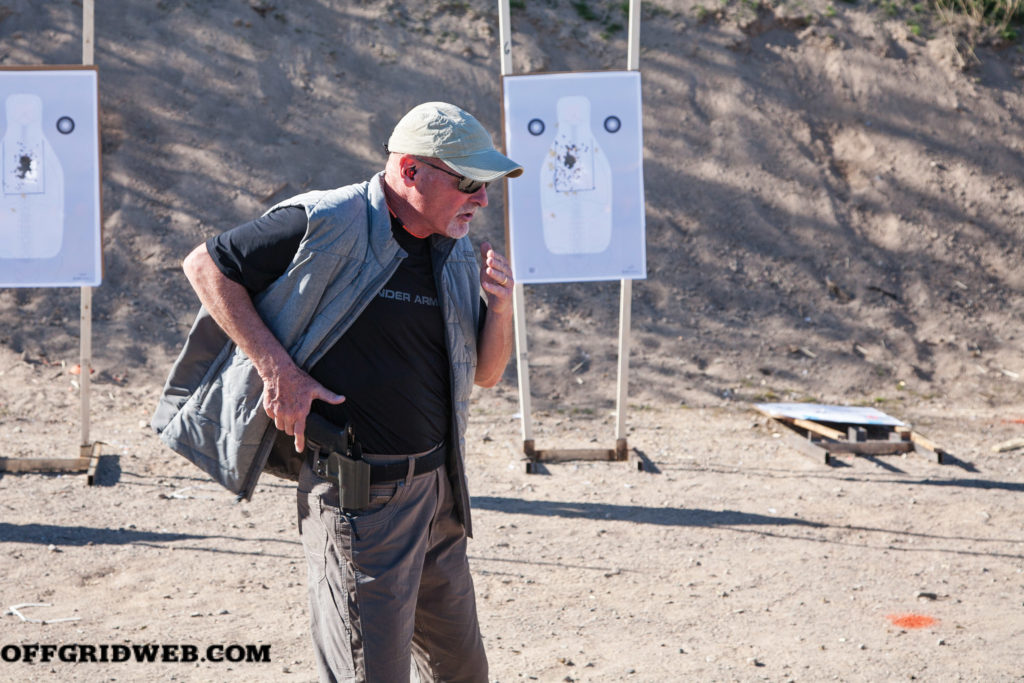
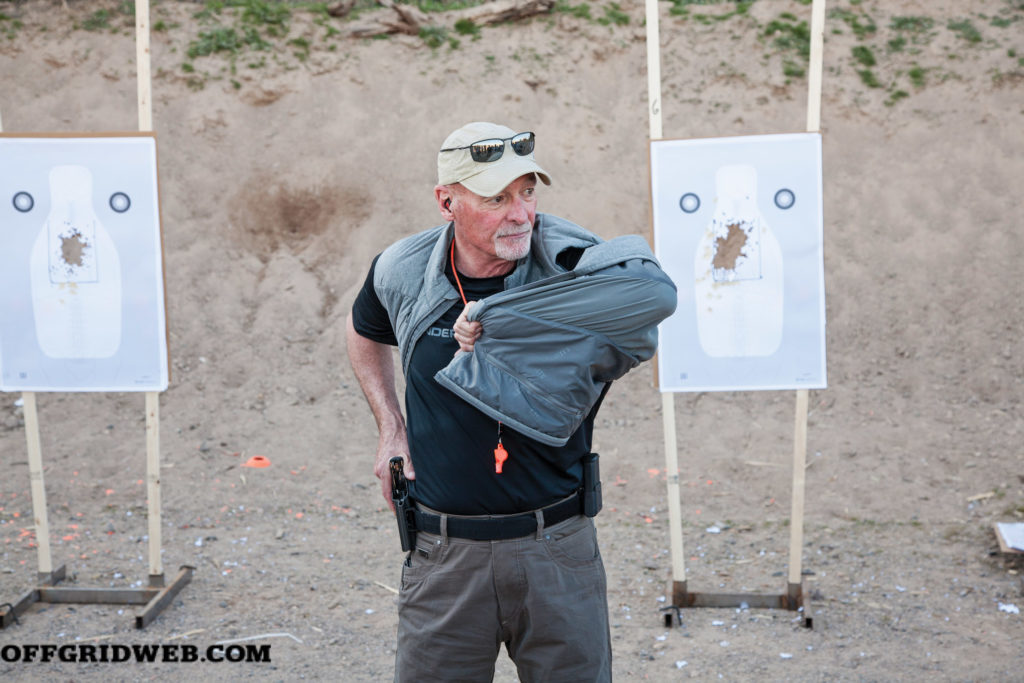
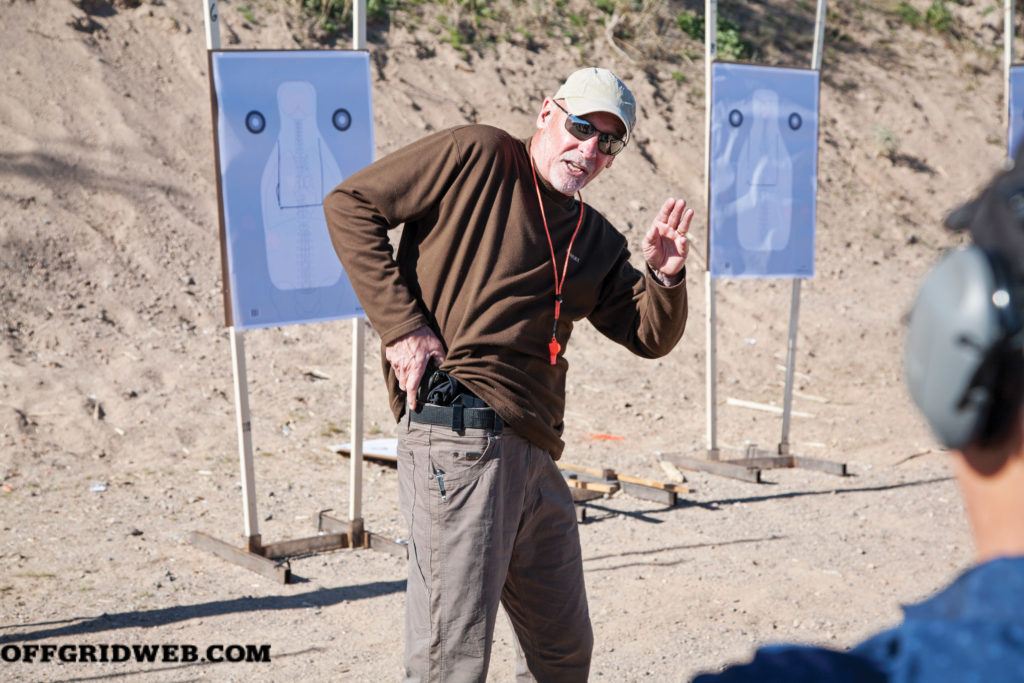
Above: The traditional strong-side garment sweep is one of the more commonly taught ways to access a concealed pistol while wearing an open-front cover garment.

Appendix/Abdominal Carry: The most covert methods of IWB carry can be split into two separate categories that are often lumped together in common vernacular. The terms “appendix carry” or “AIWB” (Appendix Inside the Waistband) have come to represent any style that sits inside your waist, forward of the hip bones. But, if we’re being specific, your appendix is roughly located just forward of your right hip. Carrying here takes advantage of the natural concave spot or “hollow” just inboard of the pointy part of your hip bone.

A properly designed appendix holster will fill this void without excess bulk and may feature an extra belt loop, bump, or “claw” feature to pull the butt of the handgun in toward that aforementioned pointy bone. Carrying in this spot is not new. In his Covert Handgun class, Spaulding cites examples of this carry spot being used as far back as the mid 1800s when derringers and small revolvers fit perfectly in this location.

What has become more common in modern times is what Spaulding categorized as abdominal carry. This technique places the gun much closer to the centerline of your body, usually just to the right (or left) or your belt buckle or belly button. The en vogue holsters of this category often feature attached pouches for a spare mag, knife, or tourniquet. We’ve personally seen people conceal a mid-size pistol, two spare magazines, and a knife in a custom rig that spanned the entire front half of their waistline.

That individual’s body type and the well-designed custom rig allowed all this gear to disappear under a plain T-shirt just one size larger than he’d wear unarmed. If you’re not looking to tote a full-combat load, this carry method will allow most people to conceal a larger handgun than they could with other carry methods. Several RECOIL and RECOIL OFFGRID staff members favor this position, and can comfortably conceal a Glock 19 equipped with both a weapon light and red-dot optic under an ordinary T-shirt.

appendix abdominal carry

Of course, size isn’t all that matters. As already mentioned, the right combination of gear and body type can make a healthy-sized handgun disappear with very little effort put into cover garment choice. In this carry position, bending over poses little risk of revealing your weapon. Reaching up high only requires your shirt tail is long enough to allow some ride up. If you reach up and then lower your arm, or transition from sitting to standing, you may have to be conscious of your shirt bunching around the back of your slide, your rear sight or your hammer (if carrying a hammer-fired gun).

If you upgrade to a heavier button-up shirt, this situation becomes even less likely. Rapid access to your gun while sitting or driving is perhaps easier in this position than any other, if you don’t find it uncomfortable. Depending on your handgun and the local climate, hard metal resting against the softer skin of your stomach may cause chafing or scraping over the course of a couple hours. It usually isn’t an issue for us. If it is for you, wearing a thin undershirt will usually fix it.

Polymer handguns with aggressive frame textures are usually the most notable culprits. Your editor’s trick is to have the front and back straps of his carry guns aggressively stippled while having a lighter, smoother texture applied to the sides. Your mileage may vary, but it’s one way.

You might be tempted to lump fanny pack holsters into this category. While they routinely fall in and out of fashion in the carry crowd, we have some serious concerns about them. Most fanny packs use a two-prong pinch clip or Fastex-type buckle to keep the pack around your waist. If someone approaches from the side, from behind, or can reach around your hip, a two-finger pinch will instantly and completely separate you from your weapon.

There are a couple of carry-specific waist packs that have a more secure closure system, but this creates a juxtaposed problem. If your pack is truly secured to you with a heavy-duty nylon or leather strap that cannot be easily unbuckled, you have just equipped yourself with an external drag handle that runs all around your body’s largest natural hinge. All someone has to do is grab that strap and yank. One of two things will happen: You’ll lose your pack or you’ll be doubled over and thrown in whatever direction you’re being pulled from. Neither one is a great way to start a gunfight.

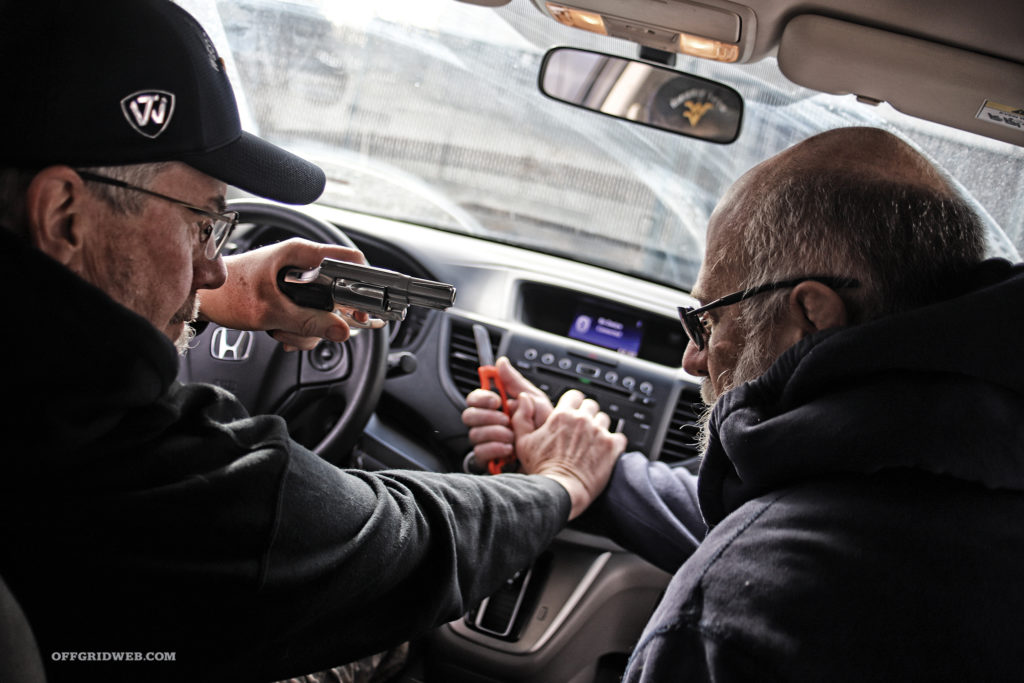
What’s Left: Behind the hip, sometimes known as FBI carry, or in the small of your back (SOB) have been used in both OWB and IWB configurations. However, these positions create additional complications on the draw stroke. Both are slower and less efficient. Additionally, imagine a scenario where you’re being pushed or grabbed from behind, or shoved into a wall or against the side of a car. From these angles of attack, it’s mechanically easier for your opponent to access your gun than for you.

Sitting or driving will not only be uncomfortable but will pin your gun against the seatback, meaning you’ll have to fight for your gun while fighting your attacker at the same time. It’s also much more difficult to tell if your gun starts printing or becomes uncovered during the course of your daily routine.

Above: If strong-side-only draw is required, you can tuck your cover garment behind the pistol to expose it before drawing.

Shoulder holsters only really conceal with very specific types of cover garments. Even then, concealment is only guaranteed if you close your jacket, which prevents access to your weapon. When you do draw, it’s nearly impossible to do so without pointing the gun at yourself or someone around you. Shoulder holsters put your gun into a very precarious position if you wind up in any kind of hands-on confrontation that require you to fight for your gun.

Shoulder rigs that orient the gun horizontally can essentially hand the gun to any potential opponent who’s ever picked a pocket or practiced a brush-pass. Opposite this are ankle holsters. Like their shoulder-mounted counterparts, ankle rigs require very specific wardrobe considerations. They also severely limit the size and type of gun you can carry, while placing that gun at the furthest possible point from your hands that’s still connected to your body.

Off-body carry in a purse, sling pack, laptop case, or backpack can be incredibly covert, although this comes at the expense of quick accessibility. In particular, off-body carry is excellent if you have a need to carry a compact carbine or rifle-caliber pistol in addition to a handgun. We’ll be covering this specifically in a future article.

Mechanical Advantage:

Modern Samurai Project’s AIWB Performance Course

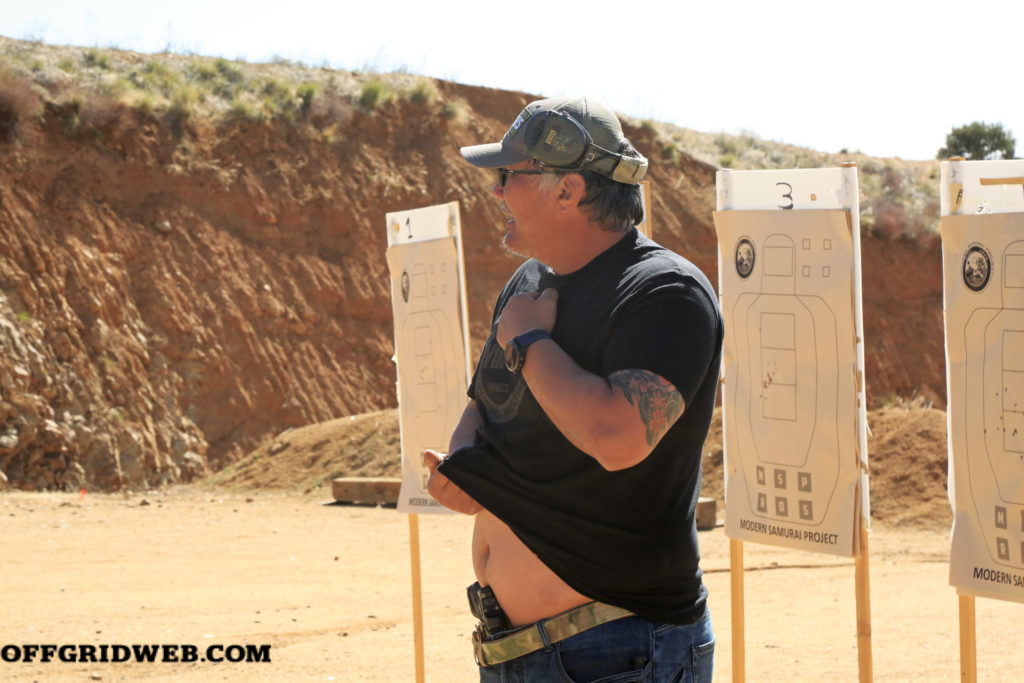
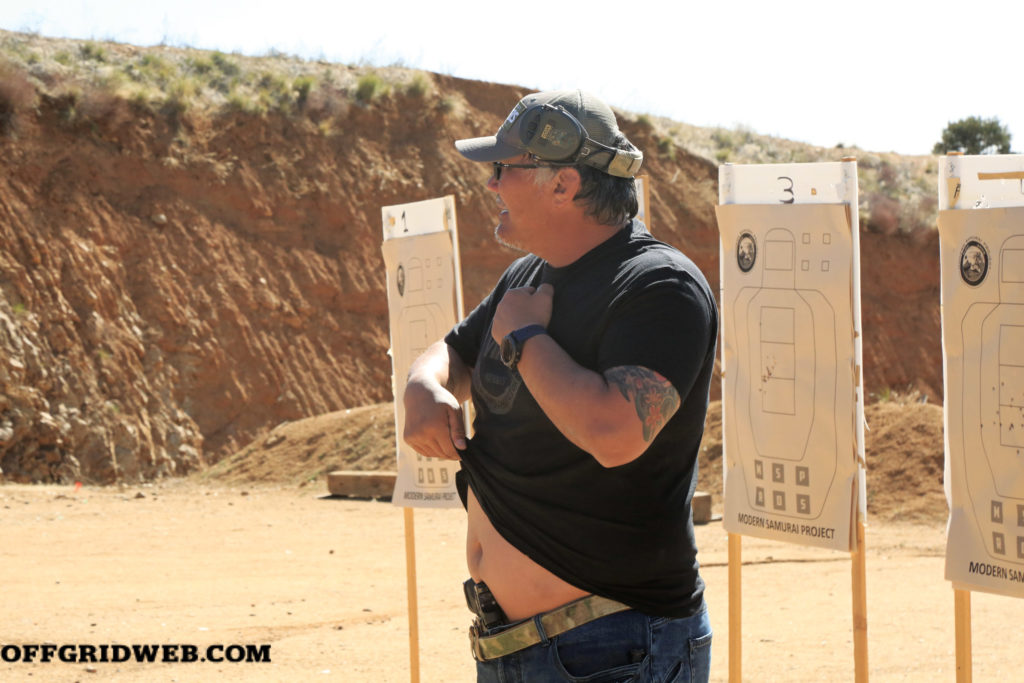
Above: An alternative to tucking the garment behind the gun for a strong-side-only draw, Jedi demonstrates pulling the garment up and then rolling your hand underneath it to trap it during the drawstroke.

A couple of months after we experienced Adaptive Covert Handgun, we had the opportunity to train with another subject-matter expert from an entirely different background. Scott Jedlinski, or “Jedi,” is a lifelong martial artist and master class competitive shooter. His company, Modern Samurai Project, is most well-known for teaching high-performance handgun shooting with red-dot-equipped pistols. But Jedlinski and assistant instructor AJ Zito also invited us to attend a one-day workshop that focused on optimizing abdominal carry performance.

Taking a high-intensity class (400-500 rounds in the one day) that specifically fuses covert carry and pistol performance taught us a couple of excellent lessons, and completely cemented our preference for abdominal carry. While you may not plant your flag on that method of carry, there are a couple of takeaways for those who favor it. These lessons, while intended for AIWB, can be adapted as examples for other methods of carry as well.

Get Personal

As we’ve already mentioned, your holster should be chosen with care, looking for overall quality as well as the specific features that best fit your mode of concealment. Jedlinski took some time to discuss holster modifications. One of the biggest issues people run into when using abdominal carry is the bottom of the holster digging into the pelvis.

Some Kydex holster makers have begun offering their abdominal holsters with adhesive Velcro strips and small blocks of foam precut in a variety of shapes to try and add some cushioning to the holster where needed. Jedlinski suggests cutting up a yoga mat for this purpose. These mats are cheap, readily available, and provide enough material to outfit multiple holsters, or at least try different shapes on the same holster.

Another concern many people have when carrying a gun at the center of their waist is that they’ll be walking around with a gun pointed directly at … well … their most intimate parts. A well-contoured piece of foam not only makes abdominal carry more comfortable, but also angles the muzzle outward and away from any part of the body, let alone sensitive ones. We learned a similar trick from Tom Matturro of One Chance Tactical Solutions. He recommended using a computer mouse pad.

We’re not sure if anyone actually has these at their desks anymore, but they’re still available at office supply stores and provide about a quarter-inch of padding. For the Editor, it’s a goldilocks level of fluff on the back of his chosen holster. We’re sure there are other things you could use, but the point is that a little padding goes a long way with abdominal holsters. Jedlinski also uses a small piece of foam at the top of his holster to create just enough space between the holster and his body to get a proper grip around the gun while drawing. But we’ll talk more about optimal AIWB draws in a moment.

Get Ready

Jedlinski and Zito cover five basic ready positions, which they describe as follows:

Surrender position: Hands held up in front of you, usually between your chin and your sternum, close to your body, elbows bent and pointed down

Arms folded: Mostly self-explanatory, with a couple of caveats for abdominal carry. Ensure that your strong arm is against your body with your hand flat on your torso. Lay your support arm over top, with your support hand flat against your strong side bicep. Many people tuck their fingers into the crook of the opposite elbow when their arms are folded. This will bind your hand up and impede the start of your draw stroke.

Hands in pockets: Again, mostly self-explanatory. But, when carrying a gun, there are only two ways to put your hands in your pockets. Either hook your thumbs in your pockets and leave your fingers flat against your pants, or put all four fingers inside the pockets but leave your thumbs exposed. Regardless, avoid placing your hands entirely in your pockets. If you have to draw your gun, you’ll be fighting the hems of your pockets to get your hands into action.

“Yosemite Sam:” This position is when you’re standing at a “soft ready” with your hands open, already hovering over your waist line.

Hands crossed: Let your arms hang loose at your sides. Now fold your hands in the middle of your body. Chances are your hands are hanging right in front of your belt buckle, which should also put them just below your AIWB holster. We found this position gave us our fastest first-shot times during the class. Whether that translates onto the streets remains to be seen.

Get A Grip

Training how to react if a fight starts from any one of five given positions might seem like a daunting task. But one of the points that Jedlinski makes in his class is that if your weapon is on or near the centerline of your body, the draw stroke is essentially universal regardless of start position. This is not not true for other carry positions, but another advantage of abdominal or appendix IWB versus OWB hip carry is that hip carry typically requires the firing hand to clear the cover garment and then return to the holster. AIWB allows you to clear the cover garment with your support hand while your strong hand grips the gun. Being able to do two things at once, using both hands, could arguably be more efficient and save you time on the draw.

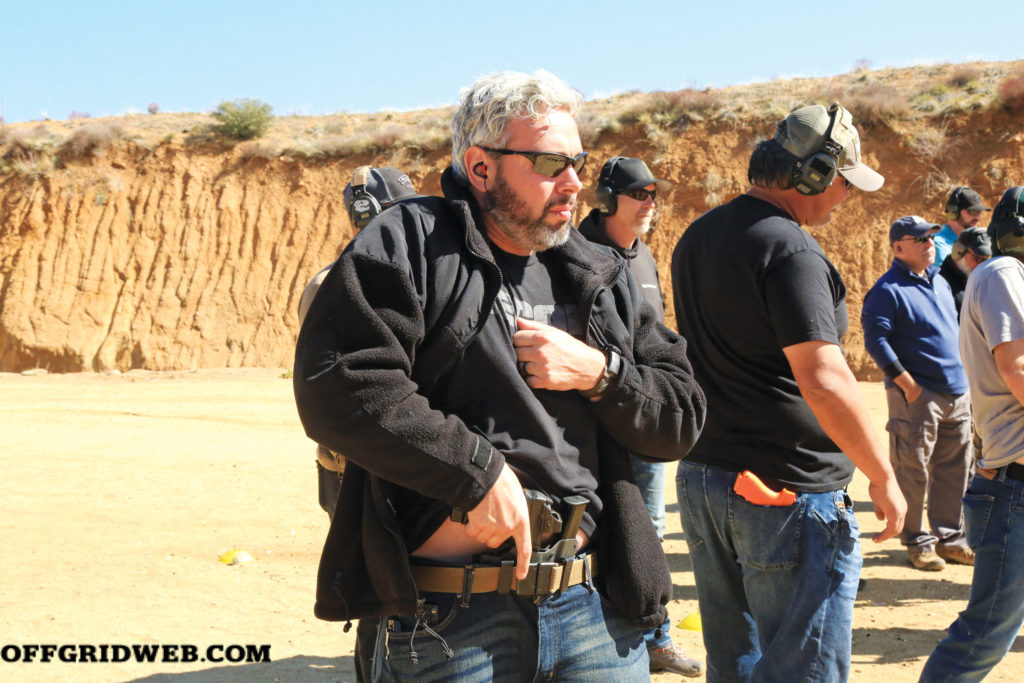
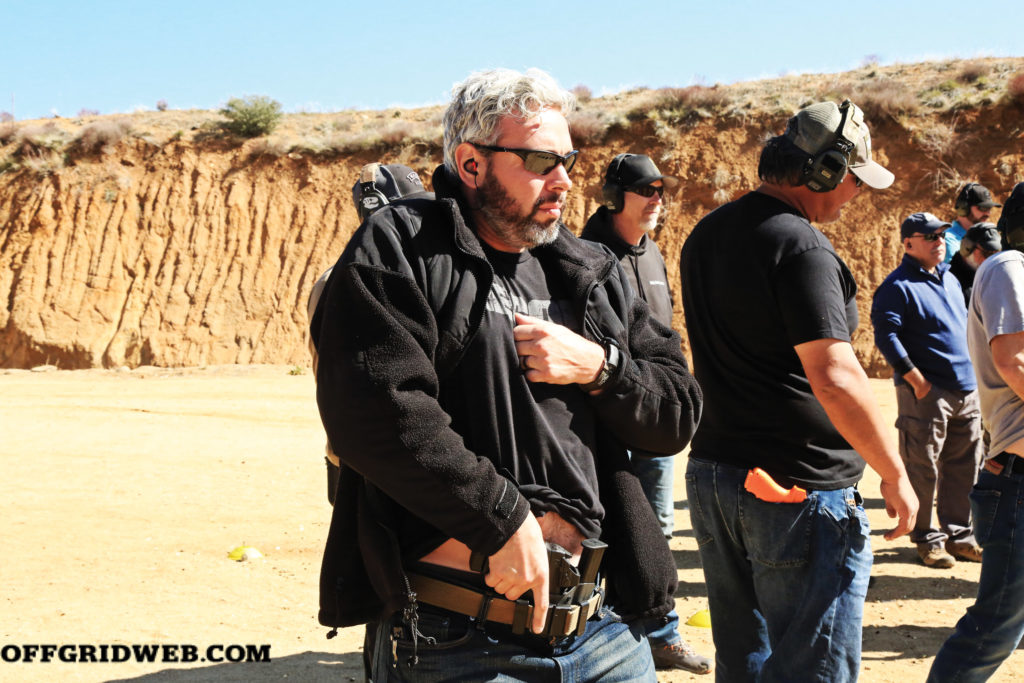
Above: Author practices the “downward stab” draw technique during Jedi's Path To Performance course.

There were two major takeaways about grip, as it relates to the draw that gave us substantial and measurable increases in speed out of the holster. The first is what Jedlinski calls the claw grip. When you first move your cover garment and go to place your strong hand on your pistol, don’t fight your own body to get a complete firing grip immediately. Since most of us keep some emergency calorie stores in our stomach area, there isn’t usually an open gap between our abdomen and the gun itself. Instead of trying to wedge your thumb in that space and wrap it around the gun, Jedlinski advises to stack your thumb on the back of the pistol.

He recommends touching your thumb to the rear sight as an index point. You may or may not be able to do this based on hand size and the pistol you’re carrying. For example, in his class we were shooting a Walther Q4 Steel Frame pistol and were not able to reach the rear sight due to the beavertail on the back of the frame. But on the Glock 19 we carry daily, that technique works perfectly. If you cannot reach the rear sight, lay your thumb along the inside edge of the back of the slide (the side resting against your body).

Then, as you draw, allow that thumb to slide further down to where it rests naturally. Once the gun cleared the holster, we didn’t spend any conscious thought on moving the thumb. It just wound up in the right spot as we reached the target. In the process, we became more efficient by not trying to force or dig our thumb in before clearing the holster.

The other tip has to do with how you grab the gun in the holster. Caveman logic led us to believe an upward-sweep type of motion with our arm, grabbing the gun on the way up, would be the quickest way to get our weapon into the fight. But the folks at Modern Samurai advocate a downward stabbing motion into the hand. We were skeptical at first, to say the least. Jamming our hand downward into the holster to pull the gun upward and out seemed counterproductive. But both Jedlinski and Zito are much faster shooters than we are, so we gave it a try.

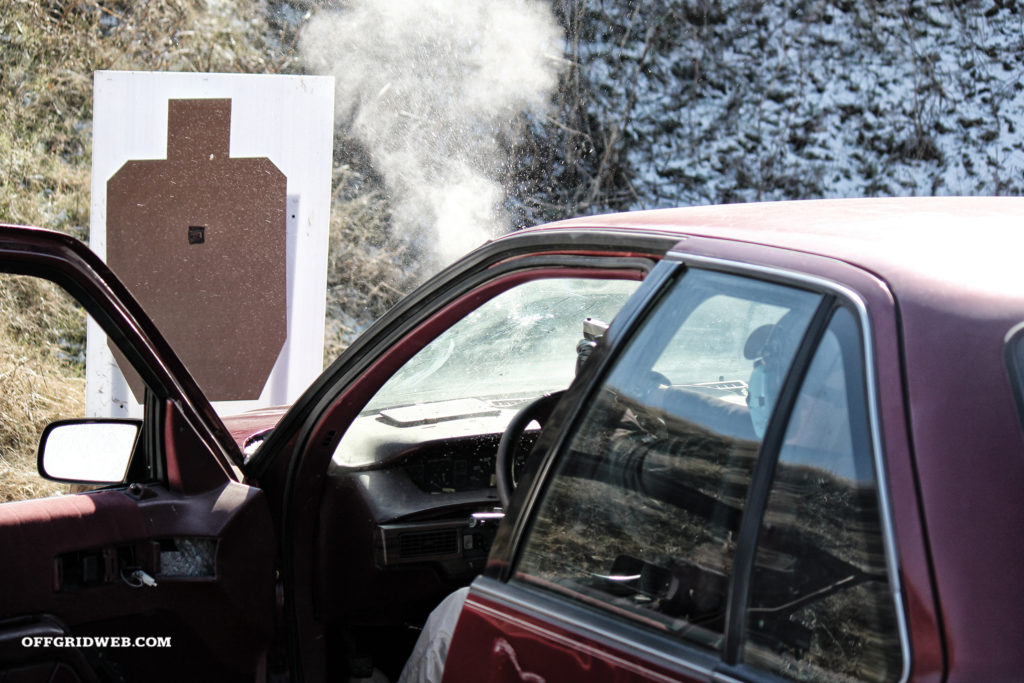
What we found was intriguing. The downward stab turns into an upward rebound almost immediately upon making contact with the gun. The net effect is that, with a little practice, the gun seems to bounce out of the holster with forward momentum preloaded to carry you through the rest of your presentation. How well does it work? Prior to this class, the author averaged a 1.6-second first shot from concealment. By the end of our three-day class with Modern Samurai Project, we were down to a 1.2-second first shot, with consistent A-zone hits. Shaving an entire half second off your draw time in just 24 hours’ training time is a significant performance increase in relatively little time.

Is this important from a practical standpoint? The average human reaction time to a visual or audible stimulus is one-quarter second. If your reflexes are exceptional and you’re already primed to action, you might be able to get that down to 0.20 or 0.18 second. But most people walking around in their daily lives will be hovering around that 0.25 mark. That half-second off the draw potentially doubles the available decision-making time available to you.

Or, if you’ve already made the decision to shoot, you can now get three rounds on target as opposed to one in the same timeframe. According to trends being examined by several federal agencies, the first shot of most defensive gunfights is fired from within 5 yards, with the overwhelming majority of instances seeing all rounds complete within 7 yards. The bottom line is that, if it happens to you, you’ll likely have a bare minimum of time and space to react.

fenix ammunition

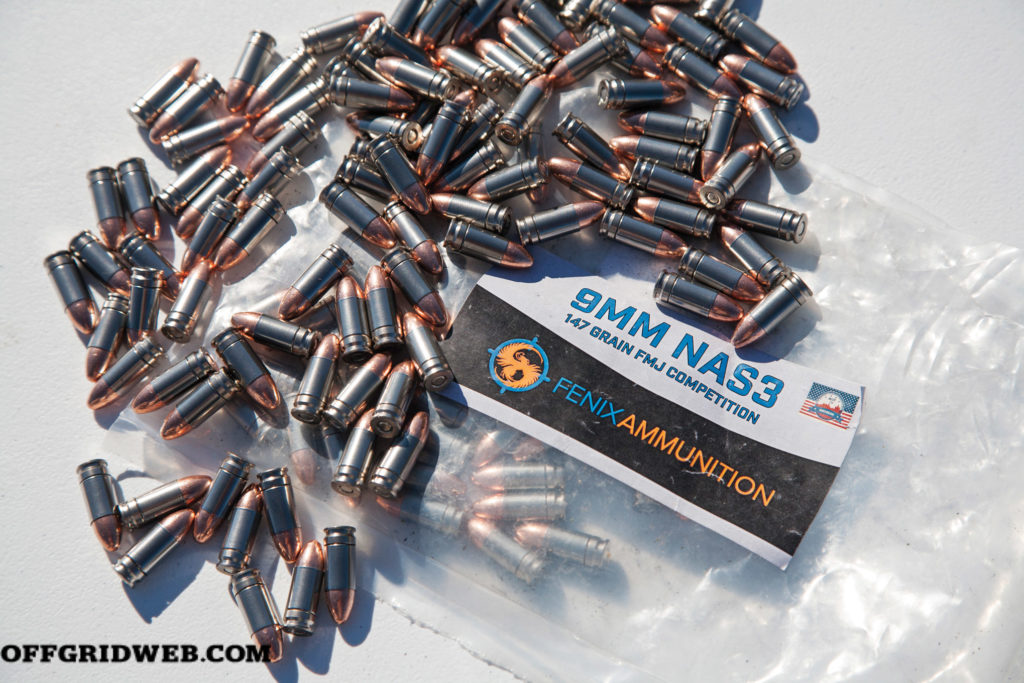
Above: Fenix Ammunition's competition load pushes a 147-grain FMJ bullet at a dainty 900 fps. During our train-up for this story, we shot thousands of rounds to gain proficiency and relied heavily on this load to reduce fatigue during back-to-back classes and high-round-count range days.

To paraphrase Jedlinski: “Does it matter? Well, if you have a 1.5-second problem to solve, do you want a 1.6-second draw or a 1.2-second draw?”

Parting Shots

Carrying a gun for personal protection isn’t a decision to be taken lightly. Many people spend days, weeks, or even months researching the best pistol to carry. But all too often, their education stops when at the gun-store register. We argue the sales transaction (and state permit class, if required) should be the beginning of your concealed-carry education, not the end of it. Knowing how to carry, deploy, and employ a firearm for self-defense is even more important than knowing what to carry. Hopefully, this article serves as a primer for the kind of knowledge you need to have to be an effective and responsible armed citizen. But we urge you to seek out professional training when and where possible and commit to a level of practice commensurate with the gravity of the task. We hope you never need lethal force to protect you and yours, but sometimes you must choose between being safe and being ready. Make sure you have both options


Photography by Niccole Elizabeth and Patrick McCarthy


More On Self Defense, Survival, and Firearms


Winning the Germ War

Pick your favorite (or least favorite) disaster scenario and ask what your top priorities following that disaster will be. Are a clean body and living space on your list? They should be.

Sanitation and hygiene are fundamental forms of preventative medicine to block disease transmission. Human waste and household garbage harbor numerous infectious diseases. Properly disposing of these items and maintaining clean bodies are staples of the modern running-water world. With a flush of the toilet, taking a can to the curb, the turn of a knob, a little soap, and a few seconds, most of our sanitation and hygiene is handled effortlessly — so much so that very few of us ever consider life without these conveniences.

History shows that in disasters, one of the first things to become compromised is the infrastructure we rely on for hygiene and sanitation. The power goes out, and pumps shut down. Water lines are broken or compromised. Essential personnel to maintain infrastructure services fall ill or are unable to reach their workplaces. No matter the scenario, one of the greatest disaster challenges is maintaining clean and healthy living conditions. Meeting needs for clean water, sanitary waste disposal, and individual hygiene tops the list of priorities for every disaster response organization. Many tasks come later, or simultaneously, but without these fundamentals, the spread of disease runs unchecked.

Above: The household cleaners and soaps you already have can work with improvised hygiene and sanitation methods. Separate into smaller containers for rationing to group members.

Sanitation means keeping environments clean and healthy. Hygiene means keeping the body clean and healthy. Disease risk from unsanitary conditions and poor hygiene can be extreme, as bacteria, viruses, and other pathogens not only thrive in dirty environments but can be spread more easily.

Of primary concern is the transmission of diseases via the fecal-oral route, where pathogens in human waste pass from one person to another and are ingested. Diseases and pathogens that can be found in human solid waste include cholera, shigella, e. coli, hepatitis, giardia, cryptosporidium, tapeworms, amoebas, and even the SARS-CoV-2 virus. Fecal-oral transmission occurs most readily in environments where human waste cannot be dealt with appropriately. Pathogen-containing particles can be carried by unwashed hands and insects like flies to other people, uncovered food, shared water, and other items. Human waste above ground can be carried by run-off to contaminate waterways. Buried human waste can soak into the ground and contaminate below-ground water.

Trash is also a concern, as many of the items we throw away can rot, grow bacteria, and attract insects. Food wastes are a particular concern. Food itself can also be a culprit for disease spread, as without ready means of preservation, food can spoil and host a cornucopia of nastiness, including toxic spoilage-produced waste products, such as botulinum toxin.

To manage these concerns, we must plan for providing sanitation and hygiene in a disaster.

Above: A gallon jug with the lid drilled or perforated in multiple spots can be mounted on a rod to tip, by hand or with an attached cord pull, to wash hands or even shower under.

Clean Water

Nearly everything in this article requires having clean water. Without clean water we are lost, regardless of the other severity of our situation. Entire books can be written on this subject, and to cover sanitation and hygiene we don’t have room to take a deep dive into water. If you take nothing else away from this, take away a desire to research water storage, emergency water access, transport, filtration, and purification.

For the majority of Americans, water comes from the tap. Some of us may buy purified water to drink, or have filters in our kitchen, but most of our water comes out of the faucet without thought. Implicit in this arrangement is that we have very little water storage. The toilet tank, the hot water heater, and maybe a rain barrel or two if we have a yard — that’s it. If the municipal water systems are disrupted, accessing more water will become a challenge. The World Health Organization recommends access to 2 to 4 gallons of water per person, per day, for disaster response provisioning. Those “native” storage resources in the home will supply that only briefly. You need to identify water sources in your area now, before something happens, and think of ways to transport, purify, and store that water.

Above: Wash bowls filled with 1 tablespoon of bleach to 1 gallon of water can be reused repeatedly for washing your hands.

Fundamental to our discussion of hygiene and sanitation is using bleach (sodium hypochlorite) to disinfect water. Although bleach cannot remove particulate contaminants, it can render water safe for use. Only a few drops are required for potable water, around eight drops per gallon. To make a cleaning solution of water and bleach, use 1 tablespoon per gallon. Only use regular sodium hypochlorite bleach; avoid scented, additive-containing, or color-safe bleaches.

Personal Hygiene

History has shown time and time again that good personal hygiene helps to prevent disease and maintain health. Though the disaster environment may make it difficult, your immediate survival and long-term success are affected by your hygiene.

Critical among personal hygiene tasks is hand washing. Pathogens from anything we touch can linger on hands and be transferred to mouths, eyes, food, and water. The barrier to this is hand washing with soap and water. We’ve all heard it a lot recently: Thoroughly lather palms, backs of hands, and fingers and scrub for at least 20 seconds under running water. Complication? You have to have running water.

Buckets and jugs with a spigot attached are the most apparent solution to creating a faucet. Turn the spigot and wash as normal. A towel can be used to turn the spigot off, or it can be washed as you wash. A larger vessel underneath can capture gray-water. Simpler systems can be created using plastic jugs filled with water and rigged up to tip slightly, running out water without spilling and returning upright by gravity. You can also create a reusable hand-washing basin with a large bowl filled with a solution of water and bleach. The aforementioned 1 tablespoon of bleach to 1 gallon of water is the right ratio. Refresh the bleach when you can no longer smell chlorine in the water and refresh the whole thing after several uses.

Above: Many buckets or other containers can be easily drilled out for attaching a spigot and used as an ad hoc faucet.

You must wash your hands after going to the bathroom, disposing of waste or trash, manual labor, or changing a diaper, and before providing medical care, preparing food, or eating, touching another person intimately, and any other time your hands might be contaminated. These common-sense rules are even more important to remember during a disaster.

The next step is keeping your body clean. Sweat attracts dirt, and unwashed bodies are ready hosts for various infections. The easiest, and least water-consumptive method is to take a “bird bath” using a bowl of water, soap, and a washcloth. Wash with the soap and cloth, and lave clean water with a dipper to rinse. While far from the most effective, this will meet the basic requirements of washing the face, armpits, crotch, and feet.

More proper bathing can be performed using portable camp showers. A heavy-duty water bladder that hangs above head height with a gravity-fed tube and shower head, these are designed to hang in the sun for heat. Hanging on a balcony or in a window, rather than fully outdoors, may only get partial sun, but will at least take the chill off. Improvised showers can be made using the same idea. Insert a spigot or tap in the bottom of any water container, with a hose running to a shower-head type fixture, be it a garden sprinkler or something improvised (a water bottle with holes in it, capped and drilled PVC pipe, or a cannibalized shower head). Use caution hanging heavy containers and make sure whatever you use can bear the weight of several gallons of water.

Another means of improvising a shower is to use a garden pump-sprayer. You must use a clean sprayer and not one that has ever had herbicides or pesticides in it. Just fill with water, pump, and spray. You can even set your sprayer in the sun for several hours to warm the water first. Baths should be avoided as they use excessive amounts of water. Wet wipes can be used for quick and minimally effective hygiene of critical areas, but are less effective and more wasteful than soap and water.

Above: Menstrual cups present a long-term reusable alternative to pads that can be extremely valuable in disaster environments.

Routine hygiene must be maintained too. A disaster is no excuse to stop brushing your teeth. Toothbrushes are cheap, especially bulk disposables such as those used in hospitals. Toothpaste too, though in an emergency baking soda can be used in place of toothpaste. Extra or worn out toothbrushes can be sterilized and reused to clean hands and cuticles. Fingernails should be trimmed to avoid breaking and injury, as small wounds on the hands are very susceptible to infection.

The next point of hygiene to take care of is bodily functions. As with different washing strategies, we must be willing to adapt. Realize that while none of these measures are convenient or comfortable, done right they achieve the goal.

Since a post-disaster run to the store is an unlikely hope, you’ll need to be stocked up on reusable hygiene supplies, or prepared to improvise them. Washable cloth menstrual pads, and reusable menstrual cups, are a long-term replacement for unavailable disposables. If caught unprepared, cloth pads can be easily sewn from absorbent materials with a nonabsorbent backer. Improvised pads can be made from household materials. Rectangles of cotton wool or similar can be wrapped in a layer of soft cotton, or a thin rectangular fold made of absorbent fabric. A thin plastic liner, between pad and underwear, can prevent leakage. Ensure you have or make enough to change frequently.

If you have young children, you may already be cloth diapering, which puts you ahead of the curve in a disaster. If not, now would be a good time to begin. Receiving blankets, which most parents have, make an excellent improvised diaper. Soft cottons, like T-shirt material, also work.

Maintain good hygiene for your little one and clean them gently but well when changing. Baby wipes would be ideal, but soft washcloths dampened with warm water work, and go right to the laundry with cloth diapers. For diaper rash, you can use coconut oil or petroleum jelly as a barrier paste.

Above: A receiving blanket can be folded and used as a diaper.

Keeping yourself clean after going to the bathroom is as important as keeping your kiddo clean. Again, you’ll have to improvise. Frequent campers know the natural materials that can stand in for TP, but good leaves and dry grass bundles may be in short supply in urban environments. Newsprint and similar paper can be crumpled and flattened repeatedly to soften it, for a less unpleasant experience. Rags can be used too.

Your hand is an option, along with a stream of water, followed by a thorough washing. If you have the water, a bidet can be improvised from a pump sprayer, as discussed for showering. Travel bidets, basically a squeeze bottle with a spray nozzle, can be purchased now and cached. Squeezable sports bottles with push-caps make a solid improvised bidet.

Sanitation

All the good hygiene in the world won’t help if your environment lacks sanitation. Just because you cannot flush or take the trash to the curb every Thursday doesn’t mean waste production stops. Human waste, food waste, and trash will continue to be produced. If these outputs aren’t dealt with, they pollute and lead to the spread of disease.

Top priority is dealing with human waste, as it is the most likely to spread disease. Our goals should be to remove all wastes from the household/living quarters as soon as possible. An indoor bathroom is hard to beat for comfort and morale, but making this work requires some adjustment. If the sewer lines are unbroken, you can activate most flush toilets by pouring water into the bowl. Urine can be left in the bowl, to reduce water use, until solid waste needs to be flushed. A large jug or pitcher can be staged in the bathroom, pre-filled with water, for this purpose. This is an excellent use of gray-water captured elsewhere.

If the sewer lines are compromised, or water availability low, the home toilet can still be used. Line the toilet with garbage bags, ideally doubled, and secure them under the lid. This may be used as normal, and when full, the entire bag simply lifted out and tied closed. Unpleasant odors and flies can be managed by topping each deposit with RV toilet sanitizing chemicals, wood ash, sawdust, cut grass, hay, or alfalfa. 

Above: Hand bidets and squeeze-bottles can be kept near, or brought to, bathroom facilities.

The next option, which can still be in the existing bathroom, is to use a portable camp toilet. A five-gallon bucket with an improvised toilet seat frame is almost the same thing. Bucket toilets should be lined with a garbage bag, and material spread over deposits. Empty bucket toilets when they are half-full to avoid a mess. 

With any container toilet, effort should be made to deposit only solid waste. Liquids fill bags faster, add weight, and can leak. Urination outside, or even in open drains, can provide an alternative to filling the toilet with liquids. In the long term, areas used for urination should be sprinkled with disinfectant to keep down odors.

You can also set up an outdoor toilet area in many ways, some better than others. An immediate first choice is to use a bucket system. For many caught in a disaster, however, the only choice ends up being various forms of trench or pit latrine. These systems are holes in the ground, dug deep enough and long enough to accommodate days’ or weeks’ worth of deposits from the entire group. Outdoor latrines create significant health hazards unless built properly, as there’s more to them than simply digging a hole and using it.

Latrines can leach into the ground, eventually contaminating ground water, as well as attracting insects that can carry pathogens out of the waste. To mitigate this, latrines must be away from any water sources, open water, dwellings, food prep areas, and showers. The minimum safe distance is 100 feet; 200 to 300 feet would be even better, but even in larger suburbs that distance may not be available in the backyard. In dense urban settings, this may require cooperation to utilize a local open space for community latrines.

You can dig a single deep hole, or a long deep trench, for a latrine. Trench latrines serve more people, or serve fewer people for a longer duration as you move from one end of the trench to the other. Latrines should be deep enough to have 18 inches of soil above the waste when filled back in. They can be equipped with a pair of boards across the pit for squatting over the hole, or made more comfortable with a seat frame, toilet seat, and privacy screens. Each person should cover their deposit with appropriate materials. When the latrine is filled to 18 to 20 inches below the ground level it should be buried and a new one dug.

If you use bucket toilets, or bags lining your indoor toilet, disposal of each full bag becomes the next priority. For a short duration, a tightly sealed garbage can works for a disposal station. It should be lined with heavy garbage bags, with shredded or crumpled paper between bags to absorb moisture and reduce odor. Bags of waste can be added to the can, and the lid tightly sealed each time. A locking lid, or other means of animal proofing the container, is a must. This must be kept a safe distance from water and living areas, and should be fastened tightly to a post or tree to prevent knocking over. In the longer term, disposal pits can be used with depth and placement constraints similar to a latrine. Waste bags should be buried immediately to prevent insect or animal access, reduce smells, and prevent infection.

Food waste and other trash is the next sanitation issue. Trash attracts bugs and animals and can be a festering ground for bacteria and disease, just like human waste. Separate your trash by wet and dry. Wet trash includes food waste, containers with food remnants, and so on; it should be handled similar to human waste. Dry trash is paper, clean containers, and the like; it can be contained with somewhat less concerns.

Above: A clean pressure sprayer filled with water can be placed near any toilet or latrine.

Liquid trash, excluding grease, can be dumped in soakage pits. To build a soakage pit, you dig a hole or trench similar to a latrine, but then fill it with rocks. Start with large stones in the bottom, and reduce to medium rocks in the middle, reducing size until the top layer is gravel. This graded fill allows the liquid waste to settle to the bottom without creating a nasty, disease-promoting, trash swamp. The concept of a soakage pit also works for building a urinal.

Reducing your trash output during a disaster can help too. Consider alternate or more complete use of everything. Evaluate all your trash for reuse — containers for water transport, washing stations, and other purposes. Clean paper trash for fire starting, lining waste containers, even improvised toilet paper. Food waste can be reduced by better use and preparing only the amount that’ll be eaten. Get creative with leftovers and use all the parts of plants and animals. This will provide more nutrition out of a given item, make food stocks last longer, and reduce the amount of waste. Dehydrating, canning, and other shelf-stable preservation methods will help to reduce spoilage.

Food prep and eating areas should be kept clean by removing large physical remnants of meals and wiping down all surfaces with soap and water or a bleach solution. Dishes should be washed thoroughly, though every effort to conserve water should be taken. Laving water over dishes, rather than filling an entire sink or basin, can reduce water use.

Above: Fitting a garbage bag into the emptied toilet bowl, with the seat closed over the opening, makes for a comfortable, easily maintained, toilet solution.

The final point is laundry. We’ve talked about keeping the body clean, and clean bodies require clean (or at least sanitized) clothes. We’ve also talked about numerous uses for fabric in waste management and cleanup. This means laundry must be done. The same clothes can be worn repeatedly, but for no more than 1 week. Items soiled with waste will need to be washed almost immediately, however. You can wash clothes entirely by hand in a bucket or tub. A few clothes at a time go into the bucket with water and detergent, and you agitate and scrub them one at a time by hand until the dirt and grime come out. Then, you repeat the process with clean water to get a thorough rinse. Devices like washboards can reduce fatigue while improving results.

One of the most effective labor savers for bucket or tub washing clothes is a plunger. There are several designs for laundry agitating plungers popular with homesteaders, but a new household toilet plunger works too. Insert the plunger into the bucket and plunge, making sure to fully agitate and compress all of the clothes within. Cutting or drilling some holes into the plunger can reduce resistance and increase the cleaning agitation. Clothes and fabric can also be disinfected, but not cleaned, by a 1- to 2-minute pass through boiling water. Leaving cloth items in direct sunlight for several days, turning them over halfway through, can also disinfect them.

Disaster survival means adaptation to the unfamiliar and the uncomfortable. For many of us, these methods will seem primitive and unattractive. The reality, however, is that they’re adequate to meet the needs of surviving until you can begin thriving, either through your own long-term solutions or the return of infrastructure and services. Non-flush toilets, wash basins and buckets, trash burial, and other improvised methods are the norm for millions of people worldwide. You can do this, maybe not with a smile, but you can do it and you will prevail.


About the Author

Morgan Atwood is the founder of No One Coming, a firm providing services, tools, and education for survival environments. A dedicated wilderness professional, Atwood has been an EMT and wildland firefighter, provided risk management and anti-poaching services for remote ranches, and lived off grid on a historic cattle ranch most of his life. www.noonecoming.com


More Reading


Surviving a Carjacking

“Carjacking” is a term first coined in 1991 by writers of The Detroit News to describe an epidemic of auto thefts at gunpoint that plagued their city. The crime first became prevalent in the 1980s, when anti-theft alarm systems made old-school car theft more challenging for criminals. Unlike an ordinary car thief, who wants your vehicle but wants nothing to do with you, a carjacker plans to meet you face-to-face and is ready and willing to use violence in the process.

Despite the fact that it’s been around for decades, many states still don’t have specific carjacking laws. Instead, they categorize it as robbery, auto theft, or aggravated assault, so tracking it statistically is challenging. The most comprehensive study of carjacking was done by the Bureau of Justice Statistics (BJS) National Crime Victimization Survey (NCVS), which analyzed it in detail during the period 1993 to 2002. While somewhat dated, their study still provides key insights into the nature of the crime — and an excellent basis for defending against it.

carjacking with family

Above: Statistically, most carjackings target solitary drivers, but when other family members are involved, things quickly get much more complicated.

Carjacking by the Numbers

According to the NCVS study, about 38,000 carjackings occur each year in the U.S. Most take place in urban or suburban areas, generally not far from the victim’s home. Other revealing statistics from the report include:

  • 63 percent of carjackings occur within five miles of the victim’s home
  • 17 percent occurred at or near the victim’s home
  • 68 percent of carjackings occurred at night
  • 93 percent of carjackers are male, 3 percent female, and about 3 percent mixed male/female groups
  • 56 percent involved multiple assailants
  • 90 percent were committed against a single victim
  • 93 percent are committed in cities and suburbs
  • A weapon was used in 74 percent of carjackings
  • Guns, especially handguns, were the most common weapons used (45 percent), followed by knives (11 percent) and other types of weapons (18 percent)
  • 44 percent of incidents occurred in an open area (such as on the street) or near public transportation, and 24 percent happened in parking lots, garages, or near commercial businesses
  • About 15 murders a year are related to carjackings
  • Men were victimized more than women, and ethnic minorities more than whites
  • About 45 percent of attempted carjackings are successful

carjacking dont tailgate

Above: Driving away from danger is always the best option. To preserve that option, don’t tailgate. When you stop behind another car, make sure you can see the rear tires so you’ll have enough turning radius to drive around if necessary.

These numbers paint a pretty clear picture of the circumstances of a typical carjacking. Armed with that knowledge, there’s a lot you can do to keep from being a victim. The more alert and aware you are, and the more precautions you can integrate into your daily habits, the safer you can be.

Even if you find yourself “behind the curve,” fighting back can still be a very viable option. According to the NCVS report, about 67 percent of carjacking victims resisted — most by running away and calling for help, and the remaining 24 percent by threatening, attacking, or chasing the offender. How effective was their resistance? About 32 percent of the victims of completed carjackings and 17 percent of attempted ones were injured, and most of their injuries were minor.

defense outside the vehicle

Above: Many carjackings occur as you approach or enter your vehicle. Stay alert and be prepared to fight back.

Anti/Counter-Carjacking Basics

The first thing you need to understand and accept about carjacking is that your car isn't worth dying for, but to a carjacker, it may be worth killing for. Put your personal safety above your car and your ego. If you're surprised by a carjacker and have no other option, give up your keys and get away. Safe escape is always the ultimate victory.

To keep from being surprised, understand that carjackings typically happen in one of two ways: Either the carjacker approaches you as you enter or exit your car, or he approaches you while you are behind the wheel and your vehicle is stopped.

Approaching and Entering Your Vehicle

Anytime you’re approaching your vehicle, you’re vulnerable and need to be aware, avoidant, and ready to react. Here are some specific warning signs you should look for:

  • People loitering around your car
  • People reacting to your presence or coordinating their movement with yours
  • People sitting in nearby parked vehicles
  • Vehicles following you or drivers paying unnatural attention to you
  • Possible hiding places near your vehicle, including vans and vehicles with tinted windows
  • Anyone hiding beside, behind, under, or in your car
  • Anyone calling attention to supposed problems with your car, like flat tires, dents, or leaking fluids.

If you see something that concerns you, stop, maintain your distance, and use your vehicle and other things in the environment as barriers. Do not walk into a situation that makes you uncomfortable. If possible, go back and ask parking lot security or a friend to walk with you to your car.

window breaking

Above: Your vehicle is your best protection until its physical structure is breached. Once a carjacker has access to you, the danger level escalates rapidly.

You should also get in the habit of entering your car efficiently, maintaining awareness, and driving away in a timely manner. The longer you linger in your vehicle, the more vulnerable you are. Some specific behaviors you should adopt include:

  • Have your keys in your hand before you approach your car. Keeping them in your non-dominant hand leaves your strong hand free to draw a weapon or strike empty handed.
  • Carry bags or other objects in your weak hand to leave your strong hand free. If you must carry something with both hands, be prepared to drop it if you have to defend yourself.
  • Use electronic key locks whenever possible. Only unlock the driver’s side door if you’re alone to prevent anyone lurking nearby from entering your vehicle through another door.
  • Know how to use the panic button on your electronic key. If you sense danger and cannot either escape or enter your car quickly, activate the alarm to call attention to your situation.
  • Keep separate key rings for each car you drive and for your home. Carry only the keys you need in your hand. If you're forced to surrender your keys, you surrender only the keys to that vehicle — not the keys to your home. If your car registration or other personally identifying documents are stored inside the car, the attacker will have your address, so this is an important safeguard.
  • Get in the habit of carrying a flashlight in your strong hand that you can use to illuminate things from a distance, or use as an improvised weapon.
  • As you get near your car, look behind, under, and inside it before you approach the door. When something doesn’t feel right, consider walking past your vehicle at a safe distance, then circle back to observe and approach it from the opposite side (this is known as a “fish hook” reconnaissance maneuver).
  • Keep your head up, continue scanning as you unlock your car, and stay alert as you enter your vehicle. If you must put packages or other items in your car, do it quickly and maintain awareness of the environment as you do.
  • Once you’re in your vehicle, lock your doors and keep the windows up. Put on your seatbelt as you continue to use your mirrors to scan the area around you.
  • Start the car and get moving ASAP. Do not check text messages, eat, or engage in other distracting activities immediately after getting into your vehicle. If you must do these things, drive a short distance and stop at another safe location — this will complicate the plan of any potential attackers.
  • This may sound like common sense, but do not get out of your vehicle while it’s running. Stories have circulated online for years about carjackers using various distractions, such as a note under the wiper or a sticker on the back window, to lure drivers to step out of their vehicles. Some claim this is just an urban myth, but the underlying lesson is valid.

carjacking fighting inside the car

Above: Against a carjacker who’s able to get into your passenger seat, a gun set up for a left-handed draw makes weapon retention easier.

Exiting Your Vehicle Safely

Exiting your vehicle can also be a time of vulnerability to carjacking. Some carjackers prefer to catch people unaware as they get out of their vehicles and before they “tune in” to their surroundings. Again, by keeping your head in the game and taking the time to apply a few simple tactics, you can significantly reduce your risk of falling victim to this type of attack. The tactics for exiting your vehicle safely include:

  • Whenever possible, back into the parking space or look for pull-through spots that allow you to drive forward to exit. This makes it much easier to drive away quickly.
  • Park in well-lit areas that offer good visibility from all sides and multiple avenues of escape.
  • Park within view of security cameras, if possible. Big-box chain stores are likely to have well-maintained exterior camera systems; restaurants and small businesses are less likely.
  • Avoid parking areas near sources of concealment (like walls, dumpsters, hedges, and similar objects).
  • Before you unlock your doors and get out of your vehicle, pause and look around. If things don’t feel right, drive away and park somewhere else.
  • When you’re ready to get out, release your seatbelt, get whatever you need to take with you, organize yourself, and then unlock the doors.
  • As you get out, scan the area and tune up your awareness. Be prepared to react.
  • Keep your key in your hand in case you need to activate the panic button or, in a worst-case scenario, surrender it.
  • As you move away from your vehicle, lock all the doors and mentally note its location. This will help you approach it directly when you return instead of wandering aimlessly in the parking lot.
  • Never leave your vehicle running when unattended, and never leave your keys in a vehicle.

carjacking vehicle combatives

Above: If you have to fight unarmed in your car, control the carjacker’s near arm to use it as a barrier and use the dashboard and other surfaces inside the car to your advantage.

Avoiding Carjacking While Driving

Carjackers may also attack while you’re behind the wheel of your vehicle, either stopped at a stoplight or “boxed in” by other cars. They may also intentionally bump your vehicle with theirs to draw you out. Depending upon the access you give them, they can threaten you with a weapon, physically attack you, or simply pull you out of the vehicle. Your first line of defense should be to make full use of the physical security your car offers.

  • Keep all your doors locked whenever you’re in your vehicle. Many new vehicles activate the locks automatically once the car is in motion.
  • Keep your keys in the ignition and be prepared to start the car and drive away if necessary. In the case of vehicles with keyless ignition, keep the key fob secure on your person; don’t leave it loose in the vehicle. A carjacker will be able to drive as long as the engine is running, but will be unable to re-start the car without the fob.
  • Wear your seatbelt at all times, even while stopped. This not only keeps you safer in case of an accident, it also makes you more difficult to pull out of the vehicle quickly.
  • Avoid leaving your windows rolled down, and never lower your window to talk to anyone who approaches your car on foot.
  • If a suspicious driver bumps you, put on your emergency flashers and slowly drive to the nearest safe, highly occupied area (ideally a police station), motioning for him to follow you.

If you’re attacked while in your vehicle, your best option is to drive away as quickly as possible. The key to maintaining that option is adjusting your driving habits as follows:

  • Remind yourself every time you’re behind the wheel — “When in doubt, drive!”
  • Always leave enough room so you can see the rear tires of the car in front of you. This gives you enough turning radius to drive around that car if necessary. If you pull too close, it’s easy to be boxed in and unable to drive away.
  • Research the areas you drive through and know their reputations. Avoid high-crime areas where carjackings are common.
  • Whenever practical, stay in the middle lane, away from curbs and sidewalks This offers multiple escape routes, and makes it harder for someone to approach on foot without warning.
  • Use your mirrors constantly, both when you’re moving and when you’re stopped. Stick-on parabolic mirrors increase your field of view and help eliminate blind spots.
  • Driving away from danger may include jumping curbs, ramming the vehicle in front of you, or taking other actions that you wouldn’t normally consider. Accept them and plan for them. Better still, take a course in evasive driving.
  • Pre-plan your reactions based on who’s in the car with you — especially children — and adjust your reaction plan accordingly.
  • If a carjacker gets the jump on you, NEVER go anywhere with him. Make it clear that you’re giving him the vehicle, get out, move to safety, and remember the details of his appearance. In a worst-case situation, you can throw the keys and run in the opposite direction, or even deliberately crash the car to avoid forced captivity.
  • Get theft insurance and LoJack or a similar GPS tracking and recovery system. They don’t replace good awareness and avoidance, but greatly increase the chances of recovering your vehicle. A dash cam can also corroborate your account of an incident, and may even help law enforcement track down the perpetrators.

Taking it to the Extreme

If you happen to drive a 1964 Aston Martin DB5 and your last name is Bond, your solution to carjacking is simple: a hidden button that fires a passenger ejector seat, as immortalized in the classic film Goldfinger. While that may seem crazy, technology-based countermeasures to the carjacking threat aren’t far behind that Hollywood gadget. Some, in fact, may have outdone it.

In South Africa, carjacking is extremely common, averaging about 44 incidents per day in 2018 and 2019 according to the country’s Department of Statistics. Because of the extreme threat of violent crime there, some citizens have taken a somewhat more “aggressive” approach to personal protection. One case in point was “The Blaster,” also known as the “BMW Flamethrower.” Invented in 1998 by Charl Fourie, it was quite literally a flamethrower mounted under the doors on each side of the vehicle. If a would-be carjacker approached the car while it was stopped, the driver could simply flip a switch and send a 15-foot jet of burning gasoline up toward his face. Although the inventor claimed it was intended to merely blind the assailant, a flamethrower is, by definition, a lethal weapon and its development was quite controversial. In light of the high rate of violent crime in the country, however, the Blaster wasn’t prohibited and remained on the market in 2001. Due to slow sales and a high price tag, production was ultimately stopped, but Blaster-equipped vehicles can still be found in South Africa.

If incinerating carjackers seems a bit much, Armormax — makers of custom-crafted armored cars — offers an electrified door handle option. Their system uses a power inverter to convert the vehicle’s 12-volt battery power into a 120-volt current that’s fed directly to the door handles. Flipping a switch inside the car arms the system and ensures that anyone attempting to open the doors gets a serious jolt.

More mundane approaches to countering carjackers with technology include kill-switches that disable a car’s electrical system, making it impossible to start. If hidden, but accessible, you might be able to discreetly hit the switch before surrendering your car. Some products have also combined kill-switches with proximity sensors that you keep on your body separate from your keys. If you're separated from your vehicle by a specific distance — usually about a quarter mile — the kill-switch activates and the car goes dead.

Technology can certainly help, but the best way to keep from becoming a carjacking statistic is to develop good avoidance habits.

Vehicle Gunfighting

Countering a carjacking attempt with a gun is certainly a viable option, but it isn’t as easy as it may seem. If you have a CCW permit and carry regularly, you know that as soon as you get behind the wheel and buckle up, your standard draw-and-shoot style of gunfighting is severely cramped. Depending on where and how you carry, getting to your gun quickly can range from difficult to nearly impossible.

One way to overcome this problem is to hard-mount a holster, magnet, or similar device inside your car that enables you to position your carry gun — or a dedicated second gun — so it’s quickly and easily accessible when you’re in the driver’s seat. Even then, however, you need to wargame the various types of threats you might face and make sure the positioning of your gun is appropriate. If your biggest fear is someone getting in the passenger seat next to you, mounting your pistol in the center console might not be as wise as mounting it in the door and accessing it with your left hand. Conversely, if you’re mostly worried about threats outside the car, the center console makes sense, but you’ll need to know how to shoot out of the vehicle effectively.

If all this sounds complicated, it is. Fortunately, you can un-complicate with good training, like Florida Firearms Training’s “Bullets and Cars” course. This outstanding course not only teaches you the proper tactics of drawing and shooting in, from, and into a vehicle, it allows you to experience the unique ballistics of shooting through vehicles, including the often-counterintuitive effects of shooting through windshields and vehicle safety glass.

For more information, visit FloridaFirearmsTraining.com.

carjacking fft training

Above: Shooting through windshields changes your point of impact in surprising ways. The best way to understand that change is to experience it firsthand in the FFT course.

Fighting Back against a Carjacking

Fighting a carjacker should always be your last resort. Doing it effectively requires specialized training, sound weapon-acquisition tactics, and a solid understanding of the laws in your area. Gun-based defenses also run a high risk of collateral damage to innocent parties.

If you want these skills, go out and get the hands-on training you need to develop them. Otherwise, become a true “defensive driver” and focus on prevention rather than a cure.

carjacking training

Above: Fighting in and around vehicles is a specialized problem that’s best solved with specialized training. Florida Firearms Training’s “Bullets and Cars” course is one of the best sources of this type of skill building.


More on Transportation and Survival


What If We Are Hit By Another Pandemic?

In Issue 28 of RECOIL OFFGRID, we wrote a feature on Operation: Dark Winter (ODW) — a senior-level government exercise from June 2001 that simulated a bioterrorism attack in the United States using smallpox as its agent of choice. Its findings were discouraging to say the least.

The results of the ODW study revealed a gut-wrenching reality that many Americans weren’t aware of until COVID-19 found its way here — we as a nation are drastically ill-prepared for pandemics. Problems range from a lack of sufficient training, delays in developing vaccines or drugs to treat a new illness, and the collateral damage it causes to our infrastructure and commerce.

Fast-forward to 2020, and the world has seen firsthand how devastating the effects of a highly communicable disease can be on every aspect of human life. The question now remains, how can we prepare for the next wave or another outbreak with a contagion that’s even deadlier? Read on as we examine this “What If?” scenario.

The Scenario

what if another pandemic scenario

The Setup: In a matter of months, the COVID-19 pandemic wreaked havoc on the United States. Businesses and schools closed. Workers were furloughed and laid off. Students and parents had to adapt to online learning. There was a run on groceries; some items sold out immediately with very little replenishment. Firearms and ammunition sales spiked, and first-time gun owners realized how difficult it was to purchase a firearm, not only due to legal formalities, but also because many retailers were left with nothing but empty display cases.

Hospitals were not only overwhelmed with new admissions, but the staff was often limited and, in some cases, quit for fear of exposure. Medical supplies were also depleted quickly due to a shortage in the national stockpile and the fact that many were made overseas. Our economy took a huge hit, and the unemployment rate is still high. With rumors of certain jobs not being reinstated, there’s a lingering fear that another recession is on the horizon.

The Complication

If another pandemic happened, how would you prepare for it, drawing on your experiences and what you witnessed with the COVID-19 pandemic? What if a new pandemic involved a disease with an even higher mortality rate? What would you stock up on, and how many weeks’ worth of supplies would you keep on hand? How can you better prepare financially for another period of indefinite employment? Who would you rely on for accurate information regarding the status of the pandemic? How would you protect your health during necessary ventures into public places? What can you do to bolster your medical knowledge and preparedness if you’re forced to stay at home and medical help and supplies are limited?

First Responder Joey Nickischer's Approach

Having just gone through an “easy” pandemic, namely COVID-19, and having tested my preparations on multiple fronts, I have to say that I’m happy to have had a “warm-up round” before the next wave hits us. Not only will you and I be better prepared, but the government and private sector will be better prepared, too.

If and when another pandemic hits and we return to full lockdown, remember that stores will probably remain open, even if with limited hours. You’ll eventually be able to get food, toilet paper, and other basic necessities. The difference is that during the pandemic, things may not be available at will, which is what we’re used to. We have become a society that thrives on “just in time” inventory, which means that most stores have just enough inventory to get them through a few days’ worth of their average sales volume. Beyond that, products usually have to be ordered from the manufacturer. Understanding this business principle will help avoid the panic buying and a repeat of the dreaded toilet paper hoarding incident of 2020.

Use the lessons learned about shortages to stock up on some of your personal staple items. If you have a preferred brand of toilet paper, buy double your usual amount. There’s plenty of toilet paper in the United States, but if people begin hoarding again, you might not be able to get your preferred brand for a few weeks. Additionally, have enough face masks and sanitizing supplies to last a few weeks. And remember, the less you venture out into public, the less you’ll need those masks and sanitizer.

what if empty shelves

Personally, the only things I’m really stocking up on are food staples — particularly meats, both canned and frozen. The 2020 pandemic hit the meat industry pretty hard, and I was informed that some of the meat processing facilities had employee infection rates around 50 percent. That’s huge, and it did cause some shortages. Again, it didn’t mean that there was no meat to be found, only that my preferred cuts or quantities weren’t always available when I wanted them.

My other staples include rice, beans, flour, yeast, sugar, and baking powder. With a generous supply of these items, combined with various meats and vegetables, I’ll never be without something to eat. I’ll continue to shop as needed, about once every two weeks, and consume the fresh stuff first. If there’s something in short supply at the store, I can easily pull from my stockpile and simply replace that item when it becomes available. In general, I keep about a 60-day supply of my personal food staples at home.

The other plus about having extra supplies in your personal stockpile is that you can make less trips to the store during a pandemic. Less trips to the store equal less exposure.

It’s good to have other items on hand, too. I keep a few standard medications, such as acetaminophen, aspirin, decongestants, and naproxen, also with a 30-plus day supply at maximum dosage, per person in my home. My house is on a private well, but there’s also 20 gallons of potable water handy in jugs for emergencies, plus a few cases of bottled water. I keep 40-plus disposable lithium AA batteries in my cache, plus half a dozen adapters to convert AA batteries to C and D size. My batteries are primarily for flashlights and my emergency AM/FM/weather radios. I don’t currently have a backup generator for my house, but I have a vehicle that has a 2,000-watt inverter on board. In an emergency, I can plug in my freezer and refrigerator to keep things cold. Our dog food is also kept at the 60-day supply level.

All items in soft packaging, such as paper or plastic bags, are kept in clear plastic bins in the basement with lids securely attached. This is primarily to ensure that no errant mouse chews through the package, but also helps to keep the packages dry if there’s a water leak. The clear bin makes it faster and easier to find what I’m looking for. Canned or jarred foods are kept in the kitchen cupboard, in the back of the hall closet and on dedicated shelves in the basement. I found that if metal cans were stored on my concrete floor, they would rust much, much faster than if stored on a shelf. A dehumidifier also helps keep the basement, and supplies, dry.

We also take safety precautions with all store-bought supplies that come into the house. If it’s something that can sit outside in the sun for a while, we start with that so the UV can help kill any germs that might be on the package. Then, the item comes inside and sits in a “quarantine area” of the basement for seven days, being careful not to cross-contaminate other items. Items that must come straight into the house are cleaned with a mild bleach solution, by submersion or wiping. While these steps might not be 100-percent effective, every step we take helps lessen our risk of exposure.

I’m not particularly worried about communications problems during a pandemic, but I maintain several communications options, just in case. First, there’s the cell phone with multiple chargers plus a few small rechargeable battery packs. I also keep in mind that the phone can be charged in my vehicle with the standard power port. I’ve also exported my cell phone contact list onto my computer, have a hard copy printed for emergencies, and leave a copy in an envelope at mom’s house. I’ll never forget mom’s number, so I can call her and get whatever important contact info I need from that list.

Other emergency communications abilities I have include two-way commercial radios, both mobile and portable, plus a HAM radio. They’re preprogrammed with all my local frequencies, plus the common FRS, GMRS, and commercial frequencies. I also have a hard copy list of the frequencies and PL tones I might use in an emergency.

One of the most important things to have available during any emergency is an excellent support network close to home. Besides maintaining a great relationship with my neighbors, I’m the chief of my local volunteer fire department. Belonging to a fire department is like having a second family — everybody pitches in to help each other during hard times. We have members who are making shopping runs for other members and some are even preparing meals for those who are self-quarantining. We’re also sharing information about what stores have shortages or surplus of critical supplies, such as sanitizing wipes.

I also have a responsibility to help keep the public safe, and that starts by making sure that my firefighters and EMTs have all the safety equipment and training that they need. Our preparations for the pandemic began in January 2020, mostly with becoming educated on what COVID-19 was, what its symptoms were, how to avoid becoming infected, and how to avoid transmission to/from others. I can say that N95 respirators were already in short supply, nationwide, in January 2020, as government and well-informed private sector groups geared up for what was coming.

In the process of equipping my fire department for emergency response to COVID-19 infected residences, we needed to issue each firefighter protective N95 masks and hand sanitizer. Just as important as having proper PPE is knowing how to use it. We see far too many people wearing quality masks inappropriately, thereby negating the positive attributes of having the higher-quality N95 mask. Whatever level of protective equipment you have access to, make sure you seek out knowledge about how to properly use it.

As the reports of the next pandemic are released, my family will increase our social distancing and remind others to do the same. We’ll also take note of whether our neighbors are following recommended guidelines, and if they are not, we’ll minimize in-person contact with them. We’ll stay out of public contact to the largest degree possible, including preparing all of our own meals and ensuring that as many precautions are taken as possible.

Disaster Management Specialist Nila Rhoades' Approach

This most recent COVID-19 pandemic has shown many avid preppers and survivalists where the holes in our supplies are. This is both a blessing and a curse. While my area wasn’t hit as hard as others, walking the grocery store aisles with my children and seeing the empty shelves definitely gave me a surprising level of anxiety even though I have a well-prepared stash of items tucked away. Knowing what I know now, there are things that my family would do differently prior to a future pandemic.

Knowledge: To set the stage, having a stash of essential items is critical. Items like basic toiletries, food items, water, medical supplies, and yes, even toilet paper. However, one frequently overlooked resource to add to your supply cache is books. Having a well-rounded library of medical, survival and preparedness, fishing/hunting, and target-hardening literature can be extremely beneficial. Make sure your library is relevant to your needs — in urban environments, learning how to fish, hunt, or build an improvised shelter from fallen logs isn’t as practical as it would be in the wilderness. Having hard copies of resources can be lifesaving. We found a great library of survival resources on www.superessestraps.com and Amazon. Military manuals like the Ranger Handbook, Winter Survival Manual, and The SERE Handbook are also crucial additions.

Toiletries: The most surprising aspect of the COVID-19 pandemic was which items flew off the shelf and how quickly the online vendors ran out of personal hygiene products. Panic buying hit the American people early, and it hit hard. There have been many videos posted on social media of parents searching stores for diapers and wipes for their children, only to leave empty handed. This was one area that I hadn’t adequately prepared for, and it was the first thing to change in preparation for the future. We purchased a case of the current size, and one size larger to be safe, along with a large case of wipes.

Food: Our food supply techniques won’t change much other than gathering more on a regular basis. More is always better. Barring any major food allergies, you can never go wrong with MREs, followed by copious amounts of fiber supplements. They’re compact and can last for an awfully long time when stored properly. Other long-term emergency foods like Mountain House, Wise Company, Augason Farms, Northwest Fork, and Survival Tabs are also great products to keep on hand. We ensure that each person in our family has approximately 2,000 calories per day. We don’t differentiate between child and adult. It’s our built-in surplus.

Water: Water can be a tough one. Water bottles expire (not the water itself, but the plastic as it starts to degrade) and take up a lot of space. Knowing what we know now, I wouldn’t worry so much about water as nothing drastic happened with water supplies in the United States that wasn’t already an issue prior. However, having a few cases of Blue Can Water can never hurt. They aren’t cheap, but they have a 50-year shelf life.

Our rule of thumb is to keep at least three months’ worth of food, water, and supplies on hand and rotate through or add to them as needed. We figure that each person needs 1 gallon of water per day. Again, we don’t differentiate between child and adult. That helps us come out ahead.

Vitamins And Personal Protective Equipment (PPE): I keep a small stock of vitamins, but finding COVID-19 appropriate vitamins was a challenge. It took me weeks to find things like multi-vitamins, colloidal silver, vitamin C, and elderberry supplements. While these aren’t specifically prescribed to help with COVID-19, we believe they help the immune system for those times when we had to leave our home to restock.

Obviously, as many of us found out earlier this year, finding masks, gloves, bleach, and hand sanitizer took the strategy and planning of a war-time sand table. Stocking up on PPE is suddenly at the top of our list. MOPP 4 gear wasn’t necessarily appropriate to wear to our local grocery store — although we considered it going to Walmart a few times — but simple PPE was adequate and even mandatory in some businesses. From now on, we’ll always ensure that we have a case of hand sanitizer, masks, latex gloves, and cleaning agents at the ready.

Finances: Financially planning for another pandemic takes patience and sacrifice. Many of us already feel this in our finances even without being insecure about our jobs or ability to put food on the table. My family follows a modified version of Dave Ramsey and The Budget Mom techniques for financial preparation. Essentially both schools of thought want you to have a $1,000 to $5,000 emergency fund, then pay off all consumer debts, then have three to six months of expenses (not income) in a savings account or money market. It won’t always be easy to reach this point, but it can aid in having cushion if your hours are cut, if you don’t know when unemployment benefits will kick in, or if you want to stock up on items in the early days of a disaster. I strongly recommend following both individuals on social media and getting Dave Ramsey’s book, The Total Money Makeover. At the very least, it’ll give you guidelines to start building what will work best for your family and your unique situation. While researching what financial preparedness method works for you, also research unemployment options should you ever have to file and keep up to date on new unemployment benefits (like the ones during the COVID-19 pandemic) to know to what to expect.

Information: During the height of the COVID-19 outbreak it seemed like everyone on social media was now suddenly an infectious disease expert. It made finding relevant and accurate data incredibly difficult. It seems like there’s a scientific publication to back up anyone’s opinion on COVID-19. New data may fluctuate, but common sense and a little bit of science goes a long way. The presidential addresses are a good place to start for an overview of the latest medical information.

Because of all the ever-changing data, it’s increasingly difficult to abide by any stringent rules. Stick to the most consistent information rather than focusing on sensational headlines and outliers. Speaking with medical professionals in your area is always a good course of action as well.

homeschool what if another pandemic

Community: The stay-at-home order was the worst part of the COVID-19 pandemic. As a work-at-home parent being able to go to the library, the park, a MOPS group, or a friend’s house was a godsend. With all our outlets taken away, it made occupying and entertaining my kiddos a challenge. My advice is to connect with friends via Zoom, Facebook Messenger, Facetime, or Skype often. Getting together in person is a calculated risk that must be assessed by each party; but seriously, nothing virtual can replace a hug from a close friend. Also, be sure to let the kids talk to their friends — they need their tribe also.

Building a sense of community is paramount should another pandemic hit the country. Text or call your neighbors, friends, and family often. In my community, someone started a public Facebook group called, “Oops, I ran out of…”  This group was created to help community members find the items that they were searching for without having to drive to a dozen different stores. This enables grocery shopping to be a group mission rather than a free-for-all. It also presents opportunities to barter and trade to gather supplies that you may be missing. Neighbors can also help you lock down your street if riots and looting are happening in your area. Emotional and mental aspects are important, but they don’t matter much if you don’t have safety or food to eat.

Safety: Having a home that’s alarmed is just smart these days. When the alarm is tripped, it calls dispatch for you, which allows you to manage the threat until law enforcement arrives. Installing a Ring or Nest video doorbell is a great option as well. While alarms aren’t always a criminal deterrent, they can buy you precious seconds to respond to danger.

Most criminals don’t want to be seen, so investing in exterior motion-activated lighting that can be secured to the exterior of the property can also mitigate a specific level of criminal.

During an uncertain time, awareness of what’s normal and abnormal in one’s surrounding environment is critical. We should never be afraid to say that something is abnormal or to respond accordingly. If something feels off, don’t let normalcy bias persuade you to rationalize it. Investigate further and be ready for the most dangerous outcome.

Communication: Communicating with others wasn’t a huge challenge during the COVID-19 pandemic. Sure, Zoom calls were overloaded or slow at times, but communications were fairly uninterrupted. That being the case, having a secondary or tertiary method of communication is always wise. Satellite phones, ham radios, walkie-talkie systems, and CB radios are always a great choice, if you have a method of charging and/or replacing the batteries.


what if another pandemic

Search and Rescue Specialist Andrew Schrader's Approach

Preparation: I remember being at Home Depot back in 2017 when the forecasted track of Hurricane Irma was shifting toward my home in Tampa Bay. My town suddenly and collectively realized that we were all about to have a bad time. Shoppers pushing their carts looked around bug-eyed, watching for signals of a stampede from the rest of the herd. Tense conversations and cart-bumping spilled into every aisle of the store, as everything even remotely related to survival and comfort got picked off. No more generators or gasoline containers, no more solar lights. When the plywood sold out, folks started buying decorative siding and trim — anything to help Band-Aid their homes against the storm. It made me realize what many of our readers probably already knew: The panicked animal inside all of us isn’t very far underneath the surface.

Personally, I consider having two weeks to a month of supplies to be appropriate. Non-perishable food and water are a given. I have many cans of Chef Boyardee and Campbell’s soups, as well as Mountain House freeze-dried meals and a little Jetboil stove. Besides food and water, the other thing I have to constantly remind myself of is to make sure I have a month’s supply of whatever prescription medicines the family needs.

Helping to ensure mere survival is good, but I try to go beyond that to determine what will make my life much more comfortable if things get shut down. Many of us are used to 48-hour deliveries from Amazon. However, we all saw how quickly the supply chain can get shut down, or simply redirected to other priorities that are considered more essential. To figure out what I should plan on stockpiling, I take a good look around my home and see what we’re actually using on a daily basis. When I do this, I find many things that go beyond what I’d really consider “survival” items, such as those that make me feel better and keep my spirits up. This includes items like shampoo, dental floss, and coffee. The more little “nonessential” goodies you already have in your house, the less you’ll be tempted to leave your house and expose yourself to potential infection. Also, you’ll have a better means to trade with your neighbors.

After waiting eight days for my power to be restored after Hurricane Irma, I paid for a natural gas line to be run to my house from the neighboring street. Now, I have both electric and natural gas availability at my house. The main point of the natural gas was to run a 22-kilowatt Generex generator. Simply installing propane tanks would’ve been less expensive, but I didn’t want to worry about getting refilled when a disaster hits, and I also figured the below-ground installation was less prone to damage or vandalism. Although my house is mainly powered by electricity, my water heater is powered by gas, as are my firepit and outdoor lamps. If the power goes out, I could boil water and cook food over the firepit. Also, I purchased 10 or so inexpensive solar security lights from Amazon and stuck them all over the perimeter of my house. It’s nice to be able to see where I’m going at night, and if we lost power, we’d be able to charge them during the day and use them for at least part of the night.

In case our cell phones go out, I use a Garmin inReach Explorer+, which allows me to message anyone from anywhere, and also provides navigation capability.

On Site: When a disease reaches pandemic levels, I do my best to take no unnecessary risks. I try to reduce trips to the store, avoid enclosed spaces with crowds, and generally follow Center for Disease Control (CDC) recommendations. I also avoid nonessential activities that might inadvertently send me to the hospital. For example, I’m not getting up on the roof just to blow leaves off. I’m not doing heavy lifting yard work and risking throwing out my back. The nonessential “honey-do” list can wait until the pandemic is over.

To stay informed, I source my information globally from outlets such as the BBC and Al Jazeera to get more than just an American perspective. If there’s a story that sounds like it might be politically motivated, I simply Google it and try to look at it from several websites to get a broader picture. I use social media to keep up with friends and hobbies, not as a news source.

During a disaster or any national crisis, I pay special attention to watch for scammers and those who try to exploit the vulnerable. There will always be someone trying to make money off of disaster victims or play off of people’s fears. Mr. Rogers told us that to feel better we should always look for the helpers. I believe that, but I also know we need to keep one eye out for the scoundrels who are never far behind.   

Crisis: When facing an unprecedented situation like this, we give ourselves the best chance of success if we practice preparedness as a mindset. I used to keep my bug-out supplies in the garage, trying to save space for something that (hopefully) wouldn’t be used very often.

What I eventually realized, though, is that when it’s in the garage I just forget about it. I never bother to check on the items or think about if I should add something to it. And worst of all, I don’t notice if things are deteriorating. Obviously, anything you may be entrusting your life to should be stored in the best conditions possible.

I currently store my bug-out supplies inside of my air-conditioned house, and not inside of a closet, either. I like to have them out where I can see them. I think it helps me keep a preparedness mindset if I have to walk by the gear every day. In a way, it’s almost helpful if you store gear in an inconvenient place. Like a blister on my toe or a thorn in my thumb, to me it’s a daily reminder of the next unknown threat that could be quietly coming down the pipe any day.

I store my especially valuable gear in a gun safe and scatter a few low-dollar items which appear high-dollar — such as a broken laptop computer and a fake Rolex — out in easy sight in the hopes that a would-be thief would take the bait and leave the rest of my valuables alone. I also use an inexpensive Wyze Cam system to keep an eye on the house and have scattered an area of functioning and non-functioning webcams around the outside to give the appearance of a seamless security system. For me, it’s not really about stopping the thief who is truly prepared and determined to rob me. Instead, it’s more about trying to look like a better-defended house than the one down the street.

For income, I’ve done my best to diversify my revenue streams and not just rely on my day job. I’ve earned additional certifications, and I’ve learned a side hustle or two just like so many others have in this gig economy. If I thought I was in for a truly disastrous dry spell, I’d maintain my checking account by putting everything I needed on credit cards until they got shut off. The long-term bankruptcy issue could be handled once I no longer had to worry about the short-term survival of my family.

A safety net is about more than what you can do on your own, though. It’s invaluable to maintain the best possible relationships with your neighbors and strengthen a local support network. Bring them booze at Christmas, mow their lawn once in a while, and actively search for how you can contribute to their well-being. Having a blood-relative 50 miles away isn’t nearly as valuable as having a good neighbor one mile away. So, think in terms of maintaining resources (like good neighbors) within walking distance. Because when your city gets locked down, walking distance may well be the furthest you can go.

This “What If?” column hits close to home for me, and I’m writing this as much to myself as to our readers. I’ve no doubt that another pandemic will visit us again — it’s just a matter of time. And, to my shame, enduring a globe-crossing infection of this size was something I never really thought would occur. I suppose that if this were 1920 and I had just seen the ravages of the 1918 influenza pandemic, I might’ve been better prepared. But time washes away all of our collective memories, and it’s tough to keep threats in mind that seem more like stories and legends. It’s made me appreciate this magazine more and be glad I held onto my back issues.

Working as a structural engineer and Urban Search and Rescue specialist deployed primarily to hurricane events, I naturally compare any disaster to a hurricane. And in the case of COVID-19, the effects on my world have been similar. I’ve watched this thing shutter my local businesses and put a damper on my own livelihood in the construction industry. Neighbors get sick and go to the hospital — some come back. Even my wife contracted the virus; watching her struggle to breathe gave me a feeling of helplessness I hope to never feel again.

Conclusion

Those who choose to procrastinate their survival planning will be the first to experience the world’s indifference to their situation if they’re caught with their proverbial pants down. Socking money away, stocking up on supplies, checking multiple sources for information on an outbreak, and above all, remaining level-headed will pay dividends for you when the unprepared masses start running around like headless chickens.

Preparing for a future pandemic doesn’t have to be a scary process, but it does have to have a level of precision and forethought. If you’re new to survival and preparedness, always start with the basic pillars of survival: food, water, fire, shelter, and medical. Having a good supply in each of these categories will help build a foundation that can handle just about anything. Also, remember that survival isn’t just about what you have; it’s about what you know and the skills you’ve developed. Seek training in key areas such as first aid and self-defense and practice these perishable skills frequently.

The good news is, there are actions we can take for next time. Although we can’t control the outcome of the game, we can make sure that we give ourselves the best possible odds going into it.

If you'd like to read more of our articles about hypothetical survival scenarios, pick up a copy of OFFGRID Presents: What If?, on sale now at GunDigestStore.com.


Going Beyond What If


About the Authors

joey NickischerJoey Nickischer is a retired detective with the New York City Police Department. He currently works as a lead technical rescue instructor with several different companies covering topics from wilderness search, high angle rope, mine rescue, and off-road operations. He serves as a team leader with the Westchester County Technical Rescue Team and is the commander of the Putnam County Technical Rescue Team, as well as serving as chief of department with the Patterson Fire Department.


nila rhoades

Nila Rhoades and her husband, Tim, operate Resilient Security Solutions, in Wyoming. She blogs at www.milspecmom.com on topics such as survival, self-defense, firearms, and tactics. Nila also loves taking any firearms training courses that she can weasel her way into. They have three children. She loves running and peanut butter ice cream.
www.resilientsecuritysolutions.com


andy schraderAndrew Schrader is a structural engineer and an Urban Search and Rescue (USAR) specialist for the State of Florida’s USAR Task Force. In his role as a Structures Specialist (StS), his job is to advise firefighters and technical rescue teams on the least hazardous means of searching for, locating, and extricating live victims in collapsed buildings. Trained by FEMA and the U.S. Army Corps of Engineers, he has been deployed in support of rescue operations for Hurricanes Hermine (2016), Irma (2017), Michael (2018), and Dorian (2019).

www.reconresponse.com


Masks and Respirators for Covid 19

The COVID-19 pandemic has brought many changes to our lives. Among the most obvious is the routine use of protective masks to prevent spreading this disease. There has been much debate about the usefulness of masks, and official guidance has flip-flopped from discouraging to encouraging their use. Many are left wondering, can they help? What kind of mask do I need? Can I make my own? These are important questions right now, and they’ll remain relevant the next time a disease inevitably spreads like wildfire through the human population.

Airborne Transmission – How Masks Can Help

Face masks can prevent the spread of viral illness, including COVID-19, if the right type is used and used correctly. To understand how masks help, we must first understand transmission of the SARS-CoV-2 virus that causes COVID-19. The primary mechanism for transmission of the virus is droplets expelled from the body by coughing, sneezing, or breathing. The virus replicates in cells of an infected person, producing new copies of itself, which can then be shed in excretions such as saliva, mucus, phlegm, and rheum. Droplets of these bodily fluids can be distributed onto surfaces where they can be picked up by contact, but they can also be passed on through the air. When someone sneezes or coughs, expelled droplets can hang in the air for some time, or land directly in the nose or mouth of others. Viral particles in these droplets can then infect the recipient. The use of masks reduces this risk in two ways: Masks can contain these droplets when someone coughs or sneezes, and masks can protect the wearer from inhalation or intake of these droplets.

morgan facemask fitment

Above: Mask fit is an important consideration. Ideally, a mask should contour around the nose and cup the chin

Categories of Masks and Respirators

Not all masks are equal. There are different types of masks sold for protection, but only some of them filter out dangerous pathogens. When searching for face masks, the results can be overwhelming. Respirators, N95, N99, PM2.5, surgical masks, dust masks — what are these things, and what are the differences?

Dust Masks: The most common type of face mask. This type of mask isn’t tested to any standard and is only for protection from large dust particles from cleaning, manufacturing, or craft processes.

Surgical Masks: The classic surgeon's mask. Loose fitting, allowing air to pass around the sides of the mask. Mostly a barrier against large droplets, splashes, and sprays. These masks are only used to prevent spread of droplets from the wearer. They don’t give protection to the wearer, only to others.

mask comparison

Above: A tin tie scavenged from a coffee bag serves as a malleable nose piece on our DIY mask.

Air Purifying Respirators: Close-fitting masks that force inhaled air through a filter to remove the smallest particles possible. The most common are N95 respirators, which filter out >95 percent of particles 0.3 micron or larger (and many that are smaller). Other grades, such as N99, filter out closer to >99 percent, while more specialized respirators such as P95 filter out >95 percent while being oil-proof as well.

Pollution Masks: Masks sold to protect the wearer from air pollution. These are uncommon in the United States but common elsewhere. Some are little more than a dust mask, while others are a washable fabric mask with disposable filter inserts. These masks are often marketed as PM2.5 masks, meaning they’re designed to filter pollution particles 2.5 microns in size or smaller. Many filters for this type of mask are N95 filters, but not all. It’s important to know which ones use which filters. Not all pollution masks fit well, which can greatly compromise effectiveness.

There are other respirators that enclose the face or use supplied air, but these are unlikely choices for most users. For reducing viral transmission among the population, simple face mask designs are more available, affordable, and easily made. The best are respirators that cover the nose and mouth, called half-mask filtering face-piece respirators (FFR). FFRs can come in different forms, such as classic disposable N95 masks or rubber masks with removable filters called elastomeric respirators. Elastomeric respirators can be impractical for daily wear outside of industrial environments, but much of what follows applies to them as well.

n95 mask

N95 Masks – The First Choice

The ideal protection from SARS-CoV-2 is an N95 (or better) filtering face-piece respirator, that fits properly. Such respirators are made from a nonwoven synthetic material that carries an electrostatic charge. Nonwoven materials are a matrix of fine fibers in an irregular arrangement, which entrap particles as air passes through. The electrostatic charge attracts particles to the fibers, dragging them in and trapping them. It’s these properties that give N95 masks their ability to filter out even viruses.

Although the individual SARS-CoV-2 virions are about 0.1 micron in size, N95 respirators can entrap them. Filtration is measured against 0.3-micron particles, as these are the most difficult size to entrap. Larger particles are easily caught by many materials. Particles under 0.3 micron are subject to a phenomenon called Brownian Motion, which causes them to bounce off air molecules erratically. This erratic motion makes sub-0.3-micron particles easier to trap as they bounce into the filter. 0.3-micron particles are the most difficult, as their travel is less erratic and their size is small enough to pass many filters. A filter that can catch 0.3-micron particles in significant number, 95 percent or greater, is effective against both larger and smaller particles. This makes N95 and better the ideal choice here … with a couple of caveats. The respirator must have a tight fit to the face that doesn’t allow air around the edges of the mask. Both inhaled air and exhaled air must pass through the filter to offer protection. N95s that are vented offer no community protection if worn by an infected person. N95s that don’t fit the wearer allow both inhaled and exhaled air around the edges, offering no protection to anyone.

mask supplies

Above: Reasonably effective homemade masks can be constructed from sterilization wrap, a non-woven fabric used in hospitals.

Mask Shortages, and Fabric and DIY Masks

In an ideal world, we would have enough N95s available for everyone. Unfortunately, they’re in short supply, if available at all, and are likely to remain so. Efforts are underway to extend the supply of N95s for healthcare workers, but despite this, many have had to find ways to do without. Similarly, most people outside healthcare have had to make do with other types of masks. For those who have the least resources, the only option has been fabric masks. According to the Centers for Disease control, the very last tier of acceptable masks are fabric, but can fabric masks actually work? The answer is yes and no.

Sadly, this situation has been long predicted by epidemiologists. Fabric masks have been studied, and science has some answers. We identified several scientific papers published since 2008 about fabric masks. Those studies looked at the usability and filtration of various fabrics, particularly cottons, for masks. From their findings, we can distill some best practices for fabric masks.

Cambridge University researchers found that some materials not only filter better, but can also fit better than others. They investigated various cotton materials and HEPA filter vacuum bags for both fit and filtration. While HEPA bags filter well, they don’t fit well if made into masks. Different weights and thicknesses of cotton fit better, but filtration varied. Double layers of tea-towel were found to have the best filtration. A single complete mask, of the surgeon’s mask style, made from T-shirt cotton was found to be somewhat effective at blocking particles expelled, but not effective at preventing their inhalation. Dutch researchers also studied masks made from layers of tea-towel, compared to surgical masks and N95s. All types of masks were found to reduce exposure to particles, but homemade were less effective than commercial styles. These researchers also looked at how wear affected the performance of homemade masks. They found that homemade masks were stable in the protection they offered for a few hours of wear at different activity levels.

Other studies measured common fabrics from garments like sweatshirts and T-shirts, finding that filtration varied widely, with none of the materials coming close to N95 masks in single layers. Leakage around the edges of homemade masks was determined to be likely, possibly owing to simple designs and the lack of sealing features. However, the resounding conclusion of the data is that fabric masks offer at least some protection when made from high-thread-count fabrics, particularly denser fabrics used in multiple layers. Other key factors identified were the use of dry masks, as moisture can compromise filtration, and the use of masks along with other preventative measures like hygiene and environmental sanitation.

batman mask

Above: Masks should extend beneath the chin, but facial hair can impede their ability to seal in this area.

Another material option for homemade masks is nonwoven fabrics. Nonwovens are used in many roles, including masks and other filters for medical use. They’re more effective filters than woven material, and resist saturation by moisture. One nonwoven material in particular shows promise. When surgical instruments are sterilized, they’re bundled in a nonwoven fabric called sterilization wrap. This wrap stays in place after sterilization to maintain sterility by filtering pathogens in the environment. In response to N95 shortages, some doctors have turned to making masks from sterilization wrap. The lowest common grade of sterilization wrap provides >96 percent filtration against 0.3-micron particles in a single layer, and two layers could equal N99 performance.

It’s important to note, not all sterilization wrap is equal. Some sterilization wraps are made from cellulose, which can tear easily. The type to use for a face mask is made from polypropylene. This sterilization wrap is identified most often as SMS (Spunbond-Meltblown-Spunbond) or SMMS (Spunbond-Meltblown-Meltblown-Spunbond). This refers to how each layer of the material is made, either by being spun into erratic webs by air streams and then thermobonded (Spunbond), or by forcing molten polypropylene through tiny nozzles into air streams that mix the web, bonding as it cools (Meltblown). Meltblown is the primary filtering layer, but fragile. Spunbond is tough and tear resistant. Bonding them together creates a soft, breathable, moisture-repellent fabric with excellent filter properties and improved durability.

The question that remains is how to make an effective mask of these materials. There are many patterns for making masks at home, but some are worse than others. Many won’t protect either the wearer or those around them. Designs made with single layers of material, or the wrong type of material, won’t work. Designs that leave gaps around the nose, cheeks, or chin also won’t work. Anywhere air can get in around the edge, particles and droplets can get in or out. Many available designs give false confidence, rather than actual protection. Comparing several different patterns, we found the best designs are sewn with contouring to fit the user’s face. Surgical mask patterns that lay flat when not worn were the least successful, with a loose fit and less comfort. Not all contoured designs are equal, however, and some available patterns had to be adjusted to cup the chin or cover the nose. When selecting a pattern for making a mask, the design must extend over the bridge of the nose, and underneath the edge of the wearer’s chin, fitting tightly across both cheeks and all edges.

mask fitment

Other critical elements are formable nose pieces, and well-fitting attachments. Nose pieces that can be formed over the bridge of the nose are essential for proper sealing. Nose pieces can be made from copper wire — a short piece with rolled ends could be sewn into masks nose bridge, then bent into shape for wear. The downside is potential discomfort. The ideal solution we found is a packaging closure called a tin tie. Commonly found on coffee bags, these are a length of ¼-inch-wide plastic with two malleable wires in either edge. A 2.5-inch-length sewn into the bridge of the mask's nose is a comfortable and effective nose piece. How the mask is held to the face also affects fit and comfort. Commercial respirator designs use elastic straps that run behind the head, while surgical masks often use elastic loops over the ears or ties that go behind the head. Each can be adapted to homemade masks, but each has shortcomings. Dual elastics around the head are the most stable but can be difficult to size properly. Ties can slip and may not get tight enough. Ear loops are easiest to fabricate, but are uncomfortable for prolonged wear and will slip off some wearers’ ears. One solution for ear loops is to use 2mm round elastic hair ties to form the loops, which we found to be more secure and comfortable.

mask fit nosepiece

Above: A loose-fitting mask allows unrestricted airflow around the nose and cheeks, leading to higher risk of disease transmission.

Prolonged wear of ear loops can cause discomfort or even injury. Healthcare workers have reported irritation and wounds from ear loops after prolonged wear. A simple device called an ear saver can be fabricated to alleviate this. These devices connect the two loops across the back of the head, relieving pressure. Ear savers can also offer better adjustment of mask fit for variations in face shape. Many types of ear savers are being produced, from leather, die-cut plastic, and by 3D printing. The thermoplastic Kydex, commonly used in holster-making and hobbyist workshops, can quickly be turned into an ear saver. A ½-inch strip is cut, and each end heated then curled over to form a small hook. Sized between 2¾ and 3¾ inches, these can fit most users, tuning up mask fit and relieving pressure.

Decontamination, Reuse, and Storage

To get the most use out of any masks, we have to be able to reuse them. To reuse a mask, it must be decontaminated between uses. Mask decontamination has been studied, and COVID-19 has spurred many new efforts. Hospitals are exploring technology to meet demand, and the CDC has created decontamination guidelines. Unfortunately, many suggested methods are industrial solutions such as ultraviolet radiation and vaporous chemical disinfection and won’t work for individuals. Fortunately, there are other options. Plain, fabric masks can be washed using hot water and detergent, but masks from nonwoven materials cannot. The methods available to individuals are steam, dry and moist heat, and some chemical disinfection methods.

Masks can be steamed in the microwave or on the stovetop with appropriate steamers. Steam has been successful in studies but comes with risks. Higher temperatures can damage nonwoven materials, and microwaves should never be used for masks with metal components. Steam isn’t recommended for decontamination of N95s by their largest producer, 3M.

mask decontamination

Above: A bag made of sterilization wrap keeps used masks isolated, and serves as a vessel during the decontamination process.

Dry heat decontamination, using the home oven, is more successful. Suspend masks, or place on a wooden rack, in the oven to prevent spot-heating from contact with metal racks. Masks should be baked at 160 to 175 degrees F for 30 minutes to allow the heat to fully penetrate. Many home ovens won’t go as low as 160 degrees F, but toaster ovens often go down to the safe 175 degrees F. If forced to use an oven that won’t go lower than 200 degrees F, the door can be cracked open to lower the temperature. Low heating remains detrimental, although the damage is low. Studies suggest this can be done 20 times before nonwoven materials are unacceptably degraded. Use an oven thermometer to ensure the temperature doesn’t exceed safe limits and use care. Handling contaminated masks in your home can spread particles, and the fan in many home ovens can blow particles off the mask before inactivation. This can be avoided by using a toaster oven that has no fan and can be set up in a closed garage or outside the home. Another solution is to fabricate a simple bag from sterilization wrap and drop masks carefully inside. The bag can then be closed and secured with a steel binder clip. That package can be inserted into the oven and baked appropriately.

Moist heat decontamination is similar to dry, but with the addition of evaporation, which is known to aid viral inactivation. The same temperatures as dry heat decon are used, but with the addition of a moisture reservoir. A 15- to 30-minute soak, at 50- to 80-percent humidity, is sufficient. Researchers have suggested a chamber for this — an enclosed container partially filled with water and a rack holding masks above the waterline. This container is put in the oven for the required time.

mask decontamination

Above: Seal the mask during sanitation.

Disinfectant chemicals are another option, but many disinfectants effective against SARS-CoV-2 aren’t safe to use on masks. Both bleach and soap have been found to damage nonwoven materials. Alcohol destroys the electrostatic charge of N95s and other nonwovens, ruining their filtration ability. The safest disinfectant chemical to use on masks is hydrogen peroxide solution. In concentrations as low as <1 percent, hydrogen peroxide inactivates SARS-CoV-2 and is safe for use on nonwoven materials. Degradation of the mask will occur, and the 20-cycle limit seems to apply here as well.

The final method is time. Simply letting the mask sit in an isolated, dry, environment for over 72 hours is likely sufficient to inactivate SARS-CoV-2. Although fabrics and nonwovens haven’t been specifically tested, SARS-CoV-2 survives the longest on plastic and stainless steel, remaining viable for around 72 hours.

Whatever the decontamination method, strict procedures must be followed. Until decontaminated, masks and any container used for storing them are a transmission risk. Carelessness can spread viral particles and damage masks. Too many decontamination cycles can also damage masks. Institute procedures for identification and separation of clean and dirty masks, and for the handling, decontamination, and return to service of dirty masks. Label masks and use tally marks to track the decontamination cycles. Masks that have visible damage or have been heavily soiled by bodily fluids should be thrown away.

Proper Wear and Storage of Masks

Masks cannot work to protect you or anyone if they aren’t worn properly. Masks must cover the parts of your face used to breathe: the mouth and nose. Masks also must seal tightly. You can’t have anything in the way of the seal. Facial hair, piercings, and dangling locks of hair can all break the seal.

In professional environments, regulations require individual fitting for respirators. If possible and if available masks are consistent in manufacture, fit testing should be performed using industry standard methods (see our gas mask buyer’s guide in Issue 26 for more details). This isn’t feasible for most of us, so it’s critical that every individual perform an informal seal check on every mask worn. To do this, first visually inspect the mask for damage. Put on the mask, adjust the nose piece, and ensure that edges of the mask are tight all around. With the mask in place, press your hands over it to block airflow and exhale fully. The mask should expand briefly before air escapes. Then, inhale fully. The mask should contract against the face, not pull air around the edges.


Donning your mask:

> Wash hands before handling, or donning, any clean mask.

> For N95 or other masks with dual elastics, cup the mask in your hand and place over your nose and mouth. With your other hand, pull the lower elastic over your head and below your ears. Repeat this with the upper strap, placing it above the ears.

> For a mask with ear loops, grasp by the loops, place the mask over the nose and mouth, and place the loops over each ear. If using an ear saver, hook one end of the device into an ear loop, hold it in place, and extend the other loop over the opposite end.

> For a mask with ties, grasp by the upper ties, place the mask over the nose and mouth, and secure the upper ties first and the lower second.

> Adjust the mask as necessary, tighten the nose piece, and seal check.

When doffing (removing) a mask, use extreme caution. The surface of the mask may have collected infectious particles. If you touch the surface, and then touch your face, you’ve defeated the entire purpose.

Above: It's not difficult to bend a scrap of Kydex into a DIY ear saver.

To doff your mask:

> Wash hands prior to removing your mask.

> Reach behind your head and grasp the elastics, ties, or clip securing your mask, unfasten them or stretch and lift them over the top of the head. If using a mask with ties or elastics that go around the head, remove the lower first, then the upper.

> Using the elastics/ties only, pull the mask off and away from your face.

> Avoid shaking or snapping your mask through the air, as this spreads particles.

> Handling it only by the elastics/ties, place the mask in paper or steriwrap bag, or other container, and close the container.

> Wash hands thoroughly again to remove any particles picked up from handling the mask.

> Remove a clean mask from storage, place and secure it on the face, and perform a seal check.

Clean masks should be stored in clean, dry, containers that prevent contamination. Masks should not be stored in containers that trap moisture, as this can degrade mask performance, and in the case of worn masks, can preserve pathogens.

Masks Don’t Work Alone

Masks are only part of the solution. Hand hygiene, other forms of protective equipment as necessary, and overall hygienic practices are all essential. These things together can effectively reduce infection and transmission of any viral illness.

Read More

Don’t miss essential survival insights—sign up for Recoil Offgrid's free newsletter today!

Check out our other publications on the web: Recoil | Gun Digest | Blade | RecoilTV | RECOILtv (YouTube)


The Latest Gear: Survival Whistles, Phone Solar Panels, Lockpick Vaults & More

Whether you're a self-proclaimed gear junkie or a minimalist, it's hard not to appreciate all of the innovative products that are being released in the world of survival and preparation. We check out several fresh items on the market to consider.

Prometheus Design Werx Ti-Signal Whistle

LENGTH: 2.19 inches
MSRP: $29
URL: prometheusdesignwerx.com


NOTES: One thing’s for sure: This ain’t your granddaddy’s survival whistle. Machined from 6AL-4V titanium billet, the Ti-Signal Whistle is lightweight, corrosion resistant, and almost indestructible. It can emit a piercing, high-pitch sound to alert others of your location. This makes it a potentially life-saving device — whether you’re injured and in need of a search- and-rescue team or just trying to reconnect with your friends after getting separated in the backcountry. And as with every- thing Prometheus Design Werx makes, the Ti-Signal Whistle exists at that intersection between aesthetics and functionality. It features a Mk2-style pineapple pattern and comes packed in a tin with form-fitting foam for long-term storage. It comes with a stainless steel ball chain or can be clipped to a keyring.


Mustang Survival Highwater 22L Day Pack

MATERIAL: 70-denier PVC-free ripstop nylon fabric shell
MSRP: $100
URL: mustangsurvival.com

NOTES: Whether you’re heading out on a fishing trip or bugging out during the rainy season, getting wet can be a strong possibility depending on your destination or mission. So, keeping your vital gear dry will be, well, vital. If you want something more durable than wrapping your daypack in a garbage bag, consider a waterproof backpack like the Highwater. Aside from the waterproof ripstop nylon fab- ric shell, its zipper-less roll-top design ensures that the main chamber stays moisture free. Plus, there are three external mesh pockets for drop-in items like water bottles or larger flashlights. For comfort on a long haul, there are slim but padded shoulder straps and a removable back pad with its own inner storage sleeve.

Kershaw Knives Epistle

OAL: 7 inches
MSRP: $49
URL: kershawknives.com


NOTES:You might be wary of carrying around a $200 blade as your everyday-carry knife for fear of losing it. After all, not all pocket clips are made equal. That’s why we’re fond of the Epistle. This folding knife performs reliably, won’t weigh you down, and looks sexy in a minimalistic way — all without breaking the bank. The 3-inch drop-point blade provides a versatile cutting edge that slices and thrusts with serious power. The aluminum handle features sleek lines, a liner lock, and a lightweight chassis. One notable drawback? It’s for righties only. Still, at less than $50, the Epistle works great in the field — and you won’t cry if you break or lose it.

PSE Archery Warhammer

WEIGHT:7.6 pounds
MSRP: Starting from $1,499
URL: psearchery.com


NOTES: PSE Archery has teamed up with TrueTimber to offer its Warhammer crossbow in Strata Camo, giving hunters more options for natural-looking concealment while in the field. Made in the USA, the Warhammer is a relatively compact crossbow (at 29 by 14.125 inches) that can deliver 400 feet per second when firing a 400-grain bolt, thanks to its powerful 142 foot-pounds of kinetic energy. Some folks might balk at the price tag, but there are times when a crossbow could be more advantageous than its powder-burning descendent. How? If you fire a cartridge and miss, you not only lose dinner but you’ll scare off other game in the area.

5.11 Tactical 5.11 1AA Headlamp

WEIGHT: 4.4 ounces (with batteries)
MSRP:$50
URL: 511tactical.com


NOTES: Whether you’re going on a hike or just wrenching under the hood,
a headlamp lets you see things clearly while also keeping your hands free. That’s why we’re digging the Rapid 1AA Headlamp. For increased versatility, it has five modes, including a flood light that’s separate from the spotlight and can run for up to 6 hours. The spotlight can put out 200 lumens with the included AA battery or a max of 330 lumens in peak spot mode if you use a 14500 lithium rechargeable cell (sold separately). It also has an integrated clip if you prefer to at- tach it to a pocket instead of us- ing the woven elastic headband. The Rapid 1AA has an IP54 rating, meaning it’s resistant to dust, impact, and water.

Diamond Performance Diamondgrip High Performance Starter Grip

SIZES: 40 inches by 2.8mm (small grip) 92 inches by 3.2mm (large grip)
MSRP: $9 (40 inches), $15 (92 inches)
URL :www.diamond-performance.com


NOTES: Let’s face it, many of the starter cords your machinery comes with are made of questionable materials. You find that out the hard way when you’re trying to start a generator, boat motor, snowmobile, or chainsaw and it snaps. If you have no replacement on hand, you may be cursing the day you were born. While most store-bought replacements are of inferior quality with a finite lifespan, the diamondgrip high-performance starter grip is made to outlast the lifespan of your equipment. Backed by a lifetime guarantee, diamondgrip features corrosion-resistant engineering for harsh environments. The small diamondgrip is designed for smaller power tools, such as saws and blowers, while its larger cousin is suited for larger engines, such as lawn mowers, generators, and pumps.

Gosun SolarPanel 10

DIMENSIONS: 10.5 by 7 inches (open) 5.25 by 7 inches (closed)
MSRP: $99
URL: gosun.com


NOTES:Whether using your smartphone for navigation or recording a stunning sunset during a road trip, there’s no reason electronics and Mother Nature can’t mix. That’s why we carry the SolarPanel 10. Thanks to rapidly advancing solar-powered technology, this portable panel puts out 10W in ideal weather conditions so you can charge your mobile device almost as fast as an average wallet outlet. Made of monocrystalline silicone and water-resistant polymer, this lightweight GoSun device is about the size of an iPad mini when closed, making it conveniently portable. And it has holes in the corners so you can strap it open to a backpack as you’re out and about. It’s a convenient way to stay powered when you’re far from the grid.

Sparrows Lock Picks Challenge Vault

DIMENSIONS:6.25 by 6.25 by 4 inches (approx.)
MSRP:$129
URL: sparrowslockpicks.com


NOTES: Whether it’s studying lockpicking so you can find the flaws in your own security or something as mundane as getting back into your house after accidentally locking yourself out, knowing covert methods of entry are invaluable. That’s why we’ve become obsessed with the Challenge Vault from Sparrows Lock Picks. As the name implies, the Challenge Vault is a professional-grade three-wheel lock and safe dial mounted onto a desktop case. The idea is to teach yourself how to open the case by spinning the dial and feeling and listening to the clicks of the wheels. If you can crack it, you’ll find tools and parts inside to change the combination and make it progressively harder to open. It’s a puzzle that can keep on challenging you.

WOOX AX1

OAL:15.7 inches
MSRP: $199
URL: wooxstore.com


NOTES:The first word that comes to mind when we grasp the AX1 is “classy.” Its old-school aesthetics are balanced beautifully with modern manufacturing, resulting in an ax that you can both abuse and admire. The handle is made of Appalachian hickory and features an octagonal shape for better ergonomics and a heavy- duty steel diamond pommel for hammering. On the business end, the 1045 carbon steel head is super sharp yet incredibly strong. Though it’s not stainless and will require maintenance, it does have a gray Cerakote to boost wear and weather resistance. And when it’s not in use, you can protect the AX1 with the included leather sheath and collar.


Kill Cliff Recover Drink

WEIGHT: 12 fluid ounces per can
MSRP: $50 per 24-pack
URL: killcliff.com


NOTES: When someone mentions the term “sports drinks,” we picture slick marketing videos of ripped, sweaty athletes dousing them- selves with colorful beverages. We also think of all the sugar and questionable ingredients they contain. Fortunately, Kill Cliff Recover doesn’t contain any of that garbage. Instead, each can of Recover is made from a non-GMO and naturally sweetened mix of plant extracts, enzymes, and electrolytes. While not every flavor is delicious, most are enjoyable beverages that provide post-workout hydration — not to mention B vitamins. Plus, it’s sweetened with stevia and erythritol so it’s keto-friendly. Founded by a former U.S. Navy SEAL, Kill Cliff has become popular in fitness circles and sponsors an assortment of athletes, from MMA fighters to skateboarders.

Emergency Prep Club 3-Day Gluten-Free Emergency Food Kit

CONTAINS:6,000 calories worth of food
MSRP: $75
URL: emergencyprepclub.com


NOTES: Alkaline this and carb-friendly that — if you’re like us, you’re pretty tired of all the marketing buzz- words. But for those with Celiac dis- ease, gluten-free food is essential for avoiding long-term damage to the small intestine. That’s why the Emergency Prep Club was started. It provides three-day, seven-day, and 14-day emergency food kits for preppers with gluten allergies. The kits contain everything from Epic turkey jerky to Mount Hagen Organ- ic Instant Coffee. While it’s usually cheaper and better to personalize your food cache, the Emergency Prep Club is a great starting point if you’re new to prepping or just looking for a convenient resupply option. You can also subscribe for a fresh kit every six months at a 5-percent discount.


Prime Day Survival Deals

Prime Day is here, and whether or not you were looking forward to the day Amazon blows open its metaphorical doors for the best deals this side of the Atlantic, we're bringing to you some of the best, time-sensitive offers available on the site. Here's the catch, though, you have to go through our page, that way they know we sent you there. It's voting season, and we all know how the sayings go, people vote with their wallets. The best part is, good survival gear doesn't care about how much you spent on it when it's saving your life in a disaster, or from a bad day in the office. Stay tuned for the best Prime Day Survival Deals.


3M WorkTunes + Gel Cups Hearing Protection

Save 30% on 3M WorkTunes Connect + Gel Ear Cushions

The only thing better than hearing protection when at the range, is hearing protection blasting the best Miley Cyrus, or Five Finger Death Punch, ironically of course. While one's choice of music may be a joke, protecting your hearing is not, and take it from any veteran, tinnitus isn't something we'd volunteer for again. The best part about these, however, is that they come standard with gel cups to go over the ears, which significantly makes them more comfortable and effective at saving those ear drums.


XAegis Shooting Glasses

XAegis Shooting Glasses for as low as $9.59

If you're wearing ear protection, you should be wearing something to keep your eyes safe, especially at the range or when working on the latest DIY project in the garage. While there's plenty of arguments that start with “what if this happens?” here's an easy answer, decent eye protection isn't that expensive, even less so on Prime Day.


Go Time Gear Life Tent Emergency Survival Shelter

Go Time Gear Life Tent for $15.95

A tent like this isn't for a week in the Rockies, if you get to choose the timing. However, emergencies wait for no one's clock, and arrive on their own time. When that is the case, ideal means what keeps us alive, and in the hierarchy of needs, during a blizzard or pouring rain, shelter ranks pretty high on that list. Easy to keep in a car or strapped to a bug out bag, saving your survival pack from being raided every time you take a weekend out at the lake, this survival tent is burning in as low as $16 during the sale. Make your move now.


Go Time Gear Life Bivy Emergency Sleeping Bag

Life Bivy Emergency Sleeping Bag for $15.95

Unless you're riding out the apocalypse with a team of porters to carry your gear, chances are it's a sleeping bag that will end up in your tent. But there's more than one application and ideal location for a survival sleeping bag, particularly for those living in northern states that suffer frigid winters which can quickly turn a stuck car into a icy tomb. Take this opportunity to prepare for a winter that might be low on available first responders and pick up one of these for less than the price of a fancy cocktail downtown.


LifeStraw Universal Water Filter Bottle Adapter Kit

LifeStraw Universal Water Filter for $29.51

Turn that Hydroflask from its days as a Visco-Girl prop into something that can save your life with the LifeStraw Universal Water Filter Bottle Adapter, and for less thanks to Amazon. Food, Water, Shelter make up the vital triad, and taking running water for granted is a fatal error. This isn't Ranger School, this is survival, and whatever you do, don't go full Bear Grylls.


J.CARP Military Tactical Backpack

J.CARP Military Tactical Backpack for $36.79

While a pack like this isn't something we'd recommend for a long haul survival experience, desperate times have driven people to go further with less. At the same time, more affordable bags like this make for excellent vehicle-bound medical kits, and survival bags that provide the live-saving gear and peace of mind in the event that one has to escape a real bad situation to get home, or happens to be in the wrong place at the right time and can do some good. With an included hydration pack, these kinds of bags hold the kit you don't mind loosing in the event that the whole vehicle and contents must be abandoned, as they can be replaced for a reasonable price.


Tobfit 12 Pack LED Road Flares

Tobfit 12 Pack LED Road Flares for $47.99

To be clear, they might not be as cinematic as those ones that look like dynamite, but they're 100% less likely to burn family members or start a forest fire as well. These road flares pack light and can be carried by the whole family to avoid being separated in the dark, and serve as not only a way to be found by first responders, but to mark a basecamp when exploring in the dark. Just remember, batteries not included.


Best Deals on Knives:

Victorinox Swiss Army Classic for $16.63

The venerable Swiss Army Knife by Victorinox is coming in at 20% off, With multiple models to choose from, these still make sentimental gifts for growing adventurers. Useful in most places except an airport, take a walk into memories past, catch a look at 5 Surprising Uses for a Swiss Army Knife.


Up To 20% Off CRKT Knives

Save up to 20% on CRKT Knives
Providing some the the best EDC knives that fit well between the lines of quality manufacturing and won't-make-you-cry-as-you-dull-it-on-cardboard, CRKT knives have circumnavigated the globe in the packs of adventurers, kits of soldiers, and edc pockets of every-day people.


Up To 26% off Streamlight Flashlights

Save 26% on Streamlight 66608 250 Lumen Microstream

There's no excuse to have to pull out an EDC pistol just to get access to a flashlight, and let's remember, cell phone lights are convenience, not a replacement. As Streamlight's hand-held and weapon lights continue to improve, their affordability becomes more and more attractive. This Prime Day sale, get them up to 26% off.


Deals

Ammo

*Note – Ammo deals are EXTREMELY volatile right now. Get what you need when you can.

Ammo Pre-Orders

*These might be worth the wait in the current climate

Pistols

Rifles

Shotguns

Optics


Rally Points: Considerations for Planning and Using Them

An extremist group attacks critical nodes of the power grid at 0100 hrs and you awake to mayhem on the streets.  City-wide traffic backups are the first indication that this isn’t a typical summer brownout, but the danger is amplified when a five-ton improvised explosive device detonates in front of a Federal building at 0830, flattening the structure while killing 75 and wounding 150 other workers as they arrive to begin their day.

kagwerks rally points

Your daughter is on her way to a college class when the traffic jams begin to pile up and the detonation occurs while your son is on the road after working third shift at a plant on the other side of town.  It is impractical for them to attempt to return to your home.

Emergencies can, and will, strike when least expected.

rally points police carPhoto credit: MSVG (https://search.creativecommons.org/photos/0c627e28-b73c-4d5a-ae20-244bb82ef65f)

While the police and first responders re-direct resources to the Federal building, another bomb detonates at the water treatment plant,  effectively crippling the city’s water system.  You could hunker down and withstand the chaos with your stock of supplies, but you decide it may be more prudent to temporarily relocate to a more secure area and ride out the current crisis occurring in your city.

While the police and first responders re-direct resources to the Federal building, another bomb detonates at the water treatment plant,  effectively crippling the city’s water system.  You could hunker down and withstand the chaos with your stock of supplies, but you decide it may be more prudent to temporarily relocate to a more secure area and ride out the current crisis occurring in your city.

RESPONSE

No matter how—or when—calamity strikes, it may be impossible for you and your loved ones, trusted friends and other members of your support network, to move as one single group to a place of safety.

It may be necessary for sub-units of your group to meet at an intermediate location, or rally point (RP), before completing the movement to a final safe haven.  For continuity throughout this article, the abbreviation RP will be used, but the term “rendezvous point” or “link-up point” could also be used to describe the location.  In fact, different militaries around the world use their own preferred term for what is basically a pre-planned location you have decided to meet other people at.

A perfect example of an RP is in the 2012 remake of the movie “Red Dawn. Characters Jed Eckert and his brother Matt Eckert swerve to a stop near their father, Spokane Police Sergeant Tom Eckert, who yells, “Get to the cabin!!!” This is a rapid response, quick decision that gets the characters to safety, while they whip up a plan to save their friends who were left behind.  This is a simple example of an RP, but the sons knew what Tom meant when he told them to head to the cabin.

RPs can aid in getting everyone to the final safe haven.

rally points winter cabin

Photo credit: Mænsard Vokser (https://search.creativecommons.org/photos/918aad2e-63b1-48de-878a-56f861e60956)

You might be fortunate enough to have that cabin or campsite deep in the woods, or even your own pre-plotted island or sand bar you decide to use to just get away from people during a crisis.  But your group still needs to get there and members might be coming from different directions, at different times, and possibly without the benefit of a means of communicating.  RPs require prior planning, and it is best to follow the K.I.S.S. principle and keep everything as simple as possible.  You might also be disoriented, fatigued or injured, which all raise the stress level and make normal tasks more difficult.

Keep it simple.  Everyone in your group needs to know the RP plan.

land rover Photo credit: landrovermena (https://search.creativecommons.org/photos/7feb7e89-95d8-4364-8286-2aa90be2b13f)

PLANNING

This article aims to lay out the main issues for consideration when planning RPs.  Take the bits and pieces that apply to your situation, terrain and capabilities, then incorporate them as part of your larger bugout plan.


  1. RP locations must be known to all members of your party—preferably noted on maps, GPS devices, etc. Most importantly, accessing the RP needs to be rehearsed, both day and night. When the situation is critical, you don’t want to discover that members of your party can only visualize what the RP looks like in daylight, but were delayed during movement and are forced to try to reach it during hours of darkness, getting lost in the process.


Ensure all adult members of your party are situationally aware of planned RPs.

Photo credit: Neal Herbert (https://search.creativecommons.org/photos/efef95be-9e55-401d-bbeb-caf651cbb662)


  1. Avoid natural lines of drift (where humans are most likely to walk, drive, travel, etc.). It’s not wise to park in the middle of a crossroads while you wait for others to arrive. If you are trying to make yourself more visible to friends and family, you’ll also be more visible to people who are not in your circle of trust.  The RP should be located away from these natural lines of drift so that you aren’t easily noticed by others.  It may mean waiting in a thicket or close stand of vegetation that does not look like an obvious hiding spot.


  1. Plan your RPs so that you access them by covered and concealed routes which limit others from observing you. Balance this with achieving clear lines of sight that allow for good visibility of the surrounding terrain. If you cannot find ground that offers cover (i.e. a barrier to protect you from say, hostile fire), at least get a minimum of good concealment.  Camouflage mirrors, windows and windshields.


Take the path less traveled to get to your RPs.

Photo credit: Bold Frontiers (https://search.creativecommons.org/photos/1a39f20d-a10f-4e6c-9a94-0e8e8572483a)


  1. A security plan must be agreed upon and initiated by the first person(s) to arrive. They should make a visual inspection of the RP from a distance, to ensure it is safe to approach and not occupied by others who might mean you harm. Once the RP is reached, it must be physically inspected as well. Until that is done, the RP is not secure and you are not safe there.


  1. You must be able to defend yourself, even if you only intend to occupy a RP for a short time before you start moving again. Select locations where you can exploit natural obstacles such as elevation, bodies of water or thick vegetation, to your advantage.


Never let your guard down.  Security is critical at all times.

Photo credit: Bob n Renee (https://search.creativecommons.org/photos/9239b7ab-564e-44aa-979a-224329e55382)


  1. Develop a simple signal plan that allows for easy identification of friend or foe. The arrival of other members of your party can be the most dangerous phase of their movement to the RP.


  1. Plan an emergency RP in case you discover, through scouting, that the original RP is occupied, or access is blocked. Simple contingency plans, such as “relocate 500 meters due north”, work best and may be easiest to remember. You don’t necessarily need to deviate to a follow-on RP that could be dozens of miles down the road. Remember, your strength is in numbers and you want your party to get together and move together, as soon as possible.  WWII British commandos, operating behind enemy lines in North Africa, would often discover that the enemy were searching for them after they had raided a German or Italian-held port or airfield, and were sometimes parked right on top of the RP!  They would avoid the enemy by moving to an emergency RP, then wait until the rest of their unit arrived, or time had run out and they needed to move back to friendly lines.


rally points phone appPhoto credit: Markus Spike (https://search.creativecommons.org/photos/970390a0-3715-411b-b786-ab2e2ab63e76)


  1. Establish a “no-later-than” timeline. If the RP is just a temporary place for a link-up before continuing movement as a larger group, you need a preplanned course of action (COA) if someone in your group does not make it to there within the agreed period of time. If your COA means you go looking for them, do it.  If your COA calls for you to abandon the RP and keep moving, then keep moving.  If you have planned them properly, you should already have a series of RPs marked along your route to safety.  If you need to keep moving, there will be opportunities for other members of your party to join you at another RP, further down your route.

Everyone must understand when they are expected at the RP

rally points clock facePhoto credit: Ell Brown (https://search.creativecommons.org/photos/a09c8a24-e8f9-4b7c-9c13-b3d677cf65d5)

  1. Plan RPs for your bug out location as well, in case it is compromised while other members of your party are away scouting and you need to evacuate the location. If you do not have direct communications with them, warn the others by a pre-arranged signal that you leave behind.


  1. Cache critical supplies at important RPs, like food, fuel or medical supplies; you may have picked up unexpected additions to your group. Despite our best plans, it happens. These cached supplies will be a buffer that allows you to get to your destination.


rally points medical Photo credit: dlg_images (https://search.creativecommons.org/photos/ed058911-84a2-4012-8180-951d63c80f8c)


Modern military forces have successfully used rally points for well over a hundred years, allowing for units to gather at decisive locations on the battlefield.  They require careful planning to be effective, but once the people you are protecting are familiar with how they fit into the bugout plan, they will increase your group’s safety, ease of movement and security.

What would make for a good RP?  The center of the inhabited area, or on the fringe of town?

Photo credit: NCRS Montana


More on Land Navigation


The Buck 110 Folder Review and History

When we hear the term “survival knife,” we most often think of a large fixed blade of some type and not a folding pocket knife. Yet, the Buck 110 Folding Hunter may make you change that way of thinking.

The Buck 110 was a familiar sight for many years. Although it’s pocket-sized, it was mostly worn on the belt in a leather sheath secured with a single snap. Even those who know little about knives can recognize it immediately. It was worn by hunters, farmers, craftsmen, tradespeople, and anyone who had the need for a compact, sharp blade with a strong lock.

When a single model of any knife becomes synonymous with an entire company’s product line for decades, and inspires countless other designs (as well as blatant imitations), I’d say that qualifies as iconic.

History

The Buck 110 was designed in 1963 as a folding hunting knife. There had been a few knives of this type on the market, but none had really been successful, and Buck wasn’t exactly a new company at the time. They were well-known for their outdoor fixed-blade knives.

buck 110 folded and open

Above: The iconic Buck 110 Folding Hunter's overall look became synonymous with the company.


Although they got their start in 1902, the company didn’t incorporate until 1961. A mere two years later they decided to introduce the first folding knife that was nearly as strong as a fixed blade. Buck rolled out their Unconditional Lifetime Warranty at this time, which was also unheard of for a knife manufacturer. Lastly, they priced their knives anywhere from $12 to $20. This wasn’t exactly a king’s ransom in 1963, but the typical field knife retailed for around $5 at the time.

Design

Credit must be given to the engineer who developed the locking bar on the Buck 110. It may look like a simple lock back, but it was designed to hold the blade in a solid position as well as release with minimal pressure applied to it.

The blade is a 3¾-inch clip point, similar to the classic Bowie knife but on a smaller scale. This is an interesting choice as it makes for a very narrow tapering point that’s critical for delicate cutting, and provides a slender tip for poking precise holes. The blade is robust enough to tackle anything from whittling stakes to skinning game.

buck 110 stone background

Above: The Buck 110 Folding Hunter is a classic, rock- solid blade that has proven itself over the past 50-plus years.


As for steel, most Buck 110 Folding Hunters use 420C stainless steel. While some knife guys today may turn their noses up at this, 420C has proven to be very durable and corrosion-resistant. This has much to do with the exceptional heat treatment applied to the blades by the legendary Paul Bos, and a Rockwell hardness of 60. Still, if you want something more upscale, the Buck 110 can be had in S30V.

This classic design has two other elements that make it so iconic — namely, the distinctive front and rear brass bolsters and the ebony wood handles. When you see one, you know exactly what it is.

It generally takes two hands to open and close the knife, making it very safe and appropriate to give to a young person as a first-time knife. It uses a nail nick cut in the side of the blade, but some people install aftermarket thumb studs to modernize it. Back in the 1970s and 1980s it wasn’t uncommon for people to close the blade on a matchstick or toothpick in order to allow the knife to flick open more easily or open as it was drawn from a pocket.

Popularity Ensues

Despite its initial price being on the high side, the Buck 110 Folding Hunter took off like wildfire. Remember, this was in 1964 — the concept of a CNC-milled titanium frame lock was unheard of. This high-tension lock back with a very low-pressure release mechanism seemed like magic.

It was hard not to spot the distinctive black leather sheath of the Buck 110 on the belts of men almost everywhere and from all walks of life. Despite the rest of the company’s offerings, when you saw a Buck 110 Folding Hunter — in the sheath or outside of it — it was referred to as a “Buck knife.”

As with any popular design, other manufacturers and custom knife makers drew inspiration from it. The classic look of the knife with front and rear bolsters and inset hardwood scales became very influential on the cutlery industry. The downside of that was that there were a lot of imitations from overseas, most notably India, Pakistan, and Taiwan. These knives were cheaper and used inferior materials based off of reverse-engineered knives.

To this day, the Buck 110 Folding Hunter has always been Buck’s number-one seller and there are tens of millions of them out there.

The knife has undergone some small changes over the years. These aren’t readily noticeable to the average user, and they’re typically an improvement. However, the U.S.-made leather sheath briefly went to nylon and eventually back to leather due to customer feedback.

As a Survival Blade

Due to its relatively small size, the Buck 110 Folding Hunter fits that first commandment of survival knives: “Have a knife.” Whether it’s in its trusty leather belt sheath, a pocket, or a pouch on someone’s pack, it’s small enough to have with you whenever you need it.

buck 110 survival

We have left ours in a dedicated bag set up for hunting as a spare knife for years, and it has served well as a skinner, utility knife for cutting rope, and edged tool for other chores around camp. It may not be ideal for batonning firewood or quartering big game, but it can be done if it’s all you have available.

If there’s a drawback to the Buck 110 it’s that while the 420C blade is hard and tough, when the edge dulls it can be a bear to sharpen. We have had the best results with a Ken Onion Work Sharp sharpener set at a 20-degree angle and a medium-grit belt.

Inspirations

The Buck 110 not only influenced the look and feel of what was to become the modern lock-back folder from other makers but has inspired Buck’s own line of knives. Smaller versions, such as the Buck 112 with a 3-inch blade, have made the lineup as well as variants using different materials for handles and bolsters.

A fixed-blade version is available from Buck, but the company offers better fixed blades that can perform the same tasks. As fine of a knife as it is, this knife excels as a folder.

This fact wasn’t lost on Buck, either. It led to two lock-back descendants of the 110 Folding Hunter: the Buck 110 Auto and the Buck 110 Slim Pro.

Buck 110 Auto

Although I’m a self-proclaimed lifelong knife fanatic, part of me had felt that I had outgrown the Buck 110 Folding Hunter until 20 years ago when I saw an automatic conversion by the late Butch Valloton. Imagine the rock-solid lockup of a Buck 110 with an automatic opener — it seems like the perfect blend of old and new. It wouldn’t be long before Buck would make an automatic themselves based on this classic design.

buck 110 auto

Above: The opening button and lack of a nail nick are the only outward differences between the Buck 110 Auto and the Buck 110 folding knife that preceded it.


The first thing you notice is the distinctive silver-colored button on the handle, which compresses the spring and holds the blade closed when not in use. Press the button and the blade launches open from the side. You need to depress the lock bar to close it, but when it’s open there’s that rock-solid feeling of a fixed-blade knife in your hand once again. The only other things that set it apart are the hole in the blade where the auto mechanism keeps it closed, and the lack of the nail nick opener.

Buck 110 Slim Pro

By this point you might be thinking that the Buck 110 has a lot of great attributes, but the design is a little dated. Perhaps you think it’s more suitable for your father or grandfather who likes brass bolsters, hardwood scales, a belt sheath, a nail nick opener, or even a steel like 420C.

buck slim pro
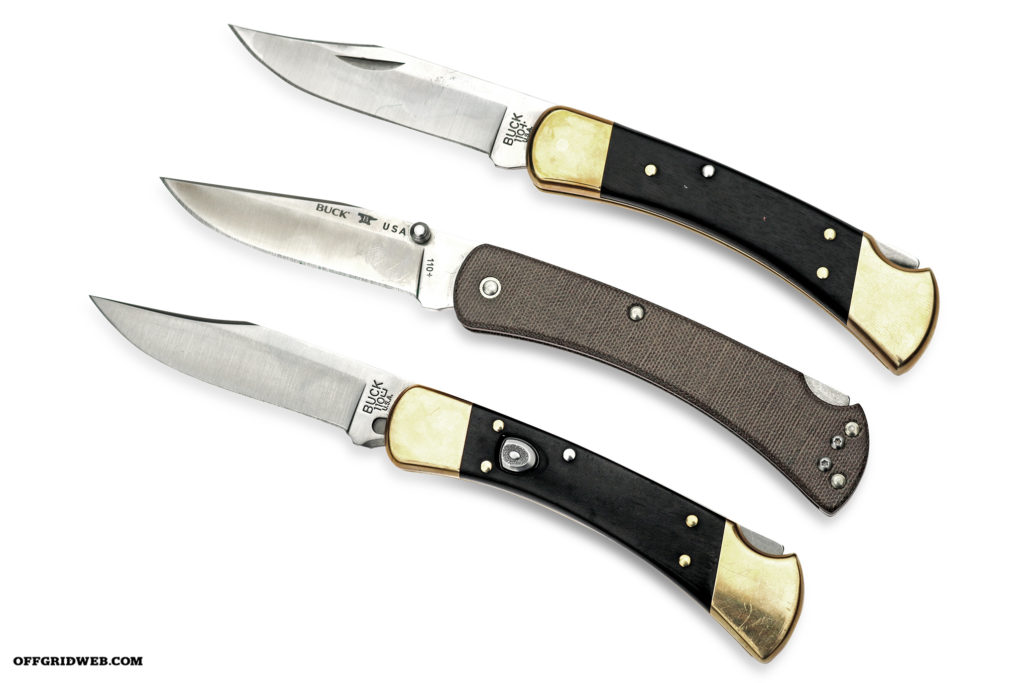
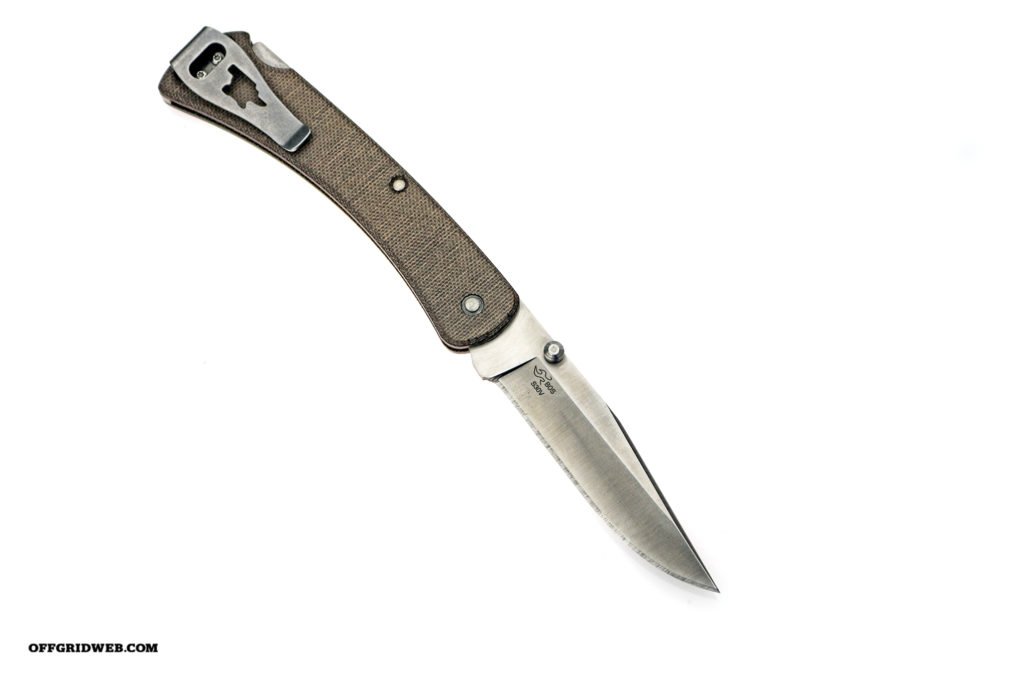
Above: The lighter weight of the 110 Slim Pro means that it can be carried via pocket clip as opposed to being worn in a belt sheath.


Buck recognized that too, and addressed it in their Buck 110 Slim Pro. They made the blade from S30V and added a thumb lug and a choice of either black G10 or tan or olive drab Micarta scales. Instead of a belt sheath, the knife is set up with a stainless reversible deep-carry pocket clip. They retained that clip-point blade and their lock-back system.

The end result is a stylish EDC pocket knife with modern materials based on one of the most proven folding blades ever made.

Inspirations

The Buck 110 Folding Hunter proved to the world that a safe and heavy-duty folding knife could be made well and priced reasonably. Tens of millions of these knives have rolled off their assembly line over the past 57 years, and it shows no sign of stopping. With a retail price of less than $50, this is an American-made iconic blade that everyone can easily afford to use as a daily work knife or emergency tool.


More on Iconic Survival Knives: