Lisa Jaster Interview: Delete the Adjective

“I don’t want to be qualified. I don’t want my accomplishments qualified,” explains a currently multitasking Lisa Jaster, graciously chatting from the car in between her children’s rugby and jiujitsu practices. “I went to the State of the Union address in 2016, and I posted a few things online. I was sick of people telling me, ‘You’re strong for a woman,’ or, ‘Wow, you’re fill-in-the-blank for your age,’ or, ‘You really know your tactics for a female soldier.’ Not only had Lisa’s gender and age suddenly become a focus, but so had her resolve. From those comments came #DeleteTheAdjective and a bit of a chip on her shoulder. “Those chips on our shoulders are what make us succeed in the long run,” Lisa explains.

She’s not wrong. Her drive has led Lisa to delete the “female” adjective in a life and career full of accomplishments. First deployment? Afghanistan after Sept. 11. Second Deployment? Operation Iraqi Freedom. Graduating from the prestigious Army Ranger School? Check. It’s an impressive feat to graduate from Ranger School at all, let alone conquer it at the tender age of 37. “In my Ranger school class, I always volunteered to be point man, or carry extra items. I remember one mission where I was a 240 gunner, which is a roughly 30-pound rig, and I had probably 100 rounds on me. As we’d conquer this mountain trail, our Platoon Sergeant would do a head count at the top. It was just one of those days, and I looked at this young guy and he was counting heads, and I elbowed him in the ribs and I laughed really hard. Later that night in the patrol base he pulls me over to the side and he’s like, ‘Why are you laughing?’ And I said, ‘You don’t get it, I get to be here.’”

Photos by John Jackson

Lisa’s zest for experience has served her well, alongside those chips on her shoulder. Currently, she wears a variety of hats — Army vet, Army Reservist, Marine wife, devout mother, Brazilian jiujitsu trainee and coach, bow hunter, and so forth. There’s never a dull moment, and that’s just the way she likes it. Ever inspirational and moving forward, Lisa took the time in her busy schedule to enlighten us on her career and resolve, and also the virtue of “going all-in” to realize your dreams. “You have two duffel bags, and you shave your head. I mean, you don’t even bring hair to school. If that’s not all-in, I don’t know what is.”

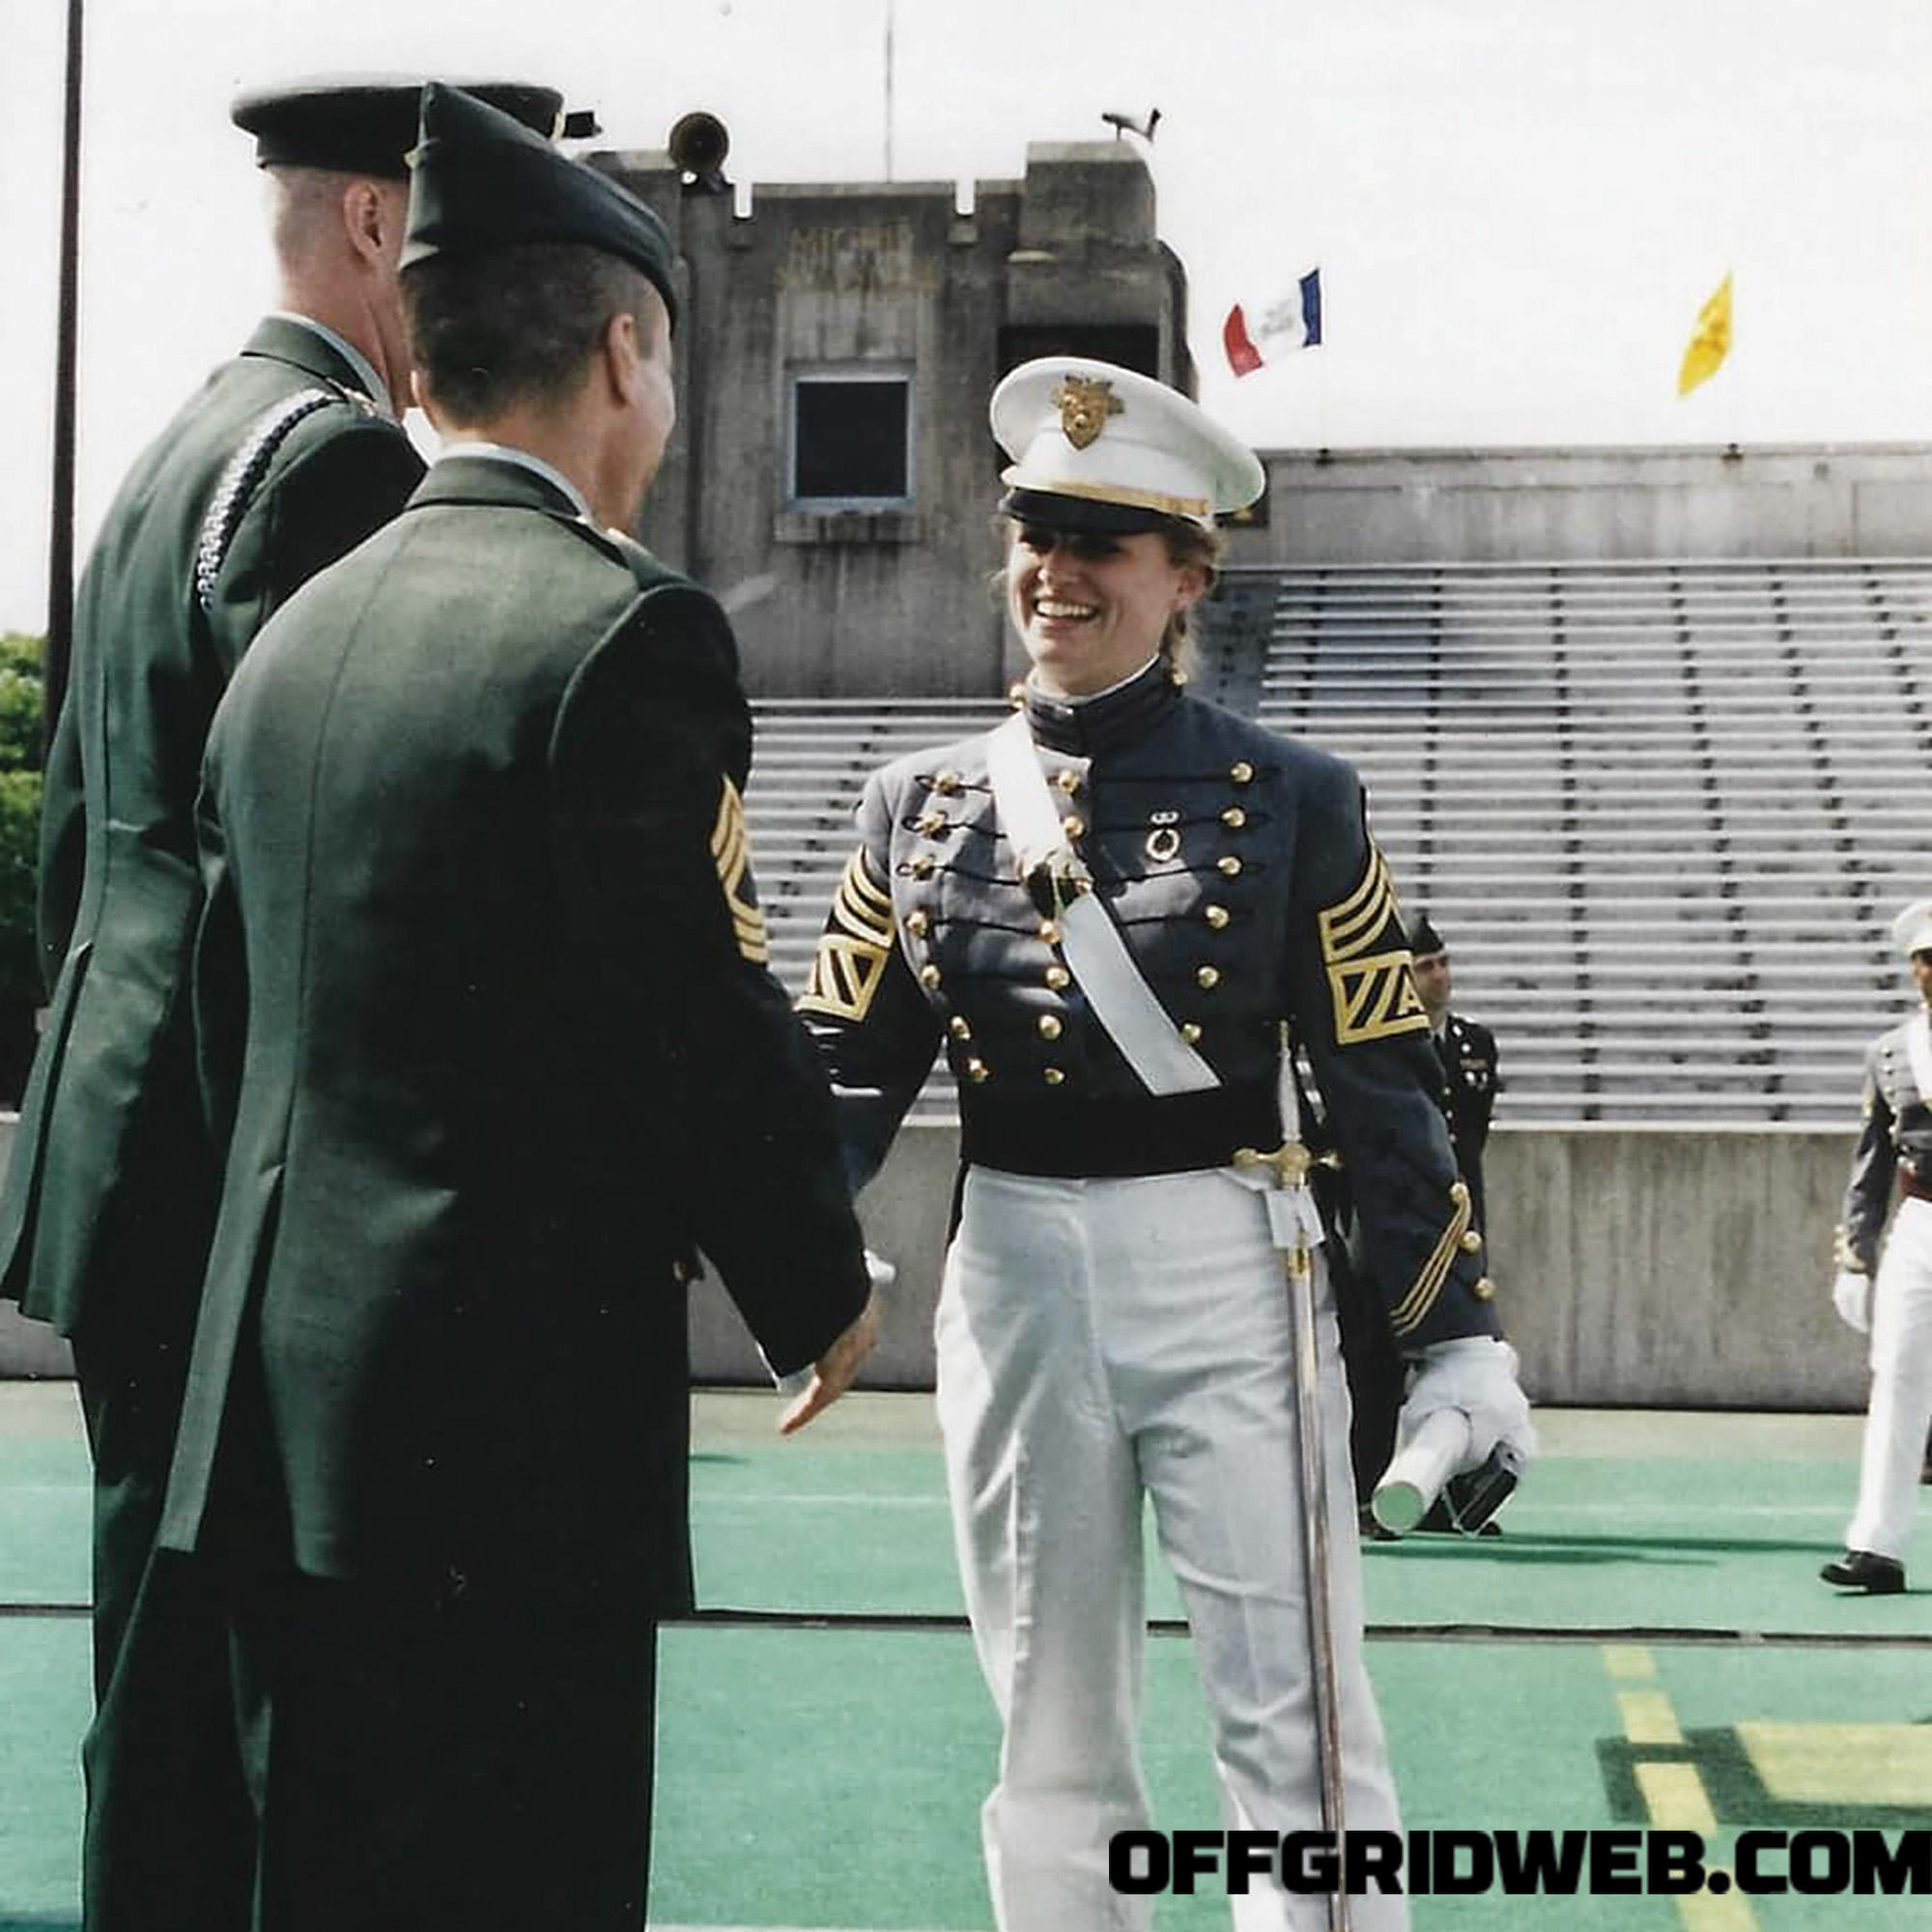
West Point graduation, May 27, 2000, shaking the hands of her company Tactical Officer and NCO.

RECOIL OFFGRID: Do you have a history of military service in your family?
Lisa Jaster: My grandfather was an Army Air Corps navigation instructor during World War II. Due to injury, he never actually ended up going over, but then he became an instructor at the navigation school. My father is a 1968 graduate of West Point and did three tours of Vietnam, received the Silver Star, and four Purple Hearts.

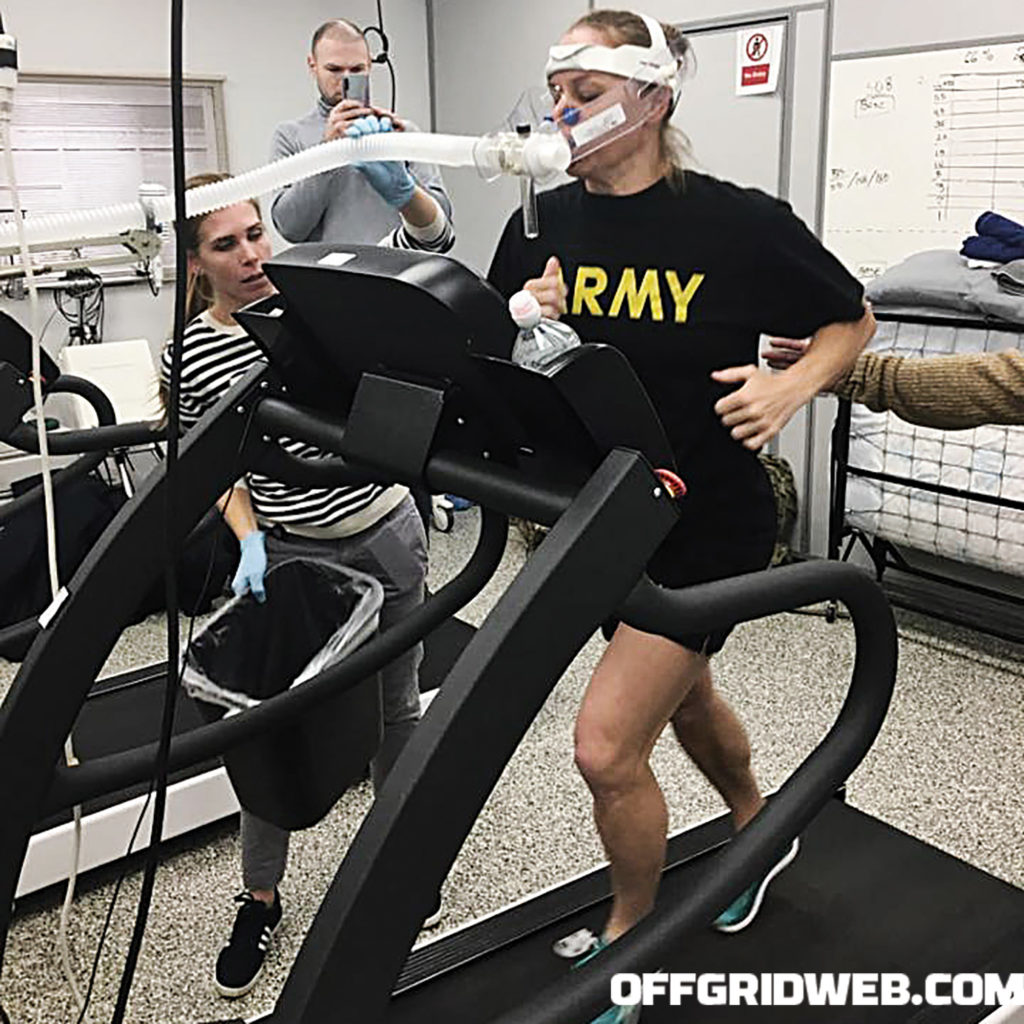
CPET testing for the “Hyperfit Female Study” at the U.S. Army Research Institute of Environmental Medicine on December 13, 2019.

What were your motivations to join the Army, and more specifically to undertake the challenge of attending Ranger school?
Lisa Jaster: I actually read a book my grandmother had found and given me called In the Men’s House by Carol Barkalow, and she’s one of the first female graduates from West Point, class of 1980. As a seventh grader, it was like, “Wow, this is neat, this is something a lot of women haven’t done before. This sounds really hard.” I was living in a small town where everybody knew everybody; it was hard to really make a splash unless you were getting in a lot of trouble or you were the quarterback of the football team. So, I read this book and I thought, My God, I want to try that. And my father was a West Point grad, so he had grown up watching The Men of West Point, which was an old TV show.

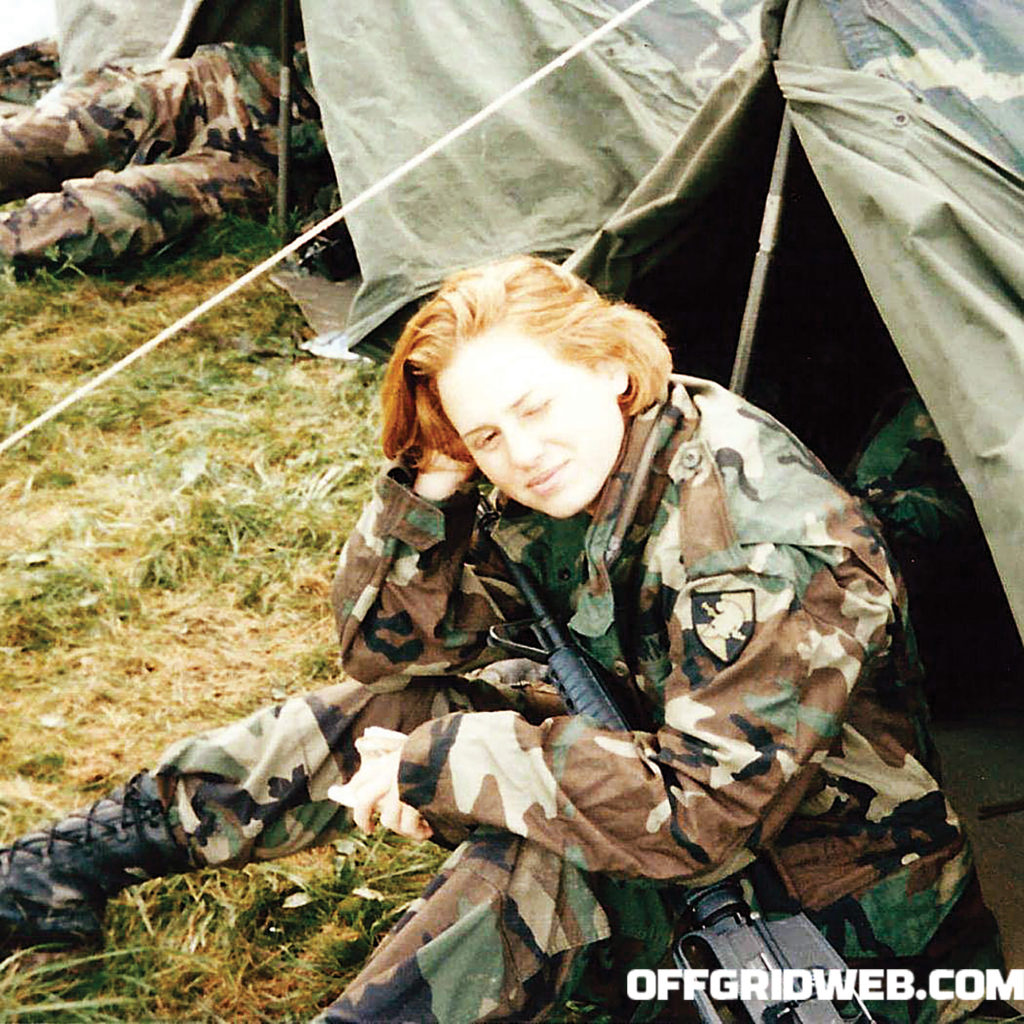
New Cadet Peplinski at Camp Buckner during the field problem at the finale of “Beast Barracks” in August 1996.

How did you push forward to get accepted and make it in?
Lisa Jaster: We didn’t have the internet back in 1990-’91, so I didn’t know how to get into West Point, but I heard that you needed a Congressional nomination. I just started sending my school pictures to my congressman and my senators. Every year, I would get my school picture and I would write them a letter, and I would send it in. If there were ever any town halls where politicians came to Plymouth, Wisconsin, or anywhere in Sheboygan County, which is where I grew up, I would be sitting there with all the retirees that went to town halls. Finally, between my junior and my senior year of high school, I got to go to a West Point summer camp. And they marched us, and they had real cadets teaching our little classes, and we did intramurals and got to wear the cadet intramural jerseys, and sleep in barracks, and I just thought it was the neatest thing ever. And I thought, Well, if I don’t go this school, I don’t want to go anywhere. And that was it. It was definitely a good fit.

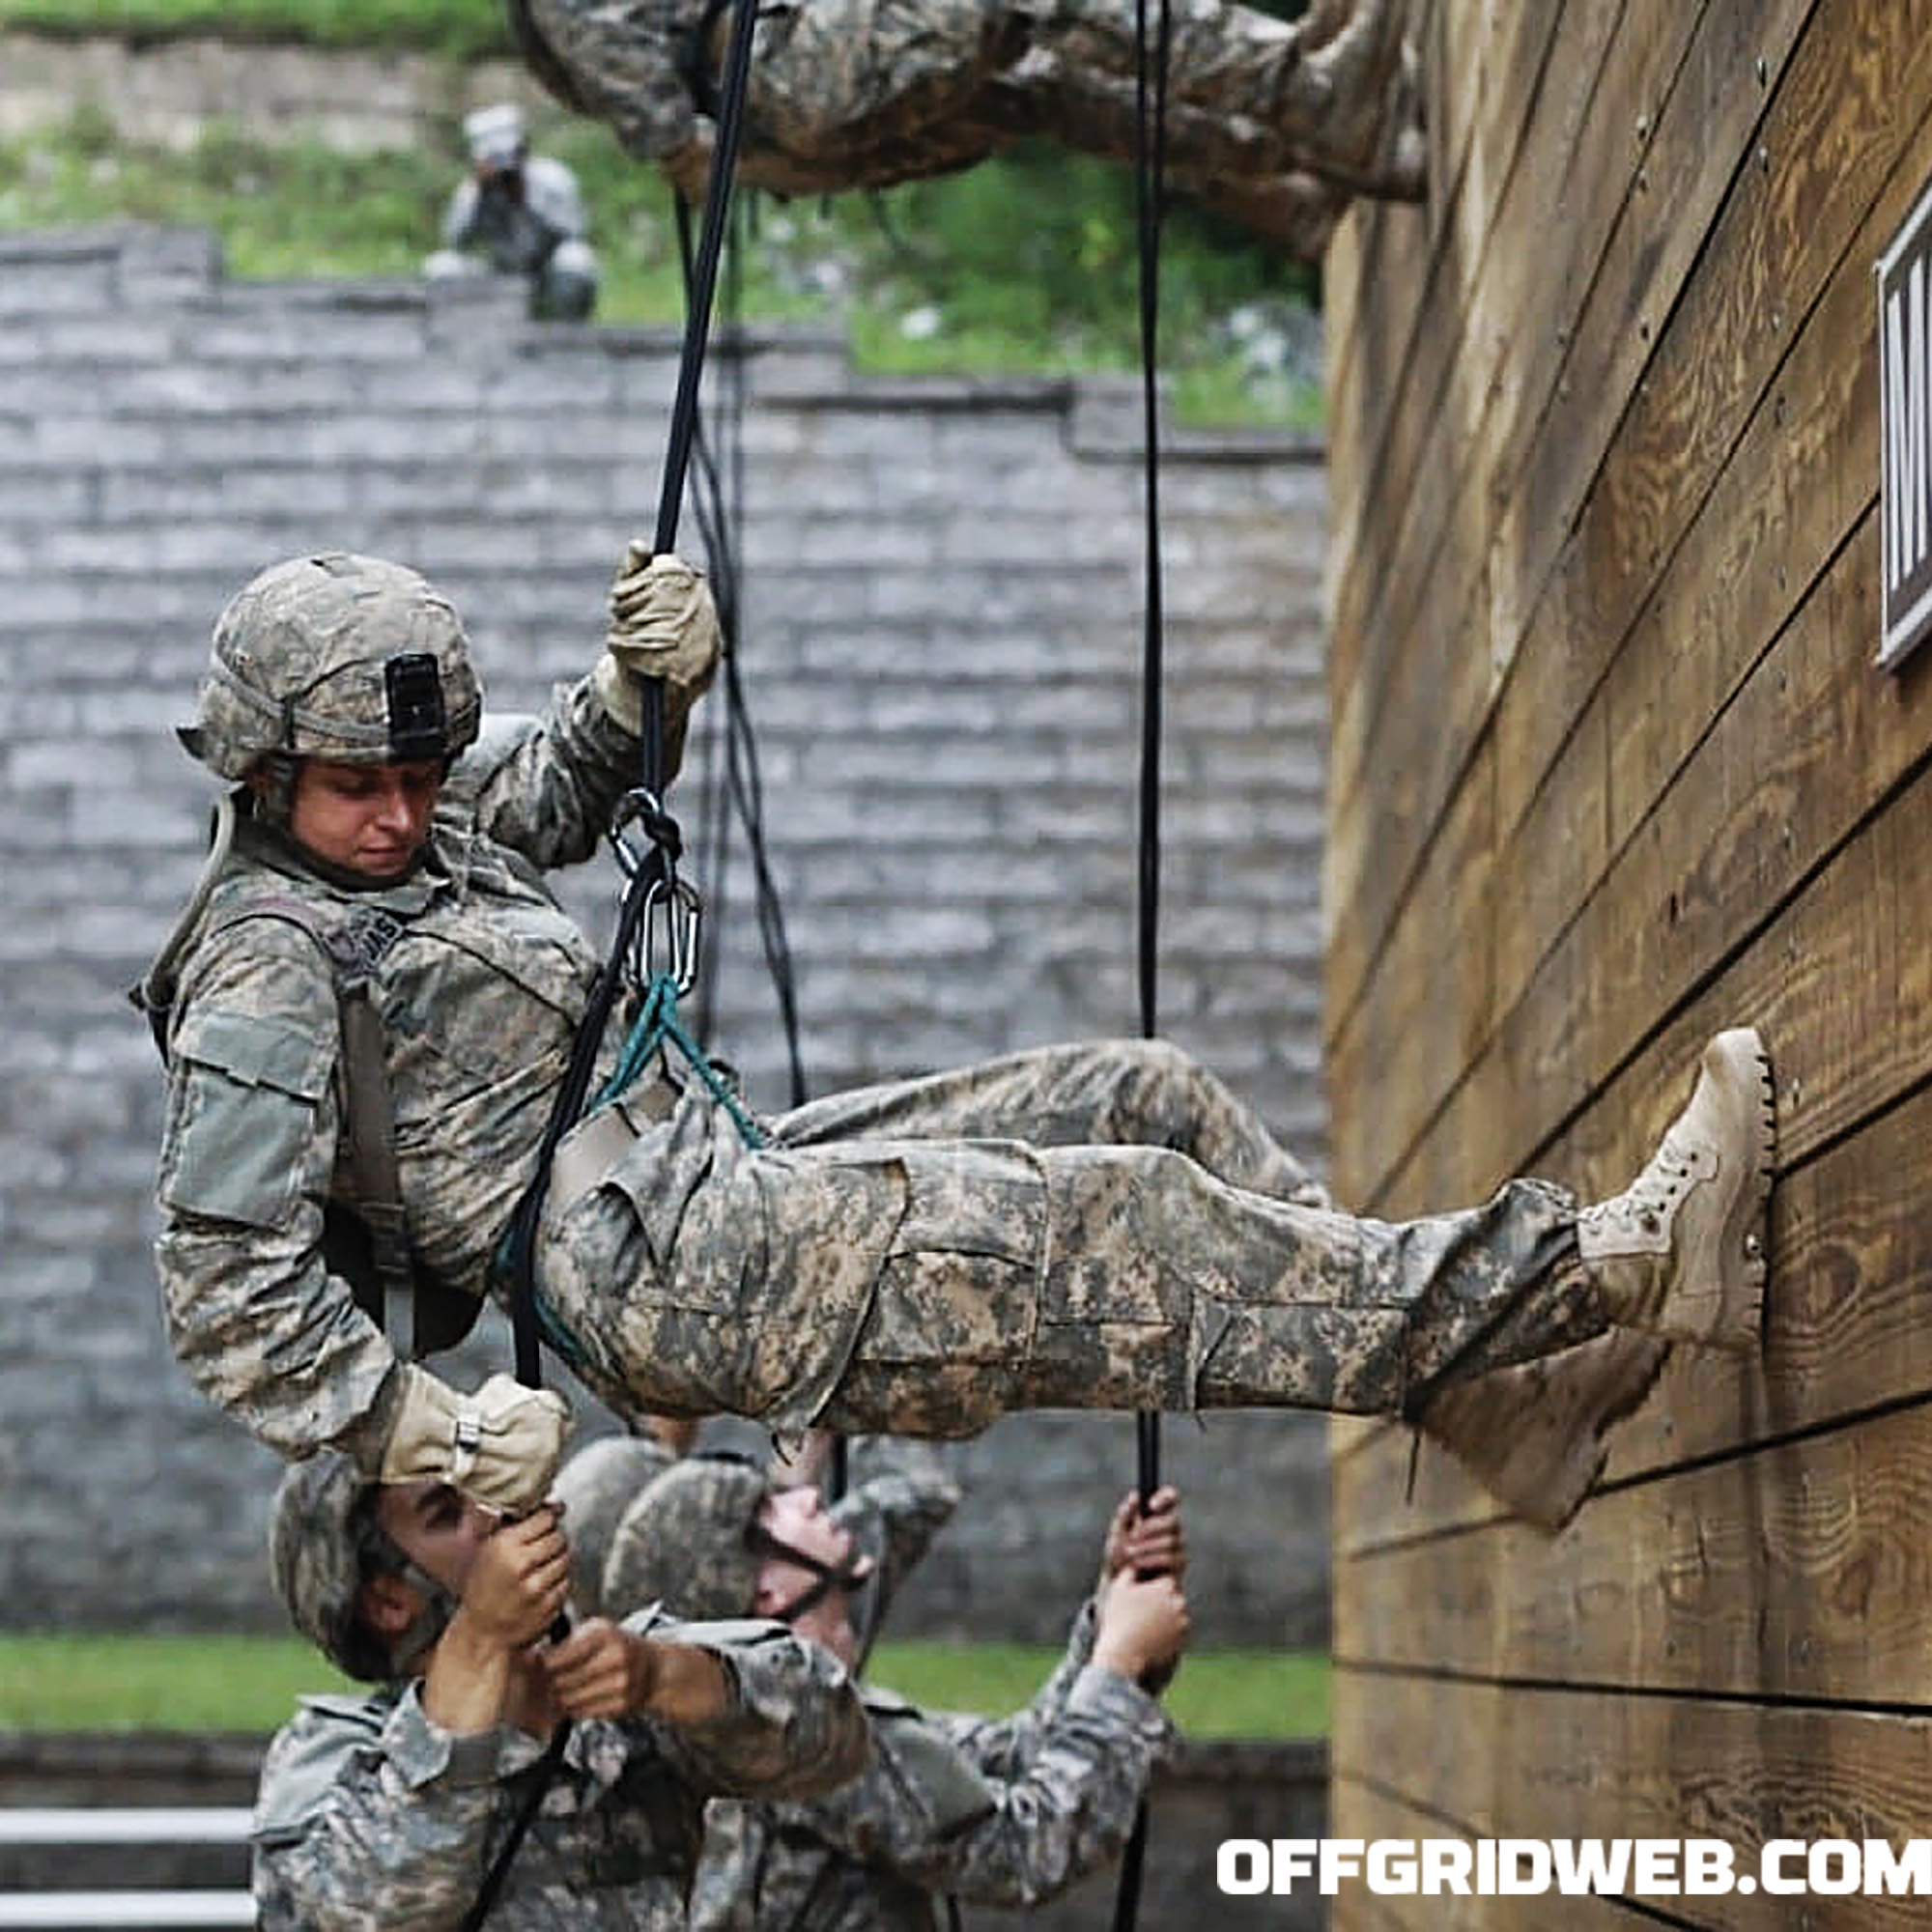
Ranger (Major) Jaster on the lowers rappel wall at Ranger School.

Can you break down your career in the service?
Lisa Jaster: I went to cadet basic training in 1996 and was commissioned in 2000. September 11 happened, and right away at the start of 2002, we went to Afghanistan. After returning from Afghanistan, we went to Iraq for Operation Iraqi Freedom I. I came back, went to grad school, and then went to South Korea for two years, and after that I got out of the Army. I got recruited for a unit after being gone from the military for about three years. Turns out I had been completely processed out, but didn’t know it, so it took me two years to get back in the Army as an Army Reservist, which is my current designation. I had to go through everything, although not basic training, but I had to prove that I really wasn’t as old and decrepit as I felt.

As you were entering, what kind of physical prep did it take to get you to where you at least physically felt like you were ready to go to West Point?
Lisa Jaster: Well, teaching myself to run at least two miles was a challenge. I danced ballet, tap, and jazz, and played soccer in high school. I was also cheer captain, but that didn’t really prepare me a whole lot for the Army fitness test. In high school, maybe junior year, I started trying to run on a regular basis, doing a mile a day, three to four days a week. By my senior year, I was trying to bike everywhere, and when I wasn’t biking I was running or walking. I tried to incorporate physical activity into every aspect of my life, and then I actually took a weight-lifting class in high school, and got taught how to lift, which it turns out is another addiction that I’ve held onto ever since then. I would say between dancing as a kid, having older brothers and stepbrothers as a kid, and then as an adult doing martial arts, specifically Brazilian jiujitsu, that’s enough to get anybody prepared for most situations.

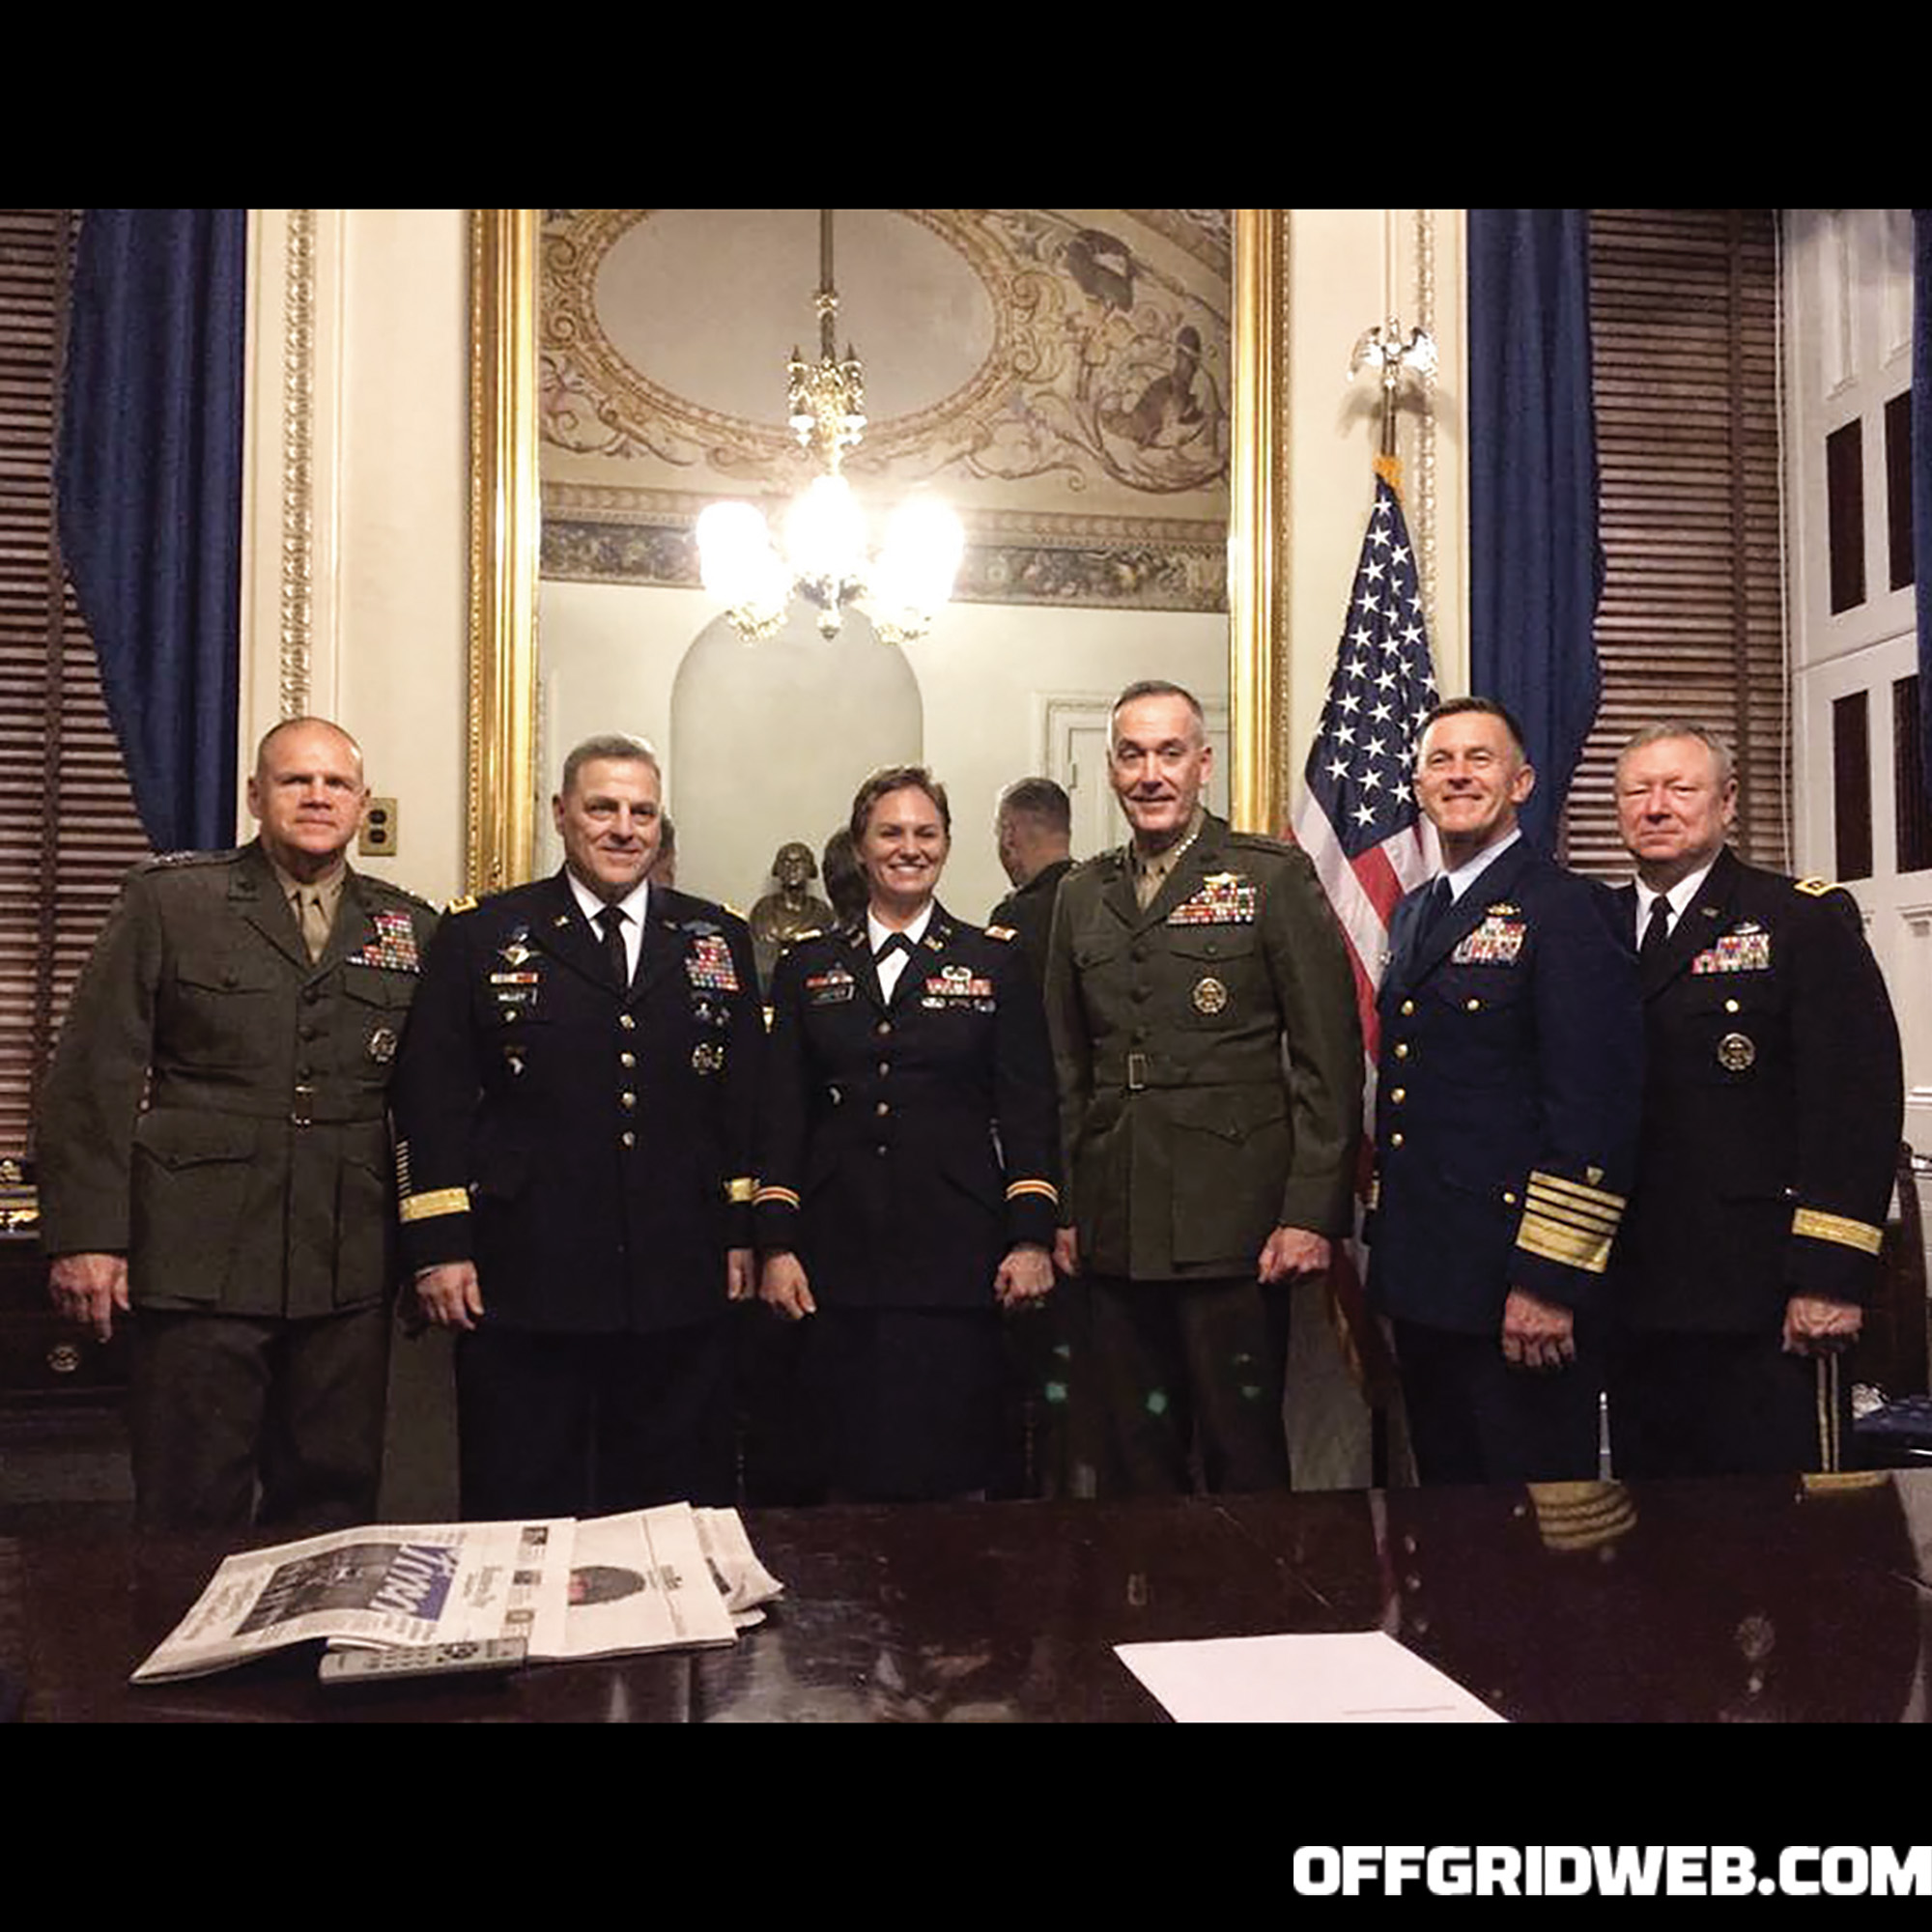
Above: Major Lisa Jaster at the State of the Union in 2016 with most of the Chiefs of Staff. From left to right: General Neller, General Milley, Jaster, General Dunford, Admiral Zukunft, and General Grass, January 12, 2016.

What about the mental stuff? How did you overcome the mental challenges of becoming a Ranger?
Lisa Jaster: I think the mental portion wasn’t as hard for me because I already had a lot of life experiences. I’d been to Afghanistan and Iraq in the beginning, when we didn’t have showers and when we weren’t sure if we were going to get real food resupplies, and when we’d eat MREs for a week before we’d get some more T-rations, before there was MWR and everybody was stealing smokes and shoes. I’ve pulled all-nighters with colicky babies, and I’ve been the wife of somebody who was deployed to a combat zone as a reconnaissance Marine, so I’d already been through all those things. I literally had duffle bags older than some of my classmates. The hardest part about it was that I missed a lot of birthdays and a lot of firsts for my kids because my daughter was really young at the time.

What types of support or criticisms did you get from your colleagues?
Lisa Jaster: By the end, I was the lone female. It was really exciting for me to see how all these young male officers and enlistees were growing and developing, but also how they looked at me differently. Day One, I got “the looks,” but by Day Five, it’s, “Hey Jaster, can you just grab this for me for a minute? Hey Jaster, can you help me out?” And to see how their perception changed from “women shouldn’t be here,” to just becoming part of the team.

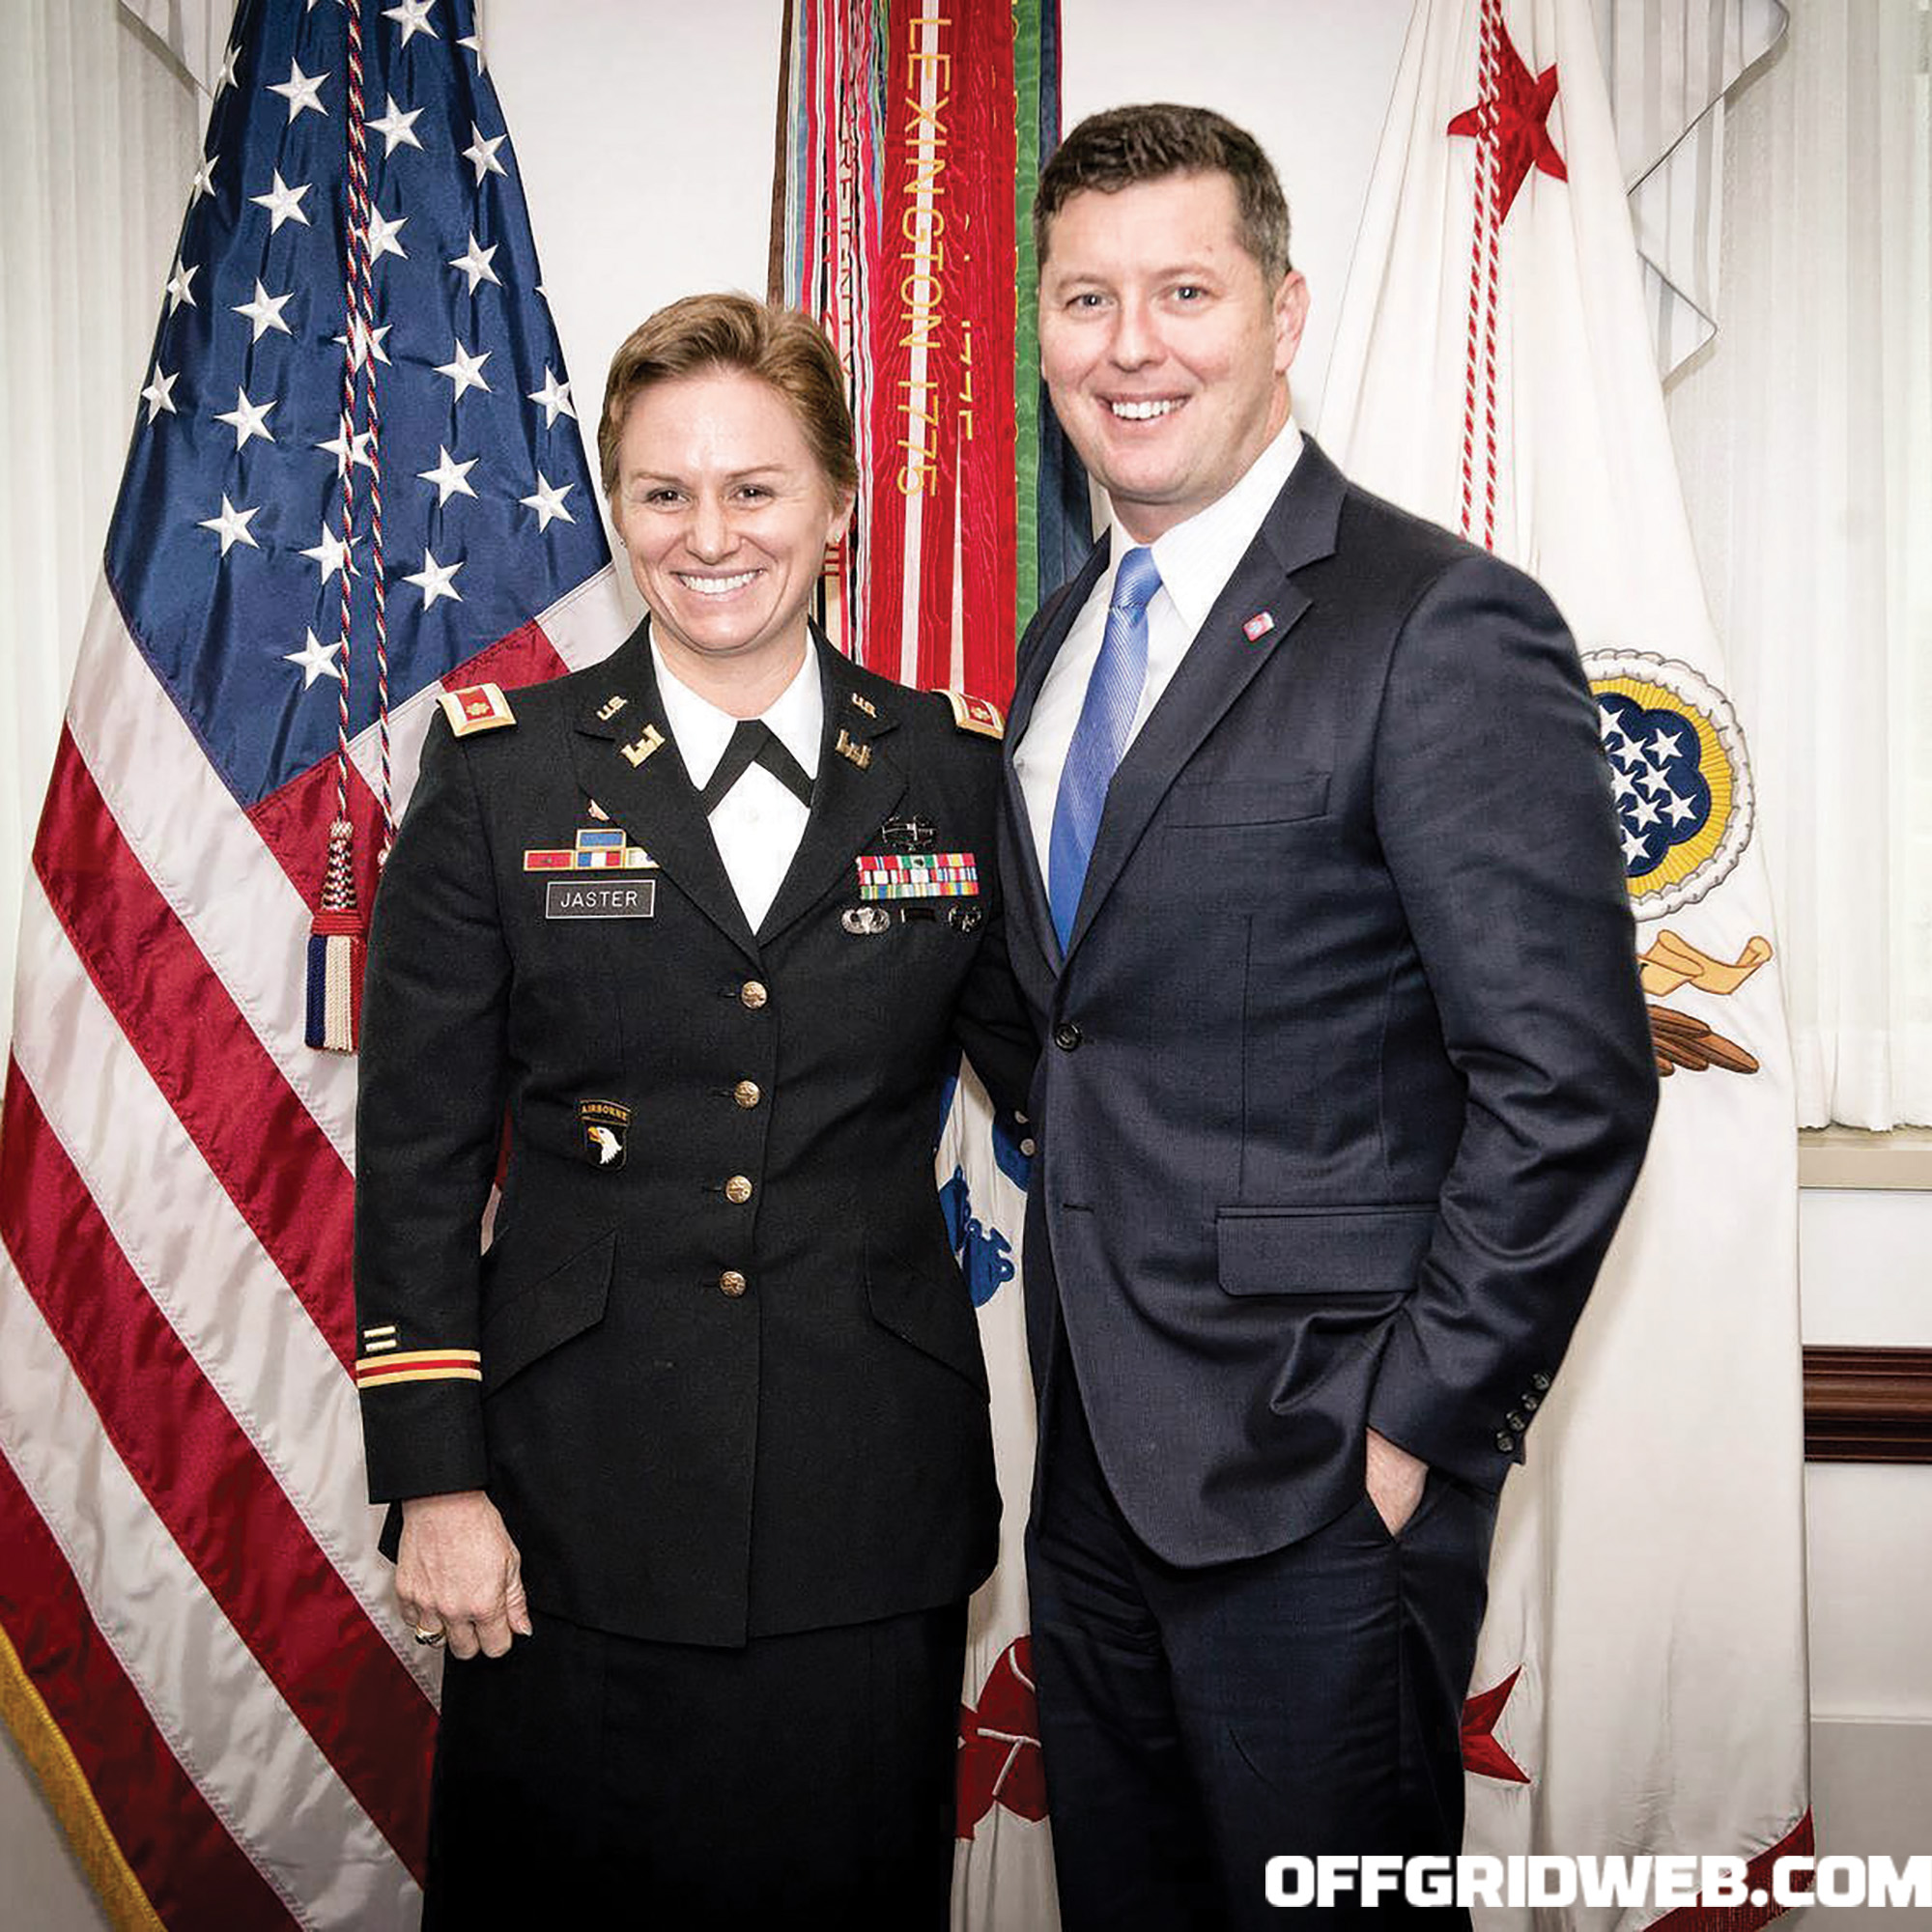
Major Lisa Jaster with the 32nd Under Secretary of the Army, Patrick J. Murphy, January 12, 2016.

How else did gender impact your experience?
Lisa Jaster: From day one I got glared at. I mean, having women at the school was changing everything. None of these young, high-speed alpha males wanted to be graduating with the first women. There are a couple reasons: the mindset that “obviously the class must be easier if women can graduate;” and fact that the media showed up for everything. Women being there took away from the accomplishment of our classmates as well. We got all the attention. My graduation day was just as important for the other 88 graduates who stood out there as it was for me, but there were 100 cameras facing me. If I could go back and change anything, that would be one thing I would change. I would figure out a way to reduce the hype about me and focus on everyone’s accomplishment. There were, of course, some guys who came in and were like, “This is awesome, I have a daughter, I can’t believe you’re here, I’m behind you.” But even they had to deal with the fact that there were so many eyes on us that things were going to be scrutinized.

How were you able to gain respect and blend in?
Lisa Jaster: For my class, just under 400 people showed up for Day Zero. Less than 75 percent of us made it to breakfast on Day One, and Day Zero’s just filling out paperwork. RAP (Ranger Assessment Phase) week is full of individual tasks, all the testing, you run everywhere, you’re doing push-ups every five minutes. I mean, you eat and you run, and then you have to do a bunch of push-ups. I will not lie, I may or may not have thrown up a few times. You’re pushing yourself to your max, and at some point in time you look at the person next to you and you say, “I don’t care what you look like, I don’t care what you sound like, but you better hold your own because every time you drop your bag, or every time you don’t do a push-up, all of us get punished.” So, for the students, that gender animosity lasted four days or less, tops. There were eight women who made it through RAP week, so as soon as the “Crazy Eight” got really integrated with their squads and were holding their own, our classmates were like, “OK, physically these girls have it.”

Eventually as classmates, we were able to bond and meld, but the Ranger instructors had to go home to all the media. I had no idea what the public was saying about the Ranger women, but I know those Ranger instructors went home and would get text messages from their buddies, or people who were uninvolved, but had such a strong opinion about gender integration. They had to come back the next morning and be professionals. They had to force themselves to ignore everything. So even though, yes, we did get treated differently, the professionalism of the instructors was phenomenal, because I can’t fathom that amount of pressure.

From your perspective, what are your thoughts on the roles of women in combat and the military in general, and what do you think can be improved?
Lisa Jaster: I don’t have a lot of complaints. I’m 42. So, at 42 my worldview is very different, but I’ve been really blessed that I went to West Point, where as soon as someone wanted to give me a hard time, I could compete against them, because I trained. As far as what needs to change, I think a lot of times it’s just perception. And if you can get acquainted with a Lisa Jaster, or Shaye Haver, or Kristen Griest, or any of these people who break the mold, the perception of what society dictates doesn’t necessarily fit.

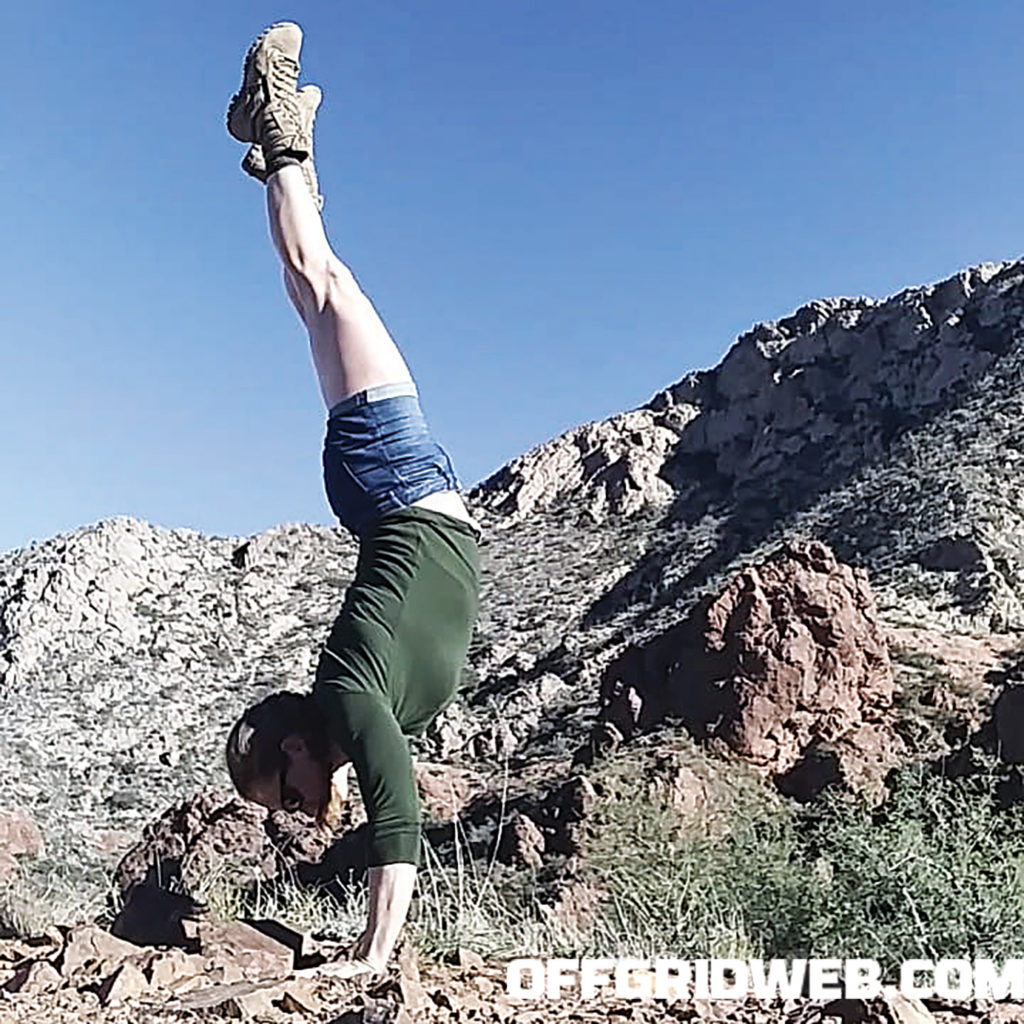
Above: Handstand near the top of North Franklin Mountain, outside of Fort Bliss, Texas, with her soldiers upon return from their deployment to Iraq, October 27, 2018.

In fact, one of the things I’m most excited about is the Army has created this gender-neutral, age-neutral PT test. The requirements are different based on your job, or a job category. I never wanted lower standards because I am a woman, because I didn’t think the job required “female standards.” When I came back in the Army I was an old captain, and based on my age, I didn’t have to do as much physically, or be in as good of shape as somebody younger than me, but I was expected to do the same job. I would not be OK with a doctor who was a little “rusty” and less knowledgeable because they were older. If physical fitness is part of my job, and there’s a job requirement for a level of physical fitness, then that’s what I need to be judged by.

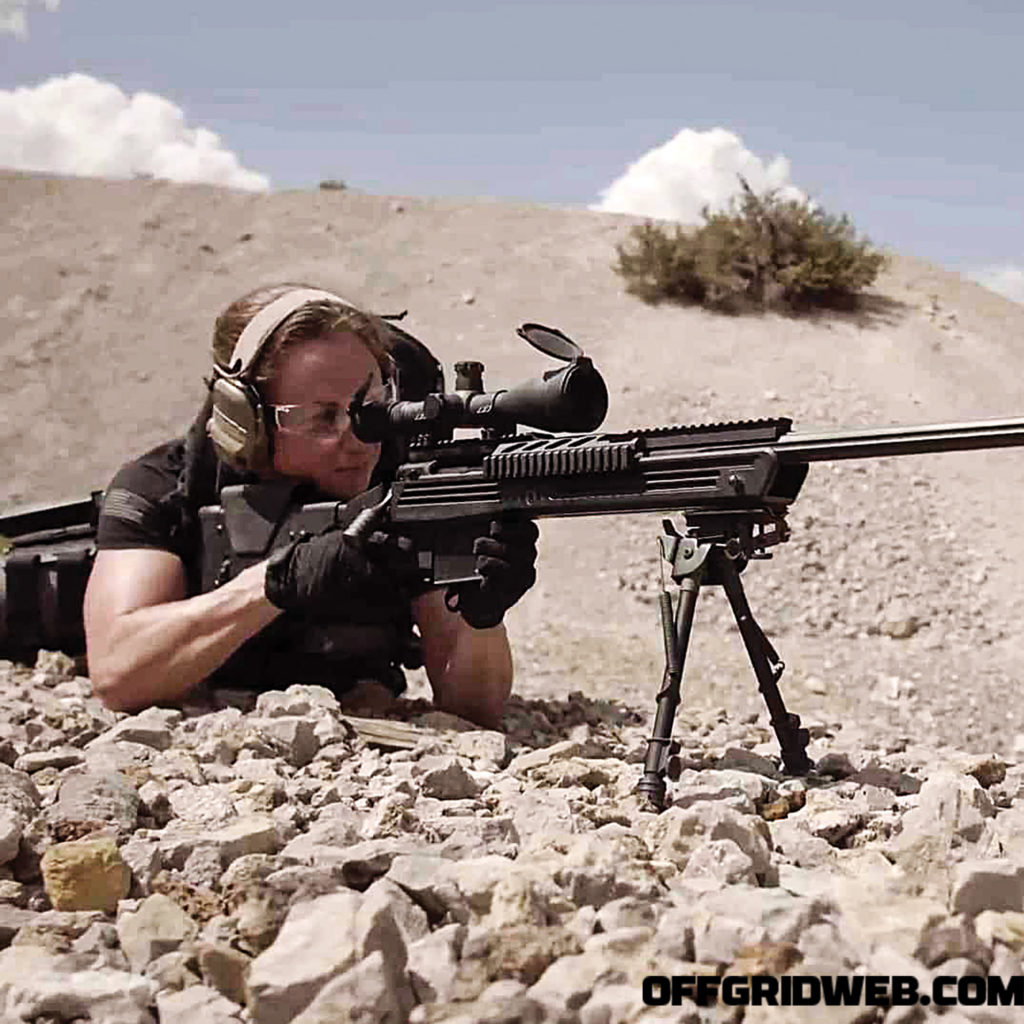
Above: Shooting a Lapua .338 while filming the 5.11 Ghost Recon: Breakpoint Challenge at Shoot Las Vegas, Nevada, on September 6, 2019. Photo by WodHawk Photography

In terms of combat, where have you served, and what have been some of those tougher experiences from some of that time?
Lisa Jaster: I have never referred to myself as a combat vet. I can’t imagine referring to myself that way. I do have a combat action badge, but I have not seen anything that’s book worthy, shall we say. There’s a part of me that wishes I had been challenged more than I was, but there’s another part of me that knows that what I bring to the battlefield, or what I bring to the fight, was at a strategic level and not at that individual tactical level. I was an engineer who did minefield clearing operations, area clearance activities. There were a lot of people who were safer because of the activity I did, and what I was doing. I’ve got a master’s in civil engineering, and I was able to use that in all three of my deployments.

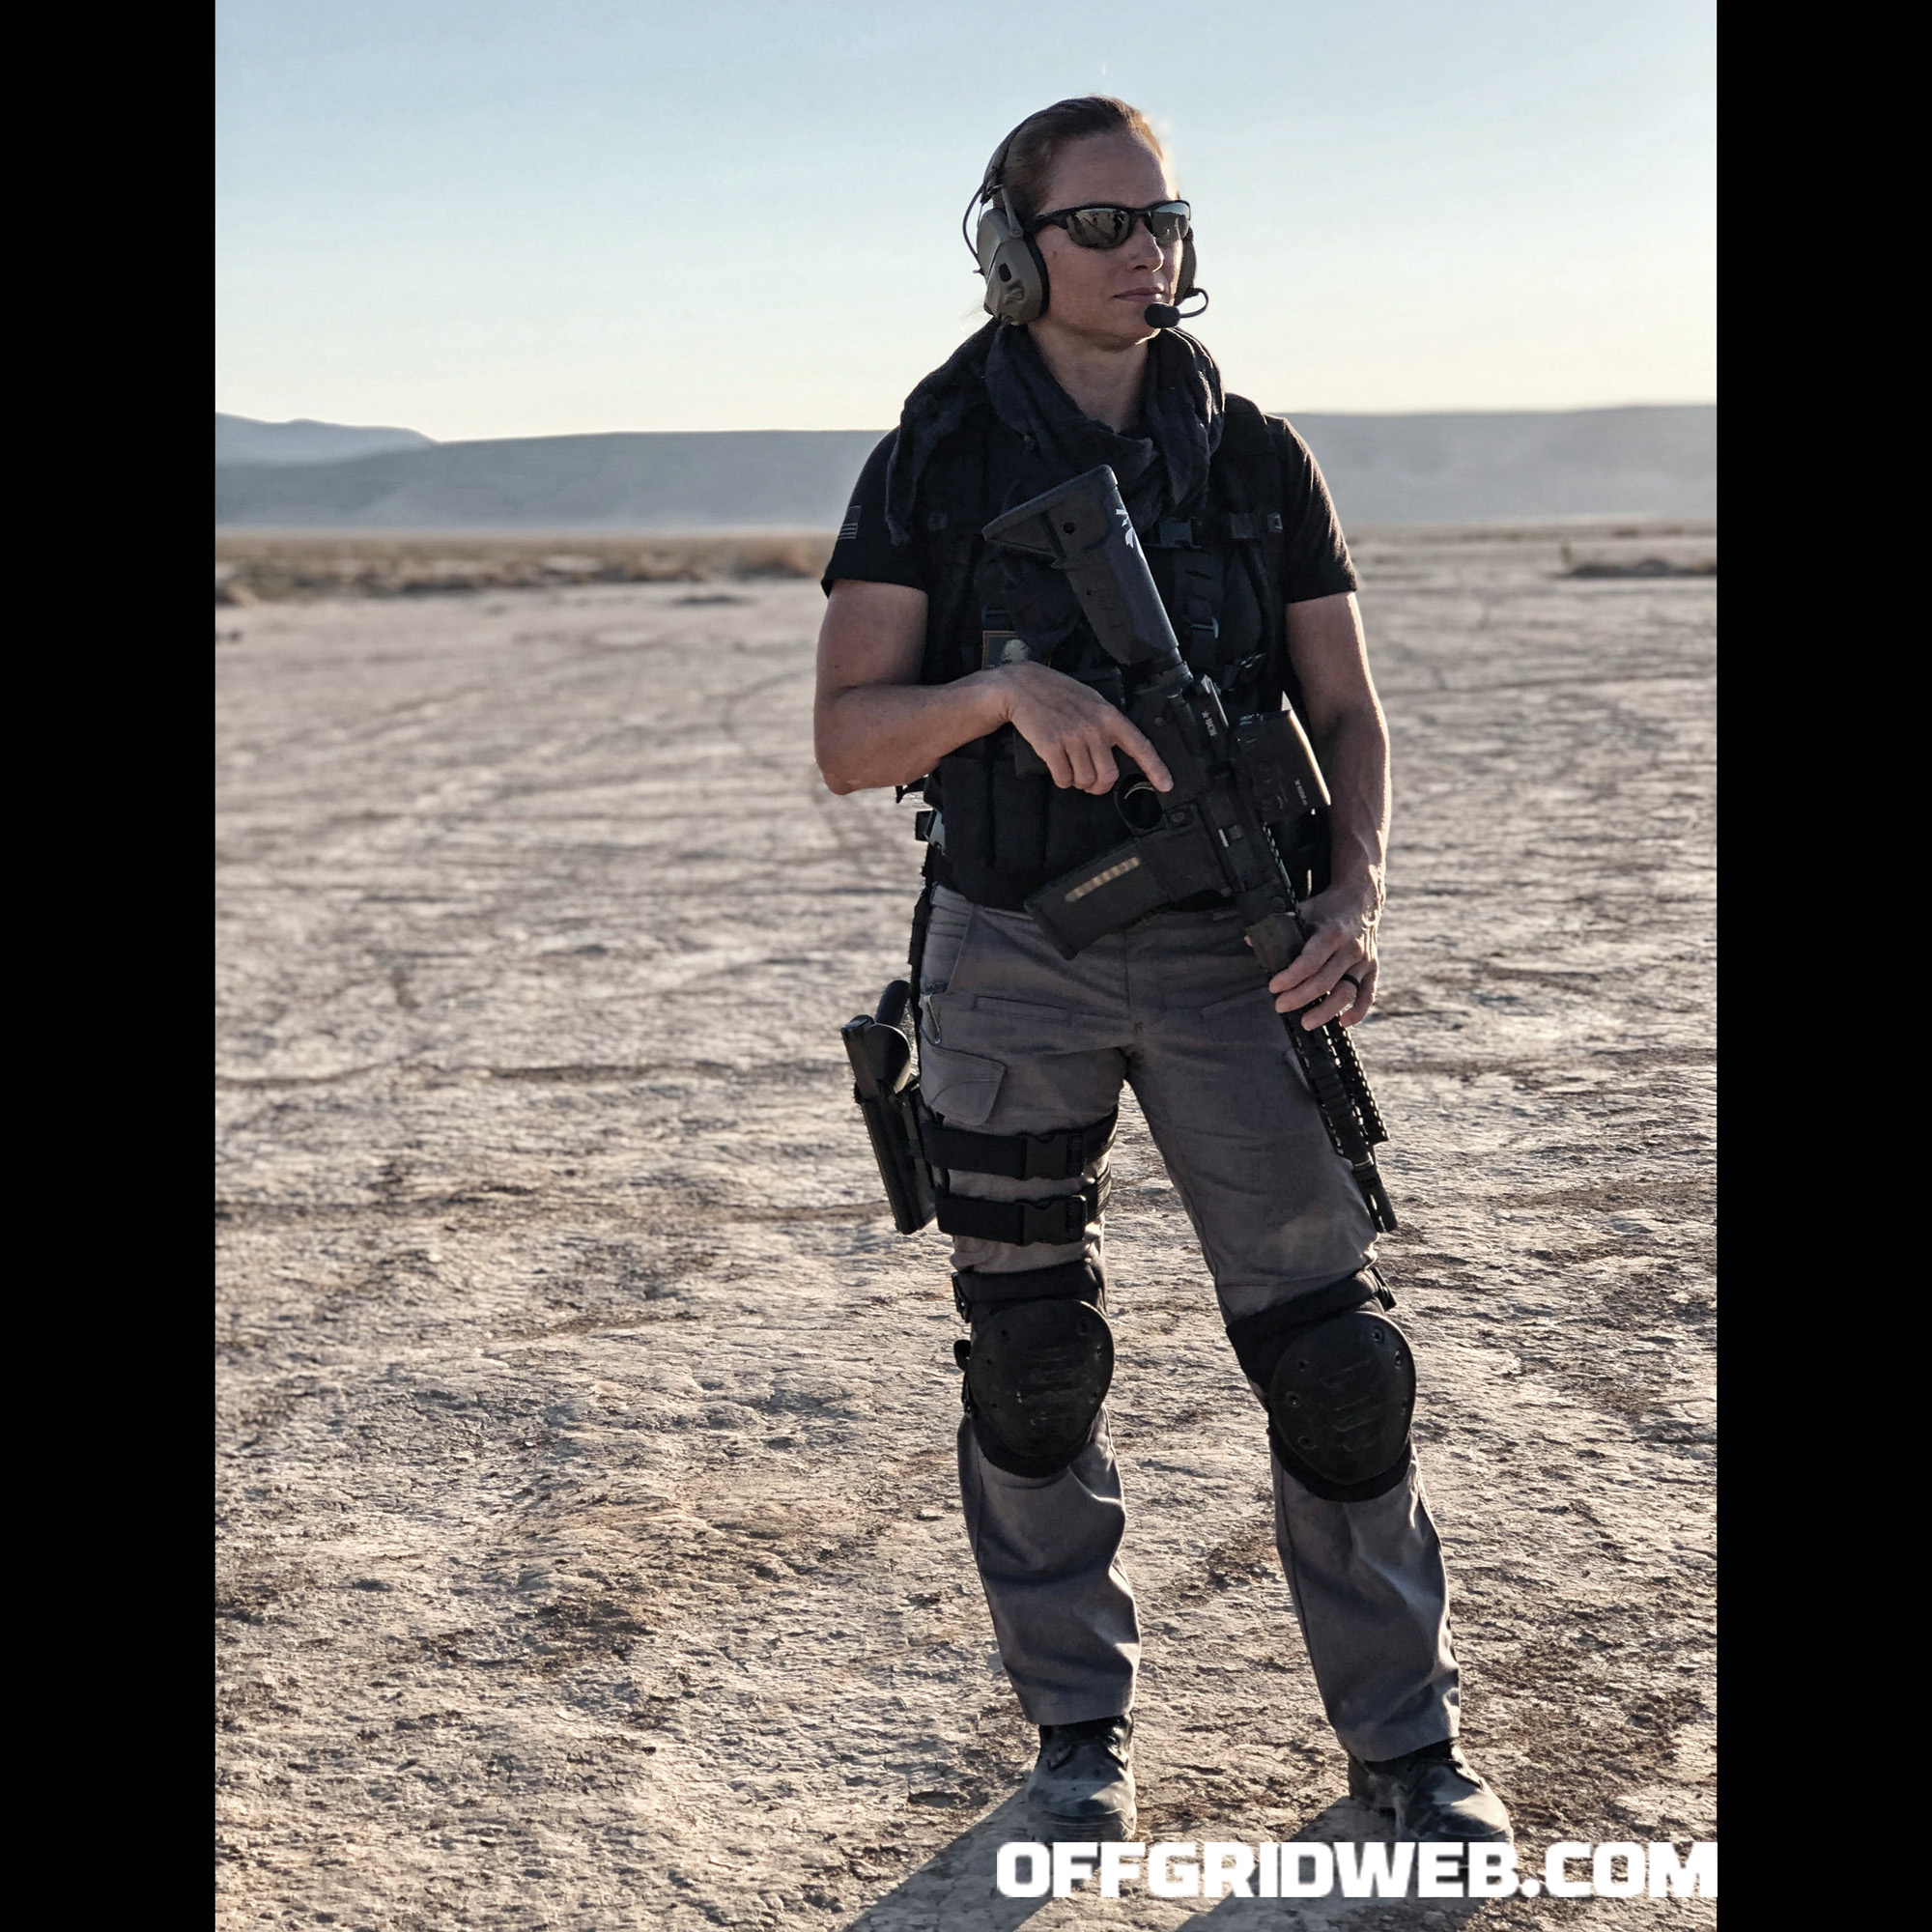
“Glamour Shot” taken while filming the 5.11 Ghost Recon: Breakpoint Challenge somewhere in the desert outside of Las Vegas, Nevada, on September 7, 2019. Photo by WodHawk Photography

How long did you serve total, and what was your highest rank that you reached?
Lisa Jaster: I did seven years of active service, and I am at seven and a half, almost eight years, of Reserve service. This last summer I was promoted to Lieutenant Colonel, and in May I will be taking Battalion Command.

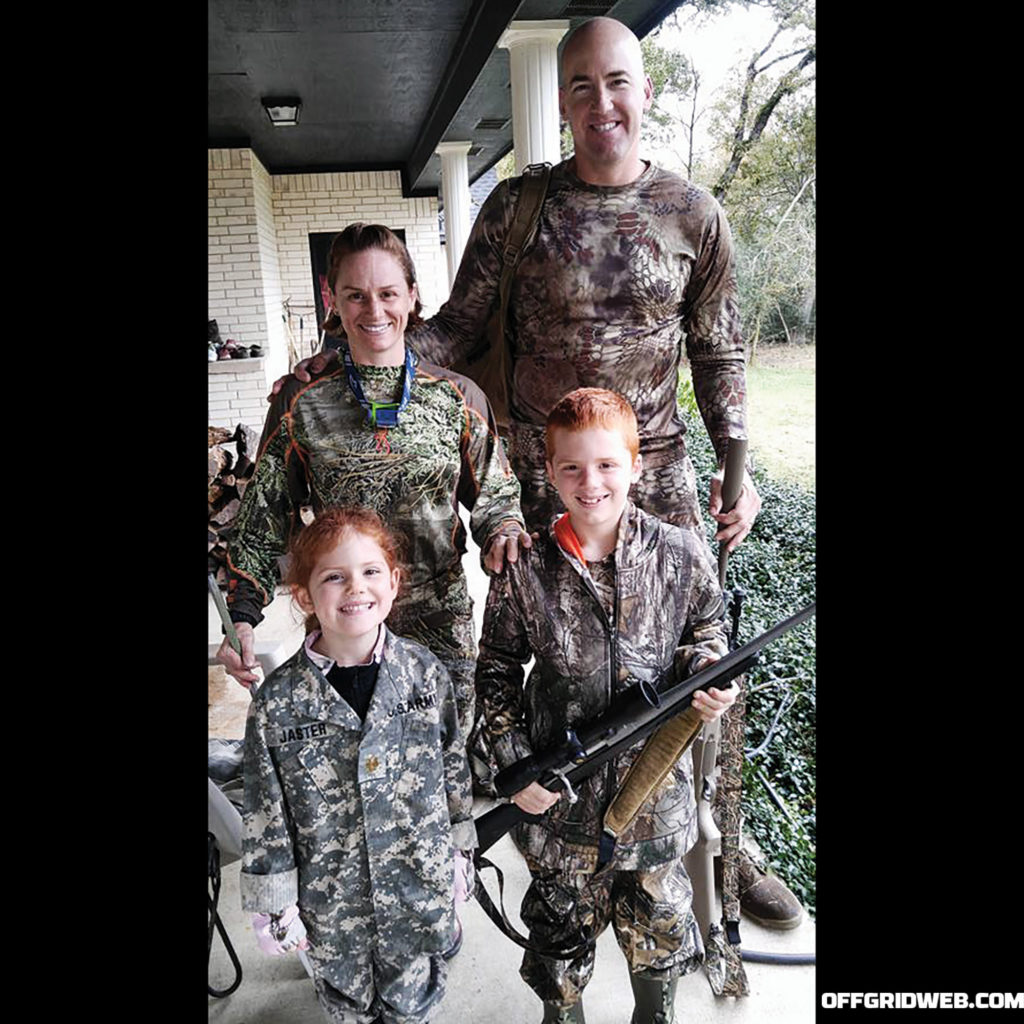
Above: A typical day at the ranch during hunting season with the family, fall 2016.

Do you have any other regrets on your service, or anything you wish you had done differently?
Lisa Jaster: I always wanted to go to Sapper school, and never really had the opportunity, so that’s one of those things I wish I could have done. But that’s not a regret, that’s just something I didn’t have the opportunity to do. I made some big mistakes. I’ve said some things. Sometimes there’s things that I’m still mulling over to this day, but I must honestly say that I’ve been glad for every single mistake in the long run. My husband has a great quote, “It’s not about the stressful situation, it’s how you react to it.” And I really look now to see how people react to those situations, rather than what bad situations they’ve put themselves into.

Are there any achievements or milestones that you’re most proud of?
Lisa Jaster: I’ve got a funny story — I don’t know if it’s a proud story. I have gone through my military career, and one of the first things was September 11. I was QRF (Quick Reaction Force) commander at Fort Stewart working directly with the MPs. My engineering unit had three teams that rotated through on a 15-minute, four-hour and eight-hour recall for the base, and I got to lead one of those teams. And then the next thing I did was go to Afghanistan for Operation Enduring Freedom I, and my very first achievement medal was a Bronze Star. So, I am a young lieutenant with a very naked uniform and a Bronze Star, and when I was a major I told my battalion commander that. He saw my DA photo and said, “You don’t even have an Army Achievement Medal (AAM).” And I laughed and said, “All I have are deployments and company command time.” All my Lieutenant time was either in Afghanistan or Iraq, and then my Captain time was in Korea. So, it’s all been big events, and he just laughed at me and I said, “But whatever you do, I don’t want any more awards because getting those award racks built is really expensive.” I ended up beating him on the next Army Physical Fitness Test, and in formation, he gave me an AAM, which is the lowest achievement ribbon. I had to get new award rack, new pictures, new everything, and it was kind of this funny, “How dare you give me this award.” Still, it’s an AAM; it’s an award, and it means something to me.

So fast-forward to now, these days. What are you focused on?
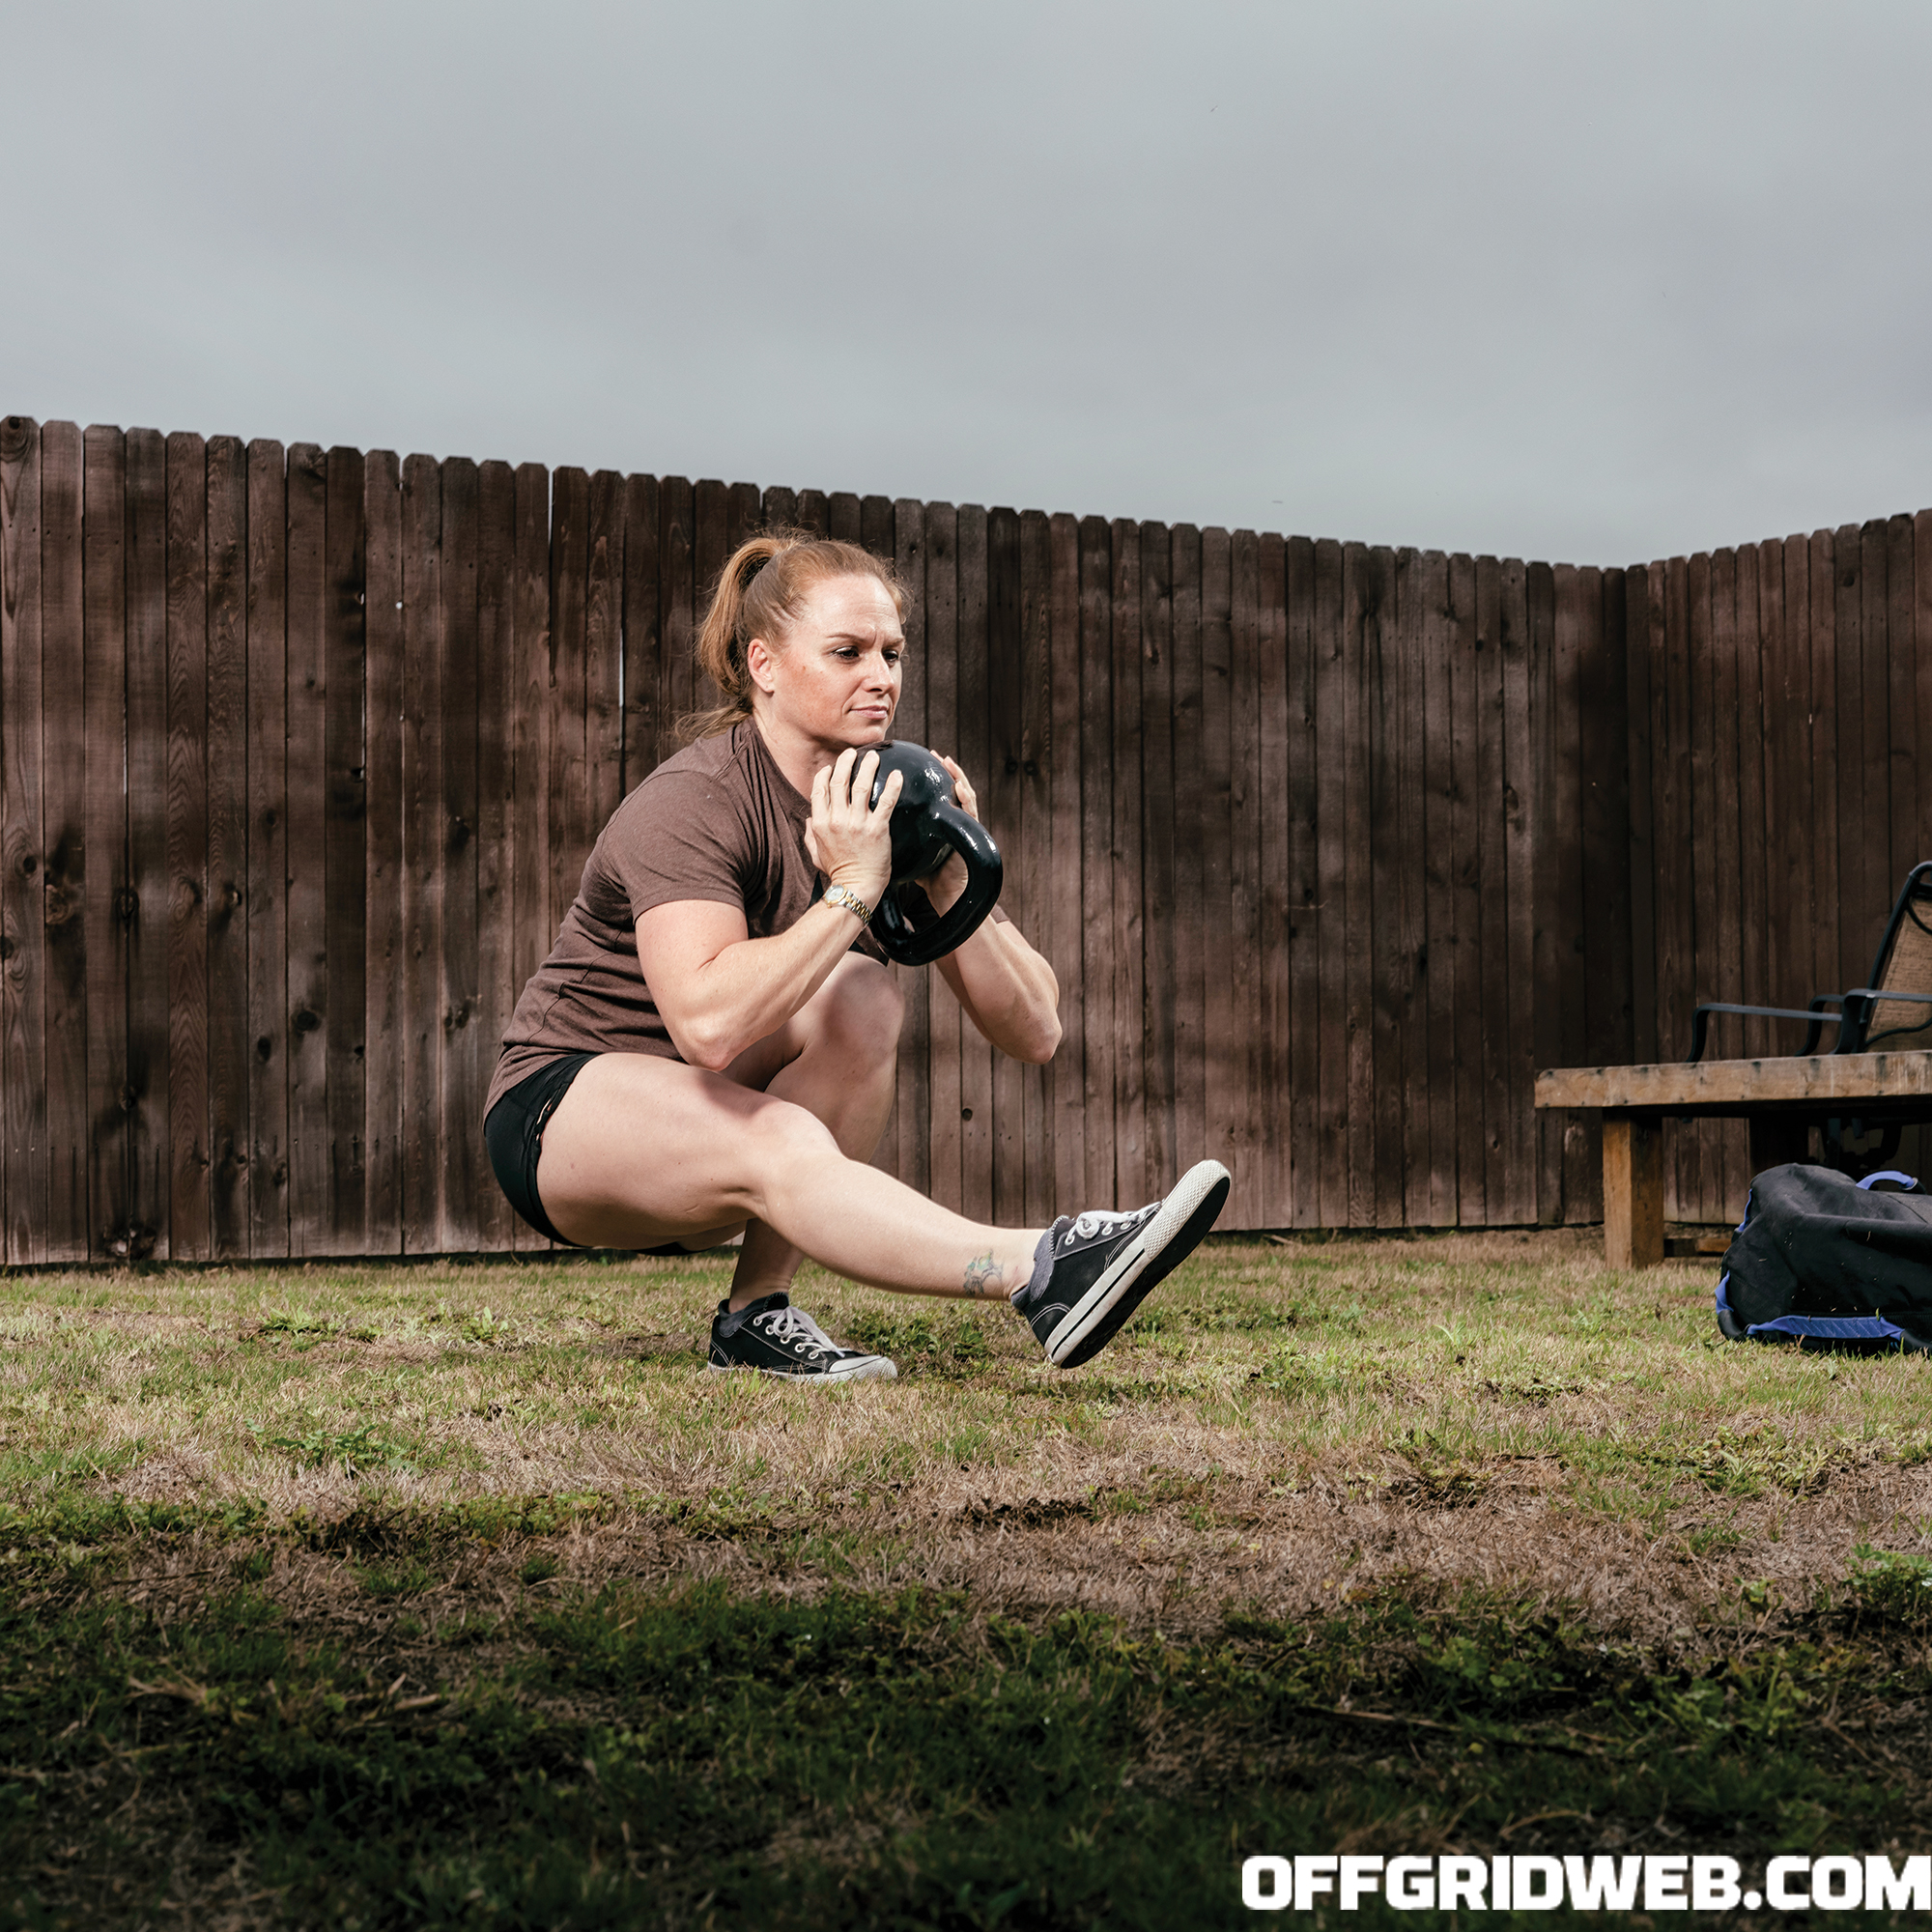
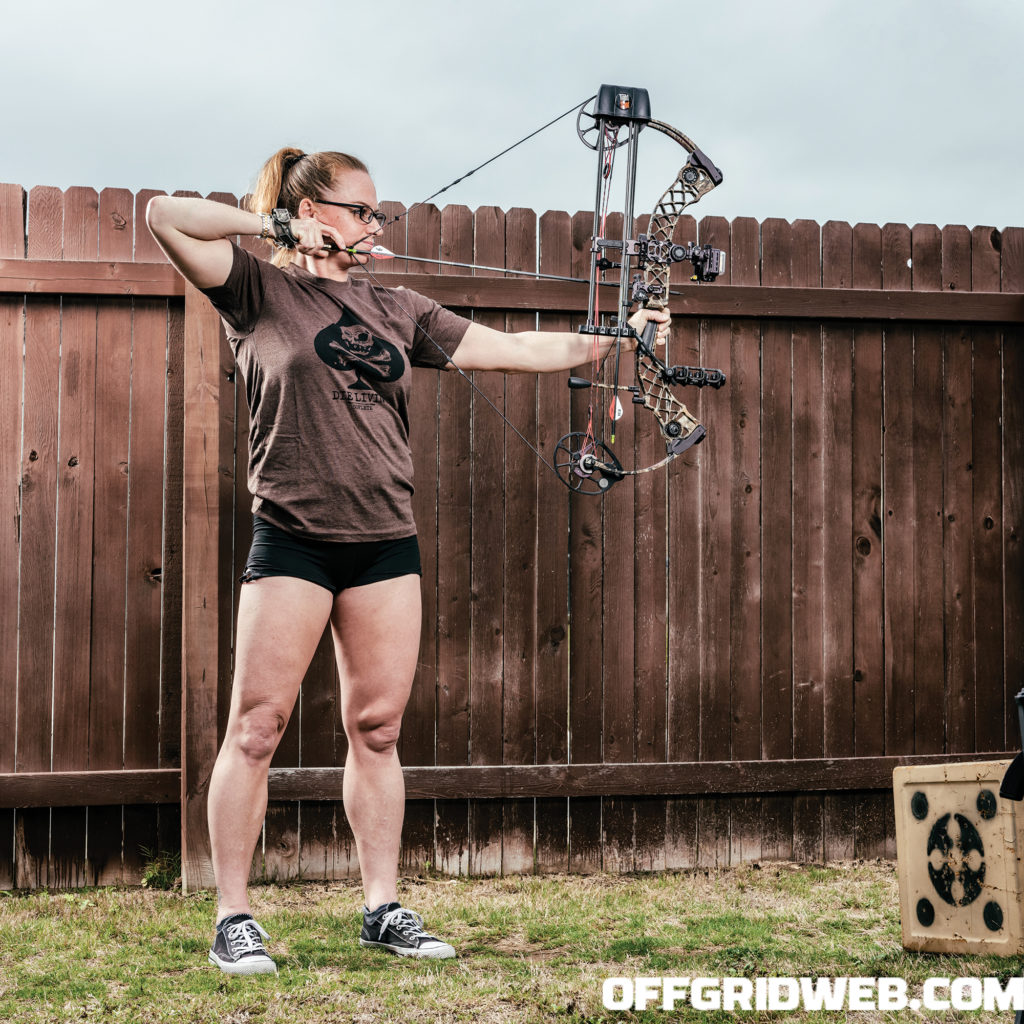
Lisa Jaster: We recently moved so I could start a new job with a new company, but I have a lot more control of my situation, and a lot more impact. The negative is that it’s hard for me to just break away and go train jiujitsu five days a week like I did before we moved. I do CrossFit-style training four to six days a week, Brazilian jiujitsu three days a week, and I also I try to help where my kids train jiujitsu, and maybe help teach a kids’ class once a week. For military skills, it’s important for me to keep up with ruck running, vest runs, normal PT stuff, as well as shooting handguns and long-guns. Myself and my husband are both concealed-carriers, so I do try to still get to the range regularly, but not as much as I would like. I like bow hunting as well, and my next goal is to kill a turkey with my bow.

What would you still like to conquer at this point in your life?
Lisa Jaster: I would love to compete in Brazilian jiujitsu. Part of the difficulty of that is the amount of 42-year-old, 140-pound women who want to compete in Brazilian jiujitsu is pretty small, so it’s hard to find people to get matched up with in tournaments. A lot of times I show up and there’s nobody in my bracket, and it’s either I fight the 22-year-olds, or I fight the 160 pounders. Of course, I’m more than willing to do both when I have the opportunity. It’s a discipline where being smart matters; it isn’t just youth, it’s also skill and endurance.

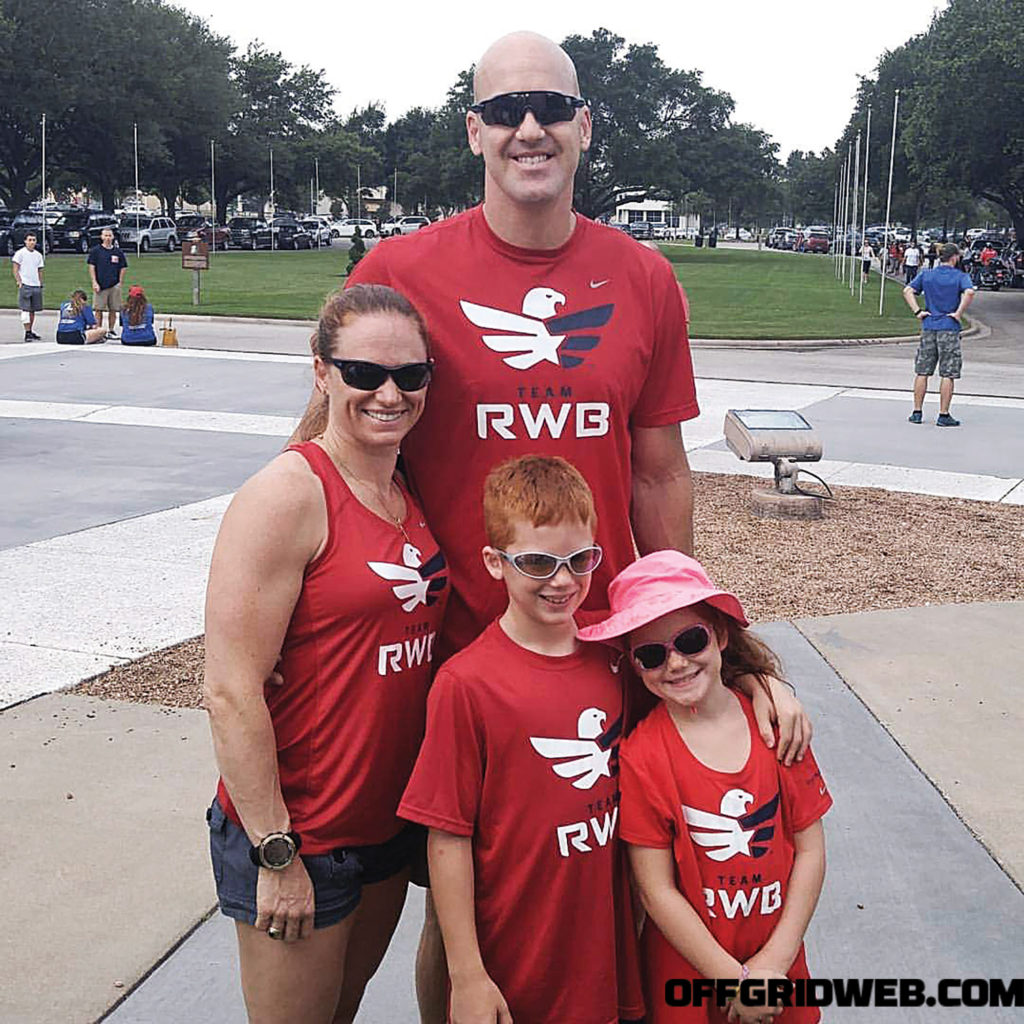
Jaster family at the Houston National Cemetery, Memorial Day 2017, placing flags near the graves of veterans with other members of Team Red, White, and Blue.

What do you think about the plight of veterans suffering from PTSD?
Lisa Jaster: I would like to see our medical system get a little less fearful of natural solutions. Most of the prescription drugs have severe side effects and limit a person’s capabilities, such as operating heavy equipment — for my engineer soldiers, that takes away many of the jobs they are best suited for. Engineers are definitely not the only ones. We’ve lost quite a few of the guys I deployed with in early 2002-’03 due to unseen injuries. Well, what can you expect if the medical solution to PTSD removes so many civilian work opportunities? These are not the type of people who want to collect a welfare check and pity from others. So, many self-medicate, abuse alcohol, or try to “suck it up.” If there are non-addictive, natural alternatives to antidepressants which can help veterans and others suffering, then there is a chance that PTSD could end up with a decreased mortality rate.

You’ve certainly had an interesting life. What’s the best part about being such a diversely accomplished woman?
Lisa Jaster: Being in the military has exposed me to so much more of the world than I ever knew existed. Getting a behind-the-scenes view into the psyche of so many hard-charging soldiers, such as at Ranger School, showed me that these guys still love their kids, want to be impressive to their loved ones, and need a support system like everyone else. Being a soldier, wife, mom, and manager allows me to see the vast complications of every situation and gives me empathy. I am blessed to live outside my comfort zone and constantly surprise people who think they know me because of an adjective.
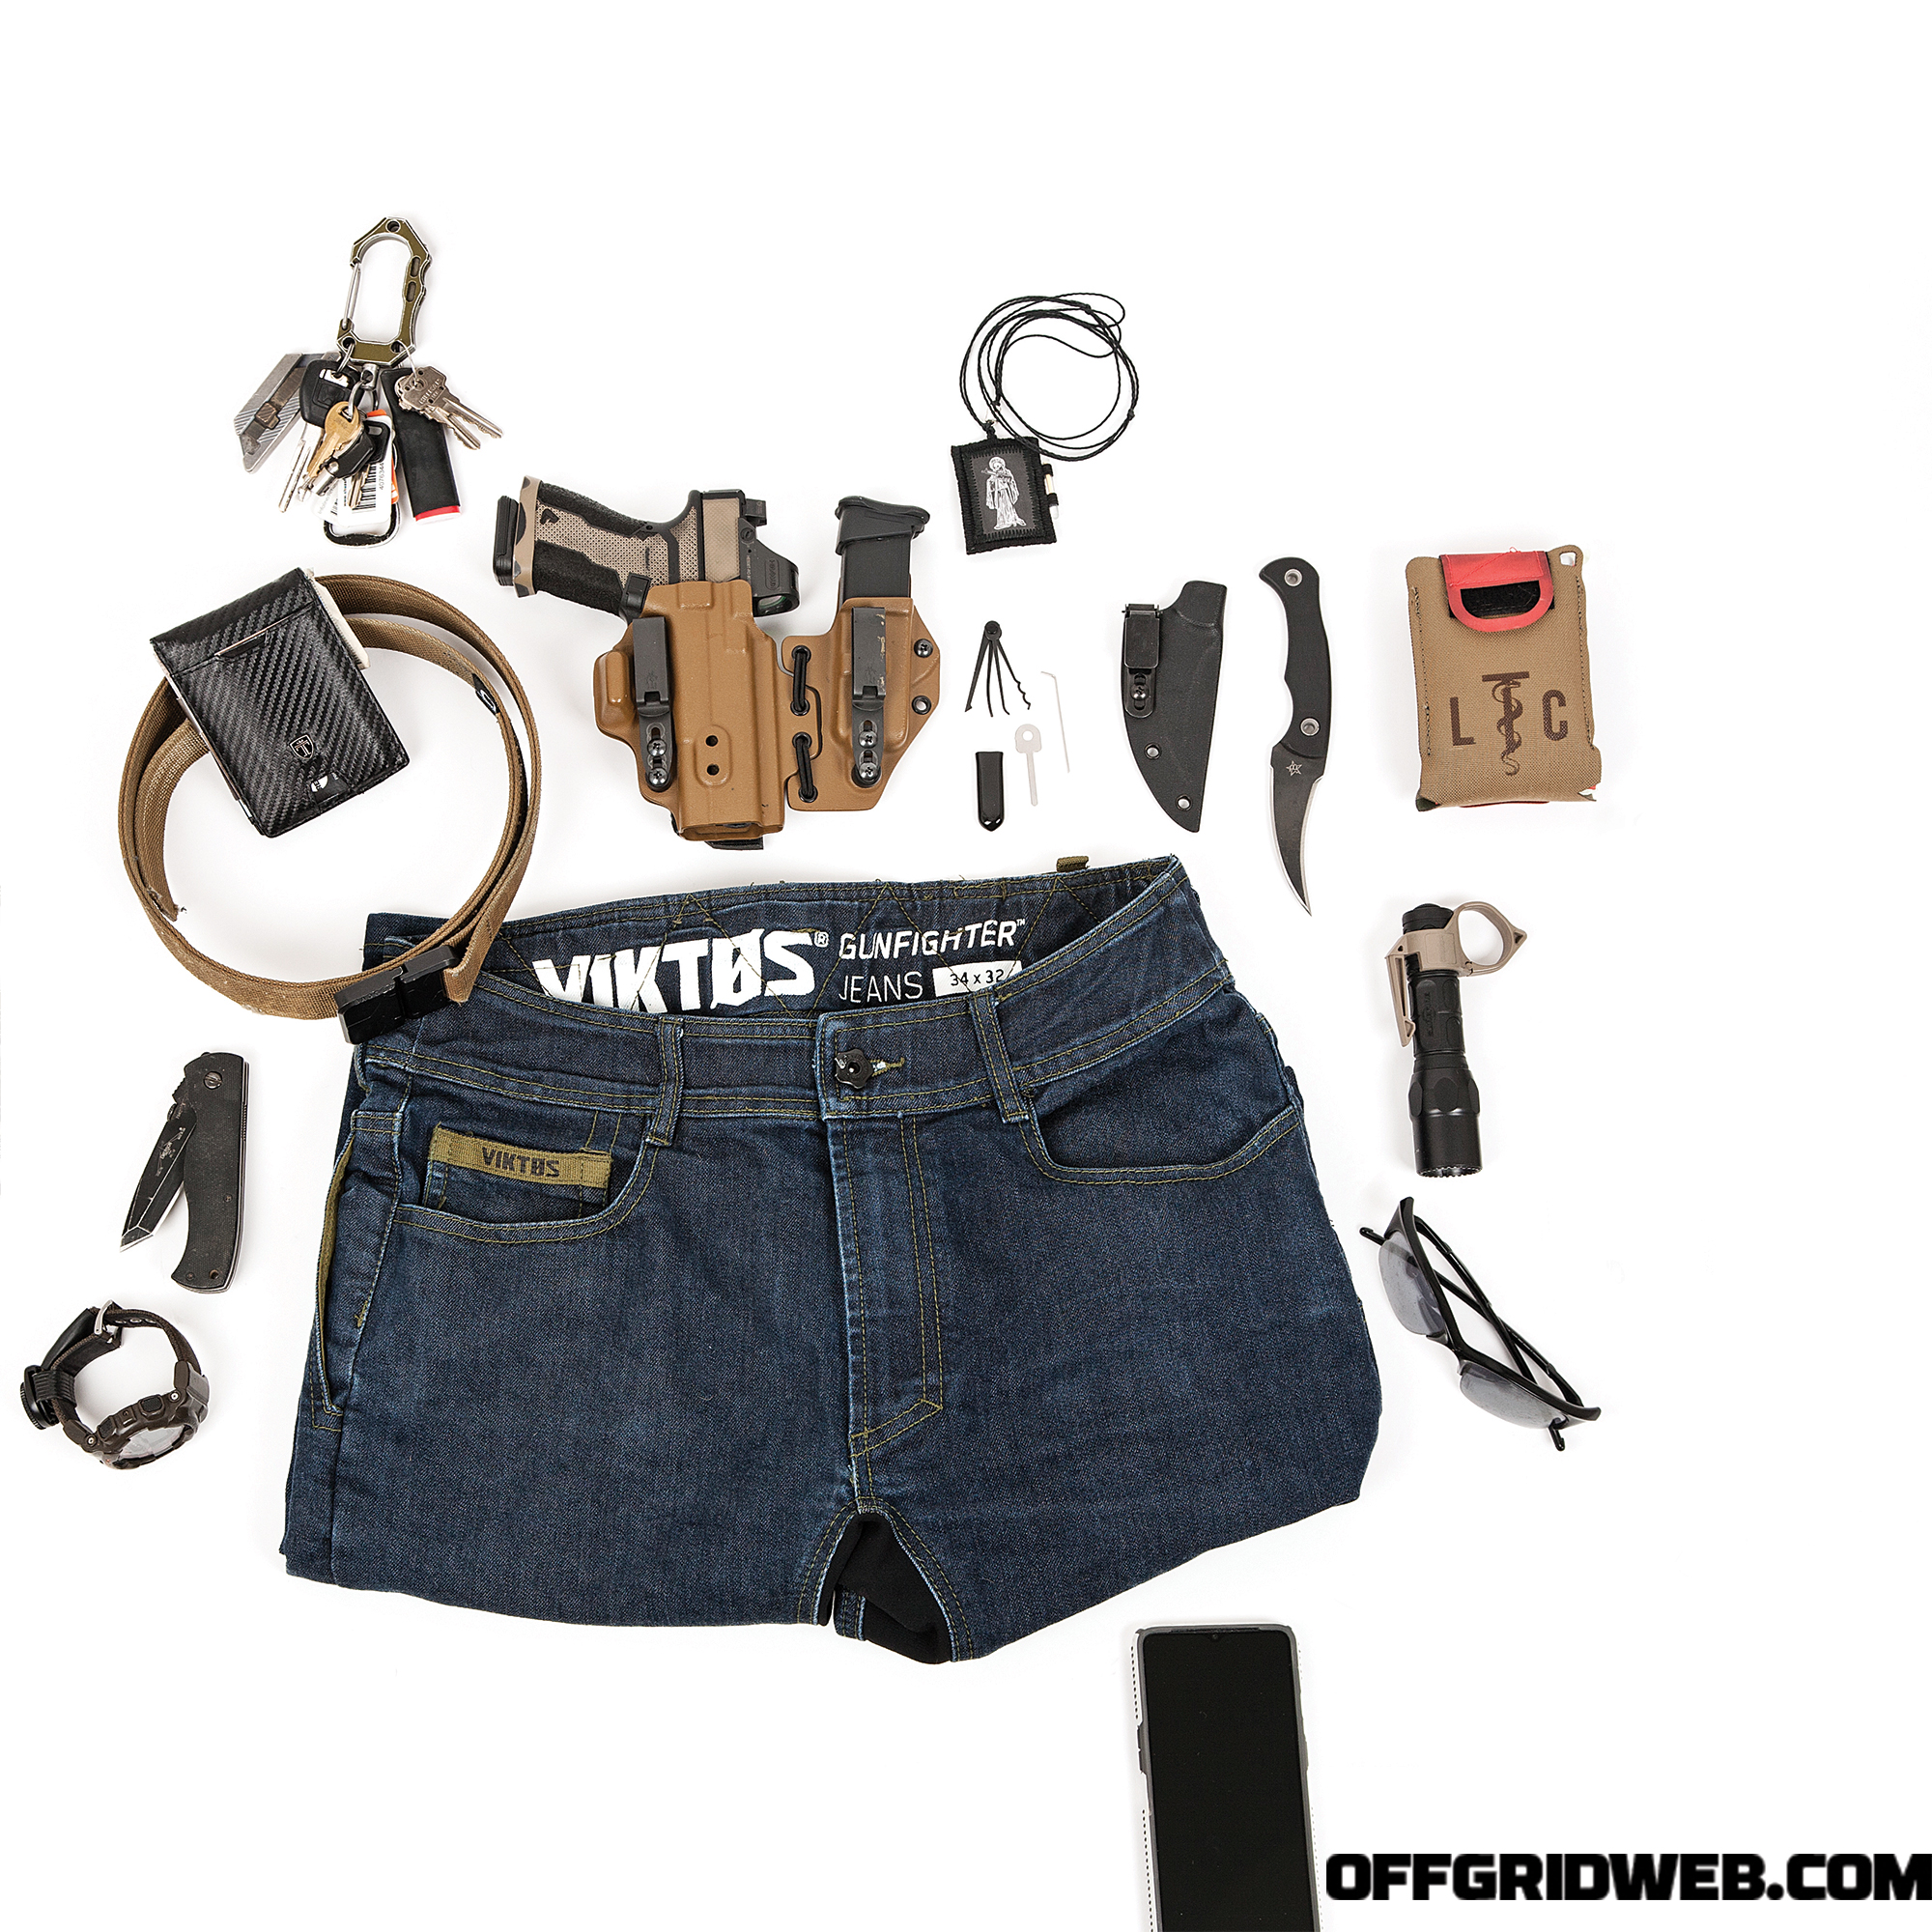
Lisa Jaster’s EDC

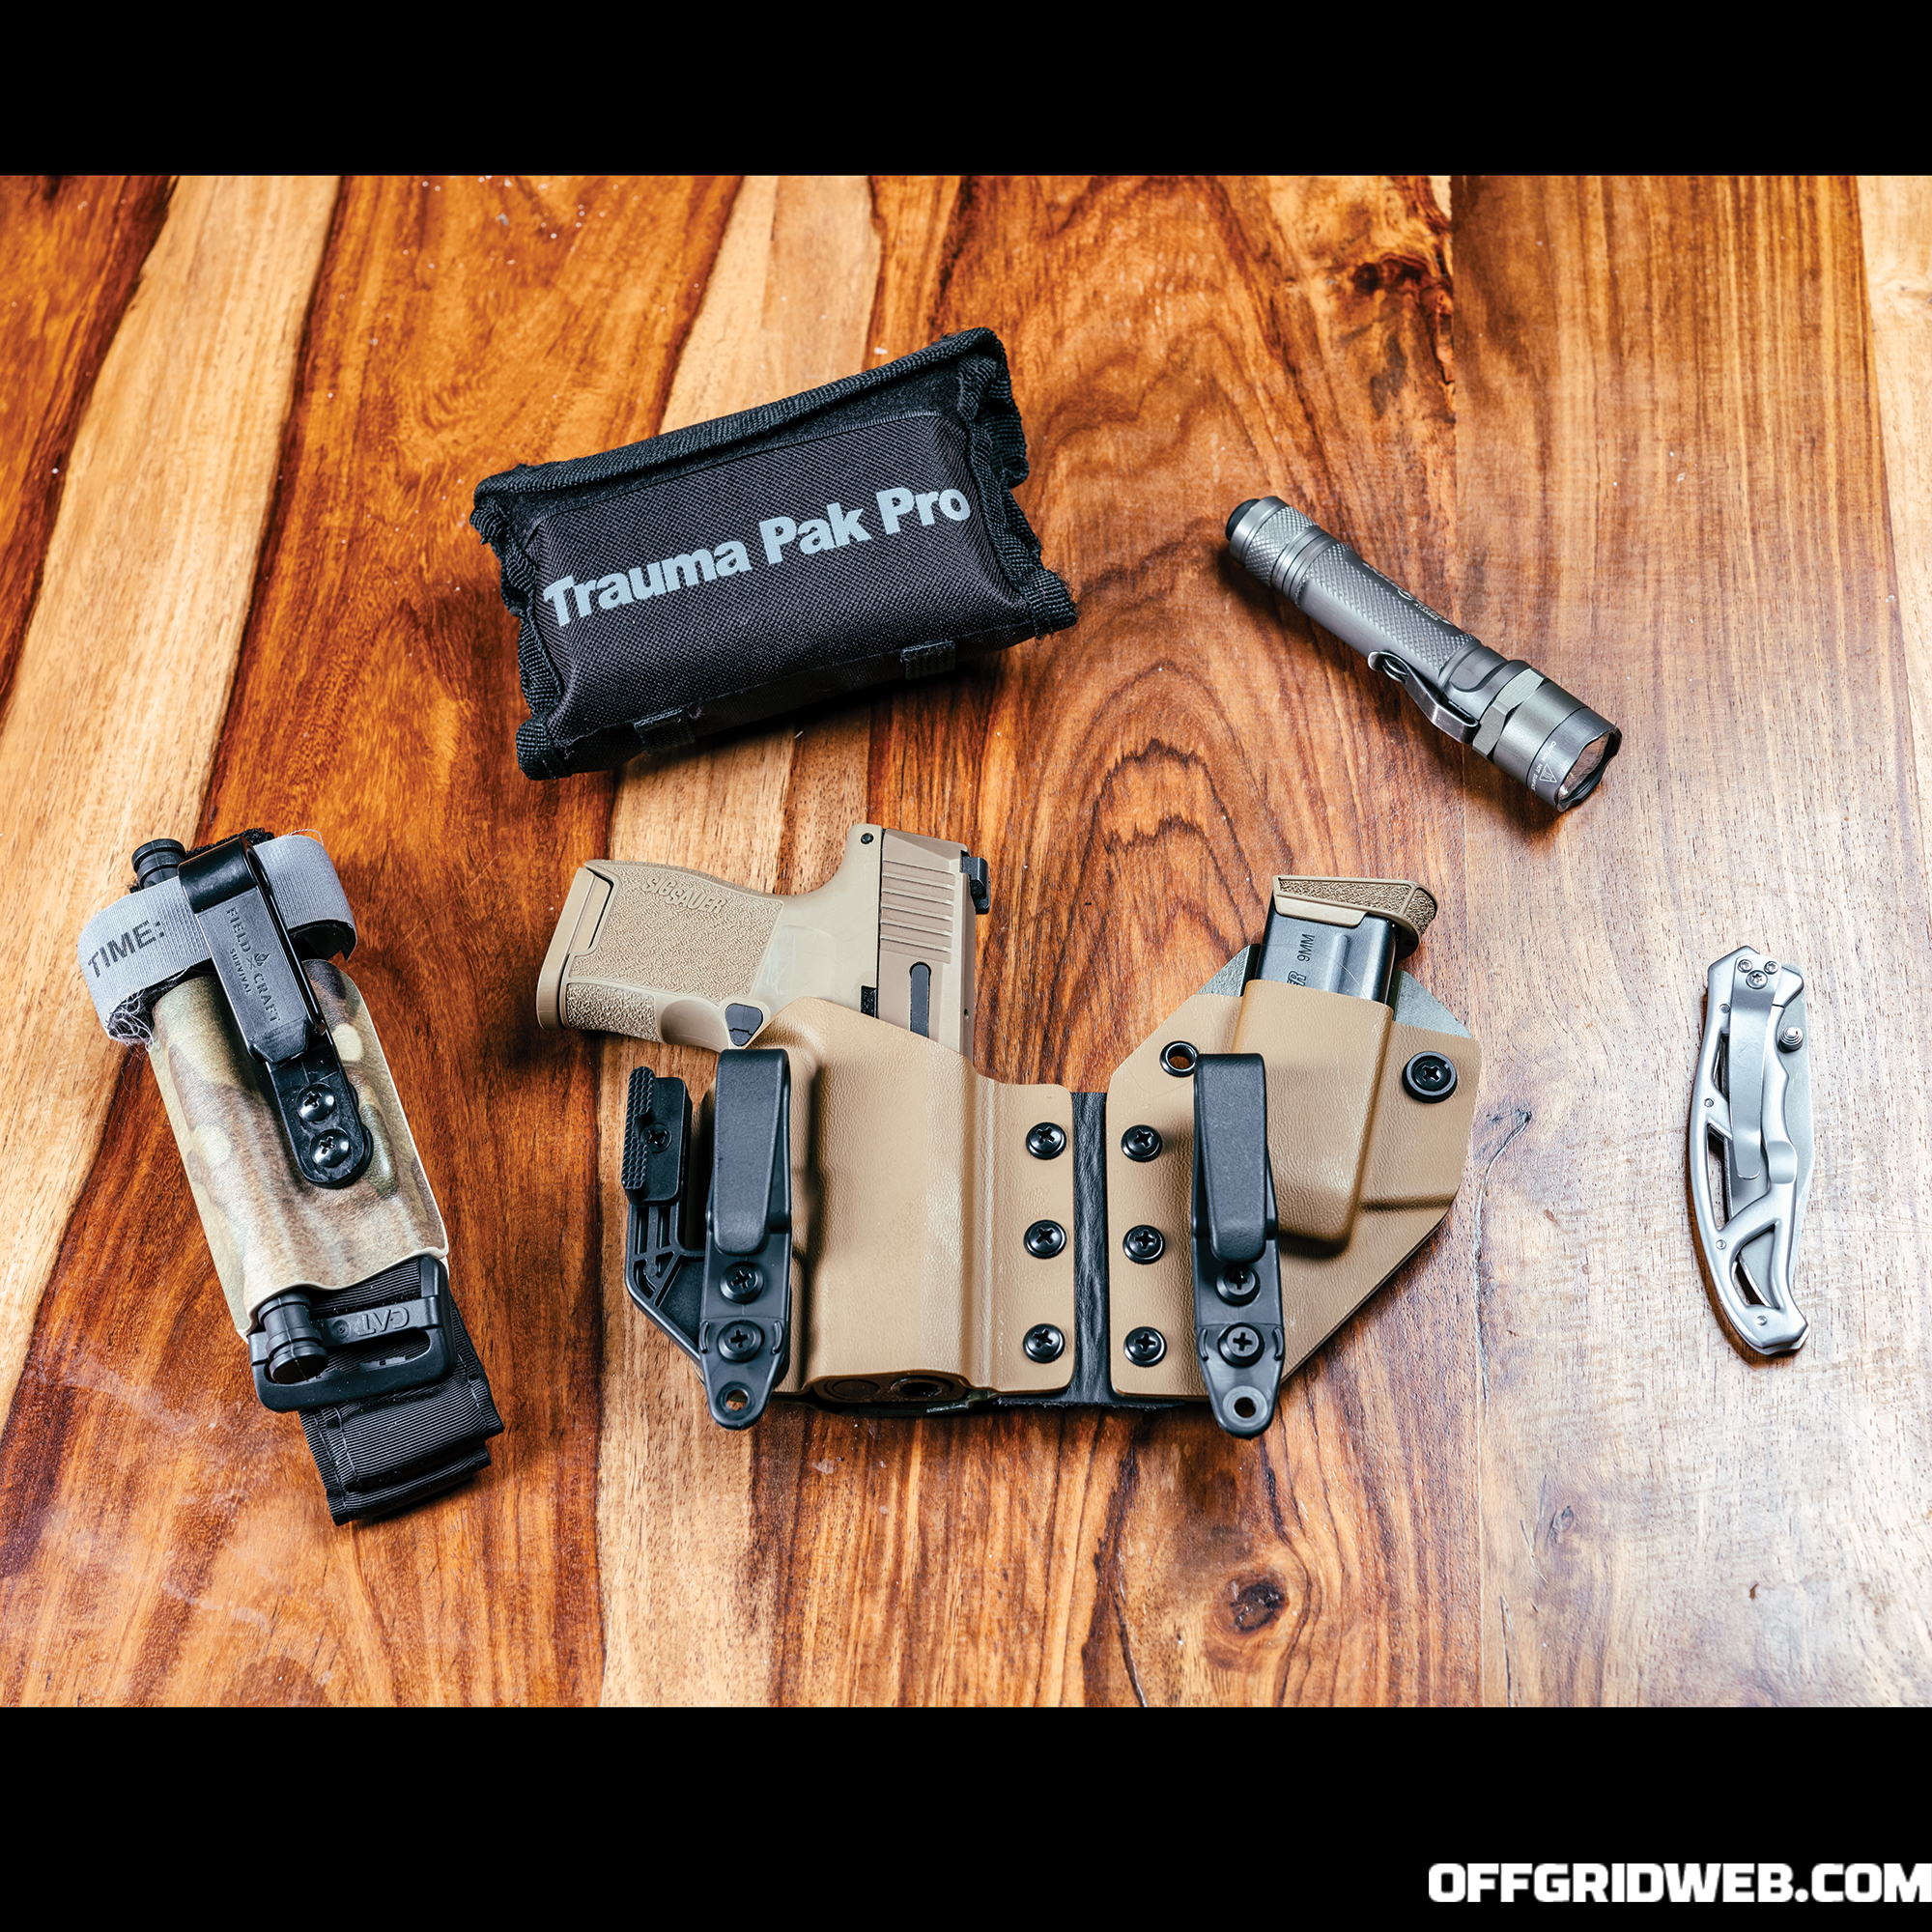
Pistol: SIG Sauer P365
Holster: Custom Blacksmith Tactical IWB Flex Rig
Knife: Gerber Paraframe
TQ: Army issue tourniquet in a Fieldcraft Survival tourniquet holster
IFAK: Adventure Medical Kit Trauma Pak
Flashlight: SureFire E2E Executive Elite

Lisa Jaster

Hometown: Plymouth, WI, and now New Braunfels, TX

Age: 42

Education: MS in civil engineering from Missouri University of Science and Technology; BS in civil engineering from the United States Military Academy at West Point

Family status: Married to a Marine Reserve Colonel with two kids (son, 11; daughter, 8)

Military accolades: Airborne, Air Assault, Ranger, a few deployments, and a couple of ribbons

Favorite movie: Tie between Hitch and Pitch Black

De Niro or Pacino? Gotta go with De Niro

Top 5 recommended books:
Ashley’s War by Gayle Tzemach Lemmon

Good to Great by Jim Collins

Outliers by Malcolm Gladwell

The Mission, The Men, and Me by Pete Blaber

Atlas Shrugged by Ayn Rand

Childhood idol: Linda Hamilton circa Terminator 2. She was a badass and when I read how she prepped for the movie, I wanted to be that focused on my goals.

Daily motivation: The fear of only being able to look back at who I once was versus striving toward who I could be

Favorite band: Metallica “Fade to Black” and earlier

Website: Facebook (Lisa Jaster – Delete the Adjective) and Instagram (@lisaajaster)


What If Your Family is the Victim of a Mountain Lion Attack?

Illustrations by Robert Bruner
It’s a beautiful summer day, so you decide to go for a family hike/picnic in the nearby Cleveland National Forest with your spouse and two children (ages 10 and 7). You’ve hiked this area before and are relatively familiar with the various hiking paths that lead to scenic areas with natural hot springs, where you plan to stop for a picnic. The hike out and back with a stop for lunch should take about four hours total. You pack plenty of water, an insulated bag full of food, and comfortable clothing before heading out to a trailhead off Ortega Highway between San Juan Capistrano and Lake Elsinore, California. The last thing on your mind is being the victim of a mountain lion attack.

This area of the Cleveland National Forest is vast, and although you have a cell phone, reception is spotty in many areas, U.S. Forest Service and park ranger presence is limited, and you’re at least a 45-minute drive from any hospitals. You’re also aware there have been recent mountain lion attacks in the area, so you’re conscious of the location of nearby Forest Service fire stations in case something should happen and you end up in desperate need of medical attention.

The Scenario

Situation type
Mountain lion attack

Your Crew
You and your family

Location
Southern California/Cleveland National Forest

Season
Summer

Weather
Warm; high 97 degrees F, low 63 degrees F

The Setup: It’s early afternoon when you arrive at your destination. You decide to hike through a known, but uncommonly traveled trail that goes to the San Juan Hot Springs, a relatively secluded area. The hike will take you inland by a few miles, but you feel the beauty of the destination is worth the extra effort. After walking for about half an hour, you stop to take a breather and rest your feet.

The Complication: As you gaze around and estimate how much farther you have to travel, suddenly you hear a blood-curdling shriek from your youngest child who had been standing a short distance away. As you turn in that direction, you see a large mountain lion walking off into the brush carrying your child by the neck in its jaws. It climbs an oak tree about 150 yards from where you are and settles on a branch about 7 feet off the ground with your child gasping for air.

In a panic, you reach for your phone to find that it says, “No service.” Calling for help from this location isn’t an option. What do you do? Should one person run for help while the other attempts to free your child? Will attempting to confront the animal and free your child risk greater trauma or possibly death, making a bad situation worse? If you had a weapon, would it be too risky to use it? What steps can you take to protect your child and escape?

Game Warden John Nores’ Approach

Having spent the first three of my 28-year California Department of Fish and Wildlife (CDFW) game warden career patrolling this region within the Cleveland National Forest, I’m intimately familiar with mountain lion presence and encounters in western Riverside County and throughout the rest of California. The CDFW reports there are between 4,000 and 6,000 mountain lions residing in California and have verified 17 mountain lion attacks on humans between 1986 and February 2020.

An additional four fatal mountain lion attacks occurred around the turn of the previous century. Of the modern era’s 17 attacks, 3 were fatal, and 8 victims were children under the age of 11. While these statistics are alarming, the relatively low number of mountain lio attacks over this 34-year period tells us the likelihood of getting attacked by a mountain lion is extremely low, especially given the millions of outdoor recreationalists adventuring throughout mountain lion habitat on a daily basis throughout the Golden State.

Preparation

Adequate first-aid supplies (in both your pack and vehicle) for any outdoor contingency are critical, especially when going into an area known for lion attacks. Trauma gear for gunshots, broken bones, and deep puncture wounds that generate heavy arterial bleeding are a must. The following essential trauma items are always in my pack and vehicle for redundancy to cover any trauma medicine contingency: hemostatic gauze (QuikClot/Celox) pack, at least one Israeli bandage, two C.A.T. tourniquets, 4×4 gauze bandages, and a roll of first-aid adhesive tape. Having these supplies on hand is critical, as is the knowledge to deploy them efficiently and correctly should the need arise. Well before this hike, I’ve trained the entire family how to use these tools properly and refreshed them again on these skills since we’re going into a known mountain lion habitat.

Other essential items in our vehicle are plenty of water; electrolytes and two water purification devices; an emergency space blanket; food (at least two days’ worth in the event of an unplanned overnight stay in the backcountry); a fire-starting tool; a sharp multipurpose knife and sharpener; a compact semi-auto pistol with integrated white light and laser combination (chambered in a caliber adequate to stop a wild animal attack with controlled expansion hollow point bullets); an extra pistol magazine; a handheld GPS device with onX Hunt topographical map program installed; a flashlight/headlamp; extra lithium batteries for all the devices carried; sunscreen; a wide brim “boonie” style hat; light jackets; and other layering clothing. I also carry an Iridium satellite phone in my pack for remote backcountry areas without cell coverage.

Food storage in both our vehicle and especially in our backpacks while in the field is of concern in this region not only for mountain lions, but other wild animal species too. Breaking food items down into quart or gallon Ziploc bags significantly dampens, if not eliminates, fresh food smells on the trail. Remember most wild animals’ sense of smell is exponentially better than humans, so eliminating this preventable animal attractant where possible is essential.

Because of recent lion attacks in the region, I’ve analyzed the topographical maps for the area we’re exploring and chose a route on a marked, well-defined, and open trail with good 360-degree visibility surrounding it. While mountain lions can attack anywhere, they’re more comfortable and likely to do so in densely wooded areas where they can stalk close to their prey undetected. We’ll stick to more wide-open trails on this hike and not make it easy for them to attack. In the event of an attack, we’ve also identified at least two (primary and secondary) evacuation routes back to our vehicle utilizing open, high-visibility trails where possible.

Since I prefer to carry at least my pistol in austere backcountry areas, our family needs to be familiar with the firearm possession laws in the Cleveland National Forest. Firearms are generally allowed to be possessed on National Forest lands throughout the U.S. only during legal hunting seasons. The exception to this restriction is that those with a concealed carry weapon (CCW) permit may carry their firearm on U.S. Forest Service lands year-round. This hike is happening during a peak summer month when hunting seasons are closed, but fortunately I’m able to carry my pistol under the provisions of my CCW permit. Remember that rules may vary throughout the nation, so be sure to check firearms carry regulations in the area you intend on exploring.

Given confirmed mountain lion presence and reported attacks in our chosen hiking area, we must review measures to prevent an attack from happening in the first place as well as the most effective response if an attack occurs. Prevention starts with the following guidelines: Hike in numbers, as attacks are less likely in a group. Don’t let small children wander off the trail unattended. Keep your kids in the middle or front of your group to prevent a cougar ambush from the rear. Avoid areas with freshly killed animals, as cougars often stash their kills to eat later and will defend their meal. Leave the area immediately if you come across cougar kittens — lions will defend their young. Small dogs can attract or invite cougar attacks, so unless you have a large, situationally aware K9 with extensive backcountry experience, it’s best to leave them at home.

If encountering a mountain lion, don’t run away. Running may trigger an attack. Never turn your back to a lion; maintain constant eye contact with the cougar while making loud noises, yelling, and waving your arms as you deliberately gain distance from the animal.

If the encounter turns into an attack, don’t play dead. Fight back using your hands, legs, and anything else that can be used as a weapon. If you carry a firearm and have the proper ammunition, training, experience, and mindset to effectively neutralize an attacking lion, a gun can be a very effective tool to stop an attack. Before using a firearm, however, you must make sure the situation allows for a safe shot (position of animal, safe backstop, crossfire with other people, etc.) before pressing the trigger. Because California mountain lions are protected mammals on both public and private property and can only be dispatched for public safety reasons (verified attack or potential attack) and/or in depredation cases (livestock, pet loss, etc.), be prepared for the investigation that’ll ensue if you have to dispatch an attacking lion with your firearm.

While using pepper spray may stop an attack some of the time, I’ve seen and heard of numerous cases where it didn’t. Given this, be ready to use any available defensive weapons like rocks, sticks, knives, and other instruments. Several cougar attacks have been thwarted by striking the animal with improvised weapons including bicycle tire pumps, soda cans, water bottles, and even an entire mountain bike in one notable case. Bottom line, don’t give up. Exhaust every defensive tool within reach to survive the attack.

On Site

Identifying mountain lion and other animal tracks and scat along the trail is also critical. These indicators verify if a threat exists and tell us not only how recently, but also how frequently that threat is in our region.

Realizing medical assistance will be a long time in coming, trauma gear is readily accessible in my pack, and I have emergency response numbers (USFS, Cal-Fire, and sheriff’s 911 dispatch) preprogrammed in our Iridium satellite phone. For added family protection, I’m first on the trail with my handgun holstered and quickly accessible. Behind me is our 7-year-old daughter, followed by our 10-year-old son with my spouse at the back of the line, also armed with a handgun.

The safest hiking method for preventing a mountain lion attack, this formation also gives us the largest and most deterring presence possible. If we unfortunately come across a lion or other predator along the trail, my family will stay behind me while I cover the animal’s approach with my pistol. We’ll stay close together, moving around and away from the threat as a unit while waving our arms and yelling at the lion to make the largest and most intimidating presence possible as we gain distance away from the stalking predator.

Crisis

When our youngest child is attacked, dragged off, and pinned between a lion’s jaws in the tree above us, we respond quickly and deliberately. With severe puncture wounds to our child’s neck, the lion stationary in a tree above us, no cell coverage, and help at least an hour away, it’s up to us to save our family.

Keeping our team together and behind me in a safe cover position, my spouse activates the satellite phone to call for help while watching our back for other predators in the area. I move into position for a broadside shot, ensuring our child isn’t in the line of fire before engaging the lion with enough shots to the cat’s vital zone to stop the threat and force the release of our child. Cougars are thin-skinned animals and having dispatched several public safety/depredation mountain lions throughout my career with my duty pistol, I see these shots neutralize the cat effectively as it drops from the tree.

With the lion and our child on the ground, I ensure the cat is neutralized and begin assessing wounds for severity before starting treatment immediately on my child. She’s conscious, yelling in pain, and bleeding from the back of the neck, but fortunately the puncture marks indicate no damage to the spinal cord or carotid artery. I stop the bleeding using a QuikClot gauze pack, 4×4 gauze pads, and a compression wrap, while maintaining spinal precautions. Given the chance of unseen spinal damage or concussion, hiking out to safety isn’t an option. We’ll need a helicopter evacuation. As I maintain trauma care, airway, shock, and concussion protocol monitoring with our 11-year-old’s assistance, my spouse is on the sat phone with a 911 dispatch center giving our exact location through GPS coordinates. She conveys identifiable landmarks around us for an inbound helicopter crew to easily spot. She requests a helicopter that has a medic, hoist, and Stokes litter system aboard to evacuate a non-ambulatory victim quickly — capabilities very few air ships have for these types of emergencies. Following the call, my spouse photographs the scene with her cell phone camera. I monitor our child while maintaining scene security, keeping our family far enough away from the lion carcass and surrounding area to avoid inner perimeter contamination for the pending wildlife attack investigation.

Survival Advocate Rogue’s Approach

With two small children, the possibility of an animal attack, especially a mountain lion attack, is always on our minds whenever we head out for an adventure. We often hike in mountain lion country, so while we want to have fun on our hike, we’re also on high alert. With more and more people getting outdoors and encroaching on nature’s territory, predators are taking more chances.

Preparation

Whenever we head out for a hike, we pack the essentials: snacks, water, a small survival kit, a first-aid kit, sunscreen, and bug spray. Both my husband and I each conceal-carry our respective firearms; we also each have a folding knife. In instances where we aren’t allowed to carry firearms (like many places in California), we carry bear spray and an air horn, in addition to our knives. Bear spray has been known to deter mountain lions and bears. An air horn has also been known to spook predators. In addition, our Jeep is stocked with a large first-aid kit, food, water, and a ham radio.

Before heading out, I always do some research on the area we’re about to explore, which would include researching the local animals. Knowing what’s out there will allow me to know what I’m looking for as far as tracks, scat, etc. If I’m unfamiliar with what tracks or scat an animal makes, I’ll search for that at the same time. I’ll even download pictures onto my phone so I can compare while out in the wild.

When doing research, I also look up self-defense laws, specifically when it comes to animal and mountain lion attacks. In California, the law allows you to defend yourself against a wild animal attack if there’s danger of an immediate attack.

On Site

Whether we’re in mountain lion country or not, we always tell our children to stay close to us and in turn, we stay close to them. In general, we try to keep our kids in between us, so we always have eyes on them, as well as the surrounding area. Plus, big cats like to come from behind, so we wouldn’t want our children to bring up the rear. Of course, because they’re children, oftentimes we have to continually remind them and/or guide them back between us as we walk.

If we were to spot a mountain lion early, we’d be as loud as possible — scream, stomp feet, jump up and down, wave arms, and so on. We’d stand our ground and show our dominance. Whatever you do, don’t run!

Crisis

Despite our best efforts, there may be times when we stop to rest or inspect a specific area, momentarily letting our guard down. If this were to happen and a mountain lion took the opportunity to attack one of my children, taking action immediately is critical. One parent would remain behind with the other child and attempt to call for help, while the other would move in to rescue the child who’s being dragged away by the mountain lion. One parent leaving wouldn’t seem prudent in this instance, as the other parent may need assistance with the animal or the wounded child.

Whether or not I knew my child was conscious and aware, I would yell to them to scratch, kick, punch, claw, do whatever they could to hit, hit, and hit some more. Of course, they’re afraid and hurt, so they might be unable to do anything at all. However, fighting back is generally key to breaking free from a mountain lion attack.

Reaching for my phone wouldn’t be my first priority — my priority is to get my child free and rush them to safety. My adrenaline would be pumping, I’d be scared, angry, and I’d put all that energy into stomping, screaming, being as loud as possible, throwing sticks, throwing my gear, throwing rocks, throwing anything I could get my hands on. I would also use my air horn to scare the animal away. If none of that worked, I’d take the bear spray out and begin to spray it as close to the animal’s face as possible. There may be residual bear spray that’d affect my child, but if I don’t get my child out of the clutches of the mountain lion, then a little bear spray in the face is the least of our worries.

If nothing worked, I’d attempt to climb the tree to scare off or attack the animal. If I couldn’t climb the tree, I’d call my husband over to help boost me up to the mountain lion’s level and begin an aggressive attack.

Once the mountain lion releases my child, we’d break out the gauze from our first-aid kit and begin to apply pressure. At the same time, we’d be rushing back to the parking lot/headquarters, all while one of us would continue to attempt to call for help. Our adrenaline would still be pumping so we’d be moving fairly quickly.

If service wasn’t available as we continued back to our Jeep, or we simply couldn’t reach anyone, as soon as we got to our Jeep, we’d call for help via our ham radio. Even as we reached out via ham, we’d be driving to the nearest facility that could provide medical attention, which may be a ranger’s station, hospital, or clinic of any kind. If at any point we were able to reach someone via radio and they couldn’t reach us, we’d ask where the nearest facility is to our location so they could direct us. In this situation, time isn’t our friend, and we need to find help immediately while continuing to apply pressure to the wound and treating it to the best of our medical knowledge.

Hiking with the family is a lot of fun, but there are also a lot of dangers that we need to be prepared for. Animal attacks may sound unlikely and are statistically rare — some sources say around 160 annually throughout the United States, but those 160 people probably never expected to be attacked, either. With proper research and preparation, anyone can be prepared for the worst-case scenario.

Conclusion

People forget that the wilderness is just that, an untamed area of our world where survival of the fittest is the norm, and the natural order of things is for larger animals to prey on smaller ones. As we push further and further into rural areas, the hunt for food can often turn to human victims. No one ever thinks it’s their turn, but assume that the hills have eyes and prepare accordingly for animals that have a level of stealth and strength honed by millennia of evolution.

Success and survival in this case, or in any other animal or mountain lion attack scenario starts with comprehensive preparation before going afield. The careful selection of the right gear for the adventure is also critical, and being ready to take appropriate and decisive action when the unthinkable happens is paramount to surviving any animal attack. Know the potential dangers in the outdoor environment you plan to explore, be prepared, never take Mother Nature for granted, and enjoy the journey.

Meet Our Panel

Morgan “Rogue”

Morgan “Rogue” resides in Texas with her husband, daughter, and two dogs, with their second daughter on the way. Her family is always venturing into the wilderness and challenging themselves, as well as others, to love the outdoors. Through Rogue Preparedness, she works toward making the world a more prepared place, where people can feel confident in knowing that they possess the skills, knowledge, and items to get them through any emergency or disaster. She educates and entertains on her YouTube channel, website, and social media platforms, as well as in-person events held in Texas. You can find Morgan at roguepreparedness.com

Lt. John Nores

Lt. John Nores (ret.) is a worldwide conservationist who has investigated environmental and wildlife crimes for 28 years as a California game warden and was awarded the Governor’s Medal of Valor for lifesaving and leadership efforts in 2008. Nores codeveloped and led the California Dept. of Fish and Wildlife’s Marijuana Enforcement Team (MET) and Delta Team (the nation’s first wilderness special ops unit and sniper element) aimed at combatting the marijuana cartel’s decimation of our nation’s wildlife, wildlands, and waterways. His latest book, Hidden War: How Special Operations Game Wardens are Reclaiming America’s Wildlands from the Drug Cartels highlights the team’s first six years of operations (2013 to 2018). Nores hosts RecoilTV’s Thin Green Line film series, cohosts the Thin Green Line and Warden’s Watch podcasts, and has been featured on several other podcasts.


Your Guide to Tips and Tools for Flat Tire Repair

Several years ago, my fellow rescue technicians and I conducted a search-and-rescue operation. We were in the middle of transporting our subject out of the woods when we realized that our transport UTV was getting a flat tire and needed some tire repair. The escort ATVs were unable to safely evacuate the subject, so we needed to come up with a quick solution to get our subject out of the woods and to a proper ambulance. Thankfully, we had several viable solutions available to us, and we were able to get to safety with only minor delay. What did we do? More importantly, if you find yourself in an austere environment or off-the-grid scenario, what are your options and what can you learn from our event?

First, let’s talk about changing a tire. Some folks out there might not have ever needed to change a flat tire by themselves. While it’s not fun to do when you’re on-road, it’s even less fun when you’re off-road. If you don’t know how to change a tire, learn. Please. It’s relatively easy to do and can save you a disproportionate amount of heartache if you find yourself in this situation. If you do already know how, you’d be remiss not to teach your spouse, children, and friends.

Your preparations need to start by making sure you have all the equipment needed to change a tire and the knowledge of how to do it safely. Naturally, having a spare tire helps a lot. Knowing where the spare tire is located and how to access it is a must. Spare tires may be located inside a vehicle, perhaps under the floor of an SUV, or covered by the plastic trim on the side. It could also be located in the trunk of a car or outside the vehicle, suspended underneath with a cable that you’ll need to crank down with a tool that should be included in the tire-changing kit that came with the vehicle. If your vehicle is like the latter, you’ll need to know the proper procedure to lower that spare. It’s not always obvious, and you should refer to the owner’s manual for instructions. Also, make sure to periodically check the tire pressure of your spare and top it off if it’s low. Note that some vehicles don’t come with a spare tire at all, instead relying on special run-flat tires or a tire repair kit.

You’ll need an appropriate jack to lift the car and a lug wrench that’s sized for your lug nuts. Some people don’t know where their spare tire is, don’t know how to access their spare tire, don’t have a jack, and don’t have a lug wrench sized to fit their vehicle. This is a recipe for disaster.

The basic steps to changing a tire are as follows: Choose a safe location with level ground. Turn on your hazard lights, then set the parking brake and block the tires so the vehicle can’t accidentally roll away while you’re jacking it up. Before you lift the car, use the lug wrench to begin loosening all of the lug nuts; it’s much easier to do this when the wheel is on the ground and can’t move. Just get them started; don’t remove them completely. Place your jack at the specified jack point for your car and raise the car. Remove the lug nuts, and then swap the spare tire for the flat. Read your owner’s manual for specifics; for example, some vehicles (like certain German cars) have lug bolts instead of lug nuts. If you’ve never changed a tire, it’s helpful to get hands-on instruction.

The natural next question becomes: What are your options if you can’t change the tire?

Above: A scissor jack, shown at left, is likely what you'll find provided by your car's manufacturer in the trunk. While working the crank is no fun and it also has a small base, these jacks are purely mechanical, so they're a reliable choice for emergency use. Hydraulic bottle jacks are compact and strong. However, their small bases compromise on stability and they might be too tall for low vehicles.

Compressed Air

The first possibility is to refill your flat tire with air. There are many inexpensive air compressors on the market that you can plug into your 12-volt power source to reinflate your tire. There are also compressed air canisters you can use, ranging from tiny CO2 cartridges that can fill a smaller tire (or use several for larger tires) to larger portable compressed air tanks that could fill large tires. In a worst-case scenario, you could use a manual pump, like a bicycle pump, to inflate the tire. If the leak is slow enough, this could buy you time to get to safety. If the tire damage is more extensive, simply refilling a tire with air might not be possible and you’ll need to try a different method.

Above: There are many options to refill a tire, from compressed air to electric pumps to good old-fashioned elbow grease.

Plugs

There are several options to plug a damaged tire. The U.S. Tire Manufacturers Association (USTMA) outlines criteria for fixing a flat. Their Product Service Bulletin titled “Puncture Repair Procedures for Passenger and Light Truck Tires,” which includes a wall chart, shows the industry recommended puncture repair procedure. It basically advises that you can only repair holes up to ¼-inch diameter in the tread area of a tire (not the edge of the tread or sidewall). This standard should be adhered to under all normal circumstances. But you might not be in normal circumstances — you might be in an off-road, off-grid, life-and-death situation!

The best type of flat tire repair is a pull-through plug with an interior patch. These are installed from inside the tire and are the type of repairs performed at service stations. It involves reaming out the hole, putting a plug into the hole, using a vulcanizing compound (glue), and then putting a patch on the plug from the inside of the tire.

A simple external tire plug can be installed by the average person, with the tire still on the rim. First, through visual and physical inspection, locate where the tire is damaged. Once located, remove any debris, such as a screw or nail. Then, insert a probe tool, which is a rough file/rasp-type rod, into the hole that caused the flat to clean it out. Next, thread a repair plug onto the plug tool, which looks like a giant sewing needle. Spread a generous amount of rubber cement onto the plug and push the plug straight down into the hole, leaving about ½ to ¼ inch of the plug sticking out of the hole. Then, twist the plug tool and pull it out, leaving the plug in the hole. Allow the cement a few minutes to dry, and if the damage isn’t too severe, the hole should be plugged. This type of repair has been known to hold up for many years.

While it’s generally not recommended, if the tire is still leaking from that hole, you can try a second, third, or fourth plug. Additionally, the USTMA advises never to put a plug into a sidewall, and I wouldn’t advise it either — but I’ve seen it done on numerous ATV, UTV, tractor, and other off-road tires in an emergency. If you should ever need to do such a thing, drive no faster than a walking pace and only as far as you need to reach a place where a proper tire change can be done. Don’t drive at roadway speeds as there’s great risk of a catastrophic blowout with a sidewall repair.

There are plenty of generic tire plugs available, but plugs from Stop & Go International are a much better option. While they follow the same plug-the-hole concept as the others, these plugs offer significant advantages. First, they’re available in two diameters (5/16 and 7/16 inch), the larger of which is much bigger than a standard tire plug. Second, they’re contoured in a mushroom shape, the head of which forms a better seal inside the tire versus a standard plug. Third, to achieve a tight fit, they require some mechanical advantage via a screw-in applicator or a springloaded “gun” applicator.

Above: The most robust repair method is to install a plug and patch from the inside. This will need to be done at a shop that can remove the tire from the wheel.

Chemical Sealants

Some of you might say, “Why go through all that trouble; why don’t you just carry a can of Fix-a-Flat?” Well, that’s certainly an option, but historically one of the worst. Does it work? Sometimes. But before you put it to use, understand its downsides. In 2016, the formulation was changed, but according to the Safety Data Sheet dated 10/15/2000, the chemical mix of the previous version of Fix-a-Flat was corrosive. If you've had a can or two of this stuff sitting in your vehicle or garage for a while, it might be the older formula that can cause damage to your tire, and if left for an extended period of time, potentially corrode the wheel, too. And if you happen to have a tire pressure monitoring system (TPMS), which was mandated for vehicles in the United States after fall 2007, there’s a good chance you’ll cause damage to this component as well. Fix-a-Flat is a very temporary fix and should be removed from the inside of your tire as soon as possible. It’ll require cleaning out the inside of the tire, and some shops will charge you extra. Even with the new formulation, Fix-a-Flat instructions specify you have three days or 100 miles to get your tire professionally repaired.

Above: Slime's tire sealant, which you inject into your tire to seal a puncture, along with more traditional repair kits.

The chemical ingredients of the older Fix-a-Flat formula are tetrafluoroethane, heavy aromatic solvent naptha, amorphous polyolefin, aromatic resin, inert filler, and a trade secret emulsifier. The current chemical ingredients are Tetrafluoro-1-propene, glycerol, and cellulose. It’s a good idea to know which version you have.

You may have also heard of Slime tire sealant, a thick green goo that you can inject inside your tire to repair small holes or prevent the tire from going flat in the first place. The manufacturer claims that their product is TPMS-safe, contains rust inhibitors to protect your rim, and is effective for up to two years. From personal experience, this stuff works very well, and I know people who have left Slime in their tires for many years. To use it, you’ll need to pull the core out of your valve stem using a special tool and inject the sealant inside your tire. It’s a simple process.

The chemical ingredients of Slime are glycerol, attapulgite (binder), cellulose, and quartz.

TireJect tire sealant is similar to Slime; it’s a liquid that you inject into your tire through the valve stem and is said to be effective for two years. However, it’s a much thinner liquid and comes in two different versions. The automotive sealant will seal bead leaks and tread punctures up to ¼ inch, while remaining safe for tires, rims, and TPMS sensors. The off-road tire sealant will seal leaks up to 3/8 inch, including the sidewall and dry rot. This sealant is made with liquid rubber, active sealing particles, and aramid (Kevlar) fiber, but it’s not TPMS friendly. I tried this product on the dry-rotted tires of my lawn aerator, which would no longer hold air for more than a day or two. Thirty days after using TireJect, the dry-rotted tires are still holding air. Impressive.

The chemical ingredients of TireJect are propylene glycol and natural rubber latex.

While doing research, I found another product, FlatOut Multi Seal. I haven’t used it yet, but feel it deserves mention. Like Slime and TireJect, this liquid is injected into your tire through the valve stem. The manufacturer claims their sealant is good for 10 years but is formulated for off-road vehicles only, as it can damage TPMS sensors. The Multi Seal Pro HD 2500 will plug holes up to ¾ inch, while the Multi Seal Armor 3500 will plug holes all the way up to a whopping 1¼ inches — that’s bullet hole territory. They have a video on their website showing them driving a 5/8-inch steel rod into a tire and FlatOut Multi Seal plugging the hole in seconds.

The chemical ingredients of FlatOut Multi Seal are approximately 50-percent propylene glycol with the remaining proprietary components not at reportable concentrations.

Above: You can use an external tire plug kit to repair a tire without removing it from the wheel. It involves removing the offending object, cleaning up the hole, then inserting a repair plug and applying cement. It's wise to have a patch applied on the inside surface of the tire afterward to reduce the risk of leaks.

Other Extreme Repairs

A friend was out on an ATV camping trip when he put a gash into the tire. It was too big to be repaired with conventional means, and he hadn’t brought a spare tire with him. Rather than attempting to drive the trail on a flat tire or hiking many miles out of the woods, he sewed the gash closed. Yes, you read that correctly. Using a heavy tarp repair needle and thread, he put a bunch of stitches into the gash to hold it closed, applied a patch inside the tire, and then coated it liberally, inside and out, with vulcanizing cement. It held, and he was able to drive out.

In some third-world countries, they still repair flats with a torch and bits of rubber that they melt back into the tire. It takes a skilled hand to do it well, but tons of tires have surely been repaired this way. There's also the old-school trick of re-seating a completely deflated tire by spraying it with a flammable aerosol such as starter fluid, then carefully igniting it. The resulting fireball can pop the tire bead back around the wheel, but we wouldn't recommend trying this dangerous technique at home.

Damage to a tire's sidewall is usually catastrophic. Plugging a hole in the sidewall isn't advisable, but can be done as a temporary measure in emergencies.

Conclusion

At the beginning of this article I mentioned having a flat tire on a mission, and that we had several options available to us to repair the flat in that situation. We could’ve patched the tire with a plug or worm, but it would’ve taken a little while to locate the exact cause of the leak and make the repair. We could’ve changed the tire, except we didn’t carry a spare tire on board any of our UTVs.

We could’ve dismounted the tire and put a new inner tube into the existing tire, but that would’ve required finding a lug wrench, jacking up the vehicle, and then replacing the tube. Well, we did have a spare inner tube, but we realized we didn’t have the lug wrench with us, and we didn’t have a jack, so this type of repair would take some improvising and a fair amount of time. We might’ve been able to take a good tire/rim from one of the ATVs and mount it on the UTV temporarily, but, again, we didn’t have the lug wrench or jack with us.

Above: High-lift jacks are particularly useful off-road with high-clearance vehicles. They have a wide range of articulation, and in addition to lifting they can push, pull, winch, and clamp.

In the end, we first set in motion our Plan B. We sent two of the four vehicles we had to retrieve the spare tire, jack, and lug wrench from our staging point along the paved road. As our Plan A, we went with the fastest and easiest short-term fix — we used the small air compressor we had on hand to add air to the tire. We had to fill it several times along the way, but it gave us several minutes of drive time between fillings. This was enough to get our subject to the ambulance waiting along the paved road. Admittedly, the process would’ve gone a lot faster if we’d had a couple more tools with us. But what we did have — a layered mission support plan and knowledge of multiple alternatives — allowed us to find a solution that worked for us in the moment. Knowledge is power, and being knowledgeable about what tools are available to repair damaged tires can go a long way to keep you rolling down whatever roads you choose to travel.


Iconic Survival Knives – Part Two: Ka-Bar Knife History

Certain knives we associate with cultures, such as the Filipino balisong or the Japanese tanto; other knives we associate with professions, like a surgeon’s scalpel or a butcher’s knife. There’s one knife we associate with the U.S. Marine Corps, a branch of the military where culture and profession intersect, and that knife is the Ka-Bar. If a Marine is on active duty, there’s a good chance he has one lashed to his kit or on his belt. If a Marine is no longer in service, he almost certainly has at least one squirreled away somewhere.

Although the Marines aren’t the only branch of the U.S. military to use this knife, people associate the Ka-Bar with the Marine Corps, and when people are looking for a good survival-type knife, it’s their Marine friends they usually look to for endorsement.

Origin of the Name

As with anything that people don’t understand completely, there are myths surrounding the Ka-Bar knife. One of the earliest we heard was that it was military shorthand for a bayonet used for the Browning Automatic Rifle (BAR). That old sea story holds that it stood for “Knife Attachment, Browning Automatic Rifle,” hence KA-BAR. Despite there being no way to directly attach a Ka-Bar knife to a BAR, this legend pops up from time to time and people believe it.

The KA-BAR trademark can be traced back to one of the first manufacturers of the Ka-Bar: Union Cutlery. According to company records, in 1923, the company received a letter purportedly from a fur trapper who had used a Union Cutlery knife to kill a wounded bear that attacked the trapper.

Apparently, poor handwriting combined with poorer spelling made the letter barely legible. The phrase “K a Bar” could be read, as fragments of the phrase “kill a bear.” Someone higher up on the chain of command liked it and decided that Union Cutlery should use Ka-Bar as its trademark. It soon began appearing as a stamp on all the company’s knives.

Even 80 years after their first issue, some Ka-Bar knives are still getting the job done in the field.

Enter the USMC

After the outbreak of World War II, the Marine Corps found itself in need of a better knife. Knives throughout the Corps reflected knuckle-guard-equipped trench daggers from World War I, the U.S. Navy Mark 1 utility knife, various machetes, and the Raider stiletto.

Two Marine officers, Colonel John M. Davis and Major Howard E. America, were tasked with finding a modern and effective fighting knife and asked several military knife and tool manufacturers to submit designs for the war effort.

The officers eliminated quite a few designs and decided the U.S. Navy Mark 1 utility knife would make a good starting point, with elements adopted from common hunting and utility knives from the era. One manufacturer seemed to be more responsive or easier to work with than the rest: Union Cutlery.

Union Cutlery lengthened and widened the blade while using a thicker bar of steel from which to grind. The famous “blood groove” was adopted to lighten the blade, and a stacked handle made of leather washers was selected to improve the grip. In keeping with Mil-spec metal treatments, the blade, pommel, and steel cross guard were Parkerized as opposed to being polished. Lastly, the profile of the blade was changed to a clip point as featured on the American Bowie knife (refer to Part One of our knife history series in Issue 37 for an overview of this iconic tool).

Davis and America felt they had their knife and put it to the test. While it passed with flying colors, they ran into a problem purchasing the knife, so they had to escalate to the commandant of the Marine Corps, Lt. General Thomas Holcomb. The commandant overrode the quartermaster’s decision, and the Marine Corps officially approved the knife on November 23, 1942, as the M1219C2. It would be manufactured by several different suppliers in subsequent years.

They may differ cosmetically between original and current manufacture, but the materials remain mostly the same along with the Ka-Bar’s form and function.

Instant Appeal

Marines received their first shipment of knives from Camillus Cutlery on January 27, 1943. It turned out to be a hit with the sailors working alongside the Marines as well, so the Navy adopted it as a diving/utility knife known as the U.S. Navy Utility Knife, Mark 2. This bit of interservice rivalry caused the Marine Corps to rename the M1219C2 as the USMC Mark 2 Combat Knife. Other records of the time reflect the official USMC name as “Knife, Fighting Utility.”

As the Marine Corps falls under the much larger Department of the Navy, most World War II-era knives are marked “USN Mark 2,” regardless of where they ended up. Although initial shipments went to the infantry first, by 1944 every Marine who needed or even wanted a knife had one, and manufacturers made them by the thousands.

Camillus Cutlery has produced over 1 million Ka-Bar knives. Other manufacturers during World War II included Robeson Cutlery and, of course, the Union Cutlery. For some reason, the big Ka-Bar lettering on the ricasso (flat of the blade near the handle) of the Union Cutlery-made knives made an impression on the Marines. By 1944, all Marines were referring to their USMC Mark 2 Combat Knives as simply “Ka-Bars.”

This didn’t go unnoticed, and in 1952, Union Cutlery formally rebranded as Ka-Bar Cutlery.

The Postwar Ka-Bar

As a generation of veterans mustered out of service, they took their Ka-Bars home with them because they were solid working knives. Footage from the war and the popularity of war movies showed the Ka-Bar to those who didn’t serve, and when people wanted a hunting or camping knife, they often went with a Ka-Bar as a result of these influences.

As the decades passed, the U.S. military kept the Ka-Bar in service. Camillus Cutlery was still their number-one supplier, followed by Utica Cutlery, and, after the Vietnam War, Ontario Knife. These companies and a few others like W.R. Case made the same knives for the civilian market, too.

Above: The Ka-Bar knife was a much-needed replacement to the dagger-like blades of the V-42 stiletto and the M1917 trench knife.

The Ka-Bar as a Survival Knife

For the price of $70 to $100, a good Ka-Bar knife is tough to beat for an all-purpose field knife. There’s a licensed version made in China for a lot less, but stick with a U.S.-made version for better quality steel and other materials.

There are higher-end versions of the Ka-Bar design that have used D2 tool steel in the blade. Some have been made with synthetic handles as a modern revision to the traditional stacked leather washer handle. A number of custom knife makers have even used the pattern to make a more decorative style, incorporating Damascus steel or even super steels like S30V or BG-42.

Despite the numerous offshoots on the market, we still think that the original Mil-spec varieties make for a good all-purpose field knife.

With a proper edge, it can be used to skin game. It’s tough enough for most bushcraft chores like splitting kindling or fashioning wooden stakes. If you find yourself without a hammer or mallet, the butt can be used to pound tent stakes while the blade is sheathed for safety.

Lastly, it makes for an effective fighting knife and weapon. One of the earliest examples was used to kill a bear, and a number of historical military stories list the knife as being used effectively as a weapon, not just from WWII through Vietnam, but as recently as a few years ago …

“No Man Left Behind” statue at Camp Pendleton, California. Photos provided by Cameron and Brittany Carden.

Legacy of the Ka-Bar

In the Battle of Fallujah, then 1st Sgt. Bradley Kasal found himself down to hand-to-hand combat to protect his junior Marines. Kasal fought his way through a house with a Beretta M9 pistol in one hand and his Ka-Bar knife in the other.

Kasal, who was with 3rd Battalion, 1st Marines, received the Navy Cross for his actions that day. The citation reads that on November 13, 2004, he was assisting a combined anti-armor platoon and saw gunfire break out in front of him, and then Marines run out of a building. When Kasal found out that insurgents had pinned Marines in their position inside the house, he and others fought their way inside. In the process, Kasal was wounded in the legs, and when an insurgent threw a grenade, Kasal rolled onto another Marine to shield him from the blast. He later refused medical attention until others were cared for, and he rallied Marines as they cleared the house.

As he was being medevaced from the building, a photographer snapped an iconic photo of him being helped out of the “Hell House” by two Marines. Kasal’s Beretta was still clearly visible in one hand and his Ka-Bar knife in the other. In 2014, that photo was used as the basis for two bronze statues called “No Man Left Behind.” These statues can be found today at the Wounded Warrior Battalions at Camp Lejeune, North Carolina, and Camp Pendleton, California.

We’re almost 20 years short of celebrating the 100th anniversary of the Ka-Bar knife, and moments like that day in Fallujah will ensure the knife is still serving somewhere around the world another 100 years from now.

As simple and plain as it may look, the Ka-Bar is clearly no ordinary knife.


More on Iconic Survival Knives:


Comparing the .22 Caliber SIG Sauer ASP20 and Benjamin Vaporizer Airguns

If you’re considering including an airgun in your SHTF kit, or are just looking for a reasonably priced, self-contained airgun to handle pests and vermin around the farm or homestead, perhaps this review will make your search a bit easier.

Break-barrel airguns, or “springers,” lend themselves admirably to survival because the powerplant of a spring or gas-ram is built-in. This means that no additional accoutrements, other than pellets, are required to put the airgun into operation. As with anything, there are pros and cons to these types of airguns for any intended purpose. Pros include sustainability, low cost to purchase and operate, low maintenance, and power.

Cons associated with springers include weight (they tend to be heavy), noise (they can be loud due to the power levels reached), steep learning curve (the “artillery hold” method is necessary to obtain best accuracy potential), and the fact that they can be finicky when it comes to the ammo they shoot best.

So, for a bug-out scenario, some practice and testing of various pellets is mandatory to ensure you’ve got a viable survival tool. However, once that’s out of the way, you’ll have a self-contained lead-launcher with a supply of inexpensive and readily available ammunition that happens to have a long shelf life. Unlike most traditional firearms, it can be used to obtain small game without a huge sound signature and no smoke, spent brass, or other telltale signs of your presence.

Far from the low-power airguns you may have grown up with, these two models require a fair amount of cocking force to...

The Basics

These two air rifles operate the same way — that is, after the safety is applied, the barrel is tapped on top near the muzzle to “break” it downward and then continue pulling the barrel in a downward arc to cock the powerplant. (Be careful to keep fingers out of the trigger guard and don’t let go of the barrel before the sear has engaged — the barrel could violently slam shut.) A pellet is inserted into the breech and the barrel is closed, readying the rifle for firing. In this case, both air rifles utilize gas ram technology similar to the gas struts you may be used to — for example, the arms that hold up the hood of your vehicle or back window of your camper shell.

This tech has been prevalent in airguns for a few years and offers improvements over the coiled-spring mechanisms still found in some airguns by eliminating “spring slap,” which makes the guns noisier and the firing sequence less smooth. Additionally, springers with gas rams are less susceptible to temperature fluctuations and can be left cocked for a period of time without serious consequences. Old-style spring-powered airguns should not be left cocked, since the spring will take a “set” in a fairly short period of time and render the airgun practically useless and in need of repair. These types of airguns also require a break-in period, usually about 100 shots, in order to become consistent and settle down.

The Benjamin Vaporizer is a handsome rifle, with contrasting inserts and a sleek barrel shroud/moderator.

Side by Side

Both airguns were single-shot models in .22 caliber with ambidextrous stocks sporting thick rubber buttpads. Both utilize gas ram (aka piston) powerplants and were scoped with their respective company’s telescopic sights — Whiskey3ASP 4-12x44mm with Adjustable Objective on the ASP20; CenterPoint 3-9×40 with Adjustable Objective bell on the Vaporizer. Both feature sound moderators on the muzzles. Neither has an automatic safety that engages upon cocking the rifle. Both are equipped with two-stage adjustable trigger units, and both guns’ triggers are made of plastic. Both offer Picatinny rail sections for mounting of optics. Lastly, both are full-length rifles. That’s where the similarities end.

What Makes These Airguns Tick?

Sig Sauer points out that the ASP20 (short for Advanced Sport Pellet) was purpose-designed and built in the USA. When they made the decision to enter the airgun market, they utilized engineers from their firearms division to make it happen. SIG engineering and materials knowhow was used to create an all-American product. Of course, that kind of R&D associated with a name brand such as SIG translates to an air rifle that pushes the cost needle northward when it comes to break-barrels on the market — not to say it isn’t worth it.

The wood stock, while a bit slippery feeling, is extremely well-finished and has laser stippling in all the right places for grip. The Sig Sauer logos are crisp and tastefully done and the overall design has a European vibe, very much like you’d find on Sig Sauer firearms. Also, for the price you get the benefit of new technologies such as the proprietary breech-locking system. Designed with tapered wings on both sides of the barrel, it produces a keystone wedge solid lockup each time the barrel is closed. Plus, the barrel and receiver assembly are drilled together for the pivot pin rather than two separate pieces mated together later on, further increasing the accuracy of the rifle.

The SIG ASP20 with its accompanying SIG Whiskey3 scope designed for break-barrel air rifles is a dynamic combination.

The cocking effort has been reduced with Sig Sauer’s proprietary GlideLight mechanism, giving magnum power for around 33 pounds of cocking force when normally 40 or 50 pounds of force would be required. The metal is well-finished in matte black Nitron, the same finish they apply to their firearms. The sliding safety is accessible on both sides of the stock for easy ambidextrous manipulation with the trigger finger. Speaking of triggers, this MatchLite has a flat trigger blade, popular these days on long-range precision rifles. The factory settings are considered optimized by SIG, but are user-adjustable with the included tools.

The Benjamin Vaporizer is synthetic-stocked only, with soft touch inserts at the gripping surfaces and a molded-in cheekpiece. The finish is good with no sharp edges or flashing needing to be trimmed. The metal receiver was well-finished in a black satin. The steel barrel has a polymer overlay ending in the polymer SBD (Silencing Barrel Device) giving an overall futuristic look to the Vaporizer.

Vaporizer stylish trigger guard and pistol grip soft rubber inserts

Driven by Crosman’s Nitro Piston Elite second generation of gas piston, it can be considered to be in the magnum class as well. The safety is mounted inside the trigger guard and easily manipulated with the trigger finger without having to adjust the shooting hand position. Besides including the optic with the rifle, there’s a front and rear sight, which aren’t always standard on modern air rifles anymore. They’re plastic, but the rear sight is adjustable for windage and elevation. Additionally, sling attachments come standard on the Vaporizer. Its point of origin is China.

But Wait … There’s More

How did they shake out when slinging lead downrange? Keep in mind that the ASP20 was Sig Sauer’s first foray into the break-barrel airgun realm. Crosman/Benjamin, on the other hand, has experience in making airguns since the 1890s. Although most were CO2 or multi-pump models, they’ve been producing break-barrels for a long time.

Cocking wasn’t difficult with either rifle, although it wouldn’t be recommended to start young shooters with powerful springers like these. Cocking does take effort, and there’s some recoil that the rubber buttpad doesn’t mitigate. A shooter may tire quickly if shooting for any length of time. Plus, while both rifles are equipped with permanently affixed suppression technology, neither would be considered “backyard friendly” unless you have a pretty big backyard.

While you won’t necessarily need ear protection with these airguns, it’s not a bad idea. Out of the box, the trigger pull on the ASP20 MatchLite trigger averaged 3 pounds, 2.8 ounces. The Vaporizer’s trigger averaged 6 pounds, 1.5 ounces. Typically, since these are loaners, the triggers are left as they come from the factory, but they’re adjustable for both pull length and weight.

The accompanying table shows velocity (fps), foot-pounds of energy (fpe), and grouping with various pellets.

Closeup of Vaporizer barrel latch detent

Pros
> Both airguns come with a five-year warranty, which shows the commitment to quality that these manufacturers are making.
> Both airguns have nicely finished metal and good fit to stock, with the ASP20 having the edge in this category.
> The ASP20 is entirely made in the USA.
> The Whiskey3 is an excellent scope to go with the ASP20 (sold separately or as part of a kit) and provides a pellet drop compensating elevation turret.
> The Vaporizer includes a decent CenterPoint scope in the MSRP and has extras like open sights and sling attachment points. In the past, cheap scopes were thrown in to entice the buyer while allowing the manufacturer to remain at a competitive price point. Now good-quality scopes have come down in price so that very serviceable models can be included with some air rifles on the market and still be competitive.

Cons
> Use of plastic triggers
> Thicker or spongier buttpads are in order if using these air rifles over a long shooting session.
> ASP20 has a solid, nicely styled stock that’s comfortable. My concern was the slickness of it, except where laser etching was done on the pistol grip and forend. If hunting in a wet environment, the ability to attach a sling would be important.

Bottom Line
Both of these airguns are also available in a .177 model. These airguns are relatively inexpensive and easy to use, operate, and maintain. They provide plenty of power as critter-getters and do so with relative quietness — more so than firearms. Either would be a good choice should you need to bug out in a SHTF scenario, depending on your potential quarry and the power level needed. The wise prepper would give due consideration to including at least one of these in their kit or bug-out bag.

Benjamin Vaporizer Airgun
Length: 46.5 inches
Weight: 8.7 pounds
Caliber: .22
Stock: Synthetic
Sights: CenterPoint 3-9×40 AO scope plus open sights
MSRP: $260
URL: www.crosman.com

SIG Sauer ASP20 Airgun
Length: 45.6 inches
Weight: 9.7 pounds
Caliber: .22
Stock: Wood or synthetic
Sights: None (unless purchased as kit w/scope)
MSRP: $400 synthetic; $490 wood (w/Whiskey3 scope: $580; $670)
URL: www.sigsauer.com

The Danger of Dry-Fire

Never fire your break-barrel airgun without a pellet in the chamber! Dry-firing can permanently damage these types of airguns. Additionally, don’t put your favorite firearm scope on one of these babies, because they generate a unique recoil impulse that’s both backward and forward each time the gun is fired. This can destroy scopes that aren’t designed to handle it.


Layering Your EDC Survival Gear

There’s discussion ad nauseum in preparedness circles about redundancy and layering of gear and survival gear. Like many survival concepts, grand-scale guidance is distilled down to a catchphrase that’s then so beat-to-death that people lose track of what it actually means. One of our favorites is “two is one, one is none.” It makes sense on the surface, but gets tossed around so much in forums and discussions that it becomes its own form of radio static. So, we thought we’d go down to brass tacks and talk about exactly why layering is important and how to do it. As always, what we present here is one way — not the only way. And, as a concept, layering is scalable to your own readiness needs. We’ll provide some specific examples as a handrail for you. But the specific layers you create should be tailored to your daily routine and the contingencies you feel are most important to prep for.

One of the best layering strategies we’ve come across is known as the “Line Gear” concept. We can’t verify for certain who coined the term or how exactly it started. We got it from an Army Special Forces veteran, and the anecdotal stories we’ve heard go something like this …

During the Vietnam War, U.S. Special Operations Forces adopted a methodology of using small, highly trained reconnaissance patrols to search the jungle for enemy forces and activity. These tiny teams, sometimes only four or six men strong, were able to move quietly and collect information about enemy movements. Many times, these teams would wind up in direct combat with forces vastly larger in size and firepower. In such cases, escape and evasion was the only effective way to survive the encounter. The ability to break away from a pursuing enemy and melt into the jungle became vital. In some cases, this meant shedding heavy rucksacks or jangling equipment vests to move faster and make less noise. But in the heat of the fight, it can be difficult to decide exactly what equipment to jettison and what to keep with you no matter what. So, the idea of organizing your gear into “lines,” based on importance and where you store it in your load-out, became a simple and effective way to avoid rationing or decision-making on the fly while under fire. With some interpretation on our part, the basic concept broke down as follows:

First Line Gear was essential survival gear. This stuff was kept on your body — perhaps on your trouser belt or stuffed in your pockets — and was considered the bare minimum for successful escape, evasion, and survival. Nuts-and-bolts necessities like a compass, map, waterproof matches, emergency signaling devices, and some basic first-aid items were in this category.

Second Line Gear was what survival gear you needed to do your immediate job. In the case of a small jungle recon team, this was what they needed to shoot, move, and communicate — things like primary weapons, ammunition, grenades, and radios. These items normally go on a soldier’s load bearing vest, chest rig, or plate carrier.

Third Line Gear was survival gear that provided long-term sustainment and comfort. Spare batteries, extra socks, rations, shelter half, Claymore mines, and anything needed for a 72-hour patrol were kept in a pack or rucksack for retrieval as needed.

The above lists are by no means comprehensive — they’re generic examples of how to organize and classify your overall load by necessity. In the jungle war context, packing your equipment in this philosophy bears out that, if falling back under fire, the long-term-use gear in your rucksack could be dropped on the run to gain speed and reduce noise while still leaving you with the necessary equipment to fight the enemy and provide for basic survival needs. If, for some reason, you became separated from your weapon and fighting equipment, the items in your pockets and on your belt could still allow you to live long enough to return to friendly lines or be picked up under in-extremis circumstances.

Thankfully, very few of us will ever have to worry about sacrificing large amounts of equipment to evade an enemy force in direct pursuit. But this concept can still be adapted to help us better organize our EDC and bug-out bags in a succinct, prioritized manner. Odds are most of us do this already, to some extent. The idea of walking in and out of work every day with a rolling duffel bag of survival equipment is unrealistic. The things we deem essential to have at all times become our EDC, and everything else gets stashed or staged elsewhere for use as the situation dictates. What we like most about this method is that it forces us to sit down and truly assess what’s important to have on us, right now, for immediate use, versus what can be packed, stowed, or stashed for retrieval if and when needed.

The approach is highly scalable and can be made your own, depending on what your routine requires. For soldiers deployed overseas, their rifle and body armor with attached ammunition pouches would be Second Line survival gear, as it’s required to do their primary job. But for a prepared citizen, these same items would likely be relegated to Third Line survival gear since, especially in an urban setting, they’re less likely to be used and more likely to be left behind if the immediate situation doesn’t include contested gunfights at distance. (Contrast this with a defensive handgun that, for many, might be considered First Line Survival Gear to be carried daily.) What follows are some examples we’ve put together to best illustrate the ideas, and to give you some inspiration to “line up” your own gear.

SURVIVAL GEAR EXAMPLE #1: “THE URBANITE”

First Line: On-Body Carry (EDC)

When all laid out for this photo, we realized just how much gear it's possible to carry comfortably and concealed in a well-broken-in pair of jeans and a loose T-shirt.

Carbon Tactics Badger Strap Belt
The Badger Strap’s double thickness makes it ideal for supporting holsters and holding up pants laden with the rest of the carry loadout.

SureFire G2X LE Flashlight with Thyrm “Switchback” Ring
The SureFire G2X series is lightweight and inexpensive, while still bringing 500 lumens to bear with a click of the tailcap. Adding the Thyrm Switchback ring provides both a pocket clip and a highly intuitive way to use the light while maintaining a two-hand grip on a pistol, if need be. The “LE” variant offers two outputs: 60 lumens and 500 lumens, but always offers 500 on the first button push. If you want to step down to 60 lumens for admin tasks, double tap the clicky tailcap. No programming, no extra switching, no twist-for-this, push-for-that.

Zero Tolerance 0566
The Zero Tolerance name is synonymous with hard use and high performance. Their now-discontinued 0566 line provides a slimmer, more discreet EDC option over some of their other offerings. (Pictured above is my previous EDC knife, a well-worn Emerson CQC-7BT.)

Casio G-Shock Watch
The G-Shock watch is bombproof and easy to operate, no stranger to hard-use environments like war zone deployments. (This particular watch has been to Afghanistan a dozen times.) In addition to the quick-reference navigation aid of the Suunto Clipper compass, the Gearward A-K (Anti-Kidnapping) band allows you to carry some sneaky escape tools like a nonmetallic handcuff key and ceramic razor blade.

LAS Concealment Ronin 3.0
A lot of holsters come across our desks. But the Ronin 3.0 from LAS Concealment has quickly become one of our favorites. It includes both holster and spare mag carrier, joined together by a length of elastic cord. This gives the rig a degree of flexibility that allows it to move with your body without the shifting, tilting, and sliding we experience when running an IWB mag pouch that’s entirely separate from the holster.

JB Knife Ditch Pik
A concealed, dedicated defensive fixed blade is typically faster and easier to bring to bear in a fight, versus having to pocket-draw and open a similar-sized folder. There are some excellent boutique knife makers specializing in sharp things for street fights. One of our favorites is the Ditch Pik from JB Knife & Tool in collaboration with our friend and colleague Ed Calderon. It’s available in a number of different configurations. This one has G10 scales and a full-length double-edged blade. We tested this knife thoroughly in Ed’s own Organic Medium Entry class — see “Sharp Edges and Dirty Tricks” in Issue 36 for more on that class — and found that it performed excellently, including stabbing through a standard-issue soft body armor vest without so much as slowing down. Depending on the circumstances, we carry our Ditch Pik instead of, or in conjunction with, our Glock 19.

LTC Pocket IFAK
The Live the Creed pocket IFAK is a drop-it-in-your-pocket way to carry some basic trauma supplies like gloves, anti-clotting agent, and chest seals.

“Scapular” E&E Necklace
This unassuming piece of jewelry came to us by way of a somewhat cryptic Instagram user known as @whoiscitizene. We got in touch with “E” through RECOIL OFFGRID alum William Echo. The necklaces are based heavily on the teachings of Ed Calderon. The Scapular consists of a Kevlar cord held together by small magnets, instead of a clasp. On the end of the Kevlar line is a small square pocket made of felt, adorned with Calderon’s signature “Sneak Reaper” totem. The felt pocket is small, so whatever you keep in it must be micro-sized. Luckily, there are a number of companies producing specialty SERE tools with incredibly reduced footprints. We chose a handcuff shim and an ITS Tactical OSS Tool. The latter is a set that consists of a pint-sized tension wrench and several styles of lockpicking rakes on a small swivel bearing, allowing them to be fanned out like a poker hand without having to detach the individual tools to use them. The Scapular also has teeny-tiny elastic loops, which hold the smallest chemlight we’ve ever seen. Locked in a dark trunk or the back of a windowless panel van? Crack the chemlight, and you’ll have just enough light to see, access, and use your tools.

Tuff Writer Carabiner
We’ve featured several Tuff Writer products before. Their Carabiner holds not only our keys, but a couple of other handy tools: namely the Carbon Tactics TiSlice box cutter and the Gearward Ranger BIC lighter carrier. The Ranger BIC sleeve provides a watertight seal around the head of a mini BIC lighter, and the bike tire inner tube it’s made out of can be cut up (with the TiSlice!) and used as rainproof tinder.

This is a comprehensive First Line that includes an array of vital survival tools without forcing you to wear cargo pants, a fishing vest, and a fanny pack everywhere you go. This setup gives you the ability to:

>Defend yourself with force
>Handle small-to-medium cutting chores
>Make fire
>Escape restraints
>Treat traumatic wounds
>Dead reckon without electronics by tracking time and direction

… all with items that are worn or carried in pockets. With this EDC, if you had no other equipment or gear besides the clothes on your back and the contents of your pockets, you could still fulfill many of your basic survival needs — at least for a short-duration — through a spectrum of situations from a roadside breakdown to an active shooter. This is the essence of First Line Gear.

Second Line: 5.11 AMP 12 Backpack with Greyman Tactical Rigid Insert Panel


The Greyman Tactical Rigid Insert Panel has proven to be an excellent way to organize gear inside a pack. As an added bonus, if we want to use our 5.11 AMP 12 as carry-on luggage we simply remove the panel and store it while we're gone. Or pack it in our checked bag for use when we land.

>Laptop computer and charging cord
>Basic first-aid supplies (Band-Aids, Ibuprofen, antihistamines, etc.)
>Passport
>Thumb drive (with tie-on glow sprinkles cube from @whoiscitizene)
>Full-size compass
>Tactical Combat Casualty Care quick reference guide
>Tactical pen
>North American Rescue IFAK trauma kit
The NAR trauma kit provides redundancy to the LTC pocket IFAK, plus a C-A-T tourniquet.

G-Code OSH holster on RTI mounting panel
G-Code is a top-notch purveyor of Kydex and nylon tactical gear. We’ve been duly impressed with everything we’ve seen from them. But, in particular, we like the RTI mounting system in this particular setup. The RTI “wheel” is a circular mounting disc that accepts the three-pronged triangular backing plate that the company attaches to the back of its holsters. Once mounted, the wheel has a locking mechanism that keeps the holster in place. Conversely, the RTI wheel can be unlocked, and the holster can be taken out of the pack and mounted onto any other piece of kit with another mounting wheel. For my daily grind as your Editor, I typically work from home or well-known local nooks like coffee shops and cigar lounges. In these environments, I don’t typically find it necessary to have my gun on my person, but always have this bag in arm’s reach when settled in behind my laptop. For unfamiliar environments and trips to more exciting locales, I switch to my LAS Concealment Ronin 3.0 holster (see above) to keep my weapon on me as needed. https://amzn.to/2Za6n8s

Glock 19 with SureFire X300 Ultra and Holosun 508T optic
This Glock has a whole slew of performance-enhancing features, from the ported barrel/windowed slide combo by Southwest Precision Arms to the Sonoran Defense laser-stippled frame, KE Arms magwell, and Johnny Custom Glocks trigger. It’s loaded with Hornady’s 135-grain Critical Duty ammunition and equipped with a SureFire X300 Ultra weapon light for things that go sideways after sundown.

The Redwire Gear Emergency Management Rack gets donned first, with the Eberlestock pack buckled on over top of it. If the pack needs to be jettisoned, simply unbuckle the waist and sternum straps and drop it without losing your Second Line Gear.

G-Code Scorpion Softshell Mag Pouch with Spare Magazine
G-Code Scorpion Softshell Mag Pouch with Leatherman F4 Free Multi-Tool
The Leatherman Free series offers some additional capabilities above and beyond the pocket knife.

5.11 Mini Operator Ax
5.11’s Operator Ax was designed with input from former Special Forces operator and Viking Tactics owner Kyle Lamb. This is a shrunk-down version we were able to fit inside the AMP 12. The small hatchet blade and hammer on the reverse side offers limited ability for emergency breaching — whether trying to get into a wrecked car to help a trapped motorist or breaking through a door or window to escape a building fire.

Sport Smoke Sportsman Smoke Grenade
Having the ability to signal for help is vital. Patrick McCarthy discussed the importance of this capability in his visual signals Pocket Preps column in Issue 37. We like the Sport Smoke grenade by Superior Signals for its emergency-ready design. These models are wax-sealed and have an advertised shelf life of five years, so you can pack ’em and forget ’em for a while without worrying about the smoke-producing agent degrading over time. When needed, simply peel off the wax cap and pull the ring ignitor. At only $12.50 per unit, they’re a low-cost, long-lasting addition to any emergency kit.

Elastic Loop Velcro Panel with Mini Chemlights
As with smoke, keeping a couple spare chemlights in your pack is a great option to signal for help, read maps, or light your way when trying to conserve flashlight batteries — or when your batteries have already faltered.

Cobra Cuffs Flex Restraints
While we don’t plan to detain anyone with flex cuffs any time soon, these are all-around useful accessories to have that can be pressed into service for multiple other uses. Two examples: They can be used to hold double doors closed if sheltering in place from an active shooter, and they can also be used to construct splints to immobilize injured limbs.

Third Line: Use What You’ve Got!

Most city-dwellers don’t usually walk around with 72 hours’ worth of sustainment supplies on their body. Nor should they, in our opinion. Instead, make use of the best two resupply points that almost everyone has built into their daily routine: your house and your car. If you live in a major metropolitan area, suburb, or even a small town or rural farm area, your Third Line will probably be in the bed of your pickup truck, the trunk of your hybrid smart-coupe, or a bin stashed in your pantry or garage. At the end of the day, the most effective and consistently practiced preps will be those that fold into your existing routines and lifestyle. Prep around your life; don’t live around your preps.

If you don’t already do so, consider keeping a duffel bag, suitcase, or plastic tub in your vehicle with enough supplies to sustain yourself and your party for 48 to 72 hours. Are you a nuclear family with three kids? That’s three days’ worth for everyone. Are you and your partner young professionals just starting out? Six days’ worth total, then. What does three days of sustainment look like? In the end, you’ll have to figure that out for yourself. We suggest keeping it sparse; don’t pack an entire second home. Even if you normally eat three full meals and a couple snacks every day, you can easily last on half that (if not less) for a short duration. Either way, the essentials probably include:

>Food
>Water
>Basic hygiene/sanitation (wet wipes, hand sanitizer, dry shampoo, some toilet paper or paper towels)
>Weather protection (sunscreen for desert dwellers, extra pairs of thermal underwear and hand warmers for northlanders)
>Emergency signaling (flares, strobe lights, smoke signals, whistles, etc.)
>One full pair of clean clothes (shirt, pants, socks, underwear, jacket/fleece)
>Chargers or battery packs for all electronic communications

If possible, include a store of emergency cash. This could be used for everything from paying for a tow truck or buying a couple gallons of gas, to tipping a stranger to hitch a ride or borrow their cell phone, to using it as “throwaway” money if confronted by opportunistic criminals.

For this particular scenario, we won’t dive into a specific sample loadout for Line Three. Instead, we’ll move into another example of how to array your “Line Gear” where a Third Line becomes much more succinct.

EXAMPLE #2: “WEEKEND WARRIOR”

While your Editor spends his day-to-day lounging around caffeine and tobacco wells, tapping away at a keyboard and scrolling through social media, short and sometimes spontaneous excursions into the surrounding mountainous desert are a welcome reprieve that can typically be planned and executed in about 30 minutes. Hitting the trail poses a new set of challenges and restrictions that require some retooling of the gear lines outlined above.

Line One, at least for us, doesn’t change much. As the term EDC would imply, we carry those items and tools on us or with us, regardless of the ebb and flow of daily routine. So, for the sake of simplicity, we’ll skip listing out a separate First Line and instead focus on what changes when you go from blacktop to backwoods.

Second Line: Redwire Gear Emergency Management Rack and Demo Pouch

The open carry of weapons and gear is more convenient and commonly accepted when traversing the great wide-open, whether for an afternoon or weekend. Initially developed by commandos in Asia and Africa for carrying spare ammo, the chest rig has evolved into a modular, utilitarian platform to carry all manner of survival sundries. We especially like chest rigs for hikes, as they can be worn in conjunction with a backpack and give us quick access to supplies without having to stop and drop ruck to reach them. The Redwire EMR is one of the slimmest, lightest chest rigs we’ve put hands on to date, carrying a Goldilocks “just right” amount of gear while keeping weight and bulk to minimum. We’ve set ours up with the following:

Shoot, Move, Communicate, Medicate — those are the “Big 4” tasks you may be required to do in an emergency situation. The Redwire Gear chest rig allows you to carry enough gear to do all four in a footprint about the size of most T-shirt logos.

2x G-Code Scorpion Softshell Rifle Mag Carriers
The stretchy bungee retention and hybrid cloth/polymer construction of the Scorpion Softshell carriers allows them to be used for a variety of purposes. We have two on our chest rig — one for a spare 30-round carbine mag and one for our cell phone. (Since our Third Line pack has a waist belt, it can be tough digging into your pants pockets on the go.)

Blue Force Gear Tourniquet NOW Pouch
Tourniquets are one of those items that you’ll probably never have to use but, if you do, you want it 10 minutes ago. Our First Line med kit doesn’t include a hard tourniquet, so we mounted one on our Second Line. The Blue Force pouch holds one C-A-T or similar TQ in an easy-to-access, rip-open vertical caddy. Putting it almost dead center on the rack allows it to be accessed with either hand from almost any angle with minimal movement.

Emdom USA Multitasker Pouch
Just as with our urban-focused Second Line, we wanted to include a multi-tool of some kind. We used a Multitasker for several years and carried it all kinds of places, including overseas and around the country. It includes a bit set and several AR-specific features, like a front sight adjustment tool and a castle nut wrench. The Emdom pouch accommodates the tool itself and has a separate pocket for the bit set that comes with it.

Redwire Demo Pouch
Redwire Gear also makes the hanger/dangler/abdominal/subload pouch (whichever term you care to use). There are a number of these types of pouches on the market, and in the tactical duty world, they’ve become a popular addition to all manner of chest rigs and plate carriers to carry additional gear. We like the Demo Pouch in particular because the inside is lined with tennis-ball-green Velcro — soft side on the back wall of the pouch, hook side on the front wall. With a couple of strips of adhesive Velcro from the hardware store, you can make sure the items in your demo pouch are securely fastened and won’t rattle around in there. We stowed the following items in ours:

>Sportsmoke Sportsman’s Smoke Grenade
>Leupold Handheld Thermal Optic
>Firefly Infrared Beacon

Our outdoors pack also contains the full-size version of the 5.11 Operator Axe. It's got a longer handle that features a pry bar at each end as well as a larger blade and hammer head.

The search-and-rescue groups in our area regularly coordinate with both federal and local law enforcement air assets to find missing or distressed hikers, and both the federal and local agencies operating in our area have FLIR-equipped aircraft. Therefore, an IR beacon is a legitimate, excellent way to signal potential rescuers without drawing unwanted attention from animals or criminal elements. We like the Firefly because it’s so small and simple to operate. Just snap the beacon directly onto the leads of a household 9-volt battery and wait for the cavalry. To store it, flip the beacon upside down and tape it to the battery. They’re small enough that you can carry several to mark a large campsite or landing zone, or drop them along a trail like IR breadcrumbs if you have to move. They can also be attached to packs, helmets, and hats, or left in trees. According to the manufacturer, the signal is so bright that the Firefly can be placed in your pocket and still be detected by IR goggles and cameras.

Explosive Ops Gear MOD 1 Chem Light Panel
One of the other things we like about the Redwire Demo pouch is that the front of it has a huge field of Velcro to accept patches or panels. We chose the MOD 1 Chem Light Panel from Explosive Ops Gear. EOG is a tiny gear company based on the East Coast and, like Redwire, composed of current and former Explosive Ordnance Disposal specialists. The MOD 1 is designed to hold up to five full-size chemlights or 10 miniature ones. We set it up with the latter, allowing us to have both visible and IR lights on hand, depending on the situation and how “loud” we want our distress signal to be.

Third Line: Eberlestock Lo Drag II

With the infinite number of day packs and hiking packs on the market today, there’s bound to be one out there that fits your wants and needs exactly, or comes pretty damn close. We settled on the Lo Drag II by Eberlestock. We knew the application would be for a short-range pack meant for day hikes and trail use. We also knew we wanted something that wasn’t excessively large — a bag that allows you to over pack can be just as bad as one that’s too small to hold what you need. We packed ours with the following:

On waistbelt:
>Gerber fixed blade knife
>Military-style white light/IR dual-use beacon
>Leatherman multi-tool
>30-round carbine magazine
>Military-style lensatic compass
>Fire-starting kit including Fiber Light tinder and ferro rod
>SureFire G2 Nitrolon flashlight with Malkoff Devices drop-in conversion head (The Malkoff lamp assembly uses a fully potted LED bulb and improved reflector. While the original G2 Nitrolon had a meager 60-lumen output, the Malkoff add-on bumps that to 250 lumens.)

Building in redundancy is always a good idea. For example: smoke signals, chemlights, and ammo are included in both our Second and Third lines. Even if you're required to ditch an entire line, you retain certain critical capabilities no matter what.

Inside the pack:
>3 stripped-down/disassembled MREs

This leads us to our only gripe about the Eberlestock Lo Drag. Its main compartment features two full-sized laptop sleeves that are sewn into the bag and can’t be removed. For a bag that otherwise seems geared toward outdoor and field use, this seems like an odd feature. However, we cut open a couple of MREs and used the laptop sleeves like an accordion file to sort the various main dishes, sides, snacks, and ancillary components of the MREs.

>300-ounce water bladder
>Shemagh/head scarf
>Microfiber camping towel
>General first-aid kit
>Collapsible entrenching tool/shovel
>Military “VS-17” signal panel
>Emergency space blanket
>550 cord
>Butane lighter
>Carbine

This is our favorite part of the Lo Drag II — it comes with a built-in sleeve for a carbine. The sleeve can be unrolled to its full length, causing it to hang down below the rest of the pack, to hold a carbine up to 36 inches in overall length. Or you can keep the bottom portion rolled up tight and still fit a 24-inch gun. We chose the latter option and are running a 12.5-inch Sage Dynamics “K9” upper from Rosco Manufacturing. It’s set up with a Vortex Razor 1-10x optic and Trijicon RMR red dot in an Arisaka Defense offset mount. The 12.5-inch barrel is match grade, made of 416R stainless, and finished in black nitride. The Rosco upper is mated to an American Defense Manufacturing lower with fully ambi controls and a Gear Head Works pistol brace. This setup allows us to carry a sub-30-inch gun that’s capable of hitting targets out to 500 meters with the right ammunition. It fits into the Lo Drag’s weapon sleeve with only the brace and the end of the lower sticking out.

The Eberlestock Lo Drag II is a medium-sized pack that works well for all-day outings with enough room for the supplies you'll need if your day hike turns into an unscheduled overnight.

THE LAST LINE
Our hiking setup falls a little more in line with the original Special Forces paradigm of Line Survival Gear. If we were on the run through the mountains from some hypothetical pursuing enemy and needed to drop the Eberlestock pack, we could remove the rifle, take the 30-round mag off the waist belt and load it into the “cell phone pouch” on our Redwire EMR, and get moving again with 90 rounds of 5.56mm, as well as some signaling and medical capability. If, for some reason, I had to shed the carbine and chest rig, I would still have a knife, light, fire-starting ability, mini IFAK, and some E&E tools.

Is this a likely scenario for any of us to encounter? No, but it illustrates the practical lessons of the Line Survival Gear philosophy. Note how it incorporates the guiding principles of redundancy and prioritization. Once you understand the purpose of each “line” in your total preparedness strategy, you can scale the system in any way necessary to meet your needs. So, if you have mountains of gear stored in the shed or stuffed into old laundry bags, maybe it’s time to get your gear in line.


The Do’s and Don’ts of Wild Mushroom Foraging

WARNING: This article is meant to be an overview and not a detailed guide on identifying and consuming edible mushrooms. Seek guidance from a trained mycologist before attempting to eat any mushrooms. Any attempt to consume mushrooms shall solely be at the reader’s risk.

When you mention harvesting — and eating — wild mushrooms, though, especially in a room full of people who’ve never experienced more than the store-bought variety, get ready to see expressions of admiration shift to skepticism.

That’s for good reason, perhaps. According to the National Poison Data Center, there are over 7,000 exposures to toxic mushrooms in the U.S. annually. Of these, 39 per year result in major harm, and statistically, 2.9 per year prove fatal.

For those who make it a point to learn a few wild mushrooms, though, nutritional rewards await. Mushrooms have more protein than most vegetables. They hold high levels of riboflavin and niacin and trace amounts of vitamin C, B1, B12, D, and E, according to the International Journal of Microbiology. Vegetarians, especially, can benefit from adding mushrooms to their diet, not only because of the protein levels, but also because mushrooms are the only nonanimal food source of vitamin D.

Medicinally, species of fungi have been shown to have antioxidant, anticancer, antiallergic, antiviral, and antibacterial characteristics, again according to the International Journal of Microbiology.

Above: Golden chanterelles sautéed in butter on the left; strips of chicken of the woods grilled with peppers and onions on the right.

Knowing What’s Out There
Foraging for mushrooms isn’t a leap one should make without being anchored to knowledgeable allies. Between 5,000 and 10,000 species of mushrooms are native to North America. Of these, about 100 are considered edible and roughly the same number are counted as toxic.

The old saying that “all mushrooms are edible once” shouldn’t be put to the test. You should be certain of the identification beyond the shadow of a doubt before ingesting any wild mushroom. In fact, learning just one or two edible species each year and then expanding your repertoire slowly is advisable to ensure that you know your chosen fungi well.

Tools for mushroom hunting will include a sharp knife, a good camera, and a few mesh bags to allow spores to be dispersed as you walk. Field guides for your location are good to include — not just identification books for mushrooms, but also for associated trees if you aren’t already familiar with common species.

A good knife and a couple of mesh bags should be in the forager’s tool kit.

If you have a reliable cell signal, iNaturalist is a beneficial app. You can post pictures and location data that other enthusiasts can view, and multiple experts can offer input on the taxonomy of your discoveries. The Mushroom Identification Forum on Facebook is another social media tool. With 170,000 members, there’s a good chance someone has seen the mushroom in question before.

Two experts correctly identified this eastern cauliflower mushroom within an hour of posting it on the iNaturalist app.

Whenever you’re relying on photos for identification, take detailed pictures of both the upper and underneath portions of the cap, as well as the stalk. Note whether it arises from the ground, from dead wood or a living tree. Species may be distinguished by the presence of gills, pores, or other spore structures.

Spore prints can also be useful. Put the mushroom cap — spore structure down — on a sheet of paper, hydrate the cap with a few drops of water, and cover it with a cup or glass for a few hours. The color and arrangement of the resulting print can aid in identification.

Help in the Flesh
As valuable as books or online resources may be, these methods aren’t nearly as beneficial as seeing mushrooms in their natural habitat alongside someone who knows.

“The best advice I can give for people wanting to forage for edible mushrooms is to join a local mushroom club,” says Dr. Jean Williams-Woodward, University of Georgia Extension plant pathologist. “Here, we have the Mushroom Club of Georgia. The clubs often conduct forays where people can learn to identify and locate edible mushrooms in person.”

If you can’t stand shoulder-to-shoulder with an expert in the mushroom’s habitat, bring the mushroom to the expert. Don’t sweat about picking a mushroom for identification later. It’s not the same thing as yanking up a wildflower. What we call mushrooms are the fruiting bodies of a complex network of vegetative fibers we can’t see beneath the soil surface or under the bark of a tree. The mushrooms are analogous to the apples on an apple tree, springing forth from an extensive hidden organism that has successfully colonized a fallen log, a standing tree, or a patch of soil.

Above: Although you may stumble across edible mushrooms in the winter, they can be tough and unpleasant. With some species, though, one may return to the same tree year after year. Photo by Elizabeth Farris.

Raw or Cooked?
Most of us have eaten raw mushrooms from salad bars, but cooking any mushroom is a good idea for a couple of reasons. First of all, the cell walls of fungi contain chitin, a fibrous substance. Breaking down the chitin via cooking will make the mushrooms easier to digest, as well as making the nutrients within more accessible.

Connoisseurs often opt against washing their mushrooms, citing the fungi’s ability to soak up water like a sponge. Given that characteristic, brushing off the visible dirt and then cooking the mushrooms is a means of “cleaning” your harvest. If that leaves you squeamish, a quick rinse is acceptable, but definitely refrain from soaking them.

Above: A translucent ghost fungus (nonedible) — an interest in edible mushrooms will spark a broader interest in fungi in general.

Some You’d Want to Eat

> Morels (Morchella species)
It’s fair to say that many mushroom hunters get their start with the elusive morels. I decided to seek them out one Easter in Kentucky, adhering to the local lore of waiting until “the poplar leaves are as big as a mouse ear.” I walked a hundred yards along a skid trail beneath a tulip-poplar forest without finding a single “dry-land fish” (as they’re known in some locales). When I did an about face to return to my starting point, I collected a pound along that same trail I had failed to see earlier.

Finding that first morel in the spring can be a thrill for a forager.

Mushrooms in the genus Morchella are considered the true morels, and several species are indigenous to North America. (There’s some debate on exactly how many species there are, as these mushrooms have been classified and reclassified over the years.) Foragers may distinguish them as black, white, gray, or yellow or identify them based on the trees they’re typically found beneath.

Morchella species grow throughout the U.S. In my part of the world, I find black morels in tulip-poplar woods first and larger white morels in old orchards or beneath sycamores. Certain morels can be found under elms and sugar maples. Forest fire sites can be good locations as well.

Size, color, and shape of morels can vary considerably.

The false morel is a toxic look-alike for which distinguishing characteristics are described later.

> Chanterelles (Cantharellus species)
As with morels, there are multiple species within the Cantharellus genus commonly referred to as chanterelles, and these are distributed throughout North America. However, species within the same family, but within different genera are also called chanterelles, such as the prized black trumpet or black chanterelle (Craterellus cornucopioides). And as with morels, there’s debate about the classification.

Chanterelles emerge individually from the soil — not in clumps from wood like some look-alikes.

Chanterelles grow from the ground and not attached to trees or logs, and they can be found in both hardwood and coniferous forests in the summer and fall. The golden chanterelle (Cantharellus cibarius) is perhaps one of the most easily recognized species in the genus, with a yellow to yellow-orange color and, some say, a fruity aroma.

A feature of chanterelles is the presence of false gills.

> Chicken of the woods (Laetiporus sulphureus)
Some consider this firm, orange and yellow fungus to be a good choice for beginning foragers, as it stands out like a neon sign. You’ll find chicken of the woods in the summer and fall growing on logs or standing trees (living or dead). In addition to the bright colors that catch your eye, the underside will be marked by pores rather than gills.

It’s not unheard of to harvest 50 pounds of chicken of the woods from a single tree.

This colorful mushroom has a texture that allows it to be used as a substitute for chicken — coated in batter and fried or added to pasta or soup.

The unmistakable colorations of chicken of the woods make it a good species for beginners.

Note that there are Laetiporus species in the western U.S. and Great Lakes region that are considered mildly toxic. Until recently, these were believed to be Laetiporus sulphureus, but they tend to grow on conifers (and on eucalyptus in the case of one). Just to be safe, only harvest chicken of the woods from hardwoods.

> Hen of the woods (Grifola frondosa)
While the name will make you believe it’s a close relative of Laetiporus species, hen of the woods (also known as maitake) isn’t even in the same family. This species is a large mushroom, comprised of lobes that fan out from a central core.

More often than not, hen of the woods is found attached to the base of living oaks in late summer through fall. Just like Laetiporus, it has pores underneath rather than gills, and the upper portions are wavy and brown, bringing to mind the tailfeathers of a hen.

The pheasant back or dryad’s saddle is said to have a lemony flavor that goes well with chicken or fish.

Hen of the woods is found in the northeastern and mid-Atlantic United States and Canada. Once you find an oak that hosts this species, you can return to the same tree again and again to harvest the fruiting bodies.

Some You Don’t Want to Eat

> Death caps and death angels (Amanita species)
An estimated 90 to 95 percent of mushroom-related deaths in North American are due to ingestion of the Amanita genus, according to the Journal of Forensic Science. Of those deaths, Amanita phalloides (the death cap mushroom) is responsible for more than 90 percent, and while this species isn’t native to North America, it has been introduced and is quite common along the West Coast of our continent.

Other species of Amanita are native to North America and widely distributed. Multiple species share the common name of death angel. One cap from an Amanita mushroom can contain a lethal dose of toxin.

Death caps and death angels

Amanitas can be recognized by volvas (veils at the base through which the stalk protrudes) and white spore prints. They’ll sometimes (but not always) have warts and stem rings.

> Galerina marginata
A little brown mushroom that contains amanitin, the same toxin as that in death caps and death angels, Galerina marginata can be found year-round in both coniferous and hardwood forests all across North America.

Galerina marginata

This species is typically attached to wood and sometimes grows in clusters, and while it’s relatively nondescript, it can be distinguished from lookalikes by its spore print, which will appear rusty brown in color.

It’s estimated that 15 to 20 caps of this species will provide a lethal dose to adults.

> False morels (Gyromitra species)
Only 20 cases of false morel poisoning have been reported in the United States since 1900, but half of those proved fatal, according to the Journal of the American Board of Family Medicine.

False morel

Gyromitra species are distributed widely across the United States and typically emerge in the spring. Rather than the pitted caps seen on true morels, this toxic look-alike will have a cap that more closely resembles a smashed and wrinkled brain on a stalk. Slicing the mushrooms open lengthwise, the true morels are hollow, but the insides of the false can be somewhat cottony in texture.

> Jack-o-lanterns (Omphalotus illudens)
Jack-o-lantern mushrooms are often found growing in the same habitats and at the same time as chanterelles, so the two can be easily mistaken. While you may see several chanterelles together, they’ll be separated on different stalks that emerge from the soil, while jack-o-lanterns will grow from wood in clumps. Furthermore, the stalk of chanterelles will have a texture reminiscent of string cheese.

Jack-o-lantern mushrooms

Jack-o-lantern mushrooms have blade-like gills beneath the cap, whereas chanterelles have false gills more akin to wrinkles. Right in line with its Halloween-inspired common name, the jack-o-lantern has the characteristic of being bioluminescent.

If you suspect that you or someone you know has eaten a toxic mushroom, get medical attention immediately. Contact the Poison Control Center at (800) 222-1222, and the call will be routed to a nurse or pharmacist near you. If it’s possible to take a sample of the ingested mushroom to the emergency room with the patient, do so.

The Legalities of the Hunt
A limited number of mushrooms for personal use may be harvested from U.S. Forest Service lands. The limit is one gallon per day or five gallons per season. If the harvest exceeds this, or if the mushrooms are to be marketed, a permit will be required.

This can vary if the species of interest is listed as threatened or endangered in the area or in regards to harvesting in designated special biological areas. The rules are more variable in regards to National Park Service property as well as state forests and state parks. If you intend to forage on public lands, it’s wise to check with a manager first to avoid legal woes in the long run.

Labeling requirements and other regulations that relate to selling wild-harvested mushrooms at farmers markets or other outlets will be location-specific. Check with the market manager or your county’s Cooperative Extension office for the most reliable information.

Foraging for wild mushrooms can be a rewarding proposition, with nutritional, gourmet products to be found from spring through fall. For those new to the game, there’s a lot of homework to do. Guidebooks, online communities, face-to-face time with experts, or, preferably, all of the above can help you gain the knowledge to feast safely. And if there’s ever any doubt as to a collected mushroom’s identity, it’s best to just walk away.

About the Author
Phillip Meeks is an agriculture and natural resources educator originally from Tennessee, but now based in the mountains of Southwest Virginia. He likes to spend his weekends hiking, gardening, beekeeping, fishing, and mushroom hunting.


Review: Team Wendy Radio Rig

Photos by Broadview Motion

Whether knowingly or unknowingly, if you’ve used ballistic or bump helmets before, you’ve probably used a Team Wendy product. While the company is best known for helmets, they also make some other products, such as the Team Wendy Radio Rig. It’s evident that a lot of thought has gone into this communications-gear-oriented load-bearing vest, which has some outstanding and thoughtful features. Depending on the environment in which you deploy, it can make you more agile and efficient while working with your comms loadout in the field.

The information Team Wendy sent out leading up to the rig’s release suggests that their target market was search-and-rescue (SAR) teams. So, while this review will primarily cover the SAR perspective, it’ll also discuss other applications in which this type of rig could be beneficial.

As opposed to most plate carriers and chest rigs, the Team Wendy Radio Rig is optimized for communications and utility...

Note: The patches in this article were provided by CitizenE Industries.

Pouches, Pockets, and Pull-Tabs
The rig is well constructed, with excellent stitching, and comes with three pouches that can accept a plethora of radio/GPS types and sizes, as well as an additional weather-resistant accessory pouch. The pouches are attached to the rig via PALS webbing, so you can attach any other MOLLE-compatible pouches that you have. However, the advantage (and value) is that the pouches are provided as part of the rig. The individual or organization purchasing it need not incur additional costs to buy extra pouches to outfit the rig appropriately.

The three pouches are very reminiscent of standard rifle magazine pouches. Attached to the Velcro closure and the rear of the pouch is shock-cord with a small nylon pull-tab. In an age of digital radios that have LCD screens and 10-plus digit key inputs, it’s very important to be able to remove the radio from its pouch without having to repeatedly manipulate the Velcro closure.

Once you select the appropriate pouch for your device, you may have some extra space in the pouch that allows your device to flop around during movement. This is easily remedied by the tried-and-true method of twisting the shock-cord repeatedly, properly adjusting your pull-tab placement, and resecuring the Velcro closure. The elastic shock-cord will then secure your device in the pouch more tightly.

The clear-windowed interior pocket of the Radio Rig is ideal for a map, tablet, or other similar-sized items needed for...

If your device is between pouch sizes, the sides of the pouches themselves also have elastic and will stretch. If you can secure your device in the smaller of the two pouches, while still being able to remove it efficiently via the shock-cord/pull-tab, that’s your best bet.

The weather-resistant accessory pouch was perfect to carry a smartphone. Its Hypalon construction and high-quality zipper provides a lot of confidence during a downpour. To test the level of weather-resistance, I poured water directly over the zipper in a sink and couldn’t find any evidence of water incursion. However, if you have a large phone or case, it may not fit, and the sternum pocket of the rig will work better. For example, an iPhone XR with a case maxed out the pouch. If you’re unable to use this pouch for your phone, it could certainly accept various GPS devices or anything else you want to shelter from the elements.

There’s a strip of loop Velcro for your name tape, identification, or other accessories that are backed with hook Velcro. There’s also two triangular pieces of elastic on each side of the Team Wendy logo. These extend behind the logo, allowing various items to be clipped on, such as a speaker/mic. The main admin pocket is located on the sternum of the rig and is a great place to put your field notebook or any other mission essentials. Team Wendy outfitted the interior of the pocket with elastic bands of various sizes that can easily accommodate pens, Sharpies, chem-lights, protein bar, or multi-tool.

Cable Management
In the admin pocket, behind a nylon separator and secured by two snaps, is the space used for cable management. That’s where I started running into some issues. On the front of the rig are six pass-throughs that are shaped like a plus sign. They allow you to run your communications cables through them, leaving excess slack in the cable management pocket and out of the way. This is an outstanding idea, but the size of the pass-through openings severely limits the size and type of cables and connectors that can be passed through them. The circumference of the pass-throughs is roughly the size of a quarter and, unless you’re just running uncoiled cables with slim audio connectors (such as dual-pin connectors or single-pin connectors used on a Peltor Comtac System), you’ll have similar issues.

While evaluating this rig, I ran a speaker/mic, and the majority of those come with a coiled cable to allow for flexibility. Coiled cables were nearly impossible to thread through the small pass-throughs. Additionally, the multi-pin connector on my speaker/mic barely fit through the opening, requiring a substantial amount of force that nearly compromised the rubber gasket on the inside of the connector. The multi-pin connector for my Hytera speaker/mic is one of the smallest multi-pin connectors on the market (without using an additional adapter) and pushing it through was still a struggle.

Several Motorola and Kenwood speaker/mics wouldn’t fit through the pass-throughs, especially those located at the bottom of the rig, which caused the connectors to bind. Switching from a speaker/mic to a two-wire earpiece and mic still results in the same issue as with the multi-pin connector, but because two-wire earpiece setups don’t incorporate coiled cables (with the exception of the earpiece itself, Secret Service style), you can at least push the excess cable into the pass-through to get it out of the way. Short of purchasing adapters for your comms gear or hogging out the pass-through openings, you can also simply snake excess cable around and in between your pouches.

Maps, Analog or Digital?
The clear interior pocket accommodates a paper map or tablet for navigation or reference. To reference your map while in the field, you can unclip the front of the rig utilizing the magnetic “Fidlock” buckles. They’re independent of the main support structure of the rig, so the rig won’t fall off of you when you unclip them. Once unclipped, the front of the rig is suspended at roughly a 45-degree angle, attached to the main support structure of the rig via two elastic straps. Once your map check is complete, simply resecure the Fidlocks into place and continue on your way.

The Fidlocks are very easy to manipulate once you practice with them a little bit. Many designs over the years have required the user to disconnect and reconnect Fastex-type connectors mounted on your shoulders. Even with a full loadout in the Team Wendy rig, using the Fidlocks was so much simpler than previous designs.

If you put a tablet in the clear pocket, it’ll be protected from rain or snow but still accessible. While typing is a challenge, swiping and manipulating a map on the touchscreen is no problem. Depending on the size of your tablet, this is a great option and allows for a lot of utility. I carried an iPad Mini in the pocket without worry — just keep in mind what you place in the admin pocket next to it. Even though the pockets are separate, items may hit your tablet if you happen to find yourself laying on your stomach, and your tablet’s glass may not appreciate that.

Inside the map pouch, there are three pieces (two short and one long) of padded material that stick to the four vertical hook Velcro strips on the interior of the map pocket. You can use them to help secure your tablet or phone in the pocket so it doesn’t bounce around, though the user guide that came with the rig doesn’t reference their intended purpose. Outside and below the clear map pocket is a 1-inch strip of mesh that had shock-cord stitched into it, complete with a keeper. Using the shock-cord and the keeper, you can make minor adjustments to how tight or loose the mesh is. It’s not clear what it’s for, as the user guide doesn’t address it either.

The minimalist footprint makes for relatively easy donning over soft armor or outerwear, and even includes a limited...

Moving to the Rear
At the top on the back of the rig is a loop Velcro field for a patch or identification. Below that are two strips of PALS webbing that are covered in loop Velcro, providing real estate for additional patches or a larger field to attach a single large patch. If you’d like to relocate an antenna to the rear panel or attach an IFAK (individual first aid kit) that a friend can use on you if you’re injured, that’s probably the best use of this space. In the guide, it states that the “low-profile rear panel allows use with other backpacks,” so a backpack like the Haley Strategic Flatpack could be a nice companion.

Other Prospective Uses
Besides SAR teams, who else could benefit from the use of this rig? It definitely has a place in the emergency management sector. Regardless of how integrated your communication plan is, emergency management teams routinely have to carry multiple radios to maintain contact with various agencies to coordinate a response.

It also has utility in tactical environments. While you may not want to stack up with an entry team wearing just the Radio Rig, it could excel in a surveillance role, especially with a multi-agency task force where different agencies may be working on different radio systems and frequencies — requiring you to carry multiple radios. Likewise, close protection teams and covert response teams could easily conceal this rig under a jacket. Last but not least, it could also be useful to amateur radio operators, especially those who participate in RACES (Radio Amateur Civil Emergency Service) and work with emergency management teams during times of crisis.

Conclusion
The Team Wendy Radio Rig is a well-constructed piece of gear that could fit into numerous applications and environments. The Fidlock buckles allow the end user to easily reference a map or a tablet in the field — they’re my favorite feature on this rig. The rig also comes with several pouches so you can put it to work right away, as well as standard PALS webbing instead of a proprietary attachment system. It’s also very comfortable — those on long callouts will certainly appreciate this.

The pass-throughs and routing loops, however, should be enlarged to accommodate the cables and connectors most commonly used in first-responder communications equipment. Also, the rig could use better instructional documentation, so you know what all of the straps and cords are intended to do.

All things considered, the Team Wendy radio rig could serve you and your team well if you’re in need of a dedicated load-bearing system for comms gear.

Team Wendy Radio Rig
Size: One size fits all
Color: Black
MSRP: $135
URL: www.teamwendy.com


Bag Drop: The Amazon Gray Man Pack

By now, most people in self-defense or preparedness-oriented communities know what the term “gray man” signifies. It’s the idea that you can walk around with all of your emergency tools at the ready without looking “tactical.” This is funny because it’s so easy to spot. Many of us are never truly a gray man, because we allow our preparedness to become a lifestyle or culture. To that end, many of us wear something that sends a signal to others and lets them know we are of this mindset, or culture. And believe it or not, there are characteristics of the gray man suit that are easy to profile by anyone who wants to do so, whether friend or foe. This means we’re almost defeating ourselves.

However, there’s still a large and legitimate market for low-profile gray man gear, and one of the biggest categories in this arena is packs. But sometimes the best sources for this kind of equipment are places that don’t specialize in it. I’ve been recently looking for a different pack to carry for my day job working executive protection. I was on one of my favorite online tactical gear sites, Amazon, looking for my next ultimate gray man bag, when I stumbled upon DSLR camera bags. I was checking them out, and there’s a wide variety to choose from. They have canvas and leather, bike messenger sling bags, sleek corporate bags, in all sorts of shapes and sizes.

Then I got to thinking, these things are really well-built, padded to protect valuable equipment, and many are designed for quick access to a camera in the same way we like quick access to a firearm. I also really took a keen interest in the organization compartments. I carry a lot of gear to keep clients and myself safe, and I hate having to dig through the bag to find stuff. The DLSR bags already come with a multitude of compartments, Velcro slots, quick-access zippers, and organizer pockets. All of them come with a compartment for computers and/or iPads. Finally, none of them looked at all tactical. Then it hit me: I don’t think I’ve ever seen anyone make use of a camera bag for their EDC.

Shortly after making this realization, I’m on my second camera bag. I thought the first one was going to be great, but a couple months in the zipper broke — that’s a no-go. Rather than buying sight unseen over the internet again, I went to Best Buy to check out their bags and found a winner. Let me introduce you to Lowepro camera bags — specifically, the Lowepro Flipside 300 AW II. This thing will run you about $120 but, in my opinion, it’s well worth it. After having surfed their website, the company really has an outstanding selection of bags that, ironically enough, include some tactical and camo-looking ones — for the gray man who likes to print just a little. I’m really impressed by their selection of bags and applications. Some are more geared toward wilderness backpacking, some for urban carry, and some have a nice combo for both applications.

A slim admin pocket on the outside of the pack provides organized storage for small items, such as business cards,...

The Lowepro Flipside has a large compartment that takes up the whole bag. Some bags that I’ve found split the main compartment in half with an opening on the lower half, either in the front of the bag or in the back neck area, and the rest use up the whole length of the bag. I’ve decided after the first bag that had the split compartment, I like the full-length compartment more. It has more room and more Velcro slots for organization. What I really like when I open it up is how quickly I can access the compartments. The zippers move smoothly, and there’s no protective material over the zipper to snag and impede access.

When the compartment opens, you’re treated to a light gray contrasting color to the black, which makes it simple to find gear, along with five potential compartments and a small detachable zip compartment that’s perfect for my gun when it’s not on my hip. The rest of the compartments can be moved and modified to fit your needs and the gear you carry.

The size of the bag is important to me as well. In EP, I don’t want a big cumbersome bag that I have to try to maneuver when on the move with the client. I like that the bag isn’t very big to make it look like I have a bunch of stuff inside of it. The way the bag is designed makes it feel sturdy, easy to carry, and light. This is one of the better bags that I’ve carried.

Make & Model
Lowepro Flipside 300 AW II
MSRP
$120
URL
www.lowepro.com


“The Final Weapon” – The Many Facets of Self Defense

Self defense skills are like ice cream. There are countless flavors, and it might be “hard” (e.g. fighting proficiency) or “soft” (e.g. awareness of pre-fight warning signs). But in the real world, it inevitably melts over time. This statement on the importance of continuous training was one of the introductory lessons from FPF Training’s Concealed Carry: Advanced Skills and Tactics (ASAT) course. ASAT is a two-day class, but it begins with some pre-class homework in the form of a four-hour YouTube video playlist created by instructor John Murphy. If you’d like to watch some free lessons from the comfort of your couch, you can find it at bit.ly/2QJ5xMO.

Although the ASAT curriculum certainly involves shooting — each student fired about 700 rounds over the course of the weekend — it places an increased emphasis on skills that go “beyond the gun.” Realistically, you’re far more likely to use verbal de-escalation to deal with a panhandler, deploy pepper spray to fend off a belligerent drunk, or use a tourniquet to help an injured motorist than you are to draw and fire your gun. Knowing how to use lethal force is undeniably valuable, but if that’s the only option you’ve ever practiced, you’re bound to be unprepared for most of life’s conflicts. Knowing this, Murphy spent a substantial amount of time focusing on supplementary skills.

After discussing topics such as awareness, avoidance, de-selection (looking like you won’t be an easy victim), de-escalation, and evasion in the classroom, we headed outside to deal with the last step in this continuum: force. However, that doesn’t just mean lethal force. Pepper spray can be an excellent intermediate tool. Murphy handed each student inert pepper spray training canisters loaded with water, and we practiced using these on an approaching attacker while maintaining a safe distance and issuing verbal commands. After seeing how simple and effective it was during training, I’ve added a canister of POM Industries pepper spray (included in the class fee) to my EDC loadout.

Transitioning to the range, we practiced fundamentals such as basic marksmanship, drawing from concealment, and moving while firing, but then continued on to more complex drills. These involved 3D targets to gauge shot placement from various angles, and multi-headed paper targets to simulate an adversary who staggers to one side after the first hit. Murphy also brought out red and green laser pointers to quickly designate a target for lethal or less-lethal force, causing students to respond on the fly as they would in a real conflict. We even had to simulate a 911 call to inform law enforcement after an incident.

Since injuries are common in daily life and self-defense scenarios, medical skills were a constant emphasis throughout the class. We practiced correctly applying tourniquets and pressure dressings and had to carry ankle trauma kits with these items at all times. Murphy would occasionally yell “tourniquet, left leg!” or similar commands with no notice, and time students until they completed the task. This reinforced the importance of being ready and able to treat a sudden, life-threatening injury.

Above all, this ASAT class served as a stark reminder that having a gun and the skill to use it is one small part of the self-defense paradigm. Gunfights are rare, but virtually all of us will witness traumatic injuries, fistfights, and/or verbal altercations in the future. Each of these skills should be balanced accordingly. For more information on FPF Training classes throughout the United States, go to www.fpftraining.com.

Keep an eye out for a recap of another training experience in the next edition of The Final Weapon. Until then, get out there and work on sharpening your own skills — when the time comes to use them, you’ll be glad you did.