Somewhere between 3 to 8 percent of the population will deal with Post Traumatic Stress Disorder, or PTSD, in their lifetime. In the past 30 years, progress has been made in identifying therapies to aid in the recovery of individuals afflicted by PTSD. Several treatment modalities have shown benefit. The purpose of this article is to review some of those treatment modalities. We hear more about PTSD today due in part to its fairly recent recognition by several organizations as a “real” psychiatric disorder as well as increased public service announcements.
A lengthy and specific definition of PTSD can be found in the Diagnostic and Statistical Manual of Mental Disorders, Fifth Edition (DSM-5). To summarize, people who have PTSD are often those who have undergone a traumatic experience related to near death or perhaps a trauma related to sexual abuse. They often have flashbacks, distressing dreams, or memories of the traumatic event. Because of these symptoms, patients may avoid anything that reminds them of the event.
These experiences cause a variety of symptoms, including anxiety, irritability, disruptive behavior, depression, isolation, and even suicidal thoughts. We now have a common screening assessment for PTSD, called the PTSD Checklist (PCL). There’s a version for civilians (PCL-C) and one for military (PCL-M). If you score above 44 on the PCL-C, or 50 on the PCL-M, you may have PTSD, and need to see a doctor for further recommendations. A shorter version is the PCL-6, where a score of 14 or greater suggests that PTSD is likely.
A physician may prescribe medication, psychotherapy, or both to assist in treatment. Studies have shown that these are about 50-percent effective in helping those with symptoms of PTSD — not perfect, but every bit helps. Medication stabilizes the mood and lessens some of the symptoms that are disrupting the individual’s life. Therapy is an essential adjunct to help the person overcome the negative associations and psychological pain attributed to the event.
Medication
Drugs like Selective Seratonin Reuptake Inhibitors (SSRIs) and Seratonin-Norepinephrine Reuptake Inhibitors (SNRIs) are the standard of care for PTSD. SSRIs include drugs like Sertraline (Zoloft), Fluoxetine (Prozac), and Paroxitine (Paxil); Venlefaxine (Effexor) is a recommended SNRI. These drugs work on chemical components of the brain that help the patient deal with anxiety and depression that’s often experienced with PTSD.
Another drug that has been helpful in some patients with PTSD is Prazosin. This drug is commonly used to treat enlarged prostate in men; however, it has been shown in some people to reduce the number of nightmares and improve quality of sleep. Study conclusions have been mixed as to Prazosin’s general effectiveness; however, it’s typically recommended to see if there’s a benefit in each individual patient.
Lastly, medical marijuana has gained a lot of popularity for treating just about everything under the sun; however, it hasn’t been shown to provide a benefit in PTSD patients.
Mindfulness
Jon Kabat-Zinn wrote his treatise on mindfulness back in 1990, detailing what mindfulness is and how to go about being mindful. In short, he proposed that we become mindful of the moment. Savor the food we chew. Feel the sun on our face and the grass beneath our feet. In doing so, we can gain an appreciation of our current moment and live a better, more in touch, life.
Often with PTSD, the trauma keeps rearing its ugly head, and we forget about the moment we are living, and step back into a horrible time in our lives. Mindfulness offers an escape from the past as we focus on the now. There’s an excellent app called Mindfulness Coach that I recommend. Also check out www.mindful.org to learn more about mindfulness.
Above: Mindfulness and meditation are essential components of PTSD treatment.
EMDR
Eye Movement Desensitization and Reprocessing (EMDR) was developed by Dr. Francine Shapiro in 1990. It’s a complex form of therapy that combines modalities from other therapies to have its beneficial effects. Basically, in EMDR, the traumatic event is recalled while a repetitive act is performed (tapping fingers, roving eyes). This interrupts the old thoughts associated with the memory and creates a new pathway for the brain to associate with the event. The process can take a while to prime the patient for successful treatment. It has a lot of research showing its benefit, as supported by the World Health Organization, the American Psychiatric Association, and the Veterans Administration. I have seen this work in several patients with amazing success. See www.emdr.com for more information.
Above: Physicians should take a multi-disciplinary approach to treat PTSD.
Stellate Ganglion Block
The idea of using medication injected into the stellate ganglion on the right side of the neck was first proposed in the 1940s. It wasn’t until 2010 that the first study was done to see if stellate ganglion block could help with PTSD. Although the exact mechanism of how it works is unknown, the idea is that it “calms down” sympathetic stimulation of the nerves during anxious times. It’s still being used, but there’s mixed evidence that it’s helpful. The Veterans Administration suggests that more study needs to be done on this modality.
Cognitive Behavioral Therapy
This popular and effective therapy focuses on the symptoms of trauma and its effects on thoughts, feelings, and behaviors. There are two modalities commonly used in CBT: exposure therapy and cognitive restructuring. In exposure therapy, the person might be asked to relive the trauma in a safe environment. The exposure can be written, verbal, or even virtual reality-based. In cognitive restructuring, the person is asked to recall the trauma in a more logical way, as they often only remember pieces of the trauma and sew together what they may have missed. The goal is to have the patient re-evaluate their negative associations with the trauma and to develop more effective patterns of thought. There are typically 12 to 16 sessions involved.
Above: Cognitive Behavioral Therapy has been proven to be effective in treating PTSD.
Cognitive Processing Therapy
This was developed in the 1980s and is a specific subset of Cognitive Behavioral Therapy aimed at treating those who have succumbed to a sexually traumatic experience. Often, patients blame themselves after such an incident. Patients are asked to think about their trauma and how it has affected them. In order to overcome their trauma, they must develop an understanding of how they feel in relation to the trauma. They must develop new patterns of behavior associated with the event (e.g. “I survived the trauma because I fought the SOB,” rather than “How did I let this happen?”). CPT is typically 12 sessions long.
Post-Traumatic Stress Disorder affects millions of people in the U.S. Our understanding of screening, diagnosis, and treatment has improved over the past 30 years. PTSD is now recognized by the American Psychiatric Association and the World Health Organization as a disease. Medications and relatively newer therapies, such as Eye Movement Desensitization and Reprocessing, as well as older therapies, such as Cognitive Behavioral Therapies, can provide benefits to people afflicted with PTSD. Treatment is lifelong, and there are no shortcuts. There is help, and there is hope, for those suffering with PTSD.
About the Author
David L. Miller, DO, FACOI, is an internist in private practice for 20 years. His experiences away from the office have included time as a fight doctor in regional MMA events and as a team physician for 10 years at a mid-major university in the Midwest. Currently, he serves as the lead medical instructor for the Civilian Crisis Response team based out of Indianapolis.
The Premise: This book is a 21st-century outdoorsman’s manual. It’s meant to be a practical guide to the thoughtful process of gear selection, food and water, dangers to be aware of, shelter and warmth, navigation and travel planning, and medical safety. It’s a team effort from a group of professionals. To date, it has sold over 100,000 copies. While it’s aimed primarily at the active outdoorsman, the information in the book also serves as a detailed manual for disaster preparedness.
The 411: The pages of this book are densely packed with practical info, with no extraneous filler.
I spoke with author Steve Rinella as part of my review process for this book, and think he can best describe the aim of this book in his own words:
Steven Rinella: “I’ve always gone into the outdoors, out in the wilderness, with something I wanted to accomplish. Whether it’s working as a journalist in very remote corners of the world, or filming a TV show, or hunting, or taking my kids out to teach them about nature, I’m going out because I want to get something done. I view wilderness survival skills as a way to facilitate accomplishing my goal.
“It’s not like I do a lot of camping just for the sake of camping. There’s a level of determination to go into places, enjoy them, and be effective. To do that, there are a lot of practical skills one needs to develop. There are also skills that you need to accumulate over the years. I think that once you get pared down to the things you need, and you know how to maintain them, then you know their applications. You keep them in your home, and they become a part of your home. We wrote a lot about building a basic kit. And then we say, it’s not a survival kit. It’s not a medical kit. It’s all those and more.
“When we go on a family vacation, I packed these things with me because it’s the stuff I know I need. It expands my ability to do things and feel comfortable. It’s got flashlights, batteries, med equipment, zip ties, all these things. Am I going into a wilderness setting? No. We’re going down to stay at a rental house, but I have it with me because it makes me feel prepared.
“I have a system in my truck. I keep my truck very well-stocked with first aid, medicine, food, insulated rain gear, tire chains, tire repair stuff. I have it all. When I’m going ice fishing or going hunting, I’ve got to be ready. But it makes it so I don’t care when I get in that truck. That thing is ready. I’m ready to go. If, somehow, I drove away from my house and my house vaporized, I would be good for a few days. I like to have that feeling.
“That does not mean I sit around rooting for the end of society. I quite like society. But I don’t live in fear of something bad happening and feeling like I’m not ready.
“I call myself an ‘accidental prepper’ because I have an enormous amount of freeze-dried food. I have firearms, ammunition, cooking fuel, everything. The only thing I needed to add, I realized, is in my crawl space. I keep treated water. That’s the only ingredient I needed to reduce my vulnerability because I already have the remaining gear as an outdoorsman, and I know how to use it.
“There’s a general preparedness that goes into life. When you get prepared, when you’re equipped, and have the knowledge, skill set, and the tool kit to get by in the winter up in the mountains, I would have to assume you should be pretty damn OK in town.
“That’s my view on it. I harvest preparedness as a sort of side benefit. A perk to the lifestyle that I have is that, at all times, I feel prepped for whatever might come my way.”
The Verdict:
The book is a true cover-to-cover read. It’s one you will reread as a reference manual as you dive into each chapter to adjust your gear. Like me, you may make changes based on what you learn. I updated my water treatment kit to include both a high-capacity MSR water filter and an ultraviolet light Steripen. I expanded the types of food I’m stocking and testing. I now carry both Tylenol and Ibuprofen. I installed and learned to use new apps, and carry multiple ways to keep devices charged. And I bought electronic arc lighters, including one long enough to stick into and light a Coleman stove without toasting my fingertips. The bottom line is that if you want to thrive while surviving, absorbing this book is worth your time.
Book and Author
The Meateater Guide to Wilderness Skills and Survival By Steven Rinella
COLORS: Various, including Blue, Gold, and Red MSRP: Starting at $25 URL: tyrantcnc.com
In a life-and-death situation, having a second magazine full of ammo won’t do you any good if you can’t eject the first empty magazine efficiently from your firearm. That’s why Tyrant Designs has come out with this extended magazine release for the popular Smith & Wesson M&P Shield. By extending the length and increasing traction with a crosshair pattern, this sturdy component increases purchase and adds control to your relo.comads so you can press the release quickly without having to grope for it. Not just for show, this upgrade can boost both your gun’s aesthetics and performance. It can be installed in seconds without any tools. Designed and made in the USA, this mag release fits both the 9mm and .40-caliber versions of the M&P Shield, as well as the newer Shield 2.0.
Loyal readers will know that an analog wristwatch can offer many improvised survival functions — way more than we have room here to describe. But rest assured, the Field Watch 2.0 will perform admirably both in the backcountry and big city. It retains the best elements from the original Field Watch but adds two important features: a clear date window and phosphorescent Super-LumiNova hands (to see in dark conditions). They’re well protected thanks to a chip- and scratch-resistant mineral crystal display, a 44mm stainless steel case with a matte ion-plated finish, and a stainless steel screw-in backing. While the 22mm-wide nylon NATO band is a tad long for our liking, it’s sturdy and flexible. Plus, the watch is water-resistant up to 100 meters.
SOG isn’t exactly what it used to be … and that’s a good thing! The Pentagon XR is a prime example of how the company has remade itself in the past year by refocusing on functionality over flash, and quality of products over quantity of sales. This folder’s spear-point blade is made of CTS-XHP, a premium stainless steel that has great corrosion resistance, toughness, and edge retention. These attributes make it effective for daily carry, professional use, or hard field use. Plus, the knife features SOG’s XR Lock, dual thumb-studs, a flipper tab, and a reversible pocket clip — all of which allow for ambidextrous, one-handed operation. Add in the ergonomic G10 handle, and the Pentagon XR is a top-performing, versatile folding knife that helps elevate SOG’s folding-blade lineup beyond many of its production-knife peers.
Maven Outdoor Equipment Company | CM.1
DIMENSIONS: 5.1 by 2 by 1.75 inches MSRP: $150 URL: mavenbuilt.com
Whether it’s finding an injured hiker during a search-and-rescue mission or more mundane tasks like checking out what’s going on in your neighborhood, the ability to see at a distance can sometimes be vital. But when you want something more compact than binoculars or a riflescope (especially if it’s a non-shooting scenario), then a monocular is the way to go. Maven’s CM.1 offers you a mid-level optic solution that fits into your jacket pocket while giving you ample magnification with its 8×32 configuration. With its compact polymer frame and multi-coated ED glass, the CM.1 provides a clear, high-contrast image, strong color fidelity, and a substantial field of view. It’s also waterproof and fog-resistant, and comes with lens caps and a microfiber storage bag.
The Mystery Ranch Tech Holster is a convenient and portable place to stow your expensive smartphone or GPS unit outside of your pants pocket, helping you avoid the fear of it getting wet or cracked. Made of 500-denier Cordura fabric and a water-resistant YKK zipper, this padded pouch can be attached to your belt, PALS webbing, a pack’s shoulder strap, a binocular harness, or any MOLLE-compatible gear. The main compartment also has a separate section for cable storage, while an external front pocket can be accessed one-handed via an adjustable elastic closure with pull tab. One caveat: If you’re rocking a massive phablet (e.g. iPhone 12 Pro Max, Samsung Galaxy S21 Ultra, etc.), it might not fit in this holster, which has external dimensions of 7 by 4.5 by 2 inches.
Cordage is an underrated piece of kit. When people prep their bug-out gear, most of the attention tends to go to water, food, fire-starting, and weapons. But rope or a strong string can make all the difference in certain situations, e.g. tying down your gear to your off-road rig. That’s why the Fire Strand 550 Paracord could come in handy. This seven-strand nylon cord is strong enough for all sorts of tasks, from tensioning tarps to making an improvised boot lace. But it has a hidden bonus: It can be unraveled to reveal a wax-coated fire strand for sparking campfires. The fire strand can also double as a fishing line or thread. Plus, it comes with a non-climbing plastic carabiner.
While the snow has melted in most places in North America, there’s still no reason you shouldn’t have a sturdy and warm pair of work gloves for chilly springtime nights or heavy-duty tasks that require a bit more paw protection. As the name denotes, the Merino Work Gloves are made partly of Outdoor Research’s Alpen-Wool — a blend of wool, nylon, and polyester that provides warmth, moisture-wicking, and odor-resistance. This is paired up with deerskin, which gets softer with use but maintains long-term durability. Moreover, the gloves have a pre-curved construction and elasticized wrist for a better fit, as well as touchscreen compatibility so you don’t have to remove the gloves to use your mobile device.
Stormproof is a recently released line of portable first aid kits that are meant to be stowed in various types of vehicles. The Auto Medic edition of Stormproof is (naturally) ideal for those driving four-wheeled transportation. It has key items for almost any emergency you might encounter while on the road, including a window-breaker, seatbelt cutter, EMT shears, and a pen light. If your ride breaks down in the middle of nowhere, there’s a survival blanket and hand warmers. For cuts and scrapes, there’s a microMend Cut Kit and various bandages. The whole package fits inside a weatherproof bag, which features MOLLE loops for easy attachment and modular mesh pockets on the inside for customization.
The last thing you want to happen to your firearm in a life-and-death situation is to press the trigger and not hear a bang. Like anything else worth maintaining (e.g. your health, your relationships), this kind of failure can certainly happen if you neglect your guns. Cleaning and lubing them regularly is an essential part of extending their life spans and having them be ready when they’re most needed. Gun-Max Gun Oil helps make that easier, thanks to its powerful inhibitors (which displace moisture to prevent corrosion) and anti-friction additives (which bond to metal surfaces for extended lubrication). Unlike other CLPs or gun oils, this comes in a smartly designed can. Its flip-up nozzle has two positions: “up” for precise applications and “down” for a wider spray.
Clint Emerson knows a thing or two about being violent when needed. He retired as a Navy SEAL with more than 20 years of service and founded Escape the Wolf, a company that focuses on crisis management for global companies. His best-selling 2015 book, 100 Deadly Skills, taught readers how to escape and evade dangers while at home or abroad. Now he’s back with 100 Deadly Skills: Combat Edition, a self-defense manual that includes everything from empty-hand combatives and surviving a multi-threat ambush to knife-throwing and drawing and shooting a handgun. Each skill isn’t just explained and illustrated; there are also QR codes that take you to a video for each concept.
Long gone are the days when survival food had to look like gray oatmeal and taste like old cardboard. Forget hardtack or MREs (aka Meals Refusing to Exit). Nowadays food prep technology has become so advanced that you can have chow that doesn’t just last a long time but also tastes delicious. The Chocolate Chip Cookie-Meals from Nutrient Survival are proof. These morsels have no artificial colors, flavors, or preservatives yet come packed with 14 vitamins, 14 minerals, Omega-3, Omega-6, fiber, and protein. One serving (two cookies) gives you 220 calories, 10 grams of fat, and 8 grams of protein. Plus, they have a shelf life of 18 months. They’re great morale boosters in a post-SHTF scenario or just as a satisfying everyday snack.
Gregory Mountain Products | Supply Duffel 90
COLORS: Brick Red, Obsidian Black MSRP: $110 URL: gregorypacks.com
This bag is so rugged and roomy that it could play double duty as a bug-out bag. But the Supply Duffel 90 is better suited as a camp/travel pack, a large gym/training bag, or as a vehicle emergency kit because of its rectangular shape, 420-denier nylon body, and flat Kevlar bottom panel for hard-core durability. Its main, lockable #10 YKK zipper can be opened or closed via a jumbo T-Grip zipper pull, while its side zippered pocket can transform into a storage pouch for the entire duffel when not in use. If you do need it to haul gear while on the move, there are grab handles on either end, padded handle wrap for suitcase carry, and an adjustable and removable strap for cross-body carry.
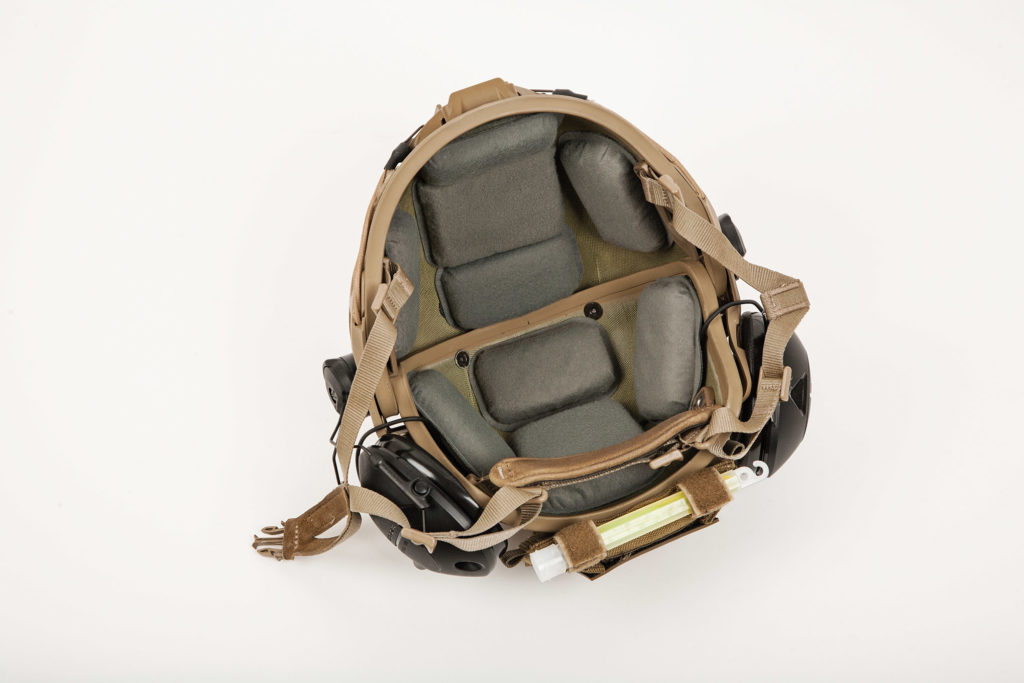
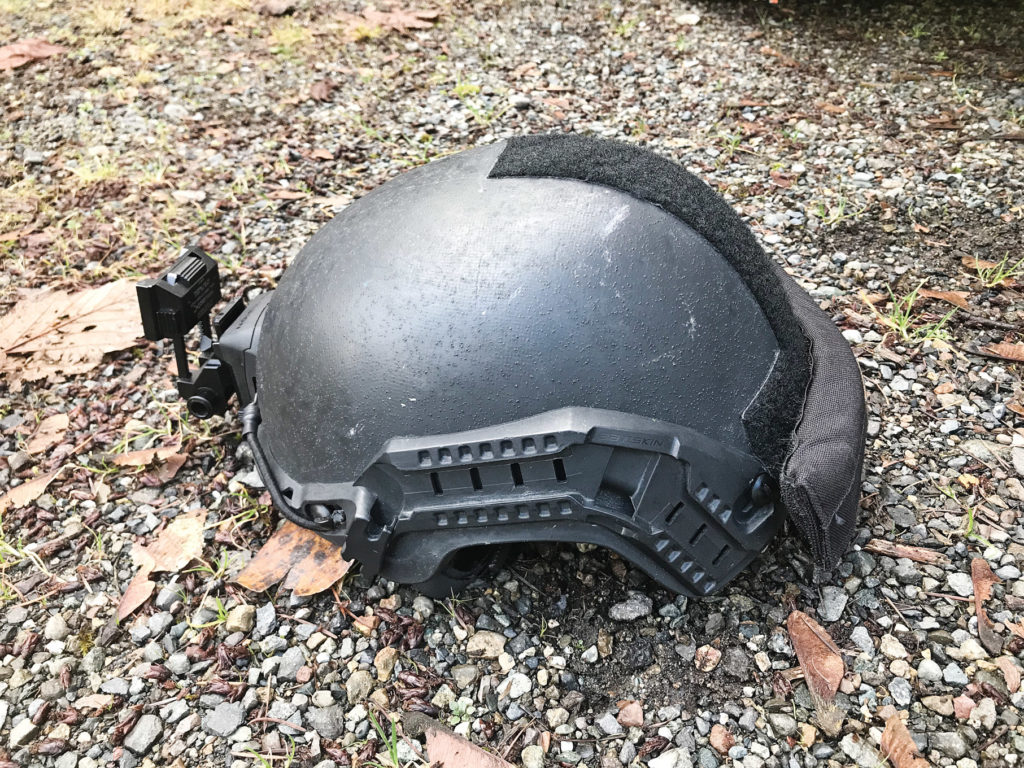
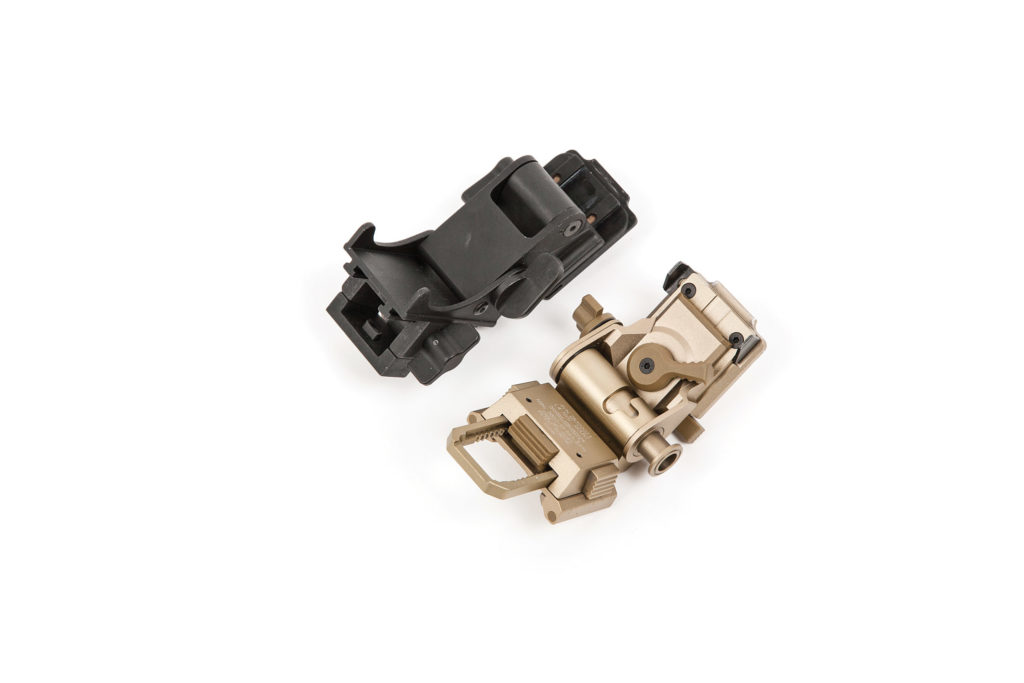
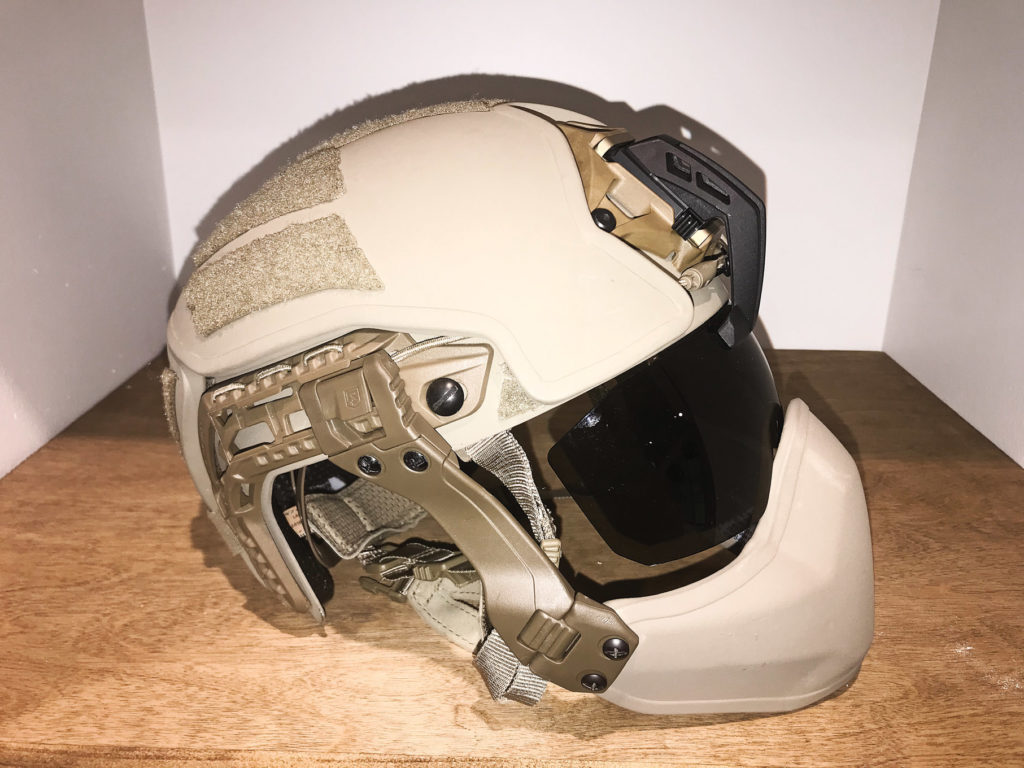
Throughout human history, our species has always looked for advantages in both technology and tactics. The rock became the club, which became the spear, which became the arrow, and finally the firearm. The sword was always more important than the shield, and offensive technology was always forward-thinking and progressive. Regardless of time, culture, race, or creed, humans have always looked at our resources and thought, how can we weaponize this? One of the biggest hindrances to warfare has always been darkness — sure, fighting happened at night, but up until recently, it wasn’t conducted the way we do business in this century. And today, what is more evocative of a “Tip-of-the-Spear Operator” than a NODs wearing warfighter.
Enter image intensification, more commonly known as night vision (NV). It’s light amplification on a large scale, turning very small amounts of light photons (be they visible or infrared) into multiplied electrons, then back to photons in a wavelength that our feeble human eyes can see. It’s been around since the 1940s in its infant form, but I’ll spare you that boring lecture. First and foremost, NV was designed for offensive operations — moving to and from a point of origin to close with and destroy the enemy. This is the advantage image intensification has over other technologies that can see into and through the darkness.
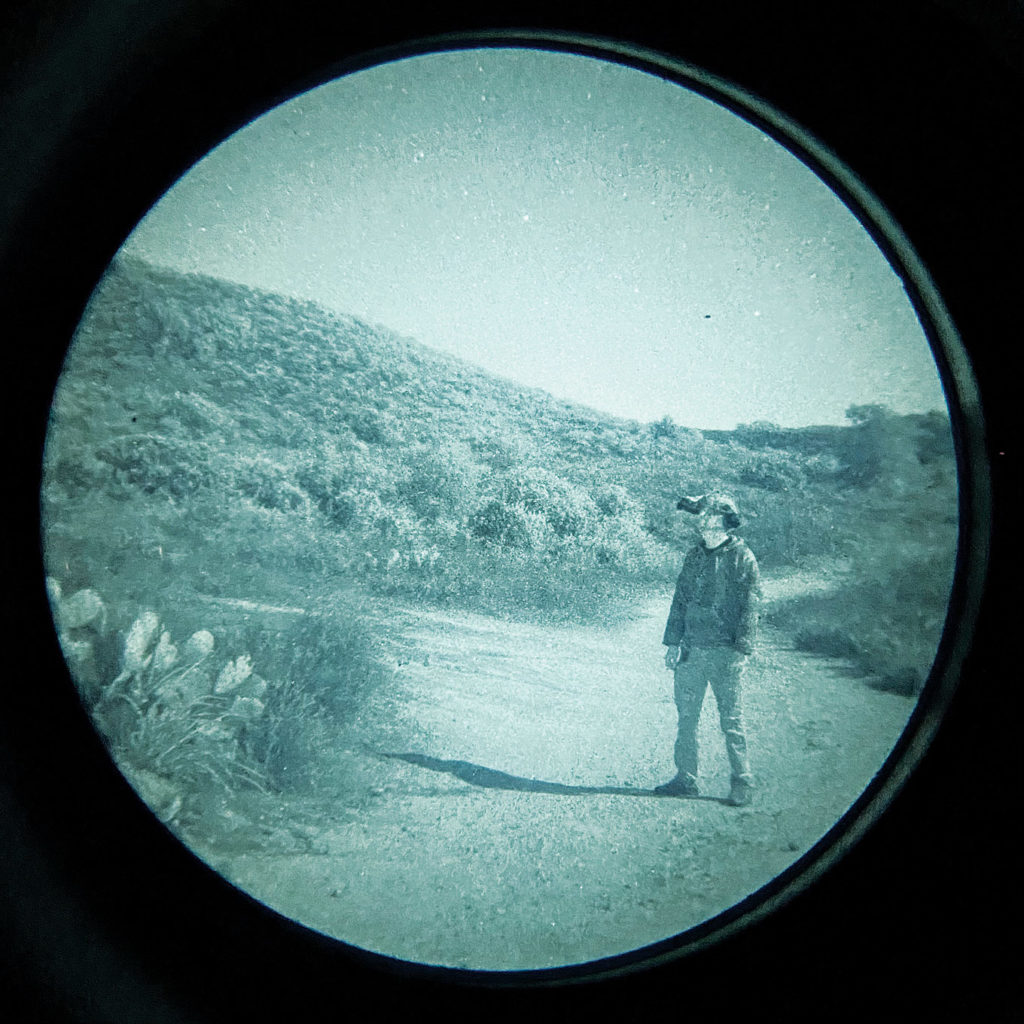
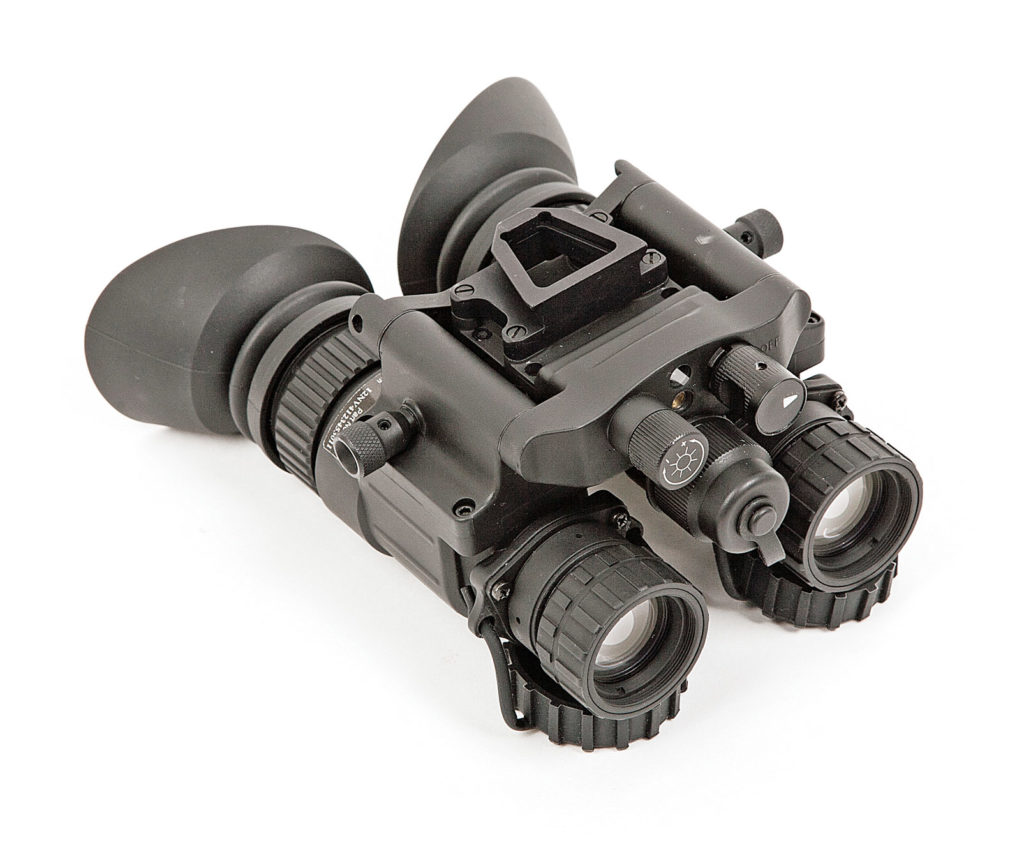
Above: Many will say the “green vs. white” argument boils down to personal preference, but physiological principles indicate that the human eye can perceive greater detail through WP tubes.
This article isn’t about the tactics, techniques, and procedures (TTPs) of NV usage in a survival situation or combat zone. That’s for another night, and best left to others to explain. Here and now, I’ll delve into some of the ins and outs of NV technology and night observation devices (NODs) so that, should you decide to add this amazing technology to your kit, you can be better informed. Much like researching the materials used and the specifications on an AR-15 before you invest in a high-end gun, this will pull back the curtain and explain several things in layman’s terms.
Green or White?
One of the most readily apparent factors of NV is phosphor screen color. A much-debated topic as of the last several years, emotions can and do run deep surrounding this subject. To understand the argument, we must first understand how the human eye works.
The retinas of our eyes have two types of photoreceptors: rods for night and cones for day. Rods are sensitive enough to perceive trace amounts of light, such as silhouettes on a moonlit night, but cannot detect color and offer low visual acuity (sharpness). Cones are far less sensitive to light, but can interpret millions of colors with much greater detail. There are three kinds of cones: red, green, and blue sensitive. Cones also give you spatial acuity, which is why you’re much less likely to stumble or stub your toe in broad daylight than you would be in a dark room. The rod and cone cells are distributed evenly throughout the retina, except in a small central area called the fovea, where there are only cone cells. The fovea is the part used for detailed vision, like reading. This is why your peripheral vision feels less precise than your direct gaze.
It takes about a thousand times more light to activate the color cone cells than it does the monochrome rods, which is why detail and depth perception are much better when using both cones and rods, instead of just rods. Rods don’t provide much detail. The goal of NODs is to take light that might only be detectable to your rods, and intensify the image enough to allow your cone cells to detect it clearly.
When using green phosphor (GP) NV we use our green cone cells, which make up only about one-third of our day vision. Humans generally don’t use rod cells with green phosphor NV systems or NODs.
With white phosphor (WP) NV (white light being the sum of all colors) we engage all three types of our day vision cones. So, WP is fully engaging our day vision mechanisms (cones) and even some of our NV mechanisms (rods). WP also has a strong blue component in the 400-nanometer wavelength range, where we engage a more substantial portion of our rod cells.
Using a WP NODs is akin to being able to use more of your brain processing power to think through and solve problems. You can certainly accomplish similar tasks with GP, but you’ll probably do so faster with WP due to the physiology involved. It delivers more light data to your brain. This leads to reduced fatigue because you’re not working as hard to gather the same amount of information. Contrast is higher and the data feed is broader.
You might be about to retort, “But Sam, the human eye can detect more shades of green than any other color in the visible spectrum!” Yeah, I’ve heard that a time or two. Here’s what you need to know about that — the dark-adapted human eye is capable of detecting more shades of green than any other color. What happens when you power up a bright phosphor screen in front of your eye? Bingo, no longer dark-adapted, so that factoid goes right out the window. In scientific terms, there’s a chemical compound in your eye called rhodopsin that’s produced at night. Once exposed to bright light, it photo bleaches.
Colorblindness is generally a genetic mutation of one of (or a combination of) the red, green, or blue cone photoreceptor cells in your eyes. True color blindness genes are carried on the X-chromosome, which is why it’s spread from grandfather to grandson. Very rarely is it expressed in women. If you’re truly colorblind, then that can affect your choice a bit, but WP probably still comes out on top for the reasons I outlined above. If you can’t see green, then WP is even more clearly the choice. If you can’t see red and blue, then maybe GP is the better choice for you.
That said, much of this argument still comes down to personal preference for many people. Nothing compares to trying both GP and WP in-person over an extended period of time to literally see which phosphor color one prefers. The physio/neurological basis for the detail, contrast, and fatigue advantages of WP are true regardless, but remember this as well: Some people are born with more of one type of photoreceptors than other folks. The same can be said about rods, as some people’s natural unaided NV is better than others, so genetics can come into play a little. Finally, individual tube and NODs specs and NV generation are important variables to consider. As we’ll explain momentarily, these issues need to be taken into account independently of phosphor choice for a truly useful comparison of WP versus GP.
Next, we must get into the nitty-gritty of the tubes’ actual performance. Think of tube specs as what a dyno readout says about an engine’s horsepower and torque. In my opinion, the following are the five most important tube data points. It should be noted that there are others, such as luminance gain and high light resolution, that aren’t included due to their secondary nature as NV tube spec data points. This is a reference for U.S. Gen 3 systems and data sheets.
Photocathode Sensitivity: Photocathode Sensitivity is the PC’s ability to convert Photons to electrons. A higher PR usually corresponds to good SNR numbers. The minimum is 1,800 for the OMNI 8 contract. 1,800 is good, anything above 2,000 is very good. It matters a great deal to have properly matched photocathode numbers for a dual-tube system, +/- 100 is generally the range I adhere to when building/assembling dual-tube systems. This will prevent one tube from appearing noticeably brighter than another while in operation.
EBI or Equivalent Background Illumination: This is the amount of light you see through NODs when an image tube is turned on, but no light is on the photocathode. EBI is affected by temperature; the warmer the NV device, the brighter the background illumination. EBI is measured in lumens per square centimeter (lm/cm2). The lower the value the better. The EBI level determines the lowest light level at which an image can be detected. Below this light level, objects will be masked by the EBI. The lower the better. For example, this will determine the contrast of a ridgeline against the sky behind it. EBI is an often-overlooked data point, but is a very important one — many times the most important in terms of detecting and/or differentiating objects.
SNR or Signal to Noise Ratio: Plays a key role in NV performance. The role of the micro-channel plate, SNR is the unit’s ability to transfer a strong signal from input to output and is usually referenced as a ratio (19:1, for example). This measures the light signal reaching the eye divided by the perceived noise as seen by the eye. The higher the difference between the two numbers, the better. As the light level drops, scintillation (visual noise or graininess) will be noted sooner on a tube with lower SNR versus one with higher SNR.
Center Resolution: Screen resolution measured in line pairs per millimeter (LP/mm). The higher the better. Usually listed in line pair increments of 57, 64, 72, 81, and so on. When a center resolution is listed, the line pair measurement could in fact be higher, but not high enough to cross the threshold of the next listed LP resolution. For example, a 64-line pair listed tube could in fact be as high as 71-line pairs, but because it doesn’t meet or exceed the 72 limit it cannot be listed as such.
Line pair resolution is generally not as important as many people make it out to be. For example, the human eye cannot tell the difference between a 64- and a 72-line pair when viewed through a 1x system such as a PVS-14. However, when used or viewed in clip-on NODs alongside a magnified rifle optic, a higher center resolution is preferred and often noticeable for better resolution/image quality.
Halo: Bloom or halo when looking at light source, or the ability to control the bloom when viewed. The lower the value the better. Objects can be masked or hidden behind bright blooms of light in tubes that have higher halo values. Lasers can also have more apparent bloom off certain objects in some tubes as opposed to others due to this attribute. A high halo value can contribute to a lowering of tube resolution (high light res) thus affecting what can be seen/detected by the user.
Above: Halo comes into play when looking at a light source that has the potential to overload receptors in your NV tubes. High-quality tubes will be able to better modulate incoming light from secondary sources like lights and illuminators.
FOM or Figure of Merit: This is simply center resolution multiplied by signal to noise ratio. The higher the value the better. It’s a quick, down-and-dirty way to determine the performance of a tube, mostly for export purposes set forth by the U.S. State Department. Because FOM measures only two data points, it’s not the be-all and end-all of a tube’s performance. In other words, you could have a low to average FOM tube that can, in certain lighting conditions, outperform a tube with a higher FOM, or at least match its real-world performance. EBI, photocathode sensitivity, and halo are three very important data points to take note of when looking at a tube.
Are Tube Specs Important?
This is an often-asked question and the short answer is maybe, maybe not. If you’re using a NODs as a stand-alone unit without supplemental infrared (IR) laser/light energy, such as for astronomy purposes, then a tube with high data points overall is going to do more for you than a lower performing system. Notice I didn’t say FOM — as I stated previously, FOM is not the be-all and end-all in a system, though it should be noted.
Now, can a human tell the difference between a 30 SNR tube and a 37 SNR tube? Not in all but the darkest of lighting conditions. Even then maybe not, depending on the viewer’s eyesight. You can chase NODs tube specs until you’re blue in the face, and in reality gain nothing but wasted time and energy. Go with what I list below as a template for tube specs, and try not to get too wrapped around the axle about them.
For a thin-filmed Gen 3 system some good numbers to go off of as of the writing of this paper would be as follows:
Photocathode: 1,900 or higher
EBI: 1.5 or lower
SNR: 26.0 or higher
Center Resolution: 64 LP/mm
Halo: 1.0 or lower
FOM: 1728 or higher
Moving onto an unfilmed system, good numbers to go off of are as follows:
Photocathode: 2,000 or higher
EBI: 1.0 or lower
SNR: 30.0 or higher
Center Resolution: 64 LP/mm
Halo: 0.8 or lower
FOM: 1920 or higher
If you have NODs that exhibits most or all of these numbers, you possess a very solid performing system.
If you’re using supplemental IR lighting in conjunction with NODs for detection and targeting, then that’s going to boost the capability of a lower performing system significantly to the point where tube specs are going to matter less and less. This is especially true at close ranges under 100 meters. Put simply, a powerful laser/illuminator is going to do more for you than tube specs will almost every time.
Ultimately though, it comes down to training with your gear and training your eyes how to observe your environment. As you spend more time using NODs and acclimating your eyes to them, you’ll be able to see things with a lower performance system than folks who are untrained and unaccustomed to using a higher performance system. If I was behind the wheel of a high-performance Formula 1 car, a skilled racecar driver could still beat me around a track in a street car simply because I don’t have the experience to make the most of that highly tuned vehicle.
The opinions expressed in this writing are mine and mine alone. Technology advances as time goes on, so in the future some (or much) of what’s said is sure to change and/or be updated. If you’re seeking further info, I welcome you to watch some of the informative videos I have on my SilentSolutions YouTube channel or attend a Greenline Tactical class taught by me and Don Edwards.
About the Author
Sam Houston is a 10-year Veteran of the U.S. Navy, where he flew onboard P-3C Orion surveillance aircraft as a flight tech and sensor operator supporting combat operations in multiple theaters. Transitioning to the civilian sector, he became a qualified UAV operator/maintainer on RQ-27’s, logging over 2,000 hours supporting conventional and Special Operations Forces in Iraq and Afghanistan, both on the battlefield and remotely, as well as a thermal and electronic surveillance sensor operator on RC-12 aircraft supporting U.S. interests overseas. He’s currently in the Florida National Guard as a forward observer.
Sam owned and operated a NV hog hunting outfitting guide service, taking clients into the Florida swamps and forests to search, locate, and harvest feral pigs with the aid of NV and thermal optics. In 2015, he was hired by TNVC and ran the NV Goggle build and repair programs and continues at TNVC as the special programs manager and a night vision technical advisor. Additionally, Sam helps run the Night Fighter NV Training Program with Don Edwards at Greenline Tactical, and works for John Lovell at the Warrior Poet Society as an assistant instructor.
A long time ago, on an Army base far away, I began my military career training to be a Cavalry Scout. This reconnaissance-oriented occupation was all about observing the battlefield undetected, whether we were in a vehicle or traveling on foot. Of all the tactics we were taught, none were as important as leveraging every asset at our disposal to our advantage, including the time of day. Scouts learn to operate under the cover of darkness to an extreme degree. After nearly a decade within the ranks, I had the opportunity to use and abuse multiple generations of night vision optics under some of the most austere conditions. A few of those optics appear in the movies, but some of them required non-disclosure agreements. I recently had the opportunity to evaluate commercially available digital night vision optics in the form of the Sionyx Aurora Pro.
Above: Nestled snugly in a near-impermeable case, the Sionyx Aurora Pro has more than enough protection to survive strong impacts and adverse atmospheric conditions.
Affordable Versatility
Sionyx uses digital night vision technology — as opposed to the analog tubes used by most of its competitors — to give you a view of the midnight realm in full-blown technicolor. After spending years staring at varying shades of green or gray, I was eager to get my hands on a system that could revolutionize how we interact with the dark.
Above: When the Trijicon MRO and Sionyx Pro are properly aligned, nighttime range training becomes a walk in the park.
If you’ve ever looked at what it costs for a third-generation night vision optic or a FLIR thermal optic, you’ll quickly learn that it’s not an inexpensive purchase. For thousands of dollars, you can have the latest analog, monochromatic optic. Now look at the top model that Sionyx has to offer, just south of a grand. They even offer financing for those of us who don’t have fat stacks of Benjamins lying around. Models with fewer features are even less expensive, making Sionyx a widely accessible option for those who need to see in the dark.
Options. As if Seeing in the Dark Wasn’t Enough …
There are several models to choose from (Aurora Sport, Aurora Black, Aurora, and Aurora Pro) each with their own pros and cons. Every optic is water- and dust-resistant, and submersible down to 3 feet for 30 minutes, which means any Sionyx optic is safe to use in the most torrential downpours. A clear, scratch-resistant lens cover keeps your view crystal-clear without having to worry too much about abrasions, and each model has been drop tested from 1 meter onto concrete. Durability in harsh conditions is great, but how do these digital optics differ from their analog counterparts?
All models have built-in memory, because they not only allow you to see in color in the dark, they also double as a digital camera which has settings comparable to a DSLR, including the ability to adjust your aperture and shutter speed. An accelerometer will let you take panoramic pictures in landscape or portrait modes. Sionyx optics will also film video at 720p with an adjustable frame rate of up to 60 frames per second. Remove the micro OLED 1024×768 eyepiece, and you’ll be able to increase the storage capacity with your choice of MicroSD card. I recommend choosing a high-quality MicroSD with fast transfer rates.
In addition to these standard features, the Black, Aurora, and Pro models offer additional benefits. They are weapons-rated up to .223/5.56, and both the Aurora and the Pro feature GPS, compass, metadata, and accelerometer recording. The Pro tops out the memory features with 256 gigabytes of onboard memory, and a 32-gigabyte MicroSD card. Sionyx also offers an attachable IR light that enhances visibility through the optic, as well as a Picatinny rail adapter that allows you to mount the optic to your favorite weapon.
Above: Jeff Stroud (aka Freebird) eagerly prepares to engage targets previously obscured by the dark.
The applications for a night vision optic dramatically increase when it’s paired with the right mounting options. With the use of a Wilcox helmet mount, rail adapter, and your choice of tactical head gear, you can walk around with this optic hands-free. Ram Mounts makes ruggedized device cradles, and with the right one, you can attach the optic to the handlebar or storage rack of an ATV or snowmobile.
Impressive Performance
My first impression of the Sionyx Aurora Pro was the protective polymer case in which it was delivered. If you’re familiar with Pelican cases, you won’t be disappointed with the case Sionyx provides — it’s durable, sealed against water and dust with a one-way pressure valve, and features snap latches and a carry handle. Inside, the optic is nestled snugly in molded polyethylene foam. Two spare batteries and a neck strap also accompany the optic, but I was surprised by the absence of a manual. Figuring out how the system works on my own seemed easy enough, but I did contact Sionyx about it. Their team promptly emailed a digital version of their operating manual along with a list of recommended optimal settings.
Above: Capable of macro photography, Sionyx allows professionals to geotag small but important details.
Charging the optic took less than an hour to bring all three batteries to their full capacity. When first powering up, note that there are three viewing settings — Day, Twilight, and Night — which can be set with a quick turn of an adjustment ring on the front of the optic. Inadvertently using the wrong setting will not harm the optic’s sensors (another benefit to using digital night vision), and the transition is nearly instantaneous.
Above: Poorly lit suburban areas become brilliantly exposed.
Viewing the surrounding landscape outdoors is phenomenal, but I also wanted to see how it stacked up to being indoors with nearly zero ambient light. Some of my military scout training included many years of urban combat, which is a cool way of saying “stumbling through pitch black buildings using optics that afforded less-than-adequate depth perception.” My first impression of the Aurora Pro Night Color mode didn’t provide the clearest picture, but the device has several built-in “Night Tone” viewing options, such as Night Color, Green, and Grayscale, all easily interchangeable with the push of a button. Grayscale, after adjusting the focus and contrast, seems best for pitch-black indoor conditions, with very little loss of depth perception.
If you’re familiar with some digital photography basics, you’ll enjoy the customizability of the Aurora Pro’s camera settings, which allow the shutter speed, brightness, contrast, zoom, and focus to be adjusted. The adjustments are straightforward and simple to understand. I was pleasantly surprised at how well the optic could focus for short-range macro photography, and the panoramic option works better than some phones I’ve owned in the past.
Wi-Fi is featured on every Sionyx model, which allows you to utilize an app available on iOS and Android devices. This app lets the user see what the optic is looking at in real time, adjust the optic’s settings, take pictures, and record video remotely. Sionyx chose Wi-Fi instead of Bluetooth because it offers longer ranges, faster transfer rates, and less latency. Ideally, you’ll want to have as unobstructed of a line of sight between optic and device to improve connectivity range and quality.
Admittedly, app usage may present the optic’s only downside. The app can tend to be quirky if the connecting process isn’t performed exactly right, and it can be frustrating to troubleshoot. Along with wireless communication comes a small amount of lag, which seems to be one of the biggest complaints when sifting through reviews on the app store. But remote and mobile wireless observation with a little lag is a fair compromise over being tethered to a cumbersome hard-wired device.
Above: Creatures of the night can no longer hide in the darkness.
Wi-Fi capabilities open a realm of clever uses for the optic. For the purpose of surveillance, placing the optic discreetly within 20 to 30 feet will give the user the advantage of viewing the intended target while being able to monitor from a concealed location. A sensitive onboard microphone will pick up and record quiet noises many digital cameras ignore. Even more impressive, and my favorite application so far, is mounting the camera to an ATV and going partial blackout mode. Pair the optic to your phone and you can see farther down the trail than you could by running on headlights alone. With the proper Ram Mount setup, your ATV or snow-machine can be as stealthy as the Batmobile. I should caution you though: Because of the wireless communication latency, the faster you travel with this optic, the less time you’ll have to react to sudden changes. This just means you need to ride/drive with caution and be aware that what you’re seeing may be a few tenths of a second behind.
A Night at the Range
To test its capabilities on a firearm, I reached out to the guys at 906 Tactical and gave it a run at a night range. Weather conditions at the range were typical of a January night in Upper Michigan — 15 degrees F, overcast, and as close to pitch black as you can get in the snow. Jeff Stroud, the owner and instructor of 906 Tactical, helped with testing, and was able to clearly identify silhouette targets at 150 meters and rough shapes beyond 200 and using Night Color mode. Picatinny rail mounting was a breeze, and before long we were ready to ring some steel.
Above: Utilizing a head mount keeps hands free for light-sensitive repairs or pest control.
Technical specs of the Sionyx Black, Aurora, and Pro have the optic rated for .223/5.56 weapons systems, and 906 Tactical provided several demo guns. First up was a silenced Daniel Defense Mk18 with Trijicon MRO sight, mounted high enough to be level with the center of the Pro’s objective lens. After some adjustments to the Aurora, we had a clear view of targets between 50 and 150 meters, and full use of the MRO’s 2-MOA dot. The .223’s recoil had no effect on image stability. There was a brief flash of washout in the Sionyx optic after shots were fired, but it recovered rapidly. We even ran it mounted to two versions of a Galil Ace, in 5.56 and 7.62x39mm, equipped with a Holosun 510c reflex sight and an Athlon 1-4x magnified optic.
If using night vision on a weapons system, I recommend pairing it with a holographic or dot sight that’s capable of projecting in green light and has a night vision setting. When using the Sionyx with a Holosun 510c, I noticed the green reticle was less intense and didn’t overwhelm the targets with its brightness. When using a magnified scope, make sure you can place the Sionyx Aurora in front of the sight’s objective lens. This will allow you to use the Aurora’s zoom capabilities cumulatively with the scope and get a much closer look at your target. Just be aware that, without a rubber eye cup, the green indicator light on the side of the optic does give off a small amount of visible light.
NV Isn’t Just for Professionals
Many people associate night vision with professional tactical teams. While that’s certainly an effective use for night vision, there are many others that could benefit from having an affordable night-capable optic.
Every year, I hear another story about someone who was out hunting until sunset, got lost, and ended up with a nasty case of hypothermia because they spent the night getting turned around trying to find their way back. With a digital compass and onboard GPS, the Sionyx could be very helpful in such a situation.
Above: From Left to Right: A scene in natural ambient light; “twilight” mode; night grayscale; night color.
Say a storm rips through your neck of the woods and you must go out to assess the damage. Just take a photo with the optic, and you’ll have GPS coordinates to the location of said damage. You can then provide photos and exact coordinates to responders or repair crews.
Anyone familiar with trail cameras understands how frustrating it can be to capture an image or video of a species you’re after. With a Sionyx optic, you could record your own high-resolution observations with metadata included.
Above: ARs are great to shoot under normal conditions, but being able to train under the stars elevates the experience to a new level.
Individuals could utilize it for personal and home security to survey a yard, large property, or even look downstairs into your living room. Late-night thrill-seekers could use it for recording their adventures. Medical personnel arriving at the scene of an accident in the middle of the night could quickly find someone in need of attention. The point I’m trying to make is that having a quality night vision system that’s this affordable opens so many opportunities that were previously unreachable.
Final Thoughts
Based on my previous experiences, I can say that Sionyx devices offer a substantial nighttime capability to just about anyone who has a need or want, with more features and a lower price point than the majority of conventional night vision devices. Affordability and versatility are often key decision-making factors when choosing a tool or piece of equipment to purchase, and Sionyx offers both. If you’ve been hesitating to invest in night vision because of the prohibitive costs associated with it, Sionyx night vision optics might be just what you’ve been waiting for.
Sionyx Aurora Pro
Above: Ram Mounts offers the right hardware to mount the optic to your choice of off-road vehicle.
[Editor’s Note: It’s worth mentioning that Sionyx Night Vision can be found on Big Daddy Unlimited. Read about it here on RECOILweb. The Savings on a Sionyx Sport, will pay for more than a year of BDU, and the unit will cost about the same as a used Glock.)
An old maxim of creativity is to take two things that aren’t normally seen together and combine them in a way that brings out new qualities in both. In regard to survival, when not under the stress of an immediate threat, this has led to the development of tools, gear, and skills not considered before. Some disappear almost immediately; others become the new standard. From the outside, GBRS Group appears to be combining two things that don’t obviously fit together: skateboards and night vision. But after talking to them, we realized they’re a surprisingly natural match.
The team at GBRS Group isn’t just a group of medically retired SEALS who provide top-tier training for end-users.
Digging into the history of combat footwear, for years those engaged in combat looked outside traditional military supply lines for anything that would give them an advantage. Skate shoes brought something otherwise overlooked to the table: dexterity and silence, both of which are sought after by those who operate mostly at night.
In the same way, Slade, DJ, and Cole of GBRS Group bring that mindset not only to survival training, but to their work with night vision, tactical gear, and firearms as a whole. Respectful of the old ways and focused on breaking problems down into their parts to comprehensively solve them, their approach to training isn’t as simple as a mere maxim. Instead, it fits into exploring new features of night vision by taking them into the world of extreme sports and practicing a skill until it becomes performance on demand.
Medically retired from the SEALs, GBRS Group’s cadre offers training for those who present them a problem to solve. This flexible approach works to their advantage, as the tactical training industry can often become hyper-focused on trends. In contrast, they’re masters of the fundamentals, especially those that relate to night vision and close-quarters combat. For all the times we’ve heard someone talk the talk on fundamentals, it’s refreshing to see that GBRS Group can pull them off, without a hitch, only to explore new options once the foundation is secure.
Above: Lightweight and Low-Vis are terms that can be applied to both guns and footwear.
What is GBRS Group? What is it that you Do?
GBRS Group: We are a Tier 1 tactical training and brand consulting company focused on providing training and equipment to end-users in military, federal, state, and local special operations units. We provide insight and development assistance to companies who serve end-user equipment needs, in addition to marketing strategy, entertainment consulting, and content production.
In other words, GBRS teaches everything but open water scuba. In our collective, we are really big into the “why” of what we do. There are a lot of people out there that can teach “hard skills”. It’s up to the professionals to provide context. It would be pretty difficult to talk about the “best” way to run your gun in a gunfight, if you’ve never actually been in a gunfight.
Where were you before starting GBRS Group?
GBRS Group: When we were in the SEAL teams, we were effectively a free-fall SWAT team. That’s all we did. We flew to a target, or drove there, or walked in, and did CQB once we got there. We had to strip away everything else that didn’t matter and do things that make you good at CQB and one of those skillsets is shooting. Shooting doesn’t matter if you can’t move predictably and efficiently on target with your weapon system. It’s a balance that very few units actually attain.
Stripped down to its parts, only two things really mattered: actions on target and the means to get you there. For the guys that actually were doing the job, that’s what became important. You would find leadership at the officer level who wouldn’t understand that and they would get distracted. By stripping down a mission to its bare parts, we could accomplish it in the most efficient way possible.
How did you approach training in the SEAL teams?
GBRS Group: When we would set up training, who was in charge of it? The Assaulters, the guys that were doing the training. You can teach anybody to go through a door, but they’re not going to understand fully why they’re going through that door and what it took to get them to go through that door the way they’re doing it. The mastery level is not just teaching tactics or techniques, but truly understanding why we teach that technique. Everything you did was a rehearsal for night. You would do daytime iterations to prepare for that evenings’ nighttime iterations.
Following the Jedi Approach, if you’re not willing to sacrifice everything to be as good as you can be, stay home. The last thing the teams need is another 89% all-in-dude. When you look at it, it’s all the little small things, and we looked at training that way. At any moment we could have been called upon to pull off a difficult mission, and if asked, should be able to respond with a yes. That meant we were never in a cold-bore status. We didn’t do anything else, no real hobbies, except what made us better. If you live like that, chances all of your friends are going to live like that. You have to surround yourself with better people.
We don’t train with Red Bull Air Force so that we could look cool with wingsuits, Rather, when a guy is jumping at 28k, under night vision, with all that gear on, and he gets unstable, he can correct himself, pull safely, and fly his canopy to get on target. There needs to be a connection to reality.
Has your methodology of training changed since leaving the Military?
GBRS Group: First off, we don’t dictate tactics to anyone we come across. Instead, we observe before we make any suggestions. We like to show what we believe to be the most efficient and best practices. We look at ourselves as facilitators, not dictators. We can take digestible knowledge and transfer that in a shortened time period to show true progression. We can have them show us their way, we can record it, and show them where we need to make corrections. We don’t try to fight against Human Nature, but work with it.
Instead, we take what they know already, and instill best practices. As the saying goes, learn the rules like a pro so you can break them like an artist. Most people don’t have the time to dedicate to get the repetition down before they can understand when they might break a life-saving rule. They don’t have that expertise.
We push students to the point where we see the performance bubble slip. But we rep it over and over again until we get the, or near, perfect repetition, and then we add pressure. We cannot tell you how many people we’ve worked with on a tactical team that have never done live-fire training for a house run. For many students, the first time they fired a gun in a house was in a real-life situation. We believe stress inoculation is one of the best ways to prepare for a stressful situation. It sounds stupid saying that, but most people that carry a gun for a living are ill-prepared.
Principles remain the same, tactics evolve. There’s only so many things people can do in a CQB situation, and the enemy always gets a vote. We rep it out to show progression and start pressure testing. Then they get to feel and see something they’ve never experienced before.
You’ve been laser-focused on accomplishing two goals: actions on target, and getting there. For someone who has never been in the military, what does that look like?
GBRS Group: Years of selection courses and putting up with bullshit to get to do the rad stuff. Just kidding, kind of. Not everyone in the military does this. There’s only a couple of units in the military that actually put in the work to be able to say that this is what they do for a living. What it looks like from a day-to-day training perspective is this: X weeks per year of a mix of range work, live-fire CQB and explosive breaching, MFF iterations, Maritime insertions, on/off-road driving, Dirt bikes and UTV’s, combatives, etc… There was no “down time”, if you weren’t overseas working, this is what you were doing stateside.
Above: The amount of time spent using night vision cannot be simulated. Experience shows its face in the deliberate execution of minuscule details.
The world is exploring what EDC means, especially in the wake of Civil Unrest and changes in policing. What is one skill that applies to survival and when did it sink in?
GBRS Group: If you’re going to carry a lifesaving/life-taking tool, you should be exceptionally proficient with it. This means understanding what it’s actually capable of: employing for the purposes it is actually intended. If you could just get everyone in this country who owns a weapon to know the condition of that weapon is 24 hours a day, we’d be better. It does me no good if I pull out a pistol that I am not proficient in, and end up shooting someone who did not deserve to be shot.
Next, if people understood the why behind the fundamentals, that would make a difference. You see this often in junior levels of special operations who are going through some of the best training in the world, but they’re not there mentally. You’re giving them gold and they’re complaining about the weight of the brick.
DJ: I think a bunch of that is generational. My father used to talk about when they came back from Vietnam. To him, it seemed like nobody in the late 70’s and 80’s cared. They thought they made it, and got lazy, then 9/11 happened and we saw the military tighten up again. But now we’re seeing that operational shift again. That beret, pin, or hat doesn’t make you anything. If you don’t train, you aren’t anything. The Art of War, that entire book can be summed up in one phrase: you must train.
You’ve never arrived. There’s always someone better than you, who’s working harder than you, who more naturally gifted than you are, who’s smarter than you are, who’s faster, who’s younger, who doesn’t get hurt as easily as you do anymore, who’s more serious about this than you are, who will not have that drink, who will not eat that whatever. There’s someone out there who’s going to be better, so you can’t slip, you have to care more.
Do you only train using Night Vision to military and LEO? Or to Civilians as well?
GBRS Group: Both. And the training is definitely experiential since it’s so new to so many. We’ve done pretty much everything on NODS.
Everything we trained was a progression to doing it at night, so everything we practice is exactly the same, day or night. For some people Night Vision is a novelty, for others, it’s for their job. We train both.
What are some commonly held myths about Night Vision?
DJ: Let’s be honest, Night Vision feels like a superpower. At the same time, you can defeat Night Vision with a $2 flashlight. We’ve seen it time and time again. The person wearing NODs has to be very good at going from looking through the tubes, to looking underneath and around them.
There’s little things: It’s easy for night vision to give you a false sense of security: You’re not a demi-god, and you’re not invisible.
When have you seen Night Vision become a Hindrance?
GBRS Group: When someone does not understand the true light-ing conditions around themselves. They’ll think that they are in the dark, but they are not. If the ambient light is just a few degrees brighter than inside a building, someone standing outside is going to be backlit. Their silhouette is going to show.
What’s the difference between single tube, dual tube, and 4 tube Night Vision?
GBRS Group: The field of view changes everything. Single tube night vision isn’t part of the conversation because of the total lack of situational awareness. Typical dual tubes have 40 degrees, where 4-tube night vision has 97 degrees. That means less tunnel vision. When you’re looking through night vision, if an object is even slightly outside of that field of view, you don’t see it at all. Adding that extra field of view increases both reaction time, and situational awareness. It gets really dangerous when do- ing things like breaching or skydiving, or riding a dirt bike under night vision.
How have you seen Night Vision gear change over the years?
DJ: As the war progressed, more senior veterans brought real knowledge to tactical gear companies. You saw it with Crye, you saw it with London Bridge Trading Company. The days of the 90’s and their concept stuff was over.
Special operations was basically the only thing cooking for many years in Afghanistan, so when those guys all got out and went to these companies, they had essentially 20 years of nothing but first hand actual feedback. They’re the ones who could say “what would be really cool with night vision is you could stop with the green stuff and make it white because it doesn’t give me eye strain and shows better contrast.”
Another great upgrade was to lasers. Early on we had two different lasers: one for IR and another for visible. The idea of combining these things didn’t start with engi- neers alone but included end-users.
What lesson have you learned that you would want to pass on to those using night vision?
DJ: The baseline for information on Night Vision is so much better than it was 20 years ago. A basic Special Operations veteran knows so much more than what was common a few years ago. So it’s no longer a short list of two or three really good instructors. Now there’s a large pool of experience, and it creates the opportunity for end-users, but not many experts. Train to be like Bruce Lee, and become a badass in multiple things, instead of only a black belt in one discipline.
What are some reasons why civilians would want to own Night Vision, and what would you recommend?
GBRS Group: It’s badass. Why wouldn’t you want to own it. When my wife first put on night vision and looked up at the stars, she cried. It opens up a whole new possibility. Even after the sun goes down you can still go out and enjoy the outdoors.
We do stuff that people don’t normally do with night vision.
For those concerned about Civil Unrest, if you were planning on buying night vision to save your life, I’d say save your money and your time. Instead, go to the flat range and get a coach who you trust to teach you to become extremely proficient. It takes years to become excellent with a handgun and a long time to not fall down your stairs wearing night vision.
When we do live firearm training under night vision, we do a 1 to 2 ratio of instructors to students on the firing line. That goes for SWAT Teams. Unless you have the time down to make this mission enhancing, save your time and money.
Take a Civilian who has proficiency through Pistol and Carbine, and who wants to get into Night Vision, what would you recommend for training and personal practice?
GBRS Group: Find a coach who has the experience base you wish you had, and then validate him by asking other people who know him personally. Guys can fake the funk for a while, but the people who worked with them professionally can call out the difference. Fortunately for us, the community is so small that it’s easy to vet dudes.
If you’re going to buy something, be prepared to spend twice as much money on training how to use it. There’s no other formula for learning how to train under NODs except time under NODs.
If a Police or SWAT team was looking at getting Night Vision Capable, how would you recommend they do it?
GBRS Group: Don’t blindly buy equipment because you get a grant. We can consult on procurement. Often we get a request for training, and when they show us the equipment they just bought, we have to tell them that they are not going to be able to do what they’re asking for with what they have.
On the law enforcement side, unless your ROE’s will let you do CQB under Night Vision, it’s better to spend the money other places. Even if you have the right gear it doesn’t matter if command will not let you do it anyway. It’s better to be excellent with white light, than be okay with night vision.
When teaching urban room clearing, what are rookie mistakes?
DJ: Stop playing paintball. We often see training runs set up as feel-good experiences with role players placed where they’re going to get defeated. Another is when students turn CQB into this two-way paintball match where they’re just slinging sim rounds back and forth. If those were actual 5.56 rounds hitting the wall, would they be dead? Why are we playing paintball?
You’ll see guys with paint up and down their legs. What I see from that shot on the inside of your thigh is nine months of physical therapy if you ever make it back. I see 20 minutes of emergency medical treatment that could have been avoided if you had not exposed that thigh. Stop playing paintball, because you can tell when someone is treating every run like it is real.
Other things you can run into when training is the limitation of the range. Constantly shooting stationary targets can produce a false sense of security which can be countered by smart role players being directed by competent cadre that can control the situation and give an honest debrief. Remember, the enemy always gets a vote.
Above: Entering a doorway can be practiced in the same way one learns to draw a pistol. By breaking down complex maneuvers into parts, each one can be individually assessed and optimized for when it counts.
What are the differences between using night vision solo versus in a group?
GBRS Group: The value of practicing solo CQB is that it shows the importance of doing it as a group. When alone, you see all the angles you wish you had a buddy to cover. For solo movement with Night Vision, you can be as weird as you want. When you’re with other people, your head has to be able to spin and see where they’re at.
Is there any difference between shooting in the daylight and shooting under night vision?
GBRS Group: Everything you practice during the daylight should be able to translate directly to shooting at night. In the dark, you don’t get to look at your hands, so a reload has to be the same every time. If you have to change the way you hold your rifle to shoot with night vision, you’re doing it wrong. The repetitions matter.
What skills that you train during the daytime can you translate into night vision?
GBRS Group: The only additional thing you should be dealing with is the night vision itself. If one of your tubes gets knocked out of focus, you should be able to fix it in one swipe. If your battery goes out you need to be able to do a one-handed battery swap. If you have to stop and get a white light out to do anything, then you don’t know how to use them.
If you’re basing your actions off operating at night, you have to be just as proficient at manipulating that equip- ment as you are anything else you use. Weird things happen at night and I need to know how to diagnose and fix all of my equipment.
What different types of environments have you used night vision and how do they affect the gear?
GBRS Group: Pretty much every environment: diving underwater with the tubes on, navigating, to jumping from a plane, to beaches, to desert. The temperature shifts are a nightmare. Jumping from 25k feet, to landing, that condensation build-up is ter- rible. In cold weather conditions, when you enter a building, the condensation is going to build instantaneously and fog up the tubes. If you don’t know that, you’re going to walk into that room blind. Rain, sleet and snow make visibility terrible as well.
If there’s condensation on Night Vision, and you walk into a dust cloud, it can quickly turn into mud. Most operators carry a specific rag just for cleaning and wiping their tubes.
What are things that you can do with night vision that you cannot do with Thermals?
GBRS Group: With Night Vision you can tell the emotion of who you’re looking at and read facial features. Since night vision is the amplification of ambient light, it can be defeated by good camouflage.
On the other side, you can see really well through a Woodline with thermals. Unless someone is wearing special materials, they’re going to give off that heat signature. What it doesn’t offer is details, which are much more important when up close and attempting PID.
Where most equipment is at now, smoke and glass can sometimes defeat thermals, but we wouldn’t be surprised if that changes soon.
Passive Aiming, or looking through your optic under night vision seems like an example of “what was old is new again.”
DJ: I wasn’t about the whole passive aiming thing until I got out of the military. Why would you want to look through one tube, and line it up with a smaller tube while shooting at night with people moving around you? We just spent $3 million to build an operator up to make everything easy, and you want to make the one thing that should be easy, now harder. I didn’t get it.
If you’re not using a raised mount, it’s not even the same thing on the shot timer. That’s a stance that we believe in: head’s up shooting. If you bring those optics higher, it makes you shoot from a head’s up posture. If I throw my weapon system out and that laser does not turn on, then I can shoot through my optic, but I am never banking on it.
Slade: Soldiers have been recovering night vision equipment for years overseas, and it’s no secret that there are forces pursuing a similar night vision capability to the United States. On top of that, night vision technology is getting cheaper and easier to acquire. The world has watched how the United States has done business for the last 20 years, and we don’t want to fall into complacency.
Passive aiming is a good skill to have. There’s no down side to being able to make a well-placed shot at night, on NODs effectively and quickly without putting out a light signature, even an IR laser.
If you could leave a student with one vital habit that you wish you had learned early on as a SEAL, what would it be?
GBRS Group: Understanding why you’re doing what you’re doing. I think back on all the time I wasted while in training because I didn’t know the connection between what I was practicing and reality. Without understanding this, you can have the best training in the world, and it all be for nothing.
We started GBRS Group because the vast majority of experience got washed away too early when too many guys got killed or got hurt and had to step down. I don’t want to see another ticker on the news. Another soldier killed overseas or another police officer shot. We want to help the people who are still in the fight, in order to save as many lives as we can.
Find your Why.
It’s not uncommon to see veterans struggling with belonging or finding meaning in their new lives. And this is no longer restricted just to the veterans. What advice do you have for finding that why?
GBRS Group: For Veterans, I have to say thank you. Because what I see more often than not are the ones who suf- fer the worst are the guys who gave a shit the most. The guys who wanted nothing but to be a Green Beret, Ranger, SEAL, name it, and had it taken from them in an injury or they got to an organization who let them down. I say thank you for giving it 100%.
The people who get out of college, who struggle to find their why. There is no set plan. You have to go make it happen. Go make your own tribe. You have to surround yourself with people who’s goals are aligned and are either struggling with the same stuff or have been before.
Luckily for me, all the shit that I went through, all of my friends have been through it too.
You’re supposed to be confused right now. Everyone is searching for a sense of purpose. In the SEAL teams, the guys that wanted to be there were the ones giving it their all. It’s a deal with the devil that you make in that selec- tion process, you have to be able to give up everything.
But now, you create your own universe.
I thought I was going to be a Navy SEAL forever, but I had to leave eventually. But there’s so much living to be done after the military.
Name: DJ Shipley IG: @tribesk8z Age: 35 Favorite Quote: “How far are you willing to go? Farther than you.” Recommended reading list: The Talent Code by Daniel Coyle, Legacy by James Kerr Favorite skate shop: Tribe Sk8z Where did you learn to skate? Chesapeake, Virginia. The older guys that lived down the road got me started. Preferred Handgun: Sig P320 Legion First Tattoo? Shark on my right calf, which has been covered up. Childhood idol/hero? My dad, because he could beat the brakes off your dad. Choice night vision? Four-Tube White Phosphor Ear pro mounted to helmet or under? Under. It gives me more options.
Name: Slade Cutrer IG: @slayderaider Age: 36 Favorite Quote: “Learn the rules like a pro so you can break them like an artist.” — Pablo Picasso Recommended reading list: The Frontiersmen by Allan Eckert Favorite skate shop: Tribe Sk8z Where did you learn to skate? Hawaii and Washington state when surf was flat and the snow was sh*t. First tattoo? I got a honu (sea turtle) on my lower calf when I was 16. My buddy from Tahiti drew it for me. Childhood idol/hero? None in particular; Jeremy McGrath and Vietnam-era SEALs would be the closest thing. Choice night vision? WP 4 tubes (GPNVG-18) Ear pro mounted to helmet or under? Under, officers and army dudes wear them on their helmets. You always need ear pro and comms, and it’s nice to take your helmet off when able. EDC: Custom TXC Holsters X1:Pro GBRS Variant, Agency Arms Sig P320 X-Carry
Name: B. Cole Fackler IG: @therealphatty Age: 36 Favorite quotes: “Success is not final, failure is not fatal: it is the courage to continue that counts.” — Winston Churchill Favorite skate shop: Tribe Sk8z Where did you learn to skate? In my driveway Preferred handgun: Agency Arms First tattoo: Tribal arm band when I was 16 years old Childhood idol/hero? Laird Hamilton Choice of night vision? Fusion (NV + thermal) Ear pro mounted to helmet or under? Under
MORE SURVIVOR SPOTLIGHTS ON OFFGRID:
Brady Pesola: Ensuring a Safe Passage for Veterans.
The necessities of our print production cycle sometimes act as a speed bump for us when we want to address current events as they relate to survival. Unfortunately, seven months past our “two weeks to flatten the curve” and five months past the death of George Floyd, the enduring fallout from one or the other continue to make many people anxious about leaving their homes. Whether intended to combat the spread of disease or to exploit a sociopolitical movement, both the government and malevolent actors alike have figured out how to press the big red STOP button on people’s daily lives.
When I was in the military, we used the phrase low-intensity conflict to refer to things like terrorism and guerrilla action — armed clashes that don’t involve a full-scale meeting of armies on a central battlefield. We can look at the ripple effects of COVID-19 countermeasures much the same way. Steps such as quarantines, mask mandates, social distancing, and telecommuting don’t fit the traditional legacy view of a “disaster” — a term most people associate with a single, sudden-onset event. Even large-scale protests, and the riots that sometimes result, can feel like distant news if you’re not there when it happens. But long-term travel restrictions and the economic impacts of civil unrest present their own set of problems that can be equally severe. Intermittent availability of household paper goods or fresh meat, the sudden financial burden of destroyed business or property, and increased vulnerability of sensitive information through the use of internet-based telecommuting services all become very real survival issues if not properly addressed or prepared for.
These kinds of simmering, persistent problems have affected a lot of people and organizations who previously believed they were well-prepared, our publication included. The widespread disruption of supply lines, reduction in disposable income through lost or furloughed jobs, and the restrictions on people’s ability to make trips to the newsstands or grocery stores has impacted our operations in a concrete way. We’re still going strong, but it’s getting harder for us to reach you with quality information that could save your life — or at least make it a little easier in times like these. There are few things I hate more than a well-polished sales pitch, so I’ll keep it simple: Please consider subscribing directly to us via our website or mail-in subscription cards. It’ll guarantee direct delivery to you, regardless of shortages or disruptions at the retail level. Also, for over five years, we’ve shipped our issues in a discreet, sealed poly bag that protects your privacy and your household by minimizing the number of hands that actually touch your magazine.
The low-intensity disaster is especially insidious, because it doesn’t match the traditional depiction of a “disaster.” This is why we’ve always been such strong advocates of the holistic approach to survival and self-reliance. Don’t just prepare for something, prepare for anything.
Human traffickers, process predators, narco-terrorists, hostage-takers — these are just a few groups within the criminal element that employ unlawful custody. These types of criminals are generally very experienced at their craft, and understand that eliminating all means of escape from their victims is a top priority.
During any form of abduction, there’s always an initial contact phase where the bad actors must subdue and restrain their victims as quickly as possible so they can relocate to a more secure and secluded location. During this initial phase, they’ll typically conduct a quick pat-down search, which must suffice until a thorough, full body-strip search can be performed.
Covert escape tools are designed to be discreet enough that they have a good chance of going undetected during this initial contact phase. This means that they can be used to escape quickly during the relocation phase, or migrated to a more concealable location prior to a full body search. When carried and used properly, these tools can mean the difference between life and death.
In this installment of Pocket Preps, we’ll look at some of the most innovative and versatile covert escape tools on the market. Hopefully, you’ll discover some tools that fit your lifestyle and can find their way into your EDC repertoire.
The CHAOS card is a fully loaded punch-out escape kit that fits into a wallet like a credit card. This master card of escape tools contains a short hook pick, triple peak rake pick, tension tool, auto lock rocker/jiggler, four- and five-prong comb pick, short wafer pick, handcuff key, and a “stabby thing.” The hook and rake picks and tension tool can be used to attack most pin tumbler locks and wafer locks. The comb picks are effective at bypassing lower security locks by pushing the pin stack above the shear line. The wafer pick works on many filing cabinet and desk wafer locks. The “stabby thing,” as described by the manufacturer, is a Tanto-shaped, pointed object that forms the handle of the auto lock jiggler. It can be used in the hand or affixed to a makeshift handle to form a prison-style shank. The half-barrel handcuff key can bypass the restricted keyway of most regulation handcuffs to disengage the locking mechanism easily.
Pros:
Several versatile escape tools in a single, compact package, easy to stow and conceal inside a wallet or pocket
Cons:
Difficult to access when placed under physical restraints
Extremely thin tools can be difficult to use under stress.
Wallets are often the first thing removed when placed under unlawful custody.
The Ed’s Manifesto Scapular by Citizen E Industries mimics the design of the religious pendants popular in Latin America. The 550D Cordura pendant contains a hidden pouch for stashing small escape tools behind the religious icon. The necklace, which doubles as a friction saw for escaping flexible restraints, consists of 400-pound Kevlar cord with a copper-encased magnetic clasp. There are two elastic loops on the side of the pendant that hold a micro chemlight to aid with fine tasks under darkness. The apparent religious significance makes this escape tool less of a target for scrutiny, reducing the likelihood of confiscation during the initial encounter.
Pros:
Unassuming religious nature makes the scapular less obtrusive
Magnetic clasps make it easier to remove the scapular when movement is restricted under restraints.
Kevlar cord is very strong and heat resistant, making it an excellent choice as a friction saw.
The necklace and magnetic clasp can be used to retrieve dropped metal escape tools when movement is limited.
Cons:
Since this tool is worn around the neck, it can be easy to see.
Escape tools can fall out of the hidden pocket if not properly secured.
The Jolly Roger 3 Knife Coin Multi-Tool is made from a real coin and includes a knife blade and a standard handcuff key. The knife blade is made from tungsten-molybdenum M2 high speed steel, providing a balance between toughness, wear-resistance, and hardness properties. The handcuff key barrel has been ground to a 45-degree angle to make it easier to insert into the keyway when the user’s hands are bound. The knife blade and handcuff key fold behind the coin, making them completely unobtrusive when viewed from the front.
Pros:
Large gripping surface created by the coin makes this key easier to manipulate than most covert handcuff keys
Convenient to carry and relatively easy to conceal in plain sight
Key works on all standard handcuff keyways.
Can be used to open single- and double-locked handcuffs
Blade can be used to cut through duct tape, flexible restraints, and rope.
Cons:
Can be difficult to access when handcuffed behind the back, assuming it’s in the front pant pocket where loose change is normally carried.
Carries a hefty price tag
Might accidentally end up in the tip jar at the local coffee shop
Southern Specialties OSS Lock Picks
Dimensions: 2.25 by 0.5 by 0.25 inches Weight: 0.4 ounces MSRP: $20 URL: www.lockpicktools.com
When deep concealment is a prime motivator for tool selection, the Southern Specialties OSS Lock Picks offer a solution. This stainless steel multi-tool is packaged in a soft vinyl boot and includes a tension tool along with a Short Hook Pick, Saw Tooth Rake, Euro Modified Curved Rake, and a Razor Saw. These tools offer a wide range of escape options. The three lockpick tools allow the user to attack most standard pin tumbler locks and a variety of low-security locks. The saw can cut through duct tape and most flexible restraints. For the well-versed escape artist, the short hook or tension bar can even be used to pick most standard handcuffs.
Pros:
Compact micro-tool can be easily stashed away for unconventional or deep concealment carry.
Multi-tool approach offers many escape options for a large number of unlawful custody scenarios.
Hinged design keeps all tools together, ensuring they’re available when needed.
Well-suited for body cavity capsule transport
Cons:
The short tools are more difficult to operate than their full-size counterparts.
Southern Specialties Titanium OSS
Dimensions: 1 by 2 by 1/16 inches Weight: 0.6 ounces MSRP: $35 URL: www.lockpicktools.com
The Southern Specialties Titanium OSS tool is an extremely compact lockpick kit that includes two standard picks and a tension tool. There are two styles available. Style 1 (shown here) includes a Euro Bogota Quad Rake and a Euro Slim Line Short Hook. Style 2 has a Snake 3/7 Rake and a Camel Back Rake. The double-ended tension tool has a traditional flat head on one side for bottom of the keyway manipulation, and a short, stepped-down head on the other side for top of the keyway tension. The kit comes with a small vinyl sleeve to carry the tools. The sleeve fits perfectly inside the Ed’s Manifesto Scapular by Citizen E Industries, making this non-ferrous kit a most versatile escape tool.
Pros:
Can be easily concealed inside wearables like the Ed’s Manifesto Scapular
Ability to be worn on or taped to the body makes this kit a wise choice for deep concealment.
Titanium is a non-ferrous material, making the magnetic signature of these tools minimal.
Cons:
The small tools can be challenging to use under stress.
Handcuff shims are used to open handcuffs by separating the pawl (ratcheting mechanism) from the teeth on the swinging locking arm. The shim is wedged between the pawl and the teeth to disengage the locking mechanism. Some handcuff models have a split pawl with a gate in the centerline to prevent shimming. These split pawl models require a split shim to disengage the pawls on each side prior to disengaging the center gate. The Sparrows Handcuff Shims comes with two standard shims and two split shims. Their unique citadel head provides the user with such an aggressive gripping surface that the shims can be used with just one finger.
Pros:
Inexpensive, versatile
The citadel head’s aggressive texture prevents the user’s hands from slipping off the shim when wet.
Faster and easier to use than handcuff keys or picking tools
Standard and split designs can be used on most popular handcuffs.
Cons:
Small tool shape can be difficult to use by people with large hands.
Shimming requires the handcuffs to be tightened during insertion, which can be dangerous if the handcuffs are already tight.
As world leaders continue to scratch their heads about the best way forward and activists demand immediate solutions to very complex societal issues, we can easily expect more knee-jerk political responses to future disasters. The collateral damage caused by legislation that’s lacking in forethought and scientific evidence only serves to complicate and aggravate an existing situation. Those of you who’ve been hit hard financially by punitive COVID-19 mandates know far too well what we’re talking about. Why wouldn’t that same haphazard approach be applied again to other areas where the government needs to “do something” instantly to solve a problem? After all, the salary, safety, and living conditions of those who create these laws always manages to remain unaffected.
So, let’s turn our attention to what the future might look like when it comes to energy conservation and increasing pressure to heavily limit industries powered by fossil fuels. The whisper campaign has already begun about various industries going completely “green” by a certain date, along with bans on gas-powered vehicles in major cities, and delusions that the country’s fossil fuel infrastructure could be completely overhauled within a decade or two. Ask yourself how authoritarian sanctions and mandated rationing could create a domino effect of other problems that impact daily life in an average American city. Today, we take a look at how the power supply might possibly be affected by heavy-handed restrictions to life as we know it.
Situation Type: At Home Your Crew: You, Your Spouse, and Your Children Location: Witchita, Kansas Season: Winter Weather: Snowy; High of 28 Degrees F, Low of 8 Degrees F.
The Scenario:
The Setup: Due to unmitigated population growth and growing concerns about global climate change, the U.S. government has recently started mandating rolling blackouts for all fossil fuel-based energy providers. Politicians claim this will reduce America’s environmental footprint and motivate utility companies to immediately invest in renewable, “green” energy sources. These blackouts are common during hotter months; sometimes they last a few hours, other times they last for days. They’re supposed to happen according to schedules posted on local municipal websites, but they’re rarely accurate, consistent, and predictable enough to prepare for with any advanced notice. And if your home doesn’t use natural gas, you’ve got one less alternative to depend on. The bottom line is, this new form of energy conservation is going to continue for the foreseeable future, since politicians’ pie-in-the-sky green energy plans will take time to implement (if they ever get implemented).
These blackouts are primarily focused on high-density living areas and major cities, but also affect the outlying suburbs. Because of complaints regarding noise and pollution, codes have also been passed to limit the hours in which gas-operated generators can be used. This has put many in the precarious situation of having to modify their home’s existing solar power system to supply as much juice to the house as long as possible. Others who have no such setup simply must go without power altogether.
The Complication: This has created the collateral damage of increasing civil unrest. Everything from petty theft to violent home invasions during blackout hours has skyrocketed. Fuel theft from parked cars has become common. Hospital admissions for temperature-related health conditions have also increased. Even water pressure has dropped in many areas as a side effect of the blackouts. There’s increasing demand for canned and sustainable food, since refrigeration is a luxury. For this What If?, how do you adapt your lifestyle to these conditions and consider things like food storage, health, self-defense, communications, and powering modern conveniences without a reliable supply of electricity? We asked survival advocate Rogue and former U.S. Army scout/sniper Alexander Crown to weigh in on the situation.
It’s not surprising that the government is holding our electricity hostage. Electricity has been relied upon for less than 100 years, but it’s become something people don’t know how to live without. Most people think they can handle being without power for a few hours. A day, at the most. More than that and people start to get cranky, restless, and potentially violent, especially when they’re without modern conveniences such as the internet or a cold beer.
We learned long ago not to rely on a third-party source for our needs, and this includes our electricity needs. We invested in a full solar power setup, one that isn’t connected to the power company at all. We have our own panels, batteries, charger, and inverter. As long as we keep it maintained, it can power all of our needs. Our most important needs are hot water, freezer, and fridge. We have energy-efficient lights, but in general, lighting can come from a variety of sources including candles and oil lamps.
During a blackout, however, we wouldn’t want to be particularly noticed among the neighbors to have a house full of lights, so we’d stick to candles, flashlights, and oil lamps to visibly match the rest of the neighborhood. Just because we have the capability to turn on every light in our house, doesn’t mean we should, as that would make us a target during a blackout. Sure, people can see that we have solar panels on our home, but we’re not the only ones in the neighborhood with solar, and they can’t be sure how much energy our panels actually produce.
Our solar setup allows us to keep our communication devices charged, including phones and ham radios. Cell reception wouldn’t immediately go down when there’s åbe overloaded with more usage than normal, as everyone is trying to communicate with loved ones. In general, we try to keep transmission at a minimum and listen the best that we can, only transmitting when we absolutely have to.
Ham radio is our main source for intel. We can listen and transmit as needed. Keeping the phone charged is mostly for emergency calls or texts, or to watch any downloaded movies or play offline games when we have time for that luxury.
We’ve been storing food and water for just such instances. We have months’ worth of food to keep us afloat. Storing food for blackout purposes is important because it may not be safe to go out for a variety of reasons. The supply chain may be slowed because trucks may be unable to reach stores due to unrest, and grocery stores may not have a good backup energy supply — they only hold about three days’ worth of groceries at a time anyway. In addition, there may be chaos and stores being ransacked.
While water may be running for a short time when the power goes out, over time it could run out of pressure and eventually stop. This is one of the main reasons to store water. If you’re not on an alternative energy source such as solar, wind, or even hydro, when the lights go out, fill up every container that you can find with water. That includes sinks and bathtubs. Water can also be sourced from a water heater; depending on your home’s size, you could have 50 to 80 gallons worth of water just sitting there. If you flush your water heater yearly, as is recommended, the water should be reasonably clean.
Leaving your home to get water isn’t ideal. Once you leave your home for any reason, especially during times of unrest such as rolling blackouts when people are agitated, you put yourself at greater risk than if you were to stay home. We store as much water as possible. We even have a rain catchment system setup. If we ever did have to leave for water, we know where the nearest water sources are, and could acquire a little at a time (a backpack’s worth) to not draw attention to ourselves.
Getting to know your neighbors and general neighborhood could be an asset. You never have to mention that you’re a prepper, but everyone could help to maintain a sense of community, and help each other out through various means, including security. We have created strong relationships with our neighbors and we rely on each other regularly. We’d certainly do so during a crisis.
Our children are probably the least affected by blackouts as they enjoy playing by flashlight or candlelight. It also provides a lot of quality time playing board games and generally being together. They still get to play with their toys and watch any movies that we’ve downloaded on their iPads.
Since it’s winter, heat is our biggest concern. While most people in my area have a fireplace or woodstove, we still have to be aware of its usage. If other people in the neighborhood aren’t able to use their fireplace or woodstove because they are low on resources, we wouldn’t want to be the only ones advertising that we have heat. In addition to our fireplace, we have a buddy heater. It runs on propane, but we’ve planned for this. During the day, we stay bundled up. At night, we congregate in one room where we all sleep. This way we can heat that one room instead of the whole house. In addition, we use our zero-degree bags to keep us extra toasty, so we don’t have to have the heat on 24/7, which helps to manage our resources better.
While all of this is well and good, there’s still unrest. People are feeling wronged by these rolling blackouts, and for good reason. Eventually, those who are unprepared will turn to anyone who they think might have more than they have. Even if you do everything right by keeping quiet and blending in with the rest of the neighborhood, you could still become a target. Anyone can become a target at any time for any reason.
We make ourselves a hard target. If someone wants to come after us for our goods or lives, we aren’t going to make it easy on them. We have fortified our home with battery-powered cameras and a kick plate on the main door, covered all windows and screen door with blackout curtains, and installed security bars on windows and the screen door. We also have two dogs that are great alarms for any disturbances in the force.
If the crisis continues on for an extended period of time and we feel we may run out of food within a month or so, we’ll start to grow small bits of food in containers — microgreens and sprouts. We wouldn’t wait until our food is gone to start acquiring more food. If we have some space that can be hidden from spying eyes, we might grow out into the yard as well. We’d catch squirrels and other small game with traps or a .22 rifle. I may even start collecting bugs and fry them up, depending on the scenario.
Blackouts seem harmless, and we all expect the lights to flicker back on any minute, any hour, any day. However, when someone else is in control of your needs, whether it’s energy or food or whatever, they have full control over how you live. Don’t allow them to have that kind of control. If you’re prepared for an extended blackout, then you’re prepared for almost anything that comes your way.
Winter weather conditions present many obstacles on a normal day, let alone during times of civil unrest and blackouts. Preparation for winter should start in spring where lessons learned can be immediately applied. My approach to this scenario will come from my current situation in Boise, Idaho. Boise and Wichita share similar weather and population sizes.
Preparation
This is a multi-phase approach to address different aspects of this scenario. First, winter preparations in general. Take advantage of the warm summer months that are great for growing your own food or frequenting local farmers’ markets, and ready that food for canning and other forms of preservation. My family takes the “half” approach when harvesting our summer bounty — we eat half of the fresh foods, and the other half gets preserved. This helps stock up the pantry while also nourishing us. Incorporating food storage into your weekly or monthly grocery bill will also help you store the basics in larger quantities. Ten to 20 bucks can buy a lot of dried beans, canned goods, or pastas. Focusing on high-carbohydrate, high-fat, and protein-rich foods will help give your body what it needs when the temperature drops. Try to buy things you and your family eat regularly, and provide variety. Don’t forget things like spices, condiments, sweeteners, and supplements like vitamins and protein powder. Most people will develop a small vitamin D deficiency in winter due to less exposure to sunlight. Supplements can help strengthen your immune system in preparation for winter colds and flus. Build a one-winter supply of food as quickly as you can, and store it in the pantry or a closet, away from light, moisture, and prying eyes.
Food preparation also includes water storage. Water should be rotated every six or so months unless treated with a water storage chemical. Having different-sized water storage containers ensures it can be taken around the house as needed. Our approach is a 50-gallon rainwater collection barrel, a 15-gallon storage barrel, two 5-gallon jugs, and numerous recycled 2-liter soda bottles. The trickle-down approach (pun intended) is that the larger containers can be used to fill the smaller ones, making the water more portable. Be sure to have at least two methods of water treatment available and know how to use them safely and efficiently. This can be any combination of bleach, a Berkey, gravity filtration, droplets, tablets, or hand pumps. The market offers plenty of choices to fit your budget and needs.
This is also a good time to get to know your neighbors, if you don’t already. If civil unrest breaks out, you’ll all have a common goal: to keep your families and properties safe. If appropriate, organize a neighborhood watch, and identify weak points in your security and in the neighborhood in general. Find out who else gardens or hunts and be prepared to exchange supplies as needed. You cannot survive alone, so building these relationships early is paramount. If riots or similar forms of mass chaos have happened in your area, study those events to learn what the enemy’s methods were. You may be able to counteract this before it happens in your neighborhood. Are your neighbors armed or viciously anti-gun? Maybe they’re somewhere in between. Just knowing these things will help you know how to deal with these people in a time of need. Encouraging them to have their own food and water storage preparations will help them not become a real problem when you need it the least.
On-Site
For blackouts of an undetermined amount of time, having multiple sources of electricity and heat are key. Prepare your home by checking the windows and doors for gaps where cold air can come in. Also, check that all locks are working, and deadbolts have at least 2-inch screws securing them. Be sure pipes and spigots are insulated before first freeze.
Energy sources in the form of generators are great if you can keep fuel on hand. The noise ordnance limits when you can use them, but it’s still a good idea to have one. Gas generators are common, and gasoline can be stored with Sta-bil. A propane generator may also fit the bill since propane has a long shelf life. Have the necessary fittings to use your propane supply with your grill or a small camping stove. The ability to boil water will help with cleaning, food prep, and even getting ready for bedtime by putting a bottle of hot water under your covers. Generators can be wired into the home to power specific areas, such as the refrigerator or deep freezer. Keeping these appliances fuller will help them maintain temperature. These generators could also be used to power a small heater, but only during the times you can run them. With any of these options, be sure you have fire extinguishers nearby and check that they are full.
Venezuelans make long queues to supply gasoline tanks their vehicles on 6 June 2019 in Maracaibo Venezuela. Most users return the next day to complete the filling, since by order of the Bolivarian government at the gas stations in the interior of the country only 30 liters are allowed for each vehicle. (Photo by Humberto Matheus/NurPhoto)
The obvious choice here is to have a solar energy option. The Renogy 200-Watt 12 Volt Solar Premium Kit will run you less than a Glock 19 and can be used to charge deep-cycle batteries that can then power small appliances, all while being silent. Affixing the two 100-watt panels to plywood stands will allow you to bring them inside at night and turn them as needed for maximum sun exposure. Smaller solar panels can be used to charge cell phones, tablets, and ham radio for communications and entertainment. Solar banks can also help charge your 18- or 20-volt tool batteries.
Clean up your garage so you can park inside to limit unwanted access to your vehicles. If a garage isn’t present, look for alternate solutions. Can you park in your backyard or pull your car up close to your home? Don’t keep anything valuable in your vehicle if it cannot be secured. Organizing your space will also help you stay sane while looking for any items you may need. If possible, keep hand tools available and also any nuts, bolts, and screws for repair jobs.
Night temperatures will drop, so designating a sleep area can help keep everyone warm. Create a smaller space within your home using mattresses and blankets. Don’t completely seal yourself off so you have proper ventilation. A heated blanket plugged into your solar-charged battery will make everyone more comfortable going to sleep. Having individual, below zero-rated sleeping bags will also aid in a good night’s sleep. Keeping everyone together or at least close by helps with security. If the threat is particularly bad, establish a communications plan with the neighbors and alternate night watch. Be sure everyone has access to a flashlight or headlamp.
Crisis
Solar power is your friend in this situation. Modern panels can still be somewhat effective even during cloudy days; they’re silent and can be moved as needed. Using different-sized panels and having small batteries will help you rotate out power supplies as needed. Multiple options are, of course, also important — the old “two is one” mantra. Propane and gas are good options, but the noise and mandated use times can be problematic. Establish priorities for your family’s needs. Lifesaving machines like oxygen, CPAPs, or medicines that require temperature control must be factored into your preparations. To minimize energy needs in other areas, have candles on hand, a backyard firepit with extra wood, and alternatives to power for lighting and cooking.
Without any knowledge of when power will be restored, the best you can do is to have as much supply on hand and limit your power needs to the most necessary items. Gas and propane will eventually run out, making solar even more important. Food will run scarce, especially if local infrastructure is failing. Identify nearest resupply areas, grocery stores, and even convenience stores. Be physically prepared to walk to these locations in inclement weather for resupplies you’ll carry on your back. Have a portable solar or hand-crank radio — local radio stations may be airing important updates, and music will help with morale. If you’re a HAM operator, be sure you have identified repeaters in your area and any local HAM clubs that may have updates from other areas. This communications method has been proven in recent catastrophes. Even if you don’t have a license, have a radio programmed that’ll let you listen in and get updates.
This event is only one of the many possibilities you should be prepared for. Having long-term food/water storage established will give you a greater edge in this event and limit your stress. Preparing your children for a no-electronics life may be one of the more difficult aspects here. Have entertainment ready and on standby to keep you all sane. Crayons, coloring books, board games, and other small toys will help them cope. Making them part of the process will keep them involved and let them feel like they’re helping. Make sure hygiene isn’t neglected either — keep extra toothpaste and brushes as well as soap. Does your wife have sanitation supplies to last six months or longer? Your water isn’t just for drinking either, so prioritize it. Will you be able to melt snow for cleaning and cooking or get water from a nearby stream or river? Practice these things ahead of time so you’re ready for a blackout that may last a day or much longer. Preparedness can be an exercise in your own imagination, so think about obstacles ahead of time in order to overcome them when they rear their ugly heads.
Conclusion
When it comes to political pandering in response to hot-button topics, usually the legislation put into effect has more to do with someone taking credit for reacting quickly than it does with actually solving problems. Could the aforementioned situation become a reality? Over 2.5-million homes were without power recently in Texas due to excessive cold, causing demand to greatly exceed generating capacity. If electricity is easily disrupted by weather, it can certainly be disrupted by other factors. With a little planning, a level-headed approach, and the right supplies on hand, you’ll be in a much better place to deal with a situation like this when there’s a run on food, the lights you take for granted don’t work, and toilet paper is once again a luxury item.
About the Authors
Alexander Crown is a former U.S. Army Paratrooper who spent time in a scout/sniper platoon in OIF. He has extensive experience in firearms, particularly silencers. Alexander spends his time exploring Idaho hunting, fishing, and camping. He’s a lifelong practitioner of preparedness emphasizing self-reliance and organic gardening. Alexander is also a regular contributor to RECOIL and RECOIL OFFGRID.
Morgan “Rogue” lives on 40 acres of land with her husband, two daughters, two dogs, cats, and chickens. She’s the owner and founder of Rogue Preparedness, a website dedicated to emergency preparedness and survival skills. Visit her at roguepreparedness.com.
The original plan for this article was to outline how to set up a helmet for use with Night Vision Goggles (NVGs). However, there’s no sense in talking about what color to paint the walls of a house before the foundation is poured — first, we need to discuss how to choose a helmet that’ll serve as the host for NVGs and related accessories.
NVGs have a definite learning curve, but a good helmet setup can make it easier. This image was taken through the AGM Global Vision white phosphor PVS-14.
Ballistic vs. Bump
Your first decision is ballistic or non-ballistic. If the objective is just hog hunting or target shooting with night vision, then you can save a ton of money by procuring a non-ballistic or “bump” helmet. Just like the name implies, it won’t stop small arms threats or fragmentation, but it will stop you from getting a Flintstones-type lump on your head. These helmets are substantially lighter, and they’re also ventilated to allow better airflow, keeping you cooler and your lenses fog-free. The current crop of quality bump helmets look very similar to ballistic helmets — many of them even have built-in shrouds to accept NVG mounts. This means the plethora of NVG-supporting equipment for ballistic helmets will interface with bump helmets. Galvion also makes a Hybrid helmet that’s a bump helmet with armor appliques, but this is a trade-off with gaps in its protection. If you’re expecting to get shot at, a full ballistic night vision helmet setup is the answer.
The author’s current setup – Galvion Caiman Ballistic, Revision Military comms, SureFire X300V umbrella light that can also be removed for use as a handheld, SureFire XC-1 as a forward white light, Princeton Tec for a small task light and Core Survival Vis/IR strobe, Wilcox G24 mount.
Much like armor plates and plate carriers, there are a lot of manufacturers out there for ballistic helmets. I can’t name them all, and this article isn’t meant to be a dedicated helmet buyer’s guide. Suffice to say, if you’re going to invest in a ballistic helmet, ensure that it’s tested to the threat rating you want, and that the company itself is reputable. The following isn’t all-encompassing and in no particular order — Galvion (formerly Revision Military), Ops-Core, Team Wendy, Crye Precision, and MTEK are a few examples of companies you can trust.
Make: Team Wendy Model:Exfil LTP with 3.0 Rails URL: www.teamwendy.com MSRP: $303
Bump Helmet
The Exfil LTP, which stands for Lightweight Tactical Polymer, is a good representation of the bump helmet category. Without accessories, it weighs in at 1.6 pounds and features an array of ventilation slots to maximize airflow around the head. Team Wendy offers buyers a choice of 2.0 or 3.0 side rails — we chose the latter for its integrated Picatinny accessory rails. This helmet includes a built-in NVG shroud with Wilcox aluminum insert, two-layer configurable foam pad system, and a highly adjustable suspension system with BOA tensioner dial.
Howard Leight Impact Sport electronic ear pro is attached to each side of the helmet via Team Wendy Exfil Peltor Quick-Release Adapters. It’s worth noting this requires cutting the headband off the earmuffs, so they can no longer be worn without a helmet.
Lastly, a Mil-spec Norotos RHNO II “Rhino” mount was attached to the helmet’s shroud, providing an attachment point for night vision systems that use a bayonet-style interface. This is perfect for a monocular such as the PVS-14 we sourced from AGM Global Vision. AGM offers many models in the PVS-14 family; this particular sample features a Gen 2 white phosphor tube. Its included adapter clips directly into the bayonet mount and can be positioned for use with either eye.
One of the most distinctive designs in the ballistic helmet market, the AirFrame uses a two-piece shell of armor that overlaps slightly at the midsection. This provides an obvious improvement in breathability over a one-piece helmet, and Crye also says it can mitigate head trauma if the wearer is hit by the pressure wave from an explosion. The ATX model meets NIJ Level IIIA ballistic requirements; our large helmet weighs 2.8 pounds. The helmet includes an Ops-Core H-Nape suspension system and cushy ¾-inch-thick memory foam pads. Our sample helmet came pre-drilled for a three-hole shroud, such as this Wilcox L4. It also includes optional AirFrame side rails and a stick-on Velcro kit.
We used Peltor ARC Rail Adapters to convert a set of Peltor Sport Tactical electronic earmuffs from headband configuration to helmet-capable (again, this requires cutting off the headband). An AirFrame Peltor Adapter Set ($8) is required to install the ARC Rail Adapters. We plan to upgrade from this consumer-grade ear pro to a professional-grade set of Peltor ComTacs in the future.
Our night vision system is a dual-tube NVG-40 3AL1 from AGM Global Vision. This system features a pair of Gen 3 green phosphor tubes, which are auto-gated to adjust brightness and protect the tubes from fluctuating light conditions. These NVGs include various attachment shoes; we chose the dovetail-style shoe and paired it with a Wilcox L4 G24 mount (anodized tan to match our helmet). This mount is highly adjustable and features a push-button locking pivot.
Unlike the lightweight monocular on the bump helmet, we felt this dual-tube setup would benefit from a counterweight, so we added a TNVC Mohawk system. It features removable lead weights, as well as retention points for replacement batteries and visible or IR glow sticks/IFF illuminators.
Basic helmet setup with shroud, Wilcox mount, and counter weight.
Shrouds and Mounts
The next consideration is: What are you using the night vision for? Levels of supporting equipment will vary depending on your activities and your budget. It doesn’t take much to get started with a basic setup but bear in mind that everything related to night vision is expensive. The first thing to look at is the mounting bracket on the front of the helmet, which is called the shroud. Most modern helmets will use a three-hole shroud. The NVG mount (the pivoting arm piece) locks into the shroud on the helmet, like the one pictured from Wilcox Industries. Norotos is another well-known and reputable brand. If your helmet has no holes for a shroud, it can be carefully drilled using the shroud as a template. There are shrouds that strap or clip onto helmets, but they’re less than optimal as a secure platform for a very expensive piece of equipment. Whatever shroud you select, make sure it’s compatible with the NVG mount you’re using, or that you have the appropriate adapter. Most will be universal.
Full setup with ear pro, counterweight, IFF, and eye pro attached to helmet.
Suspension Systems
The helmet suspension system (i.e. the strap around the head and chin) is often overlooked, but it’s a critical component to long-term wear and comfort. Current offerings that include a nape strap behind the head, and not just a chin strap, are beneficial in distributing the helmet’s weight and stabilizing it on your head. Old-school chin-strap-only designs allow the helmet to teeter-totter on the crown of your head. When you add NVG weight to the front, the helmet naturally wants to tip forward and the single strap does little to prevent that. A nape suspension system allows the user to tighten the nape strap to keep the back of the helmet down, while leaving the chin strap loose enough to talk.
Dual-tube night vision is heavier and can be a literal pain in the neck if you don’t choose the right suspension system and/or counterweight.
Pads are another worthwhile consideration. Most helmets will come with a basic internal pad system, but this may be something to consider upgrading later for improved comfort, breathability, and configurability. Memory foam or gel pads are a big upgrade over hard Styrofoam-style padding.
Ear Pro and Comms
Helmet-mounted hearing protection is a thing to consider as well. Electronic ear pro with head bands can be made to fit by removing or reconfiguring helmet pads inside the helmet. If your application will include extended wear, this can become very uncomfortable and may induce headaches, but I know several guys who like this method and don’t have any adverse effects. Another option is in-ear hearing protection, but I personally like and use helmet-mounted ear pro. Most of the current offerings and adapters allow the user to pop the ears off your head when they’re unneeded. This is preferable to headband-style ear pro, where the pressure stays on until the helmet and ears can be removed. A side benefit of helmet-mounted ear pro is that it helps with stabilizing and reducing the weight of the NVGs without having to add as much counterweight. If you’ll be using radio comms, the addition of boom mics and adapters for push-to-talk buttons (PTTs) are more plentiful with ear-muff-style electronic ear pro.
Wilcox compatible shroud comes standard on some helmets. Others can be retrofitted.
Balancing the Load
Counterweights are a popular accessory — they add weight to the back of the helmet to balance the NVG weight on the front. My first counterweight was made from fishing weights that were melted down and poured into a homemade mold. Once the lead solidified, the mold was broken away and the lead “brick” was bent to conform to the shape of the helmet. Sticky Velcro and paint were added, and the whole thing just stuck to the back of the helmet. This worked as intended, but eventually, I switched to commercially made pouches with removable weights. I kept getting neck strain while using a lead counterweight, and eventually figured out the importance of the nape suspension system, as mentioned previously. I still have a pouch, but all of the lead weights have been removed and it only carries spare batteries now. Your mileage may vary, since some guys swear by counterweights.
The Norotos bayonet-style mount and the Wilcox dovetail-style mount are two of the most common systems for attaching night vision to your helmet. Make sure your NVGs are compatible with the mount you select.
Illumination Options
A forward-pointing white and red visible light is a handy item, regardless of your purpose. I have a SureFire XC1 on one side of my helmet and use it as a work light when giving off a white light signature is of no consequence. It’s more than bright enough to check targets, conduct first aid, or complete most other tasks. I could put a brighter light on there, but that adds weight and bulk that’s unnecessary in my opinion. On the other side, I have a Princeton Tec helmet light with white and red visible LEDs. They’re much dimmer than the XC1, so circumstances will dictate which one gets used. My last light source is a SureFire X300V mounted on the back of my helmet in a prototype mount. This light points at the sky and is set to either infrared (IR) or white output based on what I’m doing. The “umbrella” effect indoors casts its light off the ceiling and provides ambient light throughout the space that’s reflected, instead of direct. This is beneficial, as opposed to a forward-mounted light that only illuminates what it’s aimed at. A bright directional light can also be annoying if you’re looking directly at a friend who is also wearing NVG. For my purposes, this light was mainly for admin tasks like post-assault checks or prepping a training area for the next run. I’ve also used it operationally to add IR energy for explosive breachers setting internal charges, or to add visibility in extremely dark spaces where my NVGs needed a bit more IR. The mount design shown also allows me to pluck the light off the back of my helmet and use it as a handheld flashlight if necessary.
Caiman Hybrid with removable ballistic panels and mandible can scale to your protection needs.
The last item to consider is a personal marking system or IFF. IFF stands for Identification of Friendly Forces, or Identification Friend or Foe, depending on who you talk to. I’ve always used the former, but regardless, it’s just a means to identify yourself. IFF can be passive or active; passive would include IR tabs or patches that reflect when IR energy hits them. Pretty simple and no batteries required. The downside is that it has to be activated with IR energy, which means someone is already identifying you with a laser or IR light before they see it. We required team members to have passive IR tabs or patches on the front, back, and on each side. Active IFF would include visible and IR markers and strobe lights. Different companies make really good strobes with different patterns and intensities. Core Survival and S&S Precision are both great companies making quality products. If you’re doing night vision hunting, alerting other hunters to your presence with an IR strobe just makes sense. In my case, the only guy strobing inside the house was the Team Leader so he was readily identifiable — this was less out of concern of being shot by teammates, and more about telling everyone the guy with the strobe is in charge. The strobe can be worn directly on top of the NIght Vision helmet so it’s visible in all directions, or 45 degrees rearward so it’s only visible if you’re behind the wearer.
Galvion Caiman “bump” helmet. These types of non-ballistic helmets are less expensive than their ballistic-rated counterparts.
Plan Ahead
As stated earlier, the night vision road is long and expensive. If your intent is to just target shoot as a hobby with minimal wear, then you can certainly get by with a bump helmet, shroud, mount, and nothing else. If your objective is to effectively work within a team conducting house-clearing work and fighting with NVGs, then almost all of this becomes a necessity instead of a nicety. The last thing I’ll bring up is that having the equipment only goes so far without training from reputable sources. It’s one more expense in an already expensive endeavor, but training from a reputable source may be the best money you’ll spend. NVG is a force multiplier like no other, whether it be checking your property, defending your home, or working in a team. It’s truly a superpower.
[Editor’s Note: This article first appeared in OFFGRID #43. Photos by Bill Blowers, Cameron Carden, and Patrick McCarthy.]


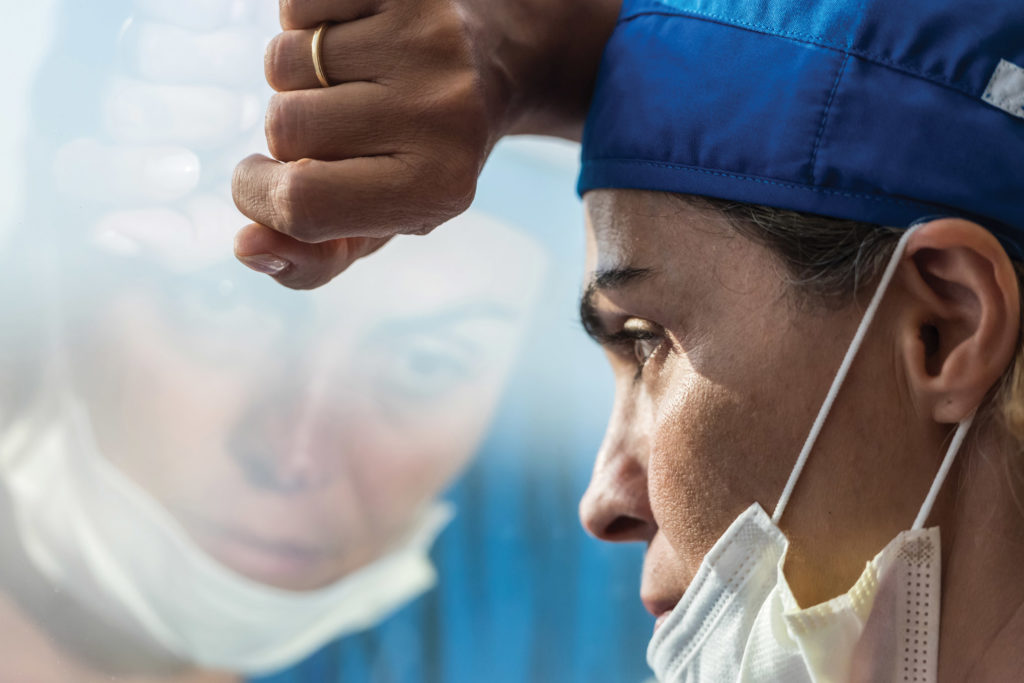


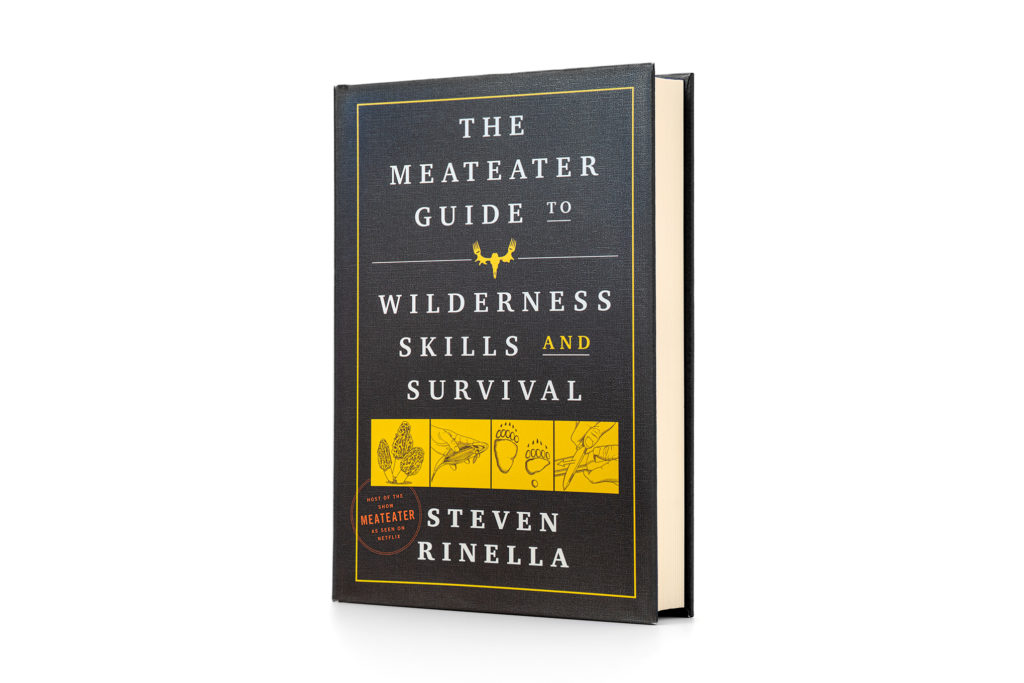


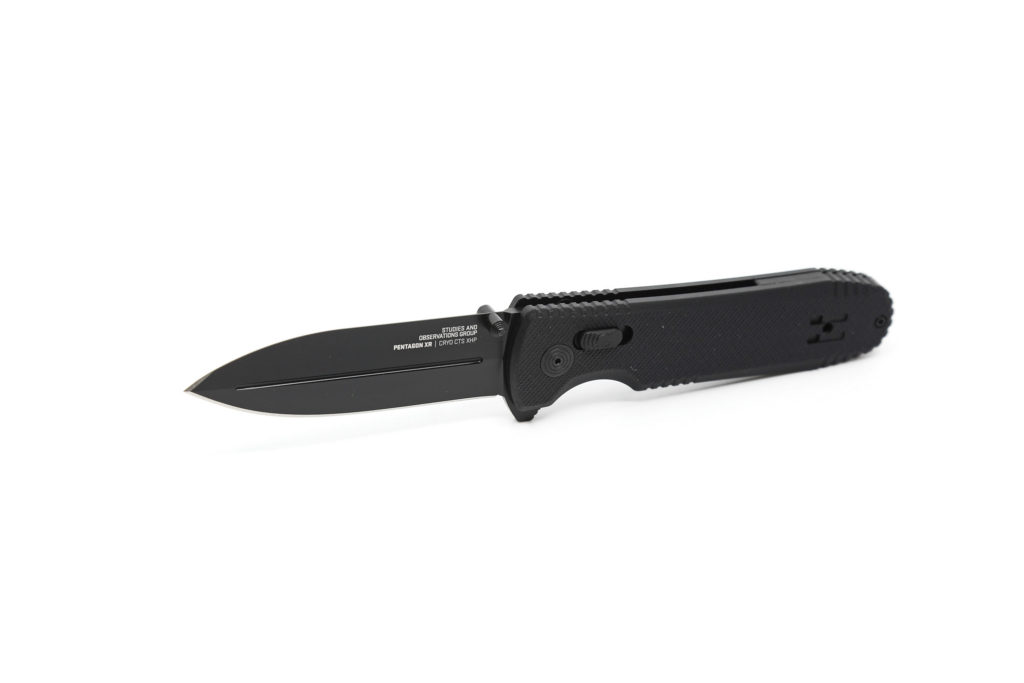
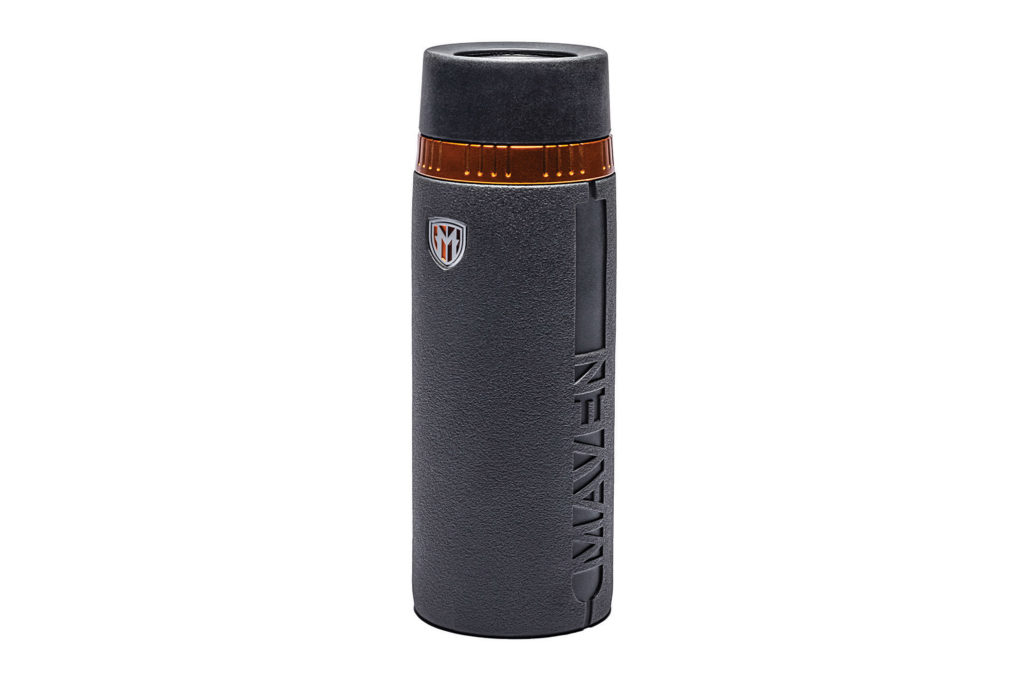
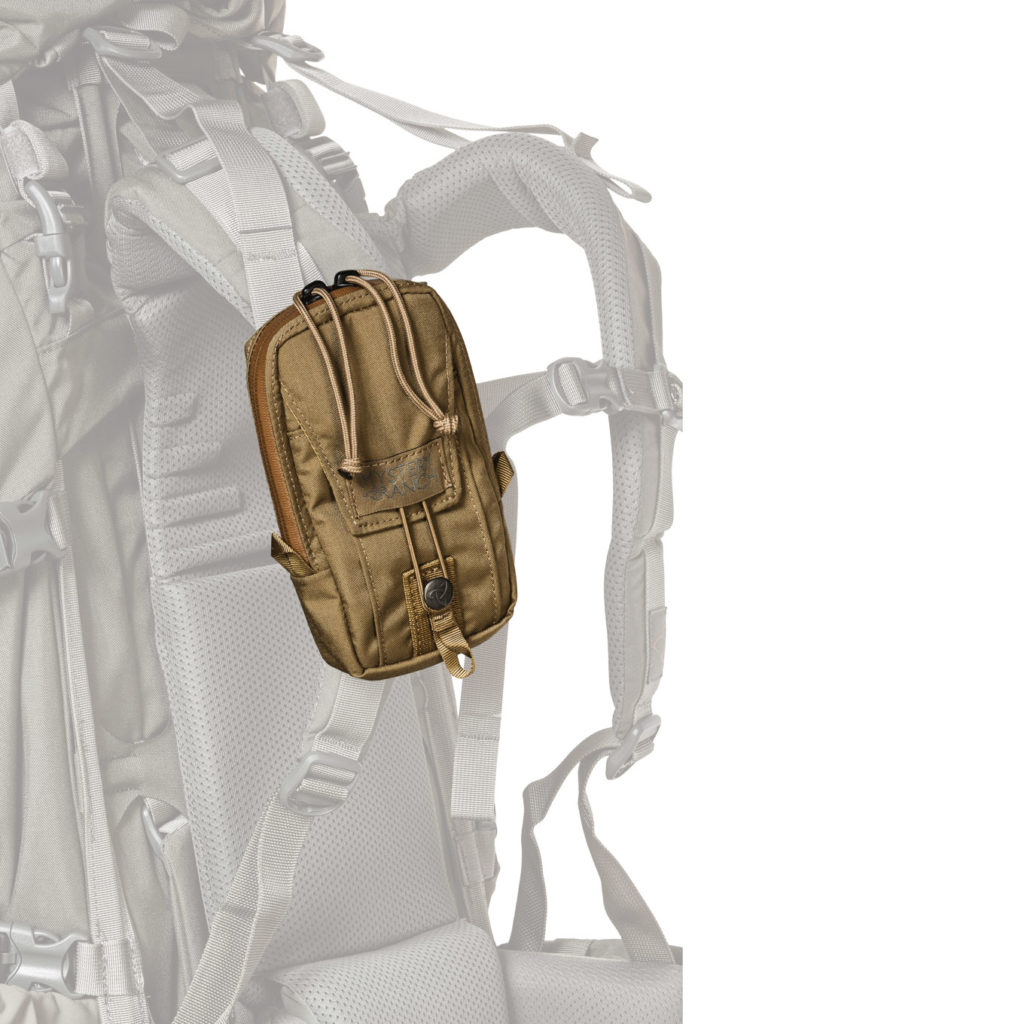
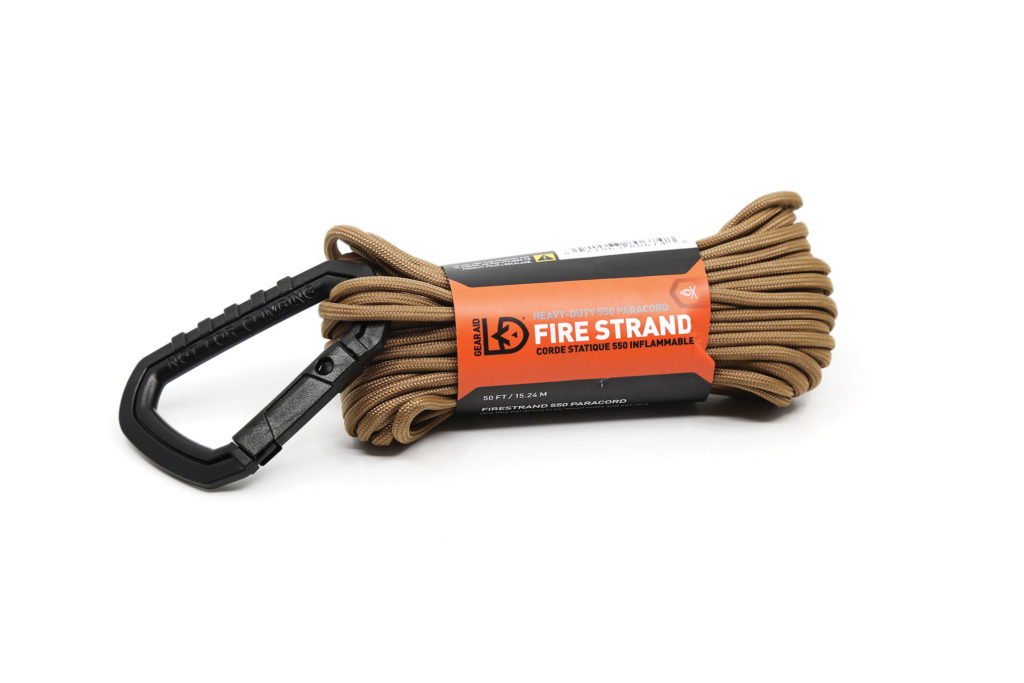
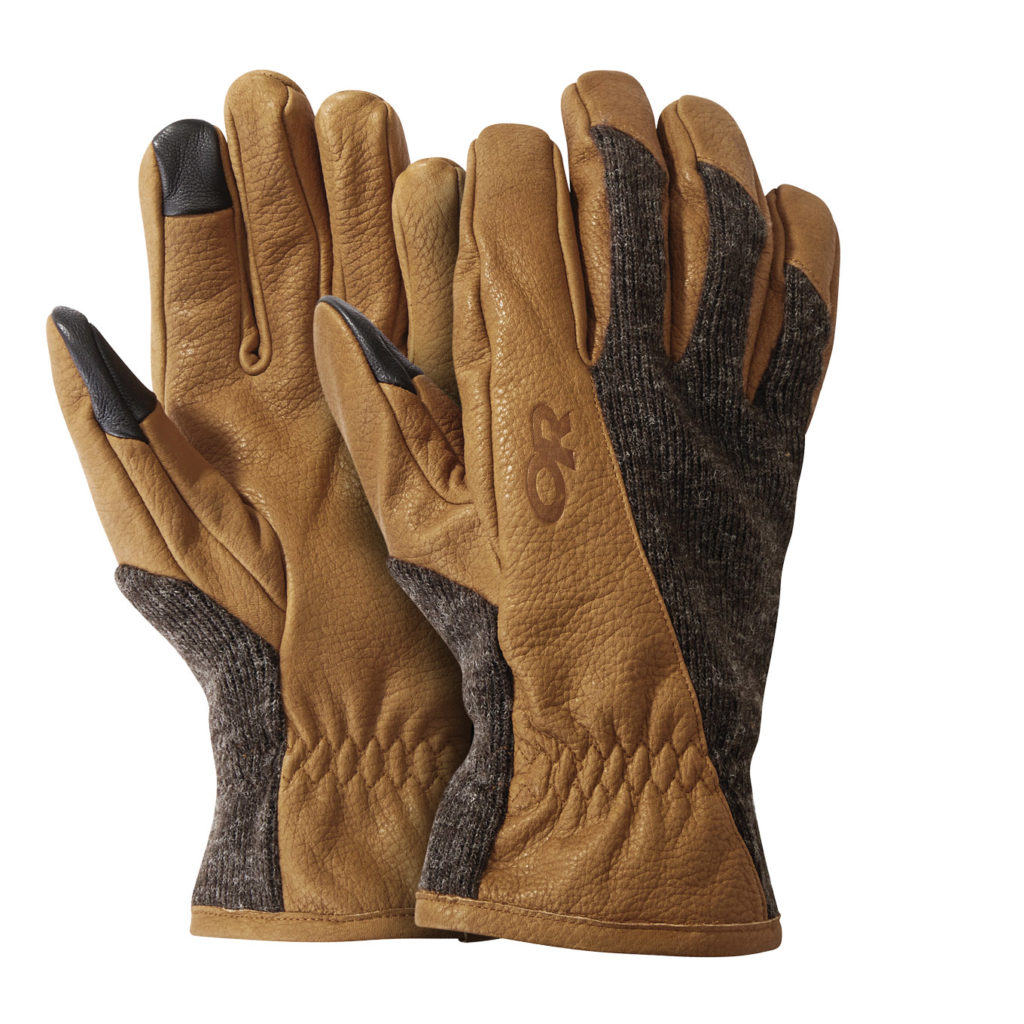

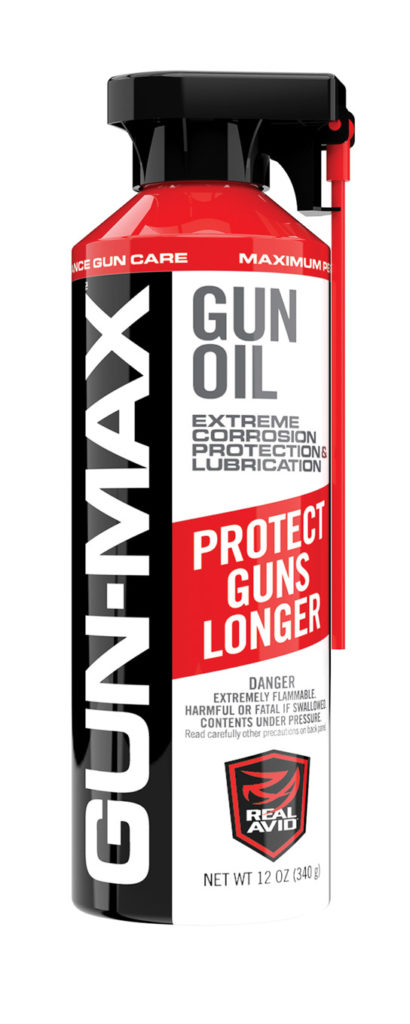
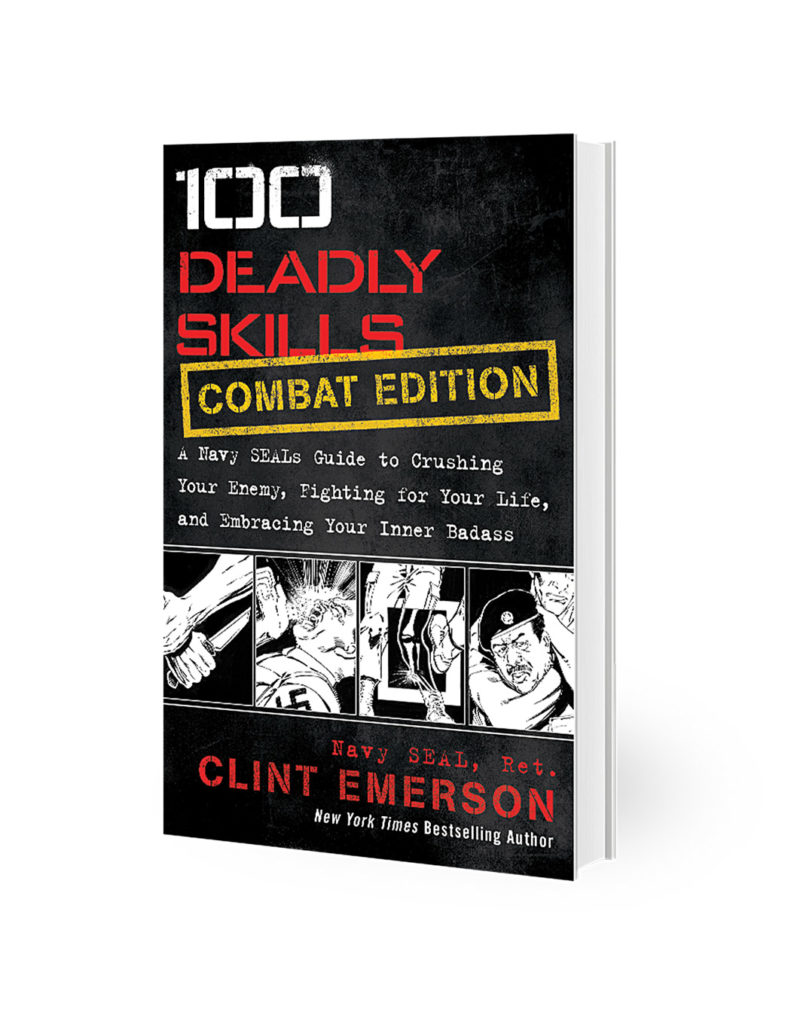


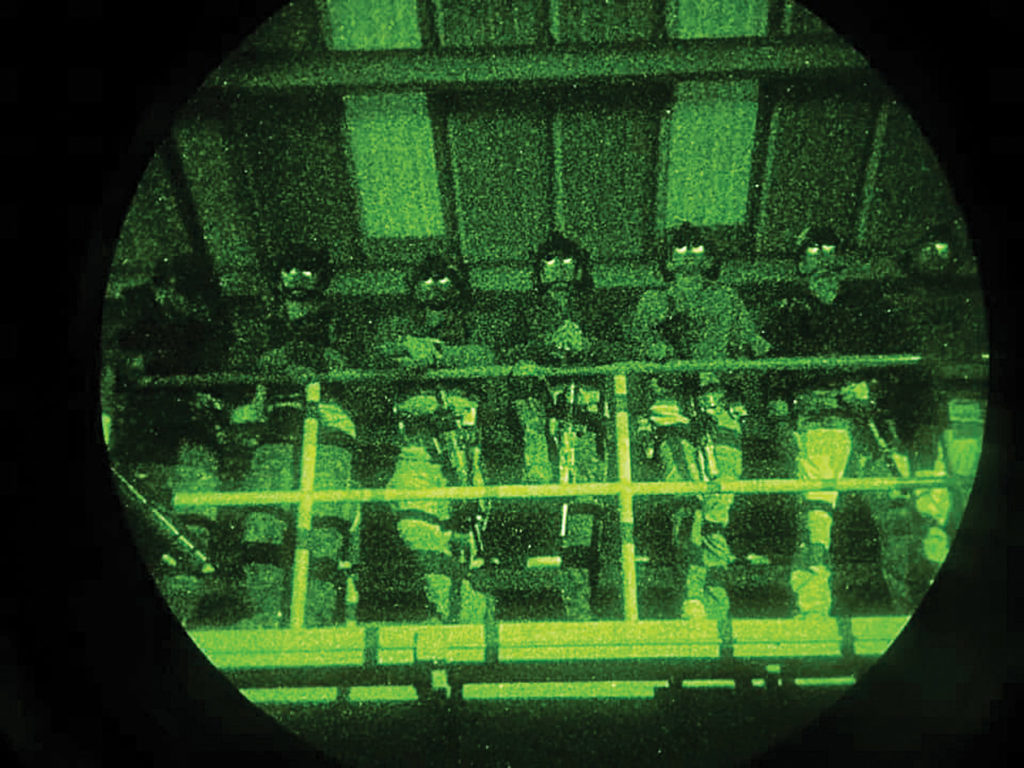
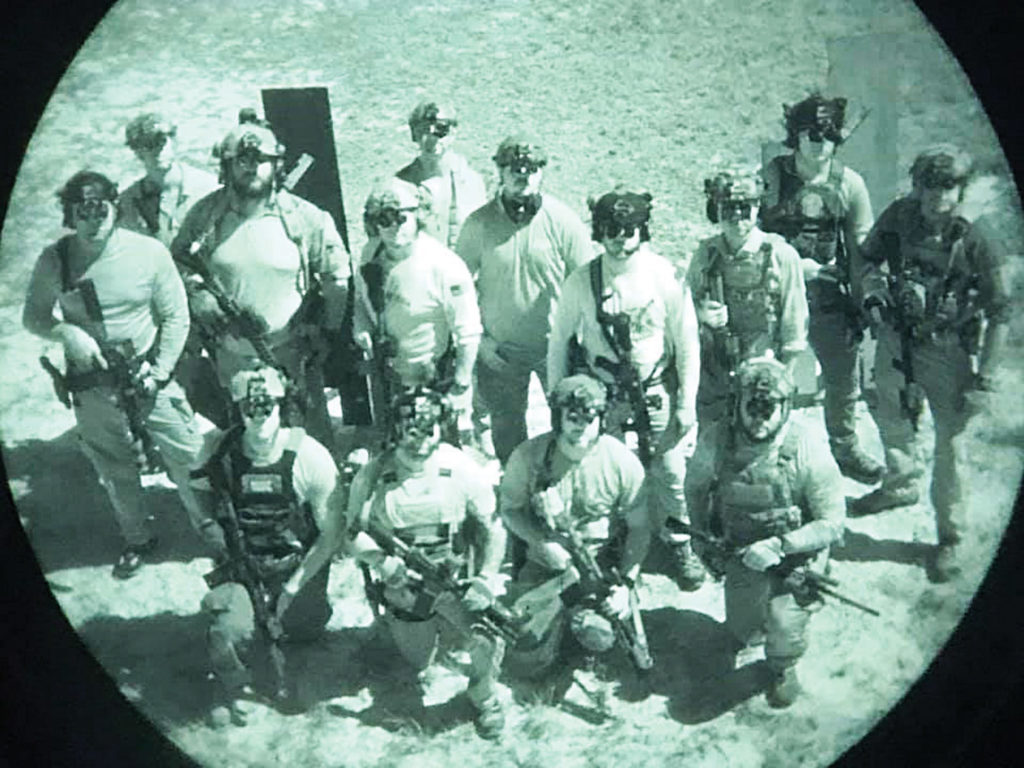
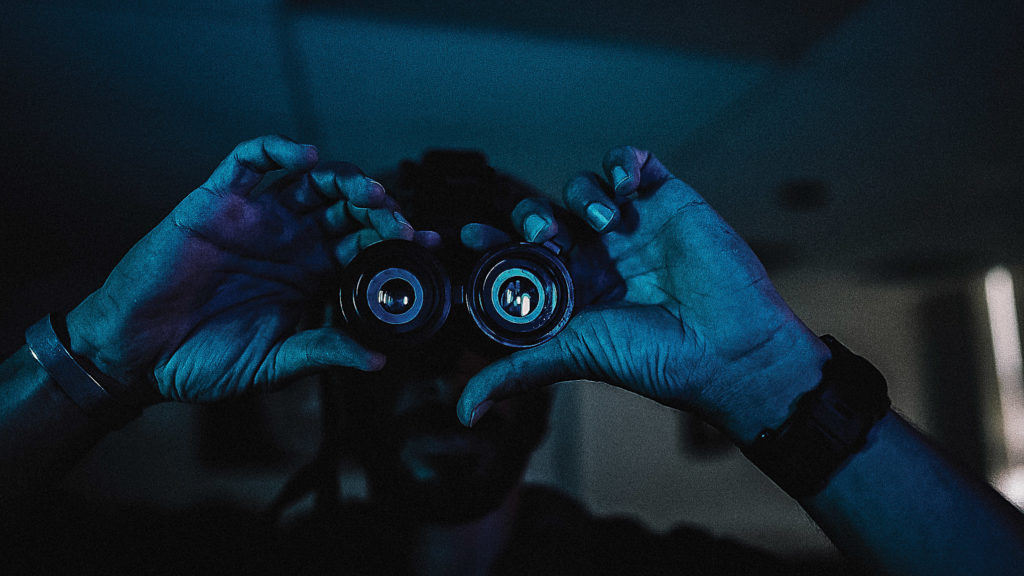

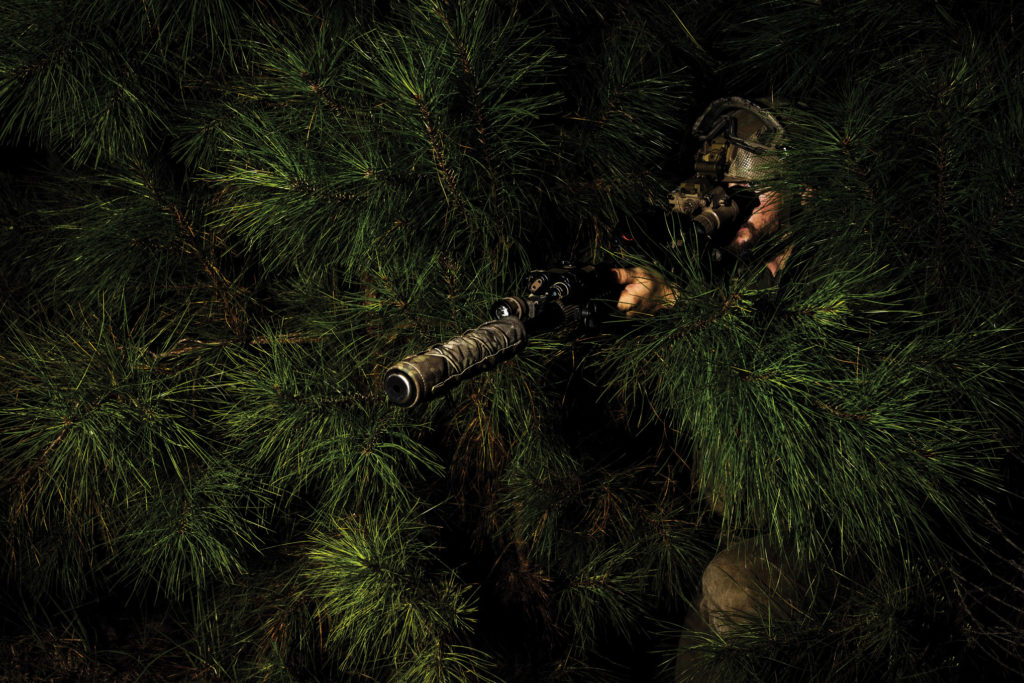
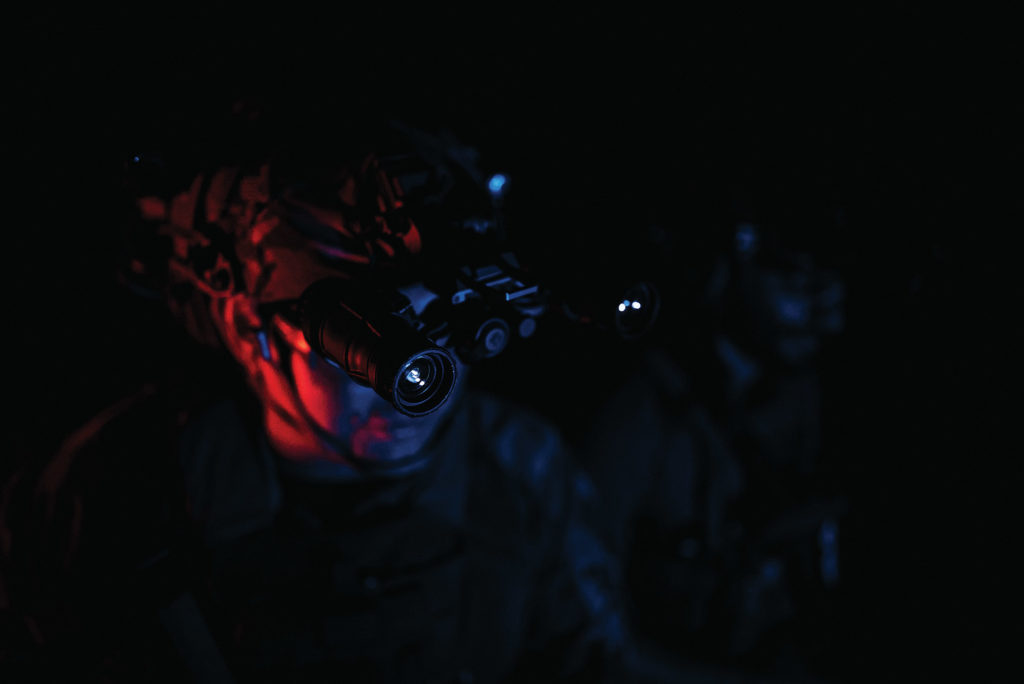
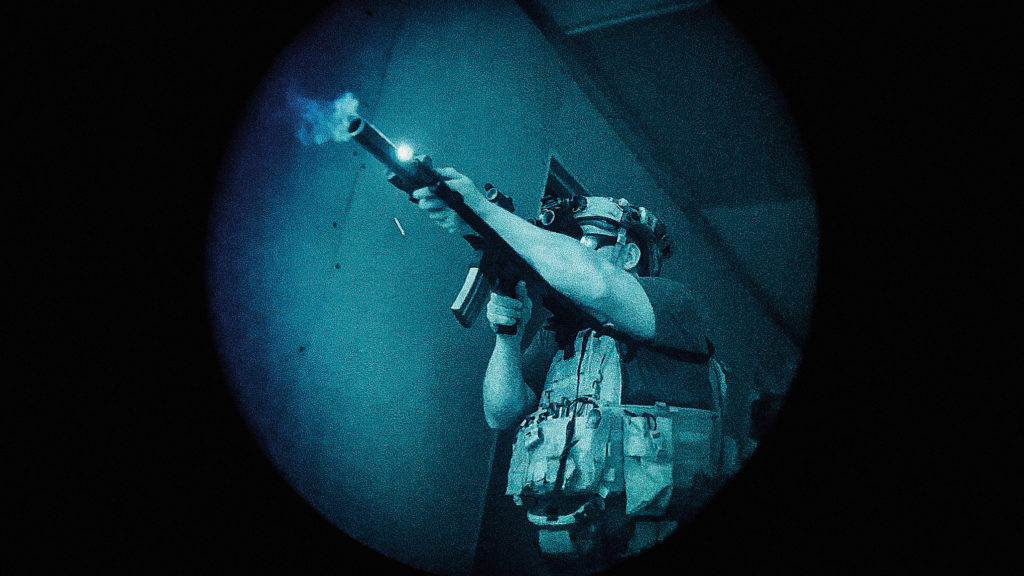
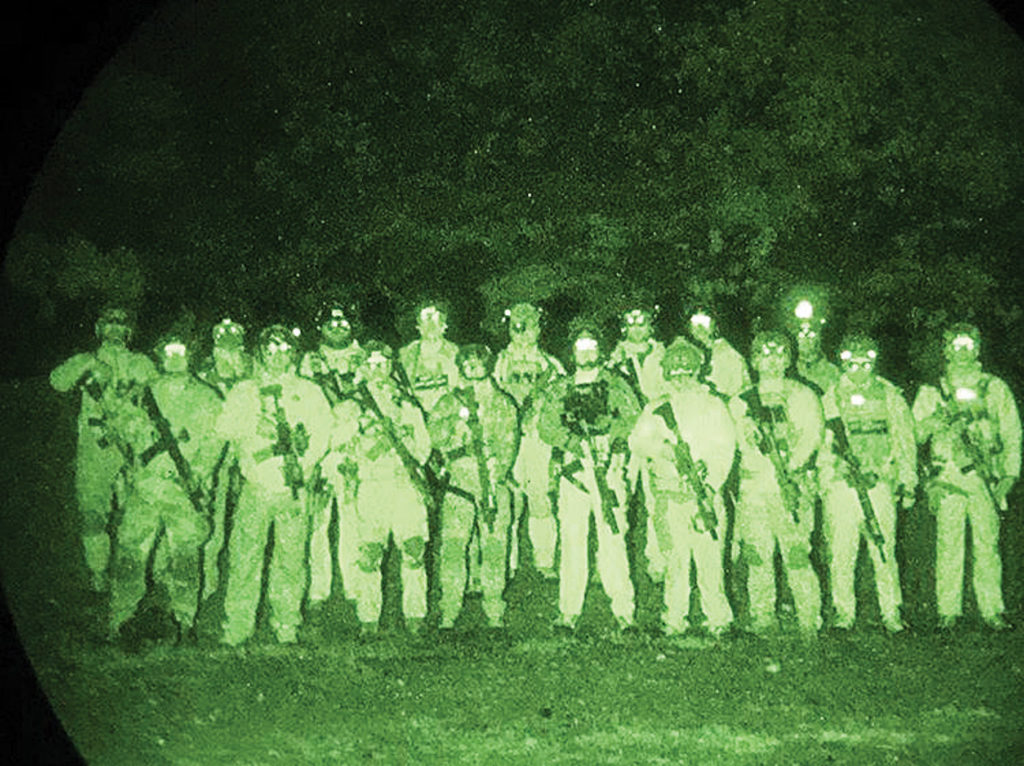

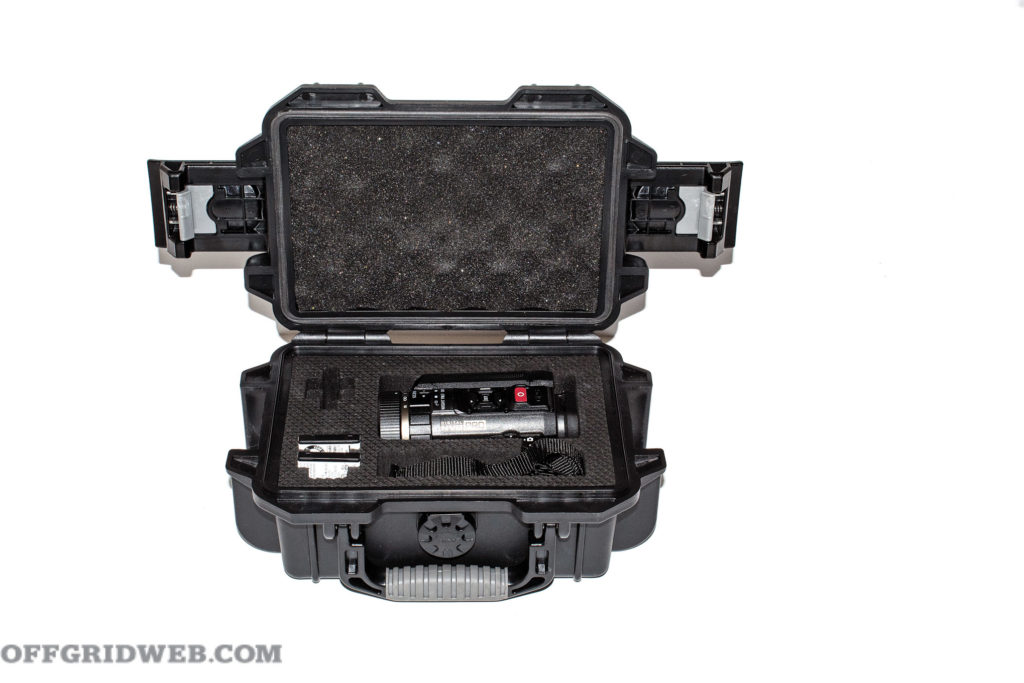
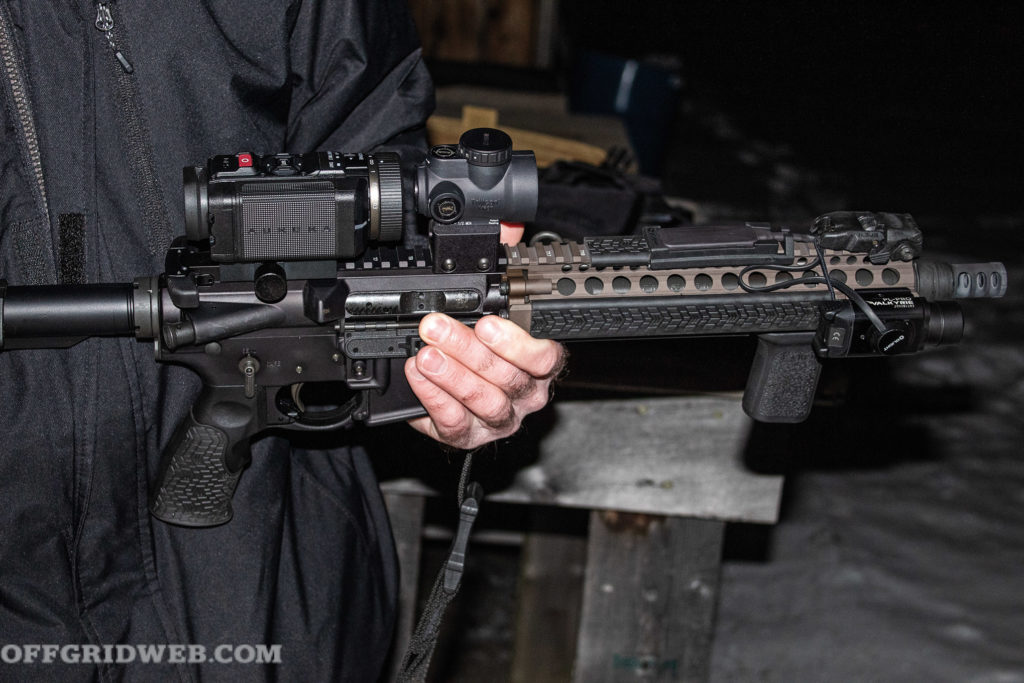
 Above: Jeff Stroud (aka Freebird) eagerly prepares to engage targets previously obscured by the dark.
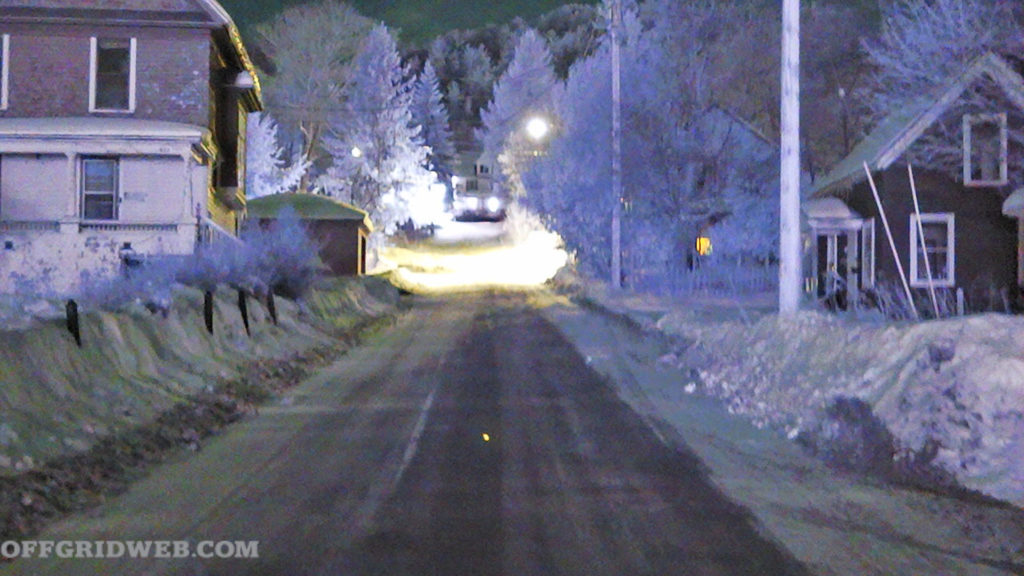

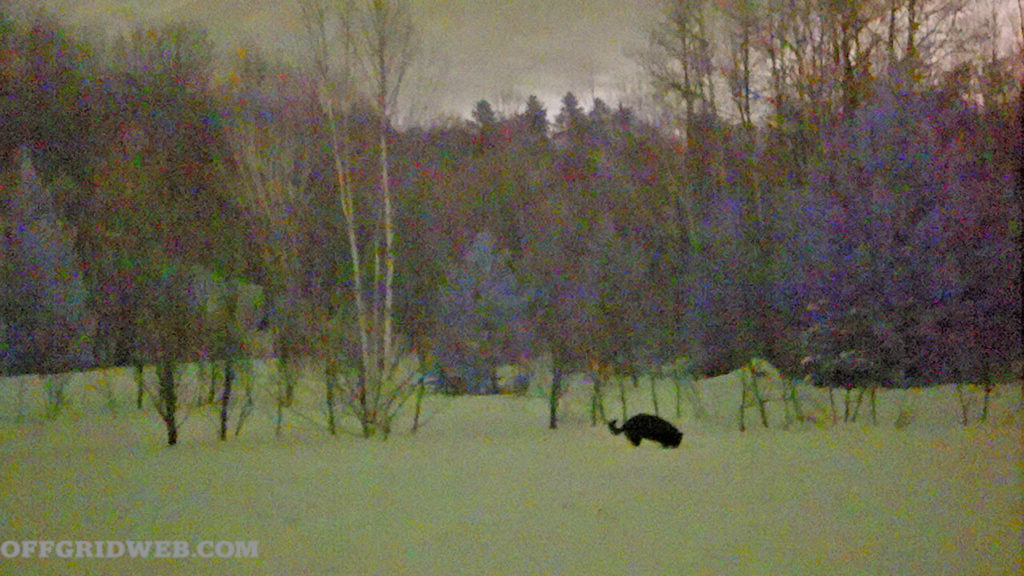


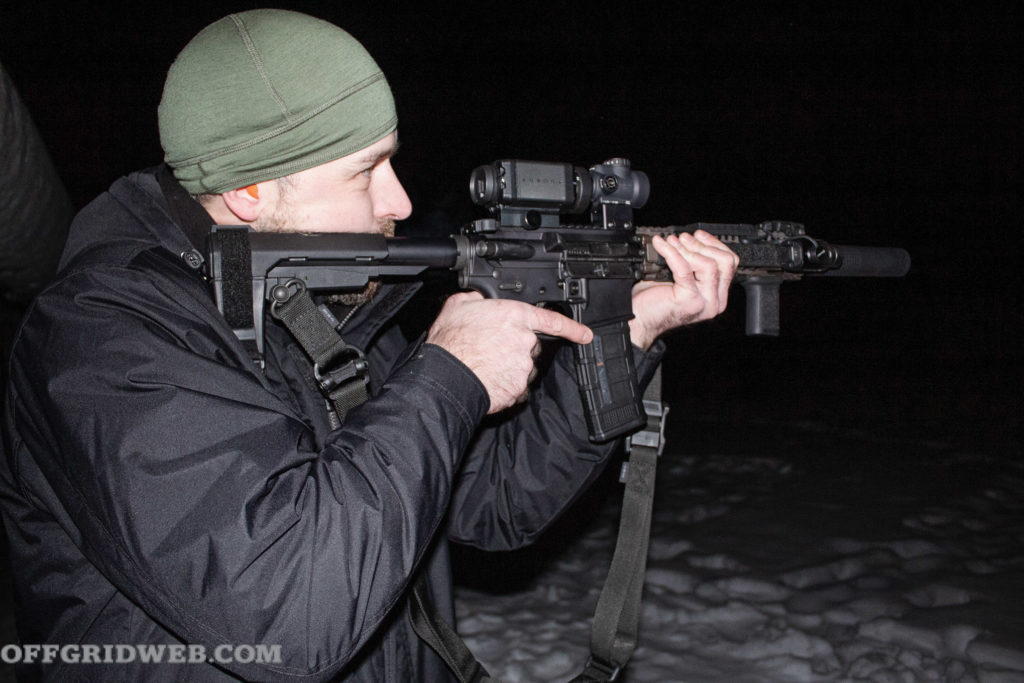


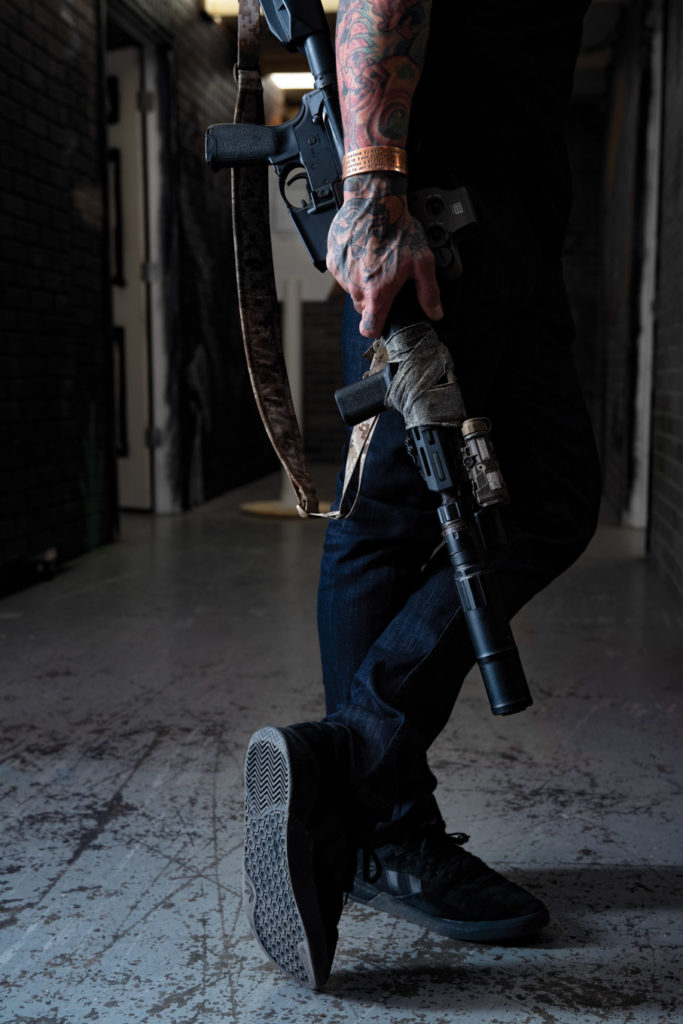
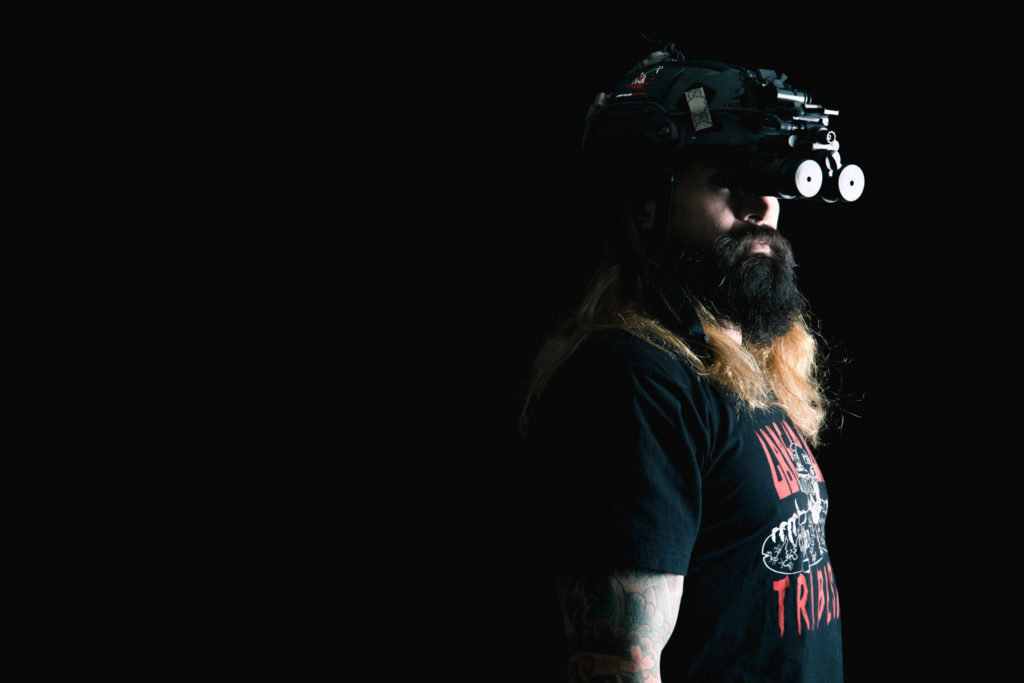
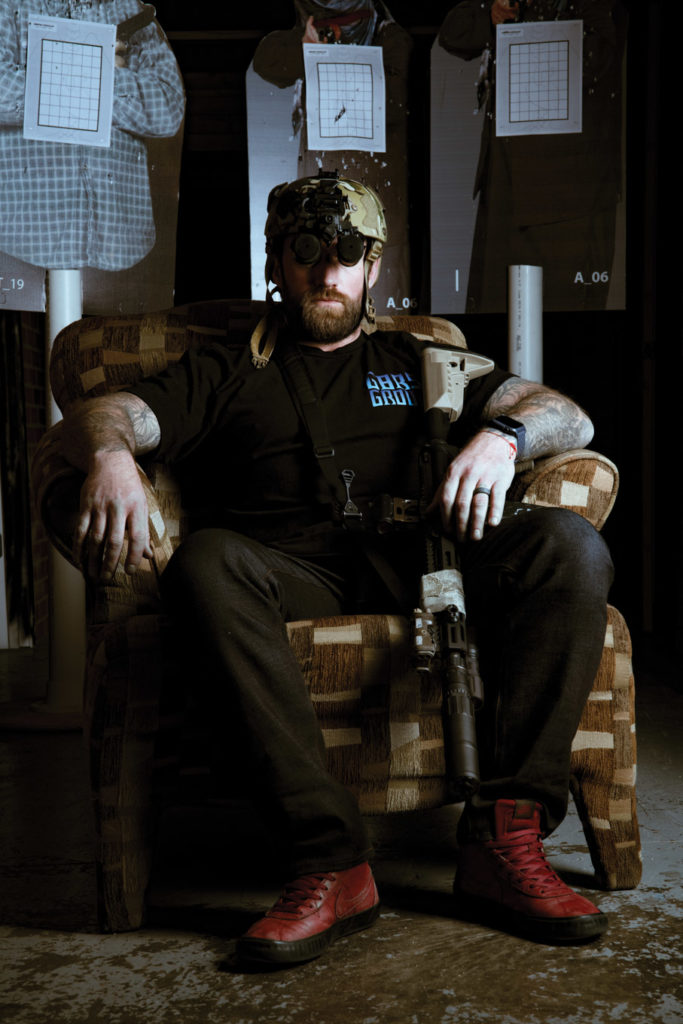
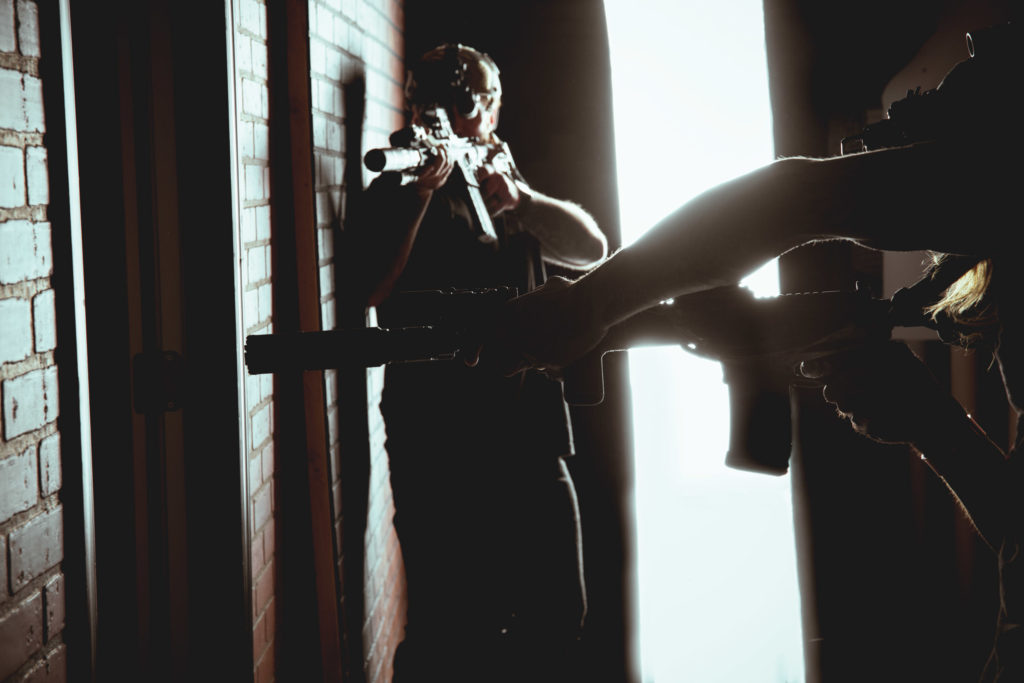
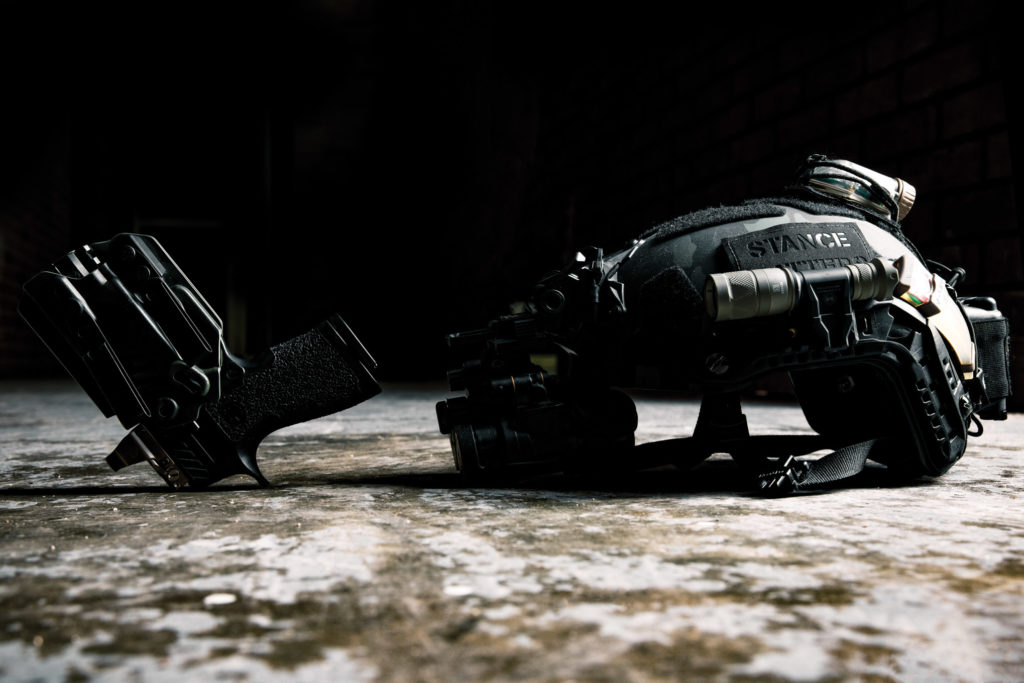
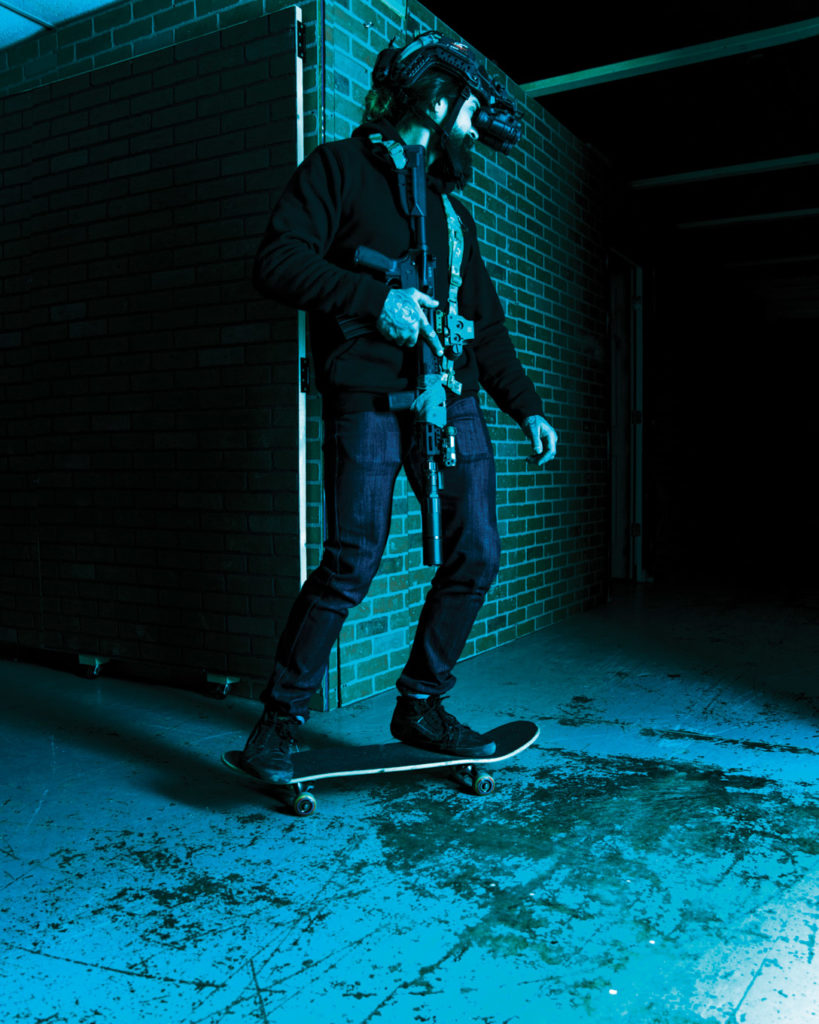


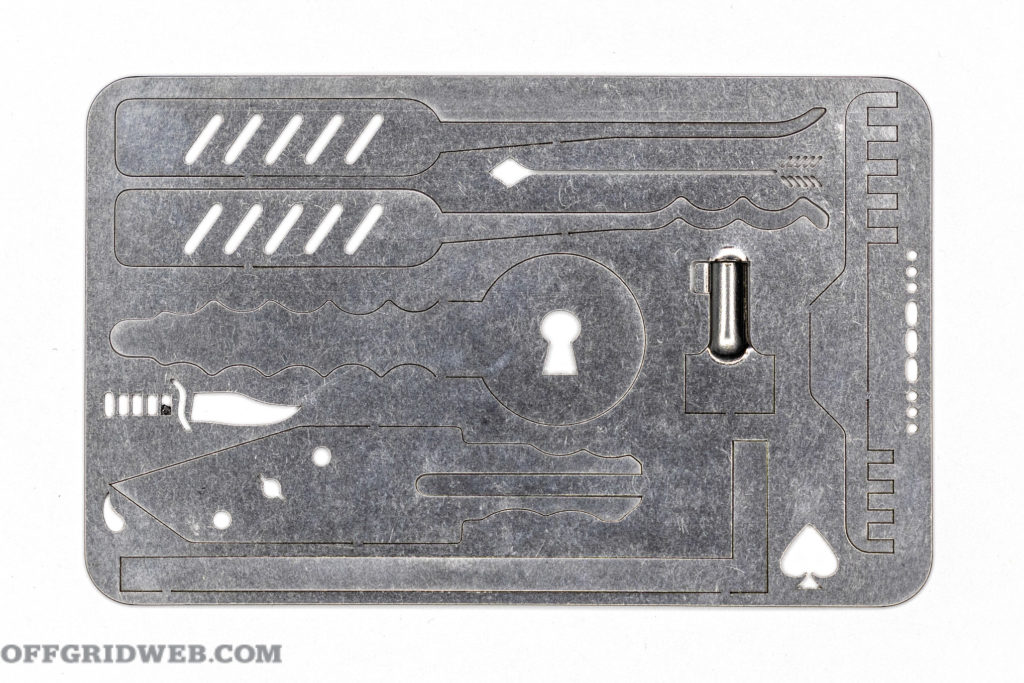
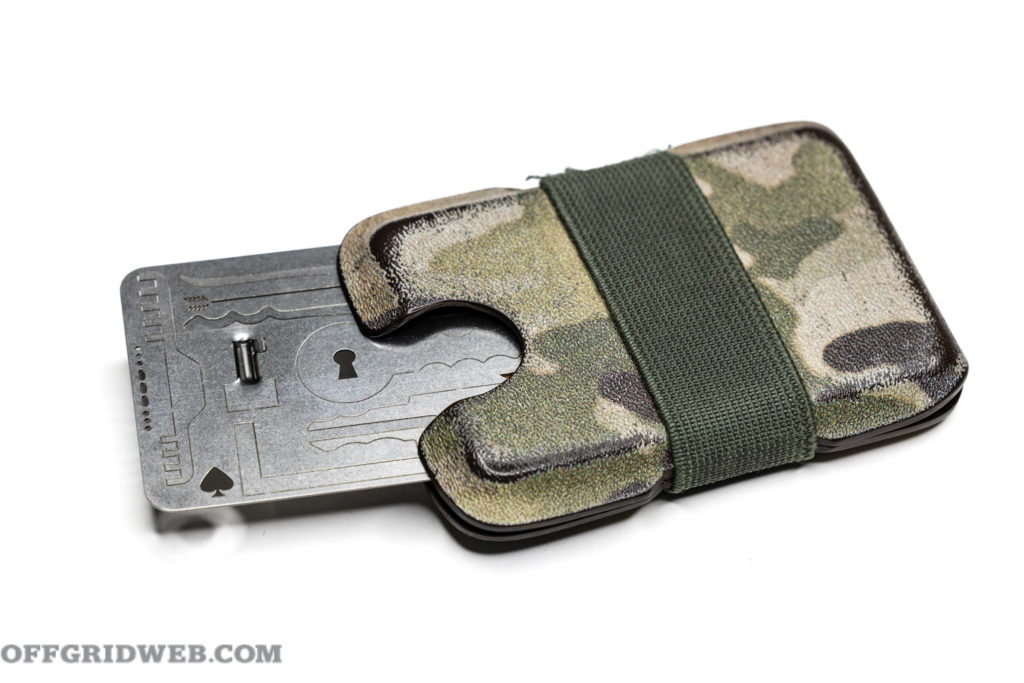
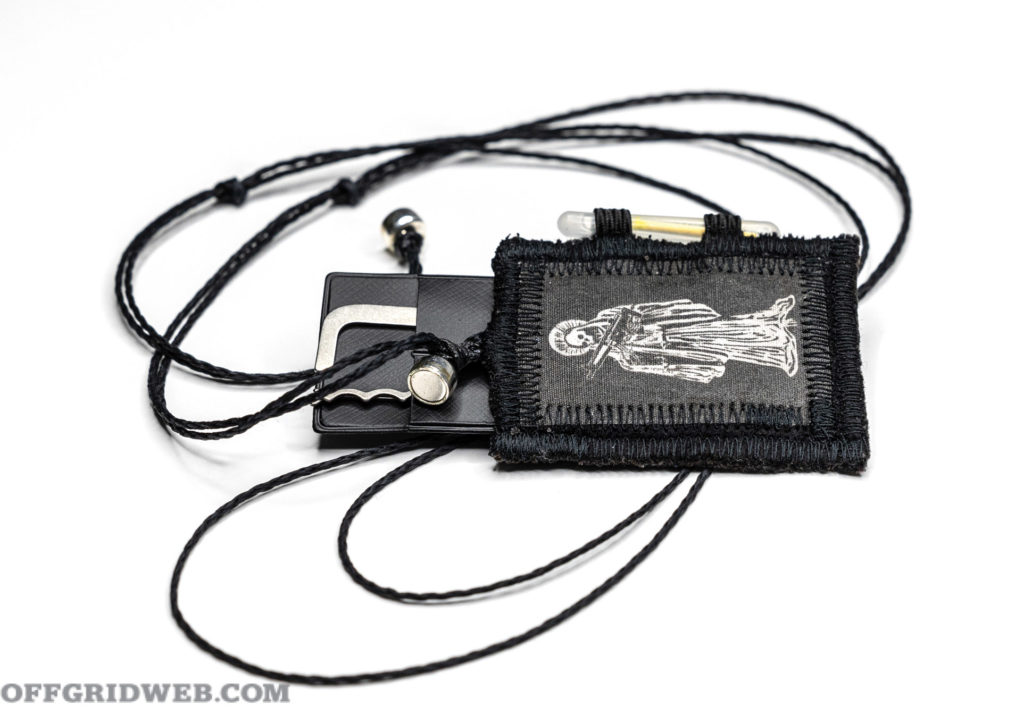
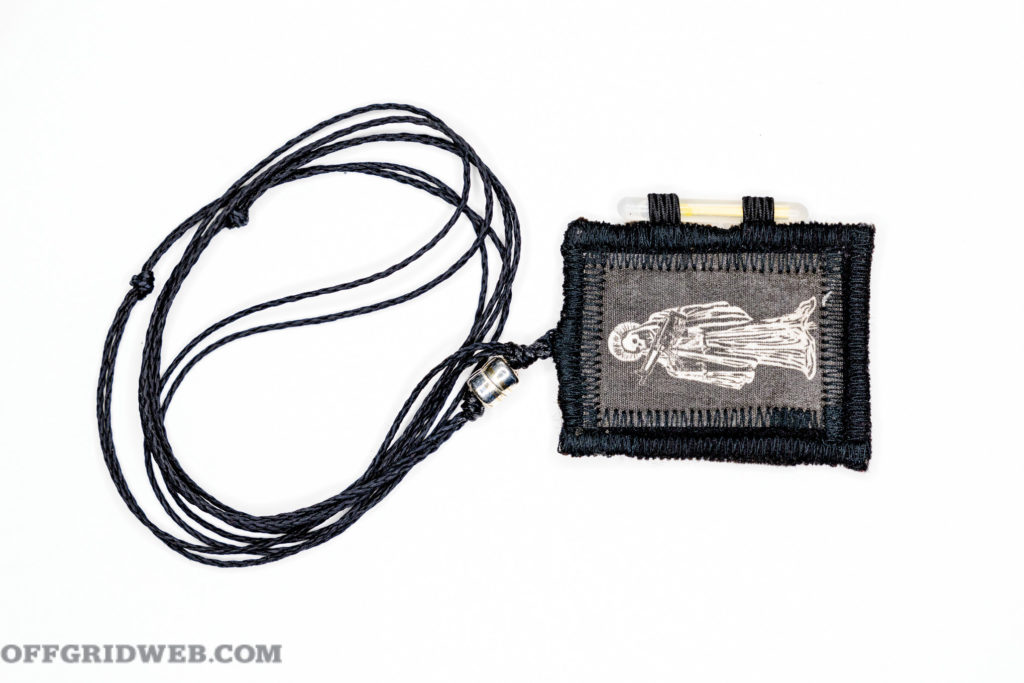
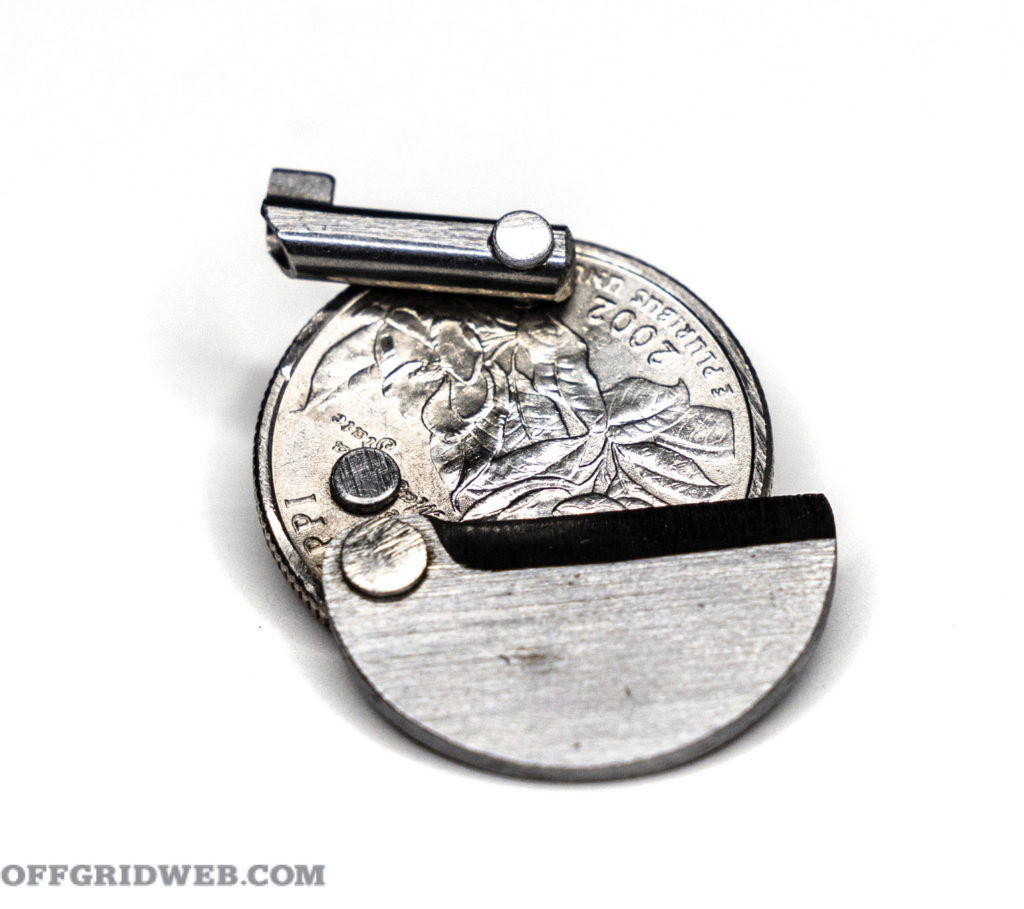
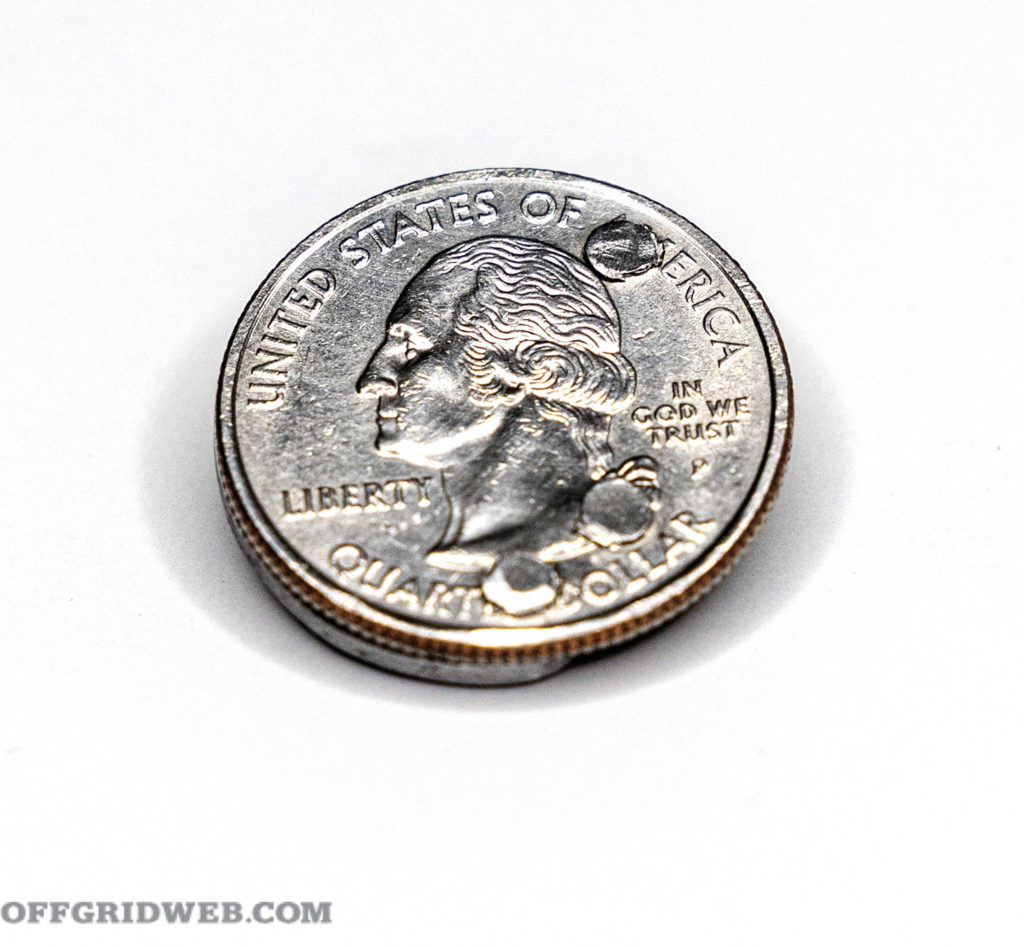
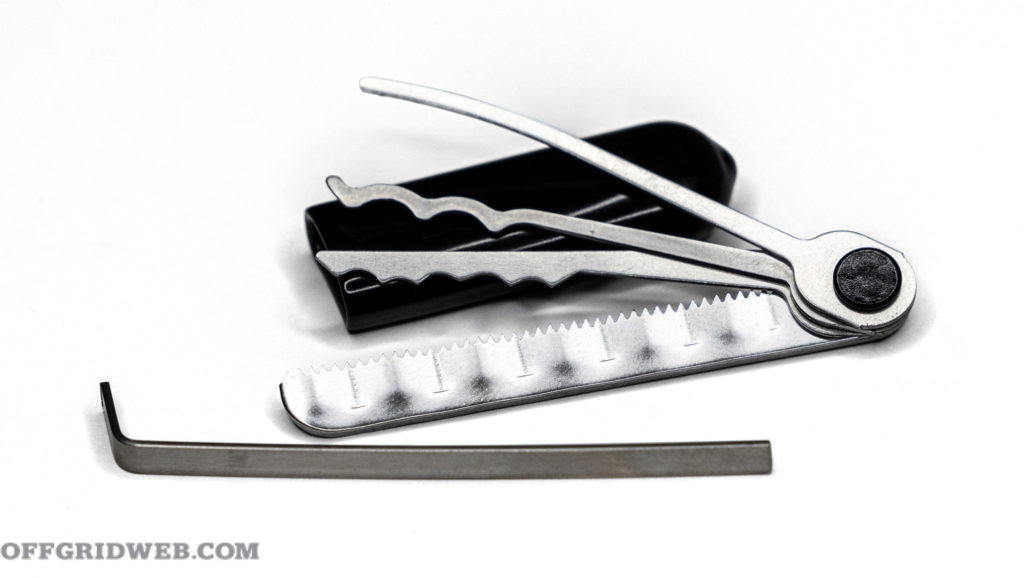
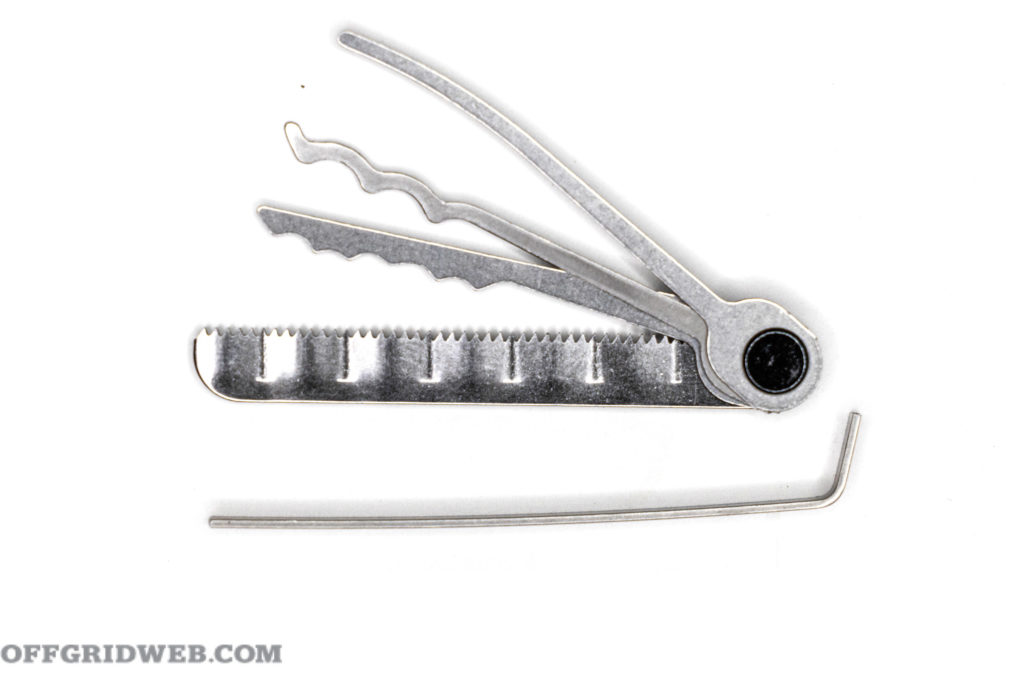
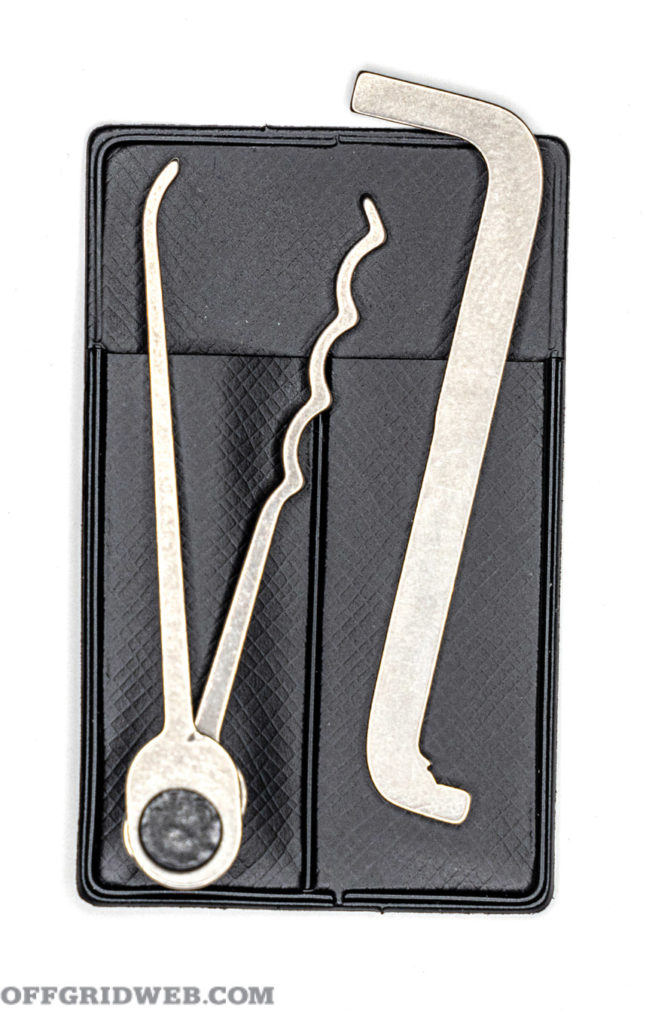

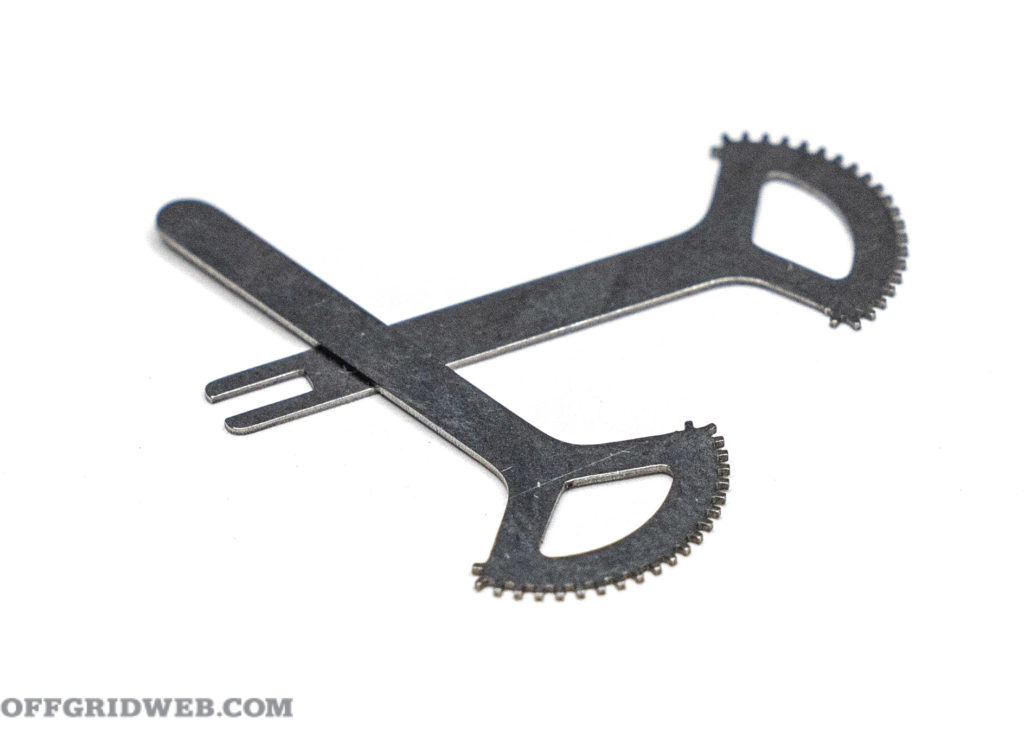


 Alexander Crown is a former U.S. Army Paratrooper who spent time in a scout/sniper platoon in OIF. He has extensive experience in firearms, particularly silencers. Alexander spends his time exploring Idaho hunting, fishing, and camping. He’s a lifelong practitioner of preparedness emphasizing self-reliance and organic gardening. Alexander is also a regular contributor to RECOIL and RECOIL OFFGRID.
 Mor
Mor