Footprint Analysis 101: Getting a Foot Message

With a seemingly unending list of useful survival skills and limited time to master them all, why should you invest your most valuable resource (time) into learning an esoteric skill such as tracking? We can answer this question with one word: versatility. Like any good piece of survival gear, your SHTF training should be multifaceted and applicable across a broad spectrum of activities. Although there’s often a preconceived notion that tracking is following a subject until contact is made and you capture or detain the fugitive, the true utility of this skill reaches far beyond the Hollywood manhunt. Tracking encompasses a wide array of uses, some of which require little effort to employ after the initial cultivation of track awareness.

The Value of a Footprint

Let’s talk about a few scenarios in which track awareness could be useful, even when you’re not following anyone (or anything):

Home/Campsite Security
It’s beneficial to know who has been in or around your area while you were away. Can you definitively ID if the tracks belong to your party or an outsider, and ascertain their intentions in approaching your area?

Food Acquisition
If you plan on tracking game and harvesting it, track awareness can help ensure you’re not sitting on a “dry hole” or aid in identifying the species, age of track, and level of activity in your daily area of operations (AO). This skill will also allow you to more effectively place snares for small game.

Bug-Out Planning
When scouting for a safe bug-out rendezvous point (RP) or escape route, it might be of interest to know the level of human activity in the area under normal circumstances, as well as the presence of large predatory species. When it comes time to use an RP, tracking can tell you whether the other party has come and gone, or if they haven’t yet arrived.

Backtracking
One of the first things people think of when they realize they’re lost is to retrace their path back. This is much harder than most people realize, however, utilizing
tracking makes it possible. Tracking takes the guesswork out, so you no longer rely on looking for that “familiar” landmark.

In a survival situation, the worst enemy is panic. The best antidote to panic is good information, along with the proper mental attitude. Tracking is one very reliable and low-tech means to acquire such information. A further benefit to adding tracking skills to your toolset is that it allows you to gather information on what has occurred in the past as well as the present.

In simple terms, track awareness is opening your eyes to the staggering number of tracks that we pass by on a daily basis. Essentially, it’s an extension of tactical situational awareness, expanding it to include information that, until now, you may have been overlooking. However, this is easier said than done, because it takes more than simple observation. The other half of track awareness is developing the skills necessary to interpret the detailed information in tracks you see. With that goal in mind, we’ll discuss the anatomy of a single footprint and some of the information it can tell us.

A single track isn’t seen as an individual unit — in the tracking realm it’s broken down into various components. The major areas of the track are terms familiar to nearly everyone: heel, toe, ball, and instep.

It should make sense that areas of the track would correspond with the part of the foot which made them. The rest of the terms used by trackers when referencing a footprint can be thought of as topography. Imagine you’re the size of an ant viewing the track from the inside, or that you’re standing at the bottom of the Grand Canyon. There’s a floor to the canyon, walls, and there may be a ridge above it. The floor is the flat area at the lowest level of the track — this is the area the foot actually rested on and compressed the soil into a uniform surface.

Above: The floor, wall and ridge of an individual track each provide the tracker with unique feedback on both the quarry's movement and the age of the track.

The track wall is in the vertical, or near vertical, area at the edge of the uncompressed medium surrounding the track floor. As the foot lands on the ground and weight is applied, some of the soil gets squished out from under the foot and piles up in a line around the track, slightly above the surrounding ground level. Think of this like water spraying out from under car tires as you drive through a puddle. This soil is known as the ridge, or the horizon line of the track topography. There’s some very clear basic information that can be contained in a track. First and foremost is direction of travel.

Direction and Speed of Travel

The toe is where we start looking for directional indicators as well as clues regarding speed of movement. If you’ve ever seen an old cowboy movie, there may have been a scene where someone walks backward to throw off pursuit. But how effective is this technique, and what does it look like when compared to someone walking normally? There are a whole host of factors that play into this, but for now we’ll limit our discussion to the elements present in a single footprint.

Above: Shadow, lighting and soil conditions all affect how easily tracks can be spotted and interpreted. 

Humans are plantigrade walkers — this means that while walking naturally, the foot strikes the ground heel-first and rolls toward the toe. In contrast, many animals are digi-grade walkers — their toes land first and the foot rolls backward in a tiptoe fashion, in reverse of human mechanics. How does this apply to moving forward or backward? When the foot first makes contact with the ground, regardless which part of the foot, there’s more body weight on a smaller area of the foot. This is the point of the greatest pressure on the soil. As the rest of the foot makes contact, the weight is distributed throughout. This causes the area of initial contact to be the deepest, clearest, most distinct section of the track. When we apply this concept to walking forward versus backward, immediately we should see the difference in clarity of the heel compared to the toe.

Newton’s Third Law of Physics states, “For every action there is an equal and opposite reaction.” This can be seen in a footprint by noting how the soil medium is moved in the opposite direction of the direction of travel. In other words, for someone walking forward, the medium will be pushed from toe to heel, in reaction to the pressure they exert in moving forward. On the other hand, if that individual is walking backward, the soil will be pushed from the heel toward the toe in reverse of what is normally seen.

Above: One of these tracks was made walking forward, the other by walking backwards. Backwards motion is unnatural for the human body and produces abnormal tracks. 

Lastly, walking backward is an unnatural movement that the body isn’t efficient at. When walking forward, our hips rotate and lift the leg — and by extension, the foot — off the ground and out of the track. This rarely leaves a dragging mark in the soil at the toe of the print, unless the medium is very deep or the person is tired. When walking backward, however, the hip doesn’t easily rotate in this direction, nor does the knee bend the right way, this combination of factors often leads to the heel of the foot dragging out the back of the print rather than lifting cleanly out of it.

While each area of a track has a primary focus we look at, no part exists in isolation from the rest. Anything that’s seen in one area should be confirmed with evidence from another.
In this example, if we find the horizon line in the toe is disturbed at the 10 o’clock position indicating the person has moved in that direction rather than straight ahead, we should also look for a higher ridge to have been pushed up by the foot’s rotation, on the outside of both the ball and the heel at around the 4 o’clock position of each. In the ball area of the track, we should also see the dirt has been moved from toe to heel along this line.

The depth of the dig, amount of soil moved, and distance it was pushed back give us an idea of the amount of force used as the person stepped off, which can be used to correlate speed of movement. This should be confirmed by looking at the disturbance to the ridge.

Both of the tracks above were made by someone turning left mid-stride. The speed and severity of the turn alters the depth and shape of the track.

Track ID

As previously discussed, the heel is usually the most distinct part of the track and it’s often here that you’re able to find conclusive evidence to positively ID your quarry. Keep in mind, however, that “conclusive evidence” varies depending on the circumstances. Conclusive in a court of law is different than conclusive for an elk hunter. According to Bill Bodziak, former FBI forensic specialist and world-renowned footprint and tire impression expert, the mathematical odds of matching three individual characteristic points in a track to a shoe based on location only is 1 in 683 billion. This doesn’t take into account the shape or type of point which is matched. For most of our purposes, this is a little extreme. However, the concept remains the same. There are three types of information we’re looking for to make this ID:

Size can be the overall size of the track using length and width at various points, or it can be the measurement of a specific area — in this example photo, size can be determined by overall width, 5 1⁄8 inches, or by the width of the lug under the tape measure, 1 3⁄16 inches.

Pattern is matching the print to a specific type of footwear. Many shoes have a unique tread pattern, which can be used to narrow the possibilities of a match. The shoe in this picture is a higher-end hiking boot, much less common than what is sold in a big box store.

Individual characteristics are the random collection of tears, nicks, and cuts that footwear collects throughout its lifespan.

Age of Track

Determining the correct age of a track, in my opinion, is one of the most difficult skills to learn. There are a seemingly unlimited number of variables to consider we have to account for — local weather, soil type and moisture, flora and fauna characteristics, and much more. There are two types of aging that apply to a track: absolute age and relative age. Absolute age is the simplest and is tied to a verifiable event. If I have time-stamped footage of a cougar on a trail cam, I’m able to verify the exact age of the track it left behind. Similarly, if I’m able to determine there’s a set of human tracks on top of the cougar tracks, I can safely say the human tracks are no older than the animal tracks. This is their absolute age. In order to further refine the age, we have to rely on relative aging.

Before we dive into the relative aging process, we need to correct a common misconception. Time doesn’t age tracks; rather, exposure to the elements over time ages tracks. Here’s an example to illustrate what I mean. There’s a cave in Italy with easily distinguishable human tracks in the mud, which scientists estimate to be 10,000 years old, because the cave system was a sealed environment, there was no exposure and therefore no erosion of detail that we call aging. However, under most normal circumstances, a track will degrade much more quickly.

Relative aging considers the amount of exposure and the level of intensity of the elements acting on a track. The best tool a tracker has to determine relative age is a comparison track. Place one near the track you’re aging and note how the older track has changed. One of the first things to change is the moisture content of the soil. As you walk, the upper crust of the soil is disturbed; the soil underneath often is moister and has a different color. As this moisture evaporates, the color of the soil will begin to blend with the surrounding undisturbed earth.

Another major clue to look at in determining the relative age of a track is the fine lines left by lugs or the outer edges of a hoof. When a track is fresh, they’ll be very sharp and crisp looking. As the wind and elements attack, the print these lines will slowly be eroded with a softer, more rounded look. Think of this like a mountain range — more recently formed mountains are jagged and distinct, while older mountains tend to have rounded profiles.

Other aging indicators to look for are debris blown into a track, the extent that vegetation has repaired itself, or grass slowly straightening after being pushed down by a passing foot. Aging is where the art of tracking really shines through, and the only way to develop the “eye” needed to correctly age a track is practice. In order to accomplish this, you should experiment with how your own tracks age in as many environments and seasons as you’re able. This allows you to compare the known absolute age of your tracks to your observations of the relative age, thereby refining your estimation.

Conclusion

If we can match size, pattern, and age of a track, as well as any individual characteristics, we can be reasonably confident in our ID. While the age of a track isn’t necessary to make a positive ID, it’s absolutely necessary to understanding the context in which the track exists. For example, if we find a track in our campsite that doesn’t belong to anyone in our group, the ability to determine the age of the track means knowing the difference between the track of the previous person who camped here or someone snooping through our area while we were gone. Judging the age correctly will tell you two very different tales.

The indicators we’ve discussed can be blatantly obvious or subtle in the extreme. As I like to tell my students, “The ground doesn’t lie.” The trick is in correctly interpreting what it’s telling you. Having said this, these telltale bits of information are extremely difficult — if not impossible — to fake. If you invest the time to learn how to properly read them, you’ll be difficult to trick. While we’ve only covered track ID and direction of travel in this article, there’s a great deal more information that can be gleaned from a track. When we widen our scope to include multiple tracks, the amount of information to be gained increases dramatically.

One final thought to remember: When we talk about tracks, most often what comes to mind is footprints. However, there are vast quantities of information present in impressions made by other parts of the body such as knees, hands, and butts. Equipment that a person could be carrying, ranging from food to weapons, may also offer an informative source of tracks. Vehicle tire tread marks are yet another application. By combining all these clues, you’ll become more aware of your environment and more prepared to face any threats or opportunities it may hold.

Want to Learn More?

Tracking is an in-depth, and at times, arcane, subject. If you’re interested in learning more about the subject, there are a handful of great books, digital accounts, and schools to attend in order to learn more. The author recommends two books for those looking to jump in with both feet. One is A Field Guide to Mammal Tracking in North America by James C Halfpenny. This is a comprehensive guide to identifying and interpreting animal tracks of all kinds throughout the American continent. If you’re looking for something a little more … tactical … try The SAS Guide to Tracking, which touches on a variety of tactical tracking subjects including tracking vehicles, defeating counter-tracking and misdirection methods, preserving night vision, and how the environment affects the track. Either of these books will give the reader a broad, fundamental understanding of how to track and why you should.

About the Author

Growing up in rural Michigan, Matt spent his free time in the surrounding woods, hunting and learning about survival and fieldcraft from his grandfather as well as a local primitive skills instructor.

In 2003, he joined the Marine Corps as an infantryman and deployed with 1st Bn 4th Marines, participating in the Battle of Najaf during OIF II. After two years in the line company, he joined the Scout Sniper platoon, earning his HOG’s tooth in 2005. Returning from his second Middle East deployment, he attended his first formal tracking class and was hooked. He immediately began practicing his tracking skills and attempting to spread the knowledge (probably to the annoyance of those around him). After getting out of the Corps, he found himself in Arizona with fellow Sniper Freddy Osuna, teaching at the U.S. Army Combat Tracking School.

In 2010, Greenside Training was created, and Matt assisted in the development of the curriculum, drills, and philosophy behind this organization. When the opportunity to get back overseas arose, he couldn't resist, and for five years has been deploying as a security contractor, teaching tracking informally to keep his skills sharp. Additionally, all the travel has allowed him to continue his own tracking education in a variety of environments, including tracking with a bushman tribe in Africa.


New: DEVCORE Plate Carrier Backpack

Plate carriers can be a catch-22 for those of us who aren't in the military, law enforcement, executive protection, or other jobs that require the use of body armor on a daily basis. On one hand, if you happen to find yourself in a situation where you're being shot at, you'll absolutely want body armor to protect your vital organs and increase your odds of survival. On the other hand, you'll turn some heads and raise some eyebrows (at the very least) if you wear your “full battle rattle” while walking around town or running errands. And if you have armor but can't access it quickly when SHTF, then it's not going to do you any good.

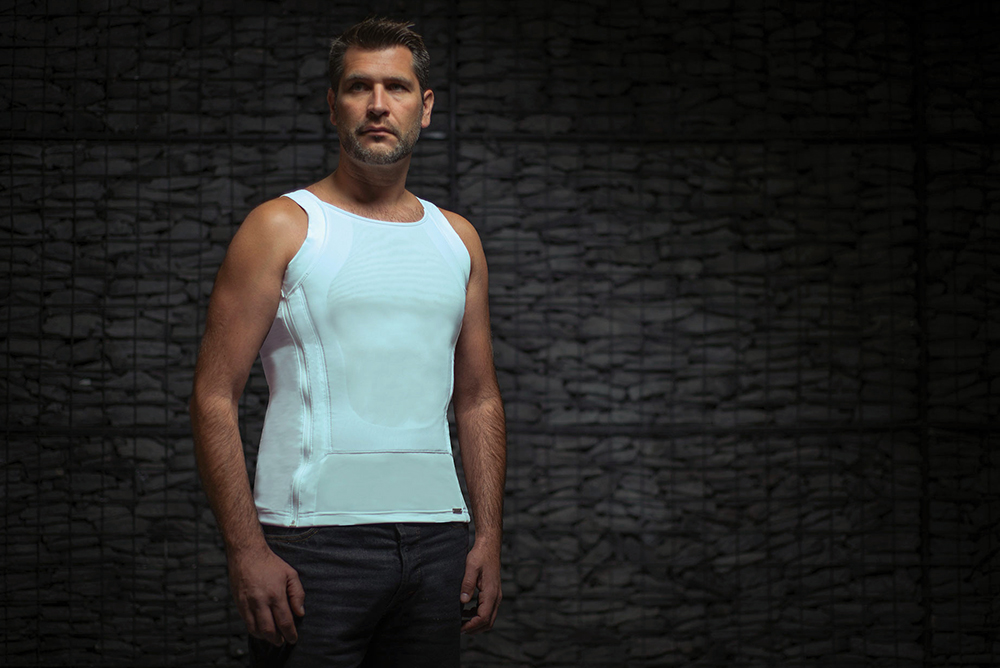
Concealable soft armor is a great option if you're only dealing with handgun calibers. (Photo: Miguel Caballero)

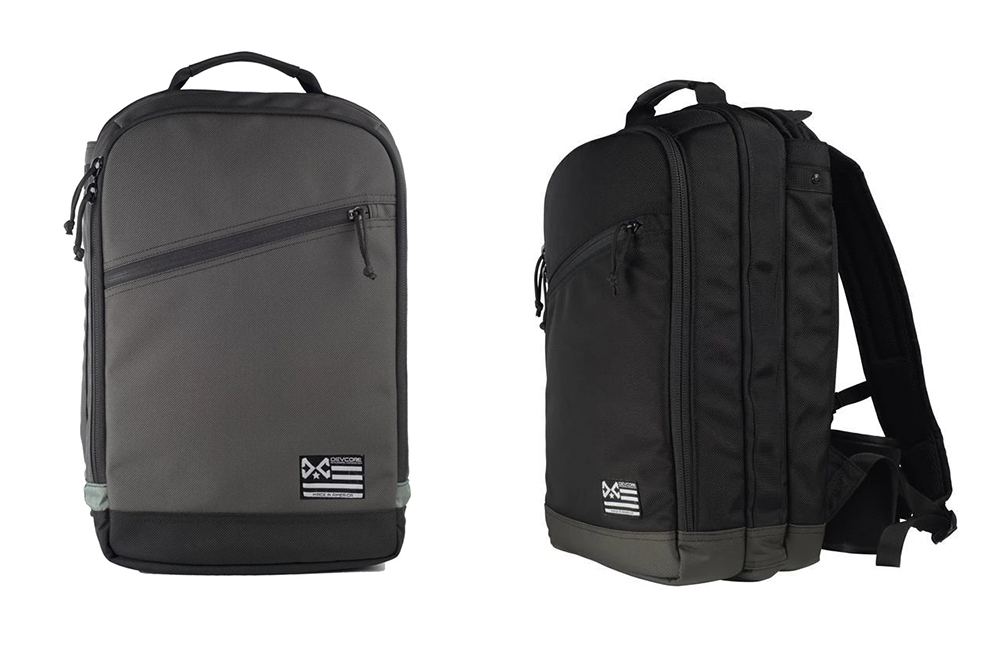
The obvious solution is to find a way to wear armor without looking like you're wearing armor. Many companies offer form-fitting Kevlar vests for protection against handgun rounds, but rifle plates are not so easy to hide, especially the all-important front plate that sits against the chest. DEVCORE has developed a new product called the Plate Carrier Backpack (PCB) that offers the ability to conceal rifle plates in a quick-deploy package that resembles an ordinary backpack.

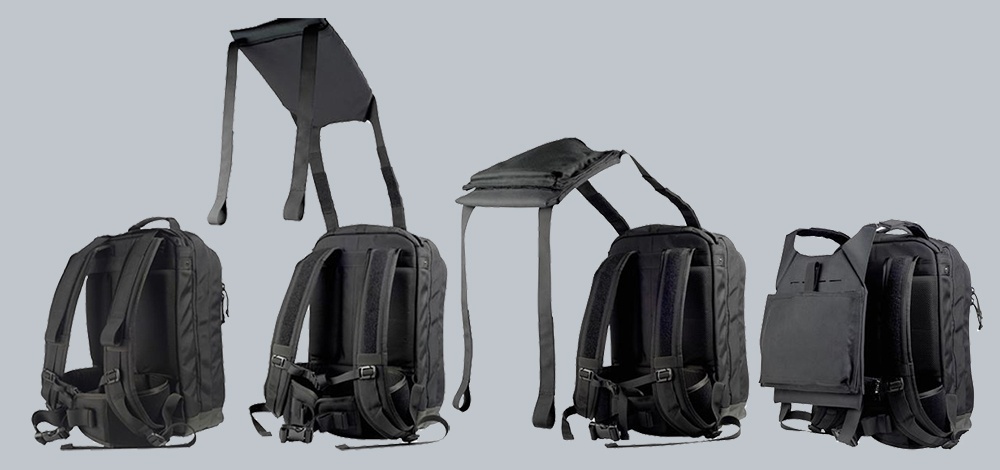
We've previously written about armored backpacks — refer to our buyer's guide from Issue 28 if you haven't read it already. But, as seen in the animated GIF above, the Plate Carrier Backpack doesn't just offer single-sided protection like traditional armored packs. It features a rear armor plate pocket, as well as thumb loops on the shoulder straps which can be pulled up rapidly to deploy a front plate pocket. The pull straps attach to Velcro on the waist belt once the plate is deployed.

This system can be used with soft Level IIIA plates for reduced weight and increased mobility, or Level III rifle plates for increased protection.

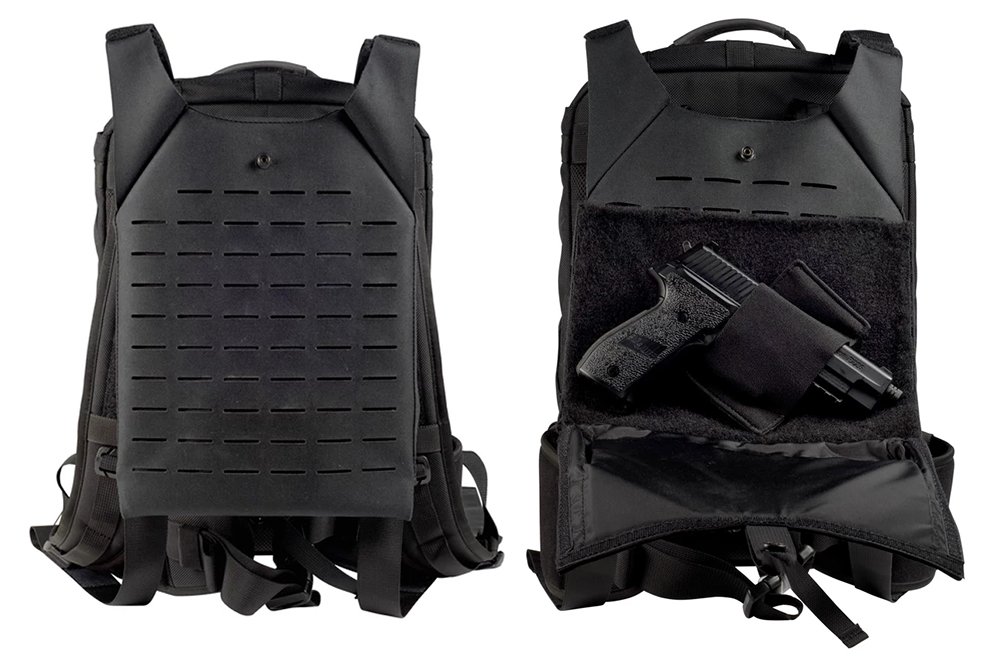
In addition to armor, the DEVCORE PCB is designed to accommodate various weapons — a submachine gun or PDW can be stored in the rapid-deployment bottom compartment, or in a Chest Holster ($65 MSRP) that attaches to MOLLE-compatible webbing on the front plate carrier. Its bottom compartment can also hold one of several optional inserts:

Plate Carrier Backpack with deployed front plate carrier (left) and optional Chest Holster (right).

The pack itself is made in America from 1000D nylon with YKK zippers and Airprene mesh padding on the back panel, shoulder straps, and removable waist belt. Its full-zip main compartment is lined with Velcro for attachment of magazine pouches and other accessories. There's also a zippered slash pocket on the exterior for documents and personal items.

MSRP for the pack, not including armor or optional inserts, is $599. However, at this time it's only available for pre-order, with DEVCORE stating that order fulfillment will begin in early November. Weight is 7 pounds empty, 10 pounds with Level IIIA soft armor, or 13 pounds with Level III hard plates.

For more information on the Plate Carrier Backpack, go to DEVCOREgear.com or check out the video overview below.


Bag Drop: The Vehicle Bail-Out Bag

EDITOR’S NOTE: Welcome to “Bag Drop” — a new column all about bags, and what we fill them with. We’ll be covering a variety of bail-out, bug-out, get-home and go bags. All of these terms are thrown around willy-nilly in the preparedness community with little time taken to define the intent and purpose of each type. What you put in your bags depends entirely on your needs and wants, but we hope to provide you with a little food for thought about what’s possible and how to pack effectively for the unforeseen.

For our inaugural installment of “Bag Drop,” I’m going to talk about a bag that’s been with me for years. It has literally traveled the world and was built for a clear purpose. I learned a long time ago that equipment selection is a form of mission analysis. In layman’s terms — a well-packed bag should fill a specific need and do so with a minimum of bulk or excess. This particular bag can also be seen in “Trick Your Truck” in RECOIL OFFGRID Issue 33.

The Bail-Out Bag

In a previous lifetime, I worked in Afghanistan as an independent contractor, providing facility security and close protection services to government personnel. Part of this job required driving or riding in armored SUVs, often as a single-truck element, in areas where IEDs and ambushes were a very real risk. In many cases, if a vehicle is blocked in or disabled during the course of an attack, you may have to bail out of it (possibly under fire) and leave the area on foot. Because of this, I wanted a lightweight low-profile bag to hold extra supplies I could bring with me if I was ever forced to exit my vehicle during a fight. This bag also stayed with me while manning static posts in the event of an active shooter or large-scale ground assault against our perimeter.

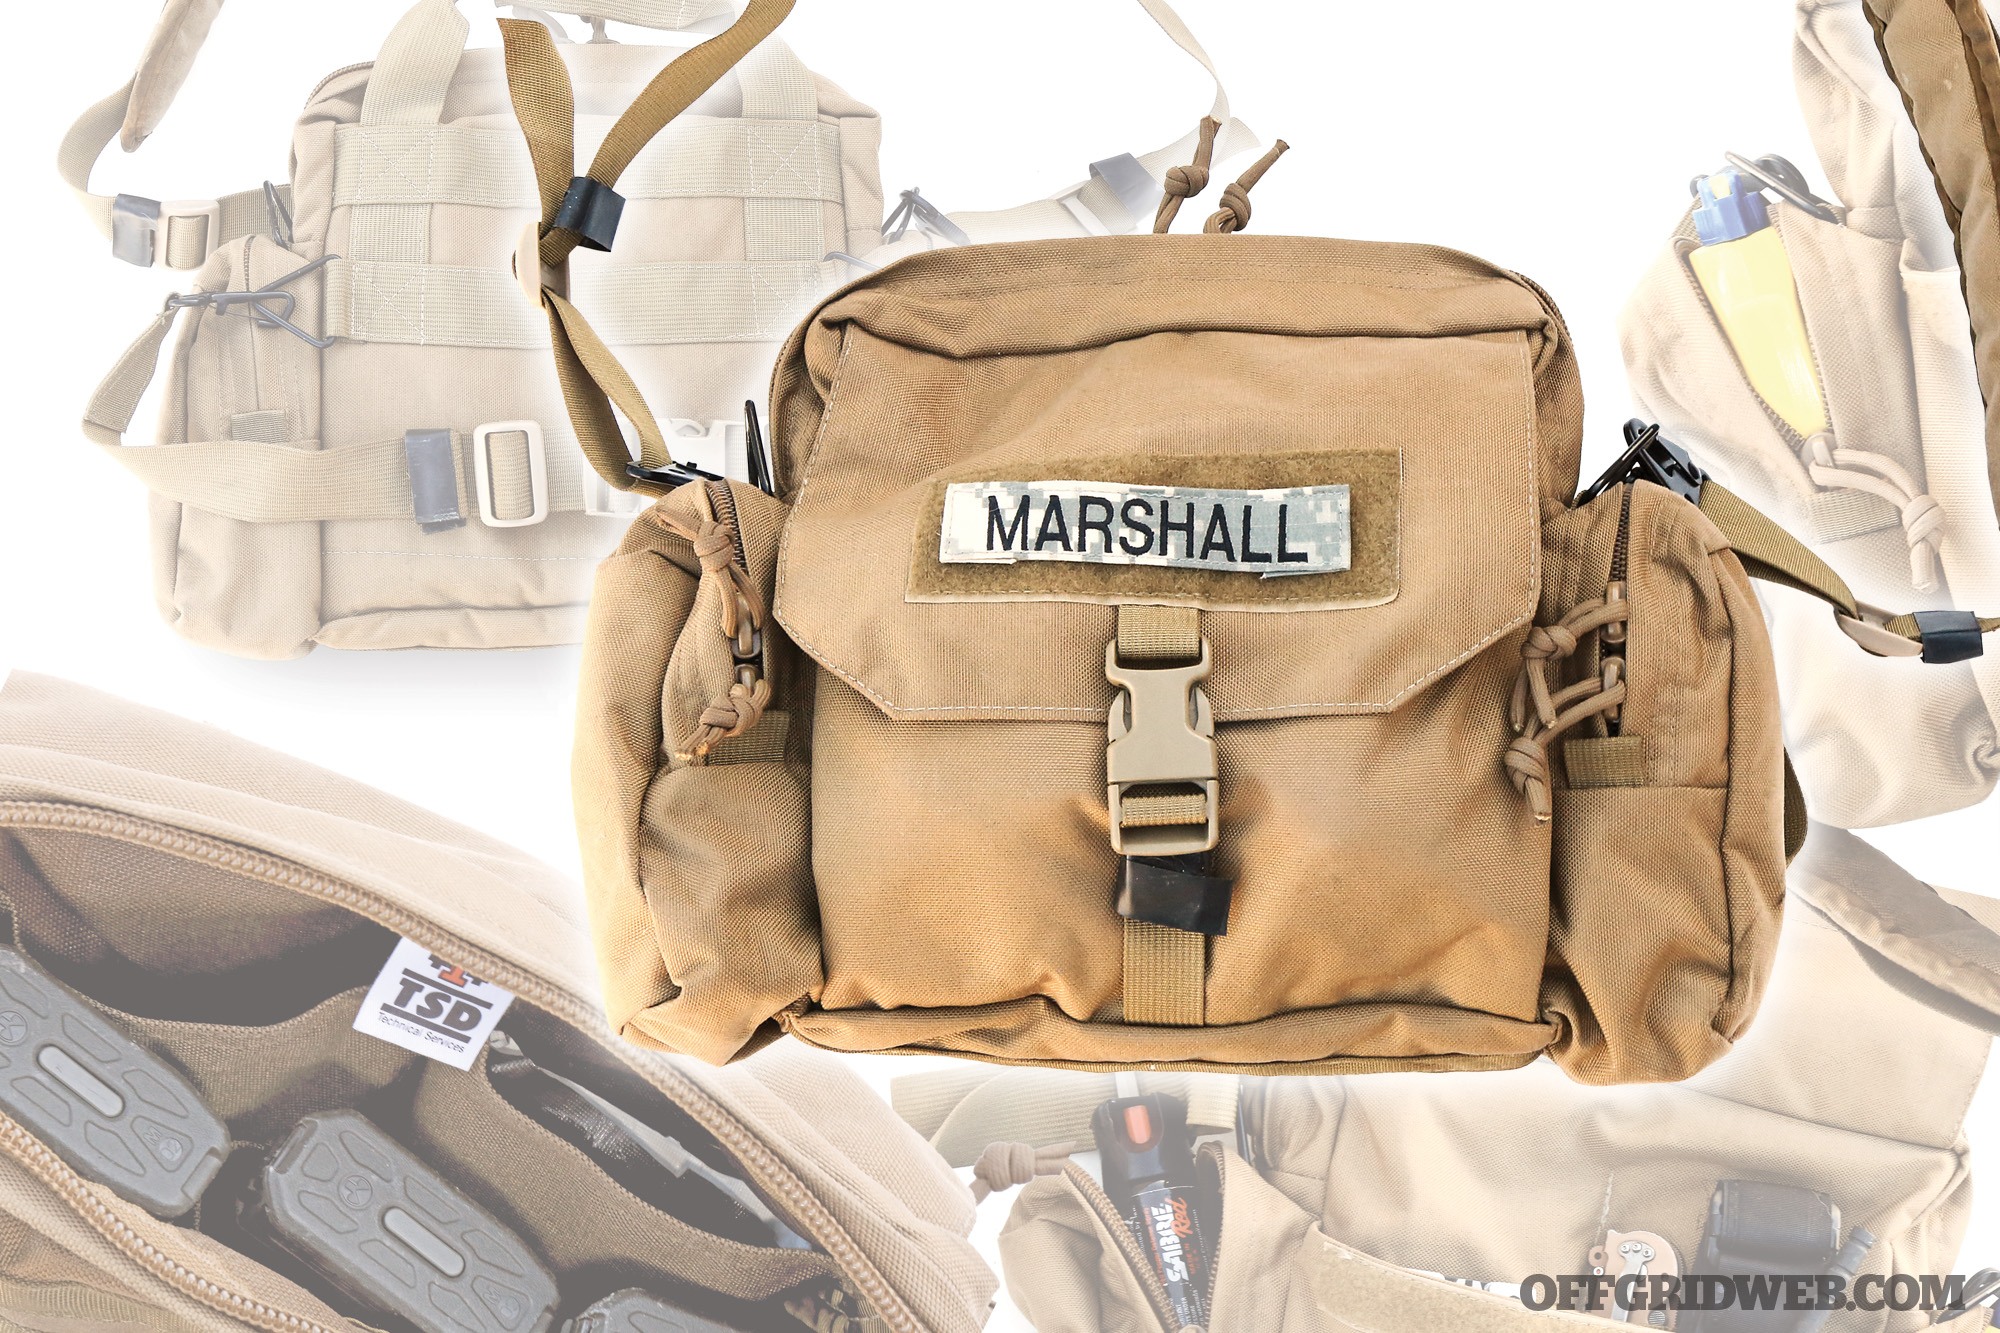
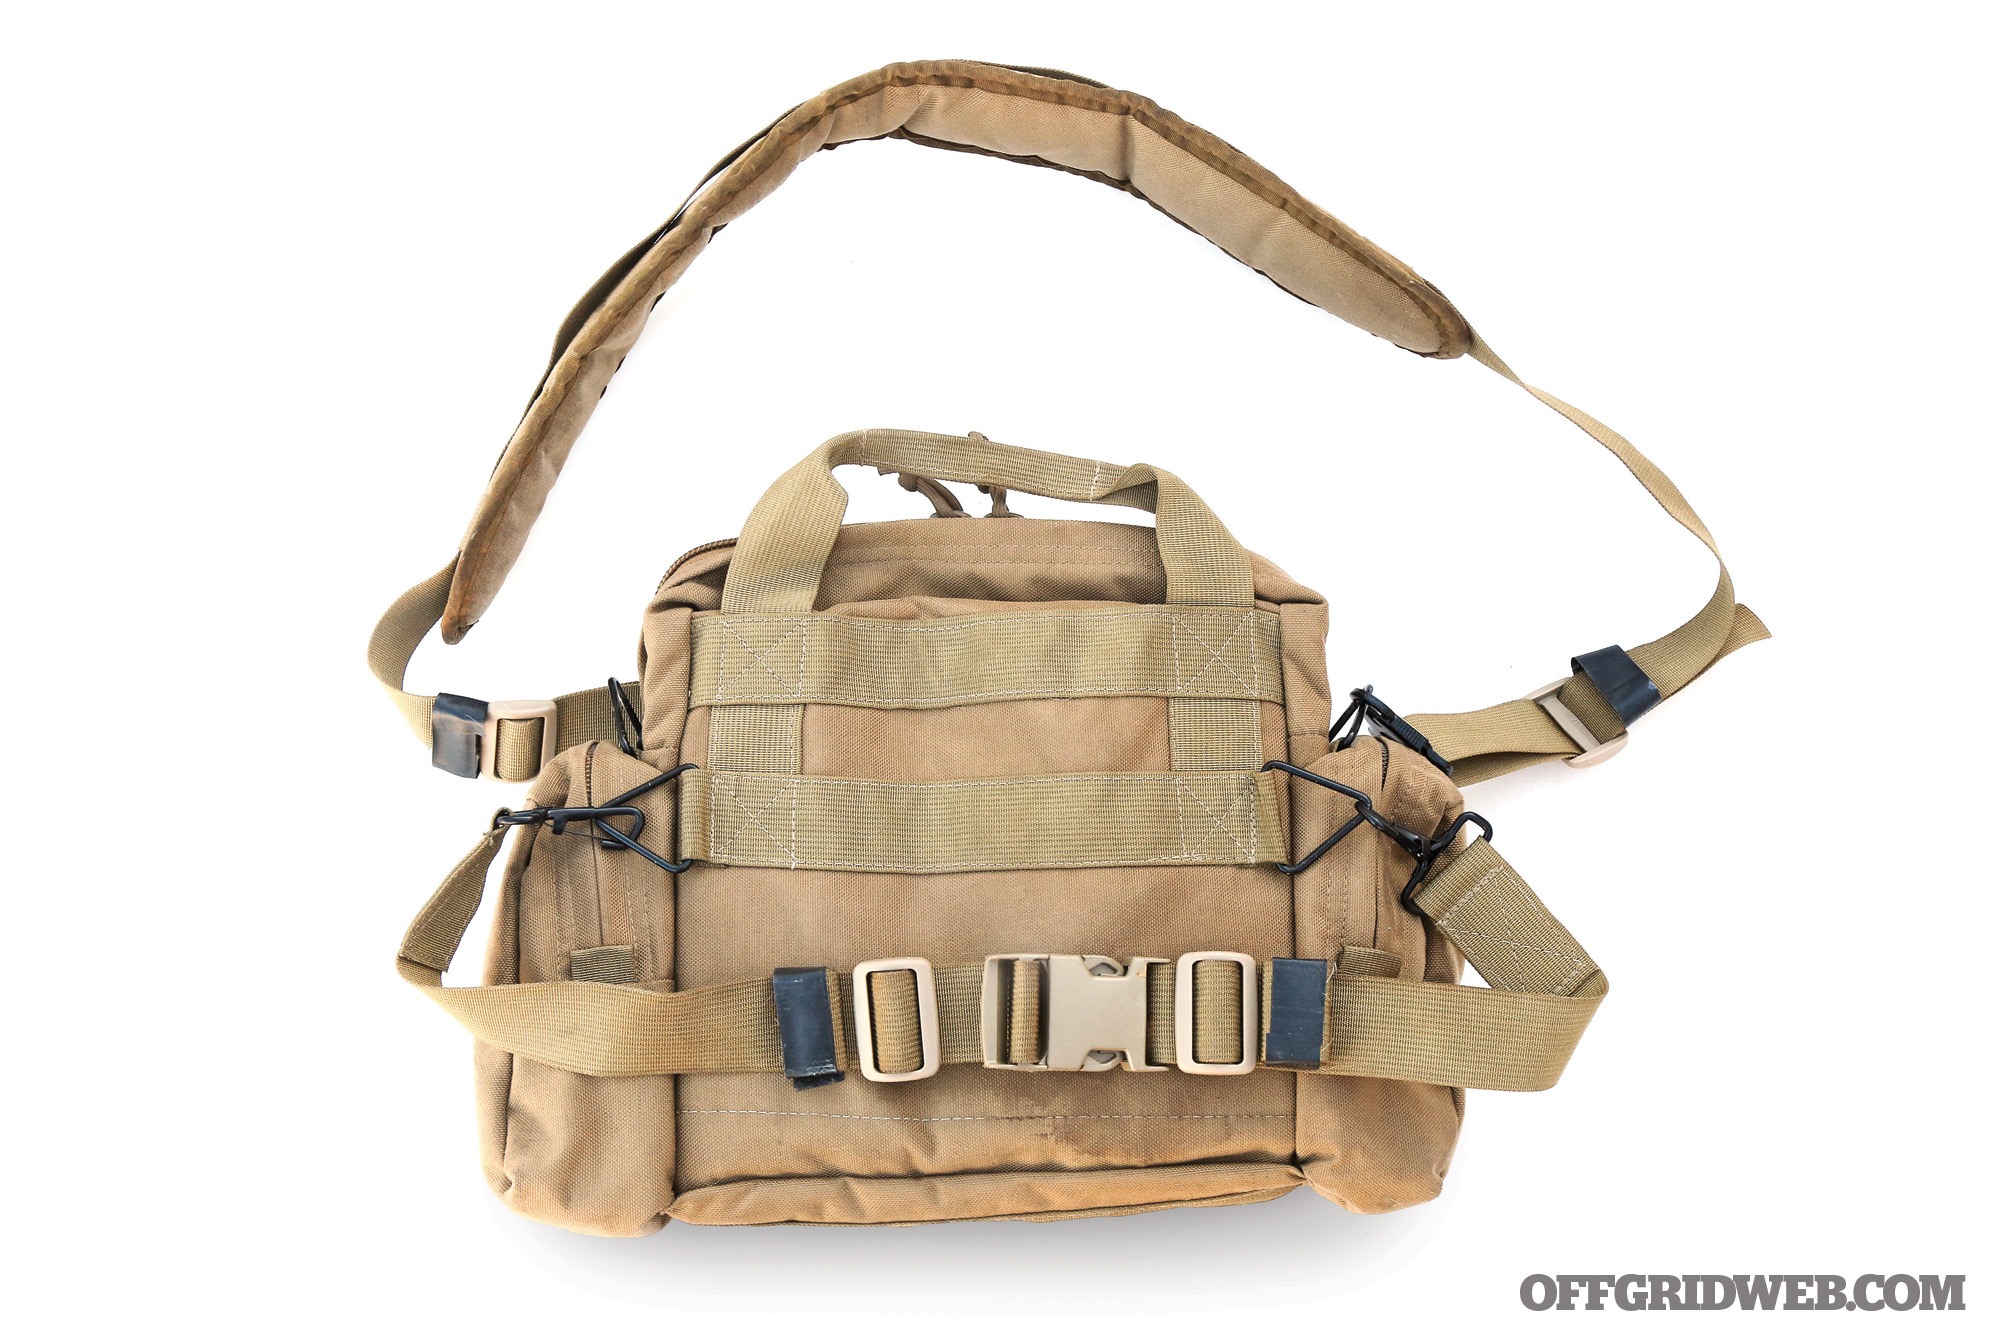
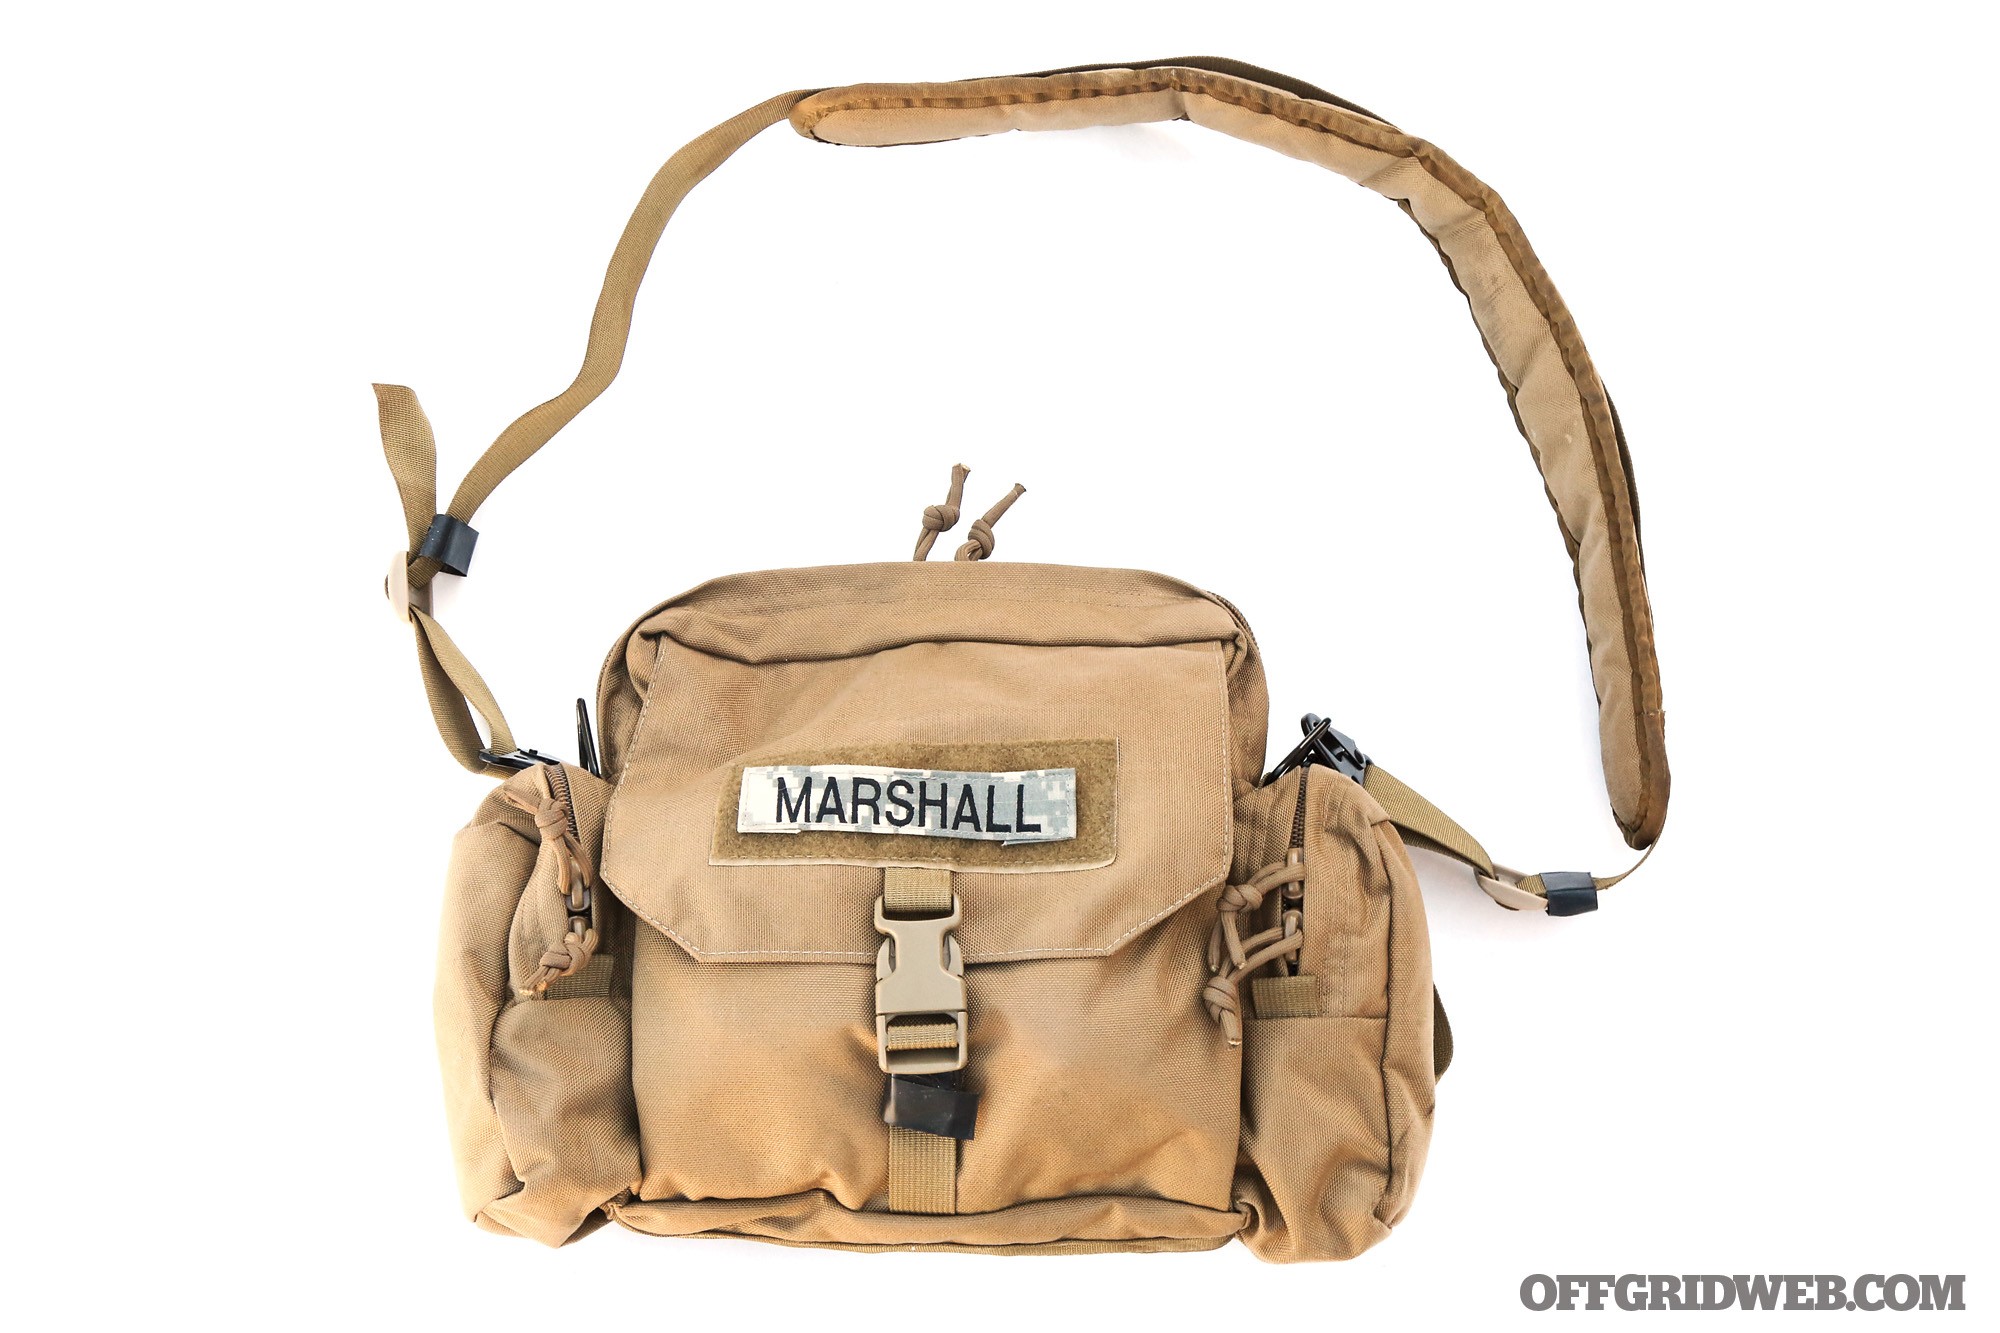
The bag itself is a Terrorist Interdiction Bag from Suarez International. Measuring only 10 by 12.5 inches, the overall design is flat and lean. I found it perfectly sized to tuck under the driver seat of my vehicle or the drawer of my desk while working various duties in Afghanistan. The bag also includes a waist strap. With the shoulder strap slung across your chest like a seatbelt, and the waist strap clipped around your torso, you can fight directly from the bag with minimal bouncing or flopping while you move. In effect, this turns the TIB into an oversized holster, with all on-board supplies easily accessible on the go. On their website, the folks at Suarez International say this: “The TIB is the answer for the man that needs to carry a full high intensity-short duration fighting kit 24/7/365, but in a very compact and ultra-discreet manner … We suggest you do not overfill it with non-essentials. Quick and dirty. Fill it with weapons, magazines, weapon accessories, and medical stuff. That is all.”

The Contents

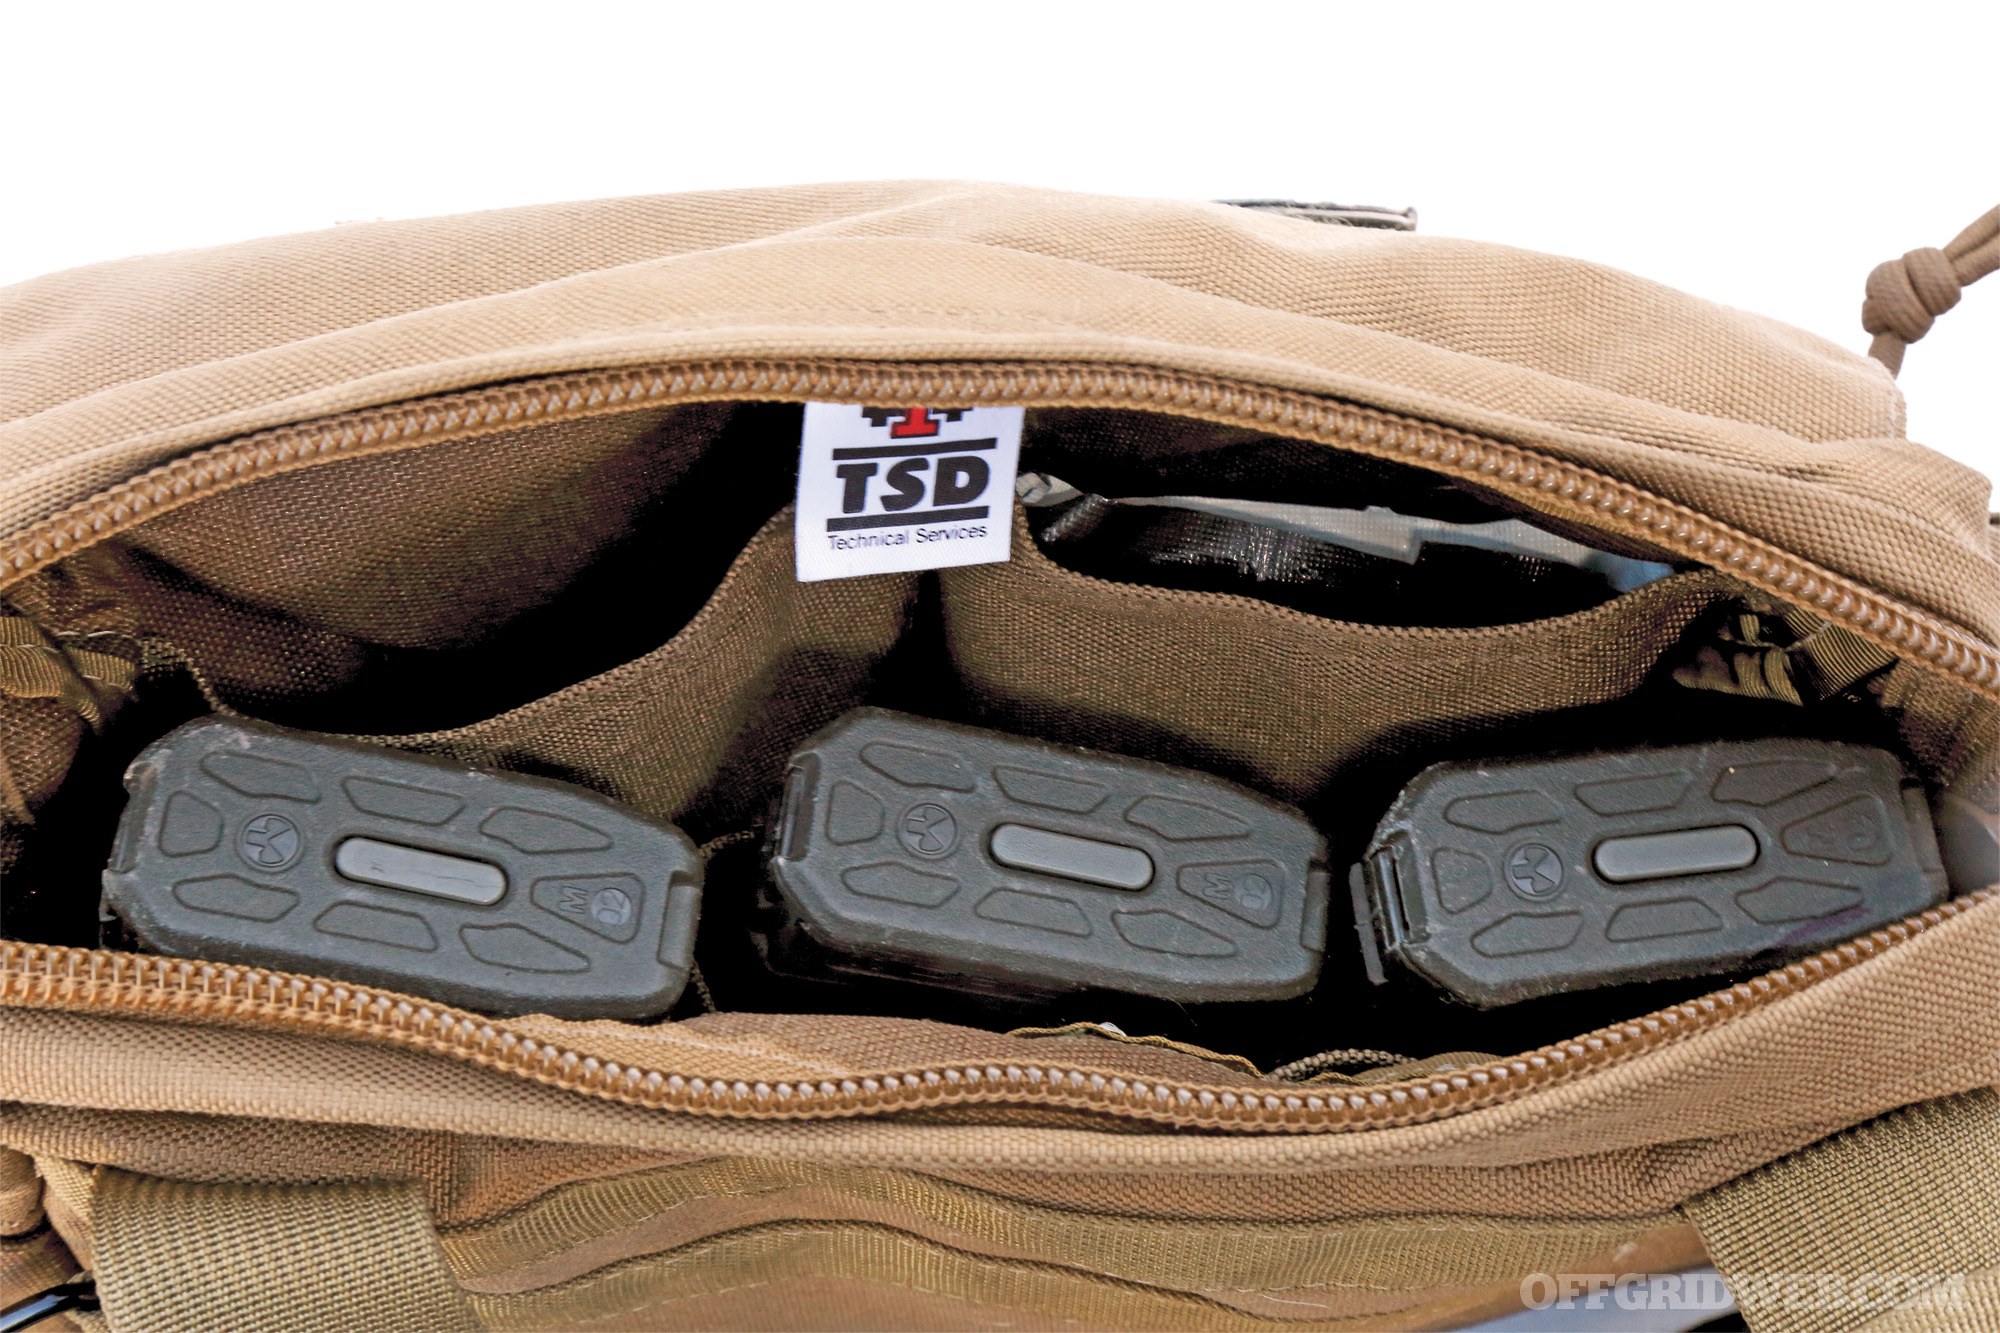
To this end, my personal TIB would be a dedicated fighting bag. There would be no long-term survival provisions. I didn’t keep any actual guns in this bag, as my duties required weapons be kept on my person while on duty. The main zip compartment includes a removable “kangaroo pouch” that holds three rifle magazine with bungee-cord top retention. I filled all three slots with spare 30-round magazines for my carbine. Behind the magazines is a large pocket, divided down the middle that I used for extra trauma medical supplies: hemostatic gauze, an Israeli bandage, and chest seals. Since the rifle mag pouch is covered with loop-side Velcro on the outside, I added a small placard with elastic loops that I filled with small chem lights for signaling or room-marking in a CQB scenario.

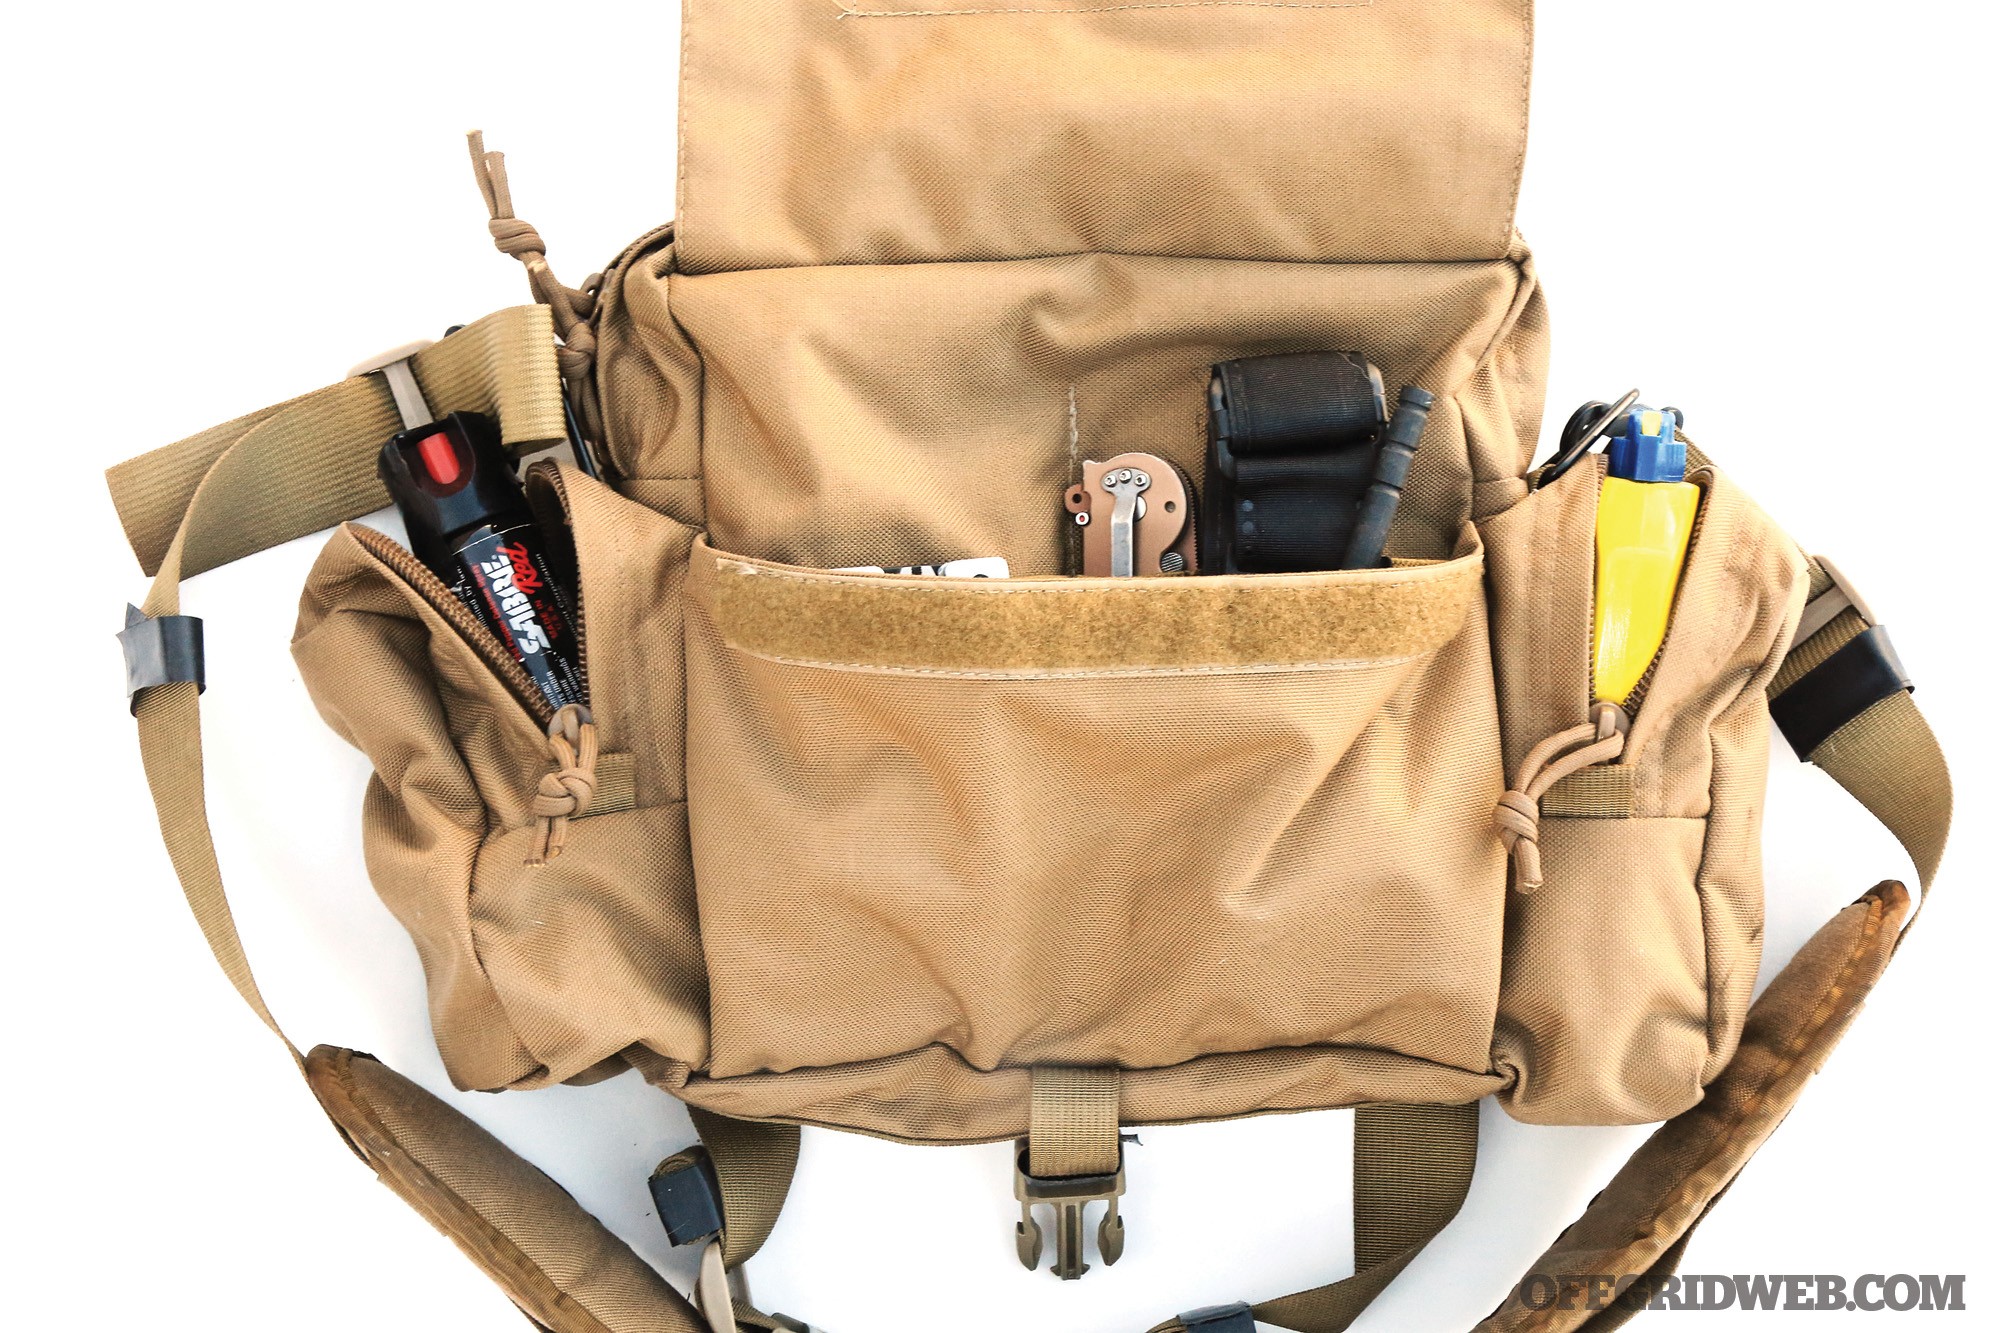
The front-flap of the bag is held closed with a Fastex buckle and covers a shallow pocket lined with elastic loops. I used the loops in this compartment to hold a flashlight, tourniquet, folding knife, and multi-tool.

Finally, there are two small end pockets on either side of the bag. In one pocket, I kept “personnel control” supplies — flex cuffs and pepper spray, in the event that hostile or unknown personnel needed to be subdued or transported after the immediate fight. In a pinch, flex cuffs can also be used to help secure doors or gates. Opposite this, I kept fire-starting supplies. This is the closest I came to including actual survival gear. A Zippo lighter, bottle of lighter fluid, and several waterproof fire-starting wicks were just enough to fit in this pocket. The only things in this bag without a direct and immediate application in combat, this inclusion was simple personal preference. In retrospect, a personal GPS beacon or satellite phone would’ve been an excellent substitute. Most small-to-medium phones or pocket beacons would’ve fit perfectly in the same pocket.

Closing Thoughts

That’s it. I carried this bag, in this configuration, for several deployments. Fortunately, I never needed to use it. But I always felt better knowing I had the extra muscle in case I did. Even if Uncle Sam never sends you on that all-expense-paid trip to the Mid East, a dedicated fighting bag is a worthwhile consideration in any preparedness plan. Even if you can’t — or don’t want to — carry a firearm on you, this bag will hold even a full-sized handgun with ease. Stashing a government-sized 1911 or Glock 17 with several extended magazines gives you an all-inclusive solution to go from unarmed to fight ready. Having a bag like this cached in your trunk, hall closet, or desk drawer gives you a strong alternative to hiding and hoping for the best if faced with armed assailants.

Suarez International Terrorist Interdiction/Active Shooter Bag (TIB)

MSRP
$55

URL
suarezinternational.com


Preparedness Lessons Learned from the Recent California Blackouts

People, on average, like to think that they are prepared for whatever life throws at them. If you are a concerned citizen who reads this type of article, you probably consider yourself sufficiently “prepped” for whatever cataclysmic event comes your way. Much of mainstream preparedness media focuses on being prepared for a “Big Event” like an electromagnetic pulse killing off all electronics, or a nuclear, biological, or chemical attack from a terrorist organization or rogue nation-state. This also includes massive natural disasters, such as a tsunami or hurricane which wipes out coastal metropolitan centers.

Many people think of disasters as world-ending catastrophes, rather than small-scale, short-term events.

But, realistically, we need to be most prepared for events that, although smaller in scale, can have very real and serious impacts on our lives and safety. A more mundane crisis that only affects a smaller geographical area or population can be just as devastating in the short term. I recently learned this lesson the hard way.

The California Blackouts

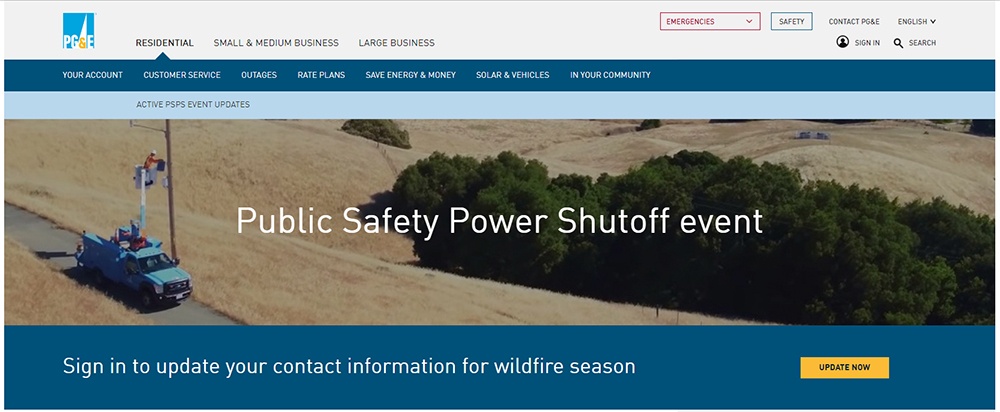
“Public safety power shutoff” was the official term used by the utility provider to describe this incident.

As a resident of California I’m used bad decision making by politicians and others. So, I guess I shouldn’t have been surprised when Pacific Gas and Electric (PG&E), the state’s largest provider of electricity, announced they would be shutting off power to hundreds of thousands of customers this month. PG&E makes its case for this “Public Safety Power Shutoff” in the optimistic-sounding video below:

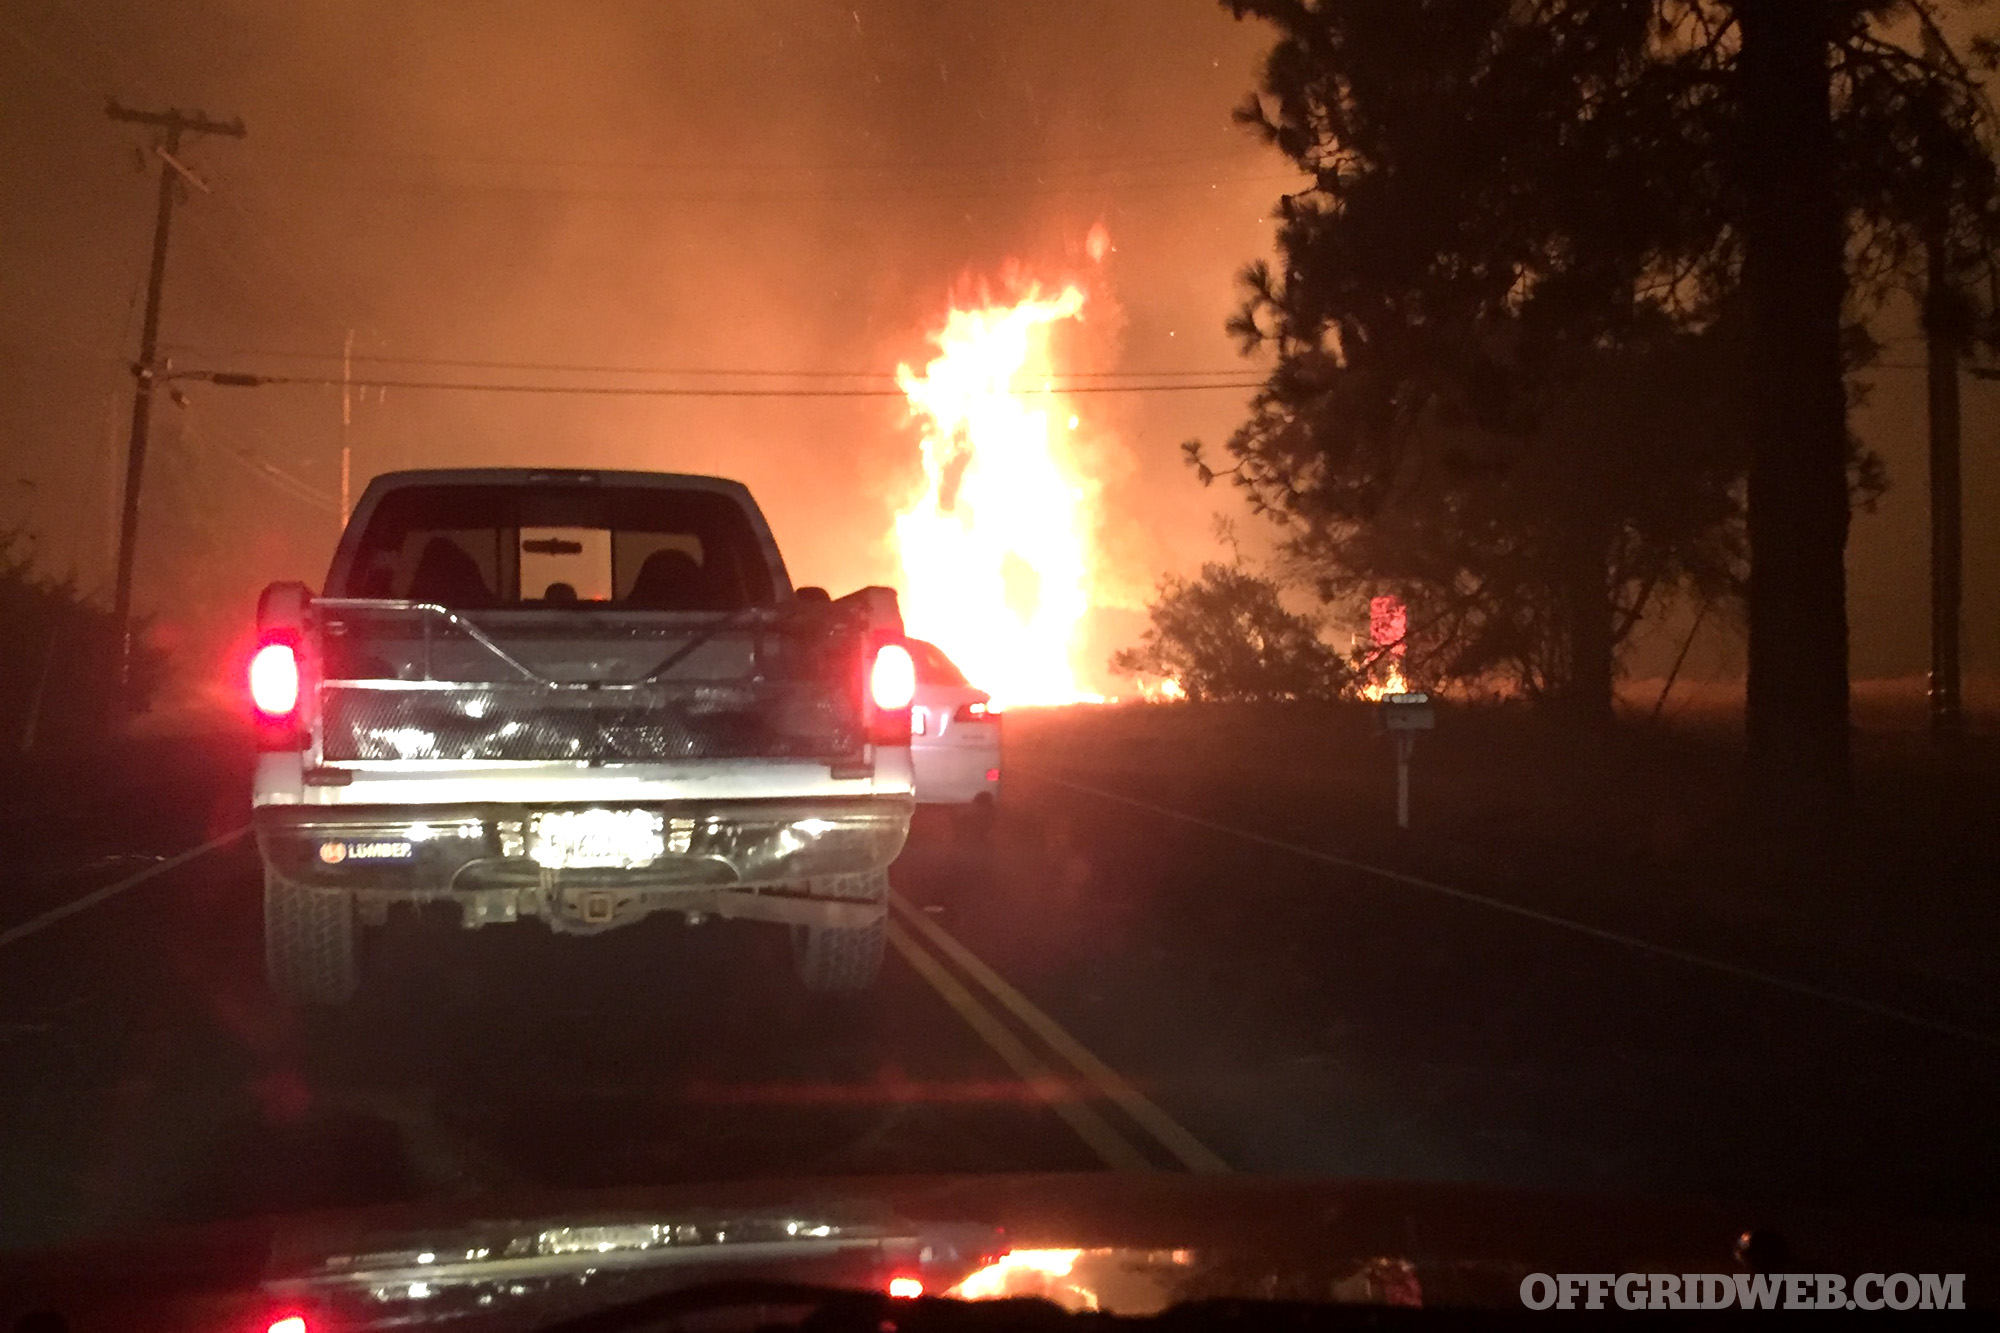
Ostensibly this was done to prevent the types of wildfires that ravage the state every fall and winter. Investigations have indicated that several of the major wildfires in 2017 and 2018 — including the Camp Fire, the most destructive in California’s history — may have been caused by faulty PG&E electric power lines and equipment failure. So, PG&E’s solution was to de-energize power lines so they couldn’t inadvertently start a fire.

In the article linked above, we interviewed a CA resident who narrowly escaped the Camp Fire in 2018.

Regardless of the reason, when I heard of the pending shutdown, I got concerned. I live in a good-sized suburb nestled between three major cities. In this sea of humanity, a blackout is a huge problem. Resources like food and gasoline disappear quickly as people empty the shelves at supermarkets and gas stations are drained of their precious dinosaur juice. Non-functioning traffic lights cause already congested streets to turn into complete gridlock. Cell service becomes spotty, even non-existent. In the short term, this can lead to shortages of essential items to residents. Longer-term effects can be price gouging of those items and civil unrest. It’s medieval times in the Golden State.

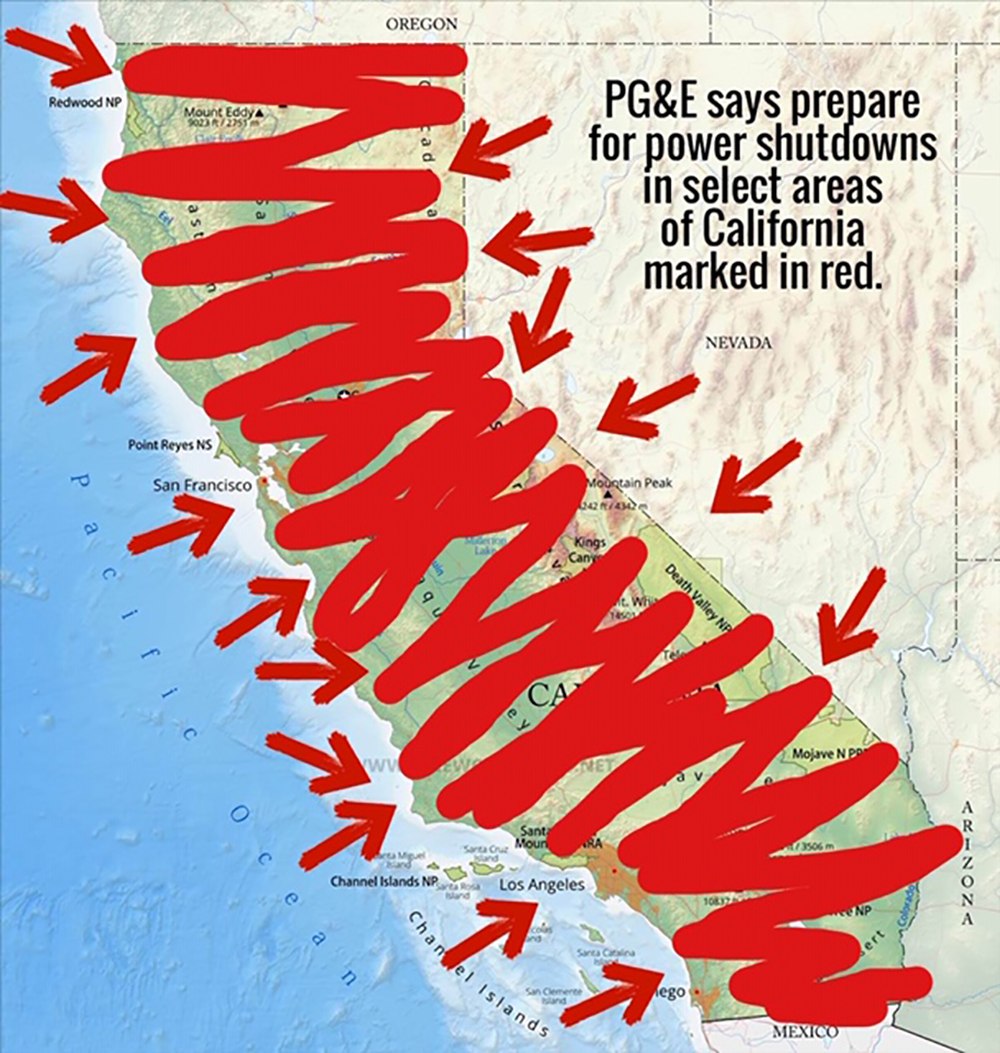
Outages could have affected any of more than 5 million customers, according to the company's web site.

I quickly realized I wasn’t sufficiently prepared for this situation. PG&E was forecasting blackouts lasting from 2 to 5 days. Adding to the difficulties was that the power provider couldn’t narrow down what parts of the state were going to be on the receiving end of a blackout or when it might occur.

Although I’ve given some consideration to emergency preparedness in the past, this was a wake-up call that I hadn’t given it enough. I wasn’t sure if I had enough food, water, gas and other items. However, there was one thing I was sure of — unlike many others in my state, I certainly wasn’t going to rely on the government to provide for my family’s needs. Here’s what I did in response, along with some lessons I came away with.

Act Fast

I did a quick assessment of what I already had around the house to decide what I needed to stock up on. I realized I had a lot of food, but most of it was refrigerated. I don’t have a backup power source for large appliances, so if the power went out and my fridge stopped working, my food would spoil. This was especially disconcerting to me because I had about twenty pounds of sausage from a pig I had harvested this summer which I didn’t want to see go to waste. I had coolers, but not enough ice. I wasn’t sure how accessible water would be or what its potability would be once our water provider was out of power, so that was a major concern as well. I quickly put together a list and headed out.

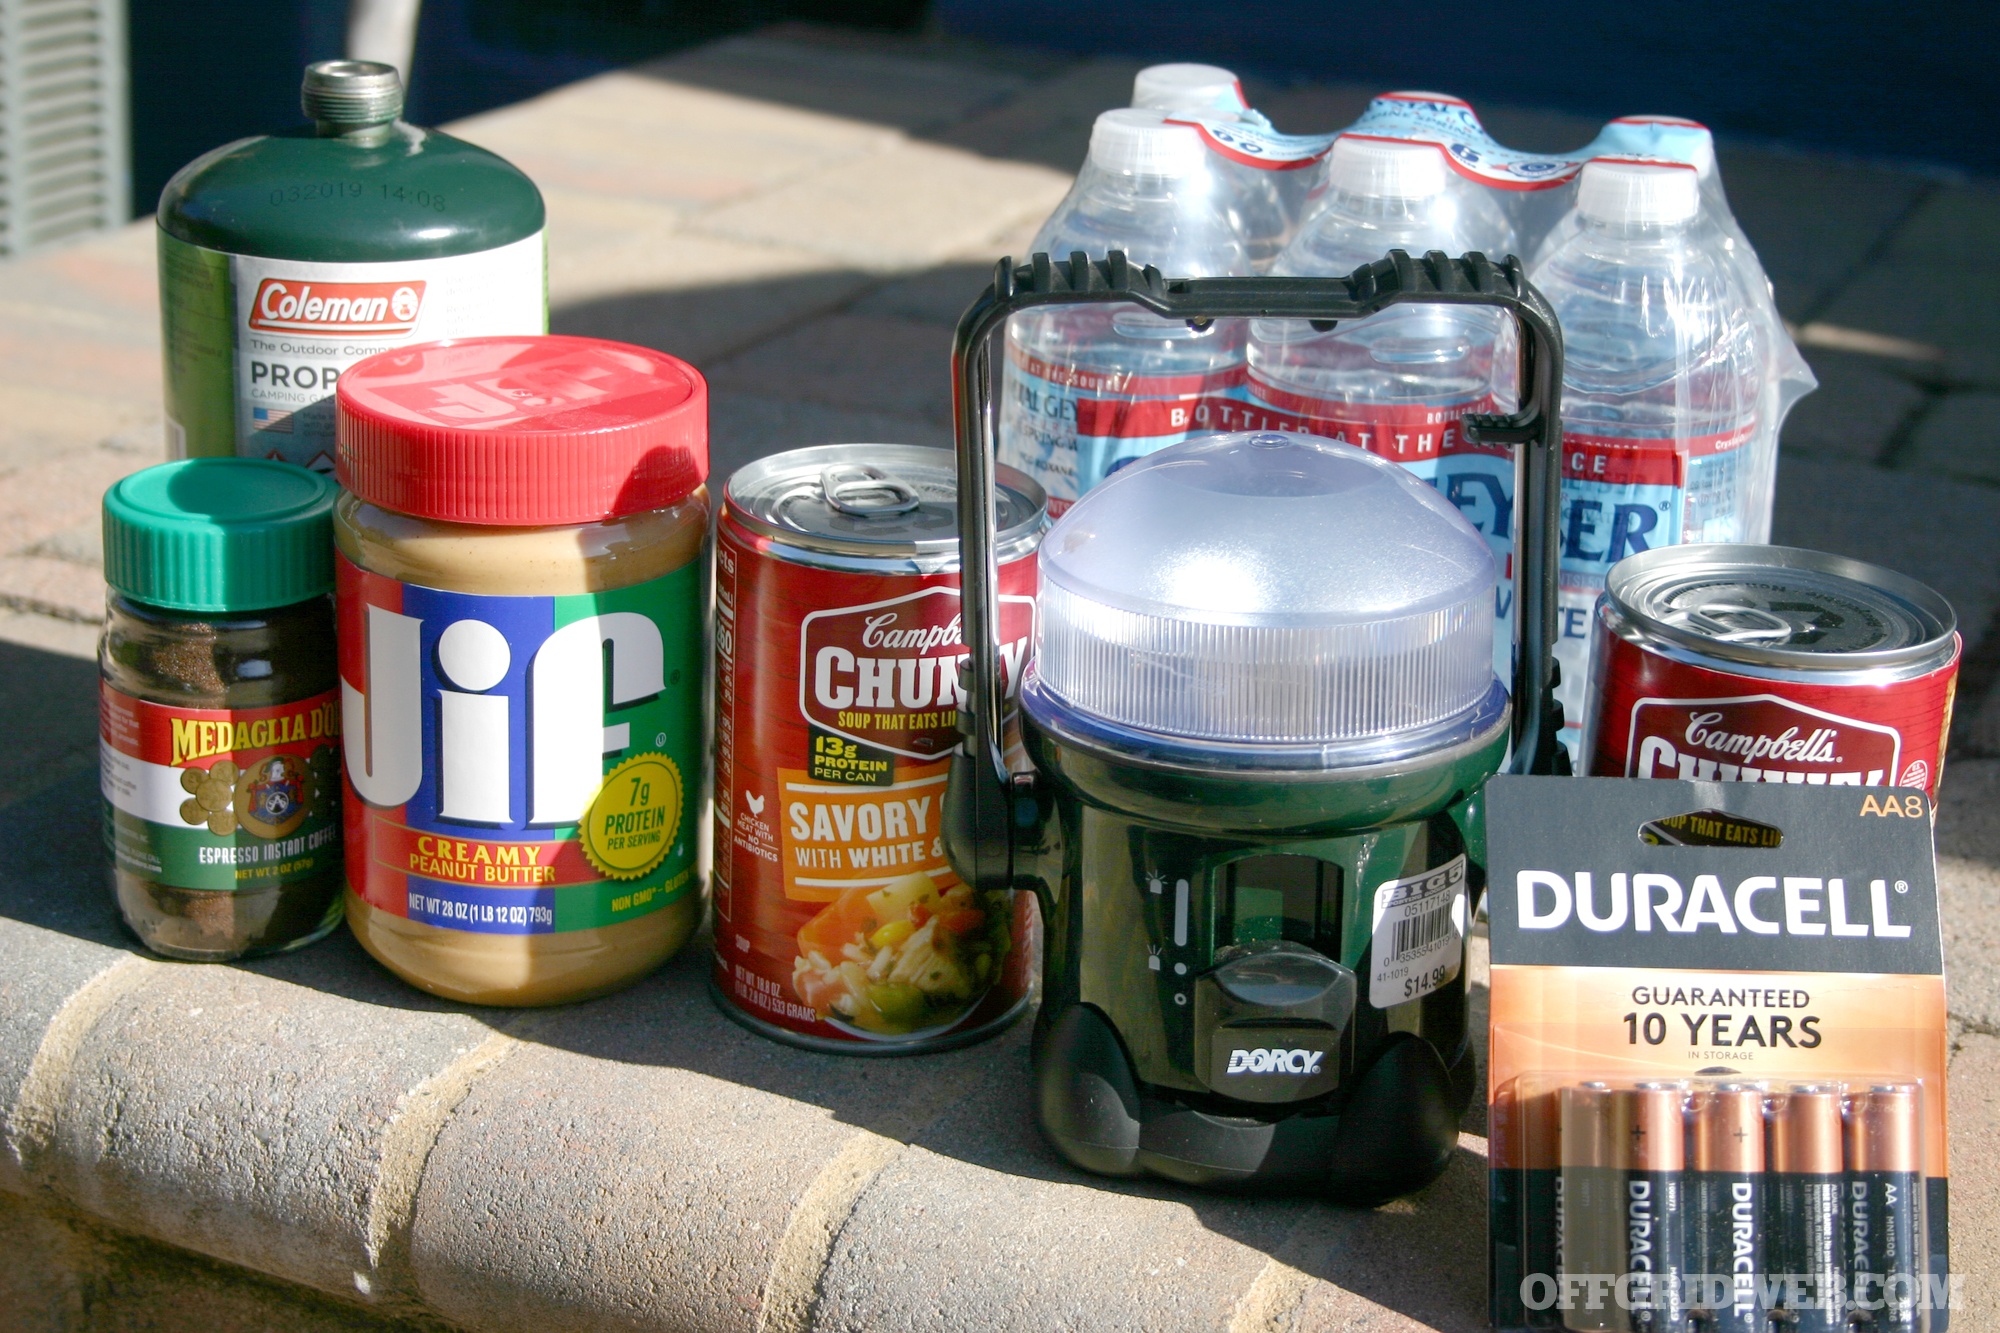
As soon as the supermarket opened, I loaded up on canned food, dry goods, water, ice, propane, and batteries. I then filled up the gas tanks in both of my cars. Surprisingly, despite feeling as though I was catastrophically late to the party, I didn’t have to wait in line at the market or the gas station. It wasn’t until after the power went out that people crowded those locations. Many were surprised to find out that gas stations were without power, resulting in pumps not operating. I may not have been fully prepared, but at least I wasn’t THAT unprepared.

Establish Short-Term and Long-Term Plans

History tells us that most power outages are short-duration events, not long-term ones. Based on what I knew of this situation, I felt no need to hang up concertina wire around the house and prepare for the end of days. I needed enough provisions to sustain my family for a week, at most.

Although some disasters lead to widespread chaos, this one thankfully did not.

That being said, I have a bug-out plan in place for a larger event like a catastrophic earthquake or some other major disaster. In retrospect, I was better prepared for the “big one” rather than a more-likely, short-term event in the comfort of my own home. A blackout isn’t as dramatic as some cataclysmic large-scale collapse of society. But it is a fairly common occurrence that, if it becomes a long-term problem, can have cataclysmic results. It doesn’t take much to disrupt our daily lives.

Decide to Stay or Go

A short-term crisis doesn’t necessarily trigger the need to relocate. In my case, the power shutdown didn’t require my family to bug out. I also wanted to stay home because I was concerned about my residence being vulnerable to break-ins, since my alarm system and cameras wouldn’t be functioning.

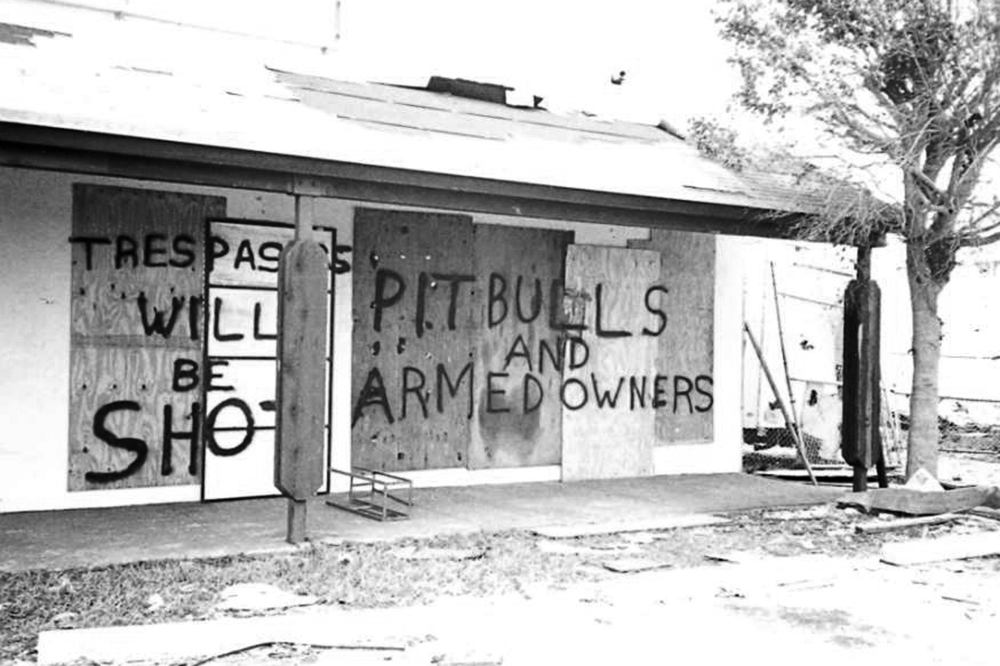
Be prepared to defend your residence against threats if your alarm system is compromised. Looting is a legitimate risk after any major disaster.

In 2017, when fires swept through towns in Northern California, large numbers of criminals showed up to break into the abandoned houses. I witnessed this first-hand when I deployed up there as part of a law enforcement response. Crooks from all over descended on the abandoned residences to steal whatever they could. Officers arrested many opportunists who showed up to take advantage of the situation. I’ve seen the same thing occur during other natural disasters I have deployed to, such as Hurricane Andrew in 1992. Factor this into your plan, but also remember that your safety is a much higher priority than protecting your property. Looted items are replaceable. Family members are not.

If you do choose to go to your bug-out location, do it as soon as possible. Highways become choke points as everyone takes the same roads to get where they are trying to go.

Don't Depend on Government Assistance

In the military and in law enforcement I have responded to locations after major hurricanes, floods, and wildfires. One consistent theme I have observed is that during the initial phase of a major disaster — the first two to three days — local, state and federal government is completely unprepared. Their plans for evacuation, resupply, medical treatment, and controlling civil disorder are woefully lacking. You are on your own, so plan for it.

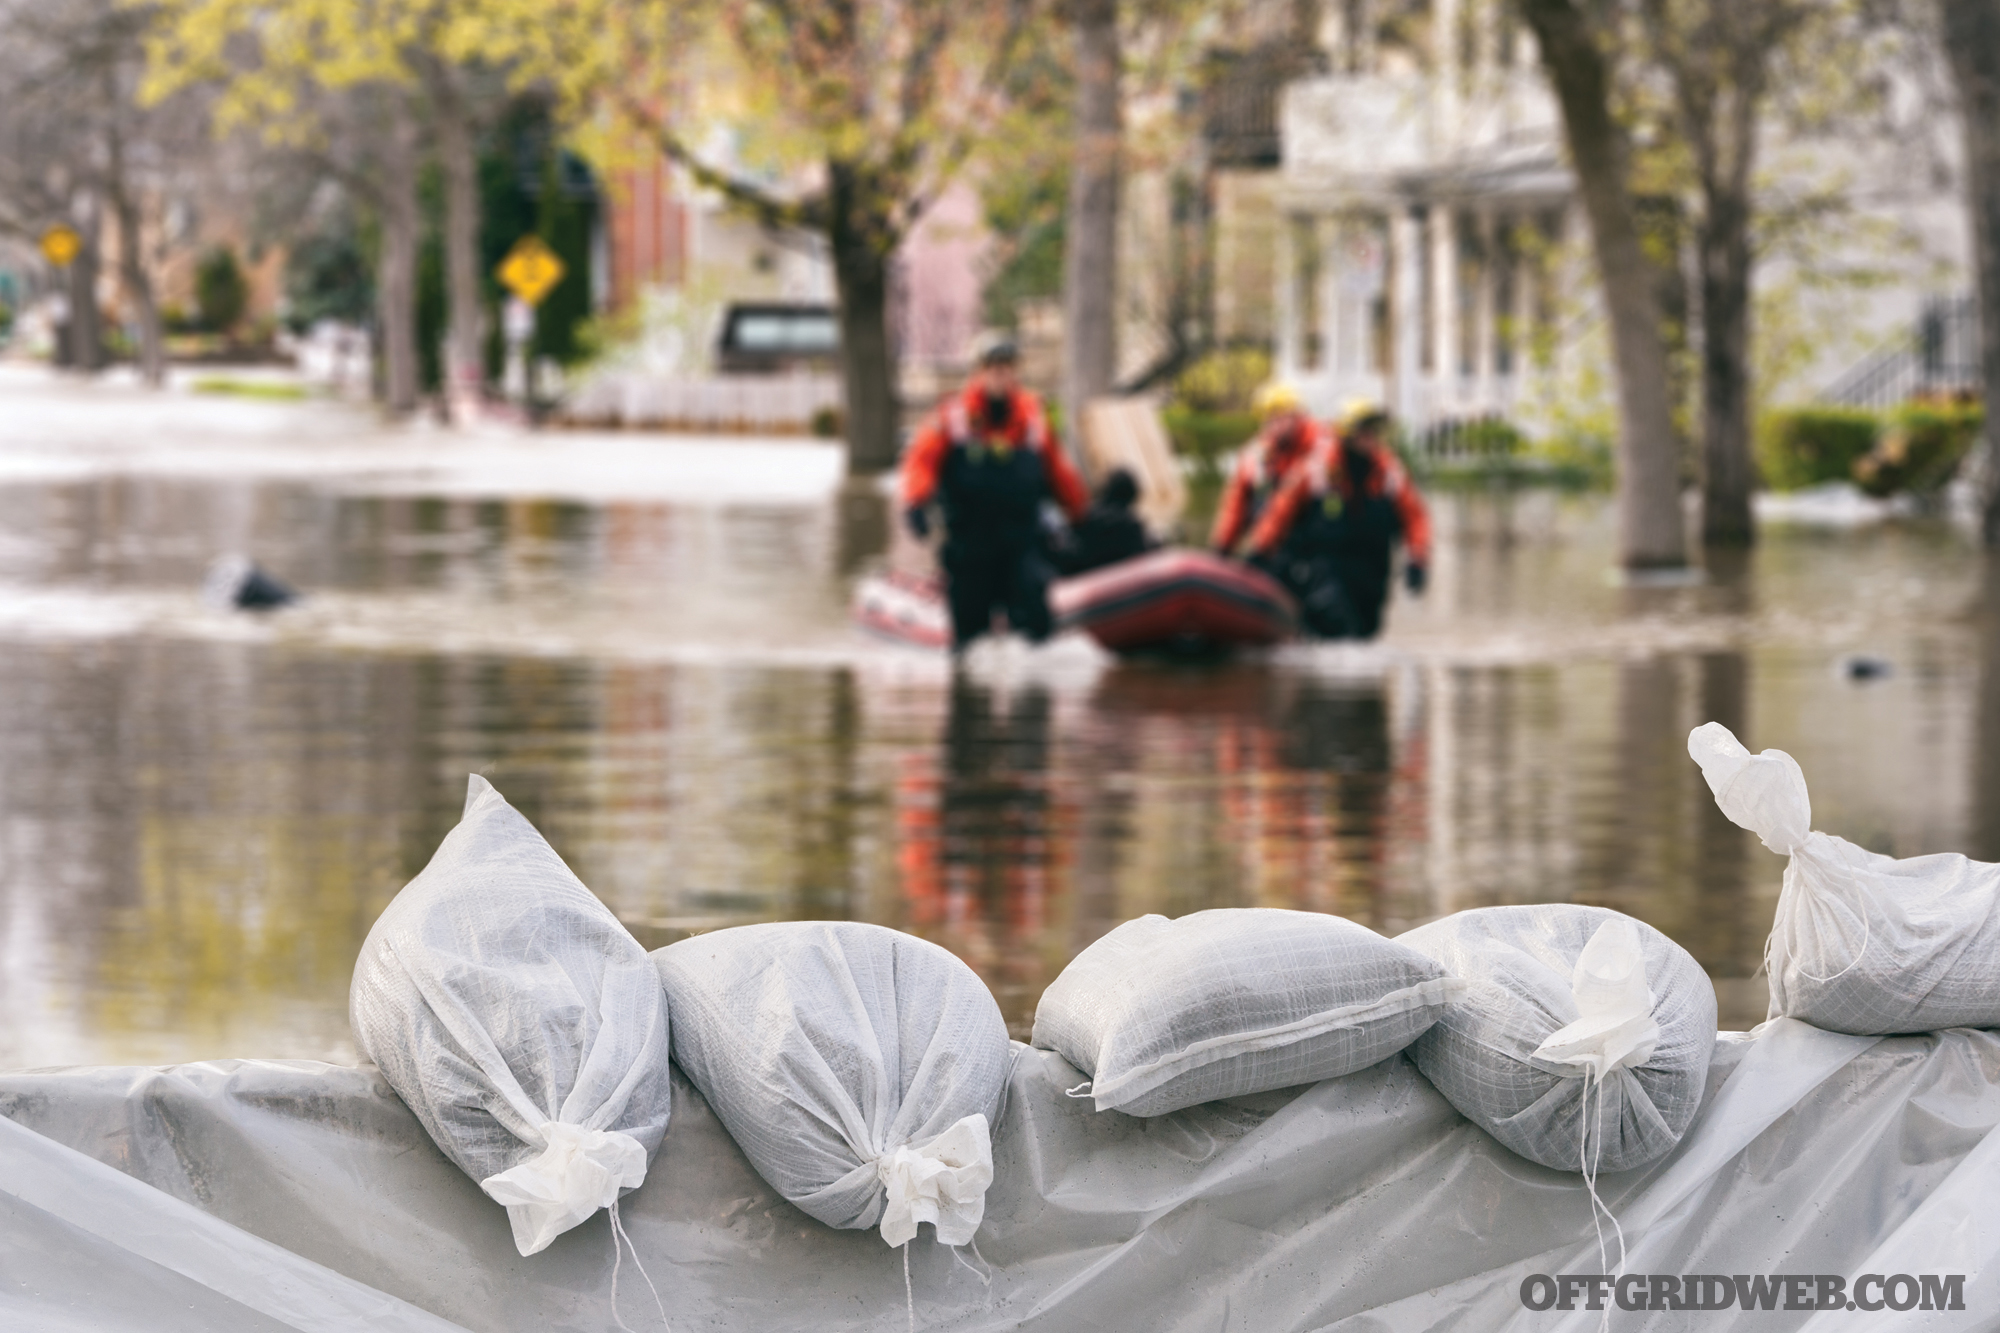
In any disaster, self-sufficiency is always preferable to waiting for rescue.

For the “planned power outage” here, the state and local government put out super-helpful hints like “have an alternative way to open your garage door.” Many local politicians gave passionate speeches condemning the power supplier. While these words did very little to improve the situation, all the resultant hot air most likely resulted in an increased risk of fire.

Develop a Backup Plan for Electronics

Think of the last time the power went out in your house. Did you catch yourself trying to turn on a light, fire up the television, microwave a meal, or charge your cell phone? We rely on electricity for everything, and it's easy to take it for granted.

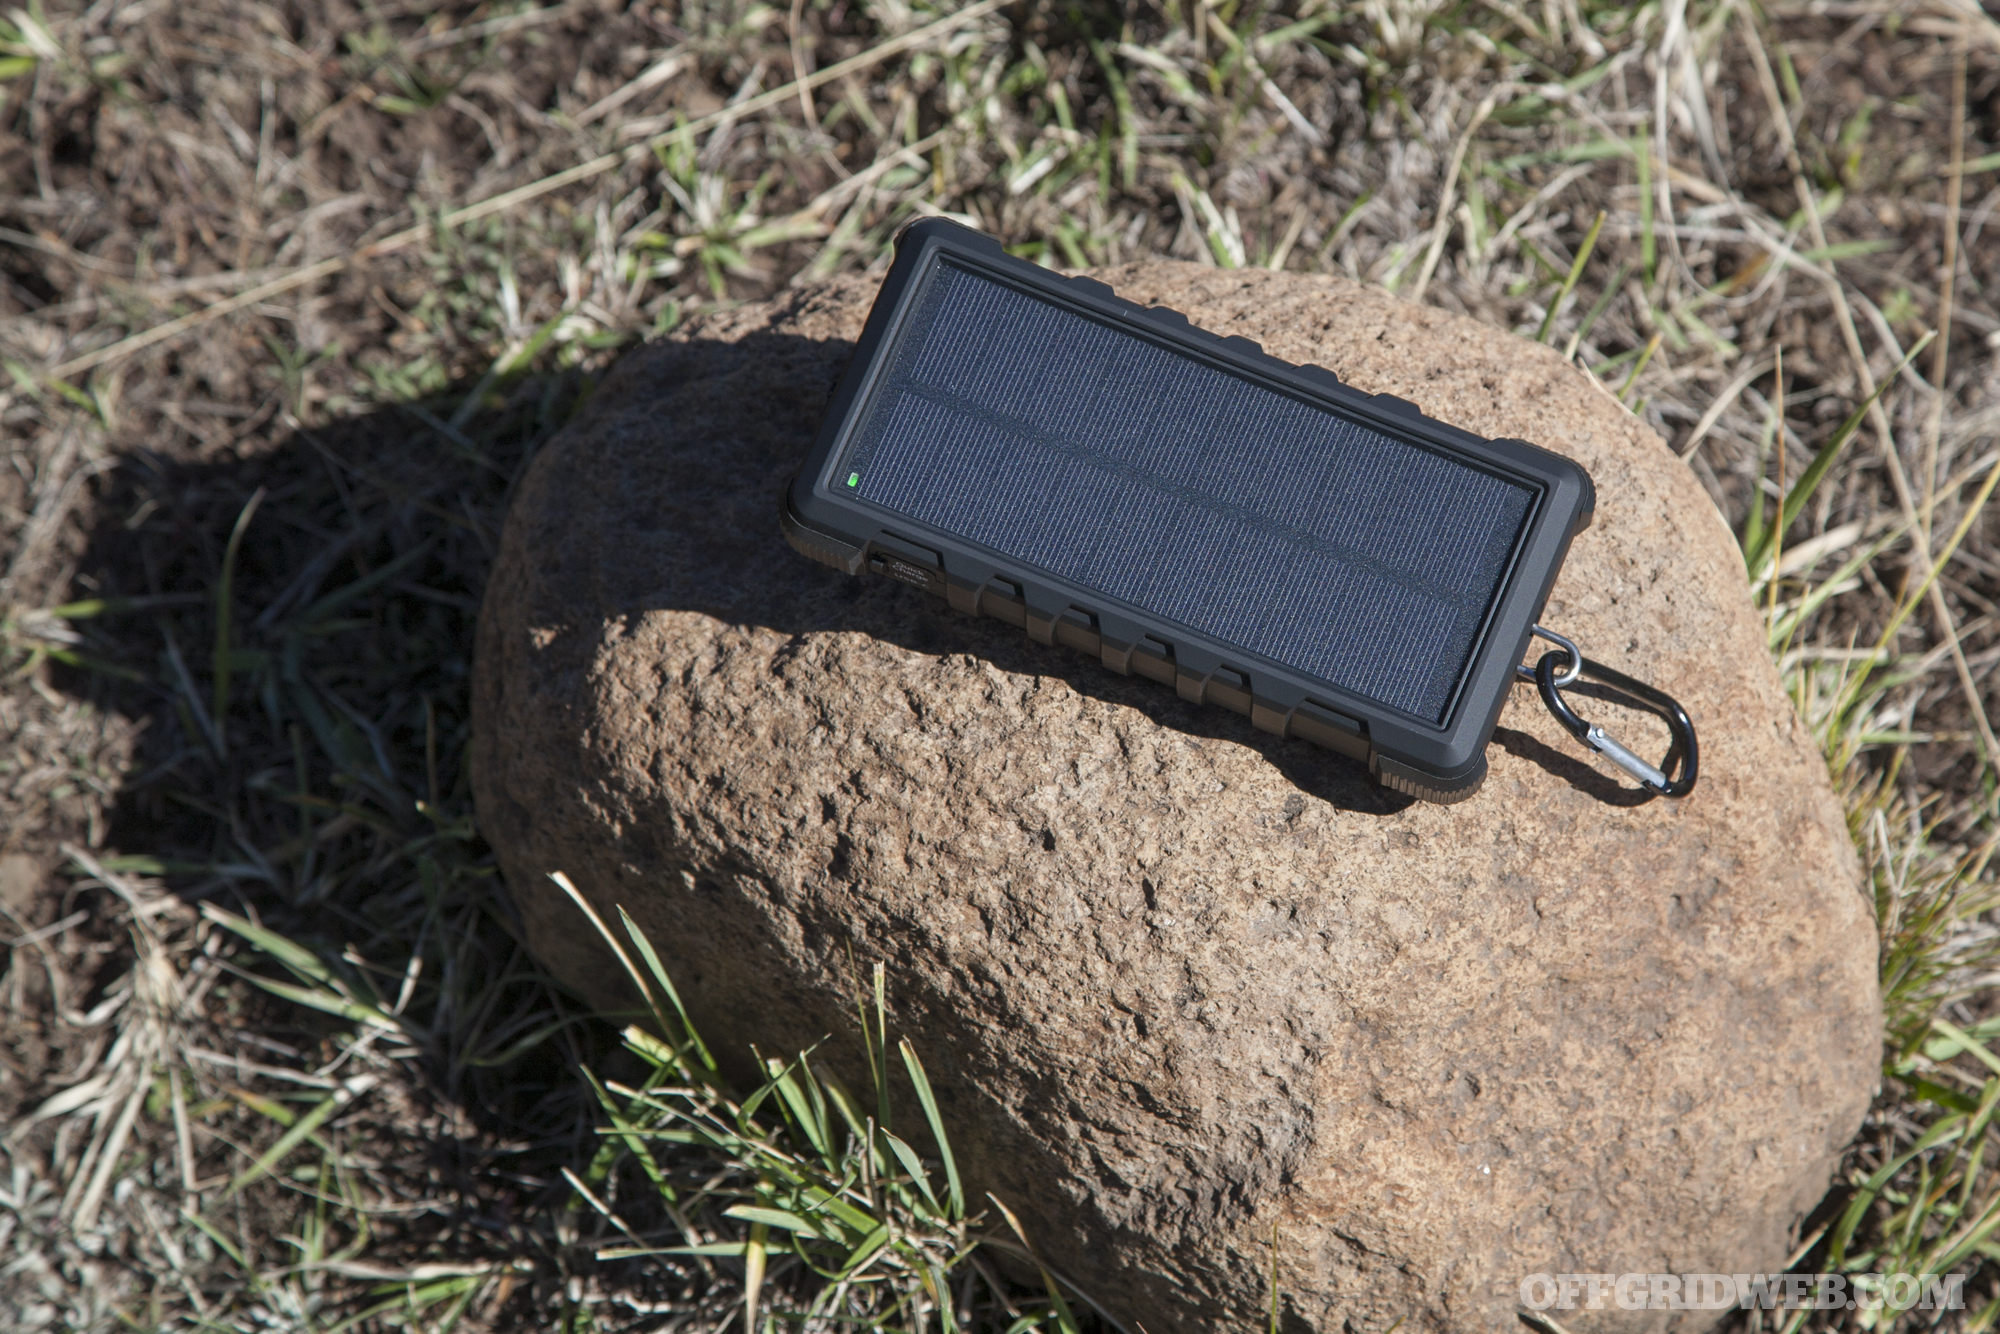
A small solar charger can be a life-saver if a short-term outage turns long-term.

Just prior to this event, my son and I had gone on a camping trip. This proved to be fortuitous. I had propane for our camp stove (the backup plan to my outdoor grill), batteries for lanterns and flashlights, and so on.

Camping is a good dry run for prepping. The location my son and I had camped at was pretty austere so if you didn’t bring it with you then you had to do without it. The Coleman two-burner stove is excellent for preparing all kinds of meals. I have both battery- and propane-powered lamps which became essential for keeping the house illuminated. We have a Yeti cooler which, when stocked with ice, keeps food preserved for days — just the thing for my precious pork! My camping kit includes seemingly unimportant items like single-serve packets of condiments (ketchup, mayo, mustard) and freeze dried coffee. These aren’t essential to survival, but they’re sure nice to have and make the lean times a little more bearable.

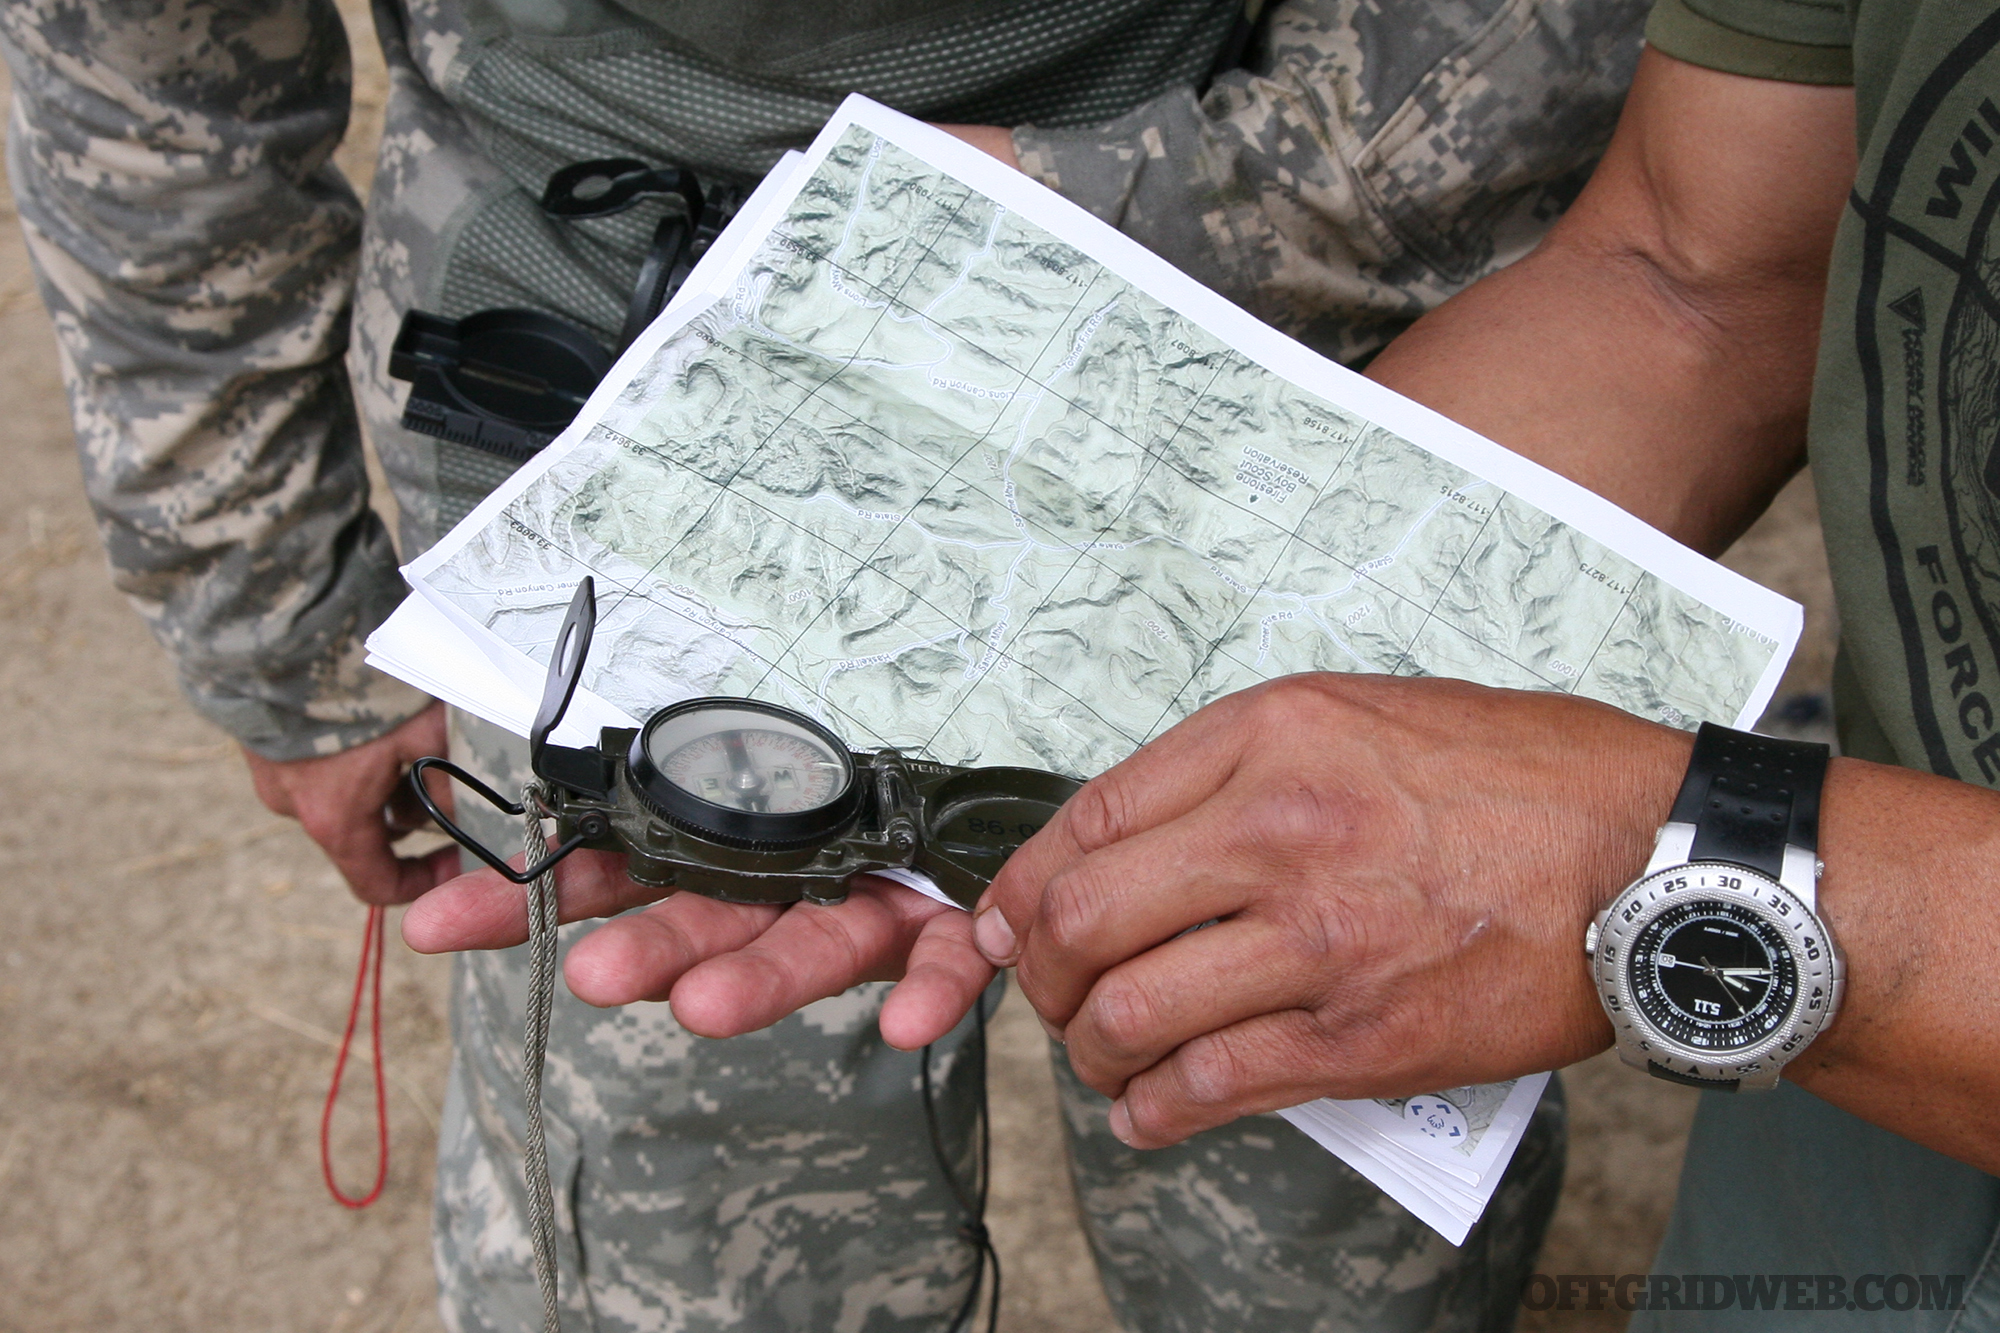
Knowing how to use topo maps and a compass is an essential for when Google Maps goes offline.

I had charged all the portable electronics. I also made sure not rely on them too much, since I knew cell service might be down. If there are important items like maps or other documents that can only be accessed over the internet, make sure you plan accordingly by printing them out.

Closing Thoughts

So, how did it all turn out? Surprisingly, my neighborhood was spared from the outages. There were roving blackouts in surrounding counties, so fires were supposedly prevented, or PG&E made their point, whatever the case may be. But, as is often the case with disaster preparedness, we thankfully didn't experience the worst-case scenario we prepared for.

Being prepared for no lights also means being prepared for no alarms, and potentially no cell service.

In this particular instance we had been forewarned about the blackouts. When a weather event or natural disaster causes one, which is more often the case, you won’t have the advantage of knowing it is coming. As if to underscore this point, while I was working on this article, we were hit with a 4.6 magnitude earthquake. For those not living on the Left Coast, that’s a small one, just enough to rattle the windows and knock items off the shelves of stores. Overall, little to no damage was done. However, it served as yet another reminder that you can’t predict when the next disaster will arrive.

Even if your preparations lead to self-righteous neighbors calling you paranoid after a potential disaster fizzles out, it’s always better to be prepared. More importantly, I now have the necessary supplies on hand to survive a short-term disaster — supplies I should have had in the first place.

About the Author

Nick Perna is a Sergeant with the Redwood City Police Department in Northern California. He has spent much of his career as a gang and narcotics investigator. He served as a member of a Multi-Jurisdictional SWAT Team for over fifteen years. He previously served as a paratrooper in the US Army and is a veteran of Operation Iraqi Freedom. He has a Master’s Degree from the University Of San Francisco. He is a frequent contributor to multiple print and online publications on topics related to law enforcement, firearms, tactics, and issues related to veterans.

Infographic: A Quick Guide to Seasonal Edibles

Unless you're a hardcore foodie, you might roll your eyes when someone starts talking about locally-grown organic seasonal heirloom produce. It's easy to assume these things only matter if you're chasing exquisite flavor or trying to sound sophisticated, but they're actually very relevant from an emergency preparedness standpoint — delicious taste is a nice bonus. If your goal is to become self-sufficient, you shouldn't rely on buying whatever produce is on sale at the grocery store. You should be working towards harvesting seasonal fruits and veggies that are locally-grown in your own backyard garden.

The following infographic by April Swiger offers a basic overview of some of the most common seasonal edibles that might be found in a backyard garden. For year-round produce availability, plant a few of your favorite items from each section — just be sure to confirm that they're viable in your climate and soil conditions first. Click here to download a full-size version of this graphic.

Even if you haven't gotten into gardening yet or don't have the time or space to cultivate crops, this guide can be used to select the freshest and most ripe ingredients from your local farmer's market or grocery store. If a disaster occurs, supply chains to exotic, out-of-season, imported produce will be the first to be interrupted, so this infographic provides some items that should be more reliably-stocked in each time of year. There's even a financial element to this information — seasonal produce involves less overhead cost, so it's usually inexpensive.

The USDA Seasonal Produce Guide (linked below) is an excellent source for more info.

For a more in-depth look at seasonal edibles, check out the U.S. Department of Agriculture's Seasonal Produce Guide. This is an extremely helpful resource — just click on any fruit or veggie on the list for nutritional facts, recipe suggestions, storage recommendations, and educational documents.


Video: Making a Fire Steel from an Old File

Redundancy is critical to many aspects of survival, and fire-starting is one of the best examples of its value. It only takes one instance of being unable to stay warm, cook food, or boil water because you couldn't start a fire to learn this lesson. Maybe your lighter ran out of fuel, your ferro rod wouldn't ignite damp tinder, your matches fizzled in the wind, or you couldn't find any flint or sparking rocks to strike your fire steel — but if you have several of these options, you'll have much better odds of making one work. Integrating multiple fire-starters into your survival kit is a wise move.

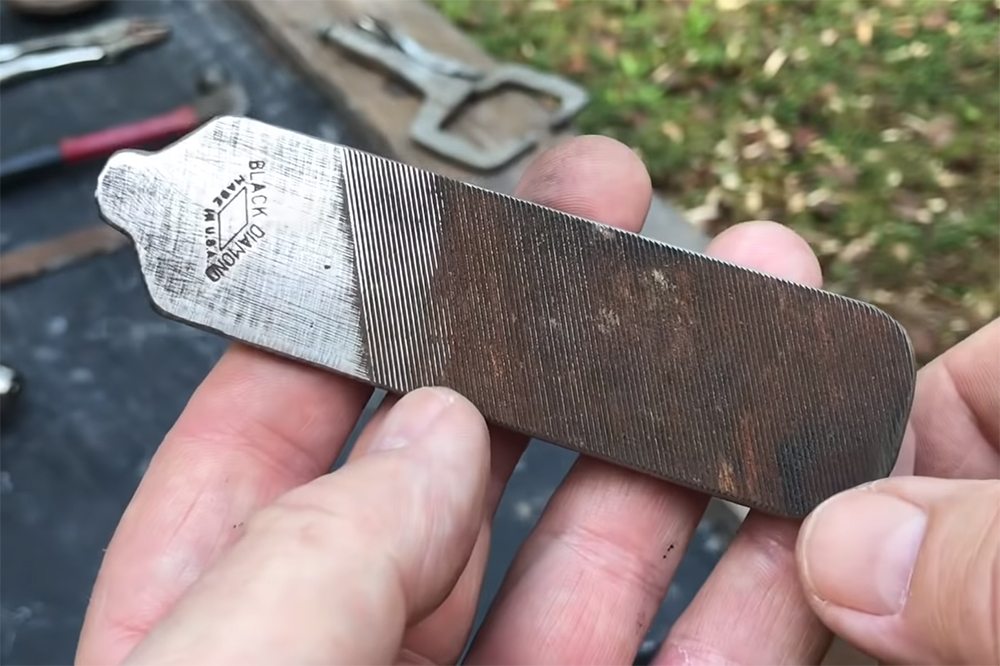
A high-carbon steel file works well as a striker for flint or other sparking rocks.

The classic fire steel is one tool that's often overlooked as a relic of the past. It has been used for centuries to generate sparks by striking flint, chert, quartz, agate, or other hard rocks. But even though it's old, it's not irrelevant. The flint and steel method is a great backup to other fire-starting techniques, especially since the necessary rocks are readily available in a variety of environments. For the steel, many bushcraft aficionados will use the spine of a high-carbon knife, or a dedicated striker on a necklace or keychain.

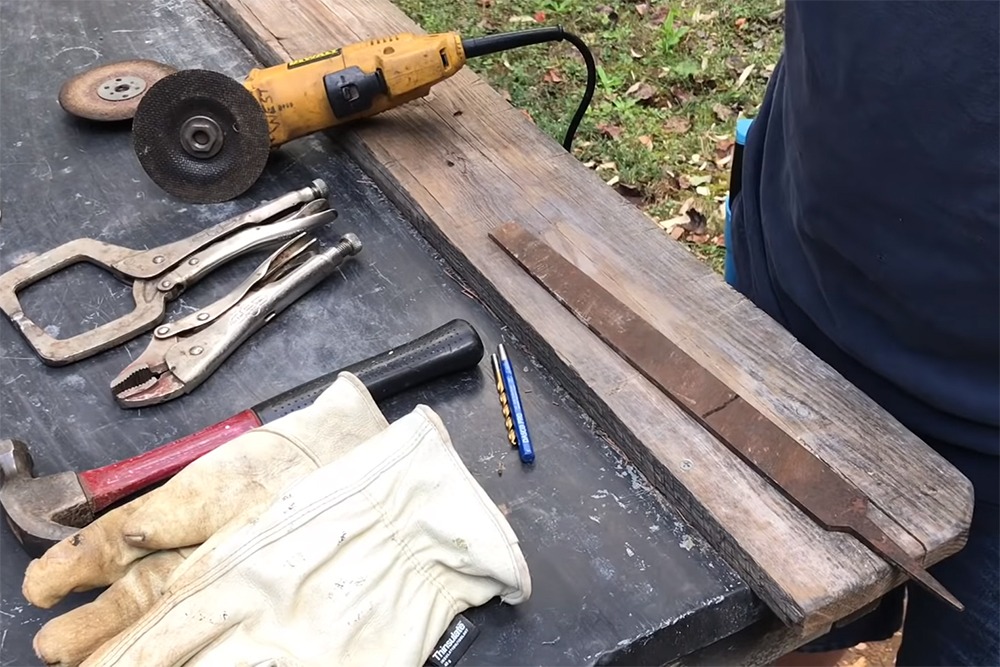
David West shows off the tools used to make this fire steel in the video below.

We recently saw a video from YouTuber David West that demonstrates how to make a fire steel from a $1 file from a flea market. West cuts the file to his desired size, grinds down the edges and tang, and drills a hole for a cobra stitch paracord lanyard. He then demonstrates its use with chert and some char cloth made from an old T-shirt.

Since the faces of the file are still abrasive, this tool has a secondary function as a sharpener for knives, axes, and other tools. It's also a cool-looking (and inexpensive) item to add to your EDC gear or gift to a friend. Either way, if you've got access to an angle grinder and power drill, this will make for a fun DIY project.


RECOILtv: Real-World Training at The Tactical Games

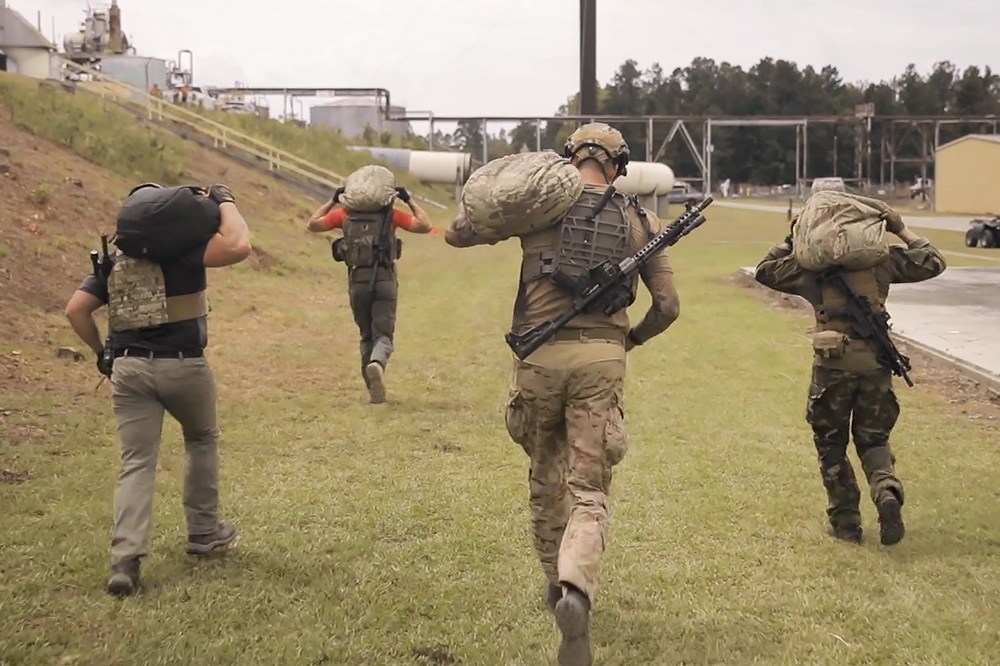
If you're looking to improve your self-defense skills and physical fitness, high-intensity shooting competitions are a great way to do both at the same time. It's exhausting to run, jump, and climb with weapons, ammo, and full tactical gear, and that exertion leads to an increased heart rate that mimics what you'd experience in a real-world defensive situation. This adds an important element of realism to training, because you probably won't end up facing an attacker downrange of your comfy bench at the shooting range. The Tactical Games is a multi-stage competition that amplifies the challenge to the extreme, placing a heavy emphasis on shooting skills, physical fitness, and mental acuity.

RECOIL team members attended one of the most recent iterations of The Tactical Games at the Government Training Institute (GTI) in Barnwell, South Carolina. As contributor Ashley Spurlin explains, “This facility is one of the most unique shooting competition venues you're ever going to see in the country… This is a decommissioned nuclear facility — it's full of tunnels, it's full of dark places, it's full of ten-story buildings and stairs. It's really going to test you both mentally and physically.”

Iain Harrison is no stranger to shooting competitions, having won Top Shot Season 1 and participated in countless other events as Editor of RECOIL. Despite this, he attests to the substantial challenge of The Tactical Games in the following video from RECOILtv. Check out the full episode below, and for more information on the event, go to TheTacticalGames.com.


Gear Up Issue 34

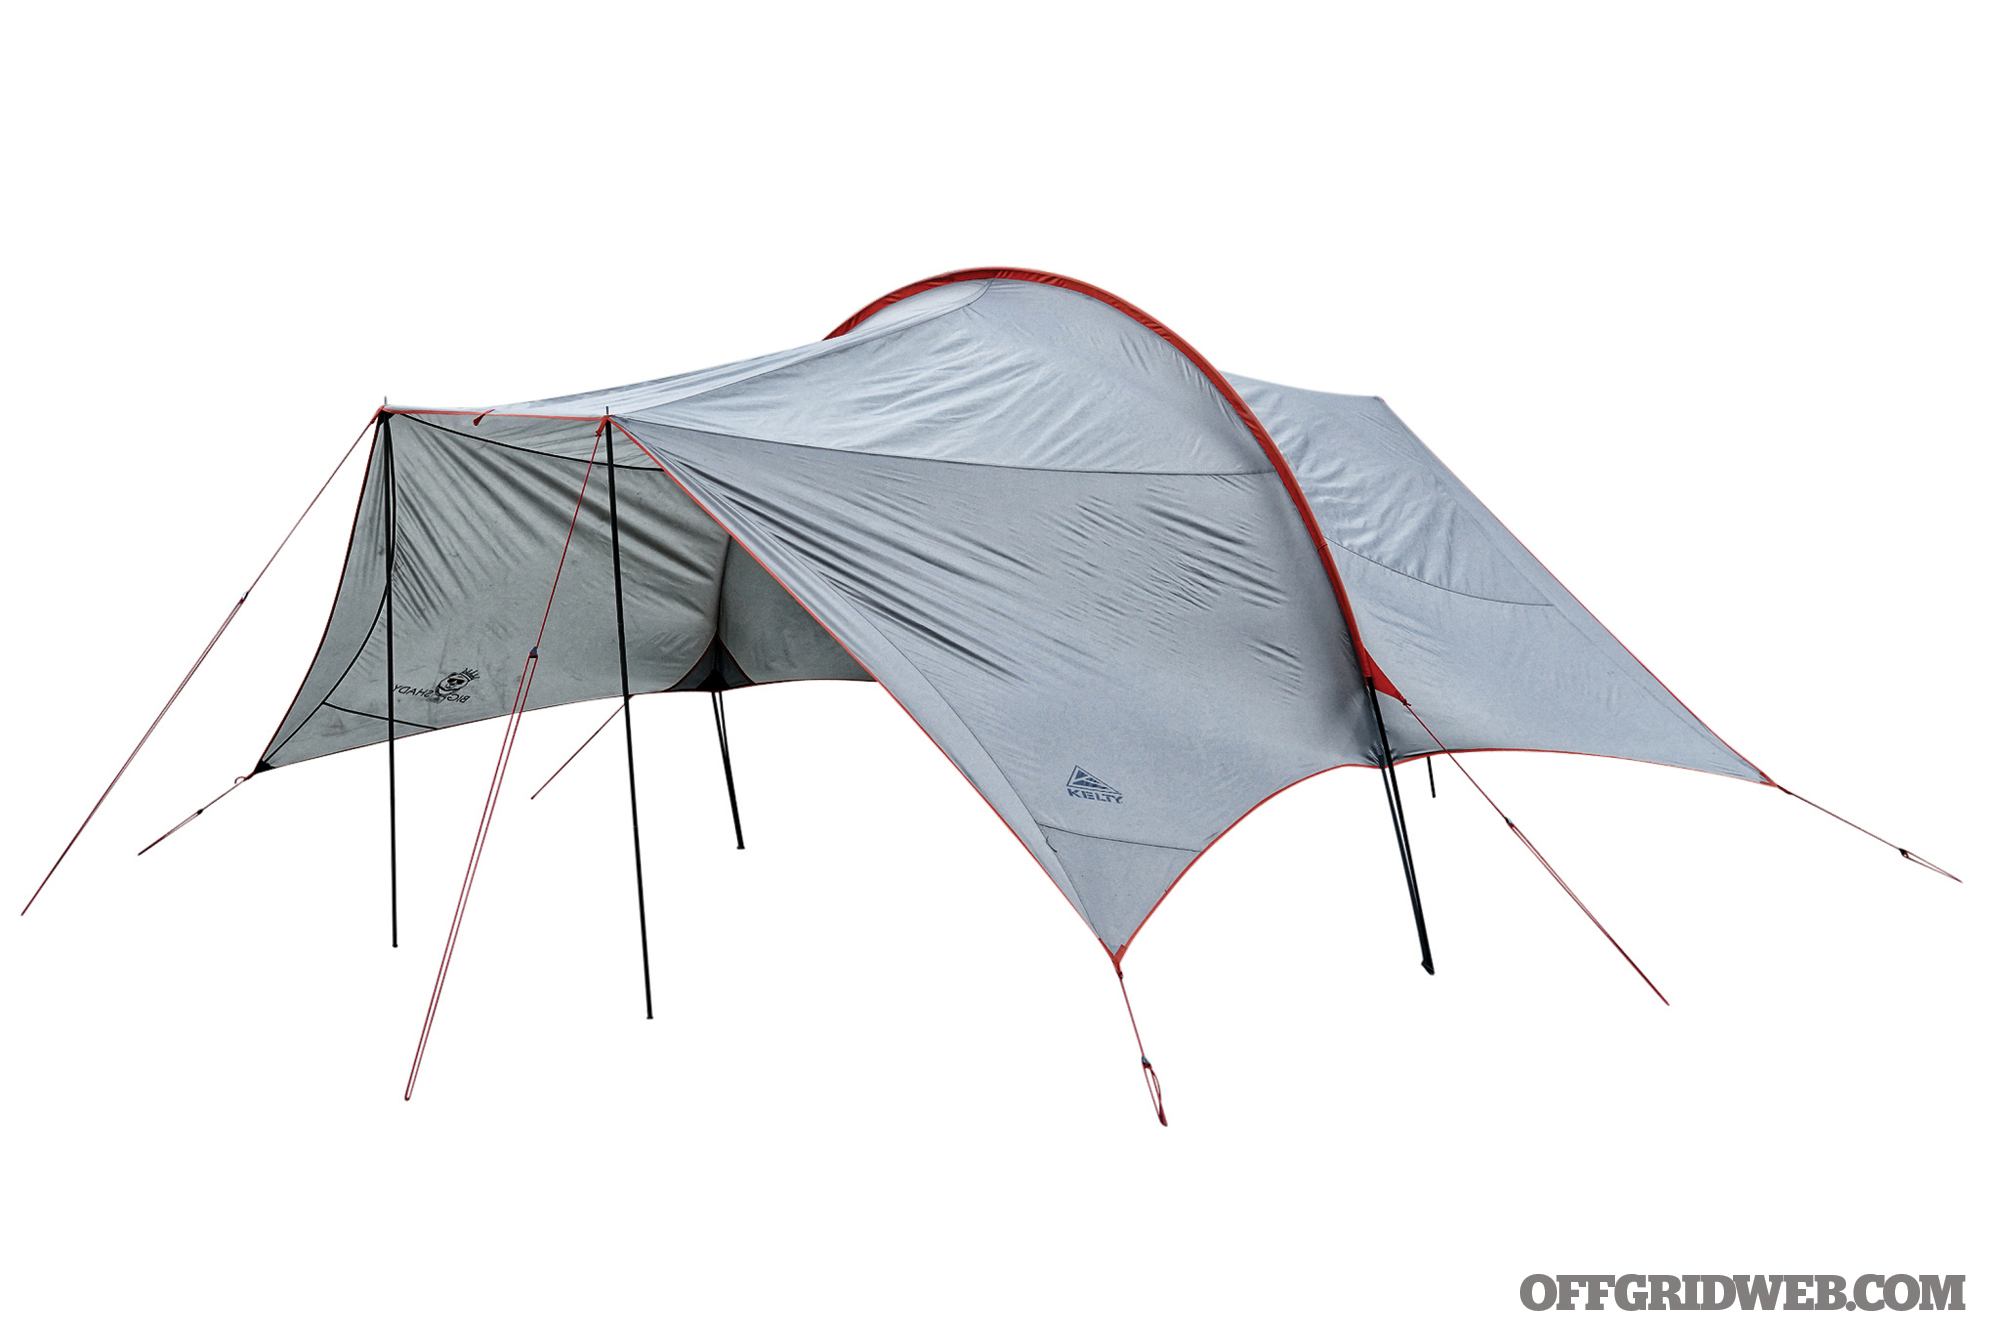
Kelty Big Shady

DIMENSIONS (OPENED)
14 by 10.8 by 10.8 feet

MSRP
$250

URL
kelty.com

NOTES
Anyone who’s ever spent time at a picnic or farmer’s market will be familiar with pop-up canopies. But most only provide decent shade when the sun is high in the sky. That’s why the Big Shady is far more effective at blocking out the elements. Once erected, it kinda looks like a humongous flying squirrel that’s trying to shield you from the rain. That’s our odd way of saying it does a fantastic job of blocking out sun, rain, and wind from different angles. Peak height is 90 inches while the 151-square-foot floor area can house a foldable table and six chairs. Its fly is made of 68-denier polyester while the main pole is aluminum and the secondary poles are steel. While its 13-pound weight doesn’t make it a likely candidate for your bug-out gear, it can stow away in your off-road truck or see good use during a camping trip.

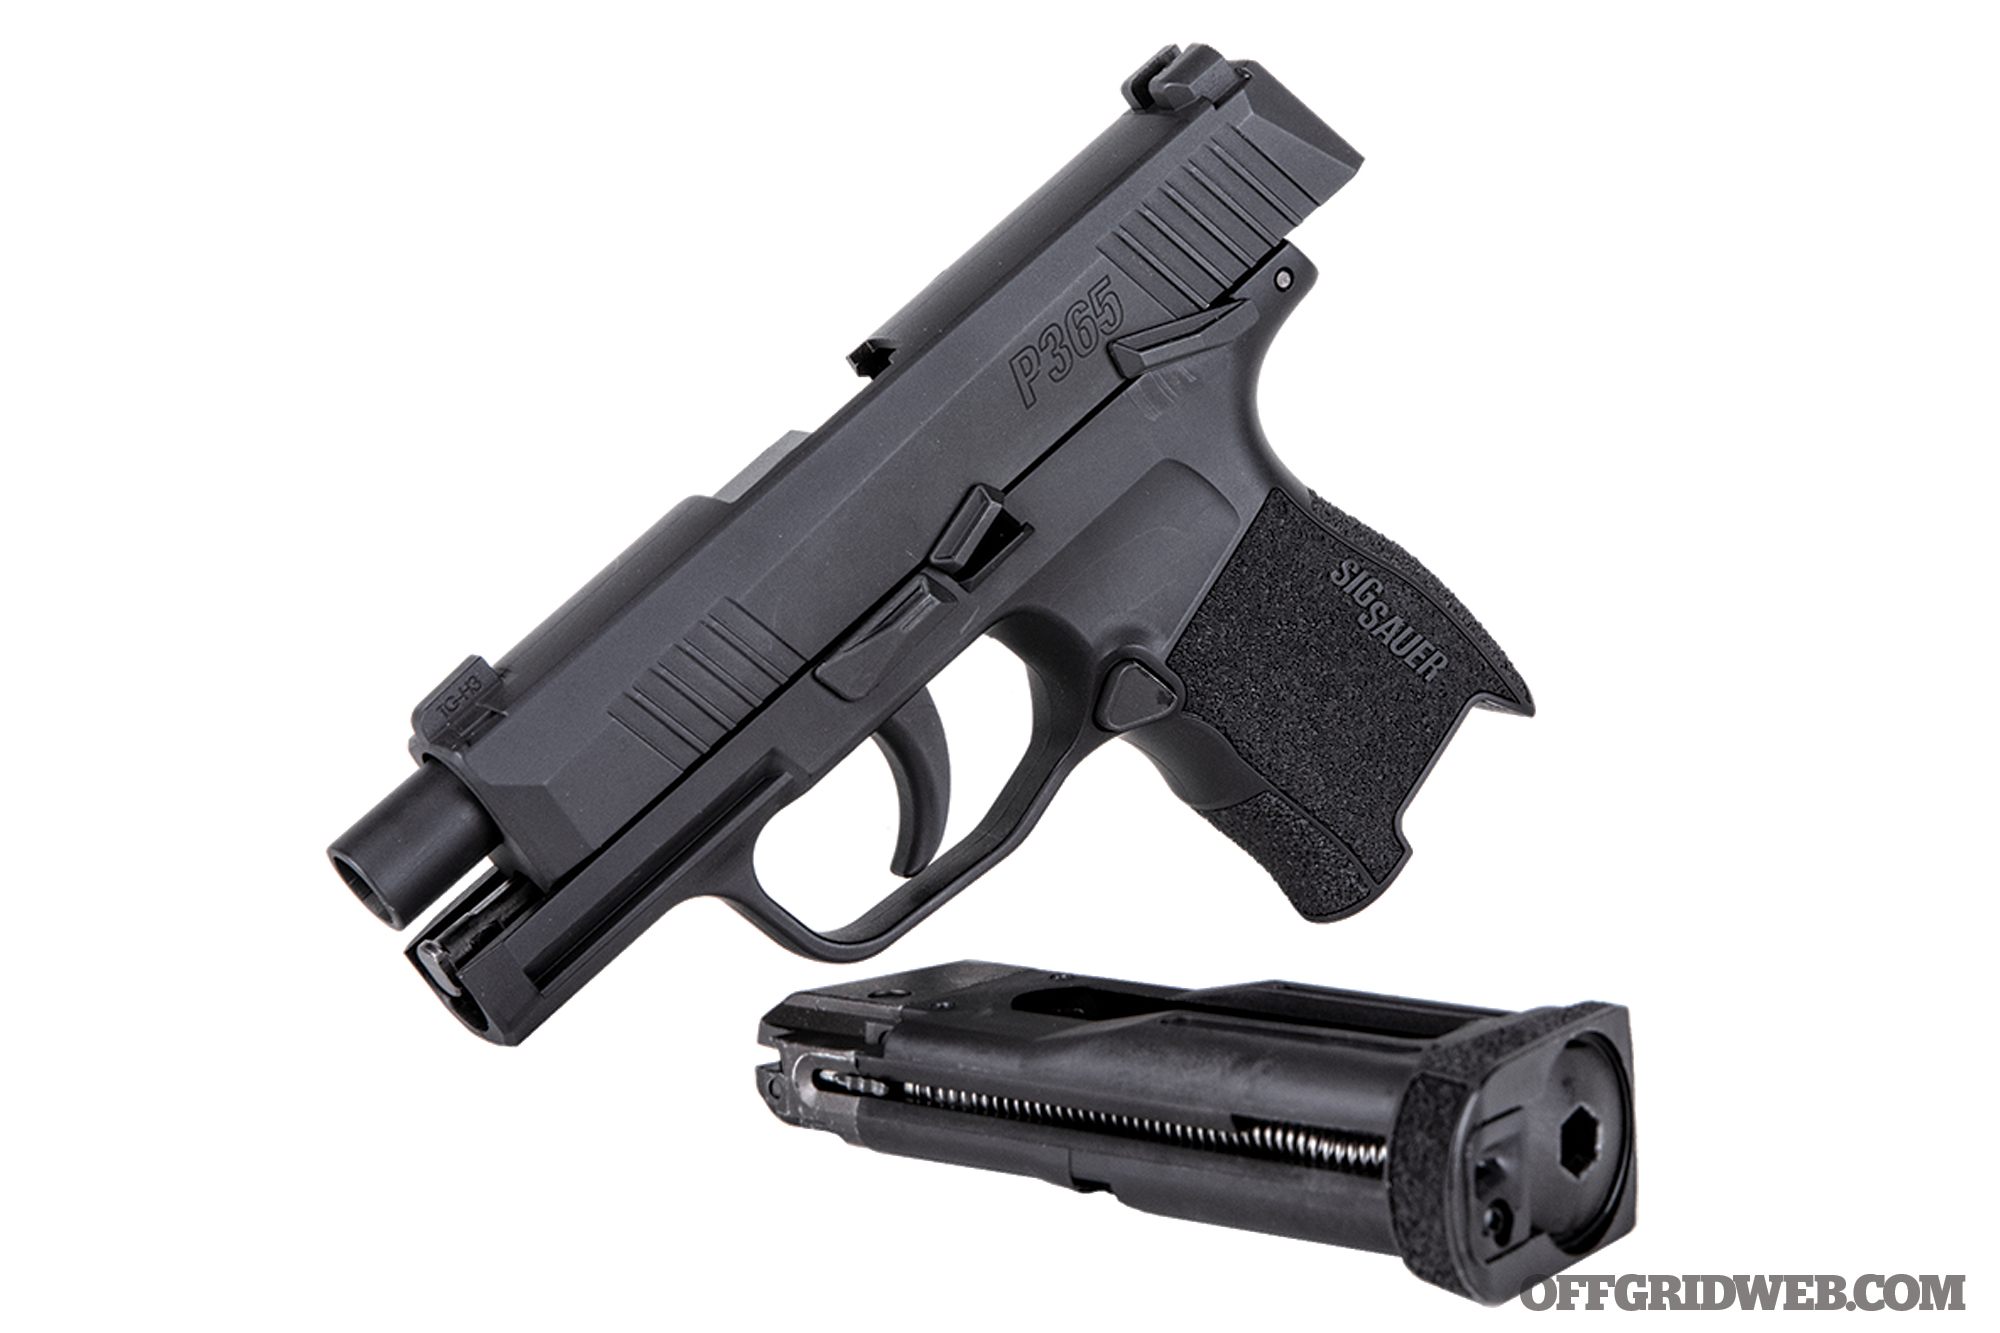
SIG SAUER P365 Air Pistol

POWER SOURCE
CO2

MSRP
$100

URL
www.sigsauer.com/store

NOTES
One hundred bucks for a P365? Yep, we’re not joking. Of course, we’re talking about the BB version, and not the powder-burning model. Then, why get it? This air gun replicates its popular 9mm predecessor, allowing you to practice your concealed carry tactics safely at home or in a combatives class without freaking out your friends or loved ones. It’s also useful for dry-fire drills. This doppelganger weighs 12.8 ounces and is 5.75 inches long with a 3.25-inch barrel — a close approximation of its firearm counterpart. Powered by a CO2 cartridge, it features realistic blowback action, holds a 12-round magazine, and fires a 4.5mm premium steel BB up to 295 feet per second.

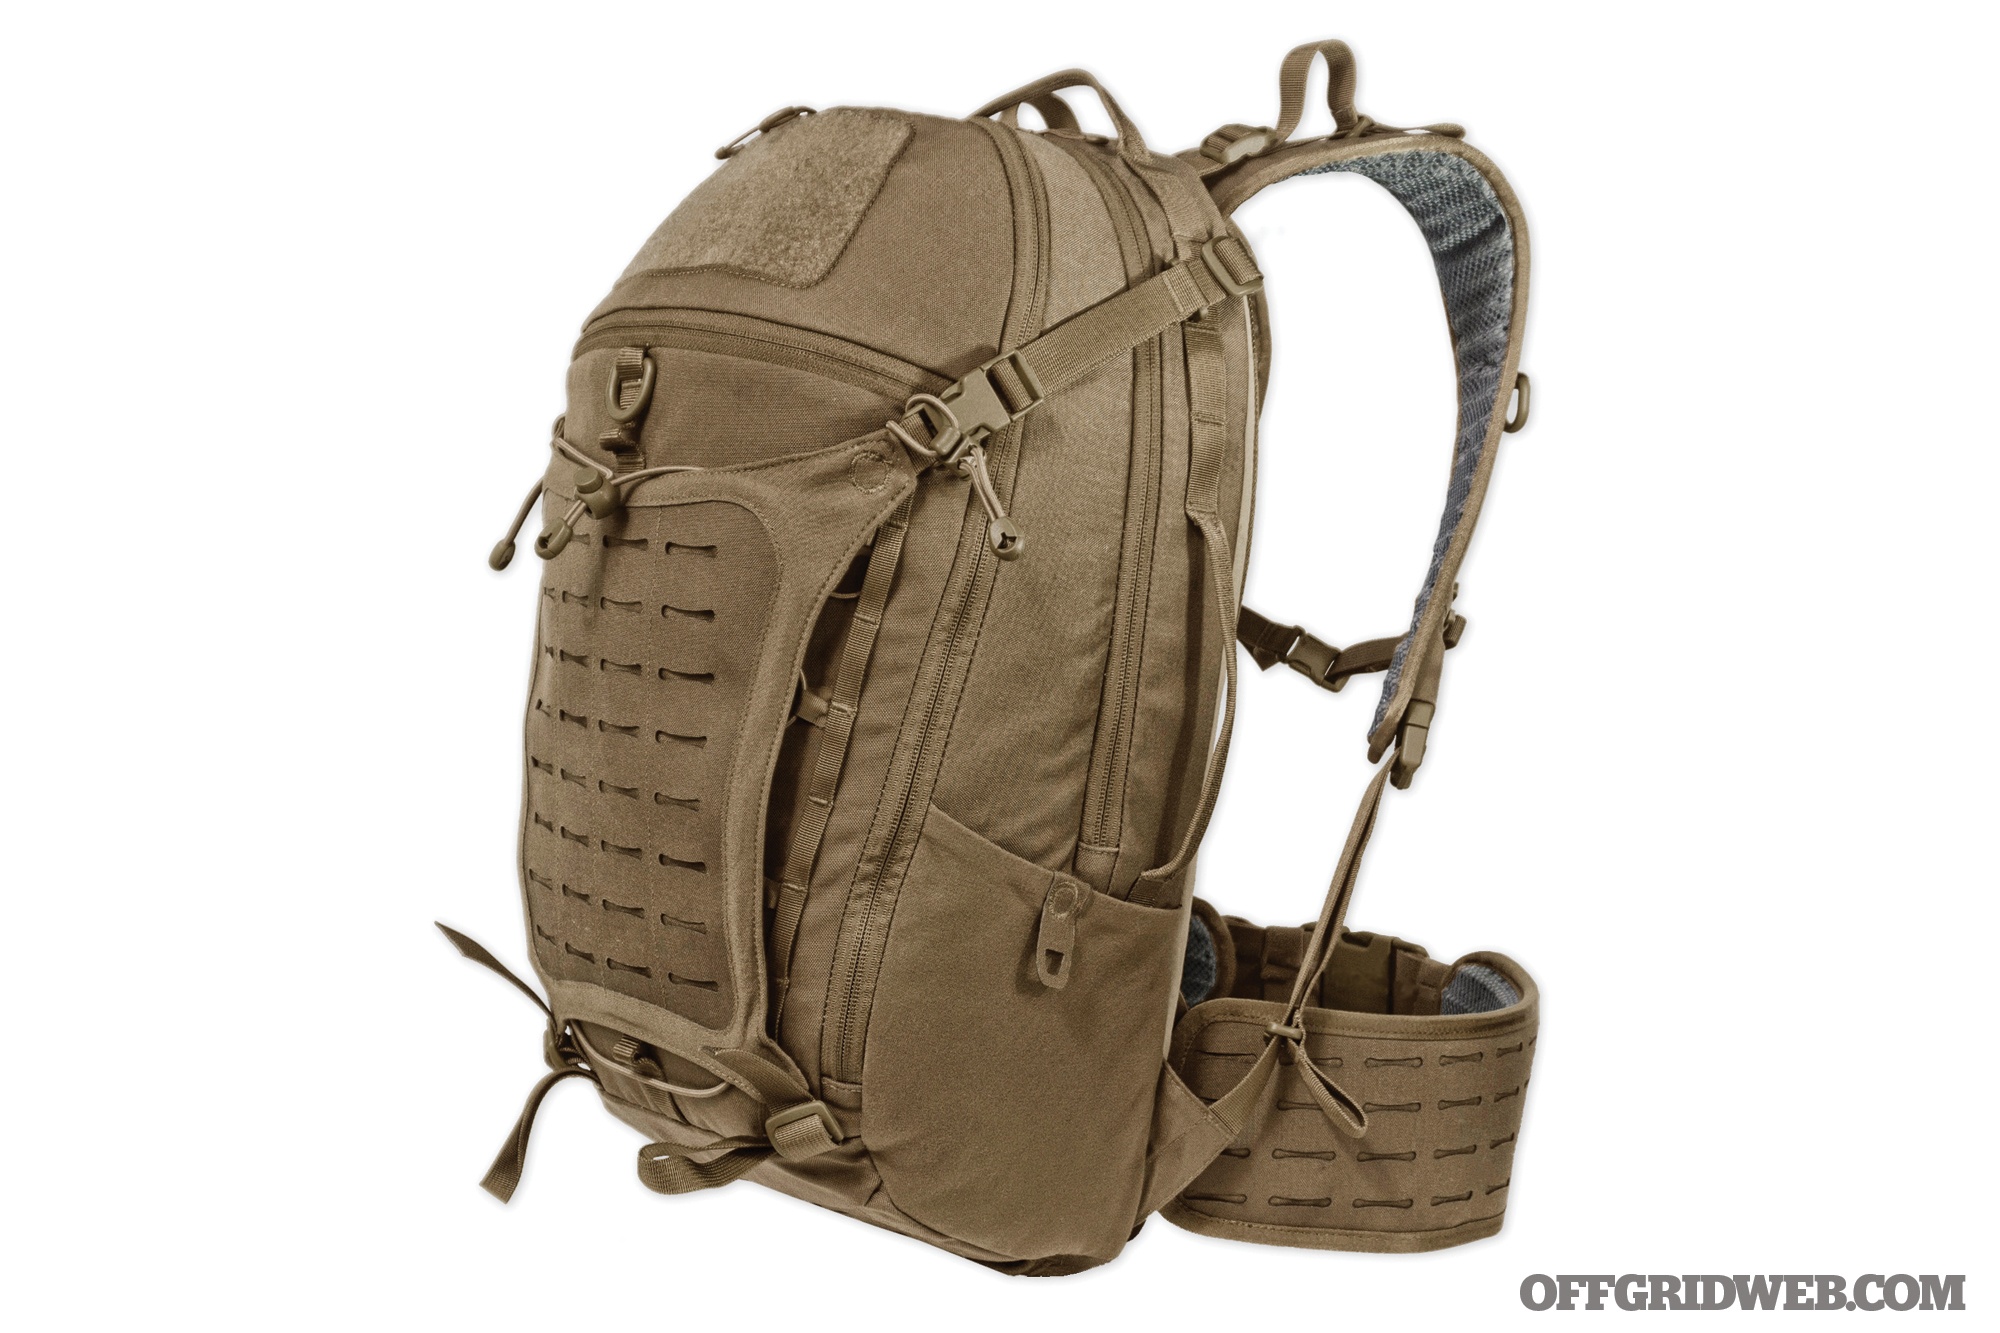
Prometheus Design Werx SHADO Pack 24L

COLORS
All Terrain Brown, Universal Field Gray

MSRP
$198

URL
prometheusdesignwerx.com

NOTES
There are daypacks and then there’s the latest iteration of the SHADO Pack. Prometheus Design Werx is now offering it in a 24L (1,465ci) capacity with upgraded features, quality materials, and top-of-the-line production. Where to begin? Firstly, its usability. Its dual-zipper-opening design gives you not only access to two main compartments but also helps you organize your goods in a logical manner. There’s a section for either a hydration bladder or dedicated EDC items, multiple zippered mesh pocket organizers, a three-stage modular belt, dual loops for ice axes, and so much more. The SHADO features materials like 500-denier Cordura, YKK reverse coil zippers, and custom-milled 500-denier nylon/spandex. It’s a wilderness-grade daypack that can handle everything from EDC duties to the rigors of an outdoor adventure.

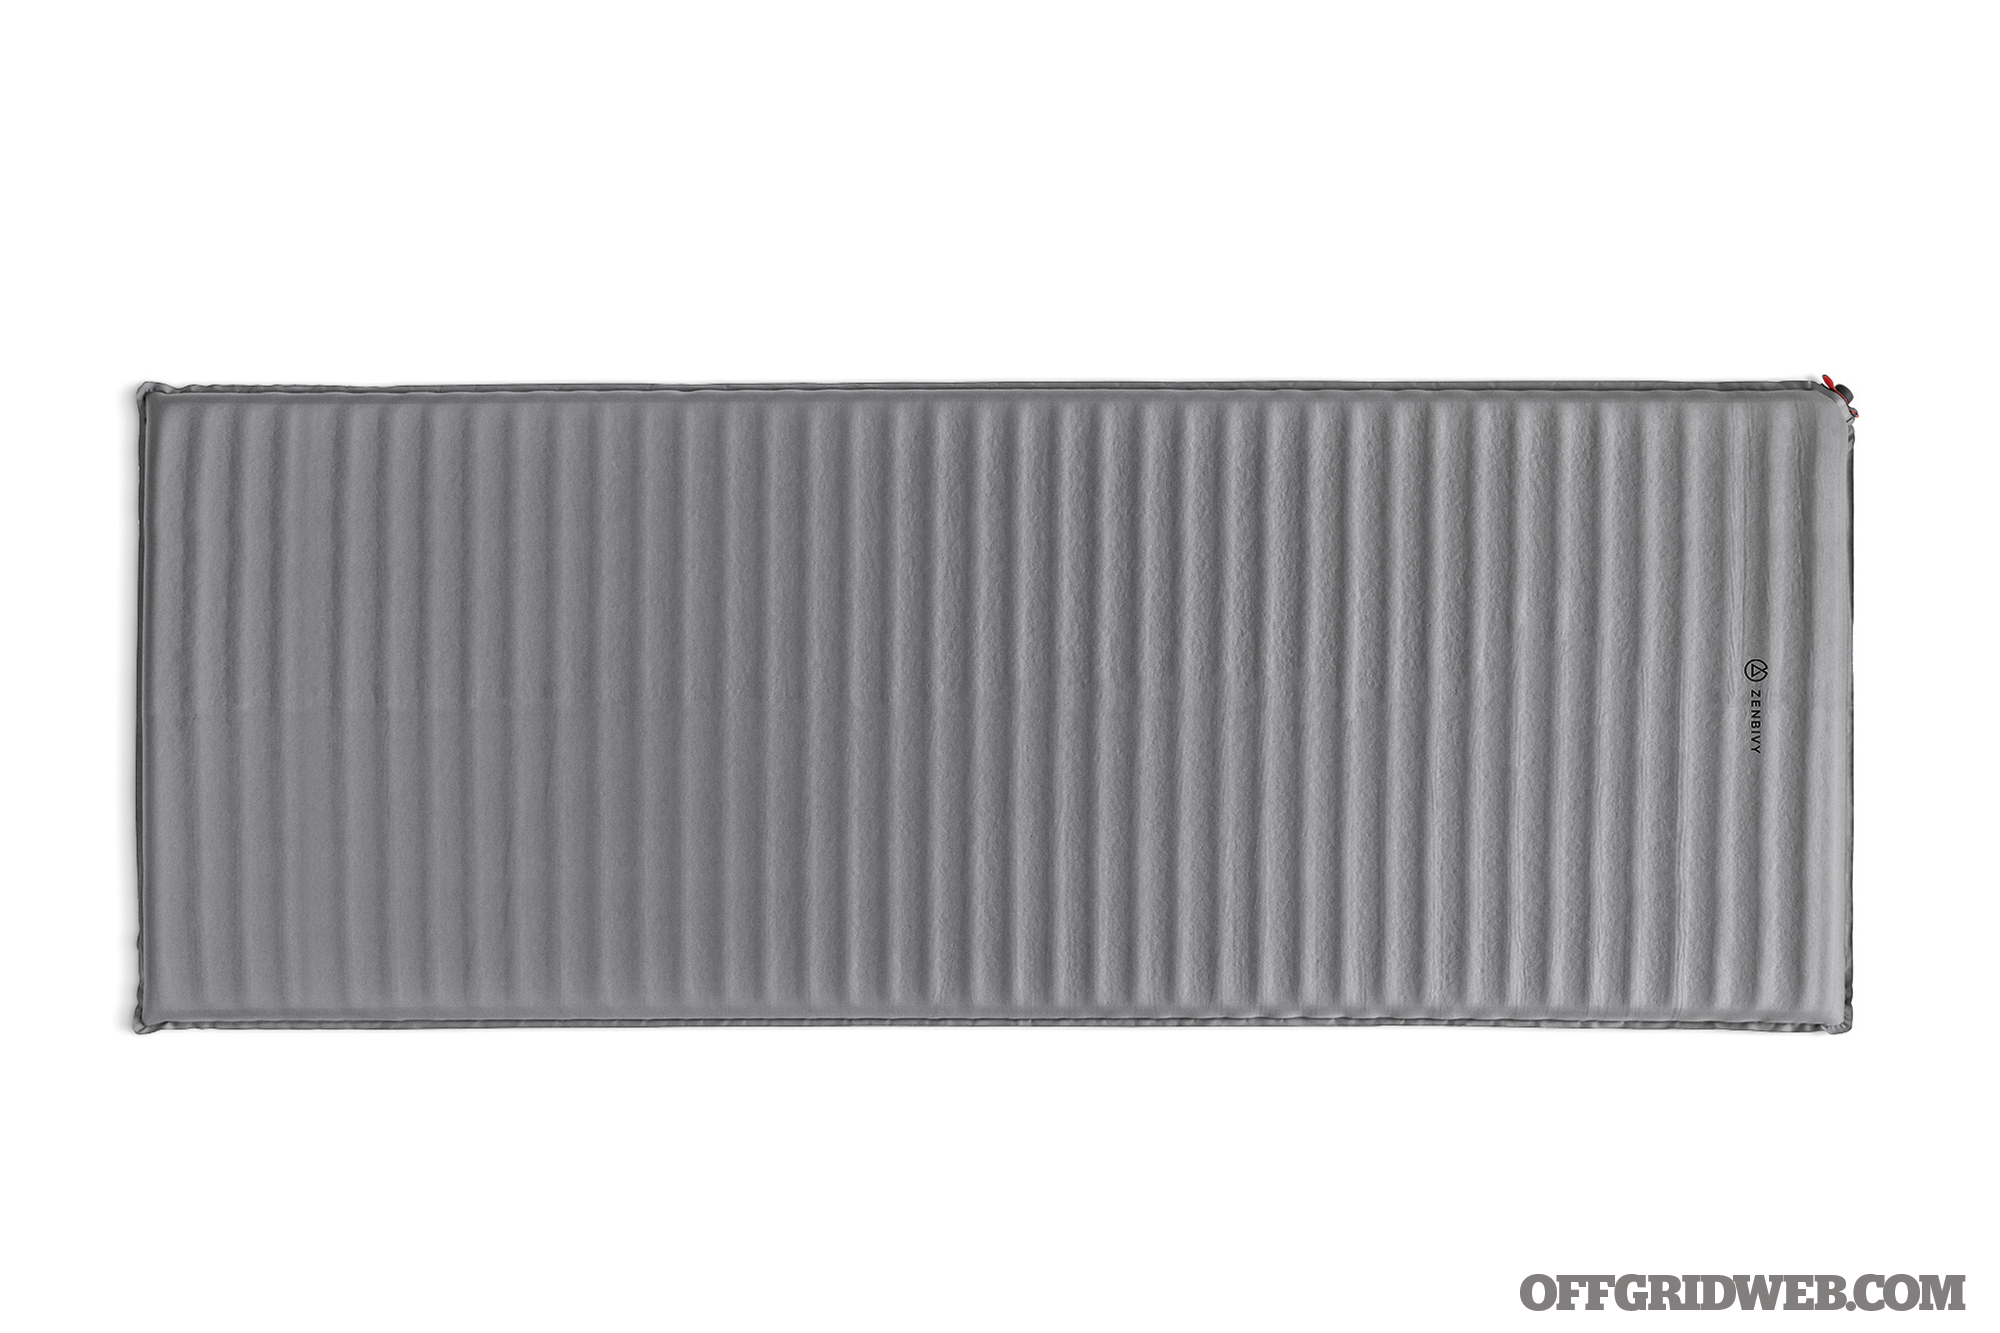
Zenbivy Flex Mattress

SIZES
72 by 20 inches; 77 by 25 inches; 80 by 30 inches

MSRP
$89

URL
zenbivy.com

NOTES
With the temperature dropping, it’s time to get your body off the ground when sleeping under the stars. While a winter-rated sleeping bag might be enough for you, it can’t hurt to consider some extra layers if you have the cargo capacity. The Zenbivy Flex Mattress can provide that extra layer of insulation from the cold earth, as well as some surprising comfort in a convenient package. It has a four-way stretch fabric made of 50-denier polyester knit that flexes with your shape and movements. Meanwhile, it’s urethane open-cell foam self-inflates the mattress to life once the large one-way valve hole is opened. Once it’s almost full, pop in the valve and top it off with a few breaths. To deflate, just flip the valve and the air stays out. Well-made and easy to use, the Flex Mattress lets you rest comfortably and warmly.

Danner Women’s Pub Garden Chelsea

SIZES
5.5 through 10

MSRP
$180

URL
danner.com

NOTES
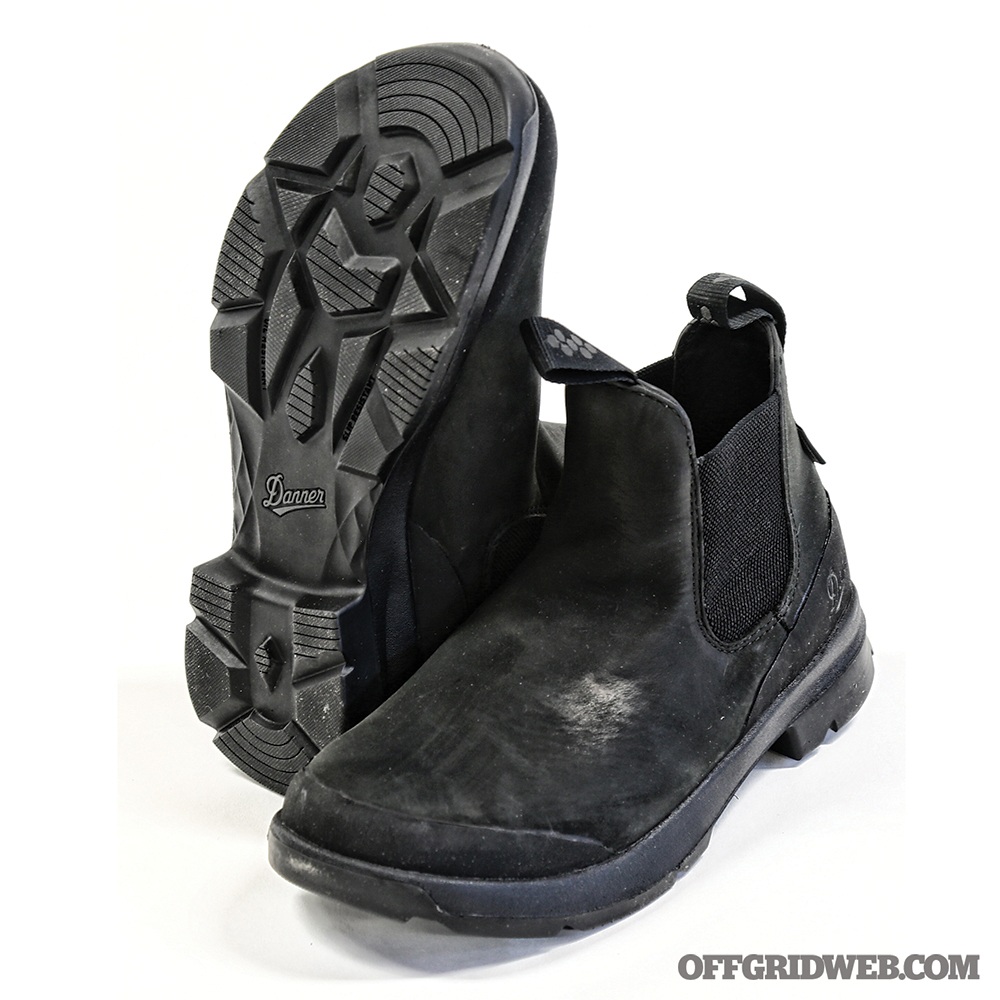
So, you wanna get your spouse into prepping? Here’s some advice: Start slowly, start incrementally, but most of all start with something she’ll look good in. No really. Take the Women’s Pub Garden Chelsea. These are waterproof footwear with a slip-resistant outsole and the technical performance of workwear but disguised as casual Chelsea boots fit for a lady’s night out. The upper is made from durable water-resistant premium leather, and the Danner Dry technology provides a 100-percent waterproof barrier that lets moisture out but prevents water from getting in. Inside, the OrthoLite footbed keeps things cushy while also allowing for air circulation and heat dissipation. Outside, the multi-directional lugs are made of an oil-and-slip-resistant compound for maximum traction. It’s the kind of footwear that lets her look and feel good but also helps her take care of business if SHTF in the concrete jungle.

DMOS Collective Delta Shovel

WEIGHT
3.5 pounds (aluminum); 6 pounds (steel)

MSRP
$199

URL
dmoscollective.com

NOTES
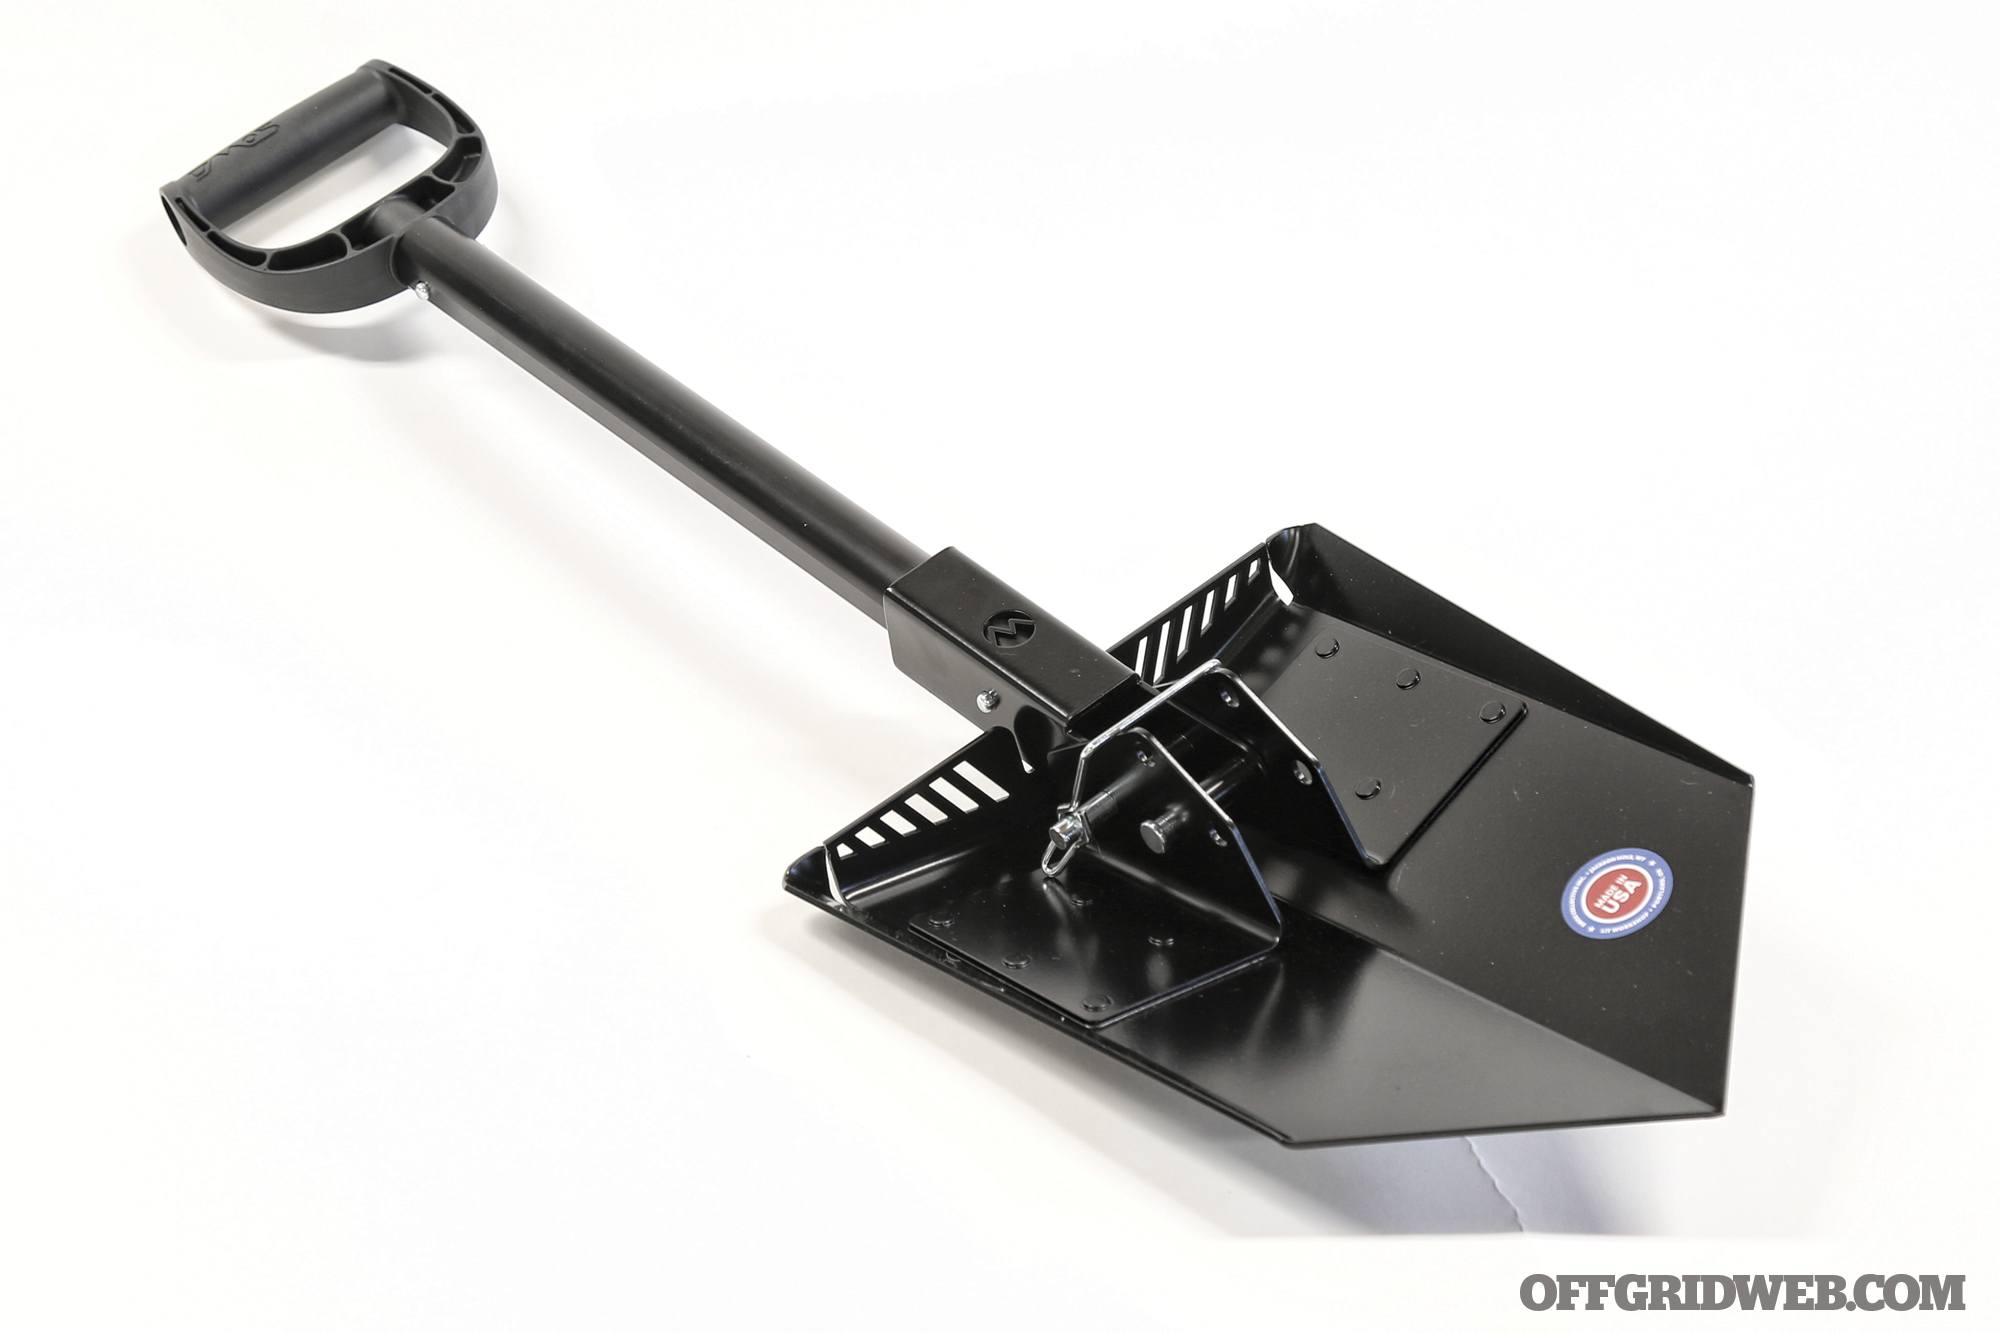
Whether you’re a soldier, a survivalist, or snow-savvy driver, there’s a good chance you have an entrenching tool (e-tool). And there’s a good chance it’s almost nothing like the DMOS Collective Delta Shovel. This brilliant feat of engineering gives you (among other benefits) a 3mm-thick aluminum blade that’s 11 inches wide — almost twice as wide as a traditional e-tool. Its three-position connector lets you transform it into a hoe or collapse it completely for stowing. Above that is the three-part telescoping anodized aluminum shaft, which can extend to 51 inches — providing more length and leverage than most foldable shovels. The Delta is available with a cold-rolled steel blade for the same price, though that version clocks in at 6 pounds, 5 ounces. Whether you’re digging a foxhole, a poop hole, or a way to get your tires unstuck, the Delta Shovel can work wonders while in use and collapse to a manageable size when not in action.

Kershaw Knives Antic

OAL
5.5 inches

MSRP
$33

URL
kershawknives.com

NOTES
Don’t get us wrong. We love a big burly blade to carry into the woods with us. But sometimes a smaller knife goes a longer way — especially if you pound pavement far more often than you do tent stakes. That’s why the Antic piqued our interest. This little folding knife features an integrated pry tip, screwdriver, and bottle opener — along with a 1.75-inch 8Cr13MoV stainless steel blade (small enough that it’s legal in most regions). In the closed position, it’s only 3.75 inches long (taking up minimal pocket real estate) and weighs just barely over 3 ounces. This compact multi-tool is easy to carry, easy to use, and easy on the wallet.

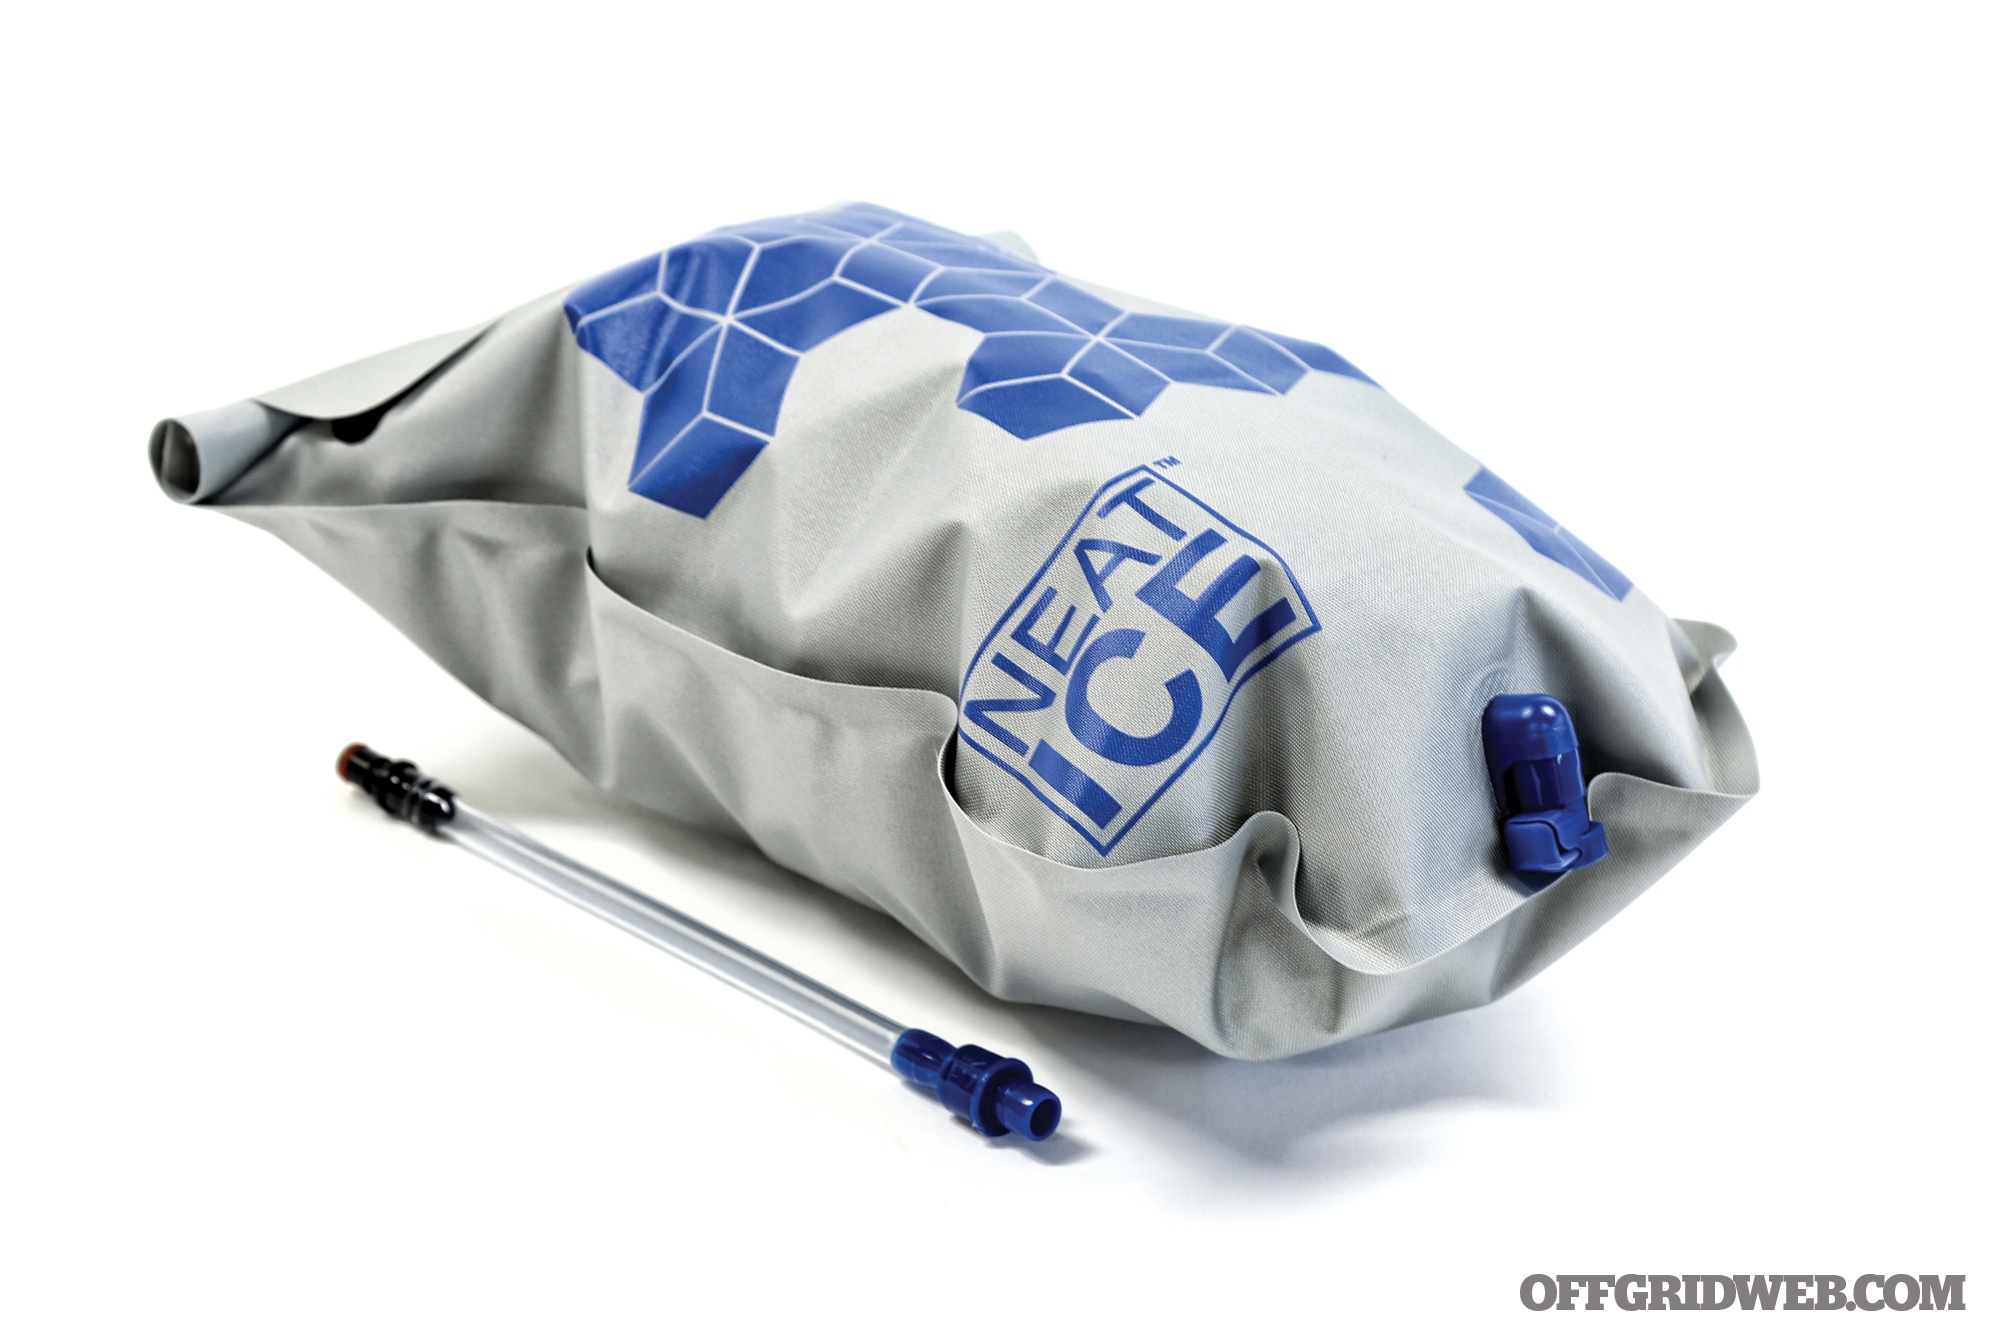
NeatIce Bag

DIMENSIONS (WHEN FULL)
15 by 9 by 6 inches

MSRP
$30

URL
neatice.com

NOTES
After a backyard barbecue, long road trip, or a weekend of camping, your cooler will no doubt look more like a swampy mix of water, wet food packages, and a ripped plastic bag that your frozen cubes came in. Not only is that a pain to deal with but also kinda unhygienic — especially if there’s still unconsumed food that you’d like to eat later. Fortunately, the NeatIce Bag offers a solution. This easy-to-use sack keeps your ice separate from your chow and drinks while keeping everything cold. Made of 420-denier nylon and lined with microbial-resistant TPU, the zippered bag is strong, BPA free, and potable-water safe. That means when the 10 pounds of ice it holds melts, you can use the included 10-inch drain hose to pour yourself a cup of cool water.


Infographic: The Rise in Smartphone Security Threats

A few decades ago, the idea of carrying a powerful, internet- and GPS-connected computer in your pocket would have seemed like the stuff of science fiction. However, smartphones have now become so ubiquitous that it's unusual if you don't carry one. They offer incredible convenience as an all-in-one tool for communication, navigation, mobile banking, social networking, and entertainment, but this power is increasingly being leveraged against us by cybercriminals. Smartphone security threats such as malware apps, phishing attacks, and connection to unsecured WiFi networks can turn our most-used piece of tech into a serious problem.

Smartphones have many valuable everyday applications, but this power comes with inherent risks.

Since October is National Cybersecurity Awareness Month, this is a timely reminder that digital security isn't only relevant to your desktop or laptop computers. It's especially relevant to the computer that resides in your pocket.

The following infographic from Scalefusion MDM collects data from cybersecurity companies such as Kaspersky, McAfee, and Check Point to illustrate the growing trend of mobile security threats. Specifically, Check Point's 2019 mid-year report says that there has been a 50% increase in mobile device cyberattacks compared to 2018. For an especially sobering illustration of the seriousness of the problem, refer to the company's Live Cyber Threat Map, which tracks cyberattack victims and perpetrators in real-time.

A screenshot of the Live Cyber Threat Map, showing tens of millions of attacks detected each day.

Take a look at the Scalefusion infographic below for an overview of common mobile device threats, or click here to download the full-size version.

MDM means Mobile Device Management, a type of business-oriented software that allows an IT department to centrally manage employees' mobile devices. MTD is Mobile Threat Defense, software specifically designed to enhance security on those devices. Unless you own a business or work in IT, you can skip the last third of this graphic, since it applies to enterprise-level software. However, the first two-thirds are very relevant to our awareness of individual device security.

We'll close with some additional reading on the top 5 mobile security threats mentioned above:

  • Anubis banking trojan — able to “take screenshots, record audio, send, receive, and delete SMS messages, steal contact lists and account credentials” and more.
  • Gustuff Android banking trojan — “targets include known banks such as Bank of America, Bank of Scotland, J.P.Morgan, Wells Fargo, Capital One, TD Bank, and PNC Bank”
  • Triada Android malware — “extremely hard to detect” and “one of the most advanced mobile Trojans [Kaspersky's] malware analysts have ever encountered”
  • Lotoor hacking tool — a family of malware offshoots that “exploit vulnerabilities in order to gain root privileges on compromised Android devices”
  • Hiddad malware — infects the Android system folder and installs hidden adware, generating revenue for the attackers

Driving the 2020 Can-Am Defender UTV

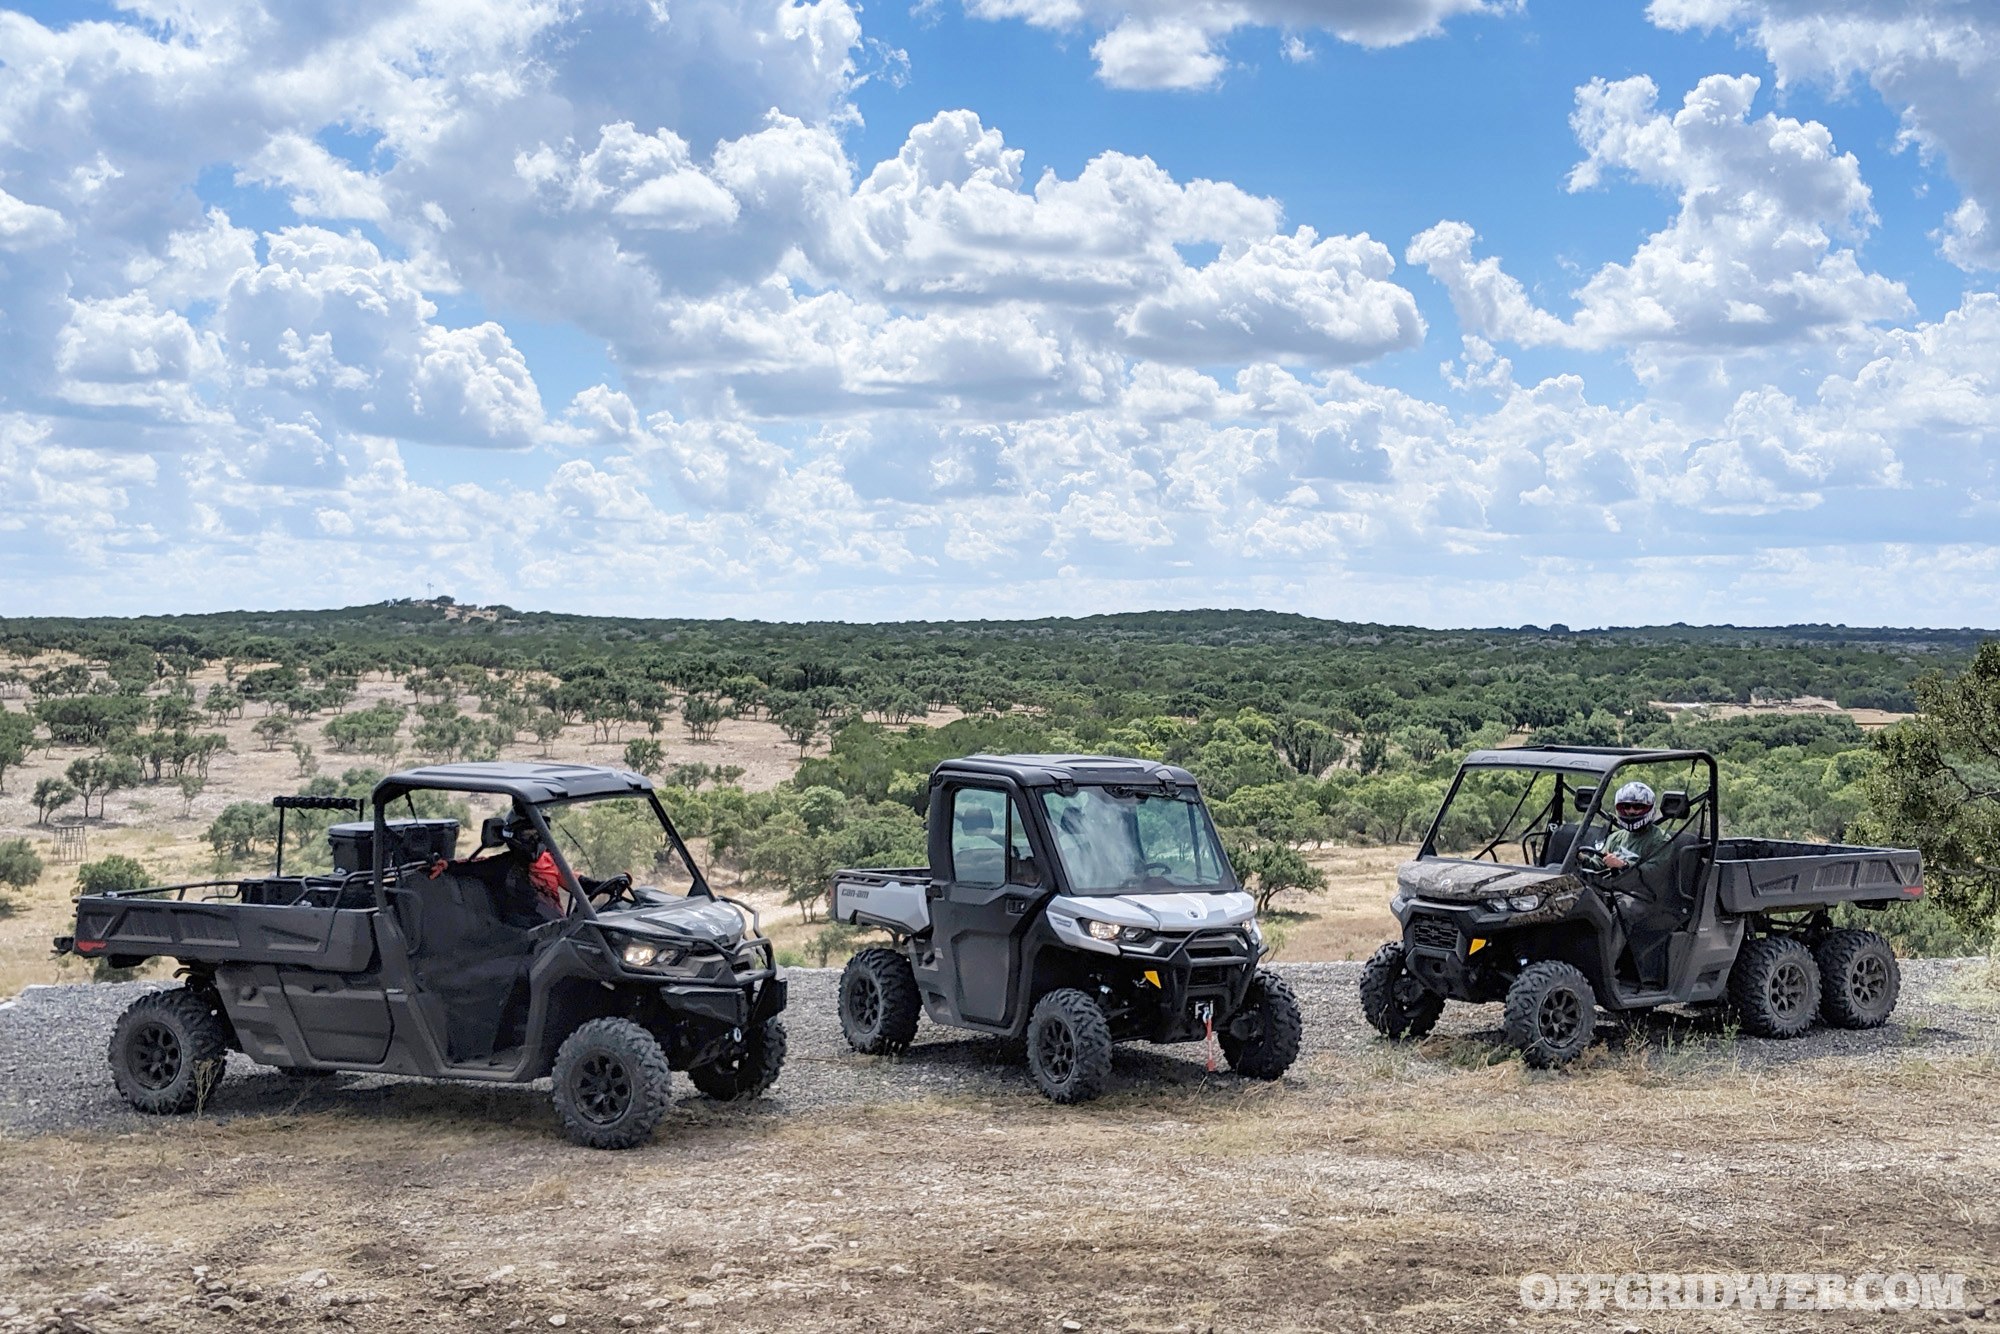
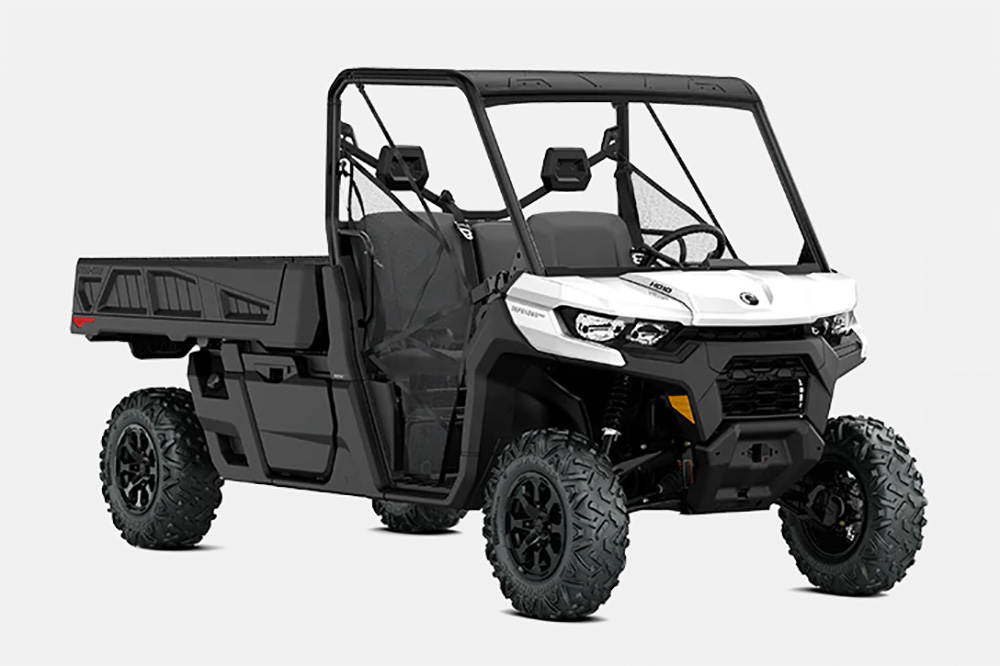
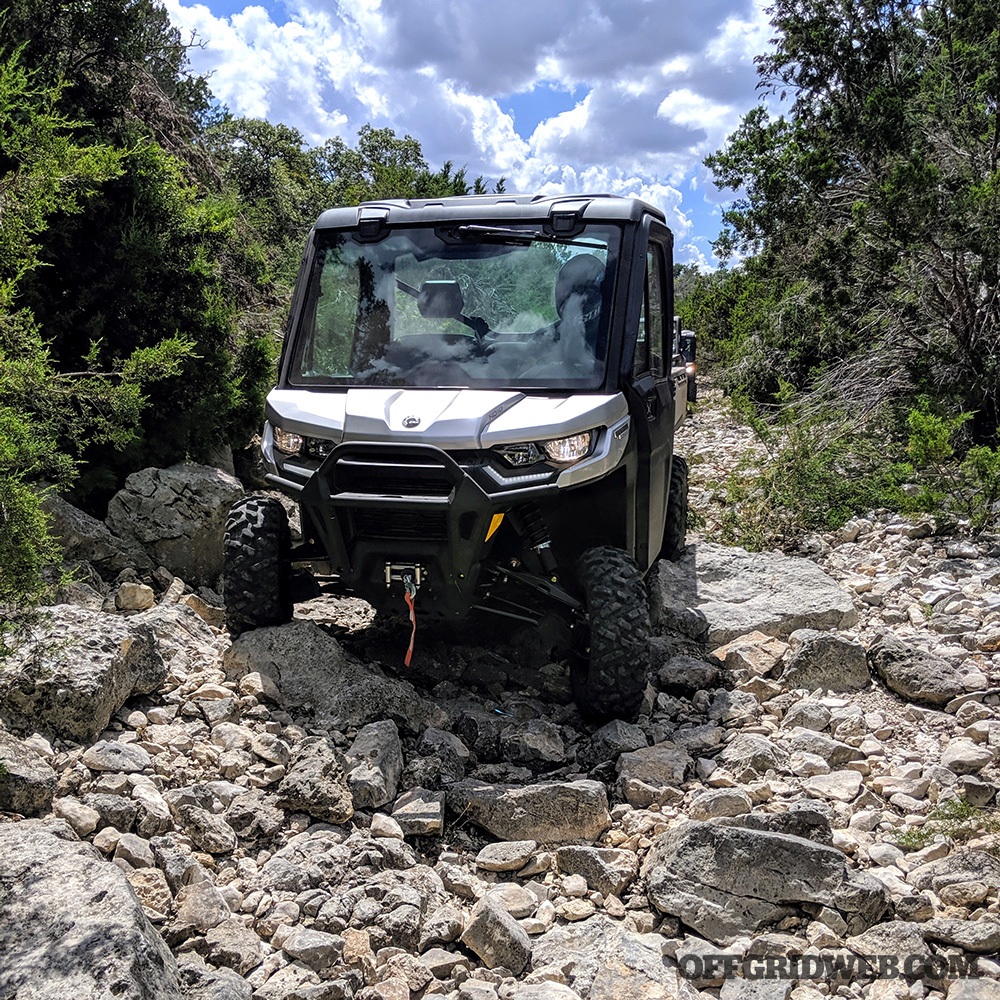
We recently had the opportunity to test drive the 2020 Can-Am Defender Limited, Defender PRO HD10 and its 6×6 version through the trails of Mountain Home, Texas. YO Ranch Headquarters provided a picturesque backdrop to Can-Am’s three-day media event. Driving through the dirt trails and rocky terrain beside the perfectly awkward loping of the resident giraffes transported us away from Hill Country and into a Sub-Saharan African overland adventure — the perfect setting to test out UTVs.

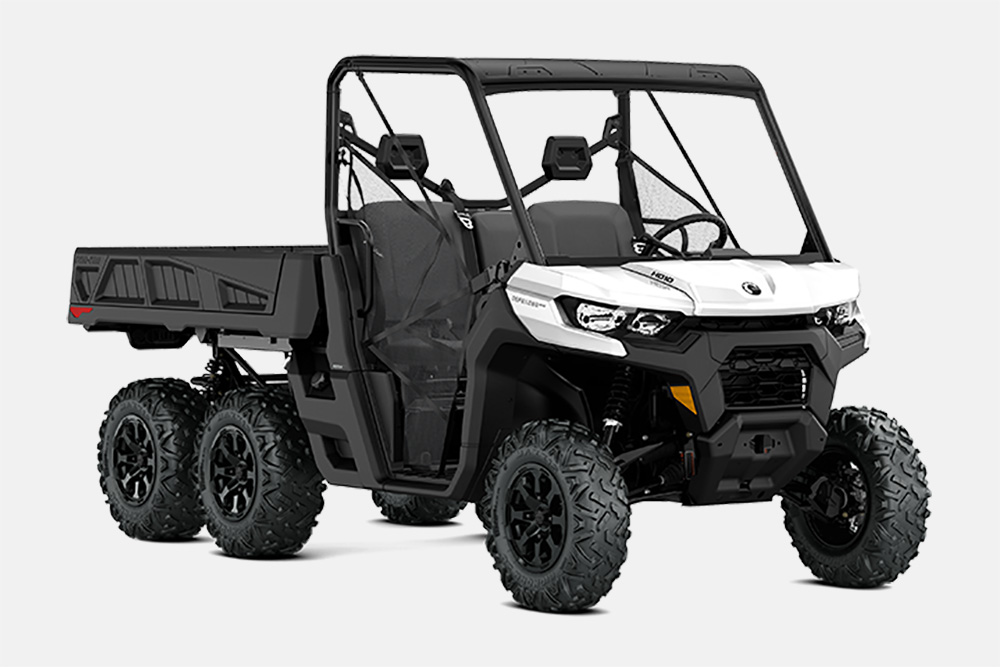
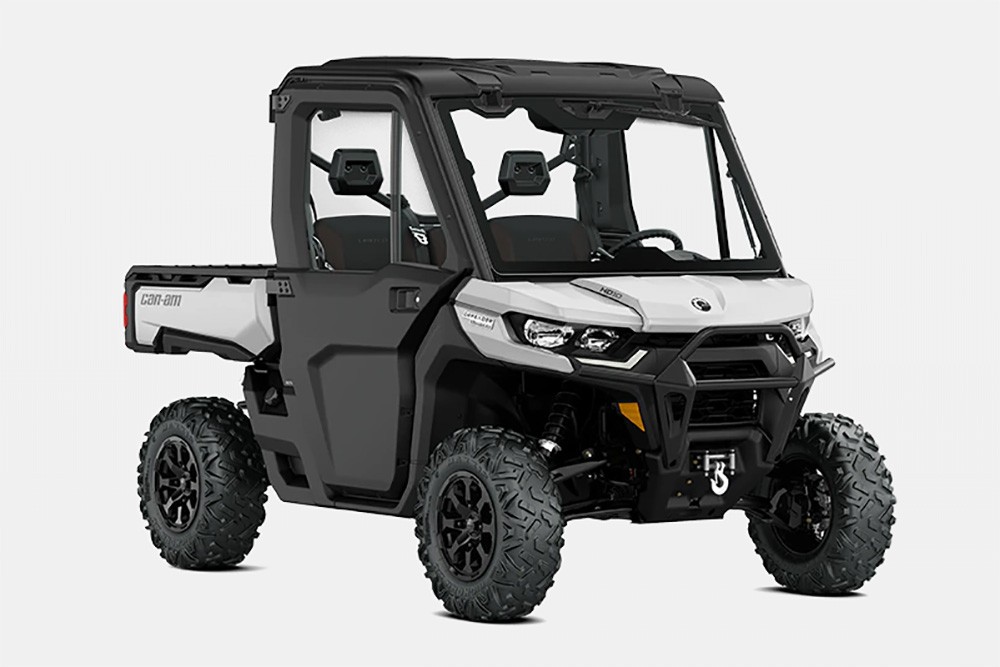
Can-Am brought three separate models of the 2020 Defender — The Defender Limited, The Defender Pro HD10 and the Defender 6×6 DPS HD10. Over the course of three days, we got an inside look into Can-Am’s theory behind their latest changes, as well as an opportunity to put them to the test.

What's New for 2020?

In a flooded UTV market, the details set companies apart. This has never been truer than with Can-Am’s 2020 upgrades and options. Every improvement was a purposeful response to its customer base, with each version designed to meet the interests of different customer groups.

Of the many changes Can-Am introduced in 2020, we focused on these practical upgrades:

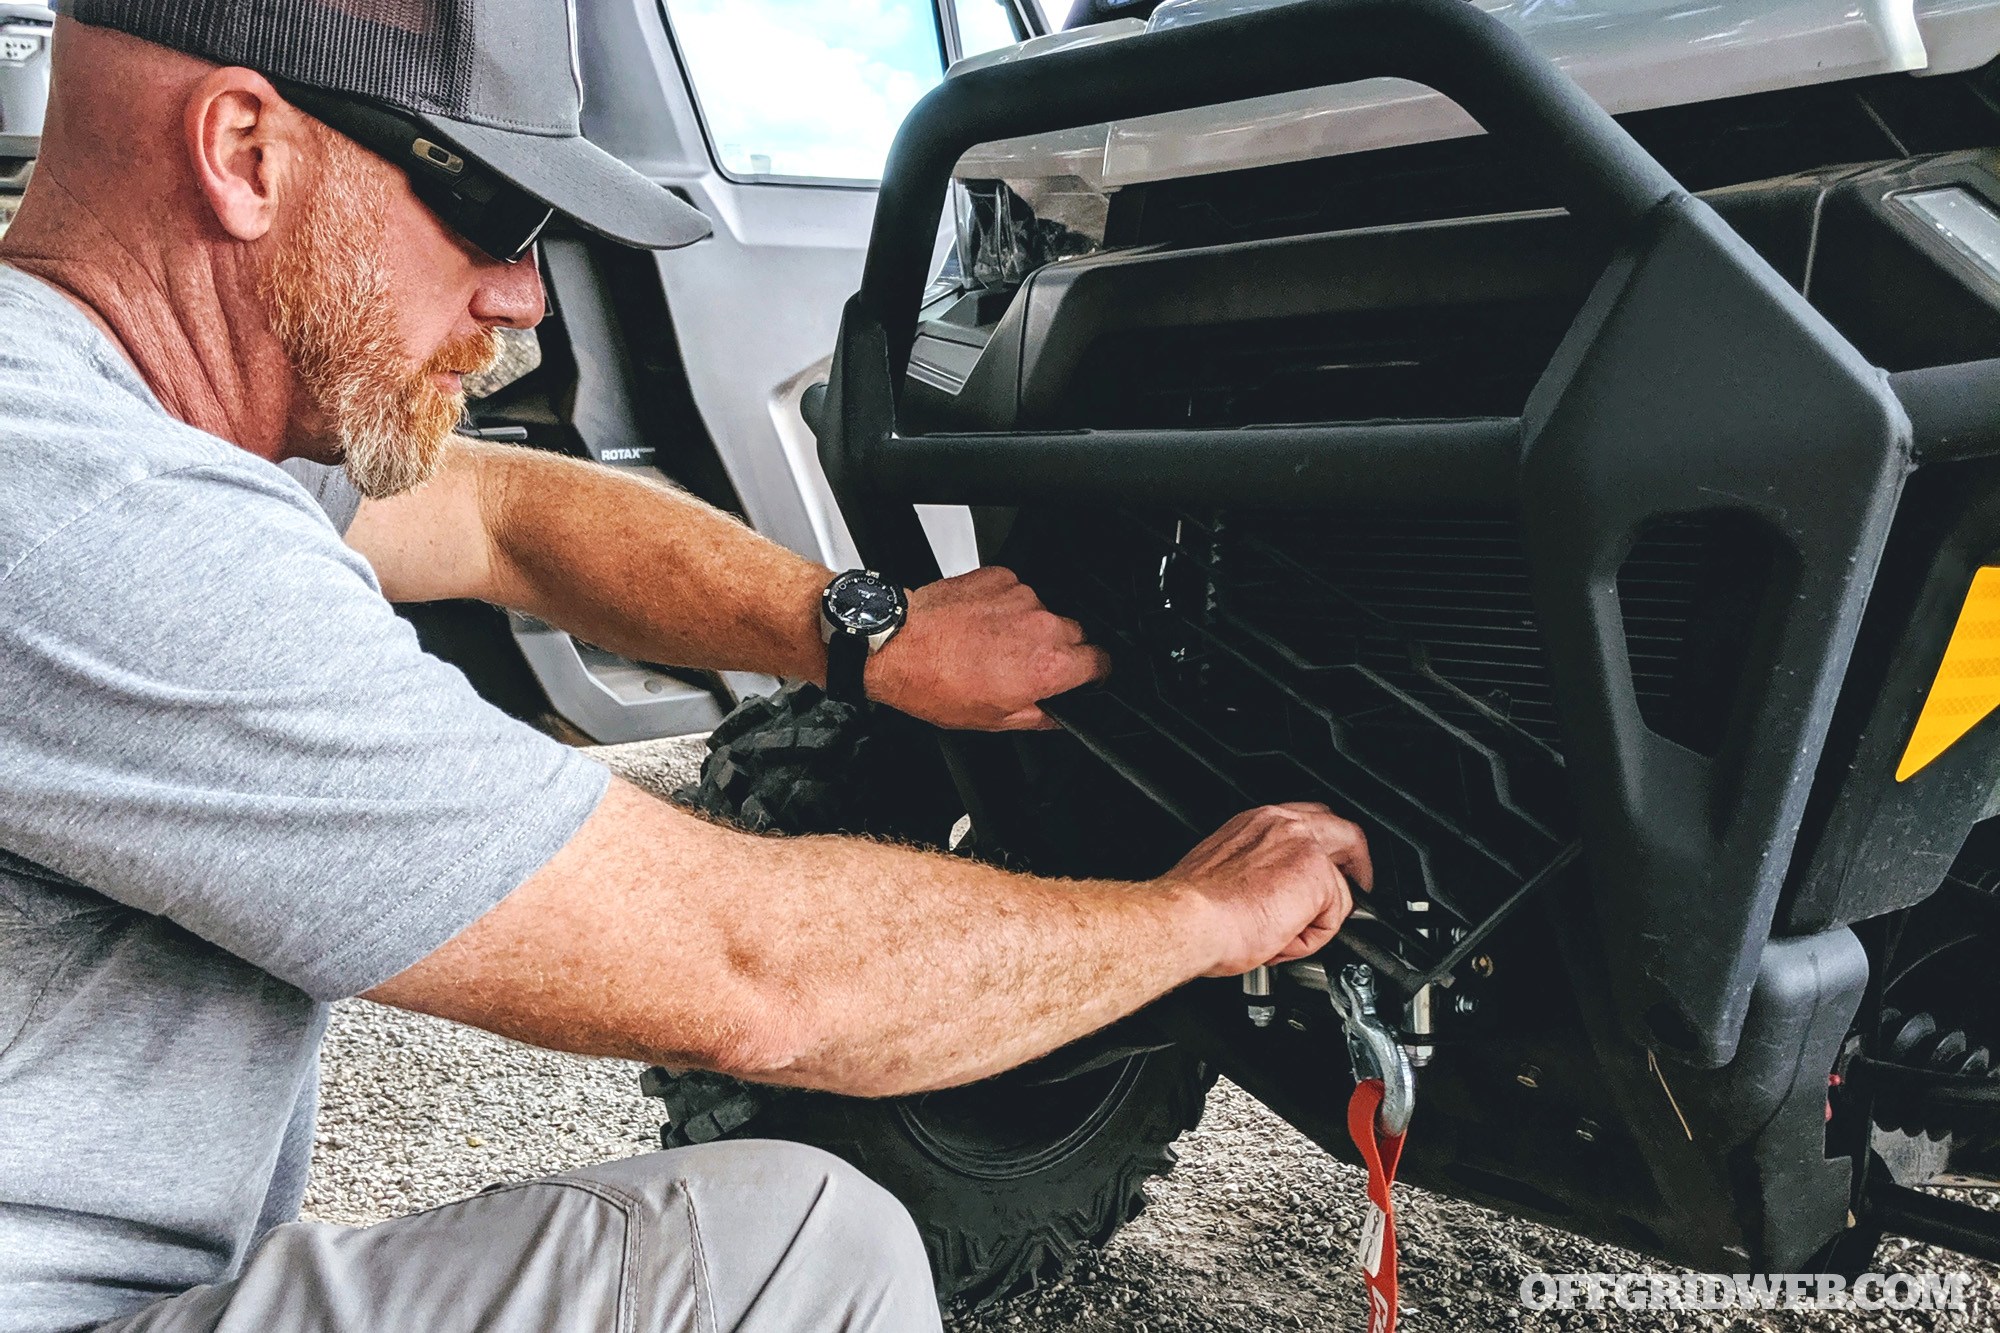
Removable Grill
Goodbye air compressors, sticks, and your girlfriend’s small hands. The 2020 version of all Defenders comes with a removable grill that enables you to clear debris, mud, and grass which might otherwise block the airflow and lead to overheating. It's always nice to see companies making it easier to maintain vehicles in the field, because you're rarely going to have a clean shop full of tools when something goes wrong.

Increased Ground Clearance
In many small off-road vehicles, there never seems to be enough ground clearance when you’re traversing through rocks and rutted terrain. Can-Am responded by not only increasing the ground clearance of its Defender models (12-inches for the Defender Limited; 13-inches for the Defender HD10), but also added an arched double A-arm front suspension. The end result is less bottoming-out and scraping as you drive over rough trails.

More Utility
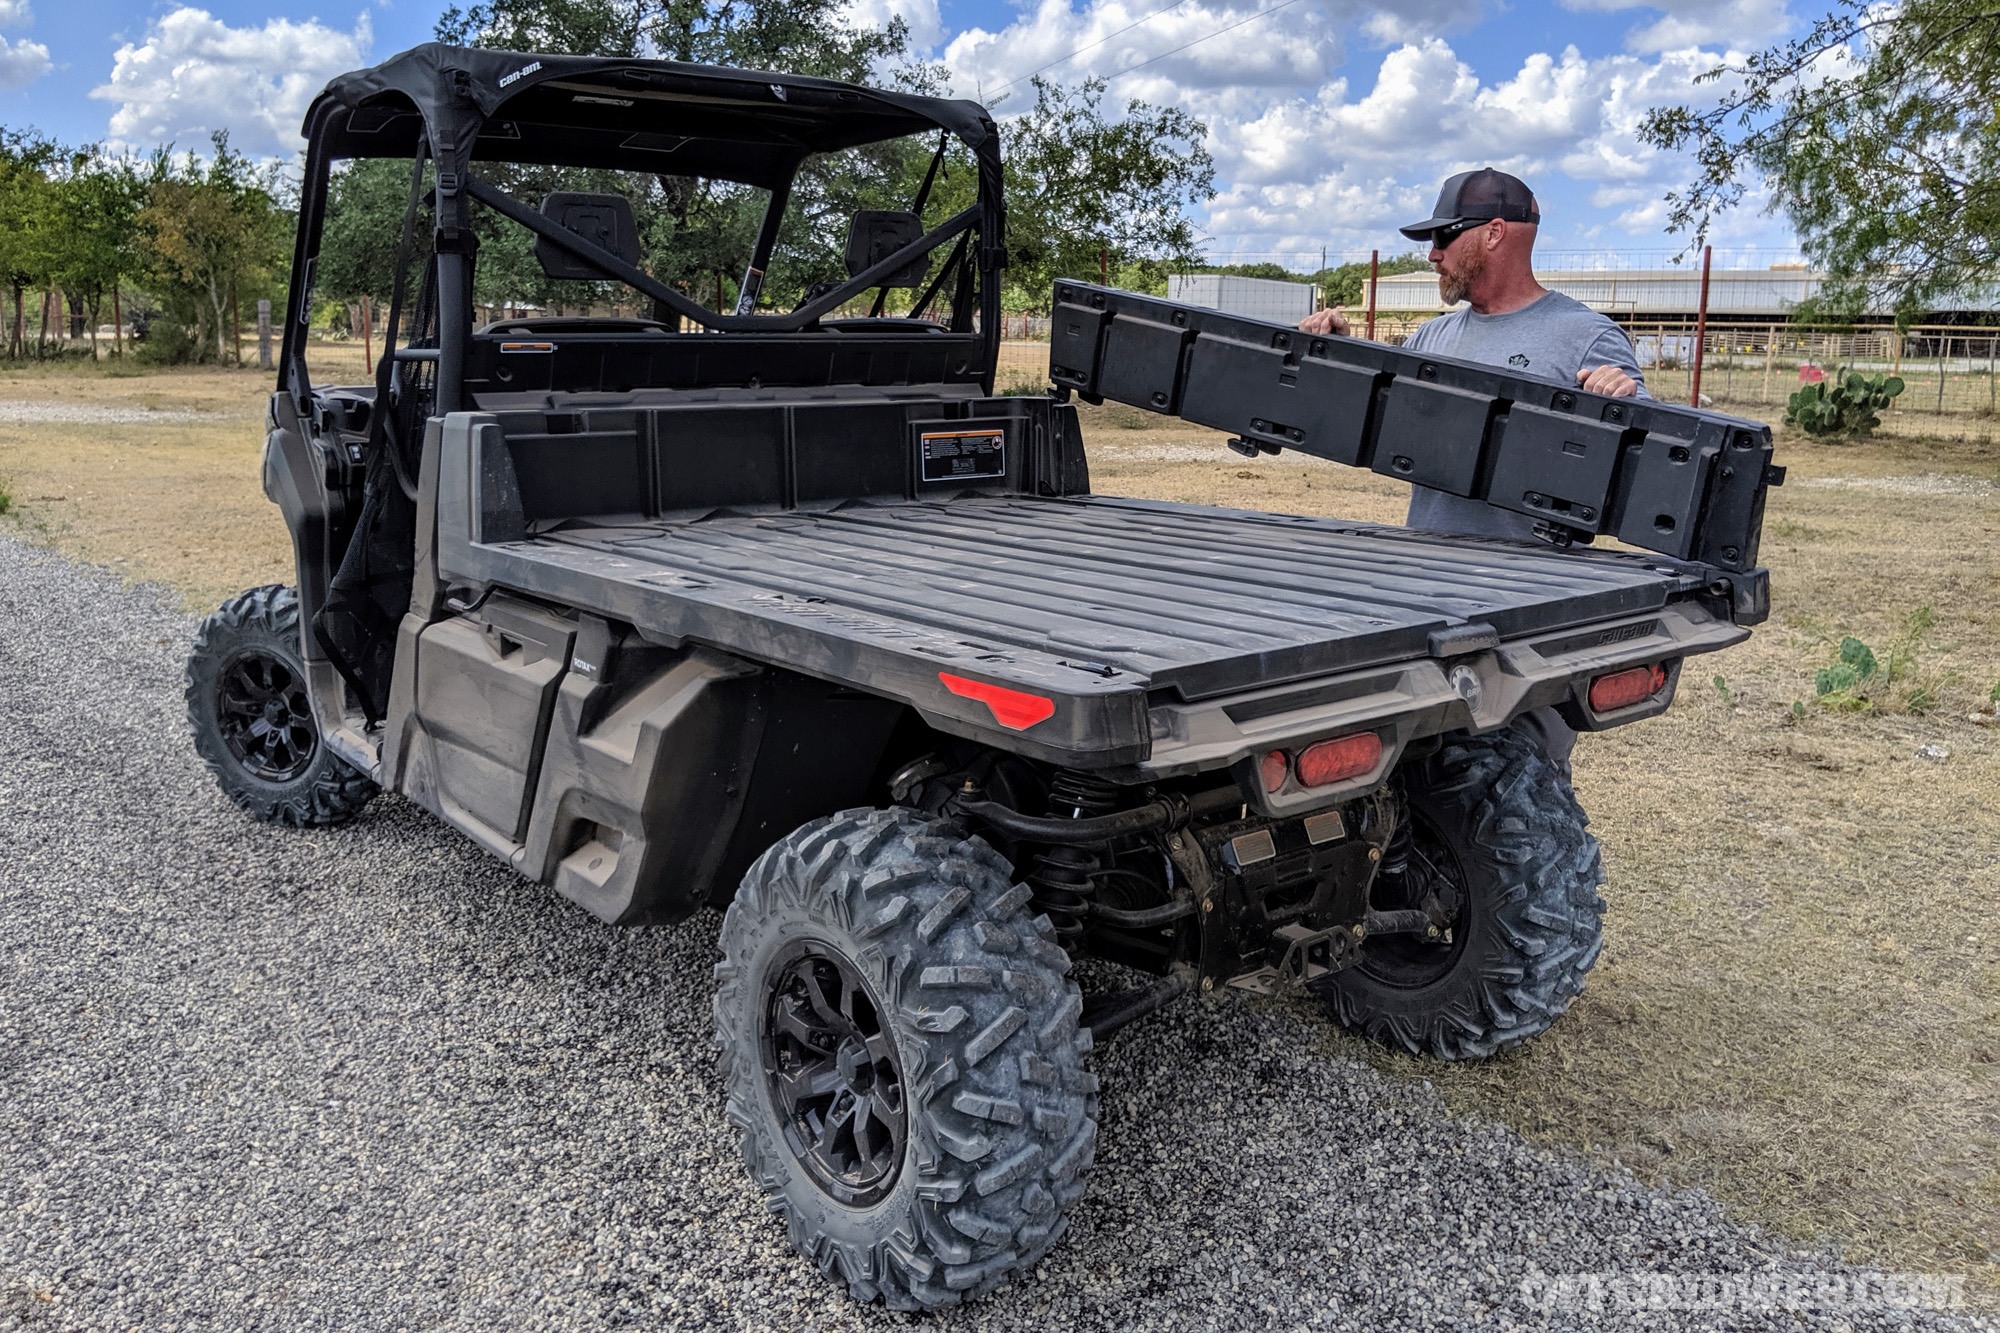
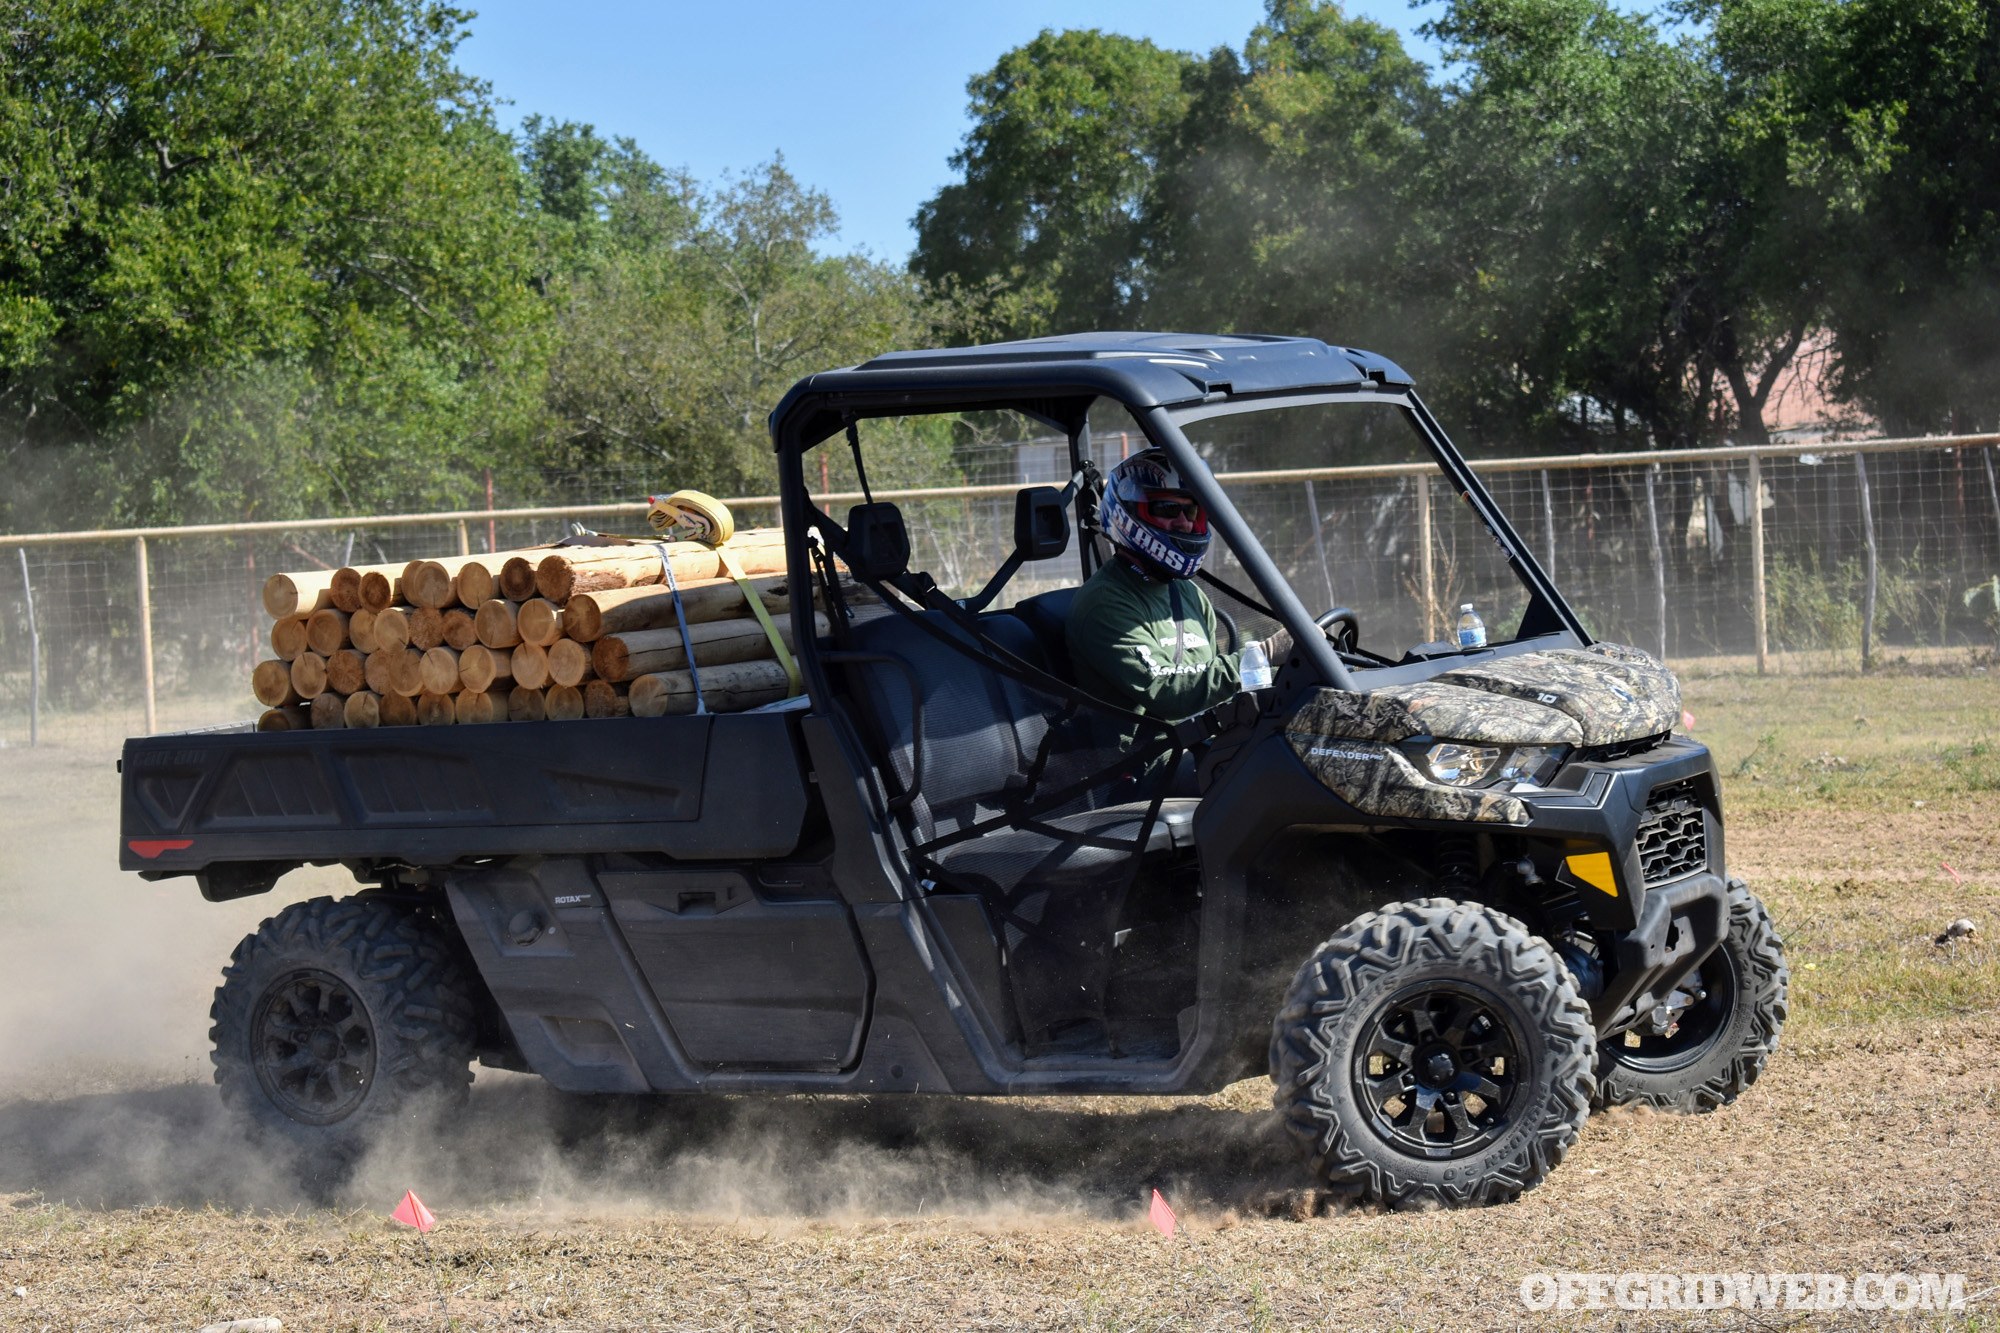
With a massive 6ft by 4.5ft bed and a payload of 1,000lbs, the Defender HD10 is an incredibly capable utility vehicle. If you need more space, the sides can be easily removed to quickly turn the cargo box into a flatbed. Additionally, the PRO HD10 can tow 2,500lbs, while the 6×6 DPS HD10 can tow a staggering 3,000lbs. With a width of just 64 inches, this UTV can go where most trucks cannot. (Note: Airtight Cab with HVAC: Can-Am’s HVAC with industry-first automatic mode provides both heat and air conditioning through their strategically placed eight-vent, air-filtered system. Only available in the Defender Limited, the HVAC system is complemented by an airtight cab. Hitting the dusty trails, you’ll have to remind yourself you’re sitting in a UTV, not a truck cab.

With these new details fresh in our minds, we were ready to test the vehicles on the trail.

The Defender 6×6

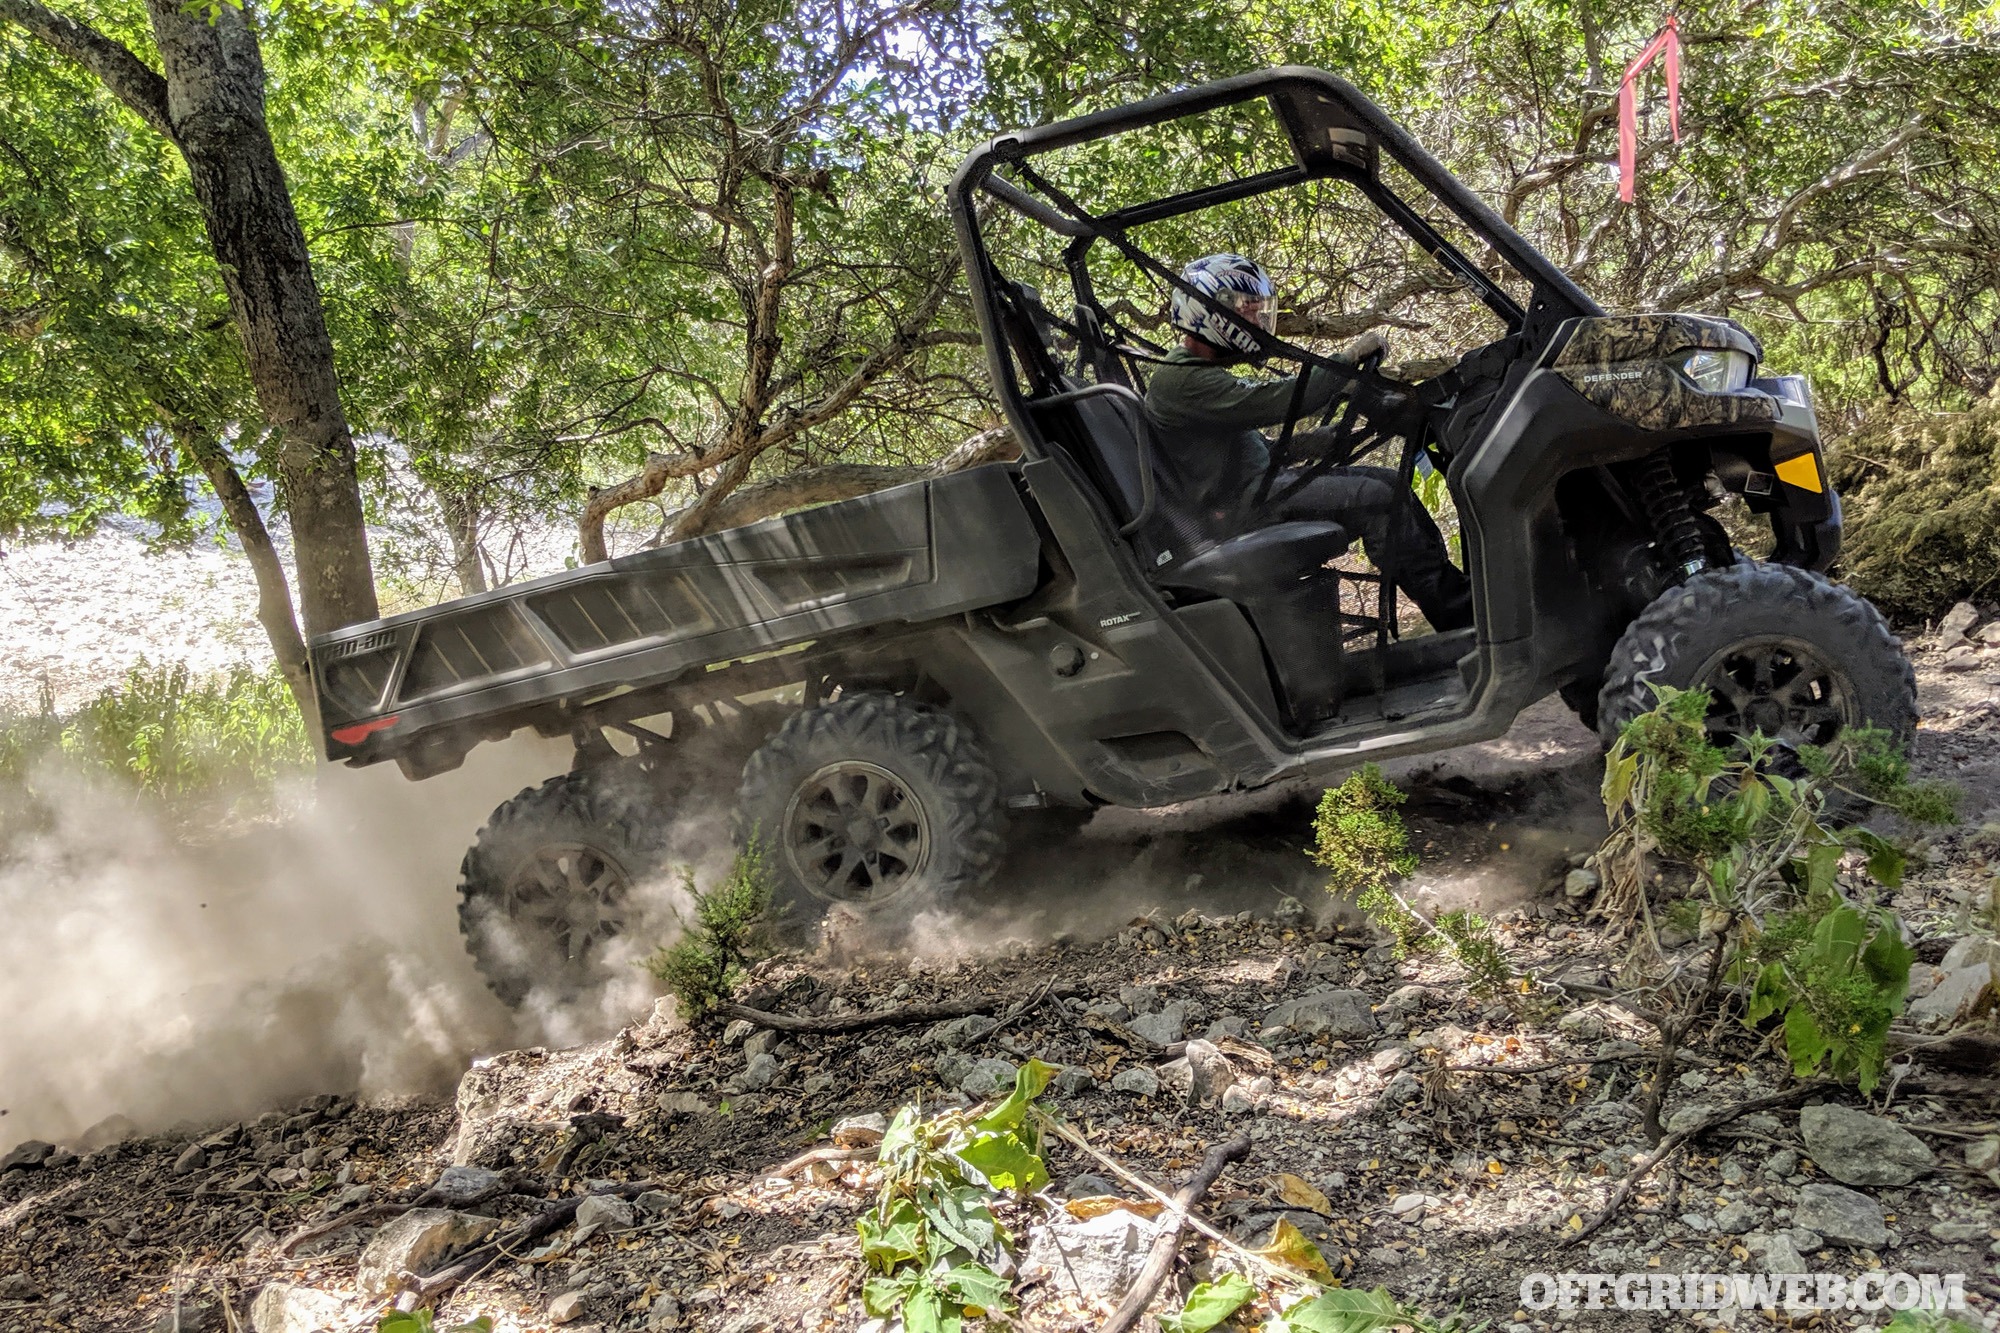
We first jumped in the new Defender 6×6 DPS HD10. By far our favorite of the three based on capability and ruggedness, this thing is a beast. The first thing we noticed was how smooth the ride is for a utility vehicle. We barely noticed the divots, ruts and rocks the six tires soared through. We were even more impressed with its maneuverability — despite its long wheelbase and six wheels we were able to take sharp corners like a pro.

Of course, this vehicle really shines traversing rocky terrain and steep inclines. Always in 4-wheel drive, a quick flip of a switch sends this into 6-wheel drive and easily up hillsides. More tires means more contact patch on the ground, which translates to less loss of traction on slippery terrain.

The Defender PRO HD10

Next, we jumped into its cousin, the PRO HD10. We utilized the 83.6 gallons of new space located under the cargo box to hold our bags. After a quick lesson on how to use the new 4.5-inch digital display to switch out of ECO mode and into the more powerful WORK mode, we were back on the trails.

An incredible machine, this UTV is best suited for those who do not require the extra towing capacity or off-road capability of the 6×6. Additionally, the PRO HD10 comes with “Turf” mode that provides traction without ripping up your lawn.

The Defender Limited

We saved this vehicle for last. We claimed it was to compare the performance on a shorter wheelbase, but, in reality, we wanted the enclosed cab with air conditioning for our Texas-hot afternoon ride. Without the AC blasting, we would have questioned whether the UTV was on; the thicker firewalls on the 2020 model greatly decreased noise pollution.

Additionally, the fully sealed cab not only kept the temperature cool, but prevented all dust from entering. This is a game changer in the UTV market.

Conclusion

In the past, UTV customers often had to determine if they were going to sacrifice comfort for capability or utility for luxury. With the new Can-Am Defender family, you really don’t have to choose. Depending on your needs, whether you’re looking to haul firewood through narrow two-track trails, tie down fence posts on a flat bed, find your perfect backwoods hunting spot, or load a bug-out vehicle that can go anywhere, the Can-Am Defender offers a configuration that fits your needs.

For more information on the 2020 Can-Am Defender, go to Can-Am.BRP.com.