Staying Sharp: Spencer Frazer of SOG Knives

SOG Specialty Knives was born from a single cell. Over the past 30 years, it’s evolved into a successful company that’s grown steadily since its founder, Spencer Frazer, designed its first product, a hardworking reproduction of the Vietnam War-era SOG Bowie knife back in the ’80s.

SOG isn’t a traditional knife company. Frazer, and the company he started, has always been a designer, not a manufacturer. He graduated from UCLA with degrees in math and science, then spent years working in the design and R&D fields. His first taste of entrepreneurship was starting a company with a friend making high-tech speakers. He left that enterprise to work on stealth projects behind the top-secret curtain at aerospace contractor Northrop.

Frazer would later find himself in the aisle of a Southern California gun show, indulging his curiosity in Vietnam War-era tiger stripe camo patterns, when he’d come across a knife that would captivate him. The Joint Services Special Operations unit or the Military Assistance Command, Vietnam Studies and Observations Group was a shadowy cousin of our nation’s special operations forces. It was a secret multi-service unit set up to run covert military operations before and during the Vietnam War.

The unit commissioned its own unique knife for its members’ use in the punishing Southeast Asian jungle environment. The SOG Bowie, as it was called, encapsulated the mystery and wonder Frazer came to hold for the unit.

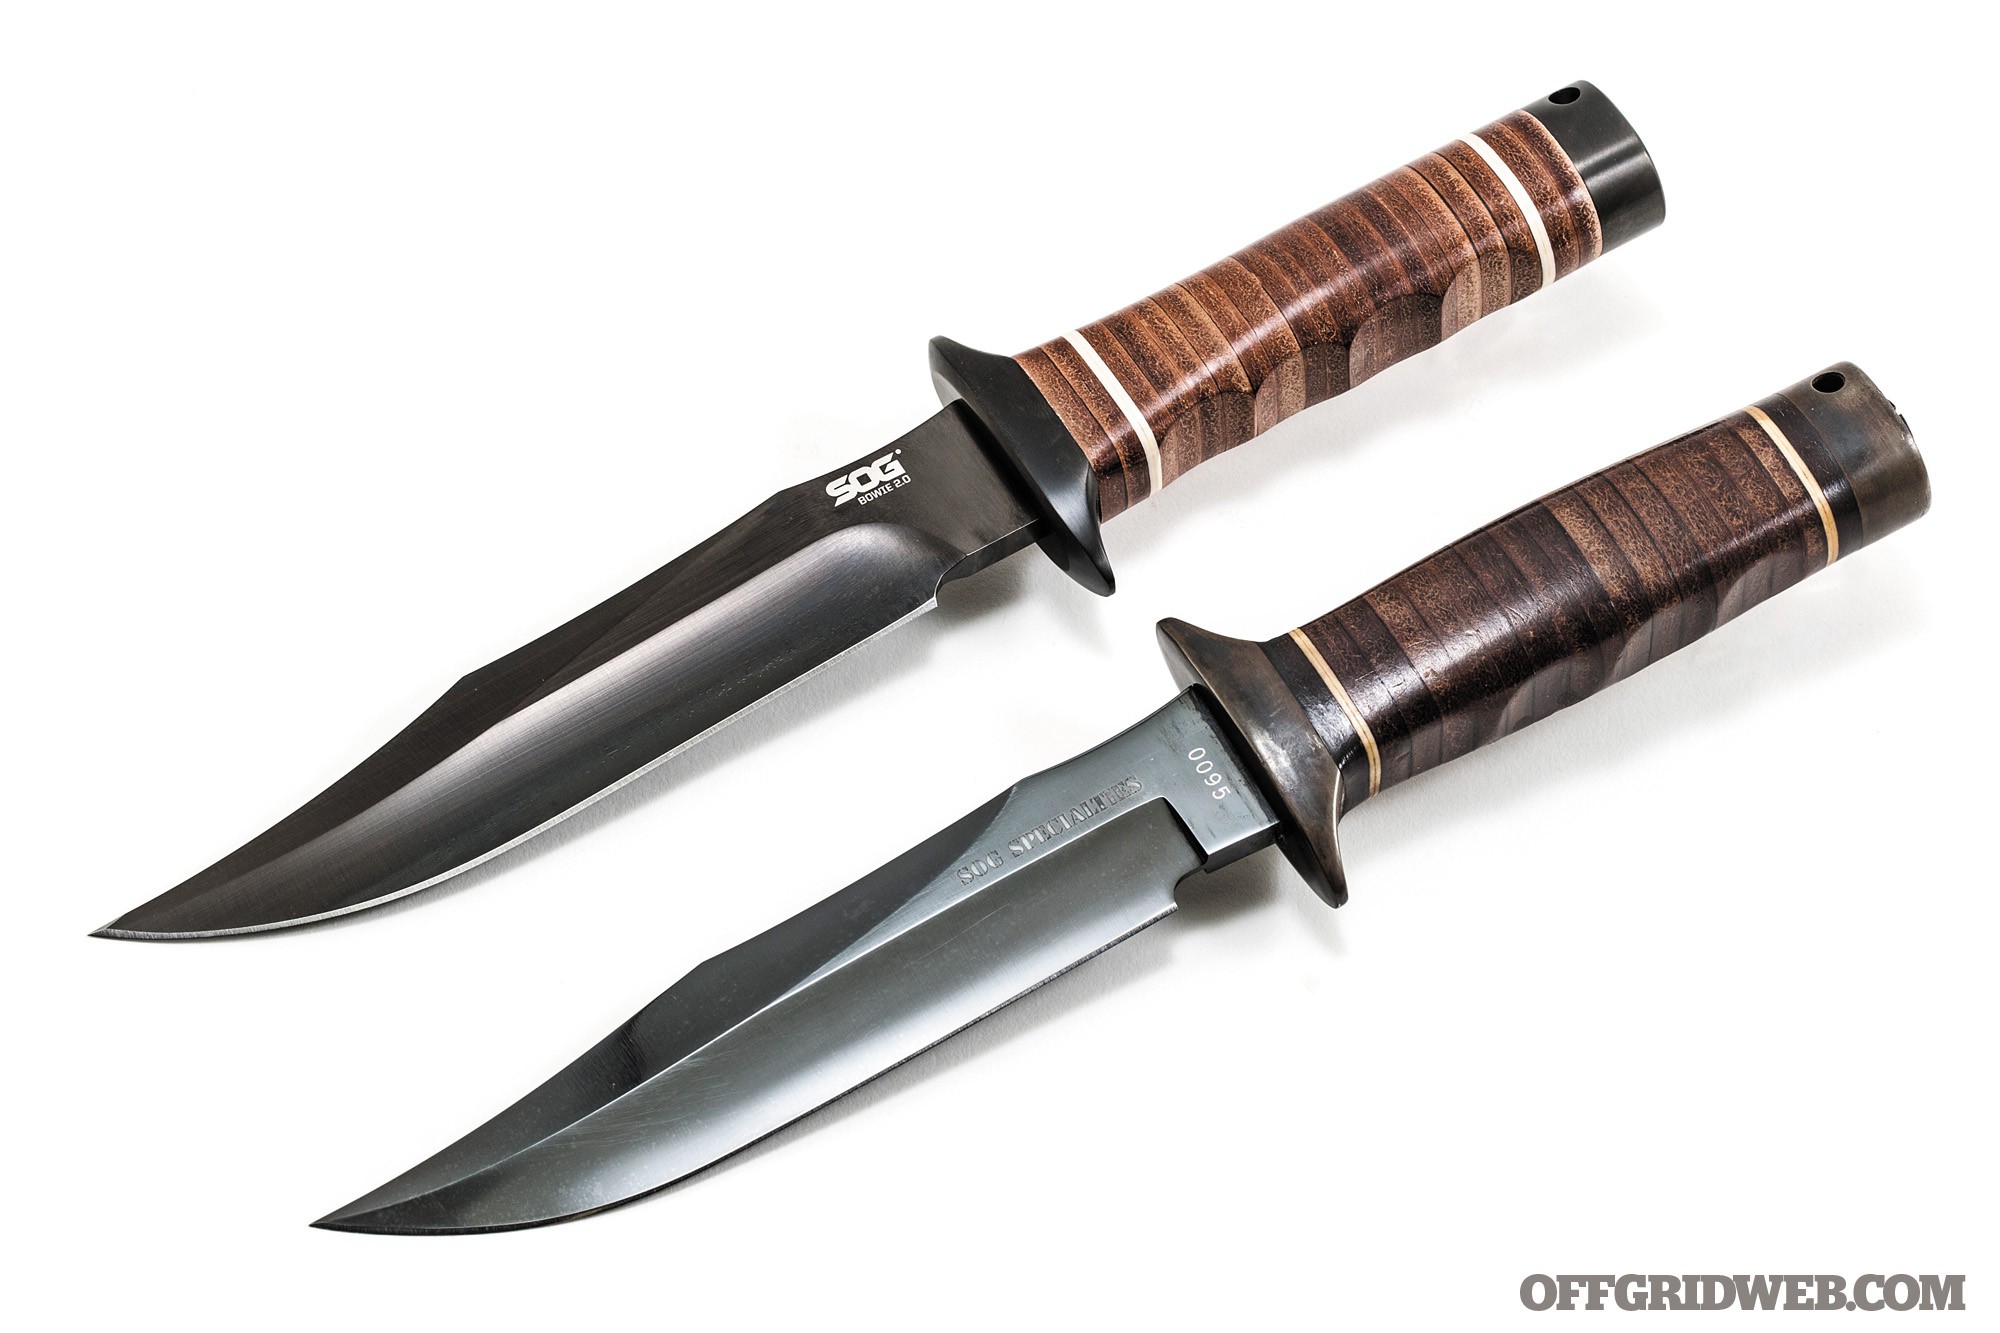
Above: One of the rare, original SOG Bowie knives along with an original SOG Command and Control, Central patch from Frazer’s collection.

This knife ignited his mixture of passion for design, knife-making, and history. The resulting combustion drove Frazer to commission his own take on the SOG Bowie, the SOG S1 Bowie, propelling the growth of a company that would ultimately help usher in a period of innovation in knife-making across the industry.

Wood and leather-clad knives of the time gave way to SOG’s satin finishes, rubber grips, composites, and resin-impregnated materials. SOG’s compound-leverage multitools (inspired by the gears of a child’s toy) and the Arc Lock mechanism for folding knives still hold their own today in a crowded market.

SOG extended an exclusive invite to RECOIL OFFGRID to meet with the company’s founder, Spencer Frazer, to see and hear how the brand has grown from one guy in his pajamas to 50 employees making gear that helps their customers prepare for anything, from the everyday to the grievous. Walking into the company’s headquarters and design studio in Lynwood, Washington, we noticed the very shape of the building displays the reverence for design the company was built on.

Interview with Spencer Frazer of SOG Knives

RECOIL OFFGRID: We noticed the SOG office building has some unique architecture. The peak above your office is reminiscent of a knife blade?

Spencer Frazer: That was my plan from the get-go. At one point, early in the design process for the building, we actually had a piece of steel that was going to hang off the edge of it and we go, “Oh my god, someone is going to run into it, and we’re going to get a lawsuit.” Do you remember the L.A. hot dog place that’s shaped like a giant hot dog, Tail o’ the Pup? I remember reading a story about a woman suing them after she hurt herself after running into the end of the building. So no knife edge on the front of our building. But we did build our own building, and we wanted it to be conceptual. It was ’96, and this was the last wooded lot in Lynwood.

Since you’re not really an architect, was that stressful?

SF: Everything I do has a sense of design and sophistication of design and that’s how I work. Working with the architects, we came up with something that’s unusual, and it won some award for the best build-to-suit in the city because it did reflect exactly who we are. Funny story: I ended up struggling over the paint combinations. I drew parts of the building in CAD and then I colored in the different sections. I worked on that for weeks. So, finally they came in and painted the whole building the base color to start, and it looked like a whorehouse. Instead of a really nice gray, it turned out a fleshy tan. I left that day with a migraine headache going, “We’re ruined. It’s, like, the worst it could ever be.” And there’s four or five colors, so they put the next color on and I go, “It’s horrible.” And, then they put the next color on and I say, “It’s terrible.” And, then they put the final color on and I said, “It’s genius!” Because colors are funny that way — they play off one another and create different perceptions.

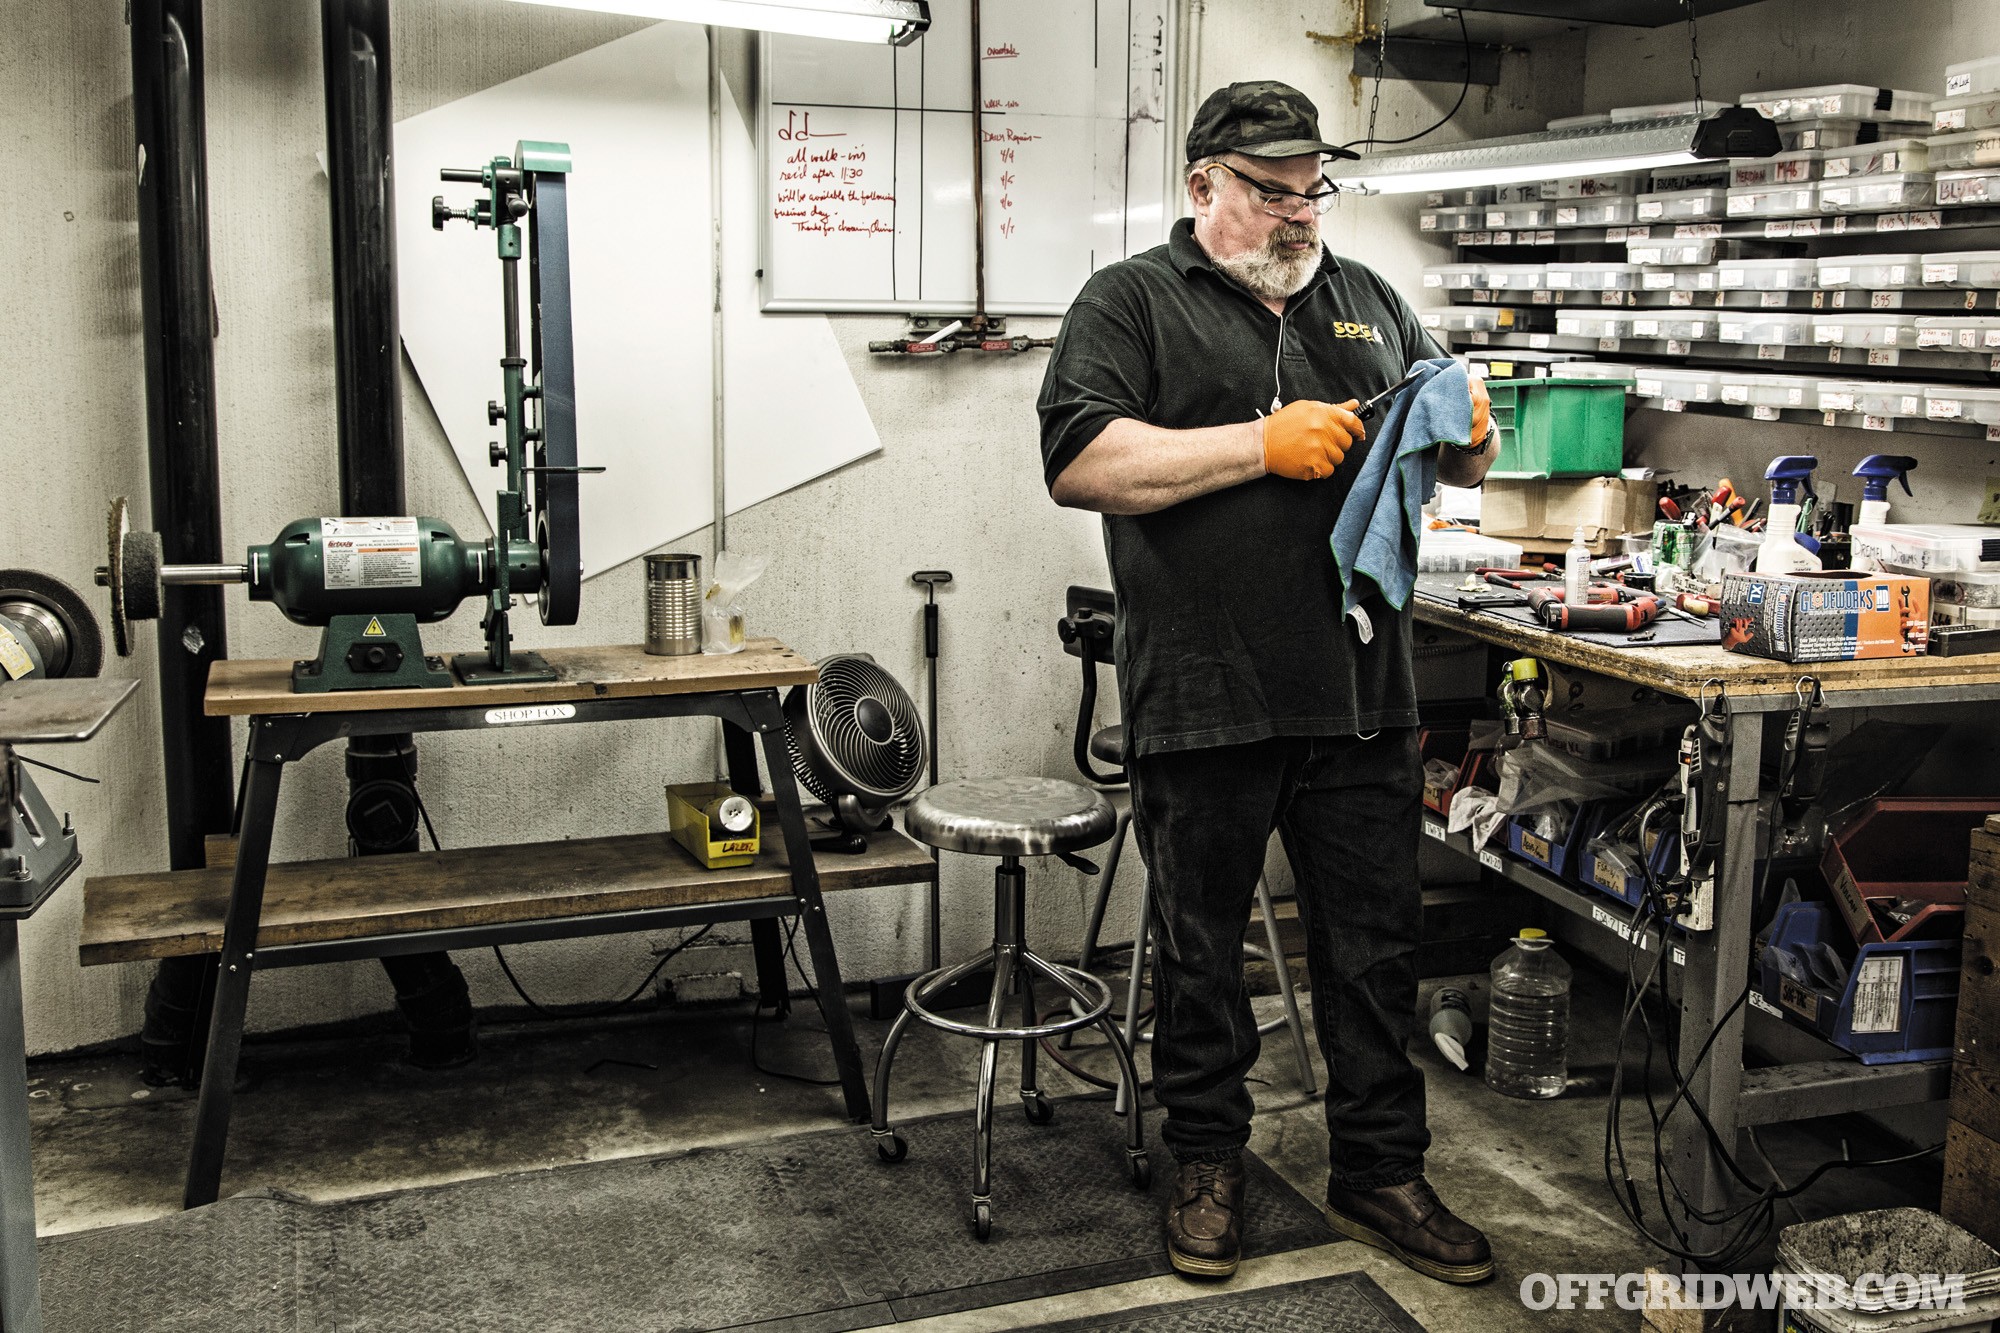
Above: Dave Ditto, repair tech, sharpens knives. SOG welcomes its customers to bring their blades in for a check up and a renewed factory edge.

This wasn’t SOG’s first home, was it? The company began in California?

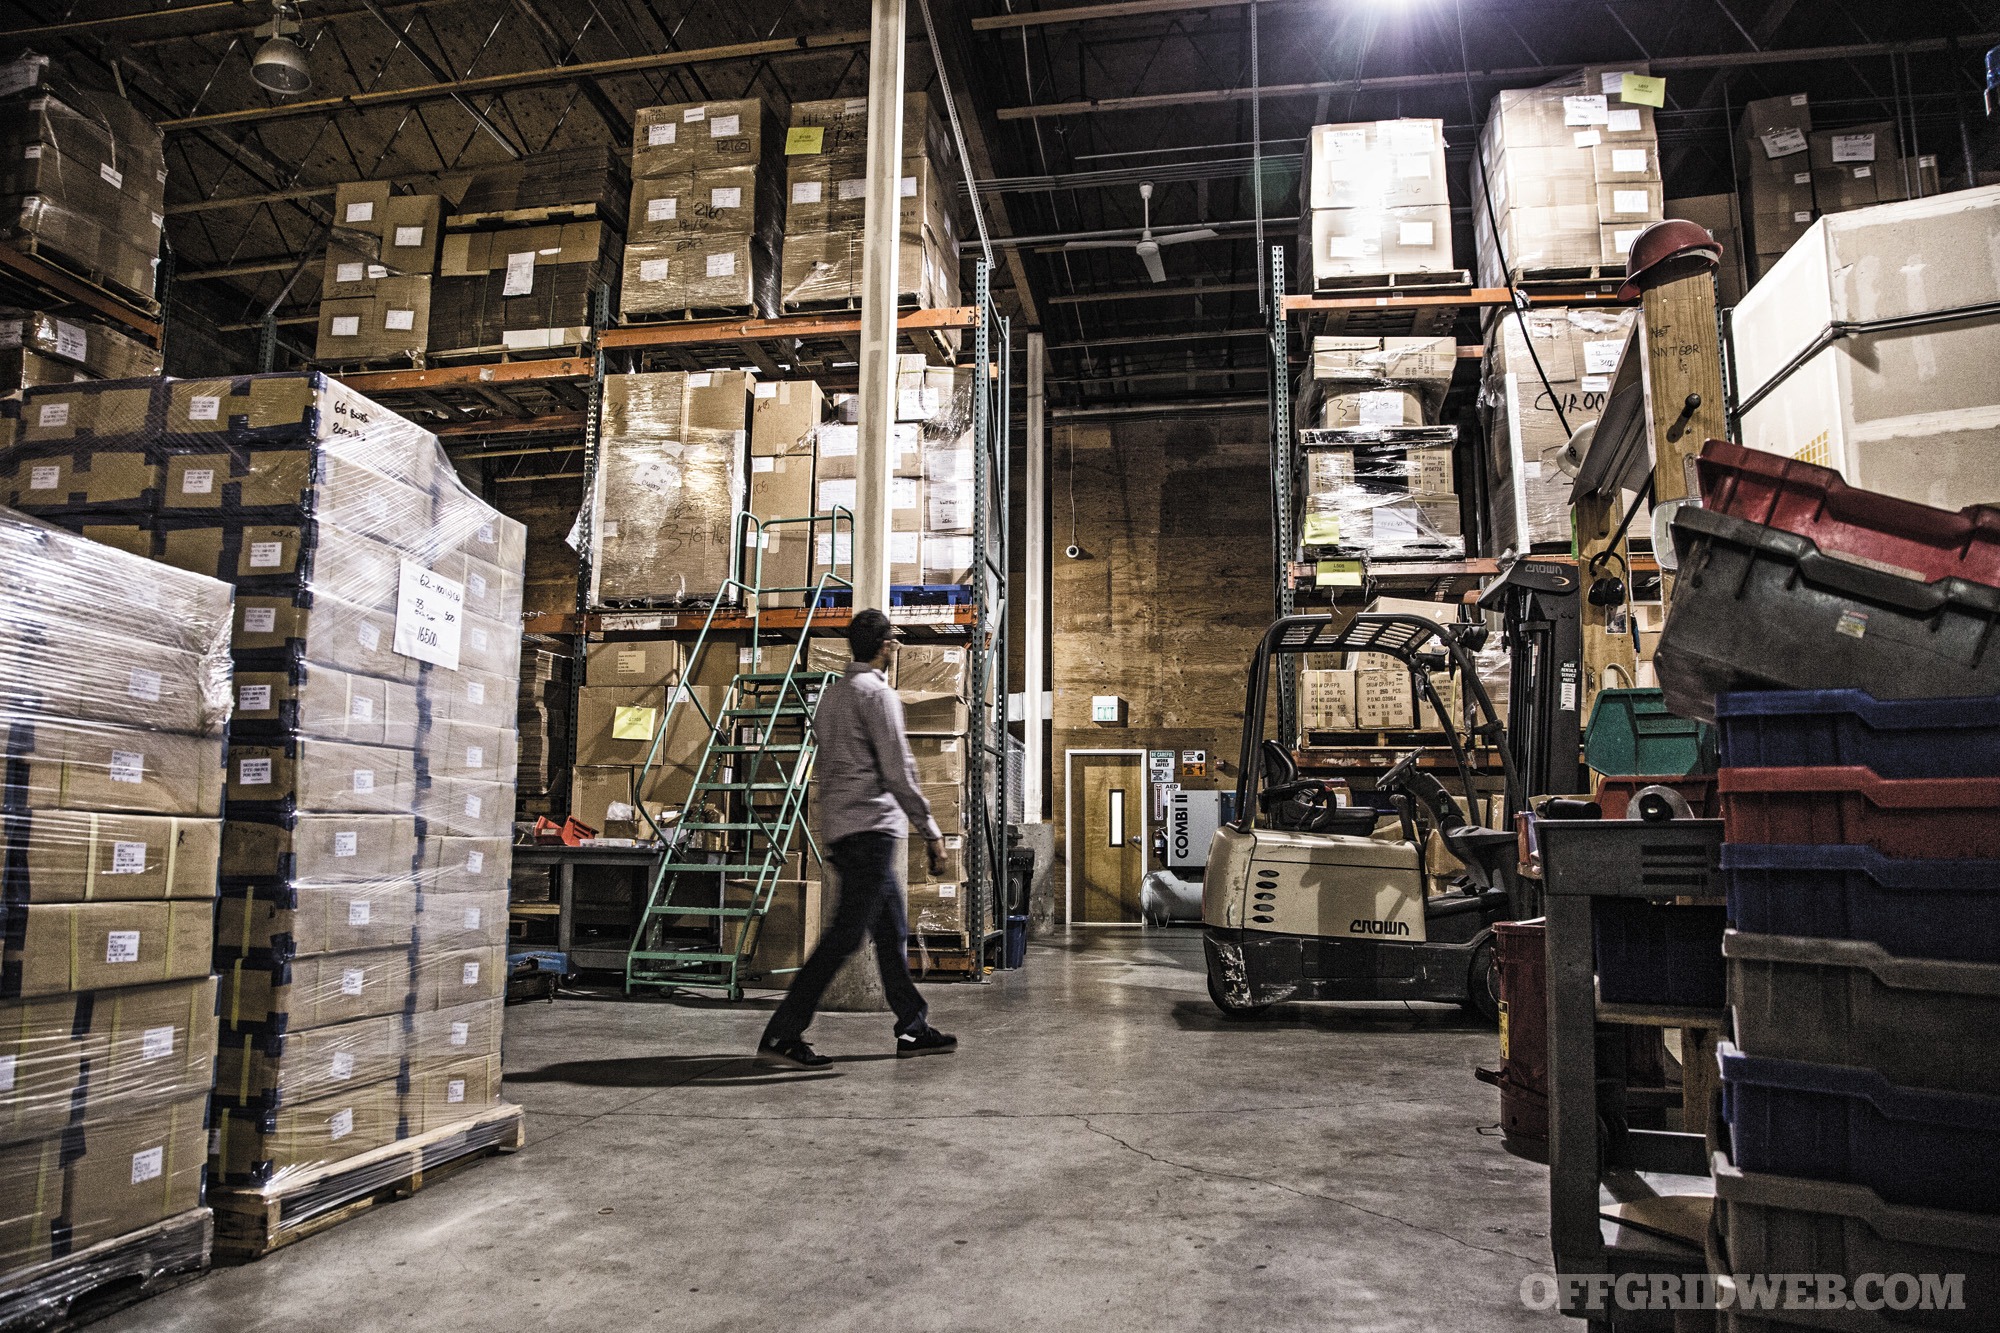
SF: When we moved up from Santa Monica to Seattle, there were a bunch of reasons. But one was that we — my wife at the time and I — wanted to buy a house and couldn’t afford one in California. This was a pro-business area. So we bought a three-bedroom, 1950s house in Edmunds overlooking Puget Sound. It was a split-level, and we had the business in the basement. We were there several years, and there was one time I realized I was still in my pajamas and it was three days later. You know, I would work all night, maybe take a nap on the couch, but that was when I said, “We’ve got to get an office.” So we found this little office in downtown Edmunds. It was tiny; there was room for a desk, a small table, and some racks. We grew a bit and took over the adjoining space, then we ran out of room and moved down the street, moved again …. We grew out of that and moved downtown to the waterfront and got a legitimate office with a warehouse behind it and stayed there for quite a few years before coming here. That was in Edmunds, at a place called Harbor Point. There was a rat breeding operation next door. When it was hot we could smell the rats through the wall. It was bad.

What’s your favorite product?

SF: The favorite one is always the next one.

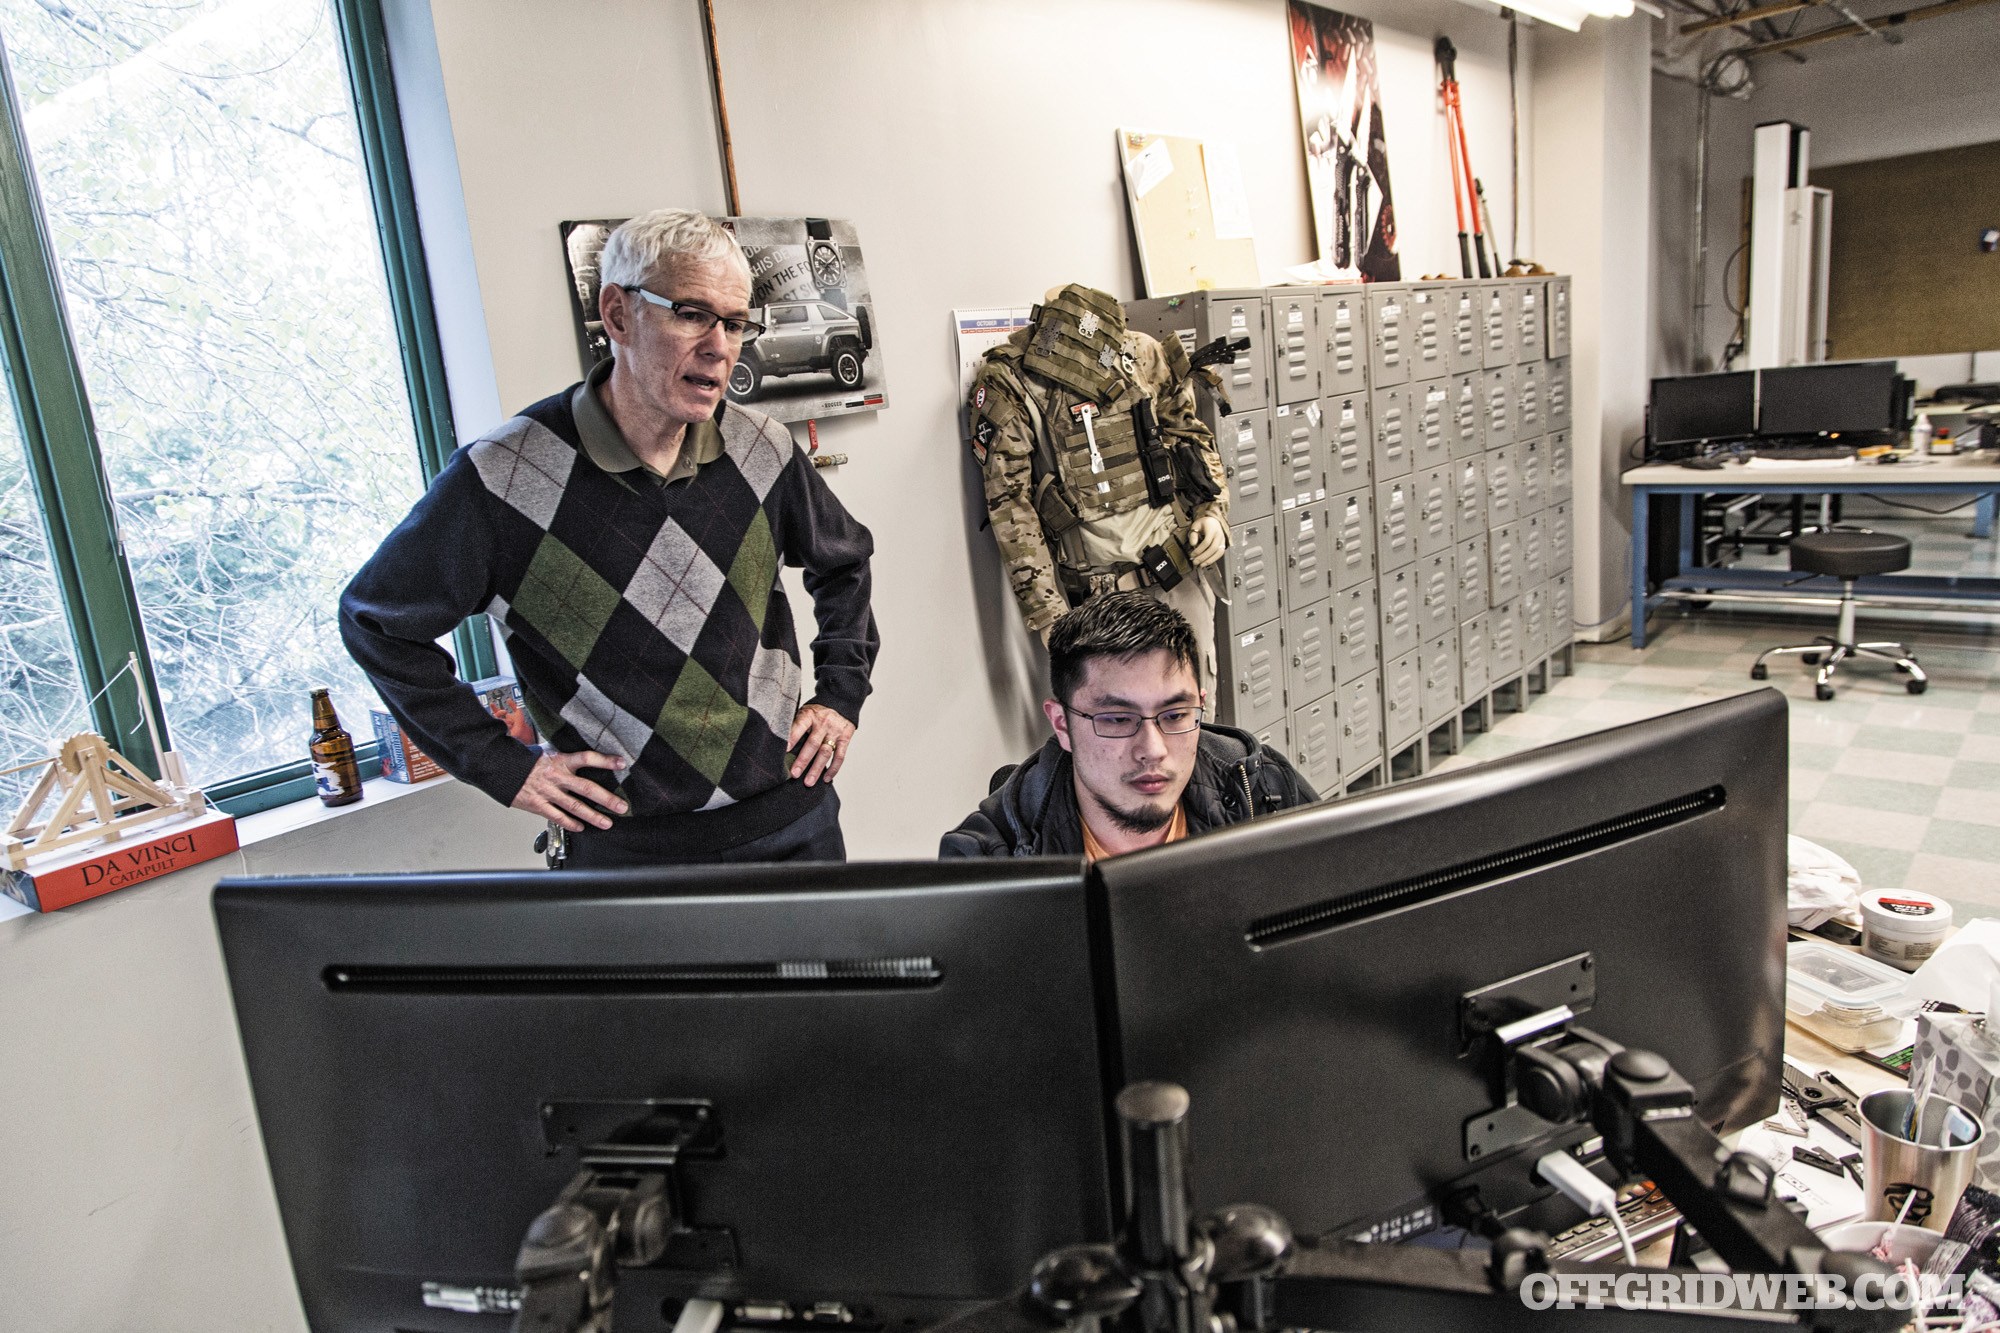
Above: Spencer Frazer, left, and mechanical design engineer Alex Hwang confer over the shape of a new product. SOG’s knives and tools are designed, prototyped, and tested in Lynwood, Washington.

Have you been emotionally attached to any particular product?

SF: Most of them. They’re my children. Especially the early days when it was just me designing them and putting them in the marketplace, creating a story about them and having them sell. It was an amazing experience. I’m still very charged up about that. I love designing, but I love designing where it’s accepted in the marketplace and ultimately rings the cash register. And that was a focus of mine early on, and it kind of separates me from a lot of designers who are pure designers. How do I make something successful and sellable? I developed a pretty good sense of what would work and what wouldn’t. Over the years, we haven’t had that many dogs.

What product taught you the most?

SF: The original Team Leader. It was our first folder. It was based on the SOG Bowie, and we wanted it to be kind of like a yawara stick. It’s symbolic in that it has the bolster and the guard, kind of, and the big Bowie blade. It’s just a monster. I wasn’t sure about it, and I was working with another guy at the time. We were working with Japan, and they misinterpreted the drawings and scaled it up a bit, too. It was a boat anchor. I think we sold something like 350 of them. I sent it to Cutlery Shop, who was pretty astute at knives, and he said to me, “That’s just terrible.” And he was right. It was too big and weighty. But that’s the thing, now — big knives. Now it’s highly collectable.

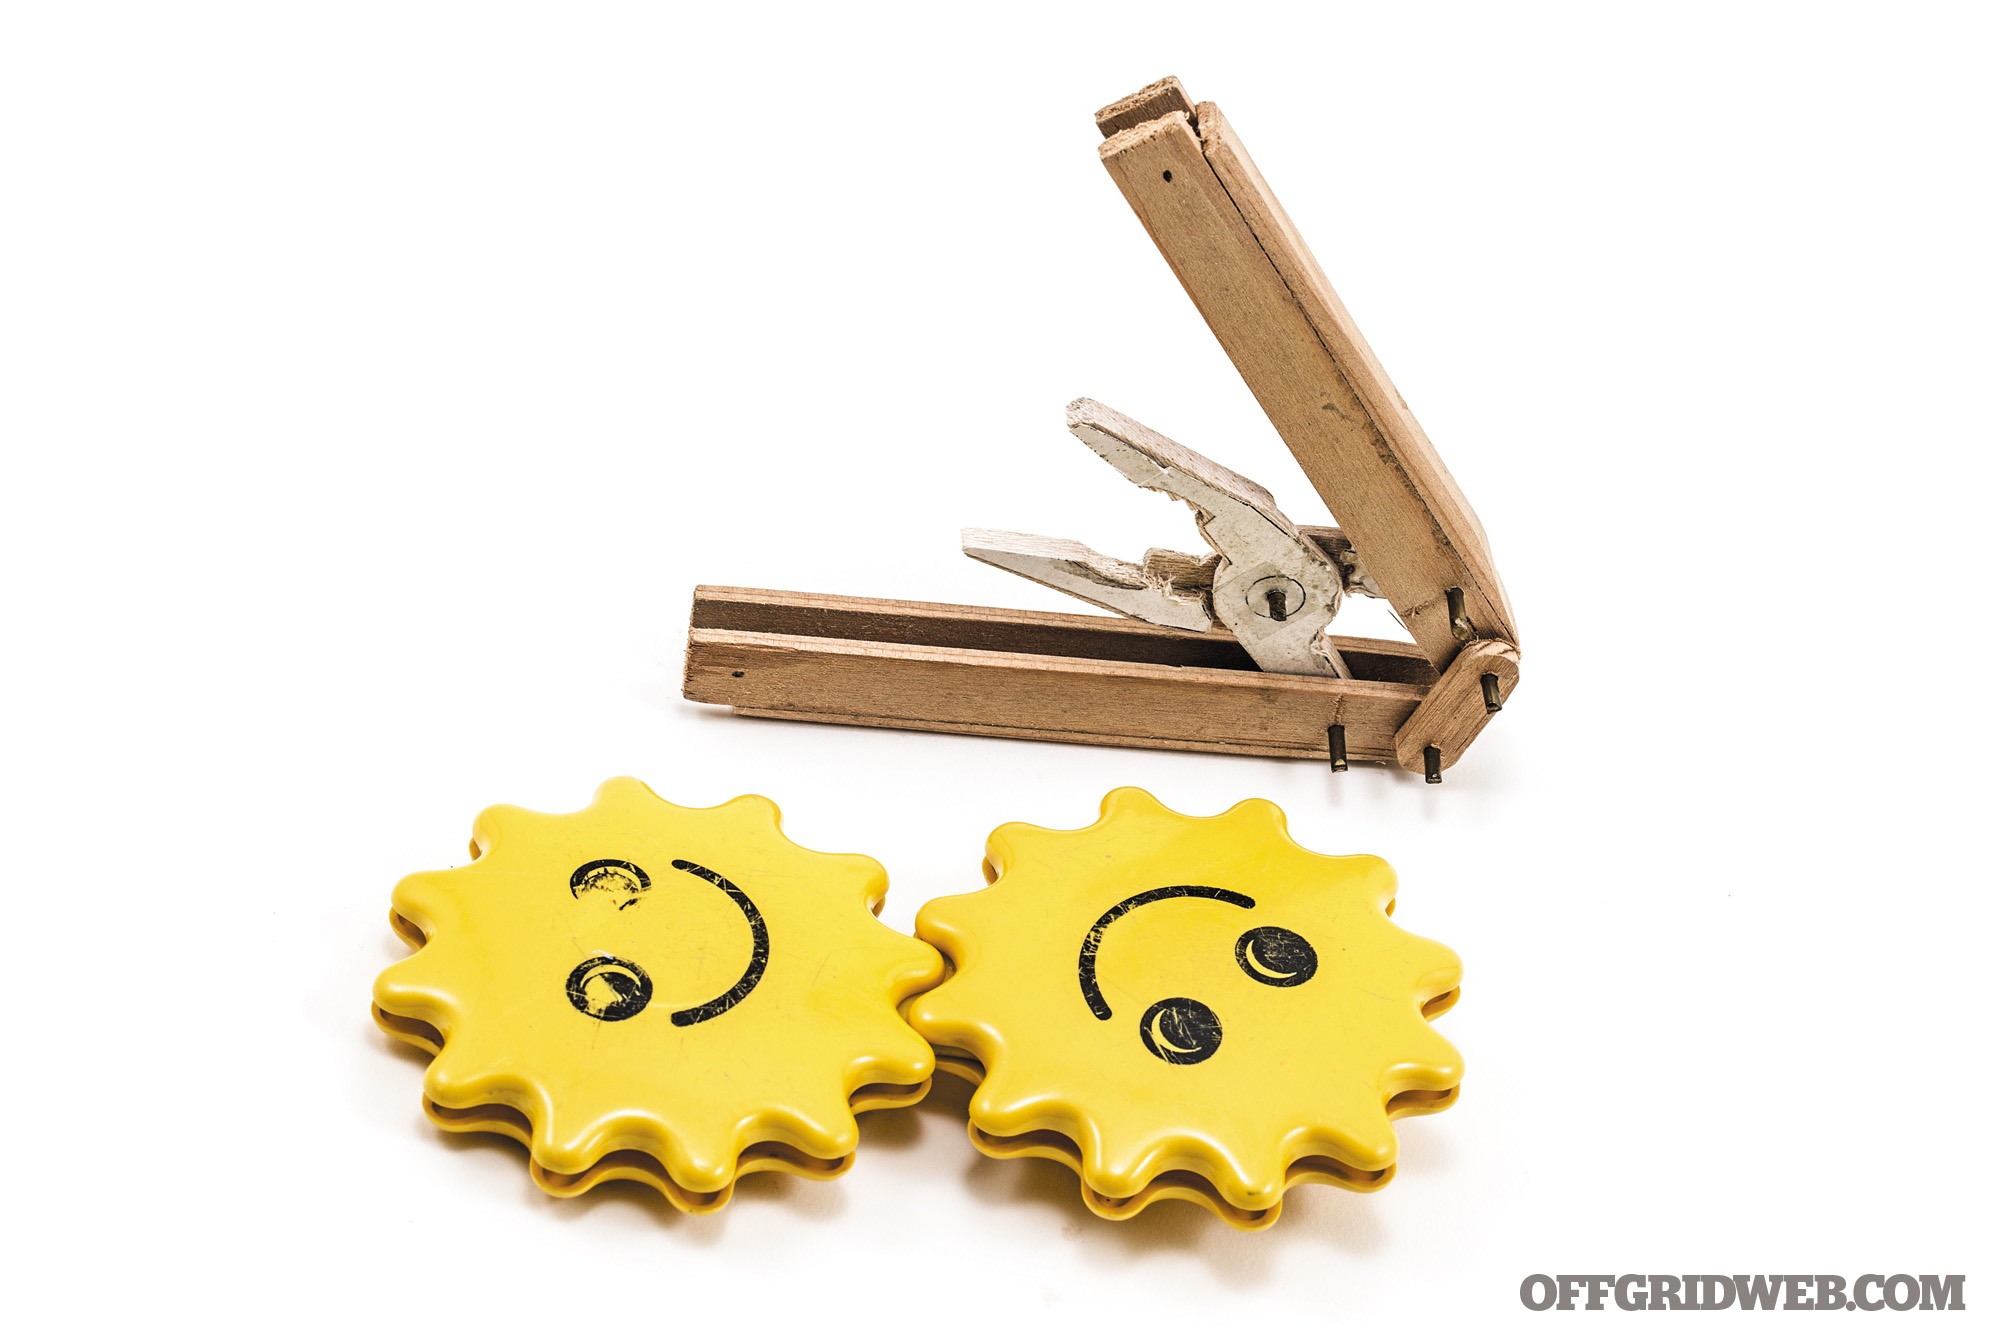
Above: The original wooden prototype showing SOG’s patented compound leverage hinge system that came to Frazer as he watched the gears of this child’s toy spin together. 

Tell us about the SOG Bowie.

SF: The SOG Bowie was the origin. When I first saw that knife, I was just taken by it. It was a magical thing. I first saw it at the gun shows. I used to go to the gun shows pretty regularly. I was collecting Vietnam-era tiger stripe prints. They were all hand silk screened, so it became this art form that I was intrigued by. I didn’t serve; the draft ended on my 18th birthday. So there are all these different types of uniforms and patterns for triple canopy, the marshlands, you know, and they are all different. I was in my late 20s in the early ’80s.

I was fascinated by tiger stripes, and they helped me discover SOG; the Studies and Observations Group, or Special Operations Group. It was a fascinating time in military history. These guys could pretty much do whatever they wanted, and they created their own equipment, their own uniforms, knives, everything. The coolest thing to come out of SOG, and I’ve been looking for one, was a dog turd seismic sensor. They put them on the Ho Chi Minh trail, and they could tell from the air if anyone was walking on the trail. But that I never got. I’ve seen very few references to it.

But when I saw the original SOG knife … it’s so historical, it’s got such provenance and soul. Where was it, what did it do?

So were you into knives from a young age?

SF: You know, knives make us feel good; they make us feel prepared and competent. They make us feel cool. I liked knives from when I was young but hadn’t really thought about them; I wasn’t really a collector or anything. And then years later I saw the SOG Bowies and began collecting them. There were these plum ones. They were an accident; bluing gone bad. English browning, they call it sometimes. So, that was rare, and had about 10 or 14 other ones. There were a lot of counterfeits, so I wasn’t sure about some of them, so I started researching them. You couldn’t find any historical information about them — nobody really knew who made them.

So, you decided to make a replica of the original SOG Bowie knife, your first product, the S1 Bowie?

SF: The big thing was how do we manufacture this and where. So, I started doing research, reading Blade Magazine. I saw this guy, Beau Randall, in Florida. He was one of the famous custom knife-makers and had semi-production. He’s still making knives today, and he’s back-ordered four years. So, I called him up and said I want to reproduce this knife and he said he could reproduce it if I wanted to give him an order for, like, a couple hundred. I said, “How fast could I get them?” And, he said, “Well I could start delivering them in about … four years.” That wasn’t going to work.

So, he tells me to call up this good old boy in Arkansas named A.G. Russell because he’s got ways to produce things. So, I call him up; a legend in our business. He started the knife-makers guild and has been around forever; one of the authorities on knives in the world. He says, “I know some people in Japan.” And, that’s how we met Bob Nanri, a sort of [knife manufacturing] agent, and got started in Japan.

Bob Nanri had this idea to create a quality [knife] market out of Japan. Up until then Japanese goods were considered junk. Cars from Japan were, like, junk metal back then. But, Japan had an incredible history with samurai swords and steel making, so he was right to do it, and he single-handedly created a high-end market for Japanese cutlery.

So, we got in with Mitsuboshi Cutlery, in Seki City, Japan, that used subcontractors. They gave us Hattori Hamono, one of the most famous knife-makers in Japan. And Hattori Hamono told me his father had been the original producer of the Vietnam SOG Bowie! So it was very serendipitous that we found through this circuitous effort one of the original factories that produced those old knives.

What was it like starting the company?

SF: I date myself, but it was so different running a business back then. Information was hard to come by and communication was difficult. In the beginning, when we worked with Japan, I would send them a letter to ask them a question. It was like, “Can you shorten this knife by a quarter inch? Here’s my sketch.” So, it’d take two weeks to get there, they’d answer, and it’d take two weeks to get it back. Then Bob Nanri, said there’s this new invention called the fax machine. He said, “You use this thing, and you send a message and get an answer back within a short period of time.” I asked how much it cost, and he said it was like $850. My God, this was in the late ’80s, so that’s like $8,000 today. But, I got one.

Did you ever learn about the origin of the SOG Bowie?

SF: There’s an article about it by Greg Walker, a writer and an old friend of mine. He found Ben Baker. He was a quartermaster or something in SOG or Special Forces. Greg found the original guy somehow, who had never wanted to talk about the project because he felt he was still under some kind of secrecy requirement. But, Greg got him to talk and he pulled out all the original data. Greg calls me and says, “You’re not going to believe it, but I found the original guy. He has all the drawings and some of the original knives.” Then we really found out the numbers of different versions of the original knives there were.

Baker took, I think, the Bowie, the KA-BAR, and the Randall and he incorporated different design features into the knife that he felt were best for [his unit’s] application. There was some science in developing the different style of blade. He did a lot of meat testing, you know cutting, penetrating, twisting, and stabbing.

Have you ever gotten into the politics of knives?

SF: There are two organizations. American Knife and Tool Institute — which is more of an industry group — we’ve been a big supporter of for 15 years or so, and our CEO is a member of the board. Then there’s Knife Rights, more of a consumer group. We support them as well. I was part of the contingent that went to Washington when we changed the federal laws for one-handed knives, which was something we never dreamt could ever be done.

When Congress added “the bias toward closure” language to the Federal Switchblade Act, it became the new definition of a switchblade. At that point, we were worried that all one-hand openers were going to be switchblades. And there are now more than 30 states where you can possess switchblades. We are working with AKTI and Knife Rights who are working to rewrite knife laws and add preemptive laws at the state level.

Spencer Frazer, SOG Knives founder and chief designer

You’re careful to point out you didn’t serve in the military. Is it difficult being an aficionado? How do you maintain brand authenticity without going over the line in your marketing?

SF: It’s something I was cognizant of from the beginning. For one, we never said we were anything we weren’t. We were honest about it. I think that’s what helped us get through it. I remember one time this Navy SEAL guy came up to our table at a Soldier of Fortune show and he was looking at one knife we named the Trident. He was really upset about it. He says, “How can you take something that is so key to who we are when you’ve never been there or done that.” And then later was another incident when a SEAL plank holder came to us and was really upset about the Trident name, but it turns out it was because he wanted to use that name on a knife of his own. We always did straight business. We were trying to do justice by the guys who had been there. I wanted to create a great product that was a tribute, and that was our intent and it carried through, even all the way to today.

More From Issue 17

Don’t miss essential survival insights—sign up for Recoil Offgrid's free newsletter today!

Read articles from the next issue of Recoil Offgrid: Issue 16

Read articles from the previous issue of Recoil Offgrid: Issue 18

Check out our other publications on the web: Recoil | Gun Digest | Blade | RecoilTV | RECOILtv (YouTube)

Editor's Note: This article has been modified from its original version for the web.


New: Pocket Hammer Pro Arrow Slingshot

A slingshot is a great survival tool for hunting small game, but a ball bearing or pebble won't be very effective against medium-sized game animals or fish beneath the surface. In those cases, the piercing power of an arrow is much more effective. Fortunately, it's possible to fire arrows from a slingshot, expanding your ability to put food on the table in a survival situation. The new Pocket Hammer Pro Arrow system is capable of firing arrows at speeds up to 170 feet per second, and is said to be capable of taking down medium-sized game.

This product was created by Pocket Shot, the company that produces pocket-sized elastic slingshots which we've written about in the past. In fact, we gave the standard Pocket Hammer our “Top Pick” award after testing it alongside competitors in Issue 29. The new Pocket Hammer Pro Arrow system is designed specifically to fire arrows. It features a 35-pound-draw Pro Arrow pouch, whisker biscuit aiming device, and an optional archery trigger release.

Three standard red arrow pouches are also included, and offer a lighter draw. The Pocket Hammer Pro Arrow system folds to fit in a pocket, and is available in black or mossy oak camo. MSRP is $99; the optional archery release is $15 extra. Check out the demonstration video below, or visit PocketShot.com for more info.


The 6th Amendment and the Yellowstone Zone of Death

How well do you know your Bill of Rights? You should know all of the ten Constitutional Amendments it contains by heart. The First, Second, Fourth, and Fifth Amendment are common knowledge and frequently discussed. The Third is something that doesn't come up often — it prohibits homeowners from being forced to provide quarter to soldiers against their will. Number six is the subject of today's post, since it lays out the rights of an accused person in a criminal case:

In all criminal prosecutions, the accused shall enjoy the right to a speedy and public trial, by an impartial jury of the state and district wherein the crime shall have been committed, which district shall have been previously ascertained by law, and to be informed of the nature and cause of the accusation; to be confronted with the witnesses against him; to have compulsory process for obtaining witnesses in his favor, and to have the assistance of counsel for his defense.

Pay special attention to the bolded portion. Under most circumstances, there should be no trouble finding twelve impartial residents from a given district who can serve as jurors. However, there is one district where it's supposedly impossible. This has been dubbed the Yellowstone Zone of Death.

Despite its ominous name, the Zone is mostly a legal curiosity. (Flickr.com/cmichel67 | CC BY 2.0)

The so-called Zone of Death was brought to the public's attention by Brian C. Kalt, a law professor at Michigan State University. While studying the Sixth Amendment, Kalt wondered if there was a district in the United States where finding a jury of twelve impartial residents wouldn't be feasible. He then noticed a strange issue regarding a 50-square-mile section of Yellowstone National Park in the state of Idaho.

Flickr.com/robglover | CC BY-SA 2.0

Yellowstone is under the jurisdiction of Wyoming, so anyone who commits a crime there would have to be tried in Wyoming. However, if the crime was committed in the portion of Yellowstone that's part of Idaho, it'd be unconstitutional to face trial in a different state. So you'd have to go back to Idaho to face trial… but there aren't enough residents in that 50-square-mile district to serve as jurors.

Theoretically, Kalt argued that this contradiction means that someone could brazenly commit a murder or some other felony within this zone and get away with it, since it would be unconstitutional for the crime to go to trial.

Kalt published a paper titled “The Perfect Crime” in the Georgetown Law Journal in 2005, explaining the issue and encouraging lawmakers to address it. However, as of 2019, the Zone of Death reportedly remains an open issue. Fortunately, there hasn't been a felony there that has put this issue officially to the test, so it remains a legal curiosity for the time being.

When asked how such an incident might play out in the real world, one attorney wrote, “It’s impossible to tell what a court would do in such a circumstance because there is absolutely no precedent… [However,] if you did in fact try it out, my guess is that the courts would do a bit of fancy footwork and find a reason to empanel a jury anyway.”


Clint Emerson’s National Preparedness Month Tips

National Preparedness Month is a great opportunity to spread the word about the value of preparedness, and 5.11 Tactical has taken that to heart. The company has been hosting free ABR Academy survival skill classes at its retail stores across the country — we attended one of them, and will be sharing our thoughts on it in the future. However, there are many who won't be able to make it to these classes, so the company also partnered with Clint Emerson to produce a 9-part video series full of a variety of quick preparedness tips.

As a retired Navy SEAL and author of 100 Deadly Skills, Emerson has put a lot of thought into survival skills and how to teach them to the average Joe. He channeled this into each of the nine videos, which you can watch below. Keep in mind that some of these tips will seem basic if you've been reading our publication and studying preparedness for a while — they're definitely oriented more towards beginners, but there's still some good food for thought in there even if you're more experienced.

Episode 1: How to Build a Go-Bag

The go-bag offers a foundation of basic gear for a variety of emergency situations, and it's something that everyone should have at home and/or in a vehicle.

Episode 2: How to Escape a Car Trunk

Clint explains some of your options for escaping a vehicle-based kidnapping, both in modern cars and older vehicles. This is a great skill to teach your kids.

Episode 3: How to Use a Flashlight Defensively

A flashlight is an exceptionally valuable tool, and one that's always part of our EDC gear. It's also a good resource for signaling or self-defense.

Episode 4: How to Work Out Like a “Violent Nomad”

This episode serves as a reminder of the critical nature of fitness to any survival situation. If you're clutching your side and wheezing during a disaster, your chances of making it out safely will diminish. The pull, push, rotate, and sprint approach can help you get back in shape.

Episode 5: How to Use a Pen for Self-Defense

Like Clint, we often carry a metal tactical pen. It's nice to have a writing implement on hand, and in a worst-case situation, the sharp tip can be used as an impact weapon.

Episode 6: How to Improve Your EDC Loadout

Most people think of items such as a pocket knife, watch, and pen when they envision every-day carry gear. But there are a lot of other items to consider — Clint's mouthguard is an unconventional example.

Episode 7: How to Build a Tactical Nightstand

Clint makes a good point: we spend a whole lot of time in bed. Since emergencies don't only occur during the day, it's advisable to have some quick-access gear at the side of your bed in case you need it.

Episode 8: How to Escape Duct Tape Restraints

Although this video oversimplifies the topic of escaping duct tape restraints — a task that's not as easy as it looks or sounds — it does provide some helpful tidbits. A concealed cutting tool (such as a razor blade, ceramic blade, or cord saw) is always a good resource to have.

Episode 9: How to Check for Tampering

Even if you're not an international super-spy, the thought of someone (e.g. your kids or a housekeeper) messing with your stuff while you're away is unnerving. Discreet alignment and cardinal bearings can let you know if someone tampered with your computer, phone, files, or other valuables while you weren't around.


Review: Console Vault Vehicle Safe

Imagine walking out to your vehicle in the morning, only to notice the window has been smashed in and the door is wide open. You do a quick inventory and find your spare cash has been cleaned out, your sunglasses are gone, and worst of all, the handgun you keep in the center console has been swiped. How could this happen? What can you do to safeguard your valuables next time? It's wise to protect yourself against smash-and-grab theft before this hypothetical scenario someday becomes your reality.

Photo: Flickr.com/dumbonyc

Theft of firearms from vehicles is a substantial problem — it gives criminals access to weapons and creates major headaches for the victims, many of whom never see their property again. If your weapon is stolen and used during the commission of a crime, it can also lead to legal issues. Installing a safe in your car or truck makes it possible to protect your gun, money, and other valuables from these opportunistic crimes. Vehicle-specific safes are especially easy to install without cutting or drilling.

Before the Console Vault, the non-locking center console wasn't ideal for storage of valuables.

The Console Vault

Console Vault is an ingenious lock box designed to fit inside the center console of various cars, trucks, and SUVs. Made from 12 gauge steel and featuring three different lock options, these safes are sturdy and concealable. Currently the company offers vaults for over 40 different vehicle applications with no modifications necessary. This makes Console Vault a good option for leased cars or work vehicles that will eventually have to be returned to their original configuration.

Thanks to the precise fit, it feels like the Console Vault came with the truck from the factory.

I often carry a Ruger SP101 .38 Special revolver in the center console of my 2018 Chevy Silverado 1500. However, the console lid doesn't have a lock. That meant if the doors were unlocked or someone forcibly entered the cab, then that gun would be totally accessible. This was unnerving, especially when I had passengers in the truck. In order to solve this problem, I recently picked up a Console Vault to securely store my gun and other every-day carry items.

For this 2018 Silverado application, MSRP is $269 — that includes your choice of the keyed lock or 3-digit option. The 4-digit combination lock pictured here adds $35 to the price, bringing total cost to $304.

Installation

Once the Console Vault arrived, I was eager to get it installed. Opening the package revealed a handful of contents. Besides the safe itself, there was only a pair of machine screws and the instructions. The instructions were straightforward, and I was relieved to find out all I needed was a 10mm socket and a Phillips screwdriver.

I removed the rubber mat, 10mm bolts, and file hangers before securing the Console Vault.

Installation took less than 5 minutes. The first step was to remove the rubber mat at the bottom of the console. Next, I was instructed to remove the two 10mm bolts from inside the console. The last part of disassembly was to remove the factory file folder hangers from the sides of the console. I set these aside as they were to be reinstalled later.

The Console Vault slid perfectly into the console and was secured in position with the two provided machine screws. A foam mat covers the bottom of the vault to reduce noise and avoid damage to items inside the vault as the truck moves. After the file folder hangers were reinstalled, a casual observer might think the truck came with a safe in the center console from the factory.

Locking Mechanism

Console Vault offers three different lock options to choose from.

As we explained above, there are three lock options: a keyed lock, a 3-digit combo, and a 4-digit combo. Both combo locks can be reprogrammed as many times as you want. Simply hold the reset plunger down on the side of the lock mechanism while inputting a new code. I ordered the Console Vault with the 4-digit combo option for added security.

With the Console Vault installed, little hands can't easily access your firearms.

However, it's important to note that a thief isn't going to take out a stethoscope and spend time trying to crack the combination. That brings me to the only real flaw I found with the Console Vault — the latch mechanism is susceptible to being cut with either a hacksaw or a cutoff wheel. As the saying goes, where there's a will there's a way. Even if the lock was reinforced, someone could rip out the whole console or steal the truck itself, given enough time and determination.

Console Vault's latch securely locks the lid, but can be cut fairly easily.

Overall, I really appreciate how much thought went into this product. In this application, there's still enough room on top of the safe to store items, and the truck retains the factory center console pocket with both 12V outlets. After the vault was installed, I lost very little room inside the console. It's a practical modification that adds peace of mind, since I know my gun and valuables are locked up.

Closing Thoughts

Along with center console safes, Console Vault makes other in-vehicle safes, as well as universal and in-home safes. To see everything they make and check applications for your vehicle, visit ConsoleVault.com.

Pros:

  • Fully concealed inside the center console
  • Easy install with no modifications to the vehicle
  • Offers protection for a gun and other small valuables

Cons:

  • Latch mechanism could be cut with handheld tools

Full Speed Ahead: Power Training Workouts for Survival

Warning! The exercises and content expressed in this column are for illustrative purposes only. Consult a medical professional before trying any physical activity or nutritional plan.

Speed and power are two vital qualities any prepper should have, lest the situation calls for you to burst out of a tight spot and haul ass to safety. With a litany of theories and exercises to choose from, what is the correct way to use power training to improve your speed? More importantly, which can be used to prepare for and possibly use during a disaster scenario? Read on to find out.

Why Power Train for Survival?

Survival scenarios can call for anything. The catch is, you have no idea what cards you’ll be dealt. From a physical standpoint, we need to do whatever we can to stack the cards in our favor, and in this case, it’s making us faster on our feet. Incorporating power training can certainly do that for you.

Dust off the weights and kettlebells: You can't survive a calamity if you can't climb the stairs without getting winded.

How? Being quick on your feet can mean escaping an animal attack or evading a group of not-so-friendly folks looking to mug you. Or, maybe you’re in a wilderness area, and hunting (or being hunted) is a real concern. You’ll certainly be thankful that you invested some extra time in this area of your physical preparation.

Older folks may need power training even more. Power can drastically decline with age, making some of the most menial tasks more dangerous. Those of us who are younger don’t see it, but power training plays a large role in fall prevention in the elderly. You may not be there yet, but as you age, this is an area that should not be neglected. Think of the strain you may put on a group of survivors if you’ve fallen and broken your hip.

How Do You Train for Power?

Using power training to improve your speed is fairly straightforward. First, we need to look at how power is measured. By definition, power is the work you do (force multiplied by distance) over the time it takes to do that work. This makes time an important factor, rather than just moving resistance a certain distance or amount of repetitions.

Rather than actually measuring an amount of time, we’re going to make that component of time involve moving something as quickly as possible. When training for power, in order to move that weight quickly, we need to reduce the amount you’re actually moving to put that emphasis on speed rather than total load. The greater the load, the slower you will be able to move it. This is most commonly done by taking your one repetition maximum with a given weight and removing about 30 to 70 percent of it, depending on what exercise you’re doing and what implement you’re using.

After getting through this, you may be getting a good idea of how to train for power: Use a lighter load and move that load (or intend to move it) as quickly as you can. While you can use many traditional exercises for power training, there are some that are better than others, especially when improving your speed with less equipment is a consideration.

How to Apply Power Training While Off-Grid?

We’re going to take some basic power movements you can do anywhere, some with equipment, but most without, to ensure you can continually improve your speed regardless of your living situation.

Since running is a series of alternating and reciprocal movements (think about arm and leg action during a sprint), most of the power exercises will focus on these concepts. First, we need mostly single-leg exercises as running takes place on one leg at a time. Next, we need to build better hip separation, meaning as one knee is driven upward, the other leg is propelling you forward by pushing in the opposite direction.

Arm action should be counteracting the rotation created through your lower body, by doing the opposite motions. We’re going to put one additional exercise in that emphasizes side-to-side movement to change things up a bit and improve power outside of pure forward movement. While it may not resemble sprinting per se, being powerful in this plane of motion is important for overall athleticism — not to mention for sidestepping potential hazards and attacks.

Explosive Step-Up

1. Begin with one foot on top of a box or sturdy object.

2. Violently drive your arms back and behind you, then throw them straight up as you push your front foot through the step.

3. Switch your feet in mid-air, and land with your feet in opposite positions.

4. Complete three sets of five to eight repetitions per leg.

Kettlebell Swing

1. Position the kettlebell out in front of you with your feet just outside shoulder-width and your toes slightly outward.

2. Begin by sitting back and reaching forward with your arms. This is the appropriate back position during the swing.

3. Hike the kettlebell straight back between your legs.

4. Explosively drive your hips forward with your arms relaxed, and swing the kettlebell to eye level. Stand tall, and don’t arch your back.

5. Guide the kettlebell back between your legs.

6. Complete three sets of 10 to 12 repetitions.

Split Squat Cycle Jump

1. Begin in a standing position with one leg in front of you and one behind, as if you lunged forward.

2. Violently drive your arms back and behind you, lower your body, then throw them straight up as you push your front foot through the floor.

3. Switch your feet in mid-air, and land with your feet in opposite positions.

In-Place Heiden and Stick

1. Begin standing on one leg.

2. Explosively push off your leg and land on the other leg. You want to take off at about 45 degrees. Try to move high and far.

3. Land on the opposite leg and stick the landing (pause).

4. Repeat and land on the original leg.

5. Complete three sets of five Heidens on each leg.

Sled Sprint

1. Begin with both hands on high handles on a sled. Your body should be in a forward lean.

2. While maintaining this position, sprint as fast as you can against the weight of the sled.

3. Complete three sets for roughly 10 to 12 seconds.

Power Skip

1. Begin in a plank position with your feet wider than hip width, with a stack of four 5-pound weight plates to your left.

2. Reach your right hand across, grab a plate, and place it to the right side. Repeat this until you have a pile on the right side.

3. Repeat this again with your other arm until you have a stack back on the left side.

4. Do this one more time on each side.

5. Repeat for the prescribed amount of sets.

Common Mistakes in Power Training

Using Too Much Weight: Power is a combination of strength and speed. Speed of movement is difficult to increase if the weight is far too heavy. You can’t be powerful if you’re not fast.

Completing Too Many Reps: Power training has a significant neuromuscular component, so it’s best to keep the repetitions low and focus more on speed of movement and less on muscle fatigue.

Not Trying to Move the Weight Quickly: Research shows that even if the weight is a little on the heavy side, your intent to move it quickly is important to increase power. Every exercise completed with the goal of power should be done as quickly as you can move it, even if it’s not lightning fast.

Doing Too Difficult a Movement: When just starting out, keep it simple. It’s very easy to see athletes doing some very technically demanding exercises, like Olympic lifts, and coming back to the gym Monday to try it out. It’s highly advised you get a coach to help you with movements that are complex and new to you. Many athletes get strong and powerful off of basic lifts and movements.

Just Focusing on Strength: While strength is a significant component of power training, it’s not the only component. Make sure to dedicate time to both strength and speed of movement when focusing on power to improve your speed.

Conclusion

When integrating these into your preexisting training program, you’ll want to place these after your warm up and before your strength work. Power training has a heavier neuromuscular component, which we want to take advantage of when you’re fresher earlier in the workout. It’s recommended you do one of these exercises, possibly paired with a core, corrective, or upper body power movement.

As you can see, developing speed through power exercises doesn’t have to be very difficult. All of the exercises listed are fairly basic, but are effective at improving power and its carryover to speed. The best part is that they really don’t require much in terms of equipment, making them ideal for any disaster scenario. Rest assured you’ll be prepared to get your ass out of harm’s way following this prescription.

About the Author

Ryne Gioviano, M.S.Ed., NSCA-CPT is the owner of Achieve Personal Training & Lifestyle Design. He holds a master’s degree in exercise physiology and is a certified personal trainer through the National Strength and Conditioning Association. For more information, visit www.achieve-personaltraining.com. You can find Ryne on Twitter and Instagram at @RGioviano.

More From Issue 17

Don’t miss essential survival insights—sign up for Recoil Offgrid's free newsletter today!

Read articles from the next issue of Recoil Offgrid: Issue 16

Read articles from the previous issue of Recoil Offgrid: Issue 18

Check out our other publications on the web: Recoil | Gun Digest | Blade | RecoilTV | RECOILtv (YouTube)

Editor's Note: This article has been modified from its original version for the web.


A Doctor’s Perspective on the “Tactical Tampon”

Improvisation is a critical skill for any preparedness-minded individual. While our stockpiled gear should help us deal with various emergencies, it's rare that you'll encounter a situation where you'll have every single resource you need. For example, the water purifier bottle in your pack is great for personal use, but knowing how to purify water with bleach can help you process larger quantities. On the other hand, there are times when improvisation isn't viable — despite what you may have seen on Gilligan's Island reruns, you can't make a fully-functional radio out of coconuts and bamboo.

You may have heard the assertion that shoving a tampon into a gunshot wound is just as good as applying hemostatic gauze and a pressure dressing. After all, tampons are made to stop blood flow, right? Many internet commenters claim to know a guy who knows a guy who has saved lives using tourniquets in a combat zone. However, the actual validity of these claims is often debatable.

Joe Alton, M.D., co-founded Doom and Bloom Medical along with his wife Amy Alton, ARNP (Advanced Registered Nurse Practitioner). The couple has written extensively on the topic of survival medicine, including The Survival Medicine Handbook, which we reviewed in Issue 32. Joe is a retired but actively-licensed OB/GYN and Fellow of the American College of Surgeons, so he is familiar with feminine products and bleeding control. He recently wrote a blog article titled “The Tactical Tampon?” that directly addresses the topic of using tampons for trauma care.

Doom and Bloom included this visual comparison of a tampon to traditional gauze and a pressure dressing.

Here are some excerpts:

“Tampons are meant to deal with menstrual bleeding, a type of bleeding that isn’t under much pressure, unlike the blood that’s coming out of a ruptured artery… How much blood are you absorbing with the tampon? Light tampons, about 6 grams, super duper absorbency, about 15 or so. That’s not so much, especially if there’s arterial bleeding. The rest has to go somewhere.”

“Plugging a hole, even one that looks like it could fit a tampon, doesn’t stop the bleeding inside. It just pools internally or maybe finds an exit wound, but the tampon is just concealing the bleeding, not stopping it. Just because you can’t see it doesn’t mean it isn’t happening.”

“If you’re a combat medic who used a tampon on a bleeding casualty and the surgical team didn’t find a lot of blood internally somewhere, well, good job. I’ll bet, however, the actual verifications are few and far-between.”

For more of Dr. Alton's thoughts on the “tactical tampon,” both as a wound packing material and an external dressing, we encourage you to read the full blog article here: doomandbloom.net/the-tactical-tampon. You can also read Amy Alton's take on the issue in her blog article.


New: TOPS Knives Viking Tactics Bloodline Series

Knives, like most other tools, are heavily influenced by personal preference. Centuries ago, craftsmen often made their own blades or hired the local blacksmith to forge something to their specifications. These days, one-off knives are less common, but some knifemakers are still producing personalized production knives for a few specialist users. TOPS Knives recently partnered with Kyle Lamb of Viking Tactics to create three new VTAC-branded fixed blades, dubbed the Norseman, Crusader, and Patriot.

After spending more than two decades in the U.S. Army, 15 years in Delta Force, and fighting in infamous warzones such as Mogadishu, Sergeant Major (retired) Kyle Lamb has some well-established preferences for tools. TOPS made these three Viking Tactics Bloodline knives to his specifications, with distinctive two-tone Micarta handle scales and a “viking vine” pattern that serves as spine jimping. All are made from 1095 steel finished in TOPS' popular “Acid Rain” finish.

The Viking Tactics Norseman is the largest of the trio, with a 5.88-inch blade and 11.5-inch overall length. It features a drop point shape and slim, straight handle. A tan Kydex sheath with MOLLE Lok clip is included. MSRP is $225.

Next is the Crusader, which features more aggressive handle curvature, a large forefinger notch, and a substantial thumb ramp for added control. This was inspired by VTAC's first ever knife design, the Assault. This also includes a Kydex sheath with MOLLE Lok clip. MSRP is $210.

Finally, there's the VTAC Patriot. This is the smallest of the three, with a 3-inch blade and 6.75-inch OAL. It includes a long belly and upswept tip for peeling, skinning, and slashing. The Kydex sheath features belt loops for scout carry. MSRP is $190.

For more information on the new TOPS Knives Viking Tactics Bloodline series, go to TopsKnives.com or VikingTactics.com.

Read More

Don’t miss essential survival insights—sign up for Recoil Offgrid's free newsletter today!

Check out our other publications on the web: Recoil | Gun Digest | Blade | RecoilTV | RECOILtv (YouTube)


RECOILtv: Off-Roading at the 2019 Overland Challenge

Competition fuels improvement — if you're looking to develop a skill, facing off against others in a competitive setting is a great way to do so. That might mean shooting three-gun matches, running marathons or GoRuck races, or even signing up for a literal survival competition. Since transportation is an essential aspect of survival, it's wise to try your hand at some vehicle-based competitions as well. The 2019 Overland Challenge is one such example.

Referred to as an off-road rally race, the Southern Xpeditions Overland Challenge is a three-day event that takes place in Uwharrie, North Carolina each year. It includes mud bogs, rock crawls, water crossings, steep inclines, and tight trail sections that push vehicles to their limits. There are also technical obstacle courses and team vs. team events that test competitors' communication and coordination. Winners receive prizes from sponsors, and all profits from the event are donated to veteran-oriented charities.

Our partners at RECOIL sent a film crew to North Carolina to cover the 2019 Overland Challenge, and produced a three-part video series for RECOILtv. Check out each episode below:

For more information on the Overland Challenge or to sign up for the 2020 event, go to southernxpeditions.com/overland-challenge.


It’s a Trap! – Small Game Trapping Tips for Survival

This article originally appeared in Issue 10 of our magazine.

Warning! The following article is a brief overview on setting traps and snares and is not meant to be a thorough in-depth guide. Some traps may be illegal or dangerous and are set at your own risk. For more information, consult with a reputable trapper or survival instructor.

It doesn’t get much worse than this. The collapse of society has come and gone. What’s left is a wasteland of devastated metropolises, a loose society ruled by roving warlords, and scattered remnants of resources. You now subsist on what you find in the urban jungles and the surrounding wilderness.

But how did you go from clueless cubicle monkey to keen trapper?

Your transformation from John in the IT department to Grizzly Adams wasn’t easy, but it had a powerful driving force — hunger is a very persuasive motivator. If we can stay alive long enough to figure out a new skill through trial and error, then we’ve learned what to do and what not to do. But there’s another path. We can try door No. 2. Learn a new skill and move toward mastery of it while we still have expert guidance and a safety net in place. If door No. 2 sounds like a smart way to learn how to secure some food, then read on.

Trapping is the ancient art form of harvesting animal foods while you’re absent from that area. It dates back thousands of years. Many of the different traps that our forebears used have survived into modern times, still used by traditional cultures around the globe — and for good reason.

Traps are like little mechanical hunters that you set out on the landscape. They hunt for you while you’re off doing other tasks. They hunt throughout the night while you’re sound asleep. They hunt in places you wouldn’t want to sit in for very long, like swamps and icy woodlands. With the proper construction, de-scenting, placement, and baiting, your “automated hunting machine” can be just as effective as the devices of the old-time trappers.

And there’s no shortage of traps to try. There are foothold traps, body grip traps, “live catch” box traps, and traps that defy classification. There are also snares and deadfalls, which are the two common types that we will discuss here. Just follow these steps, and you can set traps to provide yourself with meat, fat, and useful hides.

Seek the Best Quarry

If you’re trapping for food, then this is all about the calories. In that context, the best animals to trap prey are fatty animals. Raccoon, porcupine, and beaver have much more body fat (and therefore calories) than rabbits, squirrels, and groundhogs. People have literally starved to death eating only lean rabbit meat (look it up, it’s called “rabbit starvation”). Now this doesn’t mean that you should avoid trapping rabbits and other lean game. It just means you need to diversify your menu.

Another aspect to consider is the animal’s gullibility. “Will they fall for this trap?” is what you should be asking yourself when you select a target game species and set the trap to match your target. Some animals aren’t too bright and will fall for anything, like porcupines and groundhogs. Other animals are very discerning and intelligent.

Avoid Common Mistakes

Poorly crafted traps are a big problem in trapping. So are traps that are loaded with human scent and traps placed in “dead zones.” The first problem of craftsmanship can usually be remedied by practice and with patience. Make these traps over and over, until it becomes second nature and they function perfectly. And take your time with the work, it’s not a race.

The second problem is human scent. Wary animals will avoid a trap with too much human skin oil and skin flakes on it (yes, their noses can be that sensitive). Wipe your hands and the trap with dirt, crushed charcoal, and local non-toxic aromatic plant parts (like pine needles) to cover the human scent. Do this to your hands before collecting the materials to make traps. Do it to hands your and traps before you go out to set them.

Finally, avoid trapping in “dead zones” by selecting trap sites with plenty of tracks and other animal sign in the area. Some places just don’t have that many animals, and this is a poor place to trap.

Play Your Numbers

Since our first ancestor figured out the first trap, the art of trapping has always been a numbers game. You’re living in a fantasyland if you think you can just set out one trap and feed yourself with it. Professional trappers with modern traps enjoy only about a 10-percent return on their activities. They have to set out dozens of traps to catch just a couple of animals each day. And historic trappers during the American fur trade era probably had even less success with their field-built snares and finicky old-fashioned footholds.

Use Better Baits

Not all traps use bait to lure in your quarry. Some traps are simply placed in trails and rely on the animal’s passage to engage the trigger. But with the traps that are bait driven, that bait had better be just right. You want to bait with something that matches the animal’s diet. Use red meat, fowl, and fish for carnivores and omnivores. Use nuts, roots, and fruits for herbivores (rabbits don’t care for bloody meat chunks). It’s very helpful to use something that’s out of season or out of their reach. This scarcity will entice them further. Just remember the old trapper’s adage: Don’t bait with corn in the middle of a cornfield. This means that you should avoid using a common bait item that the animal can easily get without going toward the strangely scented and ominous-looking contraption.

Follow the Rules

In an emergency, you’ll do whatever you must, rules be damned. But in normal circumstances, check your local trapping regulations before engaging in any trapping activities, practice, or otherwise. Get a trapping license, as many areas require this. Get a signed letter that grants you permission if you are trapping on private land that you do not own. And obey the trapping season for your target game species. Certain animals are only legal to trap at certain times.

Fixed Snare

Snares are a type of trap that constrict around an animal and either hold them securely or actually kill them. Snares can be made with rope or wire, easily scavenged from modern homes, businesses, and vehicles. But for best results, we should stock up on actual snare sets made from braided steel cables with metal locking mechanisms. These are far stronger and more durable than most improvised snares, and any quarry you’ve caught is less likely to escape.

The fixed snare is typically set along small animal runs and paths, or over the mouth of animal burrows. There are typically no baits involved, we just catch the animal because it runs through the snare loop, gets hung up, and then tightens the noose by trying to run away. This snare can work well for rabbits (who are always moving quickly and likely to tighten the noose fast). It also works for slower creatures like raccoon, groundhog, and possum.

Step 1: Find an animal run or burrow opening as a trapping site. Look for tracks to confirm that it’s active and to get an idea of the species that are using it.

Step 2: Find a nearby sapling or shrub to use as an anchor for the snare. You could also drive a stake in the ground for attachment if nothing suitable is available.

Step 3: Attach the snare to the anchor and use twigs to prop the loop open in the run or over the burrow mouth. Make the opening the right size to fit your target species’ head. Too small, and they can’t fit in the noose. Too big, they simply jump through the “hoop.”

Step 4: Check the trap once or twice daily from a distance. Reset it if it gets knocked down. Collect any dead animals and butcher immediately. Use a spear, bow, or firearm to dispatch any live-caught animals.

Spring Pole Peg Snare

This versatile snare can be activated by an animal running down a trail (like a fixed snare), or it can be baited to lure in an animal. This trap includes the addition of a spring pole, which is a flexible sapling tree that lifts the snared animal up off the ground. Ideally, the spring pole should be strong enough to lift the animal at least 5 feet off the ground to keep it out of the reach of scavengers. Here’s how to set up the spring pole peg snare.

Step 1: Tie a bowline knot or similar loop in the end of a 3-foot rope and pass the free end of the rope through it (or better yet, get a manufactured cable snare noose). Carve two sticks to have hook-like notches. One stick needs to be only about 6 inches, and the other will need to be about 1 foot with a point at the non-notched end. This longer stick will be driven into the ground like a stake.

Step 2: Find a flexible sapling tree in a suitable trapping area (an area with obvious animal tracks and traffic — or a spot with food, water, and cover for animals). Bend the small tree down and trim the leaves and branches from it. This reduces drag when the trap goes off.

Step 3: Tie your snare line to the tip of the sapling tree. If using a rope noose, tie your 6-inch trigger peg stick to the snare line about 1 foot away from the tip of the sapling tree. Make sure you tie the knot on the 6-inch trigger peg on the side of the peg into which you cut the hook. Tying the line on any other side of the peg will pull the trigger at an odd angle, and you’ll never be able to set the trap.

Step 4: Drive your foot-long, notched stake into the ground with a rock or hammer. Make sure the stake is placed in a spot where the line from the tree will be plumb (completely vertical, not pulling sideways). If the stake and the line from the sapling tree aren’t plumb, they’ll be very hard to set.

Step 5: Bend the sapling down and put it under your armpit so you can safely hold it and use both hands. Set your noose in the animal’s path, propped open with sticks. Set the trigger and carefully withdraw.

Important Safety Note: Once a trigger is set and the spring pole is pulling on it, never touch an open noose with your fingers. Use a stick to adjust the noose. If you try to hold the noose or fiddle with it by hand, and the trap goes off unexpectedly, the noose can tighten around one or more of your digits. As the spring pole goes up, the noose will either skin your fingers or remove them. Remember that traps can be dangerous not only to the prey, but to the trapper as well. Be very careful and respectful of all traps.

Greasy String Deadfall

Our remote ancestors never had steel cables or Internet websites where they could buy a jar of mouse paste for trap bait (yes, that’s a real product). They worked with basic natural materials that were found all around them, and they worked with the things at hand. This trap is part of a class called deadfalls. These traps involve a trigger system that holds up a rock, log, or similar weight.

When the trigger is tripped, the weight falls upon the prey and crushes it. It’s not a pretty kill, but it gets the job done.

The greasy string deadfall is the least complicated trap in this article, best suited for small creatures, particularly rodents. For this trap, the bait is mashed into a piece of twine (which is holding up the weight). The animal goes under the weight to chew on the twine, and it breaks — dropping the rock.

Step 1: Gather your components. This trap consists of a forked stick, a deadfall weight, a length of thin twine, and suitable bait. You also will need something to secure the free end of the twine. We can get the best results by choosing a forked stick that has nearly parallel branching, and one long fork leg and a shorter one. The twine should be thin and barely able to support the weight of the deadfall. It could be hand-woven string, or a piece of cord you scavenge. The bait should be a good match for your target species.

Step 2: Tie one end of your twine to the shorter branch on the forked stick and the other end of the twine to a small shrub or stake in the ground. The deadfall weight should be placed against the forked stick so that the twine is tight and running under the weight, but not touching it. You’re not done yet, but simply placing the deadfall weight in position so you can determine where to place the bait. Remove the weight and add the bait.

Step 3: Squish the bait into the twine deeply, in a spot deep under the weight. Replace the weight and check the trap daily.

Foothold Trap

The foothold trap dates back centuries, showing up at least as early as the 1600s. These traps consist of clamping jaws that hold an animal’s foot after they set on it. These traps have been used for catching small game and larger animals, even bears. Foothold traps don’t usually kill an animal (unless they die of stress). The quarry is typically dispatched by the trapper. While you can’t make a reliable foothold trap from scratch in the wild, they’re still a great trap to know — and a better trap to stockpile. Here’s how to set one, tailored to catch predators.

Step 1: Locate a good site for this trap. A stream bank or small hillside works well. Drive a wooden stake into the bank, wiggle it around, and pull it out. This makes a hole in the dirt that resembles a rodent hole. Insert bait deep into the hole. It’s OK if you leave a little fresh loose dirt at the mouth of the hole — this makes it look “lived in.”

Step 2: Dig a shallow hole, large enough to hold the open jaws of the foothold trap, near the fake rodent hole. Drive a stake into the ground and attach the foothold chain to it. Place a piece of wax paper over the set foothold trap. This keeps the cover dirt from filling in the space under the foothold trigger. Cover lightly with dirt or sand. The ideal distance from the fake rodent hole to the foothold is the same distance from the target species’ nose to its front feet, and slightly right or left of center.

Step 3: Set up a fence or funnel. Place rocks, logs, thorny branches, or other natural obstructions near the foothold, but not over it. This will help to persuade the animal to step in the right spot. Check your trap daily and dispatch any trapped game.

Conclusion

Trapping is just like any other survival skill. The more you practice it, the better you’ll get. And you can even get in some practice time in the city and suburbs. Set traps without their harmful component.

For example, create a foothold set without burying the foothold. Just create a patch of damp sand, a baited fake rodent hole, and set up obstructions to direct the animal to set in the “track trap” to catch only their footprint. You could also set up snares with thread instead of cables or rope. Wipe a little sticky pine pitch on the tread and see what happens. If an animal gets caught, the thread will break. This shows you that your trap could have worked, and the sticky sap may give you a hair or two so you can see which species tripped the trap.

Keep these trapping tips in mind and practice your traps often — the skill will always be there to serve you.

Sources: