Road Trip Safety – Part 1: Traveling with Firearms

Editor's Note: The following article is a web-exclusive accompaniment to “Road Warrior” by Mel Ward, as seen in the upcoming Issue 33 of our magazine (on sale 8/6/19). In the print article, Mel covers a variety of tips for maintaining safety and security while on a cross-country road trip. Traveling with guns presents its own list of challenges, which Mel examines below.

Recently, I completed my second coast-to-coast crossing. As a parent, I found myself confronted with a plethora of challenges presented by traversing 3,500 miles from Washington State to North Carolina in two vehicles with a wife, five children, two dogs, and everything we owned packed into a 16-foot box truck. The following considerations are based on the lessons my family learned while traveling across the country.

Traveling with Firearms

You may or may not be traveling with a firearm. In our case, we were traveling with every gun we owned as we were moving our household across the country. For me personally, this meant I needed to address two issues:

  1. Legally transporting my daily carry pistol for protecting my family on the trip
  2. Legally storing and transporting the rest of the pistols and rifles in my collection in the back of the moving truck

The consequences of ignoring these issues could be dire — arrest, imprisonment, theft, or even your own guns being used against you and your loved ones.

Carrying for Protection

Obviously, I recommend carrying your preferred firearm for protection. That choice, and how you choose to do it is up to you, but we need to be well aware of the legal considerations since we are crossing into city, county, and state jurisdictions that may have gun laws that differ from what we’re used to.

First off, ensure your CCW license will be valid for the duration of your trip. Next, know the reciprocity of your state’s CCW license. Many CCWs are recognized in multiple states. Interactive reciprocity maps can be a good place to start — for example, the USCCA offers a free and frequently-updated map. However, I also like to consult my state’s official government page for all laws pertaining to licensing, carrying, and transporting firearms as well as those pages of any states I’ll be passing through along my chosen route. This enables you to have the most up-to-date information possible for each specific locality along your journey straight from the source. Double-check everything before you leave — it’s not worth the risk of ending your trip early by getting arrested.

Now, how do we want to carry for optimum protection throughout the trip? It’s hard to beat a good inside-the-waistband holster, but we made this household move in the middle of summer and that called for a steady diet of shorts and T-shirts each day. Depending on your preferred carry position, sitting in the car for hours can also cause IWB carry to become uncomfortable. Without being able to adequately conceal my pistol in a holster, I instead opted to use a single-strap backpack from Vertx called the Commuter Sling.

I was incredibly pleased with the Commuter Sling’s one-shoulder design as it allowed me to skip trying to conceal a full-size pistol on my hip in the summer heat. The sling looks like a high-end messenger bag a college kid might carry, but when you sling it around from back to chest and start unzipping quick-access pockets, the bag goes from urbane to urban combat in nothing-flat. If traditional carry options are unavailable, I strongly recommend a purpose-built bag such as this one. A backpack can do in a pinch, but bags like this are designed with people like us in mind. They feature incredible durability and rapid accessibility in time-is-life situations.

The Vertx Commuter Sling features a purpose-built pocket for CCW weapon storage.

Inside the bag’s Velcro-friendly pistol compartment I carried my full-size Glock 17 held in place by a nylon holster built specifically for this carry configuration. Accessing the pistol by rotating the bag to your chest and yanking open the zipper with oversized lanyard is fast and simple.

Inside the outer-most rip-away compartment I utilized the bag’s built-in MOLLE-compatible loops to weave in a nylon magazine carrier to store five additional magazines hidden from view. In other zippered pouches I stored a light, headlamp, and various other EDC items I wanted close at hand. The Commuter Sling also has compartments to throw your keys and wallet in while you hoof it around on foot. Basically, this bag contained everything I needed to defend my family while looking like nothing more than an ordinary shoulder-slung backpack.

Like so many other suggestions in this article, kit like this is worth the investment. I never had to worry about printing and I was able to one-hand this bag even when carrying one of my young daughters on my hip. Give these bags a look and see if you don’t agree. For more information on carrying concealed, refer to our sister publication CONCEALMENT.

Storing and Transporting Additional Firearms

This is pretty straightforward, but let’s be thorough and cover it anyway. I took every single rifle and pistol I owned on this move. With the exception of my carry gun, I ensured each was unloaded and locked in either their original container or a purpose-built, lockable gun storage box. Next, I ensured all my ammunition was stored in its original packaging (as much as possible) and locked everything away in ammo cans separate from my firearms. Ideally, I would have even gone a step further and transported the ammunition separately, but I had way too much to cram it into the back of my wife’s already overcrowded Suburban. So, I simply made sure weapons and ammo in the back of the rental truck were locked, separate, and physically inaccessible from the passenger compartment.

Next, I purchased an absolute beast of a lock for the back of the rental truck and ensured it was secured at every stop and fill-up along the way. (Refer to “A Look at Locks” in Issue 32 for a guide on selecting a high-security lock.) When we stayed overnight, I opted to leave everything securely locked in the back of the truck. The thought occurred to me to bring the weapons inside, but honestly, I found this to be impractical for several reasons.

For one, I had far too many weapons with me on this cross-country move. They would have needed their own hotel room. I also didn’t want to draw attention to myself by hauling an arsenal inside each night, since hard-sided gun cases look exactly like what they are. I also didn’t want to spook the management, other guests, or alert potential ne’er-do-wells I was sitting on a small fortune in firearms. Finally, I wasn’t fond of the idea of my little ones playing hide-and-go-seek amongst stacks of daddy’s rifles in the hotel room, unloaded and locked though they were.

Ultimately, this decision is up to you, but this was the safest and most practical course of action for my family. Also, the National Rifle Association Institute for Legislative Action recommends you carry printed copies of all your relevant permits and licenses as well as copies of pertinent laws governing the carry and transportation of firearms in each jurisdiction you pass through. This sounds like a lot of work, but it’s really not, and will be well worth the time and effort should you be pulled over.

For more information on transporting your firearm collection across state lines, consult the NRA ILA Interstate Transportation page.

Part 2: Situational Awareness

Now that we’ve discussed what we’re carrying, how to carry and transport it, and how to do so safely and legally, our next part in this series will cover a topic that’s just as important. Check OFFGRIDweb.com next Sunday for Part 2 of our Road Trip Safety series, which addresses ways to maintain situational awareness on the road.


Book Review: “101 Skills You Need to Survive in the Woods”

The Premise: Just like the title says, this book contains 101 skills that can save your butt when you’re outdoors. Where this book differs from others with a similar premise is the method in which Kevin Estela, of Estela Wilderness Education, shares his information — he’s a trainer of “feeders.” For the uninitiated, feeders are students of Sayoc Kali, a Filipino martial art that demands students be adaptable, smart, and have the mindset to take control of their situation, whether it’s a knife fight or surviving a night in the woods alone.

Estela provides proven and hard-learned lessons for the reader as well as challenges to them.

The 411: The 101 skills in the book are broken down into 10 sections: fire, shelter, knife, cordage, illumination, navigation, signal and communication, first aid and trauma, water, and food gathering. Each explanation of the skill paints a picture in the reader’s mind about why the skill is important and what the takeaway should be. At the end of each section are ways to further your training with simple out-of-the-box challenges.

101 Skills You Need to Survive in the Woods by Kevin Estrella

The Verdict: Estela launches into the book with some backstory on himself and, most importantly, the methodology of Sayoc Kali and becoming a feeder. Even if you’re not a martial artist, the feeder mindset is applicable to any of life’s situations, and this was explained well. The introduction to this book makes the reader want to improve their skills and Estela explains how his book can help. To say the least, reading the intro motivates the reader to grow into a better person.

The organization of the book is excellent for both the experienced and budding woodsman. Reading through a section and then trying each skill is a worthy and rewarding endeavor. The pace isn’t overwhelming, and each skill builds on the next. Since Estela is both a high school teacher and a professional wilderness survival educator, his ability to connect with the reader was apparent in how he conveys information. Each skill is described in depth and generally accompanied by a visual example. The mantra “always prepared, prepared all-ways” helps the reader understand the overarching theme.

The sections start with introductory skills and build on each one or progress in difficulty and complexity. Here are few of our favorites:

  • Skill 13: Build a hot seat/bed, a method for warming yourself or your shelter while diminishing concerns of open flame proximity.
  • Skill 71: Turnbuckle Rattler Perimeter Alarm, a skill that uses proficiency in imagination as well as resourcefulness and knot tying.
  • Skill 100: Elastic band hunting tools, showing a variety of ways to improve on the old slingshot.

We have very few complaints for 101 Skills You Need to Survive in the Woods; however, our one small gripe is that some skills lack a picture where it would be appropriate. With that being said, going back to the prevailing mindset, a feeder would seek this out elsewhere in an effort to expand personal knowledge. An example would be Skill 81: Use Medicinal Plants. Pictures are provided for only one of the five plants discussed. When it comes to identifying plants, it can be very difficult (and often dangerous) to get it incorrect. Estela does start this skill with a recommendation of seeking the assistance of a local expert.

Overall, Estela knows his stuff, as anyone who has read his previous articles in our magazine can attest. He has made these important skills easy for the common person to read and understand in 101 Skills You Need to Survive in the Woods. His encouragement to train and build on that training will produce a competent woodsman who can adapt and survive in a variety of situations. While many of these skills focus on wilderness survival, having the proper mindset can also be adapted to urban environments.

Book & Author
101 Skills You Need to Survive in the Woods
by Kevin Estela

Publisher
Page Street Publishing Co.

MSRP
$22

URL
www.pagestreetpublishing.com

Pages
208 pages

Rating
>Thrive
Survive
Die


OFFGRID Library of Recommended Books


Last-Resort Libations: Home Brewing Beer and Wine

Disclaimer: This article is for informational purposes only. Check all local, state, and federal laws before producing, consuming, or distributing alcohol. Also, improper sanitation or sealing of stored products could cause illness. If you choose to try the recipes here, be well informed and do so at your own risk.

When preparedness enthusiasts start talking about SHTF barter items, the list almost always includes alcoholic beverages. Diversified preppers often stock up on liquor and wine, since they age well, and some even dabble in storing beer (which needs to be rotated, aka consumed, before it gets “skunked”). Since all good things come to an end, at some point your stocks would run out. In the event of a drawn-out economic crisis or grid-down scenario, the value and importance of alcohol would likely increase.

But what’s your resupply strategy? Have you ever thought about making your own wine or beer? It’s not as hard as you might think, and you don’t even need much in the way of supplies. I’ve been home-brewing beer, wine, mead, and hard cider for years, and even running an annual class on the subject here in Virginia. I can’t make any promises about the taste of your first batch, but I’ve been blessed with some very good home-brew batches over the years. With a little luck and diligence to the details, you’ll brew some good batches too!

Fermentation Basics

Before we launch into the nuts and bolts of creating your own alcoholic beverages, it’s important to understand the unsung hero of it all — yeast! This is a fungal organism, acting a bit like a plant and a bit like an animal. There are about 1,500 known species of yeast, with countless strains of each species. Our little friend Saccharomyces cerevisiae is the most important one for our purposes; since it eats simple sugars, burps out carbon dioxide, and excretes alcohol (when held in a sugary liquid in a favorable temperature range and low oxygen levels).

When the right yeast is added to water filled with grain malt sugar, it proliferates and consumes the maltose. The result is beer. When the right strain of yeast goes into fruit sugar water, you get wine. Beer is made with less “sugar” per gallon, and wine is generally made with double the “sugar.” This is why most beers are about 5-percent alcohol by volume (ABV) and wines are around 10-percent ABV.

It takes roughly a month to initially ferment these drinks, during which time the excess CO2 must have a way to escape without letting in oxygen (that would make vinegar instead of alcohol). The job of letting CO2 escape is handled by one of the many forms of “wine lock.” When the alcohol tolerance of the yeast strain is reached in the sugar water and the yeast cells are, essentially, too drunk to work anymore, fermentation slows to a near stop. At this point we’d do separate steps for beer and wine — carbonate the beer and age the wine. Then, after the right amount of time, your work should yield a familiar product. For our purposes, we’ll start with wine, since it’s a simpler process, and work our way up to beer. Enjoy!

Fermenting Wine

Historic Roots: According to scholars, the production of wine dates back even farther than beer. It may have started with naturally fermented fruits, or it could have been watered down honey that turned into wine — commonly known as “mead.” Not only did this strange new elixir give our ancestors a good buzz, wine had the added benefit of being a practical way to preserve the calories of fruit. When you give it a try, go easy in the beginning and don’t be too hard on yourself if your first batch is a little weird. Remember there are thousands of wineries in the world making hundreds of styles of wine on a world-class level. And you’re just fermenting the juice from some berries by keeping it in a jug in your basement. Your results may vary.

Ingredients: For the truest form of wine, you’d crush fruit and use only the juice to craft your vino — no added water or sugar. But that takes a hell of a lot of fruit. For a more prepper-friendly approach, use a shelf-stable sweetener like white table sugar to produce the alcohol and a small amount of fruit to flavor it. To do this, you’ll need wine yeast, a stainless pot, a 1-gallon glass jug, 1 gallon of spring water (or well water), a wine lock with tight-fitting jug stopper, a strainer, a funnel, a spoon, a thermometer, and sanitizing solution (I prefer One-Step No Rinse Sanitizer).

You’ll also need bottles and corks to store your wine for proper aging. If you’re able to visit a home brew shop or order online, you could also pick up pectic enzyme to help break down the fruit, wine maker’s acid blend for tartness, and yeast nutrient. All three of these are optional, but stand a good chance of improving your wine.

Directions:

Step 1
In a large stainless or enamel pot, combine the sugar and crushed fruit with 3.5 quarts of water. Boil this mixture for 20 minutes (to kill any stray organisms in the water or on the fruit). While the liquid is boiling, add some sanitizing solution to water (follow the package directions) and swish out your strainer, funnel, 1-gallon glass jug, the wine lock, and rubber stopper. You can also cleanse your thermometer. Ideally, all items should have at least two minutes of contact time with the solution. Shake the liquid from them and air dry.

Step 2
Set the pot of hot sugar water in a container of cold water (or an ice water bath) to cool quickly. Once below 80 degrees F, stir in the wine yeast and any optional additives you have.

Step 3
Use a sanitized funnel and strainer to filter and direct your sugary juice (technically known as “must”) into a sanitized glass jug that’ll be your fermentation vessel. Don’t skip the strainer. Even small seeds and bits of fruit skin can plug up your wine lock. This causes pressure to build, and it can blow the wine lock off the top of the jug (if the batch is foamy).

Step 4
Add the sanitized fermentation lock to the fermentation vessel. Place the jug in an open topped plastic bin (in case of spills) and store it in a dark location with a stable temperature between 60 to 70 degrees F. Watch carefully for the next few days. It should start bubbling (fermenting) within a few hours. If it doesn’t start bubbling within 24 hours, add more yeast to the jug.

Step 5
After a bubbly first week, your “must” should be milkier in color and beginning to form sediment. After a month, the sediment should be thick at the bottom of the jug, and the wine should be clearing up. Let it sit for another week or two, and when you can watch it for a long time without a single bubble jumping through the wine lock, it’s finished fermenting. Slowly decant the wine into sanitized bottles or another 1-gallon glass jug and seal them tightly. Fun fact: You can bottle your wine in beer bottles for single-serve packaging, but in beer bottles it’ll only keep for months, instead of years. Although drinkable now, it’s better to age your new wine for a few months in a cool dark place. When you can’t wait any longer, open and enjoy.

Recipe:

  • 2.25 pounds of table sugar
  • 2 to 3 pounds of fresh fruit (blackberries are my favorite for this, but any fruit will work)
  • ¼ of a 5-gram package of wine yeast (red wine yeast for dark fruit and white wine yeast for light-colored fruits — save the remaining ¾ package for future batches)
  • Optional additives: 2 teaspoons of acid blend, ½ teaspoon of pectic enzyme, and 1 teaspoon of yeast nutrient

Best Practices for Storage
Wine is best kept in a cool, dark, and slightly damp environment. If you don’t happen to have a wine cellar, a root cellar will suffice (or a cool basement). Just keep it away from heat and light while aging and while in storage. Bottles with synthetic or natural corks should be stored sideways to keep the corks wet for a tighter seal. With proper storage, your wine will last for decades, and will only improve with each passing year.

“Easy cap” bottles can hold your wine or beer.

Shelf Life and Endurance
Since wine yeasts can keep working in higher alcohol solutions, this allows them to keep eating sugar when beer yeast would’ve been “too drunk” to eat or reproduce. This alcohol tolerant yeast, and the higher amount of sugar in the beginning will produce an alcoholic beverage with twice the strength of beer (on average). Typically over 10-percent alcohol by volume, wine keeps much longer than beer (years versus months). A nice glass of wine could be a great indulgence after a hard day of scavenging, and this fermented fluid can also help us sleep and be traded for needed supplies.

Brewing Beer

Historic Roots: Written records in both Egypt and Sumeria show that beer brewing started around 4,000 years ago — though I’m quite sure it dates back to the earliest days of agriculture. Some booze scholars even suggest we started farming so that we could have a regular supply of beer ingredients. And while a big Budweiser plant can turn out over 1 million containers of beer each day, the brewing of beer started in a much more humble manner. It’s likely that some grain that got wet and sprouted, which was then cooked into a porridge or watery soup. When the right strain of yeast blew into the leftovers, which sat for a few days, the world’s first beer began to foam, bubble, and ferment. And whoever drank that questionable leftover broth, liked it enough to try it again and again. For this article, we’ll focus on the beer style of ale. This beer is the easiest and quickest to make, since it ferments at room temperature and only takes three or four weeks. The other main beer is lager, which ferments at lower temperatures and takes about two months to ferment. Unless you have a brewing cave underground with a constant air temp of 56 degrees F (which is how the style originated), lager isn’t as practical for preparedness planning.

Ingredients: In the old days (and for “all grain” brewing today), home brewers would dampen barley seeds and keep them warm until they sprouted. This sprouting unlocked the malt sugar, and the grain would then be toasted to kill the sprouts and add more flavor. The toasted grain would be crushed and simmered in water to create malt sugar water. Today, you can follow the historic path of 100-percent grain brewing, or take an easier road. Dried malt extract sugar is available commercially, made from many different kinds of malt. This dried sugar powder will keep indefinitely (in a dry, dark, cool place) and is a great choice for preparedness. Skip the canned malt syrup products, as they can potentially lead to the presence of deadly botulism toxin after being stored long term (the cans will swell). In addition to your dry malt extract powder, you’ll need dried hops, ale yeast, a stainless pot, a 1-gallon glass jug, 1 gallon of spring or well water, a wine lock with jug stopper, a clear plastic or vinyl hose that fits the glass jug, a strainer, a funnel, a spoon, a thermometer, and sanitizing solution. When it comes time to bottle the beer, you’ll also need pressure-safe bottles with tight-fitting caps or lids, and a little table sugar to carbonate the beer.

Directions:

Step 1
In a multi-gallon stainless or enamel pot, boil 1 gallon of water with the dried malt extract, crushed grain, and hops for 60 minutes. This breaks down the malt sugar molecules into more “bite-sized” pieces for the yeast to eat. Use a big enough pot and be careful that it doesn’t boil over!

Step 2
Once the hour of boiling is over, cool the pot of liquid quickly by setting it in a container of cold water (ideally, an ice water bath). When the liquid is below 80 degrees F, pour in your yeast and stir. Then, place the sanitized strainer in the funnel and strain the gallon of malt liquid into your sanitized 1-gallon jug.

Step 3
Add your clear plastic or vinyl hose to jug plug, and then arrange the free end of the hose to be submerged in a glass of water. This assembly is called a “blow off hose,” and it’s perfect for dealing with the foamy mess that’ll erupt from your glass jug for the next few days. Place the jug and its accompanying glass of water in a plastic bin (for spills) and set it in a dark place with stable temperatures (ideally from 60 to 70 degrees F). Once you notice that no more foam is flowing through the blow-off hose, switch the hose for a water-filled wine lock.

Step 4
Watch your brew carefully for the first few days. If no bubbles or foam (fermentation) occurred within the first 24 to 36 hours, your yeast was dead in the package or your malt liquid was too hot. Try adding more yeast to save the batch.

Step 5
After three to four weeks, the sediment will be building up on the bottom of the glass jug, the bubbling will have stopped and the ale should be starting to clarify. At this point, carefully and slowly pour your beer into a sanitized container (to get it away from the sediment). Add the 1 ounce of table sugar and stir to dissolve. Prepare a small funnel, sanitized bottles, and caps for bottling. Bottle into sanitized bottles and cap them. You’ll need about 10 bottles (12-ounce size) and caps for 1 gallon of ale. You could also use soda bottles and their original caps, after sanitizing (however, you may notice the plastic taste). You could also use flip-top bottles, like Grolsch beer. Just make sure your bottles and caps are well-sanitized and keep your bottled beer in the dark at room temperature for one to two weeks. The yeast in the beer will consume the new sugar, and since the bottles are capped, the CO2 can’t escape. This gas actually carbonates your ale! After carbonation is done, chill your ale, and enjoy.

Ingredients:

  • 1 pound of dried amber malt extract
  • 6 ounces of caramel malt grain (crushed as best as you can)
  • ¼ ounce of Cascade (or other variety) hops (whole dried flowers or pellets)
  • ¼ of an 11-gram package of ale yeast (any style of ale will work — save the remaining ¾ package in the fridge for a future batch)
  • 1 ounce of table sugar to carbonate the ale

There are many different styles of “wine lock,” but they must all block incoming air while allowing pressure and...

Best Practices for Storage
Shelf life has always been the biggest problem for beer, and unless you have a high-proof strong ale or IPA made with extra malt and extra hops, it’ll get “skunky” in a few months. This is why beer was historically made in small batches and made often. Once you do have some excess built up, keep it in the coolest, darkest place you have. By the way, skunked beer is still safe for human consumption, but it’s just not as nice to drink. Your beer should retain its flavor and quality for several months, or longer if stored cold.

Benefits as a Survival Implement
Sometimes considered “liquid bread” by our forebears, beer gave our ancestors a way to store the calories of their grain without the vulnerabilities of grain. Beer wouldn’t mold in damp weather like grain. Insects, rodents, and pests weren’t interested in beer like they were with grain. Sure, some nutrients are lost in the brewing process — but without better ways to preserve food, beer made a lot of sense. And they felt great after drinking it! We still have all those advantages, and you can use beer for trading and nutrition. You may also be the only person in town who’s able to make beer (making you an even more valuable community member).

Alternatives
You can certainly make beer and wine using nontraditional ingredients and improvised equipment, but we have to caution you. Cobbling together some DIY brewing equipment isn’t too tricky, but getting weird with the ingredients can turn out some unpredictable results, and can even put you in harm’s way.

Create Some Wine Locks: You’ll need “wine locks” for both beer and wine, since they allow carbon dioxide to escape while preventing the abundant oxygen of our atmosphere from getting into the fermentation vessel. One of the simplest improvised versions is a balloon with a tiny hole pierced in it. Just stab an uninflated balloon with a needle to make one tiny hole (don’t punch all the way through it, you don’t need two holes). Stretch the neck of the balloon over the neck of your fermentation jug and add a few rubber bands around the neck of the vessel to help hold the balloon in place. As the balloon fills with CO2, the balloon expands until the pinprick hole opens and the CO2 escapes. Once the pressure drops, the pinhole closes. Leave this in place until the balloon hangs flaccid and isn’t moving anymore. That means your fermentation is likely to be complete.

Stalking The Wild Yeast: Our remote ancestors didn’t have a local homebrew shop (or Amazon) to provide them with hundreds of different yeast strains for wine, beer, and other fermented drinks. They had to get their yeast from the wild. You can too, but the results are a crap shoot. You know that whitish film that covers your grapes, blueberries, and other fruits? This film can be a natural source of wild yeast. There’s also wild yeast stuck to sappy pine and spruce branches. Wild yeast just blows on the wind pretty much everywhere on dry land. There’s even a species in Mongolia that allows fermenting milk to become alcoholic.

Prior to the understanding of microbiology, our brewing predecessors would make wine using raw fruit with the film-covered skin, or they’d strain their cooled beer through dozens of nontoxic evergreen branches (like a filter). They must have thought it was some kind of magic ritual or spell, but they were actually inoculating the brew with the necessary yeast to ferment it. They also knew that skipping those steps would keep the brew from fermenting. Today, we understand yeast and can experiment by adding filmy fruit skins to small batches of wine so we can see if the strains of yeast in the film will ferment and provide good flavors. We could also stir our pot of cooled beer with a live needle-covered pine or spruce branch to introduce wild yeast. Be warned! The wild yeast strains could create amazing flavors or gross ones, you’ll just have to wait and see. Some yeast strains produce esters with caramel flavors, while others produce esters that taste terrible.

A Recipe for Trouble: Those familiar with prison culture have probably heard of prison wine (aka hooch, pruno, or brown baby). This is a DIY alcoholic drink concocted by creative inmates to get a buzz in lock up. Here’s the problem, the pruno recipe is also a great way to make botulism. As you likely know, botulism is an uncommon but extremely potent toxin, attacking the body’s nervous system. With access to professional medical care and life support — meaning a ventilator — most victims recover. But without definitive medical care, botulism poisoning can lead to paralysis and death.

Pruno is typically made with any sweet food scraps the inmates can acquire, and fermented in a plastic bag for several days. The inability to cook the ingredients (and the questionable ingredients themselves) can allow the growth of the bacterium Clostridium botulinum that causes this odd poisoning. And because it’s a bacterially produced toxin (not the live organism) that makes you sick, the alcohol that forms will not kill the problem. Once the alcohol level exceeds 5 percent, most living organisms will die, but the poison they created will remain. Avoid this issue in your brewing by cooking your ingredients to kill all of the organisms they might harbor, and never use potatoes, oats, or food from bulging cans as home brew ingredients.

Stock up on the unusual supplies, since you may not be able to get them in a crisis.

DIY Beer and Wine Mistakes

There are plenty of things that can go wrong with your homemade alcohol during preparation, fermentation, bottling, or storage. Thankfully, a lot of these faux pas are easy to prevent. Here are three beginner mistakes that I see all too often.

The Wrong Disinfectant: Bleach is a great disinfectant for many things, including drinking water, kitchen countertops, and fouled laundry, but that doesn’t mean it’s a good fit for brewing. The last time I used bleach to clean bottles provided me an experience I’ll never forget. There must’ve been some bleach residue in a bottle that I filled with some very promising ale. But upon tasting, I’ve never spit out a drink so fast in my life. As soon as the liquid hit my tongue, I sprayed it across the wall. The flavor was what I imagine a combination of molten plastic and toilet cleaner tastes like. Don’t use bleach to clean your bottles or other brewing supplies. Instead, use the brewing disinfectant we recommended, or high-proof vodka. You could also boil your non-melting gear in water for five minutes.

Too Much Light: Ever wonder why so many wines come in dark green bottles and many beers come in dark brown glass? Sunlight is needed to grow the grain and fruit that we’ll turn into beer and wine but after that, the relationship is over. As your liquids ferment and while they’re in storage, block all possible sunlight — especially if you’re stuck using clear glass containers. Sunlight can actually create many “off” flavors in your beer and wine.

Killing Your Yeast: There are several things that can kill your yeast, the little workhorses that turn sugar into booze. The most common culprit is that you add the yeast while the beer or wine is too hot. I know you’re in a hurry to make your beer or wine, but it’s going to be weeks before the beer is ready to drink and months for the wine. Wait the extra few minutes for your liquid to cool down to room temperature before “pitching” the yeast. Also be aware that many juices you might try to ferment have been treated to prevent microbial growth (which includes yeast). I know, that big jug of “preservative- free” apple cider is just begging to be turned into hard cider, but if it came from a store, it’s been treated. I don’t care what the label says, something has been added and your yeast will die. Don’t waste your time. If you want hard cider, go to an orchard and watch them press the apples and grab a jug of fresh unpasteurized juice. That’ll usually turn into a fine alcoholic cider.

Bring Your Utensils!

You don’t need too much gear to start home brewing, but here are a few grid-down brewing and distillation utensils you won’t want to be caught without.

Non-Electric Scale: For measuring sugar, hops, and any number of other ingredients and adjuncts, a little spring scale is a great choice. It’ll last for years, it doesn’t mind getting wet, and it’s EMP and CME proof, unlike electronic scales.

Thermometer and Spoon: Self-explanatory.

Stainless Pots: Don’t boil your brew in aluminum pots. Stainless is the best choice, unless you have unchipped enamel pots available. Cast iron, copper, tin, and aluminum can react with acid and sugar, creating some unpleasant tastes.

Bottle Capper and New Caps: You can keep using beer bottles over and over, so long as the bottle mouth is undamaged and they're well cleaned and disinfected between uses. But you’ll need a bottle capping tool and new caps to keep the system going. These supplies aren’t expensive and easy to find from homebrew suppliers. FYI, you can’t recap twist-off bottles with new metal caps; you can only re-cap pry-off beer bottles.

Wine Corker and New Corks: Just like the beer bottle capper, you’ll need a corker and corks to store your wine. Neither is particularly expensive, and many different types of corks are on the market. Go with natural long-length corks if you want to age the wine for years (instead of months).

Stainless Mesh Strainer: Catch all the gross stuff before it goes into the fermenter.

Funnels: You can’t have too many funnels. Little ones are great for filling beer bottles. Big ones are needed to pour from cooking pot into a fermenting jug. Try to get a funnel big enough to hold your mesh strainer to limit the splashing and mess.

Conclusion

With the right combination of yeast, sugar, flavorings, water, and time, you too can join the honorable ranks of home-brewers worldwide. The main advantage to knowing this art form is your ability to resupply yourself and others. Drinkable alcohol has so many uses, that knowing how to provide it could make you an even more valuable player for your survival group or community. And the main disadvantage of this art is that everyone will always be nagging you for beer and wine, and growing impatient when you keep telling them “it’s not ready yet!”

Many of us like our alcohol and, as a species, we’ve been brewing for thousands of years. For the vast majority of that time, our alcoholic beverages were produced in the home or by local providers. These drinks have evolved from unique combinations of regional ingredients to become sophisticated beverage styles known around the globe. Yet at their heart, they’re still drinks that our forebears would recognize. No matter how complex your recipes may be, it’s still just fermented grain or fruit; you don’t need a chemistry degree to create home brew. You don’t need thousands of dollars of elaborate gear to create something tasty, either.

Pay attention to the recipe and the details, keep things clean, don’t rush the process, and have fun. Even if these skills are never necessary for your doomsday trading post and wine shop, they’re a lot of fun to practice and give us a chance to sample some of our oldest heritage products — one glass at a time.


Reader Question: How Can I Distill Water in the Wild?

We recently received an email from a reader who is just beginning his journey into emergency preparedness. He had a question about water distillation, and how it can be accomplished in the backcountry. So, we took the opportunity to provide some context on where it falls in the list of water purification options, and explain some of its advantages and disadvantages.

See below for the original email, followed by our response:


Good morning. Straight off, I admit I am new to prepping. I'm trying to understand the equipment needed to produce (not just boil, but distill) raw water into potable water. However, all the prepper-recommended sites/equipment (which I've found so far) offer systems that have a power cord to be plugged into a 110v receptacle. I must be missing something. If I am in a situation where I am having to clean my own water, I'm pretty sure there's not going to be any operating electrical sockets. Is there not distillation equipment designed for use in the wild? Thank you.


That's a great question, so thanks for reaching out.

The most important consideration before approaching water purification is the contaminants you suspect are present in the raw water. If the water contains bacteria and protozoan cysts, as most lakes and streams do, then there lots of easy options to purify it. These include:

The SODIS method can be used to kill bacteria present in water. See the linked article above for more info.

Some water sources, such as those in developing nations with limited plumbing or those which may have been contaminated by sewage runoff (or floodwater that contains sewage), may also contain viruses such as norovirus, rotavirus, or hepatitis. Viruses are smaller and more difficult to remove, so if you're buying an off-the-shelf purifier, look for one that is rated for virus removal. Brands such as Aquamira, Grayl, LifeSaver, and MSR offer purifiers in this category. For more info, see our H2O Hygiene water purifier buyer's guide.

However, the most challenging contaminants to remove are dissolved chemicals, since they are present on a molecular level. Micro-filters won't remove them, and boiling will only increase their concentration. Examples of water sources in this category would include seawater, urine, or agricultural runoff. This is where distillation is valuable — it physically separates the water from most chemical contaminants.

An example of a traditional copper still.

The classic distillation device is a still, much like what bootleggers used to make moonshine. These generally consist of a copper vessel over a fire, with a condenser coil that cools water vapor and deposits it into a clean container. As you'd expect, stills are usually heavy and not very portable.

If you need a portable way to distill water in the wild, you'll need a way to boil it, trap the vapor (steam), and cool it so it condenses back into liquid. It's possible to do this with two glass bottles, or with a pot, aluminum foil, and a glass jar. It's also possible to build a solar still, but that method will only generate a small amount of water each day.

Unless you're concerned that your water source may be contaminated with salt and/or harmful chemicals, we'd recommend using one of the simpler methods of purification we mentioned, since they will require much less equipment and time.

Hopefully this helps you as you begin learning more about prepping.


If you have a survival-related question of your own, you can email us at offgrid@recoilweb.com.


What If You’re Lured into a Roadside Robbery, Abduction, or Worse?

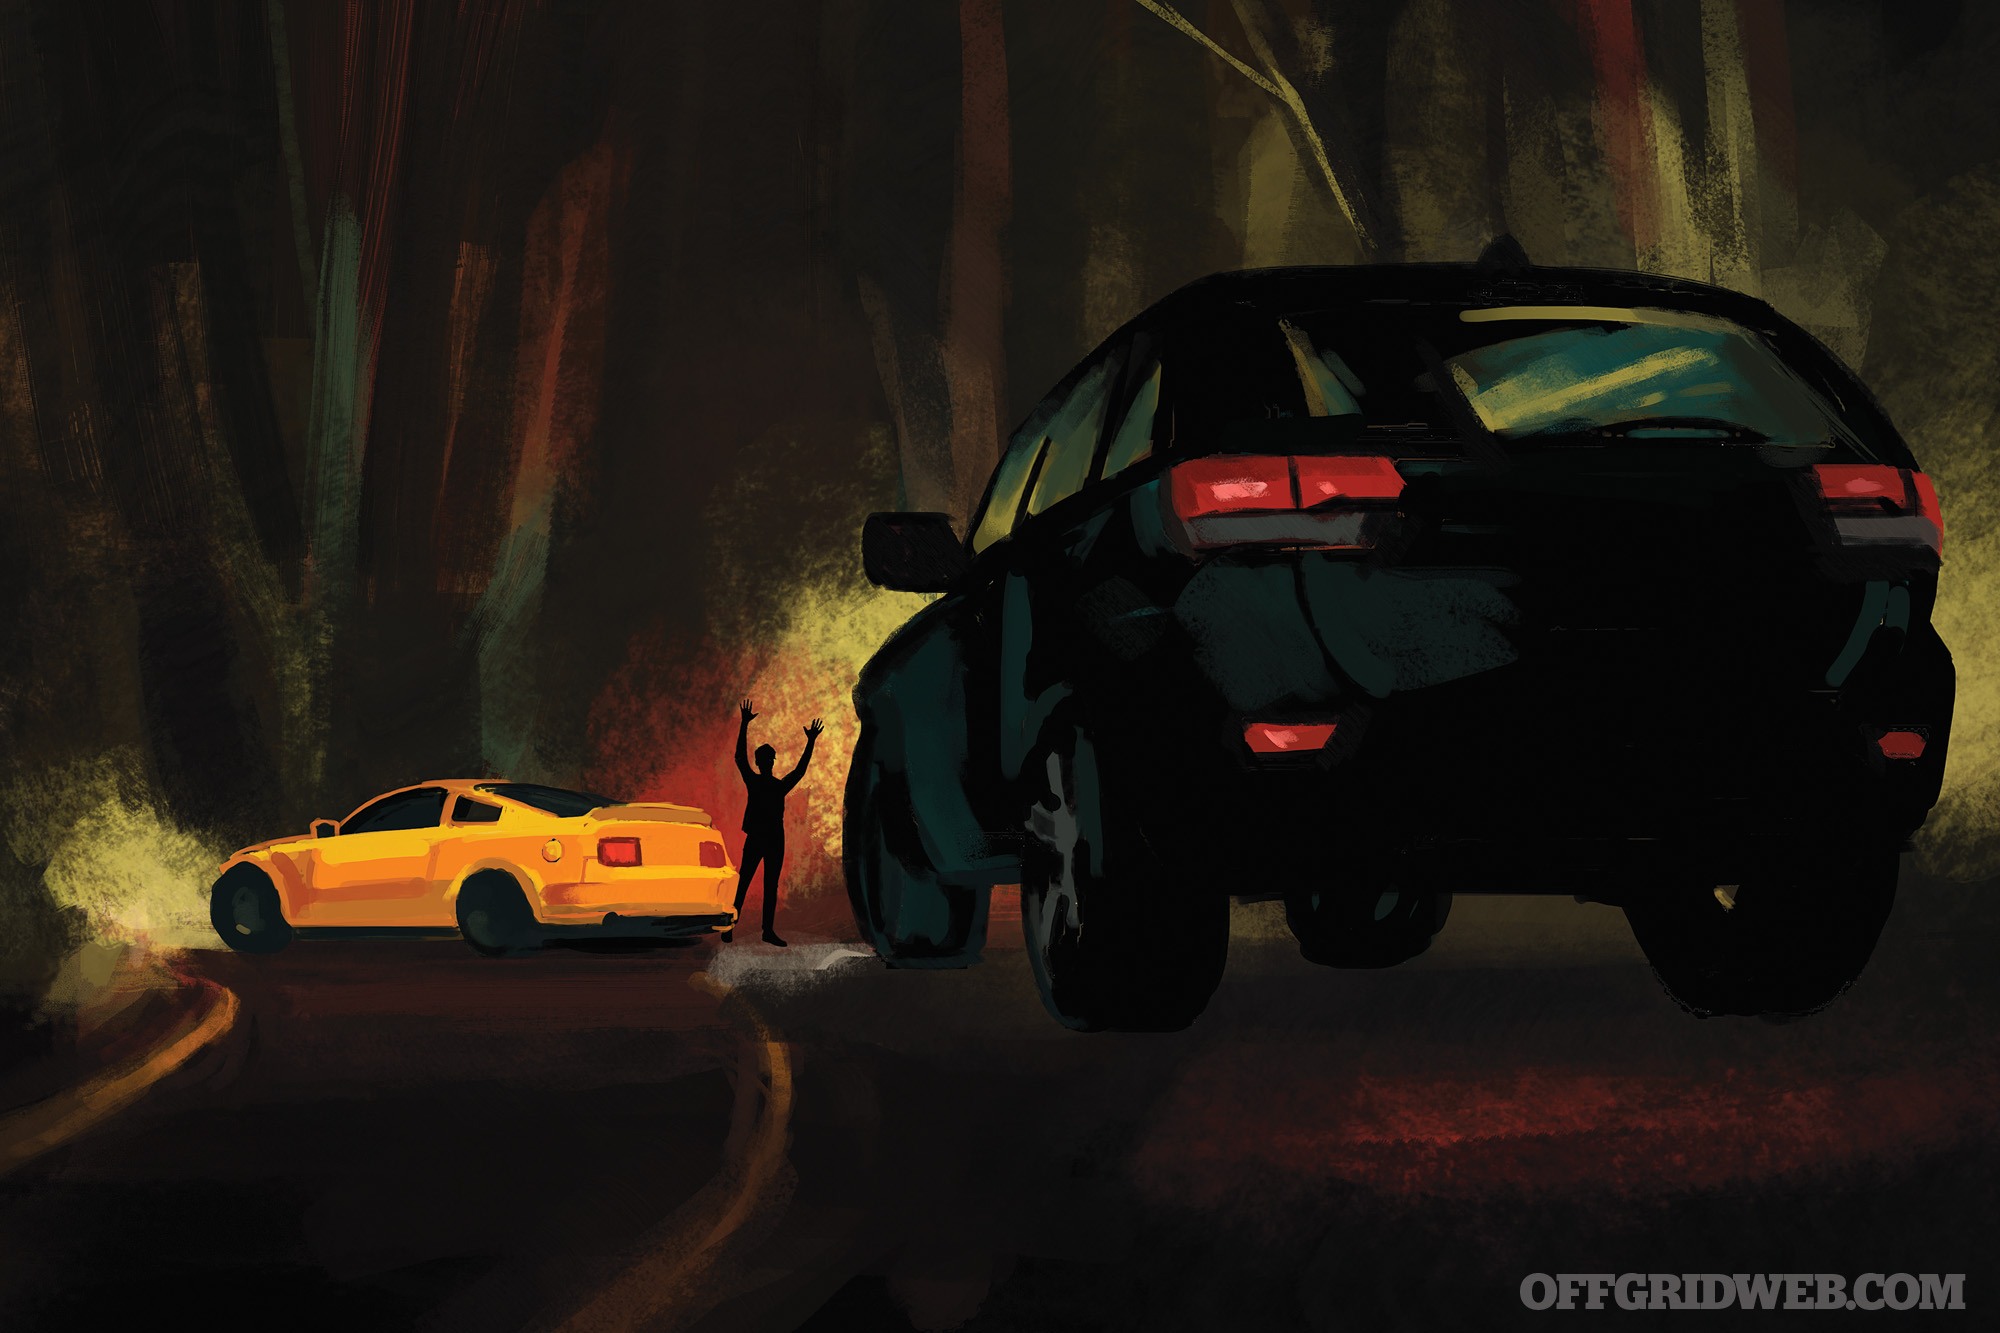
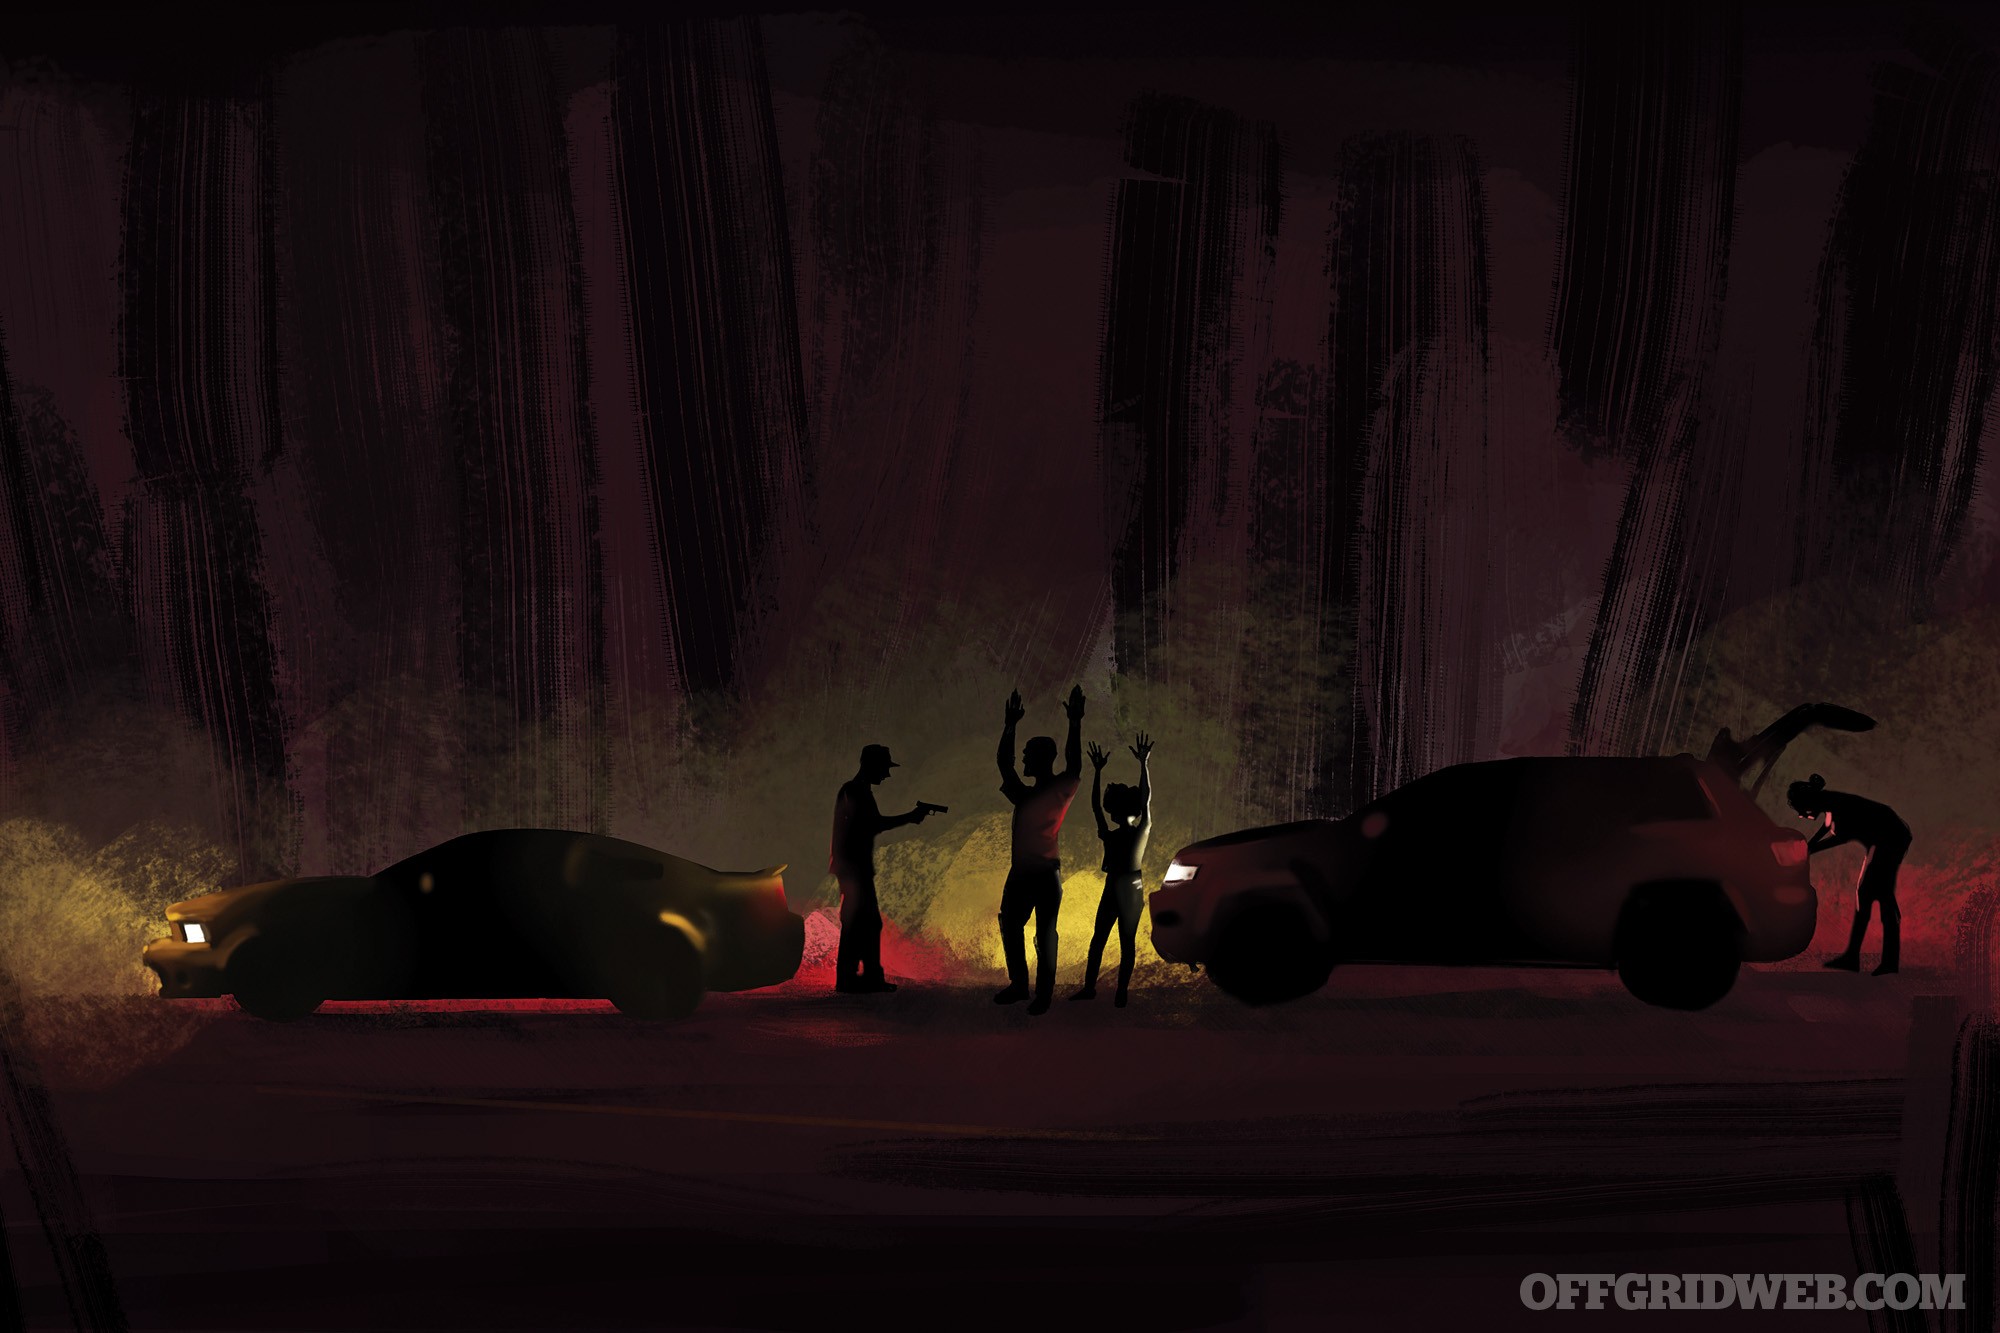
Illustrations by Cassandra Dale

With your friendliest smile, you walked up to the stranded motorist and said, “Hello sir, can I give you a hand?” From the headlights of your own vehicle, you could see him well enough in the darkness. His expression seemed to be one of relief. He pumped your handshake hard and offered his prolific thanks for your help. Instinctively, you profiled the stranger and checked your surroundings. He wasn’t dressed like a country boy (even though you were in a rural area), and you could see numerous tattoos peeking out from his shirt collar and sleeves. A few spider webs and skulls ran across the man’s visible skin. No big deal, you reasoned to yourself. Plenty of people have tattoos these days, you thought. But little red flags kept popping up.

His urban clothing style just didn’t match with the pastoral area you were traveling through. So what if his apparel seems odd, you rationalized, maybe that’s just the new style. As you considered the whole scene again, you realized that there wasn’t a rear license plate on the car either, and the other stranded motorist accompanying this man was a rather rough-looking young woman sitting in the disabled car. Still focused on your good deed and with your spouse waiting in your car, you took a gander under the hood as the young woman got out of the distressed vehicle to “stretch her legs.”

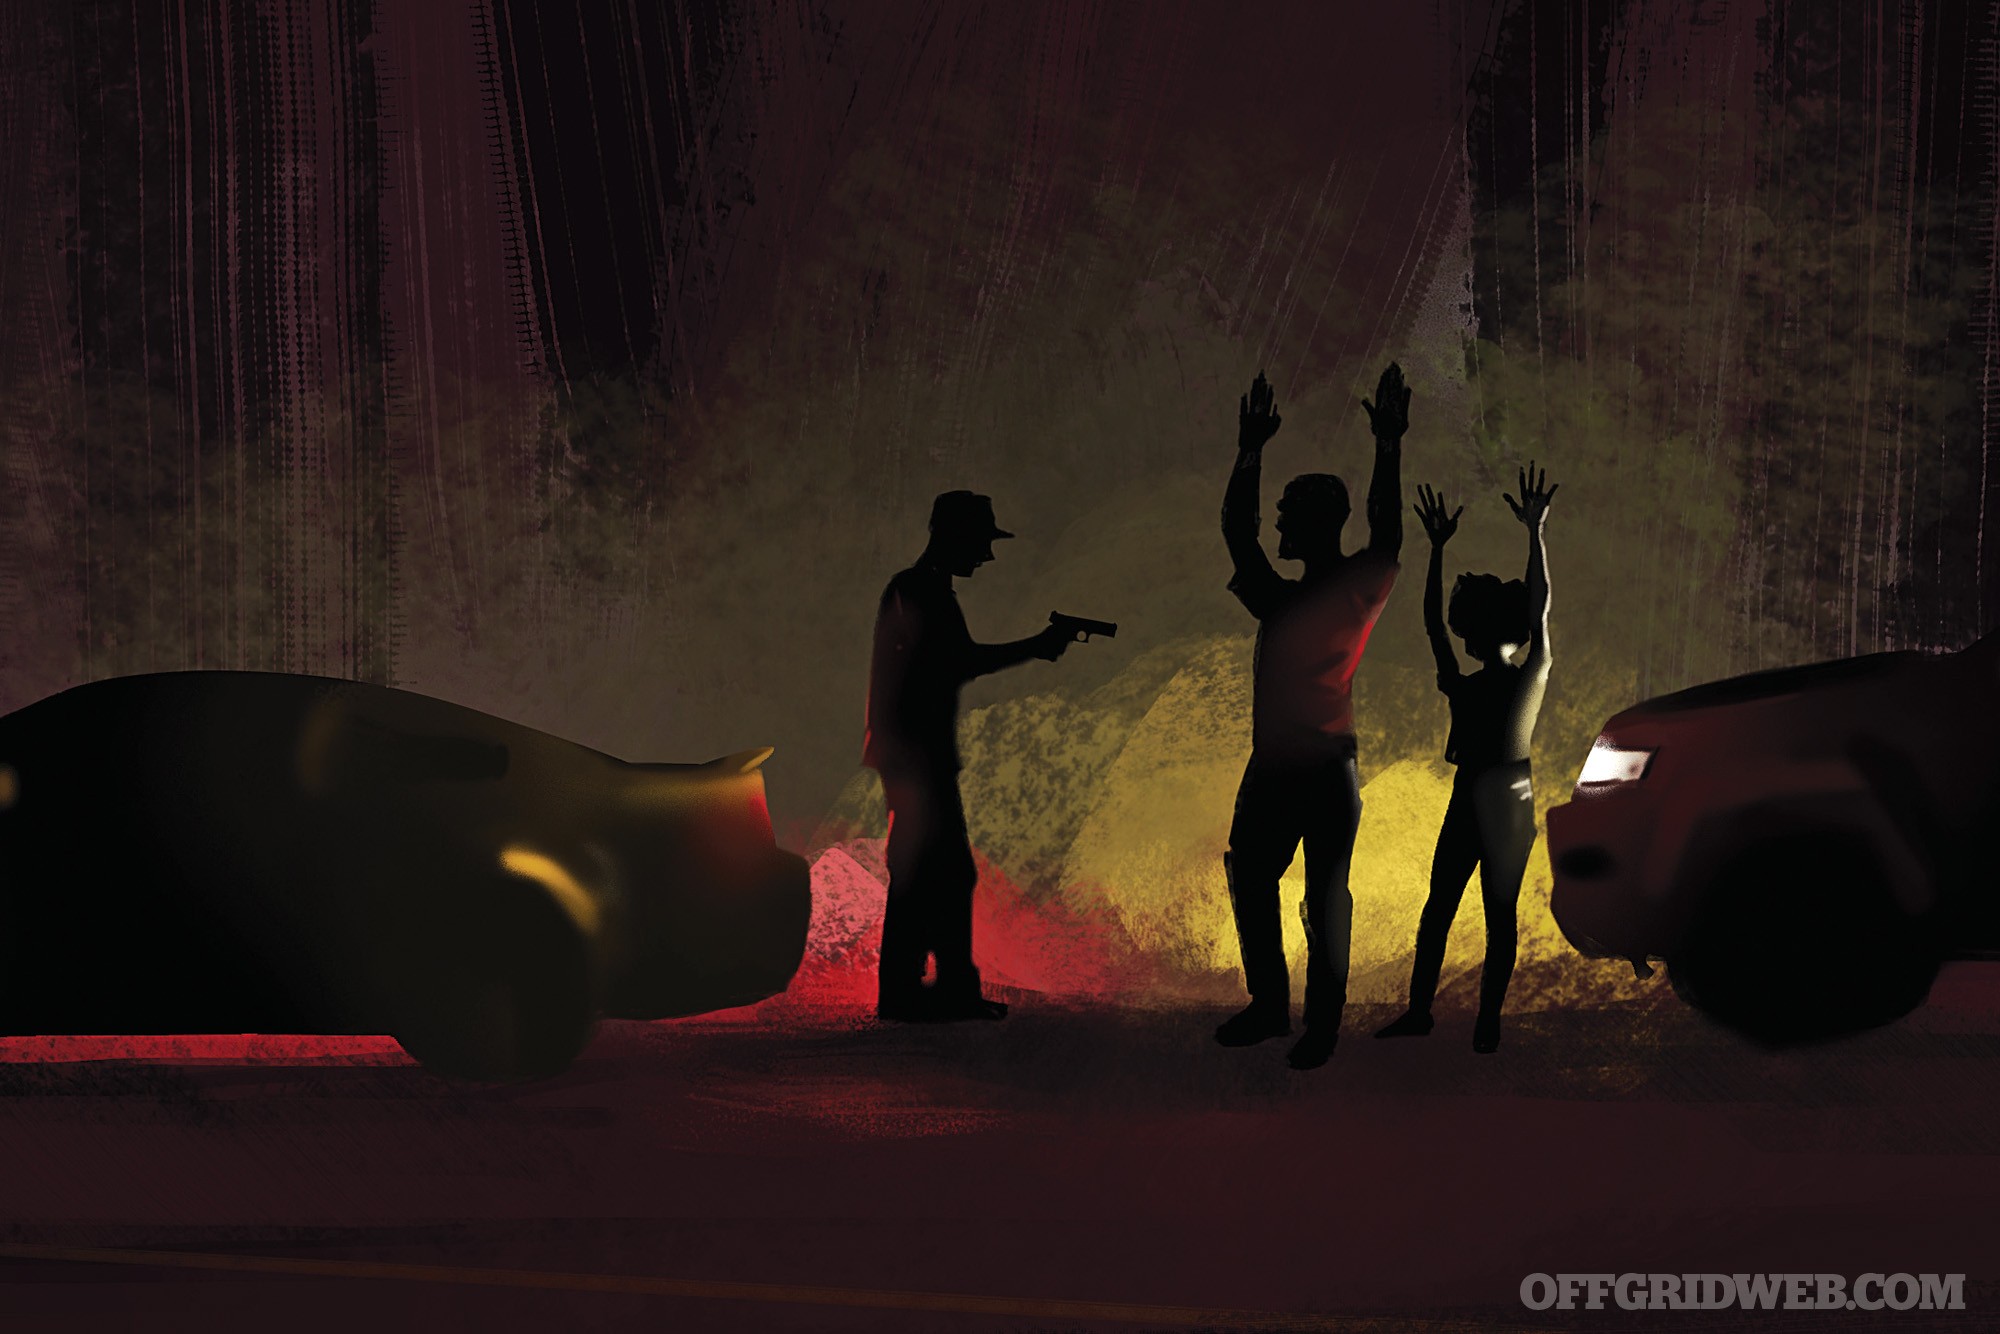
After some amicable chitchat with the man, you decided to try jumper cables. As you turned back to your vehicle for your tool kit, the man’s demeanor changed abruptly. He blocked your path and gave you a sharp shove backward. That’s when you spotted the rough woman near the front of your car — and in the bright headlights, the flash of shiny metal called your attention to her hand. As soon as you realized that the object she held was a knife, your skin started to crawl, and you felt sick to your stomach. Before you could take another step toward the knife-wielding woman and your unsuspecting spouse, the man drew a small revolver and aimed it at your face. His thumb pulled the hammer back, and a malevolent grin spread from ear to ear. He had you and your spouse right where he wanted.

In this chapter of RECOIL OFFGRID’s “What If?” column, we see that the most ordinary situation can flip on its head and become a deadly set of circumstances. To challenge our judgment, the editors have played against our natural instinct to help other stranded motorists and taken us down a dark road where no good deed goes unpunished. We’ll look at some of situational awareness skills and safety strategies you’d need when dealing with potential predators on the roadside. And maybe we’ll all think twice about stopping to help people after dark. Con games come in all shapes and sizes, and so do the bad guys.

The Scenario

Situation Type
Roadside breakdown

Your Crew
You and your spouse

Location
Highway at night in an area only marginally familiar to you

Season
Summertime

Weather
Clear; high 90 degrees F daytime, low 72 degrees F at night

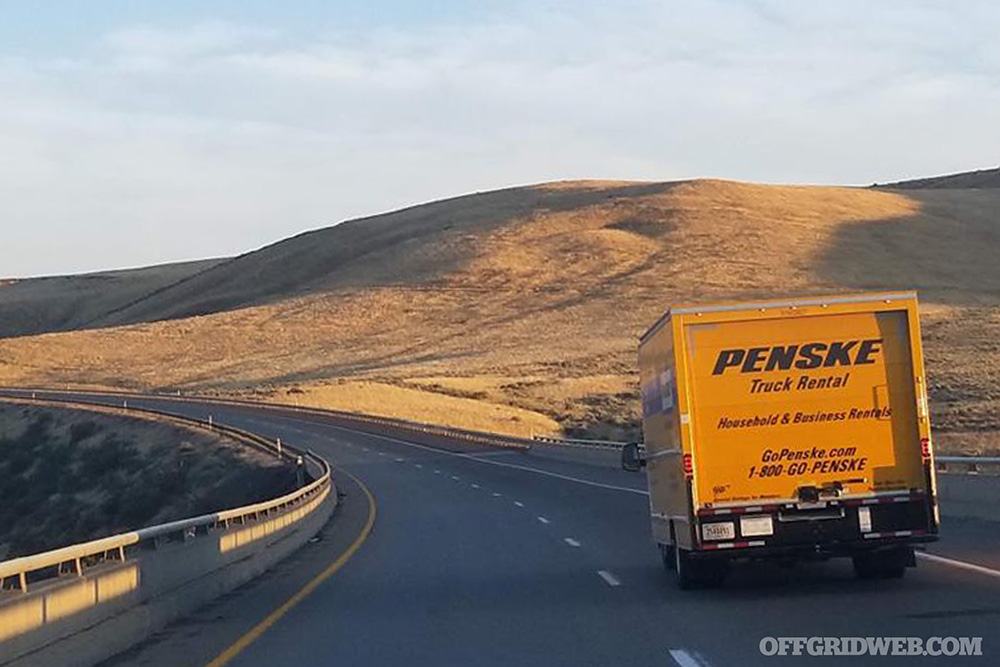
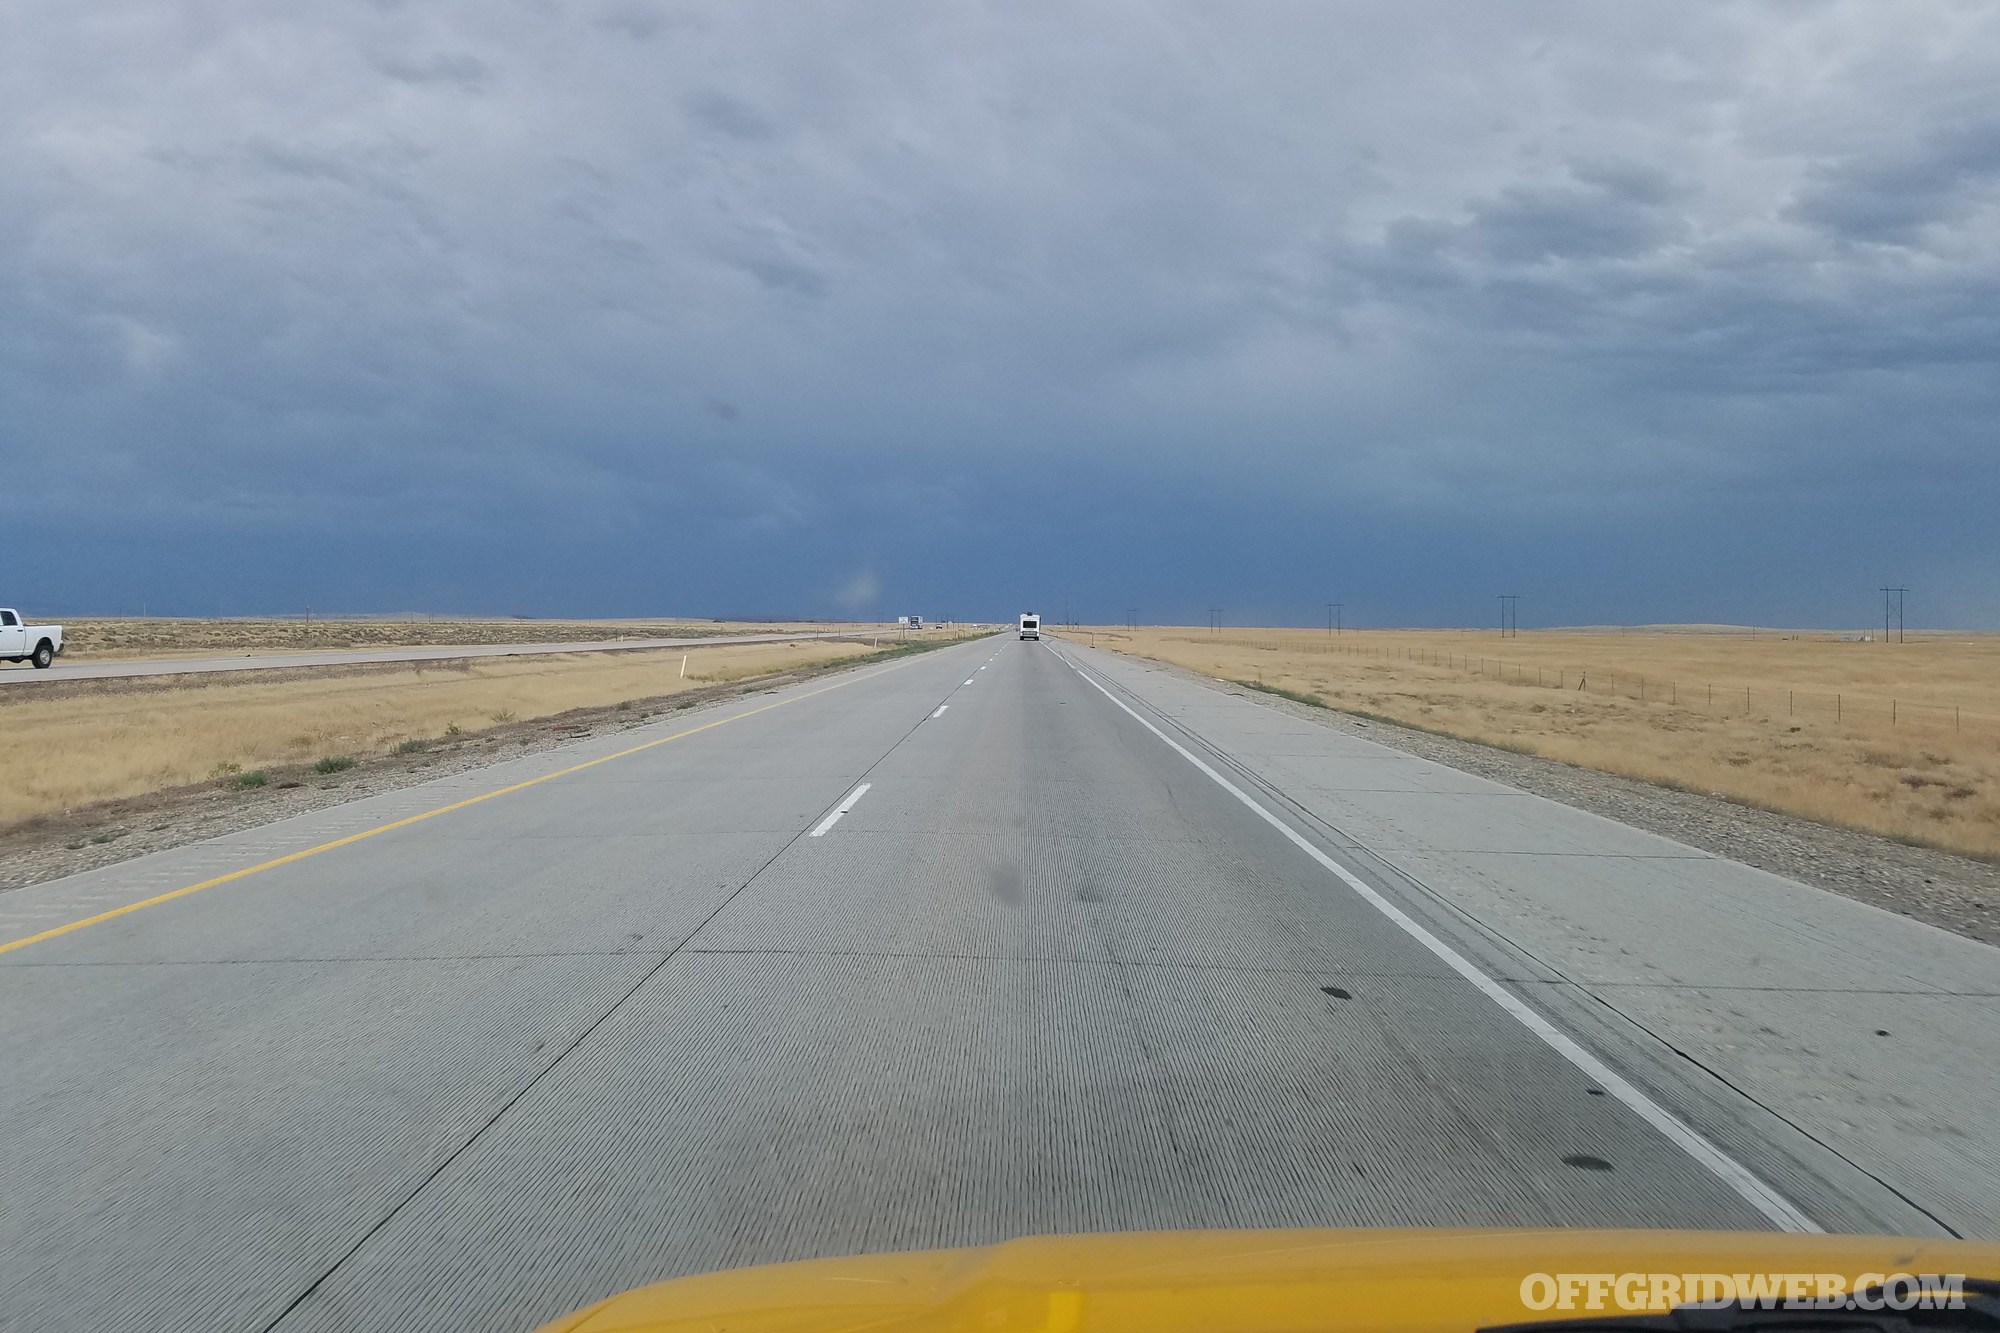
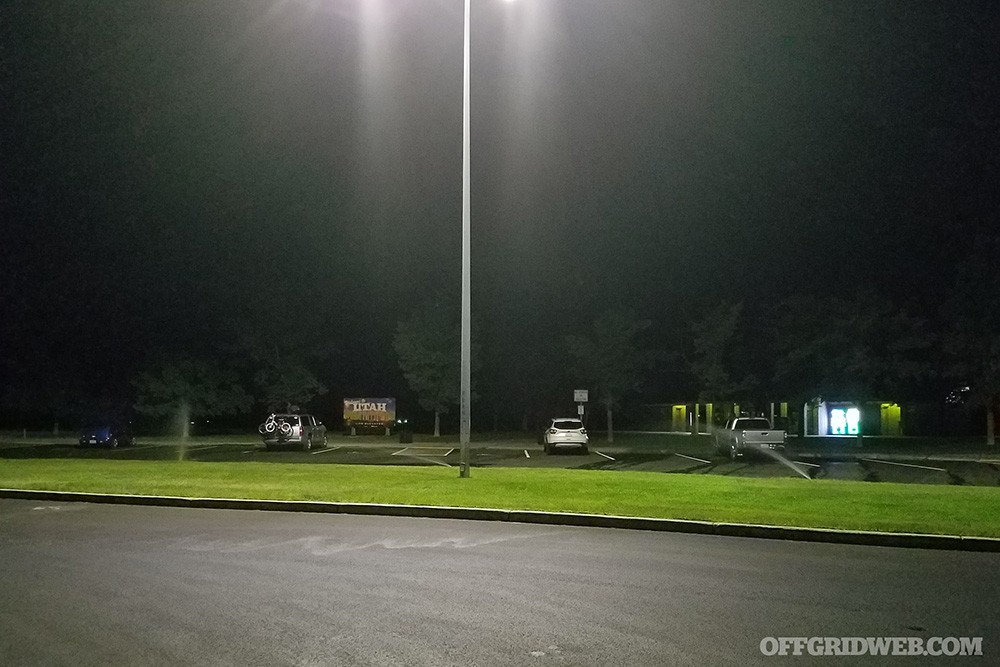
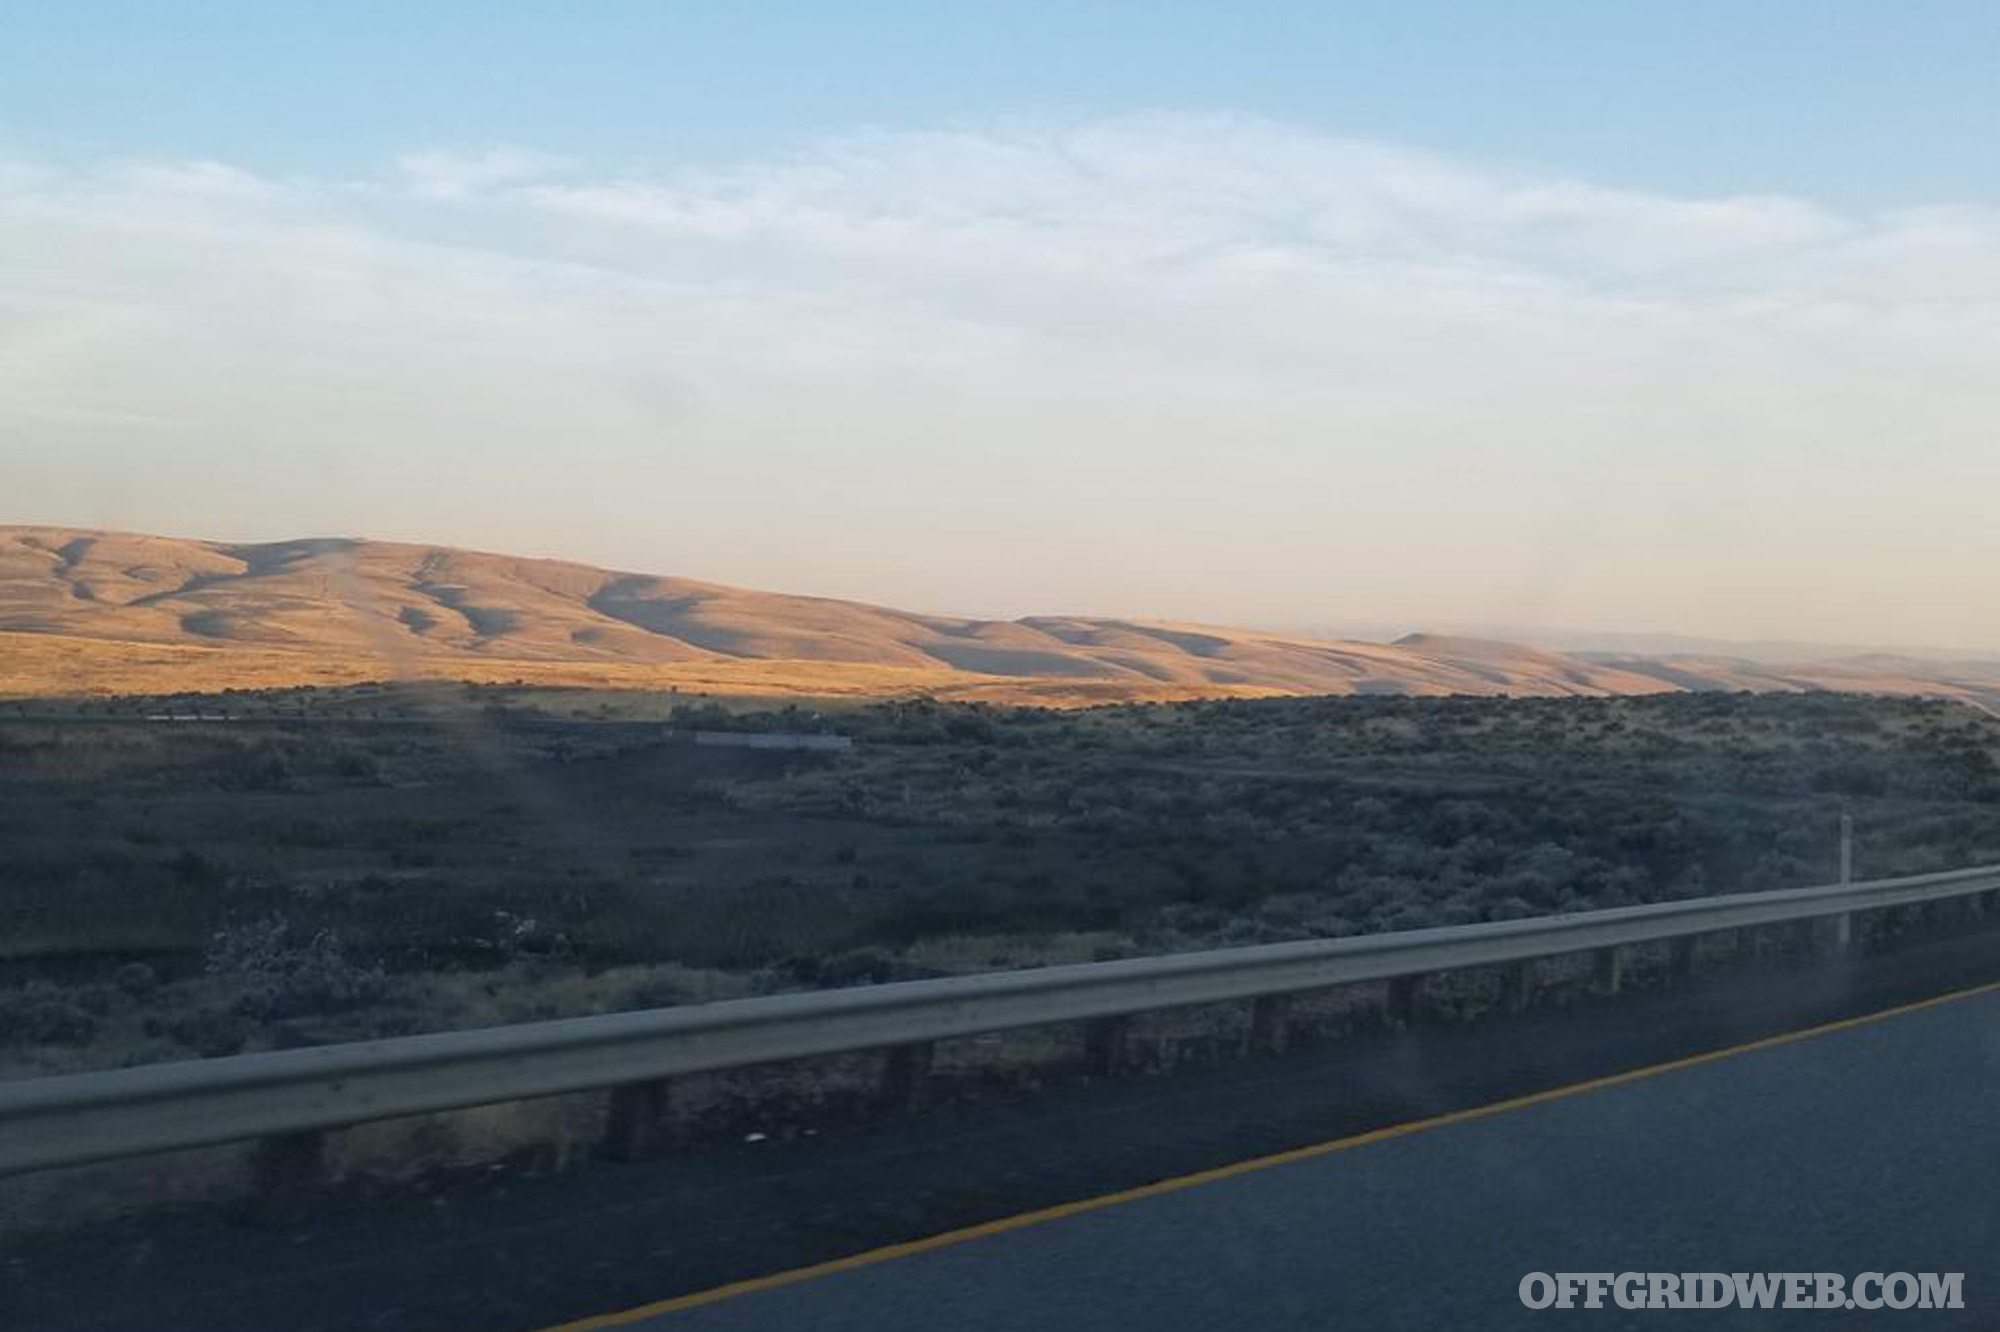
The Setup: You and your spouse spent the weekend visiting friends out of town. Your friends live several hundred miles from your home, but both of you were able to take a day off from work. So you drove two-and-a-half hours on Friday evening to crash for a few days of grilling and catching up. You spent the weekend laughing at the same jokes and telling the same stories you always do, downing cocktails and burgers. You meant to get on the road first thing Monday morning. But gossiping with old friends was too much fun, and it’s now 10 p.m. on Monday night. You and your spouse are cruising down a two-lane state road that winds through mile after mile of open country, dotted with the occasional one-horse town. You’re about halfway home, at least an hour from either your friends’ or your home. All your favorite radio stations are mostly static, and cell reception is a measly and inconsistent one bar for both of you.

The Complication: On a particularly lonely stretch of road, you see a single vehicle on the side of the highway. Its hazard lights are blinking, and the hood is up. As you get closer, you slow down, noticing a man leaning against the passenger side of the vehicle staring at his phone. Your spouse suggests that perhaps you should stop and offer assistance. You know this situation presents a potential threat. But your significant other reminds you that this is rural country and people tend to be more neighborly out here and, while your concern is legitimate, you might be overreacting in this case. Your spouse then asks what good it is to keep your trunk stocked with medical supplies, food, water, and tools if you can’t “pay it forward” and do a good turn for somebody who’s having a much worse night than you are.

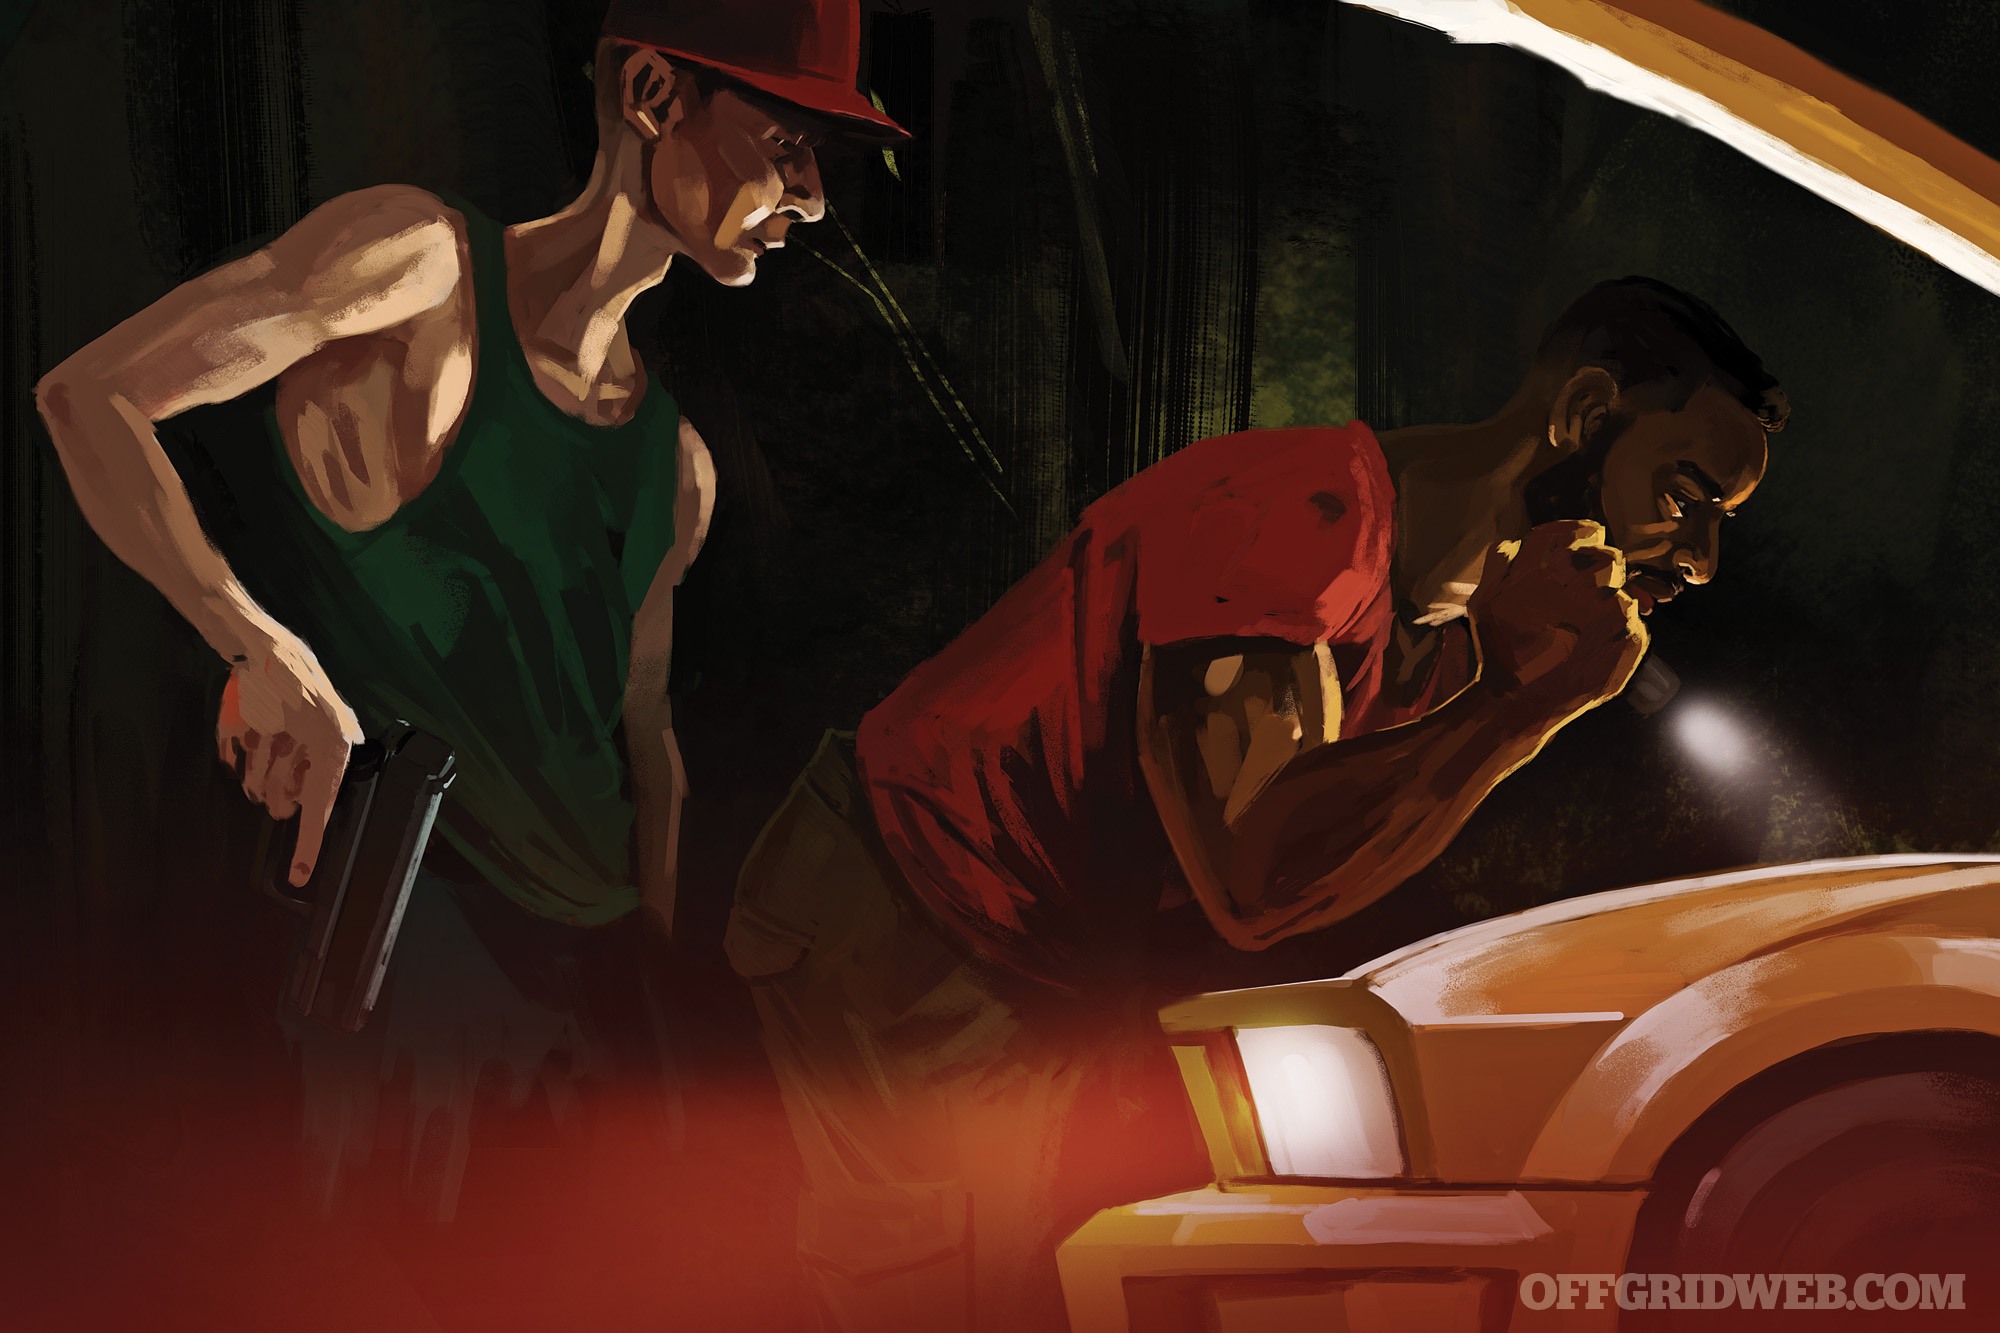
Maybe your better half is right. You’ve had a great weekend. You’re relaxed. The night is cool and quiet, but summertime highs were certainly high earlier this afternoon. Who knows how long that poor guy has been stranded. Besides, it never hurts to have a few extra karma points in the bank. So you pull off the road, leaving at least a car length when you park behind the broken-down vehicle. You ask your spouse to stay in the car while you get out and approach the man. You notice a woman sitting in the passenger seat. After introducing yourself and offering help, the man pockets his phone and thanks you profusely. He guides you to the open hood and starts gesturing at the engine and talking vaguely about some mysterious noise before the car “just died.” You’ve changed flat tires and oil in your day, but you’re no mechanic.

While the two of you talk about possible causes, the woman in the passenger seat gets out and begins walking toward your vehicle. Your attention shifts to her, and to your spouse, but the man continues to harangue you. Except now he starts to ask where you’re coming from and going to, and how far from home you are. You gently guide the conversation back to the problem at hand, offering to break out the jumper cables and give that a try. When you turn to head back toward your car, the man stands directly in front of you and shoves you back a step. Over his shoulder, you see his female companion slash your front right tire. You turn your attention back to the man, who is now holding a small pistol. The woman is leaning into the window of your own car, her head and arms inside the vehicle. Somewhere in your mind it registers that both right side tires are now flat. You’re not sure exactly what’s going on, but those karma points you were hoping for seem to be on the wrong side of the board in this situation.

Combatives Expert Chad McBroom’s Approach

Preparation

Vehicle & Gear Check: Having lived in rural areas most of my adult life, I’ve grown quite accustomed to the dangers of traveling underdeveloped state highways with little infrastructure. Before leaving our friend’s house, I would make sure the car is topped off with fuel and do a pre-flight inspection to make sure the fluids are at appropriate levels, and the spare tire is inflated.

I’d also do a thorough gear check to make sure all the emergency items we brought with us are still in the vehicle. This would include a TCCC-enhanced medical kit, bottled water, lightweight cold-weather gear, emergency foil blankets, a lockout kit (i.e. lock picks, door shims, etc.), flashlight, spare gun magazines, and a portable charging pack with appropriate phone cables. I’d also do a self-pat-down to make sure I had my standard EDC equipment, including knives, firearm, wallet, cell phone, and flashlight.

Route Check: In a day and age when our cell phones are always by our sides, we tend to rely on them a little too much when it comes to communication and navigation — and not enough when it comes to investigation.

Bad cell service can ruin your day when you’re dependent on your phone to navigate an unfamiliar area. When I know I’ll be operating in an area where cellular and, more importantly, data service is spotty, I’ll download the area maps onto my phone’s navigation app. GPS coverage is usually decent even when you can’t hit a cell tower, so having the maps stored will allow me to navigate without phone service. As a backup, I always like to have a physical map of the area. Even though I’m probably familiar with the route, I want to have it in case I have to change course.

A little bit of internet investigation will tell me if there have been any recent crime patterns or notable criminal events near the area I’m traveling. I’m looking for identifiable patterns that may indicate any specific types of threats, aside from the random criminal activity. I’m also looking to identify any stretch of highway that may be more accident-prone than others so we can exercise additional caution along those sections.

Gut Check: I believe I have a certain moral obligation and civic duty to help those in distress. I also realize the unfortunate reality is that there are predators among us who will play the role of a wounded animal to lure their prey into striking distance. I try to listen to my gut when it comes to helping others in distress. Our brains can take in a lot more information than we can process. That “funny feeling” we get about a situation is usually our brain sending warning signals based on observations that we just haven’t had the time to process.

On Site

I look at every situation to consider which scenarios are the most likely and the most dangerous. In this case, the most likely scenario is a stranded motorist who has broken down on a desolate stretch of highway, has no phone service, and is in need of assistance. The most dangerous scenario is a staged breakdown to lure in a victim for an ambush. Thinking this way keeps me on my toes and helps me to remember to keep my guard up and look for anomalies that may indicate the latter.

Since we decided to stop and render aid to this couple, I want to place my own vehicle in a position that maximizes my reactionary gap, offers the best protection from other vehicles, and provides the most amount of cover for me and my wife. For this reason, I park my car two car lengths behind and offset so the left side of the stranded vehicle aligns with the center of my car. I turn the wheels to the left, facing the road, to add additional cover and ensure that my vehicle will tend to move away from the scene in the event another motorist strikes my car from the rear. This also preps my car for a fast withdrawal if necessary.

I switch my headlights to high beams to light up the area and create a wall of illumination that will conceal activity inside our vehicle. Before getting out to approach the stranded vehicle, I do another self pat-down and check my phone for service. Then, I get out and have my wife move to the driver’s seat. I want her to be able to haul ass out of there if things go sideways, a plan I quickly discuss before leaving her behind. Using my headlights to my advantage, I walk outside the cone of light to avoid backlighting myself and mask my movement.

As I approach, I’m looking for cues that might indicate whether this is a legitimate breakdown or a ruse. Does he have a flat? Is the radiator steaming? Are there any signs that this car is disabled? What about signs to the contrary? Is the car running? A running engine would not only be a contraindication, but would suggest the occupants are planning a quick getaway. How about the lights? The driver might choose to leave the lights on so they can be seen at night, but this also tells me the battery has some juice, so I might be a little suspicious if the occupants tell me their battery is dead.

I’m also looking at body language. I’ve already observed anomalies. I just checked the cell coverage and there’s no signal here, so why is this guy staring at his cell phone? Why is he standing outside, leaning against the door, while the female occupant sits inside the car? That’s two anomalies right there.

I stop about 4 feet away to maintain a reactionary gap and begin talking to the man, keeping my hands in a natural, non-threatening position at sternum height. My hands are in a position where I can defend, strike, or go to a weapon quickly and efficiently, without appearing aggressive or defensive.

I spot a third anomaly when the passenger gets out and walks toward my vehicle. Normal behavior would be for her to converse with the person rendering assistance. The presence of three  anomalies tells me something is off-kilter, and I begin gearing toward the most dangerous course of action.

Crisis

The overt actions taken by the two seemingly stranded motorists confirm that we’re now in a “most dangerous” scenario. The act of placing himself between me and my wife while his partner slashes our tires indicates they’re using a divide-and-conquer strategy. It also tells me they’ve planned and rehearsed their assault, because he knows exactly what she’s doing.

At this point, the thought that this is just a mugging or robbery never enters my mind. This is more sinister. A staged breakdown to lure us in, a rehearsed plan, disabling our means of evacuation, and the display of deadly weapons are indicators that these people wish to kill us at worst, or take us hostage at best. My decision would be to counter deadly force with deadly force.

I now have two armed threats to address. One is standing in front of me holding a gun; the other is outside my wife’s car door holding a knife. I’m hoping my wife was alert enough to identify the threat, but hope isn’t a strategy, so I must assume she’s unaware of the danger in front of her.

The man shoves me back, which means he’s within contact distance. My response is to use a pinning check to direct his gun offline, grabbing around the slide (or cylinder if it’s a revolver) to prevent the gun from cycling when he fires. As I perform this action, I simultaneously torque my hips in the opposite direction to hollow my body out. This helps get me out of the line of fire while moving my gun side away from the threat and allowing me to draw my pistol.

I engage the threat from a body-index position. Knowing my wife is downrange, I angle my muzzle downward. As I break contact, I move offline toward my vehicle to close the distance between me and the second threat and get a better angle for selective targeting on the first.

I expect at this point that my wife is engaging the woman, using the car door to knock her off balance. As I address the female assailant, I assess her response. Has she lost her will to fight? Do I need to scale down my level of force? What comes next will depend on her.

Once the situation is under control, I check myself for holes, check my wife, and render medical aid as necessary. I also take this time to re-kit in case these two weren’t working alone. I have my wife call 911 if she can get a signal. If not, we’ll have to rely on a Good Samaritan of our own to contact the authorities and relay our location.

Never take things at face value. When approaching any situation, ask yourself: What’s the most likely scenario, and what’s the most dangerous scenario? Then, look for baseline anomalies in human behavior. Following this approach will put you in a proactive state where you can make sound decisions before SHTF and quick decisions when it does.

Survival Expert Tim MacWelch’s Approach

Preparation

One of the most common Biblical concepts to seep into pop culture is the story of the Good Samaritan. Most people understand what a Good Samaritan does, but not everybody knows the original story and context. This tale was first told by Jesus and is included in the Bible in the Gospel of Luke. In short, two supposedly righteous men pass right by a traveler who was beaten, naked, and left for dead on the roadside. A third man comes along, the Samaritan (a follower from different branch of Judaism, who didn’t get along with people of the local faith), who helps the poor man. The meaning of the story is that we should help those in need, regardless of our personal differences and preconceived notions. That’s a tall order, but it’s the task we’re handed.

To be a true “Good Samaritan,” we’re asked to intervene in situations that don’t directly affect us. If we fail to act when we could have acted, we may be in more than just a moral or ethical quagmire. We may be going against our very faith. And if you do decide to help, many countries have “Good Samaritan Laws,” which prevent a rescuer from being successfully sued if something went wrong as they attempted to help a victim. So in at least one respect, both religious and legal doctrines are in favor of us trying to help those in distress.

Now, let’s define “help” in its different forms. There are some ways to help someone in legitimate need without putting yourself at much risk. For example, I’d consider calling a tow truck for this hypothetical young couple, once we reach an area with mobile signal. I might even pay for it, if I was feeling particularly generous. And I wouldn’t hesitate to notify local law enforcement, once we reach an area with signal. Everyone should have the non-emergency number for their local law enforcement in their wallet. All of this calling can be done without interacting with the people in question, but maybe that’s not the kind of help they needed? Time may be an issue. Maybe one of the stranded motorists needed medical help (which I’m trained and equipped to provide, and you should be too). Someone could die in the time it’d take for you to find phone signal, explain the situation and location to the authorities, and for the first responders to get on the scene. The kind of help they need may only be served in person, and it may be needed now — later may be too late.

So before I pulled over to offer assistance, my first consideration would be whether I’m ready, willing, and able to help. On any given day, I carry a four-way tire iron, a small air compressor, jumper cables, a serious first-aid kit, flares, road triangles, and many other things to help myself and those in need. And if I’m ready, willing, and able to help, then my next question would be whether it’s safe to help or not. If cars are whizzing by on the highway, am I likely to get hit by stopping and getting out of my vehicle? If there isn’t a soul on the road, am I about to be in some real-life horror movie? These things would certainly be in my head.

I could mitigate the traffic threat by pulling as far off the busy highway as possible (without getting stuck in a ditch) and using the vehicle hazard flashers, flares, and reflective signs to reduce the risk of someone plowing into me at 70 mph. Or on the dark and lonesome highway, I could look at the people and the surroundings as I drove by slowly, then circle back if they looked legit (and after notifying the local PD or sheriff’s department). We could even pull up beside them and talk through the glass (without fully rolling down the windows or unlocking the doors). Ultimately, I’d have to trust my situational awareness.

In your preparation for scenarios like this, you should take the time to study the legal means of self-defense in your locality. If concealed carry of a firearm is legal in your area, take the time to get a permit (if necessary) and train frequently. Practice drawing it from concealment while standing, while holding a flashlight, and even while seated. Keep practicing to improve your ability to draw quickly. Mix it up by practicing some support-hand flashlight strikes, then drawing your CCW. And since darkness follows day like clockwork, consider adding a tactical light to your handgun.

Our final consideration for preparation is gear. Aside from your normal vehicle tools, first-aid supplies and other vehicular preparedness gear (like food, water, space blankets, etc.), you’ll want to have a quality flashlight. There’s nothing wrong with carrying a big Maglite. Stuffed with four C-cell batteries, it’s both a flashlight and a formidable baton for striking. Or you could go with a high-intensity tactical light to blind a potential adversary. Look for one that has crenellations (square teeth). These allow the impact of a small flashlight to deliver pain like a hit from a larger, heavier flashlight.

On Site

Continuing with our scenario, if I decided to help this forlorn and out-of-place couple, my first action is to park in the safest spot. As the location allows, I’d park behind the stranded car and create a good space between my vehicle and theirs, at least three car lengths. I’d also put our vehicle on the road shoulder, but without risking a loss of mobility or control in a ditch, mud, wet grass, or loose gravel. In short, we’d look before we park. I would then turn the dome light off, so it didn’t come on when the vehicle doors open. This would keep any bad guys from knowing the number or location of the people in my vehicle.

If possible, I’d have my spouse move into the driver seat, without getting out of the vehicle. In any case, I’d want them in the driver seat with the engine running, windows up, and the doors locked. My spouse would then be my “overwatch” for this roadside rescue. From the rear position, my spouse would be able to keep an eye on things at the broken-down vehicle, as well as behind our vehicle and to the sides of it. I’d leave my spouse with instructions to do three quick taps on the horn or flash the high beams three times if anything seems out of the ordinary, and to stay in the car no matter what happens. Before leaving I’d remind them of my love, and I’d remind them that our vehicle is a 1-ton weapon, easily capable of running over bad guys. They need to be mentally and physically ready to drive the vehicle into a person or the other vehicle, if things take a bad turn.

Approaching the stranded car, I certainly don’t want to look like a predator myself, especially if the young couple needs legitimate help. For example, I wouldn’t approach the scene with my gun drawn. I’d keep the flashlight in my left hand (to free up my dominant firing hand) and watch the motorist’s hands and body language. I’d also keep an eye out for any bulges under his clothing that might indicate a hidden weapon. I’d try to keep the strangers in sight, if possible, and not let them get in between me and my vehicle. We don’t need to be shy if things start to feel wrong. It’s OK to tell them flat-out to stay where you can see them and to find out more about them. It’s more important to be safe than to worry about being rude.

Not being a mechanic, I probably wouldn’t be able to mechanically assess a vehicle on the roadside (especially in the dark), so it would be hard to determine whether the “breakdown” was deliberately staged. I’d just have to watch the people, study their demeanor, and listen for holes in their story.


Crisis

There’s a gun in my face. It should never have gotten this far, but as the threat emerges in this situation, I’m not going to comply or become a victim — I’ll defend myself, even if it’s through lethal force. There’s no compliance here. Why not? Because there’s a big difference between a crime of opportunity (like mugging people for wallets and purses, or carjacking random motorists) versus this deliberately staged ambush. Sketchy mister motorist and his skid row princess probably aren’t planning to carjack us since she just slashed two of my tires. So maybe they just want our money, or maybe their friends are hiding in the bushes and they’re going to chop us up for black-market organs. We don’t know, and I’m not going to find out.

If my spouse saw my hands go up, I’d hope to receive a useful distraction (like horn honking or light flashing). But I could make my own distraction too. I’d just need to say something like “Wow, your bitch just got stabbed with her own knife!” In the two seconds he looked away, I’d draw my weapon and fire. Then, I’d check my surroundings, and kick the revolver away from the fallen man. After locating the woman and engaging her, I’d demand that she drop the knife. Compliance equals life for her. Moving into the roadway a little for better visibility, I’d back toward my own vehicle (to avoid being blinded by my own headlights), and I’d check on my spouse (without taking my eyes off the woman).

Now it’s time for the long and messy wrap-up. Without mobile phone signal, and with our vehicle disabled, we’d have to take their car (if it worked) or drive on two flats. But so many questions arise. Do I render first aid to the man that I shot in self-defense? If I didn’t have to shoot the woman, do I use some kind of restraints on her? Do I stuff her in the trunk of one of the cars? If there’s an escape latch inside the trunk, that’s a useless method to confine her. It may also cross a legal line that changes our situation. The local laws may side with her for unlawful imprisonment if she’s locked in a vehicle. As I said, it’s a mess.

Most likely, we’d have to leave the scene of a crime to get help. By heading toward the nearest town and watching our phones along the way for a signal, we’d call 911 when we could and inform law enforcement. We’d use GPS, intersections, road mile markers, or the length of time traveled to convey the location to the authorities. Finally, we could head toward the nearest police station or sheriff department to explain what happened and make our statements.

Conclusion

We’ve all seen broken-down cars on the roadside, and most us have probably been stranded by a disabled car at some point ourselves. Being stranded is part of our mobile lifestyle. And while more than 99 percent of distressed motorists are truly in need, bad guys feigning the need for help alongside a highway is as old as the concept of the highway itself. Unfortunately, we don’t often hear about motorists and hitchhikers being lured into traps and ultimately robbed, raped, or murdered as front-page news until it reaches pathological, serial killer status. Do a few web searches for stranded motorists being kidnapped or killed, and you’ll see it happens more frequently than you might think.

From the earliest days of these thoroughfares, “highwaymen” or “road agents” robbed travelers in remote areas and then disappeared with the loot. Little has changed over the centuries, and although very rare, it still takes place today. Roads can provide a natural funnel, directing the unsuspecting quarry right into a trap. Add the bait of the “poor young couple” to the trap, and it’s a damn-near-irresistible ploy to catch a soft-hearted do-gooder. And while we’re not suggesting you avoid helping beleaguered motorists ever again, we can remind you that there are many ways to help. You don’t need to stop on that dark and lonely road. You can simply call the local police non-emergency line. They can check it out and offer help if it’s truly needed, and you’ve still done your good deed to render assistance.

Meet Our Panel

Tim MacWelch

Tim MacWelch has been a survival instructor for more than 20 years, training people from all walks of life, including members from all branches of the U.S. Armed Forces, the State Department, DOD, and DOJ personnel. He’s a frequent public speaker for preparedness groups and events. He’s also the author of three New York Times-bestselling survival books, and the new Ultimate Bushcraft Survival Manual. When he’s not teaching survival or writing about it, MacWelch lives a self-reliant lifestyle with his family in Virginia. Check out his wide range of hands-on training courses that are open to the public at www.advancedsurvivaltraining.com.

Chad McBroom

Chad McBroom is a 22-year veteran law enforcement officer with most of his time spent in the tactical unit. He has spent over 30 years studying various combative systems and focuses on the science of close combat. Chad is the owner of Comprehensive Fighting Systems, offering training in empty-hand tactics, edged weapons, impact weapons, and firearms tactics. He’s also a regular contributor to RECOIL. Check out more at comprehensivefightingsystems.com


Pocket Survival Book Buyer’s Guide – Small Books for Big Trouble

This article originally appeared in Issue 15 of our magazine.

Your Bible-thumping brother was right. It’s the end times. The Seven Seals are torn asunder. The Four Horsemen have burst forth. Fire and brimstone and yada yada yada. Or maybe it’s just a thunderstorm off in the distance? According to the World Meteorological Organization, Mother Nature kills roughly 250,000 people each year, mostly by floods, storms, and heat waves.

Whether fireballs as big as Volkswagens are striking the earth around you, or a brush fire is creeping up on your neighborhood, there are 451 reasons you don’t want to be surrounded by paper at the library while looking for survival information you should already have on hand. That’s why you should carry survival literature with you, either in your car or as part of your emergency kit. Sure, we’d like to think you’ll haul all of your back issues of RECOIL OFFGRID as you flee a disaster, but we know that’s not likely. And, for some, it’s not practical to pack a 300-page hardcover book in a bug-out bag.

Therefore, we’re taking a look at tiny tomes, little books stuffed with vital guidelines for enduring a wide range of calamities. Whether you’re new to the prepping game or already an experienced outdoors enthusiast, having a pocket survival book in your jeans or jammed into your go-bag could be a small investment that goes a long way.

The Value of Survival Books

Why consider a pocket-sized survival manual? Here are a few reasons:

No Batteries Required: As soon as the grid goes down — and that’s one of the first things to go in any crisis — there will be no Internet and no Google. Plus, once your battery takes a digital dirt nap, your smartphone and all its survival apps will be a plastic brick of uselessness. However, a book made from paper, ink, glue, and string requires no batteries to work, nor does it need a satellite uplink.

No Total Recall: Some hard-core preppers reading this might scoff at the idea of carrying a survival guide, even a small one. After all, they’ve spent years studying how to stay alive in every possible disaster and would rather save that space in their kit for a tool or supplies. Well, the Salk Institute for Biological Studies reported that the human brain can store several million gigabytes of information, everything from your foot’s current position to complex mathematical formulas. However, the human brain isn’t that good at recall, especially when it comes to info you don’t use regularly — and especially when your brain is lacquered by the stress of a life-or-death situation. So, unless you teach survival skills for a living or you’re an elite bearded face-shooter fighting evil in the world’s most dangerous places, there’s a good chance you might need a handy manual when SHTF.

No Large Footprint: Since a survival book is something you won’t use every day, size may be an issue. Serious backpackers consider their gear down to the ounce, while survivalists have to decide on items based on the size of their BOB. Fortunately, almost all of the books in this buyer’s guide weigh mere ounces and will fit in your pants pocket. When you consider the life-saving knowledge they contain versus the amount of space they take up, storing these books with your emergency gear is a good trade-off.

There are dozens of pocket survival books on the market, and determining which book to buy depends on where and when you’ll mostly likely need it. These eight books represent a cross-section of the pocket survival book industry. Each one serves a niche, and each has its pros and cons. Read on to find out which might meet your needs.

Pocket Book History

Seventy-five years ago, Robert Fair de Graff was convinced he could change the way people read by making books drastically smaller. In the 1930s, it was surprisingly hard for ordinary Americans to get good books. Libraries were small and limited, and the country only had about 500 bookstores, all clustered in the 12 biggest cities. Additionally, hardcovers cost about $2.50 (or $40 in today’s currency).

De Graff revolutionized the market in 1939 when he started Pocket Books, a publishing division of Simon & Schuster. His product was a petite 4×6-inch book priced at 25 cents, and it changed everything about who could read and where they could read (and where they could be purchased). Working with the mob-controlled magazine-distribution industry, de Graff sold books at grocery stores, drugstores, and airport terminals — unheard of practices back then. Within two years, sales reached 17 million.

During World War II, American book publishers shipped nearly 123 million free books to soldiers overseas, where they devoured books like A Tree Grows in Brooklyn and The Great Gatsby. John Alden Jameson was an officer in the Library Section of the War Department during the war, and he wrote about soldiers reading during deployment: “Dog-eared and moldy and limp from the humidity those books go up the line. Because they can be packed in a hip pocket or snuck into a shoulder pack, men are reading where men have never read before. The books are read until they fall apart.”

Today, because of de Graff and the success of the publishers during World War II, they created a profitable “small book” industry and a nation of adroit readers who will take a book anywhere and read it at any time, if only to escape for a short while. Small paperback books became a mainstay of the industry and are very popular, even today.

Emergency Survival: A Pocket Guide

By Dr. Christopher Van Tilburg

MSRP
$3.50

URL
www.mountaineersbooks.org

Notes
To paraphrase the old adage, don’t judge a book by its amateurish appearance. It looks like a 47-page pamphlet that someone printed at home, but it does hold a few gems of basic information for the novice (or the amnesiac). If there were Cliff’s Notes for survival, it would be this.

The majority of the booklet is dedicated to navigating your way out of mountain terrains. Teaching you how to survive more than a couple of days isn’t a priority of this booklet, which is why the “Procuring Food” section is only 86 words long. The subject matter sometimes states the obvious — water can be found in lakes and streams … really?! — but then doesn’t go deep enough to do any real good.

But, it does share the basics one would need to extend his or her life long enough in the mountains to get rescued … or at least give it a good shot before he gave up the ghost. Before a kid can ride a bike, he gets training wheels. This booklet is the training wheels that most won’t need.

Pros:

  • Very inexpensive
  • Bends to the contours of a pack or pocket
  • Written by a doctor who volunteers on a mountain rescue team

Cons:

  • The first 14 pages are spent discussing preparation and kit supplies, while the last two discuss further books to read and courses to take.
  • Paper rips, folds, and gets damaged easily
  • Only covers a few topics, mostly related to mountain travel/survival

The Official Pocket Survival Manual

By Robert W. Pelton

MSRP
$15

URL
www.robertwpelton.com

Notes
At 338 pages, this book should be loaded with information. But when it spends three pages on the title, nine pages for the introduction, 16 pages on lists of gear suppliers, and … well, you get the picture. This is really a full-size book trimmed smaller.

With a font size my grandmother could read (and she’s dead), there’s only an average of about 50 words per page (or as many words as in this paragraph). Most of the illustrations are pointless (unless you need to know what a caterpillar looks like) or are so small the ink bleeds, making the art indecipherable.

Although defying its own existence as a pocketbook, Robert W. Pelton’s work contains an overabundance of useful, albeit abbreviated, info. For example, it’s the only book in this buyer’s guide that delves into hygiene, an often overlooked topic that’s an important element of survival. It covers a veritable bouquet of topics — from fire and water to first-aid and shelter — but doesn’t use its page space to delve into the details you would expect from a 1/2 pound of paper. It becomes a book of suggestions, ideas that you, the survivor, must elaborate on yourself.

Pros:

  • Easy to read
  • Covers a wide variety of topics
  • Entry-level survivor’s guide

Cons:

  • About 45 pages are wasted on things like book ordering info and expert opinions of the book itself
  • Uses too large of a font for a book this size
  • Wide margins, blank pages, and useless images take up valuable space

Living Ready Pocket Manual: First Aid

By Dr. James Hubbard

MSRP
$13

URL
www.thesurvivaldoctor.com

Notes
Known as the Survival Doctor in prepper circles, author James Hubbard breaks down the subject of first-aid into six broad categories: resuscitation, water, exposure, skin wounds, reactions, and bones and joints. Each section is tabbed for easy location (especially in a panic).

Though dense in subject matter, it suffers from the large-book-trying-to-be-a-pocket-book malady. Instead, it’s a pack book or a glove-box book. This can be forgiven because it’s got a ton of useful information. It’s a standout because it combines limited survival elements with first-aid info. It offers instructions on how to avoid injuries, then tells you how to treat them if they’ve happened.

Classifying this book in the survival category is a stretch, though. It’s a first-aid book for people rooted in civilization first, as far too many of the procedures suggest equipment a person on the edge of death in the middle of nowhere won’t have. That said, this is an excellent first-aid book with a hint of survivalism, one that would suit you better than just a regular first-aid book.

Pros:

  • Written by a well-respected medical doctor
  • Printed tabs call out the various sections

Cons:

  • First 38 pages discusses supplies and recommended immunizations
  • Scant few images illustrating the procedures

The Pocket Outdoor Survival Guide: The Ultimate Guide for Short-Term Survival

By J. Wayne Fears

MSRP
$10

URL
www.skyhorsepublishing.com

Notes
Although this book is practical, well organized, and written by an experienced survivalist, its first 38 pages (which defines things like search and rescue) and the last 25 (which discusses missing persons) won’t help you any more than good wishes will help you start a fire. With few exceptions, every outdated picture in this 142-page book is a waste of space.

J. Wayne Fears is a well-respected wildlife biologist who runs a commercial hunting/fishing guide business, so it is disappointing to see that only five pages are dedicated to the subject of food (he even suggests that it’s “not a necessity”). As a self-described short-term survival guide, his book focuses on rescue as its top priority — yet it defies its own goals by going into detail about insects, fear, and dealing with missing persons.

While it’s a good book to have in a tight spot, it spends too much time discussing the mechanics of survival and rescue, and not enough practical details for people with boots on the ground who have to live through it.

Pros:

  • Hardback cover protects the book
  • Chapters are well-organized and called out with printed icons

Cons:

  • Hardback cover makes packing it awkward
  • Fifty pages relegated to preparation and blank pages for end notes
  • Most all of the out-of-date images are not helpful or even useful

SAS Survival Guide: For Any Climate, In Any Situation

By John “Lofty” Wiseman

MSRP
$9

URL
www.sassurvivalguide.com

Notes
This book defines the pocket survival book genre. If you have only a few dollars for just a single book, spend it on this one. There’s a reason why it has sold more than a million copies. It has to be the tiniest gargantuan book covering most every survival skill needed to not just last a day or two in the wild but perhaps indefinitely.

However, it lacks an index for quick navigation, but the table of contents is detailed enough to make up for it. Each of the nine sections (including camp craft, reading the signs, and survival at sea) have printed callouts on the page for quick reference, but the book is so dense with information that these callouts become rather useless.

This is a true pocketbook. It’s tiny, taking up only 14.3 cubic inches of space. The font is small (which might be a complaint for older people). It’s dense, compact, and tries to be complete.

Thusly, it tries to be an “everything” book by covering every conceivable survival topic known, and many of the bushcraft methods therein are way too complicated and intricate for a novice outdoorsman. There are only three pages covering the preparation of big game, and the book makes it look a hell of a lot easier than it actually is. Note of caution: Because mushrooms are not a good source of energy and tend to absorb heavy metals, bacteria, and mold, it’s best to consider the book’s section on this topic as naïve.

Though it has faults, it’s one of the best pocket survival books on the market (and comes with a free phone app if your phone isn’t dead yet).

Pros:

  • Coated paper increases durability and water resistance
  • Color pictures where needed (plant identification section)
  • Wide variety of topics covered

Cons:

  • Twenty-five pages dedicated to preparation
  • No index
  • Though it has printed tabs, they’re too broad to be completely useful

Pocket Guide to Outdoor Survival

By Ron Cordes and Stan Bradshaw

MSRP
$13

URL
www.pocketguides.net

Notes
If we were to give points based solely on materials and construction, then this booklet would be head and shoulders above all others. The spiral binding means it can lay flat or fold in on itself, while the book’s pages are made from PVC, ensuring that they’re practically impervious to the elements. Additionally, notes can be made right on the pages with dry-erase markers … but we’re still not sure how that’ll benefit anyone.

At 28 pages — minus seven for covers and pre-disaster prep info — this guide uses its space efficiently. But, after reading that “you can lose anywhere from 50 to 75 percent of your body heat from your head,” we’re left wondering what other often-perpetuated wives’ tales and survival myths lie in wait for us. In the “Using Your Map Without a Compass” section, the authors suggest that the sun will be due north at noon in the summer, when in reality, it points more to the south (in Los Angeles on the Summer Solstice, for example, the sun is 79.4 degrees above the southern horizon) — but if you need a book to tell you which way north is, you’ve got bigger problems.

The information is broken up under 13 tabs, like “Navigate,” “Lost,” and “Signal,” but the descriptions in each are brief. And the organization is a little scrambled. The section on water comes after food, which is a lower priority on the survival spectrum. More experienced preppers won’t find the basic information in this guide helpful, especially for $13.

Pros:

  • Completely waterproof and spiral-bound
  • Tabbed sections for easy navigation

Cons:

  • Topics don’t go into great detail
  • Narrow selection of topics
  • Presents some old wives’ tales as survival facts

The Pocket Disaster Survival Guide: What to Do When the Lights Go Out

By Harris J. Andrews and J. Alexander Bowers

MSRP
$10

URL
www.skyhorsepublishing.com

Notes
This tome has no business being in a collection of pocket survival books. Why? The focus of its 160 pages makes the assumption that you’re home when disaster strikes. Sure, it fits in an oversized pocket, has a sturdy cover that can take some abuse, and is filled with useful information. But we’re not going anywhere with it. There’s no section on disasters at the office or in your car or what to do when you have to be mobile. We’re not going to sit in the crumbling rubble of our house and read it to find out what to do next.

The Pocket Disaster Survival Guide suffers from too many topics and not enough explanation of each. For example, there are only six pages for the section on floods, which kill more people worldwide than any other disaster. And only six pages are used to cover the entire subject of first-aid. While 38 percent of the book’s total pages are devoted to the discussion of what to do during a disaster (earthquake, chemical spill, terror attack, etc.), the rest of the book deals with general survival skills, from digital survival and power outages to finding water and keeping perishable foods cold (conclusion: you can’t).

The book is well laid out and has an easy flow from one section to the next. The information is basic and can mostly be classified as common sense. Its biggest problem is its smallness — it shouldn’t be a pocketbook at all, and because of this, it can easily be replaced by a dozen books that should already be in your home and have much more in-depth knowledge.

Pros:

  • Hardback cover protects the book
  • Specialized for disasters

Cons:

  • Hardback cover makes packing it difficult.
  • Almost 40 pages used to discuss preparation, pre-disaster resources, and supplies
  • Its “pocket” moniker seems contrived by marketing people to sell books

Wallace Guidebook for Emergency Care and Survival

By Howard Wallace

MSRP
$6

URL
www.survivorind.com

Notes
Wallace Guidebook is vaguely broken into two sections: The first 38 pages deal with survival situations, while the remaining pages cover first-aid scenarios. This 92-pager is concise. It doesn’t go into great detail about anything, but instead touches on the main points, touting itself as a guide that includes “common sense” tips (even though it gets the heat-loss-through-your-head tip wrong, too).

Its biggest weakness — besides its complete lack of structure — is Howard Wallace’s stream-of-consciousness writing style. The sections on auto breakdowns on page 10 evolve into water procurement on page 13, which goes into talking about exposure on page 16 before it circles back again to discuss off-road auto breakdowns on page 23. From there, it spends two pages on signaling and evacuation.

The best part of this whole book is the collection of first-aid tips. The section is tabbed for convenience, and each of the situations — minor wounds, bear attack, and even childbirth — is clearly laid out in a step-by-step manner.

The most telling aspect on the utility of this book can be found in the “Advice on Additional Materials,” where it suggests including in your “response container” a first-aid book. Isn’t that what this book is supposed to be?

Pros:

  • Large section on first-aid procedures
  • Doesn’t include useless sections

Cons:

  • Haphazardly organized
  • Too basic for experienced/knowledgeable survivalists
  • Text is too large for its size

More From Issue 15

Don’t miss essential survival insights—sign up for Recoil Offgrid's free newsletter today.

Read articles from the next issue of Recoil Offgrid: Issue 16

Read articles from the previous issue of Recoil Offgrid: Issue 14

Check out our sister publications on the web: Recoil | Gun Digest | Blade

Editor's Note: This article has been modified from its original print version for the web.


Wander Tactical Barracuda EDC Knife Review

In a recent collaborative effort, Wander Tactical teamed up with Alessandro Padovani, owner of Safer Faster Defense, to produce an everyday carry (EDC) knife designed specifically for self-protection. The Barracuda EDC is the result of that collaboration and is the first knife in the developing Protego Line.

Background

Wander Tactical is a knifemaker whose mission is to provide soldiers, survivalists, bushcrafters, and hunters with reliable, high-quality cutting tools. Based in Milan, Italy, this company is run by brothers Alex Wander and Greymoose Dino. The duo operates by the motto, “We must be ready and sharp.”

Alex, an avid outdoorsman, tests all of the company's knife prototypes in the field before releasing them.

Every Wander Tactical knife design begins by determining the intended use of the tool. Inspiration is an important part of the process for Alex and Dino, so they begin by drawing out their ideas. With collaborative designs like the Barracuda, the input of their collaborator is very important as well. After sketching out several renditions, they begin making prototypes to test the fit and function. Eventually they settle on what they believe to be the right design and move to production.

Wander Tactical Barracuda EDC

The Barracuda EDC is a tough knife. A 1/4-inch-thick piece of D2 tool steel forms its foundation. Those familiar with D2 know it is a hard steel that borders on indestructible, especially with measurements like that. It holds an edge extremely well, but can be difficult to sharpen without the proper tools. D2 isn’t the most desirable steel if you’re functioning on minimal resources and need to sharpen your blade on a rock, but it’s very good for a dedicated fighting knife.

The Barracuda EDC has a harpoon tip design with a swooping false top edge, also known as a swedge, that runs back about one inch. The geometry that’s formed at the tip gives the blade a precise penetration point that expands the wound channel as the blade moves deeper into the target. The false edge can be sharpened for integrating reverse-edge tactics and Bowie-style techniques (such as the back cut), but it will take some time and preferably some power tools to put a cutting edge on the thick false edge.

Wander Tactical offers five different finishes for the blade, from Raw steel to distinctive Ice Brush and Black Blood two-tone patterns. Each is protected by a layer of clear Gun-Kote. Our tester came with the subtle Iron Washed finish, which accents the grind lines along the blade. MSRP for this knife is $160.

Handle & Ergonomics

The handle scales consist of rock-patterned Micarta which are held in place on this full-tang knife by four large-head 3/8-inch screws. The handle hardware accents the extreme build of the knife while providing a large surface area to distribute the compressive force against the scales.

The Barracuda has aggressive jimping strategically placed on the spine and butt. The jimping on the spine is located where the user’s thumb would naturally fall when supporting the spine in a Filipino or “thumbs up” grip. The jimping on the butt covers the top and underside. This allows for contact with the thumb when held in a reverse grip, but also contacts the little finger and palm when held in a standard forward grip.

The handle ergonomics are well thought-out on the Barracuda. At first glance, the handle looks a little strange with its swooping lines, but this unusual shape serves a purpose. The peaks and valleys of the handle fill in the gaps between the fingers and the palm to give the user the best and most natural grip possible.

Sheath

A versatile sheathing system is just as important to an EDC knife as good steel and ergonomics. The Barracuda sheath system consists of a molded Kydex sheath with a multi-positional mounting clip. The sheath has a rolled, thumb-index point on the spine. This is a small but effective modification that allows the user to break the sheath tension without drawing the knife completely out of the sheath. This is essential when stealth or a low-profile deployment are required.

The mounting clip is an Italy-based, Vega Holster 8K82 Multipurpose Loop. Similar to the Blade-Tech TeK-Lok, the 8K82 is a clip that opens up like a clamshell and can be adjusted for belt width and sheath tilt. The device has a rotating locking lever that secures the locking arms in place when closed to prevent accidental disengagement.

The Barracuda Trainer

Every serious fighting knife must have an inert trainer to accompany it. If you’re going to carry a weapon, be it a firearm, blade, or impact weapon, you need to be able to train with it without harming yourself or your partner. In the case of a knife, you need to be able to practice carrying, drawing, sheathing, cutting, and stabbing. Sticking a generic 12-inch rubber training dagger in your waistband doesn’t cut it — pun intended. You need to train with something that closely resembles your EDC in terms of length, weight, and design.

This importance of a trainer is something many blade-wielders and most knife manufacturers overlook. Fortunately, Wander Tactical doesn’t fall into that group. The Barracuda has an aluminum trainer counterpart that consists of the same overall shape and dimensions as the live blade. The trainer is slightly thinner than the live version, but uses the same handle scales and hardware for an almost identical feel. The point and sharp edges are rounded off to allow the trainer to be used in live drills. The entire blade is coated with a blue finish to designate it as a training weapon, which is consistent with most government agency training regulations.

Although the Barracuda Trainer doesn't include its own sheath, Wander Tactical says Kydex trainer sheaths can be made upon request.

Making the Cut

Our field testing exposed the strengths and weaknesses of the Barracuda design. As expected, the Barracuda is extremely tough. The thick chunk of D2 steel took a lot of abuse with zero damage and little to no signs of wear or dulling.

The most vulnerable part of a blade is the tip. It’s the thinnest part, which not only means it has the least amount of mass to support it, but it also makes it susceptible to overheating during heat treatment and finishing. D2 can also be brittle if not heat treated properly, so testing the tip of this knife was a priority.

The wander tactical barracuda positioned sideways on a wooden beam that was used to test its harpoon point.

To test the tip, we took a piece of 2×4, put it in a vise, and used the Barracuda to stab, twist, pry, and rip a hole all the way through to the other side. Less extreme versions of this test have bent and broken many knife tips, but the Barracuda came through unscathed.

For our penetration testing, we used a Level IIIA Kevlar panel backed with a 1-½-inch, high-density wrestling mat. The Barracuda penetrated nicely through both layers, stopping only after reaching the wood bench under the mat.

The wander tactical barracuda stabbed into a training mat.

It was during the withdrawal that we determined the knife’s greatest asset, the harpoon-shaped point, was also its greatest liability. Although the wide surface creates a large wounding channel upon insertion, the curved back tends to snag inside the target, making withdrawal difficult. The user might be able to mitigate this problem by sharpening the false edge, but doing so can make the knife illegal in some jurisdictions, so it’s important to the laws in your area before doing so.

Aside from the snagging issue, the Barracuda performed very well and proved to be a quality knife built to take just about any abuse you can put it through. With its close-to-perfect handle design and nearly indestructible construction, it’s safe to say the Barracuda’s strengths far outweigh its weaknesses. If you’re in the market for a quality EDC fixed blade, the Barracuda deserves a close look.

Photo of the wander tactical barracuda and its sheath on a wooden bench.

For more information on the Wander Tactical Barracuda, go to WanderTactical.com or the Safer Faster Defense web store.

About the Author

Microtech SOCOM Alpha knife review Summit in the Sand RECOIL 23

Chad McBroom is a 21-year veteran law enforcement officer with most of his time spent in the tactical unit. He has also served as Tactical Emergency Medical Technician within that unit. Chad McBroom is the owner of Comprehensive Fighting Systems and offers training in empty-hand tactics, edged weapons, impact weapons, and firearms tactics. Follow him on Instagram: @cfs_combat.


Video: Unboxing a Pristine 1944 USN Pilot Survival Kit

Steve1989MREInfo is one of our favorite YouTube channels, and a great resource for anyone who's interested in learning about MREs and other military rations from throughout history and around the world. But Steve doesn't just study food — he occasionally branches out into other military gear, such as pre-packaged survival kits. In the following video, he documents a “holy grail” item from his collection: a mint-condition M-592 USN Pilot Survival Kit (a.k.a. Back Pad Kit) from 1944.

According to the video description, this was one of the most expensive items Steve has ever featured on his channel, typically costing $1,750 in this condition. He considers himself lucky to have found it for only $800. Roughly 40,000 of these 13-pound kits were produced, and they were reportedly unpopular due to the discomfort they caused when worn by pilots under their parachutes and life vests.

Watch Steve's full 48-minute analysis of the kit below:

The kit's contents are quite comprehensive. They were tailored to survival at sea or in the jungle, the environments pilots in the Pacific Theater would face if they were shot down or had to bail out. Steve goes through the entire kit, which includes the following items:

  • Tinned rations
  • Cans of water
  • Waterproof match case with compass cap
  • Magnifying lens
  • Case XX machete
  • Folding jack-knife
  • Sharpening stone
  • Signal mirror
  • Morse code signaling device
  • Whistle
  • Flare launcher with six flares
  • Rain poncho (reversible between high-vis yellow and low-vis dark blue)
  • Mosquito head net
  • Cotton gloves
  • First aid kit
  • Sunburn ointment
  • Salt tablets (to combat dehydration)
  • 25 feet of 75-pound test cotton rope
  • Fishing kit
  • Waterproof tape and safety pins
  • Kant Rust lubricant/protectant
  • Instruction manual/log book with pencil

He also addresses some related kits from WWII, such as the drinking water kit (a desalinator system that eventually replaced the cans of drinking water) and the emergency fishing roll-out kit (a metal tin stored in life rafts that contained a vest full of fishing gear).

While a few items in this kit seem outdated, such as the cotton rope instead of paracord, the majority remain relevant to this day. Hopefully studying this survival kit will give you some ideas for your own gear — even if you're not jumping out of a plane above an uninhabited Pacific island.


Pick Up Chicks: A Guide to Raising Egg-Laying Chickens

This article originally appeared in Issue 15 of our magazine.

There’s nothing like eating truly fresh eggs. We know, the egg carton you buy at the local grocer says they’re cage-free blah, blah, blah. But they’re not nearly as fresh and tasty as the eggs you might get from a hen that just laid them that morning in your backyard. And they’re even more satisfying because they came from your chickens. It’s a process the whole family can participate in — it’s a lot of work, but it’s also a lot of fun.

No, this isn’t Farming Monthly. But for many preparedness-minded folks, having a sustainable source of food on your property goes hand in hand with survivalism. That’s why in this feature article we’re flying beak-first into the topic of raising chickens.

Not everyone can raise poultry at home due to municipal codes and regulations, but that has changed a lot over the last few years. Many counties have passed ordinances stating that cities can’t restrict people from producing food. Whether it’s due to the growing hipster trend of organic foods or governments realizing the importance of sustainability, coops are sprouting up in urban and suburban areas more and more.

When we wanted to start raising chickens, we did a quick internet search for our county regulations and found that the city said no, but the county said yes (a maximum of six hens, but no roosters). The next thing we had to check was on our homeowners association (HOA) rules. Ironically, the HOA guidelines tried every way to say that we couldn’t raise chickens without expressly forbidding it. We went ahead and bought some chicks and converted a playhouse into a hen house, to avoid calling attention to it. We generally believe it’s better to beg for forgiveness than ask for permission. Also, the neighbors tend to be more supportive of your hens when you bring them fresh eggs — no one ratted us out.

After a year of covert chicken farming, we decided to move to an area where chickens were permitted and added many more.

Selection & Supplies

The first thing to decide is how many chicks and which type to buy. We advise you always buy more than one of any type of chicken and to be sure you have enough space. A general rule of thumb is to have at least 2 square feet per chicken, but we prefer about 6 square feet per chicken. We would also suggest that if you want to have six chickens, buy three each of two types or, at the very least, two each of three types.

The reason? Be prepared to lose at least one chick. As such, the tactical mindset of two is one and one is none comes into play here. If you buy two of each type and one dies, now you have one by itself. That doesn’t bode well for solitary chickens, as we’ll explain later.

Heat and Water

We bought a large plastic tub at a Costco for the incubator. Then we headed to the pet supply store to get some shavings for the bottom of the tub, as well as food and water dispensers.

You don’t want your incubator to be too large; chicks can’t manage their body heat very well, and it’s easier to heat a smaller area. Some people prefer a red bulb for their lamp because it isn’t as bright and lets the chicks sleep. Fill the bottom about 1-inch deep with shavings. It’s important to place a thin brick, piece of wood, or a RCBS loading block under the water dispenser so fewer shavings go into the water as they “scratch” the shavings. If too many shavings make it into the water they clog the system and suck up the moisture, preventing the chicks from drinking. Chickens can become dehydrated easily, and this is a fast way to kill them.

Next, buy food and water dispensers with the canisters on top. Chicks can go through a lot of food and water in a day, and this helps to ensure they don’t run out. The food they need when they’re small is a fine crumble. If the crumble is still too large, run it through a food processor.

Take a piece of tubing and attach it to the top of the tub with cable ties to attach the heat lamp to. It doesn’t need to be steel or even metal; any piece of wood or dowel will work. Attach it to the center or closer to one end, wherever is easiest and most secure. Do this so the light can be adjusted to be closer or further away from the chicks by rotating it up or down. When chicks are smaller, the light needs to be closer to produce more heat. When they’re bigger, the light needs to be higher so they can move around freely.

As soon as their feathers start to develop, they can maintain their body temperatures better, but they can also fly the coop. If these are your only chickens and it isn’t too cold outside they can go to their permanent housing once their feathers come in. If you have adult chickens or if it’s still cold outside, it’s better to build a small hen house for them that can be easily assembled inside the house.

Building the House

Let Home Depot cut the wood for you so you don’t have to do it. Buy two 4×8-foot sheets of OSB or plywood (whichever is less expensive). The first sheet should be cut into four equal-sized pieces of 2×4 feet, and the second piece cut in half at 4×4 feet.

Also buy some punched angle bracket material to put it together. If you don’t have an angle grinder, cutoff saw, or chop saw, you can buy these in specific sizes.

The finished sizes are approximately (four) 36-inch pieces and (four) 12- to 16-inch pieces. You’ll also need a roll of painter’s plastic drop-cloth, some 2½-inch drywall screws, short screws (½-inch), and some staples for your staple gun. Some sort of mesh covering to keep the chickens inside the small pen and the roof of the hen house (approximately 4×8 feet) may also be desired when you put them inside their permanent home. Bring the punch angle, short screws, staples, and the cut wood into the room with the chickens along with the staple gun and screw gun.

Create a box by first connecting two of the sides (2×4) with one of the shorter punched-angle sections and some screws. Repeat until all four sides are connected, then place the larger section (4×4 feet) on top of the four sides. Once this is in place, connect it to the sides with remaining sections of bracket material and more screws. When it has been secured to the sides, flip it over and line the bottom with your plastic drop-cloth and staple it into place, making sure the plastic material comes up the sides approximately 6 to 12 inches so that any spilled water or waste doesn’t escape.

Place the new pen where you plan to leave it and then add your shavings. Once this is done, remove the tube or dowel from the tub, drill a hole through each corner wall near the top of the small pen, and attach it to the corner of the new pen. Choose a corner that’s close to an electrical outlet and position the heat lamp on it. Put it under the top of the wall so it’s closer to the chicks, providing more heat and so you can cover the pen with the mesh.

Put your chicks in along with the food and water dispensers, cover it with the mesh, and watch them grow.

Enclosure Tips

We’ve tried many different types of enclosures for the chicken coop/hen house. The premade pressboard units at box stores aren’t very good. They tend to be small, difficult to clean, and poorly made. For the same cost you can purchase a much better solution. Our current configuration is a 10×10-foot chain-link dog kennel with a walk-in gate that costs about $250 and took about 20 minutes to assemble with only two adjustable wrenches. It comes as four premade sections with two clamps on each corner. It’s 6 feet tall, so we can walk in to clean it and fill the food and water dispensers.

As before, we buy the wood in lengths we can use without having to do much cutting. Build a frame for the roof out of 2×4-inch studs in varying lengths: (two) 12-inch, (three) 10-inch, and (three) 92 5/8-inch studs. Make sure when you lay out the frame for your roof, it remains 10 feet wide. It will actually be 12 feet, 3 inches long if done correctly, so it will hang over by 2 feet, 3 inches to cover your laying box. The third 10-foot stud will need approximately 3 inches cut off on one end to fit inside the frame. Once it’s cut, lay it inside the frame, but don’t attach it yet. Take the three 92 5/8-inch studs and place them approximately 2 feet apart (lengthwise), and butt them up to one end and to the piece you just cut.

Once they are properly laid out, secure them with the 2½-inch drywall screws. You should have an area 8×10 feet with full support for two full sheets and one half sheet of plywood or oriented strand board (OSB). This will provide shade and shelter the chickens when it rains or snows. Caulk the seams and paint the surface so it looks better and lasts longer.

The open area can be covered with wire mesh to keep birds of prey and other critters from getting to your girls. After all this is finished, line the perimeter of the enclosure with rocks. This keeps predators from digging in and the chickens from digging out. Chickens don’t dig tunnels to escape, but they do claw and scratch the ground. Eventually, there will be openings they can use to get out.

The Egg Box

Next, build a three-sided box and attach it to the side of the structure into the end post and center post. Drill through the posts and use the 2½-inch drywall screws to attach the box. The top of the box should be hinged, preferably with a long piano-type hinge keeping it strong, so you can extract the eggs without having to go inside the hen house. Once the box is attached, cut the chain-link in a square where the chickens can go inside to lay their precious eggs.

Once the hole is cut, bend the wire from the chain-link back so the sharp ends are not an issue. Make a ramp for them to walk up with small pieces of wood attached to it for traction. Connect it to the edge of the box with some drywall screws. We use buss-tubs filled with hay for their nesting and laying area. At first we had a separate tub for each hen, but they all laid their eggs in the same tub so now we have just two.

Layers of Production

Some types of egg-laying chickens, or “layers,” are more productive than others. However, egg size and frequency will fluctuate regardless of breed. This author chose his breeds based on egg output, disease resistance, temperature tolerance, and friendliness. Here are the types he owns and the approximate egg productivity:

Buff Orpington:
180 eggs per year

Hybrid:
280 to 300 eggs per year

Leghorn:
250 to 260 eggs per year

Plymouth Rock:
200 eggs per year

Rhode Island Red:
250 to 260 eggs per year

Other popular breeds are Sussex, Ancona, Austalorp, Barnevelder, and Hamburg.

Compatibility

When you put chickens together, a pecking order will be created. While humans might use this phrase to describe a hierarchical organization, it originally came from the observation of chickens establishing dominance by pecking others and/or chasing them around. When introducing new adult hens to the coop, we put them in at night, and they seem to get along without issue. When combining your new chicks with your older chickens, a much longer process is required.

Lesson Not Learned: This young Dark Cornish hen wasn’t accepted by the older chickens in the coop and was viciously attacked. The author immediately separated her from the others, but she eventually flew over the barrier — yes, chickens can fly — and back into the hen house, where she was killed by the older birds.

Birds of a feather flock together. You may have heard that as a child, but do you know what it really means? While civilization has progressed to some semblance of tolerance and acceptance, nature has not. Recently, this author’s friends wanted to raise chicks. They bought three Rhode Island Reds and one that was possibly a Dark Cornish hen. After realizing they had allergy issues, the friends brought them to us. We merged them in with our three Orpingtons, three Plymouth Rocks, and two bantams that the author’s daughter absolutely had to have.

All was well in the tub and the small box, but when we put the young ones in with older hens, it was obvious that the Dark Cornish was not welcome. We sectioned off a portion of the hen house by putting a temporary kennel fence that segregated the young ones from the hens, yet still allowed them to get acquainted to each other. After a couple weeks of total separation, we allowed them to be together for short periods.

We keep a spray bottle close as a training aid for the older hens, giving a quick squirt when they peck the new ones too aggressively.

On the first day of this process we supervised closely for about an hour and left them alone for a short time to integrate. The Dark Cornish was brutally attacked by the six older hens, removing feathers, flesh, and tissue. We separated them immediately and put the Dark Cornish in solitary confinement to let her heal. Yet, she intentionally flew over the barrier to be with the other chicks. They continued the assault, so we separated her again. The Dark Cornish once again flew over the barrier into the area with the grown hens. Not surprisingly, she was killed.

The rest seem to get along OK — even the bantams. The pecking order is being established, but there are no bloody chicks. Occasionally, one of the older chickens becomes a problem, attacking the chicks, and must be eliminated from the flock to preserve community spirit.

Living Conditions

Chickens can lay eggs for many years, but productivity will fluctuate and will steadily decrease as they age. You’ll know which chickens are laying and which ones are not by the egg color. Interestingly enough, the white Leghorns lay white eggs, the tan hybrids lay tan eggs, and the Rhode Island Reds lay brown eggs. It’s a little comical to see them separated into three groups by color, as birds of a feather flock together.

Extreme cold or heat can limit production, as well as stress or shortage of food or water. They need lots of protein and plenty of sunshine. We let our girls run around in the yard often. However, we used to let them “free range” all day until we started losing them to coyotes. Once a predator knows where your chickens are, they’ll come back again and again until they’re all gone.

Also, you don’t want your chickens laying eggs around your yard. Let them out in the late morning after the laying has been done. Herding chickens back into the coop isn’t any easier than herding cats. We use a long stick to help direct them back to the gate, but it doesn’t always work very well. They’ll hurry themselves back into the coop if you train them by giving them the remnants of fruit and vegetables. They literally run back in once they see the pie tin we use to carry the scraps of lettuce, apple core, grapes, fruit, or whatever we have laying around.

Handling Eggs

Our eggs are so tasty because they aren’t refrigerated. A fresh egg will keep for weeks provided you follow a few simple rules:

Don’t wash them when you collect them. There may mud, dirt, feathers, or whatever on them when you collect them, but that’s OK. There’s a film on them called the “bloom” that will allow them to keep for weeks. Store them just as they are in a cool dry place (not in direct sunlight) with the pointy side down.

When ready to eat, rinse them off in warm water to remove the debris and revel in the wonderful flavor of your fresh eggs.

You’ll need to refrigerate them if you want hard-boiled eggs. The shells are difficult to remove if they haven’t been chilled before you boil them.

Some people crush the shells and put them into the chicken food providing essential nutrients for them, but it’s not recommended. Once a hen gets acquainted with the taste of the shells it might start pecking the eggs — even chickens love the taste of fresh eggs! Obviously, this can create a big problem. Again, a hen like this may need to be eliminated from the flock to preserve the integrity of the project.

Coffee grounds, egg shells, and fruit are great for compost.

Eggspert Tip: After eating the eggs, mix the leftover shells with chicken poop and coffee grounds for an amazing base and combine that with compost to grow plants.

Temperature

Some things to consider when raising chickens include temperature, moisture, snow, and other elements. Don’t be afraid to leave them out in the cold — they have their own little down jackets. Their feathers are great insulators, so they’ll be fine in temperatures below freezing, even below zero. However, their water will freeze, and they’ll die from dehydration.
We use an electric heater base that turns on automatically when the temperature reaches 36 degrees F. Conversely, when the temperature is above 80 degrees, they go through a lot more water, so you must keep their dispenser(s) full.

When it rains or snows, the ground can become saturated with moisture, which isn’t good for chickens. During winter, place a tarp over the mesh portion of the roof and to cover one more side, keeping rain and snow out. Snow is much heavier and will accumulate on the tarp, which will collapse if not supported. Add some more studs to the section of the roof that’s exposed so you can cover it with OSB during winter. After the ground has become moist from the elements, it tends to create a hard surface that the chickens cannot scratch. This can be remedied with a pitchfork by churning the top layer and breaking it up.

Food and Water

The water dispensers should be elevated above the ground so they don’t get muddy. We put them on large landscaping bricks, but you can use whatever you wish provided it keeps the water clean. While the chickens are “scratching” the ground they kick dirt into the water dispenser, turning it into a muddy mess that makes their water undrinkable.

It’s better to cover their food dispensers and hang them from the roof or from a perch so the chickens don’t sit on them. Where they sit is where they poop, and you definitely don’t want poop in their food. We put one perch about 42 inches above the ground and another at about 18 inches above the ground. They have no problem getting to either.

Noise Concerns

Also, we were surprised at how loud our hens are. We thought only roosters made noise, but that’s not true. Chickens can be heard from approximately 100 yards away. This is good information if you’re trying to be covert about your chickens. In fact, we get excited when our girls are very loud because it often means a very large egg, but be aware of this in case you have neighbors who are sensitive about noise and might make a habit of complaining to the police. That could potentially put a stop to your entire chicken operation or possibly burden you with fines.

Like anything else, your experience may be different than ours, but you won’t know until you cross that road. Get out there and make it happen!

The Chicken or the Egg?

How come this feature is only about the eggs? Raising table chickens (AKA meat chickens) is not all that dissimilar to raising egg-laying chickens except that they should be fed higher percentages of protein so they gain weight faster. We don’t raise table chickens because we don’t want to breed them, and it’s not exactly cost effective to raise a bird for five to 12 weeks for one meal.

However, if you have the space and don’t mind roosters (and their crowing), you can add a rooster into the mix — about six hens per rooster — and allow them to reproduce. If you want to raise chickens for meat without breeding them, it’s less expensive to buy chicks that have not been sexed, usually equal numbers of males and females, and raise them for the table. Meat chickens are typically referred to as Cornish game hens when they’re young, then as broilers or fryers (six to eight weeks old), and later as roasters (three to four months old).

Sometimes we end up with meat chickens by accident. Case in point: One beautiful black bantam hen with orange plumes turned out to be a cock. We figured it out when he crowed early one morning and never stopped. And because our local laws don’t allow us to have roosters, table chicken he became. Eviscerating a chicken is too long to discuss here, so stay tuned for a feature on that topic in a future issue.

More From Issue 15

Don’t miss essential survival insights—sign up for Recoil Offgrid's free newsletter today.

Read articles from the next issue of Recoil Offgrid: Issue 16

Read articles from the previous issue of Recoil Offgrid: Issue 14

Check out our sister publications on the web: Recoil | Gun Digest | Blade

Editor's Note: This article has been modified from its original print version for the web.


Out of the Smoke: 5 Survival Lessons from Elite Firefighters

This article originally appeared in Issue 15 of our magazine.

Here in Ocala in the middle of Florida, far from the coastal breezes and surrounded by pine forests, we’re sweating even in the shade. Behind us a four-story concrete building burns from the inside out. Black smoke pours out of every door and window. It stings our eyes even though we turn our backs to it.

No, we’re not witness to a wildfire that’s engulfed a nearby office building. This is an intentional inferno, set at the Florida State Fire College as part of the Florida Smoke Diver School. This intense one-week course teaches firefighters to survive and thrive in situations that would incapacitate some of their less-experienced counterparts. It’s meant for the best of the best, sort of like the SWAT academy of firefighting — which might explain why only one in four candidates passes the course.

Fortunately for us, we were given an all-access pass to the program, observing what it takes to become an elite firefighter and finding out how to apply these training concepts in civilian life. Whether you’re a prepper looking to reinforce your skills or just a concerned reader hoping to learn more about surviving a fire in another hot summer season, you’ll no doubt find some valuable — and perhaps life-saving — information in these pages.


Real-World Intensity

Standing near the burning bunker, we wait for one of the Smoke Diver instructors, Lieutenant Chad Belger of the Gainesville Fire Rescue Department. He engineered the rebirth of the Florida Smoke Diver School in 2012, almost a decade after it was forced to shut down due a candidate’s accidental death in 1994. Originally structured primarily as a beat-the-sh*t-out-of-you weeklong physical challenge, Belger revamped the program to include mental training, as well. He focused on stress indoctrination training, getting firefighters to calm down and think straight even as their surroundings collapsed around them.

Belger knew the training was hazardous. But firefighters were dying in real-world fires as well, in part for lack of experience with life-threatening fires. Improved fire-resistant construction meant that large blazes were being encountered less often than they used to be. “That was our biggest argument,” Belger says. “Training is dangerous, but the industry standard for special operations is training at a high enough level where you may get hurt. That’s the nature of the beast. That intensity is necessary to perform in the real world the way that we’re expected to.”

Four years after its reboot, the Florida Smoke Diver program is one of the most elite in the country. Other states including Georgia and Texas have begun similar programs, although the Texas school remains shuttered due to its own accidental training death in 2012.

After spending some time with him and the other Smoke Diver instructors, we learned the following top five lessons that can be applied to anyone’s prep work:

Lesson 1: Know Your Limits, Your Real Limits

“We teach that it’s all about self-awareness,” Chad says. “Be aware of your abilities and limitations, but also be aware that those are just perceptions. You are capable of so much more if you can condition your brain to allow your body to do what it’s capable of.”

In other words, there’s a perceived limit to what you can do. This limit does not exist. You can do more than you think. The Smoke Divers want there to be a muscle memory response, based on past experience with similar situations through their own brand of stress inoculation training. As a result of this constant training the body should be able to say to itself, “OK, we’ve been here before, and we came out alright. We didn’t die. So maybe everybody should just calm down, and we’ll figure a way out of this.”

“Whether or not that’s actually the case is irrelevant,” Chad says. “You might end up being OK and you might not. The point is that you keep fighting, believing that you will be able to find a way out — or in if you need to get in.”

How does the school teach this? “We create situations where people are at the limits of their physical and mental ability,” Belger says. “They need to be fully pegged. We get you to the limit, but then ask you to perform basic firefighter tasks. Perform a rescue, crawl through a stud wall, the types of things that in a non-stress environment any firefighter in the country could do without a problem.

“In these situations the fine motor skill tasks become much more difficult. So throughout the class you learn — you either learn or you fail — how to make yourself slow down, control your breathing, fall back on your muscle memory training, and not let that instinctual freak-out reaction take over. Otherwise you don’t pass the class and need to come back when you’re more prepared.”

Prepper’s Application: While you won’t have your own fire school to practice running in and out of burning buildings, you can do your own training to push yourself to, and beyond, your limits. Strap on your go-bag and go for a run. Time yourself, then improve. And read our Health column every issue for more ways to improve your physical fitness.

Lesson 2: Focus on Your Breathing

Firefighters who fail to control their breathing let their heart rates skyrocket out of control. Some who have gone “into the black” have been found inside closets and pantries, literally trying to claw their way through a wall mindlessly. If you lose control of your breathing, you’ll lose your senses — figuratively and literally. A threat (real or perceived) can spark shallow or excessive breathing, which in turn can bring on tunnel vision, auditory exclusion, and lack of fine motor control, among many other negative physiological effects.

Firefighters hoping to become certified as Smoke Divers must pass stringent physical conditioning tests — in full...

“We reinforce breathing from the start,” Belger says of the Smoke Diver School. “We make people aware of their finite available oxygen, which is what they’re wearing on their back. On every drill we make them monitor their consumption. Then we have benchmark evolutions where you must improve your air consumption throughout the class to make yourself more aware. Otherwise it’s a critical failure. That’s the crux of the whole class.”

Even Belger — who routinely works in buildings where it’s 450 degrees F at the floor and 850 degrees at the ceiling — has his moments when he needs to center himself. “Myself, I got more overheated than I ever have in my life on one of our training burns,” he says. “I thought to myself, ‘I can’t go back in there or I’m going to pass out.’ But then I used Dave Grossman’s breathing techniques from his book On Combat [see next lesson]. I was able to become self-conscious of my breathing, and then bring myself back in and finish the job.”

Prepper’s Application: When you focus on your breathing, you can slow it down along with your heart rate. This prevents the negative physiological effects (tunnel vision, hyperventilation, etc.), increases your self-awareness, and allows you to make sound decisions under duress. Practice this the next time you’re working out or in a situation where you might otherwise panic, e.g. you hear a bump in the night or almost get into a car accident.

Lesson 3: Read “On Combat”

Lieutenant Colonel Dave Grossman’s landmark book is referenced by police, military, and self-defense instructors throughout the United States. It’s also a foundation for lessons that the Florida Smoke Diver School teaches every day. The book discusses at length the critical skills that warriors need to survive in any situation, from an always-on mindset and mastery of breathing and heart rate, to continuing on with the mission even after being shot or wounded.

Don’t think you’re a warrior just because you’re a civilian? As Grossman says in his book, “If you are in a war, you are a warrior. Is there a war on drugs? Is there a war on crime? Is there a war against terrorism? Are you confronting and containing aggression as a peace officer at home, a peacekeeper in some distant land, or a warrior combating terrorism around the world? Or perhaps you have chosen to be a martial arts practitioner or an armed citizen, seeking to defend yourself or your loved ones in their hour of need? Are there people who wake up every morning determined to send you back to your family in a box? Then you are in a war and you are a warrior.”

Depending on your perspective and your awareness of world events, the warrior mindset taught by Grossman could be more applicable to civilians than you would first think.

“From that book,” Belger says, “I learned the phrase that biology is not destiny. Just because I was born a certain way or that I have this amount of proclivities and weaknesses, doesn’t mean I need to accept that. I can transform myself in almost limitless ways.”

How did that apply to him? “I was never a good athlete growing up. I was an overweight kid. I had asthma. My whole family had health problems. But by now I feel like I’ve changed my biology to the point where I am a high-performing athlete, at least as much as an amateur athlete can get. I didn’t realize it until I read the book that I became aware of the process and was able to do that much more.”

Prepper’s Application: Without mental fortitude, all of your physical fitness and prep work can be for naught. Read books like On Combat to prepare the oft-neglected aspect of survivalism: mindset.

Lesson 4: Know Your Equipment

Smoke Divers train to refill their air bottles even in complete darkness, even when they are out of air, and even when they have been out of air for the last 60 seconds. They want there to be muscle memory so that their hands and bodies move without conscious thought or input. Because no matter how experienced you are, your heart will beat faster in stressful situations. Increased heart rate can lead to loss of fine motor skills, so if your body doesn’t know how to respond by instinct then it may not respond the right way.

“Every day in Smoke Diver School, we start with an hour of gear check and physical training with gear,” Belger says. “It’s all about knowing your equipment, all of its capabilities and your capabilities in that equipment. The first part of our day is just putting our gear on as fast as we can, properly, so that we can get in or out of a bad situation. You need to know that everything is in its proper place ready to go to protect you.”

Above: The first step to being prepared for a blazing inferno or inevitable disaster? High-intensity training with the clothes and equipment you’ll most likely wear when SHTF.

Prepper’s Application: Imagine if smoke’s filled your house or you’re in the middle of the woods at night time without a flashlight. It’s not enough to know what’s in your bug-out bag (BOB). You have to know where everything is in your BOB and practice getting to it — even without sight. Practice accessing items from your pack with your eyes closed or while in the dark. If you own a firearm, practice malfunction drills with dummy rounds while your eyes are closed.

Lesson 5: Always Leave a Reserve

“We train at max effort,” Belger says. “But in a real scenario you always want to leave a reserve — 75/25 is a good rule of thumb for physical exertion. But I like to account for mental awareness as well. For that I like to do 80/10/10. That means 80 percent for your task, 10 percent for an escape plan or a Plan B for when sh*t hits the fan, and 10 percent for your breathing.”

One Smoke Diver graduate told us about performing a search-and-rescue scenario at the end of the day, when he was already tapped out. He searched a smoke-choked building on hands and knees to find a weighted mannequin “victim,” conveniently with no legs and just one arm, which made it harder to carry. Hoisting it over his shoulders, the Smoke Diver to-be stumbled out of the building with five minutes of air remaining. He then triumphantly set the victim down at the feet of his instructors. “That was real good,” they told him. “But there’s another victim in there.”

Most people stop when their bodies are done. Smoke Divers stop when the job is done.

“That ability only comes through repeated training,” Belger says. “You have to know what 100 percent feels like to be able to scale it down. Obviously you can’t quantify 75 percent effort, but you have to know what your maximum ability is to be able to say to yourself, ‘OK, I’m redlining right now, and I need to bring it back a little bit. Otherwise I’m going to burn myself out.’

“We leave a reserve because you know never know when you’re going to need that last 25 percent, whether to rescue yourself or your buddy. And if you’re tapped out then who is going to come rescue you? Who are we supposed to call?”

Prepper’s Application: This can be applied on two levels. The first would mean always having reserves in your preps. For example, pack extra food in your BOB or map multiple evacuation routes in your emergency plan. The second would mean having reserves in your physical fitness and mindset (see lessons 1 and 3).

How to Escape a Fire

It’s important to learn and practice exiting the home drills with your family at least once a year. Remember, a fire may block your main exit through the front or back door. So practice getting out of a window, too. Here are some general guidelines:

Crawl to Exit: If a fire alarm goes off or you smell smoke, crawl on the floor toward the nearest door. After checking it for heat, open it. If the way is clear, keep crawling and go for it.

Out the Window: If not, close the door and exit out a window.

Shelter by the Window: If you can’t crawl out the door or climb out the window (maybe you’re in a tall building), stay near a window. Firefighters will use a Vent-Enter-Search (VES) protocol, and the windows are the first places they’ll check. Use duct tape or towels to seal the bottom of a door and air vents. Open but don’t break the window, in case smoke enters the room from outside the building. Use a flashlight or light-colored cloth to signal firefighters.

Rendezvous: Make a plan with your family for where you’ll meet (e.g. the big oak tree in the backyard). This will prevent frantic and unnecessary searches.

Conclusion

The lessons Belger has learned (and teaches) can do more than just save firefighters’ lives. They can help each one of us who plan on facing our own personal Armageddon-style scenario one day.

“The lessons we teach at the Smoke Diver School are applicable to civilians because it teaches about preparedness,” he says. “Whether you’re a gun guy or a get-the-hell-out-of-Dodge guy, it comes down to knowing yourself and your equipment. And it comes down to making sure your family knows how to use the equipment.

“At some time, everyone reaches the point where they have to make a decision: Am I going to keep pushing or am I going to give up?”

Belger already knows his answer. What’s yours?

Sources:

About the Author

Andrew Schrader is certified as a structures specialist responder by the U.S. Army Corps of Engineers and is assigned to the State of Florida’s Urban Search and Rescue Task Force. He is the founder of Recon Response Engineering LLC, a professional training outfit that specializes in educating the general public, first responders, and construction companies on how to respond to (and prevent) building collapse caused by natural or man-made disasters. www.reconresponse.com

More From Issue 15

Don’t miss essential survival insights—sign up for Recoil Offgrid's free newsletter today.

Read articles from the next issue of Recoil Offgrid: Issue 16

Read articles from the previous issue of Recoil Offgrid: Issue 14

Check out our sister publications on the web: Recoil | Gun Digest | Blade

Editor's Note: This article has been modified from its original print version for the web.