Basic Physical Fitness Techniques for Your Kids

Illustrations by Joe Oesterle

This article originally appeared in Issue 9 of our magazine.

Warning: The exercises and content expressed in this story are for illustrative purposes only. Consult a medical professional before trying any physical activity or nutritional plan.

In an instant, you find yourself in dire straits. It’s the end of the world as we know it… yet your kids feel fine. No, it’s not because they’re playing Minecraft, but they’re occupied nonetheless.

Disasters can really take a toll on the morale of a group, especially the kids. Keeping your kids positive and active is key, especially when they could very well have no electricity, let alone be able to bury their faces in a video game. What they can enjoy, however, are some different types of games — games that will make them fit for a post-apocalyptic world.

Think Like a Kid

Sure, you may be able to get your 10-year-old to go out on a run, but that’s not what we’re concerned with here. Kids typically don’t have the attention span or a firm grasp of the benefits of exercise to follow a regular exercise program. Depending on their age, they may not have even developed enough to be put through one.

Regardless, for them, it’s about enjoyment. Are they having fun? Are the exercises or activities challenging, but still achievable? There’s a fine line between what’s fun and what’s boring. Making exercise a game is a great way to keep their spirits up, while also keeping them in shape for what the future holds.

It shouldn’t come as a surprise how kids react when given too much idle time. So, let’s use that time to create some activities they can follow that will both prepare them and entertain them for the worst of the worst.

Mention exercise to kids and they’re going to scream, “Boooorring!” So, make it fun for them. All kids love to play, so make it a game. If you make it work, you’ll have to force them to do it. When you make it fun, you’ll have to force them to stop doing it.

Kids can learn a lot through movement and playing. Especially at younger ages, they’ll be able to build both fine and gross motor skills, critical for their development. The key here is to make the experience of exercise fun. There may be times when sitting still and quiet for long periods of time is necessary, and possibly crucial, so give them a chance to let loose when the time is right.

The Benefits

Physical fitness can help kids:

  • Develop social skills and teamwork
  • Improve focus, concentration, and productivity
  • Become more active when they become adults
  • Reduce the chance of injury
  • Develop fundamental movement skills that will set the foundation for the rest of their lives

Use Your Head

Contact Games: While full-contact games can be fun, the risk-to-reward ratio doesn’t quite add up. Avoid games that may lead to broken bones or other serious injuries. Kids are resilient, yes, but good luck recovering from a broken bone without a doctor. Be smart!

Hot Weather: Keep the weather in perspective when creating these games for your kids. In warmer weather, plan to have more water handy and make them dress appropriately. Take more frequent rest breaks as well, preferably in a shaded area.

Cold Weather: Consider the lengths of time the kids spend playing. Set up a little warming station if you can. Otherwise, allow them to take frequent breaks to warm up, if need be. Again, have them dress appropriately.

Ages 3 to 5

Hop

For kids 3 to 5 years of age, the main focus for anything exercise related should be on very basic movements such as crawling, jumping, hopping, or running. A very simple way to incorporate this is follow the leader. In this version, however, we’ll be getting a little creative. The movements and exercises you’ll be having them do will be very important to their development and survival in unknown terrain.

Broad Jump

Follow the leader is a great game for younger kids because it allows them to have fun while building fundamental movement skills. It can be used to your advantage in situations where you need to evacuate an area without the kids becoming aware of the severity of the situation. It’ll be easier to maintain their attention on the task at hand because it’ll be a familiar game that they enjoy playing.

Bear Crawl

Traveling longer distances through wooded areas also provides great opportunities to make a mundane task fun for kids. Incorporating specific movements like crawling under a tree limb, using a fallen tree as a balance beam, or hopping over rocks provides some levity to a bleak atmosphere. The structure should be very loose with kids this young. It’s best to let the kids have fun with this, and see how creative you can get with your surroundings. Focus on spans of 20 to 30 minutes. That’s a great amount of time to keep their attention. Some key activities to incorporate in follow the leader include: crawling, hopping, climbing, running, and balancing.
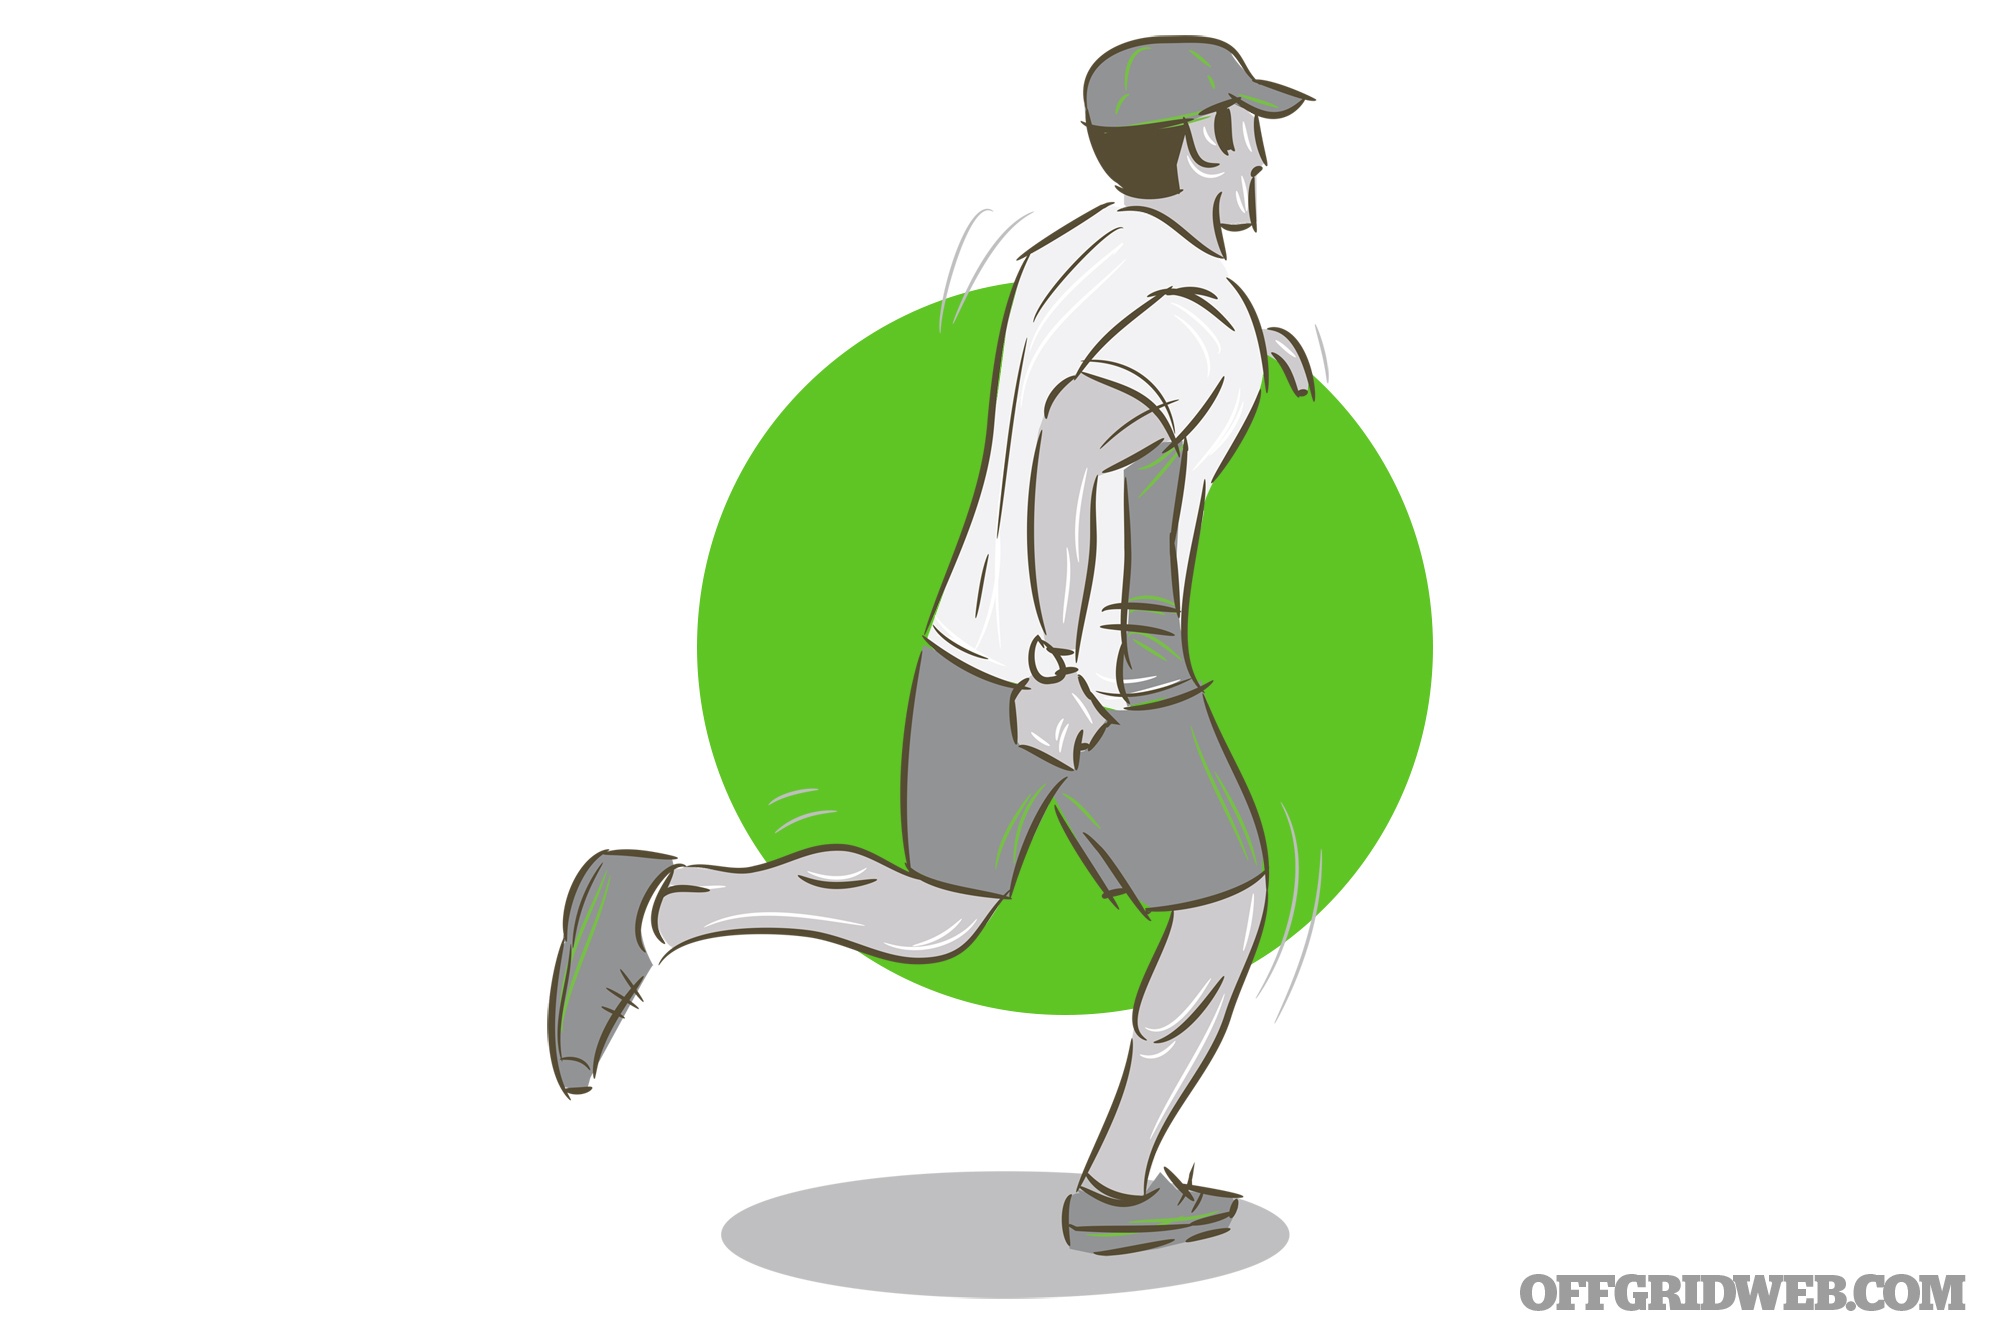
Forward Jog

Ages 6 to 9

Kids who are 6 to 9 years old are better able to take direction, but we’ll still keep it to a minimum. We’re going to build on what we would do with younger kids by focusing on more fun and athletic movements that incorporate body awareness, coordination, and playing with objects.

Lateral Shuffle

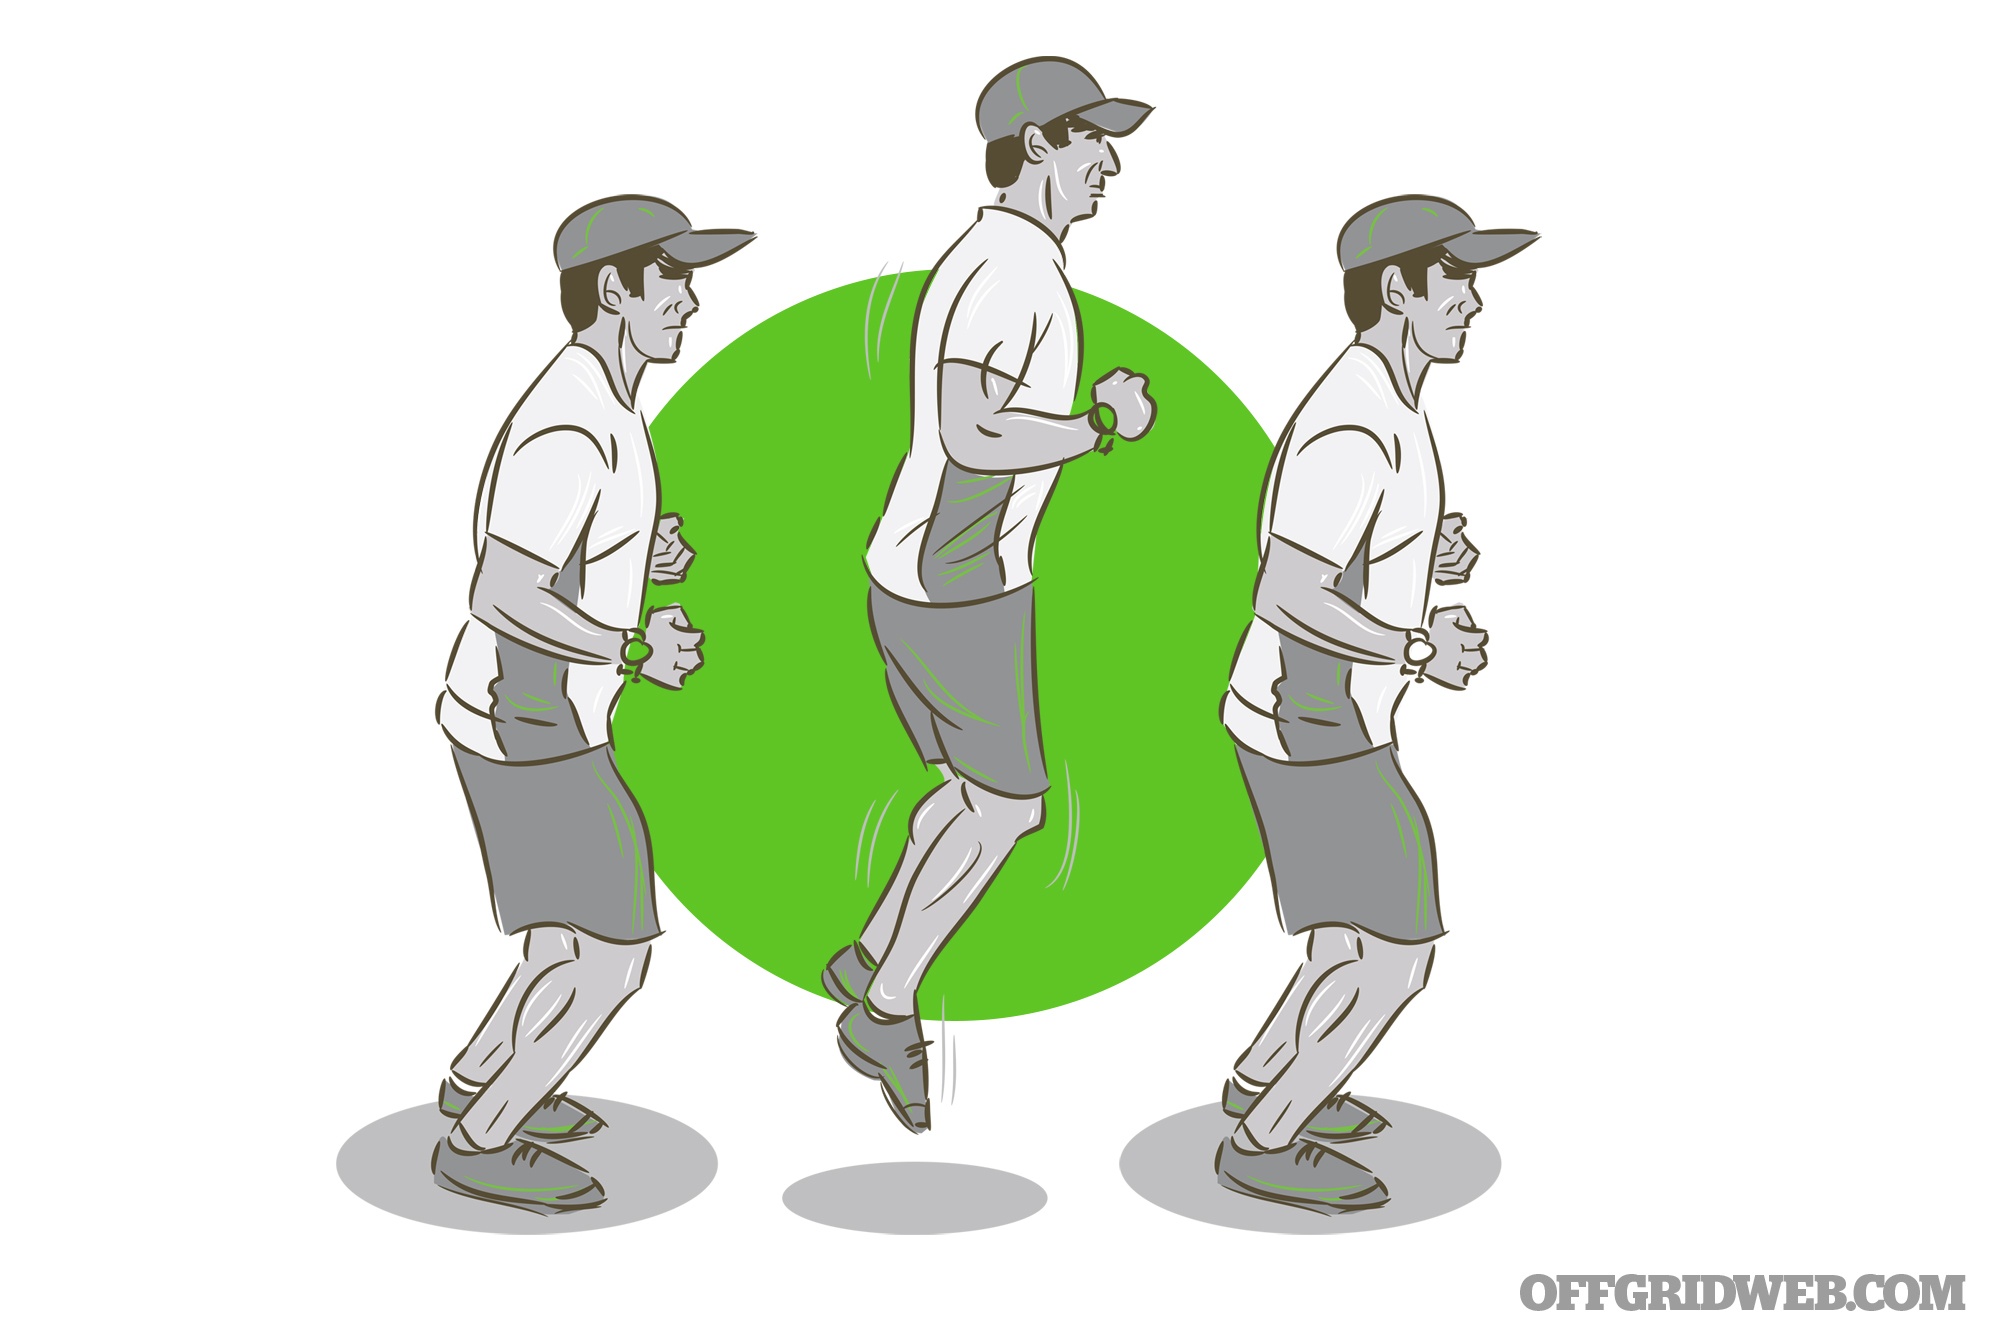
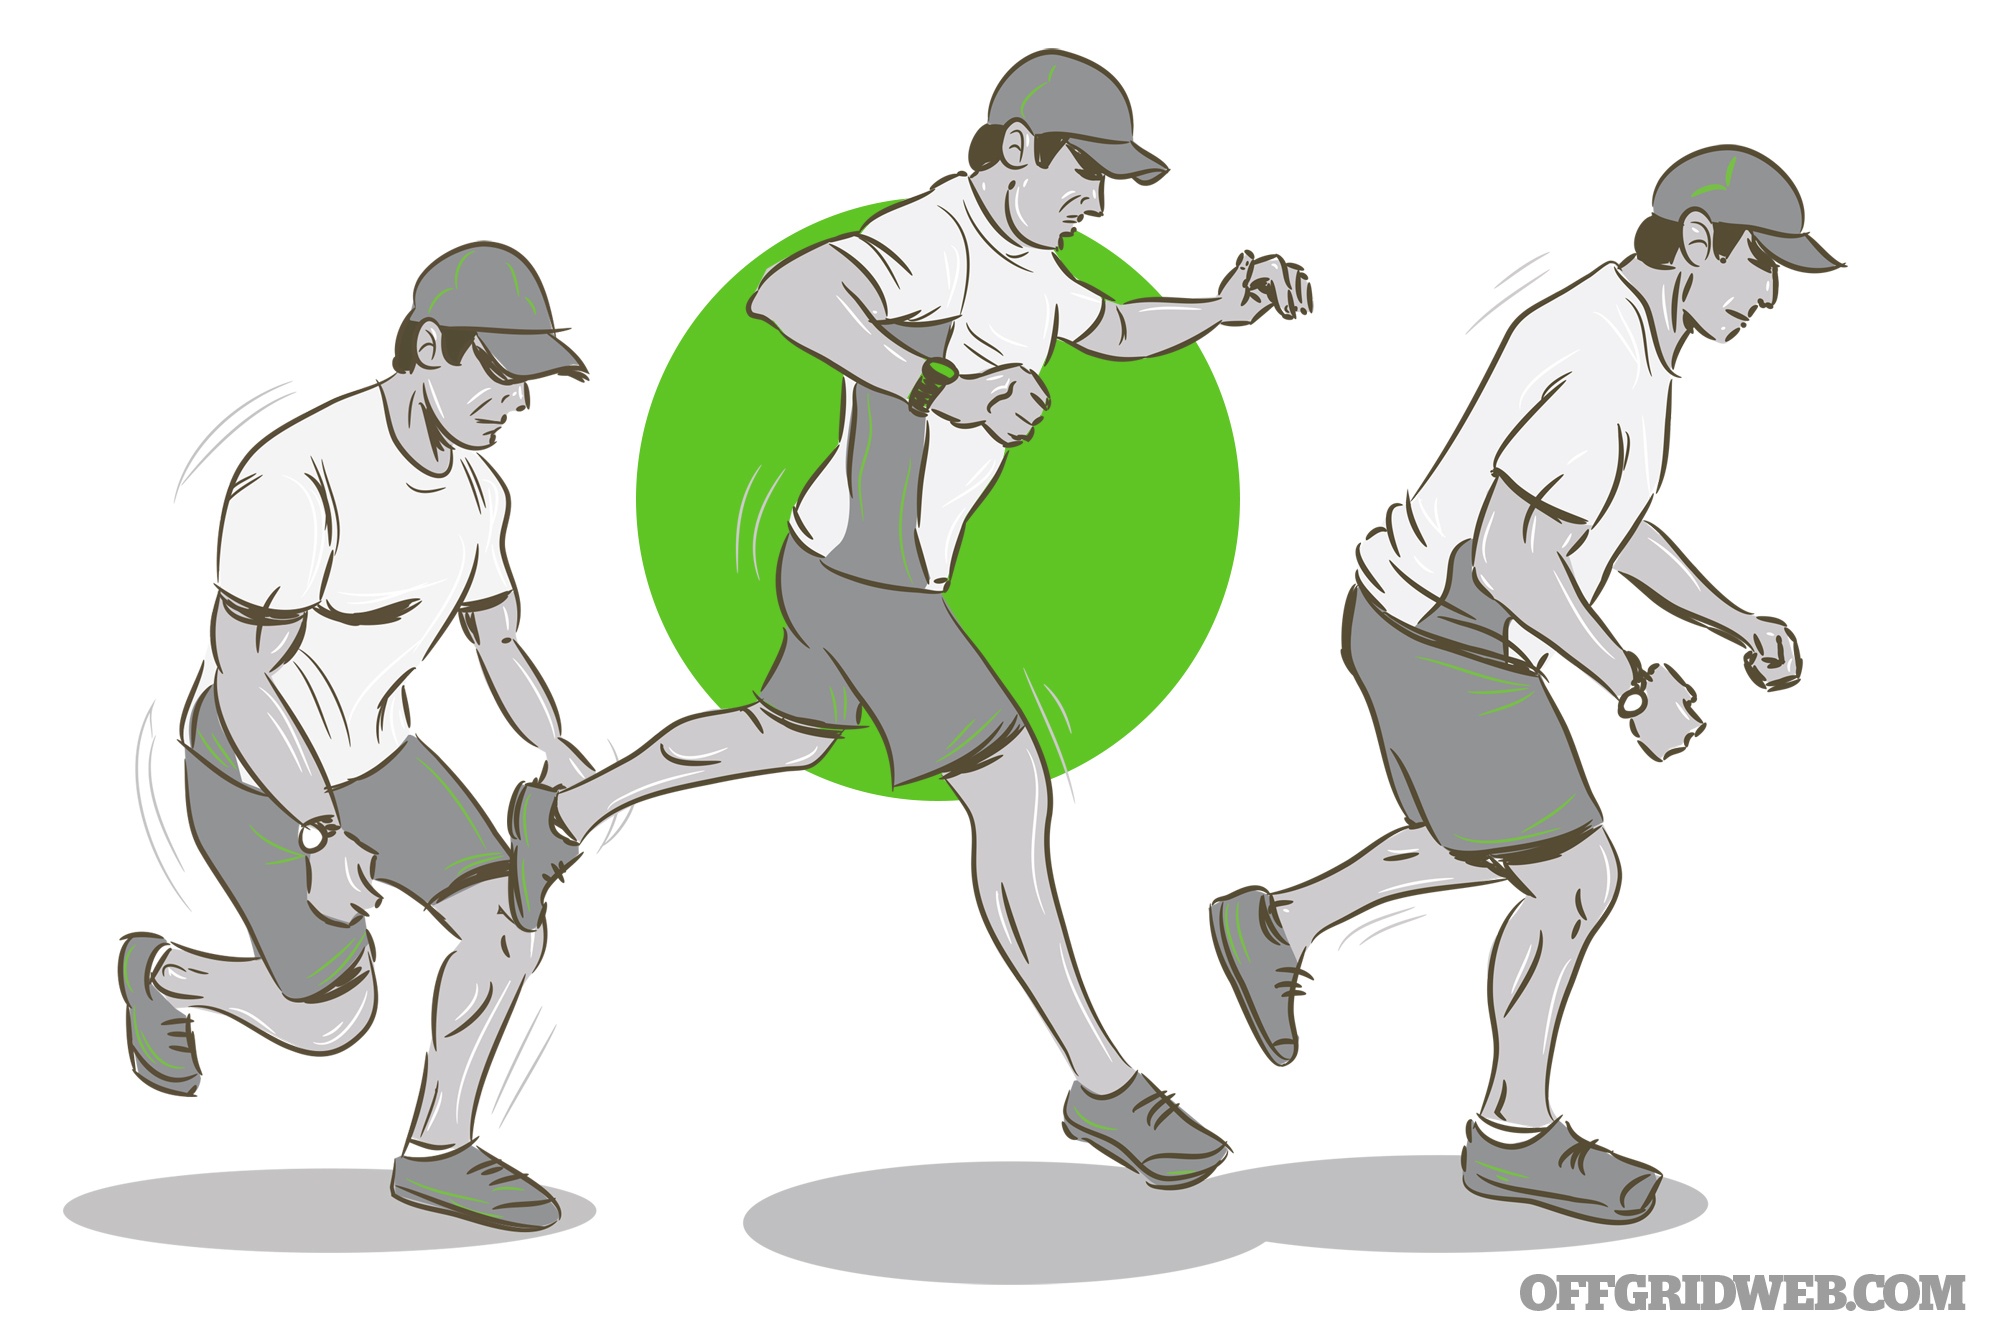
We can incorporate athletic movements with kids by playing Red Light Green Light, which will be fantastic in teaching them body awareness and coordination. This age-old game has kids lined up at a start line facing the finish line. When you say, “Green light,” everyone moves toward the finish line. When you say, “Red light,” they must immediately halt. Anyone still moving is penalized. Follow the normal rules of the game, except make them do 10 jumping jacks when they move after you say, “red light.” Take the kids through the following movements on a “green light” — knee pull, butt kick pull, bear crawl, skipping, lateral shuffling, jogging forward, jogging backward, hopping, and broad jumping. Section off about 10 to 20 yards of space, and have them complete each movement for about 10 yards, so if you only have 10 yards of space, have them go to the end and back. Limit overall time to about 30 minutes so they don’t get bored or lose interest.

Backward Jog

Well-supervised sorting-and-gathering games are great to play with kids at this age, and it can really help out with our scenario. Pick smaller objects and make a game to collect as many of something as they can find. Make it a timed game, so they’ll move more quickly and get the exercise benefit. Some things to consider: sorting or collecting cans of food, gathering dry leaves or brush for kindling, gathering pieces of fruit or berries, sorting articles of clothing, or anything else that would be useful to you and your group. Again, stay within 30 minutes in length to keep their interest.

Forward Skip

Ages 10 to 12

Once you hit the ages of 10 to 12, you can start getting a little more technical with what you have the kids do. They can follow directions pretty well, so we’ll take advantage of this. Keep the timeframe to about 45 minutes to get a great exercise benefit, but not tire them out too much.
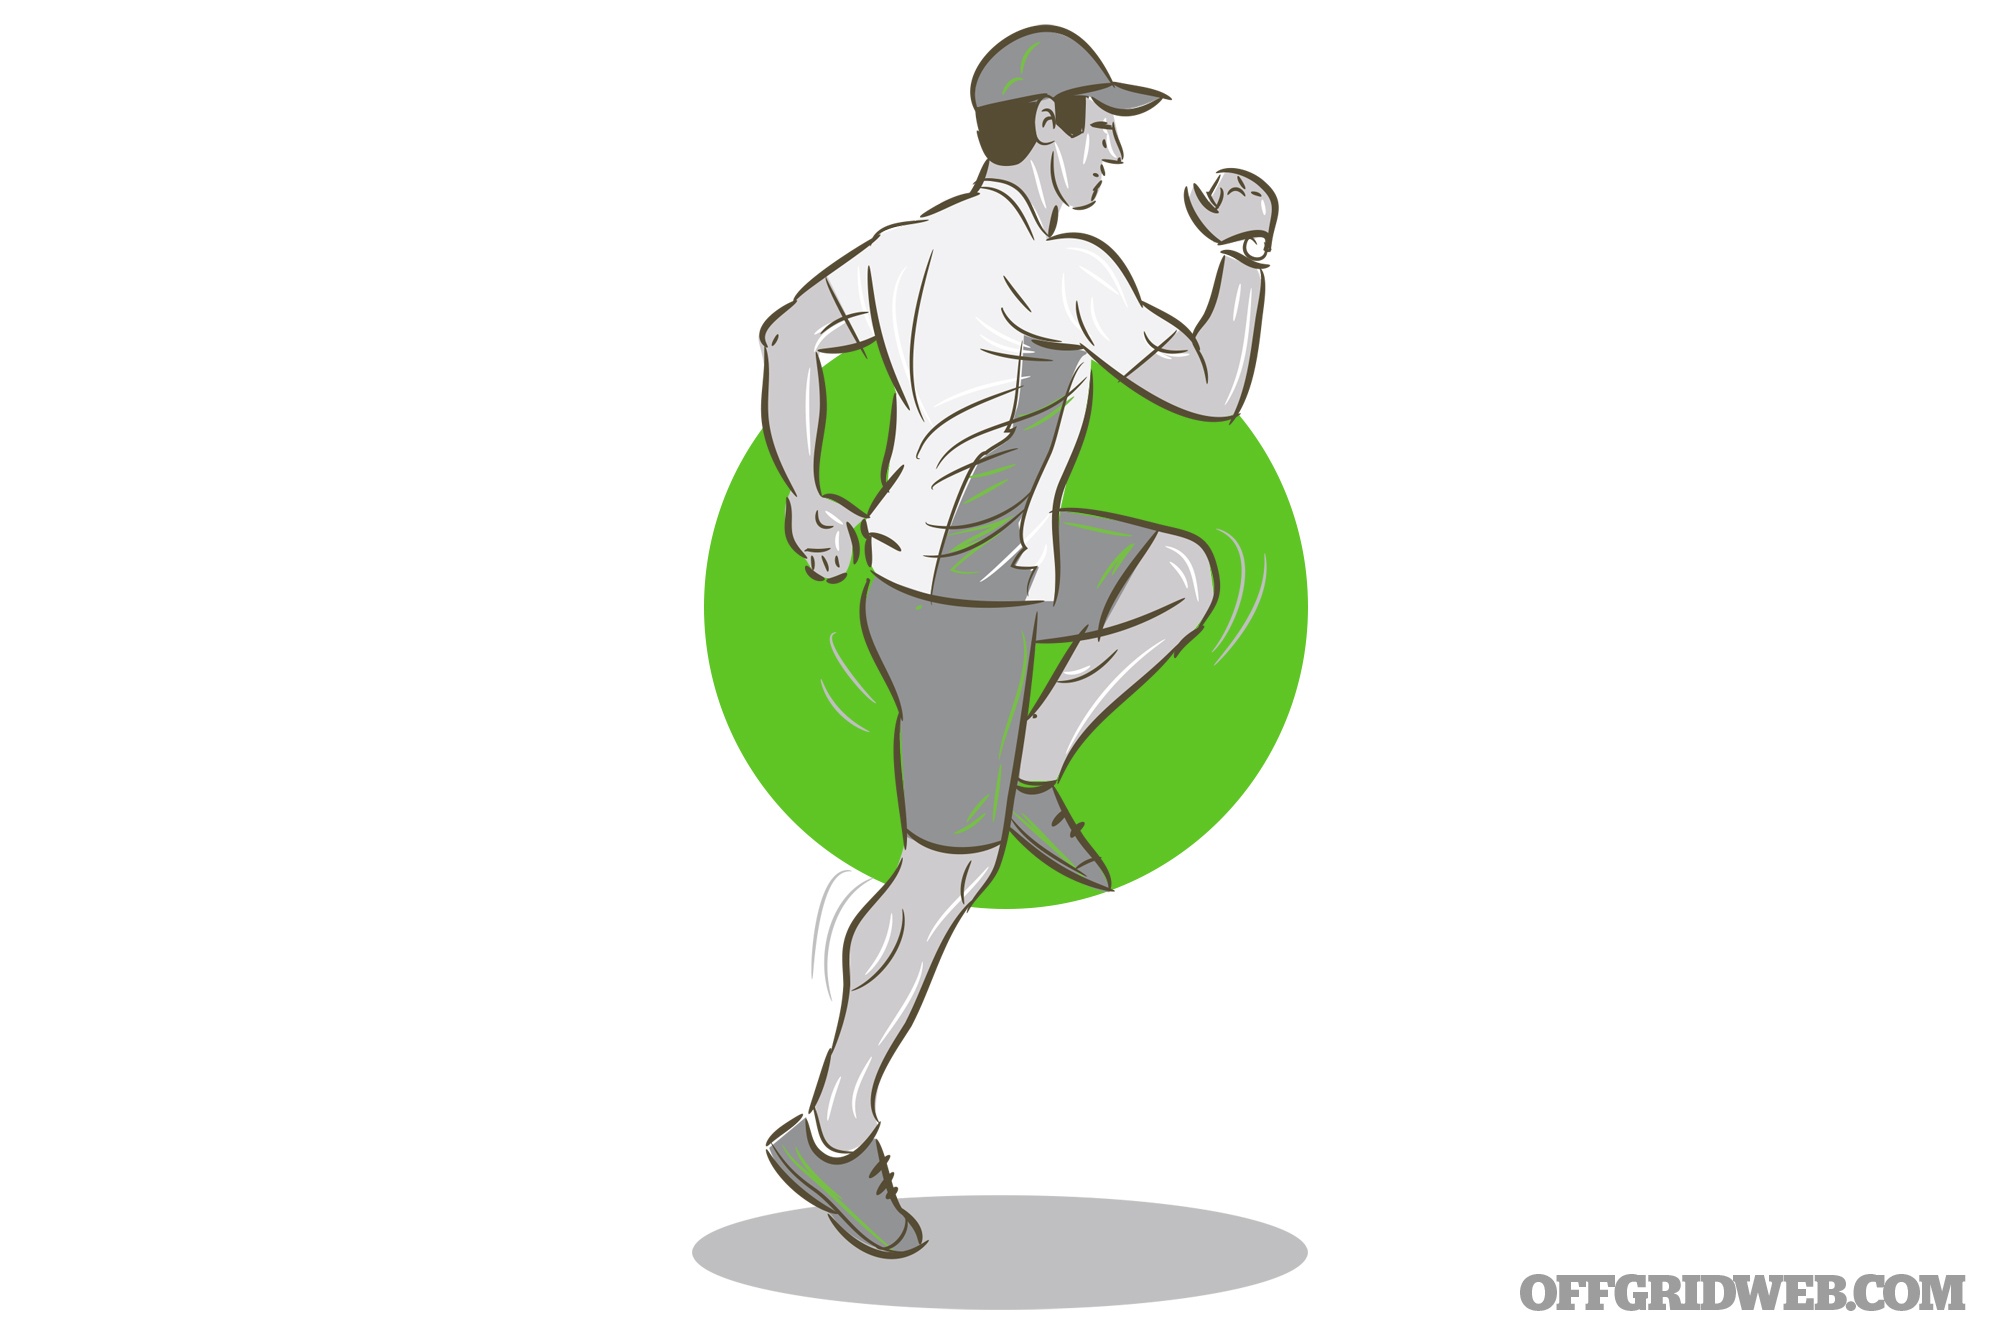
Knee Pull

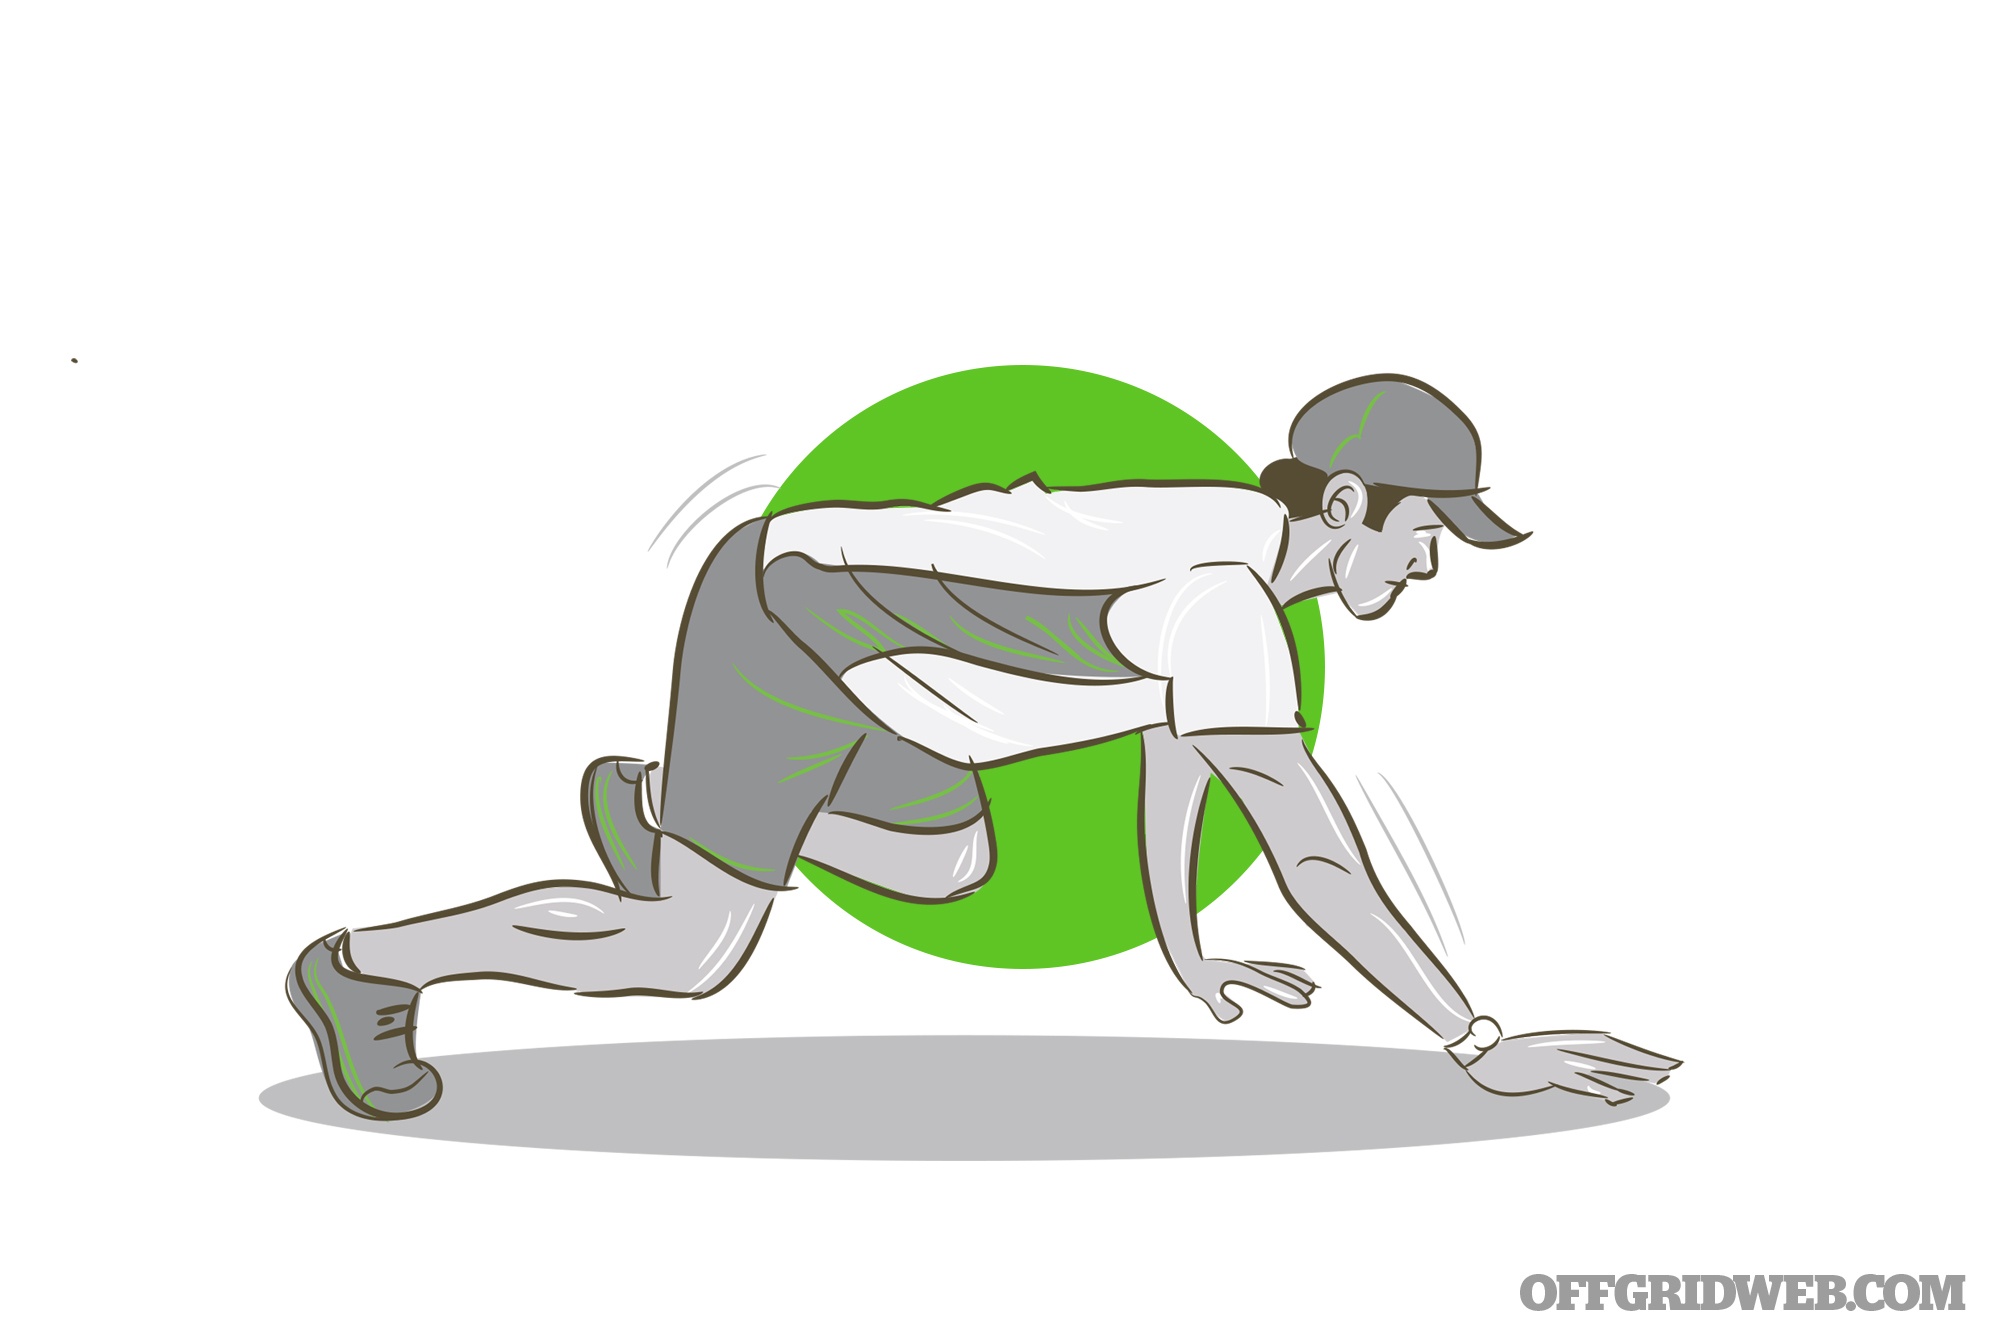
Relay races are a great activity for kids this age to complete. Our OFFGRID-style relay races will kill two birds with one stone. We’ll improve the kids’ fitness, while also helping you or your whole group. Take advantage of this fun game when moving smaller supplies, loading or unloading vehicles, or anything that would require multiple trips to and from something. Have each kid complete one trip to and from the destination, retrieving an object each time. Have them start a good distance (about 20 yards, if possible) away, so we can get them to run most of the time. This can be played with as little as four kids, with two teams of two. Generally, though, the more kids the better.

Butt Kick Pull

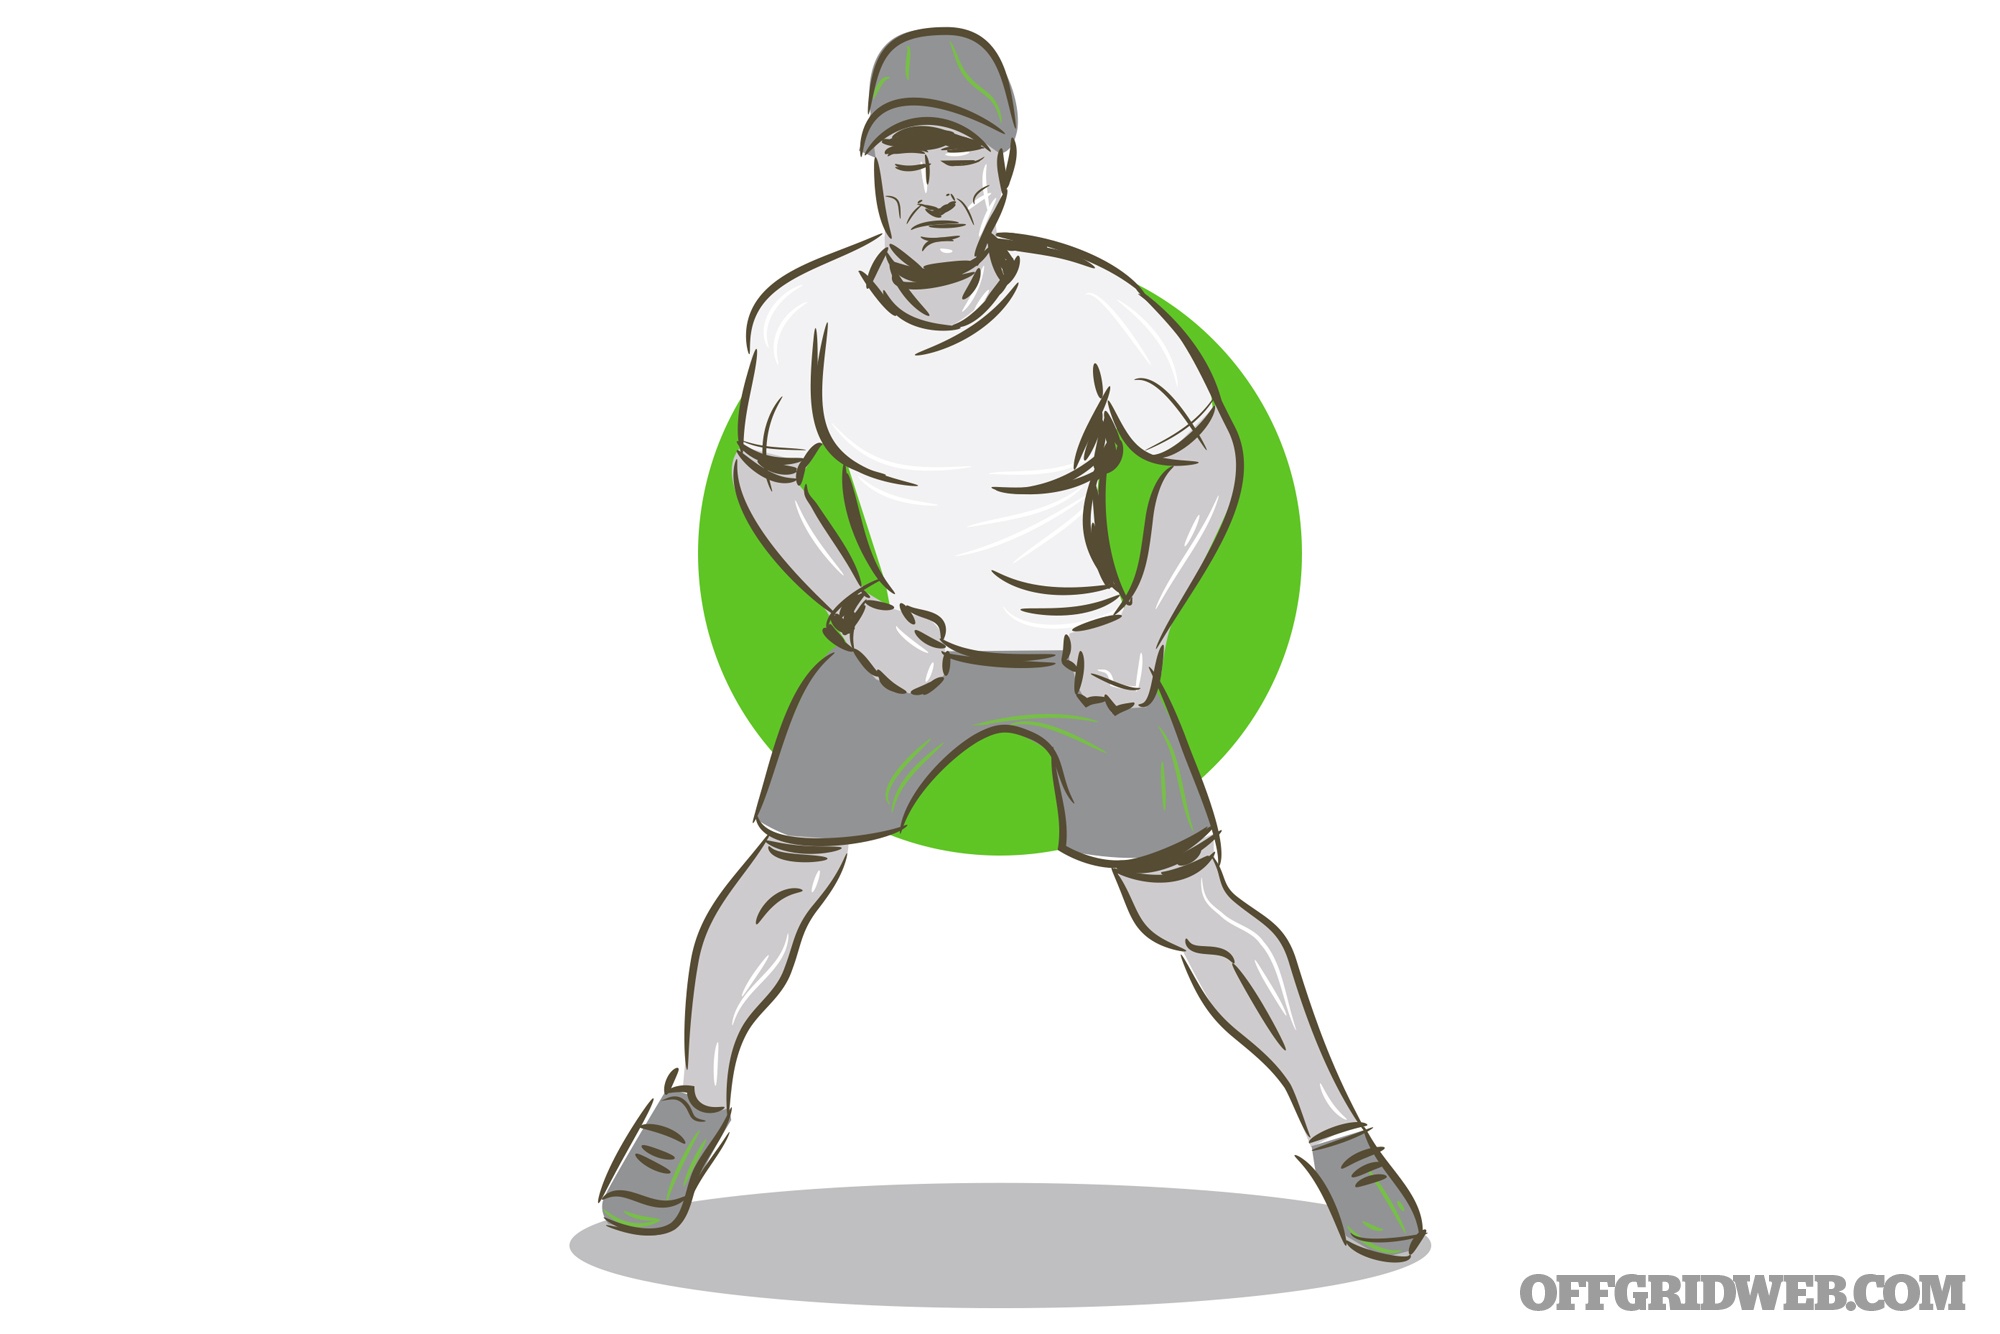
Tag incorporates many athletic abilities, and circle tag is a great way to have fun in a more confined space. The goal here is to have at least three kids in a huddle, holding on to each other at the shoulders, waist, or hips. One kid is outside of the huddle trying to tag the designated kid in the huddle. The kids in the huddle work together to keep him or her from being tagged on the back. The person who was tagged becomes “it,” and the one on the outside now joins the circle. Play in 30-second intervals, or until the kid gets tagged. There are so many great things being tested here, including agility, acceleration, teamwork, coordination, and lateral movement.
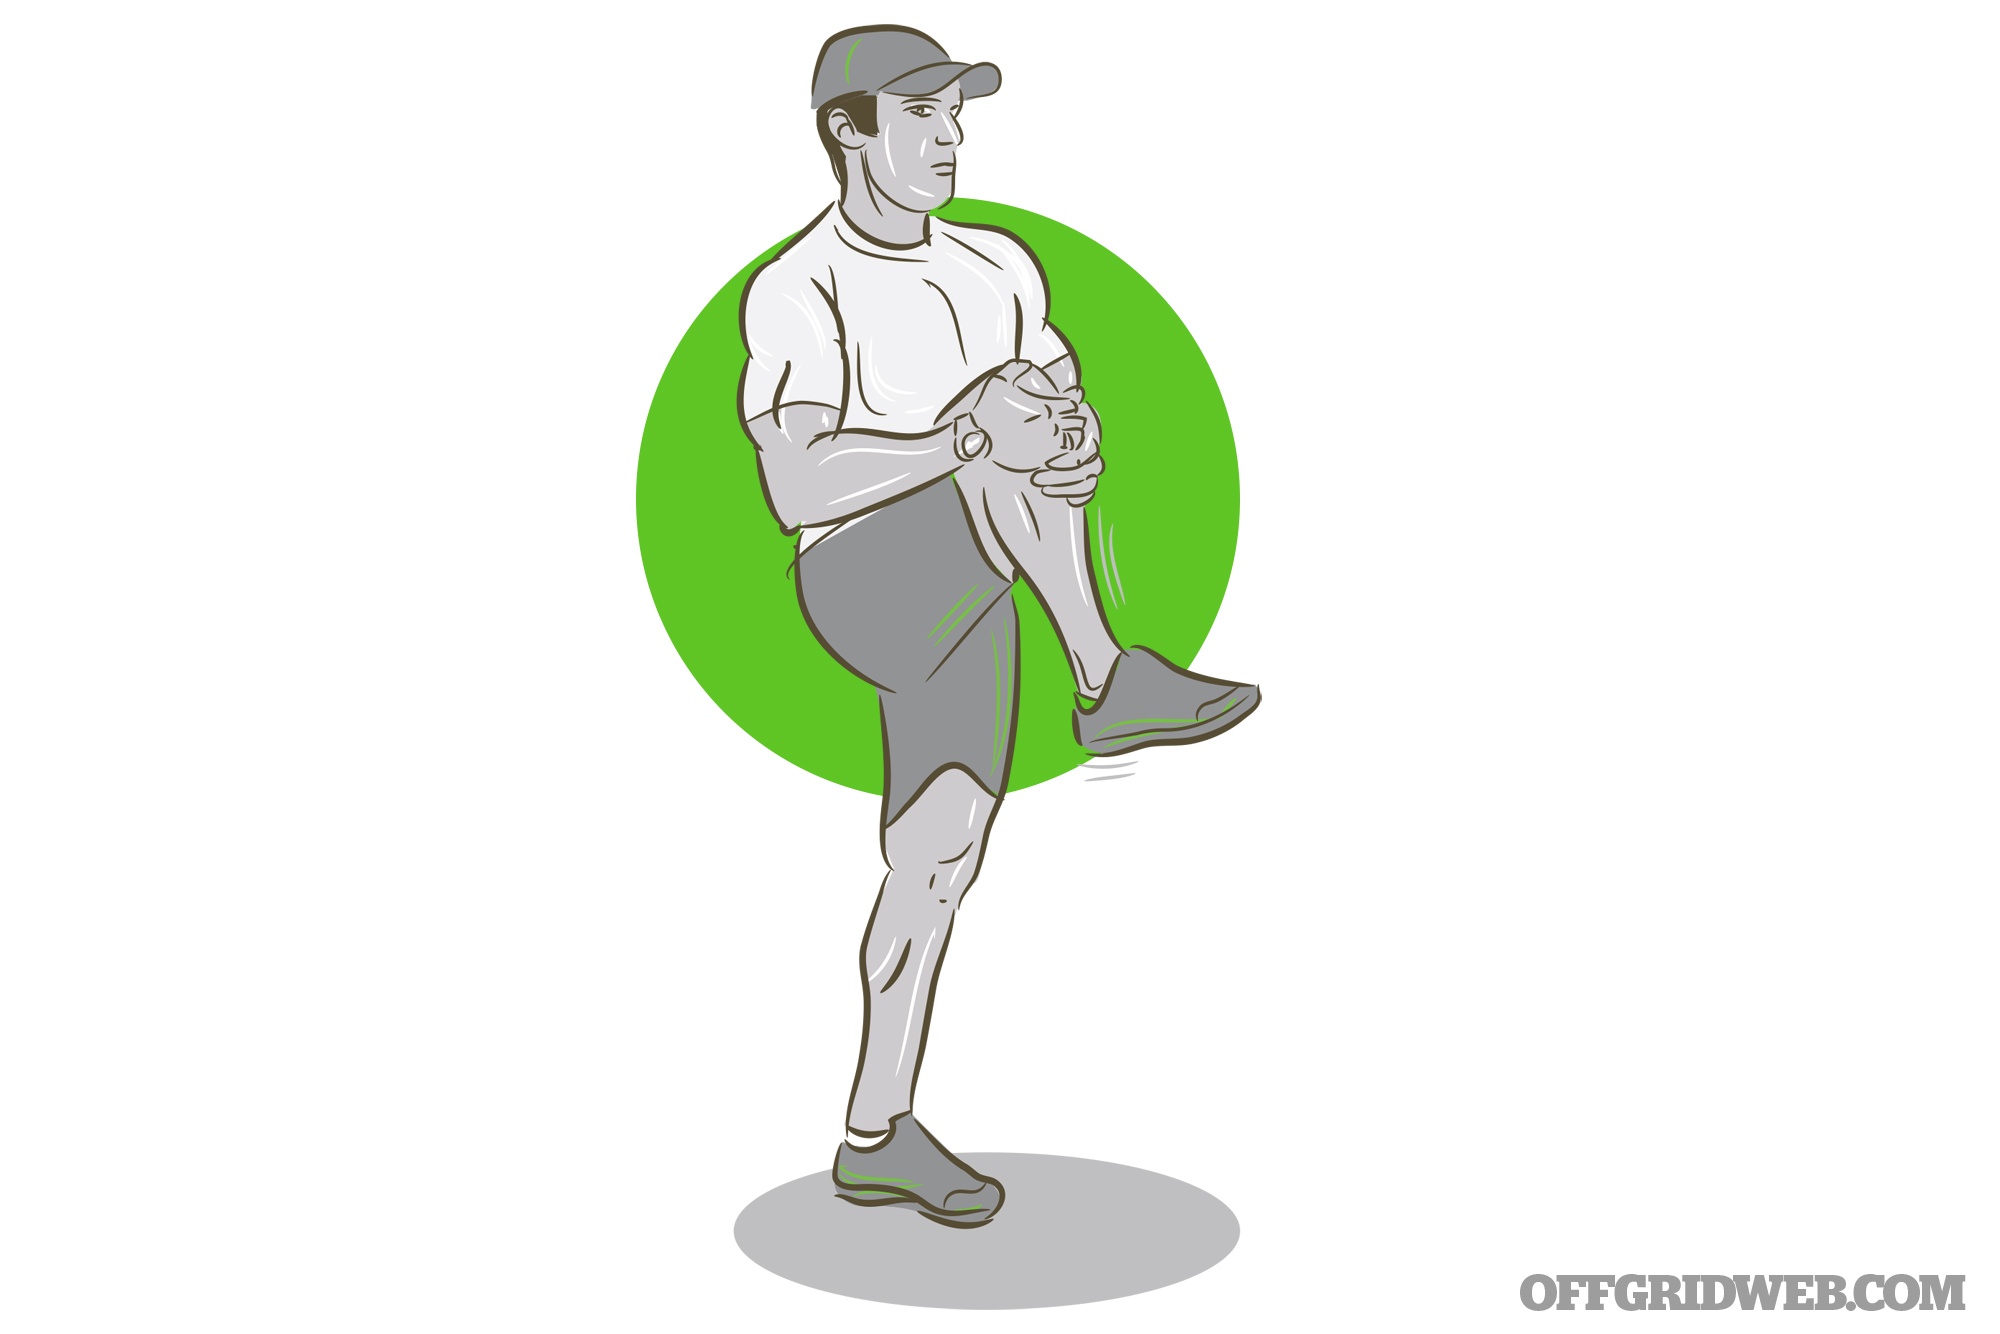
Cradle Walk

Ages 12 to 15

Adolescents are mature enough to understand the benefits of exercise, and they can take instruction well enough to incorporate some more technical concepts. In addition to the games for 10 to 12 year olds, there are several others that preteens and teens in this age range can benefit from.

Diagonal Leap

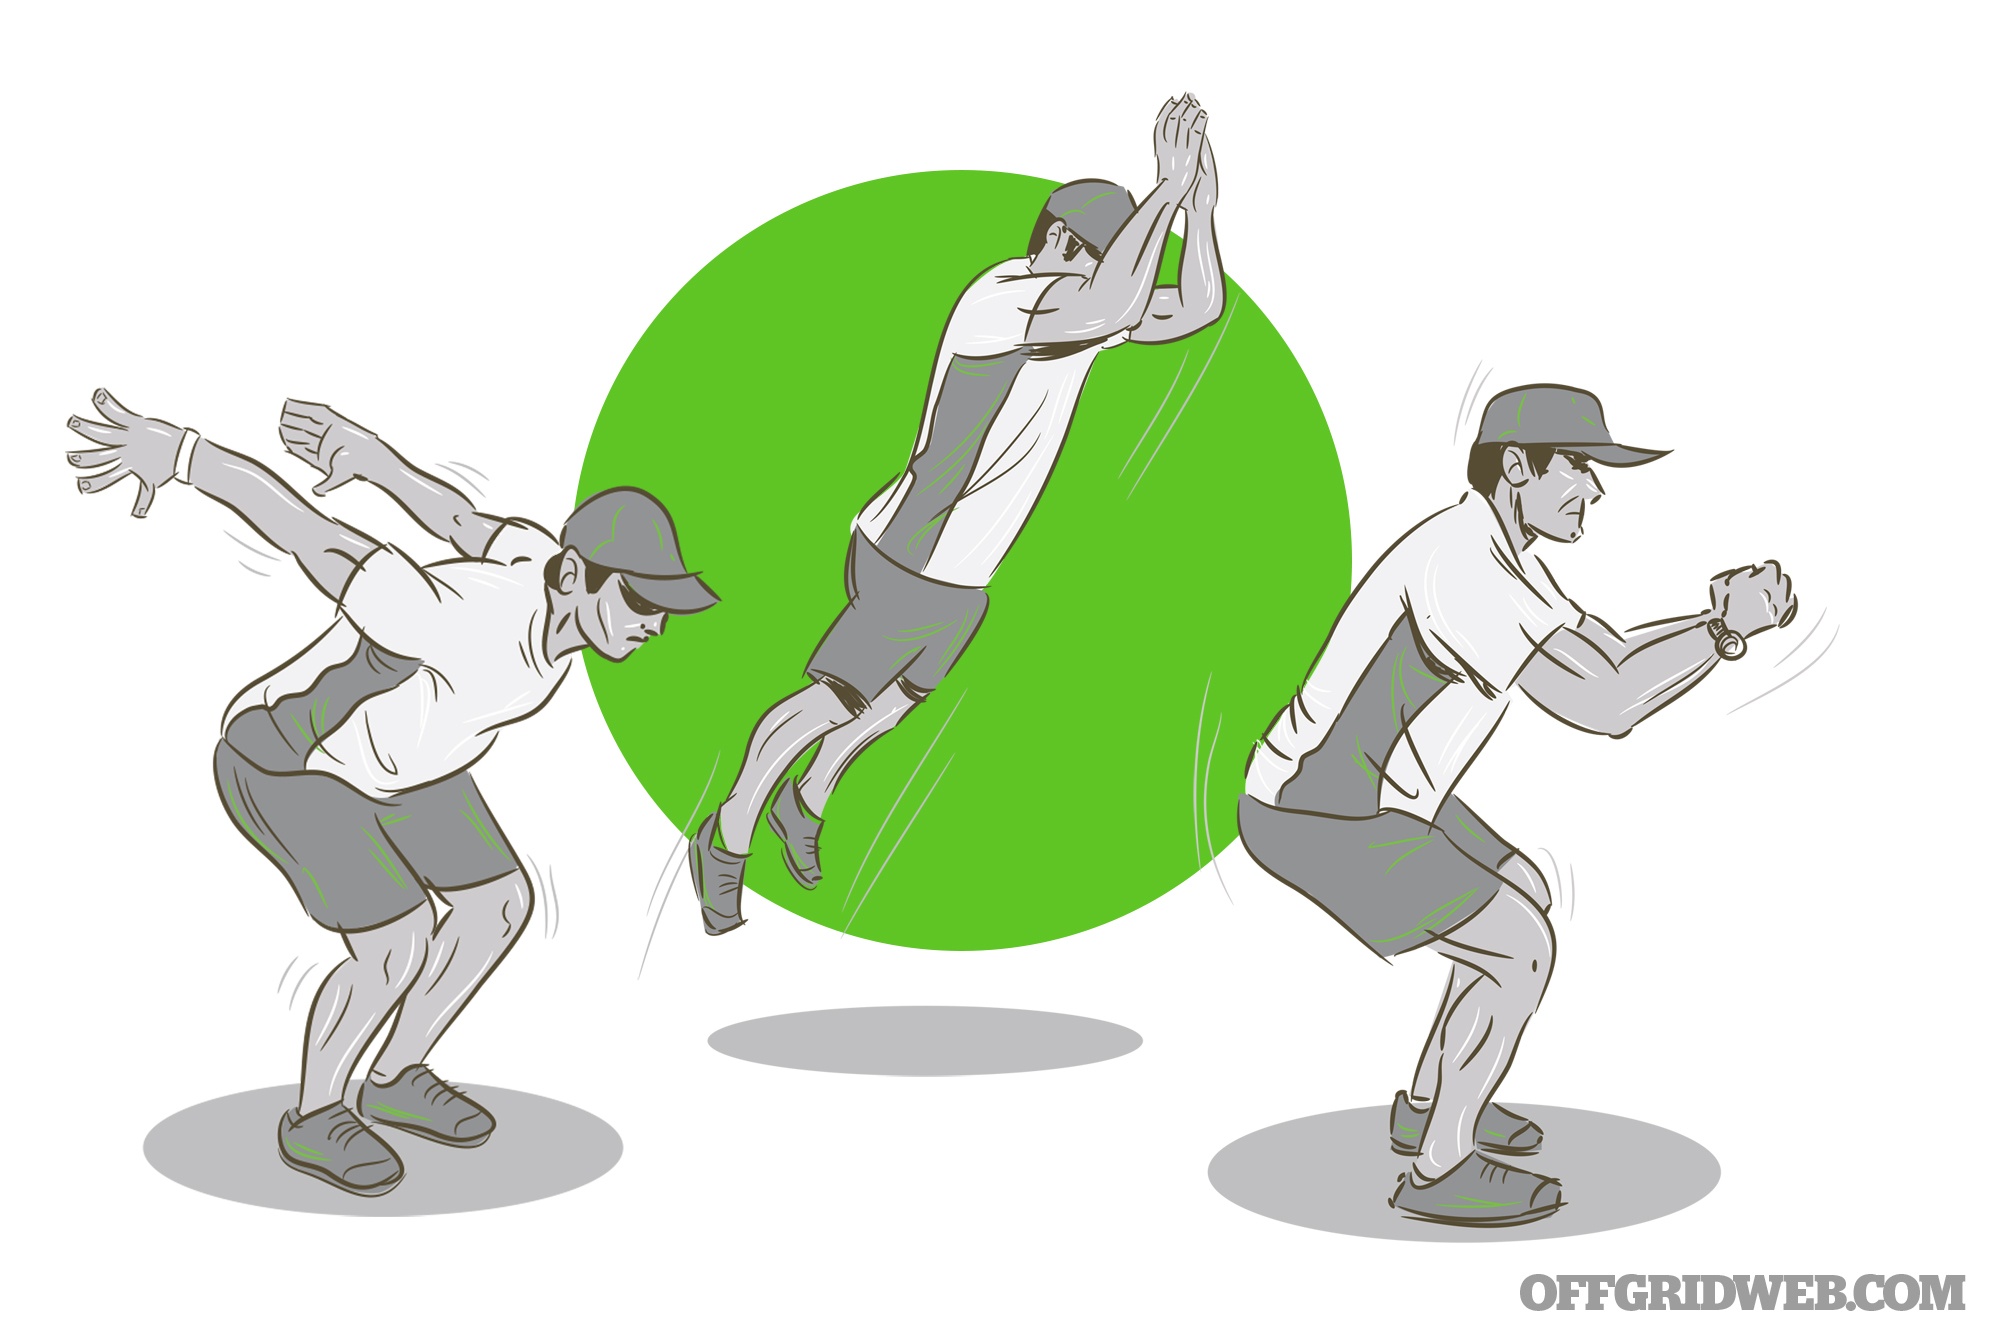
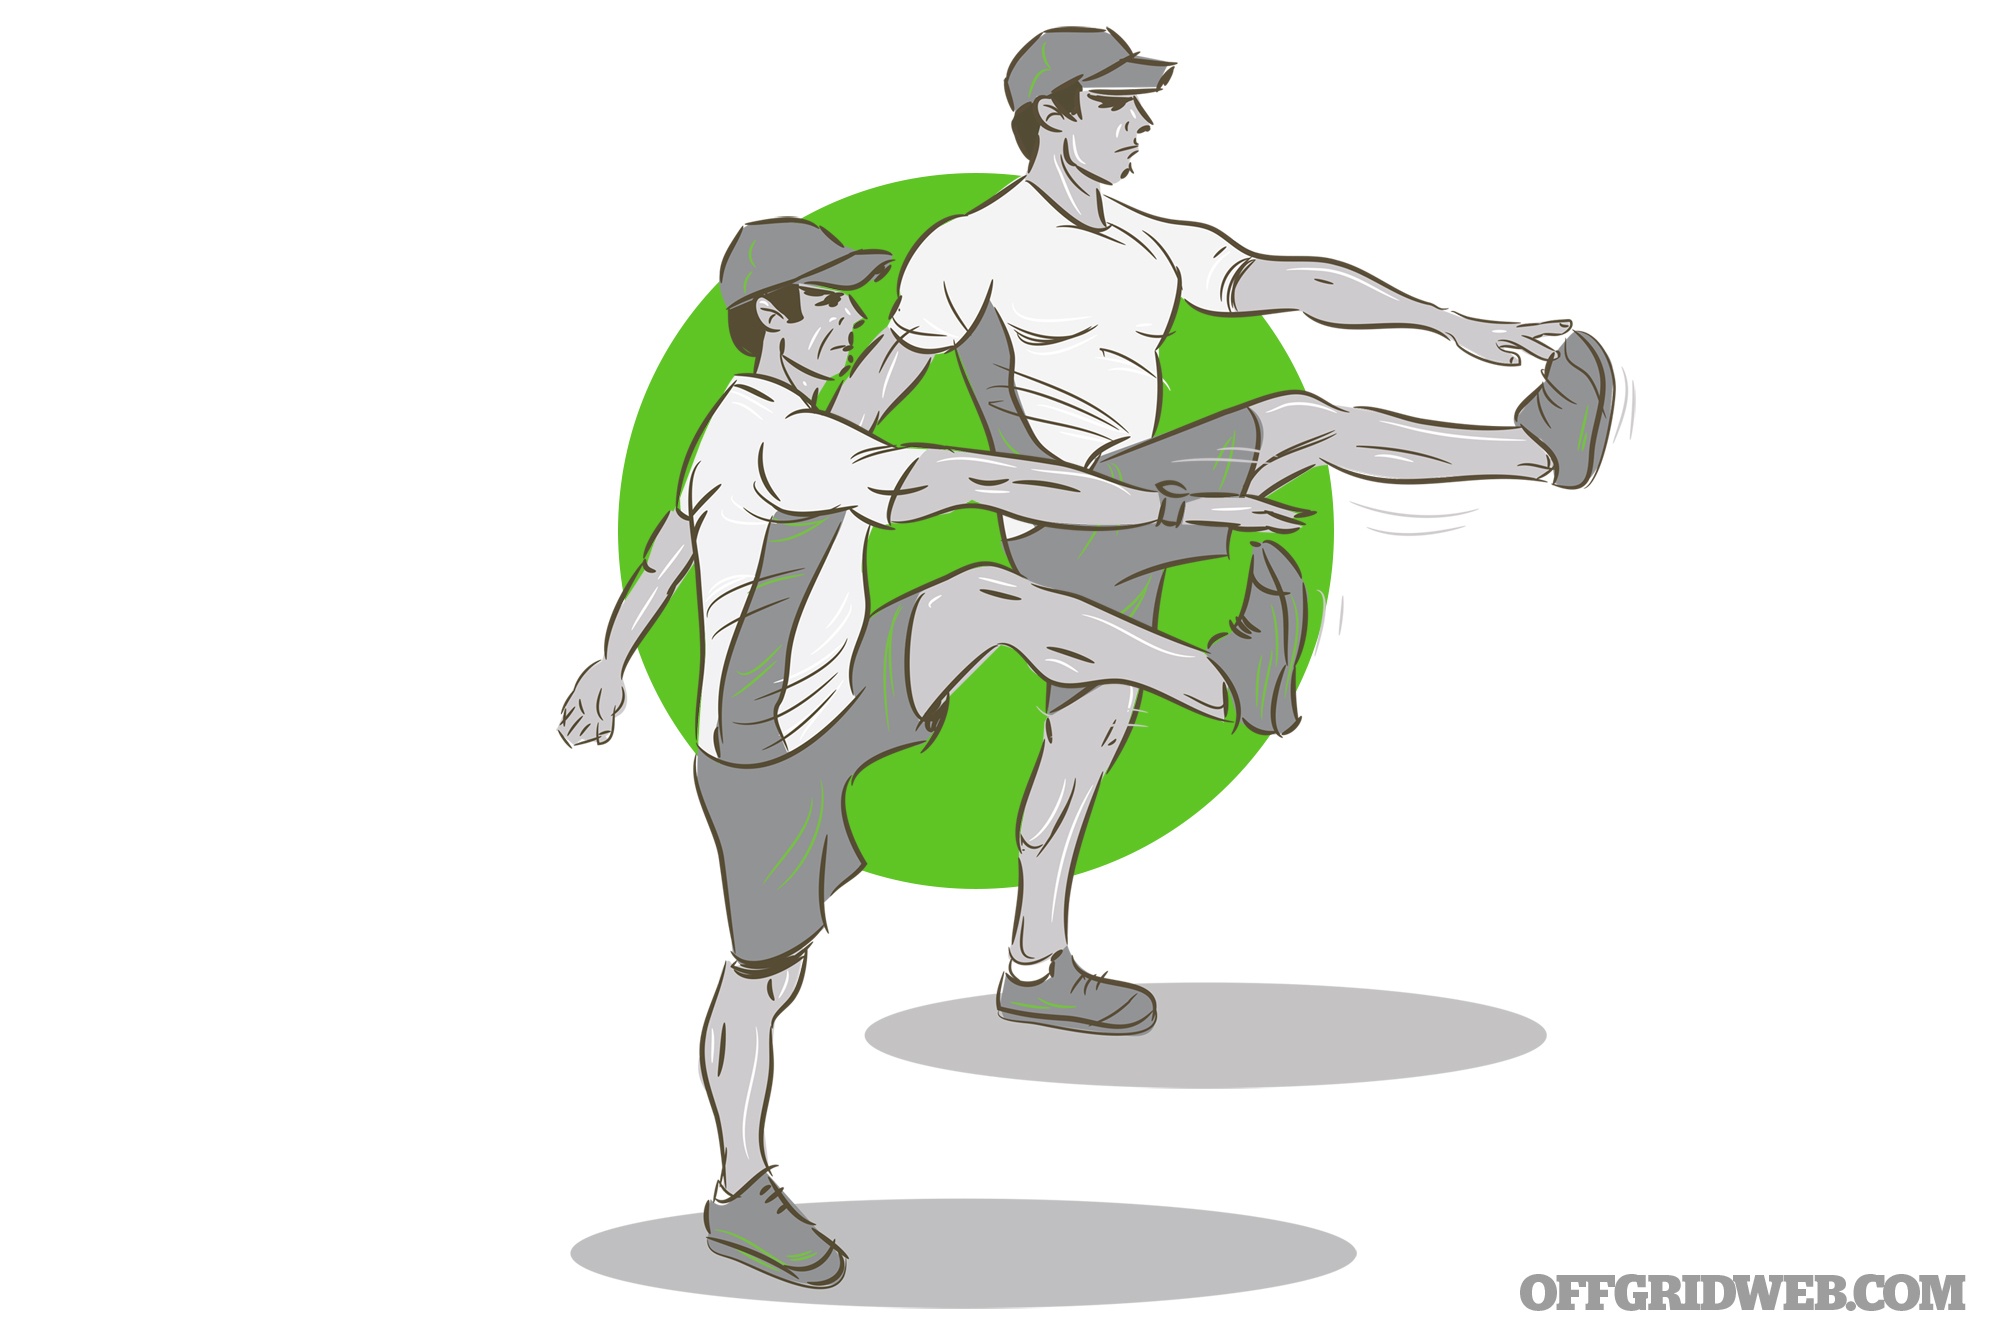
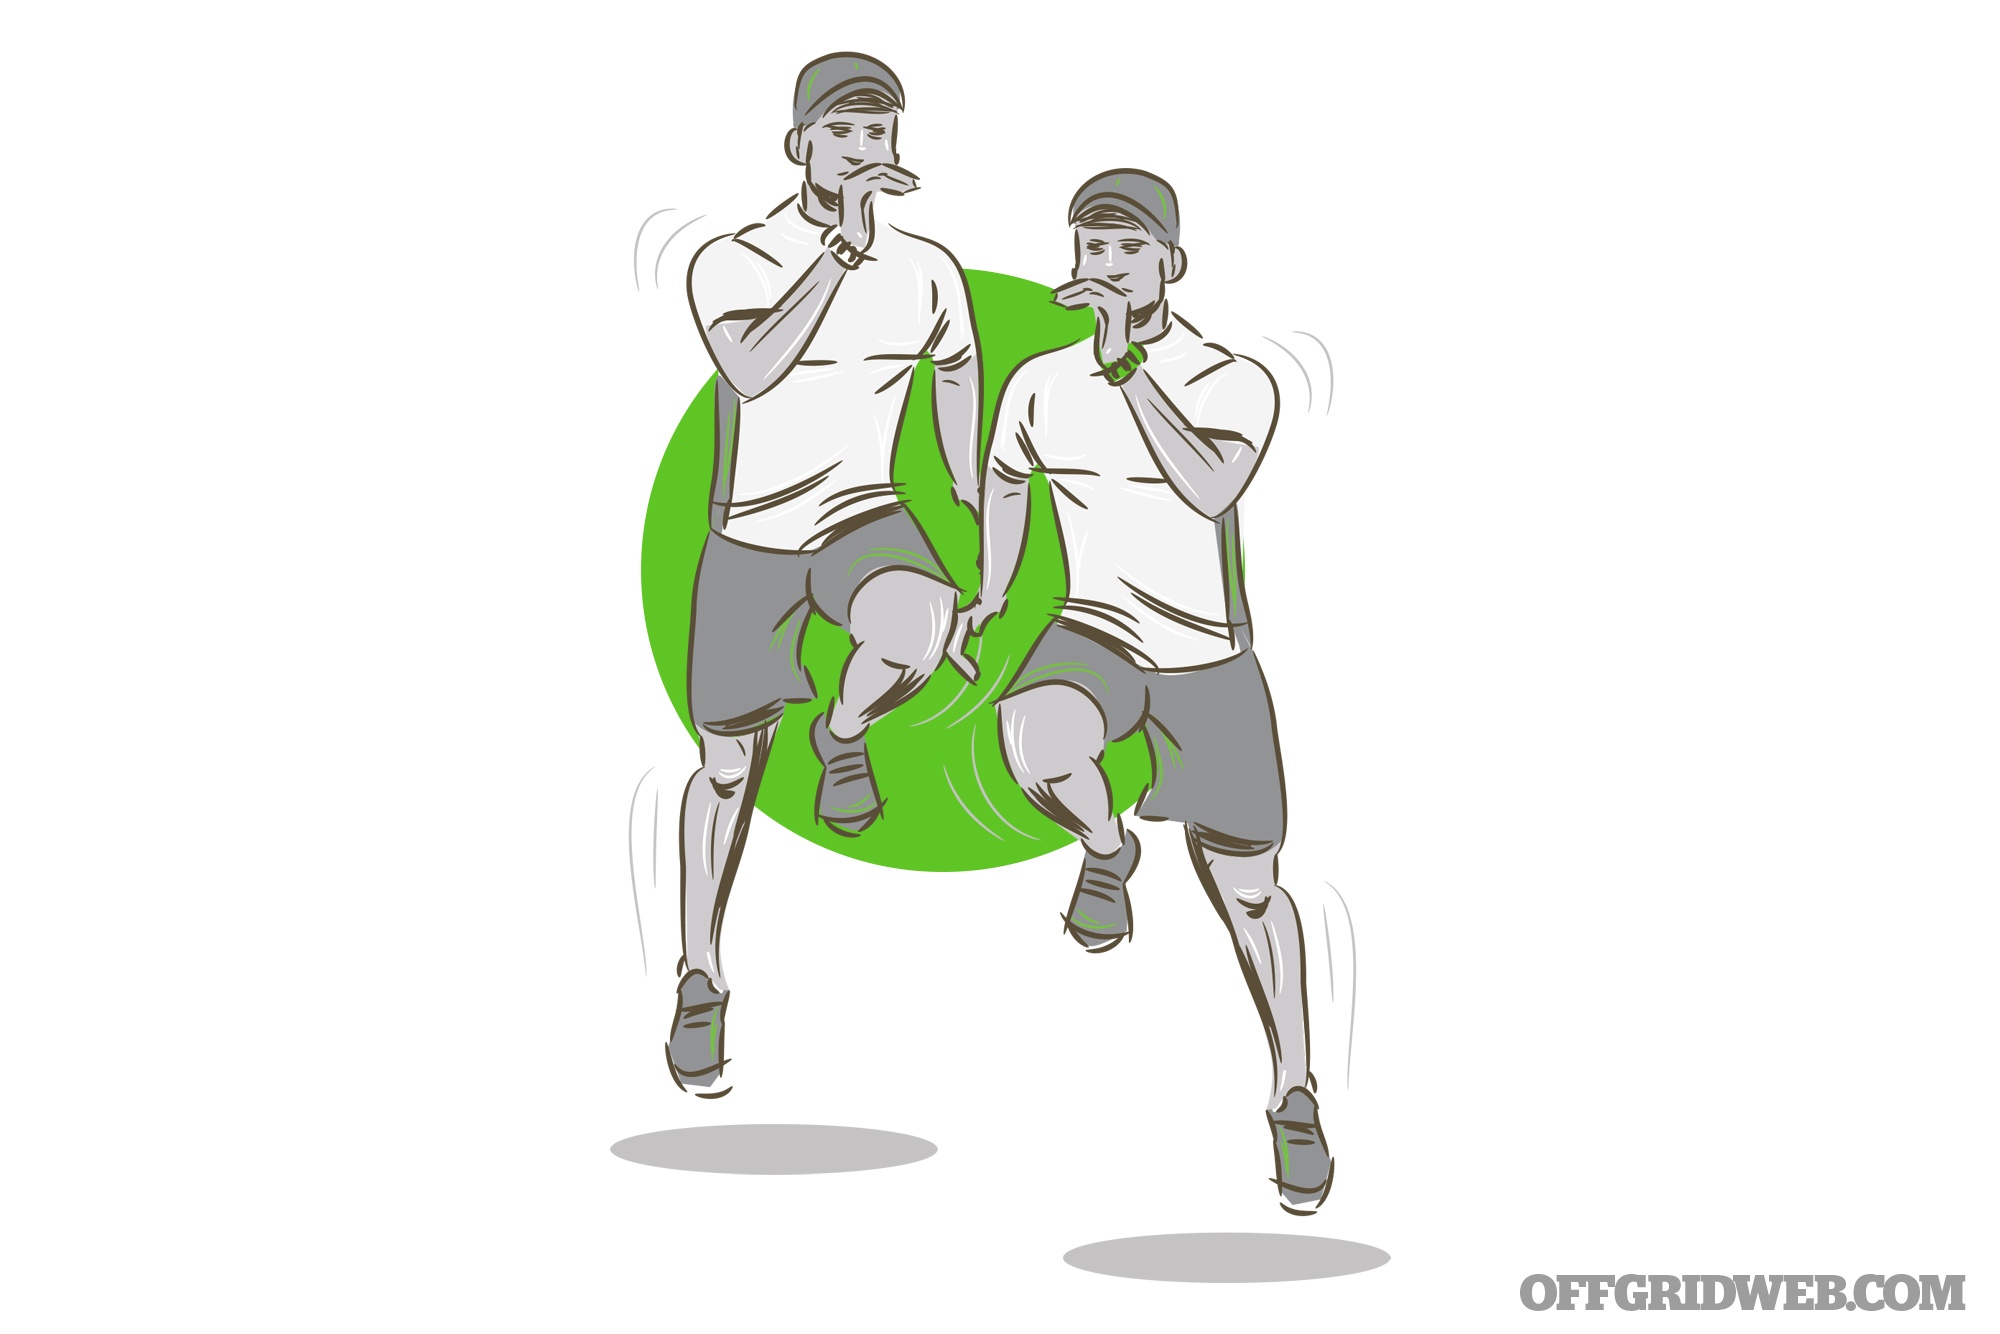
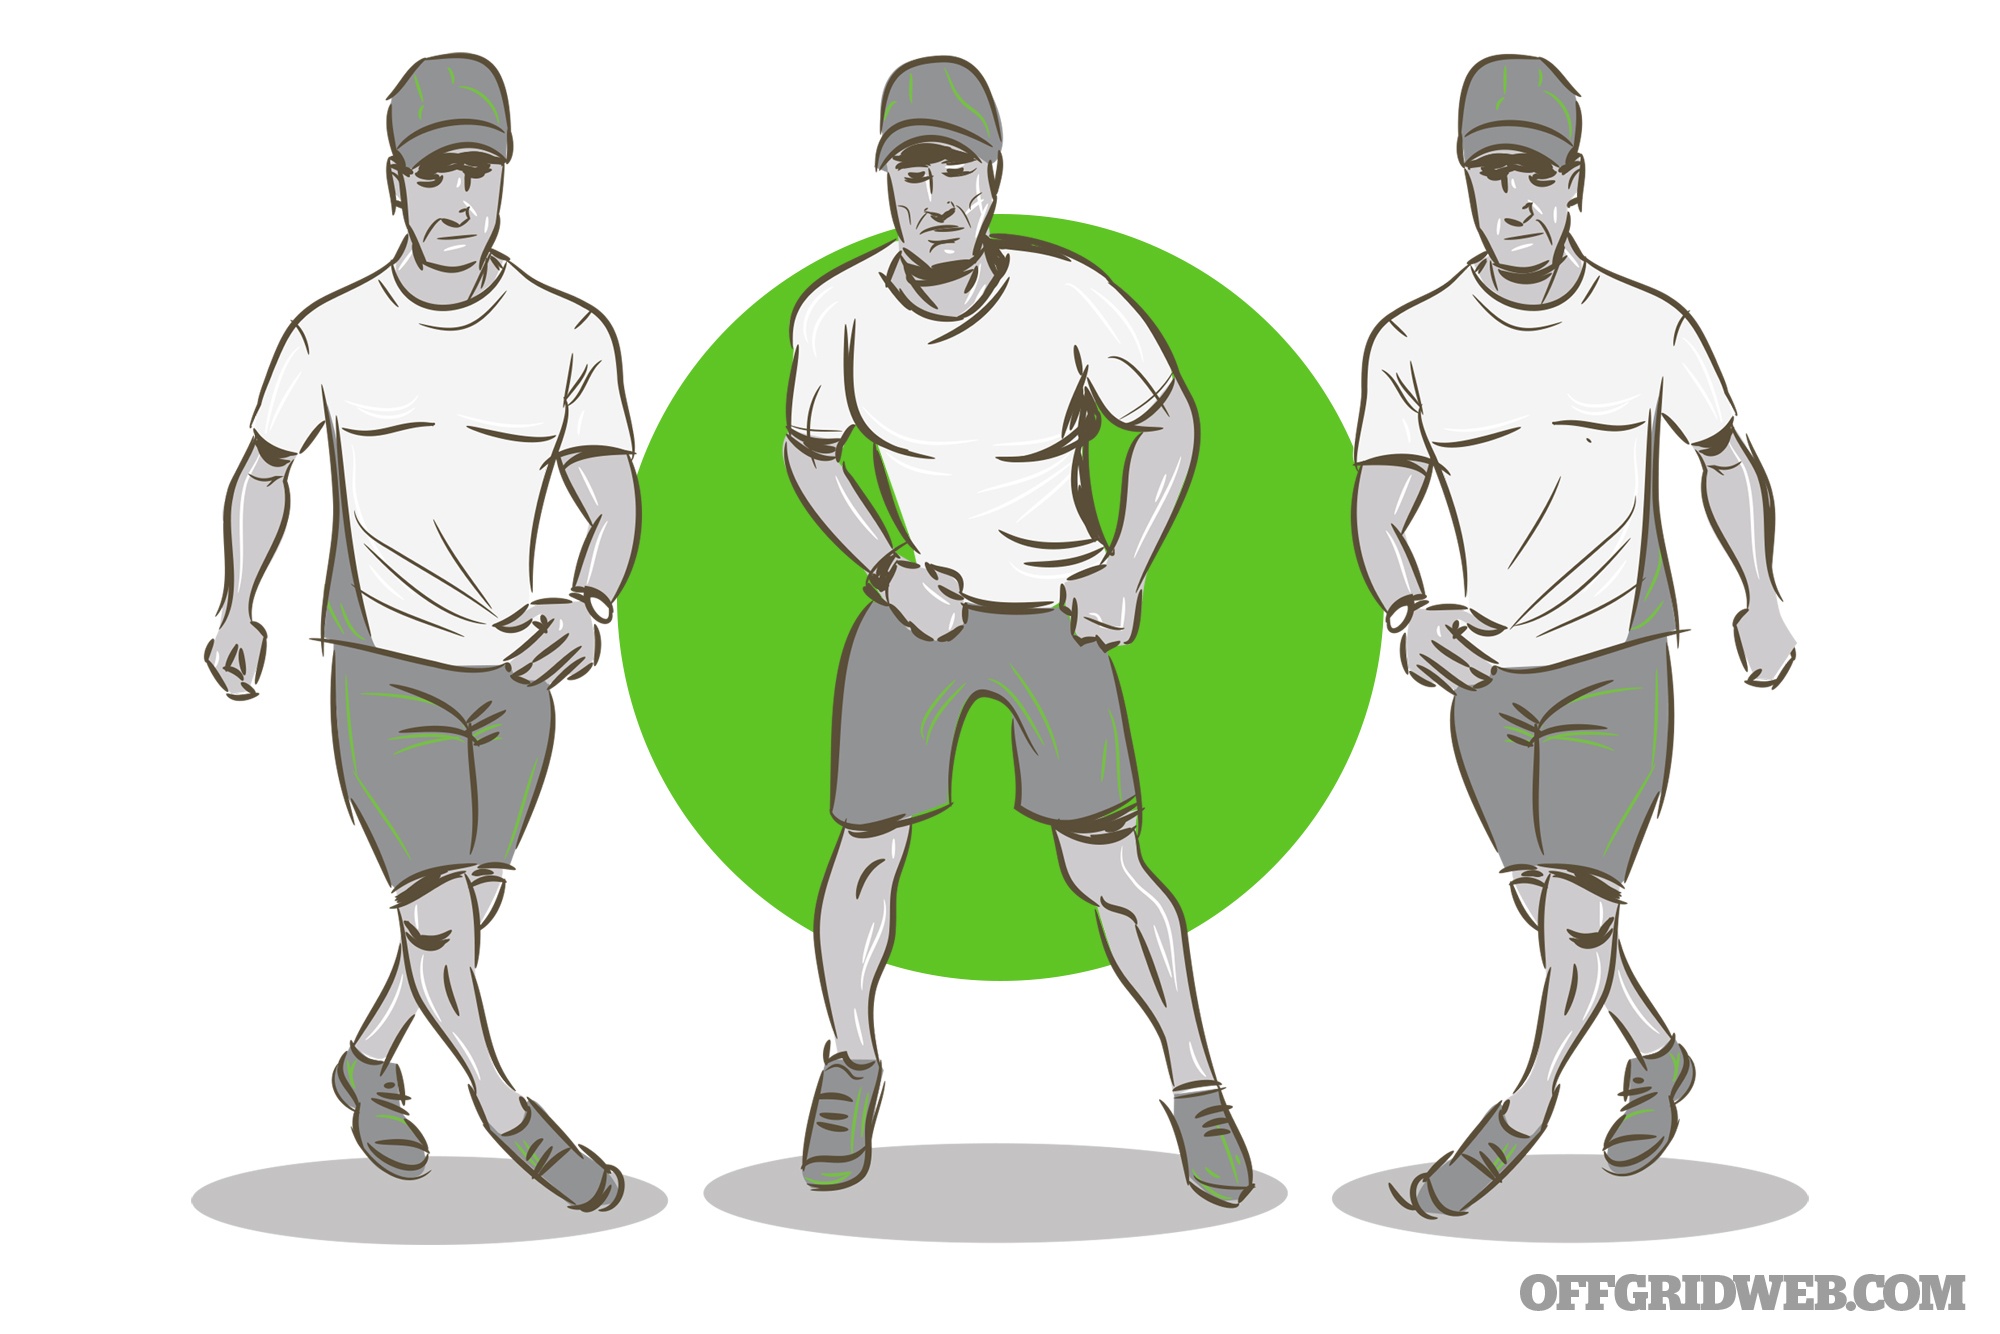
A little more structure is possible for these kids, so taking them through a warm-up is a good idea. We’ll take some of the movements found in the 6-to-9 age group to serve as the warm-up. So, put together, the warm-up will look like this: butt kick pulls, cradle walks, toy soldiers, forward skip, lateral shuffle, lateral skip, carioca, forward jog, backward jog, and diagonal leaping. Have them complete eight to 10 repetitions of each of the movements listed.

Toy Soldier

Butt Kick Pull — 10 reps each, 1 set

Cradle Walk — 10 reps each 1 set

Toy Soldier — 10 reps each 1 set

Forward Skip — 10 yards, 1 set

Lateral Shuffle — 10 yards each, 1 set

Lateral Skip — 10 yards each, 1 set

Carioca — 10 yards each, 1 set

Forward Jog — 10 yards, 1 set
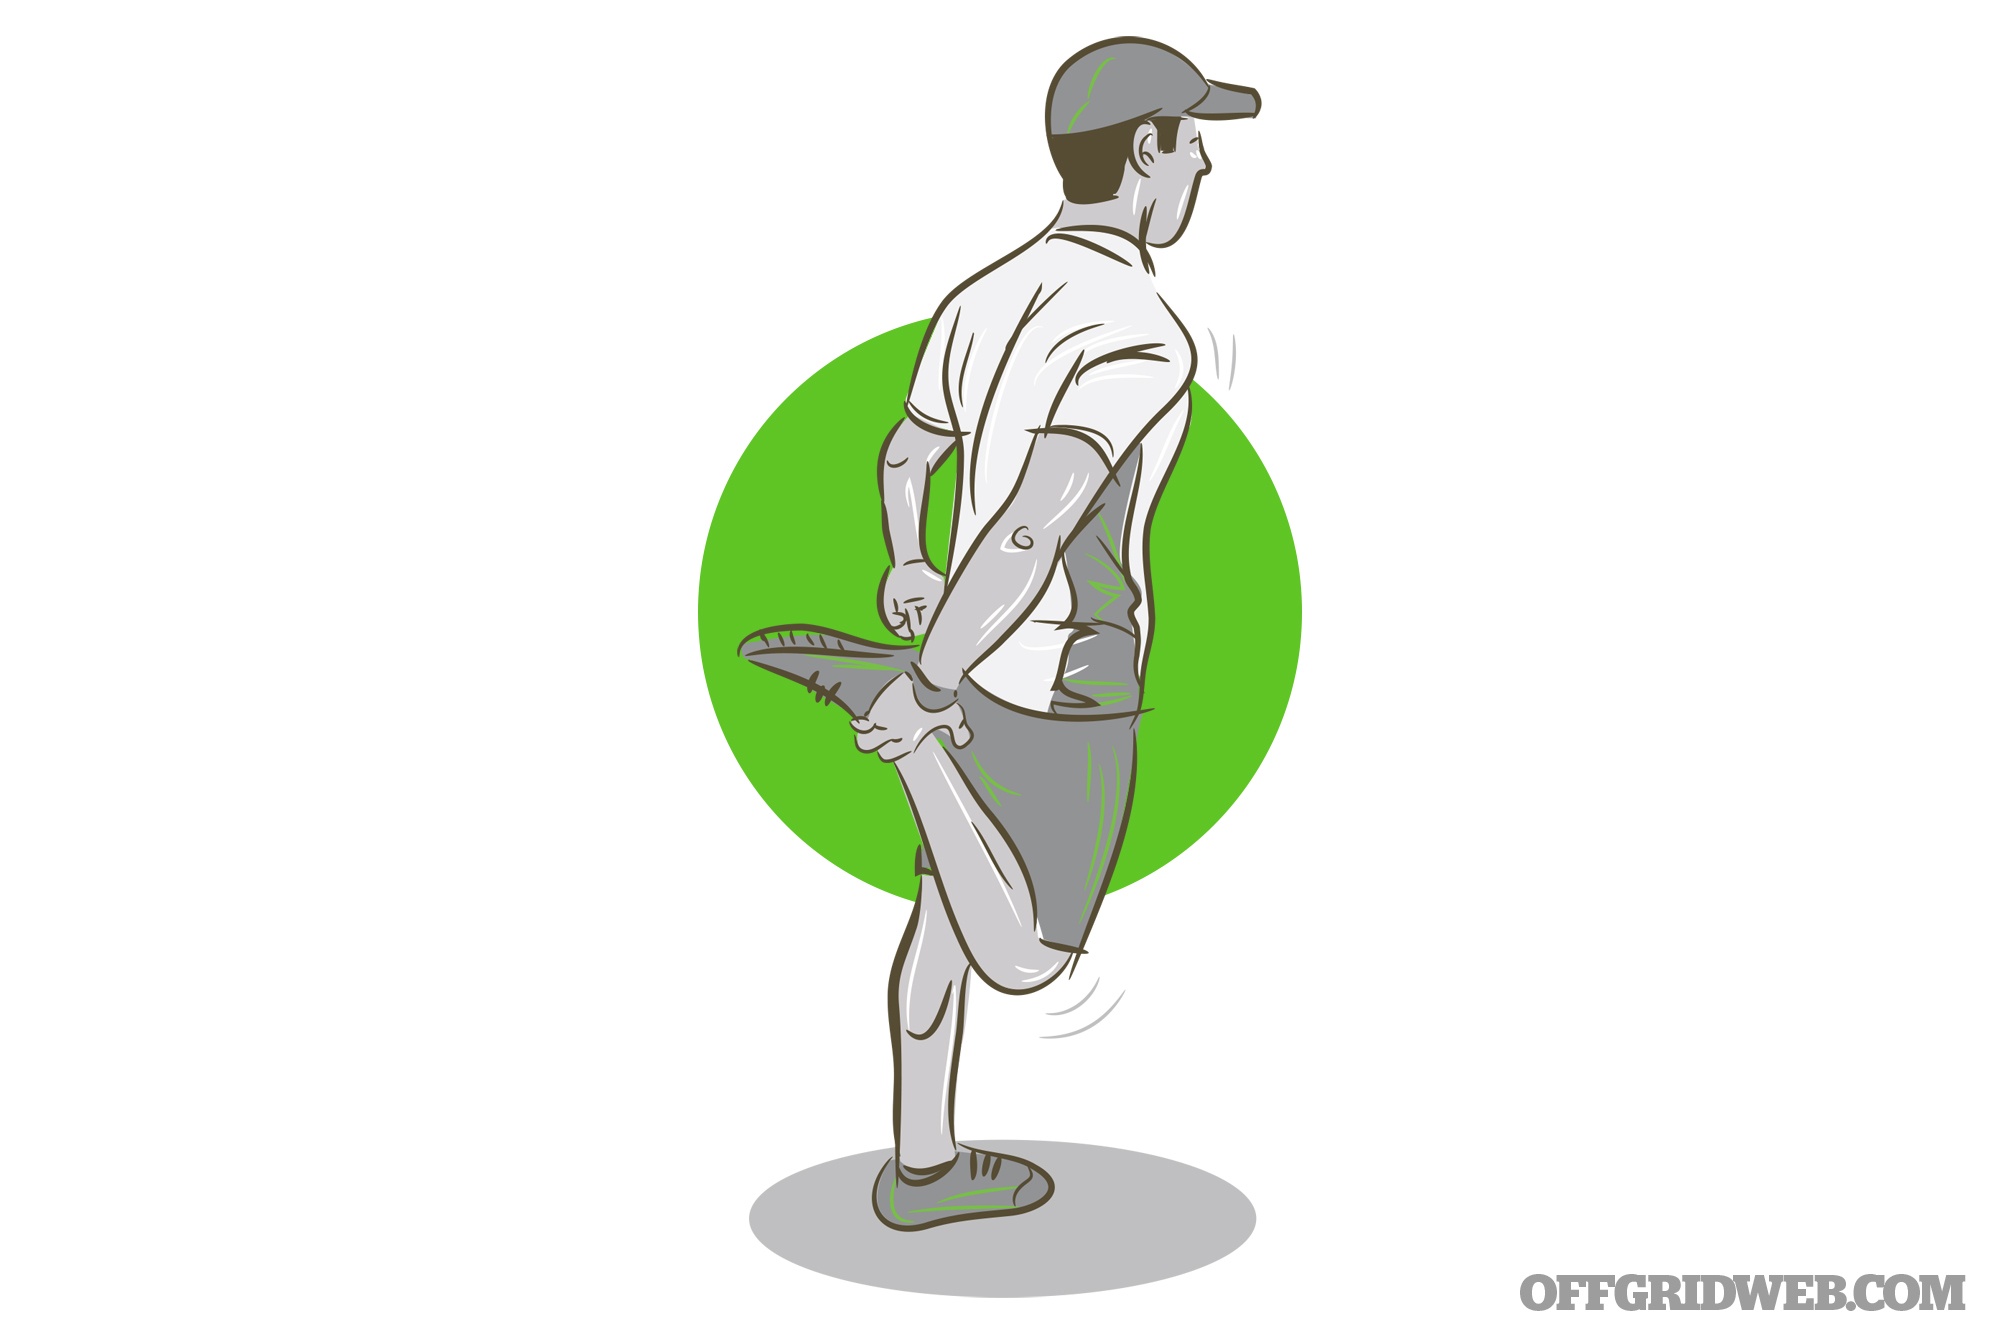
Lateral Walk

Obstacle course runs are a perfect way to get kids involved and creative in their own playing, and it’ll help them with several skills, such as agility, coordination, balance, speed, and acceleration. Allowing the kids to help construct it adds to the enjoyment because they’ve had a part in the creation.

Look to put together some of what’s around you to form something resembling a balance beam, small hurdles, objects to weave in and out of, something to crawl underneath or climb over, and a straightaway to get some acceleration and speed work.

Carioca

Tug of war is another game that can help kids work on some strength and stability of both the upper and lower body. The game is simple. Don’t get pulled beyond the starting halfway mark, or, if you want them to have a lot of fun, make the center pit muddy. It’s always a lot more fun when something’s at stake. There are many things that can be used to play, with a rope being the most obvious and best, but a large bed sheet rolled-up would also work. Again, be creative.
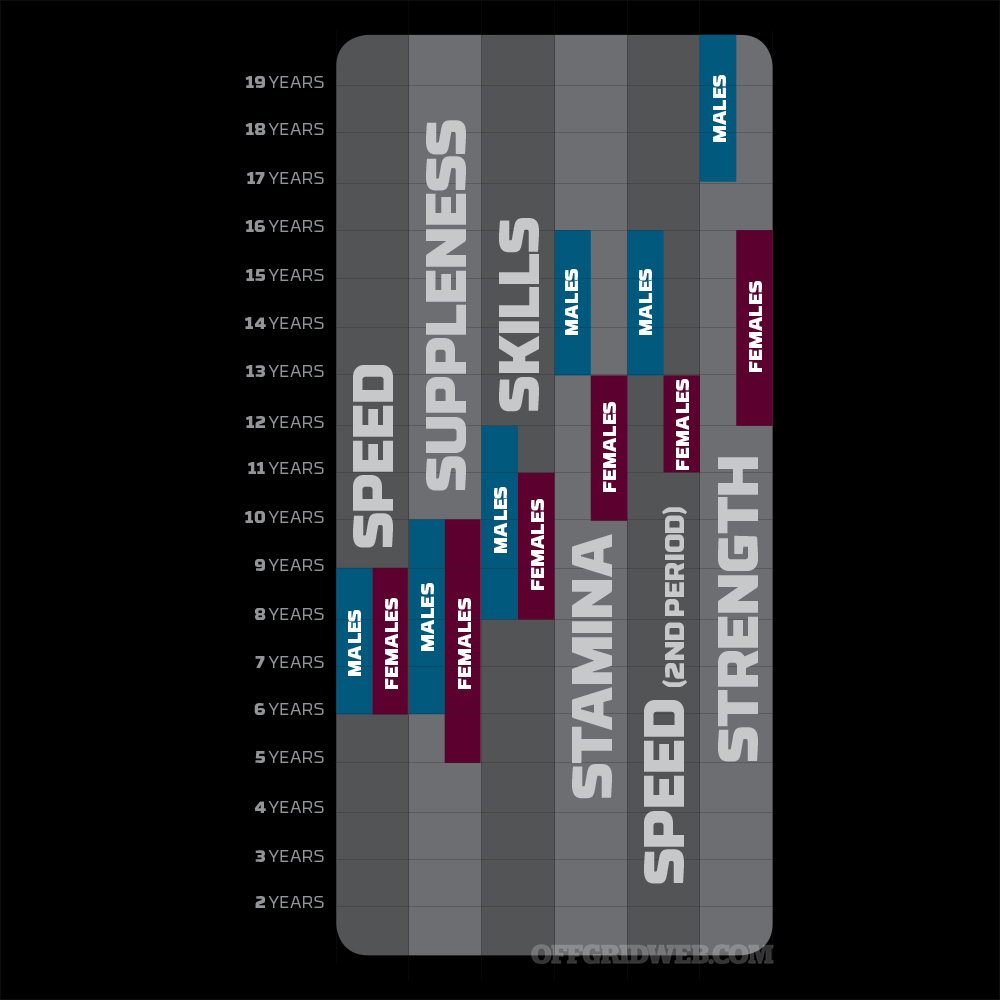
Critical Skills

Boys and girls build skills at different stages of development:

Conclusion

In the end, any way that you can keep your kids upbeat and entertained will significantly enhance their morale and enjoyment. The examples provided here can certainly give you some good information to start, but don’t be afraid to think outside the box and have a good time. Keep things light and free flowing. Remember, the adults can have fun, too. Just because the environment may be stressful doesn’t mean you can’t take a little break now and then to have a good time. Sometimes, it’s the little things like this that will get you through the tough times.

Source: Long-Term Athlete Development > www.humankinetics.com


Video: Which AA Batteries are the Best?

These days, it's easy to be overwhelmed by the aggressive marketing, colorful packaging, and bold, often misleading performance claims used to sell products in stores. Whether you're looking for dish soap, dog food, or duct tape, many of us have stood in front of shelves full of brand-name items and wondered which one to buy. Some of us buy whatever brand we're most familiar with, others get whatever looks decent and is affordably-priced, and a few buy whatever costs the most in hopes that it'll be the best.

Project Farm used a multi-mode charger to discharge batteries and measure their mAh capacity.

Simple products often result in the most difficult purchase decisions — AA batteries are a good example of this. Is ultra better than quantum? Does Energizer spend all its money on CGI bunny ads instead of product R&D? Are the cheapest batteries just as good, or so close that it doesn't matter? How much difference is there between alkaline and lithium? The YouTube channel Project Farm produced a video that shows comparison testing between 10 types of AA batteries to help answer some of these questions:

First off, the “drop test” to separate used batteries from new ones was pretty cool. We'll be keeping that trick in mind for next time we need to dig through a stash of loose batteries.

Try this test at home to see the difference between new and used AA alkaline batteries.

Although we weren't too surprised to see the cheaper batteries perform worse than the more expensive ones, we were definitely surprised by how big the difference was. And in case you're thinking those cheaper batteries might still be decent value for the money, the comparison chart proves that they underperformed there, too. The conclusions about lithium batteries were interesting as well — while we could see them being useful in cases where maximum runtime is very important, it seems like buying alkalines and swapping them a little more often is a better choice in many cases.

Project Farm also posted a follow-up video on rechargeable AA batteries, plus four more standard alkaline brands. Check it out:


Feast or Famine: A Prepper’s Guide to Nutrition

This article originally appeared in Issue 9 of our magazine.

Warning: The exercises and content expressed in this column are for illustrative purposes only. Consult a medical professional before trying any physical activity or nutritional plan.

The standard American diet is commonly referred to as the SAD diet, and for good reason — it’s awful. Thanks to fast-food joints, vending machines, and microwave dinners, the vast majority of American society no longer knows what real nutrition is. Rather than thinking of food in terms of organic, free-range, or grass-fed, many people speak in terms of “combo No. 1,” “a side of fries,” and “supersize me.”

While Twinkies or McDonald’s might last a lifetime, they’re not the ideal source of healthy, storable food. At this point, then, you may be asking yourself, “As a prepper, what do I need to know to stay healthy, both now and after a big disaster or crisis?”

Proteins

Proteins are the building blocks of life. We need them to build bodily tissues, enzymes, and hormones, and for many other functions. Without enough protein, we’re not able to function well.

The general recommendation for daily intake of protein is 0.8 grams per kilogram of body weight. Note that this is based on what your body needs to prevent a protein deficiency, not to function optimally. Depending on activity, you may need up to 2 grams per kilogram on the high end. Contrary to popular belief, this can come from a single meal or from multiple meals eaten throughout the day. You don’t need to get up at 3 a.m. to down a protein drink. That’s just silly.

Above: Nuts and legumes are good sources of protein and, if stored properly, will last longer than many other foods.

Good Storable Sources: Information about nutrition can be meaningless for the prepper if we don’t also discuss storable food options. Meat is obviously a great source of protein, but can be difficult to store long-term, especially if the power grid is down indefinitely or if you’ve bugged out and must stay mobile. Aside from canned meat, MREs, or other freeze-dried options, there are actually other good protein sources that can be stored much more easily than meat. If we look to vegetarian options for protein, there are many sources available, including spirulina, nuts, nut butters, legumes, and whey (dairy), egg, pea, or hemp protein powders. Soy is best avoided based on its chemical similarity to estrogen — just 30 grams has been shown to disrupt thyroid function.

Carbohydrates

Carbohydrates provide a more immediate fuel source for the body to break down into energy. While fats and protein can be used for energy as well, carbs provide the quickest breakdown and utilization. They can be separated into two types: simple and complex. Simple carbohydrates are smaller and more easily processed molecules, while complex carbs are larger and take more time and energy to break down. The latter variety provides energy for a longer time span, which is always a good option when considering the uncertainties of bug-out scenarios.
The minimum recommended amount of carbs per day is 130 grams for the average person. This number can increase or decrease depending on activity and body size, with larger or more active people requiring more, and smaller or inactive people requiring less.

Above: Complex carbs like brown rice provide energy for longer periods — though due to their fat content, they won’t last too much past a year.

Fiber is considered a carbohydrate, but one that we can’t digest. Because it can’t be broken down into sugar like other carbs, it passes through the body (helping us stay “regular”). It’s much more prevalent in complex sources of carbohydrates, which is another reason to prioritize complex sources. Per day, it’s recommended that adults get at least 25 grams, but anywhere from 35 to 45 grams is ideal.

Good Storable Sources: From a storable food standpoint, it’s better to focus on more complex carbohydrates (such as legumes or brown rice) rather than simple carbohydrates (such as sugar). If in a bind, by all means eat what you have available. But if the option presents itself, a longer-lasting fuel source will be more beneficial. Some very good options for carbs include wild/brown rice, quinoa, oats (preferably steel-cut), bulgar, amaranth, spelt, and legumes.

Fats

Fats are extremely important, with the benefits including immunity, hormone production, metabolism, and nutrient absorption. Dietary fats come in two different types: saturated and unsaturated. Saturated fats are generally solid at room temperature, while unsaturated fats are not. From a health standpoint, it’s beneficial to get both, preferably the least processed kinds from whole foods.

Above: Nut butters provide not only protein, but also healthy fats.

Some examples include oils, avocados, nuts, seeds, fish, animal meats, eggs, olives, and coconuts. Fats aren’t something to be too concerned about in terms of exact quantities — worry more about the quality.

Good Storable Sources: Storable options are slightly more limited than the list above. The primary ones that keep the best are nuts, nut butters, and seeds. Some outstanding specific seeds to look for are chia, flax, or hemp. They tend to last a while, are extremely nutritious, and also contain fiber and protein.

Primer On Sports Nutrition

Understanding sports nutrition is important for any prepper because it’ll inform what you eat before a calamity and affect how you perform physically during said calamity. While commonly thought to be an intricate equation of what to eat and when, recent research proves that the timing of what you eat doesn’t really matter. For most people, eating a solid meal one to two hours before exercise and one to two hours after is just fine. That said, we’ll discuss some points to consider depending on the scenario you’re faced with.

Above: Protein powder can be stored easily and last a while — ideal for short-term survival situations and CrossFit workouts alike.

Pre-Exercise: Before activity, we’re looking to improve performance, sustain energy, preserve muscle mass, or maintain adequate hydration. To do this, we’ll examine the major three macronutrients: proteins, carbohydrates, and fats.

First, protein is important since it’s responsible for tissue repair. When exercising (or fleeing or fighting), there will be some degree of tissue damage, and protein ingested before an activity will provide more readily available protein. This can reduce the amount of damage that muscles undergo during exercise. Don’t worry too much about the type of protein. Any source eaten within an hour or two of the workout will do just fine.

Men should look to get about 30 to 40 grams at this time, while women should consume about 20 to 30.

As we learned earlier, carbohydrates are responsible for more immediate energy, and therefore, they’re a great addition to a pre-workout meal. Eating carbs before you work out can spare some of the stores your body already has in the liver and muscles, allowing you to sustain exercise for longer or minimize the amount you pull from your body. These are both good things.

Men should consume about 40 to 50 grams of carbohydrates, and women would be good with about 30 to 40 grams.

Fats don’t really appear to benefit us much from a pre-workout meal standpoint. Because they’re much slower-digesting, they can help to maintain blood and glucose levels, but this won’t make much difference unless you’re completing very long duration activities.

If you’re planning on eating something within an hour of your exercise session, liquids are a better option, as you won’t have enough time to digest solids. Opt for a protein and carbohydrate source that can be mixed well with water, such as a pre-made whey protein carbohydrate drink. If you have a blender handy, you can mix protein powder with fruit and some greens. Either option will work.

During Activity: Unless you’re engaging in multiple exercise sessions per day, completing activities lasting longer than two hours, or have a goal of gaining muscle mass, you don’t need to worry about what to eat or drink during exercise. This is very necessary, however, when traversing long distances, such as when looking for shelter or moving between towns in life-and-death scenarios.
One of the main points to consider about nutrition during exercise or higher levels of movement is that blood flow will be redirected toward your working muscles. This will cause digestion to slow down quite a bit. So, the nutritional sources taken in during physical activity should be very easy to digest. For these sort of situations, let’s take a look at what you might need to pack in your bug-out bag.

Protein during exercise helps prevent your muscle mass from breaking down and will help you recover. The best sources are those that mix well with water, such as the protein powders listed previously or spirulina. Shoot for about 15 grams per hour.

If you’re not in the drinking mood, branched-chain amino acid pills or drink mix can be a great alternative. You’ll need about 10 to 15 grams during the activity.

Carbs taken during exercise can be beneficial to provide immediate energy that may have been depleted. This can be advantageous for long hikes, marathons, or while on the move all day with little food. The maximum you’ll be able to use is somewhere between 60 and 70 grams per hour. Any more than that will not be beneficial, and will almost certainly cause some stomach upset. When mixed with protein, you can take in less (around 30 to 40 grams) with similar benefit. Some great fast-digesting carbohydrate sources are pre-packaged gels (similar to what marathon runners use), sugary fruits such as bananas or grapes, or sports drinks like Gatorade. For a great storable option, look for Gatorade in powder form.

Post-Exercise: When you’re finished exercising, the main goals of your nutrition strategy should be to refuel what you used, improve recovery and future performance, and rehydrate.

Exercise causes muscle breakdown, so a logical addition to your post-workout meal should include protein for the benefit of tissue repair. As stated earlier, we’re not concerned with any 30-minute windows of opportunity, so no need to do the mad dash to your protein powder. If your pre-workout nutrition was adequate, there will be amino acids in your bloodstream to help kick-start the recovery process. For this post-exercise meal, men should take in 40 to 50 grams, and women should get 25 to 35 grams.

Carbs are also important at this time, mainly to restock the fuel we used during exercise. Instead of the common misconception of eating very quick-digesting sources, your best bets are some fruit or minimally-processed sources (such as rice or oats). Men should look for 50 to 60 grams of carbs, while women should eat 30 to 40 grams.

Conclusion

These guidelines are generally geared toward exercise, but it’s easy to translate them to bug-out scenarios. The main thing to keep in mind is that scenarios can pop up out of nowhere, and you should always be prepared. Having some fast-digesting carbohydrate sources and protein powders on hand can make all the difference when forced to travel very long distances without much notice. Luckily, there are numerous sources that are generally pre-packaged and small enough to fit into any bag or pocket for immediate grab-and-go situations. So, do your research, pack your gear, and most importantly, keep training.

About the Author

Ryne Gioviano, M.S.Ed., NSCA-CPT is the owner of Achieve Personal Training & Lifestyle Design. He holds a master’s degree in exercise physiology and is a certified personal trainer through the National Strength and Conditioning Association. For more information, visit www.achieve-personaltraining.com. You can find Ryne on Twitter and Instagram at @RGioviano.


RECOILtv: Off-Road Testing a Mercedes G-Class

Although most Americans know Mercedes as a luxury vehicle brand, the German automaker has produced some seriously rugged trucks throughout its long history — the legendary Unimog is one notable example. The Mercedes G-Class, also known as the G-Wagen or Geländewagen (meaning “cross-country vehicle”), is another. In the United States, most of these SUVs are outfitted with fancy chrome wheels and low-profile tires, and rarely see terrain more challenging than mall parking lots — but the underlying platform is surprisingly capable.

An early civilian G-Wagen. Photo: Matti Blume / Wikimedia Commons (CC BY-SA 4.0)

The G-Wagen has been around since the 1970s. It was originally developed as a military vehicle but later offered in civilian form, much like the Humvee. Although newer versions of the G-Class have transformed into luxury SUVs, they're still off-roaders at heart. They feature true body-on-frame construction, three locking differentials, short overhangs, and respectable ground clearance.

For the latest RECOILtv Transport episode, Mike Glover and George Bell of Fieldcraft Survival took a 1996 G320 out on the trails in Arizona to review its performance. This G-Class was imported straight from Germany, so you'll notice its appearance is a bit more barebones than that of newer American models (especially the flashy AMG version).

The duo also discussed considerations for a search and rescue vehicle, and how a PACE plan — primary, alternate, contingency, emergency — should be applied to communications gear in the backcountry. Check out the full video below:


Selling Preparedness: How to Introduce the Prepper Lifestyle to Skeptics

This article originally appeared in Issue 9 of our magazine.

Photos by Michael Grey and Jorge Nuñez

Among the most common complaints heard from preppers, an unsupportive or uninterested spouse ranks just behind not having enough money in the disaster readiness budget and just ahead of not being able to find like-minded folks in their local area. While the world would be pretty boring if we all agreed on every single thing, it can be nearly impossible to work out a complete disaster readiness plan if you’re the only person in the household interested in doing it.

Even if you’re unmarried and living alone, undoubtedly there are people in your life you’d like to get involved with prepping, but they’ve thus far resisted your efforts.

Here’s the thing. If these are people you truly want around you, odds are they’re fairly intelligent, rational human beings, right? That being the case, and this can be difficult to admit, odds are that they aren’t the problem. Most likely, it’s you, or at least your approach when it comes to talking about preparedness. In other words, you’re not selling it very well.

Preparedness isn't necessarily about being ready for the end of the world. It's a practical mindset.

One-Trick Pony

You know that guy at work who’s way more interested in football than seems sane? It seems like you can’t have any sort of conversation with him without passing plays, injury reports, or the latest trade rumors being somehow brought up. All you were trying to do is be polite in asking him how his weekend was and now you’ve been trapped for the last 30 minutes as he goes all Monday morning quarterback on you. Sound familiar?

Guess what? That might very well be exactly how you sound when the subject of prepping comes up. If your spouse’s eyes tend to glaze over rather quickly any time you talk about bug-out bags, home canning, or first-aid supplies, odds are pretty good you’ve overdone it a time or two in the past.

Being passionate about disaster readiness is one thing, obsessed is quite another. Honestly, it just isn’t healthy for any particular interest to have such an overriding effect on a human being. Remember your teen years when your primary mission in life seemed to be to attract the attention of a potential girlfriend or boyfriend? Remember all the dumb stuff you said and did back then? That, my friend, is what obsession can do.

If all you ever talk about is prepping, you begin to sound like a used car salesman who’s just trying to close a deal. Expand your horizons just a tad. Let people see you as a well-rounded person rather than a one-trick pony. Then, when the subject does come up, they’re more likely to pay attention and not feel as though they’ve heard it all before.

Slow Your Roll

Another very common mistake is going from 0 to 60 in 0.2 seconds flat. Here’s how it often plays out: Coworker comes and up and says, “Hey Bob, did you see the sale this week on canned chili?” Within moments, Bob is explaining, in excruciating detail, just how many cans of chili are necessary in a comprehensive food-storage plan, one that’s designed to last a family of four at least 10 years, taking into account all of the caloric and nutritional needs of each individual in the family. Ten years, of course, being the minimum time necessary for society to rebound from the coming zombie apocalypse, a disaster the government has been grooming us to handle for years, as they’re the ones behind all of the wildly popular undead TV shows and movies.

Associating practical preparedness with zombie-apocalypse fiction can make it seem unrealistic or absurd.

Coworker probably lost interest about four seconds into that conversation, and now thinks Bob is a weirdo.

If you truly want to get more people on board with prepping, you can’t go from zero to “end of the world as we know it” at the drop of a hat. You need to ease them into it. Talk about far more common, though admittedly more boring, disasters like severe weather, power outages, and such. Leave the world-altering disaster discussions for later, once they’ve caught the prepping bug.

Dollars and Sense

Money, or the lack thereof, leads to more marital strife than any other cause. The reason spending habits cause so many arguments is because the two people involved don’t agree on the relative importance of the items being purchased. If you both agreed that Jimmy Choo shoes were absolutely essential to life, there wouldn’t be an argument at all, right?

Here’s the thing. Some preppers do go overboard and put their families into serious financial trouble. Of course, so do many non-preppers. But, the fact is that prepping costs money. While there are many things you can learn to do on your own, such as gardening, home canning, and such, there are expenses involved no matter what. Your significant other might see these purchases as being wasteful because they don’t believe a disaster will ever strike.

Here’s the counter-argument: By maintaining a decent food pantry at home, you can eat tomorrow at today’s prices. Do some homework and keep track of what you spend on food supplies and let your spouse see how you’re actually saving money in the long run. Of course, you should also be using coupons and taking advantage of sales, rather than just buying for the sake of buying.

Insurance

Here’s a secret that many non-preppers don’t know. Most of us who are actively preparing for potential disasters truly and deeply pray we never need to use our plans for real. You know what else we spend money on and hope we never have to use? Insurance.

Think about it. Car insurance, in particular, is something that costs us a lot of money, and yet we’ll go out of our way to never use it. If we’re in a small fender-bender, we’re far more likely to try and work things out privately than we are to call our insurance agent. If we drive for 50 years, spend a total of $30,000 or more in insurance premiums during that time, and never once file a claim, we call that a win.

People often think (incorrectly) that preppers are all about the doom and gloom, hoping and praying for a major disaster to wipe out significant portions of the population. Really, though, that’s like saying anyone who buys house insurance is praying for a fire to turn all their possessions into ash. The reality is that we buy insurance because it’s a necessary evil. If our house burns down, we need the insurance to help us rebuild. If we get sick, we need health insurance to help us afford the proper treatment. If a major disaster strikes, we want our preparations to be able to keep us safe and alive until all is right with the world again. It truly is that simple.

Unsurprisingly, insurance companies frequently attest to the value of a comprehensive disaster preparedness plan — this article from USAA is a great example to share. Here's a relevant excerpt:

“You don’t have to live in Tornado Alley or along a major geological fault line to have a plan for surviving and riding out a disaster. It’s prudent to have an emergency plan and an emergency kit in place no matter where you live, because even if you’re at low risk for a hurricane or earthquake, events like house fires and power outages can happen anywhere.”

Conclusion

We each have a vested interest in getting our friends and family on board with prepping. Not only will doing so reduce the overall stress in your life, every person who preps is one less person likely to be knocking on your door, looking for a handout, if disaster does hit.

Something else to keep in mind — you can lead a person to knowledge, but you can’t make them think. There will always be people who will refuse to see the light. That doesn’t make them bad people. But, if they are close to your heart, you might consider doing a little prepping on their behalf.

About the Author

Jim Cobb is a recognized authority on disaster preparedness. He has studied, practiced, and taught survival strategies for about 30 years. Today, he resides in the upper Midwest with his beautiful and patient wife and their three adolescent weapons of mass destruction. His books include Prepper’s Home Defense, Countdown to Preparedness, and Prepper’s Long-Term Survival Guide. Jim’s primary home online is www.SurvivalWeekly.com. He’s also active on Facebook at www.facebook.com/jimcobbsurvival. Jim offers a consulting service as well as educational opportunities at www.DisasterPrepConsultants.com.


RECOILtv: 3 Simple Carbine Drills from Dan Brokos

Shooting — much like fire-starting and other critical survival skills — should be considered a perishable skill. In other words, if you don't use it regularly, you might lose it. In the context of a survival situation, that could mean an inability to protect yourself and your loved ones from harm. So it's advisable to get out to the range regularly and practice with your weapons in a variety of positions and conditions.

Performing a few easy drills on a regular basis can help your shooting skills stay fresh, and this is exactly the reason the RECOILtv Training Tune-Ups channel exists. In the three latest videos on this channel, Dan Brokos of Lead Faucet Tactical demonstrates three simple carbine drills to practice with your AR or other preferred carbine. They don't require a lot of range space or any special gear, just some paper targets, a shot timer or friend with a stopwatch, and (for the third drill) a few barricades to shoot around.

The first drill is a variation of Around the World, a drill we previously wrote about when Dan demonstrated it for handguns. It involves shooting a dozen 3-inch dots with two rounds per dot, reloading once during the drill. The goal is to complete all 24 shots and the reload in less than 13 seconds, with each shot outside the dots adding one second to your time.

Carbine drill number two is exceptionally simple, but challenging nonetheless. Shoot 10 rounds into a 5.5-inch bullseye target at 50 meters. The entire drill has to be completed in 20 seconds, and eight of the rounds have to be within the circle to pass the test. This one focuses more on accuracy and precision than all-out speed.

Finally, drill number three also starts at 50 meters, but places some barricades at 45 and 40 meters. You'll need to hit a silhouette target twice at the starting line, four times standing at 45M (twice on the left of the barricade, twice on the right), four more times kneeling at 40M (two left, two right), and then run back to the starting line and shoot it two more times. The entire drill should be completed in 25 seconds. If you don't have barricades, you could simplify this further, or even work in different positions such as prone. This one should get your heart rate up after a few runs, which is ideal for simulating the reality of a life-threatening situation.


Grid-Down Gardening: Become a Sustainable Survivalist

The following article was originally published in Issue 8 of our magazine.

When’s the last time you got your hands dirty? Really dirty? Like, stuck-them-in-the-dirt-on-purpose dirty? It’s OK if the answer is never. You can still grow your own food, with very little in the way of experience or materials. And this home gardening can happen if your home has a backyard, or just a balcony, or even just a sunny window. You just have to pay attention to the details in gardening.

There are lots of reasons to take up this skill set, beside the taste and enjoyment of growing your own food. A significant crisis could cut off our current food supply, and a widespread grid-down scenario could mean that food would be at a premium. Even a job loss could be the culprit behind your hunger.

One of the best ways to inoculate yourself against starvation regardless of the cause is to have your own sustainable garden. But how can a city dweller get started?

So many of our ancestors were once gardeners, farmers, foragers, and capable agrarian types. They had to be. The food-packed grocery store is a luxury that is only a few decades old. Our hardy progenitors successfully built and maintained sustainable gardens that weren’t dependent on modern conveniences. They did it because they had to.

But waiting until you “have to” is not the right approach for the modern, would-be gardener. There’s a learning curve you can’t afford in a contemporary crisis scenario. Get started now, before trouble arises. You eat every day — why not tend some plants every day (within the growing season)?

5 Critical Things

If you want to succeed, you’ll need to pay attention to five vital areas: light, soil, water, plant selection, and damage control. When these five issues are in balance, plants can thrive. When even one of these areas has a problem, your plants have a problem.

Light: The area where you grow your vegetables will need at least eight hours of direct and uninterrupted sunlight each day. Less than eight hours of direct light means that their growth will be severely stunted, and interrupted light signals to the plants that night is coming, which also disturbs their growth. In a standalone house, duplex, or townhome, try to find a south-facing patch of yard where no trees, structures, or buildings block the sun. For apartments or condos, the south side of the building may offer you all the light you need. You may be able to set up on your balcony or fire escape. Better yet, get permission to place containers on the roof. Failing that, purchase a few sturdy window boxes to hang on sunny windows. Finding light is often the biggest hurdle for backyard and urban gardeners.

Soil: Unless you’re working on a hydroponic system, you’ll need some dirt. Potting soil can be purchased as your soil medium, and it is usually weed-free. Bagged topsoil is cheaper, but may be full of weed seeds. In a yard, just use the dirt that’s already there.

Water: If your plants are in the ground, in a backyard for example, they can draw some of their own water from the soil. Container plants, however, are very dependent on your regular and thorough watering. If using tap water, fill a bucket (or several) and let the chlorine evaporate away for two to three days before watering the plants. A better way to water is by collecting as much rain water as possible for your plants (if it’s legal in your area).

Plant Selection: Each species of vegetable plant usually has several “varieties” for you to choose from. For plants in containers, it’s best to select plants that are meant to stay small. Look for words like “patio” or “miniature” in the description. These don’t need as much space to grow, or such a big container of soil. Also pay attention to the calories the veggie would provide. A post-apocalyptic salad might be nice, but salad leaves are painfully low in calories. Focus on higher calorie vegetables (see sidebar below).

Damage Control: You aren’t the only thing that wants to eat your vegetables. Insects smell the plants you are growing and come to wreak havoc on your unsuspecting crops. Diseases can also affect your plants. Many vegetables are susceptible to viral and fungal ailments, which could kill them quickly. Be vigilant for signs of pests and disease to maintain the health of your plants. Frost will also damage or kill plants. Find out the date of the last expected frost in your area. Don’t plant frost-susceptible plants till the danger of frost has passed for the season.

High-Calorie Crops

Calories are the whole point behind a survival garden. Sure, salad plants look nice and grow fast, but you couldn’t eat enough lettuce to sustain you. Leafy greens like lettuce can have as few as 10 calories per cup. It’s a smarter path to focus on high-calorie crops. Here are some survival garden veggies to consider, and their calories per 8-ounce cup (seeds and beans counted dried, roots and fruits counted cooked

  • Peanuts (a massive calorie payout at 1,200 calories per cup)
  • Sunflower seeds (800 calories)
  • Soybeans (775 calories)
  • Chickpeas, kidney, lima, and fava beans (about 600 calories)
  • Sweet potato (180 calories)
  • Potatoes (140 calories)
  • Carrots (80 calories)
  • Tomatoes (50 calories)
  • Turnips (35 calories)

As soon as you have your game plan in mind, it’s time to get busy. Follow these steps to vegetable glory.

Step 1: Go Shopping

Once you’ve found your sunny spot, it’s time to buy some basic supplies. For backyard gardens, you’ll need:

Shovel: A round-point full-length shovel, to dig your garden bed and harvest root crops like potatoes and carrots.

Fertilizer: There is a dizzying number of fertilizer types and numbers on the bags. Those numbers are the NPK numbers. This stands for nitrogen, phosphorus, and potassium. It’s always in that order. Nitrogen is needed for leaves, stems, and green growth. Phosphorus helps flowers and fruit. Potassium is needed for root growth. The average organic fertilizer has about a 3-3-3 rating and a good conventional fertilizer has a 10-10-10 rating. Follow the instructions for application rates.

Plants or seeds: If you have time to wait for seeds to sprout, this is a cheaper way to get your veggies. If time (or patience) is short, buy seedling plants that are already several inches tall and growing strong.

For container gardens, you’ll need:

Containers: These can be pots, buckets, even small garbage cans. If there are no holes for water drainage, you’ll need to punch some in the bottom. You may also purchase (or build) self-watering containers. These are filled up with water every few days, and they water the plants slowly and automatically. Window boxes are also an option if you truly have no space to use.

Soil: Potting soil is a great choice, and it can be purchased with fertilizer already included.

Fertilizer: If not included in the soil mix.

Step 2: Prep Your Soil

You can’t just throw out some seeds and hope for the best. Contemporary vegetables are not as hardy as their wild edible forebears. To perform well, your plants will need loose, rich soil and no other plant competition. Get out your shovel and dig up the grass sod from new backyard garden spots. Then dig deeply and chop the dirt clods with the shovel until they are loose soil. Dig down at least 1 foot if you can, but 2-feet deep is even more productive.

While this is backbreaking work for most people, it’s worth the effort. Deeply prepared soil allows deep root growth, more nutrient and water uptake, and happier earthworms and other beneficial organisms. For container gardens, the work is much easier. Open a bag of potting soil, fill the container, and move to step three. Although potting soil lacks many nutrients and helpful soil creatures, it’s easy to work with and reusable for several years.

Step 3: Plant Your Veggies

If you’re sowing seeds, study the package info on the depth and spacing requirements for each plant. You can use your fingers to poke holes in the loose dirt, and a tape measure or ruler to get the spacing right. Cover the seeds with soil, unless the package says differently. Water the soil gently and wait for the seedlings to emerge. Large seeds grow quickly, since they contain more fuel for growth. Expect beans and squash to pop up in days.

Small seeds are generally slow to sprout, tomatoes taking several weeks to rise from the soil, while peppers and eggplants take more than a month to emerge. Live seedling plants give you a major head start. Bury each root ball in your prepared soil and water deeply. Again, pay attention to spacing. Overcrowding stunts all of the plants that are in competition with each other. As a final option, you could plant living shoots. Cut sprouting white potatoes and sweet potatoes into chunks. Plant each one a few inches deep, and 1 foot apart.

Step 4: Maintain Your Garden

Once the seeds or seedlings are in, water them gently each morning until they are established. You may be able to back off to watering every other day once their roots are deep and the plants are healthy. You may also want to mulch the bed or container to maintain moisture in dry climates. In the beginning of the growing season, you’ll still need to be alert to frost and freeze warnings in your area. Cover plants with a light plastic or bed sheet, and anchor it in place if frost is expected. Remove the plastic as soon as the sun rises to prevent the combination of light and condensation from burning the leaves.

With container plants, if frost or freeze is predicted, just bring the whole container inside. Not all plants are this sensitive to the cold, just plants of tropical descent like tomatoes, peppers, eggplants, and a few others. Later in the season, heat can also be an issue. For urban gardeners, be careful that summer sun and heat aren’t reflected off walls, fences, and other structures. This extra heat can actually cook them. If plants are well watered, but still become “droopy” in mid-afternoon, move them to a cooler spot.

Step 5: Be Patient Till Harvest Time

Gardening isn’t like the push-button activities of the modern world. Plants grow at their own pace. Some are faster than others, but they are never fast enough to suit an impatient person. Consider the length of time until harvest as you plan your vegetable selection. Radishes offer you the quickest turnaround, growing from seed to harvestable root in about one month. The bad news is that they only have 19 calories per cup. High-calorie plants like peanuts can take four months or more for the edible part to reach maturity. Be patient and be realistic, as you wait for your food to reach maturity and ripen; and be watchful for pests and disease.

Common Mistakes to Avoid

There are a few areas where new gardeners often screw things up. Avoid these likely pitfalls and blunders, and your plants will thank you for it — by feeding you.

Using Too Much Water: The western ideal that “if some is good, more is better” doesn’t apply to watering. Overwatering can cause the soil to remain too damp for too long, leading to fungal diseases which can kill otherwise healthy plants. Too little water is a mistake also, leaving the soil dry and stunting plant growth. Water deeply and regularly, preferably in the morning. Nighttime watering can breed fungus as well.

Ignoring Pests: You never know when an insect invasion will arrive. Frequently inspect the plants for bugs and bug eggs (underneath the leaves). A few bugs are helpful, like pollinators, but the rest are enemy combatants. Crush them with extreme prejudice.

Using Too Much Fertilizer: You may be head over heels for your new vegetable plants and want them to do well. But don’t overdo it on fertilizer. The overuse of conventional fertilizer can cause harm to your plants. Follow the package instructions for directions on the use of the product.

Foregoing Regular Checkups: Plants can pick up diseases from insects, fungal spores on the wind, and even from you! If you smoke around your tomatoes, for example, they can pick up a nasty virus from the tobacco. At the first signs of sickly leaves or messed up vegetables, prowl the Internet or good gardening books to find out the cause. Many diseases can be remedied — if caught early.

How to Cultivate Your Own Seeds

It’s surprisingly easy to save seeds from year to year, and continue your own gardening traditions (and genetics). This isn’t legal when dealing with modern protected plant varieties. Heirlooms, on the other hand, still exist because of home gardeners saving their seeds. Here’s how you can carry on the heritage of seed saving in your own family.

Plan ahead for seed saving by growing single varieties of each vegetable species. This will help you avoid unpredictable results from cross-pollination and mutant vegetables next year. Let the fruiting part of your plants mature fully. This will mean mushy tomatoes, dry crusty bean pods, and rock-hard squash. This also means that the seeds are fully formed.

Next, cut or tear open the fruiting body and pick out the seeds. Large seeds are easy to pick from the flesh, smaller ones take a little time. Place them on newspaper to dry in the shade. Once they are thoroughly dry, pick off any dried flesh and place the seeds in a jar with a small desiccant pack. Store these seeds in a cool, dry, dark place until next spring. A few odd seeds require a fermentation process or scratching with sandpaper for best results, but generally, it’s that easy.

Conclusion

Like all living things, plants want to grow. Their roots dig deep, and their leaves reach toward the sun. If we provide the right plants with the light, fertile soil, water, and protection mentioned throughout this article, chances are that you will have some success. But like most endeavors, there’ll be some missteps too. Learn from your mistakes, do some research and find out what went wrong. Use that information the next time, and your results should speak for themselves. There’s no such thing as a green thumb, just dirty thumbs with calluses.


Strange Brew: Making Beer is a Valuable Survival Skill

The following article was originally published in Issue 8 of our magazine.

It goes without saying that we should all be proficient in basic bushcraft skills to ensure a certain level of self-reliance. Knowing how to build a fire, provide clean water, and hunt and defend yourself is crucial to surviving and thriving. But you don’t have to do it all alone. If you’ve read Jim Cobb’s “It Takes a Village” feature in Issue 7, you know one of the advantages of joining or forming a survival group is teaming up with others whose skills complement your own. Within those groups, various individuals will have specific skills and/or products that will contribute to the greater good. Essentially, that’s the way civilizations have functioned long before there was a grid to go off of.

Looking back on thousands of years of history there’s one skilled individual who has always been as essential as the hunter or the healer. One person who appears to be as integral to the fabric of society as a clean water source. That person is the guy (or gal) who knows how to…wait for it…make beer!

The role of beer in society goes far beyond grabbing a cold one and watching ’Bama football. It’s one of the oldest beverages created by humans. It goes even further back than the classic European monastic breweries founded after the Romans stopped sending Christians to the lions. In fact, archaeologists have found 4,000-year-old clay tablets that described beer recipes in great detail.

So maybe we’re waxing a little too poetic about “cold gold.” Nonetheless, within certain survival groups, your brewing skills could be almost as good as gold (did we mention that beer was used as currency at one time). The really good news is that — unlike learning medicine or gunsmithing — brewing is a skill easily acquired and practiced in the comfort of your own living room and/or kitchen. Whether you’re prepping for TEOTWAWKI where all bars have shuttered or you just want the extreme satisfaction of drinking an ale you gave birth to, having your own do-it-yourself brewery could be more of an asset than you think.

Setting Up Shop

You don’t need high-tech gear to start your home brewery.

If ancient cultures with no running water and poor hygiene were able to make beer, there’s no excuse should we fail to make a quality brewski with the resources we have today. It’s a pretty simple process, and the equipment is easy to find and store. And if you’re emotionally attached to your homemade tap, the buckets can be used to carry other things while you’re bugging out.

It’s easy to get started because you don’t need expensive gear. In fact, the process you’ll use will be basically the same even if we get thrown back to a 19th-century lifestyle after a massive solar flare or electromagnetic pulse attack. You don’t need any exotic cooking kettles, fermentation tanks, or bottling systems. Everything can be found at and/or made from stuff at your local home-improvement store. That being said, there’s no need to run out to The Big Orange Box and start playing MacGyver. Online supply houses like The Home Brewery are inexpensive resources for even the most basic ingredients. Plus, the folks there will have more expertise than you’ll find in this article. They will get you up and running, even if you only want to set yourself up for SHTF brewing.

Get the basic setup and you’re good to go; upgrade it and you’ll find the process a little easier and your end product a little better. Even with the much recommended upgraded kit, there’s no high-tech equipment. Below are the items you’ll want to gather.

The Gear:

  • A stainless steel brew pot big enough to hold 3 gallons of water
  • Thermometer
  • Large stirring spoon
  • Straining bags
  • Fermenting bucket (clean unused 6.5-gallon bucket) with an airtight lid
  • Bottling bucket (a 6.5-gallon bucket with a spigot)
  • Bottles and corks or caps (actually growlers with lock tops work great since they’re reusable and you don’t need a supply of caps and a capper)
  • Transfer tubing
  • Hydrometer to measure the alcohol content as an indicator of when to stop the process

An accurate thermometer is essential for brewing homemade beer, lest you just want flavored water

The essential upgrades are a 6.5-gallon glass secondary fermenting bottle (called a carboy), as well as a coil of copper tubing used in cooling the pre-beer mixture so you can add the yeast that turns boiled grains and malt into beer.

You’ll also need a reliable means of rendering all your equipment germ and bacteria free. If there’s one unbreakable rule in brewing: sanitize and sanitize again! You can stock up on sanitizing mix at online sources like The Home Brewery.

Now that you have the equipment, you’ll need ingredients. Every beer has the same basic ingredients. They are also the same staple ingredients you’ll need on hand to make bread, feed poultry, and season other foods. To start you’ll need to get your hands on the following items.

The Ingredients:

  • Yeast
  • Water
  • Spices
  • Grain (oats, barley, or wheat)
  • Sugar (cane sugar, honey, corn sugar, or milk sugar)
  • Hops (different strains yield different tastes)
  • Malted barley extract (if SHTF, you’ll need to make your own, which is a more detailed process than we have room for here. But commercial extracts are available for you to use until you need to make your own.)

Keep in mind: You don’t have to worry about sourcing all this at first. You can pick your favorite style of beer and purchase a kit that will have everything you need to cook up the recipe.

You can customize your post-apocalyptic beer by adding certain grains and spices.

Beer Pioneer?

Who made the very first mug of beer? Was it made out of a survival need or through serendipity? No one knows for sure. There’s a theory that says that cerveza was discovered because someone accidentally left soggy bread out to ferment and decided to give the run-off a swig. If you believe the ancient Egyptians, divine inspiration gifted an elder with the knowledge of taking a combination of water, grains, and wild yeast, and letting it age to create a drink that helped ease the stress of building pyramids — or at least one that would give the pharaoh a buzz. Beer was held in such high regard in Egypt that beer historians say if a gentleman gave a lady a sip of his beer they were engaged (yikes!).

The mystery as to how ale materialized might never be solved. But it’s certain that beer is so cross-cultural and enduring because the ingredients are easy to grow and are the same items used in bread making. Or perhaps it’s because beer can be a bacteria-free alternative to less reliable water. Any way you look at it, beer has been produced by virtually every civilization on earth for millennia, and it’ll surely be around for many more.

Two Types

There are two main classifications of beer: ales and lagers. They’re determined by the type of yeast used in the fermenting process.

  • Ale is a top fermenting beer, meaning the type of yeast used rises to the top during the process. These include pale ale, India pale ale, and Belgian ales.
  • Lager, conversely, is a bottom fermenting beer. The type of yeast used falls to the bottom during the process. These include bocks, dark lagers, light lagers, and pilsners.

Let’s Cook

So you’ve got your equipment and your ingredients kit — now what? Let’s get to brewing. As we mentioned, the prime rule in brewing is sanitizing. Anything that isn’t in boiled in the kettle needs to be sanitized thoroughly. Nothing ruins a brew quicker than errant bacteria. After that, in a nutshell, beer-making is simply taking the ingredients through a four-step process: boiling, fermentation, priming, and bottling. The timing and order in which to add the ingredients will determine whether your lager is worthy of a Super Bowl ad or if it’s a sad waste of water and liquid bread.

Step 1: Boiling

Beer making starts off a lot like making a good cup of tea. You’ll bring 3 to 4 gallons of water up to a pre-boil temperature of 170 degrees F. At that point you’ll fill a straining bag full of various grains and steep it like you would a tea bag. The types of grains you use will render specific tastes. When the grains have steeped, you bring your concoction to a boil. At a rolling boil, you’ll mix in your malt and hops. This mixture is called the wort and it starts to smell like beer. You’ll be boiling the wort for a good 60 minutes. Now is the time to sanitize the fermentation bucket, the lid, and the airlock if you haven’t already.

Step 2: Fermentation

If any part of the brewing process is frustrating, it’s cooling the wort after the boil. Remember: we’re brewing 5 gallons, but only boiling 3. Add the hot mixture to your sanitized fermenting bucket, then add 2 more gallons of cold spring water. You’re trying to get the mixture down to 75 to 80 degrees F so you can add the yeast. Any hotter than that and you’ll kill the yeast — meaning no alcohol will be produced.

This is the wort, a mix of malt and hops that will be fermented by the brewing yeast to produce alcohol.

The cooling process is expedited with a wort chiller, a coil of copper tubing that connects to a faucet. Put the sanitized chiller in the wort mixture and run cold water through it. This takes roughly 20 to 30 minutes off the chilling time.

Now that everything has cooled down, it’s time to add the yeast. Just like making bread, yeast is the key ingredient in the process. If the yeast isn’t active, then kiss a good batch goodbye. Different types of yeasts are required for different types of beer.

After you pitched your yeast and sealed the bucket with the sanitized lid, the waiting game begins. The lid will have an airlock on it that allows the fermenting gases to escape without letting unwanted bacteria in. So now the waiting begins…for about two weeks. You’ll see the airlock bubbling — that’s how you’ll know your sweet barley pop is on its way.

Make sure your fermenting bucket is sanitized. Nothing kills a brew like errant bacteria.

Step 3: Priming

When your brew has stopped fermenting, it’s time to prime. This is the stage in which you add a measured amount of sugar or malt extract right before bottling. This fuels the yeast and creates a new fermentation process in the bottle and, more importantly, CO2. The gases produced in the next step carbonates the beer. (Refer to the experts in our source box or other qualified breweries for information on fermentation times, amounts of sugar, and other exact details.)

Step 4: Bottling

The last stage is to bottle your brewski in sanitized bottles. Bottles that require you to press on a cap are good for the casual brewer. In an off-grid scenario, however, bottle caps will be scarce; that’s why it good to start using snap lid growlers. After you’ve bottled your suds, wait for another week or two and it’s ready to drink.

That’s it. All in all, an easy process — unless you’re super impatient. The great thing is that when it’s TEOTWAWKI you can learn to recycle the yeast to make another batch of beer. The grains you use are good for bread and animal feed. Hops are easy to grow and can also be used for feed. In addition, the soggy grains and hops left over from the process can be used as fertilizer. So, as the brewmeister, you’ll be not only lifting the morale of your loved ones and producing a valuable bartering commodity, you’ll also contribute to your survival group’s overall well-being in several ways. And that’s something we can all drink to. Cheers!

Sources

  • The Home Brewery > www.homebrewery.com
  • Home Beermaking by William Moore > www.amazon.com

New: HK Knives Mini Incursion OTF Automatic

Earlier this month at Blade Show, we stopped by the Hogue booth and noticed a new knife on display as part of the company's HK Knives line. The new Mini Incursion is an out-the-front automatic knife with a sub-3-inch blade, making it a good option for those who like the slick action of an OTF but want something more compact and EDC-friendly. We can see the appeal, since we often find ourselves minimizing gear while wearing light shorts in the hot summer months.

The new HK Knives Mini Incursion is made in the USA with an ambidextrous push-pull switch that swiftly deploys and retracts the blade. The handle/frame is machined from 6061-T6 aluminum and anodized in either a matte grey or matte black finish. It also features a deep-carry, tip-down pocket clip with the HK logo and a built-in carbide glass breaker.

Pushing forward on the switch reveals the 2.95-inch 154CM steel blade, which is heat treated to 57-59HRC and ground to either a tanto or clip point profile. Available blade finishes are tumbled (matte black frame and clip point blade only) or black PVD coating. Each knife is hand-sharpened and honed.

MSRP for the new HK Knives Mini Incursion is $290 for the tumbled-finish model, and $310 for all other models. For more information, go to HKKnives.com.


Watch Commander: Survival Watch Buyer’s Guide

Photos by Jorge Nuñez and Freddy Osuna

One century has passed since we started wearing watches on our wrists, and it appears that the wrist-mounted timepiece has yet to become obsolete. Companies continue to create a variety of features beyond simply telling time that adapt to the ever-changing needs of the tech-savvy consumer. This also raises an important question — why do you need a wristwatch when you can just look at your phone? The key question that you should ask is what kind of watch will serve your lifestyle best in the absence of a cell phone? Is it an analog automatic watch, serving the very simple task of keeping time accurately? Is a multi-function watch for work and play the way to go? How about a Bluetooth-compatible watch that’ll let you access your smartphone features at a glance?

Having an accurate, dependable timepiece has served me well on missions and in the classes I teach. Not only do they provide the ability to monitor this most precious commodity, time, but certain makes and models can also measure ambient temperature, barometric pressure, compass direction, and altitude. So what does this data translate to in austere circumstances or tactical situations? By having environmental info like temperature, you can better monitor your team’s diagnostics (gotta keep them horses watered). Temperature, barometric pressure, and altitude are factored into ballistic calculations for long-range shooting. Barometric pressure can alert you to unexpected weather, which could affect things like line-of-sight visibility.

You might think that an altimeter may only be relevant to pilots and mountain climbers — think again. In 2010, while navigating with GPS in the Sierra Nevada mountains, I had a power failure and interference that rendered the device as useful as a paperweight. I was alone and eight miles into my trek, trying to locate a designated landing zone. Since I’d mainly been following the GPS, I pulled out a map from my cargo pocket to do some terrain association. As I stopped for a map check, the GPS died. I was at 8,000 feet, it was 30 degrees F, and it was getting dark. Orienting my map to north, I looked around and tried to associate my position with visible landmarks in order to get an idea of where I was.

With my compass, I shot two azimuths, or lines of direction, in order to triangulate a resection — a method used to locate your own position on a map. In this terrain, it was very important to determine my exact location on the map because false peaks could be the difference between spending the night in the bush in very cold conditions or in my hotel. By having a general idea of where I was, I used the altimeter on my watch and matched that up with the contour lines (elevation indicators) on the map to get my exact location. This saved my bacon, and could save yours one day too.

An analog watch face can be used as an improvised compass in a pinch.

Do a web search for EDC gear. You’ll probably see a watch in almost every photo. Time keeping, orientation, coordination, and distance calculation may be the most common uses for wristwatches, but did you know there’s a hell of a lot more ways a watch can serve you?

  • In a SHTF scenario, it’s important to keep a chronological journal of even the most mundane activities. An accurate sense of time and date provides orientation and can keep the looming depression monster at bay.
  • By using an analog watch, you can approximate cardinal north and south — see this previous web article or refer to “No Compass, No GPS, No Problem” in RECOIL OFFGRID Issue 2.
  • Those unsightly, ginormous watch faces are useful as a data board in a pinch. I often write reminders or other info I may not be able to recall later on my watch faces. You can use a Staedtler felt pen (map pen) or fine-point Sharpie.
  • A watch can be used for barter.
  • You can strop your knife on a leather watchband.
  • I used to have an older watch that had a sliver of space in the battery compartment. I kept a microSD card in there with important documents on it. Key fobs work great for this as well.
  • Pop the face off and work it to an edge to use as a cutting tool in an escape scenario.

Here we take a look at 10 of the latest watches on the market, with functions that go from simple to complex. See which watch has a place in your EDC.

Brazen Sports Military Tactical Chronograph

Movement
Swiss ETA 251.274

Case
44mm stainless steel

Glass
Anti-reflective sapphire

Band
24mm vulcanized nitrile NBR rubber

Weight
4.6 ounces

Price
$850

URL
brazensports.com

Notes
The triple chrono features a 60-second, 30-minute, and one-hour dashboard. Also handy is a tachymeter with which you can estimate speed, distance, and other metrics. The “non-luminous for black ops” specification was a bit amusing. It has great, large hands with a contrasting background, plus you can use the large face as a mini data board to write on. Water-resistant to 100 meters, with a two-year limited warranty. The design of the watch body is inspired by a centerfire cartridge, with its underside mimicking the look of brass with a primer. The bullet-case design on the backplate is a nice tribute to shooting sports and 2nd Amendment rights. The details in the markings and jewels are very appealing to classy watch folks. It’s a little heavy and bulky, but that also seems to be the trend. Six-year battery life.

Casio / G Shock Master of G GG1035A-1A

Movement
Quartz – Module #5476

Case
56.2mm

Glass
Mineral glass

Band
28mm resin textured band

Weight
3.3 ounces

Price
$370

URL
www.gshock.com

Notes
Features include a digital and hand display compass that measures and displays magnetic north, 16 direction points, and bearing memory. This watch also features an altimeter for navigation tasks and barometer for predicting weather and long-range marksmanship. It has an LED backlight with neo-brite luminous hands and markers. It has world time with 31 time zones. It’s water-resistant to 200 meters and mud resistant as well. The auto compass north feature is great, and I found myself engaging compass mode just for the fun of it. For the price, this is an excellent tool for land navigation short of getting a GPS. However, its bulk is a little obtrusive, and the strap is very stiff. Despite its size, it weighs only 3.3 ounces. Battery life is approximately two years, and its warranty is three years.

Dakota Steel Angler

Movement
Analog

Case
40mm stainless steel

Glass
Mineral glass crystal

Band
22mm silicone

Weight
2.5 ounces

Price
$75

URL
www.dakotawatch.com

Notes
Oversized analog numerals with a moonglow electroluminescent function. Large hands and a contrasting background make it easy to read day and night. Rated at 5 ATM (165 feet) of water resistance. Analog watches have always served me well as an instructor for monitoring timed events. The soft band was very comfortable. Overall the Dakota brand is a cost-effective choice, available at many large department stores. In fact, it’s one of the only watch brands I’ve seen in the Walmart hunting/sports section. Its simplicity, durability, and price point under $100 make it a great everyday watch choice. With so many other watches boasting features beyond time keeping, the Dakota may not meet all the needs of a serious outdoorsman who has other options at a comparable price point. It has a two-year warranty, and battery life is one to three years.

Isobrite Valor Series ISO304

Movement
Swiss Ronda quartz (battery)

Case
47mm carbon fiber reinforced polycarbonate

Glass
Scratch-resistant sapphire

Band
22mm silicone

Weight
3 ounces

Price
$499

URL
www.armourlite.com

Notes
Isobrite is known for making the first tritium dial-lighted watches. This model has tritium vials at every hour marker, with two at the 12 o’clock position. The bezel has tacky contours with positive “clicks” and contains tritium vials at the 12 and 3 o’clock marks. The crown is nice and big with a smooth three-position function — my favorite turning crown of all the watches. The polycarbonate case is lightweight and strong. It comes with a matching silicone band, which I found to be thick and uncomfortable, or you can opt for a nylon NATO-style version. The watch is deceptively rugged and water-resistant (rated to 200 meters). The tritium vials (jewels) are amazingly bright — hence the name. Large positive clicking dials make for easy adjustment, even with sausage fingers. The tan desert color, although a low contrast color that may be a good choice for sneaking around in the bush, can make this watch look cheap or toyish to those who’d prefer other colors. Its lithium battery should last 10 years.

Luminox Master Carbon SEAL – 3813

Movement
Multi jewel Swiss quartz movement

Case
46mm Carbonox

Glass
Anti-reflective sapphire crystal

Band
24mm rubber oil-resistant strap

Weight
2.8 ounces

Price
$690

URL
luminox-usa.com

Notes
The “Carbonox” construction was very light. The company claims it’s six times lighter than steel and three times lighter than titanium. It was the lightest watch we reviewed at 80 grams. A huge, positive clicking single dial does everything. Tritium vials perform as advertised, and the single distinctive orange jewel at 12 o’clock was helpful for orientation. The watch has smooth contours with a low profile, easily accessed with long-sleeve uniforms or dress shirts. There are large bright numbers on the bezel, along with a tritium jewel at the zero mark. The strap is oil resistant, lightweight, and very comfortable — you forget you’re wearing it. It has a two-year limited warranty and 10-year warranty for the tritium tubes. It’s water-resistant to 300 meters and features an eight- to 10-year battery life.

MTM Black Predator 2

Movement
Chronograph Swiss Ronda 5040.D

Case
44.5mm stainless steel or titanium

Glass
Anti-reflective, scratch-resistant sapphire

Band
24mm stainless or titanium

Weight
9.5 ounces (stainless steel); 6.6 ounces (titanium)

Price
$1,020

URL
www.specialopswatch.com

Notes
The MTM’s three-dial chronograph can measure down to 1/10th seconds. Features include tritium glow hands, bright tritium jewels, and a unidirectional ratcheting bezel. This is a man’s watch that says “business tactical” and looks like something John Wick would wear. You can bash someone’s face in with this timepiece due to its heft, but that weight may be a turnoff for some people. MTM offers many options for finishes, as well as band, case, hand, and dial color. The size of the band is easily adjusted with an Allen key rather than the typical swear-inducing, spring-loaded pins, and you can also select from numerous nonmetallic band options. The watch is water-resistant to 200 meters and has a three-year limited, nontransferable warranty. It comes in a watertight tactical box that’d rival many gun cases for durability. Four-year battery life.

One Eleven Master SW1 Solar 3-Hand Black Nylon Strap

Movement
Solar powered

Case
42mm stainless steel

Glass
Hardened mineral crystal

Band
22mm woven nylon field strap

Weight
1.4 ounces

Price
$125

URL
www.111watches.com

Notes
This watch design looks like a wrist compass and can be used in that manner like all analog watches. You could wear this watch with a business suit during the week and in the bush on weekends. The strap has a unique spring release switch to remove and clean it; it’s also very comfortable and easy to adjust. The crystal allows for image refraction that gives it an appealing look. It’s water-resistant to 10 ATM. The large solar cell watch face ensures great light collection in order to keep it ticking. The compass-like face not only provides cool compass nostalgia, but also makes it easily interpretable as a field expedient compass. Nice crystal glass gives this watch a great look, and in a pinch could be used as a cutting implement. The markings are a little small, and the hook and loop strap keeper will wear out with time. The watch has a two-year limited warranty, and the battery is rechargeable.

Resco Instruments GMT PVD Green

Movement
Swiss quartz battery

Case
44mm 316 L Stainless Steel, PVD Black Finish

Glass
Anti-reflective sapphire crystal

Band
22mm NATO nylon

Weight
3.3 ounces

Price
$1,205

URL
rescoinstruments.com

Notes
The Resco has a matte black dial with C3 SuperLuminova luminous markings; C3 refers to its yellowish color. It has a unique internal rotating bezel, operated by the upper rotating crown. The NATO nylon strap, while functional, seems like a cheap feature for a watch at this price point, but other options are available. Overall, though, it has very nice aesthetics. It’s water-resistant to 200 meters and has a one-year warranty. A great feature is the internal bezel that can be used to mark time elapsed or a direction for navigation. A unique service provided by Resco is factory conversion of an automatic watch to a quartz battery movement for many of their models. They also donate 20 watches per year to programs that support wounded service members; it’s great to see companies that support our nation’s heroes. Three-year battery life.

Suunto Spartan Sport Wrist HR Baro Stealth

Movement
Firmware software

Case
50mm glass fibre reinforced polyamide

Glass
Mineral crystal

Band
24mm silicone

Weight
2.6 ounces

Price
$549

URL
www.suunto.com

Notes
This watch has it all. The weather barometer is excellent for reading environmental conditions. Bluetooth functionality with your smartphone is simple and intuitive, and the GPS navigation feature easily pairs with Suunto’s iOS or Android app, so you can track your progress and health diagnostics. The touch screen is responsive. Along with the amazing spectrum of features offered, you can monitor the last incoming text message while avoiding the distractions of trying to catch a glimpse of the peripherals of your smartphone. The battery life is a big con, ranging from 10 hours to 14 days, depending on which functions you’re using. And don’t forget your charge cable, because you can’t use just any USB cable. With a stainless steel bezel, it’s still very light and water-resistant to 100 meters. For a large smart watch, its contours are very unobtrusive with no sharp edges. The time face is adjustable for layout and color. Two-year limited warranty.

Traser Watches P49 Red Alert T100

Movement
Swiss Ronda 715 quartz

Case
44mm black PVD stainless steel

Glass
Anti-reflective sapphire

Band
NATO style

Price
$550

URL
www.traser.com

Notes
Known for their illuminated watches, Traser offers a proprietary “Trigalight” technology, using tritium gas in miniature tubes that light up at night. This is the same type of technology seen in self-illuminating night sights for guns. The markers are very bright, and the hands are easily picked up at the first hint of dusk. The bezel is excellent for marking time elapsed. The Traser has an overall masculine look and feel to it, and the strap is easy to remove for cleaning. The main issue that users may wish to consider is that it has a high profile and edges that may catch or snag on gear or equipment. It’s water-resistant rated to 200 meters with a two-year warranty.

More From Issue 32

Don’t miss essential survival insights—sign up for Recoil Offgrid's free newsletter today!

Read articles from the next issue of Recoil Offgrid: Issue 33

Read articles from the previous issue of Recoil Offgrid: Issue 31

Check out our other publications on the web: Recoil | Gun Digest | Blade | RecoilTV | RECOILtv (YouTube)

Editor's Note: This article has been modified from its original version for the web.