RECOIL OFFGRID Survival Hobo Stoves
In This Article
When the chips are down for whatever reason — be it a power outage, civil unrest, or the grid is down — you still gotta eat. Urban survival comes in a variety of flavors. Not all are great. Electric or gas stoves will probably be obsolete in times of trouble. Urban survival hobo stoves to the rescue!
Imagine the attention of sight and smell a big ol’, cozy, warming campfire gives off.
In an urban survival scenario, you want the opposite. Less attention is a good thing to strive for (unless search and rescue is looking to evacuate you or your group). A hobo stove helps you fly under the radar with a small, contained fire to stay out of view from the possible unsavory characters who come with urban survival scenarios. Some other benefits to hobo stove cooking include:

• Efficiency: Less fuel is needed in a concentrated area, increasing the airflow and heat. These stoves burn fuel more completely, minimizing waste. This means you’ll need less fuel to cook the same amount of food.
• Faster Cook Time: An open campfire has many health benefits. However, there’s a lot of wasted fuel, and it heats cookware slowly. Hobo stoves come to temperature faster, which is a significant advantage in cold weather and when time is of the essence.
• Safety: Small fires found in hobo stoves are easier to keep contained, reducing the risk of them getting out of control and starting a wildfire. These stable stoves lessen the risk of spilling or tipping pots and pans.
Pro Tip: Procure a large metal container that fits over your hobo stove. A trash can, barbecue cover, or larger tin can will do. The larger can will quickly cover the entire stove and snuff the fire out if you get any unwanted looky-loos. It may extinguish the fire, but remember you already have heat and fuel. Most likely, you’ll only need a resupply of oxygen.
Portable and Environmentally Friendly
No matter what size can size you use for your hobo stove, coffee, tomato, or larger cans are all portable. They’re also made of aluminum, a super lightweight metal. Aluminum also cools off lighting fast, making it easy to grab and go. Using readily available natural fuels, hobo stoves minimize their environmental impact compared to burning larger logs or using chemical fuels. They also produce less smoke due to their controlled combustion process, which helps to reduce air pollution.
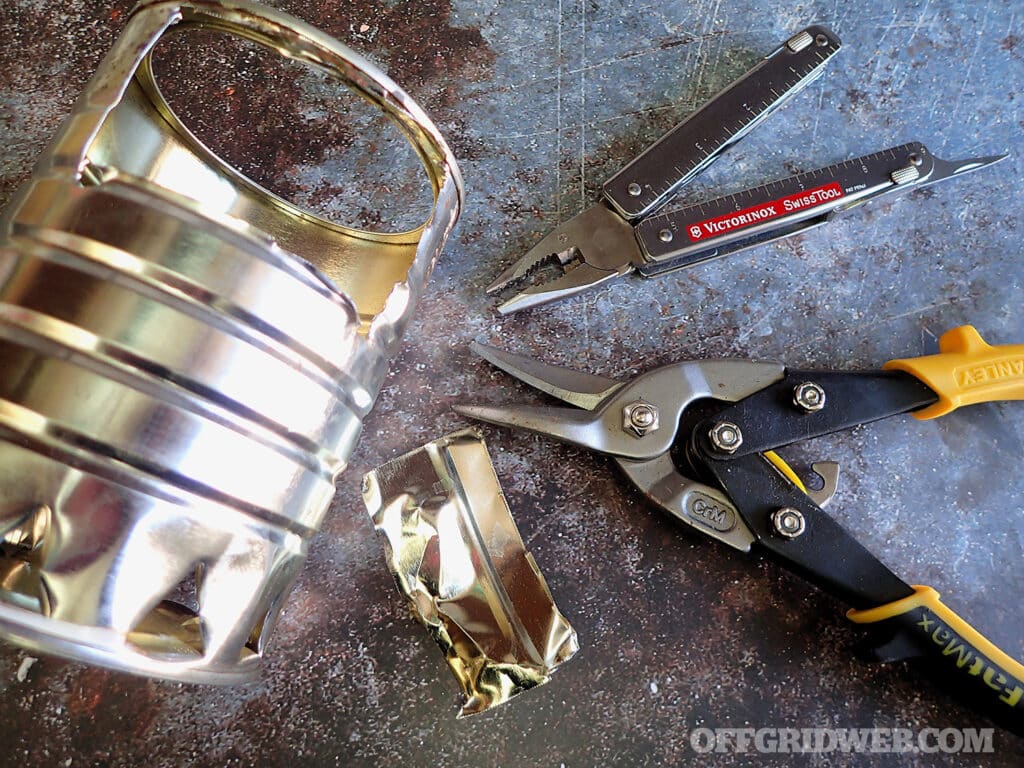
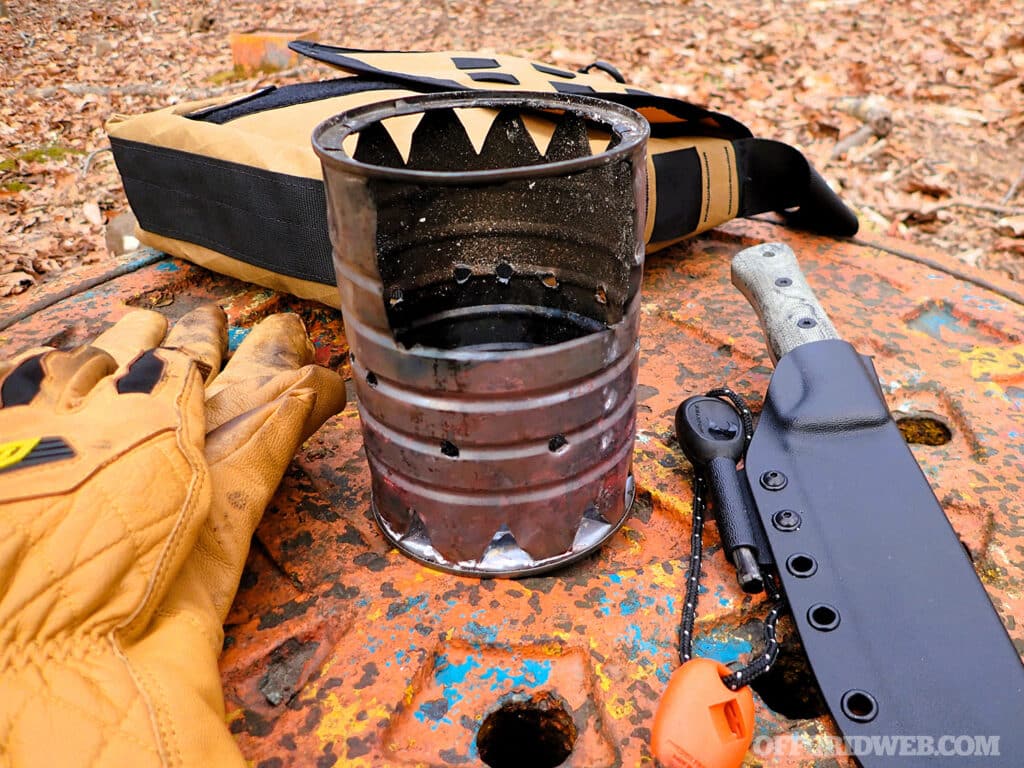
The heavy-duty tin snips make cutting the ports safe and easy.
Simple is always best, and a simple stove build requires simple tools. I used three. However, you can easily substitute these for drills, Dremel tools, and whatever you can access before you need to make do without those luxuries, like electricity to use said tools. I used an awl from a Victorinox Swiss Tool with a positive lock, tin snips, and a church key-style can opener.
A stout fixed-blade knife can replace the tin snips, but I recommend the tin snips for ease of use and safety. The most essential item you’ll need is a coffee tin, tomato sauce can, or larger green bean can, which are all excellent candidates for an urban survival hobo stove. And one more thing, get some leather gloves. You’ll see why once you start moving hot cookware around.
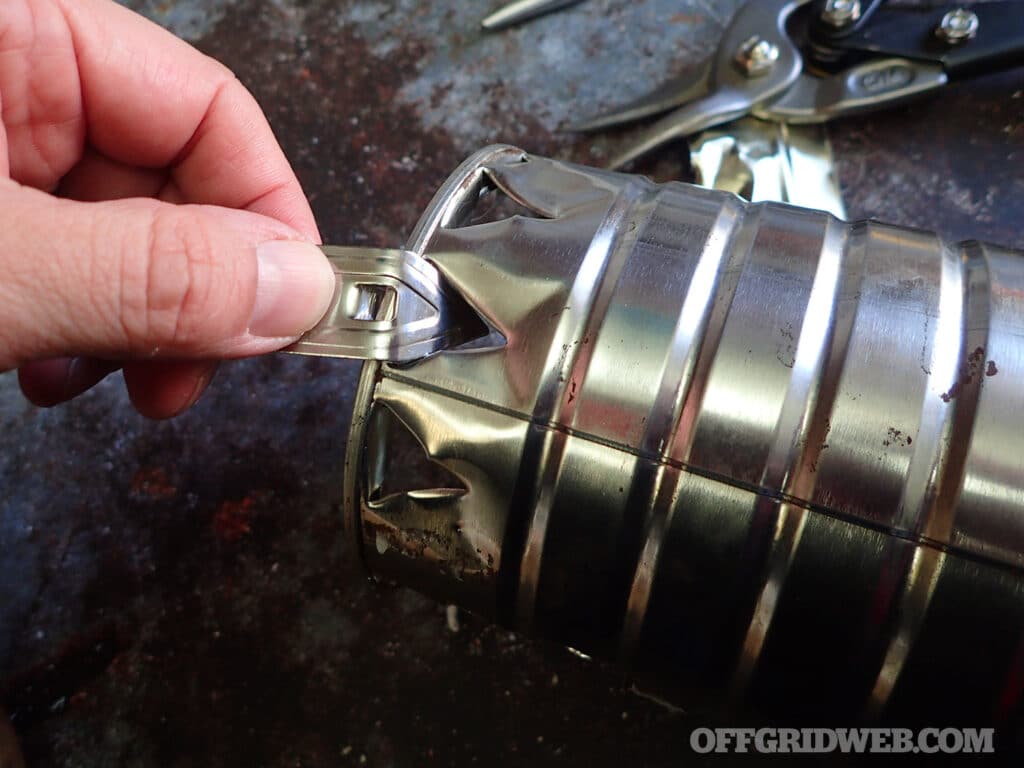
The church key can opener is simple and effective for making vent holes.
A hobo stove creates a small, efficient, controlled fire for cooking and boiling water. Its design and shape utilize the principle of hot rising air as the fire ignites from the bottom. You can also ignite it from the top. I’ve made several hobo stoves in various sizes and designs,
incorporating different vent and fuel ports. Recently, I created a hobo stove using a small coffee can, an awl from my Swiss Army Knife, and a triangular can opener (not a P-38 military type). The result was crude and rude, but it worked well.
To make the hobo stove, I started with a metal can. I used the triangular can opener to punch holes around the top and bottom for ventilation. Then, I cut out a large panel from the top to create a fuel port as an additional vent. Heavy-gauge tin snips work well for cutting this section, although other tools can do the job. The open section at the top allows the flame to escape, providing a place for metal pans and kettles. For anything smaller than the can’s diameter, I needed support. At first, I used a sturdy piece of chicken wire mesh, but later, I switched to a stovetop grill for better support. I slid steel tent stakes into the top vent holes to hold a small pot.
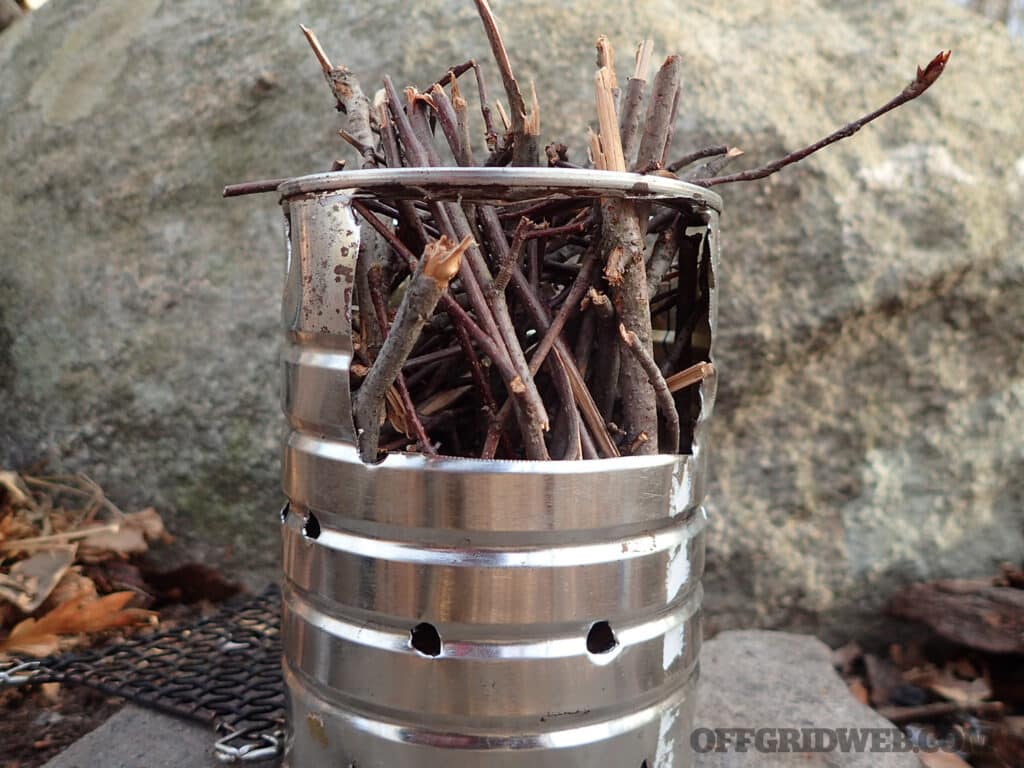
The author positions the kindling of small, toothpick, and pencil-thick dead sticks above the fuel.
Most commercial bio/twig stoves come with a large port in front and on the lower part. However, I hate valuable hardwood coals that took me time and effort to create, escaping from the bottom.
At the same time, with top-feeding ports, you’ll never need to remove your cooking vessel to add fuel. And they become self-feeding. As they burn, they descend into the fire. All the hard-fought coals stay intact and don’t escape like the previous bottom ports.
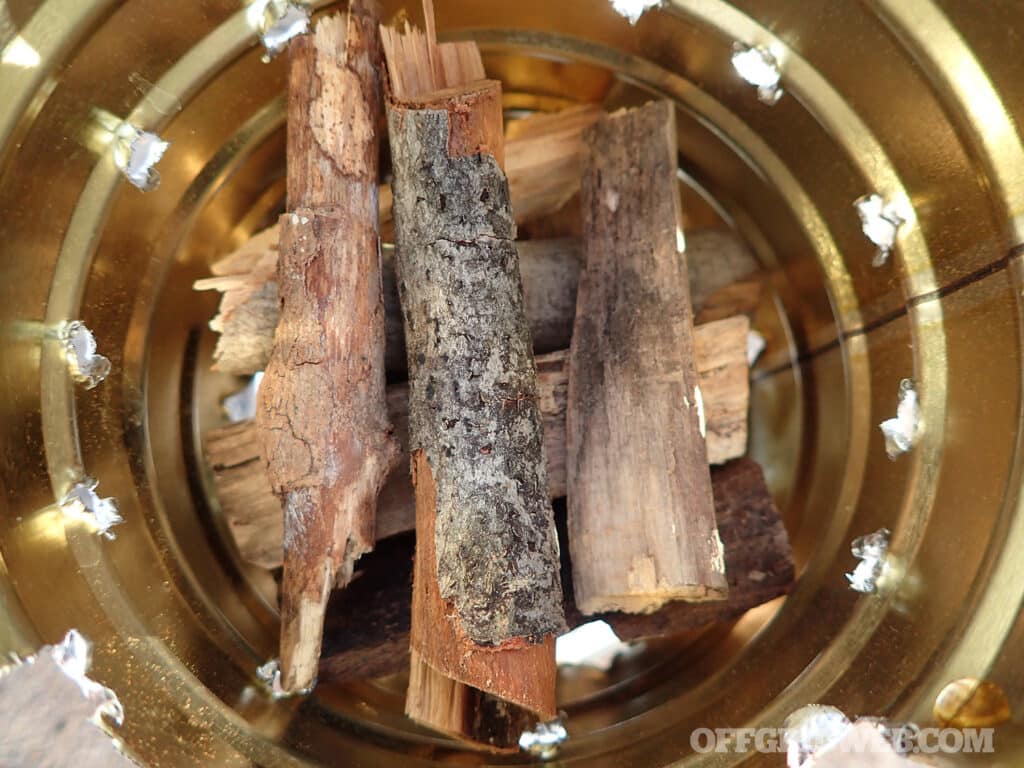
Top-down fires in hobo stoves require larger fuel at the bottom and must be alternated in direction for maximum airflow.
To kick off cooking with a hobo stove, I grab dry twigs about the size of pencils or slimmer. I start by stuffing smaller twigs in the center and then surround them with finger-thick pieces and a few larger ones to keep things spicy. Once those little guys catch fire, the larger pieces will happily fall into place. I save the fine tinder for last and cram it at the bottom without choking off the precious airflow. My go-to tinder options? Shredded poplar bark, birch bark, and a splash of Fatwood for that extra kick. Once the fire ignites from below, that snug setup works wonders, aided by the all-important air vents.
While establishing a cozy warmth and glowing coals, I pop in larger logs from the top, feeding the fire until it creates a sustainable blaze. This part is my favorite — not only does it warm me during those chilly winter days, but it also gets a kettle boiling above those high flames. When I’m ready to whip up a meal, I shove in hardwoods through the large vent. Maple, oak, hickory, and walnut are my champions in the fuel department, since they pack more BTUs and reduce the wood needed for cooking. I lay some heavy-duty chicken wire over the top to support my cookware or slide in metal tent stakes through the air vents. If I bring out a big frying pan or skillet, I don’t even need support. The can does all the heavy lifting.
Pro Tip: Keep a couple of sticks handy to adjust the larger vent or fuel port position to catch the breeze. This little maneuver will boost your flames and save you from the tiresome task of fanning when the wind decides to die down. Want to dial back the heat? Simply turn the stove away from the prevailing breeze to avoid a flame thrower scenario.
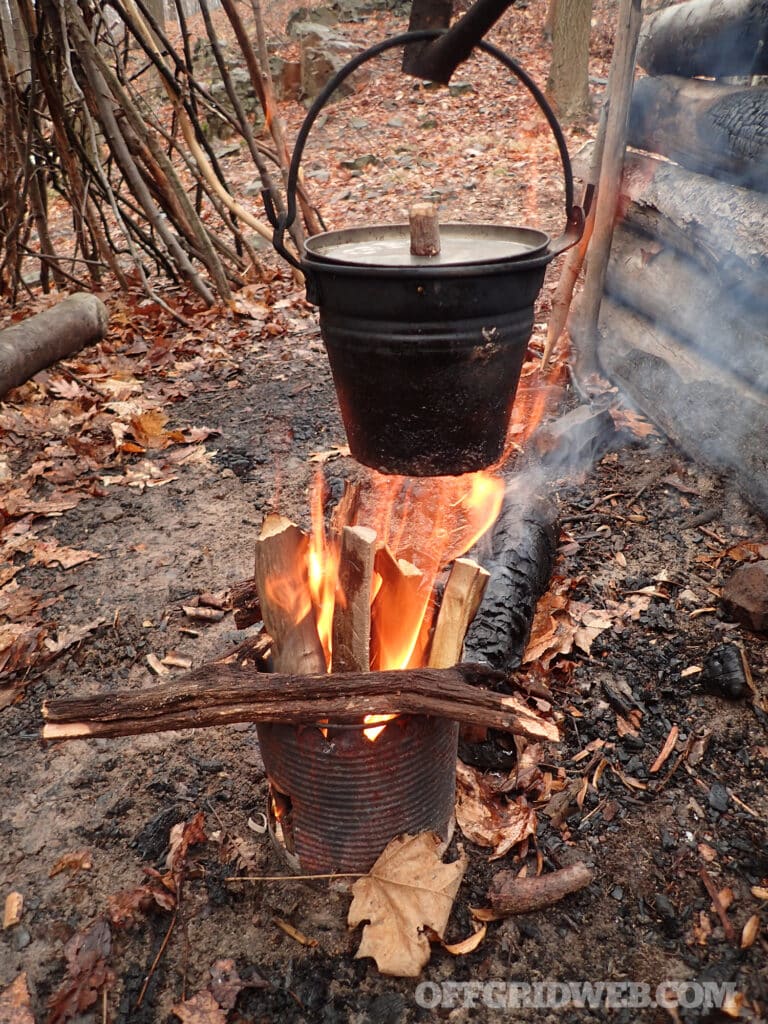
The author has used larger and wider hobo stove cans and boiled kettles by hanging them above in the cold months and taking advantage of their warmth.
The initial flame will be high once you ignite the stove. Make sure to take advantage of it. There’s no better time to use a high flame to boil water for warm drinks or to disinfect it for safe drinking. A tripod or some type of method to raise a pot will be a gem here. Be crafty and plant two Y-sticks on either side of the stove. Get a green or stout dry stick to lay across the Y-sticks, hang the pot or kettle, and use that high flame. When the flame dies down into cooking territory, act accordingly.
Frying Pan: A small to medium-sized frying pan will fit on top of most homemade hobo stoves and popular twig stoves sold commercially. The frying pan is a good choice for these types of stoves. It means you can use a flame, like cooking over a gas burner. Use leather gloves or a bandana when you handle the frying pan. Wind changes and flames will shoot out of ports and be at the mercy of the wind.
When using a very small diameter pot, kettle, or frying pan over a larger stove, use metal tent stakes, chopsticks, or wire coat hanger pieces. This method will allow smaller vessels to do their thing. However, if their handles or hanging systems allow, hang them over the initial flame, as stated above. Be creative — invent something and have fun.
Steam It: Cooking in the woods can be a breeze, especially when you choose steaming as your method. I’ve got a killer recipe that’s simple, quick, and virtually foolproof. Inspired by Scandinavian cuisine, I steam fresh vegetables and seafood on a hobo stove, and the results are delicious.
Here’s How It Works: Start with a small pot filled with water at the bottom and toss in some fresh maple or oak wood chips. Then, I layer some spruce or hemlock twigs — or even ferns — on top of those wood chips, creating a nifty platform above the water. Your creativity and the pot’s size are the only limits regarding what to cook. I like to keep things fast and efficient, so I don’t overcrowd the pot. My go-to combo usually includes some fish and shrimp. For good measure, I throw in spinach, mushrooms, tomatoes, and a sprinkle of Red Eyed Hog outdoor seasoning.
First, I layer the larger fish and veggies, stacking the smaller pieces on top. Once everything’s prepped, I cover the pot and place it over the hobo stove, waiting for that water to boil and the steam to work its magic. Every few minutes, I can’t resist checking on my creation, using leather gloves or a bandana to lift the pot lid safely. The fantastic thing about steaming is that it cooks food quickly, and thanks to the gentle steam, it’s also more forgiving than frying or grilling. Keep an eye on it, and you’ll soon whip up a fantastic meal.
Pro Tip: Leather gloves are your friend here. Wind is fickle. Use leather gloves to rotate the stove into the prevailing wind when it changes. Use wooden tongs or sticks to rotate the stove without leather gloves.
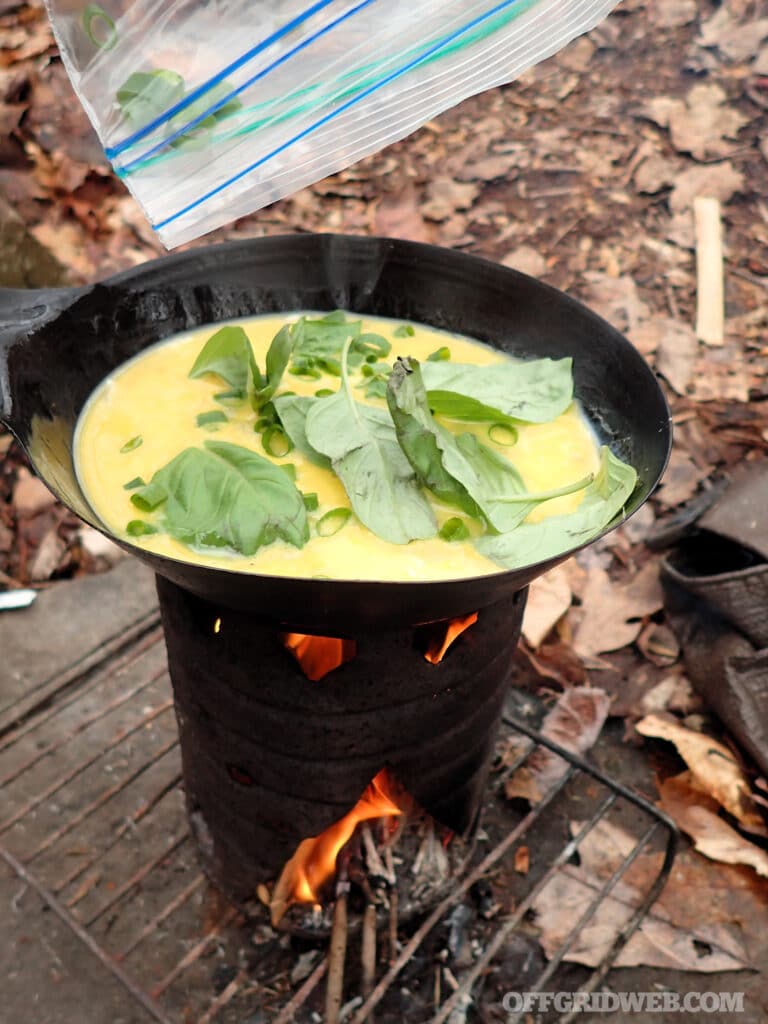
This small coffee can-style hobo stove was made with a church key and fixed-blade knife. It was perfect for a small carbon steel skillet to make a basil omelet.
The coolest thing you can do with a hobo stove — homemade or the commercially built type — is to flip it. Take what you know and invert it. Make the fire first; keep it small and contained. Once it becomes a sustainable fire, cap it with the open side down. Now you have the top as a small, flat griddle. Continue to feed the fire as usual through the port. The top surface will be large enough for sausage links or a fried egg. However, if you used a larger can, you could get two eggs or sausage and bacon. Then, transfer them and add the eggs. The flat top surface is an excellent bread or tortilla warmer, too.
When I camp outside of any urban survival scenario, my nightly ritual is making feather sticks, gathering stray shavings, and keeping them in my hobo stove. I fill it to the top while romancing over campfire TV (a lovely glowing campfire). Use your tools with caution in the dark. Make splits and large shavings in addition to the fine feathers that should be thin enough to take sparks from a ferro rod readily. Keep the loaded hobo stove under your shelter covering for the morning. Morning dew, light sprinkles, or snow will affect your dry fire preparation. Don’t give Mother Nature a vote. Always cover your hard-earned fire preparation.
Urban survival cooking has never been this easy with the small, portable, environmentally friendly hobo stove.
Using a hobo stove forces us all to keep practicing camp skills like fire making. All rules of making a fire are pertinent. You’ll always need tinder, kindling, and fuel. The fire triangle is still relevant with heat, oxygen, and fuel (HOF). If you skip a step, you’ll have either a poor fire or no fire at all. Like the legendary British author of the SAS Survival Handbook John “Lofty” Wiseman said, “What seems like a shortcut may ultimately take more time in the long run, so do it right the first time.”
Fire materials must be dead and dry. Use dead-standing wood hung up in trees or up off the ground. Split larger pieces of fuel if they’re coated with snow or moisture. However, the fuel must be deadwood. The heat of the kindling burning will dry and eventually combust the fuel.
A hobo stove makes an excellent choice for small cooking or warming fires. It uses less fuel and burns materials to ash, making disposal easy. Don’t be afraid to modify your creation and experiment with some trial and error. Make more vent holes and cut another port for maximum airflow. This isn’t a science, nor is it baking, so experiment, fail, improve, and make it better.
This affordable alternative to commercial options also provides an excellent opportunity to practice fire skills. You can use it in firepits and camps and pack it with other cookware. Plus, it’s a lot of fun.
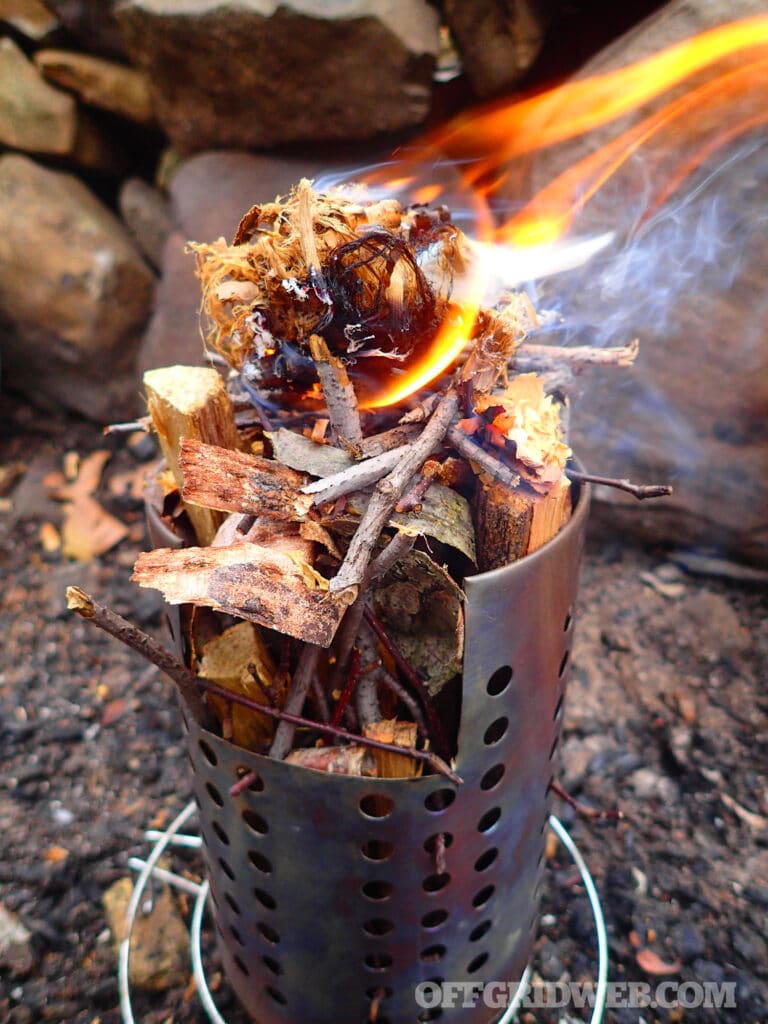
This type of stove is the easiest to make, requiring minimal modifications. It comes ready to use and needs to be fed from the top. You can also utilize the numerous vent holes to feed small sticks through. You can find stainless steel utensil holders in various places, but many people first discovered them at IKEA. Their ample air vents and ease of modification make them a popular choice for DIY enthusiasts.
They come in two sizes: 53⁄8 and 71⁄8 inches high (43⁄4 inches wide). You can choose either size for this modification. Simply cut a U-shaped port using tin snips at the top, using the pre-existing holes as guides to simplify the process. You can decide where to create the port or go without one. However, if you forgo the port, you’ll need to move the cooking container to add more fuel from the top.
Making a top vent/port design allows for sticks and longer fuel pieces to extend out and self-feed. It also keeps the coals at the bottom to prevent them from spilling. Using stones or a metal trivet can elevate the stove for improved airflow underneath and prevent it from resting on cold or damp ground. You can use metal chopsticks or stakes to support smaller-diameter cooking vessels in the various slots. Don’t forget that this style of stove can be a flipper, and the holes on the bottom are instantly transformed into a grill. Say hello to kabob heaven, or, with some creativity, this can be a mini-smoker when adequately covered.
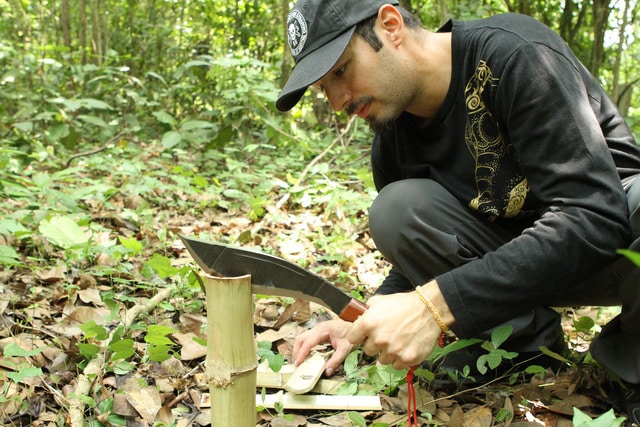
Adventurer, writer, photographer, and survival instructor for Randall’s Adventure & Training, Reuben Bolieu has spent most of his life hiking and backpacking through the world’s wildernesses. He has traveled abroad in extreme environments and seeks out primitive survival techniques, construction, and the use of knives and edged tools. Bolieu has published many articles on survival, knife and tool use, and woodcraft. He remains a lifetime student of survival.
Don’t miss essential survival insights—sign up for Recoil Offgrid's free newsletter today!
Check out our other publications on the web: Recoil | Gun Digest | Blade | RecoilTV | RECOILtv (YouTube)
Editor's Note: This article has been modified from its original version for the web.
 STAY SAFE: Download a Free copy of the OFFGRID Outbreak Issue
No Comments