In This Article
WARNING!
Fire-starting is inherently dangerous. The concepts shown here are for illustrative purposes only. Seek a reputable instructor before attempting any techniques discussed here.
Hopelessly lost and out of fuel — that’s the condition of you and your rental car as the engine sputters its last gasp and you roll to the edge of the snow-covered road. The large heavy clumps of snowflakes fall downward, turning the hilly woodland into a beautiful landscape of winter white. But this striking postcard-worthy scene isn’t the most pressing thing on your mind. All you can think about is your inoperable vehicle, your mobile phone with no service, and the fact that you could die from exposure in a few hours under conditions like these.
You check the trunk and glovebox for anything useful. No blankets, no food, no water — just a book of paper matches and a half-dozen napkins. The late-afternoon sun is hidden behind the thick bank of snow clouds, but you can tell it’s going to get dark early.
Are you going to let your bad luck continue into the night? You could use five of your napkins to catch your tears of self-pity, and the final one to write out your last will and testament. Or are you going to start making your own luck?
For any prepper, bushcrafter, or outdoor adventurer worth their salt, making a fire should be second nature — when you have your normal gear and equipment. But what happens when you have none of your usual fire-starting tools? “No problem,” you might say, “I’ll just rub two sticks together and make a fire the old-fashioned way.” That’s great. But what if you’re stranded in the dead of winter and snow blankets every inch of your vision? What now?
Scavenge For Your Fire
They say we started out as scavengers. In the savage wilderness of the African plains, we chased the vultures away from the bones of last night’s predator kills, broke open the leg bones, and feasted upon nutrient-rich marrow to become the brainiacs we are today. You might say scavenging is in our DNA. And with that uplifting story in your head, let’s delve into the art of scavenging for fire-building materials. Working within the confines of our stranded motorist’s situation, let’s outsmart the problems and seize the opportunities this situation presents.

There are two things our unlucky traveler needs to make a fire: an ignition source and some fuel. Since it makes sense to go for the easiest win, let’s pick apart the car. Given the vehicle simply ran out of gas, it means the battery is still operational. This big block of heavy metals and acid is more than capable of starting a fire.
The safest and easiest way is with a vehicle cigarette lighter, if it’s an older model. Should the vehicle have one of those, heat up the lighter and quickly touch it to some fine fluffy tinder. A fluffed cotton ball will work, as will seed down from the cattail plant. This fluffy stuff burns exceedingly well due to its high amount of surface area, which easily catches sparks and quickly turns them to flame.
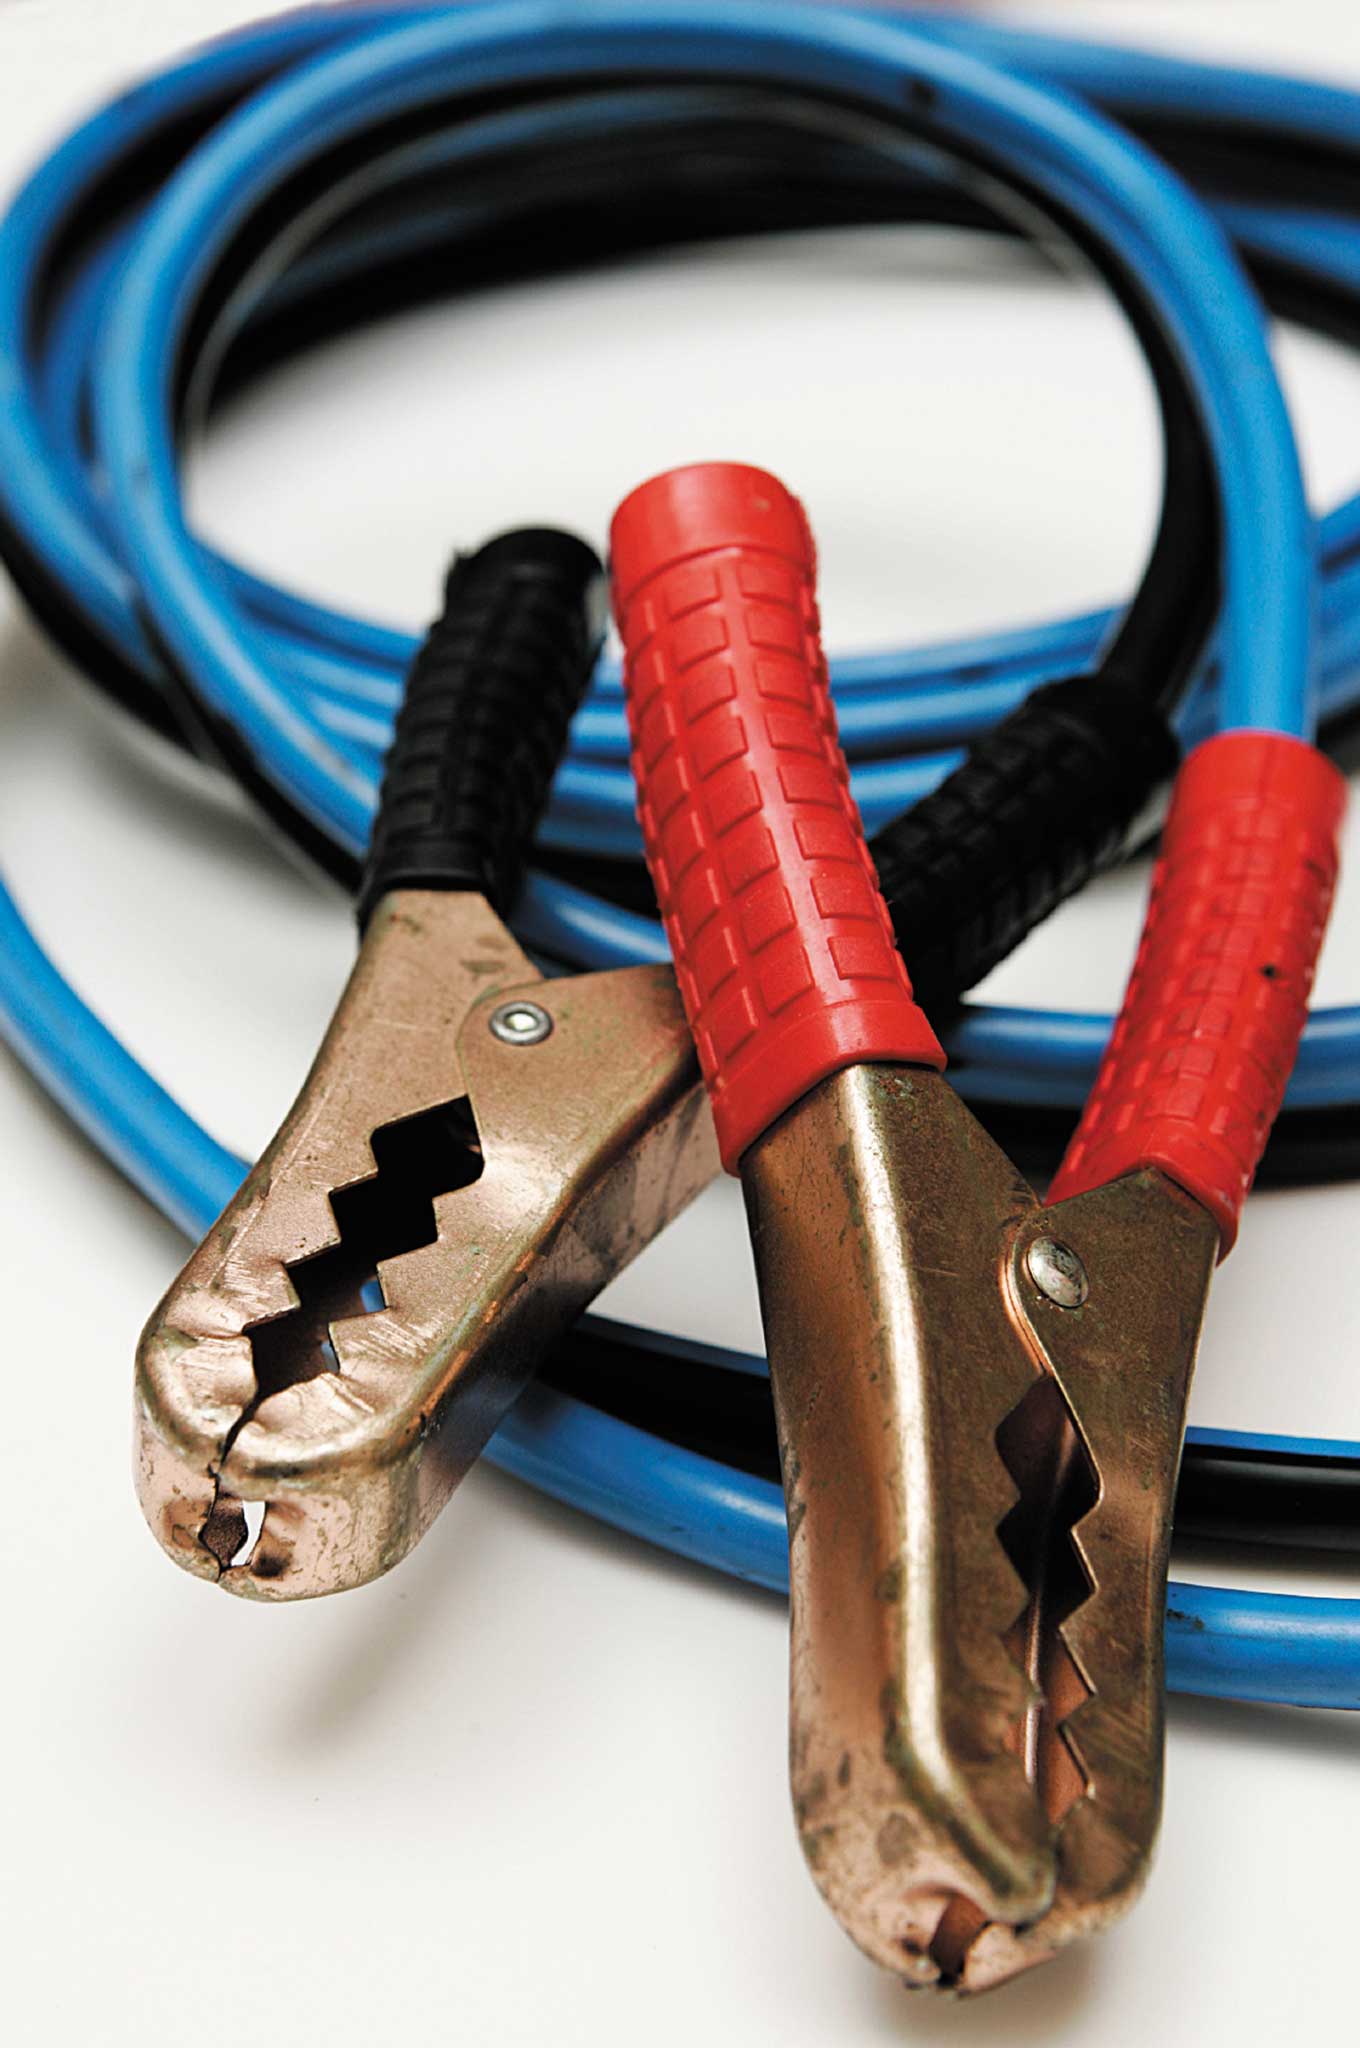
If the vehicle doesn’t have a lighter — most don’t these days — then you can jump-start your fire directly from the battery. Hook up your jumper cables to the battery, and touch the free ends together briefly over some fine tinder. The shower of hot metal sparks should do the trick, but use great caution with this method. Do not allow the free jumper cables to weld or stick together. This creates a closed circuit, which can cause the battery to explode.
And what about fuel for the fire? A modern car or truck is a storehouse of flammable products (someone really should look into that). Obviously, the gas will burn, but since it’s gone in our story let’s not open that dangerous topic.
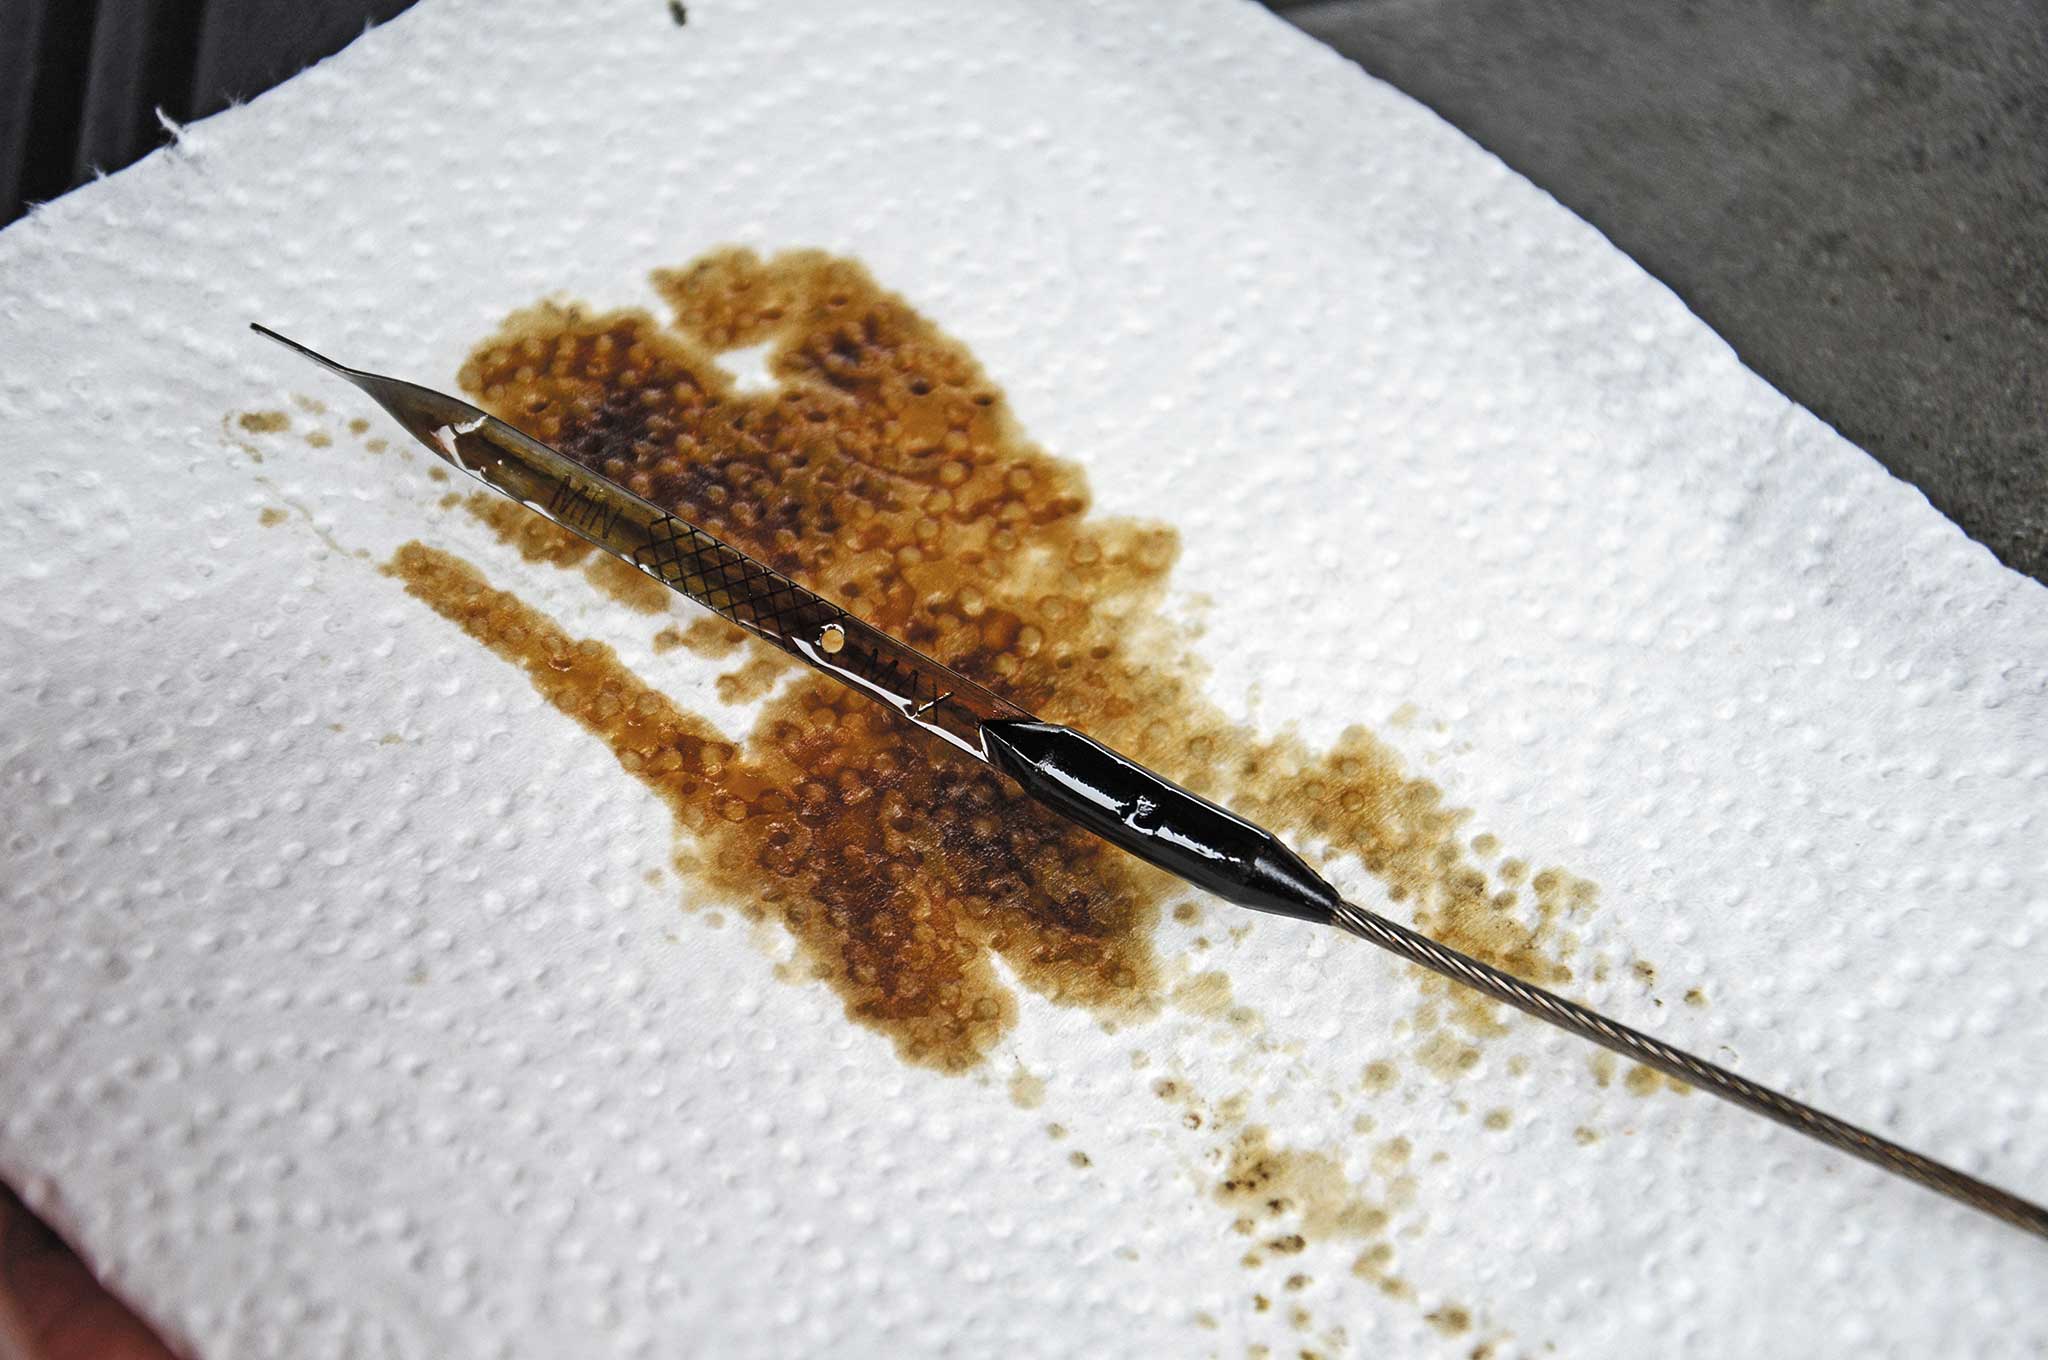
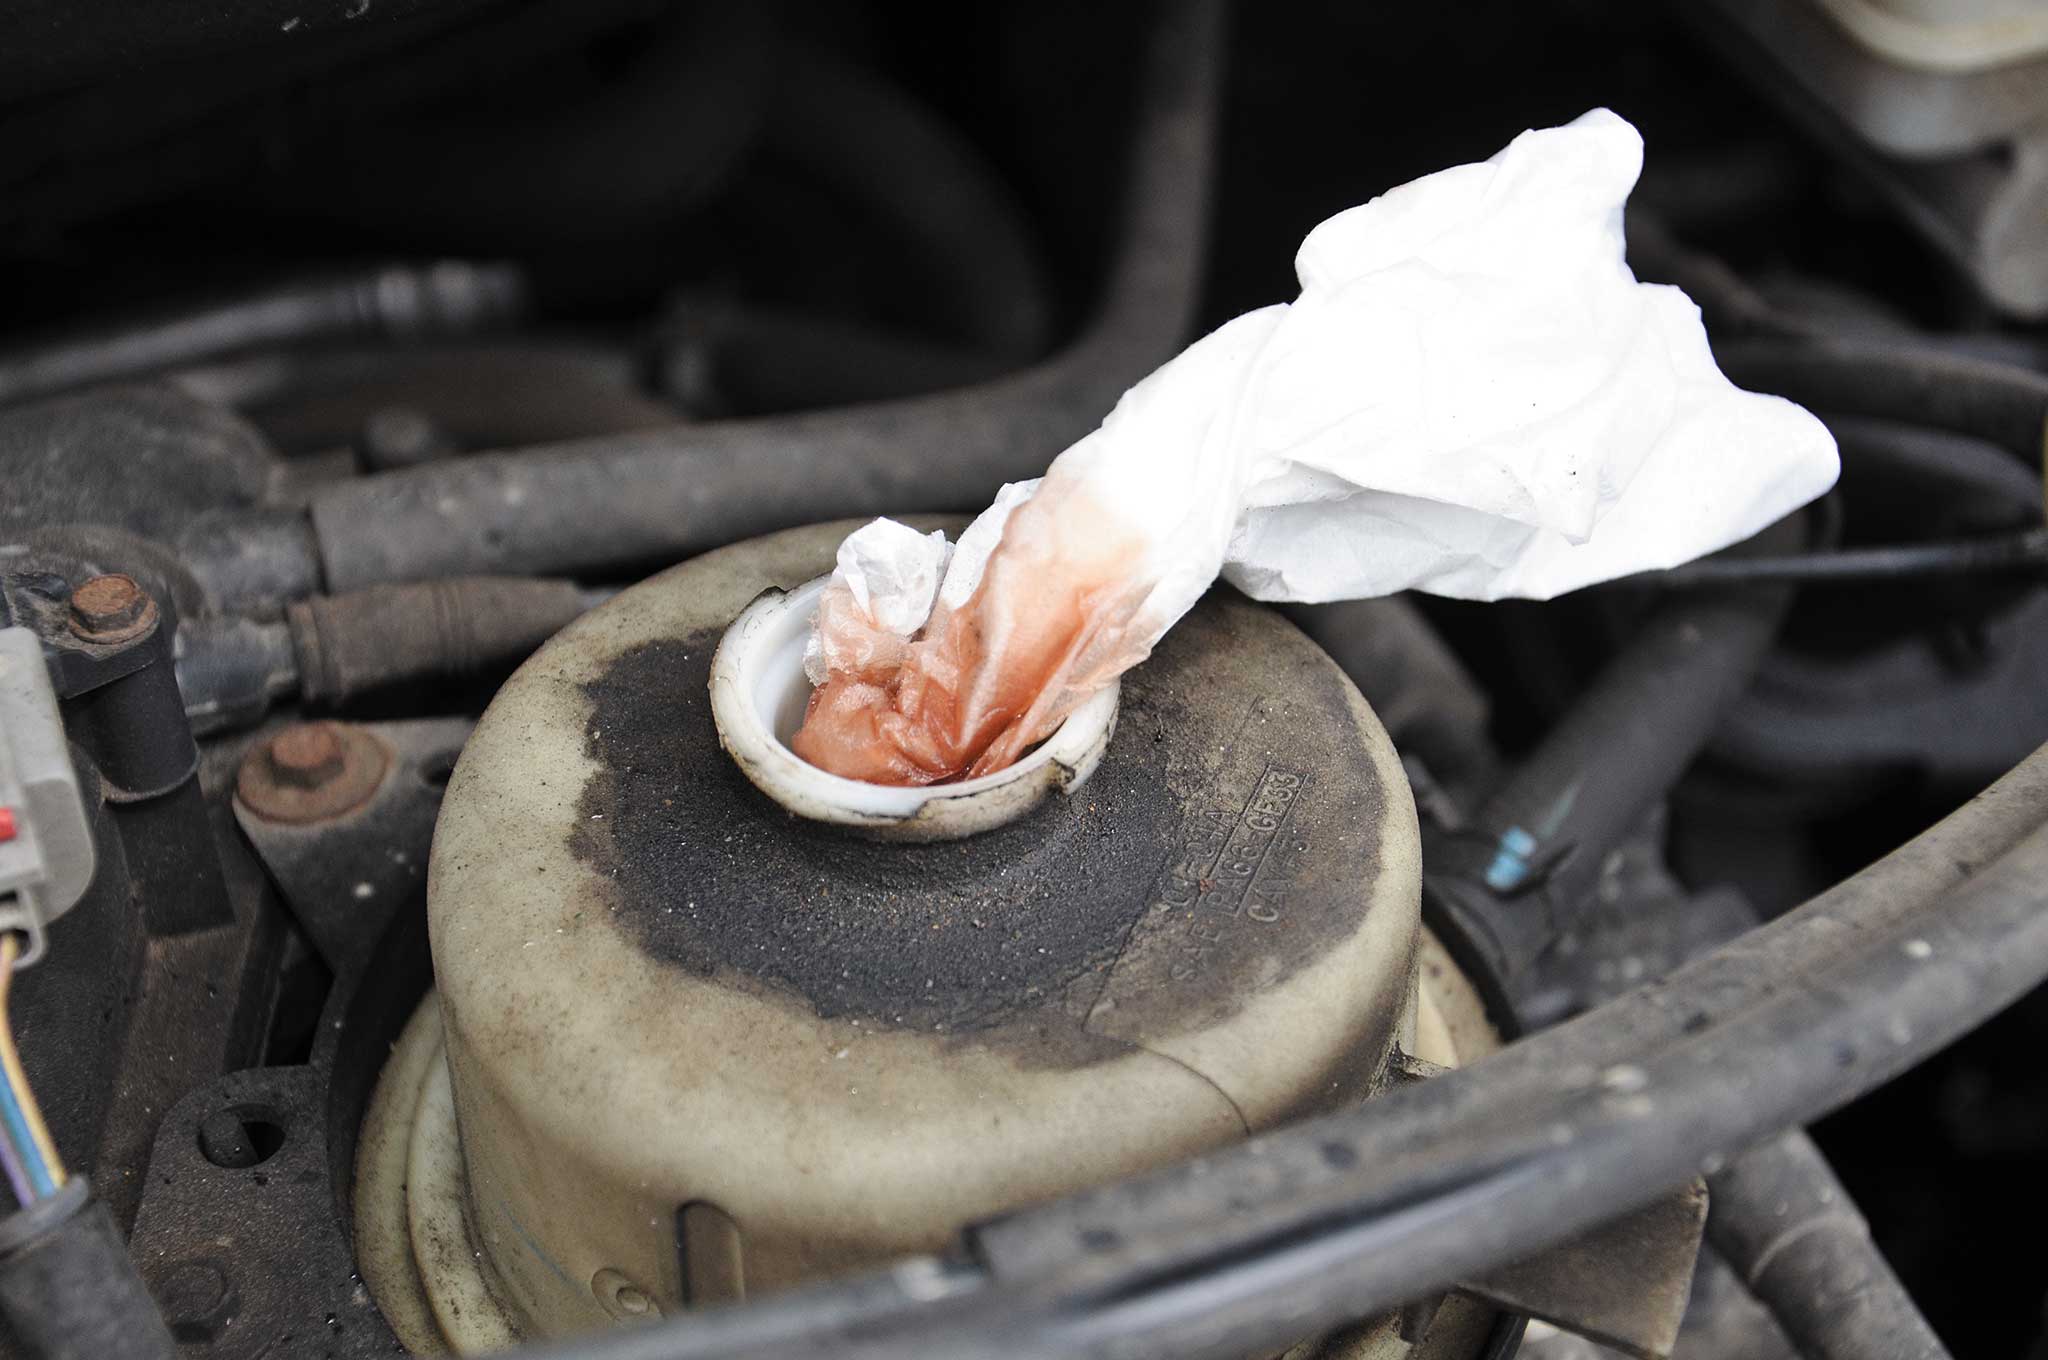
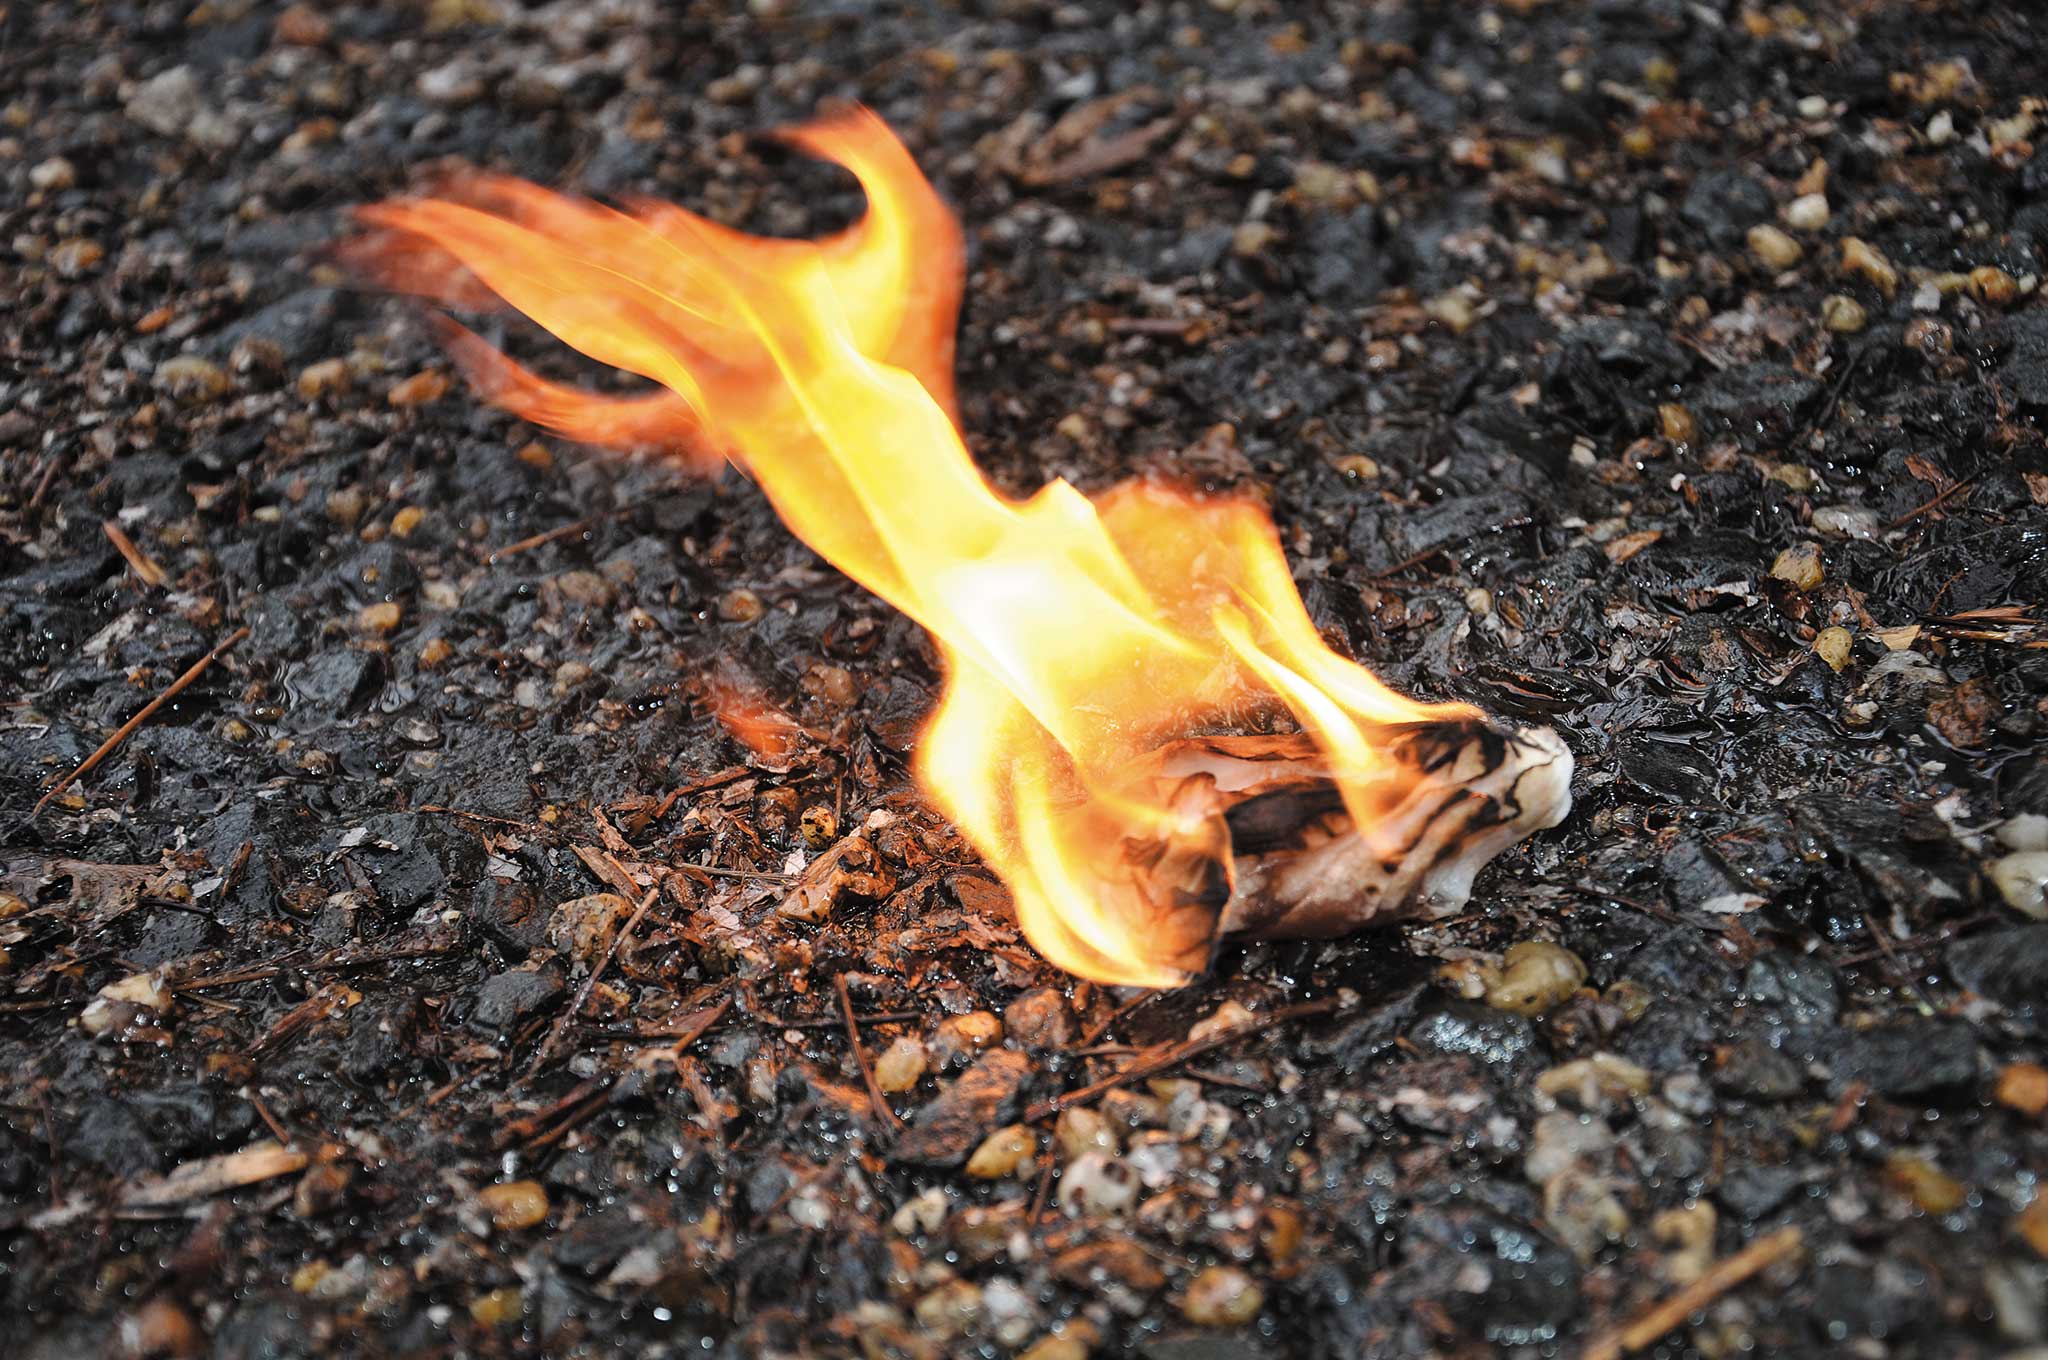
All of the fluids in the vehicle are flammable, except for the engine coolant and wiper fluid. Open the reservoir for the power steering and dip one of the previously mentioned napkins in it to get an oily boost to the napkin’s flammability. Wipe the engine oil dipstick numerous times on paper or cloth to enhance its burn time. These oily substances burn great, as they are very dense fuels. They just need something papery or fibrous to act as a wick and they will produce strong flames.
Once you have your fire going, cut or break off plastic components to throw into the fire, both as fuel and to create black smoke, which is ideal for a signal fire. (Be cautious of burning anything that might produce toxic fumes — what good is a fire if its smoke is going to kill you?) Between the burnable plastics and fluids in a modern vehicle, I’m surprised there aren’t more spontaneous car fires every day.
If you have a toolbox with you or your trusty Swiss Army Knife, then it’s MacGyver time. Open the drain plug for the engine oil pan and catch that Texas tea in a soda cup. Pour some of the oil on your frosty damp twigs and they’re sure to burn. Or use a knife to cut the vehicle’s fabric seat covers into makeshift outer wear. Or wrap upholstery strips around sticks and soak them in oil to make 20-minute torches for emergency signaling. You’re only limited by your imagination and the limits of the materials themselves.
Steps to a Sustainable Fire
Yes, you can go from a single burning match to a pile of burning logs, but there are some critical steps in between. It’s easiest to consider these as stair “steps.” To build a fire, the materials must increase in size gradually. Your materials can’t step up in size too quickly, or the fire will go out. Follow these steps, and you’ll be well on your way to a deeper understanding of fire behavior and fire dynamics.
Step 1: Pick your fire site. Try to find a place that is out of the wild wind, sleet, snow, and rain. The spot should be close to both your fuels and your shelter (if you have one). However, it shouldn’t be dangerously close to either. Dig down through the snow to reach the bare frozen ground, or build a platform for the fire from the best materials that are easily available.
Step 2: Find your fuels. Fire is like an engine, it won’t work without fuel. Scour the local area for dead dry plant materials to act as tinder, kindling, and firewood for your fire. Bring back more than you think you’ll need. You should pay extra attention to evergreens, if they are available in your area. Needle-bearing evergreens usually contain flammable sap in their twigs, wood, and dead needles. And the dead ones are easy to spot. Look for twigs without any green on them, and needles that are tan or brown. Bring in several armloads of firewood, too — you’re going to need it.
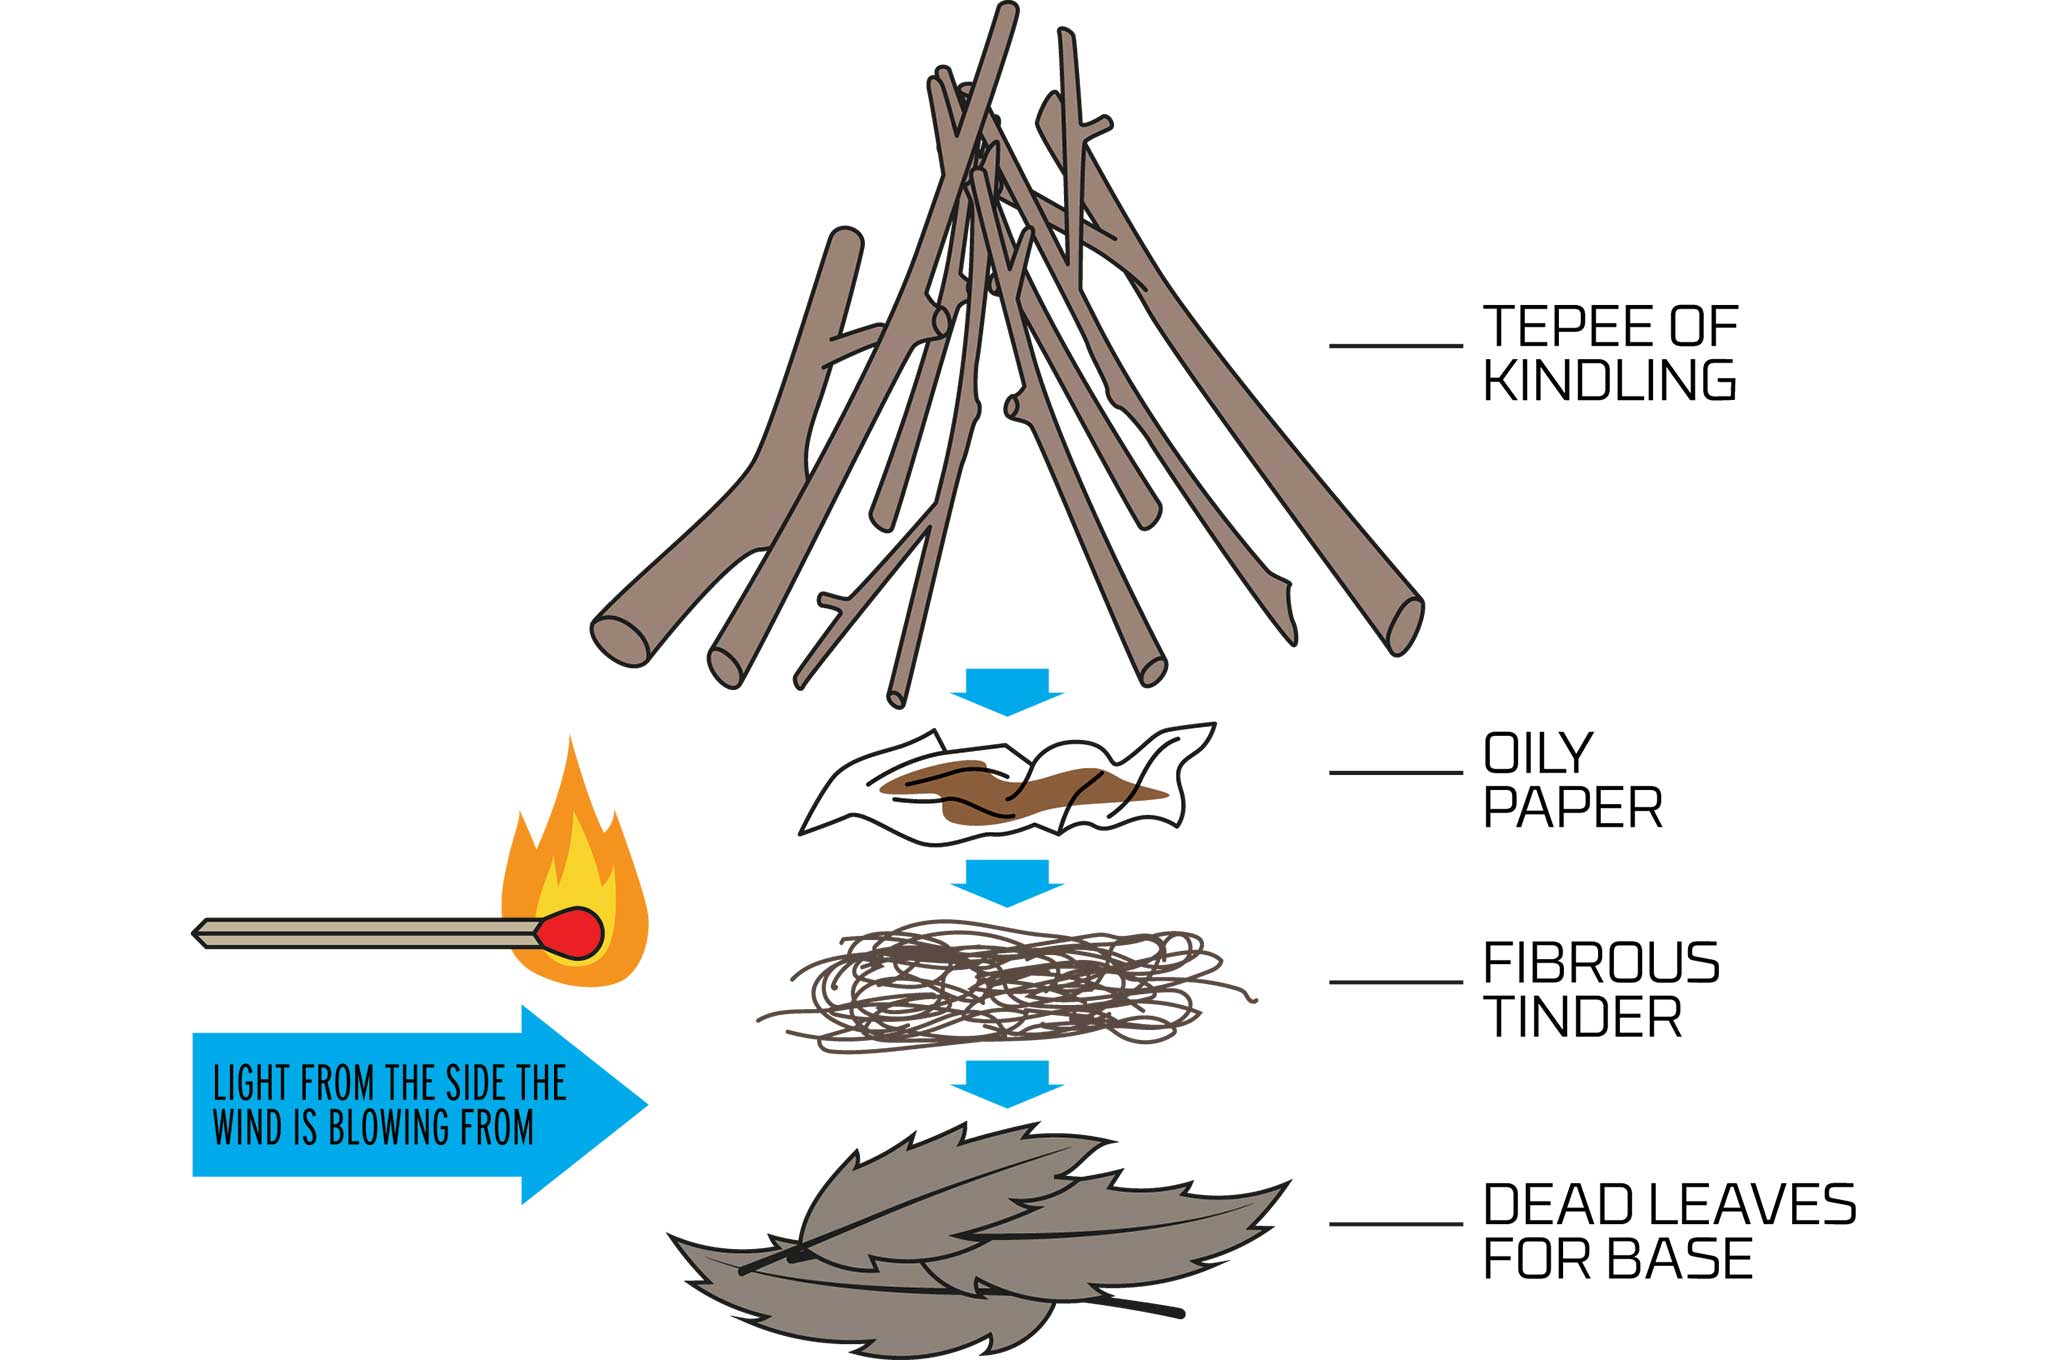
Step 3: Assemble your fire lay. On your fire site (hopefully bare ground), make a fist-sized mound of your tinder materials. If conditions are really rough, use double that amount of tinder. This can be material you have found, like dead leaves, evergreen needles, grasses, or bark fiber. It can also be tinder that you scavenged from your pockets or a vehicle. Crumpled paper or napkins will serve you very well. Over this material, place your skinniest dead twigs, sticks, grass stalks, or wood splinters. Build a cone-shaped structure with these materials, and then add finger-diameter sticks, about a foot long. Your overall fire lay should be a cone-shaped construct (like a tepee), which is about a foot wide at the base and about a foot tall at the center. The staging of your materials (from tinder, to twigs, to sticks) will allow the fire to grow quickly, but at its own pace.
Step 4: Light it! Once all your fire lay materials are ready, and you have several armloads of firewood, it’s time to light it. Figure out which way the wind is coming from. It’s generally best to allow the wind to work with you, and light the fire lay on the side that the wind is coming from. This allows the airflow to push the flames into the center of the tepee, right where you want them to go. Also, make sure you light the fire at the base. Don’t light the tip of the tepee; it’s not some kind of firework. Light is at the base, on the side the wind is coming from, so the flames will rise into the structure and consume the materials.
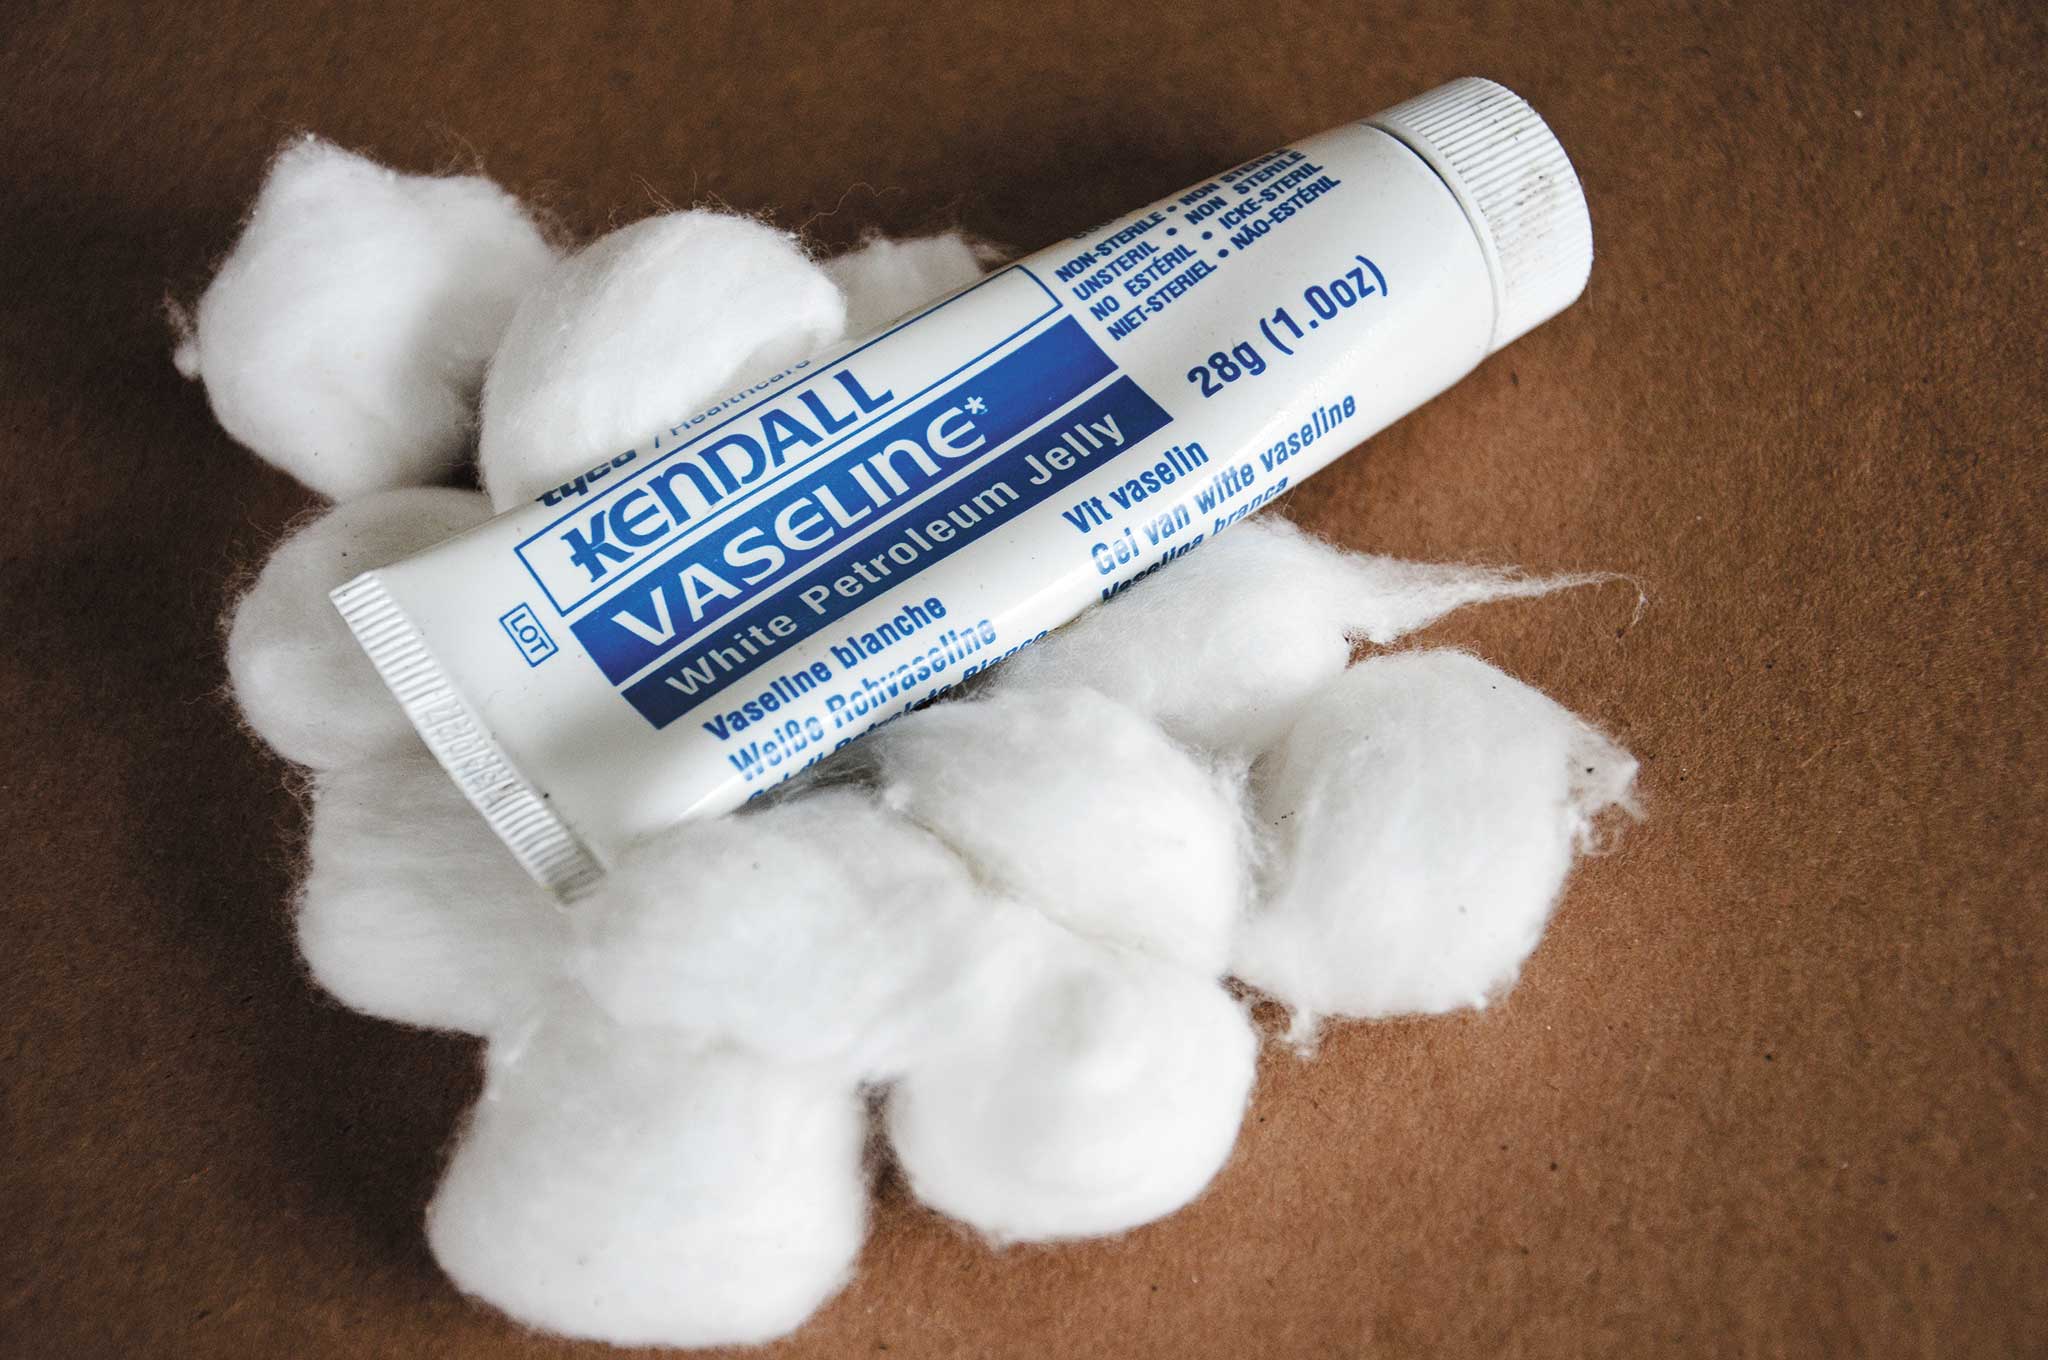
If you happen to have some fire-starter materials like Wetfire cubes, cotton balls with petroleum jelly, or some wax-soaked cardboard, place it in the base of the fire and light your fire helper as well as the tinder. Flammable vehicle fluids can be poured over the tinder and twigs prior to lighting, if you feel you need it. This additional fire-friendly material (combined with the tepee fire lay shape) should allow you to use damp materials and still get them to burn.
Step 5: Maintain your fire. You’ve won the battle, lighting a fire in rough conditions, but you still could lose the war. It’s been argued that letting your fire go out is worse than never making one at all, since you now have no fire and less fire-starting materials than before.
Important Safety Note: If you decide to burn materials from your vehicle, be aware that some are quite toxic. Brake fluid is typically the most hazardous, followed by power steering fluid, and motor oil. And don’t even think about messing with gasoline. It’s far too dangerous to be of benefit in an already sketchy survival situation.
Conclusion
Your need for a fire can be seen as a barometer of the severity of your survival situation. The more you need a crackling blaze, the worse your situation really is. Intense cold weather, wet and windy conditions, or a dunking in cold water can all lead to hypothermia, a dangerous and potentially fatal cooling of your body’s core temperature. And in some situations, your only option to dry out and warm up will be to make a big fire — quickly! — though sometimes it’s easier said than done.
The skill of fire building is age old and relatively simple. It’s not hard, but to master it you have to put in the practice time. You can’t just read about it and hope to perform well under pressure. Like every other survival skill, this one has a learning curve and it demands practice and patience. It also demands real-world training. Any novice can light a fire on a warm dry day with a butane lighter and a handful of pocket lint. But it takes a real pro to walk out in the wet snow and build a quick fire from just a few carefully chosen items. This is the level you should aspire to reach. Don’t be content with being an armchair expert or Internet commando. Put in the hours during nasty weather to become a real world expert. Then, and only then, will you always be able to rely on fire’s warm embrace.
Fire By Fritos
For those of you who already know about the flammability of snack chips, good for you. Your pyromaniac nature should serve you well. For those of you who don’t know, listen up! When it comes to fire starting with modern materials, oily snack chips are a great way to get your fire going. These grease-soaked foods burn very well when an open flame is applied to them, and it won’t take many chips to make a big impact. Just three or four chips will burn for minutes and help you establish your fire. Of course, if you had chips in your stranded winter motorist scenario, you should be eating most of the chips for calories in the cold weather. But do try to save a couple for fire starters. Here are some of the top performers.

- Bugles
- Cheetos
- Cheese puffs
- Corn chips
- Fritos
- Kettle chips
Vehicle Fire Kit
I’m sure that there were once fire-building kits in every car. The earliest steam-powered cars had an onboard stove that burned coal or wood, and an onboard servant who built and fed that fire. This is where we get the word chauffeur. It doesn’t mean driver, it basically means “fire guy” or more correctly, “one who heats.” If you want to be prepared like a modern day fire guy or gal, then build your own fire starting kit and keep it in your vehicle at all times.
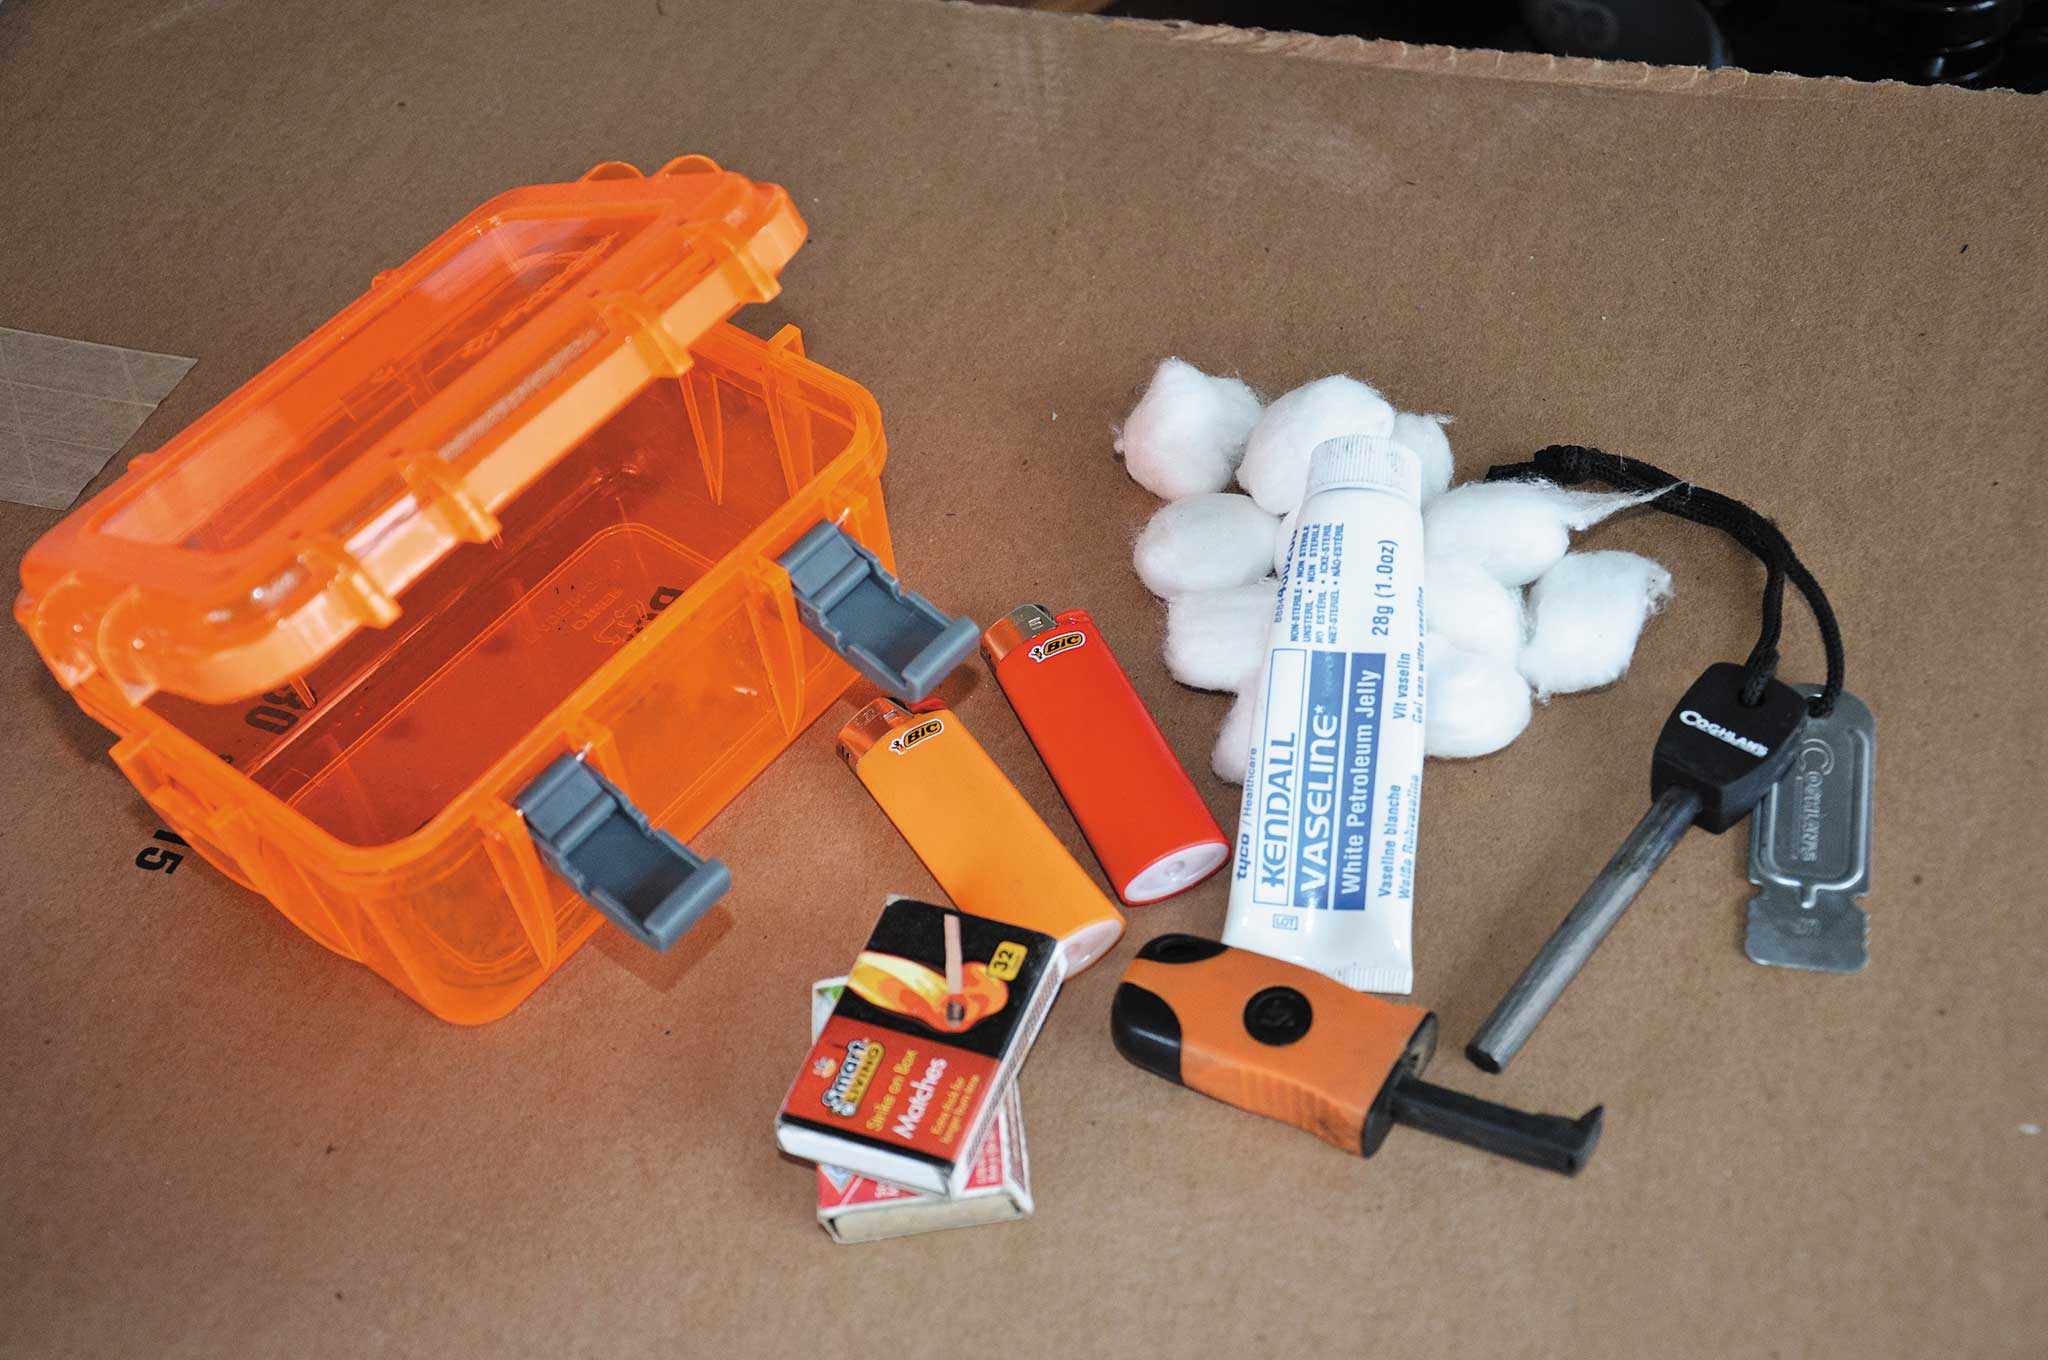
Waterproof box: The container can be very important, especially in the event of a water landing. Pick bright colors for easy visibility.
Ignition sources: These are the most important part of the kit. Place at least two butane cigarette lighters in the kit, along with several boxes of matches and at least one ferrocerium rod.
Tinder material: Dryer lint, cotton balls, paper, and many other plant-based items can be used as tinder, the first fuel used in fire building.
Fuel sources: Mix a little petroleum jelly with your cotton balls and you now have a potent fuel that will burn for several minutes with a generous flame. There are also store-bought fuels like Wetfire cubes from UST and various fire-starter tabs, packets, and pastes. A nub of a candle is a historical fire-starting classic that still pulls its weight today. Drip the melting wax from a lit candle all over stubborn kindling.
Common Mistakes to Avoid
Winter is the most unforgiving season, and if you need a fire to stay alive, this can be the toughest time of year to kindle a blaze. If you can avoid these rookie mistakes, you’ll be way ahead of the curve.
Building on Bare Snow: You may be able to light some twigs on fire, briefly, on top of the snow — but it won’t last. As the red coals drop down to the base of the fire, they fall into snow, which melts and extinguishes them. This prevents you from establishing a proper base for your fire, and it will soon die. If possible, dig down through the snow to place your fire on bare ground. If that’s not an option, find something to act as a barrier rather than trying to burn a fire directly on the snow. It can be something temporary, like a raft of logs on top of the snow. Or it can be something more substantial, like a piece of metal you have scavenged and placed upon some rock or log supports.
Forgetting the Melt: When planning where you’ll burn a fire in snowy conditions, think about the snow melting power of fire. If you burn a fire long enough, it will melt a massive amount of snow. This can mean that your fire is eventually going to be surrounded by slush or even water. Before you build your blaze, pick a spot that is out of the wind, yet has good drainage to allow any snowmelt to run away from the fire.
Grabbing the Green: One of the fastest ways to waste your matches is trying to light live twigs on fire. Just because a tree or shrub has dropped its leaves in the winter season, doesn’t mean that the twigs are dead and dry. Among deciduous woody plants, live twigs look just like the dead ones at this time of year. You should only collect twigs that are actually dead, and pass one of these two tests. First, if conditions are cold and dry, squeeze the twig with your bare hand. Live twigs are full of water, which will make them feel colder. Dead twigs will quickly “warm up” to your touch, while live ones seem to stay cold. Secondly, see if the twig will snap off easily. This is often a sign of dead material (though not a guarantee, especially in soft woods at subfreezing temperatures).
More From Issue 12
Don’t miss essential survival insights—sign up for Recoil Offgrid’s free newsletter today.
- A Bug Out Toyota Tacoma Fit For A U.S. Marine
- Insulated Gloves & Mittens Guide – [N]ICE And Warm
- Government Response to Disease Outbreaks – Outbreaking News
- What If An Outbreak of Weaponized Pneumonic Plague Hits Your City?
- Hydroponic Growing Systems – Hydro Planting
- How to Strengthen Your Defenses – The Master Key
- Lights Out: Chokehold Basics for Self-Defense
- Biggest Outbreaks in U.S. History
- Human Lie Detector
- Learn How To Start Fires In Cold Weather
- Disposable Vs. Rechargeable Batteries – In Charge
- How to Survive a Structural Collapse
- High-Lumen Flashlights
Read articles from the next issue of Recoil Offgrid: Issue 13
Read articles from the previous issue of Recoil Offgrid: Issue 11
Editor’s Note: This article has been modified from its original print version for the web.
