News: Aimpoint Micro S-1 Shotgun Red Dot Sight

shotgun can be a real asset when it comes to both home defense and putting food on the table. However, not all shotguns are created equal for these two purposes. A compact tactical shotgun may be excellent in a home-defense scenario, but it's far from ideal for hunting ducks, turkey, or even deer. A dedicated hunting shotgun will be better-suited for taking home waterfowl and game.

AImpoint micro S1 shotgun red dot sight 2

There's another key distinction between tactical shotguns and hunting shotguns. Tactical shotguns often include a Weaver or Picatinny rail for mounting a red dot optic, which can improve your ability to quickly acquire and track targets. Hunting shotguns typically lack this feature, but many do have a ventilated rib along the top of the barrel.

AImpoint micro S1 shotgun red dot sight 3

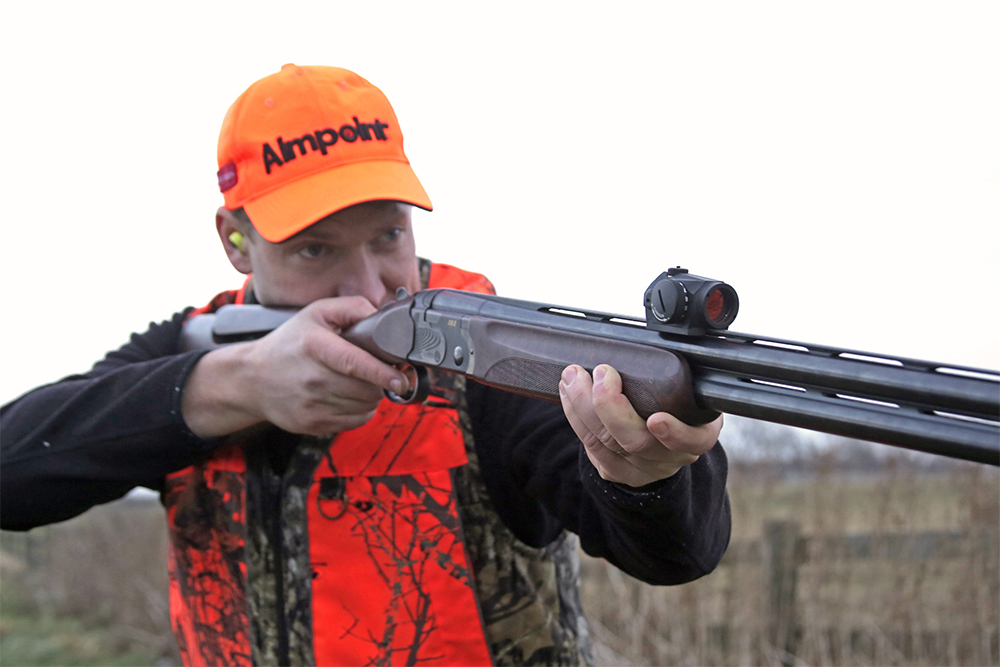
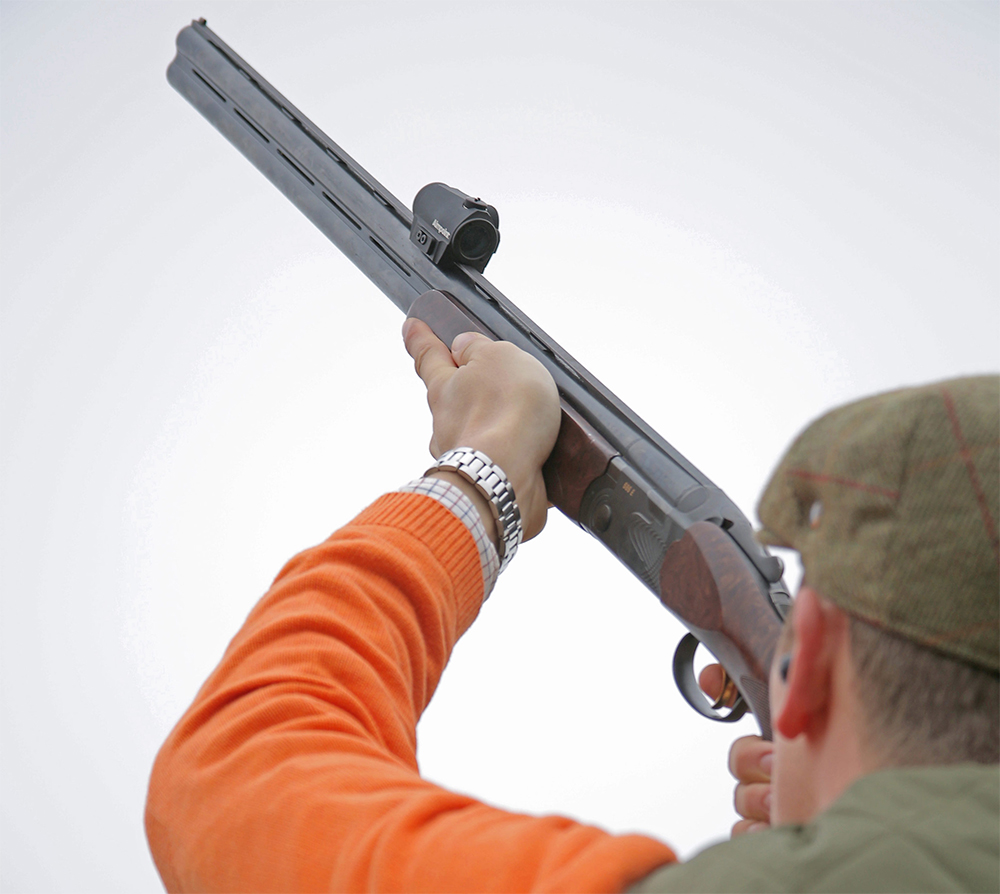
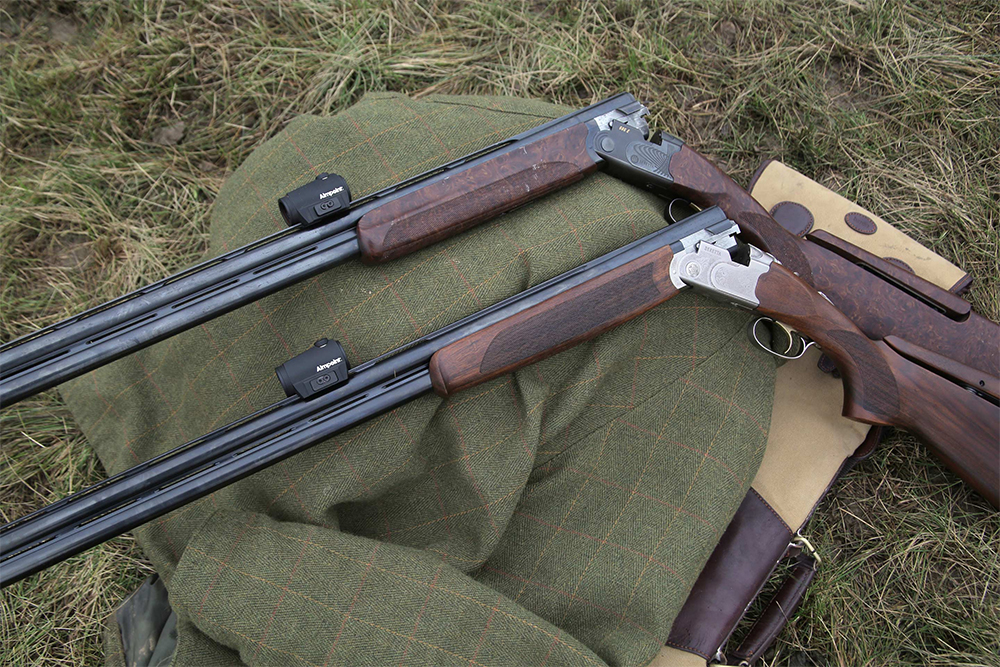
Aimpoint has announced a new red dot sight that mounts directly to the ventilated rib on most popular hunting shotguns. It's called the Aimpoint Micro S-1, and the company says it has the potential to greatly enhance hit percentage for waterfowl, upland birds, turkey, and deer. This sight was unveiled at the 2017 SHOT Show earlier this month.

AImpoint micro S1 shotgun red dot sight 5

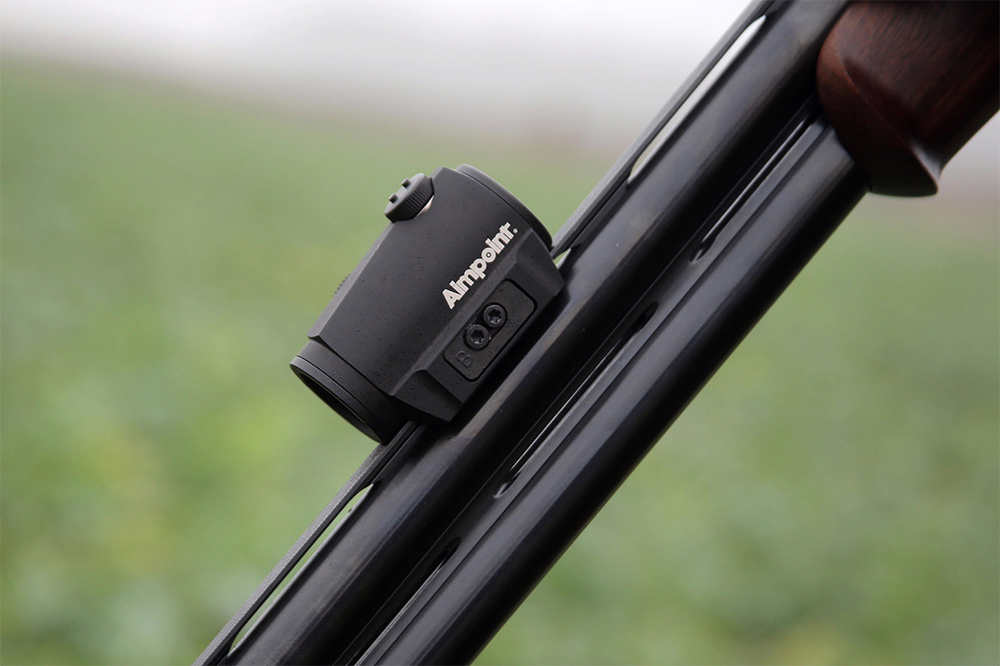
The Aimpoint Micro S-1 uses a carbon-fiber-reinforced mounting system to attach to any point on the ventilated barrel rib. This eliminates the added weight of a traditional Weaver/Picatinny rail, and keeps the sight close to the bore axis. Interchangeable adapter plates are included, allowing the the S-1 to fit most Browning, Beretta, and Benelli shotguns.

AImpoint micro S1 shotgun red dot sight 4

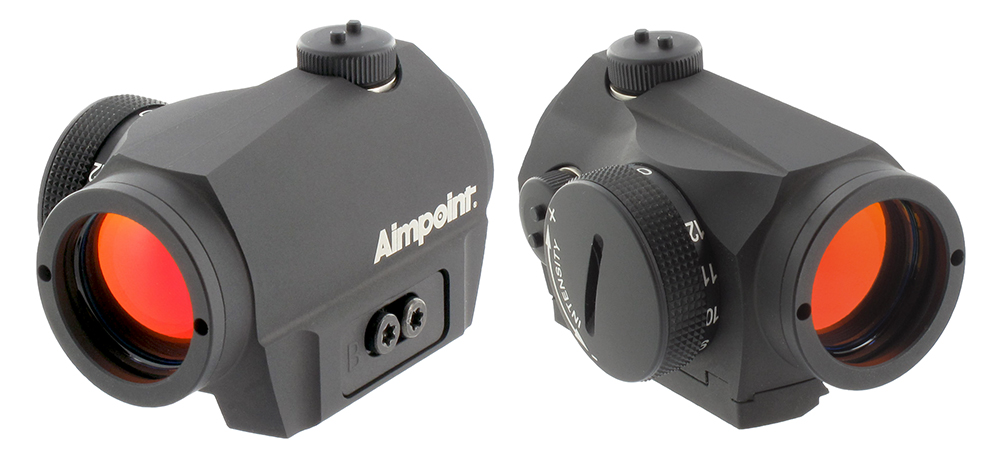
The Micro S-1 uses an 18mm aperture and large 6 MOA red dot, with 12-position intensity dial. The anodized aluminum body contains a single CR2032 lithium battery, weighs a total of 3.53 ounces, and is fully waterproof to 15 feet.

AImpoint micro S1 shotgun red dot sight 1

An official MSRP has not yet been set for this optic, but company representatives say it should be available soon in the “low-to-mid $700” range. That may sound like a lot to the more budget-conscious among us, but if it means the difference between putting food on the table and missing a crucial shot in an emergency, it's a valuable asset. For more info on the Aimpoint Micro S-1, visit Aimpoint.com.


New Yaktrax Summit Traction Device for Boots

If you're a kid on a hot day in the middle of summer, a backyard slip-and-slide is a recipe for fun. When you're an adult on a frigid day in the middle of winter, that slip-and-slide experience is anything but fun. Walking on ice in slick rubber boots often leads to a string of expletives and a bruised rear end — that is, if you don't fall flat on your face.

Winter ice crampon boot traction device

Crampons are great if you're a hardcore ice-climber, but they're overkill for walking or hiking. Photo:...

There are a few potential solutions to avert this impromptu winter slip-and-slide. Experienced ice climbers use devices called crampons, with long steel spikes that dig into the ice. Unfortunately, crampons are bulky and restrict arch movement, making walking smoothly a difficult task. On the less-extreme side, Yaktrax has offered a variety of traction devices for walking, running, and hiking in winter. But, these devices may not provide adequate traction for very slippery surfaces like hard-packed snow or glacial ice.

YT-SUMMIT-w-callouts

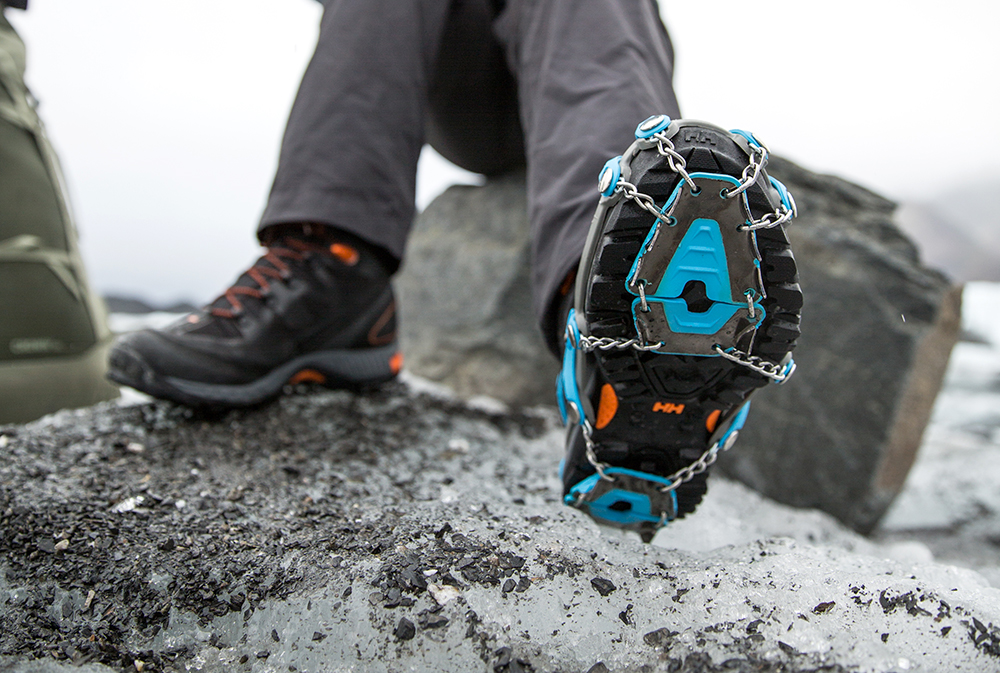
The Yaktrax Summit bridges the gap between ice-climbing crampons and spikeless traction devices.

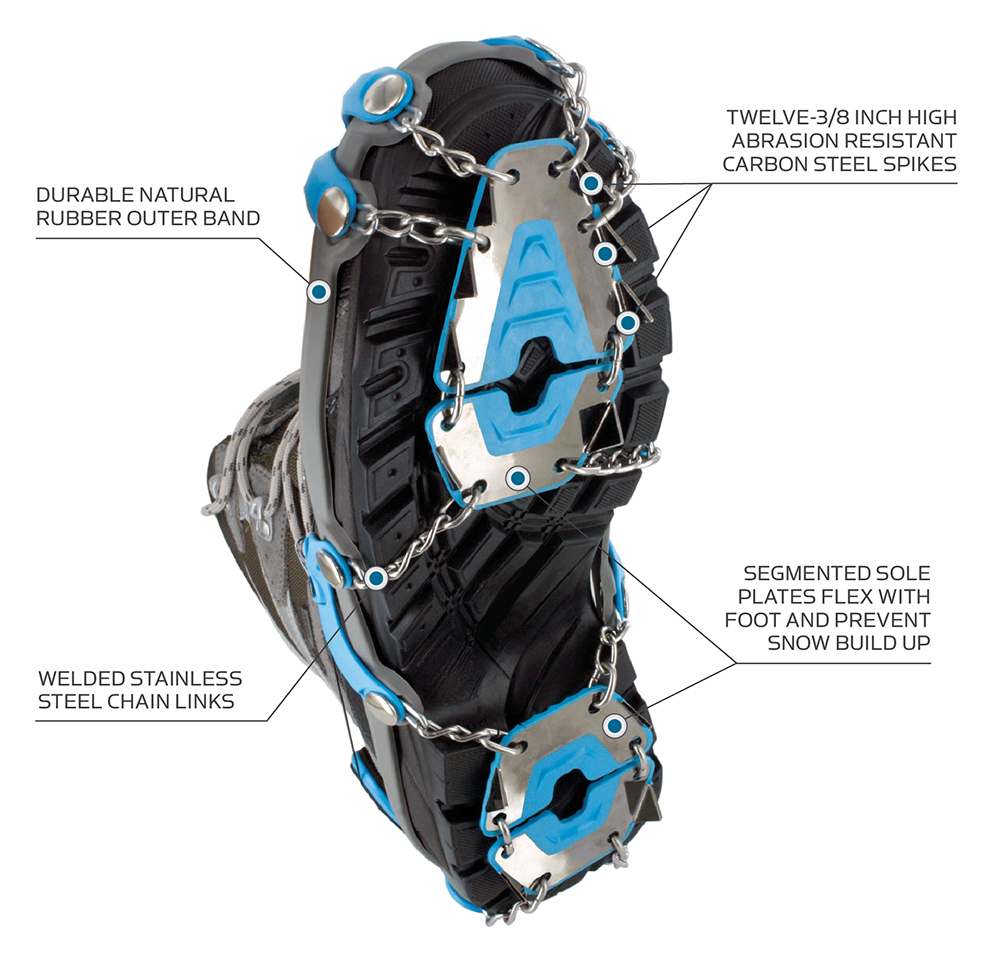
Recognizing the gap between its existing line of consumer-grade traction devices and pro-grade crampons, Yaktrax has launched a new heavy duty traction device called the Yaktrax Summit. This system uses 3/8-inch triangular carbon steel spikes to bite into ice, yet also retains comfort and natural foot flexibility.

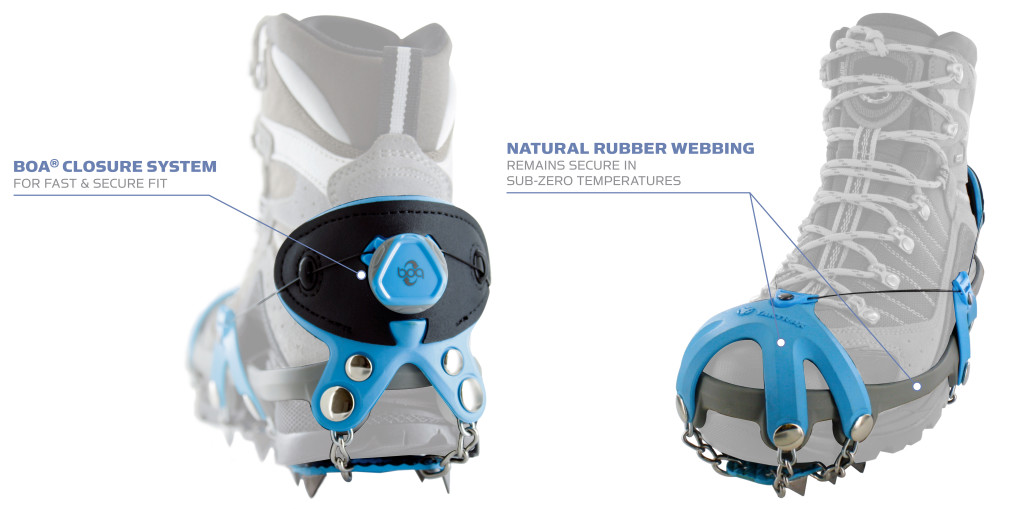
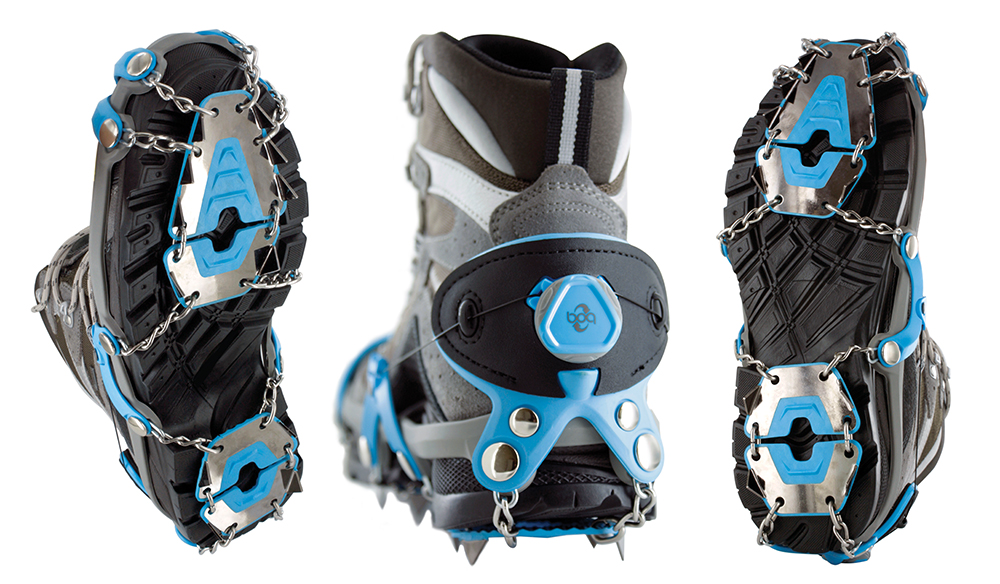
The Yaktrax Summit system fits over most types of footwear, and uses a Boa closure system to ratchet down tightly around your boot. Molded rubber bands fit the toe, heel, and each side of the arch, and attach to the sole plates via welded stainless steel chain links.

Yaktrax Summit boot ice traction spikes crampon winter 3

The sole plates are made from flexible rubber, and are molded around twelve 3/8 inch abrasion-resistant carbon steel spikes per shoe. This design maximizes grip while retaining flexibility and preventing snow buildup between the spikes.

Yaktrax Summit boot ice traction spikes crampon winter 1

The Yaktrax Summit traction device is available now in sizes from small to extra-large, fitting a range of U.S. men's shoe sizes from 5 to 14+, or U.S. women's 6.5 to 15.5+. MSRP for this system is $90. For more information, go to Yaktrax.com.


How to Make Pine Resin Glue Sticks

When it comes to binding two items together, it's hard to beat modern adhesives. Duct tape, Cyanoacrylate superglue, two-part epoxy, and even construction adhesives like Liquid Nails can be indispensable for repairing gear and crafting useful items in a survival situation. If you're in a long-term survival scenario, these resources will be limited and will inevitably run out. Even if the situation isn't dire, you may find yourself with a need for glue, and no modern adhesives on hand. Improvising an adhesive from the resources around you is a valuable skill.

Choose the right adhesive 2

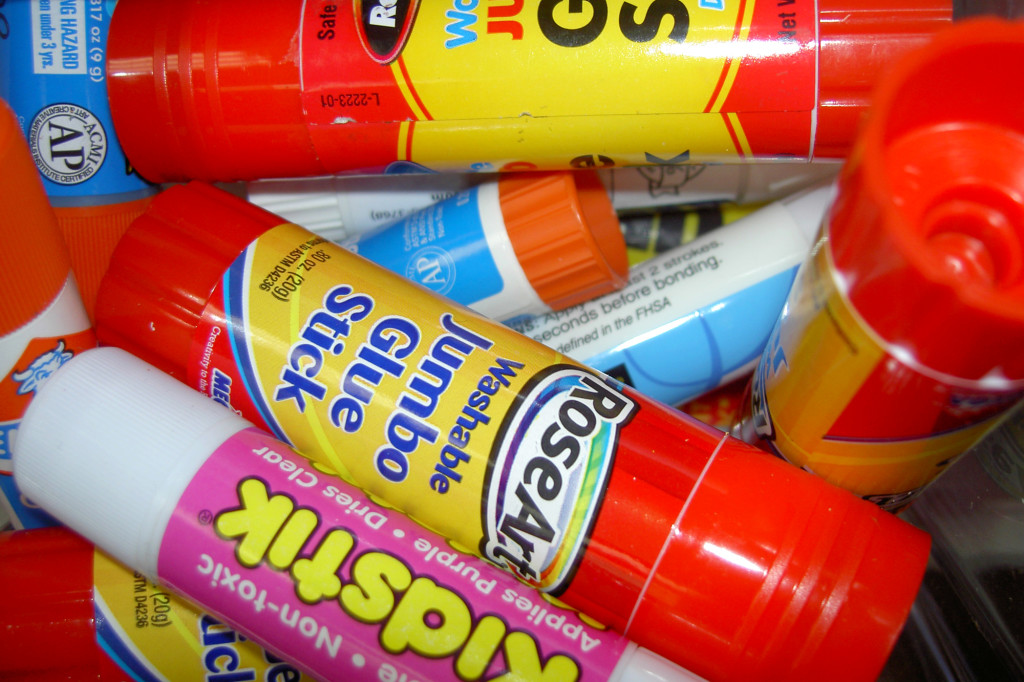
Today, we'll be taking the term “glue stick” a bit more literally.

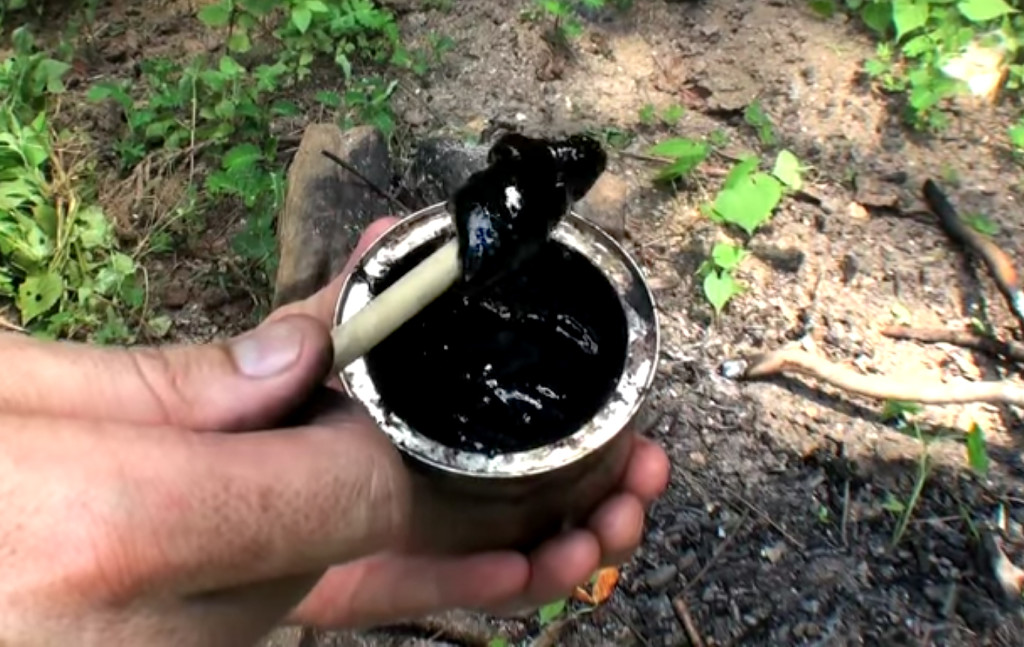
One time-tested source of adhesive in nature is pine resin, also called pine sap. This substance is naturally sticky and viscous, but can be transformed into an excellent glue through careful application of heat and a temper material. The heat liquefies the resin, and the temper thickens and strengthens it into a pliable yet sticky gel.

Pine resin glue stick adhesive sap 2

The basic steps to making pine resin glue are as follows. First, find some suitable trees. Pine is used in this example, but other evergreen conifers such as spruce, fir, or cedar can work as well. Look for sap running down the bark. It should be thick and tacky, but not completely solidified. Use a stick to scrape this resin into a metal tin.

Pine resin glue stick adhesive sap 3

Once you have a substantial amount of resin, you'll also need a temper material. Crushed charcoal powder is frequently used, but finely-ground dry grass or even pulverized rabbit droppings can be substituted. Heat the tin of resin over hot coals, and stir the resin frequently until thoroughly liquefied, gradually adding temper material until the desired consistency is reached. Just don't boil the glue, as this may cause it to become brittle.

The following video from Primitive Pathways demonstrates this technique, and gives other helpful tips:

These primitive pine resin glue sticks provide an easy way to transport and store adhesive in usable amounts. When you need some glue, just hold one of these sticks over the fire until it softens, and brush or dab it onto a surface to apply it. It may not be super glue or JB-Weld, but it's the next best thing — and it won't cost you a dime.


Cold Weather Survival – Part 1: Icy Excursions

The recent return of the “polar vortex” has brought life-threatening temperatures and Day After Tomorrow-style frozen landscapes to cities which rarely see this weather. The fortunate few, through a combination of preparation and or/luck, can curl up on the couch with extra blankets and a small(ish) glass of warming bourbon. But what if you had to not only survive in these conditions, but actually work outside in them and get things done? Regardless of where you call home, you may end up visiting one of these regions at exactly the wrong time. Or you may have to help your snowbound family members.

With that in mind, RECOIL OFFGRID presents the first installment in a series on Cold Weather Operations. It’s based on the U.S. Army’s recently updated Mountain Warfare and Cold Weather Operations Manual, as well as in-person interviews with the U.S. Army Corps of Engineers. The previous Cold Weather Manual was released in 2011, so the new 2016 version incorporates hard-won lessons from the last five years of war in the high-altitude bleakness of Afghanistan and other locales. Don’t wait to learn the hard way—use these tips to learn ahead of time how to deal with icy issues.

Know Thy Enemy: Cold Weather

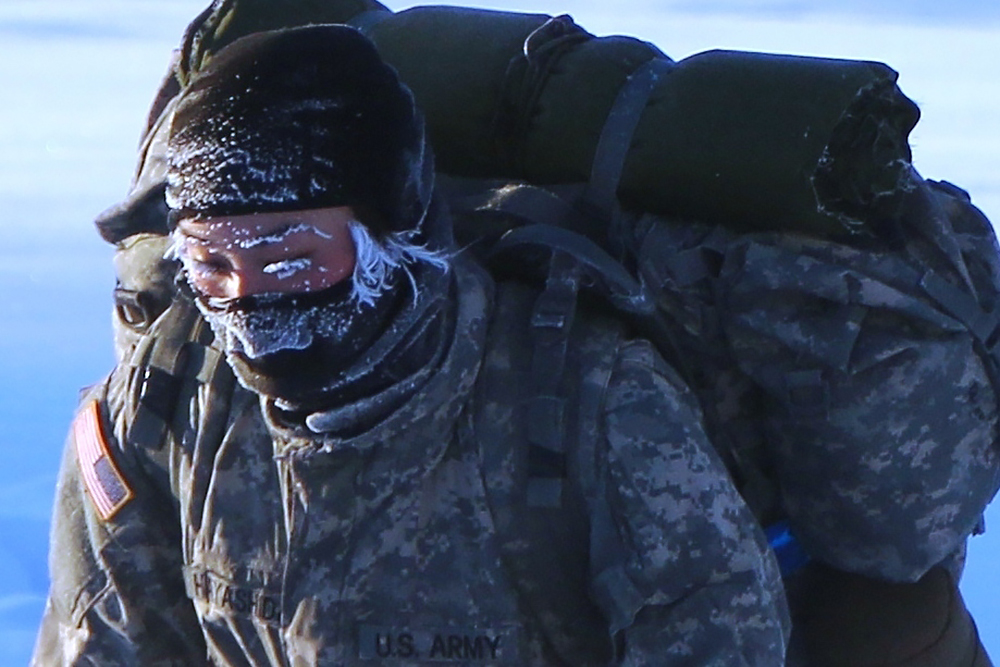
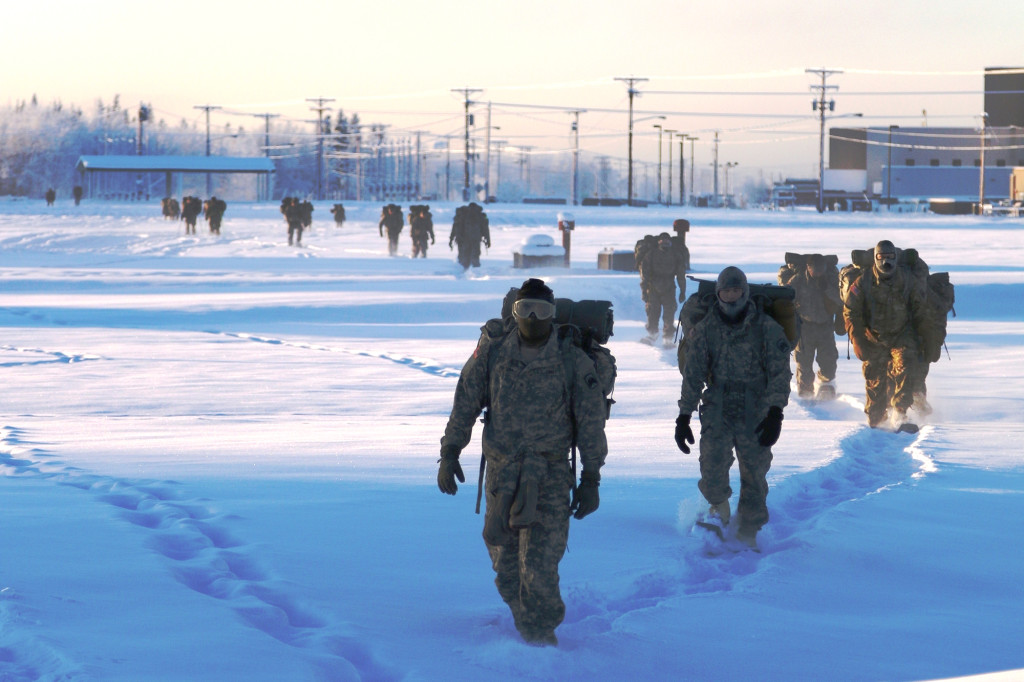
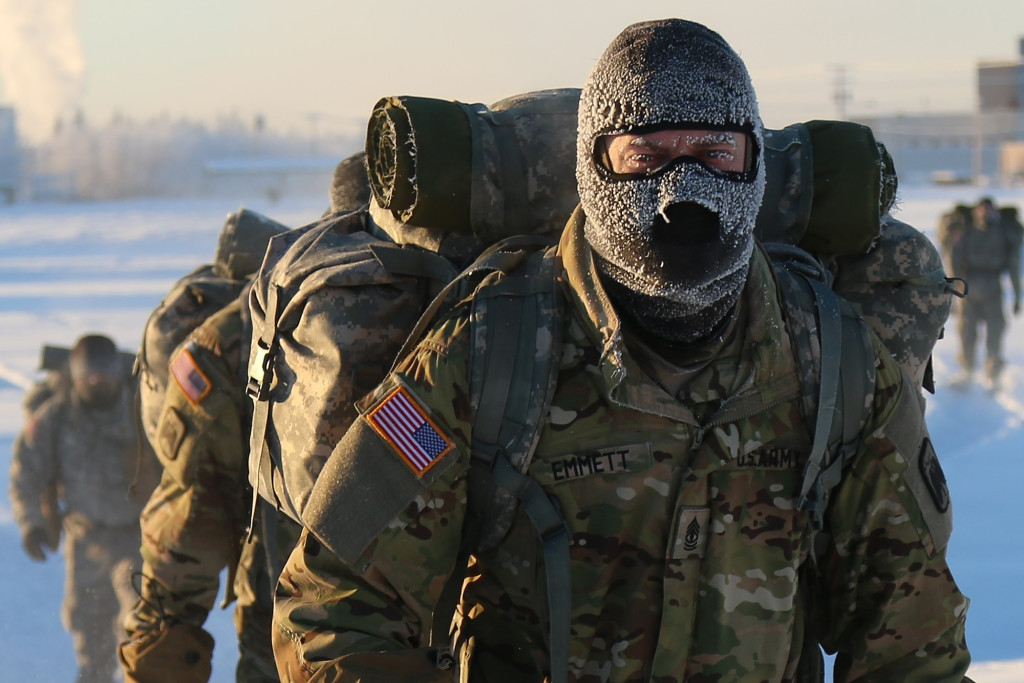
Arctic Tough 2nd Lt. Jessica K. Hayashida and her fellow U.S. Army Alaska Aviation Task Force Soldiers assigned to Headquarters Company, 1-52 Aviation Regiment, at Fort Wainwright, Alaska, conduct Cold Weather Indoctrination Course II (CWIC) training Nov. 19, 2015. These Soldiers completed a three-mile snow shoe ruck march to their bivouac site and spent the night sleeping in Arctic 10-man tents. CWIC training is required of all Soldiers assigned to U.S. Army Alaska annually to ensure America's Arctic Warriors have the knowledge and experience to survive, train, operate, fight and win in extreme cold weather and high-altitude environments. (Photo by Spc. Liliana S. Magers, U.S. Army Alaska Public Affairs)

Photo by Spc. Liliana S. Magers, U.S. Army Alaska Public Affairs

The Army defines five different categories of cold:

  • Wet cold, +39° F to +20° F
  • Dry cold, +19° F to -4° F
  • Intense cold, -5° F to -24° F
  • Extreme cold, -25° F to -40° F
  • Hazardous cold, -40° F and below

Though it might seem the opposite to those who grew up not having to scrape ice off of the windshield, dry cold is actually easier to handle than wet cold. In wet cold conditions your gear, clothing, and body are constantly damp. Your body’s core temperature will drop faster since wet skin and clothing negates any insulating effects. Simply walking becomes difficult because the ground becomes a muddy slush. However, once the temperature drops to a dry cold, humans and equipment generally work more effectively due to the consistently-frozen state.

Photo by Spc. Liliana S. Magers, U.S. Army Alaska Public Affairs

Intense cold is where the term “mind-numbing” starts to apply. Everything takes longer, not just because of the thicker clothing layers but because your brain instinctively starts to focus on survival and less on attention to detail.

The Army’s definition of extreme cold seems to say it best. “It is easy for individuals to prioritize comfort above all else. Personnel withdraw into themselves and adopt a cocoon-like existence.” Unless you’ve survived in this environment before, it’s likely that whatever plans you thought would work are no longer feasible. Obviously hazardous cold is even worse, and extensive training is required for anyone to operate effectively.

Bugging Out …Or In

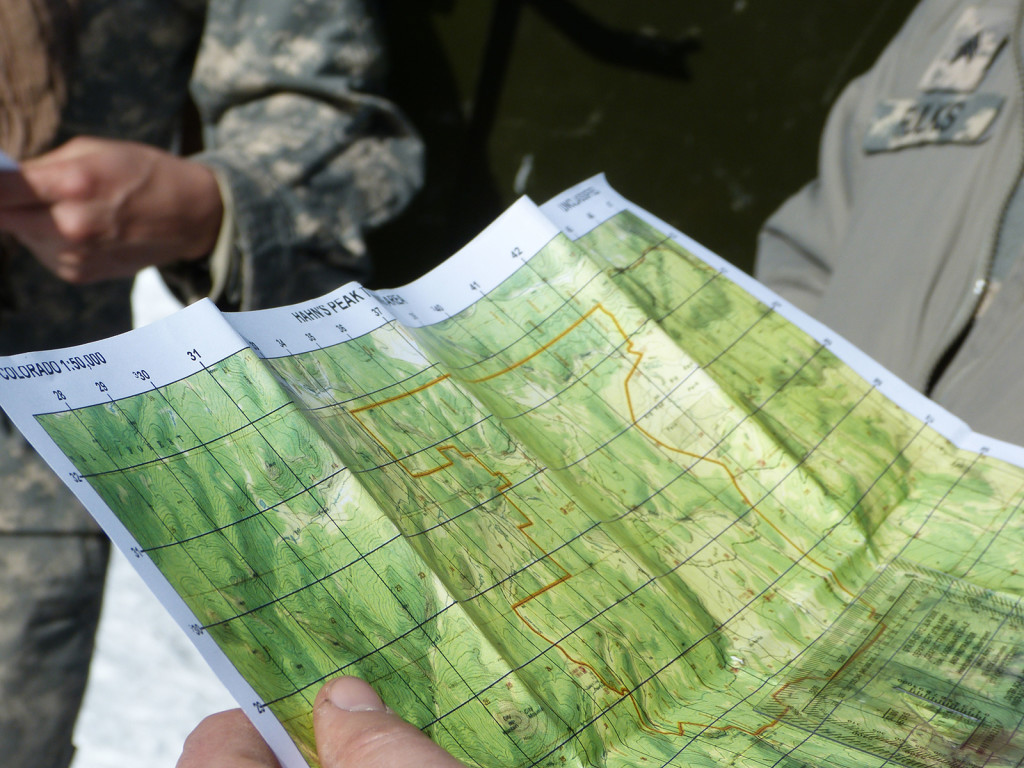
Soldiers practice plotting coordinates in preparations for real-life scenarios locating mock injured or lost recreationists near Steamboat Springs, Colo., in Routt National Forest Jan. 27, 2015. Navigation, deep snow driving, winch recovery and cold weather survival and first aid was all part of the four-day training exercise with thirty-nine Soldiers from Colorado's Front Range Jan. 26 to 29, 2015. The exercise provided realistic scenarios of lost or injured recreationists throughout the 12,000 acre training area. Soldiers practiced quick and efficient response through leadership, cooperation and planning using eight of the 10 small unit support vehicles (SUSV) owned and maintained by the Colorado National Guard. The annual training is an integral part of CONG's domestic emergency preparedness. Snow response training means CONG is always ready, always there to meet the needs of Colorado and surrounding states. (U.S. Army National Guard photo by Sgt. Manda Walters/Released)

U.S. Army National Guard photo by Sgt. Manda Walters

Regardless of why you’re having to operate in extreme cold, one thing will hold true. You’ve either got to get in to help someone or get out to help yourself. Otherwise you would stay inside by the fireplace like a sensible human being.

In a worst-case scenario, roads will be clogged with snow and you’ll have to cover the distance by foot. Once you determine how far you need to travel you can figure out how long you’ll be outside. On foot in the mountains, on an unbroken trail, you’ll need one hour to cover every mile of distance. Add one more hour for every 1,000 feet of ascent or 2,000 feet of descent.

How much gear (extra weight) you’ll take with you is a primary consideration. Only the bare essentials should be carried, although defining “essential” is a dynamic process all its own that depends on the individual and the situation. If you’re anticipating conflict and trying to figure out whether to bring more weapons or more ammunition, bring more ammunition and fewer weapons. Because it sucks to have to throw a gun at someone.

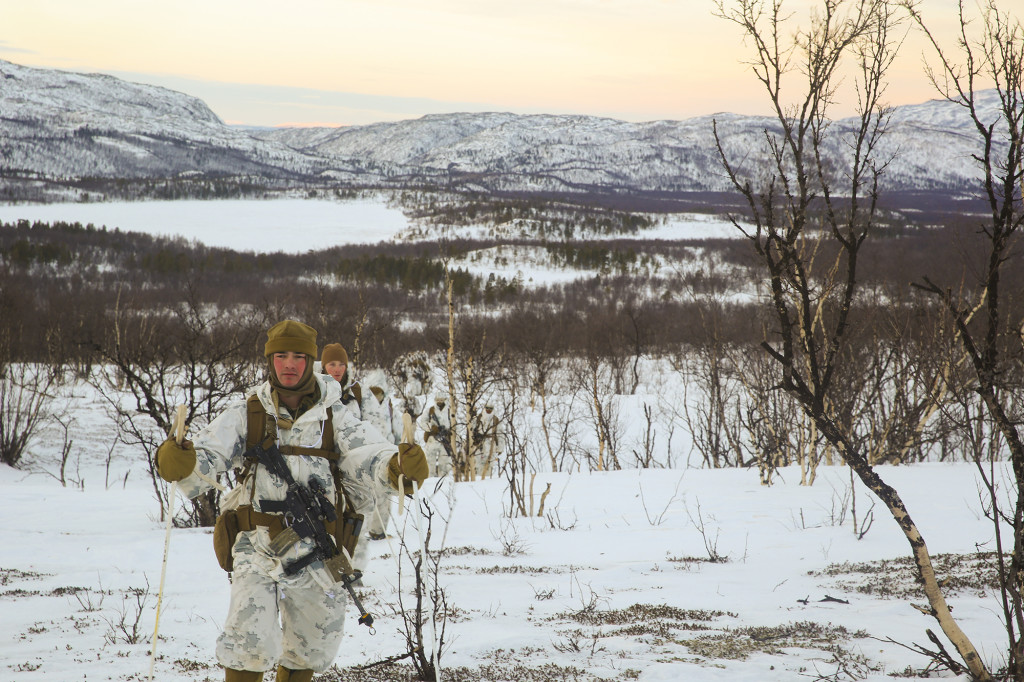
Marines with Black Sea Rotational Force march to the final assault position during the final exercise of cold-weather training aboard Porsangmoen, Norway, Feb. 16-20, 2016. Arctic training was conducted by U.K. Royal Marine Commando Mountain Leaders and hosted by the Norwegian military to improve the U.S. Marine Corps’ capability to support their NATO Allies in extreme environments. (U.S. Marine Corps photo by Cpl. Immanuel Johnson/Released)

U.S. Marine Corps photo by Cpl. Immanuel Johnson

If you live in an area where inaccessible roads are more than a remote possibility, it might be high-time to bring some beasts of burden to the ranch. Most Americans will think horses when they consider animal transportation. Think about the Marlboro Man, or Brokeback Mountain. Okay, don’t think about Brokeback Mountain. However, despite the fact that they’re beautiful and they’re what your 15-year-old daughter likely wants for her next birthday, horses may not be the best option for transporting you and/or your gear. Instead the real MVP (and the ultimate organic off-road vehicle) is the mule. Yes, the unglamorous, un-sexy, and sterile mule.

Compared to horses, mules are more sure-footed, less prone to injury and less likely to panic (a plus if firearms may be involved). They can carry about 200 pounds and traverse about 20 miles per day. Keep in mind, though, that they’ll eat about 2% of their body weight in feed per day, and even more once the temperature drops below freezing. Those of us without animal expertise (or year-round funding for their food and upkeep) may consider an all-terrain utility vehicle such as the Gator series from John Deere, or a snowmobile with a small trailer or Ahkio sled.

Winter Transportation: Ditch the Prius

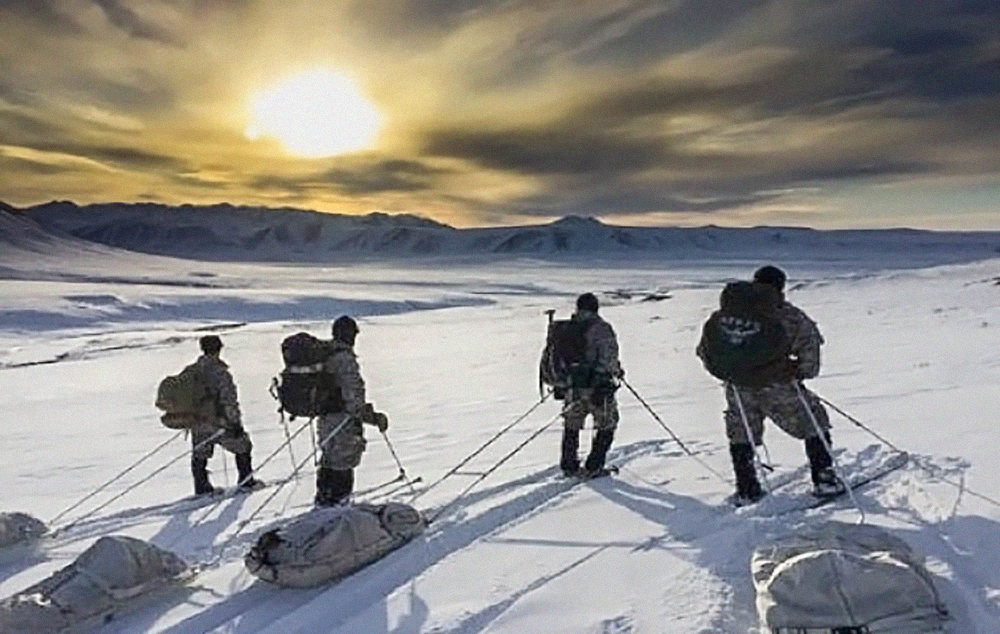
Arctic warriors from U.S. Army Alaska’s Northern Warfare Training Center survey the terrain near Galbraith Lake, Alaska March 22, 2016. The team from NWTC skied 36 miles in three days testing their capabilities in arctic conditions. (Photo by Sgt. 1st Class Adam McQuiston)

Photo by Sgt. 1st Class Adam McQuiston

If you’re lucky enough to be able to use a large vehicle, life is better but care must still be taken. At a minimum ensure that the vehicle is winterized to include things like tire chains, tire chain repair kit, deicer, scraper, non-freeze wiper fluid, and windshield cover to reduce the buildup of ice and frost. If you’ve got a trailer, bring chains for those wheels as well. Since E-brakes can freeze easily, carry chock blocks to set your wheels when parking. In cold and wet conditions, use some scrap like cardboard boxes or tree branches to park on top of so your tires won’t freeze to the ground.

“Combat load” your vehicle, putting the items of lowest priority in first so that high priority items are on top and easy to reach. This includes things like first aid and vehicle recovery/repair equipment — basically the stuff that can keep your vehicle moving and keep you in one piece. If you must stop, try to start the engine regularly, running it for at least 10 minutes every three to four hours. If the temperature is below -25˚F then the engine may need to run continuously.

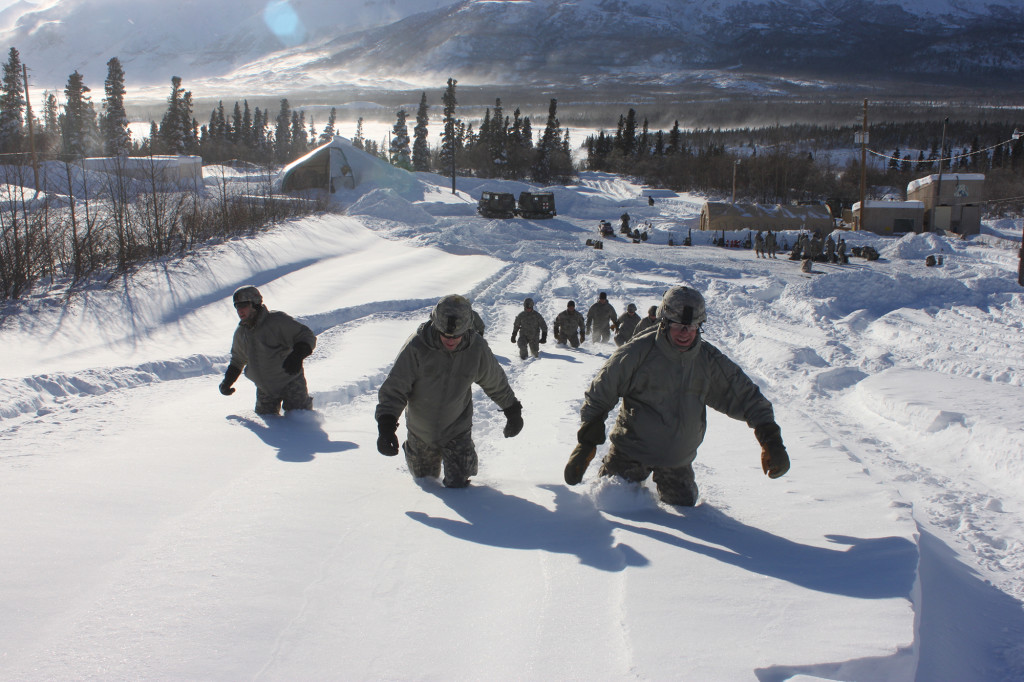
U.S. Soldiers assigned to the 4th Brigade Combat Team (Airborne), 25th Infantry Division, negotiate a snow-covered hill during the snowshoe appreciation phase of the Cold Weather Orientation Course at the Northern Warfare Training Center at the Black Rapids Training Site near Fort Greely, Alaska, March 27, 2013. The event helped develop leader skills needed for operating and planning for combat operations in extremely cold environments. (U.S. Army photo by Staff Sgt. Michael O'Brien/Released)

U.S. Army photo by Staff Sgt. Michael O'Brien

Vehicle selection can become much more important in extreme cold conditions. Using a heated vehicle for shelter is an obvious choice. However, what if your wife convinced you to buy the hybrid last year? Oh that’s right — most hybrid engines will shut off when the vehicle is stopped. You’ll freeze to death, but at least you’ll die knowing that you reduced your carbon footprint.

Despite what Al Gore may think, over-sized vehicles with plenty of interior space start to pay off here. They will have room for not only all the gear you’ll want but also your bulky, Michelin Man-inspired outfit with its three, four, or five layers of insulating clothing. So don’t worry, we’ll just go ahead and pretend that you needed one more excuse to buy that full-size bug-out truck.

Photo by Spc. Liliana S. Magers, U.S. Army Alaska Public Affairs

That's it for Part 1 of our Cold Weather Survival series. Click here to read Part 2: Weapons, Gear, and Nutrition.

For further reading, you can also check out our past articles on how to survive hypothermia and how to start a fire in cold weather.

About the Author

Andrew Schrader is a licensed professional engineer and is certified by the U.S. Army Corps of Engineers as an Urban Search and Rescue (USAR) Structures Specialist. His company, Recon Response Engineering LLC, advises state and federal government organizations on the subject of urban search and rescue and building collapse. He recently assisted the U.S. Department of State’s Italian Consulate in the development of their post-earthquake response and rescue protocol. You can follow him on Instagram at @reconresponse.


Social Engineering Tactics Infographic

Personal interaction is a fine balance of trust and suspicion. On one hand, we shouldn't be too trusting of strangers, as this may allow malicious individuals to take advantage of our blind trust. On the other hand, we can't exactly go through life cynically doubting and scrutinizing everyone we know at all times — that would be sheer paranoia. In order to find a middle ground between trust and suspicion, it's important to recognize warning signs. A heightened sense of awareness can help you know when to be suspicious, and when to let your guard down a little.

Social engineering mental manipulation techniques tech crime 8

Criminals won't always look like “the bad guy”. More often than not, they'll be smooth and...

A technique known as social engineering is used by criminals to exploit the grey areas in this balance of trust and suspicion. Social engineering is defined as “the art of manipulating people so they give up confidential information.” In essence, social engineers prey on those who tend to sway too far towards trust and gullibility, and use smooth talking charisma to steal credit card information, account passwords, PIN numbers, and other sensitive data. A social engineer may pose as a customer service associate, technician, security guard, family member, or other trusted figure.

Survival Vocabulary Quiz laptop

The term social engineering is most often used in reference to internet-based attacksphishing, a technique we've discussed in the past, falls under the umbrella of social engineering. Online social engineering has played a major role in some high-profile scandals recently, such as the DNC email leaks.

However, social engineering doesn't occur solely on the web. It can happen over the phone, or even through in-person interactions. The following infographic from SmartFile shows the three basic types of social engineering tactics, and can help us identify the warning signs of an attack. Click here for a full-size version.

Social engineering phishing security computer crime infographic 2

Social engineering phishing security computer crime infographic 3

Social engineering phishing security computer crime infographic 4

Social engineering phishing security computer crime infographic 5


Human Lie Detector

You might think the ability to determine if someone is lying only applies to interactions with lawyers, car salesmen, and late-night infomercial hosts. But it's difficult to imagine that anyone reading this article has never been told a lie. Just go to any nightclub on a Saturday night and you will definitely receive an overdose of bad pickup lines and deceptive statements.

Unfortunately, shouting “Liar, liar, pants on fire!” at someone you suspect of lying to you is not a very effective technique at getting to the truth. And, your chances of running into a wooden puppet named Pinocchio would be slim to none.

So, in this article, we're delving into how you can get complete and accurate information to help you or your loved ones survive when SHTF. While you won't turn into living lie detectors like Colombo or Daredevil, you can read on to find out how to improve your B.S. meter.

Physiology of Lying

As with most things within the behavioral sciences arena, there has been an ongoing battle regarding the validity of people as human lie detectors. Researchers have even gotten to the point where they discuss what are called micro-expressions, which are so small that they need to be evaluated on specialized computers. For this article we're going to stick with those movements, gestures, postures, and statements that might indicate that someone is lying to you or, in the least, attempting to be deceptive. It's going to be your responsibility to determine which one or combination of the lie indicators works best for you.

When you're talking to someone, whether at a party, casual meeting, date, or business, there's typically one clue that holds true in the majority of those situations. We tend not to look other people directly in the eyes for any length of time other than checking for fake eyelashes or plastic surgery. Unfortunately, we spend very little time evaluating the statements of another person by carefully analyzing their facial expressions.

Though most people get uncomfortable after a few seconds, sustained eye contact is vital to detecting deception in others.

Though most people get uncomfortable after a few seconds, sustained eye contact is vital to detecting deception in...

Many scientists have stated that the eyes are the key to emotions. Your eyes may actually be one of the most expressive organ systems in the entire body. Unfortunately, most people are very uncomfortable maintaining eye contact for longer than two to three seconds. In attempting to become a human lie detector, you need to travel into the realm of behaviors that could cause you slight discomfort, but the rewards may pay significant dividends. Maintaining eye contact is an essential part of determining if the individual you are assessing is lying. Very seldom do people lie only once. If they have been telling lies of convenience since childhood, the habit is hard to break and can become an automatic response, especially in high-stress situations.

The most important aspect of lie detection is to realize that, unless someone is a professional liar or a pathological liar, there will in most cases be an automatic physiological response. Reactions such as sweating, increased breathing, increased heart rate, eye movements, and vocalization changes due to constriction of the muscles surrounding the larynx are all typical automatic responses associated with an increase in anxiety levels triggered by lying.

Professional liars spend years perfecting their craft of controlling all aspects that could be a tipoff. If an individual's voice went up one octave every time he or she lied, they would probably not last very long as an individual trying to deceive others on a regular basis. As an example, try to remember back to a time when you may have been called to the principal's office. Even if you did nothing to warrant the trip, you would still find yourself sweating, fidgeting, and may even have a dry mouth and squeak to your voice. Ask yourself if it's possible to stop yourself from sweating. Certain unnamed spy agencies teach their operatives how to mentally block any physiological changes generated by anxiety or fear.

Indications of Lying

In the high-stakes world of poker there is a term used to detect if someone is bluffing about their hand and these are called “tells.” This is why in so many high-stakes poker games the competitors are wearing dark sunglasses; so other players can't detect eye movement. A good poker player is always aware of his hands and fingers, even when they take a drink. What you're going to be doing is looking for tells in other people.

The Hands: When someone repeatedly covers their mouth or puts their hand near their mouth when speaking, that may indicate the possibility of a lie. Wringing of hands or nervous, sweaty, and clammy hands can be indicators of deception.

The Mouth: Small twitching motions at the corners of the mouth or the upper lip can be a clue of untruthful statements. If someone (the liar) is aware that they experience twitching around the mouth, when stressed or lying, this may cause them to try and cover the behavior with their hand when they speak, even the subtlety of pretending that they are yawning.

The Eyes: Our peepers may be the easiest indicator to detect, since a majority of the movements and behaviors are unconscious. For example, an increase in blinking could possibly indicate untruthfulness. But before you call someone out, ask if he or she has allergies since that could also be the cause of the blinking. There are many studies that purport to show that if you look up to the right or up to the left, you are lying. Unfortunately there isn't consistency within the scientific field in this particular category.

Hand movement can indicate a lie, such as when someone covers his mouth.

Hand movement can indicate a lie, such as when someone covers his mouth.

The Twitches: Twitching is a very difficult indicator to quantify. Restless movements may simply be a function of sitting too long, lower back pain, or just being bored. Once again, it's going to take some detective work on your part to determine if the twitching correlates to a lie. Unlike some of the other clues, twitching may take multiple contacts with the individual over a period of time to decipher.

The Throat: Throat clearing or verbal hesitation is a rather easy indicator of possible deception, unless they have a cold or are a heavy cigarette or cigar smoker. Typically, if an individual knows that he's about to tell a lie, he might clear his throat in an attempt to modulate his voice, which inadvertently lets you know that a lie is right around the bend.

The Voice: If the voice goes up an octave or two, or the basic timbre of the voice changes, this may be a good clue that the stress of telling a lie is causing muscles to tighten in the throat and thereby constricting the vocal cords. You need to listen carefully to not only the words, but also what happens to the voice.

The Words: Sentence structure and content can, at times, be good indicators of deception. A liar might try too hard to convince you that their statements are truthful. Shakespeare hit it out of the park in Hamlet when Queen Gertrude, Hamlet's mother states, “The lady doth protest too much, methinks.” If someone keeps repeating a statement more than a few times, methinks you should seriously evaluate what is being said. Consider saying to the individual, “Let me think about that and I'll get back to you later.” If they become upset and keep pushing, you might have your answer right there.

Learning to Be a Human Lie Detector

Unless you wield Wonder Woman's Lasso of Truth, there is no magic tool to learning how to detect deception. You have to develop the skills of observing, listening, and evaluating what people are telling you. This will require you to maintain eye contact, focus on their verbal content, and most importantly, be aware of what is happening to the individual physiologically and verbally when they do attempt to lie.

This is not a skill that is gained in one or two conversations. It's going to require an effort on your part, but it can also reap significant rewards. Here is the five L's to get started:

  1. Look the person directly in his or her eyes when you first meet and maintain a minimum of 70-percent eye contact throughout the interaction.
  2. Listen to the tone and timbre of their voice.
  3. Look for extra body movements, especially if they are repetitive.
  4. Live in the moment. Don't get caught daydreaming.
  5. Leave if all the warning signs go off.

Here are some real life examples: Mandy Miller from Miami went to a specialty store to buy a long-term supply of food for her household. Always preparation-minded, she carefully checked the expiration dates on the outside of the box, which was within the appropriate dates. Normally she would not have opened the carton when she got home, but “something told me that I should open it and found out that everything would expire in two months.” Mandy went back to the store for a refund and thought it strange that the storeowner could not look her in the eye when she complained about the expiration date. Evidently the seller had switched boxes.

human-lie-detector-eye-contact

Bill Norling from Scottsdale, Arizona, had been looking for an older Jeep to use if SHTF. He liked a particular vehicle and was going to buy it with cash. He noticed that the seller became very hurried and pushed to close the deal even before Bill had fully inspected the car. The seller had begun to sweat and could not stand still. He said that he had to get home to his daughter's birthday and could not be late. Bill realized something was not right and told the seller that he was going to “sleep on it.” The seller then dropped the price another $200, but Bill left. While inspecting the Jeep, Bill had written down the VIN number. The next day he went to the Department of Motor Vehicles and found that the Jeep had been stolen in New Mexico.

So here's the deal: If you want to be a human lie detector, you're going to have to work at it. Although it would be nice if we had superhuman hearing like Daredevil and could detect rapid heart rate when someone wasn't telling the truth, the truth is you'll need to practice just like any other worthwhile skill, such as fire-starting or navigation. This doesn't mean that while talking to someone at a party you should be staring at them like a creeper, but it does mean that you need to develop awareness of not only what the person is telling you, but how they are telling it to you.

Lastly, bring intuition into play. When you can factor in your intuition with your observations, your ability to detect lies and deceptions will be significantly enhanced. If your intuition tells you that something is wrong in the individual's presentation, then it would be a good idea to bring into play your skills of observation.

Ask Dr.O

Do you have your own methods of determining if someone is lying? Want to find more resources or learn more about this topic? Do you have an idea for a column on the psychology and physiology of survival or self-defense? Email Dr. Neal H. Olshan at mindsetdoc@gmail.com.

About the Author

Dr. Neal H. Olshan is the developer of Evolution of Mindset and is a consulting psychologist for corporations and the sports industry for athletic improvement through the use of the Mindset program. He is also a pilot, an award-winning photographer, an author of both fiction and nonfiction books, and the chief combat psychologist for LMS Defense.

More From Issue 12

Don’t miss essential survival insights—sign up for Recoil Offgrid's free newsletter today.

Read articles from the next issue of Recoil Offgrid: Issue 13

Read articles from the previous issue of Recoil Offgrid: Issue 11

Editor's Note: This article has been modified from its original print version for the web.


Carving a Bushcraft Spoon Without Specialized Tools

Consider the tools you use every single day. Most of us would say items like a knife, scissors, a flashlight, or a screwdriver. However, there's another category of tool which we all use many times each day, but often overlook due to its ubiquity. You'll find them in every home, office, hospital, and restaurant. They're known as utensils, and if you've ever tried to cook or eat a meal without them, you'll understand their importance.

Carving wood bushcraft spoon knife tool 1

Finding utensils in urban areas shouldn't be too difficult — plastic spoons and forks are plentiful in every fast-food joint. But, in a wilderness survival situation, they'll be a bit harder to come by. It's wise to carry a small metal spork in your mess kit, but it's also a good idea to know how to craft backup utensils. It's possible to get by without a fork, but a spoon is especially important for eating soups and stews, or for stirring and tasting items as you cook them.

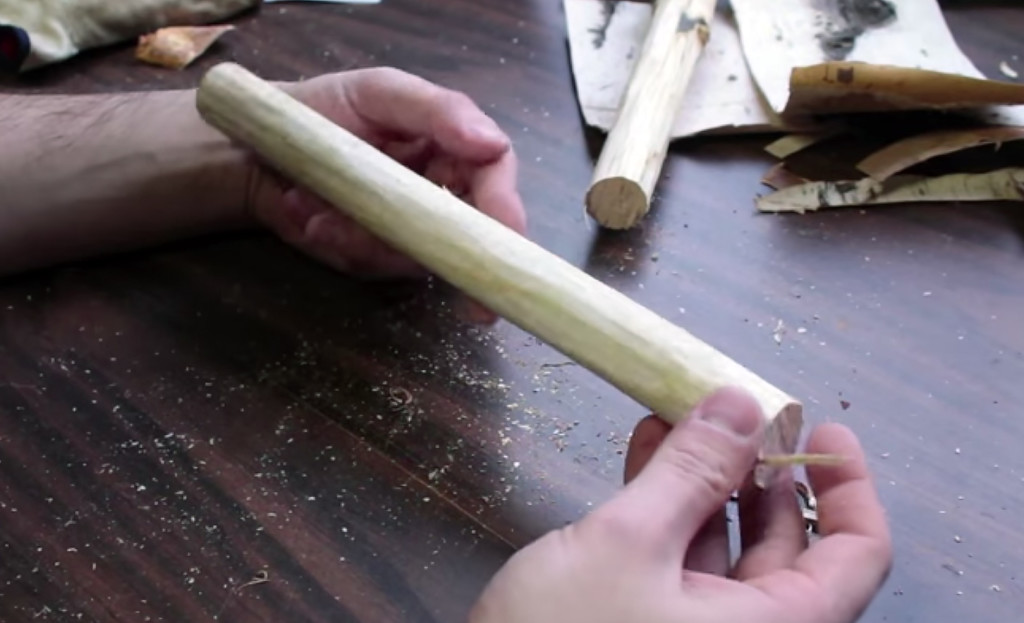
The process starts with a straight tree branch or sapling, with its bark shaved off.

The process starts with a straight tree branch or sapling, with its bark shaved off.

In the following video from David's Passage on YouTube, the host shows a technique for making a bushcraft spoon without special tools. Many other YouTube videos show how to make a wooden spoon with a curved spoon knife, but if you already own and carry a spoon knife it seems likely that you A) should know how to make a spoon and B) should probably have ditched the spoon knife and carried an actual spoon instead. So, this technique is more practical for a real outdoor survival scenario.

Obviously, it's going to take some patience to carve a spoon this way, but it's also a rewarding process. In addition to creating a useful tool, carving projects like this can keep your mind occupied and focused during a survival situation.


Learn How To Start Fires In Cold Weather

WARNING!
Fire-starting is inherently dangerous. The concepts shown here are for illustrative purposes only. Seek a reputable instructor before attempting any techniques discussed here.

Hopelessly lost and out of fuel — that's the condition of you and your rental car as the engine sputters its last gasp and you roll to the edge of the snow-covered road. The large heavy clumps of snowflakes fall downward, turning the hilly woodland into a beautiful landscape of winter white. But this striking postcard-worthy scene isn't the most pressing thing on your mind. All you can think about is your inoperable vehicle, your mobile phone with no service, and the fact that you could die from exposure in a few hours under conditions like these.

You check the trunk and glovebox for anything useful. No blankets, no food, no water — just a book of paper matches and a half-dozen napkins. The late-afternoon sun is hidden behind the thick bank of snow clouds, but you can tell it's going to get dark early.

Are you going to let your bad luck continue into the night? You could use five of your napkins to catch your tears of self-pity, and the final one to write out your last will and testament. Or are you going to start making your own luck?

For any prepper, bushcrafter, or outdoor adventurer worth their salt, making a fire should be second nature — when you have your normal gear and equipment. But what happens when you have none of your usual fire-starting tools? “No problem,” you might say, “I'll just rub two sticks together and make a fire the old-fashioned way.” That's great. But what if you're stranded in the dead of winter and snow blankets every inch of your vision? What now?

Scavenge For Your Fire

They say we started out as scavengers. In the savage wilderness of the African plains, we chased the vultures away from the bones of last night's predator kills, broke open the leg bones, and feasted upon nutrient-rich marrow to become the brainiacs we are today. You might say scavenging is in our DNA. And with that uplifting story in your head, let's delve into the art of scavenging for fire-building materials. Working within the confines of our stranded motorist's situation, let's outsmart the problems and seize the opportunities this situation presents.
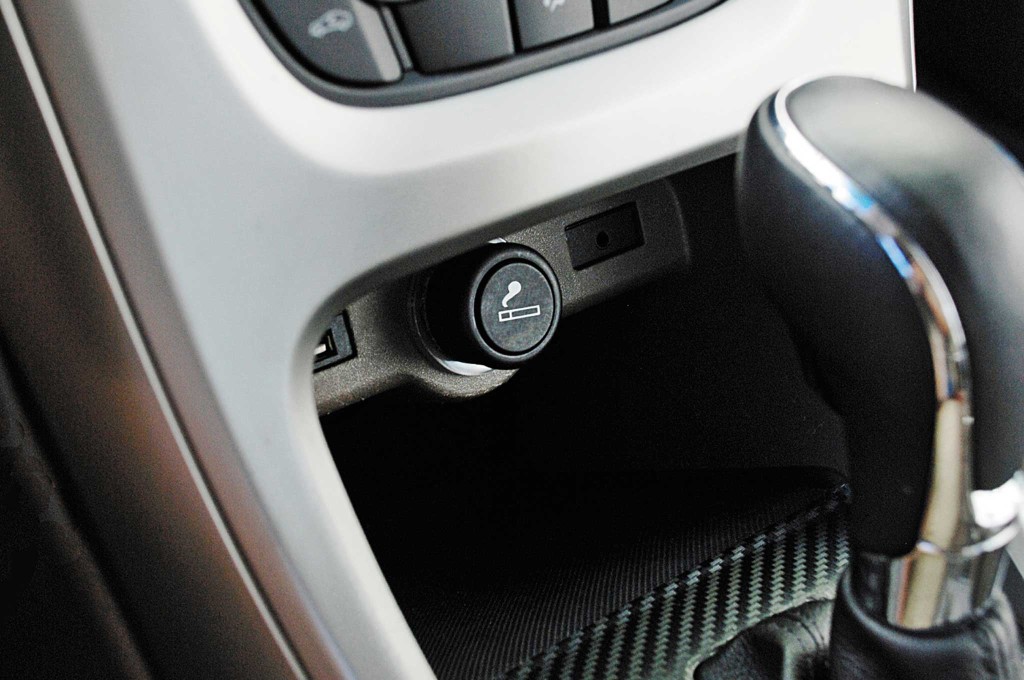
Though a rare sight these days, a car's cigarette lighter might be the safest and easiest way to light a fire in cold weather.

Though a rare sight these days, a car's cigarette lighter might be the safest and easiest way to light a fire in...

There are two things our unlucky traveler needs to make a fire: an ignition source and some fuel. Since it makes sense to go for the easiest win, let's pick apart the car. Given the vehicle simply ran out of gas, it means the battery is still operational. This big block of heavy metals and acid is more than capable of starting a fire.

The safest and easiest way is with a vehicle cigarette lighter, if it's an older model. Should the vehicle have one of those, heat up the lighter and quickly touch it to some fine fluffy tinder. A fluffed cotton ball will work, as will seed down from the cattail plant. This fluffy stuff burns exceedingly well due to its high amount of surface area, which easily catches sparks and quickly turns them to flame.
learn-how-to-start-fires-in-cold-weather-jumper-cables

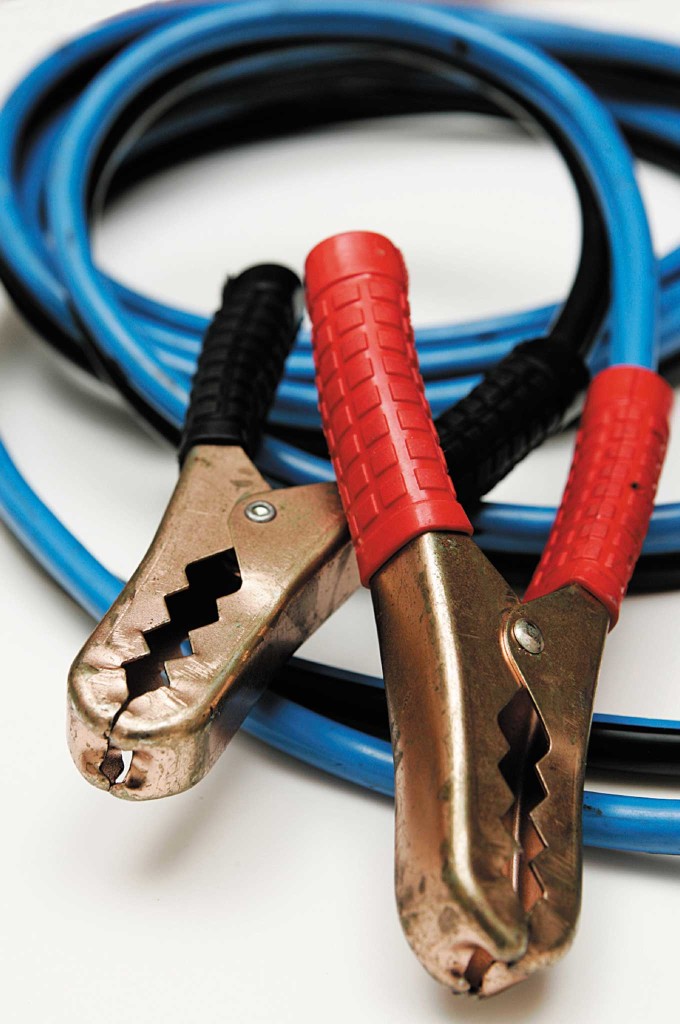
If the vehicle doesn't have a lighter — most don't these days — then you can jump-start your fire directly from the battery. Hook up your jumper cables to the battery, and touch the free ends together briefly over some fine tinder. The shower of hot metal sparks should do the trick, but use great caution with this method. Do not allow the free jumper cables to weld or stick together. This creates a closed circuit, which can cause the battery to explode.

And what about fuel for the fire? A modern car or truck is a storehouse of flammable products (someone really should look into that). Obviously, the gas will burn, but since it's gone in our story let's not open that dangerous topic.

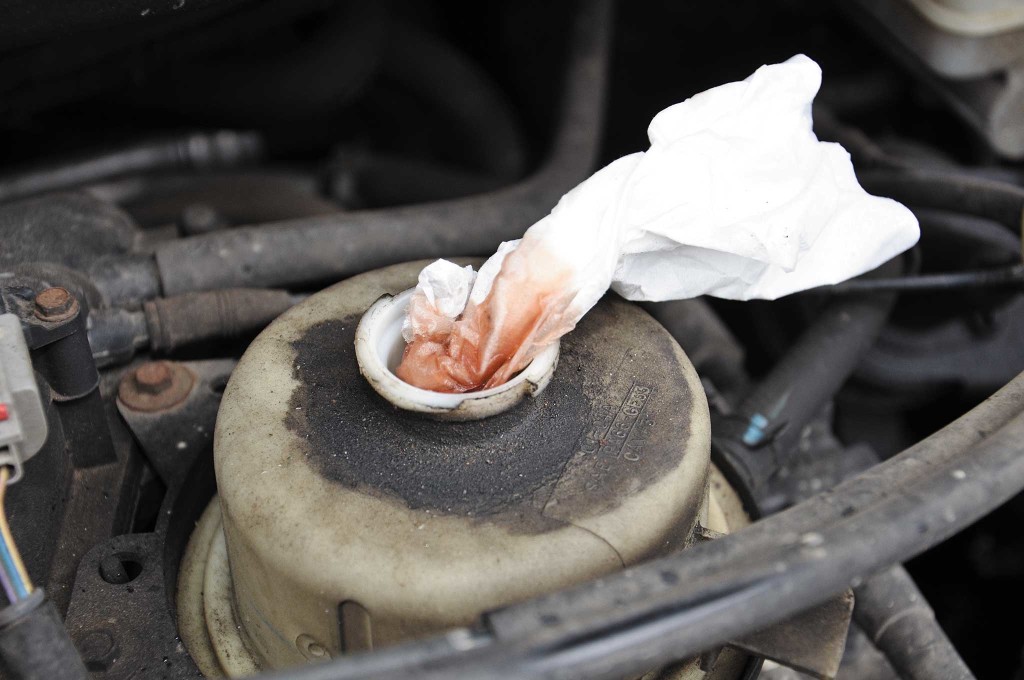
All of the fluids in the vehicle are flammable, except for the engine coolant and wiper fluid. Open the reservoir for the power steering and dip one of the previously mentioned napkins in it to get an oily boost to the napkin's flammability. Wipe the engine oil dipstick numerous times on paper or cloth to enhance its burn time. These oily substances burn great, as they are very dense fuels. They just need something papery or fibrous to act as a wick and they will produce strong flames.
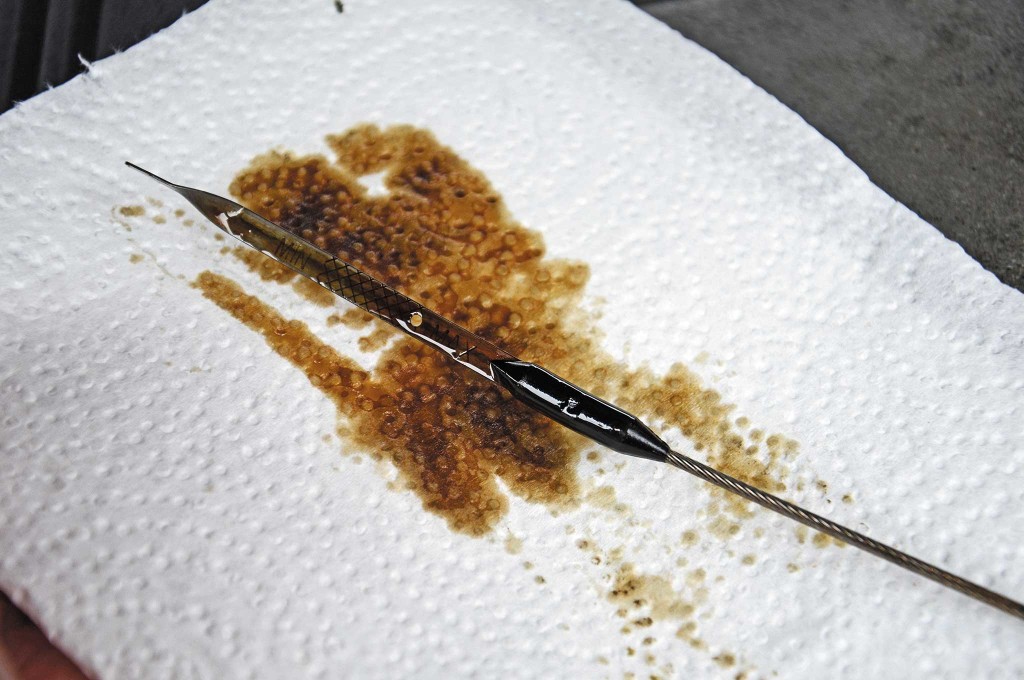
learn-how-to-start-fires-in-cold-weather-fluid-dipstick

learn-how-to-start-fires-in-cold-weather-fluid-reservoir

Dabbing a napkin in engine oil or steering fluid can help your tinder burn more intensely in winter conditions.

Dabbing a napkin in engine oil or steering fluid can help your tinder burn more intensely in winter conditions.

Once you have your fire going, cut or break off plastic components to throw into the fire, both as fuel and to create black smoke, which is ideal for a signal fire. (Be cautious of burning anything that might produce toxic fumes — what good is a fire if its smoke is going to kill you?) Between the burnable plastics and fluids in a modern vehicle, I'm surprised there aren't more spontaneous car fires every day.

If you have a toolbox with you or your trusty Swiss Army Knife, then it's MacGyver time. Open the drain plug for the engine oil pan and catch that Texas tea in a soda cup. Pour some of the oil on your frosty damp twigs and they're sure to burn. Or use a knife to cut the vehicle's fabric seat covers into makeshift outer wear. Or wrap upholstery strips around sticks and soak them in oil to make 20-minute torches for emergency signaling. You're only limited by your imagination and the limits of the materials themselves.

Steps to a Sustainable Fire

Yes, you can go from a single burning match to a pile of burning logs, but there are some critical steps in between. It's easiest to consider these as stair “steps.” To build a fire, the materials must increase in size gradually. Your materials can't step up in size too quickly, or the fire will go out. Follow these steps, and you'll be well on your way to a deeper understanding of fire behavior and fire dynamics.

Step 1: Pick your fire site. Try to find a place that is out of the wild wind, sleet, snow, and rain. The spot should be close to both your fuels and your shelter (if you have one). However, it shouldn't be dangerously close to either. Dig down through the snow to reach the bare frozen ground, or build a platform for the fire from the best materials that are easily available.

Step 2: Find your fuels. Fire is like an engine, it won't work without fuel. Scour the local area for dead dry plant materials to act as tinder, kindling, and firewood for your fire. Bring back more than you think you'll need. You should pay extra attention to evergreens, if they are available in your area. Needle-bearing evergreens usually contain flammable sap in their twigs, wood, and dead needles. And the dead ones are easy to spot. Look for twigs without any green on them, and needles that are tan or brown. Bring in several armloads of firewood, too — you're going to need it.
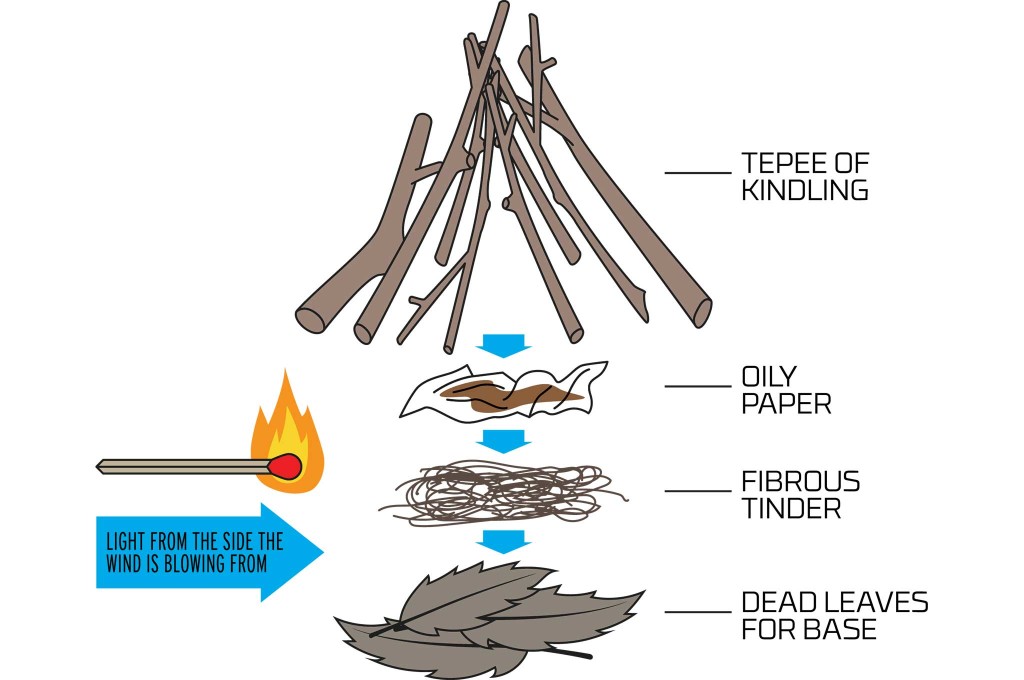
learn-how-to-start-fires-in-cold-weather-fire-assembly-diagram

Step 3: Assemble your fire lay. On your fire site (hopefully bare ground), make a fist-sized mound of your tinder materials. If conditions are really rough, use double that amount of tinder. This can be material you have found, like dead leaves, evergreen needles, grasses, or bark fiber. It can also be tinder that you scavenged from your pockets or a vehicle. Crumpled paper or napkins will serve you very well. Over this material, place your skinniest dead twigs, sticks, grass stalks, or wood splinters. Build a cone-shaped structure with these materials, and then add finger-diameter sticks, about a foot long. Your overall fire lay should be a cone-shaped construct (like a tepee), which is about a foot wide at the base and about a foot tall at the center. The staging of your materials (from tinder, to twigs, to sticks) will allow the fire to grow quickly, but at its own pace.

Step 4: Light it! Once all your fire lay materials are ready, and you have several armloads of firewood, it's time to light it. Figure out which way the wind is coming from. It's generally best to allow the wind to work with you, and light the fire lay on the side that the wind is coming from. This allows the airflow to push the flames into the center of the tepee, right where you want them to go. Also, make sure you light the fire at the base. Don't light the tip of the tepee; it's not some kind of firework. Light is at the base, on the side the wind is coming from, so the flames will rise into the structure and consume the materials.
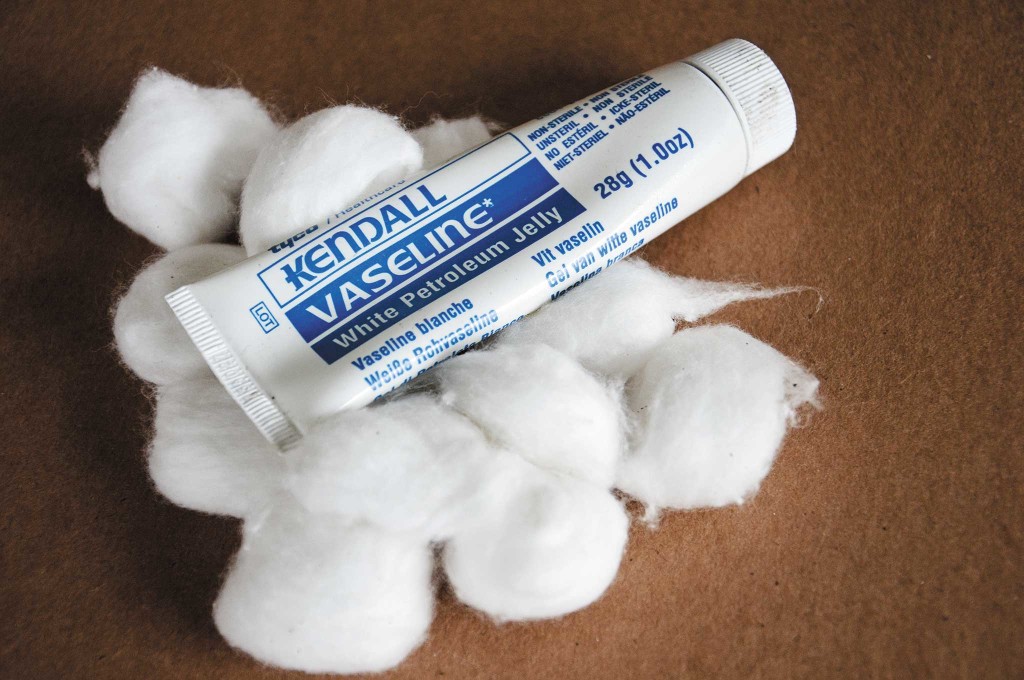
Cotton balls mixed with petroleum jelly can go a long way in getting a fire going. Prepare some in your go-bag or vehicle's fire kit.

Cotton balls mixed with petroleum jelly can go a long way in getting a fire going. Prepare some in your go-bag or...

If you happen to have some fire-starter materials like Wetfire cubes, cotton balls with petroleum jelly, or some wax-soaked cardboard, place it in the base of the fire and light your fire helper as well as the tinder. Flammable vehicle fluids can be poured over the tinder and twigs prior to lighting, if you feel you need it. This additional fire-friendly material (combined with the tepee fire lay shape) should allow you to use damp materials and still get them to burn.

Step 5: Maintain your fire. You've won the battle, lighting a fire in rough conditions, but you still could lose the war. It's been argued that letting your fire go out is worse than never making one at all, since you now have no fire and less fire-starting materials than before.

Important Safety Note: If you decide to burn materials from your vehicle, be aware that some are quite toxic. Brake fluid is typically the most hazardous, followed by power steering fluid, and motor oil. And don't even think about messing with gasoline. It's far too dangerous to be of benefit in an already sketchy survival situation.

Conclusion

Your need for a fire can be seen as a barometer of the severity of your survival situation. The more you need a crackling blaze, the worse your situation really is. Intense cold weather, wet and windy conditions, or a dunking in cold water can all lead to hypothermia, a dangerous and potentially fatal cooling of your body's core temperature. And in some situations, your only option to dry out and warm up will be to make a big fire — quickly! — though sometimes it's easier said than done.

The skill of fire building is age old and relatively simple. It's not hard, but to master it you have to put in the practice time. You can't just read about it and hope to perform well under pressure. Like every other survival skill, this one has a learning curve and it demands practice and patience. It also demands real-world training. Any novice can light a fire on a warm dry day with a butane lighter and a handful of pocket lint. But it takes a real pro to walk out in the wet snow and build a quick fire from just a few carefully chosen items. This is the level you should aspire to reach. Don't be content with being an armchair expert or Internet commando. Put in the hours during nasty weather to become a real world expert. Then, and only then, will you always be able to rely on fire's warm embrace.

Fire By Fritos

For those of you who already know about the flammability of snack chips, good for you. Your pyromaniac nature should serve you well. For those of you who don't know, listen up! When it comes to fire starting with modern materials, oily snack chips are a great way to get your fire going. These grease-soaked foods burn very well when an open flame is applied to them, and it won't take many chips to make a big impact. Just three or four chips will burn for minutes and help you establish your fire. Of course, if you had chips in your stranded winter motorist scenario, you should be eating most of the chips for calories in the cold weather. But do try to save a couple for fire starters. Here are some of the top performers.
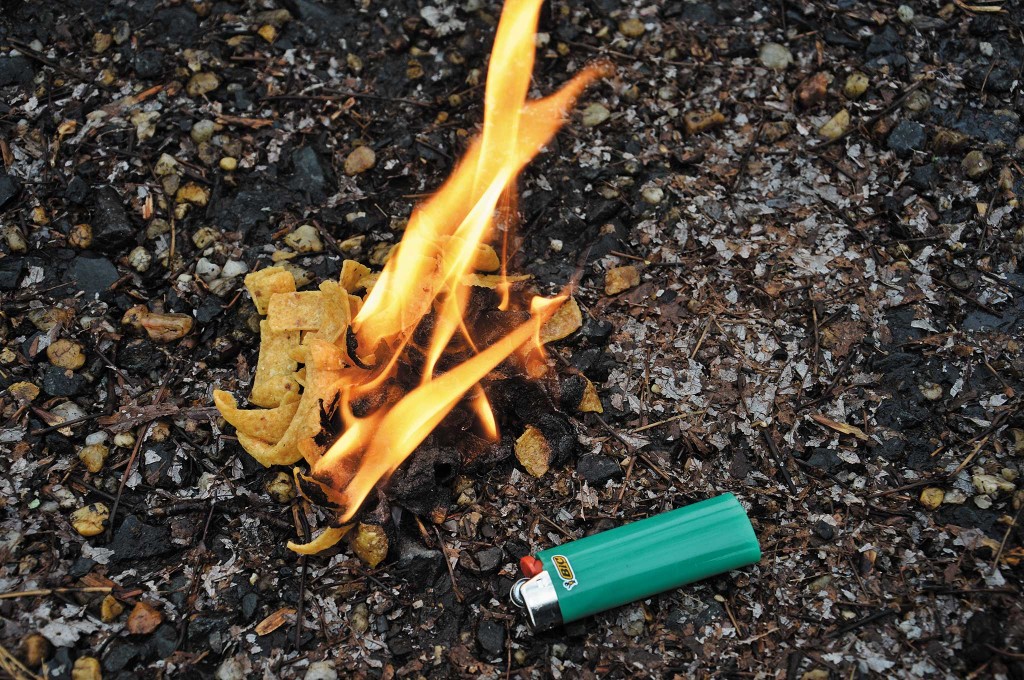
learn-how-to-start-fires-in-cold-weather-frito-based-fire

  • Bugles
  • Cheetos
  • Cheese puffs
  • Corn chips
  • Fritos
  • Kettle chips

Vehicle Fire Kit

I'm sure that there were once fire-building kits in every car. The earliest steam-powered cars had an onboard stove that burned coal or wood, and an onboard servant who built and fed that fire. This is where we get the word chauffeur. It doesn't mean driver, it basically means “fire guy” or more correctly, “one who heats.” If you want to be prepared like a modern day fire guy or gal, then build your own fire starting kit and keep it in your vehicle at all times.
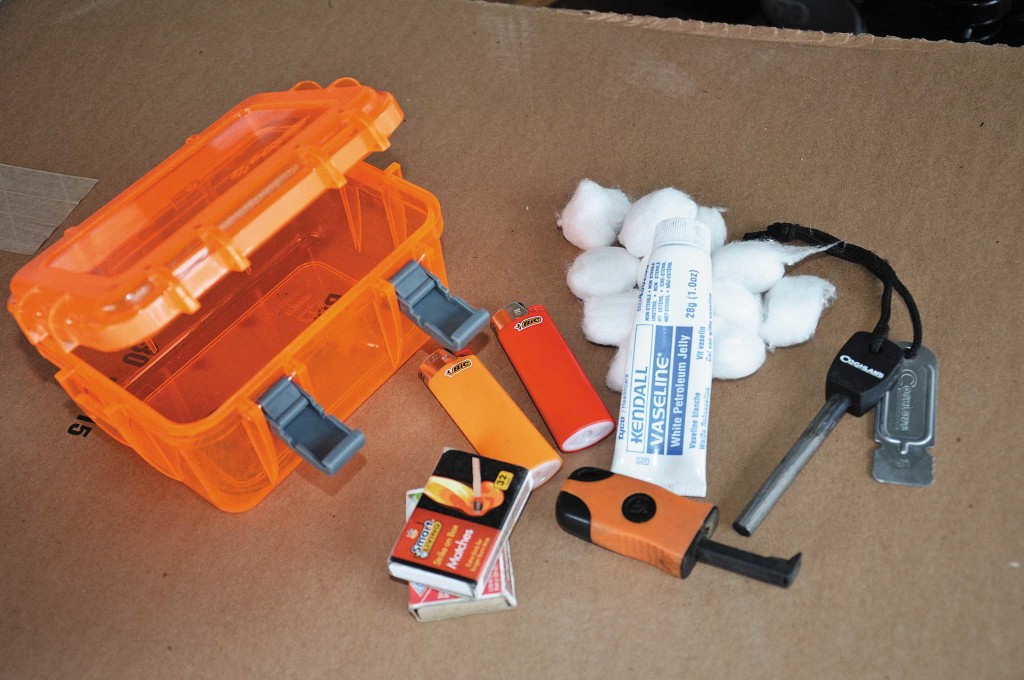
learn-how-to-start-fires-in-cold-weather-vehicle-fire-kit

Waterproof box: The container can be very important, especially in the event of a water landing. Pick bright colors for easy visibility.

Ignition sources: These are the most important part of the kit. Place at least two butane cigarette lighters in the kit, along with several boxes of matches and at least one ferrocerium rod.

Tinder material: Dryer lint, cotton balls, paper, and many other plant-based items can be used as tinder, the first fuel used in fire building.

Fuel sources: Mix a little petroleum jelly with your cotton balls and you now have a potent fuel that will burn for several minutes with a generous flame. There are also store-bought fuels like Wetfire cubes from UST and various fire-starter tabs, packets, and pastes. A nub of a candle is a historical fire-starting classic that still pulls its weight today. Drip the melting wax from a lit candle all over stubborn kindling.

Common Mistakes to Avoid

Winter is the most unforgiving season, and if you need a fire to stay alive, this can be the toughest time of year to kindle a blaze. If you can avoid these rookie mistakes, you'll be way ahead of the curve.

Building on Bare Snow: You may be able to light some twigs on fire, briefly, on top of the snow — but it won't last. As the red coals drop down to the base of the fire, they fall into snow, which melts and extinguishes them. This prevents you from establishing a proper base for your fire, and it will soon die. If possible, dig down through the snow to place your fire on bare ground. If that's not an option, find something to act as a barrier rather than trying to burn a fire directly on the snow. It can be something temporary, like a raft of logs on top of the snow. Or it can be something more substantial, like a piece of metal you have scavenged and placed upon some rock or log supports.

Forgetting the Melt: When planning where you'll burn a fire in snowy conditions, think about the snow melting power of fire. If you burn a fire long enough, it will melt a massive amount of snow. This can mean that your fire is eventually going to be surrounded by slush or even water. Before you build your blaze, pick a spot that is out of the wind, yet has good drainage to allow any snowmelt to run away from the fire.

Grabbing the Green: One of the fastest ways to waste your matches is trying to light live twigs on fire. Just because a tree or shrub has dropped its leaves in the winter season, doesn't mean that the twigs are dead and dry. Among deciduous woody plants, live twigs look just like the dead ones at this time of year. You should only collect twigs that are actually dead, and pass one of these two tests. First, if conditions are cold and dry, squeeze the twig with your bare hand. Live twigs are full of water, which will make them feel colder. Dead twigs will quickly “warm up” to your touch, while live ones seem to stay cold. Secondly, see if the twig will snap off easily. This is often a sign of dead material (though not a guarantee, especially in soft woods at subfreezing temperatures).

More From Issue 12

Don’t miss essential survival insights—sign up for Recoil Offgrid's free newsletter today.

Read articles from the next issue of Recoil Offgrid: Issue 13

Read articles from the previous issue of Recoil Offgrid: Issue 11

Editor's Note: This article has been modified from its original print version for the web.


Weapon of Opportunity: Self-Defense with a Baseball Cap

Think fast: if an attacker was charging headfirst in your direction, would you rather be unarmed or holding a weapon? You shouldn't have a hard time answering, because the answer to this question is painfully obvious. With a weapon in your hands, you stand a far greater chance of successfully stopping the attack and escaping unharmed. This is why it's recommended to carry some form of dedicated self-defense weapon whenever possible — be it a gun, a knife, a tactical pen, or even a self-defense cane.

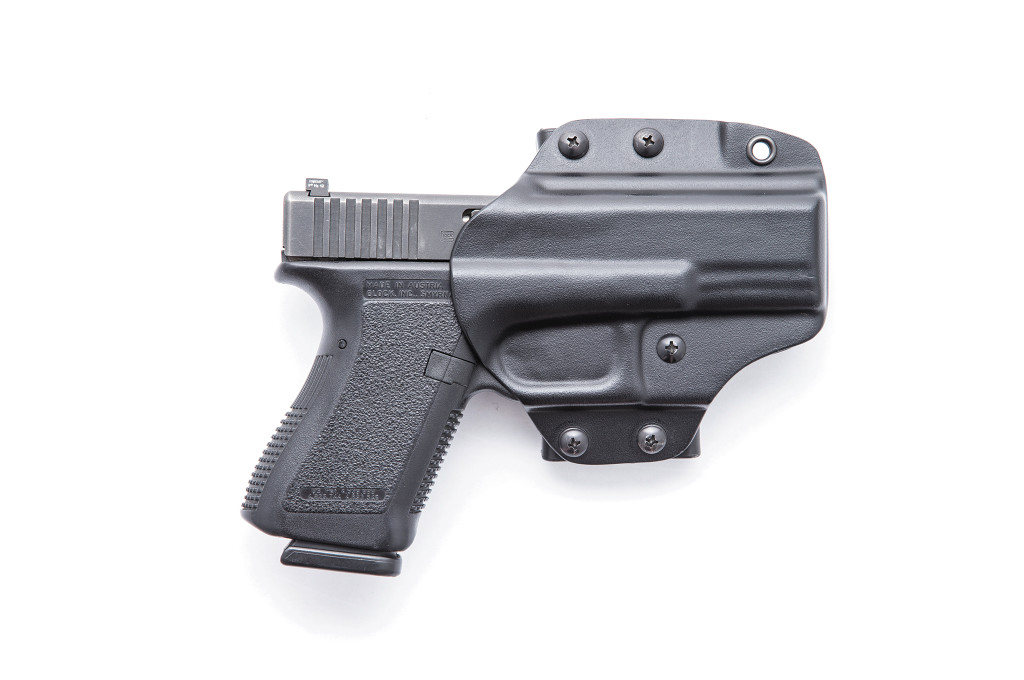
handgun-in-holster

Even if you already carry a firearm, you should always be thinking of backup self-defense plans in case SHTF.

The doctrine of Filipino martial arts known as Kali emphasizes self-defense with weapons, but this system also acknowledges that there are many cases in which carrying a weapon may not be an option. In these non-permissive environments, you'll need to think on your feet and improvise as the aforementioned attacker charges in your direction. This is when finding a weapon of opportunity can save your life.

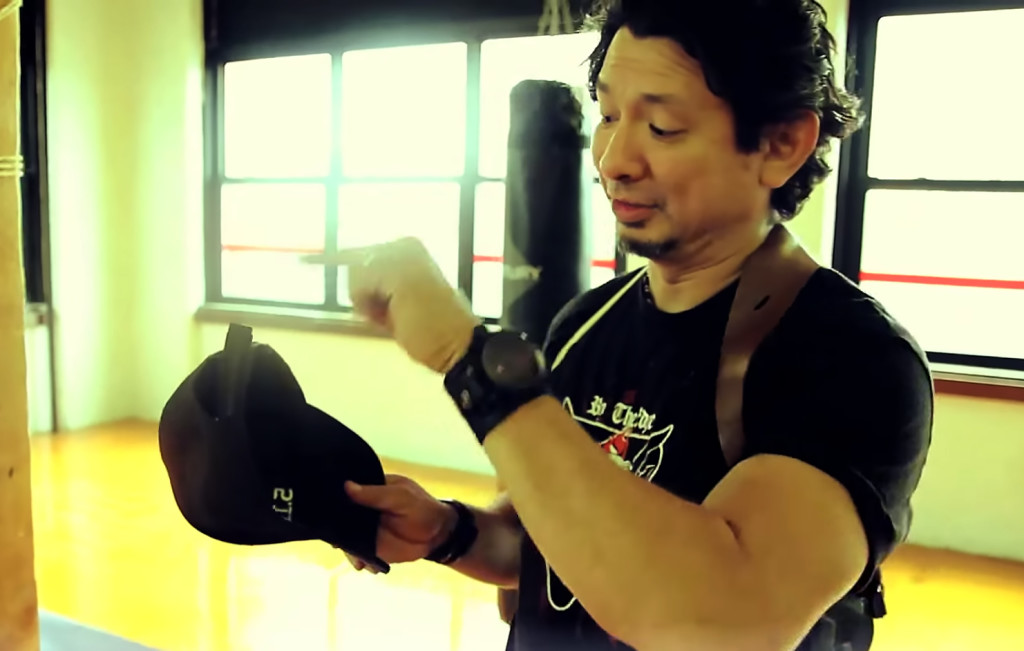
Marcaida self defense baseball cap weapon martial arts 2

In the video below, Doug Marcaida discusses various ways to use a ball cap as a defense weapon.

Doug Marcaida is the founder and expert martial arts instructor at Marcaida Kali. Put simply, he's the kind of guy who knows a thing or two about self-defense, with or without a dedicated weapon. If you're unfamiliar with Doug, we'd recommend reading our exclusive Q&A with him from last March. In the following video, Doug addresses the concept of weapons of opportunity, and shows how even a simple baseball cap can serve as a powerful self-defense tool:

So, you can toss your own baseball cap as a distraction while you throw a punch, or block your attacker's line of sight by pushing the cap in his face. If the attacker is the one wearing a hat, you can pull it over his eyes, or yank his head backwards using the brim. There are many options to consider — the real key is to think about them and practice exploiting them before you find yourself being attacked in real life.

For more on improvised weapons, check out our previous article on the newspaper-based Millwall Brick.


Web Exclusive: What If You Were Trapped in a Mass Shooting?

In the upcoming Issue 18 of our print magazine, our recurring “What If?” feature addresses a topic that has become tragically relevant of late — mass shootings. The hypothetical scenario in this issue addresses how to cope with a deranged and unstable individual firing indiscriminately into a crowd. While this situation may be frightening to consider, thinking seriously about how you'd handle an active shooter can help you mentally prepare in case that horrifying day ever comes.

170400-WHATIF mass shooting gun defense medical 2

Issue 18 shares the thoughts and reactions of three experienced individuals: U.S. Marine veteran Candice Horner, federal agent Erik Lund, and survival instructor Tim MacWelch. To read the entirety of these three perspectives on how to deal with a mass shooting event, pick up a copy of Issue 18 on sale January 27th, 2017. As a web-exclusive supplement to this print article, we'll be sharing a fourth perspective with you today. Ryan Lee Price is a freelance journalist and outdoor adventurer who resides in southern California. He wrote the following approach from his “average joe's” mindset.

What If?

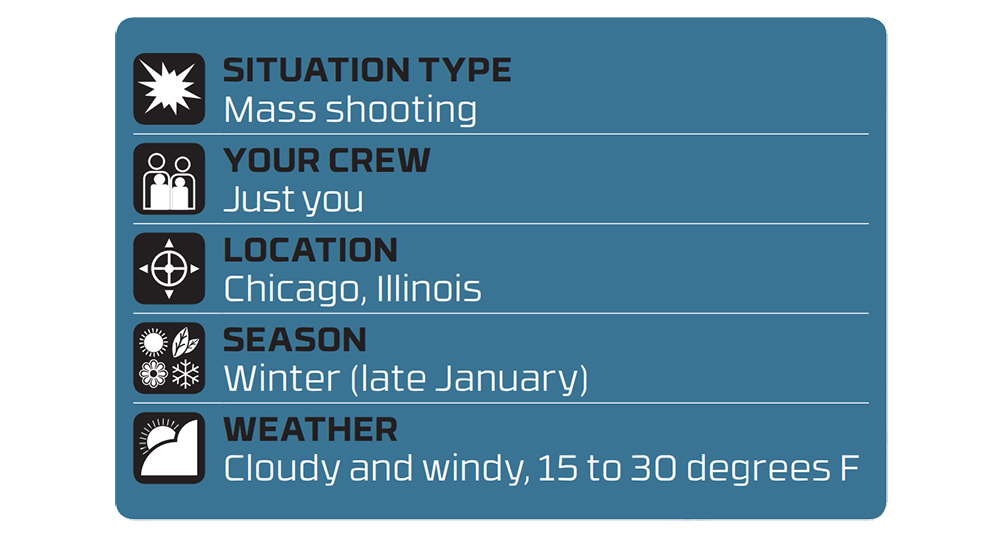
Before we share Ryan's approach to dealing with a mass shooting, here are the key details of the hypothetical scenario he'll be writing about.

The Setup: You’re visiting the Windy City and decide to have your last lunch in Illinois at Water Tower Place, the eight-level mall located inside a 74-story skyscraper. You figure you can hang out there for a few hours, buy some souvenirs, and still have plenty of time to catch an Uber to O’Hare International Airport. More importantly, you’ll be out of the bitter cold!

Whatif mass shooting chicago gun survival defense 1

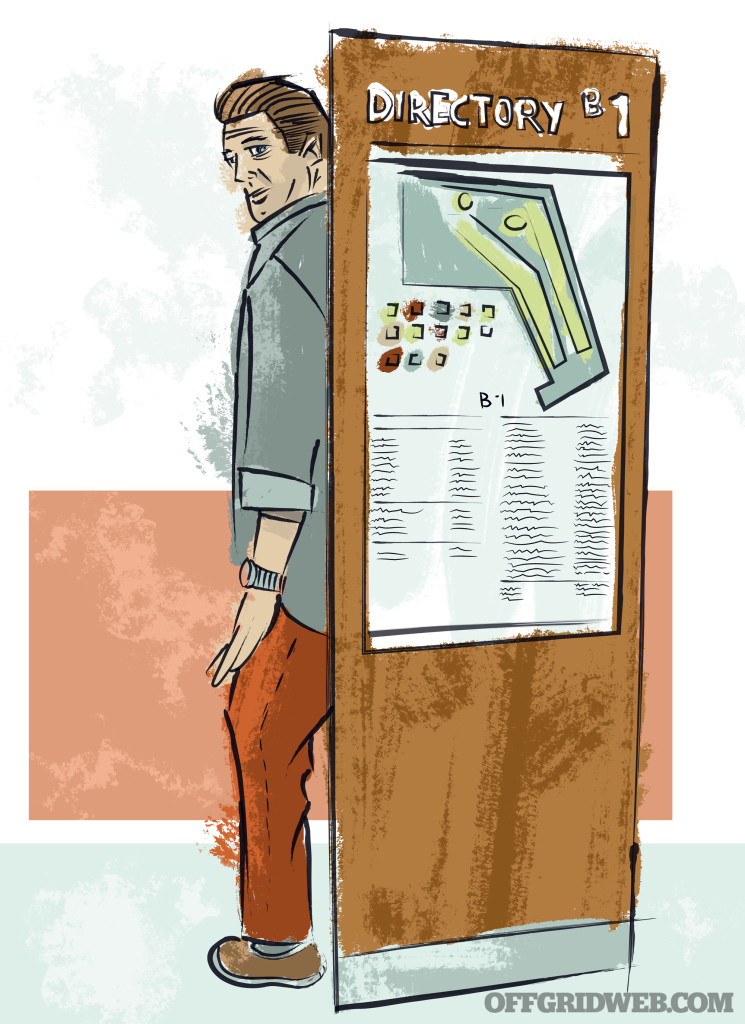
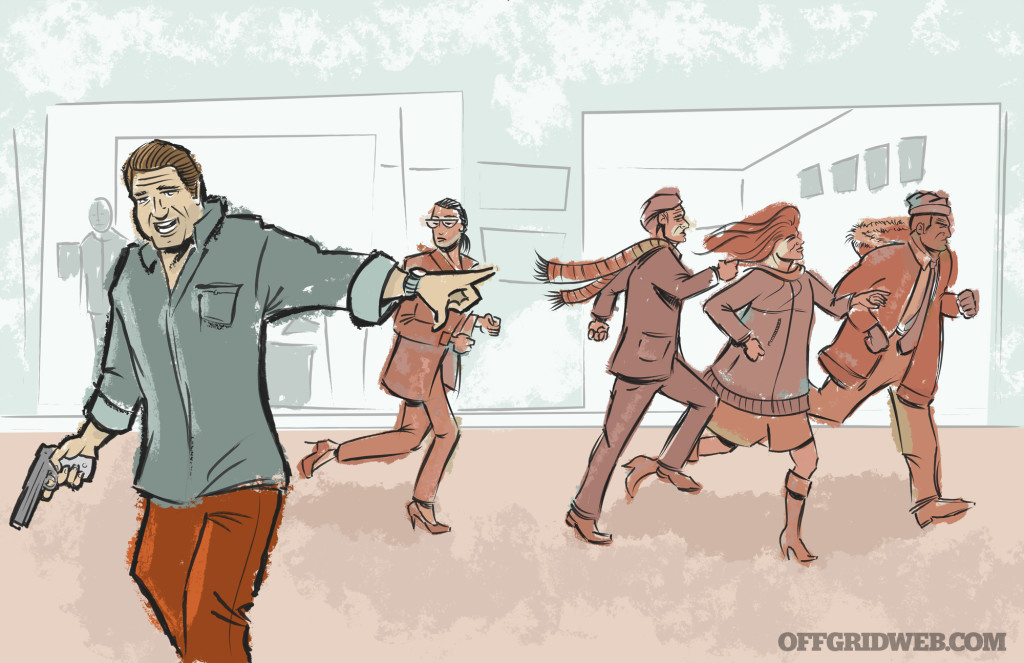
The Complication: You’re about to enter the Oakley store when a loud noise echoes throughout the mall. Everyone flinches, then freezes. Suddenly, several more bangs ring out. It’s gunfire! Immediately, people scream and sprint in every direction. You instinctively duck behind cover and carefully scan for the safest way out — instead of seeing an exit you spot a gunman who fires randomly into a crowd of people then heads in your direction. He didn’t see you, but he’s about 35 yards away and approaching. What do you do?

The New Plan: With this bad guy shooting at people indiscriminately, you’ll have to formulate a plan (and fast) for what to do. You need to deal with the environment (the store and mall), the gear you happen to be carrying, and the reaction (if any) of other shoppers, security guards, or police.

Average Joe: Ryan Lee Price's Approach

Whatif chicago city buildings urban survival defense 7

Chicago had never really been on the list of places I wanted to visit, as the idea of going from one crime-ridden, filthy, overcrowded metropolis (Los Angeles) to another isn’t very appealing. The only thing that even remotely interested me was Wrigley Field and perhaps the view from Sears Tower — er, I mean, Willis Tower. To me, vacations should be filled with relaxing activities, like dropping a hook into the Snake River with a backdrop of the spiky Grand Tetons cutting into a crisp autumn morning, or trekking through the serene Sierra Nevadas during deer season with little more than a pack and my .30-06.

However, opposites attract, right? My wife, Kara, would rather dial 9 for room service or drop her credit card at Bloomingdale’s with a backdrop of a spiky city skyline cutting into … well, you get the idea. Plus, as she pointed out to me months ago, we did the caveman thing last year, and it was her turn this time. Thus, the four of us hopped on an expensive flight to stay in an expensive hotel and drive around in an expensive rental car to eat expensive food or a week. Fish from the Snake River are free; just saying.

Whatif chicago city buildings urban survival defense 2

Because of work and my staunch appreciation for the Second Amendment, I have a concealed-carry permit … and obtaining one in California isn’t an easy feat. But Illinois law is different than California’s. The state, which just recently passed its own concealed-carry law in 2014, doesn’t recognize permits from other states, and Chicago is most undoubtedly unfriendly to gun owners, especially those from out of state.

Taking a firearm with me and having to declare, transport, and worry about the TSA stealing it at the airport didn’t seem worth the hassle, especially since Illinois law stipulated that I had to keep it secured (aka locked up and useless) in my rental car. Before traveling, I always read the laws of my destination to determine what would be best for my situation.

That being said, I would have given almost anything to have my Smith & Wesson with me when I walked into the Oakley Shop four days into our trip.

By then, we’d been to nearly every museum within 20 miles of our hotel. The family voted for a day of relaxing shopping at Chicago’s biggest indoor mall, Water Tower Place, part of the Ritz Carlton on famous Michigan Avenue. I relented, if only to have a chance for a day out of the cold — if you have to go to Chicago, by God, don’t go in the winter. It was probably 25 degrees out, with a windchill factor of 0. The mall was heated, at least, and with eight levels and a glass-enclosed elevator cascading down a center atrium, it was like hiking a waterfall in a concrete wilderness of commercialism.

Whatif chicago city buildings urban survival defense 5

Kara and the kids bee-lined to the American Girl store on the first floor. I graciously bowed out, saying I was going to wander around and find some souvenirs for my brother, an avid Cubs fan who’s back home and probably still celebrating the World Series win.

My wandering took me up to the sixth floor, where there was very little for me: A whole slew of stores geared for millennials who don’t get their clothes dirty for a living. The only bright spot to the L6 (no pun intended) was the Oakley store, as I wanted some new sunglasses.

As I stepped into the store, behind me, I heard a tremendous blast. My first thought was someone dropped a pallet of something, as the sound echoed across the marble flooring. Immediately, there was a panicked scream, then several — what seemed like far off wailing like that of gleeful children. A pallet, fireworks, backfire from the street, six floors up? Everyone around me turned to look, speechless, and struck dumb at the sight. Before I could join them, another boom exploded across the atrium, this time closer, and there was no mistaking what it was. Gunfire. Shotgun? Rifle? Pistol?

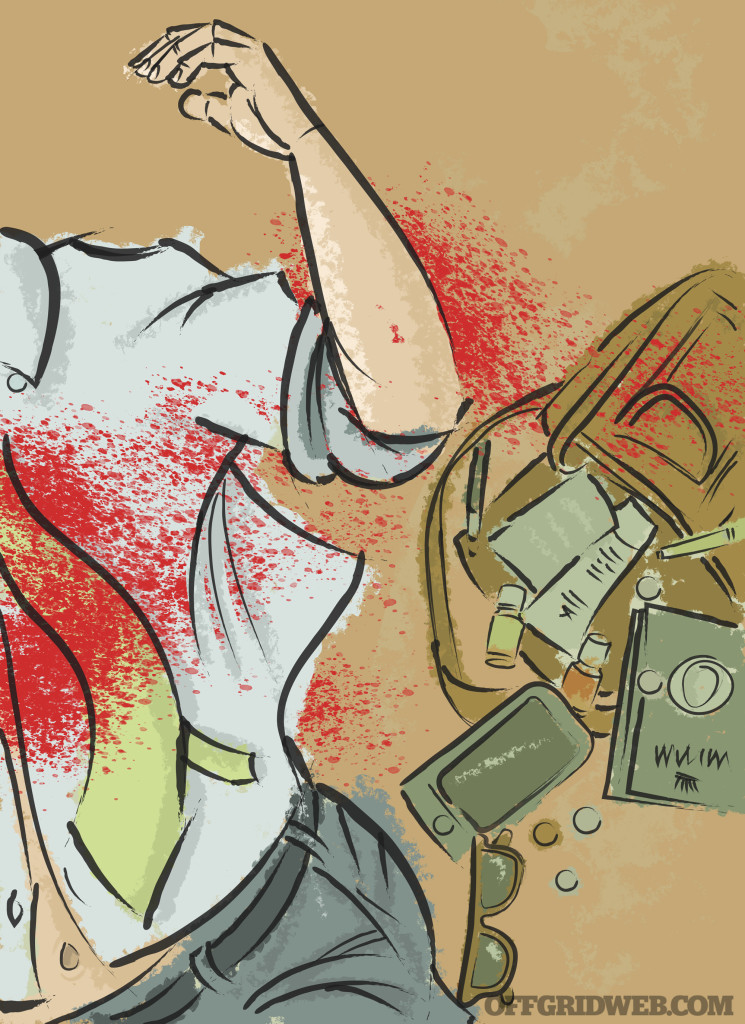
My heart stopped, and I hit the deck just inside the store along with three or four other people. Beyond the threshold of the doorway, the tan parquet floor filled with people tumbling over themselves to escape, like panicked buffalo. Screams were pitched and piercing. Three blasts reported from directly in front of us, each punctuated by a distinct racking of a weapon and the crumpled slump of a victim. The parquet floor turned red. Flat on my face, I peered out from behind the store’s folded open doors. A bank of escalators to my right blocked most of my view, but I could make out the silhouetted profile of the gunman through the glass elevator enclosure across the atrium.

170400-WHATIF mass shooting gun defense medical 6

He was walking my way, calmly, slowly, indiscriminately leveling his shotgun at anything that moved or caught his eye. Three more people were cut down before my eyes, and I could do nothing about it. My heart raced, and my body jittered with adrenaline.

He was closer now, and I hadn’t moved from my spot. I could see him clearly, standing about 15 feet from the escalator. My thoughts snapped to my family, five levels below, undoubtedly aware of what was going on. A fire alarm rang out, but beyond, it was eerily quiet. He stood there, looking for an opportunity. The time for me to run had passed, and I was in prime position to engage him if I had something to fight back with.

170400-WHATIF mass shooting gun defense medical 4

For one reason or another, I remembered a quote I saw on Facebook earlier in the week: “If violent crime is to be curbed, it is only the intended victim who can do it. The felon does not fear the police, and he fears neither judge nor jury. Therefore, what he must be taught is to fear the victim.”

The gunman’s head twitched in my direction. Several customers of the sunglass shop were attempting to scurry to the back room and to the safety of the maintenance hallway, and the scuffling noise caught his attention. As he turned to the entrance of the store, he volleyed a shell through the door, destroying a display case just over my head. Maybe he saw me, maybe not, but in a few short seconds — just the span of time it takes a man to walk 15 feet — I would become a victim, a line item in the newspaper that would forever change the lives of only a few people, my friends, family, coworkers. In those few short seconds, everything I am and everything I’d ever be would be taken from me.

170400-WHATIF mass shooting gun defense medical 3

We’d all like to see ourselves as heroes, John Wayne or Clint Eastwood, calmly entering the fray. With a quick retort, determined grit, and great hair, we’d educate the perp on the error of his ways before dispatching him to hell. But the truth of the matter is that self-preservation is a strong obstacle, and the brave, the scared, the fearful charge in with reckless abandon to defend ideals and beliefs bigger than themselves.

I couldn’t die in a room with lime-green walls.

The barrel of the shotgun slowly poked in through the door. When I saw a dirty hand on its fore-end, I knew he had a pump shotgun with enough room for about five shells. Had he spent them all or did he have one more round? Did he reload at some point? Where’s my .45 when I needed it? Locked up safely at home, not doing anyone any good.

I didn’t have time to go back in my head to do a round count. I pounced. With a violent and blinding upward motion, I grabbed the barrel of the shotgun with my left hand and his jacket collar with my right. The force lifted him off the ground and back out into the walkway. He let go of the shotgun, and his arms flung behind him as if he was falling backwards. I struck with my fists, feet, knees, and head. His coat flew open, revealing a pistol in his waistband. Before he could reach for it, I fell on him with a bear hug, grasping my arms around his scrawny body. He clawed, kicked, and thrashed his head around.

The struggle brought us to the railing of the atrium; there was no way I could let go of him. Neither of us could reach his handgun, and I couldn’t let go of him. It was as if I were holding the tail of a rattlesnake.

In our struggling, we slammed against the railing, and there was my solution: gravity. I pushed his body, his head with my head. I tangled my legs around his, and I lifted, I strained, I twisted. He had a hold of my coat, and his feet, off the ground now, were kicking at my knees. He began to scream, and my grunts and muffled swears punctuated our struggling. He’s going over, or we’re both going over. There was no third choice in my mind, until something huge slammed into both of us, like a battering ram in human form.

I found myself on the bottom of a growing pile of Chicago Police SWAT team members bristling with gear and guns. I let go of everything as something powerful dragged me free by my legs.

As it turns out, Chicago’s Northwestern Police Department is on Michigan and Superior avenues, only two blocks to the south, and my life and maybe those of many others were saved by a phone call. However, the stringent gun laws of Chicago, Illinois, and the Federal government allowed 13 people to die because they disarmed its people, leaving us as soft targets.

170400-WHATIF mass shooting gun defense medical 1

Change the laws. Votes count. People count. Freedom counts.

About the Author

Ryan Lee Price is a freelance journalist who specializes in outdoor adventuring, emergency preparedness, and the automotive industry. He has contributed to the SHTF survival column in our sister publication RECOIL and is a long-time hiking and camping enthusiast. He currently resides in Corona, California, with his wife, Kara, and their two children.