In This Article
Firoze Mehta, of Brooklyn, NY, is an ordinary guy. He's not a former military member or law enforcement officer—in fact, he has a background in computer programming. On the weekends, he likes to play sports and ride his motorcycle. However, his priorities and worldview changed drastically in late 2012, when the destructive force of Hurricane Sandy hit New York City.
A Mindset of Preparedness
Firoze writes of his experience during the hurricane, “I was living in Manhattan at the time, and the entire city shut down like I had never seen before. I realized then just how fragile our society is when it comes to being prepared. When I added up all the unsustainable activity going on in the world, it was obvious to me that society was heading for more uncertainty in the future (political, economic, climate, you name it). It was then that I made a conscious decision to do whatever I could to help people in a meaningful way. I concluded that nothing could be more impactful than helping others prepare for the unknown, just as I have been doing for myself and my family.”
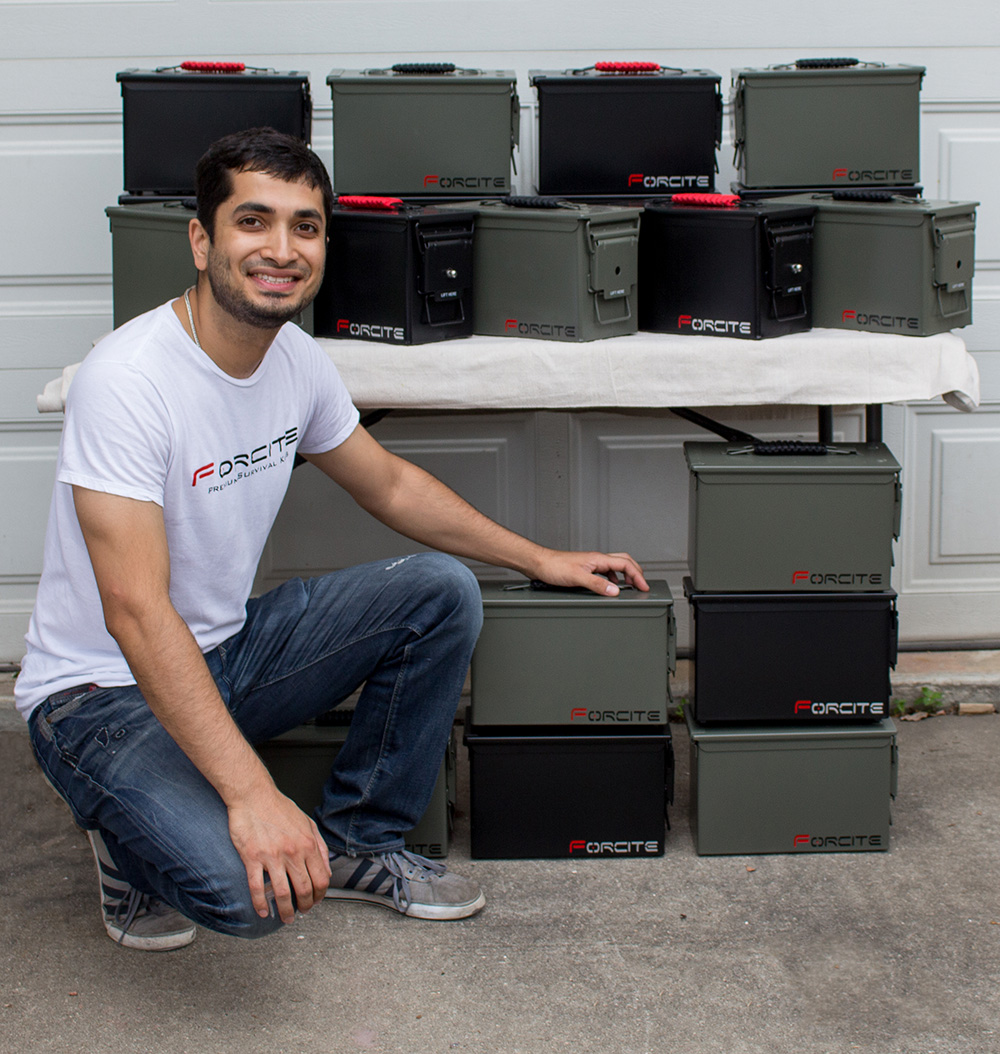
Firoze with a batch of the kits he has built.
Committing entirely to this new purpose, Firoze took a leap of faith and quit his profitable job as a software product manager. He then founded his own small business, named Forcite—a play on the word foresight, meaning provision for the future. Forcite's mission is to produce pre-assembled survival kits for the general public.
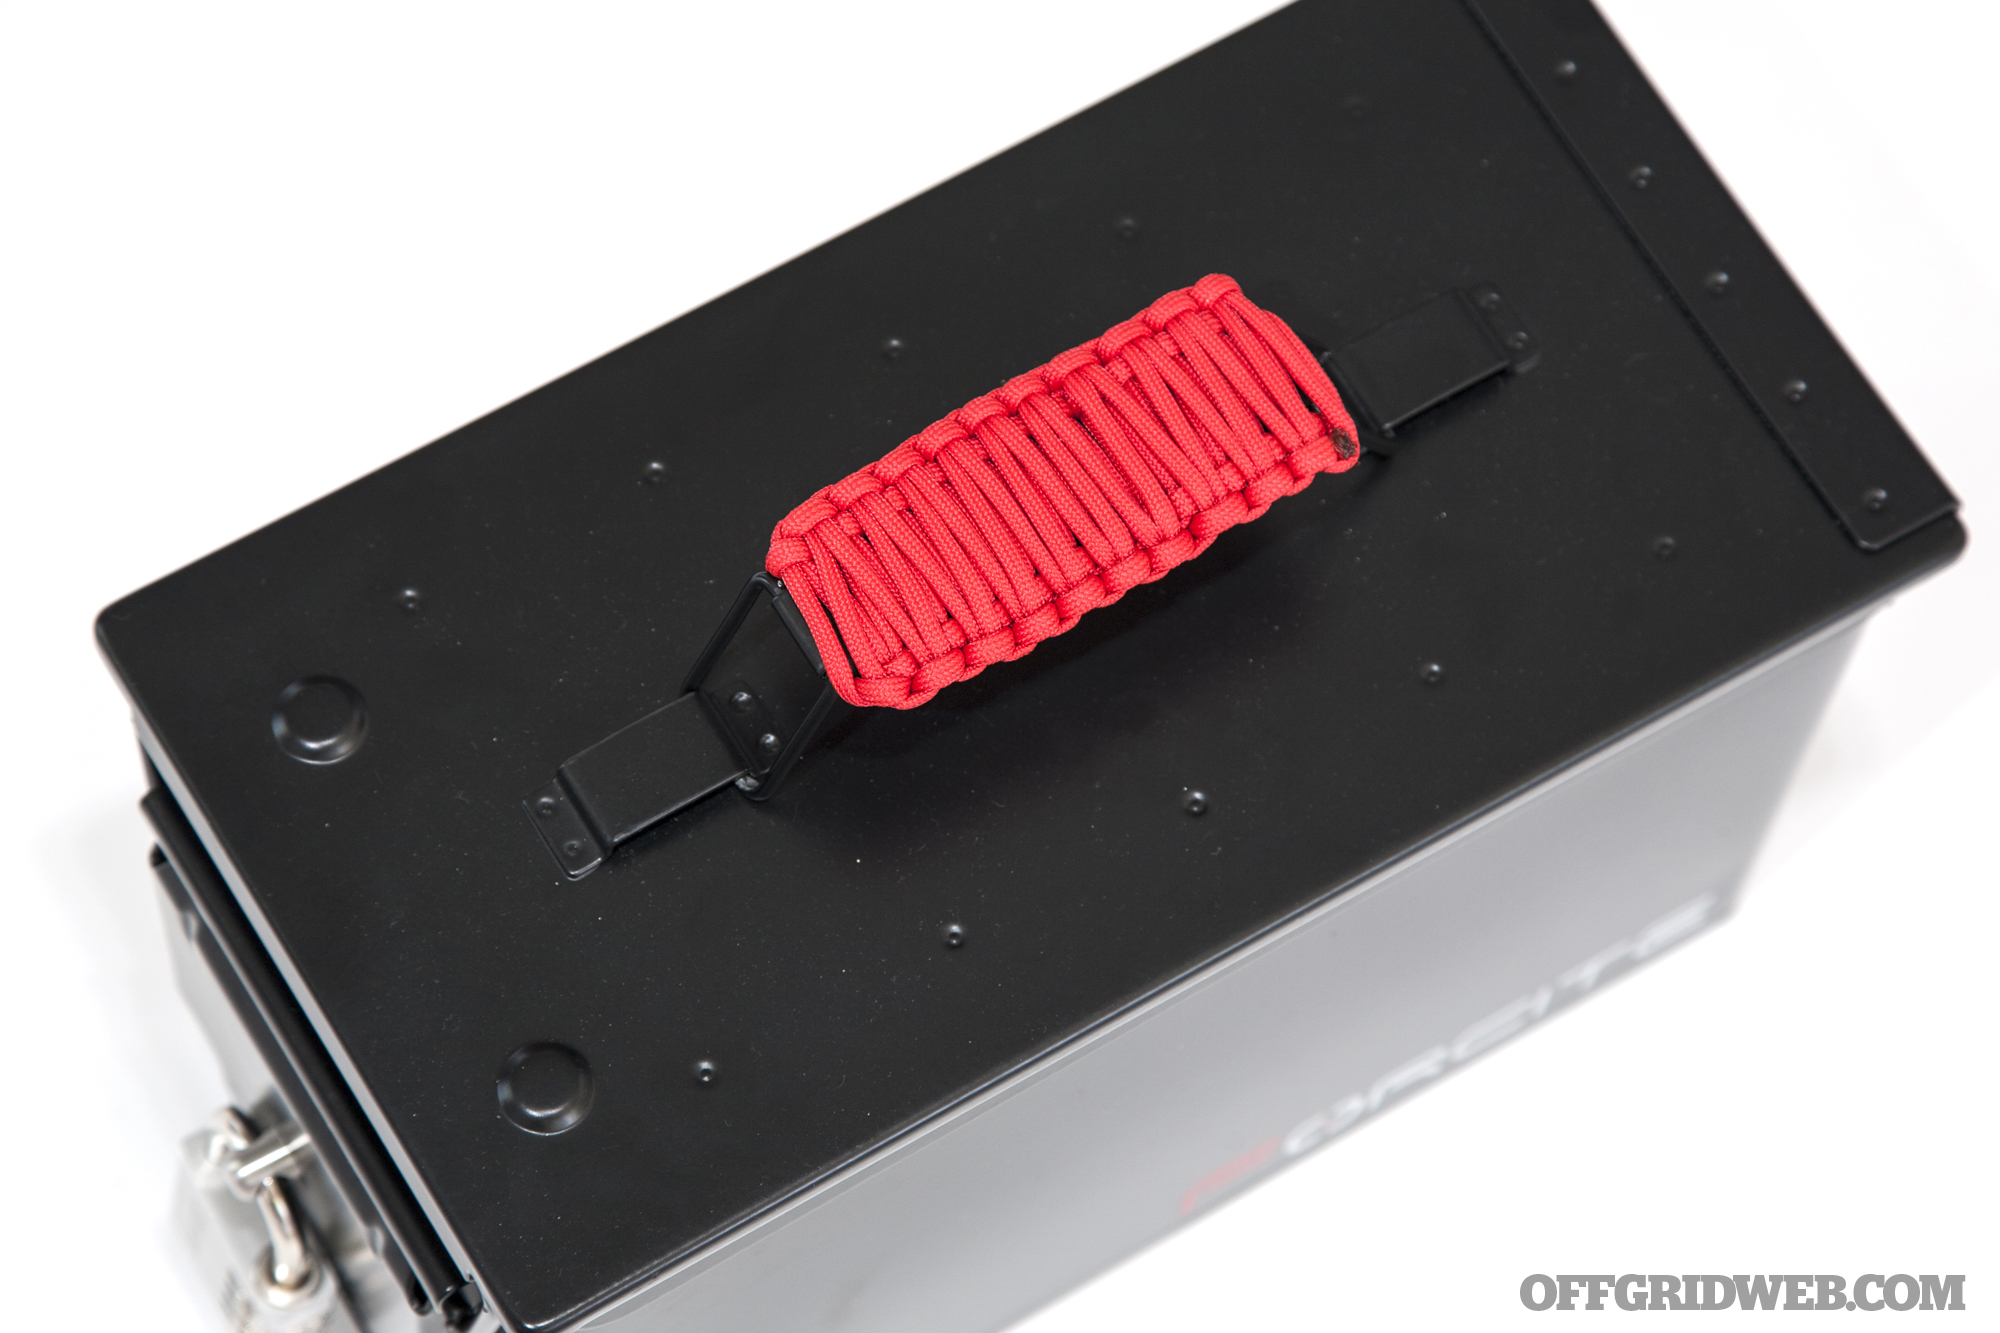
Firoze chose to contain these kits in steel .50-caliber ammo boxes, since they provide a tough exterior and secure lid that can withstand severe conditions. These boxes also offer a more appealing style than a plastic bin or duffel bag—Firoze says he wanted to design “something that you wouldn't be embarrassed to keep out of your closet.”
Each Forcite kit is assembled by Firoze in Brooklyn, and includes a first aid kit, personal hygiene kit, 52-piece survival tool kit, and a set of documents that outlines what's in the box and the potential survival uses of each item.
Firoze says this knowledge component is absolutely essential, and we tend to agree with him. He writes, “This [document set] is the one thing I wish more emergency kits included, but very few do. I think as consumers, we're all guilty of wanting to possess all the latest gadgets and gear; but we often neglect the other “boring” aspects of prepping—how to use your gear, prepare your home, make a plan, store all your important documents/belongings, and so on.”
After hearing about Forcite kits, we were intrigued. When Firoze graciously offered to send us one of his new kits to test out, we couldn't possibly say no. So, read on to hear our thoughts on the Forcite survival kit.
Forcite Kit Review: First Impressions
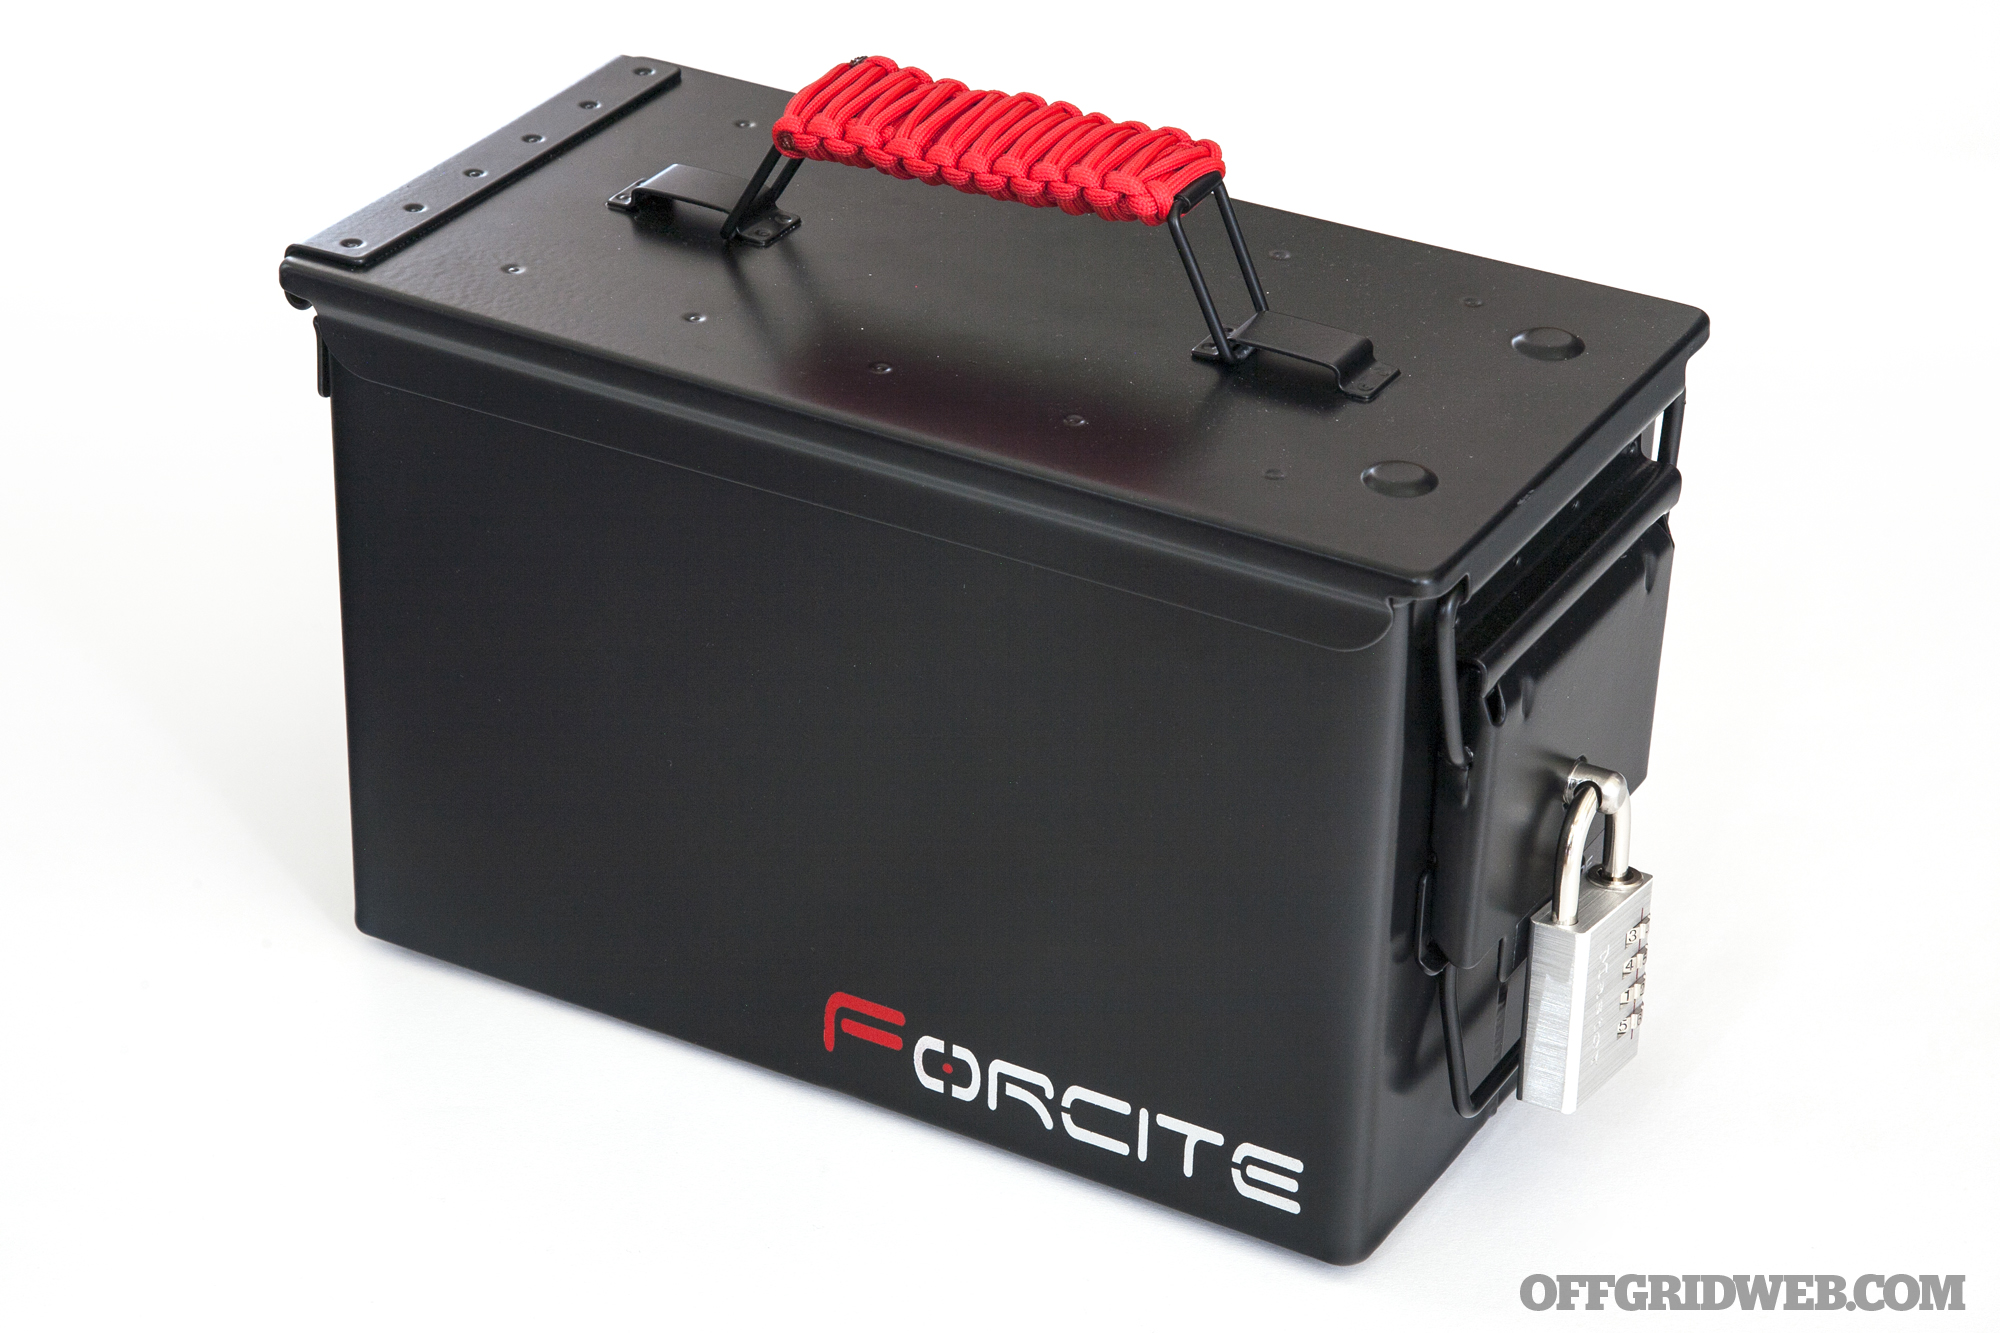
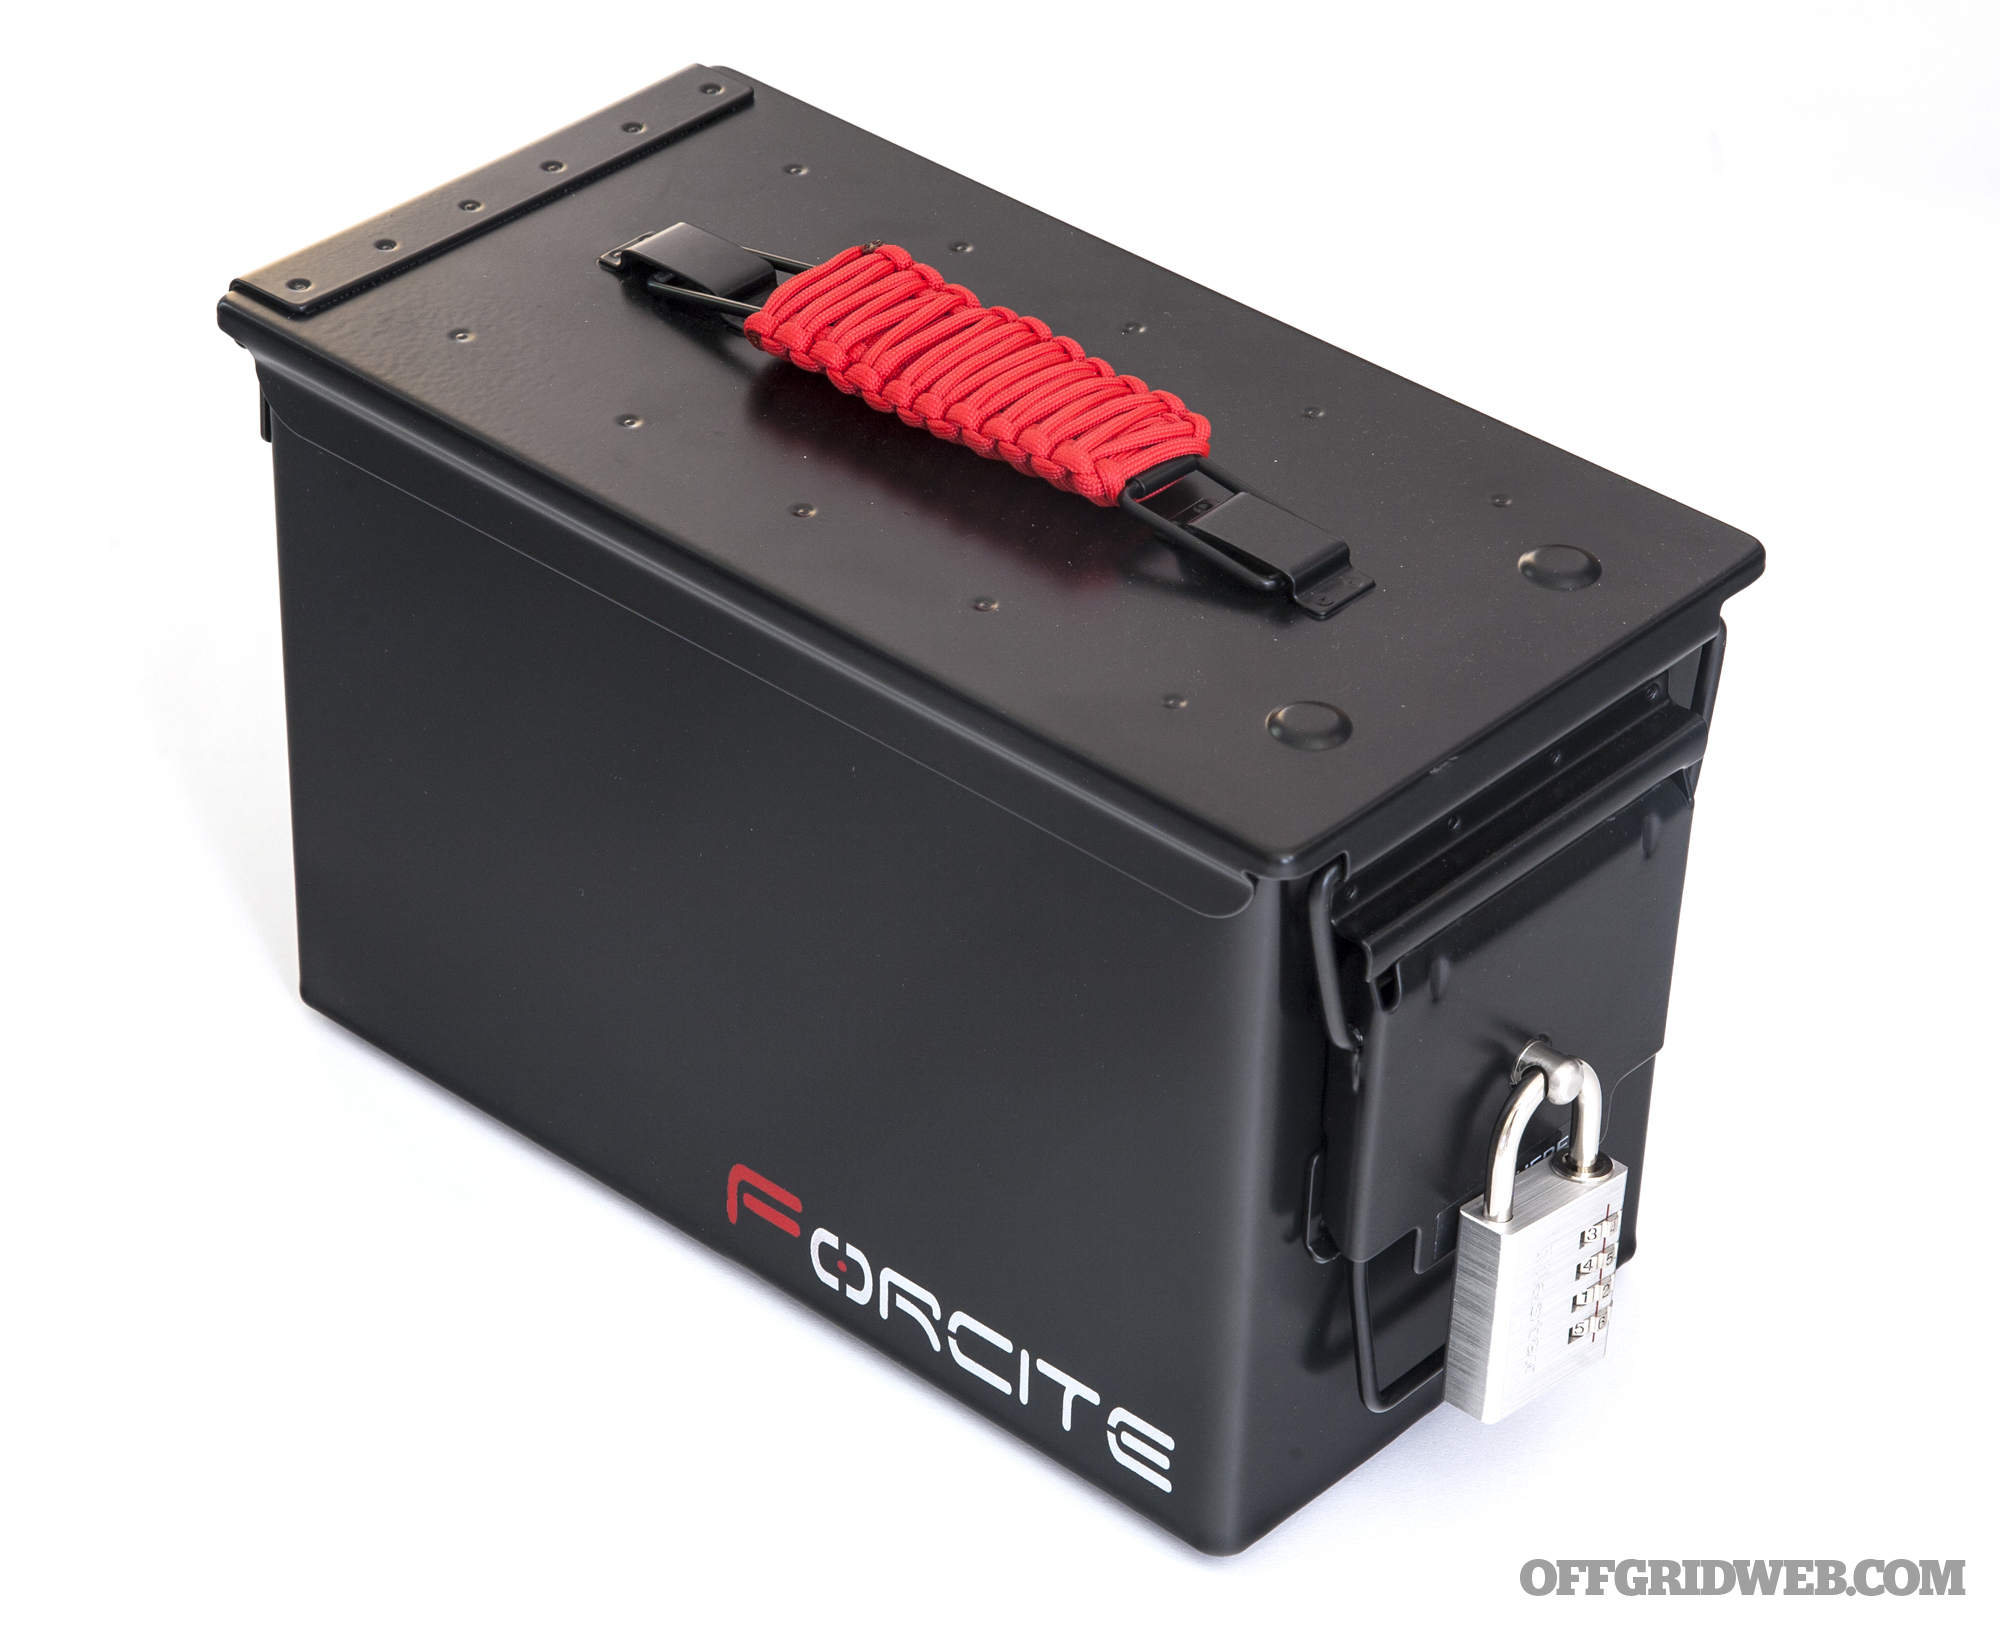
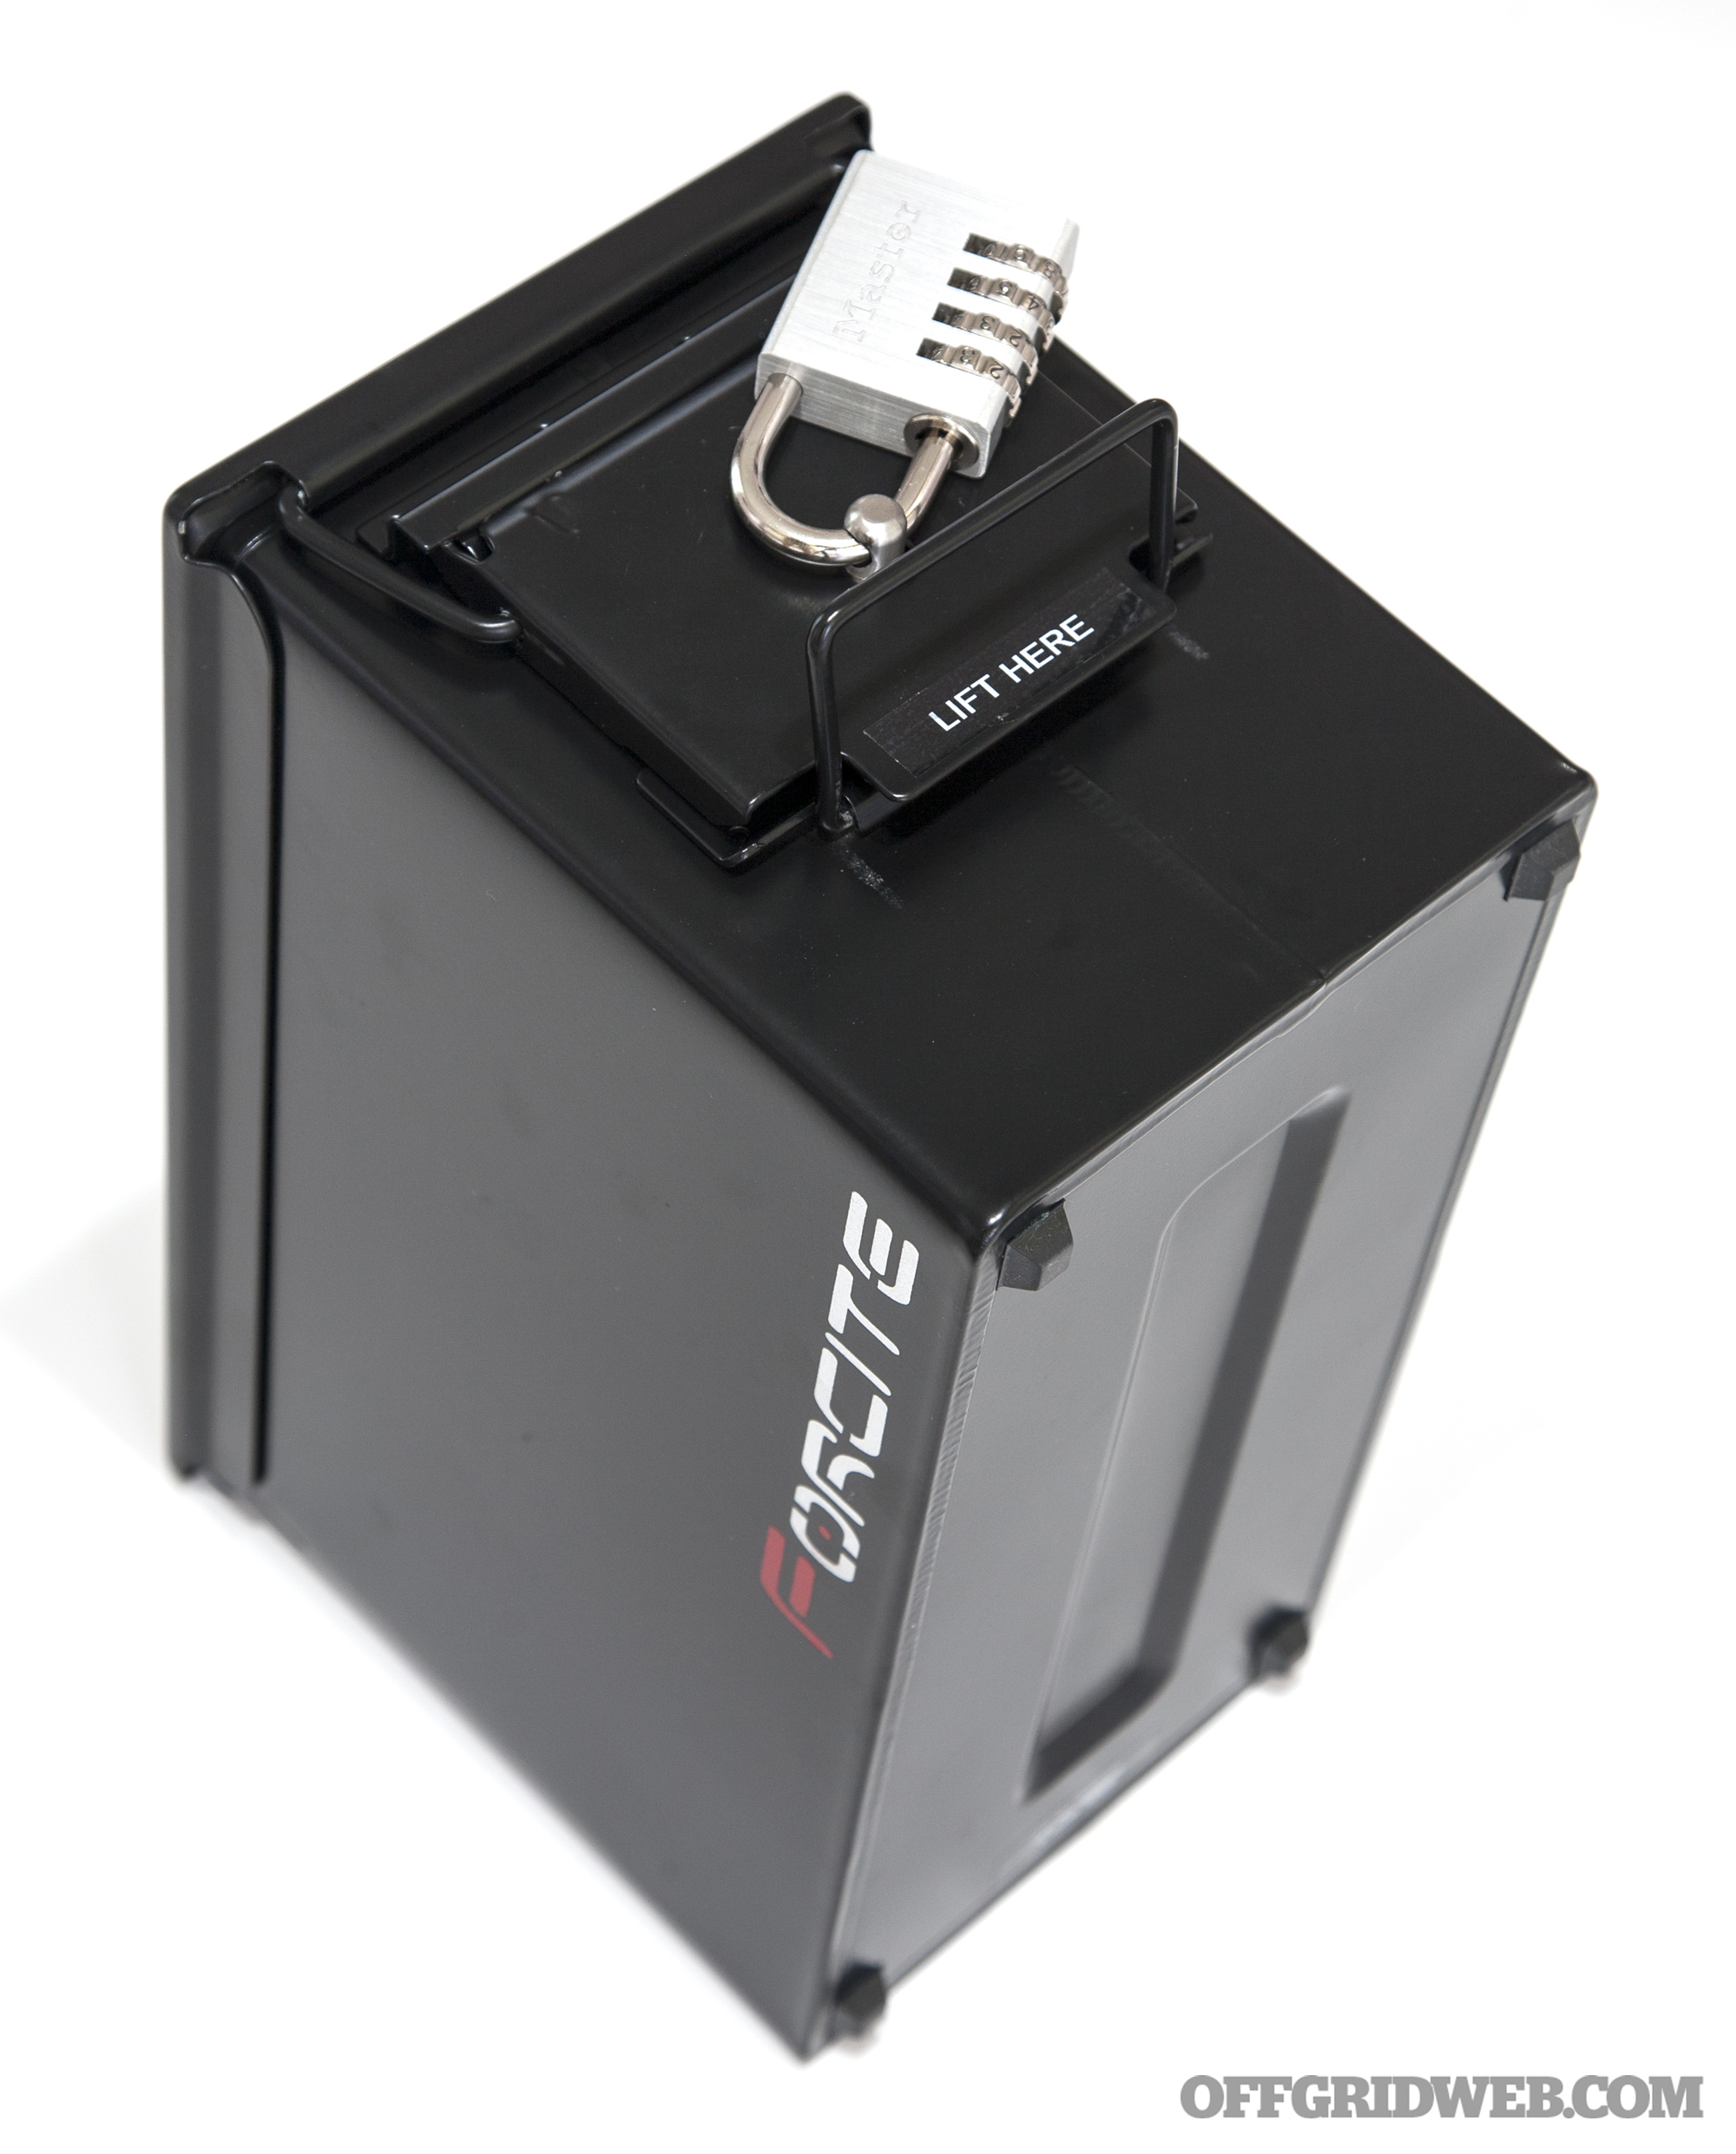
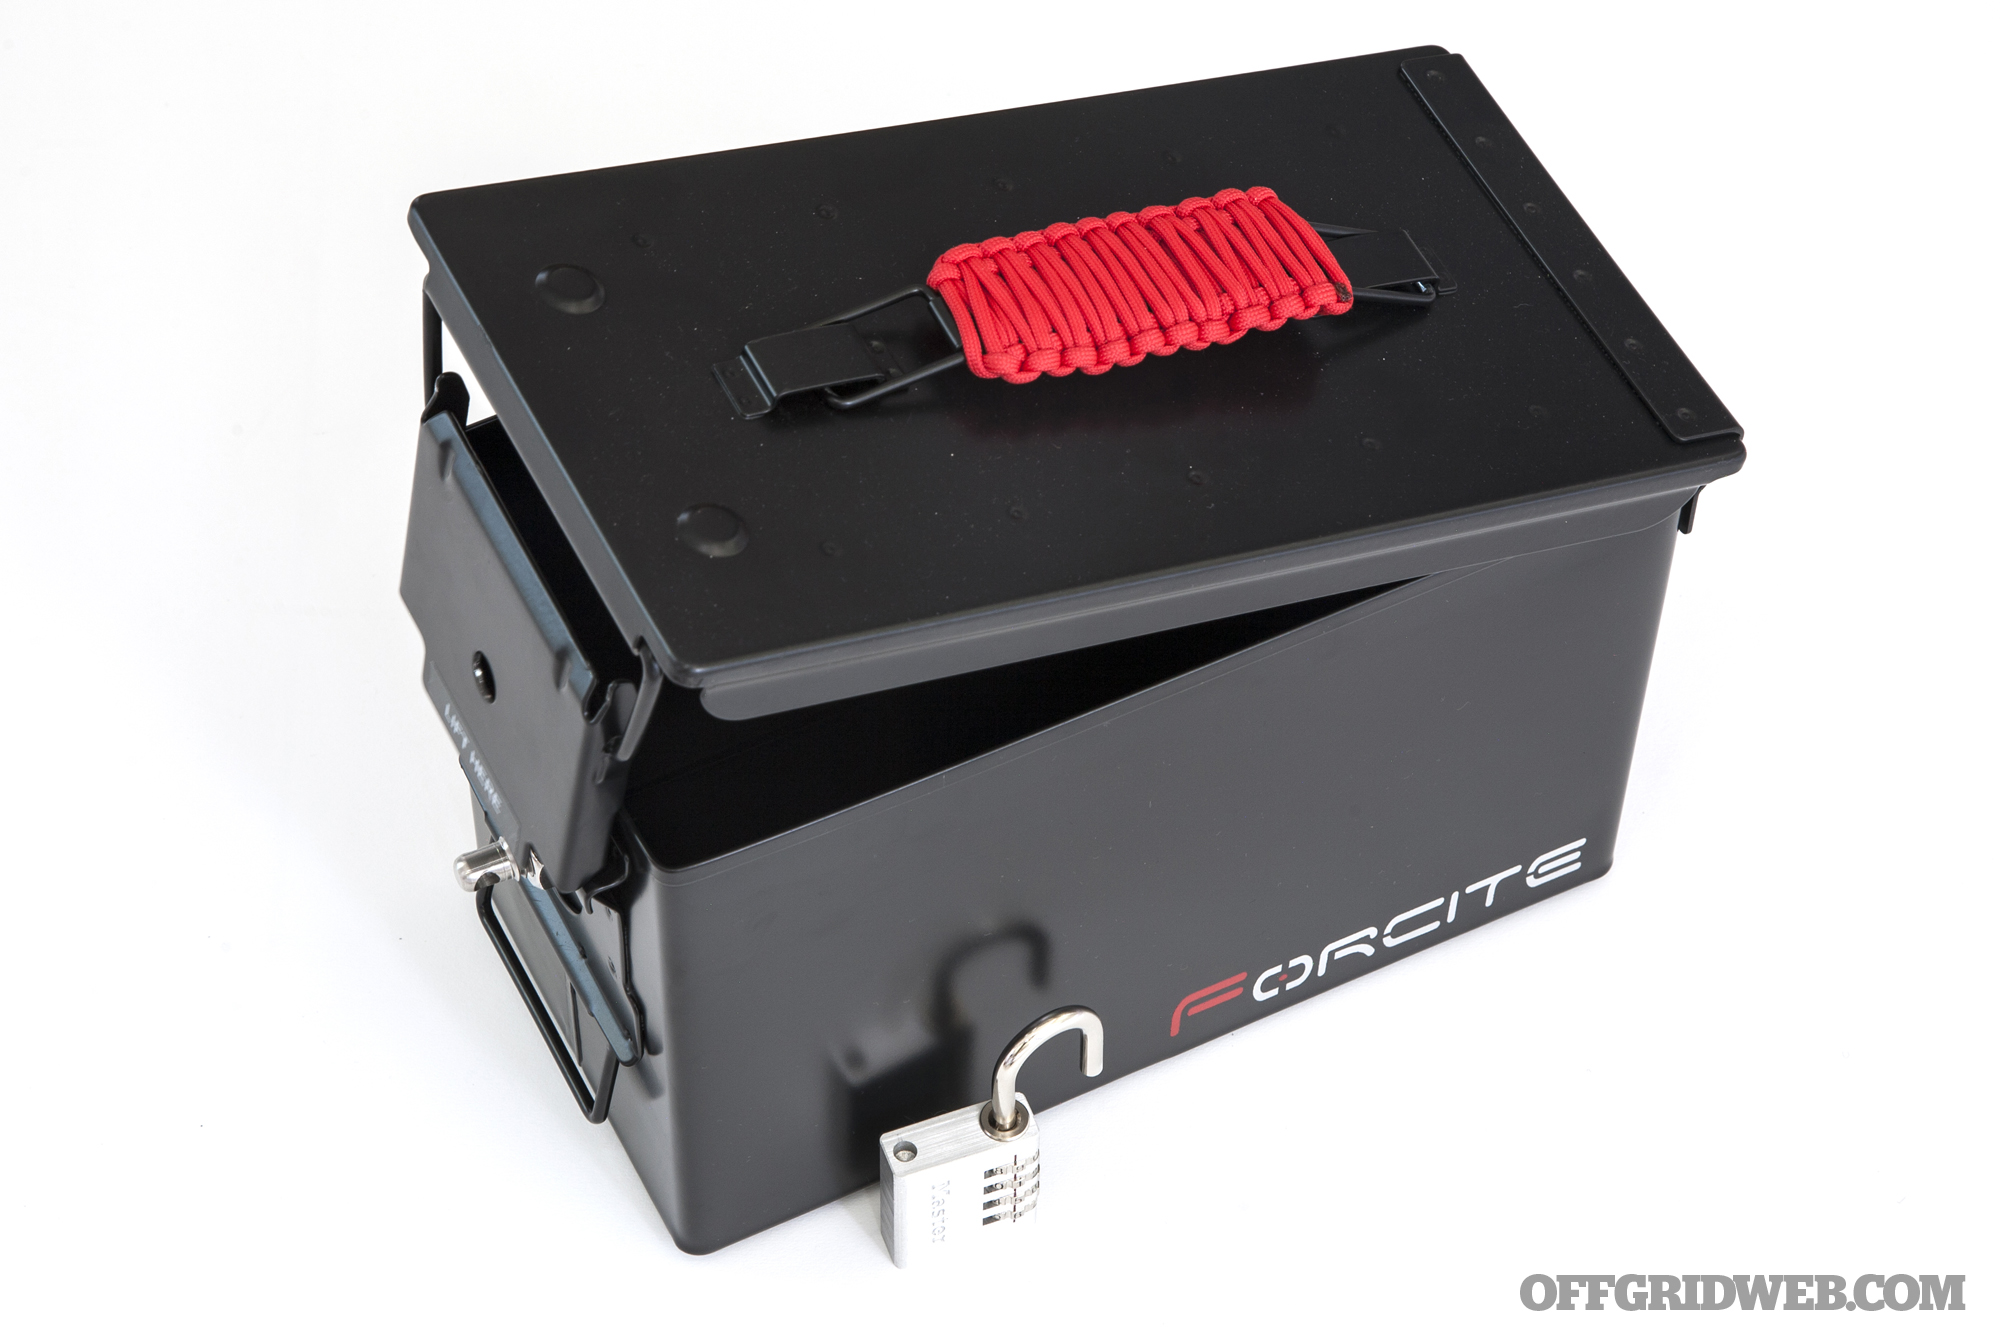
Our Forcite kit soon arrived in the mail, and we peeled away the bubble wrap to reveal a satin black ammo can. If black isn't your thing, Forcite kits are also offered in Olive Drab finish. Regardless of color, these kits retail for $150 with free shipping.
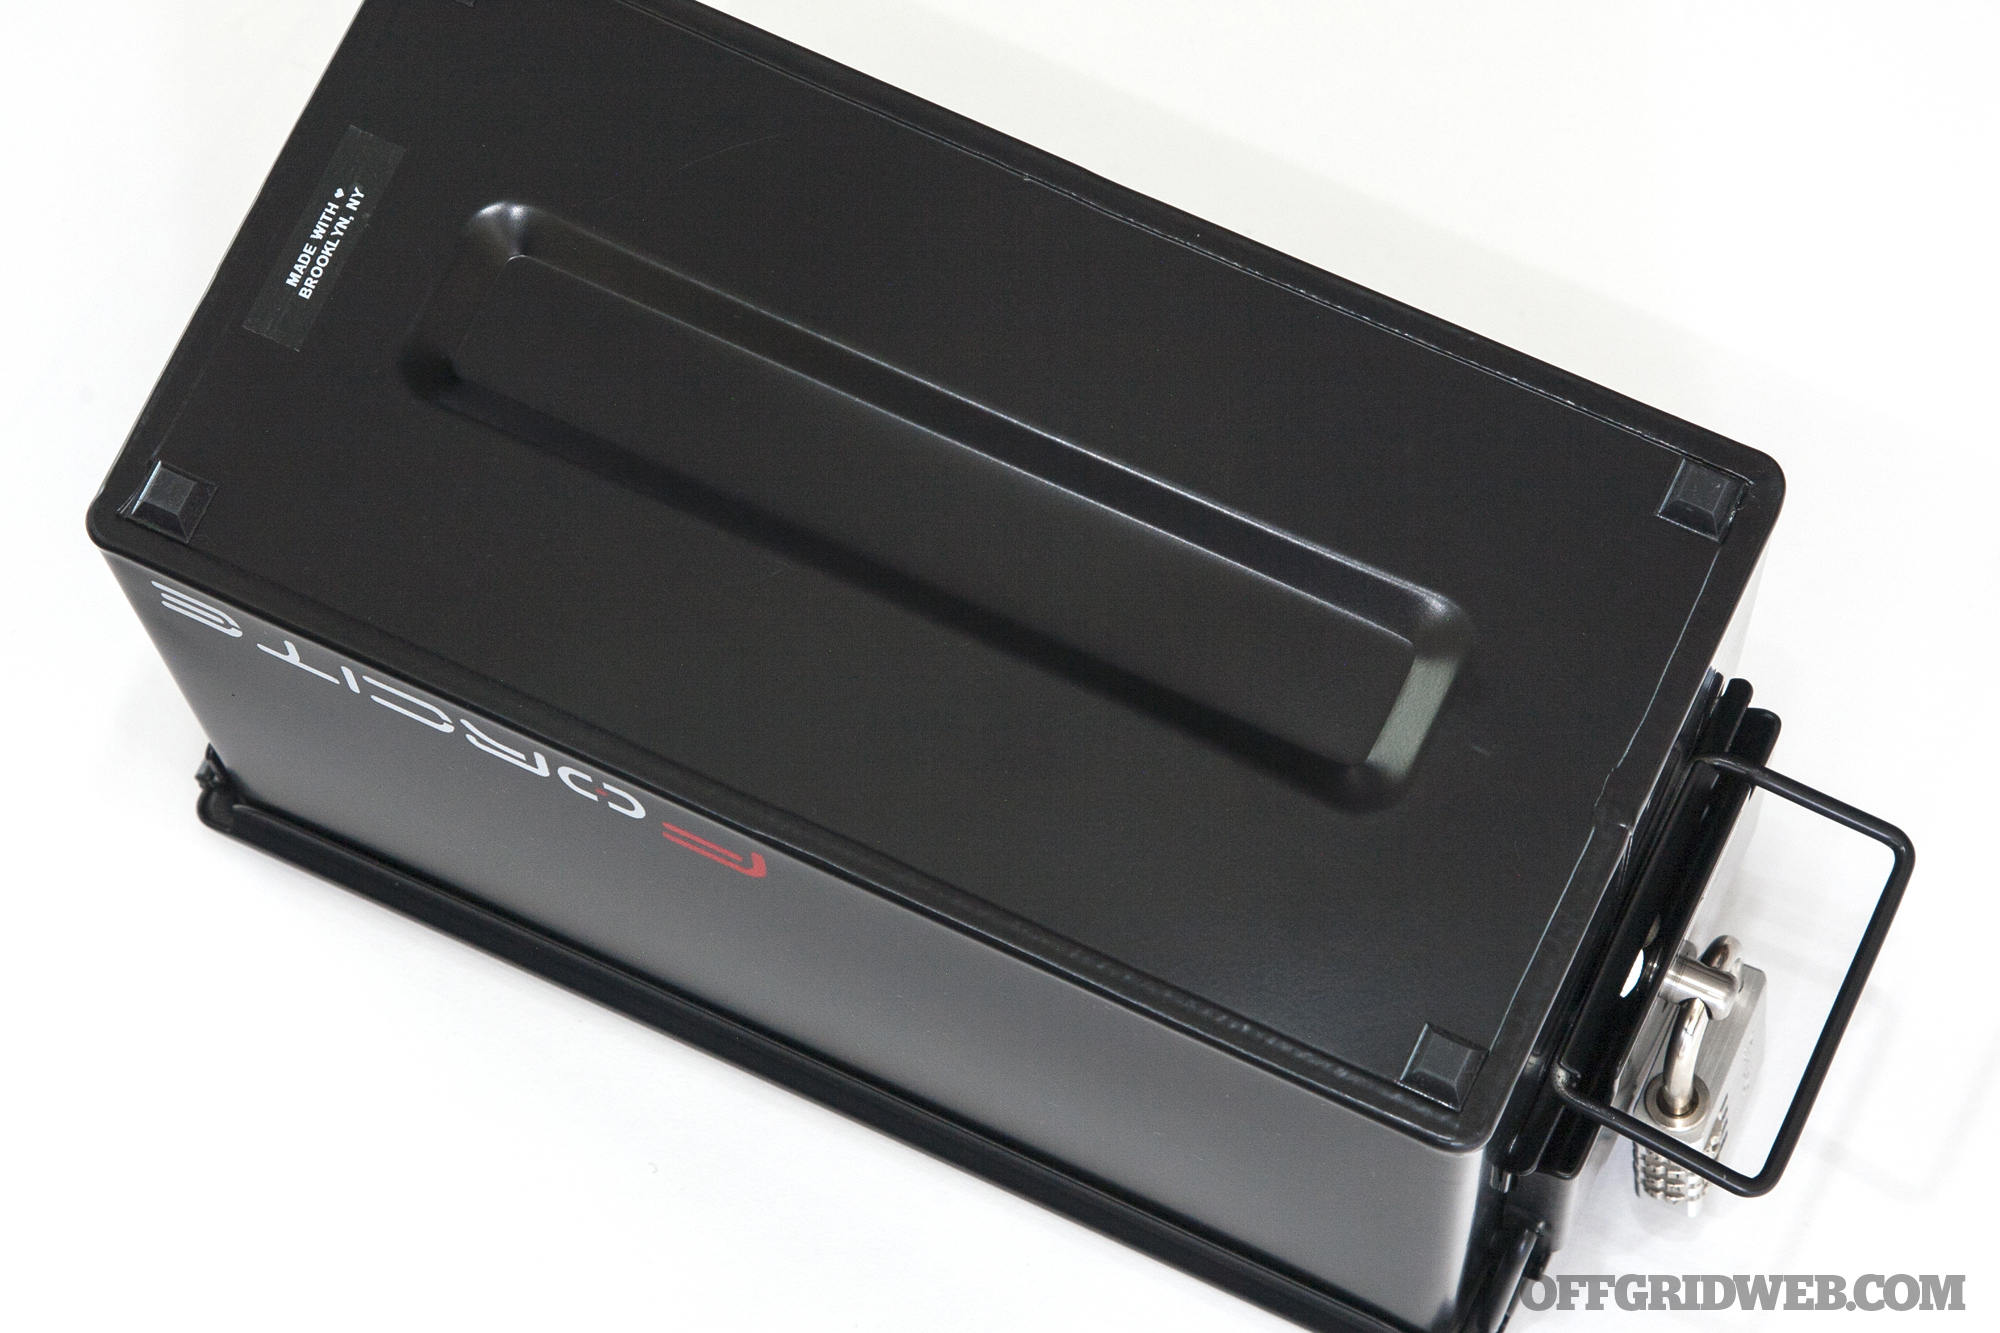
The sturdy steel can is powder-coated inside and out for durability and corrosion resistance, and its retractable carry handle is wrapped with 13 feet of red paracord. The Forcite logo is emblazoned on one side, while the base has been fitted with anti-slip rubber feet.
The kit we received also includes an optional $20 add-on: a combination padlock. This lock attaches to a steel bolt that runs through the can's latch, preventing snooping or theft of its contents. It also provides a way to secure the can itself—just run the lock through a chain, and around something heavy or immobile.


With the lock and all supplies, the kit tips the scales at 10.6 pounds. Its exterior seems quite solid, but what matters most is what's inside. In the next section, we'll crack it open and discuss the contents.
Survival Supplies in the Forcite Kit
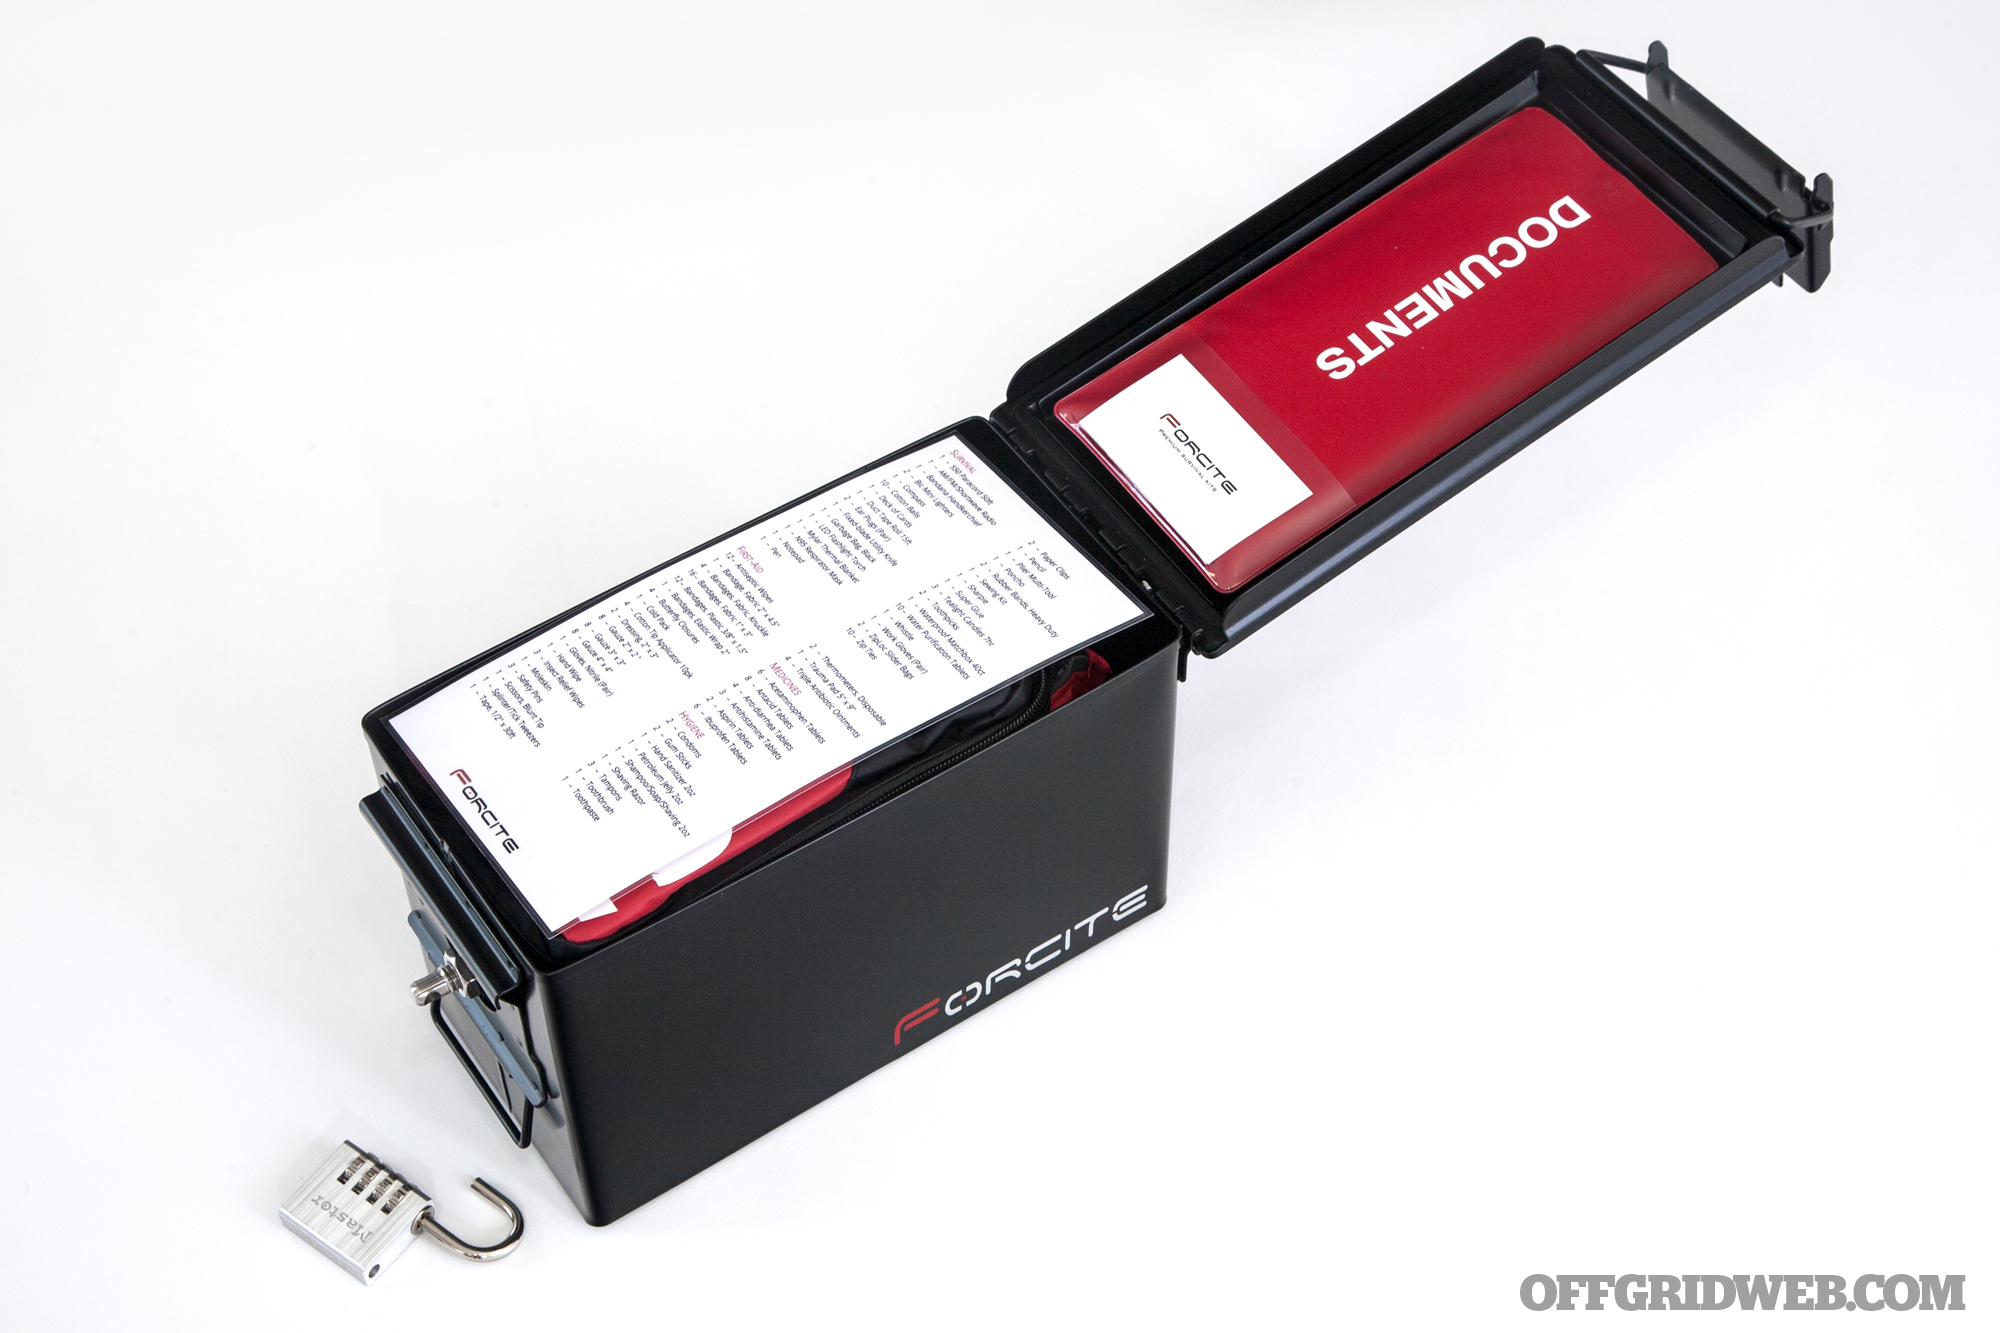
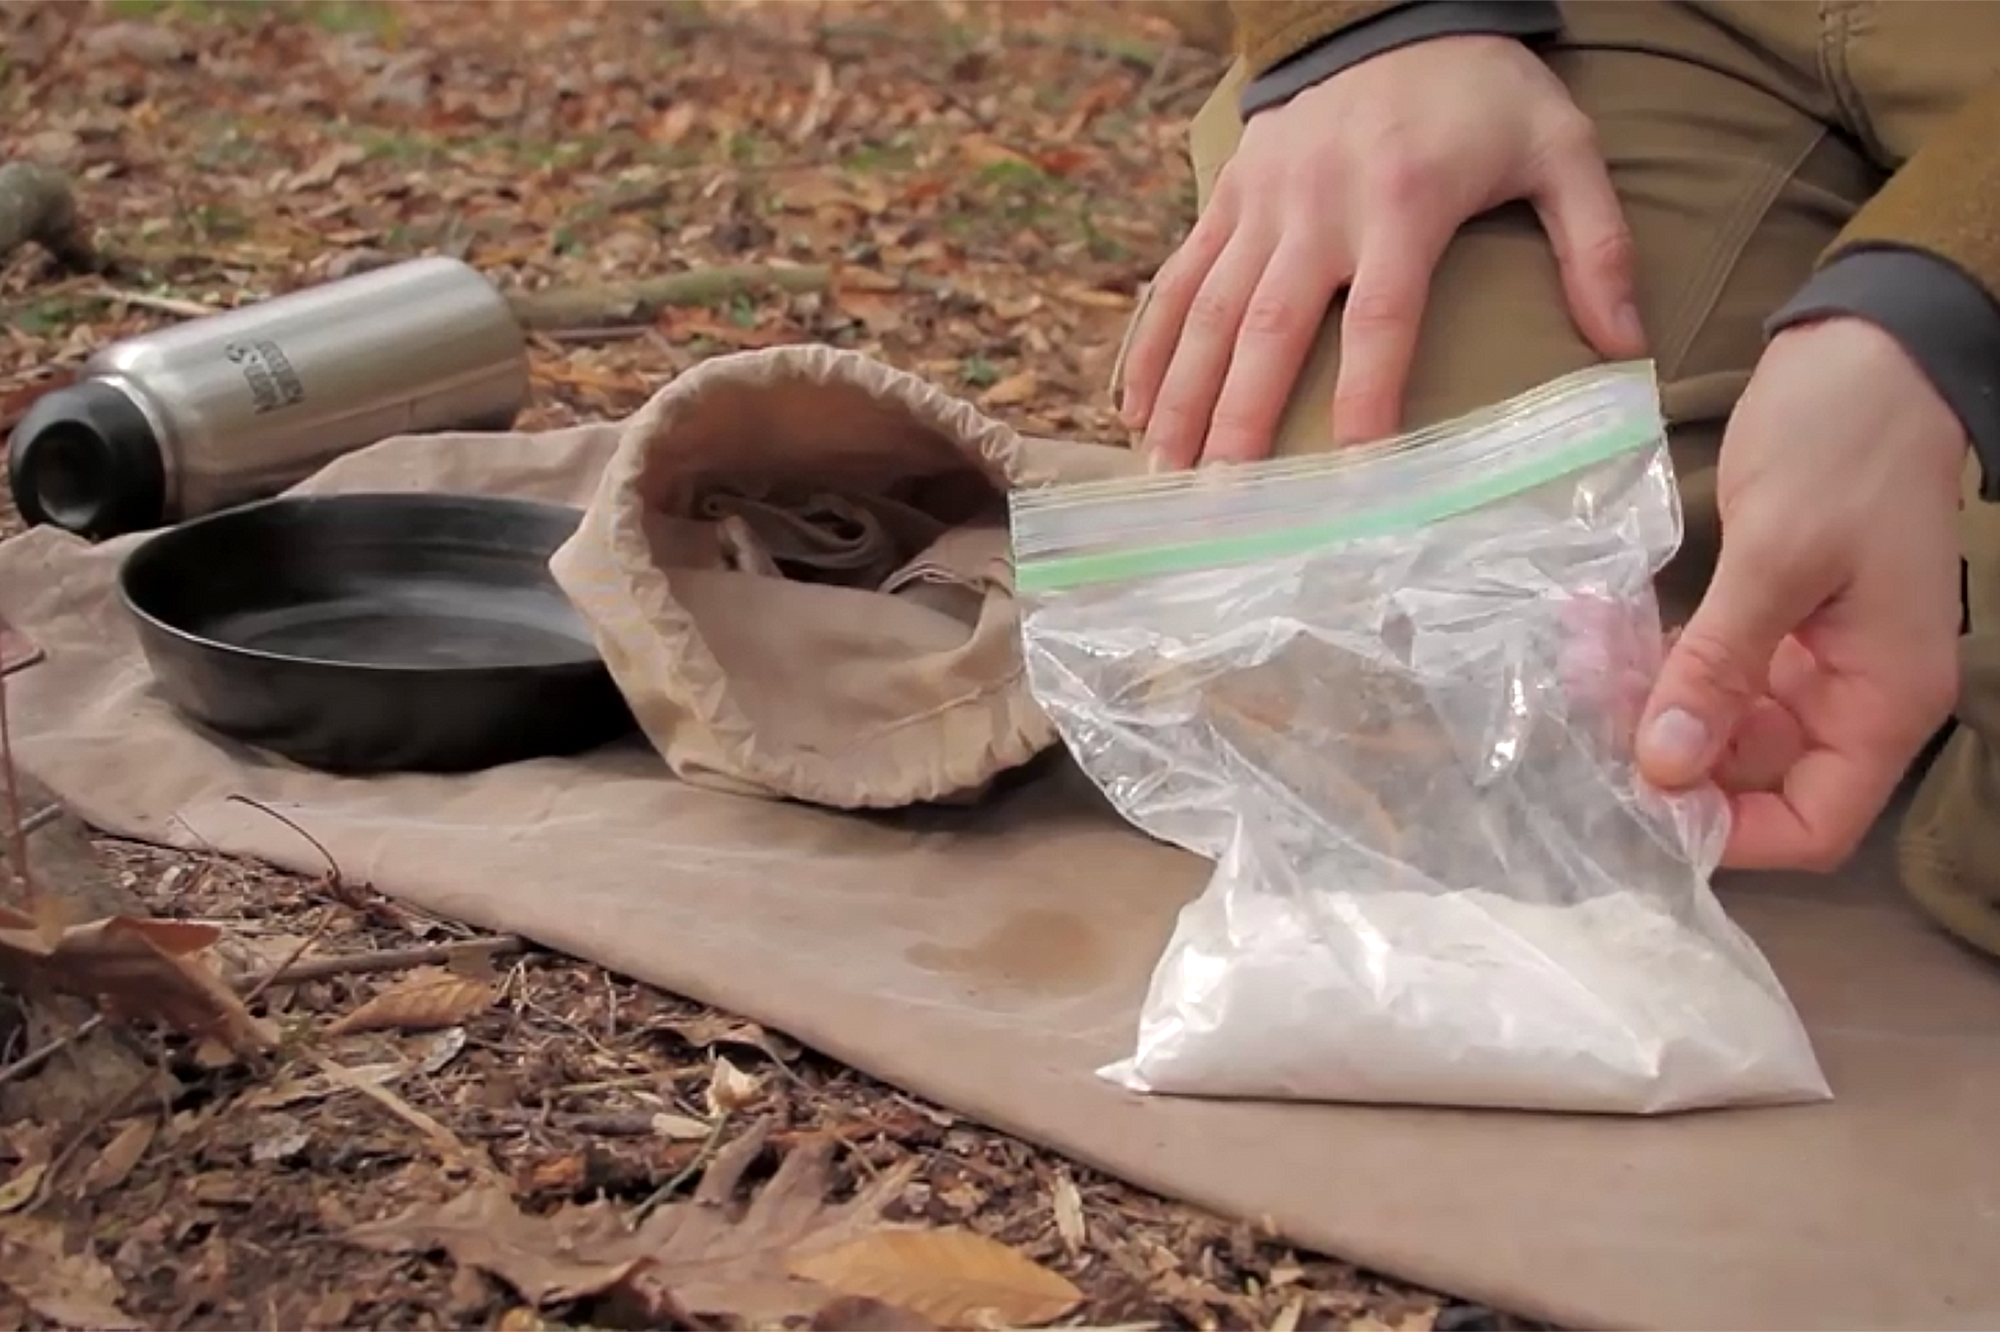
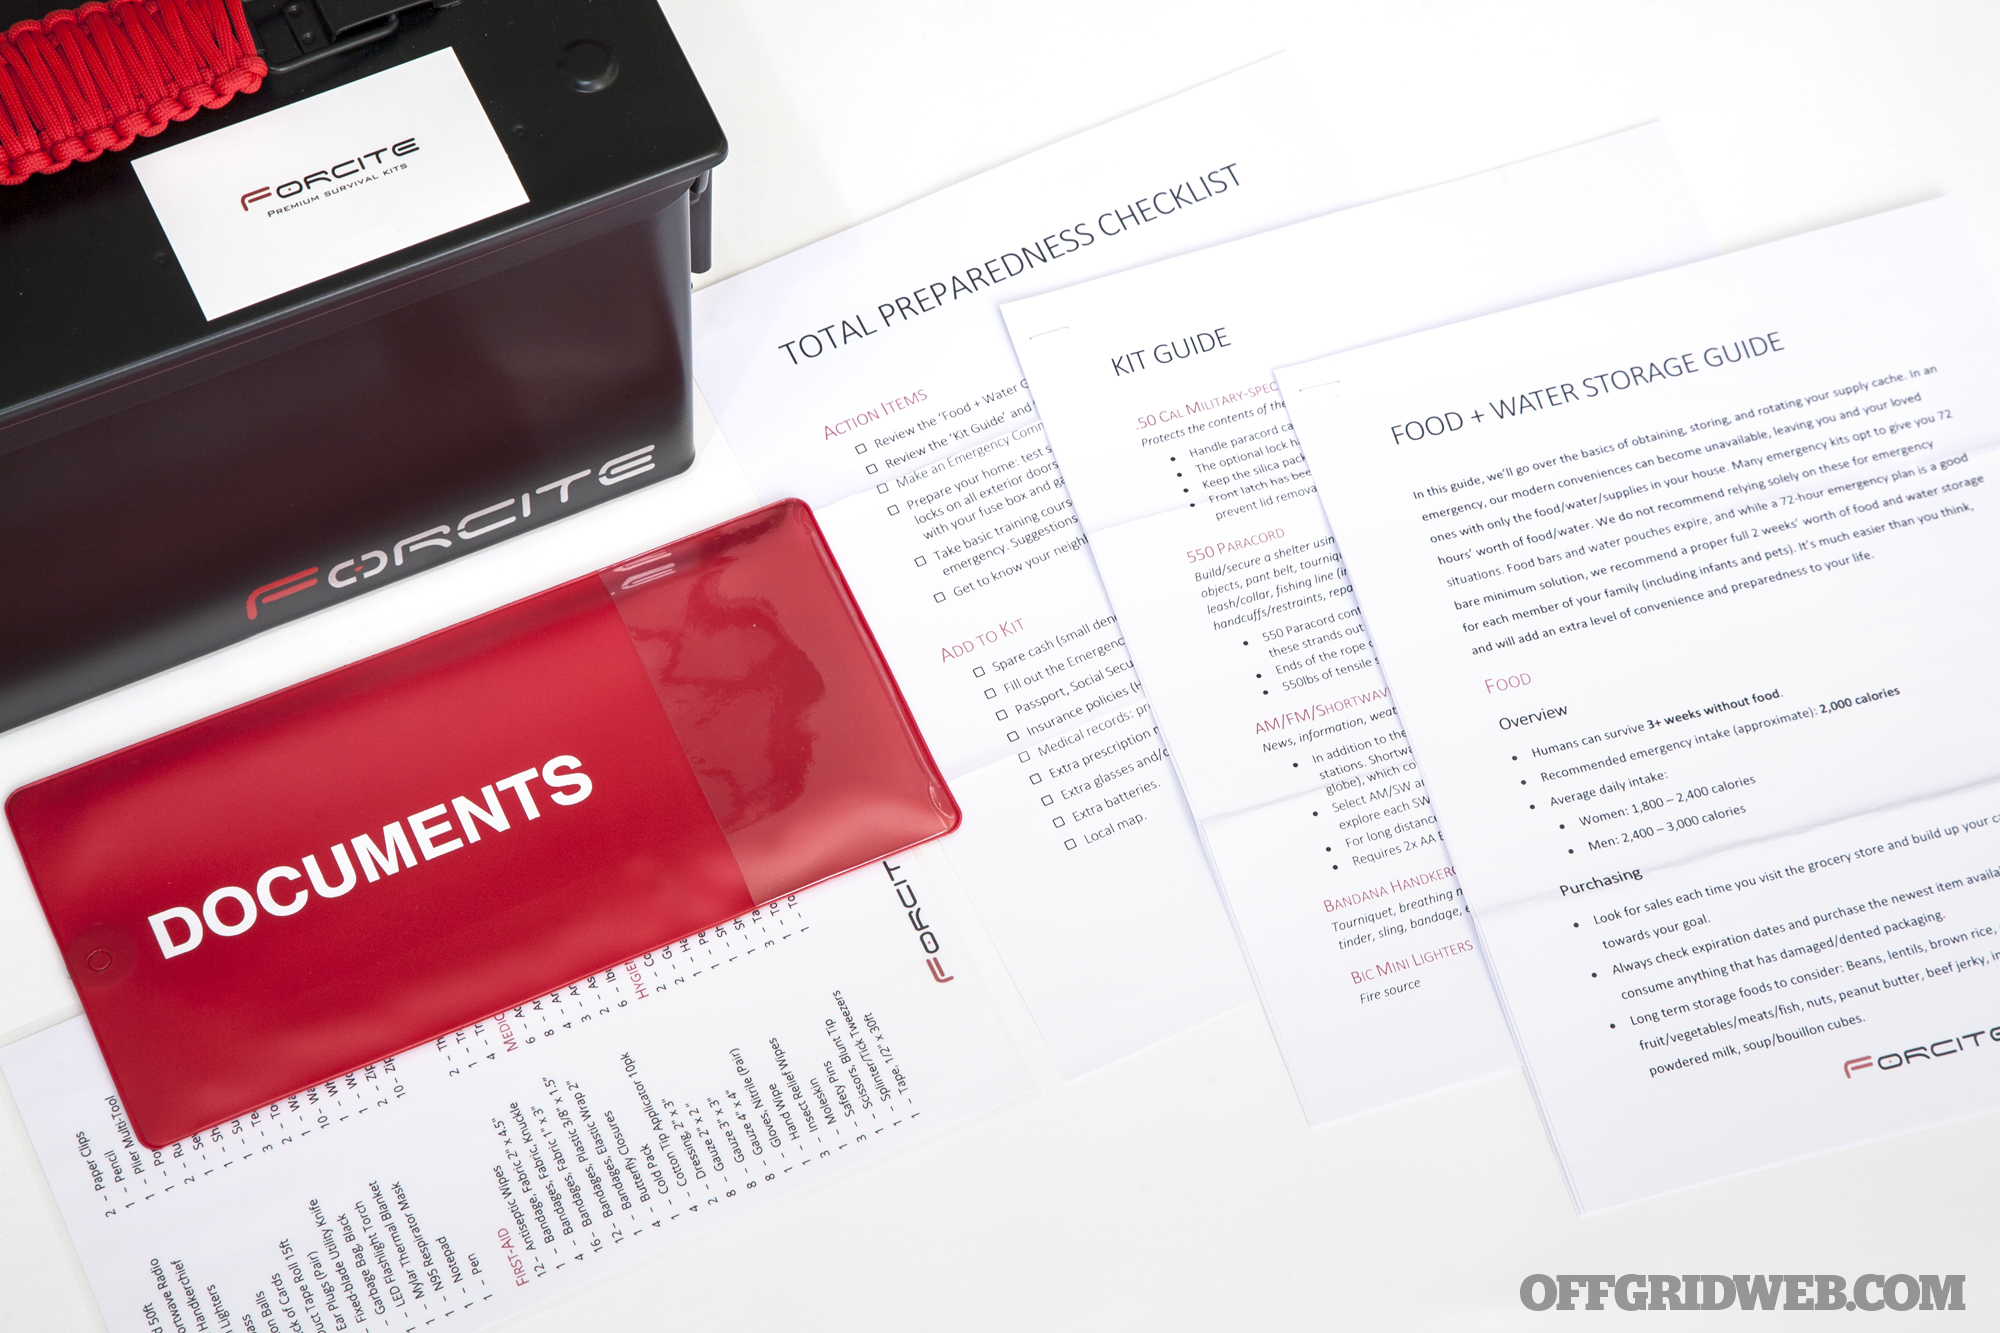
After removing our padlock and opening the latch, we lifted the lid to reveal the kit's supplies. The first items you'll notice are the red document sleeve (attached to the lid by velcro) and the laminated list of contents. We'll be addressing these items later, so we set them aside for now.
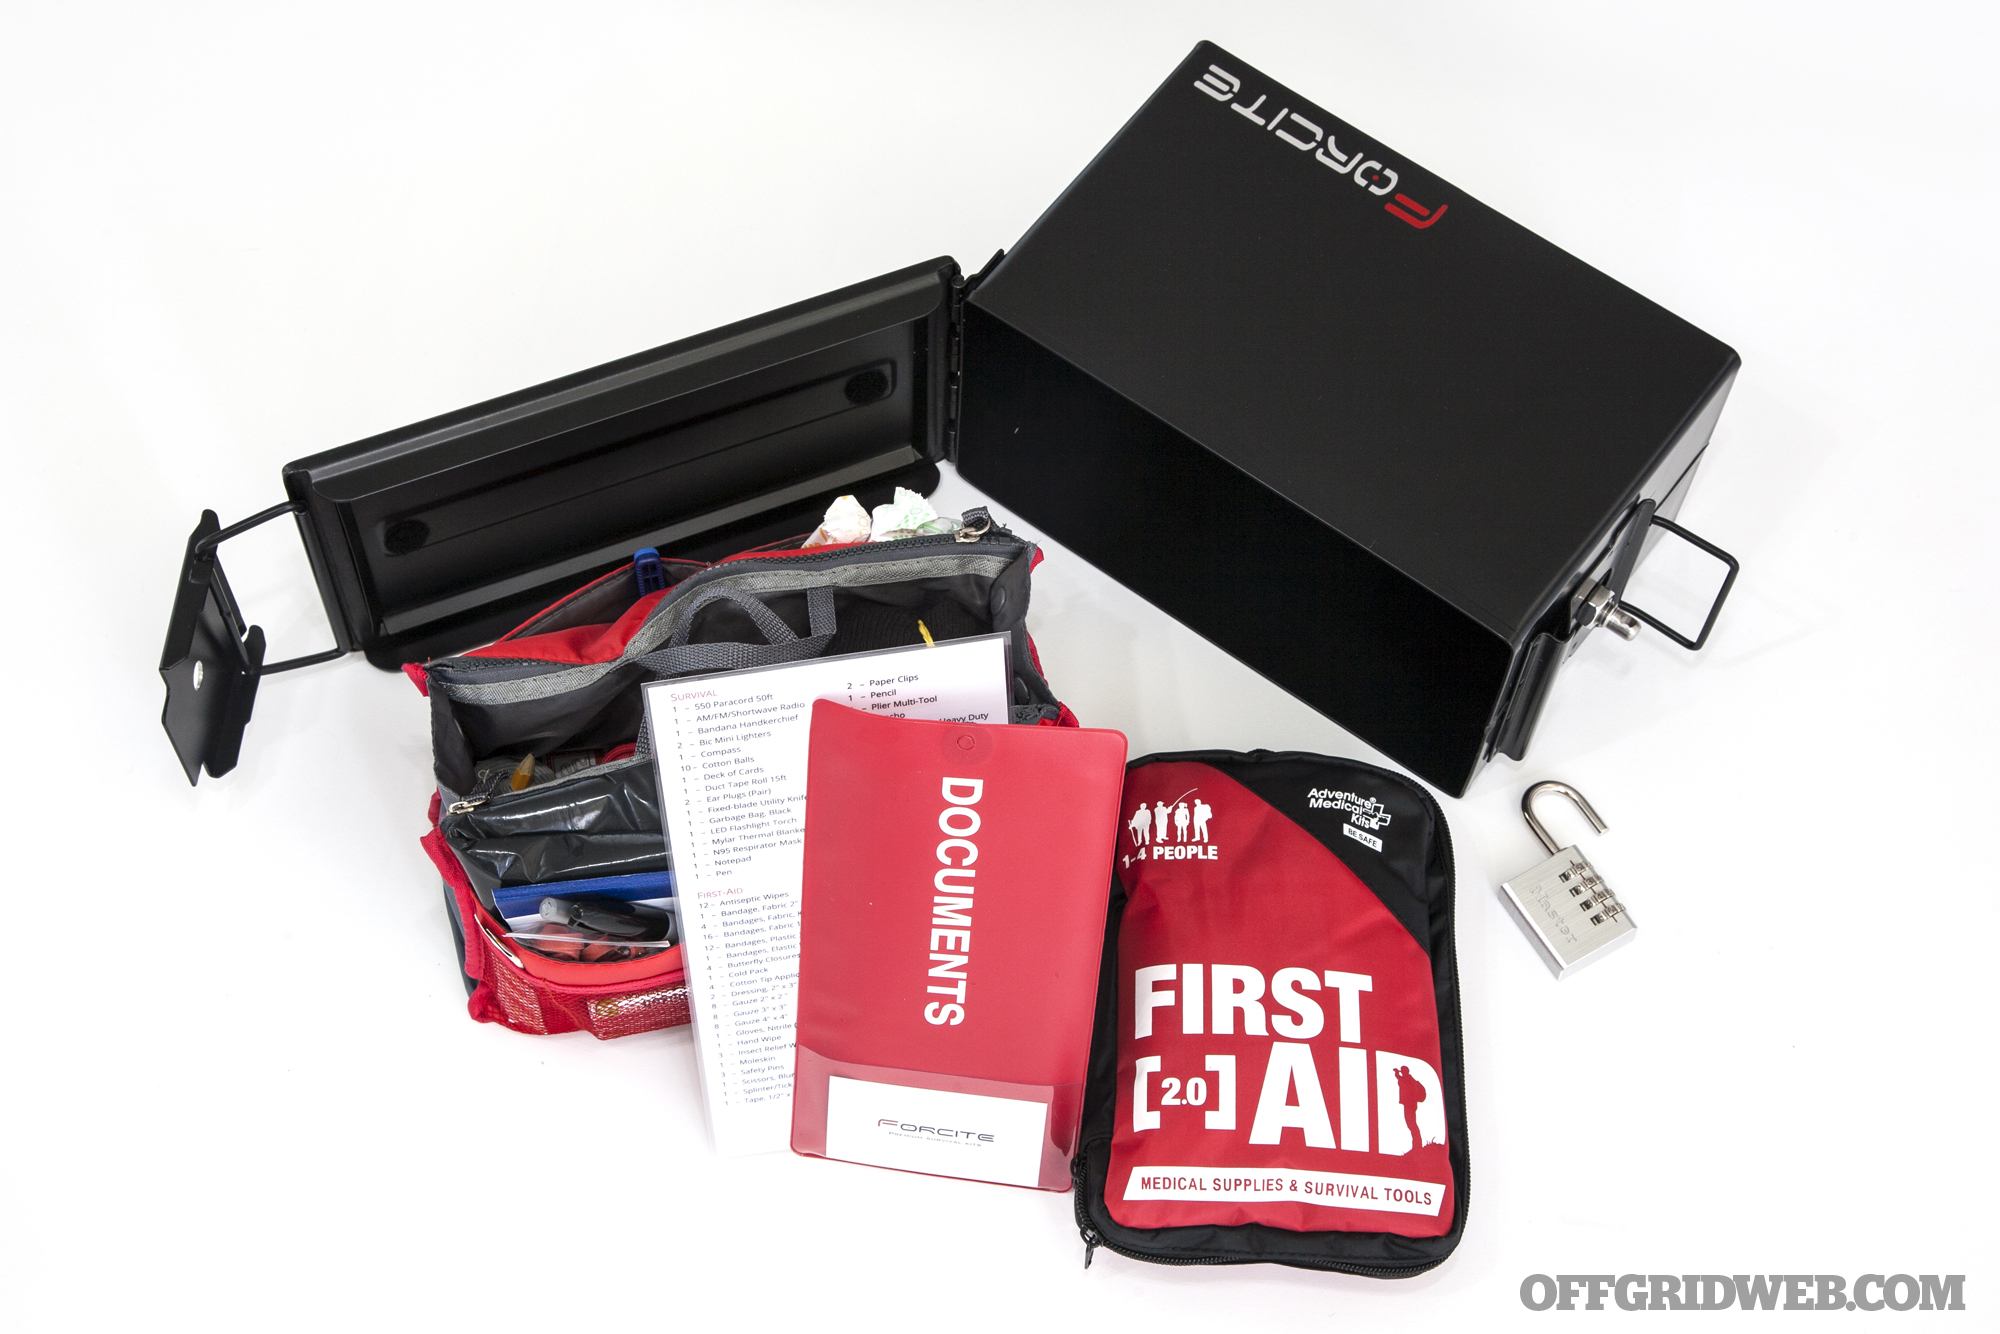
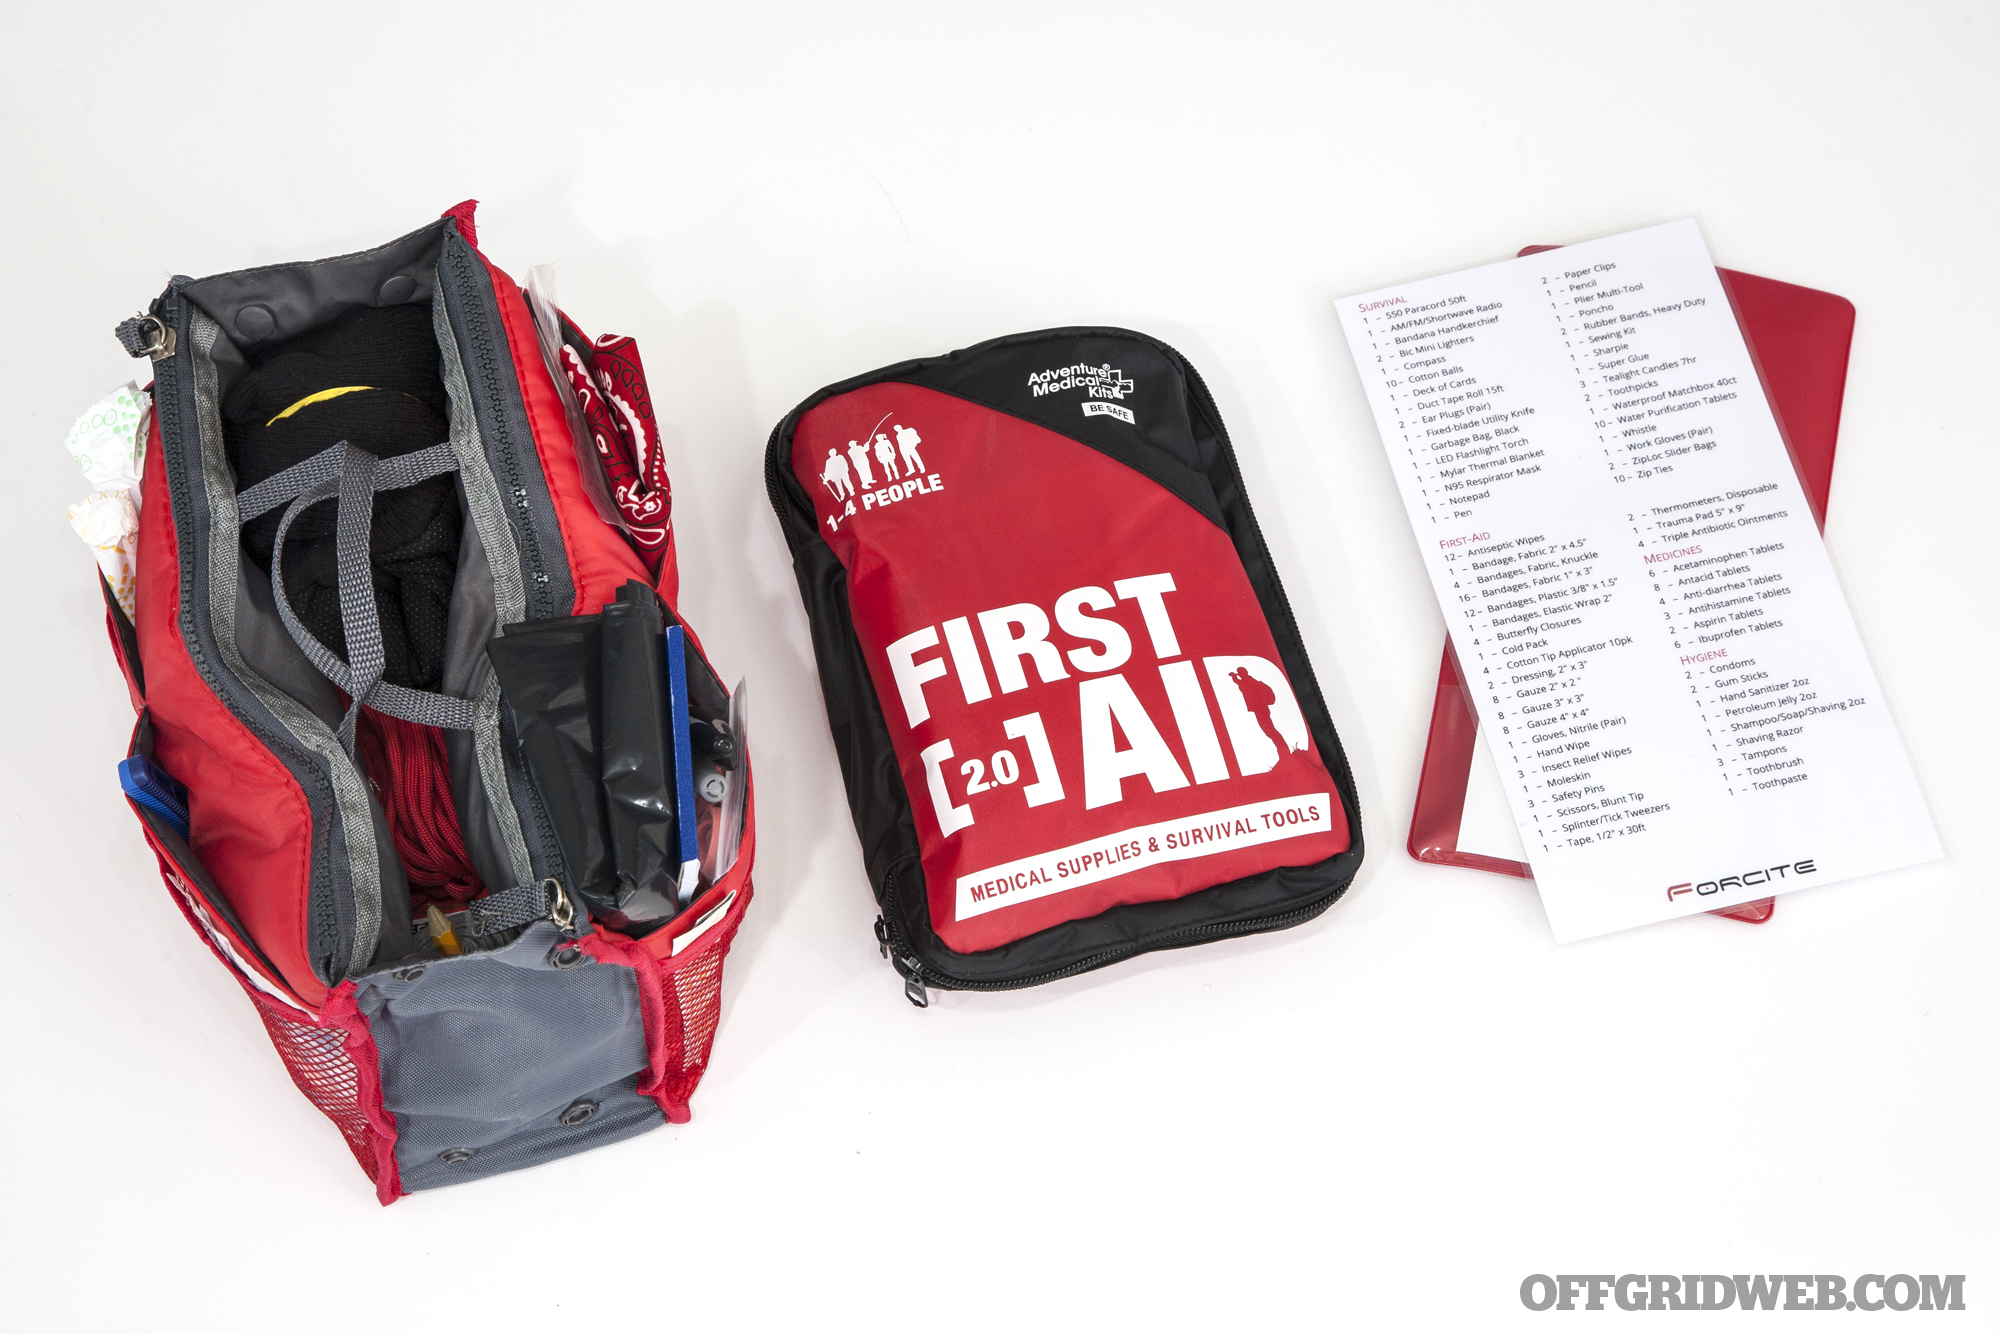
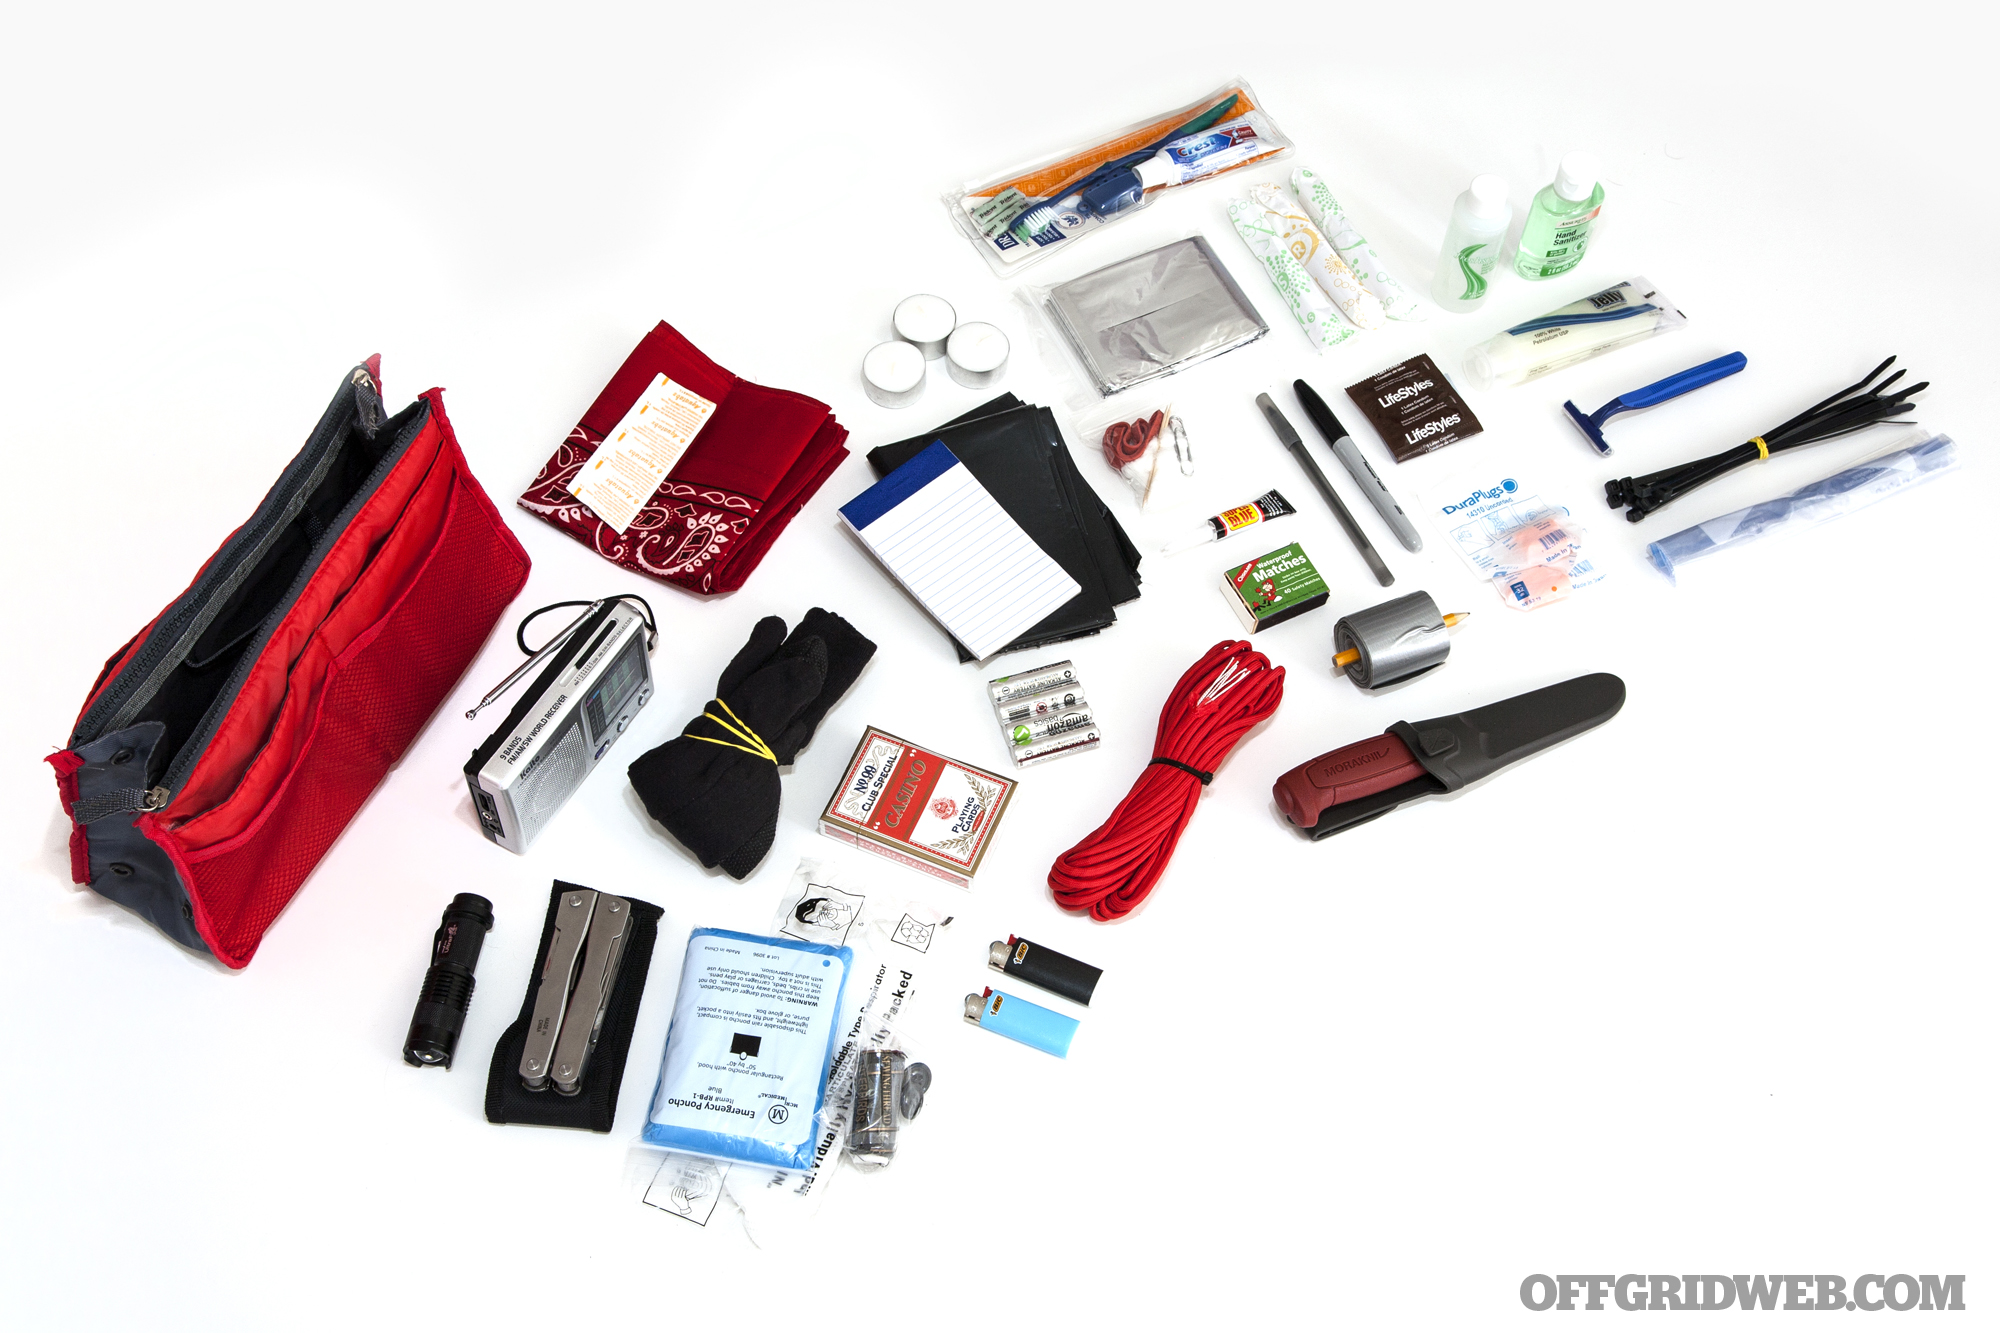
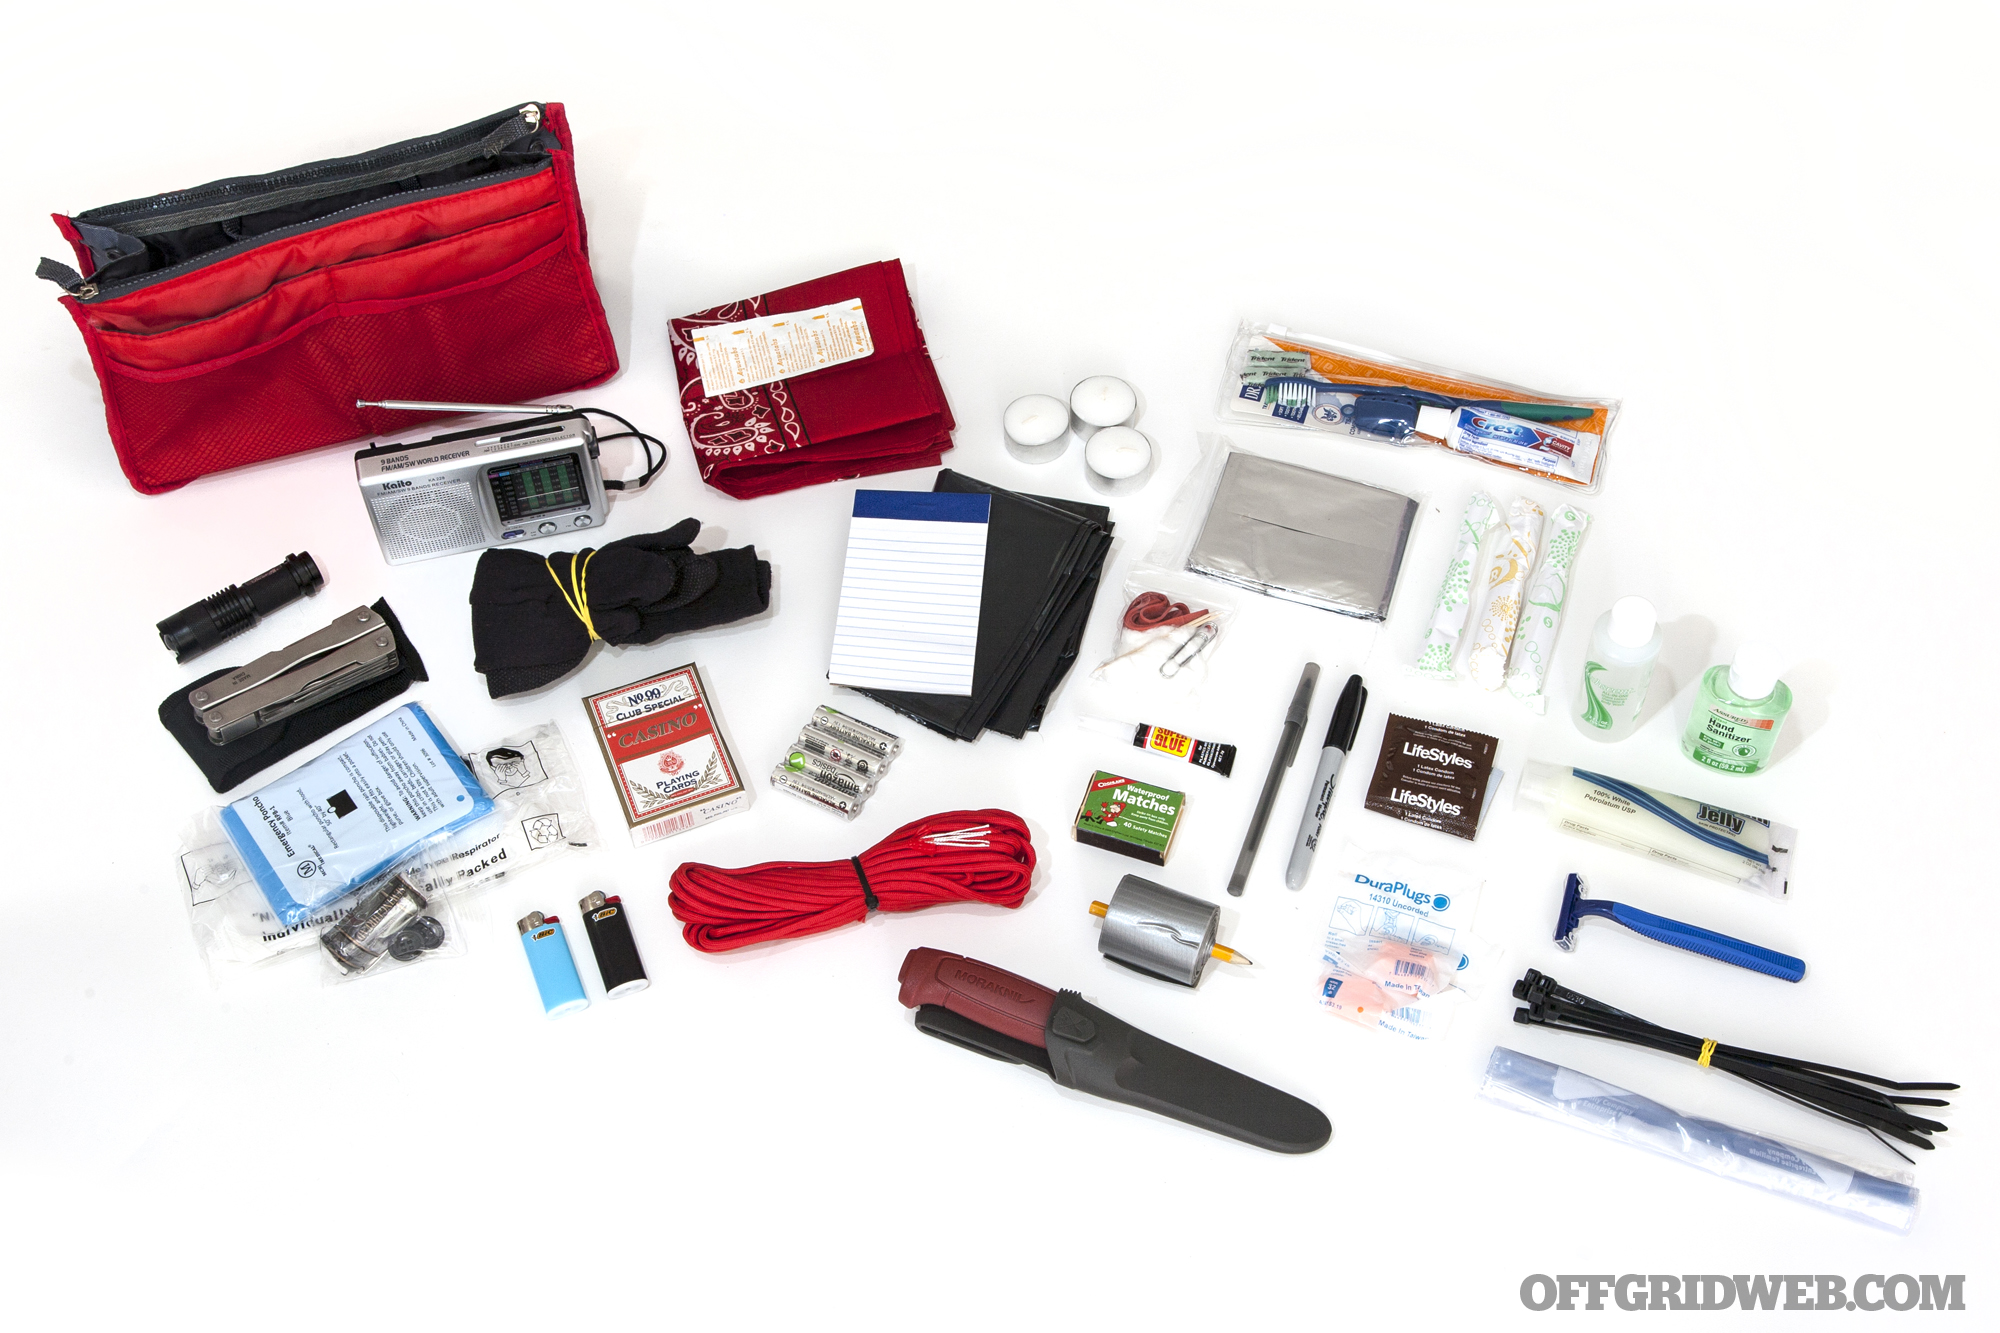
Underneath the list of contents, you'll be left with two main components: a zippered first aid kit, and an organizer with various pouches. The organizer looks like a scaled-down version of the tool bags you'll find at most hardware stores, complete with its own zippered compartments and carry handles.
We love that both of these items can be removed from the ammo can in seconds. Rather than rummaging for loose items underneath other supplies, you can access everything you need almost immediately. This organization factor is a big plus.
The First Aid Kit
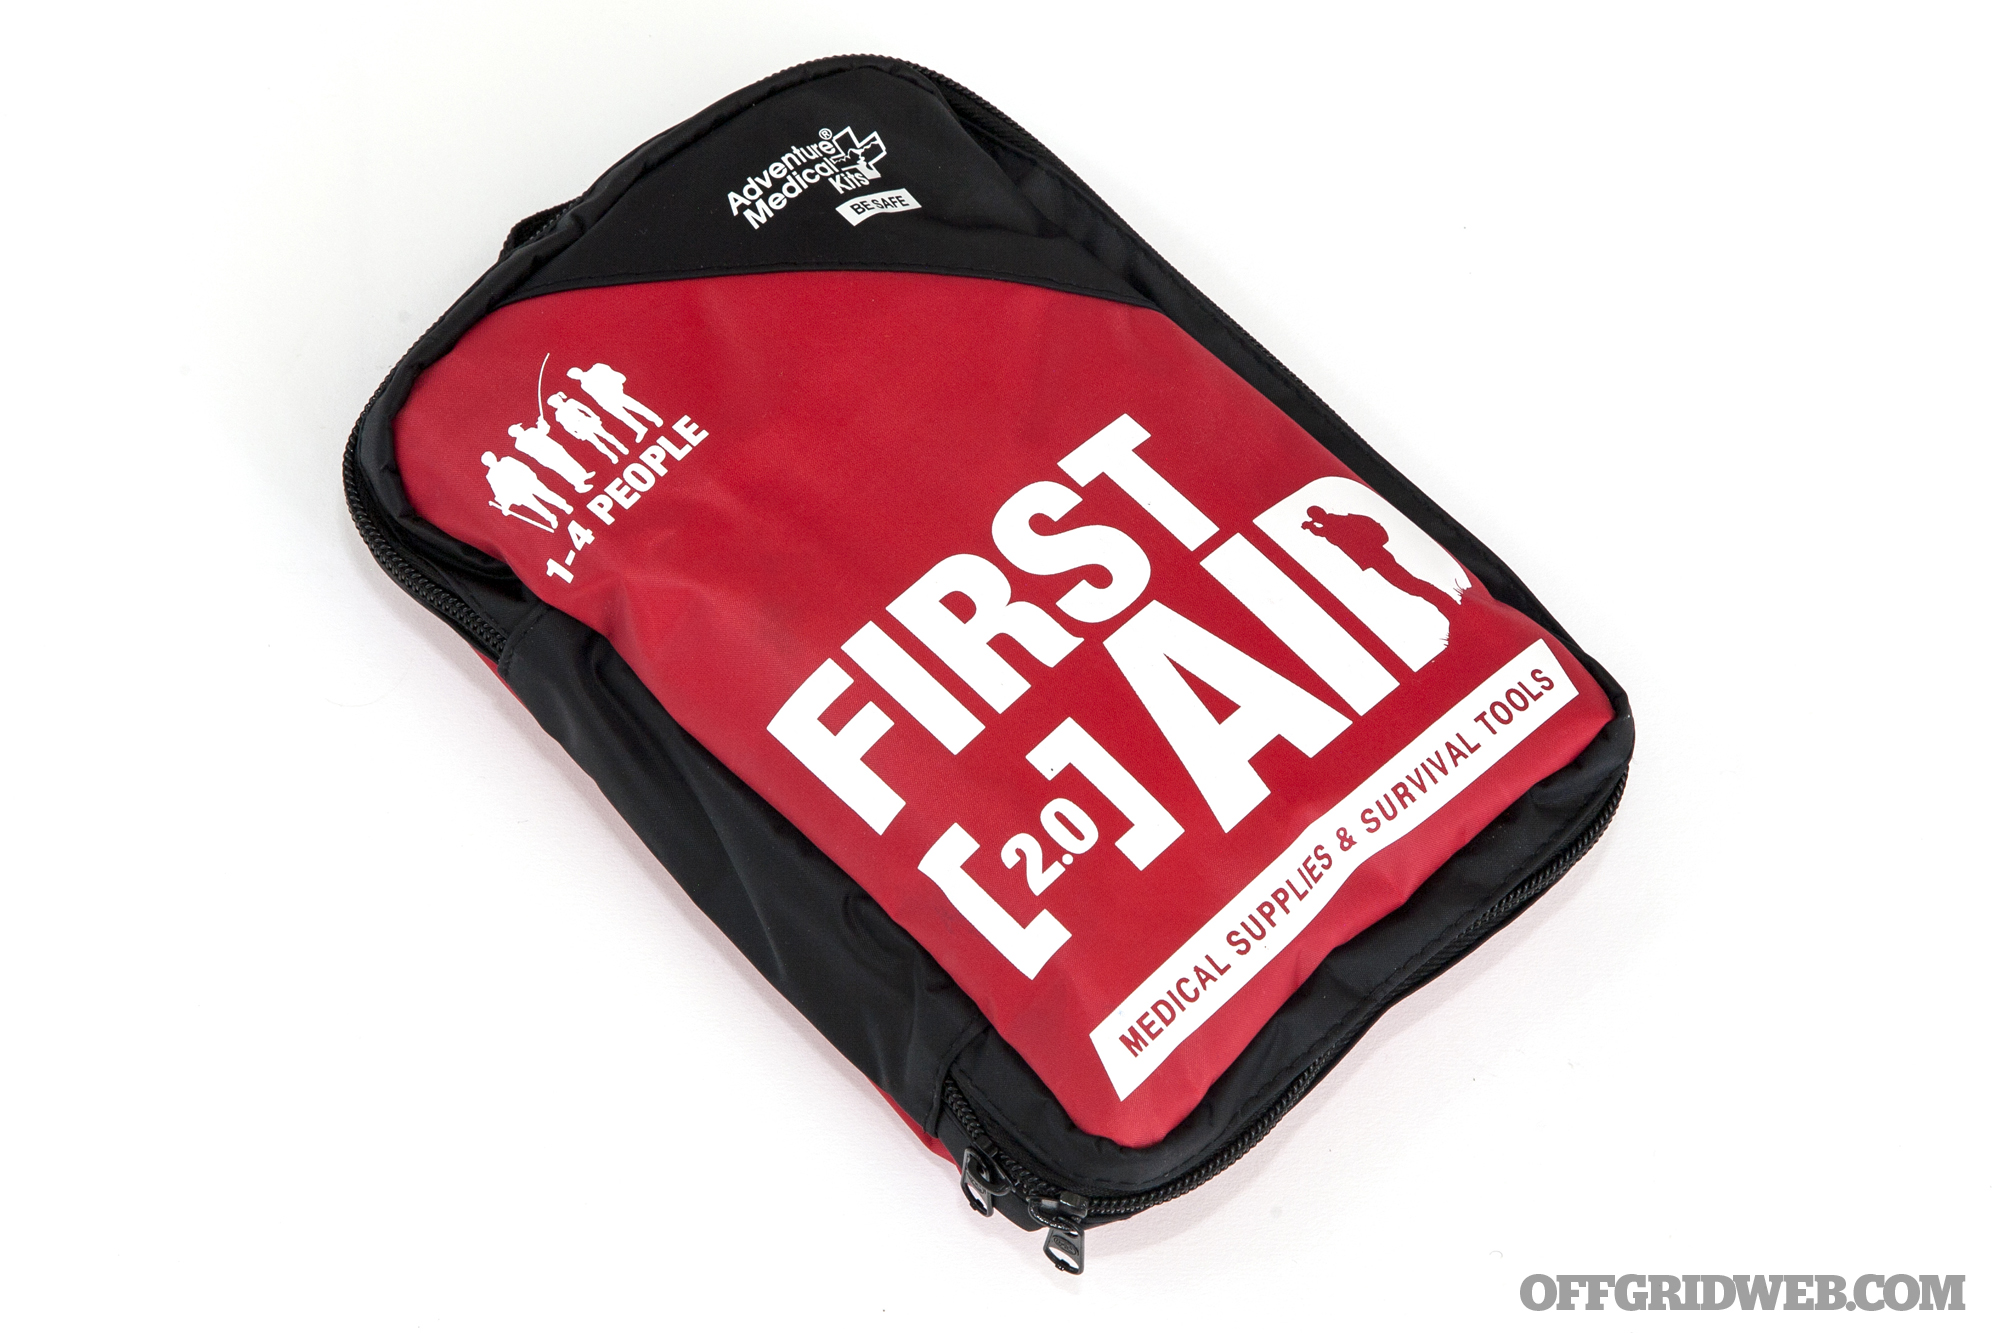
At first glance, the first aid kit looks like an off-the-shelf Adventure Medical Kit 2.0, because it's based on this pre-fab FAK. However, Forcite has expanded the kit with additional contents. We don't see anything wrong with this decision, since the Adventure Medical Kit serves as a good starting point, and it comes in an organized waterproof pouch.
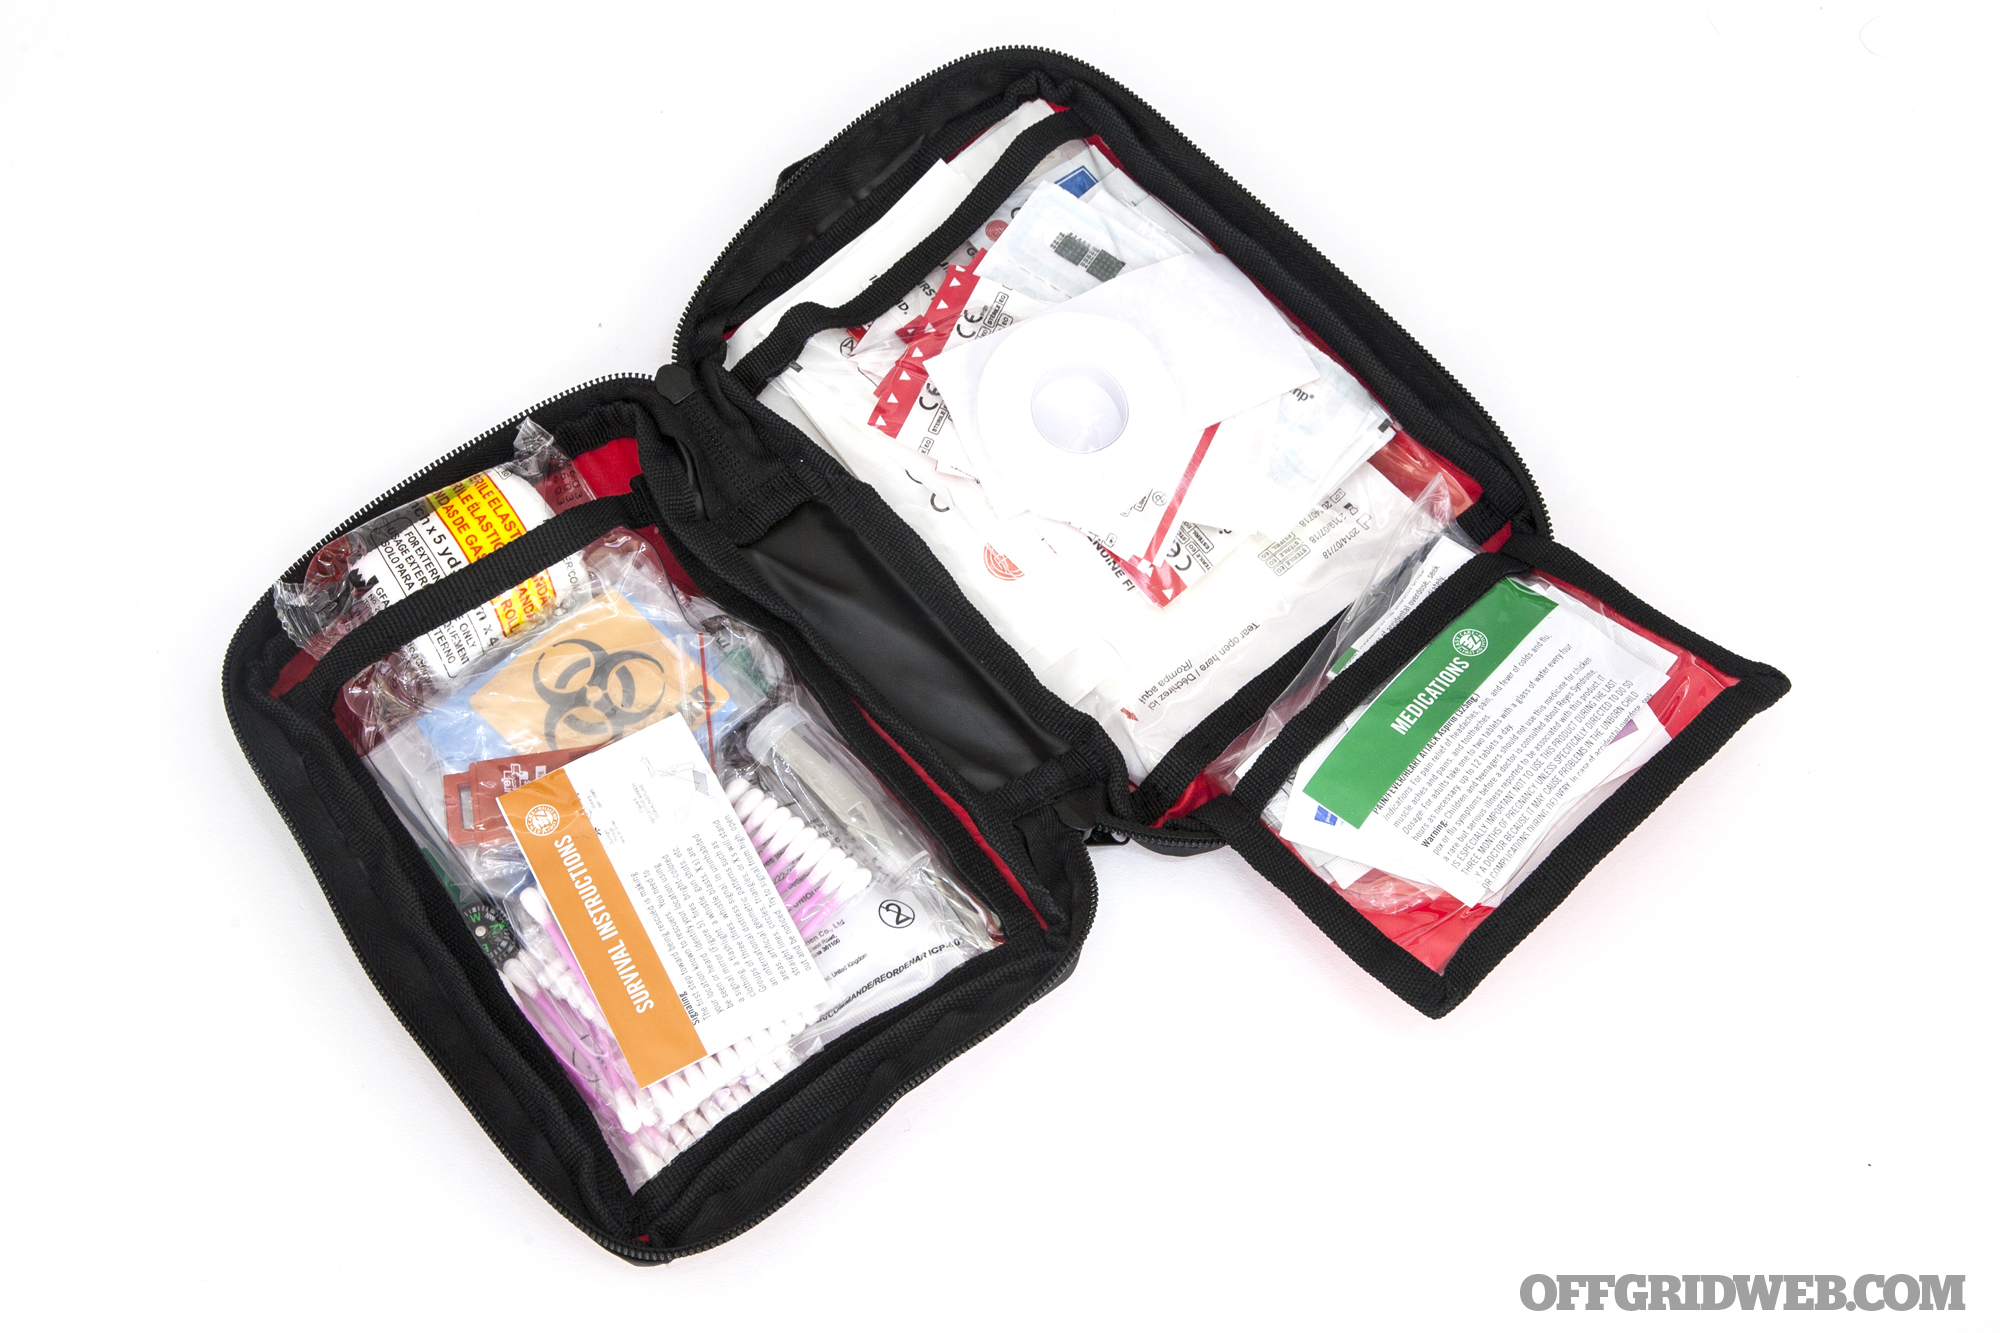
The nylon pouch contains everything you'd expect to find in this type of kit. There are various types of bandages, gauze, and antiseptic for treating small wounds. There's also a cold pack, antibiotic ointment, medical scissors, tape, safety pins, tweezers, antihistamines, and painkillers. A button compass and whistle are also standard.
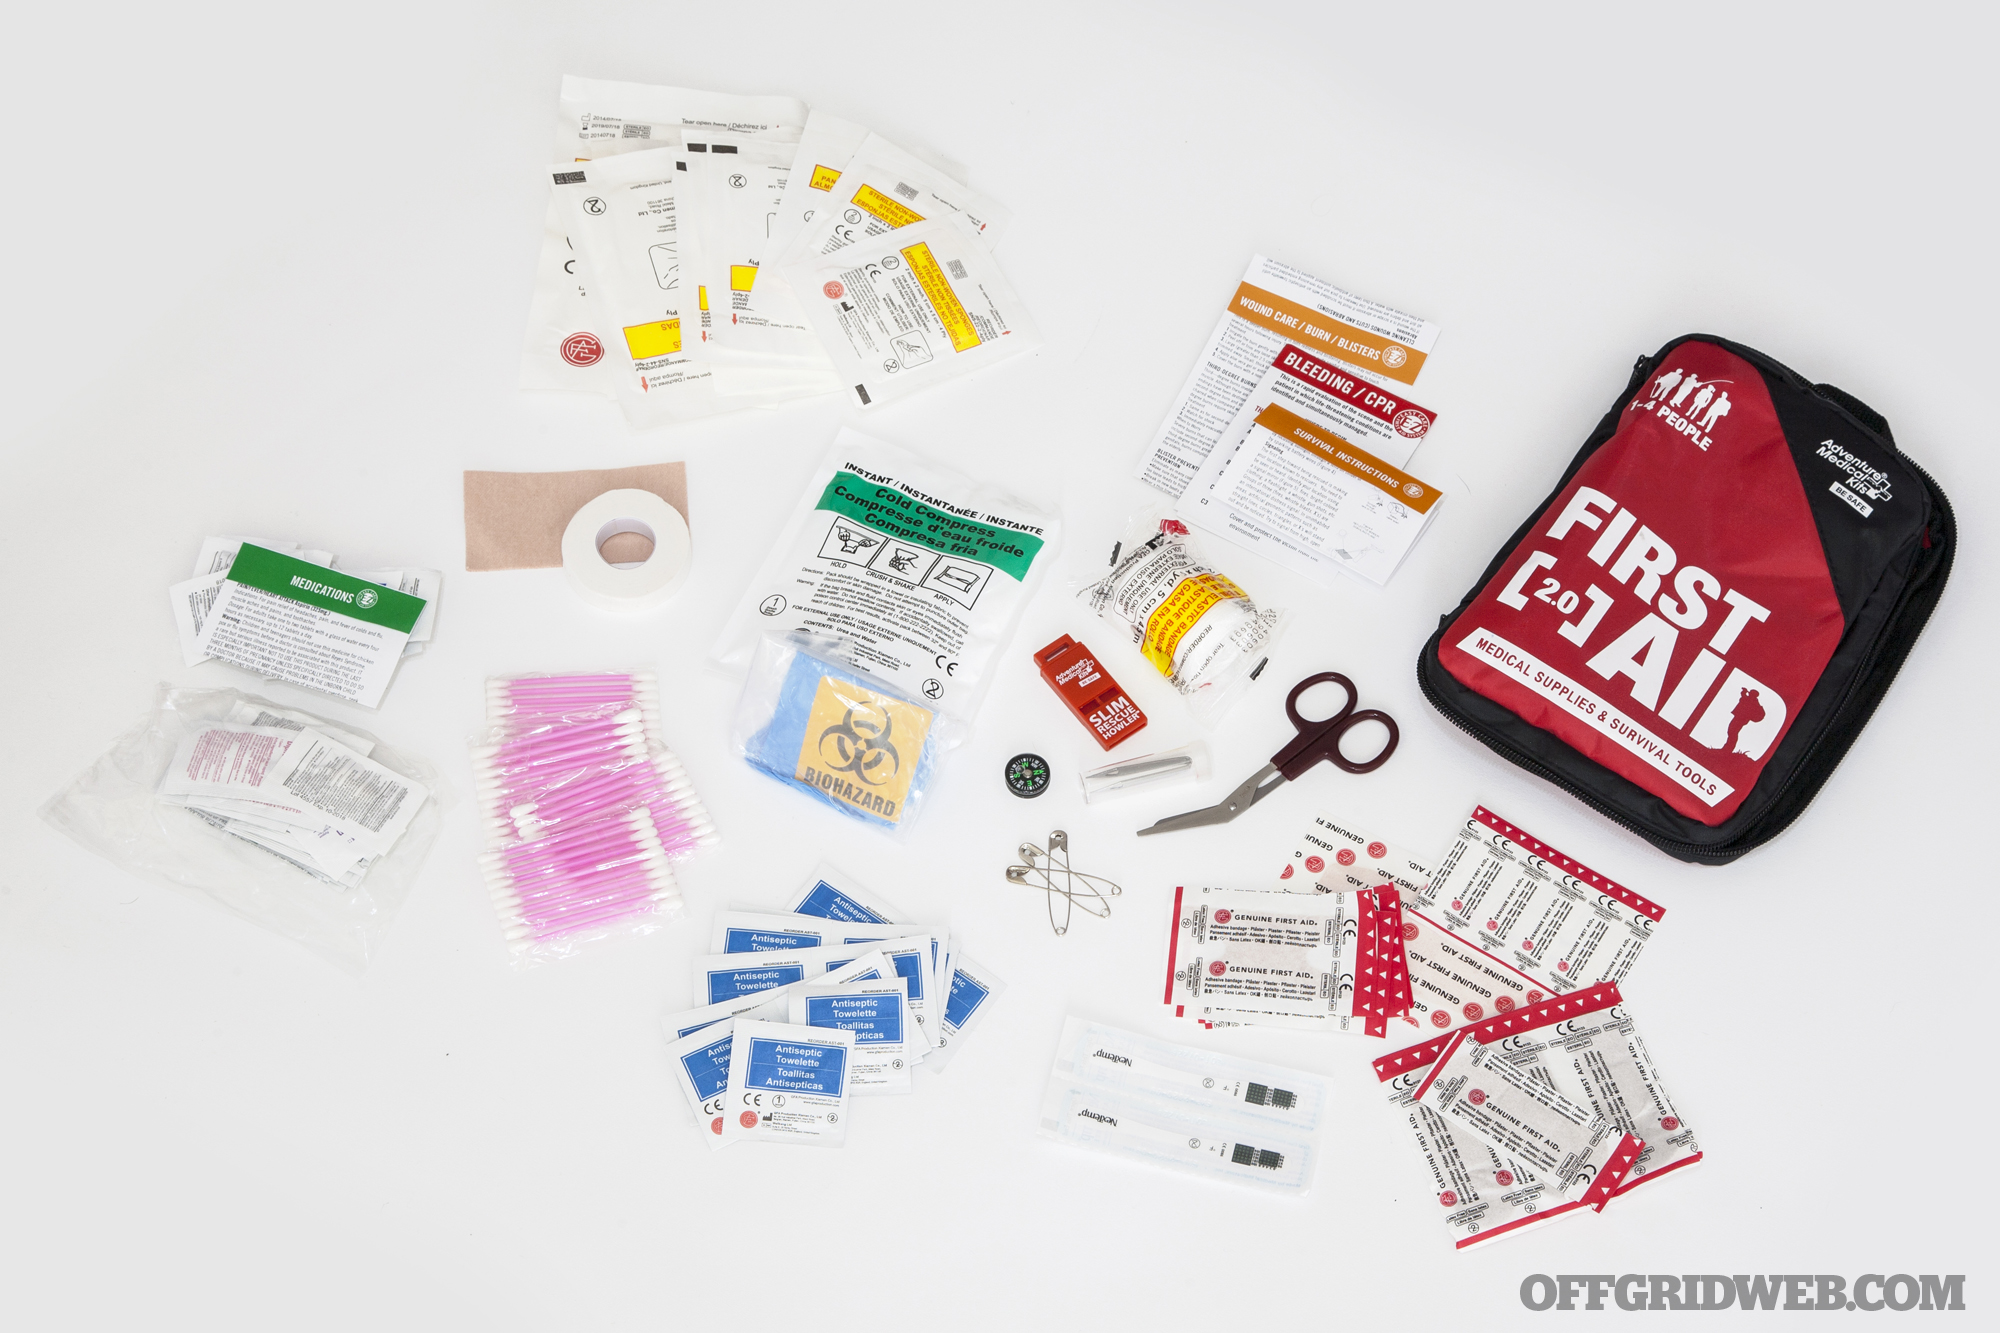
Forcite's additions to the off-the-shelf medical kit include anti-diarrhea tablets, antacids, extra aspirin, and moleskin (which helps prevent blisters). There are also several other medically-significant items to discuss, but they're not contained in the first aid pouch, so we'll discuss those in the next segment.
Survival Tools
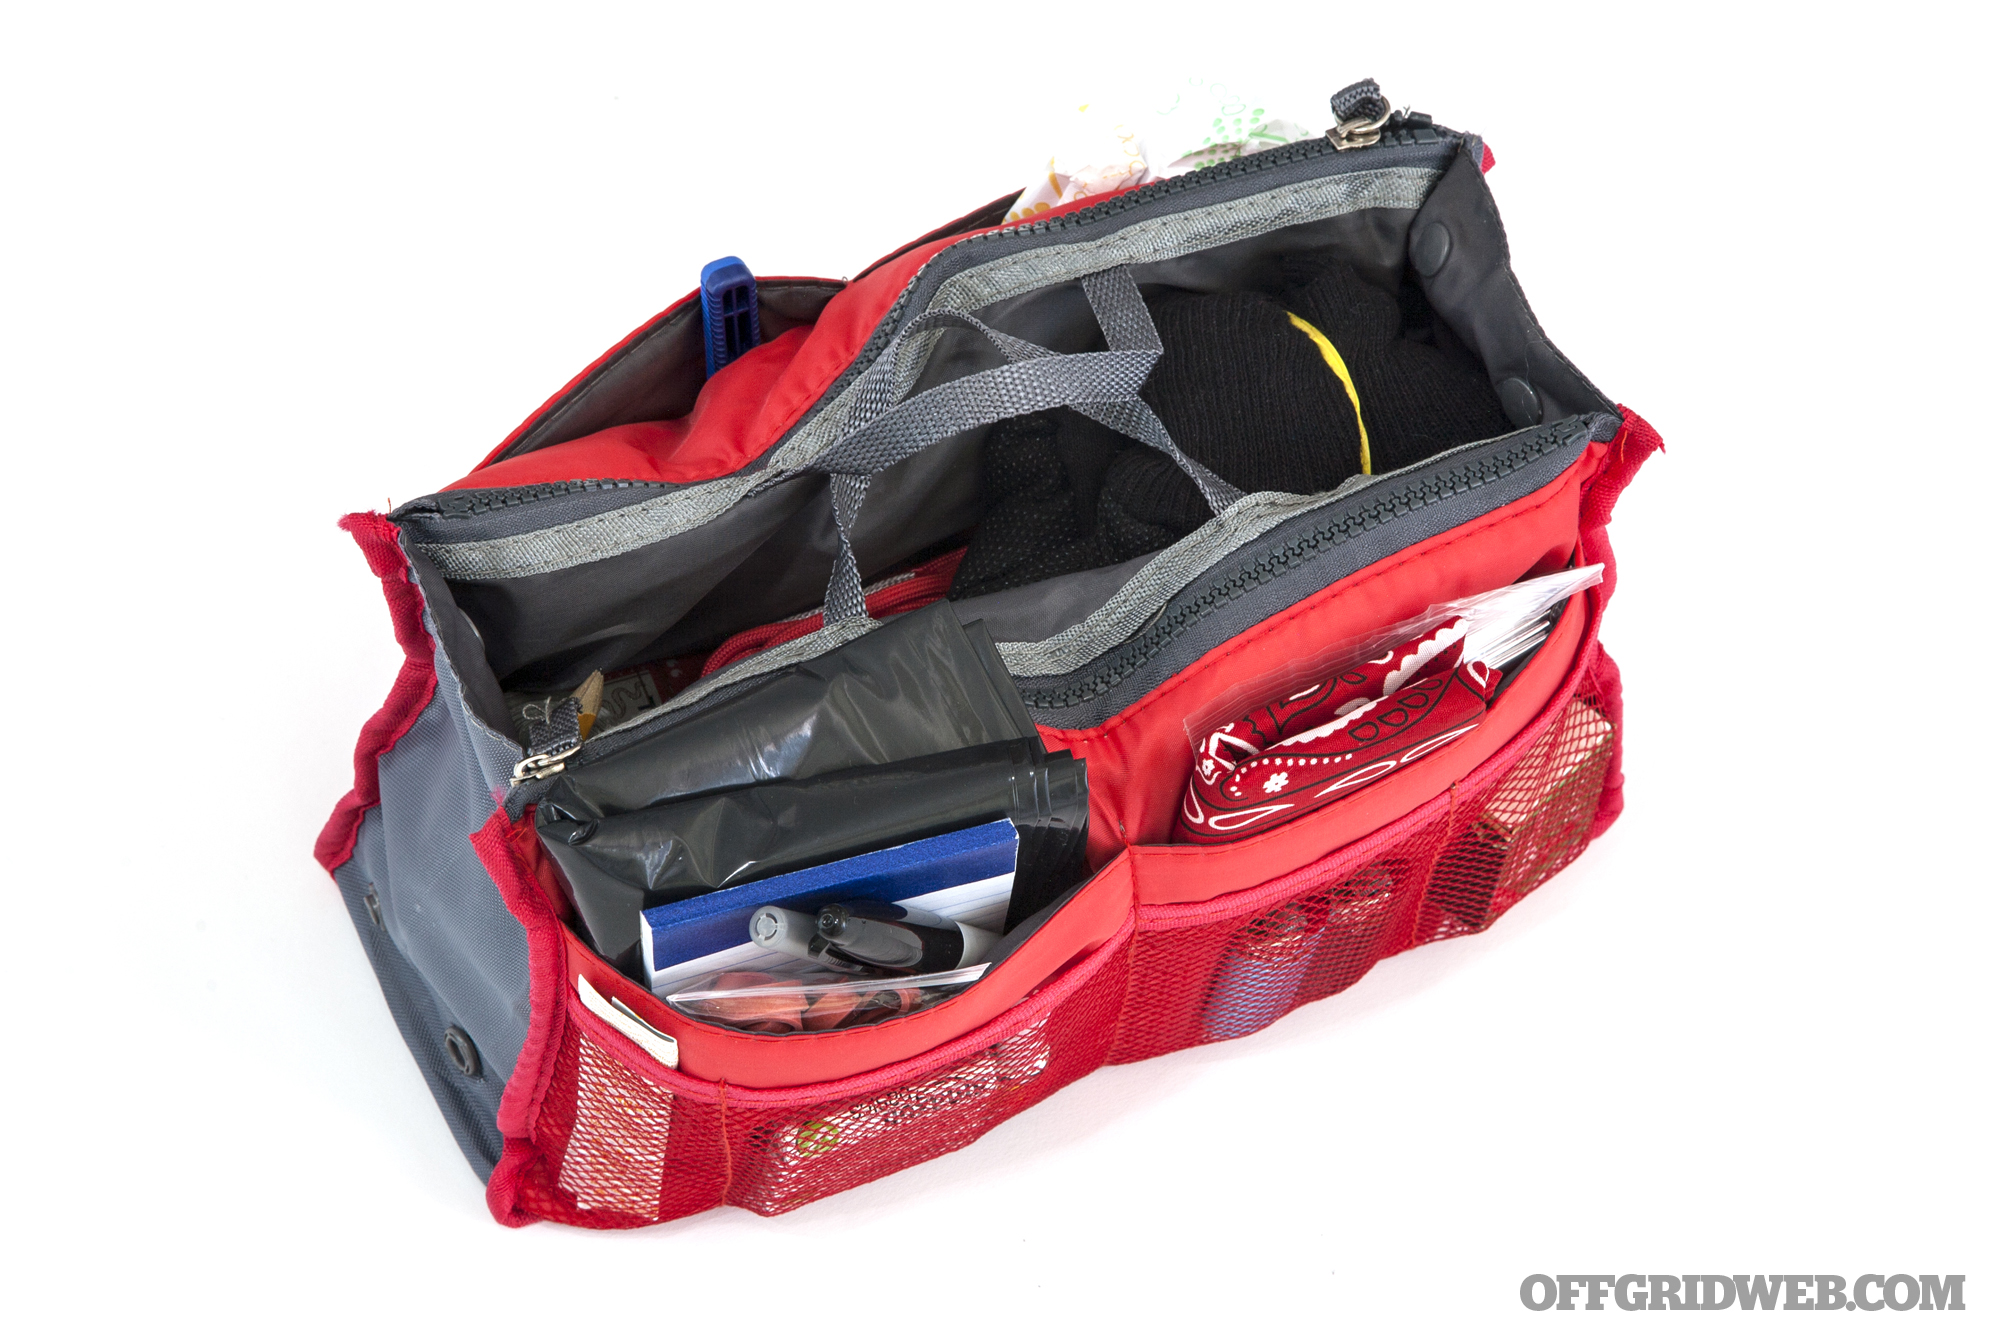
Moving on to the main organizer, we began examining its contents step-by-step. Each side of the bag has exterior pockets and an internal zippered pouch, and there are also several items in the open center section.
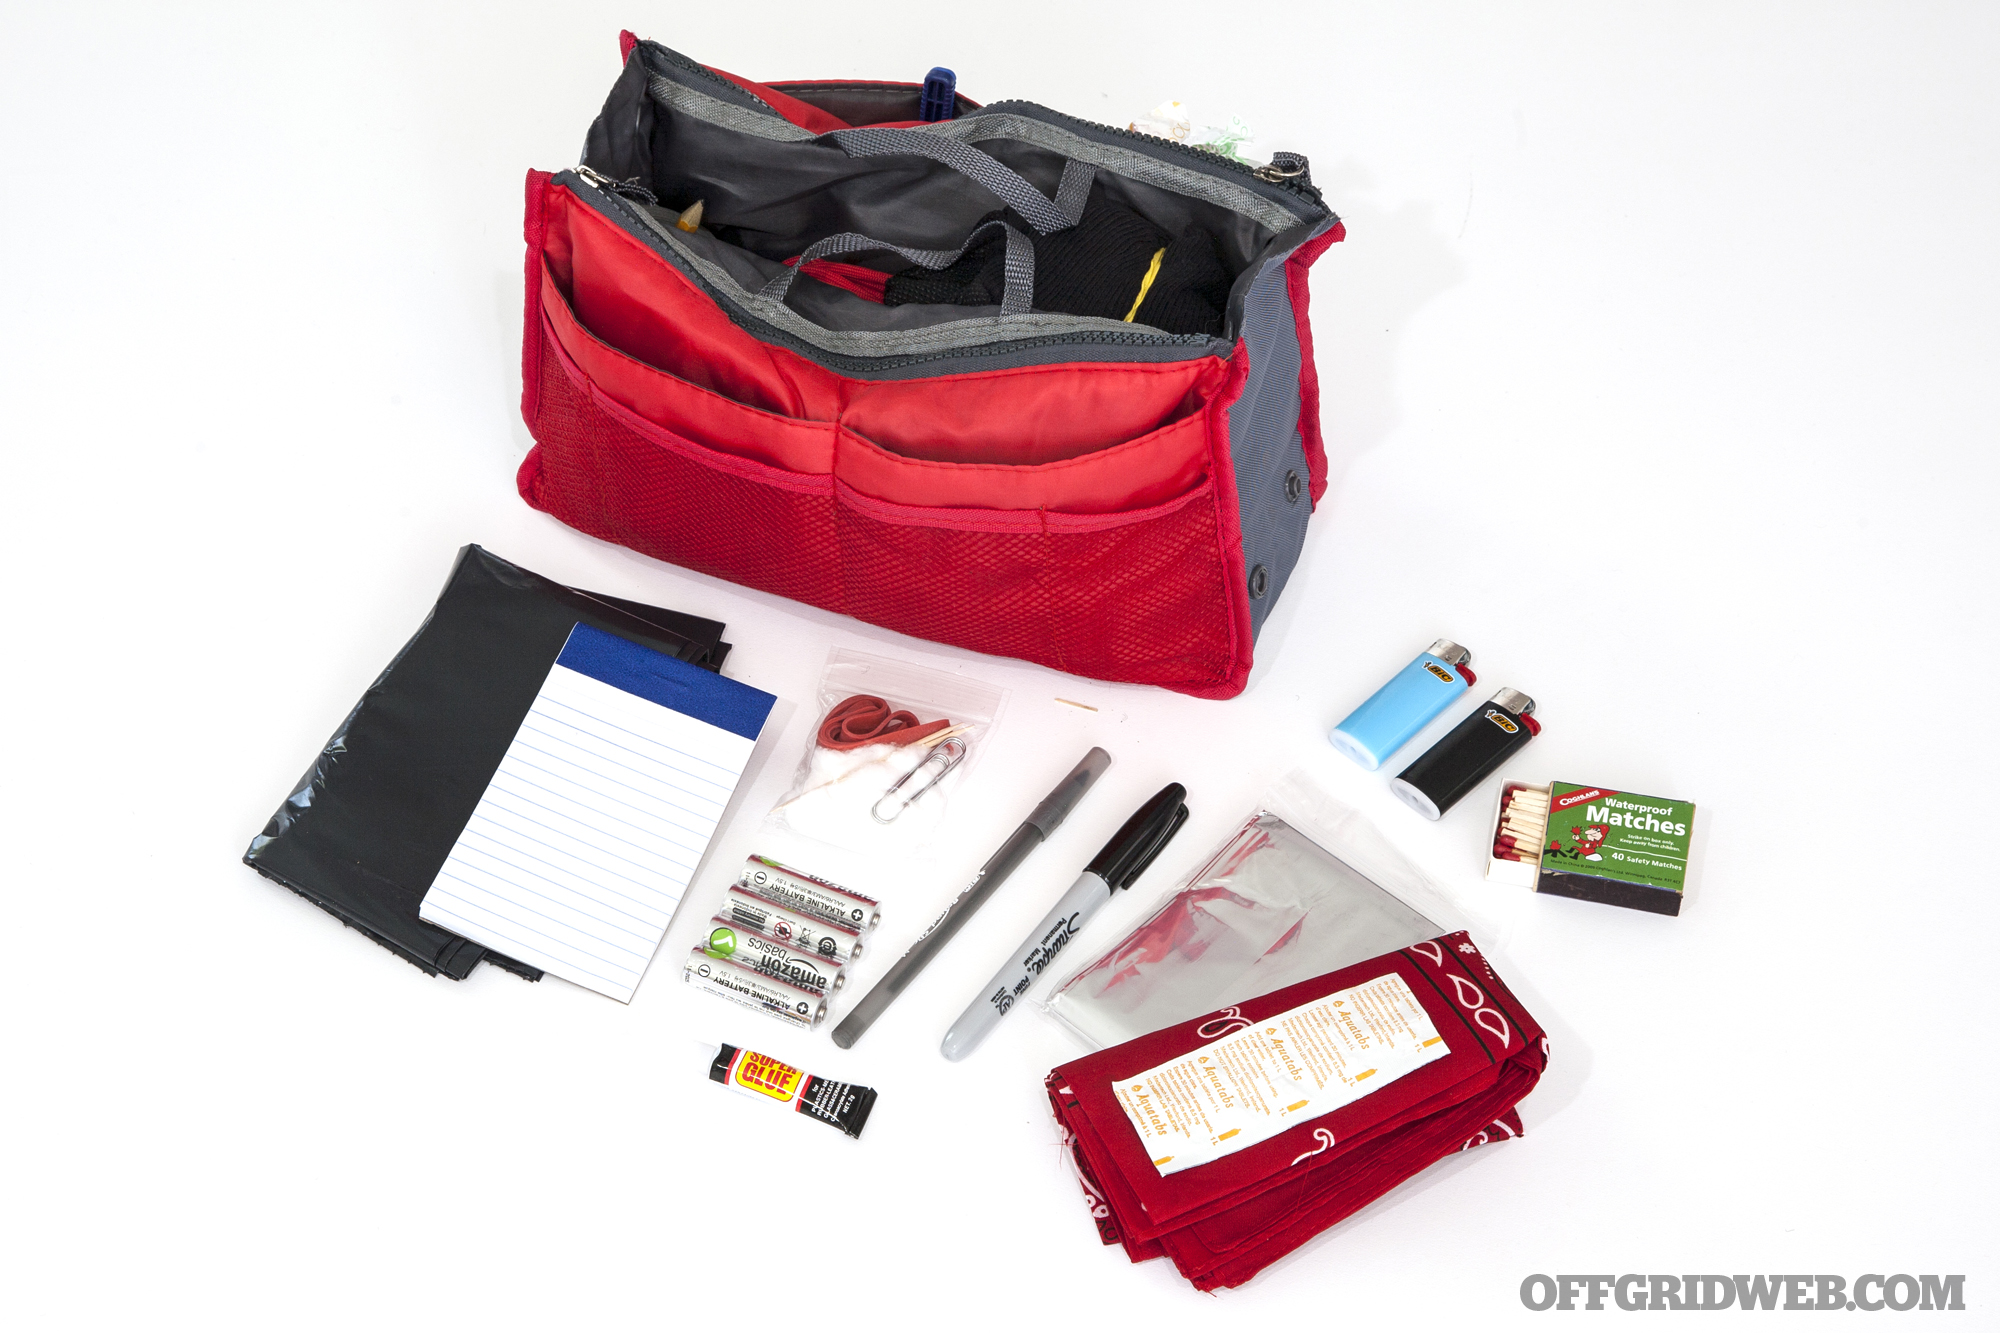
On the first side of exterior pouches, you'll find the following:
- Notepad, Bic pen, and Sharpie permanent marker
- Black trash bag
- Mylar thermal blanket
- 22-inch square bandana
- 10 Aquatabs water purification tablets (enough for 10 liters of water)
- 2 Bic mini lighters
- Box of waterproof matches
- 4 AA batteries (2 required for radio, 1 for flashlight, 1 spare)
- “Trinkets kit” ziploc baggie with paper clips, toothpicks, cotton balls, rubber bands, and safety pins
- Tube of superglue
Everything on this side seems pretty useful, with the possible exception of the trinkets kit. We'd probably keep the cotton balls for tinder, and swap everything else for a small coil of brass wire (for snares or binding) and a few bands of bicycle innertube rubber (aka “Ranger bands”).
We also wish there were more water purification tablets, as 10 liters of clean water won't last very long. Something like a Sawyer Mini filter or LifeStraw would serve as a long-lasting substitute. A good ferro rod could be substituted for one of the lighters, as well.

Next, we have the exterior pouch contents from the other side:
- 2 non-lubricated condoms
- 3 tampons
- 2 pairs of foam earplugs
- Dual-blade shaving razor
We get the condoms, as nobody wants a surprise pregnancy during a survival situation. They're also good for transporting water or for use as a tourniquet. We'd say the tampons aren't really useful unless you have a female in your group, since they are not 100% sterile, and their commonly-repeated use as a trauma dressing is debatable at best. If that's your concern, get some hemostatic bandages and a tourniquet (or a full “blow out” kit).
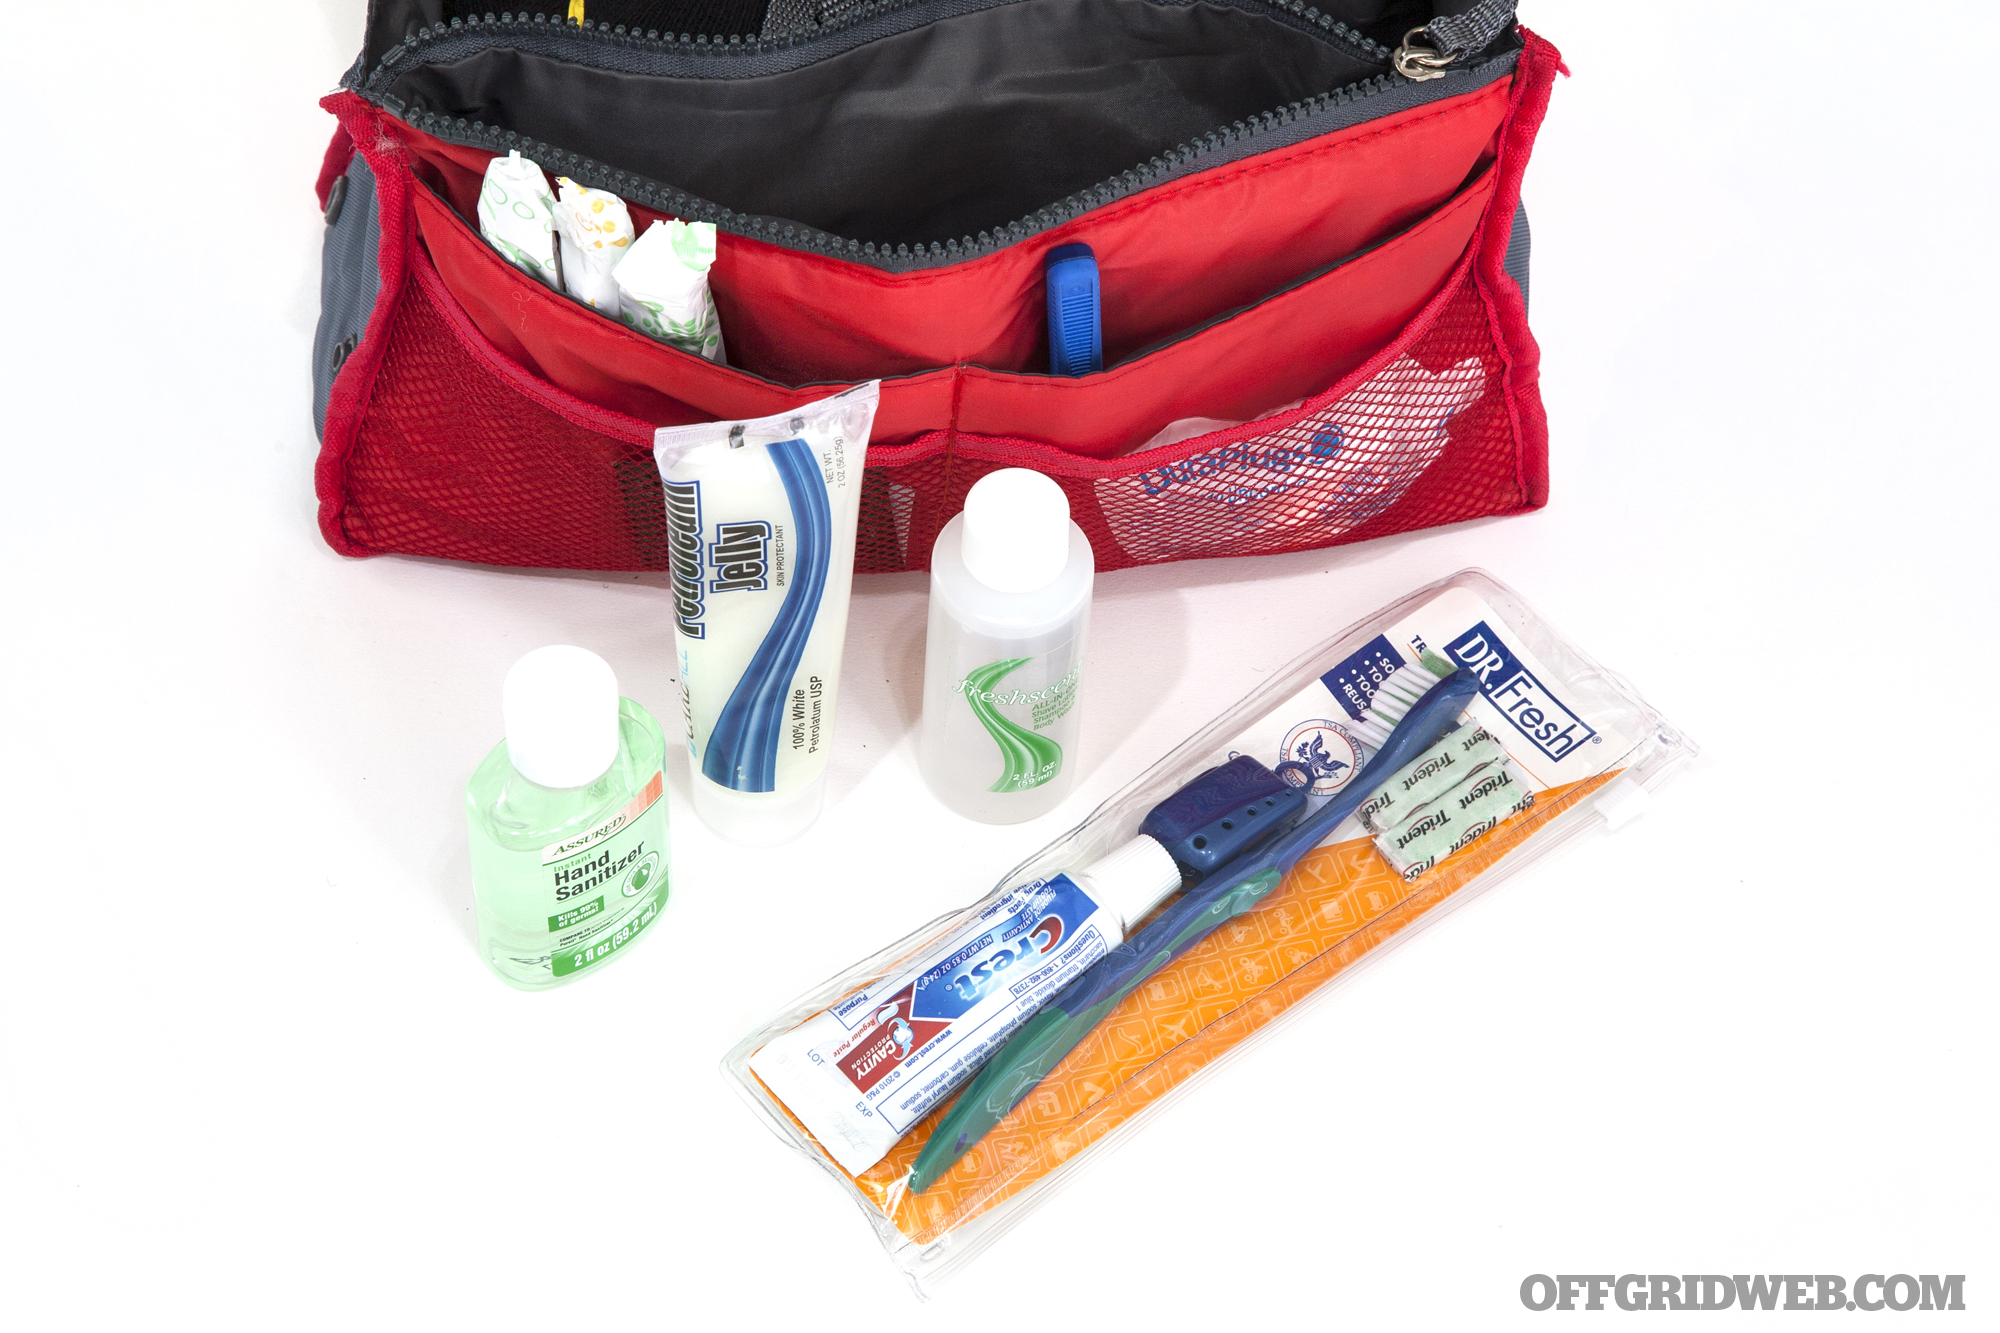
Here are the contents of the zippered pouch on this side:
- Alcohol hand sanitizer
- Petroleum jelly
- Multipurpose soap/shampoo/shaving gel
- Dental care kit: toothbrush, toothpaste, chewing gum
These items are pretty straightforward. The hand sanitizer and petroleum jelly make excellent fire accelerants, especially when paired with cotton balls. Petroleum jelly can also be used to lubricate tools, heal chapped lips, and relieve rashes. Chewing gum is fine as a morale improver, but we'd prioritize dental floss instead.
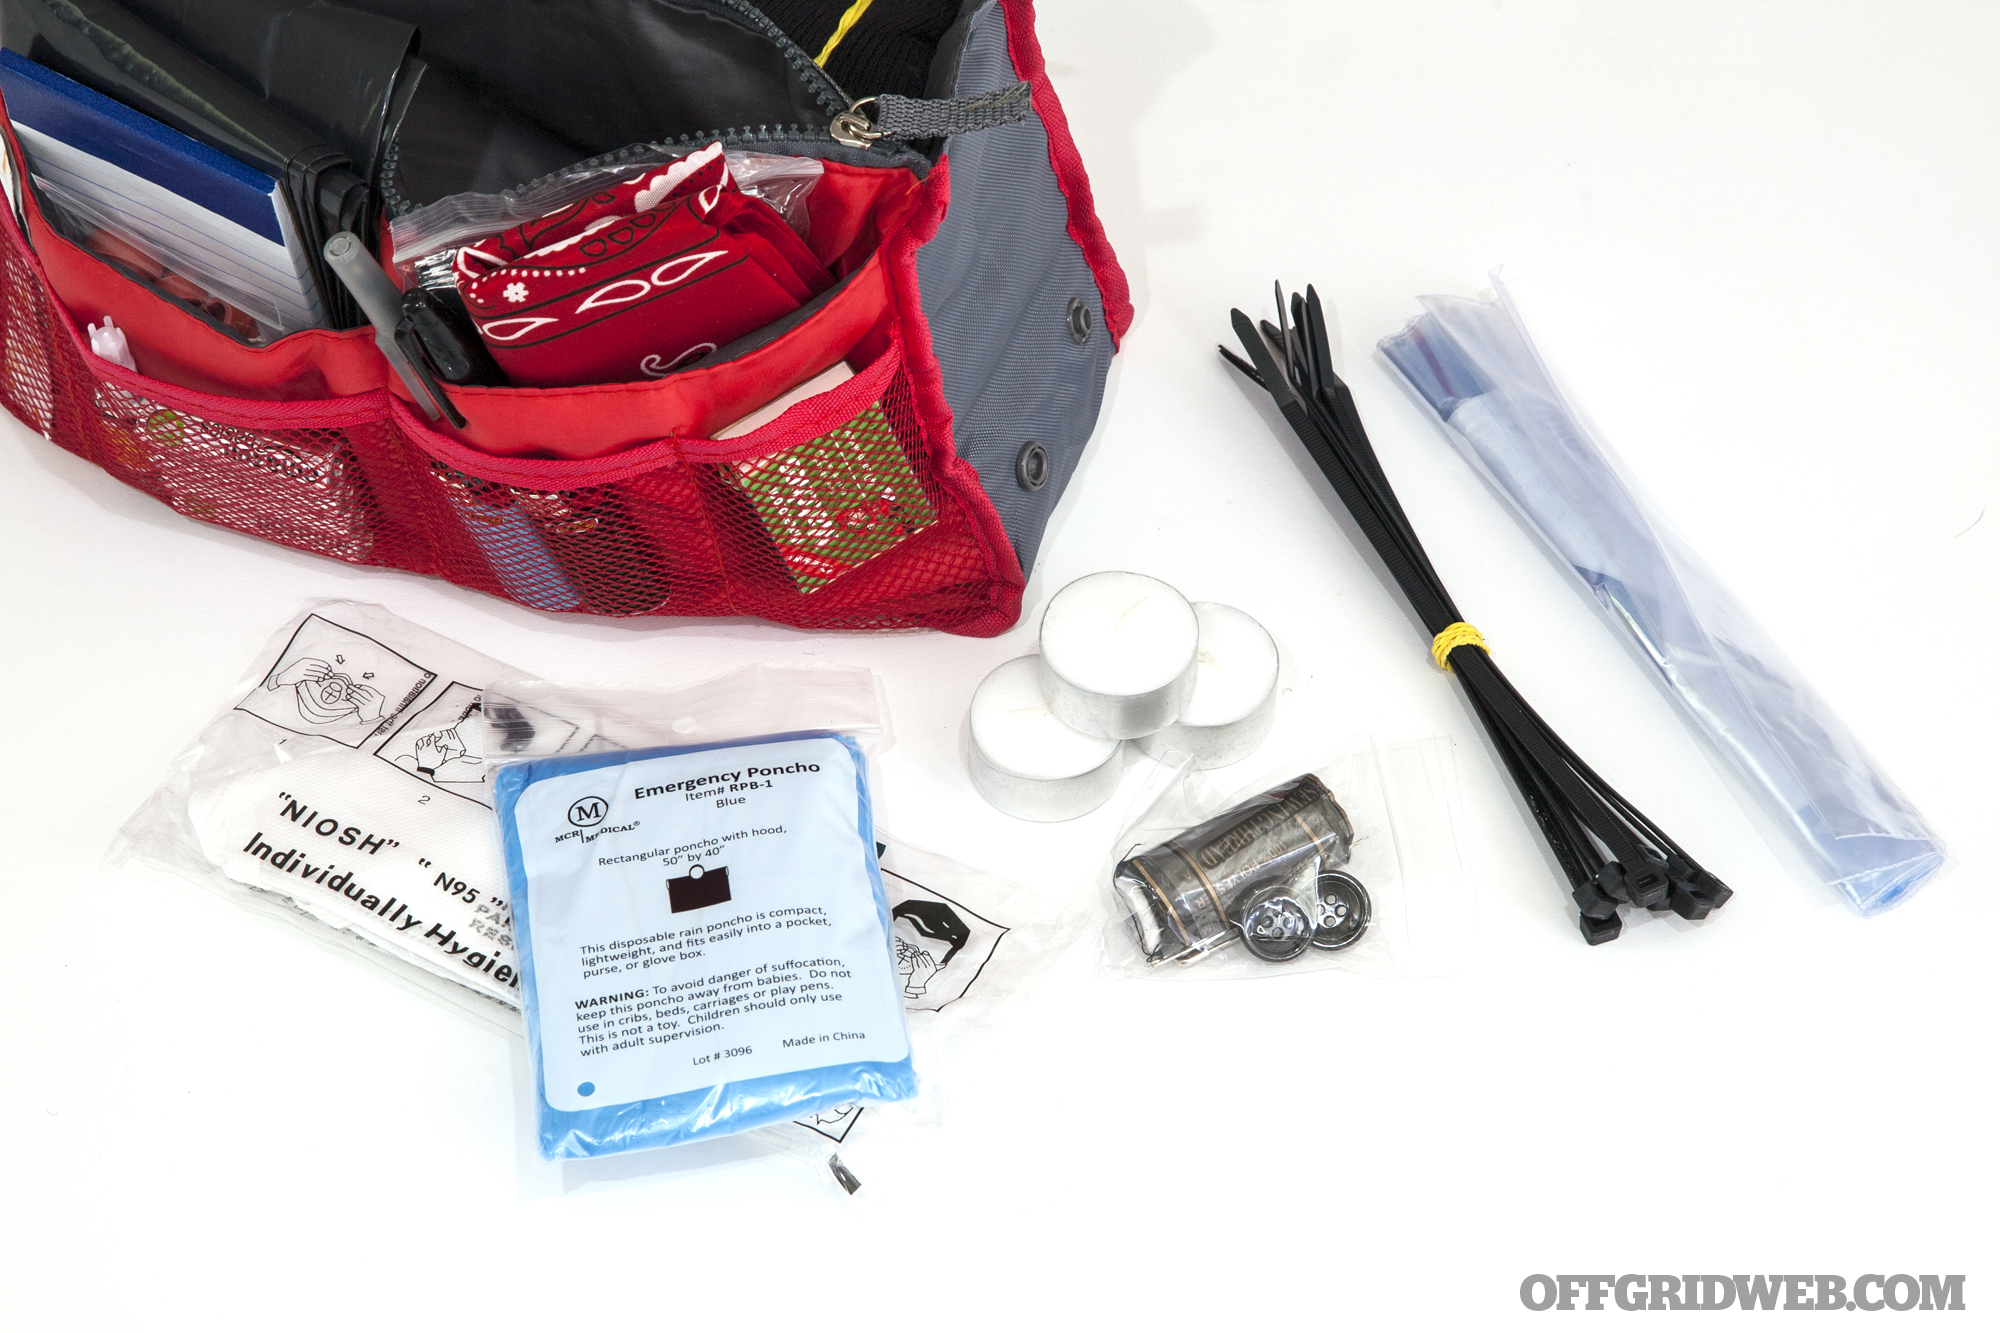
The other zip-up pouch contains:
- N95 respirator mask
- Emergency poncho
- Sewing kit: 400 yards of black thread, needles, buttons, safety pins
- 3 tea candles
- Zip ties
- ZipLoc slider bags
These items are all good to have. The amount of thread is overkill, and probably double to triple as much as you'd need, but it's small and light enough not to matter.

Finally, the central compartment contains some larger items:
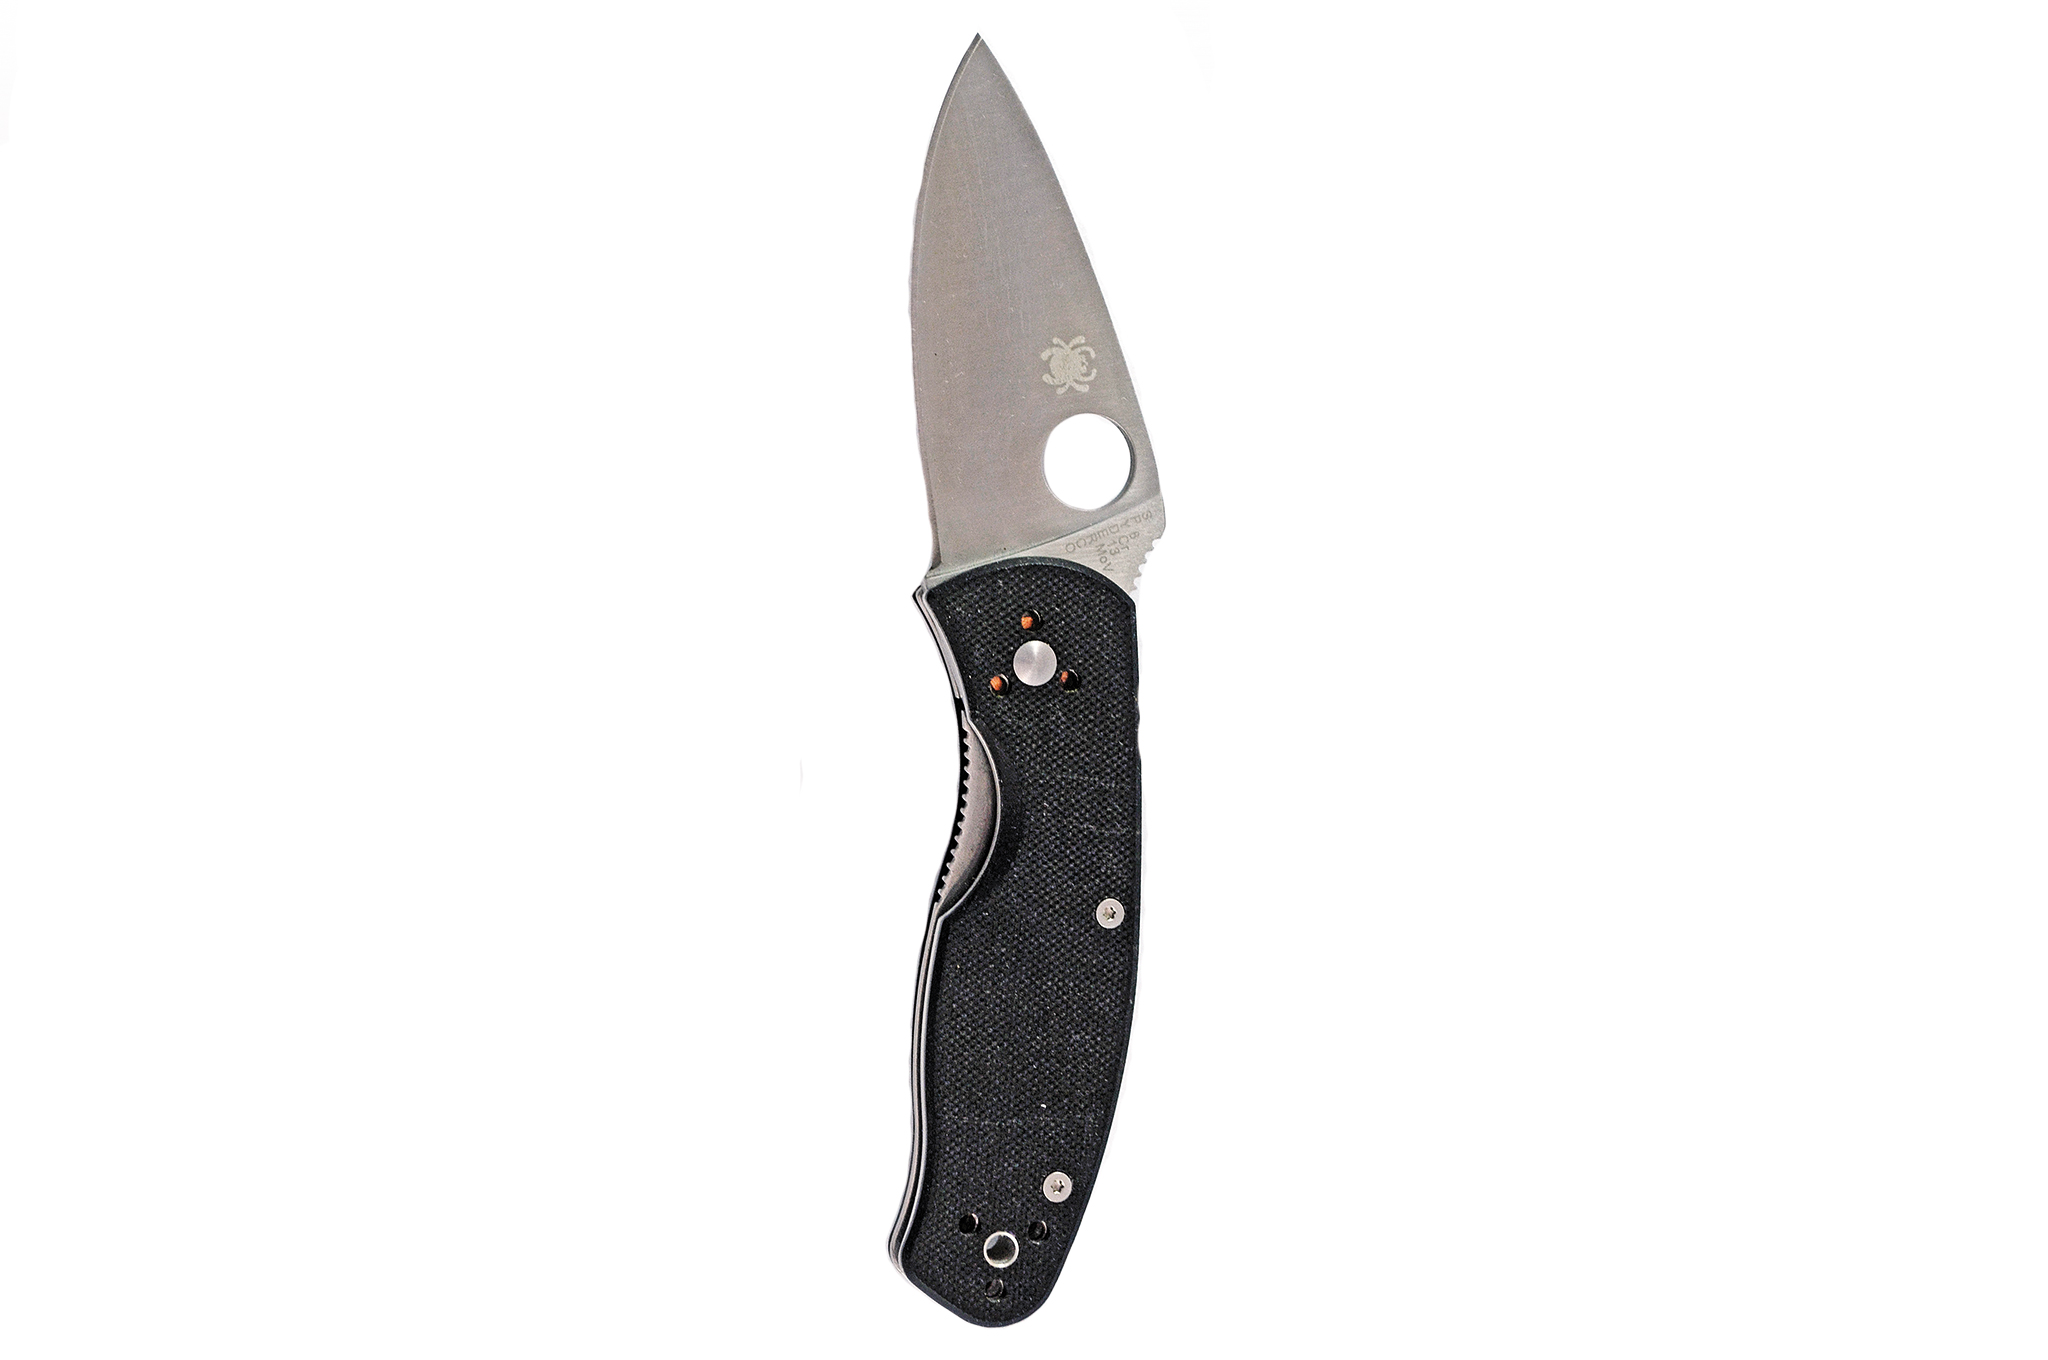
- MoraKniv 3.6-inch carbon steel fixed blade knife, with sheath
- Kangli multitool with pouch
- UltraFire UK68 300-lumen AA flashlight with high/low/strobe and zoom lens
- Generic work gloves
- 37 feet of 550 paracord (7 internal strands, 2 threads per strand. Commercial-grade variety.)
- Pencil rolled in 15 feet of duct tape
- Kaito AM/FM/shortwave AA-powered radio
- Deck of playing cards
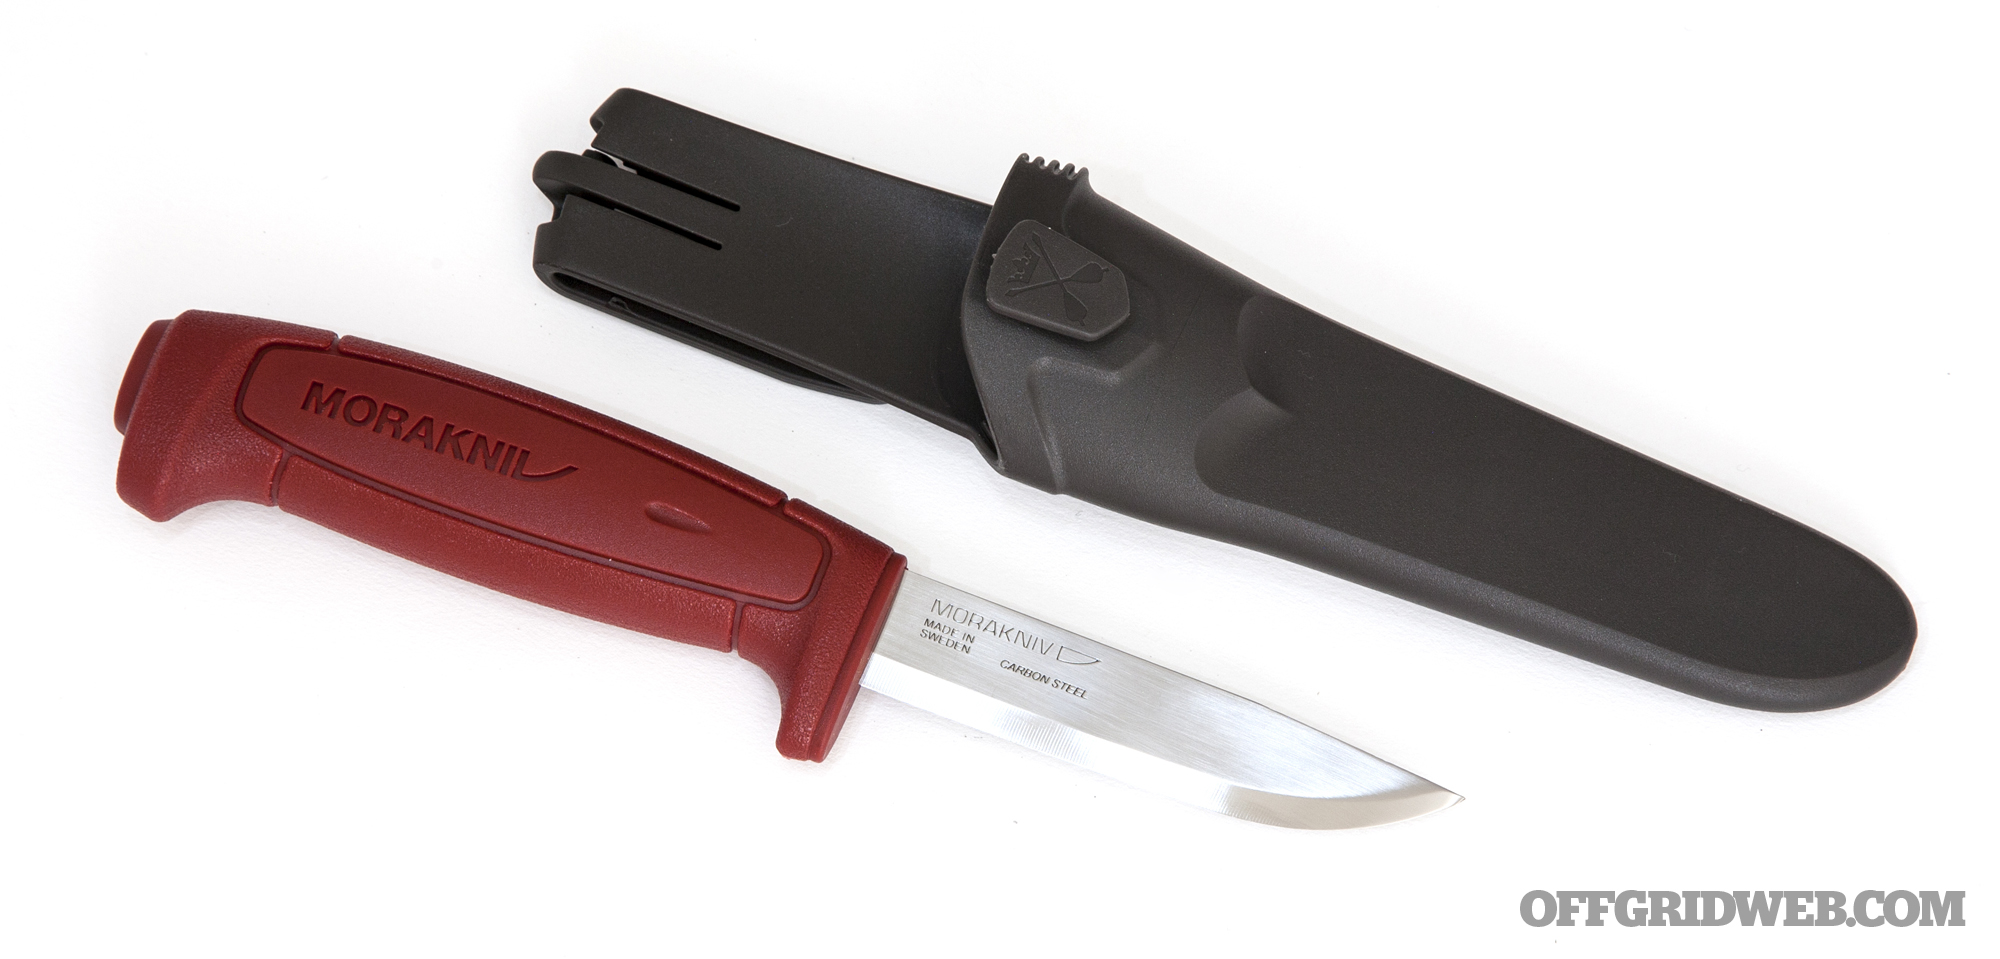
The Swedish-made Mora knife is a great choice, as its simple and compact design have made it a favorite of bushcraft aficionados. So, we're happy to see it in this kit. The multitool and flashlight, however, are both less desirable.

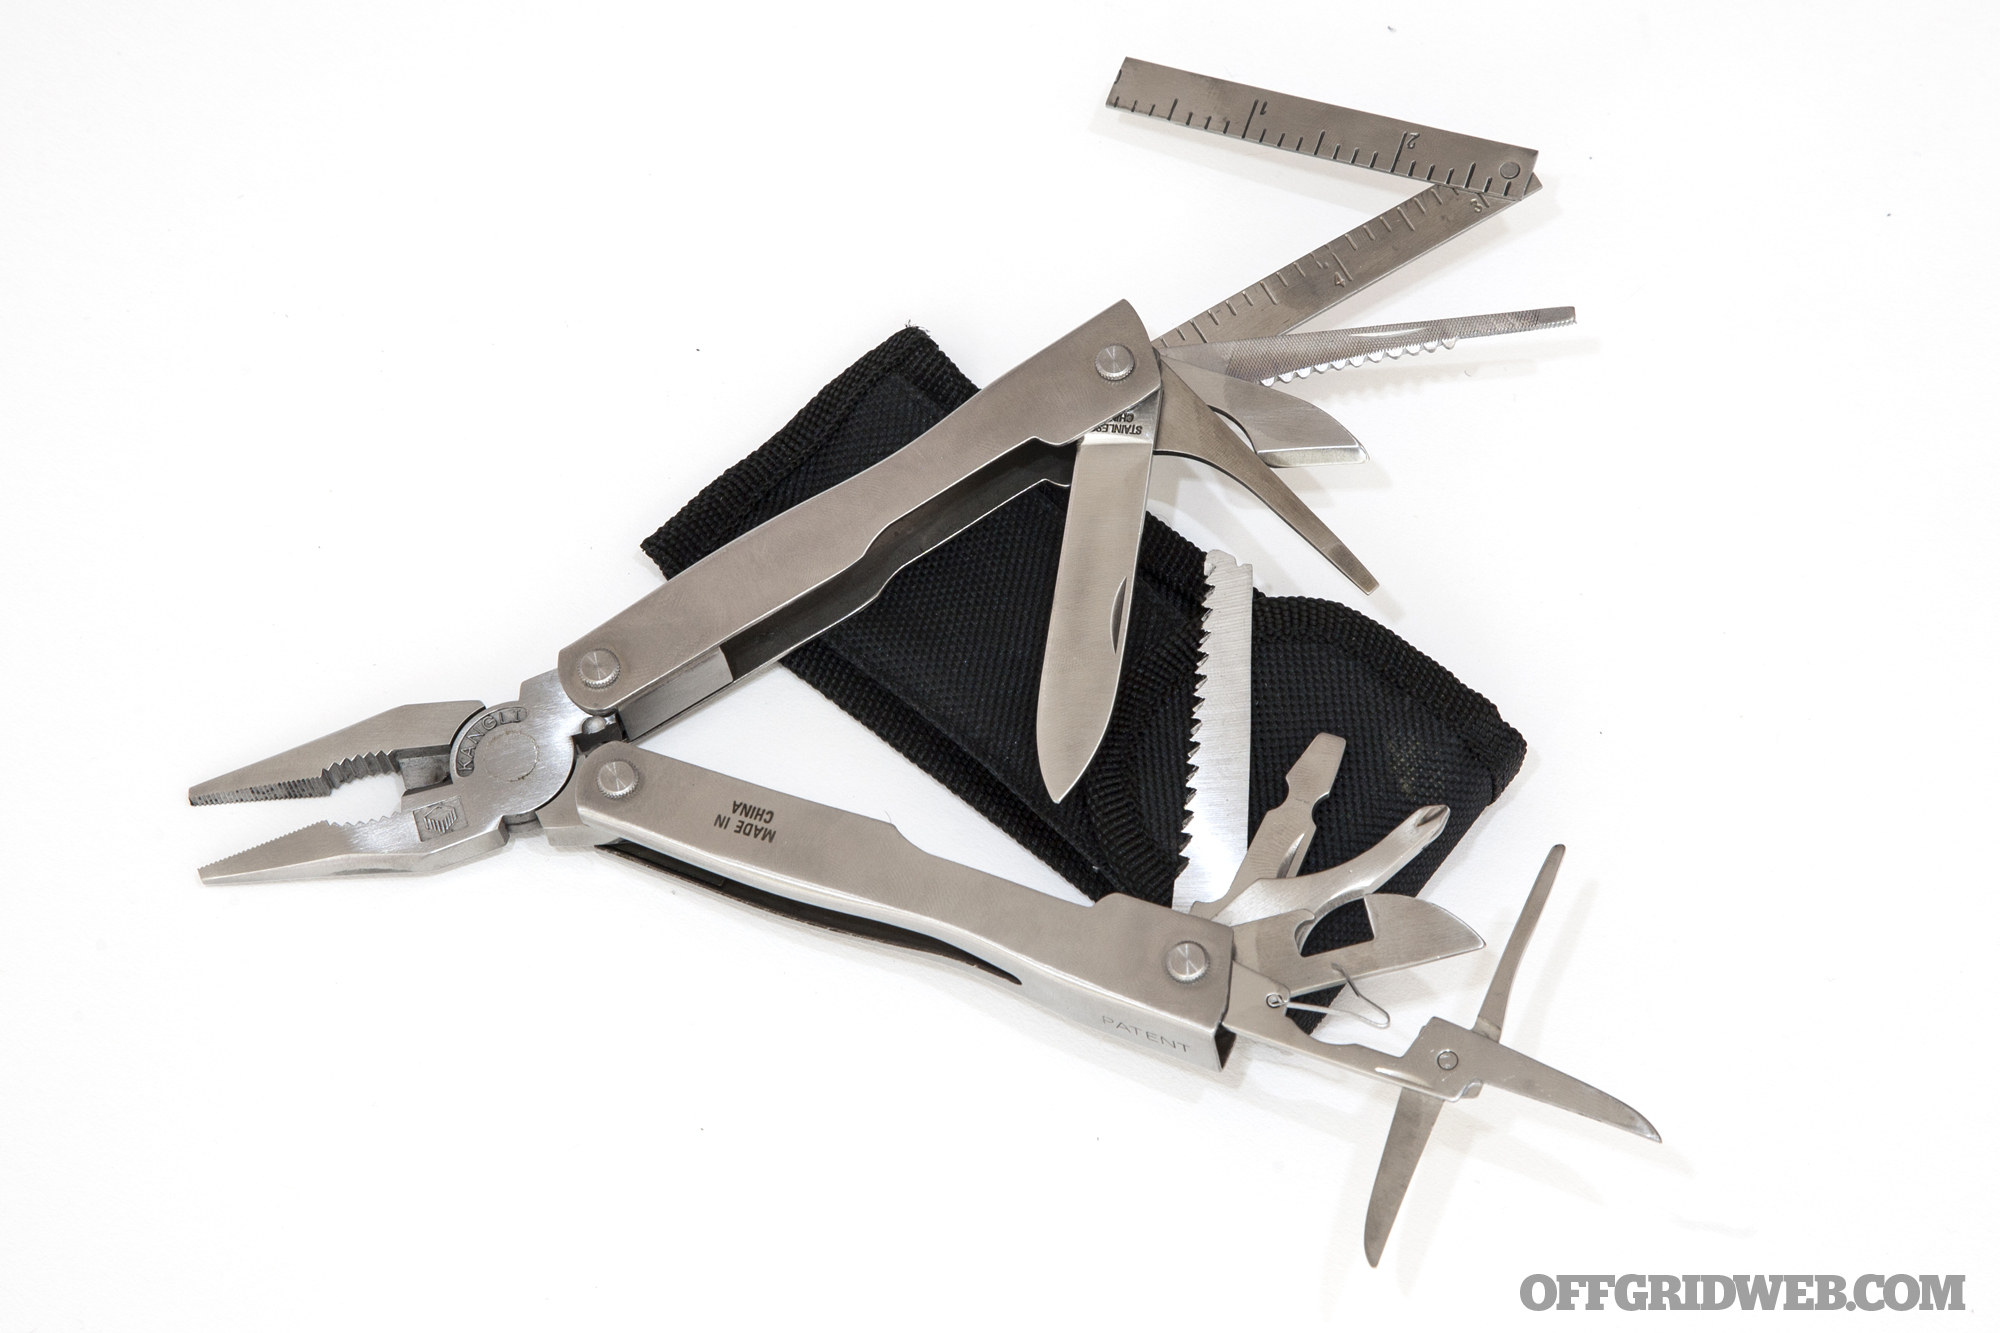
Specifically, the made-in-China Kangli multitool comes in a flimsy pouch, rattles when closed, and simply feels cheap. The pliers are OK, and the knife is quite sharp, but the stamped steel fit and finish will certainly not leave you wondering if it's a Leatherman.
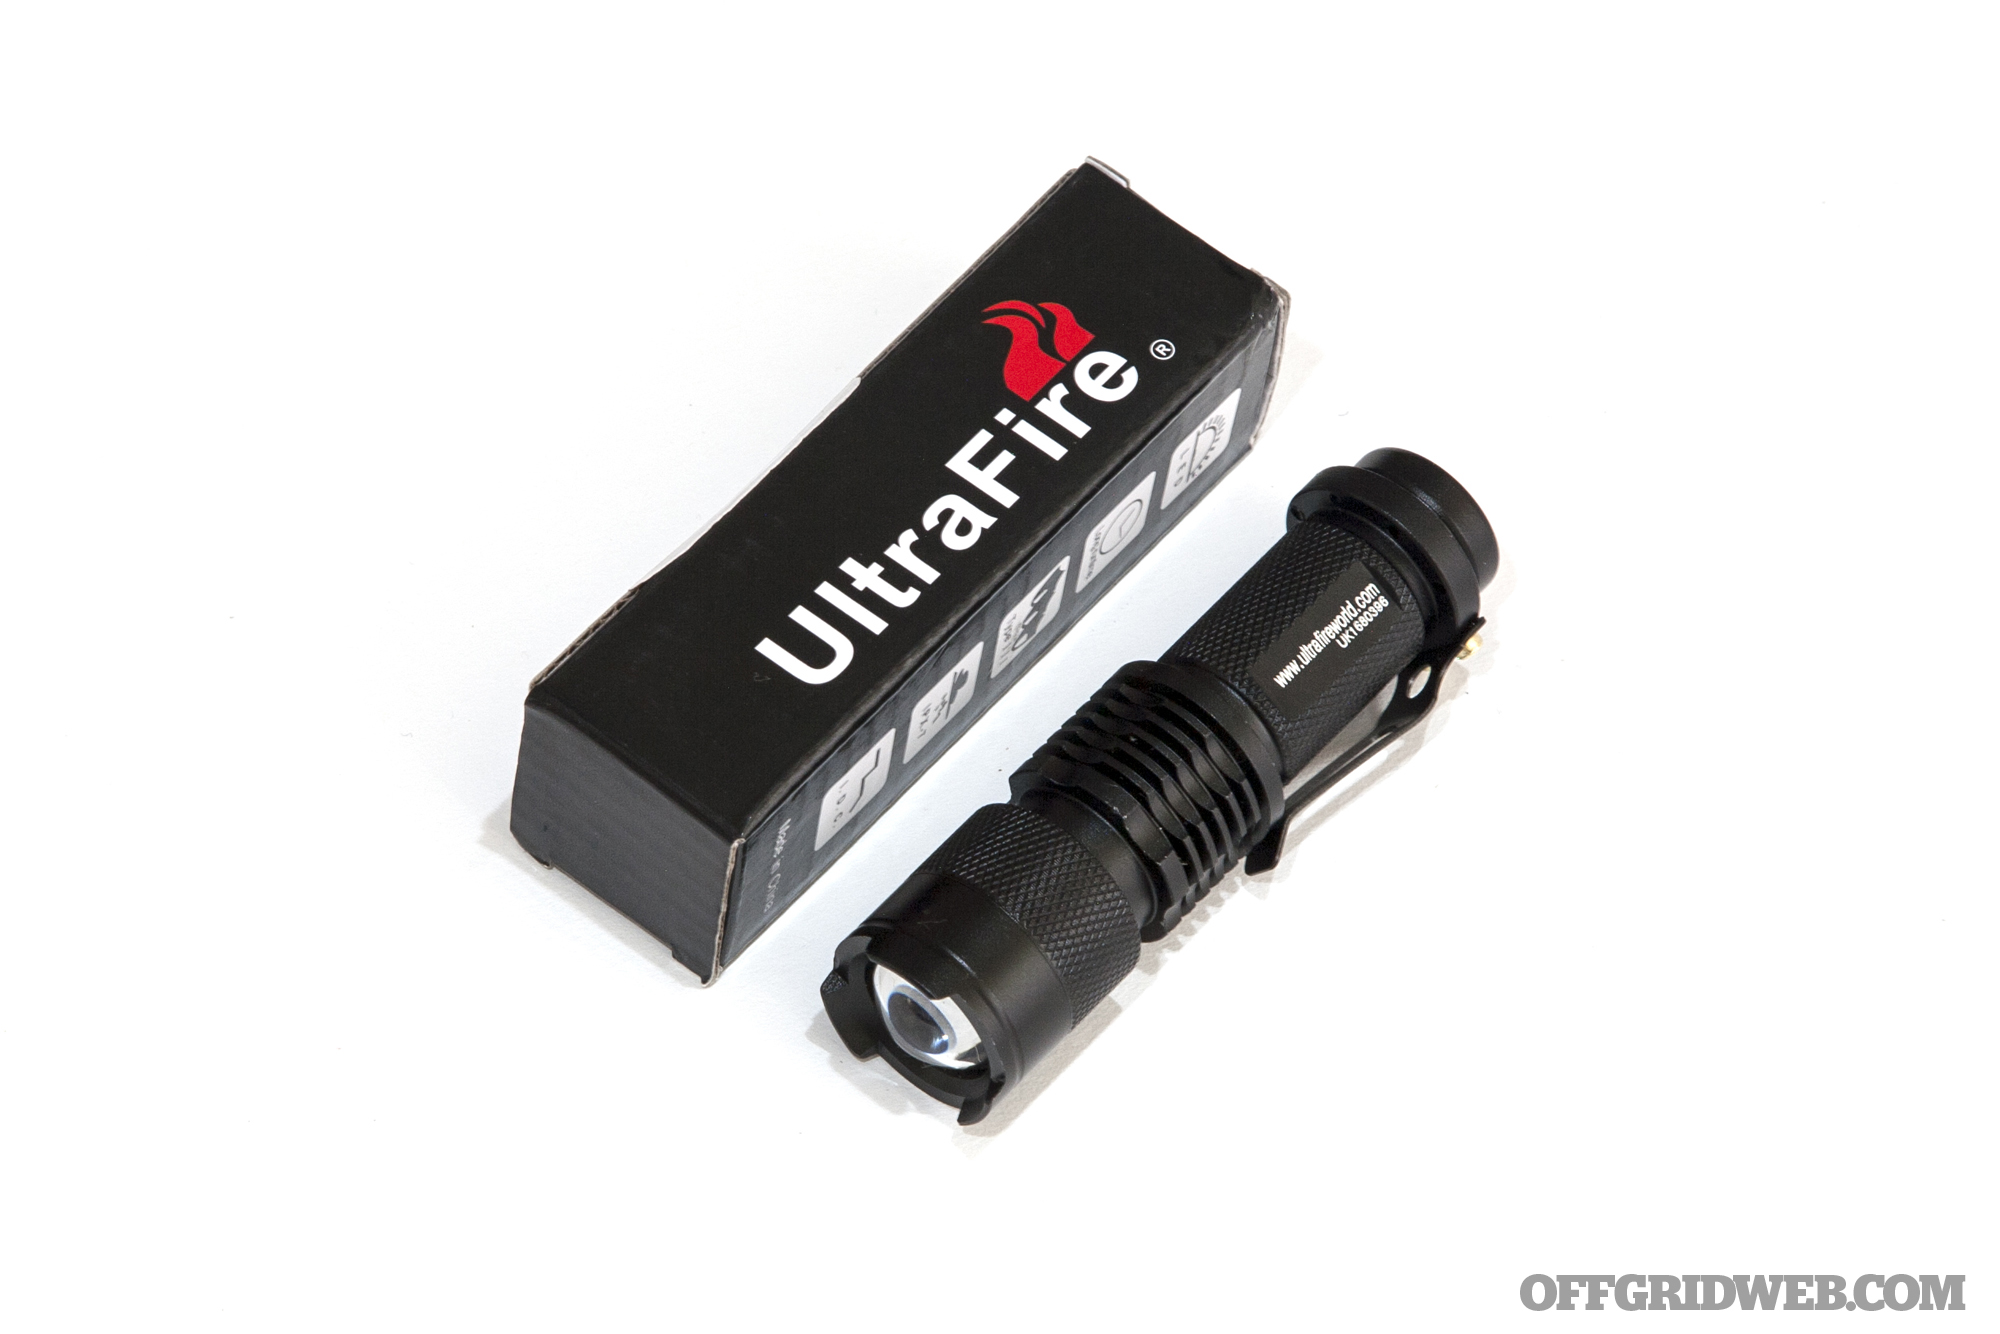
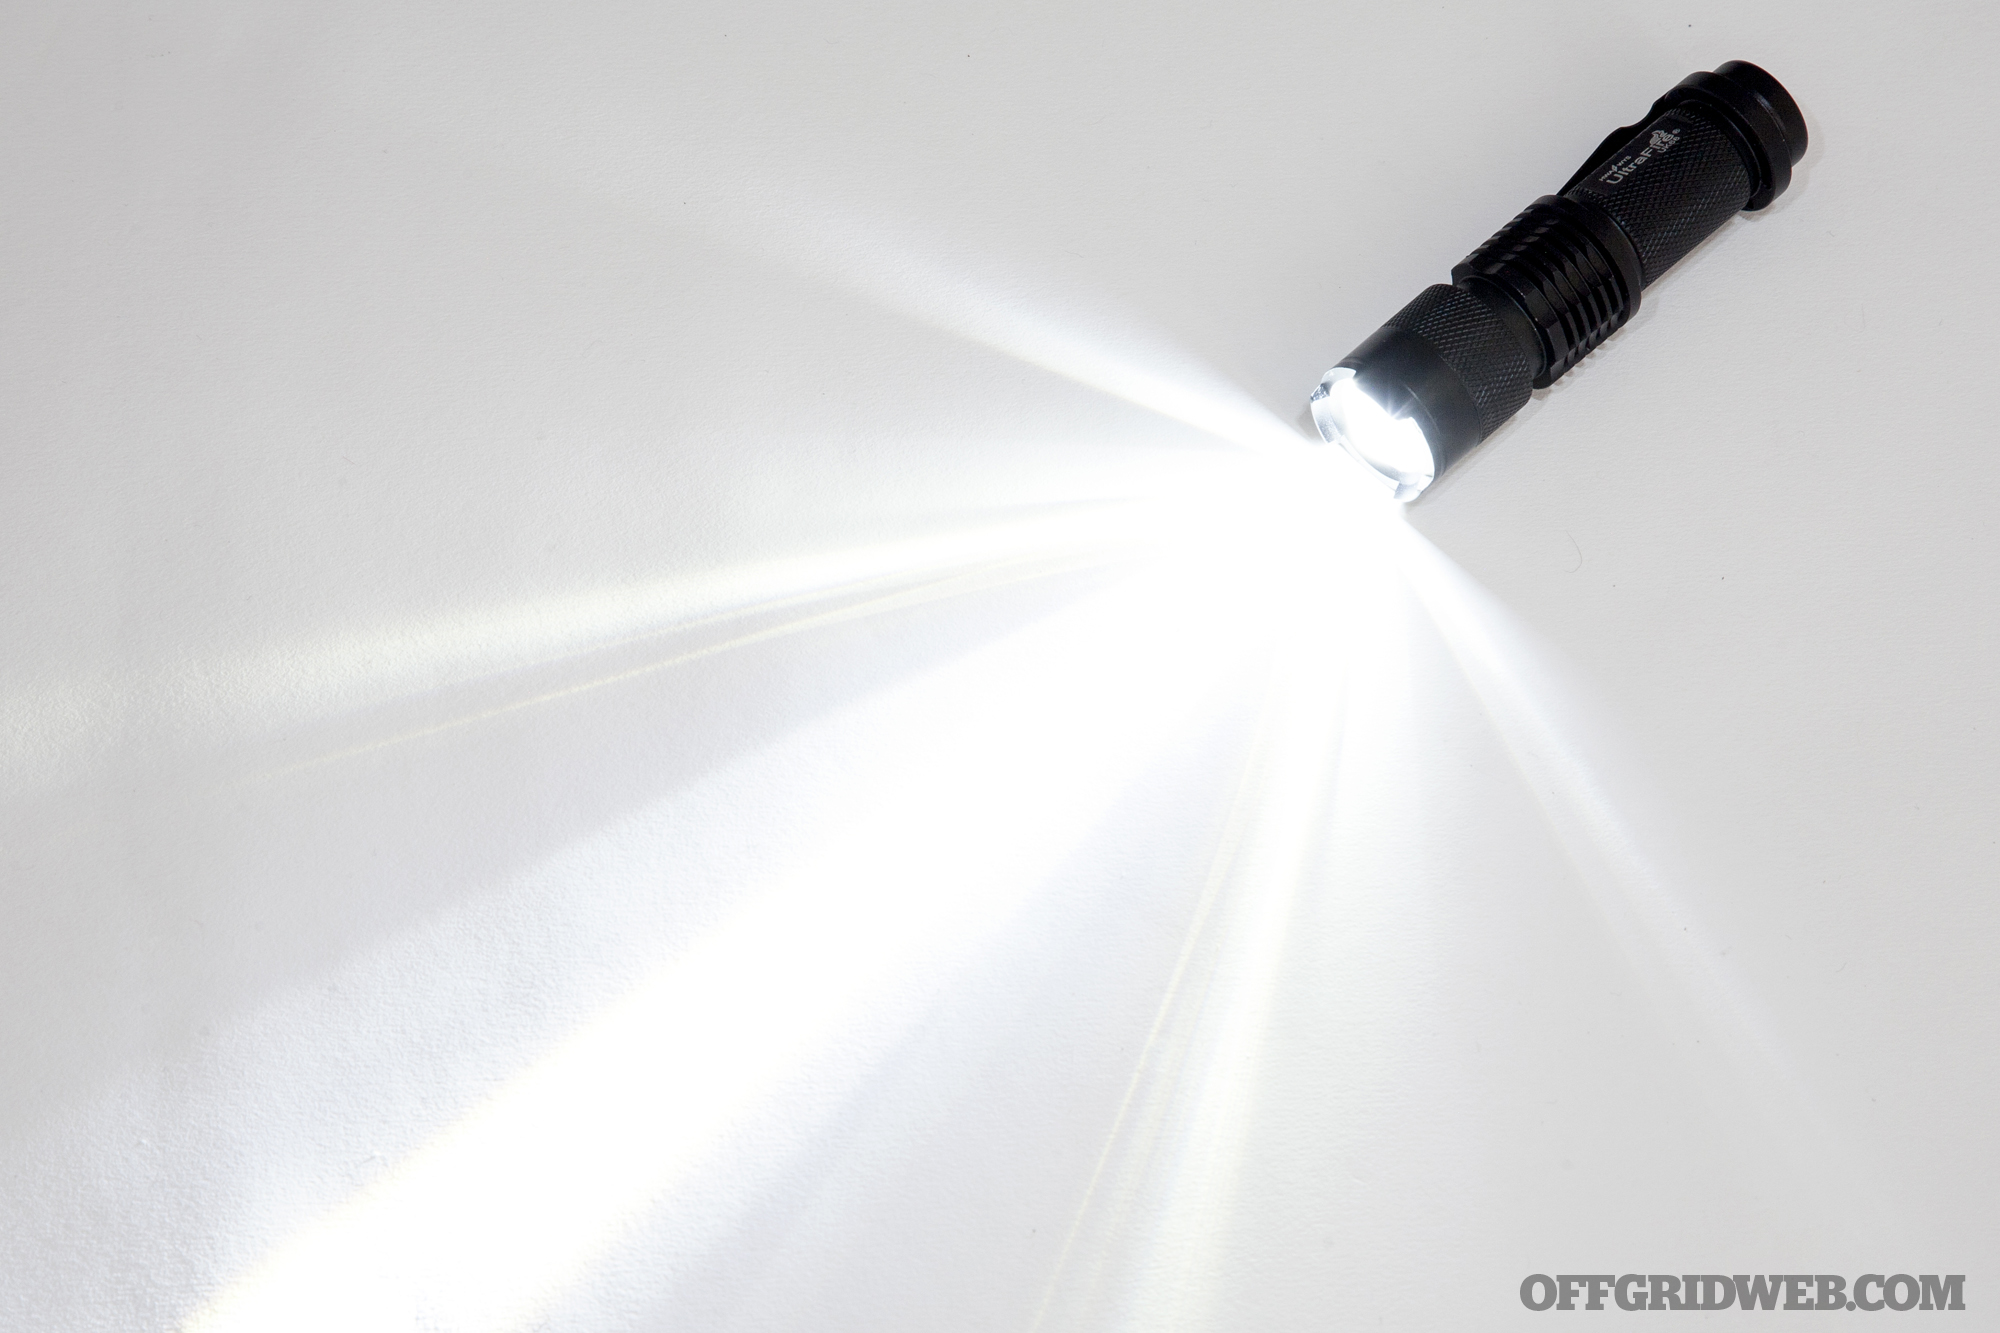
The flashlight is made by UltraFire, and the exterior construction seems sturdy. We like the versatility of the sliding zoom lens, and it's reasonably bright for a AA light. However, our light flickers noticeably when left on, and that leaves us concerned about its reliability. It also has a fairly short runtime of 90 minutes, and it doesn't have a CREE logo like the flashlight pictured on Forcite's web site.
We understand that cost was a factor when choosing these items, but we would gladly pay $20-30 more for a light and multitool we could trust. Aside from these two disappointing items, the remainder of the survival items are solid. We especially appreciate the inclusion of the radio and deck of cards, since they provide a great way to keep a positive attitude and alleviate boredom.
Knowledge and Documentation
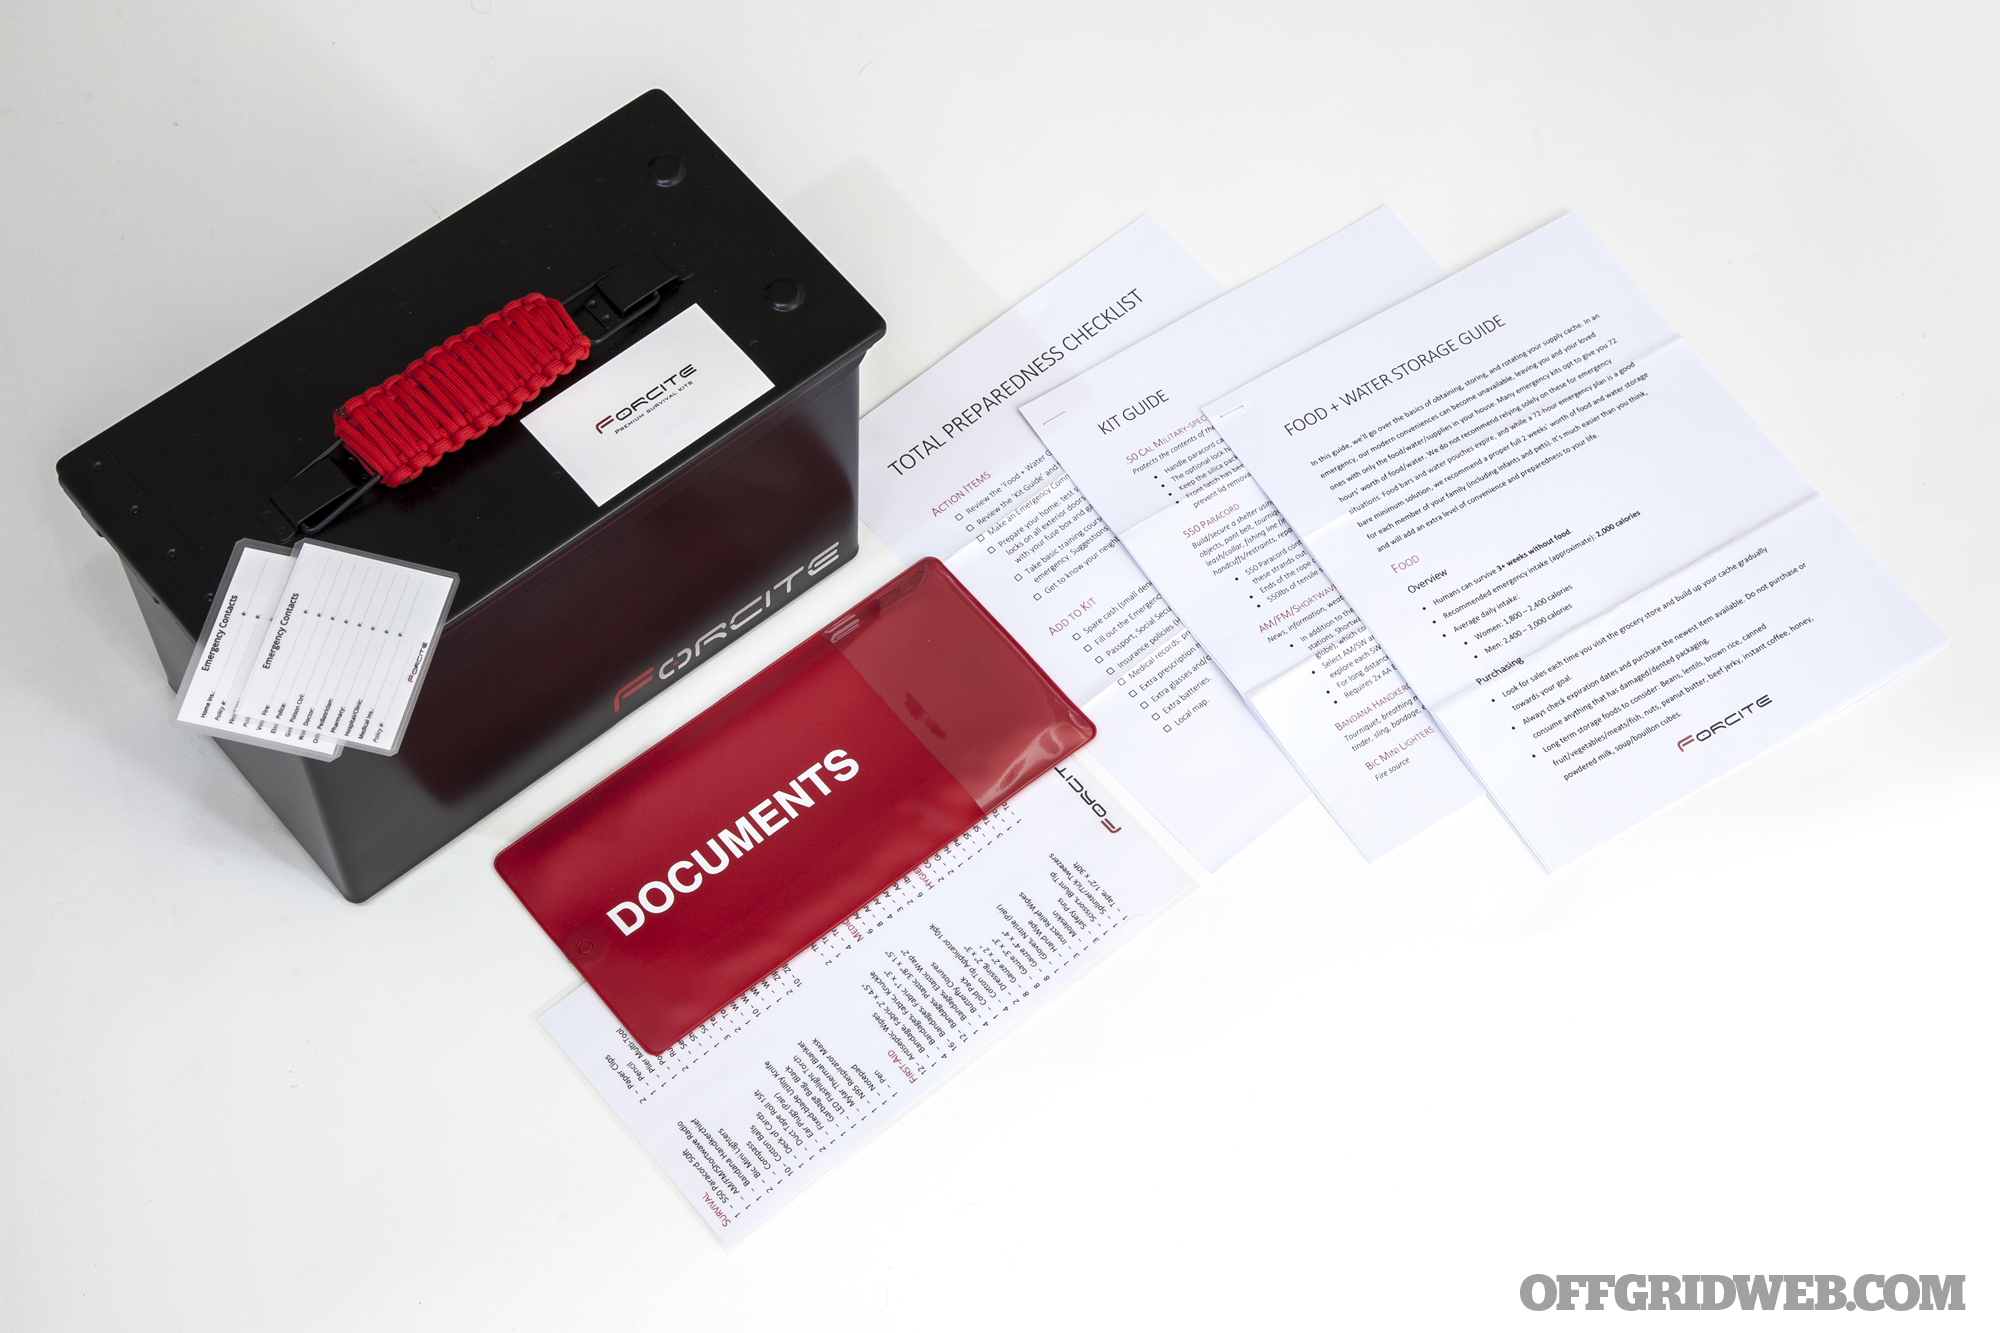
As we mentioned before, proper survival knowledge is essential to staying alive, and Forcite provides helpful documents on this topic. Here's a list of the documentation included with every Forcite kit:
- List of contents (laminated)
- 2 “Emergency Contacts” cards (laminated)
- Total Preparedness Checklist
- Food & Water Storage Guide
- Kit Guide
- Documents pouch (contains all of the above, except the contents list)

The kit contents list is useful for taking stock of your supplies, and the emergency contacts cards are also good to have. However, the really outstanding part of the Forcite kit is the three documents contained in the red pouch.
The Total Preparedness Checklist is the first single-page document in the pouch. It includes basic Action Items for emergency preparedness, and 9 additional items to add to your kit. No survival kit on the market arrives on your doorstep containing cash reserves, your passport, prescription meds, eyeglasses, and other personal items. You'll need to add those, so this serves as a good reminder.
The Food & Water Storage Guide provides many useful details on stockpiling food and water, and restates the importance of not relying solely on this box (or any other small survival kit). There's a list of recommended shelf-stable foods, as well as storage and rotation advice for keeping the items fresh. This packet also discusses water consumption, storage, and purification (including improvised techniques such as household bleach).
Finally, the six-page Kit Guide outlines potential uses for every major item in the kit. Most of these are accurate and helpful, but there are a few points we'd disagree with. Namely, breaking the compass for the handful of drops of combustible fluid inside would almost never be advisable.
As for additions to the documentation, we'd recommend the following:
- A knot tying guide, including bowline, trucker's hitch, and double fisherman's. This is essential given the inclusion of paracord.
- Improvised shelter diagrams, especially the A-frame.
- Basic home-defense and self-defense tips. These might include vital areas to strike attackers (eyes, ears, groin, etc.), and the importance of escape and evasion.
- Recommendations for supplemental reading (i.e. Wiseman's SAS Survival Handbook or the U.S. Army Survival Manual).
Conclusions
Overall, the Forcite kit provides a lot of useful resources in a small and durable package. We like that it easily fits on a shelf, under a bed, or in the trunk of a car, and it's quick to grab if SHTF. With the exception of the disappointing multi-tool and flashlight, and a handful of other minor items we'd probably replace, we were very pleased with its contents. Of course, we also plan to add to the kit to suit our specific needs, as recommended by Forcite.
Firoze tells us his kits are still evolving based on feedback from his first batch of customers. He writes, “What you see in this survival kit has been taken from shower thought to your doorstep in just 3 months. I say this to highlight the potential this product has as I have more time to iterate and improve on it.”
We'd say Forcite is off to a strong start with this kit, and it will likely get even better with a few minor tweaks. As it stands now, it's a durable, versatile, self-contained survival kit that could give you a major advantage in just about any disaster scenario. Given the substantial documentation, it's also a very approachable option for those with limited survival training or experience.
For more information on Forcite survival kits, visit Forcitekits.com.