A fresh blanket of snow across the mountains is a beautiful thing, especially if you enjoy winter sports like skiing or snowboarding. However, despite this natural beauty, there are serious dangers to be aware of in winter terrain. One of the foremost dangers to anyone on or near the slopes is that of an avalanche.
If you’re traversing a ridge, even a small avalanche can cause you to lose your footing and tumble down the slope. If you’re at the base of a gulley, an avalanche can quickly bear down on your location, leaving you nowhere to go. Avalanches can occur when you’re least expecting them; a pair of California motorists were recently buried as they drove down the highway. This is why it’s essential to be aware of your surroundings and recognize avalanche warning signs.
Backountry.com partnered with Bruce Tremper of the Utah Avalanche Center to produce the following video about identifying and avoiding avalanche terrain. Bruce discusses what he calls “critical decision spots” as he navigates through the mountains, and mentions how to spot terrain traps which could become deadly even with safety gear (such as an avalanche airbag).
As Bruce says, 34 to 45 degrees is the key danger zone to be aware of when approaching slopes — 38 degrees is considered the peak danger point. For the uninitiated, those numbers don’t mean much, but they indicate the importance of knowing how to measure slope angle.
Here are a few methods to consider for analyzing slope steepness:
Measure slope angle with a compass that has a built-in inclinometer
Use a ski pole inclinometer tool, such as the one seen in the video below
Whatever method you use, the point remains the same: situational awareness will keep you safe in the mountains. If you’re conscious of snow pack composition, slope angles, and terrain traps, you can navigate more safely during the winter.
Trash is a fact of life, especially in our densely-packed and urbanized society. Due to modern infrastructure and trash pickup services, we often don’t consider the sheer volume of trash each home produces — we wheel it out to the street, the garbage truck comes, and it’s out of sight and out of mind. However, if a major disaster occurs, trash pickup services will cease and waste buildup will become a serious problem.
One solution that can alleviate the burden of waste buildup is composting. By burying organic material in a layered structure with the right amount of moisture, composting naturally degrades waste into valuable fertilizer. Grass, leaves, sawdust, paper, cardboard, fruit peels, eggshells, and even hair can be re-purposed into a substance that enriches your soil and helps your home garden thrive.
In everyday life, composting is easy and beneficial. When trash pickup is not an option, composting is even more attractive. The alternative is a smelly disorganized trash heap that serves no purpose — unless you’re looking to attract rodents or insect pests. A properly-constructed compost heap will put this waste to good use.
The following infographic from Fix.com shows the benefits of compost, and how it turns trash into treasure. Click here to download a full-size version. (Note that the items you “cannot” compost may vary depending on local laws; in an emergency, composting human and animal waste is an option, but it may be against the law during normal circumstances.)
Wool is an incredibly versatile material. Despite the common misconception that it’s rough, itchy, and stifling, high-quality wool apparel is extremely durable, protective, and moisture-resistant. This is why wool-based fabrics have seen a resurgence in popularity for outdoor use in harsh conditions.
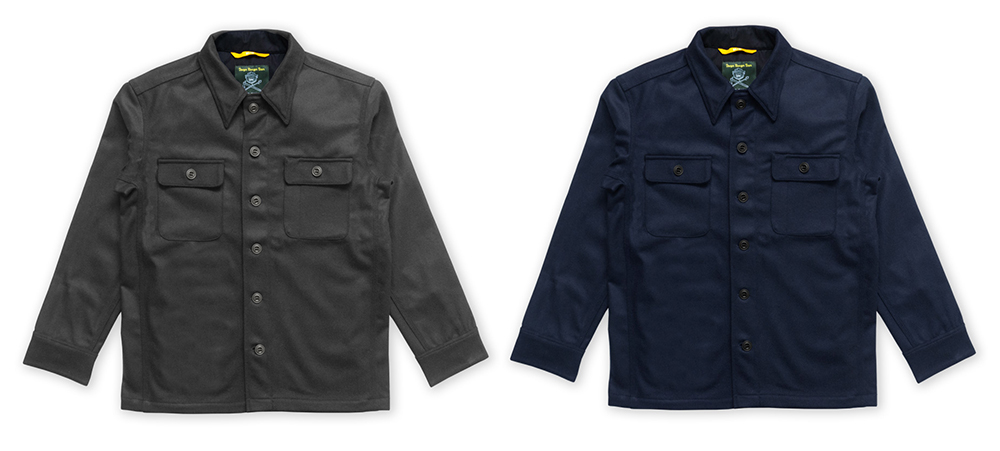
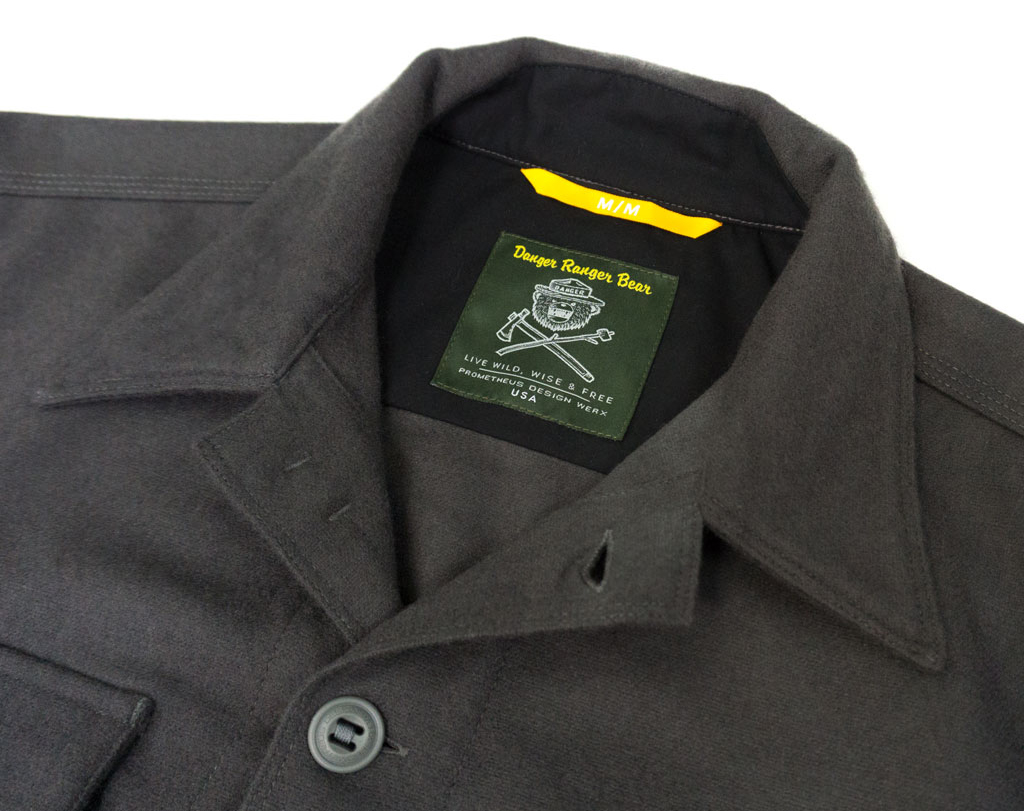
Prometheus Design Werx has released a new 3-season wool outdoor shirt under its Danger Ranger Bear brand. The shirt is called the Danger Ranger Bear Woodsman, and is inspired by the classic appearance of vintage outdoor apparel. The company says, “The DRB Woodsman Shirt is equally at home in the wilderness, at the work shop, or inside the cabin of your favorite overlanding rig. This is a modern classic we think Teddy Roosevelt would have approved of.”
The new DRB Woodsman shirts are made in small batches in the USA, from a Melton blend of 85% wool and 15% nylon. The shirt uses triple-needle stitching and bar tacks, double-reinforced elbows, and tough PDW slotted buttons for maximum durability.
Long sleeves, dual chest pockets, and a camp-style collar provide a simple and classic appearance. The chest pockets are buttoned and zippered for secure closure, and are scaled to fit most modern smartphones. The left pocket also includes a pen/pencil slot.
The Woodsman shirt is available in two standard colors: navy blue and owl grey. There’s also a Special-Edition model in genuine Woolrich Heritage red-black plaid wool. All DRB Woodsman shirts are designed for regular fit, and range in size from small to XXL. The standard shirts are available at an MSRP of $159, and the Special-Edition is available at an MSRP of $169.
A wise person once wrote, “Winter is a harsh mattress.” Or was it a “harsh mistress?” Either way, a frigid landscape is no place to slumber without a proper outfit, an insulated shelter, and a reliable heat source. But you don’t have to climb K2 or get ambushed by a Wampa for poop to go sideways during the colder months.
So if you can’t find shelter, bring shelter with you. And we don’t mean that in a “Hugh Glass, slice open your horse and slither inside” sort of way.
Hobos, ultralight backpackers, and survivalists know a quality sleeping bag can serve as a life-saving shelter by itself. With snow pummeling many parts of North America, it’s time we crawled feet first into the topic of cold-weather sleeping bags.
Rated T for Toasty
The No. 1 most important factor when considering a winter sleeping bag is its temperature rating. For example, a 0-degree bag means the end-user should snooze comfortably if the air temperature drops to 0 degrees F. However, these numbers can be a tad inaccurate, as manufacturers can assign ratings based on their own testing methods.
Enter the EN standard. This European criterion labels a sleeping bag’s rating based on a standardized test using a thermal mannequin in a controlled lab. Though the standard measures four ratings, you should focus on two:
Comfort: The temp at which an average woman can sleep comfortably in the bag.
Lower Limit: The temp at which an average man can sleep comfortably in the bag.
Why not call them the “Women’s Lower Limit” and the “Men’s Lower Limit?” We don’t know. That’s European scientists for ya. Nomenclature aside, the EN standard is optional, but many companies have adopted it as a means to add legitimacy to their marketing claims.
For the purposes of our buyer’s guide, we’ll focus on the EN Lower Limit. Keep in mind, the EN rating assumes the occupant sleeps wearing a top and bottom base layer and a hat. Au naturel sleepers may wish to look for a bag rated for a little lower temp (and that’s also machine washable).
To prevent turning into a human Popsicle overnight, pick a bag that has a rating at least 15 degrees colder than the conditions you expect. Keep in mind these ratings are aimed at the average sleeper. You should also ponder what type of snoozer you are:
Hot Sleepers: These human furnaces turn beds into foam-and-spring saunas, shrugging off the sheets in the middle of the night — much to the chagrin of their spouses.
Cold Sleepers: These icy folks produce little body heat as they count sheep, so they pile on the blankets. (Marrying someone of the opposite type will ensure a lifetime of nightly bed jiu-jitsu — and not the enjoyable kind, if you know what we mean.)
Goldilocks Sleepers: Of course, there are those whose body temps are “just right.”
The Low-Down
Generally, sleeping bags have two main types of insulation (or fill): down and synthetic. Which one should you get? That’s like asking, “What’s better, 9mm or .45?” You’ll find true believers on both sides.
Also, thanks to advancing technology, there’s now a third type of fill: hybrid.
Down: We’re not talking about a duck’s contour feathers that provide wind and water protection, nor are we talking about flight feathers that allow for lift and propulsion. We’re talking about the down feathers, the fluffy stuff underneath that traps warm air against their skin — the birds’ base layer. The fluffier the down, the more heat it traps.
Duck and goose down is desired for its softness, light weight, durability, breathability, compressibility, and heat-retaining attributes. It’s hard to beat Mother Nature.
There’s a flip side, though. Down is expensive — especially goose down. And it turns into a spitball-like lump when wet, diminishing heat retention and possibly leading to mildew growth if a bag is put away damp. It can be treated with a water-resistant coating (marketers call this “hydrophobic down”), but that’s not the same thing as waterproof. Also, some might raise ethical questions about how the waterfowls are farmed and whether they’re live-plucked.
Synthetic: Usually made from polyester, this manufactured fill offers plenty of benefits. It insulates even when wet, dries faster than down, is non-allergenic, and can be just as soft and compressible as natural fill. Plus, it’s easier on the pocketbooks and requires less maintenance than its ducky competitor.
However, synthetic has a lower warmth-to-weight ratio than down, and its insulating abilities diminish over time and after repeated use because it’s not as durable.
Hybrid: Combining the best of both types, this third type might lay the down atop the synthetic or blend both throughout the bag.
Fill ‘Er Up
You might have heard the term “fill power” when it comes to sleeping bags. It refers to the loft (or fluffiness) and, indirectly, the insulating value of a down product. The higher the number, the more loft and heat retention — and the less material needed to keep you toasty.
Usually, fill power ranges from 300 to 900. Anything below 400 should be avoided like Ford Pintos, while anything above 750 is Maserati territory.
Mummy, I’m Cold
Slumber-sack forerunners date back hundreds of years, but many consider the world’s first commercially successful sleeping bag to be the Euklisia Rug, patented in 1876 by mail-order king Pryce Pryce-Jones. It was a wool blanket that could be folded over and fastened; it even had an integrated pillow pocket.
Much has changed in sleeping bag designs since then.
Mummy: This form-fitting sack will have you wrapped up like its Egyptian namesake. The design not only reduces weight, but also the space between you and the bag, allowing your body to heat up that air quickly and stay warm longer. There’s also a hood to prevent you from suffering eternal brain freeze.
The drawback? You’re basically wearing a full-body condom; unless you sleep like Dracula, you’ll find it restrictive at best and claustrophobic at worst.
Rectangular: It’s a square blanket that folds in half (forming a rectangle) and seals shut with a zipper. This shape offers the most comfort for restless sleepers. Also, if you buy two compatible bags, you can zip them together to create an improvised double-wide bag. (Or you can just buy an actual double-wide designed for couples.)
Unfortunately, the roomy design means there’s more air to heat up, so it’s not as efficient as the mummy shape. Plus, they take up more space and add weight to your kit.
Semi-Rectangular: Sometimes called barrel-shaped, this design tapers toward the bottom to give a bit more freedom for broad-shouldered users while providing more heat retention than a rectangular sack.
Bugoutability
Also consider a bag’s bugoutability quotient. How compact, lightweight, and portable is it? Can it be quickly deployed and stowed? And can you use it in pitch darkness?
To help us determine these and other important factors for our buyer’s guide, we enlisted the help of RECOIL OFFGRID’s intrepid network manager, John Schwartze. He’s slender at 6-foot-5, whereas this author is a stocky 5-foot-8. The dichotomy provides a balanced approach to our reviews of the latest mobile sleep stations for cold weather.
Read on to find out which one you’d want to share with your mistress this harsh winter … er, we mean, which one you’d want to use as your winter’s harsh mattress. Or something like that.
Enter Sandman (in the Snow)
To fight off any possible winter nightmares and ensure a solid night’s rest, it’s ideal to supplement your sleeping bag with other key pieces of gear:
Cold-Weather Apparel: People sometimes forget that your clothes are actually your first layer of shelter in a survival situation. Be sure to bundle up before you head out. And if you didn’t, hopefully you’ve packed backup apparel in your emergency kit.
Sleeping Pad: It’s important to get off the ground if you’re spending the night outdoors. That means putting a layer between you and the snow or frozen dirt — a sleeping bag alone won’t cut it. Consider a foam pad or an air mattress that doesn’t require an air compressor, such as the Therm-a-Rest Neoair Camper SV. You can also create a ground barrier using scavenged items (foliage if you’re in the backcountry, cardboard and newspapers if you’re in an urban setting).
Cot or Hammock: Both a cot or a hammock can also get you off the ground, though they might require a bit more setup time than a pad, depending on the model. (See our survival hammock buyer’s guide in Issue 11.)
Tent: An enclosed shelter like a tent combined with a quality bag and pad is the ideal slumber situation. It’ll block out wind and snow while retaining any body heat that the sleeping bag doesn’t trap.
Hunting requires precise observation of one’s surroundings in order to track down prey. However, experienced hunters also know that it’s easy to spook prey — it only takes one slip-up to lose your opportunity for a shot. In a survival situation, this becomes even more important, since you can’t afford to make mistakes if you’re hunting to put food on the table.
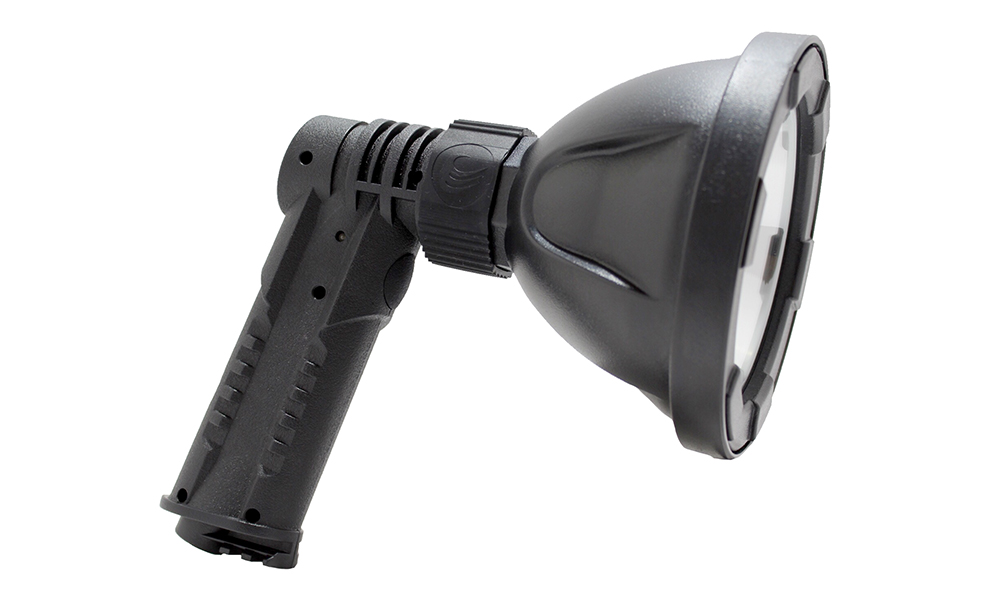
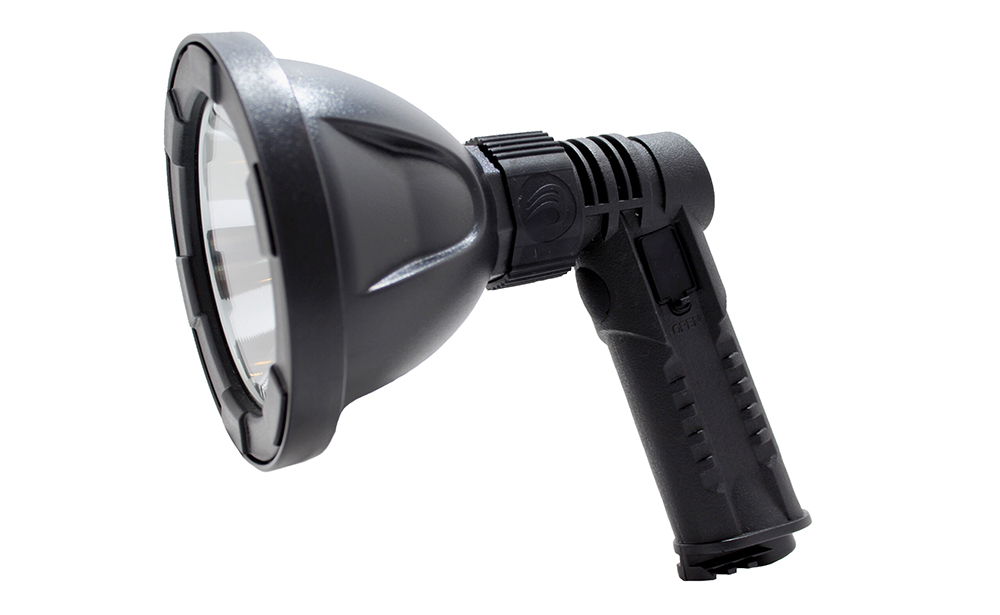
At night, this process becomes even more difficult, since it’s hard to find and track game animals without adequate illumination. On the flipside, too much light will alert prey of your presence. The Ultimate Wild SL-750 Killswitch hunting spotlight is intended to meet this delicate balance of lighting needs, with a dual-LED system for both spotting and targeting. A red LED can be used for locating prey without spooking them, while a standard 750-lumen white LED provides clear vision for the pivotal moment before you take your shot.
The SL-750 is new for 2017, with a pistol-grip handle that uses a polymer resin-fiber compound for improved durability and comfort. A weather-resistant power switch allows the user to quickly flip on the light and change colors. The built-in rechargeable lithium-ion battery offers up to 8 hours of total run time, and includes a USB-output port for charging small electronic devices in the field.
Here are the key specs of the SL-750 Killswitch light:
Output: 750 lumens
Dual CREE LED with 50,000-hour lifespan
Battery: Rechargeable lithium-ion
Chargers: Includes wall charger and 12V car charger
Length: 7 inches
Bezel Diameter: 5 inches
Weight: 13.8 ounces
MSRP: $90
For more information on the Ultimate Wild SL-750 Killswitch spotlight, visit UltimateWild.com.
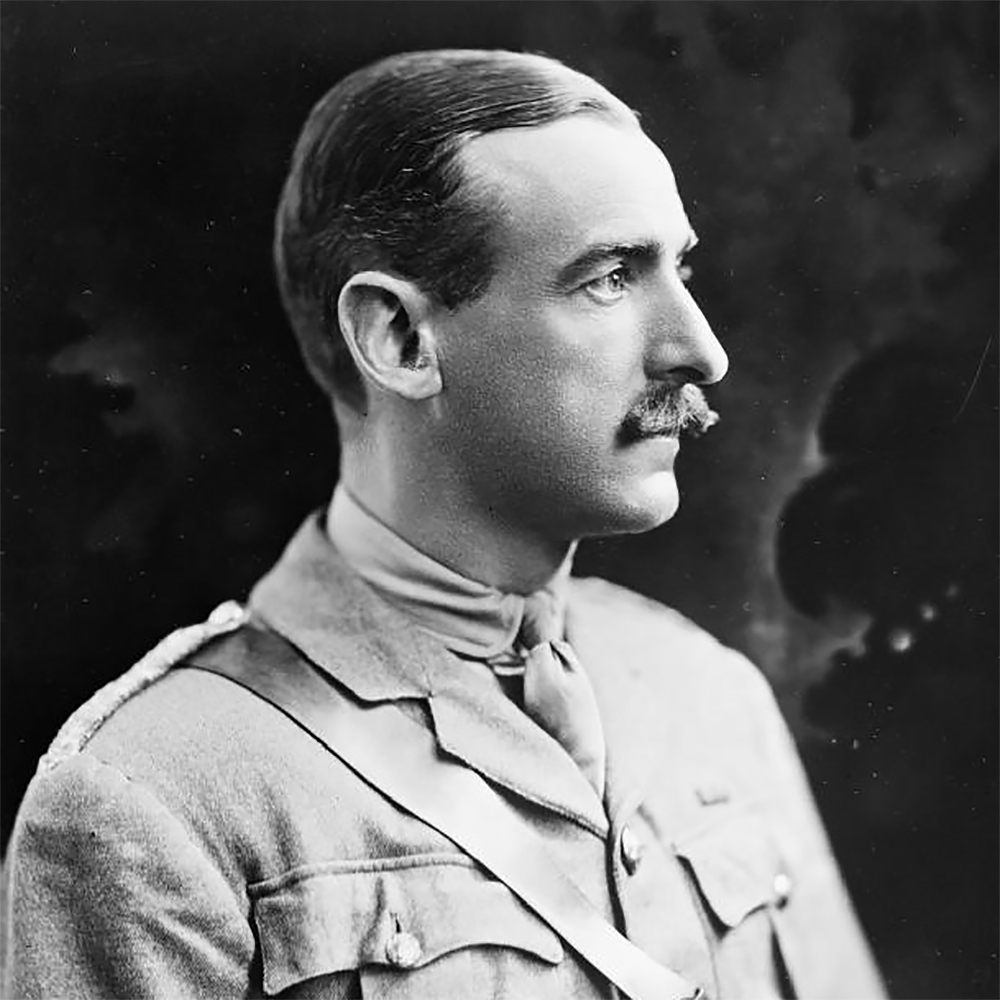
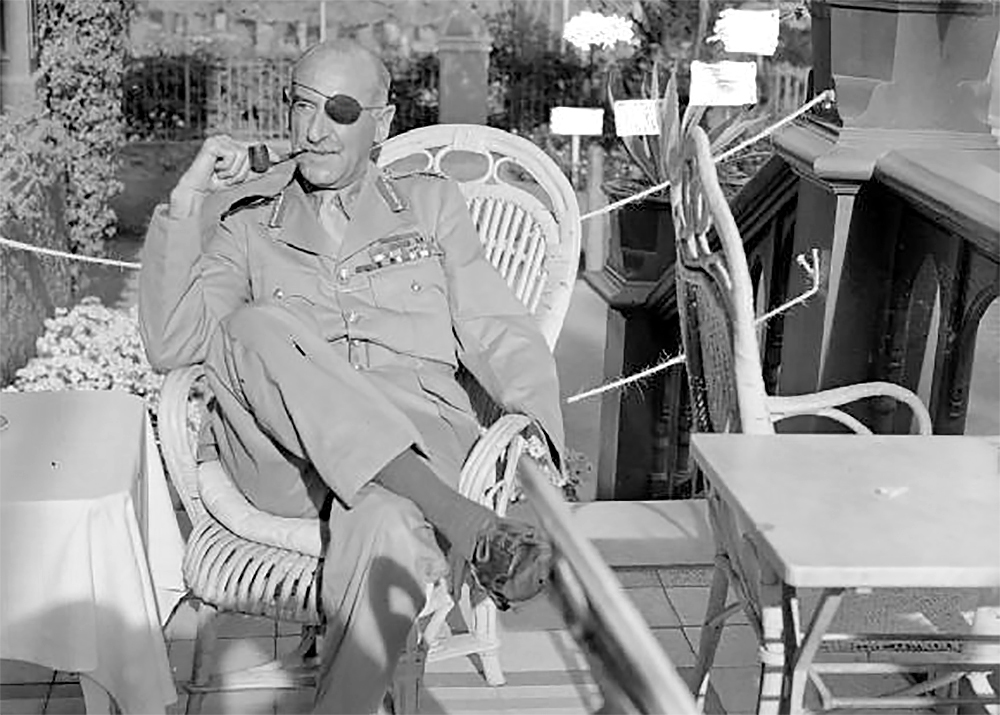
On rare occasions, truth is stranger than fiction. If the life story of Lieutenant General Adrian Carton de Wiart was made into a movie, it would almost certainly be dismissed by the general public as a laughable exaggeration of reality. We can’t say we’d blame them, either — without previous knowledge of the historical accounts, watching an actor portray this incredible journey of warfare and survival would seem unrealistic at best.
A 2015 BBC article compared Carton de Wiart’s story to that of an “unkillable” comic book hero, and one British military veteran therein likened him to Robocop. The Oxford Dictionary of National Biography refers to him as “a figure of legend”. Sir Winston Churchill even wrote the foreword to his autobiography, calling him “a model of chivalry and honour”.
A portrait of young Adrian Carton de Wiart. Photo credit: Wikipedia / IWM.org.uk
So, who was this man, and how did his real-life experiences become the stuff of legends? Read along as we summarize his incredible life story.
Birth & Early Military Career
Adrian Carton de Wiart was born in Brussels, Belgium in 1880, to wealthy aristocratic parents. His mother died when he was six years old, leading his father to move the family to Cairo, Egypt. There, young Adrian learned to speak Arabic fluently. He was eventually sent away to a Catholic boarding school in England, and continued on to study law at Oxford college.
A painting of Cairo, Egypt by artist Louis Comfort Tiffany in 1872. Source: Wikipedia / Brooklyn Museum
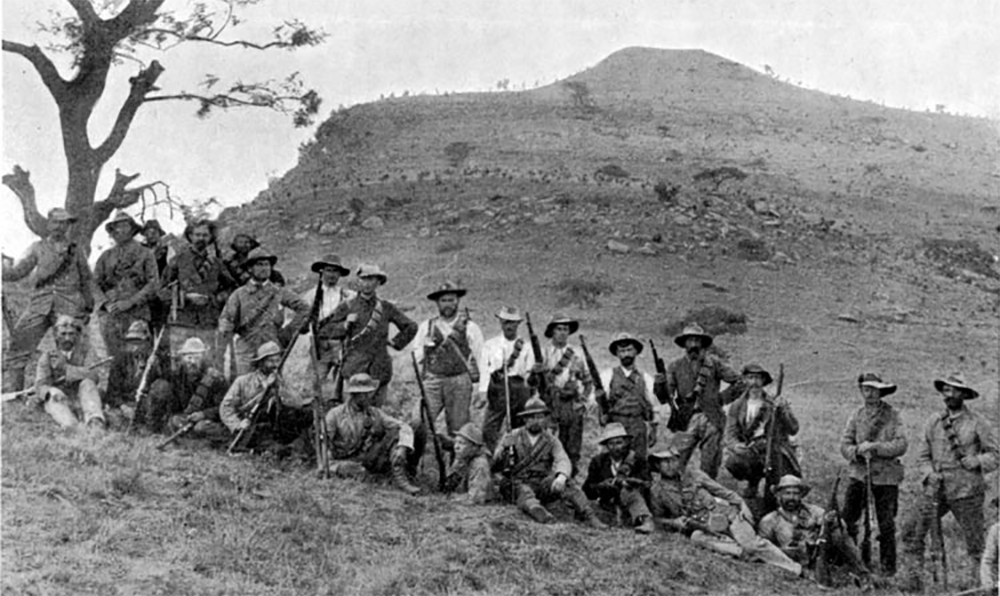
While a law degree from Oxford would be an impressive accomplishment to most, it wasn’t enough for Carton de Wiart. At age 20, he left Oxford without telling his father, and decided to enlist with the British Army. He wasn’t yet old enough to enlist, and wasn’t even a citizen (subject) of the British Empire, but that didn’t stop him. After falsifying his name and age, he was soon headed off to fight in South Africa in the Second Boer War.
Boer militiamen, such as those pictured here, fought the British in modern-day South Africa. Source: Wikipedia / Project Gutenberg
During his time in South Africa, Carton de Wiart was shot in the stomach and groin, and forced to return to England to recuperate. He returned to Oxford for a short while, then continued climbing the ranks in the British Army. By 1901, he had become a second lieutenant in the Royal Dragoon Guards; by 1904 he was a lieutenant; in 1910 he was promoted to captain. He also became a naturalized British citizen, married, and had two daughters.
World War I
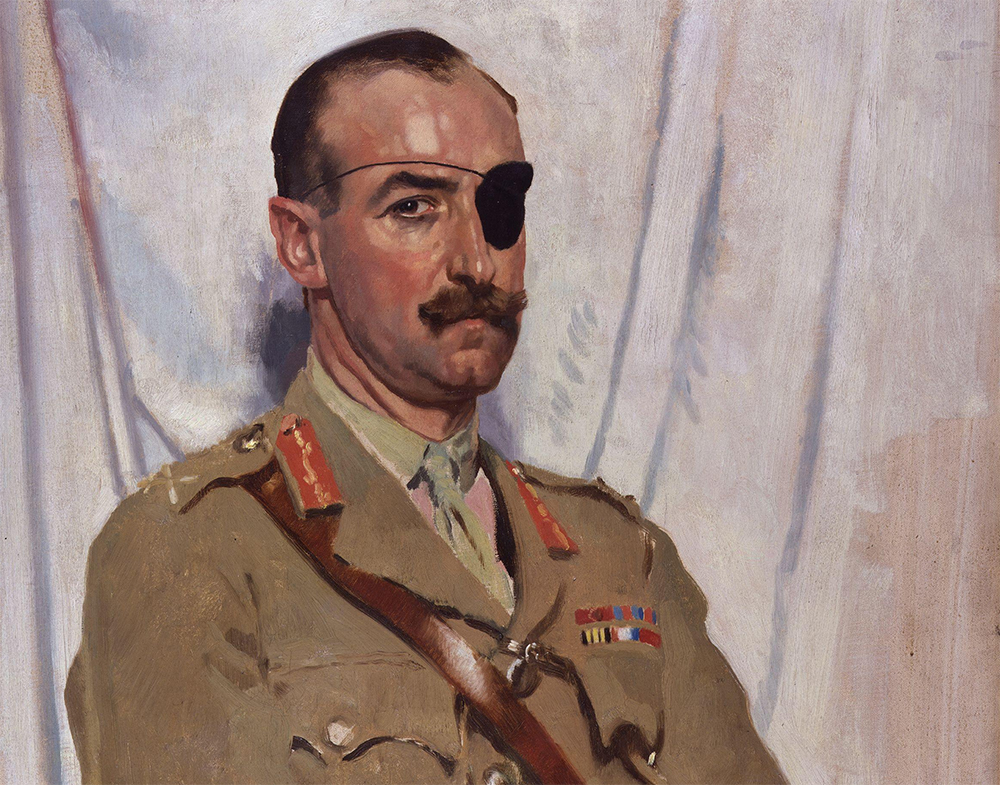
The First World War broke out in 1914, at which time Carton de Wiart was serving as part of the British Camel Corps in Somaliland, now a part of present-day Somalia. His detachment attacked a fort held by enemy leader “the Mad Mullah”, and Carton de Wiart was shot twice in the head. One bullet destroyed his left eye, while the other struck his ear.
Aside from uttering a prodigious string of expletives, Carton de Wiart was relatively unfazed by this serious injury. General Hastings Lionel Ismay, who served with him during the conflict, wrote, “I honestly believe that he regarded the loss of an eye as a blessing as it allowed him to get out of Somaliland to Europe where he thought the real action was.”
This portrait of Adrian Carton de Wiart was painted in 1919, and displays his distinctive eye patch. Source: Wikipedia / National Portrait Gallery, London
After recovering in England, Carton de Wiart donned a black eye patch, then headed into combat yet again in 1915. He fought on the Western Front in WWI, and was injured seven more times, including gunshot wounds to the head, ankle, hip, leg, and ear. The most notable of these injuries was the result of a German artillery shell which mangled his left hand. A surgeon declared that the damage would not require amputation, but Carton de Wiart disagreed. In his autobiography titled Happy Odyssey, he wrote, “I asked the doctor to take my fingers off; he refused, so I pulled them off and felt absolutely no pain in doing it.”
Somewhat ironically, Carton de Wiart titled his autobiography “Happy Odyssey”.
Later that year, the remainder of his hand was amputated. After another period of recovery in England, he returned to the war and led a battalion at the infamous Battle of the Somme.
Inter-War Period
By the end of WWI, Adrian Carton de Wiart had been promoted several more times to the rank of temporary brigadier general. In 1916, he received the Victoria Cross, the highest combat award of the British armed forces. Despite losing a hand and suffering many other grave injuries, he later wrote, “Frankly, I had enjoyed the war; it had given me many bad moments, lots of good ones, plenty of excitement.”
Carton de Wiart moved to Poland in 1919, and served as general in command of British armed forces within the country. Wiart’s troops helped the Polish fend off hostile forces from Russia, Ukraine, Lithuania, and Czechoslovakia. Once Poland achieved stability, he retired from the military and settled down peacefully for 15 years. Unfortunately, Poland would soon become anything but peaceful.
World War II
In 1939, the Germans invaded Poland, and Carton de Wiart was forced to abandon his home. He later wrote, “They took all I had, my guns, rifles, rods, clothes, furniture, but they could not take my memories.” At first, he attempted to assist Polish leadership, but the situation spiraled out of control quickly. While evacuating from Warsaw, Carton de Wiart’s convoy was raked by Luftwaffe machine gun fire, killing the wife of one of his aides. Nevertheless, he managed to make it to Romania using a forged passport.
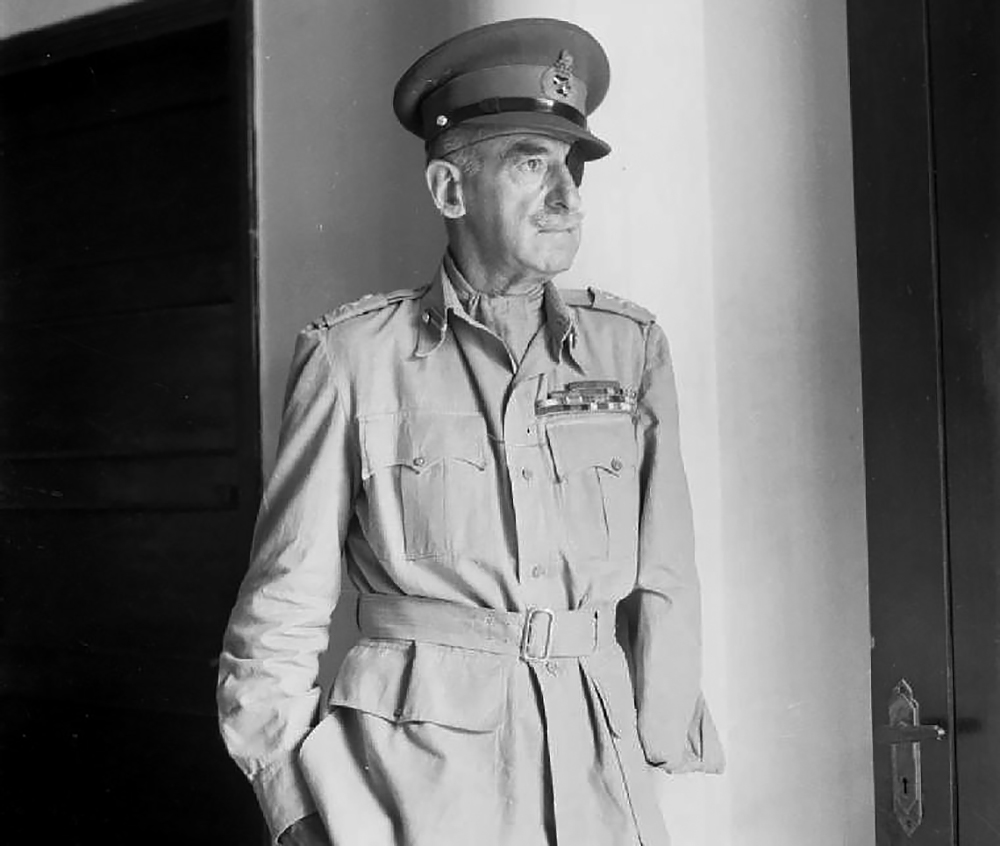
A portrait of Adrian Carton de Wiart during WWII from the Imperial War Museums. Source: Wikipedia / IWM.org.uk
Carton de Wiart returned to the military as a colonel, and was soon promoted to major-general. He was dispatched to lead troops in Namsos, Norway; the trip was yet again interrupted by gunfire from a Luftwaffe fighter plane, which fired on his aircraft. Fortunately, the plane was already on its final approach before landing, so he was not injured. Heavy bombardment by the Germans eventually forced the British to evacuate Norway.
In 1941, 60-year-old Carton de Wiart was sent to negotiate with the Yugoslavian government. However, during his journey, his plane was shot down over the Mediterranean Sea. He was knocked out cold, but reawakened and swam to shore as the plane sank into the sea. Italian authorities captured Carton de Wiart, and he was sent to a POW camp, where he would remain for more than two years.
During this time, he was a troublesome prisoner. He made five escape attempts, one of which granted him freedom for eight days. Though he didn’t speak Italian and had a very distinctive appearance, managed to blend in until he was eventually recaptured. The Italians released Carton de Wiart in 1943 as a gesture of peace to the British.
A photo of Carton de Wiart in 1943. Source: Wikipedia / IWM.org.uk
Post-War Period and Retirement
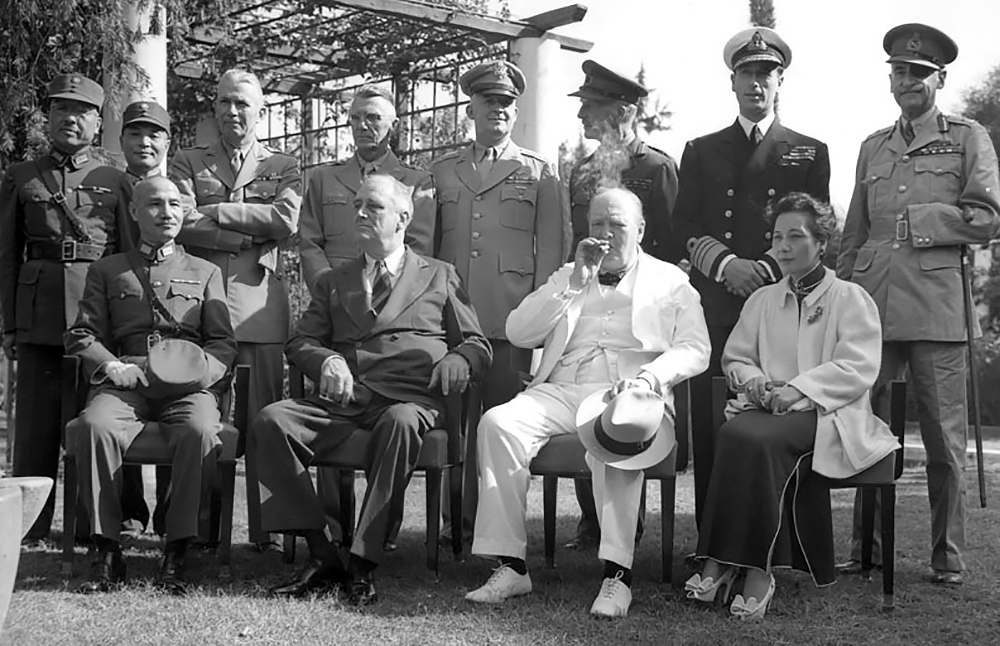
After returning home, Carton de Wiart met with Prime Minister Sir Winston Churchill, who requested his assistance in a diplomatic position. He was promoted to lieutenant general, and became Churchill’s personal representative to Chiang Kai-shek of China. The Chinese leader would eventually also offer him a job, but he declined, and retired in 1947 at age 66 as a lieutenant general.
Carton de Wiart (pictured top right) along with Chiang Kai-shek, FDR, and Churchill. Source: Wikipedia / Jim Hudson
On his way home after finalizing his retirement, Carton de Wiart stopped in Rangoon (present day Myanmar). While walking down some stairs, he slipped on a coconut husk mat and fell. He wrote, “I hit my head on the wall knocking myself almost unconscious, broke my back, crushing a vertebra, and was very lucky not to break my neck.” Yet again, he would survive these injuries and return to England to fully recover. Doctors who treated him also reportedly found and removed large amounts of shrapnel from his old wounds.
Carton de Wiart’s first wife died in 1949, and he remarried two years later at age 71. His second wife, Joan Sutherland, was 23 years younger than he was at the time. The pair settled down in a historic home in the Irish countryside, and on June 5th, 1963, Adrian Carton de Wiart died peacefully. He was 83 years old.
Carton de Wiart’s array of medals, including the prestigious Victoria Cross (bottom left). Source: Royal Dragoon Guards Museum
Today, Adrian Carton de Wiart is known as one of the most-decorated (and most-wounded) British military officers of all time. Despite an immense list of injuries and setbacks that might crush a lesser man’s spirit, Carton de Wiart refused to accept defeat. In the foreword to Happy Odyssey, his friend Sir Winston Churchill wrote the following:
“Although repeatedly wounded and suffering from grievous injuries, his whole life has been vigorous, varied, and useful. He is a model of chivalry and honour and I am sure his story will command the interest of all men and women whose hearts are uplifted by the deeds and thoughts of a high-minded and patriotic British officer.” – Winston S. Churchill
As survival-minded individuals, we have much to learn from the positivity and unflinching determination of Adrian Carton de Wiart.
Think fast: what’s the most valuable item on your person right now? Unless you’re carrying a wad of 100-dollar bills or wearing a Rolex, it’s likely that the answer to this question is your smartphone. Many smartphones these days cost $600 or more, and most people carry these devices wherever they go, making phones a common target for thieves and muggers. While it’s wise to protect the sensitive data on your phone with a passcode and remote-wipe feature, a thief can still sell your physical device online or at a shady pawn shop for some quick cash.
Smartphone theft is a major problem — a 2014 FCC study found that more than 1 million smartphone thefts occurred that year in the United States alone. Beyond the loss of property, running into a criminal who wants your phone can be dangerous. This is why it’s advisable to have a self-defense strategy in mind ahead of time.
Guard Dog Security has just announced a new self-defense device targeted at combating the threat of smartphone theft. It’s called the iStun 2, and it’s a concealable stun gun that closely resembles a smartphone. The iStun 2 is an updated version of the original iStun, a device which was significantly thicker and didn’t match the profile of a modern phone. However, based on the photos that have been released so far, the slim new iStun 2 appears to look convincing enough to fool an attacker.
The Guard Dog iStun 2 is activated by a button that appears to be the phone’s power button. Pushing this button produces a burst of high-voltage current across two low-profile prongs at the top of the “phone”. Guard Dog Security claims this power is “capable of temporary incapacitation”. There’s also a built-in LED light on the back side of the device, which can be activated by another button in place of the volume control.
The iStun 2 is rechargeable over USB, weighs about 3 ounces, and includes a leather carrying case. In order to match the appearance of various phones, the iStun is offered in three color combinations: solid black, white/rose, and white/gold. MSRP for all versions of the iStun 2 is $45.
We haven’t gotten our hands on an iStun 2, but the concept looks interesting — zapping a thief as he reaches for your phone could provide enough of a distraction to escape. This may also provide a self-defense option in places where other weapons are not permitted. Obviously, you should check your local laws before purchasing a stun gun, as some states have restricted or banned their use. Guard Dog Security provides a convenient map of stun gun laws in the U.S. on its web site.
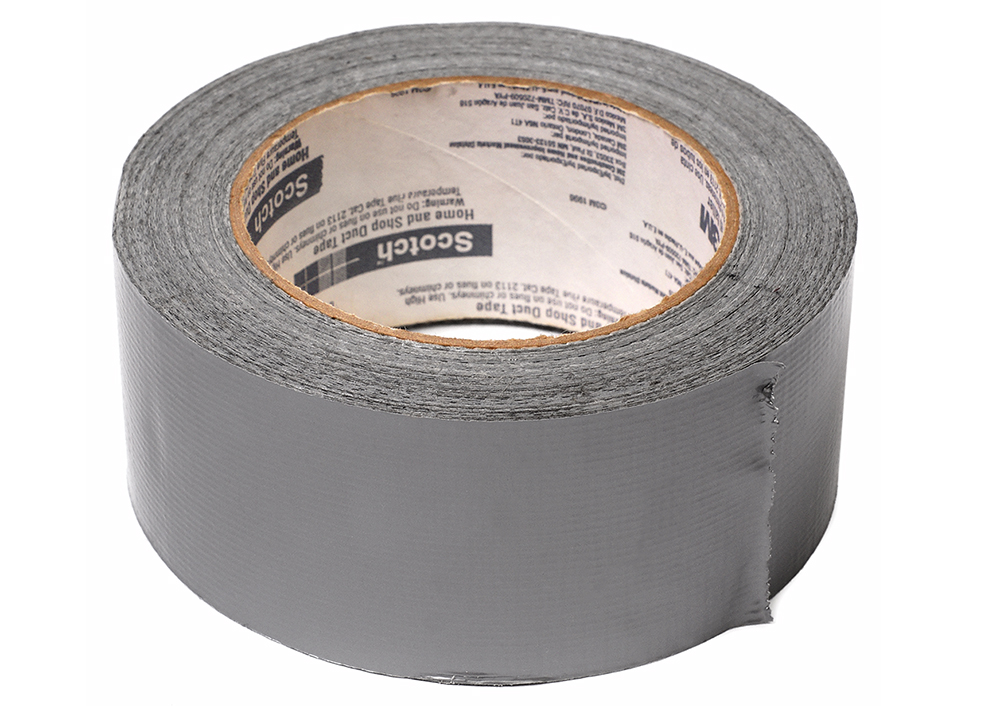
Duct tape, duck tape, or 100-mile-per-hour tape — no matter what you call it, this tough sticky substance is undeniably a valuable resource in survival situations. It can be used for mending broken tools, patching holes, sealing food, bandaging wounds, binding together gear, and hundreds of other purposes. You can even build improvised items entirely from duct tape, such as emergency cordage, a collapsible cup, or a pair of flip-flop sandals.
As useful as it is, there’s one obvious problem with duct tape: portability. You’ll find duct tape with ease at any hardware store or home goods store, but it’s typically sold in large 4- to 6-inch-diameter rolls. This isn’t a problem if you’re planning to keep your tape at home, in the garage, or in a vehicle. However, it’s a major issue if you’re looking to put some tape in your bug-out bag, get-home bag, or pocket. Storing an entire full-size roll is heavy, bulky, and impractical when all you need is a few feet for emergencies.
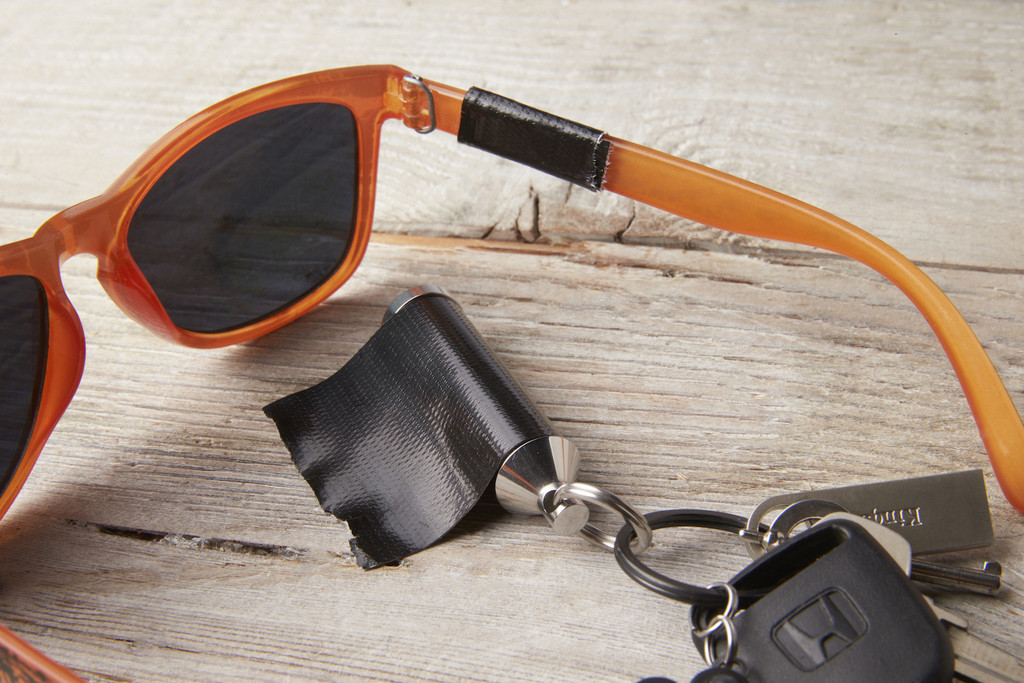
So, what’s the best duct tape storage method to maximize portability? There’s no one answer to that question, since there are many convenient ways to store tape for every-day carry. We’ll list a few below, starting with methods best-suited for small quantities, and working up to methods that can accommodate longer strips of tape.
This stainless steel keychain from Gearward is designed for EDC duct tape storage.
Flat roll around a credit card or gift card
Duct tape keychain wrapped around wire, paracord, or a purpose-built metal spool. The video below shows a quick method to make DIY duct tape keychains:
Small pen or pencil wrapped in tape
Lip balm tube wrapped in tape
Lighter wrapped in tape
A plastic Bic lighter serves as a great storage location for several feet of duct tape.
Flattened full-size roll, with cardboard tube removed
As you can see, there are many good options to consider for portable duct tape storage. Which one is your favorite — one of the above, or something we didn’t mention? Let us know in the poll below:
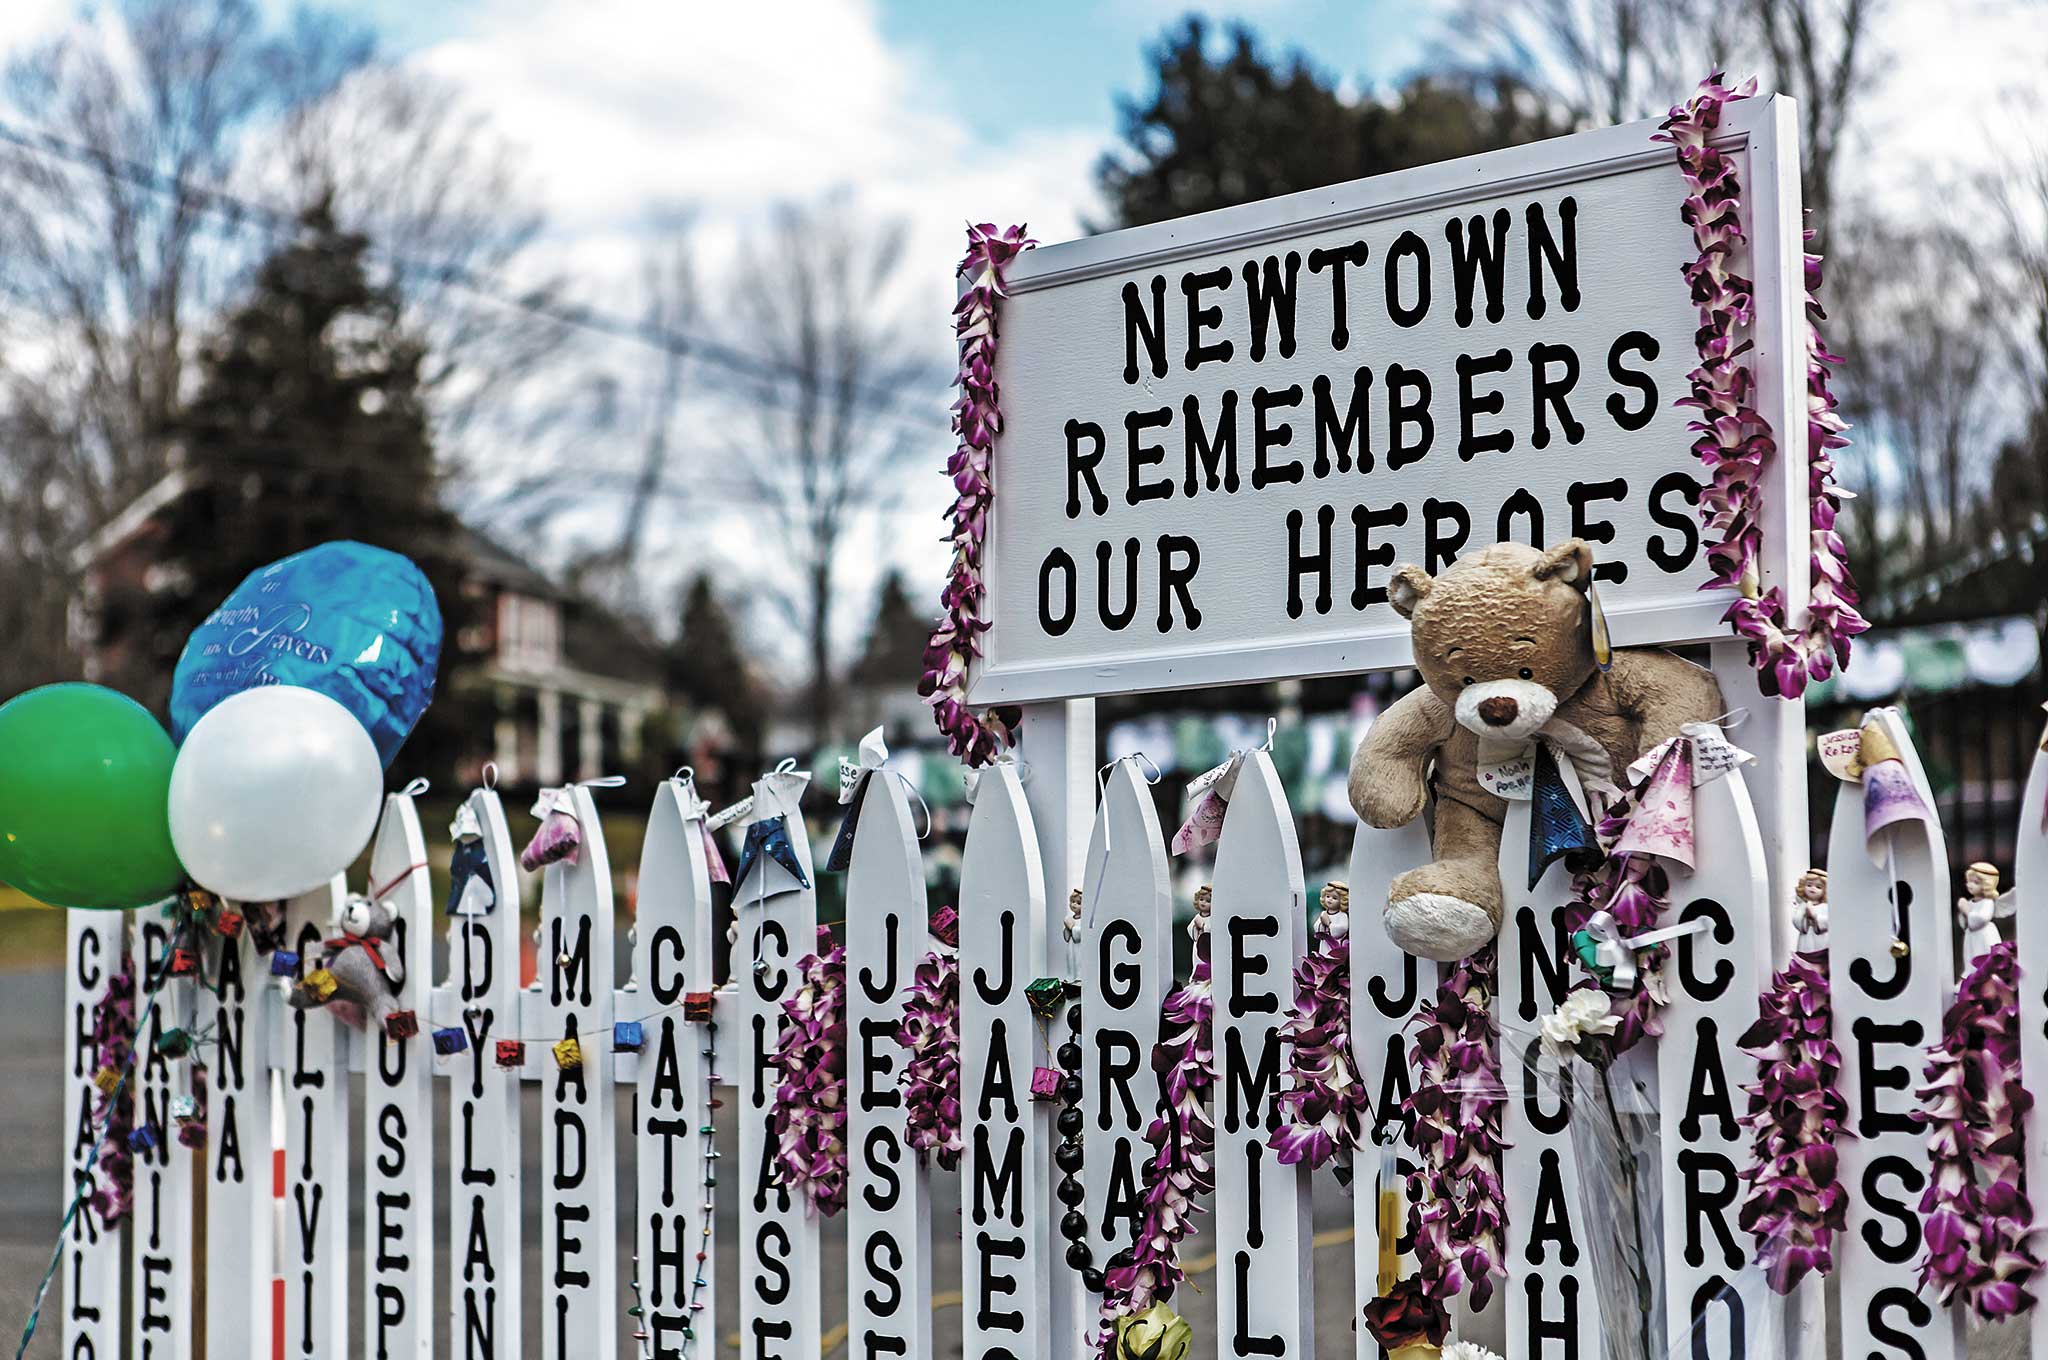
Heroes are people capable of incredible feats of courage, but they don’t expect any thanks for their actions. Instead, they’re content to look for ways to teach us how to pay it forward and make the world a safer place, one person at a time. Kaitlin Roig-DeBellis is no different.
On December 14, 2012, while working as a teacher at Sandy Hook Elementary School, Kaitlin heard the initial shots and immediately recognized what was about to happen. RECOIL OFFGRID spoke with Kaitlin about how she survived this harrowing event and protected her students. She shares her insights for anyone who might face a similar situation.
Photo by Peggy Sirota
RECOIL OFFGRID: What was the first sign that something was wrong?
Kaitlin Roig-Debellis: I had probably a very different experience than many in our school that day in the fact that my classroom was the first one in the school. I know there were a lot of reports that they heard something, but didn’t know what it was. The second the first shot was fired, I heard it and knew what it was immediately. I teach first grade. We were seated about 15 feet from where the shooting began. We were not at all removed from the situation.
ROG: When you heard the shot, what was your first reaction?
KRD: We needed to hide. Being that we were in such close proximity I understood that we didn’t have time to run, because if we were to have gone out our door we would have had to choose going left or right. Going right would have headed right toward the shooter and going left would’ve been a long straight hallway that I wasn’t confident we’d have time to get down. I knew immediately that hiding was going to be my students’ and my only option.
ROG: So you hid inside your own classroom?
KRD: Within our own classroom we had a closet that had shelving so that wouldn’t have worked, and we had a bathroom. When I say bathroom, you’re probably thinking of a bathroom you use at home or at work. It was not that. It was an impossibly small space that was built for a tiny child. Our school is very old; it was built in 1958, I think. So the classroom bathroom was very old and very, very small. It was about 3 by 3 and 1/2 feet with a toilet in the center, but for us, it was that or nothing because I couldn’t lock our classroom door. So if we didn’t attempt to fit into the bathroom we’d have just been sitting ducks.
ROG: How many children were in your classroom?
KRD: On that day, 15 students were present.
ROG: Can you walk us through those few moments? You heard the shot and said, “Class we need to hide, we’re going to go into the bathroom,” and you were able to get all 15 children in there?
KRD: When the shooting began, luckily my students were seated in our morning meeting, which is a very calm and quiet time, so I had their undivided attention. When the first shots were fired from the outside of the school, I got up, closed our door, and turned off our lights. I realized that my keys were across the classroom on my desk, and I knew I didn’t want to risk the time it would take to get them, so our classroom door remained unlocked.
I turned back around to my students and said, “We need to get into our bathroom.” And my students of course began to say, “What do you mean?” “How are we going to do that?” because they understood having used our bathroom every day how tiny it was. I, as an adult, had never been in that bathroom until that day. It was simply not a space that was large enough for an adult to fit comfortably, but for us in those moments, that really was our only option. After I repeated myself a couple times my students understood that I meant business and that this was going to happen.
We started rushing to the back of our classroom to where our bathroom was, and we just started piling in, which was me picking students up. I put one little boy behind the toilet where the flusher is, a couple of my little boys stood on top of the toilet, and we just literally pressed our bodies inside of it.
ROG: And then you just closed the door and waited it out, or did the shooter enter the classroom?
KRD: We did. Our bathroom door opened in, so once we were finally in we couldn’t close the door because we were blocking it. That was horrific because it was just another moment of “What are we going to do?” But thankfully I was able to pick up my students and cram them behind the door, so we were able to close it and lock it. I did not turn the light off in the bathroom, it stayed on. Before I closed the door, there was a storage cabinet that was kept right outside our bathroom door that was on wheels. It was a pretty large piece of furniture, but it moved easily. So I just wheeled that right in front of our door and basically barricaded us in.
I am sure the shooter came into our classroom. The police can’t tell us that, but we were the first classroom and he only caused harm in the hallway and in classrooms 2 and 3, so I can’t imagine he bypassed classroom 1. I don’t know why he would have, but I’ll never know.
rypson/istockphoto.com
ROG: So you didn’t hear anyone walking around or anything like that?
KRD: We heard everything.
ROG: As far as the shooter walking around, was there anything to indicate that he was in fact inside the classroom?
KRD: What you have to understand is that when you’re in a tiny space it all becomes relative, meaning what we heard on the other side of our bathroom wall, being out of cinder block, which was probably 7 inches, that’s where our principal and school psychologist lost their lives. We heard everything, but it was hard to determine in our space where what we were hearing was. Was it in the next classroom? Was it coming from the cafeteria? It was hard to pinpoint where the sounds came from.
ROG: So you and your students managed to avoid any injury?
KRD: Correct.
ROG: How long were you there before you realized it was OK to come out?
KRD: We were in our bathroom, I’m told, for 45 minutes. We were the last class found and rescued in our school. I was not opening the door, so we were waiting for someone to find us, and eventually they did. The SWAT team found us.
ROG: If you had it to do over again, would you do anything differently knowing what you know now?
KRD: No, I wouldn’t be here, and that I know. The classroom had an adjoining door, and we had bullet casings on our floor that had rolled under our adjoining door.
ROG: Has this changed your everyday preparedness in any way, whether it be supplies you carry with you or enrolling in self-defense training or anything like that?
KRD: No, but something that’s important to know is that I have always been a very hyper-vigilant and hyper-aware person, sometimes to a disservice. After the tragedy, I sought out counseling like anyone should after such a horrific encounter. One of the things that individual helped me work through was that my hyper-alertness and hyper-awareness that probably stems from being someone who is adopted is probably what saved us on that day. Because while many might have been thinking, “What is that? Is that a firecracker? Did something fall?” and took their time, I went into lockdown within 30 seconds. And I can only attribute that to whatever’s always been inside of me as a person who is very aware.
I think that if I were to give anyone a piece of advice about preparedness or safety at a school or any public place is just being aware. Where are the exits? Who’s coming in and out? Where is a place you could hide? Don’t have your back to an entrance. Things I think a lot of people take for granted or don’t think about. I think a lot of people turn that little voice off, and I’d recommend they keep it on.
ROG: Do you think ego can make people reluctant to react decisively in an emergency situation? Say, if someone thinks there’s a fire, they don’t want to be the first one to say it for fear they might be wrong.
KRD: But what’s the worst thing that can happen? One of the people whom I’ve met over the past few years is a gentleman who used to be involved in Israel with their defense. He and I did some training together, and I explained my heightened awareness to him and that led us to a discussion about profiling. What he taught me is that in our country, we have this very negative connotation around the word “profiling.” We think of it as racial. We think of it as singling people out, whereas in Israel they think of it as a very positive word. You’re aware of who’s connected to a situation. You’re aware if someone looks out of place. You’re aware if you’re in an audience and someone’s sitting alone and not at all interacting with people around them. These are all things that should heighten our awareness to say, “Hmm, something might not be right,” and pay attention to it. I think in our country we need to be better at that in a positive way of being aware of our surroundings. If somebody looks like they’re not in the right place for whatever reason, we need to pay attention to that. I really don’t think we do a good job of that.
ROG: Police have also said the same thing — that it’s good to profile people because it might save your life.
KRD: Right, but it’s not racial. A Caucasian female could look very out of place and you should pay attention. I think the other thing that very much comes to mind in terms of school safety specifically is that I wouldn’t be talking to you right now if our school had not been a secure, locked building. There’s this misconception that Sandy Hook Elementary School was this very laissez-faire place. While it was idyllic and very much like Pleasantville, it was not laissez-faire. We took safety and security extremely seriously.
Our doors were locked, there were double sets of locked doors, there was video surveillance, there was voice recognition. You were not getting in our school without three secretaries knowing who you were, seeing your ID, and buzzing you in. That monster shot his way through a window. There’s still so many schools in our country — and I know this because I visit lots of different states — that aren’t locked. That’s a huge problem. It’s 2016. We lock our homes, we lock businesses, we certainly lock large corporations that make millions of dollars. We need to lock schools.
ROG: Do you know why schools tend not to be locked? Is it because of fire codes or something along those lines?
KRD: The arguments that I have heard is that our schools are such special, warm places that we don’t want them to feel like a prison. That’s the most common argument that I have found. So was our school. That door being locked did not diminish or take away one ounce of the warmth and specialness that lived within those walls. Children’s lives and teachers’ lives are far more important. And look what happened at our school with our locked doors. It’s not a complete solution, but it is a really important step in the right direction. We go home at night and put our children to bed, and our front door is locked. Why shouldn’t our school doors be locked?
ROG: Are you still teaching at Sandy Hook Elementary?
KRD: No, I started a nonprofit in 2013 and have written a book titled Choosing Hope, and that keeps me very busy. I teach in different ways now. I travel and speak all around the world about my story, and I also now teach at college level. I teach future teachers about being teachers and love it.
More 411 To learn more about Kaitlin Roig-DeBellis, go to https://kaitlinroigdebellis.org.
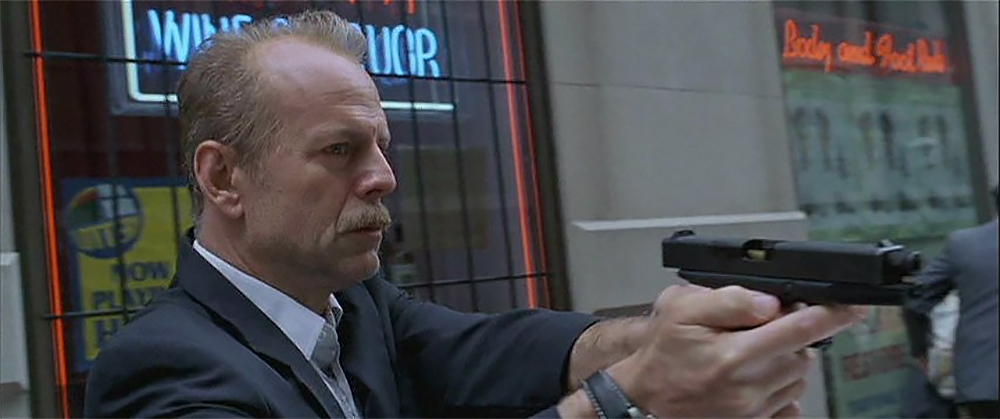
Let’s face it: although action movies are often entertaining, they also have a tendency to be highly unrealistic. We’re not just talking about the sideways-diving dual-wielding slow-mo pistol fights found in John Woo films — even purportedly realistic action and war movies sometimes feature goofy physics and laughably bad firearms technique.
In “16 Blocks”, Bruce Willis is shown aiming a jammed Glock. In the next shot, it continues firing normally. Source: Screencap via Internet Movie Firearms Database
We can understand why this is the norm in Hollywood, since fantasy and entertainment value sell more movie tickets than pure realism. It’s a lot more dramatic when a grenade launches the villain cartwheeling into the air with a massive fireball, or when a shotgun blast knocks a henchman back 20 feet through two plate glass windows and a fruit stand. While you may see the clip below from Commando and roll your eyes, you’ll probably also find Arnie’s muscle-bound blank-firing antics at least a little fun to watch.
However, not all movies are unrealistic when it comes to firearms. A select few films put in the time and effort to maintain a sense of authenticity, while still managing to remain entertaining. Director Michael Mann has received praise for his work on the classic heist film Heat, as well as the action thriller Collateral. In Collateral, Tom Cruise plays a ruthless and highly-skilled hitman who has been hired to kill several individuals in a single night.
Tom Cruise plays a hardened contract killer named Vincent in the 2004 film “Collateral”.
In order to determine if the gunfights in Collateral are based in reality, firearms instructor and Special Operations veteran Larry Vickers analyzed a famous alleyway scene from the movie. In this “Shot for Shot” video, Vickers also recreates the exact technique Cruise used — drawing from concealment, deflecting the mugger’s gun with his free hand, firing two rounds from retention, and transitioning to put three more rounds into the next threat.
Vickers calls this “one of the best movie gunplay scenes ever”. Do you agree? If not, what’s your favorite movie gunfight scene, and why?